
Fluffy Sweet Potato Pancakes
Fluffy Sweet Potato Pancakes: Your New Favorite Comfort Breakfast
Hey friends, Beau here from Feastical! Let’s talk about one of life’s simple, soul-warming pleasures: a tall stack of pancakes. But we’re not just making any pancakes today. We’re taking that cozy weekend breakfast and giving it a glorious, autumnal upgrade that will have everyone asking for seconds. Get ready to fall head over heels for my unbelievably Fluffy Sweet Potato Pancakes.
Imagine this: pancakes that are tender, cloud-like, and carry the gentle, earthy sweetness of sweet potatoes, all warmed up with a hint of cinnamon and brown sugar. They’re golden on the outside, impossibly soft on the inside, and they make your kitchen smell like a hug feels. This isn’t just a recipe; it’s a mood. It’s for those slow Saturday mornings when you have time to savor a cup of coffee and the sound of the sizzle on the griddle. It’s for impressing your in-laws at a fall brunch or for treating yourself on a crisp Tuesday because, hey, you deserve it.
The best part? These pancakes come together with a few simple tricks I’ve picked up over the years. We’re using a quick “hack” for buttermilk and mastering the art of the perfect, thick batter. No fancy skills required—just a love for good, feel-good food. So, tie on your apron, find that trusty spatula, and let’s turn those humble sweet potatoes into the most spectacular breakfast you’ve had all season.
The Pancake That Started It All
This recipe takes me right back to my grandma’s kitchen. She was a wizard with leftovers, a true kitchen magician. The day after a big holiday dinner, with a bowl of leftover mashed sweet potatoes sitting in the fridge, she’d never let it go to waste. With a twinkle in her eye, she’d declare, “Time for magic,” and start pulling out the flour and eggs.
I’d stand on a little stool next to her, watching as she transformed those humble leftovers into a stack of golden, speckled pancakes that felt like a celebration all over again. That was my first lesson in kitchen alchemy—seeing how one ingredient could play two delicious, yet completely different, roles. It taught me that cooking isn’t just about following a recipe; it’s about creativity, resourcefulness, and infusing your food with love and a little bit of story. Every time I make these, I’m eight years old again in her sunny kitchen, and that’s a feeling worth sharing with all of you.
Gathering Your Sunshine Ingredients
Here’s your shopping list for fluffy perfection. Remember, great pancakes start with great ingredients, and I’ve got some insider tips for each one to make sure your batch is a total winner.
- 1 cup mashed sweet potato: This is our star! I highly recommend baking or steaming your sweet potatoes for the deepest, richest flavor. Canned puree works in a pinch, but it can be a bit wetter, so you might need a touch more flour. Just make sure it’s plain, not the pie-filling kind!
- 2 ¼ cups all-purpose flour: The foundation of our fluffy structure. For a heartier pancake, you can swap in half whole wheat pastry flour, which keeps things light.
- 2 tsp baking powder + ½ tsp baking soda: Our dynamic leavening duo! The baking powder gives the initial lift, and the baking soda reacts with our “quick buttermilk” for an extra burst of airiness. Check the dates on yours—fresh leaveners are non-negotiable for fluffy pancakes.
- ½ tsp salt + 1 ½ tsp cinnamon: Salt is crucial for balancing all the sweetness, and cinnamon brings that warm, cozy hug. Feel free to use pumpkin pie spice here for an even more complex flavor party.
- 2 tbsp brown sugar: This adds a molasses-kissed sweetness that pairs perfectly with the sweet potato. You can use white sugar, but brown is my secret weapon here.
- 2 large eggs, room temperature: Room temp eggs incorporate more evenly into the batter, giving us a better texture. Just pop them in a bowl of warm water for 5 minutes if you forgot to take them out!
- 1 ½ cups milk + 2 tbsp apple cider vinegar: This is our genius “quick buttermilk” hack! The vinegar slightly sours the milk, creating a tangy flavor and a chemical reaction with the baking soda that makes our pancakes incredibly tender and light.
- ¼ cup melted butter: For richness and that irresistible buttery flavor. If you’re dairy-free, coconut oil or a neutral vegetable oil works beautifully.
- 1 tsp vanilla extract (optional twist): I say “optional,” but I always add it. Vanilla is the background singer that makes the whole band sound better, rounding out all the other flavors.
Let’s Make Some Magic: Step-by-Step
Okay, team, let’s get cooking. Follow these steps, and you’ll be a pancake pro in no time. I’m sharing all my little chef hacks along the way!
- Create Your “Quick Buttermilk.” In a small bowl or liquid measuring cup, combine the milk and apple cider vinegar. Give it a quick stir and let it sit for 5-10 minutes. You’ll see it start to curdle and thicken slightly—that’s exactly what we want! This little wait is the first secret to maximum fluffiness. Chef’s Hack: If you have real buttermilk on hand, you can use 1 ½ cups of that and skip the vinegar! The result is just as fantastic.
- Whisk the Dry Team. In a large mixing bowl, add your flour, baking powder, baking soda, salt, cinnamon, and brown sugar. Grab a whisk and give this a really good, thorough whisking. This isn’t just about mixing; it’s about aerating the flour and making sure those leaveners are evenly distributed. No one wants a pocket of baking soda in their pancake! Chef’s Hack: You can sift the dry ingredients if you want, but a vigorous whisking does the trick for me and saves on washing a sifter.
- Unite the Wet Team. In a separate, medium-sized bowl, whisk your eggs first until they’re smooth. Then, add in the mashed sweet potato, vanilla extract, and the melted (but slightly cooled) butter. Pour in your “buttermilk” mixture and whisk it all together until it’s relatively smooth. A few small lumps of sweet potato are totally fine—they add character!
- The Grand Batter Union. Now, pour the wet ingredients into the bowl with the dry ingredients. Switch to a spatula or a wooden spoon for this part. Gently fold the mixture together. I cannot stress this enough: MIX UNTIL *JUST* COMBINED. A few streaks of flour are okay! Overmixing is the #1 enemy of fluffy pancakes—it develops the gluten in the flour and makes them tough. Your batter will be thick and spoonable, and that’s perfect. Chef’s Hack: Let the batter rest for 5 minutes after mixing. This allows the flour to fully hydrate and the leaveners to start working, resulting in a taller, more tender pancake.
- Heat and Grease Your Stage. Place a non-stick skillet or griddle over medium heat. I like to use a knob of butter for greasing—it gives the edges a delicious, crispy lace. To test if your pan is ready, flick a few drops of water onto it. If they sizzle and dance, you’re good to go!
- Cook to Golden Perfection. Using a ¼-cup measuring cup or a large ice cream scoop, drop portions of batter onto the hot skillet. This ensures all your pancakes are the same size and cook evenly. Don’t press them down! Let them do their thing. You’ll know it’s time to flip when bubbles form on the surface and the edges look set, about 2-3 minutes. Chef’s Hack: Lift the edge gently with your spatula to check for a golden-brown color before committing to the flip.
- The Flip Side. Slide your spatula underneath confidently and flip each pancake in one smooth motion. Cook for another 2-3 minutes on the second side until it’s also golden brown and the pancake is cooked through. You can peek by pressing the center gently—if it springs back, it’s done.
Let’s Dish ‘Em Up!
Now for the best part: serving these gorgeous, golden stacks. Presentation is part of the fun, so let’s make it beautiful!
I love to stack three pancakes high on a warm plate. The warmth from the plate keeps your breakfast cozy until the last bite. Drizzle a generous river of pure maple syrup over the top—the real stuff makes all the difference. For a little crunch and elegance, sprinkle on some toasted pecans or walnuts. A pat of whipped butter melting into the crevices is absolutely mandatory in my book. And for a final touch of “wow,” a light dusting of powdered sugar through a fine-mesh sieve looks like a fresh snowfall and adds a touch of extra sweetness.
For a full feast, pair these pancakes with some crispy bacon or savory breakfast sausage to balance the sweetness. A side of fresh fruit, like sliced bananas or berries, adds a bright, fresh note. And don’t forget a big pot of hot coffee or a pot of spiced chai tea to complete the ultimate cozy morning experience.
Make It Your Own: Fun Recipe Twists
Once you’ve mastered the classic, feel free to get creative! This recipe is a wonderful canvas. Here are a few of my favorite variations:
- Pecan Praline: Fold ½ cup of chopped toasted pecans into the batter right at the end. The toasty, nutty flavor is a dream with the sweet potato.
- Gingerbread Spice: Swap the cinnamon for a blend of 1 tsp ginger, ½ tsp cinnamon, and a pinch of cloves and nutmeg. It tastes like a gingerbread cookie in pancake form!
- Apple Cinnamon: Fold in ¾ cup of finely chopped apple (like Granny Smith for a little tartness) and a dash of extra cinnamon. The little bites of soft, warm apple are pure bliss.
- Gluten-Free & Dairy-Free Friendly: Use a 1:1 gluten-free flour blend and your favorite non-dairy milk (oat milk is fantastic). Replace the butter with melted coconut oil. Easy as pie—or, well, pancakes!
- Orange Zest Zing: Add the zest of one orange to the wet ingredients. The bright citrus note cuts through the richness and makes the flavor pop in a whole new way.
Beau’s Chef’s Notes
This recipe has evolved so much since my grandma’s first batch. I’ve tweaked the spices, perfected the buttermilk ratio, and learned the hard way that overmixing is a pancake’s worst nightmare (I’ve made a few hockey pucks in my time!). One of my favorite kitchen memories is the time I accidentally used smoked paprika instead of cinnamon. Let me tell you, that was a… *spicy* surprise we still laugh about. It taught me to always taste my spices first!
These pancakes also freeze like a dream. Let them cool completely, then layer them between parchment paper in a freezer bag. On a busy morning, just pop one or two straight into the toaster for a hot, homemade breakfast in minutes. It’s like having a little bit of weekend, any day of the week.
Your Pancake Questions, Answered!
Over the years, I’ve gotten a lot of questions about this recipe. Here are the answers to the most common ones to ensure your pancake success.
Q: My pancakes are dense and gummy. What happened?
A: This is almost always a case of overmixing! Remember, a few lumps are your friend. Also, make sure your baking powder and soda are fresh. If they’re old, they won’t provide the necessary lift.
Q: Can I make the batter the night before?
A: I don’t recommend it for fluffiness. The leavening agents will activate when mixed and lose their oomph overnight, leading to flat pancakes. Instead, you can mix the dry and wet ingredients separately the night before and combine them in the morning for a quick start.
Q: Why are my pancakes burning on the outside but raw inside?
A: Your heat is too high! Cooking pancakes is a patient person’s game. Lower the heat to medium or even medium-low. It takes a little longer, but you’ll get that perfect golden-brown exterior and a fully cooked, fluffy interior every time.
Q: My sweet potato mash is really wet. What should I do?
A> Great question! If you’ve steamed or boiled your sweet potatoes, they tend to hold more water. You can spread the mash on a plate and let it cool completely to evaporate some moisture, or add an extra 1-2 tablespoons of flour to the dry ingredients to compensate.

Fluffy Sweet Potato Pancakes
Description
These pancakes are tender, cloud-like, and lightly sweet, infused with the earthy warmth of sweet potatoes and a hint of cinnamon. Perfect for a cozy weekend brunch, a fall breakfast, or just treating yourself on a crisp morning. With a few clever tricks—like a quick buttermilk hack—you’ll have golden, fluffy pancakes every time.
Ingredients
-
1 cup mashed sweet potato (baked or steamed; plain, not pie filling)
-
2 ¼ cups all-purpose flour (or half whole wheat pastry flour for a heartier pancake)
-
2 tsp baking powder
-
½ tsp baking soda
-
½ tsp salt
-
1 ½ tsp cinnamon (or pumpkin pie spice)
-
2 tbsp brown sugar
-
2 large eggs, room temperature
-
1 ½ cups milk + 2 tbsp apple cider vinegar (quick buttermilk)
-
¼ cup melted butter (or coconut/neutral oil for dairy-free)
-
1 tsp vanilla extract (optional)
Optional Mix-ins & Toppings:
-
Toasted pecans or walnuts
-
Maple syrup, butter, or Greek yogurt
-
Fresh berries, banana slices
-
Powdered sugar dusting
Instructions
Combine milk and apple cider vinegar in a small bowl. Let sit 5–10 minutes until slightly thickened.
In a large bowl, whisk together flour, baking powder, baking soda, salt, cinnamon, and brown sugar.
In a medium bowl, whisk eggs, mashed sweet potato, melted butter, vanilla, and the quick buttermilk until mostly smooth. Small lumps of sweet potato are fine.
Pour wet ingredients into dry. Gently fold until just combined. Don’t overmix—batter should be thick and spoonable. Let rest 5 minutes.
Preheat over medium heat and lightly grease with butter or oil. Test heat by flicking water—if it dances, you’re ready.
Use a ¼-cup measuring cup to drop batter onto the skillet. Cook 2–3 minutes until bubbles form and edges look set. Flip and cook another 2–3 minutes until golden and cooked through.
Stack pancakes, drizzle with maple syrup, add a pat of butter, sprinkle nuts, or dust with powdered sugar. Fresh fruit or yogurt makes a delightful addition.
Notes
-
Pecan Praline: Fold ½ cup toasted pecans into batter.
-
Gingerbread Spice: Swap cinnamon for 1 tsp ginger, ½ tsp cinnamon, and a pinch of cloves & nutmeg.
-
Apple Cinnamon: Add ¾ cup finely chopped apple + extra cinnamon.
-
Gluten-Free & Dairy-Free: Use 1:1 gluten-free flour and non-dairy milk; replace butter with coconut oil.
-
Orange Zest: Add zest of one orange to wet ingredients for a bright, citrusy note.
Nutrition
- Calories: 140 Cal Per Serving
- Fat: 5 g
- Carbohydrates: 20 g
- Protein: 3 g
Nourishing Your Body & Soul
While we’re all about indulgence here at Feastical, it’s always nice to know what’s fueling your fun. These pancakes pack a bit more nutritional punch than your standard variety, thanks to our star ingredient.
Sweet potatoes are a fantastic source of Vitamin A (in the form of beta-carotene, which gives them that beautiful orange color), Vitamin C, and fiber. Using whole ingredients like eggs and milk adds protein to help keep you full. Of course, toppings like butter and syrup add extra calories and sugar, so feel free to adjust those to your liking. A dollop of Greek yogurt and some fresh berries is a delicious, protein-packed alternative to classic syrup!
Approximate Nutrition Per Pancake (based on 12 pancakes): Calories: 140, Carbs: 20g, Fat: 5g, Protein: 3g, Fiber: 1g. Remember, this is an estimate and can vary based on your specific ingredients and toppings.
Your New Go-To Comfort Breakfast
And there you have it, friends—my ultimate recipe for Fluffy Sweet Potato Pancakes. This is more than just a list of ingredients and steps; it’s an invitation to slow down, get a little flour on your hands, and create a moment of pure joy around the breakfast table.
I hope this recipe becomes a cherished part of your kitchen story, just like it is in mine. It’s a testament to the magic that can happen when you combine simple ingredients with a little bit of love and a whole lot of appetite. So, the next time you see a sweet potato, think beyond the fries and casseroles. Think of a tall, golden stack of fluffy pancakes waiting to make your morning magnificent.
I’d love to hear how your pancakes turn out! Tag me on social @Feastical or leave a comment over on the blog. Now, go forth and get your flip on!
With a full heart and an even fuller plate,
Beau
Final Thoughts: More Than Just a Pancake
So there you have it, friends—your new secret weapon for the coziest of mornings. These Fluffy Sweet Potato Pancakes are so much more than a meal; they’re a feeling on a plate. They’re the smell that draws everyone to the kitchen, the taste that defines a slow, happy morning, and the recipe you’ll find yourself reaching for again and again.
This isn’t just about creating a delicious breakfast. It’s about carrying forward a beautiful tradition of kitchen magic, of turning simple, humble ingredients into something extraordinary. It’s about creating your own memories, whether that’s a quiet moment for yourself with a cup of coffee or a loud, joyful brunch surrounded by loved ones.
I hope this recipe brings as much warmth and joy to your kitchen as it has to mine. It’s a little piece of my family’s story, and now, I’m so excited for it to become a part of yours.
Now, I’d love to hear from you! Did you add your own twist? Did your kitchen smell like a fall-scented hug? Share your pancake masterpieces with me over on Instagram @Feastical. Happy cooking!
Roasted Hot Honey Sweet Potatoes : Sweet, Spicy & Oven-Baked Perfection
Roasted Hot Honey Sweet Potatoes – Your New Favorite Side Dish
Hey there, Feastical friends! Beau here, coming at you from a kitchen that smells absolutely incredible. If you’ve ever found yourself in a side dish rut, staring at the same old steamed veggies or plain baked potatoes, I’m about to throw you a serious flavor lifeline. Let’s talk about turning the humble sweet potato into a show-stopping, conversation-starting superstar.
We’re taking these gorgeous orange gems, cubing them up, and roasting them until their edges get all crispy and caramelized. Then, just when they’re at their peak, we’re going to drench them in a spicy-sweet hot honey glaze that will quite literally make your taste buds do a happy dance. This isn’t just a recipe; it’s a revelation. It’s the side dish that secretly wants to be the main event, the perfect partner for your weeknight chicken, your fancy holiday ham, or just a big ol’ bowl of fluffy quinoa.
The best part? This recipe is all about that “set it and (almost) forget it” oven magic. It’s simple enough for a Tuesday but special enough for a feast. So, grab your favorite baking sheet, and let’s create some sweet, spicy, and utterly irresistible oven-baked perfection together.
A Sweet (and Spicy) Thanksgiving Tale
I’ll never forget the first time I introduced these hot honey sweet potatoes to my family’s Thanksgiving table. It was a bit of a gamble. My grandma’s marshmallow-topped sweet potato casserole was, and still is, a sacred institution. It’s a dish of pure, unadulterated sweetness that holds a special place in all our hearts.
But I’m a guy who loves a little heat with his sweet, so I decided to make a small batch of these spicy-roasted cubes as a “side for the side.” I pulled them out of the oven, all glistening and fragrant, and set them quietly next to the turkey. The reaction was priceless. My uncle, a self-proclaimed spice wimp, took one tentative bite. His eyes went wide, and he immediately went back for a heaping spoonful. “Now THIS has personality!” he declared. The sweet, familiar comfort of the potato was still there, but the kick of heat and the complex flavor of the honey had everyone talking. It didn’t replace Grandma’s casserole (nothing ever could), but it earned its own permanent spot on the spread. It taught me that sometimes, the best new traditions are the ones that add a little friendly fire to the familiar.
Gathering Your Flavor All-Stars
One of the things I love most about this recipe is the short, simple ingredient list. Each one plays a crucial role in building those deep, complex flavors we’re after. Here’s what you’ll need:
- 4 large sweet potatoes, peeled and cubed: Don’t be shy with the size! We want hearty, substantial cubes that can stand up to the high heat of the oven. Look for potatoes that are firm and smooth-skinned. Chef’s Insight: Try to cut them into roughly 1-inch cubes. Keeping them uniform in size is the secret to ensuring they all cook at the same rate—no half-burnt, half-raw surprises!
- 6 tablespoons hot honey: This is the star of the show! You can find bottled hot honey in most grocery stores now, but making your own is a breeze and lets you control the heat level. Substitution Tip: No hot honey? No problem! Gently warm 6 tablespoons of regular honey with 1/2 to 1 teaspoon of red pepper flakes (or a dash of cayenne) in a small saucepan. Let it steep for 10 minutes, and voilà—homemade spicy magic.
- 4 tablespoons extra virgin olive oil: This is our roasting workhorse. It helps conduct heat, promotes that beautiful browning, and prevents sticking. Chef’s Insight: A good, robust extra virgin olive oil adds a lovely fruity note, but avocado oil works wonderfully too if you prefer a more neutral taste.
- Salt and freshly cracked black pepper, to taste: Never, ever underestimate the power of salt and pepper. Salt doesn’t just make things salty; it enhances and unlocks all the other flavors in the dish. The pepper adds a subtle, earthy warmth that plays so nicely with the sweet and spicy notes.
- Fresh herbs like thyme, parsley, or cilantro (optional, for garnish): This is your flavor confetti! A sprinkle of fresh herbs right at the end adds a burst of color and a fresh, aromatic quality that cuts through the richness. Thyme is my go-to for its earthy vibe, but cilantro is fantastic if you want a brighter, more citrusy finish.
Let’s Get Roasting: Your Step-by-Step Guide to Perfection
Ready to transform these simple ingredients into something truly spectacular? Follow these steps, and you’ll be a sweet potato roasting pro in no time. I’ve packed each step with my favorite chef hacks to guarantee success.
- Preheat and Prep Your Pan. First things first, crank that oven to 425°F (220°C). This high heat is non-negotiable—it’s what gives us those beautifully crisp, caramelized edges and a fluffy interior. While it’s heating up, line a large, rimmed baking sheet with parchment paper. Chef’s Hack: Lining the pan isn’t just for easy cleanup (though that’s a huge bonus!). It also prevents the honey glaze from sticking and burning onto the pan during the final toss, saving you from a scrubbing nightmare.
- Season with Confidence. In a large bowl, toss your cubed sweet potatoes with the olive oil, a generous pinch of salt, and a few good cranks of black pepper. Get your hands in there! Massage the oil and seasoning onto every surface of every cube. This ensures every single bite is perfectly seasoned and ready to crisp up. Chef’s Commentary: If you’re using any dry spices like smoked paprika or chili powder, now is the time to add them. Tossing them with the oil helps “bloom” their flavors, making them more potent and delicious.
- Roast to Golden Bliss. Spread the potatoes out in a single layer on your prepared baking sheet. This is key! If they’re crowded or piled on top of each other, they’ll steam instead of roast, and we’ll lose that crucial crispy texture. Pop them in the hot oven and roast for 30-35 minutes. Chef’s Non-Negotiable Tip: Set a timer for 15 minutes and flip them! I use a thin metal spatula to get under them and give them a good shuffle. This exposes all sides to the direct heat, guaranteeing an even, all-over golden-brown crust.
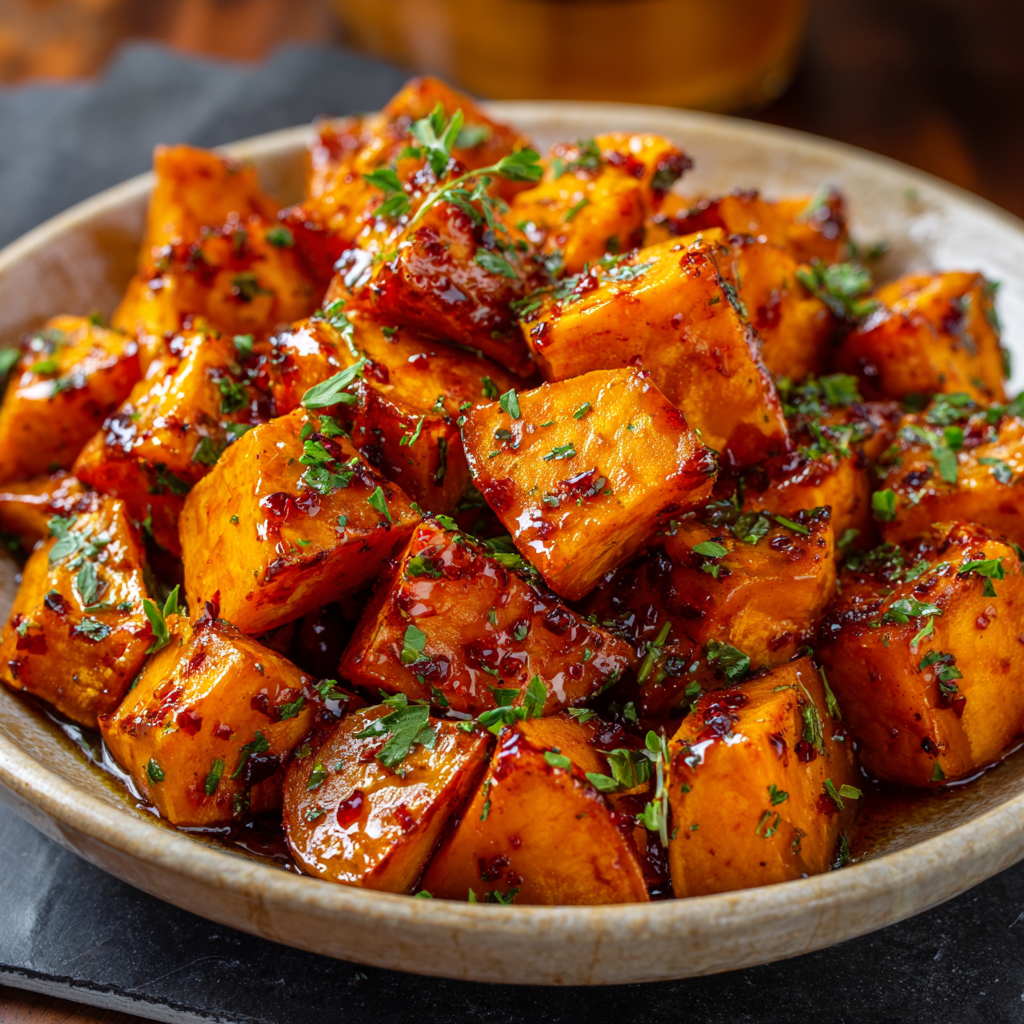
- The Grand Glaze. Once the potatoes are fork-tender and gloriously crispy on the edges, pull the baking sheet out of the oven. Immediately drizzle that gorgeous hot honey all over them. Work quickly but carefully—use a spatula or a big spoon to toss and turn the potatoes, coating every nook and cranny in that spicy-sweet glaze. The residual heat will thin out the honey just enough to make it a perfect, clingy sauce.
- The Finishing Flourish. Transfer your glazed potatoes to a serving dish and hit them with your final touches. A scattering of fresh herbs, a little citrus zest, or a crumble of tangy cheese takes this dish from a 10 to an 11. Serve them warm and watch them disappear!
How to Serve These Flavor Bombs
Okay, you’ve got this stunning dish of roasted hot honey sweet potatoes. Now what? The possibilities are endless, my friend. Here are a few of my favorite ways to let them shine:
The Perfect Pairing: These potatoes are the ultimate wingman for almost any protein. They’re phenomenal next to a simply grilled or roasted chicken, a juicy pork tenderloin, or a beautifully seared salmon fillet. The sweet and spicy notes complement the savory flavors perfectly.
Bowl Life Brilliance: Turn them into the star of a grain bowl! Start with a base of quinoa, farro, or brown rice. Add a big scoop of these warm potatoes, some sautéed greens (like kale or spinach), a handful of chickpeas for protein, and a generous drizzle of a creamy tahini or yogurt sauce. It’s a complete, satisfying, and wildly flavorful meal.
Holiday Hero: As my personal story can attest, these are a guaranteed hit on any holiday table. They add a modern, bold twist that stands out beautifully among the more traditional dishes. They look absolutely gorgeous piled high on a platter, garnished with fresh thyme sprigs.
Make It Your Own: Flavor Twists & Swaps
Once you’ve mastered the base recipe, the fun really begins. This dish is a fantastic canvas for your own culinary creativity. Here are a few of my favorite variations to get you started:
- Smoky & Deep: Add 1/2 teaspoon of smoked paprika or ancho chili powder to the olive oil before tossing with the potatoes. This adds a subtle, smoky depth that makes the flavor profile even more complex.
- Bright & Zesty: Right after glazing with the hot honey, zest a whole lime or lemon directly over the potatoes. The bright, citrusy aroma cuts through the sweetness and spice in the most refreshing way.
- Creamy & Cool: For a fantastic textural contrast, drizzle the finished dish with a tablespoon or two of tahini or a simple yogurt sauce (Greek yogurt thinned with a bit of lemon juice). The cool, creamy element is a game-changer.
- Savory & Tangy: Crumble some feta or goat cheese over the top while the potatoes are still warm. The salty, tangy cheese balances the sweetness of the honey and potatoes beautifully. This is a crowd-pleaser, for sure.
- Herbaceous & Fresh: Swap the thyme for chopped fresh cilantro and add a squeeze of fresh lime juice. This gives the dish a vibrant, almost Latin-inspired flair that’s incredibly addictive.
Beau’s Kitchen Notebook
This recipe has been a living, evolving thing in my kitchen. I first started making a version of it after a trip to a barbecue joint that served hot honey on their fried chicken. I became obsessed and started putting it on everything—including my standard roasted veggies. The sweet potatoes were the clear winner.
Over time, I learned a few things. The type of hot honey you use makes a difference! Some are more vinegar-forward, while others are purely spicy. I encourage you to taste a few brands to find your favorite. And don’t be afraid to play with the heat level. I’ve made this for friends who can’t handle any spice by just using regular honey and a pinch of black pepper, and it’s still a knockout. The goal is to make it work for you and your table. After all, the best recipes are the ones that become part of your own story.
Your Questions, Answered!
I’ve gotten a lot of questions about this recipe over the years, so I’ve gathered the most common ones here to help you out.
Q: My sweet potatoes are turning out soggy instead of crispy. What am I doing wrong?
A: The number one culprit for soggy potatoes is overcrowding the pan! If the potatoes are too close together, they release steam and end up steaming each other instead of roasting. Make sure they’re in a single layer with a little space between them. Using a very hot oven (425°F is perfect) and flipping them halfway through are also critical steps for that perfect crisp.
Q: Can I make these ahead of time for a party?
A: Absolutely! You can peel and cube the potatoes a day ahead. Keep them submerged in a bowl of cold water in the fridge to prevent browning. Just make sure to pat them very dry with a kitchen towel before tossing with oil and roasting. For the best texture, I recommend roasting and glazing them the day of, but you can re-crisp them in a 400°F oven for 5-10 minutes before serving.
Q: Is there a way to make this recipe vegan?
A> Yes, and it’s super easy! The only non-vegan ingredient is the honey. Simply swap it for a vegan-friendly liquid sweetener. Maple syrup or agave nectar work beautifully. You can make your own “hot maple syrup” by warming it with red pepper flakes, just like you would with honey.
Q: My hot honey is solid/crystallized. How do I fix it?
A> No worries, this is totally normal! Place the jar (without the lid) in a bowl of very hot water, or gently warm the honey in a heat-proof bowl over a pot of simmering water (a double boiler). It will liquify again in just a few minutes.

Roasted Hot Honey Sweet Potatoes : Sweet, Spicy & Oven-Baked Perfection
Description
Tired of the same old side dishes? Let’s turn humble sweet potatoes into a show-stopping, flavor-packed star. Roasted until golden and crispy, then tossed in a spicy-sweet hot honey glaze, these potatoes are addictive, versatile, and easy enough for a weeknight yet special enough for the holiday table.
Ingredients
-
4 large sweet potatoes, peeled and cubed (~1-inch cubes)
-
6 tbsp hot honey (store-bought or homemade – see note)
-
4 tbsp extra virgin olive oil
-
Salt and freshly cracked black pepper, to taste
-
Fresh herbs like thyme, parsley, or cilantro, for garnish (optional)
Optional Flavor Boosts:
-
½ tsp smoked paprika or chili powder for smoky heat
-
Zest of 1 lime or lemon for brightness
-
2 tbsp crumbled feta or goat cheese for a tangy finish
-
1–2 tbsp tahini or Greek yogurt for creamy contrast
Homemade Hot Honey Tip:
Warm 6 tbsp honey with ½–1 tsp red pepper flakes for 10 minutes, then strain.
Instructions
Preheat oven to 425°F (220°C). Line a large rimmed baking sheet with parchment paper.
In a large bowl, toss cubed sweet potatoes with olive oil, salt, and pepper. Add any optional dry spices at this stage. Ensure each cube is evenly coated.
Spread potatoes in a single layer on the baking sheet. Roast 30–35 minutes, flipping halfway through, until edges are golden and crispy. Avoid crowding to prevent steaming.
Remove from oven, immediately drizzle with hot honey, and toss gently to coat. The residual heat will help the honey cling to the potatoes.
Transfer to a serving dish. Sprinkle with fresh herbs, cheese, or citrus zest if desired. Serve warm.
Notes
-
Crispy Potatoes: Single layer + high heat + flipping halfway is key.
-
Make Ahead: Cube potatoes a day ahead and store in water to prevent browning. Pat dry before roasting.
-
Vegan Option: Swap honey for maple syrup or agave; warm with red pepper flakes for “hot” flavor.
-
Crystallized Honey Fix: Warm gently in hot water or over a double boiler until liquid.
Nutrition
- Calories: 280–310 Cal Per Serving
- Fat: 12–14 g
- Carbohydrates: 40–45 g
- Protein: 2–3 g
A Quick Bite on Nutrition
While I’m all about flavor first, it’s always nice to know that what you’re eating is also doing your body good. Sweet potatoes are a true nutritional powerhouse. They’re packed with beta-carotene (which your body converts to Vitamin A), a crucial nutrient for eye health, your immune system, and even your skin. They’re also a great source of fiber, which helps keep you feeling full and supports a healthy gut, and they provide a steady release of energy thanks to their complex carbohydrates.
Using olive oil, a cornerstone of the heart-healthy Mediterranean diet, adds beneficial monounsaturated fats. Remember, the nutritional info is an estimate and can vary based on the exact size of your potatoes and how much oil and honey you use. But overall, this is a dish that feeds your soul and your body wonderfully.
Approximate Nutrition Per Serving: Calories: 280-310 | Carbs: 40-45g | Protein: 2-3g | Fat: 12-14g | Fiber: 5g
Your New Go-To Side Dish Awaits
And there you have it, friends! My complete guide to creating the most unforgettable roasted hot honey sweet potatoes. This recipe is a testament to my core belief here at Feastical: that food should be a joy to make and an even bigger joy to eat. It should feel like a warm hug but never, ever taste boring.
This dish has saved me on busy weeknights, wowed my friends at potlucks, and carved out its own special place on my holiday table. I have no doubt it’ll do the same for you. So, don’t be afraid to get a little messy, to play with the level of heat, and to make it your own. That’s where the real magic happens in the kitchen.
I’d love to hear how your potatoes turn out! Tag me on social @Feastical or shoot me an email with your creations and your own fun twists. Now, go preheat that oven and get ready for some serious flavor. Happy cooking!
Final Thoughts: More Than a Recipe
This dish holds a special place in my heart, not just for its incredible flavor, but for the memories it’s created—like winning over my spice-wary uncle at Thanksgiving. For me, that’s what cooking is all about: sharing food that sparks conversation and creates new traditions, all while honoring the old.
I hope this recipe finds its way to your table and becomes a part of your own story. May it bring a little warmth, a welcome kick, and a whole lot of joy to your meals. Give it a try, make it your own, and get ready to declare these sweet potatoes your new favorite side.
High-Protein Breakfast Bowls with Sausage, Eggs & Hash Browns : Meal Prep Friendly
Your New Secret Weapon for Winning Mornings
Hey friends, Beau here! Let’s get real for a second. How many of you have had a morning that starts with a frantic search for car keys, a desperate gulp of cold coffee, and the dreaded 10:30 AM stomach growl that could scare small animals? I’ve been there more times than I’d like to admit. The truth is, a chaotic morning often starts the night before—or more accurately, in the lack of a game plan for breakfast.
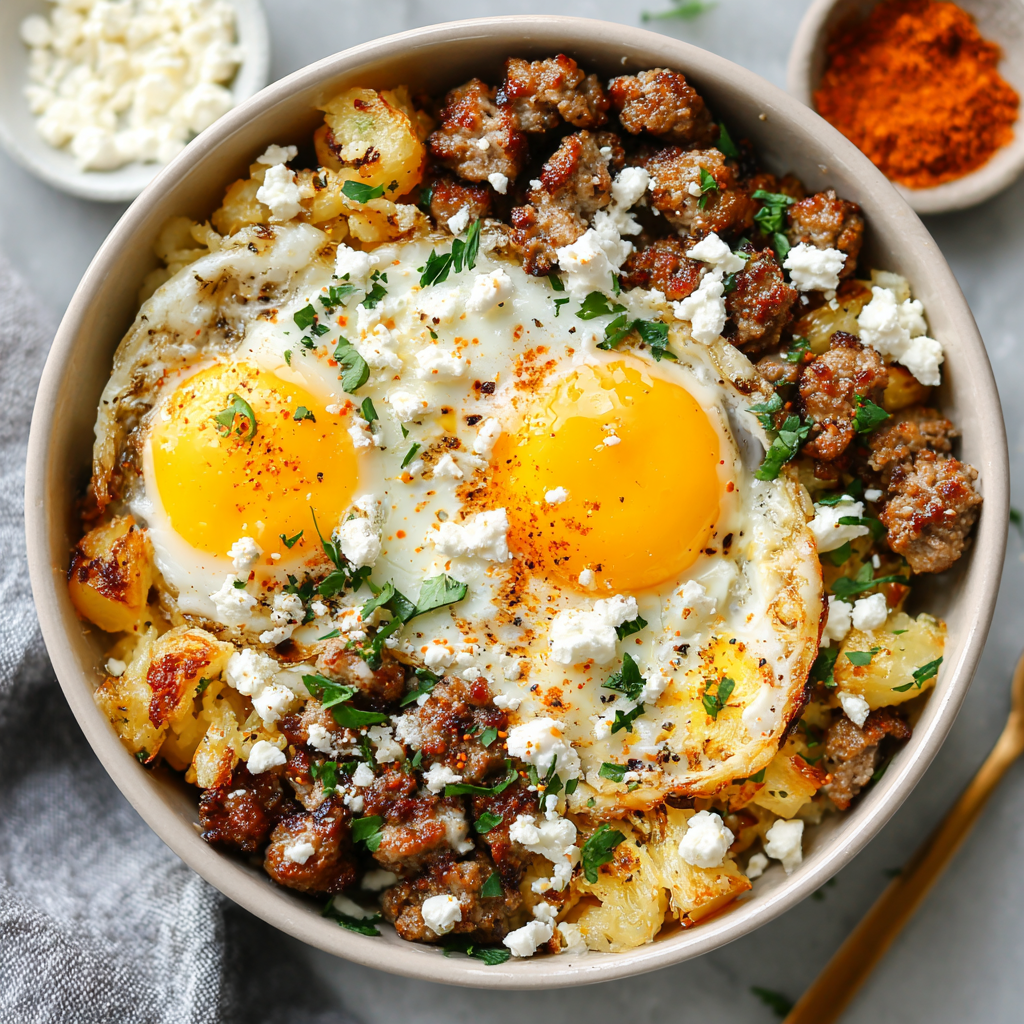
That’s why I’m so dang excited to share what might just be my favorite kitchen hack of all time: High-Protein Breakfast Bowls. This isn’t just a recipe; it’s your ticket to calm, collected, and utterly delicious mornings. We’re talking a hearty, savory mix of juicy breakfast sausage, impossibly fluffy eggs (with a secret ingredient for extra protein!), crispy golden hash browns, and a sprinkle of creamy, tangy cheese. It’s a diner-style breakfast plate, but all cozied up together in one convenient, meal-prep-friendly bowl.
Imagine opening your fridge on a Wednesday morning and being greeted by a ready-made feast that tastes like you just cooked it. No fuss, no mess, just pure, feel-good fuel that will keep you powered up and satisfied right until lunch. This is the food equivalent of a slow, deep breath before the day begins. So, let’s grab our biggest skillets and get ready to batch up some serious breakfast magic. Your future well-fed self is already thanking you.
The Breakfast That Saved My Bacon (And Sausage)
This recipe was born out of pure, unadulterated hunger. Picture a younger Beau, fresh out of culinary school and working my first gig at a cafe that opened at the ungodly hour of 5 AM. My own breakfast was an afterthought—a sad, cold piece of toast eaten over the sink if I was lucky. I was surrounded by beautiful food all day but was constantly running on empty.
One particularly brutal Monday, after burning a batch of pancakes and myself (a story for another day), I had a revelation. I looked at the components of our most popular skillet dish—sausage, taters, eggs, cheese—and thought, “Why am I not making this for ME?” That night, I whipped up a giant batch, portioned it into containers, and felt like I had discovered fire for the second time.
That first week of having a real, hot breakfast ready in minutes was a game-changer. I had more energy, I was in a better mood, and I wasn’t sneaking biscuit scraps before lunch. It reminded me of the big, noisy, family breakfasts my grandma used to make on Sundays, where the smell of frying potatoes would wake everyone up. This recipe is my way of bottling that weekend comfort and making it accessible for every single crazy, busy, wonderful day of the week.
Gathering Your Breakfast Bowl Brigade
Here’s the dream team of ingredients that come together to create this morning masterpiece. Don’t be afraid to mix and match based on what you have in your fridge—that’s the beauty of a bowl!
- 2 lbs Ground Breakfast Sausage: This is our flavor foundation. I love a sage-forward pork sausage, but feel free to use turkey sausage, chicken sausage, or even a plant-based crumble. Chef’s Insight: If you’re using a milder sausage, add a pinch of fennel seeds, red pepper flakes, and a dash of maple syrup to the pan for a custom flavor boost!
- 16 Eggs: The ultimate protein packers. Chef’s Insight: For the fluffiest scramble, I crack my eggs into a bowl and let them sit on the counter for 10-15 minutes to take the chill off before cooking. Trust me, it makes a difference!
- 2 cups Cottage Cheese: Wait, stay with me! This is the secret weapon. Whisked into the eggs, it creates an incredibly creamy, moist, and protein-rich scramble that’s out of this world. Substitution Tip: If you’re really not a cottage cheese person, you can swap it for ½ cup of heavy cream or whole milk, but you’ll be missing out on that extra protein punch and lovely texture.
- 6 cups Frozen Shredded Hash Browns: The crispy, golden crown of our bowl. Frozen is the way to go for ease and perfect texture. Chef’s Hack: For extra-crispy hash browns, spread them in a single layer on a hot, oiled skillet and don’t touch them for 5-7 minutes! That initial sear is key.
- 6 oz Crumbled Feta or Shredded Cheese: I’m a sucker for the salty, tangy punch of feta against the savory sausage, but a good sharp cheddar, pepper jack, or a Mexican blend works beautifully too.
- 2 tsp Salt & ½ tsp Black Pepper: The essential seasonings. We’ll use this to season our eggs and our hash browns. Remember: Season in layers for the best flavor!
Optional Flavor Twists (Get Creative!)
- 1 cup Diced Bell Peppers: Any color! They add a sweet crunch and a pop of color. Sauté them with the sausage or hash browns.
- ½ cup Chopped Green Onions or Chives: A sprinkle of fresh, green goodness at the end brightens up the whole dish.
- 1 tsp Smoked Paprika or Chili Flakes: For my friends who like a little heat and smokiness.
- Hot Sauce or Salsa: A must for serving! I always have a bottle of my favorite hot sauce and a jar of chunky salsa on the side.
- Fresh Herbs: A little chopped parsley or cilantro never hurt anybody.
Let’s Build Those Bowls: A Step-by-Step Guide
Alright, team, aprons on! We’re going to tackle this like a well-oiled machine. I like to work in this order to ensure everything is hot and ready for assembly at the same time. Let’s do this!
- Conquer the Hash Browns: Grab your largest, heaviest skillet (cast iron is my MVP here) and get it nice and hot over medium-high heat with a tablespoon of oil. Add your frozen hash browns in an even layer. Let them cook, undisturbed, for a good 5-7 minutes to get that glorious golden-brown crust. Season with a pinch of salt and pepper, then flip sections over and cook for another 5 minutes until crispy. Chef’s Hack: If you’re impatient for crispy taters like I am, press them down gently with a spatula to maximize contact with the hot pan.
- Brown the Sausage: While the hash browns are working their magic, get another large skillet over medium heat. Add your sausage and break it up with a wooden spoon. Cook it through until it’s nicely browned and no pink remains. If there’s a lot of excess grease, you can drain it off, but I usually leave a tablespoon or two for flavor. Chef’s Tip: This is the perfect time to add those diced bell peppers if you’re using them! Throw them in for the last 3-4 minutes of cooking to soften them up.
- Create the Fluffy Egg Cloud: This is the star of the show. In a large bowl, crack all 16 eggs. Add the 2 cups of cottage cheese, 2 teaspoons of salt, and ½ teaspoon of black pepper. Now, whisk it like you mean it! You want it to be mostly smooth, with a few small curds of cottage cheese still visible. Pour this mixture into the now-empty (but still warm) sausage skillet over low-medium heat. The Key Here: LOW AND SLOW. Gently push the eggs from the edges toward the center as they cook. You’re looking for soft, creamy curds, not dry, rubbery sheets. They’ll continue to cook a bit after you take them off the heat, so pull them off when they’re still slightly wet.
- The Grand Assembly: Get your six meal prep containers or bowls ready. We’re building layers of goodness. Start with a hearty base of crispy hash browns. Next, a generous scoop of our fluffy, creamy eggs. Follow that up with a layer of the savory sausage (and peppers!). Finally, top it all off with a hearty sprinkle of your chosen cheese. The residual heat will gently melt the cheese into everything. Pro-Tip: Let the components cool for about 10-15 minutes before putting the lids on your meal prep containers. This prevents steam from building up and making everything soggy.
How to Serve & Savor Your Masterpiece
Okay, the hard part is over. Now for the best part: eating!
For Immediate Gratification: If you’re digging in right away, slide that beautiful, steaming bowl right onto your table. I love to finish it with a vibrant sprinkle of chopped green onions or chives for a fresh bite and a pop of color. A few dashes of your favorite hot sauce or a generous dollop of cool, chunky salsa is non-negotiable in my book. It cuts through the richness perfectly. Serve it with a slice of buttered toast for the ultimate carb-loaded comfort experience.
For Your Meal Prep Glory: Once your bowls are assembled and cooled, pop the lids on and store them in the fridge. They’ll be your best friends for up to 5 days. When you’re ready to eat, just grab one, remove the lid (important step!), and microwave it for 1.5 to 2.5 minutes, stopping to stir halfway through, until it’s heated to your liking. I always add my fresh garnishes like green onions and hot sauce *after* reheating to keep them bright and fresh.
Mix It Up! 5 Delicious Twists on the Classic
This recipe is a fantastic blueprint, but don’t be afraid to make it your own! Here are a few of my favorite ways to shake things up.
- “Southwest Fiesta” Bowl: Swap the breakfast sausage for seasoned ground beef or chorizo. Use a Mexican cheese blend, and add a handful of black beans and corn to the mix. Serve with salsa and avocado slices.
- “Garden Veggie” Power Bowl: Perfect for my plant-based friends! Use a plant-based sausage crumble or just load up on veggies. Sauté mushrooms, spinach, zucchini, and onions, and mix them right into the eggs. Nutritional yeast can add a cheesy flavor if you’re skipping the dairy.
- “Everything Bagel” Bowl: This one is so fun! Use smoked salmon (or keep the sausage), swap the cottage cheese for cream cheese mixed into the eggs, and top everything with a hefty sprinkle of everything bagel seasoning. Mind-blowing!
- “Buffalo Chicken” Bowl: Swap the sausage for shredded rotisserie chicken tossed in buffalo sauce. Use a blue cheese crumble instead of feta, and whisk a tablespoon of ranch dressing powder into your eggs for an extra flavor kick.
- “Lower-Carb” Version: Easy! Simply replace the hash browns with cauliflower rice. Sauté the frozen riced cauliflower in your skillet until it’s tender and any excess moisture has cooked off. It’s a fantastic vehicle for all the other flavors.
Beau’s Kitchen Notes & Stories
This recipe has been a living, evolving thing in my kitchen. The first time I made it, I completely overcooked the eggs because the phone rang (it was my mom, asking what I was making for dinner—the irony!). I learned that day that eggs are the most forgiving of teachers; they gently show you your mistakes so you can do better next time.
I’ve also found that the type of cottage cheese matters. I prefer small-curd, 4% milkfat for the creamiest result, but any kind you love will work. The real evolution was realizing I could cook the sausage and eggs in the same pan, one after the other. Not only does it save on dishes (a win in any book), but the eggs pick up all those delicious little browned bits left behind by the sausage, infusing them with even more flavor. It’s the little things, folks.
Your Breakfast Bowl Questions, Answered!
I’ve gotten a lot of questions about this recipe over the years. Here are the most common ones to ensure your bowl success.
Q: My eggs got watery in the fridge! What happened?
A: This is almost always due to steam! Make sure you let the cooked components—especially the eggs and sausage—cool completely before you put the lid on the container. Trapped steam condenses and can make your beautiful scramble a bit sad. A quick stir when reheating will usually re-incorporate any moisture.
Q: Can I freeze these breakfast bowls?
A: You can, but with a caveat. The texture of the eggs and potatoes will change upon thawing, becoming a bit softer and potentially watery. They’re still safe to eat and will taste good, but the texture won’t be as perfect as the refrigerated version. I highly recommend enjoying them within 5 days from the fridge for the best experience.
Q: My hash browns are soggy. How can I get them crispier for meal prep?
A: Great question! The key is a hot pan, plenty of oil, and don’t crowd them. For meal prep, I actually recommend slightly *over*-crisping them. They’ll soften a bit in the fridge, so starting with an extra-crispy base ensures they still have a great texture when reheated. You can also store a portion of the hash browns separately and add them fresh each morning if you’re a true crisp-fiend.
Q: I’m not a meat-eater. What’s the best protein swap?
A: Fantastic options abound! A plant-based sausage crumble is the most direct swap. For a whole-food option, seasoned lentils or crumbled extra-firm tofu (sautéed with a little soy sauce and smoked paprika) are absolutely delicious and pack a great protein punch.

High-Protein Breakfast Bowls with Sausage, Eggs & Hash Browns : Meal Prep Friendly
Description
Mornings can be chaotic—scrambling for keys, gulping cold coffee, and hearing your stomach growl before 10 AM. Let me save you from that breakfast panic. These High-Protein Breakfast Bowls are packed with sausage, fluffy eggs, crispy hash browns, and melty cheese—all ready to grab and enjoy or prep ahead for the week. Think of it as a diner-style breakfast, condensed into a convenient, nourishing bowl.
Ingredients
-
2 lbs ground breakfast sausage (pork, turkey, chicken, or plant-based)
-
16 large eggs
-
2 cups cottage cheese (small-curd preferred)
-
6 cups frozen shredded hash browns
-
6 oz crumbled feta or shredded cheese (cheddar, pepper jack, or Mexican blend)
-
2 tsp salt
-
½ tsp black pepper
Optional Add-ins for Flavor:
-
1 cup diced bell peppers
-
½ cup chopped green onions or chives
-
1 tsp smoked paprika or chili flakes
-
Hot sauce or salsa for serving
-
Fresh herbs like parsley or cilantro
Instructions
1. Cook the Hash Browns
-
Heat 1 tbsp oil in a large skillet over medium-high heat.
-
Spread frozen hash browns evenly and cook undisturbed for 5–7 minutes for a golden crust.
-
Season with a pinch of salt and pepper, flip, and cook another 5 minutes.
Tip: Press gently with a spatula for extra crispiness.
2. Brown the Sausage
-
In another skillet over medium heat, cook the sausage, breaking it up with a spoon.
-
Add diced bell peppers in the last 3–4 minutes of cooking if using.
Tip: Keep 1–2 tbsp of sausage fat in the pan for extra flavor.
3. Make Fluffy Eggs
-
Whisk eggs, cottage cheese, salt, and pepper in a large bowl.
-
Pour into the warm sausage skillet over low-medium heat.
-
Stir gently, forming soft, creamy curds. Remove from heat while slightly wet—they’ll finish cooking in their own heat.
Tip: Let eggs sit at room temperature for 10–15 minutes before cooking for extra fluffiness.
4. Assemble the Bowls
-
Layer hash browns, then eggs, then sausage (and peppers), and top with cheese.
-
Let cool 10–15 minutes before covering for meal prep.
Serving Ideas: Add green onions, hot sauce, or salsa. Serve with toast if desired.
Meal Prep & Storage
-
Fridge: Up to 5 days.
-
Reheat: Microwave 1.5–2.5 minutes, stir halfway, then garnish.
-
Tip: Slightly over-crisp hash browns for best texture after refrigeration.
Notes
-
Southwest Fiesta: Swap sausage for chorizo or seasoned ground beef; add black beans and corn.
-
Garden Veggie: Plant-based sausage or extra veggies; optional nutritional yeast for a cheesy flavor.
-
Everything Bagel: Use smoked salmon, cream cheese in eggs, and everything bagel seasoning.
-
Buffalo Chicken: Shredded buffalo chicken instead of sausage; blue cheese crumble; ranch powder in eggs.
-
Lower-Carb: Replace hash browns with cauliflower rice.
Nutrition
- Calories: 450–500Cal Per Serving
- Fat: 30–35 g
- Carbohydrates: 15–20 g
- Fiber: 1–2 g
- Protein: 30–35 g
A Quick Look at the Fuel
Now, I’m a chef, not a dietitian, so please take this as a friendly estimate. The beauty of this recipe is that it’s packed with high-quality protein to keep you full and focused. Based on the core ingredients (and using a lean pork sausage and full-fat cheeses), here’s a rough breakdown per serving:
- Calories: 450-500
- Protein: 30-35g (That’s a powerhouse start!)
- Carbohydrates: 15-20g
- Fat: 30-35g
- Fiber: 1-2g (You can boost this significantly by adding those bell peppers or some spinach!)
Remember, these numbers can swing based on your specific ingredient choices. Using turkey sausage, egg whites, low-fat cheese, and adding more veggies are all easy ways to tailor this to your nutritional goals without sacrificing an ounce of flavor.
Go Forth and Conquer Your Mornings
And there you have it, my friends! Your complete guide to ditching the breakfast scramble (the mental one, not the delicious egg one) and embracing a week of satisfying, soul-warming mornings. This recipe is more than just a list of ingredients and steps; it’s a promise to yourself that you’re worth a great start to the day.
I truly believe that the best food is the kind that not only tastes incredible but also makes your life better. These High-Protein Breakfast Bowls do exactly that. They free up your time, fuel your body, and bring a little bit of Feastical comfort to your busiest days.
I’d love to hear how your bowls turn out! Tag me on social @Feastical with your creations and tell me your favorite variation. Now, go forth, prep with purpose, and make your mornings magnificent.
A Final Word from Beau
Friends, if you take one thing from this, let it be this: a great morning is a choice, and it’s often made the night before. It doesn’t have to be complicated. It can be as simple as a container of pre-made goodness waiting for you in the fridge.
This recipe was my personal game-changer, transforming my chaotic 5 AM starts into moments of quiet, flavorful triumph. I share it with you in the hopes that it does the same for you—that it gives you back ten minutes of peace, a belly full of fuel, and the energy to tackle whatever comes your way. So, give it a try. Make it your own. And get ready to win the morning.

Creamy Vanilla Protein Shake with Flavorful Twists : Energizing Breakfast Blend
Your New Favorite Morning Ritual: The Ultimate Creamy Vanilla Protein Shake
Hey friends, Beau here! Let’s be real for a second. Mornings can be… a lot. The alarm blares, the to-do list starts screaming, and sometimes, the last thing you have time for is a wholesome, sit-down breakfast. I get it. For years, I’d often just grab a granola bar and call it a day, only to find myself hangry and running on fumes by 10 AM. Sound familiar?
But then, I discovered the magic of a truly great protein shake. I’m not talking about those chalky, bland, “just-gotta-get-it-down” concoctions. I’m talking about a creamy, dreamy, sip-worthy masterpiece that feels like a treat but fuels your body like a champion. This Creamy Vanilla Protein Shake is my answer to the busy-morning blues. It’s the culinary equivalent of a high-five for your future self.
This shake is more than just protein powder and liquid; it’s a blank canvas for your cravings. It’s velvety, naturally sweet, and packed with lasting energy to power you through your morning, your workout, or that dreaded afternoon slump. We’re blending up a storm of simple, good-for-you ingredients that come together in under five minutes. So, dust off that blender, my friend. We’re about to make your mornings not just manageable, but downright delicious.
The Day I Fell in Love with a Blender
I’ll never forget the shake that changed it all for me. It was during my college days, living in a tiny apartment with a kitchen the size of a postage stamp. My “cooking” mostly consisted of microwave noodles and toast. My roommate, Leo, was a fitness nut who started every single day with a thunderous blender roar. One morning, after a particularly late night, he handed me a frosty glass of this creamy vanilla concoction. I was skeptical—my previous protein shake experiences were… not great.
But one sip and I was a believer. It was cold, refreshing, and tasted like a vanilla milkshake! It didn’t just satisfy my hunger; it completely turned my energy levels around. That shake became our ritual. We’d stand in our microscopic kitchen, clinking our blender cups like glasses of fine wine, ready to tackle the day. It taught me that healthy food doesn’t have to be complicated or taste like punishment. It can be simple, joyful, and the best part of your morning. This recipe is that very shake, perfected over the years, and I’m so excited to share it with you.
Gathering Your A-Team: The Ingredients
Great food starts with great ingredients, and this shake is no exception. Each one plays a specific role in creating that perfect sip. Here’s the lineup:
- 2 cups Unsweetened Almond Milk: This is our hydrating base. It’s light and has a neutral flavor that lets the vanilla shine. Chef’s Insight: Feel free to swap for oat milk for extra creaminess, dairy milk for classic richness, or even coconut water for a hydrating twist.
- 2 scoops Vanilla Protein Powder: The star of the show! This builds the foundational flavor and, of course, the protein punch. Pro Tip: Look for a powder you genuinely enjoy the taste of on its own. A whey/casein blend or a good plant-based one like pea protein works wonders for texture.
- 1 Banana (frozen!): This is the secret to a luxuriously thick, creamy shake without needing a ton of ice. Why Frozen? The frozen banana creates a smooth, almost soft-serve consistency that’s utterly irresistible. If you only have a fresh banana, you’ll definitely want to use the ice!
- 1 cup Greek Yogurt: This adds a tangy creaminess and a massive boost of protein. Substitution Tip: For a dairy-free version, coconut yogurt or silken tofu are fantastic alternatives that provide the same lush texture.
- 1 teaspoon Vanilla Extract: Don’t skip this! It amplifies the vanilla flavor from the powder and makes the whole shake taste warmer and more homemade.
- 1–2 tablespoons Honey or Maple Syrup (optional): This is your sweetness dial. I usually find the banana and protein powder make it sweet enough, but if you have a sweet tooth or are using an unflavored powder, a little drizzle of natural sweetness is a game-changer.
- 1 cup Ice Cubes (optional): The texture tuner! I almost always add a handful of ice because I love a super cold, frosty shake. If you used a frozen banana, you can skip it for a thicker, spoonable smoothie.
Blending Up Bliss: The Step-by-Step Guide
Okay, team, it’s go-time. This process is so simple, but a few little hacks will take your shake from “good” to “can-I-have-this-for-dessert?” great.
- Combine the Base: First things first, grab your blender. I always add the liquid (almond milk) first. This helps the other ingredients blend more easily and prevents them from getting stuck at the bottom. Pour in those two cups of almond milk, then add your protein powder, the frozen banana (break it in half if it helps!), the Greek yogurt, vanilla extract, and your sweetener if you’re using it.
- Customize Your Flavor: This is where the fun begins! Now’s the time to add any of those incredible flavor boosts. A dash of cinnamon for cozy warmth? A scoop of peanut butter for rich, savory depth? A tablespoon of chia seeds for fiber? Go for it! This is your shake, make it sing your song.
- Blend to Perfection: Pop the lid on securely (a lesson I learned the messy way—trust me, you don’t want a vanilla ceiling mural). Start blending on a low speed for about 10 seconds to break up the big chunks, then ramp it up to high. Let it rip for 30-60 seconds, until the shake is completely smooth, creamy, and has no visible chunks. You should hear the sound change from a loud “chunk-chunk” to a smooth, high-pitched whirl. Chef’s Hack: If the shake is too thick and struggling to blend, just stop the blender, take it off the base, and give the carafe a good shake. Or, add a tiny splash more almond milk to get things moving again.
- The Final Touch (Ice!): If you’re using ice and want that extra-frosty texture, I like to add it after the initial blend. Toss in the cup of ice and blend again on high until it’s fully incorporated. This two-step blending method ensures you don’t get any rogue ice chunks and guarantees maximum creaminess.
Pour, Garnish, and Sip: How to Serve Your Masterpiece
You’ve done the hard work, now for the reward! Pour that beautiful, creamy shake into your favorite glass—for me, that’s a big mason jar with a reusable straw. But presentation is part of the fun! Here’s how I like to make it feel extra special:
Give it a little garnish. A thin banana slice perched on the rim of the glass, a light dusting of cinnamon or nutmeg on top, or a tiny drizzle of honey or nut butter swirled over the surface. It takes 10 seconds and makes your morning fuel feel like something you ordered from a fancy café. This shake is perfect on its own, but it’s also a dream paired with a piece of whole-wheat toast with avocado or a handful of hard-boiled eggs on the side for a truly balanced breakfast. Enjoy it immediately for the best flavor and texture!
Shake It Up! 5 Flavorful Twists to Try
The beauty of this vanilla base is its incredible versatility. Once you’ve mastered the classic, get creative! Here are five of my favorite ways to mix it up:
- Java Kick-Start: Add 1-2 shots of cooled espresso or ½ cup of strong brewed coffee. It’s like a healthy, protein-packed Frappuccino that actually fuels your day.
- Tropical Escape: Swap the banana for 1 cup of frozen mango and ½ cup of frozen pineapple. Add a handful of spinach—you won’t taste it, I promise!—for a green boost. It’s a vacation in a glass.
- Chocolate Peanut Butter Cup: Add 1 tablespoon of cocoa powder and 1 tablespoon of peanut butter. It’s decadent, rich, and tastes like a dessert but is packed with protein.
- Cherry Almond Bliss: Use 1 cup of frozen dark sweet cherries instead of the banana and add ½ teaspoon of almond extract along with the vanilla. It’s a classic flavor combo that’s absolutely divine.
- Supergreen Vanilla: For a nutrient powerhouse, add a large handful of fresh spinach or kale and 1 tablespoon of flax seeds. The vanilla is so strong, it completely masks any “green” taste, leaving you with a vibrant, healthy shake.
Beau’s Chef Notes & Kitchen Stories
This recipe has been a living, evolving thing in my kitchen. I’ve learned a few things along the way. First, the power of the frozen banana cannot be overstated. I keep a zip-top bag full of peeled, broken-in-half bananas in my freezer at all times—it’s a game-changer for smoothie creaminess. Second, don’t be afraid to play with your textures. Sometimes I make it super thick and eat it with a spoon like ice cream! And a funny story: I once accidentally used salted peanuts instead of peanut butter (don’t ask how). Let’s just say it was a… memorable savory vanilla experience. We don’t talk about that one. The point is, make this shake your own. It’s a recipe that’s meant to be loved and adapted.
Shake Questions? I’ve Got Answers!
Over the years, I’ve gotten a ton of questions about this shake. Here are the most common ones to help you out:
- My shake came out too thin! What happened? No worries! The most common culprit is not using a frozen banana. Next time, be sure to freeze it. For this batch, you can thicken it up by blending in another ½ a banana (fresh is fine) or a few more ice cubes. A tablespoon of rolled oats or chia seeds can also help absorb excess liquid.
- It’s too thick! My blender is struggling. Easy fix! Just stop the blender and add a splash more of your milk (about 2 tablespoons at a time) until it starts moving freely again. Remember the shake-and-blend hack I mentioned earlier!
- Can I make this shake ahead of time? You can, but it’s best fresh. If you need to, blend it up and store it in a sealed container in the fridge for up to 24 hours. It will separate a bit, so just give it a really good shake or a quick re-blend before drinking.
- I don’t like the taste of my protein powder. Any tips? Absolutely! The ingredients in this shake are fantastic at masking less-than-perfect protein powders. The banana, vanilla extract, and yogurt add so much flavor. If it’s still not working, try adding a tablespoon of cocoa powder or a spoonful of strong coffee—they are powerful flavor maskers!

Creamy Vanilla Protein Shake with Flavorful Twists : Energizing Breakfast Blend
Description
Creamy Vanilla Protein Shake
Prep Time: 5 minutes
Servings: 1–2
Ingredients
-
2 cups unsweetened almond milk (or oat milk, dairy milk, or coconut water)
-
2 scoops vanilla protein powder (whey, casein, or plant-based)
-
1 frozen banana (for creaminess; fresh works with added ice)
-
1 cup Greek yogurt (or coconut yogurt/silken tofu for dairy-free)
-
1 tsp vanilla extract
-
1–2 tbsp honey or maple syrup (optional, adjust to taste)
-
1 cup ice cubes (optional, for extra frosty texture)
Optional Flavor Boosters
-
Cinnamon, cocoa powder, or espresso
-
Peanut butter or almond butter
-
Chia seeds, flax seeds, or spinach/kale
-
Frozen fruits like mango, pineapple, or cherries
-
Almond extract for a cherry-almond twist
Instructions
1. Combine Base Ingredients
-
Pour almond milk into blender first.
-
Add protein powder, frozen banana, Greek yogurt, vanilla extract, and sweetener (if using).
2. Blend
-
Start on low speed for 10 seconds to break up chunks.
-
Increase to high and blend 30–60 seconds until smooth and creamy.
-
If too thick, add a splash of milk. If too thin, add more frozen banana, ice, or a tablespoon of oats/chia seeds.
3. Add Ice (Optional)
-
For extra frosty texture, add ice after initial blend and blend again until incorporated.
4. Serve
-
Pour into your favorite glass or mason jar.
-
Garnish with a banana slice, cinnamon, nutmeg, or a drizzle of honey/peanut butter.
-
Enjoy immediately for best texture and flavor.
5 Flavorful Variations
-
Java Kick-Start: Add ½ cup cooled strong coffee or 1–2 shots espresso.
-
Tropical Escape: Swap banana for 1 cup frozen mango + ½ cup pineapple; add a handful of spinach.
-
Chocolate Peanut Butter Cup: Add 1 tbsp cocoa powder + 1 tbsp peanut butter.
-
Cherry Almond Bliss: Use 1 cup frozen cherries + ½ tsp almond extract.
-
Supergreen Vanilla: Add a handful of spinach or kale + 1 tbsp flax seeds.
Notes
-
Too thin? Use frozen banana, add more ice or oats.
-
Too thick? Add 1–2 tbsp milk at a time.
-
Make ahead? Blend and store in fridge up to 24 hours; shake or re-blend before drinking.
-
Protein powder tastes off? Mask with banana, vanilla, cocoa, or a splash of coffee.
Nutrition
- Fat: 6–10 g
- Carbohydrates: 22–30 g
- Protein: 28–35 g
Fueling Your Body: The Nutritional Lowdown
Now, let’s talk about what this deliciousness is doing for you! This nutritional info is an estimate for the base recipe (without optional boosts) and can vary based on your specific brand of ingredients.
This shake is a nutritional powerhouse, designed to keep you full and energized. You’re looking at a solid 28-35 grams of protein primarily from the powder and Greek yogurt, which is essential for muscle repair, satiety, and stable energy. The carbohydrates (22-30g) from the banana and a touch from the milk provide quick fuel, while the healthy fats (6-10g) help with nutrient absorption and keep you feeling satisfied for hours. It’s a balanced, complete meal that supports an active lifestyle, a busy morning, or just a desire to feel your best.
Prep Time: 5 minutes
Good For: Breakfast, Post-Workout Recovery, Clean Snacking
Your New Go-To Morning Win
And there you have it, friends! Your new secret weapon for a morning that feels good from the inside out. This Creamy Vanilla Protein Shake is more than just a recipe; it’s a promise to yourself that you’re worth a few minutes of self-care. It’s proof that eating well can be easy, fast, and an absolute joy.
I hope this shake becomes a beloved part of your routine, just like it is for me. Don’t forget to play with the flavors and make it your own. If you create a delicious new variation, I’d love to hear about it! Tag me on social @Feastical or shoot me an email. Now, go forth and blend something beautiful!
Final Thoughts
Forget the frantic, fuelless mornings. This creamy vanilla protein shake is your five-minute ticket to a calmer, more energized, and downright delicious start. It’s the simple, sip-worthy ritual that proves you can have your shake and drink it, too—no compromise required. Your new favorite morning awaits.
With a full blender and an happy heart,
Cheesy Pinto Bean Taco Casserole : Quick, Hearty & Crowd-Pleasing
Cheesy Pinto Bean Taco Casserole – Your New Weeknight Hero is Here!
Hey, friends! Beau here from Feastical. Let’s be real for a second. Some nights, you just need a dinner that feels like a warm, cheesy, flavor-packed hug without turning your kitchen into a scene from a culinary action movie. You want something hearty, something satisfying, something that makes everyone at the table do a little happy dance. You want… a casserole.
But not just any casserole. We’re talking about a casserole that’s taken all the best parts of Taco Tuesday and baked them into one glorious, bubbling, golden-brown dish. I’m thrilled to share my recipe for this Cheesy Pinto Bean Taco Casserole. It’s the ultimate crowd-pleaser, a pantry-friendly lifesaver, and it’s on the table in about 25 minutes flat. Seriously, the hardest part is waiting for that cheese to get all melty and perfect.
We’re layering slightly crushed tortilla chips for that essential crunch, a hearty filling of pinto beans and corn, a double-tomato punch from crushed tomatoes and zesty salsa, and a blanket of sharp cheddar cheese that brings it all together. I’ve even thrown in a few of my favorite “twist” add-ins to sneak in some extra veggies and depth of flavor. This isn’t just food; it’s a solution to the “what’s for dinner?” dilemma. So, preheat that oven, grab your favorite baking dish, and let’s make something delicious happen!
A Casserole Born from a “What’s in the Pantry?” Night
This recipe has a special place in my heart because it truly embodies the Feastical spirit: making something fantastic with what you have. I first threw this together during my college days. It was a rainy Thursday, my budget for the week was shot, and a few friends had unexpectedly dropped by. The mission: feed four hungry guys with one nearly-empty pantry.
I remember staring into the abyss of my shelves, seeing a can of pinto beans, a bag of tortilla chips, and a half-used jar of salsa. It was a culinary Hail Mary. I layered it all in a pie dish (I didn’t even own a real casserole dish back then!), topped it with the last shreds of cheese I had, and crossed my fingers. Twenty minutes later, we were diving into this hot, messy, incredibly delicious creation. The room went quiet except for the sounds of happy chewing. That’s when I knew—the best meals aren’t always the fanciest. They’re the ones that bring people together with simplicity and soul. This casserole has been a staple in my kitchen ever since, evolving a little but always delivering that same feel-good comfort.
Gather Your A-Team: The Ingredients
Here’s everything you’ll need to create this masterpiece. I’ve included some of my favorite chef insights and substitution tips so you can make this recipe your own!
- 16 oz Tortilla Chips: We’re giving them a slight crush by hand. You want a mix of textures—some big pieces for structure and smaller crumbs to soak up all the saucy goodness. Chef’s Tip: Stale chips work amazingly well here, so it’s a great way to use up that last bit in the bag!
- 4 (15 oz) cans Pinto Beans, drained and rinsed: Pinto beans are the hearty, creamy backbone of this dish. Rinsing them removes that excess sodium and starchy can liquid, giving you a cleaner flavor and better texture. Substitution: Black beans or kidney beans are fantastic swaps!
- 4 cups Frozen Corn: No need to thaw! The frozen kernels will cook perfectly in the oven, adding a sweet pop of color and flavor.
- 2 (15 oz) cans Crushed Tomatoes: This is our saucy base, providing rich tomato flavor and the perfect amount of liquid to bring everything together without making it soupy.
- 2 cups Red Salsa: This is our flavor bomb! It brings acidity, a little heat, and a ton of complexity. Use your favorite store-bought brand to make it easy, or use your own homemade if you’re feeling fancy. Chef’s Insight: The spiciness level of your salsa will dictate the heat of the whole casserole, so choose wisely!
- 2 envelopes Taco Seasoning Mix (or 4 tbsp homemade): The ultimate shortcut to big, bold Southwest flavor. I’m a fan of the packets for convenience, but if you have a homemade blend of chili powder, cumin, garlic powder, and paprika, this is the perfect time to use it!
- 3 cups Grated Cheddar Cheese: Because what’s a casserole without a glorious, melty cheese roof? I love sharp cheddar for its tang, but a Monterey Jack or a Mexican blend would be divine. Pro Tip: Grate your own cheese! It melts so much better than the pre-shredded stuff, which is coated in anti-caking agents.
Twist Add-Ins (Optional but Highly Recommended!)
- 1 Red Bell Pepper, diced: For a sweet crunch and a vibrant color boost.
- 1 small Red Onion, finely chopped: Adds a sharp, zesty bite that cuts through the richness.
- 1 tsp Smoked Paprika or Chili Powder: For a deeper, smokier flavor profile. It makes a huge difference!
- Fresh Cilantro or Green Onions for garnish: A fresh, herby finish that makes the dish look and taste restaurant-quality.
- Dollop of Sour Cream or Guac for serving: The cool, creamy counterpart to the hot, cheesy casserole. Non-negotiable in my book!
Let’s Build This Flavor Mountain: Step-by-Step Instructions
Ready? This is where the magic happens. It’s so simple, you’ll have it memorized after one try.
- Preheat Your Oven & Grease Your Dish: First things first, crank that oven to 375°F (190°C). This is the sweet spot for getting a bubbly filling and perfectly melted cheese without burning the tortilla chip crust. While it’s heating up, grab a 9×13 inch baking dish and give it a quick spritz with cooking spray. Little Chef Hack: Lining the dish with a piece of parchment paper first makes for the easiest cleanup imaginable. You’ll thank me later!
- Mix the Filling (The Fun Part!): Take your largest mixing bowl—I’m talking the one you use for potato salad at a family reunion. To this bowl, add your drained and rinsed pinto beans, the frozen corn, both cans of crushed tomatoes, the salsa, and the taco seasoning. If you’re using the red bell pepper and onion, toss those in now, too. Now, grab a sturdy spoon or spatula and give it all a good, confident mix until everything is evenly coated in that gorgeous red seasoning. Don’t be shy! Get in there and make sure no pocket of beans is left unseasoned.
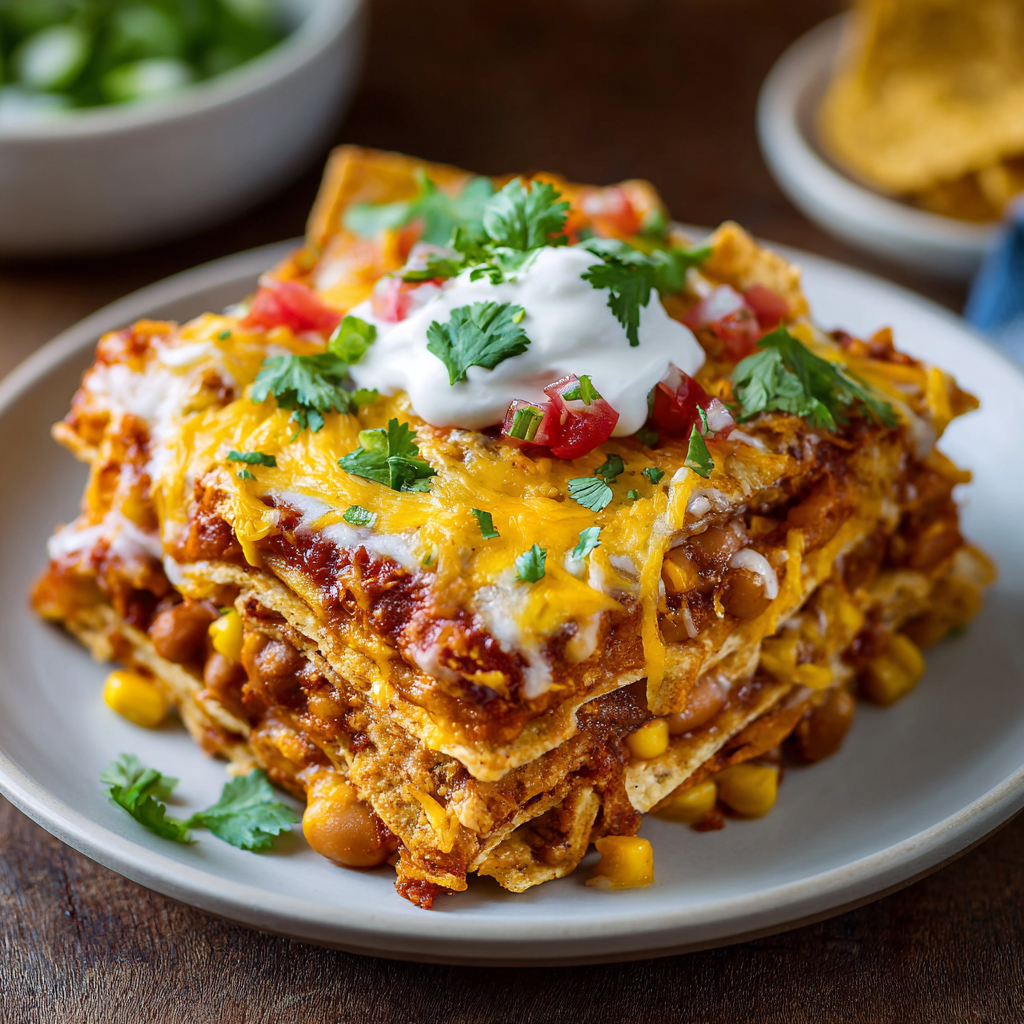
- Layer the Casserole Like a Pro: Time for architecture! Take your bag of tortilla chips and give it a gentle crush right inside the bag. You’re not making dust; you’re just breaking them up a bit. Sprinkle half of these crushed chips evenly over the bottom of your prepared baking dish. This is our foundation—it’s going to soak up some of the sauce and create an incredible bottom crust. Now, pour that beautiful bean and tomato mixture you just made directly over the chips. Use your spoon to spread it into a nice, even layer. Top it with the remaining half of the crushed chips, followed by the glorious, glorious mountain of shredded cheese. Spread the cheese all the way to the edges for maximum golden-brown coverage.
- Bake to Bubbly Perfection: Carefully slide your masterpiece into the preheated oven. We’re baking it uncovered for 20-25 minutes. You’re looking for the edges to be actively bubbling and the cheese to be completely melted, with those irresistible golden-brown spots starting to form. Your kitchen should smell absolutely incredible right now.
- The Final Touch & Serve: Once it’s out of the oven, let it sit for just 2-3 minutes. This allows the filling to set slightly, making it easier to serve. Then, scatter a generous handful of fresh, chopped cilantro or green onions over the top. This pop of green and fresh flavor is the perfect finish. Serve it up right from the dish with a big spoon, and don’t forget those cool dollops of sour cream or guacamole on the side!
How to Serve This Crowd-Pleasing Wonder
This casserole is a complete meal in one dish, but a few strategic sides can turn it into a full-blown fiesta! I love serving it family-style, right in the center of the table, and letting everyone dig in.
For plating, I get a nice sturdy spatula and lift out a square section, making sure to get all the way down to the bottom to capture every layer. Place it on a plate and immediately add a generous spoonful of cool, creamy sour cream or a hefty wedge of avocado right on top. The contrast of temperatures and textures is everything.
Want to round out the meal? Here are my go-to pairings:
- A simple, crisp romaine lettuce salad with a lime vinaigrette to cut through the richness.
- Quick-pickled red onions or jalapeños for a tangy, spicy kick.
- A big pitcher of classic margaritas or a refreshing agua fresca for the adults, and limeade for the kids.
It’s the perfect, no-stress centerpiece for a game day gathering, a potluck, or just making an ordinary Tuesday feel a whole lot more special.
Make It Your Own: Delicious Recipe Variations
One of the best things about this casserole is its flexibility. It’s a blank canvas for your culinary creativity! Here are a few of my favorite twists:
- Spicy Fiesta Swap: Kick up the heat! Use a hot salsa, add a 4 oz can of diced green chiles, or mix in 1/2 teaspoon of cayenne pepper with the taco seasoning. Top with sliced fresh jalapeños before baking for an extra punch.
- Full-On Fajita Casserole: Sauté one sliced green bell pepper and one sliced onion with a tablespoon of fajita seasoning until tender. Mix this into the bean filling along with some sliced black olives for a true fajita experience.
- Meat Lover’s Dream: For my carnivorous friends, brown one pound of ground beef, turkey, or chicken with one of the taco seasoning packets. Drain the fat and layer it over the first layer of chips before adding the bean mixture.
- Lighter & Brighter Version: Swap half the cheese for a light Mexican blend, use low-sodium beans and tomatoes, and serve over a bed of fresh greens instead of with the bottom layer of chips for a deconstructed, salad-style meal.
- Breakfast-for-Dinner Twist: Yes, really! Swap the taco seasoning for a tablespoon of chili powder and a teaspoon of cumin. After layering the chips and bean mixture, create little wells in the filling and crack a few eggs directly into them. Top with cheese and bake until the egg whites are set. Incredible!
Beau’s Kitchen Chronicles: A Few Parting Thoughts
This recipe has been on quite a journey with me. From that tiny college apartment kitchen to the Feastical test kitchen, it’s evolved. The biggest lesson? Don’t stress about being perfect. I’ve made this with all black beans, I’ve made it with a cup of leftover quinoa thrown in, and I’ve even made it without salsa once (I used a can of Rotel tomatoes instead—still awesome!).
The spirit of this dish is improvisation and comfort. It’s forgiving. It wants to help you use up what’s in your fridge. The most important ingredient you can add is a dash of confidence and a pinch of fun. Some of the best kitchen memories come from these simple, thrown-together meals. So, make it, share it, and enjoy the happy, full-bellied silence that follows.
Your Questions, Answered: FAQs & Troubleshooting
Over the years, I’ve gotten a lot of questions about this casserole. Here are the answers to the most common ones!
Q: My casserole came out a bit soupy. What happened?
A: No worries! This can happen if your salsa is particularly liquidy. The good news is, it still tastes amazing. For next time, you can drain a bit of the liquid from the canned tomatoes or salsa. For this batch, let it rest for a full 10 minutes after baking—this allows the chips and beans to absorb the excess liquid. You can also try using a slotted spoon to serve it.
Q: Can I make this ahead of time?
A: Absolutely! You can assemble the entire casserole (up to the point of baking), cover it tightly with plastic wrap or foil, and refrigerate it for up to 24 hours. When you’re ready, bake it straight from the fridge. You may need to add 5-10 minutes to the baking time since it will be cold.
Q: How do I store and reheat leftovers?
A> Leftovers will keep in an airtight container in the fridge for 3-4 days. To reheat, the oven or toaster oven (at 350°F until warm) is best for keeping the chips crispy. The microwave works in a pinch, but it will soften the chips significantly.
Q: Is this recipe freezer-friendly?
A> It is! Assemble the casserole in a freezer-safe dish, but wait to add the top layer of cheese. Wrap it tightly in a layer of plastic wrap and then a layer of foil. Freeze for up to 3 months. To cook, thaw overnight in the fridge, add the cheese, and bake as directed. You can also bake it from frozen; just add the cheese for the last 15 minutes of baking and expect the total bake time to be 45-60 minutes.

Cheesy Pinto Bean Taco Casserole : Quick, Hearty & Crowd-Pleasing
Description
Cheesy Pinto Bean Taco Casserole
Prep Time: 10 minutes
Cook Time: 20–25 minutes
Total Time: 30–35 minutes
Ingredients
Base & Filling
-
16 oz tortilla chips, slightly crushed
-
4 (15 oz) cans pinto beans, drained and rinsed (substitute black or kidney beans if desired)
-
4 cups frozen corn, no need to thaw
-
2 (15 oz) cans crushed tomatoes
-
2 cups red salsa (choose spice level to taste)
-
2 envelopes taco seasoning mix (or 4 tbsp homemade blend)
Cheese Layer
-
3 cups grated sharp cheddar cheese (or Mexican blend/Monterey Jack)
Optional Twist Add-Ins
-
1 red bell pepper, diced
-
1 small red onion, finely chopped
-
1 tsp smoked paprika or chili powder
-
Fresh cilantro or green onions for garnish
-
Dollops of sour cream or guacamole for serving
Instructions
1. Preheat & Prep
-
Preheat oven to 375°F (190°C).
-
Grease a 9×13 inch baking dish with cooking spray or line with parchment paper for easy cleanup.
2. Mix Filling
-
In a large bowl, combine drained beans, frozen corn, crushed tomatoes, salsa, taco seasoning, and optional bell pepper and onion.
-
Mix thoroughly until everything is evenly coated.
3. Layer the Casserole
-
Lightly crush tortilla chips in the bag.
-
Sprinkle half of the chips evenly in the bottom of the prepared dish.
-
Pour the bean and tomato mixture over the chips; spread into an even layer.
-
Top with remaining chips, then cover with shredded cheese, spreading to the edges.
4. Bake
-
Bake uncovered for 20–25 minutes, until edges are bubbling and cheese is golden brown.
-
Let rest 2–3 minutes before serving.
5. Serve
-
Garnish with chopped cilantro or green onions.
-
Serve with sour cream, guacamole, or both.
Notes
-
Make Ahead: Assemble up to 24 hours before baking; add 5–10 minutes to cook time if chilled.
-
Leftovers: Store in airtight container in fridge 3–4 days. Reheat in oven/toaster oven for best texture.
-
Freezer-Friendly: Assemble without top cheese layer. Wrap tightly and freeze up to 3 months. Thaw overnight, add cheese, bake as directed.
Nutrition
- Calories: 410 Cal Per Serving
- Fat: 18 g
- Carbohydrates: 48 g
- Protein: 17 g
Breaking It Down: A Quick Nutritional Look
Now, I’m not a nutritionist, but I believe in having a general idea of what’s going into our bodies. This casserole is packed with wholesome, satisfying ingredients. The pinto beans and corn are fantastic sources of fiber and plant-based protein, which helps keep you full and energized. The tomatoes bring a dose of vitamins A and C, and lycopene.
Of course, with the cheese and chips, it’s a hearty comfort food. The beauty is in the balance and the portion size! Here’s a rough estimate per serving (based on 8 servings), but remember, this can vary based on the specific brands you use and any modifications you make.
-
- Calories: ~410 kcal
- Protein: 17g
- Carbohydrates: 48g
- Fat: 18g
- Fiber: 11g (That’s nearly half your daily goal!)
Final Thoughts:
So there you have it—your new secret weapon for busy nights. This Cheesy Pinto Bean Taco Casserole is more than just a recipe; it’s a promise of a stress-free, delicious dinner that everyone will love. It’s hearty, it’s cheesy, and it’s on your table in under 30 minutes. What are you waiting for? Give it a try tonight and turn a regular weeknight into a mini fiesta!

Sourdough Discard Churro Popovers : Fluffy, Sweet & Irresistible
From Sourdough Scrap to Sweet Sensation: Meet Your New Favorite Treat
Hey friends, Beau here! Let’s get real for a second. If you’re part of the sourdough club, you know the weekly struggle: what in the world do I do with all this discard? You don’t want to waste it, but sometimes, another batch of sourdough crackers just doesn’t spark joy. I get it. That’s exactly why I started playing around in the Feastical test kitchen, and let me tell you, we struck gold.
Imagine this: You preheat your oven, and within an hour, your kitchen is filled with the warm, buttery scent of cinnamon sugar. You pull out a tray of golden-brown, impossibly puffy popovers. They’re crisp and shatter-y on the outside, with a soft, almost custardy interior that’s just begging to be rolled in a spiced sugar blanket. Sounds like a churro, right? Well, my friend, you’ve just met the Sourdough Discard Churro Popover.
This recipe is a game-changer. It transforms that tangy, leftover starter into something magical, sweet, and utterly irresistible. We’re taking a classic, simple popover recipe and giving it a fun, fiesta-ready twist. The best part? You don’t need any fancy skills or equipment (though a popover pan is a superstar here). So, grab that jar of discard from the fridge, and let’s turn what might have been waste into a warm, sweet hug for your soul.
The Happy Accident That Started It All
This recipe was born from a happy little kitchen mishap. A few Sundays ago, I was in full weekend baking mode. I had a bowl of sourdough discard sitting next to me, and on the counter was my trusty popover pan, still warm from a savory batch I’d made for breakfast. My brain, always looking for ways to connect the dots, started ticking.
I remembered the first time I had a real, fresh churro. I was maybe ten years old, at a local fair that came through town once a year. It was a magical place of flashing lights and dizzying rides, but the thing I looked forward to most was that paper bag, warm and greasy, filled with crispy, cinnamon-dusted sticks of pure joy. That memory of simple, euphoric sweetness is something I’ve always tried to capture.
So, I looked at my discard, I looked at my popover pan, and I thought, “What if…?” What if I could combine the airy, dramatic puff of a popover with the nostalgic, spiced-sugar crunch of a churro? Friends, that “what if” moment is where the best kitchen magic happens. The first batch was a revelation, and I immediately knew I had to share this little piece of happy with all of you.
Gathering Your Kitchen Crew: The Ingredients
One of the things I love most about this recipe is its simplicity. You likely have everything you need already in your pantry. Let’s break it down, because knowing your ingredients is the first step to becoming a kitchen rockstar.
For the Popover Batter:
- 1 cup unfed sourdough discard: This is our secret weapon! It adds a subtle tang that balances the sweetness and helps create a fantastic texture. Don’t worry if it’s been in the fridge for a week—it’s perfect. Chef’s Insight: The hydration of starters can vary. If yours is very thick, your popovers might be a bit denser; if it’s very runny, they might be a tad more custardy. Both are delicious!
- 6 large eggs: These are the workhorses, providing structure and that incredible rise. Make sure they’re at room temperature for the best volume. Substitution Tip: I don’t recommend substituting here, as eggs are crucial to the popover’s signature puff.
- 2 cups whole milk (room temperature): The fat in whole milk gives us a richer, more tender crumb. Substitution Tip: 2% milk will work in a pinch, but avoid skim. For a non-dairy version, unsweetened oat or almond milk are great options.
- 4 tbsp melted butter: For flavor and richness. I use unsalted so I can control the salt level.
- 2 tsp vanilla extract: The aromatic backbone that makes everything taste like a bona fide dessert.
- 2 cups all-purpose flour: Our trusty foundation. I’ve had great success with a 1:1 gluten-free blend, too!
- 2 tsp salt: Never, ever skip the salt in baking! It enhances all the other flavors and keeps the sweetness from being one-dimensional.
For the Churro Coating:
- ½ cup melted butter: This is our edible glue for the cinnamon sugar. It needs to be melted but not scorching hot.
- 1 cup granulated sugar: The sweet, crystalline canvas for our spices.
- 2 tsp cinnamon: The classic churro flavor. Don’t be shy!
- Optional: pinch of nutmeg or cardamom: This is my little pro-tip. A tiny bit of nutmeg adds warmth, and cardamom gives it a sophisticated, almost floral note. Try it!
Let’s Get Baking: The Step-by-Step Magic
Okay, team, it’s showtime! This process is simple, but there are a few key steps to ensure you get those majestic, puff-tastic popovers. Read through once, then let’s dive in together.
- Let the Batter Rest and Relax. In a large mixing bowl, whisk together your sourdough discard, eggs, milk, vanilla, and melted butter until everything is well combined and smooth. Now, add in your flour and salt. Whisk it all together until you have a smooth, thin batter, similar to heavy cream. Don’t over-mix! A few tiny lumps are totally fine. Now, walk away. Let the batter rest on the counter for a full 30 minutes. Chef’s Hack: This resting period allows the gluten to relax and the starch to hydrate, which is a fancy way of saying it gives us a taller, more stable popover. Use this time to clean up or enjoy a cup of coffee.
- Preheat Like a Pro. Place your popover pan (or muffin tin) directly into a cold oven. Then, preheat the oven to a scorching 450°F (230°C). Yes, you’re heating the pan with the oven! This is the single most important trick for a great popover. The shock of the cold batter hitting the blazing hot pan is what creates the initial explosive rise and steamy interior.
- Bake with Confidence. Once your oven is preheated and your batter has rested, carefully pull out the hot pan (use oven mitts—those handles are sneaky!). Generously grease each cup with butter or non-stick spray. I mean it, be generous! Now, fill each cup about halfway with the batter. Chef’s Insight: They need room to climb the walls and puff up, so resist the urge to overfill! Quickly get them back into the oven and bake at 450°F for 20 minutes. THEN, without opening the door, reduce the heat to 350°F (175°C) and bake for another 10-15 minutes until they are deeply golden brown and sound hollow if you tap them. Do not open that oven door during the first 25 minutes of baking! The rush of cold air can make them collapse.
- The Grand Finale: The Churro Coat. Once the popovers are out of the oven, let them cool in the pan for just a minute or two—just enough so you can handle them. Use a pastry brush to generously coat each warm popover with the melted butter. Then, roll them lovingly in a shallow bowl filled with your cinnamon-sugar mixture (I like to add my pinch of nutmeg right in there). Get them coated on all sides. The warmth of the popover will help the sugar adhere beautifully.
How to Serve These Golden Beauties
Presentation is part of the fun! I like to serve these popovers piled high on a big wooden board or a beautiful platter, with any extra cinnamon sugar dusted over the top for a snowy effect. They are absolutely perfect all on their own, still warm from the oven when the contrast between the crisp shell and tender interior is at its peak.
But if you’re feeling fancy (and why wouldn’t you?), let’s talk toppings. A simple drizzle of dulce de leche or warm chocolate sauce takes them to another level. For a real showstopper, slice them open and dollop in some lightly sweetened whipped cream or a schmear of mascarpone cheese mixed with a little honey. Serving them with a side of fresh berries for a pop of freshness is never a bad idea either. Honestly, there’s no wrong way to enjoy them!
Make It Your Own: Fun Recipe Twists
The beauty of this base recipe is its versatility. Once you’ve mastered the classic, feel free to get creative and make it your own!
- Chocolate Chip Surprise: Fold ½ cup of mini chocolate chips into the batter right before resting. You’ll get little pockets of melted chocolate in every bite.
- Orange-Zest Zing: Add the zest of one orange to the batter and a teaspoon of orange zest to the cinnamon sugar. The citrus brightens everything up beautifully.
- Apple Pie Spice Popovers: Swap the cinnamon in the coating for a pre-mixed apple pie spice. It’s like autumn in every bite.
- Gluten-Free & Dairy-Free Friendly: As mentioned, use a 1:1 gluten-free flour blend and swap the whole milk for your favorite unsweetened non-dairy milk. The results are fantastic!
- Salted Caramel Drizzle: Skip the cinnamon sugar roll and instead, drizzle the baked popovers with a generous amount of salted caramel sauce and a flaky sea salt like Maldon. Trust me on this one.
Beau’s Kitchen Chronicles: A Few Parting Thoughts
This recipe has become a staple in my home, and it’s evolved in fun ways. My partner is obsessed with the chocolate chip version, and I once, in a moment of sheer genius (or madness), filled a few with a spoonful of peanut butter before baking—highly recommend for the PB lovers out there!
The first time I made these, I was so impatient I opened the oven door to “check on them” at the 15-minute mark. I was greeted by a tray of sad, deflated little pucks. We live and we learn! That’s why I’m so adamant about the “no peeking” rule. Let the oven do its thing. The reward for your patience is a tray of golden, puffy clouds of joy. It’s a recipe that reminds me that sometimes, the most delicious things come from not letting good ingredients go to waste.
Your Questions, Answered!
I’ve gotten a lot of DMs about this recipe, so let’s tackle the most common questions head-on.
- Q: I don’t have a popover pan. Can I use a muffin tin?
A: Absolutely! A standard muffin tin will work just fine. Your popovers might not get quite as tall and dramatic as they do in a popover pan, but they will still be incredibly delicious. Just be sure to preheat the muffin tin in the oven the same way. - Q: My popovers didn’t puff up. What went wrong?
A: The most common culprits are: 1) The pan wasn’t hot enough (make sure you preheat it IN the oven), 2) The oven door was opened too early, or 3) The batter was over-mixed. Remember, we’re going for a smooth but not overly worked batter. - Q: Can I make the batter ahead of time?
A: You can! You can whisk the batter together, cover it, and let it rest in the refrigerator for up to 24 hours. Just give it a quick stir before you use it. You may need to add a minute or two to the baking time since the batter will be cold. - Q: The centers are a bit eggy. Is that normal?
A: Yes! That soft, slightly wet, custardy interior is a hallmark of a great popover. It’s not undercooked; it’s what makes them so unique and delightful compared to a muffin.

Sourdough Discard Churro Popovers : Fluffy, Sweet & Irresistible
Description
Sourdough Discard Churro Popovers
Prep Time: 15 minutes + 30 minutes batter rest
Cook Time: 30–35 minutes
Total Time: 1 hour
Yields: 12 popovers
Ingredients
Popover Batter
-
1 cup unfed sourdough discard
-
6 large eggs, room temperature
-
2 cups whole milk, room temperature (or 2% milk; unsweetened oat/almond milk for dairy-free)
-
4 tbsp melted butter, unsalted
-
2 tsp vanilla extract
-
2 cups all-purpose flour (or 1:1 gluten-free flour blend)
-
2 tsp salt
Churro Coating
-
½ cup melted butter
-
1 cup granulated sugar
-
2 tsp ground cinnamon
-
Optional: pinch of nutmeg or cardamom
Instructions
1. Make the Batter
-
In a large bowl, whisk together sourdough discard, eggs, milk, melted butter, and vanilla until smooth.
-
Add flour and salt; whisk until a smooth, thin batter forms (like heavy cream). A few tiny lumps are fine.
-
Let batter rest at room temperature for 30 minutes.
2. Preheat Oven & Pan
-
Place popover pan (or muffin tin) in a cold oven.
-
Preheat oven to 450°F (230°C). Heating the pan with the oven ensures a dramatic puff.
3. Bake the Popovers
-
Carefully remove hot pan, generously grease each cup.
-
Fill each cup about halfway with batter.
-
Bake at 450°F for 20 minutes.
-
Without opening the door, reduce heat to 350°F (175°C) and bake 10–15 minutes more until golden brown and hollow-sounding.
-
Do not peek during first 25 minutes.
4. Apply Churro Coating
-
Brush warm popovers with melted butter.
-
Roll in cinnamon-sugar mixture (add nutmeg or cardamom if using).
-
Serve warm for the best contrast between crisp exterior and soft interior.
Serving Suggestions
-
Pile on a platter or wooden board with extra cinnamon sugar dusted on top.
-
Optional toppings: drizzle of dulce de leche, warm chocolate sauce, or a dollop of sweetened whipped cream/mascarpone.
-
Pair with fresh berries for a pop of freshness.
Notes
-
No popover pan? Use a muffin tin; popovers may be slightly smaller.
-
Popovers didn’t puff? Pan wasn’t hot enough, oven door opened too early, or batter over-mixed.
-
Make ahead: Batter can rest covered in fridge up to 24 hours. Stir before use; may need slightly longer baking.
-
Custardy centers: Slightly wet interior is normal; it’s what makes popovers unique.
Nutrition
- Calories: 170–190 Cal Per Serving
A Quick Bite on Nutrition
Now, let’s be clear: this is a dessert treat, a weekend brunch superstar, a celebration of joy in food form. It’s not a salad. But I believe all food fits into a happy, balanced life! These popovers get their structure from eggs and flour, and their irresistible quality from butter and sugar.
Using sourdough discard can offer a slight benefit of pre-fermented grains, which some folks find easier to digest. Each popover (before toppings) comes in at around 170-190 calories. The main takeaway? Enjoy every single, cinnamon-sugar-coated bite mindfully and without an ounce of guilt. Food is meant to be savored, and this recipe is a perfect example of that.
Your Next Kitchen Adventure Awaits
Well, my fellow food-lover, there you have it. Your guide to turning a humble jar of sourdough discard into a truly spectacular treat that’s bound to impress anyone lucky enough to try one. This recipe is a testament to the magic that can happen when we look at our “leftovers” with a little creativity and a whole lot of love.
I can’t wait for you to experience the magic for yourself. The dramatic puff when you pull them from the oven, the intoxicating smell of cinnamon and butter, and that first bite that’s equal parts crisp, soft, and sweet. When you make them, please tag me @Feastical on social media so I can see your beautiful creations! Now, go preheat that pan and get ready for some serious baking bliss. Happy cooking!
Final Thoughts
Don’t let that sourdough discard languish in the fridge any longer. This recipe is your golden ticket to transforming a “waste product” into a pure, unadulterated joy. The Sourdough Discard Churro Popover is more than just a recipe—it’s a solution, a celebration, and a reminder that the best kitchen creations are often born from a little creativity. So, preheat that pan, embrace the puff, and get ready to meet your new favorite treat. Happy baking!

Keto Chocolate-Covered Pecans : Irresistible Low-Carb Delight
Keto Chocolate-Covered Pecans: Your New Favorite Guilt-Free Crunch
Hey friends, Beau here! Let’s be real for a second. Sometimes, a craving hits you that feels like a tidal wave. For me, it’s almost always a powerful, undeniable need for something crunchy, salty, and deeply, decadently chocolatey. But if you’re living that low-carb life like I often am, finding a treat that satisfies that specific craving without derailing your goals can feel like searching for a unicorn. You end up staring into the pantry, willing a magical, sugar-free snack to appear. Sound familiar?
Well, my foodie friends, I’m about to make your day. These Keto Chocolate-Covered Pecans are that unicorn. We’re talking about buttery, toasty pecans getting a full-on hug from a slick, rich chocolate coating. They’re the kind of treat you can proudly set out at a party where no one will even guess they’re keto, and the kind of snack you can keep stashed in your fridge for when that 3 PM slump tries to sabotage you.
This isn’t just about denying yourself the “bad” stuff; it’s about embracing something truly fantastic. We’re creating a feel-good food moment that’s big on flavor and zero on guilt. So, grab your favorite skillet and a trusty mixing bowl. We’re about to whip up a batch of pure, unapologetic joy that just happens to be low-carb. Let’s get toasting!
The Little Candy Shop That Could (And Inspired This Recipe)
This recipe takes me right back to my grandma’s kitchen. She lived in this small town that had one of those old-fashioned candy shops with a big glass window where you could watch them hand-dip chocolates. The smell of melting chocolate and roasting nuts would just pour out onto the street. My weekly allowance was almost always spent on a small, white paper bag of their chocolate-covered pecans. I’d savor each one, making it last the whole walk home.
When I first started my keto journey years later, I walked past a similar shop and that memory hit me like a ton of bricks. I wanted that experience again—that specific combination of textures and flavors. The store-bought keto options just didn’t hit the same; they often had a waxy coating or a weird aftertaste. So, I did what I always do: I headed to my own kitchen. After a little trial and error (we don’t talk about the “burnt pecan incident of 2019”), I landed on this simple, foolproof method. It captures all the magic of that childhood memory but keeps it firmly in the land of low-carb delights. It’s my little kitchen homage to that candy shop, and to Grandma, who always believed the best conversations happened over something delicious.
Gathering Your A-Team: What You’ll Need
Part of what makes this recipe so brilliant is its simplicity. You only need a handful of high-quality ingredients to create something spectacular. Here’s the lineup:
For the Toasted Pecans:
- 4 ½ cups Pecan Halves: The star of the show! Pecans have a naturally buttery, rich flavor that pairs perfectly with chocolate. Chef’s Insight: Give them a quick rinse and pat them dry before toasting—it helps the butter and sweetener cling better!
- 4 tbsp Salted Butter: We’re using salted butter here to create a wonderful sweet-and-salty foundation. It makes the pecans taste richer and helps balance the chocolate. Substitution Tip: Unsalted butter works fine too; just add an extra pinch of salt to the toasting process.
- ¼ tsp Stevia: Just a touch to enhance the natural sweetness of the nuts. Substitution Tip: You can use any powdered keto sweetener you love here, like monk fruit or erythritol. The goal is a subtle sweetness, not an overpowering one.
For the Chocolate Coating:
- 2 cups Lily’s Milk Chocolate Chips: My go-to for keto baking. They melt beautifully and have a fantastic flavor without any sugar. Chef’s Insight: If you’re a dark chocolate fiend, feel free to swap in Lily’s Dark Chocolate Chips for a deeper, less sweet flavor profile.
- 2 tsp Coconut Oil: This is our secret weapon! Adding a little fat to the chocolate makes it smoother, easier to dip with, and gives the finished product a gorgeous, glossy snap when you bite into it.
Optional Flavor Boosts (Get Creative!):
- ½ tsp Ground Cinnamon or Pumpkin Spice: A warm, cozy kick that makes these feel extra special, especially in the fall.
- Pinch of Flaky Sea Salt: Trust me on this. A little flaky salt on top of the chocolate elevates the entire experience to gourmet status.
- Crushed Freeze-Dried Raspberries: For a stunning pop of color and a tangy flavor that cuts through the richness beautifully.
Let’s Make Some Magic: The Step-by-Step Guide
Ready to create some kitchen alchemy? Follow these steps, and you’ll be a chocolate-covering pro in no time. I’ve packed this section with all my favorite little hacks to ensure your pecans are perfect.
- Toast the Pecans to Perfection. Grab your largest skillet and place it over medium heat. Add the butter and let it melt until it’s just starting to foam. Now, toss in your pecans and sprinkle that stevia evenly over the top. Here’s the key: stay put and keep them moving! Stir them frequently for 5 to 7 minutes. You’ll know they’re ready when your kitchen smells like heaven and the pecans have taken on a slightly darker, gorgeous golden-brown color. Chef’s Hack: Don’t walk away to check your phone! Pecans can go from perfectly toasted to sadly scorched in a matter of seconds. Once they’re done, immediately spread them out on a baking sheet or a large plate to cool completely. This step is non-negotiable—if the pecans are even slightly warm, they’ll melt your chocolate and make a soupy mess.
- Melt the Chocolate Like a Pro. While the pecans are cooling, it’s chocolate time! Combine the Lily’s chocolate chips and the coconut oil in a microwave-safe bowl. Now, we’re going to be patient. Microwave on high for 20 seconds, then take it out and stir. Back in for another 20 seconds, stir again. Repeat this process until the chocolate is completely smooth and glossy. Chef’s Hack: The residual heat in the bowl is your friend. Even if it looks like not much is happening after the first stir, keep going! Rushing this with high heat is the number one cause of seized, grainy chocolate. If you’re a double-boiler purist, feel free to use that method—it gives you even more control.
- The Grand Dip. Line another baking sheet with parchment or wax paper. Now for the fun part! Working with a few pecans at a time, drop them into the melted chocolate. Use a fork to swirl them around, ensuring they’re fully coated. Lift them out, let the excess chocolate drip back into the bowl, and then gently place them on your prepared sheet. Chef’s Hack: That fork is your best tool for getting a clean, professional look. Tap the fork gently on the edge of the bowl to shake off any extra chocolate before transferring.
- Add Your Signature Flair. This is where you make them your own! Before the chocolate sets, sprinkle on your chosen toppings. A little flaky sea salt? A dusting of cinnamon? A sprinkle of those vibrant crushed raspberries? Go for it! This is the moment to get creative and personalize your batch.
- The Big Chill. Once all your pecans are beautifully coated and accessorized, carefully slide the entire baking sheet into the refrigerator. Let them chill for at least 20-30 minutes, or until the chocolate coating is firm to the touch. Chef’s Hack: If you’re in a real hurry, the freezer will set them in about 10 minutes flat. Just don’t forget about them in there!
How to Serve These Little Gems
Okay, they’re set, they’re gorgeous, and you’re probably already nibbling on one (I don’t blame you!). But let’s talk about how to present these beauties. They’re incredibly versatile.
For a simple family snack, I keep them in a mason jar right on the counter (if it’s cool out) or in the fridge. They’re the perfect grab-and-go treat. When I’m having friends over, I love to fancy them up. Pile them high in a beautiful ceramic bowl or arrange them on a wooden board alongside some sharp cheese, a few low-carb crackers, and some fresh berries for a stunning dessert platter.
They also make incredible homemade gifts! Package them in a cute cellophane bag tied with a ribbon, or a small decorative tin. It’s a personal, heartfelt gift that says, “I think you’re awesome,” in the universal language of chocolate and pecans.
Mix It Up! 5 Fun Flavor Twists
Once you’ve mastered the classic, the kitchen playground opens up! Here are a few of my favorite ways to riff on this recipe:
- The Orange Zest Zinger: Add a tablespoon of freshly grated orange zest to the melted chocolate. The combination of dark chocolate and orange is a timeless, elegant flavor pairing that’s absolutely divine.
- The Coconut Lover’s Dream: After dipping the pecans in chocolate, roll them immediately in unsweetened shredded coconut. It adds fantastic texture and a tropical vibe.
- The Double Nut Delight: Use a mix of pecans and almonds! Toast them together for a more complex nutty flavor profile. It’s a great way to use up those half-empty bags of nuts in your pantry.
- The Spicy Kick: For the adventurous, add a tiny pinch of cayenne pepper or chipotle powder to the chocolate along with the cinnamon. The subtle heat that follows the sweet and salty is a real showstopper.
- The Peanut Butter Swirl: Gently warm a few tablespoons of sugar-free peanut butter. Before the chocolate sets on the pecans, drizzle the peanut butter over the top with a fork for a gorgeous marbled effect.
Beau’s Kitchen Chronicles: A Few Parting Thoughts
This recipe has truly evolved in my kitchen. The first time I made them, I was so impatient that I tried to dip the pecans while they were still warm. Let’s just say I ended up with chocolate-covered pecans… floating in a chocolate-pecan soup. It was a delicious mess, but a mess nonetheless! It taught me the invaluable lesson of letting things cool down—both in cooking and in life.
I’ve also learned that the quality of your chocolate matters most. Don’t skimp here! A good sugar-free chocolate makes all the difference between a “good” keto treat and a “I-can’t-believe-this-is-keto” masterpiece. This is one of those recipes that gets better and better each time you make it, so don’t be afraid to experiment and find your perfect combination.
Your Questions, Answered!
Over the years, I’ve gotten a lot of great questions about this recipe. Here are the answers to the most common ones:
Q: My chocolate coating turned out streaky and dull instead of shiny. What happened?
A: This usually means the chocolate got a little too hot or was stirred too vigorously, causing something called “seizing.” Next time, be extra gentle with your melting process. The slow, 20-second microwave method is your best bet. Adding the coconut oil also helps maintain a smooth, glossy finish.
Q: Can I use a different kind of nut?
A: Absolutely! Walnuts, almonds, and macadamia nuts all work wonderfully. Just keep an eye on the toasting time, as smaller nuts like almonds may toast a bit faster.
Q: How should I store these, and how long will they last?
A: Because of the chocolate, these are best stored in an airtight container in the refrigerator. They’ll stay fresh and crisp for up to two weeks… if you can make them last that long! You can also freeze them for up to three months.
Q: The chocolate is sticking to my fork and making a mess. Any tips?
A: This is a common frustration! Try lightly greasing your fork with a tiny bit of coconut oil or avocado oil spray before you start dipping. The chocolate will slide right off.

Keto Chocolate-Covered Pecans : Irresistible Low-Carb Delight
Description
Keto Chocolate-Covered Pecans
Prep Time: 15 minutes
Cook Time: 7 minutes (toasting) + 20–30 minutes (chilling)
Total Time: 45 minutes
Ingredients
Toasted Pecans
-
4 ½ cups pecan halves
-
4 tbsp salted butter (or unsalted + pinch of salt)
-
¼ tsp stevia (or any powdered keto sweetener)
Chocolate Coating
-
2 cups Lily’s Milk Chocolate Chips (or dark chocolate chips)
-
2 tsp coconut oil
Optional Flavor Enhancers
-
½ tsp ground cinnamon or pumpkin spice
-
Pinch of flaky sea salt
-
Crushed freeze-dried raspberries
Instructions
1. Toast the Pecans
-
Heat a large skillet over medium heat.
-
Melt butter until just foaming.
-
Add pecans and sprinkle with stevia.
-
Stir frequently for 5–7 minutes until golden brown and fragrant.
-
Immediately transfer pecans to a baking sheet or plate to cool completely. (Important: Chocolate will melt if pecans are warm!)
2. Melt the Chocolate
-
In a microwave-safe bowl, combine chocolate chips and coconut oil.
-
Microwave in 20-second intervals, stirring between each, until smooth and glossy.
-
Tip: Be patient! Rushing causes seizing. A double boiler works too.
-
3. Coat the Pecans
-
Line a baking sheet with parchment paper.
-
Working in small batches, dip pecans in melted chocolate using a fork.
-
Let excess chocolate drip off, then transfer pecans to the sheet.
4. Add Optional Flair
-
Sprinkle with cinnamon, flaky sea salt, or crushed raspberries while chocolate is still wet.
5. Chill to Set
-
Refrigerate for 20–30 minutes until chocolate is firm.
-
Shortcut: Freeze for ~10 minutes if needed.
Notes
-
Dull chocolate: Overheating or stirring too vigorously. Melt slowly and add coconut oil for shine.
-
Different nuts: Walnuts, almonds, macadamias work; watch for faster toasting times.
-
Storage: Airtight container in fridge up to 2 weeks, freeze up to 3 months.
-
Fork sticking: Lightly grease fork with coconut or avocado oil.
Nutrition
- Calories: 143 Cal Per Serving
- Fat: 14 g
- Carbohydrates: 2–3 g
- Protein: 3 g
The Healthy Lowdown (Because We’re Curious!)
Now, let’s talk about why you can feel so good about enjoying these. As a keto-friendly recipe, these chocolate-covered pecans are high in healthy fats and very low in net carbohydrates. Pecans are a fantastic source of fiber, antioxidants, and several important vitamins and minerals like manganese.
By using a sugar-free chocolate sweetened with stevia, we’re avoiding the blood sugar spike that comes with traditional candy. The coconut oil provides medium-chain triglycerides (MCTs), which are a great source of energy. Remember, this is a treat, so enjoy them mindfully as part of a balanced diet. Each serving (about a ¼ cup) comes in at roughly 143 calories, 14g of fat, 3g of protein, and only 2-3g of net carbs, making it a truly guilt-free indulgence.
One Last Bite of Wisdom
Well, my friends, there you have it. My not-so-secret secret to conquering those chocolate cravings without compromise. This recipe is more than just a list of ingredients and steps; it’s an invitation to play, to create, and to treat yourself with kindness. Food should bring joy, and I truly believe these little pecans are little bundles of it.
I hope this recipe becomes a staple in your kitchen, a go-to gift for your friends, and a reliable treat for those moments when you need a delicious win. Now, I’d love to hear from you! Did you try the spicy kick? Were the raspberries a hit? Tag me on social @Feastical with your creations. Happy cooking!
Final Thoughts: Your Crunchy, Chocolatey Salvation
Forget the struggle between craving and willpower. These Keto Chocolate-Covered Pecans are the delicious solution you’ve been searching for. They’re irresistibly crunchy, luxuriously chocolatey, and 100% guilt-free. Whip up a batch and prove that the best treats aren’t found in a store—they’re made with love, right in your own kitchen. Now, go conquer that craving!

Gluten-Free Vegan Blueberry Muffins : Moist, Bakery-Style with a Flavorful Twist
Gluten-Free Vegan Blueberry Muffins: Your New Go-To Comfort Bake
Hey friends, Beau here! Can we talk about muffins for a second? I’m not talking about those dry, crumbly, sad-looking things that sometimes lurk in coffee shop displays. I’m talking about the real deal. The kind of muffin that makes your kitchen smell like a warm, sunny bakery. The kind with a sky-high, fluffy dome, a tender crumb that melts in your mouth, and so many juicy blueberries that you get a little burst of fruity goodness in every single bite.
That’s the dream, right? But if you’re navigating life without gluten or dairy, finding a muffin that lives up to that fantasy can feel like a quest for the Holy Grail. I’ve had my share of hockey-puck muffins and gummy, dense disappointments. It’s enough to make you want to hang up your apron for good.
Well, don’t you dare! After countless experiments and a few (hilariously messy) kitchen fails, I’ve cracked the code. These Gluten-Free Vegan Blueberry Muffins are my absolute pride and joy. They’re moist, bakery-style perfection, completely free of eggs, dairy, and gluten, but overflowing with flavor and love. We’re adding a few of my secret weapons—a zip of lemon zest for brightness, a sprinkle of chia for wholesome texture, and a crunchy sugar top that’s pure magic. So, preheat that oven, my friend. We’re about to bake something spectacular that just so happens to be allergy-friendly. Let’s get mixing!
A Muffin Memory: For Grandma Ellie
This recipe will always have a special place in my heart because it reminds me of my Grandma Ellie. She wasn’t a fancy chef, but she was a wizard with a wooden spoon and a mixing bowl. Her blueberry muffins were legendary in our family—always from a box mix, mind you, but she’d “doctor them up” with extra berries and a heavy-handed dash of vanilla. The sound of her whisk clinking against that yellow Pyrex bowl is the soundtrack to my best childhood mornings.
When I had to go gluten-free and vegan a few years back, one of the first things I genuinely missed was being able to share one of those muffins with her. I wanted to recreate that feeling—the tender crumb, the juicy berry explosions, that simple, soul-satisfying joy. This recipe is my from-scratch, allergy-friendly homage to her. It captures every bit of that cozy, nostalgic spirit, and I know she’d have gotten a kick out of the fact that her “fancy chef” grandson spent months perfecting a muffin just to feel that connection again. Food is memory, my friends, and every time I bake these, it feels like a warm hug from her.
Gathering Your Muffin-Making Magic
Here’s the lineup for our gluten-free vegan masterpiece! Don’t be intimidated by the flours; we’re using a simple blend that creates the perfect texture. Remember, baking is a science, but it should also be fun—so I’ve included all my favorite swaps and chef-y insights.
- 2 cups gluten-free all-purpose flour: This is our structure-builder. I like a brand that includes xanthan gum, as it helps bind everything together like gluten would. If your blend doesn’t have it, just add 1 tsp of xanthan gum to the dry ingredients.
- 2 cups oat flour: Hello, tenderness! Oat flour gives these muffins a wonderfully soft, moist crumb and a lovely, wholesome flavor. Chef’s Tip: You can make your own by blitzing certified gluten-free rolled oats in a blender until super fine!
- 2 tsp baking powder & 1 tsp baking soda: Our leavening dream team. They work together to give us that gorgeous, sky-high muffin top. Make sure they’re fresh for the best rise!
- ½ tsp salt & ½ tsp ground cinnamon: Salt is the flavor enhancer—it makes the sweetness pop. The cinnamon is my little secret; it adds a warm, cozy depth that pairs perfectly with the blueberries.
- 1 tbsp chia seeds: This is our “egg” replacer and a texture superstar! They add a subtle nuttiness and a fantastic nutritional boost. If you don’t have chia, ground flaxseed works just as well.
- 1 cup maple syrup: Our natural liquid sweetener. It adds a rich, caramel-like sweetness that white sugar just can’t match. For a less expensive option, agave nectar works, but the flavor will be a bit different.
- 1 cup plant-based milk: I’m an oat milk devotee for its creamy texture and neutral flavor, but almond, soy, or cashew milk will all do the trick beautifully.
- 1 cup melted plant-based butter or avocado oil: This is our fat, and it’s key for moisture. Melted vegan butter gives a classic, rich flavor, while avocado oil is a wonderfully neutral, healthy-fat option.
- 2 tsp vanilla extract & 2 tsp almond extract: Vanilla is a given, but the almond extract? That’s the flavor twist! It adds a sophisticated, bakery-level aroma that will have people asking, “What is that amazing flavor?!”
- Zest of 1 lemon: Don’t skip this! The bright, citrusy zest cuts through the sweetness and makes the blueberry flavor sing. It’s the difference between a good muffin and a great one.
- 2 cups fresh or frozen blueberries: The star of the show! No need to thaw frozen berries. I actually find they sometimes bleed less into the batter. A pro-tip: toss them in a tablespoon of your GF flour mix to prevent sinking!
- Turbinado sugar, for topping (optional): This is the key to that professional, crunchy, sparkly muffin top. It’s totally optional, but highly, highly recommended for texture and visual appeal.
Let’s Bake! Your Step-by-Step Guide to Muffin Glory
Okay, team, this is where the magic happens. Follow these steps, embrace my little hacks, and you are guaranteed muffin success. Remember, the number one rule in muffin-making is DON’T OVERMIX! A few lumps in the batter are totally, completely fine.
- Preheat and Prep. Fire up your oven to 350°F (175°C). Now, line two muffin tins with paper liners or give them a very light greasing. This recipe makes a generous 24 muffins, so get both pans ready. Chef’s Hack: If you only have one muffin tin, you can bake in batches. Just keep the second batch of batter at room temperature while the first one bakes—it’ll be just fine!
- Combine the Dry Team. Grab a large mixing bowl and add your gluten-free flour, oat flour, baking powder, baking soda, salt, cinnamon, and chia seeds. Whisk it all together until it’s one happy, uniform mixture. This ensures our leavening agents are evenly distributed for a perfect, even rise. No one wants a baking soda pocket!
- Whisk the Wet Crew. In a separate, medium-sized bowl, it’s time for the liquids. Pour in the maple syrup, plant-based milk, and your melted vegan butter or avocado oil. Add the vanilla and almond extracts, and finally, zest that beautiful lemon right into the bowl. Whisk it all until it’s smooth and beautifully emulsified. See how the oil and syrup are playing nicely with the milk? That’s what we want!
- The Big Merge (Gentle Does It!). Pour your gorgeous wet ingredients right into the center of the dry ingredients. Now, put the whisk away and grab a spatula or a large spoon. Gently fold the batter together. I’m talking maybe 15-20 folds, max. Stop the very second you no longer see dry patches of flour. The batter will be thick and a little lumpy—that is PERFECT. Overmixing is the enemy of a tender muffin; it develops the starch and makes things tough and gummy.
- Fold in the Berries. Now, scatter your blueberries over the top of the batter. Even if you floured them, be gentle! Fold them in with just a few more strokes, until they’re evenly distributed. You want to avoid crushing them and turning your batter purple (unless you’re going for a Smurf-muffin vibe, which, hey, no judgment).
- Portion and Top. Using a large spoon or a cookie scoop, divide the batter evenly among your 24 prepared muffin cups. Fill them all the way to the top! This is the secret to getting that beautiful, domed, bakery-style top. Now, for the finishing touch: sprinkle a generous pinch of that turbinado sugar over each unbaked muffin. It adds a wonderful crunch and a sparkly, professional look.
- Bake to Golden Perfection. Slide those pans into your preheated oven and bake for 22-25 minutes. I like to rotate the pans halfway through for even baking. You’ll know they’re done when the tops are springy to the touch and a toothpick inserted into the center of a muffin comes out clean (maybe with a little blueberry juice, but no wet batter).
- The All-Important Cool Down. This is a test of your willpower! Let the muffins cool in the hot pan for exactly 5 minutes. This allows them to set up so they don’t fall apart when you take them out. After 5 minutes, carefully transfer them to a wire rack to cool completely. I know it’s hard, but try to let them cool mostly before you dive in—the flavor and texture are worth the wait!
How to Serve Up Your Masterpiece
Okay, you’ve resisted, they’ve cooled… now what? The beauty of these muffins is their versatility.
For the ultimate breakfast of champions, I love splitting one warm and slathering it with a generous pat of vegan butter or a drizzle of almond butter. The way it melts into the warm crumb is pure heaven.
Hosting a brunch? Plate a whole basket of these beauties alongside a fruit salad and a pot of coffee. They look so impressive and make everyone feel special. For a simple, afternoon pick-me-up, just grab one and go! They’re the perfect companion for a cup of tea while you’re taking a well-deserved break.
And let’s be real, my favorite way to enjoy one is still warm from the oven, standing over the kitchen counter, with a cold glass of oat milk. Sometimes, the simple joys are the best.
Get Creative! Fun Flavor Twists & Swaps
Once you’ve mastered the classic, the muffin world is your oyster! Here are a few of my favorite ways to mix things up:
- Lemon Blueberry Bliss: Amp up the citrus! Add the juice of half that zested lemon to the wet ingredients and fold in some poppy seeds for a classic lemon-poppy seed blueberry combo.
- Triple Berry Bonanza: Who says blueberries get to have all the fun? Use a mix of raspberries, blackberries, and blueberries for a triple-threat of fruity flavor. Frozen mixed berries work great here.
- Chocolate Chip Indulgence: For a dessert-like treat, swap the blueberries for 1 ½ cups of vegan chocolate chips. It’s a crowd-pleaser for kids and adults alike!
- Streusel-Topped Wonder: Feel like going all out? Skip the turbinado sugar and make a simple streusel. Mix ¼ cup GF oat flour, ¼ cup brown sugar, 2 tbsp cold vegan butter, and a pinch of cinnamon with a fork until crumbly. Sprinkle it on before baking.
- Lower-Sugar Option: If you want to cut the sugar, you can reduce the maple syrup to ¾ cup. The muffins will be a tad less moist and slightly less sweet, but still absolutely delicious.
Beau’s Kitchen Notes & Stories
This recipe has been a journey! The first time I made a vegan, gluten-free version, I was so nervous about them holding together that I basically created blueberry-flavored bricks. My partner, Sam, took one brave bite and said, “Well… the flavor is there!” We had a good laugh, and I went back to the drawing board.
The real breakthrough was discovering the power of the dual-flour blend with oat flour and finding that perfect balance of wet to dry ingredients. And that almond extract? That was a happy accident when I grabbed the wrong bottle one sleepy morning. Best mistake ever! So don’t be afraid of your own kitchen experiments. Some of the best recipes are born from a little chaos and a lot of heart.
Your Muffin Questions, Answered!
I’ve gotten a lot of questions about this recipe over time, so here are the answers to the most common ones!
Q: My muffins turned out gummy in the middle. What happened?
A: Ah, the classic gluten-free gumminess! This is almost always due to overmixing the batter. Remember, fold gently and just until combined. Another culprit could be under-baking, so make sure that toothpick comes out clean.
Q: Can I make this into a loaf instead of muffins?
A: You bet! This batter makes a lovely blueberry loaf. Just pour it into a greased 9×5 loaf pan and bake at 350°F for 50-60 minutes, or until a toothpick inserted in the center comes out clean.
Q: My blueberries all sank to the bottom! How do I prevent that?
A: The classic muffin dilemma! The best trick is to toss your blueberries (fresh or frozen) in a small bowl with about a tablespoon of your gluten-free flour blend until they’re lightly coated. This little flour jacket helps them “float” in the batter.
Q: How should I store these, and can I freeze them?
A: Once completely cool, store them in an airtight container at room temperature for 2-3 days. For longer storage, they freeze beautifully! Place them in a single layer on a baking sheet to freeze solid, then transfer to a freezer bag. They’ll keep for up to 3 months. Just thaw at room temperature or warm gently in the oven or microwave.

Gluten-Free Vegan Blueberry Muffins : Moist, Bakery-Style with a Flavorful Twist
Description
Hey friends, Beau here! These muffins are moist, fluffy, and bakery-style, completely gluten-free and vegan. Bursting with juicy blueberries, brightened with a hint of lemon zest, and topped with a crunchy sugar finish, they’re perfect for breakfast, brunch, or a snack.
Ingredients
Dry Ingredients
-
2 cups gluten-free all-purpose flour (with xanthan gum; add 1 tsp if missing)
-
2 cups oat flour (certified gluten-free)
-
2 tsp baking powder
-
1 tsp baking soda
-
½ tsp salt
-
½ tsp ground cinnamon
-
1 tbsp chia seeds (or ground flaxseed as substitute)
Wet Ingredients
-
1 cup maple syrup (or agave nectar)
-
1 cup plant-based milk (oat, almond, soy, or cashew)
-
1 cup melted plant-based butter or avocado oil
-
2 tsp vanilla extract
-
2 tsp almond extract
-
Zest of 1 lemon
Add-ins
-
2 cups fresh or frozen blueberries (toss in 1 tbsp GF flour to prevent sinking)
-
Turbinado sugar for topping (optional, for crunch and sparkle)
Instructions
1. Preheat & Prep
-
Preheat oven to 350°F (175°C).
-
Line two muffin tins with paper liners or lightly grease.
-
This recipe yields 24 muffins; bake in batches if needed.
2. Combine Dry Ingredients
-
In a large bowl, whisk together: gluten-free flour, oat flour, baking powder, baking soda, salt, cinnamon, and chia seeds.
3. Mix Wet Ingredients
-
In a medium bowl, whisk together: maple syrup, plant-based milk, melted butter/oil, vanilla, almond extract, and lemon zest.
4. Combine Wet & Dry
-
Gently fold wet ingredients into dry ingredients with a spatula or large spoon.
-
Stop folding once no dry flour remains; batter will be thick and slightly lumpy.
5. Fold in Blueberries
-
Carefully fold in blueberries with a few gentle strokes.
6. Portion & Top
-
Divide batter evenly among 24 muffin cups, filling to the top.
-
Sprinkle with turbinado sugar if desired.
7. Bake
-
Bake 22–25 minutes, rotating pans halfway through.
-
Muffins are done when tops are springy and a toothpick comes out clean or with just a little blueberry juice.
8. Cool
-
Cool muffins in the pan for 5 minutes, then transfer to a wire rack to cool completely.
Notes
-
Gummy muffins: Likely from overmixing or under-baking. Fold gently and check doneness.
-
Loaf instead of muffins: Use a 9×5 loaf pan; bake 50–60 minutes at 350°F.
-
Prevent sinking berries: Toss berries in 1 tbsp GF flour before folding.
-
Storage: Room temp in airtight container 2–3 days; freeze up to 3 months.
Nutrition
- Calories: 170 Cal Per muffin
- Sugar: 10 g
- Carbohydrates: 26 g
- Fiber: 2 g
A Quick Note on Nutrition
While I’m all about the flavor and feel-good vibes first, I know many of you are curious about what’s in your food! Here’s a general breakdown per muffin (this is an estimate and can vary based on your specific ingredients):
- Calories: ~170
- Fat: 7g
- Carbohydrates: 26g
- Sugar: 10g (primarily from natural maple syrup and fruit)
- Fiber: 2g (Thanks, oat flour and chia seeds!)
These muffins are a wonderful source of energy, and with the whole-grain oat flour and chia seeds, they offer more fiber and protein than your average refined-flour muffin. It’s a treat you can truly feel good about enjoying!
Final Thoughts: More Than Just a Muffin
So, there you have it. What started as a quest to recreate a taste of my childhood has become one of my most cherished recipes. These Gluten-Free Vegan Blueberry Muffins are so much more than just a treat; they’re a testament to the fact that with a little creativity and a lot of heart, you don’t have to miss out on life’s simple, delicious pleasures.
They prove that “allergy-friendly” doesn’t mean “flavor-free.” It means smart, thoughtful baking. It means a moist, tender crumb that doesn’t crumble into dust, a sky-high dome that would make any baker proud, and bursts of juicy blueberry in every single bite.
Whether you’re baking them for a quiet morning with coffee, to share with loved ones, or simply to fill your kitchen with that unmistakable aroma of comfort and love, I hope this recipe brings you as much joy as it has brought me.
Happy baking, friends. May your muffin tops be high, your berries be plentiful, and your heart be full.
With love and a whisk,
Beau
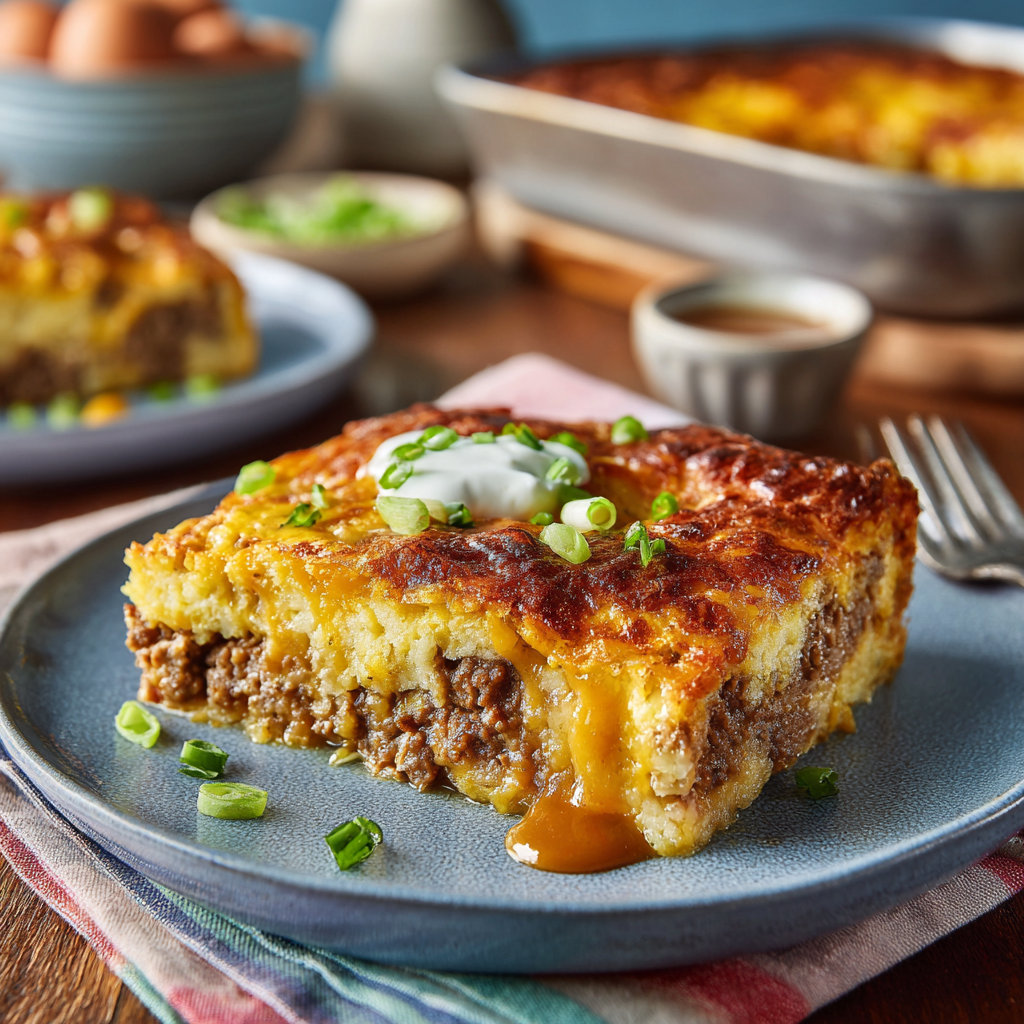
Southern-Style Cheeseburger Pie : Hearty, Cheesy, and Weeknight-Ready
Your Favorite Burger Just Got a Cozy, Southern Makeover
Hey friends, Beau here! Let’s talk about one of life’s greatest, most reliable pleasures: the cheeseburger. That perfect, juicy, cheesy masterpiece we all know and love. But let’s be real for a second—sometimes, you want all that incredible flavor without having to stand over a grill, flipping patties one by one while your stomach is doing its best impression of a angry bear. Am I right?
That’s where this beautiful, bubbly, and downright irresistible Southern-Style Cheeseburger Pie comes swooping in to save your weeknight. Imagine all the best parts of a classic burger—the savory beef, the melty cheddar, the tangy kick of pickles and ketchup—baked together into one hearty, sliceable, comfort-food casserole. It’s crispy on top, juicy in the center, and packed with so much flavor, it’ll have everyone at the table asking for seconds before they’ve even finished their first piece.
I designed this recipe to be a total crowd-pleaser. It’s perfect for a busy family dinner, a surefire hit at potlucks, and a lifesaver for your weekly meal prep. It’s simple, soulful, and so satisfying. So, preheat that oven, friends. We’re about to turn burger night into pie night, and you are going to love it.
A Pie Born from a Happy Accident
I have to share a little story about how this recipe became a staple in my kitchen. It all started one rainy Tuesday a few years back. I had a pack of ground beef thawed and a serious craving for a good burger, but my grill was soaked, and my ambition was low. I started browning the beef with some onions, my mind racing for a plan B. My grandma’s old Bisquick cookbook was sitting on the counter, and I remembered her impossible pies—the ones that magically create their own crust.
In a moment of what I can only call “hungry inspiration,” I decided to toss my burger filling into a dish, blanket it with cheese, and pour that simple Bisquick batter right over the top. I crossed my fingers and slid it into the oven. What emerged was nothing short of a miracle. It was golden, puffed up, and smelled like a diner and a bakery had a beautiful, delicious baby. That first bite was pure comfort. It was a happy accident that taught me a powerful lesson: the best meals often come from a little improvisation and a whole lot of heart.
Gathering Your Flavor All-Stars
This recipe is all about humble ingredients coming together to create something spectacular. Here’s your shopping list. I’ve added a few chef insights and easy swaps to make this pie truly your own.
- 2 lbs Ground Beef: I like an 80/20 blend for this. That little bit of extra fat means loads of flavor and a juicier final pie. For a leaner option, ground turkey or chicken works wonderfully, but you might want to add a tablespoon of olive oil to the pan when browning.
- 1 Large Onion, chopped: The humble onion is the flavor foundation. It adds a sweet, savory depth that is absolutely non-negotiable for that true burger experience.
- 1 tsp Salt & 1/2 tsp Black Pepper: The dynamic duo of seasoning! Don’t be shy here—we’re seasoning a lot of beef. Taste your mixture before it goes in the dish and adjust if needed.
- 2 cups Shredded Cheddar Cheese: Sharp cheddar gives you that classic, tangy bite. Pro tip: shred your own cheese! The pre-shredded stuff is coated to prevent clumping, which can make it less melty. For a different twist, try a pepper jack or a Colby jack blend.
- 1 cup Milk & 4 Large Eggs: This is the magic behind our “crust.” The eggs provide structure, and the milk makes the batter pourable and tender. Whole milk is my go-to for richness, but 2% works just fine.
- 1 cup Bisquick Mix: The secret weapon! This pre-mixed blend of flour, leavening, and fat creates that incredible, golden, biscuit-like topping. If you don’t have Bisquick, see the variations section for a quick homemade swap.
- 2 tbsp Worcestershire Sauce & 2 tbsp Ketchup: This is our flavor power-up! Worcestershire adds that umami, savory depth, while ketchup brings a touch of sweetness and tang that screams “cheeseburger.”
Twist Additions (My Southern-Inspired Recommendations):
- 1/2 tsp Smoked Paprika: Just a dash gives a subtle, smoky BBQ-style depth that takes this from great to “can I have the recipe?” incredible.
- 1/2 cup Chopped Pickles: Trust me on this. Fold them into the meat mixture. They add little bursts of tangy crunch that cut through the richness perfectly.
- 1 cup Diced Tomatoes or Canned Rotel: For a true Southern kick, a can of drained Rotel (tomatoes with green chilies) adds a lovely moisture and a gentle heat.
- Dash of Hot Sauce: A few shakes of your favorite brand will wake up all the other flavors. It’s all about building layers!
Let’s Build This Beautiful Pie, Step-by-Step
Alright, team, it’s go time. This process is as easy as, well, pie. I’ll walk you through each step with my favorite chef hacks to ensure your creation is absolutely perfect.
- Preheat & Prep: First things first, get that oven roaring hot to 400°F (200°C). This high heat is key for getting a gorgeous, golden-brown top. While it’s warming up, grab your trusty 9×13-inch baking dish and give it a light but thorough coating of non-stick spray or a quick swipe of butter. We want an easy release for those beautiful slices later.
- Brown the Beef (The Flavor Foundation): Grab a large skillet and set it over medium heat. Crumble in your ground beef and toss in the chopped onion. Cook this up, breaking the meat apart with your spoon, until the beef is no longer pink and the onions have turned soft and translucent. Now, here’s a pro tip for a non-greasy pie: drain off the excess fat. I like to tilt the skillet and use a spoon, or you can carefully pour it into an old can. Once drained, stir in the salt, pepper, Worcestershire sauce, ketchup, and any of your chosen “Twist Additions” like the diced tomatoes or pickles. Let it all get friendly for another minute. Your kitchen should smell amazing right now.
- Layer with Love: Time to assemble! Take your beautifully seasoned beef mixture and spread it evenly into the bottom of your prepared baking dish. Press it down gently. Now, shower the entire thing with that glorious mountain of shredded cheddar cheese. This cheesy layer acts as a barrier, protecting the meat from the batter and ensuring every single bite is ooey-gooey perfection.
- Whisk the Magic Topping: In a medium-sized bowl, it’s time for the biscuit magic. Combine the milk, eggs, Bisquick mix, and that optional smoked paprika (if you’re using it). Whisk it all together until it’s smooth. A few small lumps are okay, but we’re aiming for a consistency similar to pancake batter. Chef’s Hack: Don’t over-mix! Just whisk until the ingredients are combined. Over-mixing can make the topping a bit tough.
- The Grand Finale & Bake: Slowly and evenly, pour your batter over the cheesy meat layer. Use a spatula to gently spread it to the edges if needed. It might seem like it’s going to sink, but trust the process—it will rise and bake up beautifully. Slide that dish of potential into your preheated oven and let it bake for 25-30 minutes. You’ll know it’s done when the top is a deep, golden brown and the center is fully set (a toothpick inserted in the center should come out clean).
- The Most Important Step: Let it Rest! I know, I know. The aroma is intoxicating, and you want to dive right in. But patience, my friend! Take the pie out of the oven and let it sit on the stovetop for at least 5-10 minutes. This allows everything to set up, making it infinitely easier to slice into clean, beautiful pieces. It’s the difference between a messy scoop and a perfect slice.
How to Serve This Southern Masterpiece
Presentation is part of the fun! I love serving this pie right from the baking dish at the table—it’s rustic, inviting, and says “dig in!” Use a sharp knife to slice it into 12 generous squares and a good spatula to lift them out.
While this Cheeseburger Pie is a complete meal in itself, every great burger needs its sidekicks. Here’s how I like to round out the plate:
- Keep it Classic: Serve it with a simple, crisp green salad with a tangy vinaigrette to cut through the richness, and a big pile of crispy steak fries or tater tots for the ultimate comfort food experience.
- Embrace the Toppings Bar: Set up a little DIY station with extra ketchup, mustard, pickle spears, diced raw onion, a dollop of sour cream, and that bottle of hot sauce. Let everyone customize their slice just like they would their own burger!
- Go Southern Soul Food: Pair it with some creamy coleslaw and a side of slow-cooked collard greens. The cool, creamy slaw and the savory greens are a match made in heaven for this hearty pie.
Make It Your Own: Delicious Twists & Swaps
The beauty of this recipe is its versatility. Once you’ve mastered the base, feel free to get creative! Here are a few of my favorite variations.
- The Bacon Cheeseburger Deluxe: Before you brown the beef, cook up 6-8 slices of bacon until crispy. Crumble it and stir half into the meat mixture, reserving the other half to sprinkle on top of the cheese before adding the batter. Because everything is better with bacon.
- The “Big Mac” Style: Love that special sauce? Whisk together 1/2 cup of mayonnaise, 2 tablespoons of French dressing, 1 teaspoon of white vinegar, 1 teaspoon of paprika, and a tablespoon of sweet pickle relish. Drizzle this over the top of your baked and sliced pie for an incredible flavor bomb.
- Spicy Southwest Fiesta: Swap half the cheddar for pepper jack cheese. Add a can of drained black beans and a cup of frozen corn to the meat mixture along with a tablespoon of taco seasoning. Serve with salsa, avocado, and a squeeze of lime.
- Gluten-Free & Low-Carb Friendly: You can still enjoy this! For a gluten-free version, use a certified GF baking mix like Bob’s Red Mill 1-to-1 in place of the Bisquick. For a lower-carb option, skip the Bisquick batter and instead, whisk together 4 eggs and 1/2 cup of heavy cream or almond milk, then stir in 1 1/2 cups of shredded mozzarella. Pour this “crustless” mixture over the meat and bake as directed.
A Few More Thoughts From My Kitchen to Yours
This recipe has truly evolved over the years in my house. It’s the dish I make when friends are coming over last-minute and I need to feed a crowd with minimal fuss. It’s also my daughter’s absolute favorite “Daddy dinner,” and she loves being the one to sprinkle the cheese layer—a job she takes very seriously.
One time, I was filming a video for the site and, in my excitement, I accidentally used a cup of pancake mix instead of Bisquick. (They look identical in unmarked jars, okay?). The result was a slightly sweeter, cake-ier topping that was… actually pretty delicious? It just goes to show that even a “mistake” can lead to a new family favorite. So don’t be afraid to play with your food!
Your Questions, Answered!
I’ve gotten a lot of questions about this pie over the years. Here are the most common ones to help you out.
- Q: My pie turned out a bit soggy in the middle. What happened?
A: This usually means it needed a few more minutes in the oven. Ovens can vary, so if the top is golden but the center still jiggles, give it another 5-10 minutes. Also, make sure you thoroughly drained the fat from the cooked beef, as excess grease can lead to sogginess. - Q: Can I make this ahead of time?
A: Absolutely! You have two great options. 1) Assemble the entire pie, cover it tightly, and refrigerate it for up to 24 hours. Let it sit at room temperature for 20-30 minutes before baking, and you may need to add a few extra minutes to the bake time. 2) Bake it completely, let it cool, then cover and refrigerate. Reheat individual slices in the microwave or the whole pie, covered with foil, in a 350°F oven until warmed through. - Q: I don’t have Bisquick. What can I use instead?
A: No problem! You can make a quick homemade version. For 1 cup of Bisquick, whisk together 1 cup of all-purpose flour, 1 ½ teaspoons of baking powder, ¼ teaspoon of salt, and 1 tablespoon of melted butter or vegetable oil. Use this mixture in place of the Bisquick in the recipe. - Q: Can I freeze the leftovers?
A: You bet! This pie freezes beautifully. Let it cool completely after baking, then slice it and wrap individual pieces tightly in plastic wrap and then in foil. They’ll keep for up to 3 months. To reheat, you can pop a frozen slice right into the microwave or thaw it in the fridge overnight and reheat in the oven to keep the topping crisp.

Southern-Style Cheeseburger Pie : Hearty, Cheesy, and Weeknight-Ready
Description
Hey friends, Beau here! If you love cheeseburgers but want an easier, cozy weeknight twist, this Southern-Style Cheeseburger Pie is your new best friend. Imagine all the flavor of a juicy, cheesy burger baked into a sliceable, comfort-food casserole. Crispy on top, juicy in the center, and packed with flavor, this pie is perfect for family dinners, potlucks, or meal prep.
Ingredients
-
2 lbs ground beef (80/20 blend recommended; can substitute turkey or chicken)
-
1 large onion, chopped
-
1 tsp salt
-
½ tsp black pepper
-
2 cups shredded cheddar cheese (shred your own for extra meltiness)
-
1 cup milk
-
4 large eggs
-
1 cup Bisquick mix (or homemade substitute: 1 cup flour + 1½ tsp baking powder + ¼ tsp salt + 1 tbsp melted butter)
-
2 tbsp Worcestershire sauce
-
2 tbsp ketchup
Optional Twist Additions:
-
½ tsp smoked paprika
-
½ cup chopped pickles
-
1 cup diced tomatoes or drained Rotel
-
Dash of hot sauce
Instructions
-
Preheat & Prep:
Preheat oven to 400°F (200°C). Grease a 9×13-inch baking dish with non-stick spray or butter. -
Brown the Beef:
In a large skillet over medium heat, cook ground beef and onions until beef is no longer pink and onions are translucent. Drain excess fat. Stir in salt, pepper, Worcestershire sauce, ketchup, and any optional additions. -
Layer the Pie:
Spread beef mixture evenly in the baking dish. Top with shredded cheddar cheese. -
Make the Topping:
In a medium bowl, whisk together milk, eggs, Bisquick mix, and smoked paprika (if using) until smooth. Pour over the cheesy beef layer, spreading gently to the edges. -
Bake:
Bake 25–30 minutes, or until the top is golden brown and center is set (toothpick should come out clean). -
Rest & Serve:
Let pie sit 5–10 minutes before slicing into 12 squares. Serve family-style or with sides like green salad, fries, or coleslaw.
Notes
-
Soggy pie? Bake a few extra minutes and make sure beef is drained.
-
Make ahead: Assemble and refrigerate up to 24 hours. Bake before serving.
-
No Bisquick? Use the homemade substitute listed above.
-
Nutrition
- Calories: 330Cal Per Serving
- Fat: 24 g
- Carbohydrates: 9 g
- Protein: 22 g
Nutritional Information (A Chef’s Honest Take)
While I’m all about the joy of eating, I know many of you like to keep an eye on things. Here’s a general breakdown per serving (based on 12 servings, using 80/20 beef and including the optional smoked paprika). Remember, these are estimates and can vary based on your specific ingredients and any substitutions you make.
- Calories: ~330
- Protein: 22g (A fantastic source to keep you full and satisfied!)
- Carbohydrates: 9g
- Fat: 24g
To lighten it up, you can easily use a leaner ground beef (90/10 or 93/7), ground turkey, or even plant-based crumbles. Using low-fat milk and reduced-fat cheese will also adjust these numbers. But my personal philosophy
Final Thoughts
So there you have it, friends—the story, the secrets, and the simple steps to a dinner that’s as easy as it is delicious. This Southern-Style Cheeseburger Pie is more than just a recipe; it’s a reminder that the coziest, most satisfying meals don’t have to be complicated. It’s a hug in a baking dish, a celebration of humble ingredients, and your new secret weapon for a stress-free, crowd-pleasing dinner.
I hope this recipe brings as much joy and comfort to your table as it has to mine. Now, I’d love to hear from you! Did your family go crazy for it? What fun twists did you try? Share your stories and photos with me—because the best recipes are the ones we make and share together.
Happy cooking,
Beau
Budget-Friendly Beef Stroganoff : Feeds 6 for Under $10
Dinner for Six, Change Back from a Ten-Spot? Let’s Do This.
Hey friends, Beau here. Let’s talk about a universal truth: we all have those nights. You know the ones. The clock is ticking towards dinnertime, the troops are getting hungry, and your wallet is giving you the side-eye. You want something that feels like a warm, comforting hug in a bowl, but you don’t have the time, energy, or budget for a gourmet project.
Well, my friend, you’ve just stumbled upon your new secret weapon. This isn’t just any Beef Stroganoff. This is the Budget-Friendly Beef Stroganoff that’s going to become a legend in your weekly meal rotation. We’re talking creamy, savory, soul-satisfying goodness that feeds a family of six for under ten dollars. Yes, you read that right. For less than the cost of a movie ticket, you can serve up a meal that will have everyone asking for seconds.
I’ve taken the classic, sometimes fussy, stroganoff and stripped it down to its most delicious, wallet-friendly essentials. We’re using a few smart shortcuts and pantry power-players to create a dish that’s big on flavor but incredibly kind to your budget. So, tie on your apron, grab your favorite wooden spoon, and let’s whip up some magic that proves comfort food doesn’t have to be complicated or expensive.
The Story Behind the Supper: My First “Company’s Coming” Dinner
This recipe takes me right back to my first apartment. I was fresh out of college, my kitchen was about the size of a postage stamp, and my “fine china” was a mismatched set of plates from a thrift store. But I was determined to host a dinner party. The problem? My grocery budget for the entire week was about twenty bucks.
I needed a meal that felt fancy and generous but was, in reality, humble and affordable. I remembered my mom’s stroganoff, but her version used steak and fresh mushrooms—a little too rich for my blood. So, I got creative. I swapped in ground beef, leaned on the trusty cream of mushroom soup in my pantry, and used egg noodles as the perfect, pillowy base. The result? My friends raved. They couldn’t believe something so creamy and comforting came from my tiny kitchen. That night, I learned a lesson that still guides me at Feastical: the best meals aren’t about the price tag; they’re about the joy of sharing something delicious with the people you love.
Gathering Your Affordable All-Stars
Here’s the beautiful part—the ingredient list is short, sweet, and super simple. You might already have half of this hanging out in your pantry! Let’s break it down.
- 2 bags (12 oz each) Egg Noodles ($1.89 each): The hearty, ribbony foundation of our dish. They’re the ultimate comfort food vehicle, holding onto every bit of that creamy sauce. Chef’s Insight: Don’t overcook them at this stage! We’ll simmer them in the sauce later, so cook them to just al dente according to the package. They’ll soak up the sauce and become perfect.
- 2 cans Cream of Mushroom Soup ($0.50 for one, one from pantry): Our secret weapon for instant creaminess and deep, savory flavor. This is the hack that saves us time and money without sacrificing that classic stroganoff taste.
- 2 packets Brown Gravy Mix ($0.30 each): This little powerhouse adds a rich, meaty depth and helps thicken the sauce into a glorious gravy-like consistency. It’s a flavor booster that does all the heavy lifting for us.
- 1 lb Ground Beef ($4.54): We’re using ground beef instead of pricier steak cuts. It’s affordable, cooks up in a flash, and brings that satisfying, hearty protein to the party. Substitution Tip: Feel free to use ground turkey, chicken, or even a plant-based ground meat alternative for a different twist!
- Salt, Black Pepper, Garlic Powder (Optional): The flavor finishers! I always encourage you to taste and season at the end. The soup and gravy mix have salt, so you may just need a good crack of black pepper.
Let’s Get Cooking: Your Foolproof Path to Creamy Bliss
Ready to see how this all comes together in about 30 minutes? Follow these steps, and you really can’t go wrong. I’ve sprinkled in my favorite chef hacks to make it even easier.
- Get Your Noodles Ready for Their Sauna. Bring a large pot of well-salted water to a rolling boil. Add both bags of egg noodles and cook them according to the package directions for al dente. Remember, we want them with a little bite! Once they’re done, drain them in a colander but do not rinse them. That little bit of starch left on the noodles will help the sauce cling to them beautifully. Set them aside for their big moment.
- Brown That Beautiful Beef. While the noodles are cooking, place a large skillet or Dutch oven over medium-high heat. Add your ground beef and break it up with a wooden spoon as it cooks. We’re looking for a nice, even brown color all over, with no pink left. Once it’s perfectly cooked, this is the most important step: drain off the excess grease. Tilt the skillet and use a spoon to remove it, or carefully pour the beef into a colander to drain. This keeps our final dish from being greasy and lets the creamy flavors shine.
- Create the Creamy Dream Sauce. Return the drained beef to the skillet and reduce the heat to medium-low. Now, for the magic! Add both cans of cream of mushroom soup directly to the beef. For the gravy, prepare it right in the skillet: sprinkle the two gravy packets over the beef and soup, then add the water as directed on the packet (usually about 1 cup per packet). Using a whisk here is a pro-move—it helps break up the condensed soup and gravy mix into a perfectly smooth, lump-free sauce. Give it a good stir until everything is combined into a homogenous, creamy mixture.
- The Grand Reunion: Noodles Meet Sauce. Now, gently fold those cooked egg noodles into the creamy beef sauce in the skillet. Make sure every single noodle gets coated in that gloriousness. Let the whole thing simmer together for 5-10 minutes, stirring occasionally. You’ll see the sauce thicken up and cling to the noodles. This is when the magic really happens—the flavors marry and the texture becomes absolutely perfect.
- The Final Touch: Taste and Season. Grab a spoon and do a taste test. This is your moment! Does it need a pinch of salt? A generous grind of black pepper? A dash of garlic powder for a little extra zing? Season it to your family’s liking. You’re the chef of your kitchen!
How to Serve It Up in Style
This dish is a beautiful, complete meal all on its own, but a little presentation goes a long way! I love serving this family-style, right out of the skillet I cooked it in (less dishes—win!). Ladle generous portions into shallow bowls.
For a pop of color and a fresh contrast to the rich, creamy noodles, I love to sprinkle the top with a handful of freshly chopped parsley. If you have it, a little sprinkle of paprika adds a lovely color and a subtle, smoky sweetness. For a bit of green on the side, a simple, crisp green salad with a bright vinaigrette or some steamed green beans are the perfect companions to cut through the richness. And don’t forget the crusty bread! A loaf of warm, cheap French bread is perfect for sopping up every last drop of that incredible sauce.
Make It Your Own: 5 Delicious Twists
Once you’ve mastered the base recipe, have fun with it! Here are a few of my favorite ways to mix things up.
- The “Mushroom Lover’s” Upgrade: Sauté 8 ounces of sliced fresh mushrooms (cremini or baby bellas are great) with a little onion before adding the ground beef. It adds a wonderful earthy flavor and meaty texture.
- Slow Cooker Simplicity: Brown and drain the ground beef, then add it along with all the other ingredients (except the noodles) to your slow cooker. Cook on LOW for 4-6 hours. Stir in the cooked noodles just before serving for the ultimate easy dinner.
- Creamy Chicken Stroganoff: Swap the ground beef for 1 lb of cubed, cooked chicken breast or thigh. It’s a lighter but equally delicious take on the classic.
- A Touch of Tang: Just before serving, stir in a big spoonful of sour cream or plain Greek yogurt. This adds a fantastic, classic tangy creaminess that takes it to the next level.
- Cheesy & Comforting: For the ultimate indulgence, stir in a half-cup of shredded Parmesan cheese or a cup of sharp cheddar into the sauce along with the noodles. Let it melt into gooey, cheesy perfection.
Beau’s Kitchen Confidential
This recipe has been a work in progress for years. The first time I made it, I was so nervous I accidentally used a packet of taco seasoning instead of gravy mix. (Don’t try that at home, folks—it was an… interesting experiment!). Over time, I learned that the key is in the simplicity. Don’t overthink it. The beauty of this dish is its humble, no-fuss nature. It’s the recipe I text to friends when they’re in a dinner rut, and it’s the one my own family requests on a chilly Tuesday night. It has never, ever let me down.
Your Questions, Answered!
Q: My sauce seems a little too thick. What can I do?
A: No worries! This is an easy fix. Just splash in a little bit of beef broth, milk, or even water, a tablespoon or two at a time, stirring until it reaches your desired consistency.
Q: Can I make this ahead of time?
A: Absolutely! You can assemble the entire dish, let it cool, and store it in an airtight container in the fridge for up to 3 days. Reheat it gently on the stovetop with a splash of liquid to loosen the sauce back up. The noodles will absorb some of the sauce as it sits, so you’ll likely need to add a bit of water or broth when reheating.
Q: I don’t have egg noodles. What else can I use?
A: This sauce is very versatile! You can serve it over rice, mashed potatoes, or even wide pasta like pappardelle. Any carb that can hold a sauce will work wonderfully.
Q: The sauce is a bit too salty for my taste. How can I fix that?
A: If you find it a touch salty, a great trick is to stir in that spoonful of sour cream or a splash of milk at the end. The dairy helps to mellow and balance the saltiness perfectly.

Budget-Friendly Beef Stroganoff : Feeds 6 for Under $10
Description
Hey friends, Beau here! Ever have one of those evenings where the clock is ticking, the family is hungry, and your wallet is giving you side-eye? Enter this Budget-Friendly Beef Stroganoff—creamy, hearty, and soul-satisfying, yet super affordable. For less than $10, you can serve a family of six a dish that feels indulgent without breaking the bank. Using pantry-friendly shortcuts like cream of mushroom soup and gravy mix, this recipe proves comfort food doesn’t need to be complicated or expensive.
Ingredients
-
2 bags (12 oz each) egg noodles ($1.89 each)
-
2 cans cream of mushroom soup ($0.50 each; one from pantry is fine)
-
2 packets brown gravy mix ($0.30 each)
-
1 lb ground beef ($4.54)
-
Salt, black pepper, garlic powder (optional)
Chef Tips:
-
Cook noodles just al dente—they’ll soak up the sauce later.
-
Drain excess fat from the ground beef to keep the dish creamy, not greasy.
-
Feel free to swap beef for ground turkey, chicken, or plant-based alternatives.
Instructions
-
Cook the noodles:
Bring a large pot of salted water to a boil. Add egg noodles and cook according to package directions until al dente. Drain (do not rinse) and set aside. -
Brown the beef:
Heat a large skillet or Dutch oven over medium-high. Add ground beef, breaking it up as it cooks. Brown evenly, then drain excess grease. -
Make the sauce:
Reduce heat to medium-low. Return beef to the skillet. Stir in cream of mushroom soup. Sprinkle in the gravy mixes and add water according to the packet instructions (usually 1 cup per packet). Whisk until smooth and creamy. -
Combine noodles and sauce:
Fold in cooked noodles and simmer 5–10 minutes, stirring occasionally, until the sauce thickens and coats the noodles perfectly. -
Season to taste:
Taste and add salt, black pepper, or garlic powder as needed.
Notes
-
Sauce too thick? Add a splash of water, milk, or broth.
-
Make ahead: Store in the fridge for up to 3 days; reheat gently with a little liquid.
-
No egg noodles? Rice, mashed potatoes, or wide pasta work beautifully.
-
Too salty? Add sour cream or milk to mellow the flavor.
Nutrition
- Calories: 475 Cal Per Serving
- Fat: : 20 g
- Carbohydrates: 45 g
- Protein: 25 g
Breaking It Down
Now, let’s be real—this is a comforting, hearty meal. It’s not a salad, and that’s the point! But it’s always good to know what you’re eating. Please note that this is an estimate, as ingredients can vary by brand.
Estimated per serving (1/6th of the recipe): ~450-500 calories | 20g fat | 45g carbs | 25g protein
This dish provides a great balance of protein, carbs, and fats, making it a truly satisfying meal that will keep you full and happy. It’s a budget-friendly source of energy and comfort, perfect for a busy family.
Final Thoughts from My Kitchen to Yours
And there you have it! A dinner that’s big on comfort, flavor, and community, but incredibly small on cost and fuss. This Budget-Friendly Beef Stroganoff is more than just a recipe; it’s a reminder that feeding your family well doesn’t require a fancy degree or a bottomless bank account. It just requires a little know-how, a few simple ingredients, and a whole lot of heart.
I hope this recipe finds its way onto your table and into your regular rotation. Give it a try, make it your own, and let me know how it turns out! Tag me on social with #Feastical so I can see your beautiful creations. Now, go forth and cook with confidence!
With a full heart and an empty skillet,
Beau