
Crockpot Breakfast Tacos : Easy Morning Favorite
Wake Up to the Easiest, Coziest Morning Ever
Hey friends, Beau here! Let’s be real for a second. Mornings can be… a lot. The alarm blares, the to-do list starts screaming, and the last thing you want to do is stand over a hot stove, trying to juggle a sizzling skillet of eggs, sausage, and potatoes without burning your toast. I’ve been there more times than I’d like to admit, usually while still wearing my ridiculously fluffy slippers.
But what if I told you there’s a better way? A way where your entire, glorious, hearty breakfast cooks itself while you’re still tucked in, dreaming of sunbeams and the smell of freshly brewed coffee. Sounds like a fantasy, right? Well, pull up a chair, because today we’re making that fantasy a delicious, taco-shaped reality.
I’m talking about my legendary Crockpot Breakfast Tacos. This isn’t just a recipe; it’s your new secret weapon for stress-free mornings. Imagine fluffy, set eggs, savory chorizo, tender potatoes, and gooey melted cheese, all mingling together in your slow cooker, ready to be scooped into a warm tortilla and loaded with all your favorite toppings. It’s a feel-good food hug that powers you through your day, and the best part? You did almost nothing to make it happen. So, let’s grab that crockpot and get ready to revolutionize your A.M. routine. Your future well-fed, well-rested self will thank you.
The Camping Trip That Started It All
This recipe has a special place in my heart, and it all started on a chilly, misty morning in the Blue Ridge Mountains. A few buddies and I were on a camping trip, and let’s just say our campfire cooking skills were… optimistic. We had grand plans for a massive breakfast feast, but the reality was a chaotic mess of undercooked potatoes, scrambled eggs with bits of ash, and one very sad, deflated tube of biscuits.
We were cold, hungry, and laughing at our own culinary failure. That’s when I had a lightbulb moment. I remembered I’d brought my little portable slow cooker (a glamping essential, I swear!). We threw in the rest of our ingredients—eggs, some pre-cooked sausage, a handful of cheese—and let it do its thing while we warmed up by the fire. An hour later, we were devouring the most incredible, hot, and satisfying breakfast tacos right out of tortilla bags. It was a game-changer. That moment of turning a potential disaster into a triumphant, delicious meal is the soul of this recipe. It’s about making life easier and tastier, no matter where you are.
Gathering Your Taco Triumph
Here’s the dream team of ingredients that’s going to make your morning magical. Don’t stress if you’re missing something—I’ve got plenty of swaps and chef-y insights for you!
- 8 large eggs: The star of the show! They create that fluffy, custardy base that holds everything together. For an even richer texture, try using farm-fresh eggs if you can find them.
- 1 lb chorizo, casing removed: This is where the big, bold flavor comes from. I love the spicy, paprika-kissed kick it gives. Chef’s Tip: If you’re sensitive to heat, swap it for mild Italian sausage or even classic breakfast sausage. For a leaner option, turkey chorizo works beautifully!
- 2 cups frozen diced hash brown potatoes: The ultimate time-saver. No peeling, no dicing! They cook up tender and soak up all the wonderful flavors from the chorizo and eggs. Insight: Using frozen ensures they don’t turn to mush during the long cook time.
- 1 ½ cups shredded cheddar or Mexican blend cheese: Because everything is better with melty, glorious cheese. I’m a sucker for a sharp cheddar, but a Mexican blend with Monterey Jack and queso quesadilla is a fantastic fiesta in your mouth.
- ½ cup milk: This is our secret weapon for extra fluffy and creamy eggs. It adds a bit of richness and prevents them from becoming too rubbery. Whole milk is great, but 2% works just fine.
- Salt and pepper to taste: The classic seasonings. Go easy on the salt initially, as the chorizo and cheese can be plenty salty on their own. You can always add more at the end!
- 8–10 small flour or corn tortillas: The vessel for our masterpiece! I’m team flour for breakfast tacos (they’re so pliable!), but corn tortillas are a delicious gluten-free option. Just warm them up right before serving—it makes a world of difference.
- Optional toppings: This is where you make it your own! Think salsa for acidity, avocado for creaminess, cilantro for a fresh pop, sour cream to cool down the spice, and jalapeños for those who like to live on the edge.
Let’s Build Your Breakfast Masterpiece
Alright, team. This is where the magic happens. It’s so simple, you’ll have it prepped before your coffee finishes brewing. Let’s do this!
- Brown That Chorizo: Crank a skillet up to medium heat. Crumble in your chorizo (casings removed, remember!) and cook it until it’s beautifully browned and cooked through, about 8-10 minutes. Chef’s Hack: Once it’s cooked, drain off the excess grease. This little step prevents your final taco filling from being overly greasy. Your tortillas will thank you.
- Whisk the Egg Base: While the chorizo is doing its thing, grab a large bowl and crack in those 8 eggs. Add the milk, and a good pinch of salt and pepper. Now, whisk it like you mean it! You want it to be uniform and a little frothy. This incorporates air, which is the first step to achieving that dreamy, fluffy texture we’re after.
- Grease Your Crockpot: This is a non-negotiable, friends. Give the inside of your slow cooker a quick but thorough spray with cooking spray or a wipe with a bit of oil or butter. This is your insurance policy for easy cleanup later. Trust me on this one.
- The Layering Station: Now for the fun, no-fuss assembly! Scatter the frozen hash browns evenly over the bottom of the crockpot. Next, layer on the cooked, drained chorizo. Finally, shower everything with that glorious mountain of shredded cheese. The layers aren’t just for looks—they help everything cook evenly.
- The Big Pour: Slowly and evenly, pour your whisked egg mixture over the layers in the crockpot. Try to cover as much surface area as possible. You don’t need to stir! Let the eggs seep down through the layers on their own. This is what creates that wonderful, cohesive casserole-like texture.
- Let the Crockpot Work Its Magic: Pop the lid on, and you’re done! Now, you have a choice. For the “set it and forget it” overnight or all-day method, cook on LOW for 6-7 hours. If you’re in more of a hurry, HIGH for 3-4 hours will do the trick. It’s done when the eggs are fully set and the edges are lightly golden.
- The Grand Finale Stir: Once the cooking time is up, take off the lid and give the mixture one gentle but thorough stir. You’ll see the fluffy eggs, chorizo, potatoes, and cheese come together in perfect harmony. It’s a beautiful sight.
- Serve & Devour: Scoop that warm, hearty filling into your warmed tortillas, load up with your favorite toppings, and dig in immediately. You’ve earned this!
How to Serve These Taco Superstars
Presentation is part of the fun, even for a casual breakfast! I love setting up a “Breakfast Taco Bar” when I have friends over or for a fun family weekend. I keep the warm filling in the crockpot on the “warm” setting and arrange all the toppings in little bowls on the counter. It lets everyone build their own perfect taco creation and turns a simple meal into an event.
For a cozy morning for two, I just pile the filling high on a warm tortilla, add a generous dollop of cool sour cream and a sprinkle of fresh cilantro, and maybe a few slices of avocado on the side. Don’t forget a big mug of strong coffee or a zesty Michelada for the ultimate brunch vibe. It’s all about creating a moment of joy, one delicious, messy, perfect taco at a time.
Make It Your Own: Delicious Twists & Swaps
The beauty of this recipe is its flexibility. Think of this base as a blank canvas for your culinary creativity! Here are a few of my favorite ways to mix it up:
- The Veggie Lover’s Delight: Skip the chorizo and sauté a mix of bell peppers, onions, and mushrooms until soft. Add a can of drained black beans or pinto beans for extra protein. It’s a colorful and satisfying vegetarian option.
- Southwest Fiesta: Stir a can of diced green chiles and a teaspoon of cumin into the egg mixture before pouring it in. Top your finished tacos with a vibrant corn and black bean salsa for a real flavor party.
- Everything Bagel Twist: Swap the chorizo for cooked, crumbled bacon or diced ham. Instead of cheddar, use a Swiss or Gouda cheese, and stir a tablespoon of everything bagel seasoning into the egg mix. Unbelievably good!
- Keto/Low-Carb Version: This is a dream for low-carb eaters! Simply replace the hash browns with diced cauliflower rice (no need to thaw if frozen) and use your favorite low-carb tortillas or serve the filling in a bowl with all the toppings.
- Spicy “Rancheros” Style: Before adding the layers, spread a thin layer of your favorite red or green enchilada sauce on the bottom of the greased crockpot. Proceed with the recipe as written. The sauce will infuse the entire dish with a zesty, spicy kick.
Beau’s Kitchen Corner: A Few Parting Thoughts
This recipe has evolved so much since that fateful camping trip. I’ve learned that the key is truly in the “no-stir” method. I know it’s tempting to peek and give it a mix, but resist! Let the slow cooker do its thing. The layers will cook perfectly, and you’ll be rewarded with the ideal texture.
One of my favorite kitchen memories is the time I accidentally used a whole bag of extra-spicy chorizo. Let’s just say we were fanning our mouths and reaching for every drop of sour cream in the fridge, but we were also laughing our heads off. It’s a reminder that even the “mistakes” can lead to great stories and, sometimes, a new favorite recipe! So don’t be afraid to play around and make this dish your own.
Your Questions, Answered!
I get a lot of questions about this recipe, so I’ve gathered the most common ones right here to ensure your taco success.
Q: Can I prep this the night before?
A: Absolutely! You have two great options. 1) Cook the chorizo and whisk the egg mixture the night before, storing them separately in the fridge. In the morning, just layer everything in the crockpot and go. Or 2) Assemble the *entire thing* in the crockpot insert, cover it tightly, and refrigerate overnight. In the morning, just place the cold insert into the base and start cooking. You may need to add 30-60 minutes to the cook time since it’s starting from cold.
Q: My filling turned out a bit watery. What happened?
A: This usually happens if there’s condensation from the lid dripping back in, or if your chorizo was particularly greasy even after draining. No worries! Just leave the lid off for the last 15-30 minutes of cooking to let some of the moisture evaporate. Giving it a good stir at the end also helps redistribute any liquid.
Q: Can I use fresh diced potatoes instead of frozen?
A: You can, but I don’t recommend it for this specific recipe. Fresh potatoes release more starch and water during the long cook time and can result in a gummier texture. The frozen hash browns are par-cooked and frozen, which gives them a much better structure for slow cooking.
Q: Help! I overcooked it and the edges are brown and crispy.
A: First of all, congratulations, you’ve accidentally made the best part! I personally love the crispy, caramelized edges. But if it’s more than you’d like, just focus your scooping on the center, softer part. The crispy bits are amazing sprinkled on top for a little textural contrast!

Crockpot Breakfast Tacos : Easy Morning Favorite
Description
Tired of morning chaos? These Crockpot Breakfast Tacos are here to save the day. Imagine waking up to the irresistible aroma of fluffy eggs, spicy chorizo, tender potatoes, and melty cheese—all ready and waiting in your slow cooker. No stress, no skillet juggling—just warm, hearty tacos that make every morning feel like a weekend brunch. Whether you’re feeding a crowd, meal prepping for the week, or just craving a cozy start to your day, this recipe is your secret to effortless comfort.
Ingredients
-
8 large eggs
-
1 lb chorizo (or breakfast sausage), casing removed
-
2 cups frozen diced hash browns
-
1½ cups shredded cheddar or Mexican blend cheese
-
½ cup milk (2% or whole)
-
Salt & pepper to taste
-
8–10 small flour or corn tortillas
-
Optional toppings: salsa, avocado, cilantro, sour cream, jalapeños
Instructions
-
Brown chorizo: Cook in a skillet until browned; drain excess grease.
-
Whisk eggs: In a bowl, combine eggs, milk, salt, and pepper.
-
Grease crockpot: Spray or butter a 4–6 qt slow cooker.
-
Layer: Add hash browns, chorizo, and cheese in layers.
-
Pour: Gently pour egg mixture over the top—no stirring needed!
-
Cook: Cover and cook on LOW for 6–7 hours (overnight) or HIGH for 3–4 hours, until eggs are set.
-
Stir & serve: Give a gentle stir, then scoop into tortillas and add your favorite toppings.
Nutrition
- Calories: 270 Cal Per Serving
- Fat: 18g
- Carbohydrates: 15g
- Protein: 14g
Nutritional Information (A Quick Note!)
Hey team, just a friendly heads-up! I’m a chef, not a registered dietitian, so please treat this as a rough estimate. The values can change based on the specific brands of chorizo, cheese, and tortillas you use, and of course, your toppings.
Per Serving (1 taco, without toppings, based on 8 servings):
Calories: ~270 | Protein: 14g | Carbohydrates: 15g | Fat: 18g
This is a hearty, protein-packed breakfast designed to keep you full and satisfied for hours. To lighten it up, you can use turkey chorizo, reduced-fat cheese, and egg whites (use the liquid from a carton for easy measuring). Remember, food is fuel, but it’s also joy. So build your taco how you love it!
Final Thoughts
And there you have it, my friends. Your ticket to easier, happier, and infinitely more delicious mornings. This recipe is more than just a list of ingredients and steps; it’s a promise that a fantastic, homemade breakfast doesn’t have to be hard. It’s about giving yourself the gift of time—time to sleep in, time to sip your coffee in peace, or time to chat with your family before the day gets crazy.
I hope these Crockpot Breakfast Tacos become a regular in your rotation, the star of your brunch parties, and your go-to for effortless meal prep. Give one of the fun variations a try, and don’t forget to tag me @Feastical on social media when you make them! I love seeing your creations. Now go forth, set that crockpot, and conquer your day, one amazing taco at a time. Happy cooking!
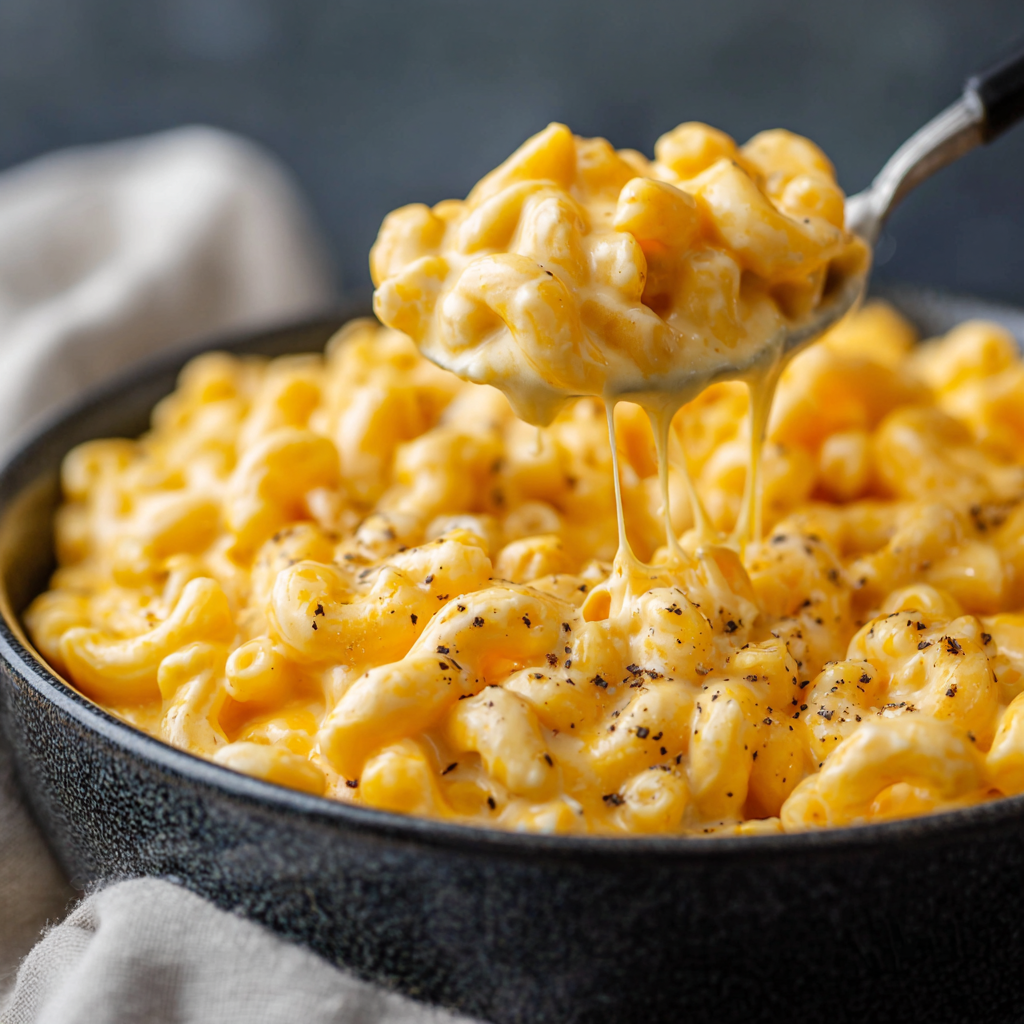
Crockpot Mac and Cheese : Ultra Creamy, Super Easy Comfort Food
Crockpot Mac and Cheese – Ultra Creamy, Set-It-and-Forget-It Recipe
Your New Favorite Comfort Food is Just a Plug-In Away
Hey friends, Beau here! Let’s talk about one of life’s greatest simple pleasures: a big, steamy bowl of mac and cheese. I’m not talking about the kind from a blue box (though we’ve all been there and it has its charm!). I’m talking about the real deal—creamy, decadent, soul-warming mac and cheese that’s so rich it practically hugs you from the inside out.
Now, I know what you might be thinking. “Beau, from-scratch mac and cheese is a project. It involves roux, constant stirring, and a watchful eye.” Well, my friend, I’m here to change the game for you. Today, we’re making the ultimate Crockpot Mac and Cheese. This recipe is the culinary equivalent of a trusty best friend—it’s reliable, requires minimal effort, and is always, always there for you when you need it most.
Imagine this: you toss a handful of simple ingredients into your slow cooker, give it a stir, and a few hours later, you’re greeted by the most luxurious, velvety, and insanely cheesy mac and cheese you’ve ever tasted. No standing over a hot stove, no last-minute panic. It’s the perfect solution for busy weeknights, potlucks where you want to be the hero, or those days when you just need a big, comforting carb-and-cheese hug. So, let’s grab our slow cookers and make some magic happen!
A Potluck Savior and a Lesson in Cheese
This recipe holds a special place in my heart because it literally saved my reputation. Picture this: it’s my first big neighborhood potluck after moving into a new apartment. I, the self-proclaimed “food guy,” signed up to bring a main dish. I had grand plans for an elaborate baked mac and cheese with a fancy breadcrumb topping. But, as fate would have it, my oven decided to call it quits the morning of the party.
Panic mode: engaged. I was staring at a raw pasta casserole and a dead appliance. But then, my eyes landed on my grandma’s old, slightly chipped crockpot sitting in the back of the cupboard. In a moment of sheer desperation (and genius, if I do say so myself), I pivoted. I cooked the pasta, cubed all the cheese I had, and threw it all into that trusty slow cooker with a silent prayer. Four hours later, I walked into that potluck with a dish that was not only saved but was the undisputed star of the show. It was gone in minutes, and I’ve been making it this way ever since. Sometimes the best recipes are born from a little kitchen chaos!
Gathering Your Cheesy All-Stars
This recipe is all about the beautiful, melty synergy of a few key players. Here’s what you’ll need to create this creamy dream:
- 16 oz (450g) Elbow Macaroni, cooked al dente: The classic choice! Its little tubes are perfect for cradling all that cheesy sauce. Chef’s Insight: Cooking it al dente (meaning it still has a slight bite) is non-negotiable. It prevents the pasta from turning to mush as it finishes cooking in the slow cooker.
- 6 tablespoons Butter: The foundation of richness and flavor. It helps create a luscious, smooth sauce and adds that irreplaceable, buttery goodness.
- 1 (12 oz) can Evaporated Milk: This is our secret weapon for ultra-creaminess without any graininess! Evaporated milk is milk that’s had about 60% of its water removed, making it thicker and richer. It’s a stabilizer’s dream. Substitution Tip: In a pinch, you can use half-and-half, but evaporated milk really gives it that perfect, classic diner-style mac and cheese texture.
- 2½ cups Milk (2% or whole preferred): This thins our sauce to the perfect, spoonable consistency. Using a milk with a bit of fat (2% or whole) gives you a richer final product than skim milk would.
- 2 cups Shredded Sharp Cheddar Cheese: The flavor backbone! I highly recommend using a block of cheddar and shredding it yourself. Pre-shredded bags are coated with anti-caking agents that can make your sauce a little grainy and less smooth. Trust me, the extra minute of shredding is worth it.
- 8 oz Velveeta Cheese, cubed: Don’t you dare turn your nose up! Velveeta is a “processed cheese product” for a reason—it melts like an absolute dream and gives our sauce that signature, velvety, cling-to-the-pasta quality that we’re after.
- 8 oz Cream Cheese, cubed: Our third cheese superstar! Cream cheese adds a subtle tang and an incredible layer of creaminess that takes this dish from great to “OH WOW.” Pro Tip: Let it sit out for 15-20 minutes to soften before cubing—it’ll incorporate much easier.
- ½ teaspoon Black Pepper: A simple but essential flavor enhancer that cuts through the richness. Feel free to add a pinch of paprika or garlic powder if you’re feeling adventurous!
Let’s Get This Cheesy Party Started
Alright, team, this is where the magic happens. It’s so simple, you’ll have it memorized after one try. Let’s walk through it together.
- Cook Your Pasta: Bring a large pot of salted water to a rolling boil. Add your elbow macaroni and cook it for about 1-2 minutes less than the package directions state for al dente. We want it firm because it’s going to hang out in the slow cooker for a while. Once it’s done, drain it thoroughly but don’t rinse it—we want that starch to help thicken our sauce! Chef’s Hack: Time this so your pasta is ready just as you’re assembling everything. Hot pasta helps start the melting process faster!
- Grease Your Slow Cooker: This is a small step with a big payoff. Give the inside of your 4-6 quart slow cooker a quick spray with non-stick cooking spray or a light rub with butter. This creates a non-stick surface that will make serving and cleanup an absolute breeze.
- The Big Dump (and Stir): Now for the fun, no-fuss part! Add the drained, hot pasta to the slow cooker. Plop in the butter, and pour in both the evaporated milk and the regular milk. Then, scatter in all three of your cheeses—the shredded cheddar, cubed Velveeta, and cubed cream cheese. Finally, sprinkle that black pepper over the top. Now, take a large spoon or spatula and give everything a really good, hearty stir. You want to try and distribute the cheeses and butter as evenly as possible throughout the pasta.
- Slow Cook to Perfection: Pop the lid on securely and set your slow cooker to LOW. I know it’s tempting to crank it to high, but patience is key here! Low and slow allows the cheeses to melt gently and evenly into a smooth sauce, without any risk of the dairy scorching on the edges. Let it cook for 2 to 4 hours. Chef’s Note: I always give it a gentle stir every hour or so, just to help the melting process along and make sure nothing is sticking to the bottom. It’s usually perfectly creamy and ready around the 2-hour mark, especially if you cubed your cheeses small.
- The Grand Finale: Once everything is melted, bubbly, and irresistibly creamy, give it one final stir. You’ll see the sauce has thickened and is lovingly coating every single piece of pasta. It’s time to serve it up immediately while it’s hot and glorious!
How to Serve Up This Cheesy Masterpiece
You’ve done it! You’ve created a pot of golden, cheesy goodness. Now, let’s talk about how to present it. This mac and cheese is a star all on its own, but a little presentation goes a long way.
For a family-style meal, I love serving it right from the crockpot (set to “warm,” of course!) with a big, beautiful wooden spoon. It creates such a cozy, communal vibe. For individual plates, use a large spoon or a small ladle to scoop it into shallow bowls. The creamy sauce pools so invitingly!
Want to take it to the next level? Right before serving, sprinkle a little extra shredded sharp cheddar over the top and let it melt in for a fresh, gooey finish. A light dusting of chopped fresh chives or parsley adds a pop of color and a hint of freshness that beautifully contrasts the richness. And if you’re like me and believe everything is better with a little crunch, a sprinkle of crispy, crumbled bacon is always a winning move.
Make It Your Own: Delicious Twists & Swaps
The beauty of this recipe is its incredible versatility. Once you’ve mastered the base, feel free to get creative and make it your own! Here are a few of my favorite riffs:
- The Protein Packer: Stir in 1-2 cups of cooked, diced ham, shredded rotisserie chicken, or crumbled cooked sausage during the last 30 minutes of cooking. It turns this side dish into a full, satisfying meal.
- The Veggie Lover: Add a pop of color and nutrition by mixing in 1-2 cups of steamed broccoli florets, thawed frozen peas, or sautéed mushrooms when you stir in the final hour.
- The Spice Seeker: Give it a kick! Add a few dashes of your favorite hot sauce, a tablespoon of chopped pickled jalapeños, or a teaspoon of smoked paprika along with the black pepper.
- The Gourmet Touch: Swap out half of the cheddar for another flavorful cheese like Gruyère, Gouda, or Fontina. You’ll get a more complex, sophisticated cheesy flavor.
- The Lighter Version: You can lighten it up a bit! Use reduced-fat cream cheese and Velveeta, and swap the whole milk for 2% or even skim. The texture will be slightly less rich, but it’ll still be deliciously creamy.
Beau’s Behind-the-Scenes Notes
Over the years, this recipe has become a Feastical staple, and I’ve learned a thing or two. The biggest lesson? Do not, I repeat, DO NOT cook the pasta all the way through initially. I learned this the hard way with a slightly mushy batch. Al dente is your best friend here.
Also, the type of slow cooker you use can affect the cooking time. Older models that run a bit hotter might be done closer to 2 hours, while newer ones might take the full 3. Your nose and eyes are the best tools—when it smells amazing and looks perfectly creamy, it’s done! This dish is a testament to the fact that the best food doesn’t have to be complicated. It just has to be made with a little love (and a lot of cheese).
Your Crockpot Mac and Cheese Questions, Answered!
I’ve gotten a lot of questions about this recipe over time, so I’ve gathered the most common ones right here for you.
- Can I cook this on HIGH instead of LOW? I don’t recommend it. Cooking on high heat can cause the dairy to separate or scorch, giving you a grainy texture and potentially burning the bottom. The low-and-slow method is crucial for that ultra-creamy, dreamy result.
- My sauce seems a little thin. What can I do? No worries! First, give it a good stir—sometimes the cheeses just need to be fully incorporated. If it’s still too thin, you can make a quick slurry by mixing a tablespoon of cornstarch with two tablespoons of cold milk. Stir this into the mac and cheese, cover, and cook for another 15-20 minutes on high until thickened.
- Can I prepare this ahead of time? Absolutely! You can cook the pasta al dente and cube all your cheeses the day before. Store them separately in the fridge. When you’re ready, just assemble everything in the crockpot as directed. You may need to add an extra 15-30 minutes to the cook time since you’re starting with cold ingredients.
- How do I store and reheat leftovers? Store any leftovers in an airtight container in the fridge for up to 4 days. Reheat gently in the microwave, stirring every 30 seconds, with a splash of milk to help loosen the sauce back up. It reheats like a champ!

Crockpot Mac and Cheese : Ultra Creamy, Super Easy Comfort Food
Description
Meet your new comfort food hero: Crockpot Mac and Cheese—the ultimate “set it and forget it” recipe that delivers maximum creamy, cheesy bliss with minimum effort. This dish takes everything you love about classic mac and cheese and makes it easier than ever. No roux, no babysitting the stove—just rich, velvety cheese sauce that practically stirs itself. Perfect for potlucks, weeknight dinners, or cozy weekends, this slow cooker version guarantees comfort in every bite.
Ingredients
-
16 oz (450g) elbow macaroni, cooked al dente
-
6 tbsp butter
-
1 (12 oz) can evaporated milk
-
2½ cups milk (2% or whole)
-
2 cups shredded sharp cheddar cheese
-
8 oz Velveeta, cubed
-
8 oz cream cheese, cubed
-
½ tsp black pepper
-
Optional: paprika, garlic powder, or chopped chives for garnish
Instructions
-
Cook pasta 1–2 minutes shy of al dente. Drain (don’t rinse).
-
Grease crockpot with butter or nonstick spray.
-
Combine everything: Add pasta, butter, evaporated milk, regular milk, cheeses, and pepper to the slow cooker. Stir well to coat evenly.
-
Slow cook: Cover and cook on LOW for 2–4 hours, stirring once or twice. The cheese will melt into a thick, creamy sauce.
-
Final touch: Stir one last time before serving. Garnish with extra cheddar, bacon bits, or herbs if desired.
Notes
-
Always cook pasta al dente—soft noodles turn mushy in the crockpot.
-
Shred your own cheese for a smoother sauce.
-
Want extra flavor? Swap cheddar for gouda or Gruyère.
Nutrition
- Calories: 480 Cal Per Serving
- Fat: 30g
- Carbohydrates: 35g
- Protein: 16g
Let’s Talk Nourishment
Friends, let’s be real: this is a celebration of comfort food. It’s rich, cheesy, and indulgent, and it’s meant to be enjoyed as such! While it’s packed with calcium and protein from all that glorious dairy, it’s also a hearty dish.
This nutritional info is an estimate per serving (assuming 8 servings), but it can vary based on the specific brands of ingredients you use. A single serving provides a good amount of protein (around 16g) to help keep you full, and the carbs from the pasta give you that wonderful energy boost. To balance out your meal, I love serving it alongside a big, crisp green salad or some roasted green veggies. Remember, food is about joy and connection, and this dish delivers both in spades!
Final Thoughts
Well, there you have it, my friends—the secret to the easiest, creamiest, most crowd-pleasing mac and cheese you’ll ever make. It’s a recipe built for real life: busy schedules, hungry families, and those moments when you just need a guaranteed win in the kitchen.
I hope this recipe finds its way into your regular rotation and becomes a source of joy and comfort in your home, just like it has in mine. Cooking should be fun, freeing, and fulfilling. So plug in that crockpot, embrace the simplicity, and get ready for the compliments to roll in.
I’d love to hear how it turns out for you! Tag me on social @Feastical or shoot me an email with your photos and your own creative twists. Now, go forth and get your cheese on!
With a full heart and an even fuller bowl,
Beau

Ultra Creamy 5-Cheese Baked Macaroni
Your New Go-To Comfort Food: Ultra Creamy 5-Cheese Baked Macaroni
Hey friends, Beau here from Feastical! Let’s have a real chat for a second. We all have that one dish, right? The one that feels like coming home after the longest day. The one that promises everything is going to be okay, with just one bite. For me, and I’m guessing for a lot of you, that dish is a truly epic, soul-warming, ultra-creamy baked macaroni and cheese.
But we’re not talking about the boxed stuff today (no shame, we’ve all been there!). We’re talking about a mac and cheese that’s a full-on event. A version that’s so rich, so melty, and so packed with flavor that it might just steal the show at your next family dinner, potluck, or cozy night in. This is my Ultra Creamy 5-Cheese Baked Macaroni, and it’s the recipe I get asked for more than any other.
What’s the secret? It’s all about the cheese symphony. We’re blending five different cheeses, each playing a crucial role in creating a harmony of flavor and texture that’s simply unforgettable. We’re talking sharp cheddar for that classic bite, melty mozzarella for its legendary stretch, smoky gouda for a touch of depth, nutty parmesan for a salty kick, and creamy, dreamy cream cheese to bring it all together into the silkiest, most luxurious sauce you’ve ever tasted. No complicated roux required! So, preheat your ovens and grab your favorite baking dish. We’re about to create some serious magic.
The Mac and Cheese That Started It All
My love affair with this dish started in my Nana’s kitchen. Every Sunday, without fail, the whole Collier clan would descend upon her house. The air would be thick with the smell of roasting chicken and the sound of laughter. And right there, always in the center of the table, was her famous mac and cheese. It wasn’t fancy, but it was legendary. It had this golden, almost crispy top that gave way to a pool of pure, cheesy joy underneath.
I remember standing on a stool, “helping” her stir the pot, my small hands struggling with the big wooden spoon. She’d let me sprinkle the extra cheese on top, a responsibility I took very seriously. To me, that dish wasn’t just about the ingredients; it was about the connection. It was the way my uncle would tell a joke and my mom would laugh so hard she’d snort, all while reaching for a second helping. It was the warmth, the chaos, and the love all baked into one perfect casserole dish. This recipe is my homage to those Sundays. It’s my Nana’s spirit, leveled up with a few chef-y tricks I’ve picked up along the way. It’s more than food; it’s a edible hug.
Gathering Your Cheesy All-Stars
Here’s the dream team! The beauty of this recipe is in its simplicity and the quality of its stars. Don’t be intimidated by the cheese list—this is where the fun begins.
- 1 lb Elbow Macaroni: The classic choice! Its small, tube-shaped curves are perfect for trapping all that cheesy goodness. Chef’s Insight: I like to use a larger elbow macaroni for a heartier bite.
- 2 cups Shredded Sharp Cheddar Cheese: This is the backbone of our flavor. Its sharp, tangy profile cuts through the richness. Substitution Tip: Feel free to use medium cheddar if you prefer a milder flavor, but the sharp is my go-to for a bolder taste.
- 1 cup Shredded Mozzarella Cheese: The king of meltiness! Mozzarella is our secret weapon for that incredible, photogenic cheese pull. Chef’s Insight: I recommend buying a block of low-moisture mozzarella and shredding it yourself. The pre-shredded stuff is coated to prevent clumping, which can make your sauce less smooth.
- 1 cup Shredded Smoked Gouda Cheese: This is the flavor game-changer. Smoked gouda adds a subtle, savory, almost bacony note that takes this mac from great to “OH WOW.” Substitution Tip: If you can’t find smoked gouda, regular gouda or even a good Swiss cheese like Gruyère would be fantastic.
- 1 cup Grated Parmesan Cheese: Our salty, nutty flavor booster. Parmesan adds a complexity that makes the sauce taste like it simmered for hours. Chef’s Insight: Please, for the love of all things cheesy, grate it fresh from a wedge! The flavor and meltability are worlds apart from the canned powder.
- 1 cup (8 oz block) Softened Cream Cheese: This is the magic ingredient for ultra-creaminess without a roux. It melts into the hot pasta and creates a luxuriously smooth, velvety base that binds all the other cheeses together.
- ½ cup Whole Milk: This helps to loosen the sauce just enough to make it pourable and perfectly creamy. Substitution Tip: 2% milk will work, but the extra fat in whole milk contributes to a richer, more decadent final product.
Let’s Get Cooking: Building the Ultimate Comfort Food
Okay, team! It’s showtime. This process is straightforward, but a few little tricks along the way will ensure mac and cheese perfection.
- Preheat and Prep: First things first, get that oven preheating to 350°F (175°C). This gives it plenty of time to come to the perfect temperature. While it’s warming up, grab a 9×13 inch baking dish and give it a light coating of butter or a non-stick spray. Trust me, you don’t want to be chiseling cheesy bits off the pan later!
- Cook the Pasta: Bring a large pot of generously salted water to a rolling boil. Add your elbow macaroni and cook it until it’s just al dente—that means it should still have a slight bite to it. This is crucial! We’re going to bake this pasta, and if you cook it until it’s soft now, it’ll turn into mush in the oven. Check the package directions and subtract a minute or two. Once it’s done, drain it well, but do not rinse it! The little bit of starch left on the pasta helps the cheese sauce cling to every nook and cranny.
- The Big Cheese Mix (This is the fun part!): Immediately after you drain the pasta, transfer it back to the hot pot (off the heat) or into a large mixing bowl. The residual heat is your best friend here. Now, start adding your cheeses and milk. I like to start with the cream cheese, breaking it up into chunks so it melts evenly. Then, add all the other shredded cheeses and the milk. Chef’s Hack: Reserve about a half cup of the cheddar and mozzarella mix to sprinkle on top later for an extra-cheesy, golden-brown crust.
- Stir with Soul: Now, grab a sturdy spoon or spatula and stir, stir, stir! You want to work relatively quickly while the pasta is still very hot. You’ll see the cheeses slowly melting and combining with the milk and the heat from the pasta to form a gorgeous, creamy sauce that coats every single piece. Keep stirring until everything is beautifully combined and you see a consistently creamy texture.
- Into the Dish & Top It Off: Pour the cheesy macaroni mixture into your prepared baking dish and spread it out into an even layer. Now, take that reserved cheese you set aside and sprinkle it generously over the top. This is what’s going to give you that beautiful, bubbly, golden top we all dream about.
- Bake to Perfection: Carefully place the dish in your preheated oven and bake for 25-30 minutes. You’re looking for the cheese on top to be completely melted, the sauce to be bubbling around the edges, and the top to have those gorgeous golden-brown spots. If you want an extra-crispy top, you can pop it under the broiler for the last minute or two—but watch it like a hawk! It can burn in a flash.
- The Hardest Part: Let It Rest: I know, I know. The smell is intoxicating, and you just want to dive in with a fork. But patience, my friend! Let the mac and cheese sit for about 5-10 minutes after pulling it out of the oven. This allows the sauce to thicken up slightly and set, making it easier to serve and saving you from a molten-lava-cheese burn on the roof of your mouth. It’s worth the wait, I promise.
How to Serve This Cheesy Masterpiece
Presentation is part of the fun! You’ve just created a show-stopping dish, so let’s serve it with style.
For a family-style meal, I love placing the whole baking dish right in the middle of the table on a trivet. There’s something so welcoming and communal about letting everyone dig in from the same dish it was baked in. Use a large spoon to get those perfect, clean scoops.
For individual plates, use an ice cream scoop! It sounds silly, but it gives you a beautiful, round quenelle of mac and cheese that looks super chef-y. Garnish with a little sprinkle of fresh chopped parsley or chives for a pop of color and a fresh flavor contrast.
What to serve with it? This mac is rich, so it pairs wonderfully with simple, fresh, or acidic sides. Think a crisp green salad with a tangy vinaigrette, some simple roasted green beans, or my personal favorite, a juicy roasted chicken. It’s also the ultimate companion to any BBQ spread, like pulled pork or burgers.
Make It Your Own: Delicious Recipe Variations
Once you’ve mastered the base recipe, the world is your cheesy oyster! Here are a few of my favorite ways to mix it up.
- The Carnivore’s Dream: Stir in 1 cup of cooked, crumbled bacon or diced ham along with the cheeses. For a spicy kick, use andouille sausage!
- Veggie Lover’s Delight: Add 1-2 cups of your favorite steamed or roasted vegetables. Broccoli florets, caramelized onions, sautéed mushrooms, or even some roasted cherry tomatoes are fantastic additions that add flavor and nutrition.
- Spicy Buffalo Twist: For all my heat-seekers! Stir in ½ cup of your favorite buffalo sauce along with the milk. Fold in 1-2 cups of shredded cooked chicken and top with a mix of cheeses and a drizzle of blue cheese dressing after baking. Unreal.
- Lobster Mac for a Special Occasion: Feeling fancy? Fold in 1-1.5 cups of chopped, cooked lobster meat right before baking. It transforms this homey dish into a restaurant-worthy entrée.
- Gluten-Free & Lighter Swap: This recipe is easily adaptable! Use your favorite gluten-free pasta (the brown rice or chickpea ones work great). For a lighter version, you can use low-fat cheeses and milk, though the texture will be slightly less rich.
Beau’s Chef Notes & Kitchen Confessions
This recipe has been a living, evolving thing in my kitchen for years. The first time I made it, I was so excited that I forgot to reserve cheese for the top. The result was delicious, but it lacked that iconic crust. Lesson learned! Now, I always set my topping cheese in a little bowl before I even start mixing.
Another funny story: I once tried to “get creative” and added blue cheese. A lot of it. Let’s just say it was… an acquired taste that not everyone at the table acquired. My brother still gives me a hard time about my “stinky sock mac.” So, we stick with the winning five-cheese combo you see here. It’s a crowd-pleaser through and through, and that’s what Feastical is all about.
Your Mac and Cheese Questions, Answered!
I’ve gotten a lot of questions about this recipe over the years. Here are the most common ones to help you avoid any kitchen mishaps.
Q: My sauce turned out a bit grainy/oily. What happened?
A: This is usually due to the cheese being overheated or cooked too aggressively. The key is to let the residual heat from the pasta do most of the melting off the heat, and to avoid over-baking. Also, always shred your own cheese when possible—the anti-caking agents in pre-shredded bags can sometimes lead to a less smooth melt.
Q: Can I make this mac and cheese ahead of time?
A: Absolutely! Assemble the entire dish up to the point of baking, cover it tightly, and refrigerate for up to 24 hours. When you’re ready, you may need to add 5-10 minutes to the baking time since you’re starting with a cold dish. You can also freeze the unbaked casserole for up to 3 months. Thaw in the refrigerator overnight before baking.
Q: How do I reheat leftovers without it drying out?
A: The best way is to reheat it gently. Add a tiny splash of milk to the portion, cover it with a damp paper towel, and microwave in 30-second intervals, stirring in between. For the oven, reheat covered with foil at 325°F until warm, again with a splash of milk.
Q: My pasta absorbed all the sauce after baking. Help!
A> This can happen if the pasta was overcooked initially or if the dish was baked for too long. Ensuring your pasta is very al dente and not letting the baked mac rest for too long before serving will help keep it saucier. You can also increase the milk by a couple of tablespoons next time.

Ultra Creamy 5-Cheese Baked Macaroni
Description
Craving the kind of mac and cheese that makes the whole table go quiet after the first bite? This Ultra Creamy 5-Cheese Baked Macaroni is that dish. A bubbling, golden pan of cheesy perfection layered with sharp cheddar, smoky gouda, melty mozzarella, nutty parmesan, and silky cream cheese—it’s indulgence at its finest. No roux, no fuss, just pure, soul-hugging comfort. Whether it’s a weeknight pick-me-up, a holiday showstopper, or the centerpiece of your next potluck, this mac and cheese promises warmth, nostalgia, and second helpings every single time.
Ingredients
-
1 lb elbow macaroni
-
2 cups shredded sharp cheddar cheese
-
1 cup shredded mozzarella cheese
-
1 cup shredded smoked gouda
-
1 cup grated parmesan
-
1 block (8 oz) cream cheese, softened
-
½ cup whole milk
-
Salt & pepper to taste
-
Optional: fresh parsley or chives for garnish
Instructions
-
Preheat oven to 350°F (175°C). Grease a 9×13-inch baking dish.
-
Cook pasta until just al dente. Drain (don’t rinse).
-
Mix cheeses: In a large bowl, combine hot pasta, cream cheese, milk, and remaining cheeses (reserve ½ cup of cheddar and mozzarella for topping). Stir until melted and creamy.
-
Assemble: Spread mixture evenly in the prepared dish. Sprinkle reserved cheese on top.
-
Bake for 25–30 minutes until bubbling and golden. For an extra crisp crust, broil for 1–2 minutes at the end.
-
Rest & serve: Let sit 5–10 minutes before serving. Garnish with herbs for a touch of color.
Notes
-
Shred cheese fresh for the smoothest melt.
-
Add cooked bacon, lobster, or veggies for fun twists.
-
Use al dente pasta—overcooked noodles will absorb too much sauce.
Nutrition
- Calories: 490Cal Per Serving
- Fat: 31g
- Carbohydrates: 32g
- Protein: 21g
Nutritional Information (Because We’re Curious!)
Okay, let’s be real—this is a celebratory, indulgent dish, and we love it for exactly that reason! It’s pure comfort. But for those who like to keep track, here’s a general breakdown per serving (based on 8 servings). Remember, these are estimates and can vary based on the specific brands of ingredients you use.
Per Serving (est.):
Calories: 490 | Protein: 21g | Carbohydrates: 32g | Fat: 32g | Saturated Fat: 18g | Cholesterol: 95mg | Sodium: 750mg
To lighten it up a bit, you can use whole wheat pasta, reduced-fat cheeses, and low-fat milk. The flavor will still be fantastic, though the texture will be slightly less decadent. My philosophy? Enjoy the real deal in moderation as part of a balanced diet. Life’s too short for bad mac and cheese!
Final Thoughts from My Kitchen to Yours
Well, there you have it, my friends. My heart and soul in a baking dish. This Ultra Creamy 5-Cheese Baked Macaroni is more than just a recipe; it’s a reminder of the power of food to bring us together, to comfort us, and to create lasting memories.
I hope this recipe becomes a staple in your home, just like it is in mine. I hope you make it for your family on a busy weeknight, bring it to a potluck to share with friends, or whip it up just for yourself on a day when you need

Slow Cooker Amish Savory Onion Potatoes : Buttery, Creamy, and Packed with Flavor
Your New Favorite Side Dish is Waiting in the Slow Cooker
Hey there, friend! Beau from Feastical here. Can we talk for a minute about the unsung hero of the dinner table? I’m not talking about the main course—I’m talking about that one side dish that somehow steals the show. The one that has everyone asking for the recipe before they’ve even finished their first bite. You know the one. For me, that dish, the one I turn to time and time again when I need a guaranteed win, is these incredibly creamy, dreamy, and soul-satisfying Slow Cooker Amish Savory Onion Potatoes.
Imagine this: tender slices of potato, slow-cooked for hours until they’re melt-in-your-mouth perfect, swimming in a rich, buttery sauce that’s tangy from sour cream and deeply savory from onion soup mix. The onions sweeten and caramelize, the garlic powder adds a warm hum, and the whole thing comes together in a way that feels like a warm hug from your grandma. The best part? Your slow cooker does 98% of the work. You get to be the kitchen hero with about ten minutes of actual effort. Whether you’re prepping for a hectic weeknight, a packed potluck, or a big holiday feast, this recipe is your secret weapon for creating that “everyone feels at home” kind of meal. So, let’s ditch the stress and dig into the good stuff. Your fork is waiting!
A Potluck Promise and a Recipe That Never Fails
I’ll never forget the first time I brought these potatoes to a neighborhood potluck. I was new to the area and, like any sane person, I was a little nervous about making a good impression. My go-to chocolate chip cookies felt too safe, and a main course felt like too much pressure. Then I remembered this recipe, scribbled on a notecard from a friend’s Amish grandmother years prior. It was simple, humble, and promised maximum comfort. I threw it all in my slow cooker that morning, crossed my fingers, and hoped for the best.
Well, let me tell you, I showed up with my slow cooker in tow, lifted the lid, and the aroma alone created a line. Within minutes, the entire dish was scraped clean. I spent the rest of the evening not as the “new guy,” but as the “potato guy,” fielding questions and recipe requests. It was the dish that broke the ice, sparked conversations, and made me feel like part of the community. That’s the power of food done right—it doesn’t just fill bellies; it connects people. This recipe has been my potluck promise ever since, and now, I’m so excited to share that same magic with you.
Gathering Your Flavor All-Stars
One of the things I love most about this recipe is its beautiful simplicity. We’re using humble, easy-to-find ingredients and letting the slow cooker work its transformative magic. Here’s what you’ll need to gather up.
- 2½ lbs Potatoes, peeled and sliced: I’m a Russet potato guy for this recipe—they break down a bit and give us that perfect, creamy texture. Chef’s Insight: No Russets? Yukon Golds are a fantastic substitute! They’re naturally buttery and will hold their shape a little more, giving you a slightly different, but equally delicious, creamy bite.
- 1 packet Dry Onion Soup Mix: This is our flavor powerhouse! It’s a brilliant blend of dehydrated onions, salt, and savory spices that creates an incredible depth of flavor with zero fuss. Substitution Tip: Want to control the sodium? You can make your own blend with dried minced onions, onion powder, parsley, paprika, and a touch of celery salt!
- ½ cup Unsalted Butter, melted: Butter is love in solid form, and here it adds that rich, luxurious mouthfeel we’re after. Using unsalted lets you control the final seasoning perfectly.
- ½ cup Sour Cream: This is our secret weapon for tangy, creamy goodness. It gets stirred in at the beginning, melting into the sauce and making it irresistibly silky.
- 1 small Onion, chopped: A fresh onion adds another layer of sweet, aromatic flavor that complements the soup mix beautifully. Yellow or white onions work great here.
- 1 teaspoon Garlic Powder: Don’t sleep on the garlic powder! It adds a warm, savory base note that makes the entire dish feel more rounded and complex than fresh garlic sometimes can in a slow cooker.
- Salt & Pepper to taste: Always, always season as you go! Because the soup mix is salty, I like to add a little pepper at the start and then do a final taste-test for salt at the very end.
- Optional: Chopped Parsley or Shredded Cheese for topping: A sprinkle of fresh parsley adds a pop of color and freshness, while a handful of shredded sharp cheddar or Colby Jack cheese takes this right over the top into ultimate indulgence territory.
Let’s Get Cooking: Effortless, Flavor-Packed Steps
Ready to see how this all comes together? It’s so easy, you’re going to laugh. The key is in the slow, gentle cooking that coaxes out all the flavors and creates that magical, creamy texture.
- Prep Your Slow Cooker: Start by giving the inside of your slow cooker a light coating of butter, cooking spray, or a quick wipe with oil. Chef’s Hack: This little step is a game-changer for easy cleanup later. Trust me, your future self, scrubbing the pot, will thank you profusely.
- The Big Mix: In a large bowl, combine your peeled and sliced potatoes, the chopped onion, sour cream, melted butter, garlic powder, and the entire packet of onion soup mix. Now, get in there with a big spoon or (my preferred method) clean hands, and mix it all up until every single potato slice is gloriously coated in that creamy, savory mixture. Pro Tip: Don’t worry if it looks a little thick or pasty at this stage. The potatoes will release moisture as they cook, and all that goodness will melt down into the most incredible sauce.
- Into the Pot: Carefully transfer the whole potato mixture into your prepared slow cooker. Spread it out into a somewhat even layer. Now, take a moment to season it with a few good cracks of black pepper. Go easy on the salt for now—remember, that soup mix is doing a lot of the heavy lifting.
- The Magic Happens: Pop the lid on, and that’s it! You’re done with the active work. Now, you have a choice. For the most tender, fall-apart texture, set it to LOW for 5-6 hours. If you’re short on time, HIGH for 2.5-3 hours will get you there. You’ll know they’re done when you can easily pierce a potato slice with a fork with no resistance.
- The Grand Finale: Once the potatoes are perfectly tender, give everything a gentle stir. You’ll see how the sauce has thinned out and become beautifully cohesive. This is your moment to taste and decide if it needs that final pinch of salt. Then, scatter over your chopped fresh parsley or a generous handful of shredded cheese, put the lid back on for a few minutes just to let the cheese melt, and you are ready to serve up some serious comfort.
How to Serve These Creamy Dreamy Potatoes
This dish is the ultimate team player on your dinner table. It’s rich and comforting, so it pairs beautifully with simpler mains that can stand up to its bold flavor. I love serving it family-style, right out of the slow cooker (set on a trivet, of course!), to keep that warm, communal vibe going.
For a classic, down-home feast, plate it up next to a juicy rotisserie chicken or some oven-baked pork chops. The potatoes soak up the juices beautifully. During the holidays, it’s a show-stopping side next to your holiday ham or roasted turkey—it gives mashed potatoes a run for their money! For a lighter pairing, a simple green salad with a sharp vinaigrette helps cut through the richness perfectly. And don’t forget a big, crusty loaf of bread for mopping up every last bit of that incredible buttery sauce.
Make It Your Own: Delicious Twists & Swaps
One of my favorite things about a great recipe is how it can become a canvas for your own creativity. Here are a few of my favorite ways to mix things up with these Amish potatoes.
- The “Fully Loaded” Bake: Stir in ½ cup of cooked, crumbled bacon and 1 cup of shredded sharp cheddar cheese during the last 30 minutes of cooking. Top with more cheese, some sliced green onions, and a dollop of sour cream. It’s like a loaded baked potato casserole!
- Cheesy Garlic Lover’s Dream: Add an extra teaspoon of garlic powder and a full 1 ½ cups of a shredded cheese blend (like mozzarella and Parmesan) into the mix before cooking. The cheesy, garlicky crust that forms on top is absolutely divine.
- Lighter & Brighter: To lighten it up, swap the sour cream for plain Greek yogurt and cut the butter back to ¼ cup. The result is still wonderfully creamy but with a tangier, fresher profile and a bit of a protein boost.
- Cream of Something Wonderful: For an even richer, more casserole-like consistency, add one can of condensed cream of mushroom or cream of chicken soup to the mixture before cooking. It makes it extra decadent and perfect for a special occasion.
- Herb Garden Fresh: Stir in 2 tablespoons of fresh, chopped herbs like thyme, rosemary, or chives along with the other ingredients. The fresh herbs will perfume the entire dish with a wonderful, aromatic quality.
Beau’s Kitchen Notes & Stories
This recipe has been a part of my life for so long, it’s practically evolved on its own. I remember one time, in a pre-coffee haze, I accidentally used French onion dip instead of sour cream. Guess what? It was a happy accident! It added an even deeper onion flavor that was a huge hit. So don’t be afraid to play around.
The other thing I’ve learned is that slow cookers can vary in temperature, so the first time you make this, just keep an eye on it. If you’re around the house, give it a stir halfway through if you can—it’s not strictly necessary, but it helps everything cook evenly. This dish also holds beautifully on the “warm” setting for over an hour, making it the most forgiving guest at any party.
Your Questions, Answered!
Over the years, I’ve gotten a lot of great questions about this recipe. Here are the answers to the most common ones to ensure your potato success!
Q: Can I prepare this dish the night before?
A: Absolutely! You can do what I call the “night-before shuffle.” Peel and slice your potatoes, then store them completely submerged in cold water in the fridge to prevent browning. In a separate container, mix the sour cream, melted butter, onion soup mix, and garlic powder. In the morning, just drain the potatoes, mix everything together, and cook as directed. Easy!
Q: My potatoes are still a bit firm. What happened?
A: No worries! This usually means the potato slices were a little on the thick side, or your slow cooker runs a bit cool. Just pop the lid back on and give them another 30-45 minutes on high. They’ll get there! For next time, just aim for slices about ¼-inch thick for perfectly even cooking.
Q: Can I freeze the leftovers?
A: You can, but with a caveat. Because of the dairy (sour cream and butter), the texture can become a little grainy upon thawing and reheating. It will still taste great, but the silky creaminess might be slightly compromised. I highly enjoy these as leftovers within 3-4 days, reheated gently in the microwave or a covered dish in the oven.
Q: Is there a way to make this without a packaged soup mix?
A: For sure! To make your own quick blend, combine: ¼ cup dried minced onion, 2 tablespoons beef bouillon powder (or 4 crumbled beef bouillon cubes), 1 teaspoon onion powder, ¼ teaspoon paprika, and a pinch of celery seed and pepper. Use this in place of the packaged mix.

Slow Cooker Amish Savory Onion Potatoes : Buttery, Creamy, and Packed with Flavor
Description
Tired of juggling too many dishes at dinner? Meet your new secret weapon: Slow Cooker Amish Savory Onion Potatoes. This side dish quietly steals the show with tender potatoes bathed in a buttery, tangy, onion-infused sauce—all made effortlessly in your slow cooker. Think of it as comfort food with class: rich, velvety, and impossible to stop eating. Whether for weeknights, holidays, or potlucks, this dish guarantees compliments (and zero leftovers). Let your slow cooker do the work—your guests will think you spent hours in the kitchen.
Ingredients
-
2½ lbs potatoes, peeled & sliced (Russet or Yukon Gold)
-
1 packet dry onion soup mix
-
½ cup unsalted butter, melted
-
½ cup sour cream
-
1 small onion, chopped
-
1 tsp garlic powder
-
Salt & pepper to taste
-
Optional: fresh parsley or shredded cheese for topping
Instructions
-
Prep slow cooker: Grease lightly with butter or cooking spray.
-
Mix it up: In a large bowl, combine potatoes, onion, sour cream, melted butter, garlic powder, and soup mix. Stir until evenly coated.
-
Load the slow cooker: Spread mixture evenly inside. Season with pepper.
-
Cook low & slow: Cover and cook on LOW for 5–6 hours or HIGH for 2½–3 hours, until potatoes are fork-tender.
-
Finish strong: Stir gently, adjust seasoning, and top with parsley or melted cheese. Serve straight from the slow cooker for cozy, family-style dining.
Notes
-
Keep potato slices around ¼-inch thick for even cooking.
-
Want to prep ahead? Assemble ingredients the night before and refrigerate.
-
For a “loaded” version, stir in bacon and cheddar near the end.
Nutrition
- Calories: 260 Cal Per Serving
- Fat: 17g
- Carbohydrates: 23g
- Protein: 3g
Nutritional Information (For Your Info!)
Hey, we’re all about feel-good food here, and that includes feeling good about what we’re eating! This is a rich, comforting side dish, and it’s helpful to know what’s in it. This is a rough estimate per serving (if you get 8 servings out of the batch) and can vary based on your specific ingredients.
- Calories: ~260
- Fat: 17g
- Carbohydrates: 23g
- Protein: 3g
Remember, this is meant to be a celebratory side, not an everyday green salad. It’s all about balance! To lighten it up, check out the “Lighter & Brighter” variation above using Greek yogurt and less butter. Enjoy it mindfully as part of a delicious, balanced meal.
Final Thoughts from My Kitchen to Yours
Well, friend, there you have it—my go-to, never-fail, always-impresses recipe for Slow Cooker Amish Savory Onion Potatoes. It’s more than just a recipe to me; it’s a reminder that the most memorable meals aren’t about perfection. They’re about simplicity, big flavor, and the joy of sharing something truly delicious with the people you care about.
I hope this recipe finds its way into your regular rotation and becomes a source of as much comfort and connection for you as it has for me. If you make it (and I really hope you do!), I’d love to hear about it. Tag me over on @Feastical or shoot me an email with your photos and stories. Now, go forth, get that slow cooker humming, and fill your home with the incredible smell of comfort. Happy cooking!
With a full heart and an even fuller plate,
Beau

Willie’s Creamy Mac and Cheese Recipe
Forget the Blue Box: This is The Only Mac and Cheese Recipe You’ll Ever Need
Hey, friends! Beau here, welcoming you back to my kitchen at Feastical. Let’s be real for a second. We’ve all been there. It’s been a long day, the couch is calling your name, and the siren song of that bright blue box of mac and cheese is almost too powerful to resist. I get it. The promise of a cheesy, comforting meal in minutes is a powerful one.
But what if I told you that in just about the same amount of time, you could be diving face-first into a bowl of mac and cheese so decadent, so soul-satisfyingly creamy, and so packed with real, honest flavor that you’ll never look at that powder packet the same way again? This isn’t just mac and cheese; this is a warm, cheesy hug in a bowl. It’s the kind of dish that turns a regular Tuesday into a minor celebration.
Today, I’m sharing a recipe that holds a special place in my heart and my recipe box: Willie’s Creamy Mac and Cheese. Inspired by the one and only Willie Robertson of Duck Dynasty fame, this recipe is all about unapologetic, down-home goodness. It skips the fussy baking step and gets right to the good stuff: a velvety, from-scratch cheese sauce that clings to every nook and cranny of your favorite pasta. So, grab your favorite wooden spoon and let’s make some magic happen. You’ve got this!
The Day My Mac and Cheese Game Changed Forever
I’ll never forget the first time I stumbled upon the concept for this recipe. It was a lazy Sunday afternoon, and I was deep in a rabbit hole of old cooking shows and food documentaries. I landed on an episode featuring the Robertson family, and Willie was talking about his favorite foods. He described his ideal mac and cheese in a way that made my stomach growl on the spot. No breadcrumbs, no time in the oven—just a ridiculously creamy, stovetop cheese sauce that was ready in a flash.
It was a total “aha!” moment. As much as I love a crispy, baked mac, sometimes you just need that immediate, saucy, spoonable comfort. It reminded me of the mac and cheese my dad would whip up for my sister and me after a big soccer game—quick, hot, and always hitting the spot. Willie’s description captured that same spirit of simple, no-fuss satisfaction. I ran to the kitchen, started experimenting with his basic blueprint, and after a few tweaks to make it my own, this legendary recipe was born. It’s been a Feastical favorite ever since, and I have a feeling it’s about to become one of yours, too.
Gathering Your Cheesy Arsenal
This recipe is a beautiful example of how a few simple, high-quality ingredients can create something truly spectacular. Here’s everything you’ll need to bring this creamy dream to life.
- 1 package (16 oz) of Your Favorite Pasta – Elbow macaroni is the classic, but I’m a huge fan of rotini or cavatappi because all those spirals and tubes trap so much glorious sauce. The shape is your canvas!
- 2 ½ cups Sharp Cheddar Cheese, freshly shredded – This is non-negotiable, folks. Pre-shredded cheese is coated in anti-caking agents that can make your sauce grainy. Taking the extra minute to shred a block of good, sharp cheddar yourself is the #1 secret to a silky-smooth sauce. The sharper the cheddar, the bigger the flavor punch.
- 1 stick (½ cup) of Butter – This is the rich, flavorful base of our sauce. It’s comfort food, let’s not skimp.
- ½ cup All-Purpose Flour – Our trusty thickener. When combined with the butter, it creates the “roux,” which is the foundation that will give our sauce its perfect body.
- Salt, Black Pepper, and Garlic Powder to taste – Don’t be shy! Season in layers. I start with about ½ tsp of salt and ¼ tsp each of pepper and garlic powder, then adjust at the end. The cheese is salty, so taste as you go!
- 3–4 cups Milk – Whole milk will give you the creamiest result, but 2% works great too. For a truly decadent, “special occasion” mac, swap in one cup of half-and-half or even heavy cream. You deserve it.
Let’s Get Cooking: Your Path to Creamy Perfection
Okay, team. It’s go-time. This whole process moves quickly once you start, so I like to have all my ingredients measured and ready to go. Chefs call this mise en place—it just means “everything in its place,” and it’s a total game-changer for stress-free cooking.
- Boil the Pasta: Bring a large pot of well-salted water to a rolling boil. You want the water to taste like the sea—this is your one chance to season the pasta from the inside out. Cook your pasta according to the package directions, but aim for al dente (which means “to the tooth”). It should still have a slight bite to it because it’s going to hang out in that hot sauce and soften up a bit more. Drain it, but do NOT rinse it! That starchy surface helps the sauce cling on for dear life.
- Cheese Prep is Key: While the pasta is bubbling away, shred your block of sharp cheddar. This is a great little arm workout! Once it’s all shredded, take about ½ cup of it and set it aside in a small bowl. This is our reserved cheese for that gorgeous, melty topping at the very end.
- Create the Roux: In a large saucepan or Dutch oven, melt the stick of butter over medium heat. Once it’s foaming slightly, sprinkle in the flour and your seasonings (salt, pepper, garlic powder). Now, grab your whisk and get to work! Whisk constantly for about 2-3 minutes. You’re cooking the raw taste out of the flour, and you’ll know it’s ready when the mixture is bubbly and smells a little toasty and nutty. This is the flavor foundation of your sauce.
- Whisk in the Milk: Here’s where the magic happens. Slowly, and I mean slowly, pour in the milk while whisking like your life depends on it. Starting with 3 cups is perfect. This constant whisking is what prevents lumps from forming. Keep whisking until the mixture is smooth and begins to thicken. It should coat the back of a spoon. If it seems too thick for your liking, you can whisk in that extra ½ to 1 cup of milk. Let it come to a gentle simmer (not a rolling boil) until it’s beautifully thickened. Chef’s hack: Drag your finger through the sauce on the back of the spoon. If it leaves a clean line, it’s ready!
- The Grand Cheese Melt: Turn off the heat! This is crucial. Removing the pan from the heat before adding the cheese prevents it from breaking and becoming oily. Now, pour all but that reserved ½ cup of shredded cheddar into the hot sauce. Stir with your whisk or a wooden spoon until the cheese is completely melted and the sauce is velvety and smooth. Take a second to admire your work. You just made a perfect béchamel cheese sauce from scratch!
- Bring It All Home: Add the drained, cooked pasta to the pot of cheesy sauce. Gently fold everything together until every single piece of pasta is gloriously coated. The sound alone is pure comfort.
- The Finishing Touch: Transfer your creamy mac and cheese to a serving bowl and immediately sprinkle that last ½ cup of reserved shredded cheese over the top. The residual heat will melt it into a beautiful, gooey blanket. Serve it up hot and watch the smiles appear.
How to Serve Up This Masterpiece
This mac and cheese is a star all on its own, but a little presentation goes a long way! I love serving it family-style right out of a big, colorful ceramic bowl—it feels homey and inviting. For a solo dinner, a deep pasta bowl is your best friend.
While it’s the ultimate main dish, it also plays incredibly well with others. It’s the perfect sidekick for a pile of saucy pulled pork, some juicy grilled chicken, or even a simple, crispy-skinned pork chop. For a true Southern-style feast, pair it with some collard greens and a slice of cornbread to sop up every last bit of sauce. And if you’re feeling fancy, a light sprinkle of chopped fresh chives or a crack of black pepper on top right before serving adds a lovely pop of color and freshness.
Make It Your Own: Delicious Twists & Swaps
The beauty of this base recipe is that it’s a fantastic launchpad for your own culinary creativity. Once you’ve mastered the classic, try one of these fun variations!
- The “Kitchen Sink” Upgrade: Stir in ½ cup of cooked, crumbled bacon and ¼ cup of sliced green onions along with the pasta. A classic combo that never fails.
- Spicy Buffalo Style: For a kick, swap 1 cup of the cheddar for pepper jack cheese. Once the sauce is made, stir in ¼ cup of your favorite buffalo sauce and a handful of chopped, cooked chicken. Finish with a drizzle of blue cheese or ranch dressing.
- Gourmet Mushroom & Truffle: Sauté 8 oz of sliced cremini mushrooms in a separate pan until golden brown. Stir them into the finished mac and cheese along with 1 teaspoon of truffle oil. So elegant, so delicious.
- Gluten-Free & Lighter Swaps: This recipe is wonderfully adaptable! Use your favorite gluten-free pasta and a 1:1 gluten-free flour blend for the roux. For a lighter version, you can use a lower-fat milk and reduce the butter by a tablespoon or two, though I always recommend full-fat for the creamiest result.
Beau’s Back-Pocket Tips & Stories
Over the years, this recipe has become my go-to for potlucks, family gatherings, and those “I need mac and cheese NOW” nights. I’ve learned a few things along the way. First, don’t stress the roux. If you get a few tiny lumps, just keep whisking as you add the milk—they’ll almost always cook out. If you’re really worried, you can always pour the finished sauce through a fine-mesh sieve before adding the cheese. (But that’s our little secret).
The funniest kitchen fail I ever had with this was the time I was talking to my mom on the phone, got distracted, and accidentally used powdered sugar instead of flour for the roux. Let me save you the trouble: it does NOT work. We ended up ordering pizza, but we still laugh about my “dessert mac and cheese” to this day. Moral of the story: always label your pantry containers!
Your Mac and Cheese Questions, Answered!
Q: My cheese sauce turned out grainy/oily. What happened?
A: This is almost always because the heat was too high when you added the cheese. Remember: off the heat is the rule for melting cheese into a sauce. Also, double-check that you’re using freshly shredded cheese from a block, as pre-shredded bags can cause this issue.
Q: Can I make this ahead of time?
A: You can! The sauce will thicken as it sits. To reheat, place it in a saucepan over low heat and whisk in a splash of milk or cream until it’s smooth and creamy again.
Q: My sauce is too thin! How can I thicken it?
A> No worries! Let it simmer for a few more minutes, whisking constantly. The roux will continue to do its job. If it’s still too thin, make a “slurry” by mixing 1 tablespoon of flour with 2 tablespoons of cold milk until smooth, then whisk it into the simmering sauce. Cook for another 2 minutes until thickened.
Q: Can I use different types of cheese?
A> Absolutely! A combination of cheeses is fantastic. Try a mix of sharp cheddar for bite, Monterey Jack for meltability, and a little Gruyère for a nutty, sophisticated flavor. Just make sure the total volume stays around 2 ½ cups.

Willie’s Creamy Mac and Cheese Recipe
Description
-
Ditch the blue box forever. This stovetop mac and cheese is rich, creamy, and velvety, clinging to every nook of your pasta. Inspired by Willie Robertson, it’s comfort food in its purest form—quick, satisfying, and impossible to resist.
Ingredients
-
16 oz pasta (elbows, rotini, or cavatappi)
-
2 ½ cups sharp cheddar cheese, freshly shredded
-
1 stick (½ cup) butter
-
½ cup all-purpose flour
-
3–4 cups milk (whole milk preferred; can swap 1 cup for half-and-half for extra richness)
-
Salt, black pepper, and garlic powder, to taste
Optional Mix-Ins & Toppings:
-
½ cup cooked, crumbled bacon
-
¼ cup sliced green onions
-
¼ cup buffalo sauce & cooked chicken
-
8 oz sautéed mushrooms + 1 tsp truffle oil
-
Extra shredded cheese for topping
Instructions
Bring a large pot of salted water to a boil. Cook pasta al dente according to package directions. Drain, but do not rinse. Set aside.
While pasta cooks, shred the cheddar. Reserve ½ cup for topping.
In a large saucepan, melt butter over medium heat. Whisk in flour, salt, pepper, and garlic powder. Cook 2–3 minutes until bubbly and slightly toasty.
Slowly whisk in 3 cups milk until smooth. Simmer gently until thickened, coating the back of a spoon. Add extra milk if needed for desired consistency.
Remove pan from heat. Stir in shredded cheddar (except reserved ½ cup) until smooth and creamy.
Add drained pasta to the sauce. Gently fold to coat evenly.
Transfer to a serving bowl and sprinkle reserved cheese on top. Let it melt slightly before serving. Enjoy immediately.
Notes
-
Grainy or oily sauce? Add cheese off the heat; use freshly shredded cheese.
-
Too thin? Simmer longer or whisk in a slurry (1 tbsp flour + 2 tbsp milk).
-
Make ahead: Sauce will thicken. Reheat gently with a splash of milk.
Let’s Talk Nutrition (The Real, Comfort Food Kind)
Look, we’re all friends here. This is a rich, indulgent, homestyle comfort food recipe, and it’s not pretending to be a salad. It’s meant to be enjoyed as part of a balanced diet. It’s a fantastic source of calcium and protein from all that glorious cheese and milk, and the pasta provides energizing carbohydrates to fuel your day.
As a general guide, one serving (based on 6 servings total) provides approximately: 480 calories, 42g of carbohydrates, 18g of protein, and 28g of fat. Remember, these are estimates and can vary based on the specific brands of ingredients you use and any modifications you make. If you’re watching your sodium, you can reduce the added salt and use a lower-sodium cheese. The most important ingredient, however, is the joy it brings to your table. So serve it up, savor every bite, and enjoy the moment!
You Did It! Now, Dig In.
And there you have it! You’ve just created a from-scratch, incredibly creamy mac and cheese that’s miles ahead of anything from a box. I’m so proud of you for taking the time to make something truly special for yourself and your people. This is what Feastical is all about—taking those simple, satisfying recipes and making them with love.
I’d love to hear how your Willie’s Creamy Mac and Cheese turned out! Did you add any fun mix-ins? Tag me on social @Feastical or leave a comment below with your creations. Until next time, keep your whisks ready and your hearts full. Happy cooking!
Final Thoughts:
So, the next time that blue box calls your name, remember this: in the same 15 minutes, you can have something real, something creamy, and something made entirely by you. This isn’t just a recipe; it’s your new secret weapon for turning an ordinary night into a cheesy, unforgettable celebration. The box will always be there, but this mac and cheese? This is a memory in the making. Now, go forth and cheesy!

Yellow Cheesy Cake : Vintage Cream Cheese Cake Hack
Your New Favorite Dessert is a Happy Little Accident
Hey there, friend! Beau here, welcoming you back to my kitchen at Feastical. You know me—I’m all about those recipes that feel like a warm hug, the ones that bring people together without stressing you out. Today, we’re whipping up a dessert that’s so simple, so soul-satisfyingly good, it feels like a secret we all should have been let in on years ago. I’m talking about my Yellow Cheesy Cake.
Now, if you’re picturing a classic, fussy New York-style cheesecake with a water bath and a potential for cracks, take a deep breath and let that go. This is the opposite of that. This is a vintage, grandma-style hack that uses a box of yellow cake mix as its starting point. But wait—before you scroll on, hear me out! This isn’t just a cake mix cake. By folding in creamy, tangy cream cheese and a dollop of rich sour cream, we transform that humble box into something magical: a dense, moist, and incredibly tender cake that tastes just like the soul of a cheesecake, but with the easy-breezy attitude of a weeknight snack.
It’s soft, it’s creamy, and it has this melt-in-your-mouth texture that will have you sneaking back to the pan for just one more “forkful.” It’s the perfect bridge between a casual potluck and a cozy family dinner. So, grab your favorite mixing bowl and that trusty spatula (you know, the one that’s always hiding in the back of the drawer). We’re about to make a little magic happen.
The Day Grandma’s Recipe Box Spilled Its Secrets
This recipe takes me right back to my Aunt Carol’s sun-drenched kitchen. She was the queen of “semi-homemade” before it was even a thing. One sweltering summer afternoon, she was supposed to bring a dessert to a family reunion. The problem? Her air conditioner was on the fritz, and the last thing she wanted to do was fuss with a complicated, hours-long recipe.
I watched her, a whirlwind of flour and determination, glance at a box of yellow cake mix and then at a block of cream cheese softening on the counter. With a mischievous grin, she declared, “We’re experimenting, Beau!” What came out of the oven that day was a revelation. It was golden, slightly crisp on the edges, but impossibly soft and rich in the middle. It had the familiar comfort of a birthday cake but with a sophisticated, tangy depth we all recognized from cheesecake. It was an instant hit, and it’s been a staple in my recipe arsenal ever since. It’s a beautiful reminder that the best recipes aren’t always the most complicated—they’re the ones born out of necessity, a little creativity, and a whole lot of love.
Gathering Your Kitchen Crew: The Ingredients
Here’s the beautiful part: you only need a handful of simple ingredients to create this masterpiece. Let’s break them down, because knowing your “why” makes the cooking so much more fun.
- 1 box Yellow Cake Mix: This is our foundation. It brings the perfect vanilla-buttery flavor and the structure we need. Don’t use a “pudding in the mix” variety if you can avoid it; the standard one works perfectly. Chef’s Insight: The pre-mixed flour, leavening, and sugar in the box are our best friends for a no-fail start.
- 2 large Eggs: Our binding agents! They add richness, structure, and that beautiful golden color to the crumb. Make sure they’re at room temperature for a smoother, more cohesive batter.
- 3–4 tbsp Sour Cream: This is the secret weapon for incredible moisture and a subtle tang. The fat content is key here. Substitution Tip: No sour cream? Full-fat Greek yogurt is a fantastic stand-in.
- ½ block (4 oz) Cream Cheese, softened: The star of the show! This is what gives our cake that iconic “cheesy” flavor and dense, luxurious texture. Softening it is non-negotiable—if it’s cold, you’ll end up with lumpy batter. Leave it on the counter for a good hour before you start.
- Water or Buttermilk, as needed: We use this to bring the batter to the perfect, thick-but-pourable consistency. Chef’s Hack: I highly recommend buttermilk! Its acidity tenderizes the gluten in the cake mix, making for an even more tender crumb and adding another layer of tangy flavor. If you only have water, that’s totally fine—it’ll still be delicious!
Let’s Get Baking: The Step-by-Step Magic
Ready to see how this all comes together? It’s a one-bowl wonder, my friends. Follow these steps, and you’ll be a hero in under an hour.
- Preheat and Prep. Fire up that oven to a cozy 350°F (175°C). While it’s warming up, generously grease your 9×13 inch baking pan or a standard round cake pan. I’m a big fan of using a little butter and a dusting of flour, but a good non-stick spray works wonders, too. Chef’s Tip: For super easy removal, line your greased pan with a sheet of parchment paper, letting the edges hang over the sides. You’ll thank me later!
- The Big Mix. In a large mixing bowl, combine the yellow cake mix, eggs, sour cream, and that all-important softened cream cheese. Now, here’s where your arm gets a little workout! Using a hand mixer (or a sturdy whisk and some determination), beat everything on medium speed until it’s just combined. You want a thick, almost cookie-dough-like consistency at this stage. A few small lumps of cream cheese are okay—they’ll melt into lovely little pockets of creaminess.
- Find the Flow. This is where you become the artist. Start adding your water or buttermilk, a tablespoon or two at a time, mixing after each addition. We’re looking for a thick but pourable batter—think a slow-moving lava kind of vibe. You may not need the full amount listed, or you might need a splash more. Trust your instincts! The batter should plop off a spoon rather than run off.
- Pan and Smooth. Pour your beautiful batter into your prepared pan. Use a spatula or the back of a spoon to spread it into an even layer, making sure you get right into the corners. Little Chef Hack: Give the pan a few gentle taps on the countertop to release any large air bubbles, which helps us get an even bake.
- Bake to Golden Perfection. Slide that pan into the center of your preheated oven and let the magic happen for 35-40 minutes. You’ll know it’s done when the top is a gorgeous golden brown, the edges are just starting to pull away from the pan, and a toothpick inserted into the center comes out clean or with a few moist crumbs attached. Watchful Eye: All ovens are different, so start checking at the 30-minute mark!
- The Hardest Part: The Cool Down. I know, the aroma is intoxicating and you want to dive right in. But patience, young grasshopper! Let the cake cool in the pan on a wire rack for at least 20-30 minutes. This allows the structure to set, making it much easier to slice and serve.
How to Serve This Slice of Sunshine
Now for the fun part: eating! This Yellow Cheesy Cake is incredibly versatile. Here are a few of my favorite ways to dress it up (or down!).
Keep it Simple: Honestly, a square of this cake, still slightly warm from the pan, is absolute perfection all on its own. The flavors are so rich and comforting, it doesn’t need a thing.
Classic & Creamy: A generous dollop of freshly whipped cream and a handful of fresh berries (raspberries or strawberries are my go-to) cuts through the richness beautifully and adds a bright, fresh note.
Frosting Fanatic? You can’t go wrong with a simple vanilla glaze (just mix powdered sugar with a little milk and vanilla extract) or even a smear of store-bought cream cheese frosting for the ultimate cheesy experience. Drizzle it over the top while the cake is still warm so it soaks in a little.
Pro Plating: For a dinner party, slice a square, place it slightly off-center on a white plate, dust it with powdered sugar, add a mint sprig, and a zigzag of raspberry coulis. Looks fancy, took seconds. Your secret is safe with me.
Make It Your Own: Delicious Twists & Swaps
Once you’ve mastered the base recipe, the playground is open! Here are a few ways to mix it up and keep things exciting.
- Lemon Zest Sunshine: Add the zest of one large lemon to the batter. The bright, citrusy pop works wonders with the creamy tang of the cheese.
- Chocolate Chip Cheesy Dream: Fold in a heaping ½ cup of semi-sweet chocolate chips right before pouring the batter into the pan. It’s like a cookie and a cake had the most delicious baby.
- Fruity Swirl Sensation: Before baking, drop spoonfuls of your favorite fruit preserves (raspberry, cherry, or apricot are fantastic) over the top of the batter. Use a knife or toothpick to gently swirl it in for a beautiful marbled effect.
- Gluten-Free & Dairy-Smart: You can absolutely make this work for your dietary needs! Use a certified gluten-free yellow cake mix. For the dairy, swap the sour cream for a plant-based alternative and use a vegan cream cheese and butter substitute. The texture might vary slightly, but the delicious spirit will remain.
- Spice It Up: For a fall-inspired version, add a teaspoon of cinnamon and a pinch of nutmeg to the dry cake mix. It’s like a cozy snickerdoodle in cake form.
Beau’s Kitchen Chronicles: A Few Parting Thoughts
This recipe has been with me through so many life moments—it’s been the star of backyard barbecues, the comfort food after a long day, and the “oh, you shouldn’t have!” dish at countless potlucks. Over the years, I’ve learned it’s virtually foolproof. I once accidentally used a whole block of cream cheese instead of a half (I was chatting and not paying attention!), and you know what? It was even richer and more decadent! A happy little accident, as Bob Ross would say.
The beauty of this Yellow Cheesy Cake is its flexibility and its heart. It never fails to bring a smile. So don’t be afraid to make it your own. Baking is about joy, not just rules.
Your Questions, Answered!
I’ve gotten a lot of questions about this recipe over the years. Here are the most common ones to ensure your baking success.
Q: My batter was really lumpy. What did I do wrong?
A: This almost always happens when the cream cheese wasn’t fully softened. Make sure to take it out of the fridge at least an hour beforehand. If you’re in a pinch, you can microwave it for 10-15 seconds on a plate, but be careful not to melt it! For existing lumps, just keep mixing—they’ll mostly incorporate.
Q: Can I make this into cupcakes?
A: Absolutely! This recipe makes fantastic, dense cupcakes. Line a muffin tin with liners, fill them ⅔ full, and bake for 18-22 minutes, or until a toothpick comes out clean. They’re a huge hit with kids and are perfect for portioning.
Q: The middle of my cake sunk a little after baking. Is it ruined?
A: Not at all! A slight dip in the center is pretty common with this denser cake and is often due to the high moisture content from the cream cheese and sour cream. It’s certainly not a flaw in flavor! This is actually the perfect little well for holding extra whipped cream or glaze. No one will ever know it wasn’t planned.
Q: How should I store leftovers?
A> Cover the pan tightly with plastic wrap or transfer slices to an airtight container. It will keep beautifully at room temperature for 2 days, or in the fridge for up to 5 days. I actually love it cold straight from the fridge—the texture becomes even more fudgy!

Yellow Cheesy Cake : Vintage Cream Cheese Cake Hack
Description
This isn’t your fussy, crack-prone cheesecake. This is a dense, moist, and tender cake with all the rich, tangy flavor of cheesecake, made simple with a humble box of yellow cake mix. With cream cheese, sour cream, and a few clever tricks, this dessert is a happy little accident that will have everyone coming back for more.
Ingredients
-
1 box yellow cake mix (regular, no pudding-in-the-mix)
-
2 large eggs, room temperature
-
3–4 tbsp sour cream (or full-fat Greek yogurt)
-
½ block (4 oz) cream cheese, softened
-
2–4 tbsp water or buttermilk (to adjust batter consistency)
Optional Add-ins & Toppings:
-
Fresh berries or fruit preserves
-
Whipped cream
-
Powdered sugar or vanilla glaze
-
Chocolate chips
-
Spices: cinnamon, nutmeg, or lemon zest
Instructions
Preheat oven to 350°F (175°C). Grease a 9×13-inch pan or standard cake pan (line with parchment for easy removal).
In a large bowl, beat together eggs, sour cream, and softened cream cheese until smooth.
Add the yellow cake mix to the bowl. Beat on medium speed until combined. Batter will be thick—small lumps of cream cheese are okay.
Add water or buttermilk 1 tbsp at a time, mixing gently, until the batter is thick but pourable.
Transfer batter to the prepared pan. Spread evenly, and tap gently to release air bubbles.
Bake for 35–40 minutes, or until the top is golden and a toothpick inserted in the center comes out clean or with a few moist crumbs. Start checking at 30 minutes.
Cool for at least 20–30 minutes before slicing. Serve warm or at room temperature. Add whipped cream, fresh berries, or a simple glaze if desired.
Notes
-
Lumpy batter? Cream cheese may not have been fully softened. Mix a bit longer; small lumps will bake in beautifully.
-
Can this be cupcakes? Yes! Line a muffin tin, fill ⅔ full, bake 18–22 minutes.
-
Sinking middle? Common for dense cakes with high moisture—perfect for holding toppings like whipped cream.
-
Storage: Cover tightly; keeps 2 days at room temperature, 5 days refrigerated. Delicious cold!
Nutrition
- Calories: 240 Cal Per Serving
- Sugar: 15g
- Fat: 12g
- Carbohydrates: 28g
- Protein: 3g
Let’s Talk Nutrition (The Real Talk!)
Look, I’m a firm believer that food is about nourishment for the soul as much as it is for the body. This Yellow Cheesy Cake is a dessert, through and through—a treat to be savored and shared with joy. It’s not a salad, and we’re not going to pretend it is!
That said, here’s a general nutritional breakdown per slice (based on 12 servings, without any added frosting or glaze, and using the ingredients listed). Remember, these are estimates and can vary based on the specific brands you use.
- Calories: ~240
- Carbohydrates: 28g
- Fat: 12g
- Sugar: 15g
- Protein: 3g
My philosophy? Enjoy a slice, share the rest, and savor every single, blissful bite without an ounce of guilt. Life’s too short not to enjoy the simple, cheesy pleasures.
One Last Forkful of Wisdom
And there you have it, my friend. The wonderfully simple, endlessly adaptable Yellow Cheesy Cake. It’s proof that you don’t need a culinary degree or a pantry full of obscure ingredients to create something truly special and memorable in the kitchen. It’s about the joy of mixing, the anticipation as it bakes, and the shared happiness as you pass a plate to someone you love.
I’d love to hear how your cake turns out! Did you add a twist? Did it become an instant family favorite? Tag me on social @Feastical or drop a comment on the blog. Sharing our kitchen stories is my favorite part of this whole delicious journey.
Until next time, keep your whisks busy and your hearts full.
– Beau

Fluffy Sweet Potato Pancakes
Fluffy Sweet Potato Pancakes: Your New Favorite Comfort Breakfast
Hey friends, Beau here from Feastical! Let’s talk about one of life’s simple, soul-warming pleasures: a tall stack of pancakes. But we’re not just making any pancakes today. We’re taking that cozy weekend breakfast and giving it a glorious, autumnal upgrade that will have everyone asking for seconds. Get ready to fall head over heels for my unbelievably Fluffy Sweet Potato Pancakes.
Imagine this: pancakes that are tender, cloud-like, and carry the gentle, earthy sweetness of sweet potatoes, all warmed up with a hint of cinnamon and brown sugar. They’re golden on the outside, impossibly soft on the inside, and they make your kitchen smell like a hug feels. This isn’t just a recipe; it’s a mood. It’s for those slow Saturday mornings when you have time to savor a cup of coffee and the sound of the sizzle on the griddle. It’s for impressing your in-laws at a fall brunch or for treating yourself on a crisp Tuesday because, hey, you deserve it.
The best part? These pancakes come together with a few simple tricks I’ve picked up over the years. We’re using a quick “hack” for buttermilk and mastering the art of the perfect, thick batter. No fancy skills required—just a love for good, feel-good food. So, tie on your apron, find that trusty spatula, and let’s turn those humble sweet potatoes into the most spectacular breakfast you’ve had all season.
The Pancake That Started It All
This recipe takes me right back to my grandma’s kitchen. She was a wizard with leftovers, a true kitchen magician. The day after a big holiday dinner, with a bowl of leftover mashed sweet potatoes sitting in the fridge, she’d never let it go to waste. With a twinkle in her eye, she’d declare, “Time for magic,” and start pulling out the flour and eggs.
I’d stand on a little stool next to her, watching as she transformed those humble leftovers into a stack of golden, speckled pancakes that felt like a celebration all over again. That was my first lesson in kitchen alchemy—seeing how one ingredient could play two delicious, yet completely different, roles. It taught me that cooking isn’t just about following a recipe; it’s about creativity, resourcefulness, and infusing your food with love and a little bit of story. Every time I make these, I’m eight years old again in her sunny kitchen, and that’s a feeling worth sharing with all of you.
Gathering Your Sunshine Ingredients
Here’s your shopping list for fluffy perfection. Remember, great pancakes start with great ingredients, and I’ve got some insider tips for each one to make sure your batch is a total winner.
- 1 cup mashed sweet potato: This is our star! I highly recommend baking or steaming your sweet potatoes for the deepest, richest flavor. Canned puree works in a pinch, but it can be a bit wetter, so you might need a touch more flour. Just make sure it’s plain, not the pie-filling kind!
- 2 ¼ cups all-purpose flour: The foundation of our fluffy structure. For a heartier pancake, you can swap in half whole wheat pastry flour, which keeps things light.
- 2 tsp baking powder + ½ tsp baking soda: Our dynamic leavening duo! The baking powder gives the initial lift, and the baking soda reacts with our “quick buttermilk” for an extra burst of airiness. Check the dates on yours—fresh leaveners are non-negotiable for fluffy pancakes.
- ½ tsp salt + 1 ½ tsp cinnamon: Salt is crucial for balancing all the sweetness, and cinnamon brings that warm, cozy hug. Feel free to use pumpkin pie spice here for an even more complex flavor party.
- 2 tbsp brown sugar: This adds a molasses-kissed sweetness that pairs perfectly with the sweet potato. You can use white sugar, but brown is my secret weapon here.
- 2 large eggs, room temperature: Room temp eggs incorporate more evenly into the batter, giving us a better texture. Just pop them in a bowl of warm water for 5 minutes if you forgot to take them out!
- 1 ½ cups milk + 2 tbsp apple cider vinegar: This is our genius “quick buttermilk” hack! The vinegar slightly sours the milk, creating a tangy flavor and a chemical reaction with the baking soda that makes our pancakes incredibly tender and light.
- ¼ cup melted butter: For richness and that irresistible buttery flavor. If you’re dairy-free, coconut oil or a neutral vegetable oil works beautifully.
- 1 tsp vanilla extract (optional twist): I say “optional,” but I always add it. Vanilla is the background singer that makes the whole band sound better, rounding out all the other flavors.
Let’s Make Some Magic: Step-by-Step
Okay, team, let’s get cooking. Follow these steps, and you’ll be a pancake pro in no time. I’m sharing all my little chef hacks along the way!
- Create Your “Quick Buttermilk.” In a small bowl or liquid measuring cup, combine the milk and apple cider vinegar. Give it a quick stir and let it sit for 5-10 minutes. You’ll see it start to curdle and thicken slightly—that’s exactly what we want! This little wait is the first secret to maximum fluffiness. Chef’s Hack: If you have real buttermilk on hand, you can use 1 ½ cups of that and skip the vinegar! The result is just as fantastic.
- Whisk the Dry Team. In a large mixing bowl, add your flour, baking powder, baking soda, salt, cinnamon, and brown sugar. Grab a whisk and give this a really good, thorough whisking. This isn’t just about mixing; it’s about aerating the flour and making sure those leaveners are evenly distributed. No one wants a pocket of baking soda in their pancake! Chef’s Hack: You can sift the dry ingredients if you want, but a vigorous whisking does the trick for me and saves on washing a sifter.
- Unite the Wet Team. In a separate, medium-sized bowl, whisk your eggs first until they’re smooth. Then, add in the mashed sweet potato, vanilla extract, and the melted (but slightly cooled) butter. Pour in your “buttermilk” mixture and whisk it all together until it’s relatively smooth. A few small lumps of sweet potato are totally fine—they add character!
- The Grand Batter Union. Now, pour the wet ingredients into the bowl with the dry ingredients. Switch to a spatula or a wooden spoon for this part. Gently fold the mixture together. I cannot stress this enough: MIX UNTIL *JUST* COMBINED. A few streaks of flour are okay! Overmixing is the #1 enemy of fluffy pancakes—it develops the gluten in the flour and makes them tough. Your batter will be thick and spoonable, and that’s perfect. Chef’s Hack: Let the batter rest for 5 minutes after mixing. This allows the flour to fully hydrate and the leaveners to start working, resulting in a taller, more tender pancake.
- Heat and Grease Your Stage. Place a non-stick skillet or griddle over medium heat. I like to use a knob of butter for greasing—it gives the edges a delicious, crispy lace. To test if your pan is ready, flick a few drops of water onto it. If they sizzle and dance, you’re good to go!
- Cook to Golden Perfection. Using a ¼-cup measuring cup or a large ice cream scoop, drop portions of batter onto the hot skillet. This ensures all your pancakes are the same size and cook evenly. Don’t press them down! Let them do their thing. You’ll know it’s time to flip when bubbles form on the surface and the edges look set, about 2-3 minutes. Chef’s Hack: Lift the edge gently with your spatula to check for a golden-brown color before committing to the flip.
- The Flip Side. Slide your spatula underneath confidently and flip each pancake in one smooth motion. Cook for another 2-3 minutes on the second side until it’s also golden brown and the pancake is cooked through. You can peek by pressing the center gently—if it springs back, it’s done.
Let’s Dish ‘Em Up!
Now for the best part: serving these gorgeous, golden stacks. Presentation is part of the fun, so let’s make it beautiful!
I love to stack three pancakes high on a warm plate. The warmth from the plate keeps your breakfast cozy until the last bite. Drizzle a generous river of pure maple syrup over the top—the real stuff makes all the difference. For a little crunch and elegance, sprinkle on some toasted pecans or walnuts. A pat of whipped butter melting into the crevices is absolutely mandatory in my book. And for a final touch of “wow,” a light dusting of powdered sugar through a fine-mesh sieve looks like a fresh snowfall and adds a touch of extra sweetness.
For a full feast, pair these pancakes with some crispy bacon or savory breakfast sausage to balance the sweetness. A side of fresh fruit, like sliced bananas or berries, adds a bright, fresh note. And don’t forget a big pot of hot coffee or a pot of spiced chai tea to complete the ultimate cozy morning experience.
Make It Your Own: Fun Recipe Twists
Once you’ve mastered the classic, feel free to get creative! This recipe is a wonderful canvas. Here are a few of my favorite variations:
- Pecan Praline: Fold ½ cup of chopped toasted pecans into the batter right at the end. The toasty, nutty flavor is a dream with the sweet potato.
- Gingerbread Spice: Swap the cinnamon for a blend of 1 tsp ginger, ½ tsp cinnamon, and a pinch of cloves and nutmeg. It tastes like a gingerbread cookie in pancake form!
- Apple Cinnamon: Fold in ¾ cup of finely chopped apple (like Granny Smith for a little tartness) and a dash of extra cinnamon. The little bites of soft, warm apple are pure bliss.
- Gluten-Free & Dairy-Free Friendly: Use a 1:1 gluten-free flour blend and your favorite non-dairy milk (oat milk is fantastic). Replace the butter with melted coconut oil. Easy as pie—or, well, pancakes!
- Orange Zest Zing: Add the zest of one orange to the wet ingredients. The bright citrus note cuts through the richness and makes the flavor pop in a whole new way.
Beau’s Chef’s Notes
This recipe has evolved so much since my grandma’s first batch. I’ve tweaked the spices, perfected the buttermilk ratio, and learned the hard way that overmixing is a pancake’s worst nightmare (I’ve made a few hockey pucks in my time!). One of my favorite kitchen memories is the time I accidentally used smoked paprika instead of cinnamon. Let me tell you, that was a… *spicy* surprise we still laugh about. It taught me to always taste my spices first!
These pancakes also freeze like a dream. Let them cool completely, then layer them between parchment paper in a freezer bag. On a busy morning, just pop one or two straight into the toaster for a hot, homemade breakfast in minutes. It’s like having a little bit of weekend, any day of the week.
Your Pancake Questions, Answered!
Over the years, I’ve gotten a lot of questions about this recipe. Here are the answers to the most common ones to ensure your pancake success.
Q: My pancakes are dense and gummy. What happened?
A: This is almost always a case of overmixing! Remember, a few lumps are your friend. Also, make sure your baking powder and soda are fresh. If they’re old, they won’t provide the necessary lift.
Q: Can I make the batter the night before?
A: I don’t recommend it for fluffiness. The leavening agents will activate when mixed and lose their oomph overnight, leading to flat pancakes. Instead, you can mix the dry and wet ingredients separately the night before and combine them in the morning for a quick start.
Q: Why are my pancakes burning on the outside but raw inside?
A: Your heat is too high! Cooking pancakes is a patient person’s game. Lower the heat to medium or even medium-low. It takes a little longer, but you’ll get that perfect golden-brown exterior and a fully cooked, fluffy interior every time.
Q: My sweet potato mash is really wet. What should I do?
A> Great question! If you’ve steamed or boiled your sweet potatoes, they tend to hold more water. You can spread the mash on a plate and let it cool completely to evaporate some moisture, or add an extra 1-2 tablespoons of flour to the dry ingredients to compensate.

Fluffy Sweet Potato Pancakes
Description
These pancakes are tender, cloud-like, and lightly sweet, infused with the earthy warmth of sweet potatoes and a hint of cinnamon. Perfect for a cozy weekend brunch, a fall breakfast, or just treating yourself on a crisp morning. With a few clever tricks—like a quick buttermilk hack—you’ll have golden, fluffy pancakes every time.
Ingredients
-
1 cup mashed sweet potato (baked or steamed; plain, not pie filling)
-
2 ¼ cups all-purpose flour (or half whole wheat pastry flour for a heartier pancake)
-
2 tsp baking powder
-
½ tsp baking soda
-
½ tsp salt
-
1 ½ tsp cinnamon (or pumpkin pie spice)
-
2 tbsp brown sugar
-
2 large eggs, room temperature
-
1 ½ cups milk + 2 tbsp apple cider vinegar (quick buttermilk)
-
¼ cup melted butter (or coconut/neutral oil for dairy-free)
-
1 tsp vanilla extract (optional)
Optional Mix-ins & Toppings:
-
Toasted pecans or walnuts
-
Maple syrup, butter, or Greek yogurt
-
Fresh berries, banana slices
-
Powdered sugar dusting
Instructions
Combine milk and apple cider vinegar in a small bowl. Let sit 5–10 minutes until slightly thickened.
In a large bowl, whisk together flour, baking powder, baking soda, salt, cinnamon, and brown sugar.
In a medium bowl, whisk eggs, mashed sweet potato, melted butter, vanilla, and the quick buttermilk until mostly smooth. Small lumps of sweet potato are fine.
Pour wet ingredients into dry. Gently fold until just combined. Don’t overmix—batter should be thick and spoonable. Let rest 5 minutes.
Preheat over medium heat and lightly grease with butter or oil. Test heat by flicking water—if it dances, you’re ready.
Use a ¼-cup measuring cup to drop batter onto the skillet. Cook 2–3 minutes until bubbles form and edges look set. Flip and cook another 2–3 minutes until golden and cooked through.
Stack pancakes, drizzle with maple syrup, add a pat of butter, sprinkle nuts, or dust with powdered sugar. Fresh fruit or yogurt makes a delightful addition.
Notes
-
Pecan Praline: Fold ½ cup toasted pecans into batter.
-
Gingerbread Spice: Swap cinnamon for 1 tsp ginger, ½ tsp cinnamon, and a pinch of cloves & nutmeg.
-
Apple Cinnamon: Add ¾ cup finely chopped apple + extra cinnamon.
-
Gluten-Free & Dairy-Free: Use 1:1 gluten-free flour and non-dairy milk; replace butter with coconut oil.
-
Orange Zest: Add zest of one orange to wet ingredients for a bright, citrusy note.
Nutrition
- Calories: 140 Cal Per Serving
- Fat: 5 g
- Carbohydrates: 20 g
- Protein: 3 g
Nourishing Your Body & Soul
While we’re all about indulgence here at Feastical, it’s always nice to know what’s fueling your fun. These pancakes pack a bit more nutritional punch than your standard variety, thanks to our star ingredient.
Sweet potatoes are a fantastic source of Vitamin A (in the form of beta-carotene, which gives them that beautiful orange color), Vitamin C, and fiber. Using whole ingredients like eggs and milk adds protein to help keep you full. Of course, toppings like butter and syrup add extra calories and sugar, so feel free to adjust those to your liking. A dollop of Greek yogurt and some fresh berries is a delicious, protein-packed alternative to classic syrup!
Approximate Nutrition Per Pancake (based on 12 pancakes): Calories: 140, Carbs: 20g, Fat: 5g, Protein: 3g, Fiber: 1g. Remember, this is an estimate and can vary based on your specific ingredients and toppings.
Your New Go-To Comfort Breakfast
And there you have it, friends—my ultimate recipe for Fluffy Sweet Potato Pancakes. This is more than just a list of ingredients and steps; it’s an invitation to slow down, get a little flour on your hands, and create a moment of pure joy around the breakfast table.
I hope this recipe becomes a cherished part of your kitchen story, just like it is in mine. It’s a testament to the magic that can happen when you combine simple ingredients with a little bit of love and a whole lot of appetite. So, the next time you see a sweet potato, think beyond the fries and casseroles. Think of a tall, golden stack of fluffy pancakes waiting to make your morning magnificent.
I’d love to hear how your pancakes turn out! Tag me on social @Feastical or leave a comment over on the blog. Now, go forth and get your flip on!
With a full heart and an even fuller plate,
Beau
Final Thoughts: More Than Just a Pancake
So there you have it, friends—your new secret weapon for the coziest of mornings. These Fluffy Sweet Potato Pancakes are so much more than a meal; they’re a feeling on a plate. They’re the smell that draws everyone to the kitchen, the taste that defines a slow, happy morning, and the recipe you’ll find yourself reaching for again and again.
This isn’t just about creating a delicious breakfast. It’s about carrying forward a beautiful tradition of kitchen magic, of turning simple, humble ingredients into something extraordinary. It’s about creating your own memories, whether that’s a quiet moment for yourself with a cup of coffee or a loud, joyful brunch surrounded by loved ones.
I hope this recipe brings as much warmth and joy to your kitchen as it has to mine. It’s a little piece of my family’s story, and now, I’m so excited for it to become a part of yours.
Now, I’d love to hear from you! Did you add your own twist? Did your kitchen smell like a fall-scented hug? Share your pancake masterpieces with me over on Instagram @Feastical. Happy cooking!
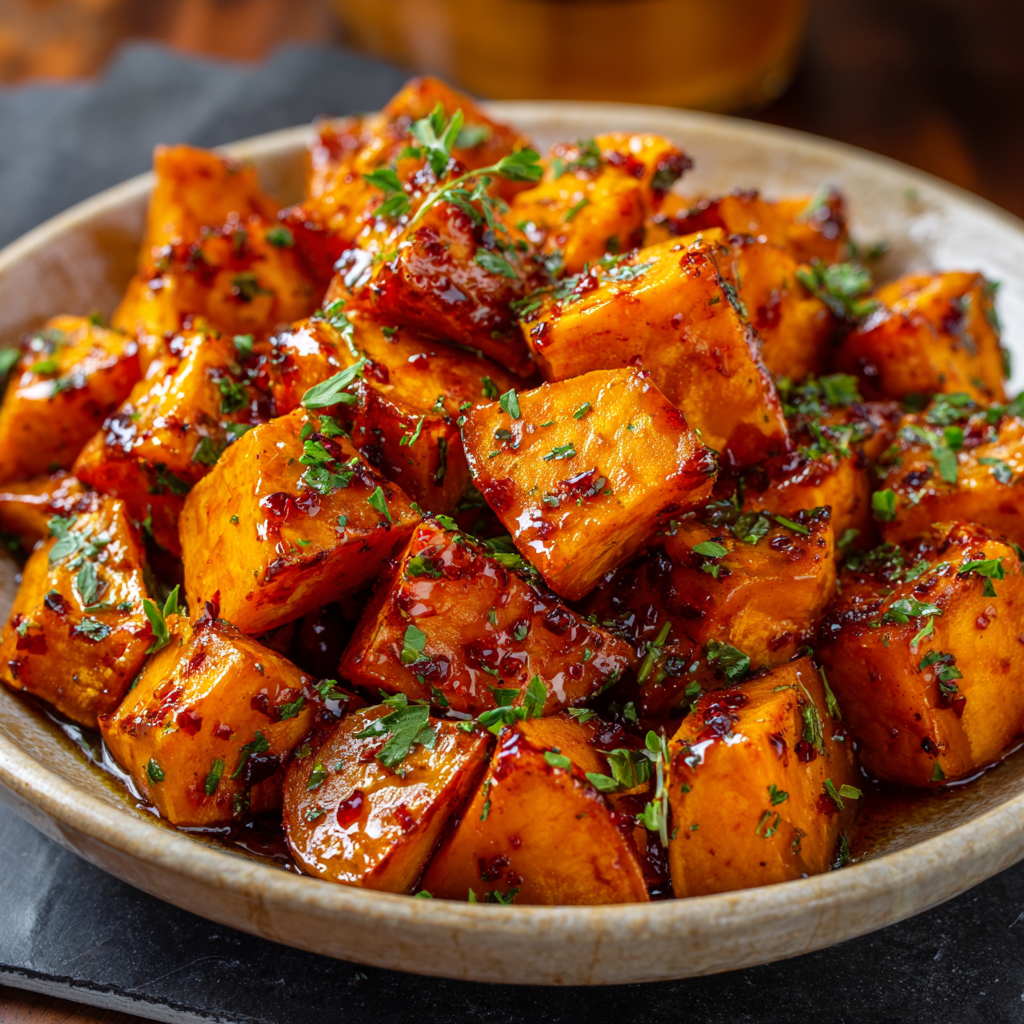
Roasted Hot Honey Sweet Potatoes : Sweet, Spicy & Oven-Baked Perfection
Roasted Hot Honey Sweet Potatoes – Your New Favorite Side Dish
Hey there, Feastical friends! Beau here, coming at you from a kitchen that smells absolutely incredible. If you’ve ever found yourself in a side dish rut, staring at the same old steamed veggies or plain baked potatoes, I’m about to throw you a serious flavor lifeline. Let’s talk about turning the humble sweet potato into a show-stopping, conversation-starting superstar.
We’re taking these gorgeous orange gems, cubing them up, and roasting them until their edges get all crispy and caramelized. Then, just when they’re at their peak, we’re going to drench them in a spicy-sweet hot honey glaze that will quite literally make your taste buds do a happy dance. This isn’t just a recipe; it’s a revelation. It’s the side dish that secretly wants to be the main event, the perfect partner for your weeknight chicken, your fancy holiday ham, or just a big ol’ bowl of fluffy quinoa.
The best part? This recipe is all about that “set it and (almost) forget it” oven magic. It’s simple enough for a Tuesday but special enough for a feast. So, grab your favorite baking sheet, and let’s create some sweet, spicy, and utterly irresistible oven-baked perfection together.
A Sweet (and Spicy) Thanksgiving Tale
I’ll never forget the first time I introduced these hot honey sweet potatoes to my family’s Thanksgiving table. It was a bit of a gamble. My grandma’s marshmallow-topped sweet potato casserole was, and still is, a sacred institution. It’s a dish of pure, unadulterated sweetness that holds a special place in all our hearts.
But I’m a guy who loves a little heat with his sweet, so I decided to make a small batch of these spicy-roasted cubes as a “side for the side.” I pulled them out of the oven, all glistening and fragrant, and set them quietly next to the turkey. The reaction was priceless. My uncle, a self-proclaimed spice wimp, took one tentative bite. His eyes went wide, and he immediately went back for a heaping spoonful. “Now THIS has personality!” he declared. The sweet, familiar comfort of the potato was still there, but the kick of heat and the complex flavor of the honey had everyone talking. It didn’t replace Grandma’s casserole (nothing ever could), but it earned its own permanent spot on the spread. It taught me that sometimes, the best new traditions are the ones that add a little friendly fire to the familiar.
Gathering Your Flavor All-Stars
One of the things I love most about this recipe is the short, simple ingredient list. Each one plays a crucial role in building those deep, complex flavors we’re after. Here’s what you’ll need:
- 4 large sweet potatoes, peeled and cubed: Don’t be shy with the size! We want hearty, substantial cubes that can stand up to the high heat of the oven. Look for potatoes that are firm and smooth-skinned. Chef’s Insight: Try to cut them into roughly 1-inch cubes. Keeping them uniform in size is the secret to ensuring they all cook at the same rate—no half-burnt, half-raw surprises!
- 6 tablespoons hot honey: This is the star of the show! You can find bottled hot honey in most grocery stores now, but making your own is a breeze and lets you control the heat level. Substitution Tip: No hot honey? No problem! Gently warm 6 tablespoons of regular honey with 1/2 to 1 teaspoon of red pepper flakes (or a dash of cayenne) in a small saucepan. Let it steep for 10 minutes, and voilà—homemade spicy magic.
- 4 tablespoons extra virgin olive oil: This is our roasting workhorse. It helps conduct heat, promotes that beautiful browning, and prevents sticking. Chef’s Insight: A good, robust extra virgin olive oil adds a lovely fruity note, but avocado oil works wonderfully too if you prefer a more neutral taste.
- Salt and freshly cracked black pepper, to taste: Never, ever underestimate the power of salt and pepper. Salt doesn’t just make things salty; it enhances and unlocks all the other flavors in the dish. The pepper adds a subtle, earthy warmth that plays so nicely with the sweet and spicy notes.
- Fresh herbs like thyme, parsley, or cilantro (optional, for garnish): This is your flavor confetti! A sprinkle of fresh herbs right at the end adds a burst of color and a fresh, aromatic quality that cuts through the richness. Thyme is my go-to for its earthy vibe, but cilantro is fantastic if you want a brighter, more citrusy finish.
Let’s Get Roasting: Your Step-by-Step Guide to Perfection
Ready to transform these simple ingredients into something truly spectacular? Follow these steps, and you’ll be a sweet potato roasting pro in no time. I’ve packed each step with my favorite chef hacks to guarantee success.
- Preheat and Prep Your Pan. First things first, crank that oven to 425°F (220°C). This high heat is non-negotiable—it’s what gives us those beautifully crisp, caramelized edges and a fluffy interior. While it’s heating up, line a large, rimmed baking sheet with parchment paper. Chef’s Hack: Lining the pan isn’t just for easy cleanup (though that’s a huge bonus!). It also prevents the honey glaze from sticking and burning onto the pan during the final toss, saving you from a scrubbing nightmare.
- Season with Confidence. In a large bowl, toss your cubed sweet potatoes with the olive oil, a generous pinch of salt, and a few good cranks of black pepper. Get your hands in there! Massage the oil and seasoning onto every surface of every cube. This ensures every single bite is perfectly seasoned and ready to crisp up. Chef’s Commentary: If you’re using any dry spices like smoked paprika or chili powder, now is the time to add them. Tossing them with the oil helps “bloom” their flavors, making them more potent and delicious.
- Roast to Golden Bliss. Spread the potatoes out in a single layer on your prepared baking sheet. This is key! If they’re crowded or piled on top of each other, they’ll steam instead of roast, and we’ll lose that crucial crispy texture. Pop them in the hot oven and roast for 30-35 minutes. Chef’s Non-Negotiable Tip: Set a timer for 15 minutes and flip them! I use a thin metal spatula to get under them and give them a good shuffle. This exposes all sides to the direct heat, guaranteeing an even, all-over golden-brown crust.
- The Grand Glaze. Once the potatoes are fork-tender and gloriously crispy on the edges, pull the baking sheet out of the oven. Immediately drizzle that gorgeous hot honey all over them. Work quickly but carefully—use a spatula or a big spoon to toss and turn the potatoes, coating every nook and cranny in that spicy-sweet glaze. The residual heat will thin out the honey just enough to make it a perfect, clingy sauce.
- The Finishing Flourish. Transfer your glazed potatoes to a serving dish and hit them with your final touches. A scattering of fresh herbs, a little citrus zest, or a crumble of tangy cheese takes this dish from a 10 to an 11. Serve them warm and watch them disappear!
How to Serve These Flavor Bombs
Okay, you’ve got this stunning dish of roasted hot honey sweet potatoes. Now what? The possibilities are endless, my friend. Here are a few of my favorite ways to let them shine:
The Perfect Pairing: These potatoes are the ultimate wingman for almost any protein. They’re phenomenal next to a simply grilled or roasted chicken, a juicy pork tenderloin, or a beautifully seared salmon fillet. The sweet and spicy notes complement the savory flavors perfectly.
Bowl Life Brilliance: Turn them into the star of a grain bowl! Start with a base of quinoa, farro, or brown rice. Add a big scoop of these warm potatoes, some sautéed greens (like kale or spinach), a handful of chickpeas for protein, and a generous drizzle of a creamy tahini or yogurt sauce. It’s a complete, satisfying, and wildly flavorful meal.
Holiday Hero: As my personal story can attest, these are a guaranteed hit on any holiday table. They add a modern, bold twist that stands out beautifully among the more traditional dishes. They look absolutely gorgeous piled high on a platter, garnished with fresh thyme sprigs.
Make It Your Own: Flavor Twists & Swaps
Once you’ve mastered the base recipe, the fun really begins. This dish is a fantastic canvas for your own culinary creativity. Here are a few of my favorite variations to get you started:
- Smoky & Deep: Add 1/2 teaspoon of smoked paprika or ancho chili powder to the olive oil before tossing with the potatoes. This adds a subtle, smoky depth that makes the flavor profile even more complex.
- Bright & Zesty: Right after glazing with the hot honey, zest a whole lime or lemon directly over the potatoes. The bright, citrusy aroma cuts through the sweetness and spice in the most refreshing way.
- Creamy & Cool: For a fantastic textural contrast, drizzle the finished dish with a tablespoon or two of tahini or a simple yogurt sauce (Greek yogurt thinned with a bit of lemon juice). The cool, creamy element is a game-changer.
- Savory & Tangy: Crumble some feta or goat cheese over the top while the potatoes are still warm. The salty, tangy cheese balances the sweetness of the honey and potatoes beautifully. This is a crowd-pleaser, for sure.
- Herbaceous & Fresh: Swap the thyme for chopped fresh cilantro and add a squeeze of fresh lime juice. This gives the dish a vibrant, almost Latin-inspired flair that’s incredibly addictive.
Beau’s Kitchen Notebook
This recipe has been a living, evolving thing in my kitchen. I first started making a version of it after a trip to a barbecue joint that served hot honey on their fried chicken. I became obsessed and started putting it on everything—including my standard roasted veggies. The sweet potatoes were the clear winner.
Over time, I learned a few things. The type of hot honey you use makes a difference! Some are more vinegar-forward, while others are purely spicy. I encourage you to taste a few brands to find your favorite. And don’t be afraid to play with the heat level. I’ve made this for friends who can’t handle any spice by just using regular honey and a pinch of black pepper, and it’s still a knockout. The goal is to make it work for you and your table. After all, the best recipes are the ones that become part of your own story.
Your Questions, Answered!
I’ve gotten a lot of questions about this recipe over the years, so I’ve gathered the most common ones here to help you out.
Q: My sweet potatoes are turning out soggy instead of crispy. What am I doing wrong?
A: The number one culprit for soggy potatoes is overcrowding the pan! If the potatoes are too close together, they release steam and end up steaming each other instead of roasting. Make sure they’re in a single layer with a little space between them. Using a very hot oven (425°F is perfect) and flipping them halfway through are also critical steps for that perfect crisp.
Q: Can I make these ahead of time for a party?
A: Absolutely! You can peel and cube the potatoes a day ahead. Keep them submerged in a bowl of cold water in the fridge to prevent browning. Just make sure to pat them very dry with a kitchen towel before tossing with oil and roasting. For the best texture, I recommend roasting and glazing them the day of, but you can re-crisp them in a 400°F oven for 5-10 minutes before serving.
Q: Is there a way to make this recipe vegan?
A> Yes, and it’s super easy! The only non-vegan ingredient is the honey. Simply swap it for a vegan-friendly liquid sweetener. Maple syrup or agave nectar work beautifully. You can make your own “hot maple syrup” by warming it with red pepper flakes, just like you would with honey.
Q: My hot honey is solid/crystallized. How do I fix it?
A> No worries, this is totally normal! Place the jar (without the lid) in a bowl of very hot water, or gently warm the honey in a heat-proof bowl over a pot of simmering water (a double boiler). It will liquify again in just a few minutes.

Roasted Hot Honey Sweet Potatoes : Sweet, Spicy & Oven-Baked Perfection
Description
Tired of the same old side dishes? Let’s turn humble sweet potatoes into a show-stopping, flavor-packed star. Roasted until golden and crispy, then tossed in a spicy-sweet hot honey glaze, these potatoes are addictive, versatile, and easy enough for a weeknight yet special enough for the holiday table.
Ingredients
-
4 large sweet potatoes, peeled and cubed (~1-inch cubes)
-
6 tbsp hot honey (store-bought or homemade – see note)
-
4 tbsp extra virgin olive oil
-
Salt and freshly cracked black pepper, to taste
-
Fresh herbs like thyme, parsley, or cilantro, for garnish (optional)
Optional Flavor Boosts:
-
½ tsp smoked paprika or chili powder for smoky heat
-
Zest of 1 lime or lemon for brightness
-
2 tbsp crumbled feta or goat cheese for a tangy finish
-
1–2 tbsp tahini or Greek yogurt for creamy contrast
Homemade Hot Honey Tip:
Warm 6 tbsp honey with ½–1 tsp red pepper flakes for 10 minutes, then strain.
Instructions
Preheat oven to 425°F (220°C). Line a large rimmed baking sheet with parchment paper.
In a large bowl, toss cubed sweet potatoes with olive oil, salt, and pepper. Add any optional dry spices at this stage. Ensure each cube is evenly coated.
Spread potatoes in a single layer on the baking sheet. Roast 30–35 minutes, flipping halfway through, until edges are golden and crispy. Avoid crowding to prevent steaming.
Remove from oven, immediately drizzle with hot honey, and toss gently to coat. The residual heat will help the honey cling to the potatoes.
Transfer to a serving dish. Sprinkle with fresh herbs, cheese, or citrus zest if desired. Serve warm.
Notes
-
Crispy Potatoes: Single layer + high heat + flipping halfway is key.
-
Make Ahead: Cube potatoes a day ahead and store in water to prevent browning. Pat dry before roasting.
-
Vegan Option: Swap honey for maple syrup or agave; warm with red pepper flakes for “hot” flavor.
-
Crystallized Honey Fix: Warm gently in hot water or over a double boiler until liquid.
Nutrition
- Calories: 280–310 Cal Per Serving
- Fat: 12–14 g
- Carbohydrates: 40–45 g
- Protein: 2–3 g
A Quick Bite on Nutrition
While I’m all about flavor first, it’s always nice to know that what you’re eating is also doing your body good. Sweet potatoes are a true nutritional powerhouse. They’re packed with beta-carotene (which your body converts to Vitamin A), a crucial nutrient for eye health, your immune system, and even your skin. They’re also a great source of fiber, which helps keep you feeling full and supports a healthy gut, and they provide a steady release of energy thanks to their complex carbohydrates.
Using olive oil, a cornerstone of the heart-healthy Mediterranean diet, adds beneficial monounsaturated fats. Remember, the nutritional info is an estimate and can vary based on the exact size of your potatoes and how much oil and honey you use. But overall, this is a dish that feeds your soul and your body wonderfully.
Approximate Nutrition Per Serving: Calories: 280-310 | Carbs: 40-45g | Protein: 2-3g | Fat: 12-14g | Fiber: 5g
Your New Go-To Side Dish Awaits
And there you have it, friends! My complete guide to creating the most unforgettable roasted hot honey sweet potatoes. This recipe is a testament to my core belief here at Feastical: that food should be a joy to make and an even bigger joy to eat. It should feel like a warm hug but never, ever taste boring.
This dish has saved me on busy weeknights, wowed my friends at potlucks, and carved out its own special place on my holiday table. I have no doubt it’ll do the same for you. So, don’t be afraid to get a little messy, to play with the level of heat, and to make it your own. That’s where the real magic happens in the kitchen.
I’d love to hear how your potatoes turn out! Tag me on social @Feastical or shoot me an email with your creations and your own fun twists. Now, go preheat that oven and get ready for some serious flavor. Happy cooking!
Final Thoughts: More Than a Recipe
This dish holds a special place in my heart, not just for its incredible flavor, but for the memories it’s created—like winning over my spice-wary uncle at Thanksgiving. For me, that’s what cooking is all about: sharing food that sparks conversation and creates new traditions, all while honoring the old.
I hope this recipe finds its way to your table and becomes a part of your own story. May it bring a little warmth, a welcome kick, and a whole lot of joy to your meals. Give it a try, make it your own, and get ready to declare these sweet potatoes your new favorite side.
High-Protein Breakfast Bowls with Sausage, Eggs & Hash Browns : Meal Prep Friendly
Your New Secret Weapon for Winning Mornings
Hey friends, Beau here! Let’s get real for a second. How many of you have had a morning that starts with a frantic search for car keys, a desperate gulp of cold coffee, and the dreaded 10:30 AM stomach growl that could scare small animals? I’ve been there more times than I’d like to admit. The truth is, a chaotic morning often starts the night before—or more accurately, in the lack of a game plan for breakfast.
That’s why I’m so dang excited to share what might just be my favorite kitchen hack of all time: High-Protein Breakfast Bowls. This isn’t just a recipe; it’s your ticket to calm, collected, and utterly delicious mornings. We’re talking a hearty, savory mix of juicy breakfast sausage, impossibly fluffy eggs (with a secret ingredient for extra protein!), crispy golden hash browns, and a sprinkle of creamy, tangy cheese. It’s a diner-style breakfast plate, but all cozied up together in one convenient, meal-prep-friendly bowl.
Imagine opening your fridge on a Wednesday morning and being greeted by a ready-made feast that tastes like you just cooked it. No fuss, no mess, just pure, feel-good fuel that will keep you powered up and satisfied right until lunch. This is the food equivalent of a slow, deep breath before the day begins. So, let’s grab our biggest skillets and get ready to batch up some serious breakfast magic. Your future well-fed self is already thanking you.
The Breakfast That Saved My Bacon (And Sausage)
This recipe was born out of pure, unadulterated hunger. Picture a younger Beau, fresh out of culinary school and working my first gig at a cafe that opened at the ungodly hour of 5 AM. My own breakfast was an afterthought—a sad, cold piece of toast eaten over the sink if I was lucky. I was surrounded by beautiful food all day but was constantly running on empty.
One particularly brutal Monday, after burning a batch of pancakes and myself (a story for another day), I had a revelation. I looked at the components of our most popular skillet dish—sausage, taters, eggs, cheese—and thought, “Why am I not making this for ME?” That night, I whipped up a giant batch, portioned it into containers, and felt like I had discovered fire for the second time.
That first week of having a real, hot breakfast ready in minutes was a game-changer. I had more energy, I was in a better mood, and I wasn’t sneaking biscuit scraps before lunch. It reminded me of the big, noisy, family breakfasts my grandma used to make on Sundays, where the smell of frying potatoes would wake everyone up. This recipe is my way of bottling that weekend comfort and making it accessible for every single crazy, busy, wonderful day of the week.
Gathering Your Breakfast Bowl Brigade
Here’s the dream team of ingredients that come together to create this morning masterpiece. Don’t be afraid to mix and match based on what you have in your fridge—that’s the beauty of a bowl!
- 2 lbs Ground Breakfast Sausage: This is our flavor foundation. I love a sage-forward pork sausage, but feel free to use turkey sausage, chicken sausage, or even a plant-based crumble. Chef’s Insight: If you’re using a milder sausage, add a pinch of fennel seeds, red pepper flakes, and a dash of maple syrup to the pan for a custom flavor boost!
- 16 Eggs: The ultimate protein packers. Chef’s Insight: For the fluffiest scramble, I crack my eggs into a bowl and let them sit on the counter for 10-15 minutes to take the chill off before cooking. Trust me, it makes a difference!
- 2 cups Cottage Cheese: Wait, stay with me! This is the secret weapon. Whisked into the eggs, it creates an incredibly creamy, moist, and protein-rich scramble that’s out of this world. Substitution Tip: If you’re really not a cottage cheese person, you can swap it for ½ cup of heavy cream or whole milk, but you’ll be missing out on that extra protein punch and lovely texture.
- 6 cups Frozen Shredded Hash Browns: The crispy, golden crown of our bowl. Frozen is the way to go for ease and perfect texture. Chef’s Hack: For extra-crispy hash browns, spread them in a single layer on a hot, oiled skillet and don’t touch them for 5-7 minutes! That initial sear is key.
- 6 oz Crumbled Feta or Shredded Cheese: I’m a sucker for the salty, tangy punch of feta against the savory sausage, but a good sharp cheddar, pepper jack, or a Mexican blend works beautifully too.
- 2 tsp Salt & ½ tsp Black Pepper: The essential seasonings. We’ll use this to season our eggs and our hash browns. Remember: Season in layers for the best flavor!
Optional Flavor Twists (Get Creative!)
- 1 cup Diced Bell Peppers: Any color! They add a sweet crunch and a pop of color. Sauté them with the sausage or hash browns.
- ½ cup Chopped Green Onions or Chives: A sprinkle of fresh, green goodness at the end brightens up the whole dish.
- 1 tsp Smoked Paprika or Chili Flakes: For my friends who like a little heat and smokiness.
- Hot Sauce or Salsa: A must for serving! I always have a bottle of my favorite hot sauce and a jar of chunky salsa on the side.
- Fresh Herbs: A little chopped parsley or cilantro never hurt anybody.
Let’s Build Those Bowls: A Step-by-Step Guide
Alright, team, aprons on! We’re going to tackle this like a well-oiled machine. I like to work in this order to ensure everything is hot and ready for assembly at the same time. Let’s do this!
- Conquer the Hash Browns: Grab your largest, heaviest skillet (cast iron is my MVP here) and get it nice and hot over medium-high heat with a tablespoon of oil. Add your frozen hash browns in an even layer. Let them cook, undisturbed, for a good 5-7 minutes to get that glorious golden-brown crust. Season with a pinch of salt and pepper, then flip sections over and cook for another 5 minutes until crispy. Chef’s Hack: If you’re impatient for crispy taters like I am, press them down gently with a spatula to maximize contact with the hot pan.
- Brown the Sausage: While the hash browns are working their magic, get another large skillet over medium heat. Add your sausage and break it up with a wooden spoon. Cook it through until it’s nicely browned and no pink remains. If there’s a lot of excess grease, you can drain it off, but I usually leave a tablespoon or two for flavor. Chef’s Tip: This is the perfect time to add those diced bell peppers if you’re using them! Throw them in for the last 3-4 minutes of cooking to soften them up.
- Create the Fluffy Egg Cloud: This is the star of the show. In a large bowl, crack all 16 eggs. Add the 2 cups of cottage cheese, 2 teaspoons of salt, and ½ teaspoon of black pepper. Now, whisk it like you mean it! You want it to be mostly smooth, with a few small curds of cottage cheese still visible. Pour this mixture into the now-empty (but still warm) sausage skillet over low-medium heat. The Key Here: LOW AND SLOW. Gently push the eggs from the edges toward the center as they cook. You’re looking for soft, creamy curds, not dry, rubbery sheets. They’ll continue to cook a bit after you take them off the heat, so pull them off when they’re still slightly wet.
- The Grand Assembly: Get your six meal prep containers or bowls ready. We’re building layers of goodness. Start with a hearty base of crispy hash browns. Next, a generous scoop of our fluffy, creamy eggs. Follow that up with a layer of the savory sausage (and peppers!). Finally, top it all off with a hearty sprinkle of your chosen cheese. The residual heat will gently melt the cheese into everything. Pro-Tip: Let the components cool for about 10-15 minutes before putting the lids on your meal prep containers. This prevents steam from building up and making everything soggy.
How to Serve & Savor Your Masterpiece
Okay, the hard part is over. Now for the best part: eating!
For Immediate Gratification: If you’re digging in right away, slide that beautiful, steaming bowl right onto your table. I love to finish it with a vibrant sprinkle of chopped green onions or chives for a fresh bite and a pop of color. A few dashes of your favorite hot sauce or a generous dollop of cool, chunky salsa is non-negotiable in my book. It cuts through the richness perfectly. Serve it with a slice of buttered toast for the ultimate carb-loaded comfort experience.
For Your Meal Prep Glory: Once your bowls are assembled and cooled, pop the lids on and store them in the fridge. They’ll be your best friends for up to 5 days. When you’re ready to eat, just grab one, remove the lid (important step!), and microwave it for 1.5 to 2.5 minutes, stopping to stir halfway through, until it’s heated to your liking. I always add my fresh garnishes like green onions and hot sauce *after* reheating to keep them bright and fresh.
Mix It Up! 5 Delicious Twists on the Classic
This recipe is a fantastic blueprint, but don’t be afraid to make it your own! Here are a few of my favorite ways to shake things up.
- “Southwest Fiesta” Bowl: Swap the breakfast sausage for seasoned ground beef or chorizo. Use a Mexican cheese blend, and add a handful of black beans and corn to the mix. Serve with salsa and avocado slices.
- “Garden Veggie” Power Bowl: Perfect for my plant-based friends! Use a plant-based sausage crumble or just load up on veggies. Sauté mushrooms, spinach, zucchini, and onions, and mix them right into the eggs. Nutritional yeast can add a cheesy flavor if you’re skipping the dairy.
- “Everything Bagel” Bowl: This one is so fun! Use smoked salmon (or keep the sausage), swap the cottage cheese for cream cheese mixed into the eggs, and top everything with a hefty sprinkle of everything bagel seasoning. Mind-blowing!
- “Buffalo Chicken” Bowl: Swap the sausage for shredded rotisserie chicken tossed in buffalo sauce. Use a blue cheese crumble instead of feta, and whisk a tablespoon of ranch dressing powder into your eggs for an extra flavor kick.
- “Lower-Carb” Version: Easy! Simply replace the hash browns with cauliflower rice. Sauté the frozen riced cauliflower in your skillet until it’s tender and any excess moisture has cooked off. It’s a fantastic vehicle for all the other flavors.
Beau’s Kitchen Notes & Stories
This recipe has been a living, evolving thing in my kitchen. The first time I made it, I completely overcooked the eggs because the phone rang (it was my mom, asking what I was making for dinner—the irony!). I learned that day that eggs are the most forgiving of teachers; they gently show you your mistakes so you can do better next time.
I’ve also found that the type of cottage cheese matters. I prefer small-curd, 4% milkfat for the creamiest result, but any kind you love will work. The real evolution was realizing I could cook the sausage and eggs in the same pan, one after the other. Not only does it save on dishes (a win in any book), but the eggs pick up all those delicious little browned bits left behind by the sausage, infusing them with even more flavor. It’s the little things, folks.
Your Breakfast Bowl Questions, Answered!
I’ve gotten a lot of questions about this recipe over the years. Here are the most common ones to ensure your bowl success.
Q: My eggs got watery in the fridge! What happened?
A: This is almost always due to steam! Make sure you let the cooked components—especially the eggs and sausage—cool completely before you put the lid on the container. Trapped steam condenses and can make your beautiful scramble a bit sad. A quick stir when reheating will usually re-incorporate any moisture.
Q: Can I freeze these breakfast bowls?
A: You can, but with a caveat. The texture of the eggs and potatoes will change upon thawing, becoming a bit softer and potentially watery. They’re still safe to eat and will taste good, but the texture won’t be as perfect as the refrigerated version. I highly recommend enjoying them within 5 days from the fridge for the best experience.
Q: My hash browns are soggy. How can I get them crispier for meal prep?
A: Great question! The key is a hot pan, plenty of oil, and don’t crowd them. For meal prep, I actually recommend slightly *over*-crisping them. They’ll soften a bit in the fridge, so starting with an extra-crispy base ensures they still have a great texture when reheated. You can also store a portion of the hash browns separately and add them fresh each morning if you’re a true crisp-fiend.
Q: I’m not a meat-eater. What’s the best protein swap?
A: Fantastic options abound! A plant-based sausage crumble is the most direct swap. For a whole-food option, seasoned lentils or crumbled extra-firm tofu (sautéed with a little soy sauce and smoked paprika) are absolutely delicious and pack a great protein punch.

High-Protein Breakfast Bowls with Sausage, Eggs & Hash Browns : Meal Prep Friendly
Description
Mornings can be chaotic—scrambling for keys, gulping cold coffee, and hearing your stomach growl before 10 AM. Let me save you from that breakfast panic. These High-Protein Breakfast Bowls are packed with sausage, fluffy eggs, crispy hash browns, and melty cheese—all ready to grab and enjoy or prep ahead for the week. Think of it as a diner-style breakfast, condensed into a convenient, nourishing bowl.
Ingredients
-
2 lbs ground breakfast sausage (pork, turkey, chicken, or plant-based)
-
16 large eggs
-
2 cups cottage cheese (small-curd preferred)
-
6 cups frozen shredded hash browns
-
6 oz crumbled feta or shredded cheese (cheddar, pepper jack, or Mexican blend)
-
2 tsp salt
-
½ tsp black pepper
Optional Add-ins for Flavor:
-
1 cup diced bell peppers
-
½ cup chopped green onions or chives
-
1 tsp smoked paprika or chili flakes
-
Hot sauce or salsa for serving
-
Fresh herbs like parsley or cilantro
Instructions
1. Cook the Hash Browns
-
Heat 1 tbsp oil in a large skillet over medium-high heat.
-
Spread frozen hash browns evenly and cook undisturbed for 5–7 minutes for a golden crust.
-
Season with a pinch of salt and pepper, flip, and cook another 5 minutes.
Tip: Press gently with a spatula for extra crispiness.
2. Brown the Sausage
-
In another skillet over medium heat, cook the sausage, breaking it up with a spoon.
-
Add diced bell peppers in the last 3–4 minutes of cooking if using.
Tip: Keep 1–2 tbsp of sausage fat in the pan for extra flavor.
3. Make Fluffy Eggs
-
Whisk eggs, cottage cheese, salt, and pepper in a large bowl.
-
Pour into the warm sausage skillet over low-medium heat.
-
Stir gently, forming soft, creamy curds. Remove from heat while slightly wet—they’ll finish cooking in their own heat.
Tip: Let eggs sit at room temperature for 10–15 minutes before cooking for extra fluffiness.
4. Assemble the Bowls
-
Layer hash browns, then eggs, then sausage (and peppers), and top with cheese.
-
Let cool 10–15 minutes before covering for meal prep.
Serving Ideas: Add green onions, hot sauce, or salsa. Serve with toast if desired.
Meal Prep & Storage
-
Fridge: Up to 5 days.
-
Reheat: Microwave 1.5–2.5 minutes, stir halfway, then garnish.
-
Tip: Slightly over-crisp hash browns for best texture after refrigeration.
Notes
-
Southwest Fiesta: Swap sausage for chorizo or seasoned ground beef; add black beans and corn.
-
Garden Veggie: Plant-based sausage or extra veggies; optional nutritional yeast for a cheesy flavor.
-
Everything Bagel: Use smoked salmon, cream cheese in eggs, and everything bagel seasoning.
-
Buffalo Chicken: Shredded buffalo chicken instead of sausage; blue cheese crumble; ranch powder in eggs.
-
Lower-Carb: Replace hash browns with cauliflower rice.
Nutrition
- Calories: 450–500Cal Per Serving
- Fat: 30–35 g
- Carbohydrates: 15–20 g
- Fiber: 1–2 g
- Protein: 30–35 g
A Quick Look at the Fuel
Now, I’m a chef, not a dietitian, so please take this as a friendly estimate. The beauty of this recipe is that it’s packed with high-quality protein to keep you full and focused. Based on the core ingredients (and using a lean pork sausage and full-fat cheeses), here’s a rough breakdown per serving:
- Calories: 450-500
- Protein: 30-35g (That’s a powerhouse start!)
- Carbohydrates: 15-20g
- Fat: 30-35g
- Fiber: 1-2g (You can boost this significantly by adding those bell peppers or some spinach!)
Remember, these numbers can swing based on your specific ingredient choices. Using turkey sausage, egg whites, low-fat cheese, and adding more veggies are all easy ways to tailor this to your nutritional goals without sacrificing an ounce of flavor.
Go Forth and Conquer Your Mornings
And there you have it, my friends! Your complete guide to ditching the breakfast scramble (the mental one, not the delicious egg one) and embracing a week of satisfying, soul-warming mornings. This recipe is more than just a list of ingredients and steps; it’s a promise to yourself that you’re worth a great start to the day.
I truly believe that the best food is the kind that not only tastes incredible but also makes your life better. These High-Protein Breakfast Bowls do exactly that. They free up your time, fuel your body, and bring a little bit of Feastical comfort to your busiest days.
I’d love to hear how your bowls turn out! Tag me on social @Feastical with your creations and tell me your favorite variation. Now, go forth, prep with purpose, and make your mornings magnificent.
A Final Word from Beau
Friends, if you take one thing from this, let it be this: a great morning is a choice, and it’s often made the night before. It doesn’t have to be complicated. It can be as simple as a container of pre-made goodness waiting for you in the fridge.
This recipe was my personal game-changer, transforming my chaotic 5 AM starts into moments of quiet, flavorful triumph. I share it with you in the hopes that it does the same for you—that it gives you back ten minutes of peace, a belly full of fuel, and the energy to tackle whatever comes your way. So, give it a try. Make it your own. And get ready to win the morning.

Creamy Vanilla Protein Shake with Flavorful Twists : Energizing Breakfast Blend
Your New Favorite Morning Ritual: The Ultimate Creamy Vanilla Protein Shake
Hey friends, Beau here! Let’s be real for a second. Mornings can be… a lot. The alarm blares, the to-do list starts screaming, and sometimes, the last thing you have time for is a wholesome, sit-down breakfast. I get it. For years, I’d often just grab a granola bar and call it a day, only to find myself hangry and running on fumes by 10 AM. Sound familiar?
But then, I discovered the magic of a truly great protein shake. I’m not talking about those chalky, bland, “just-gotta-get-it-down” concoctions. I’m talking about a creamy, dreamy, sip-worthy masterpiece that feels like a treat but fuels your body like a champion. This Creamy Vanilla Protein Shake is my answer to the busy-morning blues. It’s the culinary equivalent of a high-five for your future self.
This shake is more than just protein powder and liquid; it’s a blank canvas for your cravings. It’s velvety, naturally sweet, and packed with lasting energy to power you through your morning, your workout, or that dreaded afternoon slump. We’re blending up a storm of simple, good-for-you ingredients that come together in under five minutes. So, dust off that blender, my friend. We’re about to make your mornings not just manageable, but downright delicious.
The Day I Fell in Love with a Blender
I’ll never forget the shake that changed it all for me. It was during my college days, living in a tiny apartment with a kitchen the size of a postage stamp. My “cooking” mostly consisted of microwave noodles and toast. My roommate, Leo, was a fitness nut who started every single day with a thunderous blender roar. One morning, after a particularly late night, he handed me a frosty glass of this creamy vanilla concoction. I was skeptical—my previous protein shake experiences were… not great.
But one sip and I was a believer. It was cold, refreshing, and tasted like a vanilla milkshake! It didn’t just satisfy my hunger; it completely turned my energy levels around. That shake became our ritual. We’d stand in our microscopic kitchen, clinking our blender cups like glasses of fine wine, ready to tackle the day. It taught me that healthy food doesn’t have to be complicated or taste like punishment. It can be simple, joyful, and the best part of your morning. This recipe is that very shake, perfected over the years, and I’m so excited to share it with you.
Gathering Your A-Team: The Ingredients
Great food starts with great ingredients, and this shake is no exception. Each one plays a specific role in creating that perfect sip. Here’s the lineup:
- 2 cups Unsweetened Almond Milk: This is our hydrating base. It’s light and has a neutral flavor that lets the vanilla shine. Chef’s Insight: Feel free to swap for oat milk for extra creaminess, dairy milk for classic richness, or even coconut water for a hydrating twist.
- 2 scoops Vanilla Protein Powder: The star of the show! This builds the foundational flavor and, of course, the protein punch. Pro Tip: Look for a powder you genuinely enjoy the taste of on its own. A whey/casein blend or a good plant-based one like pea protein works wonders for texture.
- 1 Banana (frozen!): This is the secret to a luxuriously thick, creamy shake without needing a ton of ice. Why Frozen? The frozen banana creates a smooth, almost soft-serve consistency that’s utterly irresistible. If you only have a fresh banana, you’ll definitely want to use the ice!
- 1 cup Greek Yogurt: This adds a tangy creaminess and a massive boost of protein. Substitution Tip: For a dairy-free version, coconut yogurt or silken tofu are fantastic alternatives that provide the same lush texture.
- 1 teaspoon Vanilla Extract: Don’t skip this! It amplifies the vanilla flavor from the powder and makes the whole shake taste warmer and more homemade.
- 1–2 tablespoons Honey or Maple Syrup (optional): This is your sweetness dial. I usually find the banana and protein powder make it sweet enough, but if you have a sweet tooth or are using an unflavored powder, a little drizzle of natural sweetness is a game-changer.
- 1 cup Ice Cubes (optional): The texture tuner! I almost always add a handful of ice because I love a super cold, frosty shake. If you used a frozen banana, you can skip it for a thicker, spoonable smoothie.
Blending Up Bliss: The Step-by-Step Guide
Okay, team, it’s go-time. This process is so simple, but a few little hacks will take your shake from “good” to “can-I-have-this-for-dessert?” great.
- Combine the Base: First things first, grab your blender. I always add the liquid (almond milk) first. This helps the other ingredients blend more easily and prevents them from getting stuck at the bottom. Pour in those two cups of almond milk, then add your protein powder, the frozen banana (break it in half if it helps!), the Greek yogurt, vanilla extract, and your sweetener if you’re using it.
- Customize Your Flavor: This is where the fun begins! Now’s the time to add any of those incredible flavor boosts. A dash of cinnamon for cozy warmth? A scoop of peanut butter for rich, savory depth? A tablespoon of chia seeds for fiber? Go for it! This is your shake, make it sing your song.
- Blend to Perfection: Pop the lid on securely (a lesson I learned the messy way—trust me, you don’t want a vanilla ceiling mural). Start blending on a low speed for about 10 seconds to break up the big chunks, then ramp it up to high. Let it rip for 30-60 seconds, until the shake is completely smooth, creamy, and has no visible chunks. You should hear the sound change from a loud “chunk-chunk” to a smooth, high-pitched whirl. Chef’s Hack: If the shake is too thick and struggling to blend, just stop the blender, take it off the base, and give the carafe a good shake. Or, add a tiny splash more almond milk to get things moving again.
- The Final Touch (Ice!): If you’re using ice and want that extra-frosty texture, I like to add it after the initial blend. Toss in the cup of ice and blend again on high until it’s fully incorporated. This two-step blending method ensures you don’t get any rogue ice chunks and guarantees maximum creaminess.
Pour, Garnish, and Sip: How to Serve Your Masterpiece
You’ve done the hard work, now for the reward! Pour that beautiful, creamy shake into your favorite glass—for me, that’s a big mason jar with a reusable straw. But presentation is part of the fun! Here’s how I like to make it feel extra special:
Give it a little garnish. A thin banana slice perched on the rim of the glass, a light dusting of cinnamon or nutmeg on top, or a tiny drizzle of honey or nut butter swirled over the surface. It takes 10 seconds and makes your morning fuel feel like something you ordered from a fancy café. This shake is perfect on its own, but it’s also a dream paired with a piece of whole-wheat toast with avocado or a handful of hard-boiled eggs on the side for a truly balanced breakfast. Enjoy it immediately for the best flavor and texture!
Shake It Up! 5 Flavorful Twists to Try
The beauty of this vanilla base is its incredible versatility. Once you’ve mastered the classic, get creative! Here are five of my favorite ways to mix it up:
- Java Kick-Start: Add 1-2 shots of cooled espresso or ½ cup of strong brewed coffee. It’s like a healthy, protein-packed Frappuccino that actually fuels your day.
- Tropical Escape: Swap the banana for 1 cup of frozen mango and ½ cup of frozen pineapple. Add a handful of spinach—you won’t taste it, I promise!—for a green boost. It’s a vacation in a glass.
- Chocolate Peanut Butter Cup: Add 1 tablespoon of cocoa powder and 1 tablespoon of peanut butter. It’s decadent, rich, and tastes like a dessert but is packed with protein.
- Cherry Almond Bliss: Use 1 cup of frozen dark sweet cherries instead of the banana and add ½ teaspoon of almond extract along with the vanilla. It’s a classic flavor combo that’s absolutely divine.
- Supergreen Vanilla: For a nutrient powerhouse, add a large handful of fresh spinach or kale and 1 tablespoon of flax seeds. The vanilla is so strong, it completely masks any “green” taste, leaving you with a vibrant, healthy shake.
Beau’s Chef Notes & Kitchen Stories
This recipe has been a living, evolving thing in my kitchen. I’ve learned a few things along the way. First, the power of the frozen banana cannot be overstated. I keep a zip-top bag full of peeled, broken-in-half bananas in my freezer at all times—it’s a game-changer for smoothie creaminess. Second, don’t be afraid to play with your textures. Sometimes I make it super thick and eat it with a spoon like ice cream! And a funny story: I once accidentally used salted peanuts instead of peanut butter (don’t ask how). Let’s just say it was a… memorable savory vanilla experience. We don’t talk about that one. The point is, make this shake your own. It’s a recipe that’s meant to be loved and adapted.
Shake Questions? I’ve Got Answers!
Over the years, I’ve gotten a ton of questions about this shake. Here are the most common ones to help you out:
- My shake came out too thin! What happened? No worries! The most common culprit is not using a frozen banana. Next time, be sure to freeze it. For this batch, you can thicken it up by blending in another ½ a banana (fresh is fine) or a few more ice cubes. A tablespoon of rolled oats or chia seeds can also help absorb excess liquid.
- It’s too thick! My blender is struggling. Easy fix! Just stop the blender and add a splash more of your milk (about 2 tablespoons at a time) until it starts moving freely again. Remember the shake-and-blend hack I mentioned earlier!
- Can I make this shake ahead of time? You can, but it’s best fresh. If you need to, blend it up and store it in a sealed container in the fridge for up to 24 hours. It will separate a bit, so just give it a really good shake or a quick re-blend before drinking.
- I don’t like the taste of my protein powder. Any tips? Absolutely! The ingredients in this shake are fantastic at masking less-than-perfect protein powders. The banana, vanilla extract, and yogurt add so much flavor. If it’s still not working, try adding a tablespoon of cocoa powder or a spoonful of strong coffee—they are powerful flavor maskers!

Creamy Vanilla Protein Shake with Flavorful Twists : Energizing Breakfast Blend
Description
Creamy Vanilla Protein Shake
Prep Time: 5 minutes
Servings: 1–2
Ingredients
-
2 cups unsweetened almond milk (or oat milk, dairy milk, or coconut water)
-
2 scoops vanilla protein powder (whey, casein, or plant-based)
-
1 frozen banana (for creaminess; fresh works with added ice)
-
1 cup Greek yogurt (or coconut yogurt/silken tofu for dairy-free)
-
1 tsp vanilla extract
-
1–2 tbsp honey or maple syrup (optional, adjust to taste)
-
1 cup ice cubes (optional, for extra frosty texture)
Optional Flavor Boosters
-
Cinnamon, cocoa powder, or espresso
-
Peanut butter or almond butter
-
Chia seeds, flax seeds, or spinach/kale
-
Frozen fruits like mango, pineapple, or cherries
-
Almond extract for a cherry-almond twist
Instructions
1. Combine Base Ingredients
-
Pour almond milk into blender first.
-
Add protein powder, frozen banana, Greek yogurt, vanilla extract, and sweetener (if using).
2. Blend
-
Start on low speed for 10 seconds to break up chunks.
-
Increase to high and blend 30–60 seconds until smooth and creamy.
-
If too thick, add a splash of milk. If too thin, add more frozen banana, ice, or a tablespoon of oats/chia seeds.
3. Add Ice (Optional)
-
For extra frosty texture, add ice after initial blend and blend again until incorporated.
4. Serve
-
Pour into your favorite glass or mason jar.
-
Garnish with a banana slice, cinnamon, nutmeg, or a drizzle of honey/peanut butter.
-
Enjoy immediately for best texture and flavor.
5 Flavorful Variations
-
Java Kick-Start: Add ½ cup cooled strong coffee or 1–2 shots espresso.
-
Tropical Escape: Swap banana for 1 cup frozen mango + ½ cup pineapple; add a handful of spinach.
-
Chocolate Peanut Butter Cup: Add 1 tbsp cocoa powder + 1 tbsp peanut butter.
-
Cherry Almond Bliss: Use 1 cup frozen cherries + ½ tsp almond extract.
-
Supergreen Vanilla: Add a handful of spinach or kale + 1 tbsp flax seeds.
Notes
-
Too thin? Use frozen banana, add more ice or oats.
-
Too thick? Add 1–2 tbsp milk at a time.
-
Make ahead? Blend and store in fridge up to 24 hours; shake or re-blend before drinking.
-
Protein powder tastes off? Mask with banana, vanilla, cocoa, or a splash of coffee.
Nutrition
- Fat: 6–10 g
- Carbohydrates: 22–30 g
- Protein: 28–35 g
Fueling Your Body: The Nutritional Lowdown
Now, let’s talk about what this deliciousness is doing for you! This nutritional info is an estimate for the base recipe (without optional boosts) and can vary based on your specific brand of ingredients.
This shake is a nutritional powerhouse, designed to keep you full and energized. You’re looking at a solid 28-35 grams of protein primarily from the powder and Greek yogurt, which is essential for muscle repair, satiety, and stable energy. The carbohydrates (22-30g) from the banana and a touch from the milk provide quick fuel, while the healthy fats (6-10g) help with nutrient absorption and keep you feeling satisfied for hours. It’s a balanced, complete meal that supports an active lifestyle, a busy morning, or just a desire to feel your best.
Prep Time: 5 minutes
Good For: Breakfast, Post-Workout Recovery, Clean Snacking
Your New Go-To Morning Win
And there you have it, friends! Your new secret weapon for a morning that feels good from the inside out. This Creamy Vanilla Protein Shake is more than just a recipe; it’s a promise to yourself that you’re worth a few minutes of self-care. It’s proof that eating well can be easy, fast, and an absolute joy.
I hope this shake becomes a beloved part of your routine, just like it is for me. Don’t forget to play with the flavors and make it your own. If you create a delicious new variation, I’d love to hear about it! Tag me on social @Feastical or shoot me an email. Now, go forth and blend something beautiful!
Final Thoughts
Forget the frantic, fuelless mornings. This creamy vanilla protein shake is your five-minute ticket to a calmer, more energized, and downright delicious start. It’s the simple, sip-worthy ritual that proves you can have your shake and drink it, too—no compromise required. Your new favorite morning awaits.
With a full blender and an happy heart,