
Loaded Cottage Cheese Salad : High-Protein, Creamy & Seriously Addictive
Loaded Cottage Cheese Salad: Your New Protein-Packed Obsession
Hey friends, Beau here! Let’s talk about lunch. More specifically, let’s talk about that all-too-common midday slump where you’re staring into the fridge, willing something delicious, satisfying, and actually good for you to magically appear. You want something cool and creamy, but also packed with protein to keep you going. You crave something savory and crunchy, but don’t want a mountain of dishes to prove it. Sound familiar?
Well, pull up a stool, because I’m about to introduce you to your new best friend: The Loaded Cottage Cheese Salad. This isn’t your grandma’s plain cottage cheese with a sad peach slice (no offense to grandma). This is a flavor explosion—a creamy, cool, savory bowl loaded with crispy bacon, sharp cheddar, sweet pops of pea, and a fresh bite of green onion. It’s high-protein, seriously addictive, and comes together in minutes. It’s the ultimate feel-good food that tastes indulgent but fuels your body right. Consider this your official invitation to join the creamy-crunchy-savory revolution happening right here in my kitchen. Let’s get into it!
The Picnic That Started It All
This recipe has a seriously humble, and kinda funny, origin story. A few summers back, I was volunteered (read: strong-armed by my lovely family) to handle the “protein” for a giant family reunion picnic. The problem? It was 95 degrees outside, the grill was already claimed for burgers, and the thought of turning on my oven for a heavy casserole made me sweat just thinking about it. I was in a serious bind.
I did what any sane person does in a crisis: I stared into the fridge. There was a giant tub of cottage cheese, leftover bacon from breakfast, a block of cheddar, and a bag of peas in the freezer. In a moment of “what’s the worst that could happen?” inspiration, I threw it all together in a bowl, gave it a stir, and crossed my fingers. Friends, it was the unexpected star of the picnic. Gone before the potato salad, vanished quicker than the deviled eggs. My cousin’s kids, who usually turn their noses up at anything “salad,” were asking for seconds. That’s when I knew this wasn’t just a kitchen sink experiment; it was a legit, crowd-pleasing masterpiece. Now, it’s my secret weapon for busy weeks, easy lunches, and any time I need a guaranteed win.
Gathering Your Flavor Crew
Here’s the beautiful part: this recipe is all about simple, impactful ingredients. Each one plays a crucial role in the texture and taste symphony. Let’s break it down.
- 2 cups cottage cheese (full-fat or low-fat): This is our creamy, high-protein base. Chef’s Insight: I prefer full-fat for ultimate creaminess and satisfaction, but low-fat works great too! If you’re dairy-free, a thick, plain unsweetened almond or cashew yogurt can step in, though the protein content will change.
- ¾ cup cooked bacon, crumbled: Savory, salty, crispy magic. Pro Tip: Bake your bacon on a sheet pan at 400°F for 15-20 minutes for perfectly even, hands-off crispiness. For a shortcut, use quality pre-cooked bacon. For a vegetarian twist, crispy chopped mushrooms or coconut bacon are fantastic!
- 1 cup cheddar cheese, shredded: Sharpness and that melt-in-your-mouth quality. Substitution Tip: Pepper jack for a kick, smoked gouda for depth, or a good mozzarella for milder flavor. Always shred it yourself for the best melt and no weird anti-caking additives.
- 1 cup green peas (boiled or steamed, cooled): Little bursts of sweet, fresh flavor and a gorgeous color pop. Chef’s Hack: No time to cook? Frozen peas thaw incredibly quickly under cool running water. They stay nice and crisp! Edamame is a brilliant swap for extra protein.
- ½ cup green onions, chopped: The necessary fresh, oniony bite that cuts through the richness. Don’t skip these! Use both the white and green parts.
- ¼ tsp black pepper: Simple, but essential for rounding out the flavors. Freshly cracked is always best.
- Optional: 1–2 tbsp sour cream or Greek yogurt: This is your “luxury upgrade” for an even creamier, tangier experience. Highly recommended if you’re using a drier cottage cheese.
Let’s Build the Magic: Step-by-Step
This is less of a cooking process and more of a joyful assembly. Here’s exactly how I layer the flavors for the best result.
- Bacon & Peas First: If you haven’t already, get your bacon crispy and your peas cooked/cooled. I like to do this first so everything is ready to party. Pro Tip: Let the bacon drain on paper towels and cool completely. Warm bacon will make the cheese greasy and melt it—which we don’t want for this chilled salad.
- The Foundation: Grab a large, cozy-looking mixing bowl. Plop in your 2 cups of cottage cheese. Give it a quick stir with a fork to break up any large curds if you prefer a smoother base.
- Fold, Don’t Stir: Here’s a key chef move: Add in your shredded cheddar, cooled peas, most of the green onions (save a pinch for garnish!), and the cooled, crumbled bacon. Now, use a gentle folding motion with a spatula to combine. Why folding? We want to keep those distinct textures—the crispy bacon bits, the whole peas—intact. Vigorous stirring will smash it all together.
- Season & Enrich: Crack in that black pepper. Now’s the time to add the optional sour cream or Greek yogurt if you’re going for extra creaminess. Give it a few more gentle folds until everything is happily distributed in its creamy cottage cheese blanket.
- The Patience Payoff: This is the hardest but most important step. Cover the bowl and pop it in the fridge for at least 30 minutes. Overnight is even better! This chill time lets the flavors get to know each other, the sharp cheddar mellows into the cottage cheese, and the whole thing becomes gloriously cohesive.
- Serve & Devour: Take it out, give it one last gentle stir, transfer to a serving bowl or your lunch container, and sprinkle with those reserved green onions. That’s it! You’ve just created lunchtime legend.
How to Serve This Superstar
This salad is famously versatile. Here’s how I love to enjoy it:
The Classic Bowl: Straight up, in a bowl, with a fork. Perfect for a quick, powerful lunch at your desk or on the patio.
The Ultimate Vessel: Scoop it onto a thick slice of toasted rustic bread, a crispy bagel chip, or even inside a halved avocado for the ultimate creamy-crunchy bite. It’s an insane topping for a baked potato!
Side Dish Hero: It pairs phenomenally with grilled chicken, burgers, or as part of a “salad bar” spread alongside fresh greens, tomato slices, and some crusty bread. For a picnic or potluck, I’ll often double the batch and serve it in a hollowed-out rustic bread bowl—it always gets demolished.
Make It Your Own: Delicious Twists
The basic formula is a canvas for your cravings. Try these spins:
- The “Everything Bagel”: Swap cheddar for everything bagel seasoning stirred right into the cottage cheese. Use smoked salmon (or chickpeas) instead of bacon, and add some finely diced red onion and capers. Mind-blowing.
- Garden Veggie Crunch: Add ½ cup each of finely diced cucumber and radish for incredible freshness and crunch. A handful of fresh dill would be gorgeous here.
- Southwest Fiesta: Use a pepper jack cheese, swap peas for black beans and corn (thawed frozen is fine), add a pinch of cumin and chili powder. Top with a squeeze of lime and some chopped cilantro.
- Mediterranean Dream: Omit bacon. Add chopped sun-dried tomatoes, kalamata olives, chopped parsley, and a sprinkle of dried oregano. Feta cheese instead of cheddar would be incredible.
- Higher-Protein Powerhouse: Stir in a scoop of unflavored protein powder into the cottage cheese first, or add a can of drained, flaked tuna or chopped hard-boiled eggs along with the other ingredients.
Beau’s Kitchen Notes
This recipe has evolved from that frantic picnic throw-together into a true staple. I’ve learned a few things along the way: First, the chilling time is non-negotiable for flavor. Second, this salad is a meal prep king. It keeps beautifully for 3-4 days in the fridge, making weekday lunches a no-brainer. The flavors actually improve on day two!
Funny story: I once accidentally used vanilla-flavored Greek yogurt instead of plain in a sleepy morning prep session. Let’s just say sweet-savory-bacon was… an adventure. Not one I’d recommend! Now I always double-check my labels. The beauty of this recipe is in its forgiving nature. Don’t have peas? Use corn. Out of green onions? A bit of red onion works. Make it yours!
Your Questions, Answered
- Can I make this ahead of time? Absolutely! In fact, I encourage it. Make it the night before, store it covered in the fridge, and the flavors will be even more amazing by lunchtime.
- My salad seems a bit watery after storing. What happened? Cottage cheese and peas can release a little liquid over time. No worries! Just give it a good stir before serving. Using full-fat cottage cheese and making sure your peas are thoroughly cooled and drained helps prevent this.
- What’s the best way to store leftovers? In an airtight container in the fridge for up to 4 days. I don’t recommend freezing it, as the texture of the dairy and veggies will change.
- I’m not a big bacon person. Any other protein ideas? Totally! Try diced ham, chopped turkey, crispy chickpeas, or even flaked salmon or tuna. The recipe is incredibly flexible.

Loaded Cottage Cheese Salad : High-Protein, Creamy & Seriously Addictive
Description
Hey friends, Beau here! Let’s talk about lunch—the kind that’s cool, creamy, crunchy, and actually keeps you full past 3 p.m. This Loaded Cottage Cheese Salad is my go-to when I want something fast, satisfying, and packed with protein. It’s savory, fresh, and loaded with crispy bacon, sharp cheddar, sweet peas, and green onions.
Ingredients
-
2 cups cottage cheese (full-fat or low-fat)
-
¾ cup cooked bacon, crumbled
-
1 cup shredded cheddar cheese
-
1 cup green peas (steamed or thawed, fully cooled)
-
½ cup green onions, chopped
-
¼ teaspoon black pepper
-
Optional: 1–2 tablespoons sour cream or plain Greek yogurt (for extra creaminess)
Instructions
Cook the bacon until crispy, then let it cool completely before crumbling.
Make sure peas are fully cooled and drained.
In a large bowl, add the cottage cheese. Stir lightly to smooth out large curds if desired.
Add cheddar, peas, most of the green onions (save a little for garnish), and bacon.
Use a spatula to gently fold everything together. Avoid overmixing—you want texture!
Add black pepper and optional sour cream or Greek yogurt.
Cover and refrigerate for at least 30 minutes (overnight is even better).
Stir once more before serving and top with remaining green onions.
Notes
-
Cool ingredients completely before mixing to prevent excess moisture.
-
Use freshly shredded cheese for better texture and flavor.
-
If the salad becomes slightly watery after storing, just stir it well.
-
Want extra crunch? Add diced cucumber or radish right before serving.
-
Meal prep friendly: Keeps well in an airtight container for up to 4 days.
Nutritional Highlights (A Friendly Breakdown)
Okay, I’m a chef, not a dietitian, but here’s the general scoop on why this salad makes you feel so good: Using full-fat ingredients, one serving (about 1/4 of the recipe) clocks in around 320 calories and delivers a whopping 22 grams of protein, thanks to the dynamic duo of cottage cheese and bacon. That protein is key for keeping you full and energized. You’re also getting calcium from the dairy, and a veggie boost from the peas and onions. It’s a balanced, satisfying meal that truly fuels you. Remember, these are estimates—your exact numbers will vary based on the specific brands and ingredients you use.
Final Thoughts from My Kitchen to Yours
So there you have it, friends—my not-so-secret secret for beating the lunchtime blues and fueling your day with something downright delicious. This Loaded Cottage Cheese Salad proves that feel-good food doesn’t have to be complicated, expensive, or time-consuming. It’s about combining simple, real ingredients with big flavors and a whole lot of love.
I hope this recipe finds its way into your regular rotation and becomes as much of a joy for you as it is for me. Remember, the kitchen is your playground. Don’t be afraid to toss in that extra sprinkle of cheese or that herb from your windowsill. Cook with your senses, taste as you go, and most importantly, enjoy every single creamy, crunchy, savory bite.
If you make it, I’d love to see your creation! Tag me @feastical or use #feasticalfood so I can cheer you on. Now, go forth and conquer that fridge. You’ve got this!
With a full heart and an even fuller bowl,
Beau

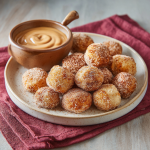
Air-Fried Protein Churro Bites : Healthy Snack with Cinnamon Sugar Flavor
Forget the Fair: These Protein Churro Bites Are Your New Go-To Snack
Hey friends, Beau here! Let’s be real for a second. Is there anything in this world that hits the spot quite like a warm, crispy, cinnamon-sugar-dusted churro? That first bite is pure magic—a crunch that gives way to a soft, warm center, all wrapped up in that iconic sweet spice. It’s the taste of celebration, of sunny afternoons at the fair, and of pure, unadulterated joy.
But let’s talk about the other side of that coin. You know the one. The one that comes about twenty minutes later, when the sugar high plummets and you’re left feeling a little… blah. That’s the feeling I’ve always wanted to outsmart in my kitchen. I’m all about indulgence, but I’m also about feeling fantastic after you eat.
So, I got to tinkering. What if we could capture all that fairground magic but turn it into a snack that actually fuels your day? A snack you could enjoy post-workout, as a mid-afternoon pick-me-up, or even as a sneaky-smart dessert without a hint of guilt? Friends, I’m thrilled to tell you: mission accomplished.
Welcome to the world of Air-Fried Protein Churro Bites. These little golden nuggets are a game-changer. They’re crispy on the outside, tender on the inside, and rolled in a low-sugar cinnamon coating that’s just as addictive as the original. And the piece de resistance? A creamy, dreamy Protein Dulce de Leche Dip that’s so good, you might just want to eat it with a spoon. Get ready to fall in love with your air fryer all over again.
A Churro Memory That Stuck
My love affair with churros started long before Feastical, on a family trip to a beachside boardwalk. I was maybe ten years old, and the air was a perfect mix of salty ocean breeze and the sweet smell of funnel cakes. I saw a vendor spinning golden dough into a bubbling fryer, and I was mesmerized. My dad bought a paper cone stacked high with them, and we stood there, sharing, getting cinnamon sugar absolutely everywhere. It wasn’t just a snack; it was a moment of pure, shared happiness.
That’s the feeling I wanted to bottle with this recipe. I wanted to create that same sense of joyful indulgence, but in a way that fits into our real, busy, often health-conscious lives. These Protein Churro Bites are my love letter to that boardwalk memory. They’re my way of saying you can have your churro and eat it too—feeling energized, satisfied, and happy long after the last bite is gone.
Gathering Your Churro-Making Gear
Don’t let the “protein” part intimidate you! We’re using simple, wholesome ingredients to create a powerhouse dough. Here’s the lineup for our high-protein, feel-good churro bites.
For the Churro Dough:
- 1/2 cup oat flour: This gives us a wonderful, tender crumb and a mild, nutty flavor. It’s also a great source of fiber! Chef’s Tip: No oat flour? No problem! Just blitz old-fashioned or quick-cook oats in your blender or food processor until they form a fine powder.
- 1/4 cup vanilla or cinnamon whey protein powder: This is our protein superstar! It builds the structure of our bites and adds that incredible flavor. Vanilla is a classic, but cinnamon gives it an extra warm kick.
- 1/4 cup unsweetened applesauce: Our secret weapon for moisture and natural sweetness! It keeps the bites incredibly soft without needing a ton of oil or butter.
- 1 egg: The binder that holds our dough together and helps it puff up beautifully in the air fryer.
- 1 tbsp almond butter or Greek yogurt: A little healthy fat and tangy creaminess to enrich the dough. I love the subtle nuttiness of almond butter, but Greek yogurt makes it extra tender.
- 1/2 tsp baking powder: Our leavening agent for that perfect, airy lift.
- 1 tsp cinnamon: We’re building that warm, spiced flavor right into the dough. Don’t be shy!
- Pinch of salt: Crucial for balancing all the sweet flavors and making them pop.
For the Cinnamon “Sugar” Coating:
- 2 tbsp erythritol (or your preferred granulated sweetener): I use erythritol because it doesn’t have a bitter aftertaste and it granulates just like sugar. Monk fruit sweetener or allulose work great too!
- 1 tsp cinnamon: Because you can never have too much of a good thing.
For the Protein Dulce de Leche Dip:
- 2 tbsp almond butter: The base of our creamy, dreamy dip. Its natural oils help create a silky-smooth texture.
- 2 tbsp vanilla protein powder: Doubling down on the protein and flavor. This thickens the dip and makes it taste like dessert.
- 1 tbsp maple syrup or sugar-free syrup: For a touch of liquid sweetness and to help bring everything together.
- 2–3 tbsp unsweetened almond milk: We’ll add this a tablespoon at a time to thin the dip to your perfect dunking consistency.
Let’s Make Some Magic: Step-by-Step
Ready to see how these little bites of heaven come together? It’s easier than you think. Let’s fire up that air fryer!
- Preheat Your Air Fryer: Get it nice and hot at 375°F (190°C). Chef’s Hack: Preheating is key for that instant “sear” and crispy exterior. If your model doesn’t have a preheat function, just let it run empty for 2-3 minutes.
- Make the Dough: In a medium-sized bowl, add all of your churro dough ingredients—the oat flour, protein powder, applesauce, egg, almond butter (or yogurt), baking powder, cinnamon, and salt. Chef’s Insight: I like to mix the dry ingredients a little with a fork first, just to ensure the baking powder and cinnamon are evenly distributed. Then, go in with a spatula and mix everything until a sticky, cohesive dough forms. Don’t overmix! Just bring it together.
- Shape the Bites: Now, lightly wet your hands. This is my number one tip for preventing a sticky situation! The dough is tacky, and wet hands will make it a breeze to handle. Roll the dough into small, 1-inch balls. You should get about 16 perfect little bites. Chef’s Note: They don’t have to be perfect spheres. Rustic and homemade-looking is part of the charm!
- Air Fry to Golden Perfection: Place the dough balls in your air fryer basket, making sure they aren’t touching. Do not overcrowd! We need hot air to circulate around each one for even cooking. You may need to work in batches. Air fry for 6-8 minutes, but here’s the pro move: shake the basket or gently turn the bites halfway through. You’ll know they’re done when they’re beautifully golden brown and firm to the touch.
- Create the Coating: While the bites are cooking, mix your erythritol and cinnamon for the coating in a small, shallow bowl. Give it a good stir so the cinnamon is evenly distributed.
- The Best Part—The Sugar Shower! As soon as those hot, gorgeous bites come out of the air fryer, carefully transfer them directly into the cinnamon-sweetener bowl. Gently toss them until they’re fully coated in that magical, fragrant dust. The residual heat helps the coating stick perfectly.
- Whip Up the Dip: For the protein dulce de leche, grab a small bowl and whisk together the almond butter, vanilla protein powder, and maple syrup. It will be thick at first. Start by adding one tablespoon of almond milk and whisk. Keep adding milk, one tablespoon at a time, until you reach a smooth, dippable consistency. Think thick and creamy, like a caramel sauce.
How to Serve These Golden Gems
Presentation is part of the fun! You can absolutely just grab them straight from the bowl (I won’t judge), but if you want to make it an occasion, here are a few ideas.
For the ultimate snack plate, pile the warm churro bites high on a small wooden board or a cute plate. Place the bowl of protein dulce de leche dip right in the center for easy communal dunking. I love to sprinkle a little extra cinnamon over the whole platter for a professional touch.
Feeling fancy? For a individual dessert, place a small stack of 3-4 bites on a dessert plate. Drizzle the dip over the top like a sauce instead of serving it on the side. It looks incredibly elegant and ensures you get a bit of that creamy goodness in every single bite.
And let’s not forget the ultimate pairing: a hot cup of coffee or a tall glass of cold milk. Dunking a warm, cinnamon-y churro bite into your morning brew is a little slice of breakfast heaven.
Mix It Up! Fun Flavor Twists
Once you’ve mastered the classic, the kitchen playground opens up! Here are a few of my favorite ways to riff on this recipe.
- Chocolate Lover’s Dream: Add 1 tablespoon of cocoa powder to the dough and use chocolate protein powder. For the coating, mix the cinnamon-sweetener with a teaspoon of cocoa powder. You’ve just made double-chocolate churro bites!
- Pumpkin Spice Sensation: Replace the applesauce with an equal amount of canned pumpkin puree and add a pinch of nutmeg, ginger, and allspice to the dough. Hello, fall!
- Nutty Delight: Roll the finished, cinnamon-coated bites in finely chopped pecans or walnuts. The extra crunch and nutty flavor are out of this world.
- Vegan-Friendly Version: Use a plant-based protein powder, a flax egg (1 tbsp ground flax + 3 tbsp water, let sit for 5 mins), and vegan yogurt. It works like a charm!
- “Sugar” Cookie Style: Skip the cinnamon in the coating and roll the warm bites in plain erythritol mixed with a drop of vanilla extract or a little lemon zest for a completely different vibe.
Beau’s Kitchen Confidential
This recipe has come a long way from its first test kitchen iteration. The first batch I ever made? Let’s just say they were more like “Cinnamon Sugar Hockey Pucks.” I learned the hard way that the dough hydration is everything. The applesauce is non-negotiable for that perfect, soft interior!
Another funny story: I was so excited to photograph the first successful batch that I stacked them into a mini Jenga tower. My dog, Biscuit, who thinks he’s my official taste-tester, was circling my feet. Let’s just say the tower didn’t survive, and Biscuit enjoyed a very unexpected gourmet treat. He approved, for the record.
The beauty of this recipe is its flexibility. It’s a blueprint for healthy, handheld joy. Don’t be afraid to make it your own!
Your Churro Questions, Answered!
I know you might have a question or two, so I’ve tackled the most common ones right here.
Q: My dough is too sticky to handle! What did I do wrong?
A: You likely did nothing wrong! This is a sticky dough by design to keep the bites moist. The trick is to lightly wet your hands before rolling the balls. It makes the process seamless and mess-free.
Q: Can I bake these instead of using an air fryer?
A: Absolutely! Preheat your oven to 350°F (175°C) and place the dough balls on a parchment-lined baking sheet. Bake for 10-12 minutes, or until golden and firm. They won’t be quite as crispy all over as the air-fried version, but they’ll still be delicious.
Q: The coating isn’t sticking well. Help!
A: The key is to roll the bites in the cinnamon-sweetener mixture while they are still very warm, straight out of the air fryer. The slight residual moisture on the surface is what helps the coating adhere. If they’ve cooled down, give them a very quick spritz with cooking spray or brush with a tiny bit of melted butter before rolling.
Q: How should I store leftovers?
A: These are best enjoyed the day they’re made, but you can store any leftovers in an airtight container in the fridge for up to 3 days. To re-crisp them, pop them back in the air fryer for 1-2 minutes or in a toaster oven for a few minutes. The microwave will make them soft.
Air-Fried Protein Churro Bites : Healthy Snack with Cinnamon Sugar Flavor
Description
Air-Fried Protein Churro Bites with Protein Dulce de Leche Dip
Prep Time: 10 minutes
Cook Time: 8 minutes per batch
Total Time: 20–25 minutes
Servings: ~16 bites
Ingredients
For the Churro Dough:
-
1/2 cup oat flour (or finely blended oats)
-
1/4 cup vanilla or cinnamon whey protein powder
-
1/4 cup unsweetened applesauce
-
1 egg
-
1 tbsp almond butter or Greek yogurt
-
1/2 tsp baking powder
-
1 tsp cinnamon
-
Pinch of salt
For the Cinnamon “Sugar” Coating:
-
2 tbsp erythritol (or preferred granulated sweetener)
-
1 tsp cinnamon
For the Protein Dulce de Leche Dip:
-
2 tbsp almond butter
-
2 tbsp vanilla protein powder
-
1 tbsp maple syrup (or sugar-free syrup)
-
2–3 tbsp unsweetened almond milk (adjust to reach desired consistency)
Instructions
-
Preheat Air Fryer: 375°F (190°C).
-
Make Dough: In a bowl, mix all churro dough ingredients until sticky and cohesive. Don’t overmix.
-
Shape Bites: Lightly wet your hands and roll dough into 1-inch balls (~16).
-
Air Fry: Place bites in a single layer, not touching. Air fry 6–8 minutes, shaking or turning halfway, until golden and firm. Cook in batches if needed.
-
Coat: Mix erythritol and cinnamon in a small bowl. While bites are hot, roll them in the mixture until fully coated.
-
Make Dip: Whisk together almond butter, protein powder, and maple syrup. Gradually add almond milk until smooth and dippable.
-
Serve: Plate churro bites with dip for dunking, drizzle dip over bites, or enjoy individually with coffee or milk.
Notes
-
Sticky Dough? Wet your hands lightly to handle it easily.
-
No Air Fryer? Bake at 350°F (175°C) for 10–12 minutes on a parchment-lined sheet.
-
Extra Crunch: Roll bites in finely chopped nuts after coating.
-
Flavor Twists: Add cocoa powder for chocolate churros, pumpkin puree + spices for fall flavor, or use plant-based protein and flax egg for vegan version.
The Nutritional Lowdown (The Feel-Good Part!)
I’m not a registered dietitian, but I love knowing what’s fueling my body. Here’s a rough breakdown of what you’re getting in these powerhouse bites (approximate, per serving of 4 bites):
- Calories: 165
- Protein: 12g – This is the star! It’s what keeps you full, satisfied, and helps repair and build muscle.
- Carbohydrates: 10g – A balanced amount, primarily from the oat flour and applesauce, giving you energy without the spike.
- Fat: 8g – Healthy fats from the almond butter and egg, which are essential for absorbing nutrients and keeping you happy.
- Sugar: 1g – Mostly natural sugar from the applesauce and a touch from the protein powder.
- Fiber: 2g – Thanks to the oat flour, helping with digestion and keeping things moving smoothly.
Compare that to a single traditional, fried fair churro, which can easily pack 25g of sugar and minimal protein, and you can see why this recipe is such a win. You’re trading a sugar crash for sustained energy and satisfaction.
Your New Kitchen Staple Awaits
And there you have it, my friends! Your complete guide to making insanely delicious, protein-packed churro bites right in your own kitchen. This recipe is proof that you don’t have to give up the foods you love to feel your absolute best. It’s all about smart, simple swaps and a whole lot of heart.
I can’t wait for you to try these. I can’t wait for you to experience that first warm, crunchy, cinnamon-y bite and realize that healthy eating can be an absolute delight. This is what Feastical is all about—food that feels as good as it tastes.
Final Thoughts: A New Snacking Tradition
So, there you have it. We’ve taken a beloved, nostalgic treat and transformed it into something that truly loves you back. These Protein Churro Bites are proof that you don’t have to choose between joy and well-being. You can have both, right here in your own kitchen.
This recipe is more than just a list of ingredients and steps; it’s an invitation to play, to experiment, and to create new moments of happiness. It’s about that feeling of accomplishment when you pull a golden batch from the air fryer, the shared smile when you surprise someone with a healthy treat that tastes anything but, and the simple, personal satisfaction of fueling your body with something genuinely delicious.
Forget fighting the crowds and the inevitable sugar crash. Your new favorite snack is no longer at the fair—it’s waiting for you in your air fryer, ready to turn any ordinary moment into a tiny celebration.
Now, I’d love to hear from you! Did you stick with the classic or try a fun twist? Tag me on social @BeausFeastical with your creations. Happy cooking, friends!
With love and a dash of cinnamon,
Beau

ALMOND FLOUR BROWNIES
You Won’t Believe These Are Gluten-Free: The Ultimate Almond Flour Brownies
Hey friends, Beau here! Let’s have a real talk for a second. Is there anything in this world quite as magical, as deeply satisfying, as a perfect, fudgy brownie? That glossy, crackly top. That rich, chocolatey interior that’s somehow both dense and melt-in-your-mouth tender. It’s the dessert equivalent of your favorite cozy sweater—comforting, reliable, and always, always a good idea.
But I know that for some of my favorite foodies out there, that classic brownie bliss can feel just out of reach. Maybe you’re avoiding gluten, or perhaps you’re just looking for a way to sneak a little more wholesome goodness into your treats without sacrificing an ounce of flavor. Well, my friend, consider your search over. Today, we’re diving fork-first into what might just become your new favorite recipe: my outrageously good Almond Flour Brownies.
These aren’t just a “good for being gluten-free” brownie. Oh no. These are a straight-up, no-holds-barred, chocolate-lover’s dream. They’re fudgy, intensely chocolatey, and have that signature chewy texture we all crave. And the best part? They’re made with simple, real ingredients you can feel good about. So, preheat that oven, grab your favorite mixing bowl, and let’s make some kitchen magic happen. I promise, one bite and you’ll be a believer.
A Pan of Brownies and a Side of Nostalgia
This recipe takes me right back to my grandma’s kitchen. Her house always smelled like a beautiful mix of fresh coffee and something baking in the oven. She was a wizard with desserts, but her brownies? They were legendary. They were the kind of treat that would make all us cousins stop our chaotic games and silently congregate around the pan, hoping for a corner piece.
When I first started experimenting with gluten-free baking years ago, recreating her brownie recipe was my white whale. I tried every flour blend under the sun, and while some were okay, they never quite captured that specific fudgy-chewy alchemy. Then, I tried almond flour. The moment I pulled that first test batch out of the oven, I knew I had it. The aroma was identical—that deep, roasty, chocolate scent that filled my grandma’s house. It wasn’t just a good gluten-free alternative; it was a direct portal back to those warm, happy afternoons. It proved that the heart of a great recipe isn’t in the wheat, it’s in the love and the chocolate you pour into it.
Gathering Your Brownie Brigade: The Ingredients
Part of what makes this recipe so special is its beautiful simplicity. We’re letting high-quality chocolate do the heavy lifting. Here’s your shopping list—think of it as gathering your kitchen squad for a delicious mission.
- 1 cup semisweet chocolate chips: This is your flavor foundation! I like using a good-quality chip here—it really makes a difference. Chef’s Insight: For an even deeper chocolate experience, chop up your favorite dark chocolate bar instead.
- 1/2 cup butter or coconut oil: Butter gives that classic, rich flavor, while coconut oil keeps things dairy-free and adds a subtle, lovely note. Substitution Tip: If using coconut oil, make sure it’s unrefined (virgin) for a neutral taste, or refined if you want to avoid any coconut flavor.
- 3/4 cup sugar (or coconut sugar): We’re using just enough sugar to sweeten the deal without overpowering the chocolate. Chef’s Insight: Coconut sugar is my go-to for a less refined option. It creates a darker, almost caramel-like depth that pairs incredibly with the almond flour.
- 2 large eggs: Our binding agents and the secret to that gorgeous, shiny, crackly top. Make sure they’re at room temperature for a smoother, more emulsified batter.
- 1 tsp vanilla extract: The trusty sidekick that amplifies all the other flavors. Don’t you dare skip it!
- 1/2 cup almond flour: The star of the show! This is what makes our brownies gluten-free and gives them an incredibly moist, tender crumb. Pro Tip: Make sure you’re using blanched almond flour, not almond meal. Almond meal is more coarse and will give you a grainier texture.
- 1/4 cup cocoa powder: This double-chocolate punch ensures our brownies are intensely fudgy and rich. Use natural, unsweetened cocoa powder for the best results.
- 1/4 tsp salt: Crucial for balancing the sweetness and making the chocolate flavor pop. If you’re using salted butter, you can reduce this to a pinch.
- Optional: extra chocolate chips or chopped nuts for topping: I’m a purist, but my partner swears by a handful of walnuts folded into the batter. This is your canvas—decorate it!
Let’s Get Baking: Your Foolproof Brownie Blueprint
Okay, team! Aprons on. This is where the fun begins. Follow these steps, and you’ll be a brownie hero in no time.
Step 1: Preheat & Prep
Preheat your oven to 350°F (175°C). This isn’t just a suggestion—a properly preheated oven is key to getting those perfect, set edges. While it’s warming up, line an 8×8-inch baking pan with parchment paper. I like to leave a little overhang on two sides. Why? This creates “handles” that will let you lift the entire slab of brownies out of the pan later for super clean, crumb-free slicing. A little kitchen hack that makes a huge difference!
Step 2: Melt the Chocolate Goodness
In a microwave-safe bowl or using a double boiler, melt the chocolate chips and butter (or coconut oil) together. If using the microwave, do it in 30-second bursts, stirring well between each one. Watch it like a hawk! Burnt chocolate is a sad, sad thing. We want it just melted and smooth. Give it a good stir until it’s one gloriously shiny, chocolatey pool.
Step 3: The Whisking Workout
Let the chocolate mixture cool for just a minute or two—you don’t want it so hot that it cooks the eggs when you add them! Now, whisk in the sugar. Then, add the eggs one at a time, whisking vigorously after each addition. This is the moment you’re building the structure and that signature shiny crust. Keep whisking for a good minute until the batter becomes thick and glossy. Now, whisk in the vanilla. See how it’s already starting to look like brownie batter? We’re getting close!
Step 4: Gently Does It
Switch to a spatula for this part. We’re going to gently fold in the almond flour, cocoa powder, and salt. The key word here is fold. Don’t aggressively stir! We want to incorporate the dry ingredients without deflating all the air we just whisked into the eggs. Mix until just combined and no dry streaks remain. A few lumps are totally fine—overmixing is the enemy of fudgy brownies.
Step 5: Pan & Sprinkle
Pour that beautiful, thick batter into your prepared pan and use your spatula to spread it into an even layer. Now, for the grand finale: sprinkle the top with those extra chocolate chips or nuts. This isn’t just for looks; it gives little pockets of molten chocolate in every bite.
Step 6: The Bake-Off
Slide that pan into the center of your preheated oven and set your timer for 22 minutes. This is the hardest part: do not open the oven door! We need that steady heat. At 22 minutes, take a peek. The edges should look set and the center should still look soft, but not raw. A toothpick inserted into the center should come out with some moist crumbs, not clean batter. If it needs more time, go in 2-minute increments. For super fudgy brownies, 22-25 minutes is usually the sweet spot.
Step 7: The Patience Test
This is the ultimate test of willpower. You must let the brownies cool completely in the pan on a wire rack. I know, the smell is intoxicating. But if you cut into them while they’re warm, they’ll be a gooey mess (a delicious mess, but still a mess). Cooling allows them to set up properly, giving you those clean, sharp slices we all love. For best results, I sometimes even pop the whole pan in the fridge for an hour after they’ve cooled to room temperature. Trust me, it’s worth the wait.
How to Serve Up These Beauties
Once they’re completely cool, use your parchment paper handles to lift the entire brownie block onto a cutting board. Slice them into 12 perfect squares (or 9 if you’re feeling generous!). These brownies are a masterpiece all on their own, but if you want to take them over the top, serve them slightly warm with a scoop of vanilla bean ice cream melting over the top. A drizzle of salted caramel or a dusting of flaky sea salt also works wonders. For a simpler treat, just grab one with a tall glass of cold milk or a hot coffee. Pure bliss.
Make Them Your Own: Delicious Variations
The beauty of this base recipe is how adaptable it is! Here are a few of my favorite twists:
- Salted Caramel Swirl: Before baking, drizzle 1/4 cup of warmed store-bought or homemade caramel sauce over the batter and use a knife to swirl it beautifully into the top. Sprinkle with flaky sea salt.
- Peppermint Patty: Add 1/2 tsp of peppermint extract along with the vanilla. Fold in 1/2 cup of chopped dark chocolate or chocolate chunks for a cool, refreshing twist.
- Espresso Infusion: Whisk 1 tablespoon of instant espresso powder or finely ground coffee into the melted chocolate mixture. This doesn’t make them taste like coffee—it just makes the chocolate flavor deeper and more intense.
- Rocky Road: After folding in the dry ingredients, stir in 1/2 cup of mini marshmallows and 1/2 cup of chopped walnuts or almonds.
- Double Chocolate Chip: For the ultimate chocoholic, fold an additional 1/2 cup of chocolate chips into the batter before pouring it into the pan.
Beau’s Kitchen Notes
This recipe has been through more iterations than I can count! The first time I made it, I was so excited I definitely underbaked it. We ended up eating brownie soup with spoons—which, let me tell you, is not the worst problem to have. I’ve learned that the perfect bake time can vary slightly depending on your oven and even the type of pan you use (glass vs. metal). My advice? Get to know your oven. That first batch is a learning experience. And if they do come out a little too gooey, just call them “brownie truffles,” scoop them into balls, and roll them in cocoa powder. No one will complain!
Over time, I’ve also started using a mix of chocolate chips and a chopped dark chocolate bar for even more complexity. This recipe is your foundation—feel free to build on it and make it your own. That’s what cooking is all about!
Your Brownie Questions, Answered
Q: My brownies are too cakey and dry. What did I do wrong?
A: The most common culprit here is overbaking. Remember, we’re going for fudgy, so the toothpick should have moist crumbs, not be clean. Another possibility is overmixing the batter after adding the almond flour, which can incorporate too much air. Finally, make sure you’re measuring your almond flour correctly—spoon it into the measuring cup and level it off. Packing it down can lead to using too much flour, resulting in a drier brownie.
Q: Can I make these dairy-free?
A: Absolutely! This recipe is incredibly easy to make dairy-free. Simply use dairy-free chocolate chips and substitute the butter with an equal amount of coconut oil. You’ll still get incredibly rich and fudgy results.
Q: Why didn’t I get a shiny, crackly top?
A: That shiny top is created by properly dissolving the sugar into the fat and eggs. The key is to whisk the sugar and eggs into the warm chocolate mixture really, really well. You’re essentially creating a simple emulsion. If your chocolate was too hot, it could have started to cook the eggs, and if it was too cool, the sugar might not dissolve properly. Getting that mixture to a glossy stage is the secret handshake to a perfect crackly top.
Q: How should I store these brownies?
A> Once cooled, store them in an airtight container at room temperature for up to 3 days. They also freeze like a dream! Just wrap individual squares in plastic wrap and place them in a freezer bag for up to 3 months. Let them thaw at room temperature or pop one in the microwave for 15 seconds for a warm, gooey treat.

ALMOND FLOUR BROWNIES
Description
Almond Flour Brownies (Gluten-Free & Irresistibly Fudgy)
Rich, chocolatey, fudgy brownies that taste indulgent but are gluten-free.
Ingredients
-
1 cup semisweet chocolate chips (or chopped dark chocolate)
-
1/2 cup butter (or coconut oil for dairy-free)
-
3/4 cup sugar (or coconut sugar)
-
2 large eggs, room temperature
-
1 tsp vanilla extract
-
1/2 cup almond flour (blanched, not almond meal)
-
1/4 cup cocoa powder (unsweetened)
-
1/4 tsp salt
-
Optional: extra chocolate chips, chopped nuts, mini marshmallows
Instructions
1. Prep
-
Preheat oven to 350°F (175°C).
-
Line an 8×8-inch pan with parchment paper, leaving a slight overhang for easy lifting.
2. Melt Chocolate & Fat
-
Melt chocolate chips and butter (or coconut oil) together in a microwave (30-second bursts) or double boiler until smooth.
3. Whisk Sugar & Eggs
-
Let chocolate mixture cool slightly.
-
Whisk in sugar, then eggs one at a time until thick and glossy.
-
Stir in vanilla extract.
4. Fold in Dry Ingredients
-
Gently fold in almond flour, cocoa powder, and salt until just combined. Avoid overmixing.
-
Optional: fold in extra chocolate chips, nuts, or mini marshmallows.
5. Bake
-
Pour batter into prepared pan and spread evenly.
-
Bake 22–25 minutes until edges are set and center has moist crumbs.
-
Toothpick should come out with a few crumbs, not wet batter.
6. Cool & Slice
-
Cool completely on a wire rack (or refrigerate for 1 hour for cleaner slices).
-
Lift using parchment overhang and cut into 12 squares.
Notes
-
Don’t overbake; fudgy is the goal.
-
Avoid overmixing after adding almond flour.
-
For a shiny, crackly top, whisk eggs and sugar well into slightly cooled chocolate.
Nutrition
- Calories: 210 Cal per brownie
- Carbohydrates: 19g
- Fiber: 2g
- Protein: 4g
Nutritional Information*
*This is an estimate provided for informational purposes only. Actual values will vary based on specific ingredients used.
Per Brownie (based on 12 brownies): Calories: 210 | Protein: 4g | Carbohydrates: 19g | Fiber: 2g | Sugar: 15g | Fat: 14g
Prep Time: 10 min | Cook Time: 25 min | Total Time: 35 min
Final Thoughts: More Than Just a Brownie
So there you have it—the recipe that changed my gluten-free baking game and brought a piece of my grandma’s kitchen into my own. These almond flour brownies are proof that you don’t have to choose between mindful ingredients and decadent, soul-satisfying flavor. They’re a testament to the fact that the best recipes aren’t about restriction, but about rediscovery.
I hope this batch brings as much joy to your kitchen as it has to mine. I hope it fills your home with that unforgettable chocolatey aroma and gives you that same feeling of triumph I felt when I finally nailed the recipe. Most importantly, I hope it reminds you that no dietary tweak should ever mean missing out on life’s simple, delicious pleasures.
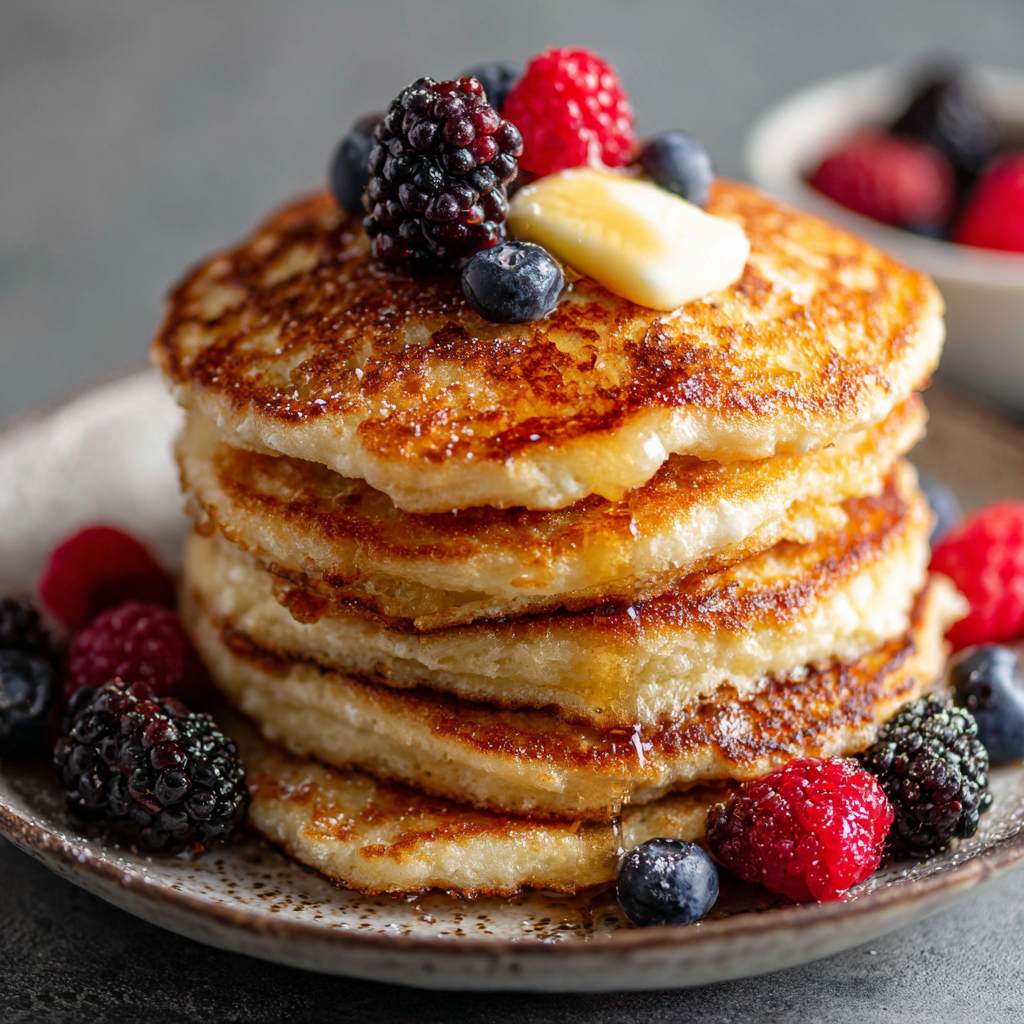
Amazing Fluffy Cottage Cheese Pancakes : Perfect for Breakfast or Brunch
Wake Up to a Stack of Pure Comfort
Hey friends, Beau here! Let’s talk about one of life’s simplest, most perfect pleasures: a tall, warm stack of pancakes on a slow morning. The sizzle of batter hitting a hot pan, that sweet, toasty aroma filling the kitchen, the quiet promise of a delicious meal shared (or blissfully savored solo) – it’s pure kitchen magic. But if you’re anything like me, you’ve also known the disappointment of a pancake that’s just… meh. Too dense, too dry, or so airy it disappears after two bites. We deserve better. Our mornings deserve better.
That’s why I’m so excited to pull you into my kitchen today to share a recipe that changed my pancake game forever: Amazing Fluffy Cottage Cheese Pancakes. Before you wrinkle your nose at the “cottage cheese” part, hear me out. This isn’t a health-food gimmick; it’s a total texture revelation. These pancakes are the beautiful lovechild of a classic buttermilk flapjack and a tender, creamy Dutch baby. They achieve this incredible height and a fluffy, melt-in-your-mouth crumb, while the cottage cheese works its silent magic, adding a subtle tang, a protein punch that keeps you full for hours, and a luxurious, moist tenderness inside.
They’re the perfect canvas for all your favorite toppings – a river of maple syrup, a tumble of fresh berries, a dollop of lemon curd – but honestly, they’re so good you could eat them plain. They’re weekend-special but easy enough for a Wednesday. They’re what I make when I want to treat my family, or when I need a protein-packed fuel-up before a busy day. So, tie on your apron, grab your favorite spatula (let’s hope you find it!), and let’s make a breakfast memory together. Trust me, once you go cottage cheese, you never go back.
The Happy Accident That Started It All
This recipe has a fun little origin story, as the best ones often do. It was a Sunday morning a few years back, and I was in full “clean-out-the-fridge” mode before the grocery run. The usual pancake suspects were MIA: no buttermilk, and my last egg was staring at me, lonely, in the carton. But I had a whole container of cottage cheese that needed using, and a serious pancake craving.
I remember standing there, fridge door open, letting the cold air hit my legs, thinking, “Well, it’s creamy… it’s kind of like ricotta… people put ricotta in pancakes…” With a “what’s the worst that could happen?” shrug, I tossed it into the blender with the lonely egg and a couple more I miraculously found. I added just enough flour to bring it together and crossed my fingers. The first one that hit the skillet puffed up like a little golden cloud. I was shocked! That first bite was the real revelation – incredibly light, yet somehow substantial, with a rich, almost custardy center. My wife took one bite, raised an eyebrow, and said, “What did you do? These are incredible.” That happy fridge-foraging accident is now a cornerstone of our brunch repertoire. It taught me that sometimes, the best recipes come from a little improvisation and a willingness to play with your food.
Gathering Your Kitchen Crew (Ingredients & Insights)
One of the things I love about this recipe is its beautiful simplicity. You likely have most of this in your kitchen right now. Here’s what you’ll need and my little chef’s notes on each:
- 1 cup cottage cheese: The star of the show! I prefer full-fat for the richest flavor and creamiest texture, but low-fat works perfectly well. Don’t use fat-free, as it can be a bit rubbery. If you have lumps and want a super-smooth batter, give it a quick blend or mash with a fork. I often leave the small curds for a bit of lovely texture.
- 3 large eggs: Our binding agent and a key source of that glorious fluff. They provide structure and richness. Make sure they’re at room temperature if you can – they incorporate more easily into the batter.
- 1/2 cup all-purpose flour: Just enough to give the pancakes structure without weighing them down. For a gluten-free twist, oat flour is a fantastic 1:1 swap and adds a lovely, nutty flavor.
- 1 tablespoon sugar (optional): A touch of sweetness to balance the tang of the cottage cheese. I usually include it, but you can skip it if you plan to drown your stack in syrup or if you’re watching sugar intake. A natural alternative like maple syrup or honey in the batter works too – just reduce other liquids a smidge.
- 1/2 teaspoon baking powder: Our leavening agent – the tiny miracle worker that gives these pancakes their lift. Make sure yours is fresh (less than 6 months old) for maximum puff power.
- 1/4 teaspoon salt: Never, ever skip the salt in baking. It enhances every other flavor in the pan. It’s the difference between “tasty” and “WOW.”
- 1/2 teaspoon vanilla extract: The warm, aromatic hug for your batter. Pure vanilla is always my go-to for that extra layer of cozy flavor.
- Butter or oil for cooking: Butter equals flavor, hands down. It gives the edges that lacy, crispy, golden-brown finish. For a higher smoke point, use avocado oil or ghee. A light, neutral oil like grapeseed works if you’re out of butter.
Let’s Get Flipping! (Step-by-Step with Beau’s Hacks)
Ready to make magic? Here’s my foolproof, chatty guide to pancake perfection. Read through once before you start – it makes the whole process feel like a breeze.
Step 1: The Gentle Mix. In a medium-sized bowl, combine your cottage cheese, eggs, vanilla extract, and sugar (if using). Use a sturdy fork or a whisk to mix this until it’s mostly smooth. You’ll still see some tiny white flecks from the cottage cheese, and that’s totally fine – we want character! Chef’s Hack: If you have an immersion blender or regular blender, you can blitz these wet ingredients for about 10 seconds for an ultra-smooth, crepe-like texture. Both methods are great!
Step 2: The Dry Team Joins In. Sprinkle the flour, baking powder, and salt right over the wet ingredients. Now, here’s the crucial tip for fluffy anything: mix until just combined. Use a gentle folding motion with a spatula. A few lumps in the batter are not the enemy; overmixing is! Overmixing develops the gluten in the flour and leads to tough, flat pancakes. We want tender, airy clouds. Your batter will be thick, creamy, and slightly stretchy – that’s perfect.
Step 3: Pan Prep is Key. Place a non-stick skillet or a well-seasoned griddle over medium heat. Not high, not low – medium is the sweet spot. Let it heat up for a good 3-4 minutes. This is the secret to even cooking and a beautiful golden crust. Test it by flicking a few drops of water onto the surface; they should skitter and dance. Add a small pat of butter or a drizzle of oil and swirl to coat.
Step 4: The Cook & Flip. Using a 1/4-cup measure or a large spoon, drop portions of batter onto the hot skillet. I like to make them about the size of my palm. They won’t spread much because the batter is thick. Now, be patient. Let them cook for 2-3 minutes. You’ll know it’s time to flip when the edges look set, the surface is dotted with several popped bubbles, and the bottom is a deep golden brown (peek gently with your spatula). Slide your spatula underneath with confidence and flip in one smooth motion. Cook for another 1-2 minutes on the second side until golden and puffed. Chef’s Hack: Don’t press down on the pancakes with the spatula after flipping! You’ll squeeze out all the lovely air we worked so hard to create.
Step 5: Keep ‘Em Cozy. As you cook in batches, transfer your finished pancakes to a wire rack set on a baking sheet in a warm oven (set to 200°F/95°C). This keeps them all perfectly warm and crisp until the whole family is ready to eat. Stacking them on a plate will trap steam and make the bottoms soggy – the wire rack prevents that tragedy!
Plating Up Your Masterpiece
This is the fun part! How you serve these can take them from amazing to absolutely legendary.
I’m a classicist at heart: a towering stack with a generous pad of good, salted butter melting into every layer, and a cascade of warm, pure maple syrup flowing down the sides. For a fresh twist, I love a tumble of mixed berries (blueberries, raspberries, sliced strawberries) and a dusting of powdered sugar.
Want to get fancy? Try a dollop of lemon curd and fresh raspberries for a bright, sunny flavor. Or go savory with a side of crispy turkey bacon and a drizzle of hot honey. For extra protein, a scoop of Greek yogurt and some toasted nuts on top is incredible. Serve them with a big pot of strong coffee, freshly squeezed orange juice, or a pot of herbal tea. Remember, presentation is part of the joy – use a pretty plate, add a sprig of mint, and make your morning feel special.
Make It Your Own: Delicious Twists & Swaps
The beauty of this base recipe is its versatility. Once you’ve mastered the classic, play around! Here are a few of my favorite riffs:
- Blueberry Lemon Zest: Fold 1/2 cup of fresh or frozen blueberries and the zest of one lemon into the batter right before cooking. The burst of berry and citrus is a classic for a reason.
- Chocolate Chip Comfort: A handful of semi-sweet or dark chocolate chips transforms these into a dessert-for-breakfast treat. Sprinkle the chips onto each pancake right after you pour the batter onto the skillet so they don’t all sink to the bottom.
- Savory Herb & Pepper: Omit the sugar and vanilla. Fold in 2 tablespoons of chopped fresh chives, 1/4 teaspoon of garlic powder, and lots of cracked black pepper. Serve with a dollop of sour cream and smoked salmon for an epic brunch.
- Gluten-Free & Hearty: Use 1/2 cup oat flour (just blend rolled oats until fine!) as mentioned. For extra fiber, add 2 tablespoons of ground flaxseed or chia seeds to the dry ingredients.
- “Ricotta-Style” Pancakes: Swap the cottage cheese for an equal amount of whole-milk ricotta for an even richer, slightly sweeter, and more uniform texture. It’s pure decadence.
Beau’s Kitchen Confidential Notes
This recipe has evolved in my kitchen from that initial “fridge forage” into a true staple. I’ve learned that the batter thickness can vary slightly based on your cottage cheese brand’s moisture content. If it feels too thick to scoop, add a splash of milk (just a tablespoon at a time). If it’s runny, add a spoonful more flour. Cooking is about feel!
One funny fail I had early on was using a pan that was too hot. The outside burned before the fluffy inside could set, leaving me with sad, dark pancakes that were raw in the middle. Patience with that medium heat is non-negotiable. Now, I use that waiting time to set the table, brew the coffee, and soak in the anticipation. That’s part of the ritual, too. These pancakes also freeze like a dream. Cool them completely on a rack, then layer between parchment paper in a freezer bag. Reheat in the toaster for a instant gourmet breakfast on a busy day!
Your Pancake Questions, Answered
Q: My pancakes aren’t fluffy. What went wrong?
A: The most common culprits are old baking powder (it loses its power over time) or overmixing the batter. Also, make sure your pan is properly preheated to medium, not high. High heat sets the outside too fast, preventing the lift from the baking powder.
Q: Can I make the batter ahead of time?
A: I don’t recommend it for the fluffiest results. The baking powder starts working as soon as it hits the liquid. For the best rise, cook the batter within 10-15 minutes of mixing it. You can, however, pre-measure all your dry and wet ingredients the night before for a super-fast morning assembly.
Q: My pancakes are sticking to the pan, even though it’s non-stick!
A: This usually means 1) the pan wasn’t hot enough before adding the batter, or 2) you tried to flip them too early. Wait for those bubbles and set edges. Also, ensure you’re using enough butter/oil to lightly coat the surface for each new batch.
Q: Can I use a blender for everything?
A> Absolutely! Blending all the ingredients together is my go-to method for a perfectly smooth, diner-style texture. Just pulse until combined—don’t over-blend. It’s also great for hiding the cottage cheese from skeptical kids (our secret!).

Amazing Fluffy Cottage Cheese Pancakes : Perfect for Breakfast or Brunch
Description
These cottage cheese pancakes are the ultimate weekend—or any day—treat: fluffy, tender, and rich with subtle tang. The cottage cheese keeps them moist and protein-packed, while the eggs and flour create a light, airy texture. Perfect with maple syrup, berries, or even savory toppings.
Ingredients
-
1 cup full-fat cottage cheese
-
3 large eggs
-
½ cup all-purpose flour (or oat flour for GF)
-
1 tbsp sugar (optional)
-
½ tsp baking powder
-
¼ tsp salt
-
½ tsp vanilla extract
-
Butter or oil, for cooking
Optional toppings: Maple syrup, fresh berries, lemon curd, Greek yogurt, toasted nuts, or savory sides.
Instructions
1. Mix Wet Ingredients:
-
In a medium bowl, combine cottage cheese, eggs, vanilla, and sugar. Mash lightly with a fork or blend briefly for a smooth texture.
2. Fold in Dry Ingredients:
-
Sprinkle in flour, baking powder, and salt. Gently fold until just combined. Some lumps are fine—overmixing = tough pancakes.
3. Heat the Pan:
-
Preheat a non-stick skillet or griddle over medium heat for 3–4 minutes. Test with a few water drops—they should skitter. Coat lightly with butter or oil.
4. Cook Pancakes:
-
Pour ¼ cup batter per pancake. Cook 2–3 minutes until edges look set and bubbles form. Flip carefully and cook another 1–2 minutes until golden. Don’t press them down!
5. Keep Warm:
-
Place cooked pancakes on a wire rack in a 200°F (95°C) oven while cooking the rest to avoid soggy bottoms.
6. Serve:
-
Stack, add your favorite toppings, and enjoy warm.
Notes
-
Blueberry Lemon Zest: Fold ½ cup blueberries + zest of 1 lemon into batter.
-
Chocolate Chip: Sprinkle semi-sweet chips onto batter in pan.
-
Savory: Skip sugar/vanilla, add 2 tbsp chopped chives + ¼ tsp garlic powder, serve with sour cream & smoked salmon.
-
Ricotta-Style: Swap cottage cheese for whole-milk ricotta for richer texture.
-
Freezing: Cool pancakes, layer with parchment in freezer bag. Reheat in toaster.
Nutritional Breakdown (A Chef’s Perspective)
While I’m all about flavor first, it’s nice to know what’s fueling your day! This is an approximate breakdown for one serving (about 3 pancakes) from the recipe as written, using full-fat cottage cheese. Please note, this does not include toppings like syrup or butter.
- Calories: ~280-320
- Protein: 17-20g (The cottage cheese and eggs make this a protein powerhouse!)
- Carbohydrates: 20-25g
- Fat: 12-15g
Compared to traditional pancakes, you’re getting significantly more protein and fewer refined carbs, which helps keep your energy stable and hunger at bay. It’s a satisfying meal that truly fuels you. Using low-fat cottage cheese and egg whites can adjust these numbers, but I always advocate for the balance and satiety that healthy fats from whole eggs and dairy provide.
The Last Bite
And there you have it, friends – my not-so-secret secret to the fluffiest, most satisfying pancakes around. This recipe is a testament to the joy of simple ingredients coming together to create something extraordinary. It’s about more than just breakfast; it’s about starting the day with a small act of delicious self-care, or gathering your people around the table
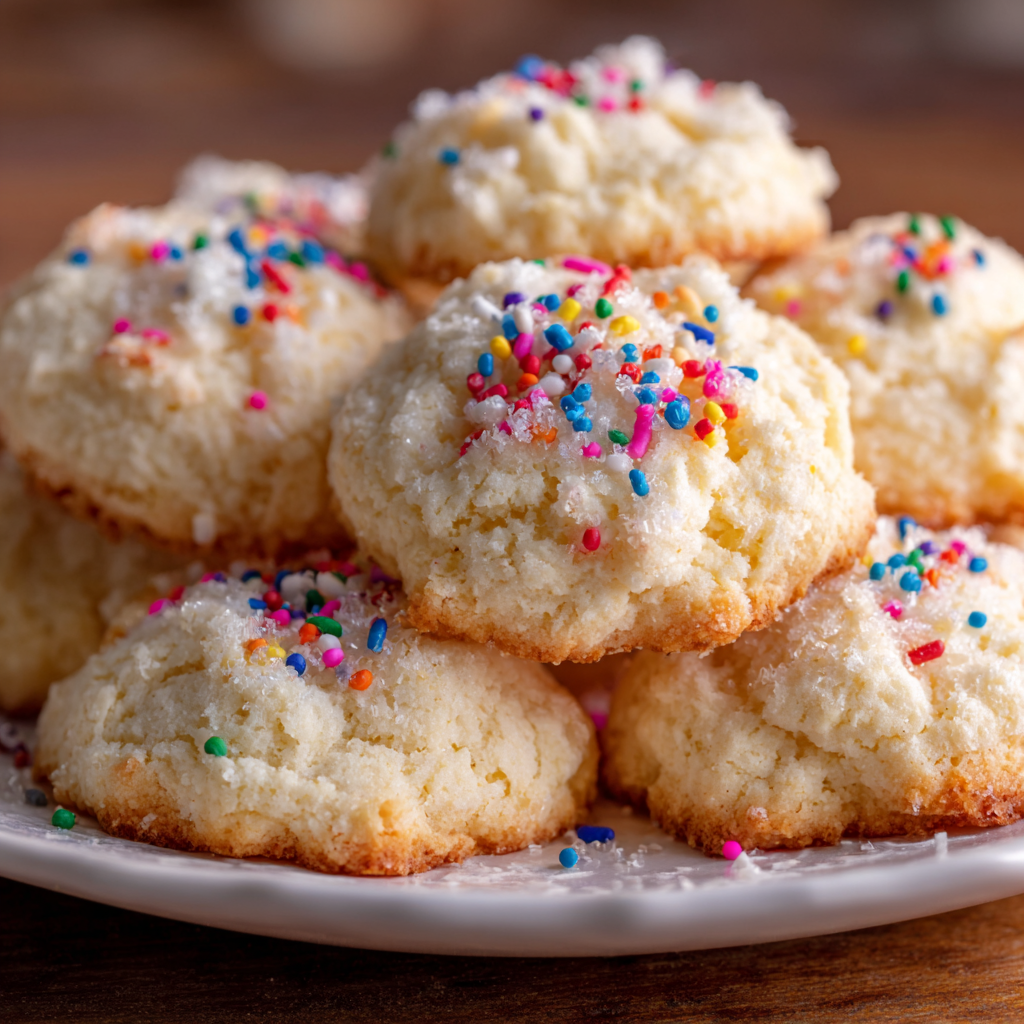
Angel Food Cake Cookies
Heavenly Bites: Your New Favorite Angel Food Cake Cookies
Hey friends, Beau here! Let’s be real for a second. Is there anything more wonderfully simple and soul-soothing than a classic angel food cake? That cloud-like texture, that delicate sweetness that just melts on your tongue… it’s a hug in cake form. But let’s also be real about something else: sometimes, you don’t want to haul out the tube pan, separate a dozen eggs, and patiently wait for a full-sized cake to cool. Life gets busy, cookie cravings hit hard, and we need a little bit of that heavenly magic, stat.
That’s exactly why I’m so ridiculously excited to share this recipe with you today. We’re taking everything we adore about angel food cake and transforming it into the most delightful, soft, and chewy cookies you’ve ever sunk your teeth into. And the best part? We’re doing it with just three simple ingredients and about 15 minutes of your time. No kidding!
These Angel Food Cake Cookies are my go-to for last-minute potlucks, a fun baking project with the kids, or when I just need a sweet little treat that feels a bit lighter. They’re impossibly easy, incredibly satisfying, and they taste like a sweet little cloud decided to take a cozy nap in your cookie jar. So, preheat that oven, grab your favorite mixing bowl, and let’s whip up some pure, uncomplicated joy together.
A Slice of Sunshine and a Hand-Me-Down Recipe
This recipe always takes me back to my grandma’s sun-drenched kitchen. She was the queen of “semi-homemade” magic long before it was a trend. She believed good food was about the feeling it created, not about slaving over a hot stove for hours. I remember one sweltering summer afternoon, the kind where the air felt like a warm blanket. I was maybe ten years old, covered in grass stains, and desperately craving something sweet.
Grandma just smiled, wiped the sweat from her brow, and pulled out a box of cake mix and a tub of yogurt. My little-kid brain was confused. “We’re making a cake? But it’s too hot for cake!” She just winked and said, “We’re making sunshine, honey.” What came out of the oven weren’t cakes, but these puffy, golden-topped little cookies. We ate them sitting on the back porch steps, still warm, and they were pure bliss. That day, she didn’t just teach me a recipe; she taught me that the best kitchen tricks are often the simplest ones, and that a little creativity can turn a few basic ingredients into a core memory.
Gathering Your Cloud-Making Kit
Here’s the beautiful part: your shopping list is incredibly short. This is all you need to create cookie magic. Let’s break it down, because even simple ingredients deserve a little love and explanation.
- 1 box (approx. 15.25 oz) Classic White Cake Mix: This is the powerhouse of our recipe, providing the structure and that signature angel food cake flavor. I often use Baker’s Corner or a similar store brand—it works perfectly! Chef’s Insight: Avoid cake mixes that already have pudding in the mix, as they can make the dough too dense. We want light and airy!
- 2 cups Nonfat Greek Yogurt: This is our brilliant swap for eggs and oil! The yogurt adds moisture, a slight tang that balances the sweetness, and a boost of protein. It’s what gives the cookies their wonderfully soft and chewy texture. Substitution Tip: You can use full-fat Greek yogurt for a slightly richer cookie, or even a plain regular yogurt (just know the batter might be a tad thinner). For a dairy-free version, an unflavored, unsweetened plant-based yogurt works wonders.
- 1 teaspoon Vanilla Extract: The supporting actor that makes the star shine brighter. A good vanilla enhances the sweet, delicate flavor of the cake mix and makes your whole kitchen smell amazing. Chef’s Insight: If you’re feeling fancy, a scrape of real vanilla bean paste would be sublime here!
- Optional: Holiday Sprinkles or Powdered Sugar for Topping: This is where you make them your own! A sprinkle of colorful jimmies makes them party-ready, while a dusting of powdered sugar right after baking gives them that elegant, snow-kissed look.
Let’s Bake! Your Foolproof Cookie Roadmap
Ready to see some magic happen? Follow these steps, and you’ll be a cookie hero in no time. I’ve packed this section with all my favorite little hacks to ensure your success.
- Preheat and Prep. Fire up your oven to 350°F (175°C). This is the perfect temperature to get these cookies to puff up beautifully without browning too much. Now, line a baking sheet with parchment paper. Chef’s Hack: Do not skip the parchment! This batter is sticky, and parchment is your best friend for easy cleanup and preventing any stuck-on cookie tragedies.
- The Big Mix. In a large mixing bowl, combine the entire box of cake mix, the Greek yogurt, and the vanilla extract. Now, grab a sturdy spatula or a wooden spoon and mix until you have a thick, sticky, and fully combined dough. Chef’s Commentary: Don’t be tempted to use an electric mixer here—it’s overkill and can overwork the dough. A little arm workout is good for the soul! The dough will be very thick and tacky, and that’s exactly what we want.
- Scoop and Plop. Using a medium cookie scoop (about 1.5 tablespoons), drop rounded mounds of dough onto your prepared baking sheet, spacing them about 2 inches apart. Chef’s Hack: The beauty of these cookies is their rustic, “cloud-like” appearance. Don’t try to roll them into perfect balls—just scoop and plop! If you’re adding sprinkles, now’s the time to press a few onto the top of each cookie before baking.
- Bake to Perfection. Slide the baking sheet into your preheated oven and bake for 10-12 minutes. You’re looking for the cookies to be “set”—they won’t brown much on top, but the edges and bottoms will be a very light golden color. Chef’s Insight: They might still look a little soft in the center, and that’s perfect! This is the secret to their soft, cake-like interior. Do not overbake!
- The Patient Cool Down. This might be the hardest step! Let the cookies cool on the hot baking sheet for at least 5 minutes before you even think about moving them. Chef’s Hack: They are very delicate right out of the oven and need this time to firm up. After 5 minutes, you can gently transfer them to a wire rack to cool completely. I promise, the wait is worth it.
How to Serve Up a Little Slice of Heaven
Okay, the cookies are cooled, and your willpower has been heroic. Now, how do we make these simple bites feel extra special? Presentation is part of the fun!
For a classic, elegant look, give them a generous dusting of powdered sugar right before serving. It looks like a light snowfall and adds a tiny extra burst of sweetness. If you’re serving them for a birthday or holiday, a small bowl of extra sprinkles on the side lets guests customize their own cookie.
Now, let’s talk pairings. These cookies are a dream with a hot cup of coffee or a cold glass of milk. For a truly decadent dessert, sandwich a small scoop of vanilla bean ice cream or fresh whipped cream between two cookies. It’s an instant ice cream sandwich that will blow your mind! They also make a fantastic base for strawberry shortcake—just top a cookie with macerated strawberries and a dollop of whipped cream. Divine.
Make Them Your Own: Fun Flavor Twists!
Once you’ve mastered the basic recipe, the playground is open! Here are a few of my favorite ways to mix things up and keep this recipe on heavy rotation.
- Lemon Zest Sunshine: Add the zest of one large lemon to the dough. The bright, citrusy flavor cuts through the sweetness and is an absolute classic pairing. A simple lemon glaze (powdered sugar + lemon juice) drizzled on top takes it to the next level.
- Funfetti Party Time: Swap the white cake mix for a Funfetti mix! Fold in an extra tablespoon or two of rainbow sprinkles into the batter for maximum color and fun. It’s an instant party in a cookie.
- Chocolate Dream: Use a devil’s food cake mix instead of white. You’ll get a rich, chocolatey, brownie-like cookie that’s still incredibly soft. Fold in a handful of white chocolate chips to really lean into the “angel” theme.
- Berry Blast: Gently fold in ½ cup of freeze-dried strawberry or raspberry pieces (crushed into small bits) into the dough. They add a fantastic pop of fruity flavor and a little bit of texture without making the dough wet.
- Gluten-Free & Dairy-Free Friendly: Use your favorite gluten-free white cake mix and a plain, unsweetened almond or coconut yogurt. The method stays exactly the same, so everyone can enjoy a taste of heaven.
Beau’s Kitchen Chronicles
This recipe has been a staple in my kitchen for years, and it’s evolved in the best ways. I once, in a pre-coffee haze, accidentally used a vanilla frosting instead of the yogurt. Let me tell you, that was a sticky, sweet disaster we don’t need to repeat! The beauty of this recipe is its flexibility. I’ve made them with kids who are just learning to bake, and I’ve served them at fancy dinner parties where everyone demanded the recipe.
The biggest lesson? Embrace the “plop.” These cookies aren’t meant to be perfectly uniform. Their rustic, craggy tops are part of their charm. So don’t stress, have fun, and know that even if they’re a little misshapen, they’re going to taste absolutely incredible.
Your Questions, Answered!
I’ve gotten a lot of questions about these cookies over the years, so I’ve compiled the most common ones right here to be your troubleshooting guide.
Q: My dough is really, really sticky. Did I do something wrong?
A: Not at all! A very thick and sticky dough is completely normal for this recipe. That’s why using a cookie scoop and parchment paper is non-negotiable. If it’s absolutely unworkable, you can chill it for 15-20 minutes, but I find that a confident “scoop and plop” is all you need.
Q: Can I make the dough ahead of time?
A: You can! Simply mix the dough, cover the bowl tightly with plastic wrap, and store it in the refrigerator for up to 24 hours. Let it sit at room temperature for 10-15 minutes before scooping and baking. The cookies might be slightly denser, but still delicious.
Q: Why are my cookies flat?
A: This usually happens if the dough was over-mixed. Once the ingredients are just combined, stop mixing! Over-mixing can develop the gluten in the cake mix, leading to a flatter, tougher cookie. Remember, gentle is the name of the game.
Q: How should I store these cookies?
A: Because of the yogurt, it’s best to store them in a single layer in an airtight container in the refrigerator. They’ll keep for 3-4 days. You can also freeze the baked cookies for up to 2 months!

Angel Food Cake Cookies
Description
A Slice of Sunshine and a Hand-Me-Down Recipe
This recipe always takes me back to my grandma’s sun-drenched kitchen. She was the queen of “semi-homemade” magic before it was cool. Her motto? Good food is about the feeling it creates, not how long you’re stuck at the stove.
I still remember one sweltering summer afternoon — I was ten, grass-stained, and craving something sweet. Grandma smiled, grabbed a box of cake mix and a tub of yogurt, and said, “We’re making sunshine, honey.”
Instructions
1. Preheat and Prep
Preheat oven to 350°F (175°C) and line a baking sheet with parchment paper.
Don’t skip the parchment — this dough is sticky!
2. Mix the Magic
Combine cake mix, Greek yogurt, and vanilla in a large bowl. Stir by hand with a sturdy spoon until thick and sticky.
No mixers needed — a little arm work keeps the dough tender.
3. Scoop and Plop
Drop rounded scoops (1½ tablespoons each) onto the baking sheet, 2 inches apart.
Press in sprinkles now if using. The rustic “cloud” look is part of their charm!
4. Bake to Perfection
Bake for 10–12 minutes, until the tops are set and the edges are pale golden.
They may look soft in the center — that’s perfect. Don’t overbake!
5. Cool with Care
Let cookies rest on the hot baking sheet for 5 minutes before transferring to a wire rack to cool completely.
Nutrition
- Calories: ~80 kcal
- Sugar: 9 g
- Fat: 1 g
- Carbohydrates: 16 g
- Protein: 2 g
A Lighter Little Treat
Now, I’m a chef, not a nutritionist, but I always like to have a general idea of what I’m eating. One of the things I love about these cookies is that by using Greek yogurt instead of the typical eggs and oil, we’re creating a treat that feels a bit lighter. You’re getting a nice little protein boost from the yogurt, which is a win in my book!
Please remember, these are approximate values and can vary based on the specific brands of ingredients you use. But for a general idea, per cookie (based on a yield of 24):
- Calories: ~80 kcal
- Fat: 1 g
- Carbohydrates: 16 g
- Sugar: 9 g
- Protein: 2 g
Allergen Note: This recipe contains gluten and dairy (if using dairy-based yogurt). Please see the variations section for easy swaps!
Go Forth and Bake with Joy!
And there you have it, my friends—the incredible, three-ingredient cookie that tastes like a dream. This recipe is proof that you don’t need a pantry full of fancy ingredients or a whole afternoon to create something truly special and delicious. It’s about the joy of baking, the smell of vanilla filling your kitchen, and the smile on someone’s face when they bite into a warm, soft cookie.
I hope this recipe becomes a quick and easy favorite in your home, just like it is in mine. It’s a little trick I’m so happy to share with you. Now, I’d love to hear from you! Did you add a fun twist? Did your kids love plopping the dough? Tag me on social @Feastical or shoot me an email—I love seeing your kitchen creations.
Final Thoughts: A Little Bit of Heaven, Made Simple
So there you have it, friends. A cookie that’s as easy to make as it is delightful to eat. These Angel Food Cake Cookies are more than just a recipe; they’re a reminder that incredible treats don’t have to be complicated. They’re proof that with a little ingenuity (and a trusty box of cake mix), you can capture the essence of a classic dessert in a brand-new, bite-sized form.
From my grandma’s sun-drenched kitchen to yours, this recipe is a testament to the joy of simple, feel-good food. It’s for the busy weeknights, the sudden sweet tooth, the baking session with a little one, and the need for a dessert that feels like a warm, fluffy hug.
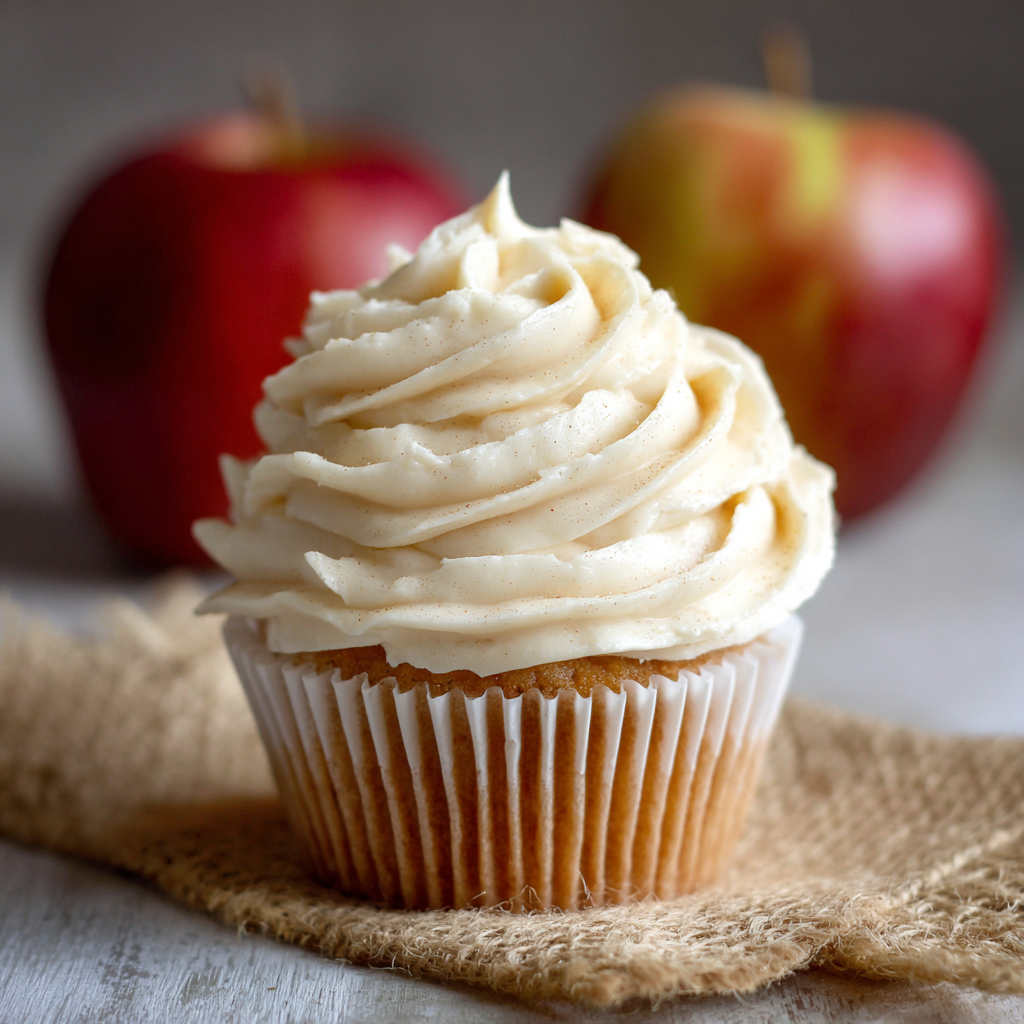
Apple Buttercream Icing
When Fall Calls, This Icing Answers
Hey friends, Beau here! 🍎✨ Ever have one of those moments when you’re elbow-deep in flour, the oven’s humming, and suddenly… your dessert feels naked? Like that spice cake you just pulled out deserves more than a sad sprinkle of sugar? That’s where this Apple Buttercream Icing swaggers in like a hero in a flannel shirt. Imagine whipped clouds of cinnamon-kissed sweetness with the cozy depth of slow-cooked apples, all fluffy enough to float away. This isn’t just frosting—it’s a hug for your cupcakes, a high-five for your pumpkin bread, and frankly, it’s dangerous with a spoon. I created this recipe after a cider mill pilgrimage left me drowning in apple butter (the happy kind of drowning!). Today, I’ll show you how to whip up this autumnal magic in 10 minutes flat. No fancy skills needed—just butter, joy, and maybe a podcast playing in the background. Ready to make your desserts the star of the fall potluck? Let’s dive in.
The Apple Orchard Epiphany
Picture this: Vermont, peak foliage season, and my buddy’s uncle’s orchard. We’re “helping” press cider (read: sampling more than working). Back home, I’m staring at a jar of apple butter so good it should be illegal. That’s when my spice cake—destined for a bake sale—decides to crumble mid-frosting. Panic mode! I grab the apple butter, whisk it into emergency buttercream, and… silence. Then, a chorus of “WHAT IS THIS SORCERY?!” from my taste-testers (aka my kids and the dog begging for crumbs). That happy accident became our family’s fall tradition. Now, every September, my daughter demands we make “the fuzzy apple sweater icing” (her words, not mine!). It’s proof that kitchen disasters often bake up the sweetest memories.
Your Flavor Toolkit: Simple Stars, Big Impact
- Butter (2 cups, softened): Salted or unsalted? I prefer salted—it balances the sugar’s sweetness. Pro tip: Leave it on the counter for 2 hours. Too cold? Grate it! Too warm? Chill for 5 mins. Vegan? Swap in plant-based butter (Miyoko’s works wonders).
- Powdered Sugar (10 cups): Yes, it’s a lot! This is a double batch because you’ll want leftovers (trust me). Sift it if you’re fancy—lumps hate smooth icing.
- Apple Butter (½ cup): The MVP! Use homemade or store-bought (my recipe’s here). Avoid “apple sauce”—it’s thinner and less flavorful. Pumpkin butter? Heck yes, try it in the variations!
- Apple Cider (4 tbsp): Reduces the powdered sugar’s chalkiness. Boil it down to 2 tbsp for intense flavor! No cider? Apple juice + ½ tsp cider vinegar works.
Whipping Up Clouds of Autumn (Seriously, It’s Easy)
- Beat that butter like it owes you money. In a stand mixer (or with a hand mixer), cream softened butter on medium-high for 3 minutes. Want extra fluff? Scrape the bowl halfway! Chef’s hack: Toss a kitchen towel over the mixer to avoid the “snowstorm of sugar shame.”
- Apple party time! Pour in apple butter and 3 tbsp cider. Mix on low until combined—don’t rush! Watch for separation: If it looks curdled, your butter was too cold. Fix: Warm the bowl with a hair dryer (seriously!).
- Sweeten the deal. Gradually add powdered sugar (½ cup at a time) on LOW speed. Once incorporated, crank it to high for 2 minutes. Texture check: Drag a spoon through it. If the line holds, you’re golden! Too thick? Add remaining cider ½ tsp at a time.
- Fluff therapy. Beat on high for 1 final minute. This aerates it into that dreamy, pipeable cloud. Taste? Add a pinch of cinnamon if your apple butter’s shy.
Where to Smear This Happy Stuff
Slather it on warm pumpkin muffins like edible sunshine. Pipe rosettes onto chai-spiced cupcakes and top with candied pecans. For drama, frost a naked caramel apple cake and drizzle with salted caramel. Bonus: Spread it between oatmeal cookies for “grown-up sandwich cremes.” My kids? They dip pretzel rods in it. Zero judgment here.
Shake It Up, Sugar!
1. Boozy Bourbon Bliss: Swap cider with 2 tbsp bourbon + 2 tbsp reduced cider. Adults only!
2. Dairy-Free Darling: Use vegan butter and coconut cream (1 tbsp) instead of cider.
3. Maple Kissed: Replace 1 cup powdered sugar with ¼ cup maple syrup (reduce cider by 1 tbsp).
4. Ginger Zing: Fold in 2 tsp grated fresh ginger for a spicy kick.
5. Protein Power: Mix in ¼ cup vanilla protein powder (great for post-workout… muffins?).
Confessions from My Icing-Splattered Apron
True story: I once added hot cider and melted the butter into soup. (Cue the sad trombone.) Now I reduce cider cold. This recipe’s evolved from a “fix-it-fast” trick to my most requested fall staple—even my stoic mailman asks for jars! Pro tip: Make a triple batch and freeze portions in muffin tins. They thaw in 30 minutes, ready for pancake emergencies. Also? If your icing tastes too sweet, a pinch of sea salt fixes everything. #LifeHack
Your Icing SOS, Solved
Q: Why is my buttercream runny?
A: Warm kitchen? Over-zealous cider adding? Pop the whole bowl in the fridge for 15 minutes, then re-whip. Still loose? Mix in 2 tbsp powdered sugar at a time.
Q: Can I use reduced-sugar apple butter?
A: Absolutely! But taste before adding all the powdered sugar—you might need less.
Q: How long does it keep?
A: 5 days refrigerated (in airtight containers), or freeze for 3 months. Let it warm to room temp before re-whipping.
Q: Why salted butter?
A: Salt cuts through sweetness and enhances flavor. If using unsalted, add ¼ tsp fine sea salt with the apple butter.

Apple Buttercream Icing
- Total Time: 10 mins (plus butter softening)
Description
Fluffy, spiced, and packed with apple butter goodness, this icing transforms basic desserts into autumnal masterpieces. Perfect for cakes, cupcakes, or eating straight from the bowl (we won’t judge).
Ingredients
-
2 cups (4 sticks) salted butter, softened (or vegan butter)
-
10 cups powdered sugar, sifted (yes, it’s a double batch—trust me!)
-
½ cup apple butter (not applesauce!)
-
4 tbsp apple cider (reduced to 2 tbsp for intense flavor)
-
1 tsp cinnamon (optional, for extra spice)
Instructions
-
Beat the butter on medium-high for 3 mins until light and fluffy. Scrape the bowl halfway.
-
Add apple butter & 3 tbsp cider. Mix on low until smooth.
-
Gradually add powdered sugar, ½ cup at a time, mixing on low. Then beat on high for 2 mins until fluffy.
-
Adjust consistency: Too thick? Add remaining cider, ½ tsp at a time. Too thin? Chill 15 mins, then re-whip.
Notes
✅ For best texture: Use room-temperature butter (press a finger in—it should dent easily).
✅ No apple cider? Use apple juice + ½ tsp cider vinegar.
✅ Storage: Keeps 5 days in the fridge or 3 months frozen. Re-whip before using.
Nutrition
- Calories: 110 Cal Per Tbsp
- Sugar: 14g
- Fat: 6g
Nutritional Sunshine (Per Tbsp)
Calories: ~110 | Sugar: 14g | Fat: 6g | Carbs: 15g
Note: This is frosting, friends—not kale. Enjoy mindfully! 😉
Final Thoughts: More Than Just Frosting
This apple buttercream isn’t just a recipe—it’s a story. It’s the crunch of Vermont leaves underfoot, the laughter of kids licking spoons, and the quiet pride of turning a kitchen oops into an heirloom trick. It’s proof that the best creations often come from improvisation (and a little desperation). Whether you’re dressing up a weeknight muffin or gifting a jar to a neighbor, this icing carries the warmth of fall in every bite. So go ahead—slather it thick, experiment wildly, and maybe, just maybe, eat a spoonful straight from the bowl. After all, as my daughter says, it’s basically “a fuzzy apple sweater for your soul.”

Apple Cider Cake with Cinnamon Sugar Topping
Warm Up Your Oven & Your Soul: Apple Cider Cake Magic!
Hey friends, Beau here! Is there anything better than that first crisp snap in the air? Suddenly, we’re all craving cozy sweaters, crackling fires, and flavors that hug us from the inside out. That’s exactly why I’m practically bursting to share this recipe with you today. This Apple Cider Cake with Cinnamon Sugar Topping? It’s pure autumn alchemy. Imagine the sweet, tangy essence of your favorite orchard cider baked right into a tender, moist cake. Then picture it wearing a gloriously crunchy, buttery crown of cinnamon sugar that crackles ever so slightly when you cut into it. This isn’t just dessert; it’s a golden ticket to fall nostalgia, perfect for tailgates, potlucks, or a quiet Tuesday night when you deserve a sweet high-five. It comes together faster than you can say “pumpkin spice latte,” uses simple ingredients (including a trusty cake mix – no shame in that game!), and fills your kitchen with a scent that rivals any fancy candle. So grab your favorite mug of cider (or coffee!), preheat that oven, and let’s bake up some seriously good vibes together. Your spatula is about to become a magic wand!
Orchard Adventures & Grandma’s Apron
This cake always whisks me straight back to my grandparent’s farm in Vermont. Every October, we’d pile into the old pickup truck for the annual apple picking pilgrimage. My brother and I would race through rows of gnarled trees, filling bushels until our arms ached, while Grandma Collier, ever practical in her flour-dusted apron, murmured about “pie potential.” But the real treasure? The fresh-pressed cider. We’d get it still warm from the mill, cloudy and tangy-sweet. Grandma, bless her, wasn’t a fancy baker. She believed in joy, not stress. One blustery afternoon, craving something simpler than pie, she grabbed a box of yellow cake mix, swapped the water for that glorious cider, tossed in some applesauce “for good measure,” and created pure magic. That humble experiment became legend. Baking this cake now, I swear I catch a whiff of woodsmoke and hear her laugh as the cinnamon sugar shimmers on top – a sweet, crunchy echo of those golden afternoons and the simple, soul-satisfying power of a shared treat.
Your Fall Flavor Toolkit
Gather up these simple stars! Don’t sweat substitutions – cooking should be fun, not fussy.
- 1 box yellow cake mix (Betty Crocker recommended): Our trusty foundation! Betty Crocker’s mix has the perfect crumb structure here. If you swap brands, aim for a classic “yellow” or “butter recipe golden” mix – avoid ones with pudding in the mix, they can get too dense.
- 3/4 cup apple cider: The HEART of the flavor! Use the good stuff – fresh, unfiltered, and preferably local for maximum apple punch. Chef’s Hack: Simmer 1 cup cider down to 3/4 cup for an intense flavor bomb! No cider? Unsweetened apple juice works, but bump up the cinnamon a pinch.
- 1/2 cup sweetened applesauce: Double apple power! This keeps the cake incredibly moist and adds natural sweetness. Unsweetened works too (just taste the batter, might need a smidge more brown sugar).
- 3 large eggs: Room temp, please! They bind everything and create a lovely lift. Cold eggs can make the batter lumpy.
- 2 tbsp butter, melted: Adds richness and depth beyond the oil in the mix. Salted or unsalted is fine here.
- 1 tbsp brown sugar: A little molasses magic for caramel undertones. Light or dark works!
- 1 tsp vanilla extract: The warm hug tying all the cozy flavors together. Pure extract makes a difference!
For That Irresistible Crunch (The Topping):
- 1/4 cup butter: Melted and ready to brush! This is the glue for our sugary crown. Use salted for a nice contrast.
- 1/2 cup granulated sugar: Creates that signature sweet crackle.
- 1 tsp cinnamon: The essential spice partner. Use fresh, fragrant cinnamon for the best punch! Feeling adventurous? Add a tiny pinch of nutmeg or cardamom.
Let’s Bake! Simple Steps to Sweet Success
Ready? This is where the magic happens! Follow these steps, and you’ll be a cake hero in no time.
- Preheat & Prep: Fire up your oven to 350°F (175°C). This is crucial for even baking! While it heats, grab your trusty 9×13-inch baking pan (metal or glass both work great!). Grease it generously with butter, baking spray, or a light swipe of oil. Chef’s Tip: For super-easy release, line the bottom with parchment paper after greasing!
- Batter Up!: In a large bowl (bigger than you think you need – trust me!), combine the dry cake mix, apple cider, applesauce, room-temperature eggs, melted butter, brown sugar, and vanilla extract. Key Hack: Dump everything in at once! No need for fancy alternating. Grab your electric mixer (handheld is perfect) or a sturdy whisk. Mix on medium speed for about 2 minutes, or until the batter is beautifully smooth and just combined. Don’t overmix! A few tiny lumps are totally fine; overbeating leads to toughness.
- Pan & Bake: Pour that gorgeous, fragrant batter into your prepared pan. Use a spatula to scrape the bowl and spread it evenly into the corners. Slide it into the preheated oven, middle rack position. Set your timer for 25 minutes. Chef’s Secret: Resist the urge to open the oven door early! Peeking lets heat escape and can cause uneven baking.
- Check for Doneness: At the 25-minute mark, do the toothpick test. Insert a toothpick or a clean butter knife into the very center of the cake. If it comes out clean or with just a few moist crumbs clinging, it’s DONE! If it’s still wet or gooey, give it 2-5 more minutes and check again. Ovens vary! Remember, the cake will continue cooking slightly as it cools.
- Topping Time! (The Fun Part): While the cake bakes, prep the topping. Melt the 1/4 cup butter in a small saucepan over low heat or in the microwave (use a microwave-safe bowl!). In another small bowl, whisk together the granulated sugar and cinnamon. As soon as the cake comes out of the oven (it MUST be warm!), immediately brush the entire surface evenly with the melted butter. Work quickly but gently. Then, grab handfuls of the cinnamon sugar and sprinkle it generously and evenly over the buttery surface. You should hear a faint, happy sizzle! Pro Move: Tilt the pan slightly as you sprinkle to cover the edges perfectly.
- Cool & Conquer: Let the cake cool in the pan on a wire rack for at least 20-30 minutes. This patience allows the topping to set into that perfect, crackly crust and lets the cake structure firm up for clean slices. Cutting into it too soon can make it crumble.
How to Serve Up the Cozy
This cake is a superstar all on its own, warm from the oven! Slice it into generous squares right in the pan. For pure, unadulterated bliss, serve it slightly warm – the cinnamon sugar topping will be extra shattery, and the cake impossibly tender. Feeling fancy? Plop a dollop of softly whipped cream (a hint of vanilla or bourbon whipped in is divine) or a scoop of high-quality vanilla ice cream right on top. The warm cake + cold cream combo is heavenly. A drizzle of warm caramel sauce or a sprinkle of chopped toasted pecans takes it over the top for a special occasion. But honestly? A fork and a comfy chair are all you really need.
Make It Your Own: Delicious Twists!
Love this base recipe? Try these fun spins:
- Nutty Crunch: Stir 1/2 cup chopped toasted pecans or walnuts into the batter before baking. Sprinkle another 1/4 cup on top with the cinnamon sugar for double nutty goodness!
- Apple Chunk Delight: Fold in 1 cup of finely chopped apples (peeled or unpeeled, Granny Smith or Honeycrisp) into the batter. Adds lovely texture and bursts of fresh apple flavor.
- Gluten-Free Goodness: Swap the yellow cake mix for your favorite 1:1 gluten-free yellow cake mix (like King Arthur or Bob’s Red Mill). Ensure your cider and applesauce are GF too!
- Bourbon-Spiked: Add 1-2 tablespoons of bourbon to the melted butter for the topping. Brush and sprinkle as usual – adds a warm, sophisticated note adults will love.
- Cream Cheese Swirl: Before baking, dollop the batter with spoonfuls of a mixture made from 4 oz softened cream cheese, 1/4 cup sugar, and 1 egg yolk. Swirl gently with a knife for a marbled effect. Bake as usual, then add the cinnamon sugar topping.
Beau’s Baking Backstory & Bits
This cake truly is a Feastical favorite and has evolved from Grandma Collier’s “throw it together” moment! Over the years, I’ve tinkered relentlessly. The brown sugar in the batter? That was a happy accident when I ran out of white sugar once – loved the depth it added! Simmering the cider down? Discovered that trick trying to use up leftover spiced cider that was too strong to drink. The biggest lesson? Don’t skip brushing the butter on while the cake is piping hot! That heat is what makes the sugar partially dissolve and then re-crystallize into that addictive, crunchy layer. I once got distracted by a very insistent squirrel outside my kitchen window (long story!) and let the cake cool too much before topping it. The result? Gritty sugar that just fell off. Total bummer! Now I treat the post-oven topping step like a sacred ritual. It’s foolproof… unless there are squirrels involved.
Your Apple Cider Cake Questions, Answered!
Let’s tackle those common kitchen curiosities:
- Q: My topping isn’t crunchy! It’s kinda wet/gritty. What happened?
A: The #1 culprit is usually the cake temperature. The cake MUST be piping hot when you brush on the butter and sprinkle the sugar. The heat helps melt the sugar slightly, allowing it to form that glassy crust as it cools. If the cake cooled too much, the butter just sits on top and the sugar stays gritty. Also, ensure you’re using melted butter, not softened. If it happens, pop the topped cake under the broiler for 1-2 MINUTES (watch like a hawk!) to melt the sugar, then let it cool again to set. - Q: Can I make this cake ahead of time?
A: Absolutely! Bake and top the cake as directed. Let it cool completely in the pan, then cover tightly with plastic wrap or foil. It keeps well at room temperature for up to 2 days. The topping might soften slightly but is still delicious. For longer storage (up to 3 months), freeze the cooled, UNTOPPED cake. Wrap it tightly. Thaw overnight in the fridge, then warm it gently in a 300°F oven for 10-15 minutes. Brush with melted butter and sprinkle the cinnamon sugar while it’s warm. - Q: My cake sunk in the middle! Why?
A: A few possibilities: 1) Overmixing: Beating the batter too long develops gluten, leading to collapse. Mix just until combined! 2) Underbaking: If the center wasn’t fully set, it collapses as it cools. Ensure the toothpick comes out clean. 3) Oven Temp: An oven running too cool can cause sinking. Use an oven thermometer to verify accuracy! 4) Opening the Oven Door: Resist peeking before at least 25 minutes! - Q: Can I use homemade cake flour instead of a mix?
A: While the mix is key for the simplicity factor, you *can*! Substitute with a recipe for a standard yellow cake (approx. 3 cups dry ingredients). Whisk together 2 1/2 cups all-purpose flour, 1 1/2 cups granulated sugar, 3 1/2 tsp baking powder, and 1 tsp salt. Then proceed with the wet ingredients (cider, applesauce, eggs, melted butter, brown sugar, vanilla). Baking time might vary slightly – start checking at 30 minutes.
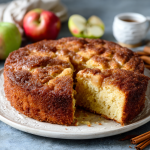
Apple Cider Cake with Cinnamon Sugar Topping
Ingredients
Cake:
-
1 box yellow cake mix (no pudding mix)
-
¾ cup fresh apple cider (reduce for stronger flavor)
-
½ cup sweetened applesauce
-
3 large eggs (room temp)
-
2 tbsp melted butter
-
1 tbsp brown sugar
-
1 tsp vanilla extract
Topping:
-
¼ cup melted butter
-
½ cup granulated sugar
-
1 tsp cinnamon
Instructions
-
Preheat & Prep – Heat oven to 350°F (175°C). Grease or parchment-line a 9×13 pan.
-
Mix Batter – Combine cake mix, cider, applesauce, eggs, melted butter, brown sugar, and vanilla. Mix on medium speed 2 min, just until smooth.
-
Bake – Pour into pan, spread evenly. Bake 25–30 min, until a toothpick comes out clean.
-
Top While Hot – Immediately brush cake with melted butter, then sprinkle cinnamon sugar evenly over top.
-
Cool & Serve – Let cool 20–30 min for topping to set. Slice and enjoy warm or at room temp.
Notes
-
Cake must be HOT when topping is added for the crunch to form.
-
For deeper apple flavor, simmer 1 cup cider to ¾ cup before adding.
-
Add diced apples or nuts for extra texture.
Nutrition
- Calories: 260 Cal per serving
- Sugar: 25g
- Fat: 10g
- Carbohydrates: 38g
- Protein: 3g
Nutritional Info (Approximate per serving)
Calories: 260 | Carbohydrates: 38g | Fat: 10g | Protein: 3g | Sugar: 25g | Sodium: 280mg
Remember, nutritional values are estimates and can vary based on specific brands and ingredient amounts used.
Final Thoughts: Why This Cake Captures Fall
This cake is more than dessert—it’s a sensory time machine. The crackle of cinnamon sugar echoes crunching leaves, the cider’s tang recalls orchard visits, and the warmth feels like a hug from Grandma’s kitchen. It’s versatile enough for fancy dinners and lazy Sundays alike, and forgiving enough for novice bakers.
So whether you’re baking it for a crowd or sneaking a midnight slice straight from the pan, remember: the best recipes aren’t just about flavor—they’re about feeling. Now go forth, bake joy, and let that cinnamon sugar crown work its magic!
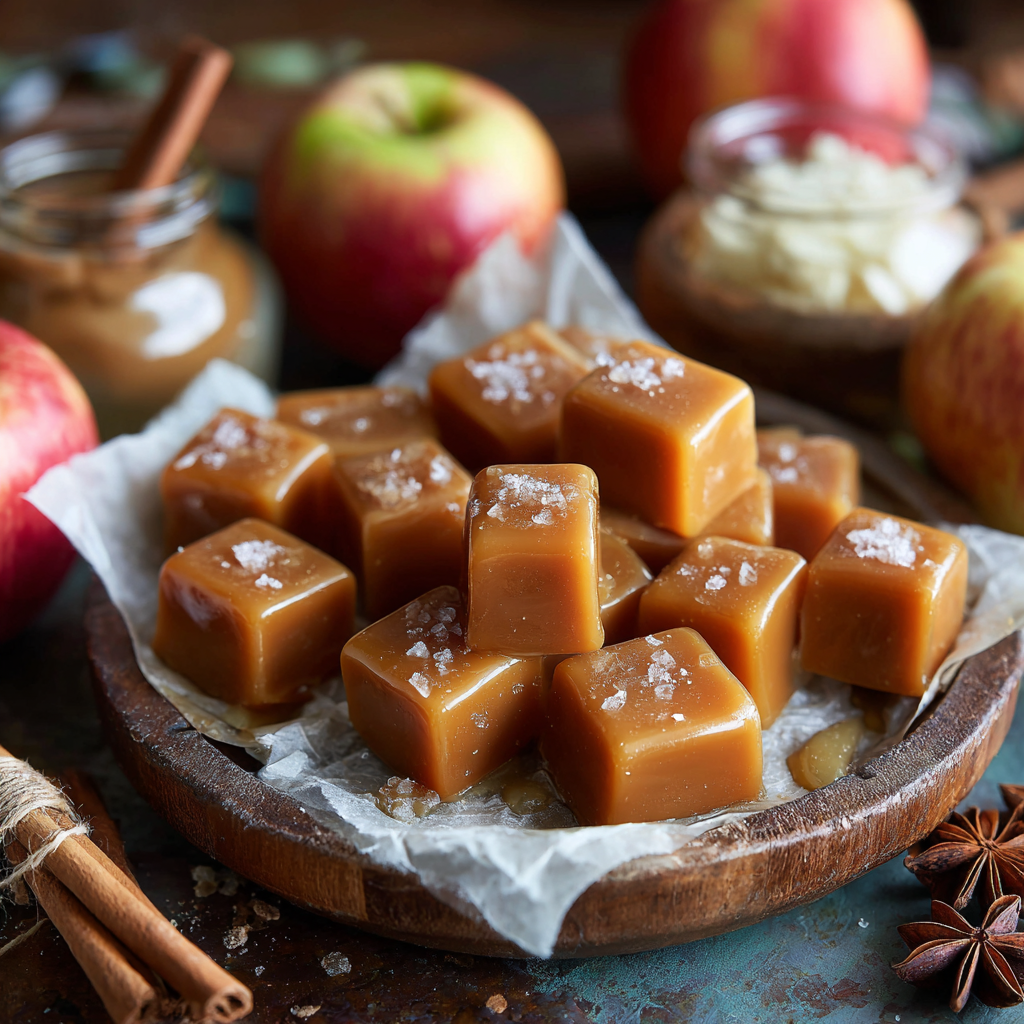
Apple Cider Caramels
Your New Favorite Fall Treat: Homemade Apple Cider Caramels
Hey friends, Beau here! Is there anything better than that crisp, magical feeling in the air when autumn finally rolls around? I’m talking about pulling on your favorite cozy sweater, the sound of leaves crunching under your boots, and the smell of something warm and spiced wafting from the kitchen. For me, fall isn’t just a season; it’s a full-blown vibe. And if I had to bottle up that feeling and turn it into a candy, it would absolutely be these unbelievably delicious Apple Cider Caramels.
Now, I know the words “homemade candy” might make some of you break out in a nervous sweat. But trust me on this one. We’re going to walk through this together, step-by-step, and I promise you’ll end up with a batch of soft, chewy, buttery caramels that taste like a walk through a sun-drenched apple orchard. They’re the perfect project for a lazy Sunday afternoon, and they make the most incredible, heartfelt gifts. Seriously, wrap a few of these in a little wax paper and you instantly become everyone’s favorite person. So, grab your favorite saucepan and let’s make some magic happen. This is feel-good food at its sweetest!
A Caramel Memory: Why This Recipe Sticks With Me
This recipe takes me right back to my first autumn living out in the country. My neighbor, Mrs. Gable, was this incredible force of nature—80 years young and still making her own apple cider from the ancient trees in her backyard. One blustery October afternoon, she showed up at my door with a giant jug of still-warm cider and a challenge: “Don’t just drink it, boy. Do something with it.”
I spent the whole weekend experimenting. There were a few… let’s call them “learning experiences” (aka a pot of scorched sugar that I’m still scraping off my stovetop). But finally, after much trial and error, I landed on this formula. The moment I tasted that first successful, spicy-sweet square, I knew it was a winner. I brought a whole tin over to Mrs. Gable, and the way her face lit up is a memory I’ll always cherish. It’s a reminder that the best recipes aren’t just about flavor; they’re about the stories and the people we share them with. Every time I make these caramels, I think of her and that lesson: to take something wonderful and make it even more special.
Gathering Your Autumn Arsenal: The Ingredients
Here’s everything you’ll need to create these little pockets of joy. The beauty of this list is its simplicity—most are pantry staples, with the star being that reduced apple cider!
- 2 cups apple cider: This is the heart and soul of the recipe! Don’t use apple juice; you want the robust, tangy, unfiltered flavor of real cider. The reduction process intensifies its flavor into a powerful syrup.
- 1 cup heavy cream: This is what gives our caramels that luxuriously creamy, soft chew. For a slightly richer flavor, you can sub in half-and-half in a pinch, but the texture will be a tad softer.
- 1 tsp ground cinnamon, ¼ tsp ground nutmeg, Pinch of ground cloves: Our warm spice trio! This is “apple pie in a jar” and it makes the kitchen smell incredible. Feel free to add a pinch of allspice or cardamom if you’re feeling adventurous.
- 1½ cups granulated sugar: The foundation of any good caramel. It caramelizes to create that deep, classic candy flavor we all love.
- ½ cup light corn syrup: Now, don’t fret! This isn’t here for sweetness. Corn syrup is a “interfering agent” that prevents the sugar from crystallizing, ensuring our caramels are smooth and chewy, not grainy and hard. It’s a candy-making essential.
- 1 stick (½ cup) unsalted butter, cubed: Unsalted is key so we can control the salt level. The butter adds richness, flavor, and that signature melt-in-your-mouth quality. Keep it cold and cubed so it incorporates evenly.
- ½ tsp sea salt: This is our secret weapon! The salt cuts through the sweetness and makes all the other flavors pop. I use a fine sea salt for even distribution.
- 1 tsp vanilla extract: The finishing touch. Use the real stuff! It adds a beautiful, warm aroma that complements the spices perfectly. Stir it in at the very end to preserve its flavor.
Let’s Get Cooking: The Step-by-Step Guide
Okay, team. Put on some good music, clear your workspace, and let’s do this. Read through all the steps once before you begin—it makes the process so much smoother.
Step 1: Reduce that Cider! First, pour your 2 cups of apple cider into a medium-sized, light-colored saucepan (a light interior helps you see the color change). Bring it to a boil over medium-high heat, then reduce to a steady simmer. Let it cook away for 20-30 minutes. You’re waiting for it to reduce down to about ½ cup. It will become a darker, more syrupy liquid and your whole house will smell amazing. Chef’s Hack: Swirl the pan occasionally, but don’t feel the need to stir constantly. Use this time to prep your other ingredients and line your pan!
Step 2: Prep Your Pan. While the cider reduces, take an 8×8-inch baking pan and line it with parchment paper, leaving some overhang on two sides. This creates “handles” that will make it super easy to lift the whole block of caramel out later. Lightly butter the parchment paper. This little extra step guarantees a perfect release.
Step 3: Create the Cream Mixture. Once your cider is reduced to a thick, dark syrup (you should have about ½ cup), take it off the heat. Immediately whisk in the heavy cream, cinnamon, nutmeg, and cloves. It might bubble up a bit—that’s normal! Once combined, set this spiced cider cream aside.
Step 4: The Main Event. Now, in a large, heavy-bottomed saucepan (I use a 4-quart Dutch oven—the heavy bottom prevents hot spots and burning), combine the granulated sugar, corn syrup, and cubed butter. Cook this over medium heat, stirring gently but constantly with a wooden spoon or heatproof spatula until the butter melts and the sugar completely dissolves. This should take about 5-7 minutes. Chef’s Hack: Avoid splashing the mixture up the sides of the pan. Sugar crystals there can fall back in and cause graininess.
Step 5: Combine and Cook to Temp. This is the most important part! Slowly and carefully pour the reserved spiced cider cream mixture into the sugar mixture. It will bubble vigorously. Stir it constantly until everything is smoothly combined. Now, attach your candy thermometer to the side of the pan, making sure the tip is submerged but not touching the bottom. Cook over medium heat, stirring occasionally, until the mixture reaches 248°F (120°C), the “firm-ball” stage. This can take 15-20 minutes. Be patient! Chef’s Hack: No thermometer? Test a small bit in a bowl of ice water. It should form a firm, pliable ball that doesn’t flatten when you take it out.
Step 6: Finish and Pour. As soon as it hits 248°F, immediately remove the pan from the heat! Working quickly, stir in the vanilla extract and sea salt. The vanilla will sizzle and steam—that’s its flavor releasing. Pour the hot caramel into your prepared pan. Try to pour it evenly—you can tilt the pan a bit to help it spread. Do not scrape the pot! Just leave that last bit behind to avoid any potentially scorched bits.
Step 7: The (Hardest Part) Wait. Let the caramel cool completely at room temperature until it’s firm. This takes at least 2 hours, but I often let it go for 3-4 or even overnight. Rushing this will make a sticky, messy cutting job.
Step 8: Cut and Wrap. Use the parchment paper handles to lift the entire slab of caramel onto a cutting board. Using a sharp knife, cut it into strips and then into small squares. If the knife gets sticky, grease it lightly with butter. Wrap each individual caramel in a small square of wax paper or parchment paper, twisting the ends. Now, try not to eat them all in one sitting!
How to Serve These Sweet Little Gems
You’ve done the hard work, now for the fun part: enjoying them! These caramels are incredibly versatile. Of course, they’re perfect just popped straight into your mouth from the jar. But let’s get creative!
For a gorgeous dessert platter, arrange a few caramels alongside some sharp aged cheddar, slices of a crisp apple (like Honeycrisp or Granny Smith), and a handful of toasted walnuts. The sweet, salty, creamy, and crunchy combo is a total showstopper. You can also chop them up and use them as a mind-blowing topping for vanilla ice cream or a warm apple pie—they’ll get wonderfully soft and saucy. And my favorite way? Gift them! Find a cute mason jar, cellophane bag, or vintage tin and fill it with these wrapped caramels. Tie it with a bit of twine or ribbon, and you have a genuinely heartfelt, homemade gift that says, “I think you’re awesome.”
Mix It Up: Delicious Recipe Variations
Once you’ve mastered the classic, the playground is open! Here are a few of my favorite ways to twist this recipe.
- Bourbon-Spiked: For a grown-up twist, replace one tablespoon of the reduced apple cider with one tablespoon of good-quality bourbon. Add it along with the vanilla at the end.
- Chocolate-Dipped: Take these to eleven by melting some dark or white chocolate. Dip half of each cooled and cut caramel into the chocolate, let the excess drip off, and place on a parchment-lined sheet to set. Sprinkle with a little flaky sea salt.
- Dairy-Free Delight: You can make this vegan! Use full-fat canned coconut milk instead of heavy cream and a good vegan butter stick. The result is just as rich and delicious, with a very subtle coconut note that works beautifully with the spices.
- Ginger Kick: Love ginger? Add ½ teaspoon of ground ginger to the spice mix, or for a real punch, stir in 2 tablespoons of finely chopped crystallized ginger along with the vanilla.
- Salted Maple: Replace the granulated sugar with 1 cup of granulated sugar and ½ cup of dark maple syrup. The flavor is deep, complex, and utterly addictive.
Beau’s Chef’s Notes & Kitchen Stories
This recipe has seen a few iterations over the years. The first time I made it, I was so impatient that I poured the caramel into the pan and tried to cut it after 30 minutes. Let’s just say I ended up with a delicious caramel sauce instead of chewy squares! Lesson learned: patience is not just a virtue in candy making; it’s a requirement.
I also highly recommend getting a good digital candy thermometer. It takes all the guesswork out and is worth every penny. And remember, weather can play a role! On a very humid day, your caramels might be a bit softer. If they’re too soft for your liking, you can always cook the mixture to 250°F next time for a firmer chew. Cooking is an adventure, not a perfect science!
Apple Cider Caramel FAQs
Q: My caramel is too soft and won’t hold its shape. What happened?
A: This usually means the mixture didn’t quite reach the full 248°F. Humidity can also be a factor. No worries! You can still use it—it makes an incredible ice cream topping. Next time, ensure your thermometer is accurate and cook just a degree or two hotter.
Q: My caramel is too hard and crunchy. What did I do wrong?
A: This means the temperature got a little too high. You likely cooked it past the firm-ball stage. It might have reached the hard-ball stage (250-265°F). They’re still edible but will have a much harder chew. Try again, and pull it off the heat the second it hits 248°F.
Q: Can I use apple juice instead of cider?
A: I really don’t recommend it. Apple cider has a much more concentrated, spiced, and tangy apple flavor that reduces into a powerful syrup. Apple juice is often much sweeter and lighter, and the final caramel will lack that deep, autumnal punch.
Q: How long do these caramels keep, and how should I store them?
A: Once wrapped, they will keep beautifully in an airtight container at room temperature for about 2-3 weeks. If your kitchen is warm, you can store them in the fridge, but let them come to room temp for the best texture and flavor.
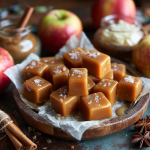
Apple Cider Caramels
Description
Homemade Apple Cider Caramels
Soft, buttery, and full of autumn flavor—perfect for gifts or cozy nights in.
Ingredients
For the Cider Reduction & Spices:
-
2 cups apple cider (real, unfiltered)
-
1 tsp ground cinnamon
-
¼ tsp ground nutmeg
-
Pinch of ground cloves
For the Caramel Base:
-
1 cup heavy cream
-
1½ cups granulated sugar
-
½ cup light corn syrup
-
½ cup (1 stick) unsalted butter, cubed
-
½ tsp sea salt
-
1 tsp vanilla extract
Optional:
-
Chocolate for dipping
-
Additional sea salt for topping
Tools: Heavy-bottomed saucepan, candy thermometer, 8×8-inch pan, parchment paper
Instructions
1. Reduce the Cider
-
In a medium saucepan, bring apple cider to a boil over medium-high heat.
-
Reduce to a simmer for 20–30 min, until about ½ cup remains.
-
Stir in spices and set aside.
2. Prep Your Pan
-
Line an 8×8-inch baking pan with parchment paper, leaving overhang “handles.”
-
Lightly butter the parchment for easy removal.
3. Make the Cream Mixture
-
Whisk heavy cream into the reduced cider.
-
Set aside while preparing the sugar mixture.
4. Cook the Caramel Base
-
In a heavy-bottomed saucepan, combine sugar, corn syrup, and cubed butter.
-
Cook over medium heat, stirring gently until sugar dissolves and butter melts (~5–7 min).
5. Combine & Cook to Temperature
-
Slowly add spiced cream mixture—mixture will bubble. Stir to combine.
-
Attach candy thermometer and cook to 248°F (firm-ball stage), stirring occasionally (~15–20 min).
6. Finish & Pour
-
Remove from heat. Stir in vanilla and sea salt.
-
Pour evenly into prepared pan. Let cool at room temperature 2–3 hours (or overnight).
7. Cut & Wrap
-
Lift caramel slab using parchment “handles.”
-
Cut into squares. Grease knife lightly if sticky.
-
Wrap in wax paper for storage or gifting.
Notes
-
Use a candy thermometer for accuracy.
-
Patience is key—don’t cut until fully set.
-
Sticky knife? Lightly grease with butter between cuts.
Nutritional Information*
Alright, let’s be real—these are a treat! But it’s always good to know what you’re enjoying. Here’s a rough breakdown per caramel (assuming the batch yields about 50 pieces).
Per Caramel: Calories: 90 | Fat: 4g | Saturated Fat: 2.5g | Carbohydrates: 13g | Sugar: 11g | Protein: 0.3g | Sodium: 35mg
*Please note: This is an estimate provided by an online nutrition calculator. Values can vary based on specific ingredients used and exact portion sizes.
Final Sweet Thoughts
Well, friends, we made it! I hope you feel empowered and excited to try your hand at these Apple Cider Caramels. This recipe is more than just a list of ingredients; it’s an experience. It’s about filling your home with the incredible scent of fall, embracing a little kitchen magic, and creating something truly special to share (or not share—no judgment here!).
Remember, the best cooking comes from the heart. Don’t stress over perfection. If your first batch isn’t 100% textbook, I guarantee it will still be 100% delicious. That’s the Feastical way: keep it simple, soulful, and always satisfying.
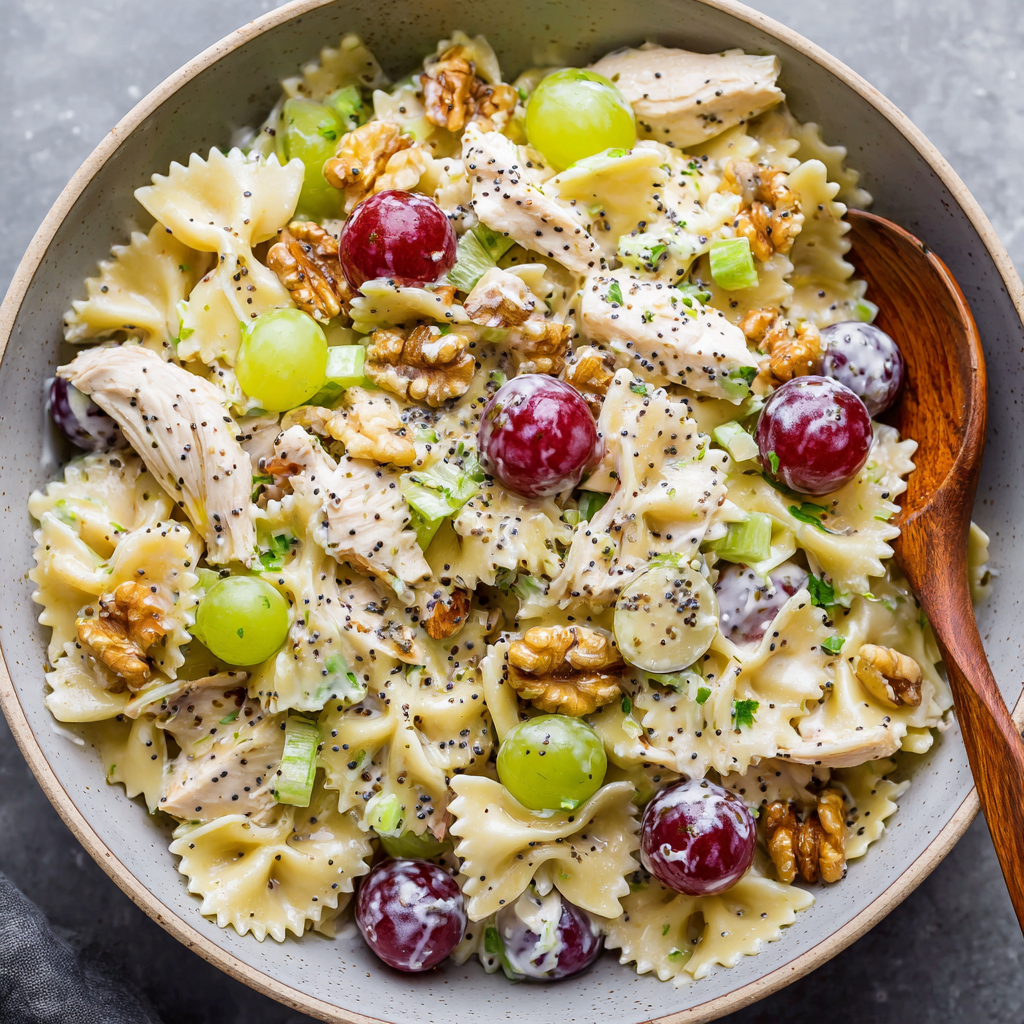
Creamy Chicken Grape Pasta Salad with Poppy Seed Dressing (Easy & Refreshing)
Creamy Chicken Grape Pasta Salad: Your New Go-To for Easy, Flavor-Packed Meals
Hey friends, Beau here from Feastical! Let me paint you a picture: It’s a warm afternoon, you’ve got a potluck in an hour, and you need to bring something that will make people’s eyes light up. You don’t want to slave over a hot stove, but you also refuse to show up with a sad bag of chips. Sound familiar? That, right there, is the exact moment this Creamy Chicken Grape Pasta Salad with Poppy Seed Dressing was born to save the day.
This isn’t just another pasta salad. This is the pasta salad. The one that disappears first from the buffet table. The one that gets you text messages later asking, “Hey, what was in that?!” It’s a glorious, no-fuss symphony of textures and tastes: tender pasta, juicy bites of sweet grape, savory shredded chicken, a satisfying crunch from walnuts and celery, all wrapped up in a lusciously creamy, slightly sweet, and tangy poppy seed dressing that clings to every single nook and cranny.
I’m all about recipes that feel like a warm hug but don’t turn your kitchen into a war zone. This dish is the epitome of that Feastical philosophy. It’s refreshing enough for a summer picnic, substantial enough for a weekday lunch, and elegant enough for a weekend get-together. Plus, it gets even better as it chills, making it the ultimate make-ahead hero. So, tie on your apron (or don’t, we’re casual here), and let’s make something truly special together.
The Potluck That Started It All: A Nod to Grandma’s Table
This recipe always takes me back to my grandma’s sun-drenched kitchen. She was the queen of “kitchen sink” salads—throw in a little of this, a little of that, and somehow it always worked. She had a particular love for pairing fruit with savory dishes, a trait I definitely inherited. I remember one specific family reunion where she brought out a big, chilled bowl of something with grapes and pasta. It was novel, it was delicious, and it was gone in about five minutes flat.
Years later, when I was scrambling for my own potluck contribution, that memory floated back. I started tinkering, adding my own spins—like using rotisserie chicken for instant flavor and ease, swapping in Greek yogurt for some zip, and finding the perfect honey-to-vinegar balance in the dressing. What emerged was this recipe, a loving homage to her spirit of improvisation and joy in feeding people. Every time I make it, I think of her, and that’s what good food is all about: connection, memory, and a whole lot of flavor.
Gathering Your Cast of Characters
Here’s everything you’ll need to bring this superstar salad to life. I’ve added my little chef notes for each one because knowing your ingredients is half the fun (and success!) of cooking.
- 6 oz (170g) Farfalle (Bowtie) Pasta: Those little bows are perfect for catching bits of dressing, chicken, and grape in every forkful. Chef’s Tip: You can use any short pasta you love—rotini, penne, or shells all work beautifully.
- 1 cup Rotisserie Chicken, Diced: Our ultimate time-saver and flavor-booster! The seasoned skin and meat add a depth you just don’t get from plain boiled chicken. Substitution: Leftover grilled chicken or a can of high-quality chunk chicken (drained) works in a pinch.
- ¾ cup Seedless Red Grapes, Halved: The sweet, juicy pop is non-negotiable. Red grapes hold their shape and color better than green here. Trust me on this.
- ½ cup Celery, Finely Diced: This isn’t just filler! Celery adds a crucial, refreshing crunch and a subtle herby note that balances the sweetness.
- ½ cup Walnut Pieces: Toasted walnuts are a game-changer. They add a nutty, earthy richness and another layer of texture. Allergy Alert: Sunflower seeds or pepitas make a fantastic crunch swap.
- ¼ cup Green Onions, Sliced: A mild, oniony bite without the harshness of a regular onion. They add a lovely fleck of green, too.
For the Creamy Poppy Seed Dressing:
- ¼ cup Nonfat Greek Yogurt: This is our secret weapon! It gives the dressing a creamy tang and protein boost without making it overly heavy. Insight: Full-fat Greek yogurt or sour cream are delicious, richer alternatives.
- ¼ cup Full-Fat Mayonnaise: The creamy base. Using full-fat here ensures the dressing is lush and doesn’t break or get watery. For a different twist, try avocado oil mayo.
- 2 Tablespoons Honey: Our natural sweetener that harmonizes all the flavors. Substitution: Pure maple syrup or agave nectar work for a vegan version.
- 1½ Tablespoons White Wine Vinegar: The essential acidic counterpoint to the honey and creaminess. It brightens the whole dish. Apple cider vinegar is a great stand-in.
- 2 Teaspoons Poppy Seeds: They’re not just for looks! These tiny seeds add a delightful, subtle crunch and a signature flavor that makes the dressing.
- ¼ teaspoon Salt (or to taste): The flavor enhancer. Always season to taste at the end, especially if your rotisserie chicken was already salty.
Let’s Build Some Magic: Step-by-Step
Follow these simple steps, and you’ll have a masterpiece in no time. I’ve sprinkled in my favorite kitchen hacks to guarantee your success.
- Cook the Pasta Like a Pro: Bring a large pot of well-salted water to a rolling boil. Seriously, salt it like the sea—it’s your only chance to season the pasta itself. Cook the farfalle according to package directions for al dente (usually 10-12 minutes). You want it to have a slight bite so it doesn’t turn to mush when you mix everything. Chef Hack: Add a splash of olive oil to the boiling water to prevent the pasta from sticking together without making it slick for the dressing later.
- The Cool-Down: Once perfectly cooked, drain the pasta in a colander and immediately rinse it under cold water. Don’t just run it for a second—rinse until the pasta is completely cool to the touch. This stops the cooking process and washes away excess starch so your salad isn’t gummy. Give the colander a good shake to remove as much water as possible. A wet pasta will waterlog your beautiful dressing.
- Prep Party: While the pasta cooks/cools, prep your mix-ins. Dice the chicken, halve the grapes, finely dice the celery, slice the green onions, and if you’re feeling fancy, give those walnut pieces a quick toast in a dry pan over medium heat for 3-5 minutes until fragrant. Toasting nuts is a 30-second task that pays off in tenfold flavor.
- Whisk the Dream Dressing: In a medium bowl, combine the Greek yogurt, mayonnaise, honey, white wine vinegar, poppy seeds, and salt. Whisk, whisk, whisk until it’s completely smooth and creamy. No honey globs left behind! Give it a taste. Want it tangier? A tiny splash more vinegar. Sweeter? A drizzle more honey. This is your dressing—make it sing to you.
- The Grand Toss: In a large, spacious bowl (I’m talking bigger than you think you need), combine the cooled, drained pasta, all your prepped salad ingredients (chicken, grapes, celery, walnuts, green onions). Now, pour that glorious dressing over the top.
- Mix with Love: Using a large rubber spatula or two spoons, gently but thoroughly toss everything together. Get right down to the bottom of the bowl and fold everything over until every single piece of pasta, every grape, every bit of chicken is lovingly coated in that creamy dressing.
- The Patience Payoff: This is the hardest but most important step: Cover the bowl and refrigerate for at least 40 minutes, or ideally up to 2 hours. This chilling time allows the flavors to get to know each other, mingle, and deepen. The pasta soaks up the dressing, and everything comes together in harmony. Give it one final stir before serving.
How to Serve This Stunner
Presentation is part of the fun! Here’s how to make this salad shine on any table:
For a family-style feast, I love transferring the chilled salad to a large, wide, shallow bowl or a pretty platter. Scatter a few extra grape halves, a sprinkle of poppy seeds, and some chopped green onion or fresh parsley over the top for a restaurant-worthy finish.
For individual servings, use an ice-cream scoop to create neat, rounded mounds on a bed of butter lettuce or fresh spinach. It’s a complete, satisfying meal in a bowl. This salad is the ultimate companion for grilled mains—think juicy burgers, lemon-herb chicken breasts, or simple garlic butter shrimp. It also holds up incredibly well in a sealed container, making it the perfect pack-and-go lunch for work or a picnic in the park. Just don’t forget the fork!
Make It Your Own: Delicious Twists & Swaps
One of the best things about this recipe is its versatility. Play with it! Here are a few of my favorite riffs:
- The “Harvest” Version: Swap the grapes for diced crisp apples or pears in the fall. Add some dried cranberries and swap walnuts for pecans. A sprinkle of cinnamon in the dressing? Yes, please.
- Lighter & Brighter: Use all Greek yogurt instead of mayo for a tangier, high-protein dressing. Add a big handful of fresh chopped dill and swap the celery for diced cucumber.
- Dairy-Free/Vegan Dream: Use your favorite vegan mayo and swap the honey for maple syrup. Replace the chicken with 1-1.5 cups of hearty chickpeas or baked, cubed tofu. You’ll get that same fantastic texture and protein punch.
- Cheesy Pleaser: Fold in ½ cup of crumbled feta or gorgonzola cheese just before serving. The salty, tangy cheese against the sweet grapes is a next-level combination.
- Herb Garden Explosion: Add ¼ cup of finely chopped soft herbs like tarragon, chives, or parsley. Herbs instantly make any dish taste fresh and sophisticated.
Beau’s Kitchen Notes & Stories
This recipe has been on quite a journey with me. The first time I made a version for a big backyard BBQ, I was so nervous. Would people think grapes in pasta salad was weird? The answer was a resounding NO. The bowl was scraped clean, and I’ve been tweaking it ever since.
A key evolution: I used to make the dressing with just mayo. Switching half of it to Greek yogurt was a revelation—it added a welcome tang and made the whole thing feel a bit lighter. Also, toasting the nuts is non-negotiable in my kitchen now. It takes this salad from great to “oh-wow-what-is-that-flavor” incredible.
Funny story: I once accidentally used balsamic vinegar instead of white wine vinegar. It turned the whole salad a… unique shade of gray-brown. The flavor was actually amazing, but the appearance was, let’s say, “rustic.” My friends still tease me about my “mud salad.” So, learn from my mistake and double-check your vinegar bottle!
Your Questions, Answered
Q: Can I make this salad the night before?
A: Absolutely! In fact, I often do. Just hold off on adding the walnuts until an hour or so before serving to keep them perfectly crunchy. The flavors meld beautifully overnight.
Q: My salad seems a bit dry after chilling. What happened?
A: No worries! This usually means the pasta absorbed a lot of the dressing. Simply whisk together an extra tablespoon each of yogurt and mayo (or a splash of milk) and gently fold it into the salad to refresh it.
Q: Can I use a different type of pasta?
A: Of course! Any short pasta with grooves or shapes that hold dressing works. Rotini, cavatappi, and medium shells are all excellent choices. Just stick to the same weight (6 oz).
Q: How long does it keep in the fridge?
A: Stored in an airtight container, it’s fantastic for 3-4 days. The grapes may soften slightly by day 4, but it will still taste delicious.

Creamy Chicken Grape Pasta Salad with Poppy Seed Dressing (Easy & Refreshing)
Description
This creamy chicken grape pasta salad is sweet, savory, crunchy, and refreshing all at once. Tender pasta, juicy grapes, seasoned chicken, and toasted nuts get tossed in a tangy poppy seed dressing for a dish that works just as well for potlucks as it does for easy lunches. It’s quick, make-ahead friendly, and packed with flavor and texture.
Ingredients
Salad
-
6 oz (170 g) farfalle (bowtie) pasta
-
1 cup cooked chicken, diced or shredded (rotisserie works great)
-
¾ cup seedless red grapes, halved
-
½ cup celery, finely diced
-
½ cup walnut pieces (preferably toasted)
-
¼ cup green onions, sliced
Creamy Poppy Seed Dressing
-
¼ cup Greek yogurt
-
¼ cup mayonnaise
-
2 tbsp honey
-
1½ tbsp white wine vinegar (or apple cider vinegar)
-
2 tsp poppy seeds
-
¼ tsp salt (plus more to taste)
Instructions
-
Cook the pasta
Bring a pot of well-salted water to a boil. Cook pasta until al dente according to package directions. Drain and rinse under cold water until fully cooled. Shake off excess water. -
Prep the mix-ins
Dice the chicken, halve the grapes, chop celery, and slice green onions. If desired, toast walnuts in a dry pan over medium heat for 3–5 minutes until fragrant. Cool. -
Make the dressing
In a medium bowl, whisk yogurt, mayonnaise, honey, vinegar, poppy seeds, and salt until smooth and creamy. Taste and adjust — add a little more honey for sweetness or vinegar for tang. -
Combine
In a large bowl, add cooled pasta, chicken, grapes, celery, walnuts, and green onions. Pour dressing over the top. -
Toss gently
Fold everything together until evenly coated. -
Chill
Cover and refrigerate at least 40 minutes (up to 24 hours) so flavors blend. -
Stir & serve
Stir before serving. If it looks a bit dry, mix in a spoonful of yogurt or mayo to refresh.
Notes
-
Cool pasta completely so the dressing stays thick and creamy.
-
Toast the nuts — it adds a big flavor upgrade.
-
Cut ingredients small and even for better texture in every bite.
-
Add nuts last if making far ahead to keep them crunchy.
-
Use rotisserie chicken for maximum flavor with zero extra cooking.
Nutritional Information (Per Serving)
Please note: The following is an estimate based on the specific ingredients listed and yields approximately 4 servings. Values may vary depending on your ingredient brands and substitutions.
- Calories: ~450
- Protein: 16.5g (Thanks, chicken and Greek yogurt!)
- Carbohydrates: 50.2g
- Dietary Fiber: ~3g
- Sugars: 16.2g (Mostly natural from the grapes and honey)
- Total Fat: 22.2g
- Saturated Fat: ~3g
- Sodium: ~274mg
- Cholesterol: ~29mg
This salad offers a wonderful balance of macronutrients: quality protein from the chicken and yogurt, energizing carbohydrates from the pasta and fruit, and healthy fats from the walnuts and mayo. It’s a satisfying, balanced meal that fuels you without weighing you down.
Final Thoughts
Creamy Chicken Grape Pasta Salad: Your New Go-To for Easy, Flavor-Packed Meals
As I sit here writing this, I can almost taste that first cold, creamy forkful—the way the sweet grape bursts against the savory chicken, how the poppy seeds add that tiny, satisfying crunch, and how the tender pasta holds it all together like a delicious edible hug. This Creamy Chicken Grape Pasta Salad isn’t just a recipe; it’s become a staple in my kitchen, and I have a feeling it’s about to become one in yours, too.
What I love most about this dish is how it effortlessly straddles two worlds. It’s humble enough for a Tuesday night dinner straight from the fridge (don’t judge, we’ve all been there) yet elegant enough to steal the spotlight at a holiday brunch or baby shower. It asks very little of you in terms of effort but gives back tenfold in flavor, compliments, and empty bowls returned to the kitchen.
This salad has taught me something important about cooking: the best recipes aren’t complicated ones with hard-to-find ingredients or techniques that require a culinary degree. They’re the ones that work with your life, not against it. They’re the dishes that say, “I’ve got you,” whether you’re juggling work deadlines, chasing kids, or simply don’t feel like spending hours in the kitchen but still want to eat something that feels special.
Every time I make this salad, I’m reminded of my grandma’s philosophy: feed people well, feed them simply, and always, always include something unexpected. For her, that was grapes in pasta salad. For you, maybe it’ll be something else down the road. But for now, I hope this recipe becomes your unexpected favorite, the one your friends and family start requesting, the one that earns its permanent spot in your recipe box (or, let’s be real, your bookmarked digital folder).
So go ahead—make it for that potluck, that picnic, that lazy Sunday meal prep. Make it because you deserve something delicious without the stress. Make it because good food shared with people you love is one of life’s greatest simple pleasures.

Cheeseburger Potato Skillet : Easy 30-Minute One-Pan Family Dinner
Cheeseburger Potato Skillet: Your New 30-Minute Family Favorite
Hey friends, Beau here from Feastical! Let’s get real for a second. How many times have you stood in front of the fridge after a long day, craving something deeply satisfying like a big, juicy cheeseburger, but the thought of firing up the grill, toasting buns, and dealing with a mountain of dishes just… no. Absolutely not. Your spatula is hiding, your energy is low, but your hunger is real.
I see you. I’ve been you. That’s exactly why I created this Cheeseburger Potato Skillet. Imagine all the iconic flavors of your favorite diner burger—the savory seasoned beef, the smoky bacon, the melty cheese, the tangy-special sauce—but instead of a bun, it’s piled high with crispy, golden potatoes, and the whole glorious mess comes together in one single pan in about 30 minutes.
This isn’t just a recipe; it’s your weeknight superhero. It’s budget-friendly, wildly customizable, and has that magical ability to make everyone at the table (yes, even the picky ones) light up. It’s the culinary equivalent of your favorite cozy sweater. So, let’s ditch the complicated and embrace the wonderfully simple, soulful, and supremely satisfying. Grab your trustiest skillet, and let’s make a memory that tastes incredible.
The Night That Sparked a Skillet Revolution
This recipe was born on a classic “Beau Collier Kitchen Meltdown” night. Picture it: a rainy Wednesday, two hungry kids who’d declare a food mutiny if presented with “one more pasta dish,” and me, staring at a pound of ground beef like it was a Rubik’s Cube. I wanted burgers. They wanted fries. We were at a stalemate.
Then, I had one of those slap-the-forehead moments. What if the fries were the bun? Or rather, the vessel? I cubed some spuds, got them crispy in the air fryer (a game-changer, friends), and sautéed that beef with a heavy hand of my favorite burger seasonings. I brought them together in the same skillet I cooked the beef in, blanketed everything with a mountain of cheese and leftover bacon bits, and drizzled my “secret” burger sauce over the top.
The silence that fell over the table was the best review I’ve ever received. Just the sounds of forks scraping against cast iron. That’s when I knew: this wasn’t just a thrown-together dinner. This was a new family tradition. It captured the fun of a burger night without any of the fuss, and it taught me that the best recipes often come from a little chaos and a lot of heart.
Gathering Your Flavor Arsenal
Here’s everything you’ll need to build this masterpiece. I’ve added my little chef insights and swaps so you can make it your own!
For That Iconic Burger Sauce:
- ½ cup ketchup: The sweet, tomatoey base. For a tangier kick, use a spicy ketchup!
- ¼ cup mayo: Creates that creamy, rich texture that binds it all together. I’m a Duke’s mayo fan, but use your favorite.
- 2 tbsp yellow mustard: Classic burger vibes. Dijon works for a more sophisticated zing.
- 2 tbsp sweet relish: This is the secret weapon! It adds pops of sweetness and crunch. No relish? Finely chop a couple of dill pickle slices.
For the Skillet Magic:
- 5 small/medium russet potatoes, peeled & cubed: Russets get fabulously crispy on the outside and fluffy inside. Chef Tip: For quicker cooking, cut them into ½-inch cubes. Yukon Golds are a great sub if you have them.
- 1–2 tbsp olive oil: To coat those taters for perfect crisping. Avocado oil works great too.
- Salt, pepper, garlic powder, paprika (for potatoes): Don’t be shy! Season each layer for maximum flavor.
- 1 lb ground beef: I use 80/20 for the best flavor and juiciness. Ground turkey or chicken works for a leaner option.
- 1 onion, chopped: Sweet or yellow onion, diced small. They caramelize and add a ton of sweetness.
- The Seasoning Squad: ½ tsp each salt & pepper, 1 tsp each onion powder, garlic powder, smoked paprika, ½ tsp ground mustard. This combo is my burger spice blend—it smells like a cookout!
- 1 tbsp minced garlic: Added at the end so it doesn’t burn. Fresh is best, but jarred is a totally fine time-saver.
- 1½ cups shredded Colby Jack cheese: Melts like a dream and has that classic burger cheese flavor. Cheddar, Monterey Jack, or a Mexican blend are all fantastic.
- 6 slices bacon, cooked & crumbled: The smoky, salty crown. Pre-cooked bacon bits are a legitimate shortcut here. No judgment!
- 2 green onions, chopped: For a fresh, colorful finish. Chives work too.
Let’s Build Your Skillet, Step-by-Step
Follow along, and I’ll share my hacks to make this foolproof.
- Mix the Sauce First. In a small bowl, stir together the ketchup, mayo, mustard, and relish until smooth. Pop it in the fridge. Chef Hack: Doing this first lets the flavors marry and become something truly special by the time you need it.
- Prep the Potatoes. Peel and cube those potatoes into even pieces. Toss them in a bowl with the olive oil and a generous sprinkle of salt, pepper, garlic powder, and paprika. Coat every nook and cranny. Chef Insight: Even pieces = even cooking. No one wants a half-raw, half-burnt potato cube.
- Crisp Those Taters. Air fry at 400°F for 20-25 minutes, shaking the basket halfway through. You want them golden and crispy. NO AIR FRYER? No problem! Toss them on a baking sheet and roast in a 425°F oven for about 25-30 minutes, flipping once. They’ll be just as perfect.
- Brown the Beef & Onions. While the potatoes cook, grab your large, oven-safe skillet. Over medium-high heat, cook the ground beef and chopped onion, breaking up the meat with your spatula. When no pink remains, drain any excess grease (leave a little for flavor!). Stir in all those beautiful seasonings—the salt, pepper, onion powder, garlic powder, smoked paprika, and ground mustard. Cook for another minute until fragrant, then stir in the minced garlic for 30 seconds. Chef Tip: Draining the grease is key to avoid a greasy final dish.
- The Grand Unification. Add your crispy, glorious potatoes directly into the skillet with the beef. Gently fold them together so they get friendly. Then, flatten the mixture into an even layer. This is your canvas.
- The Cheese Blanket. Sprinkle the shredded Colby Jack evenly over the entire surface, all the way to the edges. Follow this with the crumbled bacon. This is not the time for moderation.
- The Meltdown. If your skillet is oven-safe (and it should be for this!), pop the whole thing into a 400°F oven for 3-5 minutes, just until the cheese is bubbly and melted. No oven? Simply put a lid on the skillet and let it sit on the warm (but turned-off) stove for a few minutes. The residual heat will melt the cheese beautifully.
- The Final Flourish. Pull your masterpiece from the oven. Drizzle that amazing burger sauce over the top in a zig-zag pattern (or just plop it on, I won’t tell). Finish with a vibrant sprinkle of chopped green onions.
How to Serve This Heartwinner
The beauty of this dish is its casual, dig-right-in nature. I love to bring the whole skillet to the table (with a trivet, please!) and let everyone serve themselves. It feels communal and festive.
For a true “deconstructed cheeseburger” experience, set out small bowls of classic burger toppings: shredded iceberg lettuce for crunch, dill pickle chips, sliced tomatoes, and even some sliced jalapeños for the heat-seekers. Let everyone customize their bowl!
This skillet is a complete meal on its own, but if you want to stretch it or add a fresh element, a simple side salad or some steamed green beans work wonderfully. And don’t forget the beverages—a cold lager, a fizzy soda, or just ice-cold water is the perfect accompaniment.
Make It Your Own: 5 Tasty Twists
Once you’ve mastered the classic, have fun with it! Here are some of my favorite riffs:
- The “Western” BBQ Burger Skillet: Swap the burger sauce for your favorite BBQ sauce. Stir in a handful of frozen corn and diced bell peppers with the onions.
- The “Big Mac” Style: Add an extra tablespoon of mayo and a teaspoon of white vinegar to the sauce for that “special sauce” taste. Use shredded lettuce and a sprinkle of sesame seeds on top.
- Breakfast for Dinner: Use breakfast sausage instead of beef, and top with a fried or poached egg after it comes out of the oven. Hollandaise sauce optional but highly encouraged.
- Loaded Veggie Power: Use ground turkey or a plant-based crumble. Add diced zucchini, mushrooms, and spinach with the onions for an extra veggie punch.
- Spicy Fiesta Burger: Use a pepper Jack cheese blend. Add a diced jalapeño to the beef, and mix a tablespoon of chipotle pepper into the burger sauce for a smoky heat.
Beau’s Kitchen Notes & Stories
Over the years, this recipe has seen some fun evolutions. I once made it on a camping trip in a cast-iron Dutch oven over the fire—talk about flavor! The key takeaway I’ve learned is this: the potatoes must be crispy. If they’re soft, the whole texture changes. Don’t rush the air frying/roasting step. That contrast between the crisp potato, savory beef, and gooey cheese is everything.
Also, confession: I almost never measure the potato seasonings. I do the classic “chef’s shake” over the bowl until it looks right. Trust your instincts! Cooking should feel intuitive, not like a chemistry exam. And if you accidentally use shredded cheddar instead of Colby Jack? Congratulations, you’ve just made the Cheddar Bacon Cheeseburger Skillet. It’s all good.
Your Questions, Answered
Q: Can I make this ahead of time?
A: You can prep components! Cook and season the beef, mix the sauce, and cook the bacon ahead. Store separately. When ready, re-crisp the potatoes, warm the beef, combine, and melt the cheese. It’ll still be fantastic.
Q: My cheese isn’t melting in the oven. Help!
A: Two likely culprits: 1) The skillet was too cold going in. Make sure the beef/potato mixture is hot before adding cheese. 2) The oven wasn’t hot enough. Use the broiler for the last 1-2 minutes (watch it like a hawk!) for an instant, perfect melt.
Q: Can I use frozen potatoes?
A: Absolutely! A bag of frozen diced potatoes or even crispy potato nuggets is a huge time-saver. Cook them according to the package directions for crispiness before adding to the skillet.
Q: It’s a bit greasy. What did I do wrong?
A: You likely didn’t drain enough fat from the ground beef after cooking. For leaner beef (like 90/10), this is less of an issue. Just tilt the skillet and use a spoon to remove excess grease before adding the seasonings.
Print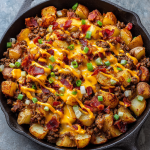
Cheeseburger Potato Skillet : Easy 30-Minute One-Pan Family Dinner
Description
If you’re craving a cheeseburger and fries but don’t want the grill, the buns, or the cleanup, this one-pan cheeseburger potato skillet is the answer. You get crispy potatoes, savory seasoned beef, smoky bacon, melty cheese, and a tangy burger-style sauce — all in one hearty, comforting dish. It’s fast, flexible, and perfect for busy weeknights when everyone is hungry now.
Ingredients
Burger Sauce
-
½ cup ketchup
-
¼ cup mayonnaise
-
2 tbsp yellow mustard
-
2 tbsp sweet relish (or finely chopped pickles)
Skillet
-
5 small–medium russet potatoes, peeled and ½-inch cubed
-
1–2 tbsp olive oil
-
Salt, pepper, garlic powder, paprika (for potatoes)
-
1 lb (450 g) ground beef (80/20 preferred for flavor)
-
1 onion, finely chopped
-
½ tsp salt
-
½ tsp black pepper
-
1 tsp onion powder
-
1 tsp garlic powder
-
1 tsp smoked paprika
-
½ tsp ground mustard
-
1 tbsp minced garlic
-
1½ cups shredded Colby Jack or cheddar cheese
-
6 slices bacon, cooked and crumbled
-
2 green onions, sliced
Instructions
-
Make the sauce
In a small bowl, mix ketchup, mayo, mustard, and relish. Refrigerate to thicken and develop flavor. -
Cook the potatoes
Toss cubed potatoes with olive oil, salt, pepper, garlic powder, and paprika.-
Air fryer: Cook at 400°F (205°C) for 20–25 minutes, shaking halfway.
-
Oven: Roast at 425°F (220°C) for 25–30 minutes, turning once.
Cook until golden and crisp.
-
-
Brown the beef
Heat a large skillet over medium-high heat. Cook ground beef and onion, breaking up the meat, until browned and fully cooked. Drain excess grease. -
Season
Stir in salt, pepper, onion powder, garlic powder, smoked paprika, and ground mustard. Cook 1 minute. Add minced garlic and cook 30 seconds more. -
Combine
Add crispy potatoes to the skillet. Gently fold together and spread into an even layer. -
Add cheese and bacon
Sprinkle cheese evenly over the top, then bacon. -
Melt
Place skillet in a 400°F (205°C) oven for 3–5 minutes until cheese is melted.
No oven? Cover with a lid and let residual heat melt the cheese. -
Finish
Drizzle burger sauce over the top and sprinkle with green onions. Serve hot.
Notes
-
Cut potatoes evenly so they cook at the same rate.
-
Get potatoes truly crispy — soft potatoes change the whole texture.
-
Drain beef well to avoid a greasy skillet.
-
Shred your own cheese for smoother melting.
-
Heat the skillet mixture before cheesing so melt time is quick and even.
Nutritional Information (A Quick Note)
I’m a chef, not a dietitian, but I believe in transparency! This is a hearty, comforting dish. The following is an estimate per serving (based on 4 servings), calculated using standard ingredients.
- Calories: ~650-750
- Protein: ~35g (Great for keeping you full!)
- Fat: ~40-45g
- Carbohydrates: ~45g
To lighten it up: use lean ground turkey, reduce the cheese by 1/4 cup, opt for center-cut bacon, and use a light mayo in the sauce. But remember, friends: food is also for joy, and sometimes you just need that full-cheese experience.
Final Thoughts from My Kitchen to Yours
At the end of the day, recipes like this Cheeseburger Potato Skillet are what Feastical is all about. It’s not about perfection; it’s about connection. It’s about turning a hectic weeknight into a moment of shared, delicious comfort. It’s about the smile on your family’s face when you present them with a sizzling skillet of something you made with love (and maybe a little help from the air fryer).
I hope this recipe becomes a trusted friend in your kitchen rotation, just like it is in mine. It’s resilient, forgiving, and always, always satisfying. Give it a try, put your own spin on it, and most importantly, enjoy the process and the people you share it with.
Made it? Tag me @feastical so I can see your creation! Now, go forth and conquer that dinner hour. You’ve got this.
With a full heart and an even fuller skillet,
Beau