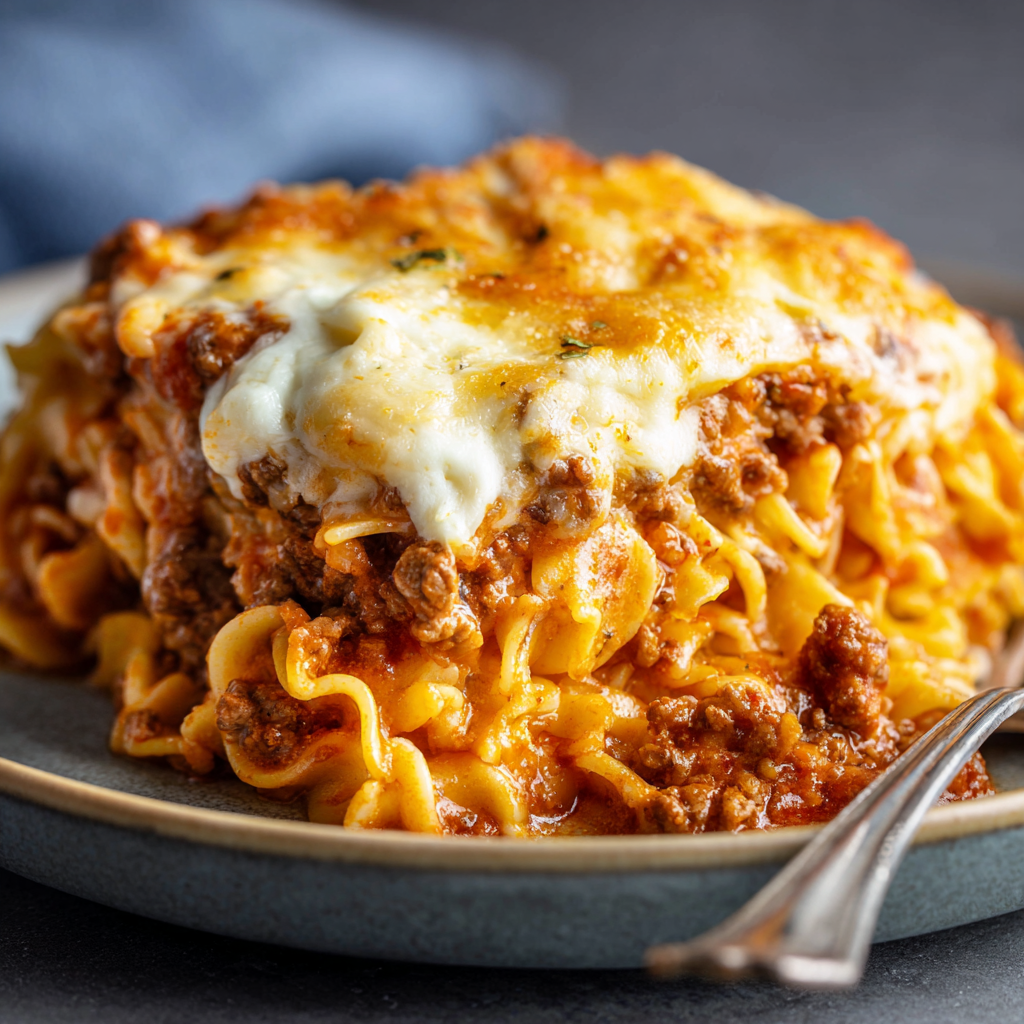
Poor Man’s Husband Casserole : Creamy, Cheesy, and Budget-Friendly Comfort
Poor Man’s Husband Casserole: Your New Go-To Comfort Food
Hey friends, Beau here! Let’s get real for a second. Some days, you just need a dinner that feels like a warm, reassuring hug from the inside out. You know the kind I’m talking about. The one that doesn’t require a fancy degree or a trip to three different specialty stores. The one that fills your kitchen with the kind of smell that makes everyone’s stomach growl in happy anticipation.
Well, pull up a chair, because I’m about to share one of my all-time favorite recipes for exactly that kind of meal: the Poor Man’s Husband Casserole. Now, don’t let the name fool you—this dish is rich in flavor and big on comfort. It’s the beautiful lovechild of a classic baked pasta and the creamiest, dreamiest cheeseburger you can imagine. We’re talking tender egg noodles, a robust and savory tomato-meat sauce, and a hidden layer of creamy, tangy magic that will have everyone asking for seconds.
This isn’t just a recipe; it’s a solution. It’s for busy weeknights, for tight budgets, for feeding a crowd of hungry teenagers, or for those evenings when you just need to look in your pantry and whip up something truly satisfying without the stress. It’s forgiving, flexible, and so darn delicious. So, preheat your oven and grab your favorite baking dish. We’re about to create some serious kitchen magic that’s as easy on your wallet as it is on your soul.
A Dish Steeped in Love and Leftovers
This recipe takes me right back to my grandma’s linoleum-floored kitchen. She was the queen of making something spectacular out of seemingly nothing. I remember one chilly autumn evening, a whole herd of my cousins had descended upon her house. The cupboards weren’t exactly bare, but they weren’t overflowing, either. With a twinkle in her eye, she pulled out some ground beef, a few pantry staples, and a block of cream cheese.
As she layered everything into her trusts, well-loved ceramic dish, the air filled with the scent of browning beef and garlic. The result was this incredibly rich, hearty casserole that had all of us kids (and the adults!) scraping our plates clean. She called it her “Husband Tamer,” a joke about how a happy, well-fed husband was a happy man. I’ve since tweaked it a bit (and given it a slightly less problematic name!), but the soul of the dish—that magical combination of simplicity, resourcefulness, and pure comfort—remains exactly the same. Every time I make it, I’m transported back to that noisy, loving, and utterly delicious evening.
Gathering Your Cast of Kitchen Characters
Here’s the beautiful part: you probably have most of this already. This is a recipe built on backbone ingredients, the kind that are affordable and keep well. Let’s break it down.
- 8 oz Egg Noodles: The sturdy foundation of our casserole. Their ruffled edges are perfect for grabbing all that saucy goodness. Chef’s Insight: No egg noodles? Any short pasta like elbow macaroni, rotini, or penne will work in a pinch!
- 1½ lbs Ground Beef: I use an 80/20 blend for the best flavor, but leaner beef works too. Substitution Tip: Ground turkey, chicken, or even a plant-based ground crumble are fantastic swaps here.
- 2 cans (15 oz each) Tomato Sauce: This is our flavor vehicle. It creates a rich, saucy base that coats every noodle. Chef’s Insight: If you only have pasta sauce, use that! Just skip or reduce the added Italian seasoning.
- 8 oz Cream Cheese, softened: This is the secret weapon! It creates an irresistibly creamy, tangy layer that makes this casserole special. Pro Tip: Take it out of the fridge at least an hour before. If you forget, pop it in the microwave for 15-20 seconds to soften it up.
- 8 oz Sour Cream: Partner-in-crime to the cream cheese, it adds a lovely tang and lightens up the cream layer just a touch.
- 2 tsp Garlic, minced: Flavor bomb, activated! I’m a garlic lover, so I often add an extra clove. Use jarred for convenience or fresh for that extra punch.
- 1 tsp Italian Seasoning: A little herbaceous magic. This classic blend of oregano, basil, thyme, and rosemary brings it all together.
- 1 tsp Sugar: Don’t skip this! It’s not for sweetness, but to balance the acidity of the tomato sauce, giving you a smoother, richer flavor.
- ¼ tsp Salt: To taste! I start with this and always do a final taste of the meat sauce before assembling.
Let’s Build Some Delicious Layers!
Alright, team, let’s get cooking. This is where the magic happens, and I promise, it’s as easy as 1-2-3 (and 4-5-6). Read through these steps first—it’ll make the process a breeze.
- Preheat and Prep: First things first, get that oven going to a cozy 350°F (175°C). This gives it plenty of time to come to the perfect temperature. While it’s heating, cook your egg noodles according to the package directions until they’re al dente (that means they still have a little bite to them). Drain them and set them aside. Chef’s Hack: Drizzle a tiny bit of oil over the drained noodles and give them a toss. This prevents them from sticking together in one big clump while you prepare the other components.
- Brown the Beef: Grab a large skillet and cook your ground beef over medium heat. Break it up with a wooden spoon as it cooks until it’s nicely browned and no pink remains. Now, here’s a key step for a non-greasy casserole: drain off the excess grease. I just tilt the skillet and use a spoon to remove it, or you can carefully pour it into an old can.
- Create the Saucy Base: To the drained beef, add both cans of tomato sauce, your minced garlic, Italian seasoning, sugar, and salt. Give it a good stir, let it come to a gentle bubble, then reduce the heat and let it simmer for 5-10 minutes. Why simmer? This little wait allows all those flavors to get to know each other, mellow out, and become one delicious, unified sauce.
- Whip Up the Creamy Layer: While the meat sauce is simmering, let’s make the creamy surprise. In a medium bowl, combine your softened cream cheese and the sour cream. Use a hand mixer or a sturdy whisk to blend it until it’s completely smooth and lump-free. Chef’s Hack: If the cream cheese is still being stubborn, a squeeze of fresh lemon juice can help loosen it up and make it easier to blend.
- The Grand Assembly: Grab your trusty 9×13 inch baking dish and give it a light coating of non-stick spray or a butter rub. Now, let’s layer up the goodness!
- Bottom Layer: Spread half of your cooked egg noodles evenly across the bottom.
- The Secret Middle: Carefully dollop all of the cream cheese mixture over the noodles. This is the fun part! Use a spatula to gently spread it into an even layer, creating a creamy blanket over the noodles.
- Noodle Layer #2: Top the cream layer with the remaining half of the egg noodles.
- The Grand Finale: Pour the entire skillet of meat sauce over the top and spread it evenly, covering every last bit of noodle.
- Bake to Perfection: Slide your masterpiece into the preheated oven and bake it uncovered for 25-30 minutes. You’re looking for it to be bubbly all around the edges and for the top to have a few beautiful, caramelized spots. If you added extra cheese (which I highly recommend!), it should be melted and lightly golden.
Plating Up Your Comfort Masterpiece
Okay, the timer has dinged, and your kitchen smells incredible. Now, the most important step: let it rest for about 5-10 minutes after pulling it from the oven. I know, it’s torture, but this allows the layers to set up a bit, making it much easier to slice and serve without it turning into a soupy mess.
I like to serve this up in hearty scoops right into shallow bowls. The contrast of the rich, red meat sauce against the white creamy layer when you scoop in is just gorgeous. To turn this into a well-rounded feast, here are a few of my favorite sides:
- A simple, crisp green salad with a sharp vinaigrette to cut through the richness.
- Some garlic bread or crusty dinner rolls for mopping up every last bit of sauce.
- A side of steamed green beans or roasted broccoli for a fresh, green counterpoint.
It’s the perfect centerpiece for a casual family dinner or a potluck with friends. Just be prepared to share the recipe!
Make It Your Own: 5 Flavorful Twists
The beauty of this casserole is its flexibility. Once you’ve mastered the basic blueprint, feel free to get creative and make it your own! Here are a few of my favorite variations.
- The “Garden Patch” Version: Sneak in some veggies! When you’re browning the beef, add one finely chopped onion and a cup of sliced mushrooms. Or, after draining the grease, stir in a couple of handfuls of fresh spinach and let it wilt into the meat sauce.
- The “Three-Cheese Champion”: Take the cheesiness to the next level. Before baking, sprinkle a generous cup of shredded mozzarella or a sharp cheddar cheese over the top. For the ultimate experience, mix a half cup of grated Parmesan into the meat sauce.
- The “Crunchy Top” Upgrade: Add a fantastic textural contrast. Mix ½ cup of crushed Ritz crackers, panko breadcrumbs, or even crushed potato chips with 2 tablespoons of melted butter. Sprinkle this over the casserole before it goes in the oven for a deliciously crispy, golden crust.
- The “Spicy Kick”: Like a little heat? Add a teaspoon of crushed red pepper flakes to the meat sauce, or stir in a few dashes of your favorite hot sauce. A can of diced green chiles mixed into the cream layer is also a game-changer.
- The Lighter Lift: You can easily lighten it up! Use ground turkey, low-fat cream cheese, and light sour cream. I promise, it will still be incredibly satisfying.
Beau’s Kitchen Chronicles
This recipe has been on quite a journey with me. I once made a double batch for a big family reunion, only to realize I’d forgotten the sugar. Let me tell you, the difference is real! It was still eaten, but it had a sharper, tangier edge. It was a good reminder of how that one tiny ingredient can smooth out the entire flavor profile. Another time, I was out of sour cream and used plain Greek yogurt instead—it worked like a charm! This dish is a testament to the fact that cooking doesn’t have to be perfect to be perfect. It’s about the joy of creating, the fun of feeding people, and the memories you make around the table.
Your Questions, Answered!
Over the years, I’ve gotten a lot of great questions about this casserole. Here are the answers to the most common ones.
Q: Can I make this casserole ahead of time?
A: Absolutely! You can assemble the entire casserole, cover it tightly with plastic wrap or foil, and refrigerate it for up to 24 hours before you need to bake it. When you’re ready, just pop it in the oven. You might need to add 5-10 extra minutes to the baking time since it’s going in cold.
Q: My casserole turned out a bit watery. What happened?
A> This usually happens for one of two reasons. First, make sure you’re draining the ground beef really well after browning. That extra grease can make things oily. Second, that resting period after baking is non-negotiable! It gives the starches in the noodles time to absorb any excess liquid and for the whole dish to firm up.
Q: Can I freeze it?
A: You bet! This is a fantastic freezer meal. Assemble it completely but do not bake it. Wrap it tightly in a layer of plastic wrap and then a layer of heavy-duty foil to prevent freezer burn. It will keep for up to 3 months. To cook, thaw it in the refrigerator overnight, then bake as directed.
Q: I’m not a fan of cream cheese. Is there a substitute?
A> I’d recommend trying ricotta cheese instead! If you use ricotta, I suggest mixing in one beaten egg to help it bind and become creamier when baked. Cottage cheese (small curd) blended until smooth is another great option.

Poor Man’s Husband Casserole : Creamy, Cheesy, and Budget-Friendly Comfort
Description
A baked pasta-meets-cheeseburger casserole with tender noodles, rich tomato-meat sauce, and a creamy, tangy layer of cream cheese and sour cream. Perfect for weeknights, potlucks, or budget-friendly family dinners.
Ingredients
Base & Meat Sauce:
-
8 oz egg noodles (or other short pasta)
-
1½ lbs ground beef (80/20 or leaner)
-
2 cans (15 oz each) tomato sauce
-
2 tsp garlic, minced
-
1 tsp Italian seasoning
-
1 tsp sugar
-
¼ tsp salt
Creamy Layer:
-
8 oz cream cheese, softened
-
8 oz sour cream
Optional Toppings / Variations:
-
Shredded cheese (mozzarella, cheddar, or Parmesan)
-
Crushed crackers, panko, or potato chips for a crunchy top
-
Veggies: onions, mushrooms, spinach, or diced green chiles
-
Spices: crushed red pepper flakes or hot sauce for heat
Instructions
-
Preheat & Cook Pasta:
Preheat oven to 350°F (175°C). Cook egg noodles according to package until al dente, drain, and toss with a little oil to prevent sticking. -
Brown the Beef:
Cook ground beef in a large skillet over medium heat until no pink remains. Drain excess grease. -
Make Meat Sauce:
Stir in tomato sauce, garlic, Italian seasoning, sugar, and salt. Simmer 5–10 minutes to meld flavors. -
Prepare Creamy Layer:
In a medium bowl, beat cream cheese and sour cream until smooth and lump-free. -
Assemble Casserole:
-
Grease a 9×13-inch baking dish.
-
Layer half the cooked noodles on the bottom.
-
Spread the cream cheese mixture evenly over the noodles.
-
Top with remaining noodles.
-
Pour meat sauce over everything and spread evenly.
-
-
Optional Topping:
Sprinkle shredded cheese or a crunchy topping if desired. -
Bake:
Bake uncovered for 25–30 minutes until bubbly and lightly golden. Let rest 5–10 minutes before serving to allow layers to set.
Notes
-
Make Ahead: Assemble, cover, and refrigerate up to 24 hours before baking. Add 5–10 extra minutes if baking cold.
-
Prevent Watery Casserole: Drain beef well and let casserole rest after baking.
-
Freeze: Assemble unbaked, wrap tightly, freeze up to 3 months. Thaw overnight and bake.
-
Cream Cheese Substitute: Use ricotta (mix with 1 egg) or smooth cottage cheese.
Nutritional Information (Per Serving, Approximate)
Hey, I believe all food fits into a happy, balanced life! Here’s a rough nutritional breakdown for those who are curious, based on 8 servings. Remember, these are estimates and can vary based on your specific ingredients (like the leanness of your beef).
- Calories: ~480
- Protein: 27g (Excellent for keeping you full and satisfied!)
- Carbohydrates: 28g
- Fat: 30g
To boost the nutritional profile, try my “Garden Patch” variation above—adding onions, mushrooms, and spinach is a great way to get in extra fiber and vitamins. Using whole wheat egg noodles is another easy, healthy swap!
Dig In and Enjoy!
And there you have it, my friends—the glorious, un-fussy, and deeply satisfying Poor Man’s Husband Casserole. It’s more than just a recipe; it’s a reminder that the best meals often come from a place of love and resourcefulness, not a huge grocery bill. It’s the food that gathers people, that fills bellies, and that creates those warm, fuzzy memories we carry with us long after the last bite is gone.
I hope this recipe becomes a trusted friend in your kitchen, just like it is in mine. Give it a try, make it your own, and most importantly, share it with someone you love. Now, go forth and cook with confidence! And if you do make it, I’d be thrilled if you tagged me @FeasticalBeau or used the hashtag #FeasticalFeast so I can see your beautiful creations. Happy cooking!
Final Thoughts: More Than a Meal
So there you have it—the humble, hearty, and utterly delicious Poor Man’s Husband Casserole. This dish is proof that you don’t need a pantry full of exotic ingredients or a whole day to spend in the kitchen to create something truly special. It’s a testament to the power of simple, honest food made with love and a little bit of kitchen wisdom.
It’s the recipe you turn to not just to feed hungry mouths, but to nourish souls. It’s for the busy weeknights, the budget-conscious stretches, and the moments when you need a guaranteed win. It’s a edible hug, a plateful of comfort, and a delicious story you get to tell with every layer.
I hope this casserole finds its way into your regular rotation and becomes a part of your own family’s story, creating warm, full-bellied memories for years to come. Now, get out there and create some kitchen magic of your own. Happy cooking!
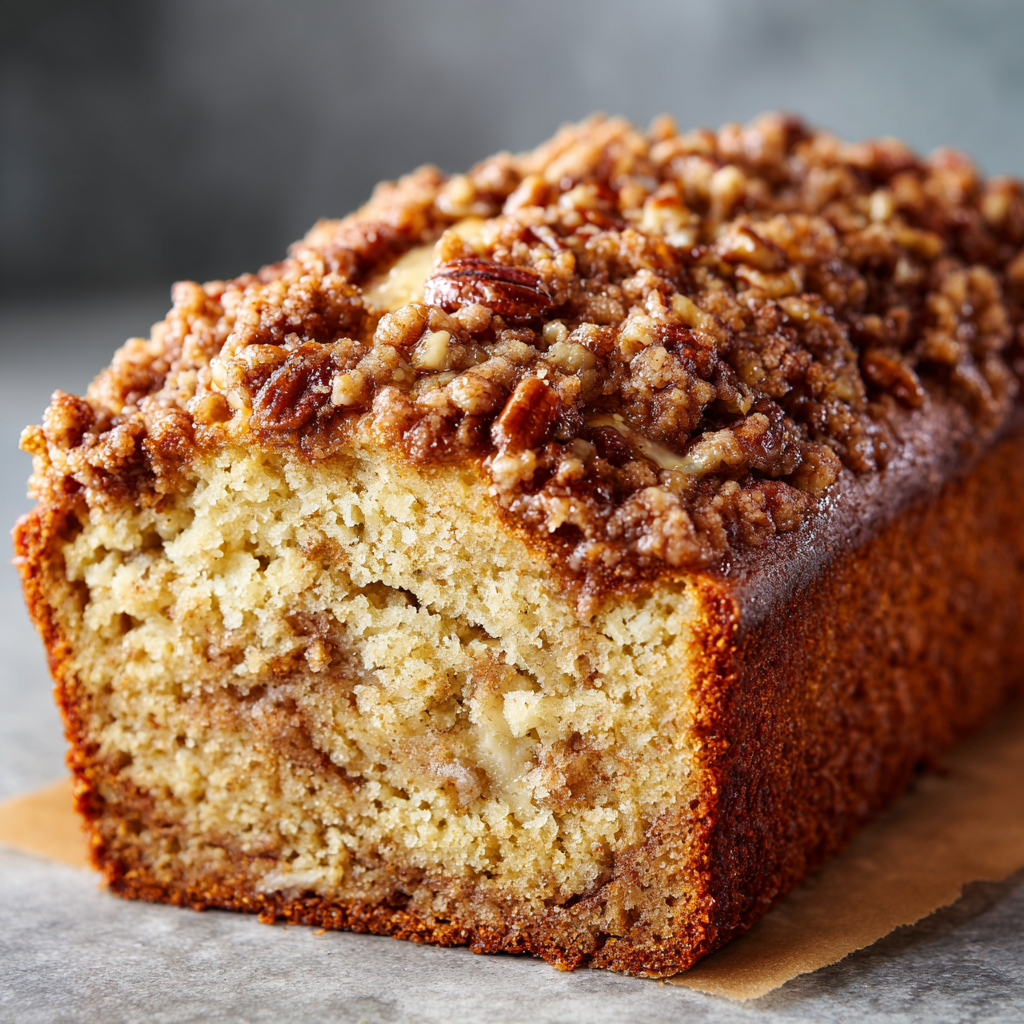
Banana Pecan Streusel Loaf : Moist Banana Bread with a Sweet Crunchy Topping
Banana Pecan Streusel Loaf: Your New Favorite Comfort Food
More Than Just Banana Bread
Hey friends, Beau here! Let’s be real for a second. Is there any smell in the world more comforting than banana bread baking in the oven? It’s like a warm, sweet hug for your entire house. It whispers promises of cozy mornings and satisfied sweet tooths. But what if I told you we could take that classic, beloved loaf and turn it into a show-stopping, bakery-worthy masterpiece? That’s exactly what we’re doing today with this Banana Pecan Streusel Loaf.
This isn’t just any banana bread. Oh no. This is the ultimate version. We’re talking about an incredibly moist, tender crumb, packed with real banana flavor and little nuggets of toasty pecans. And then—just when you thought it couldn’t get better—we crown it with a buttery, crunchy, sweet pecan streusel topping that bakes into a glorious, golden crust. Every single slice is the perfect balance of soft, cozy cake and that irresistible sugary crunch. It’s the kind of treat that makes you feel like a professional baker, even if you’re just whipping it up in your pajamas on a lazy Sunday. So, let’s grab those spotty bananas sitting on your counter and turn them into something truly magical.
The Tale of the Almost-Thrown-Out Bananas
This recipe has a special place in my heart, and it all goes back to my grandma’s kitchen. She had a steadfast rule: you never, ever waste food. So, when a bunch of bananas on her counter would cross that line from bright yellow to a beautifully speckled brown, she wouldn’t see them as past their prime. She’d see them as an opportunity. With a knowing smile, she’d mash them up and say, “Beau, my dear, the uglier the banana, the more beautiful the bread.” I’d pull up a stool, watch her work her magic, and the whole kitchen would fill with the most incredible aroma. That loaf, warm from the oven and slathered with butter, was more than a snack. It was a lesson in resourcefulness, a moment of connection, and the pure, simple joy of creating something wonderful out of something humble. This streusel-topped version is my own little upgrade on her classic, a tip of the hat to her wisdom with a bit of my own playful flair mixed in.
Gathering Your Kitchen Crew: The Ingredients
One of the best things about this recipe is that you probably have most of this stuff in your pantry right now! Here’s the lineup, with a few of my chef-y insights to help you understand the “why” behind the “what.”
For the Super-Moist Loaf:
- 2–3 Ripe Bananas, mashed (about 1 cup): This is the star of the show! The riper they are (think brown and spotty), the sweeter they are and the more intense that classic banana flavor will be. No yellow bananas allowed for this job—they lack the necessary sweetness and moisture.
- ½ cup Unsalted Butter, melted: This gives our loaf its rich, tender texture and that beautiful, golden-brown crust. Using unsalted lets you control the salt level perfectly. Chef’s Tip: If you only have salted butter, that’s okay! Just reduce the added salt in the dry ingredients by about ¼ teaspoon.
- ¾ cup Brown Sugar: I prefer brown sugar over white because its molasses content adds a deeper, caramel-like flavor and contributes to that incredible moisture. It’s a one-way ticket to Flavor Town.
- 2 large Eggs: Our trusty binders! They hold everything together and give the loaf structure so it doesn’t fall apart when you slice it.
- 1 tsp Vanilla Extract: The flavor enhancer. It rounds out the sweetness and makes the banana and pecan flavors pop even more. Always use the real stuff if you can!
- 1½ cups All-Purpose Flour: The foundation of our loaf. I use all-purpose for a reliable, tender crumb.
- 1 tsp Baking Soda: This is our leavening agent—the magical ingredient that makes the loaf rise and become light and fluffy. Make sure it’s fresh for the best lift!
- ½ tsp Salt: Never skip the salt! It’s not to make it taste salty, but to balance all the sweetness and enhance every other flavor in the mix.
- ½ tsp Cinnamon: This is my secret weapon. Just a hint adds a warm, cozy background note that makes the banana flavor sing. It’s the difference between “good” and “where has this been all my life?”
- ½ cup Chopped Pecans: These add a wonderful toasty flavor and a delightful crunch in every bite. If you’re not a nut person, you can leave them out, but I highly recommend giving them a try!
For That Irresistible Crunchy Streusel Topping:
- ¼ cup Brown Sugar: Creates that sweet, crisp, caramelized crust.
- ¼ cup Chopped Pecans: Doubling down on that nutty goodness for maximum texture.
- 1 tbsp All-Purpose Flour: The stabilizer. It helps bind the streusel together so it doesn’t just melt into the batter.
- 1 tbsp Melted Butter: This is what creates those buttery, crumbly clusters we all love.
- ½ tsp Cinnamon: A little extra spice to make the topping truly shine.
Let’s Get Baking: The Step-by-Step Guide
Ready to create some magic? Follow these steps, and you’ll be a banana bread hero in no time. I’ve sprinkled in my favorite kitchen hacks to make sure your loaf turns out perfect.
- Preheat and Prep. Fire up your oven to 350°F (175°C). Now, take your 9×5-inch loaf pan and give it a good greasing with butter or a non-stick spray. For ultimate easy removal, you can line it with parchment paper, leaving a little overhang on the two long sides. Chef’s Hack: A well-greased pan is non-negotiable! Nothing is sadder than a beautiful loaf that gets stuck.
- Mash and Mix the Wet Team. In a large bowl, take those beautifully ripe bananas and mash them with a fork until they’re nice and goopy. A few small lumps are totally fine—they add character! Now, whisk in the melted (but slightly cooled) butter, brown sugar, eggs, and vanilla extract. Whisk it all until it’s smooth and beautifully combined. You’ll see the mixture lighten in color a bit as you whisk—that’s the eggs doing their thing!
- Whisk the Dry Crew. In a separate, medium-sized bowl, whisk together the flour, baking soda, salt, and cinnamon. This is a crucial step! Whisking ensures the baking soda is evenly distributed, so your loaf rises evenly and you don’t get any bitter pockets. Chef’s Hack: I always give my dry ingredients a quick sift through a fine-mesh strainer if I have time. It aerates the flour and guarantees a super tender crumb.
- Combine with Care. Now, pour the dry ingredient mixture into the wet ingredients. Grab a spatula and gently fold everything together. Stop as soon as you no longer see streaks of flour. I’ll say it again: DO NOT OVERMIX! A few lumps are your friend. Overmixing develops the gluten in the flour and leads to a tough, dense loaf, and we are all about that tender, moist life.
- Fold in the Goodies. Gently fold in the ½ cup of chopped pecans until they’re just distributed throughout the batter.
- Make the Magic Dust (Streusel!). In that now-empty medium bowl (less dishes!), mix together all the streusel ingredients: the brown sugar, chopped pecans, flour, melted butter, and cinnamon. Use a fork to mix until it resembles coarse, wet sand and starts to form little clumps. That’s exactly what you want!
- Assemble and Bake to Perfection. Pour the batter into your prepared loaf pan and spread it out evenly. Now, generously sprinkle the streusel topping all over the surface, covering it completely. Pop it into the preheated oven and bake for 55 to 65 minutes. The true test? A toothpick or a thin skewer inserted into the very center of the loaf should come out clean or with a few moist crumbs attached, but no wet batter.
- The All-Important Cool Down. This is the hardest part—waiting! Let the loaf cool in the pan on a wire rack for at least 10-15 minutes. This allows the structure to set. Then, carefully run a knife around the edges and lift it out (using your parchment paper handles if you used them) to cool completely on the wire rack. I know it’s tempting to slice into it warm (and you totally can!), but letting it cool completely will give you much cleaner slices.
How to Serve This Masterpiece
Okay, the loaf is cooled (or let’s be real, still slightly warm because you couldn’t wait). How do we serve it? Let me count the ways!
For the ultimate simple pleasure, just grab a slice and enjoy it as is. The contrast of the soft, fragrant interior and the crunchy, sugary top is a experience all on its own. If you’re feeling a little decadent, slather a warm slice with a generous pat of salted butter. The way it melts into the warm crumb is nothing short of divine. For a next-level breakfast or brunch treat, toast a slice lightly and add a dollop of Greek yogurt or a drizzle of honey. And if you really want to send it over the top, serve it warm with a scoop of vanilla bean ice cream for the most incredible, easy dessert. No matter how you serve it, a tall glass of cold milk or a hot cup of coffee is its perfect partner in crime.
Make It Your Own: Delicious Variations
The beautiful thing about this recipe is that it’s a fantastic canvas for your own creativity. Here are a few of my favorite twists:
- Chocolate Chip Bliss: Fold in ¾ cup of semi-sweet or dark chocolate chips along with (or instead of) the pecans. Because bananas and chocolate are a match made in heaven.
- Nut-Free & Tropical: Omit the pecans from both the loaf and the streusel. Instead, fold in ½ cup of shredded coconut into the batter, and use rolled oats instead of pecans in the streusel for a tropical vibe.
- Double the Spice: Feeling cozy? Add an extra ¼ teaspoon of nutmeg or a pinch of ground cloves to the dry ingredients for a deeply spiced loaf that’s perfect for fall.
- Gluten-Free Friendly: You can easily swap the all-purpose flour for a 1:1 gluten-free baking blend. The result is just as moist and delicious!
- Muffin Magic: Turn these into incredible bakery-style muffins! Just divide the batter into a lined muffin tin, top with streusel, and bake for 18-22 minutes. Perfect for on-the-go snacking.
Beau’s Kitchen Chronicles
This recipe has been on quite a journey with me. The first time I made it, I was so excited I accidentally used baking powder instead of baking soda. Let’s just say I ended up with a very dense, sad-looking brick. A valuable lesson was learned that day about always reading labels! Over the years, I’ve tweaked it—adding the cinnamon, upping the brown sugar, and of course, creating that signature streusel topping after being inspired by a coffee cake my neighbor brought over. It’s evolved into the recipe I’m sharing with you today, and it’s a testament to the fact that sometimes the best recipes come from a few happy accidents and a whole lot of tasting along the way.
Your Questions, Answered!
I’ve gotten a lot of questions about this loaf over the years. Here are the answers to the most common ones!
Q: My bananas aren’t ripe enough! Can I speed up the process?
A: Absolutely! Place your yellow bananas on a baking sheet and bake them in a 300°F oven for about 15-20 minutes, until the skins are black and shiny. Let them cool, and you’re in business! Alternatively, you can pop them in a paper bag for a day or two to ripen naturally.
Q: Why did my loaf sink in the middle?
A: This is usually due to one of two things: 1) The loaf was underbaked. Make sure that toothpick comes out clean! Or 2) The batter was overmixed. Remember, gentle folding is the key to a perfect rise.
Q: Can I freeze this banana bread?
A: You bet! Let the completely cooled loaf double-wrap tightly in plastic wrap, then again in aluminum foil. It will keep beautifully in the freezer for up to 3 months. Thaw at room temperature whenever a craving strikes.
Q: My streusel topping sunk into the batter! What happened?
A: This can happen if the streusel is too wet or the batter is too thin. Make sure your streusel has a nice, crumbly texture (add a tiny bit more flour if it’s too buttery). Also, ensure your batter is thick, not runny—using the correct amount of bananas is key.
Banana Pecan Streusel Loaf : Moist Banana Bread with a Sweet Crunchy Topping
Description
-
Bake the perfect loaf with just 5 ingredients! Our easy, step-by-step guide to homemade bread will fill your kitchen with an incredible aroma.
Ingredients
For the Loaf:
-
2–3 ripe bananas, mashed (about 1 cup)
-
½ cup unsalted butter, melted
-
¾ cup brown sugar
-
2 large eggs
-
1 tsp vanilla extract
-
1½ cups all-purpose flour
-
1 tsp baking soda
-
½ tsp salt
-
½ tsp cinnamon
-
½ cup chopped pecans
For the Streusel Topping:
-
¼ cup brown sugar
-
¼ cup chopped pecans
-
1 tbsp all-purpose flour
-
1 tbsp melted butter
-
½ tsp cinnamon
Instructions
-
Preheat & Prep Pan:
Preheat oven to 350°F (175°C). Grease a 9×5-inch loaf pan and optionally line with parchment paper. -
Mash & Mix Wet Ingredients:
Mash bananas in a large bowl. Whisk in melted butter, brown sugar, eggs, and vanilla until smooth. -
Whisk Dry Ingredients:
In a separate bowl, whisk together flour, baking soda, salt, and cinnamon. -
Combine Gently:
Fold dry ingredients into wet until just combined. Do not overmix—lumps are fine. -
Add Pecans:
Fold in ½ cup chopped pecans. -
Make Streusel:
In a small bowl, mix brown sugar, pecans, flour, melted butter, and cinnamon until crumbly. -
Assemble & Bake:
Pour batter into prepared pan. Sprinkle streusel evenly on top. Bake 55–65 minutes until a toothpick inserted in the center comes out clean or with a few moist crumbs. -
Cool:
Let loaf cool in pan 10–15 min. Run a knife around edges and transfer to a wire rack to cool completely before slicing.
Notes
-
Enjoy as-is or with butter
-
Toast lightly with Greek yogurt or honey
-
Serve warm with vanilla ice cream for dessert
Nutritional Information (Because We’re Curious!)
Now, let’s be clear—this is a treat, a dessert, a celebratory snack. It’s soul food! But I know many of you like to have a general idea of what you’re enjoying, so here’s a rough estimate per slice (assuming 10 slices per loaf). Remember, these values can vary based on the specific brands of ingredients you use.
- Calories: ~290
- Fat: 15g
- Carbohydrates: 36g
- Sugar: 20g
- Protein: 4g
The bananas provide potassium and a bit of fiber, and the pecans add healthy fats and a touch of protein. But mostly, this loaf provides joy, and that’s a nutrient we can all use more of!
Final Slice of Wisdom
And there you have it, my friends! My ultimate, go-to, never-fail Banana Pecan Streusel Loaf. It’s a recipe built on nostalgia, perfected with a few kitchen experiments, and shared with a whole lot of love. I hope this loaf finds its way into your kitchen and becomes a new tradition for you, just like it is for me. It’s proof that the simplest ingredients can create the most memorable moments. Now, I’d love to hear from you! Did you add chocolate chips? Try the coconut version? Snap a picture and tag me @FeasticalBeau or use the hashtag #Feastical so I can see your beautiful creations. Happy baking!
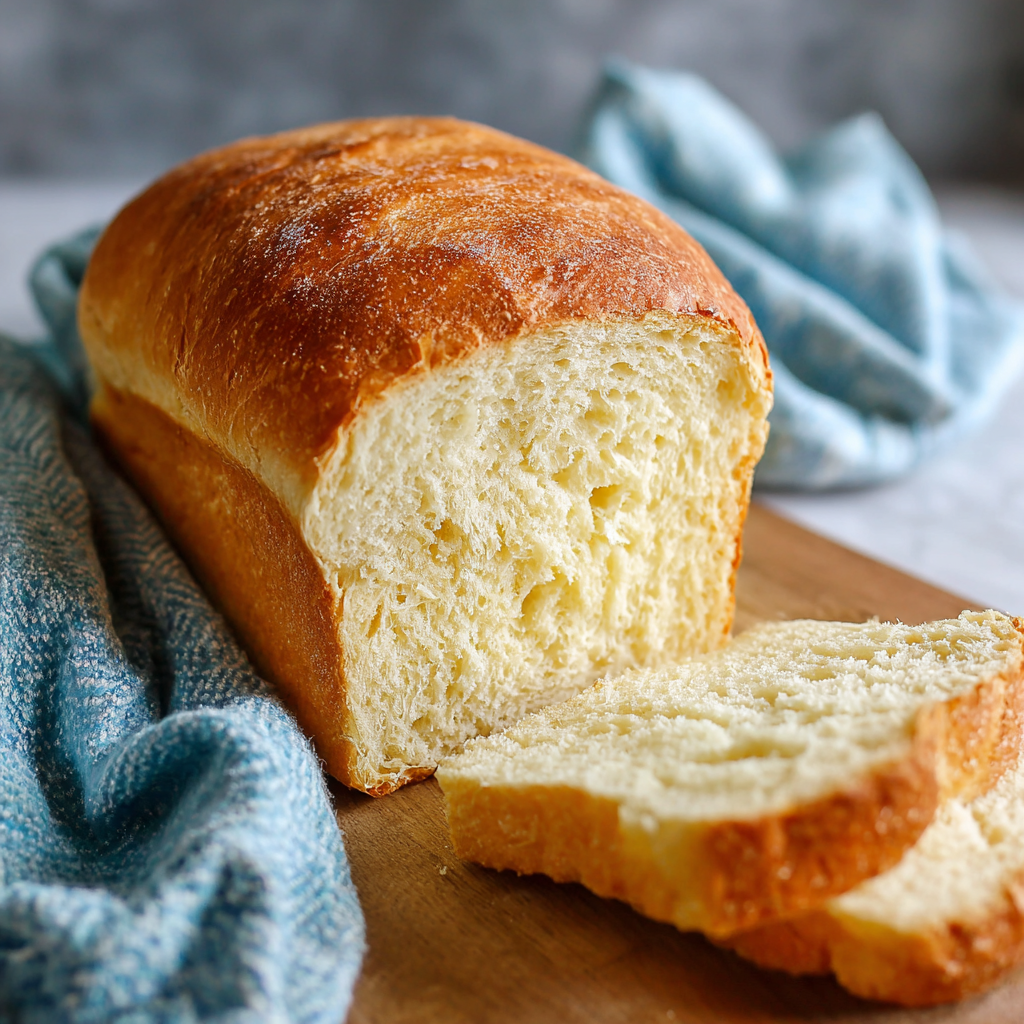
Simple Homemade Bread : Soft, Fluffy, and Just 5 Ingredients
Your Kitchen is About to Smell Incredible: Let’s Make Bread!
Hey friends, Beau here! Can we talk about one of life’s simplest, most soul-satisfying pleasures? I’m not talking about a fancy, five-course meal. I’m talking about the warm, golden, crackly-crusted miracle that is a loaf of homemade bread, fresh from your very own oven.
I get it. The idea of baking bread from scratch can feel a little intimidating. Visions of complicated starter cultures, temperamental yeast, and hours of labor might be dancing in your head. But what if I told you that the most beautiful, fluffy, and downright delicious loaf of bread you’ve ever tasted is just five simple pantry ingredients away? And you don’t need a stand mixer, a bread machine, or any fancy gear—just your two hands and a little bit of love.
This recipe is my go-to, my bread-baking security blanket. It’s the one I teach to friends who swear they have a “black thumb” for baking. It’s forgiving, it’s straightforward, and it’s designed to build your confidence. We’re going to turn flour, water, yeast, salt, and a pinch of sugar into a masterpiece that will make your entire house smell like a professional bakery. So, tie on your apron, dust off that counter, and let’s turn today into a Feastical. You’ve got this.
The Loaf That Started It All
This recipe takes me right back to my grandma’s kitchen. She wasn’t a fancy chef, but she was a wizard with simple ingredients. Her counter was always dusted with a fine layer of flour, and her oven seemed to hold a perpetual, golden-brown loaf. I’ll never forget the first time she let me “punch” the risen dough. To my eight-year-old eyes, it was pure magic. This soft, puffy cloud of potential collapsed with a gentle whoosh, and she’d just smile and say, “See, Beau? It’s alive. And now it’s ready for its next chapter.”
That moment—the tactile joy of it, the quiet patience, the triumphant reveal from the oven—is baked into my very soul. It’s where I learned that cooking isn’t just about feeding people; it’s about connection, tradition, and the simple magic of creation. This recipe is my homage to her. It’s that same, simple, soul-warming bread, and every time I make it, I’m right back in her sunny kitchen, covered in flour and full of wonder.
Gather Your Dream Team: Just 5 Ingredients!
See? I told you it was simple. This is the A-team, the whole crew. Let’s get to know them a little better, because each one plays a starring role in our bread-baking adventure.
- 3 cups All-Purpose Flour (plus more for dusting): This is our foundation. All-purpose flour has the perfect protein level to create a soft, tender crumb with just enough structure. Chef’s Insight: I like to fluff the flour in its bag with a spoon before measuring, then spoon it lightly into the measuring cup and level it off. This prevents packing in too much flour, which is the number one cause of dense bread!
- 1 tablespoon Sugar: Don’t worry, this isn’t to make the bread sweet! The sugar is the favorite food for our next ingredient, the yeast. It gives those tiny microorganisms a quick burst of energy to get them going. Substitution Tip: Honey or maple syrup work beautifully here for a slight flavor twist.
- 2 ¼ teaspoons (1 packet) Active Dry Yeast: This is the engine of our bread, the living ingredient that makes it rise and gives it that incredible, airy texture. Chef’s Insight: Make sure your yeast isn’t past its expiration date! We’re going to “proof” it first to make sure it’s alive and kicking.
- 1 teaspoon Salt: This is the flavor maestro. Salt does more than just make the bread taste good; it actually strengthens the gluten structure and controls the yeast’s activity, so your loaf doesn’t rise too fast and then collapse. Never skip the salt!
- 1 cup Warm Water (110°F/45°C): The temperature of the water is crucial. Too hot, and you’ll kill the yeast. Too cold, and it won’t wake up. Chef’s Hack: If you don’t have a thermometer, think of baby bottle temperature—warm to the touch, but not hot. A quick wrist test is perfect.
Let’s Get Baking: Your Step-by-Step Roadmap to Bread Bliss
Ready to create some magic? Follow these steps, read my little hacks along the way, and you’ll be holding a gorgeous, warm loaf before you know it.
- Activate the Yeast – Wake Up the Team!In a large mixing bowl, combine your warm water, sugar, and the entire packet of yeast. Give it a quick stir and then just walk away. Let it sit for 5-10 minutes. You’re looking for a foamy, creamy layer on top—that’s your sign that the yeast is happy, active, and ready to go to work. If you don’t see foam after 10 minutes, your yeast might be old, and it’s best to start fresh.
- Make the Dough – It’s Mixing Time!Add your 3 cups of flour and 1 teaspoon of salt directly into the bowl with the yeasty water. I use a wooden spoon or a sturdy spatula to mix until a shaggy, rough dough forms and it pulls away from the sides of the bowl. It might look a little messy, and that’s totally fine! This is where the real fun begins.
- Knead the Dough – Your Arm Workout for the Day!Lightly flour your clean countertop and turn the dough out onto it. Now, we knead! This is the most therapeutic part of the process. Use the heels of your hands to push the dough away from you, then fold it back over, give it a quarter turn, and repeat. You’ll do this for 8-10 minutes. Chef’s Hack: If the dough feels too sticky, add a tiny sprinkle of flour (a tablespoon at a time). You’re done when the dough is smooth, slightly elastic, and springs back slowly when you poke it.
- First Rise – The Patience Pays Off!Drizzle a little oil (canola or olive oil works great) into the now-empty mixing bowl. Place your beautiful, smooth ball of dough in the bowl and turn it over once to coat it lightly in oil. This prevents a skin from forming. Cover the bowl with a clean, damp kitchen towel or plastic wrap and place it in a warm, draft-free spot. Let it rise for about 1 hour, or until it has doubled in size. Chef’s Hack: I like to turn my oven on to the “warm” setting for just a minute, then turn it off and place the bowl inside. It creates the perfect cozy environment.
- Shape & Second Rise – Almost There!Once your dough is beautifully puffed up, it’s time for the most satisfying step: punch it down! Gently press your fist into the center to deflate it. Turn it out onto a lightly floured surface and shape it into a loaf that will fit nicely into a greased 9×5-inch loaf pan. Place the shaped dough seam-side down in the pan, cover it again with the towel, and let it rise for a second time. This rise is shorter, about 30-40 minutes. It should crest just above the top of the pan.
- Bake – Let the Magic Happen!While the dough is on its second rise, preheat your oven to 375°F (190°C). When the dough is ready, place the loaf pan in the center of the oven and bake for 25-30 minutes. You’ll know it’s done when the top is a deep, golden brown and the loaf sounds hollow when you tap the top. Chef’s Hack: For an extra-golden, professional-looking crust, you can brush the top with a little melted butter or an egg wash (1 egg beaten with 1 tbsp water) right before baking.
- Cool – The Hardest Part!I know, I know. The smell is intoxicating, and you just want to tear into it. But trust me on this! Let the bread cool in the pan for 10 minutes, then carefully transfer it to a wire rack to cool completely. This waiting period allows the internal steam to finish cooking the loaf and sets the crumb. If you slice it while it’s too hot, it can be gummy inside. You can do it!
How to Serve Your Masterpiece
Okay, the loaf has cooled. Now what? The world is your oyster!
For the ultimate experience, that first slice deserves a thick slather of good, salted butter that melts into all the nooks and crannies. It’s a religious experience, I tell you.
This bread is the perfect companion for a big, cozy bowl of soup or stew. It’s fantastic for sandwiches—your turkey and avocado have never had it so good. And let’s not forget about French toast the next morning; using slightly stale homemade bread is the secret to the best French toast of your life.
My personal favorite? A thick slice, lightly toasted, with a generous swipe of peanut butter and a drizzle of local honey. That, right there, is a Feastical.
Get Creative! 5 Fun Twists on the Classic
Once you’ve mastered the basic loaf, the fun really begins. Here are a few of my favorite ways to mix it up:
- Herb & Garlic Heaven: Knead in 2 tablespoons of finely chopped fresh herbs (rosemary and thyme are a dream team) and 1-2 minced garlic cloves during the last minute of kneading.
- Whole Wheat Wonder: Substitute 1 cup of the all-purpose flour with whole wheat flour for a nuttier flavor and extra fiber. You might need to add an extra tablespoon or two of water, as whole wheat flour absorbs more liquid.
- Everything Bagel Bliss: Before the second rise, brush the top of the shaped loaf with a little water or an egg wash and generously sprinkle on your favorite everything bagel seasoning.
- Cinnamon Swirl Sensation: After the first rise, roll the dough out into a rectangle. Sprinkle with a mixture of 1/4 cup sugar and 1 tbsp cinnamon. Roll it up tightly, pinch the seam, and place it in the loaf pan for the second rise. You get a beautiful, swirled loaf perfect for toasting.
- Cheesy Pull-Apart Bread: Instead of a loaf pan, form the dough into small balls. Toss them in melted butter and grated cheddar cheese, then pile them into a greased Bundt pan for the second rise. Bake as directed for a fun, shareable cheesy bread.
Beau’s Bread-Baking Brain Dump
This recipe has been a living, evolving thing in my kitchen. I’ve made it in a heatwave and in the dead of winter, and sometimes the rise times vary—and that’s okay! Bread teaches you to be flexible. My funniest kitchen fail was the time I accidentally used self-rising flour (which has baking powder in it) and my loaf rose so violently it looked like a mushroom cloud. We still ate it, but it was… interesting. The lesson? Always read your flour bag labels!
Over time, I’ve learned to trust the dough and my instincts more than the clock. If it’s a cold day, the rise might take longer. If it’s humid, the dough might be a bit stickier. Don’t stress. This recipe is resilient. The more you make it, the more you’ll understand the feel of a perfect dough, and it will become second nature.
Your Bread Questions, Answered!
I’ve heard every question in the book, so let’s tackle the most common ones head-on.
Q: My bread is too dense. What did I do wrong?
A: The most common culprit is using too much flour. Remember to fluff, spoon, and level! Other causes could be over-kneading (which toughens the gluten) or killing the yeast with water that was too hot. Next time, try being a little gentler with the flour and double-check your water temperature.
Q: Can I make this dough ahead of time?
A: Absolutely! After the first rise, you can punch the dough down, place it in a greased bowl, cover it tightly with plastic wrap, and stash it in the fridge for up to 24 hours. When you’re ready, let it come to room temperature for about an hour, then shape, do the second rise, and bake. The slow, cold rise actually develops more flavor!
Q: Why didn’t my yeast foam?
A: This usually means the yeast was no longer active. The water could have been too hot and killed it, or the yeast itself could be past its prime. Always check the expiration date and make sure your water is warm, not scalding.
Q: My crust is too hard. How can I make it softer?
A: For a softer crust, brush the top of the hot loaf with melted butter as soon as it comes out of the oven. Also, make sure you’re storing the completely cooled bread in a plastic bag or a bread box, not out in the open air.

Simple Homemade Bread : Soft, Fluffy, and Just 5 Ingredients
Description
Simple Homemade Bread: Warm, Golden, Soul-Satisfying Loaf
A fluffy, crackly-crusted loaf made with just 5 ingredients. Perfect for sandwiches, toast, or simply enjoying with butter.
Ingredients
-
3 cups all-purpose flour (plus extra for dusting)
-
1 tbsp sugar
-
2¼ tsp (1 packet) active dry yeast
-
1 tsp salt
-
1 cup warm water (110°F / 45°C)
Instructions
-
Activate Yeast:
In a large bowl, mix warm water, sugar, and yeast. Let sit 5–10 min until foamy. -
Make Dough:
Add flour and salt. Mix until a shaggy dough forms. -
Knead Dough:
Turn onto a floured surface. Knead 8–10 min until smooth, elastic, and slightly springy. Add flour sparingly if sticky. -
First Rise:
Lightly oil a bowl, place dough inside, turn to coat, cover with damp towel or plastic wrap. Let rise 1 hour or until doubled. -
Shape & Second Rise:
Punch down dough. Shape into a loaf for a greased 9×5-inch pan. Cover and let rise 30–40 min until slightly above the pan. -
Bake:
Preheat oven to 375°F (190°C). Bake 25–30 min until golden brown and hollow-sounding when tapped. Optional: brush with melted butter or egg wash for a shiny crust. -
Cool:
Cool in pan 10 min, then transfer to a wire rack to cool completely before slicing.
Notes
-
Herb & Garlic: Knead in 2 tbsp fresh herbs + 1–2 garlic cloves.
-
Whole Wheat: Replace 1 cup flour with whole wheat (may need extra water).
-
Everything Bagel: Sprinkle seasoning on top before second rise.
-
Cinnamon Swirl: Roll out dough, add sugar + cinnamon, roll, and bake.
-
Cheesy Pull-Apart: Form small balls, coat with butter + cheese, bake in Bundt pan.
Nutrition
- Calories: 120Cal Per Serving
- Fat: 0.3
- Carbohydrates: 23 g
- Protein: 3 g
Breaking It Down: The Good Stuff
I’m all about feel-good food, and that includes knowing what you’re putting into your body. This homemade bread is about as clean as it gets—no preservatives, no unpronounceable ingredients. Here’s a general nutritional breakdown per slice (based on 12 slices per loaf). Remember, these are estimates and can vary based on specific ingredients used.
- Calories: ~120
- Protein: 3g
- Carbohydrates: 23g
- Fat: 0.5g
Compared to most store-bought breads, you’re getting a product with full control over the sodium and sugar content, and you’re skipping all the processed additives. It’s pure, simple, and satisfying fuel.
You Did It! Welcome to the Bread-Baking Club
Look at you, you magnificent baker! You started with a few simple ingredients and created something warm, nourishing, and filled with love. That golden loaf on your counter is more than just bread; it’s a testament to your capability. It’s a story of patience, a little bit of science, and a whole lot of heart.
I hope this recipe becomes a staple in your home, just like it is in mine. I hope you share it with friends, slather it with jam for your kids, and feel that incredible sense of pride every single time. This is what Feastical is all about—making delicious food accessible and turning your kitchen into the heart of your home.
Now, go enjoy that bread! And if you made it, I’d love to see it. Tag me @Feastical on social media so I can celebrate with you. Until next time, happy baking!
Final Thoughts: A Loaf Full of Magic
As the last crumbs are swept away and the final slice is enjoyed, I hope you carry the feeling of this bake with you. The feeling of the soft, pliable dough under your palms, the quiet anticipation of the rise, the intoxicating scent that promised something wonderful was coming, and the final, glorious reveal from the oven.
This recipe is a keeper, but the real magic is in the act itself—the act of creating, of nurturing, and of sharing. You didn’t just make bread; you made a memory. You bottled a feeling of warmth and accomplishment that no store-bought loaf could ever provide.
So here’s to many more loaves, more flour-dusted counters, and a kitchen that always smells incredible. You’ve got the power to create Feastical moments, anytime you like.
Chocolate Layer Cake with Cookies and Cream Filling : A Decadent Showstopper Dessert
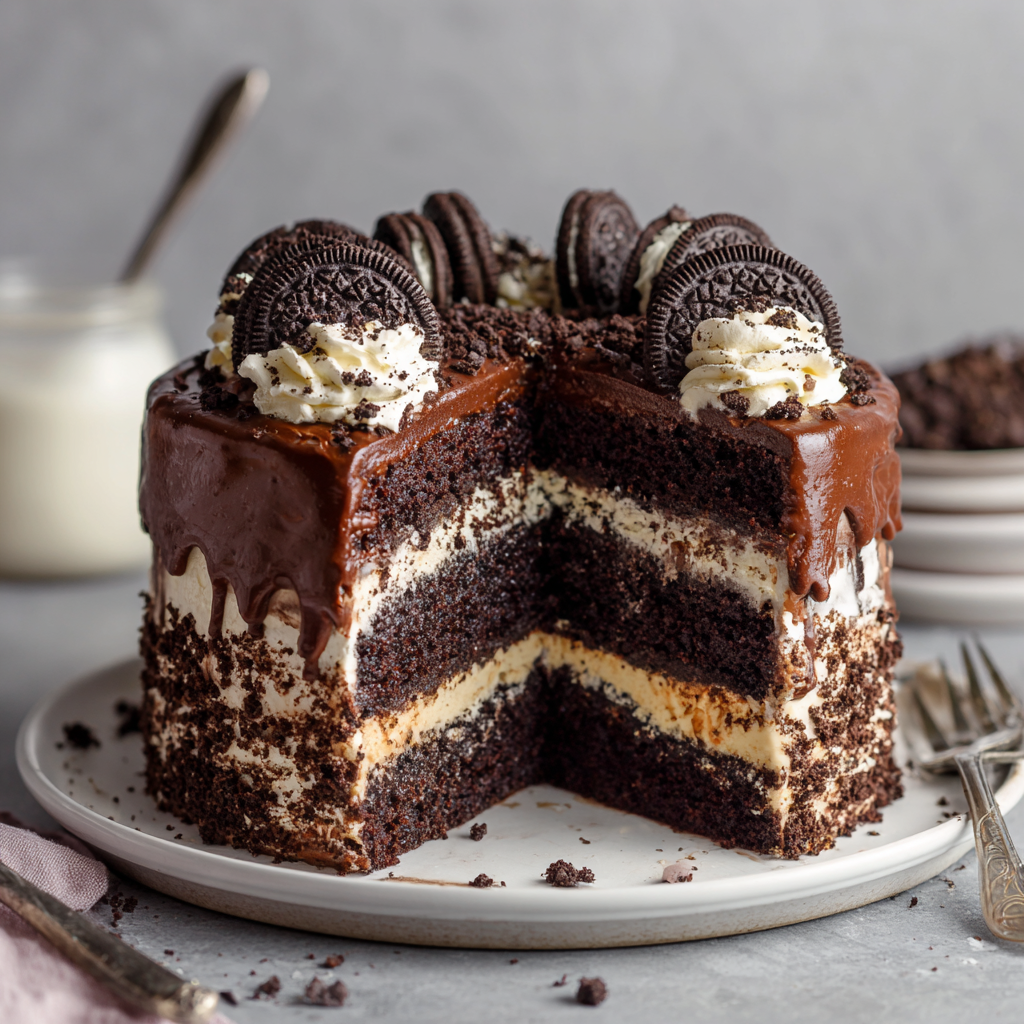
Chocolate Layer Cake with Cookies and Cream Filling: A Decadent Showstopper Dessert
Hey there, friend! Beau here, welcoming you back to my kitchen at Feastical. You know what I love more than a good, simple weeknight meal? A full-blown, no-holds-barred, celebration-worthy DESSERT. The kind of cake that makes people’s eyes go wide when you carry it to the table. The kind that gets a round of applause before the first slice is even cut. If you’re nodding along, then you and I are on the same delicious wavelength.
Today, we’re throwing caution to the wind and building a masterpiece: my Ultimate Chocolate Layer Cake with a Cookies and Cream Filling. This isn’t just any chocolate cake. This is a deeply moist, intensely chocolatey cake that stays tender for days, layered with a cloud-like, whipped cream and cookie filling that cuts through the richness perfectly. And we’re finishing the whole thing with a silky, dreamy chocolate frosting that’s so good, you might just find yourself eating it with a spoon. (No judgment here—I’ve been there!)
I know layer cakes can seem a little intimidating, but trust me, we’re going to walk through this together, step-by-step. I’ve packed this guide with all my favorite chef hacks and simple tricks to make you feel like a baking pro. So, tie on your favorite apron, find that spatula (check the dishwasher first, that’s where mine always hides), and let’s create some magic.
The Cake That Started It All
This particular cake recipe holds a special place in my heart. It was the very first “from-scratch” cake I ever dared to make for my mom’s birthday. I must have been about sixteen, feeling wildly overconfident in my limited kitchen skills. I envisioned this towering, gorgeous creation, but what I produced was… well, let’s call it “rustic.” The layers were lopsided, my frosting job was, generously speaking, “textured,” and I may have used an entire box of cookies in the filling because, more is more, right?
But when we sliced into it? The room went quiet. That first bite was a revelation. The cake was so incredibly soft and rich, and the cool, creamy filling with those crunchy cookie bits was a total game-changer. My family demolished it. It didn’t matter that it looked a little messy; it tasted like pure, unadulterated joy. That was the moment I truly understood the power of a homemade dessert. It’s not about perfection; it’s about the love and the fantastic flavor you bake into it. This recipe is that same reliable, soul-satisfying cake, just with a few years of practice and finesse added in.
Gathering Your A-Team: The Ingredients
Great baking starts with great ingredients. Don’t worry, we’re not using anything too fancy—just simple, quality components that work together in perfect harmony. Here’s your shopping list, with a little Beau-style commentary for each one.
For the Chocolate Cake:
- 2 cups all-purpose flour: The trusty foundation of our cake. For a slightly lighter crumb, you can swap it 1:1 with cake flour.
- 2 cups sugar: Sweetness and tenderness, all in one. We’re using granulated white sugar to keep the cake’s color a rich, deep brown.
- ¾ cup unsweetened cocoa powder: This is where the magic happens! Use a good-quality cocoa powder—natural or Dutch-processed will both work beautifully here for that deep chocolate flavor.
- 2 tsp baking powder & 1½ tsp baking soda: Our dynamic leavening duo. They work together to give this dense batter a beautiful, airy rise.
- 1 tsp salt: A must! Salt makes all the other flavors pop and balances the sweetness. Don’t you dare skip it.
- 1 cup buttermilk: The secret weapon for an unbelievably moist and tender crumb. No buttermilk? No problem! Make a quick “sour milk” by adding 1 tablespoon of white vinegar or lemon juice to a cup of regular milk and let it sit for 5 minutes.
- ½ cup vegetable oil: Oil keeps the cake moister for longer than butter would. I use a neutral oil like canola or avocado.
- 2 large eggs: They bind everything together and add structure and richness.
- 2 tsp vanilla extract: The flavor enhancer. It rounds out the chocolate and makes it taste even more complex.
- 1 cup hot water or hot coffee: This is my #1 pro tip! The hot liquid “blooms” the cocoa powder, intensifying its chocolate flavor. Don’t worry, you won’t taste the coffee—it just makes the chocolate taste richer and deeper. The batter will be thin, but that’s exactly what we want!
For the Cookies and Cream Filling:
- 1½ cups heavy cream (or heavy whipping cream): Make sure it’s very cold! This is key for getting those beautiful, stiff peaks.
- ¼ cup powdered sugar: Sweetens the cream without any grittiness.
- 1 tsp vanilla extract: A little flavor boost for our creamy cloud.
- 10 chocolate sandwich cookies, crushed: I use the classic ones, but any brand will do! Crush them with some texture—you want some bigger chunks for that satisfying crunch.
For the Chocolate Frosting & Topping:
- 1 cup (2 sticks) butter, softened: Real butter, please! It should be soft to the touch but not melted for the fluffiest frosting.
- ¾ cup unsweetened cocoa powder: We’re doubling down on that chocolate goodness.
- 3 cups powdered sugar: Sift it if it’s lumpy for an ultra-smooth frosting.
- ¼ cup heavy cream: This loosens the frosting to a spreadable, silky consistency.
- 1 tsp vanilla extract: The finishing touch for our frosting.
- 6-8 crushed chocolate sandwich cookies: For that gorgeous, rustic finish on top of the cake.
Let’s Get Baking: The Step-by-Step Guide
Okay, team. Here’s where the fun begins. Read through all the steps once before you start, and remember: baking is a science, but it’s also an act of love. Let’s do this.
- Preheat and Prep. Fire up your oven to 350°F (175°C). Now, let’s get our cake pans ready. Grease two 9-inch round cake pans with a little butter or non-stick spray. Then, dust them with a tablespoon of flour or cocoa powder, tapping out the excess. For absolute foolproof removal, I like to line the bottoms with a circle of parchment paper. This little hack guarantees your cakes will slide out perfectly.
- Combine the Dry Ingredients. In a large bowl, grab your whisk and give the flour, sugar, cocoa powder, baking powder, baking soda, and salt a really good whisk. We’re not just mixing here; we’re aerating the dry ingredients to ensure everything is evenly distributed. No one wants a pocket of baking soda in their slice! Chef’s Hack: Sifting the dry ingredients together is an even better way to ensure a lump-free, super-light cake base.
- Add the Wet Ingredients (Except the Hot Liquid!). Make a well in the center of your dry ingredients and pour in the buttermilk, oil, eggs, and vanilla. Using an electric mixer on medium speed (or a ton of elbow grease with a whisk), beat this all together until the batter is smooth and beautifully combined. It will be thick and shiny at this point.
- The Magic Step: Add the Hot Water/Coffee. Now, with the mixer on low speed, gradually pour in the hot water or coffee. The batter will become very thin and liquidy. This is NORMAL and exactly what you want! This thin batter is the secret to that incredibly moist texture. Chef’s Insight: Be careful not to overmix at this stage. Just mix until it’s fully incorporated.
- Bake to Perfection. Carefully divide the batter evenly between your two prepared pans. I like to use a kitchen scale for perfect layers, but eyeballing it works too! Slide them into the preheated oven and bake for 30-35 minutes. You’ll know they’re done when the tops spring back lightly when touched, and a toothpick inserted into the center comes out with a few moist crumbs attached, but not wet batter.
- The Most Important Step: Cool Completely. This is the test of your patience! Let the cakes cool in their pans on a wire rack for about 15 minutes. Then, run a knife around the edges and gently invert them onto the rack to cool completely. I’m talking *completely* cool. If you try to frost a warm cake, you’ll have a melty, sliding mess. Trust me, I’ve learned this the hard way.
- Whip Up the Filling. While the cakes are cooling, let’s make that dreamy filling. In a chilled bowl (I pop my bowl and beaters in the freezer for 10 minutes beforehand), beat the heavy cream, powdered sugar, and vanilla on medium-high speed until stiff peaks form. That means when you lift the beaters, the cream stands straight up. Be careful not to overbeat, or you’ll start making butter! Gently fold in the crushed cookies with a spatula, then pop the whole bowl into the fridge to stay firm.
- Create the Chocolate Frosting. In another bowl, beat the softened butter and cocoa powder together until smooth and combined. This might look a little gritty at first, but it will come together. Gradually add the powdered sugar, one cup at a time, alternating with a splash of the heavy cream and vanilla. Beat on medium-high speed for 2-3 minutes until it’s light, fluffy, and wonderfully spreadable. If it’s too thick, add a teaspoon more cream. Too thin? A little more powdered sugar.
- The Grand Finale: Assemble the Cake! Place one cooled cake layer on your cake stand or plate. Spread the entire bowl of chilled cookies and cream filling evenly over the top, going all the way to the edges. Gently place the second cake layer on top. Now, frost the top and sides of the cake with that luscious chocolate frosting. Don’t stress about it being perfectly smooth—a slightly rustic, “homemade” look is full of charm! Finally, press the remaining crushed cookies onto the top and sides of the cake for that final, showstopping touch.
How to Serve This Masterpiece
You’ve built a beautiful cake, now let’s serve it with style! For the cleanest slices, I recommend popping the assembled cake into the fridge for about 30 minutes to let everything set up. When you’re ready, use a long, thin knife. Dip it in hot water, wipe it dry, and then make your cut. This gives you those gorgeous, professional-looking layers in every slice.
This cake is rich, so a modest slice is plenty. I love serving it with a cold glass of milk for the ultimate classic combo, or a strong cup of black coffee to complement the deep chocolate notes. For a real dinner party wow-factor, add a small scoop of vanilla bean ice cream on the side. The warm-cold, creamy-crunchy contrast is absolutely divine.
Make It Your Own: Delicious Recipe Variations
One of the best things about this recipe is how adaptable it is. Feel like mixing it up? Here are a few of my favorite twists:
- Mint Chocolate Chip Twist: Add 1 teaspoon of peppermint extract to the cookies and cream filling and fold in ½ cup of mini chocolate chips instead of the cookies for a refreshing, classic flavor combo.
- Peanut Butter Lover’s Dream: Swap the cookies and cream filling for a peanut butter frosting. Beat 1 cup of creamy peanut butter with ½ cup of softened butter, 2 cups of powdered sugar, and a splash of cream until fluffy. You can even press chopped peanut butter cups on top!
- Cookies and Cream Overload: For the ultimate cookie fan, chop up an extra 5-6 cookies and gently fold them into the cake batter right before dividing it into the pans. It’s cookies and cream in every single bite!
- Dairy-Free Delight: You can still enjoy this! Use your favorite plant-based milk mixed with vinegar for the buttermilk, and use coconut oil. For the filling and frosting, use well-chilled canned coconut cream (just the solid part) and dairy-free sandwich cookies.
- Mini Cake Layer Version: Want more layers? Divide the batter between three 8-inch pans and reduce the baking time to 22-27 minutes. You’ll get a stunning, sky-high cake!
Beau’s Kitchen Notes & Stories
This cake has been my go-to for so many years, and it’s evolved in little ways. I started using hot coffee after a chef friend insisted, and wow, was she right! I also used to be terrified of my filling sliding out, until I started chilling it thoroughly. The funniest mishap was the time I accidentally used salted butter for the frosting and forgot to adjust the salt. Let’s just say it was a *very* savory chocolate experience—my friends still tease me about it! The moral of the story? Laugh it off, learn from it, and know that even the “mistakes” usually still taste pretty darn good.
Your Questions, Answered!
Over the years, I’ve gotten a lot of questions about this cake. Here are the most common ones to help you bake with confidence.
Q: Can I make this cake ahead of time?
A: Absolutely! You can bake the cake layers a day in advance. Let them cool completely, then wrap them tightly in plastic wrap and store at room temperature. You can also freeze the unfrosted layers for up to 2 months. The filling and frosting are best made the day of, but the assembled cake holds up beautifully in the fridge for a day.
Q: My cake layers sunk in the middle. What happened?
A: This is usually a sign of too much leavening (baking soda/powder) or underbaking. Make sure your baking soda and powder are fresh, and use a toothpick to test for doneness—it should come out clean or with a few moist crumbs, not wet batter. Also, avoid opening the oven door too early, as a sudden temperature drop can cause the cake to fall.
Q: Why is my frosting grainy?
A: Grainy frosting is almost always due to powdered sugar that hasn’t fully dissolved. Sifting your powdered sugar before adding it to the butter is the best way to prevent this. Also, make sure you’re beating the frosting for a full 2-3 minutes to incorporate plenty of air and dissolve the sugar.
Q: Can I use a different type of cookie for the filling?
A: Of course! Get creative. Golden Oreos would be fantastic for a vanilla-cookie flavor. Or, try chopping up some peanut butter-filled cookies for a different twist. The recipe is a wonderful canvas for your favorite flavors.

Chocolate Layer Cake with Cookies and Cream Filling : A Decadent Showstopper Dessert
Description
Chocolate Layer Cake with Cookies and Cream Filling
A deeply chocolatey, moist layer cake with a fluffy cookies and cream filling and rich chocolate frosting—a showstopper dessert for any celebration.
Ingredients
Chocolate Cake:
-
2 cups all-purpose flour (or cake flour)
-
2 cups sugar
-
¾ cup unsweetened cocoa powder
-
2 tsp baking powder
-
1½ tsp baking soda
-
1 tsp salt
-
1 cup buttermilk (or 1 cup milk + 1 tbsp vinegar)
-
½ cup vegetable oil
-
2 large eggs
-
2 tsp vanilla extract
-
1 cup hot water or hot coffee
Cookies and Cream Filling:
-
1½ cups cold heavy cream
-
¼ cup powdered sugar
-
1 tsp vanilla extract
-
10 chocolate sandwich cookies, crushed
Chocolate Frosting & Topping:
-
1 cup (2 sticks) butter, softened
-
¾ cup unsweetened cocoa powder
-
3 cups powdered sugar
-
¼ cup heavy cream
-
1 tsp vanilla extract
-
6–8 crushed chocolate sandwich cookies for garnish
Instructions
-
Prep: Preheat oven to 350°F (175°C). Grease and flour two 9-inch cake pans; line bottoms with parchment paper.
-
Mix Dry Ingredients: Whisk flour, sugar, cocoa, baking powder, baking soda, and salt until evenly combined.
-
Add Wet Ingredients: Mix in buttermilk, oil, eggs, and vanilla until smooth.
-
Add Hot Water/Coffee: Mix on low until fully incorporated; batter will be thin—this ensures a moist cake.
-
Bake: Divide batter between pans and bake 30–35 min. Test with a toothpick; it should come out with a few moist crumbs. Cool completely.
-
Make Filling: Beat cold heavy cream, powdered sugar, and vanilla until stiff peaks form. Fold in crushed cookies and chill.
-
Make Frosting: Beat butter and cocoa powder until smooth. Gradually add powdered sugar, alternating with heavy cream, and vanilla. Beat until fluffy and spreadable.
-
Assemble Cake: Place one cake layer on plate, spread filling evenly, top with second layer. Frost top and sides with chocolate frosting. Press crushed cookies onto top and sides.
-
Chill & Serve: Refrigerate 30 min for clean slices. Serve with milk or coffee.
Notes
-
Mint Chocolate Twist: Add peppermint extract and mini chocolate chips to the filling.
-
Peanut Butter Version: Replace filling with peanut butter frosting.
-
Extra Cookie Crunch: Fold additional cookies into the batter.
-
Dairy-Free Option: Use plant-based milk, coconut cream, and dairy-free cookies.
-
Mini Layer Cakes: Use three 8-inch pans for more layers; bake 22–27 min.
Nutrition
- Calories: 480Cal Per Serving
- Fat: 25 g
- Carbohydrates: 58g
- Protein: 5 g
Final Thoughts: A Cake Worth Celebrating
Well, my friend, there you have it. We started with a pile of simple ingredients and transformed them into something truly spectacular. This Chocolate Layer Cake with its dreamy Cookies and Cream Filling is more than just a dessert; it’s an experience. It’s the star of the birthday party, the centerpiece of the anniversary dinner, the “just because” treat that turns an ordinary Tuesday into a occasion.
Remember, the true magic of this cake isn’t in achieving bakery-level perfection on your first try. The magic is in the process—the scent of chocolate filling your kitchen, the satisfaction of whipping that cream into soft peaks, and the proud moment you place that final layer on top. It’s in the shared “oohs” and “aahs” when you reveal your creation, and the happy silence that falls as everyone takes their first, blissful bite.
So, don’t let the layers intimidate you. Embrace the little imperfections; they’re proof that this was made with your own two hands. You now have a go-to, showstopping dessert recipe in your back pocket, one that’s as adaptable as it is delicious.
Thank you for spending this time with me in my kitchen. I hope this cake becomes a part of your own family’s cherished memories, just as it has in mine. Now, go forth and bake with confidence! And don’t forget

Peanut Butter Banana Pudding : A Creamy, Dreamy Southern Dessert Twist
Peanut Butter Banana Pudding: The Creamy, Dreamy Dessert That Feels Like a Hug
Hey, friends! Beau here, welcoming you back to my kitchen. You know me—I’m all about those recipes that don’t just fill your belly but also warm your soul. The ones you can whip up without a fancy culinary degree, the ones that make your people gather around the table a little longer, laughing a little louder. Today, we’re diving headfirst into one of those magical, no-fuss desserts that I absolutely live for: Peanut Butter Banana Pudding.
Now, if you’ve ever had classic Southern banana pudding, you know it’s a masterpiece in its own right. It’s nostalgia in a bowl, a sweet, creamy, and comforting treat that feels like a Sunday afternoon at your grandma’s house. But what happens when you take that beloved classic and give it a little *Feastical* twist? You add a generous, glorious swirl of creamy peanut butter, that’s what.
This isn’t just a recipe; it’s a flavor experience. Imagine layers of vanilla wafers getting soft and cake-like, ripe bananas adding their sweet, mellow fruitiness, and a cloud-like pudding that’s somehow even creamier and more decadent than the original. And then, the star of the show: that rich, nutty, and deeply satisfying peanut butter flavor weaving through every single spoonful. It’s the perfect marriage of two iconic comfort foods, and I promise you, it’s a game-changer for potlucks, family dinners, or those “I just need a little something sweet” moments. So, grab your favorite mixing bowl and let’s make some magic happen!
The Day I Accidentally Created a Family Legend
I have to share a quick story about where this recipe really came from. It was a classic “Beau in the kitchen” moment—a happy accident born from a serious craving and a near-empty pantry. A few years back, I was tasked with bringing dessert to a big family potluck. I had my heart set on banana pudding, but as I started gathering ingredients, I realized I was short on cream cheese, which I sometimes use for extra richness. Panic mode? Almost. But then, my eyes landed on a nearly-full jar of the good stuff: creamy peanut butter.
In a moment of “what’s the worst that could happen?” inspiration, I scooped a big dollop right into the pudding mixture. I gave it a whisk, took a tentative taste, and my eyes just about popped out of my head. It was INCREDIBLE. The peanut butter didn’t overpower the vanilla and banana; it complemented them, adding a salty, nutty depth that made the whole dessert taste… well, more like *itself*, but better. I layered it up, crossed my fingers, and brought it to the party. Let me tell you, it was the first dish to disappear. My cousin’s kids still ask for “Uncle Beau’s Peanut Butter Pudding” at every gathering. It just goes to show that some of the best creations come from a little improvisation and a whole lot of love.
Gathering Your Dream Team: The Ingredients
One of the best things about this recipe is its beautiful simplicity. You probably have most of this in your kitchen right now! Here’s the lineup that creates this creamy dream.
- 1 (5.1 oz) box instant vanilla pudding mix: This is our foundation. It gives us that classic, creamy pudding texture without any fuss. Chef’s Insight: I use instant because it sets quickly and stays light. If you only have cook-and-serve, you can use it, but let it cool completely before moving to the next steps!
- 2 cups cold milk: The key word here is cold. It helps the pudding mix thicken up properly and quickly. Whole milk will give you the richest result, but 2% works great, too.
- 1 (14 oz) can sweetened condensed milk: This is the secret weapon for ultra-creamy, decadent pudding. It adds a lovely caramel-like sweetness and a smooth, thick body that’s just irresistible.
- ½ cup creamy peanut butter: Use a standard, no-stir creamy peanut butter for the smoothest incorporation. Substitution Tip: If you’re a crunchy peanut butter fan, go for it! It will add a wonderful little textural surprise in every bite.
- 1 (8 oz) container whipped topping (like Cool Whip), thawed: This folds in to make our pudding mixture light, fluffy, and cloud-like. Chef’s Insight: You can absolutely use an equal amount of freshly whipped heavy cream if you prefer! Just whip 1 ½ cups of heavy cream with a tablespoon of sugar until you get stiff peaks.
- 4 ripe bananas, sliced: Look for bananas that are yellow with a few brown spots—they’re at their peak sweetness and flavor. Pro Tip: Don’t slice them until you’re ready to assemble to prevent browning!
- 1 box vanilla wafer cookies: The classic choice! They provide that iconic soft-yet-slightly-chewy layer that soaks up all the pudding goodness.
- Optional for topping: Crushed peanuts or extra cookies: This is your chance to add a final flourish! A little crunch on top makes for a beautiful presentation and a fantastic textural contrast.
Let’s Build the Dream: Step-by-Step Instructions
Ready to assemble this masterpiece? It’s so simple. Put on some good music, clear a space in your fridge, and let’s get layering.
- Create the Pudding Base: Grab a large mixing bowl and pour in the cold milk. Sprinkle the entire box of instant vanilla pudding mix over the milk. Now, take your whisk and get to work! Whisk steadily for about 2 minutes. You’ll see it transform from a liquid into a lovely, thick pudding. Chef’s Hack: Don’t over-whisk here! Two minutes is usually perfect. Over-whisking can sometimes make it a bit thin.
- Incorporate the Richness: Now, pour in that entire can of sweetened condensed milk. See that thick, sweet stream? That’s pure magic right there. Next, add your half-cup of creamy peanut butter. Chef’s Hack: To make the peanut butter easier to mix, give it a quick stir in its jar first. It incorporates into the pudding like a dream. Whisk everything together until it’s completely smooth, creamy, and uniform in color. No streaks of peanut butter left behind!
- Fold in the Fluff: Time to lighten things up! Grab your thawed whipped topping. Using a spatula, gently fold it into the peanut butter pudding mixture. Chef’s Hack: “Folding” is key here. Instead of stirring vigorously, which would deflate the whipped topping, use a gentle, sweeping motion—down the side of the bowl, across the bottom, and up and over the top. Repeat until you see no more white streaks. Your mixture will be incredibly light and fluffy.
- The Grand Layering: Get out your trusty 9×13-inch dish—this is the classic vessel for a reason; it gives you the perfect ratio of layers. Start by spreading a thin, even layer of the pudding mixture on the very bottom. This just helps anchor everything. Now, create your first proper layer: a single layer of vanilla wafers, followed by a layer of banana slices (use about half of them), and then a third of your remaining pudding mixture, spreading it gently to cover the bananas. Repeat the layers—wafers, bananas, pudding—one more time. For your final top layer, finish with the remaining pudding mixture, spreading it out beautifully. Pro Tip: Save a few of your best-looking wafers and banana slices for a pretty garnish on top right before serving!
- The Patience Game (Aka Chilling): This is the hardest part, I know! But trust me, it’s non-negotiable. Cover the dish tightly with plastic wrap and pop it in the fridge for at least 4 hours, but ideally overnight. This waiting period is when the alchemy happens. The wafers soften and become almost cake-like, the bananas release their sweet juice into the pudding, and all the flavors marry into one harmonious, creamy, incredible bite.
- The Final Flourish: Right before you’re ready to serve, it’s topping time! Sprinkle on some crushed peanuts for a salty crunch, crumble a few extra wafers over the top, or artfully arrange a few fresh banana slices. Then, stand back and admire your creation before you dive in with a big spoon.
How to Serve This Slice of Heaven
Presentation is part of the fun! You can absolutely serve this family-style right from the baking dish—it’s cozy and inviting. But if you want to get a little fancy, here are a few of my favorite ways to plate it up.
For a stunning individual dessert, use a large mason jar or a clear trifle bowl. Simply build the layers directly in the jar for a beautiful, visible parfait effect. It’s a total showstopper at parties!
You can also use a large ice cream scoop to dollop generous servings into wide, shallow bowls. The soft, creamy texture looks gorgeous this way. No matter how you serve it, I love pairing this pudding with a hot cup of coffee or a cold glass of milk. The contrast is just perfect. And remember, this dessert is rich! A little goes a long way, making it perfect for feeding a crowd.
Make It Your Own: Delicious Recipe Variations
One of the best things about a recipe like this is its flexibility. Feel free to play around and make it suit your taste buds or dietary needs!
- The Chocolate Lover’s Dream: Swap the vanilla wafers for chocolate wafer cookies or even crushed Oreos. You could even add a tablespoon of cocoa powder to the pudding mix for a chocolate-peanut butter cup vibe.
- Nutty Twist: Use almond butter or cashew butter instead of peanut butter for a different, equally delicious nutty flavor. Top with toasted sliced almonds or chopped cashews.
- Boost the Banana: For an extra banana punch, mash one very ripe banana and whisk it into the pudding mixture along with the sweetened condensed milk. It intensifies the flavor beautifully.
- Lighter Version: You can use sugar-free instant pudding mix, fat-free milk, and a light whipped topping to cut down on calories and sugar without sacrificing the creamy texture.
- Boozy Banana Pudding (For the Grown-Ups): Add a tablespoon or two of bourbon or banana liqueur to the pudding mixture when you add the sweetened condensed milk. It adds a wonderful, warm depth of flavor.
Beau’s Chef’s Notes & Kitchen Confessions
This recipe has evolved so much since that first panicked potluck creation. I’ve learned that letting it sit overnight is truly the key to transcendent banana pudding. The texture becomes something else entirely—softer, more unified, and just… better.
I also have a funny kitchen confession: I once, in a hurry, tried to use frozen bananas that I had thawed. Big mistake! They released way too much water and made the whole pudding soupy. Learn from my error—always use fresh, ripe (but not mushy) bananas! This dish is a testament to the beauty of simple, high-quality ingredients. It doesn’t need to be complicated to be absolutely unforgettable.
Your Questions, Answered: FAQs & Troubleshooting
I’ve gotten a lot of questions about this pudding over the years, so let’s tackle the most common ones!
Q: Can I make this peanut butter banana pudding ahead of time?
A: Absolutely! In fact, I highly recommend it. Making it the day before you need it is the best way to go. Just hold off on adding any crunchy toppings (like peanuts) until right before serving so they stay crisp.
Q: My pudding seems runny. What happened?
A: Don’t worry! This can happen for a couple of reasons. First, did you use cold milk? Warm milk can prevent the pudding from setting. Second, it might just need more time to chill. The pudding and wafers need those full 4+ hours to set up properly. Pop it back in the fridge and give it more time. It will almost always firm up.
Q: How long will the leftovers last?
A: This pudding is best enjoyed within 2-3 days. The bananas will start to brown and get very soft after that. It’s still safe to eat, but the texture and appearance won’t be at their peak.
Q: Can I use homemade pudding instead of instant?
A: You sure can! Make your favorite cooked vanilla pudding recipe (about 3 cups worth) and let it cool completely to room temperature. Then, proceed with the recipe from step 2, adding the sweetened condensed milk and peanut butter to the cooled homemade pudding.
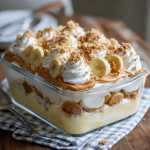
Peanut Butter Banana Pudding : A Creamy, Dreamy Southern Dessert Twist
Description
Peanut Butter Banana Pudding: Creamy, Dreamy, Soul-Warming Dessert
A luscious twist on the classic Southern banana pudding, layered with peanut butter, bananas, and soft vanilla wafers. Perfect for potlucks, family dinners, or a sweet treat anytime!
Ingredients
-
1 (5.1 oz) box instant vanilla pudding mix
-
2 cups cold milk
-
1 (14 oz) can sweetened condensed milk
-
½ cup creamy peanut butter
-
1 (8 oz) container whipped topping, thawed (or 1 ½ cups whipped heavy cream)
-
4 ripe bananas, sliced
-
1 box vanilla wafer cookies
-
Optional topping: crushed peanuts or extra vanilla wafers
Instructions
-
Make the Pudding Base:
In a large bowl, whisk cold milk and instant pudding mix for 2 minutes until thickened. -
Add Peanut Butter & Sweetness:
Stir in sweetened condensed milk and peanut butter until smooth. -
Fold in the Whipped Topping:
Gently fold in the whipped topping to keep the mixture light and airy. -
Layer the Dessert:
-
Spread a thin layer of pudding in a 9×13-inch dish.
-
Layer vanilla wafers, half of the banana slices, and a third of the pudding mixture.
-
Repeat: wafers, bananas, pudding.
-
Top with remaining pudding. Reserve a few bananas or wafers for garnish.
-
-
Chill:
Cover and refrigerate for at least 4 hours, preferably overnight. -
Add the Final Touch:
Before serving, sprinkle crushed peanuts or extra wafers on top for texture and visual appeal.
Notes
-
Use fresh, ripe bananas—not frozen—to avoid a watery pudding.
-
Make ahead for best flavor and texture. Add crunchy toppings just before serving.
-
Cold milk ensures instant pudding sets correctly.
Nutrition
- Calories: 310 Cal Per Serving
- Fat: 14 g
- Carbohydrates: 40 g
- Protein: 6 g
Let’s Talk Nutrition (The Real Talk)
Now, I’m a firm believer that dessert is meant to be enjoyed soulfully and without guilt! This Peanut Butter Banana Pudding is a treat, through and through. It’s rich, satisfying, and packed with flavor. Here’s a general breakdown per serving (remember, this is an estimate and can vary based on your specific ingredients).
Per Serving (Approximately):
Calories: 310 | Fat: 14g | Carbs: 40g | Protein: 6g
It does provide a bit of protein from the peanut butter and milk, and bananas offer potassium and fiber. But let’s be real—we’re here for the comfort and the joy it brings. My philosophy is always about balance. Enjoy a generous serving of this at your family BBQ, savor every bite, and then maybe have a lighter meal the next day. Food is fuel, but it’s also love, memory, and celebration. This dessert is definitely a celebration.
Final Thoughts from My Kitchen to Yours
Well, there you have it, my friends—my heart and soul in a pudding dish. This Peanut Butter Banana Pudding is more than just a recipe; it’s a reminder that the best meals and memories are often the simplest ones. It’s about taking a classic, adding your own personal twist, and sharing it with the people you love.
I can’t wait for you to try this. I can already picture you pulling that chilled dish out of the fridge, seeing those perfect layers, and watching the smiles spread around your table. That’s what Feastical is all about. So, go on, make it, share it, and tag me on social media with #Feastical so I can see your beautiful creations! Until next time, happy cooking!
With a full heart and an even fuller spoon,
Beau

Mini Waffle Skewers with Berries : Fun, Bite-Sized Brunch Treat
Mini Waffle Skewers with Berries: The Brunch Showstopper You Need
Hey friends, Beau here! Let’s talk about brunch. We’ve all been there, right? You want to whip up something that feels special, something that makes your people’s eyes light up when they see it. But you also don’t want to spend your entire Saturday morning chained to the stove, juggling twelve different pans while your coffee gets cold. I hear you. I’ve lived it.
That’s exactly why I’m so head-over-heels in love with these Mini Waffle Skewers with Berries. They are the ultimate solution to the “fancy-but-easy” brunch dilemma. Imagine this: golden, buttery mini waffles, stacked high with juicy, sweet strawberries, all dusted with a snowy blanket of powdered sugar. They’re fun, they’re portable, and they are an absolute joy to eat. This isn’t just a recipe; it’s a whole vibe. It’s the kind of dish that turns a regular morning into a mini-celebration, and I’m so excited to share it with you. So, let’s ditch the stress and create some edible magic that’s as fun to make as it is to devour.
A Skewer of Sweet Memories
This recipe takes me right back to my grandma’s kitchen. She wasn’t a fancy chef, but she was a wizard at making everyday moments feel magical. One sleepover weekend, she decided our standard stack of pancakes was due for an upgrade. She dug out her ancient waffle iron, whipped up a quick batter, and started making the tiniest waffles I’d ever seen. Instead of piling them on a plate, she handed me a box of toothpicks and a bowl of fresh berries from her garden. “Let’s build something, Beau,” she said.
We spent the next half-hour constructing wobbly towers of waffles and berries, laughing as some toppled over before we could even spear them. It was less about cooking and more about creating together. That’s the spirit I want to bring to your kitchen with this recipe. It’s an invitation to play with your food, to get a little creative, and to turn a simple meal into a sweet, shared memory. Every time I make these skewers, I can still smell her kitchen and hear her laugh. Food is love, my friends, especially when it’s served on a stick.
Gathering Your Brunch Brigade
Here’s the beautiful part: you only need a handful of simple ingredients to create this masterpiece. This is where we keep it real and soulful. I’ll walk you through each one, because knowing your ingredients is the first step to cooking with confidence.
- 12 Mini Waffles (store-bought or homemade): This is your foundation! I’m a huge fan of using high-quality frozen mini waffles for ultimate convenience—they toast up perfectly golden and crisp. But if you’re feeling ambitious, whipping up a batch of my simple buttermilk waffles from scratch makes them extra special. Chef’s Insight: If using frozen, look for a brand with real butter in the ingredients for that classic, rich flavor.
- 6 Fresh Strawberries, hulled and halved: The juicy, ruby-red jewels of our skewer! They add a burst of freshness that cuts through the richness of the waffle. Substitution Tip: No strawberries? No problem! Blueberries, raspberries, or even thin slices of banana or peach would be absolutely delicious.
- Powdered Sugar, for dusting: This is the fairy dust that makes everything look (and taste) incredible. It adds a lovely, melt-in-your-mouth sweetness. Chef’s Hack: For a super fine, professional-looking dusting, place the powdered sugar in a fine-mesh sieve and gently tap it over the skewers.
- 6 Toothpicks or Mini Skewers: Our trusty construction tools! Standard toothpicks work great, but if you want to make a longer, more impressive skewer, 4-inch mini skewers are perfect. Safety Note: If you’re serving these to little ones, you can break off the sharp tips of the toothpicks after assembling.
Let’s Build Some Brunch Magic!
Okay, team, it’s go time. This is where we turn those simple ingredients into a brunch legend. I’ll be with you every step of the way, sharing my favorite little hacks to ensure your skewers are nothing short of perfect.
- Toast the Waffles to Golden Perfection. Fire up your toaster or toaster oven! We’re aiming for a beautiful golden-brown color with a crisp exterior. If you’re using a regular oven, spread them on a baking sheet and pop them in at 375°F for about 5-7 minutes. Chef’s Tip: Don’t be shy with the toasting! A crisp waffle is key—it provides the structural integrity to hold up the strawberry and prevents the skewer from getting soggy. I like to give mine an extra minute for maximum crunch.
- Prep Your Strawberry Stars. While the waffles are getting toasty, wash your strawberries and hull them (that’s just a fancy word for removing the green leafy top). Slice each one in half from top to bottom. You’ll see they look like little hearts—how adorable is that? Chef’s Insight: Pat the strawberry halves dry with a paper towel. This extra second of effort prevents any extra moisture from making our beautiful waffles soft.
- The Grand Assembly! This is the fun part! Grab your toothpicks or mini skewers. We’re building from the bottom up. Start by carefully pushing a mini waffle onto the skewer. Next, add one of your strawberry halves, placing it cut-side down so it sits nicely. Then, top it all off with a second mini waffle. You’ve just created a delicious, edible sandwich on a stick! Chef’s Hack: If the waffles are resisting the skewer, gently wiggle it back and forth as you push—it helps it glide through without cracking.
- The Final Flourish. Arrange your completed skewers on a beautiful platter. Now, for the magic touch: grab your powdered sugar and that fine-mesh sieve I mentioned. Hold it a few inches above the skewers and give it a gentle tap-tap-tap. Watch as a beautiful, snowy dusting settles over everything. It’s instantly gorgeous. Pro Move: Always dust right before serving to keep that picture-perfect look.
- Serve with a Smile (and Maybe Some Syrup). Your masterpiece is ready! Serve these immediately while the waffles are still warm and crisp. I love placing a small bowl of warm maple syrup or even a vanilla yogurt dip in the center of the platter for dunking. Dive in and enjoy the fruits of your (minimal) labor!
How to Serve These Skewered Sensations
Presentation is half the fun with a dish like this! You’ve put in the love, now let’s make it look stunning. I like to arrange my skewers standing upright in a tall glass or a small vase—it creates a beautiful, edible centerpiece for your brunch table. If you’re laying them flat, fan them out on a rustic wooden board or a bright, colorful platter for a pop of color.
Now, let’s talk dipping sauces. While they are phenomenal on their own, a little dip takes them to the next level. Here are my go-to’s:
- Classic Maple Syrup: You can’t go wrong. Warm it up for a cozy, comforting touch.
- Vanilla Greek Yogurt Dip: Just mix some Greek yogurt with a splash of vanilla extract and a drizzle of honey. It’s creamy, tangy, and adds a protein boost.
- Chocolate Hazelnut Spread: Thin out some chocolate hazelnut spread with a little warm milk for a decadent, dessert-like dip. The kids (and let’s be honest, the adults too) will go wild for this.
Get Creative! 5 Fun Twists on the Classic
Once you’ve mastered the basic blueprint, the culinary world is your oyster! Or, in this case, your waffle. Here are a few of my favorite ways to mix things up and make this recipe your own.
- Chocolate Lover’s Dream: Use chocolate chip mini waffles. In between the waffles, add a few chocolate chips along with the strawberry. Drizzle with melted chocolate instead of dusting with powdered sugar. You’re welcome.
- Tropical Vacation Skewers: Swap the strawberries for chunks of fresh pineapple and mango. A dusting of toasted coconut flakes on top will transport you straight to the islands.
- Lemon Blueberry Bliss: Use blueberry-flavored mini waffles or add fresh blueberries to the skewer. Right before serving, add a tiny drizzle of a simple lemon glaze (just mix powdered sugar with a little lemon juice). It’s bright, zesty, and incredible.
- PB&J Style: This one is a game-changer. Lightly spread a thin layer of peanut butter or almond butter on the inside of the waffles before you skewer them. The combination with the berry is a nostalgic flavor bomb.
- Gluten-Free & Vegan Friendly: Easily adapt this for any diet! Simply use your favorite gluten-free or vegan mini waffles. For a vegan option, ensure your powdered sugar is vegan (some brands use bone char) and serve with a plant-based yogurt dip.
Beau’s Kitchen Notes & Stories
This recipe has become a staple in my home, especially when friends come over. I’ll never forget the time I set up a “build-your-own-waffle-skewer” bar for a brunch potluck. It was chaos in the best way possible—people were mixing and matching ingredients, laughing, and creating their own wild combinations. My buddy Dave even tried to build a five-waffle-high skyscraper. It, predictably, collapsed in a delicious heap, but the memory is a classic.
The beauty of this recipe is its evolution. It started in my grandma’s kitchen as a fun project and has morphed into my go-to for effortless entertaining. Don’t be afraid to play around with it. The best recipes aren’t just written in stone; they’re written in butter, sugar, and a whole lot of love.
Your Waffle Skewer Questions, Answered!
I know you might have a question or two before you get started, so I’ve gathered the most common ones right here. Think of this as our little pre-brunch huddle.
Q: Can I make these ahead of time?
A: You can do some prep! You can hull and slice the strawberries a few hours ahead and keep them in the fridge. However, I highly recommend toasting the waffles and assembling the skewers right before serving. This ensures the waffles stay crisp and don’t get soft from the berry juices.
Q: My waffles are cracking when I skewer them. Help!
A> No worries, this happens! It usually means the waffles are a bit too crisp (which is a great problem to have). Just make sure you’re using a sharp toothpick or skewer and gently wiggle it as you push it through. A little crack won’t affect the taste one bit!
Q: What’s the best way to hull a strawberry?
A> My favorite method is to use a small paring knife. Just angle the knife inward around the stem and pop it out in a cone shape. If you don’t have a knife, you can also use a sturdy straw—push it through the bottom of the berry up through the top, and it will push the hull right out!
Q: Can I use a different fruit?
A> Absolutely! Get creative with what’s in season. Raspberries, blackberries, sliced kiwi, or mandarin orange segments all work beautifully. Just make sure the pieces aren’t too heavy or juicy, as they can make the waffle soggy faster.
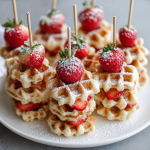
Mini Waffle Skewers with Berries : Fun, Bite-Sized Brunch Treat
Description
Mini Waffle Skewers with Berries
A fun, colorful, and utterly delicious brunch treat that’s as easy to make as it is to eat. Perfect for sharing or serving as a showstopper centerpiece!
Ingredients
-
12 mini waffles (store-bought or homemade)
-
6 fresh strawberries, hulled and halved
-
Powdered sugar, for dusting
-
6 toothpicks or mini skewers
-
Optional dips: warm maple syrup, vanilla Greek yogurt, or chocolate-hazelnut spread
Instructions
-
Toast the Waffles:
Toast waffles in a toaster or toaster oven until golden and crisp (or bake at 375°F for 5–7 minutes). A crisp exterior helps the skewer stay sturdy. -
Prep the Strawberries:
Wash, hull, and slice strawberries in half. Pat dry to avoid soggy waffles. -
Assemble the Skewers:
-
Start with one mini waffle on a toothpick.
-
Add a strawberry half, cut-side down.
-
Top with another mini waffle. Repeat for remaining skewers.
-
Tip: Gently wiggle the skewer through the waffles if needed to avoid cracks.
-
-
Dust with Powdered Sugar:
Use a fine-mesh sieve for an even, snowy finish. Do this right before serving. -
Serve & Dip:
Arrange skewers on a platter or in a tall glass. Serve with maple syrup, yogurt dip, or chocolate-hazelnut spread for extra indulgence.
Notes
-
Fruit swaps: Blueberries, raspberries, bananas, or peaches.
-
Chocolate twist: Use chocolate chip waffles or drizzle with melted chocolate.
-
Tropical version: Pineapple and mango with toasted coconut.
-
PB&J style: Spread peanut or almond butter inside waffles.
-
Gluten-free/Vegan: Use GF/vegan mini waffles and plant-based yogurt.
A Quick Bite on Nutrition
Now, I’m all about feel-good food that tastes great, and I believe part of that is knowing what you’re eating. Here’s a general breakdown of the nutritional profile for one classic skewer (using standard frozen mini waffles). Remember, these are estimates and can vary based on your specific ingredients.
These skewers are a fantastic source of quick energy, thanks to the carbohydrates from the waffles and fruit. The strawberries pack a powerful punch of Vitamin C and antioxidants. To boost the nutritional value, opt for whole-grain mini waffles for added fiber, or serve with a protein-rich Greek yogurt dip to help keep you full and satisfied longer. It’s all about balance and joy!
Approximate Nutrition Per Skewer: Calories: 100 | Carbs: 14g | Fat: 3g | Sugar: 4g | Protein: 2g
Your New Go-To Brunch Best Friend
And there you have it, my friends! Your complete guide to creating the most delightful, stress-free, and downright delicious Mini Waffle Skewers. This recipe proves that you don’t need complicated techniques or a million ingredients to create something truly special. All you need is a little creativity and a willingness to have fun in the kitchen.
I hope this recipe brings as much laughter and joy to your table as it has to mine. It’s a reminder that the best meals are often the simplest ones, shared with the people we love. Now, I’d love to hear from you! Tag me @FeasticalBeau on Instagram when you make your skewers. I can’t wait to see your beautiful creations.
Until next time, keep your spatula close and your kitchen full of love.
Final Thoughts: Your New Go-To Brunch Best Friend
And there you have it, my friends! Your complete guide to creating the most delightful, stress-free, and downright delicious Mini Waffle Skewers.
This recipe is more than just a list of ingredients and steps; it’s a reminder. A reminder that you don’t need complicated techniques or a million ingredients to create something truly special and memorable for the people you care about. All you need is a little creativity, a willingness to have fun, and a few humble ingredients.
It’s a recipe built on a foundation of love, laughter, and a belief that food should be a joy, not a chore. From my grandma’s kitchen to yours, I hope these skewers become a catalyst for your own sweet, shared moments. They’re proof that the best meals are often the simplest ones, served with a generous side of love.
Now, I’d love to hear from you! Did you stick with the classic or try a fun twist? Tag me @FeasticalBeau on Instagram when you make your skewers. I can’t wait to see your beautiful creations and the smiles that go with them.
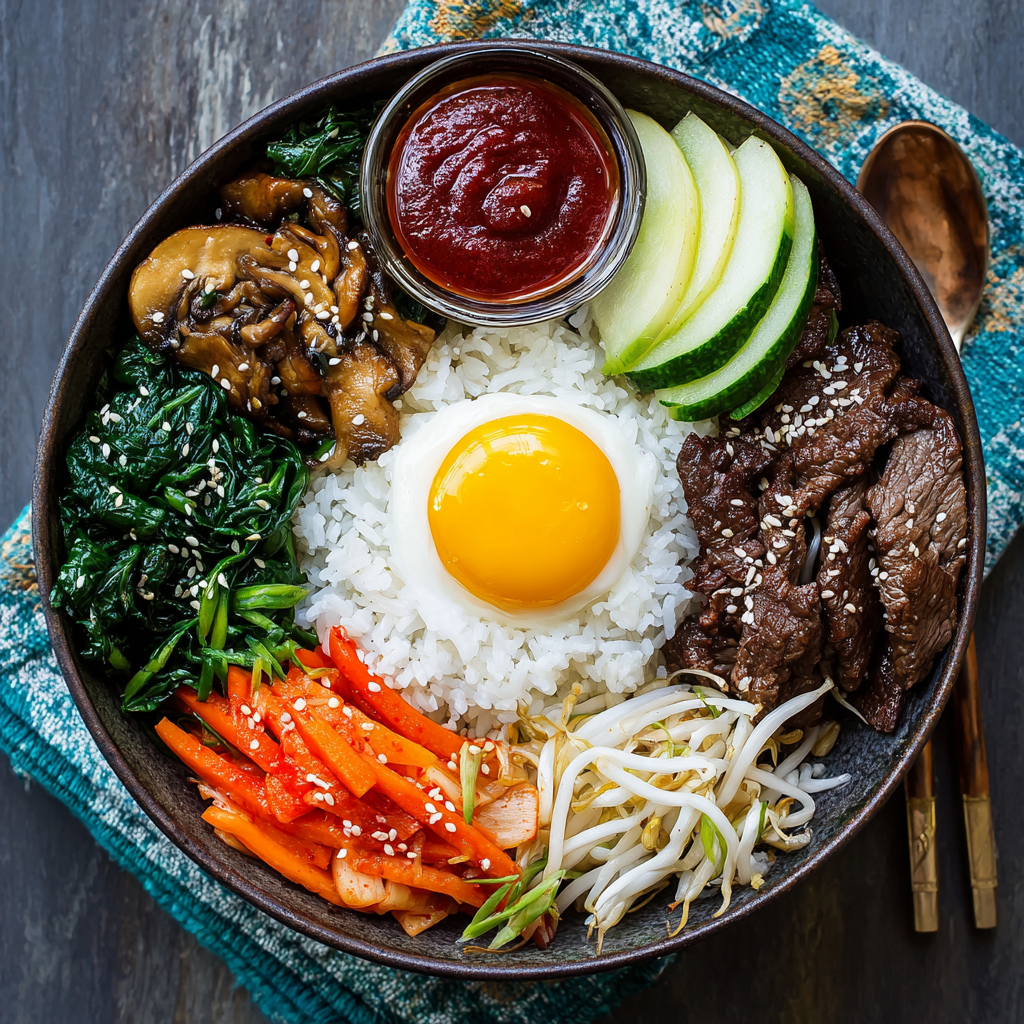
Authentic Korean Bibimbap Recipe : Beef, Veggies, and Spicy Gochujang Sauce
Your New Favorite Bowl of Sunshine: Authentic Korean Bibimbap
Hey friends, Beau here from Feastical! Let’s talk about one of life’s greatest joys: a meal that’s a total party in a bowl. I’m not talking about just throwing leftovers together (though we’ve all been there, and no judgment!). I’m talking about a dish that’s a vibrant, intentional, and beautiful symphony of flavors and textures. A dish that feels like you’re creating edible art, but that’s secretly way easier to pull off than it looks.
That dish, my friends, is Bibimbap (pronounced bee-bim-bap).
If you’ve never had the pleasure, let me paint you a picture. Imagine a bowl of steaming, fluffy white rice acting as a blank canvas. Arranged on top, like colorful spokes on a wheel, are an array of separately sautéed, seasoned, and perfectly cooked vegetables. In the center sits a nest of savory, sweet, and tender marinated beef, crowned with a glorious sunny-side-up egg, its yolk just waiting to become a rich, golden sauce. The final flourish? A big, bold dollop of spicy-sweet gochujang sauce that ties this entire flavor festival together.
The magic of bibimbap isn’t just in its stunning appearance; it’s in the action. You get to be the maestro of your meal, grabbing your spoon and chopsticks and mixing everything together with gusto. The hot rice, the runny egg yolk, the crisp veggies, and that spicy sauce all become one incredible, harmonious bite. It’s a feel-good food experience that’s nourishing, exciting, and downright fun. So, are you ready to bring this Korean classic into your kitchen? Let’s dig in!
The Seoul-Food Bowl That Stole My Heart
My love affair with bibimbap didn’t start in a fancy restaurant. It started in a tiny, hole-in-the-wall spot in Seoul during a trip I took years ago. I was jet-lagged, a little overwhelmed, and desperately seeking something that felt like a warm hug. A local friend dragged me to this bustling place where the sound of sizzling stone pots and the lively chatter of diners filled the air.
I pointed at a picture on the wall—a bowl that looked like a rainbow had exploded in it. When it arrived, dolsot bibimbap in a scorching hot stone bowl, it was sizzling and crackling. The server gestured for me to mix it fast. As I did, the bottom layer of rice turned into this incredible, crispy, golden crust. That first bite was a revelation. It was warm, comforting, and packed with so many different textures and flavors—it was a complete meal and a total adventure in one bowl. It was the moment I truly understood that food is the universal language of comfort and connection. I’ve been chasing that perfect, crispy-bottomed bite in my own kitchen ever since.
Gathering Your Bibimbap Brigade: The Ingredients
Don’t let the list of ingredients intimidate you! Part of the beauty of bibimbap is its flexibility. Think of this as your blueprint. We’re building layers of flavor, and each component is simple on its own. Here’s what you’ll need, with a little chef-ly insight for each.
For the Beef Marinade:
- 8 oz beef tenderloin, finely sliced: Tenderloin is fantastic because it’s lean and tender, but you can also use ribeye or sirloin for a richer flavor. The key is to slice it against the grain as thinly as you can. Pro-tip: pop it in the freezer for 15-20 minutes first to firm it up, making slicing a breeze!
- 1/4 green apple, grated: This is my secret weapon! The natural enzymes in the apple help tenderize the beef, and it adds a subtle, sweet background note that balances the soy and garlic. It’s a game-changer.
- 3 garlic cloves, minced: Because what’s a good marinade without garlic? It’s the soul of this savory base.
- 1 tbsp soy sauce: For that essential salty, umami depth. Use tamari for a gluten-free version.
- 1 tbsp brown sugar: To caramelize and create a beautiful glaze on the beef as it cooks.
- 2 tsp sesame oil: We’re finishing the marinade with this nutty, aromatic oil. It’s the signature scent of so many Korean dishes.
For the Vibrant Veggies:
- 1 carrot, cut into matchsticks: Adds a gorgeous orange color and a lovely crunch. A julienne peeler is your best friend here!
- 1 zucchini, cut into matchsticks: Brings a gentle, fresh flavor and soft texture once sautéed.
- 1 bunch spinach, blanched and squeezed dry: This gives us our dark, leafy green component. Blanching it quickly in boiling water then shocking it in ice water keeps it vibrant and tender.
- 8 dried shiitake mushrooms, rehydrated and sautéed: Dried shiitakes have an intensely savory, almost meaty flavor that’s far superior to fresh here. Save the soaking liquid for a future soup!
- 2 cups bean sprouts, lightly boiled: They offer a fantastic, clean, and crisp texture. A quick boil (about 2 minutes) is all they need.
For the Legendary Gochujang Sauce:
- 3 tbsp gochujang (Korean chili paste): The star of the show! This fermented chili paste is spicy, sweet, and deeply complex. Find it in the Asian aisle of most grocery stores. There’s no true substitute, but sriracha can work in a pinch.
- 3 tbsp rice vinegar: Cuts through the richness and adds a necessary tang.
- 1 tsp soy sauce: A little extra umami boost for the sauce.
- 3 tsp white sugar: Balances the heat and vinegar. Adjust to your taste!
- 1 garlic clove, finely grated: Because we can never have too much garlic.
- 1 tsp sesame oil: Ties the sauce together with its signature aroma.
To Serve & Assemble:
- Steamed white rice (2 to 3 cups): Short-grain white rice is traditional—it’s nice and sticky. But brown rice or quinoa are great healthy swaps.
- 2 to 4 fried eggs (sunny-side-up preferred): The crown jewel! That runny yolk is non-negotiable for me. It’s the sauce that brings everything to life.
- Sesame seeds, for garnish: For a little toasty, visual flair.
Let’s Build Your Masterpiece: Step-by-Step Instructions
Okay, team! This is where the magic happens. We’re going to tackle this like a well-orchestrated kitchen dance. We’ll work on components one by one, and before you know it, you’ll be ready to assemble your beautiful bowls. Read through all the steps first—it’s the chef’s secret to a stress-free cooking experience.
Step 1: Marinate the Beef. In a medium bowl, combine the thinly sliced beef with the grated apple, minced garlic, soy sauce, brown sugar, and sesame oil. Use your hands to really massage those flavors into the meat. Let it hang out on the counter while you prep your veggies (15-30 minutes). This short marinating time is all it needs! Chef’s Hack: While the beef marinates, this is the perfect time to get your rice cooking and start rehydrating your dried shiitake mushrooms in hot water.
Step 2: Conquer the Vegetables. We cook each veggie separately to honor its unique texture and flavor. Don’t worry, it goes fast!
- Spinach & Bean Sprouts: Bring a pot of water to a boil. Blanch the spinach for 30 seconds, then remove with a slotted spoon and plunge into a bowl of ice water. Squeeze it completely dry, then season with a tiny pinch of salt and a few drops of sesame oil. In the same boiling water, cook the bean sprouts for 1-2 minutes until slightly softened but still crunchy. Drain and season the same way.
- Sautéed Veggies: Heat a drizzle of neutral oil (like vegetable or canola) in a skillet or wok over medium-high heat. Sauté the carrot matchsticks with a pinch of salt for about 1-2 minutes until they’re slightly softened but still snappy. Remove to a plate. Do the same with the zucchini. Finally, squeeze the water from your rehydrated shiitakes (slice them if they’re large), and sauté them until they’re browned and fragrant.
Chef’s Hack: No need to wash the pan between veggies—a little flavor crossover is a good thing! Just give it a quick wipe if there are any burnt bits.
Step 3: Cook the Beef. Using the same skillet (see a theme? Less cleanup!), cook the marinated beef over high heat. Spread it out in a single layer and let it sear without moving it for a minute to get a good caramelization. Then, stir-fry until it’s just cooked through, about 2-3 minutes total. You don’t want to overcook it! Remove it from the pan and set aside.
Step 4: Whisk the Gochujang Sauce. This is the easiest part. In a small bowl, whisk together the gochujang, rice vinegar, soy sauce, sugar, grated garlic, and sesame oil until it’s smooth and glorious. Taste it! Want it sweeter? Add a pinch more sugar. More tang? A splash more vinegar. You are the boss of your bibimbap sauce.
Step 5: Fry Those Perfect Eggs. Last but not least, fry up your eggs sunny-side-up. We want the whites to be fully set and the yolks to be gloriously runny and golden. A little crispy lace around the edges is always a welcome bonus.
Step 6: The Grand Assembly! Place a generous serving of warm, steamed rice into the bottom of each bowl. Artfully arrange your vegetable components and the beef in little piles around the edge of the rice. It’s okay to be fancy here! Place your beautiful fried egg right in the center. Drizzle with the gochujang sauce and sprinkle with sesame seeds.
Step 7: The Most Important Step. Serve immediately, and instruct everyone to dive in with their spoons and chopsticks, mixing everything together thoroughly. This is where the separate elements become one incredible, unified dish. Enjoy the symphony!
How to Serve Your Bibimbap Like a Pro
Presentation is half the fun with bibimbap! I love using wide, shallow bowls so you have plenty of room to create your colorful landscape. The traditional way is to arrange the veggies and beef in distinct sections around the perimeter, almost like the hands of a clock, with the egg as the centerpiece. It’s a real “wow” moment when you bring it to the table.
But hey, if you’re serving a hungry crowd and don’t have time for art, consider a bibimbap bar! Set out a big pot of rice, and all the components—the beef, each vegetable, the sauce, and a plate of fried eggs—in separate bowls. Let everyone build their own perfect combination. It’s interactive, fun, and ensures everyone gets exactly what they want.
For drinks, a crisp, cold lager or a dry Korean beer like Hite pairs wonderfully. If you’re not drinking, an iced barley tea or even sparkling water with a squeeze of lime is incredibly refreshing against the spicy, savory flavors.
Make It Your Own: Delicious Bibimbap Variations
The beauty of this recipe is its adaptability. Don’t be afraid to play with it based on what you have or what you’re craving!
- Go Veggie: Skip the beef and make it a vegetable bibimbap! You can add sautéed bell peppers, sliced onions, or even some crispy baked tofu or tempeh for protein.
- Spicy Pork Swap: Love pork? Swap the beef for thinly sliced pork belly or shoulder and marinate it the same way. It’s a fantastic, rich alternative.
- Dolsot (Stone Pot) Bibimbap: This is the ultimate experience. Heat an oven-safe stone or ceramic bowl in a 450°F oven for 30 minutes. Carefully remove it, coat the inside with a little sesame oil, add your rice, and assemble your bibimbap. The sizzling hot bowl will create an incredible crispy rice crust on the bottom. (Be super careful—the bowl will be extremely hot!)
- Korean Fusion Twist: Love Mexican flavors? Try a version with a base of cilantro-lime rice, use black beans and corn as your veggies, and mix the gochujang with a little lime juice and crema for the sauce. It’s a wild, delicious fusion!
- Lower-Carb Option: For a lighter version, swap the rice for cauliflower rice. Just be sure to sauté it to remove as much moisture as possible so your bowl isn’t soggy.
Beau’s Kitchen Chronicles: A Few Parting Thoughts
This recipe has been a living, evolving thing in my kitchen. The first time I made it, I was so focused on getting the vegetables perfectly straight that I forgot to cook the egg! We had to pause the whole assembly line to fry them up. My friends still give me a hard time about it. The moral of the story? It doesn’t have to be perfect. It just has to be delicious.
Over time, I’ve learned that the grated apple in the marinade was my own happy accident that stuck, and that a little extra sesame oil on the spinach is never a bad thing. Cooking is about making a recipe your own. So take this blueprint, run with it, and create a bibimbap that sings your song.
Bibimbap FAQs: Your Questions, Answered!
Q: My bibimbap sauce is too spicy! How can I tone it down?
A: No worries! The easiest way is to add a little more sugar or even a teaspoon of honey to balance the heat. You can also thin it out with a tablespoon of water or a touch more rice vinegar. Taste as you go!
Q: Can I make the components ahead of time?
A: Absolutely! This is a fantastic meal-prep dish. Cook all your vegetables and the beef, let them cool, and store them in separate airtight containers in the fridge for up to 3 days. The sauce can be made weeks ahead and kept in the fridge. When you’re ready to eat, just reheat the rice and veggies, fry a fresh egg, and assemble!
Q: My rice is getting cold by the time I assemble everything. Help!
A: This is a common one! The key is to have your rice ready and kept warm. Time your veggie cooking so it all finishes around the same time. Use a hot skillet for the beef and eggs right at the end. And remember, the hot rice will slightly warm the room-temp veggies when you mix it all together. For the best experience, use warm bowls—you can pop your empty serving bowls in a warm oven

Authentic Korean Bibimbap Recipe : Beef, Veggies, and Spicy Gochujang Sauce
Description
Your New Favorite Bowl of Sunshine: Korean Bibimbap
A vibrant, nourishing, and totally customizable Korean classic that’s as fun to assemble as it is to eat.
Ingredients
For the Beef Marinade:
-
8 oz beef tenderloin, thinly sliced
-
1/4 green apple, grated
-
3 garlic cloves, minced
-
1 tbsp soy sauce
-
1 tbsp brown sugar
-
2 tsp sesame oil
For the Vegetables:
-
1 carrot, julienned
-
1 zucchini, julienned
-
1 bunch spinach, blanched
-
8 dried shiitake mushrooms, rehydrated & sautéed
-
2 cups bean sprouts, lightly boiled
For the Gochujang Sauce:
-
3 tbsp gochujang (Korean chili paste)
-
3 tbsp rice vinegar
-
1 tsp soy sauce
-
3 tsp sugar
-
1 garlic clove, finely grated
-
1 tsp sesame oil
To Serve:
-
2–3 cups steamed short-grain rice
-
2–4 fried eggs (sunny-side-up preferred)
-
Sesame seeds for garnish
Instructions
-
Marinate the Beef:
Combine beef, apple, garlic, soy sauce, brown sugar, and sesame oil. Let rest 15–30 minutes. -
Prep Vegetables:
-
Blanch spinach 30 sec, shock in ice water, squeeze dry, season with salt & sesame oil.
-
Boil bean sprouts 1–2 min, drain, season.
-
Sauté carrot, zucchini, and mushrooms separately with a pinch of salt.
-
-
Cook the Beef:
Sear marinated beef in a hot skillet 2–3 minutes until just cooked. -
Make the Sauce:
Whisk together gochujang, rice vinegar, soy sauce, sugar, garlic, and sesame oil. Adjust to taste. -
Fry Eggs:
Sunny-side-up with set whites and runny yolks. -
Assemble Bowls:
-
Layer rice in bowls.
-
Arrange vegetables and beef around the rice.
-
Top with a fried egg.
-
Drizzle sauce and sprinkle sesame seeds. Mix before eating.
-
Notes
-
Prep ahead: Cook veggies and beef in advance; assemble fresh at mealtime.
-
Vegetarian option: Swap beef for tofu or extra mushrooms.
-
Crispy rice magic: Use a hot stone pot or cast iron for a golden crust.
-
Mild spice: Adjust gochujang with sugar or a splash of water.
Nutrition
- Calories: 450–500 kcal Per Serving
- Fat: 14 g
- Carbohydrates: 60 g
- Fiber: 6 g
- Protein: : 28 g
Final Thoughts: More Than a Meal, It’s an Experience
So, there you have it. Bibimbap isn’t just a recipe; it’s a invitation to play with your food, to celebrate color and texture, and to create something truly special from a handful of simple, wholesome ingredients. It’s the culinary equivalent of a burst of sunshine in a bowl—nutritious, vibrant, and guaranteed to lift your spirits.
Remember, the goal isn’t perfection. It’s the joy of the process. Whether you arrange your vegetables with artistic precision or simply pile them on with hungry abandon, the final, glorious mix is what it’s all about. That moment when the runny yolk, spicy gochujang, and warm rice become one is a little bit of magic you can create any night of the week.
Don’t be afraid to make it your own. Use this recipe as your trusted blueprint, but listen to your cravings. Swap the veggies, change the protein, or adjust the sauce to your preferred level of fire. This is your kitchen, and your bibimbap is your masterpiece.
Now, it’s your turn. Gather your ingredients, put on some music, and treat yourself to a bowl of pure, unadulterated joy. Your new favorite meal is waiting.
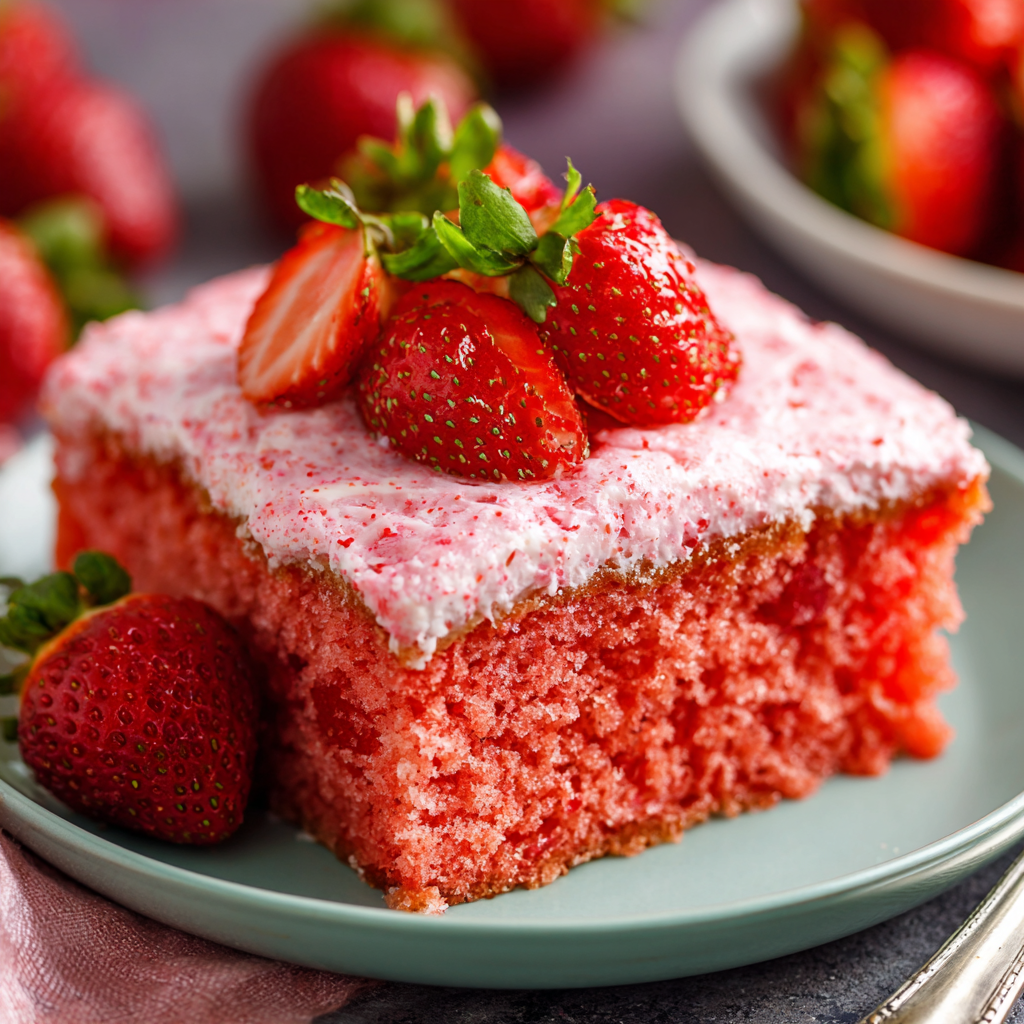
Best Ever Strawberry Cake : Moist, Fruity, and Totally Irresistible
The Best Ever Strawberry Cake: A Slice of Sunny Nostalgia
Hey friends, Beau here! Welcome back to the Feastical kitchen, where the coffee is always on and the oven is usually preheating for something wonderful. Today, we’re diving headfirst into a recipe that holds a special place in my heart and, I’m willing to bet, will quickly earn one in yours. We’re making my absolute Best Ever Strawberry Cake.
Now, I know what you might be thinking. “Beau, another strawberry cake?” And to that I say, oh yes. But this isn’t just any strawberry cake. This is the one that makes people’s eyes light up. The one that tastes like the very essence of a ripe, sun-warmed strawberry field, captured in an incredibly moist, tender, and vibrantly pink crumb. It’s the cake you bring to a potluck and leave with an empty pan and a dozen new friends asking for the recipe.
We’re using a little kitchen magic with a box mix base (no shame in my game—it’s a fantastic shortcut!) and amplifying it with real, pureed strawberries and a hint of strawberry Jell-O for that unforgettable flavor and color. Then, we’re crowning this beauty with a luscious, creamy, strawberry-speckled cream cheese frosting that is quite literally the icing on the cake. So, tie on your favorite apron, grab your mixing bowl, and let’s bake a memory together.
A Sweet Slice of Memory
This cake always takes me right back to my Grandma Dot’s linoleum-floored kitchen. Every summer, when the local strawberry patches were bursting with red, juicy gems, she’d let me tag along to pick them. I’d end up with a red-stained shirt and a belly full of berries, but she never minded. Back in her kitchen, the air thick with the sweet, jammy scent of cooking fruit, she’d let me press the pulse button on her old beige food processor to puree our haul.
She’d whip up this very cake, and the wait for it to cool felt like an eternity. The reward, though, was a thick layer of pink frosting and a slice so soft and fruity it felt like summer itself. It was more than dessert; it was a celebration of the season, of family, and of the simple, profound joy that comes from sharing something you made with love. That’s the spirit I want to bring to your kitchen today.
Gathering Your Sunshine Ingredients
This recipe is a beautiful blend of convenience and from-scratch heart. Here’s everything you’ll need to create this masterpiece. I’ve included my chef-y insights and easy swaps to make this cake your own!
For the Strawberry Cake:
- 1 box white cake mix: This is our trusty foundation. I prefer a simple white mix because it lets the strawberry flavor shine without competing with vanilla or butter notes.
- 3 tablespoons all-purpose flour: A little secret weapon! This helps balance the extra moisture from the puree, giving the cake a better structure and that perfect, moist-but-not-dense crumb.
- 1 (3 oz) box strawberry gelatin (Jell-O): This is the flavor and color powerhouse. It gives the cake its signature vibrant pink hue and an intense strawberry punch that pure fruit alone can’t always achieve.
- ½ cup water: Just plain water to help bring the batter together.
- ¾ cup canola oil: Oil keeps this cake supremely moist for days, far better than butter would in this particular recipe. For a different flavor, you can use an equal amount of melted coconut oil.
- 4 large eggs: Make sure they’re at room temperature! This helps them incorporate more easily, creating a smoother, more emulsified batter and a lighter cake texture.
- 2 cups fresh or frozen pureed strawberries (divided): The star of the show! We use 1 cup in the cake and save the other for the frosting. If using frozen, just thaw them first. No need to drain—that liquid is pure flavor!
For the Cream Cheese Frosting:
- 1 stick (½ cup) butter, softened: Unsalted is my go-to, so I can control the salt. “Softened” means it should give slightly when you press it, but not be greasy or melted.
- 1 (8 oz) package cream cheese, softened: Full-fat cream cheese gives the frosting the best structure and richest flavor. Let it sit on the counter alongside the butter for at least 30 minutes.
- 1 cup fresh or frozen pureed strawberries (reserved from above): This gives our frosting that beautiful pink color and real fruit flavor. Pro-tip: If your puree is very watery, you can simmer it for 5-10 minutes to reduce it slightly and concentrate the flavor.
- 3 cups powdered sugar: This sweetens and thickens the frosting. You can adjust this to your taste—a little more if you like it sweeter, a little less if you prefer a tangier frosting.
Let’s Bake! Your Step-by-Step Guide to Strawberry Bliss
Ready to make some magic? Follow these steps, and you’ll be a strawberry cake hero in no time. I’ve sprinkled in my favorite chef hacks to ensure your success.
- Preheat and Prep: Fire up your oven to 350°F (175°C). Now, take your 9×13-inch pan and give it a good greasing with butter or baking spray. I’m a big fan of the “baker’s goop” method—a quick brush of oil followed by a light dusting of flour—for a perfectly non-stick release every time.
- The Dry Team Assembles: In a large mixing bowl, whisk together the white cake mix, your 3 tablespoons of flour, and the entire box of strawberry Jell-O. Whisking these dry ingredients first ensures everything is evenly distributed, so you don’t get any pockets of plain cake mix or gelatin. This is the secret to that consistent, beautiful pink color throughout.
- Bring in the Wet Crew: Pour in the water and canola oil. Crack in your room-temperature eggs one at a time, mixing well after each addition. I like to use my hand mixer on medium speed for this. Why one egg at a time? It allows each egg to fully emulsify into the batter, which gives the cake a stable and tender structure. Your batter should be looking thick and luscious at this point.
- The Star Ingredient Enters: Now, for the grand finale—gently fold in 1 cup of your strawberry puree. Once it’s mostly incorporated, crank that mixer back up to medium and beat for a full 2 minutes. I know it seems like a long time, but this is crucial! It aerates the batter, giving your cake a wonderfully light and fluffy texture. You’ll see the batter turn a gorgeous, uniform pink.
- Bake to Perfection: Pour the beautiful pink batter into your prepared pan and smooth the top with a spatula. Slide it into the center of your preheated oven and bake for 40-45 minutes. You’ll know it’s done when the top is springy to the touch and a toothpick inserted into the center comes out clean or with a few moist crumbs attached. No wet batter!
- The Patience Test: This is the hardest part, I swear! Place the cake pan on a wire rack and let it cool completely. I mean it—completely. If you frost a warm cake, that glorious cream cheese frosting will melt into a sad, runny puddle. Let’s avoid the heartbreak, folks.
While the Cake Cools, Make the Frosting:
- In a medium bowl, combine the softened butter and softened cream cheese. Beat them together with a hand mixer until they are completely smooth, creamy, and no lumps remain. Scrape down the sides of the bowl to make sure everything is incorporated.
- Add in your reserved 1 cup of strawberry puree and mix on low speed until just combined. We’re adding liquid here, so starting on low prevents a pink shower of frosting from covering your kitchen!
- Gradually add the powdered sugar, one cup at a time, mixing on low speed until incorporated after each addition. Once all the sugar is in, turn the mixer up to medium-high and beat for 1-2 minutes until the frosting is fluffy, smooth, and dreamy.
How to Serve This Stunner
Once that cake is cool and frosted, the fun begins! For a classic, homey feel, you can serve it right from the pan. I love to add a few fresh, sliced strawberries on top for a pop of color and a hint of what’s inside.
If you’re feeling a little fancy, you can slice it into squares and plate it individually. A little dollop of freshly whipped cream and a single, perfect mint leaf on the side turns it into a restaurant-worthy dessert. This cake is perfectly happy paired with a cold glass of milk, a hot cup of coffee, or even a glass of bubbly Prosecco for a real celebration.
Make It Your Own: Fun Recipe Twists
One of the best things about this recipe is its versatility. Feel free to play with it! Here are a few of my favorite variations:
- Strawberry Lemonade Cake: Add the zest of one lemon to the cake batter and a tablespoon of fresh lemon juice to the frosting. The bright, tangy lemon is a fantastic partner for the sweet strawberries.
- Chocolate-Dipped Strawberry Version: Fold ½ cup of mini chocolate chips into the cake batter. You can even drizzle the frosted cake with a simple chocolate ganache.
- Layer Cake Extravaganza: Feel like a baking rockstar? Double the recipe and divide the batter between three greased and floured 8-inch round cake pans. Bake for 25-30 minutes, then cool completely. Use the frosting between the layers and all over the outside for a spectacular birthday or celebration cake.
- Dairy-Free Delight: Use a vegan cream cheese and plant-based butter stick for the frosting. The cake itself is already dairy-free!
Beau’s Chef’s Notes
This recipe has been a living, evolving thing in my kitchen for years. I originally found a version of it scribbled on an index card at a flea market, and I’ve tweaked and tuned it ever since. Adding the extra flour was a game-changer I discovered after one particularly dense (but still delicious!) cake fail. The first time I made it for a big family reunion, my uncle ate three pieces and then tried to hire me as his personal baker. I consider that a win. Don’t be afraid to make it your own—that’s where the real magic happens.
Your Questions, Answered!
I’ve made this cake a hundred times, and I’ve heard all your brilliant questions. Here are the answers to the most common ones.
Q: Can I use fresh strawberries instead of frozen?
A: Absolutely! Fresh, ripe strawberries are fantastic. Just hull them, puree them, and you’re good to go. If they’re very juicy, you might get a slightly wetter batter, but it bakes up just fine.
Q: My frosting is a little runny. What can I do?
A> This can happen if your puree is very watery or if your cream cheese/butter was too soft. The best fix is to pop the frosting bowl into the fridge for 20-30 minutes to firm up, then whip it again. If it’s still too soft, you can add a bit more powdered sugar, a quarter cup at a time, until it reaches a spreadable consistency.
Q: Why did my cake sink in the middle?
A> This is usually an issue with leavening or under-baking. Make sure you’re beating the batter for the full 2 minutes as directed—this incorporates air. Also, be sure your oven is fully preheated and don’t open the oven door during the first 30 minutes of baking. Use that toothpick test to ensure it’s fully baked!
Q: Can I make this cake ahead of time?
A> You sure can! The cake itself (unfrosted) can be baked, cooled, wrapped tightly in plastic wrap, and stored at room temperature for a day. You can also freeze it for up to 3 months. The frosted cake must be stored in the refrigerator due to the cream cheese frosting and will keep beautifully for 2-3 days.
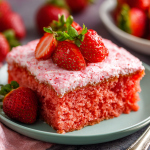
Best Ever Strawberry Cake : Moist, Fruity, and Totally Irresistible
Description
Hey friends! Today we’re making a strawberry cake that’s bright, moist, and absolutely bursting with flavor. This cake combines the ease of a box mix with the natural sweetness of fresh strawberries, all crowned with a creamy strawberry-speckled cream cheese frosting. Perfect for birthdays, potlucks, or any day that needs a little sunny sweetness.
Ingredients
For the Strawberry Cake:
-
1 box white cake mix
-
3 tbsp all-purpose flour
-
1 (3 oz) box strawberry gelatin (Jell-O)
-
½ cup water
-
¾ cup canola oil (or melted coconut oil)
-
4 large eggs, room temperature
-
2 cups fresh or frozen strawberries, pureed (divide: 1 cup for cake, 1 cup for frosting)
For the Cream Cheese Frosting:
-
½ cup (1 stick) unsalted butter, softened
-
1 (8 oz) package cream cheese, softened
-
1 cup reserved strawberry puree
-
3 cups powdered sugar
Instructions
1. Prepare and Preheat
-
Preheat oven to 350°F (175°C).
-
Grease a 9×13-inch baking pan with butter or non-stick spray, lightly dust with flour.
2. Mix Dry Ingredients
-
In a large bowl, whisk together cake mix, flour, and strawberry Jell-O until well combined.
3. Add Wet Ingredients
-
Pour in water and oil, then beat in eggs one at a time. Mix until smooth.
4. Fold in Strawberry Puree
-
Gently fold in 1 cup of strawberry puree. Beat on medium speed for 2 minutes to aerate the batter.
5. Bake the Cake
-
Pour batter into the prepared pan and smooth the top.
-
Bake 40–45 minutes, until a toothpick comes out clean or with a few moist crumbs.
-
Let the cake cool completely on a wire rack before frosting.
6. Make the Frosting
-
Beat butter and cream cheese together until smooth.
-
Mix in reserved strawberry puree on low speed.
-
Gradually add powdered sugar, one cup at a time, until frosting is fluffy.
7. Frost and Serve
-
Spread frosting evenly over cooled cake.
-
Optional: Top with fresh strawberry slices or a mint leaf for garnish.
-
Serve with milk, coffee, or sparkling water for a refreshing treat.
Notes
-
Room temperature eggs create a smoother batter and lighter cake.
-
If frosting is too runny, chill for 20–30 minutes and re-whip.
-
Cake sinking? Ensure the oven is fully preheated and don’t open the door during the first 30 minutes of baking.
-
Make ahead: Cake can be baked and frozen unfrosted for up to 3 months. Frosted cake stores in the fridge for 2–3 days.
Nutrition
- Calories: 410 Cal Per Serving
- Fat: 22g
- Carbohydrates: 48g
- Protein: 4g
Nutritional Information*
Okay, let’s talk real life. This is a celebratory dessert, a treat to be enjoyed with joy and zero guilt. Here’s a general breakdown per serving (based on 12 servings), but please remember this is an estimate and can vary based on specific ingredients used.
- Calories: ~410
- Carbohydrates: 48g
- Fat: 22g
- Protein: 4g
*This information is provided as a courtesy and is an estimate only. For precise dietary needs, please calculate using the specific brands and ingredients you use.
Final Sweet Thoughts
And there you have it, my friends—my heart and soul poured into one perfect, pink, and utterly irresistible strawberry cake. It’s a recipe built on nostalgia, perfected with a few kitchen hacks, and designed to bring people together. I truly believe that the best meals and the best desserts aren’t just about the food; they’re about the connection, the stories, and the warm, full-bellied happiness that follows.
So, I hope you’ll give this recipe a try. I hope it becomes a staple in your home, the star of your summer picnics, and the dessert that your own family requests for years to come. When you make it, tag me @Feastical online—I’d love to see your beautiful creations!
Until next time, keep your whisks busy and your hearts full.
– Beau
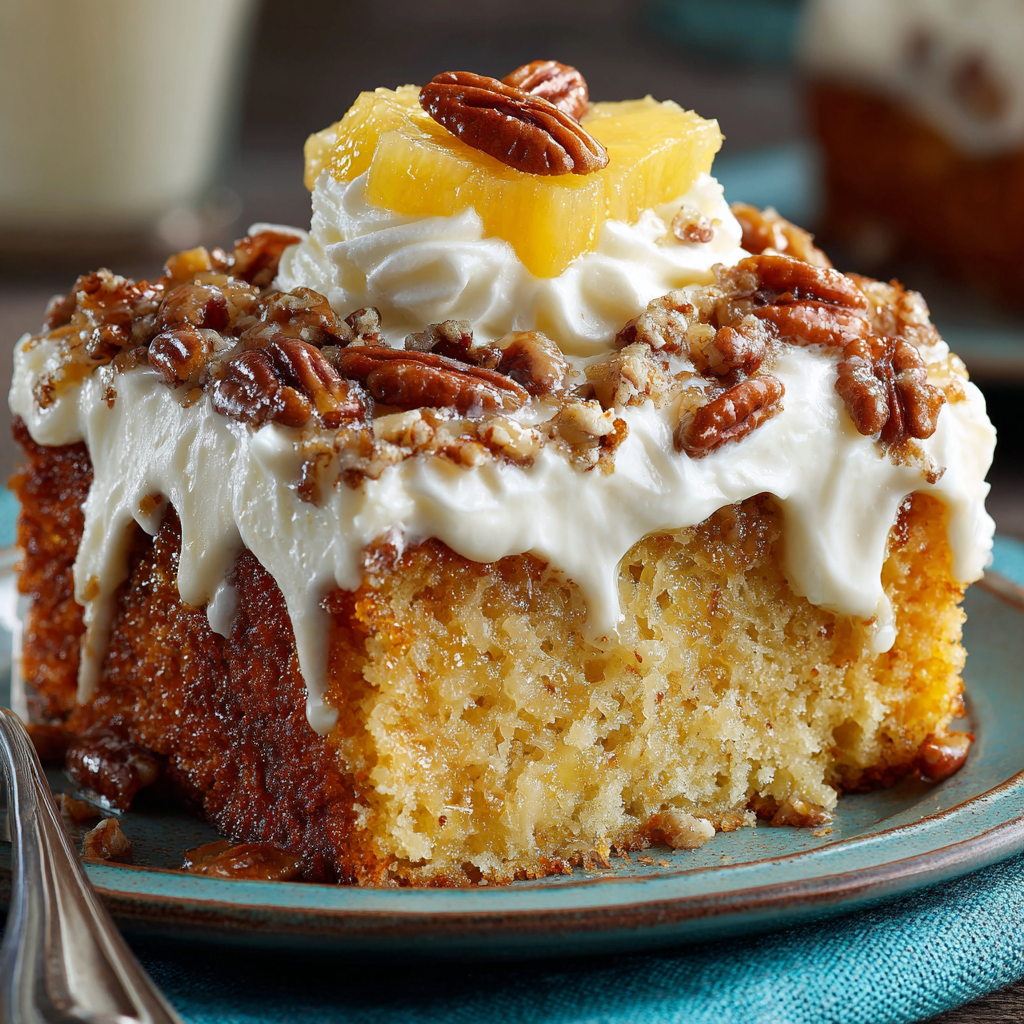
Elvis Presley Pineapple Cake : Sweet, Tangy & Southern Classic
Elvis Presley Pineapple Cake: A Sweet Slice of Southern Legend
Hey friends, Beau here! Welcome back to the Feastical kitchen, where the coffee’s always on and the oven is permanently preheated for something wonderful. Today, we’re whipping up a dessert that’s as big on personality as the man it’s named after. We’re talking about the one, the only, the utterly irresistible Elvis Presley Pineapple Cake.
Now, if you’ve never experienced this Southern classic, you are in for a treat that will make your taste buds sing “Hound Dog” with joy. Imagine this: a supremely moist white cake, still warm from the oven, gets poked all over and drenched in a sweet-and-tangy pineapple syrup that soaks right down to the bottom. Then, while it’s cooling and dreaming of its glorious future, we whip up a frosting that could probably solve world peace—a lush, tangy cream cheese frosting loaded with buttery, toasted pecans. This isn’t just a cake; it’s an experience. It’s a poke cake, a dump cake, a sheet cake, and a piece of culinary history all rolled into one glorious 9×13 pan.
So, whether you’re headed to a potluck, celebrating a Tuesday, or just need a dessert that feels like a warm, sugary hug from the King himself, you’ve come to the right recipe. It’s simple, soulful, and guaranteed to bring everyone together. Let’s get baking!
A Cake That Whispers Stories
This cake takes me right back to my grandma’s linoleum-floored kitchen. She wasn’t a fancy baker, but boy, did she have a roster of legendary desserts. The first time I saw her make this, I was mesmerized. She’d just taken a golden cake out of the oven, and before I could even ask for a corner piece, she was stabbing it with the tines of a fork like it had personally offended her.
“What are you doing, Nana?” I whispered, horrified. She just winked, her hands moving with a practiced ease I now recognize as pure kitchen confidence. Then came the bubbling pineapple and sugar mixture, which she poured over the entire thing. The cake gulped it down, drinking in every last drop of that syrupy goodness. The smell that filled her kitchen—sweet pineapple, vanilla, and that unmistakable scent of a well-loved oven—is a core memory for me. She’d let me lick the cream cheese frosting bowl clean, and we’d wait, somewhat impatiently, for the cake to cool enough to frost and slice. That first bite was always a revelation: impossibly moist, tangy, sweet, and nutty all at once. It taught me that the best recipes aren’t just about taste; they’re about the stories and the people we share them with.
Gathering Your Band: The Ingredients
Part of the beauty of this cake is its beautiful simplicity. We’re starting with a trusty box mix to keep things easy, but we’re transforming it into something completely homemade and spectacular. Here’s your lineup:
- 1 box white cake mix (plus the ingredients listed on the box, typically eggs, oil, and water). Chef’s Insight: The neutral flavor of a white cake mix is the perfect canvas for our pineapple star. Using the mix lets us focus our energy on the from-scratch syrup and frosting that truly make this cake legendary.
- 1 (8 oz) can crushed pineapple, WITH the juice. Chef’s Insight: Do not drain this! The juice is liquid gold for our soaking syrup. It provides the tangy, tropical flavor that cuts through the sweetness and makes this cake so uniquely delicious.
- 1 cup granulated sugar. Why it’s here: We’re cooking this with the pineapple to create a simple syrup that will soak into the cake, giving it that signature moist texture and flavor in every single bite.
- 1 (8 oz) package cream cheese, softened. Pro Tip: Softened is key! Leave it on the counter for at least 30-60 minutes before you start. If it’s too cold, you’ll end up with lumpy frosting, and we’re going for smooth and dreamy here.
- ½ cup (1 stick) butter, softened. Chef’s Insight: Like the cream cheese, your butter needs to be at room temp for a silky, spreadable frosting. I use unsalted, but salted will work just fine and add a nice little salty contrast.
- 3 cups powdered sugar. Why it’s here: This gives our frosting its structure and sweet, melt-in-your-mouth quality.
- 1 teaspoon pure vanilla extract. Chef’s Insight: A splash of vanilla is the secret handshake of good baking. It rounds out the flavors in the frosting and makes everything taste more… well, more like home.
- 2–3 cups chopped pecans. Substitution Tip: Not a nut person? You can leave them out, but they add a fantastic buttery crunch. If you’re not a fan of pecans, walnuts would be a great substitute. For the ultimate flavor, toast them in a dry skillet for a few minutes until fragrant before chopping!
Let’s Make Some Magic: Step-by-Step Instructions
Alright, team! Aprons on, ovens preheating, and let’s create some kitchen magic. Follow these steps, and you’ll have a show-stopping dessert in no time.
- Bake That Base: Start by preheating your oven to the temperature specified on your cake mix box (usually 350°F). Grease and flour a 9×13-inch baking pan, or give it a good spray with baking spray. Prepare the cake mix according to the package directions. Pour the beautiful, smooth batter into your prepared pan and pop it in the oven. Bake for the time listed on the box, or until a toothpick inserted into the center comes out clean. Chef’s Hack: For an extra-moist crumb, I sometimes substitute the water called for on the box with an equal amount of whole milk or even buttermilk!
- The Great Poke: As soon as the cake comes out of the oven, place the pan on a wire cooling rack. Now, take a fork, a wooden skewer, or even the handle of a wooden spoon, and poke holes all over the top of the warm cake. Get enthusiastic about it! You want plenty of channels for that pineapple syrup to dive deep into the cake’s layers. Little Chef Story: This is my favorite part. It feels a little destructive and a whole lot of fun. Don’t be shy!
- Create the Pineapple Syrup: While the cake is baking (or cooling slightly), let’s make the magic potion. In a medium saucepan, combine the entire can of crushed pineapple (with its juice) and the 1 cup of granulated sugar. Stir it together over medium heat until the sugar completely dissolves. Bring it to a gentle boil, letting it bubble for a minute or two until it thickens slightly and becomes syrupy. Pro Tip: Keep stirring to prevent the sugar from sticking and burning on the bottom of the pan.
- The Soaking Ceremony: Slowly and carefully, pour the hot pineapple syrup evenly over the warm, hole-y cake. Use a spatula to gently spread it and encourage it into all those little holes. Watch as the cake eagerly drinks it all in. This is the step that transforms a simple box mix into a moist, flavor-packed masterpiece. Let the cake cool completely in the pan on the wire rack. Patience is a virtue here!
- Whip Up the Frosting: Once the cake is completely cool, it’s frosting time! In a large mixing bowl, beat the softened cream cheese and softened butter together with an electric mixer on medium speed until it’s completely smooth, creamy, and lump-free. This should take about 2 minutes. Scrape down the sides of the bowl. Add the vanilla extract. Now, gradually add the powdered sugar, one cup at a time, beating on low speed at first to avoid a powdered sugar snowstorm in your kitchen, then increasing to high until the frosting is light and fluffy. Chef’s Hack: If your frosting seems a bit thick, add a teaspoon of milk or pineapple juice to thin it. If it’s too thin, add a little more powdered sugar.
- Fold in the Pecans & Frost: Switch to a spatula and gently fold in the chopped pecans, reserving a handful for sprinkling on top if you’d like. Now, spread that glorious, nut-studded frosting evenly over the completely cooled cake. Why we wait: If you frost the cake while it’s still warm, the frosting will melt into a sad, runny puddle. Letting the cake cool ensures a beautiful, thick layer of frosting that holds its shape.
How to Serve This Southern Stunner
This cake is a beautiful, rustic dessert that doesn’t need a lot of fuss to shine. I like to serve it right from the pan—it feels homey and inviting. For a picture-perfect slice, use a sharp knife and wipe it clean between cuts.
While it’s absolutely divine all on its own, a little flair never hurt anybody. For a special occasion, serve each square with a dollop of freshly whipped cream and a maraschino cherry on top for a real “Elvis in Vegas” vibe. A sprinkle of extra toasted pecans over the top adds a nice textural contrast. And a cold glass of milk or a hot cup of black coffee is the non-negotiable, perfect beverage pairing for this sweet, rich treat. It’s the ultimate crowd-pleaser for picnics, potlucks, and family dinners alike.
Make It Your Own: Recipe Variations
One of the best things about this recipe is how adaptable it is! Feel like mixing it up? Here are a few of my favorite twists:
- Coconut Dream: Elvis loved peanut butter and banana, but he was also a fan of coconut! Fold 1 cup of sweetened shredded coconut into the frosting along with the pecans for a tropical tornado of flavor.
- Banana Split Upgrade: Mash one very ripe banana and add it to the cake batter along with the other ingredients called for on the box. You’ll get a wonderful banana bread-like flavor that pairs incredibly with the pineapple.
- The “No-Nut” Navigator: Have a nut allergy? Simply leave out the pecans! The cake is still phenomenal. You could also substitute with a cup of toasted coconut for a different kind of crunch.
- Bourbon Caramel Drizzle: For a truly grown-up version, add a tablespoon of good bourbon to the cream cheese frosting. Then, right before serving, drizzle the slices with a warm salted caramel sauce. You’re welcome.
- From-Scratch Swagger: Feeling ambitious? Use your favorite homemade vanilla cake recipe instead of the box mix. Just bake it in a 9×13 pan until a toothpick comes out clean, and proceed with the recipe as written.
Beau’s Kitchen Chronicles: Chef’s Notes
This recipe has been on quite a journey in my own kitchen. I’ve made it for heartbroken friends, jubilant birthday parties, and sleepy Sunday afternoons. One time, I was so eager to taste it that I frosted it while it was still slightly warm. Let’s just say I ended up with more of a “pineapple cream cheese soup cake.” It still tasted amazing, but it was a hilarious, delicious mess. Lesson learned: let the cake cool!
Over the years, I’ve found that toasting the pecans is the single biggest flavor upgrade you can make for minimal effort. It unlocks their natural oils and gives the frosting a deep, buttery, nutty flavor that is just unforgettable. This cake also gets even better the next day, as the flavors continue to meld and marry in the fridge. Trust me on that.
Your Questions, Answered: FAQs & Troubleshooting
Q: My syrup is super runny and pooled at the bottom of the cake. What happened?
A: This usually means the cake was too cool when you added the syrup, or the syrup wasn’t thick enough. Make sure the syrup comes to a genuine gentle boil and let it cook for a full 1-2 minutes to thicken. And pour it over the cake the *moment* it comes out of the oven while it’s still very warm.
Q: Can I make this cake ahead of time?
A: Absolutely! In fact, I often do. Bake it, soak it, and let it cool completely. Then, cover it tightly and store it in the refrigerator for up to 2 days. Make the frosting separately and store it in an airtight container in the fridge. Let the frosting soften at room temp for 30 minutes before spreading it on the cake the day you plan to serve it.
Q: My frosting is lumpy! How can I fix it?
A> Lumpy frosting is almost always due to the cream cheese and/or butter not being soft enough. To salvage it, let the frosting sit at room temperature for a bit longer and then beat it again with your mixer. If that doesn’t work, you can press it through a fine-mesh sieve—it’s a bit of a workout, but it will smooth it out!
Q: Can I use a different pan, like two 9-inch rounds?
A> You can, but the baking time will be shorter, so keep a close eye on it. The real trick will be poking and pouring the syrup over two layers. You’ll want to divide the syrup evenly between them. It makes for a beautiful layered cake, but the classic 9×13 is definitely the easiest route.

Elvis Presley Pineapple Cake : Sweet, Tangy & Southern Classic
- Total Time: 1.5 hrs
Description
Meet the Elvis Presley Pineapple Cake—a dessert so luscious, it could make the King himself swoon. This Southern classic combines a moist white cake soaked in warm pineapple syrup and topped with a rich, tangy cream cheese frosting loaded with buttery toasted pecans. It’s sweet, tangy, nutty, and utterly soul-satisfying. Whether for potlucks, family gatherings, or a little weekday indulgence, this cake brings all the nostalgia and flavor of a Southern kitchen right to your table. Get ready for a dessert that sings in perfect harmony!
Ingredients
-
1 box white cake mix (plus ingredients listed on the box)
-
1 (8 oz) can crushed pineapple with juice
-
1 cup granulated sugar
-
1 (8 oz) package cream cheese, softened
-
½ cup (1 stick) butter, softened
-
3 cups powdered sugar
-
1 tsp vanilla extract
-
2–3 cups chopped toasted pecans
Instructions
-
Bake the Cake: Prepare cake mix per box instructions. Bake in a greased 9×13 pan at 350°F until a toothpick comes out clean.
-
Poke the Cake: While hot, poke holes all over the top with a fork or skewer.
-
Make Pineapple Syrup: In a saucepan, combine crushed pineapple (with juice) and sugar. Bring to a gentle boil for 1–2 minutes until syrupy.
-
Soak the Cake: Pour the hot syrup evenly over the warm cake, spreading gently. Let cool completely.
-
Frosting Time: Beat softened cream cheese and butter until smooth. Add vanilla, then gradually mix in powdered sugar until fluffy.
-
Add the Crunch: Fold in chopped pecans (reserve some for topping) and spread frosting evenly over the cooled cake.
-
Chill & Serve: Refrigerate at least 30 minutes before slicing.
Notes
-
Substitute milk or buttermilk for the water in the cake mix for extra richness.
-
Toast pecans for a deeper flavor.
-
For a tropical twist, add shredded coconut to the frosting.
- Prep Time: 15 min
- Cook Time: 30 min
Nutrition
- Calories: 420 Cal Per Serving
- Fat: 23g
- Carbohydrates: 48g
- Protein: 5g
Nutritional Info (A Slice of Reality)
Now, let’s be real, y’all. This is a celebration cake, a treat, a slice of pure joy. It’s not a health food, and it doesn’t pretend to be! But I believe in transparency, so here’s a general estimate of what you’re looking at per serving (based on 12 servings).
Remember, these are estimates and can vary based on the specific brands of ingredients you use. If you need precise dietary information, I always recommend using a trusted online nutrition calculator with your exact ingredients.
Per Serving (estimate):
Calories: ~430 | Total Carbohydrates: 42g | Fat: 27g | Protein: 4g
Final Sweet Thoughts
And there you have it, my friends—the legendary Elvis Presley Pineapple Cake in all its sweet, tangy, nutty glory. This recipe is more than just a list of ingredients; it’s a ticket to creating your own kitchen memories. It’s a testament to the fact that the most beloved dishes are often the simplest ones, made with a little bit of love and a whole lot of flavor.
I hope you bake this cake, share it with people you adore, and maybe even start a new tradition of your own. If you make it, I’d be thrilled to hear about it! Tag me on social @Feastical or drop a comment on the blog. Now, go forth and bake something Feastical!
With a full heart and an even fuller plate,
Beau

Cottage Cheese Pancakes : Fluffy, Low Carb, and Protein-Packed
Say Goodbye to Sad, Floppy Pancakes: Hello Fluffy Cottage Cheese Pancakes!
Hey there, friend! Beau here, welcoming you back to my cozy corner of the internet, Feastical. Let’s talk about a classic morning dilemma. You’re standing in your kitchen, stomach rumbling, dreaming of a stack of warm, fluffy pancakes. But then that little voice in your head chimes in, reminding you that in about an hour, that sugar rush is going to crash and burn, leaving you hangry and hunting for a snack before lunch even rolls around. Sound familiar?
For the longest time, I thought I had to choose between a breakfast that tasted like a weekend treat and one that actually fueled my day. But then, I discovered a secret weapon hiding in plain sight in my fridge: cottage cheese. I know, I know. It might not sound like the most glamorous pancake ingredient, but trust me on this. When you blend it up, it performs absolute magic.
These Cottage Cheese Pancakes are the holy grail of breakfast. They’re naturally low in carbs, packed with a serious protein punch, and they cook up with this incredible golden-brown crisp on the edges and a melt-in-your-mouth, fluffy interior that will absolutely blow your mind. They’re the satisfying, feel-good food you crave, without the mid-morning slump. They come together in one bowl in about 15 minutes flat, and they’re so versatile, you can dress them up sweet or take them in a savory direction. So, grab your favorite mixing bowl and let’s turn that morning dilemma into your new favorite breakfast victory.
The Accidental Pancake That Changed My Mornings
This recipe has a fun little origin story, as the best kitchen discoveries often do. It was a lazy Sunday morning, and I was determined to clear out the fridge before my weekly grocery run. Staring back at me was a almost-finished container of cottage cheese, a half-dozen eggs, and a bag of almond flour from a previous baking experiment. The classic “clean-out-the-fridge” scramble felt a little too predictable.
On a whim, I decided to throw caution to the wind. I dumped everything into my blender, gave it a whir, and hoped for the best. What came out of that skillet was a revelation. They were the lightest, most protein-packed pancakes I’d ever tasted. They didn’t feel heavy in my stomach, but they kept me full and energized all the way until a late lunch. It was a total “Aha!” moment. It reminded me that the best recipes aren’t always found in fancy cookbooks; sometimes, they’re born from a little kitchen creativity and a willingness to play with your food. Now, this happy accident is a staple in my home, and I’m just so thrilled to share it with you.
Gathering Your Pancake Power Players
One of the best things about this recipe is its beautiful simplicity. You probably have most of this in your kitchen right now! Here’s the lowdown on what we’re using and why each ingredient is a superstar.
- 1 Cup Cottage Cheese: This is our secret weapon! It’s the source of our major protein boost and creates an incredibly tender, moist crumb. Chef’s Insight: Don’t stress about the curds! We’ll blend the batter until smooth, so no one will ever know our secret. For the creamiest result, I like to use 4% milkfat, but low-fat works great, too.
- 3 Large Eggs: Our binding agents and structure-builders. Eggs give these pancakes their lovely lift and rich, satisfying texture. They’re essential for that perfect flip!
- ½ Cup Almond Flour: This is my go-to for a low-carb, gluten-free base that adds a wonderfully nutty, buttery flavor. Substitution Tip: No almond flour? No problem! Oat flour works beautifully for a slightly higher-carb option, and all-purpose flour will do in a pinch (use ⅓ cup).
- ¼ Teaspoon Baking Powder: Our little lift agent! It gives the pancakes an extra bit of fluffiness and helps them achieve that perfect, airy interior.
- Pinch of Salt: Never, ever skip the salt! It’s the flavor enhancer that makes all the other ingredients sing, balancing the richness of the eggs and cheese.
- Optional Flavor Boosters: This is where you make it your own! For a sweet version, a splash of vanilla extract or a sprinkle of cinnamon is divine. For a savory twist, think fresh chives or a crack of black pepper.
Let’s Get Flipping! Your Foolproof Pancake Method
Ready to see how easily this all comes together? I’ll walk you through every step, sharing my favorite little chef hacks to ensure pancake perfection every single time.
- Combine the Wet Team. In a mixing bowl, add your cottage cheese and eggs. Now, here’s my first pro-tip: use a blender or an immersion blender for this step if you have one. Blending for just 15-20 seconds will give you an impeccably smooth, lump-free batter that cooks evenly. If you’re going the manual route, just whisk with gusto until the mixture is as smooth as you can get it!
- Bring in the Dry Squad. To your smooth cottage cheese and egg mixture, add the almond flour, baking powder, salt, and any of your chosen flavorings (vanilla, cinnamon, etc.). Gently fold everything together with a spatula until just combined. Chef’s Hack: A few small lumps are totally fine! Overmixing can make pancakes tough. We want tender, not rubbery.
- The Power of the Pause. Let the batter rest for about 5 minutes. This is a non-negotiable, friends! It allows the almond flour to fully hydrate and the baking powder to start doing its thing. You’ll see the batter thicken up slightly, which is exactly what we want for fluffy, well-shaped pancakes.
- Heat Things Up. While the batter rests, place a non-stick skillet or griddle over medium heat. Let it get properly hot. To test if it’s ready, flick a few drops of water onto the surface – if they sizzle and dance, you’re good to go. Lightly grease the pan with your favorite cooking spray, butter, or a touch of avocado oil.
- Cook to Golden Perfection. Using a ¼-cup measuring cup for consistency, pour the batter onto the hot skillet to form small rounds. Cook for 2-3 minutes. You’ll know it’s time to flip when the edges look set and you see little bubbles forming and popping on the surface. Flip with Confidence: Slide your spatula completely underneath and commit to a quick, smooth flip. The second side will cook faster, usually about 1-2 minutes, until it’s a beautiful golden brown.
- Keep ‘Em Warm. As you cook subsequent batches, transfer your finished pancakes to a wire rack on a baking sheet in a warm (200°F / 95°C) oven. This keeps them perfectly warm and crisp for everyone without getting soggy.
Dish ‘Em Up: Sweet, Savory, You Decide!
This is the fun part! These pancakes are a blank canvas for your culinary creativity. Here’s how I love to serve them up.
For the Sweet Tooth: This is the classic route and oh-so-satisfying. I love a generous dollop of Greek yogurt, a mountain of fresh mixed berries (their tartness is perfect with the slightly savory pancake), and a light drizzle of pure maple syrup or honey. A sprinkle of chopped nuts or a swipe of almond butter adds a fantastic crunch and extra protein.
For the Savory Soul: Don’t sleep on this option! These pancakes have a subtle cheesy flavor that works incredibly well with savory toppings. Top them with a couple of sunny-side-up eggs for a ultimate protein-packed meal, a few slices of creamy avocado, a sprinkle of everything bagel seasoning, and a handful of fresh herbs like chives or dill. It’s a breakfast-for-dinner dream come true!
Mix It Up! 5 Delicious Twists on the Classic
Once you’ve mastered the base recipe, the world is your oyster pancake! Here are a few of my favorite ways to keep things exciting.
- Lemon Blueberry Bliss: Add the zest of one lemon to the batter and fold in a handful of fresh or frozen blueberries right before cooking. The bright, sunny flavor is absolutely irresistible.
- Chocolate Chip Celebration: A family favorite! Fold in 2-3 tablespoons of dark chocolate chips. It feels like a decadent treat but is still packed with wholesome fuel.
- “Everything Bagel” Savory Pancakes: Skip the vanilla. To the batter, add one tablespoon of everything bagel seasoning, a tablespoon of finely chopped chives, and a pinch of garlic powder. Serve with smoked salmon and cream cheese for the ultimate brunch.
- Apple Cinnamon Comfort: Fold in ½ a cup of finely diced apple (like Honeycrisp or Granny Smith) and an extra ½ teaspoon of cinnamon. It tastes like a warm slice of apple pie for breakfast.
- Dairy-Free Swap: Use a plain, unsweetened dairy-free yogurt (like coconut or almond-based) in place of the cottage cheese. The texture will be slightly different but still delicious!
Beau’s Kitchen Confidential
This recipe has truly evolved in my kitchen. I started out meticulously mashing the cottage cheese with a fork, then graduated to the whisk, and finally saw the light with the immersion blender—it’s a total game-changer for texture. My partner, who was initially skeptical of “cheese in pancakes,” is now the number one requester of this recipe. It just goes to show that the best dishes are the ones that become part of your story. Don’t be afraid to make it your own! The first time I made these, I may or may not have eaten them straight from the skillet, leaning over the counter. No regrets. Some meals are just too good to wait for a plate.
Your Pancake Questions, Answered!
I’ve made these pancakes more times than I can count, and I’ve helped plenty of friends through their first batch. Here are the most common questions and how to solve them.
Q: My batter seems too thin. What did I do wrong?
A: Don’t worry! Different brands of cottage cheese and almond flour can have varying moisture levels. If your batter seems runny, just let it rest for a full 10 minutes—the almond flour will continue to absorb liquid. If it’s still too thin, add another tablespoon of almond flour until it reaches a scoopable, pancake-batter consistency.
Q: Can I make the batter ahead of time?
A: You can, but with a caveat. The baking powder will start to activate as soon as it hits the liquid, so for the fluffiest results, I recommend cooking the pancakes immediately. If you must, you can mix the dry and wet ingredients separately the night before and combine them in the morning for a super-fast breakfast.
Q: Why did my pancakes stick to the pan?
A: This almost always comes down to heat and fat. Make sure your pan is properly preheated before adding the batter, and don’t be shy with that little bit of grease! A well-seasoned cast-iron or a reliable non-stick skillet is your best friend here.
Q: Are these pancakes freezer-friendly?
A: Absolutely! They freeze like a dream. Let them cool completely, then lay them in a single layer on a baking sheet to “flash freeze” for an hour. Once solid, transfer them to a freezer bag. They’ll keep for up to 3 months. Reheat straight from the freezer in a toaster or a 350°F oven until warm and crisp.

Cottage Cheese Pancakes : Fluffy, Low Carb, and Protein-Packed
- Total Time: 15 minutes
Description
Say goodbye to floppy pancakes and hello to Fluffy Cottage Cheese Pancakes—your new breakfast obsession. These beauties are light, golden, and packed with protein to keep you full and energized all morning long. Blending cottage cheese into the batter gives them a dreamy, cloud-like texture with crisp edges and a melt-in-your-mouth center. They’re simple, fast (ready in under 15 minutes!), and endlessly versatile—sweet or savory, the choice is yours. It’s time to turn your breakfast into a feel-good ritual that actually fuels your day.
Ingredients
-
1 cup cottage cheese (4% milkfat preferred)
-
3 large eggs
-
½ cup almond flour (or oat flour/all-purpose substitute)
-
¼ tsp baking powder
-
Pinch of salt
-
Optional: ½ tsp vanilla extract or cinnamon (sweet) OR chives & pepper (savory)
Instructions
-
Blend: Combine cottage cheese and eggs in a blender until smooth.
-
Mix: Stir in almond flour, baking powder, salt, and any flavor add-ins. Don’t overmix!
-
Rest: Let batter sit for 5 minutes to thicken.
-
Cook: Heat a non-stick skillet over medium heat and lightly grease. Pour ¼ cup batter rounds and cook 2–3 min per side until golden and fluffy.
-
Serve: Stack high and top with Greek yogurt and berries for sweet vibes—or avocado and eggs for savory bliss.
Notes
-
Resting the batter = fluffier pancakes.
-
Use a blender for silky-smooth texture.
-
Freeze leftovers and reheat in the toaster for quick weekday breakfasts.
- Prep Time: 5 min
- Cook Time: 10 min
Nutrition
- Calories: 250 Cal Per Serving
- Fat: 15g
- Carbohydrates: 7g
- Protein: 20g
The Feel-Good Fuel Breakdown
Now, let’s talk about why these pancakes make you feel so amazing. This isn’t about restrictive dieting; it’s about nourishing your body with food that truly satisfies. The magic here is in the macros. Traditional pancakes are primarily simple carbohydrates, which can cause a quick spike and crash in your blood sugar.
These cottage cheese pancakes flip the script (pun intended!). By using almond flour and cottage cheese as the base, we dramatically increase the protein and healthy fats while reducing the refined carbs. This powerful combo provides a slow, steady release of energy, keeping you full, focused, and satisfied for hours. It’s a breakfast that truly works for you. Remember, nutritional values can vary based on the specific brands you use, but here’s a general idea per serving (approx. 3 pancakes):
Calories: ~250 | Protein: ~20g | Carbs: ~7g | Fat: ~15g
Your New Breakfast Tradition Starts Now
And there you have it! Your complete guide to making the fluffiest, most satisfying, protein-packed cottage cheese pancakes you’ve ever tasted. This recipe is a testament to the Feastical philosophy: food should be a joy, not a chore. It should make you feel good from the first bite to the last hour of your energized morning.
I really hope this recipe becomes a beloved staple in your kitchen, just like it is in mine. I’d love to hear how you make it your own! Did you go for the lemon-blueberry twist? Or did you blow everyone’s mind with the “everything bagel” savory version? Tag me on social @Feastical or drop a comment on the blog—sharing your kitchen wins is my favorite thing.
Now, go forth and flip with confidence! Until next time, happy cooking.
– Beau