
Valentine Chocolate Covered Oreos : Dipped, Decorated & Devoured Fast
The Ultimate No-Bake Valentine’s Treat: Chocolate Covered Oreos That Steal the Show
Hey there, friends! Beau here, welcoming you back to Feastical. Now, I’m a firm believer that the best recipes are the ones that bring a little magic to your table without turning your kitchen into a war zone. And with Valentine’s Day right around the corner, I know the pressure is on to create something sweet, special, and downright delightful.
Maybe you’re planning a cozy night in, surprising your kids with a fun after-school treat, or need a last-minute homemade gift that screams “I care!” without you spending all day in the kitchen. I get it. That’s why today, we’re ditching the complicated pastry bags and temperamental baking temperatures for a recipe that is pure, unadulterated joy: my famous Valentine Chocolate Covered Oreos.
Imagine this: a classic Double-Stuf Oreo, that perfect little package of chocolate and cream, getting a full-on Valentine’s makeover. We’re dipping them in smooth, dreamy pink and red chocolate, showering them with heart sprinkles, and maybe even drizzling them with a little extra love. The result? A treat that looks like it came from a fancy chocolatier but is so easy, you can whip up a whole batch in under 30 minutes. They’re crunchy, creamy, sweet, and seriously impossible to eat just one. So, grab your favorite mug of coffee, and let’s make some memories—and some seriously delicious Oreos.
A Sprinkle of Nostalgia: Where My Love for These Oreos Began
This recipe takes me right back to my Grandma Lou’s kitchen. She wasn’t a fancy chef, but she was the queen of making everyday moments feel like a celebration. One gloomy February afternoon when I was about ten, I came home from school feeling a little down. Valentine’s Day parties at that age are a minefield of cardboard mailboxes and hoping you get as many cards as you gave.
Grandma Lou saw my face, smiled her knowing smile, and without a word, pulled out a box of Oreos, a bag of pink chocolate chips, and a giant tub of sprinkles. “We’re making sunshine, Beau,” she declared. We spent the next hour dipping, decorating, and laughing. We made a glorious mess. Some Oreos had a mountain of sprinkles, others had a lopsided drizzle, but to me, they were perfect. She taught me that day that the real magic wasn’t in the perfect dessert, but in the act of making it together. Every time I make these, I feel a little of that sunshine. It’s my hope that this recipe brings a little of that same, simple joy into your kitchen.
Gathering Your Sweet Supplies: The Ingredients
One of the best things about this recipe is its simplicity. You only need a handful of ingredients to create something truly spectacular. Here’s your shopping list, with a few of my chef-y insights to help you out.
- 1 package Double-Stuf Oreos: I’m a loyalist to the Double-Stuf for this recipe. That extra layer of cream gives you the perfect balance against the sweet candy coating. It’s like a little pillow of happiness in the middle! If you only have regular Oreos, they’ll work just fine, but trust me on this one—the Double-Stuf is the way to go.
- 1 cup pink candy melts & 1 cup red candy melts: These are your color MVPs! Candy melts (also called candy wafers) are designed to melt smoothly and harden with a beautiful, snappy finish. You can find them in the baking aisle of most craft or grocery stores. Chef’s Tip: If you can’t find melts, you can use high-quality white chocolate chips and mix in a little oil-based food coloring to get those vibrant pink and red hues.
- 1 tsp coconut oil (optional, but highly recommended): Think of this as your secret weapon for a flawlessly smooth dip. A tiny bit of coconut oil thins the melted candy just enough, making it easier to coat the Oreos and giving you that gorgeous, professional-looking drip-off. You won’t taste it, I promise!
- Heart sprinkles or Valentine-themed decorations: This is where you get to be the artist! Go for classic heart sprinkles, tiny red and pink nonpareils, or even some festive edible glitter. This is your chance to personalize your creations.
- Parchment paper and dipping tools (forks or toothpicks): Parchment paper is non-negotiable—it prevents your beautiful creations from sticking to the pan. As for tools, a simple dinner fork works wonders, but if you want to get fancy, you can grab a set of dipping tools online. They’re cheap and make the process even easier!
Let’s Get Dipping: Your Step-by-Step Guide to Oreo Perfection
Alright, team, it’s go-time! This is the fun part. I’ll walk you through each step, sharing all my little hacks to ensure your Oreos are the star of the show.
Step 1: Prep Your Station Like a Pro
Before you even think about melting chocolate, get your workstation ready. This “mise en place” (a fancy term for “everything in its place”) is the key to a stress-free, mess-minimized experience. Line a large baking sheet with parchment paper. This is where your finished Oreos will set. Have your sprinkles and decorations open and within easy reach. Once you start dipping, you’ll want to move quickly before the chocolate sets. A little prep now saves a lot of panic later!
Step 2: The Art of Melting Chocolate
Place your pink and red candy melts into two separate microwave-safe bowls. I like to use glass bowls because they retain heat well. Now, the golden rule of melting candy: low and slow. Zap one bowl at a time for 30 seconds on high power. Take it out and give it a good stir. It will look mostly unmelted—that’s normal! Pop it back in for another 30 seconds, stir again. You’ll likely need one more 15-30 second burst. Stir, stir, stir until the last little lumps melt away from the residual heat. This is the moment to add that teaspoon of coconut oil to each bowl if you’re using it. Stir it in until the chocolate is silky and smooth. Chef’s Hack: Never, ever microwave the chocolate for one long stretch. You’ll scorch it, and it will become a thick, clumpy mess. Patience is your best friend here.
Step 3: The Grand Dip
Take one Oreo and place it gently on the tines of your fork. Lower it slowly into the melted candy. Use a spoon to help ladle the chocolate over the top, ensuring the entire cookie is submerged. Lift the Oreo out of the chocolate, and gently tap the fork on the side of the bowl. This encourages the excess chocolate to drip off, preventing a big, messy “foot” from forming at the bottom of your cookie. This tapping motion is the secret to a beautifully coated Oreo!
Step 4: The Decorating Dance
Carefully slide the dipped Oreo off the fork and onto your prepared parchment paper. Now, move fast! This is your window of opportunity to add sprinkles. Generously shower your Oreo with hearts or other decorations before the chocolate sets. If you’re feeling fancy, you can now take a spoonful of the contrasting color of melted chocolate (say, red if your base is pink), hold it high above the Oreo, and drizzle it back and forth for a gorgeous marbled effect. Pro-Tip: For a super-clean drizzle, put the contrasting chocolate in a small zip-top bag, snip a tiny bit off the corner, and use it like a piping bag.
Step 5: The Patience Game (Letting Them Set)
Once your tray is full of these decorated beauties, you have two options. You can let them set at room temperature, which will take about 30-45 minutes. Or, if you’re as impatient as I am, you can pop the entire tray into the refrigerator for 10-15 minutes. The chill will firm them up quickly. Either way, you’ll be rewarded with a satisfying *snap* when you break into one.
Sharing the Love: How to Serve Your Masterpieces
Presentation is half the fun! You’ve created little edible works of art, so let’s show them off. For a simple dessert plate, arrange a few Oreos on a cute plate or cake stand. They look fantastic alongside some fresh berries—the tartness of a raspberry is a perfect counterpoint to the sweet chocolate.
Thinking of gifts? These make incredible homemade presents. Stack a few in a clear cellophane bag, tie it with a pretty ribbon, and you have a gift that’s straight from the heart (and the kitchen!). They’re also a huge hit for classroom parties. Tuck a single Oreo into a small treat bag for a sweet surprise that every kid will love. However you serve them, do it with a smile. You just made something amazing!
Mix It Up! Creative Twists on the Classic
Once you’ve mastered the basic technique, the flavor world is your oyster! Here are a few of my favorite ways to mix things up.
- The Minty Fresh Valentine: Use Mint Oreos as your base! The combination of cool mint and sweet pink chocolate is absolutely divine.
- The Peanut Butter Paradise: Are you a PB fan? Use Peanut Butter Oreos. After dipping, while the chocolate is still wet, press a few mini peanut butter cups or chopped peanuts on top. It’s a Reese’s lover’s dream come true.
- The Dark Chocolate Dream: For a slightly more sophisticated, less sweet option, dip your Oreos in melted dark chocolate instead of the candy melts. Decorate with sea salt flakes and a drizzle of white chocolate for an incredibly chic look.
- The “Fruity Pebbles” Crunch: After dipping, instead of sprinkles, press on some Fruity Pebbles cereal. It adds a fantastic crunch and a burst of fruity flavor.
- The Vegan/Dairy-Free Delight: Use Gluten-Free or specific vegan Oreos (check the label!) and dairy-free chocolate. It’s an easy swap that ensures everyone can enjoy the fun.
Beau’s Chef’s Notes: A Few Parting Thoughts
This recipe has been a staple in my kitchen for years, and it’s evolved in the best ways. I’ve learned that a slightly messy, heavily sprinkled Oreo made by a kiddo has more soul than a perfect one. I once tried to use a hair dryer to speed up the setting process and ended up with a chocolate-splattered wall—so learn from my mistakes and just let the fridge do its thing! The beauty of this recipe is its flexibility. Don’t have heart sprinkles? Crush up some Conversation Hearts! Want to be extra? Add a little edible gold dust. Make it your own. That’s what cooking is all about.
FAQs & Troubleshooting: Your Questions, Answered
Q: My chocolate is thick and clumpy. What did I do wrong?
A: Ah, you likely overheated it! Candy melts are temperamental. If this happens, you can try to save it by adding a tiny bit more coconut oil (about 1/2 tsp at a time) and stirring vigorously. If it’s truly seized, it’s best to start over with new melts. Remember, low and slow is the way to go!
Q: Can I use almond bark instead of candy melts?
A: Absolutely! Almond bark is a great, easy-to-melt alternative. It behaves very similarly to candy melts and will give you a beautiful, hard shell. Follow the same melting instructions.
Q: How far in advance can I make these?
A: These keep wonderfully! Store them in a single layer in an airtight container at cool room temperature for up to a week. You can also layer them between sheets of parchment paper. I don’t recommend storing them in the fridge long-term, as condensation can make them sticky.
Q: My sprinkles are sliding off! How do I make them stick?
A: This means the chocolate had already started to set before you added your decor. The key is to decorate immediately after placing the Oreo on the parchment paper. Have your sprinkles open and ready to go before you even start dipping.

Valentine Chocolate Covered Oreos : Dipped, Decorated & Devoured Fast
Description
Valentine’s Chocolate Covered Oreos – No-Bake Treat
Sweet, festive, and surprisingly easy, these Chocolate Covered Oreos are perfect for Valentine’s Day, parties, gifts, or just a fun treat at home.
Ingredients
-
1 package Double-Stuf Oreos (regular Oreos work too)
-
1 cup pink candy melts
-
1 cup red candy melts
-
1 tsp coconut oil (optional, for smooth chocolate)
-
Heart sprinkles or Valentine-themed decorations
-
Parchment paper
-
Forks or toothpicks for dipping
Instructions
1. Prep Your Station
-
Line a baking sheet with parchment paper.
-
Set out sprinkles and decorations so they’re within easy reach.
2. Melt the Candy
-
Place pink and red candy melts in separate microwave-safe bowls.
-
Microwave in 30-second intervals, stirring in between until smooth.
-
Stir in coconut oil if using.
3. Dip the Oreos
-
Place an Oreo on a fork and slowly dip into melted candy.
-
Use a spoon to coat evenly.
-
Tap gently on the side of the bowl to remove excess chocolate.
4. Decorate
-
Place the dipped Oreo on parchment paper.
-
Immediately add sprinkles or drizzle contrasting chocolate before it sets.
-
Optional: Use a small zip-top bag with a tiny snip for precise drizzling.
5. Let Set
-
Allow chocolate to harden at room temperature for 30–45 minutes, or chill in the fridge for 10–15 minutes.
Notes
-
Mint Lovers: Use Mint Oreos with pink chocolate.
-
Peanut Butter Fans: Use Peanut Butter Oreos, top with mini peanut butter cups or chopped peanuts.
-
Dark Chocolate Option: Dip Oreos in melted dark chocolate and drizzle white chocolate on top.
-
Crunchy Twist: Press Fruity Pebbles or crushed cookies on wet chocolate.
-
Vegan/Dairy-Free: Use vegan Oreos and dairy-free chocolate
Nutritional Info (For Your Inner Foodie)
Okay, let’s be real—we’re not eating Chocolate Covered Oreos for their health benefits! We’re eating them for pure, soul-satisfying joy. But I believe in transparency, so here’s the general breakdown per Oreo (approximate, as it depends on your decorations). Think of it as information, not a deterrent!
Per Serving (1 Oreo): Calories: 190 | Total Fat: 10g | Saturated Fat: 6g | Cholesterol: 0mg | Sodium: 85mg | Total Carbohydrates: 24g | Dietary Fiber: 0g | Sugars: 16g | Protein: 1g
Prep Time: 10 mins | Set Time: 15 mins | Total Time: 25 mins | Yields: ~24 Oreos
Final Thoughts: Your New Go-To Valentine’s Tradition
And there you have it! The simplest, most satisfying Valentine’s treat that packs a huge punch of love and flavor. I hope this recipe brings as much laughter and happiness to your kitchen as it has to mine over the years. Remember, the goal isn’t perfection; it’s connection. It’s the fun of licking the spoon, the joy of seeing your creations lined up on the tray, and the smile on someone’s face when you hand them a treat made just for them.
So, what are you waiting for? Grab those Oreos and get dipping! And if you make them, I’d love to see your creations. Tag me on social @Feastical so I can share in the fun. From my kitchen to yours, happy Valentine’s Day!
With love and a full plate,
Beau

Taco Sliders : Bold, Cheesy, and Built for Sharing
Taco Sliders: Your New Go-To Party Hero is Here!
Hey friends, Beau here! Let me paint you a picture. It’s game day, a birthday bash, or just a classic Friday night when you’ve got a hungry crew to feed. You want something everyone will love, something you can make without a fuss, and something that feels like a genuine celebration on a plate. You’re thinking tacos… but you’re also thinking sliders. Well, what if I told you the best of both worlds exists, and it’s even more fun and flavorful than you imagined?
Welcome to the glorious universe of Taco Sliders! This is the recipe that never fails to steal the show. We’re talking juicy, perfectly seasoned beef, a glorious river of melted cheddar cheese, all snuggled inside soft, pillowy slider buns. They’re built for sharing, designed for maximum deliciousness, and guaranteed to have your people hovering around the oven, asking “are they ready yet?”
I created this recipe for Feastical to solve that “what do I feed a crowd?” puzzle. It’s the culinary equivalent of a high-five. It’s simple enough for a weeknight but special enough for your biggest gatherings. So, grab your favorite skillet, and let’s make some magic happen. These bold, cheesy, and utterly shareable Taco Sliders are about to become a regular star in your kitchen lineup.
The Messy, Beautiful Origin of These Sliders
This recipe was born out of pure, beautiful kitchen chaos. Picture this: It was my nephew’s 10th birthday, and I was on snack duty for a dozen rambunctious kids. The plan was a classic taco bar. I had all the toppings laid out—lettuce, tomatoes, sour cream, the works. It was a great plan… until I realized I’d completely forgotten the taco shells. A moment of pure panic!
But then, my eyes landed on a package of soft, fluffy slider rolls I’d bought for burgers later in the week. A lightbulb went off. I quickly browned the beef, seasoned it up, and instead of filling hard shells, I spread that glorious mixture over the bottom layer of rolls, blanketed it in cheese, and popped the whole thing in the oven. What emerged was a golden, cheesy, cohesive masterpiece. The kids could grab their own slider, and the parents didn’t have to worry about messy, crumbling tacos. It was a unanimous win. That happy accident taught me a valuable lesson: sometimes, the best recipes come from a little improvisation and a lot of love.
Gathering Your Flavor Arsenal
One of the best things about this recipe is its simplicity. You probably have most of this in your pantry right now! Here’s your shopping list for flavor town.
- 1 lb ground beef (80/20 blend): I like a little fat for flavor and juiciness, but lean 90/10 works great, too! Chef’s Insight: For a lighter twist, ground turkey or chicken is a fantastic swap.
- 1 packet taco seasoning: The ultimate shortcut to big flavor. Use your favorite brand! Substitution Tip: Have 5 minutes? Make your own blend with chili powder, cumin, garlic powder, onion powder, and a pinch of paprika and oregano.
- 12 slider rolls: Those soft, connected Hawaiian sweet rolls are my absolute favorite here, but any dinner roll style will work. Chef’s Insight: The slightly sweet flavor of Hawaiian rolls is a perfect counterpoint to the savory, spiced beef.
- 1 cup shredded cheddar cheese: We want meltability! Pre-shredded is convenient, but a block you shred yourself will melt even creamier. Substitution Tip: Pepper jack for a kick, a Mexican blend for complexity, or Monterey Jack for a milder melt.
- Shredded lettuce, diced tomato, sour cream (for topping): The fresh, cool crunch that brings it all home. Chef’s Insight: Don’t add these before baking! They go on fresh at the end to keep their texture and brightness.
Let’s Build These Flavor Bombs!
Okay, team, aprons on! This is where the fun begins. Follow these steps, and you’ll have a tray of perfection in no time.
- Preheat & Prep: First things first, get that oven preheated to a cozy 350°F (175°C). This gives it time to come to the perfect temperature while we work. Then, grab your trusty 9×13 inch baking dish. No need to grease it—the rolls usually have enough butter to prevent sticking. Chef’s Hack: You can line the dish with parchment paper for the absolute easiest cleanup later.
- Cook the Beef: Grab a large skillet and place it over medium heat. Crumble in your ground beef. I like to use a wooden spatula to really break it up into small, perfect pieces for our sliders. Cook it until it’s beautifully browned and no pink remains. Now, here’s a key step: carefully drain off the excess fat. This keeps our sliders from getting greasy. Return the skillet to the heat, add your taco seasoning and the amount of water the packet calls for (usually about ¾ cup). Let it simmer for 3-5 minutes, stirring occasionally, until the sauce has thickened and clings to every bit of beef. That’s flavor central, right there.
- Assemble the Sliders: Take your whole sheet of slider rolls and, without separating them, slice the entire thing in half horizontally, so you have a top “lid” and a bottom “base.” Place the bottom half of the rolls snugly into your baking dish. Now, evenly spread that glorious, seasoned beef all over the roll bottoms. Get it right to the edges! Next, shower the beef with your shredded cheddar cheese. Don’t be shy—this is the glue that holds our happy little community together.
- The Optional (But Highly Recommended) Bake: Place the top half of the rolls back on, creating a delicious beef and cheese sandwich. Now, for the pro-move: cover the whole dish loosely with aluminum foil. This traps the steam and gently warms the rolls and melts the cheese without over-toasting the tops. Bake for 10-12 minutes, or until everything is warm, gooey, and irresistible.
- Add the Fresh Toppings: Carefully remove the tray from the oven (it’s hot!). Using a fork or your fingers, gently lift the top “lid” of rolls. This is your canvas! Pile on the shredded lettuce, the juicy diced tomatoes, and generous dollops of cool sour cream. Chef’s Hack: If you’re adding guacamole, now is the time! Spreading it under the top bun lets it get slightly warm and creamy.
- Serve Immediately & Watch Them Disappear: The final act! Use a sharp knife to slice along the perforated lines, creating 12 individual sliders. Transfer them to a platter, stand back, and watch the magic happen. They are best enjoyed warm, straight from the oven, when the cheese is at its peak stretchiness.
How to Serve These Crowd-Pleasers
Presentation is part of the fun! I love serving these Taco Sliders right on a big wooden cutting board or a vibrant platter. It feels rustic, inviting, and totally shareable. Let people dig in with their hands—that’s the whole point!
While these sliders are a meal all on their own, turning them into a full fiesta spread is a breeze. I love pairing them with a big, colorful corn and black bean salad, a bowl of tortilla chips and chunky salsa, or some simple cilantro-lime rice. For drinks, a crisp Mexican lager, a zesty margarita, or a refreshing agua fresca are the perfect partners in crime. Don’t forget the napkins—the good, sturdy kind. You’re going to need them!
Make It Your Own: Taco Slider Twists
The beauty of this recipe is its versatility. Once you’ve mastered the classic, get creative! Here are a few of my favorite ways to mix it up.
- Spicy Fiesta: Kick up the heat! Mix a few tablespoons of chopped pickled jalapeños into the beef mixture and swap the cheddar for pepper jack cheese. You can even brush the bun tops with a mix of melted butter and a dash of hot sauce before baking.
- Crunchy Taco Supreme: Right after you add the fresh toppings, sprinkle a handful of crushed tortilla chips over the top of each slider. It adds an incredible, satisfying crunch that mimics your favorite hard-shell taco.
- Green Goddess: For a fresher, creamier twist, skip the lettuce and tomato and spread a layer of simple, mashed avocado or store-bought guacamole on the bottom bun before adding the beef. It’s rich, delicious, and a total crowd-pleaser.
- Buttery, Garlicky Top: This is a game-changer for the bun itself. Before baking, whisk together 2 tablespoons of melted butter with ½ teaspoon of garlic powder and ½ teaspoon of the taco seasoning. Brush this mixture generously over the top of the buns. It gives them a gorgeous, golden, and flavor-packed crust.
- Double Batch for a Crowd: Simply double all the ingredients and use a larger baking sheet. This makes 24 sliders, perfect for a big party. You can even create a “slider bar” with two different fillings—one beef and one shredded chicken with green chiles!
Beau’s Kitchen Notes & Stories
This recipe has truly evolved in my kitchen. The first time I made it, I just piled the cold toppings on and served it. It was good, but the cold-on-hot contrast was a bit jarring. Then I tried baking the lettuce and tomato (disaster—wilted and sad). Finally, I landed on the “lift the lid” method, and it was a revelation. The toppings stay crisp, and you get that perfect temperature and texture in every single bite.
A funny story: I once accidentally used cinnamon rolls instead of slider buns (the packages looked identical in my haste!). It was… an interesting experiment. Let’s just say sweet and savory took on a whole new meaning. Stick to the dinner rolls, folks. Trust me on this one.
Your Taco Slider Questions, Answered!
I’ve gotten a lot of questions about this recipe over the years. Here are the most common ones to help you nail it every single time.
- Can I make these Taco Sliders ahead of time? Absolutely! You can assemble the entire slider (beef and cheese only, no toppings) up to a day in advance. Cover it tightly with plastic wrap and foil and keep it in the fridge. When you’re ready, just pop it in the oven, adding a few extra minutes to the bake time since it’s starting from cold.
- My sliders got a bit soggy. What happened? The most common culprit is not draining the fat from the beef adequately. Make sure you give it a good drain after browning. Also, letting the beef mixture cool for a few minutes before assembling can help prevent the steam from immediately softening the buns.
- Can I use something other than ground beef? Of course! Ground turkey, chicken, or even a plant-based ground “meat” work wonderfully. Just be sure to season it well. For a shredded meat option, try using leftover shredded chicken or pork tinga—it’s incredible!
- Do I have to bake them? Nope! If you’re in a super hurry, you can skip the baking step. The heat from the beef will melt the cheese enough if you assemble and let it sit for a minute. But I highly recommend the quick bake—it toasts the buns slightly and makes everything wonderfully warm and cohesive.

Taco Sliders : Bold, Cheesy, and Built for Sharing
Description
These cheesy, flavorful sliders are the perfect mash-up of tacos and sandwiches—easy to make, shareable, and guaranteed to disappear fast. Perfect for game day, birthday parties, or a casual Friday night with friends!
Ingredients
-
1 lb ground beef (80/20 blend; lean 90/10 or turkey/chicken works too)
-
1 packet taco seasoning (or homemade: chili powder, cumin, garlic powder, onion powder, paprika, oregano)
-
12 slider rolls (Hawaiian rolls recommended)
-
1 cup shredded cheddar cheese (or pepper jack, Monterey Jack, or Mexican blend)
-
Shredded lettuce, diced tomato, sour cream (for topping)
-
Optional: guacamole, pickled jalapeños, crushed tortilla chips
Instructions
-
Preheat oven: 350°F (175°C). Prepare a 9×13 inch baking dish. Optional: line with parchment paper for easy cleanup.
-
Cook the beef: In a large skillet over medium heat, crumble and brown the beef. Drain excess fat. Stir in taco seasoning and water (usually ¾ cup). Simmer 3–5 minutes until thickened.
-
Assemble sliders: Slice the slider rolls horizontally as a whole sheet. Place the bottom half in the baking dish. Spread the seasoned beef evenly over the rolls and top with shredded cheese. Place the top half of the rolls back on.
-
Bake: Cover loosely with foil and bake 10–12 minutes until cheese is melted and sliders are warm.
-
Add toppings: Lift the top buns and add lettuce, tomato, sour cream, and optional toppings like guacamole or jalapeños.
-
Serve: Slice along the roll seams to create individual sliders and enjoy immediately.
Notes
-
Spicy Fiesta: Add chopped pickled jalapeños to beef and swap cheddar for pepper jack.
-
Crunchy Taco Supreme: Sprinkle crushed tortilla chips over sliders after topping with veggies.
-
Green Goddess: Spread mashed avocado or guacamole on the bottom bun instead of lettuce.
-
Garlic-Butter Buns: Brush tops with melted butter, garlic powder, and taco seasoning before baking.
-
Double Batch: Double all ingredients and bake in a larger dish for 24 sliders.
Nutrition
- Calories: 180–220 Cal Per Serving
- Fat: 9g
- Carbohydrates: 18g
- Protein: 10g
Quick Nutrition Breakdown
Now, I’m all about feel-good food, and that includes being mindful of what we’re eating. Here’s a general estimate of what you’re getting in one classic Taco Slider. Remember, these numbers can vary based on the specific brands of meat, cheese, and rolls you use.
Estimated per slider (based on 12 sliders): 180-220 calories | 9g fat | 18g carbs | 10g protein
To lighten things up, you can use lean ground beef (90/10 or 93/7), opt for low-fat cheese, and use whole-wheat slider rolls. Loading them up with fresh veggies like lettuce and tomato adds volume and nutrients for very few calories. It’s all about balance! Enjoy them as part of a fun gathering without any guilt.
Your New Signature Party Dish Awaits
And there you have it, my friends—the complete guide to the most fun, flavorful, and foolproof party food you’ll ever make. These Taco Sliders are more than just a recipe; they’re a ticket to a stress-free, delicious time with the people you love most.
I hope this recipe brings as much joy and laughter to your table as it has to mine. It’s a reminder that the best meals aren’t always the fanciest—they’re the ones that bring us together. So, go on, give it a try. And when you do, I’d love to see your creation! Tag me @Feastical on social media so I can share in the fun.
Final Thoughts: Your New Party Staple is Served!
Taco Sliders are the ultimate win: minimal effort for maximum flavor and fun. They’re the guaranteed crowd-pleaser that solves the “what to feed everyone” dilemma. So ditch the stress, embrace the delicious, and make your next gathering an unforgettable fiesta. Your guests will thank you!
Happy cooking, and remember—keep it simple, soulful, and always satisfying.
– Beau
Healthy Protein Balls : Easy, No-Bake, and Packed with Energy
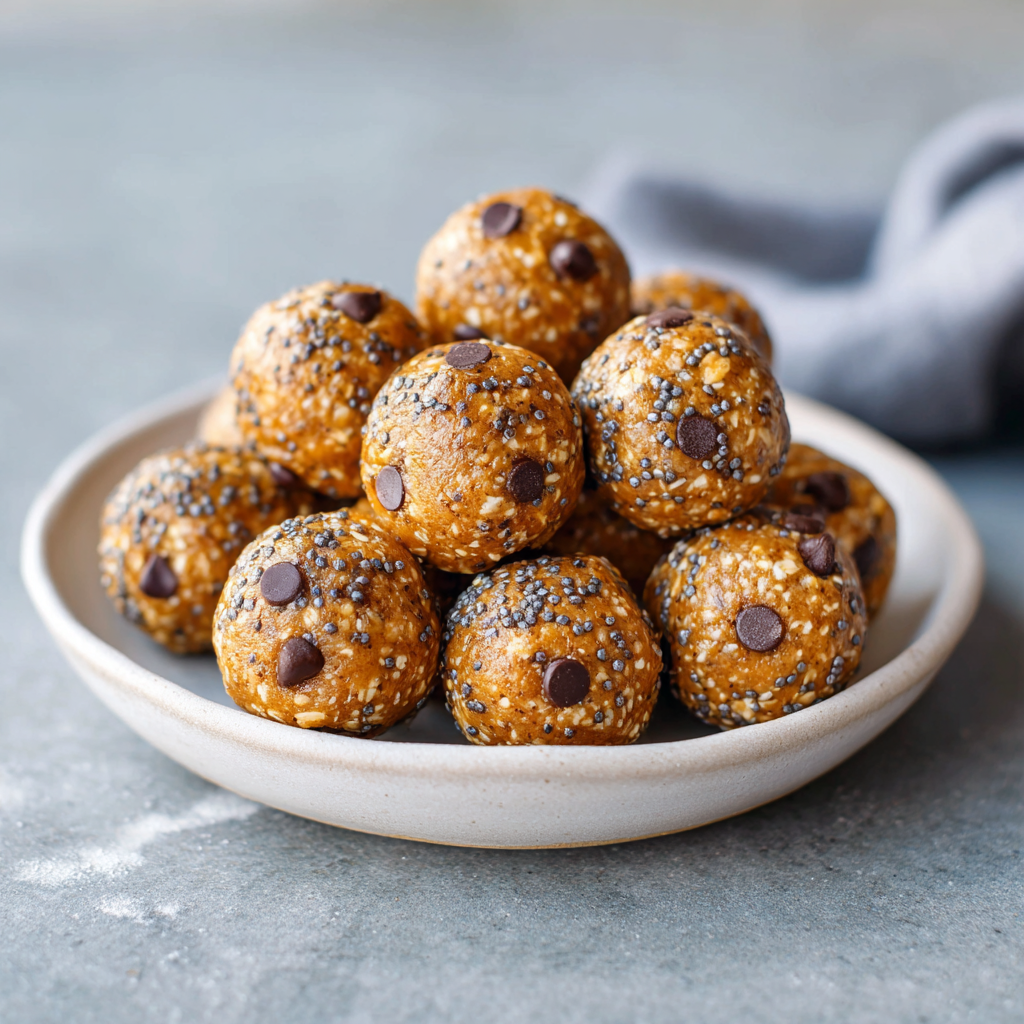
Your New Go-To Snack: No-Bake Healthy Protein Balls
Hey friends, Beau here! Let’s get real for a second. How many times have you found yourself staring into the abyss of your pantry at 3 PM, looking for something—anything—to silence that grumbling stomach and fuel you through the rest of the day? You’re not reaching for a carrot stick, let’s be honest. You’re dreaming of something sweet, a little chocolatey, and satisfying. But then the guilt sets in before you’ve even taken a bite. Sound familiar?
Well, my food-loving friend, I’m about to change your snacking life forever. We’re whipping up a batch of my legendary Healthy Protein Balls. These little powerhouses are the ultimate kitchen heroes: no baking required, endlessly customizable, and so delicious you’ll forget they’re actually good for you. They’re the perfect union of a treat and fuel, ready in minutes, and guaranteed to become a staple in your fridge. Think of them as your edible secret weapon against hanger, sluggish afternoons, and those late-night sugar cravings. So, grab a bowl and let’s make something magical happen!
A Kitchen Disaster That Led to a Snacking Triumph
I wish I could tell you this recipe was born from a flawless, sun-drenched moment of culinary genius. The truth is, it came from a kitchen catastrophe. Picture this: It was 2018, and I was hosting a big game day party at my place. I’d spent hours prepping elaborate appetizers, and my pièce de résistance was a towering platter of beautifully decorated energy bars I’d baked. With five minutes until guests arrived, I went to slice them… and they completely crumbled into a sad, granola-like pile. Panic mode!
I stared at the rubble, my heart sinking. But then, I had a wild idea. I grabbed a scoop of the mess, squeezed it in my hand, and it held together! I started rolling the “rubble” into little balls, tossed them with a bit of powdered sugar to hide the evidence, and presented them as “Game Day Power Bites.” They were the first thing to disappear. Everyone raved, asking for the recipe. That day, a kitchen fail taught me a beautiful lesson: sometimes, the best recipes aren’t about perfection; they’re about a little improvisation and a whole lot of heart. These protein balls are the polished, perfected version of that happy accident.
Gathering Your Power-Packed Ingredients
One of the best things about this recipe is its flexibility. You probably have most of this in your pantry right now! Here’s what you’ll need and why each ingredient is a rockstar.
- 1 cup Rolled Oats (Old-Fashioned): This is our base, providing lasting energy and fiber. Chef’s Insight: Don’t use instant oats! They’re too fine and can make the texture mushy. Rolled oats give that perfect, substantial chew.
- ½ cup Natural Peanut Butter: Our superstar binder and protein source. Substitution Tip: Any nut or seed butter works wonderfully here. Almond butter, cashew butter, or even sunflower seed butter for a nut-free version are all fantastic.
- ⅓ cup Honey or Maple Syrup: This is our natural sweetener and the other key binder. Chef’s Insight: Maple syrup keeps these vegan, while honey gives a lovely floral sweetness. If your mixture seems dry, add an extra tablespoon.
- ¼ cup Ground Flaxseed or Chia Seeds: A mega-dose of fiber, omega-3s, and nutrients. Substitution Tip: You can use one or the other, or a mix! If you only have whole flaxseeds, just give them a quick blitz in a spice grinder or blender.
- ¼ cup Mini Dark Chocolate Chips: Because every hero needs a sidekick, and that sidekick is chocolate. Chef’s Insight: The mini chips distribute the chocolatey joy more evenly in every single bite. Cacao nibs are a great less-sweet alternative!
- 1 scoop (2-3 tbsp) Vanilla or Chocolate Protein Powder (optional): This is your protein boost! Substitution Tip: If you don’t use protein powder, you can replace it with an additional ¼ cup of oats or ground flaxseed. Easy!
- 1 tsp Vanilla Extract: The flavor enhancer that makes everything taste like a baked good, even though we’re not baking. Don’t skip it!
- Pinch of Salt: This is my secret weapon. It balances the sweetness and makes all the other flavors pop. Trust me on this.
Let’s Get Rolling: Your Foolproof Steps to Protein Ball Bliss
This isn’t just a recipe; it’s a 10-minute therapy session. Get ready to get your hands a little dirty and feel like a kitchen wizard.
- Mix Your Dry Team. Grab a medium-sized mixing bowl and dump in your rolled oats, ground flaxseed (or chia), protein powder (if you’re using it), and that all-important pinch of salt. Give it a good whisk with a fork. You’re not just mixing; you’re introducing these ingredients to each other so they become best friends by the time we’re done. Chef’s Hack: If you want a smoother texture, you can pulse the oats in a food processor a few times first. I like the hearty chew, so I leave them as-is.
- Bring in the Wet Team. Now, plop in your peanut butter, honey (or maple syrup), and vanilla extract. This is where the magic starts. I like to use a sturdy spatula at first to begin combining everything. It’s going to look like it won’t come together, but have faith! Chef’s Hack: If your nut butter is super thick or straight from the fridge, warm it for 15 seconds in the microwave to make it easier to mix.
- Get Your Hands in There! When the spatula starts struggling, it’s time to use the best tools you have: your hands! Dive in and start kneading the mixture like you’re playing with edible Play-Doh. Squeeze it, press it, and mix until no dry spots remain and a thick, cohesive dough forms. This is oddly satisfying, I promise.
- The Grand Finale: Chocolate. Once your dough is uniform, sprinkle in those glorious mini chocolate chips. Fold them in gently with your hands or the spatula until they’re evenly distributed. We want every ball to have its fair share of chocolatey goodness.
- The Chill Test (Optional but Smart). Now, take a small pinch of the dough and try to roll it into a ball. If it holds together easily, you’re golden! If it feels a bit too soft or sticky, no sweat. Just pop the entire bowl into the fridge for 10-15 minutes. This firms up the fats and makes rolling a breeze.
- Roll, Roll, Roll Your Balls. Using a tablespoon cookie scoop or just a regular spoon, portion out the dough. Scoop up about a tablespoon’s worth and roll it firmly between your palms until it’s a smooth, round sphere. Chef’s Hack: If the mixture is sticking to your hands, lightly spray them with cooking spray or rub a tiny bit of coconut oil on your palms. Game-changer!
- Store for Snacking Success. Line ’em up on a plate or baking sheet. You can eat one immediately (the chef’s privilege!), but for the best texture, I recommend letting them set in the fridge for at least 30 minutes. Then, transfer them to an airtight container. They’ll keep happily in the fridge for up to a week, or you can freeze them for up to 3 months for instant snack attacks.
How to Serve Your Homemade Protein Balls
Okay, you’ve made these beautiful little orbs of energy. Now what? The beauty is in their versatility!
I love keeping a container right at the front of my fridge for a grab-and-go breakfast with my morning coffee. They’re the perfect pre-workout boost about 30 minutes before you hit the gym, or the ideal post-workout refuel. Toss one or two in a small reusable bag and throw them in your kid’s lunchbox (or your own!) for a lunchtime treat that’s miles better than a sugary snack bar.
For a fun dessert, roll the finished balls in a light coating of unsweetened cocoa powder, shredded coconut, or even crushed nuts for a little extra pizzazz. Serve a platter at your next book club or gathering, and watch them vanish. They’re conversation starters, I’m telling you!
Mix It Up! 5 Delicious Variations to Try
Once you’ve mastered the base recipe, the culinary world is your oyster! Here are a few of my favorite spins to keep things exciting.
- Tropical Paradise: Swap the peanut butter for coconut butter, use maple syrup, and replace the chocolate chips with chopped dried mango and unsweetened shredded coconut. It’s like a vacation in a bite!
- Almond Joy: Use almond butter, and mix in 2 tablespoons of cocoa powder with the dry ingredients. Fold in unsweetened shredded coconut and chopped almonds instead of chocolate chips. You’ll feel like you’re indulging in your favorite candy bar.
- Gingerbread Spice: Perfect for the holidays! Add 1 tsp of cinnamon, ½ tsp of ginger, and a pinch of nutmeg and cloves to the dry ingredients. Use molasses instead of half the honey for that authentic gingerbread flavor, and use raisins or chopped dates instead of chocolate chips.
- Nut-Free “Sunflower Joy”: For my friends with allergies, use sunflower seed butter and replace the chocolate chips with sunflower seeds and dairy-free chocolate chips. It’s just as delicious and totally inclusive!
- Double Chocolate Mint: Use chocolate protein powder, add 2 tablespoons of cocoa powder, and replace the vanilla extract with ¼ tsp of peppermint extract. Fold in cacao nibs or dairy-free chocolate chips for an ultra-chocolatey, refreshing treat.
Beau’s Kitchen Notes & Stories
This recipe has truly evolved in my kitchen over the years. It’s been scaled up for potlucks, scaled down for late-night solo cravings, and adapted more times than I can count based on what’s in the pantry. One time, I was out of chocolate chips and used crushed pretzels instead for a sweet-and-salty situation—mind-blowing!
The biggest lesson? Don’t be afraid to play with your food. This isn’t a fussy soufflé; it’s a forgiving, friendly recipe that wants to work for you. The dough is your canvas. If it feels too dry, add a touch more honey or nut butter. Too wet? A sprinkle more oats will fix it right up. You’ve got this.
Your Questions, Answered!
Q: My mixture is too dry and crumbly. It won’t hold together when I roll it. Help!
A> No worries! This is the most common issue and an easy fix. The culprit is usually the nut butter or the honey. Add more binding agent. Mix in an additional tablespoon of peanut butter and/or honey (or maple syrup) until the dough becomes pliable and holds together when you squeeze it.
Q: Can I make these without a protein powder?
A> Absolutely! Just omit it. The recipe works perfectly without it. You’ll still get plenty of protein from the nut butter and seeds. If you want to maintain the volume, you can add an extra ¼ cup of oats or ground flaxseed.
Q: Why do mine taste a bit bland?
A> My friend, you likely forgot the salt! That tiny pinch is crucial for elevating all the other flavors. Also, make sure you’re using a nut butter you love the taste of on its own, and don’t be shy with the vanilla extract. A little flaky sea salt on top after rolling can also elevate them to a whole new level.
Q: Are these freezer-friendly?
A> They are freezer champions! After rolling, place them on a baking sheet to freeze solid (this prevents them from sticking together in a big clump), then transfer to a freezer bag or container. They’ll keep for up to 3 months. Thaw at room temperature for 10-15 minutes or just grab one and eat it frozen—it’s like a little fudge pop!

Healthy Protein Balls : Easy, No-Bake, and Packed with Energy
Description
Hey friends! If you’ve ever found yourself staring into the pantry mid-afternoon, craving something sweet, chocolatey, and satisfying—but also healthy—this recipe is for you. These no-bake protein balls are quick to make, endlessly customizable, and perfect for snacks, pre- or post-workout fuel, or even a guilt-free dessert.
Ingredients
-
1 cup rolled oats (old-fashioned)
-
½ cup natural peanut butter (or almond/cashew/sunflower butter)
-
⅓ cup honey or maple syrup
-
¼ cup ground flaxseed or chia seeds
-
¼ cup mini dark chocolate chips (optional)
-
1 scoop (2–3 tbsp) vanilla or chocolate protein powder (optional)
-
1 tsp vanilla extract
-
Pinch of salt
Instructions
-
Mix dry ingredients: In a medium bowl, combine oats, flaxseed or chia, protein powder (if using), and a pinch of salt.
-
Add wet ingredients: Mix in peanut butter, honey or maple syrup, and vanilla extract. Use a spatula until it starts coming together.
-
Knead by hand: Use your hands to form a thick, uniform dough. Add a little extra nut butter or honey if too dry.
-
Fold in chocolate chips: Gently distribute chocolate chips throughout the dough.
-
Chill (optional): If the dough is sticky, refrigerate for 10–15 minutes to firm up.
-
Roll into balls: Using a tablespoon, scoop and roll dough into smooth spheres. Lightly coat hands with cooking spray if needed.
-
Store: Place in an airtight container. Refrigerate up to 1 week or freeze up to 3 months.
Notes
-
Tropical Twist: Use coconut butter, dried mango, and shredded coconut.
-
Almond Joy: Almond butter, cocoa powder, shredded coconut, and chopped almonds.
-
Gingerbread Spice: Add cinnamon, ginger, nutmeg, cloves, molasses, and raisins.
-
Nut-Free: Use sunflower seed butter and sunflower seeds with dairy-free chocolate chips.
-
Double Chocolate Mint: Chocolate protein powder, cocoa powder, and peppermint extract.
Nutrition
- Calories: 130Cal Per Serving
- Sugar: 6g
- Fat: 7g
- Carbohydrates: 12g
- Fiber: 2g
- Protein: 5g
A Quick Peek at the Nutrition
Now, I’m a chef, not a dietitian, so please take this as a friendly estimate. The exact numbers will vary based on the specific brands and ingredients you use. But here’s a general idea of the powerhouse you’re creating (per ball, based on a batch of 15):
- Calories: ~130
- Protein: 5g (A solid boost to keep you full and support your muscles!)
- Carbohydrates: 12g (A mix of complex carbs from the oats for energy and simple carbs from the honey for a quick pick-me-up.)
- Fat: 7g (Mostly the healthy, unsaturated kind from the nut butter and seeds, which is great for brain health and satiety.)
- Fiber: 2g (Thanks to the oats and flaxseed, helping with digestion and keeping you feeling satisfied.)
- Sugar: 6g (Primarily natural sugars from the honey and a bit from the chocolate chips.)
Remember, these are a wholesome snack, not a “diet” food. They’re about giving your body real, tasty fuel.
Your Snacking Game, Forever Changed
And there you have it! Your complete guide to becoming a no-bake protein ball master. This recipe is more than just a list of ingredients and steps; it’s an invitation to be creative, to not fear a little kitchen mess, and to give yourself the gift of a healthy, delicious snack that’s ready when you are.
I can’t wait for you to make these. When you do, please share your creations with me! Tag @Feastical on social media and let me know what fun variations you tried. You’re not just making a snack; you’re joining a community of foodies who believe that feeling good should taste good, too.
Final Thoughts
Forget the 3 PM slump and the guilt that comes with it. These no-bake protein balls are your deliciously simple solution. Quick, customizable, and packed with real ingredients, they’re proof that healthy snacking can be the most satisfying part of your day. Whip up a batch, and make hanger a thing of the past.
Happy snacking!
Beau
Happy rolling,
Beau

Cheeseburger Ziti Casserole : Creamy, Cheesy, and Crowd-Pleasing
Cheeseburger Ziti Casserole: Your New Favorite Comfort Food Mashup
Hey friends, Beau here! Let’s be real for a second. Some nights, you’re staring into the fridge, and you’re torn between two mighty cravings. On one hand, you’ve got that classic, juicy, all-American cheeseburger calling your name. On the other, you’re dreaming of a big, bubbly, cheesy pasta bake that feels like a warm hug from the inside out. Sound familiar? Well, what if I told you that you don’t have to choose?
Welcome to the glorious world of my Cheeseburger Ziti Casserole. This isn’t just another pasta bake, my friends. This is a full-on, flavor-packed party in a baking dish that brings the best of your favorite burger joint right to your dinner table. We’re talking seasoned ground beef, tender ziti pasta, and a luxuriously creamy, cheesy sauce that bakes up into pure golden perfection.
It’s the ultimate crowd-pleaser, the weeknight warrior, and the potluck superstar all rolled into one. Whether you’re feeding a hungry family, hosting a casual game-day gathering, or just meal-prepping for a week of delicious lunches, this recipe has got your back. It’s incredibly simple, ridiculously satisfying, and guaranteed to have everyone asking for seconds. So, tie on your favorite apron, and let’s turn that craving into reality!
A Tale of Two Cravings: How This Dish Was Born
This recipe has a special place in my heart because it was born from a seriously hungry (and maybe a little indecisive) moment. Picture this: It was a rainy Tuesday, and my friends and I had just finished a long hike. We were soggy, tired, and our stomachs were growling louder than the thunder outside. The debate over what to cook for dinner started immediately.
One friend was adamant about firing up the grill for burgers. Another was craving a “big bowl of cheesy pasta, something cozy.” I stood in the middle of my kitchen, looking back and forth between a package of ground beef and a box of ziti, and had my eureka moment. Why not both? I started browning the beef, boiling the pasta, and whipping up a simple, creamy cheese sauce. I layered it all together, popped it in the oven, and held my breath.
The result was nothing short of magic. The second that casserole came out of the oven, bubbling and gorgeous, the whole room fell silent. Then, it was just the sound of forks scraping plates and a chorus of “Wow.” That’s the power of comfort food, folks. It turns a gloomy day into a celebration. This Cheeseburger Ziti Casserole has been a Feastical favorite ever since, and it all started with a little kitchen improvisation.
Gather Your A-Team: The Ingredients
One of the best things about this recipe is its beautiful simplicity. You probably have most of this stuff in your pantry and fridge right now! Here’s what you’ll need to serve 6-8 happy people.
- 1 lb Ground Beef (80/20 blend is ideal): This is the “burger” in our cheeseburger pasta! I like an 80/20 blend because a little fat means a lot of flavor. Feel free to use leaner beef, or for a twist, try ground turkey or Italian sausage. Chef’s Insight: Don’t drain all the fat immediately after browning! Let the beef sit in its juices for a minute to reabsorb some of that flavor.
- 12 oz Ziti or Penne Pasta (uncooked): I love ziti or penne for their tube shapes that trap all that creamy, meaty goodness. You can use any short pasta you have on hand—rigatoni, elbows, or shells would all be fantastic.
- 1 pint (2 cups) Heavy Cream: This is the base of our super simple, no-roux sauce. It creates a rich, velvety texture that coats every single noodle. For a lighter version, you can try half-and-half, but the sauce won’t be quite as thick and luxurious.
- 2 – 2 ½ cups Shredded Cheese: Hello, cheesy goodness! I’m a big fan of a sharp cheddar for that classic cheeseburger vibe, but a cheddar-mozzarella blend is pure magic. The mozzarella gives you that epic stretch, and the cheddar brings the flavor. Pro-Tip: Always shred your own cheese if you can! Pre-shredded bags contain anti-caking agents that can make your sauce a bit grainy.
- Salt & Pepper to Taste: The dynamic duo! Season your beef well and don’t forget to taste the final mixture before it goes in the oven.
- Optional Flavor Boosters:
- 1 tsp Garlic Powder or Onion Powder: An easy way to add a deep, savory layer.
- 1 tbsp Ketchup or Yellow Mustard: This is my secret weapon for that authentic “cheeseburger” taste! Stir it into the beef mixture at the end of browning.
- Pickle Slices or Chopped Green Onions: For topping! They add a fantastic pop of brightness and crunch right before serving.
Let’s Get Cooking: Step-by-Step Instructions
Ready to make some magic? This comes together so quickly, you’ll be amazed. Let’s walk through it, step by step, with all my favorite chef hacks along the way.
- Preheat and Prep: First things first, get that oven preheating to a cozy 350°F (175°C). This ensures it’s perfectly hot and ready for our casserole when we are. Then, grab your trusty 9×13-inch baking dish. No need to grease it—the cream and cheese will take care of that for us!
- Conquer the Pasta: Bring a large pot of well-salted water to a rolling boil. Cook your ziti according to the package directions, but here’s my big tip: cook it to al dente! That means it should still have a slight bite to it. Remember, this pasta is going to hang out in a hot oven for another 20 minutes, and we don’t want it turning to mush. Once it’s done, drain it well and set it aside.
- Brown the Beef: While the pasta is boiling, let’s tackle the beef. Heat a large skillet over medium-high heat. Add your ground beef, breaking it up with a wooden spoon as it cooks. Season it generously with salt, pepper, and any of those optional seasonings you’re using (garlic powder, onion powder). Once it’s beautifully browned and no pink remains, it’s decision time. If you added the ketchup or mustard, stir it in now. Chef’s Hack: For extra flavor, I sometimes toss in a finely chopped onion to sauté with the beef right at the beginning. Drain off any excess grease, but remember our tip from earlier—don’t go overboard!
- Create the Creamy Dream: In a large mixing bowl—and I mean large, we’re going to mix everything in here—pour in your heavy cream. Add about 2 cups of your shredded cheese (reserve the rest for the top). Give it a good stir. It might look a little separated at first, but that’s totally fine. It will all come together in the oven, I promise!
- The Grand Assembly: Now for the fun part! To the same large bowl with the cream and cheese, add your drained pasta and the browned ground beef. Gently mix everything together until the pasta and beef are evenly coated in that creamy, cheesy mixture. Then, pour the whole glorious contents into your waiting 9×13 baking dish and spread it out into an even layer.
- The Golden Blanket: Take the remaining ½ cup (or more if you’re feeling extra cheesy!) of shredded cheese and sprinkle it evenly over the top. This is what’s going to create that beautiful, bubbly, golden-brown crust we all dream about.
- Bake to Perfection: Slide that beautiful dish into your preheated oven and bake it, uncovered, for about 20 minutes. You’re looking for the sauce to be bubbling enthusiastically around the edges and the cheese on top to be melted, slightly spotty, and utterly irresistible.
- The Final Countdown: Once it’s out of the oven, this is crucial: let it rest for 5-10 minutes. I know, the temptation is real, but this waiting period allows the sauce to thicken up just a bit, making it easier to serve perfect, clean slices. Use this time to chop those green onions or get your pickle toppings ready!
Plating Up: How to Serve This Masterpiece
Okay, the casserole has rested, and you’re ready to serve. How you present it can take it from great to “can I get your recipe?!” level.
I love using a large, flat spoon or a small ladle to scoop out hearty portions. Serve it right in a shallow bowl—it just feels cozier that way. Now, for the toppings! This is where you can really drive home the cheeseburger theme. A generous scattering of thinly sliced green onions adds a fresh, sharp bite. A few dill pickle slices on the side or even chopped up and sprinkled on top are a GAME CHANGER. They cut through the richness perfectly.
What to serve with it? A simple, crisp green salad with a tangy vinaigrette is the perfect partner to balance out the richness of the casserole. If you’re feeding a real hungry crowd, some buttery garlic bread is never a bad idea for mopping up every last bit of sauce. And don’t forget the drinks—a cold lager or a fizzy root beer would be absolutely spot-on.
Make It Your Own: Delicious Recipe Variations
One of the best things about a recipe like this is how adaptable it is. Feel free to get creative and make it suit your taste buds or dietary needs!
- The Bacon Cheeseburger: Because everything is better with bacon! Cook up 6-8 slices of bacon until crispy, crumble it, and mix it in with the beef. A smoky barbecue sauce swirled in instead of ketchup would be incredible here.
- The “Big Mac” Style: Want those famous special sauce vibes? Try stirring a few tablespoons of thousand island dressing into the cream and cheese mixture before assembling. Top with shredded lettuce and sesame seeds after baking for the full effect.
- Spicy Southwest Twist: Kick things up a notch! Use a pepper jack cheese blend, and add a can of diced green chiles or a tablespoon of taco seasoning to the beef as it browns. Top with fresh cilantro and a dollop of cool sour cream.
- Lighter Version: You can absolutely lighten this up! Use ground turkey or chicken, swap the heavy cream for half-and-half or even whole milk (just know the sauce will be thinner), and load it up with finely chopped veggies like mushrooms, bell peppers, or spinach sautéed with the meat.
- Gluten-Free Friendly: Easy! Just use your favorite gluten-free pasta. The rest of the recipe is naturally gluten-free, so you’re good to go.
Beau’s Kitchen Notes & Stories
This recipe has evolved so much since that first rainy night. I’ve made it for birthday parties, potlucks, and countless “I don’t feel like cooking” nights. One time, I accidentally used a whole cup of mustard instead of a tablespoon (note to self: read labels carefully!). It was… intense, but my mustard-loving uncle declared it the best thing he’d ever eaten. So, don’t be afraid of a little kitchen chaos!
My biggest piece of advice? Make a double batch and freeze one. Assemble the casserole in a disposable aluminum pan, cover tightly with foil, and freeze it before baking. On a busy night, just pop it straight from the freezer into a 350°F oven and bake for 60-90 minutes, until hot and bubbly. It’s a lifesaver!
Your Questions, Answered: FAQs & Troubleshooting
I’ve gotten a lot of questions about this recipe over the years, so I’ve gathered the most common ones here to help you out.
- Q: My sauce came out a bit greasy. What happened?
A: This usually means there was a bit too much fat from the ground beef. No worries! Just be sure to drain the beef well after browning. Using a leaner blend (90/10) can also help prevent this. - Q: Can I make this ahead of time?
A: Absolutely! You can assemble the entire casserole, cover it, and refrigerate it for up to 24 hours before you need to bake it. When you’re ready, just pop it in the oven. You might need to add 5-10 minutes to the baking time since it’s going in cold. - Q: Why is my pasta mushy?
A: The #1 culprit is overcooking the pasta initially. Remember, al dente is key! It finishes cooking in the oven. Also, letting the casserole rest after baking allows the pasta to absorb the sauce without breaking down further. - Q: I don’t have heavy cream. What can I use?
A: You can create a quick sauce with 2 cups of milk and a 8oz block of cream cheese, melted together with the shredded cheese. It will be a bit tangier and thicker, but still delicious! A can of cream of mushroom or cheddar soup mixed with a little milk is another classic “cheat” that works in a pinch.

Cheeseburger Ziti Casserole : Creamy, Cheesy, and Crowd-Pleasing
Description
Hey friends, Beau here! Imagine your two favorite comfort foods in one dish: a juicy cheeseburger and a creamy, cheesy pasta bake. That’s exactly what this Cheeseburger Ziti Casserole delivers. It’s hearty, cheesy, and full of flavor, making it perfect for family dinners, potlucks, or even meal prep for the week.
Ingredients
-
1 lb ground beef (80/20 blend recommended)
-
12 oz ziti or penne pasta (uncooked)
-
2 cups heavy cream
-
2–2½ cups shredded cheese (sharp cheddar or cheddar-mozzarella blend)
-
Salt & pepper to taste
-
Optional flavor boosters:
-
1 tsp garlic powder or onion powder
-
1 tbsp ketchup or yellow mustard
-
Pickle slices or chopped green onions for topping
-
Instructions
Step 1: Preheat & Prep
-
Preheat oven to 350°F (175°C).
-
Grab a 9×13-inch baking dish; no need to grease.
Step 2: Cook Pasta
-
Boil pasta in salted water until al dente. Drain and set aside.
Step 3: Brown the Beef
-
Cook ground beef over medium-high heat, breaking it up as it cooks.
-
Season with salt, pepper, and optional seasonings.
-
Stir in ketchup or mustard if desired. Drain excess grease.
Step 4: Make the Creamy Cheese Sauce
-
In a large mixing bowl, combine heavy cream and about 2 cups of shredded cheese.
-
Stir until combined (it may look slightly separated; it will come together in the oven).
Step 5: Assemble the Casserole
-
Add cooked pasta and browned beef to the cream and cheese mixture. Mix gently to coat everything evenly.
-
Pour into prepared baking dish and spread evenly.
-
Sprinkle remaining cheese over the top.
Step 6: Bake
-
Bake uncovered for 20 minutes, until sauce is bubbling and cheese is golden.
-
Let rest 5–10 minutes before serving.
Step 7: Serve & Top
-
Garnish with chopped green onions and pickle slices.
-
Pair with a crisp green salad or garlic bread for a complete meal.
Notes
-
Make-Ahead: Assemble and refrigerate up to 24 hours. Add 5–10 minutes to bake if starting cold.
-
Sauce Too Greasy? Drain beef thoroughly or use leaner meat.
-
Mushy Pasta? Cook pasta al dente and allow casserole to rest before serving.
-
No Heavy Cream? Use milk + cream cheese, or cream of mushroom/cheddar soup mixed with milk.
Nutrition
- Calories: 520 Cal Per Serving
- Fat: 35g
- Saturated Fat: 18g
- Carbohydrates: 32g
- Protein: 25g
Nutritional Information (Approximate)
Okay, let’s talk nutrition! I’m all about balance, and while this is a comfort food dish, it’s always good to know what you’re enjoying. Here’s a rough breakdown per serving (based on 8 servings, using 80/20 beef and cheddar cheese). Remember, these are estimates and can vary based on your specific ingredients and substitutions.
- Calories: ~520
- Protein: 25g (Great for keeping you full!)
- Carbohydrates: 32g
- Fat: 35g
- Saturated Fat: 18g
To lighten it up, refer to our variations section above! Using lean ground turkey, a lower-fat cheese, and half-and-half can significantly reduce the calorie and fat content while still delivering on that comfort food feeling.
Final Thoughts from My Kitchen to Yours
And there you have it, friends! My go-to recipe for when comfort and convenience need to shake hands. This Cheeseburger Ziti Casserole is more than just a meal; it’s a reminder that the best dishes often come from a little experimentation and a whole lot of heart.
I truly hope this recipe becomes a star in your home kitchen, creating its own set of happy memories and satisfied smiles around your table. If you make it (and I really hope you do!), I’d love to see your creation! Tag me on social @Feastical or @BeauCollier with #Feastical so I can check out your cheesy masterpiece.
Now, go forth and bake

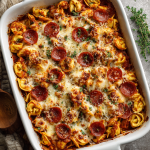
Cheese Tortellini Pepperoni Pizza Casserole : Cheesy, Saucy & Family-Approved
Cheese Tortellini Pepperoni Pizza Casserole: Your New Family Favorite
Hey there, Feastical friends! Beau here, coming to you from a kitchen that smells absolutely incredible. If your crew is anything like mine, you’ve probably hit that dreaded dinner-time question: “What should we make tonight?” You’re craving something cozy, cheesy, and guaranteed to get a “Wow!” from everyone at the table. But you also don’t want to spend your entire evening slaving over a hot stove.
Well, my friend, I’ve got the answer, and it’s a glorious mash-up that’s about to become your new weeknight hero. Imagine all the cheesy, saucy goodness of a pepperoni pizza, cozying up with the soft, pillowy comfort of cheese tortellini. That’s right—we’re making a Cheese Tortellini Pepperoni Pizza Casserole!
This isn’t just another casserole; it’s a flavor party in a baking dish. It’s the ultimate comfort food hybrid that solves the “pizza or pasta?” debate by boldly choosing both. It’s ridiculously easy to throw together, it bakes up into a bubbly, golden-brown masterpiece, and it’s the kind of meal that makes everyone feel like they’re getting a great big, delicious hug. So, preheat that oven, grab your favorite baking dish, and let’s create some magic together.
Where It All Began: A Happy Kitchen Accident
I have to share a little story about how this beautiful monster of a recipe came to be. It was a classic “What’s left in the pantry?” kind of night. I had a half-empty bag of cheese tortellini staring me down, a jar of pizza sauce left over from a pizza-making weekend, and, of course, my eternal backup singer, a stick of pepperoni.
My first thought was, “Well, I could just make pasta… or I could just make a pizza.” But then a lightbulb went off. What if I didn’t choose? What if I layered them all together and let the oven work its unifying magic? I remember pulling that bubbling, cheesy creation out of the oven and thinking, “This either looks genius or like a complete disaster.” One bite told me everything I needed to know. It was a triumph! It instantly took me back to those childhood nights of digging into a hot, cheesy pizza, but with the satisfying heartiness of a pasta bake. It was a happy accident that’s now a requested favorite, and I’m so excited to share it with you.
Gathering Your Cast of Characters
One of the best things about this recipe is its beautiful simplicity. You probably have most of this stuff on hand already! Here’s what you’ll need to feed a hungry crowd of six.
- 1 package (9 oz) Cheese Tortellini: This is our star! I love using fresh tortellini from the refrigerated section for the most tender bite, but frozen works perfectly, too—no need to thaw! The little pockets of cheese are like delightful surprises in every forkful.
- 1 jar (24 oz) Pizza Sauce: This is our flavor foundation. I’m a fan of a good, robust marinara here, but use your favorite brand. Chef’s Hack: If you have extra time, sauté a little minced garlic in olive oil before adding the sauce for a flavor boost!
- 2 cups Shredded Mozzarella Cheese: The glue that holds our delicious world together. I always recommend shredding your own from a block if you can—it melts so much creamier and doesn’t have the anti-caking agents that pre-shredded bags do.
- 1 cup Shredded Italian Cheese Blend: This is my “optional but highly recommended” player. A blend of provolone, Romano, Parmesan, and Asiago adds a deeper, more complex cheesy flavor. If you don’t have it, no sweat! Just add an extra cup of mozzarella.
- 1 cup Sliced Pepperoni: Our pizza MVP! I use the standard slices, but if you’re feeling fancy, get the larger “cup and char” style—they curl up and get extra crispy in the oven. For a real treat, try a few slices of spicy soppressata!
- 1 tsp Italian Seasoning: A little herbal magic. It’s a simple blend that screams “Italian comfort food.”
- ½ tsp Garlic Powder: We’re layering flavors here. The powder disperses evenly and gives us that warm, savory garlic note throughout the whole dish.
- ¼ tsp Red Pepper Flakes: My little secret for a subtle kick. It just wakes up all the other flavors. If you’re sensitive to heat, you can totally skip it, but I promise it’s not overwhelmingly spicy.
Let’s Build This Cheesy Masterpiece!
Okay, team, it’s go time. This comes together so fast, you’ll be amazed. We’re talking about 10 minutes of prep for a meal that tastes like you fussed for hours. Let’s do this.
- Preheat and Prep: First things first, get that oven heating to a cozy 375°F (190°C). This gives the oven time to come to the perfect temperature while we assemble our casserole. Grab your trusty 9×13-inch baking dish—no need to grease it, the saucy goodness will take care of that.
- Cook the Tortellini: Bring a large pot of salted water to a rolling boil. Cook your tortellini according to the package directions, but here’s a major chef tip: cook it just until it’s al dente, which usually means shaving a minute off the recommended cook time. It’s going to spend another 20+ minutes in the oven, and we don’t want mushy pasta! Drain it well.
- The Big Mix: In a large mixing bowl, combine your perfectly cooked (and drained) tortellini with the entire jar of pizza sauce. Now, sprinkle in your flavor boosters: the Italian seasoning, garlic powder, and red pepper flakes. Give it a really good stir until every single tortellini is coated in that glorious red sauce. Your kitchen should already be smelling amazing.
- Layer It Up: This is where we build flavor and texture. Spread half of the saucy tortellini mixture evenly in the bottom of your baking dish. Now, sprinkle half of your mozzarella and Italian blend cheeses over the top. This creates a melty cheese layer right in the middle! Next, artfully arrange (or just casually scatter) half of your pepperoni slices over the cheese.
- Repeat the Layers: Here we go again! Gently spread the remaining tortellini mixture over the first layer. Top with the rest of the cheese, and finish it all off with the remaining pepperoni. This double-decker approach ensures every single serving is packed with flavor from top to bottom.
- Bake to Bubbly Perfection: Slide your masterpiece into the preheated oven, uncovered, for 20-25 minutes. You’re looking for the sauce to be bubbling around the edges and the cheese to be completely melted, gooey, and maybe even getting a few gorgeous golden-brown spots. If you’re a fan of a extra-crispy top, you can pop it under the broiler for the last minute—just watch it like a hawk!
- The Hardest Part: Resting: I know, I know. It’s torture. But carefully remove the casserole from the oven and let it sit for about 5 minutes before serving. This allows the sauce to thicken up slightly and makes it much easier to scoop out perfect portions. I like to garnish it with a little sprinkle of fresh parsley or chopped basil for a pop of color.
How to Serve Up the Goodness
This casserole is a complete meal all on its own, but a little something on the side never hurts! I love serving this right from the baking dish in the middle of the table for a real family-style feast.
For a perfect plate, use a large spoon or a small ladle to scoop out a generous portion. The cheesy strands will be gloriously stretchy—that’s how you know you did it right! A simple, crisp green salad with a tangy vinaigrette is the perfect partner to cut through the richness of the casserole. A side of buttery, toasted garlic bread is also a no-brainer for mopping up every last bit of sauce. And for the grown-ups? A cold, crisp lager or a glass of Chianti pairs absolutely beautifully.
Make It Your Own: Delicious Twists & Swaps
The beauty of this recipe is its versatility. Think of it as a canvas for your culinary creativity! Here are a few of my favorite ways to mix it up.
- The “Supreme” Treatment: Turn it into a fully loaded pizza! Sauté some diced bell peppers, onions, and sliced mushrooms, and layer them in with the pepperoni. Black olives are a fantastic addition here, too.
- Meat Lover’s Dream: Go big on the protein! Brown some Italian sausage (mild or hot) or some ground beef with a pinch of fennel seed and mix it right in with the tortellini and sauce. You can even add some cooked, crumbled bacon.
- White “Pizza” Casserole: Not in a red sauce mood? Swap the pizza sauce for a creamy Alfredo sauce. Use cooked, diced chicken instead of pepperoni, and maybe stir in some fresh spinach. It’s a whole new, decadent dish!
- Veggie Delight: For a vegetarian version, simply skip the pepperoni. Load it up with roasted zucchini, eggplant, sun-dried tomatoes, and artichoke hearts. It’s just as satisfying and packed with flavor.
- Spicy ‘Roni Roll: If you love heat, this one’s for you. Use spicy pepperoni and mix a tablespoon of Calabrian chili paste into your pizza sauce. Thank me later!
Beau’s Kitchen Notes & Stories
This recipe has seen a few evolutions in my kitchen. The first time I made it, I went a little overboard on the red pepper flakes, let’s just say my nephew needed a whole glass of milk! I’ve learned that a quarter teaspoon is the sweet spot for a gentle warmth that pleases most palates.
Another fun discovery? My friend Sarah makes this with gluten-free tortellini for her family, and it works like a dream. It’s truly a recipe that welcomes everyone to the table. Don’t be afraid to play around and find your family’s perfect version. That’s what cooking is all about!
Your Questions, Answered!
I’ve gotten a few questions about this recipe over time, so I figured I’d answer the most common ones right here.
Q: Can I make this casserole ahead of time?
A: Absolutely! You can assemble the entire casserole, cover it tightly with plastic wrap or foil, and refrigerate it for up to 24 hours. When you’re ready to bake, just pop it straight into the cold oven, then turn the oven on to 375°F. You’ll need to add about 10-15 minutes to the baking time since it’s starting from cold.
Q: My casserole came out a bit watery. What happened?
A> This usually happens if the tortellini was a bit over-cooked before baking or if your pizza sauce was particularly thin. Next time, make sure to cook the tortellini just to al dente, and maybe let your sauce-and-pasta mixture sit for 5 minutes before assembling to allow the pasta to absorb some of the liquid. Also, that 5-minute rest after baking is crucial for letting everything set up!
Q: Can I freeze the leftovers?
A: You can, but with a caveat. Pasta in creamy or cheesy sauces can sometimes get a bit grainy when thawed. It will still taste great, but the texture might not be as perfect. For best results, freeze individual portions in airtight containers for up to 2 months. Thaw in the fridge overnight and reheat gently in the microwave or oven.
Cheese Tortellini Pepperoni Pizza Casserole : Cheesy, Saucy & Family-Approved
Description
Hey Feastical friends, Beau here! Picture this: the gooey, melty, cheesy magic of a pepperoni pizza combined with the pillowy comfort of cheese tortellini. That’s exactly what this casserole delivers—layers of cheesy, saucy goodness that make everyone at the table smile. It’s quick to prep, bakes into a bubbly masterpiece, and is guaranteed to become a weeknight favorite.
Ingredients
-
1 package (9 oz) cheese tortellini – fresh or frozen
-
1 jar (24 oz) pizza sauce – marinara works great
-
2 cups shredded mozzarella cheese – shredded from a block if possible
-
1 cup shredded Italian cheese blend – provolone, Parmesan, Romano, Asiago
-
1 cup sliced pepperoni – standard or “cup and char” style
-
1 tsp Italian seasoning
-
½ tsp garlic powder
-
¼ tsp red pepper flakes (optional)
Instructions
Step 1: Preheat & Prep
-
Preheat oven to 375°F (190°C).
-
Grab a 9×13-inch baking dish. No need to grease it; the sauce will do the work.
Step 2: Cook Tortellini
-
Boil tortellini in salted water according to package directions, but cook slightly less than al dente to avoid mushy pasta after baking.
-
Drain well.
Step 3: Mix the Sauce & Seasoning
-
In a large bowl, combine tortellini with pizza sauce, Italian seasoning, garlic powder, and red pepper flakes. Stir until evenly coated.
Step 4: Layer the Casserole
-
Spread half of the tortellini mixture in the bottom of the baking dish.
-
Sprinkle half of the mozzarella and Italian blend cheeses on top.
-
Scatter half of the pepperoni slices over the cheese.
-
Repeat with remaining tortellini, cheeses, and pepperoni.
Step 5: Bake to Perfection
-
Bake uncovered for 20–25 minutes until cheese is melted and bubbly.
-
Optional: Broil 1 minute for a crisp, golden top.
Step 6: Rest & Serve
-
Let the casserole sit 5 minutes before serving.
-
Garnish with fresh parsley or basil if desired.
Notes
-
Make-Ahead: Assemble, cover, and refrigerate up to 24 hours. Add 10–15 minutes to bake from cold.
-
Watery Casserole: Avoid overcooking tortellini; let pasta-sauce mixture sit 5 minutes before layering.
-
Freezing: Freeze individual portions up to 2 months. Thaw overnight and reheat gently.
Nutrition
- Calories: 420–480 Cal Per Serving
- Fat: 24g
- Carbohydrates: 38g
- Protein: 20g
Quick Nutrition & Prep Info
Let’s be real, we’re not eating this casserole because it’s a diet food—we’re eating it because it’s pure, unadulterated joy on a plate. But it’s always good to know what you’re working with! This is a hearty, satisfying meal, so a little goes a long way.
Prep Time: 10 minutes
Cook Time: 25 minutes
Total Time: 35 minutes
Servings: 6
Estimated per serving: 420–480 calories | 24g fat | 38g carbs | 20g protein
Remember, these are estimates and can vary based on the specific brands of ingredients you use. To lighten it up a bit, you can use part-skim cheeses, turkey pepperoni, and whole-wheat or high-protein tortellini.
Final Thoughts from My Kitchen to Yours
Well, there you have it, friends—my go-to recipe for when I need a guaranteed crowd-pleaser that’s as fun to make as it is to eat. This Cheese Tortellini Pepperoni Pizza Casserole is more than just a meal; it’s a conversation starter, a memory maker, and the ultimate solution for a busy night.
I hope this recipe brings as much laughter and full-bellied happiness to your table as it has to mine. Don’t forget to tag me @FeasticalBeau on Instagram if you make it—I love seeing your creations! Now, go forth and get your cheesy, saucy, pizza-pasta mash-up on. You’ve earned it.
With love and a full baking dish,
Beau

Cinnamon Roll French Toast Bites : Sticky, Sweet, and Drenched in Icing
Cinnamon Roll French Toast Bites – Sticky, Sweet, and Drenched in Icing
The Breakfast Mashup of Your Dreams is Here!
Hey friends, Beau here from Feastical! Let’s be real for a second. Who among us hasn’t stood in front of the oven, watching a tube of cinnamon rolls slowly bake, and thought, “I wish this was faster… and maybe even more delicious?” I know I have. The intoxicating smell of cinnamon and sugar is pure magic, but that wait can feel like an eternity, especially when you’ve got a hungry crew (or just a serious craving) to feed.
That’s exactly why I created these Cinnamon Roll French Toast Bites. We’re taking everything we adore about a classic cinnamon roll—the warm, gooey, buttery spiced goodness—and smashing it together with the quick, custardy comfort of French toast. The result? Perfect, golden-brown, bite-sized pieces of joy that are crispy on the outside, dreamily soft on the inside, and absolutely drenched in a luscious, creamy icing. They’re the ultimate weekend breakfast hero, the star of any brunch spread, and let’s be honest, a pretty spectacular excuse for dessert. So, let’s ditch the long rise times and get straight to the good part. Your fork is waiting!
A Sticky-Fingered Memory
This recipe takes me right back to my grandma’s kitchen. She wasn’t a fancy baker, but she was a wizard with simple ingredients. Every Sunday, the air would be thick with the scent of her “fancy” French toast, which was really just thick-cut bread dipped in eggs and a heavy-handed sprinkle of cinnamon sugar. My brother and I would sit at her formica table, our legs swinging, watching her work her magic at the stove. She’d always cut our slices into little “soldier” bites, claiming it made them easier to eat. I now realize it was her secret way of maximizing the crispy, buttery edges—the best part! These Cinnamon Roll French Toast Bites are my full-circle tribute to her. It’s that same childhood comfort, but all grown up and extra indulgent, just like she would have loved.
Gathering Your Sweet Arsenal
This is where the fun begins! The ingredient list is beautifully simple, but a few little chef secrets can make all the difference. Here’s what you’ll need to serve 4-6 lucky people (or, you know, two very enthusiastic ones).
- 1 loaf brioche or Texas toast, cut into bite-sized cubes – This is your foundation. Brioche is my go-to because its rich, buttery, and eggy flavor creates an incredibly tender interior. Texas toast is a fantastic, sturdy backup that soaks up the custard like a champ without falling apart. Chef’s Insight: Stale bread is actually a secret weapon here! It soaks up the egg mixture without becoming mushy.
- 4 large eggs – The backbone of our custard. They create that rich, golden coating that fries up to perfection.
- ½ cup milk – This thins the egg mixture to the perfect consistency. Whole milk gives you the creamiest result, but any milk you have on hand will work beautifully.
- 2 tsp cinnamon – The heart and soul of the “cinnamon roll” flavor! Don’t be shy here. We want that warm, spicy aroma to shine through in every single bite.
- 1 tsp vanilla extract – A non-negotiable for any great French toast. It adds a layer of warm, floral sweetness that makes the whole dish smell and taste like a bakery.
- 2 tbsp sugar – A little sweetness in the batter helps with caramelization, giving you those gorgeous golden-brown edges.
- Butter or oil, for cooking – I’m Team Butter all the way for that unparalleled rich flavor. But a neutral oil like avocado or canola works great too, especially if you’re worried about the butter burning.
For the Heavenly Cream Cheese Icing (Do Not Skip This!)
- 4 oz cream cheese, softened – The “cream” in our cream cheese icing! Let it sit on the counter for 30 minutes before you start. Trust me, trying to whisk rock-hard cream cheese is a workout nobody needs. Substitution Tip: For a dairy-free version, use your favorite plant-based cream cheese alternative.
- ½ cup powdered sugar – It dissolves instantly, giving us that silky-smooth texture we’re after.
- 1–2 tbsp milk – This is our control knob for consistency. Start with one tablespoon and add more until it’s perfectly drizzle-able.
- ½ tsp vanilla extract – Because even our icing deserves a little flavor boost!
Let’s Get Cooking: Your Step-by-Step Roadmap to Bliss
Alright, team, it’s go-time! This process is fast, fun, and almost impossible to mess up. I’ll walk you through each step with all my favorite kitchen hacks to ensure your bites are nothing short of phenomenal.
- Make the Egg Mixture (The Flavor Foundation): Grab a large bowl—one that gives you plenty of room to toss the bread later. Crack in your 4 eggs and whisk them until the yolks and whites are fully combined and slightly frothy. Now, pour in the milk, vanilla, sugar, and that glorious cinnamon. Whisk it all together until it’s a smooth, homogenous, and beautifully speckled custard. Chef’s Hack: A tiny pinch of salt added to the egg mixture can actually make the sweet flavors pop even more! It’s a little secret all the pastry pros use.
- Coat the Bread (The Soaking Station): Now, gently add all your bread cubes to the bowl. Using a large spatula or a big spoon, fold the bread into the egg mixture. You want every single surface of every single cube to get a nice, cozy bath. Once they’re all coated, let them sit for a solid 5 minutes. This is the patience-pays-off moment! This soaking time allows the bread to drink up the custard, which is the key to a fluffy interior instead of a dry one. Give it another gentle stir halfway through.
- Cook to Golden-Brown Perfection (The Main Event): Place a large skillet or non-stick pan over medium heat. Add a generous tablespoon of butter or oil. You’ll know it’s ready when a drop of water sizzles on contact. Now, working in batches (don’t crowd the pan!), add a single layer of your soaked bread cubes. We’re looking for a gentle sizzle. Cook for 3-4 minutes, then flip or stir them around. Your goal is to get them golden brown and slightly crispy on all sides. This should take about 6-8 minutes total per batch. Chef’s Hack: Resist the urge to move them around constantly! Let them sit and develop a beautiful crust before you flip. And don’t forget to add more butter or oil between batches—it’s what makes them taste so good!
- Whip Up the Icing (The Grand Finale): While your first batch of bites is sizzling away, let’s make the icing. In a medium bowl, combine your softened cream cheese, powdered sugar, vanilla, and 1 tablespoon of milk. Whisk vigorously until it’s completely smooth and creamy. If it’s too thick for drizzling, add the second tablespoon of milk, a little at a time, until it’s just right. It should ribbon off your whisk beautifully.
How to Serve These Little Clouds of Joy
Presentation is part of the fun! You’ve just created something amazing, so let’s show it off. I love piling these Cinnamon Roll French Toast Bites high on a big rustic platter. Drizzle that gorgeous cream cheese icing over the top in a zig-zag motion, making sure every bite gets some love. For an extra touch of “wow,” I always add a few more sprinkles of cinnamon right on top. If you’re feeling fancy, a handful of fresh berries like raspberries or blueberries on the side adds a lovely pop of color and a little tartness to balance the sweetness. And remember, these are best served immediately, right from the skillet to the plate, while they’re still warm and the icing is just starting to melt into all the nooks and crannies. Pure heaven.
Make It Your Own: Delicious Twists & Swaps
The beauty of this recipe is its versatility. Once you’ve mastered the classic, feel free to get creative! Here are a few of my favorite ways to mix it up.
- Apple Pie Twist: Toss your bread cubes with 1 cup of finely diced apples (like Granny Smith) and a tablespoon of brown sugar before adding them to the egg mixture. It’s like apple pie and French toast had a baby!
- Chocolate Lover’s Dream: Add ¼ cup of cocoa powder to the cream cheese icing and use a bit more milk to thin it out. Drizzle this chocolate glaze over the bites for a decadent treat.
- Pumpkin Spice Everything: Replace ¼ cup of the milk with canned pumpkin puree and swap the cinnamon for pumpkin pie spice in the egg batter. Hello, fall!
- Dairy-Free & Delicious: Use your favorite plant-based milk (oat milk is fantastic here), dairy-free butter, and a vegan cream cheese for the icing. It works like a charm.
- Nutty Crunch: After cooking, toss the warm bites in a mixture of chopped toasted pecans or walnuts and a little powdered sugar for an incredible texture contrast.
Beau’s Kitchen Notebook
This recipe has become a Feastical staple, and it’s evolved in fun ways over the years. I once accidentally used Hawaiian sweet bread instead of brioche, and it was a glorious, extra-sweet mistake that I now make on purpose sometimes! I’ve also learned that this is the ultimate “clean out the pantry” recipe. That half-bag of chocolate chips about to go stale? Toss ’em in the batter. Those last few slices of sandwich bread? They’ve found their higher calling. The point is, don’t be afraid to play with your food. Some of the best kitchen memories start with a happy accident.
Your Questions, Answered!
I’ve made this recipe a zillion times and have heard all your brilliant questions. Here are the answers to the most common ones.
Q: My French toast bites turned out soggy in the middle. What happened?
A: The most likely culprit is the pan being too crowded or the heat being too low. If you add too many bites at once, they steam instead of fry. Always cook in batches! Also, make sure your pan is properly preheated so you hear that satisfying sizzle when the bread hits the surface.
Q: Can I make these ahead of time?
A: You can! You can cut the bread and make the egg mixture the night before (keep them separate). In the morning, just combine and cook. You can also keep cooked bites warm on a baking sheet in a 200°F (95°C) oven while you finish the batches. They are truly best fresh, but they reheat surprisingly well in a toaster oven or air fryer to re-crisp.
Q: My icing is too thick/too thin. How can I fix it?
A: No worries, this is an easy fix! Too thick? Add more milk, just a teaspoon at a time, whisking after each addition until it’s perfect. Too thin? Add more powdered sugar, a tablespoon at a time, until it thickens up to your liking.
Q: Can I use regular sandwich bread?
A> You absolutely can! I’d recommend a heartier white or wheat bread. Just be a little more gentle when stirring, as it can be more delicate than brioche or Texas toast.
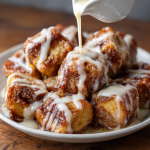
Cinnamon Roll French Toast Bites : Sticky, Sweet, and Drenched in Icing
Description
Hey friends, Beau here from Feastical! Imagine everything you love about a cinnamon roll—warm, gooey, buttery, spiced perfection—married with the custardy comfort of French toast, but in bite-sized pieces. Crispy on the outside, soft and dreamy on the inside, and topped with luscious cream cheese icing… these are your new brunch heroes, weekend treats, or anytime indulgences. Quick to make, impossible not to love.
Ingredients
For the French Toast Bites:
-
1 loaf brioche or Texas toast, cut into bite-sized cubes
-
4 large eggs
-
½ cup milk (whole milk recommended)
-
2 tsp ground cinnamon
-
1 tsp vanilla extract
-
2 tbsp sugar
-
Butter or oil, for cooking
For the Cream Cheese Icing:
-
4 oz cream cheese, softened
-
½ cup powdered sugar
-
1–2 tbsp milk (adjust for desired consistency)
-
½ tsp vanilla extract
Instructions
Step 1: Make the Egg Mixture
In a large bowl, whisk together eggs, milk, cinnamon, sugar, and vanilla until smooth. Optional: add a pinch of salt to make flavors pop.
Step 2: Coat the Bread
Gently fold the bread cubes into the egg mixture until fully coated. Let sit 5 minutes to soak.
Step 3: Cook the Bites
-
Heat a skillet over medium heat and melt butter or add oil.
-
Cook bread cubes in batches, 3–4 minutes per side, until golden and slightly crispy. Avoid overcrowding.
-
Add more butter/oil between batches as needed.
Step 4: Make the Icing
In a medium bowl, whisk cream cheese, powdered sugar, vanilla, and 1 tablespoon milk until smooth. Add extra milk if needed for drizzle-able consistency.
Step 5: Serve
Pile the bites on a platter, drizzle with icing, and sprinkle extra cinnamon or berries if desired. Serve immediately while warm.
Notes
-
Soggy Middle? Don’t crowd the pan and ensure proper preheat. Cook in batches.
-
Make-Ahead: Pre-cut bread and mix eggs the night before. Cook in the morning. Keep warm in a 200°F (95°C) oven.
-
Icing Too Thick/Thin? Adjust with small amounts of milk or powdered sugar.
-
Bread Swap: Hearty white or wheat sandwich bread works if handled gently.
Let’s Talk Nutrition & Prep
I’m all about balance, and that means enjoying life’s sweet pleasures, too! Here’s the lowdown on what you’re diving into. Remember, these are estimates and can vary based on the specific ingredients and brands you use.
- Prep Time: 10 minutes
- Cook Time: 10 minutes
- Total Time: 20 minutes
- Servings: 4-6
Estimated Per Serving (with icing): 320-380 calories | 16g fat | 35g carbs | 8g protein. This is a treat that’s meant to be savored and shared. Pair it with some fresh fruit and a protein source like scrambled eggs or bacon for a more rounded brunch that will keep you full and happy for hours.
Your New Go-To Brunch Masterpiece
And there you have it! My ultimate hack for getting all the cozy, comforting vibes of a cinnamon roll in a fraction of the time. I hope this recipe brings as much laughter and sticky-fingered joy to your kitchen as it has to mine. Remember, cooking isn’t about perfection; it’s about the love you stir into every bite. So, don’t stress about a lopsided bite or a messy drizzle. Just enjoy the process, and more importantly, enjoy the delicious results with the people you love.
I’d love to see your creations! Tag me @Feastical on social media so I can cheer you on. Now, go forth and conquer that skillet!
Final Thoughts: A Brunch Legend is Born
And there you have it—the secret to turning a simple loaf of bread into a legendary breakfast experience. These Cinnamon Roll French Toast Bites are the ultimate solution for when that cinnamon-sugar craving hits, but time is not on your side. They’re a tribute to cherished memories, a canvas for your creativity, and most importantly, an incredibly delicious, shareable joy.
This is more than just a recipe; it’s an invitation to create your own kitchen moments. So don’t stress over perfection. Embrace the mess, play with the flavors, and share the results with someone special. I hope this recipe finds its way into your regular rotation and brings a little bit of Feastical magic to your table.
I can’t wait to see what you create! Tag me @Feastical so I can be part of your brunch journey.
Happy cooking!
Beau

Chicken Parmesan Sliders : Crispy, Cheesy, and Baked to Perfection
Chicken Parmesan Sliders: Your New Go-To Crowd Pleaser!
Hey friends, Beau here from Feastical! Let’s talk about one of life’s greatest simple pleasures: food that brings everyone together. You know the kind. The dish that makes eyes light up, the one that disappears from the platter faster than you can say “seconds?” For me, that magic dish is often a big, beautiful, cheesy, shareable bake. And today, we’re taking a beloved classic and turning it into the ultimate party hero: Chicken Parmesan Sliders.
Imagine this: perfectly crispy chicken tenders, nestled in soft, buttery slider buns, smothered in a rich, garlicky marinara sauce, and absolutely buried in a blanket of molten mozzarella and parmesan cheese. We’re talking all the soul-satisfying flavor of a full-blown, restaurant-style Chicken Parm, but in a fun, handheld, no-fuss format. These sliders are baked to golden-brown perfection, making them the undisputed MVP for game day spreads, potlucks, busy weeknights, or anytime you need to feed a hungry crew with a smile.
I’ve built this recipe to be your new kitchen best friend. It’s incredibly flexible, forgiving, and designed for maximum flavor with minimal stress. Whether you’re a seasoned pro who loves to fry your own chicken or someone who appreciates a brilliant shortcut (no judgment here!), this recipe adapts to you. So, preheat that oven, grab your favorite baking dish, and let’s create some cheesy, glorious magic together.
A Slider-Sized Trip Down Memory Lane
This recipe always takes me back to my first big football party I ever hosted. I was young, eager to impress, and maybe a little overly ambitious. I decided I was going to make homemade Chicken Parmesan for a dozen friends. Let’s just say the kitchen looked like a tomato sauce bomb had gone off, I was juggling multiple pans, and my guests were hovering hungrily while I frantically tried to plate everything at once.
It was in that beautiful, chaotic moment that I had a lightning bolt of an idea. What if I could capture all that flavor, but make it ahead of time and serve it in a way that was easy, communal, and fun? I grabbed a bag of slider rolls, layered everything casserole-style, and popped it in the oven. The result? A silent, smiling room of happy people, all digging into these warm, cheesy, perfectly portioned sliders. It was a total game-changer. That’s the spirit I’ve baked into this recipe—it’s not just about great food, it’s about creating more time and joy with the people you’re feeding.
Gathering Your Slider Squad: The Ingredients
Here’s the beautiful part: the ingredient list is straightforward and packed with opportunities to make it your own. This is your culinary playground!
- 24 Cooked Chicken Tenders: This is your main event! I love the flexibility here. You can absolutely make your own from scratch—just season, dredge in flour, egg, and panko, then pan-fry or bake until golden. But on a busy day? A high-quality bag of frozen, fully-cooked tenders (baked or air-fried according to the package) is a lifesaver. Chef’s Insight: Using pre-cooked chicken is the ultimate shortcut that cuts your active prep time down to almost nothing!
- 2 Cups Marinara Sauce: Choose a brand you genuinely love, because its flavor will shine through. Or, if you’re feeling fancy, use your favorite homemade recipe! Substitution Tip: If you’re out of marinara, a simple can of crushed tomatoes seasoned with a pinch of salt, dried basil, and a garlic clove simmered for 10 minutes works wonderfully.
- 2 Cups Shredded Mozzarella Cheese: The glue that holds our cheesy dreams together! I highly recommend shredding a block of low-moisture, whole-milk mozzarella yourself. It melts far more smoothly and doesn’t have the anti-caking agents that pre-shredded bags do. Chef’s Hack: For an extra flavor boost, mix in some of the parmesan right with the mozzarella!
- 24 Slider Rolls: The foundation. Hawaiian or brioche-style rolls are my top picks because their slight sweetness is a fantastic counterpoint to the savory, tangy sauce and cheese. They also get incredibly soft and pillowy when baked.
- ½ Cup Grated Parmesan Cheese: This is our secret weapon for a salty, umami punch. The nutty flavor of real Parmigiano-Reggiano makes a world of difference compared to the shelf-stable canisters.
- 4 Tbsp Melted Butter, 1 Minced Garlic Clove, 1 Tbsp Fresh Parsley: This trio is non-negotiable for the glorious, golden-brown, flavor-packed top crust. It’s the detail that makes people say, “Wow, this is next-level.”
- Fresh Basil or Spinach Leaves (Optional): I love tucking a few leaves in for a pop of color and a fresh, herbal note that cuts through the richness.
Let’s Build Some Slider Magic: Step-by-Step
Ready to assemble? This is where the fun really begins. Follow these steps, and you’ll be a slider master in no time.
- Preheat and Prep: Fire up your oven to 350°F (175°C). This is the perfect temperature for melting cheese and toasting buns without burning. Take your 9×13-inch baking dish and give it a quick spritz with cooking spray or line it with parchment paper. Chef’s Hack: Lining the dish isn’t just for easy cleanup; it also makes lifting the whole block of sliders out for slicing a total breeze!
- The Great Roll Slice: This is a game-changing trick! Take your package of 24 slider rolls and, keeping them all connected, slice the entire block in half horizontally. You’ll have one giant “sheet” of roll tops and one giant “sheet” of roll bottoms. Place the bottom half directly into your prepared baking dish. No wrestling with individual buns!
- Layer on the Goodness: Now, place one cooked chicken tender onto each roll bottom. They should fit snugly. Next, take your marinara sauce and spoon it generously over each piece of chicken. Don’t be shy! Then, unleash the cheese. Sprinkle the shredded mozzarella and parmesan evenly over everything, making sure to get some in every nook and cranny. If you’re using fresh basil or spinach, now’s the time to scatter those leaves over the cheese for a fresh, green layer.
- Top It Off & Butter Up: Gently place the top half of the rolls back on, creating a beautiful, cheesy sandwich. In a small bowl, whisk together the melted butter, minced garlic, and chopped parsley. Using a pastry brush, generously and lovingly brush this garlic butter mixture all over the top of the rolls. This is what gives them that irresistible, bakery-worthy golden sheen and incredible flavor.
- Bake to Perfection: Here’s the key to perfect sliders: cover the entire dish loosely with aluminum foil. This initial covered bake (about 15 minutes) allows the heat to penetrate, warm the filling through, and gently steam the rolls so they become incredibly soft. Then, remove the foil and bake for another 5-7 minutes, or until the cheese is spectacularly bubbly and the tops of the rolls are a perfect golden brown.
- The Finale: Slice and Serve! Carefully remove the dish from the oven. Let it rest for just 2-3 minutes—this makes slicing cleaner. Then, use a sharp knife to slice along the perforations between the rolls. Use a small spatula to lift them out, and watch them disappear!
How to Serve These Cheesy Wonders
Presentation is part of the fun! I love serving these sliders right in the baking dish they were cooked in—it’s rustic, inviting, and says “dig in!” For a casual gathering, just place the dish in the center of the table with a stack of napkins and let everyone help themselves.
If you want to fancy it up a bit for a party, arrange the individual sliders on a large wooden board or platter. I like to garnish the platter with a few extra sprigs of fresh basil and maybe a little bowl of warm marinara sauce for extra dipping. A side of a simple garlic aioli or a zesty Italian salad with a sharp vinaigrette is the perfect partner to balance out the richness of the sliders. They’re a complete meal all on their own, but they play wonderfully with others!
Make It Your Own: Delicious Recipe Variations
The beauty of this recipe is its adaptability. Don’t be afraid to get creative and tweak it to your heart’s content!
- The “Meatball Sub” Slider: Swap the chicken tenders for fully cooked, bite-sized meatballs! Use a toothpick to secure them if they’re a bit round.
- Spicy Arrabbiata Twist: Love a little heat? Use a spicy arrabbiata sauce instead of marinara, and mix some sliced pepperoncini or a sprinkle of red pepper flakes into the cheese layer.
- Pesto Lover’s Dream: Before adding the marinara, spread a thin layer of basil pesto directly onto the bottom bun halves. The combination of pesto, marinara, and cheese is absolutely divine.
- Veggie-Packed Power-Up: Want to sneak in some veggies? Sauté some sliced mushrooms, bell peppers, and onions and layer them under or over the chicken tender.
- Gluten-Free & Low-Carb Friendly: You can still enjoy the fun! Use your favorite gluten-free slider buns or, for a low-carb option, skip the bun and bake the chicken, sauce, and cheese layers in a dish, then scoop it up with veggie sticks or enjoy it with a fork.
Beau’s Chef’s Notes & Kitchen Stories
This recipe has been a living, evolving thing in my kitchen for years. I’ve learned that the best recipes are the ones that grow with you. One of my favorite “mistakes” was the time I ran out of mozzarella and had to use a blend of provolone and fontina. It was so good it’s now a regular variation in my house! The moral of the story? Don’t be afraid to improvise. Cooking is about joy, not perfection. These sliders have been there for last-minute potlucks, late-night study sessions with my niece, and countless Sunday football wins (and losses). They’re more than just a recipe; they’re a little edible piece of community.
Your Slider Questions, Answered!
Let’s tackle a few common questions to ensure your slider success.
Q: Can I make these sliders ahead of time?
A: Absolutely! You are a meal-prep genius. Assemble the entire dish right up to the point of baking (including the garlic butter on top), cover it tightly with foil, and refrigerate for up to 24 hours. When you’re ready, just pop it in the oven. You may need to add a few extra minutes to the baking time since it’s starting from cold.
Q: My slider buns got a bit soggy. How can I prevent that?
A: Great question! Sogginess usually comes from the sauce. A pro tip is to create a tiny “barrier” by spreading a very thin layer of softened butter or even a light schmear of cream cheese on the bottom bun halves before adding the chicken. This helps seal the bread and keep it sturdy.
Q: What’s the best way to reheat leftovers?
A: To maintain that crispy top, the oven or air fryer is your best friend. Reheat at 350°F for about 5-10 minutes, or until warm. The microwave will work in a pinch, but it will steam the buns and make them soft.
Q: Can I use a different cheese?
A: Of course! While mozzarella is classic for its meltiness, feel free to experiment. A combination of provolone, fontina, or even a little smoked gouda would be delicious. Just make sure whatever you use is a good melting cheese.

Chicken Parmesan Sliders : Crispy, Cheesy, and Baked to Perfection
Description
Hey friends, Beau here from Feastical! If you love the classic Chicken Parmesan but wish it could be handheld, fun, and easy to serve to a crowd, these sliders are your dream come true. Crispy chicken tenders, soft buttery slider buns, garlicky marinara, and a blanket of gooey mozzarella and parmesan cheese—they’re the ultimate comfort food in miniature. Perfect for game days, potlucks, or anytime you need a cheesy crowd-pleaser!
Ingredients
-
24 cooked chicken tenders (homemade or high-quality pre-cooked)
-
2 cups marinara sauce (store-bought or homemade)
-
2 cups shredded mozzarella cheese
-
½ cup grated parmesan cheese
-
24 slider rolls (Hawaiian or brioche recommended)
-
4 tbsp melted butter
-
1 clove garlic, minced
-
1 tbsp fresh parsley, chopped
-
Fresh basil or spinach leaves (optional, for garnish)
Instructions
Step 1: Preheat & Prep
Preheat oven to 350°F (175°C). Spray a 9×13-inch baking dish or line with parchment paper for easy cleanup.
Step 2: Slice Your Rolls
Slice the block of 24 slider rolls horizontally in one go, creating a bottom and top layer. Place the bottom layer in your baking dish.
Step 3: Layer the Goodness
-
Place a chicken tender on each roll bottom.
-
Spoon marinara sauce generously over the chicken.
-
Sprinkle mozzarella and parmesan evenly.
-
Optional: scatter basil or spinach leaves for a fresh note.
Step 4: Top & Butter
Place the top layer of rolls over the cheese. Mix melted butter, minced garlic, and parsley, then brush over the top layer.
Step 5: Bake to Perfection
-
Cover loosely with foil and bake 15 minutes.
-
Remove foil and bake an additional 5–7 minutes until tops are golden and cheese is bubbly.
Step 6: Slice & Serve
Let rest 2–3 minutes. Slice along the bun seams and serve straight from the dish or on a platter.
Notes
-
Make-Ahead: Assemble, cover with foil, and refrigerate up to 24 hours. Add extra bake time if cold.
-
Prevent Soggy Buns: Spread a thin layer of butter or cream cheese on bottom buns before adding chicken.
-
Reheating: Oven or air fryer at 350°F for 5–10 minutes preserves the golden top.
-
Cheese Swap: Provolone, fontina, or smoked gouda work beautifully.
Nutrition
- Calories: 280 Cal Per Serving
- Fat: 14 g
- Carbohydrates: 22 g
- Protein: 17 g
Nutritional Information (Approximate, Per Slider)
Let’s keep it real—this is a treat meant to be enjoyed! But I believe in transparency, so here’s a general breakdown. Remember, these values can vary based on the specific brands of ingredients you use (like the type of chicken tender or rolls).
- Calories: ~280
- Protein: 17g
- Carbohydrates: 22g
- Fat: 14g
To lighten it up a bit, you can use low-fat cheese, a leaner chicken tender option (like grilled), and whole-wheat slider buns. But sometimes, your soul just needs that full, cheesy, buttery experience, and that’s more than okay!
Final Thoughts from My Kitchen to Yours
Well, there you have it, my friends—my heart and soul poured into a pan of Chicken Parmesan Sliders. This recipe is a testament to what I truly believe: that the best food is meant to be shared, to be easy, and to bring a genuine moment of happiness to your table. It’s not about fancy techniques or hard-to-find ingredients; it’s about creating connection, one cheesy, delicious bite at a time.
I hope this recipe becomes a trusted favorite in your home, just like it is in mine. I’d love to hear how it turns out for you! Tag me on social @Feastical or drop a comment on the blog with your own twists and stories. Now, go forth and bake something Feastical!
With love and a full plate,
Beau
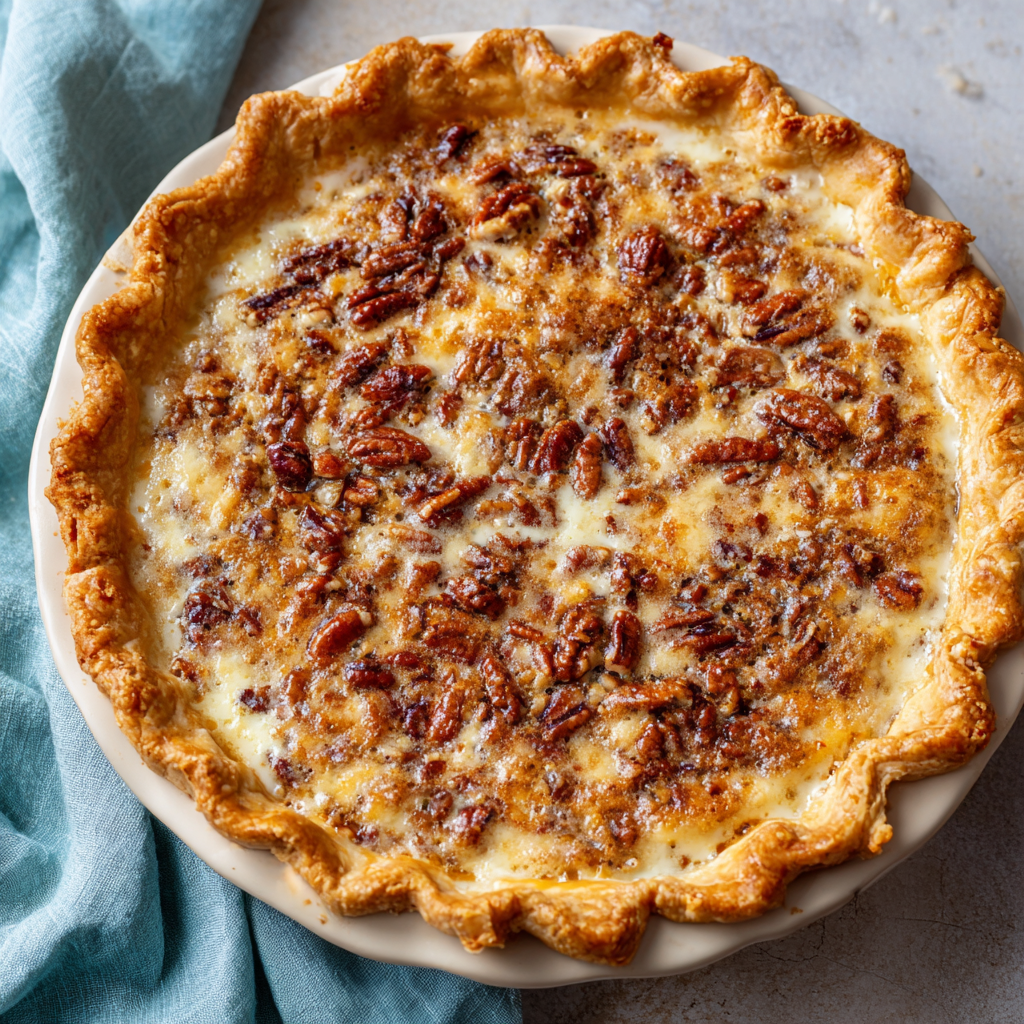
Buttermilk Pecan Pie : A Southern Classic with a Tangy Twist
Buttermilk Pecan Pie: Your New Favorite Slice of Sunshine
Hey friends, Beau here! Let’s talk about pie for a second. Not just any pie, but the kind of pie that makes you close your eyes after the first bite. The kind that sparks a little “mmm” of pure, unadulterated joy. You know the one. For me, that pie has always been a classic pecan. But a few years back, I stumbled upon a recipe that took my all-time favorite and made it even better. I’m talking about this glorious Buttermilk Pecan Pie.
Imagine this: the familiar, crunchy, caramel-toasted pecan topping you know and love, but underneath it? A secret weapon. A creamy, tangy, almost custard-like filling that cuts through the sweetness like a dream. This isn’t just a pecan pie; it’s a harmonious blend of two Southern legends—buttermilk pie and pecan pie—having a party in a flaky, golden crust.
If you’ve ever found traditional pecan pie a little too sweet, a little too dense, this is the answer to your prayers. The buttermilk works its magic, adding a subtle tang that balances every single note. It’s rich without being heavy, sophisticated without being complicated. It’s the pie that will have your friends and family asking, “What did you do to this? It’s incredible!” So, grab your favorite mixing bowl, and let’s make a pie that’s about to become a new tradition in your kitchen.
The Pie That Started It All
I’ll never forget the first time I tasted a buttermilk pecan pie. It wasn’t in a fancy restaurant or at a big city bakery. It was at a county fair in Georgia, tucked away in the home economics tent, surrounded by quilts and prize-winning jams. My grandma, a woman who believed all of life’s problems could be solved with a well-stocked pantry, dragged me over to the pie section.
“Beau,” she said, pointing to a modest, golden-brown pie with a perfectly cracked surface, “that one’s got a secret.” I was expecting a standard pecan, but one bite told a different story. It was lighter, brighter, with a flavor I couldn’t quite place. The baker, a lovely woman with a blue-ribbon pinned to her apron, just winked and said, “A little buttermilk never hurt nobody.” She was right. That pie was a revelation. It taught me that the best recipes often come from a simple, clever twist on a classic. It’s a lesson I carry with me in my kitchen every single day, and it’s the spirit I’m bringing to you with this recipe.
Gathering Your Pie-Making Posse (The Ingredients)
This recipe is beautifully simple, but every ingredient plays a starring role. Here’s what you’ll need and why it matters.
- 1 unbaked 9-inch pie crust – Homemade is fantastic if you have the time (my flaky butter crust is a reader favorite!), but a good-quality store-bought crust is a total lifesaver. No judgment here! The goal is pie, and we’re making it happen.
- 1 cup granulated sugar – This is our sweet foundation. It dissolves beautifully into the custard for that smooth, classic texture.
- ½ cup light brown sugar – Hello, molasses! Brown sugar brings in those warm, caramel notes that pair so perfectly with the pecans. It’s the cozy sweater of sugars.
- 3 large eggs – These are the backbone of our custard, providing structure and that beautiful, silky texture. Make sure they’re at room temperature for a smoother, more even mix.
- 1 cup buttermilk – The MVP! This is what makes the pie special. Its tanginess balances the sweetness and adds incredible moisture. Chef’s Tip: No buttermilk? No problem! Make a quick “sour milk” by adding 1 tablespoon of white vinegar or lemon juice to a liquid measuring cup, then filling it with whole milk to the 1-cup line. Let it sit for 5-10 minutes until it curdles slightly. Boom. DIY buttermilk.
- ½ cup unsalted butter, melted and cooled – This adds richness and flavor. We use unsalted so we can control the salt level ourselves. Let it cool slightly so it doesn’t scramble the eggs when you mix it in!
- 2 tablespoons all-purpose flour – Our stealthy thickening agent. It helps stabilize the custard so it sets up perfectly without being gummy.
- 1 teaspoon vanilla extract – The flavor enhancer. Use the real stuff if you can—it makes a world of difference.
- ¼ teaspoon salt – Don’t skip this! Salt is a flavor amplifier. It makes the sweet taste sweeter and the nutty taste nuttier.
- 1½ cups chopped pecans – The star of the show! I like to use a mix of chopped and a few halves for the top for a beautiful presentation. Toasting them beforehand is a next-level move for an even deeper, nuttier flavor.
Let’s Build Some Pie Magic: The Step-by-Step
Ready to create something delicious? Follow these steps, and you’ll be a pie hero in no time. I’ve sprinkled in my favorite chef hacks to make sure you succeed.
Step 1: Preheat and Prep
First things first, preheat your oven to a nice, steady 350°F (175°C). While it’s warming up, fit your pie crust into a 9-inch pie pan. If you’re using a store-bought crust, just press it in gently. If you’re going homemade, roll it out and crimp the edges with your fingers or a fork for a pretty finish. I like to keep my crust in the fridge until the very last second to keep it cold.
Step 2: The Filling Frenzy
Grab a large bowl—this is where the magic happens. Add both the granulated and brown sugars. Whisk them together to break up any lumps from the brown sugar. Now, crack in your three room-temperature eggs. Chef’s Hack: Room temp eggs incorporate much more easily, giving you a smoother custard. Whisk the eggs and sugars together until they’re just combined and look a little pale.
Now, pour in that glorious buttermilk, the cooled melted butter, and the vanilla. Whisk it all together. Finally, sprinkle in the flour and salt. Whisk one last time until the whole mixture is smooth, silky, and homogenous. Don’t over-mix! We’re not building gluten here; we’re just making friends.
Step 3: Bring in the Crunch
Time for the pecans! Pour your chopped pecans (toasted or not, your call!) into the filling. Grab a spatula and gently fold them in. Folding is just a gentle, turning motion that ensures everything is combined without deflating our beautiful liquid. Once they’re evenly distributed, carefully pour the entire filling into your waiting pie shell.
Step 4: The Big Bake
Place your pie on a baking sheet—this is a pro-move that catches any potential drips and makes it easier to move in and out of the oven. Slide it into the center of your preheated oven and set your timer for 45 minutes.
Now, here’s the test of patience. The pie is done when the edges are set, but the center still has a slight, gentle jiggle—like Jell-O. If the crust starts getting too dark too quickly, just tent the edges with a little strip of aluminum foil. The top should be a gorgeous, deep golden brown. This usually takes 45-50 minutes, but trust your eyes (and that jiggle test) more than the timer.
Step 5: The Cruelest Wait of All
I know, I know. The smell is intoxicating, and you want to dive right in. But you must let this pie cool completely. I mean it! This is non-negotiable. The custard needs time to set up as it cools. If you cut into it warm, it’ll be a soupy mess. Let it cool on a wire rack for at least 3-4 hours, or even better, overnight. I promise, the wait is worth it.
How to Serve This Southern Stunner
Once your pie has fully set, it’s showtime! Here’s how to make it a truly unforgettable dessert experience.
Slice it with a sharp, thin-bladed knife, wiping the blade clean between cuts for perfect, clean slices. This pie is magnificent all on its own, but a few accompaniments can take it over the top. A dollop of freshly whipped cream is my go-to—the airy lightness is the perfect contrast to the rich, dense pie. For a real indulgence, a scoop of vanilla bean ice cream melting into the creamy custard is pure heaven. And if you’re feeling extra, a drizzle of warm bourbon caramel sauce never hurt anybody. Serve it up on your prettiest plate, and get ready for the compliments to roll in.
Make It Your Own: Delicious Recipe Variations
This recipe is a fantastic canvas for your creativity. Here are a few of my favorite ways to mix it up.
- The Chocolate Lover’s Dream: Before you pour in the filling, sprinkle ½ cup of semi-sweet chocolate chips onto the bottom of the pie crust. The chocolate will melt into the custard as it bakes, creating a decadent chocolate-pecan twist.
- Bourbon-Spiked Bliss: Add two tablespoons of good-quality bourbon to the filling along with the buttermilk. It adds a warm, oaky depth that is just incredible with the pecans.
- Toasty & Deep: Take an extra five minutes to toast your pecans in a dry skillet over medium heat until fragrant before chopping and adding them. It unlocks a whole new level of nutty flavor.
- Gluten-Free Friendly: This is an easy one! Simply use a 1:1 gluten-free flour blend in place of the all-purpose flour and ensure your pie crust is gluten-free. The structure works perfectly.
- Coconut Twist: For a tropical vibe, reduce the pecans to 1 cup and add ½ cup of toasted, unsweetened coconut flakes to the filling.
Beau’s Kitchen Confidential
This recipe has evolved so much in my kitchen over the years. The first time I made it, I was so nervous about the custard setting that I overbaked it. Let’s just say it was…firm. But that’s how you learn! The jiggle test is your best friend. I’ve also learned that using a deep-dish pie plate is a great idea if you have one—it gives you a little extra insurance against bubbling over. And my funniest kitchen story with this pie? I once accidentally used salted butter and forgot to reduce the added salt. Let’s just call it the “Salted Caramel Pecan Surprise.” It was…unique. My dog was the only one who finished his slice. Learn from my mistakes, folks!
Your Pie Questions, Answered!
Q: My filling is soupy after cooling. What happened?
A: This usually means the pie needed a bit more time in the oven. Remember, we’re looking for a set edge and a *slight* jiggle in the center, not a big wave. If it happens, don’t despair! It will still taste amazing—just serve it in a bowl with a spoon and call it a “buttermilk pecan pudding.” Problem solved.
Q: Can I make this pie ahead of time?
A: Absolutely! This pie is a fantastic make-ahead dessert. Bake it, let it cool completely, and then cover it tightly with plastic wrap or foil. It will keep beautifully at room temperature for a day, or in the fridge for up to 3 days. The flavors actually meld and get even better!
Q: Why did my crust get soggy?
A: A soggy bottom can happen if the filling is very wet. To prevent this, you can blind-bake (pre-bake) your crust for about 10 minutes before adding the filling. Just prick the bottom with a fork, line it with parchment and pie weights or dried beans, and bake at 375°F until lightly golden. Let it cool slightly before adding the filling.
Q: Can I use a different kind of nut?
A: Of course! Walnuts would be a delicious and classic substitute. For a different flavor profile, try using toasted hazelnuts or macadamia nuts.

Buttermilk Pecan Pie : A Southern Classic with a Tangy Twist
Description
Hey friends, Beau here! If you love pecan pie but sometimes find it too sweet or dense, this Buttermilk Pecan Pie is about to change your life. Picture the crunchy, caramelized pecans you adore, with a creamy, tangy custard underneath that balances the sweetness perfectly. It’s like a Southern love story between pecan pie and buttermilk pie—flaky, rich, and unforgettable.
Ingredients
Pie Crust & Filling:
-
1 unbaked 9-inch pie crust (homemade or store-bought)
-
1 cup granulated sugar
-
½ cup light brown sugar
-
3 large eggs (room temperature)
-
1 cup buttermilk (or homemade with 1 tbsp vinegar/lemon juice + milk)
-
½ cup unsalted butter, melted and cooled
-
2 tablespoons all-purpose flour
-
1 teaspoon vanilla extract
-
¼ teaspoon salt
-
1½ cups chopped pecans (toasted for extra flavor, optional)
Instructions
Step 1: Preheat and Prep
Preheat oven to 350°F (175°C). Fit your pie crust into a 9-inch pie pan and keep it cold until ready.
Step 2: Make the Filling
-
Whisk together granulated sugar and brown sugar.
-
Add eggs and whisk until pale and smooth.
-
Stir in buttermilk, cooled butter, and vanilla.
-
Sprinkle in flour and salt; whisk until homogenous.
-
Fold in pecans gently.
Step 3: Assemble and Bake
Pour the filling into the prepared crust. Place on a baking sheet to catch drips. Bake for 45–50 minutes until edges are set and the center has a slight jiggle. Tent crust edges with foil if browning too fast.
Step 4: Cool Completely
Cool on a wire rack for at least 3–4 hours, preferably overnight. The custard will set fully, giving you perfect slices.
Notes
-
Soupy Filling: Likely underbaked. The edges should be set with a slight jiggle in the center.
-
Make-Ahead: Pie can be baked, cooled, and stored covered at room temp (1 day) or in the fridge (up to 3 days).
-
Soggy Crust: Blind-bake crust for 10 minutes before adding filling.
-
Nut Substitutes: Walnuts, hazelnuts, or macadamias work beautifully.
Nutrition
- Calories: 420 Cal Per Serving
- Fat: 24 g
- Carbohydrates: 48 g
Nutritional Information (Because We’re Curious!)
Okay, let’s be real—this is a celebratory dessert, a slice of pure joy. But I know some of you like to know what’s in your food, so here’s a general breakdown per slice (based on 8 slices). Remember, these are estimates and can vary based on your specific ingredients.
Calories: ~420 | Fat: 24g | Carbohydrates: 48g | Sugar: 34g | Protein: 5g
The pecans and eggs provide a good source of protein and healthy fats, while the buttermilk adds a dose of calcium. The main source of calories is from the sugars and fats, which is what makes it such a treat! Enjoy it mindfully as part of a balanced diet, and savor every single bite.
One Last Slice of Wisdom
And there you have it, my friends—my absolute love letter to Buttermilk Pecan Pie. This recipe is more than just a list of ingredients and steps; it’s an invitation to create a moment of connection and pure comfort. It’s the pie you bring to a potluck that disappears first. It’s the dessert you make on a rainy Sunday that fills the whole house with warmth and anticipation.
I hope this recipe brings as much happiness to your kitchen as it has to mine. Don’t be afraid to put your own spin on it. That’s what cooking is all about. Now, I’d love to hear from you! Did you add the bourbon? Try the chocolate chips? Tag me on social @Feastical with a photo of your beautiful creation. Happy baking!
Final Thoughts: A Slice of Sunny Tradition
So, there you have it—my absolute love letter to Buttermilk Pecan Pie. This recipe is more than just a list of ingredients; it’s an invitation to create a moment of pure, unadulterated comfort. It’s the pie you bring to the potluck that disappears first, the dessert you make on a rainy Sunday that fills your home with warmth and the promise of something wonderful.
I hope this recipe finds its way into your kitchen and becomes a new tradition, just as it did for me in that home economics tent. Don’t be afraid to make it your own. That’s what cooking is all about. Now, I’d love to hear from you! Did you add the bourbon? Try the chocolate chips? Tag me on social @Feastical with a photo of your beautiful creation.
Happy baking!
With a full heart and an even fuller plate,
Beau

Overnight Crockpot Christmas Breakfast Casserole : Cheesy, Hearty & Stress-Free
Overnight Crockpot Christmas Breakfast Casserole – Cheesy, Hearty & Stress-Free
Wake Up to the Smell of Christmas Morning Magic
Hey friends, Beau here from Feastical! Let’s paint a picture, shall we? It’s Christmas morning. The tree is twinkling, there’s a gentle quietness in the air, and from the kitchen, the most incredible aroma is starting to drift through the house. It’s the smell of savory sausage, melted cheese, and cozy, comforting herbs. But here’s the best part: you’re still in your pajamas, sipping your first cup of coffee, completely relaxed. Why? Because breakfast has been magically cooking itself all night long.
That, my friends, is the pure, unadulterated joy of this Overnight Crockpot Christmas Breakfast Casserole. This isn’t just a recipe; it’s your ticket to a stress-free, delicious, and memorable holiday morning. We’re talking layers of fluffy eggs, crispy hash browns, perfectly seasoned sausage, and a double dose of gooey cheese, all slow-cooked to perfection. I’ve even tossed in a couple of my secret weapons—smoky paprika and buttery croissant pieces—to take it from great to absolutely “can-I-get-the-recipe?” legendary. So, let’s ditch the stress and embrace a morning where the only thing you have to do is scoop, serve, and savor the moment.
The Christmas I Almost Burned the Bacon (And Learned a Better Way)
I’ll never forget the Christmas of, oh, let’s call it ‘The Great Bacon Incident.’ I was determined to host a massive brunch for my family. I had skillets sizzling, the oven beeping, and toast popping—all while trying to open presents and be present. Long story short, I got distracted by a particularly epic gift-wrapping fail from my nephew, and let’s just say the bacon turned into charcoal briquettes, setting off the smoke alarm in a glorious Christmas symphony. The kitchen was a war zone, and I was a frazzled mess.
That was the year I swore off complicated morning recipes. I started experimenting with my slow cooker, dreaming of a single dish that could do it all. After a few, let’s say, “interesting” texture experiments (we don’t talk about the soggy bread phase), I landed on this beautiful, layered masterpiece. Now, Christmas morning is peaceful. I get to be part of the magic, not a slave to the stove. This casserole is my gift to you—so you can have a flawless, feel-good feast without any of the fuss.
Gather Your Ingredients: The Dream Team for a Hearty Breakfast
Here’s your shopping list for a truly epic breakfast that feeds a crowd. Don’t be intimidated by the quantities; this is a double-batch beauty designed to keep everyone full and happy until the big holiday dinner!
- 24 eggs: The superstar protein that fluffs up and holds everything together. They create that beautiful, quiche-like texture. For a richer taste, I sometimes use half whole milk and half heavy cream.
- 2 cups whole milk: This is key for a creamy, not rubbery, egg base. The fat content in whole milk makes all the difference. If you’re in a pinch, 2% works, but avoid skim.
- 4 lbs frozen hash browns: The hearty foundation! I use the classic shredded kind straight from the freezer—no need to thaw. They soak up the egg mixture and get perfectly tender.
- 2 lbs breakfast sausage: I love the savory, herby flavor of classic breakfast sausage. You can use mild for the kids or spicy to give it a kick! Make sure to brown and crumble it well before adding.
- 1 cup diced onions & 1 cup diced bell peppers (red and green): The “Holy Trinity” of flavor and color! The peppers add a sweet crunch and a festive red-and-green vibe. You can buy them pre-diced to save time.
- 2 cups shredded cheddar cheese & 2 cups shredded pepper jack cheese: The glorious, melty glue! Cheddar brings that classic comfort flavor, while pepper jack adds a subtle, welcome heat. Buy blocks and shred them yourself for the best melt—pre-shredded cheese has anti-caking agents.
- 1½ teaspoons kosher salt, 1 teaspoon black pepper: Seasoning superheroes! Kosher salt is less salty by volume than table salt, so adjust if you’re substituting.
- 1 teaspoon smoked paprika (our optional twist): My secret weapon! It doesn’t add heat, just a deep, smoky aroma that makes the whole dish smell and taste incredible.
- 1–2 large croissants, torn into pieces (our optional twist for texture): This is a Feastical favorite! The buttery, flaky croissant pieces bake up into golden, pillowy pockets that are a delightful surprise. It’s a next-level upgrade from traditional bread.
- Butter or non-stick spray: Don’t skip greasing the pot! This ensures your beautiful casserole slides out in perfect slices.
Let’s Build This Masterpiece: Your Stress-Free Steps
This is where the magic happens, and it couldn’t be easier. We’re building layers of flavor that will meld together into breakfast perfection while you catch some Z’s.
- Prep the Crockpot: First things first, take a generous scoop of butter or a good spritz of non-stick spray and grease the entire inside of your 6-8 quart slow cooker. Get the sides nice and coated, too. This is your insurance policy for easy serving later! Chef’s Hack: Using softened butter and a paper towel gives you the most control and ensures every nook is covered.
- Layer the Casserole: Now for the fun, assembly-line part! We’re creating two beautiful layers. Start with half of the frozen hash browns, spreading them into an even layer at the bottom of the crock. Next, sprinkle half of the cooked sausage, diced onions, bell peppers, and those lovely torn croissant pieces. Finally, top this layer with half of your cheddar and pepper jack cheeses. Now, take a deep breath and repeat the entire process: the rest of the hash browns, sausage, veggies, croissants, and cheese. You’ve just built a flavor skyscraper!
- Make the Egg Mixture: Grab your largest mixing bowl—I’m talking the one you use for Thanksgiving stuffing. Crack in all 24 eggs. Add the milk, kosher salt, black pepper, and that magical smoked paprika. Now, whisk it! Whisk until the yolks and whites are completely unified and the mixture is a pale, uniform yellow. You want to incorporate some air to help with the fluff factor. Chef’s Hack: For an ultra-silky egg mixture, you can whisk this all together in a blender for about 30 seconds.
- Pour and Settle: Slowly and evenly, pour the egg mixture over the layered ingredients in the crockpot. It might pool at the top, but don’t worry. Take a fork and gently poke around the layers to help the egg mixture seep down into every cheesy, sausage-y crevice. This ensures every single bite is custardy and delicious.
- Cook Overnight: Pop the lid on your crockpot. This is the “set-it-and-forget-it” moment! You have two options here. For the best, most gentle cooking, set it to LOW for 8 hours. This is my preferred method. If you’re getting a later start, you can cook it on HIGH for 4 hours. The casserole is done when the eggs are completely set in the center, and the edges are golden brown. Your house will smell absolutely heavenly when you wake up.
Dishing Up the Holiday Goodness
The moment of truth! When you lift that lid, you’ll be greeted with a beautifully puffed-up, golden-brown, and fragrant casserole. I like to use a large serving spoon or a small spatula to scoop out hearty portions directly onto plates or into shallow bowls.
Now, let’s talk toppings! This casserole is a fantastic canvas. A dollop of cool sour cream or Greek yogurt is fantastic against the warm, savory flavors. A few dashes of your favorite hot sauce (I’m a Cholula guy myself) will wake everything up. For a fresh, colorful touch, a sprinkle of chopped chives or fresh parsley adds a beautiful finish. And for my fellow avocado lovers, sliced creamy avocado on the side is a dream. Serve it with a fresh fruit salad or a few extra croissants on the side, and you have a holiday feast that looks as good as it tastes.
Make It Your Own: Delicious Twists & Swaps
One of the best things about this recipe is its flexibility. Want to mix it up or cater to dietary needs? Go for it! Here are a few of my favorite variations:
- Vegetarian Delight: Simply swap the breakfast sausage for a plant-based sausage crumble or sautéed sliced mushrooms and spinach (just be sure to wilt and drain the spinach well first).
- “Everything Bagel” Upgrade: Stir two tablespoons of everything bagel seasoning into the egg mixture. Trust me, the onion, garlic, and sesame flavors are a game-changer.
- Southwest Fiesta: Use spicy chorizo instead of breakfast sausage, swap the peppers for a can of drained green chiles, and use a Monterey Jack and pepper jack cheese blend. Serve with salsa and cilantro!
- Gluten-Free Friendly: This recipe is naturally gluten-free if you ensure your sausage and hash browns are certified GF. Just omit the croissant pieces, or replace them with a gluten-free bread option.
- Ham & Swiss Classic: Got leftover holiday ham? Use 2 lbs of diced ham instead of sausage and swap the cheeses for 4 cups of shredded Swiss or Gruyère. It’s like a Crockpot Croque Madame!
Beau’s Kitchen Corner: A Few Parting Thoughts
Over the years, this recipe has become a non-negotiable part of my holiday tradition. It’s evolved from a simple “eggs and potatoes” dish to this loaded, celebratory feast. The croissant addition was a happy accident—I had some stale ones lying around and decided to toss them in, and now I’ll never go back! The key takeaway is to not stress. This casserole is forgiving. Did you forget the peppers? No big deal. Only have mozzarella cheese? It’ll still be delicious. The goal is togetherness and a full belly, not perfection. Some of my best kitchen memories come from the “imperfect” dishes, shared with loved ones.
Your Questions, Answered!
I’ve gotten a lot of questions about this casserole over the years. Here are the most common ones to ensure your success!
- Q: Can I prepare this casserole ahead of time and just start the crockpot before bed?
A: Absolutely! This is a fantastic time-saver. Assemble the entire casserole—layers and egg mixture—in the greased crockpot insert, cover it tightly with plastic wrap, and refrigerate for up to 24 hours. When you’re ready, take the insert out of the fridge, let it sit on the counter for 20-30 minutes to take the chill off, then place it in the base and start cooking. You may need to add 15-30 minutes to the cooking time since it’s starting cold. - Q: My casserole is a bit watery in the middle. What happened?
A: This usually means it needed a bit more time. The frozen vegetables and hash browns can release liquid. Just pop the lid back on and give it another 30-60 minutes on HIGH. Also, make sure your sausage is well-cooked and drained of excess grease before adding it to the layers. - Q: Can I make this in the oven instead?
A: You can! Assemble the casserole in a well-greased 9×13 inch baking dish (you may need two). Cover with foil and bake at 350°F (175°C) for about 45-60 minutes, then uncover and bake for another 10-15 until golden and set. The slow cooker gives it a unique, custardy texture, but the oven method works great too! - Q: I don’t have a 6-quart crockpot. Can I use a smaller one?
A: I don’t recommend it for this double batch. The casserole puffs up as it cooks, and you risk it overflowing or cooking unevenly. If you must use a smaller pot, halve the recipe.

Overnight Crockpot Christmas Breakfast Casserole : Cheesy, Hearty & Stress-Free
Description
This recipe is a true one-pot wonder that cooks while you sleep. Layers of fluffy eggs, crispy potatoes, savory sausage, and melted cheese come together into a cozy, crowd-pleasing breakfast that’ll have everyone asking for seconds. So plug in that slow cooker, set it before bed, and wake up to pure holiday happiness.
Ingredients
For the Casserole:
-
24 large eggs
-
2 cups whole milk (for richness)
-
4 lbs frozen hash browns (shredded style, unthawed)
-
2 lbs breakfast sausage, browned and crumbled
-
1 cup diced onions
-
1 cup diced red and green bell peppers
-
2 cups shredded cheddar cheese
-
2 cups shredded pepper jack cheese
-
1½ tsp kosher salt
-
1 tsp black pepper
-
1 tsp smoked paprika (optional but magical)
-
1–2 large croissants, torn into pieces (optional texture boost)
-
Butter or non-stick spray for greasing
Instructions
-
Prep the Slow Cooker:
Generously grease the inside of a 6–8 quart crockpot with butter or non-stick spray. Get every corner—this ensures easy cleanup later! -
Layer the Goodness:
-
Start with half the frozen hash browns.
-
Add half the sausage, onions, peppers, croissant pieces, and cheese.
-
Repeat the layers with the remaining ingredients.
-
-
Whisk the Egg Mixture:
In a large bowl, whisk together the eggs, milk, salt, pepper, and smoked paprika until smooth and airy. Pour evenly over the layered ingredients, letting it soak through the layers. -
Cook Overnight:
-
Cover and cook on LOW for 8 hours (perfect for overnight) or HIGH for 4 hours.
-
It’s ready when the eggs are set and the top is golden brown.
-
-
Serve & Enjoy:
Scoop generous portions into bowls, top with sour cream, chives, or a dash of hot sauce, and serve with fresh fruit or toast.
Notes
-
Make-Ahead: Assemble everything the night before, refrigerate, then start cooking before bed.
-
Cheese Matters: Shred your own cheese—it melts creamier than pre-shredded.
-
No Mushy Veggies: If using fresh peppers or mushrooms, lightly sauté them first to remove excess moisture.
-
Holiday Hero Move: Place a clean kitchen towel under the lid while cooking to absorb condensation and prevent soggy spots.
Nutrition
- Calories: 370 Cal Per Serving
- Fat: 24 g
- Carbohydrates: ~15 g
- Fiber: ~2 g
- Protein: ~26 g
A Quick Nutritional Glance
Now, let’s be real—this is a hearty, celebratory dish meant for a special morning! It’s packed with protein to keep you energized through all the gift-unwrapping chaos. Here’s a general breakdown per serving (assuming 16 servings), but remember, this can vary based on the specific brands of ingredients you use, and especially if you make any of the tasty swaps I suggested. The high protein content (~26g) from the eggs and sausage is fantastic for staying full and satisfied. The carbs come primarily from the hash browns, providing that classic comfort food energy. As with all good things, enjoy it as part of a balanced holiday spread!
Your Stress-Free Christmas Morning Awaits
And there you have it, my friends—your ultimate guide to a Christmas morning where you’re a guest at your own party. This Overnight Crockpot Christmas Breakfast Casserole is more than just a recipe; it’s a strategy for joy. It’s the promise of more time spent watching your kids’ faces light up, more sips of coffee actually enjoyed while hot, and more memories made around the table.
So this holiday, give yourself the gift of a relaxed morning. Whip up this easy, cheesy, soul-satisfying casserole, and wake up to the undeniable smell of Christmas magic. From my kitchen at Feastical to yours, I wish you the warmest, most delicious holiday season. Now, go be the hero of your holiday breakfast!
Final Thoughts
This Overnight Crockpot Christmas Breakfast Casserole is your secret weapon for a flawless, festive morning. It’s the ultimate trade: just a few minutes of prep for the priceless gift of time. So, this holiday, give yourself the grace to be present. Whip up this hearty, cheesy masterpiece, and wake up not to stress, but to the incredible aroma of a meal that’s already made. You deserve a Christmas morning filled with magic, not mess.
From my family at Feastical to yours, Merry Christmas and happy cooking!
— Beau
Happy cooking,
Beau

Sausage Gravy Monkey Bread : The Ultimate Pull-Apart Breakfast Bake
Sausage Gravy Monkey Bread – The Ultimate Pull-Apart Breakfast Bake
Forget Everything You Thought You Knew About Monkey Bread
Hey friends, Beau here! Let me paint you a picture. It’s a lazy Sunday morning. The sun is streaming through the kitchen window, and there’s a specific kind of hunger in the air. You know the one—it’s not for a dainty pastry or a simple bowl of cereal. It’s a hunger for something savory, cheesy, and totally over-the-top. A hunger that demands flaky biscuits, rich sausage gravy, and pockets of melted cheddar all in one glorious, shareable bite.
Well, my foodie friends, I’ve got the answer to that very specific, very real craving. Welcome to the world of Sausage Gravy Monkey Bread.
This isn’t your grandma’s cinnamon-sugar monkey bread (though I love that, too!). This is a revolutionary breakfast bake that takes everything we adore about a hearty, soul-warming Southern breakfast and transforms it into a golden, pull-apart masterpiece. Imagine: tender biscuit pieces, each one coated in a peppery, homemade sausage gravy, layered with sharp cheddar cheese, and baked until the top is crisp and the inside is a steamy, cheesy paradise. It’s the star of the brunch table, the hero of holiday mornings, and the easiest way I know to feed a hungry crowd with a whole lot of love and zero stress. So, tie on your favorite apron, and let’s make some magic.
The Brunch That Started It All
This recipe was born out of a happy accident, as the best ones often are. A few years back, I was hosting my entire family for a post-Christmas brunch. I had grand plans for made-to-order omelets and a towering stack of pancakes. But, as life would have it, I slept through my alarm. Panic started to set in as I heard the coffee machine humming and the cheerful chaos of my family downstairs.
I stared into the fridge, my eyes landing on a roll of breakfast sausage, a tube of biscuits, and a block of cheddar. In a moment of pure, kitchen-sink inspiration, I thought, “What if I combined the sausage gravy and the biscuits… but in one pan?” I started tearing biscuits, whipping up a quick gravy, and layering it all in my trusty Bundt pan. Forty minutes later, I inverted this golden, bubbling beauty onto a platter. The silence that fell over the room as everyone pulled apart their first piece was followed by a chorus of “Oh, wow.” It was an instant classic, and it’s been a Feastical family favorite ever since.
Gathering Your Cast of Characters
One of the best things about this recipe is its beautiful simplicity. You probably have most of this in your kitchen right now! Here’s the lineup:
- 2 cans (16 oz each) refrigerated biscuits: The humble foundation of our masterpiece. I like the flaky layers kind for extra texture, but any classic buttermilk biscuit will work beautifully. Chef’s Insight: Don’t stress about making them perfect! The rustic, torn pieces create all the right nooks and crannies for the gravy to pool.
- 1 lb breakfast sausage: This is your flavor engine! I prefer a sage-forward pork sausage for that classic taste, but feel free to use spicy, maple, or even a chicken/turkey sausage. Substitution Tip: Going meat-free? A plant-based ground sausage works amazingly well here.
- ¼ cup all-purpose flour: Our trusty thickener. This is what will transform our milk and sausage drippings into a luscious gravy.
- 2 cups whole milk: For the richest, creamiest gravy, whole milk is my go-to. Substitution Tip: 2% milk will work in a pinch, but avoid skim milk as the gravy won’t have the same body or richness.
- Salt and black pepper to taste: Don’t be shy with the pepper! A generous amount of freshly cracked black pepper is the soul of a great sausage gravy.
- 1 teaspoon garlic powder (optional): I’m a garlic lover, so I always add this for a little extra savory depth. It’s totally optional, but highly recommended.
- 1½ cups shredded cheddar cheese: The glorious, gooey glue! I like to shred a block of sharp cheddar myself for the best melt. Chef’s Insight: Pre-shredded bags often have anti-caking agents that can make the cheese a bit grainy when melted.
- 2 tablespoons melted butter (for brushing): The final touch! This gives the top that irresistible, golden-brown, buttery crust.
Let’s Build This Beautiful Beast: A Step-by-Step Guide
Ready to get your hands a little dirty? This process is as fun as it is delicious. Follow these steps, and you’ll be a monkey bread master in no time.
Step 1: Preheat and Prep
First things first, get that oven preheated to a cozy 350°F (175°C). This is the perfect temperature to cook the biscuits all the way through without burning the outside. While it’s warming up, grab your Bundt pan and give it a very generous coating of cooking spray or butter. I’m talking into every nook and cranny! This is non-negotiable for a clean release later. Chef’s Hack: If you’re nervous about sticking, you can even sprinkle a light dusting of flour over the greased pan after the spray.
Step 2: Craft the Perfect Sausage Gravy
Now, for the heart of the dish. Grab a large skillet and cook your sausage over medium heat. Use your spatula to break it up into small, bite-sized crumbles. Once it’s fully browned and no longer pink, it’s time to work our gravy magic. Do not drain the drippings! That flavorful fat is liquid gold. Sprinkle the ¼ cup of flour directly over the cooked sausage and stir constantly for about a minute. This cooks out the raw flour taste and creates our “roux.” Now, slowly pour in the 2 cups of milk, whisking constantly as you go. Keep whisking! This prevents lumps and encourages a silky-smooth gravy. Let it bubble gently until it thickens nicely—this should take about 3-5 minutes. It should coat the back of a spoon. Now, season it boldly with salt and a hearty dose of black pepper, plus that garlic powder if you’re using it. Remove it from the heat.
Step 3: Prep the Biscuit Pieces
Open those cans of biscuits (the *pop* is so satisfying, right?). Using kitchen shears or a sharp knife, cut each biscuit into quarters. They don’t have to be perfect! Irregular pieces mean more texture.
Step 4: The Grand Assembly
This is where the fun really begins. We’re building flavor layers! Start by scattering half of your biscuit pieces evenly in the bottom of your prepared Bundt pan. Now, spoon half of your glorious sausage gravy over the biscuit layer. Don’t worry about covering every single piece perfectly; it will spread as it bakes. Next, sprinkle half of your shredded cheddar cheese over the gravy. Repeat the layers one more time: remaining biscuits, remaining gravy, and finally, the last of the cheese. You’ve just built a tower of breakfast dreams.
Step 5: Bake to Golden Perfection
Take your melted butter and gently brush it over the top layer. This is the secret to that beautiful, bronzed finish. Slide the pan into your preheated oven and bake for 35-40 minutes. You’re looking for a deep golden-brown top and bubbly cheese around the edges. Your kitchen is going to smell absolutely incredible.
Step 6: The All-Important Rest
This might be the hardest step, but it’s crucial! When you pull it out of the oven, let it rest for a full 10 minutes on a wire rack. This allows the molten cheese and gravy to set just enough so that when you invert it, it holds its majestic shape and doesn’t collapse into a delicious puddle (which, let’s be honest, would still taste amazing). After 10 minutes, place a large plate or platter over the Bundt pan and, with confidence (and maybe a kitchen towel for grip), flip it over. Gently lift the pan away to reveal your masterpiece.
How to Serve This Pull-Apart Wonder
Presentation is part of the fun! I love placing the whole monkey bread in the center of the table on a big wooden board or a vibrant platter. Let everyone gather ’round and pull apart their own pieces—it’s interactive, it’s communal, and it’s guaranteed to bring smiles.
While this dish is a complete meal in itself, I love serving it with a few simple sides to balance out the richness. A big bowl of fresh fruit salad adds a sweet, bright contrast. A platter of scrambled or fried eggs turns it into the ultimate protein-packed feast. And if you really want to lean into the Southern comfort vibe, you can’t go wrong with a side of sautéed greens like kale or collards. And of course, plenty of hot coffee or freshly squeezed orange juice is mandatory!
Make It Your Own: Delicious Twists & Swaps
The beauty of this recipe is its versatility. Once you’ve mastered the classic, feel free to get creative!
- The “Everything” Bagel: Swap the cheddar for a mix of shredded mozzarella and everything bagel seasoning sprinkled between the layers. Incredible!
- Green Chile & Pepper Jack: For a Southwest kick, mix a 4-oz can of diced green chiles into the gravy and use pepper jack cheese instead of cheddar.
- Chicken & Biscuits Remix: Use cooked, shredded rotisserie chicken instead of sausage. Add a teaspoon of poultry seasoning to the gravy for that classic chicken pot pie flavor.
- Make-Ahead Magic: Assemble the entire monkey bread the night before, cover tightly with plastic wrap, and refrigerate. In the morning, let it sit on the counter while the oven preheats, then bake as directed. You may need to add 5-10 minutes to the baking time.
- Gluten-Free & Dairy-Friendly: Use your favorite gluten-free biscuit dough (many brands now offer canned versions), a 1:1 gluten-free flour blend for the gravy, unsweetened almond or oat milk, and dairy-free cheese and butter. It works like a charm!
Beau’s Kitchen Notebook
This recipe has evolved so much since that first panicked morning. I’ve learned that a heavy, high-quality Bundt pan makes a world of difference in even baking. I’ve also been known to sneak in a handful of finely chopped onions into the sausage as it browns for an extra layer of flavor. One time, I accidentally used a tube of cinnamon roll dough instead of biscuits (don’t ask, it was a pre-coffee mistake!), and while it was… interesting, it confirmed that savory is definitely the way to go here. Trust me on that one!
Your Questions, Answered!
Q: My monkey bread stuck to the pan! What did I do wrong?
A: Oh, I’ve been there! The two most common culprits are not greasing the pan enough or not letting it rest before inverting. Be *generous* with that cooking spray, and have patience during that 10-minute rest. It makes all the difference.
Q: Can I use frozen biscuits?
A: You can, but they need to be fully thawed first. Otherwise, the frozen dough won’t cook through in the center, and you’ll end up with a cold, doughy middle. Thaw them in the fridge overnight for best results.
Q: The middle of my bread seems doughy. How can I fix this?
A: This usually means the oven was a bit too hot, causing the outside to brown before the inside cooked. Next time, try baking at 325°F for a little longer. If it’s happening right now, you can cover the top with foil to prevent further browning and return it to the oven for another 5-10 minutes.
Q: Can I make this in a different pan?
A: Absolutely! A 9×13-inch baking dish works wonderfully. You’ll just lose the classic “pull-apart” ring shape, but the flavor will be identical. Just layer everything in and bake as directed.
Let’s Talk Nourishment
Now, I’m all about balance. Life is too short not to enjoy a decadent, cheesy, comfort-food bake like this Sausage Gravy Monkey Bread. It’s a celebration dish, perfect for weekends, holidays, and special gatherings. It’s hearty and satisfying, providing a good source of protein from the sausage and cheese to keep you full and fueled. While it’s not an everyday health food, it’s a wonderful treat made with real, simple ingredients. Enjoy it mindfully, share it with people you love, and savor every single delicious, pull-apart bite. That’s what Feastical is all about!
Print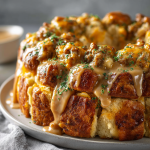
Sausage Gravy Monkey Bread : The Ultimate Pull-Apart Breakfast Bake
Description
Hey friends, Beau here! Imagine a lazy weekend morning when the smell of something buttery and savory fills the air. This Sausage Gravy Monkey Bread is that smell — the kind that gets everyone out of bed fast. It’s a mash-up of two Southern classics: flaky biscuits and creamy sausage gravy, baked together into a golden, pull-apart breakfast masterpiece.
Ingredients
-
2 cans (16 oz each) refrigerated biscuits (flaky or buttermilk style)
-
1 lb breakfast sausage (pork, turkey, or plant-based)
-
¼ cup all-purpose flour
-
2 cups whole milk (or 2%)
-
1½ cups shredded sharp cheddar cheese
-
1 tsp garlic powder (optional)
-
Salt and black pepper, to taste
-
2 tbsp melted butter (for brushing)
-
Cooking spray or butter, for greasing the pan
Instructions
Step 1 – Preheat & Prep
Preheat oven to 350°F (175°C). Generously grease a Bundt pan with cooking spray or butter.
Step 2 – Make the Gravy
In a large skillet, cook sausage over medium heat until browned. Sprinkle in flour and stir for 1 minute. Slowly whisk in milk until smooth and thickened (about 5 minutes). Season with salt, pepper, and garlic powder if using.
Step 3 – Prep the Biscuits
Cut each biscuit into quarters.
Step 4 – Layer It Up
Add half the biscuit pieces to the Bundt pan. Spoon half the sausage gravy on top, then sprinkle half the cheese. Repeat layers with remaining biscuits, gravy, and cheese. Brush melted butter on top.
Step 5 – Bake & Rest
Bake 35–40 minutes, until golden and bubbly. Let rest 10 minutes before inverting onto a platter.
Notes
Serve warm as the centerpiece of your brunch table. Pair it with:
-
A fresh fruit salad for brightness.
-
Scrambled eggs for extra protein.
-
A hot cup of coffee or orange juice to round it out.
Nutrition
- Calories: 410 Cal Per Serving
- Fat: 26g
- Carbohydrates: 27g
- Protein: 17g
Your New Brunch Secret Weapon
And there you have it! My foolproof recipe for the most epic, crowd-pleasing, conversation-starting breakfast bake you’ll ever make. It’s the kind of recipe that looks like you fussed for hours, but we know the simple, beautiful truth. It’s all about layering fantastic flavors and letting the oven do the work.
I truly hope this recipe becomes a part of your own family’s traditions. When you make it, I’d love to see it! Tag me @Feastical on social media or use the hashtag #FeasticalFeast so I can share in the delicious fun. Now, go forth and bake something legendary!
Final Thoughts
Will this Sausage Gravy Monkey Bread be the star of your next holiday morning, or the talk of your next casual potluck? However it fits into your life, one thing is certain: it’s a recipe that turns a simple meal into a special occasion.
So, what are you waiting for? Grab that Bundt pan, pop those biscuits, and get ready to bake your way to brunch immortality. I can’t wait to see your beautiful creations! Be sure to tag me @Feastical with your masterpiece so I can see how it turned out.