
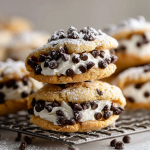
Irresistible Cannoli Cookies with Creamy Ricotta Filling
When a Cannoli Met a Cookie: And Lived Happily Ever After
Hey friends, Beau here! Let’s be real for a second. Is there anything more glorious than a perfectly crisp, creamy-filled cannoli? That satisfying shell crack, the rich, sweet ricotta, the little bursts of chocolate… it’s a little piece of Sicilian heaven. But let’s also be real about the other part: the mess. The delicate shells that shatter if you look at them wrong, the filling that squirts out the other end on the first bite, and the inevitable powdered sugar mustache. It’s a delicious, beautiful disaster.
What if I told you we could capture every single bit of that magical cannoli flavor, but in a form that’s made for sharing, for packing in lunches, for enjoying with a cup of coffee without needing three napkins? Enter my Irresistible Cannoli Cookies. This is the recipe that takes all the heart of the classic pastry and bakes it into a soft, golden, impossibly tender cookie that cradles that luscious ricotta cream filling.
These cookies are my go-to when I want to impress without the stress. They look like you spent all day in a professional bakery, but the process is straightforward, fun, and honestly, kind of therapeutic. We’re making a simple, forgiving cookie dough, whipping up a no-cook filling that’s pure bliss, and assembling them into little sandwich-style delights. So, preheat your oven, grab your favorite mixing bowl, and let’s create some kitchen magic that’s part cookie, part cannoli, and 100% delicious.
A Sweet Memory in Every Bite
This recipe always takes me back to my Nonna’s kitchen. Well, my friend Maria’s Nonna, to be exact. I didn’t have a Sicilian grandmother, but Maria’s family adopted me as an honorary grandson every Sunday. The star of the show was always her legendary cannoli, which she would make from scratch, frying the shells in a bubbling pot of oil right on the stove. We weren’t allowed to touch them until dessert, and the anticipation was a physical presence in the house.
One particularly hot summer day, the fried shells just wouldn’t cooperate. They were soft, they were soggy, and Nonna was not having it. With a determined glint in her eye, she looked at the big bowl of sweetened ricotta filling and then at a batch of simple sugar cookie dough she had resting in the fridge. “We improvise,” she declared. She rolled out the dough, cut it into circles, baked them, and sandwiched the cannoli cream inside. They were a hit! While my version has evolved a bit, the spirit is the same: it’s about the joy of the flavor, not the perfection of the form. It’s a lesson in kitchen resilience that has stuck with me ever since.
Gathering Your Cannoli Cookie Crew
Here’s your shopping list for this flavor fiesta! Don’t worry, I’ve included all my favorite chef insights and substitution hacks to make this recipe your own.
For the Cookies:
- 2 ½ cups all-purpose flour: The reliable backbone of our cookie. It gives just the right amount of structure without making them tough.
- ½ tsp baking powder: Our little leavening agent that gives the cookies a slight puff and a tender, cake-like crumb.
- ¼ tsp salt: Never, ever skip the salt! It’s the flavor enhancer that makes the sweet notes pop and balances the entire cookie.
- ¾ cup unsalted butter, softened: The key to richness and that melt-in-your-mouth texture. “Softened” means you can press your finger into it easily. If it’s melty, the cookies will spread too much.
- ¾ cup granulated sugar: For sweetness and that lovely, lightly crisp edge. For a deeper flavor, you can swap half for light brown sugar.
- 1 large egg: Our binding agent, bringing the dough together and adding moisture.
- 1 tsp vanilla extract: The warm, aromatic soul of so many baked goods. Use the real stuff—it makes a difference!
- 1–2 tbsp milk: This is our “as needed” ingredient. Depending on your flour and the humidity, your dough might need a tiny splash to come together into a soft, pliable ball.
For the Ricotta Filling:
- 1 ½ cups whole milk ricotta cheese: This is the star of the show! Pro Chef Tip: Drain your ricotta well. Place it in a fine-mesh strainer over a bowl for at least 30 minutes. This step is non-negotiable for a thick, non-watery filling.
- ½ cup powdered sugar: It dissolves instantly into the ricotta, giving us a silky-smooth cream without any graininess.
- ½ tsp vanilla extract: A little more vanilla love to perfume the filling.
- ¼ tsp cinnamon (optional): My personal touch. It adds a warm, subtle depth that whispers “cannoli.” Feel free to leave it out if you’re a purist!
- ½ cup mini chocolate chips: The mini ones are perfect here—they distribute evenly and don’t clog your piping tip. I prefer semi-sweet to balance the sweetness.
For the Topping:
- Powdered sugar for dusting: For that classic, snowy, bakery-style finish.
- Additional mini chocolate chips: A sprinkle on top makes them look irresistible and gives a hint of what’s inside.
Let’s Get Baking: Your Step-by-Step Roadmap to Cookie Bliss
Follow these steps, and you’ll be a cannoli cookie pro in no time. I’ve packed each one with little hacks I’ve learned along the way.
Step 1: Make the Cookie Dough
First, in a medium bowl, whisk together your flour, baking powder, and salt. This isn’t just busywork—whisking ensures the leavening and salt are evenly distributed, so every cookie bakes up perfectly. Now, in a larger bowl, cream together the softened butter and granulated sugar. We’re not just mixing here; we’re creaming. Beat it on medium-high speed for 2-3 minutes until it’s pale, fluffy, and beautiful. This step incorporates air, which is part of what gives our cookies their lovely texture. Scrape down the bowl, then beat in the egg and vanilla until just combined.
Step 2: Bring the Dough Together
With your mixer on low, gradually add the dry ingredients to the wet. Mix until the flour just disappears and a soft dough forms. Now, take a look. If it’s holding together when you pinch it, you’re golden. If it seems a bit crumbly, add a tablespoon of milk at a time until it comes together. Don’t overmix! Overworking the dough leads to tough cookies, and we want tender.
Step 3: Chill Out
This is a crucial step, my friends. Wrap your dough in plastic wrap and chill it for at least 30 minutes. Why? Chilling firms up the butter, which prevents the cookies from spreading into flat puddles in the oven. It also gives the flour time to hydrate, resulting in a better texture. Use this time to clean up or start on your filling!
Step 4: Bake to Golden Perfection
Preheat your oven to 350°F (175°C) and line your baking sheets with parchment paper. This is my secret for easy cleanup and no sticking! Scoop the dough into small, tablespoon-sized balls. I use a small cookie scoop for uniformity—it’s a game-changer. Place them on the sheet a couple of inches apart and give them a gentle flatten with the palm of your hand or the bottom of a glass. They don’t spread a ton, but they need a little room to breathe. Bake for 10-12 minutes, just until the edges are set and have a hint of golden brown. The centers might look slightly soft—that’s perfect! They’ll firm up as they cool. Let them cool on the baking sheet for 5 minutes before transferring them to a wire rack to cool completely. Patience is key here! If you try to fill warm cookies, the filling will melt and make a mess.
Step 5: Whip Up the Dreamy Filling
While the cookies are cooling, let’s make the magic. Take your well-drained ricotta and place it in a clean bowl. Add the powdered sugar, vanilla, and cinnamon (if using). Whisk it all together until it’s smooth and creamy. Now, fold in the ½ cup of mini chocolate chips with a spatula. Be gentle! Cover the bowl and pop it in the fridge to firm up a bit while the last cookies cool.
Step 6: The Grand Finale: Assembly!
You’ve made it! Time to bring it all home. You have two options here: you can make closed sandwich cookies, or you can go open-faced. For sandwiches, pair up your cooled cookies by size. Spoon a generous tablespoon of filling onto the flat side of one cookie and gently press its partner on top. For open-faced, just dollop or pipe the filling onto the top of a single cookie—it looks gorgeous and is a bit easier. If you want to be fancy, use a piping bag with a star tip. Top your assembled masterpieces with a light dusting of powdered sugar and a sprinkle of extra mini chocolate chips.
How to Serve These Little Pieces of Heaven
Presentation is part of the fun! I love arranging these on a rustic wooden board or a beautiful vintage platter. The contrast of the white filling and powdered sugar against the dark wood just makes them pop. They are the ultimate shareable dessert for a party or potluck.
For a truly next-level experience, serve them with a strong cup of espresso or a dark roast coffee. The bitterness of the coffee is a perfect counterpoint to the sweet, creamy cookie. They’re also fantastic with a glass of cold milk for the kids (or the kids at heart). If you’re feeling extra, a small glass of Moscato or a sweet Marsala wine would be a stunningly authentic pairing.
Make It Your Own: Creative Cannoli Cookie Twists
Once you’ve mastered the classic, the world is your cannoli! Here are a few of my favorite ways to mix things up:
- The Citrus Zest Zinger: Add the zest of one orange or lemon to the ricotta filling. The bright, citrusy notes cut through the richness and add a whole new dimension of flavor.
- The “Everything but the Kitchen Sink”: Fold chopped pistachios and dried cherries into the filling along with the chocolate chips. You get sweet, tart, crunchy, and creamy all in one bite.
- The Chocolate-Dipped Dream: Instead of making sandwich cookies, bake your cookies as single rounds. Once cooled, dip half of each cookie in melted dark chocolate and let it set before adding the filling to the top. It’s decadent and gorgeous.
- The Gluten-Free & Vegan Friend: Use a 1:1 gluten-free flour blend for the cookies. For the filling, swap the ricotta for a thick, strained vegan yogurt or a firm vegan cream cheese sweetened with powdered sugar.
Beau’s Chef’s Notes: A Few Parting Wisdom Nuggets
This recipe has been a living, evolving thing in my kitchen. The first time I made them, I was in such a rush I didn’t drain the ricotta. Let’s just say I ended up with cannoli cookie *soup*. It was a delicious, messy lesson learned! Now I always, always drain it.
I’ve also found that these cookies are at their absolute best the day they are assembled. The cookie has a slight crispness that contrasts beautifully with the cream. If you need to get a head start, you can bake the cookies and make the filling up to two days ahead. Store them separately and assemble no more than a few hours before serving to keep that perfect texture. Most of all, have fun with it! Cooking is about joy, not perfection.
Your Cannoli Cookie Questions, Answered!
Q: My filling is a bit runny. What did I do wrong and how can I fix it?
A: The number one culprit is undrained ricotta! For future batches, drain it longer, even up to an hour. If you’re in a pinch with your current batch, you can stir in a tablespoon or two of instant pudding mix (vanilla or cheesecake flavor works great) to help thicken it up quickly. You can also gently fold in a bit of whipped cream.
Q: Can I freeze these cookies?
A: You absolutely can, but with a strategy! The baked (unfilled) cookies freeze beautifully for up to 3 months in an airtight container. The ricotta filling does not freeze well—it becomes watery when thawed. So, freeze the cookie components and assemble with fresh filling when you’re ready to serve.
Q: My cookies spread too much! Why?
A> This usually points to butter that was too warm or an insufficient chill time. Make sure your butter is just softened, not melted, and don’t skip that 30-minute fridge rest for the dough. Also, check that your baking powder is fresh!
Q: Can I use mascarpone instead of ricotta?
A: Yes! Mascarpone will give you an even richer, denser, and creamier filling, almost like a cannoli-cheesecake hybrid. It’s delicious. Just be aware that it’s thicker, so you might need to whip it with a tiny splash of milk or cream to get it to a pipeable consistency.
Irresistible Cannoli Cookies with Creamy Ricotta Filling
Description
All the joy of a classic cannoli, no pastry tubes required! These Cannoli Cookies capture the essence of the beloved Italian dessert—crisp edges, soft centers, and a luscious ricotta cream filling dotted with mini chocolate chips. They’re elegant enough for a dinner party, easy enough for a weeknight treat, and guaranteed to make any coffee break feel special. A bite of nostalgia, a touch of Nonna’s love, and a whole lot of flavor—these cookies are pure edible happiness.
Ingredients
For the Cookies:
-
2½ cups all-purpose flour
-
½ tsp baking powder
-
¼ tsp salt
-
¾ cup unsalted butter, softened
-
¾ cup granulated sugar
-
1 large egg
-
1 tsp vanilla extract
-
1–2 tbsp milk (as needed)
For the Filling:
-
1½ cups whole milk ricotta cheese, well-drained
-
½ cup powdered sugar
-
½ tsp vanilla extract
-
¼ tsp cinnamon (optional)
-
½ cup mini chocolate chips
For the Topping:
-
Powdered sugar, for dusting
-
Extra mini chocolate chips, for garnish
Instructions
-
Make the Dough: Whisk flour, baking powder, and salt. In another bowl, beat butter and sugar until fluffy (2–3 min). Mix in egg and vanilla. Gradually add dry ingredients until a soft dough forms. Add milk if needed.
-
Chill: Wrap dough and refrigerate 30 minutes to prevent spreading.
-
Bake: Preheat oven to 350°F (175°C). Scoop 1 tbsp portions onto parchment-lined trays. Flatten slightly. Bake 10–12 min until edges are just golden. Cool completely.
-
Prepare Filling: In a bowl, mix drained ricotta, powdered sugar, vanilla, and cinnamon. Fold in mini chocolate chips. Chill for 15 min to firm up.
-
Assemble: Spread or pipe filling onto half of the cookies. Top with remaining cookies to make sandwiches or leave open-faced. Dust with powdered sugar and extra chips.
Notes
-
Always drain ricotta for at least 30 minutes for thick, creamy filling.
-
Bake cookies a day ahead, fill before serving for best texture.
-
Try flavor twists with orange zest, chopped pistachios, or mascarpone for a luxurious variation.
Crispy, creamy, and charmingly nostalgic—these Cannoli Cookies are love at first bite.
Nutrition
- Calories: 190 Cal Per Serving
- Sugar: 11g
- Fat: 9g
- Carbohydrates: 22g
Nutritional Info (Because Knowledge is Power!)
Okay, let’s be clear: these are a treat, and they are meant to be enjoyed as such! But I believe in transparency. Here’s a rough breakdown per cookie (assuming one sandwiched cookie). Remember, these are estimates and can vary based on specific ingredients used.
- Calories: ~170
- Protein: 3g
- Fat: 8g
- Carbohydrates: 20g
- Sugar: 11g
- Fiber: 1g
The ricotta does provide a bit of protein and calcium, which is a nice bonus. To lighten them up a touch, you could use part-skim ricotta and reduce the chocolate chips slightly, but honestly? Life’s too short not to enjoy the real deal once in a while.
Final Thoughts from My Kitchen to Yours
And there you have it! My take on the cookie that stole my heart and became a Feastical favorite. These Irresistible Cannoli Cookies are more than just a dessert; they’re a conversation starter, a memory maker, and a perfect example of how a little kitchen creativity can lead to something truly special.
I hope you love making them as much as I do. I hope your kitchen fills with the warm, sweet smell of baking cookies, and I hope you get to see the smiles on the faces of the people you share them with. That’s what Feastical is all about.
So, give this recipe a try, and let me know how it goes! Tag me on social with #Feastical so I can see your beautiful creations. Until next time, happy baking!
– Beau
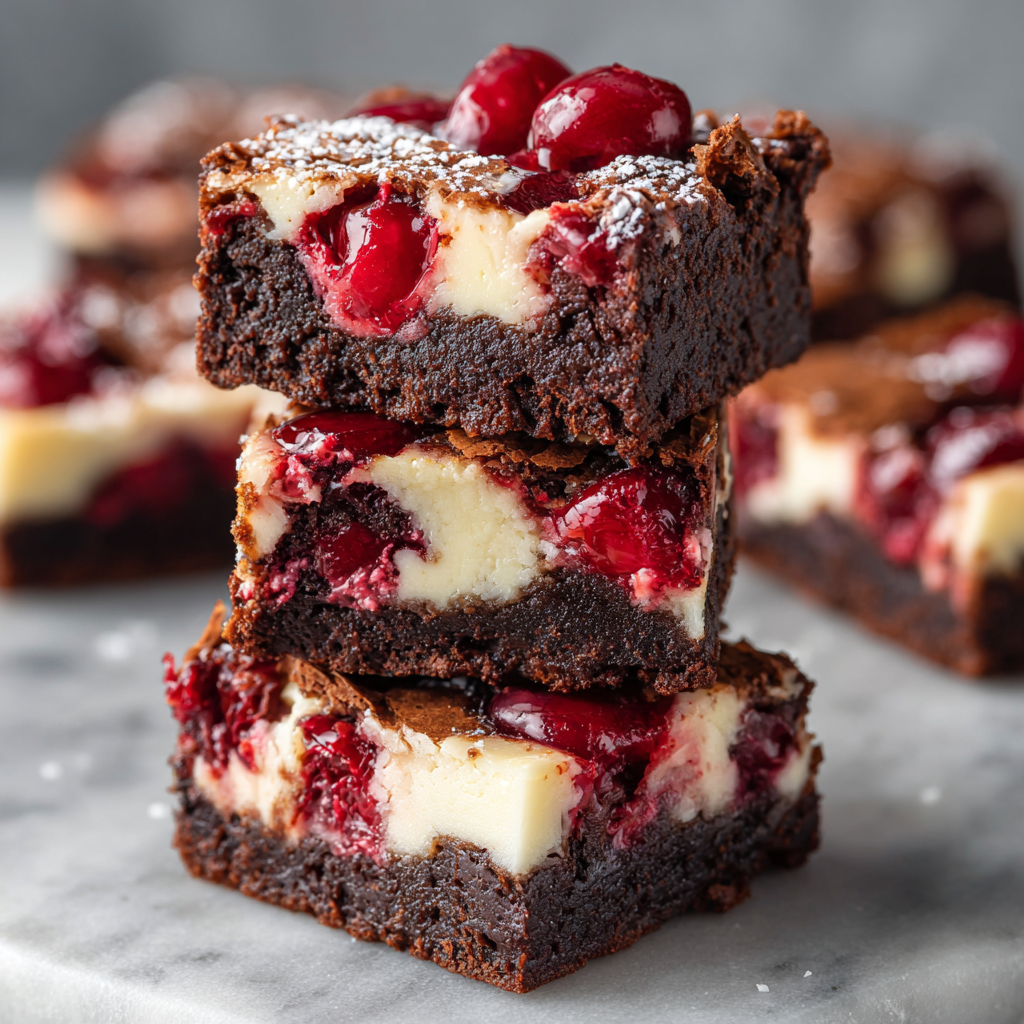
Cherry Cheesecake Brownies : Fudgy, Fruity, and Swirled to Perfection
Your New Favorite Dessert Just Walked In
Hey, friends! Beau here, welcoming you back to my kitchen. You know that feeling when you just can’t decide what to bake? One part of your soul is craving something rich, dark, and deeply chocolatey. The other part is whispering sweet nothings about something creamy, tangy, and dreamy. And then, just to complicate things, a third, very persuasive part chimes in with, “But what about fruit? We need a little fruity pop!”
Well, what if I told you that you don’t have to choose? What if I told you there was a dessert that brings all of those wild cravings together in one perfect, harmonious, and downright beautiful pan of bliss? Friends, meet my Cherry Cheesecake Brownies.
This is the ultimate dessert mash-up, the kind of treat that makes people’s eyes light up. Imagine this: a dense, fudgy brownie base that’s so rich it almost feels like a secret. On top of that, a cloud-like vanilla cheesecake swirl, tangy and smooth. And woven throughout, pockets of sweet-tart cherry pie filling that burst with flavor in every single bite. It’s a textural party in your mouth, and everyone’s invited.
This recipe is my go-to for potlucks, birthday parties, or just a Tuesday that needs a little extra sparkle. It’s deceptively simple, always a crowd-pleaser, and it looks like you slaved away for hours. (We’ll keep that our little secret). So, tie on your apron, grab your favorite mixing bowl, and let’s create some magic together.
The Happy Accident That Started It All
This recipe, like so many of the best things in life, was born from a happy little kitchen disaster. It was my niece’s birthday, and I had grand plans for a towering, multi-layer cherry chocolate cake. I had the layers baked, the frosting whipped, and I was feeling pretty proud of myself. Then, in a classic “Beau” move, I turned around too quickly and sent one of my beautiful cake layers tumbling onto the floor. Chocolate cake everywhere.
I was down to two layers, which felt a little sad for a birthday cake. Panic mode set in. I had a block of cream cheese softening on the counter for a different recipe and a can of cherry pie filling in the pantry. In a moment of “what do I have to lose?” inspiration, I crumbled the remaining cake layers into a brownie-like base, swirled them with a quick cheesecake mixture and the cherries, and threw it in the oven, praying it would work.
The result? A standing ovation. My niece declared it the best dessert I’d ever made. It was fudgier than cake, creamier than a brownie, and more exciting than either on their own. That “mistake” instantly became a family legend and a Feastical staple. It just goes to show that sometimes the best recipes aren’t found in fancy cookbooks—they’re discovered in the beautiful, flour-dusted chaos of a real kitchen.
Gathering Your Flavor All-Stars
One of the things I love most about this recipe is how approachable the ingredient list is. We’re using a trusty brownie mix as our foundation—because why make life harder than it needs to be? Let’s break it down.
For the Fudgy Brownie Layer:
- 18 oz Brownie Mix: Use your favorite family-size mix! I typically go for a “dark chocolate” or “fudge” style for that extra-rich base. This is our canvas.
- 3 Eggs: They bind everything together and give the brownies structure. Make sure they’re at room temperature for a smoother batter.
- ½ cup Vegetable Oil: This is the key to that wonderfully moist, fudgy crumb. Chef’s Insight: You can swap this for melted (and slightly cooled) butter if you prefer a richer, more buttery flavor.
- ¼ cup Water: Simple, but essential for bringing our brownie batter to the perfect pourable consistency.
For the Swirly, Creamy Toppings:
- 8 oz Cream Cheese, softened: This is the heart of our cheesecake swirl. CRUCIAL TIP: Let it sit on the counter for at least 30-60 minutes. If it’s cold, you’ll end up with lumpy swirls, and we’re going for smooth and dreamy.
- ¾ cup Powdered Sugar: It sweetens the cream cheese perfectly without any graininess. It also helps thicken the swirl so it doesn’t just sink into the brownie batter.
- ½ tsp Vanilla Extract: The classic partner for cream cheese. It adds a warm, aromatic depth that makes the swirl taste like pure cheesecake.
- ¼ cup Cold Heavy Cream: This is my secret weapon! Whipping a little cold cream into the cheesecake mixture makes it incredibly light, fluffy, and easier to swirl. Don’t skip it!
- 1 tbsp All-Purpose Flour: A little sprinkle of flour helps stabilize the cheesecake swirl as it bakes, preventing it from weeping or becoming too liquid.
- 1½ cups Canned Cherry Pie Filling: The star of the show! I love the convenience and perfect gel-like consistency of the canned filling. It provides those gorgeous, juicy cherry bursts. Substitution Tip: Not a cherry fan? Any pie filling works wonders here—blueberry, raspberry, or apple are all fantastic!
Let’s Build These Beautiful Brownies!
Alright, team, this is where the fun begins. We’re going to layer, dollop, and swirl our way to dessert heaven. Read through these steps once before you start—it’s a simple process, but a few key tips will ensure brownie perfection.
- Preheat & Prep: First things first, get that oven preheating to a cozy 350°F (175°C). This gives it plenty of time to reach the perfect, even temperature. Now, take your 9×13-inch baking pan and line it with parchment paper, leaving a little overhang on two sides. Chef’s Hack: This little trick is a game-changer! Once the brownies are cool, you can just lift the whole slab out of the pan using the parchment paper “handles.” It makes for incredibly clean, crumble-free slicing. If you don’t have parchment, just give the pan a good greasing with butter or baking spray.
- Whip Up the Brownie Base: In a large mixing bowl, combine the brownie mix, eggs, oil, and water. Now, mix it! I like to use a sturdy whisk or a spatula. Mix just until everything is combined and you don’t see any dry pockets of mix. Pro-Tip: Avoid overmixing! A few little lumps are totally fine. Overmixing can incorporate too much air and make your brownies more cake-like than fudgy. We want dense and decadent. Pour this gorgeous, chocolatey batter into your prepared pan and spread it into an even layer.
- Create the Fluffy Cloud (Cheesecake Swirl): Grab another bowl and your softened cream cheese. Using an electric hand mixer (or a stand mixer with the paddle attachment), beat the cream cheese on medium speed until it’s completely smooth and creamy. This should take about a minute. Scrape down the sides of the bowl. Now, add in the powdered sugar, vanilla extract, cold heavy cream, and that tablespoon of flour. Start mixing on low speed so the powdered sugar doesn’t poof everywhere, then increase to medium-high and beat for 1-2 minutes, until the mixture is light, fluffy, and well combined. You should see a noticeable change in texture—it will look like a thick, spreadable cloud.
- The Art of the Swirl (Assembly Time!): This is the creative part! Take spoonfuls of the cherry pie filling and dollop them randomly all over the surface of the brownie batter. Don’t pour it—dollop it! Then, do the same with your fluffy cheesecake mixture, placing dollops in between the cherry spots. Now, take a thin knife or a wooden skewer. Gently drag it through the batter in a zig-zag, figure-eight, or swirling pattern. KEY TIP: Don’t over-swirl! You want beautiful marbled pockets of cheesecake and cherry, not a homogenous mud-colored mess. Four or five passes through the pan is plenty.
- Bake to Perfection: Carefully slide your masterpiece into the preheated oven. Bake for 35-40 minutes. You’re looking for the edges of the brownie to be set and pulling away slightly from the pan. The center should still have a very slight jiggle—it will firm up as it cools. The ultimate test? A toothpick inserted into a brownie-dominant section (not a cheesecake swirl!) should come out with a few moist crumbs attached, not wet batter. If it’s completely clean, you might have overbaked them.
- The Hardest Part: Let Them Cool! I know, the aroma is intoxicating and the temptation is real. But you have to let these guys cool completely in the pan on a wire rack. This is non-negotiable for a clean slice. The brownie layer needs time to set, and the cheesecake swirl needs to firm up. For the absolute cleanest cuts, I sometimes even pop the fully cooled pan into the refrigerator for an hour before slicing. Patience, my friend, it is a virtue that pays off in gorgeous brownie squares.
How to Serve These Show-Stoppers
You’ve waited patiently, and now it’s time for the grand reveal! Lift the entire brownie slab out of the pan using the parchment paper. Place it on a cutting board and use a sharp knife to slice it into squares. For super clean cuts, wipe the knife clean between each slice.
These brownies are magnificent all on their own, but if you want to take them to a “dinner party dessert” level, here are a few of my favorite ways to serve them:
- À La Mode is Always a Good Idea: Place a warm (gently reheated for 10 seconds in the microwave) brownie on a plate and top it with a scoop of high-quality vanilla bean ice cream. The contrast of warm brownie, cool ice cream, and creamy cheesecake is a religious experience.
- A Drizzle of Decadence: Melt a little chocolate ganache or even just some hot fudge sauce and drizzle it over the top. A little extra cherry pie filling on the side makes it look extra fancy.
- Keep it Simple & Elegant: Just a light dusting of powdered sugar right before serving looks beautiful and adds a tiny touch of extra sweetness.
No matter how you serve them, be prepared for recipe requests. You’ve been warned!
Make It Your Own: Fun Flavor Twists
The classic cherry and chocolate combo is timeless, but the beauty of this recipe is its versatility. Don’t be afraid to play with flavors! Here are a few of my favorite variations:
- Black Forest Twist: Add a teaspoon of almond extract to the cheesecake swirl instead of vanilla. Use a dark chocolate brownie mix, and fold ½ cup of mini chocolate chips into the brownie batter. Hello, Black Forest cake in brownie form!
- Salted Carella Swirl: Omit the cherry pie filling. Instead, swirl in ½ cup of salted caramel sauce along with the cheesecake mixture. Sprinkle the top with a little flaky sea salt before baking. Sweet, salty, and sublime.
- Berry Bliss: Swap the cherry pie filling for raspberry or blueberry pie filling. The tartness of the berries cuts through the richness of the chocolate and cream cheese beautifully.
- Nutty Professor: For a little crunch, sprinkle ⅓ cup of chopped pecans or walnuts over the top right before you do the swirling.
- Peanut Butter Cup Dream: Add ½ cup of creamy peanut butter to the cheesecake swirl mixture (you may need to reduce the heavy cream by a tablespoon). Swirl with the brownie batter and sprinkle with chopped Reese’s Peanut Butter Cups. You’re welcome.
A Few More Thoughts From My Kitchen
Over the years, this recipe has seen many iterations. I’ve tried it with from-scratch brownie batter (delicious, but more work), and I’ve found that a good quality mix is just a fantastic, reliable shortcut. The real star is that cheesecake swirl—the heavy cream trick was something I learned after a batch where my swirl sank a bit. It makes all the difference, giving it enough body to stay proud and swirly.
One funny story: I once brought these to a friend’s BBQ and someone asked me if I was a professional pastry chef. I just smiled and said, “Nope, just a guy who loves a good shortcut and a great flavor.” That’s what Feastical is all about—delicious food that feels special, without the stress.
Your Questions, Answered!
I’ve made these brownies more times than I can count, and I’ve also read all your comments! Here are the most common questions and how to solve them.
Q: My cheesecake swirl sunk! What happened?
A: The most common culprit is that the cream cheese wasn’t soft enough, so the mixture was too dense. Another reason could be overmixing the swirl into the brownie batter. Remember, gentle, minimal swirls are key! Finally, make sure your cheesecake mixture is nice and thick—that’s why the heavy cream and flour are there to help.
Q: Can I make these ahead of time?
A: Absolutely! In fact, I think they taste even better the next day. Once completely cooled, store them in an airtight container in the refrigerator for up to 5 days. They can also be frozen for up to 3 months. Just thaw in the fridge overnight.
Q: My brownies are too cakey. How do I keep them fudgy?
A> Great question. First, double-check that you’re using the ingredients listed on the back of the brownie mix box for “fudgy” brownies if there’s an option. Second, avoid overmixing the batter. Third, be careful not to overbake them. Taking them out when the center is *just* set is crucial for that fudgy texture.
Q: Can I use fresh cherries instead of pie filling?
A> You can, but it requires an extra step. Pit and halve about 2 cups of fresh cherries. Toss them in a saucepan with ¼ cup sugar and a tablespoon of lemon juice. Cook over medium heat for 5-10 minutes until the cherries break down and the liquid thickens into a syrupy consistency. Let it cool completely before using.

Cherry Cheesecake Brownies : Fudgy, Fruity, and Swirled to Perfection
Description
Why choose between chocolate, cheesecake, and cherries when you can have all three? These Cherry Cheesecake Brownies are the ultimate dessert trifecta—rich, fudgy brownie base, creamy vanilla cheesecake swirls, and juicy cherry bursts baked to perfection. They’re stunning, indulgent, and secretly simple to make. Ideal for birthdays, potlucks, or when you just need a little sweetness in your week. This is comfort baking at its most joyful—decadent, eye-catching, and guaranteed to earn you “best baker” status at any table.
Ingredients
For the Brownie Layer:
-
1 (18 oz) box brownie mix
-
3 large eggs, room temperature
-
½ cup vegetable oil (or melted butter)
-
¼ cup water
For the Cheesecake Swirl:
-
8 oz cream cheese, softened
-
¾ cup powdered sugar
-
¼ cup cold heavy cream
-
½ tsp vanilla extract
-
1 tbsp all-purpose flour
For the Cherry Layer:
-
1½ cups canned cherry pie filling
Instructions
-
Preheat Oven: Set oven to 350°F (175°C). Line a 9×13-inch pan with parchment paper for easy removal.
-
Make Brownie Batter: In a large bowl, mix brownie mix, eggs, oil, and water until just combined. Spread evenly in the pan.
-
Prepare Cheesecake Swirl: Beat softened cream cheese until smooth. Add powdered sugar, vanilla, heavy cream, and flour. Beat until light and fluffy.
-
Layer & Swirl: Dollop cheesecake mixture and cherry pie filling over brownie batter. Gently swirl with a knife—don’t overmix.
-
Bake: Bake 35–40 minutes until edges are set and center has a slight jiggle. Cool completely before slicing for clean cuts.
Notes
-
Use softened cream cheese for silky swirls.
-
Refrigerate before slicing for perfect squares.
-
Try flavor twists like raspberry, salted caramel, or almond extract for fun variations.
Nutrition
- Calories: 310Cal Per Serving
- Sugar: 26g
- Fat: 16g
- Carbohydrates: 38g
A Little Note on Nutrition
Let’s be real—we’re not eating cheesecake brownies for our health. We’re eating them for joy, for celebration, and for the pure, unadulterated pleasure of a damn good dessert. That said, I believe all food fits into a happy, balanced life.
This nutritional information is an estimate based on the specific ingredients used and dividing the pan into 16 brownies. Your exact values may vary depending on the brands you choose.
Per Serving (approx): Calories: 310 | Carbohydrates: 38g | Fat: 16g | Sugar: 26g | Protein: 4g
My philosophy? Savor every single bite without an ounce of guilt. Share them with people you love, and enjoy the moment. That’s the real nourishment.
Final Crumbs of Wisdom
And there you have it! My beloved, accidentally-discovered, always-requested Cherry Cheesecake Brownies. This recipe is a perfect example of what I love about cooking: it doesn’t have to be complicated to be impressive, and the best creations often come from a place of fun and a willingness

Christmas Puppy Chow : A Festive Twist on a Classic Snack
Your New Favorite Holiday Tradition is Here!
Hey there, friends! Beau from Feastical back with a little bowl of magic that screams holiday cheer. We’re talking about Christmas Puppy Chow, that irresistibly sweet, salty, and crunchy snack mix that disappears faster than a snowman in July. You might know it as Muddy Buddies, but once we deck it out in its festive finest, it’s a whole new level of party-ready perfection.
Imagine this: you’re cozied up by the twinkling lights of the tree, a classic holiday movie playing in the background, and within arm’s reach is a big, beautiful bowl of this stuff. It’s the snack that brings everyone together—kids, grandparents, that one uncle who claims he doesn’t like sweets (until he sneaks a third handful). This isn’t just a recipe; it’s a memory-maker, a gift from the kitchen that says, “Hey, let’s enjoy this moment together.”
And the best part? You don’t need to be a pastry chef to pull this off. If you can melt chocolate and shake a bag, you are absolutely in business. This Christmas Puppy Chow is our simple, soulful, and always satisfying philosophy in a nutshell—or should I say, in a cereal box? So, tie on your favorite apron, cue up the holiday tunes, and let’s make your kitchen the happiest place in the house this season.
A Messy Kitchen and a Memory I’ll Always Treasure
I’ll never forget the first time I truly *made* Puppy Chow. I was about ten years old, “helping” my mom in the kitchen during our annual Christmas cookie marathon. We had flour on the ceiling and sprinkles in places sprinkles should never be. Amid the chaos, she pulled out a box of Chex cereal and a giant bowl of melted chocolate. My job was the shaking—a gallon-sized bag filled with powdered sugar and the chocolate-covered cereal.
I remember the sheer, unadulterated joy of it. I wasn’t just following a recipe; I was creating a snowstorm in a bag. Powdered sugar puffed out with every vigorous shake, dusting my face and the floor in a fine, sweet white powder. When we finally dumped it into a bowl and mixed in the red and green M&M’s, it was like we’d created edible confetti. That messy, joyful process is what cooking is all about for me. It’s not about perfection; it’s about the fun you have along the way. Every time I make this recipe, I’m transported right back to that linoleum floor, covered in sugar and beaming with pride.
Gathering Your Festive Cast of Characters
This is where the magic starts! Here’s your shopping list for the most epic Christmas Puppy Chow you’ve ever tasted. I’ve included some of my favorite chef insights and substitutions so you can make it your own.
- 12 cups Rice Chex or Corn Chex cereal: This is our blank canvas! Rice Chex gives you a lighter, super-crunchy base, while Corn Chex has a slightly heartier, corn-y flavor. Both are fantastic. Chef’s Tip: Be gentle when stirring to avoid turning your cereal into dust!
- 2 cups semi-sweet chocolate chips: The rich, chocolatey foundation. I prefer semi-sweet to balance the sweetness of the powdered sugar. Substitution Tip: Feel free to use milk chocolate for a sweeter treat or dark chocolate for a more sophisticated, less sweet vibe.
- 1½ cups creamy peanut butter: This is the glue that holds our dream team together, adding a salty, creamy depth. Substitution Tip: For a nut-free version, SunButter (made from sunflower seeds) works like a charm and tastes amazing!
- ½ cup unsalted butter: It helps create a smooth, pourable chocolate mixture. Using unsalted lets you control the salt level. Chef’s Insight: This is a non-negotiable for silkiness—don’t skip it!
- 1 tablespoon vanilla extract: The secret weapon! A full tablespoon might seem like a lot, but it adds a warm, complex flavor that makes people go, “Wow, what is *in* this?”
- 4 cups powdered sugar (more if needed): This is what gives Puppy Chow its iconic “snowy” look and prevents the pieces from sticking together. Chef’s Tip: Have an extra half-cup on standby just in case your mixture feels a bit sticky.
- 1½ cups holiday M&M’s (red and green): The festive confetti! They add a pop of color and a delightful chocolate crunch.
- 1 cup mini pretzels (optional for crunch): My personal favorite add-in. They introduce a fantastic salty crunch and break up the texture beautifully. Seriously, try it!
- ½ cup crushed peppermint candies or festive sprinkles (optional for a seasonal twist): This is where you can get creative! Crushed candy canes bring a refreshing peppermint zing, and festive sprinkles are just pure joy.
Let’s Get Mixing: Your Foolproof Roadmap to Puppy Chow Perfection
Okay, team, this is where the fun begins. I’ll walk you through every step, complete with my favorite kitchen hacks to ensure your Puppy Chow is absolutely flawless.
- Prep Your Station. Pour your 12 cups of Chex cereal into the largest bowl you own. I’m not kidding—use the biggest one. This gives you plenty of room to fold the chocolate in without making a mess. Chef’s Hack: Line your counter with a large piece of parchment paper or wax paper. Trust me, this makes cleanup a dream later on.
- Melt the Good Stuff. In a medium, microwave-safe bowl, combine the chocolate chips, peanut butter, and butter. Now, the key to perfectly smooth chocolate is patience. Microwave on high for 30 seconds, then take it out and stir. Repeat—30 seconds, stir—until the mixture is completely smooth and glossy. Rushing this with high heat will scorch your chocolate, and we don’t want that! Chef’s Hack: You can also do this in a heatproof bowl set over a pot of simmering water (a double boiler) if you’re nervous about the microwave.
- Wake Up the Flavor. Once your chocolate-peanut butter mixture is silky smooth, stir in that full tablespoon of vanilla extract. It will smell like heaven. This is the moment you know you’re creating something special.
- The Big Coat. Slowly pour the warm chocolate mixture over the waiting cereal. Now, with a large rubber spatula, gently fold and toss the cereal. I mean *gently*—like you’re tucking it into a cozy chocolate blanket. You want every single piece to be lovingly coated, but you also want to keep those cereal squares intact.
- The Shake-Up! Here comes the fun part. Carefully transfer the coated cereal into one or two large resealable plastic bags (or a large container with a tight-fitting lid). Add the 4 cups of powdered sugar, seal the bag tightly (double-check that zip-top!), and shake, shake, shake! Shake it like a polaroid picture! Shake it until every piece is evenly coated in that beautiful snowy sugar and no longer looks wet or sticky.
- Cool It Down. Dump the contents of your bag(s) out onto your prepared parchment paper. Spread it into an even layer and let it cool completely. This usually takes about 15-20 minutes. Chef’s Hack: You can pop the entire tray into the fridge for 10 minutes to speed up the process if you’re impatient like me.
- The Final Festive Touch. Once the Puppy Chow is completely cool and the chocolate has set, transfer it back to your giant clean bowl. Now, stir in the holiday M&M’s, the optional mini pretzels, and your crushed peppermint or sprinkles. Mixing them in at the end keeps the pretzels crunchy and the M&M’s from bleeding their color.
Sharing the Holiday Spirit: How to Serve Your Masterpiece
You’ve done it! You’ve created a holiday snack legend. Now, how do you present this beauty? My go-to is a big, wide wooden bowl or a festive holiday tray. It’s casual, inviting, and says “dig in!”
But don’t stop there! This stuff makes for the most thoughtful homemade gift. Grab some clear cellophane bags, tie them with a cute ribbon, and you’ve got a present for neighbors, teachers, or your mail carrier that’s straight from the heart (and the kitchen). I also love setting out a few smaller bowls around the house—one by the tree, one near the front door for guests—so the merriment is always within reach.
For a next-level treat, layer it in a clear glass with some vanilla ice cream for an epic Puppy Chow sundae. Yes, it’s as incredible as it sounds.
Make It Your Own: 5 Festive Twists on Classic Puppy Chow
The basic recipe is a certified hit, but the kitchen is your playground! Here are a few of my favorite ways to mix things up.
- The White Christmas: Swap the semi-sweet chocolate for white chocolate chips. Use white candy melts and festive Christmas sprinkles for a stunning winter wonderland look.
- The Peppermint Patty: Use dark chocolate chips and add 1 teaspoon of peppermint extract (in addition to or instead of the vanilla) to the melted mixture. Fold in a full cup of crushed candy canes at the end for a cool, refreshing kick.
- The Gingerbread Spice: Add a teaspoon of ground ginger, a half teaspoon of cinnamon, and a pinch of cloves to the powdered sugar before shaking. It’ll taste just like a gingerbread cookie!
- The Ultimate Salty-Sweet: Double down on the salty! Use salted peanuts instead of (or in addition to) the pretzels. You can even use a salted caramel baking chip along with the M&M’s.
- The “Fancy” One: Ditch the powdered sugar coating. Instead, after the chocolate-coated cereal has cooled on the parchment, drizzle it with melted white or dark chocolate and a light sprinkle of flaky sea salt. It’s a more grown-up, elegant take.
Beau’s Kitchen Confidential: A Few Parting Thoughts
This recipe has been with me through countless holiday seasons, and it’s evolved in the best ways. One year, in a pre-coffee haze, I accidentally used crunchy peanut butter. You know what? It was delicious! The little peanut bits added a wonderful texture. So don’t be afraid of a happy accident.
The biggest lesson I’ve learned? Always, and I mean *always*, make a double batch. One for the party, and one “for quality control” that mysteriously never makes it to the party. It’s the Feastical guarantee of a good time. This dish is meant to be shared, to be messy, and to bring a little extra joy to your holiday table. Have fun with it!
Your Puppy Chow Questions, Answered!
Over the years, I’ve gotten a lot of great questions about this recipe. Here are the answers to the most common ones.
Q: My Puppy Chow turned out clumpy and sticky. What did I do wrong?
A: The most common culprit is not coating the cereal thoroughly enough with the powdered sugar, or the chocolate mixture was still too warm when you started shaking. Make sure you’re using a big enough bag and shake vigorously! If it’s still sticky after the first round of sugar, don’t be shy—add another 1/4 to 1/2 cup and shake again.
Q: Can I make this gluten-free or vegan?
A> You absolutely can! For gluten-free, just ensure you’re using gluten-free Chex cereal (the Rice and Corn varieties are naturally GF) and gluten-free pretzels. For vegan, use dairy-free chocolate chips, vegan butter, and check that your M&M’s are vegan (many of the dark chocolate ones are, or use a vegan candy like Enjoy Life chocolates). SunButter is a great vegan alternative to peanut butter.
Q: How far in advance can I make this? How do I store it?
A> This is a fantastic make-ahead snack! Stored in an airtight container at room temperature, it will stay perfectly fresh and crunchy for up to 2 weeks. I don’t recommend refrigerating it, as that can sometimes introduce moisture and make it lose its crispness.
Q: Can I use crunchy peanut butter?
A> You sure can! As I discovered by accident, it adds a nice little textural surprise. Just know that it will be a slightly different experience from the classic smooth version.
Let’s Talk Nutrition (The Real, No-Nonsense Kind)
Look, we’re all friends here. This is a holiday treat, through and through. It’s not a salad, and it’s not pretending to be one! It’s a celebratory snack meant to be enjoyed in moments of joy and connection.
That said, I believe in being transparent about what we’re eating. A standard 1/2-cup serving of this Christmas Puppy Chow clocks in at roughly 210 calories. It’s a sweet treat, with about 17g of sugar and 10g of fat, balanced by 3g of protein from the peanut butter and nuts. The beauty of this recipe is that a little goes a long way in satisfying those sweet-and-salty cravings.
My philosophy has always been about balance. Enjoy a handful of this magical mix with a hot cup of coffee or a glass of cold milk, savor every bite, and then maybe go for a walk to look at the neighborhood Christmas lights. It’s all about enjoying the flavors of the season without any guilt, just pure, unadulterated happiness.
Print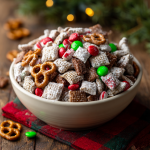
Christmas Puppy Chow : A Festive Twist on a Classic Snack
Description
Sweet, salty, crunchy, and impossible to stop eating — this festive snack mix is the definition of holiday cheer. It’s everything you love about Muddy Buddies, dressed up for Christmas with red and green M&M’s, a flurry of powdered sugar, and the kind of nostalgic fun that makes your kitchen smell like happiness.
Ingredients
-
12 cups Rice Chex or Corn Chex cereal
-
2 cups semi-sweet chocolate chips
-
1½ cups creamy peanut butter (or SunButter for nut-free)
-
½ cup unsalted butter
-
1 tablespoon vanilla extract
-
4 cups powdered sugar (plus extra if needed)
-
1½ cups holiday M&M’s (red & green)
-
1 cup mini pretzels (optional, for crunch)
-
½ cup crushed peppermint candies or festive sprinkles (optional)
Instructions
1. Prep the Stage.
Pour Chex cereal into the biggest bowl you own. Line your counter with parchment paper for easy cleanup.
2. Melt the Magic.
In a microwave-safe bowl, combine chocolate chips, peanut butter, and butter. Microwave in 30-second intervals, stirring after each, until smooth and glossy. Stir in vanilla extract.
3. Coat It All.
Pour the warm chocolate mixture over the cereal. Gently fold with a spatula until every piece is coated — no cereal left behind!
4. Shake It Up!
Transfer the chocolatey cereal into two large zip-top bags. Add powdered sugar. Seal tightly and shake until fully coated in “snow.”
5. Cool & Set.
Spread the mixture onto parchment paper. Let cool for 15–20 minutes (or chill for 10 in the fridge).
6. Add the Holiday Cheer.
Once cooled, toss in M&M’s, mini pretzels, and crushed peppermint or sprinkles. Gently mix to combine.
Notes
-
Always make a double batch. Trust me.
-
Crunchy peanut butter? Deliciously accidental upgrade.
-
For gluten-free: use Rice Chex and GF pretzels.
-
For vegan: swap dairy-free chocolate and butter alternatives.
Nutrition
- Calories: 210 Cal Per Serving
- Sugar: 17g
- Fat: 10g
- Protein: 3g
Wrapping It Up With a Bow
And there you have it, my friends—the complete guide to creating the most festive, delicious, and shareable Christmas Puppy Chow your kitchen has ever seen. From the nostalgic memories it brings to the simple joy of shaking that bag, this recipe is a true embodiment of what Feastical is all about: feel-good food that brings people together.
I hope this recipe becomes a part of your family’s holiday tradition, just like it’s a part of mine. I’d love to see your creations! Tag me on social @Feastical or @BeauCollier with your pictures and stories. Now, go forth and make a delicious mess! Wishing you and yours a season filled with warmth, laughter, and plenty of good food.
Final Thoughts: More Than Just a Snack
So, there you have it—the complete guide to creating a holiday treat that’s as fun to make as it is to eat. But this Christmas Puppy Chow is so much more than a simple list of ingredients. It’s the powdered sugar on your nose, the laughter in a messy kitchen, and the irresistible snack that draws everyone into the same room, sharing the same joyful moment.
It’s a reminder that the best holiday traditions aren’t about perfection. They’re about the feeling. The feeling of creating something with your own two hands to share with the people you love. Whether you’re gifting it in a simple bag tied with a ribbon or serving it up in a big, welcoming bowl, you’re not just giving a snack—you’re giving a little piece of the holiday spirit.
This season, don’t just make a recipe. Make a memory. Turn up the holiday music, embrace the mess, and fill your home with the incredible smell of chocolate, peanut butter, and happiness. From my Feastical family to yours, I hope this recipe finds its way into your heart and your holiday celebrations for years to come.
Now, go shake up some magic.
Wishing you a season full of flavor and joy,
Beau

Movie Night Snack Charcuterie Board : The Ultimate Sweet & Salty Spread
Your Blockbuster Night Deserves a Blockbuster Snack Board
Hey friends, Beau here! Let’s be real for a second. What’s the one thing that can make a great movie night absolutely legendary? Is it the surround sound? The comfy blankets? The heated debate over who the best Marvel hero *really* is? (It’s Iron Man, by the way. Don’t @ me.)
Nope. It’s the snacks.
For too long, we’ve settled for a single bowl of popcorn and a bag of chips passed awkwardly down the couch. But I’m here to tell you that it’s time for a snack revolution. It’s time to ditch the boring and embrace the glorious, the shareable, the utterly irresistible… Movie Night Snack Charcuterie Board.
This isn’t just a platter of food; it’s the co-star of your evening. It’s a vibrant, textural playground of sweet, salty, chewy, and crunchy that has something for every craving. Best of all, it’s ridiculously easy to put together. We’re not cooking, we’re *curating*. We’re building a landscape of deliciousness that turns snacking from a side activity into the main event. So, grab your biggest board or baking sheet, and let’s create a spread that’ll have your crew pausing the movie just to applaud your snack-game genius.
The Night We Traded a Ticket for a Tower of Treats
This whole idea actually came from a memory that still makes me smile. Back in college, my roommate Dave and I were broke. I mean, “living-off-ramen-and-prayer” broke. We had scrounged up enough cash for one movie ticket on a Friday night, but we were both dying to see the new big sci-fi flick.
Instead of flipping a coin, we had a better idea. We pooled the rest of our money, skipped the theater, and raided the bulk bin section of the grocery store. We came home with a wild assortment: generic gummy worms, chocolate-covered peanuts, a bag of pretzel sticks, and the biggest, cheapest bag of popcorn we could find. We spread an old map out on our dorm floor, dumped our treasures into little piles, and hit play on a movie we already owned.
It was, without a doubt, one of the best movie nights of my life. We were gracelessly diving into this chaotic mosaic of flavors, building bizarre bite combinations, and just laughing our heads off. That’s the magic I want to bring to your living room. It’s not about fancy ingredients; it’s about the shared experience, the joy of discovery, and the simple truth that everything tastes better when it’s eaten with friends.
Gathering Your Cast of Snack-tastic Characters
Here’s the beautiful part: this “recipe” is more of a guideline. Use what you love! This is my personal go-to lineup, designed to hit all the major flavor and texture notes. Think of this as your shopping inspiration.
- Popcorn (Buttery & Kettle Corn): The undisputed king of movie snacks and the perfect salty, fluffy base for your board. Chef’s Insight: I like to use a mix of buttery and a sweet/salty kettle corn to cover both bases from the get-go.
- Goldfish Crackers: A nostalgic, cheesy, salty bite that adds a different kind of crunch. Substitution Tip: Any small, cheesy cracker like Cheez-Its or Annie’s Cheddar Bunnies will work perfectly here.
- Mini Animal Crackers & Frosted Animal Cookies: Don’t let their size fool you! The mini animals bring a light, simple sweetness, while the frosted ones add a pop of color and a shortbread-like texture. They’re the adorable supporting actors of the board.
- Gummy Bears & Sour Watermelon Slices: Your chewy, fruity contingent. The gummy bears are a classic, while the sour watermelons bring a fantastic tangy punch that cuts through all the rich, chocolatey elements.
- Red Licorice Bites: These are great for their unique, pull-apart chewy texture and a bold hit of strawberry flavor. They also look fantastic scattered around the board.
- M&Ms & Reese’s Pieces: The chocolate core of the operation. M&Ms give you that classic candy shell crunch and melty chocolate, while Reese’s Pieces bring that unbeatable peanut butter and chocolate combo. Chef’s Insight: Using both provides a visual and flavorful contrast that’s just *chef’s kiss*.
- Chocolate-Covered Raisins & Malt Balls: The sophistication squad. The raisins offer a touch of fruitiness, while the malt balls (like Whoppers) have that unique, airy crunch and malty flavor that is pure nostalgia.
- Yogurt-Covered Pretzels: The ultimate sweet-and-salty ambassador. The tangy yogurt coating paired with the salty pretzel inside is a bite-sized revelation. They’re also great for structural integrity when you’re building your board!
- Mini Chocolate Chip Cookies: The comforting, familiar favorite. They’re perfect for dipping or just munching on their own. They make the whole board feel like home.
Lights, Camera, Assemble! Building Your Masterpiece
Okay, the snacks are out of the bags and the board is waiting. Let’s build this thing! The goal is abundance and accessibility. You want it to look overflowing and inviting.
- Set Your Stage. Grab your largest wooden board, a rimmed baking sheet, a large cutting board, or even a clean pizza pan. If you’re worried about small things rolling off, you can line it with a piece of parchment paper first. No rules, just a solid surface.
- Place Your Anchors. This is your pro tip for a board that looks professional and doesn’t get messy. Start by placing your largest items. I like to use a couple of small bowls or ramekins. Fill one with popcorn and another with loose, small items like M&Ms or chocolate-covered raisins. This creates height and contains the runaways. Now, place your stacks of cookies and clusters of yogurt pretzels. These are your structural landmarks.
- Create Flavor Neighborhoods. Think about grouping similar items. Make a “salty corner” with Goldfish and popcorn. Create a “chocolate district” with your M&Ms, Reese’s Pieces, and malt balls. Then, build a “fruity fun-zone” with your gummy bears and watermelon slices. This isn’t just for looks; it helps your guests intuitively navigate the board based on their craving.
- Fill in the Gaps & Add Texture.Now, take your remaining items and start filling in all the empty spaces. Scatter the licorice bites and animal crackers between the larger groups. The goal is to have very little of the actual board showing. As you fill, consciously mix textures—place a soft gummy worm next to a crunchy cookie, and a salty pretzel stick next to a sweet chocolate nonpareil. This visual and textural variety is what makes every bite exciting.
- The Final Flourish (Optional but Awesome). If you really want to go the extra mile, add a small bowl of something dippable in the center. A little cup of warm caramel sauce for the apples and pretzels, or a dollop of Nutella for the cookies and fruit, takes this from a 10 to an 11. If you included fresh fruit like strawberries or apple slices, tuck them in last so they stay fresh.
And that’s it! You didn’t just dump snacks on a plate; you designed an experience. Stand back and admire your work for a second. You’ve earned it.
Roll Out the Red Carpet: How to Serve Your Snack Board
Presentation is part of the fun! Place your finished board right in the center of the coffee table where everyone can reach it. This isn’t a formal dining situation; this is a “dig in with your hands” kind of feast.
I like to put out a stack of small napkins or, even better, little dessert bowls or paper cones. This lets everyone create their own personal mix without having to keep going back to the board. It also prevents the dreaded “double-dip” if you have any shared dips out.
The most important rule? There are no rules. Encourage your friends and family to mix flavors. A gummy bear on top of a popcorn? Yes. A yogurt pretzel dipped in caramel? Absolutely. The beauty of this board is that it invites creativity and conversation. It’s the ultimate interactive dining experience for a cozy night in.
Direct Your Own Flavor: Endless Variations
The template is here, but you are the director of your own snack board! Feel free to remix this based on your theme, dietary needs, or just what’s on sale. Here are a few of my favorite twists:
- The “Gourmet” Grown-Up Board: Swap in spiced nuts, high-quality dark chocolate bars (broken into chunks), fancy sea salt potato chips, marcona almonds, and dried figs or apricots. Perfect for a wine and movie night.
- The Holiday Hullabaloo: Easily theme your board for any season! Use holiday-shaped pretzels or cookies, red and green M&Ms, candy corn for Halloween, or pastel-coated chocolates for Easter. It’s an instant party.
- The Allergy-Friendly & Gluten-Free Board: So easy to accommodate! Use popcorn (check labels), Enjoy Life chocolates, Skittles, Starburst, gummy candies (most are GF), and gluten-free pretzels and crackers. Everyone gets to join the fun.
- The “No Left Behind” Board: Got half-empty bags of chips, trail mix, and cereal in the pantry? This is their moment! Combine them all on one board for a deliciously resourceful and unique spread that clears out your cabinets.
Beau’s Behind-the-Scenes Notes
Over the years, this board has become my signature move for any gathering that involves a screen. I’ve learned a few things. First, don’t stress about it being perfect. The first one I made for a big group looked a little… lopsided. But you know what? nobody cared once they started eating. The “messy” look is part of the charm!
Second, I always make more popcorn than I think I need. It’s the cheapest ingredient and it acts as a fantastic “filler” that makes the board look incredibly abundant. It’s the edible version of movie set dressing! This recipe has evolved from that dorm room floor map to what you see today, but the spirit of fun and sharing has never changed.
Your Snack Board Questions, Answered!
Q: How far in advance can I assemble this?
A: You can build it up to a few hours ahead, but I’d wait to add the popcorn until the last minute so it stays crisp. If you’re using fresh fruit, add that right before serving, too. The rest of the components hold up beautifully at room temperature.
Q: My board feels a little sparse. What can I do?
A: No worries! This is where popcorn is your best friend. Pile it high in a bowl or even directly on the board to create volume. You can also crinkle up some parchment paper and tuck it under certain areas to give them more height, making the whole arrangement look fuller.
Q: Help! I don’t have a fancy board. What can I use instead?
A> I’ve used a clean baking sheet, a large serving platter, a cutting board, and even a large piece of food-safe slate! In a real pinch, a clean sheet of poster board or the lid of a large plastic storage bin works just fine. It’s about the food, not the vessel.
Q: What’s the best way to store leftovers?
A> Simply deconstruct! Separate the different components into their own zip-top bags or airtight containers. The popcorn might lose a little crunch, but everything else will keep just fine for a few days. It’s like having pre-made snacks for the rest of the week!

Movie Night Snack Charcuterie Board : The Ultimate Sweet & Salty Spread
Description
Hey friends, Beau here! Let’s be real — what makes a movie night legendary? It’s not the sound system or the seat cushions. It’s the snacks.
We’ve spent too long settling for sad popcorn bowls and half-empty chip bags. It’s time to up the ante with the ultimate shareable, snackable masterpiece: the Movie Night Snack Charcuterie Board.
This is more than food — it’s a co-star. A colorful, texture-packed spread that transforms snacking from a side act into the main event. No cooking, no stress — just pure, delicious fun. Ready? Let’s roll credits on boring movie nights forever.
Ingredients
Think of this as your snack ensemble — every bite plays its part.
-
Popcorn (Buttery & Kettle Corn): Your fluffy, salty base.
Chef’s Insight: Mix buttery with kettle corn for the perfect salty-sweet balance. -
Goldfish Crackers: The cheesy, crunchy sidekick.
Swap it up: Use Cheez-Its, Annie’s Bunnies, or any cheesy bite. -
Mini Animal Crackers & Frosted Animal Cookies: Cute, crunchy, colorful — the comic relief.
-
Gummy Bears & Sour Watermelon Slices: Fruity, chewy heroes. That tangy punch? Unforgettable.
-
Red Licorice Bites: Bold, chewy texture and a hit of nostalgia.
-
M&Ms & Reese’s Pieces: Chocolate’s dynamic duo.
Chef’s Note: Using both creates a perfect visual and flavor balance. -
Chocolate-Covered Raisins & Malt Balls: The “mature” actors — rich, nostalgic, and perfectly snackable.
-
Yogurt-Covered Pretzels: The sweet-and-salty ambassador.
-
Mini Chocolate Chip Cookies: The comforting crowd-pleaser that ties it all together.
Optional extras:
Fresh strawberries or apple slices
Mini pretzel rods
Warm caramel or Nutella dip
Instructions
-
Set the Stage:
Use your largest serving board, baking sheet, or even a pizza pan. Line it with parchment paper for easy cleanup. -
Place Your Anchors:
Start with bowls of popcorn and loose candies. Stack cookies and pretzels for structure — these are your visual landmarks. -
Create Flavor Neighborhoods:
Group similar items:-
Salty corner: Popcorn + crackers
-
Chocolate zone: M&Ms + malt balls + Reese’s Pieces
-
Fruity district: Gummies + licorice
This makes the board feel natural and easy to navigate.
-
-
Fill the Gaps:
Tuck in the smaller items — animal crackers, gummies, and pretzels. The goal? No empty space. Variety is key! -
Add the Final Flourish:
Include a dip bowl (caramel, chocolate, or yogurt). Add any fresh fruit last so it stays fresh and bright. -
Admire Your Work:
Step back, grab a photo (you will want one), and get ready to wow the room.
Notes
-
Place the board at the center of your coffee table.
-
Hand out napkins, paper cones, or small bowls so everyone can build their own snack mix.
-
Encourage creativity — popcorn + gummy bear? Go for it. Yogurt pretzel dipped in caramel? Absolutely.
A Quick Note on the Good Stuff (and the Fun Stuff)
Let’s keep it real—this is a treat board, through and through. It’s not a salad, and it’s not meant to be. It’s a celebration of joy, nostalgia, and shared moments. That being said, you can absolutely make balanced choices within the framework.
Including elements like fresh strawberries, apple slices, or grapes adds a touch of natural sweetness and vitamins. You can opt for dark chocolate options for antioxidants, and look for lower-sodium popcorn or whole-grain crackers. But my philosophy at Feastical has always been about balance. Enjoy the indulgence, savor the moment with your people, and maybe have a green smoothie for breakfast tomorrow. Life’s too short not to enjoy a chocolate-covered malt ball with your besties.
The Credits Roll, But the Memory Lasts
Well, that’s a wrap! I hope you feel inspired and empowered to create your own epic Movie Night Snack Charcuterie Board. Remember, the goal isn’t perfection; it’s connection. It’s the laughter that erupts when someone discovers the perfect flavor combo, the quiet contentment of munching together in the dark, and the shared memory of a night that felt a little more special because the food was a part of the story.
So tell me, what’s going on your board? Tag me @Feastical on Instagram with a picture of your creation—I love seeing your kitchen wins! Now, go grab your remote, your coziest blanket, and dig into a night of fantastic films and even better snacks.
Happy munching,
Beau
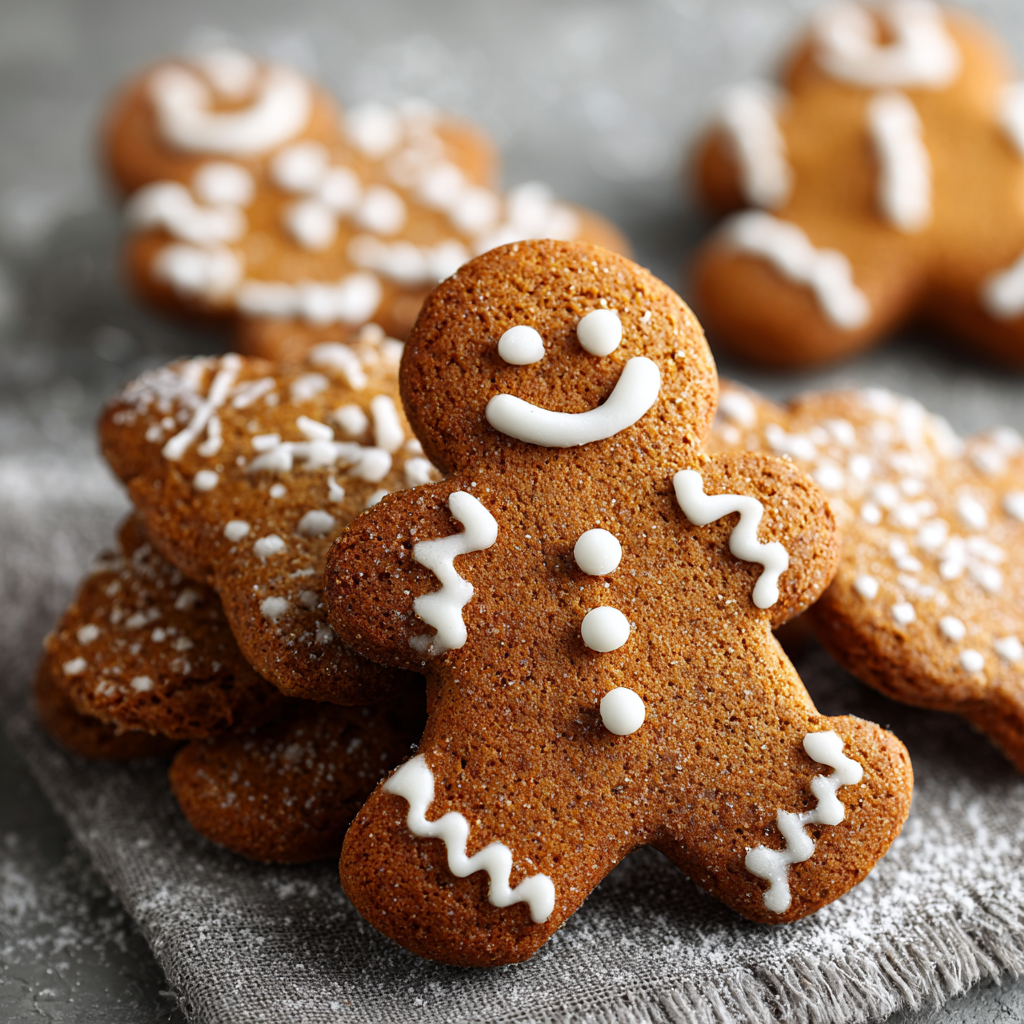
Classic Fluffy Gingerbread : Soft, Spiced & Perfect for Holiday Cut-Outs
Classic Fluffy Gingerbread: Your New Go-To Holiday Cookie
Hey friends, Beau here! Can you smell it? That magical, unmistakable aroma of warm ginger, spicy cinnamon, and rich molasses wafting through the house? To me, that’s the official scent of the holidays. It’s the smell of happiness, of gathered loved ones, and of flour-dusted countertops covered in festive cookie cutters.
If you’ve ever been intimidated by the idea of making gingerbread from scratch, let me stop you right there. I’m here to pull up a stool, hand you a rolling pin, and show you just how simple and soul-satisfying it can be. This isn’t just any gingerbread recipe; this is my go-to for creating the softest, fluffiest, most perfectly spiced gingerbread cookies you’ll ever sink your teeth into. They’re sturdy enough to hold their shape as reindeer, stars, and jolly old St. Nicks, but tender enough to melt in your mouth with every single bite.
We’re talking about more than just a cookie here. We’re crafting edible memories. This recipe is your blank canvas for a afternoon of festive fun, whether you’re flying solo with a mug of hot cocoa or hosting a full-blown decorating party with the whole family. So, tie on your favorite apron, friends. We’re about to bake up a whole lot of cozy, and I can’t wait to get started with you.
The Gingerbread House That Started It All
My love affair with gingerbread started, as many great food stories do, in my Grandma Eleanor’s kitchen. Every December, she’d pull out her big, yellow mixing bowl, and the transformation would begin. She wasn’t just making cookies; she was building a world. One year, she decided we weren’t just making cookies—we were constructing a full-scale gingerbread mansion, complete with a licorice fence and gumdrop shrubbery.
I was her chief dough-roller and sprinkles distributor, a title I wore with immense pride. I’ll never forget the feeling of that warm, pliable dough under my tiny hands, or the intense concentration on her face as she carefully placed the walls. The house, in the end, was… let’s call it “structurally unsound.” The roof slid off at a dramatic angle, and one wall was visibly thicker than the others. But when we finally stood back to admire our lopsided masterpiece, beaming with pride, I understood. It wasn’t about architectural perfection. It was about the laughter, the shared focus, and the incredible smell that clung to our clothes for days. That’s the spirit I bake into every single batch of this dough. It’s a recipe built for joy, not perfection.
Gathering Your Gingerbread Dream Team
Before we dive in, let’s chat about our ingredients. Using simple, quality components is the secret to a standout cookie. Here’s what you’ll need and why each one matters.
- 3 cups All-Purpose Flour: This is the backbone of our cookie, giving it the perfect structure for rolling and cutting. For a slightly more tender cookie, you can swap in 1/2 cup of cake flour, but all-purpose works beautifully.
- 1 tsp Baking Soda: Our leavening agent! This is the little powerhouse that gives these cookies their signature fluffy lift, preventing them from being hard and dense.
- 1 tsp Ground Ginger: The star of the show! It provides that warm, peppery kick that defines a great gingerbread. Feel like being bold? Bump it up to 1 ½ teaspoons for an extra-spicy cookie.
- 1 tsp Ground Cinnamon: Ginger’s best friend. Cinnamon adds a sweet, woody warmth that rounds out the spice profile perfectly.
- ½ tsp Ground Cloves: This is our secret weapon. Cloves bring an intense, aromatic depth that makes the flavor complex and unforgettable. A little goes a long way!
- ½ tsp Salt: Never skip the salt! It’s the flavor enhancer that makes all the spices pop and balances the sweetness. It’s the difference between a flat cookie and a fantastic one.
- ½ cup Unsalted Butter, softened: This brings the rich, tender texture and that irresistible buttery flavor. I always use unsalted so I can control the salt level. Chef’s Tip: Your butter is perfectly softened when you can press your thumb into it easily and leave an indentation, but it hasn’t started to melt or look greasy.
- 1 cup Brown Sugar: I prefer brown sugar over white for its deep molasses flavor and moisture. It gives the cookies a softer chew and a beautiful color.
- ½ cup Molasses: The soul of the gingerbread! I use regular, unsulphured molasses (not blackstrap) for its robust, bittersweet flavor. This is what gives gingerbread its iconic taste and dark color.
- 1 Large Egg: Our binding agent. The egg adds structure, richness, and helps create a tender crumb.
- Optional Twist: A ¼ tsp of freshly grated nutmeg adds a lovely, warm complexity, while the zest of one orange will brighten everything up with a citrusy sparkle. Try one, or both!
Let’s Get Baking: The Step-by-Step Guide to Gingerbread Bliss
Alright, team, it’s go-time! This is where the magic happens. Follow these steps, and you’ll have a kitchen that smells like a holiday dream and a batch of cookies that’ll make you a legend.
- Combine the Dry Ingredients: In a medium bowl, grab your whisk and give the flour, baking soda, ginger, cinnamon, cloves, and salt a good, thorough mixing. Whisking these together first ensures every single cookie gets an even distribution of spice and leavening, so no one gets a bland bite or a clump of baking soda. I call this the “flavor foundation.”
- Cream the Butter and Sugar: In a large bowl, use an electric mixer (or some serious elbow grease with a wooden spoon) to beat the softened butter and brown sugar together. We’re not just mixing them; we’re creaming them. Beat on medium-high speed for 2-3 minutes until the mixture is pale, fluffy, and wonderfully smooth. This step incorporates air, which is key for that soft, fluffy texture we’re after.
- Incorporate the Wet Ingredients: Crack in the egg and pour in that glorious, dark molasses. Mix on medium speed until everything is perfectly blended, scraping down the sides of the bowl as needed. The batter will be a beautiful, shiny brown and smell absolutely incredible already.
- Bring the Dough Together: Now, with your mixer on low, gradually add the dry ingredients to the wet. I like to add it in three parts to avoid a flour cloud erupting in my kitchen! Mix just until the flour disappears and a soft dough forms. Don’t overmix! As soon as it looks cohesive, stop the mixer.
- Chill Out (The Dough, That Is): This is the most important step for easy rolling! Divide the dough in half, flatten each half into a 1-inch thick disk, and wrap them tightly in plastic wrap. Chill for at least 1 hour, and up to 2 days. This firms up the butter, making the dough less sticky and much easier to roll out without sticking to your rolling pin. It also allows the flavors to meld together beautifully.
- Roll and Cut: Preheat your oven to 350°F (175°C) and line your baking sheets with parchment paper. Lightly flour your work surface and rolling pin. Take one disk of dough out of the fridge and roll it to a consistent ¼-inch thickness. This is the sweet spot for cookies that are sturdy but still soft. Now for the fun part! Dip your cookie cutters in a little flour to prevent sticking and start cutting out your shapes. Place them about 1 inch apart on the prepared baking sheets.
- Bake to Perfection: Bake for 8-10 minutes. The cookies are done when the edges are just set and the centers appear slightly puffed. They might still look a little soft in the middle—that’s exactly what we want! They will firm up as they cool. Overbaking is the enemy of a soft gingerbread, so err on the side of caution.
- Cool Completely: Let the cookies cool on the baking sheet for 5 minutes before transferring them to a wire rack to cool completely. This is a test of your willpower, I know, but decorating warm cookies is a recipe for runny icing! Let them get fully cool to the touch.
Sharing the Joy: How to Serve Your Gingerbread Masterpieces
Okay, the cookies are baked, the house smells divine, and you’re ready to serve. Here’s how to make the moment extra special.
For a classic presentation, I love piling these fluffy gingerbread cookies high on a rustic wooden board or a vintage cake stand. It just feels right. Set out bowls of royal icing, buttercream, sprinkles, and candies, and let your guests go to town decorating their own. It’s an instant party activity!
These cookies are a match made in heaven with a hot beverage. Serve them alongside a steaming mug of spiced apple cider, a rich hot chocolate, or my personal favorite, a strong cup of coffee. The bitterness of the coffee cuts through the sweet spice of the cookie in the most delightful way.
And don’t forget, these make incredible edible gifts! Stack them in a cellophane bag tied with a ribbon, or package them carefully in a festive tin. A homemade gift from the kitchen is always filled with more love than anything you can buy at a store.
Mix It Up! Fun Gingerbread Variations
Once you’ve mastered the classic, feel free to get creative! This dough is a wonderful canvas. Here are a few of my favorite twists:
- Orange-Spiced Delight: Add the zest of one large orange to the dough when you’re creaming the butter and sugar. The bright citrus note cuts through the richness and makes the spices sing.
- Lemon Glazed Gems: Skip the royal icing and instead, whisk together 1 cup of powdered sugar with 2-3 tablespoons of fresh lemon juice until smooth. Drizzle this simple glaze over the cooled cookies for a zesty, sweet-tart finish.
- Chocolate-Dipped Dream: Melt 1 cup of semi-sweet or dark chocolate chips. Dip half of each cooled cookie into the chocolate, let the excess drip off, and place on parchment paper. Sprinkle with a little sea salt before the chocolate sets for a next-level treat.
- Vegan-Friendly Swap: You can easily make this vegan! Use a plant-based butter stick (not spread) and a flax egg (1 tbsp ground flaxseed mixed with 3 tbsp water, let sit for 5 mins). For the molasses, just double-check the label to ensure it’s vegan-friendly.
- Spice Explorer: Add a ¼ teaspoon of black pepper or cardamom to the dry ingredients for a subtly complex, grown-up spice kick that will keep people guessing what your secret ingredient is!
Beau’s Kitchen Confidential
Over the years, I’ve learned a few things about this recipe. First, the dough might seem a bit soft right after mixing, but trust the chilling process. It transforms it from slightly unruly to a baker’s dream. Second, this recipe is a survivor. I once left a disk of dough in the back of my fridge for three days, and it baked up perfectly. The flavor was even deeper!
And a funny story: I once tried to rush the chilling step by putting the dough in the freezer for 15 minutes. It froze the outside but left the center soft, leading to a rolling disaster that looked more like a gingerbread topographical map of the Andes than a smooth cookie. Patience, my friends, is a virtue that yields flat, beautiful cookies. Learn from my mistakes!
Your Gingerbread Questions, Answered!
I’ve gotten a lot of questions about this recipe over the years. Here are the answers to the most common ones.
Q: My dough is too sticky to roll, even after chilling. What happened?
A: Don’t panic! This usually means the dough needs a bit more flour. The humidity in your kitchen can affect the dough. Lightly flour your work surface and rolling pin, and knead in a tablespoon of flour at a time until the dough is manageable but not tough.
Q: Why are my cookies spreading and losing their shape?
A: This is almost always a temperature issue. The butter in the dough was too warm when it went into the oven. Make sure you chill the dough for the full hour, and if your kitchen is very warm, you can even pop the cut-out shapes on the baking sheet into the freezer for 5-10 minutes before baking. Also, double-check your baking soda isn’t expired!
Q: My gingerbread is too hard. What did I do wrong?
A> The two most common culprits are overmixing the dough after adding the flour (which develops too much gluten) or overbaking. Remember, you only need to mix until the flour is *just* incorporated, and you should pull the cookies out when the edges are set, even if the centers look slightly soft.
Q: Can I make the dough ahead of time?
A> Absolutely! This is a fantastic make-ahead recipe. You can wrap the dough disks tightly and refrigerate them for up to 2 days. You can also freeze them for up to 3 months. Just thaw overnight in the fridge before rolling.

Classic Fluffy Gingerbread : Soft, Spiced & Perfect for Holiday Cut-Outs
Description
The Magic of Gingerbread
Can you smell it? That unmistakable aroma of warm ginger, spicy cinnamon, and rich molasses that fills your home with holiday cheer? This recipe brings all that—and more. These cookies are soft, fluffy, and full of cozy spice. They’re sturdy enough for decorating, but tender enough to melt in your mouth.
Whether you’re baking solo with a mug of cocoa or hosting a full-blown cookie-decorating party, this recipe is your ticket to instant holiday joy.
Ingredients
Dry Ingredients
-
3 cups all-purpose flour (swap ½ cup for cake flour for extra tenderness)
-
1 tsp baking soda
-
1 tsp ground ginger (bump up to 1½ tsp for extra zing!)
-
1 tsp ground cinnamon
-
½ tsp ground cloves
-
½ tsp salt
-
Optional: ¼ tsp grated nutmeg or zest of one orange for brightness
Wet Ingredients
-
½ cup unsalted butter, softened
-
1 cup brown sugar
-
½ cup molasses (use regular unsulphured, not blackstrap)
-
1 large egg
Instructions
1. Mix the Dry Team:
In a medium bowl, whisk together flour, baking soda, ginger, cinnamon, cloves, and salt. This ensures your spices and leavening are perfectly distributed.
2. Cream the Butter & Sugar:
In a large bowl, beat softened butter and brown sugar on medium-high for 2–3 minutes until pale and fluffy.
3. Add the Wet Ingredients:
Beat in the egg and molasses until fully blended and glossy.
4. Bring It Together:
On low speed, mix in the dry ingredients a little at a time until just combined. Stop as soon as you no longer see streaks of flour—don’t overmix!
5. Chill Time:
Divide dough in half, shape into disks, wrap tightly, and chill at least 1 hour (up to 2 days). This step makes rolling easy and boosts flavor.
6. Roll & Cut:
Preheat oven to 350°F (175°C). Roll chilled dough on a lightly floured surface to ¼-inch thickness. Cut out your favorite shapes with floured cutters and place on parchment-lined baking sheets, 1 inch apart.
7. Bake to Perfection:
Bake for 8–10 minutes, until edges are just set and centers are slightly puffed. Let cool 5 minutes on the sheet, then transfer to a rack.
8. Cool Completely Before Decorating:
Resist the urge to decorate too soon—icing will slide right off warm cookies!
Notes
-
Don’t skip chilling—it’s the difference between perfect cutouts and sticky chaos.
-
If dough is too sticky after chilling, knead in 1 tbsp of flour at a time.
-
Pop shaped cookies in the freezer for 10 minutes before baking if your kitchen is warm—this helps them keep their shape.
-
For deeper flavor, chill the dough overnight (or up to 2 days).
Nutritional Information (For Your Info!)
Hey, I’m all about balance! While we should definitely enjoy our holiday treats guilt-free, I know some of you like to keep track. Here’s a rough breakdown per cookie (based on a yield of 24 cookies). Remember, these are estimates and can vary based on the specific ingredients you use and the size of your cookie cutters.
- Calories: ~140
- Fat: 4g
- Carbohydrates: 24g
- Sugar: 11g
- Protein: 2g
- Fiber: <1g
These cookies get their energy mainly from the carbohydrates in the flour and sugar, providing a little boost for all your festive activities. The molasses also adds a tiny amount of iron and calcium. So, enjoy one (or two!) as part of your holiday celebrations.
Final Thoughts from My Kitchen to Yours
Well, friends, we’ve done it. We’ve taken a handful of simple ingredients and transformed them into something truly magical. This Classic Fluffy Gingerbread recipe is more than just a list of instructions; it’s an invitation to slow down, get your hands a little messy, and create something beautiful and delicious.
I hope this recipe finds its way into your holiday traditions, just like it has in mine. I hope it fills your kitchen with warmth and your heart with the same joy I feel every time I bake a batch. Remember, the slightly lopsided gingerbread man has more character, and the cookies you decorate with your loved ones will always be the most beautiful ones in the batch.
Now, I’d love to see your creations! Tag me @FeasticalBeau and use the hashtag #FeasticalGingerbread so I can share in your baking joy.
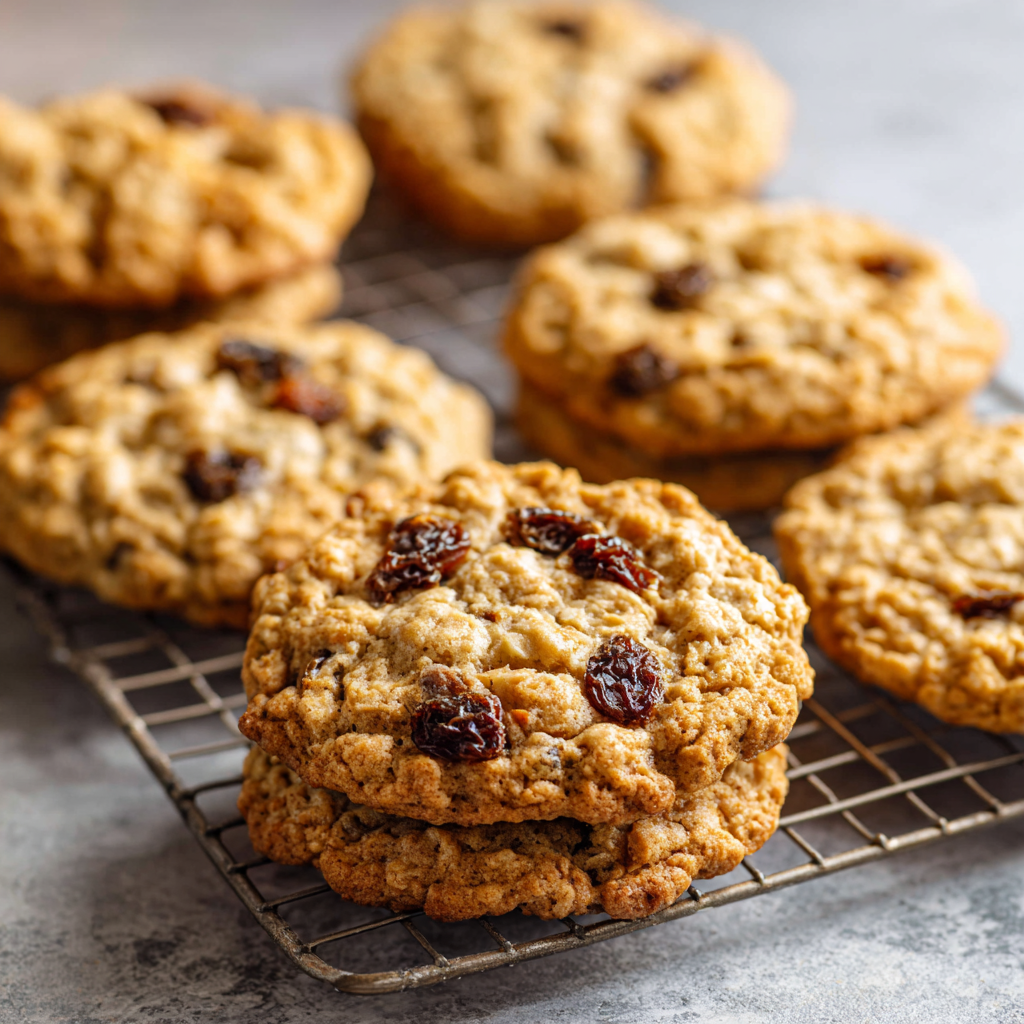
Bakery-Style Oatmeal Raisin Cookies : Chewy, Golden & Packed with Flavor
Bakery-Style Oatmeal Raisin Cookies: Your New Comfort Food Hero
Hey friends, Beau here! Let’s talk about a universal truth: there are cookies, and then there are COOKIES. You know the kind I mean. The ones you find in a glass-domed jar at a real-deal bakery—the ones that are somehow impossibly chewy, perfectly spiced, and so substantial they feel like a edible hug. For too long, the humble oatmeal raisin cookie has been the underdog of the cookie platter, but I’m here to tell you that when it’s done right, it’s an absolute showstopper.
Today, we’re not just making oatmeal raisin cookies. We’re crafting giants. We’re creating those thick, craggy-topped, golden-brown masterpieces that are soft and tender in the center with just the right amount of crisp around the edges. This recipe is my go-to for a reason. It’s a bit of a legend in my family and friend circle, and it’s about to become one in yours. We’re packing them with plump, juicy raisins, a double hit of warm cinnamon and nutmeg, and an optional (but highly recommended) crunch from toasted nuts. We’re even adding a secret ingredient—a splash of molasses—for a depth of flavor that will have people asking, “What is that amazing taste?”
So, tie on your apron, dig out that trusty mixing bowl, and preheat your oven. We’re about to fill your kitchen with the most incredible aroma and your cookie jar with the kind of treats that disappear faster than you can say, “Just one more!”
The Cookie That Built a Fort
I can trace my love for these cookies back to my grandma’s kitchen, a place that always smelled like cinnamon and unconditional love. She didn’t just make cookies; she built edible architecture. Her oatmeal raisin cookies were the size of a child’s palm and just as comforting. My cousin and I would sneak them, still warm and slightly bendy, and build literal forts out of the couch cushions, munching on our spoils as we planned our imaginary adventures.
For me, that’s what this recipe is all about. It’s not just a list of ingredients; it’s a vessel for memory. It’s the taste of rainy afternoons, of laughter echoing in the living room, and of the simple, profound joy that comes from a truly great homemade cookie. Every time I bake a batch, that warm, spiced smell transports me right back to that fort. My goal today is to help you create that same magic in your own kitchen, building new memories one delicious, chewy bite at a time.
Gathering Your Cookie Crew: The Ingredients
This is a big-batch recipe, perfect for gifting, potlucks, or stocking the freezer for future cravings. Don’t let the quantity scare you—the process is just as simple as any other cookie recipe. Here’s the lineup, with a few of my chef-y insights to guide you.
- 3 cups Crisco (or butter): Crisco is our secret weapon for a cookie that stays soft and chewy for days. It creates a higher, more cake-like texture. If you’re a butter purist, go for it! Just know your cookies will be a bit flatter, crispier, and have that classic buttery flavor. Both are fantastic, it just depends on your texture preference.
- 4 cups packed brown sugar & 2 cups granulated sugar: This is a sweet cookie, friends! The brown sugar brings that iconic molasses-y moisture and chew, while the white sugar helps with spreading and that lovely crisp edge.
- 4 large eggs: Our binders. They provide structure and richness. Make sure they’re at room temperature for a smoother, more emulsified dough.
- 1 cup water: This might seem unusual, but it’s the key to hydrating all those oats and ensuring the cookies don’t become dry. Trust the process!
- 4 teaspoons vanilla extract: Don’t be shy! Vanilla is the backbone of flavor in so many baked goods. Use the good stuff if you have it.
- 1 tablespoon molasses (optional): My pro-tip for depth! It amplifies the brown sugar flavor and gives the cookies a beautiful, warm color. Highly recommended!
- 12 cups quick oats: The star of the show! Quick oats blend into the dough more seamlessly than old-fashioned, giving us a more uniform, tender chew.
- 5 cups all-purpose flour: The structural foundation. It gives the cookies their body.
- 2 teaspoons cinnamon & ½ teaspoon nutmeg: The warm, cozy soul of this cookie. The nutmeg is optional, but it adds a wonderful, subtle complexity.
- 4 teaspoons salt & 2 teaspoons baking soda: Salt is a flavor enhancer—it makes the sweet and spice pop. Baking soda is our leavening agent, helping the cookies rise and spread.
- 2 cups raisins: I like to plump mine up by soaking them in hot water for 10 minutes, then draining them thoroughly. This makes them incredibly juicy in the final cookie.
- 1½ cups chopped walnuts or pecans (optional): For texture and a nutty richness. Toasting them first in a dry skillet for a few minutes takes their flavor to a whole new level.
Let’s Get Baking: The Step-by-Step Magic
Ready to make some magic? This is where the fun begins. I’ll walk you through each step, sharing all my little hacks to ensure cookie perfection.
- Preheat and Prep. Fire up your oven to 350°F (175°C). Line your baking sheets with parchment paper. This is a non-negotiable for me—it prevents sticking and makes cleanup an absolute dream. No parchment? A light greasing will do in a pinch.
- Cream the Good Stuff. In a very large bowl (I’m not kidding, this is a big batch!), cream together the Crisco (or butter), brown sugar, and granulated sugar. Use an electric mixer on medium speed for a good 2-3 minutes. We’re not just mixing; we’re creaming. This incorporates air into the fat and sugar, which is what gives our cookies a lovely, light texture. You’ll know it’s ready when the mixture turns pale and fluffy.
- Combine the Wet Team. Beat in the eggs, one at a time, letting each one fully incorporate before adding the next. This ensures a smooth, emulsified dough. Now, mix in the water, vanilla extract, and that secret weapon—the molasses. The dough might look a little curdled at this point, but don’t panic! It will all come together when we add the dry ingredients.
- Whisk the Dry Team. In a separate, equally large bowl, whisk together the flour, salt, baking soda, cinnamon, and nutmeg. Whisking is crucial here—it evenly distributes the baking soda and spices so you don’t get a bitter bite in one cookie and a bland one in the next.
- The Grand Union. Gradually add the dry ingredients to the wet ingredients, mixing on low speed until just combined. My number one tip here: DO NOT OVERMIX. Overworking the flour develops gluten, which can lead to tough cookies. A few streaks of flour are okay—we’ll finish mixing by hand.
- Fold in the Fun Bits. Switch to a sturdy wooden spoon or spatula. Stir in the quick oats, followed by the plump raisins and toasted nuts (if using). Mix until everything is evenly distributed. You’ll have a very thick, hearty dough—exactly what we want for our bakery-style cookies!
- Scoop with Confidence. Using a cookie scoop (a #20 or 3-tablespoon scoop is perfect for large cookies), portion the dough onto your prepared baking sheets. Leave about 2 inches between each one because these beauties will spread. For an extra-professional look, roll the scooped dough into a rough ball and slightly flatten the top with your palm.
- Bake to Perfection. Bake for 10-12 minutes. We’re looking for golden brown edges and centers that look just barely set. The secret to a chewy cookie? Take them out when they still look a tiny bit underdone in the middle. They will continue to cook on the hot baking sheet. Over-baking is the enemy of chewiness!
- The Cool Down. This is the hardest part: patience. Let the cookies cool on the baking sheet for a full 5 minutes. This allows them to set up properly. Then, transfer them to a wire rack to cool completely. This step ensures the bottom doesn’t get soggy.
How to Serve These Golden Gems
Sure, you can just pile these on a plate and call it a day (a perfectly wonderful day, I might add). But if you want to elevate the experience, here are a few of my favorite ways to serve them.
The Classic Combo: Serve a platter of these cookies alongside a tall, ice-cold glass of milk. It’s a timeless pairing for a reason. For the adults, a mug of strong black coffee or a latte makes for a sublime afternoon break.
À La Mode Extravaganza: Warm a cookie for 10 seconds in the microwave and top it with a scoop of high-quality vanilla bean ice cream. The contrast of warm, spiced cookie and cold, creamy ice cream is nothing short of divine.
The Gift of Good Taste: These cookies are incredible gifts! Let them cool completely, then stack them in a cellophane bag tied with a rustic ribbon, or arrange them in a festive tin. A homemade gift from the kitchen is always a winner.
Make It Your Own: Delicious Recipe Variations
This recipe is a fantastic canvas for your creativity. Feel free to play and adapt it to your heart’s content! Here are a few of my favorite twists.
- Chocolate Chip Oatmeal: Can’t decide between an oatmeal raisin and a chocolate chip cookie? Don’t! Swap the raisins for 2 cups of semi-sweet chocolate chips. It’s a crowd-pleasing classic.
- Cranberry White Chocolate: For a tangy, sweet twist, use dried cranberries instead of raisins and fold in 1 ½ cups of white chocolate chips. The red and white makes them especially pretty around the holidays.
- Gluten-Free Goodness: You can easily make these gluten-free! Simply replace the all-purpose flour with your favorite 1:1 gluten-free flour blend. The oats are naturally gluten-free, but be sure to use certified gluten-free oats if you have a sensitivity.
- “Kitchen Sink” Power Cookies: Go all out! Add a mix of raisins, chocolate chips, shredded coconut, and your favorite nuts. It’s a hearty, energy-packed cookie perfect for an on-the-go snack.
- Spice It Up: If you love warmth, add an extra teaspoon of cinnamon or a ¼ teaspoon of ground cloves or ginger to the dry ingredients.
Beau’s Chef’s Notes & Kitchen Confessions
This recipe has been through many iterations in my kitchen. I once, in a moment of sheer distraction, accidentally used baking powder instead of baking soda. The result was puffy, cake-like cookies with no spread—not terrible, but not the chewy dream we’re after! It was a good reminder to always label my pantry jars. Over the years, I’ve landed on this version as the absolute gold standard. The molasses tip came from a baker friend of mine, and the water addition was a happy accident that turned into a game-changer. Don’t be afraid to make this recipe your own. That’s the beautiful thing about cooking—it’s a living, breathing art form.
Your Cookie Questions, Answered!
Q: My cookies spread too much and became flat. What happened?
A: This is usually a temperature issue. Your dough was likely too warm when it went into the oven. If you feel your dough is very soft, pop the bowl in the refrigerator for 20-30 minutes before scooping and baking. Also, double-check that you used baking soda, not baking powder.
Q: Can I freeze the cookie dough?
A: Absolutely! This is one of my favorite meal prep tricks. Scoop the dough into balls and freeze them on a parchment-lined sheet. Once solid, transfer them to a freezer bag. You can bake them straight from the freezer—just add 1-2 minutes to the baking time. Hello, fresh cookies anytime!
Q: My cookies are dry. How can I prevent that?
A: The most common culprit is over-baking. Remember, take them out when the edges are golden and the centers look slightly underdone. Also, be sure to measure your flour correctly. Spoon it into your measuring cup and level it off; don’t scoop directly from the bag, as this can pack in too much flour.
Q: Can I use old-fashioned oats instead of quick oats?
A> You can, but the texture will be different. Old-fashioned oats are larger and heartier, which will give your cookies a more robust, chewy texture. The cookies may also be a bit more crumbly. I prefer quick oats for their uniform blend, but it’s a matter of personal taste!

Bakery-Style Oatmeal Raisin Cookies : Chewy, Golden & Packed with Flavor
Description
Bakery-Style Oatmeal Raisin Cookies
Ingredients
-
1 cup (230 g) unsalted butter, softened
-
1 ¼ cups (250 g) brown sugar, packed
-
½ cup (100 g) granulated sugar
-
2 large eggs
-
2 tsp pure vanilla extract
-
1 ½ cups (190 g) all-purpose flour
-
1 tsp baking soda
-
1 ½ tsp ground cinnamon
-
½ tsp salt
-
3 cups (270 g) old-fashioned rolled oats
-
1 ½ cups (210 g) raisins
-
Optional: ½ cup (60 g) chopped walnuts or pecans
Instructions
-
Preheat oven to 350°F (175°C). Line two baking sheets with parchment paper.
-
Cream the butter and sugars together in a large bowl using a hand or stand mixer until light and fluffy (about 2–3 minutes).
-
Add eggs and vanilla. Beat until well combined.
-
In a separate bowl, whisk together flour, baking soda, cinnamon, and salt.
-
Add dry ingredients to the wet mixture. Mix just until combined — don’t overmix.
-
Stir in oats, raisins, and nuts (if using) with a wooden spoon or spatula until evenly distributed.
-
Scoop dough using a 2-tablespoon cookie scoop and place on the prepared baking sheets, leaving about 2 inches between each cookie.
-
Bake for 10–12 minutes, until edges are golden and centers still look slightly soft.
-
Cool on the baking sheet for 5 minutes before transferring to a wire rack to cool completely.
Notes
-
For chewier cookies, slightly underbake and let them finish setting on the tray.
-
For crispier cookies, bake 1–2 minutes longer.
-
You can soak raisins in warm water or rum for 10 minutes before adding for extra plumpness.
Nutritional Information (A Quick Bite-Sized Look)
Hey, I’m all about balance! While these are definitely a treat, it’s always good to know what you’re enjoying. Here’s a rough estimate per cookie (based on a yield of 65 cookies, using Crisco and including nuts). Remember, these values can vary based on your specific ingredients and portion sizes.
- Calories: ~180
- Carbohydrates: 26g
- Fat: 7g
- Fiber: 2g (Thank you, oats and raisins!)
- Protein: 3g
These cookies get a good amount of their energy from complex carbohydrates in the oats, providing a more sustained release of energy than a cookie made with just white flour. Everything in moderation, friends!
Final Thoughts from My Kitchen to Yours
Well, there you have it—my heart and soul baked into one, big, beautiful batch of oatmeal raisin cookies. This recipe is more than just a list of instructions; it’s an invitation to slow down, to create, and to share something made with love. The smell of cinnamon and toasting oats wafting through your home is one of life’s simplest and greatest pleasures.
I truly hope this recipe becomes a staple in your home, a source of joy for your people, and a reason to gather around the table. Now, I’d love to hear from you! Did you add your own twist? Did your kitchen smell like heaven? Snap a picture and share your Feastical creations with me on social by tagging @Feastical!
Happy baking, friends!
Beau

Christmas Pretzel Hugs : Easy Holiday Candy with a Sweet & Salty Twist
Your New Favorite Holiday Tradition: Christmas Pretzel Hugs
Hey friends, Beau here! Can you smell that? It’s the scent of pine needles, cinnamon sticks, and pure, unadulterated holiday magic wafting from the kitchen. And you know what? You’re officially invited to join the party. If you’ve ever found yourself scrolling through endless complicated dessert recipes, feeling that familiar pang of “I-don’t-have-time-for-this,” then take a deep breath and get ready to fall in love. Today, we’re making Christmas Pretzel Hugs, and I promise, they are the easiest, most crowd-pleasing treat you’ll whip up this season.
Imagine this: a crisp, salty pretzel cradling a perfectly melted Hershey’s Kiss, all hugged tight by a cheerful M&M that adds a delightful crunch. It’s that magical sweet-and-salty combo we all crave, wrapped up in a bite-sized piece of edible joy. These little guys are the heroes of hectic holidays. They require zero baking skills, just a few minutes of your time, and they are guaranteed to bring smiles to faces young and old. Whether you’re building a legendary cookie tray, need a last-minute party snack, or want to create heartfelt, homemade gifts for neighbors and teachers, this recipe is your golden ticket. So, let’s ditch the stress and dive into some delicious, simple fun. Your kitchen is about to become the heart of the holiday!
A Kitchen Memory: Where It All Began
I’ll never forget the first time I made these. It was my second year running Feastical, and I was up to my eyeballs in testing a complicated croquembouche for a video (a story for another day, complete with caramel disasters). My niece, Lily, who was about six at the time, wandered into the kitchen with big, curious eyes, wanting to “help the chef.” I looked at the mountain of dirty bowls and the delicate pastry puffs and knew I needed a Plan B, fast.
I remembered a friend mentioning “pretzel hugs,” and we decided to give them a shot. What happened next was pure magic. Lily’s little hands were so careful arranging the pretzels, and her face lit up with every “plink” of an unwrapped Hershey’s Kiss hitting its salty base. When they came out of the oven, she pressed the M&Ms on top with such serious concentration, declaring each one “a button of happiness.” That messy, joyful, 20-minute baking session with her became one of my all-time favorite holiday memories. It wasn’t about a perfect, fancy dessert; it was about the connection, the laughter, and the sheer, simple delight of creating something together. That’s the real spirit of Feastical, and it’s baked right into every single one of these pretzel hugs.
Gathering Your Happy Ingredients
The beauty of this recipe is in its beautiful simplicity. You only need three core ingredients to create this holiday wonder! Here’s what you’ll need, along with a few chef-y insights to make your process even smoother.
- 140 Square Pretzel Snaps: The sturdy, salty foundation of our treat. I love the classic “snap” shape because it creates a perfect little cup to hold the chocolate. Chef’s Tip: If you can only find the tiny twist pretzels, those work too, but the snaps give you the best structural integrity and flavor balance.
- 140 Hershey’s Kisses: The melty, creamy heart of the hug! Classic milk chocolate is a winner, but don’t be afraid to play. Substitution Insight: Hugs (the striped ones) are fantastic for a swirled look, and Peppermint Swirl Kisses add a festive kick. For a more sophisticated twist, dark chocolate kisses or even caramel-filled ones are divine.
- 140 Red & Green M&M Candies: The festive “hat” that seals the deal! They add a pop of color and a satisfying crunch. Quick Swap: If it’s not Christmas, use any color M&Ms! For a different texture, you could use a single pecan half or a mini marshmallow.
Optional, but oh-so-fun: A little sprinkle of flaky sea salt right after you press the M&M can elevate the sweet-and-salty profile to gourmet levels. Or, for a peppermint blast, a dusting of crushed candy canes looks stunning!
Let’s Make Some Magic: Step-by-Step Instructions
Ready? Let’s do this! I’ll walk you through each step with all my favorite little hacks to ensure your pretzel hugs are absolutely perfect.
- Preheat and Prep. First things first, preheat your oven to a low and slow 200°F (95°C). This low temperature is our secret weapon—it’s just enough to soften the chocolate without turning it into a puddle. While it’s warming up, line your baking sheets with parchment paper. Chef’s Hack: Parchment paper is non-negotiable here. It prevents sticking and makes cleanup an absolute dream. No parchment? A silicone baking mat works wonderfully too.
- Arrange Your Base. Grab your pretzel snaps and arrange them in a single layer on your prepared baking sheets. Give them a little space, but don’t worry about them being miles apart. They aren’t going to spread! Pro Tip: This is a fantastic step to delegate to little helpers. They love creating the “pretzel parade.”
- The Kissing Booth. Unwrap all your Hershey’s Kisses. I know, I know—this is the most “labor-intensive” part. Pop on some holiday music and make a production of it! Place one unwrapped Kiss right in the center of each pretzel. Chef’s Insight: See the little point on the Kiss? Make sure it’s facing up. It helps guide the M&M into the perfect spot later.
- The Warm Hug. Carefully place the baking sheet in your preheated oven. Now, watch them like a hawk! Bake for just 2-3 minutes. You’re looking for the chocolate to become glossy and soft to the touch. Do not wait for them to look completely melted and flat! Biggest Tip: The residual heat will continue to soften them once they’re out of the oven. An extra 30 seconds can be the difference between a perfect hug and a chocolate swamp.
- The Grand Finale. Pull the baking sheet out of the oven (please use an oven mitt!). Immediately, but gently, press one M&M candy right into the center of each softened Kiss. You’ll feel the chocolate squish down and hug the pretzel. Chef’s Secret: Press straight down firmly, but don’t twist. A twist can cause the chocolate to swirl out from under the M&M.
- The Patience Game. Now, let them cool. You can leave them at room temperature, but if you’re as impatient as I am (or have little fingers eager to taste-test), pop the entire baking sheet into the refrigerator for 15-20 minutes. This speeds things up and gives the chocolate a lovely snap when you bite into it.
Sharing the Joy: How to Serve Your Pretzel Hugs
Okay, they’re set, they’re gorgeous, and they’re begging to be shared! Presentation is half the fun with these. For a classic holiday cookie tray, pile them high in a festive bowl or scatter them amongst your other baked goods—they add instant color and charm. If you’re turning them into edible gifts, you have so many options! Clear cellophane treat bags tied with a curly ribbon make perfect little “goodie bags” for classmates or coworkers. For something a bit fancier, stack them in a decorative holiday tin between layers of parchment paper. I’ve even seen people create beautiful pretzel hug “wreaths” by arranging them in a circle on a plate! However you serve them, the reaction is always the same: pure delight.
Get Creative! Fun Recipe Variations
Once you’ve mastered the classic, the kitchen playground opens up! Here are a few of my favorite twists to keep things exciting:
- Peppermint Perfection: Use Peppermint Swirl Hershey’s Kisses and top with a sprinkle of crushed candy cane instead of an M&M. It’s like a peppermint patty and a pretzel had a holiday baby.
- Salted Caramel Dream: Swap in Rolo candies for the Kisses. Bake as directed, and after you press them (a pecan half works wonderfully here), give them a tiny pinch of flaky sea salt. Unreal.
- Dark Chocolate Elegance: Use dark chocolate Kisses or even a small square of a high-quality dark chocolate bar. Top with a single dried cranberry and a tiny piece of rosemary for a truly sophisticated bite.
- White Chocolate Wonderland: White chocolate Hugs or melts are a beautiful base. Top them with a green M&M and a sprinkle of red sanding sugar for a super festive look.
- PB&J Bite: This one’s for the kids! Use a Peanut Butter Cup Mini (unwrapped) as your base. After baking, press a single red M&M on top for that classic jelly vibe.
Beau’s Chef Notes & Kitchen Stories
This recipe has seen a lot of love and a few happy accidents in my kitchen. One year, I was in such a rush that I accidentally set the oven to 300°F instead of 200°F. Let’s just say I created “Christmas Pretzel Puddles” in record time! The lesson? Double-check that oven dial. Over the years, I’ve learned that the “low and slow” method is the only way to go. I’ve also started making double batches right from the start—they disappear faster than you can say “ho ho ho!” The best part is that this recipe is practically foolproof. It’s a testament to the fact that the most beloved foods are often the simplest ones, made with a generous dash of joy.
Your Questions, Answered! FAQs & Troubleshooting
I’ve gotten tons of questions about these over the years, so here are the answers to the most common head-scratchers.
- Q: My chocolate melted completely and ran off the pretzel! What happened?
A: Your oven was likely too hot. Oven thermostats can be notoriously inaccurate. Invest in a cheap oven thermometer to check the real temperature. Also, remember, 2-3 minutes is a guideline—start checking at 2 minutes!
- Q: Can I make these ahead of time?
A: Absolutely! They are a fantastic make-ahead treat. Once fully set, store them in an airtight container at room temperature for up to a week, or in the fridge for up to two weeks. Just be careful—they can be fragile!
- Q: My M&Ms are cracking! Why?
A: This usually means the chocolate underneath wasn’t quite soft enough when you pressed the M&M. Make sure your Kiss is glossy and soft to the touch right out of the oven. Press firmly and quickly.
- Q: Can I use other types of chocolate?
A: You bet! Chocolate almond bark or Wilton melting wafers are a great choice as they are specifically designed to melt smoothly and set firmly. Just break them into small, Kiss-sized pieces.
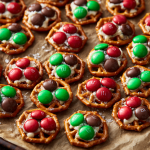
Christmas Pretzel Hugs : Easy Holiday Candy with a Sweet & Salty Twist
Description
Your New Favorite Holiday Tradition: Christmas Pretzel Hugs
Hey friends, Beau here! Can you smell that? It’s the scent of pine needles, cinnamon sticks, and pure, unadulterated holiday magic wafting from the kitchen. And you know what? You’re officially invited to join the party.
If you’ve ever found yourself scrolling through endless complicated dessert recipes, feeling that familiar pang of “I-don’t-have-time-for-this,” then take a deep breath and get ready to fall in love. Today, we’re making Christmas Pretzel Hugs — the easiest, most crowd-pleasing treat you’ll whip up this season.
Instructions
Set your oven to 200°F (95°C) — low and slow!
Line baking sheets with parchment paper or silicone mats for easy cleanup.
Place pretzel snaps in a single layer on your baking sheet. This is a great step for little helpers!
Unwrap your Hershey’s Kisses (holiday music makes this part go faster!) and place one in the center of each pretzel, pointy tip facing up.
Bake for 2–3 minutes, just until the chocolate looks glossy and soft.
Don’t overbake — they’ll continue to soften from residual heat!
Remove the tray from the oven and immediately press an M&M candy gently into the center of each Kiss.
Chef’s Secret: Press straight down, not sideways, to avoid spreading the chocolate.
Let them cool completely at room temp, or chill in the fridge for 15–20 minutes if you’re in a hurry.
Once firm, they’re ready to serve or package!
Notes
-
Double-check your oven temp! 300°F turns these into puddles.
-
Make double batches — they vanish.
-
Imperfect ones (tilted M&Ms, uneven chocolate) are often the most charming.
-
Store in an airtight container at room temp for up to 1 week or refrigerated for 2 weeks.
Nutrition
- Calories: 45 Cal Per Serving
- Sugar: 4g
- Fat: 2g
- Carbohydrates: 6g
Quick Nutritional Snapshot
Now, we all know this is a treat, not a salad! But it’s always helpful to know what you’re enjoying. Here’s a rough estimate per piece (assuming classic milk chocolate Kisses):
- Calories: ~45
- Fat: 2g
- Carbohydrates: 6g
- Sugar: 4g
- Sodium: 15mg (hello, salty pretzel!)
- Protein: <1g
The beauty of this treat is that it’s a small, portion-controlled bit of sweetness. You can enjoy one or two without any guilt, savoring that perfect sweet-and-salty combo!
Final Thoughts from My Kitchen to Yours
Well, there you have it, my friends—the complete guide to creating pure holiday happiness with Christmas Pretzel Hugs. This recipe is more than just a list of ingredients and steps; it’s an invitation to slow down, have fun, and create something that brings people together. It’s proof that you don’t need to be a professional pastry chef to make memorable, delicious food. All you need is a warm oven, a few simple ingredients, and a heart full of holiday spirit.
I hope you and your loved ones have as much fun making these as my niece Lily and I did. If you give them a try, I’d love to see your creations! Tag me on social @Feastical or @BeauCollier so I can share in your kitchen victory. From my family to yours, have a delicious and joy-filled holiday season. Now, go hug a pretzel!

Santa Nutter Butter Cookies : A Fun, Festive Holiday Treat
Santa Nutter Butter Cookies: Your New Favorite No-Bake Holiday Tradition!
Hey friends, Beau here from Feastical! Can you smell it? That magical time of year is upon us. The air is crisp, the holiday tunes are spinning, and my kitchen… well, my kitchen is officially in full-blown festive mode. I’m talking about sprinkles everywhere, the warm scent of gingerbread, and the joyful chaos that comes with creating edible happiness.
But I get it. Between shopping for gifts, decking the halls, and trying to remember where you stored all the holiday decorations, finding time to bake an elaborate batch of cookies can feel like a chore. And around here, we believe food should never, ever feel like a chore. That’s why I’m so ridiculously excited to share one of my all-time favorite holiday hacks with you: these absolutely adorable Santa Nutter Butter Cookies.
These little guys are the ultimate feel-good food project. They require zero baking, come together in under an hour, and are guaranteed to bring a smile to every single face that sees them. We’re taking the humble, deliciously peanut-buttery Nutter Butter cookie and giving it a full Santa makeover. With a little melted white chocolate, some festive sprinkles, and a whole lot of love, we’re creating a treat that’s as fun to make as it is to eat. So, grab your favorite apron, call the kids (or just embrace your inner kid), and let’s make some holiday magic together!
The Year the Elves Took Over My Kitchen
I have to confess, I didn’t invent this recipe. This little gem was a happy accident that stumbled into my life a few years back. My niece and nephew were visiting for the weekend, and we had promised to make Christmas cookies. I had grand plans for intricately decorated sugar cookies, but a last-minute plumbing issue left us with a kitchen that was, let’s just say, not fit for a baking marathon.
Panic started to set in. I had two very excited little chefs and zero oven. Then, I saw it: a lonely sleeve of Nutter Butters in the pantry, next to some leftover white chocolate from a previous project. A lightbulb went off. “What if…,” I thought. We melted the chocolate, dug out every red sprinkle and candy we could find, and in a flurry of giggles and sticky fingers, the very first Santa Nutter Butter was born. It was a little lopsided, with one eye bigger than the other, but the pure joy it inspired was absolutely perfect. That day, we learned that the best holiday traditions aren’t about perfection—they’re about the messy, happy, delicious moments we share.
Gathering Your Santa Squad: What You’ll Need
The beauty of this recipe is its simplicity. You probably have a few of these items in your pantry already! Here’s your shopping list for 24 jolly little Santas.
- 24 Nutter Butter cookies – The star of the show! Their iconic peanut shape is the perfect base for Santa’s face and beard. Keep them sealed until you’re ready to decorate to ensure they stay crisp.
- 1½ cups white chocolate chips or vanilla almond bark – This is Santa’s fluffy white beard! I often use almond bark because it melts smoothly and sets up firmly, but high-quality white chocolate chips work beautifully too. Chef’s Insight: If using chocolate chips, a tiny teaspoon of coconut oil can help thin it for a perfect dipping consistency.
- Red sanding sugar or red sprinkles – This creates Santa’s iconic hat. Sanding sugar gives a vibrant, solid red look, while round sprinkles add a fun, textured sparkle. Feel free to use what you love!
- Mini chocolate chips – These are for Santa’s twinkling eyes. Their small size is just right for the scale of the cookie.
- Red M&M’s – The perfect, plump little nose for our festive friend. If you don’t have M&M’s, a red Sixlet or even a red sprinkle will work in a pinch!
- White chocolate chips or mini marshmallows – This is the fluffy pom-pom on the end of Santa’s hat! A white chocolate chip is cute, but a mini marshmallow cut in half gives a wonderfully textured, classic look.
Let’s Build Some Santas! Your Step-by-Step Guide
Alright, team, this is where the fun begins. Clear a space on your counter, line a baking sheet with wax or parchment paper, and let’s get our hands (a little bit) dirty. I’ll walk you through every step with a few of my favorite chef hacks to make this process a breeze.
- Melt Your White Chocolate Like a Pro. Place your white chocolate or almond bark in a microwave-safe bowl. Heat it in the microwave on 50% power for 30-second intervals, stirring vigorously between each burst. Why 50% power? It prevents the chocolate from seizing up and becoming a grainy mess. You want it smooth and fluid. Chef’s Hack: If your chocolate is still a bit thick, stir in that ½ teaspoon of coconut oil I mentioned—it’s a game-changer.
- The Dip & Drip Technique. Hold a Nutter Butter cookie by its edges. Carefully dip the TOP third of the cookie into the melted white chocolate, letting the excess drip back into the bowl. Now, flip it and dip the BOTTOM third. The goal is to leave the middle section of the cookie untouched—this will be Santa’s lovely peanut-buttery face. Place the cookie on your prepared baking sheet.
- Create the Festive Hat. Immediately, while the white chocolate on the TOP section is still wet, dip it straight into your bowl of red sanding sugar. Gently press it down to make sure you get a good, vibrant coating. This is Santa’s hat, so don’t be shy!
- Add the Pom-Pom. Now, take your white chocolate chip or half of a mini marshmallow and gently press it onto the very tip of the red “hat” to create the fluffy pom-pom. Doing this while everything is still wet acts as its own edible glue.
- Give Santa a Face. This is my favorite part—it’s when the personality shines through! Take two mini chocolate chips and press them point-side-down into the bare middle section of the cookie for the eyes. Then, take a red M&M and place it right in the center, just below the eyes, for his cheerful nose. Chef’s Tip: If your chocolate has started to set and the candies aren’t sticking, just dab a tiny, tiny bit of melted chocolate on the back of them to act as adhesive.
- The Patience Game. Once all your Santas are assembled, let them sit at room temperature until the white chocolate is completely firm. This usually takes 15-20 minutes. You can pop the tray in the fridge to speed things up, but let them come back to room temperature before storing to prevent condensation.
Spreading the Holiday Cheer: How to Serve Your Santas
Presentation is part of the fun! You’ve just created a platoon of adorable edible Santas, so let’s show them off. I love arranging them on a simple white platter or a rustic wooden board—it really makes their red and white colors pop. For a real “wow” factor, create a scene! Place them on a bed of fluffy “snow” made from shredded coconut or even a sprinkle of powdered sugar.
These cookies are the life of any party. Pile them high on a cake stand for your holiday open house, pack them carefully in cellophane bags for a sweet teacher gift, or line them up on a plate for Santa on Christmas Eve (I have it on good authority they’re his favorite). They’re a guaranteed conversation starter and an instant mood-lifter. Seeing that row of jolly faces is like getting a warm hug from the North Pole itself.
Mix It Up! Fun Santa Nutter Butter Variations
One of the best things about this recipe is how easily you can customize it. Got a different candy craving? A dietary need? Let’s get creative!
- The Snowman Swap: Not feeling the Santa vibe? Turn them into snowmen! Dip the entire cookie in white chocolate, then use mini chocolate chips for a coal smile and eyes, and an orange sprinkle for the carrot nose.
- Reindeer Rendezvous: Create Rudolph! Use pretzel sticks for antlers, brown M&M’s for eyes, and a red M&M for his shiny nose. You can even use a little black icing to draw on a smile.
- Nut-Free Necessity: Have a nut allergy in the family? No problem! Several brands make peanut-shaped sandwich cookies with a sunflower butter or cookie butter filling. They work exactly the same way.
- Chocolate Lover’s Dream: Swap the white chocolate for milk or dark chocolate for the beard! Use yellow M&M’s or butterscotch chips for the nose to create a “Gingerbread Santa” look.
- Gluten-Free Friendly: Check your grocery store for gluten-free peanut-shaped sandwich cookies. The rest of the ingredients are naturally gluten-free, making this an easy swap for everyone to enjoy.
A Few Chef’s Secrets from My Kitchen to Yours
Over the years, my Santa Nutter Butter assembly line has gotten a little more streamlined, but the spirit remains the same. I’ve learned to embrace the “imperfect” Santas—the one with a slightly crooked nose or one eye that’s winking. Those ones have the most character! One year, my dog managed to sneak one off the counter, and let me tell you, he was not sorry about it. We just made a new one and laughed it off. That’s what these cookies are all about: fun, not fuss. I always double the batch because, trust me, you’ll want to have extras for snacking, gifting, and those last-minute “I need a treat to bring!” moments. They’ve become a non-negotiable part of my holiday season, and I have a feeling they’re about to become one of yours, too.
Your Santa Cookie Questions, Answered!
Even the simplest recipes can have a hiccup or two. Here are answers to the most common questions I get about these festive treats.
- Q: My white chocolate is thick and clumpy! What did I do wrong?
A: This is called “seizing,” and it usually happens if even a single drop of water gets into the chocolate, or if it’s overheated. To fix it, try stirring in a tiny bit of solid vegetable shortening (like Crisco) or coconut oil (about ½ tsp at a time) until it smooths out. Prevention is key: make sure your bowl and utensils are completely dry. - Q: Can I use candy melts instead of white chocolate?
A: Absolutely! Candy melts are designed for this kind of project. They come in a variety of colors, melt easily, and set up firmly. If you use them, you can skip the red sugar step and just use red candy melts for the hat portion. - Q: How far in advance can I make these?
A: They are best enjoyed within 3-5 days. Store them in a single layer in an airtight container at cool room temperature. I don’t recommend refrigerating them as it can cause the cookies to soften and the chocolate to “sweat.” - Q: My decorations won’t stick! Help!
A: The key is speed! You have to work quickly to add the sprinkles and face details before the initial chocolate dip sets. If you’re too slow, just keep a toothpick and a small dish of melted chocolate handy. Use it as edible glue to attach any stray eyes or noses.
Let’s Talk Ingredients & Dietary Info
While these are definitely a “sometimes food” meant for pure holiday joy, it’s always good to know what you’re enjoying. The main components are the Nutter Butter cookie (which contains enriched flour, peanut butter, sugar, and oils) and the white chocolate coating (primarily sugar, cocoa butter, and milk solids).
Because they are no-bake, you’re not altering the nutritional profile with heat. They are a treat rich in carbohydrates and sugars. As I mentioned in the variations, you can easily seek out nut-free or gluten-free base cookies to accommodate dietary needs. For a slightly lower sugar option, you could use a sugar-free vanilla almond bark for the coating. Remember, the spirit of Feastical is about joy and togetherness, so enjoy every bite without guilt!
Print
Santa Nutter Butter Cookies : A Fun, Festive Holiday Treat
Description
Santa Nutter Butter Cookies: Your New Favorite No-Bake Holiday Treat!
Hey friends, Beau here from Feastical! The holidays are here, and you know what that means — cookies, cocoa, and cozy kitchen chaos. But between gift wrapping, decorating, and hunting for that one missing ornament hook, who has time to bake for hours?
Ingredients
-
24 Nutter Butter cookies – The perfect peanut-shaped base
-
1½ cups white chocolate chips or vanilla almond bark
-
1 teaspoon coconut oil (optional, for smoother melting)
-
Red sanding sugar or sprinkles – For Santa’s hat
-
24 red M&M’s – Santa’s nose
-
48 mini chocolate chips – Santa’s eyes
-
24 white chocolate chips or mini marshmallows (cut in half) – Pom-poms
Instructions
-
Melt the Chocolate
Place white chocolate and coconut oil in a microwave-safe bowl. Microwave at 50% power in 30-second intervals, stirring each time, until smooth. -
Dip for the Beard & Hat
Hold a Nutter Butter by the edges. Dip the top third into the white chocolate (for Santa’s hat) and the bottom third (for the beard). Let excess drip off, leaving the center plain for the face. -
Add the Hat Sparkle
While the chocolate is still wet, dip the top section into red sanding sugar to make Santa’s hat. -
Add the Pom-Pom
Press a white chocolate chip or half marshmallow onto the tip of the hat. -
Create Santa’s Face
Press two mini chocolate chips for eyes and a red M&M for the nose. If they don’t stick, dab a little melted chocolate on the back as glue. -
Let Them Set
Place cookies on parchment paper. Let sit 20–30 minutes at room temperature (or 10–15 minutes in the fridge) until chocolate firms up.
Notes
-
Thin chocolate with a bit of coconut oil or shortening if too thick.
-
Work quickly so decorations stick before the chocolate hardens.
-
Store in an airtight container at room temperature up to 5 days.
-
Display idea: Arrange on a platter with shredded coconut “snow” — it’s holiday magic!
Nutrition
- Calories: 140Cal Per Serving
- Sugar: 11 g
- Fat: 7 g
- Saturated Fat: 3.5 g
- Protein: 2 g
Your New Go-To Holiday Happy-Maker
And there you have it, my friends! From my Feastical kitchen to yours, the recipe for pure, unadulterated holiday fun. These Santa Nutter Butter Cookies are more than just a treat; they’re a memory-making activity, a simple kitchen project, and a guaranteed way to spread a little extra cheer this season.
I hope you have as much fun making them as I do. Remember, don’t stress about making them perfect. The messy ones, the lopsided ones, the ones your kids decorate with five eyes… those are often the most loved. That’s the real-life flavor I’m always talking about.
Final Thoughts: Your New Holiday Happy-Maker
And there you have it! From my Feastical kitchen to yours, the secret to a stress-free, joy-filled holiday treat. These Santa Nutter Butter Cookies are proof that the most magical moments don’t require a perfect recipe—just a willingness to have a little fun. So, embrace the sprinkles, laugh at the lopsided Santas, and savor the delicious memories you’re creating. I hope this simple project becomes a cherished part of your holiday season, bringing smiles and a taste of pure, uncomplicated joy for years to come.
Happy Holidays, everyone!
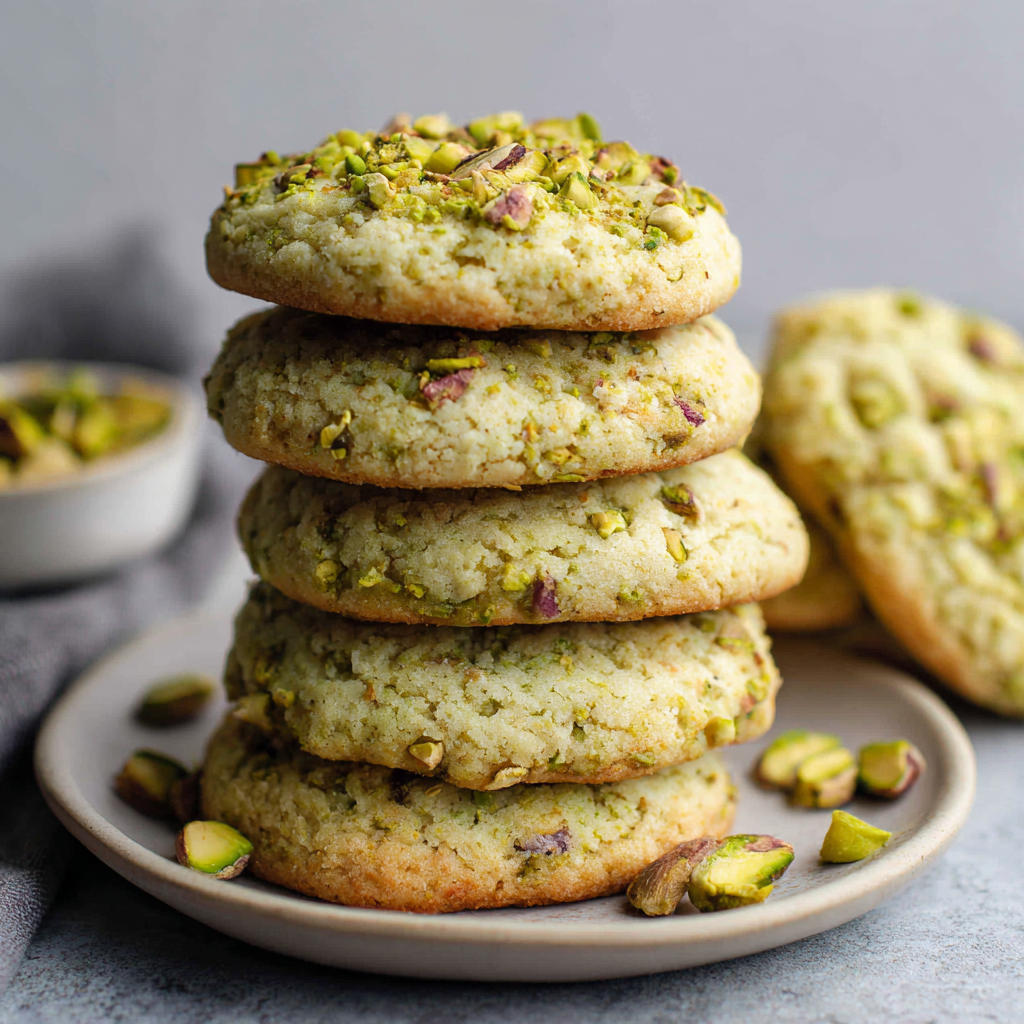
Soft & Chewy Pistachio Cookies : A Nutty Twist on a Classic
Soft Pistachio Cookies – Easy Green Cookie Recipe with Real Pistachios
Welcome to Your New Favorite Cookie
Hey friends, Beau here! Let’s talk about one of life’s simple, soul-satisfying pleasures: a perfect cookie. You know the one. It’s soft without being cakey, chewy without being tough, and has that little *something* that makes you close your eyes and just savor the moment. For me, that cookie is right here – these incredibly Soft & Chewy Pistachio Cookies.
If you’ve never baked with pistachios before, you are in for a treat that’s about to become a staple in your recipe box. These cookies are a nutty, buttery dream with a gorgeous green hue that’s just so happy. They’re like a classic chocolate chip cookie’s more sophisticated, wildly charming cousin who shows up to the party and instantly becomes the life of it. The secret weapon? A box of instant pistachio pudding mix. It’s the ultimate kitchen hack that guarantees a soft, melt-in-your-mouth texture and an incredible burst of flavor in every single bite.
Whether you’re whipping up a batch for a spring brunch, a holiday cookie swap, or just because it’s Tuesday and you deserve a little joy, these cookies deliver. They’re quick to mix up, stay wonderfully chewy for days (good luck with that—they tend to vanish!), and are guaranteed to have everyone asking, “What’s in these? They’re amazing!” So, tie on your apron, grab your favorite mixing bowl, and let’s make some magic happen.
A Pistachio-Powered Memory
My love affair with these cookies started in my Nana’s kitchen, a place that always smelled like butter and nostalgia. She was a wizard with simple ingredients, and she never, ever followed a recipe to the letter. One St. Patrick’s Day, she decided we weren’t having the usual green cupcakes. “We’re making something special, Beau,” she’d said with a wink, pulling out a bag of pistachios.
I remember sitting at her formica table, painstakingly shelling what felt like a million nuts, my fingers stained slightly green. She hummed an old tune while she creamed the butter and sugar, letting me lick the beater afterwards. The moment those warm, fragrant cookies came out of the oven, I was hooked. They weren’t just green food coloring; they were *real*. To me, they’ll always taste like her kitchen—like love, laughter, and a little bit of delicious mischief. It’s that feeling I want to share with you every time you bake a batch.
Gathering Your Cookie Crew: The Ingredients
Part of the beauty of this recipe is its simplicity. Here’s your grocery list—and a few of my chef-y insights to help you understand the “why” behind each item.
- ½ cup unsalted butter, softened: This is the heart of our cookie, providing that rich, buttery flavor and tender crumb. Using unsalted lets you control the salt level. Pro-Tip: “Softened” means your butter should give slightly when pressed, but not be greasy or melted. Leave it on the counter for about 30-60 minutes before you start.
- ¾ cup granulated sugar: Sweetness and structure! The sugar creams with the butter to create tiny air pockets that help the cookies rise and gives them those delightfully crisp edges.
- 1 large egg: Our binding agent, bringing everything together and adding moisture and richness.
- 1 teaspoon clear vanilla extract: I specify clear to keep that beautiful green color vibrant, but regular vanilla works just fine if you don’t mind a slightly off-white, more rustic-looking dough.
- 1 box (3.4 oz) instant pistachio pudding mix: The superstar! This isn’t just for flavor; the modified corn starch in the mix is a miracle worker for keeping cookies incredibly soft and chewy for days.
- 1¼ cups all-purpose flour: The foundation. It gives our cookies structure so they don’t spread into thin, crispy puddles.
- ½ teaspoon baking soda: Our leavening agent, giving the cookies a little lift and that perfect, slightly puffy texture.
- ½ cup chopped pistachios (plus extra for topping): The textural hero! Using real, chopped pistachios adds a wonderful nutty crunch and authentic flavor. I like to use unsalted, shelled pistachios for this.
- Optional: A drop or two of green food coloring: If you want that vibrant, festive green color, a little food coloring goes a long way. Gel food coloring is best as it won’t alter the dough’s consistency.
Let’s Get Baking: The Step-by-Step Guide
Ready? Let’s turn these simple ingredients into cookie jar legends. Follow these steps, and you’ll be a pistachio cookie pro in no time.
- Preheat and Prep. Fire up your oven to 350°F (175°C). Line a baking sheet with parchment paper. This isn’t just for easy cleanup; it prevents the bottoms from over-browning. Chef’s Hack: If you don’t have parchment, a light coating of baking spray works, but parchment is king for perfect cookies.
- Cream the Butter and Sugar. In a large bowl, beat together the softened butter and granulated sugar. We’re not just mixing; we’re “creaming.” Beat it on medium-high speed for a good 2-3 minutes until it becomes pale, fluffy, and wonderfully smooth. This step incorporates air, which is key for a perfect texture. Don’t rush it!
- Incorporate the Wet Ingredients. Beat in the egg and clear vanilla extract until everything is just combined and smooth. Scrape down the sides of the bowl with a spatula to make sure no butter is hiding out.
- Bring in the Dry Team. Now, add the instant pistachio pudding mix, all-purpose flour, and baking soda right into the bowl. Mix on low speed until *just* combined. The dough will be thick and will start to smell amazing. Watch out! Overmixing at this stage can lead to tough cookies. A few streaks of flour are okay; they’ll get worked in during the next step.
- Fold in the Good Stuff. This is where we add the star of the show. Use your spatula to gently fold in the ½ cup of chopped pistachios. If you’re using food coloring, add a drop or two now and fold it in until the color is even.
- Scoop and Top. Using a tablespoon or a small cookie scoop (my favorite tool for uniform cookies!), portion the dough into roughly 1-inch balls. Place them about 2 inches apart on your prepared baking sheet. Gently press down on each ball just a little to flatten it slightly. Then, press a few extra pistachio pieces onto the top of each cookie. This makes them look bakery-level beautiful.
- Bake to Perfection. Slide the sheet into your preheated oven and bake for 10-12 minutes. You’re looking for the edges to be just set and very lightly golden. The centers will still look soft and slightly underdone—this is the secret to a super chewy cookie! Trust the process. They’ll continue to cook on the hot baking sheet.
- The All-Important Cool Down. This is the hardest part: patience. Let the cookies cool on the hot baking sheet for at least 5 minutes before you transfer them to a wire rack to cool completely. This allows them to set up properly without falling apart.
How to Serve These Nutty Gems
Okay, the cookies are cool enough to handle (or maybe you snagged one warm—I won’t tell!). How you serve them can turn a simple treat into a moment of pure bliss.
For the ultimate experience, I love serving these cookies stacked high on a vintage cake stand. They look so cheerful and inviting. A cold glass of milk is, of course, the classic pairing, but let’s get creative! Try them with a hot cup of chai tea—the warm spices are a fantastic complement to the nutty pistachio flavor. For a truly decadent dessert, crumble a cookie over a scoop of vanilla bean or coconut ice cream. The contrast of temperatures and textures is out of this world.
If you’re gifting them, a simple cellophane bag tied with a rustic twine bow makes anyone feel special. However you choose to enjoy them, do it with people you love. That’s what Feastical is all about.
Make It Your Own: Recipe Variations
Once you’ve mastered the base recipe, the fun really begins. Here are a few of my favorite ways to mix things up:
- Pistachio & White Chocolate: Fold in ½ cup of white chocolate chips along with the pistachios. The sweet creaminess of the white chocolate is a match made in heaven with the nutty cookie.
- Lemon-Pistachio Twist: Add the zest of one lemon to the butter-sugar mixture for a bright, zesty kick that cuts through the richness beautifully.
- Double Nut Delight: Replace half of the pistachios with chopped almonds or macadamia nuts for a more complex nutty flavor profile.
- Gluten-Free Swap: You can easily use a 1:1 gluten-free all-purpose flour blend in place of the regular flour. The pudding mix keeps them just as soft!
- “Everything but the Kitchen Sink” Pistachio: Feeling adventurous? Add a mix-in medley! Try ¼ cup dried cranberries, ¼ cup coconut flakes, and the pistachios for a cookie that’s bursting with flavor and texture.
Beau’s Chef’s Notes
This recipe has evolved a bit since my Nana first showed me the ropes. She always used salted butter and never measured the pistachios—it was always “a good handful.” I’ve standardized it for reliability, but I still encourage you to make it your own. One of my funniest kitchen fails was the time I accidentally used *cooked* pudding mix instead of instant. Let’s just say we ended up with pistachio-scented cement! Learn from my mistake, friends. The instant pudding mix is non-negotiable. Over the years, I’ve found that letting the dough chill for 20-30 minutes before baking can help prevent a little excess spreading, but honestly, they’re pretty forgiving. That’s what I love about them.
Your Questions, Answered!
I’ve made these cookies a hundred times and answered just as many questions. Here are the most common ones.
- Q: Can I make these without the pudding mix?
A: The pudding mix is crucial for the signature soft texture and intense pistachio flavor. I don’t recommend omitting it. If you can’t find pistachio flavor, vanilla or cheesecake flavor pudding can be a fun, though different, alternative. - Q: My cookies spread too much! What happened?
A: This usually means your butter was too warm. Next time, make sure it’s just softened, not melty. You can also pop the dough in the fridge for 20-30 minutes before baking to firm it up. Using a light-colored baking sheet (not dark) can also help. - Q: Can I freeze the dough?
A: Absolutely! Scoop the dough balls onto a baking sheet, freeze them solid, then transfer to a freezer bag. You can bake them straight from the freezer, just add 1-2 minutes to the baking time. - Q: Why are my cookies cakey?
A: This can happen if you over-measure the flour. The best way to measure flour is to spoon it into your measuring cup and level it off with a knife. Don’t scoop directly from the bag!

Soft & Chewy Pistachio Cookies : A Nutty Twist on a Classic
- Total Time: 30 mins
Description
Peanut Butter Lunch Lady Cookie Bars : Soft, Sweet, and Totally Nostalgic
Ingredients
-
½ cup unsalted butter, softened
-
¾ cup granulated sugar
-
1 large egg
-
1 tsp clear vanilla extract
-
1 box (3.4 oz) instant pistachio pudding mix
-
1¼ cups all-purpose flour
-
½ tsp baking soda
-
½ cup chopped pistachios (plus extra for topping)
-
Optional: 1–2 drops green gel food coloring
Instructions
-
Preheat & Prep: Heat oven to 350°F (175°C). Line a baking sheet with parchment paper.
-
Cream Butter & Sugar: Beat butter and sugar 2–3 mins until light and fluffy.
-
Add Wet Ingredients: Mix in egg and vanilla until smooth.
-
Combine Dry Ingredients: Add pudding mix, flour, and baking soda. Mix just until combined—don’t overmix!
-
Fold & Scoop: Gently fold in pistachios and food coloring if using. Scoop dough into 1-inch balls and place 2 inches apart.
-
Top & Bake: Press a few pistachio pieces on top. Bake 10–12 mins, until edges are set but centers are soft.
-
Cool: Let cookies rest on the baking sheet for 5 minutes, then move to a wire rack to cool completely.
Notes
-
Chill dough for 20 minutes if your butter was too soft—this prevents spreading.
-
Add ½ cup white chocolate chips for a sweet, creamy twist.
-
For extra flavor, sprinkle a pinch of flaky salt right after baking.
- Prep Time: 15 mins
- Cook Time: 12 mins
Nutrition
- Calories: 110 each
Nutritional Information (For Your Info!)
Hey, we’re all about balance here at Feastical! While these are definitely a treat, it’s always good to know what you’re enjoying. This is an estimate per cookie (based on a batch of 24).
Estimated per cookie: 110 calories | 6g fat | 12g carbs | 2g protein
Remember, these numbers can vary based on the specific brands of ingredients you use and your exact portion sizes. The good news is, using real pistachios adds a bit of protein and healthy fats. So, enjoy every mindful, delicious bite!
Final Thoughts from My Kitchen to Yours
And there you have it, my friends—my all-time favorite Soft & Chewy Pistachio Cookie recipe. It’s more than just a list of ingredients and steps; it’s a little piece of my story, and I’m so thrilled to share it with you. This recipe is a testament to the fact that the most memorable food doesn’t have to be complicated. It’s about the joy of creating, the warmth of sharing, and that unbeatable feeling of pulling a tray of perfectly golden, nutty cookies out of your own oven.
I truly hope this recipe finds a special place in your kitchen and creates its own wonderful memories for you and your loved ones. If you make them, I’d be absolutely over the moon to see your results! Tag me on social @Feastical or @BeauCollier with #Feastical so I can share in your baking joy.
Now go forth and bake something beautiful!
With a full heart and an even fuller cookie jar,
Beau
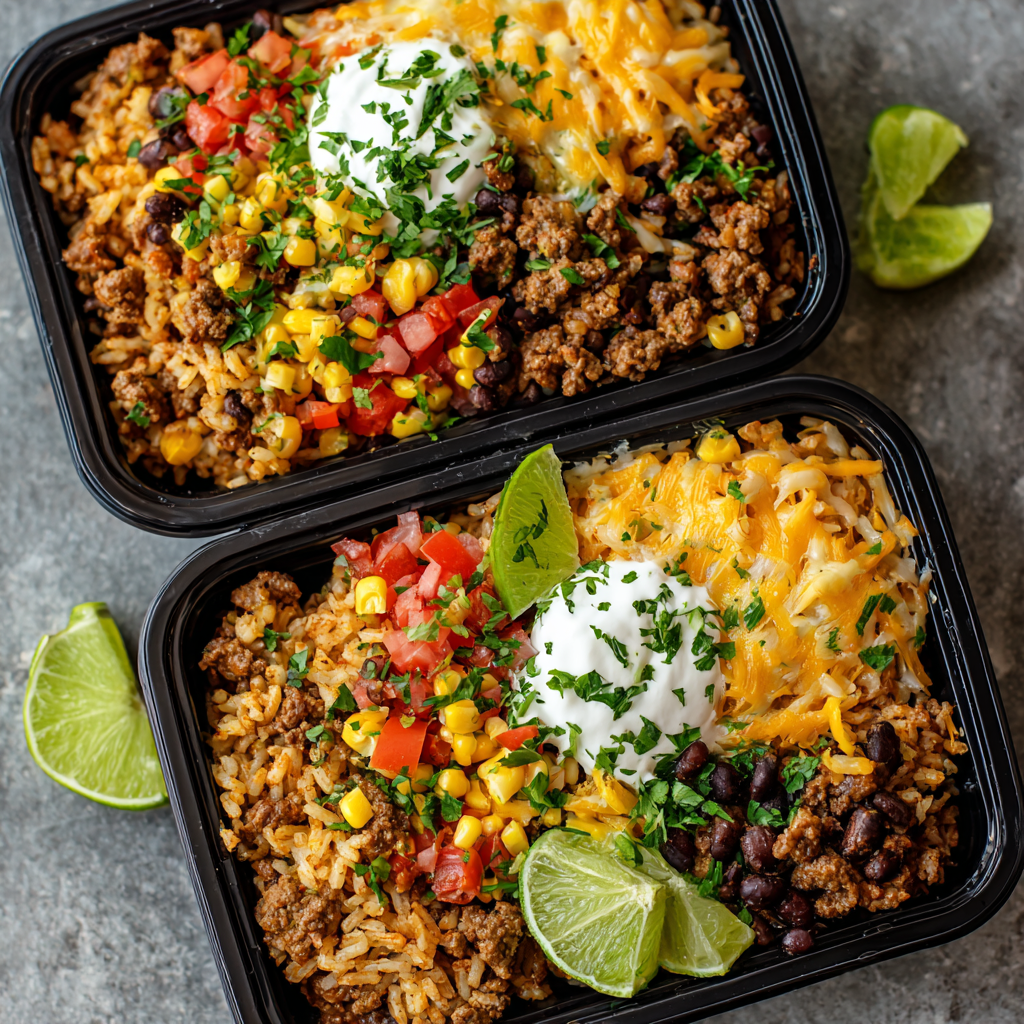
Cheesy Beef Enchilada Meal Prep Bowls : Bold, Balanced, and Ready to Grab
Ditch the Sad Desk Lunch: Your New Favorite Tex-Mex Escape is Here!
Hey friends, Beau here! Let’s be real for a second. How many times have you stared into the sad, fluorescent-lit abyss of your refrigerator at 7 AM, wondering what in the world you’re going to pack for lunch? You’re faced with the usual suspects: a questionable leftover, a wilted salad kit, or the siren call of an overpriced takeout menu. I’ve been there, and my stomach has staged more than one midday protest.
But what if I told you that in about 30 minutes, you could have a week’s worth of lunches that you’ll actually look forward to? Lunches that are bursting with flavor, packed with protein to keep you powered through the afternoon, and so darn satisfying you’ll feel like you’re treating yourself at a cozy cantina instead of slogging through another workday.
That’s the magic of these Cheesy Beef Enchilada Meal Prep Bowls. We’re taking everything you adore about a gooey, saucy, fully-loaded enchilada—the savory seasoned beef, the fluffy Spanish rice, the sweet pops of corn, the hearty black beans, and the fresh zip of pico de gallo—and we’re packing it all into one incredibly convenient, grab-and-go container. It’s bold, it’s balanced, and it’s about to become your meal prep MVP. So, grab your favorite skillet and let’s turn your lunch game from “meh” to “¡Olé!”
A Tale of Two Tacos: Where My Love for Tex-Mex Began
My obsession with these flavors didn’t start in a fancy kitchen; it started at a wobbly Formica table in my Nana’s sun-drenched Arizona kitchen. Every Friday night was “Fiesta Friday.” The air would be thick with the scent of toasting cumin and chilies, and the counter would be a vibrant buffet of toppings: diced onions, fresh cilantro, a mountain of shredded cheese, and a bowl of her legendary (and secret recipe) salsa.
My job was to brown the beef. I’d stand at the stove, wooden spoon in hand, watching the plain ground beef transform into something magical the moment that seasoning hit the hot pan. It was like a flavor explosion in slow motion. The best part was building my own plate—a little of this, a lot of that, a squeeze of lime over everything. These meal prep bowls are my grown-up, meal-prepping homage to those chaotic, joyful, and deeply delicious Friday nights. They capture that same spirit of building a meal you love, one delicious layer at a time.
Gathering Your Flavor Arsenal: What You’ll Need
Here’s your shopping list for deliciousness! Don’t sweat it if you’re missing an item or two—I’ve included my favorite swaps and chef insights to make this recipe your own.
- 1 lb lean ground beef: I like 90/10 or 93/7 lean beef. It gives you all that rich, meaty flavor without a ton of excess grease to drain. Chef’s Tip: Ground turkey or chicken works beautifully here for a lighter option!
- 1 packet low-sodium taco or enchilada seasoning: The convenience king! Using a low-sodium version lets you control the salt level. Chef’s Insight: If you have 5 extra minutes, make your own blend with chili powder, cumin, garlic powder, and a pinch of oregano. It’s a game-changer!
- 2 cups cooked Spanish or Mexican-style rice: This is the fluffy, tomato-infused foundation of our bowl. You can use store-bought, or cook up a batch from scratch. Substitution Tip: Plain brown rice, cilantro-lime rice, or even cauliflower rice for a low-carb twist are all fantastic.
- 1 cup canned corn, drained: It brings a touch of sweetness and a wonderful pop of texture. Chef’s Tip: For a next-level flavor, quickly char the corn in a dry skillet before adding it to the bowls!
- 1 cup black beans, rinsed and drained: A powerhouse of fiber and plant-based protein. Rinsing them gets rid of that starchy can liquid and makes them taste fresher.
- 1 cup pico de gallo: The fresh, zesty heart of the bowl! You can find it in the refrigerated section, or whip up a simple batch with diced tomato, red onion, cilantro, and a squeeze of lime.
- ½ cup shredded cheese (optional, for melting over beef): I say “optional,” but let’s be real, the cheese is what makes it “cheesy”! A Mexican blend, cheddar, or Monterey Jack are all perfect. For a dairy-free option, a sprinkle of nutritional yeast can add a cheesy flavor.
- 4 lime wedges: Don’t you dare forget these! A squeeze of fresh lime juice right before eating brightens up every single component.
- ½ cup light sour cream or Greek yogurt: This is our cool, creamy finisher. Greek yogurt adds a tangy protein boost, while sour cream is a classic.
- Chopped parsley or cilantro, for garnish: A little green for a fresh finish! If you’re one of those folks who thinks cilantro tastes like soap, flat-leaf parsley is your best friend.
Let’s Get Building: Your Step-by-Step Roadmap to Meal Prep Glory
This isn’t a complicated culinary operation; it’s a simple, satisfying assembly line. Follow these steps, and you’ll have four gorgeous bowls ready for the fridge in no time.
- Cook the Beef to Savory Perfection. Grab your trustiest skillet and get it over medium heat. Crumble in that beautiful ground beef and cook it up, breaking it apart with your spoon, until it’s no longer pink. This usually takes about 7-8 minutes. If you’re using a higher-fat beef, now’s the time to drain off that excess grease. Then, sprinkle over your seasoning packet and add a good splash of water (about ¼ cup). Let it simmer together for 2-3 minutes until it thickens into a glorious, fragrant sauce. Chef’s Hack: This is the moment! Turn off the heat and stir in your shredded cheese. Let the residual heat melt it into a gooey, cheesy beef masterpiece. Your future self will thank you.
- The Art of the Assembly Line. Get out your four meal prep containers. I’m a big fan of the glass ones with compartments, but any containers will do the trick. Now, let’s build from the bottom up! Start by dividing your fluffy Spanish rice evenly between the four bowls. This is our sturdy, flavorful base. Next, spoon that glorious cheesy beef directly over the rice. Pro-Tip: Let the beef cool for a few minutes before adding it to the containers. This prevents steam from making the rice mushy.
- Load Up the Good Stuff. Now for the colorful part! Artfully (or just enthusiastically) arrange your corn and black beans around the beef. Then, crown it all with a generous scoop of that bright, fresh pico de gallo. See how the colors are coming together? You’re not just making lunch; you’re creating edible art.
- The Grand Finale: Garnish & Pack. Don’t skip the fresh touches—they make all the difference. Tuck a lime wedge into the side of each bowl. For the sour cream or Greek yogurt, I highly recommend using a tiny separate container or a little silicone cup placed on top of the bowl. This keeps it fresh and cool and prevents it from melting into everything when you reheat. Finally, sprinkle the whole thing with a flourish of chopped cilantro or parsley. Boom. You’re done.
- Store and Serve Like a Pro. Pop the lids on and stash these beauties in the fridge. They’ll stay fresh and delicious for up to 4 days. When lunchtime calls, simply reheat the main bowl (without the sour cream cup and lime) in the microwave for 1.5-2 minutes, or until piping hot. Then, squeeze that lime wedge over everything, dollop on the cool sour cream, give it a quick stir, and dive into a world of flavor.
How to Serve Your Enchilada Bowl Masterpiece
You’ve done the hard work, now let’s enjoy the rewards! The beauty of these bowls is in their built-in convenience, but a few extra touches can make your midday meal feel extra special.
If you’re eating at home, consider transferring your heated bowl to a real plate and giving it a final fresh garnish. A few extra cilantro leaves or a thin slice of avocado on the side can make it feel like a restaurant-quality dish. For the ultimate “cantina at your desk” experience, serve it with a side of crunchy tortilla chips for scooping. They’re perfect for getting every last bit of beans, beef, and cheese. And that lime wedge? It’s non-negotiable. That final squeeze of acidic brightness is the secret ingredient that ties the whole hearty, cheesy, savory bowl together.
Make It Your Own: Delicious Twists & Swaps
This recipe is like your favorite pair of jeans—it’s a perfect base that you can dress up or down depending on your mood. Here are a few of my favorite ways to mix it up:
- Go Green with a Taco Salad: Swap the Spanish rice for a bed of chopped romaine or crunchy iceberg lettuce. It turns your warm bowl into a vibrant taco salad. Just pack the dressing (a mix of sour cream and lime juice works great) separately!
- Kick Up the Heat: Are you a spice lover like me? Add a diced jalapeño (seeds and all for maximum fire) to the beef as it cooks. Or, stir a tablespoon of chipotle in adobo into the sour cream for a smoky, spicy crema.
- Vegetarian Fiesta: Skip the beef altogether! Use a plant-based ground “meat” or double up on the black beans and corn. For an extra-hearty veggie version, add some sautéed diced zucchini and bell peppers.
- Breakfast for Lunch Enchilada Bowl: Yep, you read that right. Use seasoned breakfast sausage or chorizo instead of beef, and swap the rice for a layer of crispy hash browns or scrambled eggs. Top with pico and avocado. Trust me on this one.
- The “Everything but the Kitchen Sink” Bowl: Got leftovers? This is the perfect place for them! A little leftover roasted sweet potato, some sautéed mushrooms, or a handful of quinoa can all find a happy home in this bowl.
Beau’s Kitchen Confidential: A Few Parting Thoughts
This recipe has been a staple in my own meal prep rotation for years, and it’s evolved in the best ways. I once, in a frantic pre-vacation fridge clean-out, used a jar of leftover salsa instead of pico de gallo and a cup of cooked quinoa that was hiding behind the milk. The result was still absolutely delicious! The moral of the story? Don’t be afraid to play with your food. This isn’t a fussy French pastry; it’s a hearty, forgiving Tex-Mex hug in a bowl. The core formula is simple: a grain + a protein + beans/veggies + fresh toppings. Memorize that, and you can conquer lunch forever.
Your Questions, Answered! (FAQs & Troubleshooting)
I’ve gotten a lot of DMs about this recipe over on Instagram, so let me tackle the most common head-scratchers right here.
Q: My rice gets so mushy when I reheat it! What am I doing wrong?
A: Ah, the soggy rice syndrome! Two things: First, make sure your beef mixture has cooled down a bit before you assemble the bowls. Adding piping-hot beef to the rice creates steam that gets trapped in the container. Second, when you reheat, don’t overdo it. 1.5 to 2 minutes is usually plenty. The goal is to heat it through, not cook it again.
Q: Can I freeze these bowls?
A: You can, but with a caveat. The beef and rice freeze and reheat beautifully. However, the fresh elements like pico de gallo and corn will become watery and lose their texture upon thawing. My advice? Freeze just the beef and rice layers, then add fresh beans, corn, and pico when you’re ready to eat.
Q: The beef seems a little dry after reheating. Help!
A: No problem! The solution is in the simmer. When you’re cooking the beef with the seasoning, make sure you add that splash of water and let it simmer until it creates a light sauce. That extra bit of moisture gets absorbed into the meat and protects it from drying out in the fridge and microwave. You can also add an extra tablespoon of water to the container before reheating.
Q: What other protein can I use?
A: The world is your oyster… or, more accurately, your taco! Shredded rotisserie chicken, ground turkey, ground pork, or even a can of drained and rinsed lentils (toss them with the seasoning) are all incredible in this.
Breaking It Down: The Nutritional Lowdown
I’m all about feel-good food that makes you feel good, and part of that is knowing what you’re putting into your body. Here’s a general breakdown of what you’re getting in one of these power-packed bowls (calculated using lean beef, light sour cream, and including the cheese). Remember, these are estimates and can vary based on your specific ingredients.
Print
Cheesy Beef Enchilada Meal Prep Bowls : Bold, Balanced, and Ready to Grab
Description
Skip the soggy salads and overpriced takeout—these Cheesy Beef Enchilada Meal Prep Bowls are your new go-to for bold, crave-worthy lunches. Imagine tender, seasoned beef smothered in melty cheese, nestled over fluffy Spanish rice, and topped with sweet corn, hearty black beans, and zesty pico de gallo. Each bite delivers the smoky-sweet magic of a classic enchilada, all in one convenient, protein-packed bowl. They’re fresh, satisfying, and meal-prep friendly—aka your ticket to stress-free, flavor-filled workdays.
Ingredients
-
1 lb lean ground beef (90/10 or 93/7)
-
1 packet low-sodium taco or enchilada seasoning
-
¼ cup water
-
½ cup shredded cheese (cheddar, Monterey Jack, or Mexican blend)
-
2 cups cooked Spanish or Mexican rice
-
1 cup canned corn, drained (char for extra flavor!)
-
1 cup black beans, rinsed and drained
-
1 cup pico de gallo
-
½ cup light sour cream or Greek yogurt
-
4 lime wedges
-
Fresh cilantro or parsley for garnish
Instructions
-
Cook the Beef
Brown the ground beef in a skillet over medium heat (7–8 mins). Drain any grease, then stir in seasoning and water. Simmer 2–3 mins until thickened. Stir in cheese off the heat until melted and gooey. -
Assemble the Bowls
Divide rice evenly between 4 meal prep containers. Top with cheesy beef, then arrange corn, black beans, and pico de gallo around it. -
Add the Finishing Touches
Garnish with cilantro or parsley, and tuck in a lime wedge. Store sour cream or yogurt in a small separate cup to keep it fresh. -
Store & Reheat
Refrigerate up to 4 days. Reheat the main bowl (without toppings) for 1½–2 minutes. Add sour cream and lime juice just before serving.
Notes
-
Swap beef for ground turkey or rotisserie chicken for a lighter twist.
-
Freeze the beef and rice layers for easy future lunches.
-
Add jalapeños or chipotle for a fiery kick!
Nutrition
- Calories: 460 Cal Per bowl
- Fat: 20g
- Carbohydrates: 35g
- Protein: 32g
Per Serving (Approximately):
Calories: ~460 | Protein: 32g | Carbohydrates: 35g | Fat: 20g
Why this is such a winning combo? That 32 grams of protein is a powerhouse! It comes from the lean beef and black beans, and it’s essential for keeping you full, satisfied, and energized throughout the afternoon, so you can skip the 3 PM vending machine run. The carbs from the rice and beans provide steady energy, while the fat from the beef and cheese helps with nutrient absorption and flavor. It’s a truly balanced meal designed to fuel your busy life deliciously.
Final Thoughts: More Than a Meal, It’s a Mindset
This recipe is about more than just fueling your body for the week; it’s about reclaiming a small moment of your day. It’s a reminder that you deserve a lunch that brings you genuine joy, not just one that fills a hole. It’s a tribute to the power of a little planning and a lot of flavor.
So this Sunday, put on some music, channel your inner Nana, and fill your kitchen with the incredible aroma of toasting spices. You’re not just prepping food; you’re prepping for success. You’re investing in a week of easier mornings, happier afternoons, and lunches that you’ll actually look forward to. That’s a transformation worth celebrating.
I can’t wait to see your masterpiece. Tag me @FeasticalBeau with #Feastical!
With flavor and gratitude,
Beau