
Fudgy Sourdough Brownie Cookies (Rich, Chewy & Chocolate-Lovers Approved)
When a Brownie and a Cookie Fall in Love…
Hey friends, Beau here! Let’s cut right to the chase: have you ever been stuck in that delicious, agonizing dilemma of not knowing whether to bake a batch of chewy, fudgy brownies or a tray of crisp-edged, soft-centered chocolate chip cookies? What if I told you that you don’t have to choose? What if your two favorite chocolatey worlds could collide in one spectacular, soul-satisfying treat?
Well, stop the press and preheat your oven, because these Sourdough Brownie Cookies are about to become your new baking obsession. Imagine the crackly top of a perfect brownie, the rich, deep flavor of a double-chocolate masterpiece, and the delightful, portable form factor of a cookie. Now, add a secret weapon that makes them uniquely incredible: a cup of sourdough starter discard.
Before you scroll away, hear me out! That tangy, unfed starter you were maybe thinking of tossing? It’s the magic key. It doesn’t make these taste like sourdough bread; instead, it adds a subtle, sophisticated tang that cuts through the intense sweetness, making the chocolate flavor sing even louder. The result is a cookie with a crisp shell, a chewy edge, and a center so gloriously gooey it’s basically a warm, molten brownie you can hold in your hand. They’re rich, they’re decadent, and they are 100% chocolate-lovers approved. So, grab your favorite mixing bowl and let’s make some kitchen magic happen.
The Happy Accident That Started It All
I have to confess, this recipe was born from a happy little kitchen accident. It was a lazy Sunday afternoon, and a serious chocolate craving had hit. My mission was clear: bake brownies. But as I was gathering ingredients, I spotted my jar of sourdough starter discard sitting on the counter, looking a little lonely. I hate food waste more than I hate a soggy bottom on a pie, so the guilt was real.
At the same time, my next-door neighbor’s kid, Leo, popped his head over the fence and asked, “What smells so good, Mr. Beau?” with those big, hopeful eyes. I knew a whole pan of brownies was a commitment for one guy, but cookies? Cookies are for sharing. In a moment of pure, “what-if” inspiration, I decided to morph my brownie batter into cookie dough, and on a whim, I folded in that cup of discard, hoping it would add some moisture and chew.
The result was nothing short of legendary. The cookies baked up with this incredible texture—crisp on the outside, fudgy and almost brownie-like on the inside. Leo’s eyes went wide after the first bite, and he declared them “the best cookies in the whole universe.” High praise indeed! That’s when I knew this happy accident was a recipe worth sharing with all of you.
Gathering Your Chocolatey Arsenal
Here’s everything you’ll need to create these little pockets of joy. Don’t be intimidated by the list—it’s mostly pantry staples, and I’ve got some handy tips and swaps for you right here.
- 1 cup unsalted butter – This is our fat base, and it’s going to create an incredibly rich and tender crumb. Using unsalted lets you control the salt level perfectly. Chef’s Insight: If you only have salted butter, that’s okay! Just reduce the added salt in the recipe by about half.
- 3 cups semi-sweet chocolate chips – We’re using most of these melted into the batter for intense flavor, and the rest we’ll fold in for those glorious molten pockets. Substitution Tip: Feel free to use a bar of high-quality dark chocolate, chopped. A mix of milk and dark chocolate also works if you like a sweeter cookie.
- 1 cup cocoa powder – This is the one-two punch of chocolate! I prefer Dutch-process cocoa for its deeper, smoother flavor, but regular natural cocoa powder works great, too.
- 4 tsp vanilla essence – Yes, four whole teaspoons! Vanilla is the supporting actor that makes the chocolate star shine even brighter. Don’t skimp.
- 4 large eggs + 2 egg yolks – The extra yolks are our secret weapon for an ultra-rich, fudgy, and chewy texture. They add fat and moisture without too much additional structure, giving us that brownie-like center.
- 2 cups white sugar – For sweetness and that classic crisp edge.
- 1 cup packed brown sugar – The molasses in the brown sugar brings moisture, chew, and a beautiful caramel-like depth.
- 1 cup sourdough starter discard (unfed) – Our superstar! It should be at room temperature. It adds a subtle tang and amazing chew. Don’t have a starter? See the variations section below for a super easy workaround!
- 2 cups plain flour – The structure-builder. We’ll sift it with the cocoa to avoid lumps.
- 2 tsp salt – Crucial for balancing all that sweetness and making the chocolate flavors pop. Trust me on this.
- 1 tsp instant espresso powder (optional but highly recommended) – This is my favorite chef hack! It won’t make your cookies taste like coffee; it just deepens and enhances the chocolate flavor in a magical way.
- Flaky sea salt & dark chocolate chunks for topping – The grand finale. A sprinkle of flaky salt right when they come out of the oven is a game-changer.
Let’s Get Baking: The Step-by-Step Magic
Okay, team, aprons on! Let’s walk through this together. I’ll be with you every step of the way with my best tips and hacks to ensure cookie perfection.
- Preheat and Prep. First things first, get that oven heating to a cozy 350°F (175°C). This gives it plenty of time to reach the perfect, even temperature. Line your baking sheets with parchment paper. Chef’s Hack: No parchment? A light coating of baking spray works, but parchment is the MVP for easy cleanup and no sticking.
- Melt the Chocolatey Goodness. In a medium saucepan over low heat, melt the butter and 2½ cups of the chocolate chips together. Stir constantly until it’s one smooth, glossy, heavenly pool of chocolate. Take it off the heat and let it cool for about 10-15 minutes. Why? If it’s too hot, it’ll scramble our eggs when we mix it in, and we don’t want chocolate omelet cookies!
- Whip the Eggs and Sugar. While the chocolate is cooling, grab a large bowl and add the eggs, egg yolks, both sugars, and that glorious vanilla. Using a hand mixer or a stand mixer with the whisk attachment, beat this on medium-high speed for a good 3-4 minutes. You’re looking for it to become thick, pale, and beautifully glossy. This step incorporates air, which helps give our dense cookies a bit of lift.
- Combine the Wet Teams. Now, let’s unite our mixtures! Stir the room-temperature sourdough discard into the egg mixture until it’s fully incorporated. Then, slowly pour in the slightly cooled chocolate-butter mixture while mixing on low. It will look marbled and beautiful at first, then turn into a thick, dark, luxurious batter.
- Bring in the Dry Crew. In a separate bowl, sift together the flour, cocoa powder, salt, and that optional espresso powder. Sifting is key here to avoid lumps of cocoa in your finished cookies. Add these dry ingredients to the wet batter and mix on low speed just until the flour disappears. Do not overmix! Overmixed dough = tough cookies.
- The Final Fold. Switch to a spatula and gently fold in the remaining ½ cup of chocolate chips (or chunks, or nuts!). This ensures every scoop is packed with melty surprises.
- The Patience Payoff (Optional but Recommended). Here’s a pro move for you: cover the bowl and chill the dough for 30-60 minutes. Why chill? This solidifies the butter, which prevents the cookies from spreading too thin in the oven. It gives you a thicker, puffier, chewier cookie. If you’re in a hurry, you can skip it, but I promise the wait is worth it!
- Scoop and Space. Using a cookie scoop or a couple of tablespoons, drop mounds of dough onto your prepared baking sheets, leaving about 2 inches between them. These cookies need their personal space to spread and become perfect.
- Bake to Perfection. Bake for 10-12 minutes. Now, listen closely: you want to take them out when the edges look set and maybe even a little crackly, but the centers still look soft, slightly puffed, and underdone. This is the secret to that fudgy center! They will continue to cook on the hot baking sheet.
- The Grand Finale. As soon as you pull the trays from the oven, immediately sprinkle the tops with a little flaky sea salt. Let the cookies cool on the baking sheet for a full 5 minutes—this is part of the cooking process and helps them set. Then, transfer them to a wire rack to cool completely (or, let’s be real, eat a few warm and gooey right now).
How to Serve These Showstoppers
Okay, you’ve baked the most incredible cookies. How do you serve them? Let me count the ways!
For the ultimate comfort food experience, serve them still slightly warm from the oven, maybe with a cold glass of milk for the classic dunk. For a next-level dessert, crumble one over a scoop of high-quality vanilla bean ice cream – the contrast of warm cookie and cold ice cream is a religious experience.
If you’re feeling fancy, a quick dusting of powdered sugar right before serving looks beautiful. For a party, I love stacking them on a rustic wooden board or piling them high in a big, beautiful ceramic bowl. They’re so visually striking with their crackly tops that they really don’t need much dressing up. The best way to serve them? With a big smile, shared with people you love.
Make Them Your Own: Fun Flavor Twists
Once you’ve mastered the base recipe, the playground is open! Here are a few of my favorite ways to mix things up.
- The Nutty Professor: Fold in 1 cup of chopped walnuts, pecans, or even hazelnuts along with the final chocolate chips. The nutty crunch is a fantastic textural contrast to the fudgy center.
- The Peanut Butter Pocket: Press a small, frozen ball of peanut butter into the center of each cookie dough ball right before baking. As it bakes, it creates a hidden, melty peanut butter core that will blow your mind.
- Orange Zest Zing: Add the zest of one large orange to the egg-sugar mixture. The bright, citrusy aroma cuts through the richness of the chocolate in the most elegant way.
- Mint Chocolate Chip: Swap the vanilla extract for 1 tsp of peppermint extract. Fold in dark chocolate chunks and maybe even some white chocolate chips for a cookie that tastes like your favorite holiday ice cream.
- No Sourdough? No Problem! Don’t have a starter? Replace the 1 cup of sourdough discard with ½ cup of Greek yogurt or sour cream mixed with ½ cup of all-purpose flour. It will mimic the tang and moisture beautifully.
Beau’s Kitchen Chronicles
This recipe has evolved so much since that first batch for Leo. I’ve learned that the chill time is your best friend for a thick cookie, and that the espresso powder is the ultimate flavor booster. One time, I was filming a video for the site and was talking so much I completely forgot to add the brown sugar! The cookies were… fine, but they lacked that deep, caramel chew. We had a good laugh about it and dubbed them the “Flatliners.” So, learn from my mistake and double-check your ingredients! The beauty of this recipe is its flexibility and forgiving nature. It’s a true Feastical favorite, and I love hearing all your versions of it.
Your Questions, Answered!
I’ve gotten a lot of questions about these cookies over time, so here are the answers to the most common ones.
Q: My cookies spread too much and got flat. What happened?
A: The most common culprits are dough that wasn’t chilled (especially if your kitchen is warm), an oven that wasn’t hot enough, or using a baking sheet that’s still warm from a previous batch. Always use cool pans and don’t skip the chill for best results!
Q: Can I make the dough ahead of time?
A: Absolutely! You can cover the bowl and chill the dough for up to 72 hours. The flavor actually deepens the longer it rests! You can also scoop the dough into balls, freeze them on a tray, then transfer to a freezer bag. Bake from frozen, just adding 1-2 minutes to the baking time.
Q: My cookies are cakey, not fudgy. How do I fix that?
A> A cakey texture usually means you over-mixed the dough after adding the flour, or you baked them a little too long. Remember, mix just until combined, and pull them out while the centers still look soft!
Q: Is the sourdough discard necessary? What does it actually do?
A> It’s not *strictly* necessary (see the variation with yogurt above), but it’s highly recommended! The discard adds a subtle tang that balances the sweetness, contributes to a chewier texture, and gives the cookies a unique, complex flavor profile that sets them apart from any other brownie cookie.

Fudgy Sourdough Brownie Cookies (Rich, Chewy & Chocolate-Lovers Approved)
Description
Sourdough Brownie Cookies
Crisp edges, fudgy centers, and a subtle tang from sourdough discard—your new chocolate obsession!
Ingredients
-
1 cup unsalted butter
-
2½ cups semi-sweet chocolate chips, divided
-
1 cup cocoa powder (Dutch-process preferred)
-
4 tsp vanilla extract
-
4 large eggs + 2 egg yolks
-
2 cups white sugar
-
1 cup packed brown sugar
-
1 cup sourdough starter discard (unfed, room temp; see variation below if none)
-
2 cups all-purpose flour
-
2 tsp salt
-
1 tsp instant espresso powder (optional, enhances chocolate)
-
Flaky sea salt & extra chocolate chunks for topping
Variation (no sourdough): Replace discard with ½ cup Greek yogurt or sour cream + ½ cup flour.
Instructions
-
Preheat Oven & Prep Sheets:
Preheat oven to 350°F (175°C). Line baking sheets with parchment paper. -
Melt Chocolate & Butter:
In a medium saucepan over low heat, melt butter with 2½ cups chocolate chips until smooth. Let cool 10–15 min. -
Beat Eggs & Sugars:
In a large bowl, whisk eggs, egg yolks, white sugar, brown sugar, and vanilla on medium-high speed 3–4 min until thick and glossy. -
Combine Wet Ingredients:
Stir in sourdough discard, then slowly mix in cooled chocolate-butter mixture. -
Add Dry Ingredients:
Sift together flour, cocoa, salt, and optional espresso powder. Mix into wet batter on low speed just until combined. Do not overmix. -
Fold in Chocolate Chips:
Gently fold remaining ½ cup chocolate chips (or chunks) into batter. -
Chill Dough (Optional but Recommended):
Cover and chill 30–60 min for thicker, chewier cookies. -
Scoop & Space:
Using a cookie scoop or 2 tablespoons, drop dough 2 inches apart on prepared sheets. -
Bake:
10–12 min until edges look set but centers still appear soft and slightly puffed. -
Finish & Cool:
Immediately sprinkle with flaky sea salt and extra chocolate chunks. Cool 5 min on the sheet, then transfer to wire rack.
Notes
-
Chill dough up to 72 hours—flavor improves over time.
-
Freeze scooped dough balls; bake from frozen, adding 1–2 min.
-
Store baked cookies in an airtight container up to 4 days.
Nutrition
- Calories: 180 Cal Per cookie
- Sugar: 15g
- Fat: 10g
- Carbohydrates: 22g
Nutritional Info (For Your Inner Fact-Checker)
Okay, let’s be real—we’re not eating these for our health, we’re eating them for our soul! But I know some of you like to keep track, so here’s a general breakdown. Remember, these are estimates and can vary based on specific ingredients and cookie size.
- Prep Time: 20 minutes (+ 30-60 min optional chill time)
- Cook Time: 10-12 minutes per batch
- Yield: About 36 glorious cookies
Per Cookie (Approximate):
- Calories: ~180
- Fat: 10g
- Carbohydrates: 22g
- Sugar: 15g
- Protein: 2g
Final Crumbs of Wisdom
And there you have it, my friends—the complete guide to what might just be the perfect chocolate cookie. They’re a little bit brownie, a little bit cookie, and 100% a feel-good food masterpiece. The sourdough discard trick is one of my favorite ways to reduce waste and create something truly special, and I hope it becomes a staple in your kitchen, too.

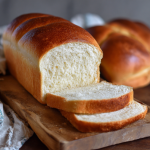
Soft Sourdough Sandwich Bread : Fluffy, Buttery, and Naturally Leavened
Your New Favorite Loaf: The Soft Sourdough Sandwich Bread of Your Dreams
Hey friends, Beau here! Let’s have a little heart-to-heart about bread. I’m talking about the kind of bread that makes your kitchen smell like a cozy bakery on a Saturday morning. The kind that’s so soft and pillowy you can’t resist tearing off a warm, steamy chunk the second it’s out of the oven. You might be thinking, “Beau, that sounds amazing, but sourdough? That’s for the pros with their fancy starters and perfect, crusty boules.”
Well, I’m here to tell you that this sourdough sandwich bread is a whole different beast. It’s your gateway to the world of natural fermentation, but in the most approachable, forgiving, and downright delicious way possible. This isn’t a crusty, hole-riddled artisan loaf (though I love those, too!). This is the fluffy, buttery, slightly sweet sandwich bread you grew up loving, but with the incredible depth of flavor that only a sourdough starter can provide. It’s a game-changer for your toast, your PB&J, and your turkey club. It’s the loaf that will make you feel like a kitchen wizard, and I am so excited to guide you through it. So, tie on your apron, grab your bubbly starter, and let’s bake some bread that tastes like a warm hug.
The Loaf That Started It All: A Nod to Nana’s Kitchen
This recipe takes me right back to my grandmother’s linoleum-floored kitchen. Nana Collier was a no-nonsise woman who could make a feast out of what seemed like thin air. She didn’t have a fancy “sourdough starter” living in a jar on her counter; she had what she called her “ferment,” a simple mix of flour and water that she’d use to make the most incredible, soft sandwich bread. I remember watching her gnarled, flour-dusted hands work the dough, feeling the rhythm of her kneading. She never used a timer; she’d just press a finger into the dough and just *know* it was ready. The smell of that bread baking was the smell of love, of patience, of a home well-lived in.
My version is a slight homage to hers, updated with a little more precision (and a stand mixer, God bless it) but with the same soul. It’s that feeling of creating something timeless and fundamental that I want to share with you. Every time I bake this bread, I feel that connection, that thread of culinary love passed down through generations. It’s more than flour and water; it’s a story in every slice.
Gathering Your Ingredients: The Dream Team for a Perfect Loaf
Here’s the all-star cast that’s going to come together to create your new favorite bread. Using quality ingredients here makes a real difference, so let’s break it down.
- 1 stick (113g) butter, softened – This is our secret weapon for a soft, tender crumb and that rich, buttery flavor. Using it softened, not melted, helps it incorporate evenly into the dough. Chef’s Tip: For a dairy-free version, a neutral oil like avocado or a vegan butter works beautifully.
- 2 tablespoons honey – Honey adds a subtle, floral sweetness that balances the tang of the sourdough. It also gives the yeasties in your starter a little extra food to get them excited! Substitution: Maple syrup or agave nectar are fantastic alternatives.
- 1 tablespoon salt – Don’t be shy with the salt! It’s crucial for flavor and for strengthening the gluten structure. I prefer fine sea salt for its pure, clean taste.
- 1 cup (227g) active, bubbly sourdough starter – This is the heart of the operation! Make sure your starter is “active” – meaning it’s been fed 4-8 hours prior and has doubled in size, is full of bubbles, and has a pleasantly sour aroma. If it’s fallen and liquidy (hooch on top), it’s past its peak. Stir it in, give it a fresh feed, and wait for those bubbles!
- 2 ½ cups warm water – The warmth helps wake up the wild yeast. Think baby-bottle warm, not hot. Too hot, and you’ll harm your starter. A good test is that it should feel warm on your wrist, not sting.
- 8 cups all-purpose flour – I use good old, reliable all-purpose flour for this loaf. It gives us that classic, soft sandwich bread texture. Chef’s Insight: You can substitute up to 2 cups with whole wheat flour for a heartier flavor and more fiber, but be prepared to add a touch more water as whole wheat is thirstier.
Let’s Get Baking: The Step-by-Step Magic
Okay, team, this is where the fun begins. I’ll walk you through every step. Remember, bread baking is a feel, not just a formula. Trust your instincts!
- The Mix-Up. In the bowl of your stand mixer fitted with the dough hook, add the softened butter, honey, salt, active starter, and warm water. Give it a quick stir with a spatula just to combine. Now, add the flour last. Chef’s Hack: I like to hold back half a cup of flour at first. Different flours and humidities absorb liquid differently. You can always add more in, but you can’t take it out! Start mixing on low speed until a shaggy dough forms.
- The Knead for Speed. Once the flour is incorporated, crank that mixer up to medium speed and let it knead for a solid 8-10 minutes. You’re looking for the dough to become smooth, elastic, and to pull away cleanly from the sides of the bowl. It might still stick a little to the bottom—that’s okay! If it seems excessively sticky after 5 minutes, add that reserved flour a tablespoon at a time. My Commentary: This is a great time to put on some music and just watch the gluten develop. You’ll see the dough transform from a shaggy mess into a smooth, supple ball.
- The Long, Slow Rise (Bulk Fermentation). This is the secret to incredible flavor. Lightly oil a large bowl, place your beautiful dough ball inside, and turn it over to coat. Cover the bowl with a damp kitchen towel or plastic wrap. Now, find a warm, draft-free spot in your kitchen and let it rise for 10-12 hours. Overnight is perfect. Chef’s Tip: Don’t look for it to double or triple like commercial yeast bread. It will rise, but the magic is happening on a microscopic level as the wild yeast and bacteria work their slow, flavorful fermentation.
- Shaping Your Loaves. The next morning, your dough should look puffy and alive. Lightly flour your counter and gently turn the dough out. We don’t want to punch it down aggressively—just a gentle deflation. Divide the dough into two equal parts. Take one piece and flatten it into a rough rectangle, about 9×12 inches. Now, starting from a short end, roll it up tightly, like a jelly roll, pinching the seam closed as you go. Pinch the final seam and tuck the ends under. This creates surface tension for a beautiful rise in the pan.
- The Final Proof. Place your shaped loaves into two parchment-lined loaf pans. Cover them lightly with that damp towel again. Now, let them rise for another 2-4 hours. They’re ready when the dough has crested about 1-2 inches above the rim of the pan. It should hold a gentle indent when you poke it softly. This second rise is where you see the real volume develop.
- Bake to Golden Perfection. While the loaves are proofing, preheat your oven to 375°F (190°C). Once ready, slide those pans into the oven and bake for 45 minutes. You’ll know it’s done when the top is a deep, golden brown and the loaf sounds hollow when you tap the bottom. Pro Tip: For an extra-soft crust, brush the top with a little melted butter as soon as it comes out of the oven.
- The Hardest Part: Waiting. I know, I know. You want to dive in. But you must let the loaves cool in their pans for about 10 minutes, then turn them out onto a wire rack to cool completely. Slicing into warm bread is tempting, but it will be gummy! The structure is still setting. I promise, the wait is worth it.
Sharing the Love: How to Serve Your Masterpiece
Now for the best part—eating it! This bread is the ultimate all-rounder. For the perfect slice, use a serrated bread knife and a gentle sawing motion.
For breakfast, it makes the most incredible toast. It gets crispy on the outside but stays miraculously soft on the inside. Slather it with good butter and your favorite jam. For lunch, it’s the undisputed champion of the sandwich world. It’s sturdy enough to hold a mountain of turkey, avocado, and sprouts without falling apart, but soft enough not to scrape the roof of your mouth. And for a simple snack, there’s nothing better than a thick slice with a drizzle of honey or a smear of almond butter. Honestly, sometimes I just stand over the cutting board and tear into it, savoring the simple, wholesome flavor.
Make It Your Own: Delicious Recipe Twists
Once you’ve mastered the basic loaf, the fun really begins. Here are a few of my favorite ways to mix it up:
- Everything Bagel Loaf: Before the final proof, brush the top of the loaf with an egg wash (1 egg + 1 tbsp water) and sprinkle generously with everything bagel seasoning. Savory, seedy, and absolutely addictive.
- Honey Whole Wheat: Substitute 2 cups of the all-purpose flour with whole wheat flour. You’ll get a heartier, nuttier loaf that’s fantastic for breakfast.
- Herb & Garlic Swirl: Mix 2 tablespoons of softened butter with 1 minced garlic clove and a tablespoon of your favorite chopped herbs (rosemary and thyme are classic). After flattening the dough for shaping, spread the herb butter mixture evenly over the rectangle before rolling it up. You’ll get a gorgeous, flavorful swirl in every slice.
- Cinnamon Raisin: A family favorite! During the kneading process, add 1 tablespoon of cinnamon and 1 cup of raisins (soak them in warm water for 10 minutes first to plump them up). It’s like dessert for breakfast.
- Vegan Version: It’s easy! Simply swap the butter for an equal amount of vegan butter or coconut oil, and use maple syrup instead of honey. The result is just as soft and delicious.
Beau’s Kitchen Chronicles: A Few Parting Thoughts
This recipe has been a living, breathing thing in my kitchen for years. It’s evolved from a dense brick (my first attempt was… educational) to the fluffy cloud it is today. The biggest lesson I’ve learned? Temperature is your secret weapon. In the winter, my kitchen is cold, and my rise times can stretch to 14 hours. In the summer, it might be ready in 8. Don’t be a slave to the clock; watch the dough, not the timer. And one funny story: I once forgot the salt. Just completely spaced it. The resulting loaf was bland, pale, and weirdly tough. A total facepalm moment! So, learn from my mistake—salt is non-negotiable, friends.
Your Questions, Answered: Sourdough Sandwich Bread FAQ
I’ve gotten a lot of questions about this loaf over the years. Here are the most common ones to help you troubleshoot!
Q: My bread is too dense. What happened?
A: This is usually one of three things: 1) Your starter wasn’t active and bubbly enough. Always do the float test (drop a teaspoon of starter in a glass of water; if it floats, it’s ready!). 2) You killed the yeast with water that was too hot. 3) You didn’t let it proof long enough. Be patient and wait for that dough to rise properly.
Q: Can I make this by hand without a stand mixer?
A: Absolutely! It’s a great arm workout. Mix everything in a large bowl with a wooden spoon until it comes together, then turn it out onto a floured surface and knead by hand for 12-15 minutes, until smooth and elastic.
Q: The dough is too sticky to handle! Help!
A: Don’t panic! Wet or oil your hands instead of adding more flour. Adding too much flour is a common mistake that leads to a dry loaf. The dough should be tacky, but not unmanageably sticky. If it’s truly a mess, sprinkle a *little* flour on while kneading.
Q: My kitchen is cold. How can I help it rise?
A: I love this hack! Turn your oven on to the “warm” setting for just one minute, then turn it OFF. Place the covered bowl of dough inside the warm (not hot!) oven. It creates the perfect little proofing box.
Soft Sourdough Sandwich Bread : Fluffy, Buttery, and Naturally Leavened
Description
Soft Sourdough Sandwich Bread
Fluffy, tender, and naturally fermented—your new favorite loaf!
Ingredients
-
1 stick (113g) unsalted butter, softened (or neutral oil/vegan butter)
-
2 tbsp honey (or maple syrup/agave)
-
1 tbsp salt
-
1 cup (227g) active, bubbly sourdough starter
-
2 ½ cups warm water (baby-bottle warm, ~95°F / 35°C)
-
8 cups all-purpose flour (swap up to 2 cups for whole wheat; adjust water if needed)
Optional Flavor Twists:
-
Everything Bagel Loaf: Egg wash + everything bagel seasoning
-
Honey Whole Wheat: 2 cups whole wheat flour
-
Herb & Garlic Swirl: Softened butter + garlic + herbs
-
Cinnamon Raisin: 1 tbsp cinnamon + 1 cup soaked raisins
-
Vegan Version: Vegan butter + maple syrup
Instructions
-
Mix Ingredients:
-
In stand mixer bowl (dough hook), combine butter, honey, salt, starter, and warm water. Stir to combine. Add 7 ½ cups flour, reserving ½ cup. Mix on low until shaggy dough forms.
-
-
Knead Dough:
-
Knead on medium for 8–10 min until smooth, elastic, and pulling from sides. Add reserved flour 1 tbsp at a time if excessively sticky.
-
-
Bulk Fermentation (First Rise):
-
Lightly oil a large bowl, place dough inside, turn to coat, cover with damp towel or plastic wrap. Let rise 10–12 hours at room temp (overnight).
-
-
Shape Loaves:
-
Gently turn out dough onto floured surface. Divide in two. Flatten each piece into ~9×12 inch rectangle. Roll from short end, pinching seam and tucking ends under.
-
-
Final Proof:
-
Place loaves in parchment-lined pans, cover lightly. Rise 2–4 hours until dough crests 1–2 inches above pan and gently springs back when poked.
-
-
Bake:
-
Preheat oven to 375°F (190°C). Bake 45 min until golden and hollow-sounding when tapped. Optional: brush tops with melted butter for extra softness.
-
-
Cool:
-
Let loaves cool in pans 10 min, then turn out onto wire rack. Cool completely before slicing to avoid gummy texture.
-
Notes
-
Dense bread? Ensure starter is active, water isn’t too hot, and proof dough fully.
-
No stand mixer? Knead by hand 12–15 min until smooth and elastic.
-
Sticky dough? Wet or oil hands; avoid adding too much flour.
-
Cold kitchen? Warm oven for 1 min, turn off, place covered dough inside to proof.
Breaking It Down: A Peek at the Nutrition
Now, I’m all about feel-good food, and that includes knowing what’s going into your body. This bread is a wholesome, real-food alternative to store-bought versions that are often packed with preservatives. Here’s a rough nutritional breakdown per slice (assuming about 20 slices per loaf). Remember, this is an estimate and can vary based on your exact ingredients.
Per Slice (approx.):
Calories: ~180 | Protein: 5g | Carbohydrates: 28g | Fat: 5g | Fiber: 1g | Sugar: 2g
The natural fermentation process in sourdough can help pre-digest some of the starches and may make the bread easier on the digestive system for some people. Plus, you control the sugar and salt, making it a truly wholesome choice for your family.
Final Thoughts: You’ve Got This!
Well, my friend, we’ve reached the end of our bread-baking journey together. I hope you feel empowered and excited to bake this soft sourdough sandwich bread. Remember, every loaf is a learning experience. Don’t get discouraged if it’s not perfect the first time. The simple act of mixing flour and water and transforming it into a nourishing, delicious loaf is a small miracle in itself.
This bread is more than just food; it’s a connection to tradition, a lesson in patience, and a truly satisfying creation. So, go forth and bake! Fill your home with that incredible aroma, and share the love, one warm, buttery slice at a time. I can’t wait to hear how it turns out. Tag me on social with #Feastical so I can see your beautiful bakes!
Until next time, keep it simple, soulful, and satisfying.
– Beau

Sourdough Discard Pretzel Bites (Soft, Chewy & Zero-Waste Snack)
Your New Favorite Snack is Here: Sourdough Discard Pretzel Bites!
Hey friends, Beau here! Let me paint you a picture. It’s a lazy Sunday afternoon. The game is on, friends are coming over, or maybe you just need a seriously satisfying project to make your kitchen smell like heaven. You open your fridge, and there it is: that jar of sourdough discard, staring back at you with a mix of promise and mild accusation. Sound familiar?
We’ve all been there. You can’t bear to throw it away, but you’re not quite ready to commit to a full loaf. Well, my friend, I have the absolute perfect solution that’s about to become your go-zero-waste, feel-good hero. Get ready for the softest, chewiest, most outrageously delicious Sourdough Discard Pretzel Bites you’ve ever sunk your teeth into.
These little golden nuggets of joy are the ultimate crowd-pleaser. They have that signature pretzel crust, a tender, fluffy interior, and a subtle tang from your starter that takes them to a whole new level. They’re fun to make, impossible to stop eating, and they turn what might have been waste into a triumph. So, grab your apron and that jar of discard—we’re about to make some magic happen.
A Pretzel Epiphany at a German Market
My love affair with soft pretzels started not in a fancy bakery, but at a freezing cold Christmas market. I was about sixteen, trying to look cool in a thick scarf, when I bit into my first authentic, warm, soft pretzel. It was a revelation. The crackly, salty exterior gave way to a cloud-like, chewy center, and I was instantly hooked. I spent the rest of the trip trying every pretzel I could find.
Years later, deep into my sourdough journey, I had a “Eureka!” moment. I was making a sourdough pizza crust and noticed the dough had a similar chewy quality. I thought, “What if…?” After a few (dozen) experiments, ranging from hockey pucks to glorious success, I landed on this recipe. It’s my way of capturing that magic from the German market and bringing it right into your kitchen, with a clever zero-waste twist that makes it even more rewarding.
Gather Your Ingredients: The Dream Team
This is a simple, pantry-friendly recipe. Here’s what you’ll need and why each ingredient is a star player:
- 1 cup sourdough discard (unfed): This is our zero-waste hero! It doesn’t need to be active or bubbly—straight from the fridge is perfect. It adds a wonderful depth of flavor and a slight tang that makes these pretzel bites unforgettable. Chef’s Insight: If your discard is particularly watery, you may need a tiny bit more flour. Just add it a tablespoon at a time until the dough comes together.
- ½ cup warm water: The base of our dough. Make sure it’s warm to the touch, not hot, to gently wake up the yeast.
- 2 tsp active dry yeast: This gives our pretzel bites their lift and airy texture. Don’t worry, it plays nicely with the sourdough discard! Substitution Tip: You can use instant yeast instead. Just mix it directly in with the flour.
- 1 tbsp sugar or honey: A little food for the yeast to get the party started. It also balances the tanginess perfectly. I love the floral note honey adds, but plain sugar works great, too.
- 2½ cups all-purpose flour: The workhorse of our dough. It creates the perfect structure for that soft, chewy bite.
- 1 tsp salt: Crucial for flavor! Don’t skip it.
- 1 tbsp melted butter: This adds a touch of richness and helps keep the crumb tender. Substitution Tip: For a dairy-free version, feel free to use olive oil or vegan butter.
- ¼ cup baking soda (for boiling): This is the BIG secret! The boiling bath with baking soda is what gives pretzels their iconic dark, glossy, and slightly crackly crust. It’s a science miracle, and it’s so much fun.
- Coarse sea salt, for topping: The finishing touch! The big, crunchy flakes are a textural dream. Chef’s Insight: You can also use everything bagel seasoning, cinnamon sugar, or even grated Parmesan for different flavor profiles!
Let’s Get Cooking: Your Step-by-Step Guide to Pretzel Perfection
Don’t let the steps intimidate you! I’ll walk you through each one. Making these is a joyful, hands-on process. Put on some music, and let’s get our hands doughy!
- Wake Up the Yeast: In a large mixing bowl, combine your sourdough discard, warm water, yeast, and sugar (or honey). Give it a quick stir and let it sit for 5-10 minutes. You’re looking for it to get foamy and bubbly—this is a great sign that your yeast is alive and hungry! Chef’s Hack: If your mixture doesn’t foam, your yeast might be old. It’s best to start fresh to ensure your dough rises properly.
- Make the Dough: Now, add in the flour, salt, and melted butter. If you’re using a stand mixer, fit it with the dough hook and let it run on medium-low for about 5 minutes. If you’re kneading by hand (my preferred method for feeling connected to the food!), turn the shaggy mass out onto a lightly floured surface and knead for 8-10 minutes. You’re done when the dough is smooth, slightly elastic, and springs back slowly when you poke it.
- The First Rise: Place your beautiful ball of dough into a lightly oiled bowl, turn it over to coat, and cover the bowl with a clean kitchen towel or plastic wrap. Find a warm, draft-free spot in your kitchen and let it rise until doubled in size. This usually takes 60-90 minutes. Chef’s Hack: No warm spot? Turn your oven on to the lowest setting for one minute, then turn it OFF. Place the covered bowl in the warm (not hot!) oven to rise.
- Shape the Bites: Once your dough is puffy and glorious, punch it down gently to release the air. Turn it out onto a clean surface and divide it into 4 equal portions. Roll each portion into a long rope, about an inch thick. Then, using a sharp knife or a bench scraper, cut each rope into 1-inch pieces. Don’t worry about making them perfect—rustic is charming!
- The Secret Boiling Bath: Preheat your oven to 425°F (220°C) and line a baking sheet with parchment paper. Now, for the fun part! Bring a large, wide pot of water to a rolling boil. CAREFULLY add the ¼ cup of baking soda—it will fizz up, which is totally normal. Working in batches, gently drop about 10-15 dough bites into the boiling water. They’ll sink and then float. Boil them for exactly 30 seconds, then use a slotted spoon or spider strainer to lift them out, letting the excess water drip off, and place them on your prepared baking sheet. Chef’s Note: Don’t overcrowd the pot, and be gentle—they’re delicate after their bath!
- Top and Bake: While the pretzel bites are still damp from their bath, generously sprinkle them with coarse sea salt. This is when it really starts to look like the real deal! Pop the baking sheet into your preheated oven and bake for 12-15 minutes, until they are a deep, rich golden brown. Your kitchen will smell incredible.
- Cool (If You Can Wait!): Remove them from the oven and let them cool on the pan for just a minute or two. I highly, highly recommend eating a few straight away—they are at their absolute peak when warm and fresh.
How to Serve These Golden Gems
Presentation is part of the fun! I love piling these warm pretzel bites high in a big, rustic wooden bowl or on a simple platter. They’re a social food, meant for sharing and dipping.
And speaking of dipping, let’s talk sauces! You can’t go wrong with classic yellow mustard or a grainy Dijon. But if you want to level up, here are my favorites:
- Beer Cheese Dip: A warm, sharp cheddar cheese sauce made with a splash of lager? It’s a match made in heaven.
- Spicy Chipotle Mayo: Just mix mayo with a little adobo sauce from a can of chipotles, a squeeze of lime, and a pinch of salt.
- Jalapeño Queso: For when you want a little kick.
- Simple Honey Mustard: Mix equal parts Dijon mustard and honey. It’s sweet, tangy, and perfect for the kids.
They’re also fantastic all on their own, maybe with a cold beer or a crisp hard cider. The perfect snack for game day, movie night, or just because it’s Tuesday.
Get Creative: 5 Fun Flavor Twists
Once you’ve mastered the classic, the world is your pretzel! Here are a few of my favorite ways to mix things up:
- Everything Bagel Pretzel Bites: Instead of coarse salt, sprinkle the boiled bites with everything bagel seasoning before baking. Serve with a whipped cream cheese dip.
- Cinnamon Sugar Sweet Bites: Skip the salt entirely. After baking, brush the warm bites with melted butter and roll them in a mixture of cinnamon and sugar. Divine with a coffee dip (mix mascarpone, a little milk, and instant espresso powder).
- Garlic Parmesan: Toss the warm, baked bites in melted butter mixed with minced garlic and dried parsley, then shower them with finely grated Parmesan cheese.
- Whole Wheat & Herb: Substitute 1 cup of the all-purpose flour with whole wheat flour. Add 2 tablespoons of chopped fresh rosemary or thyme to the dry ingredients for a savory, earthy twist.
- Stuffed Pretzel Bites: Feeling ambitious? Flatten each dough piece, place a small cube of cheese (like mozzarella or cheddar) or a little piece of pepperoni in the center, and pinch the dough tightly around it to seal before boiling and baking. A gooey, surprise-filled treat!
Beau’s Kitchen Notes & Stories
This recipe has seen some things in my kitchen! I’ve made them for my nephew’s birthday party (a huge hit), and I’ve definitely had a batch where I forgot the salt in the dough. (Pro-tip: don’t do that. They were very, very bland.)
The recipe has evolved, too. I started by making full-sized pretzels, but the bites are just so much more practical for sharing. They bake more evenly, and you get more delicious surface area for dipping. It’s a forgiving dough, so don’t stress. The goal is to have fun and end up with a delicious, zero-waste snack that makes you proud.
FAQs & Troubleshooting: Your Questions, Answered
Q: My dough didn’t rise much. What went wrong?
A: The most common culprits are old yeast or water that was too hot, which can kill the yeast. Always test your yeast in the first step to ensure it gets foamy. Also, make sure your rising spot is nice and warm!
Q: Can I make these without the boiling step? It seems intimidating.
A: I really don’t recommend skipping it! The baking soda bath is non-negotiable for achieving that classic, dark, chewy pretzel crust. It’s what chemically creates the “pretzel” flavor and texture. It’s less intimidating than it looks—just be careful with the boiling water.
Q: My pretzel bites taste a bit soapy. Is that normal?
A: This is a rare but possible comment if you’re sensitive to the flavor of baking soda. It’s completely safe, but to avoid it, make sure you’re using the full ¼ cup in a large pot of water (at least 8-10 cups) to properly dilute it.
Q: How do I store leftovers and reheat them?
A> Store cooled bites in an airtight container at room temperature for up to 3 days. To reheat and bring back that magic, pop them in a 350°F (175°C) oven for 5-8 minutes until warm. They also freeze beautifully for up to 3 months!

Sourdough Discard Pretzel Bites (Soft, Chewy & Zero-Waste Snack)
Description
Perfect for using up sourdough discard, these little golden nuggets have a tender interior, a signature pretzel crust, and a subtle tang from your starter. Ideal for game day, movie nights, or a fun baking project.
Ingredients
-
1 cup sourdough discard (unfed, straight from the fridge)
-
½ cup warm water (not hot)
-
2 tsp active dry yeast (or instant yeast)
-
1 tbsp sugar or honey
-
2½ cups all-purpose flour
-
1 tsp salt
-
1 tbsp melted butter (or olive oil/vegan butter)
-
¼ cup baking soda (for boiling)
-
Coarse sea salt (for topping, or optional seasonings: everything bagel, cinnamon sugar, Parmesan)
Instructions
-
Activate Yeast:
In a large mixing bowl, combine sourdough discard, warm water, yeast, and sugar/honey. Stir and let sit 5–10 minutes until foamy. -
Make Dough:
Add flour, salt, and melted butter. Knead by hand for 8–10 min or with a stand mixer for ~5 min until smooth and slightly elastic. -
First Rise:
Place dough in a lightly oiled bowl, cover, and let rise in a warm, draft-free spot until doubled, 60–90 min. -
Shape Pretzel Bites:
Punch down dough and divide into 4 portions. Roll each into ~1-inch thick ropes, then cut into 1-inch pieces. -
Boil Bites:
Preheat oven to 425°F (220°C). Line baking sheet with parchment.
Bring a large pot of water to a rolling boil; carefully add ¼ cup baking soda. Working in batches, drop 10–15 pieces into water for 30 seconds. Remove with slotted spoon, drain, and place on baking sheet. -
Top & Bake:
Sprinkle with coarse sea salt or preferred seasoning. Bake 12–15 min until deep golden brown. -
Cool & Serve:
Let cool 1–2 minutes on pan. Serve warm—perfect for dipping in mustard, beer cheese, honey mustard, or enjoy on their own.
Notes
-
Store in an airtight container at room temperature for up to 3 days.
-
Reheat in a 350°F (175°C) oven for 5–8 min.
-
Freeze for up to 3 months.
Quick Nutritional Breakdown
Hey, we’re all about balance here! While these are a treat, it’s good to know what you’re enjoying. Please note, this is an estimate and can vary based on specific ingredients and toppings.
- Prep Time: 1 hour 30 minutes (including rise)
- Cook Time: 15 minutes
- Yield: About 50-60 pretzel bites
Per Serving (approx. 5 bites):
- Calories: ~160
- Carbohydrates: 28g
- Protein: 4g
- Fat: 3g
- Sodium: This varies greatly depending on how much coarse salt you use for topping.
Final Thoughts from My Kitchen to Yours
Well, there you have it! My foolproof recipe for turning that lonely jar of sourdough discard into a snack that will have everyone asking for the recipe. This is what Feastical is all about—taking simple, real ingredients and creating something that truly brings people together. It’s food that feels like a warm hug, a high-five, and a proud “I made that!” moment all rolled into one.
So, don’t let that discard go to waste. Whip up a batch of these soft, chewy, sourdough discard pretzel bites. I promise, your future self (and your hungry friends) will thank you. Happy baking!
– Beau
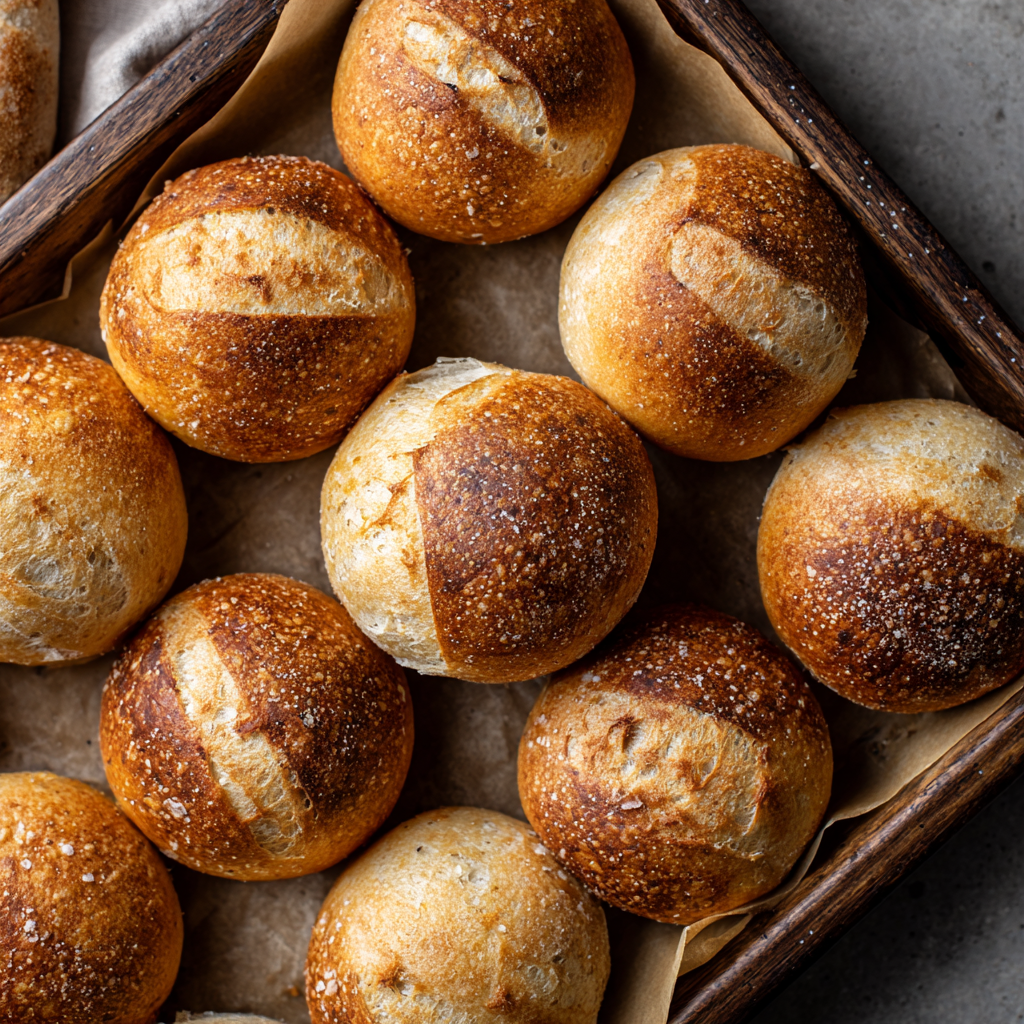
Mini Sourdough Bread Rolls (Muffin Pan Baked, Small-Batch Friendly)
Your New Favorite Bite: Mini Sourdough Bread Rolls
Hey friends, Beau here! Tell me if this sounds familiar: you’ve caught the sourdough bug. You’re nurturing your starter like a proud plant parent, you’ve mastered a gorgeous, crackly-crusted loaf, and you’re feeling pretty darn accomplished. But then… a craving hits. You want that incredible, tangy, chewy sourdough experience, but you don’t want to commit to a whole loaf. Maybe it’s just you and your partner for dinner, or you’re planning a cozy get-together and want everyone to have their own perfect little bread bundle.
Well, my fellow food-lover, I have the most delightful, game-changing solution for you: Mini Sourdough Bread Rolls. We’re taking all the magic of a classic artisan loaf—the blistered, crisp crust, the soft, airy crumb, that satisfying tang—and shrinking it down into adorable, single-serving packages. Baked right in a standard muffin pan, these little guys are the ultimate in portion control, party perfection, and pure, unadulterated bread joy.
And the best part? No fancy Dutch oven required! We’re using a simple chef’s hack with a baking tray and some water to create that professional-grade steam oven environment right in your kitchen. So, whether you’re a sourdough sage or just getting your hands floury, these mini rolls are about to become your new baking obsession. Let’s get this dough party started!
The Little Loaf That Could: A Sourdough Story
This whole mini-roll obsession started in my kitchen a few Christmases ago. I was hosting my family, and my mom, the queen of holiday dinners, had outdone herself with the menu. I was on bread duty, and I’d baked my usual stunning sourdough boule. But when it came time to serve, we had to slice and pass it around, which, while lovely, felt a little… formal. I watched as my niece, little Lily, tried to wrestle a giant slice onto her small plate, and I had a lightbulb moment.
The next day, with some leftover dough from my weekly bake, I decided to experiment. I shaped a few little dough balls and plopped them into a muffin tin, thinking, “Worst case, we have some interesting bread nuggets.” What came out of the oven was pure magic. They were like individual pieces of art, each with its own tiny, perfect ear and a crust that shattered when you tore it open. Lily got her own personal “baby loaf,” and her face lit up. That’s when I knew—this wasn’t just a hack; it was a new tradition. It’s about making food that’s not only delicious but also fun, personal, and a little bit magical.
What You’ll Need for These Mini Marvels
We’re keeping it classic here, using a straightforward sourdough bread dough. A hydration of around 70-75% is the sweet spot—it’s manageable to shape but still gives us that beautiful, open crumb. Here’s the breakdown:
- Active Sourdough Starter (100g): This is the heart and soul of the operation! Make sure your starter is ripe, bubbly, and has recently been fed. It should have a pleasant, slightly sweet, and tangy aroma. If it smells like acetone or vinegar, it’s a bit past its prime—give it a fresh feed and wait a few hours.
- Bread Flour (350g): I love bread flour for its higher protein content (usually 12-13%), which gives our rolls that fantastic chew and structure. Chef’s Insight: If you only have all-purpose flour, you can use it! Your rolls will be a touch softer and less chewy, but still absolutely delicious.
- Water (235g, lukewarm): Lukewarm water, around 75-80°F (24-27°C), is ideal. It gently coaxes the fermentation along without shocking the yeast. Substitution Tip: Feel free to swap up to 50g of the water for whole milk for a slightly richer, softer roll.
- Salt (7g): Don’t you dare forget the salt! It’s not just for flavor; it also tightens the gluten structure and helps control fermentation. I use fine sea salt for even distribution.
Shaping & Baking Your Mini Masterpieces
Okay, team! You’ve mixed your dough, done your stretches and folds, and let it bulk ferment until it’s nicely risen and bubbly. Now for the fun part—let’s turn that beautiful dough into rolls!
- Divide with Love: Gently turn your dough out onto a very lightly floured surface. Using a bench scraper or a sharp knife, divide the dough into 12 equal pieces. I aim for about 77g each for standard muffin cups—it’s the perfect size! Chef’s Hack: Weigh your pieces for uniformity. This ensures they all bake at the same rate and look like a professional set.
- The Pre-Shape & Rest: Lightly shape each piece into a loose round. Don’t go for tightness yet—we’re just creating a basic shape. Cover them with a clean kitchen towel and let them rest for 20-30 minutes. This relaxes the gluten, making the final shaping much easier.
- Final Shaping: Now, let’s create some surface tension! Take one dough piece. Pull the edges of the dough down and toward the center, creating a smooth, taut “skin” on top. Pinch the seams together at the bottom. Cup your hand around the dough and drag it in a small, tight circle on the counter to seal the bottom and tighten the ball. You should feel a little resistance. This tension is what helps them rise up, not just out, in the oven.
- Proofing in the Pan: Lightly grease your standard 12-cup muffin pan. No liners needed! Place each shaped dough ball, seam-side down, into a cup. Cover the entire pan loosely with a large plastic bag or damp tea towel. Let them proof until they look puffy and have risen slightly. Because they’re small, this might be quicker than a whole loaf, so keep an eye on them! The poke test works well here—a gentle poke should leave a slight indent that slowly springs back.
- Preheat & Create Steam: Place a baking sheet or roasting pan on the very bottom rack of your oven. Preheat your oven to a scorching 450°F (232°C). This high heat and the steam we’re about to add are the secrets to that blistered, professional crust.
- Score for Style: Right before baking, it’s time to get artistic! Using a lame, a very sharp razor blade, or even a meticulously clean utility knife, make a shallow slash on top of each roll. A simple “X,” a single slash, or even a leaf pattern works beautifully. This isn’t just for looks; it controls where the steam escapes, allowing the roll to expand evenly.
- Bake to Golden Perfection: Carefully place the muffin pan on a rack in the center of the oven. THEN, quickly pour about 4 cups of hot water into the preheated baking sheet on the bottom rack and shut the oven door immediately. This blast of steam is our Dutch oven replacement! Bake for 15-17 minutes until the rolls are deeply golden brown and sound hollow when tapped on the bottom.
- Cool (The Hardest Part!): As soon as they’re out, transfer the rolls from the muffin pan to a wire rack. I know it’s tempting, but you must let them cool for at least 20 minutes! This allows the crumb to set properly. If you tear into them too soon, the inside can be gummy.
How to Serve These Adorable Bread Balls
Honestly, one of these rolls, still slightly warm from the oven and slathered in good salted butter, is a meal in itself. But let’s get creative!
For a dinner party, pile them high in a rustic wooden bowl or a linen-lined basket. They’re the perfect elegant companion to a big pot of soup, a hearty stew, or a fancy pasta dish. For a holiday meal or brunch, they are absolutely show-stopping. Imagine a Thanksgiving table where everyone gets their own miniature, artisan-style roll—it’s a detail guests will remember.
And don’t forget the dippers! Serve them alongside a small dish of high-quality olive oil mixed with balsamic glaze and herbs. Or, turn them into the world’s best mini-slider buns! They’re sturdy enough to hold a juicy burger or some pulled pork without getting soggy.
Mix It Up! Fun Flavor Twists
Once you’ve mastered the basic roll, the flavor world is your oyster! Here are a few of my favorite ways to jazz them up:
- Everything Bagel Bliss: After shaping, brush the tops lightly with water or an egg wash and generously sprinkle with everything bagel seasoning before the final proof. Savory, seedy, and irresistible.
- Garlic & Herb Heaven: During the initial mixing, add 2-3 finely minced garlic cloves and 2 tablespoons of your favorite chopped fresh herbs (rosemary, thyme, and chives are a killer combo).
- Cheesy Pull-Apart Dream: Add ½ cup of finely grated sharp cheddar or parmesan cheese to the dry ingredients. For extra cheesy goodness, you can even fold in another ¼ cup of small cheese cubes during the final shaping.
- Whole Wheat Wonder: Substitute up to 50% of the bread flour with whole wheat flour. You’ll get a nuttier flavor and a denser, heartier crumb. Just note, you may need to add a touch more water as whole wheat flour is thirstier.
- Sweet Cinnamon Swirl: For a breakfast treat, after the pre-shape rest, roll each dough piece into a small rectangle, brush with melted butter, and sprinkle with a cinnamon-sugar mix. Roll it up like a tiny log, tuck the ends, and then shape into a ball. You’ll get a lovely swirl inside!
Beau’s Baker’s Notes
This recipe has truly evolved in my kitchen. I’ve learned that the muffin pan isn’t just a mold; it’s a support system. It guides the rolls to rise upwards, giving them a beautiful, uniform shape that’s perfect for sandwiches. I once tried baking them free-form on a sheet pan, and while they were tasty, they spread out into more of a “roly-poly” shape. Cute, but not the elegant little boules we’re going for here.
My biggest “aha!” moment was realizing I could skip the stressful transfer of a pre-heated Dutch oven. The steam tray method is foolproof and less intimidating for new bakers. It just goes to show that sometimes, the best kitchen tricks are the simplest ones. Don’t be afraid to make this recipe your own—that’s where the real magic happens!
Your Sourdough Roll Questions, Answered!
Q: My rolls didn’t get a very crispy crust. What happened?
A: The most common culprit is not enough steam! Make sure your oven is fully preheated and that you’re using a HOT baking sheet (a cold one could warp). Pour the water in quickly and shut the door immediately to trap all that beautiful steam. Also, ensure your oven is properly calibrated—an oven thermometer is a baker’s best friend.
Q: Can I make these with discard for a less tangy flavor?
A> You absolutely can, but the process changes! Using unfed “discard” starter won’t provide enough leavening power on its own. For a discard version, you’d want to treat this more like a yeasted roll and add about ½ teaspoon of instant yeast to the recipe to ensure a good rise. The flavor will be milder, which some people prefer!
Q: My dough is really sticky and hard to shape. Help!
A> Don’t panic! Wet your hands with a little water instead of using flour. It will prevent the dough from sticking to you without incorporating too much extra flour, which can make the rolls dense. A bench scraper is also your best friend for handling sticky dough.
Q: How long do these keep, and what’s the best way to reheat them?
A> They are best enjoyed the day they’re baked. After that, store them in a paper bag at room temp for a day to keep the crust crisp. To revive them, a 5-7 minute warm-up in a 350°F (175°C) oven works wonders. For longer storage, they freeze beautifully for up to 3 months.

Mini Sourdough Bread Rolls (Muffin Pan Baked, Small-Batch Friendly)
Description
Love sourdough but don’t want a whole loaf? These Mini Sourdough Bread Rolls capture all the tangy, chewy, crackly magic of a classic loaf in adorable, single-serving rolls. Perfect for weeknight dinners, brunch, or impressing guests with minimal fuss.
Ingredients
-
100g active sourdough starter (ripe and bubbly)
-
350g bread flour (or all-purpose)
-
235g lukewarm water (optionally swap up to 50g with milk for a softer crumb)
-
7g fine sea salt
Optional Flavor Twists:
-
Everything Bagel seasoning
-
Garlic & herbs (2–3 cloves garlic + 2 tbsp fresh herbs)
-
Cheddar or parmesan (½ cup grated cheese + optional ¼ cup small cubes)
-
Cinnamon-sugar swirl for breakfast rolls
Instructions
-
Mix & Autolyse:
Combine flour and water, mix until no dry spots remain. Let rest 20–30 min. -
Add Starter & Salt:
Incorporate sourdough starter and salt, knead until smooth and elastic (8–10 min by hand or stand mixer). -
Bulk Fermentation:
Cover and let dough rise 3–4 hours at room temp, performing 2–3 stretch & folds during the first 2 hours. -
Divide & Pre-Shape:
Turn dough onto lightly floured surface. Divide into 12 equal pieces (~77g each). Pre-shape into loose rounds, cover, rest 20–30 min. -
Final Shaping:
Create surface tension by pulling edges under to form tight balls. Place seam-side down in a lightly greased 12-cup muffin pan. Cover loosely and proof until slightly puffy (poke test: indent springs back slowly). -
Preheat & Steam Prep:
Preheat oven to 450°F (232°C) with a baking sheet on the bottom rack for steaming. -
Score & Bake:
Make a shallow slash on each roll. Place pan in oven, quickly pour ~4 cups hot water into the bottom sheet, and close door. Bake 15–17 min until golden brown and hollow-sounding. -
Cool:
Transfer to a wire rack; cool at least 20 min before serving to set crumb.
Notes
-
Fluffier rolls: Wet your hands slightly when shaping instead of adding flour.
-
Cheesy rolls: Fold in cheese during shaping for gooey pockets.
-
Sweet rolls: Add cinnamon-sugar swirl inside the dough before shaping.
-
Herb rolls: Mix garlic and fresh herbs into dough for savory flavor.
-
Everything Bagel rolls: Brush tops lightly with water or egg wash and sprinkle seasoning before final proof.
Nutrition
- Calories: 130 Cal Per Serving
- Carbohydrates: 26 g
- Protein: 4 g
A Quick Bite on Nutrition
Now, I’m not a nutritionist, I’m a “make-it-taste-good-ist,” but I know many of you are curious about what you’re eating! Since these are made with just four simple, whole ingredients, they’re a pretty wholesome choice.
As a rough estimate, each of these mini sourdough rolls comes in at around 130 calories. You’re looking at about 26g of carbohydrates, a solid 4g of protein from the bread flour, and less than 1g of fat. The real benefit of sourdough is the fermentation process, which can make the bread easier to digest and can lead to a lower glycemic index compared to commercial yeast breads. So, you can feel good about enjoying one (or two!) of these delicious, handmade rolls.
Your New Go-To Bread Recipe
And there you have it! Your guide to creating the most charming, delicious, and impressively easy mini sourdough rolls. This recipe is a testament to what I truly believe here at Feastical: that incredible, soul-satisfying food doesn’t have to be complicated or intimidating. It’s about taking a classic technique and adapting it to fit your life, your kitchen, and your cravings.
These little rolls have brought so much joy to my table, from holiday feasts to simple weeknight soups, and I truly hope they do the same for yours. So, feed that starter, get your muffin pan ready, and bake a batch of happiness. I can’t wait for you to tear into your first one. Happy baking!
Final Thoughts: Your New Go-To Bread Recipe
And there you have it! Your complete guide to creating the most charming, delicious, and impressively easy mini sourdough rolls. This recipe is a testament to what I truly believe: that incredible, soul-satisfying food doesn’t have to be complicated or intimidating.
We’ve taken the grand, sometimes daunting, art of the sourdough boule and transformed it into something approachable, personal, and downright fun. These little rolls are proof that a simple shift in perspective—from one big loaf to twelve perfect little ones—can open up a world of culinary possibilities. They’ve brought so much joy to my table, from holiday feasts to simple weeknight soups, and I truly hope they do the same for yours.
So, feed that starter, dust off that muffin pan, and get ready to fill your kitchen with the unbeatable aroma of baking bread. You’re not just making rolls; you’re creating edible joy, one mini masterpiece at a time.

High-Protein Yogurt Tiramisu (No Eggs, No Bake, Light & Creamy)
Your New Favorite Dessert Just Got a Protein-Packed Upgrade!
Hey friends, Beau here! Let’s talk about one of life’s greatest culinary dilemmas: you’re craving something decadent, something that feels like a luxurious treat, but you also want to feel good about what you’re eating. You want that “wow” factor without the “ugh, I shouldn’t have” feeling afterward. Sound familiar? For the longest time, my beloved tiramisu lived firmly in the “special occasion only” category in my mind. It was a restaurant dessert, a holiday treat, something packed with mascarpone, sugar, and eggs that left me needing a nap.
But what if we could change that? What if we could capture all the magic of a classic tiramisu—the bold coffee, the delicate, soaked ladyfingers, the creamy, cloud-like layers, and that iconic dusting of cocoa—and give it a makeover that’s not only guilt-free but actually good for you?
Well, pull up a chair, because I’ve been tinkering in the Feastical kitchen, and I’ve created something truly spectacular. This High-Protein Yogurt Tiramisu is my new obsession. It’s incredibly light and creamy, has no eggs, requires zero baking, and is packed with protein to keep you satisfied. It’s the perfect dessert for a weeknight treat, a brilliant breakfast meal prep (yes, you read that right!), or a show-stopping dish to bring to a gathering that will have everyone asking for the recipe. It’s simple, soulful, and I promise, it tastes like a warm, caffeinated hug. Let’s make it!
The Tiramisu That Started It All
My love affair with tiramisu began not in a fancy Italian restaurant, but in my Nonna’s best friend’s kitchen. Zia Lucia, as I called her, was a force of nature. She didn’t so much cook as she conducted a symphony of flavors, and her tiramisu was the grand finale. I remember watching, utterly mesmerized, as she assembled it. There was no recipe card, just intuition and a well-loved ceramic dish. The air was thick with the scent of freshly brewed espresso and sweet Marsala wine. She’d let me lick the mascarpone bowl, and it was pure heaven.
But as I got older and my own cooking style evolved towards feel-good, energizing food, I found myself missing that experience. I wanted to recreate that same feeling of joy and comfort, but in a way that fit my active lifestyle. This High-Protein Yogurt Tiramisu is my tribute to Zia Lucia. It’s my way of saying that the soul of a dish—the layers, the textures, the love—can live on, even when you change the ingredients. It might not be her exact recipe, but every time I make it, I’m right back in that warm, fragrant kitchen, and that’s a feeling worth sharing.
Gathering Your Tiramisu Toolkit
Part of the beauty of this recipe is its simplicity. You likely have most of these ingredients already, and the ones you don’t are easy finds at any grocery store. Here’s the lineup for our protein-packed masterpiece:
- 40 Ladyfingers (Savoiardi): These light, airy biscuits are the backbone of any tiramisu. Chef’s Insight: Look for them in the international aisle or the bakery section. Their dry, sponge-like texture is perfect for soaking up all that coffee goodness without turning to complete mush.
- 1.4 kg Protein Yogurt: This is our superstar! This is where the magic happens. Explanation: I use a pre-mixed vanilla protein yogurt (like a high-protein Greek yogurt or Skyr) for convenience and sweetness. Substitution Tip: If you can only find plain Greek yogurt or quark, no worries! Just mix in 2 tablespoons of maple syrup, honey, or your favorite liquid sweetener to taste.
- 2 Cups Strong Black Coffee, cooled: This is non-negotiable for that authentic tiramisu flavor. Chef’s Hack: Brew it strong! I use about 50% more coffee grounds than I normally would for drinking. If you’re not a coffee drinker, a good-quality instant espresso powder dissolved in hot water works beautifully. Let it cool completely before using.
- 2 tbsp Vanilla Protein Powder (Optional): This is our secret weapon for an extra protein boost and a richer, more decadent-tasting cream. Explanation: It thickens the yogurt slightly and deepens the vanilla flavor. If you don’t have any, you can simply omit it—the recipe will still be fantastic!
- 1 tsp Vanilla Extract: Only needed if you’re using plain, unflavored yogurt. It just helps round out that warm, comforting vanilla base.
- 10g Unsweetened Cacao Powder: For that iconic, beautiful finish. Chef’s Insight: Using a fine-mesh sieve to dust the cocoa gives you that professional, snow-like sprinkle. It’s a small step that makes a huge visual difference!
- Optional Grown-Up Twist: A splash of coffee liqueur (like Kahlúa) in the coffee for a more traditional kick, or some dark chocolate shavings on top for a bit of textural contrast and extra chocolatey bliss.
Let’s Build Our Masterpiece: Step-by-Step
Alright, team, it’s assembly time! This is where the fun begins. We’re not cooking, we’re crafting. Put on some good music, and let’s create some layers of joy.
- Whip Up Your Creamy Filling. Grab a large mixing bowl and plop in all of your protein yogurt. If you’re using the optional protein powder and/or vanilla extract (for plain yogurt), add it now. Take a whisk or a spatula and stir everything together until it’s smooth, creamy, and perfectly combined. Give it a little taste. Is it sweet enough for you? Feel free to adjust here. Once it’s perfect, set it aside. Chef’s Hack: For an even fluffier, lighter texture, you can whisk the yogurt mixture for a full minute. You’ll be amazed at the airy volume you can get!
- Get Your Coffee Station Ready. Pour your completely cooled, strong coffee into a shallow bowl or a pie dish. The wider the dish, the easier it is to dip. If you’re adding that splash of coffee liqueur for a grown-up version, now’s the time to stir it in. Pro Tip: Have your serving dish (a 25-30 cm / 9×13 inch dish is perfect) and your ladyfingers lined up next to the coffee. This creates an efficient assembly line.
- The Art of the Dip. This is the most crucial step! Take one ladyfinger and quickly, I mean quickly, dip it into the coffee. We’re talking one second per side, max. You want it to absorb the coffee and become moist, but you do NOT want it waterlogged and falling apart in your fingers. Think of it as a quick swim, not a deep-sea dive. Little Chef Story: I learned this the hard way with my first test batch. I got distracted, let a few soak for too long, and ended up with a tiramisu soup. A quick dunk is all you need, I promise!
- Create Your First Layer. As you dip each ladyfinger, immediately place it in your serving dish. Arrange them in a single layer, side-by-side, to cover the entire bottom of the dish. You might need to break one or two to fill in the gaps—that’s totally fine! We’re going for rustic, not perfect.
- Spread on the Cloud. Now, take half of your creamy yogurt mixture and plop it right on top of the ladyfinger layer. Use a spatula to gently spread it into an even, smooth layer, making sure to cover the edges. You’ve just created your first glorious stratum!
- Repeat the Magic. Just like before, dip your next round of ladyfingers and create a second layer on top of the yogurt. Then, swoop in with the rest of your yogurt mixture and spread it out for the grand finale cream layer. Use the back of your spoon or spatula to make some soft peaks and swirls—it makes the final product look even more inviting.
- The Grand Finale: Cocoa Snow. Take your unsweetened cocoa powder and your fine-mesh sieve. Hold it over the entire dish and gently tap the side to create a beautiful, even dusting of chocolatey goodness. This is the moment it truly becomes tiramisu! Tip: For the cleanest look, you can lay parchment paper strips over parts of the dish to create lines, but I love the rustic, full-coverage look.
- The Tortuous Wait. I know, I know. You want to dig in right now. But trust me on this. Gently cover your tiramisu with plastic wrap or a lid and slide it into the fridge. Let it chill for at least 4 hours, but honestly, overnight is the real game-changer. This waiting period is when the alchemy happens. The ladyfingers soften fully, the flavors meld together, and the whole dessert transforms from separate components into one cohesive, incredible treat.
How to Serve This Stunner
The wait is over! You’ve pulled your gorgeous tiramisu out of the fridge, and it’s set perfectly. Now, how do you serve it like a pro?
For a beautiful presentation, take a sharp knife and dip it in hot water, wiping it clean between each cut. This will give you those pristine, clean-edged portions. I love serving it in shallow bowls rather than on flat plates because it contains any potential saucy goodness.
For a little extra flair, right before serving, add a final light dusting of fresh cocoa powder to make it pop. A few fresh raspberries or a mint leaf on the side adds a lovely touch of color and a hint of freshness that cuts through the richness beautifully.
And here’s my favorite way to enjoy it: for breakfast! That’s right. Because it’s high in protein and not overly sweet, a square of this tiramisu with a side of fruit is the most exciting, feel-good way to start your day. It’s meal prep that actually feels like a treat.
Make It Your Own: Delicious Twists & Swaps
One of the best things about this recipe is its versatility. Feel free to get creative and play with the flavors! Here are a few of my favorite variations:
- Chocolate Orange Dream: Add the zest of one orange to the yogurt mixture and use a chocolate-flavored protein powder. It’s like a Terry’s Chocolate Orange in tiramisu form!
- Tropical Escape: Swap out the coffee for cold brew coffee with a hint of coconut, or even a light coconut milk. Layer in some finely chopped toasted coconut into the yogurt cream for a piña colada vibe.
- Berry Bliss (No Coffee): Not a coffee fan? No problem! Dip your ladyfingers in a mixture of melted raspberry or strawberry jam thinned out with a little warm water or lemon juice. The result is a bright, fruity, and stunningly pink dessert.
- Dairy-Free Delight: Easily make this vegan! Use your favorite plant-based yogurt (a thick, coconut-based one works best) and ensure your ladyfingers are egg-free and vegan-friendly. They’re surprisingly easy to find these days!
- Mocha Madness: Stir 1-2 tablespoons of unsweetened cocoa powder right into the yogurt mixture for a double-chocolate, mocha-infused experience.
Beau’s Kitchen Notes & Stories
This recipe has been a fun journey of experimentation. The first time I made it, I was so nervous it wouldn’t set. I must have opened the fridge a dozen times to “check on it,” which, as any chef will tell you, is the worst thing you can do! But patience paid off, and the result was even better than I’d hoped.
Over time, I’ve found that using a really thick yogurt, like Icelandic Skyr or a strained Greek yogurt, gives the absolute best, most mousse-like texture. It holds its shape beautifully and makes the dessert feel incredibly indulgent. This tiramisu has now become my go-to potluck dish. It travels like a dream, and I love the look of surprise on people’s faces when I tell them it’s packed with protein. It’s a conversation starter that ends with empty plates and happy smiles.
Your Tiramisu Questions, Answered!
I’ve made this a bunch, and I’ve also heard from many of you. Here are the most common questions and how to fix them.
Q: My tiramisu is too runny! What happened?
A: The most common culprit is over-soaking the ladyfingers. If they’re too wet, they release liquid into the dessert. Another reason could be a particularly runny yogurt. Next time, ensure a quick dip and, if using plain yogurt, consider straining it through a cheesecloth for 30 minutes to remove excess whey.
Q: Can I make this ahead of time?
A: Absolutely! In fact, I highly recommend it. This dessert is at its absolute best after a full 24 hours in the fridge. The flavors have so much time to get to know each other and become best friends. You can make it up to 2 days in advance.
Q: I don’t have a big dish. Can I make individual portions?
A> That’s a fantastic idea! This recipe is perfect for making in individual glasses or mason jars. Just break the ladyfingers to fit, and layer away. It makes for a gorgeous, personalized presentation.
Q: Is there a way to reduce the sugar even more?
A> For sure. Use plain, unflavored yogurt and sweeten it minimally with a natural sweetener like stevia or monk fruit to taste. Also, ensure you’re using unsweetened cocoa powder for the topping.
The Healthy Scoop (Because We’re Curious!)
Now, let’s be clear: I’m a chef, not a dietitian. These figures are estimates based on the specific ingredients I used and a standard nutritional calculator. Your exact numbers will vary depending on your brand of yogurt, ladyfingers, etc. But to give you a general idea of why this dessert feels so good:
This High-Protein Yogurt Tiramisu is a nutritional powerhouse compared to its traditional counterpart. A serving (roughly 1/20th of the dish) comes in at around 130 calories, with an impressive 12 grams of protein! That protein comes from the yogurt and optional protein powder, and it’s key to keeping you full and satisfied. You’re looking at about 10 grams of carbs, 2 grams of fat, and only about 4 grams of sugar. Compared to a traditional tiramisu that can easily be 300-400 calories per serving with much more sugar and fat, this is a feel-good win that doesn’t sacrifice an ounce of flavor.
Print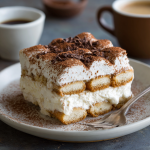
High-Protein Yogurt Tiramisu (No Eggs, No Bake, Light & Creamy)
Description
Craving a dessert that feels indulgent but actually fuels you? This High-Protein Yogurt Tiramisu captures all the magic of classic tiramisu—the rich coffee, soft ladyfingers, and creamy layers—but with no eggs, zero baking, and a protein boost to keep you satisfied. Perfect for a weeknight treat, breakfast, or impressing guests.
Ingredients
-
40 ladyfingers (Savoiardi)
-
1.4 kg vanilla protein yogurt (or Greek yogurt mixed with 2 tbsp honey/maple syrup)
-
2 cups strong black coffee, cooled
-
2 tbsp vanilla protein powder (optional, for extra protein and richness)
-
1 tsp vanilla extract (only if using plain yogurt)
-
10 g unsweetened cocoa powder (for dusting)
-
Optional: splash of coffee liqueur, dark chocolate shavings
Instructions
-
Prepare the creamy filling:
In a large bowl, whisk together the protein yogurt, optional protein powder, and vanilla extract until smooth. Taste and adjust sweetness if needed. -
Set up the coffee station:
Pour cooled coffee into a shallow dish. Stir in coffee liqueur if using. Keep your serving dish nearby for easy assembly. -
Dip the ladyfingers:
Quickly dip each ladyfinger into the coffee—just 1 second per side—to absorb flavor without becoming soggy. -
Layer the tiramisu:
-
Place the first layer of dipped ladyfingers in the dish.
-
Spread half of the yogurt mixture over them.
-
Repeat with the remaining ladyfingers and yogurt for a second layer.
-
-
Dust with cocoa:
Use a fine-mesh sieve to evenly dust the top with unsweetened cocoa powder. -
Chill:
Cover and refrigerate for at least 4 hours, ideally overnight, to allow flavors to meld and the dessert to set.
Notes
-
For fluffier cream: Whisk yogurt mixture for 1–2 minutes before layering.
-
Fruit twist: Replace coffee with raspberry or strawberry jam thinned with water for a fruity tiramisu.
-
Chocolate lovers: Mix 1–2 tbsp cocoa powder into the yogurt for a mocha version.
-
Dairy-free: Use thick coconut yogurt and vegan ladyfingers.
Nutrition
- Calories: 130 Cal Per Serving
- Fat: 2 g
- Carbohydrates: 10 g
- Protein: 12 g
Final Thoughts from My Kitchen to Yours
And there you have it, friends. My heart and soul (and a whole lot of protein yogurt) poured into this recipe. This High-Protein Yogurt Tiramisu is proof that you don’t have to give up the foods you love to feel your best. It’s all about smart, simple swaps and a whole lot of love in the assembly.
This dessert is a celebration—of flavor, of health, and of the simple joy that comes from creating something delicious with your own two hands. I hope this recipe finds its way into your regular rotation and becomes a new favorite in your home, just like it has in mine.
So, did you make it? I’d love to see

Cookies and Cream Cinnamon Rolls : Soft, Swirled & Oreo-Loaded
Cookies and Cream Cinnamon Rolls – Oreo-Stuffed Sweet Rolls with Cream Cheese Frosting
Wake Up to a Swirled Dream: Cookies and Cream Cinnamon Rolls
Hey friends, Beau here from Feastical! Let’s be real for a second. Is there anything in this world that smells better than cinnamon rolls baking in the oven? That warm, sweet, buttery aroma just wraps around your kitchen and pulls everyone in like a delicious, invisible magnet. It’s the official scent of lazy weekends, special celebrations, and “I-love-you-now-bring-me-coffee” mornings.
But what if we took that classic, beloved comfort and gave it a serious, show-stopping upgrade? What if we swirled in the one treat that’s pretty much universally adored? That’s exactly what we’re doing today with these Cookies and Cream Cinnamon Rolls.
Imagine this: Pillowy-soft, yeasted dough, rolled up with a cinnamon-chocolate filling that’s absolutely loaded with crushed Oreos. Before they even hit the oven, we drench them in a little heavy cream, which bakes into the bottom layers, creating an almost magical, rich, and custardy base. Then, while they’re still warm and bubbling, we slather them with a tangy, luscious cream cheese frosting and crown them with a final avalanche of more Oreo crumbs. It’s a cinnamon roll that decided to put on its party clothes, and let me tell you, it is ready to have a good time.
This recipe is my go-to for birthdays, holiday mornings, or any day that needs a little extra sparkle. And the best part? We’re starting with frozen bread dough. It’s our little secret for getting that incredible, from-scratch texture without the fuss of proofing yeast. So, tie on your apron, grab your favorite mug of coffee, and let’s make some magic happen.
The Happy Accident That Started It All
This recipe was born from a late-night baking whim and a serious Oreo craving. It was my nephew’s 10th birthday sleepover, and I’d promised him a “crazy good” breakfast. I had the classic cinnamon roll ingredients laid out, but as I looked at them, I felt like something was missing. A little *wow* factor.
My eyes landed on a half-eaten pack of Oreos on the counter, left over from the s’mores station. A lightbulb went off. What if…? I crushed a handful and sprinkled them right over the cinnamon-sugar filling. I held my breath as they went into the oven, not entirely sure if I’d just created a masterpiece or a mess.
The moment I pulled them out, I knew. The Oreos had melted just enough to create these pockets of fudgy, chocolatey goodness within the swirled layers. The look on those kids’ faces when they took their first bite? Pure, unadulterated joy. One of them, with a mouth full of roll and a smear of frosting on his nose, declared it “the best thing I’ve ever eaten in my whole life.” And just like that, a new Feastical legend was born.
Gathering Your Sweet Swirl Squad: The Ingredients
Here’s your grocery list for greatness. Don’t be intimidated! I’ve included some of my favorite chef insights and easy swaps to make this recipe work for you.
For the Rolls:
- 1 lb frozen bread dough, thawed: This is our secret weapon! It gives you that amazing, soft, bakery-style texture without the wait. Look for it in the freezer aisle. Let it thaw completely in the fridge overnight for the easiest handling.
- ¼ cup unsalted butter, softened: The glue for our filling! Using unsalted lets you control the salt level. Make sure it’s truly soft so it spreads like a dream without tearing the dough.
- ½ cup light brown sugar: Its molasses notes add a deeper, caramel-like sweetness that pairs perfectly with the chocolate. In a pinch, dark brown sugar works too for an even richer flavor.
- 1 tbsp cinnamon: The warm, cozy heart of any cinnamon roll. Don’t be shy with it!
- 1 tbsp cocoa powder: This is our flavor booster! It deepens the chocolate flavor of the Oreos and makes the filling look extra decadent.
- 1 cup crushed Oreos: The star of the show! I use a zip-top bag and a rolling pin to get a mix of fine crumbs and a few bigger chunks for texture.
- ½ cup heavy cream: This is the magic potion! Pouring it over the rolls before baking creates an insanely rich, almost bread-pudding-like texture on the bottom. It’s a game-changer, trust me.
For the Frosting & Topping:
- 4 oz cream cheese, softened: The base of our frosting. Full-fat is best for that creamy, tangy flavor that cuts the sweetness.
- 1½ cups powdered sugar: It dissolves beautifully for a smooth, lump-free frosting. Sift it if you have the time for an ultra-silky texture.
- ⅛ cup heavy cream: (That’s 2 tablespoons). This loosens the frosting to a perfect, drizzle-able consistency.
- ¼ tsp vanilla extract: A classic flavor enhancer that makes the frosting taste like it came from a professional bakery.
- 1 cup crushed Oreos (for topping): Because more is more! This gives every single bite that iconic cookies and cream crunch.
Let’s Get Rolling: Your Step-by-Step Guide
Ready to create these beautiful, swirled masterpieces? Follow these steps, and you’ll be a cinnamon roll pro in no time. I’ve packed this section with all my favorite chef hacks to ensure your success.
- Prep the Dough & Pan: First, lightly flour your work surface and rolling pin. Take your fully thawed bread dough and roll it out into a large rectangle, about ¼ inch thick. Don’t stress about perfection! A roughly 12×9 inch shape is perfect. Chef Hack: If the dough keeps springing back, let it rest for 5 minutes. The gluten just needs to relax! While you’re at it, grease a 9×13 inch baking dish with butter or non-stick spray.
- Create the Filling: In a small bowl, mix together the light brown sugar, cinnamon, and cocoa powder. This little combo is the flavor foundation. Now, spread the softened butter evenly over your entire rectangle of dough, leaving just a half-inch border around the edges. Sprinkle the cinnamon-sugar-cocoa mixture over the butter, followed by that glorious first cup of crushed Oreos. Press the crumbs down gently so they stick to the butter.
- Roll & Slice Like a Pro: This is the fun part! Starting from the long side, tightly roll the dough into a log. Pinch the seam to seal it. Now, for clean cuts: take a piece of unflavored dental floss or a very sharp serrated knife. If using a knife, saw gently back and forth—don’t press straight down. You’ll slice this log into 12 even rolls. Chef Hack: Mark the log lightly with a knife into 12 sections first to ensure they’re all the same size.
- The Cream Pour & Rise: Place your 12 swirls cut-side up in your prepared baking dish. Now, pour that ½ cup of heavy cream right over the top of the rolls, trying to get it in between them. This is the secret to an ultra-moist, rich finish! At this point, you can cover the dish and let the rolls rise in a warm spot for 30-45 minutes. They’ll get a bit puffier, which is great, but if you’re in a hurry, you can absolutely bake them right away. They’ll still be fantastic!
- Bake to Golden Perfection: Preheat your oven to 350°F (175°C). Bake the rolls for 25-30 minutes, until the tops are a beautiful golden brown and the centers are cooked through. You should see that delicious cream bubbling around the edges. Your kitchen will smell absolutely incredible.
- Whip Up the Frosting: While the rolls are baking, make the frosting. In a medium bowl, beat the softened cream cheese until it’s smooth and lump-free. Gradually beat in the powdered sugar, then the heavy cream and vanilla extract, until everything is combined into a silky, dreamy frosting.
- The Grand Finale: Frost & Devour! As soon as the rolls come out of the oven, spread that cream cheese frosting over the top. Watch as it melts into all the nooks and crannies. Now, for the pièce de résistance: immediately sprinkle the remaining 1 cup of crushed Oreos over the frosting so they stick perfectly. Serve warm and prepare for the applause!
How to Serve These Oreo Cinnamon Roll Stars
Presentation is part of the fun! While these rolls are stunning right in the baking dish, you can plate them up for an extra special touch. I love using a wide, shallow bowl for individual servings. Place a warm roll right in the center, and maybe drizzle a little extra frosting around the plate for a restaurant-worthy look.
These are rich, so one roll is usually plenty. Serve them with a tall, cold glass of milk for the ultimate classic combo, or a strong cup of black coffee to balance the sweetness. They are the undisputed star of any brunch spread, so pair them with some fresh fruit salad or crispy bacon to round out the meal. For a truly over-the-top dessert, add a scoop of vanilla ice cream on the side while the rolls are still warm. You’re welcome.
Make It Your Own: Delicious Recipe Variations
Once you’ve mastered the base recipe, the world is your Oreo-stuffed oyster! Here are a few of my favorite twists:
- Mint Chocolate Chip: Use Mint Oreos instead of the classic ones, and add a tiny drop of peppermint extract to the frosting. It’s like a dessert in breakfast form!
- Peanut Butter Lover’s: Before adding the cinnamon-sugar filling, spread a thin layer of creamy peanut butter over the buttered dough. The combination of peanut butter, chocolate, and cinnamon is mind-blowing.
- Fruity Twist: Add ½ cup of dried cranberries or chopped maraschino cherries (well-drained) to the filling along with the Oreos for a sweet and tangy surprise.
- Golden Oreo Version: For a slightly less chocolatey roll, use Golden Oreos in both the filling and the topping. The vanilla flavor is incredible with the cinnamon and cream cheese.
- From-Scratch Dough: If you have a favorite homemade sweet dough or cinnamon roll recipe, by all means, use it! Just swap in this Oreo filling and cream topping, and follow your recipe’s rising and baking instructions.
Beau’s Kitchen Notes & Stories
This recipe has evolved so much since that first birthday sleepover experiment. I’ve learned that a little extra cocoa powder in the filling makes the chocolate flavor pop, and that letting the rolls do a short rise after shaping gives them an even lighter, fluffier texture. One time, I was filming a video for Feastical and I was talking so much (shocker, I know) that I completely forgot to add the heavy cream before baking. The rolls were still tasty, but they were missing that signature custardy base. It was a great reminder that even the “pros” make mistakes! The lesson? Don’t skip the cream—it really does make a difference.
Your Questions, Answered: FAQs & Troubleshooting
Q: My dough was really sticky and hard to roll. What did I do wrong?
A: This usually means the dough was a bit too warm or the work surface wasn’t floured enough. Don’t be afraid to use a generous dusting of flour on your counter, rolling pin, and even on top of the dough. If it becomes a sticky mess, just pop the whole thing (dough and all) into the fridge for 15 minutes to firm up.
Q: Can I make these the night before?
A> Absolutely! This is a fantastic make-ahead trick. Assemble the rolls completely through step 4 (pouring the cream over them). Instead of letting them rise, cover the dish tightly with plastic wrap and refrigerate overnight. In the morning, take them out, let them sit on the counter for 30 minutes to take the chill off, then bake as directed. You might need to add 2-5 extra minutes to the bake time.
Q: My frosting is too runny/thick. How can I fix it?
A> Frosting consistency is easy to adjust! If it’s too runny, beat in a little more powdered sugar, a tablespoon at a time. If it’s too thick to spread, add more heavy cream, just a teaspoon at a time, until it reaches your desired consistency. Remember, it will melt a bit on the warm rolls, so erring on the side of slightly thick is okay.
Q: I don’t have heavy cream. What can I use?
A> For the filling pour, half-and-half is the best substitute, though the rolls won’t be quite as rich. For the frosting, you can use milk, but add it very slowly—you’ll need less than you would with cream.
Cookies and Cream Cinnamon Rolls : Soft, Swirled & Oreo-Loaded
Description
Hey friends, Beau here from Feastical! Let’s be real — is there anything that smells better than cinnamon rolls baking in the oven? That buttery-sweet aroma is pure magic. But today, we’re turning that weekend classic into something next-level fabulous: Cookies and Cream Cinnamon Rolls.
Ingredients
-
1 lb frozen bread dough, thawed overnight
-
¼ cup unsalted butter, softened
-
½ cup light brown sugar
-
1 tbsp ground cinnamon
-
1 tbsp cocoa powder
-
1 cup crushed Oreos (about 10 cookies)
-
½ cup heavy cream
For the Frosting
-
4 oz cream cheese, softened
-
1½ cups powdered sugar, sifted
-
2 tbsp heavy cream
-
¼ tsp vanilla extract
-
1 cup crushed Oreos, for topping
Instructions
Lightly flour your counter and rolling pin. Roll the thawed bread dough into a rectangle, about 12×9 inches and ¼ inch thick. If it keeps shrinking back, let it rest for 5 minutes so the gluten can relax.
Grease a 9×13-inch baking dish.
In a small bowl, stir together brown sugar, cinnamon, and cocoa powder. Spread the softened butter evenly over the dough, leaving a ½-inch border.
Sprinkle the sugar mixture evenly, then top with 1 cup crushed Oreos. Press down gently so they stick.
Starting from the long edge, roll the dough tightly into a log. Pinch the seam to seal.
Use unflavored dental floss (or a sharp knife) to slice the log into 12 even rolls.
Chef Hack: Mark your dough log first before cutting — it keeps all your rolls the same size!
Place rolls cut-side up in your baking dish. Pour ½ cup heavy cream evenly over the rolls.
Let them rise in a warm spot for 30–45 minutes, until slightly puffed. (You can skip the rise if short on time — they’ll still be great!)
Preheat oven to 350°F (175°C).
Bake for 25–30 minutes, until golden brown and the centers are set.
Your kitchen will smell unbelievable.
In a bowl, beat cream cheese until smooth. Add powdered sugar, then heavy cream and vanilla, mixing until silky.
Spread frosting over warm rolls so it melts into every swirl.
Top with the remaining crushed Oreos before it sets.
Notes
Sticky Dough? Chill it for 10–15 minutes before rolling.
Forgot the Cream? Don’t skip it next time — it creates that iconic gooey bottom!
Make-Ahead Magic: Prep the rolls, cover, and refrigerate overnight. Bake in the morning (add 5 minutes).
Nutrition
- Calories: 360 Cal Per Serving
- Sugar: 24g
- Fat: 18g
- Carbohydrates: 44g
Nutritional Info (Because We’re All Friends Here)
Let’s keep it real—these are a treat, through and through. I believe in enjoying indulgent food mindfully and joyfully. This nutritional breakdown is an estimate per roll, to help you plan accordingly.
- Calories: ~360
- Carbohydrates: 44g
- Fat: 18g
- Sugar: 24g
- Protein: 5g
Remember, these numbers can vary based on the specific brands of ingredients you use. The key is to savor every single bite without guilt!
Final Sweet Thoughts
Well, my friends, there you have it—my heart and soul poured into a pan of Cookies and Cream Cinnamon Rolls. This recipe is a celebration of everything I love about food: joy, creativity, and the power of a sweet treat to bring a smile to someone’s face. It’s not about being a perfect chef; it’s about having fun in the kitchen and creating something delicious to share.
I hope you feel inspired to give these a try. Whether you’re making them for a sleepy Saturday morning with your family or to be the hero of your next potluck, they’re guaranteed to be a hit. Don’t forget to snap a picture and tag me @Feastical so I can see your beautiful creations! Now, go forth and bake. Your swirled, Oreo-loaded destiny awaits.
With a full heart and an empty plate,
Beau

Ultimate Easy Smoked Brisket with Beer Baste & Bold Spice Rub
Best Smoked Brisket Recipe with Beer Baste and Bold Spice Rub
The Brisket That Will Make You a Backyard Legend
Hey friends, Beau here from Feastical! Let’s have a real chat for a second. Is there anything in the world of barbecue that feels quite as monumental, as downright mythical, as a perfectly smoked brisket? I don’t think so. It’s the holy grail, the summit of the smoking mountain. For a long time, I thought it was a secret club I’d never get into—something only reserved for pitmasters with decades of experience and forearms like Popeye.
Well, I’m here to let you in on a little secret: you can absolutely do this. I’ve poured my heart, soul, and a fair share of (delicious) mistakes into perfecting this recipe. We’re talking about a brisket that’s got a crusty, flavor-bomb bark on the outside that gives way to meat so juicy, so tender, and so profoundly smoky it practically melts on your tongue. This isn’t just food; it’s an experience. It’s the kind of meal that turns a regular Saturday into a full-blown, finger-licking, story-telling event in your own backyard. So, grab your favorite apron, fire up that smoker, and let’s make some magic together. This Ultimate Easy Smoked Brisket with a cheeky Beer Baste and a Bold Spice Rub is about to become your new signature dish.
My First Brisket: A Story of Smoke and Salvation
I’ll never forget my first brisket. It was for my dad’s 50th birthday bash. I was determined to impress, to present this glorious hunk of meat like a culinary knight returning from battle. I read every forum, watched every video, and felt… terrified. What if it was dry? What if it was tough? The pressure was on.
The night before the party, I mixed my rub with the focus of a scientist, massaged it into that beautiful cut of beef like I was giving it a spa treatment, and then I didn’t sleep a wink. I was up at 4 a.m., starting the smoker in the chilly, quiet morning. As the sun came up and that sweet hickory smoke started to curl into the sky, something shifted. The anxiety melted away, replaced by the simple, meditative rhythm of maintaining the temperature and mopping the brisket with that beer baste. The smell alone was a triumph. When I finally sliced into it hours later, revealing that perfect pink smoke ring and hearing the collective “ooh” from my family, I knew. This was more than cooking; it was connection. It was love, served up on a cutting board. And that’s the feeling I want for you.
Gathering Your Brisket Brigade: Ingredients & Insights
Great brisket starts with great ingredients. Don’t just think of this as a shopping list; think of it as gathering your team. Each player has a specific role, and I’ve got some chef-y insights to help you understand why they’re so important.
- 2 briskets (about 15 lbs each), trimmed but with fat cap intact: Yes, two! Brisket shrinks a lot, and leftovers are a gift from the BBQ gods. Look for briskets with a good, firm fat cap (about 1/4 inch thick after trimming). This fat will slowly render, basting the meat from the inside and creating that incredible bark.
- 2 cups light beer (lager or pilsner works great): The base of our baste! We’re not looking for a hoppy, bitter beer here. A light lager adds a subtle malty sweetness and helps caramelize the bark. Chef’s Tip: If you don’t cook with alcohol, you can swap this for more beef stock or even apple juice.
- ½ cup apple cider vinegar: This cuts through the richness of the meat and fat, adding a tangy brightness to the baste. It’s the secret weapon that keeps each bite interesting.
- ½ cup beef stock: This deepens the savory, umami flavor in our baste. Use a good quality stock for the best results.
- 10 tbsp unsalted butter, melted: Butter makes everything better, right? It adds richness and helps the baste ingredients stick to the brisket, creating a gorgeous, glazed finish.
For the Bold Spice Rub:
- 4 tbsp each of garlic powder, onion powder, paprika, chili powder, kosher salt, and coarse black pepper: This is the foundation of your flavor. The coarse pepper and salt create the texture of the bark, while the paprika gives it that classic red BBQ color. Pro Insight: Using smoked paprika instead of sweet will give you an even deeper, smokier flavor profile right from the rub.
- 2 tbsp brown sugar: A little sweetness is the perfect counterpoint to the smoke and spice. It helps with caramelization, leading to a more complex bark.
- Optional twist: Add 2 tsp ground cumin and 1 tsp cayenne: This is where you make it yours! The cumin adds an earthy, warm note, and the cayenne brings a gentle, building heat. Don’t be scared—it adds personality!
The Low-and-Slow Dance: Your Step-by-Step Guide
Alright, team. This is where the magic happens. Get comfortable, put on some good music, and embrace the process. Smoking a brisket is a marathon, not a sprint, and every step has a purpose.
- Prep the Brisket Like a Pro: First, pat your briskets completely dry with paper towels. A dry surface is crucial for the rub to stick and for that bark to form properly. Now, let’s talk trimming. You want to trim off any really hard, thick chunks of fat, but leave a beautiful, even layer about 1/4 inch thick on the fat cap. This is your built-in basting system! Now, in a large bowl, mix all your dry rub ingredients. Don’t be shy—coat those briskets on all sides, massaging the seasoning into every nook and cranny. Let them sit at room temperature for about 30-45 minutes while your smoker heats up. This helps the meat cook more evenly.
- Preheat Your Smoker for Success: Fire up your smoker and get it to a steady, steady 225°F (107°C). Consistency is key here! For wood, I’m a huge fan of hickory or oak for brisket—they provide a strong, classic smoke flavor that can stand up to the beef. Mesquite is also great but can be a bit more intense, so use it if you’re a smoke lover. Soak a few wood chunks in water for 30 minutes before adding them to your coals or chip tray for a longer, slower smoke.
- Smoke Low & Slow with Love: Place your briskets directly on the grill grates, fat-side up. Why fat-side up? As that fat slowly renders, it will drip down through the meat, naturally basting it and keeping it incredibly moist. Now, mix all your baste ingredients in a spray bottle or a bowl with a silicone basting brush. Every 60-90 minutes, open that smoker and give the brisket a generous spritz or mop with the beer baste. Chef’s Hack: Try to combine your basting with when you need to add more wood or fuel to minimize heat loss. This process builds layers of flavor and keeps the surface from drying out.
- The Texas Crutch: Wrap & Finish Strong: Around the 5-6 hour mark, start paying close attention. When the brisket has a deep, dark, firm bark and the internal temperature hits around 165°F (74°C), it’s time for the “Texas Crutch.” Carefully wrap each brisket tightly in butcher paper (my preference, as it lets the brisket breathe a bit) or heavy-duty aluminum foil. Wrapping speeds up the cooking process through the “stall” (when the meat’s temp plateaus) and traps steam, which braises the meat to ultimate tenderness. Return it to the smoker and keep going until the internal temperature probes like butter and reaches about 203°F (95°C).
- The Most Important Step: Rest & Slice: You are so close! But do NOT skip this part. Once the brisket hits temp, take it off the smoker and let it rest, still wrapped, for at least one hour. I like to place mine in a dry cooler lined with towels to keep it warm. This allows the frantic muscle fibers to relax and reabsorb all those incredible juices. If you slice it right away, all that liquid will just run out onto the cutting board. Patience is rewarded with juiciness! When you’re ready, unwrap, find the direction of the grain (the lines of muscle fiber), and slice against the grain with a sharp knife. This ensures every bite is tender.
Feasting Time: How to Serve Your Masterpiece
You’ve done the hard work, now let’s celebrate! Presentation is part of the fun. I love serving brisket family-style on a large wooden cutting board. Pile those beautiful, glistening slices high and let people dig in. Of course, you need the perfect supporting cast. Classic BBQ sides are non-negotiable: creamy, tangy coleslaw, baked beans with bits of burnt ends mixed in, and my famous ultra-cheesy smoked mac and cheese. For a lighter touch, a simple vinegary potato salad or a crisp cucumber salad cuts through the richness beautifully. And don’t forget the sauce! I always offer a side of my favorite BBQ sauce, but the true test of a great brisket is that it doesn’t need any. It stands proudly on its own.
Make It Your Own: Delicious Brisket Variations
Once you’ve mastered the classic, the world is your smoked oyster! Here are a few of my favorite ways to mix things up:
- Texas Hill Country Style: Keep it pure and simple. Skip the baste and the sugar in the rub. Just use a heavy coating of equal parts kosher salt and coarse black pepper. It’s a bold, peppery, meat-lover’s dream.
- Korean BBQ Twist: For the rub, swap the chili powder and paprika for gochugaru (Korean chili flakes). For the baste, replace the beer and vinegar with a mix of 1 cup pear juice, 1/2 cup soy sauce, and 2 tbsp of grated fresh ginger. The result is sweet, spicy, and deeply savory.
- Espresso & Ancho Chili Rub: Add 2 tbsp of finely ground espresso beans and 2 tbsp of ancho chili powder to your base rub. The coffee adds an incredible depth and richness that pairs magically with the smoke and the slight heat from the ancho.
- For a Smaller Crowd: No problem! Just get a single, smaller brisket flat. The cooking principles are the same, though it will likely cook a bit faster, so keep a closer eye on the internal temperature.
Beau’s Backyard Notes
This recipe has been a living, breathing thing in my kitchen for years. It started as a rigid, by-the-book formula, but over time, it’s evolved into this flexible, forgiving friend. I’ve learned that the “perfect” brisket isn’t always about hitting 203°F on the dot; it’s about the probe test—when your thermometer slides into the meat with the resistance of room-temperature butter, you’re golden. I once had a smoker temperature spike on me, and I panicked. But you know what? The brisket was still fantastic. These things are more resilient than we think. So relax, trust your instincts, and enjoy the day. Some of the best conversations happen while you’re waiting for that temp to climb.
Your Brisket Questions, Answered!
I get a lot of questions about brisket, so let’s tackle the big ones head-on.
- Q: My brisket is tough! What went wrong?
A: A tough brisket almost always means it’s undercooked. Brisket has a lot of connective tissue that needs time and low heat to break down into gelatin. If it’s tough, it likely didn’t get to that high internal temp (around 203°F) or didn’t rest long enough. Don’t pull it off the heat just because a timer goes off—let the temperature and the feel of the probe be your guide.
- Q: Butcher paper or foil for the wrap?
A: This is a great debate! Foil (the “Texas Crutch”) traps more steam, so it braises the meat and gets you through the stall faster, resulting in a more pot-roast-like texture that’s fall-apart tender. Butcher paper is more breathable, so it protects the brisket without steaming it, preserving a slightly firmer bark. I prefer butcher paper, but you can’t go wrong with either!
- Q: Can I make this in the oven?
A: You can, but it will be “brisket” and not “smoked brisket.” Follow all the prep steps, then place it in a 225°F oven on a wire rack set inside a baking sheet. You’ll miss the smoky flavor, but you’ll still get a delicious, tender result. A teaspoon of liquid smoke in the baste can help bridge the gap.
- Q: How do I store and reheat leftovers?
A: Leftovers? Lucky you! Store sliced brisket in an airtight container in the fridge for up to 4 days. To reheat, never use the microwave—it will turn it to rubber. Gently warm slices in a steamer basket over simmering water, or place them in a baking dish with a splash of beef broth, cover with foil, and warm in a 300°F oven until heated through.
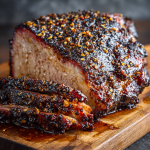
Ultimate Easy Smoked Brisket with Beer Baste & Bold Spice Rub
Description
Meet the brisket that will make you a backyard legend. This Smoked Brisket with Beer Baste and Bold Spice Rub isn’t just a recipe—it’s an experience. Low and slow, kissed by hickory smoke, and basted with a buttery beer blend, this brisket transforms into juicy, tender perfection wrapped in a dark, flavor-packed bark. Whether you’re smoking for a crowd or just for the love of barbecue, this dish brings that true pitmaster energy home. Fire up the smoker, grab a cold drink, and get ready for the kind of meal people talk about for years.
Ingredients
For the Brisket & Baste:
-
1 whole brisket (12–15 lbs), trimmed, fat cap intact
-
2 cups light beer (lager or pilsner)
-
½ cup apple cider vinegar
-
½ cup beef stock
-
10 tbsp melted unsalted butter
Bold Spice Rub:
-
4 tbsp each: garlic powder, onion powder, paprika, chili powder, kosher salt, black pepper
-
2 tbsp brown sugar
-
(Optional) 2 tsp ground cumin & 1 tsp cayenne for extra depth and heat
Instructions
-
Prep the Brisket: Pat dry and trim excess fat, leaving about ¼-inch on the cap. Rub generously with the spice mix on all sides. Let rest at room temp for 30–45 minutes.
-
Preheat Smoker: Heat to 225°F (107°C). Use hickory or oak for classic flavor.
-
Smoke It Low & Slow: Place brisket fat-side up on the grates. Mix beer, vinegar, stock, and butter for the baste. Mop or spritz the brisket every 60–90 minutes.
-
Wrap & Continue Cooking: At 165°F (74°C) internal temp and when the bark looks dark and set, wrap in butcher paper or foil. Return to smoker until it reaches 203°F (95°C) and feels like butter when probed.
-
Rest & Slice: Let the wrapped brisket rest for at least 1 hour in a cooler or warm spot. Slice against the grain for melt-in-your-mouth tenderness.
Notes
-
Don’t rush the rest—it’s the secret to juicy slices.
-
For a bolder bark, use smoked paprika and coarse black pepper.
-
Want a twist? Try a Korean BBQ baste with pear juice and soy sauce or an espresso-ancho rub for rich, smoky complexity.
Nutrition
- Calories: 450Cal Per Serving
- Fat: 30g
- Carbohydrates: 4g
- Protein: 40g
Nutritional Information (Per Serving – Approx.)
Let’s keep it real, friends. Brisket is a celebratory feast, not a daily diet food, and that’s perfectly okay! Here’s a rough breakdown per 6-ounce serving of lean meat (because we’re trimming that fat cap, remember!). This is an approximation, as the exact values can vary based on the specific cut and trimming.
- Calories: 450
- Protein: 40g (A fantastic source of high-quality protein!)
- Fat: 30g
- Carbohydrates: 4g (Mostly from the rub and baste)
- Sugar: 1g
- Fiber: 0g
The key, as with all good things, is balance and enjoyment. Pair it with those healthy veggie sides and savor every single, glorious bite.
Your Next Culinary Adventure Awaits
And there you have it! Your comprehensive guide to a smoked brisket that’s bound to impress. Remember, the goal isn’t perfection; it’s the joy of the process and the incredible people you get to share it with. This brisket is more than just a recipe—it’s a project, a lesson in patience, and a guaranteed way to create lasting memories around the table.
I am so incredibly proud of you for taking on this challenge. Now, I’d love to hear from you! Did you try the beer baste? Did you add the cayenne for that extra punch? Tag @Feastical on Instagram with your brisket masterpieces and stories. Until next time, keep those fires burning and your spatulas close.
Happy Smoking,
es a bold homemade spice rub and an incredible beer-based basting sauce that locks in moisture and
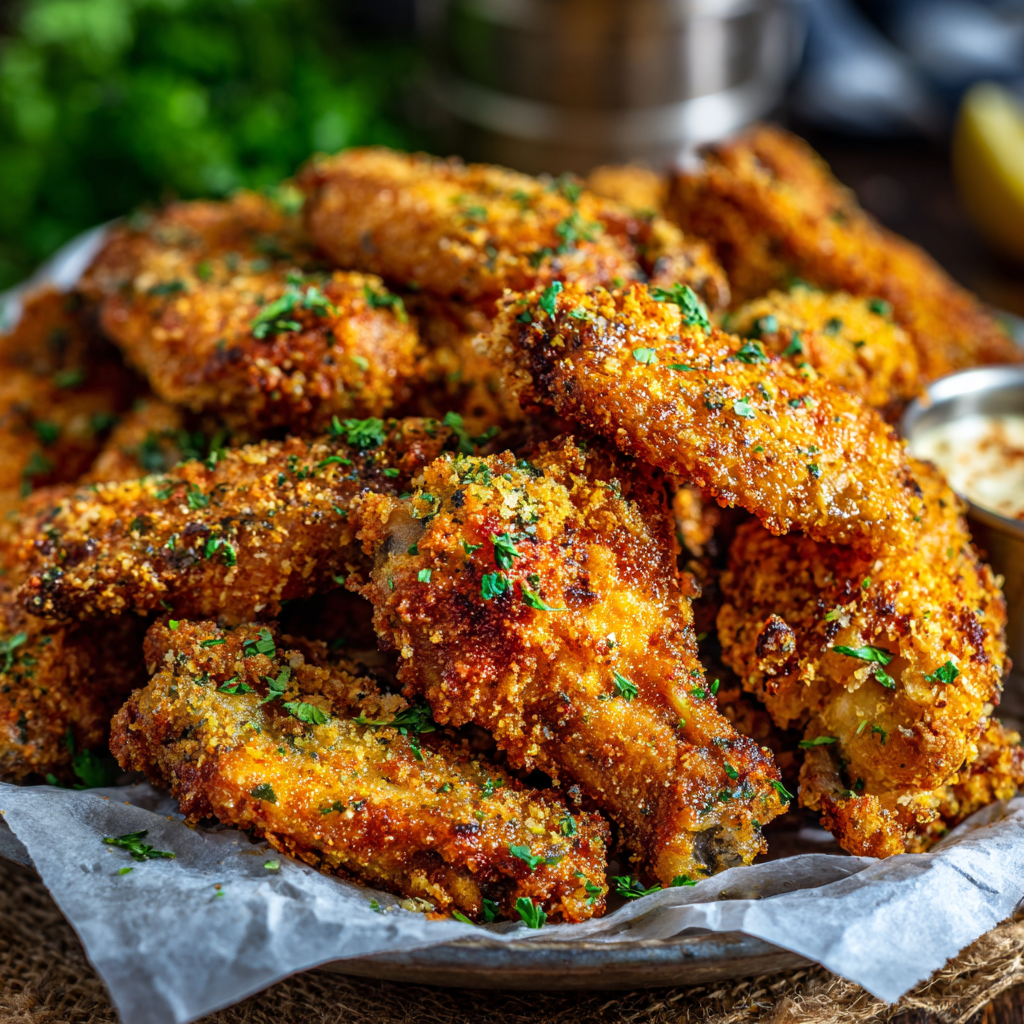
Crispy Oven-Fried Parmesan Chicken Wings : No Deep Fryer Needed
Crispy Oven-Fried Parmesan Chicken Wings with Garlic Butter
Forget the Grease, Not the Flavor: Your New Favorite Wing Night is Here
Hey friends, Beau here from Feastical! Let’s get real for a second. Is there anything more universally loved than a perfectly crispy, flavor-packed chicken wing? They’re the star of the game day spread, the hero of a casual Friday night, and the ultimate shareable comfort food. But let’s be honest—the whole deep-frying situation? The vat of bubbling oil, the lingering smell in your kitchen for days, the greasy splatter on your favorite apron… it can be a whole production.
What if I told you that you could achieve that satisfying, shatteringly crisp exterior and juicy, tender interior without ever turning on your deep fryer? Sounds like a kitchen dream, right? Well, pull up a chair, because I’m about to share one of my all-time most-requested recipes: Crispy Oven-Fried Parmesan Chicken Wings.
This recipe is my golden ticket to easy, crowd-pleasing perfection. We’re tossing wings in a magical, savory blend of grated Parmesan and seasoned breadcrumbs, then baking them until they’re gorgeously golden. A final drizzle of garlicky, melted butter sends them straight over the top. They’re so good, so undeniably crunchy, and so much simpler than you think. I’ve made these for everyone from my toddler nephew to my most discerning food-snob friends, and the result is always the same: a quiet table, because everyone is too busy eating to talk. So, let’s preheat that oven and make some magic happen!
A Wing and a Prayer: My First Big Game Day
This recipe takes me right back to my first “big” hosting gig. It was years ago, and my college buddies were coming over to watch the championship game. I was determined to impress. I decided on classic buffalo wings, but my tiny apartment kitchen had one major flaw: no ventilation and a smoke detector more sensitive than a food critic. The deep-frying attempt was a disaster. Smoke billowed, the alarm screamed, and my wings were somehow both burnt and greasy. It was a total kitchen fail.
Desperate, I scoured my fridge and pantry. I had wings, Parmesan, breadcrumbs, and a whole lot of hope. I threw it all together, crossed my fingers, and tossed them in the oven. What emerged was a miracle—crispy, golden, and incredibly delicious. My friends devoured them, declaring them the best wings they’d ever had. That night, a Feastical staple was born from a near-catastrophe. It taught me that the best recipes often come from a little improvisation and a whole lot of heart.
Gathering Your Flavor Arsenal
This is where the magic starts! The beauty of this ingredient list is its simplicity. You probably have most of this in your pantry right now. Here’s everything you’ll need to feed a hungry crowd:
- Cooking Spray: Our trusty non-stick sidekick. A quick spritz ensures our crispy crust doesn’t become one with the baking sheet. If you don’t have spray, a light brush of oil works just as well.
- 2 cups Grated Parmesan Cheese: This is the star of the show, folks! It creates that incredible, savory, umami-rich crust. I often use the pre-grated stuff for convenience, but if you have a block of Parmigiano-Reggiano and a microplane, freshly grated will take the flavor to a whole new level.
- 2 cups Seasoned Bread Crumbs: They’re our crunch foundation. The “seasoned” part already has herbs and salt, which is why we go easy on the extra salt later. For a gluten-free swap, your favorite GF panko or breadcrumbs work beautifully here.
- ¼ tsp Garlic Powder & ¼ tsp Onion Powder: These pantry powerhouses deliver a consistent, mellow background flavor that permeates the entire crust. No chopping required!
- ¼ tsp Ground Black Pepper & a Pinch of Salt: The essential flavor enhancers. We use a pinch of salt because the Parmesan and seasoned breadcrumbs already bring some to the party. Always taste and adjust to your liking!
- 10 pounds Chicken Wings: The main event! Look for packages that are already “party-ready” with the tips removed and the drums and flats separated. This saves you a crucial prep step. Patting them very dry with paper towels is my #1 chef hack for the crispiest skin possible.
- 1 cup Melted Butter (Unsalted): This acts as our glue, helping the coating stick, and it adds that irresistible, rich flavor. Using unsalted lets us control the salt level perfectly. For a dairy-free version, olive oil or even a neutral avocado oil are fantastic substitutes.
Let’s Get Cooking: The Path to Crispy Perfection
Ready to transform these simple ingredients into something spectacular? Follow these steps, and you’ll be a wing wizard in no time. I’ve packed each one with my favorite chef hacks to ensure your success.
- Prep the Oven & Coating Station: First things first, preheat your oven to 375°F (190°C). This is a slightly lower temp than some recipes use, but it’s our secret weapon—it allows the chicken to cook through without burning our Parmesan crust. Line two large baking sheets with foil (for easy cleanup!) or parchment paper, and give them a generous coat of cooking spray. Trust me, you’ll thank me later.
- Mix the Magic Coating: Grab a large, shallow bowl. This is where we build our flavor crust. Dump in the grated Parmesan, seasoned breadcrumbs, garlic powder, onion powder, black pepper, and that pinch of salt. Use a fork or your fingers to mix it all together until it’s one uniform, fragrant party. Give it a little taste—smell that? That’s the sound of your future self cheering.
- The Coating Dance (This is the Fun Part!): Now, set up your assembly line: your bowl of dry wings, the bowl of melted butter, the bowl of Parmesan coating, and your prepared baking sheets. Working with one wing at a time, give it a full, luxurious dip in the melted butter. Let the excess drip off for a second—this prevents a soggy bottom. Then, plop it right into the breadcrumb mixture and roll it around, pressing gently to make sure every nook and cranny gets covered in that glorious, cheesy crunch. Place it on the baking sheet, and make sure they’re not touching! We need good air circulation for maximum crispiness.
- Bake to Golden Glory: Slide those trays into your preheated oven and let the magic happen. We’re going to bake them for 30-35 minutes total. Now, here’s the most important tip: flip them halfway through! Set a timer for 15-17 minutes, pull the sheets out, and use tongs to carefully flip each wing. This ensures even browning and crispness on both sides. You’ll know they’re done when they’re a deep, golden brown, the crust looks super crispy, and the internal temperature reads 165°F (74°C) on a meat thermometer.
Plating Up Your Masterpiece
You’ve done it! You’ve pulled a sheet pan of golden, crispy, aromatic wings out of the oven. The smell is incredible. Now, how do we serve these beauties?
I’m a big believer in the “family-style pile” on a big wooden board or a large platter. Scatter them generously, maybe with a few extra sprinkles of fresh parsley or a little lemon zest for a pop of color and freshness. The classic move is to serve them with a trio of dipping sauces: cool and creamy ranch, tangy blue cheese, and a bold buffalo sauce for those who like a kick. But don’t stop there! Honey mustard, barbecue sauce, or even a sriracha-mayo are all fantastic companions.
What to serve them with? You can’t go wrong with the classics: crisp celery sticks, carrot sticks, and a big, cold beverage. For a full-on feast, pair them with my Creamy Loaded Potato Salad or a simple, refreshing Veggie Slaw to balance out the richness. Remember, the goal is a relaxed, hands-on meal where everyone can dig in and enjoy.
Make It Your Own: Delicious Twists & Swaps
One of the best things about this recipe is its versatility. It’s a perfect canvas for your own culinary creativity. Here are a few of my favorite ways to mix it up:
- Spicy Kick: Add ½ teaspoon of smoked paprika or cayenne pepper (or both!) directly into the breadcrumb mixture. The smokiness from the paprika is absolutely divine.
- Herbaceous Bliss: Stir one tablespoon of dried Italian herbs (think oregano, basil, thyme) into the coating. It gives the wings a real “Italian restaurant” vibe that’s just irresistible.
- Lemon Pepper Zing: Add the zest of one lemon and an extra ½ teaspoon of black pepper to the dry coating. After they bake, squeeze a little fresh lemon juice over the top for a bright, zesty finish.
- Everything Bagel Twist: Swap out half of the breadcrumbs for Everything Bagel Seasoning. You get that incredible garlic, onion, and sesame flavor in every single bite.
- Keto/Low-Carb Friendly: It’s super easy! Just replace the breadcrumbs with 2 cups of crushed pork rinds or almond flour. You’ll still get a fantastic, crispy coating that fits your dietary needs.
Beau’s Kitchen Confidential
Over the years, this recipe has become a true Feastical workhorse, and it’s evolved in fun ways. I’ve learned that the single biggest factor for ultimate crispiness is making sure those wings are BONE DRY before they hit the butter. I even sometimes let them sit uncovered on a rack in the fridge for an hour before cooking—it’s a game-changer!
And a funny story: I once accidentally used cinnamon instead of paprika in a sleepy Sunday morning prep session. Let’s just say, Parmesan Cinnamon wings are… an acquired taste I have not yet acquired. It was a hilarious reminder to always, always label my spice jars! The recipe is forgiving, but maybe not that forgiving.
Your Wing Questions, Answered!
I’ve made these wings a million times, and I’ve heard all your questions. Here are the answers to the most common ones:
Q: My coating isn’t sticking to the wings! What did I do wrong?
A: The most common culprit is not letting the excess butter drip off before rolling the wing in the coating. You want a thin, even layer of butter to act as glue, not a thick, pooling layer that makes the coating slide off. Also, pressing the coating on gently but firmly helps it adhere.
Q: Can I make these ahead of time?
A: You can do the prep ahead! Assemble the wings up to the point of baking, arrange them on the baking sheet, cover them tightly with plastic wrap, and refrigerate for up to 4 hours. Then, just pop them straight into the preheated oven. You might need to add 2-3 extra minutes to the bake time since they’ll be going in cold.
Q: Why are my wings not getting crispy?
A: The #1 reason is overcrowding the pan. If the wings are too close together, they steam instead of bake. Use two sheets and give them space! Also, ensure your oven is fully preheated and you’re using the middle rack. Flipping them halfway is non-negotiable for even crisping.
Q: What’s the best way to reheat leftovers?
A: Do NOT use the microwave—it will turn your crispy crust soggy. To reheat, use an air fryer at 375°F for 3-4 minutes, or your oven at 375°F for about 8-10 minutes. They’ll come back to life beautifully.

Crispy Oven-Fried Parmesan Chicken Wings : No Deep Fryer Needed
Description
Skip the fryer and still get that irresistible crunch! These Crispy Oven-Fried Parmesan Chicken Wings bring golden, cheesy perfection with zero grease. Coated in a savory Parmesan-breadcrumb crust and finished with melted garlic butter, they’re everything you crave from a pub-style wing—right from your oven. Perfect for game day, parties, or lazy Friday nights, this recipe turns simple ingredients into pure crowd-pleasing magic. Ready to make your kitchen smell amazing? Let’s wing it!
Ingredients
-
10 lbs chicken wings, patted dry
-
2 cups grated Parmesan cheese
-
2 cups seasoned breadcrumbs (or gluten-free alternative)
-
¼ tsp garlic powder
-
¼ tsp onion powder
-
¼ tsp ground black pepper
-
Pinch of salt
-
1 cup melted unsalted butter (or olive oil substitute)
-
Cooking spray
Optional Twists:
Add ½ tsp cayenne for heat, 1 tbsp Italian herbs for a Mediterranean kick, or lemon zest for a bright twist.
Instructions
-
Prep: Preheat oven to 375°F (190°C). Line two baking sheets with foil or parchment and coat with cooking spray.
-
Mix Coating: In a shallow bowl, combine Parmesan, breadcrumbs, garlic powder, onion powder, pepper, and salt.
-
Coat Wings: Dip each wing in melted butter, let excess drip off, then roll in the Parmesan mix. Arrange wings on baking sheets without touching.
-
Bake: Bake 30–35 minutes, flipping halfway, until golden and crisp. Internal temp should reach 165°F (74°C).
-
Finish: Drizzle with extra melted garlic butter and garnish with parsley or lemon zest. Serve with ranch, blue cheese, or spicy buffalo sauce.
Notes
For next-level crispiness, let wings rest uncovered in the fridge for an hour before baking—this simple step ensures a flawless crunch every time.
Nutrition
- Calories: 180Cal Per Serving
- Sugar: 0g
- Fat: 12g
- Carbohydrates: 4g
- Protein: 13g
Nourishing Your Appetite (The Fun Way!)
Now, I’m not a nutritionist, but I am a big believer in enjoying real, satisfying food. These wings are a fantastic alternative to deep-fried versions because baking them significantly reduces the overall grease and fat content. You’re still getting a great hit of protein from the chicken to keep you full and satisfied.
Here’s a rough nutritional breakdown per wing (approximate, as ingredients can vary):
- Calories: 180
- Protein: 13g
- Fat: 12g
- Carbohydrates: 4g
- Sugar: 0g
- Fiber: 0.5g
Remember, this is celebratory food, meant to be shared and enjoyed with gusto! It’s all about balance.
Your New Go-To Recipe Awaits
And there you have it, my friends! Your complete guide to making the most delicious, crispy, oven-fried Parmesan chicken wings you’ve ever tasted. This recipe is proof that you don’t need fancy equipment or complicated techniques to create truly memorable food that brings people together.
It’s a recipe built for laughter, for game-day highs and lows, for casual weeknight dinners, and for creating your own kitchen stories. I hope this recipe finds a happy home in your kitchen and becomes a trusted favorite, just like it is in mine.
I’d love to hear how your wings turn out! Tag me on social @Feastical with your creations, and don’t forget to pin this recipe to your board so you can find it every time a wing craving strikes. Now, go forth and get crispy!
With love and a full plate,
Beau

Blueberry Lemon-Frost Cookies : Soft, Zesty & Bursting with Berries
Sunshine in a Cookie Jar: My Blueberry Lemon-Frost Cookies
Hey, friends! Beau here, welcoming you back to my kitchen at Feastical. You know that feeling when you bite into something and it just instantly transports you? Maybe it’s to a sunny porch in July, or a happy memory from a lazy summer afternoon. That’s the magic I’m always chasing with my recipes, and friends, I’ve absolutely nailed it with these Soft Blueberry Lemon-Frost Cookies.
Imagine this: a cookie so soft and tender it practically melts in your mouth, with little pockets of juicy, bursting blueberries and a subtle, buttery background. Then, just when you think it can’t get any better, a bright, zesty lemon glaze swoops in and ties the whole party together. It’s not just a cookie; it’s a full-on feel-good experience. These are the stars of every brunch I’ve brought them to, the perfect pick-me-up with a cup of afternoon tea, and honestly, they’ve saved more than one “I need something sweet, stat!” evening at my house.
The best part? You don’t need to be a pastry chef to make these beauties. We’re keeping it simple, soulful, and seriously satisfying. If you can cream some butter and sugar, you’re already 90% of the way there. So, tie on your favorite apron, dig out that spatula (you know, the one that’s always hiding in the back of the drawer), and let’s bake up a little batch of sunshine together.
The Summer I Learned to Bake (and Share)
This recipe takes me right back to my grandma’s kitchen in the peak of summer. Her backyard had this massive, wild blueberry bush, and every July, it was my job to pick them. I’d come inside with more berries on my face and in my stomach than in the bowl, my fingers stained a happy shade of purple.
One particularly sweltering afternoon, she decided we weren’t just going to make a pie. She wanted to teach me how to make cookies that “taste like summer feels.” We zested lemons until the whole room smelled like a citrus grove, and she showed me her secret trick of tossing the blueberries in a little flour to keep them from sinking. The first batch came out a little… well, let’s call them “blueberry pancakes” because we overmixed the dough. But the second batch? Perfection. We sat on her porch swing, devouring warm cookies with a glass of cold milk, and I realized right then that the best recipes aren’t just about flavor—they’re about the stories and the people you share them with. That’s the heart and soul I’ve baked into this version for you.
Gathering Your Sunshine Squad: The Ingredients
Before we start, let’s get familiar with our team players. Using simple, quality ingredients is the secret to making these cookies truly sing. Here’s what you’ll need:
For the Cookies:
- 1 cup unsalted butter, softened: This is the foundation of our soft, tender cookie. Pro-Tip: “Softened” means it should give slightly when you press it, not melted and oily. If you forget to take it out of the fridge, you can cube it and let it sit for 15-20 minutes. For a dairy-free swap, a high-quality plant-based butter works wonderfully.
- 1 cup granulated sugar: This sweetens the deal and, when creamed with the butter, creates tiny air pockets that give our cookies a lovely, light texture.
- 1 large egg: Our binding agent! It brings everything together and adds richness. Make sure it’s at room temperature to prevent the butter from seizing up.
- 2 tsp vanilla extract: The flavor enhancer. It deepens the overall sweetness and makes the berry and lemon flavors pop. Don’t be shy with it!
- 2 ½ cups all-purpose flour: The structure of our cookie. We’re using just the right amount to hold all those juicy berries without becoming cakey.
- ½ tsp baking soda: Our leavening agent. It helps the cookies rise and spread just enough to get those golden edges.
- ¼ tsp salt: The secret weapon! Salt balances the sweetness and intensifies all the other flavors. Trust me, never skip the salt.
- 1 tbsp lemon zest: This is where the big, sunny lemon flavor comes from! Zest your lemons before you juice them for the glaze. The oils in the zest are packed with aroma.
- 1 ½ cups fresh blueberries, tossed in 1 tbsp flour: The star of the show! The quick toss in flour is a little chef’s hack that creates a light barrier, helping to prevent all your beautiful berries from sinking to the bottom of the cookie during baking.
For the Lemon Frosting:
- 1 cup powdered sugar: It creates a smooth, drizzle-able glaze that sets beautifully.
- 2–3 tbsp fresh lemon juice: Fresh is key here! The bottled stuff just doesn’t have the same bright, vibrant punch. Start with 2 tablespoons and add the third if you need to thin it out.
- ½ tsp lemon zest (optional): I almost always add this. It gives the glaze an extra zesty kick and a beautiful, speckled texture.
Let’s Get Baking: The Step-by-Step Magic
Okay, team! Now for the fun part. Follow these steps, and you’ll have a kitchen that smells like a dream and a cookie jar that’s the envy of the neighborhood.
- Cream the Base: The Foundation of Fluffiness.In a large mixing bowl, beat together your softened butter and granulated sugar. Now, don’t rush this! We’re looking for a mixture that is light and fluffy, almost like a pale yellow cloud. This should take a good 2-3 minutes with an electric mixer on medium speed. This step is crucial because it incorporates air into the dough, which is what gives us that soft, tender texture. Once it’s fluffy, mix in the egg, vanilla extract, and that glorious tablespoon of lemon zest. The smell alone will make you happy you started this project.
- Dry Ingredients: Bringing It All Together.In a separate, medium-sized bowl, whisk together your flour, baking soda, and salt. Why whisk? It ensures the baking soda and salt are evenly distributed throughout the flour, so every cookie bakes up perfectly. Now, slowly add these dry ingredients to your wet butter mixture. I like to add it in two or three batches, mixing on low speed just until the flour disappears. Chef’s Hack: The moment you no longer see dry flour, STOP MIXING. Overmixing at this stage is the number one cause of tough cookies. A few stray flour streaks are okay; they’ll incorporate when we add the berries.
- Add the Berries: The Gentle Fold.Remember those blueberries you tossed in a tablespoon of flour? Now’s their time to shine! Add them to the bowl. Put away your electric mixer and grab a spatula. We’re going to gently fold them in. This is a careful, turning motion that protects the berries from getting smashed and turning our whole dough purple. Be patient and gentle—your cookies will thank you with beautiful, whole berry bursts.
- The Chill (If You Can Wait!): The Secret to the Perfect Shape.This step is optional but highly recommended. Cover your bowl with plastic wrap and pop it in the fridge for 30 minutes. Chilling the dough solidifies the butter, which means your cookies will spread less in the oven, resulting in a thicker, softer cookie. If you’re in a hurry, you can skip it, but if you have the time, it makes a noticeable difference!
- Bake: The Transformation.Preheat your oven to a steady 350°F (175°C). Line your baking sheets with parchment paper—this prevents sticking and makes cleanup a breeze. Using a cookie scoop or a tablespoon, drop rounded balls of dough (about 1.5 tablespoons each) onto your prepared sheets, leaving about 2 inches between them for a little spread. Bake for 11-13 minutes. You’re looking for lightly golden edges while the centers still look soft and slightly underdone. They will continue to cook on the hot baking sheet as they cool. Let them rest on the sheet for 5 minutes before transferring them to a wire rack to cool completely. I know it’s hard to wait, but you MUST let them cool before glazing, or you’ll have a melty, messy (but still delicious) situation.
- Glaze: The Grand Finale.While the cookies are cooling, make your simple lemon frosting. In a small bowl, whisk together the powdered sugar and 2 tablespoons of fresh lemon juice. You’re aiming for a thick but pourable consistency—like a thin honey. If it’s too thick, add the extra tablespoon of juice, a teaspoon at a time. Too thin? Add a bit more powdered sugar. Stir in the optional extra zest for that flavor punch. Once the cookies are completely cool, use a spoon to drizzle the glaze back and forth over them, or for more control, you can put the glaze in a small zip-top bag, snip off a tiny corner, and pipe it on. Let the glaze set for about 15 minutes before stacking or serving.
Sharing the Sunshine: How to Serve These Beauties
Presentation is part of the fun! These cookies are gorgeous all on their own, but here’s how I love to serve them up:
For a simple, homey look, just arrange them on a rustic wooden board or a vintage plate. The purple-blue berries and white glaze look stunning against a dark background. If you’re feeling fancy, right after you drizzle the glaze, place a single, perfect fresh blueberry in the center of each cookie. It’s a little “chef’s kiss” that tells people these are something special.
These are the ultimate companion to your favorite drinks. A hot cup of Earl Grey tea is a classic pairing, but they’re also incredible with a glass of cold milk, a frothy iced latte, or even a crisp glass of Prosecco for a celebratory brunch. They’re the perfect bake-sale superstar, the star of a baby or bridal shower dessert table, or just the thing to pack in a picnic basket for a sweet surprise.
Make It Your Own: Delicious Recipe Twists
One of my favorite things about a great base recipe is how easily you can play with it! Here are a few of my favorite variations on these blueberry lemon cookies:
- Lemon Blueberry Thumbprint: Before baking, press your thumb gently into the center of each dough ball to create a small well. Drop a teaspoon of lemon curd into the center, then bake as directed. The result is a double-lemon, gooey-centered masterpiece.
- White Chocolate & Blueberry: Fold in ½ cup of white chocolate chips along with the blueberries. The creamy sweetness of the white chocolate is a heavenly match for the tart berries and lemon.
- Gluten-Free & Happy: No problem! Simply swap the all-purpose flour for a 1:1 gluten-free baking blend. The result is just as soft and delicious.
- Venture into Other Berries: While blueberries are classic, this recipe is fantastic with raspberries or chopped strawberries. Just be extra gentle when folding, as these berries are more delicate.
- Lavender Infused: For a truly elegant twist, add ½ teaspoon of culinary-grade dried lavender to your dry ingredients. It adds a beautiful floral note that pairs wonderfully with the lemon and blueberry.
Beau’s Kitchen Chronicles: A Few Parting Thoughts
This recipe has evolved so much since that first batch with my grandma. I’ve made them for neighbors after they had a new baby, as a “thank you” for friends who helped me move, and as a guaranteed mood-lifter on rainy days. I once even shipped a carefully packed box to my cousin across the country because she was having a rough week. Food is love, folks, and these cookies are one of my favorite ways to show it.
The funniest kitchen fail I’ve had with these was the time I accidentally used salted butter and didn’t adjust the salt. Let’s just say they were… aggressively savory. We laughed it off and called them “Sweet & Salty Surprise Cookies.” It was a good reminder that even mistakes can be delicious in their own way, and to always taste as you go!
Your Questions, Answered: FAQs & Troubleshooting
Over the years, I’ve gotten a lot of great questions about this recipe. Here are the answers to the most common ones:
Q: My blueberries all sunk to the bottom! What happened?
A: Ah, the classic berry sink! This usually means the dough was a bit too soft or the berries weren’t coated in flour. Make sure you give them that quick toss in the tablespoon of flour—it’s a game-changer. Chilling the dough also helps firm it up, providing more support for the berries during baking.
Q: Can I use frozen blueberries instead of fresh?
A: You can, but you have to be careful! Do NOT thaw them first, or they’ll turn your entire dough a swampy purple. Take them straight from the freezer, toss them in the flour (you might need an extra dusting), and fold them in gently. Your bake time might increase by a minute or two, and the cookies might be slightly more cake-like due to the extra moisture.
Q: My cookies spread out really flat. How can I prevent that?
A> Flat cookies are usually a sign that the butter was too warm. Next time, make sure your butter is just softened, not melty, and don’t skip the chilling step! Also, double-check that your baking soda is fresh. An old leavener can lose its potency.
Q: How should I store these cookies, and how long will they last?
A> Once the glaze is fully set, store them in an airtight container at room temperature for up to 3 days. For longer storage, you can freeze the unglazed cookies. Place them in a single layer on a baking sheet to freeze solid, then transfer to a freezer bag. They’ll keep for up to 3 months. Thaw and glaze when you’re ready to serve!
Blueberry Lemon-Frost Cookies : Soft, Zesty & Bursting with Berries
Description
Bring a burst of sunshine to your kitchen with these Soft Blueberry Lemon-Frost Cookies—tender, buttery cookies studded with juicy blueberries and kissed with a bright lemon glaze. Each bite feels like a warm summer breeze: light, tangy, and joyfully sweet. Inspired by lazy afternoons and porch-swing moments, these cookies are equal parts comfort and celebration. They’re perfect for brunch, tea parties, or simply brightening a cloudy day. One bowl, a handful of fresh berries, and a whisk of lemon zest—that’s all it takes to bake happiness into every bite.
Ingredients
Cookies:
-
1 cup unsalted butter, softened
-
1 cup granulated sugar
-
1 large egg
-
2 tsp vanilla extract
-
2½ cups all-purpose flour
-
½ tsp baking soda
-
¼ tsp salt
-
1 tbsp lemon zest
-
1½ cups fresh blueberries, tossed in 1 tbsp flour
Lemon Frosting:
-
1 cup powdered sugar
-
2–3 tbsp fresh lemon juice
-
½ tsp lemon zest (optional)
Instructions
-
Cream Butter & Sugar: Beat softened butter and sugar until light and fluffy (2–3 min). Add egg, vanilla, and lemon zest.
-
Mix Dry Ingredients: Whisk flour, baking soda, and salt in a bowl. Gradually add to wet mixture, stirring until just combined—don’t overmix!
-
Add Blueberries: Gently fold in flour-coated blueberries with a spatula.
-
Chill (Optional): For thicker cookies, refrigerate dough 30 minutes.
-
Bake: Preheat oven to 350°F (175°C). Scoop 1½-tbsp dough balls onto parchment-lined trays, spacing 2 inches apart. Bake 11–13 minutes until edges are lightly golden. Cool 5 minutes, then transfer to a wire rack.
-
Frost: Whisk powdered sugar and lemon juice until smooth and drizzle over cooled cookies. Let set for 15 minutes before serving.
Notes
-
Toss blueberries in flour to keep them from sinking.
-
Use fresh lemon juice for a bright, natural flavor.
-
For a fun twist, fold in white chocolate chips or swap blueberries for raspberries.
Nutrition
- Calories: 160Cal Per Serving
- Sugar: 11g
- Fat: 8g
- Carbohydrates: 21g
- Protein: 2g
Nutritional Info (Because We’re Curious!)
Okay, let’s be real—we’re not eating cookies for their health benefits, but it’s always good to know what you’re enjoying! Here’s a rough breakdown per cookie (based on a yield of 24 cookies). Please note, this is an estimate and can vary based on specific ingredients used.
Approx. Per Cookie: Calories: 160 | Fat: 8g | Carbs: 21g | Sugar: 11g | Fiber: 1g | Protein: 2g
The blueberries bring a touch of antioxidants and vitamin C to the party, and using real, fresh ingredients means you’re avoiding any weird preservatives. My philosophy? Enjoy every single, soul-satisfying bite mindfully and with joy. That’s the best nutrition of all.
Final Thoughts from My Kitchen to Yours
And there you have it! My go-to recipe for bringing a little burst of sunshine into any day. I hope these Blueberry Lemon-Frost Cookies become a new favorite in your home, creating as many happy memories for you as they have for me.
Remember, baking is about the journey, not just the destination. If a berry bursts or a cookie is a little lopsided, it just

Peanut Butter & Jelly Cookies : Classic Sandwich, Cookie-Style!
Your Childhood Sandwich Just Got a Major Dessert Glow-Up
Hey there, Feastical family! Beau here, coming at you from a kitchen that currently smells like toasted peanuts and sweet, bubbling jam. If that doesn’t sound like a slice of heaven to you, just hang tight—I’m about to change your mind.
We all have those flavor memories that instantly transport us, right? For me, it’s the unbeatable combo of creamy peanut butter and sweet, fruity jelly, smooshed between two slices of soft white bread. It was the taste of after-school snacks, of lunchboxes traded on the playground, of simple, no-fuss comfort. But what if I told you we could take that iconic duo and turn it into something even more magical? Something you can hold in one hand with a cup of coffee in the other, no plate required?
Welcome to the world of Peanut Butter & Jelly Cookies. This isn’t just a recipe; it’s a full-blown nostalgia trip, baked to perfection. We’re talking buttery-soft peanut butter cookies, warm from the oven, each one cradling a hidden pocket of your favorite jam. And because we believe in going the extra mile for that “wow” factor, we’re finishing them with a graceful drizzle of melted peanut butter that sends these cookies straight into the hall of fame.
Whether you’re a seasoned baker or someone who considers store-bought dough a major win, this recipe is for you. It’s simple, soulful, and guaranteed to make your kitchen the happiest place in the house. So, tie on your apron, dig out that jar of peanut butter from the back of the pantry, and let’s bake up some memories together.
The Little League Lunch That Started It All
I’ll never forget my first-grade lunchbox. It was this beat-up, blue plastic thing with a matching thermos that always smelled faintly of tomato soup. But every Tuesday, without fail, my mom would pack me the king of all sandwiches: peanut butter and grape jelly on whole wheat, cut into two perfect triangles. It was my secret pre-game fuel before Little League, and I was convinced it made me run faster and hit harder.
One particular Tuesday, we had a bake sale to raise money for new team jerseys. My mom, being the absolute rockstar she is, decided to “cookie-fy” my favorite sandwich. She showed up with a tupperware container full of these warm, jammy thumbprint cookies. The team went wild for them. They sold out in minutes, and for one glorious afternoon, I wasn’t just the kid with a decent throwing arm—I was the kid with the cool mom who made the best cookies ever. That’s the power of food, friends. It’s not just about taste; it’s about the stories and the feelings we bake right into every batch.
Gathering Your Cookie Dream Team
This is where the magic begins! I’ve built this recipe to be forgiving and flexible, because life’s too short to stress over cookies. Let’s break down what you’ll need and why each ingredient is a key player.
- 1 cup unsalted butter, softened: This is the foundation of our cookie’s rich, tender texture. Using unsalted lets you control the salt level. Chef’s Tip: “Softened” means your butter should give slightly when you press it, but you shouldn’t be able to poke your finger straight through it. If you forget to take it out of the fridge, cut it into chunks and let it sit for 15-20 minutes.
- 1 cup granulated sugar + 1 cup brown sugar, packed: The dynamic duo of sweetness! Granulated sugar gives our cookies that slight crispness on the edges, while the brown sugar (pack it firmly into your measuring cup!) brings moisture, chewiness, and that deep, caramel-like flavor we all love.
- 2 large eggs: Our binding agents. They bring everything together and add structure. Make sure they’re at room temperature to blend seamlessly with the butter and sugars.
- 1 teaspoon vanilla extract: The flavor enhancer. It might seem simple, but a good quality vanilla adds a warm, aromatic depth that makes the peanut butter and jelly sing in harmony.
- 2½ cups all-purpose flour: The backbone of our cookie. It provides the structure so our cookies don’t spread into one giant, delicious puddle. For a gluten-free swap, a 1:1 gluten-free flour blend works wonderfully here.
- 1 teaspoon baking powder + 1 teaspoon baking soda: Our leavening dream team. They work together to give the cookies the perfect amount of lift and that signature soft, cake-like crumb.
- ½ teaspoon salt: Don’t skip this! Salt is the secret weapon that balances the sweetness and makes all the other flavors pop. If you only have salted butter, just reduce this to a pinch.
- 1 cup creamy peanut butter: The star of the show! I prefer creamy for a smooth texture, but if you’re a crunchy peanut butter fan, go for it—it’ll add a lovely little texture. Natural peanut butter can sometimes make the dough a bit oily, so a standard brand like Jif or Skippy works best for consistency.
- 1 cup jelly or jam of choice: This is where you get to be the artist! Grape is the classic, but I’m a sucker for raspberry or strawberry. Jam tends to be thicker and less runny than jelly, which is perfect for keeping its shape in the cookie’s center.
Let’s Get Baking: The Step-by-Step Cookie Journey
Ready to create some magic? Follow these steps, and you’ll be a PB&J cookie pro in no time. I’ve sprinkled in my favorite chef hacks to make the process even smoother.
- Preheat Oven & Prep Your Pans: First things first, get that oven preheating to a cozy 350°F (175°C). This ensures it’s perfectly hot and ready when your cookies are. Line your baking sheets with parchment paper. Chef’s Hack: This isn’t just for easy cleanup; it prevents the bottoms from browning too quickly. No parchment? A light coating of non-stick spray works too.
- Cream Butter & Sugars: In a large bowl, beat the softened butter, granulated sugar, and brown sugar together. We’re not just mixing here; we’re “creaming.” Beat it on medium-high speed for a good 2-3 minutes until the mixture turns pale, fluffy, and almost looks like a light cookie dough itself. This step is crucial for incorporating air, which gives our cookies that perfect, soft texture.
- Add the Wet Team: Crack in the eggs, add the vanilla extract, and scoop in that glorious peanut butter. Mix on medium speed until everything is beautifully combined and smooth. Scrape down the sides of the bowl with a spatula to make sure no rogue pockets of butter are hiding.
- Welcome the Dry Ingredients: In a separate bowl, whisk together your flour, baking powder, baking soda, and salt. This little pre-mix ensures the leavening agents are evenly distributed, so every cookie rises uniformly. Now, gradually add these dry ingredients to the wet mixture, mixing on low speed just until the flour disappears. Chef’s Tip: Overmixing at this stage can lead to tough cookies! A few streaks of flour are okay; they’ll get incorporated when we shape the dough.
- Shape & Create the “Sandwich”: Here’s the fun part! Roll the dough into 1-inch balls. I use a small cookie scoop for uniformity, but a tablespoon works great. Place them about 2 inches apart on your prepared baking sheets. Now, using your thumb, the back of a small measuring spoon, or even the handle of a wooden spoon, press a firm indentation into the center of each dough ball. Chef’s Hack: If the dough starts sticking to your thumb, lightly dip it in a small bowl of water or flour.
- The Jammy Heart: Grab your jelly or jam. If it’s super thick, you can give it a quick stir to loosen it up. Spoon about ½ a teaspoon into each little well you created. Don’t overfill them! The jam expands as it heats up, and we want a cute little pool, not a volcanic eruption.
- Bake to Golden Perfection: Slide those trays into your preheated oven and bake for 10-12 minutes. You’re looking for the edges to be lightly golden and set. The centers might still look a tiny bit soft—that’s perfect! They’ll continue to firm up as they cool. For even baking, rotate your trays halfway through.
- The All-Important Cool Down: Once they’re out of the oven, let the cookies rest on the baking sheet for 5 minutes. This allows them to set up enough to handle. Then, carefully transfer them to a wire rack to cool completely. This step is non-negotiable if you’re planning that peanut butter drizzle—it will just slide right off a warm cookie!
- The Grand Finale: Peanut Butter Drizzle: For that extra flair, put a few tablespoons of creamy peanut butter in a microwave-safe bowl and heat it in 15-second bursts, stirring each time, until it’s melted and drizzle-able. You can use a fork, a spoon, or for more control, put it in a small zip-top bag, snip off a tiny corner, and pipe it over the cooled cookies. It’s the ribbon on the present!
How to Serve These Jammy Jewels
Okay, the cookies are cooled, the drizzle is set… now what? The beauty of these cookies is that they’re fantastic all on their own. But if you want to elevate the experience, here are a few of my favorite ways to serve them up.
For the ultimate nostalgia trip, serve them warm with a tall, ice-cold glass of milk. It’s a classic for a reason. If you’re feeling fancy, crumble one over a scoop of vanilla bean ice cream—the warm cookie, cool ice cream, and jammy center is a textural masterpiece.
These are also the undisputed champions of bake sales and lunchboxes. Tuck one into a lunchbox for a sweet surprise, or stack them high on a rustic wooden board for your next potluck. I promise, they’ll be the first thing to disappear. And for my fellow coffee lovers, a slightly warm PB&J cookie alongside your afternoon cup of joe is a little moment of pure bliss.
Mix It Up! Creative Twists on the Classic
Once you’ve mastered the base recipe, the playground is yours! Here are a few delicious ways to put your own spin on these cookies.
- The Chocolate Lover’s Dream: Fold 1 cup of chocolate chips into the dough right after the dry ingredients. Chocolate and peanut butter? A match made in heaven.
- Savory & Salty Swirl: Use a naturally salted, crunchy peanut butter and top each cookie with a light sprinkle of flaky sea salt right when they come out of the oven. The sweet-and-salty combo is next-level.
- Fruit Explosion: Swap the jelly for a high-quality fruit preserves with chunks of real fruit. Apricot, blackberry, or even orange marmalade offer a more sophisticated, tangy twist.
- Sunflower Seed Butter Swap: Have a nut allergy? No problem! Use sunflower seed butter in place of the peanut butter and pair it with your favorite seed-free jam. The flavor is remarkably similar and just as delicious.
- Peanut Butter Cup Thumbprint: Instead of jelly, press a mini peanut butter cup into the thumbprint right after the cookies come out of the oven. The heat will soften it into a gooey, chocolatey center.
Beau’s Kitchen Chronicles: A Note on Cookie Evolution
This recipe has been a living, breathing thing in my kitchen for years. The first time I made them, I was so worried about the jam spilling that I barely put any in! They were more like “Peanut Butter Cookies with a Hint of Jelly.” Over time, I learned to embrace the mess. A little jam bubbling over the side just adds to the homemade charm, you know?
I’ve also learned that chilling the dough for 30 minutes if your kitchen is really warm can help the cookies hold their shape even better. But honestly? Some days I don’t have the patience, and they turn out just fine. Cooking is about joy, not perfection. So have fun with it!
Your PB&J Cookie Questions, Answered!
I’ve gotten a lot of questions about this recipe over the years, so I’ve compiled the most common ones here to help you troubleshoot like a pro.
Q: My jelly always spills out and makes a mess! What am I doing wrong?
A: This is the #1 question! A few things can help: 1) Make sure your thumbprint is deep enough and has a defined “well.” 2) Don’t overfill it—stick to that ½ teaspoon. 3) Chilling the shaped, jam-filled dough balls for 15 minutes before baking can help them set up faster in the oven, reducing spillage.
Q: My cookies turned out dry and crumbly. Why?
A> This usually means the dough was over-mixed after the flour was added, or they were baked a minute or two too long. Remember, mix just until the flour disappears, and take them out when the edges are golden, even if the centers look soft. They continue to cook on the hot tray!
Q: Can I use natural peanut butter?
A> You can, but be cautious. Natural peanut butters often have more oil and can separate, which might make your dough greasy and cause the cookies to spread more. If it’s all you have, give the jar a really good stir to reincorporate the oils, and consider reducing the butter by a tablespoon or two.
Q: How do I store these cookies, and can I freeze the dough?
A> Once completely cool, store them in an airtight container at room temperature for up to 5 days. You can absolutely freeze the dough! Roll the dough balls (without the jam), place them on a parchment-lined tray to freeze solid, then transfer to a freezer bag. When you’re ready to bake, let them thaw just enough to make the thumbprint, add the jam, and bake. You may need to add 1-2 minutes to the baking time.
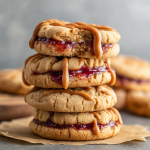
Peanut Butter & Jelly Cookies : Classic Sandwich, Cookie-Style!
Description
Say hello to childhood nostalgia, all grown up. These Peanut Butter & Jelly Cookies take the classic lunchbox duo and give it a dreamy dessert makeover. Imagine soft, buttery peanut butter cookies baked to golden perfection, each one cradling a sweet, jammy center that melts in your mouth. And just when you think it can’t get better—each cookie gets a silky drizzle of warm peanut butter on top. Simple, sentimental, and irresistibly delicious, these cookies turn snack time into story time. Grab your apron and let’s bake a batch of pure joy.
Ingredients
Cookie Dough:
-
1 cup unsalted butter, softened
-
1 cup granulated sugar
-
1 cup brown sugar, packed
-
2 large eggs (room temp)
-
1 tsp vanilla extract
-
1 cup creamy peanut butter
-
2½ cups all-purpose flour
-
1 tsp baking powder
-
1 tsp baking soda
-
½ tsp salt
Filling & Finish:
-
1 cup jelly or jam (grape, strawberry, or raspberry)
-
3 tbsp creamy peanut butter (for drizzle)
Instructions
-
Preheat Oven: Set oven to 350°F (175°C) and line baking sheets with parchment paper.
-
Cream Butter & Sugars: Beat butter, granulated sugar, and brown sugar until light and fluffy (2–3 min). Add eggs, vanilla, and peanut butter; mix until smooth.
-
Mix Dry Ingredients: In another bowl, whisk flour, baking powder, baking soda, and salt. Gradually add to wet ingredients, mixing until just combined.
-
Shape Cookies: Roll dough into 1-inch balls and place 2 inches apart on baking sheets. Press a thumbprint into each center.
-
Fill with Jam: Spoon about ½ tsp jam into each well.
-
Bake: Bake 10–12 min until edges are lightly golden. Cool 5 min on tray, then transfer to wire rack.
-
Drizzle: Melt 3 tbsp peanut butter in the microwave until smooth. Drizzle over cooled cookies for that perfect finish.
Notes
-
Chill the dough 30 min if your kitchen is warm for perfect shape.
-
For a twist, swap peanut butter for sunflower butter or add chocolate chips.
-
A sprinkle of flaky sea salt right after baking takes these to gourmet level.
Nutrition
- Calories: 180 Cal Per Serving
- Fat: 9g
- Carbohydrates: 21g
Let’s Talk Nutrition (The Fun Part!)
Now, we all know a cookie is a treat, and that’s exactly what it should be—a delightful, soul-satisfying indulgence. But I also believe in being transparent about what we’re eating. The nutritional info below is an estimate per cookie (based on a batch of 36).
Each cookie comes in at around 180 calories, with about 9g of fat (from the butter and peanut butter—the good, satisfying fats!), 21g of carbs for energy, and 3g of protein from the peanut butter and eggs to help keep you full.
Remember, these are approximations, and the exact numbers will change if you use different brands of peanut butter or jam. The beauty of baking at home is that you control the ingredients. You can choose a natural peanut butter, a low-sugar jam, or even experiment with a sugar alternative if that’s your thing. But my professional chef opinion? Life’s too short not to enjoy a classic, delicious, jam-filled PB&J cookie every now and then.
One Last Bite of Wisdom
And there you have it, friends! My complete guide to turning your favorite childhood sandwich into a show-stopping cookie. This recipe is more than just a list of ingredients and steps; it’s an invitation to slow