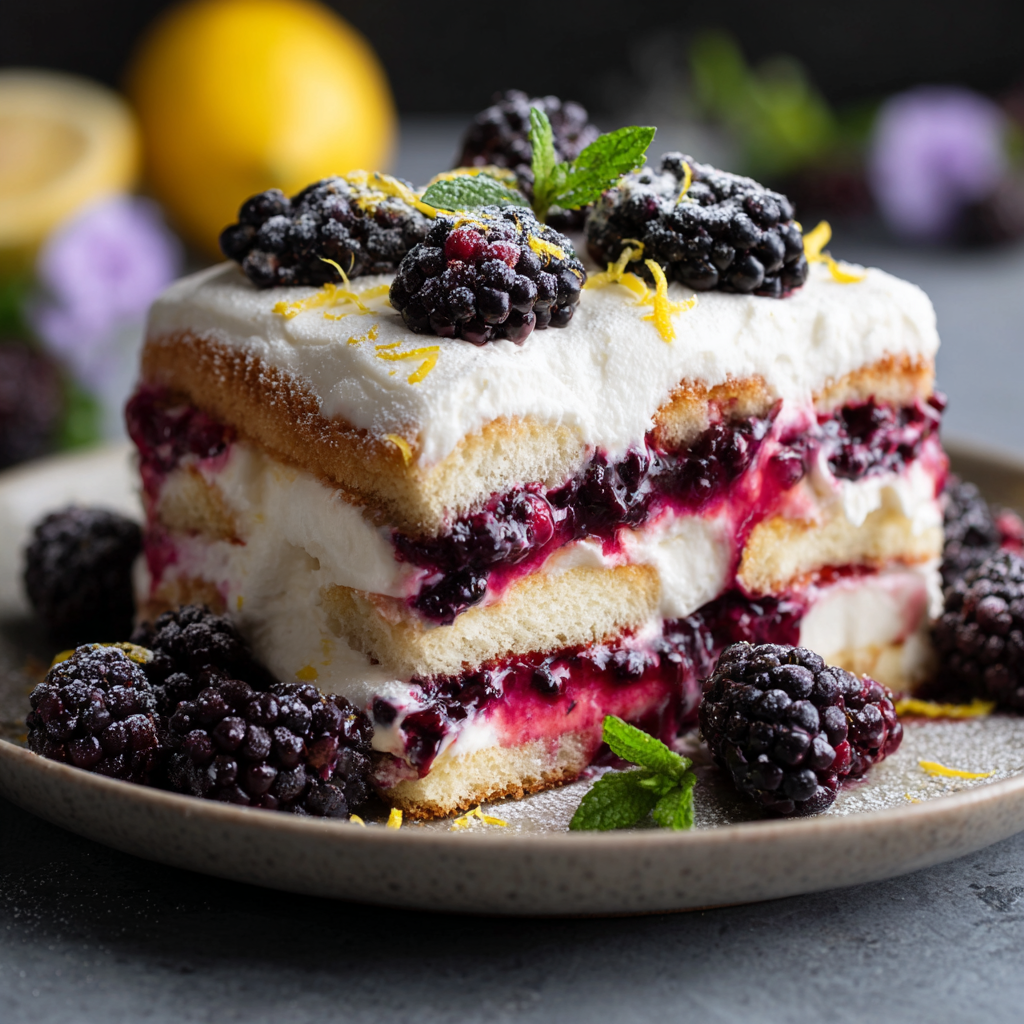
Blackberry Tiramisu: A Bright, Fruity No-Bake Dessert Twist
Blackberry Tiramisu: Your New Go-To No-Bake Showstopper
Hey friends, Beau here! Let’s be real for a second. Is there anything more universally loved than a classic tiramisu? That dreamy, coffee-soaked, mascarpone-layered masterpiece is a dessert table legend for a reason. But what if I told you we could take that iconic comfort and give it a fresh, vibrant, sun-kissed makeover? Get ready to fall in love with your new favorite summer dessert: Blackberry Tiramisu.
This isn’t just a recipe; it’s a mood. It’s the dessert you bring to a backyard barbecue that makes everyone’s eyes light up. It’s the treat you whip up on a warm evening when turning on the oven feels like a punishable offense. We’re swapping out the strong coffee for a sweet-tart blackberry syrup that’s so good you’ll want to put it on everything, and layering it with our signature pillowy, vanilla-kissed mascarpone cream.
It’s elegant enough for a dinner party but simple enough for a Tuesday night victory dance. So, if you’re ready to create something incredibly delicious that requires exactly zero baking, you’re in the right kitchen. Grab your favorite mixing bowl, and let’s make some magic happen!
A Berry Sweet Memory
This recipe was born from a happy accident and a serious blackberry surplus. A few summers back, my partner and I went a little overboard at a “pick-your-own” farm. We came home with buckets of berries, their dark juice staining our fingers and a big, dumb grin on our faces. After making jam, pies, and smoothies until we could barely see straight, we still had a mountain left.
I was staring at this berry bounty, wondering what to create next, when I saw a half-eaten classic tiramisu in the fridge. A lightbulb went off. What if we swapped the espresso for a fruity syrup? The result was nothing short of spectacular. The first bite was a revelation—all the familiar, comforting texture of tiramisu, but with a bright, sunny, berry-forward flavor that just screams summer. It was an instant hit, and it’s been a Feastical favorite ever since. It just goes to show that the best kitchen creations often come from a little bit of chaos and a whole lot of fruit!
Gathering Your Sunshine Ingredients
Here’s your shopping list for this burst of berry bliss. The beauty of this dish is in its simplicity, so using quality ingredients really makes a difference!
- 4 cups fresh or frozen blackberries: Don’t stress if fresh aren’t in season! Frozen berries work beautifully here and are often more affordable. They break down into a gorgeous syrup just as well as their fresh counterparts.
- 1 cup granulated sugar: This sweetens our vibrant blackberry syrup. If your berries are super sweet, you can scale this back to 3/4 cup, but I find a full cup gives us the perfect balance against the tart lemon and rich mascarpone.
- 2 tbsp lemon juice & Zest of 1 lemon: This is our secret weapon! The lemon juice brightens the berry flavor, preventing the syrup from being one-note sweet, while the zest adds little pops of citrusy fragrance throughout the dessert.
- 16 oz mascarpone cheese: The heart and soul of any tiramisu! Make sure it’s at room temperature before you start. This is non-negotiable for a silky-smooth, lump-free cream. Cold mascarpone is a stubborn beast to whip.
- 1 cup powdered sugar: We use powdered sugar in the cream because it dissolves instantly, giving us an impossibly smooth texture. No gritty surprises here!
- 2 cups heavy whipping cream, cold: The “pillowy” part of our pillowy cream. For the best volume, make sure your cream, and even your mixing bowl, are ice-cold. I sometimes pop my bowl in the freezer for 10 minutes before I start.
- 1 tsp vanilla extract: A little warmth and depth to complement the berries. Feel free to use the seeds from a vanilla bean for an extra-special touch.
- 2 packages ladyfingers (Savoiardi-style): These dry, crisp cookies are the traditional choice for a reason. They hold their structure just enough when dipped, giving us that perfect soft-but-not-mushy texture we’re after.
- Optional for garnish: fresh blackberries, mint leaves, extra lemon zest: This is your moment to be an artist! A little garnish makes the dessert look professionally styled and adds fresh flavor and texture.
Let’s Build This Beauty: Step-by-Step
Ready to assemble our masterpiece? Follow these steps, and you’ll be a tiramisu pro in no time. I’ve packed in all my favorite chef hacks to make this foolproof.
Step 1: Create the Blackberry Elixir
In a medium saucepan, combine your blackberries, granulated sugar, lemon juice, and lemon zest. Cook this over medium heat for 5-7 minutes. You’ll hear it start to bubble and pop—that’s the berries breaking down and releasing their incredible juice. Use a wooden spoon or potato masher to gently help them along. Once it looks like a gorgeous, jammy pot of purple goodness, remove it from the heat. Now, here’s a crucial step for a silky-smooth texture: strain the syrup through a fine-mesh sieve into a bowl, pressing down on the solids with the back of a spoon to get every last drop of that flavorful liquid. Discard the seeds and pulp. Let this syrup cool completely. I sometimes pop it in the fridge to speed things up. Chef’s Hack: A warm syrup will turn your ladyfingers into mush, so patience is key here!
Step 2: Whip Up the Dreamiest Cream
Now for the cloud-like layer that brings it all together. In a large, cold bowl, beat your cold heavy cream and vanilla extract together. Start on low speed and gradually increase to high. Watch it like a hawk! You’re looking for soft peaks—that means when you lift the beaters out, the cream will form peaks that gently curl over at the tips. In a separate bowl, let’s tackle the mascarpone. Remember, it should be at room temp! Add the powdered sugar and use a spatula or whisk (an electric mixer on low is fine too) to mix it until it’s smooth and creamy. Now, the magic: gently fold the whipped cream into the mascarpone mixture. “Folding” is a fancy term for being gentle! Use a spatula to cut down through the center, scoop along the bottom, and fold it over the top. Repeat just until no white streaks remain. Overmixing will deflate your beautiful cream, so be kind to it.
Step 3: The Grand Assembly
Grab your 9×13 dish. Now, for the fun, slightly messy part! Take a ladyfinger and give it a very quick dip—I’m talking one second per side—into the cooled blackberry syrup. You want it to be coated and softened, but not saturated and falling apart. Think “moist,” not “soggy.” Line the bottom of your dish with a single layer of these dipped cookies. You might need to break a few to fill in the gaps—no problem! Spread half of your luxurious mascarpone cream over the ladyfingers in an even layer. Now, repeat the process: another layer of quickly-dipped ladyfingers, followed by the remaining cream. Smooth the top with your spatula.
Step 4: The Torturous (But Essential) Chill
This is the hardest part: waiting. Cover the dish tightly with plastic wrap and refrigerate it for at least 6 hours, but honestly, overnight is pure perfection. This waiting period is when the alchemy happens. The ladyfingers soften further, the flavors meld together, and the whole dessert sets up into a sliceable, dreamy, cohesive wonder.
Step 5: The Grand Finale – Serving
When you’re ready to serve, take it out of the fridge and behold your creation! Scatter a handful of fresh blackberries over the top, sprinkle on some bright lemon zest, and tuck in a few fresh mint leaves for a pop of color and freshness. Slice, serve, and get ready for the compliments to roll in.
How to Serve Your Blackberry Tiramisu
Presentation is part of the fun! While serving it right from the baking dish is perfectly charming (and my go-to for family-style gatherings), you can also elevate it for a special occasion. For a stunning individual presentation, use a round cookie cutter to create neat, cylindrical portions. Place each portion in the center of a plate and garnish with a single perfect blackberry and a tiny mint sprig.
What to serve it with? It’s fantastic all on its own, but a drizzle of extra blackberry syrup on the plate looks beautiful. For the ultimate indulgence, a small glass of dessert wine like a Moscato d’Asti or a late-harvest Riesling pairs incredibly well with the berry and citrus notes. For a non-alcoholic option, a sparkling lemonade or even a cold brew coffee (a little nod to the original!) makes a great companion.
Make It Your Own: Delicious Twists & Swaps
One of the best things about this recipe is its versatility. Feel free to play with it and make it your own!
- Mixed Berry Bliss: Don’t limit yourself to just blackberries! Use a mix of raspberries, blackberries, and blueberries for a “summer berry” tiramisu that’s bursting with different flavors and colors.
- Lemon Blueberry Swap: Swap the blackberries for blueberries and add an extra tablespoon of lemon zest to the syrup. It’s a classic, unbeatable flavor combination that feels fresh and bright.
- Boozy Berry Kick: Want an adult-only version? After straining the blackberry syrup, stir in a tablespoon or two of Chambord (black raspberry liqueur) or even a little Grand Marnier for a citrusy punch.
- Gluten-Free & Vegan Friendly: For a gluten-free version, use your favorite gluten-free ladyfingers or even thin slices of gluten-free pound cake. For a vegan twist, use vegan mascarpone (or a blend of vegan cream cheese and coconut cream) and coconut whipped cream. The berry syrup is already naturally vegan!
- Individual Jars: For a portable, no-mess option, layer the dipped ladyfinger pieces and cream in individual mason jars or glasses. They’re adorable and perfect for picnics or parties.
Beau’s Kitchen Notes
This recipe has evolved a bit since that first berry-filled experiment. I’ve found that adding the lemon zest directly to the syrup, rather than just the juice, makes a world of difference in the final flavor. It perfumes the entire dessert. I also used to be timid with the dipping, but I’ve learned that a confident, quick dip is the true secret to the perfect ladyfinger texture—soft, but with a slight bite. One of my funniest kitchen fails was the first time I made this; I was so impatient I used warm syrup and ended up with a delicious but structurally unsound tiramisu soup! We ate it with a spoon and it was still fantastic, but lesson learned: let that syrup cool!
Your Questions, Answered!
Q: My mascarpone cream is lumpy! What did I do wrong?
A: This almost always happens when the mascarpone cheese is too cold. It’s a finicky ingredient! Always, always let it sit on the counter for at least 30-60 minutes before you start. If you do end up with lumps, you can try to beat it with an electric mixer on low for a few seconds to smooth it out, but prevention is the best cure.
Q: Can I make this dessert ahead of time?
A: Absolutely! In fact, I highly recommend it. Making it the day before you plan to serve it is ideal. The flavors have more time to develop and meld, and it sets up perfectly. Just add the fresh garnishes right before serving so they look their best.
Q: My whipped cream won’t form peaks. Help!
A: This is usually a temperature issue. Your cream, bowl, and beaters all need to be very cold. If your kitchen is warm, try placing your bowl of cream into a larger bowl filled with ice water while you whip it. Also, make sure you’re using heavy whipping cream, not half-and-half or milk.
Q: How long will the leftovers last in the fridge?
A: It will keep beautifully, covered tightly, for 2-3 days. The ladyfingers will continue to soften, but it will still be delicious. I wouldn’t recommend freezing it, as the creamy layer can become grainy when thawed.

Blackberry Tiramisu: A Bright, Fruity No-Bake Dessert Twist
Description
This isn’t just tiramisu—it’s a vibrant, fruity twist on a classic dessert. Sweet-tart blackberry syrup replaces coffee, while a pillowy, vanilla-kissed mascarpone cream layers perfectly over ladyfingers. Elegant enough for a dinner party, simple enough for a weeknight treat, and zero baking required!
Ingredients
For the Blackberry Syrup:
-
4 cups fresh or frozen blackberries
-
1 cup granulated sugar (adjust based on berry sweetness)
-
2 tbsp lemon juice
-
Zest of 1 lemon
For the Mascarpone Cream:
-
16 oz mascarpone cheese, room temperature
-
1 cup powdered sugar
-
2 cups heavy whipping cream, cold
-
1 tsp vanilla extract
For Assembly:
-
2 packages ladyfingers (Savoiardi-style)
-
Optional garnish: fresh blackberries, mint leaves, extra lemon zest
Instructions
Step 1: Make the Blackberry Syrup
-
In a medium saucepan, combine blackberries, granulated sugar, lemon juice, and zest.
-
Cook over medium heat for 5–7 minutes, gently mashing berries.
-
Strain through a fine-mesh sieve into a bowl, pressing to extract juice. Discard solids.
-
Let syrup cool completely. Chef’s Tip: Warm syrup will make ladyfingers soggy—patience is key!
Step 2: Whip the Mascarpone Cream
-
In a cold bowl, beat heavy cream and vanilla extract until soft peaks form.
-
In a separate bowl, combine mascarpone and powdered sugar until smooth.
-
Gently fold whipped cream into mascarpone mixture until fully incorporated. Avoid overmixing.
Step 3: Assemble the Tiramisu
-
Quickly dip ladyfingers (1 second per side) into cooled blackberry syrup and line the bottom of a 9×13 dish.
-
Spread half of the mascarpone cream over the ladyfingers.
-
Repeat: another layer of dipped ladyfingers, followed by remaining cream. Smooth the top.
Step 4: Chill
-
Cover tightly with plastic wrap and refrigerate for at least 6 hours, preferably overnight, to let flavors meld and dessert set.
Step 5: Serve & Garnish
-
Scatter fresh blackberries, mint leaves, and lemon zest over the top.
-
Slice and serve. Optional: drizzle extra syrup or serve with dessert wine or sparkling lemonade.
Notes
-
Mixed Berry: Use a combination of raspberries, blackberries, and blueberries.
-
Lemon Blueberry: Swap blackberries for blueberries and add extra lemon zest.
-
Boozy: Stir in 1–2 tbsp Chambord or Grand Marnier into the syrup.
-
Gluten-Free / Vegan: Use gluten-free ladyfingers or pound cake; vegan mascarpone and coconut cream.
-
Individual Portions: Layer in mason jars or glasses for a portable, elegant treat.
Nutrition
- Calories: 310 Cal Per Serving
- Fat: 21g
- Carbohydrates: 26g
Quick Nutritional & Prep Info
(Please note: The following is an approximate estimate based on the ingredients used. For precise dietary information, I recommend using a dedicated nutritional calculator with your specific brands.)
Prep Time: 20 mins | Chill Time: 6 hours | Total Time: 6 hrs 20 mins
Servings: 12
Calories per serving: ~310 | Fat: 21g | Carbohydrates: 26g | Protein: 4g
This dessert is a treat, and it’s rich, so a little goes a long way! The blackberries provide a source of Vitamin C and fiber, and by making it at home, you’re controlling the sugar. It’s a wonderful way to enjoy a decadent dessert with a fruity, fresh twist.
Final Thoughts from My Kitchen to Yours
Well, there you have it, friends—my all-time favorite summer dessert that never fails to bring a smile. This Blackberry Tiramisu is proof that you don’t need fancy techniques or a hot oven to create something truly memorable and share-worthy. It’s about taking a classic, adding a splash of seasonal color, and creating a new tradition.
I hope this recipe brings as much joy to your table as it has to mine. It’s a celebration of simple ingredients, a little bit of kitchen creativity, and the pure happiness that comes from sharing a delicious homemade treat with the people you love. Now, I’d love to hear from you! Did you try it? What variations did you create? Tag me on social @Feastical so I can see your beautiful creations. Until next time, keep your spatula close and your joy for cooking closer.
Happy cooking,
Beau

High-Protein Mexican Chicken Bowl with Veggies : Clean, Colorful & Satisfying
Your New Go-To Meal: The High-Protein Mexican Chicken Bowl
Hey friends, Beau here! Let’s be real for a second. We’ve all been there—staring into the fridge after a long day, caught in the eternal struggle between wanting something that tastes incredible and something that makes you feel amazing. It’s like you have to choose between a flavor party and a nutrition lecture. Well, my friends, I’m here to tell you that the era of choosing is OVER.
Welcome to the solution: the High-Protein Mexican Chicken Bowl. This isn’t just a meal; it’s a vibrant, colorful, and downright satisfying experience in a bowl. We’re talking seasoned, juicy chicken, sweet and smoky roasted sweet potatoes, crisp-tender veggies, and creamy, dreamy toppings that all come together in a symphony of texture and taste. It’s the kind of food that powers you through your day, satisfies those cravings, and still aligns with your wellness goals. Best of all, it comes together in about 30 minutes, making it a perfect weeknight hero or a brilliant meal prep superstar. So, tie on your apron, grab your favorite knife, and let’s build a bowl that’s as fun to make as it is to eat!
A Bowl Born from Busy Days & Big Cravings
This recipe has a special place in my heart because it literally saved my sanity during my early days working in a chaotic restaurant kitchen. My days were a blur of chopping, sautéing, and plating, and by the time my shift ended, I was ravenous. The last thing I wanted was a sad, limp salad, but I also didn’t have the energy for a complicated project.
One night, I just started throwing the “bits and bobs” from the line into a bowl—some leftover grilled chicken, the last of the roasted sweet potatoes from family meal, a handful of fresh pico de gallo, and a big scoop of cool Greek yogurt standing in for sour cream. I took one bite and had a total “Aha!” moment. It was everything I needed: hearty, healthy, bursting with flavor, and ready in minutes. It became my post-shift ritual, my edible victory lap. This recipe is that exact same spirit—a no-fuss, feel-good feast designed for real life.
Gathering Your Flavor Power Players
Here’s your shopping list! This isn’t just a list of ingredients; it’s a toolkit for building incredible flavor and texture. Don’t be afraid to swap things based on what you have—cooking is an adventure, not a strict science exam.
- 1 medium sweet potato, cubed: Our starchy superhero! It roasts up with crispy edges and a soft, sweet interior that balances the spice. Chef’s Insight: No sweet potato? Butternut squash or even regular potatoes will work beautifully.
- 1 cup cooked Mexican-spiced chicken breast with sautéed onion and capsicum (bell peppers): The main event! We’re using lean chicken breast for a protein punch. The onion and bell peppers (use any color you love!) add sweetness and a wonderful crunch. Substitution Tip: Ground turkey, lean steak, or even a can of black beans (rinsed and warmed) are fantastic alternatives.
- 1/2 cup chopped cherry tomatoes: For a burst of fresh, juicy acidity. Chef’s Insight: They’re sweeter and less watery than large tomatoes, which keeps our bowl from getting soggy.
- 2 tablespoons chopped fresh basil or cilantro: The aromatic finisher! Cilantro gives that classic Mexican flair, but if you’re one of those folks who thinks it tastes like soap (no judgment!), fresh basil or even flat-leaf parsley adds a lovely, fresh note.
- 1/2 avocado, mashed or sliced: Hello, creamy healthy fats! Avocado makes everything better, adding a rich, buttery texture that brings all the elements together.
- 1/2 cup Greek yogurt (plain, full-fat or low-fat): Our secret weapon for a protein-packed, tangy “crema.” Chef’s Insight: It’s a brilliant, high-protein swap for sour cream. Trust me, you won’t miss it!
- 1/2 cup shredded cheese (cheddar or Mexican blend): Because everything is better with a little melted, cheesy goodness. This is the comforting, salty element we all crave.
- Olive oil, salt, pepper, and smoked paprika (for the sweet potato): The simple seasoning squad. Smoked paprika is the star here, giving a deep, smoky flavor that mimics bacon—it’s a game-changer!
- Cumin, chili powder, garlic powder, and salt (for the chicken): The essential Mexican spice blend. This combo is the soul of the dish, creating that warm, earthy, and slightly spicy flavor profile we love.
- Optional: squeeze of lime, pinch of chili flakes, or a drizzle of hot sauce: Your personal flavor adjusters! I always add a squeeze of lime right at the end for a hit of brightness.
Let’s Build Your Masterpiece: Step-by-Step
Okay, team! Let’s fire up the oven and the stovetetop and get this party started. We’re going to multitask like pros to get this done in record time.
- Roast Those Sweet Potatoes to Perfection. Preheat your oven to 400°F (200°C). Toss your cubed sweet potato with a glug of olive oil, a good pinch of salt and pepper, and that magical smoked paprika. Spread them out on a baking sheet in a single layer—this is key for getting them crispy, not steamed! Chef’s Hack: Give the baking sheet a quick spritz of cooking spray to prevent any sticking. Roast for 20-25 minutes, or until they’re tender and have those beautiful caramelized edges.
- Sizzle Up the Chicken & Veggies. While the potatoes are roasting, let’s tackle the skillet. Heat a tablespoon of oil over medium-high heat. Add your chopped onion and bell pepper and sauté for 3-4 minutes until they just start to soften. Add your cubed chicken breast and all those wonderful spices—cumin, chili powder, garlic powder, and salt. Cook, stirring occasionally, for about 6-8 minutes, until the chicken is cooked through and the veggies are tender-crisp. Chef’s Hack: Don’t crowd the pan! If you add too much at once, the chicken will steam instead of getting a nice sear. If your skillet is small, cook in two batches.
- Whip Up Your Quick Tomato Salsa. This takes 60 seconds, I promise. In a small bowl, simply combine your chopped cherry tomatoes and fresh basil or cilantro. Give it a little stir. That’s it! You’ve just made a fresh, vibrant salsa that will light up the whole bowl.
- The Grand Assembly! This is the most fun part. Grab two bowls. Start with a hearty base of the roasted sweet potatoes. Top that with a generous scoop of the chicken and veggie mixture. Then, artfully arrange your tomato salsa, that gorgeous mashed or sliced avocado, and a sprinkle of shredded cheese. Chef’s Hack: Placing the cheese on top of the hot chicken will make it deliciously melty.
- Finish with Flair. The final touches! Add a generous, cool dollop of Greek yogurt right in the center. This is your creamy, tangy sauce. Now, hit it with your optional extras—a squeeze of fresh lime juice, a pinch of chili flakes for heat, or a drizzle of your favorite hot sauce. Look at that! You’ve just created a restaurant-quality meal in your own kitchen.
How to Serve It Up in Style
Presentation matters, even for a casual weeknight dinner! Eating with your eyes first is a real thing, and this bowl is a natural beauty. I love serving this family-style for a fun, interactive meal. Pile all the components into separate small bowls and let everyone build their own dream bowl at the table. It’s a fantastic way to get kids involved, too!
If you’re plating individually, remember the “layers of love.” Start with your starchy base, add your protein, and then dot the colorful toppings around so you get a bit of everything in every single bite. A final sprinkle of fresh herbs and that lime wedge on the side makes it look like it came straight from a food magazine. Pair it with a chilled glass of sparkling water with lime or a light Mexican lager for the ultimate feel-good feast.
Make It Your Own: Delicious Twists & Swaps
The beauty of a bowl is its flexibility. Think of the core recipe as your canvas, and feel free to paint with whatever flavors you’re craving! Here are a few of my favorite variations:
- Southwest Style: Swap the sweet potato for a cup of cooked quinoa or brown rice. Add a handful of corn kernels (frozen and thawed is fine!) and a scoop of black beans to the chicken mixture.
- “Taco Tuesday” in a Bowl: Use seasoned ground chicken or turkey instead of cubed breast. Crumble a handful of tortilla chips on top for an irresistible crunch, and swap the Greek yogurt for a drizzle of zesty ranch dressing.
- Kick Up the Heat: For spice lovers, add a chopped jalapeño (seeds and all!) to the chicken skillet. Use a pepper jack cheese and finish with a drizzle of spicy chipotle hot sauce.
- Keep it Lean & Green: For an even lighter version, double up on the bell peppers and onions in the chicken mix and skip the cheese. The avocado and Greek yogurt will still provide plenty of creaminess.
- Mediterranean Twist: Change the spice profile completely! Use oregano, thyme, and a pinch of cinnamon on the chicken. Swap the tomato salsa for a cucumber and tomato salad with red onion and a lemon vinaigrette, and use feta cheese instead of cheddar.
Beau’s Kitchen Notes & Stories
This recipe has been a living, evolving thing in my kitchen. I’ve made it for prepping for a big hike, for comforting a friend after a tough day, and for impressing a date with minimal effort (shhh, that’s our secret). One time, I was so tired I accidentally used pumpkin pie spice instead of the Mexican spice blend on the chicken. It was… interesting! Not my finest moment, but a good reminder to always label your spice jars. The version you see here is the refined, “learned-from-my-mistakes” champion. It’s foolproof, flexible, and always delivers. Don’t be afraid to make it your own—that’s where the real magic happens!
Your Questions, Answered!
I’ve gotten a lot of questions about this bowl over the years, so here are the answers to the most common ones.
Q: Can I make this ahead for meal prep?
A: Absolutely! This is a meal prep superstar. Keep the components separate in airtight containers in the fridge for up to 4 days. I recommend storing the Greek yogurt and avocado separately and adding them fresh when you’re ready to eat to prevent browning and sogginess.
Q: My sweet potatoes are soggy. What did I do wrong?
A: The most common culprit is overcrowding the pan. If the potato cubes are too close together, they steam instead of roast. Make sure they’re in a single layer with a little space between them. Also, don’t skip preheating the oven—a hot oven is essential for that initial sear.
Q: Is Greek yogurt really a good substitute for sour cream?
A: In a dish like this, 100% yes! It provides the same cool, tangy contrast to the spicy chicken, but with a massive boost of protein and less fat. The texture is virtually identical once it’s dolloped and mixed in. Give it a try—you might just be converted!
Q: My chicken always comes out dry. Any tips?
A: Two key tips: First, don’t overcook it! Chicken breast is done at an internal temperature of 165°F (74°C). Use a meat thermometer if you have one. Second, make sure your chicken pieces are roughly the same size so they cook evenly.

High-Protein Mexican Chicken Bowl with Veggies : Clean, Colorful & Satisfying
Description
Hey friends! Say goodbye to choosing between a flavor-packed meal and a nutritious one. This High-Protein Mexican Chicken Bowl delivers both in every colorful, satisfying bite. Juicy, seasoned chicken, roasted sweet potatoes, crisp-tender veggies, creamy avocado, and tangy Greek yogurt all come together in a protein-rich, nutrient-packed feast. Perfect for a quick weeknight dinner or meal prep hero!
Ingredients
For the Sweet Potatoes:
-
1 medium sweet potato, cubed
-
1 tsp olive oil
-
¼ tsp salt
-
¼ tsp black pepper
-
½ tsp smoked paprika
For the Chicken & Veggies:
-
1 cup cooked Mexican-spiced chicken breast, cubed
-
½ cup onion, chopped
-
½ cup bell peppers, chopped (any color)
-
½ tsp cumin
-
½ tsp chili powder
-
¼ tsp garlic powder
-
¼ tsp salt
For the Bowl Toppings:
-
½ cup chopped cherry tomatoes
-
2 tbsp fresh cilantro or basil, chopped
-
½ avocado, sliced or mashed
-
½ cup Greek yogurt (plain, full-fat or low-fat)
-
½ cup shredded cheese (cheddar or Mexican blend)
-
Optional: lime wedge, chili flakes, hot sauce
Instructions
-
Roast Sweet Potatoes
Preheat oven to 400°F (200°C). Toss sweet potato cubes with olive oil, salt, pepper, and smoked paprika. Spread in a single layer on a baking sheet. Roast 20–25 minutes until tender and lightly caramelized. -
Cook Chicken & Veggies
Heat 1 tsp olive oil in a skillet over medium-high heat. Sauté onions and bell peppers 3–4 minutes until tender-crisp. Add chicken and spices (cumin, chili powder, garlic powder, salt) and cook 6–8 minutes until heated through. -
Make Quick Tomato Salsa
In a small bowl, combine cherry tomatoes and chopped cilantro or basil. Stir to combine. -
Assemble Bowls
In each bowl, layer roasted sweet potatoes as the base. Top with chicken & veggies, then add tomato salsa, avocado, shredded cheese, and a dollop of Greek yogurt. Finish with optional lime, chili flakes, or hot sauce.
Notes
-
Meal Prep: Store components separately in the fridge for up to 4 days; add avocado and yogurt fresh.
-
Avoid Soggy Sweet Potatoes: Roast in a single layer and preheat the oven for a crispy finish.
-
Spice Swaps: Add jalapeño for heat or use pepper jack cheese.
-
Grain Boost: Replace sweet potatoes with quinoa or brown rice for a hearty, carb-rich base.
-
Lean & Green: Skip the cheese for a lighter option; avocado and Greek yogurt provide creaminess.
Nutrition
- Calories: 480 Cal Per Serving
- Fat: 23g
- Carbohydrates: 28g
- Protein: 38g
The Goodness Inside Your Bowl
Let’s talk about what’s fueling your body! This bowl is intentionally designed to be a balanced meal. The lean chicken breast is your protein powerhouse, essential for muscle repair and keeping you full for hours. The sweet potato provides complex carbohydrates for sustained energy, along with a great dose of Vitamin A and fiber. The healthy fats from the avocado and olive oil are crucial for absorbing all those fat-soluble vitamins and keeping your heart happy. The veggies add micronutrients, antioxidants, and more fiber. Together, it’s a complete, nutrient-dense meal that truly satisfies. Remember, these numbers are estimates and can vary based on your specific ingredients and portion sizes.
Prep Time: 10 minutes | Cook Time: 20 minutes | Total Time: 30 minutes | Servings: 2
Estimated Per Serving: Calories: ~480 | Protein: 38g | Carbs: 28g | Fat: 23g | Fiber: 6g
Final Thoughts from My Kitchen to Yours
And there you have it, friends! My all-time favorite, feel-good, high-protein Mexican Chicken Bowl. It’s more than just a recipe; it’s a reminder that eating well doesn’t have to be complicated, boring, or time-consuming. It’s about combining simple, wholesome ingredients in a way that brings you joy and makes you feel fantastic from the inside out.
I hope this recipe becomes a trusted friend in your kitchen, just like it is in mine. Give it a try, play with the variations, and make it your own. And when you do, I’d love to hear about it! Tag me on social @Feastical or @BeauCollier with a photo of your beautiful creation. Now, go forth and build your bowl! Happy cooking!
– Beau
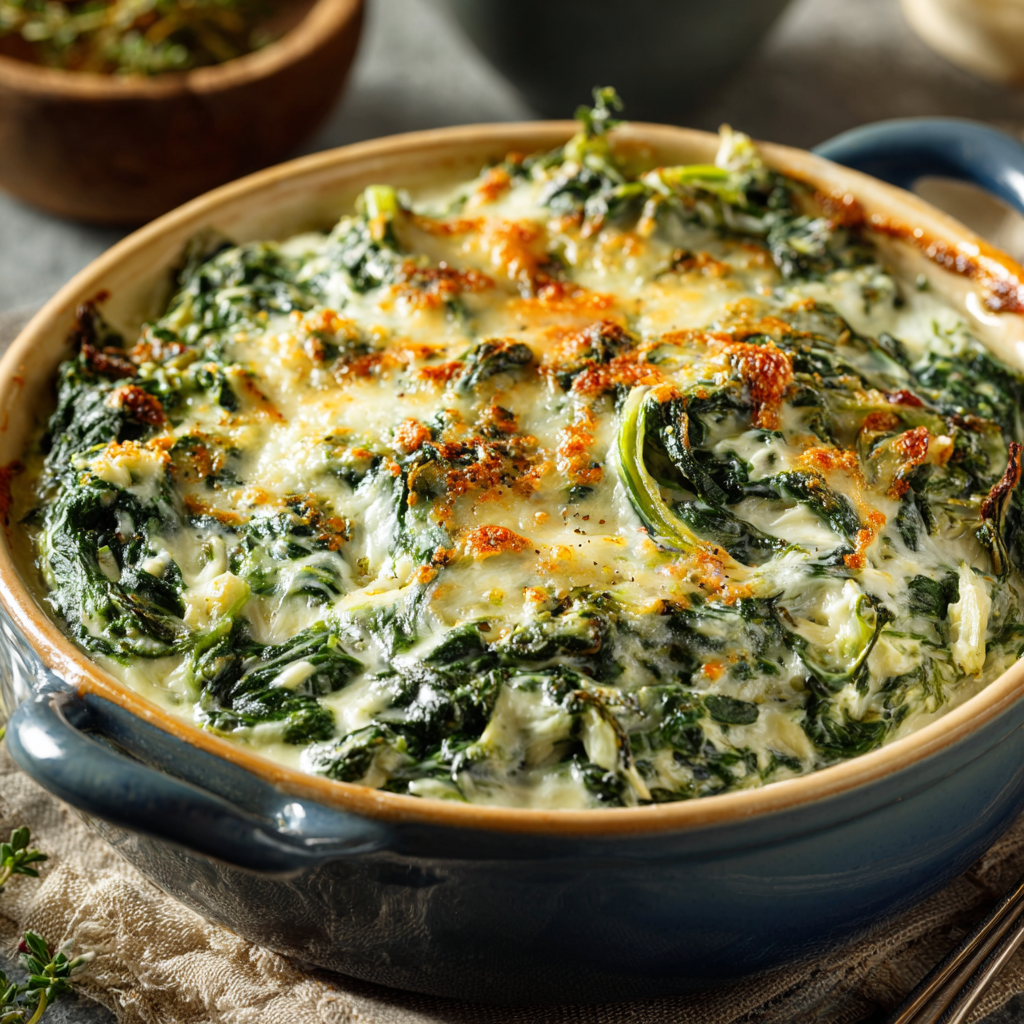
Creamy Baked Spinach Casserole : Easy, Cheesy & Crowd-Pleasing
Creamy Baked Spinach Casserole: Your New Go-To Comfort Food
Hey friends, Beau here from Feastical! Let’s be real for a second. Some days, you just need a big, warm, cheesy hug from your dinner plate. You know the feeling. It’s been a long day, the weather’s turning chilly, and you’re craving something that feels both wholesome and indulgent. You want a dish that whispers, “Everything is going to be okay,” with every single bite.
Well, pull up a chair, because I’m about to introduce you to your new kitchen bestie: my Creamy Baked Spinach Casserole. This isn’t just any side dish; it’s a creamy, dreamy, cheesy revelation that walks the beautiful line between elegant enough for a holiday table and easy enough for a hectic Tuesday night. We’re talking tender spinach swirled in a rich, tangy cheese sauce, all baked up until the top is golden and the center is blissfully set.
The best part? It’s incredibly forgiving. No fancy chef skills required here. If you can chop an onion, whisk some ingredients, and operate an oven, you are 100% equipped to make magic happen. This spinach casserole is the culinary equivalent of your favorite cozy sweater—comforting, reliable, and always a good idea. So, let’s preheat those ovens and get ready to make your kitchen smell absolutely incredible.
The Potluck That Started It All
This recipe holds a special place in my heart because it truly saved the day. A few years back, I was invited to a last-minute Friendsgiving potluck. I’d spent all day on a complicated tart that, let’s just say, had a disagreement with gravity on my way out the door. There I was, standing in my kitchen with 45 minutes to spare, staring at a puddle of fancy filling and shattered dreams.
Panic mode? You bet. But then I remembered the basics. I always have frozen spinach, eggs, and a few different cheeses hanging out in the fridge for emergency situations. I started throwing things together, whisking and seasoning with a “what do I have to lose?” attitude. I popped it in the oven, crossed my fingers, and showed up with this humble, bubbling dish. Friends, it was the first thing to disappear. People were scraping the dish clean! It was a powerful reminder that the best food isn’t always the most complicated—it’s the food made with heart (and a little bit of delicious, melty cheese). This casserole has been a staple in my repertoire ever since.
Gathering Your Ingredients
This recipe is all about simple, wholesome ingredients working in perfect harmony. Here’s your shopping list and a few of my chef-y insights to help you understand the “why” behind each one.
- 2 tablespoons butter – This is the foundation of our flavor. We’re using it to sauté our aromatics, building a base of rich, savory goodness. Unsalted is best so you can control the salt level, but salted works in a pinch—just adjust the added salt later.
- 1 small onion, finely chopped – The humble onion adds a subtle sweetness and depth that balances the tangy cheeses. Don’t rush the sauté! We want them soft and translucent, not browned.
- 2 garlic cloves, minced – Hello, flavor town! Garlic brings that essential aromatic punch. Fresh is always best here, but ½ teaspoon of garlic powder can work in a real emergency.
- 2 large eggs – Our magic binder! The eggs hold everything together, giving the casserole a lovely, firm-yet-tender texture once baked.
- 1 cup cottage cheese OR ricotta – This is the secret to the incredible creaminess! Ricotta will give you a slightly denser, classic texture. Cottage cheese (my personal favorite for this) creates a lighter, more dynamic creaminess with little pockets of tang. If you’re using cottage cheese, a small-curd, full-fat version is perfection.
- 1/2 cup sour cream OR plain Greek yogurt – More tangy, creamy goodness! Sour cream is classic and rich. Plain Greek yogurt is a fantastic, protein-packed alternative that adds a lovely zing.
- 1/2 cup grated Parmesan cheese – The salty, umami powerhouse. It deepens the overall cheese flavor. Use the good stuff from the refrigerated section, not the shelf-stable canister, for the best melt and flavor.
- 1 1/2 cups shredded mozzarella (or cheddar) – The star of the show for that glorious, stretchy cheese pull. Mozzarella is mild and melty, while sharp cheddar will give you a bolder, tangier flavor. Why not use a mix? I do it all the time!
- Seasoning Squad: 1/2 tsp salt, 1/4 tsp black pepper, 1/4 tsp nutmeg (optional but highly recommended), 1/2 tsp dried thyme or Italian seasoning. The nutmeg is a pro-move—it doesn’t make it taste like pumpkin pie, it just enhances the savory, cheesy notes in a magical way. Trust me on this one.
- 16 oz frozen chopped spinach, thawed and drained WELL – This is the non-negotiable step! Squeeze that spinach like it owes you money. I put it in a clean kitchen towel and wring it out over the sink. Removing that excess water is the key to a non-watery, perfectly set casserole.
Let’s Get Cooking: Your Step-by-Step Guide
Alright, team, it’s go-time. This is where the magic happens. Follow these steps, and you’ll be a casserole champion in no time.
- Preheat and Prep. Fire up your oven to 375°F (190°C). Take a moment to lightly grease your baking dish—an 8×8-inch square or a 2-quart oval dish works perfectly. A little butter or a quick spray of oil will ensure a clean getaway for every serving. Chef’s Hack: Doing this first means your oven is hot and ready the moment your casserole is assembled. No waiting around!
- Sauté the Aromatics. Grab a skillet and melt your butter over medium heat. Once it’s foaming slightly, add the chopped onion. We’re not looking for color here, just tenderness. Give it 4-5 minutes, stirring occasionally, until the onions are soft and smell amazing. Now, add the minced garlic and cook for just one more minute. Garlic burns fast, and bitter garlic is not the vibe we’re going for! Chef’s Hack: You can do this step while your spinach is draining. Multitasking for the win!
- Create the Creamy Base. In a large mixing bowl—and I mean large, we need elbow room—whisk the two eggs until they’re well-beaten. Now, add the cottage cheese (or ricotta), sour cream (or yogurt), Parmesan, and one cup of the shredded mozzarella (we’re saving that last ½ cup for the top!). Sprinkle in all your seasonings: salt, pepper, nutmeg, and thyme. Give it a really good whisk until everything is combined into a luscious, creamy mixture.
- The Big Combine. Time to bring it all together! Add the sautéed onion and garlic mixture (no need to cool it completely) and the very-well-drained spinach to the bowl. This is a hands-on moment. I find it easiest to use my (clean) hands to mix everything thoroughly, breaking up any clumps of spinach and ensuring every leaf is coated in that cheesy goodness. A sturdy spatula works too—just make sure it’s all one happy, green family.
- Bake to Perfection. Transfer the entire mixture to your prepared baking dish. Use your spatula to smooth the top into an even layer. Now, for the grand finale: sprinkle that reserved ½ cup of mozzarella cheese evenly over the top. This creates that gorgeous, golden-brown, cheesy crust we all dream about. Slide the dish into your preheated oven and bake for 30-35 minutes. You’re looking for a set center (no jiggling) and a beautifully golden, bubbly top.
- The Most Important Step: Rest! I know, I know. It’s bubbling and beautiful and you want to dive right in. But patience, young grasshopper! Let the casserole sit on the stovetop for about 10 minutes before you cut into it. This allows the proteins to set fully, making it easier to slice and serve. It also saves you from a scorched tongue—a crucial kitchen safety tip!
How to Serve This Cheesy Masterpiece
So, your casserole is baked, rested, and ready for its close-up. Now what? This dish is a versatile superstar.
As a show-stopping side dish, it’s the perfect partner for a holiday ham, a juicy roasted chicken, or a beautiful herb-crusted pork loin. It brings a vibrant, cheesy element that balances out richer meats perfectly.
But let’s not forget it can absolutely shine as a satisfying vegetarian main course! For a complete meal, I love serving a generous square alongside a bright, crisp salad with a lemony vinaigrette to cut through the richness. A thick slice of crusty, buttered bread is also non-negotiable for mopping up every last cheesy crumb.
For a fun family-style presentation, I often bake it in a colorful ceramic dish and bring it straight to the table, letting everyone serve themselves. A little extra sprinkle of fresh black pepper and some chopped fresh parsley or chives on top right before serving adds a pop of color and freshness that makes it look extra special.
Make It Your Own: Delicious Twists & Swaps
One of the things I love most about this recipe is its adaptability. Feel free to get creative and make it suit your taste or what you have in the fridge!
- Meat Lover’s Delight: Crumble in ½ cup of cooked, crispy bacon or diced ham along with the spinach. It adds a wonderful smoky, salty flavor that takes it to a whole new level of comfort food.
- Italian-Inspired Veggie Boost: Stir in ¼ cup of chopped sun-dried tomatoes and ¼ cup of chopped artichoke hearts. You’ll feel like you’re biting into a warm, cheesy, spinach-artichoke dip casserole. It’s incredible.
- Keto/Low-Carb Powerhouse: This recipe is naturally pretty low in carbs! To make it even more substantial, add a cup of chopped mushrooms (sauté them with the onions) or use full-fat dairy options. It’s a fantastic fit for a low-carb lifestyle.
- Gluten-Free & Grain-Free: Good news! This casserole is naturally gluten-free. Just double-check your labels on pre-shredded cheese, as some contain anti-caking agents with gluten.
- A Spicy Kick: Like a little heat? Add a pinch of red pepper flakes to the onion while it’s sautéing, or stir in a few dashes of your favorite hot sauce into the cheese mixture.
Beau’s Kitchen Notebook
This recipe has evolved so much since that fateful Friendsgiving. I’ve learned that using cottage cheese over ricotta was a game-changer for my personal texture preference. I’ve also become militant about spinach-draining after one slightly soupy batch (we don’t talk about that one). It’s a living recipe, and I encourage you to make it your own. The funniest thing? I once accidentally used vanilla Greek yogurt instead of plain. It was… an interesting experiment. Let’s just say it had a certain “je ne sais quoi” that I wouldn’t recommend. We all have kitchen mishaps—it’s how we learn and laugh!
Your Questions, Answered!
Over the years, I’ve gotten a few repeat questions about this casserole. Here are the answers to the most common ones.
Q: My casserole turned out watery. What happened?
A: 99% of the time, this is due to the spinach not being drained thoroughly enough. Frozen spinach holds a ton of water! Really squeeze it in a towel until it feels quite dry. Also, make sure you’re baking it long enough for the eggs to set, which helps bind the moisture.
Q: Can I make this ahead of time?
A: Absolutely! You can assemble the entire casserole, cover it tightly, and refrigerate it for up to 24 hours before you need to bake it. You might need to add 5-10 minutes to the baking time since it will be going into the oven cold.
Q: Can I use fresh spinach instead of frozen?
A> You can, but it requires a bit of prep. You’ll need about 20 ounces of fresh spinach. Sauté it in a large pan (in batches, if needed) with a tiny bit of water until it’s completely wilted. Then, drain it and give it the same intense squeezing treatment as the frozen stuff.
Q: I don’t have cottage cheese or ricotta. Is there another substitute?
A> In a bind, you can try using an 8-ounce block of softened cream cheese, beaten until smooth with the eggs. The texture will be denser and richer, but it will still be deliciously creamy.

Creamy Baked Spinach Casserole : Easy, Cheesy & Crowd-Pleasing
Description
Hey friends! Some days call for a big, warm, cheesy hug from your dinner plate—and this Creamy Baked Spinach Casserole is exactly that. Tender spinach enveloped in a rich, tangy cheese sauce, baked until golden and bubbly, it’s perfect as a cozy weeknight side, a holiday table showstopper, or a satisfying vegetarian main. Easy, comforting, and totally forgiving, this casserole is about to become your new kitchen favorite.
Ingredients
-
2 tbsp butter
-
1 small onion, finely chopped
-
2 garlic cloves, minced
-
2 large eggs
-
1 cup cottage cheese or ricotta
-
½ cup sour cream or plain Greek yogurt
-
½ cup grated Parmesan cheese
-
1½ cups shredded mozzarella or cheddar (reserve ½ cup for topping)
-
½ tsp salt
-
¼ tsp black pepper
-
¼ tsp nutmeg (optional, enhances cheesy notes)
-
½ tsp dried thyme or Italian seasoning
-
16 oz frozen chopped spinach, thawed and drained well
Instructions
-
Preheat & Prep
Preheat oven to 375°F (190°C). Lightly grease an 8×8-inch or 2-quart baking dish. -
Sauté Aromatics
Melt butter in a skillet over medium heat. Add onion and cook 4–5 minutes until soft. Add garlic and cook 1 more minute. -
Mix Creamy Base
In a large bowl, whisk eggs, then add cottage cheese (or ricotta), sour cream (or yogurt), Parmesan, 1 cup mozzarella, salt, pepper, nutmeg, and thyme. Mix until smooth. -
Combine with Spinach
Add sautéed onion and garlic, then well-drained spinach. Mix thoroughly, breaking up any clumps of spinach. -
Assemble & Bake
Transfer mixture to prepared dish. Smooth top and sprinkle reserved ½ cup mozzarella evenly. Bake 30–35 minutes until set and golden. -
Rest & Serve
Let casserole sit 10 minutes before slicing. Serve as a side with roasted meats or as a vegetarian main with salad and crusty bread.
Notes
-
Drain Spinach Well: Excess water = watery casserole. Wring thoroughly in a clean towel.
-
Make Ahead: Assemble, cover, and refrigerate up to 24 hours before baking. Add 5–10 minutes to bake time if chilled.
-
Fresh Spinach Option: Use ~20 oz fresh spinach, sauté until wilted, drain, and squeeze out moisture.
-
Cheese Swap: In a pinch, use softened cream cheese instead of cottage or ricotta; texture will be denser.
-
Flavor Boost: Add cooked bacon, diced ham, sun-dried tomatoes, or artichoke hearts for variety.
Nutrition
- Calories: 210 Cal Per Serving
- Carbohydrates: 6g
- Protein: 14g
Nutritional Breakdown (A Chef’s Perspective)
Now, I’m not a nutritionist, but I am a chef who cares about what goes into my body. I love that this dish feels indulgent but is packed with real, wholesome ingredients. Here’s a general look at what you’re getting per serving (based on the original recipe, serves 6):
- Calories: ~210
- Protein: 14g – A fantastic source, thanks to the eggs and trio of cheeses!
- Carbohydrates: 6g – Naturally low, making it a great option for many eating styles.
- Fat: 15g – This is where the flavor and satisfaction live! Using the full-fat dairy options helps keep you full and happy.
- Fiber: 2g – A nice little boost from our star ingredient, the spinach.
Remember, this is comfort food that nourishes you. Spinach brings iron and vitamins, the eggs and cheese provide protein for sustained energy, and let’s not forget the joy factor—which is off the charts!
Final Thoughts from My Kitchen to Yours
And there you have it, my friends. My everything-you-need-to-know guide to the creamiest, cheesiest, most soul-satisfying baked spinach casserole on the planet. This recipe is a testament to the fact that the best dishes often come from a place of simplicity and a little bit of love. It’s built for sharing, for comforting, and for making any meal feel just a little bit more special.
I truly hope this recipe finds a happy home in your kitchen, becoming a reliable favorite for your family and friends, just like it has in mine. If you make
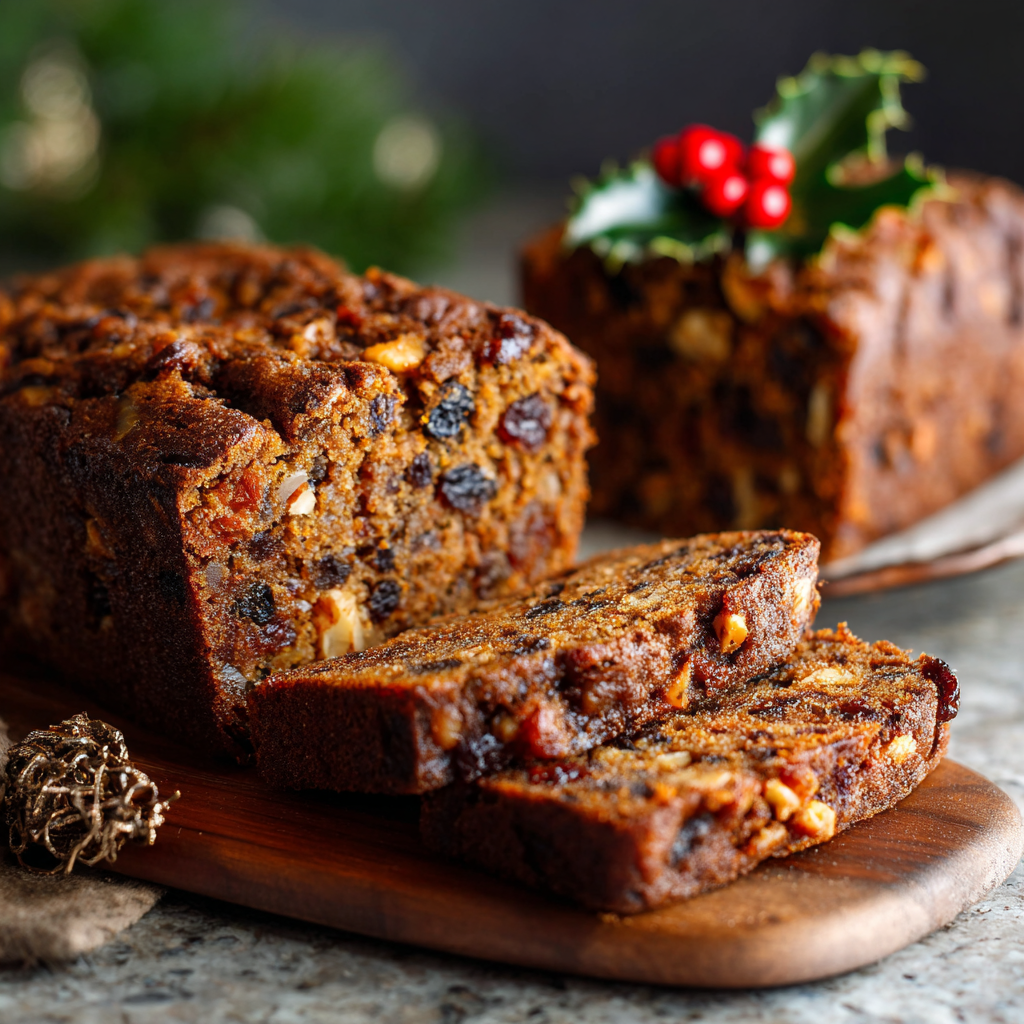
Old-Fashioned German Fruit Cake: Rich, Spiced & Holiday-Ready
More Than a Cake: Your New Holiday Tradition Awaits
Hey friends, Beau here! Let’s get one thing straight right out of the gate: this isn’t your average, run-of-the-mill fruitcake. I know, I know. The very word can conjure images of doorstops and re-gifted holiday bricks, but trust me on this. The Old-Fashioned German Fruit Cake we’re diving into today is a whole different, glorious beast.
Imagine this: the air in your kitchen is thick with the warm, soul-stirring scent of cinnamon, cloves, and nutmeg. You’re pulling out two gorgeously dark, crackly-topped loaves that are dense, incredibly moist, and packed with a confetti of chewy dried fruits and toasty nuts. This cake is rich, deeply spiced, and has a complexity that only comes from a recipe that’s been loved and shared for generations. It’s the kind of bake that feels like a warm hug from your German grandma, even if you’ve never met her.
What makes it truly special? It’s a keeper. This cake ages beautifully, getting better and better over days or even weeks, making it the ultimate make-ahead holiday gift or a secret stash for your own cozy moments by the fire. So, grab your favorite mixing bowl and let’s create some magic. We’re about to bake a cake that will completely redefine what you thought fruitcake could be.
A Slice of Memory: Where It All Began
My love affair with this cake started years ago, not in a fancy patisserie, but in the wonderfully cluttered kitchen of my neighbor, Mrs. Schumacher. Every December, she’d invite me over, and the second I stepped through her door, I was hit by this incredible aromatic wave—a mix of melting butter, warm spices, and something uniquely earthy and sweet. She’d always have a slice waiting for me, so dark it was almost black, and she’d serve it with a mischievous wink, saying, “A little something for the grown-ups,” having brushed it with a generous glug of brandy.
It was nothing like the sad, bright-green-and-red-flecked cakes I’d seen in stores. This was substantial. It was serious baking. Each bite was a journey—a bit of chewy cherry, a crunch of walnut, the zing of citrus peel, all held together by this profoundly spiced, molasses-kissed crumb. She taught me that this cake wasn’t meant to be eaten immediately; it was a patient recipe. We’d wrap the cooled loaves in foil and tuck them away in her cool pantry, letting the flavors “get to know each other,” as she’d say. That anticipation, that building of flavor, taught me one of my most cherished kitchen lessons: the best things are worth waiting for.
Gathering Your Cast of Characters
This recipe makes two loaves—one to keep and one to give (or, you know, both to keep… no judgment here!). The beauty is in the quality and balance of your ingredients. Here’s what you’ll need:
- 4 cups all-purpose flour: The sturdy foundation of our cake. It gives the dense, tender structure needed to hold all our goodies. For a slightly lighter texture, you can swap one cup for whole wheat pastry flour.
- 2 tsp baking powder + ½ tsp baking soda: Our dynamic leavening duo! The powder gives it initial lift, while the soda reacts with the buttermilk for a tender crumb.
- 1 tsp salt: Never skip the salt in baking! It’s the flavor enhancer that makes all the spices and sweetness pop.
- 2 tsp ground cinnamon, 1 tsp ground cloves, 1 tsp ground nutmeg: The holy trinity of warmth. This spice blend is non-negotiable for that classic, nostalgic flavor. Feel the coziness!
- 1 cup unsalted butter, softened: For unparalleled richness and moisture. “Softened” means it should give easily when pressed. Don’t melt it!
- 2 cups granulated sugar: Sweetens the deal and helps create that lovely, crackly top.
- 6 large eggs: They provide structure, richness, and help bind everything together. Make sure they’re at room temperature for the best emulsion with the butter and sugar.
- ½ cup molasses: This is the secret weapon! It delivers that deep, almost bitter-sweet flavor, incredible moisture, and the beautiful dark color. Use a robust, dark molasses for the best result.
- 1 cup buttermilk: The tanginess balances the sweetness and reacts with the baking soda for a supremely tender cake. No buttermilk? No problem! Add 1 tbsp of white vinegar or lemon juice to a cup of regular milk and let it sit for 5 minutes.
- 2 cups chopped nuts: I love a mix of walnuts, pecans, and almonds for varied texture and flavor. Toast them lightly beforehand for a massive flavor upgrade!
- 2 cups mixed dried fruits: Raisins and currants are classic, but I adore adding chopped dried cherries or apricots for a tangy twist. Get creative!
- 1 cup candied citrus peel, chopped: This provides little bursts of bright, citrusy sunshine that cut through the richness. If you’re not a fan, sub with more dried fruit or even some diced dried pineapple.
- Optional, but highly encouraged: The zest of 1 orange and ½ tsp ground ginger. This is my little twist—the orange zest adds fantastic freshness, and the ginger gives an extra layer of spicy depth.
- Also optional, for the grown-ups: ½ cup dark rum or brandy for brushing on the warm loaves. It adds moisture, flavor, and helps preserve the cake. For a non-alcoholic version, a simple syrup or even strong orange juice works wonderfully.
Let’s Get Baking: The Step-by-Step Magic
Ready to create this masterpiece? Follow these steps, and you’ll be a fruitcake champion in no time. Read through all the instructions first—it makes the process smooth and stress-free.
- Prep Your Stage. Preheat your oven to 325°F (165°C). This is a lower-and-slower bake, which is key for cooking such a dense cake through without burning the top. Grease two 9×5 inch loaf pans and line them with parchment paper, leaving an overhang on the long sides. This little “sling” will be your best friend when it’s time to lift the hot, heavy loaves out. Chef’s Hack: A light dusting of flour over the greased parchment and sides prevents any sticking.
- Combine the Dry Ingredients. In a large bowl, whisk together your flour, baking powder, baking soda, salt, and all the spices—cinnamon, cloves, nutmeg, and that optional ginger if you’re using it. Whisking ensures the leaveners and spices are evenly distributed, so you don’t get a bitter bite of baking soda in one slice. Set this bowl aside.
- Creaming is Key. In the bowl of a stand mixer fitted with the paddle attachment (or in a large bowl with a hand mixer), beat the softened butter and sugar together on medium-high speed. We’re not just mixing them; we’re creaming them until the mixture is pale, fluffy, and light. This usually takes a good 3-5 minutes. This step is crucial for incorporating air into the batter, giving our dense cake a little lift.
- Incorporate the Eggs and Molasses. With the mixer on medium, add the eggs one at a time, beating well after each addition. This allows each egg to fully emulsify into the butter mixture, creating a smooth, stable base. Scrape down the bowl, then mix in the molasses and that fresh orange zest. Your batter will now be a beautiful, glossy brown.
- The Alternating Game. Reduce the mixer speed to low. Add about one-third of the dry flour mixture, mixing until just combined. Now, pour in half of the buttermilk. Mix, then repeat with another third of the flour, the rest of the buttermilk, and finally the last of the flour. Mix until just combined—a few streaks of flour are okay! Overmixing at this stage is the enemy of a tender cake.
- The Grand Finale: Fold-ins. Take the bowl off the mixer. Grab a sturdy spatula and get ready to fold. Add your toasted nuts, dried fruits, and candied citrus peel. Use a folding motion to gently incorporate them evenly throughout the batter. This is a thick, heavy batter, so don’t be shy—put some muscle into it!
- Pan and Smooth. Divide the thick, fruit-and-nut-packed batter equally between your two prepared pans. Use your spatula to smooth the tops, making sure it’s pushed into the corners.
- Bake to Perfection. Place the pans in the center of your preheated oven and bake for 70-80 minutes. DO NOT open the oven for at least the first hour! The cake is done when a long skewer or toothpick inserted into the center comes out with just a few moist crumbs attached, not wet batter. The tops will be dark brown and sound hollow if you tap them lightly.
- The Crucial Cool-Down. Let the loaves cool in their pans on a wire rack for exactly 10 minutes. This allows them to set up enough to handle. Then, using your parchment slings, carefully lift them out and place them directly on the wire rack to cool completely. This prevents the bottoms from getting soggy.
- The Flavor-Boosting Soak (Do Not Skip!). While the loaves are still warm, brush the tops and sides generously with the rum or brandy (or your non-alcoholic alternative). The warm cake will soak it right up, adding incredible moisture and flavor. This is the traditional step that makes it a true “keeper.”
How to Serve This Masterpiece
Once your cakes are completely cool, this is where the patience pays off. For the absolute best flavor, wrap them tightly in foil or plastic wrap and store them in a cool, dark place for at least 24 hours, but ideally up to a week. This “maturing” time allows the flavors to meld and mellow into something truly extraordinary.
When you’re ready to serve, slice it thin. This is a rich, dense cake, and a little goes a long way. I love it simply as is, with a cup of strong black coffee or a hot tea. For a truly decadent treat, lightly toast a slice and slather it with good salted butter. Around the holidays, serve it on your finest plate with a dusting of powdered sugar or a dollop of lightly sweetened whipped cream or brandy butter. It’s the star of the show, so it doesn’t need much fuss!
Make It Your Own: Delicious Twists & Swaps
The fantastic thing about this recipe is its flexibility. Don’t be afraid to play with the mix-ins and make it your own!
- Tropical Getaway: Swap the traditional dried fruits for a mix of diced dried mango, pineapple, papaya, and macadamia nuts. Use a light rum for the soak to complement the theme.
- Chocolate Lover’s Dream: Replace 1 cup of the dried fruit with 1 cup of dark chocolate chips or chunks. The chocolate and spice combo is out of this world.
- Gluten-Free & Glorious: Use a 1:1 gluten-free all-purpose flour blend. The dense, moist nature of this cake means you won’t sacrifice texture at all.
- Boozy Fruit Soak: For an extra-adult version, soak your dried fruits in the rum or brandy overnight before adding them to the batter. This plumps them up and infuses every bite with flavor.
- Allergy-Friendly: For a nut-free version, simply replace the 2 cups of nuts with an additional 1 ½ cups of your favorite dried fruits and ½ cup of sunflower or pumpkin seeds for crunch.
Beau’s Kitchen Chronicles
This recipe has evolved so much in my kitchen over the years. The first time I made it alone, after Mrs. Schumacher moved away, I was so nervous I forgot the baking soda. Let’s just say the resulting loaves could have been used for self-defense. I learned the hard way that leaveners matter! Another time, I got overzealous with the molasses and created a cake so dark and intense it almost tasted like licorice. We’ve found a happy medium since then. The addition of orange zest and ginger is my personal stamp on her classic—a little tip of the hat to the teacher, with a bit of the student’s own flair mixed in. Every time I bake it, the smell transports me right back to her warm, welcoming kitchen.
Your Questions, Answered!
Q: My cake is browning too fast on top but still raw inside. Help!
A: This is a common issue with dense cakes! Tent the top loosely with a sheet of aluminum foil for the remainder of the baking time. This will shield it from direct heat and allow the interior to cook through without burning the top.
Q: How long will this cake actually keep?
A: Thanks to the sugar, molasses, and optional alcohol, this cake is a preservation champion. Wrapped tightly and stored in a cool, dark place (not the fridge, as it can dry out), it will keep beautifully for 2-3 weeks. If you used the alcohol soak, it can last even longer. The flavor just keeps improving!
Q: Can I freeze this German Fruit Cake?
A: Absolutely! Wrap the cooled, un-soaked loaves tightly in plastic wrap and then in foil. They will freeze perfectly for up to 3 months. Thaw overnight at room temperature, and then give them the boozy or syrupy soak once they’ve thawed.
Q: My fruit and nuts all sank to the bottom. What did I do wrong?
A: This usually happens if the batter is too thin or the fruits/nuts are too heavy. A pro tip is to toss your dried fruits and nuts in a tablespoon or two of the measured flour from the recipe before folding them in. The light coating of flour helps suspend them in the batter, so they stay evenly distributed.

Old-Fashioned German Fruit Cake: Rich, Spiced & Holiday-Ready
Description
sharing something homemade. Whether you’re gifting it, serving it, or sneaking a slice at midnight with a glass of eggnog, this cake has a way of wrapping you up in warmth and nostalgia.
So, this year, skip the store-bought tins and bake this instead. Your house will smell like Christmas, your friends will beg for the recipe, and you’ll have started a new holiday tradition worth keeping.
Ingredients
-
4 cups all-purpose flour
-
2 tsp baking powder
-
½ tsp baking soda
-
1 tsp salt
-
2 tsp ground cinnamon
-
1 tsp ground cloves
-
1 tsp ground nutmeg
-
(Optional) ½ tsp ground ginger
-
(Optional) Zest of 1 orange
-
1 cup unsalted butter, softened
-
2 cups granulated sugar
-
6 large eggs (room temperature)
-
½ cup molasses
-
1 cup buttermilk (or 1 cup milk + 1 tbsp lemon juice)
-
2 cups chopped nuts (walnuts, pecans, almonds)
-
2 cups mixed dried fruits (raisins, currants, cherries, apricots)
-
1 cup candied citrus peel, chopped
-
(Optional) ½ cup dark rum or brandy for brushing
Instructions
-
Preheat & Prepare:
Preheat oven to 325°F (165°C). Grease two 9×5″ loaf pans and line with parchment paper. -
Mix Dry Ingredients:
In a large bowl, whisk together flour, baking powder, baking soda, salt, and all spices. Set aside. -
Cream Butter & Sugar:
In a mixer, beat butter and sugar until pale and fluffy (about 3–5 minutes). -
Add Eggs & Molasses:
Beat in eggs one at a time, then add molasses and orange zest. Mix until smooth. -
Alternate Dry & Wet:
On low speed, mix in one-third of the dry mixture, then half of the buttermilk. Repeat, ending with dry ingredients. Mix only until combined. -
Fold In Fruit & Nuts:
Toss fruits and nuts with a little flour, then fold into batter with a spatula. -
Fill Pans & Bake:
Divide evenly between pans and smooth tops. Bake for 70–80 minutes, or until a skewer comes out with just a few moist crumbs. -
Cool & Brush:
Cool in pans for 10 minutes, then remove. While warm, brush loaves with rum or brandy (or orange juice). -
Wrap & Rest:
Once cool, wrap tightly in foil. Let rest at least 24 hours before serving—the flavor deepens beautifully.
Notes
-
Prevent sinking fruit: Toss fruit in flour before folding into batter.
-
Keep it moist: Brush with brandy weekly if storing long-term.
-
Make it ahead: The flavor improves after a few days—perfect for gifting!
-
Freezer-friendly: Wrap well and freeze up to 3 months.
Nutrition
- Calories: 280 kcal per Slice
- Fat: 12g
- Carbohydrates: 38g
- Protein: 4g
Nutritional Info (Because Knowledge is Power!)
Let’s be real—this is a celebratory treat, a slice of indulgence meant to be savored. But here’s a rough nutritional breakdown per slice (assuming 24 slices total) so you can bake and enjoy with confidence:
- Calories: ~280
- Fat: 12g
- Carbohydrates: 38g
- Protein: 4g
Remember, these are approximate values and can vary based on your specific ingredients and slice size. The nuts provide healthy fats and a bit of protein, while the dried fruits offer natural sugars and fiber. It’s a hearty, energy-packed snack that’s perfect for a cold winter day!
Your New Go-To Holiday Bake
And there you have it, my friends—the Old-Fashioned German Fruit Cake that will steal the show this holiday season. It’s a project of love, a lesson in patience, and ultimately, a reward for both. This cake is a story in every slice: a story of tradition, of shared kitchens, and of the simple, profound joy of

Hearty Chunky Vegetable and Bean Chili : A Wholesome One-Pot Wonder
Hearty Chunky Vegetable and Bean Chili – A Wholesome One-Pot Wonder
Hey friends, Beau here from Feastical! Let’s talk about one of life’s greatest simple pleasures: a steaming, fragrant, soul-warming bowl of chili. I’m not talking about a sad, thin soup masquerading as a meal. I’m talking about a hearty, chunky, vegetable and bean chili that’s so robust and satisfying, it feels like a warm hug from the inside out. This is the kind of dish that turns a regular weeknight into something special and makes casual gatherings with friends feel like a celebration.
Now, I know what some of you might be thinking. “Beau, can a chili without meat *really* hit the spot?” My answer, delivered with a confident spoonful, is a resounding YES. This isn’t a “compromise” meal; it’s a celebration of vegetables and beans in all their glory. We’re loading this pot with a rainbow of crisp bell peppers, tender zucchini, and smoky fire-roasted tomatoes. We’re toasting our spices to unlock their deepest, most aromatic flavors. And we’re using a secret, simple ingredient to give it a beautifully thick, spoon-coating texture that will make you a believer.
This recipe is my go-to for busy days, potlucks, and those times when you just need a big dose of cozy. It’s a true one-pot wonder that comes together in under an hour, filling your kitchen with the most incredible aroma. So, grab your favorite Dutch oven or big soup pot, and let’s make a batch of this wholesome, feel-good food together.
The Potluck That Started It All
This particular chili recipe has a special place in my heart because it was born out of a happy kitchen accident. A few years back, I was signed up to bring a dish to a big neighborhood potluck. I had grand plans for a classic beef chili, but when I opened my fridge, my plans changed. I found a vibrant collection of veggies staring back at me—a lone zucchini, a yellow squash that needed a purpose, and a trio of bell peppers in every color. It was a “use-it-or-lose-it” situation.
So, I threw caution to the wind and decided to go all in on the vegetables. I chopped, I sautéed, and I let the pot simmer. I was a little nervous, I’ll admit, showing up with a meatless chili to a crowd of dedicated carnivores. But you know what? That pot was the first one to empty. People couldn’t get over the chunky texture, the smoky depth from the tomatoes, and how incredibly satisfying it was. It was a powerful reminder that sometimes, the best recipes aren’t meticulously planned—they’re created with a little creativity and whatever you have on hand. This chili has been a Feastical favorite ever since.
Gathering Your Chili Champions
This is where the magic starts! The beauty of this ingredient list is its flexibility. Don’t have a yellow squash? No problem. Want it spicier? We can do that. Here’s your shopping list, complete with my chef-y insights to help you understand the “why” behind each item.
- 2 tbsp Olive Oil: Our cooking fat of choice. It adds a lovely, fruity base note. Avocado oil works great too if that’s what you have.
- 1 Large Onion, chopped: The flavor foundation. I like yellow or white onions for their balanced sweetness and punch.
- 4 Large Garlic Cloves, chopped: Because is it even a recipe from me without a generous amount of garlic? It adds that essential, aromatic backbone.
- 1 Jalapeño, diced: This gives us a gentle, building heat. For a milder chili, remove the seeds and ribs. For more fire, leave ’em in or add a second one!
- 1 Red, Green, and Yellow Bell Pepper, large dice: The colorful crew! They bring sweetness, a slight bitterness, and a fantastic crunchy-tender texture. Using all three makes the chili visually stunning.
- 1 Zucchini, large dice & 1 Yellow Squash, large dice: These summer squashes cook down beautifully, adding body and a mild, sweet flavor that soaks up all the spiced tomato goodness.
- 2 tsp Ground Cumin & 2 tsp Chili Powder: The dynamic duo of flavor town! Toasting them in the oil for just a minute wakes them up and makes your whole kitchen smell incredible.
- 1 (28 oz) can Fire-Roasted Diced Tomatoes: This is the SECRET WEAPON. Fire-roasted tomatoes have a smoky depth that instantly elevates this chili from “good” to “can-I-have-the-recipe” great. Don’t skip these if you can find them!
- Salt and Pepper, to taste: Season as you go! Don’t wait until the end. Salting the vegetables as they cook helps draw out their moisture and deepen their flavor.
- 1 tbsp Quick-Cooking Polenta: My favorite little thickener! It dissolves seamlessly into the chili, giving it a rich, hearty body without making it taste gritty or floury. It’s a brilliant little hack.
- 2 (15 oz) cans Black Beans, drained & 1 (15 oz) can Red Kidney Beans, drained: Our protein-packed powerhouses! I love the combination of creamy black beans and meaty kidney beans. Always give them a good rinse and drain to keep the chili from being too starchy.
Let’s Get Cooking: Building Your One-Pot Wonder
Alright, team, it’s time to fire up the stove. This process is all about building layers of flavor. Follow these steps, and you’ll have a pot of gold (or, you know, chili) in no time.
- Sauté the Aromatics: In a large Dutch oven or heavy-bottomed pot, heat the olive oil over medium heat. Add your chopped onion and garlic. Now, here’s a pro-tip: you don’t want to rush this. We’re not looking for color, we’re looking for softness and fragrance. Cook them for about 5 minutes, stirring occasionally, until the onions are translucent and smell sweet. This is the flavor base of your entire dish, so give it the love it deserves!
- Toast Those Spices: This is the step that separates a good chili from a great one. Push the onions and garlic to the side and add your diced jalapeño, cumin, and chili powder right into the oil. Let them sizzle for just 60 seconds. You’ll smell the spices becoming incredibly fragrant and nutty. This toasting process unlocks their essential oils and maximizes their flavor potential.
- Veggie Party Time: Now, toss in all your beautifully diced bell peppers, zucchini, and yellow squash. Stir everything together so the veggies get coated in the spiced oil. We’re going to cook them for 5-7 minutes, just until they start to soften and lose their raw edge. We want them to retain some texture, so no need to cook them all the way through here.
- Simmer with the Star: Pour in the entire can of fire-roasted tomatoes with all their glorious juices. This is where the magic really starts to happen. Season generously with salt and pepper—don’t be shy! Bring the pot up to a gentle boil. You’ll hear it start to bubble and pop, and the colors will become vibrant and rich.
- The Thickening Trick: Here’s my little chef’s hack! Sprinkle the tablespoon of quick-cooking polenta over the simmering tomato and vegetable mixture. Stir it in thoroughly. You’ll notice the chili will almost immediately start to look a bit thicker and glossier. The polenta works its magic by absorbing excess liquid and giving the broth a wonderful, substantial body.
- Bring in the Beans: Finally, stir in your drained and rinsed black beans and kidney beans. Reduce the heat to low, cover the pot with a lid slightly ajar (to let some steam escape), and let it simmer gently for 20-25 minutes. This is the “walk-away” time. This simmering period is crucial for all the flavors to get to know each other, mingle, and become one big, happy family. The veggies will become perfectly tender, and the chili will thicken to perfection.
- The Final Taste Test: Grab a clean spoon and taste your creation! This is your moment. Does it need more salt? A crack of black pepper? Maybe another pinch of cumin? Adjust the seasoning to your liking. You are the boss of your chili pot!
How to Serve This Beautiful Bowl of Comfort
Okay, the hard part is over (and it wasn’t even that hard, was it?). Now for the fun part: serving it up! A chili this good deserves a great presentation and even better toppings. Here’s how I love to plate it up.
Ladle the hot chili into deep, wide bowls. I love the contrast of a colorful chili in a white bowl—it really makes the colors pop. Now, let’s talk toppings! This is where everyone can customize their own bowl. Set up a little topping bar with:
- A big dollop of cool, creamy sour cream or Greek yogurt.
- Some diced creamy avocado or a simple guacamole.
- A generous sprinkle of sharp, shredded cheddar or Monterey Jack cheese.
- A handful of fresh, chopped cilantro or green onions for a burst of freshness.
- A squeeze of fresh lime juice to brighten everything up.
- And for the heat-seekers, a few slices of fresh jalapeño or a dash of hot sauce.
For the ultimate comfort food experience, serve it alongside a slice of warm, buttery cornbread, over a bed of fluffy rice, or with a pile of sturdy tortilla chips for dipping. It’s a complete, crowd-pleasing meal that requires minimal cleanup. What’s not to love?
Make It Your Own: Delicious Recipe Variations
One of the best things about this chili is its versatility. It’s a fantastic canvas for your own culinary creativity. Here are a few of my favorite twists to keep things exciting.
- Smoky & Spicy Twist: Add 1-2 chipotle peppers in adobo sauce, finely chopped, when you add the tomatoes. They bring an incredible smoky heat and a rich, complex flavor.
- Sweet Potato Power: Swap the zucchini and yellow squash for one large sweet potato, peeled and diced into ½-inch cubes. It adds a wonderful sweetness and makes the chili even heartier.
- “Meatier” Texture with Lentils: Add ½ cup of dry brown or green lentils when you add the tomatoes. They’ll cook right in the pot and give the chili a ground meat-like texture and a boost of protein and fiber.
- Three-Bean Fiesta: Feel free to mix and match your beans! Pinto beans, cannellini beans, or even chickpeas would be fantastic additions or substitutions.
- Instant Pot / Pressure Cooker Method: Use the sauté function for steps 1-3. Add everything else (including UN-drained beans), secure the lid, and cook on high pressure for 10 minutes. Let the pressure release naturally for 10 minutes, then quick release the rest.
Beau’s Chef’s Notes
This recipe has truly evolved in my kitchen. The polenta thickener was a complete “aha!” moment after a batch turned out a bit too soupy. I’ve found it works even better than a cornstarch slurry or a flour roux for this application. Another funny story: I once accidentally used a tablespoon of cinnamon instead of cumin (similar containers, late night!). Let me tell you, that was a… unique batch. We now have a very strict “label everything” policy in the Feastical test kitchen! This chili also tastes even better the next day, as the flavors continue to meld, so don’t hesitate to make a big batch for effortless leftovers.
Your Chili Questions, Answered!
I’ve made this recipe a zillion times and have heard all your questions. Here are the answers to the most common ones.
Q: My chili is too thin! How can I thicken it up?
A: No worries! The easiest fix is to let it simmer uncovered for an extra 10-15 minutes to reduce. If you’re still not happy, make a quick slurry by mixing 1 tablespoon of cornstarch with 2 tablespoons of cold water. Stir this into the simmering chili, and it will thicken up in a minute or two.
Q: Can I freeze this vegetable chili?
A: Absolutely! This chili freezes like a dream. Let it cool completely, then portion it into airtight containers or freezer bags. It will keep beautifully for up to 3 months. Thaw overnight in the fridge and reheat gently on the stove.
Q: Is there a way to make this in a slow cooker?
A> You bet. Sauté the onions, garlic, and spices in a pan first (this step is key for flavor). Then, transfer everything to your slow cooker and give it a stir. Cook on LOW for 6-8 hours or on HIGH for 3-4 hours.
Q: The chili tastes a bit flat. What can I do?
A> This usually means it needs more seasoning or acidity. Add more salt, pepper, or chili powder in small increments, tasting as you go. A splash of fresh lime juice or a teaspoon of red wine vinegar at the end can also work wonders to brighten all the flavors.

Hearty Chunky Vegetable and Bean Chili : A Wholesome One-Pot Wonder
Description
Hey friends, Beau here from Feastical! You know those nights when you just want a big, cozy bowl of something that hugs you from the inside out? This Hearty Chunky Vegetable and Bean Chili is that hug. It’s rich, smoky, and full of texture — the kind of meal that satisfies even the most dedicated meat-lovers.
Ingredients
For the Chili Base
-
2 tbsp olive oil
-
1 large onion, chopped
-
4 garlic cloves, minced
-
1 jalapeño, diced (remove seeds for less heat)
-
1 each red, green, and yellow bell pepper, diced
-
1 zucchini, diced
-
1 yellow squash, diced
Spices & Seasoning
-
2 tsp ground cumin
-
2 tsp chili powder
-
Salt and pepper, to taste
For the Sauce & Body
-
1 (28 oz) can fire-roasted diced tomatoes
-
1 tbsp quick-cooking polenta (for thickening)
-
2 (15 oz) cans black beans, drained and rinsed
-
1 (15 oz) can kidney beans, drained and rinsed
Instructions
-
Sauté the Aromatics:
In a large Dutch oven, heat olive oil over medium heat. Add the onion and garlic and cook for 5 minutes until soft and fragrant. -
Toast the Spices:
Push the onions to one side and add the jalapeño, cumin, and chili powder directly to the oil. Toast for 1 minute until fragrant — this deepens the flavor beautifully. -
Cook the Veggies:
Add the bell peppers, zucchini, and yellow squash. Stir to coat in the spice mix and cook for 5–7 minutes until they start to soften. -
Simmer Everything:
Pour in the fire-roasted tomatoes (with juices) and season with salt and pepper. Sprinkle in the polenta, stirring well to thicken the mixture slightly. -
Add the Beans:
Stir in the beans, reduce the heat to low, and simmer uncovered for 20–25 minutes, stirring occasionally. The chili will thicken and the flavors will meld. -
Taste & Adjust:
Taste for seasoning — add more salt, pepper, or chili powder if needed. If you love spice, a few dashes of hot sauce will do the trick!
Notes
-
Don’t skip toasting the spices. It’s what gives your chili that deep, rich flavor.
-
Polenta is the secret weapon! It thickens the chili naturally without any grainy texture.
-
Even better the next day: The flavors deepen overnight, making this perfect for meal prep or leftovers.
Nutrition
- Calories: 280 Cal Per Serving
- Fat: 9g
- Carbohydrates: 35g
- Protein: 12g
Nourishment in Every Bite
While I’m all about flavor first, it feels great to know that this dish is also packing a serious nutritional punch. This is a rough estimate, but it gives you a fantastic idea of what you’re putting into your body. It’s a true plant-based powerhouse!
This chili is naturally high in fiber from all the beans and vegetables, which is great for digestive health and keeping you feeling full and satisfied. The beans provide a solid source of plant-based protein, and the colorful array of veggies delivers a wide spectrum of vitamins and antioxidants. The olive oil provides healthy fats. It’s a balanced, nourishing meal that truly proves healthy eating doesn’t have to be boring or restrictive.
Approximate Nutritional Info (per serving, serves 8):
Calories: ~280 | Protein: 12g | Carbohydrates: 35g | Fat: 9g | Fiber: 10g
Final Thoughts from My Kitchen to Yours
Well, there you have it, my friends—my go-to recipe for a Hearty Chunky Vegetable and Bean Chili. This isn’t just a recipe; it’s a reminder that the most satisfying meals are often the simplest ones, made with wholesome ingredients and a dash of love. It’s proof that plant-based eating can be every bit as comforting and decadent as its meaty counterparts.
I hope this recipe finds its way into your regular rotation and becomes a source of warmth and joy in your home, just like it is in mine. If you make it, I’d be absolutely thrilled if you tagged me @Feastical on social media so I can see your beautiful creations! Now, go forth, get that pot simmering, and fill your home with the best smell in the world. Happy cooking!
With a full heart and an even fuller pot,
Beau
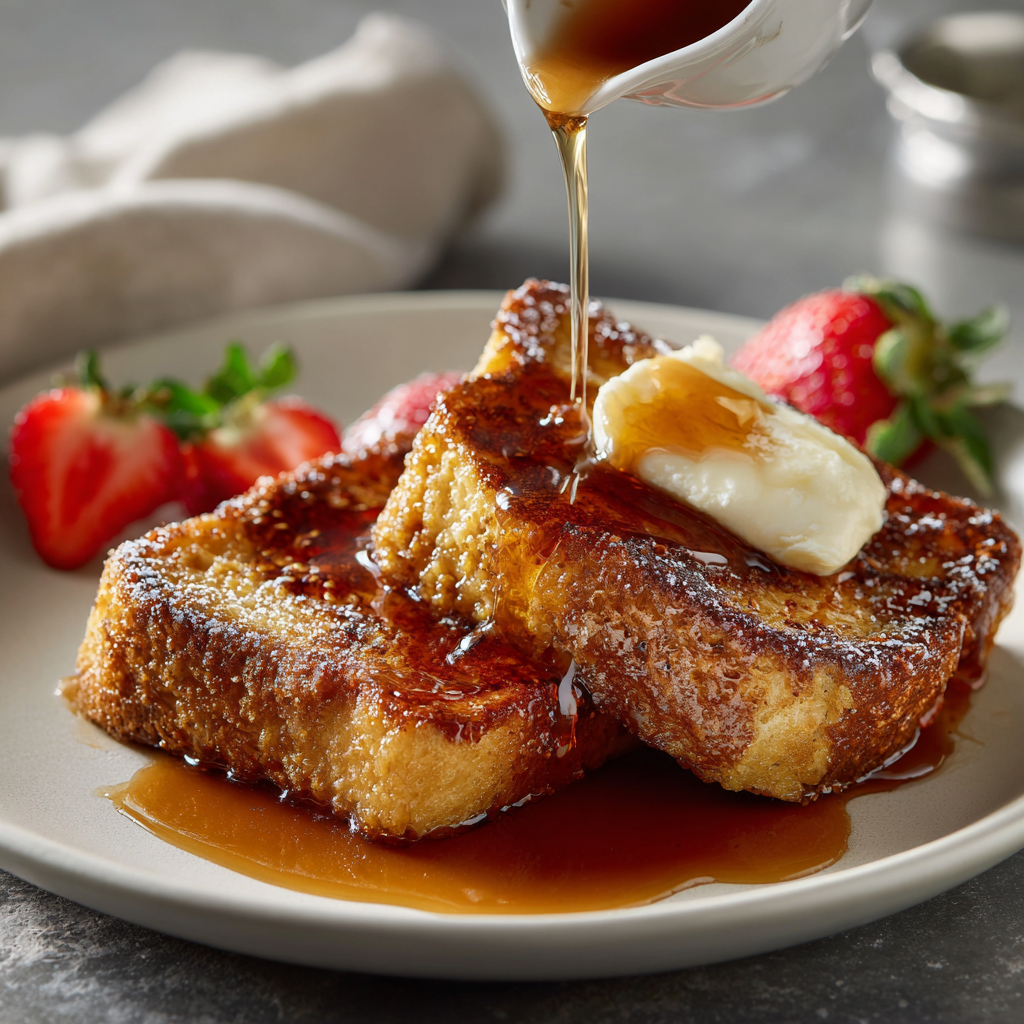
Overnight Crème Brûlée French Toast : Buttery, Caramelized Brunch Magic
Wake Up to Magic: Overnight Crème Brûlée French Toast
Hey friends, Beau here! Let’s talk about one of life’s greatest simple pleasures: a brunch that feels like a standing ovation without you having to break a sweat. You know the scene. It’s a lazy Saturday morning, or maybe a holiday, and you’re torn between wanting to be the host with the most and actually, you know, enjoying the company. You deserve a recipe that does the heavy lifting for you, a dish that whispers “you brilliant culinary genius” while you’re still sipping your first coffee. That, my friends, is the sheer power of our Overnight Crème Brûlée French Toast.
This isn’t just any French toast. This is the French toast that dreams are made of. We’re taking everything we love about the elegant, crackly-topped dessert—crème brûlée—and marrying it to the cozy, comforting soul of baked French toast. The result? A buttery, caramelized masterpiece that bakes up golden and bubbling, with a hidden treasure of a caramel base that becomes the glorious, crackly crown when you flip it over. The best part? You do almost all the work the night before. Just assemble, let it chill, and in the morning, you pop it in the oven. The aroma alone will make you a legend in your own kitchen. So, let’s get ready to make some brunch magic that’s as easy as it is unforgettable.
The Brunch That Started It All
This recipe takes me right back to my first “grown-up” holiday hosting gig. I was determined to impress my family with a Christmas morning spread that would knock their cozy socks off. But I also knew I wanted to be present—not chained to the stovetop, flipping individual slices of French toast while everyone else was opening gifts and laughing. I remember digging through my grandma’s old recipe box and finding a faded, butter-stained card for “Overnight French Toast.” It was a starting point, but my chef’s brain started whirring. What if we gave it that crème brûlée treatment? A little more brown sugar, a generous pour of cream, and a splash of that orange liqueur I loved from my favorite dessert. The next morning, when I pulled that golden, puffed-up pan out of the oven and flipped the first slice to reveal that shimmering, crackly caramel crust, I heard a collective gasp. It was a silent, then very loud, victory. That dish taught me a lesson I carry through all my cooking now: the most impressive meals are often the ones that give you your time back.
Gather Your Ingredients for Brunch Bliss
Here’s the beautiful lineup of simple ingredients that transform into something truly spectacular. This is where the magic begins!
- 1 stick (1/2 cup) unsalted butter: This is the rich, creamy foundation of our caramel layer. Using unsalted lets you control the seasoning perfectly. Chef’s Tip: If you only have salted, it’s okay! Just skip any additional salt in the recipe.
- 1 cup packed dark brown sugar: Dark brown sugar has more molasses, which gives our caramel a deeper, almost toffee-like flavor compared to light brown sugar. It’s the secret to that rich, complex sweetness.
- 2 tablespoons light corn syrup: Don’t be scared! This little bit isn’t for extreme sweetness; it’s a wizard that prevents the caramel from crystallizing and seizing up, ensuring a smooth, saucy base every single time. Honey or maple syrup can work in a pinch, but the texture might be slightly different.
- 1 loaf crusty white bread, unsliced: This is your canvas! A sturdy, crusty loaf like a French baguette or a rustic Italian bread is perfect because it holds up to the custard without turning to mush. Great Swap: Challah or brioche will make this extra decadent, while a day-old sourdough adds a wonderful tangy contrast.
- 5 large eggs: The backbone of our custard. They create that lush, creamy texture that sets up perfectly in the oven.
- 1 1/2 cups half-and-half: This is the sweet spot between milk and heavy cream, giving us incredible richness without being overly heavy. For a lighter version, whole milk works. For an ultra-indulgent treat, go for heavy cream!
- 1 teaspoon pure vanilla extract: The soul-warming aroma that makes everything smell and taste like home. Always use the real stuff if you can!
- 1 teaspoon triple sec (orange liqueur, optional): This is my secret weapon! It subtly enhances the vanilla and adds a whisper of bright citrus that cuts through the richness. Don’t worry, the alcohol cooks off. If you don’t have it, a teaspoon of orange zest is a fantastic non-alcoholic substitute.
Let’s Build Your Overnight Masterpiece
Ready to create some kitchen magic? Follow these steps, and you’ll be a brunch hero in no time. I’ve packed each one with my favorite chef hacks to ensure your success.
- Create the Caramel Base: Grab a medium saucepan and place it over medium heat. Add your butter, dark brown sugar, and corn syrup. Let it melt together, stirring frequently with a whisk. You’re looking for it to become completely smooth and just start to bubble gently. This should only take about 3-5 minutes. Chef’s Hack: Don’t walk away! Butter and sugar can go from perfectly golden to burnt in a flash. Once it’s bubbly and unified, immediately pour this liquid gold into your 9×13-inch baking dish. Tilt the dish to spread it into a beautiful, even layer. The smell alone is worth it.
- Prepare the Bread Layer: Now, take your loaf of bread and slice it into thick, generous slices—about 1 to 1.5 inches thick. You want sturdy soldiers that can soak up all that custardy goodness. Arrange the slices tightly over the caramel layer in the dish. It’s okay if they overlap a little or are snug; we’re building a delicious bread puzzle.
- Whisk the Dreamy Custard: In a large bowl, crack in your eggs and give them a quick whisk to break them up. Then, pour in the half-and-half, vanilla extract, and that secret weapon, the triple sec. Whisk it all together until it’s completely smooth and homogenous. You shouldn’t see any strands of egg white. Pro Tip: Whisk gently to avoid incorporating too much air and creating foam. We want a silky custard, not a bubbly one.
- The Soak is Everything: Slowly and deliberately, pour the custard mixture over the arranged bread slices. Try to cover every slice evenly. Now, here’s a crucial step for perfection: gently press down on the bread with your fingers or a spatula. This helps the bread start absorbing the custard right away. You’ll see it drinking it up like a sponge!
- Patience in the Fridge: Cover the baking dish tightly with plastic wrap or a lid. Now, the hardest part: walk away. Tuck it into your refrigerator and let it rest overnight, or for at least 8 hours. This slow soak is non-negotiable. It allows the custard to fully penetrate every single pore of the bread, resulting in that unbelievably creamy, uniform texture that won’t leak liquid when baked.
- Bake to Golden Perfection: The next morning, take the dish out of the fridge about 20-30 minutes before you plan to bake it. Preheat your oven to a steady 350°F (175°C). Remove the cover and place the dish directly into the hot oven. Bake it uncovered for 35-40 minutes. You’ll know it’s done when the top is puffed, beautifully golden brown, and the edges are bubbling furiously with that amazing caramel.
- The Grand Finale: Take the pan out of the oven—be careful, it’s hot!—and let it rest on a wire rack for about 5 minutes. This rest period allows the custard to set just a bit more, making it easier to serve. Then, take a thin spatula, slide it under a slice, and carefully lift and flip it onto a plate. That stunning, glossy, crackly caramel that was on the bottom is now the glorious top! Serve immediately.
How to Serve This Showstopper
Plating this beauty is part of the fun! Since it’s already rich and decadent, you don’t need much to make it a complete meal. I love serving each caramel-side-up slice with a light dusting of powdered sugar for a pretty snowy effect. A handful of fresh berries—raspberries, strawberries, or blueberries—adds a wonderful pop of color and a fresh, tart contrast to the sweetness. If you really want to lean into the indulgence, a drizzle of pure maple syrup or a dollop of freshly whipped cream is absolutely heavenly. For the savory lovers in the crowd (like me!), serving this with a side of crispy bacon or savory breakfast sausages creates the perfect sweet-and-salty balance that will have everyone coming back for seconds.
Make It Your Own: Delicious Twists & Swaps
The beauty of this recipe is its versatility. Once you’ve mastered the classic, feel free to get creative and play with flavors!
- Apple Cinnamon Twist: Before you pour the caramel into the baking dish, scatter a layer of thinly sliced apples (like Granny Smith or Honeycrisp) over the bottom. Sprinkle the apples with a teaspoon of cinnamon. Then proceed with the caramel and the rest of the recipe. You’ll get a built-in apple pie filling!
- Nutty & Nice: Add a fantastic crunch by sprinkling a half-cup of chopped pecans or walnuts over the caramel sauce right after you pour it. The nuts will toast as it bakes, adding a wonderful texture.
- Chocolate Lover’s Dream: For a truly decadent version, sprinkle a cup of semi-sweet chocolate chips over the bread slices right after you arrange them, before you pour the custard on top.
- Dairy-Free & Delicious: This is easily adaptable! Use vegan butter, and swap the half-and-half for a rich, creamy canned coconut milk. The result is incredibly lush and has a subtle coconut flavor that pairs beautifully with the caramel.
- Boozy Berry Bliss: Macerate some berries the night before! Toss a cup of mixed berries with a tablespoon of that triple sec and a teaspoon of sugar. Let them sit in the fridge, and spoon this boozy berry compote over the finished French toast right before serving.
Beau’s Kitchen Notes
This recipe has been a living, evolving thing in my kitchen for years. I once, in a sleepy daze, used a whole baguette that was far too long for the pan and had to break it into pieces to fit. It turned into a kind of bread-pudding-meets-French-toast hybrid that was messy, hilarious, and absolutely delicious. Don’t be afraid of imperfection! I’ve also learned that the type of bread is your biggest variable. A super-soft sandwich loaf will give you a more spoonable, bread-pudding texture (which is still amazing!), while a crusty, airy loaf gives you that definitive custard-soaked slice. Both are wins in my book. This dish is about joy, not stress.
Your Questions, Answered!
I’ve gotten a lot of questions about this recipe over the years. Here are the most common ones to help you out.
- Can I make this without the overnight soak? You can, but you’ll be missing the key feature! The overnight rest isn’t just for convenience; it’s crucial for the texture. A quick soak (even 30 minutes) will result in a less creamy center and a more “eggy” layer on the bottom, rather than that uniform custard throughout. Trust me, the wait is worth it.
- My caramel sauce hardened in the pan after I poured it. Did I mess up? Not at all! This is totally normal. The caramel will firm up significantly once it hits the cold baking dish and chills in the fridge. Don’t worry one bit. As it bakes, it will melt back down into a luscious sauce and bubble up around the bread, creating that incredible topping.
- Can I freeze this? I don’t recommend freezing the assembled, unbaked casserole. The custard can separate and the bread can become unpleasantly soggy upon thawing. However, you can successfully freeze the baked French toast. Let it cool completely, cut it into portions, wrap them tightly, and freeze for up to 2 months. Reheat in the oven or a toaster oven to bring back the crispness.
- The center seems a little wobbly when I take it out. Is it done? A slight jiggle in the very center is okay—it will continue to set as it rests. However, if it looks truly liquidy, it needs more time. The top should be uniformly puffed and golden brown, and you should see that caramel bubbling vigorously around the edges.

Overnight Crème Brûlée French Toast : Buttery, Caramelized Brunch Magic
Description
Hey friends, Beau here! Let’s be honest—sometimes, the best brunches are the ones that make you look like a culinary wizard while you’re still in your pajamas, coffee in hand. This Overnight Crème Brûlée French Toast is just that: a make-ahead miracle that transforms simple ingredients into a golden, caramelized masterpiece. The buttery brown sugar base melts into a luscious sauce, and the bread soaks up a rich vanilla custard overnight. In the morning? You just pop it in the oven and let your kitchen smell like heaven.
Ingredients
For the Caramel Base
-
½ cup (1 stick) unsalted butter
-
1 cup packed dark brown sugar
-
2 tablespoons light corn syrup (or honey/maple syrup in a pinch)
For the French Toast
-
1 loaf crusty white bread (French or Italian), sliced 1–1½ inches thick
-
5 large eggs
-
1½ cups half-and-half (or whole milk/heavy cream)
-
1 teaspoon pure vanilla extract
-
1 teaspoon triple sec or 1 teaspoon orange zest (optional)
Instructions
-
Make the Caramel Base:
In a medium saucepan over medium heat, melt the butter, brown sugar, and corn syrup together until smooth and just beginning to bubble (about 3–5 minutes). Pour into a 9×13-inch baking dish and tilt to coat evenly. -
Arrange the Bread:
Slice the bread and lay the slices tightly in the dish over the caramel layer. Slight overlap is fine—think cozy, not perfect. -
Whisk the Custard:
In a large bowl, whisk together eggs, half-and-half, vanilla, and triple sec (if using) until smooth. Pour evenly over the bread. Press lightly to help the bread absorb the mixture. -
Chill Overnight:
Cover tightly with plastic wrap and refrigerate for at least 8 hours or overnight. This slow soak creates that signature creamy, custard-like texture. -
Bake to Perfection:
Preheat your oven to 350°F (175°C). Uncover the dish and bake for 35–40 minutes, until golden and puffed, with bubbling caramel around the edges. Let rest 5 minutes before serving. -
Serve & Enjoy:
Flip each portion onto a plate so the caramel side is up. Serve with fresh berries, powdered sugar, or a dollop of whipped cream.
Notes
-
Bread matters: Use a day-old loaf for best texture—it’ll hold up beautifully.
-
No corn syrup? Maple syrup gives a deeper, rustic sweetness.
-
Add flair: Sprinkle pecans, chocolate chips, or sliced apples over the caramel before layering the bread.
-
Storage: Leftovers keep well in the fridge for up to 3 days. Reheat in the oven to restore crispness.
Nutrition
- Calories: 420 Cal Per Serving
- Fat: 22g
- Carbohydrates: 48g
- Protein: 9g
Nutritional Information (Per Serving)
Let’s keep it real, friends. This is a special occasion treat, a celebration in a baking dish. It’s rich, indulgent, and meant to be savored. Here’s a general breakdown per serving (based on 6 servings) so you can enjoy it mindfully. Please note that this is an estimate and can vary based on the specific brands of ingredients you use. If you’re following a strict dietary plan, I always recommend calculating with your exact ingredients.
- Calories: ~420
- Protein: 9g
- Fat: 22g
- Saturated Fat: 12g
- Carbohydrates: 48g
- Sugar: 31g
- Fiber: 1g
- Sodium: 210mg
Your New Brunch Secret Weapon
And there you have it! Your guide to the most stress-free, crowd-pleasing brunch dish that will have everyone thinking you trained under a pastry chef. This Overnight Crème Brûlée French Toast is more than a recipe; it’s a ticket to a relaxing, delicious morning surrounded by good food and great people. It’s the dish you’ll be asked to bring to every potluck and the one your family will request for birthdays and holidays. I hope it brings as much joy and ease to your kitchen as it has to mine. Now, go forth and bake! And don’t forget to tag me @Feastical when you make it—I love seeing your creations!
Final Thoughts: Your Brunch Victory Awaits
So, there you have it. The secret to a stress-free, showstopping brunch isn’t a secret at all—it’s a little planning and a recipe that’s designed to make you look like a rockstar. This Overnight Crème Brûlée French Toast is more than just a dish; it’s your ticket to actually enjoying those slow, magical mornings with the people you love.
You’ve got the blueprint for that perfect, crackly caramel crown and the impossibly creamy custard center. You have the tricks, the twists, and the confidence to make it your own. Remember, the real work happens while you’re dreaming, leaving you with nothing but the simple joy of baking and the unforgettable aroma of success.
So go ahead, be the hero of your next lazy weekend or holiday gathering. Whip this up, tuck it in the fridge, and wake up to your own kitchen magic. You’ve totally got this.
Happy cooking, and enjoy every delicious bite!
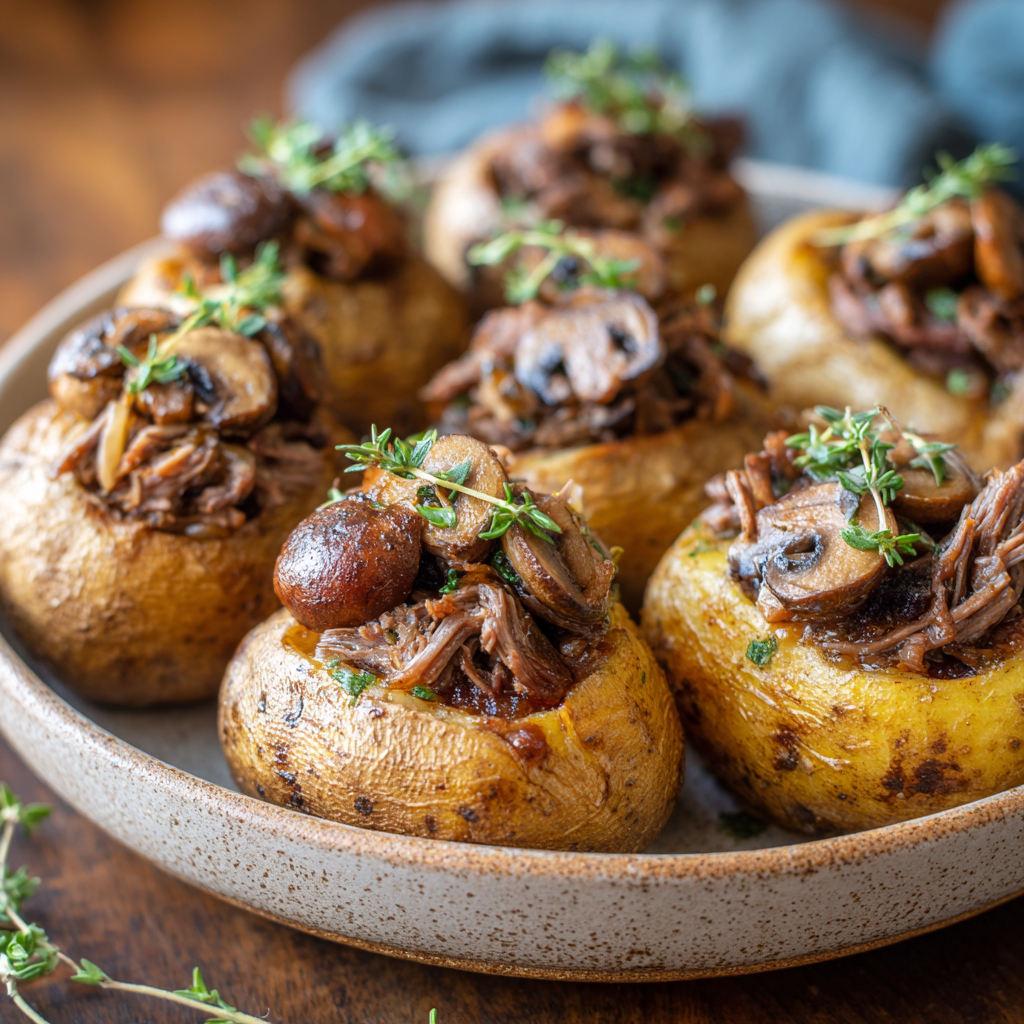
Crock Pot Steak & Mushroom Stuffed Potatoes : Comfort Food, Elevated
The Ultimate Cozy Dinner: Crock Pot Steak & Mushroom Stuffed Potatoes
Hey friends, Beau here from Feastical! Let’s be real for a second. Some days, you crave a meal that feels like a warm, hearty hug from the inside out. You want something that whispers “fancy steakhouse” but also shouts “I didn’t spend my entire evening slaving over a hot stove.” Sound familiar? I hear you, and that’s exactly why I’m so excited to share this recipe with you today.
We’re taking the humble stuffed potato and giving it a serious glow-up. Imagine this: tender, slow-cooked beef that falls apart at the touch of your fork, swimming in a rich, savory sauce packed with earthy crimini mushrooms and fresh herbs. Now, picture that glorious filling piled high into a fluffy, perfectly baked russet potato with a crispy, salty skin. This, my friends, is Comfort Food, Elevated.
The real magic here? Your trusty crock pot does about 95% of the work. We’re talking about 20 minutes of quick prep in the morning, and by the time you get home, your house smells incredible and a restaurant-worthy dinner is waiting for you. It’s the kind of meal that brings everyone to the table, no questions asked. So, let’s ditch the complicated recipes and dig into something truly soul-satisfying. Grab your slow cooker, and let’s make some magic happen!
A Memory in Every Bite: Why This Dish Sticks
This recipe always takes me right back to my early days in my first tiny apartment. My kitchen was about the size of a postage stamp, and my “fancy” cookware consisted of one lopsided skillet and a hand-me-down crock pot from my grandma. I was determined to impress a few friends with a “gourmet” dinner, but my budget and my kitchen skills were, let’s say, limited.
I had a couple of steaks, a bag of potatoes, and some mushrooms that were on their last leg. Throwing caution to the wind, I seared the steaks, made a pan sauce with what I had, and let it all bubble away with the potatoes in that old crock pot for the whole afternoon. When my friends arrived, the aroma alone had them hooked. The moment we cut into those potatoes and saw the steak-infused, fluffy interior, I knew it was a winner. It wasn’t just a meal; it was a lesson that the best food isn’t about being fancy—it’s about being clever, resourceful, and cooking with heart. This dish is that same spirit, perfected over the years.
Gathering Your Flavor Arsenal
Here’s your shopping list for this cozy masterpiece. Don’t stress if you need to make a swap or two—I’ve got you covered with some chef-y insights and substitution tips.
- 8 large russet potatoes, washed and pricked with a fork – Russets are our MVP here. Their thick skin gets perfectly crisp, and their starchy interior becomes light and fluffy, making them the ideal vessel for all that saucy goodness.
- 4 teaspoons olive oil – A simple rub to help the potato skins get that beautiful, crispy texture as they slow-cook.
- Salt and pepper to taste – The foundation of all great cooking! Don’t be shy here.
- 4 beef tenderloin steaks (about 2 lbs total) – Tenderloin becomes incredibly buttery and tender after the long cook. Chef’s Tip: If you’re on a budget, chuck roast or sirloin steaks work wonderfully too—they have more connective tissue that breaks down into pure tenderness.
- 4 tablespoons butter – For building our flavor base. It adds a rich, nutty depth to the mushrooms.
- 20 ounces (4 cups) crimini mushrooms, quartered – I love criminis (aka baby bellas) for their deeper, earthier flavor compared to white buttons. If you can find them, wild mushrooms like cremini or shiitake would be a gorgeous upgrade!
- 1 cup thinly sliced onions – They melt down and add a subtle sweetness to balance the savory beef.
- 4 cloves garlic, chopped – Because what’s a feel-good meal without garlic? Fresh is best for that bright, aromatic punch.
- 2 teaspoons chopped fresh thyme – Thyme and mushrooms are a match made in heaven. Its woodsy flavor is a key player. If you only have dried, use ¾ teaspoon.
- 2 teaspoons chopped fresh sage – This is our secret weapon! Sage adds a slightly peppery, warm flavor that makes the whole dish taste more complex.
- 6 tablespoons red wine – This deglazes the pan, grabbing all those delicious browned bits from the steak. It adds a touch of acidity and richness. No wine? Use an equal amount of additional beef stock with a teaspoon of balsamic vinegar.
- 6 tablespoons flour – This is our thickening agent for the sauce. It creates a luscious, gravy-like consistency.
- 4 cups beef stock – The liquid gold that brings our sauce together. Use a good-quality stock for the best flavor!
- Extra thyme leaves, for garnish – A little fresh green on top makes it look as good as it tastes.
Let’s Get Cooking: Your Step-by-Step Guide to Comfort
Ready to build this beautiful dish? Follow these steps, and you really can’t go wrong. I’ve sprinkled in my favorite kitchen hacks to make the process even smoother.
- Prep Your Potatoes: “First things first, give your washed potatoes a few good pricks with a fork. This lets the steam escape so they don’t turn into potato grenades in your crock pot (trust me, you don’t want to clean that up!). Rub them lightly with the olive oil and give them a generous sprinkle of salt. This simple step is the secret to getting a baked-potato-style skin, even in the slow cooker. Place them right in the bottom of your crock pot—they’re going to be the foundation for our entire meal.”
- Sear the Steak: “Now, let’s get some color on that beef! Heat a large skillet over medium-high heat. While it’s heating, pat your steaks dry with a paper towel—this is crucial for a good sear. Season them liberally with salt and pepper. Place them in the hot, dry skillet and let them sear for 2-3 minutes per side, until you have a beautiful, brown crust. Don’t move them around! Let them do their thing. We’re not cooking them through, just building flavor. Once seared, set them aside on a plate.”
- Build the Mushroom Sauce: “This is where the magic happens! In that same skillet, melt your butter. You’ll see all those little browned bits from the steak—that’s pure flavor gold. Toss in your quartered mushrooms, sliced onions, and chopped garlic. Sauté for 5-7 minutes, until the mushrooms have released their liquid and started to brown and the onions are soft and fragrant. Now, add your fresh thyme and sage, and pour in the red wine. It will sizzle and steam—use your spatula to scrape all those delicious browned bits from the bottom of the pan. Let it cook for about 2 minutes, allowing the wine to reduce slightly.”
- Thicken the Sauce: “Sprinkle the flour over the mushroom mixture and stir constantly for about one minute. This cooks the raw flour taste out and creates a roux, which will thicken our sauce. Now, slowly pour in the beef stock while whisking continuously. This prevents lumps and creates a smooth, velvety base. Keep whisking until the sauce begins to thicken slightly.”
- Assemble in the Crock Pot: “Time to bring it all together! Carefully pour your beautiful mushroom sauce right over the waiting potatoes in the crock pot. Now, nestle the seared steaks down into the sauce, making sure they’re mostly submerged. This is like tucking them in for a long, cozy nap where they’ll transform into something magical.”
- Slow Cook to Perfection: “Pop the lid on, set your crock pot to LOW, and walk away for 6-8 hours. I know it’s tempting to peek, but resist! Every time you lift the lid, you let out heat and steam, which can add to your cooking time. The dish is done when the potatoes are easily pierced with a fork and the steak is fall-apart tender.”
- Serve and Devour: “The moment of truth! Carefully remove the potatoes and steaks from the crock pot. Slice each potato open and fluff the insides with a fork. Shred or slice the steak—it should be so tender it practically does this itself. Now, pile the steak and those amazing mushrooms and sauce generously into each potato. Finish with a sprinkle of fresh thyme leaves for a pop of color and freshness. Serve immediately and get ready for the compliments to roll in!”
How to Serve These Stuffed Spuds Like a Pro
This dish is a complete meal in itself, but a little styling goes a long way! I love serving these potatoes on a warm plate with a little extra sauce spooned around the base. It just looks so inviting. For a pop of color and a fresh contrast to the rich, savory flavors, a simple side salad with a sharp vinaigrette is absolutely perfect. Think arugula with a lemon-Dijon dressing—the brightness cuts through the richness beautifully.
If you’re feeding a crowd, this recipe is a dream. You can set up a “stuffed potato bar” right on your kitchen counter! Lay out the baked potatoes, the big bowl of steak and mushroom filling, and then let everyone top their own. Set out little bowls of extra toppings like shredded sharp cheddar cheese, a dollop of sour cream, or even some crispy fried onions. It’s fun, interactive, and makes everyone feel right at home.
Make It Your Own: Delicious Twists & Swaps
One of the best things about this recipe is its flexibility. Don’t be afraid to play with it and make it suit your taste!
- Cheesy Bliss: Stir a handful of shredded Gruyère or sharp white cheddar cheese into the mushroom sauce during the last 30 minutes of cooking for an ultra-creamy, cheesy version.
- Herbaceous & Bright: Swap the thyme and sage for 2 tablespoons of chopped fresh rosemary. Its piney, robust flavor stands up wonderfully to the long cooking time.
- Make it Creamy: For a stroganoff-style twist, stir in ½ cup of sour cream or full-fat Greek yogurt at the very end, right before serving.
- Spice It Up: Add a kick by tossing in a teaspoon of smoked paprika or a pinch of red pepper flakes when you’re sautéing the mushrooms.
- Dietary Swaps: To make this gluten-free, simply swap the all-purpose flour for a 1:1 gluten-free flour blend. For a dairy-free option, use olive oil or a plant-based butter alternative.
Beau’s Kitchen Chronicles
This recipe has been a living, evolving thing in my kitchen for years. I’ve made it for everything from casual Sunday football gatherings to cozy date nights at home. One of my favorite kitchen fails-turned-wins was the time I accidentally used a full cup of red wine instead of six tablespoons. I thought I’d ruined it, but it actually reduced down into the most incredibly rich, deeply flavored sauce. Sometimes the best recipes come from happy accidents! The core of it, though, remains the same: simple ingredients, transformed with time and a little bit of love into something truly special.
Your Questions, Answered!
I’ve gotten a lot of questions about this recipe over the years, so here are the answers to the most common ones.
Q: Can I cook this on HIGH instead of LOW?
A: You can, but I don’t recommend it. Cooking on LOW for 6-8 hours allows the connective tissues in the steak to break down slowly, resulting in that incredible, melt-in-your-mouth tenderness. Cooking on HIGH for 3-4 hours will cook the food, but the texture of the beef won’t be nearly as soft and shreddable.
Q: My sauce is a little thin. How can I thicken it up?
A: No problem! If your sauce is too thin after cooking, ladle about a cup of the liquid into a small saucepan. Whisk in a slurry of 1 tablespoon of cornstarch and 2 tablespoons of cold water until smooth. Bring it to a simmer, stirring constantly, until it thickens. Then, stir this back into the crock pot.
Q: Can I prepare this the night before?
A: Absolutely! You can do all the prep the night before: sear the steaks, make the mushroom sauce, and even rub the potatoes with oil. Store everything separately in airtight containers in the fridge. In the morning, just assemble everything cold in the crock pot. You may need to add 30-60 minutes to the cooking time since you’re starting with cold ingredients.

Crock Pot Steak & Mushroom Stuffed Potatoes : Comfort Food, Elevated
Description
Think of this as your favorite steakhouse meal… in a potato.
Tender, slow-cooked beef melts in your mouth, bathed in a rich mushroom and herb sauce, all stuffed into crispy-skinned baked russet potatoes. This dish is cozy, hearty, and elegant — a crock pot miracle that makes dinner feel special without the stress.
Ingredients
For the Potatoes
-
8 large russet potatoes, washed and pricked with a fork
-
4 tsp olive oil
-
Salt & pepper, to taste
For the Steak & Mushroom Filling
-
4 beef tenderloin steaks (about 2 lbs total) (or chuck roast/sirloin for a budget-friendly swap)
-
4 tbsp butter
-
20 oz (about 4 cups) crimini mushrooms, quartered
-
1 cup thinly sliced onions
-
4 cloves garlic, chopped
-
2 tsp fresh thyme (or ¾ tsp dried)
-
2 tsp fresh sage (or ¾ tsp dried)
-
6 tbsp red wine (or beef stock + 1 tsp balsamic vinegar)
-
6 tbsp all-purpose flour (or gluten-free blend)
-
4 cups beef stock
-
Salt & black pepper, to taste
-
Fresh thyme leaves, for garnish
Instructions
1. Prep the Potatoes
Prick potatoes all over with a fork. Rub with olive oil and salt, then place directly in the bottom of your crock pot.
2. Sear the Steak
Pat steaks dry, season generously with salt and pepper, and sear in a hot skillet (2–3 minutes per side) until browned.
Set aside — you’re just building flavor here, not cooking them through.
3. Build the Mushroom Sauce
In the same skillet, melt butter and add mushrooms, onions, and garlic.
Sauté 5–7 minutes until mushrooms are browned and onions soft.
Add thyme, sage, and pour in red wine to deglaze, scraping the flavorful bits from the bottom.
Cook 2 minutes to reduce slightly.
4. Thicken the Sauce
Sprinkle flour over the mushroom mix, stir for 1 minute, then slowly whisk in beef stock.
Stir until smooth and slightly thickened.
5. Assemble & Slow Cook
Pour the sauce over the potatoes in the crock pot. Nestle the seared steaks into the sauce.
Cover and cook on LOW for 6–8 hours, until steak is fall-apart tender and potatoes are soft.
6. Serve It Up
Slice open each potato and fluff with a fork.
Top generously with steak, mushrooms, and that luscious sauce.
Garnish with fresh thyme and serve hot.
Notes
-
Sear first, always. That crust adds a deep, meaty flavor that makes the sauce unforgettable.
-
No peeking! Lifting the lid adds up to 30 extra minutes of cooking time.
-
Thicker sauce hack: Whisk 1 tbsp cornstarch + 2 tbsp water into the sauce if needed.
Nutrition
- Calories: 510 Cal Per Serving
- Fat: 18g
- Saturated Fat: 7g
- Carbohydrates: 49g
- Protein: 35g
Nutritional Breakdown (Per Serving)
While this is definitely a comfort food dish, it’s packed with wholesome, real ingredients. Here’s a general look at the nutritional profile per serving (one stuffed potato). Please note that this is an estimate and can vary based on specific ingredients used.
- Calories: 510
- Protein: 35g
- Fat: 18g
- Saturated Fat: 7g
- Carbohydrates: 49g
- Sugar: 4g
- Fiber: 4g
- Sodium: 520mg
This meal is an excellent source of protein, which is essential for keeping you full and satisfied. The potatoes provide complex carbohydrates for sustained energy, and the mushrooms add a boost of nutrients like B vitamins and selenium. It’s a balanced, hearty meal that truly nourishes you.
Final Thoughts from My Kitchen to Yours
Well, there you have it, my friends—my go-to recipe for turning an ordinary day into something a little more special without any of the stress. This Crock Pot Steak & Mushroom Stuffed Potato recipe is more than just a list of ingredients and steps; it’s a reminder that the most memorable meals are often the simplest ones, made with a little patience and a lot of heart.
I hope this dish finds its way to your table and becomes a new favorite in your rotation. If you make it (and I really hope you do!), I’d love to see your creation! Tag me @Feastical on social media or shoot me an email. Hearing your kitchen stories is my favorite part of this whole journey. Now, go forth and cook something delicious!

Loaded Buffalo Chicken Nachos : Game Day’s Boldest Snack
Loaded Buffalo Chicken Nachos: The Ultimate Game Day Snack Attack
Hey, friends! Beau here, welcoming you back to Feastical. You know that feeling? The one where your team is on the two-yard line, the clock is ticking down, and the entire room is holding its breath? In that moment of pure, unadulterated suspense, you need a snack that’s not just food—it’s a experience. You need something bold, cheesy, a little bit messy, and completely, 100% irresistible.
Well, pull up a chair and get ready to meet your new MVP: my Epic Loaded Buffalo Chicken Nachos. This isn’t just a recipe; it’s a flavor touchdown. We’re talking a mountain of crispy tortilla chips, piled high with juicy, spicy buffalo chicken, smothered in not one, but two kinds of glorious, melty cheese, and finished with all the cool, crunchy toppings your heart desires. It’s the perfect harmony of fiery and cool, crunchy and creamy, all on one seriously epic platter.
I designed this recipe for sharing, for gathering, for those times when you want to hear, “Wow, you made this?!” It’s deceptively simple to throw together but delivers a massive payoff in flavor and fun. So, grab your biggest baking sheet, rally your friends and family, and let’s create the boldest, most crowd-pleasing snack that will have everyone cheering—no matter who wins the game.
A Nacho Revelation: How My Love Affair Began
I’ll never forget the first time nachos truly blew my mind. It wasn’t at a fancy restaurant or a sports bar; it was in my Aunt Carol’s cramped but always-warm kitchen during a championship game. My uncle was yelling at the TV, my cousins were running underfoot, and the air was thick with the smell of roasting chicken and something… tangy.
Aunt Carol, the undisputed queen of comfort food, didn’t just open a bag of chips and cheese whiz. Oh no. She brought out a sheet pan still sizzling from the oven, loaded with what looked like a beautiful, delicious mess. She had taken leftover roast chicken, tossed it in her signature fiery hot sauce, and layered it with what seemed like a whole block of cheddar. The blue cheese crumbles were a bold move that my ten-year-old self was skeptical of, but one bite and I was a convert. The spicy, cheesy, crunchy, cool combination was a revelation. It was more than a snack; it was the heart of the party, the centerpiece of our togetherness. That’s the spirit I’ve tried to bottle up in this recipe—a little bit of nostalgia, a whole lot of flavor, and the undeniable magic of food that brings people together.
Gathering Your All-Star Lineup: The Ingredients
Every great team is built on a solid roster, and this nacho platter is no different. Here’s the dream team of ingredients that’ll make your game day spread legendary.
- 1 large bag (12-13 oz) Tortilla Chips: I’m a big fan of a sturdy, restaurant-style corn chip here. They hold up to the weight of all those glorious toppings without getting soggy. For a colorful twist, use a mix of yellow corn and blue corn chips!
- 6 cups Cooked, Shredded Chicken: This is your MVP, and it’s a fantastic way to use up leftover rotisserie chicken or last night’s roasted chicken breasts. For maximum flavor, shred it yourself—it’s so much more tender than pre-shredded!
- 10 tbsp Hot Sauce (or more to taste!): This is where the “Buffalo” magic happens. I’m a classic Frank’s RedHot devotee for that authentic wing flavor, but use your favorite. The key is a cayenne pepper-based sauce for that true Buffalo tang.
- 6 cups Shredded Sharp Cheddar Cheese: Chef’s Hack Alert: Always, always shred your own cheese! Pre-shredded bags are coated with anti-caking agents that prevent it from melting as smoothly and beautifully. The sharpness cuts through the rich, spicy chicken perfectly.
- 2 cups Crumbled Blue Cheese: Don’t be scared! The funky, salty punch of blue cheese is the classic, essential counterpart to Buffalo sauce. If you’re really not a fan, you can swap for extra cheddar or even a crumbled feta for a different salty bite.
- 12 Scallions, chopped: These add a necessary pop of fresh, mild onion flavor and a gorgeous green color. Use both the green and white parts!
- 6 Celery Ribs, diced small: The ultimate crunchy, cooling element that’s fundamental to the Buffalo wing experience. It brings a fresh, clean taste to each bite.
- 2 medium Tomatoes, diced: A little juicy, acidic sweetness to balance the heat. I like to remove the seeds and pulp before dicing to prevent extra moisture from making the chips soggy.
- Sour Cream & Salsa, for serving: The dynamic duo on the side. The cool, creamy sour cream is a must for taming the flame, and a little salsa adds another layer of zesty flavor.
Building Your Nacho Masterpiece: Step-by-Step
Alright, team huddle! This is where the magic happens. Follow these steps, and you’ll have a perfectly layered, crispy-to-the-last-bite nacho platter that’s the envy of every snack table.
- Preheat Oven & Prep Your Tray: First things first, get that oven roaring to 375°F (190°C). While it’s heating, line your largest, heaviest baking sheet with parchment paper or aluminum foil. This isn’t just for easy cleanup (though that’s a huge bonus!), it also helps prevent any cheesy deliciousness from permanently bonding to your pan. A little non-stick spray on top of the foil never hurts, either.
- Create the Fiery Chicken: In a large mixing bowl, toss your beautifully shredded chicken with that glorious hot sauce. Don’t be shy! Get in there with your hands or a spoon and make sure every single strand of chicken is coated in that spicy, tangy goodness. Let it sit for a minute to really soak in the flavor. Pro-Tip: For an extra layer of flavor, add a tablespoon of melted butter to the hot sauce mixture. It adds a rich, silky texture that’s just like the real deal.
- The Art of the Layer: This is the most important step for avoiding the dreaded “naked chip.” We are building in two distinct layers. Start by spreading half of your tortilla chips in a single, even layer on your prepared baking sheet. Now, top with half of your buffalo chicken, half of the shredded cheddar, half of the blue cheese, and a good sprinkle of scallions, celery, and tomatoes. Now, repeat! Add the second half of the chips and layer on the remaining ingredients. This double-decker method ensures that every scoop gets a perfect bite of everything.
- The Meltdown (The Good Kind!): Carefully slide your fully loaded tray into the preheated oven. Bake for 12-15 minutes. You’re looking for the cheddar to be completely melted, bubbly, and maybe even just starting to get a few golden-brown spots. The blue cheese will have softened beautifully, and the chips on the edges will be a perfect golden brown. Keep a close eye on it after the 10-minute mark—ovens can vary, and nobody wants burnt nachos!
- The Grand Finale: Once it’s out of the oven, let it rest for just a minute or two. This allows the molten cheese to set slightly, so you get gorgeous cheesy pulls instead of a messy spill. Now is the time to drizzle with a little extra hot sauce if you’re feeling extra bold. Serve it immediately, right from the tray, with generous bowls of cool sour cream and zesty salsa on the side for dipping and dolloping.
How to Serve These Nachos Like a Pro
Presentation is part of the fun! I’m a big believer in serving these loaded nachos right on the baking sheet you cooked them on. Place the whole sizzling tray in the center of the table with a stack of small plates or even just napkins. It creates an interactive, communal feast that gets everyone digging in together.
For the full experience, set up a little “topping bar” nearby with small bowls of extra diced celery, scallions, jalapeño slices for the heat-seekers, and of course, the sour cream and salsa. If you really want to go all out, a side of chunky blue cheese dressing for dipping is never a bad idea. For drinks, you can’t go wrong with an ice-cold lager or a crisp, hard cider to cut through the richness and spice. Now, stand back and watch the magic happen.
Mix It Up! Delicious Nacho Variations
One of the best things about this recipe is its versatility. Feel free to get creative and make it your own!
- BBQ Pulled Pork Swap: Not in a buffalo mood? Swap the buffalo chicken for your favorite tender, smoky pulled pork and use a sharp Monterey Jack cheese. Drizzle with extra BBQ sauce at the end!
- Make it Meatless: For a vegetarian win, replace the chicken with two cans of black beans (rinsed and drained) and a can of corn kernels. Toss the beans with the hot sauce for that signature kick, or use a smoky chipotle sauce instead.
- Ranch Everything: Are you a ranch fanatic? Toss the chicken in a dry ranch seasoning packet mixed with the hot sauce, and use a Monterey Jack cheese. Serve with a creamy ranch dressing for dipping instead of salsa.
- “The Supreme” Treatment: Go full-on loaded nacho by adding a can of sliced black olives and a finely diced jalapeño to your topping layers. A few dollops of guacamole on top after baking takes it over the top.
- Sweet Potato Power: For a healthier twist, use sturdy baked sweet potato rounds or cauliflower florets as your base instead of tortilla chips. The cooking time might need a slight increase.
Beau’s Kitchen Confidential: Chef’s Notes
This recipe has been a living, evolving thing in my kitchen for years. I once made it for a big family gathering and accidentally used a ghost pepper sauce instead of Frank’s. Let’s just say it cleared the sinuses of every uncle I have! We laugh about it now, but it taught me to always, *always* taste your hot sauce first.
Over time, I’ve learned that the key to nacho nirvana is all about balance and texture. That’s why I’m so adamant about the double layer and the cool, fresh toppings added *before* baking. They soften just enough to meld with the cheese but still retain a bit of their crunch. It’s a beautiful thing. Don’t stress about perfection—a “rustic” look is part of the charm!
Nacho FAQs: Your Questions, Answered
Q: How do I keep my nachos from getting soggy?
A: The arch-nemesis of nachos! The three keys are: 1) Use sturdy chips. 2) Layer properly (chips, cheese, toppings, repeat) so the cheese acts as a protective barrier. 3) Serve immediately after baking. Don’t let them sit out for too long!
Q: Can I make these ahead of time?
A: You can do some prep! Shred the chicken, chop all the veggies, and shred the cheese a few hours ahead. But assemble and bake right before you plan to serve them. A pre-assembled, unbaked tray will definitely lead to soggy chips.
Q: My cheese isn’t melting well. What happened?
A> I’ll bet you used pre-shredded cheese! Those anti-caking agents are the culprit. For the creamiest, most luxurious melt, take the extra two minutes to shred a block of cheese yourself. You will taste and see the difference, I promise.
Q: I don’t have a baking sheet that big. What can I do?
A> No problem! Make smaller, individual portions on oven-safe plates or use a 9×13-inch casserole dish. Just be sure to reduce the baking time by a few minutes since the layers will be deeper and might heat through faster.

Loaded Buffalo Chicken Nachos : Game Day’s Boldest Snack
Description
Crispy tortilla chips piled high with spicy buffalo chicken, two kinds of melty cheese, and all the cool, crunchy toppings your heart desires — this is your new game-day hero! These nachos hit every note: fiery, creamy, crunchy, and cheesy. A guaranteed touchdown for your taste buds and your crowd.
Ingredients
Base & Protein
-
1 large bag (12–13 oz) sturdy tortilla chips
-
6 cups cooked, shredded chicken (rotisserie or roasted)
-
10 tbsp Frank’s RedHot (or your favorite cayenne hot sauce)
-
1 tbsp melted butter (optional, for richer flavor)
Cheeses
-
6 cups shredded sharp cheddar cheese
-
2 cups crumbled blue cheese
Fresh Toppings
-
12 scallions, chopped (green and white parts)
-
6 celery ribs, finely diced
-
2 medium tomatoes, diced (seeds removed)
To Serve
-
Sour cream
-
Salsa
-
Optional extras: jalapeño slices, guacamole, extra hot sauce
Instructions
1. Preheat & Prep
Preheat oven to 375°F (190°C).
Line your largest baking sheet with foil or parchment paper and lightly coat with nonstick spray.
2. Make the Buffalo Chicken
In a large bowl, toss shredded chicken with hot sauce (and melted butter, if using) until fully coated. Let sit for 5 minutes to soak in the flavor.
3. Build the First Layer
Spread half the tortilla chips evenly on the tray.
Top with half the buffalo chicken, half the cheddar, half the blue cheese, and half of the scallions, celery, and tomatoes.
4. Double Up!
Add a second layer of chips and repeat with remaining ingredients.
This ensures every bite gets maximum flavor and cheesy goodness.
5. Bake to Perfection
Bake for 12–15 minutes, or until the cheddar is melted, bubbly, and lightly golden.
Keep an eye on it after 10 minutes to prevent overbrowning.
6. Serve Hot
Let rest 1–2 minutes, then serve straight from the tray.
Top with a drizzle of extra hot sauce if you dare, and serve with sour cream and salsa on the side.
Notes
-
Cheese Matters: Always shred your own cheese for perfect meltability.
-
Layering = Love: The double layer is key for even distribution and no “naked chips.”
-
Stay Crunchy: Serve right away for best texture — nachos wait for no one!
Nutrition
- Calories: 540 Cal Per Serving
- Fat: 32g
- Carbohydrates: 34g
- Protein: 29g
Nutritional Info (Because We Care!)
Okay, let’s be real—this is a celebratory, indulgent snack, and it’s proud of it! But I believe in transparency. Here’s a general breakdown per serving (assuming this makes 12 generous servings). Remember, these are estimates and can vary based on your specific ingredients and toppings.
Calories: ~540 | Protein: 29g | Carbohydrates: 34g | Fat: 32g
This dish is a fantastic source of protein, thanks to all that chicken and cheese. To lighten it up a bit, you can use reduced-fat cheese, lean chicken breast, and load up even more on the fresh veggie toppings like celery and tomatoes. Baking the nachos instead of frying them is already a great step! As always, enjoy this as part of a balanced diet—it’s all about that Feastical philosophy: food that feels like a warm hug, never a chore.
Final Thoughts from My Kitchen to Yours
And there you have it, my friends—the blueprint for the most unforgettable, conversation-starting, game-changing snack of the season. These Loaded Buffalo Chicken Nachos are more than just a recipe; they’re a catalyst for connection, a reason to gather around the table (or the TV), and a guaranteed way to make any day a little more special.
I hope you have as much fun making and sharing these as I do. Don’t forget to tag @Feastical and use the hashtag #FeasticalFeasts when you post your gorgeous creations! I love seeing your kitchen triumphs. Now, go forth, build that nacho mountain, and dig in!
With love and a full plate,
Beau

Chicken Parmesan Sliders : Crispy, Cheesy, and Crowd-Pleasing
Chicken Parmesan Sliders: Your New Go-To Party Hero!
Hey friends, Beau here from Feastical! Let me paint you a picture. You’re hosting a game day gathering, a family movie night, or just a casual get-together with your favorite people. The energy is high, the conversation is flowing, and then… the hunger hits. You need something that screams “comfort food,” something everyone will love, and something that doesn’t chain you to the stove all day while your guests are having all the fun. Sound familiar?
Well, pull up a chair and get ready to meet your new kitchen bestie: Crispy, Cheesy, Crowd-Pleasing Chicken Parmesan Sliders. We’re taking everything you adore about a classic, soul-warming Chicken Parm—the golden, crunchy crust, the tender chicken, the tangy marinara, and that glorious, stretchy mozzarella cheese—and we’re packing it all into a fun, handheld, perfectly portioned package.
These sliders are the ultimate party food. They’re easy to make ahead, they feed a crowd without a fuss, and they disappear from the platter faster than you can say “touchdown!” But here’s my favorite part: they make everyone feel like a kid again. There’s just something incredibly joyful about picking up your own personal, mini chicken parm sandwich and taking that first, epic bite. No knife and fork required, just pure, unadulterated deliciousness. So, let’s roll up our sleeves and create some magic that’s guaranteed to bring everyone together around the table.
The Slider That Started It All
This recipe has a special place in my heart because it was born out of a little bit of kitchen chaos and a whole lot of love. A few years back, I was hosting a big family reunion in my backyard. My plan was to make my famous, from-scratch Chicken Parmesan. But as the day went on, the guest list grew, and I realized I had severely underestimated the number of chicken breasts I’d need. Panic started to set in!
Staring into the fridge, I spotted a pack of soft, mini buns I’d bought for pulled pork later in the week. A lightbulb went off. What if I sliced the chicken breasts I did have into smaller pieces, fried them up, and served them on these buns? It was a Hail Mary pass, but it worked. Those sliders were the absolute hit of the party. My cousin’s kids, who usually turn their noses up at anything “fancy,” devoured three each. My grandma said it was the best thing she’d eaten all year. That day, I learned that sometimes the best recipes aren’t meticulously planned; they’re born from a desire to feed the people you love, no matter the circumstances. These sliders are a testament to that.
Gathering Your Flavor Arsenal
Don’t let the list intimidate you! Part of the beauty of this recipe is its flexibility. I’ll walk you through each component and give you my best chef hacks and substitutions along the way.
For the Homemade Marinara (The Soul of the Dish):
- 1 tablespoon olive oil: Our cooking fat. It adds a lovely, fruity depth. Any neutral oil works, but olive oil gives it that authentic Italian feel.
- 1/2 cup diced onions: The sweet, aromatic base of our sauce. No fresh onions? A teaspoon of onion powder stirred in with the dried herbs is a fine quick fix.
- 3 garlic cloves, chopped: Because life is always better with garlic. Feel free to use the pre-chopped jarred stuff to save time—I won’t tell!
- 1 (28 oz) can whole plum tomatoes, crushed by hand: This is my secret weapon. San Marzano tomatoes are the gold standard—they’re sweeter and less acidic. Crushing them by hand (or with a potato masher) gives the sauce a fantastic, rustic texture. Chef’s Insight: You can use a can of crushed tomatoes, but hand-crushing is a fun, cathartic step that makes you feel like a true nonna.
- 1 tsp each dried basil & oregano, 1/2 tsp dried thyme: The holy trinity of Italian herbs. If you have an Italian seasoning blend, you can use about 1 tablespoon of that instead.
- 1/2 tsp fennel seeds: This is my little pro-move. It gives the sauce a subtle, sweet sausage-like flavor that is just incredible. You can skip it, but trust me, it’s a game-changer.
- 1/4 tsp red pepper flakes: For a gentle, background warmth. Adjust to your family’s spice tolerance!
- 1 tsp salt: To make all those beautiful flavors pop.
- Chef’s Shortcut: Look, I get it. Sometimes you just need dinner on the table. Using 2-3 cups of your favorite store-bought marinara sauce is a totally legit and delicious shortcut! No judgment here.
For the Crispy Chicken:
- 4 boneless, skinless chicken breasts: We’re going to slice these into slider-sized cutlets. For even easier cooking, you can sometimes find pre-cut chicken cutlets at the store.
- The Breading Station (Flour, Eggs, Panko): This three-step process is what gives us that iconic, crispy crust. Keep one hand for dry ingredients and one for wet to avoid “club fingers.”
- 2 cups panko breadcrumbs: Panko is a Japanese-style breadcrumb that’s lighter and flakier than traditional crumbs, resulting in a super-crispy, non-greasy coating. It’s the key to the perfect crunch!
- 1/3 cup grated Parmesan cheese: We’re mixing this right into the panko. It adds a salty, savory, umami punch to the crust itself.
- Salt and pepper to taste: Season every layer! Don’t forget to season the chicken directly before you start breading.
- About 1/4 cup olive oil for frying: You don’t need to deep fry; a shallow pan-fry in a good skillet (cast iron is perfect!) will give us that gorgeous golden-brown color.
For Assembly:
- 1 cup shredded mozzarella cheese: The melty, glorious glue that holds it all together. Low-moisture, part-skim mozzarella works great and doesn’t make the buns soggy.
- 16 mini buns (slider buns): Hawaiian sweet rolls are my personal favorite—their slight sweetness is a fantastic contrast to the savory chicken and tangy sauce. But any soft mini bun will do the trick!
Let’s Build Some Deliciousness: Your Step-by-Step Guide
Okay, team! Let’s get cooking. I’ll be right here with you, talking you through each step with all my favorite tips and tricks.
Step 1: Crafting Your Marinara Masterpiece
If you’re going the homemade route, start here. Heat the olive oil in a medium saucepan over medium heat. Add your diced onions and sauté until they turn soft and translucent, about 5-7 minutes. You’re not looking for color, just sweetness. Now, add the garlic and cook for just one more minute until it’s fragrant—be careful not to burn it! Burnt garlic is bitter, and we’re all about the love here.
Now for the fun part: dump in your can of tomatoes. Roll up your sleeves and get in there with your hands, crushing each tomato one by one. It’s messy, it’s fun, and it’s how the pros do it! Alternatively, a potato masher works wonders. Stir in all your herbs, fennel seeds, red pepper flakes, and salt. Bring it to a lively simmer, then reduce the heat to low and let it bubble gently for 20-30 minutes. This simmering time allows the flavors to marry and the sauce to thicken up beautifully. Give it a stir every now and then.
Chef’s Hack: Taste your sauce after about 15 minutes. Does it need more salt? A pinch of sugar to balance the acidity? Make it yours!
Step 2: Prepping and Breading the Chicken (The Assembly Line)
While the sauce simmers, let’s tackle the chicken. Place your chicken breasts on a cutting board. Using a sharp knife, carefully slice each breast horizontally into 3 or 4 thin, even cutlets. The goal is to have pieces that are roughly the size of your slider buns. Season both sides generously with salt and pepper.
Now, set up your breading station! You’ll need three shallow dishes. In the first, spread out your flour. In the second, beat your three eggs until uniform. In the third, mix together the panko breadcrumbs, grated Parmesan, dried basil, and oregano.
Here’s the golden rule: Dry hand, wet hand. Use one hand (your “dry” hand) to place a chicken cutlet into the flour, coating it lightly and shaking off any excess. Then, use that same dry hand to drop it into the egg wash. Now, use your other hand (your “wet” hand) to flip it in the egg, ensuring it’s fully coated. Finally, use your wet hand to move it to the panko mixture. Use your dry hand to scoop the crumbs over the top, pressing gently to make sure they adhere. This method saves you from ending up with two completely breaded hands! Place the breaded cutlet on a clean plate and repeat with the rest.
Step 3: Frying to Golden Perfection
Heat about 1/4 cup of olive oil in a large skillet (I adore my cast iron for this) over medium heat. To test if the oil is ready, flick a tiny bit of panko into it—if it sizzles immediately, you’re good to go.
Working in batches to avoid crowding the pan, carefully place the chicken cutlets in the hot oil. You should hear a happy sizzle! Cook for 3-4 minutes per side, until the crust is a deep, golden brown and the chicken is cooked through. The internal temperature should read 165°F (74°C) on a meat thermometer.
Chef’s Tip: As each batch finishes, transfer the chicken to a wire rack set over a baking sheet. This keeps the bottom from getting steamy and soggy, which is what happens if you put it directly on a paper towel-lined plate. We want maximum crunch!
Step 4: The Grand Finale: Assembly!
Preheat your oven to 350°F (175°C). Now, let’s build our sliders! You can do this two ways:
Method 1 (The Individualist): Place the bottom halves of all your slider buns on a large baking sheet. Spread a spoonful of marinara sauce on each one. Top with a crispy chicken cutlet. Sprinkle a generous pinch of shredded mozzarella over each piece of chicken. Crown it with the top bun.
Method 2 (The Party Platter): This is my go-to for a crowd. Without separating the buns, slice the entire sheet of Hawaiian rolls in half horizontally, so you have one giant top and one giant bottom. Place the bottom slab on your baking sheet. Spread a thin layer of marinara over the entire surface. Arrange all your chicken cutlets on top, then blanket everything with the cup of mozzarella. Place the top slab of buns on, and you’re ready to warm.
Once assembled, pop the whole baking sheet into the preheated oven for 5-7 minutes, just until the cheese is melty and the buns are warm and slightly toasty. If you used the Party Platter method, you can slice them into individual sliders after warming.
How to Serve These Beauties
Presentation is part of the fun! For a casual vibe, I love piling these sliders high on a big wooden cutting board or a large, vibrant platter. Scatter a few fresh basil leaves over the top for a pop of color and freshness. It screams, “Dig in!”
What to serve on the side? Keep it simple and satisfying. A big, bright Italian salad with a sharp vinaigrette cuts through the richness perfectly. A bowl of sweet potato fries or crispy roasted rosemary potatoes are also a match made in heaven. And for those who like to dip? Put a little extra warm marinara sauce in a small bowl right in the center of the platter for double-dipping action.
These sliders are the life of the party, but they’re also a fantastic, fun family dinner. Pair them with a simple veggie like roasted broccoli or a quick coleslaw, and you’ve got a meal that will make everyone smile.
Shake It Up! Fun Variations to Try
Once you’ve mastered the classic, the world is your oyster! Here are a few of my favorite twists:
- Parmesan Pull-Apart Slider Bake: Use the “Party Platter” assembly method. Before adding the marinara, brush the inside of the top and bottom buns with a mixture of melted butter, garlic powder, and a tablespoon of grated Parmesan. Assemble and bake as directed. It’s a garlic bread and chicken parm hybrid dream!
- Spicy ‘Nduja Twist: Love heat? Stir a tablespoon of ‘nduja (a spicy, spreadable Italian sausage) into your marinara sauce as it simmers. It will infuse the whole sauce with a deep, smoky heat.
- Eggplant Parm Sliders (Vegetarian): Swap the chicken for sliced eggplant! Use the same breading and frying method, but cook the eggplant for just 2-3 minutes per side until golden and tender.
- Air Fryer Magic: Want a lighter version? Your air fryer is your friend! Spray the breaded chicken cutlets with cooking spray and air fry at 400°F (200°C) for 10-12 minutes, flipping halfway through, until crispy and cooked. It works like a charm.
- Prosciutto & Fresh Mozzarella: For a gourmet touch, place a thin slice of fresh mozzarella on each chicken piece instead of shredded. After warming the sliders, drape a thin slice of prosciutto over the chicken before adding the top bun.

Chicken Parmesan Sliders : Crispy, Cheesy, and Crowd-Pleasing
Description
Chicken Parmesan Sliders
Prep Time: 20 mins
Cook Time: 25 mins
Total Time: 45 mins
Servings: 12 sliders
Ingredients
For the Chicken
-
2 large chicken breasts, cut horizontally into 4 thin cutlets
-
1 cup buttermilk (or 1 cup milk + 1 tsp lemon juice, rested 5 min)
-
1 cup flour
-
1 cup seasoned breadcrumbs (Italian-style preferred)
-
½ cup grated Parmesan cheese
-
1 tsp garlic powder
-
½ tsp onion powder
-
½ tsp paprika
-
½ tsp salt
-
¼ tsp black pepper
-
Vegetable oil, for frying
For Assembly
-
1 package (12-count) Hawaiian rolls
-
1½ cups marinara sauce (store-bought or homemade)
-
2 cups shredded mozzarella cheese
-
¼ cup grated Parmesan cheese
-
2 tbsp melted butter
-
½ tsp garlic powder
-
1 tbsp fresh parsley, chopped
Instructions
1. Prep the Chicken:
Cut chicken breasts into smaller slider-sized pieces (about 12). Pat dry with paper towels.
2. Bread the Chicken:
Set up three bowls:
-
Bowl 1: flour mixed with garlic powder, onion powder, paprika, salt, and pepper
-
Bowl 2: buttermilk
-
Bowl 3: breadcrumbs mixed with Parmesan cheese
Dredge each chicken piece in flour, dip into buttermilk, then coat in breadcrumb mixture.
3. Fry the Chicken:
Heat about ½ inch of oil in a skillet over medium-high heat. Fry chicken pieces 3–4 minutes per side until golden and cooked through (165°F/74°C internal temp). Drain on paper towels.
4. Assemble the Sliders:
Preheat oven to 375°F (190°C).
Slice the Hawaiian rolls in half horizontally (keep them connected).
Place the bottom halves on a parchment-lined baking sheet.
Layer in order:
-
Spoon marinara sauce over the bottoms.
-
Add the fried chicken pieces.
-
Spoon a little more sauce on top of each chicken piece.
-
Sprinkle mozzarella and Parmesan over the top.
-
Add the top halves of the rolls.
5. Brush and Bake:
In a small bowl, mix melted butter, garlic powder, and parsley. Brush over the tops of the rolls.
Bake uncovered for 10–12 minutes, until the cheese melts and the tops are golden.
6. Serve:
Let rest 5 minutes, then slice along the roll lines and serve warm.
Notes
-
Make it spicy: Add crushed red pepper flakes or a drizzle of spicy marinara.
-
Shortcut: Use frozen breaded chicken tenders or cutlets to save time.
-
Make ahead: Bread and fry the chicken up to a day ahead; reheat before assembling.
Nutrition
- Calories: 310 Cal Per Serving
- Carbohydrates: 24g
- Protein: 23g
Beau’s Kitchen Chronicles
This recipe has evolved so much since that first frantic family reunion. I’ve learned that the type of bun makes a huge difference—Hawaiian rolls were a total game-changer. I’ve also started adding that fennel seed to the sauce after a trip to Sicily, where I tasted it in a nonna’s ragù and nearly fell out of my chair. The best recipes are living things; they grow and change with you.
One of my favorite kitchen fails turned into a win was the time I ran out of panko. I crushed up plain potato chips mixed with a little Parmesan, and you know what? It was insanely delicious. A little salty, super crunchy. Don’t be afraid to improvise—that’s where the real fun is!
Final Thoughts: More Than Just a Sandwich
So, there you have it. What started as a kitchen panic attack has become one of my most trusted, joy-spreading recipes. These Chicken Parmesan Sliders are more than just a convenient party food; they’re a little bundle of shared happiness.
They prove that you don’t need a fancy, complicated menu to be the host everyone raves about. You just need food made with a little bit of love and a whole lot of flavor—food that makes people feel good. It’s the sight of a platter disappearing in minutes, the sound of a satisfied “Mmm!” from across the room, and the simple joy of a meal that brings everyone to the table, literally and figuratively.
Whether you stick to the classic recipe, take a shortcut with store-bought sauce, or get creative with one of the fun variations, you’re not just making dinner. You’re creating a moment. You’re building a memory around the simple, universal love of a really, really good sandwich.
So go ahead, give them a try. I have a feeling this recipe might just become your new kitchen bestie, too.
Now get out there and feed the people you love,
Beau

Stir Fry Udon Noodles with Beef and Broccoli : Quick & Flavor-Packed Dinner
Stir Fry Udon Noodles with Beef and Broccoli – Your New Weeknight Hero
Hey friends, Beau here! Let’s talk about that beautiful, universal feeling: the weeknight dinner scramble. You’re hungry, maybe a little tired from the day, and the siren call of the takeout menu is getting louder by the minute. I hear you, I’ve been there more times than I can count. But what if I told you there’s a way to get a meal on the table that’s faster than delivery, more rewarding, and packed with so much flavor it’ll make your taste buds do a happy dance?
Enter my Stir Fry Udon Noodles with Beef and Broccoli. This isn’t just a recipe; it’s your kitchen’s new secret weapon. We’re talking about tender, marinated beef, crisp-tender broccoli, savory mushrooms, and those gloriously thick and chewy udon noodles, all tossed in a glossy, umami-rich sauce that clings to every single strand and morsel. It’s the kind of meal that feels like a cozy hug but comes together with the speed and sizzle of a restaurant wok. So, let’s ditch the delivery guilt and fire up the stove together. I promise, this is one flavor-packed journey you’ll want to take again and again.
The Stir-Fry That Started It All
This dish takes me right back to my first tiny apartment kitchen. I had a wok, a single burner, and a serious craving for the beef and broccoli noodle bowl from my favorite spot across town. My first attempt was… well, let’s call it a “saucy learning experience.” It was more of a beef and broccoli soup with limp noodles! But that little kitchen fail lit a fire in me. I became obsessed with cracking the code—how to get that perfect, glossy sauce that coats instead of pools, and how to keep the beef tender and the veggies crisp.
After more experiments than I’d like to admit (my roommate was a very patient taste-tester), I landed on this combination. The moment I took that first perfect bite—the chewy udon, the savory beef, the slight sweetness of the sauce—I did a little victory dance right there in my galley kitchen. It was the dish that truly made me fall in love with the magic of a well-executed stir-fry. It taught me that the best meals aren’t about fancy techniques, but about understanding a few key principles and cooking with heart. This recipe is that kitchen victory, shared with you.
Gathering Your Flavor Arsenal
Here’s everything you’ll need to create this masterpiece. The beauty of a stir-fry is in its flexibility, so I’ve included my favorite chef insights and swaps to make this recipe your own.
For the Beef Marinade:
- 1 tbsp low sodium soy sauce: Our salty, umami base. Using low-sodium gives us control over the final flavor, especially since we’re adding more later. If you only have regular, that’s okay—just taste before adding extra salt at the end.
- 1 tbsp oyster sauce: The secret weapon! It adds a deep, savory richness that’s irreplaceable. For a vegetarian version, mushroom stir-fry sauce is a fantastic swap.
- 2 tsp lemon juice: A little acid to tenderize the beef and brighten up the marinade. Lime juice or even a splash of rice vinegar works beautifully here too.
- 1/4 tsp sesame oil: A tiny amount with massive impact. It gives that classic, nutty aroma. Pro-tip: Always add this at the end of cooking or in marinades; high heat can make it bitter.
- 2 tsp brown sugar: Balances the saltiness and helps with caramelization on the beef. Honey or maple syrup are great alternatives.
- 3/4 lb beef tenderloin, thinly sliced: Tenderloin is fantastic because it’s so lean and tender. But don’t stress! Flank steak, sirloin, or even skirt steak are all stellar, budget-friendly choices. Just make sure to slice against the grain for the most tender bite.
For the Stir-Fry Sauce:
- 2 tbsp oyster sauce: Doubling down for that deep, savory flavor.
- 1 tbsp soy sauce: For that essential salty kick.
- 1/4 cup water: This loosens up the sauce just enough so it can coat everything evenly without being too thick or sticky.
- 1 tbsp honey: I love the floral sweetness it adds, which perfectly counters the salty elements. Agave nectar is a good vegan substitute.
For the Stir-Fry Itself:
- 4 tsp peanut oil, divided: I love peanut oil for its high smoke point and neutral flavor. Avocado oil, canola oil, or any other neutral oil will work in a pinch. We divide it to cook the beef and veggies separately for the best results.
- 1/2 red bell pepper, diced: Adds a sweet crunch and a pop of color. Feel free to use orange or yellow!
- 10 button mushrooms, sliced: These little sponges soak up all the delicious sauce and add an earthy, meaty texture.
- 2 cups broccoli florets: The classic! For crisp-tender broccoli, make sure your florets are all roughly the same size.
- 1 (14.2 oz) package udon stir-fry noodles: I use the pre-cooked, soft udon noodles you find in the refrigerated or Asian aisle of the grocery store. They’re a huge time-saver! If you can only find dried, just cook them according to package directions before adding.
Let’s Get Sizzling: Your Step-by-Step Guide
Alright, team, this is where the magic happens. Read through these steps once before you start—it’s all about moving quickly and confidently. I’ll be right here with you, offering my best chef hacks along the way.
- Marinate the Beef: In a medium bowl, combine the soy sauce, oyster sauce, lemon juice, sesame oil, and brown sugar. Whisk it until the sugar dissolves. Add your thinly sliced beef, toss it well to ensure every piece is coated in that flavorful goodness, and let it sit for 15-30 minutes. Chef’s Hack: Don’t marinate for much longer than 30 minutes, as the acid can start to “cook” the beef and make it mushy. While it marinates, you can chop all your veggies and mix the sauce—this is your “mise en place” moment!
- Mix the Sauce: In a small bowl or even a liquid measuring cup, whisk together the 2 tbsp oyster sauce, 1 tbsp soy sauce, 1/4 cup water, and 1 tbsp honey. Set this right next to your stove. Having it ready to go is crucial for a smooth stir-fry process.
- Sear the Beef: Place your largest skillet or wok over high heat and let it get seriously hot. You want to hear a sizzle the moment the beef hits the pan. Add 2 teaspoons of peanut oil, swirl it around, and then add the marinated beef in a single layer. Let it sear for about 1 minute without touching it to get a good crust, then stir-fry for another minute or two until it’s browned on the outside but still a little pink inside. Chef’s Hack: Don’t crowd the pan! If you need to, cook the beef in two batches. Overcrowding steams the meat instead of searing it. Remove the beef to a clean plate, including all those delicious juices.
- Cook the Veggies: In the same now-empty skillet, add the remaining 2 teaspoons of peanut oil. Toss in the red bell pepper, mushrooms, and broccoli. Stir-fry for 3-4 minutes. You’re looking for the broccoli to turn bright green and become fork-tender, but still have a little crunch. The mushrooms will release their water and start to brown beautifully. Chef’s Hack: If you like your broccoli super tender, you can blanch the florets in boiling water for 1 minute before adding them to the stir-fry. This is a great trick to ensure everything cooks evenly.
- The Grand Finale – Add Noodles & Combine: Now, add the udon noodles straight into the skillet with the veggies. They might be clumped together—just use your tongs or spatula to gently separate them. Stir-fry for about 1 minute to warm them through. Now, return the beef (and any accumulated juices) back to the pan. Pour your pre-mixed sauce over everything. Here’s the fun part: toss, toss, toss! Keep everything moving for 2-3 minutes until the sauce thickens slightly, coats every single ingredient in a glossy sheen, and the beef is cooked to your liking. The noodles will soak up that incredible flavor.
Plating Up the Perfect Bowl
You’ve done it! Now, let’s serve this beauty with a little flair. I’m a big believer that we eat with our eyes first.
Grab your favorite big, cozy bowls—this is a comfort food, after all. Use tongs to give the noodles a graceful twist as you lift them into the bowl, creating a lovely nest. Then, strategically place those gorgeous pieces of beef and broccoli on top. The final, non-negotiable touch? A generous sprinkle of toasted sesame seeds and a few thin slices of green onion. The color and texture contrast is everything.
This dish is a complete meal in a bowl, but if you’re feeding a crowd or just want to go all out, it pairs wonderfully with a simple side of steamed jasmine rice or a light, crunchy cucumber salad with a rice vinegar dressing to cut through the richness.
Make It Your Own: Delicious Twists & Swaps
The fun doesn’t stop here! This recipe is a fantastic template. Feel free to play with your food and customize it based on what you have or what you’re craving.
- Spicy Kick: Add 1-2 teaspoons of Sriracha or a few sliced fresh red chilies to the sauce. A drizzle of chili crisp on top at the end is also a game-changer.
- Chicken or Shrimp: Swap the beef for thinly sliced chicken breast or thigh, or peeled raw shrimp. The cooking method remains the same—just cook your protein until done through before removing it from the pan.
- Totally Vegetarian: Omit the beef and use cubed firm tofu or tempeh. For the oyster sauce, use a vegetarian mushroom stir-fry sauce. Load up on extra veggies like carrots, snap peas, and baby corn!
- Different Noodles, Same Vibes: No udon? No problem! Thick lo mein noodles, ramen noodles (discard the seasoning packet), or even linguine in a real pinch will work beautifully.
- Extra Veggie Power: Throw in a handful of spinach or kale in the last minute of cooking to wilt it down. Thinly sliced carrots or snow peas would also be right at home here.
Beau’s Kitchen Notes & Stories
This recipe has been on quite a journey with me. I’ve made it for first dates (it’s a winner), for sad friends needing comfort food, and for chaotic family weeknights where it single-handedly saved my sanity. The biggest evolution was mastering the sauce-to-noodle ratio. I remember one time I was so distracted telling a story that I accidentally doubled the sauce. Turns out, it was a happy accident! My friends declared it the “ultimate saucy noodle situation,” and I’ve been a little more generous with the sauce ever since. The moral of the story? Don’t be afraid to make mistakes in the kitchen. Sometimes, they lead to your best creations.
Your Stir-Fry Questions, Answered!
I’ve gotten a lot of questions about this recipe over the years. Here are the most common ones to help you nail it every single time.
Q: My stir-fry is turning out soggy. What am I doing wrong?
A: The most common culprit is overloading the pan! When you add too many ingredients at once, the temperature drops and the food steams instead of fries. Cook in batches if your pan isn’t giant. Also, make sure your pan is screaming hot before you add anything, and don’t add the sauce until the very end—just long enough to heat through and coat everything.
Q: Can I make this ahead of time?
A: You can prep the components ahead! Marinate the beef and chop the veggies a day in advance. Mix the sauce and keep it separate. When you’re ready to eat, the actual cooking will take less than 10 minutes. I don’t recommend cooking the entire dish ahead, as the noodles can become a bit soft upon reheating.
Q: My beef is tough. How can I make it more tender?
A> Two key things: 1) Always slice your beef against the grain. This shortens the muscle fibers, making it much more tender to chew. 2) Don’t overcook it! We sear it quickly over high heat to keep it juicy. Taking it out of the pan before it’s fully cooked allows it to finish cooking when we add it back at the end, preventing it from turning into leather.
Q: I can’t find oyster sauce. Is there a substitute?
A> Absolutely! For a similar savory depth, you can use hoisin sauce (though it’s sweeter), or my top recommendation: vegetarian mushroom stir-fry sauce. In a real pinch, you can use a little extra soy sauce with a tiny pinch of sugar, but you’ll lose some of that complex umami.

Stir Fry Udon Noodles with Beef and Broccoli : Quick & Flavor-Packed Dinner
Description
Tender beef, crisp-tender broccoli, and chewy udon noodles come together in a glossy, umami-rich sauce that tastes better than takeout — and cooks faster, too. This quick, flavor-packed stir-fry is your new weeknight hero!
Ingredients
For the Beef Marinade
-
1 tbsp low sodium soy sauce
-
1 tbsp oyster sauce
-
2 tsp lemon juice (or rice vinegar)
-
¼ tsp sesame oil
-
2 tsp brown sugar
-
¾ lb beef tenderloin, thinly sliced (or flank/sirloin)
For the Stir-Fry Sauce
-
2 tbsp oyster sauce
-
1 tbsp soy sauce
-
¼ cup water
-
1 tbsp honey (or agave)
For the Stir-Fry
-
4 tsp peanut oil, divided
-
½ red bell pepper, diced
-
10 button mushrooms, sliced
-
2 cups broccoli florets
-
1 (14.2 oz) package pre-cooked udon stir-fry noodles
For Garnish
-
Toasted sesame seeds
-
Thinly sliced green onions
Instructions
1. Marinate the Beef
Whisk soy sauce, oyster sauce, lemon juice, sesame oil, and brown sugar until smooth. Add sliced beef, toss to coat, and let marinate 15–30 minutes.
2. Mix the Sauce
In a small bowl, combine oyster sauce, soy sauce, water, and honey. Set aside.
3. Sear the Beef
Heat 2 tsp peanut oil in a large skillet or wok over high heat. Add beef in a single layer. Sear 1 minute undisturbed, then stir-fry 1–2 minutes until browned but slightly pink inside. Remove and set aside.
4. Cook the Veggies
Add remaining 2 tsp peanut oil. Stir-fry red bell pepper, mushrooms, and broccoli for 3–4 minutes, until broccoli is bright green and crisp-tender.
5. Combine & Toss
Add udon noodles to the pan and separate gently with tongs. Stir-fry 1 minute, then return beef (and juices). Pour in sauce. Toss 2–3 minutes until everything is glossy and coated.
6. Serve & Garnish
Transfer to bowls. Sprinkle with sesame seeds and sliced green onions. Serve hot and enjoy!
Notes
-
Don’t overcrowd the pan — cook beef in batches for perfect sear.
-
Slice against the grain for tender beef.
-
Blanch broccoli for 1 minute before stir-frying if you prefer it softer.
-
Make it spicy: Add Sriracha or chili crisp to the sauce.
Nutrition
- Calories: 480 Cal Per Serving
- Carbohydrates: 45g
- Protein: 26g
Nourishing Your Body & Soul
While I’m all about flavor first, I also believe in feeling good about what we eat. This bowl is a wonderfully balanced meal. The beef provides a solid 26 grams of protein to keep you full and satisfied. The udon noodles are a great source of energizing carbohydrates. And let’s not forget the superstar veggies! The broccoli and bell peppers are packed with Vitamin C, fiber, and antioxidants, while the mushrooms offer a unique set of nutrients and that savory umami flavor.
Remember, these numbers are an estimate. Using low-sodium sauces, lean beef, and loading up on extra vegetables makes this a healthy and hearty choice for any night of the week. It’s proof that eating well doesn’t mean sacrificing an ounce of satisfaction.
Approximate Nutrition per Serving (based on 4 servings): Calories: ~480 | Protein: 26g | Carbohydrates: 45g | Fat: 22g
Your New Go-To Dinner Awaits
And there you have it, my friends—your passport to a ridiculously delicious and satisfying dinner that’s ready in a flash. This Stir Fry Udon Noodles with Beef and Broccoli is more than just a recipe; it’s a confidence-builder. It’s the dish that will make you feel like a weeknight warrior, a kitchen rockstar who can whip up something incredible with just a few simple ingredients and a whole lot of heart.
I hope this recipe finds its way into your regular rotation and creates as many happy memories for you as it has for me. Now, I’d love to hear from you! Did you add a spicy twist? Try it with chicken? Tag me on social @Feastical or shoot me an email. Happy cooking, and as always, dig in!
Final Thoughts
This Stir-Fry Udon Noodles with Beef and Broccoli is your ultimate weeknight win. It’s the perfect combination of fast, flavorful, and fulfilling, proving that a homemade meal can easily rival takeout. With a few simple techniques and a sauce that’s pure magic, you have a versatile recipe that’s ready for your own personal twist. So, save that takeout menu for a real emergency, and let this dish become your new kitchen hero. Happy cooking!