Deep Hamburger Sausage & Pepperoni Pie : The Ultimate Meaty Comfort Bake
The Ultimate Meaty Comfort Bake: Deep Hamburger Sausage & Pepperoni Pie
Hey friends, Beau here from Feastical! Let’s get real for a second. Some days, a simple salad just doesn’t cut it. Some days, your soul screams for something hearty, something cheesy, something so unapologetically meaty that it feels like a high-five for your stomach. You know the feeling. It’s the kind of craving that demands a dish built with love, layered with flavor, and designed to bring everyone to the table with zero complaints.
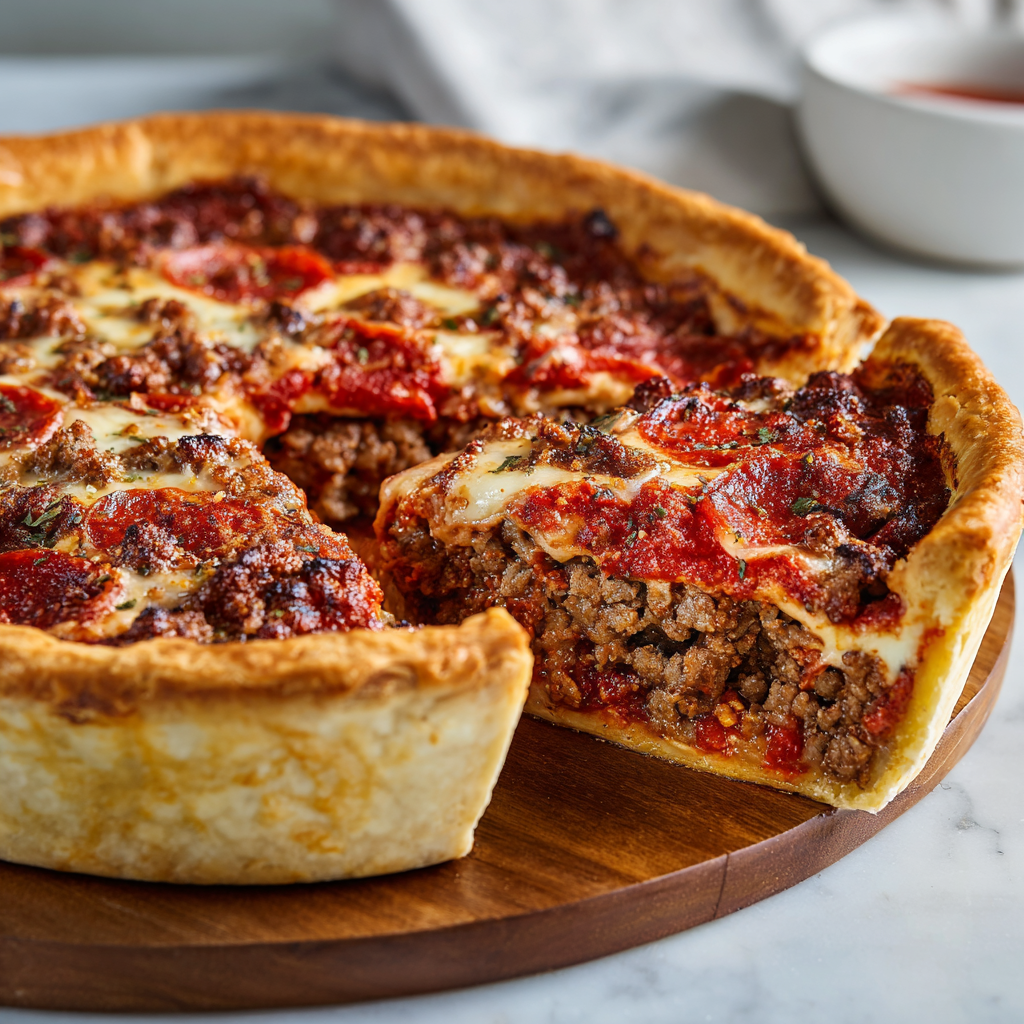
Well, my fellow foodies, today is that day, and this Deep Hamburger Sausage & Pepperoni Pie is that dish. Imagine the best parts of a loaded deep-dish pizza and a classic, savory meat pie got together and had a beautiful, delicious baby. That’s what we’re making. We’re talking a golden, flaky crust holding a treasure trove of seasoned ground beef, robust Italian sausage, zesty pepperoni, and not one, not two, but *three* kinds of gooey, melted cheese, all swimming in a rich tomato sauce. This isn’t just dinner; it’s an event. It’s the star of the family dinner table, the hero of game day feasts, and the answer to your deepest comfort food prayers. So, tie on your apron, grab your favorite deep dish, and let’s create some kitchen magic together.
A Pie Born from Happy Chaos
This recipe didn’t come from a fancy cookbook; it was born in my kitchen on a rowdy Sunday afternoon. My entire family had descended for a surprise visit, and the game was on. The problem? My fridge was a landscape of random ingredients—a partial pound of ground beef, some Italian sausage links left over from pasta night, and a nearly forgotten stick of pepperoni. Panic? For a second. Then, inspiration struck. I thought, “Why choose? Let’s use it all!”
I started layering everything I had into a pie crust, figuring if it failed, we’d just order pizza. But when I pulled that bubbling, cheesy, golden-brown behemoth from the oven, the entire house fell silent, followed by a collective “WOW.” It was gone in about ten minutes flat. My nephew, a notoriously picky eater, asked for a second slice and then declared it the “best thing ever.” That’s when I knew this kitchen experiment was a keeper. It’s a reminder that the best meals often come from a little improvisation and a whole lot of love.
Gathering Your Flavor All-Stars
Here’s your shopping list for this meat-lover’s dream. Don’t be intimidated by the length—this is about building layers of flavor, and I’ve got some chef insights and easy swaps for you right here.
- 2 lbs Ground Beef (80/20 blend): I like an 80/20 blend for this. The little bit of extra fat adds incredible flavor and keeps the filling juicy. If you’re using leaner beef, just add a tablespoon of olive oil to your skillet.
- 1 lb Italian Sausage (mild or spicy): This is our flavor powerhouse! The fennel and herbs in the sausage make the whole pie sing. Go spicy if you like a kick, mild for a crowd-pleaser. You can use links (just remove the casings) or ground sausage.
- 1 cup Sliced Pepperoni: Don’t skip these little guys! They add a salty, zesty punch and get wonderfully crispy around the edges. Use mini pepperonis for better distribution.
- 2 small Onions, diced & 4 cloves Garlic, minced: The aromatic foundation. They add sweetness and depth. No fresh garlic? A teaspoon of garlic powder will work in a pinch.
- 3 cups Pizza or Marinara Sauce: This is the glue that holds our meaty masterpiece together. Use your favorite jarred sauce to save time, or your homemade one if you’re feeling fancy.
- 2 Deep-Dish Pie Crusts (homemade or store-bought): Absolutely no judgment from me on using store-bought! It’s a huge time-saver. Just make sure they’re the deep-dish kind to hold all our glorious filling.
- The Cheese Trio!
- 3 cups Shredded Mozzarella: For that iconic, stretchy, melty goodness.
- 1 cup Shredded Provolone or Cheddar (optional): Provolone adds a smoky note, while sharp cheddar brings a tangy bite. Mix and match!
- ½ cup Grated Parmesan Cheese (optional): This adds a salty, nutty flavor that takes the cheesy top layer to the next level.
- 2 tsp Italian Seasoning, Salt & Pepper to taste, Red Pepper Flakes (optional): Season as you go! Taste your filling before it goes into the crust. The Italian seasoning is a great base, but the red pepper flakes are your secret weapon for a subtle heat.
- Cooking Spray or Oil: A quick spritz ensures your beautiful pie releases without a fight.
Let’s Build This Meaty Masterpiece! (Step-by-Step)
Ready to get your hands dirty? Follow these steps, and you’ll be a pie pro in no time. I’ve sprinkled in my favorite chef hacks to make it even better.
- Preheat and Prep: Fire up your oven to 375°F (190°C). This is our sweet spot—hot enough to cook everything through and get a gorgeous, bubbly top, but not so hot that the crust burns before the inside is done. Take your deep-dish pie pan or springform pan and give it a good coat of cooking spray. Chef’s Hack: If you’re using a springform pan, wrap the outside bottom in foil to catch any potential drips. Trust me on this one!
- Brown the Meats: Grab your largest, heaviest skillet. We’re going big! Crumble in the ground beef and Italian sausage. Cook over medium heat, breaking it up with a wooden spoon, until it’s beautifully browned and cooked through. Now, here’s a pro move: don’t just drain the fat—drain it into a heat-proof bowl. That flavorful liquid gold can be used to sauté your onions and garlic for an extra flavor boost! Otherwise, just drain and discard.
- Sauté the Aromatics: If you drained all the fat, add a tablespoon of oil back to the skillet. Toss in your diced onions and cook for about 3-4 minutes until they start to turn translucent. Now, add the minced garlic and cook for just one more minute until fragrant. Never burn your garlic—it turns bitter. We’re just waking it up!
- Create the Saucy Filling: Return all the browned meat to the skillet with the onions and garlic. Pour in your pizza sauce, and add the Italian seasoning, salt, pepper, and red pepper flakes if using. Give it a big, happy stir and let it simmer for about 5 minutes. This allows the flavors to get to know each other and marry into one delicious, cohesive filling. Take it off the heat.
- Build the Layers: Press one of your pie crusts into the prepared pan, making sure it goes all the way up the sides. Now for the fun part! Spoon in half of your meat mixture. Smooth it out. Now, scatter half of your pepperoni and half of your cheese blend over the meat. Repeat the layers: the rest of the meat, the rest of the pepperoni, and finally, the glorious mountain of remaining cheese.
- Bake to Perfection: Place your pie on a baking sheet (just in case of bubble-overs) and tent it loosely with aluminum foil. This is crucial! It prevents the top from getting too dark before the center is hot. Bake for 25 minutes. Then, carefully remove the foil and bake for another 10-15 minutes. You’re looking for a golden-brown crust, bubbling sauce around the edges, and that cheese on top to be melted, lightly spotted with brown, and utterly irresistible.
- The Most Important Step: REST! I know, I know. It smells incredible and you want to dive in. But you must, must, MUST let it rest for a full 15 minutes. This isn’t just me being fussy. This allows the layers to set, so when you cut into it, you get a clean, beautiful slice instead of a cheesy, saucy landslide. It’s worth the wait, I promise.
How to Serve This Hearty Pie
Presentation is part of the fun! After the torturous 15-minute rest, run a knife around the edge of the pan. If you used a springform, simply unlock the collar. For a regular pie dish, you can serve it right from the pan.
Use a sharp, serrated knife and a sturdy pie server or spatula to lift out those hefty slices. This is a main course that stands proud all on its own, but I love to frame it with some lighter sides to balance the richness. Think a simple, crisp green salad with a sharp vinaigrette to cut through the fat, or some garlic-roasted green beans or broccoli. For the ultimate comfort food spread, serve it with a side of creamy coleslaw or crispy potato wedges. And don’t forget the hot sauce on the table for the brave ones!
Make It Your Own: Delicious Twists & Swaps
The beauty of this recipe is its flexibility. Want to change it up? Go for it! Here are a few of my favorite variations.
- The “Kitchen Sink” Veggie Load-Up: Sauté a cup each of diced bell peppers and mushrooms with the onions. Spinach is a great add-in too—just stir in a couple of handfuls at the very end of the simmering step until it wilts.
- Spicy ‘Nduja Bomb: Love heat? Swap the Italian sausage for a spicy chorizo, and mix a tablespoon or two of ‘nduja (a spreadable spicy sausage) into the tomato sauce. You’ve been warned—it’s addictive!
- Breakfast-for-Dinner Pie: Swap the meats for cooked, crumbled bacon and breakfast sausage. Use a creamy gravy instead of tomato sauce, and cheddar cheese. Pour a whisked egg mixture over the top before baking. Mind-blowing!
- Low-Carb/Keto Version: Ditch the pie crust! Just press the meat mixture into the greased pan, create a well in the center, and bake until heated through. Top with cheese and pepperoni for the last 10 minutes.
- Garlic Butter Crust Finish: For a truly next-level crust, melt two tablespoons of butter with a minced garlic clove and a pinch of Italian seasoning. Brush this on the exposed crust edges for the last 5 minutes of baking. It’s a game-changer.
Beau’s Chef’s Notes & Kitchen Stories
This pie has evolved so much since that first chaotic Sunday. I’ve learned a few things along the way. First, don’t stress about making the bottom crust perfect. It’s going to be hidden under a mountain of awesome, so just get it in the pan. Second, the type of cheese matters. I once tried it with pre-shredded bagged cheese that had a lot of anti-caking agent, and it didn’t melt as beautifully. For the ultimate melt, shred your own blocks of cheese—it’s a little extra work for a big payoff.
And a funny story: I once accidentally used a pound of *hot* Italian sausage instead of mild when cooking for my in-laws. My father-in-law, who claims ketchup is too spicy, took a huge bite. The look on his face was pure panic, followed by a frantic reach for his water glass. We still laugh about it. So, learn from my mistake—know your audience and your spice level!
Your Questions, Answered!
I’ve made this pie a zillion times, and here are the most common questions I get.
- Q: My bottom crust is soggy! What did I do wrong?A: This is the #1 question! A few tips: 1) Make sure your meat filling isn’t overly watery before adding it. Let it simmer to thicken. 2) A pre-bake (or “blind bake”) can help. Just bake the bottom crust for about 10 minutes before adding the filling. 3) Letting the pie rest after baking is non-negotiable. This allows the filling to set, which helps the crust underneath.
- Q: Can I make this ahead of time?A: Absolutely! You can assemble the entire pie, cover it tightly, and keep it in the fridge for up to 24 hours. When you’re ready, you might just need to add 5-10 minutes to the baking time since it’s going in cold. You can also freeze the unbaked pie for up to 3 months. Thaw in the fridge overnight before baking.
- Q: What can I use instead of Italian sausage?A: No problem! You can use all ground beef (3 lbs total) and just bump up the Italian seasoning to 1 tablespoon. Ground turkey or pork also work wonderfully.
- Q: My pie is overflowing! Help!A: Oh, the perils of a too-full pie! Always, always place your pie pan on a baking sheet before it goes in the oven. It’s your insurance policy against a smoky kitchen and a messy oven cleanup.

Deep Hamburger Sausage & Pepperoni Pie : The Ultimate Meaty Comfort Bake
Description
Sometimes, you just need a hearty, cheesy, meaty meal that feels like a warm hug. This Deep Hamburger Sausage & Pepperoni Pie is exactly that—layers of seasoned ground beef, Italian sausage, zesty pepperoni, and melty cheese baked in a golden, flaky crust. Perfect for family dinners, game days, or any night you want a show-stopping comfort dish.
Ingredients
For the Filling:
-
2 lbs ground beef (80/20)
-
1 lb Italian sausage (mild or spicy, casings removed)
-
1 cup sliced pepperoni
-
2 small onions, diced
-
4 cloves garlic, minced
-
3 cups pizza or marinara sauce
-
2 tsp Italian seasoning
-
Salt & pepper to taste
-
Red pepper flakes (optional)
For the Pie:
-
2 deep-dish pie crusts (homemade or store-bought)
-
3 cups shredded mozzarella
-
1 cup shredded provolone or cheddar (optional)
-
½ cup grated Parmesan (optional)
-
Cooking spray or oil
Instructions
-
Preheat Oven & Prep Pan:
Preheat oven to 375°F (190°C). Grease a deep-dish pie pan with cooking spray. If using a springform pan, wrap the bottom with foil to catch any drips. -
Cook the Meats:
In a large skillet, brown the ground beef and Italian sausage over medium heat, breaking it into crumbles. Drain excess fat (or save a tablespoon for cooking the onions). -
Sauté Aromatics:
In the same skillet, add a bit of fat or oil and cook onions for 3–4 minutes until translucent. Add garlic and cook for 1 more minute. -
Combine Filling:
Return the meat to the skillet. Stir in pizza sauce, Italian seasoning, salt, pepper, and red pepper flakes. Simmer 5 minutes to let flavors combine. -
Assemble the Pie:
-
Press one pie crust into the prepared pan.
-
Layer half the meat mixture, half the pepperoni, and half the cheese.
-
Repeat layers with remaining meat, pepperoni, and cheese.
-
Top with remaining cheese and Parmesan if using.
-
-
Bake:
Place the pie on a baking sheet. Tent loosely with foil and bake 25 minutes. Remove foil and bake another 10–15 minutes until the top is golden and bubbly. -
Rest & Serve:
Let the pie rest 15 minutes before slicing. Serve with a crisp salad or roasted vegetables for balance.
Notes
-
Prevent Soggy Crust: Simmer the filling to reduce excess liquid or pre-bake the bottom crust 10 minutes before layering.
-
Make Ahead: Assemble and refrigerate up to 24 hours, then bake. Can also freeze unbaked for up to 3 months.
-
Cheese Tip: Shredding your own cheese gives a better melt than pre-shredded.
-
Spice It Up: Add red pepper flakes, swap Italian sausage for spicy chorizo, or mix in ’nduja for a bold twist.
-
Low-Carb Version: Skip the crust and bake the meat mixture directly, topping with cheese for the last 10 minutes.
Nutritional Info (Because We’re Curious!)
Alright, let’s talk numbers. I’m all about balance, and that means enjoying indulgent dishes like this one mindfully. This is a hearty, rich pie, so a little goes a long way. The estimated nutritional information per serving (based on 16 slices) is roughly:
- Calories: 520
- Protein: 28g (Great for keeping you full!)
- Carbohydrates: 20g
- Fat: 35g
- Sodium: 890mg
- Fiber: 1g
Remember, these are estimates and can vary based on the specific brands of ingredients you use, how much fat you drain, and your exact cheese measurements. To lighten it up, you can use lean ground beef, turkey sausage, and part-skim cheeses. But sometimes, your soul needs the full, glorious, cheesy experience—and that’s perfectly okay!
Final Thoughts from My Kitchen to Yours
Friends, this Deep Hamburger Sausage & Pepperoni Pie is more than just a recipe. It’s a testament to the power of comfort food. It’s the dish you make when you want to see smiles, when you need to feed a hungry crowd, or when you simply deserve a warm, hearty hug from the inside out. It’s forgiving, customizable, and packed with so much flavor in every single bite.
I hope you make it, love it, and make it your own. Tag me @Feastical on social media if you do—I love seeing your creations! Now, go forth and bake
Chocolate-Covered Strawberry Drip Cake: A Showstopping Centerpiece of Romance
Chocolate-Covered Strawberry Drip Cake: Your New Go-To Celebration Showstopper
Hey friends, Beau here! Let’s talk about that moment. You know the one. It’s a birthday, an anniversary, Valentine’s Day, or maybe just a Tuesday you decided deserves a gold star. You want a dessert that doesn’t just sit on the table—it makes an entrance. A dessert that has people pulling out their phones before they pull out their forks.
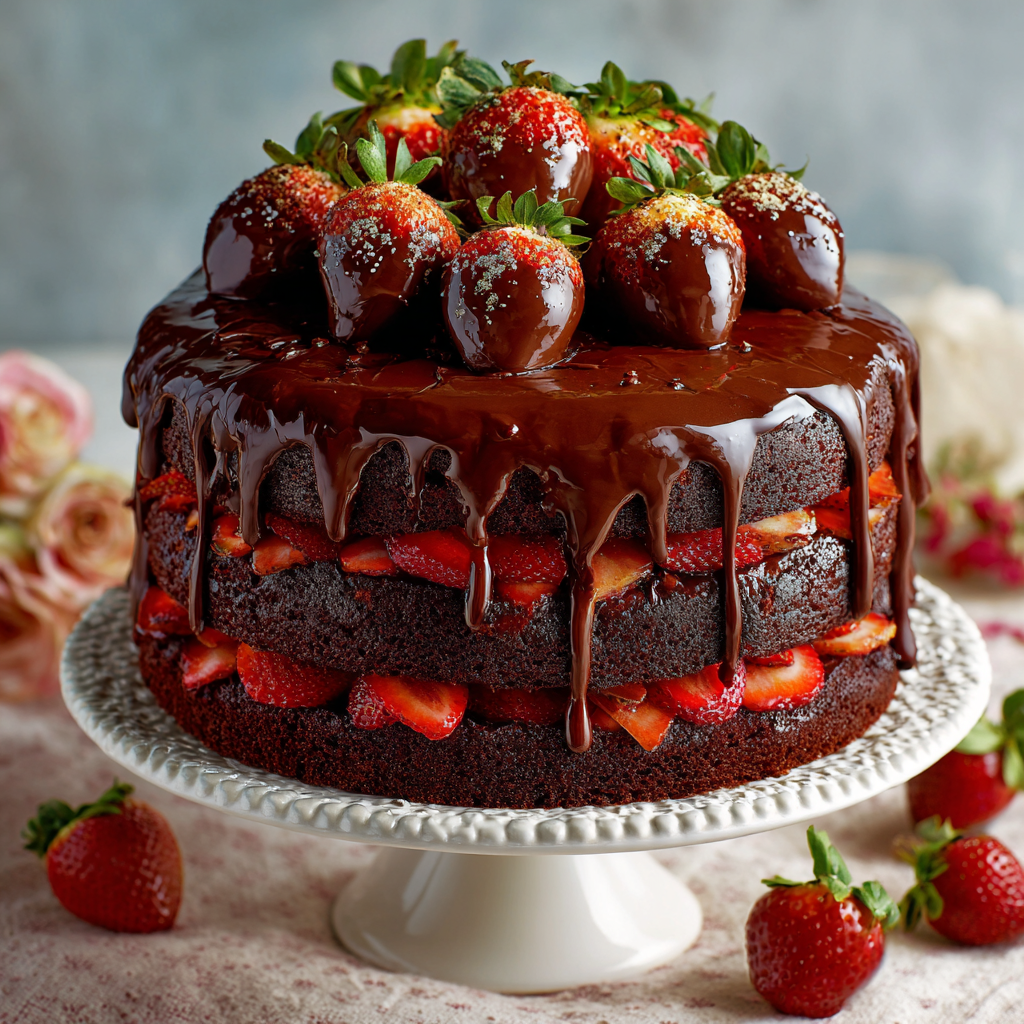
Well, my food-loving friends, I’m about to hand you the keys to the kingdom. This Chocolate-Covered Strawberry Drip Cake is that moment, bottled up in layers of pure, unadulterated joy. We’re talking about a melt-in-your-mouth moist chocolate cake that’s so rich it should pay taxes. It’s layered with a sweet, fruity strawberry filling that cuts through the decadence perfectly. The whole gorgeous thing gets cloaked in a sleek, shiny chocolate ganache drip that cascades down the sides like a delicious waterfall. And the crowning glory? A handful of glossy, chocolate-dipped fresh strawberries perched on top.
It looks like it came from a fancy patisserie, but I promise you, it’s built on simple, soulful techniques. We’re going to walk through this together, step-by-step. No fancy chef jargon, no stress—just you, me, and the glorious mission of creating a centerpiece that tastes even better than it looks. So, tie on that apron, find your favorite mixing bowl, and let’s make a memory, one delicious layer at a time.
The Cake That Started It All: A Sweet Slice of Memory
This cake takes me right back to my first “serious” date with my now-wife. I was a nervous wreck, trying to plan the perfect evening. I figured a home-cooked meal would show I had skills, but dessert… dessert needed to be a grand gesture. I wanted to create something that said, “I’m sophisticated and have my life together,” but also, “I have a giant, gooey, chocolate-filled heart.”
I landed on the classic combination of chocolate and strawberries. But a simple bowl of dipped berries felt too simple. I wanted drama! So, I baked my most reliable chocolate cake, whipped up a ganache I crossed my fingers would drip just right, and arranged those chocolate-dipped strawberries on top like a crown. When I brought it out, her face lit up. It wasn’t just a cake anymore; it was a symbol of effort, of care, of saying “you’re special” without using any words. It’s been our anniversary cake ever since, and now, I’m so thrilled to share that same feeling with you.
Gathering Your Delicious Arsenal: The Ingredients
Before we start, let’s get familiar with our team players. Using quality ingredients makes a difference, but I’ve also got plenty of swaps and shortcuts if you’re in a pinch!
For the Chocolate Cake:
- 1¾ cups all-purpose flour: The sturdy foundation of our cake. For a slightly denser, richer crumb, you can swap in cake flour.
- ¾ cup unsweetened cocoa powder: Use natural, not Dutch-processed, for the best rise with our baking soda. This is where that deep chocolate flavor comes from, so don’t skimp!
- 2 cups granulated sugar: Sweetness and tenderness, all in one. It also helps create that beautiful, crackly cake top we all love.
- 1½ teaspoons baking soda & 1½ teaspoons baking powder: Our dynamic leavening duo! This double act ensures our cake rises sky-high and stays beautifully light.
- 1 teaspoon salt: A must! Salt is the secret weapon that makes all the chocolate flavors pop and prevents the cake from tasting flat.
- 2 large eggs: They bring structure and richness to the party. Make sure they’re at room temperature for a smoother, more emulsified batter.
- 1 cup buttermilk: The tangy superstar that tenderizes the crumb like nobody’s business. No buttermilk? No problem! Add 1 tablespoon of white vinegar or lemon juice to a cup of milk and let it sit for 5 minutes.
- ½ cup vegetable oil: Oil keeps this cake incredibly moist for days longer than butter-based cakes would. I use canola or avocado oil.
- 1 teaspoon pure vanilla extract: The flavor enhancer. It rounds out the chocolate and adds a layer of warmth.
- 1 cup hot coffee or hot water: Don’t panic! You won’t taste the coffee. It simply intensifies the chocolate flavor, making it taste more chocolaty. It’s my #1 chef hack for the ultimate chocolate cake.
For the Filling & Frosting:
- ¾ cup high-quality strawberry preserves or jam: Look for one with real fruit pieces for the best texture and flavor. This is our simple, no-cook filling!
- Optional: 1 cup fresh sliced strawberries: For an extra burst of fresh fruitiness inside, toss some sliced berries over the jam layer.
For the Ganache Drip & Decoration:
- ½ cup heavy cream: The high fat content is crucial for a silky, luxurious ganache that drips beautifully.
- 1 cup semi-sweet chocolate chips: We’ll use half for the ganache drip and half for dipping the strawberries. I like semi-sweet for its balance, but dark chocolate works wonderfully too!
- 8-10 perfect, fresh strawberries: Pick ones that are bright red, firm, and have a nice shape for dipping. Wash and dry them THOROUGHLY—water is the enemy of melted chocolate!
Let’s Get Baking: The Step-by-Step Guide
Okay, team. Here we go. Follow these steps, read my little hacks along the way, and you’ll have a masterpiece in no time.
Step 1: Bake the Chocolate Cake
Preheat your oven to 350°F (175°C). Grease three 8-inch round cake pans with butter or cooking spray, then line the bottoms with parchment paper circles. This is my non-negotiable tip for cakes that release perfectly every single time.
In a large bowl, whisk together the flour, cocoa powder, sugar, baking soda, baking powder, and salt. Get it really well combined. We’re building a strong flavor base here.
Add the eggs, buttermilk, oil, and vanilla to the dry ingredients. Use an electric mixer on medium speed (or a whole lot of elbow grease with a whisk) to beat it for about two minutes until it’s smooth and beautifully combined.
Now, for the magic. Reduce the mixer speed to low and carefully pour in the hot coffee or water. The batter will be very thin—this is exactly what we want! Don’t fret; it’s the key to an ultra-moist cake.
Divide the batter evenly between your three prepared pans. I like to use a kitchen scale for precision, but if you don’t have one, a measuring cup works just fine. Bake for 30-35 minutes, or until a toothpick inserted into the center comes out with just a few moist crumbs attached.
Chef’s Hack: Let the cakes cool in their pans on a wire rack for 10 minutes. Then, run a knife around the edge and invert them onto the rack to cool completely. Do not try to assemble this cake with even slightly warm layers, or you’ll have a melty, sliding mess. Patience is your best friend here!
Step 2: Whip Up the Silky Ganache
Place ½ cup of the chocolate chips in a heatproof bowl. In a small saucepan, heat the heavy cream over medium heat until it just begins to simmer—you’ll see little bubbles around the edges. Don’t let it boil vigorously!
Immediately pour the hot cream over the chocolate chips. Let it sit, untouched, for one full minute. This allows the chocolate to gently melt from the bottom up.
After a minute, start in the center of the bowl and whisk slowly, moving outward, until the mixture is smooth, glossy, and completely combined. Let this ganache cool at room temperature. We need it to thicken slightly so it drips down the cake slowly instead of just running right off. This can take 15-30 minutes.
Step 3: Create the Chocolate-Dipped Strawberries
While the ganache is cooling, melt the remaining ½ cup of chocolate chips. You can do this in the microwave in 20-second bursts, stirring between each, or over a double boiler.
Hold each strawberry by the stem (or stick a toothpick in the top) and dip it into the melted chocolate, swirling to coat about two-thirds of the berry. Let the excess chocolate drip off, then place it on a parchment-lined plate or tray. Let them set at room temperature or pop them in the fridge to speed things up.
Step 4: The Grand Assembly!
Place your first completely cool cake layer on a cake stand or plate. Spread a thin, even layer of the strawberry jam over the top. If you’re using fresh sliced strawberries, scatter a handful over the jam now.
Place the second cake layer on top and repeat. Top with the final cake layer.
At this stage, I like to do a “crumb coat.” Spread a very thin layer of the slightly thickened ganache (or a simple chocolate buttercream if you prefer) over the entire cake. This isn’t for looks; it’s to trap any loose crumbs. Pop the cake in the fridge for 15 minutes to set this coat. This makes the final drip and decoration infinitely cleaner!
Now, for the main event! Take your thickened ganache. The consistency is key—it should be like warm pudding. Pour about half of the ganache onto the center of the chilled cake. Use an offset spatula to gently push it to the edges and encourage it to drip over the sides. Add more ganache as needed until you love the look. Don’t worry about it being perfect—the drips are part of the charm!
Finally, artfully arrange your gorgeous chocolate-dipped strawberries on top of the cake. And just like that, you’ve created a showstopper.
How to Serve This Masterpiece
Presentation is the final flourish! Use a beautiful cake stand to give your creation the pedestal it deserves. When it’s time to slice, dip your sharp knife in hot water and wipe it dry between each cut. This gives you those stunning, clean slices where you can see every beautiful layer.
I love serving this cake with a little extra something on the side. A dollop of freshly whipped cream or a small scoop of vanilla bean ice cream provides a lovely, cool contrast to the rich chocolate. For a truly decadent touch, drizzle a little extra melted strawberry jam or chocolate sauce on the plate before placing the slice.
Make It Your Own: Delicious Recipe Variations
The beauty of this cake is its versatility. Feel free to play and customize it to your heart’s content!
- White Chocolate Dream: Swap the semi-sweet chocolate in the ganache and dip for white chocolate. It creates a stunning visual contrast and a sweeter flavor profile.
- Raspberry Rendezvous: Not a strawberry fan? Use seedless raspberry jam for the filling and dip fresh raspberries for the top. The tartness is incredible with the chocolate.
- Nutty Crunch: Add a layer of texture! Sprinkle some chopped, toasted hazelnuts or pecans between the cake layers along with the jam.
- Boozy & Bold (Adults Only!): For a sophisticated twist, brush the cake layers with a little Chambord (raspberry liqueur) or Grand Marnier before adding the jam filling.
- Gluten-Free & Dairy-Free Friendly: Use your favorite 1:1 gluten-free flour blend. For the buttermilk, use a plant-based milk + vinegar substitute, and use coconut cream and dairy-free chocolate chips for the ganache.
Beau’s Chef’s Notes & Kitchen Confessions
This recipe has been my faithful companion for years, and it’s evolved with every bake. I once, in a frantic pre-date hurry, used boiling hot ganache for the drip. Let’s just say it looked more like a chocolate mudslide than an elegant cascade. I learned the cooling lesson the hard way so you don’t have to!
Another time, I didn’t dry my strawberries well enough, and the chocolate seized up into a grainy mess. We ended up with “chocolate-crusted” strawberries, which, while still tasty, weren’t exactly the glossy beauties I was going for. The journey is half the fun, and even the “mistakes” usually still taste amazing.
Your Questions, Answered: FAQs & Troubleshooting
Q: My ganache is too thin/runny. What do I do?
A: Don’t worry, this happens to the best of us! Just let it sit at room temperature for a bit longer. If you’re really in a rush, you can pop it into the fridge for 5-minute intervals, stirring each time, until it thickens to a pourable but not watery consistency.
Q: Can I make the components ahead of time?
A: Absolutely! This is a great party trick. Bake the cake layers up to 2 days in advance, wrap them tightly in plastic wrap, and store at room temp. You can make the ganache and dip the strawberries a day ahead; just store the ganache at room temperature and the berries in the fridge. Assemble the cake the day you plan to serve it for the freshest look and taste.
Q: Why did my cake layers sink in the middle?
A: This is usually due to two things: 1) The oven door was opened too early, causing a temperature drop, or 2) The leavening agents (baking soda/powder) are old and have lost their potency. Check those expiration dates!
Q: Can I use frozen strawberries for the filling?
A: I don’t recommend it for the fresh slices inside, as they release too much water and can make the cake soggy. Stick to high-quality jam or preserves, or use perfectly fresh berries.

Chocolate-Covered Strawberry Drip Cake: A Showstopping Centerpiece of Romance
Description
This cake is a showstopper for any celebration! Layers of moist chocolate cake meet sweet strawberry filling, all covered in a glossy chocolate ganache drip and topped with chocolate-dipped strawberries. Perfect for birthdays, anniversaries, Valentine’s Day, or any day that deserves a special treat.
Ingredients
Chocolate Cake
-
1¾ cups all-purpose flour
-
¾ cup unsweetened cocoa powder
-
2 cups granulated sugar
-
1½ tsp baking soda
-
1½ tsp baking powder
-
1 tsp salt
-
2 large eggs, room temperature
-
1 cup buttermilk (or 1 cup milk + 1 tbsp vinegar)
-
½ cup vegetable oil
-
1 tsp vanilla extract
-
1 cup hot coffee or hot water
Strawberry Filling
-
¾ cup strawberry preserves or jam
-
Optional: 1 cup fresh sliced strawberries
Chocolate Ganache & Decoration
-
½ cup heavy cream
-
1 cup semi-sweet chocolate chips (½ for ganache, ½ for dipping strawberries)
-
8–10 fresh strawberries, washed and dried
Instructions
1️⃣ Bake the Chocolate Cake
-
Preheat oven to 350°F (175°C). Grease three 8-inch cake pans and line bottoms with parchment.
-
Whisk together flour, cocoa, sugar, baking soda, baking powder, and salt.
-
Add eggs, buttermilk, oil, and vanilla. Beat until smooth.
-
Slowly add hot coffee/water and mix until combined. Batter will be thin—this keeps it moist!
-
Divide batter among pans and bake 30–35 min. Toothpick should come out with a few crumbs.
-
Cool in pans 10 min, then invert onto a wire rack to cool completely.
2️⃣ Make the Ganache
-
Heat ½ cup cream until it simmers, then pour over ½ cup chocolate chips.
-
Let sit 1 min, then whisk until smooth and glossy.
-
Cool 15–30 min until slightly thickened for dripping.
3️⃣ Dip the Strawberries
-
Melt remaining ½ cup chocolate chips.
-
Dip strawberries, coating 2/3 of each. Set on parchment to firm.
4️⃣ Assemble the Cake
-
Place first cake layer on stand, spread strawberry preserves and fresh slices.
-
Add second layer, repeat. Top with final layer.
-
Optional: Crumb coat with thin ganache layer; chill 15 min.
-
Pour thickened ganache on top, let drip down sides.
-
Arrange chocolate-dipped strawberries on top.
Notes
-
Cake layers: Completely cool before assembling to avoid sliding layers.
-
Cutting slices: Dip knife in hot water and wipe clean between cuts.
-
Make ahead: Cake layers and ganache can be prepared 1–2 days ahead. Assemble the day of serving.
-
Substitutions: Use white chocolate or raspberry jam for variations; gluten-free flour works too.
Nutrition
- Calories: 560 Cal Per Serving
- Fat: 30g
- Carbohydrates: 65g
- Protein: 6g
Nutritional Information (Because We’re All About Balance!)
Alright, let’s keep it real. This is a celebration cake, a treat to be savored and enjoyed with loved ones. It’s not your everyday health food, and that’s perfectly okay! Life is all about balance. Here’s a rough estimate per slice (based on 12 servings), so you can indulge mindfully.
Per Slice: Calories: ~560 | Protein: 6g | Fat: 30g | Carbs: 65g
Remember, these values can vary based on the specific brands of ingredients you use and the size of your slices. My philosophy? Enjoy a magnificent slice, share it with people you love, and maybe go for an extra walk tomorrow. Food is joy, and this cake is pure, unapologetic joy.
Final Sweet Thoughts
And there you have it! Your guide to creating a truly unforgettable Chocolate-Covered Strawberry Drip Cake. This isn’t just a recipe; it’s a project, a story, and a delicious piece of edible art. It’s about the joy of creating something beautiful with your own two hands and sharing that feeling with others.
I hope this recipe brings as much happiness to your kitchen as it has to mine. If you make it (and I really hope you do!), I’d be absolutely thrilled to see your

Cupid’s Marble Cake: Swirled, Sweet & Valentine-Ready
Cupid’s Marble Cake: Swirled, Sweet & Valentine-Ready
More Than Just a Pretty Face: Your New Go-To Valentine’s Cake
Hey friends, Beau here! Let’s be real for a second. Valentine’s Day can sometimes feel like a lot of pressure, right? Fancy dinners, extravagant gifts… it can be overwhelming. But you know what never lets you down? A homemade cake, baked with a little bit of love and a whole lot of butter. And that’s exactly why I’m so excited to share my recipe for Cupid’s Marble Cake with you today.
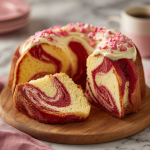
This isn’t just any cake. This is a show-stopping, conversation-starting, “did-you-really-make-that?!” kind of cake. We’re talking a soft, moist, buttery vanilla cake swirled with a gorgeous, vibrant red batter. It’s festive without being fussy, elegant but incredibly easy, and it tastes like a warm, sugary hug. Whether you’re planning a romantic dinner for two, hosting a Galentine’s bash with your besties, or just want to treat yourself because you deserve it (you do!), this marble cake is your perfect partner in crime. So, tie on your favorite apron, preheat that oven, and let’s create some magic that’s as fun to make as it is to eat.
The Cake That Started It All: A Sweet Slice of Memory
This cake takes me right back to my Grandma June’s kitchen. She wasn’t a fancy pastry chef, but boy, could she bake. Her marble cake was legendary. Every Sunday, without fail, one would be cooling on her wire rack, filling the whole house with that sweet, vanilla-kissed aroma. I’d sit at her Formica table, legs swinging, watching with sheer wonder as she’d create those beautiful swirls with nothing more than a butter knife and a steady hand. To me, it was pure wizardry.
She’d always let me have the first slice, still slightly warm from the oven. That first bite was a treasure hunt—would I get more of the classic vanilla or a bite of the deeper, slightly richer chocolate swirl? (Hers was chocolate, my Valentine’s version is a fun, festive twist on her classic). She’d wink and say, “Beau, life is like a marble cake. The best parts are all mixed up together.” This recipe is my love letter to her, to those Sunday afternoons, and to the simple, powerful joy of sharing something delicious with someone you love.
Gathering Your Sweetheart Squad: The Ingredients
One of the best things about this cake is that you probably have most of these ingredients in your pantry right now. It’s all about simple, quality components coming together to create something extraordinary. Let’s break it down.
- 2½ cups all-purpose flour: The trusty foundation of our cake. It gives the crumb that perfect, tender structure. For a slightly lighter cake, you can swap in cake flour, but all-purpose works beautifully.
- 2½ tsp baking powder: Our leavening hero! This is what gives the cake its lift and fluffy texture. Make sure yours is fresh for the best rise.
- ½ tsp salt: Don’t you dare skip it! Salt is the flavor enhancer that makes all the sweet, buttery notes pop. It’s the secret weapon in every baker’s arsenal.
- ¾ cup unsalted butter, softened: This is non-negotiable, friends. “Softened” is the key word here. Leave it on the counter for an hour or so until it’s cool but yields gently to a press. This creams up with the sugar to create an airy, light base for our batter.
- 1¾ cups sugar: For sweetness and that lovely, tender crumb. I use regular granulated sugar here.
- 4 large eggs: Bring these to room temperature, too! Room temp eggs incorporate much more smoothly into the butter and sugar, creating a better emulsion and a loftier cake.
- 1 tbsp vanilla extract: Go for the good stuff! A full tablespoon might seem like a lot, but it gives us that wonderful, warm vanilla flavor that sings through every single bite.
- 1 cup whole milk: I prefer whole milk for its richness, which contributes to a super moist cake. But 2% will work in a pinch. Also, room temp! See a pattern? 🙂
- Red food coloring: This is where the Valentine’s magic happens! I recommend a gel food coloring for a vibrant, bold red without thinning out the batter. You’ll only need a few drops.
Let’s Get Swirling: The Step-by-Step Dance
Ready to play Cupid in the kitchen? Follow these steps, and you’ll have a masterpiece in no time. I’ve packed this section with all my favorite chef hacks to ensure your success.
- Preheat and Prep: First things first, get that oven preheated to a toasty 350°F (175°C). This ensures a consistent temperature from the moment your cake goes in. Now, generously grease your bundt pan or a 9×5 inch loaf pan. I’m a big fan of using a baking spray with flour in it – it’s a lifesaver for easy release! Set your pan aside.
- Whisk the Dry Team: In a medium bowl, grab your whisk and give the flour, baking powder, and salt a good, thorough whisking. We’re not just mixing here; we’re aerating the flour and making sure the baking powder is evenly distributed. This is your first step to a uniform, perfect rise. Set this bowl aside.
- Cream the Butter & Sugar: In a large mixing bowl, beat the softened butter and sugar together. Now, don’t rush this! We’re not just combining them; we’re “creaming” them. Beat on medium-high speed for a good 3-5 minutes, until the mixture turns pale yellow and becomes wonderfully light and fluffy. This process incorporates air, which is crucial for the cake’s texture. This is the heart of the operation, folks.
- Incorporate the Eggs & Vanilla: With the mixer on medium, add the eggs one at a time, beating well after each addition. This prevents the batter from breaking. Then, beat in that glorious tablespoon of vanilla. Scrape down the sides of the bowl with a spatula to make sure everything is homogenous.
- Combine Wet & Dry: Here’s the final mixing phase. With the mixer on low, add about one-third of the dry ingredients, followed by half of the milk. Repeat, ending with the final third of the dry ingredients. Mix just until the flour disappears. Pro-Tip: Overmixing at this stage develops gluten and can lead to a tough cake. A few streaks of flour are okay; we’ll finish mixing when we divide the batter.
- Create the Red Batter: Now for the fun part! Divide the batter evenly between two bowls. Into one bowl, add your red food coloring. I start with a few drops, mix, and then add more until I get that perfect, passionate red hue. Stir gently until the color is fully incorporated.
- The Marbling Magic: Using two spoons or a small scoop, alternate dollops of the red and white batter into your prepared pan. You can be random or create a pattern—there’s no wrong way! Once all the batter is in, take a thin knife or a long skewer and gently swirl it through the batter in a figure-eight or zig-zag motion. Don’t overdo it! 4-5 passes is plenty. We want defined swirls, not a muddy pink cake.
- Bake to Perfection: Slide the pan into your preheated oven and bake for 45-50 minutes. The cake is done when it’s golden on top, pulling away slightly from the sides, and a toothpick inserted into the center comes out clean or with a few moist crumbs. Ovens vary, so start checking at the 40-minute mark.
- The All-Important Cool Down: Once baked, let the cake cool in the pan on a wire rack for 15-20 minutes. This allows the structure to set. Then, carefully invert it onto the rack to cool completely before you even *think* about frosting it. A warm cake will melt your frosting into a puddle!
Dress to Impress: Serving Your Masterpiece
Now that your stunning cake has cooled, it’s time for the finishing touches! I love keeping it simple to let those beautiful swirls take center stage. A simple whipped vanilla frosting piped or spread over the top is just perfect. It’s light, not too sweet, and lets the cake shine. Then, go wild with the decorations! A shower of red and pink sprinkles, a few conversation hearts, or even some fresh raspberries make it look extra special.
For serving, I like to use a serrated knife and a gentle sawing motion to get clean slices that proudly display the marbled interior. Pair each slice with a cold glass of milk, a hot cup of coffee, or even a glass of bubbly prosecco for a truly celebratory feel. This cake is the star of the show, so let it be!
Make It Your Own: Delicious Twists & Swaps
Feel like playing around? This recipe is a fantastic canvas for your creativity. Here are a few of my favorite ways to mix it up:
- Chocolate-Vanilla Classic: Swap the red food coloring for ¼ cup of unsweetened cocoa powder sifted into one half of the batter. Add a tablespoon of extra milk to that portion to keep it the right consistency. Hello, nostalgia!
- Almond Joy Twist: Add ½ teaspoon of almond extract to the white batter and fold a handful of shredded coconut and mini chocolate chips into the red batter before swirling. It’s like a candy bar in cake form!
- Lemon-Raspberry Dream: Add the zest of one lemon to the white batter. For the red batter, use a few tablespoons of raspberry jam instead of food coloring for a natural flavor and color.
- Gluten-Free Friendly: No problem! Use a 1:1 gluten-free all-purpose flour blend. I’ve had great success with this swap, and the results are just as tender.
- Funfetti Valentine: Fold a handful of red and pink sprinkles into the white batter before you divide it. It’s a confetti explosion of joy in every bite!
Beau’s Kitchen Confidential: A Few Parting Tips
This recipe has been a labor of love, and it’s evolved a bit over the years. My first attempt at marbling was… well, let’s just say it looked more like a pink-brown abstract painting than a cake! The key, I learned, is a light hand with the knife. Trust the process.
I also used to be impatient and would frost the cake while it was still warm. The resulting “glaze” was tasty, but not the look I was going for. Letting it cool completely is a game-changer. This cake keeps beautifully in an airtight container at room temperature for several days, if it lasts that long! The flavors actually meld and get even better the next day.
Your Questions, Answered: Cake SOS
I’ve been there, and I’ve got your back. Here are answers to the most common questions I get about this cake.
- Q: My cake is dense and didn’t rise much. What happened?
A: The most common culprits are old baking powder (check the expiry date!), overmixing the batter after adding the flour, or your oven temperature being off. An oven thermometer is a cheap and invaluable tool for any baker!
- Q: How can I get a really vibrant red color?
A: Gel food coloring is your best friend here. Liquid food coloring requires a lot more, which can throw off the liquid balance in your batter. Start with a small amount of gel and build up to your desired shade.
- Q: Can I make this into cupcakes?
A: Absolutely! Line a muffin tin with cupcake liners and fill them ⅔ full. The baking time will be shorter, around 18-22 minutes. Keep a close eye on them!
- Q: My cake stuck to the pan! Help!
A: Oh, the heartbreak! Don’t worry, we’ve all been there. Next time, be extra generous with the baking spray, making sure to get into every nook of the bundt pan. Letting it cool for that 15-20 minutes in the pan is also crucial—it allows the cake to firm up and pull away from the sides naturally.
Cupid’s Marble Cake: Swirled, Sweet & Valentine-Ready
Description
Cupid’s Marble Cake
Ingredients
Dry Ingredients
-
2½ cups all-purpose flour
-
2½ tsp baking powder
-
½ tsp salt
Wet Ingredients
-
¾ cup unsalted butter, softened
-
1¾ cups sugar
-
4 large eggs, room temperature
-
1 tbsp vanilla extract
-
1 cup whole milk, room temperature
-
Red food coloring (gel recommended)
Optional Frosting & Decoration
-
Whipped vanilla frosting
-
Red and pink sprinkles, fresh raspberries, or conversation hearts
Instructions
1️⃣ Prep
-
Preheat oven to 350°F (175°C).
-
Grease a bundt pan or 9×5-inch loaf pan (baking spray with flour recommended).
2️⃣ Mix Dry Ingredients
-
Whisk together flour, baking powder, and salt in a medium bowl. Set aside.
3️⃣ Cream Butter & Sugar
-
In a large bowl, beat butter and sugar 3–5 minutes until pale and fluffy.
-
Add eggs one at a time, then vanilla extract, mixing well.
4️⃣ Combine Wet & Dry
-
On low speed, alternately add flour mixture and milk in thirds, starting and ending with flour. Mix until just combined.
5️⃣ Create Red Batter
-
Divide batter into two bowls.
-
Add red food coloring to one bowl, mixing until fully incorporated.
6️⃣ Marble the Cake
-
Spoon alternating dollops of red and white batter into the pan.
-
Use a knife or skewer to gently swirl 4–5 times, creating defined marbled patterns.
7️⃣ Bake
-
Bake for 45–50 minutes (start checking at 40 minutes).
-
Toothpick should come out clean or with a few moist crumbs.
8️⃣ Cool
-
Cool in pan 15–20 minutes, then invert onto wire rack to cool completely.
9️⃣ Frost & Decorate
-
Spread whipped vanilla frosting over cooled cake.
-
Add sprinkles, raspberries, or conversation hearts for Valentine flair.
Notes
-
Chocolate-Vanilla Twist: Use cocoa powder instead of red food coloring.
-
Almond Joy: Add ½ tsp almond extract to white batter; fold in shredded coconut and mini chocolate chips into red batter.
-
Raspberry-Lemon: Add lemon zest to white batter; fold raspberry jam into red batter.
-
Gluten-Free: Use 1:1 gluten-free flour blend.
-
Cupcake Version: Fill liners ⅔ full; bake 18–22 minutes.
Just the Facts: Nutritional Info*
I believe in balance, friends. Life is about enjoying delicious food, and part of that is being informed. Here’s a rough breakdown per slice (based on 12 slices without frosting). Remember, this is an estimate, and your specific ingredients may vary.
- Calories: 320
- Fat: 14g
- Carbohydrates: 44g
- Sugar: 25g
- Protein: 4g
*This information is approximate and provided for informational purposes only. I’m a chef, not a nutritionist, but I want to give you a helpful guide!
A Sweet Finale
And there you have it! Your guide to creating a truly unforgettable Cupid’s Marble Cake. This recipe is more than just a list of ingredients and steps; it’s an invitation to create, to share, and to make someone’s day a little sweeter. The swirls might not be perfect the first time, and that’s more than okay. It’s the love and the story you bake into it that truly matters.
I’d love to see your beautiful creations! If you make this cake, please share a photo and tag me @FeasticalBeau or use the hashtag #Feastical. You’re not just making a cake; you’re becoming part of our kitchen community. Now go on, preheat that oven and bake someone happy.
With a full heart and an empty mixing bowl,

Chocolate-Covered Cherry Cake: Decadent, Dreamy, and Full of Nostalgia
Chocolate-Covered Cherry Cake: Your New Favorite Slice of Nostalgia
Hey there, friend! Beau here, welcoming you back to my kitchen. You know, I’ve always believed that the very best recipes are the ones that do more than just fill your belly—they fill your heart. They’re the dishes that transport you with a single bite, wrapping you up in a warm, fuzzy blanket of memory and pure, unadulterated joy. And if I had to pick one dessert that absolutely *nails* that feeling, it would be this show-stopping, soul-soothing, downright decadent Chocolate-Covered Cherry Cake.
Think about it: that classic candy combination is iconic for a reason. The deep, dark chocolate. The bright, juicy burst of cherry. It’s a romance in flavor form. But we’re not just making a candy replica here. Oh no. We’re taking that beloved duo and turning it into a full-blown, three-layer celebration cake that’s as beautiful as it is delicious. This is the kind of cake you make for Valentine’s Day to see your sweetheart’s eyes light up. It’s the cake you bake for an anniversary, a birthday, or just a Tuesday when you need a reminder that life is sweet.
I’ve poured all my love for feel-good, comforting desserts into this recipe. We’re talking about a supremely moist and tender chocolate cake that practically melts on your tongue, layered with a sweet-tart cherry filling that oozes with every slice, all wrapped up in a silky-smooth dark chocolate frosting that’s so good, you might just find yourself eating it by the spoonful. (No judgment here—I’ve been there!) So, tie on your favorite apron, put on some good music, and let’s create some magic together. This is more than a cake; it’s an experience.
A Sweet Memory: Where It All Began
This cake has a special little story, and it takes me right back to my grandma’s linoleum-floored kitchen. Every Sunday after church, without fail, she’d have a little glass bowl on her counter filled with those classic, foil-wrapped chocolate-covered cherries. It was our ritual. I’d help her with the roast, and my reward was sneaking one (or two) of those precious treats. I loved the way the chocolate shell would crack under the slightest pressure, giving way to that liquid cherry center. It felt like a tiny, delicious secret.
Years later, when I was first finding my footing in the kitchen, I wanted to recreate that feeling for my wife on our first Valentine’s Day as a married couple. A simple box of candies felt too small for the occasion, but the memory was too big to ignore. So, I started experimenting. I baked my go-to chocolate cake, whipped up a frosting I hoped was worthy of the name, and spooned a simple cherry filling between the layers. The moment we cut into it, that cherry goodness started to spill out, and I was instantly transported back to those sunny Sunday afternoons. It was a hit, and it’s been a Collier family legend ever since. It just goes to show that the most powerful ingredient in any dish is always a dash of nostalgia.
Gathering Your Delicious Cast of Characters
Alright, let’s get our mise en place! That’s just a fancy chef-term for getting all your ingredients measured and ready to go. It makes the baking process feel like a calm, organized dance instead of a frantic scavenger hunt. Here’s everything you’ll need to bring this beauty to life.
For the Chocolate Cake:
- 1¾ cups all-purpose flour: The trusty foundation of our cake. For a slightly lighter crumb, you can swap it 1:1 with cake flour.
- ¾ cup unsweetened cocoa powder: This is where the deep chocolate flavor lives! Use a good-quality cocoa powder—I prefer Dutch-processed for its rich, mellow flavor, but natural works great, too.
- 2 cups granulated sugar: For the perfect level of sweetness that balances the cocoa’s bitterness.
- 1½ teaspoons baking powder & 1½ teaspoons baking soda: Our dynamic leavening duo! They work together to give this cake its impressive rise and tender texture.
- 1 teaspoon salt: Never skip the salt! It’s the flavor enhancer that makes all the chocolate and cherry notes pop.
- 2 large eggs: They’re the binding agents that give our cake structure and a lovely, rich texture.
- 1 cup buttermilk: The secret weapon for an incredibly moist and tender crumb! No buttermilk? No problem! Make a quick substitute by adding 1 tablespoon of white vinegar or lemon juice to a cup of regular milk and let it sit for 5 minutes.
- ½ cup vegetable oil: Oil keeps the cake moist for days longer than butter-based cakes. I use a neutral oil like canola or grapeseed.
- 2 teaspoons vanilla extract: The aromatic backbone that makes everything taste more… well, more like itself!
- 1 cup hot water or hot coffee: Now, don’t be scared! The hot liquid “blooms” the cocoa powder, intensifying its chocolate flavor. The coffee won’t make it taste like coffee—it just makes the chocolate taste richer and deeper. I highly recommend it!
For the Luscious Cherry Filling:
- 1 can (21 oz) cherry pie filling: This is our convenient, flavor-packed shortcut! It’s got the perfect balance of cherries and thick, glossy sauce.
- Optional: A splash of almond extract: If you really want to level up, add about ¼ to ½ teaspoon. Almond and cherry are a match made in heaven, and it echoes that classic candy flavor beautifully.
For the Silky Chocolate Frosting:
- 1 cup (2 sticks) unsalted butter, softened: The base of our frosting. “Softened” is key! It should be at room temperature so it whips up light and fluffy.
- ¾ cup unsweetened cocoa powder: Double the chocolate, double the fun!
- 3½ cups powdered sugar: This gives the frosting its structure and sweetness. Sift it if it’s lumpy for an extra-smooth finish.
- ¼ cup heavy cream: This creates that luxurious, silky texture. You can use milk, but the cream gives it a richer, more stable consistency.
- 1 teaspoon vanilla extract: Because even frosting needs a little vanilla love.
- A pinch of salt: To cut through the sweetness and balance everything out.
Let’s Bake: The Step-by-Step Magic
Ready to get your hands dirty? Follow these steps, and you’ll have a stunning, professional-looking cake that’s straight from the heart. I’ve sprinkled in my favorite chef hacks to make sure you feel confident every step of the way.
Step 1: Preheat and Prep. First things first, get that oven preheating to a toasty 350°F (175°C). Now, let’s get our cake pans ready. You’ll need three 8-inch round pans. My foolproof method? I trace the bottom of a pan on parchment paper, cut out the circles, and place them in the bottom of the pans. Then, I give the sides a good coating of butter or baking spray and a light dusting of flour or cocoa powder. This little ritual guarantees your cakes will release perfectly every single time. No more cake-wrecking heartbreaks!
Step 2: The Dry Team Assembles. In the bowl of your stand mixer (or a large bowl if you’re using a hand mixer), we’re going to whisk together all our dry ingredients: the flour, cocoa powder, sugar, baking powder, baking soda, and salt. Give them a good whisk for about a minute. This isn’t just about combining; it’s about aerating the flour and making sure those leaveners are evenly distributed for a uniform rise. See? We’re already building a better cake.
Step 3: Bring in the Wet Crew. Now, with your mixer on low speed, add in the eggs, one at a time, followed by the buttermilk, vegetable oil, and vanilla extract. Mix just until everything is combined. The batter will be lovely and thick at this point. Now, here comes the fun part. Slowly pour in the hot water or coffee. The batter will become very thin and liquidy—this is totally normal and exactly what we want! Don’t panic. This thin batter is the secret to that incredibly moist, almost fudgy crumb.
Step 4: Bake to Perfection. Carefully divide the batter evenly between your three prepared pans. I like to use a kitchen scale for ultimate precision, but if you don’t have one, a measuring cup works just fine. Slide them into your preheated oven and bake for 30-35 minutes. You’ll know they’re done when a toothpick inserted into the center comes out with a few moist crumbs attached, but no wet batter. Chef’s Hack: Rotate your pans halfway through baking to ensure they bake evenly.
Step 5: The All-Important Cool Down. This might be the hardest step: you have to let the cakes cool. Take them out of the oven and let them rest in their pans for about 10 minutes. Then, run a knife around the edge, and invert them onto a wire rack to cool completely. I’m serious about completely cool. If you try to frost a warm cake, you’ll have a melty, sliding mess on your hands. Patience is a virtue, especially in baking!
Step 6: Whip Up That Dreamy Frosting. While the cakes are cooling, let’s make the frosting. In a large bowl, beat the softened butter and cocoa powder together until they’re smooth and combined. Gradually add in the powdered sugar, about a cup at a time, alternating with splashes of the heavy cream and the vanilla. Once it’s all in, beat the living daylights out of it on medium-high speed for 2-3 minutes. You’ll see it transform from a dull brown to a lighter, fluffier, and much more spreadable frosting. That beating incorporates air, making it light as a cloud.
Step 7: The Grand Assembly! Place your first cake layer on your cake stand or plate. Spoon about half of the cherry pie filling onto the center and spread it out evenly, leaving about a half-inch border around the edge. This prevents the filling from squishing out when you add the next layer. Place the second cake layer on top and repeat with the remaining filling. Top with the final cake layer. Now, take about a third of your frosting and do a “crumb coat”—a very thin layer all over the cake to seal in any crumbs. Pop the whole thing in the fridge for 15 minutes to set. Then, use the remaining frosting to beautifully cover the top and sides of the cake. Don’t worry about it being perfect—a few swoops and swirls just add to the homemade charm!
How to Serve This Masterpiece
Presentation is the final flourish! I love to garnish this cake with a few simple touches that make it look like it came straight from a patisserie. A crown of fresh, stem-on cherries on top is always a showstopper. You could also sprinkle the top with some chocolate shavings, a dusting of cocoa powder, or even a few slivered almonds for a little crunch that plays off that optional almond extract.
When it’s time to slice, use a sharp, thin-bladed knife. Run it under hot water, wipe it dry, and then make your cut. The heat will glide right through the chocolate frosting and cleanly into the cake, giving you those picture-perfect slices where the cherry layer is proudly on display. Serve it up with a cold glass of milk, a hot cup of coffee, or even a glass of red wine for the ultimate grown-up treat. This cake is rich, so a little slice goes a long, delicious way.
Make It Your Own: Fun Recipe Twists
One of the best things about cooking is making a recipe your own. Feel free to play with this one! Here are a few of my favorite variations:
- The Black Forest Twist: Add a layer of sweetened whipped cream on top of the cherry filling before adding the next cake layer. Garnish with more whipped cream and chocolate curls for a classic Black Forest gateau vibe.
- Boozy & Bold: For an adult-only version, add a tablespoon of Kirsch (cherry liqueur) or Chambord (black raspberry liqueur) to the cherry filling. You can also brush a little on the cake layers themselves for an extra flavor punch.
- Chocolate Ganache Drip: Feeling extra decadent? Instead of frosting the entire cake, do a simple crumb coat, then pour a warm, glossy chocolate ganache over the top, letting it drip artfully down the sides. It’s pure drama.
- Gluten-Free Friendly: You can easily make this cake gluten-free by using a 1:1 gluten-free all-purpose flour blend. I’ve had great success with this swap, and the cake is just as moist and delicious.
- Fresh Cherry Filling: If you have the time and fresh cherries are in season, you can make a homemade filling. Pit about 2 cups of cherries, cook them down with a little sugar and lemon juice until syrupy, and thicken with a cornstarch slurry.
Beau’s Kitchen Confidential
This recipe has been a living, evolving thing in my kitchen for years. The first time I made it, I was so nervous about the thin batter that I almost added more flour! I’m so glad I trusted the process. Over time, I started adding the hot coffee instead of water, and it was a total game-changer. The depth of flavor it adds is incredible.
Another funny story: I once made this for a potluck and transported it in my car. I had to brake a little hard, and the top layer slid right off! I arrived with a slightly lopsided cake, which I quickly dubbed my “Leaning Tower of Yum-za.” You know what? It was the first cake to disappear. It just goes to show that even the “imperfect” bakes are full of perfect flavor and love. Don’t stress about it being flawless. The love you bake into it is the most important ingredient.
Print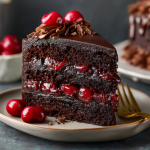
Chocolate-Covered Cherry Cake: Decadent, Dreamy, and Full of Nostalgia
Description
Chocolate-Covered Cherry Cake
Ingredients
For the Cake
-
1 box devil’s food cake mix (15.25 oz)
-
1 can cherry pie filling (21 oz)
-
3 large eggs
-
1 teaspoon almond extract (optional but amazing)
For the Chocolate Ganache Frosting
-
1 cup semi-sweet chocolate chips
-
½ cup heavy cream
-
2 tablespoons unsalted butter
-
1 teaspoon vanilla extract
For Topping (Optional but Delicious)
-
Fresh cherries or maraschino cherries for garnish
-
Chocolate shavings or curls
Instructions
1️⃣ Make the Cake
-
Preheat oven to 350°F (175°C). Grease and flour a 9×13-inch baking pan (or line with parchment).
-
In a large mixing bowl, combine the cake mix, cherry pie filling, eggs, and almond extract.
-
Mix gently by hand or with a spatula until combined — don’t overmix! You want to keep the cherries intact.
-
Pour batter into the prepared pan and spread evenly.
-
Bake for 30–35 minutes or until a toothpick inserted in the center comes out clean.
-
Let the cake cool completely in the pan.
2️⃣ Make the Ganache
-
In a small saucepan over low heat, warm the heavy cream just until it starts to steam — don’t boil.
-
Remove from heat and add chocolate chips and butter. Let sit for 1–2 minutes.
-
Whisk until smooth and glossy. Stir in vanilla extract.
-
Allow the ganache to cool slightly (about 10 minutes) until it thickens enough to spread.
3️⃣ Frost and Finish
-
Spread ganache evenly over the cooled cake.
-
Chill in the fridge for about 20 minutes to set the chocolate.
-
Garnish with cherries and chocolate shavings if desired.
-
Slice and serve!
Storage
-
Store covered in the refrigerator for up to 5 days.
-
For longer storage, freeze individual slices for up to 2 months — thaw before serving.
Notes
-
Add a splash of coffee (2 tablespoons) to the batter for a richer chocolate flavor.
-
For an extra cherry punch, drizzle a little cherry juice from the pie filling over the cake before frosting.
-
You can also bake it in two 9-inch round pans for a layer cake look.
Your Questions, Answered!
I’ve gotten a lot of questions about this cake over the years, so I’ve compiled the most common ones here to help you out.
Q: My cake layers sunk in the middle. What happened?
A: This is usually a sign of too much leavening or under-baking. Make sure your baking powder and soda are fresh! Also, resist the urge to open the oven door during the first 25 minutes of baking, as a rush of cold air can cause the cake to fall. Finally, make sure that toothpick test comes out clean.
Q: Can I make this cake ahead of time?
A: Absolutely! You can bake the cake layers up to two days in advance. Let them cool completely, then wrap them tightly in plastic wrap and store them at room temperature. You can also freeze them for up to a month. The frosting can be made a day ahead and stored in the fridge; just let it come to room temperature and re-whip it before using. I prefer to assemble the cake the day I’m serving it for the freshest taste and texture.
Q: My frosting is too thick/too thin. How can I fix it?
A: Frosting is all about texture. If it’s too thick and difficult to spread, beat in another tablespoon or two of heavy cream. If it’s too thin and runny, you likely need to add a bit more powdered sugar. Add it a quarter cup at a time until it reaches your
Final Thoughts: A Cake That Feels Like Home
So, there you have it. This Chocolate-Covered Cherry Cake is more than just a list of ingredients and steps—it’s a passport to a sweeter, simpler time. It’s the taste of a cherished memory, baked into a form you can share with the people you love most. Whether you’re celebrating a milestone or simply celebrating the fact that you made it through another week, this cake turns an ordinary moment into something extraordinary.
Don’t be intimidated by its stunning appearance. Every step, from the surprisingly thin batter to the final flourish of frosting, is designed with heart and home bakers in mind. Trust the process, embrace any happy little accidents (like my famous “Leaning Tower of Yum-za”), and remember that the warmth and love you pour into it are what truly make it special.
So, go ahead. Preheat that oven. Fill your kitchen with the unforgettable aroma of chocolate and nostalgia. I have a feeling that after one bite, this won’t just be a recipe you tried—it will become a new tradition, a story you’ll tell, and your new favorite slice of nostalgia.
Happy Baking,
Beau
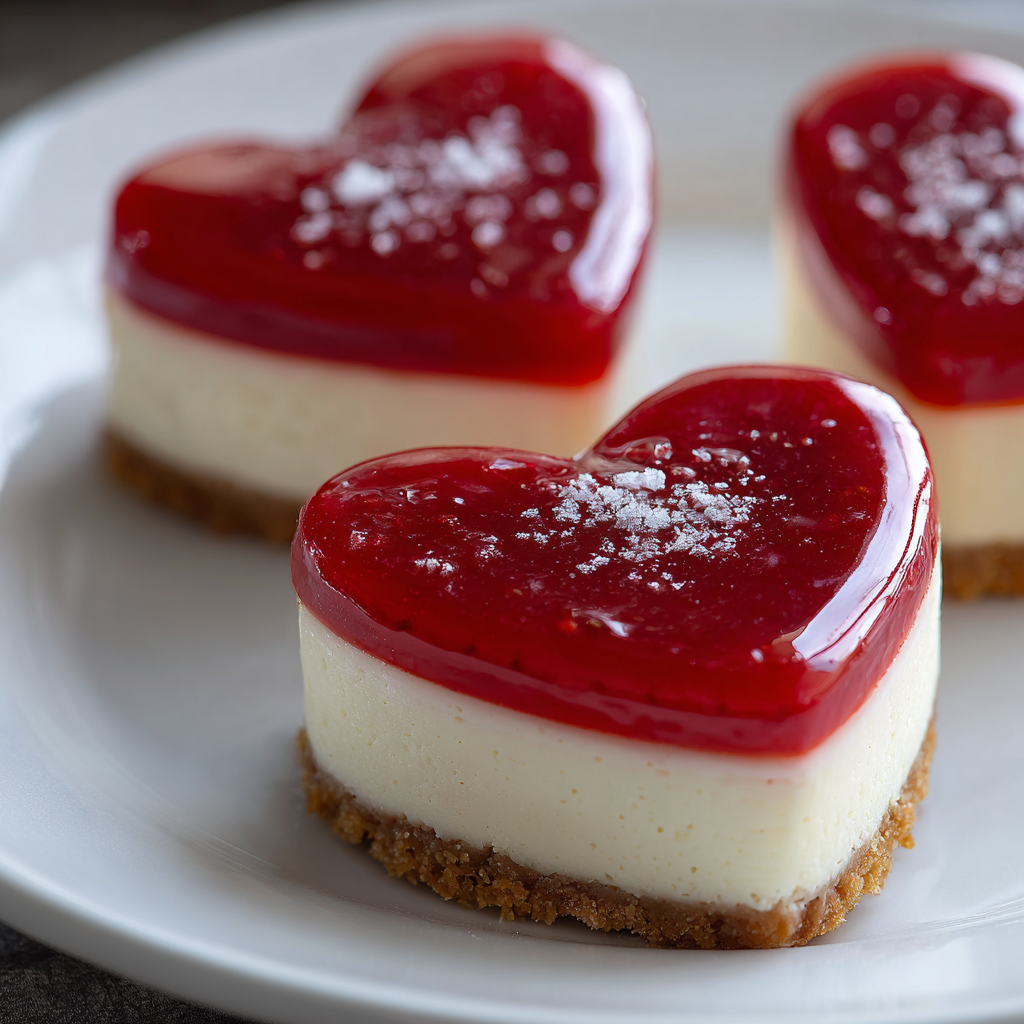
Valentine’s Cheesecake Hearts: Creamy, Dreamy & Full of Love
Valentine’s Cheesecake Hearts: Your New Sweetheart of a Dessert
Hey there, friends! Beau here, welcoming you back to Feastical, your cozy corner for food that feels like a celebration. With Valentine’s Day just around the corner, I know the pressure is on to create something special. You want a dessert that whispers “you’re amazing,” not one that screams from a stressed-out kitchen. Forget the fussy, five-hour pastry projects. This year, we’re making magic with these unbelievably creamy, dreamy, and downright adorable Valentine’s Cheesecake Hearts.
Imagine this: a velvety-smooth cheesecake, so rich it practically melts on your tongue, baked into the most charming little heart shapes. Each one gets a buttery graham cracker hug at the bottom and a glossy, jewel-toned topping of strawberry glaze or tangy raspberry coulis. They’re elegant enough to make your sweetheart’s eyes light up, but simple enough that you can whip them up without breaking a sweat. Whether you’re planning a romantic dinner for two or just want to show your friends and family some love, these mini cheesecakes are my go-to recipe for spreading joy, one delicious bite at a time. So, let’s preheat that oven and get ready to bake a little love into our lives!
A Cheesecake Kind of Love
This recipe takes me right back to my first Valentine’s Day with my now-wife. I was a young, eager cook, dead-set on impressing her with a from-scratch, grand gesture of a dessert. I attempted a towering, multi-layer chocolate cake. Friends, it was a disaster. The layers slid, the frosting was grainy, and my kitchen looked like a flour bomb had gone off. In a last-minute panic, I remembered my grandma’s simple, no-fail cheesecake recipe. I didn’t have a springform pan, so I used a muffin tin and did my best to shape the topping into a heart with some strawberry jam. They were lopsided, a little messy, but made with 100% heart.
Her face when she saw them? Pure, unadulterated joy. It wasn’t about a perfect, magazine-worthy dessert. It was about the love and the effort. That’s the spirit I’ve baked into these Valentine’s Cheesecake Hearts. They’re my way of saying that the best food, the food that truly connects us, doesn’t have to be complicated. It just has to be made with a little bit of your story stirred in.
Gathering Your Love Potion Ingredients
Here’s the beautiful part: you only need a handful of simple, high-quality ingredients to create pure dessert magic. Using the best you can find truly makes a difference here, because each component shines through. Let’s break it down.
For the Buttery Crust:
- 1 cup graham cracker crumbs: This is our foundation, providing that classic, slightly sweet, and toasty flavor. Chef’s Insight: You can buy pre-crumbled crumbs, but crushing whole graham crackers in a zip-top bag with a rolling pin is a fantastic (and fun!) way to release any pent-up energy.
- 2 tablespoons granulated sugar: Just a touch to sweeten the deal and help the crust crisp up beautifully.
- 4 tablespoons (½ stick) unsalted butter, melted: This is the glue that holds our crust together and gives it that irresistible, rich flavor. Substitution Tip: For a nuttier flavor, try using browned butter. It adds a whole new dimension of deliciousness!
For the Creamy, Dreamy Filling:
- 16 oz (two 8-oz blocks) full-fat cream cheese, softened: This is the star of the show, so please use full-fat! It’s what gives us that luxuriously creamy, stable texture. Chef’s Hack: To soften cream cheese quickly, take it out of the foil and microwave it on 50% power for 15-second intervals. You want it pliable but not melted or hot.
- ½ cup granulated sugar: We use less sugar than many recipes because we want the tangy cream cheese flavor to be the hero, not just the sweetness.
- 1 teaspoon pure vanilla extract: The warm, aromatic backbone of our filling. It rounds out all the flavors perfectly.
- 2 large eggs, at room temperature: These are our binding agents, giving the cheesecake its structure. Room temperature eggs incorporate much more smoothly into the batter, preventing overmixing. Pro Tip: Place cold eggs in a bowl of warm water for 5-10 minutes to bring them to temp fast.
- ¼ cup sour cream: This is my secret weapon! Sour cream adds a subtle tang and an incredible amount of velvety moisture, ensuring our mini cheesecakes stay creamy and never dry.
For the Glamorous Topping (Choose Your Adventure!):
- Strawberry Glaze (store-bought or homemade): A classic for a reason! It’s sweet, shiny, and screams Valentine’s Day. A fantastic, no-fuss option.
- Raspberry Coulis: My personal favorite. It’s a simple blend of fresh or frozen raspberries, a spoonful of sugar, and a squeeze of lemon juice, all whirled together and strained for a elegant, seed-free, tangy sauce.
Crafting Your Edible Valentines: A Step-by-Step Guide
Ready to create some kitchen magic? Follow these steps, and you’ll be a cheesecake-heart-hero in no time. I’ve sprinkled in my best chef hacks to ensure your success.
- Preheat and Prep: Start by preheating your oven to 325°F (160°C). This lower temperature is key for a gentle, even bake that prevents cracking and gives us that perfect creamy texture. While it heats up, generously grease your heart-shaped muffin pan or silicone molds. Chef’s Hack: If using a metal pan, I highly recommend lining the cavities with heart-shaped parchment papers for foolproof removal. A light spritz of cooking spray on the pan before pressing in the crust also works wonders.
- Create the Crust: In a medium bowl, stir together the graham cracker crumbs and sugar. Pour in the melted butter and mix until the mixture resembles wet sand and holds together when you pinch it. Divide this mixture evenly among your prepared molds (about a heaping tablespoon per heart). Use a small glass, a measuring spoon, or your fingers to press it down firmly and evenly into the bottom. We want a solid foundation! Pop the pan in the oven and bake for 5-7 minutes. This pre-bakes the crust, giving it a wonderful toasty flavor and preventing it from getting soggy. Set it aside to cool slightly while you make the filling.
- Whip Up the Filling: In a large mixing bowl, beat the softened cream cheese and sugar together on medium speed until it is completely smooth, creamy, and free of any lumps. This is the most important step! Scrape down the bowl and beater thoroughly. Now, beat in the vanilla extract. Next, add the eggs one at a time, mixing on low speed just until the yolk disappears into the batter after each addition. Finally, mix in the sour cream, again, just until everything is combined and smooth. Chef’s Golden Rule: DO NOT overmix after adding the eggs! Overbeating incorporates too much air and can cause the cheesecakes to puff up and crack as they bake. We’re going for smooth, not fluffy.
- Assemble and Bake: Pour the gorgeous, velvety filling over the slightly cooled crusts, dividing it evenly among the molds. Gently tap the pan on the counter a few times to release any large air bubbles. Slide the pan into the preheated oven and bake for 15-18 minutes. You’re looking for the edges to be set, but the centers should still have a slight jiggle when you gently shake the pan—like Jell-O. They will continue to set as they cool. This “carryover cooking” is your best friend for achieving that perfect creamy center.
- The All-Important Cool Down: Once baked, remove the pan from the oven and let the cheesecake hearts cool completely at room temperature on a wire rack. Do not try to remove them while warm! After they’ve cooled, transfer the entire pan to the refrigerator to chill for at least 2-3 hours, but preferably overnight. This patient chilling step is non-negotiable for that firm, sliceable-yet-creamy texture we all love in a cheesecake.
- The Grand Finale – Topping! Once your cheesecake hearts are thoroughly chilled, it’s time for the fun part. Carefully run a small offset spatula or a thin knife around the edges of each heart to loosen them, then gently pop them out. If you used silicone molds, they should release like a dream. Now, artfully drizzle or spoon your chosen topping over each heart. The vibrant red against the creamy white cheesecake is simply stunning.
Sharing the Love: How to Serve Your Masterpiece
Presentation is the final touch of love! You’ve put in the work, now let’s make these little hearts shine. For a simple, elegant look, place each cheesecake heart on a clean, white plate. That beautiful red topping will just pop. If you’re feeling fancy, you can add a tiny dusting of powdered sugar, a fresh mint leaf, or even a few fresh raspberries or sliced strawberries on the side.
These are perfect for a romantic dessert for two. Arrange two hearts on a shared plate, light a candle, and you’ve got a restaurant-quality dessert right at home. Hosting a Galentine’s party or family gathering? Create a stunning dessert platter! Arrange all the cheesecake hearts on a beautiful board or cake stand. It’s a guaranteed showstopper that lets everyone grab their own little piece of happiness.
Make It Your Own: Delicious Twists on the Classic
One of the best things about this recipe is how easily you can customize it. Feel like playing? Here are a few of my favorite variations:
- Chocolate Lovers’ Dream: Replace the graham cracker crumbs with chocolate wafer or Oreo cookie crumbs (filling removed). For the filling, add ¼ cup of sifted cocoa powder when you add the sugar, and fold in ½ cup of mini chocolate chips at the end.
- Lemon Berry Bliss: Add the zest of one lemon and a tablespoon of fresh lemon juice to the filling for a bright, sunny twist. Top with the raspberry coulis—the lemon and raspberry combo is a classic for a reason!
- White Chocolate Raspberry: Melt 4 oz of high-quality white chocolate and let it cool slightly. Beat it into the cream cheese and sugar mixture. Top with the raspberry coulis for a truly decadent treat.
- Nutty Crunch: Swap out half of the graham cracker crumbs for finely ground toasted almonds or pecans for a crust with incredible depth and flavor.
- Dairy-Free Delight: Use your favorite plant-based cream cheese and butter, and swap the sour cream for a plain, unsweetened dairy-free yogurt. The method remains exactly the same!
Beau’s Kitchen Chronicles
This recipe has been a labor of love, quite literally. Over the years, I’ve learned that the secret isn’t just in the ingredients, but in the rhythm of making it. I always put on a little Motown music when I’m whipping up the filling—it keeps me from overmixing! I also have a funny story about the first time I made these for my kids’ school bake sale. I was so proud, until I realized I’d accidentally used a teaspoon of almond extract instead of vanilla. Let’s just say we had “Amaretto-Style” Cheesecake Hearts that year, and they were a surprising hit! The moral of the story? Don’t be afraid of happy accidents in the kitchen. They often lead to the best discoveries.
Your Cheesecake Questions, Answered!
I’ve gotten a lot of questions about this recipe over the years. Here are the ones I hear most often:
Q: My cheesecakes cracked on top! What did I do wrong?
A: Don’t worry, they still taste amazing! Cracking usually happens for one of three reasons: the oven was too hot, the cheesecakes were overbaked, or the batter was overmixed after the eggs were added. Remember our gentle jiggle and low-speed mixing next time. But hey, that’s what the gorgeous berry topping is for—it covers any and all imperfections beautifully!
Q: Can I make these ahead of time?
A: Absolutely! In fact, I highly recommend it. These cheesecake hearts taste even better the next day after the flavors have had time to meld. You can bake and chill them (without the topping) up to 2 days in advance. Add the glaze or coulis right before serving for the freshest look and taste.
Q: I don’t have a heart-shaped pan. Can I use a regular muffin tin?
A: Of course! You’ll make adorable, round mini cheesecakes that are just as delicious. The baking time should be roughly the same. Just be sure to grease the tin well or use cupcake liners for easy removal.
Q: How should I store leftovers?
A> Keep any leftover cheesecake hearts (lucky you!) covered tightly in the refrigerator. They’ll stay fresh and delicious for up to 5 days.

Valentine’s Cheesecake Hearts: Creamy, Dreamy & Full of Love
Description
Hey there, friends! Beau here, welcoming you back to Feastical, your cozy corner for food that feels like a celebration. With Valentine’s Day just around the corner, we’re skipping the stress and embracing simplicity with a dessert that’s creamy, dreamy, and full of heart—literally. These Valentine’s Cheesecake Hearts are rich, velvety mini cheesecakes baked into sweet heart shapes, finished with a buttery graham crust and a glossy berry topping. Elegant, impressive, and surprisingly easy, they’re the perfect way to say “I love you” without spending hours in the kitchen.
Ingredients
For the Buttery Crust
-
1 cup graham cracker crumbs
-
2 tbsp granulated sugar
-
4 tbsp (½ stick) unsalted butter, melted
For the Creamy Filling
-
16 oz (2 blocks) full-fat cream cheese, softened
-
½ cup granulated sugar
-
1 tsp vanilla extract
-
2 large eggs, room temperature
-
¼ cup sour cream
For the Topping (Choose One)
-
Strawberry glaze or
-
Raspberry coulis (blend raspberries, 1 tbsp sugar, and 1 tsp lemon juice, then strain)
Instructions
-
Prep the Pan & Oven
Preheat oven to 325°F (160°C). Lightly grease a heart-shaped muffin pan or silicone mold. (If using metal, line with parchment for easy removal.) -
Make the Crust
In a bowl, combine graham crumbs, sugar, and melted butter until the texture resembles wet sand. Press a heaping tablespoon into each mold. Bake for 5–7 minutes, then set aside to cool slightly. -
Mix the Filling
Beat softened cream cheese and sugar until smooth and creamy. Add vanilla, then beat in eggs one at a time on low speed. Stir in sour cream until just combined—don’t overmix! -
Fill & Bake
Spoon the filling over crusts, dividing evenly. Tap the pan gently to remove air bubbles. Bake for 15–18 minutes, until edges are set but centers still jiggle slightly. -
Cool & Chill
Cool completely at room temperature, then refrigerate for at least 3 hours (or overnight) until firm and creamy. -
Top & Serve
Carefully remove cheesecakes from molds. Spoon your chosen topping over each heart and garnish with fresh berries or mint if desired.
Notes
-
Quick Softening Trick: Microwave cream cheese (unwrapped) for 15 seconds at 50% power—just until pliable.
-
Smooth Texture Secret: Avoid overmixing after adding eggs—less air means fewer cracks.
-
Make Ahead: Cheesecake hearts keep beautifully for up to 2 days in the fridge before topping.
A Quick Bite on Nutrition
Now, let’s be real—these are a treat, through and through. We’re here for joy and celebration, not a diet food. But for those who like to know, here’s a general breakdown per cheesecake heart (with graham crust and strawberry glaze). Remember, these are estimates and can vary based on your specific ingredients.
- Calories: ~240
- Fat: 18g
- Carbohydrates: 17g
- Sugar: 13g
- Protein: 4g
The main sources of calories are the cream cheese and butter, which are also what make these so irresistibly rich and satisfying. It’s all about balance—enjoy one or two of these beauties mindfully as part of your celebration!
Your Sweet Finale
And there you have it, my friends—everything you need to create a Valentine’s Day dessert that’s straight from the heart. These cheesecake hearts are more than just a recipe; they’re a reminder that the most meaningful food is often the simplest, made with good ingredients and a generous dash of love. I am so grateful you chose to spend this time in the kitchen with me.
I’d love to see your beautiful creations! Tag me @FeasticalBeau on social media or use the hashtag #Feastical so I can share in your sweet success. However you celebrate, and whoever you share them with, I hope these little bites bring a whole lot of joy to your table. Happy baking!
With love and a full heart,
Beau
***
Mini Red Velvet Cheesecake Bites: Lush, Velvety, and Perfectly Portioned
Mini Red Velvet Cheesecake Bites: Your New Favorite Party Trick
Hey friends, Beau here from Feastical! Let’s talk about a little magic, shall we? You know that feeling when you’re staring down a dessert table, torn between a slice of rich, tangy cheesecake and a gorgeous, crimson piece of red velvet cake? It’s a delicious dilemma we’ve all faced. Well, my food-loving friends, I’m here to solve that problem once and for all. Get ready to fall head-over-heels for these Mini Red Velvet Cheesecake Bites.
Imagine this: a tender, almost brownie-like red velvet crust, packed with that signature cocoa flavor. On top of that, a layer of the creamiest, smoothest, most luxuriously tangy cheesecake you’ve ever tasted, all baked into a perfect, pop-in-your-mouth size. They’re stunning to look at, incredibly fun to make, and even more fun to eat. Whether you’re hosting a fancy soiree, need a show-stopping treat for a potluck, or just want to make your Tuesday feel a little more special, these bites are your answer. They’re proof that the best things really do come in small, deliciously portioned packages. So, preheat your ovens and grab your favorite mixing bowl—we’re about to create some serious kitchen joy.
A Slice of Nostalgia: Where This Recipe Was Born
This recipe isn’t just a random combination for me; it’s a delicious collision of my two favorite childhood desserts. My Grandma Eleanor, a woman who believed a meal wasn’t complete without something sweet, had two legendary specialties. The first was a towering, snow-white coconut cake, but the second… the second was her Red Velvet Cake. It was a thing of beauty, with a deep red crumb that felt impossibly moist and a flavor that was more than just “chocolate.” It was complex, a little mysterious, and always, always made with a hefty dose of love.
Years later, I had my first proper New York-style cheesecake at a little deli, and my dessert world exploded. The dense, creamy, tangy filling captivated me. One day, while experimenting in my first real apartment kitchen (a.k.a. a kitchen the size of a postage stamp), I had a brilliant, if I do say so myself, idea. What if I took the soul of Grandma’s red velvet and married it to the elegance of that cheesecake? After a few… let’s call them “learning experiences”… these mini bites were born. They’re my personal homage to tradition and innovation, all wrapped up in a beautiful, bite-sized package.
Gathering Your Ingredients: The Dream Team
Great food starts with great ingredients. Here’s everything you’ll need to bring these little gems to life. Don’t worry, I’ve included my favorite chef hacks and substitutions to make this recipe work for you!
For the Red Velvet Crust:
- 1 cup red velvet cake crumbs – You can crumble up a baked and cooled homemade cupcake or use a slice of store-bought cake. Chef’s Insight: Using actual cake (instead of just crumbs and cocoa) gives the crust an incredible, fudgy texture that’s far superior to a standard graham cracker base.
- 2 tablespoons melted butter – This is our binding agent, giving the crumbs that perfect sandy texture that holds together. Unsalted is best so you control the salt level, but salted will work in a pinch!
For the Luscious Cheesecake Filling:
- 16 oz (two blocks) full-fat cream cheese, softened – This is non-negotiable for the creamiest texture. Take it out of the fridge at least an hour before you start. Pro Tip: Feel the package. It should yield gently to pressure. If it’s still cold, you’ll get lumpy filling, and we don’t want that!
- ½ cup granulated sugar – This sweetens the deal without making it overly sweet, letting the tangy cream cheese flavor shine.
- 2 large eggs, at room temperature – Room temp eggs incorporate much more smoothly into the cream cheese, ensuring a silky, not curdled, filling.
- ¼ cup sour cream – The secret weapon! Sour cream adds a wonderful tang and an extra layer of creamy richness that makes these bites truly irresistible.
- 1 teaspoon pure vanilla extract – The warm, floral notes of vanilla are the perfect complement to both the chocolate and the cheese. It’s the flavor bridge.
- A tiny pinch of salt – This might seem odd, but salt is a flavor enhancer. It makes the sweet taste sweeter and balances the tang perfectly.
For the Optional (But Highly Recommended) Toppings:
- Freshly whipped cream – For a cloud-like finish.
- Extra red velvet crumbs – For a pop of color and texture.
- White chocolate drizzle – Because everything is better with a little chocolate drizzle.
Let’s Get Baking: Your Step-by-Step Roadmap to Bliss
Ready to make some magic? Follow these steps, and you’ll be a mini cheesecake master in no time. I’ve packed this section with all my favorite tips to guarantee your success.
- Prep Party! First things first, preheat your oven to a cozy 325°F (160°C). This lower temperature is key for baking cheesecake gently, preventing cracks and ensuring a creamy center. While it’s warming up, line a mini muffin pan with those cute little paper liners. This makes removal a total breeze and keeps our bites looking pristine. Chef’s Hack: Give the liners a very light spritz with cooking spray. It helps the finished cheesecake peel away cleanly.
- Create the Crust. In a medium bowl, combine your 1 cup of red velvet cake crumbs and the 2 tablespoons of melted butter. Use a fork to mix it until it resembles wet sand and holds together when you pinch it. Now, take about 1 teaspoon of this mixture and press it firmly into the bottom of each prepared mini liner. I like to use the back of a small measuring spoon or my fingers to really compact it. A firm crust means it won’t fall apart when you take a bite!
- Whip Up the Filling. In a large mixing bowl, beat the softened cream cheese and ½ cup of granulated sugar together on medium speed. Use a hand mixer or stand mixer fitted with the paddle attachment. Beat for a good 2-3 minutes, scraping down the sides of the bowl halfway through, until the mixture is completely smooth and lump-free. This is the most important step for a silky texture! Now, beat in the room-temperature eggs, one at a time, mixing just until each is incorporated. Over-beating at this stage can incorporate too much air and cause puffing and cracking. Finally, mix in the ¼ cup sour cream, 1 teaspoon vanilla, and that tiny pinch of salt. Mix until it’s just combined and beautifully smooth.
- Fill ‘Er Up! Transfer your cheesecake filling to a piping bag or a large zip-top bag with a corner snipped off. This is my go-to method for neat, easy, and mess-free filling! Pipe the filling over the crust in each liner, filling them up to just below the top. Leaving a tiny bit of space gives them room to rise slightly without overflowing.
- Bake to Perfection. Carefully place the pan in your preheated oven and bake for 15-18 minutes. You’re looking for the edges to be set, while the centers still have a slight jiggle when you gently shake the pan. They will firm up dramatically as they cool. Chef’s Secret: For extra insurance against cracks, you can place a pan of hot water on the rack below the cheesecakes to create a steamy environment.
- The All-Important Chill. Once baked, remove the pan from the oven and let the cheesecake bites cool completely in the pan on a wire rack. Then, and this is crucial, transfer the entire pan to the refrigerator to chill for at least 2 hours, but preferably overnight. This patience-testing step allows the flavors to meld and the texture to become perfectly firm and lush.
Plating Up: How to Serve These Showstoppers
Now for the best part—serving and eating! These bites are gorgeous all on their own, but a little flair never hurt anybody. For a simple, elegant look, arrange them on a beautiful cake stand or a rustic wooden board. Just before serving, top each one with a small dollop of freshly whipped cream and a tiny sprinkle of reserved red velvet crumbs. For a truly decadent touch, melt some white chocolate chips with a teaspoon of coconut oil, drizzle it over the tops, and watch your guests’ eyes light up.
They are the ultimate party dessert, perfect for passing around. I love serving them with a cup of strong coffee to cut through the richness or a cold glass of milk for the ultimate nostalgic treat. They also make incredible edible gifts—package a few in a clear cellophane bag tied with a ribbon, and you’ve just become someone’s favorite person.
Make It Your Own: Delicious Recipe Variations
One of the best things about this recipe is its versatility. Feel free to get creative and put your own spin on it!
- The Chocolate Lover’s Dream: Add ½ cup of mini chocolate chips to the cheesecake filling right before piping. You could also use a chocolate cake for the crust instead of red velvet for a double-chocolate experience.
- Lemon Zest Twist: Brighten things up by adding the zest of one lemon to the cheesecake filling. The combination of bright citrus and rich, creamy cheesecake is a match made in heaven.
- Gluten-Free Friendly: Simply use your favorite gluten-free red velvet cake mix or recipe to make the crumbs for the crust. The rest of the recipe is naturally gluten-free!
- Peppermint Patty: Perfect for the holidays! Add ¼ teaspoon of peppermint extract to the cheesecake filling and top with a drizzle of dark chocolate and crushed candy canes.
- Cookies & Cream: Swap the red velvet crust for a crust made from Oreo cookie crumbs (filling included!) mixed with butter. It’s a classic combo that never fails.
Beau’s Chef’s Notes: A Few Parting Thoughts
This recipe has been a labor of love, and it’s evolved quite a bit from my first attempt (which involved a very crumbly crust and a slightly lumpy filling—we live and we learn!). I’ve found that the flavor is absolutely at its peak after a full 24 hours in the fridge, so if you can plan ahead, do it. The wait is worth it, I promise.
And a funny story: I once brought a batch of these to a friend’s barbecue. I turned my back for two minutes to grab a drink, and when I looked back, the entire platter was gone. A quiet, serious-looking man in the corner just gave me a thumbs up, his cheeks full of cheesecake. That’s the power of a great mini dessert—it brings out the joy in everyone.
Your Questions, Answered: FAQs & Troubleshooting
Let’s tackle some common questions to make sure your baking experience is smooth sailing.
Q: My cream cheese was a little cold, and now my filling has tiny lumps. Can I fix it?
A: Don’t panic! The best fix is to strain the filling through a fine-mesh sieve before piping it into the liners. This will catch any pesky lumps and give you that perfectly smooth texture we’re after.
Q: Can I make these without a mini muffin pan?
A> You sure can! A regular standard-size muffin pan will work beautifully. Just increase the baking time to about 20-25 minutes, and keep an eye on them for that same “set edges, jiggly center” doneness. You’ll get fewer, but larger, cheesecakes.
Q: How far in advance can I make these?
A> They are the perfect make-ahead dessert! Once cooled and chilled, store them in an airtight container in the fridge for up to 4 days. I recommend adding any whipped cream or drizzle toppings right before serving for the best texture.
Q: Can I freeze them?
A> Absolutely. After they are fully chilled, arrange them in a single layer on a baking sheet and “flash freeze” for an hour until solid. Then, transfer the frozen bites to a freezer-safe bag or container. They’ll keep for up to 2 months. Thaw in the refrigerator overnight before serving.

Mini Red Velvet Cheesecake Bites: Lush, Velvety, and Perfectly Portioned
Description
Mini Red Velvet Cheesecake Bites
Prep Time: 20 min
Bake Time: 15–18 min
Chill Time: 2+ hours (or overnight)
Total Time: ~3 hours
Ingredients
Red Velvet Crust:
-
1 cup red velvet cake crumbs (homemade or store-bought)
-
2 tbsp melted butter
Cheesecake Filling:
-
16 oz (2 blocks) full-fat cream cheese, softened
-
½ cup granulated sugar
-
2 large eggs, room temperature
-
¼ cup sour cream
-
1 tsp pure vanilla extract
-
Pinch of salt
Optional Toppings:
-
Whipped cream
-
Extra red velvet crumbs
-
White chocolate drizzle
Variations:
-
Chocolate Lover’s Dream: Add ½ cup mini chocolate chips to filling or use chocolate cake for crust
-
Lemon Zest Twist: Add zest of 1 lemon to filling
-
Gluten-Free: Use gluten-free red velvet cake for crumbs
-
Peppermint Patty: Add ¼ tsp peppermint extract, drizzle with chocolate and crushed candy canes
-
Cookies & Cream: Swap crust for Oreo cookie crumbs + butter
Instructions
-
Preheat Oven & Prep Pan
-
Oven: 325°F (160°C)
-
Line a mini muffin pan with paper liners; lightly spray with cooking oil
-
-
Make Crust
-
Mix cake crumbs with melted butter until sandy and holds together
-
Press ~1 tsp of mixture into the bottom of each liner; compact firmly
-
-
Make Filling
-
Beat cream cheese and sugar until smooth (2–3 min)
-
Beat in eggs, one at a time, just until incorporated
-
Mix in sour cream, vanilla, and salt until smooth
-
-
Assemble Bites
-
Pipe filling over crust in each liner, filling to just below the top
-
-
Bake
-
15–18 min until edges are set and centers slightly jiggle
-
Optional: place pan of hot water below pan for extra moisture and to prevent cracking
-
-
Cool & Chill
-
Cool in pan on a wire rack, then refrigerate at least 2 hours (overnight is best)
-
-
Serve
-
Top with whipped cream, extra crumbs, or chocolate drizzle
-
Arrange on a cake stand or serving board
-
Notes
-
Lumpy Filling: Strain through a fine-mesh sieve before piping
-
No Mini Muffin Pan: Use standard muffin pan; bake 20–25 min
-
Make Ahead: Store in airtight container in fridge up to 4 days
-
Nutrition
- Calories: 110 Cal Per Serving
- Fat: 8g
- Carbohydrates: 8g
- Protein: 2g
Nutritional Information*
Alright, let’s talk real life. These are a treat, and we should enjoy them as such! Here’s a general breakdown per mini cheesecake bite (without toppings), based on a yield of 24.
- Calories: ~110
- Protein: 2g
- Fat: 8g
- Carbohydrates: 8g
*Please note: This is an estimated nutritional breakdown based on the specific ingredients I used. Your actual numbers may vary depending on the brands and exact measurements you use. This information is provided as a courtesy, but for precise dietary needs, it’s always best to calculate using your specific ingredients.
Final Thoughts from My Kitchen to Yours
Well, there you have it, my friends—everything you need to create these unforgettable Mini Red Velvet Cheesecake Bites. They’re more than just a dessert; they’re a little bite of joy, a conversation starter, and a surefire way to make any occasion feel special. I hope this recipe brings as much happiness to your kitchen as it has to mine.
Remember, cooking is about the journey, not just the destination. Don’t stress over a little lump or a messy drizzle. The love you put into it is the most important ingredient of all. Now, I’d love to see your creations! Tag me @Feastical on social media so I can cheer you on.
Until next time, keep your whisks busy and your hearts full.
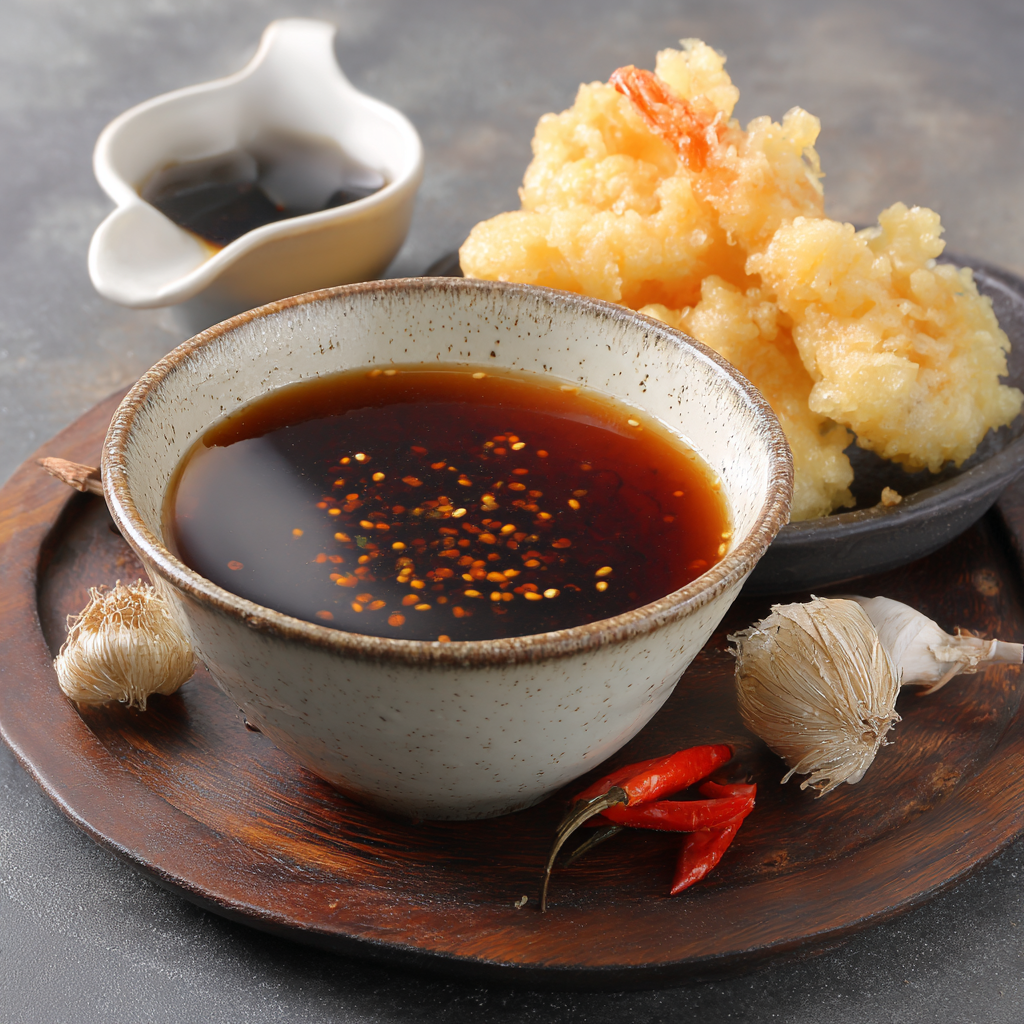
Tempura Dipping Sauce : Rich, Savory, and Perfectly Balanced
Authentic Tempura Dipping Sauce with Dashi, Soy, and Mirin
More Than Just a Dip: Your Ticket to Tempura Bliss
Hey friends, Beau here! Let’s talk about one of life’s simple, crispy pleasures: a perfect piece of tempura. You know the one. That shrimp or sweet potato slice that’s so ethereally light and crunchy it practically shatters when you bite into it. But here’s a little secret I learned the hard way: the real magic, the thing that elevates tempura from a great snack to a soul-satisfying experience, isn’t just the fry—it’s the dipping sauce.
Now, I’ve been to restaurants where the tempura sauce is an afterthought—a thin, overly salty puddle that doesn’t do justice to the masterpiece you’re about to eat. It breaks my chef-heart! A truly great tempura dipping sauce should be a star in its own right. It needs to be a rich, savory, umami-packed elixir that’s both deeply flavorful and perfectly balanced, with just enough sweetness and depth to make you want to drink it straight from the bowl (no judgment here).
That’s exactly what we’re making today. This isn’t just a recipe; it’s your new kitchen sidekick for bringing authentic Japanese flavor right to your dinner table. We’re talking about a sauce that’s thicker, bolder, and more complex than what you might be used to. It’s designed to cling to your tempura, complementing that incredible crispy texture without ever overpowering it. And the best part? It comes together in about five minutes with just a handful of powerhouse ingredients. So, grab your favorite little saucepan, and let’s create some dipping magic together.
The Tokyo Noodle Stall That Changed Everything
I’ll never forget the first time I had real tempura sauce. I was wandering through a bustling night market in Tokyo, completely overwhelmed (in the best way) by the sights and smells. I stumbled upon a tiny, steam-filled stall run by an older gentleman who was silently, masterfully frying tempura. I ordered a mix, and he handed me a basket along with a small, warm ceramic bowl of this dark, aromatic liquid.
I took one dip, and my entire concept of tempura flipped. This sauce wasn’t just salty; it was alive. It had a savory backbone that I now know was dashi, a gentle sweetness from mirin, and a complexity that made every bite an adventure. He saw the look on my face and gave me a knowing nod, pointing to the grated daikon on the side. I added a spoonful to my sauce, and it was a revelation—the bright, peppery kick cut through the richness perfectly. That humble bowl taught me that the sauce isn’t a dip; it’s a co-star. It’s a lesson in balance I carry with me in every kitchen, and it’s the soul of the recipe I’m sharing with you today.
Gathering Your Flavor All-Stars
This sauce is a beautiful example of how a few simple, high-quality ingredients can create something extraordinary. Here’s what you’ll need:
- 2 cups Water: This is the base of our sauce. Using filtered water ensures no off-flavors interfere with our delicate balance. It’s the blank canvas for our masterpiece!
- 2 tablespoons Dashi Granules: Meet the secret weapon. Dashi is a Japanese stock, typically made from kelp and bonito flakes, that’s pure umami in a jar. It provides that deep, savory, oceanic flavor that forms the foundation of the sauce. Chef’s Insight: If you can’t find dashi granules, you can use a dashi tea bag steeped in the hot water, or for a vegetarian version, use vegan dashi granules or a bit of shiitake mushroom powder.
- 1/2 cup Mirin: This is a sweet Japanese rice wine that brings a gentle, complex sweetness and a beautiful glossy sheen to the sauce. It’s what keeps the soy sauce from being too harsh. Substitution Tip: In a pinch, you can use a dry sherry or a sweet marsala wine with a tiny pinch of sugar, but the flavor profile will be slightly different.
- 4 tablespoons Soy Sauce: I recommend using a regular Japanese soy sauce (like Kikkoman) for its well-rounded saltiness. We’re using a good amount because we want a bold, robust sauce. Dietary Swap: For a gluten-free version, simply use tamari or a certified gluten-free soy sauce. It works like a charm!
Optional, But Highly Recommended Garnishes:
- Freshly Grated Ginger or Daikon Radish: Served on the side for stirring in. This isn’t just garnish; it’s a flavor and texture activator! The ginger adds a warm, spicy kick, while the daikon is peppery and refreshing.
- 1 tablespoon Rice Vinegar (Optional Twist): For a hint of bright, tangy acidity that cuts through the richness. A little splash right at the end makes all the flavors pop.
- A Dash of Toasted Sesame Oil (Optional Twist): Just a few drops will add a nutty, rich aroma that’s incredibly comforting.
Let’s Get Cooking: Your 5-Minute Flavor Journey
See? I told you it was simple. Let’s walk through these steps together. I’ll be right here with my chef hacks to make sure it’s perfect.
- Wake Up the Dashi: Grab a small saucepan and pour in your 2 cups of water. Now, sprinkle in the 2 tablespoons of dashi granules. Place it over medium heat. As it heats up, stir gently with a whisk or a fork. You’ll see the granules start to dissolve and the water will become cloudy. Chef’s Hack: Don’t let it boil violently here. We just want to heat it enough to fully dissolve the dashi and wake up all those savory flavors. A gentle heat is your friend!
- Create the Symphony: Once the dashi is fully dissolved and you see tiny bubbles starting to form around the edge of the pan, it’s time for the main players. Pour in the 1/2 cup of mirin and the 4 tablespoons of soy sauce. Give it a good, gentle stir to combine. The aroma that will hit you at this point is just incredible—that’s the sound of your kitchen singing!
- The Simmer is Key: Bring the mixture to a gentle simmer. You’ll see little bubbles breaking the surface. Let it dance like this for just 1 to 2 minutes. Why? This short simmer time allows the alcohol from the mirin to cook off (so you’re left with just the sweetness), and it lets the flavors meld together into a harmonious, unified sauce. It also thickens it slightly, giving it that richer, bolder body we’re after.
- Finish with Flair (Optional): Take the saucepan off the heat. This is the moment for your optional twists! If you’re using the rice vinegar or a dash of sesame oil, stir it in now. The residual heat will incorporate it perfectly without dulling its vibrant character.
- Serve with Style: You can serve this sauce warm, at room temperature, or even chilled. I personally love it warm. Pour it into individual small dipping bowls—little ramekins or Japanese soy sauce dishes work perfectly. Now, for the final touch of authenticity: place a small spoonful of your freshly grated ginger or daikon right on the side of the dipping bowl, or let your guests add their own. It makes the experience interactive and personalized!
How to Serve Your Homemade Tempura Sauce
Presentation is part of the fun! Don’t just pour this liquid gold into any old bowl. Serving it correctly enhances the whole tempura experience.
I love using small, ceramic dipping bowls for each person. It feels special and authentic. Pour the warm sauce about halfway up the bowl. Then, on the saucer or right next to it, add a little mound of your freshly grated daikon or ginger. This lets everyone customize their dip to their liking.
Of course, the star of the show is your crispy tempura—shrimp, sweet potato, broccoli, bell peppers, mushrooms, you name it. Arrange the tempura beautifully on a wire rack (to keep it crispy!) or a plate lined with paper towels. The real pro move? Take a piece of tempura, dip it gently into the sauce, and enjoy the perfect bite. The sauce should be a partner, not a pool—you don’t want to drown that beautiful crunch!
And don’t stop at tempura! This sauce is incredible drizzled over steamed rice, used as a base for a noodle soup, or as a marinade for grilled chicken or tofu. It’s a versatile flavor bomb waiting to be explored.
Make It Your Own: Delicious Twists & Swaps
Once you’ve mastered the classic, feel free to play with your food! Here are a few of my favorite ways to mix it up:
- The Citrus Zing: Add the zest of one small lemon or yuzu (if you can find it!) to the finished sauce. The bright, citrusy notes are a fantastic contrast to the umami depth.
- Spicy Kick: Love heat? Add a teaspoon of chili-garlic paste (like Sriracha or Sambal Oelek) or a few thin slices of fresh Thai chili to the saucepan as it simmers.
- Mushroom Magic (Vegan Depth): For an even deeper, earthier flavor, add a few rehydrated shiitake mushrooms to the water as you make the dashi. Let them steep for 10-15 minutes before removing, then proceed with the recipe.
- Sweet & Sour Twist: Add a tablespoon of pineapple or orange juice along with the mirin for a fruitier, tangier profile that’s amazing with vegetable tempura.
- The “Cheater’s” Rich Version: For an extra layer of luxury, replace 1/2 cup of the water with prepared dashi stock or even a light chicken broth. It doubles down on that savory goodness.
Beau’s Kitchen Corner: Stories & Evolution
This recipe has been a living, evolving thing in my kitchen. I remember one time, early on, I got distracted by a boiling-over pot of pasta and let my tempura sauce reduce way too much. It became this super salty, syrupy glaze. Disaster? I thought so, until I tasted it. I ended up brushing it on some salmon fillets I was about to grill, and it was a happy accident winner! It taught me that this sauce is incredibly forgiving and versatile.
Over time, I’ve found that the quality of your dashi makes the biggest difference. It’s worth seeking out a good brand. And that tip about the grated daikon? That came straight from the master at that Tokyo stall. It’s a simple gesture that makes the meal feel restaurant-quality. Don’t skip it!
Your Questions, Answered!
Q: My sauce is too salty! What did I do wrong?
A: The most common culprit is the type of soy sauce. Different brands have different sodium levels. Don’t worry! You can fix it by adding a bit more water and a tiny pinch of sugar to rebalance. Next time, taste your soy sauce first and adjust the quantity if needed.
Q: Can I make this sauce ahead of time?
A: Absolutely! It keeps beautifully in a sealed jar in the refrigerator for up to a week. The flavors often meld and become even better the next day. Just give it a good stir and warm it gently on the stovetop or in the microwave before serving.
Q: I can’t find mirin. What’s the best substitute?
A> This is a great question. As mentioned, a dry sherry or sweet marsala with a pinch of sugar works. You can also use 1/4 cup of sake mixed with 2 tablespoons of sugar, though the flavor will be less complex. Hon-Mirin (true mirin) is best, but we work with what we have!
Q: Why is my sauce thin and not clinging to the tempura?
A> You might not have simmered it long enough. That brief 1-2 minute simmer is crucial for slight reduction and thickening. If it’s still too thin for your liking, let it simmer for another minute or two. Remember, it will thicken slightly as it cools, too.

Tempura Dipping Sauce : Rich, Savory, and Perfectly Balanced
Description
Authentic Tempura Dipping Sauce (Tentsuyu)
Prep Time: 5 min
Cook Time: 5 min
Servings: 8
Ingredients
-
2 cups water (filtered recommended)
-
2 tbsp dashi granules (or dashi tea bag; vegan option: shiitake powder)
-
½ cup mirin (substitute: dry sherry or sweet marsala + pinch of sugar)
-
4 tbsp soy sauce (gluten-free: use tamari)
Optional Garnishes & Twists:
-
Freshly grated daikon or ginger
-
1 tbsp rice vinegar (for brightness)
-
A few drops toasted sesame oil
-
Citrus zest (lemon or yuzu)
-
Chili paste or fresh chili slices
Instructions
-
Heat Dashi Base
-
In a small saucepan, combine water and dashi granules over medium heat.
-
Stir gently until dissolved; avoid boiling vigorously.
-
-
Add Flavor Players
-
Stir in mirin and soy sauce.
-
Bring to a gentle simmer for 1–2 minutes to meld flavors and cook off alcohol from mirin.
-
-
Finish (Optional)
-
Remove from heat. Stir in rice vinegar, sesame oil, or any other optional twists.
-
-
Serve
-
Pour into small dipping bowls.
-
Add grated daikon or ginger on the side for guests to customize.
-
Perfect for tempura, steamed vegetables, rice, noodles, or grilled proteins.
-
Notes
-
Too salty? Dilute with a little water or add a pinch of sugar.
-
Thin sauce? Simmer 1–2 extra minutes; it thickens slightly as it cools.
-
Make-ahead: Store in the fridge up to 1 week; warm gently before serving.
Nutrition
- Calories: 30 Cal Per Serving
- Sugar: 2g
- Carbohydrates: 4g
Nutritional Information (Because We Care!)
Hey, it’s always good to know what you’re putting into your body! This sauce is naturally low in calories and fat, making it a fantastic, flavor-packed condomint. Here’s the estimated breakdown per serving (based on 8 servings, without optional additions):
- Calories: 30
- Carbohydrates: 4g
- Sugar: 2g (primarily from the natural sugars in mirin)
- Protein: 1g
- Sodium: 520mg
A quick note on sodium: The sodium content comes predominantly from the soy sauce and dashi. If you are watching your sodium intake, you can use a reduced-sodium soy sauce and low-sodium dashi granules. The flavor will still be fantastic, just a bit lighter.
Your New Go-To Dip Awaits
And there you have it! You’re now armed with the knowledge to create an authentic, deeply flavorful tempura dipping sauce that will transform your homemade Japanese meals. It’s a recipe that proves you don’t need hours in the kitchen to create something truly special and soul-satisfying.
This sauce has become a staple in my home, and I have a feeling it’s about to become one in yours, too. It’s the kind of simple, feel-good food that brings people together around the table. So, the next time you’re frying up a batch of tempura, or just looking for a way to jazz up some steamed veggies and rice, remember this little pot of magic. It’s waiting for you.
I’d love to hear how it turns out for you! Tag me on social @Feastical with your creations. Now, go forth and dip fearlessly!
Final Thoughts: More Than a Recipe, a Ritual
So, there you have it. What might seem like a simple dipping sauce is, in reality, a tiny bowl of transformation. It’s the bridge between a great fry and an unforgettable meal, the whisper of a Tokyo night market that you can now recreate in your own kitchen.
This recipe is more than just a list of ingredients and steps; it’s an invitation to slow down and savor the details. It’s about toasting with a warm cup of sauce to the simple, profound joy of good food. Don’t be afraid to make it your own—add that extra zing of ginger, that dash of sesame oil, or keep it classically pure. However you choose to enjoy it, you’re not just making a dip; you’re crafting an experience.
So, the next time that tempura craving hits, you’re ready. You’ve got this. Now, go forth, dip fearlessly, and taste the bliss.
With a full heart and a happy palate,
Beau
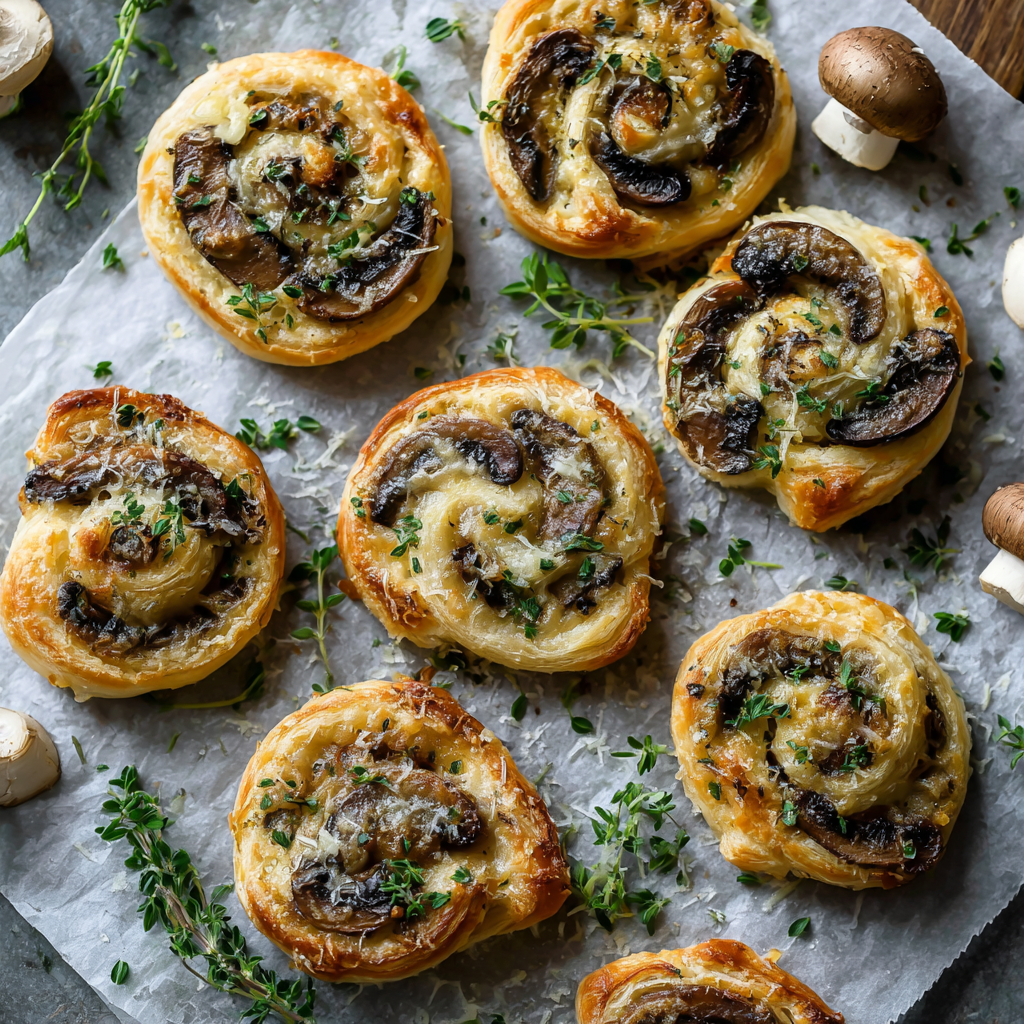
Savory Mushroom Puff Pastry Pinwheels with Cheese & Garlic
The Appetizer That Steals the Show Every Single Time
Hey friends, Beau here! Let me paint you a picture. You’ve got people coming over in, oh, about an hour. The house is clean(ish), the music is on, and the drinks are chilling. But that little voice in your head starts whispering, “What are you going to feed everyone?” You need something impressive, something delicious, something that looks like you fussed for hours but secretly comes together with a few smart shortcuts.
Enter my Savory Mushroom Puff Pastry Pinwheels. These little spirals of joy are my ultimate party superhero. Imagine this: a flaky, buttery puff pastry, rolled up with a deeply savory, garlicky mushroom and onion filling, and oozing with not one, but two kinds of cheese. They bake up into golden, puffed masterpieces that are impossible to resist. I’ve seen trays of these vanish in minutes, followed by a chorus of “What’s in these?” and “Can I get the recipe?” They’re the culinary equivalent of a warm welcome hug, and today, I’m so excited to show you exactly how to make them.
A Pinwheel, A Party, and A Happy Accident
I’ll never forget the first time I made a version of these. It was my third year of college, and I was hosting a last-minute “study group” (which was code for “potluck and hangout”). My budget was tight, but my ambition was high. I had a box of mushrooms, a leftover onion, and a roll of puff pastry I’d snagged from the freezer aisle. My plan was vague, but my hunger was specific.
I sautéed everything together, slathered it on the pastry, and rolled it up. I didn’t have a proper baking sheet, so I used a warped, old pizza pan. I held my breath as they baked, hoping they wouldn’t be a disaster. What emerged from the oven was pure magic. They were golden, cheesy, and the entire apartment smelled incredible. They were the hit of the night, and that happy accident taught me a valuable lesson: the best food isn’t about being fancy; it’s about being flavorful, generous, and made with a dash of love (and a good dose of melted cheese). This recipe is that same spirit, just refined over years of making it for the people I care about most.
Gathering Your Cast of Flavor Characters
This recipe is all about simple ingredients doing extraordinary things together. Here’s your shopping list, with a few of my chef-y insights to help you understand the “why” behind each one.
- 6 tbsp Olive Oil: We use a generous amount to really sauté our veggies to perfection. It adds a fruity depth that butter can’t. Chef’s Insight: If you prefer, you can use half butter and half oil for a richer flavor, but the oil helps the mushrooms get a beautiful sear without burning.
- 2 medium Onions, finely chopped: These sweeten as they cook, forming the flavor base of our filling. Substitution Tip: Yellow or white onions are perfect here. In a pinch, a large shallot will work, too!
- 32 oz Mushrooms, finely chopped: This might seem like a lot, but mushrooms shrink down dramatically! We’re using their earthy, umami power to create a hearty, meaty texture. Chef’s Insight: Don’t be shy about using a mix! Cremini, shiitake, and even a few chopped portobellos create a fantastic, complex flavor.
- 2 tbsp Mayonnaise: I know, I know. “Mayo, Beau?” Trust me on this. It’s not for flavor, but for function. It acts as a binder, keeping the filling moist and preventing it from drying out in the oven. Substitution Tip: You can use full-fat Greek yogurt or even sour cream if you’d like.
- 2 Garlic Cloves, minced: The aromatic soulmate to our mushrooms. Fresh is best here! Chef’s Insight: Feel free to add a third clove if you’re a true garlic lover. We don’t judge!
- 1/2 tsp Salt & 1/2 tsp Black Pepper: The essential seasonings to make all the other flavors pop. Always season in layers!
- 1 cup grated Parmesan Cheese: This brings a salty, nutty, umami punch that elevates the mushrooms beautifully. Chef’s Insight: For the best flavor, grate it yourself from a block. The pre-grated stuff often has anti-caking agents that can make it a bit gritty.
- 2–3 cups shredded Mozzarella Cheese: This is our glorious, melty, stretchy cheese. Substitution Tip: Low-moisture mozzarella is key here to prevent sogginess. You can also swap in provolone, Gruyère, or fontina for a different melt.
- 2 packages Puff Pastry, thawed: Our secret weapon for an elegant, flaky crust with minimal effort. Chef’s Hack: Thaw it overnight in the fridge, not on the counter. This keeps the butter cold, which is the secret to a super-flaky pastry.
- 2 Eggs, beaten (for egg wash): This is our finishing touch! Brushing it on gives the pinwheels that gorgeous, professional-looking golden-brown sheen.
- Optional Twist: 1 tsp fresh Thyme or Rosemary, chopped: A little fresh herb goes a long way to brighten up the earthy mushrooms.
- Optional Twist: A dash of Chili Flakes for heat: For those who like a little kick! It adds a wonderful, subtle warmth in the background.
Let’s Get Rolling: Your Step-by-Step Guide to Pinwheel Perfection
Ready to create some magic? Put on your favorite apron, and let’s get to it. I’ll walk you through every step, with all my best tips to ensure your pinwheels are flawless.
Step 1: Preheat and Prep
Preheat your oven to 375°F (190°C). This is a crucial first step—a properly hot oven is what makes the puff pastry, well, puff! Line your baking sheets with parchment paper. Chef’s Hack: Parchment paper is non-negotiable here. It prevents sticking and makes cleanup an absolute dream. No scrubbing pans after the party!
Step 2: Sauté the Savory Filling
In a large skillet, heat the olive oil over medium heat. Add your finely chopped onions and cook for about 5-7 minutes, until they’re soft and translucent. Now, stir in the minced garlic—ah, that smell!—and cook for just 30 seconds until fragrant. Don’t let the garlic burn! Next, add all those finely chopped mushrooms. Chef’s Insight: They will look like a mountain at first, but don’t worry. Just keep stirring occasionally. They will release their liquid and slowly shrink down and turn a beautiful golden brown. This is where the flavor develops, so be patient and let all that moisture evaporate. This should take about 10-12 minutes. Once the mixture is fairly dry, stir in the mayonnaise, salt, pepper, and any optional herbs or chili flakes. Take the skillet off the heat and let this filling cool completely. Chef’s Pro-Tip: A warm filling will melt the butter in the puff pastry and make it a nightmare to roll. I sometimes spread it on a plate and pop it in the fridge for 10 minutes to speed this up.
Step 3: Assemble the Pinwheels
On a lightly floured surface, roll out one sheet of thawed puff pastry just enough to smooth out any folds. Spread half of the cooled mushroom mixture evenly over the entire surface, leaving just a tiny border around the edges. Now, for the best part: the cheese! Sprinkle half of the Parmesan and mozzarella generously over the mushroom layer. You want every bite to be cheesy.
Step 4: Roll and Slice with Confidence
Now, starting from one of the longer sides, tightly roll the pastry up into a log, like a jelly roll. Don’t be afraid to roll it snugly! Once it’s rolled, give the seam a little pinch to seal it. Using a sharp serrated knife, slice the log into ½-inch rounds. Chef’s Hack: A gentle sawing motion works best here—don’t press down or you’ll squish the beautiful spiral. Place the rounds cut-side-up on your prepared baking sheet, about an inch apart to allow for puffing. Repeat the entire process with the second sheet of pastry and the remaining filling and cheese.
Step 5: Bake to Golden Glory
Give the tops of your pinwheels a gentle but thorough brush with the beaten egg wash. This is what gives them that gorgeous, glossy, bakery-quality finish. Slide the baking sheets into your preheated oven and bake for 20-25 minutes. You’re looking for a deep golden-brown pastry and melted, bubbly cheese. They’ll fill your kitchen with an aroma that is simply irresistible.
Step 6: The All-Important Rest
I know it’s tempting to grab one straight from the oven, but trust me on this one. Let the pinwheels rest on the baking sheet for at least 5 minutes before serving. This allows the cheese to set slightly, so they’re easier to pick up, and it gives the flavors a moment to meld together perfectly.
How to Serve These Show-Stopping Pinwheels
Presentation is part of the fun! I love piling these golden pinwheels high on a beautiful wooden board or a rustic platter. Scatter a few extra fresh herbs around them for a pop of color. They are the ultimate party appetizer, perfect for passing around with cocktails or wine. But don’t stop there! These are incredibly versatile. Serve a couple alongside a big, bright salad for a fantastic light lunch or a simple dinner. They’re also a huge hit as a fancy snack for game day or a holiday party. No matter how you serve them, be prepared for them to disappear fast!
Make It Your Own: Delicious Pinwheel Twists
Once you’ve mastered the classic, the pinwheel world is your oyster! Here are a few of my favorite ways to mix things up:
- The “Everything But The Kitchen Sink”: Add ½ cup of finely chopped spinach (thawed and squeezed dry) and ¼ cup of crumbled feta cheese to the filling for a Greek-inspired twist.
- The Carnivore’s Dream: Stir in ½ cup of finely chopped cooked bacon or ham into the mushroom mixture before rolling. The salty, smoky flavor is a game-changer.
- Sun-Dried Tomato & Pesto Swirl: Swap the mushroom filling for a layer of store-bought basil pesto, a sprinkling of sun-dried tomatoes (packed in oil, patted dry), and mozzarella.
- Make-Ahead Magic: You can assemble the logs, wrap them tightly in plastic wrap, and keep them in the fridge for up to 24 hours before slicing and baking. You can also freeze the unbaked logs; just slice and bake from frozen, adding a few extra minutes to the baking time.
Beau’s Back-Pocket Tips & Stories
This recipe has been my faithful companion for years, and it’s evolved in fun ways. I once accidentally used phyllo dough instead of puff pastry for a holiday party—let’s just say it was a crumbly, buttery mess that still tasted amazing! Lesson learned: always double-check your freezer. The biggest improvement I ever made was learning to let the filling cool completely. My early attempts were a bit soggy because I was too impatient. Now, I use that cooling time to clean up the kitchen and get a head start on the dishes, so I can actually enjoy the party with my guests.
Your Pinwheel Questions, Answered!
Q: My pinwheels came out a bit soggy on the bottom. What happened?
A: The most common culprit is a filling that was too warm when you assembled them, which melts the butter in the pastry. Always let the mushroom mixture cool completely. Also, make sure you’ve cooked the mushrooms long enough for all their liquid to evaporate.
Q: Can I make these ahead of time?
A: Absolutely! You can assemble the whole log, wrap it tightly in plastic wrap, and refrigerate it for up to a day. Slice and bake when you’re ready. You can also freeze the unbaked log for up to 3 months. Slice it while it’s still a little firm and bake from frozen, adding 5-7 extra minutes.
Q: My pastry didn’t puff up very much. Why?
A: This usually means the pastry was over-handled or got too warm. Work quickly and keep it cold. Also, make sure your oven is fully preheated—a hot oven is essential for creating that steam that makes the pastry layers separate and puff.
Q: Can I use a different cheese?
A> Of course! Cooking is about creativity. Gruyère, sharp cheddar, Gouda, or fontina would all be delicious. Just make sure whatever you use is good at melting.

Savory Mushroom Puff Pastry Pinwheels with Cheese & Garlic
Description
Savory Mushroom Puff Pastry Pinwheels
Flaky, cheesy, and party-ready—perfect as an appetizer or snack.
Ingredients
Filling:
-
6 tbsp olive oil (or 3 tbsp oil + 3 tbsp butter for richer flavor)
-
2 medium onions, finely chopped
-
32 oz mushrooms, finely chopped (cremini, shiitake, or a mix)
-
2 garlic cloves, minced
-
2 tbsp mayonnaise (or Greek yogurt / sour cream)
-
½ tsp salt
-
½ tsp black pepper
-
Optional: 1 tsp fresh thyme or rosemary, chopped
-
Optional: a dash of chili flakes
Cheese:
-
1 cup grated Parmesan
-
2–3 cups shredded mozzarella (low-moisture)
Pastry & Finish:
-
2 packages puff pastry, thawed
-
2 eggs, beaten (for egg wash)
Instructions
1. Preheat & Prep
-
Preheat oven to 375°F (190°C).
-
Line baking sheets with parchment paper.
2. Sauté the Filling
-
Heat olive oil in a large skillet over medium heat.
-
Cook onions 5–7 min until soft and translucent.
-
Add garlic, cook 30 sec until fragrant.
-
Stir in mushrooms and cook 10–12 min until liquid evaporates and mushrooms are golden.
-
Remove from heat; stir in mayonnaise, salt, pepper, and optional herbs or chili. Cool completely.
3. Assemble the Pinwheels
-
Roll out one sheet of thawed puff pastry to smooth folds.
-
Spread half the cooled mushroom mixture evenly, leaving a ½-inch border.
-
Sprinkle half the Parmesan and mozzarella over filling.
4. Roll & Slice
-
Roll pastry tightly from one long side into a log; pinch seam to seal.
-
Slice into ½-inch rounds using a serrated knife. Place cut-side up on baking sheet, 1 inch apart.
-
Repeat with second pastry sheet and remaining filling/cheese.
5. Bake
-
Brush tops with beaten egg.
-
Bake 20–25 min until golden and bubbly.
6. Rest & Serve
-
Let pinwheels rest 5 min before serving.
-
Serve on a platter or wooden board, optionally garnished with fresh herbs.
Notes
-
Soggy bottoms? Let the filling cool completely and ensure mushrooms are dry.
-
Cheese swap: Gruyère, cheddar, Gouda, or fontina all work.
-
Make ahead: Assemble logs, refrigerate up to 24 hours, or freeze unbaked for up to 3 months.
-
Twists:
-
Spinach & feta for a Greek version
-
Bacon or ham for a meaty option
-
Pesto & sun-dried tomato swirl
-
Nutrition
- Calories: 136 Cal Per Serving
- Fat: 9g
- Carbohydrates: 10g
- Protein: 5g
Nutritional Information (Because We’re All Curious!)
Okay, let’s be real—these are a treat, and we’re here for it! But if you’re keeping an eye on things, here’s a rough breakdown per pinwheel (assuming you get 64 from the batch):
- Calories: 136
- Protein: 5g
- Fat: 9g
- Saturated Fat: 3.5g
- Carbohydrates: 10g
- Sugar: 1g
- Fiber: 0.5g
- Sodium: 190mg
Remember, this is an approximation and can vary based on the specific brands of ingredients you use. The key is to enjoy them mindfully as part of a fun gathering or a special treat!
Your New Go-To Party Trick
And there you have it, my friends! My all-time favorite, foolproof recipe for Savory Mushroom Puff Pastry Pinwheels. They’re more than just an appetizer; they’re a conversation starter, a memory maker, and a guaranteed way to make any gathering feel a little more special. I hope this recipe brings as much joy to your kitchen as it has to mine. Now, I’d love to hear from you! Did you add your own twist? Did they disappear as fast as they do at my place? Tag me on social with #Feastical so I can see your beautiful creations. Happy cooking!
Final Thoughts: Your New Go-To Party Trick
And there you have it, friends! My not-so-secret secret to effortless, crowd-pleasing entertaining. These Savory Mushroom Puff Pastry Pinwheels are more than just a recipe; they’re a reliable little trick up your sleeve for any occasion that calls for something special.
They prove that you don’t need a chef’s kitchen or a whole day to create something truly memorable. All it takes is a few simple ingredients, a happy accident of an idea from years ago, and the confidence to roll it all up into one delicious package.
So the next time that little voice of panic starts whispering before guests arrive, you can just smile, head to the kitchen, and whip up a batch of these. I promise they’ll fill your home with an incredible aroma and your table with happy, satisfied people.
I hope this recipe becomes a trusted favorite in your home, creating as many happy memories for you and your loved ones as it has for me. Now get baking, and prepare to take a bow!
With love and a full plate,
Beau

Mini Bell Pepper Nachos : Low-Carb, High-Protein & Seriously Satisfying
Ditch the Chips! These Mini Bell Pepper Nachos Are Your New Snack Obsession
Hey friends, Beau here from Feastical! Let’s get real for a second. Who among us hasn’t faced down a massive platter of nachos, felt that initial wave of pure joy, only to be followed by the dreaded “carb coma” an hour later? You know the one—where you feel like you could nap on the kitchen floor, surrounded by a confetti of stray jalapeño slices and a profound sense of regret. We love the gooey cheese, the savory toppings, the whole glorious mess of it… but sometimes, our bodies (or our dietary goals) scream for a lighter option.
Well, my fellow food lovers, I’ve got the solution that doesn’t involve sacrificing flavor. We’re trading the tortilla chips for something brighter, crunchier, and packed with a sweet, fresh flavor that perfectly balances the spice. That’s right, we’re making Mini Bell Pepper Nachos!
This isn’t just a “healthy alternative.” This is a straight-up upgrade. Imagine: crisp, colorful rings of mini bell peppers acting as the world’s most perfect edible platter. They’re loaded with perfectly seasoned ground turkey, smothered in melty, bubbly cheddar cheese, and finished with all your favorite fresh toppings. It’s low-carb, high-protein, and so seriously satisfying that you might just forget about traditional nachos altogether. It’s the perfect feel-good food for a weeknight dinner, a game-day snack that won’t weigh you down, or a bariatric-friendly treat that delivers on every front. So, let’s grab those peppers and get cooking!
The Nacho Night That Changed Everything
This recipe was born out of a little kitchen desperation, I’ll admit. It was a typical Tuesday, and my best friend was coming over. We had a long-standing tradition of “Trashy Tuesday Nachos,” where we’d load up a sheet pan with every chip, cheese, and bean we could find. But this time, she was deep into a health kick and feeling a little down about having to skip our ritual.
I peered into the fridge, determined to create something that felt indulgent but aligned with her goals. I saw a bag of those vibrant mini bell peppers, a leftover container of taco-seasoned ground turkey, and a big block of cheddar. A lightbulb went off. What if I used the peppers as the base? I sliced them into rings, tossed everything together, and threw it in the air fryer. Eight minutes later, we were staring at a vibrant, cheesy, glorious mess. We dug in, and her face just lit up. “Beau,” she said, mouth half-full, “this is better than the real thing.” It was a moment of pure, unscripted kitchen magic—the kind that reminds me why I started Feastical in the first place. Food should bring us together, no matter what our journey looks like.
Gather ‘Round: Your Nacho Building Blocks
Here’s everything you need to create this masterpiece. Don’t be shy about substitutions—cooking is all about making it work for you!
- 1 lb bag of Mini Bell Peppers: The star of the show! I love using the multi-colored ones for a rainbow effect. They’re sweet, they’re crunchy, and they hold up beautifully in the heat. Chef’s Insight: Look for peppers that are firm and have a glossy skin for the best crunch.
- 1 tbsp Olive Oil: Just a drizzle. This helps the seasoning stick and encourages the peppers to get those delicious, slightly blistered edges.
- 1-2 tbsp Taco Seasoning: To taste! Use your favorite store-bought blend, or make your own with chili powder, cumin, garlic powder, and a pinch of paprika. This is where the flavor lives!
- 1 cup Shredded Cheddar Cheese: The glue that holds our nacho universe together. I like to shred my own from a block because it melts so much creamier than the pre-shredded stuff (which has anti-caking agents). Substitution Tip: A Mexican blend, Monterey Jack, or even pepper jack for a kick would be fantastic.
- 1 lb Cooked Ground Turkey or Chicken: Our high-protein hero! I brown mine with a little onion and garlic before adding the taco seasoning. Substitution Tip: Ground beef, plant-based crumbles, or even black beans for a vegetarian version work perfectly.
- A Pinch of Salt: Don’t forget this! It enhances all the other flavors and makes the peppers pop.
For The “Cool-Down” Toppings (The Finishing Touch!)
- Greek Yogurt: My go-to swap for sour cream. It’s tangy, creamy, and packs an extra protein punch. Chef’s Insight: The coolness is the perfect contrast to the spicy, cheesy base.
- Guacamole: Because what are nachos without guac? Use store-bought or mash a ripe avocado with a squeeze of lime and a sprinkle of salt.
- Fresh Salsa or Pico de Gallo: This adds a juicy, acidic burst that cuts through the richness. The freshness is non-negotiable!
- Chopped Green Onion or Chives: For a pop of color and a mild, oniony bite. It makes the whole dish look restaurant-worthy.
Let’s Build These Flavor Bombs: Your Step-by-Step Guide
Ready to see how this all comes together? It’s so simple, you’ll have it memorized after one try. I’m throwing in all my favorite chef hacks to make it foolproof.
- Preheat Your Air Fryer (or Oven). Crank that air fryer to 400°F. If you’re using an oven, preheat it to 425°F. We want a hot, fast cook to melt the cheese and crisp the peppers without making them soggy. Chef’s Hack: Giving your appliance a proper preheat is the secret to evenly cooked, perfectly melty nachos every single time.
- Slice and Dice. Wash those beautiful mini peppers, slice off the tops, and then slice them into ¼ to ½-inch rings. Shake out the seeds. You’ll be left with a pile of perfect, colorful pepper rings ready to become your new favorite chip. Chef’s Hack: Use a sharp paring knife for this—it gives you more control for those little peppers and makes the job super quick.
- The Big Shake! This is the fun part. Add all your pepper rings to a large ziplock bag. Drizzle in the olive oil, add your taco seasoning, a pinch of salt, the shredded cheese, and the cooked ground turkey. Seal the bag (make sure it’s sealed—trust me on this one!) and shake, shake, shake! Chef’s Commentary: This method is my absolute favorite because it coats every single pepper ring evenly with flavor and cheese, ensuring you don’t get any sad, naked peppers.
- Spread It Out. Pour the contents of the bag into your air fryer basket or onto a baking sheet if using an oven. Spread everything into a single, even layer. Chef’s Hack: Try not to overcrowd the basket. If you pile it on top of itself, the peppers will steam instead of crisp up. A little space is your friend here!
- Cook to Perfection. Air fry for 8-10 minutes, or bake for 10-12, until the cheese is gloriously melted and bubbly and the pepper edges are just starting to char and soften. You’re looking for a mix of tender-crisp texture. Chef’s Insight: All air fryers and ovens run a little different, so keep an eye on them after the 8-minute mark. That smell is your cue—it’s going to be incredible.
- The Grand Finale: Toppings! Carefully transfer your creation to a serving platter. Now, artfully (or just enthusiastically) dollop on the Greek yogurt, guacamole, and fresh salsa. A final sprinkle of chopped green onions is the confetti this party deserves. Serve immediately and watch them disappear!
How to Serve These Mini Masterpieces
Presentation is part of the fun! I love serving these right in the air fryer basket for a casual, “dig-in” vibe when it’s just my wife and me. For a bigger crowd, transfer them to a large, colorful platter so everyone can see the rainbow of peppers and toppings.
These nachos are a complete meal on their own, but if you want to turn it into a full-on fiesta, they pair beautifully with a simple side salad with a zesty lime vinaigrette. For a beverage, a crisp Mexican lager, a fizzy club soda with lime, or a refreshing agua fresca would be absolutely perfect. The goal is to keep things light, bright, and celebratory!
Make It Your Own: 5 Delicious Twists
One of the best things about this recipe is its versatility. Don’t be afraid to play with your food! Here are a few of my favorite variations:
- The “Big Game” Buffalo Chicken: Swap the taco seasoning for cooked, shredded chicken tossed in buffalo sauce. Use a blue cheese or ranch dressing instead of Greek yogurt, and top with chopped celery.
- Fully Loaded Veggie: Perfect for my plant-based friends! Skip the meat and add a can of black beans (rinsed and drained) and canned corn to the bag. You could even use a vegan cheese shred.
- Pizza Party Nachos: Toss the peppers with olive oil, garlic powder, and dried oregano. Use cooked Italian sausage or pepperoni, and swap the cheddar for mozzarella and parmesan. After cooking, top with a drizzle of marinara and fresh basil.
- Breakfast Nachos: Yes, really! Use cooked breakfast sausage or crumbled bacon and swap the cheddar for pepper jack. After air frying, top with a drizzle of sriracha and a few fried eggs for the ultimate weekend brunch.
- The “Everything Bagel”: For a completely different direction, toss the peppers with everything bagel seasoning and top with smoked salmon, red onion, capers, and a dollop of cream cheese after cooking. Unconventional? Maybe. Delicious? Absolutely.
Beau’s Kitchen Confidential
This recipe has become a staple in my house, and it’s evolved in fun ways. My wife loves it when I add a few slices of pickled jalapeño into the bag before shaking for an extra kick. And I’ll let you in on a little secret: the “shake in a bag” method was a complete accident the first time I made it because I was too lazy to dirty a bowl. Now, it’s my non-negotiable step! It just works so well.
The best part is watching people’s faces when they try it for the first time. There’s always a moment of hesitation, followed by a look of surprise, and then pure delight. It’s a reminder that healthy eating doesn’t have to be about deprivation; it can be about creative, delicious upgrades that make you feel amazing.
Your Questions, Answered!
I’ve gotten a few questions about this recipe over time, so I figured I’d answer the most common ones right here.
Q: My peppers got a little soggy. What did I do wrong?
A: The most common culprit is overcrowding! If the pepper rings are piled on top of each other, they steam instead of roast. Make sure they’re in a single layer with a little breathing room. Also, make sure your air fryer or oven is fully preheated for that instant blast of heat.
Q: Can I make these ahead of time?
A: You can do the prep ahead! Slice the peppers, cook and season the meat, and shred the cheese. Keep them in separate containers in the fridge. When you’re ready to eat, just toss everything together and cook. I don’t recommend assembling and refrigerating it before cooking, as the peppers will release moisture.
Q: My cheese burned before my peppers were tender. Help!
A> This can happen if the heat is too high. Try lowering your air fryer temp to 375°F and cooking for a few minutes longer. The slower cook will give the peppers time to soften without sacrificing that beautifully melted cheese.
Q: Is the ground meat absolutely necessary?
A> Not at all! This recipe is incredibly flexible. As I mentioned in the variations, black beans, lentils, or even just loading up with extra cheese and veggies makes for a fantastic vegetarian option.
The Good Stuff: A Peek at the Nutrition
Now, I’m a chef, not a nutritionist, but I love knowing what’s fueling my body. Here’s a rough estimate of what you’re getting in one generous serving (based on using ground turkey and the listed toppings). Remember, these are estimates and can vary based on your specific ingredients!
- Calories: ~250-300
- Protein: 20g+ (This is the real win! It keeps you full and satisfied.)
- Carbohydrates: ~10g (A fraction of what you’d find in traditional nachos.)
- Fat: ~15g (The good, flavorful kind from the meat, cheese, and olive oil.)
Compared to a plate of restaurant nachos that can easily soar over 1,000 calories and 100+ grams of carbs, this is a feel-good swap that delivers on flavor without the heavy aftermath. It’s a fantastic option for anyone following a low-carb, keto-friendly, high-protein, or bariatric diet.
Print
Mini Bell Pepper Nachos : Low-Carb, High-Protein & Seriously Satisfying
Description
Ditch the Chips! Mini Bell Pepper Nachos
A crunchy, colorful, and protein-packed nacho upgrade that won’t weigh you down.
These Mini Bell Pepper Nachos are a low-carb, high-protein twist on the classic snack. Sweet, crisp pepper rings replace tortilla chips, topped with seasoned ground turkey (or your choice of protein), melty cheddar, and fresh toppings. Perfect for a weeknight snack, game day, or a healthy, feel-good treat.
Ingredients
For the Nachos:
-
1 lb mini bell peppers, multi-colored
-
1 tbsp olive oil
-
1–2 tbsp taco seasoning (to taste)
-
1 lb cooked ground turkey or chicken
-
1 cup shredded cheddar cheese
-
Pinch of salt
Toppings (optional, but highly recommended):
-
Greek yogurt (instead of sour cream)
-
Guacamole or sliced avocado
-
Fresh salsa or pico de gallo
-
Chopped green onions or chives
Instructions
1. Preheat & Prep:
-
Preheat air fryer to 400°F (oven: 425°F).
-
Wash peppers, slice tops off, then cut into ¼–½ inch rings. Remove seeds.
2. Season & Combine:
-
In a large ziplock or bowl, add pepper rings, olive oil, taco seasoning, salt, shredded cheese, and cooked ground meat. Shake or toss until everything is evenly coated.
3. Cook:
-
Spread the mixture in a single layer in the air fryer basket or on a baking sheet.
-
Air fry 8–10 minutes (oven: 10–12 minutes) until cheese is melted and peppers are tender-crisp.
4. Add Toppings & Serve:
-
Transfer nachos to a platter. Dollop with Greek yogurt, guacamole, and fresh salsa. Sprinkle with green onions. Serve immediately.
Notes
-
Avoid soggy peppers: Don’t overcrowd the basket; give them room to crisp.
-
Make ahead: Prep peppers, meat, and cheese separately. Combine and cook just before serving.
-
Vegetarian option: Swap meat for black beans, lentils, or extra veggies.
-
Cheese options: Pepper jack, Monterey Jack, or Mexican blend works beautifully.
Nutrition
- Calories: 250 Cal Per Serving
- Fat: 15g
- Carbohydrates: 10g
- Protein: 20g+
Your New Go-To Snack is Served
And there you have it, my friends—the recipe that saved my Trashy Tuesday and brought a whole new level of vibrancy to my table. These Mini Bell Pepper Nachos are proof that eating well doesn’t mean giving up the foods you love. It’s about getting a little creative in the kitchen and finding joy in every single bite.
I hope this recipe becomes a regular in your rotation, just like it is in mine. It’s quick, it’s easy, it’s customizable, and it’s packed with real-life, feel-good flavor. If you make it (and I really hope you do!), tag me on social @Feastical so I can see your beautiful creations! Now, go forth and nacho.
Final Thoughts: Your Snack Game, Upgraded.
So, there you have it. The “what if” that turned into a “why didn’t I think of this sooner?” Ditching the chips for mini bell peppers isn’t just a clever swap—it’s a revelation. It’s the joy of nacho night, reimagined without the heaviness. This recipe is your ticket to a snack that feels indulgent but fuels you right, proving that the best kind of food is the kind that makes you feel as good as it tastes.
You’ve got the blueprint, the chef’s hacks, and a world of delicious variations to explore. So, the next time that nacho craving hits, you know exactly what to do. Grab those peppers, get shaking, and prepare to be obsessed.

Zesty Cottage Cheese & Avocado Breakfast Burrito : Fuel Your Morning Right
Zesty Cottage Cheese & Avocado Breakfast Burrito – Fuel Your Morning Right
Hey there, Feastical friend! Let’s be real for a second. How many mornings have you found yourself sprinting out the door, stomach growling, with nothing but a sad granola bar or a questionable cup of coffee to power you through until lunch? I’ve been there more times than I’d like to admit. That frantic, hungry feeling is exactly what I’m here to banish from your life, one delicious, fuel-packed bite at a time.
I’m a firm believer that the first meal of the day shouldn’t just be an afterthought—it should be a celebration. It should be something you genuinely look forward to, something that tastes incredible and makes you feel like a superhero ready to conquer your to-do list. And that’s where our hero of the hour comes in: The Zesty Cottage Cheese & Avocado Breakfast Burrito.
This isn’t just another breakfast recipe. This is your secret weapon. We’re talking creamy, protein-packed cottage cheese, fluffy scrambled eggs, buttery avocado, and a fresh pop of tomato and cilantro, all wrapped up in a cozy, golden-toasted whole-wheat tortilla. It’s a flavor and texture party that comes together in about 10 minutes flat. It’s the warm, satisfying hug your busy morning has been begging for. So, let’s ditch the breakfast blues and get cooking!
The Burrito That Started It All
This recipe takes me right back to my college days. I was sharing a cramped apartment with three other guys, and our kitchen was… well, let’s just call it “well-loved.” Our budget was tight, but our appetites were massive. One lazy Sunday, after a particularly ambitious (and sleep-deprived) study session, we raided the fridge. We had eggs, a lone tub of cottage cheese someone’s mom had left behind, and a perfectly ripe avocado begging to be used.
In a moment of pure, hungry genius, we scrambled it all together, wrapped it in the last two tortillas we had, and toasted them in a pan. The result was a revelation! It was creamy, hearty, and so much greater than the sum of its parts. That messy, shared burrito became our weekend ritual—the fuel for late-night talks and big dreams. It taught me that the best food isn’t about fancy ingredients; it’s about creativity, community, and the simple joy of a seriously satisfying meal.
Gather Your A-Team: The Ingredients
One of the best things about this burrito is its beautiful simplicity. Here’s everything you’ll need to create this morning masterpiece. Don’t forget, cooking is an adventure, so feel free to play around with these!
- 2 Large Whole-Wheat Tortillas: I love the nutty flavor and extra fiber from whole wheat, but this is your canvas! Use flour, spinach, or even a low-carb wrap if that’s your jam. Just make sure they’re the large, burrito-sized ones so you have plenty of room for the good stuff.
- ½ Cup Cottage Cheese: This is our secret protein powerhouse! It adds an incredible creaminess that makes the eggs feel extra luxurious. If you’ve been on the fence about cottage cheese, this is the recipe that will convert you. For the creamiest texture, I like to use 4% milkfat, but any fat percentage works.
- 1 Ripe Avocado, Sliced: Look for an avocado that yields gently to a squeeze. Its buttery richness is the perfect counterpoint to the zesty ingredients. No ripe avocados? A smear of store-bought guacamole works in a pinch!
- 2 Large Eggs, Scrambled: The humble egg, truly a culinary workhorse. They’re our main source of fluffy, satisfying structure. For an extra-rich flavor, I sometimes add a tiny splash of water to the eggs before scrambling—it creates amazing steam and fluffiness!
- ¼ Cup Diced Tomato: A little fresh, acidic pop to cut through the richness. I like to use Roma tomatoes because they’re less watery, but any fresh tomato will do the trick. Just give them a quick dice, and you’re golden.
- 2 Tbsp Chopped Fresh Cilantro: Don’t skip this! It brings a bright, herbaceous zing that ties the whole burrito together. If you’re one of those folks who thinks cilantro tastes like soap (no judgment!), fresh parsley or a sprinkle of chives are lovely substitutes.
- Salt & Pepper to Taste: The dynamic duo of seasoning. Be generous! Season your eggs as they cook and don’t be shy about adding a little extra pinch over the finished filling.
- Cooking Spray or a Dab of Butter/Oil: This is just to keep everything from sticking to the pan. A non-stick skillet is your best friend here.
Let’s Build the Ultimate Breakfast Burrito!
Alright, team, it’s go time! This whole process is a quick, satisfying dance in the kitchen. Follow these steps, and you’ll be a breakfast burrito pro in no time.
Step 1: The Fluffy Egg Foundation
First, grab a medium non-stick skillet and give it a quick spritz of cooking spray. Place it over medium heat. While it’s warming up, crack your two eggs into a small bowl, add a pinch of salt and pepper, and whisk them until they’re nice and uniform. Chef’s Hack: See those bubbles forming as you whisk? That’s air being incorporated, which is the secret to super fluffy eggs! Pour the eggs into the warm skillet. Let them set for about 10 seconds, then gently push the cooked edges toward the center with a spatula, letting the uncooked eggs fill the space. Keep doing this until the eggs are just cooked through but still soft and moist—this should only take 2-3 minutes. Immediately transfer them to a plate. Overcooked, rubbery eggs are the enemy of a great burrito!
Step 2: The Art of Assembly
Lay your two tortillas flat on your work surface. If they’re a bit stiff, you can warm them for 15 seconds in the microwave to make them more pliable. Now, let’s layer! Start by spreading half of the cottage cheese down the center of each tortilla, leaving about a 2-inch border at the top and bottom. This is our creamy base layer. Next, divide the warm, fluffy scrambled eggs on top of the cottage cheese. Follow that with the beautiful slices of ripe avocado and the diced tomato. Finally, shower everything with that vibrant, chopped cilantro. Chef’s Tip: Try to keep the fillings in a neat, horizontal line in the center—it makes the rolling process so much easier!
Step 3: The Perfect Roll & The Golden Toast
This is the step that intimidates people, but trust me, you’ve got this. Fold the left and right sides of the tortilla inward over the filling. Now, lift the bottom flap (the side closest to you) and tuck it tightly over the filling, using your fingers to really snug it in. Then, simply roll it forward, away from you, into a tight, secure burrito. Give it a little pat—you did it! Now, wipe out the skillet you used for the eggs (no need to wash it yet!) and place it back over medium heat. Give it another light spray. Place your burritos seam-side down in the pan. This is crucial—toasting the seam side first seals the burrito shut! Cook for 2-3 minutes, until beautifully golden and crisp, then carefully flip and toast the other side for another 2 minutes. That crispy, warm tortilla shell makes all the difference.
How to Serve It Up in Style
You’ve created a masterpiece—now let’s present it like one! I love to slice my burrito in half on a slight diagonal. This not only looks professional but also reveals that gorgeous cross-section of all the colorful, layered fillings. Plate it up with a few extra avocado slices on the side for that extra dose of healthy fats.
But let’s talk about sauces, because this is where you can really make it your own. A drizzle of your favorite hot sauce or salsa (a zesty verde salsa is fantastic here) adds a wonderful kick. For a creamy, cool contrast, a dollop of sour cream or Greek yogurt is divine. If you’re feeling extra feastical, a quick squeeze of lime juice over the top right before serving wakes up every single flavor. Enjoy it immediately while the tortilla is crisp and the eggs are still warm!
Make It Your Own: Delicious Variations
The beauty of this recipe is its versatility. Once you’ve mastered the basic blueprint, the flavor world is your oyster! Here are a few of my favorite twists:
- The “Southwest Fiesta”: Add a sprinkle of shredded pepper jack cheese, a handful of black beans, and a spoonful of roasted corn to the filling. A dash of cumin and chili powder in the eggs takes it to the next level.
- The “Everything Bagel”: Swap the cottage cheese for a thick schmear of plain cream cheese and mix a hefty teaspoon of “Everything But The Bagel” seasoning into your scrambled eggs. It’s a game-changer.
- The “Green Machine” (Vegan-Friendly): Skip the eggs and cottage cheese. Instead, use crumbled firm tofu (scrambled with turmeric for color) and a generous scoop of vegan sour cream or creamy hummus. It’s just as satisfying!
- The “Meat Lover’s”: Crumble in some cooked breakfast sausage or crispy bacon with the eggs. Because sometimes, you just need that savory, salty punch.
- The “Spicy Sunrise”: Add some heat! Mix finely diced jalapeño or a spoonful of pickled jalapeños into the filling, or use a spicy salsa for serving.
Beau’s Kitchen Notes & Stories
This recipe has been a part of my life for so long, it’s practically family. It’s evolved from that chaotic college kitchen experiment to the polished (but still super easy) version you see today. The biggest lesson I’ve learned? Don’t overthink it. The first time my now-wife watched me make these, she was skeptical about the cottage cheese. One bite in, and her eyes lit up. It’s now her most-requested weekend breakfast. I’ve also learned that the toasting step is non-negotiable. It transforms the burrito from a simple wrap into a crispy, warm, handheld meal that holds together perfectly. It’s the little things, friends!
Your Burrito Questions, Answered!
Q: My burrito keeps falling apart when I try to eat it! What am I doing wrong?
A: This usually comes down to two things: overfilling or an imperfect roll. Make sure you’re leaving a clear border at the top and bottom of the tortilla. And remember the tuck-and-roll method—tuck the bottom flap tightly over the filling before you roll it forward. Toasting it seam-side down first also acts like a natural glue!
Q: Can I meal prep these burritos for the week?
A: Absolutely! Assemble and roll the burritos, but do not toast them. Wrap each one tightly in parchment paper, then in foil or a freezer bag. They’ll keep in the freezer for up to a month. To reheat, remove the foil (keep the parchment), and microwave for 1-2 minutes, then toast in a dry skillet or air fryer to crisp up the tortilla. Perfect for grab-and-go mornings!
Q: I’m not a fan of the texture of cottage cheese. Any tips?
A: I totally get it! For a smoother texture, you can give the cottage cheese a quick pulse in a food processor or blender before adding it to the burrito. It becomes a wonderfully creamy, ricotta-like spread that blends seamlessly with the eggs.
Q: The bottom of my tortilla is getting soggy from the warm eggs. Help!
A: Great observation! A simple fix is to create a “double layer” barrier. After you spread the cottage cheese, lay a single small piece of lettuce (like butter lettuce) on top. Then add your warm eggs. The lettuce acts as a brilliant moisture barrier, keeping that tortilla crisp.

Zesty Cottage Cheese & Avocado Breakfast Burrito : Fuel Your Morning Right
Description
Zesty Cottage Cheese & Avocado Breakfast Burrito
Fuel Your Morning Right!
Hey there, Feastical friend! Let’s be real—mornings can be chaos. You’re racing out the door, stomach rumbling, hoping that a sad granola bar and lukewarm coffee will somehow carry you through the morning. But you deserve better.
Enter the Zesty Cottage Cheese & Avocado Breakfast Burrito — your new secret weapon for busy mornings. It’s creamy, protein-packed, and full of flavor, ready in just 10 minutes. With fluffy scrambled eggs, smooth cottage cheese, buttery avocado, and a pop of tomato and cilantro, all wrapped in a warm whole-wheat tortilla — it’s the perfect balance of comfort and nutrition.
Ingredients
-
2 large whole-wheat tortillas
-
½ cup cottage cheese (4% milkfat preferred)
-
2 large eggs, scrambled
-
1 ripe avocado, sliced
-
¼ cup diced tomato
-
2 tbsp fresh cilantro, chopped
-
Salt & pepper, to taste
-
Cooking spray or a small dab of butter/oil
Optional toppings:
-
Salsa or hot sauce
-
Sour cream or Greek yogurt
-
Lime wedges for serving
Instructions
1. Cook the Eggs:
Spray a non-stick skillet with cooking spray and heat over medium. Whisk eggs with salt and pepper until fluffy. Pour into the pan and cook gently, pushing the eggs from edges to center until just set (2–3 minutes). Transfer to a plate — don’t overcook!
2. Assemble the Burritos:
Lay the tortillas flat. Spread cottage cheese down the center of each, leaving about a 2-inch border. Top with scrambled eggs, avocado slices, diced tomato, and cilantro.
3. Roll It Up:
Fold in the sides, then roll tightly from the bottom up to form a burrito.
4. Toast to Perfection:
Wipe out the skillet, spray again, and place burritos seam-side down. Toast 2–3 minutes per side until golden brown and crisp. This seals the seam and gives the tortilla that irresistible crunch.
5. Serve & Enjoy:
Slice in half diagonally, plate beautifully, and serve with salsa, a dollop of Greek yogurt, or a squeeze of lime.
Notes
-
Make it meal-prep friendly: Assemble and freeze before toasting. Reheat in the microwave, then crisp in a skillet.
-
Smooth texture: Blend the cottage cheese briefly if you prefer a creamy spread.
-
Prevent sogginess: Add a leaf of butter lettuce between warm eggs and tortilla to act as a moisture barrier.
-
Mix it up: Try adding black beans, pepper jack cheese, or cooked bacon for extra flavor.
Fueling Your Body Right
Let’s talk about why this burrito makes you feel so darn good. This isn’t just empty calories; it’s balanced fuel designed to keep you energized and satisfied for hours. The eggs and cottage cheese are a powerful protein duo, providing about 19 grams per serving to support muscle repair and keep hunger at bay. The avocado brings heart-healthy monounsaturated fats and fiber, which are fantastic for sustained energy and keeping you full. The whole-wheat tortilla adds complex carbohydrates and additional fiber for steady blood sugar levels, unlike the crash you might get from a sugary pastry. It’s a well-rounded, nutrient-dense meal that truly fuels your morning right.
Final Thoughts: Your Ticket to a Better Morning
So, there you have it—the full story behind the humble burrito that has the power to transform your hectic mornings. This isn’t just about following a recipe; it’s about embracing a new mindset. It’s about choosing a few minutes of self-care over a frantic, hungry dash. It’s about realizing that a truly great breakfast doesn’t have to be complicated or time-consuming.
The Zesty Cottage Cheese & Avocado Breakfast Burrito is your proof. It’s a testament to the magic that happens when simple, wholesome ingredients come together with a little bit of intention. It’s creamy, satisfying, packed with protein, and—most importantly—it’s made for you.
So tomorrow morning, I challenge you: trade that sad granola bar for a warm, crispy, flavor-packed hug in a tortilla. Give yourself the fuel you deserve to feel focused, energized, and ready to take on the world. Your taste buds—and your to-do list—will thank you.
Now, I’d love to hear from you! Did you stick with the classic or try a fun variation? What’s your ultimate breakfast burrito hack? Share your creations and stories with me on social @Feastical. Let’s build a community of well-fueled, happy morning people, together.
Here’s to great food and even better mornings,
Beau