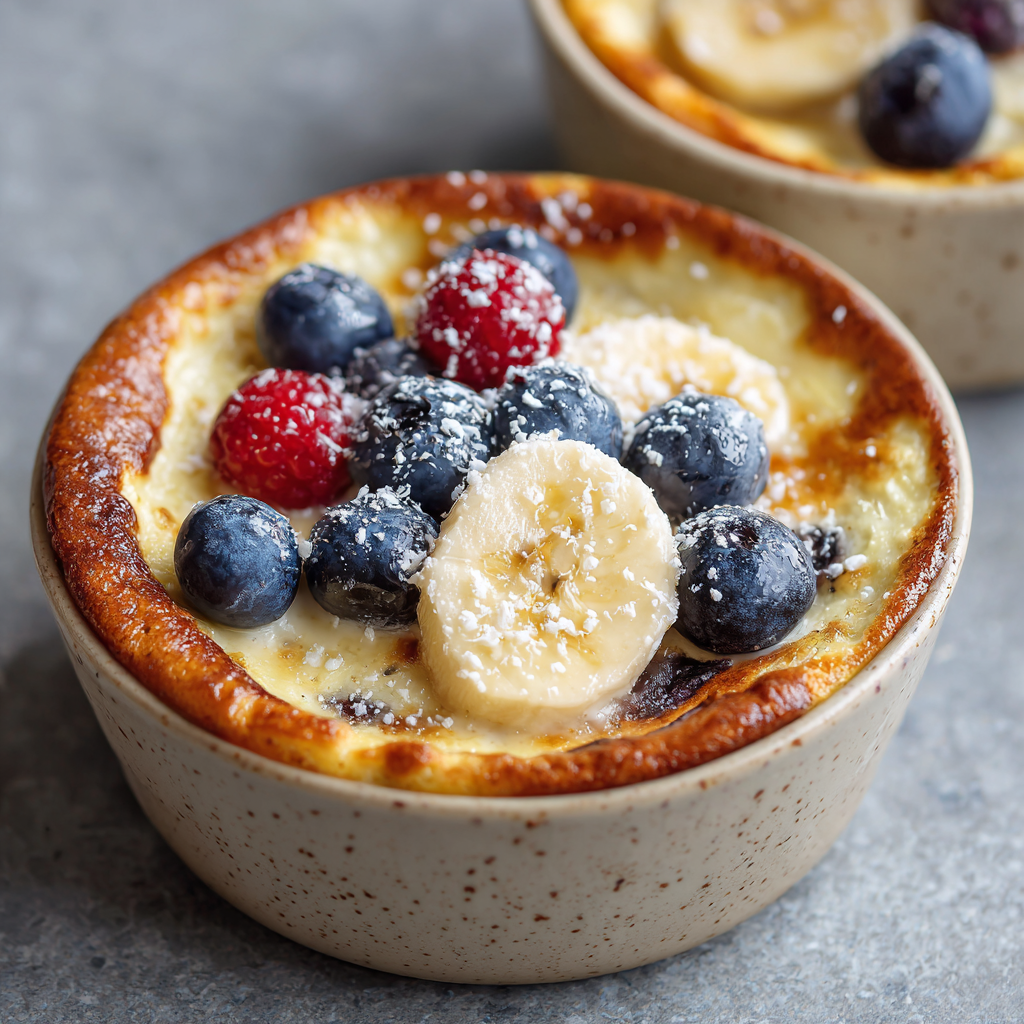
Baked Protein Pancake Bowls : Meal Prep Breakfast Made Simple
Ditch the Morning Rush with Baked Protein Pancake Bowls
Hey friends, Beau here! Let’s get real for a second. How many of us have grand plans for a healthy, sit-down breakfast, only to have our mornings hijacked by the snooze button, lost keys, and that sudden panic of being late? I’ve been there more times than I’d like to admit, staring into the fridge abyss while my stomach rumbles a protest song.
That’s why I became obsessed with creating a breakfast that was more than just a grab-and-go bar, but felt like a warm, homemade hug. I wanted something that packed a serious protein punch to keep me fueled for hours, but didn’t require me to stand over a griddle flipping a dozen individual pancakes while my coffee got cold. The answer, my friends, came from my oven.
Say a very happy hello to your new breakfast MVP: Baked Protein Pancake Bowls. Imagine the fluffiest, most comforting pancake you’ve ever had, but baked into a perfect, personal portion. It’s warm, it’s satisfying, and the best part? You can make a whole batch on a Sunday and have a gourmet-level breakfast ready in minutes all week long. No banana needed here, just simple, soulful ingredients that come together to create pure morning magic. So, preheat your oven and let’s make your mornings something to truly look forward to.
The Pancake That Changed My Morning Game
This recipe was born out of a minor kitchen disaster that turned into a major “aha!” moment. Picture this: It was a chilly Sunday morning, and I was craving pancakes. I had my bowl of batter ready, my pan was hot, and I was in the zone. But then my dog, Biscuit, decided the squeaky toy he’d ignored for weeks was now the most fascinating object on earth—right behind my ankles. In the ensuing chaos of dodging a zig-zagging terrier, I accidentally knocked over my measuring cup, sending a cascade of batter right into a waiting oven-safe ramekin I’d used for a crème brûlée the night before.
Instead of tossing it, I thought, “What the heck?” and shoved the ramekin into the oven. Twenty minutes later, I pulled out this beautifully puffed, golden-brown, individual pancake cake. It was perfectly cooked, incredibly easy, and felt so much more special than a standard pancake. That happy accident was the spark. I spent the next few weeks tweaking and testing, adding protein powder for staying power, and perfecting the ratios until it became the foolproof, feel-good recipe I’m sharing with you today. Sometimes the best recipes find you when you’re not even looking!
Gathering Your Bowl of Goodness
Here’s everything you need to create this simple masterpiece. Don’t be shy about making swaps—cooking is all about making it work for you!
- 2 Eggs: Our trusty binder and leavening agent. They give the bowl its lovely structure and rich flavor. For a vegan swap, I’ve had great success with flax eggs (2 tbsp ground flaxseed mixed with 5 tbsp water, let it sit for 5 mins).
- 100 g Vanilla or Unflavoured Yogurt: This is the secret to an incredibly moist and tender crumb! The tang from the yogurt balances the sweetness perfectly. I use Greek yogurt for an extra protein kick, but any plain or vanilla yogurt works. Dairy-free? Coconut or almond yogurt are fantastic here.
- 140 ml Milk (soy, almond, or any milk of choice): The liquid that brings it all together. I love the creaminess of soy milk, but this is your chance to use whatever you have in the fridge. Oat milk makes it extra rich!
- 70 g All-Purpose Flour: The foundation of our fluffy structure. For a gluten-free version, a 1:1 gluten-free baking blend works like a charm.
- 50 g Vanilla or White Chocolate Protein Powder: The star of the show for that fuel-up factor! A quick chef’s note: I used a plant-based vegan protein powder for this recipe. If you’re using whey or casein protein, which tend to absorb more liquid, you may need to add an extra tablespoon or two of milk to achieve the same pancake-batter consistency.
- 10 g Zero-Calorie Granulated Sweetener (or sweetener of choice): Just a touch to enhance the natural sweetness. This is totally customizable. The same amount of coconut sugar, maple syrup, or even regular sugar works beautifully.
- 1 tsp Baking Powder: Our little puff-maker! This is what gives the bowl its lovely rise and airy texture. Make sure yours is fresh for the best lift.
Let’s Bake Some Magic: Your Foolproof Steps
Ready to see how easy this is? Follow these steps, and you’ll be a Baked Protein Pancake Bowl pro in no time.
- Preheat and Prep. First things first, get that oven roaring to a cozy 350°F (175°C). This gives it time to reach the perfect, even temperature. While it’s heating up, lightly grease your oven-safe bowl or ramekin with a little butter, oil, or cooking spray. I use a 12-ounce (about 350 ml) ramekin, but any similar-sized, oven-proof dish will work. Chef Hack: A quick brush of melted coconut oil gives a lovely, subtle flavor and ensures a clean release.
- Combine the Wet Team. In a nice, spacious mixing bowl, crack in your two eggs. Add the yogurt and milk. Now, grab your whisk and go to town! You want to whisk this until it’s completely smooth and homogenous. No streaks of yogurt, just a beautiful, creamy liquid. This initial mixing is key for a uniform texture later.
- Welcome the Dry Crew. Here’s the most important tip for fluffy pancakes: don’t overmix! Add the all-purpose flour, protein powder, your chosen sweetener, and the baking powder right on top of the wet ingredients. Use a spatula or a wooden spoon and gently fold everything together. Stop as soon as you no longer see dry streaks of flour. A few small lumps are totally fine—I promise! Overmixing develops the gluten and can lead to a tough, dense pancake bowl, and we are all about that light, fluffy life.
- Batter Up! Pour your beautifully mixed batter into your prepared ramekin. It should fill it up about ¾ of the way to leave room for that glorious rise. Give the ramekin a little tap on the counter to settle the batter and release any large air bubbles. Chef Hack: For a fun “surprise inside,” you can drop a few dark chocolate chips or blueberries into the center of the batter right before baking. They’ll sink just a bit and create a delicious molten center!
- Bake to Golden Perfection. Carefully place your ramekin in the preheated oven. Now, set a timer for 18 minutes. At this point, take a peek. It should be puffed up and have a matte, golden-brown surface. If it still looks a bit wet or jiggly in the center, give it another 2-4 minutes. Total bake time is typically 18-22 minutes. You can also do the classic toothpick test—insert it into the center, and if it comes out clean, you’re good to go!
- The Cool Down. This is the hardest part—waiting! Use oven mitts to remove the hot ramekin and place it on a heat-safe surface. Let it cool for at least 5 minutes. It will deflate slightly, which is totally normal and makes it the perfect vessel for holding all your delicious toppings.
Dress It Up & Dig In
Now for the really fun part—making it your own! This warm, fluffy bowl is a blank canvas for your breakfast dreams.
I love keeping it classic with a handful of fresh, juicy berries (their tartness is a perfect contrast), a generous drizzle of almond butter for healthy fats, and a tiny drizzle of raw honey for a natural sweetness. Feeling decadent? A scoop of Greek yogurt, a sprinkle of granola for crunch, and a dark chocolate shaving never disappoints.
For a “Peanut Butter Cup” vibe, swirl some peanut butter into the batter before baking and top with a few chocolate chips while it’s still warm so they get all melty. However you choose to top it, the goal is to create a bowl that makes you smile. Grab your favorite spoon and dig into a breakfast that truly fuels your day and your soul.
Make It Your Own: 5 Delicious Twists
Once you’ve mastered the base recipe, the world is your pancake bowl! Here are a few of my favorite ways to mix it up.
- Lemon Blueberry Bliss: Add the zest of one lemon to the wet ingredients and gently fold in a handful of fresh or frozen blueberries into the batter before baking. So bright and fresh!
- Chocolate Chip Cookie Dough: Swap the vanilla protein for chocolate protein powder and fold in 2 tablespoons of dark chocolate chips. It tastes like a warm, guilt-free cookie for breakfast.
- Apple Cinnamon Spice: Fold in ¼ cup of finely chopped apple and a teaspoon of ground cinnamon into the batter. It’s like biting into a cozy apple pie, but for breakfast.
- Tropical Escape: Use coconut milk and coconut yogurt, and fold in 2 tablespoons of shredded coconut and a few chunks of diced mango or pineapple. Close your eyes and you’re on vacation.
- Pumpkin Pie Power Bowl: Replace 50g of the yogurt with 100% pure pumpkin puree and add a dash of pumpkin pie spice. Perfect for those crisp fall mornings.
Beau’s Kitchen Chronicles
This recipe has become a true staple in my home, and it’s evolved in the funniest ways. My partner now judges my recipe testing by the “Bowl of the Week,” and let me tell you, the “Everything But The Kitchen Sink” version with leftover nuts and seeds was not a winner! The biggest lesson I’ve learned is to embrace the simplicity. It doesn’t need to be complicated to be incredible.
I also love that this recipe is virtually spill-proof for my less-than-graceful mornings. No more flipping pancakes onto the floor (Biscuit thanks you) or dripping batter across the counter. It’s all contained in one beautiful, easy-to-clean little bowl. For me, that’s what Feastical is all about—recipes that bring joy without the stress.
Your Questions, Answered!
I’ve gotten a lot of DMs about this recipe, so here are answers to the most common questions.
Q: My pancake bowl came out dense and rubbery. What happened?
A: The most common culprit is overmixing! Remember, once you add the dry ingredients, you just want to gently fold until combined. Lumps are your friend. Also, double-check that your baking powder hasn’t expired.
Q: Can I make a big batch for the whole week?
A: Absolutely! You can double, triple, or even quadruple the recipe. Just mix the batter in a large bowl and divide it among multiple greased ramekins. Bake them all at once on a large baking sheet. Once cooled, they store beautifully in an airtight container in the fridge for up to 5 days.
Q: My batter was super thick. Is that right?
A: It should be a thick, but pourable, pancake batter consistency. If it’s more like a dough, the protein powder you used has likely absorbed a lot of liquid. No worries! Just whisk in an extra tablespoon or two of milk until it loosens up.
Q: Can I reheat it?
A: You bet! For the best texture, reheat it in an air fryer or toaster oven at 350°F for about 5 minutes until warm. The microwave works in a pinch (20-30 seconds), but it can make it a tad softer.

Baked Protein Pancake Bowls : Meal Prep Breakfast Made Simple
Description
Baked Protein Pancake Bowls
Prep Time: 5 minutes
Cook Time: 18–22 minutes
Total Time: ~25 minutes
Servings: 1 bowl (easy to multiply)
A soft, fluffy, high-protein pancake baked in a ramekin — no flipping, no mess, just a warm grab-and-go breakfast.
Ingredients
Wet Ingredients
-
2 large eggs
-
100 g vanilla or plain yogurt (Greek recommended; dairy-free works)
-
140 ml milk (soy, almond, oat, dairy — any kind)
Dry Ingredients
-
70 g all-purpose flour (or 1:1 gluten-free blend)
-
50 g vanilla or white chocolate protein powder
-
Note: whey/casein may need +1–2 tbsp extra milk
-
-
10 g zero-calorie granulated sweetener
-
(or sugar, coconut sugar, or maple syrup to taste)
-
-
1 tsp baking powder
Optional Add-ins
-
Chocolate chips
-
Blueberries
-
Cinnamon
-
Lemon zest
-
Chopped fruit
-
Nuts or seeds
Instructions
1. Preheat and Prepare
-
Preheat oven to 350°F (175°C).
-
Lightly grease a 12 oz (350 ml) oven-safe ramekin with butter, oil, or cooking spray.
2. Mix the Wet Ingredients
In a medium bowl, whisk together:
-
Eggs
-
Yogurt
-
Milk
Whisk until smooth and consistent.
3. Add the Dry Ingredients
Add:
-
Flour
-
Protein powder
-
Sweetener
-
Baking powder
Gently fold with a spatula until just combined.
Do not overmix—small lumps are fine.
If batter is very thick, add 1–2 tbsp extra milk.
4. Fill and Bake
-
Pour batter into the greased ramekin (about ¾ full).
-
Tap lightly on the counter to remove large air bubbles.
-
Bake 18–22 minutes, until puffed and golden.
-
Toothpick should come out clean.
5. Cool and Serve
-
Let cool 5 minutes.
-
Top as desired:
-
Fresh berries
-
Almond or peanut butter
-
A drizzle of honey or maple
-
Greek yogurt
-
Granola
-
Chocolate chips
-
Notes
Dense/rubbery texture: Overmixed batter; fold gently.
Didn’t rise: Baking powder may be old.
Batter too thick: Add 1–2 tbsp milk.
Dry result: Bake time too long or too much whey protein.
The Fuel Breakdown (Because We’re Curious!)
I know many of you are mindful about what fuels your body, so here’s a general nutritional breakdown for one bowl (calculated with large eggs, 2% Greek yogurt, unsweetened soy milk, and a plant-based vanilla protein powder). Remember, this will vary based on your specific ingredient brands and any substitutions you make!
- Calories: 338
- Protein: 27g (Hello, muscle fuel!)
- Carbohydrates: 27g
- Fat: 12g
This macro profile is what makes this breakfast such a powerhouse. The combination of high protein and complex carbs provides sustained energy, keeping you full, focused, and satisfied all the way until lunch. It’s a balanced start that truly sets the tone for a great day.
Your New Morning Ritual Awaits
And there you have it, friends—your ticket to stress-free, delicious, and empowering mornings. This Baked Protein Pancake Bowl is more than just a recipe; it’s a little act of self-care you can give yourself each day. It’s a reminder that taking a few minutes to nourish your body with something made with love is never a chore.
I truly hope this recipe becomes a beloved part of your routine, just like it has in mine. Give it a try, get creative with your toppings, and make it yours. And when you do, I’d love to see your creation! Tag me on Instagram @Feastical with your beautiful bowls.
Final Thoughts: Your Peaceful Morning Awaits
And there you have it, friends—the humble pancake, reimagined not as a source of morning stress, but as a simple, soul-nourishing ritual. This Baked Protein Pancake Bowl is more than just a recipe; it’s a permission slip to slow down, even on your busiest days.
It’s a reminder that taking a few moments to fuel your body with something warm and wholesome is an act of self-care. No more frantic scrambling or settling for something that leaves you hungry an hour later. This bowl is a promise of satisfaction, a container for creativity, and your ticket to ditching the morning rush for good.
So, whether you’re meal-prepping a week of wins on a Sunday or treating yourself to a special Wednesday morning, I hope this recipe finds its way into your kitchen and becomes a beloved part of your routine. It changed my mornings, and I have a feeling it might just change yours, too.
Now, I’d love to hear from you! What’s your favorite topping combination? Tag me on social with #BakedPancakeBowl and show me your creations. Happy baking!
With love and a full belly,
Beau

Crispy Loaded Potato Skins : A Crowd-Favorite Game Day Snack
More Than Just a Snack: Your New Go-To Party Hero
Hey friends, Beau here! Let’s talk about one of life’s simple, undeniable truths: nothing brings people together like a truly epic plate of food. You know the kind I mean. The one that appears from the kitchen, greeted by a chorus of “oohs” and “ahhs,” and disappears within minutes, leaving behind nothing but happy smiles and a few stray crumbs. For me, that plate is almost always heaped high with Crispy Loaded Potato Skins.
We’re not just talking about a side dish here. We’re talking about a full-blown culinary experience. Imagine this: a golden, twice-baked potato shell, so crispy it practically sings when you bite into it. It’s a vessel, lovingly cradling a river of melted, sharp cheddar cheese and a generous scattering of smoky, crumbled bacon. The final flourish? A cool, creamy dollop of sour cream and a confetti of fresh green onions that adds just the right amount of bite. It’s a perfect bite, every single time.
Whether you’re gearing up for the big game, hosting a casual get-together, or simply surrendering to a serious snack attack on a Tuesday night, these loaded potato skins are your absolute MVP. They’re deceptively simple to make, endlessly customizable, and they have this magical ability to make any occasion feel a little more special. So, tie on your favorite apron, preheat that oven, and let’s create some kitchen magic that’s guaranteed to earn you a standing ovation from your hungriest fans.
The Skinny on My Love for Skins: A Super Bowl Story
My lifelong love affair with potato skins started, as many great American stories do, in front of a television during the Super Bowl. I was about ten years old, and my dad was hosting his annual “Guys’ Night.” The air was thick with the scent of competition, cheap aftershave, and something absolutely intoxicating coming from the kitchen. My mom emerged with a baking sheet, and on it were these glorious, cheesy, bacon-topped boats. I was handed one, and my world changed.
I remember the heat warming my hands, the incredible crunch giving way to the soft, fluffy potato interior, and the way the cheese stretched for what seemed like miles. I was hooked. From that moment on, potato skins became more than just food; they were a symbol of celebration, of community, of everyone crowding around the coffee table, united by good food and great company. It’s that feeling—that warm, connected, joyful feeling—that I try to bake into every single recipe I create here at Feastical. This isn’t just a snack; it’s a memory maker.
Gathering Your All-Star Lineup
Great food starts with great ingredients, but I’m a firm believer in keeping it simple and stress-free. Here’s everything you’ll need to create these crispy wonders. Don’t be afraid to make it your own—I’ve included some of my favorite swaps and chef secrets right here.
- 4 large russet potatoes – These are the MVP for a reason! Their thick skin gets incredibly crispy, and their starchy, fluffy interior is the perfect blank canvas. Chef’s Tip: Look for potatoes that are uniform in size and oblong in shape—they’ll bake more evenly and give you more real estate for toppings!
- 1 tbsp olive oil – This is our crisp-enabler. A light brush of oil and a hot oven transform the skin from a wrapper into the star of the show.
- Salt & pepper to taste – Never underestimate the power of this dynamic duo. Seasoning every layer is the secret to deeply flavorful food.
- 1 cup shredded cheddar cheese – I love a good sharp or extra-sharp cheddar for that classic, tangy punch. Pro Hack: Buy a block and shred it yourself! Pre-shredded cheese is coated with anti-caking agents that can prevent it from melting as smoothly and beautifully.
- 6 slices cooked bacon, crumbled – Smoky, salty, crispy bacon. Need I say more? For a great shortcut, you can find real bacon bits or pieces in the salad aisle, but cooking and crumbling your own is always worth the extra few minutes.
- ½ cup sour cream – This is our cool, creamy counterpoint to all the warm, crispy, cheesy goodness. It brings everything into perfect, delicious balance.
- ¼ cup chopped green onions – Also known as scallions! They add a fresh, mild oniony bite and a gorgeous pop of green color.
- Optional: hot sauce or ranch for drizzling – This is where you make it yours! A zigzag of your favorite hot sauce or a drizzle of cool, herby ranch dressing takes these over the top.
Let’s Get Cooking: Building the Perfect Bite
Alright, team, it’s game time. Follow these steps, and you’ll have a tray of perfectly crispy, loaded potato skins that will have everyone asking for your secret. I’ve sprinkled in my favorite kitchen hacks to make the process even smoother.
- Preheat and Prep: Fire up your oven to a solid 400°F (200°C). While it’s heating, give those russet potatoes a good scrub under cold running water. We want to eat the skins, so let’s make sure they’re nice and clean! Pat them dry with a kitchen towel. Chef’s Hack: Drying the potatoes helps the skin get extra crispy! Now, take a fork and prick each potato 4-5 times. This is a crucial step—it lets the steam escape during baking so your spuds don’t turn into potato bombs in your oven.
- Bake to Perfection: Place the pricked potatoes directly on the oven rack. This allows for hot air to circulate all around them, cooking them evenly. Bake for 45-50 minutes, or until they are tender when pierced with a fork. You’re looking for that perfect, fluffy interior.
- The Great Scoop: Carefully remove the potatoes from the oven (they’ll be hot!) and let them cool just enough that you can handle them. This usually takes about 10-15 minutes. Slice each potato in half lengthwise. Now, with a spoon, gently scoop out the warm, fluffy potato from the center, leaving about a ¼-inch thick layer of potato attached to the skin. Don’t toss that scooped-out potato! Save it for the most incredible mashed potatoes or to thicken a soup later in the week. Zero waste is the goal!
- Crisp ‘Em Up: This is the secret to next-level potato skins. Brush the inside and outside of each potato shell with that olive oil, and don’t be shy with the salt and pepper. Place them cut-side DOWN on a baking sheet. Starting them face-down helps the interior get super crispy. Bake for 10 minutes. Flip them over, and bake for another 10 minutes, until the skins are golden brown and irresistibly crisp.
- The Load-Up: Now for the fun part! Flip the crispy skins so they’re cut-side up again. Divide the shredded cheese and crumbled bacon evenly among them. Pop them back into the oven for just 5-7 minutes, until the cheese is completely melted, bubbly, and glorious.
- The Grand Finale: Take your masterpiece out of the oven. Let them rest for just a minute (the cheese is molten lava hot!). Then, artfully dollop each one with cool sour cream, sprinkle with those vibrant green onions, and if you’re feeling fancy, add that drizzle of hot sauce or ranch. Serve immediately and accept your applause!
How to Serve These Superstar Skins
Presentation is part of the fun! I love using a large wooden cutting board or a rustic platter for serving. It gives that casual, “dig in!” vibe that’s perfect for this kind of food. Scatter a few extra green onions or a little extra bacon over the top for a professional touch.
These are the ultimate finger food, so have plenty of napkins on hand. While they are a star all on their own, they play incredibly well with others. Serve them alongside a big, crisp salad for a lighter meal, or pair them with a bowl of spicy chili for the ultimate game-day spread. They’re also the perfect companion to a lineup of other appetizers like buffalo wings, fresh veggies and dip, and a killer seven-layer dip. Trust me, your guests will be doing a happy dance.
Mix It Up! Your Potato Skin, Your Rules
The classic version is a 10/10, but one of the best things about this recipe is its versatility. Don’t be afraid to get creative and tailor it to your taste buds! Here are a few of my favorite twists:
- The Buffalo Chicken Lover: Swap the bacon for 1 cup of shredded cooked chicken tossed in your favorite buffalo sauce. Use a blue cheese or Monterey Jack cheese blend, and top with blue cheese crumbles and a extra drizzle of buffalo sauce.
- The Fully Loaded Everything Bagel: Mix everything bagel seasoning into the sour cream. Fill the skins with cheese and bacon as usual, but after baking, top with the everything bagel sour cream and a sprinkle of extra seasoning. It’s insanely good.
- The BBQ Pulled Pork Powerhouse: Leftover pulled pork? It’s destiny. Fill the skins with a blend of cheddar and Monterey Jack cheese, top with warm pulled pork, and bake. Finish with a dollop of coleslaw right on top for a textural dream.
- The Veggie Delight: For a meat-free version, skip the bacon. Sauté some finely chopped mushrooms, bell peppers, and onions until soft, and use those as your filling along with the cheese. It’s hearty, satisfying, and packed with flavor.
- The Pizza Party: Kid-approved and fun! Fill with shredded mozzarella and pepperoni slices. After baking, top with a small spoonful of warm marinara sauce and a sprinkle of dried oregano.
Beau’s Kitchen Confidential
This recipe has been a part of my life for so long, it’s practically evolved with me. I remember one particularly chaotic Friendsgiving where I was so busy chatting, I completely forgot the potato skins in the oven during the final cheese-melting phase. Let’s just say we ended up with what I now call “Cajun Blackened Potato Skins.” They were… well, they were a lesson learned! The takeaway? Set a timer, friends. Even for a quick 5-minute bake.
Over the years, I’ve learned that the double-bake is non-negotiable for that signature crunch, and that letting the baked potatoes cool just enough before scooping prevents the skins from tearing. It’s these little lessons, learned through happy (and sometimes smoky) accidents, that make a recipe truly your own.
Your Potato Skin Questions, Answered!
I get a lot of questions about this recipe, so I’ve gathered the most common ones here to ensure your potato skin success.
Q: Can I make these ahead of time?
A: Absolutely! You can complete the recipe all the way through step 4 (the second bake to crisp the shells). Let the crispy, unfilled shells cool completely, then store them in an airtight container in the fridge for up to 24 hours. When you’re ready to serve, let them come to room temp for 15 minutes, then fill with cheese and bacon and bake as directed. They might need an extra minute or two in the oven since they’re starting from cold.
Q: My potato skins are soggy. What did I do wrong?
A: The most common culprit is not brushing them with enough oil before the second bake, or crowding them on the baking sheet. Make sure they have some space for the air to circulate! Also, ensure your oven is fully preheated—a hot oven is key for that instant crisp.
Q: What can I do with the leftover potato I scooped out?
A: Don’t you dare throw it away! That’s culinary gold. You can mix it with a little milk, butter, and seasoning for incredible instant mashed potatoes. Or, use it to make potato pancakes, add it to a breakfast hash, or thicken a soup or stew. It’s pure, fluffy potato perfection.
Q: Can I use a different type of potato?
A: For the classic, crispy-skinned result, russets are your best bet. Yukon Golds have a thinner, waxier skin that doesn’t get as crispy, and sweet potatoes will give you a completely different (but also delicious) flavor profile and a softer skin.

Crispy Loaded Potato Skins : A Crowd-Favorite Game Day Snack
Description
Crispy Loaded Potato Skins
Prep Time: 15 minutes
Cook Time: 1 hour 10 minutes
Total Time: ~1 hour 25 minutes
Servings: 8 halves (4 people)
Golden, crispy potato shells loaded with cheddar cheese, bacon, sour cream, and green onions — the ultimate party appetizer.
Ingredients
Potatoes
-
4 large russet potatoes
-
1 tbsp olive oil
-
Salt and pepper, to taste
Toppings
-
1 cup shredded sharp cheddar cheese
-
6 slices cooked bacon, crumbled
-
½ cup sour cream
-
¼ cup chopped green onions
Optional
-
Hot sauce, for drizzling
-
Ranch dressing, for drizzling
Instructions
1. Bake the Potatoes
-
Preheat oven to 400°F (200°C).
-
Scrub potatoes, dry well, and pierce each 4–5 times with a fork.
-
Place directly on oven rack and bake 45–50 minutes, until tender.
-
Let cool 10–15 minutes.
2. Prepare the Skins
-
Slice each potato in half lengthwise.
-
Scoop out the centers, leaving about ¼ inch of potato inside the shell.
-
Save the scooped potato for mashed potatoes, soup, etc.
-
3. Crisp the Shells
-
Brush inside and outside of each shell with olive oil.
-
Season with salt and pepper.
-
Place skins cut-side down on a baking sheet.
-
Bake 10 minutes, flip, then bake another 10 minutes, until crisp and golden.
4. Load the Potatoes
-
Turn skins cut-side up.
-
Divide the shredded cheddar and bacon evenly among all potato halves.
-
Return to oven and bake 5–7 minutes, until cheese is fully melted and bubbly.
5. Finish & Serve
-
Top with a dollop of sour cream.
-
Sprinkle with green onions.
-
Add optional hot sauce or ranch drizzle.
-
Serve immediately.
Notes
-
Don’t skip the double bake — this is what makes the shells crisp.
-
Don’t overcrowd the pan or they won’t crisp properly.
-
Shred your own cheese for best melting.
-
Russet potatoes work best because their skins get crispest.
Let’s Talk Nourishment
Now, we all know this is a treat, and I’m a firm believer in enjoying every single bite! But it’s also good to know what you’re eating. Here’s a general breakdown for two loaded potato skin halves. Remember, these values can change based on the specific brands and amounts of ingredients you use, like the type of cheese or bacon.
This snack packs a decent amount of protein and carbs, giving you a satisfying energy boost—perfect for fueling up during a long game or a fun party. To lighten it up a bit, you can use reduced-fat cheese and sour cream, or load up on those veggie-filled variations. But my philosophy? Life’s too short not to enjoy the full, glorious, cheesy, bacon-y experience once in a while.
Servings: 8 halves (4 people)
Prep Time: 15 minutes
Cook Time: 1 hour 10 minutes
Calories: ~290 per 2 halves
Protein: 10g
Fat: 18g
Carbs: 23g
Fiber: 2g
Sugar: 1g
Sodium: 450mg
The Final Scoop
And there you have it, my friends—my ultimate guide to creating Crispy Loaded Potato Skins that are guaranteed to steal the show. This recipe is more than just a list of ingredients and steps; it’s a formula for creating joy, for gathering your people, and for sharing something made with love (and a whole lot of cheese).
I hope you have as much fun making these as I do. I hope your kitchen fills with that incredible, savory aroma, and I hope these crispy little boats become a part of your own family traditions and game-day celebrations. Now, go forth and get loading! And if you make them, I’d love to see your creations. Tag me @Feastical on social media so I can share in the deliciousness.
Happy cooking,
Beau
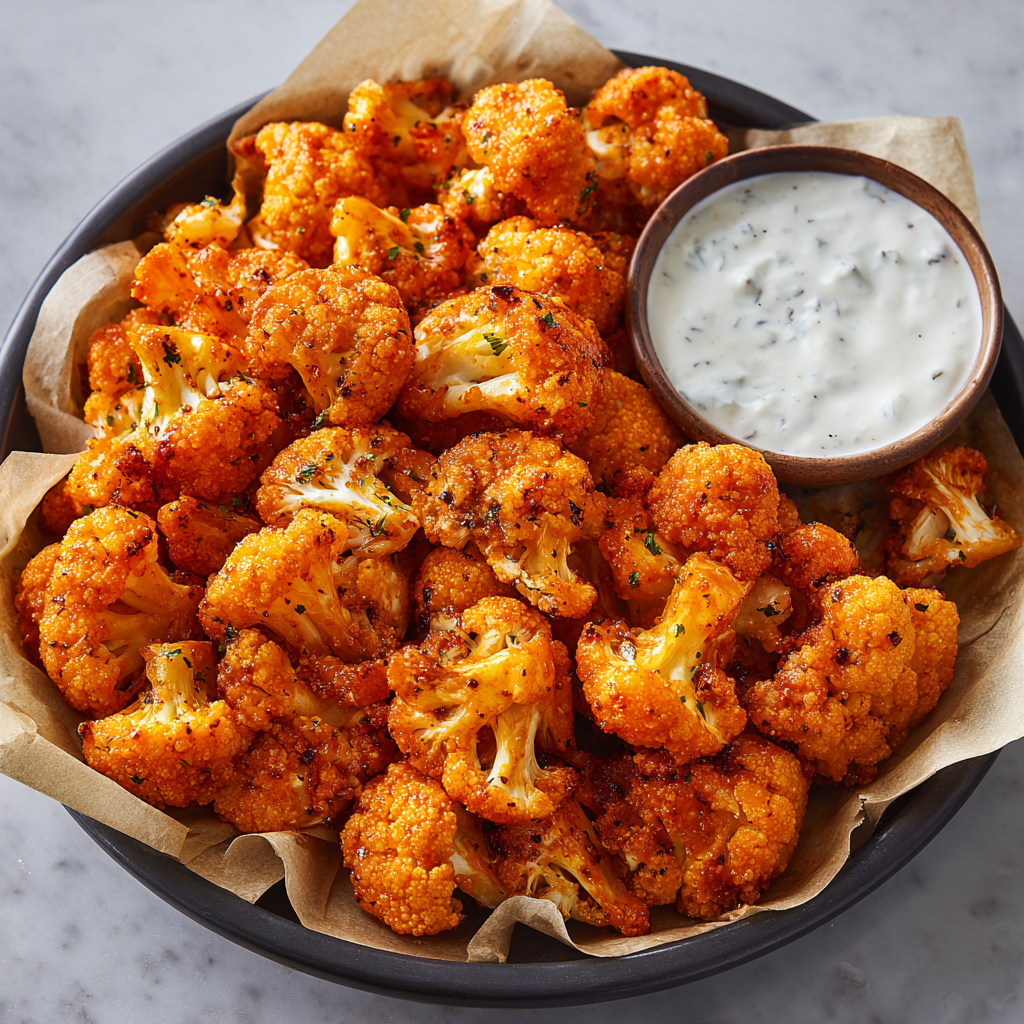
Buffalo Cauliflower Bites Recipe
Crispy Buffalo Cauliflower Bites: Your New Favorite Game Day Snack
Hey friends, Beau here from Feastical! Tell me if this sounds familiar: it’s a lazy Saturday afternoon, the big game is about to start (or maybe it’s just a new binge-worthy show), and you get that undeniable craving for something spicy, crispy, and downright satisfying. For the longest time, that craving had one name: buffalo wings.
But maybe you’re trying to eat a few more veggies, or you’re hosting a mixed crowd of vegetarians and meat-lovers, or you just don’t feel like dealing with a pile of chicken bones. I’ve been there, and let me tell you, I’ve found the ultimate solution that’s so good, it might just steal the spotlight from the traditional wing platter.
Enter these glorious Buffalo Cauliflower Bites. We’re taking humble cauliflower florets, giving them a crispy, golden-brown coat, and drenching them in that iconic, tangy, and spicy buffalo sauce we all know and love. The best part? They’re baked, not fried, which means you can feel a little better about going back for seconds (or thirds… no judgment here).
This recipe is a game-changer. It’s proof that feel-good food doesn’t have to be complicated or heavy. It’s about that warm-hug flavor in a fun, shareable, and totally veggie-packed package. So, preheat your ovens and grab your favorite dipping sauce—we’re about to make your new go-to party snack.
The Wing Dilemma That Led to a Cauliflower Revolution
This recipe was born out of a little bit of kitchen chaos and a whole lot of necessity. A few years back, I was hosting a Super Bowl party, and one of my best friends, who had recently gone vegetarian, was coming over. I wanted to make sure she had something epic to eat, not just a sad veggie platter while the rest of us devoured a mountain of wings.
I’d seen versions of cauliflower “wings” floating around the internet, but I was skeptical. Could a vegetable really satisfy that specific, saucy, crispy craving? I decided to experiment, and let’s just say the first batch was… a learning experience. I under-baked them, and they turned out more like buffalo-flavored sponges. Not exactly the win I was hoping for!
But that failure was the best thing that could have happened. It sent me back to the drawing board, tweaking the batter for maximum crispiness and perfecting the bake-and-sauce technique. When I finally served the perfected version to my friend, her eyes lit up. She took one bite, then another, and declared, “Beau, these are dangerous.” That’s the moment I knew we had a Feastical classic on our hands.
Gathering Your Flavor Arsenal
One of the things I love most about this recipe is how simple the ingredient list is. You probably have most of this in your pantry right now! Here’s everything you’ll need to create this magic.
- 1 large head of cauliflower: This is our star! Look for a head that feels heavy for its size with tight, bright white florets and crisp, green leaves. No brown spots, please!
- 3/4 cup all-purpose flour: The base of our crispy coating. It creates a perfect paste that clings to the cauliflower and bakes up beautifully. Chef’s Insight: For a gluten-free version, a 1:1 gluten-free flour blend works like a charm.
- 1/2 cup water: This is what brings our simple batter together. For an extra-flavorful and crispier result, you can swap this with cold milk or even a light beer!
- 1 tsp garlic powder: We’re building flavor right into the batter. This gives a savory, aromatic base note that pairs perfectly with the buffalo sauce.
- 1/2 tsp paprika: This isn’t just for color (though it gives a lovely golden hue); it adds a subtle, sweet smokiness. Smoked paprika is a fantastic upgrade here if you have it.
- 1/2 tsp salt & 1/4 tsp black pepper: The essential seasonings! Don’t be shy—this helps season the cauliflower itself.
- 1 cup buffalo wing sauce: The MVP of the sauce! I’m a Frank’s RedHot devotee, but use your favorite brand. Pro-Tip: If you’re sensitive to heat, start with 3/4 cup and add more to taste.
- 2 tbsp unsalted butter, melted: This is the secret to a rich, glossy sauce that clings to every nook and cranny. It mellows out the sharp vinegar notes and adds that classic “wing sauce” depth.
Let’s Get Cooking: The Path to Crispy Perfection
Alright, team, it’s time to get our hands a little dirty. Follow these steps, and you’ll be rewarded with the most incredible, crowd-pleasing snack. I’m throwing in all my chef hacks to make sure your bites are flawless.
- Preheat and Prep: First things first, get that oven roaring hot to 425°F (220°C). This high heat is crucial for getting a crispy exterior without steaming the cauliflower. While it’s heating, line a large baking sheet with parchment paper or give it a light coating of cooking spray. Chef’s Hack: For the absolute crispiest results, place a wire rack on top of your baking sheet. This allows hot air to circulate all around the bites, preventing any sogginess on the bottom.
- Create the Magic Batter: In a large bowl—and I mean large, you need room to toss—whisk together the flour, water, garlic powder, paprika, salt, and pepper. You’re aiming for a smooth, thick paste, almost like a pancake batter. If it seems a little too thick, add a tablespoon of water at a time until it’s pourable but still very coating.
- The Cauliflower Coating Tango: Now, add your bite-sized cauliflower florets to the batter. Here’s my favorite part: use your hands (or a couple of spoons) to toss and massage that batter onto every single floret. Get it in all the crevices! You want each piece to be thoroughly coated, but not drowning in excess batter. A thin, even layer is the goal.
- Bake to Golden Brown (Phase 1): Spread your coated cauliflower out on your prepared baking sheet in a single layer. This is non-negotiable! If they’re crowded, they’ll steam instead of bake. Pop them in the hot oven for 20 minutes. At the 10-minute mark, take them out and give them a good flip. You’ll see they’re already starting to firm up and get a little golden.
- Whip Up the Signature Sauce: While the cauliflower is doing its first bake, mix your buffalo sauce and melted butter in a medium bowl. Whisk it until it’s emulsified and gorgeous. Give it a taste and adjust to your liking—more butter for milder, more sauce for fiercer!
- The Saucy Finale (Phase 2): Carefully remove the baking sheet from the oven. The florets should be firm and the coating should be set. Now, pour your saucy mixture over the hot cauliflower and gently toss, toss, toss until every piece is gloriously covered in that orange-red goodness.
- The Final Crisp: Spread the saucy bites back out on the baking sheet and return them to the oven for another 10-15 minutes. This final bake is what sets the sauce and gives you that sticky, crispy, finger-licking-good finish.
Plating Up the Perfect Bite
You’ve done it! Your kitchen smells incredible, and you have a tray of golden, saucy Buffalo Cauliflower Bites ready to devour. Now, let’s talk about how to serve them up in style.
I always serve these straight from the oven, piled high on a big platter. The heat makes them so inviting. Right alongside, you gotta have your dipping sauces. A big bowl of cool, creamy ranch dressing is the classic pairing, and it’s a must for cutting through the spice. For the purists out there, blue cheese dressing is also a phenomenal choice.
To really make it a meal or a full-on party spread, add some classic wing accompaniments. A big bowl of crisp celery sticks and carrot sticks provides a fresh, crunchy contrast. If you’re feeling fancy, serve them over a bed of crisp lettuce for a deconstructed “buffalo salad” situation, or stuff them into a soft, fluffy pita with some lettuce and extra ranch.
And don’t forget the napkins! These are meant to be eaten with your hands, so make sure you have plenty within reach. This is messy, joyful eating at its best.
Mix It Up! Creative Twists on the Classic
The beauty of this recipe is its versatility. Once you’ve mastered the basic technique, the flavor world is your oyster! Here are a few of my favorite ways to shake things up.
- Honey Sriracha Glaze: Swap the buffalo sauce for a mix of 1/2 cup sriracha and 1/4 cup honey. You get a fantastic sweet-heat combo that’s absolutely addictive.
- BBQ Ranch: Toss the baked bites in 1 cup of your favorite BBQ sauce instead of buffalo. Serve with ranch for dipping and you’ve got a whole new flavor profile.
- Vegan-Friendly Version: It’s super easy to make this plant-based! Simply use a plant-based milk instead of water in the batter, and substitute the melted butter with an equal amount of melted vegan butter or olive oil in the sauce.
- “Parmesan Garlic” Bites: Skip the spicy sauce altogether. After the final bake, toss the hot cauliflower with 2 tablespoons of melted butter, 1/4 cup of grated Parmesan cheese, and a teaspoon of garlic powder. It’s like cheesy garlic bread, but in bite-sized veggie form!
- “Buffalo Chicken” Cauliflower Salad: Chop the cooked bites and toss them with romaine lettuce, cherry tomatoes, red onion, celery, blue cheese crumbles, and a generous drizzle of ranch dressing.
Beau’s Kitchen Corner: A Few Parting Thoughts
This recipe has become such a staple in my home that I barely even think about the recipe anymore—I just make it by feel. It’s evolved from that first soggy batch into a dish I can whip up with my eyes closed for unexpected guests or a late-night snack attack.
One of my favorite kitchen memories involving these bites was when my nephew, a notoriously picky eater, came over. He saw the bright orange cauliflower and was immediately suspicious. I told him they were “dragon bites.” He was skeptical, but he tried one. Then he ate half the tray. Now he requests “Uncle Beau’s Dragon Bites” every time he visits. It just goes to show that sometimes, all it takes is a fun name and a delicious recipe to win someone over to the veggie side.
Your Questions, Answered!
I’ve gotten a lot of questions about this recipe over the years, so I’ve gathered the most common ones here to help you out.
Q: My cauliflower bites turned out soft, not crispy. What did I do wrong?
A: The most common culprit is overcrowding the pan! If the florets are too close together, they steam instead of bake. Make sure they’re in a single layer with a little space between them. Also, ensure your oven is fully preheated—an oven thermometer is a cheap and handy tool to verify the temperature.
Q: Can I make these ahead of time?
A: You can prepare them through the first bake (Step 4), let them cool completely, and store them in an airtight container in the fridge for up to 24 hours. When you’re ready to serve, toss them with the sauce and finish the second bake. They might take a few extra minutes since they’re going in cold.
Q: How can I make them spicier (or milder)?
A> You have total control! For milder bites, use less buffalo sauce and more melted butter. You can even try a “mild” wing sauce. For an extra kick, add a pinch of cayenne pepper to the batter or a few dashes of your favorite hot sauce to the buffalo-butter mixture.
Q: Can I use frozen cauliflower?
A> You can, but I don’t recommend it. Frozen cauliflower has a much higher water content, which almost guarantees a soggier result. Fresh cauliflower is definitely the way to go for the best texture.
A Little Note on Nutrition
Now, I’m not a nutritionist, but I am a chef who cares about what I’m putting into my body and sharing with you all. One of the reasons I love this recipe so much is that it’s a fantastic way to enjoy a classic flavor in a lighter way.
By baking instead of deep-frying, we’re significantly cutting down on the fat and calories. Cauliflower itself is a nutritional powerhouse—it’s low in calories and carbs but high in fiber and vitamins C and K. The sauce does contribute some sodium, so if you’re watching your salt intake, you can look for a lower-sodium buffalo sauce.
Remember, this is about balance. It’s a feel-good snack that lets you indulge in that spicy, tangy buffalo flavor while also getting a solid serving of vegetables. It’s a win-win in my book!
Approximate Nutrition (Per Serving, serves 6): Calories: 120, Fat: 6g, Saturated Fat: 2g, Carbohydrates: 14g, Fiber: 2g, Sugars: 2g, Protein: 2g, Sodium: 460mg
Final Thoughts
And there you have it, friends—my go-to recipe for Crispy Buffalo Cauliflower Bites that never fails to impress. It’s simple, satisfying, and proof that the most comforting foods often come from the most unexpected places.
This recipe is all about sharing good food and good times. It’s brought my friends and family together over laughter and empty platters more times than I can count, and I truly hope it does the same for you. Food is my love language, and dishes like this are why I started Feastical—to share the recipes that turn ordinary moments into little celebrations.
So, give this

Easy Jalapeño Popper Bites Recipe
Spicy Jalapeño Popper Bites – Easy Cheesy Party Appetizer
The Irresistible Bite-Sized Party Hero
Hey, friends! Beau here from Feastical. Let’s talk about that magical moment at any gathering when a plate of something truly irresistible comes out of the kitchen. You know the one. The conversation stops. Eyes widen. And a quiet, collective “Ooooh” fills the room before a friendly, yet determined, scramble for the first bite. If you’ve ever wanted to be the person who creates that moment, you’ve just found your secret weapon.
I’m so excited to share my recipe for Easy Jalapeño Popper Bites. We’re taking everything we adore about classic jalapeño poppers—the creamy, tangy cheese, the smoky bacon, the spicy kick that makes your taste buds sing—and turning them into the most poppable, shareable, and downright addictive party appetizer you’ll ever make. Forget the fuss of stuffing individual peppers; we’re loading up sturdy tortilla scoops with a killer cheese mixture and baking them to golden, bubbly perfection. They’re the ultimate crowd-pleaser for game day, holiday parties, or just because it’s Tuesday and you deserve a treat.
Best of all, this recipe is a dream come true for busy hosts. We’re talking about 10 minutes of prep and less than 10 minutes in the oven. Seriously, you can go from zero to party hero in under 20 minutes. So, tie on your favorite apron, and let’s make some magic happen. Your next gathering is about to get a whole lot more delicious.
A Fiery Family Tradition
This recipe always takes me right back to my Grandpa Joe’s backyard. Every summer, he’d host a massive “Fiesta Friday,” and his famous, albeit dangerously unpredictable, homemade jalapeño poppers were the main event. He’d stuff them by the dozen, but he never, ever kept track of which ones were mild and which were nuclear. Biting into one was a true culinary gamble! We’d all be sitting around the picnic table, watching each other take that first tentative bite, erupting in laughter when someone got a real firecracker.
It was chaotic, a little messy, and absolutely filled with love. My Easy Jalapeño Popper Bites are my tribute to that spirit. I’ve taken the soul of his recipe—the bold flavors and the joy of sharing—and streamlined it into a format that’s guaranteed to bring people together without the spicy roulette. It’s all the feel-good, none of the stress, and every single bite is a perfect, creamy, crunchy, smoky delight.
Gathering Your Flavor All-Stars
This is where the magic starts! The beauty of this recipe is in its simple, high-impact ingredients. Each one plays a crucial role in creating that iconic jalapeño popper flavor profile. Let’s break it down.
- 16 oz Cream Cheese, softened: This is the creamy, tangy base that holds everything together. Chef’s Insight: Letting it sit at room temperature for 30-60 minutes is non-negotiable! A soft cream cheese blends smoothly, preventing a lumpy filling. If you’re in a pinch, you can microwave it for 15-20 seconds, but be careful not to melt it.
- 6 to 8 Green Onions, finely sliced: They add a mild, fresh oniony bite and a beautiful pop of green color. Use both the white and green parts!
- 4 Jalapeños, seeded and finely diced: The star of the show! Seeding them removes a lot of the intense heat, making them more palatable for a crowd. Substitution Tip: For a milder version, use poblano peppers. For more fire, leave in some of the seeds or add a dash of cayenne pepper.
- 16 slices Bacon, cooked and crumbled: Bacon brings the smoke, salt, and crunch. Chef’s Hack: Baking your bacon on a sheet pan at 400°F (200°C) is the easiest, least messy way to get it perfectly crispy for crumbling.
- 16 oz Pepper Jack Cheese, shredded: This gives our bites a fantastic melty quality and a gentle, peppery kick. Substitution Tip: Can’t find Pepper Jack? Use Monterey Jack and add an extra 1/4 teaspoon of black pepper and a pinch of red pepper flakes.
- 8 oz Sharp Cheddar Cheese, shredded: The cheddar provides a robust, tangy depth that balances the cream cheese beautifully. I love the extra flavor punch of a sharp or extra-sharp cheddar.
- 96 Tortilla Scoop Chips: Our edible little vessels! Chef’s Insight: The brand matters here. You want a sturdy, thick-shelled scoop (like Tostitos Scoops!) that can hold the weight of the filling without getting soggy or breaking.
Let’s Get Popping: Your Foolproof Guide
Alright, team, it’s go-time! This process is so simple and satisfying. I’ll walk you through each step with a few of my favorite kitchen hacks to ensure your popper bites are absolutely perfect.
- Preheat and Prep. Fire up your oven to 375°F (190°C). While it’s heating, line two large baking sheets with parchment paper. Chef’s Hack: The parchment paper isn’t just for easy cleanup; it prevents the bottoms of the tortilla scoops from getting too dark and ensures they stay crispy. Don’t skip it!
- Create the Filling. In a large mixing bowl, combine the softened cream cheese, green onions, diced jalapeños, crumbled bacon, shredded pepper jack, and shredded cheddar. Now, roll up your sleeves and get in there with your hands or a sturdy spatula! Mix until everything is beautifully and evenly combined. Chef’s Commentary: I honestly prefer using my (clean!) hands for this. It’s the best way to feel when the mixture is perfectly homogenous, and it’s kind of fun—like being a kid again.
- Fill the Scoops. Arrange your tortilla scoop chips in a single layer on your prepared baking sheets. Now, grab your filling and generously stuff each and every scoop. Don’t be shy! I like to mound it up a little bit. Pro-Tip: A small cookie scoop or a spoon is great for this, but I often just use my fingers to pinch off a bit of filling and press it in. It goes faster than you think!
- Bake to Perfection. Pop those loaded baking sheets into your preheated oven and bake for 8 to 10 minutes. You’re looking for the cheese to be completely melted, gloriously bubbly, and maybe just starting to get a few golden-brown spots on top. Chef’s Hack: For extra-even baking, rotate your pans halfway through. Ovens often have hot spots, and this little move guarantees every bite is equally amazing.
- The Most Important Step: Rest! Carefully remove the baking sheets from the oven. I know it’s tempting to dive right in, but you must, must, MUST let them cool for about 5 minutes. Why? This allows the filling to set just slightly, transforming it from molten lava into a creamy, dippable perfection. It also saves the roof of your mouth from a serious scolding. Trust me on this one.
How to Serve These Crowd-Pleasing Bites
Presentation is part of the fun! You’ve created a masterpiece; let’s show it off.
I love serving these warm on a large wooden board or a vibrant platter. Scatter a few extra slices of fresh jalapeño and a sprinkle of leftover green onions over the top for a gorgeous, fresh finish. It makes the platter look professional and tells your guests exactly what flavor adventure they’re about to embark on.
While these bites are fantastic all on their own, offering a couple of dipping sauces takes them to the next level. Set out small bowls of cool and creamy ranch dressing, a zesty cilantro-lime crema, or even a sweet and smoky bbq sauce for dipping. It’s a simple touch that encourages interaction and lets everyone customize their experience. Pair them with a cold beer, a margarita, or a refreshing sparkling water with lime, and watch your platter empty in record time.
Make It Your Own: Delicious Twists & Swaps
One of the best things about this recipe is its flexibility. Feel free to get creative and tweak it to your heart’s content! Here are a few of my favorite variations.
- The Smoky Sensation: Add a teaspoon of smoked paprika or a 1/2 teaspoon of chipotle powder to the cheese mixture. This deepens the flavor and adds a wonderful, campfire-like smokiness that pairs incredibly well with the bacon.
- The “Buffalo Wing” Spin: Love buffalo chicken dip? Me too! Fold in 1 1/2 cups of finely chopped or shredded cooked chicken that has been tossed in 1/4 cup of buffalo sauce. It’s a heartier bite that’s packed with flavor.
- The Lighter Lift: You can easily lighten this up without sacrificing taste. Use reduced-fat cream cheese and part-skim cheeses. You can also swap the bacon for real bacon bits or even turkey bacon.
- The Zesty Ranch Upgrade: For a flavor that everyone recognizes and loves, mix in one tablespoon of dry ranch seasoning mix. It adds a herby, tangy dimension that is absolutely irresistible.
- Top It Off: Before baking, crown each loaded bite with a single, thin slice of fresh jalapeño. This not only looks stunning but gives your heat-lovers a direct hit of spice.
Beau’s Kitchen Chronicles
This recipe has been a staple in my party playbook for years, and it’s evolved in the funniest ways. I once, in a pre-coffee morning haze, accidentally used cinnamon bagel chips instead of tortilla scoops for a holiday brunch. It was a wild, sweet-and-spicy experiment that actually… wasn’t half bad? But let’s stick to the savory path for now!
The biggest lesson I’ve learned is to embrace the “assembly line” method. Laying out all the scoops first, then filling them all, is so much faster and cleaner than doing one tray at a time. I’ve also found that this filling is a fantastic make-ahead option. You can mix it up, cover it tightly, and keep it in the fridge for up to 24 hours before you need to bake. It’s one less thing to worry about when your guests arrive!
Your Questions, Answered!
Over the years, I’ve gotten a few repeat questions about these popper bites. Here are the answers to help you nail it every single time.
- Q: Can I make these ahead of time and reheat them?
A: You can! They are absolutely best fresh from the oven, but for busy hosts, you can assemble them completely (but do not bake), cover the trays tightly with plastic wrap, and refrigerate for up to 8 hours. When you’re ready, just pop them in the preheated oven. You may need to add 1-2 extra minutes to the bake time since they’re starting from cold. - Q: My tortilla chips got soggy. What happened?
A: Sogginess is usually caused by one of two things: 1) The filling was too wet (make sure your cream cheese is just softened, not melted or oily), or 2) They were left to sit for too long after baking. Serve them within 10-15 minutes of coming out of the oven for the best texture. - Q: How can I control the spiciness level?
A: You are the master of your heat domain! For mild bites, be thorough when seeding and deveining the jalapeños (wear gloves if you have sensitive skin!). For a serious kick, leave some of the white ribs and seeds in, or even add a finely diced serrano pepper to the mix. - Q: Can I use pre-shredded cheese?
A: You can, and it will work just fine. But here’s a chef’s secret: pre-shredded cheese is coated with anti-caking agents like potato starch or cellulose, which can prevent it from melting as smoothly. For the ultimate creamy, velvety texture, I highly recommend shredding your own cheese from a block. The difference is noticeable!

Easy Jalapeño Popper Bites Recipe
Description
These bite-sized poppers give you all the flavor of classic jalapeño poppers—creamy cheese, spicy peppers, smoky bacon—without stuffing a single pepper. Perfect for parties, game days, or anytime you want a fast crowd-pleaser.
Ingredients
-
16 oz cream cheese, softened
-
6–8 green onions, finely sliced
-
4 jalapeños, seeded & finely diced
-
16 slices cooked bacon, crumbled
-
16 oz pepper jack cheese, shredded
-
8 oz sharp cheddar cheese, shredded
-
96 tortilla scoop chips (like Tostitos Scoops)
Instructions
1. Preheat Oven
Heat to 375°F (190°C).
Line two baking sheets with parchment paper.
2. Make the Filling
In a large bowl, mix together:
-
Cream cheese
-
Green onions
-
Jalapeños
-
Bacon
-
Pepper jack
-
Cheddar
Mix until smooth and evenly combined.
3. Fill the Scoops
Lay tortilla scoops on the baking sheets.
Stuff each chip with a generous spoonful (or finger pinch!) of filling.
4. Bake
Bake 8–10 minutes, until the cheese is melted and bubbly.
Let cool 5 minutes before serving so the filling sets.
Notes
-
Cilantro-lime crema
-
BBQ sauce
-
Fresh jalapeño slices
-
Extra green onions
Nutritional Information*
I believe in keeping things real, including understanding what we’re eating. Here’s a general breakdown for those who are curious. Remember, this is an estimate and values can vary based on the specific brands and ingredients you use.
Per Serving (2 Bites):
Calories: 170 | Total Fat: 13g | Saturated Fat: 6g | Carbohydrates: 5g | Fiber: <1g | Sugar: 1g | Protein: 7g | Sodium: 220mg
*This information is provided as a courtesy and is an estimate only. For precise dietary needs, please use your preferred nutritional calculator with the exact ingredients and quantities you use.
Your New Go-To Party Trick
And there you have it, my friends! Your complete guide to creating the most talked-about appetizer at your next get-together. These Easy Jalapeño Popper Bites are more than just a recipe; they’re a tool for connection, a spark for conversation, and a guaranteed way to make any occasion feel a little more special.
I hope this recipe brings as much joy and flavor to your kitchen as it has to mine. Remember, cooking is about sharing love and creating memories, one delicious bite at a time. Don’t forget to snap a picture of your beautiful creation and tag me @Feastical on social media—I love seeing your culinary adventures!
Final Thoughts: Why You Should Make These Now
Let’s be real: the world of party appetizers can be complicated. These Jalapeño Popper Bites are the glorious exception. They are the trifecta: fast, foolproof, and phenomenally delicious. In under 20 minutes, you can transform a handful of simple ingredients into the star of any snack table.
Stop stressing over complicated canapés and embrace the power of the poppable bite. Whip up a batch for your next gathering and get ready to accept your well-earned compliments. You’ve got this!
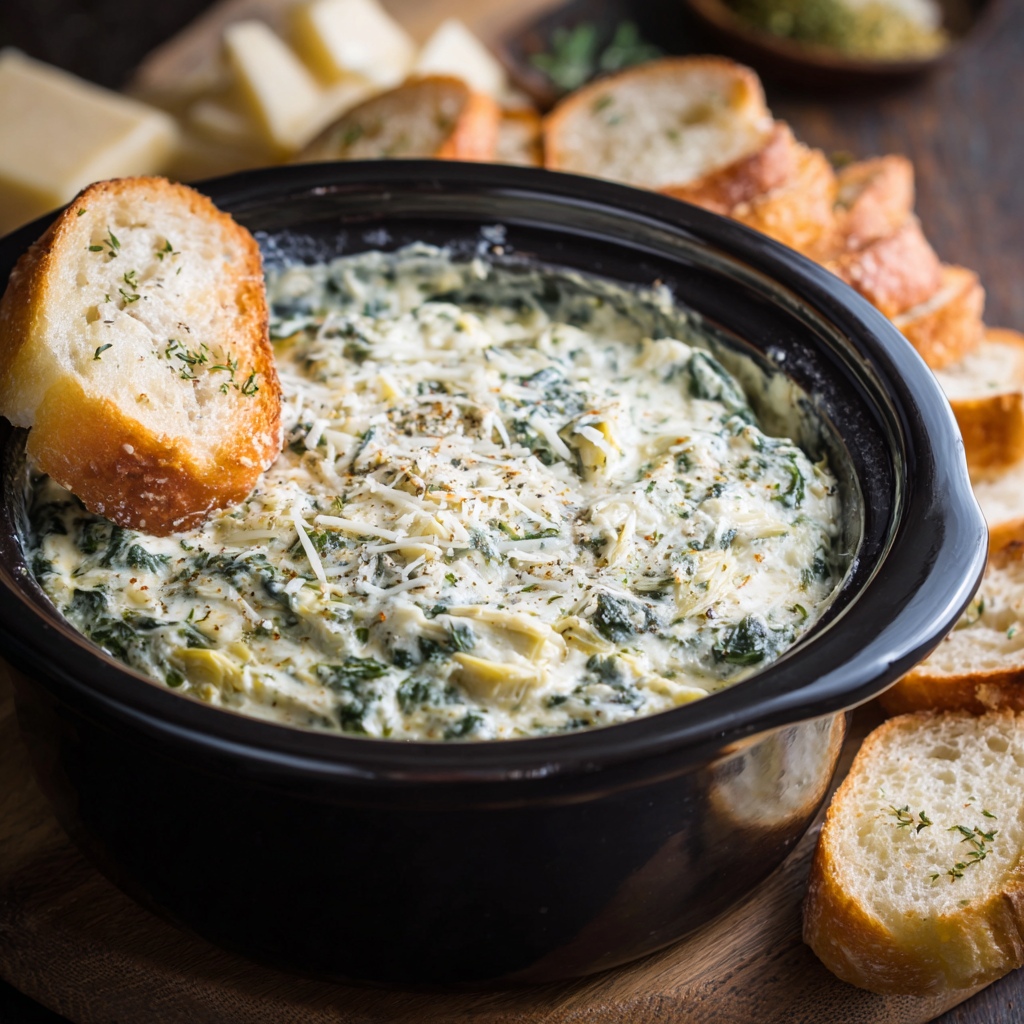
Crockpot Spinach Artichoke Dip Recipe
The Easiest, Cheesiest Party Hero: My Crockpot Spinach Artichoke Dip
Hey friends, Beau here! Let’s talk about one of life’s simple, glorious truths: a really good dip can absolutely make the party. It’s the culinary equivalent of that friend who shows up with a great playlist and a positive attitude—everyone flocks to them, and they just make everything better. And in the world of legendary party starters, few dishes command the respect and adoration of a perfectly executed, gloriously cheesy, warm Spinach Artichoke Dip.
But here’s the thing. I love a good time, but I don’t love being stuck in the kitchen while my guests are having fun in the other room. Sound familiar? That’s exactly why I’m completely, head-over-heels in love with this Crockpot Spinach Artichoke Dip. This isn’t just a recipe; it’s your ticket to being the host with the most, without any of the stress. We’re talking minimal prep, maximum flavor, and a slow cooker that does all the heavy lifting for you. Imagine this: you’re mingling, laughing, and enjoying your own party, and all the while, your crockpot is quietly working its magic, transforming a handful of simple ingredients into a bubbling, creamy, savory dip that will have everyone hovering around the snack table. So, let’s ditch the complicated steps and embrace the easy, the cheesy, and the utterly delicious. Grab your slow cooker, and let’s make some magic happen!
A Dip That Brings Everyone to the Table
This recipe always takes me right back to my first big game day party in my first real apartment. The place was tiny, the TV was questionable, but my heart was set on hosting. I wanted to make a spread that felt impressive but wouldn’t send my rookie-chef anxiety through the roof. I settled on a spinach artichoke dip, but the oven-baked versions I found felt fussy—constantly checking, worrying about the top burning, the dreaded cold-center scenario. In a moment of what I call “lazy genius,” I thought, “Why not the crockpot?”
I threw everything in, gave it a stir, and crossed my fingers. A few hours later, the entire apartment smelled like a cozy Italian restaurant. That first batch was gone in about 15 minutes. My friends weren’t just eating; they were gathered around the slow cooker, scooping, laughing, and telling stories. It wasn’t just a dip; it was the centerpiece. It created a little hub of joy in my cramped living room. That’s the power of a great, easy recipe—it doesn’t just feed people, it brings them together. And that’s the feeling I want to share with you every time you make this.
Gathering Your Dip Dream Team
Part of the beauty of this recipe is its simplicity. You probably have half of this in your fridge and pantry right now! Here’s your all-star cast of characters.
- 1 (10 oz) package frozen chopped spinach, thawed and well-drained: This is our green, earthy base. Chef’s Hack: To get it REALLY dry and prevent a watery dip, squeeze the thawed spinach in a clean kitchen towel over the sink. Wring it out like you’re mad at it! No one likes a soggy dip.
- 1 (14 oz) can artichoke hearts, drained and chopped: They bring a tangy, slightly sweet, and uniquely savory flavor. I use canned in water for convenience, but marinated artichokes can add an extra herby kick (just pat them dry to avoid excess oil).
- 8 oz cream cheese, cut into cubes: The king of creaminess! Using full-fat cream cheese gives you the richest, smoothest texture. Cube it while it’s cold for easier handling, and it will melt beautifully into the mix.
- 1/2 cup sour cream & 1/4 cup mayonnaise: This dynamic duo adds tang, moisture, and that perfect dip-able consistency. The mayo, in particular, adds a subtle richness that balances the tang of the other ingredients.
- 1 cup shredded mozzarella cheese & 1/2 cup grated Parmesan cheese: The cheesy, gooey, glorious heart of the dip. Mozzarella gives us that epic stretch, while Parmesan brings a sharp, salty, umami punch. Pro-Tip: For the best melt, shred your own mozzarella from a block! Pre-shredded bags often have anti-caking agents that can make the texture a bit grainy.
- 2 cloves garlic, minced: Don’t you dare use the jarred stuff here! Fresh garlic is non-negotiable for that punch of aromatic flavor. If you’re a garlic lover, feel free to add an extra clove. I won’t tell.
- Salt and black pepper to taste: We add this at the end, after everything has melded together, so we can perfectly season our masterpiece.
Let’s Get This Party Started: Your Foolproof Steps
Alright, team. This is where the magic happens, and I promise, it’s as easy as it gets. Get ready to be the most relaxed host on the planet.
- The Prep Work. First things first, make sure your spinach is thoroughly thawed and squeezed of all excess water. This is the single most important step for a thick, creamy dip and not a watery one! Next, drain your artichoke hearts and give them a rough chop—you want nice, bite-sized pieces. Mince your garlic, cube your cream cheese, and have all your other ingredients measured and ready to go. This is called your “mise en place,” and it makes you feel like a professional TV chef, even in your pajamas.
- The Dump-and-Stir (Phase 1). Now for the fun part. Take your trusty crockpot and add everything inside: the squeezed-dry spinach, chopped artichokes, cubed cream cheese, sour cream, mayo, both cheeses, and that beautiful minced garlic. Little Chef Hack: Hold off on the salt and pepper for now. We’ll season at the end once the cheeses have melted and we can truly taste the flavor profile.
- The Gentle Mix. Grab a sturdy spoon or spatula and give everything a really good stir. You want to try and coat all the ingredients evenly, breaking up the cream cheese cubes as much as you can. Don’t worry if it looks a little lumpy and not fully combined—that’s exactly what it’s supposed to look like at this stage. The slow cooker’s low, gentle heat will work its magic and melt everything into creamy perfection.
- The Waiting Game (The Hardest Part). Pop the lid on your crockpot and set it to LOW for 2 to 3 hours. I know, I know, the temptation to crank it to high is real, but patience is key here! Low heat allows the flavors to meld together slowly and prevents the dairy from breaking or scorching on the bottom. About halfway through, I like to give it one quick stir, just to help incorporate any stubborn cream cheese cubes. You’ll know it’s done when the entire mixture is hot, bubbly around the edges, and beautifully smooth.
- The Final Flourish. Once your dip is hot and glorious, take a tiny taste (blow on it first!). Now is the time to season with salt and black pepper. Start with a little, mix it in, taste again, and adjust until it’s perfect for you. This final seasoning step wakes up all the flavors and makes the dip truly sing.
How to Serve Your Dip Like a Pro
Presentation is part of the fun! You can absolutely serve this beauty right from the crockpot—it keeps it warm for hours and has a wonderfully rustic, “dig in!” vibe. But if you want to fancy it up a bit, transfer it to a nice serving bowl. Here’s what I love to serve alongside this cheesy wonder:
- The Classics: A big bowl of sturdy, salty tortilla chips is a must. Thick, toasted baguette slices or warm, soft pita bread are also fantastic for scooping up every last bit.
- The Healthy(ish) Crunch: For a fresh contrast, I always put out a platter of fresh veggie sticks. Crisp celery, carrot sticks, bell pepper strips, and cool cucumber slices are perfect for dipping.
- Think Outside the Bowl: This dip is so versatile! Don’t just stop at dipping. It’s incredible slathered on a grilled chicken breast, used as a spread for a next-level sandwich, or even as a topping for baked potatoes. Leftovers (if you have any!) are a gift.
Make It Your Own: Delicious Recipe Twists
Once you’ve mastered the classic, feel free to get creative! This recipe is a fantastic canvas for your own flavor ideas. Here are a few of my favorite twists:
- The Spicy Kick: Add a 4-ounce can of diced green chiles (drained) for a subtle Southwestern flair. For real heat, mix in a tablespoon of your favorite hot sauce or a teaspoon of crushed red pepper flakes.
- The Smoky Bacon Bomb: Because bacon makes everything better. Crumble 6-8 slices of cooked, crispy bacon and stir it in during the last 30 minutes of cooking. A bit of smoked paprika works wonders here, too.
- The “Extra Something” Herb Garden: Stir in 2 tablespoons of freshly chopped parsley and a tablespoon of chopped fresh dill at the very end. The fresh herbs add a bright, pop-of-color flavor that cuts through the richness beautifully.
- The Lighter Version: You can easily lighten this up! Use Neufchâtel (low-fat) cream cheese, light sour cream, and light mayonnaise. The flavor is still fantastic, and you can feel a little bit better about going back for that third scoop.
- The Extra Cheesy & Garlicky: Are you my soulmate? Double the amount of garlic and add an extra 1/2 cup of both mozzarella and Parmesan. For a fun twist, swap the mozzarella for a Italian cheese blend or even some provolone.
Beau’s Kitchen Notes & Stories
This recipe has been a workhorse in my kitchen for years, and it’s evolved in the best ways. I’ve learned that the “low and slow” method is truly the secret—I once got impatient and cooked it on high, and while it was still tasty, the texture wasn’t as silky-smooth. Lesson learned! Another funny story: I once brought this to a potluck and forgot to bring a serving spoon. We ended up using (washed) plastic cups as makeshift scoops. It was chaotic, hilarious, and honestly, it didn’t slow anyone down one bit. The dip was gone before anyone could find a proper utensil. That’s the sign of a winner. The beauty of this dish is its flexibility and forgiving nature. Don’t stress, just enjoy the process and the delicious results.
Your Dip Questions, Answered!
Over the years, I’ve gotten a lot of great questions about this recipe. Here are the ones I see most often:
- Q: My dip turned out a bit watery. What happened?
A: The most common culprit is not squeezing the spinach enough. Frozen spinach holds a TON of water, so you really have to go to town wringing it out in that kitchen towel. If your dip is still a little loose after cooking, you can stir in an extra handful of shredded cheese and let it melt in, which will help thicken it up. - Q: Can I make this ahead of time?
A: Absolutely! You can combine all the ingredients (except salt/pepper) in the crockpot insert the night before, cover it, and keep it in the fridge. When you’re ready, just take the insert out, let it sit on the counter for 20-30 minutes to take the chill off, then pop it into the slow cooker base and cook as directed. You might need to add 15-20 extra minutes to the cook time since it’s starting from cold. - Q: Can I use fresh spinach instead of frozen?
A: You can! Sauté about 10 ounces of fresh spinach in a pan until it’s completely wilted. Then, let it cool and follow the same crucial step: squeeze out every last drop of water you can. - Q: My cream cheese is still a little lumpy after cooking. Help!
A: No worries! Just give it a really vigorous stir or whisk. The residual heat and a little elbow grease will almost always smooth everything out. For next time, make sure your cream cheese cubes are small and evenly sized.
Crockpot Spinach Artichoke Dip Recipe
Description
This is the easiest version of the classic party dip — creamy, cheesy, warm, and made entirely in the slow cooker. Just dump, stir, and let the crockpot do the work. Perfect for game days, gatherings, or anytime you need a no-stress crowd-pleaser.
Ingredients
-
1 (10 oz) pkg frozen chopped spinach, thawed & squeezed completely dry
-
1 (14 oz) can artichoke hearts, drained & roughly chopped
-
8 oz cream cheese, cubed
-
½ cup sour cream
-
¼ cup mayonnaise
-
1 cup shredded mozzarella
-
½ cup grated Parmesan
-
2 cloves fresh garlic, minced
-
Salt & black pepper, to taste (added at the end)
Instructions
1. Prep
-
Thaw spinach and squeeze it VERY dry with a towel.
-
Chop artichokes.
-
Cube cream cheese.
-
Mince garlic.
2. Load the Crockpot
Add to the slow cooker:
-
Spinach
-
Artichokes
-
Cream cheese
-
Sour cream
-
Mayo
-
Mozzarella
-
Parmesan
-
Garlic
(Don’t add salt/pepper yet.)
3. Stir Everything
Mix well, breaking up cream cheese cubes a bit.
4. Slow Cook
-
Cook on LOW for 2–3 hours, stirring once halfway through.
-
Dip is ready when completely hot, melty, and smooth.
5. Season
Taste, then add:
-
Salt
-
Black pepper
Adjust until perfect.
How to Serve
Great with:
-
Tortilla chips
-
Baguette slices
-
Pita bread
-
Carrot sticks
-
Celery
-
Bell peppers
-
Cucumber slices
Also delicious as:
-
A sandwich spread
-
A topping for baked potatoes
-
A sauce for grilled chicken
Notes
Dip is watery: Spinach wasn’t squeezed dry enough — next time wring more. For now, add a handful of cheese and stir until melted.
Cream cheese still lumpy: Stir vigorously; the heat will smooth it out.
Too thick: Add a tablespoon of sour cream.
Nutritional Info (For Your Inner Food Scientist)
Okay, let’s be real—this is a celebratory, indulgent dip, and it’s not claiming to be a salad! But I believe in transparency, so here’s a rough breakdown per serving (based on about 10 servings). Remember, these are estimates and can vary based on the specific brands you use and any substitutions you make.
- Calories: 185
- Fat: 15g
- Saturated Fat: 7g
- Carbohydrates: 5g
- Fiber: 2g
- Sugars: 1g
- Protein: 6g
- Sodium: 360mg
To balance it out, I always make sure to have those fresh veggie dippers on hand. It’s all about that joyful balance!
Your New Go-To Party Secret
And there you have it! My no-fuss, always-a-hit, legendary Crockpot Spinach Artichoke Dip. It’s more than just a recipe; it’s a reliable friend for every gathering, from game day to book club to “I-just-need-comfort-food-Tuesday.” It proves that the most memorable food doesn’t have to be complicated. It just has to be made with a little love (and a lot of cheese).
I hope this recipe becomes a staple in your home, creating its own wonderful memories and empty bowls. If you make it, I’d be absolutely thrilled if you tagged me on social @Feastical or left a comment on the blog. Seeing your creations and hearing your stories is my favorite part of this whole journey. Now go forth, cook with joy, and enjoy every delicious, cheesy bite!

Blueberry Lemon Mini Puff Pastries : Buttery, Bright & Bite-Sized
Blueberry Lemon Mini Puff Pastries: Your New Go-To Party Hero
Hey friends, Beau here! Let’s be real for a second. Have you ever been staring down the barrel of a last-minute brunch invite or a “just bring a little something” party request and felt that tiny wave of panic? You want to bring something that looks like you fussed for hours, something that whispers “elegant baker” but really shouts “I’m a genius who knows a good shortcut.”
Well, my friend, you’ve just found your secret weapon. These Blueberry Lemon Mini Puff Pastries are the answer to all those prayers. Imagine this: impossibly flaky, buttery puff pastry that shatters with every bite. Inside, a hidden pocket of sweet, jammy blueberries meets a cloud of zesty, tangy lemon buttercream. It’s a flavor hug—warm and cozy from the pastry, bright and sunny from the lemon, and sweetly comforting from the blueberry.
The best part? We’re letting store-bought puff pastry do the heavy lifting. No one needs to know that. They’ll be too busy marveling at these gorgeous, bite-sized delights that look like they flew straight out of a Parisian patisserie. They’re the perfect project for a lazy Saturday morning or a lifesaver for a busy weeknight when you need a sweet treat, stat. So, grab your favorite baking sheet, and let’s make your kitchen the happiest place on earth.
The Happy Accident That Started It All
I have to confess, this recipe wasn’t born from some grand, generations-old family secret. Nope. It came from a classic “Beau” moment of kitchen chaos. It was a few years ago, right before my friends were coming over for a big, messy game day brunch. I’d planned to make my famous lemon bars, but in my typical pre-guest frenzy, I realized I was completely out of all-purpose flour. Cue the panic!
I was rummaging through the freezer, muttering to myself, when my eyes landed on a lonely box of puff pastry hiding behind a bag of frozen peas. Next to it, in the fridge, was a half-eaten jar of blueberry jam and a lemon that was looking a little… eager. A lightbulb went off. I threw the pastry in the oven, whipped up a quick lemon buttercream with what I had, and assembled these little Franken-treats in about five minutes flat.
The result? They were the first thing to disappear. My friends couldn’t stop raving about the “perfect combination” of flavors and textures. I just smiled, knowing it was a happy accident born from a near-disaster. It taught me a beautiful lesson: the best recipes often come from a little improvisation and a whole lot of love, not a perfectly stocked pantry.
Gathering Your Sunshine & Berry Squad
This is where the magic begins! The ingredient list is short, sweet, and simple. Here’s everything you’ll need to make about 24 of these little bites of heaven, along with a few of my chef-y insights to make you feel like a pro.
- 1 lb Frozen Puff Pastry (2 sheets), thawed: This is our MVP. I always keep a box in the freezer for emergencies. Look for an all-butter puff pastry if you can find it—the flavor is incomparable. Chef’s Tip: Thaw it slowly in the fridge overnight for the best, most manageable results. Rushing it on the counter can make it sticky and tough to work with.
- 1 egg + 1 tbsp cold water, beaten for egg wash: This is our golden glow-up potion. The egg wash gives the pastry that beautiful, shiny, professional-looking brown finish and helps the sugar stick. Don’t skip it!
- 2–3 tbsp Granulated Sugar: We’re sprinkling this on top before baking. It creates a delightful, delicate crunch that plays so nicely against the flaky layers. For a fun twist, use coarse sugar or even vanilla sugar if you have it.
- 2 tbsp Blueberry Jam: The sweet, fruity heart of the operation. Use a good quality jam you love! Substitution Tip: Any berry jam works wonderfully here. Raspberry, blackberry, or even a spiced fig jam would be absolutely divine.
- Lemon Zest (for garnish): A little fresh zest on top at the end isn’t just pretty; it’s a burst of aromatic lemon oil that makes the whole experience pop.
For the Lemon Buttercream Frosting:
- 1/2 cup Unsalted Butter, softened: The base of our creamy dream. Using unsalted lets you control the salt level. Chef’s Insight: “Softened” is key! Leave it on the counter for about 30-60 minutes. It should be cool to the touch but yield easily when you press it. Too cold, and your frosting will be lumpy; too warm, and it will be soupy.
- 1 1/2 cups Powdered Sugar: This gives us that smooth, melt-in-your-mouth texture that granulated sugar can’t. Sift it if you have time to avoid any little lumps.
- 1 tbsp Fresh Lemon Juice: Fresh is best! That bottled stuff just doesn’t have the same bright, vibrant punch. Roll your lemon on the counter firmly before juicing to get the most out of it.
- 1 tsp Lemon Zest: This is where the big, bold lemon flavor lives. Zest your lemon before you juice it—it’s much easier!
- 1–2 tsp Milk (if needed): This is your texture-adjuster. If your frosting is too thick to pipe easily, a teaspoon or two of milk will get it to the perfect, pipeable consistency.
Let’s Build Some Bite-Sized Bliss: A Step-by-Step Guide
Ready to create some magic? Follow these steps, and you’ll be a puff pastry pro in no time. I’ve sprinkled in my favorite hacks to make the process smooth and fun.
Step 1: Preheat & Prep. Fire up your oven to 400°F (200°C). This hot oven is crucial for creating that epic puff and flake. While it’s heating, line a standard baking sheet with parchment paper. No parchment? A light coating of butter or non-stick spray will work, but parchment is my ride-or-die for easy cleanup and no sticking. Chef’s Hack: If your kitchen is warm, pop your lined baking sheet into the freezer or fridge to keep it cold. A cold pan helps the pastry start baking from a chilled state, leading to a better rise.
Step 2: Pastry Playtime. Unfold your thawed puff pastry sheets onto a lightly floured surface. Using a sharp knife or a pizza cutter, cut each sheet into 12 equal squares. They should be about 2.5 inches each—the perfect two-bite size. Don’t worry about being a perfectionist here; a little rustic charm is a good thing!
Step 3: The Golden Touch. In a small bowl, beat your single egg with that tablespoon of cold water until it’s smooth. Now, lightly brush this egg wash over the top of each pastry square. This is the glue for our sugary crunch! Generously sprinkle the granulated sugar over the top of each one. You want a nice, even coating that will caramelize beautifully in the oven.
Step 4: Bake to Perfection. Arrange your sugared squares on the prepared baking sheet, giving them about an inch of space to puff up and spread. Slide them into your preheated oven and bake for 12-15 minutes. You’re looking for a gorgeous, deep golden brown color and layers that have puffed up dramatically. Chef’s Tip: Ovens can be sneaky. Rotate your pan halfway through baking to ensure they color evenly. And don’t open the oven door too early! You’ll let the heat out and deflate your pastries.
Step 5: The Patience Game. This might be the hardest step. When your pastries are beautifully golden, take them out and transfer the entire parchment sheet to a wire rack. Let them cool completely. I mean it! If you try to fill them while they’re warm, the buttercream will melt into a sad puddle, and the jam will soak in and make the pastry soggy. Let’s avoid that heartbreak together.
Step 6: Whip Up the Sunshine Cream. While the pastries are cooling, let’s make that lemon buttercream. In a medium bowl, beat the softened butter with an electric mixer (or a stand mixer with the paddle attachment) for about a minute until it’s smooth and pale. Gradually add the powdered sugar, beating on low at first to avoid a sugar-dust cloud, then increase the speed to high. Beat for 2-3 minutes until it’s super light and fluffy. Now, beat in the fresh lemon juice and lemon zest. If it’s too thick, add a teaspoon of milk until it’s smooth and pipeable.
Step 7: The Grand Assembly. Once the pastries are completely cool, it’s time for the fun part! You have two options here. You can use a small, sharp knife to carefully slice the “top” off each puff, creating a little lid. Or, my preferred method, just take a small spoon and gently press down the center of each pastry to create a little well or cavity. This is less fussy and works perfectly. Add about a half-teaspoon of blueberry jam into each well. Then, transfer your lemon buttercream to a piping bag fitted with a star tip (for a fancy look) or just a zip-top bag with the corner snipped off. Pipe a generous swirl of buttercream right over the jam.
Step 8: The Final Flourish. A little garnish goes a long way. Sprinkle a bit of fresh lemon zest over the top for a pop of color and flavor. For a real showstopper, you can add a few crushed freeze-dried blueberries or even a tiny, edible flower. They’re ready to steal the show!
How to Serve These Stunners
Presentation is part of the fun! You’ve put in the work, now let’s make these mini pastries shine. I love arranging them on a beautiful wooden board or a tiered cake stand. It creates height and visual interest that makes people go “Wow!”
These are the ultimate versatile treat. They’re perfect for a fancy brunch spread alongside a frittata and some mimosas. They’re a hit at baby showers, bridal showers, or as a sweet ending to a dinner party. I’ve even been known to pack a couple in my wife’s lunchbox for a midday pick-me-up (it makes me the hero of the day, every time).
Pair them with a cup of strong coffee, a glass of cold milk, or a bubbly glass of Prosecco. The bright lemon and sweet berry cut through the richness of the pastry beautifully, making them feel light and indulgent all at once. However you serve them, get ready for compliments!
Mix It Up! 5 Fun Flavor Twists
Once you’ve mastered the classic blueberry-lemon combo, the world is your oyster! Puff pastry is a blank canvas. Here are a few of my favorite ways to play with the recipe:
- Raspberry Lime: Swap the blueberry jam for raspberry and the lemon juice/zest for fresh lime. It’s a tangy, tropical-inspired twist that’s incredibly refreshing.
- Lemon Curd & Mascarpone: For an extra creamy, decadent version, skip the jam and the buttercream. Fill the cooled pastries with a dollop of store-bought lemon curd and a dollop of whipped mascarpone cheese. Divine.
- Savory-Sweet Brie & Fig: Go rogue! Before baking, place a tiny cube of brie and a dab of fig jam in the center of each pastry square. Bake as directed. The result is a gooey, savory-sweet bite that’s perfect for a cocktail party.
- Dairy-Free Delight: Easily make these vegan! Use a vegan puff pastry (many are accidentally vegan), a plant-based butter for the frosting, and your favorite dairy-free milk. The jam is already your friend.
- “Everything But The…” Pastry: Craving something less sweet? Skip the sugar sprinkle and instead brush the pastries with everything bagel seasoning mixed into the egg wash. Bake, then fill with a savory herbed cream cheese. You’re welcome.
A Few Final Thoughts from My Kitchen
This recipe has evolved so much since that first frantic game day. I’ve learned that a tiny pinch of salt in the buttercream makes the lemon flavor sing even louder. I’ve also found that letting the assembled pastries sit for about 10 minutes before serving lets the flavors meld together just perfectly.
My funniest kitchen fail with these was the time I was chatting with my neighbor and completely forgot the sugar on top. I baked a whole batch of beautifully puffed, totally pale pastries. They looked a little sad, but you know what? We drizzled them with the buttercream and jam anyway, and they were still delicious. It was a good reminder that even the “mistakes” are usually still pretty great. Cooking is about joy, not perfection.
Your Questions, Answered!
Over the years, I’ve gotten a few repeat questions about this recipe. Here are the answers to the big ones!
Q: Can I make these ahead of time?
A: Absolutely! You have a few options. You can bake the pastry shells a day ahead and store them in an airtight container at room temperature, then fill them the day of serving. You can also make the buttercream up to 3 days ahead and keep it covered in the fridge; just let it come to room temp and re-whip it before using. I don’t recommend assembling them more than a few hours ahead, as the pastry can lose its crispness.
Q: My pastry didn’t puff up much. What happened?
A: The most common culprit is the pastry getting too warm before baking. Remember, those little layers of butter need to stay cold to create steam and puff. Another reason could be rolling or handling the dough too much after cutting, which can seal the layers. Handle it gently and keep it cool!
Q: My buttercream is too runny! Help!
A: No worries, this is an easy fix. If your kitchen is hot or your butter was too soft, the frosting can get loose. Just pop the whole bowl of buttercream into the fridge for 15-20 minutes to firm up, then whip it again. If it’s still too soft, you can beat in a little more sifted powdered sugar, a tablespoon at a time, until it thickens.
Q: Can I use fresh blueberries instead of jam?
A: I wouldn’t recommend it for this specific assembly method. Fresh berries release a lot of water when baked, which can make the pastry soggy and leak. The jam is thick and concentrated, so it stays put. If you’re craving fresh berry flavor, try folding a few *very finely chopped* fresh blueberries into the buttercream instead!

Blueberry Lemon Mini Puff Pastries : Buttery, Bright & Bite-Sized
Description
Simple, flaky, fruity, and bright — these mini pastries make the perfect party treat. They use store-bought puff pastry, a spoonful of blueberry jam, and a quick lemon buttercream, so they look fancy but take very little effort. They’re great for brunch, holidays, or anytime you need a fast dessert that impresses.
Ingredients
For the Pastries
-
2 sheets frozen puff pastry, thawed
-
1 egg + 1 tbsp cold water (egg wash)
-
2–3 tbsp granulated sugar
-
2 tbsp blueberry jam
-
Fresh lemon zest (garnish)
For the Lemon Buttercream
-
½ cup unsalted butter, softened
-
1½ cups powdered sugar
-
1 tbsp fresh lemon juice
-
1 tsp lemon zest
-
1–2 tsp milk (only if needed)
Instructions
1. Prep
-
Preheat oven to 400°F (200°C).
-
Line a baking sheet with parchment paper.
2. Cut the Pastry
-
Lay out the puff pastry on a lightly floured surface.
-
Cut each sheet into 12 squares (about 2.5 inches).
3. Add the Golden Shine
-
Brush each square with egg wash.
-
Sprinkle the tops with sugar.
4. Bake
-
Arrange on the baking sheet with space between each square.
-
Bake 12–15 minutes or until puffed and golden brown.
-
Cool completely on a rack.
5. Make the Lemon Buttercream
-
Beat the softened butter for 1 minute.
-
Gradually add the powdered sugar.
-
Mix in the lemon juice and zest.
-
If the frosting is too thick, add a tiny splash of milk.
6. Assemble
-
Gently press the center of each pastry to create a small well.
-
Add ½ teaspoon blueberry jam to each.
-
Pipe or spoon lemon buttercream on top.
-
Garnish with lemon zest.
Notes
-
Keep the pastry cold. Warm puff pastry won’t rise well.
-
Don’t fill while warm. The frosting will melt — make sure pastries are fully cooled.
-
Use good-quality jam. It makes a big difference in flavor.
-
Buttercream too soft? Chill for 10–15 minutes, then re-whip.
Nutritional Information (Because We’re Curious!)
Okay, let’s keep it real. We’re not eating puff pastries for their kale-like health benefits. We’re eating them for pure, unadulterated joy! But I know some of you like to keep track, so here’s a rough breakdown per pastry (approximate, as ingredients can vary).
- Calories: 145
- Carbohydrates: 14g
Final Thoughts: Your New Secret Weapon
So there you have it, friends. From a near-disastrous kitchen panic to your new go-to party hero, these Blueberry Lemon Mini Puff Pastries are more than just a recipe—they’re a reminder that the best things in life are often simple, joyful, and a little bit buttery.
Don’t let their elegant, patisserie-style look fool you. You now hold the secret: that a box of puff pastry and a few simple ingredients are all it takes to create something truly magical. They’re a testament to the fact that you don’t need to be a professional chef to impress; you just need a little confidence and a great shortcut.
This recipe is your canvas. Master the classic, then make it your own with the endless flavor twists. Whether you’re whipping them up for a lazy Sunday, a last-minute get-together, or just because you deserve a sweet treat, these little puffs of sunshine are guaranteed to bring a smile to your face and to everyone lucky enough to try one.
Remember, the goal isn’t perfection. It’s the joy of creating, the fun of sharing, and the delicious satisfaction of a bite that tastes like you fussed, when you really just got to have fun. So go forth, bake with confidence, and get ready to be declared a kitchen genius.
Happy Baking!
Beau

Protein Pancake Tacos : Wholesome, Family-Friendly Brunch with Berry Syrup
Protein Pancake Tacos: The Brunch Game-Changer You Didn’t Know You Needed
Hey friends, Beau here from Feastical! Let’s be real for a second. Weekend brunch is a sacred ritual. It’s that glorious, slow-moving moment where you can actually taste the coffee, linger over conversation, and indulge in something truly delicious. But if your home is anything like mine, it’s also a battlefield of conflicting cravings. One person wants a towering stack of syrup-drenched pancakes, another is craving something fresh and fruity, and someone else (probably me, after a morning workout) is desperately seeking a protein punch to fuel the rest of the day.
For the longest time, I felt like I had to choose. Pancakes or fuel. Sweet or satisfying. It was a culinary conundrum that left me a little frustrated. That is, until I had a lightning-bolt moment one lazy Sunday morning, staring at a warm pancake as it flopped deliciously over the edge of my plate. It hit me: that thing is totally foldable. What if… we treated it like a taco shell?
And just like that, the Protein Pancake Taco was born. This isn’t just a recipe; it’s a whole new brunch philosophy. We’re taking soft, fluffy, secretly-good-for-you pancakes, folding them into perfect little vessels, and stuffing them with a cloud of whipped Greek yogurt, a riot of fresh berries, and a drizzle of a naturally sweet berry “syrup” that’s so simple, you’ll wonder why you ever bought the bottled stuff.
This dish is the ultimate crowd-pleaser. It’s fun enough to get the kids (and let’s be honest, the adults) genuinely excited, and it’s wholesome enough that you can feel fantastic about serving it. It’s a feel-good food moment that brings everyone to the table, forks (and hands!) at the ready. So, let’s ditch the dilemma and create a brunch that truly has it all. Ready to dig in?
The Pancake Flip That Started It All
This recipe has a special place in my heart because it reminds me of chaotic, joyful Sunday mornings growing up. My dad was the designated Pancake Master. His buttermilk stacks were legendary, but his flipping technique… well, let’s call it “ambitious.” I have this vivid memory of him going for a particularly high flip, sending a half-cooked pancake sailing through the air. It didn’t land back in the pan. Oh no. It landed with a soft plop right over the edge, perfectly folded in half over the handle of the frying pan, like a weird, crispy hat.
We all burst out laughing, but my mom, ever the pragmatist, looked at it and said, “Well, now you’ve invented the pancake taco.” She scooped it up, filled the fold with some berries from our bowl, and ate it right then and there. The look of delight on her face was pure magic. That silly kitchen fail planted a seed. Years later, playing in my own kitchen, that memory came rushing back. I thought, “What if we made that on purpose? What if we made it better?” By adding a little protein power and a killer filling, I turned a childhood laugh into the recipe I’m so excited to share with you today.
Gathering Your Taco Toolkit: The Ingredients
Part of the beauty of this recipe is its simplicity. We’re using straightforward ingredients to create something extraordinary. Here’s your shopping list, complete with a few chef-ly insights to set you up for success.
For the Protein Pancakes:
- 1 cup oat flour – This is my go-to for a tender, gluten-free base. It gives the pancakes a lovely, nutty flavor and a soft texture that’s perfect for folding. Chef’s Tip: No oat flour? No problem! Just blitz 1 cup of old-fashioned or quick-cook oats in your blender until they reach a fine, flour-like consistency.
- 1 scoop vanilla protein powder – This is our secret weapon for staying power. It adds sweetness and structure. Chef’s Insight: I prefer a whey-casein blend for fluffiness, but plant-based powders work great too! Just know that the liquid might need a tiny adjustment—start with the recipe amount and add a splash more milk if the batter feels too thick.
- 1 tsp baking powder – Our little leavening agent, responsible for all those lovely air pockets and a light, fluffy rise.
- 1/2 tsp cinnamon – A touch of warm spice that makes the whole kitchen smell like a hug. It pairs beautifully with the berries.
- 1 large egg – The binder that holds our taco dreams together and adds richness.
- 1/2 cup unsweetened almond milk – Or any milk you love! This gets our batter to the perfect, pourable consistency. Substitution Tip: Dairy milk, oat milk, or even water will work perfectly here.
- 1 tsp vanilla extract – The flavor booster that makes everything taste like a bakery-worthy treat.
For the Filling & “Syrup”:
- 1 cup Greek yogurt – We’re using this as our “sour cream” alternative! Its tanginess cuts through the sweetness perfectly. Chef’s Hack: Whip it with a whisk for a minute or two before using—it becomes incredibly light and spreadable. For a sweeter touch, fold in a teaspoon of honey or maple syrup.
- 1 cup fresh mixed berries – Strawberries, blueberries, raspberries—the more color, the better! They provide a fresh, juicy burst in every bite.
- 1 cup frozen mixed berries – Frozen berries are a freezer staple and perfect for our syrup because they break down so easily and are often more affordable than fresh.
- 1 tbsp maple syrup or honey – Just a touch to sweeten our natural syrup. You can adjust this to your taste!
- 1 tbsp chia seeds – These are the magic that thickens our berry syrup into a gorgeous, jam-like consistency without any fuss. Plus, they add a bonus hit of fiber and omega-3s.
- Splash of lemon juice – A bright squeeze at the end balances the sweetness and makes the berry flavor pop.
Let’s Get Cooking: Building Your Brunch Masterpiece
Okay, team! Aprons on, music playing—let’s make some magic. This whole process comes together in about 25 minutes, and the payoff is so, so worth it.
- Become One with the Batter. Grab your blender or a medium-sized mixing bowl. Add your oat flour, protein powder, baking powder, cinnamon, egg, almond milk, and vanilla. If you’re using a blender, just blast it for 30-45 seconds until it’s completely smooth. If you’re mixing by hand, whisk with gusto until you have a smooth, slightly thick batter. Little Chef Hack: Let the batter sit for 5 minutes. This allows the oat flour to fully hydrate, giving you a more tender pancake and preventing it from being gummy.
- Master the Pancake “Shell.” Heat a non-stick skillet or griddle over medium heat. I like to give it a very light spritz of cooking spray, but a well-seasoned non-stick pan might not need it. The key here is to make smaller pancakes than you normally would—aim for about 1/4 cup of batter per pancake. Pour it onto the skillet and gently spread it into a 4-5 inch circle. Watch for the Bubbles: Cook for 2-3 minutes, until you see bubbles forming on the surface and the edges look set. This is your cue to flip! Cook for another 1-2 minutes on the second side until golden and cooked through. They should be pliable, not crispy!
- Create the Magic “Syrup.” While the pancakes are cooking, let’s make that incredible chia jam syrup. In a small saucepan, combine the frozen berries and maple syrup. Cook over medium heat, stirring occasionally, for about 5-7 minutes. The berries will thaw, release their juices, and start to bubble away. Use a fork or the back of your spoon to mash them to your desired consistency—I like a few chunks left in there! Remove the pan from the heat and immediately stir in the chia seeds and a good splash of lemon juice. Let it sit for 5-10 minutes; you’ll watch it transform into a beautifully thick, glossy syrup right before your eyes.
- The Art of the Fold. As your pancakes come off the griddle, let them cool on a wire rack or plate for just a minute. You want them to be warm and soft, not scalding hot. Then, gently fold them in half, taco-style. If they crack a little, don’t sweat it! It just adds character. Pro-Tip: If a pancake seems a bit too stiff to fold, just drape it over a wooden spoon handle or the edge of a bowl for a minute—it will soften up and take on that perfect taco shape.
- Assembly Line of Joy. Now for the fun part! Take your slightly-cooled, folded pancake tacos and set them up like a little buffet. First, a generous schmear of that whipped Greek yogurt. Next, a handful of your fresh, vibrant berries. Finally, the pièce de résistance: a glorious drizzle of your warm, homemade berry chia syrup. The contrast of the cool yogurt, fresh fruit, and warm syrup is absolutely divine.
Plating Up the Perfect Brunch Vibe
How you serve these can turn a great meal into a memorable experience. I’m a firm believer that we eat with our eyes first!
For a family-style feast, I love piling the filled pancake tacos onto a big, rustic wooden board or a large platter. Let everyone grab their own! Scatter a few extra berries and mint leaves around the platter for a gorgeous, “I’m a professional food stylist” touch.
For individual plates, place two or three tacos slightly overlapping. Drizzle a little extra syrup around the plate and maybe add a tiny dollop of yogurt on the side. It makes everyone feel like they’re at a fancy brunch spot, but with all the comfort of home.
And don’t forget the drinks! A pot of strong coffee, some frothy cappuccinos, or a pitcher of fruity iced tea are the perfect companions to this sunny, satisfying dish. The goal is relaxation and connection, so keep the vibe easy and the conversation flowing.
Mix It Up! Your Taco, Your Rules
The basic blueprint for these Protein Pancake Tacos is just the beginning. Once you’ve mastered the classic, the canvas is yours to paint! Here are a few of my favorite twists to keep things exciting.
- Tropical Vacation: Swap the mixed berries for diced mango, pineapple, and kiwi. Use coconut Greek yogurt and add a tablespoon of shredded coconut to the pancake batter. A drizzle of honey-lime syrup would be incredible here.
- Apple Cinnamon “Dessert” Taco: Sauté thinly sliced apples with a bit of butter and cinnamon until soft and caramelized. Use the apple mixture as your main filling, along with the Greek yogurt. A drizzle of peanut butter or almond butter thinned with a little warm water makes for an insane “syrup.”
- Chocolate Lover’s Dream: Add a tablespoon of unsweetened cocoa powder to the pancake batter. Fill with yogurt and sliced strawberries or bananas. For the syrup, warm up a tablespoon of chocolate hazelnut spread with a splash of milk until it’s pourable.
- Savory Spin: Who says tacos have to be sweet? Omit the vanilla and cinnamon from the batter. Fill with scrambled eggs, a sprinkle of sharp cheddar cheese, and a few slices of avocado. A dollop of salsa or hot sauce is your new “syrup.”
- Nut-Free & School-Safe: Use sunflower seed butter (SunButter) in place of any nut-based suggestions, and make sure your protein powder is nut-free. It’s a fantastic and inclusive option for playdates and lunchboxes.
Beau’s Kitchen Confidential
This recipe has truly evolved in my kitchen. It started as a single, slightly messy experiment and has since become my most-requested dish for weekend guests. I’ve learned a few things along the way. First, don’t stress about the perfect fold! A few cracks just mean more nooks for the syrup to pool into, and I consider that a win. Second, the chia jam syrup is a revelation I now use on everything—oatmeal, ice cream, toast, you name it. I always make a double batch and keep it in a jar in the fridge.
One of my favorite kitchen memories is of my niece, who is a notoriously picky eater, devouring three of these in a row. She had no idea she was eating something packed with protein and whole grains; she just knew she was eating a “pancake taco” and was utterly delighted. That, right there, is the Feastical spirit. It’s about creating food that feels like a celebration, no matter what’s secretly inside.
Your Questions, Answered!
I love hearing from you all, and over time, a few common questions have popped up. Here’s the inside scoop to ensure your taco success.
Q: My pancakes are turning out dry and crumbly. What did I do wrong?
A: This usually means the batter is a bit too thick or you’re overcooking them. Remember that protein powders vary wildly in their thirstiness! If your batter looks more like cookie dough than pancake batter, don’t be shy—add another tablespoon or two of milk until it’s pourable. Also, keep an eye on the heat; medium is your friend. You want a golden-brown color, not a dark brown.
Q: Can I make the components ahead of time for a crowd?
A: Absolutely! This is a fantastic strategy for stress-free entertaining. Cook the pancakes the night before, let them cool completely, and store them in an airtight container in the fridge. Gently reheat them in a toaster oven or a 300°F (150°C) oven for a few minutes to soften them up for folding. The chia jam syrup can be made up to 5 days in advance and stored in the fridge—just warm it gently before serving.
Q: My pancake cracked when I folded it! Is it ruined?
A: Not at all! I call that “rustic charm.” A small crack won’t affect the taste one bit. To prevent this, make sure you’re not overcooking them (a softer pancake is more pliable) and fold them while they are still warm and flexible. If one does crack, just position it at the bottom of the taco—the filling will help hold it together.
Q: I don’t have a blender. Can I still make the oat flour?
A: You can! If you have a coffee grinder or a high-powered food processor, they will work. If not, you can often find pre-made oat flour in the baking aisle of most well-stocked grocery stores these days, usually near the gluten-free flours.

Protein Pancake Tacos : Wholesome, Family-Friendly Brunch with Berry Syrup
Description
Protein Pancake Tacos – Sweet, Protein-Packed Brunch
Prep Time: 10 min
Cook Time: 15 min
Total Time: 25 min
Ingredients
For the Protein Pancakes:
-
1 cup oat flour (or blitz 1 cup oats to make flour)
-
1 scoop vanilla protein powder
-
1 tsp baking powder
-
1/2 tsp cinnamon
-
1 large egg
-
1/2 cup unsweetened almond milk (or milk of choice)
-
1 tsp vanilla extract
For the Filling & Berry Syrup:
-
1 cup Greek yogurt (whipped if desired)
-
1 cup fresh mixed berries (strawberries, blueberries, raspberries)
-
1 cup frozen mixed berries
-
1 tbsp maple syrup or honey
-
1 tbsp chia seeds
-
Splash of lemon juice
Optional Toppings:
-
Extra fresh berries
-
Mint leaves
-
Drizzle of leftover berry syrup
Instructions
1. Make the Pancake Batter
-
In a blender or bowl, combine oat flour, protein powder, baking powder, cinnamon, egg, almond milk, and vanilla.
-
Blend or whisk until smooth. Let rest 5 minutes for best texture.
2. Cook the Pancakes
-
Heat a non-stick skillet over medium heat, lightly greased if needed.
-
Pour ~1/4 cup batter per pancake, spreading to a 4–5 inch circle.
-
Cook 2–3 minutes until bubbles form, flip, and cook 1–2 more minutes.
-
Remove and let warm pancakes cool slightly.
3. Make the Berry Chia Syrup
-
In a small saucepan, combine frozen berries and maple syrup over medium heat.
-
Mash slightly with a fork, cook 5–7 minutes until juices release.
-
Remove from heat, stir in chia seeds and lemon juice. Let sit 5–10 minutes to thicken.
4. Assemble the Pancake Tacos
-
Fold pancakes in half taco-style.
-
Spread a layer of Greek yogurt inside each.
-
Add fresh berries.
-
Drizzle with the chia berry syrup.
-
Garnish with extra berries, mint, or syrup if desired.
Notes
-
Dry pancakes? Batter too thick or overcooked; thin with extra milk, cook medium heat.
-
Cracks when folding? Warm, soft pancakes fold best; small cracks are fine.
-
Prep ahead: Cook pancakes in advance, store in fridge, reheat gently. Syrup keeps 5 days in fridge.
-
No blender? Use a coffee grinder or pre-made oat flour.
Nutrition
- Calories: 280Cal Per Serving
- Fat: 7g
- Carbohydrates: 32g
- Protein: 18g
The Good Stuff: Fueling Your Fun
One of the best parts about this recipe is that it’s a treat you can feel genuinely good about. Unlike traditional pancake stacks that can leave you in a carb-coma, these tacos are designed to provide balanced, sustained energy.
The protein from the powder, egg, and Greek yogurt helps build and repair muscle and keeps you feeling full and satisfied for hours. The oat flour and chia seeds deliver a fantastic dose of fiber, which is great for digestive health and also helps stabilize blood sugar. The fresh berries are packed with antioxidants and vitamins. And by making our own syrup, we control the sugar, using just
Final Thoughts
So, there you have it. The Protein Pancake Taco is more than just a meal; it’s an invitation to play with your food, to break a few rules, and to turn a simple brunch into a moment of pure, unadulterated joy. It’s the delicious proof that you don’t have to choose between a decadent treat and a wholesome fuel-up. You can truly have it all.
This recipe is a celebration of that Feastical philosophy: food should be fun, flexible, and deeply satisfying. It’s about taking a silly kitchen memory and transforming it into a new tradition. It’s about watching faces light up when you bring a platter of these to the table, proving that eating well doesn’t have to be complicated or boring.
I hope this recipe becomes a canvas for your own creativity. Mix and match the fillings, make it your own, and most importantly, share it with people you love. Because the best meals are always about the connection, the laughter, and the shared delight in discovering something new together.
Now, I’d love to hear from you! Did you stick with the classic berries or invent a wild new filling? Tag me on social @Feastical with your creations. Let’s inspire each other.
Happy cooking, and enjoy your brunch game-changer
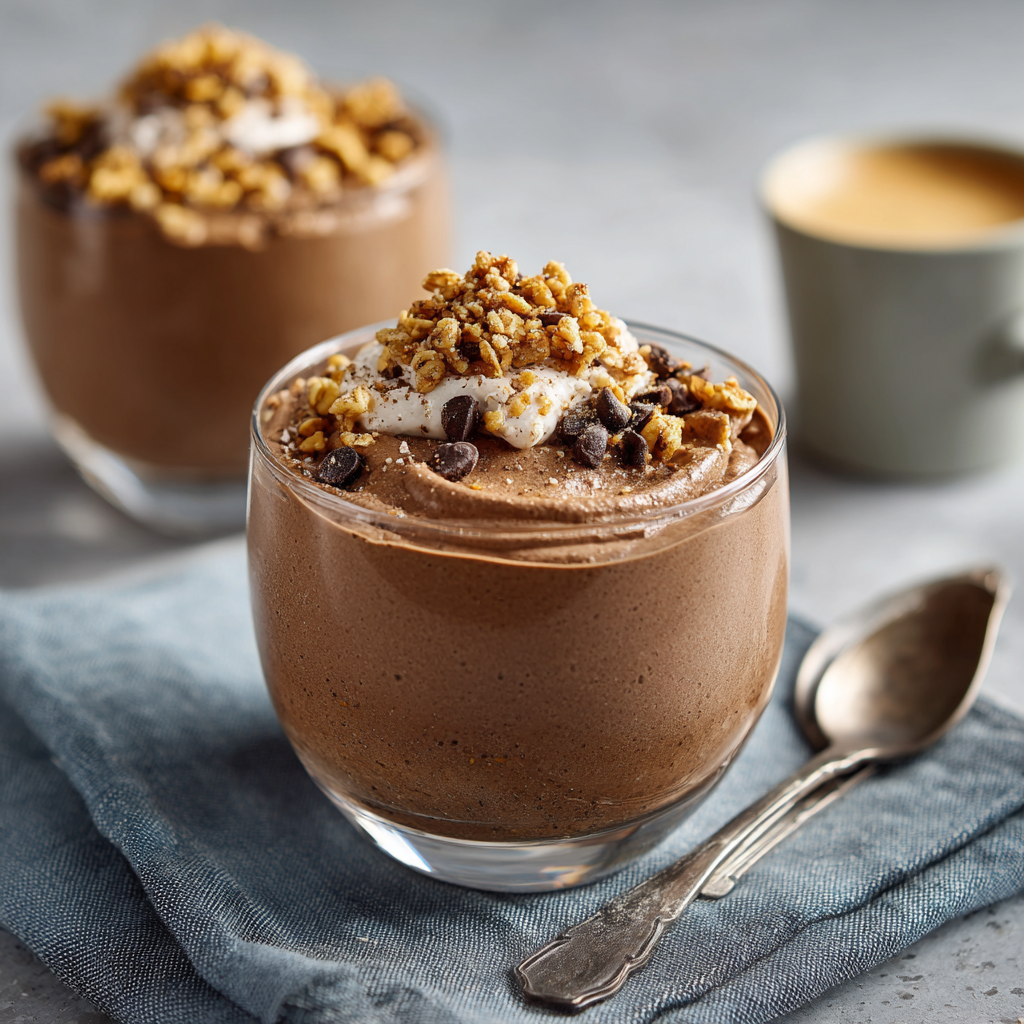
Mocha Protein Mousse : High-Protein, Dairy-Free & Coffee-Lover Approved
Mocha Protein Mousse – High-Protein, Dairy-Free & Coffee-Lover Approved
Who Says Healthy Can’t Be Heavenly?
Hey friends, Beau here! Let’s talk about one of life’s great dilemmas. You’re staring down a serious dessert craving, the kind that whispers sweet nothings about rich chocolate and creamy textures. But maybe you’re also trying to be a little kinder to your body, fuel it with good stuff, and not end up in a sugar coma on the couch. For the longest time, I felt like I had to choose: either the decadent dessert or the healthy choice. It was a tug-of-war between my taste buds and my goals.
Well, I’m here to tell you that the era of choosing is OVER. I’ve been tinkering in the Feastical test kitchen (aka my wonderfully cluttered countertop), and I’ve landed on a recipe that feels like pure magic. This isn’t a “good-for-you” compromise. This is a straight-up, spoon-licking, “I-can’t-believe-it’s-actually-packed-with-protein” triumph. We’re making a Mocha Protein Mousse that’s so creamy, so bold, and so satisfying, it’s going to change your dessert game forever.
Imagine the silkiest chocolate mousse you’ve ever had, then give it a welcome jolt of rich coffee flavor and a powerful protein punch. It’s dairy-free, surprisingly simple, and comes together in about five minutes of active work. This is the dessert you can whip up for a fancy-ish dinner party or enjoy as a post-workout treat without a single shred of guilt. So, grab your blender and your favorite mug—we’re about to make a feel-good food moment happen.
A Coffee-Fueled Flashback
This recipe takes me right back to my grandma’s kitchen. She was a formidable woman who believed a shot of strong coffee could solve most of life’s problems. Every afternoon, without fail, she’d brew a pot, and the entire house would fill with that warm, invigorating aroma. She’d let me have a tiny cup, mostly milk and sugar, but I felt so grown-up. That ritual was our special time—a moment of calm and connection.
When I started creating this mousse, I wanted to capture that feeling. The comfort of chocolate and the soul-stirring wake-up call of coffee, all in one bite. But I also wanted it to be the kind of energy boost I needed for my busy days, not the crash that follows a sugary treat. Blending that rich espresso with silken tofu and chocolate protein powder felt like a revelation. It’s my modern, health-conscious homage to those afternoons with Gran—a dessert that comforts you while it fuels you forward. Every spoonful is a little taste of nostalgia, with a powerful protein kick.
Gathering Your Mocha Magic
This is where the fun begins! The beauty of this mousse lies in its simple, powerhouse ingredients. Each one plays a crucial role in creating that perfect texture and flavor. Here’s what you’ll need to serve four lucky people (or, you know, one very determined you).
- 1 block (12 oz) Silken Tofu, drained: Don’t let this scare you! Silken tofu is our secret weapon for that incredibly creamy, dairy-free texture. It’s neutral in flavor, so it lets the chocolate and coffee shine. Chef’s Insight: Make sure it’s silken or soft tofu, not firm. The firm stuff won’t blend up as smoothly.
- 1/4 cup Chocolate Protein Powder: This is our protein powerhouse and a key flavor builder. I love a good plant-based blend, but whey protein works great too if that’s your jam. Substitution Tip: If your protein powder is very sweet, you can reduce the maple syrup a touch.
- 2 tbsp Unsweetened Cocoa Powder: This brings the deep, rich chocolate flavor that forms the soul of our mousse. Use the highest quality you have for the best taste.
- 2 tbsp Maple Syrup or Monk Fruit Syrup: Our natural sweetener! Maple syrup adds a lovely warmth, while monk fruit keeps it sugar-free. Substitution Tip: Agave nectar or honey (if you’re not strictly vegan) work beautifully too.
- 2–3 tbsp Brewed Espresso (or strong coffee): This is the “mocha” in our mousse! It amplifies the chocolate flavor and adds that sophisticated coffee kick. Chef’s Insight: Using cooled espresso or coffee is key. Hot liquid will warm the tofu and make the mousse less appealing. No espresso maker? Instant espresso powder dissolved in a little hot water is a fantastic pantry staple for this.
- 1 tsp Vanilla Extract: The supporting actor that makes all the other flavors pop. A splash of vanilla rounds out the sharp edges and adds a layer of warmth.
- Pinch of Salt: Never, ever skip the salt! It’s not about making things taste salty; it’s about making the chocolate taste more chocolatey. It balances the sweetness perfectly.
For the Topping:
- 1/4 cup Cacao Nib Granola or Crushed Cacao Nibs: We’re adding crunch! Cacao nibs are like nature’s chocolate chips—bitter, crunchy, and packed with antioxidants. The granola version adds a little extra texture and sweetness.
- Flaky Sea Salt (optional): A tiny sprinkle on top just before serving is a game-changer. It creates these incredible sweet-and-salty bursts that will make you swoon.
Let’s Make Some Mousse Magic!
Ready for the easiest dessert of your life? If you can press a button on a blender, you are already a mousse-making master. Let’s walk through it.
- The Prep: First things first, drain your block of silken tofu. You don’t need to press it like you would with firm tofu; just let the water run off. Give it a little pat dry with a paper towel if it seems extra wet. This simple step ensures our mousse isn’t watery. Chef’s Hack: If you have time, pop your blender pitcher and the tofu in the fridge for 30 minutes before you start. Starting with cold ingredients helps the mousse set faster and gives it a lovely chilled texture right out of the gate.
- The Blend: Crumble the tofu into your blender. Add the chocolate protein powder, cocoa powder, your chosen syrup, the cooled espresso, vanilla extract, and that all-important pinch of salt. Now, put the lid on tight and let ‘er rip! Blend on high for a good 60-90 seconds. You’re looking for a completely smooth, creamy, and homogenous mixture. Stop the blender, scrape down the sides with a spatula if needed, and blend for another 15 seconds just to be sure. Chef’s Commentary: Don’t be shy here. Blending it really well is the secret to that dreamy, silky-smooth texture. Under-blending can leave you with a slightly grainy feel.
- The Taste Test: This is the most important step! Grab a spoon and taste your creation. This is your kitchen, your rules. Want it sweeter? Add another half tablespoon of syrup. Want a bigger coffee kick? Drizzle in another half tablespoon of espresso. This is where you make it perfect for you. Blend again for 10 seconds to incorporate any adjustments.
- The Chill: Once you’re happy with the flavor, spoon the mousse into four serving glasses or ramekins. I’m a sucker for little mason jars or elegant cocktail glasses—it makes it feel extra special. Cover them with plastic wrap or a lid and gently place them in the refrigerator. Let them chill and set for at least 1 hour. Chef’s Hack: If you’re in a real hurry, you can pop them in the freezer for 20-25 minutes. Just don’t forget about them, or you’ll have mocha protein ice cream (which, honestly, isn’t a bad plan B).
- The Grand Finale: When you’re ready to serve, take the mousses out of the fridge. Give them a generous sprinkle of the cacao nib granola for that essential crunch, and finish with a delicate pinch of flaky sea salt. This final touch elevates it from a simple pudding to a gourmet dessert.
How to Serve This Stunner
Presentation is part of the fun! This mousse is incredibly versatile. For a casual weeknight treat, eating it straight from the jar with a big spoon is totally acceptable (and encouraged). But if you’re feeling fancy, here are a few of my favorite ways to serve it up:
- The Classic Elegance: Serve it in clear glasses or vintage coupes. Let those beautiful layers of dark mousse and light toppings shine. It looks incredibly professional with almost zero effort.
- The Deconstructed Affogato: Love the coffee theme? Serve the mousse in a bowl and pour a shot of warm espresso over the top right before serving. It’s a melty, mocha-y dream.
- The Party Parfait: Layer the mousse with fresh berries (raspberries are a match made in heaven), a little coconut whipped cream, and some granola in a tall glass. It’s a showstopping dessert that’s also a complete, balanced treat.
- With a Side of… Breakfast? Honestly, this mousse is so packed with protein and so low in sugar, it makes a fantastic breakfast. Pair it with a piece of whole-grain toast or some fresh fruit to start your day on a deliciously indulgent note.
Make It Your Own: 5 Delicious Twists
Once you’ve mastered the basic recipe, the kitchen playground opens up! This mousse is a fantastic base for all kinds of flavor adventures. Here are a few of my favorite variations:
- Mint Chocolate Chip: Add 1/4 teaspoon of peppermint extract (not mint extract, it’s too strong!) along with the vanilla. After blending, fold in 2 tablespoons of mini dairy-free chocolate chips for that classic nostalgic flavor.
- Orange Mocha: Add the zest of one small orange to the blender. The bright, citrusy notes cut through the richness of the chocolate and coffee in the most incredible way. It’s sophisticated and refreshing.
- Peanut Butter Cup: Who can resist? Add a heaping tablespoon of natural peanut butter (or any nut or seed butter) to the blender. Top with crushed, salted peanuts for the ultimate sweet-and-salty satisfaction.
- Keto/Very Low-Carb: Swap the maple syrup for your favorite sugar-free syrup (monk fruit is perfect) and use a keto-friendly chocolate protein powder. Double-check that your cocoa powder is unsweetened, and you’ve got a decadent dessert that fits your macros.
- Simple Chocolate: Not a coffee fan? No problem! Simply replace the espresso with 2-3 tablespoons of unsweetened almond milk or water. You’ll get a pure, creamy, and intensely chocolatey mousse that’s still packed with protein.
Beau’s Kitchen Chronicles
This recipe has come a long way from its first iteration. I’ll let you in on a little secret: the first time I tried a version of this, I used firm tofu by accident. Let’s just say the texture was… interesting. More like a thick, chocolate hummus than a light mousse! It was a classic case of “read the label, Beau.” That little failure taught me the importance of silken tofu’s unique, custardy texture.
Over time, I’ve also learned that the quality of your protein powder makes a HUGE difference. Some can have a chalky or artificial aftertaste. My advice? Use a brand you already know and love to drink on its own. If it tastes good in a shaker bottle, it’s going to taste incredible in this mousse. This recipe is a testament to the fact that the best dishes often come from a little experimentation and a willingness to laugh at your own kitchen mishaps.
Your Mocha Mousse Questions, Answered!
I’ve made this recipe a zillion times and I’ve heard all your questions. Here are the answers to the most common ones.
- Q: My mousse is a bit runny. What did I do wrong?
A: This usually happens for one of two reasons. First, the tofu might have had a bit more water content. Next time, give it an extra gentle press with a paper towel. Second, it might just need more chilling time! Pop it back in the fridge for another 30-60 minutes; that should firm it right up. The protein powder will continue to absorb moisture as it chills. - Q: Can I taste the tofu?
A: I get this one a lot! I promise, if you use silken tofu and blend it really well, you will not taste it. The powerful flavors of chocolate, coffee, and vanilla completely take over. The tofu is just there to work its textural magic, creating that lush, creamy base that feels indulgent. - Q: How long will this keep in the fridge?
A: It stores beautifully! Keep it covered in the refrigerator for up to 3-4 days. I recommend adding the crunchy toppings right before you serve it to keep them from getting soggy. - Q: I don’t have a high-powered blender. Will a food processor work?
A: Absolutely! A food processor will work just fine. It might take a little longer to get it perfectly smooth, so just let it run for a couple of minutes, scraping down the sides once or twice. The goal is total silkiness.

Mocha Protein Mousse : High-Protein, Dairy-Free & Coffee-Lover Approved
Description
Mocha Protein Mousse (Dairy-Free, High-Protein)
Prep Time: 5–10 minutes
Chill Time: 1 hour (or 20–25 min in freezer for quick set)
Total Time: 1 hour
Servings: 4
Ingredients
Mousse Base:
-
1 block (12 oz) silken tofu, drained
-
1/4 cup chocolate protein powder
-
2 tbsp unsweetened cocoa powder
-
2 tbsp maple syrup or monk fruit syrup
-
2–3 tbsp brewed espresso or strong coffee, cooled
-
1 tsp vanilla extract
-
Pinch of salt
Topping:
-
1/4 cup cacao nib granola or crushed cacao nibs
-
Flaky sea salt (optional)
Instructions
1. Prep the Tofu
-
Drain silken tofu and pat lightly with paper towels to remove excess moisture.
-
Optional: Chill tofu and blender pitcher for 30 minutes to improve texture.
2. Blend the Mousse
-
Crumble tofu into a blender or food processor.
-
Add protein powder, cocoa powder, syrup, cooled espresso, vanilla, and pinch of salt.
-
Blend on high for 60–90 seconds until smooth and creamy. Scrape down sides and blend an extra 15 seconds if needed.
-
Taste and adjust sweetness or coffee strength, blending briefly again.
3. Chill
-
Spoon mousse into four serving glasses or ramekins.
-
Cover and refrigerate for at least 1 hour (or freeze 20–25 min for faster set).
4. Serve
-
Sprinkle with cacao nib granola or crushed cacao nibs and a pinch of flaky sea salt before serving.
-
Enjoy straight from the jar, or layer with berries or coconut whipped cream for a fancy parfait.
Notes
-
Runny mousse? Drain tofu well, or chill longer.
-
Taste tofu? Silken tofu is neutral if blended well; chocolate & coffee dominate.
-
Storage: Keeps 3–4 days in fridge; add crunchy toppings before serving.
-
No high-powered blender? A food processor works; blend a bit longer.
The Good Stuff: A Peek at the Nutrition
Now, let’s talk about why this dessert makes you feel so good. This isn’t just empty calories; it’s functional fuel. Per serving (approximately one-quarter of the recipe), you’re looking at roughly:
- Calories: 160
- Protein: 14g – This is the star! It’s what keeps you full, satisfied, and helps repair your muscles.
- Carbohydrates: 10g
- Fat: 8g – Healthy fats from the tofu and cocoa help with nutrient absorption and keep you satiated.
- Sugar: 4g – Mostly natural sugars from the maple syrup, making it a low-sugar dessert option.
- Fiber: 3g – Thanks to the cocoa and tofu, it gives your digestive system a little love.
Compare that to a traditional chocolate mousse made with heavy cream and sugar, which can easily clock in at over 400 calories and 30g of sugar per serving, with very little protein. This version lets you indulge your cravings while genuinely nourishing your body. It’s a win-win.
Your New Go-To Guilt-Free Dessert
And there you have it! A dessert that truly delivers on every front: incredible flavor, luxurious texture, and a powerhouse of nutrition. This Mocha Protein Mousse is proof that you don’t have to give up the foods you love to feel your best. It’s about making smart, delicious swaps that add up to a happier, healthier you.
Final Thoughts: Your Dessert Dilemma, Solved.
So, there you have it. The great dessert dilemma—decadence versus health—is officially a thing of the past. This Mocha Protein Mousse isn’t just a recipe; it’s your new secret weapon. It’s the answer to that 3 p.m. slump, the perfect post-workout reward, and the effortless, impressive dessert that will have your friends begging for the recipe.
We started with a simple craving and a bit of kitchen nostalgia, and we ended up with a creation that feels like a hug and a high-five all at once. It’s proof that “healthy” doesn’t have to mean “bland,” and “indulgent” doesn’t have to mean “regretful.” With a base of silken tofu and protein powder, you’re choosing a dessert that fuels your body without sacrificing a single bit of joy.
I encourage you to make it your own. Try the variations, play with the toppings, and adjust the sweetness to your heart’s content. Let this recipe be a launchpad for your own culinary creativity.
Most of all, remember that taking care of yourself can and should be delicious. So go ahead, grab a spoon, and dig into a dessert that loves you back.
Stay sweet (but not too sweet!),
Beau

Strawberry Shortcake Protein Icebox Cake
Your New No-Bake Summer Obsession is Here!
Hey friends, Beau here! Can we talk about summer for a second? The sun is shining, the grill is probably firing, and the last thing anyone wants to do is crank up the oven and heat up the whole kitchen. I get it. You’re craving something sweet, something celebratory, but you also want to feel good about what you’re eating. You want that dessert that makes everyone at the picnic go, “Wow, you made this?!” without you having to spend hours slaving over it.
Well, my foodie friend, I’ve got your back. I’m about to let you in on my ultimate summer party secret weapon: the Strawberry Shortcake Protein Icebox Cake. This beauty is everything we love about classic strawberry shortcake—the juicy berries, the creamy vanilla, the soft, cakey layers—but it’s completely no-bake, packed with a sneaky protein punch, and it literally gets better as it chills in your fridge. We’re talking about a dessert that tastes like a dream but fuels your body like a champion.
Imagine layers of vanilla protein cookies getting all soft and cake-like, sandwiched between a cloud of whipped Greek yogurt filling and piles of fresh, ruby-red strawberries. It’s sliceable, it’s stunning, and it’s so simple to make, you’ll have it assembled in about 15 minutes flat. So, let’s ditch the hot oven and dive into the cool, creamy, and utterly delicious world of icebox cakes. Trust me, this is one recipe you’ll be making on repeat all season long.
A Strawberry-Stained Memory
This recipe takes me right back to my grandma’s porch on a sticky July afternoon. She wasn’t a fancy chef, but she was a wizard with simple, feel-good food. Her classic strawberry shortcake, with biscuits she’d bake first thing in the morning before the heat set in, was legendary. I remember sitting at her feet, watching her macerate the strawberries with a little sugar, the juices pooling at the bottom of the bowl like liquid rubies. The smell of those warm biscuits and sweet berries is a core memory for me.
But as much as I adored her version, my own life as a busy guy who loves to stay active demanded a little twist. I started playing around in the kitchen, wanting to capture that same soul-satisfying essence of her dessert but in a way that was easier and could keep up with my lifestyle. The moment I layered some Greek yogurt with protein cookies and fresh berries and let it sit overnight, I knew I had something special. It was a happy accident that tasted like nostalgia but was built for modern life. It’s my little tribute to Grandma Collier, minus the hot oven.
Gathering Your Sunshine Ingredients
Part of the magic of this icebox cake is its beautiful simplicity. We’re using just a handful of key players, and each one brings something special to the party. Here’s your grocery list:
- 2 cups Vanilla Greek Yogurt: This is the superstar of our creamy base. I love using Greek yogurt because it’s thick, tangy, and packed with protein, which gives our cake that satisfying structure and nutritional boost. If you’re not a vanilla person, plain Greek yogurt works perfectly too—just add a touch more sweetener!
- 1 scoop Vanilla Protein Powder: This is our secret weapon for amplifying the flavor and protein content. It helps thicken the yogurt mixture into a lush, mousse-like consistency. A good-quality whey or plant-based vanilla protein powder works wonders here.
- 1 tsp Vanilla Extract: Don’t skip this! A real splash of vanilla extract deepens the flavor profile and makes the whole dessert taste more complex and homemade. It’s that little “chef’s kiss” that elevates everything.
- 1 1/2 cups Sliced Fresh Strawberries: The star of the show! Look for ripe, red, and fragrant berries. Their natural sweetness and slight acidity cut through the richness of the creamy layers beautifully. In a pinch, frozen and thawed strawberries can work, but they’ll release more liquid.
- 12–15 Vanilla Protein Cookies or Graham Crackers: This is our “cake” layer! Vanilla protein cookies are my go-to for an extra protein hit, but classic graham crackers are a fantastic and delicious substitute. They soften as they chill, creating that perfect, tender shortcake texture we’re after.
- Optional: Honey or Maple Syrup, to taste: Depending on the sweetness of your yogurt, protein powder, and berries, you might want a touch more sweetness. I usually add a drizzle of honey if my strawberries are a bit tart. Taste as you go!
- Fresh Mint or Extra Berries for Garnish: This isn’t just for looks (though it does make it gorgeous!). A sprig of fresh mint adds a wonderful, refreshing aroma that complements the strawberries perfectly.
Let’s Build This Creamy Masterpiece!
Ready to create some magic? Grab a medium bowl, a loaf pan (or an 8×8 square dish), and let’s get layering. This is the fun part—it’s like edible arts and crafts.
- Whip Up That Dreamy Yogurt Base: In your bowl, plop in the 2 cups of vanilla Greek yogurt, that one scoop of vanilla protein powder, and the teaspoon of vanilla extract. If you’re using a sweetener, add it now. Now, grab a whisk and go to town! You want to mix it until it’ completely smooth, light, and creamy. Chef’s Hack: If your protein powder is particularly clumpy, you can sift it into the yogurt to avoid any pesky lumps. The mixture should be thick but spreadable—like a delicious cloud.
- Time to Layer It Up: Now, take your chosen pan or dish. We’re building from the ground up! Start with a single layer of your vanilla protein cookies or graham crackers. You might need to break a few to fill in any gaps—think of it as a tasty jigsaw puzzle. Next, spoon and spread about one-third of your whipped yogurt mixture over the cookies. Try to spread it evenly so every bite is perfect. Then, artfully arrange a layer of your sliced strawberries over the yogurt.
- Repeat the Rainbow: Here we go again! Add another layer of cookies, followed by another layer of the yogurt cloud, and another happy layer of strawberries. Keep going until you’ve used up all your ingredients, making sure you end with a final, beautiful layer of the yogurt mixture on top.
- The Grand Finale & The Big Chill: Dot the top of your cake with a few extra strawberry slices for a gorgeous presentation. Now, for the hardest part: patience. Cover the pan tightly with plastic wrap and tuck it into the fridge. You need to let it chill for at least 6 hours, but honestly, overnight is absolute magic. This waiting time is non-negotiable—it’s when the cookies soften and absorb the moisture, transforming from crunchy separate layers into one cohesive, sliceable, cake-like dream.
How to Serve This Stunner
When it’s finally time to serve (see? Patience pays off!), you have a couple of gorgeous options. For clean, beautiful slices, I like to run a sharp knife under hot water, wipe it dry, and then cut straight down. It gives you those picture-perfect layers.
You can serve it right out of the pan for a cozy, family-style feel, or carefully lift each slice onto an individual plate. Right before serving, I love to add that final touch of freshness—a sprig of bright green mint or a scattering of a few extra berry slices. It makes the whole thing look like it came from a professional bakery. This cake is fantastic all on its own, but if you’re feeling extra, a tiny extra drizzle of honey over the top never hurt anybody!
Make It Your Own! Creative Twists & Swaps
The beauty of this icebox cake is its incredible versatility. Don’t be afraid to play with the formula and make it your own! Here are a few of my favorite riffs:
- Chocolate Lover’s Delight: Swap the vanilla cookies for chocolate protein cookies or even simple chocolate graham crackers. Use chocolate protein powder in the yogurt layer and add some raspberries or dark chocolate chips between the layers. It’s a whole new dessert!
- Mixed Berry Bonanza: Why stop at strawberries? Layer in some fresh blueberries, raspberries, and blackberries for a patriotic or just plain fruity explosion of flavor and color.
- Tropical Escape: Close your eyes and pretend you’re on a beach! Use coconut-flavored Greek yogurt, a scoop of vanilla or unflavored protein powder, and layer with sliced mango, kiwi, and crushed up macadamia nuts or coconut cookies.
- Lemon Blueberry Bliss: Swap the vanilla extract for lemon extract (or the zest of one lemon). Use plain Greek yogurt and layer with fresh blueberries for a bright, zingy, and utterly refreshing summer treat.
- Dairy-Free Dream: Easily make this vegan! Use a thick, vanilla-flavored plant-based yogurt (like coconut or almond milk yogurt) and a vegan protein powder. Your cookies can be vegan graham crackers or any vegan-friendly vanilla cookie.
A Few Chef’s Secrets & Stories
This recipe has been a fun one to evolve. The first time I made it, I was so impatient that I only let it chill for two hours. Let’s just say we had more of a “deconstructed parfait” than a sliceable cake—still tasty, but not the elegant showstopper I was hoping for! The overnight chill is the real key to the perfect texture.
Another little tip I’ve picked up along the way: if your strawberries are a little lackluster, toss the slices with a teaspoon of honey or maple syrup and let them sit for 10 minutes before assembling. It helps them release their own amazing syrupy juices, which then soak into the cookies, making everything even more flavorful.
Your Questions, Answered!
I know you might have a question or two, so I’ve tackled some of the most common ones right here.
Q: My cake seems a bit runny. What happened?
A: The most common culprit is the yogurt. Be sure you’re using a thick, Greek-style yogurt. If you use a regular yogurt, it will be too thin. Another reason could be the berries—if you used frozen and thawed berries, they release a lot more water. Always pat them dry if you go that route!
Q: Can I make this ahead of time?
A: Absolutely! In fact, I insist on it. This cake is designed to be made ahead. It will keep beautifully in the fridge, covered, for 2-3 days. The flavors just keep getting better as they mingle.
Q: I don’t have protein powder. Can I just leave it out?
A> You can, but the filling will be a bit thinner and less mousse-like. To compensate, you could try folding in a couple of tablespoons of whipped coconut cream or even a little bit of sugar-free cheesecake pudding mix to help thicken it up without baking.
Q: What’s the best protein powder to use?
A: I’ve had great success with both whey-casein blends and plant-based powders (pea or brown rice protein blends). The key is to use one you already enjoy the taste of on its own!
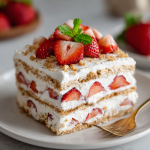
Strawberry Shortcake Protein Icebox Cake
Description
Strawberry Shortcake Protein Icebox Cake (No-Bake)
Prep Time: 15 minutes
Chill Time: 6+ hours (overnight is best)
Total Time: 6–8 hours
Servings: 6
Ingredients
Creamy Yogurt Base:
-
2 cups vanilla Greek yogurt
-
1 scoop vanilla protein powder
-
1 tsp vanilla extract
-
Optional: honey or maple syrup, to taste
Layers:
-
12–15 vanilla protein cookies or graham crackers
-
1 1/2 cups fresh strawberries, sliced
-
Optional: extra strawberries or fresh mint for garnish
Instructions
1. Prepare the Yogurt Filling
-
In a medium bowl, whisk together Greek yogurt, protein powder, vanilla extract, and optional sweetener until smooth and creamy.
-
If protein powder clumps, sift it before mixing.
2. Layer the Cake
-
In a loaf pan or 8×8 square dish, start with a layer of cookies, breaking them to fit as needed.
-
Spread about one-third of the yogurt mixture over the cookies.
-
Add a layer of sliced strawberries.
-
Repeat layers (cookies → yogurt → strawberries) until ingredients are used, ending with a yogurt layer on top.
-
Dot the top with extra strawberry slices for presentation.
3. Chill
-
Cover tightly with plastic wrap and refrigerate for at least 6 hours or overnight. This softens the cookies and creates a sliceable, cake-like texture.
4. Serve
-
Slice with a hot knife for clean edges.
-
Garnish with extra berries or mint if desired.
-
Optional: drizzle a little honey over the top for extra sweetness.
Notes
-
Chocolate Lover: Use chocolate cookies and chocolate protein powder; add raspberries or dark chocolate chips.
-
Mixed Berry: Add blueberries, raspberries, and blackberries for extra color and flavor.
-
Tropical: Use coconut-flavored yogurt with mango, kiwi, and crushed coconut cookies.
-
Lemon Blueberry: Swap vanilla extract for lemon extract and layer with blueberries.
-
Vegan/Dairy-Free: Use plant-based yogurt and protein powder, and vegan cookies.
Nutrition
- Calories: 210 Cal Per Serving
- Fat: 6g
- Carbohydrates: 18g
- Protein: 17g
The Nourishing Breakdown
Now, let’s talk about why this dessert makes you feel so good! This isn’t just empty calories; it’s fuel that loves you back.
This Strawberry Shortcake Protein Icebox Cake is a fantastic source of high-quality protein, primarily from the Greek yogurt and protein powder. Protein is essential for keeping you full and satisfied, and for helping to repair and build muscle, especially after a workout. The fresh strawberries provide a wonderful dose of Vitamin C, antioxidants, and fiber, which is great for digestive health. By using wholesome ingredients and controlling the added sugar, you’re treating yourself to a dessert that’s balanced and nourishing.
Approximate Nutritional Info (Per Serving, based on 6 servings):
Calories: ~210 | Protein: ~17g | Carbohydrates: ~18g | Fat: ~6g
(Please note: These values are estimates and can vary based on the specific brands of ingredients you use.)
Your New Go-To Summer Treat
And there you have it, my friend! The secret to a no-fuss, incredibly delicious, and surprisingly wholesome dessert that’s guaranteed to be the hit of any summer gathering. It’s proof that you don’t need a fancy degree or a hot kitchen to create something truly special. All you need is a few simple ingredients, a little bit of patience, and a whole lot of love.
Final Thoughts: Your New Go-To Summer Treat
And there you have it, my friend! The secret to a no-fuss, incredibly delicious, and surprisingly wholesome dessert that’s guaranteed to be the hit of any summer gathering. It’s proof that you don’t need a fancy degree or a hot kitchen to create something truly special. All you need is a few simple ingredients, a little bit of patience (for that all-important chill time!), and a whole lot of love.
This Strawberry Shortcake Protein Icebox Cake is more than just a recipe; it’s your ticket to a stress-free, celebratory summer. It’s the dessert that lets you spend less time in the kitchen and more time making memories with the people you care about.
I hope this creation finds its way into your regular rotation and becomes a new favorite in your home, creating its own set of sweet, strawberry-stained memories for you and your loved ones. If you make it (and you totally should!), I’d love to see your creation. Tag me on social [@YourHandleHere] so I can cheer you on!
Now go forth, enjoy the sunshine, and treat yourself to a cool, creamy slice of heaven.
Happy cooking!
— Beau
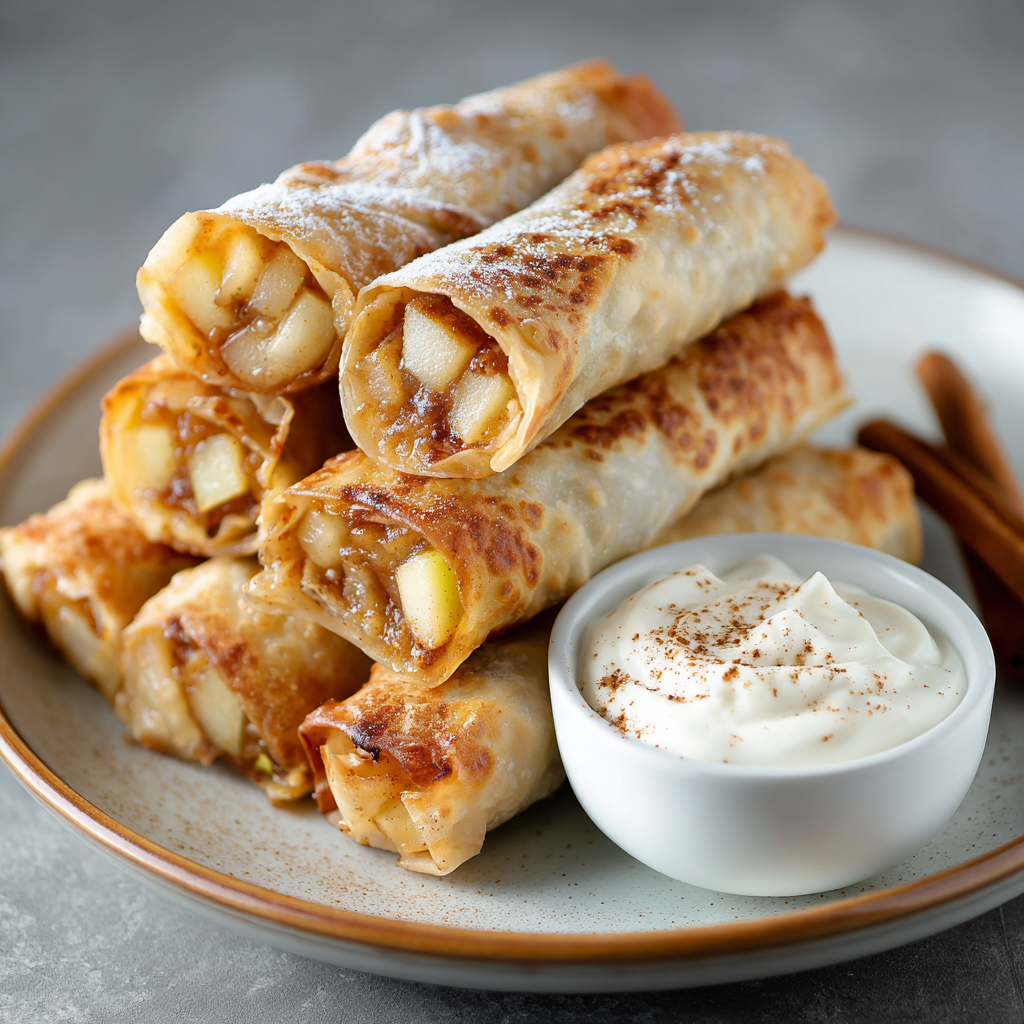
Apple Pie Protein Spring Rolls
Apple Pie Protein Spring Rolls: Your New Go-To Cozy Snack
Hey friends, Beau here! Can we talk about cravings for a second? You know the ones I mean. It’s a crisp fall afternoon, you’re wrapped in your favorite sweater, and all you can think about is the warm, spiced comfort of a freshly baked apple pie. But maybe you’ve also just crushed a workout, or you’re looking for a snack that won’t leave you in a total food coma. That, my friends, is the culinary crossroads where magic happens.
I’m so excited to share with you what might just be my new favorite creation: Apple Pie Protein Spring Rolls. Imagine this: all the soul-warming, cinnamon-spiced goodness of your grandma’s best apple pie, but wrapped up in a delightfully crispy, golden-brown spring roll wrapper and cooked to perfection in your air fryer. The filling is soft, sweet, and packed with a protein punch that keeps you satisfied, and we’re serving it with a dreamy vanilla protein dip that’s basically a hug in a bowl.
This isn’t just a dessert. It’s a post-workout victory lap, a mid-afternoon snack savior, and a show-stopping treat for your next game night. It’s proof that feeling-good food can absolutely be indulgent, fun, and seriously delicious. So, preheat that air fryer, grab your favorite mixing bowl, and let’s make your kitchen smell like a fall fantasy come true.
The Pie That Started It All
This recipe takes me right back to my grandparents’ farm. Every autumn, my Grandma Eleanor would declare it “Apple Pie Season,” and the whole house would transform. The air would get thick with the scent of cinnamon and butter, and there was always a flour-dusted apron waiting for me.
My job was the “Apple Peeler Extraordinaire.” I’d sit at that old wooden table with a mountain of Granny Smiths, meticulously peeling and coring, while she’d weave her pastry magic. She’d always save a small bowl of the sugared, spiced apple slices for me to eat raw—my little chef’s treat. That memory, the feeling of warmth, love, and anticipation, is the soul I wanted to capture in this recipe. We’re just trading the lattice crust for a crispy wrapper and adding a modern, protein-packed twist that Grandma would absolutely approve of (and probably steal the last one!).
Gathering Your Cozy Ingredients
Part of the beauty of this recipe is its simplicity. You likely have most of this in your pantry right now! Here’s the full breakdown, with a few of my chef-y insights to help you nail it.
For the Apple Pie Filling:
- 2 Apples, peeled and finely diced: I love using Granny Smith for their tartness that balances the sweet, or Honeycrisp for a naturally sweeter vibe. The key is a fine dice so they cook quickly and fit nicely in the wrapper.
- 1 Scoop Vanilla Protein Powder: This is our secret weapon! It thickens the filling and adds that protein boost. A good-quality whey or plant-based vanilla protein works best. Chef’s Tip: If your protein powder is super sweet, you can reduce the maple syrup a touch.
- 1 tsp Cinnamon: The heart and soul of apple pie. Don’t be shy with it! A pinch of nutmeg or apple pie spice would be a welcome addition here, too.
- 1 Tbsp Maple Syrup or Honey: For that natural, caramel-like sweetness. If you’re watching sugar, a sugar-free maple syrup works perfectly.
- 1 tsp Lemon Juice: A little acid brightens everything up and keeps the apples from browning. Freshly squeezed is best, but the bottled stuff will do in a pinch!
- Pinch of Salt: This might seem small, but trust me—it makes the sweet flavors pop and taste more rounded.
For Assembly:
- 8 Egg Roll Wrappers: These are my go-to for maximum crispiness. You can find them in the refrigerated section of most grocery stores. Want a lighter option? Rice paper spring roll wrappers can work, but the texture will be chewier, not crispy.
- 1 Egg, beaten: This is our “glue.” It creates a perfect seal so our delicious filling doesn’t escape during cooking. A little brush of water can work if you’re egg-free, but the egg wash gives a nicer golden color.
- Cooking Spray or Light Oil: Just a spritz is all you need to achieve that gorgeous, golden, crispy exterior in the air fryer. Avocado or olive oil spray are my top picks.
For the Vanilla Protein Dip:
- 1/2 Cup Vanilla Greek Yogurt: Creamy, tangy, and already flavored! It’s the perfect base. Plain Greek yogurt works too, just add an extra tiny drizzle of maple syrup.
- 1/2 Scoop Vanilla Protein Powder: This thickens the dip and doubles down on the protein. If it gets too thick, no worries—we’ve got a fix for that.
- Splash of Almond Milk (or any milk): This is our magic wand for getting the dip to the perfect, dippable consistency. Start with a teaspoon and go from there.
- Dash of Cinnamon: Because we’re committed to the cozy flavor theme.
Let’s Get Rolling: Your Step-by-Step Guide
Ready to create some crunch? Follow these steps, and you’ll be a spring roll pro in no time. I’ve packed this section with all my favorite hacks to make the process smooth and fun.
- Make the Filling: Grab a medium saucepan and set it over medium heat. Toss in your diced apples, lemon juice, maple syrup, cinnamon, and that all-important pinch of salt. Add a tablespoon of water to get the party started. Cook this for 5-7 minutes, stirring occasionally, until the apples have softened but still have a little bite. You want them tender, not mushy! Chef’s Hack: Use a potato masher for just a second or two to break down some of the apples—this creates a thicker, more cohesive filling that’s easier to roll.
- Incorporate the Protein: Take the pan off the heat. This next part is crucial! Let the apple mixture cool for a minute or two. If you add the protein powder to piping hot apples, it can get clumpy and weird. Once it’s slightly cooled, sprinkle in your scoop of vanilla protein powder and stir vigorously until it’s fully incorporated and thick. Let this filling cool completely before you start rolling. A warm filling will make your wrappers soggy and difficult to handle.
- Assemble the Spring Rolls: Lay one egg roll wrapper on a clean surface with one corner pointing towards you (like a diamond). Place about 2 tablespoons of the cooled filling just below the center of the wrapper. Fold the bottom corner up and over the filling, tucking it in snugly. Now, fold the left and right corners inward, like you’re folding a burrito. Brush the top triangle of the wrapper with your beaten egg wash. Finally, roll it up tightly towards that top corner. The egg wash will seal it shut. Repeat with the remaining wrappers and filling. Pro Tip: Keep your unused wrappers under a slightly damp paper towel to prevent them from drying out and cracking.
- Air-Fry to Perfection: Preheat your air fryer to 375°F (190°C). Lightly spray the basket with oil, then arrange your spring rolls in a single layer, making sure they aren’t touching. Give the tops a light spray with oil—this is the key to that golden, crispy texture! Air fry for 8-10 minutes, flipping them halfway through. You’re looking for a beautiful, deep golden brown and an audible crunch when you tap them.
- Whip Up the Dip: While the rolls are cooking, let’s make that dreamy dip. In a small bowl, whisk together the vanilla Greek yogurt, the half-scoop of protein powder, and a dash of cinnamon. It will be thick. Add a splash of almond milk, a teaspoon at a time, and whisk until it reaches a smooth, dippable consistency. Taste it! Want it sweeter? Add a drip of maple syrup. Want more cinnamon? Go for it! This is your dip.
How to Serve These Golden Gems
Presentation is part of the fun! You’ve just created something incredible, so let’s show it off. I love serving these spring rolls still warm from the air fryer, when the contrast between the hot, spiced filling and the cool, creamy dip is at its most magical.
Arrange them on a rustic wooden board or a simple white plate for a gorgeous contrast. Place the bowl of vanilla protein dip right in the center for easy communal dunking. For a little extra chef’s flair, dust the whole plate with a light snowfall of cinnamon or a tiny drizzle of warm maple syrup. If you’re serving these for dessert after a dinner party, a small scoop of vanilla bean ice cream on the side turns it into a next-level treat. And don’t forget the most important part: share them with people you love! Food like this is meant to be enjoyed together.
Mix It Up! Fun Recipe Variations
Once you’ve mastered the classic, the kitchen playground is yours! Here are a few of my favorite ways to switch things up:
- Pear & Ginger Twist: Swap the apples for ripe pears and add 1/4 teaspoon of ground ginger (or a teaspoon of freshly grated ginger) to the filling. It’s elegant and wonderfully warm.
- Savory-Sweet BBQ Chicken Spring Rolls: Turn this into a main course! Replace the apple filling with 1.5 cups of shredded cooked chicken mixed with 1/3 cup of your favorite BBQ sauce and 2 tablespoons of cream cheese. Roll and air-fry as directed. Serve with a ranch or blue cheese dip.
- Chocolate Hazelnut Delight: Craving chocolate? Mix 1/2 cup of chocolate hazelnut spread with 1/4 cup of crushed toasted hazelnuts and a scoop of chocolate protein powder. Use this as the filling and dip in a whipped coconut cream dip.
- Vegan-Friendly Version: It’s easy! Use a plant-based vanilla protein powder, agave nectar instead of honey, and seal the wrappers with a cornstarch slurry (1 tbsp cornstarch + 2 tbsp water) instead of the egg wash.
- Baked, Not Fried: No air fryer? No problem! Preheat your oven to 400°F (200°C). Place the spring rolls on a parchment-lined baking sheet, spray with oil, and bake for 15-20 minutes, flipping once, until golden and crisp.
Beau’s Kitchen Notes
This recipe has become a staple in my house, and it’s evolved a bit since the first batch. The first time I made these, I was so eager I tried to roll them while the filling was still hot. Let’s just say I ended up with more apple pie filling on my hands than in the wrappers! Patience is your best friend here—let that filling cool.
I’ve also learned that a tight roll is a crispy roll. Don’t be afraid to really tuck and roll them firmly. Any loose pockets will steam and become soggy. And my final piece of wisdom? Always make a double batch. They disappear faster than you can say “Feastical.”
FAQs & Troubleshooting
Got a question? I’ve probably got an answer! Here are the most common ones I hear.
Q: My spring rolls turned out soggy. What happened?
A: The usual suspects are 1) The filling wasn’t cooled completely before rolling, or 2) The air fryer was overcrowded. Steam needs space to circulate! Make sure your rolls are in a single layer with some breathing room between them.
Q: Can I make these ahead of time?
A: You can absolutely assemble them ahead of time! After you’ve rolled them, place them on a baking sheet, not touching, and freeze for one hour. Then, transfer them to a freezer bag. You can cook them straight from frozen, just add 2-4 minutes to the air frying time.
Q: My protein dip is too thick/grainy. Help!
A: No worries! Graininess usually means the protein powder needs more liquid to dissolve. Just add another splash of milk and whisk like crazy. If it’s too thick, keep adding milk a teaspoon at a time until it’s smooth and dippable.
Q: Can I use a different fruit?
A: Of course! Peaches or cherries would be fantastic. Just make sure to cook them down first to remove excess moisture, as very watery fruits can make the wrappers break.

Apple Pie Protein Spring Rolls
Description
Apple Pie Protein Spring Rolls with Vanilla Protein Dip
Prep Time: 15 minutes
Cook Time: 8–10 minutes per batch
Total Time: 25–30 minutes
Servings: 4 (2 spring rolls per serving)
Ingredients
For the Filling:
-
2 apples, peeled and finely diced (Granny Smith or Honeycrisp)
-
1 scoop vanilla protein powder
-
1 tsp cinnamon (optional: pinch of nutmeg or apple pie spice)
-
1 tbsp maple syrup or honey
-
1 tsp lemon juice
-
Pinch of salt
-
1 tbsp water
For the Spring Rolls:
-
8 egg roll wrappers
-
1 egg, beaten (for sealing)
-
Cooking spray or light oil
For the Vanilla Protein Dip:
-
1/2 cup vanilla Greek yogurt
-
1/2 scoop vanilla protein powder
-
Splash of almond milk (or any milk)
-
Dash of cinnamon
-
Optional: drizzle of maple syrup for extra sweetness
Instructions
1. Make the Filling
In a medium saucepan over medium heat, combine diced apples, lemon juice, maple syrup, cinnamon, salt, and water.
Cook 5–7 minutes, stirring occasionally, until apples are softened but still slightly firm.
Remove from heat and let cool for 1–2 minutes.
Stir in the protein powder until fully incorporated. Cool completely before rolling.
2. Assemble the Spring Rolls
Lay one wrapper on a flat surface in a diamond shape. Place ~2 tbsp of filling just below the center.
Fold the bottom corner over the filling, tuck the sides in, brush the top corner with beaten egg, and roll tightly to seal.
Repeat with remaining wrappers and filling. Keep unused wrappers under a damp paper towel.
3. Air-Fry
Preheat air fryer to 375°F (190°C).
Lightly spray the basket with oil. Arrange spring rolls in a single layer, not touching.
Spray tops lightly with oil. Air-fry 8–10 minutes, flipping halfway, until golden and crispy.
4. Make the Dip
In a small bowl, whisk together yogurt, protein powder, and cinnamon.
Add almond milk, 1 tsp at a time, until smooth and dippable. Sweeten with maple syrup if desired.
Notes
-
Soggy Rolls? Ensure filling is fully cooled and don’t overcrowd the air fryer.
-
Make Ahead: Assemble, freeze for 1 hour, then cook from frozen (add 2–4 min to air frying time).
-
Fruit Swaps: Cook down peaches, cherries, or pears first to prevent soggy wrappers.
-
Vegan Option: Use plant-based protein powder, agave nectar, and seal wrappers with cornstarch slurry (1 tbsp cornstarch + 2 tbsp water) instead of egg.
Nutrition
- Calories: 230 Cal Per Serving
- Carbohydrates: 25g
- Protein: 16g
Nutritional Breakdown (Approximate)
Let’s talk about the good stuff! This info is per serving (2 spring rolls with dip), but remember, it can vary based on the specific brands of ingredients you use.
Calories: ~230 | Protein: ~16g | Carbohydrates: ~25g | Fat: ~6g
Why I love these numbers: You’re getting a powerful protein punch that’s essential for muscle repair and keeping you full and satisfied. The carbs are primarily from the apples and a bit from the wrappers, giving you energy. And the fat content is relatively low, especially since we’re air-frying. It’s a balanced, wholesome treat that truly fuels your body while delighting your taste buds.
Final Thoughts from My Kitchen to Yours
Well, there you have it! My recipe for Apple Pie Protein Spring Rolls—a little bit of nostalgia, a whole lot of flavor, and a smart twist that fits right into your modern, active lifestyle. I hope this recipe brings as much joy to your kitchen as it does to mine.
The real beauty of cooking is making a recipe your own. Don’t be afraid to play, to experiment, and to add your own personal touch. Maybe that’s a sprinkle of nutmeg, a dash of cardamom, or a caramel drizzle on top. This is your culinary adventure.
If you make these (and I really hope you do!), I’d be absolutely thrilled to see your creations. Tag me @Feastical on social media so I can share in the deliciousness! Now, go forth and get your roll on.
With love and a full plate,
Beau