
3-Ingredient Blueberry Breakfast Cookies : Quick, Healthy & Delicious
3-Ingredient Blueberry Breakfast Cookies – Your New Morning BFF
Hey friends, Beau here from Feastical! Let’s be real for a second. How many mornings have you spent staring into the fridge, half-awake, wondering how toast suddenly feels like a complicated life choice? Or scrambling to find a breakfast that doesn’t leave you crashing by 10 AM? I’ve been there more times than I’d like to admit, usually while trying to locate my coffee mug that’s somehow always in the last place I look (which is, inevitably, the dishwasher).
That’s exactly why I’m so crazy about this recipe. We’re throwing the classic breakfast rulebook out the window and making something that feels like a treat but fuels your body like a champion. Introducing my 3-Ingredient Blueberry Breakfast Cookies. Yes, you read that right. Three core ingredients stand between you and a warm, soft, fruity cookie that’s perfect for breakfast. No flour, no refined sugar, no fancy equipment—just simple, feel-good food that comes together faster than you can brew your first cup of coffee.
Think of these as the love child of a muffin-top and an oatmeal bowl, all dressed up in a portable, hand-held package. They’re naturally sweet, packed with fiber, and bursting with juicy blueberries. Whether you’re running out the door, need a lunchbox star, or just want a cozy snack with your afternoon tea, these cookies have got your back. So, let’s ditch the morning stress and make something deliciously simple together.
A Little Sunshine in a Cookie: Why This Recipe Sticks
This recipe always takes me back to my grandma’s sun-drenched kitchen. She wasn’t a “fancy” cook, but she was a wizard with simplicity. Her biggest kitchen hack? Never let a ripe banana go to waste. “Beau,” she’d say, pointing a flour-dusted finger my way, “a spotted banana isn’t past its prime—it’s just telling you it’s ready for something better.”
She’d mash those bananas into pancakes, swirl them into batter, and yes, mix them into her “kitchen sink” oatmeal cookies. I remember one sleepy summer morning, I was disappointed we were out of chocolate chips. With a wink, she pulled a container of wild blueberries from the fridge, fresh from the farmer’s market. “Try these instead, sunshine.” The resulting cookies were a revelation—tart, sweet, and so moist. They didn’t need anything else. That lesson in adaptable, joyful cooking stuck with me. This recipe is my tribute to that: a little bit of nostalgia, a whole lot of practicality, and the promise that the best foods are often the simplest ones we make with love (and ripe bananas).
Gathering Your Simple, Mighty Trio (Plus Friends)
Here’s the beautiful part. You probably have these ingredients sitting in your kitchen right now, just waiting for their moment of glory. Let’s break them down.
- 1 large ripe banana – This is our superstar, our natural sweetener, and our binder all in one. The riper (read: spottier and softer) the banana, the sweeter and more fragrant your cookies will be. Chef’s Insight: No ripe bananas? Bake a yellow banana at 300°F for 15-20 minutes until the skin blackens. It works like a charm!
- 1 cup rolled oats (old-fashioned) – These give our cookies heart, texture, and staying power. Rolled oats are perfect because they hold their shape just enough. Substitution Tip: Need to be gluten-free? Just ensure your oats are certified GF. In a pinch, quick oats work, but the texture will be a bit more uniform and less chewy.
- ⅓ cup fresh or frozen blueberries – Little bursts of joy and antioxidants! I love frozen wild blueberries because they distribute beautifully and rarely bleed as much. Pro Hack: If using frozen, do NOT thaw them. Toss them in straight from the freezer to prevent a purple swamp.
- ½ tsp lemon zest (The Secret Sparkle) – Okay, I know this makes it four things, but trust me, it’s a game-changer. This tiny addition brightens up all the flavors and makes the blueberry taste even more… blueberry-y. It’s non-negotiable in my book!
- A pinch of cinnamon or vanilla extract (Optional, but Highly Recommended) – A dash of cinnamon adds cozy warmth, while a few drops of vanilla rounds out the sweetness. Think of these as your flavor boosters.
Let’s Make Some Magic: Step-by-Step
Preheat your oven to 350°F (175°C). Line a baking sheet with parchment paper. (This is the easiest cleanup you’ll ever have. No sticking, I promise!).
Step 1: The Banana Mash
Peel that ripe banana and plop it into a medium mixing bowl. Now, get mashing! A fork works perfectly here. You want it mostly smooth, but a few tiny lumps are A-OK—they’ll create lovely little pockets of intense banana flavor. Chef’s Chatter: This is a fantastic job for a kitchen helper, big or small. There’s something deeply satisfying about turning a banana into mush.
Step 2: The Oaty Embrace
Pour your cup of rolled oats right into the banana mush. Also, add your lemon zest and that optional pinch of cinnamon or vanilla now. Stir everything together with a sturdy spoon or spatula. You’ll have a thick, sticky, and frankly, somewhat dubious-looking mixture. This is normal! You’re on the right track. Let it sit for 2-3 minutes. This allows the oats to soak up the banana moisture and become perfectly tender.
Step 3: The Berry Fold
Time for the blueberries! Gently fold them in until they’re just distributed. Be gentle here—we want to avoid crushing them into the batter and turning everything gray-blue. If you’re using frozen berries, work quickly. Pro Tip: A folding motion with your spatula, turning the batter over from the bottom, is the best technique.
Step 4: Shape & Bake
Using a spoon or a cookie scoop, drop mounds of the dough onto your prepared baking sheet. You should get about 6-8 cookies. Now, use the back of a spoon or your fingers (a little water on them prevents sticking) to gently press and flatten each mound into a cookie shape. They won’t spread much, so shape them how you want them to look finished.
Slide the tray into your preheated oven and bake for 12-15 minutes. You’re looking for the edges to be set and lightly golden. The tops will still look a bit soft—that’s perfect! They firm up as they cool.
Step 5: The (Brief) Patience Part
Let the cookies cool on the baking sheet for at least 5-10 minutes. This is crucial—they need this time to set up and become cookie-like. If you try to move them too soon, they’ll think they’re still batter. After that, transfer them to a wire rack or directly to your plate!
How to Serve These Sunny Little Disks of Joy
Warm from the oven, these cookies are basically a hug for your taste buds. But the fun doesn’t stop there! Here are my favorite ways to serve them up:
- The Classic Combo: Pair two cookies with a dollop of Greek yogurt and an extra handful of fresh berries. It’s a balanced, protein-packed breakfast plate.
- On-The-Go Power-Up: Let them cool completely, then wrap them individually in parchment paper. Grab one as you head out the door with a travel mug of coffee for the ultimate busy-morning duo.
- Dessert Remix: Crumble a slightly warmed cookie over a bowl of vanilla ice cream or coconut whipped cream. Drizzle with a touch of honey. You’re welcome.
- Afternoon Recharge: They’re the ideal companion to a cup of tea or a glass of cold milk for that 3 PM slump. It’s a healthy choice that feels decidedly indulgent.
Make It Your Own: Fun Twists & Swaps
The base recipe is your canvas. Get creative! Here are a few of my favorite riffs:
- Tropical Vibes: Swap the blueberries for ¼ cup of chopped dried mango and 2 tablespoons of shredded coconut. Hello, vacation in a cookie!
- Apple Cinnamon Delight: Replace the blueberries with ¼ cup of finely chopped apple (no need to peel) and add an extra ½ teaspoon of cinnamon. Cozy autumn flavors, anytime.
- Chocolate Chip Happy Place: Because sometimes you just need chocolate for breakfast. Use 2-3 tablespoons of dark chocolate chips instead of blueberries. (We won’t tell!).
- Nutty Crunch: Fold in 2 tablespoons of chopped walnuts, pecans, or almonds along with the blueberries for added crunch and healthy fats.
- Peanut Butter Lover’s: Add a heaping tablespoon of natural peanut butter (or any nut/seed butter) to the mashed banana. It adds protein and a delicious richness.
Beau’s Kitchen Notes & Stories
This recipe has been my kitchen sidekick for years, and it’s evolved in the funniest ways. I once accidentally used steel-cut oats (don’t ask how I confused the bags). The result was… crunchy. Very, very crunchy. We dubbed them “breakfast biscotti.” So, learn from my mistake: rolled oats are your friend!
I’ve also learned that these cookies are the ultimate peacekeepers. Kids love them because they’re cookies. Parents love them because they’re secretly wholesome. It’s a win-win. I always double the batch and keep some in the freezer. A 30-second zap in the microwave brings them right back to life, as if by magic. They’ve saved me from more than one “hangry” moment, and I’m sure they’ll do the same for you.
Your Questions, Answered!
Q: My cookies turned out soggy/mushy in the middle. What happened?
A: This usually means they needed more bake time or more cooling time. Ovens vary, so if yours runs cool, add 2-3 minutes. Also, make sure you’re letting them cool fully on the baking sheet—this is when they finish setting up! Using a very, very ripe (almost liquid) banana can also contribute, so try one that’s spotty but still holds some shape when peeled.
Q: Can I make these vegan or add protein?
A: They’re naturally vegan as written! For a protein boost, stir 1-2 tablespoons of your favorite vanilla or unflavored protein powder into the oats before adding them. You may need a tiny splash of plant-based milk if the dough gets too thick.
Q: How do I store them, and how long do they last?
A: They keep best in an airtight container at room temp for 2 days. For longer storage, I highly recommend the freezer! Lay them flat on a tray to freeze solid, then transfer to a bag. They’ll keep for up to 2 months. Thaw at room temp or microwave for 20-30 seconds.
Q: Can I use something other than banana?
A: The banana is key as the binder and sweetener. For a banana-free version, you’d need a major recipe overhaul (like using applesauce and an egg, which changes everything). This recipe is proudly and unapologetically banana-based!

3-Ingredient Blueberry Breakfast Cookies : Quick, Healthy & Delicious
Description
Say goodbye to rushed mornings and uninspiring toast! These 3-ingredient blueberry breakfast cookies are soft, naturally sweet, and packed with fiber and antioxidants. They’re easy, portable, and delicious—a cozy muffin-top and oatmeal bowl rolled into one cookie. Perfect for breakfast, lunchboxes, or a guilt-free snack.
Ingredients
-
1 large ripe banana
-
1 cup rolled oats (old-fashioned)
-
⅓ cup fresh or frozen blueberries
-
Optional: ½ tsp lemon zest (brightens flavors)
-
Optional: pinch of cinnamon or 1 tsp vanilla extract (adds warmth and depth)
Instructions
-
Preheat & Prep: Preheat oven to 350°F (175°C) and line a baking sheet with parchment paper.
-
Mash the Banana: Peel and mash the banana in a medium bowl with a fork until mostly smooth. A few small lumps are fine—they add flavor pockets.
-
Add the Oats & Flavorings: Stir in the oats, lemon zest, and optional cinnamon or vanilla. Let the mixture sit 2–3 minutes for the oats to absorb moisture.
-
Fold in Blueberries: Gently fold in blueberries without crushing. If using frozen, fold straight from the freezer to prevent color bleed.
-
Shape the Cookies: Drop spoonfuls of batter onto the prepared sheet. Flatten slightly with the back of a spoon or your fingers (wetting your fingers prevents sticking).
-
Bake: Bake 12–15 minutes, until edges are set and lightly golden. The tops may look soft—that’s perfect.
-
Cool: Let cookies cool 5–10 minutes on the sheet, then transfer to a wire rack or plate. They’ll firm up as they cool.
Notes
-
Avoid soggy cookies: Make sure to let them cool fully before moving.
-
Extra protein: Stir 1–2 tbsp of protein powder into the oats before adding bananas. Add a splash of plant milk if needed.
-
Storage: Store in an airtight container at room temp for 2 days. Freeze for up to 2 months. Reheat in the microwave 20–30 seconds.
-
Banana hack: If no ripe bananas, bake a yellow banana at 300°F (150°C) for 15–20 min until blackened and soft.
Nutritional Nibbles (Because We’re Curious!)
Okay, let’s talk facts, but let’s keep it simple and real. These aren’t meant to be a low-calorie diet food; they’re meant to be a nourishing, real-food start to your day. Per cookie (assuming the recipe makes 7):
- Calories: ~90
- Key Features: They provide a nice dose of dietary fiber from the oats and banana to keep you full, natural sugars for energy, and antioxidants from those beautiful blueberries.
- They are naturally gluten-free (with GF oats), dairy-free, egg-free, and contain no added sugar or oil. They’re a whole-grain, fruit-filled option that beats a sugary cereal bar any day of the week. Think of them as fuel, not just food.
Final Crumbs of Wisdom
And there you have it, friends—the simplest, most forgiving recipe in my arsenal. These 3-Ingredient Blueberry Breakfast Cookies are proof that you don’t need a pantry full of exotic items or hours of free time to make something truly wonderful to eat. They’re about embracing imperfection (lumpy banana mash is beautiful!), celebrating simple ingredients, and giving yourself a break in the morning.
I hope this recipe finds its way into your regular rotation and becomes a little beacon of simplicity on your craziest days. Make them, share them, and tag me @feastical so I can see your beautiful creations! Now, go grab that spotted banana and make your kitchen smell amazing. Happy baking!
With a full heart and a full plate,
Beau
3-Ingredient Sourdough Crackers : Easy, Crispy & Perfect for Snacking
The Magical, Crispy Cure for Your Sourdough Discard Blues
Hey friend, Beau here. Can we have a quick, totally judgment-free heart-to-heart about that jar lurking in the back of your fridge? You know the one. It’s got that familiar, tangy scent, and it’s filled with the sourdough starter discard you just couldn’t bear to toss. You promised yourself you’d make pancakes or a coffee cake, but here we are. Again. I feel you. We’ve all been there, staring at the discard, feeling a twinge of guilt mixed with culinary indecision.
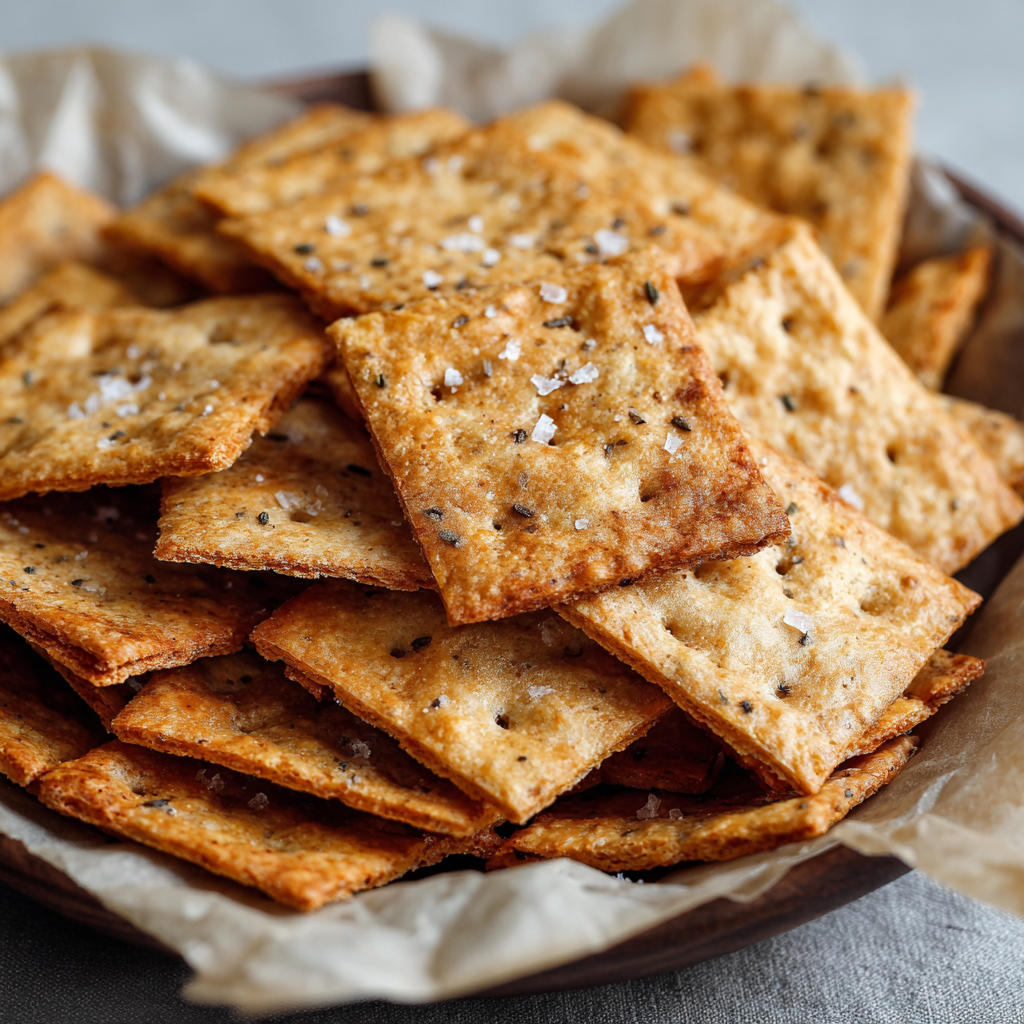
But what if I told you that in about five minutes of active effort, you could transform that humble discard into the most addictive, satisfying, and seriously impressive homemade crackers you’ve ever tasted? Crackers so crisp they sing when you break them, with a rich, buttery flavor and that subtle tang that makes sourdough so irresistible. And the best part? We’re talking three ingredients. That’s it. No kneading, no fancy rolling pins, no chilling for hours. This is the ultimate low-effort, high-reward kitchen magic, and I’m so excited to guide you through it.
At Feastical, I live for recipes that feel like a warm hug but don’t turn your kitchen into a war zone. These sourdough discard crackers are exactly that. They’re the perfect vehicle for your favorite cheese, a swoop of creamy hummus, or even just enjoyed solo as you walk past the cookie jar (we don’t judge here). They’re a fantastic way to reduce food waste, impress your friends, and finally feel like a sourdough wizard. So, let’s grab that jar, preheat the oven, and turn what felt like a chore into your new favorite snack. Trust me, once you make these, you’ll start hoarding your discard on purpose!
More Than a Snack: A Taste of Grandma’s Kitchen
This recipe always takes me back to my Grandma Lou’s kitchen. She wasn’t a fancy “sourdough baker,” but she was a queen of “waste not, want not.” Her counter was a perpetual buffet of simple, incredible food made from bits and bobs. I remember one summer afternoon, she saw me about to scrape the last of some old, thin pancake batter down the sink. “Hold on there, Beau,” she said, her eyes twinkling. She poured it onto a hot, greased sheet pan, slid it in the oven, and twenty minutes later, we were breaking apart the most delicious, crispy, savory “chip” I’d ever had. It was a revelation!
Making these sourdough crackers feels like that same magic. It’s taking something seemingly past its prime and, with a little heat and love, creating pure gold. Whenever my kitchen fills with the toasty, buttery aroma of these crackers baking, I’m eight years old again in Grandma Lou’s kitchen, learning that the best food often comes from the simplest, most resourceful ideas. It’s a tradition of flavor and frugality I’m so happy to carry on and share with you.
Your Tiny, Mighty Ingredient List
See? I told you it was simple. The beauty here is in the quality and your little tweaks. Let’s break down this powerhouse trio.
- 1 Cup Sourdough Discard (Unfed): This is your star player! The hydration of your starter (how thick or thin it is) can vary. Don’t sweat it. A thicker discard will make a slightly sturdier cracker, a thinner one will spread more easily and be extra crisp. Chef’s Insight: This is the perfect use for discard that’s been in the fridge for a few days, developing even more complex, tangy flavor. No starter? A mix of 1/2 cup flour + 1/2 cup water with a big splash of plain yogurt or vinegar can mimic the tang in a pinch, but the real sourdough flavor is irreplaceable.
- 2 Tablespoons Melted Butter (or Olive Oil): Butter gives an incomparable rich, savory flavor and helps the crackers achieve that perfect golden hue and snap. Substitution Tip: For a dairy-free version, extra-virgin olive oil is fantastic, lending a fruity, rustic note. Avocado oil or melted coconut oil (refined for neutral taste) work great too. This is your chance to play with flavor!
- 1/2 Teaspoon Fine Sea Salt (Plus Extra for Topping): Salt is the conductor of this flavor orchestra. It enhances the tang of the sourdough and the richness of the fat. I prefer fine sea salt in the batter for even distribution. Chef’s Insight: The sprinkle of salt on top before baking isn’t just for taste—it creates those delightful salty crystals that make each bite pop. Try using flaky sea salt like Maldon for the topping for an extra special texture and burst of flavor.
Let’s Make Some Noise: The Step-by-Step Crack
Ready? This is where the fun begins. Preheat your oven to a cozy 325°F (160°C). This lower temperature is key—it dries the crackers out slowly for maximum crispiness without burning. Line a standard half-sheet baking pan (about 18″x13″) with parchment paper. No parchment? A silicone baking mat is your best friend here.
- The Simple Stir: In a medium bowl, combine your sourdough discard, melted butter (or oil), and the 1/2 teaspoon of salt. Grab a whisk or a fork and give it a good, vigorous stir for about 30 seconds. You want it completely smooth, with no streaks of fat or dry pockets. It will be a loose, pourable batter. That’s perfect! Chef Hack: If your discard is super thick, you can add a teaspoon of water to help it loosen up and incorporate with the butter smoothly.
- The Art of the Spread: Pour your batter directly onto the center of your prepared parchment paper. Now, take an offset spatula or the back of a large spoon. Your mission is to spread the batter as thinly and evenly as humanly possible. We’re talking nearly translucent in spots. This is the most important step for getting crackers, not a flatbread. Work from the center out, using gentle, sweeping motions. Don’t worry about covering the entire pan; focus on a thin, even layer. Chef Hack: Tilt and gently shake the pan to help the batter flow into a thin sheet.
- The Salty Finish: Once you’re happy with your spread, give the top a light, even sprinkle of your chosen salt (flaky is amazing here!). You can also add cracked black pepper, everything bagel seasoning, or dried herbs at this stage. Press them in gently with your palm.
- The First Bake: Slide the pan into your preheated oven. Set a timer for 10 minutes. This initial bake sets the structure.
- The Score & Return: After 10 minutes, the batter will be set and may just be starting to pull away from the edges. Carefully pull it out. Now, take a pizza cutter, sharp knife, or even a bench scraper and score the entire sheet into your desired cracker size. I like 1-inch squares, but rectangles or diamonds are fun too! Don’t skip this step. Scoring now makes breaking them apart later a clean, satisfying snap instead of a messy shatter.
- The Crispening: Return the pan to the oven. Now, we play the waiting game. Bake for another 30 to 40 minutes. Start checking at 30 minutes. You’re looking for a deep, golden brown color across the entire sheet, especially in the center. The edges will be darker—that’s good! They should feel completely dry and firm to the touch.
- The Cool Down: This is the final test of your patience! Remove the pan and let the giant cracker sheet cool completely on the pan. I mean it. As it cools, it continues to crisp up. Trying to break them warm leads to bending, not snapping.
- The Grand Finale: Once totally cool, use your hands to break the sheet apart along the scored lines. Listen to that beautiful crackle! That’s the sound of success.
How to Serve Your Homemade Masterpiece
Congratulations, you’ve just made legit artisan crackers! Now, let’s do them justice. For the ultimate cheese board, pair these tangy crackers with a creamy, mild brie or goat cheese to complement the sourdough flavor, or a sharp aged cheddar for a powerful contrast. A dollop of fig jam on top? Divine.
For a quick snack, a bowl of these next to a container of hummus, olive tapenade, or a simple white bean dip will disappear frighteningly fast. Crumble them over a creamy soup instead of croutons for an incredible texture contrast. Or, my personal favorite: pack a handful in a small zip-top bag for an afternoon pick-me-up that’s miles better than anything from a vending machine. They’re sturdy, so they travel well!
Make It Your Own: 5 Flavor Twists to Try
The basic recipe is a perfect canvas. Once you’ve mastered it, let your creativity run wild with these easy variations:
- Everything Bagel Magic: After spreading the batter, sprinkle generously with everything bagel seasoning. The garlic, onion, sesame, and poppy seeds toast beautifully and create an instant favorite.
- Herb & Garlic Delight: Whisk 1 teaspoon of dried rosemary (crushed), 1/2 teaspoon of garlic powder, and 1/4 teaspoon of onion powder right into the batter. Finish with a sprinkle of flaky salt.
- Cheesy Parmesan Crisps: Fold 1/4 cup of finely grated Parmesan or Pecorino Romano cheese into the batter. The cheese adds a salty, umami punch and helps create an even crispier texture.
- Seeded & Wholesome: Add 2 tablespoons of mixed seeds (sesame, flax, sunflower, pumpkin) to the batter for extra crunch, fiber, and a lovely speckled look.
- Spicy Sriracha Kick: Replace 1 tablespoon of the melted butter with 1 tablespoon of Sriracha or your favorite hot sauce. You’ll get a gorgeous rosy color and a slow, building heat that’s seriously addictive.
A Few Notes from My Kitchen to Yours
I’ve made these crackers more times than I can count, and they’ve become a Feastical staple. The recipe has evolved from a “let’s try this” experiment to a non-negotiable weekly bake. One funny fail early on? I got impatient and broke them while still warm. Let’s just say I ended up with a bowl of “cracker bites” and “cracker dust”—still tasty, but not the elegant snap I was after. Patience is truly a virtue here!
Also, don’t be afraid if your batter looks too thin in the pan. It’s supposed to! A thicker layer just means a chewier, more flatbread-like result, which is also delicious in its own right. But for that classic cracker crisp, thin is in. Finally, these keep surprisingly well. If they last more than two days (a big if), store them in an airtight container at room temperature. If they lose a little snap, a quick 5-minute warm-up in a 300°F oven will revive them perfectly.
Your Questions, Answered
Q: My crackers are chewy, not crispy. What happened?
A: The most common culprit is under-baking or spreading the batter too thick. Next time, spread it even thinner and bake until the *entire* sheet, especially the center, is a uniform golden brown. They should feel completely dry. Also, ensure they cool completely on the pan.
Q: Can I use active, bubbly starter instead of discard?
A: Absolutely! The result will be slightly less tangy and may have a tiny bit more “lift,” but it works perfectly fine. The recipe is wonderfully forgiving.
Q: How long do they stay fresh, and how should I store them?
A: In an airtight container at room temperature, they stay perfectly crisp for up to a week. You can also freeze the cooled crackers in a freezer bag for up to 2 months. They thaw almost instantly.
Q: My crackers burnt on the edges but are soft in the middle.
A: This usually means your oven runs hot or has hotspots. Try reducing the temperature to 300°F next time and rotating the pan halfway through the second bake. Using a light-colored aluminum pan instead of a dark sheet can also help prevent over-browning.

3-Ingredient Sourdough Crackers : Easy, Crispy & Perfect for Snacking
Description
These sourdough discard crackers are the fastest, crunchiest way to use up leftover starter—no kneading, no rolling, no stress. With just three ingredients and a low, slow bake, you’ll get deeply golden, snappy crackers with that irresistible sourdough tang. Perfect for cheese boards, dips, or straight-from-the-jar snacking.
Ingredients
-
1 cup sourdough discard (unfed)
-
2 tablespoons melted butter or olive oil
-
½ teaspoon fine sea salt (plus extra for topping)
Instructions
-
Preheat & Prep:
Heat oven to 325°F (160°C). Line a baking sheet with parchment paper or a silicone mat. -
Mix:
In a bowl, whisk together the discard, melted butter (or oil), and salt until smooth and pourable. -
Spread Thin:
Pour onto the prepared pan and spread as thinly and evenly as possible with a spatula. Thin = crispy. -
Season:
Sprinkle lightly with extra salt (optional add-ins below). -
Bake & Score:
Bake for 10 minutes, remove, then score into cracker-sized pieces with a knife or pizza cutter. -
Crisp:
Return to the oven and bake 30–40 minutes, until uniformly golden and dry (edges will be darker). -
Cool Completely:
Let cool on the pan; crackers crisp as they cool. Break along score lines.
Notes
-
Go thinner than you think: Thick batter = chewy. Ultra-thin = crackly crisp.
-
Rotate if needed: If edges brown too fast, rotate the pan halfway through.
-
Revive snap: If they soften, warm at 300°F for 5 minutes.
-
Storage: Airtight container at room temp for up to 1 week; freeze up to 2 months.
Nutritional Snapshot
Let’s be real—we’re eating crackers for joy and crunch, not as a diet food! But it’s good to know what’s in your snack. This nutritional info is an estimate for approximately 8 small crackers (about a 1-ounce serving), based on using butter. Remember, ingredients and serving sizes can vary.
Per Serving: Calories: ~120 | Total Fat: 7g | Saturated Fat: 4g (with butter) | Carbohydrates: 12g | Dietary Fiber: <1g | Sugars: 0g | Protein: 2g | Sodium: 200mg
These crackers are a source of energy from carbohydrates and fats. Using olive oil increases heart-healthy monounsaturated fats. The sourdough fermentation process may help pre-digest some of the grains, making them potentially easier on the stomach for some people, though the discard in this recipe hasn’t undergone a long ferment. Most importantly, they’re a homemade, whole-ingredient alternative to store-bought crackers, which often contain added preservatives and oils.
The Final, Delicious Thought
And there you have it! What started as a jar of forgotten sourdough discard is now a beautiful batch of homemade, deeply satisfying crackers. This recipe embodies everything I love about cooking: simplicity, resourcefulness, and the pure joy of creating something delicious from scratch. It’s a little kitchen win that feels huge.
I hope these crackers become a regular in your home, a secret weapon for your cheese boards, and a source of pride when you casually say, “Oh these? I just whipped them up from my sourdough discard.” Remember, the best meals and snacks are the ones shared. So make a double batch, pack some for a friend, and spread the crispy, tangy love.
Happy baking, and as always, thanks for hanging out in my kitchen!
– Beau

50-Year-Old Lunchroom Ladies Brownies : Soft, Fudgy, and Frosted to Perfection
Remember the Best Part of School? It Was These Brownies.
Hey friends, Beau here! Let’s get real for a second. When you think back to your school days, what sticks with you? For me, beyond the history tests and playground games, it’s the food. Specifically, the legendary, almost mythical desserts that appeared on the lunch tray. And the undisputed champion of the cafeteria? The thick, fudgy, perfectly frosted Lunch Lady Brownie.
You know the one I’m talking about. It wasn’t some delicate, artisanal pastry. No, this was a substantial brownie. A square of pure, unadulterated joy that was soft, chewy, and slathered with a creamy chocolate frosting that seemed to melt into the warm surface beneath. It was the treat that could turn a rough day around, the one you’d trade your fruit cup for in a heartbeat.
Well, my fellow food-lovers, I’ve got fantastic news. That iconic recipe isn’t lost to time. After chatting with a lovely retired lunchroom lady named Carol at a church potluck (the best place to find culinary treasure!), I’m thrilled to share this piece of edible nostalgia with you. This is the 50-Year-Old Lunchroom Ladies Brownie recipe, passed down through generations, and it’s every bit as soft, fudgy, and frosted to perfection as you remember. So, preheat your ovens and grab your favorite mixing bowl—we’re about to take a delicious trip down memory lane.
A Slice of Sweet Nostalgia
This recipe takes me right back to the crisp autumn of fourth grade. Picture it: I’d just aced a spelling test I’d been sweating over for weeks. As a reward to myself, I used my coveted lunch money to buy the “hot lunch” instead of my usual brown-bag sandwich. The main course is a blur, but I can still vividly remember the moment I saw that brownie sitting on the edge of my orange plastic tray. It was glorious. Thick, almost cake-like, with a crackly surface and that unmistakable sheen of chocolate frosting.
I took my first bite right there in the noisy cafeteria, and it was pure magic. It tasted like victory, like comfort, like a warm hug from someone who just wanted you to be happy. That single brownie became my personal benchmark for all brownies to come. For years, I chased that specific texture and flavor, and finding this recipe felt like unearthing a priceless artifact. It’s more than a dessert; it’s a time machine to a simpler, sweeter moment.
Gathering Your Simple, Soulful Ingredients
The beauty of this recipe is its beautiful simplicity. No fancy chocolate to chop, no complicated techniques. Just honest, pantry-staple ingredients coming together to create something extraordinary. Here’s what you’ll need:
For the Brownies:
- 1 cup butter, melted – This is the secret to that dense, moist crumb. Using oil can work, but butter gives it that rich, classic homemade flavor we’re after. Chef’s Insight: I like to melt it until it’s just liquid and slightly golden, which adds a tiny nutty note.
- 1/2 cup cocoa powder – We’re using standard, unsweetened cocoa powder here, not Dutch-process. This is what gives it that classic, “lunchroom” chocolate flavor. It’s nostalgic and perfect.
- 2 cups all-purpose flour – The structure-builder. Don’t over-measure! Spoon it into your measuring cup and level it off for the perfect texture.
- 2 cups granulated sugar – This is what creates that beautifully crisp, paper-thin crust on top as the brownies bake. It’s a signature trait of this style of brownie.
- 4 large eggs – They bind everything together and contribute to the rich, tender structure. Make sure they’re at room temperature for a smoother batter.
- 4 teaspoons vanilla extract – Yes, four whole teaspoons! This might seem like a lot, but it’s essential for balancing the sweetness and adding a beautiful aroma. Substitution Tip: If you have it, vanilla bean paste would be incredible here!
- 1 cup chopped nuts (optional) – Walnuts or pecans are the traditional choice. They add a wonderful crunch and contrast to the soft, fudgy brownie. But if you’re a purest, feel free to leave them out!
For That Legendary Frosting:
- 1/4 cup softened butter – Not melted! Softened to room temperature so it whips up light and fluffy with the sugar.
- 1/4 cup milk – Whole milk or evaporated milk both work beautifully. Evaporated milk makes it extra creamy and rich.
- 1/4 cup cocoa powder – The same unsweetened cocoa we used in the brownies for consistent flavor.
- 3 cups powdered sugar – This gives the frosting its smooth, spreadable consistency and sweet finish.
- Dash of salt – Never, ever skip the salt in a sweet frosting! It cuts the sweetness and makes the chocolate flavor pop.
Let’s Bake Some Magic: Your Step-by-Step Guide
Ready to create some kitchen magic? Follow these steps, and you’ll be a lunchroom legend in no time. I’ve sprinkled in my favorite chef hacks to ensure your success.
- Preheat and Prep. Fire up your oven to 350°F (175°C). Grab your trusty 9×13-inch baking pan and give it a good greasing with butter or a non-stick spray. Chef’s Hack: For super easy removal, line the pan with parchment paper after greasing, leaving a little overhang on the sides. You’ll thank me later!
- Create the Chocolate Base. In a large mixing bowl, combine the melted butter and 1/2 cup of cocoa powder. Whisk it together until it forms a smooth, dark paste. This step, called “blooming” the cocoa in the fat, intensifies the chocolate flavor right from the start.
- Sweeten the Deal. Add the 2 cups of granulated sugar to the chocolate-butter mixture and stir it in. You’ll notice the texture change and become grainy—that’s perfectly normal!
- Incorporate the Eggs. Crack in your four eggs, one at a time, mixing well after each addition. This helps build the structure and ensures a smooth, emulsified batter. Now, pour in those glorious 4 teaspoons of vanilla and give it one more good stir.
- Bring It All Together. It’s flour time! Add the 2 cups of all-purpose flour to the bowl. Now, here’s the key: mix just until the flour disappears and the batter is smooth. Do NOT overmix! Overmixing develops gluten and can make your brownies tough instead of tender. Chef’s Tip: I like to switch to a spatula for this step to avoid over-beating.
- Fold in the Fun. If you’re using nuts, now’s the time. Gently fold them into the batter until they’re evenly distributed.
- Bake to Perfection. Pour the thick, luscious batter into your prepared pan and spread it into an even layer. Pop it into the preheated oven and set your timer for 20 minutes. The magic number for these is usually 20-25 minutes. You’re looking for the edges to be set and pulling slightly away from the pan, while the center still looks a little soft. A toothpick inserted near the edge should come out with a few moist crumbs, not wet batter. Remember, slightly underbaked is better than overbaked for a fudgy texture!
While the Brownies Bake, Make the Frosting!
- In a medium bowl, beat the softened 1/4 cup butter with 1/4 cup cocoa powder and a dash of salt until it’s combined. It will be thick.
- Alternately add the milk and the powdered sugar, about a cup at a time, beating on medium speed until the frosting is smooth, creamy, and spreadable. If it seems too thick, add a teaspoon of milk. Too thin? A little more powdered sugar. You’ve got this!
The Final, Crucial Step: As soon as the brownies come out of the oven, spread that beautiful frosting right over the top while they’re still warm. This is the lunchroom secret! The residual heat will help the frosting melt slightly, creating that seamless, glossy layer that sinks into every nook and cranny. Let the frosted brownies cool completely in the pan on a wire rack before you even think about cutting them. I know, the wait is torture, but it’s essential for clean squares!
How to Serve Up a Slice of Happiness
Presentation is part of the fun! For the ultimate nostalgic experience, serve these brownies just as they are, cut into generous squares right from the pan. A simple glass of ice-cold milk is their lifelong companion.
Want to dress them up for a potluck or party? Here are a few ideas:
- Top a warm brownie square with a scoop of high-quality vanilla bean ice cream for the ultimate Brownie Sundae.
- Add a drizzle of caramel or raspberry sauce for a beautiful and delicious twist.
- For a festive touch, sprinkle a few colorful sprinkles or some flaky sea salt on top of the frosting before it sets.
No matter how you serve them, the reaction will be the same: pure, unbridled joy and a chorus of “Oh my gosh, these taste just like I remember!”
Make It Your Own: Delicious Recipe Variations
While the classic version is perfection, every great recipe has room for a little personal flair. Here are a few of my favorite twists:
- Mint Chocolate Chip: Add 1/2 teaspoon of peppermint extract to the frosting and fold 3/4 cup of mini chocolate chips into the brownie batter instead of nuts.
- Rocky Road: After frosting the warm brownies, immediately sprinkle with mini marshmallows, chopped walnuts, and a handful of chocolate chips.
- Peanut Butter Swirl: Drop 1/2 cup of warmed, smooth peanut butter by spoonfuls onto the brownie batter before baking. Use a knife to swirl it gently through the batter for a marbled effect.
- Gluten-Free Swap: You can easily substitute the all-purpose flour with your favorite 1:1 gluten-free flour blend. I’ve had great success with this!
- Double Chocolate Chaos: Fold in 1 cup of semi-sweet or milk chocolate chips along with the nuts (or instead of them) for an extra hit of melty chocolate in every bite.
Beau’s Chef’s Notes & Kitchen Confessions
Over the years, this recipe has become a staple in my own kitchen, and it’s evolved in little ways. I once, in a moment of sheer distraction, accidentally used a whole cup of cocoa powder in the brownie batter instead of a half. The result? The most intensely dark, almost black, and fudgy brownie you can imagine. It was a happy accident we now call “Midnight Brownies”!
The other thing I’ve learned is that this recipe is incredibly forgiving. It doesn’t demand precision. It invites you to relax, have fun, and trust the process. That’s the real magic of these old-fashioned recipes—they were made to be shared and loved, not stressed over.
Your Brownie Questions, Answered!
Let’s tackle a few common questions to make sure your brownie-baking is foolproof.
Q: My brownies are cakey, not fudgy. What happened?
A: The most common culprit is overbaking. Remember, take them out when the center is still slightly soft! Also, check your flour measurement—if you packed too much flour in, it will lead to a drier, cakier texture.
Q: Can I make these brownies ahead of time?
A: Absolutely! In fact, I think they taste even better the next day. The flavors have more time to meld, and the texture becomes even more soft and cohesive. Just store them covered at room temperature.
Q: My frosting is too runny/thick. How can I fix it?
A> No worries! Frosting is all about balance. If it’s too runny, beat in a little more powdered sugar, a quarter cup at a time. If it’s too thick to spread, add a teaspoon of milk until it reaches your desired consistency.
Q: Why frost them while they’re warm?
A> This is the signature move! Spreading the frosting on the warm brownies creates a thin, glossy layer that partially melts and bonds with the brownie itself. It creates a unique texture you can’t get by frosting them cold.
Let’s Talk Nutrition (The Realistic, Foodie Way)
Friends, we’re here for a good time, not a long time—and that includes enjoying decadent desserts without guilt! These brownies are a treat, through and through. They’re made with real ingredients like butter, eggs, and sugar, and they’re meant to be savored and shared.
Approximately, one brownie (based on 24 servings) contains around 290 calories, 14g of fat, and 28g of sugar. My philosophy at Feastical has always been about balance. Enjoy one (or two!) of these incredible brownies with your afternoon coffee, pack them in a lunchbox for a special surprise, or share them with neighbors. Food is love, and these brownies are packed with it. So, enjoy every single bite mindfully and joyfully. Life’s too short for mediocre desserts!
Print
50-Year-Old Lunchroom Ladies Brownies : Soft, Fudgy, and Frosted to Perfection
- Total Time: 35 mins
Description
Thick, fudgy, and topped with that melt-into-the-warm-brownie frosting—this is the Lunch Lady Brownie you grew up loving. It’s rich, nostalgic, and dangerously easy to make. Straight from a 50-year-old cafeteria recipe passed down through generations, this brownie delivers pure chocolate comfort in every bite. Whether you’re baking for a potluck, a craving, or just a trip down memory lane, these will transport you right back to the lunchroom—minus the hairnets!
Ingredients
For the Brownies
-
1 cup butter, melted
-
½ cup unsweetened cocoa powder
-
2 cups granulated sugar
-
4 large eggs, room temp
-
4 tsp vanilla extract
-
2 cups all-purpose flour
-
1 cup chopped nuts (optional)
-
Pinch of salt
For the Frosting
-
¼ cup softened butter
-
¼ cup milk (whole or evaporated)
-
¼ cup unsweetened cocoa powder
-
3 cups powdered sugar
-
Dash of salt
Instructions
-
Preheat & Prep
Heat oven to 350°F (175°C). Grease a 9×13-inch pan or line with parchment for easy lifting. -
Mix the Batter
In a large bowl, whisk melted butter and cocoa until smooth. Add sugar, mix well, then beat in eggs one at a time. Stir in vanilla, then gently fold in flour (and nuts if using) until just combined. -
Bake
Spread batter evenly into the pan. Bake 20–25 minutes—edges should pull slightly from the pan while the center stays soft. -
Make the Frosting
Beat butter, cocoa, and salt together. Gradually add powdered sugar, alternating with milk, until smooth and spreadable. -
Frost While Warm
Spread frosting over hot brownies so it melts slightly into the surface. Cool completely before cutting into squares.
Notes
-
Slightly underbake for fudgy texture.
-
Use evaporated milk for ultra-creamy frosting.
-
Add a sprinkle of flaky salt for a gourmet touch.
- Prep Time: 10 mins
- Cook Time: 25 mins
Nutrition
- Calories: 290 Cal Per Serving
The Last, Delicious Bite
And there you have it! The legendary 50-Year-Old Lunchroom Ladies Brownie, ready to bring a wave of sweet nostalgia and chocolatey comfort into your kitchen. This recipe is a testament to the fact that the best foods aren’t always the most complicated. They’re the ones made with simple ingredients, a little bit of love, and a whole lot of history.
I hope you’ll bake a batch, fill your home with that incredible chocolate-vanilla aroma, and create some new happy memories around this old-school classic. Don’t forget to tag me @Feastical on social media when you make them—I love seeing your culinary creations!
Until next time, keep your whisks busy and your hearts full.
Final Thoughts:
So, there you have it—the secret to recapturing one of childhood’s simplest joys. This isn’t just a brownie recipe; it’s a time machine disguised as dessert. It’s a reminder that the best memories are often sweet, a little messy, and shared with others. Now, go preheat that oven and make some new memories. Happy baking!

A One-Pan Chicken Pot Pie, No Rolling Pin Required
Your New Favorite Weeknight Wonder: One-Pan Chicken Pot Pie (No Rolling Pin Required!)
Hey friends, Beau here from Feastical! Let’s talk about magic. Not the rabbit-out-of-a-hat kind (though that’s cool too), but the kind that happens when a few simple ingredients, one trusty skillet, and about 40 minutes come together to create a dinner that feels like a standing ovation. I’m talking about the ultimate comfort food hug in a dish: Chicken Pot Pie.
But let’s be real for a second. The classic version? It can be a project. Making pastry, rolling it out, blind-baking… it’s a labor of love I absolutely adore on a lazy Sunday, but on a Wednesday when I’m rummaging through the fridge and my stomach is grumbling like a disgruntled bear? Not so much.
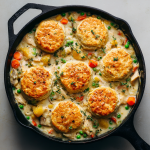
That’s exactly why I created this One-Pan Chicken Pot Pie Skillet. We’re keeping all the soul-soothing goodness—the creamy, herb-flecked filling, the tender chicken, the sweet pops of peas and carrots—but we’re ditching the fuss. Instead of a pie crust, we’re crowning our masterpiece with fluffy, golden, buttery biscuits that bake right on top, soaking up all that glorious sauce. It’s quicker, easier, and honestly? The texture combo of that fluffy biscuit with the rich filling is a game-changer. This is feel-good food that doesn’t just taste amazing; it makes you feel like a weeknight superhero. So, grab your favorite oven-safe skillet, and let’s make some magic together.
Why This Skillet is My Kitchen Security Blanket
This recipe isn’t just a dinner; it’s a time machine. One whiff of thyme and baking biscuits instantly zaps me back to my grandma’s kitchen after a long, chilly afternoon playing outside. Her pot pie was legendary, a deep-dish affair that required the good china. But the secret she taught me wasn’t in the pastry—it was in the *feeling*. It was the steam fogging up the window, the collective “ahhh” when she brought it to the table, and the way a simple dish could make everyone lean in and talk a little slower, laugh a little easier.
My version is a tribute to that feeling, just streamlined for real life. I wanted that same cozy blanket of flavor without waiting for pie dough to chill. Using biscuits was my “aha!” moment. It’s clever, it’s forgiving, and it gives you those irresistible, buttery nooks and crannies to mop up every last drop. It’s the taste of memory, made manageable. Every time I make it, I think of her, and I hope this recipe becomes a part of your own family’s story, too.
Gathering Your Cozy Ingredients
Here’s the beautiful part: you probably have most of this already. This is pantry-and-fridge harmony at its best.
- 1½ lbs boneless, skinless chicken breasts, diced: I use breast here for a leaner, cleaner bite that lets the veggies and sauce shine. Chef’s Tip: For even more flavor, use rotisserie chicken! Just shred about 3 cups and add it in step 5, skipping the initial browning.
- Salt & pepper to taste: Your foundational flavor builders. Don’t be shy—season each layer as you cook.
- 1 tbsp olive oil or butter: Butter adds incredible richness, while olive oil is a great neutral option. I often use one tablespoon of each for the best of both worlds.
- 1 small onion, diced: The aromatic start. A yellow or white onion works perfectly.
- 2 carrots, sliced: A touch of natural sweetness and color. No fresh carrots? A cup of frozen sliced carrots works in a pinch.
- 2 celery stalks, sliced: The unsung hero that adds a subtle, savory depth.
- 2 cloves garlic, minced: Because garlic is life. Always.
- ¼ cup all-purpose flour: This is our thickening agent, creating the luscious gravy. For a gluten-free version, a 1:1 GF flour blend works beautifully.
- 2 cups chicken broth: The liquid gold that forms our sauce base. Low-sodium is best so you can control the salt level.
- ½ cup milk or cream: Milk gives you a creamy result, but heavy cream or half-and-half will make it luxuriously silky. I’ve even used unsweetened almond milk with great success.
- 1 cup frozen peas: We add these frozen at the end so they stay bright green and perfect. No need to thaw!
- 1 tsp thyme (fresh or dried): The quintessential pot pie herb. If using fresh, strip the leaves from 3-4 sprigs.
- 1 can (8 count) refrigerated biscuit dough: Our glorious, no-fuss “crust.” Feel free to use homemade drop biscuits if you’re feeling fancy!
Let’s Build Your One-Pan Masterpiece
See? Nothing scary here. We’re building flavors in one pan, from stovetop to oven. Put on some good music and let’s do this.
- Fire up the oven and prep. Preheat your oven to a hot 400°F (200°C). This ensures our biscuits puff up and turn golden beautifully. While it heats, dice your chicken and veggies. This “mise en place” (getting everything in place) makes the cooking process smooth and zen-like.
- Brown that chicken. Heat your oil or butter in a large (at least 10-inch), oven-safe skillet over medium-high heat. Season the chicken well with salt and pepper. Add it to the hot skillet and let it sear without moving it for a few minutes to get some nice color. This isn’t just for looks; it builds flavor in the pan. Cook until just done, then scoop it out onto a plate. Chef’s Hack: Don’t overcrowd the pan! If needed, brown the chicken in two batches.
- Sweat the veggies. In the same skillet (see all those tasty browned bits? That’s flavor!), add the onion, carrots, and celery with a pinch of salt. Cook, stirring occasionally, until they start to soften and the onions turn translucent, about 5-7 minutes. Add the garlic and stir for just 30 seconds until fragrant—burnt garlic is bitter, and we don’t want that.
- Create the creamy gravy. Sprinkle the flour evenly over the veggies. Stir and cook for a full minute. This cooks out the raw flour taste. Now, slowly pour in the chicken broth while whisking constantly. This is the key to a lump-free sauce! Once smooth, whisk in the milk or cream. Let it come to a gentle simmer—it will start to thicken almost immediately.
- Bring it all together. Add the seared chicken (and any juices from the plate) back into the skillet. Stir in the frozen peas and thyme. Let it simmer for about 5 minutes, stirring occasionally, until the sauce is thick and creamy, coating the back of a spoon. Give it a taste and season with more salt and pepper if needed. This is your moment to make it perfect for you.
- Top with biscuits and bake! Turn off the stovetop. Open your can of biscuits (that *pop* is so satisfying) and place them evenly on top of the simmering filling. They’ll expand, so leave a little space between them. Carefully transfer the whole skillet to your preheated oven.
- Bake to golden perfection. Bake, uncovered, for 15-18 minutes. You’re looking for the biscuits to be deeply golden brown and cooked through. A toothpick inserted into the center of a biscuit should come out clean.
- The hardest part: letting it rest. Pull the skillet out (use an oven mitt—the handle is HOT!) and let it sit for 5-10 minutes. This allows the filling to set slightly so it doesn’t run everywhere when you scoop it, and it saves everyone from burning the roofs of their mouths. Worth the wait, I promise.
How to Serve This Cozy Masterpiece
Presentation is part of the fun! I love bringing the whole skillet right to the table—it’s rustic, inviting, and means fewer dishes to wash. Use a big spoon to scoop down through a biscuit and into the filling, making sure everyone gets a bit of that golden top and creamy bottom in each serving.
What to serve with it? Honestly, it’s a complete meal in a pan. But if you want to round it out, a simple, crisp green salad with a bright vinaigrette cuts through the richness perfectly. For my fellow bread lovers, a warm, crusty baguette on the side is never a bad idea (because more carbs with your carbs is sometimes the answer).
Make It Your Own: Delicious Twists & Swaps
The beauty of this blueprint is its flexibility. Play with it!
- Turkey & Mushroom: Got leftover holiday turkey? Swap it for the chicken. Add 8 oz of sliced cremini mushrooms when you cook the carrots and celery for an earthy, umami-packed version.
- Vegetarian Lover’s Dream: Omit the chicken. Use vegetable broth. Add more veggies like diced par-boiled potatoes, sweet corn, and green beans. For protein, stir in a can of drained and rinsed white beans or chickpeas with the peas.
- Cheesy Herb Bomb: Before adding the biscuits, stir ½ cup of shredded sharp cheddar or gruyère into the filling. Sprinkle another ¼ cup over the tops of the biscuits halfway through baking.
- Biscuit Upgrade: Brush the tops of the biscuits with melted garlic butter or herb butter before baking. Or, sprinkle them with everything bagel seasoning for a fun, savory crunch.
- Lightened-Up: Use 1% milk and a lean chicken breast. You can also reduce the biscuits to 6 and space them out more for a lower-carb ratio.
Beau’s Kitchen Notebook
This recipe has become my go-to for last-minute guests or when I need a guaranteed crowd-pleaser. I’ve learned a few things along the way: First, the type of skillet matters. Cast iron is my favorite—it gives an incredible sear and bakes evenly. A heavy stainless steel or oven-safe non-stick works great too. Second, don’t stress if your filling seems a bit thin after adding the liquids; the simmering and baking time will thicken it up perfectly. And lastly, this recipe is a fantastic fridge cleaner. That half bag of frozen mixed veggies? In it goes. A lone potato? Dice it small, par-boil, and add it with the carrots. Cooking should be joyful, not rigid. Make it yours.
Your Questions, Answered
Q: Can I make this ahead of time?
A: Absolutely! You can prepare the filling completely (through step 5), let it cool, and store it covered in the fridge for up to 2 days. When ready to bake, reheat the filling on the stovetop until simmering, then top with biscuits and bake as directed. You may need to add a minute or two to the bake time if the filling is cold.
Q: My sauce is too thin/too thick! Help!
A> No panic! If it’s too thin after simmering, let it bubble a bit longer to reduce. If it’s getting too thick (like a paste), simply whisk in a splash more broth or milk until it reaches your desired consistency. Remember, it will thicken a bit more as it bakes and cools.
Q: Can I use frozen veggies instead of fresh?
A> You bet! For the carrots and celery, use about 1 ½ cups of a frozen “soup mix” or mirepoix blend. Add them straight from the freezer when you’d add the fresh ones. You may need to add an extra minute of cooking time to soften them.
Q: My biscuits are done but the filling is bubbling like a volcano!
A> That’s normal and delicious! If the biscuits are perfectly golden but you’re concerned, simply lay a piece of aluminum foil loosely over the top for the last few minutes of baking to prevent over-browning while the filling finishes bubbling.
A One-Pan Chicken Pot Pie, No Rolling Pin Required
Description
Skip the fuss of pie crust and make a cozy, comforting chicken pot pie all in one skillet! Tender chicken, sweet veggies, and creamy sauce get topped with buttery, golden biscuits for the ultimate weeknight dinner hug.
Ingredients
For the Filling:
-
1½ lbs boneless, skinless chicken breasts, diced (or 3 cups shredded rotisserie chicken)
-
Salt & pepper, to taste
-
1 tbsp olive oil or butter (or ½ tbsp each)
-
1 small onion, diced
-
2 carrots, sliced (or 1 cup frozen)
-
2 celery stalks, sliced (or ½ cup frozen)
-
2 cloves garlic, minced
-
¼ cup all-purpose flour (or gluten-free 1:1 blend)
-
2 cups chicken broth (low-sodium preferred)
-
½ cup milk or cream (or unsweetened almond milk)
-
1 cup frozen peas
-
1 tsp thyme (fresh or dried)
For the Topping:
-
1 can (8 count) refrigerated biscuit dough
-
Optional: melted butter, garlic butter, or herbs for brushing
Instructions
-
Preheat oven: 400°F (200°C).
-
Cook chicken: Heat oil/butter in a large oven-safe skillet over medium-high heat. Season chicken with salt and pepper. Cook until lightly browned, then remove to a plate.
-
Cook veggies: In the same skillet, add onion, carrots, and celery. Cook 5–7 minutes until softened. Stir in garlic for 30 seconds.
-
Make the sauce: Sprinkle flour over veggies and stir for 1 minute. Slowly whisk in chicken broth and milk until smooth. Simmer until slightly thickened.
-
Combine: Add chicken, peas, and thyme. Simmer 5 minutes, stirring occasionally. Taste and adjust seasoning.
-
Top with biscuits: Turn off heat. Place biscuits evenly on top of filling. Brush with melted butter if desired.
-
Bake: Transfer skillet to oven. Bake 15–18 minutes until biscuits are golden and cooked through.
-
Rest: Let sit 5–10 minutes before serving to allow the filling to set.
Notes
-
Use rotisserie chicken: Saves time—skip the browning step.
-
Frozen veggies work fine: Add straight from freezer, cook slightly longer.
-
Fix thin/thick sauce: Simmer longer to thicken; add extra broth/milk if too thick.
-
Crispier biscuit tops: Brush with melted butter or sprinkle herbs before baking.
Nutritional Information*
*Please note: The following is an approximate estimate calculated using generic ingredients and standard biscuit dough. Your specific brands and modifications will alter the values.
Per serving (based on 6 servings):
Calories: ~430 | Protein: 36g | Carbohydrates: 28g | Dietary Fiber: 3g | Sugars: 6g | Fat: 20g | Saturated Fat: 5g | Cholesterol: 85mg | Sodium: 750mg
This dish is an excellent source of protein and Vitamin A (thanks, carrots!). To reduce sodium, use low-sodium broth and be mindful of seasoning with salt. The carbohydrates come primarily from the biscuits, veggies, and thickener, providing energy to fuel your cozy evening.
Final Thoughts from My Kitchen to Yours
And there you have it, friends—the ultimate shortcut to comfort without any compromise on flavor. This One-Pan Chicken Pot Pie Skillet is more than just a recipe; it’s a reminder that the best meals are often the simplest ones, made with a dash of love and a whole lot of convenience. It’s the dish that says, “I care,” without you spending hours shouting at a lump of pastry dough.
I hope this recipe finds its way into your regular rotation, becoming your secret weapon for busy nights, impromptu gatherings, or whenever you need a edible hug. If you make it (and I really hope you do), tag me @Feastical or shoot me a message! I love seeing your creations. Now, go preheat that oven and claim your weeknight win. You’ve got this.
Stay cozy and keep cooking,
Beau

Adorable Bunny Oreo Balls : Easy No-Bake Easter Treat
Adorable Bunny Oreo Balls: Your New Go-To Easter Treat That’s Almost Too Cute to Eat
Hey there, friend! Beau here, from Feastical. Can we talk about the best part of holiday cooking? For me, it’s never the fussy, five-hour marathons. It’s the recipes that spark pure joy—the ones that make your kids gasp, your guests grin, and leave your kitchen feeling more like a playground than a lab. That’s exactly the magic we’re whipping up today with these Adorable Bunny Oreo Balls.
Imagine this: rich, chocolatey Oreo truffles, coated in smooth white chocolate, and transformed with just a few clever details into the sweetest little bunny faces. They’re creamy, they’re decadent, and they sit on your Easter dessert table looking like they hopped straight out of a storybook. The best part? Zero baking required. We’re talking about a treat that comes together in under an hour, with ingredients you can grab on a quick grocery run.
Whether you’re hosting a big Easter brunch, need a show-stopping treat for the school bake sale, or just want to create a fun kitchen memory with your favorite little helpers, this recipe is your ticket. It’s forgiving, endlessly customizable, and proof that the most memorable food often comes from the simplest methods. So, tie on your apron, clear a little counter space, and let’s make some edible magic that’s equal parts delicious and delightful.
The Year the Easter Bunny Needed a Helper (Spoiler: It Was Me)
This recipe takes me back to my niece Lily’s fourth Easter. I, the “cool uncle who cooks,” had boldly promised to handle the dessert table. My sister’s words, “Just keep it simple, Beau,” echoed in my head as I surveyed a kitchen littered with failed pie crusts and a cupcake disaster that looked more like abstract art. It was 9 PM the night before, and I was in full-blown “kitchen panic.”
Then I remembered the Oreo truffles my mom used to make. I had Oreos, cream cheese, and some leftover white chocolate from a previous project. In a last-ditch effort, I whipped up a batch of balls. But plain balls wouldn’t cut it for Easter. With a squeeze of pink icing and a couple of chocolate chips, a few funny faces appeared. They were lopsided, a little derpy, but unmistakably bunny-like. The next day, Lily didn’t go for the fancy ham first. She beelined for the “bunny bites,” her eyes wide. “Uncle Beau,” she whispered, “The real Easter Bunny must have helped you.” That’s when I knew. Perfection is overrated; joy is the real goal. These bunnies have been a happy, messy, beloved tradition ever since.
Gathering Your Bunny-Making Squad: Ingredients & Insights
Here’s the beautiful part: the ingredient list is short and sweet. Quality matters, but so does knowing you can swap things around. Let’s break it down.
- 36 Oreo Cookies: The classic, original flavor is our gold standard here. That perfect cookie-to-cream filling ratio gives us the ideal texture and flavor. Chef’s Insight: Don’t bother scraping out the cream—it all gets blended in! For a fun twist, try mint Oreos for a “grass-eating” bunny vibe.
- 8 oz (one block) Cream Cheese, softened: This is our glue and our magic maker, transforming crumbly cookies into a pliable, rollable dough. Pro Tip: Take it out of the fridge at least an hour before. Room-temp cream cheese mixes seamlessly, preventing lumpy bunnies.
- 2 cups White Chocolate Chips or Candy Melts: This is the bunny’s fluffy white coat! Key Choice: High-quality baking chocolate tastes amazing but can be temperamental. Candy melts (like Wilton brand) are formulated to melt smoothly, set firmly, and are more forgiving for beginners. I often use a mix of both!
- Pink Candy Melts or Pink Food Coloring + White Chocolate: For those iconic inner ears and cute little noses. A small bag of pink candy melts is easiest. If you’re in a pinch, a drop of oil-based pink food coloring mixed into melted white chocolate works.
- Mini Chocolate Chips OR Edible Candy Eyes: The eyes are the soul of the bunny! Mini chocolate chips give a sweet, classic look. Pre-made edible candy eyes (found at craft or baking stores) are foolproof and super cute.
- Black Decorating Gel OR Melted Dark Chocolate: For the whiskers and mouth. A tube of black decorating gel is no-mess and sets nicely. A tiny bit of melted dark chocolate in a zip-top bag with the corner snipped off gives you more control.
Let’s Build Some Bunnies: Your Step-by-Step Roadmap to Cuteness
Ready? Let’s do this. We’ll move in three easy acts: making the base, creating the shape, and bringing our bunnies to life with decorations.
Act 1: Creating the Oreo “Dough”
Step 1: The Great Cookie Crush. Toss your Oreos (yes, the whole cookie, cream filling and all) into a food processor. Pulse until you have fine, uniform dark crumbs. No food processor? No sweat! Place cookies in a heavy-duty zip-top bag, seal it tightly, and unleash your inner superhero (or a rolling pin) until you’ve got crumbs. Chef’s Hack: A few larger chunks are okay—they add a nice texture—but aim for mostly fine for smooth rolling.
Step 2: The Creamy Merge. In a large mixing bowl, combine your fine Oreo crumbs with the softened block of cream cheese. Use a hand mixer (or serious elbow grease with a spatula) to mix until it’s completely combined and looks like a unified, dark, fudgy dough. You shouldn’t see any streaks of white. This is the moment it all comes together!
Act 2: Shaping & Chilling – The Foundation of a Good Bunny
Step 3: Roll Call. Scoop out about 1 tablespoon of the mixture. Roll it firmly between your palms to form a smooth, 1-inch ball. Place it on a baking sheet lined with parchment or wax paper. Repeat with all the mixture. Pro Tip: If the dough is super sticky, lightly dampen your hands with water. This prevents sticking and gives you a smoother finish.
Step 4: The Big Chill. This step is NON-NEGOTIABLE. Pop the tray of uncoated balls into the freezer for 15-20 minutes, or the fridge for 30-45 minutes. They need to be very firm. A firm ball won’t fall apart when we dip it, making the whole process ten times easier. Trust me on this.
Act 3: The Chocolate Coat & Personality Transplant
Step 5: Mastering the Melt & Dip. Melt your white chocolate or candy melts according to package directions. I prefer the double-boiler method (a heatproof bowl set over a pot of simmering water, not touching the water) for gentle, even heat. If using a microwave, do it in 30-second bursts, stirring vigorously in between. Key Hack: For a thinner, smoother coating that’s easier to work with, add a teaspoon of coconut oil or vegetable shortening to the melting chocolate.
Step 6: The Dip. Using a fork or dipping tools, submerge one chilled ball at a time. Tap the fork gently on the side of the bowl to let the excess chocolate drip off. Carefully slide the coated ball back onto your parchment-lined tray. Don’t worry about perfection—a little “puddle” at the base is just the bunny sitting down!
Step 7: Bring on the Cute. WORK QUICKLY before the chocolate sets! Immediately after dipping:
- Press on two mini chocolate chips (pointy side down) or candy eyes for eyes.
- Using melted pink candy (in a small bag with the corner snipped), draw a small “V” for a nose and two longer, curved shapes on top for the inner ears.
- Once the pink sets a bit (a minute or two), use your black gel or melted chocolate to add three little dots on each side for whiskers and a tiny smiling mouth.
Step 8: The Final Set. Allow the bunnies to set completely at room temperature (if your kitchen is cool) or in the fridge for about 15 minutes. Once the chocolate shell is hard, they’re ready to party!
Hopping onto the Table: How to Serve Your Bunny Crew
Presentation is half the fun! These bunnies are social creatures, so don’t leave them lonely on a plate. Create a “Spring Garden” platter by covering a tray or cake stand with green-tinted coconut (pulse coconut shreds with a drop of green food coloring in a bag) or a bed of green Easter grass. Nestle your bunnies in, and maybe add a few jelly bean “eggs” or flower decorations around them.
For individual treats, place each bunny in a pastel-colored mini cupcake liner. They make incredible homemade Easter gifts. Pack a few into a clear cellophane bag tied with a ribbon, or arrange them in a pretty box for teachers, neighbors, or friends. They’re also the star of any dessert table—pair them with some lemon bars, fresh fruit, and a pitcher of iced tea for the perfect spring spread.
Mix It Up! 5 Fun Twists on the Classic Bunny
Once you’ve mastered the basic bunny, the pasture is wide open for creativity! Here are a few of my favorite spins:
- Carrot-Crazy Bunnies: Use Golden Oreos instead of chocolate. Mix in a teaspoon of orange zest to the filling. Coat in orange-tinted white chocolate. Decorate with green piping gel or a sliver of a green fruit roll-up for the carrot top!
- “Some-Bunny” Special Dietary Needs: Use gluten-free Oreos and dairy-free cream cheese. Opt for dairy-free white chocolate chips. Voilà—allergy-friendly bunnies that everyone can enjoy.
- Mocha Bunnies: Add 1-2 teaspoons of instant espresso powder to the Oreo-cream cheese mixture for a sophisticated coffee-chocolate kick. Perfect for the adults’ table.
- Party Animal Bunnies: Before dipping, roll the Oreo balls in colorful sprinkles for a fun-fur effect, or use different colored candy melts to make a whole rainbow bunny family.
- Peanut Butter Bunny Holes: Substitute 1/4 cup of the cream cheese with creamy peanut butter in the filling. Use milk chocolate for coating. A nutty, delicious twist.
Beau’s Kitchen Confidential: Lessons from the Bunny Frontlines
Over the years, I’ve learned a thing or two. First, embrace the imperfections. Some bunnies will be cross-eyed. Some ears will be lopsided. That’s where the charm is! Kids especially love the ones with “personality.” Second, this recipe is a fantastic kitchen therapy session. Get the family involved: let someone crush cookies, someone else roll balls, and the artists in the group handle the decorating. It’s about the messy, fun, laughing process as much as the delicious result. Finally, these guys are best enjoyed within 3-4 days, stored in a sealed container in the fridge. The flavor actually gets better on day two! Just let them come to room temp for about 10 minutes before serving for the softest, most decadent bite.
Your Bunny Questions, Answered
Q: My mixture is too sticky to roll! Help!
A: This usually means the cream cheese was too warm or you need to chill the mixture. Pop the whole bowl in the fridge for 20 minutes. Also, lightly wetting your hands with cold water before rolling each ball is a game-changer.
Q: My chocolate coating is thick and clumpy. What did I do wrong?
A: Chocolate can “seize” if even a tiny drop of water gets in, or if it’s overheated. If it’s just thick, stir in a bit of coconut oil or shortening to thin it. If it’s truly seized (grainy), sadly it’s best to start fresh. Always melt gently and keep everything completely dry!
Q: Can I make these ahead of time?
A: Absolutely! You can make the uncoated Oreo balls and freeze them for up to a month in an airtight container. Thaw in the fridge before dipping and decorating. Fully decorated bunnies keep beautifully in the fridge for 3-4 days.
Q: I don’t have a piping bag for the details. Any hacks?
A: My favorite hack! Spoon melted candy or chocolate into a small zip-top bag. Seal it, then snip the TINIEST corner off. Instant, disposable piping bag. For whiskers, a toothpick dipped in black gel works great too.

Adorable Bunny Oreo Balls : Easy No-Bake Easter Treat
Description
If you’re looking for a fun, no-bake dessert that brings instant smiles, these Bunny Oreo Balls are perfect. They’re creamy, chocolatey, and easy to decorate into cute bunny faces using simple candies. This is a great recipe to make with family or friends, and it doesn’t require any oven time — just mix, roll, dip, and decorate.
Ingredients
Base
-
36 Oreo cookies (regular flavor)
-
8 oz (225 g) cream cheese, softened
Coating & Decorations
-
2 cups white chocolate chips or white candy melts
-
½ cup pink candy melts (or white chocolate tinted pink with oil-based food coloring)
-
Mini chocolate chips or candy eyes
-
Black decorating gel or melted dark chocolate (for whiskers and mouth)
-
Optional: sprinkles, coconut flakes, or colored sugar
Instructions
1️⃣ Make the Oreo Mixture
-
Place the Oreo cookies (with filling) in a food processor.
-
Pulse until they become fine crumbs.
No processor? Put them in a sealed bag and crush with a rolling pin. -
Add softened cream cheese.
-
Mix until fully combined into a smooth, dough-like mixture.
2️⃣ Shape
-
Scoop about 1 tablespoon of mixture and roll into balls.
-
Place on a parchment-lined tray.
-
Chill in the freezer for 15–20 minutes (or fridge 30–40 minutes) until firm.
3️⃣ Melt the Coating
-
Melt white chocolate or candy melts slowly (microwave in short bursts, stirring each time).
-
If thick, stir in 1 teaspoon of coconut oil or vegetable shortening to thin it.
4️⃣ Dip
-
Dip each chilled ball into melted chocolate using a fork.
-
Let excess drip off.
-
Place back on parchment paper.
5️⃣ Decorate the Bunnies
-
While coating is still soft:
-
Add candy eyes or mini chocolate chips.
-
Pipe a small pink nose and inner ears with pink candy melts.
-
Draw whiskers and a mouth with black gel or melted chocolate.
6️⃣ Set
-
Let set at room temperature or refrigerate 15 minutes until firm.
Notes
-
✅ Chill well before dipping — this prevents cracking and falling apart.
-
✅ Keep hands slightly damp when rolling to prevent sticking.
-
✅ Candy melts are easier than real chocolate if you’re a beginner.
-
✅ Use a zip-top bag with a tiny corner cut off as a quick piping bag.
-
✅ Store in the fridge in an airtight container up to 4 days.
Nutritional Snapshot (Because We’re All Curious!)
Let’s be real: these are a celebratory treat, meant to be enjoyed mindfully and with delight! The following is an estimated nutritional breakdown per bunny ball (based on a yield of 24, using standard ingredients). If you’re managing specific dietary needs, always double-check your specific product labels.
- Calories: ~160
- Total Fat: 9g
- Saturated Fat: 5g
- Carbohydrates: 18g
- Sugar: 14g
- Protein: 2g
To lighten things up slightly, you can use reduced-fat cream cheese and/or dip only half the ball in chocolate (creating a “bunny butt” look, which is also adorable!). Remember, sharing these with friends and family spreads the joy—and the calories!
The Final Scoop (Or Should I Say, Hop?)
And there you have it—your complete guide to creating pure, unadulterated Easter joy, one bunny face at a time. This recipe is more than just a list of steps; it’s an invitation to play in the kitchen, to not take yourself too seriously, and to create something that sparks a smile.
Angel Food Cake CookiesAir Fryer Potato Wedges : Crispy, Seasoned, and Ready in 35 Minutes
Crispy Air Fryer Potato Wedges with Spices and Parmesan Option
Forget Soggy Fries: Your Crispy Air Fryer Potato Wedges Are Here!
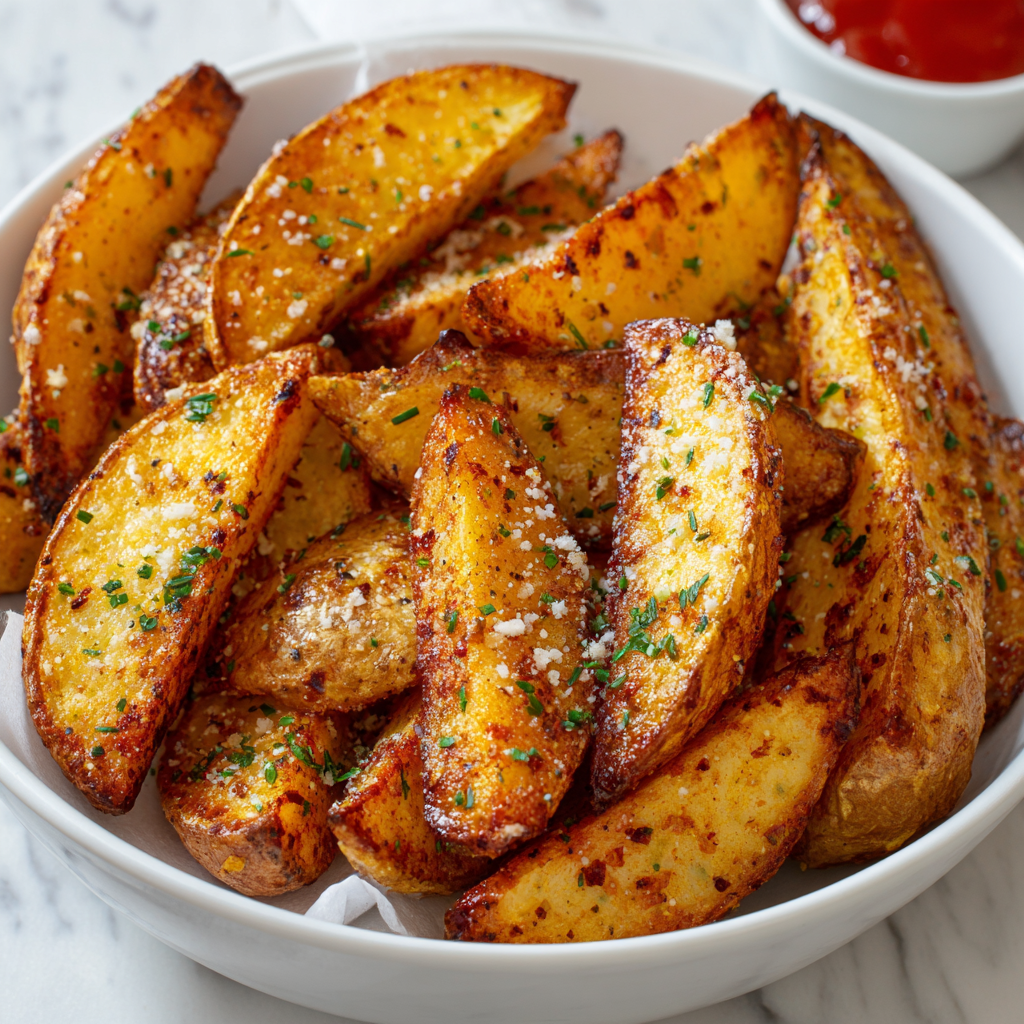
Hey friends, Beau here from Feastical! Let’s get real for a second. Is there anything more universally loved than a perfectly cooked potato wedge? We’re talking about that magical combination of a shatteringly crispy, seasoned exterior giving way to a cloud-like, fluffy interior. It’s the stuff of snack-time dreams. But let’s be honest, traditional oven-baking can leave you with a sad, limp version of that dream, and deep-frying, while delicious, turns your kitchen into a greasy spatter zone and leaves you feeling… well, a little heavy.
That’s where our hero, the air fryer, swoops in to save the day. This little countertop powerhouse is a game-changer, and it was practically made for creating the ultimate potato wedge. It circulates super-heated air around every nook and cranny of our seasoned spuds, cooking them to golden-brown perfection with just a fraction of the oil. We’re talking maximum crunch with minimal guilt. In about 35 minutes from potato to plate, you can have a side dish that will steal the show from any main course, or a snack so good your friends will be begging for the recipe. So, grab your favorite potatoes and let’s make some magic happen. Your spatula is safe with me!
The Humble Spud That Won My Heart
My love affair with the potato wedge started long before I ever picked up a chef’s knife professionally. It goes back to my grandma’s kitchen, a place that always smelled like comfort. She had this old, slightly lopsided baking sheet she used for one thing and one thing only: “Grandma’s Special Spuds.” They were thick-cut, gloriously uneven, and seasoned with a mysterious blend of spices from an unlabeled jar. The edges were always the crispiest part, and we’d fight over them at the dinner table.
She taught me that the secret wasn’t a fancy technique, but patience and a generous hand with the seasoning. While my version today has a few more chef-y tweaks and uses an air fryer for that unbeatable crunch, the soul of the recipe is all hers. Every time I make these wedges, I’m transported back to that linoleum-floor kitchen, reminding me that the best food isn’t about being perfect—it’s about being shared. These air fryer potato wedges are my modern tribute to that feeling.
Gathering Your Cast of Characters
Part of the beauty of this recipe is its simplicity. You likely have most of these ingredients in your pantry right now. Here’s what you’ll need to create potato wedge perfection:
- 4 medium russet potatoes: These are our MVP. Russets are high in starch and low in moisture, which is the perfect combo for getting that fluffy inside and crispy outside. Chef’s Insight: Don’t peel them! The skin adds great texture and holds onto our seasoning blend.
- 3 tablespoons olive oil: This is our crispy-conductor. A light coating helps the spices stick and ensures every wedge gets beautifully golden. Substitution Tip: Avocado oil or any other high-heat neutral oil works wonderfully here.
- 1 teaspoon ground paprika: This gives us that classic, vibrant color and a sweet, smoky base note.
- 1 teaspoon dried parsley flakes: They add a subtle, earthy freshness and a pop of green. Chef’s Insight: If you have fresh parsley, chop it up and use it as a garnish *after* cooking for an even bigger flavor boost.
- 1 teaspoon chili powder: Don’t worry, this isn’t for major heat! It provides a deep, complex warmth that plays so well with the paprika. Substitution Tip: For a kick, swap in a ¼ teaspoon of cayenne pepper.
- 1 teaspoon sea salt: The essential flavor enhancer. I prefer sea salt for its clean taste.
- ¼ teaspoon ground black pepper: For that little bit of sharp, aromatic spice.
- Optional Twist (Parmesan & Rosemary): ¼ cup of grated Parmesan and 1 tablespoon of fresh chopped rosemary, tossed with the hot wedges right out of the air fryer. Trust me on this one.
Your Step-by-Step Guide to Wedge Greatness
Alright, team, let’s fire up that air fryer! Follow these steps, and you’ll be a wedge wizard in no time. I’ve packed each one with my favorite little hacks to ensure your success.
- Wash and Wedge: First, give those potatoes a good scrub under cold water. We’re keeping the skins on, so we want them nice and clean. Now, for the cut. Slice a potato in half lengthwise, then lay each half flat and cut it into 4 equal wedges. You should get 8 wedges per potato. Chef’s Hack: Try to make them as uniform as possible. This isn’t about being a perfectionist, but it ensures they all cook at the same rate. No one wants a mix of burnt and raw wedges!
- The Secret Soak: This is the step you might be tempted to skip. Don’t! Place your wedges in a large bowl and cover them with cold water. Let them soak for at least 15 minutes. Why? This pulls out the excess starch from the potatoes, which is the key to achieving that ultimate crispy exterior instead of a gummy one. It’s a game-changer.
- Dry, Dry, Dry: After their bath, drain the wedges and then pat them DRY with a clean kitchen towel or paper towels. I mean, really dry them. Chef’s Commentary: Water is the enemy of crispiness. Any extra moisture will just steam the wedges, so be thorough here. This is arguably the most important step!
- The Flavor Toss: In a large, dry bowl, toss your bone-dry potato wedges with the olive oil, paprika, parsley, chili powder, salt, and pepper. Get your hands in there and massage that seasoning into every single wedge. You want each one to be evenly coated in that beautiful, spicy oil.
- Preheat for Power: Preheat your air fryer to 400°F (200°C). Just like with a traditional oven, this gives the wedges an instant blast of heat, helping to lock in the crispiness from the second they hit the basket.
- Arrange with Care: Place the wedges in the air fryer basket in a single layer. They need their personal space! If they’re too crowded, they’ll steam instead of fry. Chef’s Hack: No shame in cooking in batches! It’s better to have two batches of perfect wedges than one batch of mediocre ones.
- Air Fry to Perfection: Cook for 28-30 minutes, but here’s the crucial part: shake the basket or flip the wedges halfway through! This ensures every side gets its moment in the spotlight and browns evenly. You’ll know they’re done when they’re deeply golden brown and you can easily pierce them with a fork.
- The Finishing Touch: If you’re going for the cheesy upgrade, now’s the time! As soon as the wedges come out of the air fryer, toss them in a bowl with the grated Parmesan and fresh rosemary. The residual heat will gently melt the cheese and wake up the rosemary’s beautiful aroma.
Let’s Get These Wedges to the Party!
Okay, you’ve got a basket full of golden, crispy potato wedges. Now what? The possibilities are endless, but here are a few of my favorite ways to serve them up.
For the ultimate casual snack, serve them straight from the basket in a big, rustic bowl with a couple of ramekins of dipping sauce. My top picks are a creamy garlic aioli for a touch of elegance, a classic spicy mayo (just mix sriracha with mayo!), or a simple cooling ranch.
As a side dish, these wedges are a powerhouse. They’re incredible next to a juicy air fryer burger, a pile of saucy pulled pork, or even alongside some sunny-side-up eggs for a next-level brunch. For plating, I love piling them high on a wooden board or a simple white platter to really show off their gorgeous color. Scatter over some extra fresh herbs for a restaurant-worthy touch.
Make It Your Own: 5 Delicious Twists
Once you’ve mastered the basic recipe, the fun really begins. The humble potato wedge is a blank canvas for your culinary creativity. Here are five variations to get you started:
- Loaded Nacho Wedges: After cooking, top with melted cheddar cheese, crispy bacon bits, sliced jalapeños, a dollop of sour cream, and a sprinkle of green onions. It’s a meal in itself!
- Lemon-Herb Zest: Swap the paprika and chili powder for 2 teaspoons of Italian seasoning and the zest of one lemon. Toss with the olive oil and salt as usual. Bright, fresh, and fantastic with chicken or fish.
- Salt & Vinegar Vibes: For my UK friends and all salt & vinegar chip lovers! Soak the raw wedges in malt vinegar (instead of water) for 30 minutes. Pat dry, toss with oil and a generous amount of salt, and air fry as directed. Tangy and addictive.
- Everything Bagel Seasoned: Replace the spice blend with 2 tablespoons of everything bagel seasoning. It’s savory, sesame-seed-filled perfection.
- Sweet Potato Switch-Up: For a sweeter, earthier take, use sweet potatoes! Follow the exact same method. They pair beautifully with a smoky paprika or a dusting of cinnamon and a pinch of cayenne.
Beau’s Back-Kitchen Notes
This recipe has been a staple in my kitchen for years, and it’s evolved with me. I’ll never forget the first time I made them for a big game day gathering—I made a triple batch, and they were gone before the first quarter ended. I’ve learned a few things along the way. Don’t stress if your spice measurements aren’t exact; cooking is about feeling. If you love garlic, add garlic powder! If you’re a heat-seeker, double the chili powder. The potato is forgiving and just wants to be delicious. The real goal here is to get you comfortable and confident in the kitchen, creating a dish that makes you and the people you share it with genuinely happy.
Your Wedge Questions, Answered!
I’ve gotten a lot of questions about this recipe over the years. Here are the most common ones to help you troubleshoot like a pro.
- Q: My wedges aren’t getting crispy. What did I do wrong?
A: The number one culprit is moisture. Make sure you pat the soaked wedges COMPLETELY dry before adding the oil and seasoning. Also, ensure they aren’t overcrowded in the basket—steam is the enemy of crisp! Finally, don’t skip the preheat. - Q: Can I use a different type of potato?
A: Absolutely! Russets are my top pick for the fluffiest interior, but Yukon Golds are a great second choice. They have a creamier texture and a buttery flavor that’s just divine. The cooking time might be slightly less, so keep an eye on them. - Q: Do I really need to soak them? It seems like an extra step.
A: I highly, highly recommend it. Soaking removes the surface starch, which prevents the wedges from sticking together and promotes maximum crispiness. Think of it as a 15-minute investment for a far superior texture. If you’re in a huge rush, you can rinse them very well under cold water instead, but soaking is best. - Q: Can I make these ahead of time?
A: You can prep the raw, soaked, and dried wedges and keep them in a bowl of water in the fridge for up to 24 hours (change the water if it gets too cloudy). However, for the best texture, I recommend air frying them fresh and serving immediately. They lose their crispiness if they sit for too long.

Air Fryer Potato Wedges : Crispy, Seasoned, and Ready in 35 Minutes
Description
Crispy Air Fryer Potato Wedges (with Optional Parmesan & Rosemary)
Perfectly crisp on the outside, fluffy on the inside—air fryer magic in just 35 minutes.
Ingredients
For the Wedges:
-
4 medium russet potatoes, scrubbed (skins on)
-
3 tbsp olive oil (or avocado oil)
-
1 tsp paprika
-
1 tsp dried parsley flakes
-
1 tsp chili powder (or ¼ tsp cayenne for heat)
-
1 tsp sea salt
-
¼ tsp black pepper
Optional Parmesan & Herb Twist:
-
¼ cup grated Parmesan
-
1 tbsp fresh chopped rosemary
Instructions
1. Prep the Potatoes:
-
Cut each potato in half lengthwise, then slice each half into 4 wedges (8 wedges per potato).
-
Optional: soak in cold water for 15 min to remove excess starch.
2. Dry & Season:
-
Drain and pat the wedges completely dry.
-
Toss with olive oil, paprika, parsley, chili powder, salt, and pepper until evenly coated.
3. Preheat & Arrange:
-
Preheat air fryer to 400°F (200°C).
-
Arrange wedges in a single layer in the basket. Cook in batches if necessary.
4. Air Fry to Perfection:
-
Cook 28–30 minutes, shaking the basket or flipping halfway through. Wedges should be golden brown and crispy on the outside.
5. Optional Parmesan & Rosemary:
-
Toss wedges immediately with Parmesan and rosemary while hot for a cheesy, aromatic upgrade.
6. Serve:
-
Serve hot with your favorite dips like garlic aioli, ranch, or spicy mayo.
Notes
-
Crispiness is key: Dry wedges thoroughly and don’t overcrowd the air fryer.
-
Potato options: Yukon Golds work too, slightly shorter cook time.
-
Flavor variations:
-
Loaded Nacho Wedges: cheddar, bacon, jalapeños, sour cream
-
Lemon-Herb: Italian seasoning + lemon zest
-
Salt & Vinegar: soak in malt vinegar for 30 min, then air fry
-
Everything Bagel: toss with everything bagel seasoning
-
Sweet Potato: swap russets for sweet potatoes, add a pinch of cinnamon
-
Nutrition
- Calories: 160 kcal per bite
- Fat: 5g
- Carbohydrates: 26g
- Fiber: 3g
- Protein: 3g
Nutritional Nibbles
Now, I’m not a registered dietitian, but I am a chef who cares about what I’m putting into my body. One of the reasons I love this recipe is that it feels indulgent without being overly heavy. Here’s a quick, estimated breakdown per serving (about 4 wedges), based on the standard recipe without the Parmesan topping. Remember, these are estimates and can vary based on the exact size of your potatoes and how much oil is absorbed.
Per Serving: Calories: 160 | Carbohydrates: 26g | Fat: 5g | Fiber: 3g | Protein: 3g | Sodium: 310mg
Compared to traditional deep-fried wedges or fast-food fries, you’re saving a significant amount of fat and calories by using the air fryer. You’re also getting a good dose of fiber and potassium from the potato skins. It’s a win-win: delicious food that also loves you back a little.
Your New Go-To Side Dish is Served
And there you have it, my friends—everything you need to know to create ridiculously crispy, flavor-packed air fryer potato wedges right in your own kitchen. This recipe is more than just a list of ingredients and steps; it’s a launchpad. It’s about reclaiming the humble potato and turning it into something spectacular with a few simple tricks and a whole lot of love.
I hope these wedges become a regular in your recipe rotation, bringing a little bit of that Feastical comfort and joy to your table. Now, I’d love to hear from you! What’s your favorite way to season your wedges? Did you try the Parmesan twist? Tag me on social @Feastical with your creations. Happy cooking!
Final Thoughts
Forget everything you thought you knew about homemade fries. The air fryer has changed the game, and this recipe is your winning play. In less time than it takes to order takeout, you can have a batch of potato wedges that are crispy on the outside, fluffy on the inside, and bursting with flavor.
It’s simple, it’s reliable, and it’s downright delicious. Your new favorite snack is waiting. Now go get it!
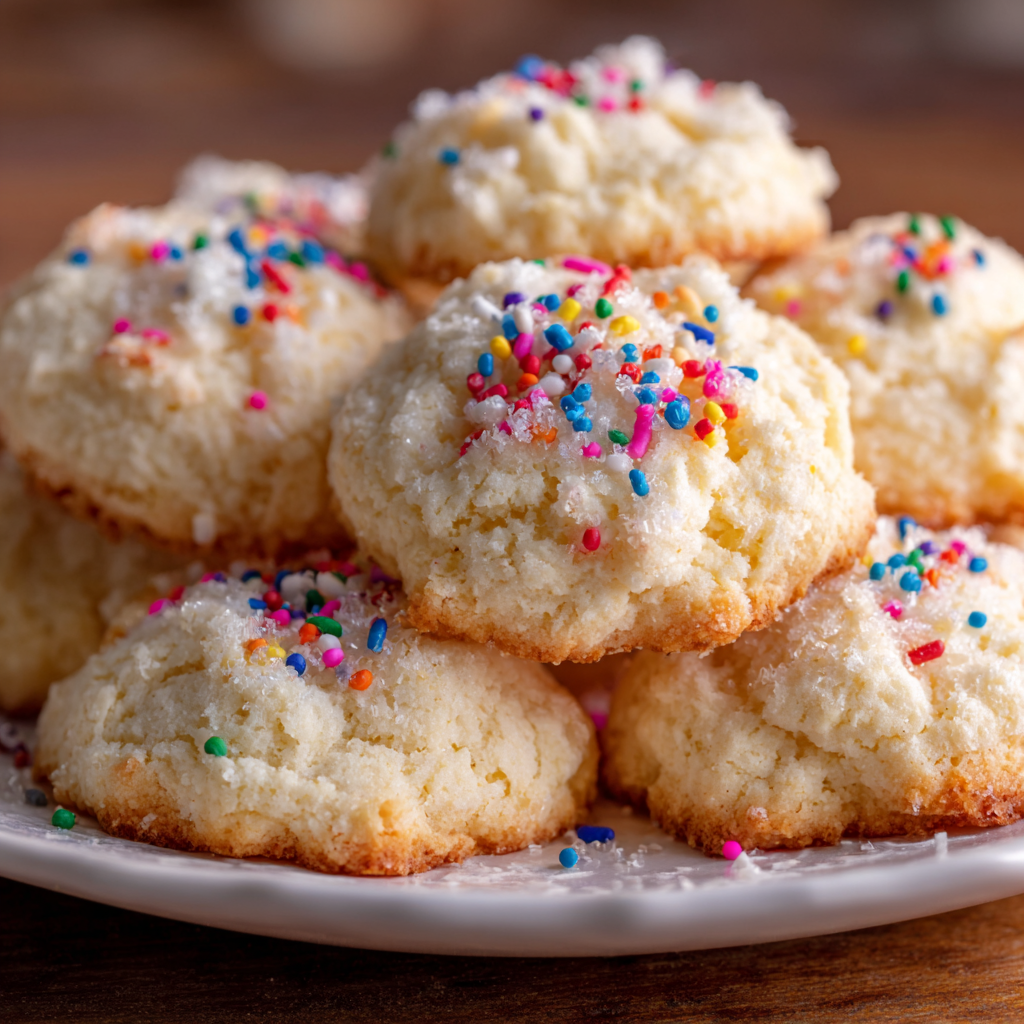
Angel Food Cake Cookies
Heavenly Bites: Your New Favorite Angel Food Cake Cookies
Hey friends, Beau here! Let’s be real for a second. Is there anything more wonderfully simple and soul-soothing than a classic angel food cake? That cloud-like texture, that delicate sweetness that just melts on your tongue… it’s a hug in cake form. But let’s also be real about something else: sometimes, you don’t want to haul out the tube pan, separate a dozen eggs, and patiently wait for a full-sized cake to cool. Life gets busy, cookie cravings hit hard, and we need a little bit of that heavenly magic, stat.
That’s exactly why I’m so ridiculously excited to share this recipe with you today. We’re taking everything we adore about angel food cake and transforming it into the most delightful, soft, and chewy cookies you’ve ever sunk your teeth into. And the best part? We’re doing it with just three simple ingredients and about 15 minutes of your time. No kidding!
These Angel Food Cake Cookies are my go-to for last-minute potlucks, a fun baking project with the kids, or when I just need a sweet little treat that feels a bit lighter. They’re impossibly easy, incredibly satisfying, and they taste like a sweet little cloud decided to take a cozy nap in your cookie jar. So, preheat that oven, grab your favorite mixing bowl, and let’s whip up some pure, uncomplicated joy together.
A Slice of Sunshine and a Hand-Me-Down Recipe
This recipe always takes me back to my grandma’s sun-drenched kitchen. She was the queen of “semi-homemade” magic long before it was a trend. She believed good food was about the feeling it created, not about slaving over a hot stove for hours. I remember one sweltering summer afternoon, the kind where the air felt like a warm blanket. I was maybe ten years old, covered in grass stains, and desperately craving something sweet.
Grandma just smiled, wiped the sweat from her brow, and pulled out a box of cake mix and a tub of yogurt. My little-kid brain was confused. “We’re making a cake? But it’s too hot for cake!” She just winked and said, “We’re making sunshine, honey.” What came out of the oven weren’t cakes, but these puffy, golden-topped little cookies. We ate them sitting on the back porch steps, still warm, and they were pure bliss. That day, she didn’t just teach me a recipe; she taught me that the best kitchen tricks are often the simplest ones, and that a little creativity can turn a few basic ingredients into a core memory.
Gathering Your Cloud-Making Kit
Here’s the beautiful part: your shopping list is incredibly short. This is all you need to create cookie magic. Let’s break it down, because even simple ingredients deserve a little love and explanation.
- 1 box (approx. 15.25 oz) Classic White Cake Mix: This is the powerhouse of our recipe, providing the structure and that signature angel food cake flavor. I often use Baker’s Corner or a similar store brand—it works perfectly! Chef’s Insight: Avoid cake mixes that already have pudding in the mix, as they can make the dough too dense. We want light and airy!
- 2 cups Nonfat Greek Yogurt: This is our brilliant swap for eggs and oil! The yogurt adds moisture, a slight tang that balances the sweetness, and a boost of protein. It’s what gives the cookies their wonderfully soft and chewy texture. Substitution Tip: You can use full-fat Greek yogurt for a slightly richer cookie, or even a plain regular yogurt (just know the batter might be a tad thinner). For a dairy-free version, an unflavored, unsweetened plant-based yogurt works wonders.
- 1 teaspoon Vanilla Extract: The supporting actor that makes the star shine brighter. A good vanilla enhances the sweet, delicate flavor of the cake mix and makes your whole kitchen smell amazing. Chef’s Insight: If you’re feeling fancy, a scrape of real vanilla bean paste would be sublime here!
- Optional: Holiday Sprinkles or Powdered Sugar for Topping: This is where you make them your own! A sprinkle of colorful jimmies makes them party-ready, while a dusting of powdered sugar right after baking gives them that elegant, snow-kissed look.
Let’s Bake! Your Foolproof Cookie Roadmap
Ready to see some magic happen? Follow these steps, and you’ll be a cookie hero in no time. I’ve packed this section with all my favorite little hacks to ensure your success.
- Preheat and Prep. Fire up your oven to 350°F (175°C). This is the perfect temperature to get these cookies to puff up beautifully without browning too much. Now, line a baking sheet with parchment paper. Chef’s Hack: Do not skip the parchment! This batter is sticky, and parchment is your best friend for easy cleanup and preventing any stuck-on cookie tragedies.
- The Big Mix. In a large mixing bowl, combine the entire box of cake mix, the Greek yogurt, and the vanilla extract. Now, grab a sturdy spatula or a wooden spoon and mix until you have a thick, sticky, and fully combined dough. Chef’s Commentary: Don’t be tempted to use an electric mixer here—it’s overkill and can overwork the dough. A little arm workout is good for the soul! The dough will be very thick and tacky, and that’s exactly what we want.
- Scoop and Plop. Using a medium cookie scoop (about 1.5 tablespoons), drop rounded mounds of dough onto your prepared baking sheet, spacing them about 2 inches apart. Chef’s Hack: The beauty of these cookies is their rustic, “cloud-like” appearance. Don’t try to roll them into perfect balls—just scoop and plop! If you’re adding sprinkles, now’s the time to press a few onto the top of each cookie before baking.
- Bake to Perfection. Slide the baking sheet into your preheated oven and bake for 10-12 minutes. You’re looking for the cookies to be “set”—they won’t brown much on top, but the edges and bottoms will be a very light golden color. Chef’s Insight: They might still look a little soft in the center, and that’s perfect! This is the secret to their soft, cake-like interior. Do not overbake!
- The Patient Cool Down. This might be the hardest step! Let the cookies cool on the hot baking sheet for at least 5 minutes before you even think about moving them. Chef’s Hack: They are very delicate right out of the oven and need this time to firm up. After 5 minutes, you can gently transfer them to a wire rack to cool completely. I promise, the wait is worth it.
How to Serve Up a Little Slice of Heaven
Okay, the cookies are cooled, and your willpower has been heroic. Now, how do we make these simple bites feel extra special? Presentation is part of the fun!
For a classic, elegant look, give them a generous dusting of powdered sugar right before serving. It looks like a light snowfall and adds a tiny extra burst of sweetness. If you’re serving them for a birthday or holiday, a small bowl of extra sprinkles on the side lets guests customize their own cookie.
Now, let’s talk pairings. These cookies are a dream with a hot cup of coffee or a cold glass of milk. For a truly decadent dessert, sandwich a small scoop of vanilla bean ice cream or fresh whipped cream between two cookies. It’s an instant ice cream sandwich that will blow your mind! They also make a fantastic base for strawberry shortcake—just top a cookie with macerated strawberries and a dollop of whipped cream. Divine.
Make Them Your Own: Fun Flavor Twists!
Once you’ve mastered the basic recipe, the playground is open! Here are a few of my favorite ways to mix things up and keep this recipe on heavy rotation.
- Lemon Zest Sunshine: Add the zest of one large lemon to the dough. The bright, citrusy flavor cuts through the sweetness and is an absolute classic pairing. A simple lemon glaze (powdered sugar + lemon juice) drizzled on top takes it to the next level.
- Funfetti Party Time: Swap the white cake mix for a Funfetti mix! Fold in an extra tablespoon or two of rainbow sprinkles into the batter for maximum color and fun. It’s an instant party in a cookie.
- Chocolate Dream: Use a devil’s food cake mix instead of white. You’ll get a rich, chocolatey, brownie-like cookie that’s still incredibly soft. Fold in a handful of white chocolate chips to really lean into the “angel” theme.
- Berry Blast: Gently fold in ½ cup of freeze-dried strawberry or raspberry pieces (crushed into small bits) into the dough. They add a fantastic pop of fruity flavor and a little bit of texture without making the dough wet.
- Gluten-Free & Dairy-Free Friendly: Use your favorite gluten-free white cake mix and a plain, unsweetened almond or coconut yogurt. The method stays exactly the same, so everyone can enjoy a taste of heaven.
Beau’s Kitchen Chronicles
This recipe has been a staple in my kitchen for years, and it’s evolved in the best ways. I once, in a pre-coffee haze, accidentally used a vanilla frosting instead of the yogurt. Let me tell you, that was a sticky, sweet disaster we don’t need to repeat! The beauty of this recipe is its flexibility. I’ve made them with kids who are just learning to bake, and I’ve served them at fancy dinner parties where everyone demanded the recipe.
The biggest lesson? Embrace the “plop.” These cookies aren’t meant to be perfectly uniform. Their rustic, craggy tops are part of their charm. So don’t stress, have fun, and know that even if they’re a little misshapen, they’re going to taste absolutely incredible.
Your Questions, Answered!
I’ve gotten a lot of questions about these cookies over the years, so I’ve compiled the most common ones right here to be your troubleshooting guide.
Q: My dough is really, really sticky. Did I do something wrong?
A: Not at all! A very thick and sticky dough is completely normal for this recipe. That’s why using a cookie scoop and parchment paper is non-negotiable. If it’s absolutely unworkable, you can chill it for 15-20 minutes, but I find that a confident “scoop and plop” is all you need.
Q: Can I make the dough ahead of time?
A: You can! Simply mix the dough, cover the bowl tightly with plastic wrap, and store it in the refrigerator for up to 24 hours. Let it sit at room temperature for 10-15 minutes before scooping and baking. The cookies might be slightly denser, but still delicious.
Q: Why are my cookies flat?
A: This usually happens if the dough was over-mixed. Once the ingredients are just combined, stop mixing! Over-mixing can develop the gluten in the cake mix, leading to a flatter, tougher cookie. Remember, gentle is the name of the game.
Q: How should I store these cookies?
A: Because of the yogurt, it’s best to store them in a single layer in an airtight container in the refrigerator. They’ll keep for 3-4 days. You can also freeze the baked cookies for up to 2 months!

Angel Food Cake Cookies
Description
A Slice of Sunshine and a Hand-Me-Down Recipe
This recipe always takes me back to my grandma’s sun-drenched kitchen. She was the queen of “semi-homemade” magic before it was cool. Her motto? Good food is about the feeling it creates, not how long you’re stuck at the stove.
I still remember one sweltering summer afternoon — I was ten, grass-stained, and craving something sweet. Grandma smiled, grabbed a box of cake mix and a tub of yogurt, and said, “We’re making sunshine, honey.”
Instructions
1. Preheat and Prep
Preheat oven to 350°F (175°C) and line a baking sheet with parchment paper.
Don’t skip the parchment — this dough is sticky!
2. Mix the Magic
Combine cake mix, Greek yogurt, and vanilla in a large bowl. Stir by hand with a sturdy spoon until thick and sticky.
No mixers needed — a little arm work keeps the dough tender.
3. Scoop and Plop
Drop rounded scoops (1½ tablespoons each) onto the baking sheet, 2 inches apart.
Press in sprinkles now if using. The rustic “cloud” look is part of their charm!
4. Bake to Perfection
Bake for 10–12 minutes, until the tops are set and the edges are pale golden.
They may look soft in the center — that’s perfect. Don’t overbake!
5. Cool with Care
Let cookies rest on the hot baking sheet for 5 minutes before transferring to a wire rack to cool completely.
Nutrition
- Calories: ~80 kcal
- Sugar: 9 g
- Fat: 1 g
- Carbohydrates: 16 g
- Protein: 2 g
A Lighter Little Treat
Now, I’m a chef, not a nutritionist, but I always like to have a general idea of what I’m eating. One of the things I love about these cookies is that by using Greek yogurt instead of the typical eggs and oil, we’re creating a treat that feels a bit lighter. You’re getting a nice little protein boost from the yogurt, which is a win in my book!
Please remember, these are approximate values and can vary based on the specific brands of ingredients you use. But for a general idea, per cookie (based on a yield of 24):
- Calories: ~80 kcal
- Fat: 1 g
- Carbohydrates: 16 g
- Sugar: 9 g
- Protein: 2 g
Allergen Note: This recipe contains gluten and dairy (if using dairy-based yogurt). Please see the variations section for easy swaps!
Go Forth and Bake with Joy!
And there you have it, my friends—the incredible, three-ingredient cookie that tastes like a dream. This recipe is proof that you don’t need a pantry full of fancy ingredients or a whole afternoon to create something truly special and delicious. It’s about the joy of baking, the smell of vanilla filling your kitchen, and the smile on someone’s face when they bite into a warm, soft cookie.
I hope this recipe becomes a quick and easy favorite in your home, just like it is in mine. It’s a little trick I’m so happy to share with you. Now, I’d love to hear from you! Did you add a fun twist? Did your kids love plopping the dough? Tag me on social @Feastical or shoot me an email—I love seeing your kitchen creations.
Final Thoughts: A Little Bit of Heaven, Made Simple
So there you have it, friends. A cookie that’s as easy to make as it is delightful to eat. These Angel Food Cake Cookies are more than just a recipe; they’re a reminder that incredible treats don’t have to be complicated. They’re proof that with a little ingenuity (and a trusty box of cake mix), you can capture the essence of a classic dessert in a brand-new, bite-sized form.
From my grandma’s sun-drenched kitchen to yours, this recipe is a testament to the joy of simple, feel-good food. It’s for the busy weeknights, the sudden sweet tooth, the baking session with a little one, and the need for a dessert that feels like a warm, fluffy hug.

Gourmet Hot Dogs (Creative Toppings for Next-Level Flavor)
From Ballpark to Gourmet: Why Your Hot Dog Deserves a Flavor Upgrade
Hey friends, Beau here from Feastical! Let’s talk about a beautiful piece of culinary magic that we’ve all probably taken for granted: the humble hot dog. Now, I’m not talking about that sad, pale dog rolling on a gas station roller grill. I’m talking about a canvas for flavor, a handheld masterpiece just waiting for its moment to shine. We all have those core memories—the smoky scent of a backyard grill, the crack of a baseball game on the radio, the simple joy of a perfectly dressed dog in a soft bun. That feeling is pure gold. But what if I told you we could keep all that nostalgic joy and level it up into something that makes your taste buds do a happy dance?
That’s exactly what we’re doing today. We’re throwing out the rulebook (except for the one that says you must enjoy every single bite) and diving headfirst into the world of gourmet hot dogs. This isn’t about fancy ingredients you can’t pronounce; it’s about smart, bold, and delicious combinations that transform a weeknight dinner or weekend cookout into a flavor festival. Think crispy, buttery-toasted buns, juicy, snappy dogs with just the right amount of char, and toppings so good you’ll want to eat them with a spoon. Whether you’re feeding a hungry crowd or just treating yourself, these creations are all about feel-good food that’s simple, soulful, and seriously satisfying. So, grab your favorite spatula and let’s turn the ordinary into the extraordinary.
The Hot Dog That Started It All: A Stadium-Side Revelation
My love affair with upgraded hot dogs started in the most un-gourmet place imaginable: a packed baseball stadium. I was about ten, and the hot dog was your standard-issue stadium fare—steamed bun, boiled dog, a squiggle of yellow mustard. Don’t get me wrong, I was in heaven. But next to me, my granddad, a man of few words but impeccable taste, was building something different. From his little insulated bag, he pulled out a tiny container of onions he’d sautéed in butter that morning, still slightly warm, and a jar of his own spicy brown mustard. He piled those sweet, golden onions high on his dog, dabbed on the good mustard, and took a bite with a contented sigh that I can still hear.
I remember staring, my plain dog suddenly seeming…naked. He caught my look, winked, and slid his creation onto my napkin. “Try it, Beau. Food’s about the experience, not just the fuel.” That first bite was a revelation. The sweet, rich onions against the salty meat, the tang of the mustard cutting through it all—it was a symphony in a bun. It taught me that with just a little extra thought and love, you can elevate the simplest things into moments of pure joy. That stadium dog is the spiritual ancestor of every recipe we’re making today. It’s proof that a “gourmet” mindset isn’t about being complicated; it’s about being intentional with your flavors.
Your Gourmet Hot Dog Toolkit: Ingredients & Insights
Every great build starts with a solid foundation. Here’s your shopping list for success, with some chef-y notes to guide you. Remember, quality ingredients here make a world of difference!
- All-Beef Hot Dogs (4): This is your star player. Look for natural casing dogs if you can find them—they give that satisfying “snap” when you bite in. Chef’s Insight: No natural casing? No problem! A good pan-sear on a skinless dog will create a delicious, caramelized crust that mimics that textural joy.
- Brioche or Bakery-Style Buns (4): The vessel matters! Brioche is buttery and slightly sweet, which balances savory toppings beautifully. A good, sturdy bakery-style potato bun is another winner—it’s soft but holds up to juiciness. Substitution Tip: For a whole-grain option, seek out pretzel buns or whole wheat brioche. Avoid flimsy, airy buns—they’ll fall apart on you.
- Unsalted Butter (2 Tbsp): For toasting and sautéing. Butter equals flavor and that gorgeous golden-brown color. Chef’s Hack: Mix a little minced garlic or a pinch of dried herbs into your softened butter before slathering it on the buns for an instant flavor boost.
- Large Yellow Onion (1), thinly sliced: The workhorse of gourmet toppings. When slowly cooked, it transforms into sweet, jammy, caramelized magic. Substitution Tip: Red onions work great for quicker pickling or adding raw for a sharper bite.
- Topping Bar Essentials: This is where you get creative! We’ll focus on three styles, but think of these as your building blocks:
- For Creamy & Tangy: Sauerkraut, Dijon/whole-grain mustard, Tzatziki, Guacamole.
- For Fresh & Crisp: Pico de Gallo, Chopped cucumber/tomato, Shredded lettuce, Pickled jalapeños.
- For Rich & Savory: Warm chili, Shredded cheese (cheddar, pepper jack, feta), Crispy fried onions, Crumbled bacon.
Crafting Your Masterpiece: A Step-by-Step Guide
Follow these steps for foolproof, flavorful dogs every single time. I’m chatting you through each one with all my best kitchen hacks!
- Prep Your Toppings First (Mise en Place): This is the golden rule! Chop your veggies, warm your chili, make your guac, and get your cheeses shredded before you even turn on the stove. A relaxed cook makes a better meal. It also lets flavors in things like pico de gallo or dressings start to mingle. Chef’s Tip: If caramelizing onions (for the All-American), start them now in a pan with 1 Tbsp butter/oil over medium-low heat. Stir occasionally. This low-and-slow process takes 15-20 minutes but is 100% worth it for that deep, sweet flavor.
- The Great Bun Toast: Never, ever skip this. Split your buns and spread a thin layer of butter on the inside surfaces. Place them butter-side down in a large skillet or on a grill over medium heat for 1-2 minutes, until golden brown and toasty. You can also do this under the broiler for a minute, but watch them like a hawk! Chef’s Hack: No time to butter? A light spray of olive oil works, but butter truly gives that rich, diner-style finish.
- Cook the Dogs to Perfection: You have options, all great!
- Grill/Griddle: Medium-high heat for 4-6 minutes, rolling occasionally for an even, lightly charred exterior. This is my favorite method for maximum flavor.
- Pan-Sear: In a non-stick skillet with a tiny bit of oil over medium heat. Cook for 5-7 minutes, turning frequently.
- Simmer: Place dogs in a saucepan, cover with water, and bring to a gentle simmer for 5-7 minutes. Less browning, but incredibly juicy. Chef’s Insight: If you boiled or simmered, you can still give them a 30-second sear in a hot pan afterward for color and texture!
- The Art of Assembly: This is the fun part! Place your toasted bun on a plate. For saucier dogs (like the Tex-Mex or Mediterranean), spread your base sauce (tzatziki, guacamole) directly on the bottom bun first—it acts as a delicious moisture barrier. Place the hot dog snugly inside. Now, build from the base up: heavier/wetter items (chili, onions) go first, followed by cheeses (so they melt a little), then fresh/crisp items, and finally delicate herbs or a final drizzle. This creates structural integrity so you can actually take a bite without everything sliding out!
- Serve Immediately & Joyfully: Gourmet hot dogs are best enjoyed hot, fresh, and with plenty of napkins. The moment they’re assembled, call everyone to the table or patio and dig in.
How to Serve Your Gourmet Creations
Presentation is part of the experience! Don’t just hand someone a wrapped dog. Plate it with intention. Use a simple, colorful plate or even a sheet of parchment paper for a casual, food-cart vibe. Since these are loaded, serve them with a knife and fork on the side—no shame in that game! For sides, keep it simple and complementary: a big bag of good kettle chips, a tangy vinegar-based coleslaw (especially with the All-American dog), or a simple corn and black bean salad for the Tex-Mex version. The goal is to create a spread that feels special but effortless. Set up a topping bar with all the components in little bowls and let everyone build their own—it’s a fantastic interactive meal for gatherings.
Get Creative: 5 Flavor Twists to Try
Once you master the basics, the world is your hot dog oyster! Here are some of my favorite riffs to spark your imagination:
- The Reuben Dog: Top your dog with Russian dressing, Swiss cheese, and a big pile of sauerkraut. Toast under the broiler for 30 seconds to melt the cheese. It’s a Reuben sandwich in handheld form!
- BBQ Bacon Cheddar: Smother with warm, smoky BBQ sauce, a handful of crispy crumbled bacon, a generous sprinkle of sharp cheddar, and a spoonful of tangy coleslaw right on top.
- Banh Mi Inspired Dog: Spread bun with a little mayo or sriracha mayo. Top dog with quick-pickled carrots and daikon radish, thin cucumber slices, fresh cilantro, and a sprinkle of chopped roasted peanuts.
- Breakfast Dog: Perfect for brunch! Top with a fried egg, a slice of melty American cheese, and a drizzle of hot sauce or maple syrup. Yes, maple syrup. Trust me.
- Caprese Style (Veggie-Friendly): For a meatless option, use a grilled portobello strip or a plant-based dog. Top with sliced fresh mozzarella, tomato slices, fresh basil leaves, a drizzle of balsamic glaze, and a pinch of flaky sea salt.
Beau’s Kitchen Notes & Stories
This recipe is a living, breathing thing in my house. The Mediterranean version was actually a happy accident when I was making Greek salads and hot dogs for two different events on the same day and…well, let’s just say the flavors collided in the best possible way. My biggest evolution has been in the bun toasting. I used to just warm them, but that step of actually buttering and toasting until crisp? Total game-changer. It adds a textural contrast that makes the whole experience feel chef-y. Also, a funny story: I once tried to make “gourmet” dogs for a kids’ birthday party, forgetting that sometimes the classic ketchup-and-mustard combo is truly king. The lesson? Have fun and be bold, but always know your audience. Sometimes, the upgrade is simply using really good mustard.
Your Questions, Answered
Q: My buns always get soggy by the time we eat. Help!
A: The triple threat against sogginess: 1) Toast your buns thoroughly. A lightly toasted bun will soften quickly. 2) Apply a “moisture barrier” like mayo, cream cheese, or a thick sauce to the bottom bun first. 3) Assemble just before serving. If making a bunch, set up a topping bar and let people build their own.
Q: Can I make any of this ahead of time?
A> Absolutely! Caramelized onions can be made days ahead and reheated. Pico de gallo, guacamole (press plastic wrap directly on the surface), and chili are great make-aheads. Cook and slice veggies. The day of, just warm your dogs and toppings, toast the buns, and assemble.
Q: What’s the best way to heat hot dogs for a crowd?
A: For a big party, I swear by the “simmer then hold” method. Gently simmer them in a large pot of water, then turn off the heat. They’ll stay perfectly hot and juicy in the water for up to an hour. You can also keep them warm in a slow cooker on the “warm” setting with a bit of water or beer in the bottom.
Q: Are there good vegetarian/vegan options for this?
A> 100%! The beauty is in the toppings. Use a high-quality plant-based hot dog or even a grilled and seasoned portobello mushroom strip. Load it up with all the veggie-centric toppings from our variations—the Caprese, Banh Mi, or Mediterranean styles are especially fantastic for this.

Gourmet Hot Dogs (Creative Toppings for Next-Level Flavor)
Description
From Ballpark to Gourmet: Give Your Hot Dog the Upgrade It Deserves
Hey friends! We all love a classic hot dog moment—whether it’s backyard grilling or grabbing one at a game. But let’s be honest… that humble dog has serious gourmet potential.
Even the iconic dogs from New York Yankees stadium or a quick stop at Nathan’s Famous prove one thing: simple can be legendary. Now imagine taking that same nostalgic energy and layering it with intentional flavors, better textures, and bold toppings.
Let’s level up your dog.
Ingredients
-
4 hot dogs (beef, chicken, or turkey)
-
4 hot dog buns
-
1 tablespoon butter (optional, for toasting buns)
-
Ketchup
-
Mustard
-
Chopped onions (optional)
-
Pickles or relish (optional)
Instructions
1️⃣ Cook the Hot Dogs
You can use any of these methods:
Boiling (Easy Method):
-
Bring a pot of water to a boil.
-
Add hot dogs and cook for 4–5 minutes.
-
Remove and drain.
Pan Cooking:
-
Heat a skillet over medium heat.
-
Add hot dogs and cook for 5–7 minutes, turning occasionally until heated through and slightly browned.
Grilling:
-
Grill over medium heat for 5–7 minutes, turning until evenly heated and lightly charred.
2️⃣ Toast the Buns (Optional but Recommended)
-
Spread a little butter inside each bun.
-
Toast in a pan for 1–2 minutes until lightly golden.
3️⃣ Assemble
-
Place a hot dog inside each bun.
-
Add ketchup, mustard, onions, pickles, or your favorite toppings.
Notes
-
Don’t overcook — hot dogs are already fully cooked.
-
Lightly toasting the bun makes a big difference.
-
Serve immediately for best taste.
A Quick Note on Nutrition
Let’s keep it real—a loaded gourmet hot dog is an indulgent, celebratory meal. The exact nutrition varies wildly based on your chosen dog (beef, turkey, plant-based), bun, and toppings. As a general estimate, one fully loaded dog like the ones described can range from 350 to 550 calories. The protein comes mainly from the dog itself (12-18g), carbs from the bun and any sugary sauces (25-35g), and fat from the dog, cheese, butter, and creamy toppings (20-35g). The great news? By loading up with fresh veggie toppings like tomatoes, cucumbers, onions, and peppers, you’re adding fiber, vitamins, and freshness. Think of it as balancing the plate in one handy package. As always, enjoy mindfully and savor every delicious bite!
Final Thoughts
And there you have it, friends—your passport to hot dog heaven. This isn’t about reinventing the wheel; it’s about dressing it up with some fantastic new tires. I hope this inspires you to look at that pack of hot dogs in your fridge not as a last-resort dinner, but as the start of a fun, flavorful adventure. Remember, the best meals are the ones shared with laughter and maybe a few stray toppings on the table. So fire up that grill or heat up that skillet, toast those buns like your life depends on it (because your sandwich’s structural integrity does), and pile on the love.
I’d love to hear which creation you try first! Tag me @Feastical on social media with your gourmet dog masterpieces. Now, go forth and build something delicious. Until next time, keep your spatula close and your appetite closer.
Hungry for more? Explore all my feel-good recipes and kitchen stories at Feastical.com!
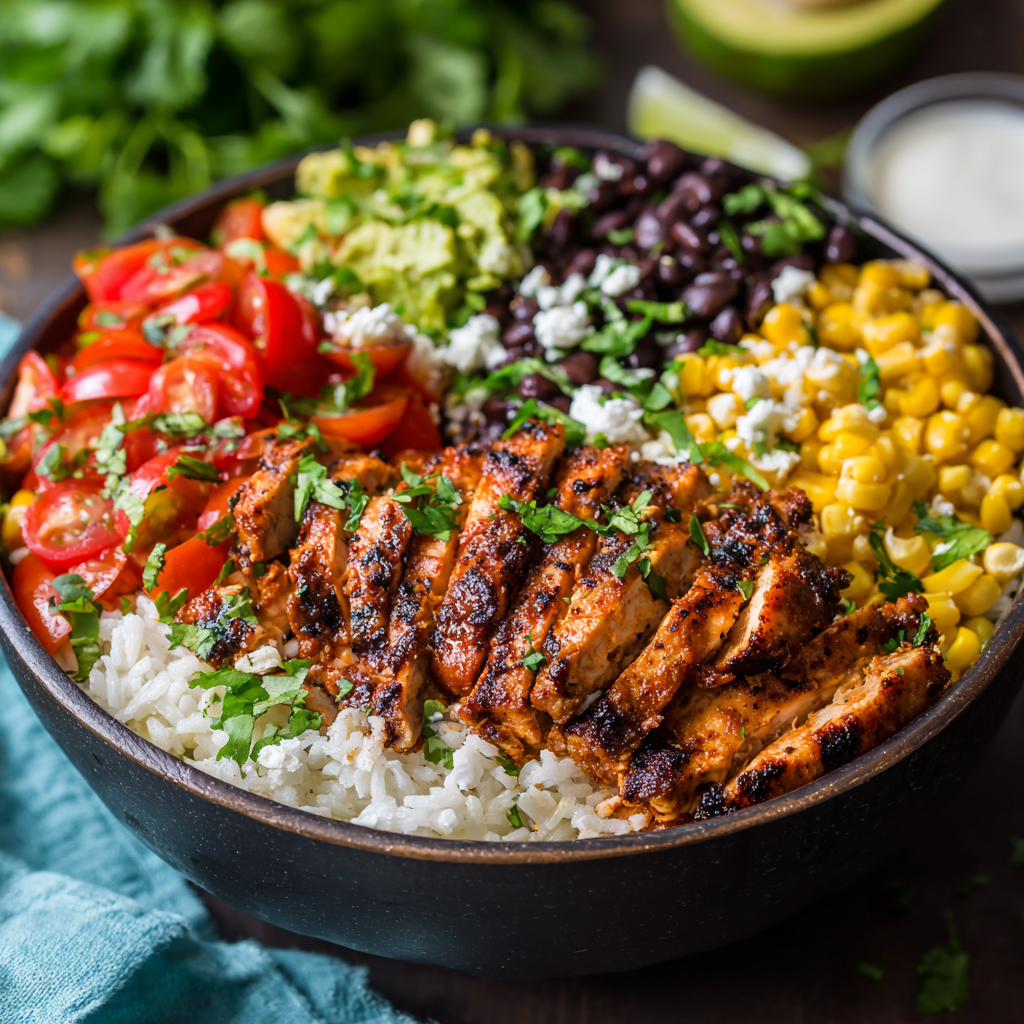
Chipotle Chicken and Rice Bowls : Smoky, Spicy & Meal-Prep Ready
Chipotle Chicken and Rice Bowls: Your New Weekly MVP
Hey friends, Beau here from Feastical! Let me paint you a picture. It’s 5:30 PM. You’re staring into the fridge, the universal signal for “I’m hungry but have zero inspiration.” You want something that tastes like you spent an hour simmering and layering flavors, but you also really want to be on the couch in, like, forty-five minutes. Sound familiar? That exact scenario is why this recipe for Chipotle Chicken and Rice Bowls is about to become your kitchen’s MVP (Most Valuable Player).
This isn’t just another bowl recipe. This is a symphony of smoky, spicy, and fresh flavors that come together in a beautiful, customizable stack. We’re talking juicy, chipotle-marinated chicken that gets those gorgeous charred edges, piled onto fluffy cilantro-lime rice, and surrounded by all the vibrant toppings your heart desires. It’s a high-protein, flavor-packed meal that feels indulgent but is secretly simple and smart. Whether you’re feeding a hungry family on a busy Tuesday or prepping a week’s worth of “grab-and-go” lunches that you’ll actually be excited to eat, this recipe has your back. So, tie on your apron, grab your favorite skillet, and let’s make dinner the highlight of your day, not the hurdle.
The Backyard Fiesta That Started It All
This recipe has roots in one of my favorite food memories. Years ago, a good friend of mine decided to host a last-minute, “clean-out-the-fridge” backyard fiesta. The rule was simple: bring something you could throw on the grill or in a bowl. I showed up with a ziplock bag of chicken I’d hastily marinated in a mysterious, smoky red sauce I’d concocted from a lonely can of chipotles, some random spices, and a hopeful squeeze of lime. I grilled it up, sliced it over a bed of rice and beans I found in his kitchen, and told everyone to go nuts with the toppings.
You would have thought I’d brought gourmet catering. The bowl station became the party’s epicenter. Friends were customizing their creations, arguing good-naturedly about the perfect ratio of avocado to corn, and declaring it the best “thrown-together” meal they’d ever had. That’s the magic of this dish. It’s communal, it’s flexible, and it’s powered by that incredible, smoky chipotle flavor that makes everything taste like a celebration. Every time I make these bowls now, I’m transported back to that sunny backyard, surrounded by friends and the sound of satisfied munching. Food that brings people together? That’s the Feastical spirit.
Gathering Your Flavor All-Stars
Here’s the beautiful part: most of these ingredients are pantry heroes or easy fresh finds. Let’s break them down. I’ll give you the “why” behind each one and some easy swaps so you can make this bowl your own.
- 1½ lbs boneless, skinless chicken thighs or breasts: I’m Team Thigh all the way here. They stay juicier, are more forgiving if you overcook them a smidge, and their richer flavor stands up to the bold chipotle marinade. But breasts work perfectly if that’s your preference—just watch the cooking time closely!
- 1 tbsp olive oil: The base of our marinade. It helps the spices coat the chicken and prevents sticking in the pan.
- 1–2 tbsp chipotle peppers in adobo, minced + 1 tbsp adobo sauce: The STARS of the show! That iconic smoky heat lives here. Start with 1 tbsp of minced peppers if you’re sensitive to spice. The adobo sauce is packed with flavor, not just heat, so don’t skip it. Chef Insight: Leftover peppers? Freeze them individually in an ice cube tray for future recipes!
- 1 tsp cumin, 1 tsp smoked paprika, ½ tsp garlic powder: Our supporting flavor cast. Cumin adds earthiness, smoked paprika doubles down on the smokiness (use regular paprika in a pinch), and garlic powder is our quick, no-chop flavor friend.
- Juice of 1 lime + Salt and black pepper: The bright acid from the lime cuts through the richness and “wakes up” the marinade. Season generously—it makes all the difference.
- For the Bowls: This is your playground!
- 3 cups cooked cilantro lime rice: Pro tip: cook your rice in chicken broth instead of water for an extra flavor boost. No cilantro? Just lime rice or plain jasmine is fine.
- 1 cup black beans & 1 cup corn kernels: Use canned for ultimate ease (just rinse those beans!). For a flavor upgrade, char your corn in a dry skillet for a minute.
- 1 cup cherry tomatoes, halved: Their sweet pop is essential. Grape tomatoes work too.
- ½ cup shredded cheese or queso fresco: Melty Monterey Jack or pepper jack is amazing. Queso fresco gives a salty, crumbly contrast.
- 1 avocado, sliced & Fresh cilantro: The cool, creamy finisher and the herbal pop. Don’t skimp!
Let’s Build Some Flavor: Step-by-Step
Okay, team. Time to get cooking. This process is simple, but a few chef hacks along the way will make your results restaurant-level.
- Make the Magic Marinade: In a medium bowl, whisk together the minced chipotle peppers, adobo sauce, olive oil, lime juice, and all the dried spices. Give it a taste (carefully—it’s spicy!). It should be deeply red, smoky, and tangy. This is your flavor paint. Chef Hack: No time to mince? Throw all the marinade ingredients into a small food processor and blitz until smooth!
- Marinate the Chicken: Pat your chicken completely dry with paper towels—this helps the marinade stick and promotes browning. Add the chicken to the bowl and use your hands (I recommend gloves if you’re sensitive to capsaicin!) to massage the marinade into every nook and cranny. Let it hang out for at least 20 minutes at room temp. For life-changing flavor, do this in the morning, cover it, and let it marinate in the fridge all day. The longer, the better!
- Cook to Charred Perfection: Heat a large skillet, grill pan, or actual grill over medium-high heat. You want it nice and hot. Add the chicken, shaking off excess marinade. Don’t crowd the pan! Cook for 6-8 minutes per side for thighs (slightly less for breasts), until you get those beautiful dark, caramelized marks and the internal temperature hits 165°F. RESIST THE URGE TO MOVE IT for the first few minutes—that’s how you get the good char. Transfer to a cutting board and let it rest for a full 5 minutes. This lets the juices redistribute so every slice is moist.
- Slice and Assemble: While the chicken rests, warm your beans and corn if desired, and slice your avocado and tomatoes. Slice the rested chicken against the grain into strips—this makes it tender and easy to eat. Now, the fun part: assembly! Start with a base of fluffy cilantro-lime rice. Artfully (or just hungrily) arrange your sliced chipotle chicken, black beans, corn, and tomatoes around it. Top with cheese, those gorgeous avocado slices, and a generous shower of fresh cilantro.
How to Serve It Up (Style & Storage!)
Presentation is part of the fun! I like to serve these “build-your-own-bowl” style. Put all the components—the warm rice, sliced chicken, beans, corn, tomatoes, cheese, avocado, extra lime wedges, and maybe some sour cream or hot sauce—in separate bowls on the table. Let everyone craft their own masterpiece. It’s interactive and guarantees happy customers.
Now, for the meal-prep champions: this recipe is a DREAM for make-ahead lunches. Simply divide the cooled components (I keep avocado separate until the day of) into airtight containers. They’ll keep beautifully in the fridge for 4 days. The flavors actually meld and get better! Reheat the chicken/rice/beans/corn portion gently in the microwave, then top with your fresh cold toppings. Dinner solved, lunch sorted. You’re welcome.
Make It Your Own: Delicious Twists
The beauty of this bowl is its versatility. Play around with these ideas!
- Shrimp or Steak Swap: Use the same marinade for large shrimp (cook 2-3 min per side) or flank/skirt steak. For steak, let it rest before slicing thinly against the grain.
- Go Vegetarian/Vegan: Substitute the chicken with 2 cans of drained, rinsed chickpeas or a block of extra-firm tofu (pressed and cubed). Marinate and roast on a sheet pan at 400°F for 25-30 mins until crispy. Skip the cheese or use a vegan alternative.
- Lower-Carb/Keto Style: Ditch the rice and serve the chicken and toppings over a huge bed of crisp romaine lettuce, cauliflower rice, or sautéed bell peppers and onions.
- Pineapple Salsa Topping: Add a sweet twist! Mix 1 cup diced fresh pineapple with some diced red onion, jalapeño, cilantro, and lime juice. Spoon it over the bowl for a tropical kick.
- Breakfast Bowl Remix: Leftover chipotle chicken is *incredible* chopped up in scrambled eggs or a breakfast burrito. Just saying.
A Few Notes from My Kitchen to Yours
This recipe has evolved from that backyard experiment into a true Feastical staple. I’ve learned a few things along the way. First, that can of chipotles in adobo is your friend, but it’s potent. I once got overzealous and used three whole peppers for a single batch. Let’s just say we were all breathing fire—flavorful fire, but still fire. Start conservative; you can always add more heat with hot sauce later.
Second, don’t fear the char on the chicken. Those little blackened bits are FLAVOR GOLD. They’re not burnt; they’re caramelized spice and sugar from the marinade. That’s where the real magic is. Finally, this recipe is a fantastic fridge-cleaner. Have a half bell pepper? Dice it in. Some red onion? Perfect. A spoonful of leftover corn? Toss it in the bowl. Make it work for you!
FAQs: Your Questions, Answered
Q: Can I make this less spicy?
A: Absolutely! The heat comes primarily from the chipotle peppers’ seeds and ribs. For a milder version, scrape the seeds out of the peppers before mincing, and rely more on the adobo sauce for flavor. You can also reduce the amount to 1 teaspoon and add a bit more smoked paprika.
Q: My marinade isn’t sticking to the chicken. What gives?
A: The #1 culprit is moisture. Make sure you pat your chicken bone-dry with paper towels before adding it to the marinade. A wet surface just slides the flavor right off.
Q: How long can I marinate the chicken?
A: 20 minutes is the bare minimum for good flavor. Overnight (up to 24 hours) is IDEAL. The acid in the lime juice can start to break down the chicken and make it mushy if you go much longer than that, so I don’t recommend exceeding 24 hours.
Q: Can I bake the chicken instead of pan-frying?
A: You bet! For easy, hands-off cooking, place the marinated chicken on a parchment-lined baking sheet and bake at 400°F for 20-25 minutes, or until it reaches 165°F. You won’t get the same char, but it will still be delicious. For more color, broil for the last 2-3 minutes.

Chipotle Chicken and Rice Bowls : Smoky, Spicy & Meal-Prep Ready
Description
Chipotle Chicken and Rice Bowls: Bold Flavor, Zero Weeknight Stress
Hey friends! If you love those smoky, customizable burrito bowls from Chipotle Mexican Grill, but want something fresher (and budget-friendlier) at home, this recipe is about to become your weekly MVP.
Juicy chipotle-marinated chicken. Fluffy cilantro-lime rice. Black beans, corn, creamy avocado, melty cheese. It’s smoky, zesty, protein-packed, and totally meal-prep friendly. Let’s build your new go-to bowl.
Instructions
In a bowl, whisk olive oil, minced chipotle peppers, adobo sauce, lime juice, cumin, smoked paprika, garlic powder, salt, and pepper.
Pat chicken dry. Coat thoroughly in marinade.
Let sit 20 minutes (or refrigerate up to 24 hours for deeper flavor).
Heat a skillet or grill pan over medium-high.
Cook chicken 6–8 minutes per side (thighs) until internal temp reaches 165°F.
Let rest 5 minutes, then slice against the grain.
Warm rice, beans, and corn. Slice avocado and tomatoes.
Start with rice.
Add sliced chicken, beans, corn, and tomatoes.
Top with cheese, avocado, and cilantro.
Finish with a squeeze of fresh lime.
Notes
-
Pat chicken dry first for better browning.
-
Don’t move the chicken too soon—let it char!
-
Cook rice in chicken broth for extra flavor.
-
Double the marinade and freeze half for next time.
Nutritional Breakdown (Approximate, per serving)
Let’s talk fuel! One generously portioned bowl (using chicken thighs and the listed toppings) comes in around:
Calories: 550 | Protein: 42g | Carbohydrates: 58g | Fat: 18g | Fiber: 12g
This is a balanced, high-protein, and high-fiber meal that will keep you full and satisfied for hours. The healthy fats from the avocado and olive oil are great for you, and the complex carbs from the rice and beans provide steady energy. To reduce sodium, use low-sodium beans and broth for the rice. Remember, these numbers are a guide—they’ll shift based on your specific ingredients and portion sizes.
Final Thoughts
And there you have it, friends—my not-so-secret weapon for winning weeknights and conquering lunch prep. These Chipotle Chicken and Rice Bowls are more than just a recipe; they’re a template for endless deliciousness. They prove that big, bold flavor doesn’t have to be complicated.
I hope this recipe brings as much joy and convenience to your kitchen as it has to mine. Give it a try, get creative with your toppings, and most importantly, share it with someone you love. Food tastes better when it’s shared. Now, go forth and make something feastical! Don’t forget to tag me @Feastical if you make it—I love seeing your creations.
Stay hungry,
Beau Collier

Sausage, Egg & Cheese McGriddles : Homemade Sweet & Savory Breakfast Sandwich
The Homemade McGriddle: Because Breakfast Deserves a High Five
Hey there, friends! Beau here, welcoming you back to my kitchen at Feastical. Today, we’re tackling a breakfast legend, a marvel of modern fast-food engineering, and turning it into something you can proudly make at home. I’m talking about the iconic Sausage, Egg & Cheese McGriddle. Now, before you raise an eyebrow, hear me out. This isn’t about copying a drive-thru menu. It’s about capturing that magical, irresistible sweet-and-savory combo and making it even better with simple, real ingredients and a whole lot of love.
Imagine this: fluffy, golden pancakes, subtly sweet with maple syrup baked right in. Not just any pancakes—these are your sandwich buns. Now, layer in a juicy, perfectly seasoned sausage patty, a soft-cooked egg that’s just begging to be runny (or not, you do you!), and a slice of melty, gooey cheese that holds it all together. One bite, and you get that symphony: the sweet, the savory, the salty, the rich. It’s comfort food that feels like a weekend morning victory lap.
Maybe you’re feeding a hungry family, maybe you’re prepping awesome make-ahead breakfasts for the week, or maybe you just want to treat yourself to something spectacular without leaving your pajamas. This recipe is your ticket. We’re keeping it simple, soulful, and deeply satisfying. So, tie on your apron, grab your favorite spatula, and let’s make a breakfast sandwich that’s so good, it might just make you forget how to find your car keys. Let’s get cooking!
A Tale of Two Breakfasts: My McGriddle Epiphany
I have to confess something. My first encounter with a McGriddle wasn’t some carefully planned culinary moment. It was a desperate, road-trip-at-6-AM, need-coffee-and-food-NOW situation. I was skeptical. Pancakes… as a bun? It sounded like a gimmick. But one hungry, bleary-eyed bite later, I was a convert. The genius of it hit me! It was the breakfast equivalent of dipping your fries in a milkshake—a crazy idea that’s secretly brilliant.
But, as a guy who loves cooking at home, I couldn’t shake the feeling that it could be… *more*. More flavorful sausage, a fresher egg, a pancake with real maple depth. So, I started tinkering. My first homemade version was a mess—pancakes too thick, sausage flying out the sides, egg everywhere. It was delicious chaos. My partner took one look and laughed, “It’s a breakfast *experience*!” That’s when I knew I was onto something. After many (many) happy Saturday morning experiments, I nailed down this version. It’s my kitchen’s homage to that original fast-food spark, but made with the care and quality we all deserve first thing in the morning. It’s the taste of a happy accident, perfected.
Gathering Your Breakfast Symphony
Here’s everything you need to conduct your morning masterpiece. I’ve included some of my favorite insights and swaps, because cooking should be flexible, not rigid!
For the Maple Pancake “Buns” (Makes 8 small pancakes)
- 1 cup all-purpose flour: The trusty foundation. For a slightly heartier texture, you can swap in ¼ cup of whole wheat flour.
- 1 tablespoon pure maple syrup: This is our secret weapon! It gets cooked into the batter, creating those sweet pockets of flavor. Don’t use pancake syrup here—the real stuff makes all the difference.
- 1 tablespoon granulated sugar: A little extra sweetness to balance the savory fillings. You can reduce or omit if you prefer.
- 1 teaspoon baking powder: Our leavening agent for fluffy, lift-off-the-griddle pancakes. Make sure it’s fresh!
- ¾ cup milk: Whole milk gives the richest texture, but any milk you have works. Buttermilk is a fantastic tangy twist!
- 1 large egg: Binds the batter and adds richness.
- 1 tablespoon melted butter, plus more for the skillet: Melted butter in the batter = flavor city. Using butter to cook the pancakes gives them those gorgeous, golden-brown edges.
- ½ teaspoon vanilla extract: A chef’s kiss. It enhances the maple and makes the pancakes smell incredible.
- A generous pinch of salt: Crucial! It balances all the sweet and savory elements and makes every flavor pop.
For the Savory Fillings (For 4 Sandwiches)
- 4 good-quality breakfast sausage patties: This is where you can shine. I love using a local butcher’s blend, or even making your own with ground pork and sage. Pre-formed patties are a totally legit time-saver!
- 4 large eggs: The star of the show. We’ll cook them just how you like them.
- 4 slices of cheese: American is the classic for its meltability, but a mild cheddar or even pepper jack adds a great flavor punch. Use what you love!
- 1 teaspoon butter or oil: For cooking our eggs and keeping everything from sticking.
Let’s Build the Dream: Step-by-Step
Alright, team. Let’s break this down into easy, fun steps. I’ll be right here with you, offering my favorite hacks along the way.
Step 1: The Pancake Foundation. In a large bowl, whisk together your dry ingredients: the flour, sugar, baking powder, and that all-important pinch of salt. In another bowl or a large measuring jug, whisk the wet team: the milk, egg, melted butter, maple syrup, and vanilla. Now, pour the wet ingredients into the dry. Here’s my #1 pancake hack: mix until the batter is just combined. Lumps are your friend! Over-mixing makes tough pancakes. A few flour streaks are totally fine. Let the batter rest for 5 minutes while your skillet heats up. This allows the gluten to relax and the baking powder to start working its magic.
Step 2: Cooking the “Buns.” Heat a non-stick skillet or griddle over medium heat. Add a tiny pat of butter and let it melt and foam slightly. You want it hot enough that a drop of water sizzles, but not smoking. For perfect sandwich-sized pancakes, I use a ¼ cup measure to scoop the batter. Pour it onto the skillet and let it spread into a nice circle. Cook for 2-3 minutes. You’ll know it’s ready to flip when the edges look set and bubbles form on the surface and start to pop. Gently slide your spatula underneath and flip! Cook for another 1-2 minutes on the second side until golden brown. Repeat until you have 8 beautiful pancake buns. Keep them warm in a low oven (200°F) on a baking sheet while you cook the fillings.
Step 3: The Sausage & Egg Dance. In the same skillet (hello, flavor!), cook your sausage patties over medium heat for about 3-4 minutes per side, until they’re browned and cooked through. Remove and set aside. Now, for the eggs. If you want that perfect round shape that fits the sandwich, use a metal ring mold or even the lid from a wide-mouth mason jar. Lightly grease the inside of the ring, place it in the skillet, and crack an egg right into it. Cook to your desired doneness. No ring? No problem! Just fry or scramble your eggs loosely—it will taste just as amazing.
Step 4: The Grand Assembly. This is the fun part. Take one pancake (this is your bottom bun). Place a warm sausage patty on it. Immediately top with a slice of cheese so the residual heat starts to melt it. Slide your cooked egg on top of the cheese. Crown it with a second pancake. Give it a gentle press. Admire your creation. Repeat for the remaining three sandwiches. The cheese acts as the glorious, tasty glue holding everything together.
How to Serve Your Masterpiece
Presentation is part of the joy! I like to serve these sandwiches on a simple plate with a little extra maple syrup on the side for dipping or drizzling. For a full-on weekend feast, pair them with some crispy hash browns or fresh fruit like berries or orange slices to cut through the richness. A big mug of strong coffee or a glass of cold orange juice is the perfect beverage sidekick. The best way to eat it? With your hands, leaning slightly over your plate to catch any delicious drips. That’s the true Feastical way!
Make It Your Own: Flavor Twists & Swaps
The beauty of this recipe is its versatility. Don’t be afraid to play!
- The “Loaded” Griddle: Add a layer of crispy bacon and the sausage. Top the egg with a slice of tomato and a few leaves of spinach for a fresh crunch.
- Spicy Southwest Style: Use a spicy chorizo or andouille sausage patty, pepper jack cheese, and add a dollop of creamy avocado or salsa between the layers.
- Turkey & Swiss: For a lighter take, use a lean turkey sausage patty and a slice of Swiss cheese. Add a smear of whole-grain mustard to the pancake bun for tang.
- Pancake Mix Shortcut: In a pinch, use your favorite “just add water” pancake mix (enough for 8 small pancakes) and stir in the tablespoon of maple syrup. It works like a charm!
- Freezer-Friendly Hero: These sandwiches freeze beautifully! Assemble them completely, let them cool, then wrap each one tightly in parchment paper and foil. Freeze for up to a month. Reheat in the microwave (unwrap first!) or a toaster oven until hot through.
Beau’s Kitchen Notes
This recipe has evolved from that messy first attempt into my go-to crowd-pleaser. One Sunday, I made a double batch for friends after a camping trip, and they were gone in minutes—the highest compliment! I’ve learned that letting the pancake batter rest is non-negotiable for tenderness. Also, if your cheese isn’t melty enough after assembly, pop the whole sandwich on a baking sheet under the broiler for 30 seconds. Watch it closely! It creates the most glorious, bubbly, golden top. Finally, don’t stress about perfection. A lopsided egg or oozing cheese just adds character. It’s homemade, not assembly-line, and that’s what makes it special.
Your Questions, Answered
Q: Can I make the pancakes ahead of time?
A: Absolutely! Cook the pancakes, let them cool completely, and store them in an airtight container in the fridge for 2 days or the freezer for a month. Reheat in a toaster or warm oven before assembling.
Q: My pancakes are coming out flat. What did I do wrong?
A: Flat pancakes usually point to old baking powder. Check the expiration date! Also, make sure your skillet is at the right temperature (not too cool) and you’re not pressing down on them with the spatula while they cook.
Q: What’s the best way to get a round egg for the sandwich?
A: Ring molds are a game-changer, as mentioned. If you don’t have one, you can also lightly grease the inside of a wide metal cookie cutter or even use a cleaned-out tuna can with both ends removed (just be careful of sharp edges!).
Q: Can I use pancake syrup instead of pure maple syrup?
A: You can, but the flavor will be different—more straightforwardly sweet and less complex. Pure maple syrup has a depth that really elevates the dish. I highly recommend the real deal!

Sausage, Egg & Cheese McGriddles : Homemade Sweet & Savory Breakfast Sandwich
Description
Hey friends! If you love that sweet-and-savory breakfast combo but want something fresher and homemade, this one’s for you. We’re recreating the magic of the iconic McDonald’s Sausage, Egg & Cheese McGriddle—but with real maple syrup, fluffy pancakes, and ingredients you can feel good about.
Ingredients
For the Maple Pancake “Buns” (Makes 8 small pancakes)
-
1 cup all-purpose flour
-
1 tablespoon pure maple syrup
-
1 tablespoon granulated sugar
-
1 teaspoon baking powder
-
¾ cup milk
-
1 large egg
-
1 tablespoon melted butter
-
½ teaspoon vanilla extract
-
Pinch of salt
-
Butter for cooking
For the Fillings
-
4 breakfast sausage patties
-
4 large eggs
-
4 slices American cheese (or cheddar)
-
1 teaspoon butter or oil
Instructions
In a bowl, whisk flour, sugar, baking powder, and salt.
In another bowl, whisk milk, egg, melted butter, maple syrup, and vanilla.
Pour wet into dry and mix just until combined (lumps are okay!). Let rest 5 minutes.
Heat a lightly buttered skillet over medium heat.
Pour about ¼ cup batter per pancake to make sandwich-sized rounds.
Cook 2–3 minutes until bubbles form, flip, and cook 1–2 more minutes until golden.
Repeat until you have 8 pancakes. Keep warm.
In the same skillet, cook sausage patties over medium heat 3–4 minutes per side until browned and cooked through. Set aside.
Add butter or oil to the skillet.
Cook eggs to your preference—fried, scrambled, or using a ring mold for perfect circles.
Place one pancake down.
Top with sausage → cheese → egg → second pancake.
Gently press together and serve warm.
Notes
-
Don’t overmix pancake batter—this keeps them soft.
-
For perfectly round eggs, use a metal ring mold.
-
Add cheese immediately after cooking sausage so it starts melting.
-
Nutritional Information*
*Please note: These are estimates based on the specific ingredients listed and can vary greatly with substitutions.
Per Sandwich (approximate):
Calories: 520 | Total Fat: 28g | Saturated Fat: 12g | Cholesterol: 275mg | Sodium: 780mg | Total Carbohydrates: 42g | Dietary Fiber: 1g | Sugars: 12g | Protein: 24g
This is a hearty, satisfying breakfast designed to fuel your morning. To lighten it up, consider using turkey sausage, reduced-fat cheese, and cooking with a light spray of oil. Adding a side of fruit is a great way to get more fiber and vitamins!
Final Thoughts from My Kitchen to Yours
And there you have it, friends—the homemade Sausage, Egg & Cheese McGriddle, Feastical-style. This recipe is more than just a clone; it’s an invitation to play, to experiment, and to start your day with something genuinely joyful and delicious. It proves that the best breakfasts aren’t always the fanciest, but the ones made with a little intention and a lot of flavor. I hope this becomes a regular in your weekend rotation, a solution for your meal prep, or just a fun project that makes your kitchen smell amazing.
If you make it (and I really hope you do!), tag me @Feastical or use the hashtag #FeasticalFeast so I can see your beautiful creations! Now, go enjoy that sweet-and-savory bite. You’ve earned it.
Until next time, keep cooking with heart,
Beau