
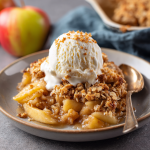
Easy Apple Crisp : Warm, Classic Dessert with a Buttery Oat Topping
Easy Apple Crisp: Your New Go-To Warm Hug of a Dessert
Hey friends, Beau here from Feastical! Let’s get real for a second. Is there anything better than the smell of cinnamon and apples wafting through your kitchen? It’s the universal signal that something cozy, delicious, and utterly soul-satisfying is about to happen. That’s exactly why I’m so pumped to share this recipe with you today.
This Easy Apple Crisp is my dessert soulmate. It has all the heartwarming, nostalgic flavor of a classic apple pie, but here’s the kicker—there’s no finicky pie crust involved. Nope. Just a mountain of juicy, spiced apples hidden under a blanket of buttery, crispy, oat-y goodness that bakes up into pure gold. It’s the dessert you can whip up on a busy Tuesday because you deserve a treat, or the showstopper you proudly serve to a table full of friends on a chilly Saturday night.
Whether you’re a seasoned pro who can julienne a carrot in your sleep or you’re just starting your kitchen journey (we’ve all been there—where DOES that spatula go?), this recipe is for you. It’s forgiving, flexible, and designed to make you feel like a rockstar. So, tie on your apron, preheat that oven, and let’s create some magic. This isn’t just dessert; it’s a edible reminder that the best things in life are often the simplest.
The Apple Doesn’t Fall Far From the Tree (Or the Crisp!)
This recipe takes me straight back to my grandma’s linoleum-floored kitchen. She was the queen of “a little of this, a pinch of that” cooking, and her apple crisp was legendary. I remember standing on a wobbly step-stool, “helping” her slice apples (read: eating more than made it into the bowl), and being utterly mesmerized as she used her fingers to work the cold butter into the flour and oats. “The secret,” she’d whisper, like she was sharing state secrets, “is getting it just crumbly enough.”
The real ritual, though, was the waiting. That 45 minutes in the oven felt like an eternity. We’d play cards at the kitchen table, the scent wrapping around us like a promise. When that timer finally dinged, she’d pull out the bubbling, golden dish and, without fail, let me have the first spoonful straight from the corner—blowing on it furiously so I wouldn’t burn my tongue. It was more than sugar and spice; it was love, patience, and the simple joy of creating something wonderful together. Every time I make this crisp, I’m right back there, and I hope this recipe creates a similar warm memory for you.
Gathering Your Apple Crisp Dream Team
Part of the beauty of this dessert is the short, sweet ingredient list. We’re using pantry staples to create something extraordinary. Here’s everything you’ll need, with a few chef-y insights to guide you.
For the Apple Filling:
- 6 medium apples, peeled and sliced – This is where the flavor party starts! I love a mix of Granny Smith (for their tartness and structure) and Honeycrisp or Gala (for their sweetness and softness). Using two types gives you a perfect balance. Chef’s Tip: No need to be perfect! Just slice them about 1/4-inch thick so they cook evenly.
- 1/4 cup granulated sugar – This sweetens the apples and helps pull out their natural juices to create that glorious syrupy filling.
- 1/2 teaspoon ground cinnamon – The classic cozy spice. Don’t be shy here—this is the soul of the filling.
- 1 tablespoon lemon juice – A little bright acid to balance the sweetness and prevent the apples from browning while you prep. Fresh is great, but bottled works in a pinch!
- 1 tablespoon all-purpose flour – Our thickening agent. It soaks up the apple juices as they bake, so you get a luscious sauce, not a soupy puddle. A great gluten-free swap is an equal amount of cornstarch.
For the Buttery Oat Topping:
- 3/4 cup old-fashioned rolled oats – These give the topping its signature hearty texture and crispiness. Quick oats will work but yield a softer, less textured topping. Avoid steel-cut—they won’t cook through.
- 1/2 cup all-purpose flour – The base of our crumble. It creates those irresistible buttery clumps.
- 1/3 cup packed brown sugar – Hello, molasses notes! The brown sugar adds a deep, caramel-like flavor and helps the topping crisp up beautifully. Light or dark both work.
- 1/2 teaspoon ground cinnamon – We’re echoing the flavor in the filling, tying the whole dish together.
- 1/4 teaspoon salt – Do not skip this! Salt is the flavor amplifier. It makes the sweet taste sweeter and the buttery taste richer.
- 1/2 cup (1 stick) COLD butter, cut into small pieces – This is the non-negotiable star. Cold butter is the key to a crisp, not soggy, topping. When the cold butter hits the hot oven, it steams and creates flaky, separate crumbs. I cut it into cubes and then pop it back in the fridge until the very last second.
Let’s Build Some Deliciousness: Step-by-Step
Ready? Let’s turn those ingredients into the cozy dessert of your dreams. I’ll walk you through each step with my favorite kitchen hacks.
- Preheat and Prep. Fire up your oven to 350°F (175°C). Take an 8×8-inch baking dish (or a similar 2-quart dish) and give it a light coating of butter, baking spray, or a quick wipe of oil. This little step guarantees easy serving later—no stuck-on apple casualties! Beau’s Hack: If I’m feeling fancy or serving a crowd, I’ll use a pretty ceramic or cast-iron skillet. It goes straight from oven to table for major “wow” factor.
- Create the Apple Filling. In a large mixing bowl, combine your sliced apples, granulated sugar, cinnamon, lemon juice, and flour. Now, get in there with your (clean!) hands and toss it all together. You want every single apple slice to get a light, friendly coating of the sugary, spiced mixture. This ensures every bite is perfectly balanced. Pour this fragrant apple mountain into your waiting baking dish and spread it into an even layer. Don’t wash that bowl yet!
- Make the Magical Topping. In the same bowl (see? less dishes!), whisk together the oats, flour, brown sugar, cinnamon, and salt. Make sure the brown sugar is broken up and evenly distributed. Now, scatter those cold butter cubes over the top. Here’s the fun part: use a pastry cutter, two forks, or my personal favorite—your fingertips—to work the butter into the dry ingredients. Pinch and rub the mixture between your fingers until it resembles a rough, crumbly texture with pea-sized (and some smaller) butter pieces throughout. The goal is not a uniform paste, but a shaggy, crumbly mess. Those visible butter bits are what will melt and create crispy pockets of joy.
- Assemble and Bake to Golden Perfection. Sprinkle the oat topping evenly over the apples. No need to press it down—let it be fluffy! Slide the dish onto the middle rack of your preheated oven. Now, the hardest part: the wait. Bake for 40-45 minutes. You’re looking for a topping that’s deeply golden brown (almost toasted-looking) and a filling that is visibly bubbling around the edges. That bubble is the sound of success—it means your filling is thick and juicy.
- The Crucial Rest. I know, I know. You want to dive in. But trust me on this: let the crisp rest for at least 15-20 minutes after pulling it from the oven. This allows the bubbling filling to settle and thicken up just enough so that when you scoop it, you get a perfect, cohesive serving and not apple soup. It’s worth the wait, I promise.
How to Serve This Beauty (The Best Part!)
This is where your apple crisp becomes an experience. Sure, you can eat it straight from the dish with a spoon (no judgment here), but let’s talk about elevating the moment.
The Classic & Unbeatable: A generous scoop of high-quality vanilla ice cream melting over the warm crisp is a match made in heaven. The hot-and-cold, creamy-and-crispy contrast is everything.
The Cozy Alternative: A dollop of softly whipped cream or a spoonful of thick, tangy Greek yogurt adds a lovely richness and cuts the sweetness perfectly.
For Breakfast? (Yes, Really): Leftover apple crisp is absolutely fantastic reheated and served with a pour of cold milk or a scoop of vanilla yogurt. I fully endorse dessert for breakfast when it involves fruit and oats!
However you serve it, do it warm. That’s when the flavors sing and the textures are at their peak. It’s comfort in a bowl.
Make It Your Own: Delicious Twists & Swaps
One of my favorite things about this recipe is its versatility. Feel free to play and adapt it to your taste or pantry!
- Pear & Ginger Crisp: Swap out half the apples for ripe, peeled pears. Add 1 teaspoon of freshly grated ginger or 1/2 teaspoon of ground ginger to the filling for a bright, zippy twist.
- Berry-Apple Harvest: Add 1 cup of fresh or frozen blueberries or blackberries to the apple mixture. The berries will burst and create a gorgeous, vibrant purple-pink filling.
- Nutty Crunch: Stir 1/2 cup of chopped pecans or walnuts into the oat topping before sprinkling it on. It adds an incredible toasted flavor and extra crunch.
- Gluten-Free & Dairy-Free Friendly: Use a 1:1 gluten-free flour blend in both the filling and topping. For the butter, swap in a high-quality, firm vegan butter stick (keep it cold!). The result is just as delicious.
- Maple Sweetness: Replace the brown sugar in the topping with 1/3 cup of pure maple syrup. You may need to add an extra 2-3 tablespoons of flour to compensate for the extra liquid and keep the topping crumbly.
Beau’s Kitchen Notebook
This recipe has been with me through countless potlucks, holiday feasts, and “I need chocolate—wait, no, apple crisp” moments. It’s evolved from my grandma’s “pinch of this” method to these written-down measurements, but the spirit is the same. Over the years, I’ve learned that the type of apple truly changes the game—tart apples give a more grown-up, complex flavor, while sweet apples feel like instant nostalgia.
A funny story: I once was so eager to make this for a date that I forgot to add the flour to the filling. The result was essentially sweet, spiced apple soup with a floating oat raft. We laughed so hard, ate it with straws (joking, kind of), and it’s still a story we tell. Even the “failures” are memorable. So don’t stress. Cooking is about joy, not perfection. Now, go preheat that oven!
Your Apple Crisp Questions, Answered
Q: Can I make this apple crisp ahead of time?
A: Absolutely! You can assemble the crisp completely (cover tightly) and refrigerate it for up to 24 hours before baking. You may need to add 5-10 extra minutes to the bake time since it’s going into the oven cold. You can also bake it, let it cool completely, cover, and reheat it in a 300°F oven for 15-20 minutes before serving.
Q: My topping is soggy! What happened?
A: The usual suspects: 1) The butter was too soft or melted when you mixed it. Always start with cold butter. 2) The crisp didn’t bake long enough. Ensure the top is a deep golden brown and you see active bubbling around the edges. 3) Let it rest! The filling continues to thicken as it cools outside the oven.
Q: Can I use frozen apples?
A: You can, but don’t thaw them first. Toss the frozen slices directly with the filling ingredients (you might need an extra half-tablespoon of flour) and bake. Expect a slightly more liquidy filling, and potentially a longer bake time.
Q: What’s the best way to store leftovers?
A: Cover the baking dish with foil or transfer leftovers to an airtight container. They’ll keep in the fridge for 3-4 days. Reheat single servings in the microwave for a minute, or reheat the whole dish in a 325°F oven until warmed through.
Easy Apple Crisp : Warm, Classic Dessert with a Buttery Oat Topping
Description
Hey friends, Beau here from Feastical! This Easy Apple Crisp is everything we love about apple pie—warm cinnamon apples, buttery sweetness, and pure nostalgia—without the stress of rolling out dough. Juicy apples bake beneath a golden, oat-studded crumble that’s crisp on top and tender underneath. It’s simple, forgiving, and endlessly comforting, whether you’re baking for guests or just treating yourself on a quiet night in.
Ingredients
Apple Filling
-
6 medium apples, peeled and sliced (Granny Smith + Honeycrisp is ideal)
-
¼ cup granulated sugar
-
½ teaspoon ground cinnamon
-
1 tablespoon lemon juice
-
1 tablespoon all-purpose flour (or cornstarch for gluten-free)
Buttery Oat Topping
-
¾ cup old-fashioned rolled oats
-
½ cup all-purpose flour
-
⅓ cup packed brown sugar
-
½ teaspoon ground cinnamon
-
¼ teaspoon salt
-
½ cup (1 stick) cold butter, cubed
Instructions
-
Preheat oven to 350°F (175°C). Lightly grease an 8×8-inch baking dish.
-
Make the filling
In a large bowl, toss apples with sugar, cinnamon, lemon juice, and flour until evenly coated. Spread into the prepared baking dish. -
Prepare the topping
In the same bowl, mix oats, flour, brown sugar, cinnamon, and salt. Cut in cold butter using fingers or a pastry cutter until the mixture is crumbly with pea-sized butter pieces. -
Assemble & bake
Sprinkle topping evenly over apples. Bake uncovered for 40–45 minutes, until the topping is golden and the filling is bubbling around the edges. -
Rest before serving
Let cool for 15–20 minutes to allow the filling to set.
Notes
-
Use cold butter for a crisp, not soggy, topping
-
Mix apple varieties for balanced sweet-tart flavor
-
Deep golden topping = success — pale topping means underbaked
-
Let it rest so the filling thickens properly
Nutritional Info (Approximate & For Your Info!)
Here’s a general breakdown per serving (based on 6 servings). Remember, this is a treat meant to be enjoyed soulfully!
Calories: ~300 | Total Fat: 12g | Saturated Fat: 7g | Cholesterol: 30mg | Sodium: 150mg | Total Carbohydrates: 48g | Dietary Fiber: 4g | Sugars: 32g | Protein: 2g
Please note: These values are estimates calculated using online tools and will vary based on specific ingredients used (like apple type, butter brand, etc.). For precise dietary needs, use your preferred nutritional calculator with your exact ingredients.
Final Thoughts from My Kitchen to Yours
And there you have it, friends—my heart-on-a-plate, Easy Apple Crisp. This recipe is more than just a list of steps; it’s an invitation to slow down, to create something with your hands, and to fill your home with a smell that feels like a celebration. It’s proof that you don’t need complicated techniques or fancy equipment to make a dessert that people will absolutely rave about.
I hope this crisp becomes a regular in your recipe rotation, a solution for last-minute guests, and a treat that makes an ordinary day feel special. Most of all, I hope you have as much fun making it as I do. Now, go grab that ice cream! And when you make it, tag me over at @Feastical—I’d love to see your masterpiece.
Until next time, keep it simple, keep it soulful, and always keep a fork handy.
– Beau

Crockpot Chicken and Stuffing : The Ultimate Set-It-and-Forget-It Comfort Meal
Crockpot Chicken and Stuffing – The Ultimate Set-It-and-Forget-It Comfort Meal
Creamy, Savory, and Effortlessly Cozy
When Your Soul Needs a Warm Hug, Your Crockpot Answers
Hey friends, Beau here from Feastical. Let’s talk about those days. You know the ones. The sky is grey, your to-do list is laughing at you, and the very last thing you want to do is stand at the stove orchestrating a complicated dinner symphony. Your stomach is rumbling for something that feels like a Sunday at grandma’s house, but your energy is firmly planted in “takeout menu” territory. I get it. We’ve all been there.
That’s exactly why this Crockpot Chicken and Stuffing recipe is my not-so-secret weapon. It’s the culinary equivalent of a cozy blanket and your favorite sweatpants. This dish is pure magic: tender, juicy chicken, nestled under a layer of savory, herb-infused stuffing that turns luxuriously soft and creamy as it cooks. The best part? You achieve this state of comfort food nirvana with about 10 minutes of active effort. Just a few simple layers, the click of a lid, and you’re free for the next 5-6 hours. The slow cooker does the heavy lifting, filling your home with the kind of aroma that makes everyone wander into the kitchen asking, “Is it ready yet?” with hopeful puppy-dog eyes.
This isn’t just a recipe; it’s a permission slip to take it easy. It’s for the busy parent, the tired professional, the student on a budget, or anyone who believes that good food should bring comfort, not stress. So, let’s ditch the complicated and embrace the beautifully simple. Grab your crockpot, and let’s make a meal that’s guaranteed to feel like a warm hug on a plate.
Why This Dish Feels Like Coming Home
This recipe always takes me straight back to my Aunt Clara’s kitchen after a long, cold day of playing outside. She wasn’t a fancy chef, but she was a wizard with a slow cooker and a can of cream soup. Her version of this was legendary in our family. She’d have it bubbling away on the counter, and the second we’d burst through the door, cheeks rosy and starving, that smell would hit us—the savory scent of poultry seasoning, the rich promise of creamy sauce.
We’d set the table (impatiently), and she’d lift the lid, releasing a cloud of steam that fogged up her glasses. She’d always serve it with a dramatic flourish, saying, “The pot did all the work, I just made the magic happen!” It was our guaranteed post-adventure feast, eaten with big spoons and even bigger smiles. It taught me early on that the best meals aren’t about perfection; they’re about ease, warmth, and the people you share them with. Every time I make this now, I get a little taste of that childhood comfort, and I love that I can pass that feeling right on to you.
Gathering Your Comfort Food Toolkit
Here’s the beautiful lineup of simple ingredients that come together to create something truly greater than the sum of its parts. Don’t stress about brand names or exactness—this is a forgiving recipe!
- 1 ½ to 2 lbs boneless, skinless chicken breasts or thighs: The star of the show! I often use a mix. Thighs are my personal favorite for slow cooking—they stay incredibly juicy and are more forgiving if you cook them a bit longer. Breasts are leaner and will shred beautifully. Use what you love or have on hand!
- 1 box (6 oz) stuffing mix (any flavor): This is our flavor and texture hero. The classic “herb” or “chicken” flavored mix is perfect. Those little dried bread cubes and packets of seasoning are a brilliant shortcut for incredible flavor. (Gluten-free? Use your favorite GF stuffing mix!)
- 1 can (10.5 oz) cream of chicken soup: The creamy base that brings everything together. It creates a luxurious sauce as it melds with the broth. Chef’s Insight: For a richer flavor, try cream of mushroom or celery. To lighten it up, a 98% fat-free version works great, or you can use a homemade cream soup substitute.
- ¾ cup chicken broth: The essential liquid that brings moisture and depth. This hydrates the stuffing and creates the sauce. Pro Tip: If you want a thicker, more stuffing-like topping, reduce this to ½ cup. For a saucier, almost casserole-like dish, stick with ¾ cup or even go up to 1 cup.
- ½ cup sour cream: The secret weapon for tangy richness! It adds a wonderful creaminess and a slight zing that balances the savory flavors. Don’t skip it! If you’re in a pinch, plain Greek yogurt is a fantastic substitute.
- ½ teaspoon garlic powder: An easy flavor booster that distributes evenly. You can also use a teaspoon of minced fresh garlic if you’re feeling fancy.
- Salt and black pepper, to taste: Always season your chicken directly! The stuffing mix and soup have sodium, so I’m light on the salt here and let people adjust at the table.
- Optional: 1-2 cups frozen green beans or peas: My little hack for a one-pot meal. Toss them in during the last 30-60 minutes—they’ll heat through and add a pop of color and veggie goodness without getting mushy.
- Fresh parsley, for garnish: A sprinkle of green at the end makes it look restaurant-fresh and adds a tiny bit of freshness. Chives or thyme are lovely too!
Let’s Build Your Cozy Masterpiece (It’s So Easy!)
Ready for the simplest cooking session ever? Follow these steps, and you really can’t go wrong. I’ve packed in my favorite chef hacks along the way.
- Prep Your Pot & Protein: Give the inside of your slow cooker a quick spray with non-stick cooking spray. This isn’t totally necessary, but it makes cleanup a dream. Place your chicken in a single layer on the bottom. Now, season it well! Sprinkle both sides with a pinch of salt, pepper, and that garlic powder. This simple step ensures the chicken itself is flavorful, not just the topping.
- Create the Flavor Bomb Topping: In a medium bowl, dump in your dry stuffing mix (crumbs, herbs, and all!). Add the entire can of cream soup, the sour cream, and the chicken broth. Grab a spoon or spatula and mix it until it’s just combined. It will be a very thick, almost pasty mixture—this is perfect! Don’t add more liquid; the magic happens as it cooks. Chef’s Hack: If you want extra flavor, stir in a teaspoon of dried onion flakes or a sprinkle of dried thyme at this stage.
- The Big Layer: Take your thick stuffing mixture and plop it right on top of the seasoned chicken. Use your spoon to spread it into an even layer, covering the chicken completely. This blanket of goodness will steam and baste the chicken as it cooks, keeping it unbelievably moist. Put the lid on securely. That’s it. Your active work is done. Go live your life!
- Let the Slow Cooker Work Its Magic: Cook on LOW for 5-6 hours or on HIGH for 3-4 hours. Low and slow is always my preference for the most tender chicken, but high works perfectly if you’re on a tighter schedule. The dish is done when the chicken is cooked through (165°F internal temperature) and the stuffing on top is set, moist, and heated through.
- Veggie Time (Optional but Smart): About 30 to 60 minutes before serving, if you’re adding frozen veggies, simply stir them gently into the top layer of the stuffing. Don’t bury them; just nestle them in so they can heat through. Replace the lid and let it finish cooking. This keeps them bright and crisp-tender.
- Serve & Swoon: When the timer goes off and your kitchen smells like heaven, it’s time! You can serve the chicken breasts/thighs whole, or use two forks to easily shred the chicken right in the pot—it will be that tender. Spoon generous helpings of the creamy chicken and savory stuffing onto plates or into bowls. Garnish with that fresh parsley for a beautiful finish.
How to Serve Up This Cozy Classic
This dish is a complete meal in a pot, but a couple of simple sides can turn it into a feast. Here’s how I love to plate it up:
For a classic, homey presentation, I go for a wide, shallow bowl. Place a piece of the tender chicken or a pile of shredded meat right in the center. Spoon a big heap of that creamy stuffing right over the top, letting some of the sauce pool around the edges. That sauce is liquid gold—don’t waste a drop!
Now, for sides: because we have our protein and starch covered, a simple, bright vegetable is the perfect contrast. Steamed or roasted broccoli with a squeeze of lemon is my go-to. A crisp green salad with a tangy vinaigrette cuts through the richness beautifully. And honestly, a side of cranberry sauce (the kind from the can is totally acceptable here!) adds a sweet-tart pop that is absolutely divine with the savory stuffing. Don’t forget a big basket of warm, crusty bread for mopping up every last bit of that delicious sauce.
Make It Your Own: Fun Twists & Swaps
The beauty of this recipe is its flexibility. Once you’ve mastered the basic version, play around! Here are a few of my favorite spins:
- The “Thanksgiving Leftovers” Twist: Use cream of mushroom soup and add ½ cup of dried cranberries to the stuffing mix. In the last hour, stir in 1 cup of chopped leftover roasted turkey instead of chicken. Top with a sprinkle of pecans before serving.
- The “Everything Cheese Lover”: After cooking, stir 1 cup of shredded cheddar cheese into the hot stuffing topping until melty. Let it sit for 5 minutes. Garnish with extra cheese and crispy fried onions for a decadent treat.
- The “Herb Garden” Fresh Version: Swap the boxed stuffing mix for 4 cups of dried, cubed artisan bread. Increase the broth to 1 cup and add 1 tablespoon of your favorite poultry seasoning blend, ¼ cup of fresh chopped parsley, and 2 tablespoons of fresh chopped sage.
- The “Lightened Up” Swap: Use chicken breasts, 98% fat-free cream of chicken soup, low-sodium broth, and plain non-fat Greek yogurt instead of sour cream. You’ll still get all the creamy comfort with a lighter footprint.
- The “Pork Chop” Alternative: Replace the chicken with 4-6 boneless pork chops. They become incredibly tender and pair wonderfully with the stuffing flavors. Cook times remain the same.
Beau’s Kitchen Confidential
This recipe has been in my back pocket for years, and it’s evolved from my Aunt Clara’s classic. The biggest game-changer was adding the sour cream—it was her “secret” that I’m now shouting from the rooftops! It transforms the texture from just “wet stuffing” to a luxuriously creamy one.
A funny story: I once was filming a video for this recipe and was so busy chatting to the camera about how “hands-off” it was that I completely forgot to actually plug in the crockpot. Six hours later, I had a very sad, very raw dinner. We ordered pizza and laughed about it. The moral? Always double-check that little red light is on! Even us “pros” have kitchen fails. It’s all part of the fun.
Your Questions, Answered
Q: Can I put raw chicken frozen in the crockpot?
A: I don’t recommend it for food safety and even cooking. Thaw your chicken first for the best (and safest) results. The frozen chicken can stay in the “danger zone” temperature for too long as it thaws in the slow cooker.
Q: My stuffing turned out a bit mushy. What happened?
A: This usually means a bit too much liquid. Next time, try reducing the broth by ¼ cup. Also, avoid stirring during the cooking process—that can break down the bread cubes. The texture should be moist and cohesive, not soupy.
Q: Can I make this in the oven instead?
A: Absolutely! Layer everything in a 9×13 baking dish as directed. Cover tightly with foil and bake at 350°F (175°C) for about 45-55 minutes, until the chicken is cooked through and the stuffing is hot. Uncover for the last 10 minutes if you like a crisper top.
Q: How do I store and reheat leftovers?
A: Store in an airtight container in the fridge for up to 4 days. Reheat individual portions in the microwave with a splash of broth or water to keep it moist. You can also reheat it covered in a 350°F oven until warmed through.

Crockpot Chicken and Stuffing : The Ultimate Set-It-and-Forget-It Comfort Meal
Description
Creamy, savory, and endlessly cozy, this Crockpot Chicken and Stuffing is the definition of effortless comfort food. Tender chicken cooks low and slow beneath a rich, herby stuffing topping that turns irresistibly soft and creamy as it simmers. With just minutes of prep and one slow cooker, this is the kind of meal that feels like a warm hug after a long day—no stirring, no stress, no fancy steps.
Ingredients
-
1½–2 lbs boneless, skinless chicken breasts or thighs
-
Salt and black pepper, to taste
-
½ teaspoon garlic powder
-
1 box (6 oz) stuffing mix (chicken or herb flavor)
-
1 can (10.5 oz) cream of chicken soup
-
¾ cup chicken broth
-
½ cup sour cream (or plain Greek yogurt)
-
Optional: 1–2 cups frozen green beans or peas
-
Optional garnish: chopped fresh parsley or chives
Instructions
-
Prep the slow cooker
Lightly grease the crockpot. Place chicken in an even layer on the bottom and season with salt, pepper, and garlic powder. -
Mix the topping
In a bowl, combine stuffing mix, cream of chicken soup, sour cream, and chicken broth. Stir until just combined. The mixture will be thick. -
Layer and cook
Spread the stuffing mixture evenly over the chicken. Cover and cook:-
LOW: 5–6 hours
-
HIGH: 3–4 hours
Until chicken is fully cooked and tender.
-
-
Add vegetables (optional)
During the last 30–60 minutes, gently stir frozen vegetables into the top layer. Cover and continue cooking. -
Serve
Serve chicken whole or shredded, topped generously with creamy stuffing. Garnish with fresh herbs if desired.
Notes
-
Chicken thighs stay juicier if cooking on the longer end.
-
Don’t over-stir — stirring too much breaks down the stuffing.
-
For thicker stuffing, reduce broth to ½ cup.
-
For extra sauce, increase broth to 1 cup.
-
Always thaw chicken first for safe, even cooking.
Final Thoughts: Your New Go-To for Cozy Nights
This Crockpot Chicken and Stuffing is more than just a recipe—it’s a reminder that good food doesn’t have to be complicated. It’s the warm, savory hug you can count on when life feels overwhelming, when time is short, or when you simply crave the kind of meal that feels like home.
Whether you stick to the classic version or make it your own with one of the fun twists, this dish delivers every time. It forgives, adapts, and fills your kitchen with the kind of smell that makes everyone feel welcome.
So, the next time that grey day rolls around and takeout menus are calling, remember: you have a better option. Set it, forget it, and let your slow cooker do what it does best—turning simple ingredients into a moment of pure comfort.
Thanks for cooking with me, friends. Now, go enjoy that well-deserved cozy night in. You’ve earned it.
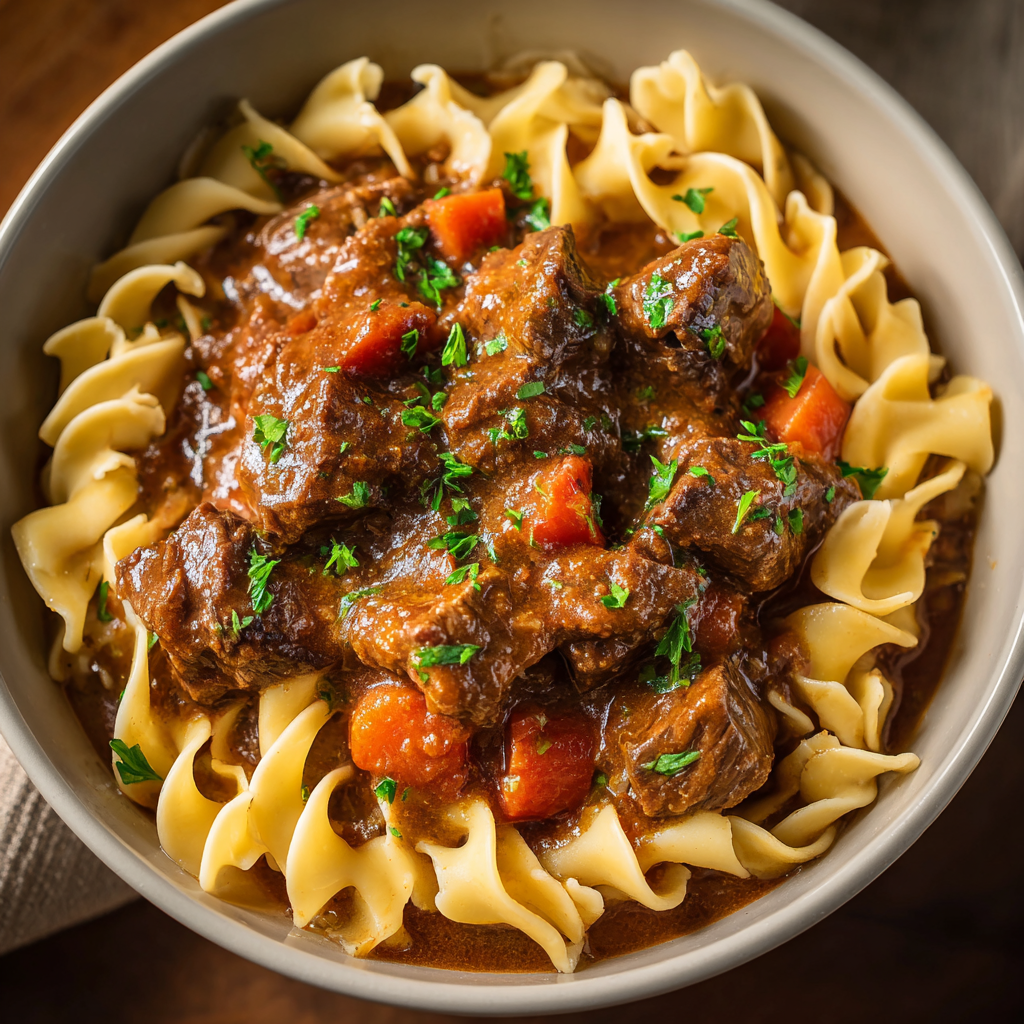
Beef & Noodles : A Cozy, Hearty Midwest Classic
Beef & Noodles: The Cozy Midwest Classic That Tastes Like a Hug
Hey friends, Beau here from Feastical! Pull up a chair and let’s talk about one of life’s greatest, simplest pleasures: a steaming bowl of food that just gets you. You know the kind. It’s the dish you crave when the wind is howling, when you need a serious pick-me-up, or when you just want to wrap your hands around something warm and reassuring. For me, and for so many across the heartland, that dish is a humble, glorious bowl of Beef & Noodles.
This isn’t fancy cuisine. It’s better. It’s heritage food. It’s the kind of recipe passed down on stained index cards and made by memory in well-loved Dutch ovens. Tender, fall-apart beef swimming in a savory, onion-kissed gravy, all tangled up with soft, pillowy egg noodles. It’s sustenance. It’s soul. It’s the culinary equivalent of your favorite worn-in sweater.
Today, I’m sharing my tried-and-true, foolproof version of this Midwest classic. We’re going to build layers of flavor the easy way, with a few of my favorite kitchen hacks tucked in. Whether you’re a weeknight warrior or a Sunday simmerer, this recipe is your ticket to comfort food bliss. So, tie on your apron, grab your biggest pot, and let’s make a meal that’ll have everyone asking for seconds. This is more than just dinner; it’s a feel-good feast.
A Simmering Pot of Memories
This recipe always takes me right back to my grandma’s kitchen in Indiana. It wasn’t a fancy space— Formica counters, that faint smell of coffee and cinnamon always in the air—but it was the heart of her home. She made Beef & Noodles almost every Sunday after church. The ritual was as comforting as the food itself.
I’d sit at the table, supposedly doing homework, but really just watching her. There was no recipe in sight. She’d brown the beef with a focus that meant business, then deglaze the pan with a splash of broth, scraping up every last flavorful bit with a satisfied sigh. The pot would then go into the oven for its long, slow simmer. For hours, the most incredible aroma would weave through the house—a savory promise of what was to come.
When the family gathered, she’d pull the bubbling pot from the oven, stir in the wide egg noodles, and within minutes, she was ladling heaping portions into our bowls. It was quiet, focused work. The joy was in the serving, in watching us dig in. That first bite was pure magic: savory, rich, and profoundly simple. It taught me that the best meals aren’t about complexity; they’re about patience, love, and the powerful act of feeding the people you care for. Every time I make this, I feel that connection. It’s my edible heirloom.
Gathering Your Flavor Makers
Here’s everything you’ll need to create this bowl of comfort. I’ve added my little chef’s notes alongside each one—because knowing the why makes you a more confident cook!
- 2 lbs beef chuck roast, cut into 1.5-inch chunks: This is our star! Chuck roast is my go-to because it’s marbled with fat that melts during the long cook, making it incredibly tender and flavorful. Chef’s Insight: Ask your butcher to cut it for you to save time. Stew meat works, but chuck has better flavor consistency.
- 1 tablespoon neutral oil (like avocado or canola): Just enough to get a good sear. We’re not deep-frying, just creating a flavorful foundation.
- 1 small yellow onion, diced: The sweet, aromatic backbone of our gravy. It melts down into silky sweetness. Sub Tip: No yellow onion? A white onion or two large shallots will do in a pinch.
- 3 cloves garlic, minced: Our aromatic powerhouse. Please, use fresh! That jarred stuff just can’t compete when it’s a key flavor layer.
- 4 cups beef broth: This forms our gravy base. Chef’s Hack: For a richer, fuller flavor, I like to use a good-quality, low-sodium broth. It lets you control the salt. Need a boost? A splash of red wine when deglazing is a game-changer!
- 1 tablespoon Worcestershire sauce: The secret umami bomb! It adds a deep, savory, slightly tangy complexity that makes the gravy sing. Don’t skip it.
- 1 teaspoon dried thyme: Herbal, earthy notes that pair perfectly with beef. Sub Tip: Fresh thyme is fantastic—use 3-4 sprigs tied together and remove before adding noodles.
- Salt and black pepper, to taste: Season as you go! I season the beef before searing and adjust again at the end.
- 12 oz wide egg noodles (homestyle or extra wide): The classic companion. They’re sturdy enough to hold up to the rich gravy and have a wonderful, comforting texture. Sub Tip: For a gluten-free twist, your favorite GF wide noodles work great—just cook them separately and add at the end.
- Optional: chopped fresh parsley for garnish: A little pop of color and fresh flavor to finish. Chives or even a tiny dollop of sour cream are also delicious.
Let’s Get Cooking: Building Your Masterpiece
Okay, team. Time to fire up the stove. Follow these steps, soak up the tips, and you’re guaranteed a perfect pot of comfort.
Step 1: The Perfect Sear (Don’t Rush This!)
Pat your beef chunks very dry with paper towels. This is the #1 trick for a good sear, not a steam. Season generously with salt and pepper. In your large, heavy-bottomed pot or Dutch oven, heat the oil over medium-high heat until it shimmers. Add the beef in a single layer, with space between the pieces. Work in batches! Crowding the pan is the enemy of browning. Let it sear, undisturbed, for 3-4 minutes per side until you get a gorgeous, deep-brown crust. Remove to a plate and repeat. Chef’s Mantra: Brown food = flavor food. Those crispy bits left in the pot? Liquid gold.
Step 2: Building the Flavor Foundation
In that same glorious pot (with all those browned bits), reduce the heat to medium. Add the diced onion. Sauté for 4-5 minutes, stirring occasionally, until they’re softened and turning translucent. Now, add the minced garlic and cook for just 30 seconds until fragrant—you’ll smell it! Garlic burns fast, so keep it moving.
Step 3: The Slow Simmer (This is Where Magic Happens)
Return all the seared beef and any accumulated juices back to the pot. Pour in the beef broth and Worcestershire sauce. The broth will sizzle and steam—use your spoon to scrape up every last bit of browned fond from the bottom of the pot. This is called deglazing, and it’s where we capture all that flavor we worked so hard to create. Stir in the dried thyme, and bring everything to a lively boil. Once boiling, immediately reduce the heat to low. Cover the pot with a tight-fitting lid and let it simmer gently for 1.5 to 2 hours. The beef should be fork-tender, practically melting apart. This low-and-slow cook is non-negotiable for that perfect texture.
Step 4: Noodle Time!
Once your beef is tender, taste the broth and adjust seasoning with more salt and pepper if needed. Bring the stew back to a low boil. Stir in the dry egg noodles directly into the pot. Submerge them in the liquid. Let them cook, uncovered, at a simmer for 10-12 minutes, stirring occasionally to prevent sticking. The noodles will soak up the broth and thicken the gravy beautifully. If it gets too thick before the noodles are done, just add a splash of water or extra broth. You’re looking for a glossy, coat-the-spoon consistency.
Step 5: The Grand Finale
Turn off the heat. Let the pot sit for 5 minutes—this allows the gravy to settle and the flavors to marry one last time. Give it one final gentle stir. Ladle generous servings into deep bowls. Garnish with that chopped parsley for a fresh contrast. Serve immediately and watch the smiles appear.
How to Serve Your Cozy Creation
This dish is a complete meal in a bowl, but let’s talk about making it a true Midwest feast! The beauty is in its simplicity, so your sides should be simple too.
The Classic Plate: A deep, wide bowl is essential. Pile that Beef & Noodles right in the center. I love to serve it with a slice of thick, buttered crusty bread or a soft dinner roll on the side for sopping up every last drop of gravy. A simple, crisp green salad with a tangy vinaigrette cuts through the richness perfectly.
Go All-In on Comfort: Feeling extra indulgent? Serve it over a cloud of creamy mashed potatoes or buttery wide egg noodles. Yes, noodles on noodles! It’s a carb-lover’s dream and a true regional tradition. A side of roasted carrots or steamed green beans adds a lovely veggie component.
For the Crowd: This recipe doubles beautifully for a potluck or family gathering. Keep it warm in a slow cooker on the “warm” setting. Set out bowls, spoons, and your chosen sides for a build-your-own comfort bowl bar. It’s a guaranteed crowd-pleaser that asks for nothing but your appetite.
Make It Your Own: Fun Twists & Swaps
Love the base recipe? Awesome! Now let’s play with it. Here are a few of my favorite ways to mix things up.
- The “Kitchen Sink” Stew: Add 2 cups of chunked carrots and celery when you sauté the onions. For the last 20 minutes of simmering, toss in a cup of frozen peas. You’ve just turned it into a hearty beef stew with noodles!
- Mushroom Lover’s Dream: Sauté 8 oz of sliced cremini or baby bella mushrooms with the onions. Their earthy flavor adds incredible depth. A splash of dry sherry when deglazing takes it over the top.
- Chicken & Noodles (The Comfort Cousin): Swap the beef for 2 lbs of boneless, skinless chicken thighs. Use chicken broth instead of beef. The cook time is shorter—simmer for about 45 minutes or until the chicken shreds easily. A teaspoon of poultry seasoning is a great addition here.
- Slow Cooker Simplicity: Perfect for busy days. After searing the beef and sautéing the onion/garlic, transfer everything to your slow cooker. Add broth and Worcestershire. Cook on LOW for 7-8 hours or HIGH for 4-5. An hour before serving, stir in uncooked noodles, cover, and cook on HIGH until tender.
- Creamy Herb Version: For a richer, creamier gravy, stir in 1/2 cup of sour cream or full-fat plain Greek yogurt at the very end, after you’ve turned off the heat. Add a tablespoon of chopped fresh dill or parsley. So good!
Beau’s Kitchen Notes & Stories
This recipe has been my reliable friend for years, and it’s evolved in my kitchen. I used to be terrified of overcooking the beef, so I’d pull it too early. Lesson learned: trust the low simmer! The connective tissue needs time to break down into that gorgeous tenderness.
One hilarious kitchen fail early on? I was in a hurry and dumped all the uncooked noodles in at the beginning of the 2-hour simmer. Let’s just say I ended up with beef-flavored paste and had to order pizza. A humble, but delicious, reminder that timing matters!
Now, I see this recipe as a template. It’s forgiving. Not enough broth? Add some water. Want it thicker? Make a quick slurry of cornstarch and cold water at the end. The goal isn’t perfection; it’s a delicious, soul-warming meal shared with good people. That’s the real Feastical spirit.
Your Questions, Answered
Q: My gravy is too thin! How can I thicken it?
A: No sweat! The easiest fix is to create a slurry. Mix 1 tablespoon of cornstarch with 2 tablespoons of cold water until smooth. After the noodles are cooked, bring the stew to a gentle simmer and stir in the slurry. Cook for 1-2 minutes until thickened. You can also let it simmer uncovered for a bit longer to reduce.
Q: Can I cook the noodles separately?
A: Absolutely, and sometimes I prefer it! Boil the noodles in a separate pot of salted water according to package directions. Drain, toss with a tiny bit of butter to prevent sticking, and then ladle the beef and gravy over them. This gives you more control over the noodle texture and prevents them from absorbing all the gravy if you have leftovers.
Q: What’s the best way to store and reheat leftovers?
A: Store in an airtight container in the fridge for up to 4 days. The noodles will continue to absorb liquid, so when reheating on the stove or in the microwave, add a splash of broth or water to loosen it back up to that perfect saucy consistency.
Q: Is there a way to make this in an Instant Pot or pressure cooker?
A: Yes! Use the sauté function to brown the beef and soften the onions/garlic. Add everything EXCEPT the noodles. Pressure cook on High for 35 minutes, with a natural pressure release for 10 minutes. Then, use the sauté function again to bring it to a simmer and cook your noodles right in the pot, or add pre-cooked noodles to heat through.

Beef & Noodles : A Cozy, Hearty Midwest Classic
Description
Hey friends, Beau here from Feastical! When the weather turns cold or life just feels heavy, this is the bowl I reach for. Beef & Noodles is pure Midwest comfort—tender chunks of beef simmered low and slow in a savory gravy, finished with soft, pillowy egg noodles. It’s simple, hearty, and deeply satisfying. No frills, no fuss—just the kind of meal that warms you from the inside out.
Ingredients
-
2 lbs beef chuck roast, cut into 1½-inch chunks
-
1 tablespoon neutral oil (canola or avocado)
-
1 small yellow onion, diced
-
3 cloves garlic, minced
-
4 cups beef broth (low sodium preferred)
-
1 tablespoon Worcestershire sauce
-
1 teaspoon dried thyme
-
Salt and black pepper, to taste
-
12 oz wide egg noodles
-
Optional garnish: chopped fresh parsley
Instructions
-
Sear the beef
Pat beef dry and season generously with salt and pepper. Heat oil in a large Dutch oven over medium-high heat. Brown beef in batches, 3–4 minutes per side, until deeply golden. Remove and set aside. -
Build the base
Reduce heat to medium. Add onion to the same pot and cook 4–5 minutes until softened. Stir in garlic and cook 30 seconds until fragrant. -
Simmer low and slow
Return beef (and juices) to the pot. Add beef broth, Worcestershire sauce, and thyme. Bring to a boil, scraping up browned bits from the bottom. Reduce to low, cover, and simmer 1½–2 hours, until beef is fork-tender. -
Cook the noodles
Bring stew back to a gentle boil. Stir in egg noodles and cook uncovered 10–12 minutes, stirring occasionally, until noodles are tender and the gravy thickens. -
Finish & serve
Taste and adjust seasoning. Let rest 5 minutes before serving. Garnish with parsley if desired.
Notes
-
Don’t rush the simmer – Chuck roast needs time to become tender.
-
Brown in batches – Crowding the pot causes steaming, not searing.
-
Too thick? Add a splash of broth or water.
-
Too thin? Simmer uncovered or stir in a cornstarch slurry (1 tbsp cornstarch + 2 tbsp cold water).
-
Leftovers tip: Add broth when reheating—noodles soak up liquid overnight.
Nutritional Information (Approximate)
Here’s a general breakdown per serving (based on 6 servings). Remember, this is comfort food meant to be enjoyed as part of a balanced diet!
- Calories: ~480
- Protein: 35g (Excellent source for staying full!)
- Carbohydrates: 30g (Primarily from the nourishing egg noodles)
- Fat: 24g (This includes the marbled fat from the chuck roast, which provides flavor and tenderness)
- Fiber: 2g
- Sodium: ~720mg (Using low-sodium broth can significantly reduce this)
Note: These values are estimates calculated using generic ingredients. For precise nutritional information, consider using a calculator with your specific brand ingredients. To lighten it up slightly, you can trim excess fat from the beef and use a lower-fat broth.
Final Thoughts: More Than a Meal
Friends, if you take only one thing away from our time together today, let it be this: Beef & Noodles is a feeling.
This recipe isn’t just a list of ingredients and steps. It’s an invitation. An invitation to slow down, to savor the process, and to create something profoundly good and simple for yourself and the people around your table. In a world that often feels complex and fast, there’s a sacred kind of peace found in the rhythmic sear of meat, the slow simmer of a pot, and the warm, fragrant steam that rises when you lift the lid.
Whether this dish is a beloved memory from your own past or a brand-new tradition you’re starting today, you’re participating in something timeless. You’re crafting comfort. You’re turning humble, honest ingredients into a bowlful of sustenance that does more than fill a stomach—it soothes the soul.
Don’t stress over perfection. My grandma’s stained recipe card didn’t have precise grams or degrees. It had heart. So, whether you follow my version to the letter or twist it into something uniquely yours, you’re doing it right. The goal is the shared sigh of contentment after the first bite. The goal is the quiet around the table, broken only by the sound of spoons scraping bowls.
So here’s to the cozy classics. To the meals that feel like a hug. To the recipes we pass down and the stories we share over them. Thank you for letting me share one of my heart’s favorite recipes with you.
Now, go forth and simmer. I can’t wait to hear about your own kitchen stories.
With a full heart and an empty bowl,
Beau @ Feastical

Mini Chicken Pot Pies : Muffin-Tin Comfort Food You Can Hold
Mini Chicken Pot Pies: Muffin-Tin Comfort Food You Can Hold
Hey friends, Beau here from Feastical! Let’s talk about one of life’s greatest, coziest inventions: the chicken pot pie. That glorious fusion of creamy filling, tender chicken, and a flaky, buttery crust that shatters at the touch of a fork. It’s a hug in a baking dish. But what if I told you we could take all that soul-warming goodness and make it portable? What if you could hold your comfort food in your hand, no plate required, perfect for game day, packed lunches, or just a super fun family dinner?
Well, stop dreaming, because these Mini Chicken Pot Pies are about to become your new favorite kitchen hack. We’re taking all the classic flavor and baking it right into a muffin tin, creating golden, flaky, handheld pockets of pure joy. They’re irresistibly cute, deceptively easy (thanks to a couple of smart shortcuts), and they disappear from the plate faster than you can say “seconds, please!” Whether you’re a seasoned pro or someone who considers “ordering takeout” a core culinary skill, this recipe is for you. So, tie on your apron, preheat that oven, and let’s turn classic comfort into a totally holdable feast.
The Pie That Built a Fort (And My Love for Comfort Food)
My obsession with pot pies started long before I ever ran a food blog. It goes back to rainy Saturday afternoons at my grandma’s house. The moment those tell-tale clouds would roll in, she’d wink, head to the kitchen, and pull out her deep, ceramic pie dish. To me, the magic wasn’t just in the eating (though that was phenomenal)—it was in the ceremony. The whole house would slowly fill with the scent of roasting chicken, thyme, and pastry. It was the signal that the world outside could do its worst; in here, we were safe, full, and together.
One particular stormy day, the power flickered out just as her pie was cooling. Undeterred, Grandma declared it a “fort night.” We dragged every blanket and pillow into the living room, built a massive fortress, and ate that entire chicken pot pie by flashlight, using our hands when the forks got lost in the pillow piles. It was messy, hilarious, and utterly perfect. That’s the spirit I wanted to capture with these mini pies: all the soul-soothing flavor of that memory, but in a form that’s ready for adventure, for sharing, for eating in a blanket fort (or just on the couch). It’s comfort food that fits in your hand, and honestly, isn’t that what we all need sometimes?
Gathering Your Cozy Ingredients
Here’s the beautiful part: we’re keeping it simple and stress-free. This is about maximizing flavor, not your time spent prepping. Here’s what you’ll need to make about 12 perfect little pies.
- 2 cups cooked, shredded chicken: This is your star! I love using the meat from a store-bought rotisserie chicken—it’s juicy, flavorful, and the ultimate timesaver. Leftover roasted or grilled chicken works wonderfully too. Chef’s Insight: For a deeper flavor, poach a couple of chicken breasts in broth with a bay leaf and some peppercorns.
- 1 cup frozen mixed vegetables (peas, carrots, corn): Don’t thaw them! The frozen veggies hold their shape and texture perfectly during the quick bake. This blend is the classic trifecta, but feel free to swap in your favorite frozen mix. Substitution Tip: Fresh diced carrots and peas are great too; just give them a quick 2-minute blanch in boiling water first.
- 1 can (10.5 oz) cream of chicken soup: Our creamy, savory glue. It creates the perfect saucy base without needing to make a roux from scratch. Chef’s Insight: For a richer, homemade vibe, you can substitute with 1 cup of a thick, seasoned béchamel or even a jarred chicken gravy in a pinch.
- 1 tube refrigerated biscuit dough (8 large biscuits): The game-changing shortcut! These become our flaky, golden crust. We’re going to stretch one tube to cover 12 muffin cups—trust me, it works like a charm. Substitution Tip: For a from-scratch option, use your favorite biscuit or even pie dough recipe, rolled thin.
- ½ teaspoon garlic powder: Adds a warm, savory backbone. Granulated garlic distributes evenly throughout the filling. Chef’s Insight: A teaspoon of fresh thyme or a pinch of poultry seasoning would be a fantastic addition here for an herby note.
- Salt and pepper, to taste: Always, always taste your filling before assembling! Season it well.
- Optional: chopped fresh parsley for garnish: A little green sprinkle makes everything look (and taste) more vibrant and finished.
Let’s Build Some Mini Masterpieces: Step-by-Step
Ready to see the magic happen? Follow these steps, and you’ll have a tray of golden cuties in no time. I’ve sprinkled in my favorite chef hacks to ensure your success.
- Preheat & Prep: Fire up your oven to 375°F (190°C). While it’s warming, grab a standard 12-cup muffin tin and give it a generous spritz of non-stick cooking spray. Chef Hack: For an extra guarantee of no sticking and a richer flavor, you can brush the cups with a little melted butter instead.
- Mix the Hearty Filling: In a large mixing bowl, combine your shredded chicken, frozen veggies, cream of chicken soup, garlic powder, and a good crack of black pepper. Give it a gentle but thorough mix until everything is evenly coated in that creamy sauce. This is your tasting moment! Dip a spoon in and try it. Does it need a pinch more salt? A little more pepper? Adjust it now—this is where you make it yours.
- The Biscuit Transformation: Open your tube of biscuits (that satisfying *pop* never gets old). Separate them onto a clean surface. Here’s the key trick: take each plump biscuit and carefully split it in half horizontally, like you’re opening a hamburger bun. You’ll end up with 16 thinner rounds of dough. Chef Hack: If the dough is sticky, dust your fingers and the knife with a tiny bit of flour. Don’t worry if they aren’t perfect circles; rustic is charming!
- Form the Crust Cups: Take 12 of your thinner biscuit rounds and press each one into the bottom and up the sides of a prepared muffin cup. Use your fingers to gently press and smooth the dough, ensuring it goes about halfway up the sides. It should look like a little dough cup waiting for treasure. The dough might seem thin, but it puffs up beautifully!
- Fill to the Brim: Evenly divide the chicken and veggie filling among your 12 dough cups. Spoon it right in, packing it gently. You want them nice and full—this is no time for shyness! If you have a little filling left over, just tuck it into the cups that look like they could handle it.
- Top It Off (Optional but Awesome): You have a few options here. You can leave them as open-faced pies. Or, you can take the 4 remaining biscuit rounds, stretch them slightly, and place them on top of some of the pies, pressing the edges to seal. You won’t have enough for all 12, so I like to make a few “lidded” ones for variety! For a classic look, cut a small slit in the top to let steam escape.
- Bake to Golden Perfection: Slide the muffin tin into your preheated oven and bake for 15-18 minutes. You’re looking for the biscuit dough to be fully cooked through and a gorgeous golden brown on top and around the edges. Your kitchen will smell absolutely incredible.
- The Grand Release: Once out of the oven, let the mini pies cool in the tin for 5-7 minutes. This is crucial—it lets the filling set slightly and makes them much easier to remove. Then, gently run a butter knife around the edges of each pie and carefully lift them out. They should pop right out!
How to Serve These Handheld Hugs
Presentation is part of the fun! Place these warm, golden mini pot pies on a big wooden board or a simple platter. Scatter that optional chopped parsley over the top for a fresh, colorful finish. These are the ultimate finger food for a crowd—just set them out and watch them vanish. For a family dinner, I love serving 2-3 per person alongside a bright, simple green salad with a tangy vinaigrette to cut through the richness. They’re also fantastic dipped into a little extra gravy or a side of cranberry sauce for a sweet-and-savory kick. And let’s not forget the lunchbox hero award: pack a couple in a container once cooled; they taste fantastic at room temperature, too!
Make It Your Own: Delicious Twists & Swaps
The beauty of this recipe is its versatility. Once you’ve mastered the basic formula, the world is your muffin tin! Here are a few of my favorite spins:
- The Thanksgiving Leftover Pie: Swap the chicken for diced leftover turkey, use cream of mushroom soup, and add a handful of dried cranberries to the filling. A sprinkle of sage in the mix is pure holiday magic.
- Vegetarian “Chick’n” Pot Pie: Use a plant-based chicken substitute or hearty chunks of sautéed mushrooms and potatoes. Cream of mushroom or celery soup keeps it creamy and delicious.
- Biscuit-Topped Casserole Style: Don’t feel like forming cups? Press the entire tube of biscuits (not split) into the bottom of a greased 9×13 baking dish. Spread the filling over top, then bake. You’ll get a fantastic pot pie casserole with a thick, fluffy biscuit base.
- The “Everything” Upgrade: Sauté a diced small onion and a rib of celery in butter before adding it to the filling. Stir in a big spoonful of sour cream or cream cheese for extra tang and richness.
- Puff Pastry Elegance: For a super flaky, French-inspired crust, use a thawed sheet of puff pastry instead of biscuits. Cut it into squares and press into the muffin cups. So fancy, so easy.
Beau’s Kitchen Notes & Stories
This recipe has become a Feastical staple, and it’s evolved in my kitchen more times than I can count. I once accidentally used a can of cheddar cheese soup instead of cream of chicken, and you know what? It was a delicious, cheesy accident my nephews still ask for! The lesson? Don’t fear improvisation. These mini pies are incredibly forgiving.
I also learned the hard way that letting them cool before removal is non-negotiable. In my early, over-eager days, I tried to pry one out immediately and ended up with a delicious but tragically deconstructed mess on my plate. Patience, young padawan. Let the magic set. Now, I use those 5 minutes to whip up a quick salad or pour the drinks. Every recipe has a rhythm; find yours and have fun with it.
Your Questions, Answered (Let’s Troubleshoot!)
Q: My biscuit cups came out soggy on the bottom. What happened?
A: This usually means the filling was a bit too wet or they needed a tad more bake time. Next time, make sure you’re not using any extra liquid from the chicken or soup can. Also, ensure your oven is fully preheated and try placing the muffin tin on a lower rack for the last few minutes to crisp the bottom.
Q: Can I make these ahead of time and reheat them?
A: Absolutely! They reheat beautifully. Let them cool completely, store in an airtight container in the fridge for up to 3 days. Reheat in a 350°F oven for 10-12 minutes, or in the air fryer for about 5 minutes, until hot and crisp. The microwave works in a pinch but will soften the crust.
Q: I’m gluten-free. Any swaps?
A> For sure! Use a gluten-free cream of chicken soup (or make a simple gluten-free gravy) and a tube of gluten-free biscuit dough. The method stays exactly the same.
Q: Can I freeze the unbaked or baked mini pies?
A> Yes! For unbaked, assemble them completely, then freeze the whole muffin tin until solid. Pop the frozen pies out and store in a freezer bag. Bake from frozen, adding 5-10 minutes to the bake time. Baked pies can also be frozen and reheated in the oven.

Mini Chicken Pot Pies : Muffin-Tin Comfort Food You Can Hold
Description
If classic chicken pot pie feels like a warm hug, these mini versions are little handheld cuddles. Creamy chicken and veggies tucked into flaky biscuit cups, baked right in a muffin tin—easy, fun, and perfect for family dinners, parties, or make-ahead lunches. Same cozy flavor, way more convenient.
Ingredients
-
2 cups cooked, shredded chicken (rotisserie works great)
-
1 cup frozen mixed vegetables (peas, carrots, corn – no need to thaw)
-
1 can (10.5 oz / 300 g) cream of chicken soup
-
½ teaspoon garlic powder
-
Salt and black pepper, to taste
-
1 tube refrigerated biscuit dough (8 large biscuits)
-
Optional garnish: chopped fresh parsley
Instructions
-
Preheat oven to 375°F (190°C). Grease a 12-cup muffin tin well.
-
Make the filling: In a bowl, mix chicken, frozen vegetables, cream of chicken soup, garlic powder, salt, and pepper. Taste and adjust seasoning.
-
Prep the biscuits: Separate biscuits and carefully split each one in half horizontally to make thinner rounds.
-
Form crusts: Press 12 biscuit halves into the muffin cups, covering the bottom and sides to form little dough cups.
-
Fill: Spoon the chicken mixture evenly into each cup.
-
Bake for 15–18 minutes, until biscuits are golden and cooked through.
-
Cool slightly (5–7 minutes), then gently remove from the tin. Garnish if desired and serve warm.
Notes
-
Use thick filling: Extra liquid can make the bottoms soggy.
-
Don’t overbake or biscuits may dry out—golden is perfect.
-
Make ahead: Store baked pies in the fridge up to 3 days.
-
Reheat smart: Oven or air fryer keeps them crisp; microwave softens the crust.
-
Freezer-friendly: Freeze baked pies up to 2 months. Reheat from frozen at 350°F (180°C) until hot
Nutritional Information (A Quick Note)
While I’m all about the flavor and the feeling first, I know many of you like to keep track. Here’s a rough estimate per mini pie, based on the ingredients listed. Remember, variations will change this!
- Calories: ~210
- Protein: ~10g (Great for keeping you full!)
- Carbohydrates: ~18g
- Fat: ~11g
- Sodium: This will vary based on your soup and chicken. Using low-sodium soup and seasoning to taste is a great way to control it.
These are satisfying little packages—two or three with a big salad makes for a perfectly balanced, utterly comforting meal.
Final Thoughts from My Kitchen to Yours
And there you have it, friends—your new secret weapon for delicious, crowd-pleasing, holdable comfort. These Mini Chicken Pot Pies are more than just a recipe; they’re a reminder that the best food is often the simplest, and that joy can literally fit in the palm of your hand. They bridge the gap between nostalgic weekend cooking and busy weekday reality, and that’s a gap I love to fill.
I hope you bake up a batch, share them with people you love, and maybe even start a new tradition of your own. If you do, I’d love to hear about it! Tag me @feastical or drop a comment on the blog. Now, go forth and bake. Your fork (or frankly, just your hands) is waiting.
With love and a full plate,
Beau

Calzone Pockets : Handheld, Cheesy, and Freezer-Friendly
Calzone Pockets: Your New Freezer-Friendly Secret to Cheesy Joy
Hey friends, Beau here from Feastical! Let’s talk about one of life’s greatest culinary truths: sometimes, you just need to hug your food. I’m not talking about getting emotionally attached to your avocado toast (though, no judgment), I’m talking about the literal, doughy, cheesy embrace of a perfect calzone. But today, we’re taking that beautiful concept and making it even better. We’re making Calzone Pockets.
Imagine all the gooey, savory, saucy goodness of your favorite pizza, folded into a neat, portable, golden-brown parcel. No plate required, minimal mess, maximum satisfaction. These aren’t just a meal; they’re a meal plan. We’re making a batch big enough to enjoy a hot, melty dinner tonight and stow the rest in the freezer for those “what’s for lunch?” or “I can’t even think about cooking” days. It’s like giving your future self a delicious high-five.
Whether you’re wrangling hungry kids, prepping for a busy week, or just craving something profoundly comforting that doesn’t require a culinary PhD, these pockets are your answer. They’re forgiving, fun to make, and wildly customizable. So, tie on that apron, clear a little counter space, and let’s turn simple ingredients into your new favorite hand-held feast. Trust me, your freezer (and your taste buds) will thank you.
The Calzone That Started It All: A Diner Booth Dream
My love affair with the calzone didn’t start in a fancy kitchen; it started in a sticky vinyl booth at a classic, no-frills pizza joint when I was about ten. My dad, a man of simple but impeccable taste, always ordered the same thing: a massive, football-sized calzone. When it arrived, steaming and dusted with powdered sugar (a wild but genius Jersey-style move), he’d carefully cut into it, releasing a cloud of aromatic steam and a river of molten cheese and sauce.
I’d watch, mesmerized, as he shared a bite with me. It was more than food; it was an experience. The act of breaking that sealed crust felt like unwrapping the best present ever. There was drama, surprise, and incredible flavor all in one package. That memory—the shared bite, the laughter, the sheer practicality of eating pizza with your hands without losing all the toppings—stuck with me. My Calzone Pockets are a direct descendant of that booth-side magic. They’re my way of packaging up that feeling of cozy, shareable joy, making it accessible for any Tuesday night, and ensuring there’s always a little extra joy waiting in the freezer. It’s nostalgia you can eat, and frankly, it’s the best kind.
Gathering Your Pocket-Making Posse: Ingredients & Insights
Here’s the beautiful part: the ingredient list is a choose-your-own-adventure book. Start with this core cast of characters, and feel free to audition your favorites for the starring “filling” roles.
- 1 batch pizza dough (about 1 lb / 450g): The trusty vessel! Store-bought dough from the deli section is a brilliant shortcut and works like a dream. If you’re a homemade hero, my easy no-knead dough is on the blog! Chef’s Insight: Let the dough sit at room temp for 30-60 minutes before shaping. It becomes much more pliable and less likely to snap back.
- 1 cup pizza sauce or marinara: Flavor foundation. Use a high-quality jarred sauce you love, or simmer your own. Pro Tip: Opt for a thicker sauce. A watery sauce will make your pockets soggy. If yours is thin, simmer it for 10 extra minutes to concentrate it.
- 1 ½ cups shredded low-moisture mozzarella cheese: The glue of happiness. Pre-shredded is fine for convenience, but block cheese you shred yourself melts creamier (it lacks anti-caking agents). Substitution: A blend of mozzarella and provolone is fantastic. For a sharper bite, add some fontina or asiago.
- Fillings of choice (1-2 cups total): This is your playground! Classic pepperoni, cooked Italian sausage, sautéed mushrooms & onions, diced bell peppers, black olives, or wilted spinach are all winners. Golden Rule: Keep fillings dry and cooked. Sauté veggies to release water, and blot wet ingredients like olives or fresh mozzarella.
- 1 egg + 1 tbsp water (for egg wash): The golden glow secret. A simple egg wash gives that gorgeous, professional-looking sheen and helps any toppings stick. Vegan Swap: Use olive oil or plant-based milk for brushing.
- Optional Toppers: Grated Parmesan cheese, dried oregano, garlic powder, red pepper flakes, or a flaky sea salt sprinkle. This is where you add your signature flavor dust!
Let’s Build Some Pockets: A Step-by-Step Journey
Ready for the fun part? Let’s transform that dough into golden pockets of joy. Follow these steps, and you’ll be a calzone pro in no time.
- Preheat & Prep: Fire up your oven to 400°F (200°C). This hot oven is key for a crispy, well-risen crust. Line a large baking sheet with parchment paper—no sticking, easy cleanup. You’re winning already.
- Portion the Dough: On a lightly floured surface, gently shape your dough into a log. Using a sharp knife or dough scraper, divide it into 6-8 equal pieces (6 for hearty lunch-sized pockets, 8 for smaller snacks). Roll each piece into a ball, cover with a damp kitchen towel, and let them rest for 10 minutes. This relaxes the gluten, making rolling a breeze.
- Roll & Fill (The Art of the Half-Moon): Take one dough ball and roll it out into a circle or oval about ⅛-inch thick (roughly 6-7 inches across). Chef’s Hack: If the dough keeps shrinking back, walk away for 2 minutes. It just needs a breather! Spoon 1-2 tablespoons of sauce onto one half of the circle, leaving a ½-inch border. Layer on cheese and your chosen fillings. Don’t overstuff! This is the #1 mistake. You want a happy seal, not a bursting seam.
- Fold & Seal (Fort Knox That Pocket): Carefully fold the bare half of the dough over the filling to create a half-moon shape. Now, seal it like it holds the secret to eternal happiness. First, press the edges firmly with your fingers. Then, for an ultra-secure, cute finish, press down all around the edge with the tines of a fork. Pro Move: You can also fold and crimp the edge over itself for a fancy “braided” look. Just ensure it’s sealed!
- Glaze & Garnish: Whisk the egg with a tablespoon of water. Gently brush the top of each calzone pocket with this egg wash. This is your canvas! Sprinkle with grated Parmesan, a pinch of oregano, or a dusting of garlic powder. Don’t skip this—it builds flavor and texture.
- Bake to Golden Perfection: Place the pockets on your prepared sheet, giving them a little room to breathe. Bake for 15-20 minutes, or until they’re deeply golden brown and sound hollow when tapped. The smell will be incredible.
- The Cool-Down (Patience is a Virtue): Transfer the baked pockets to a cooling rack. Let them rest for 5-10 minutes. I know it’s hard, but this allows the molten cheese and sauce to settle, preventing a scalding, messy first bite. Your mouth will thank you.
How to Serve Your Calzone Masterpieces
Presentation is part of the fun! For a casual family meal, pile them high on a big wooden board or platter right in the center of the table. Tuck a bowl of warm marinara or ranch dressing for dipping on the side—because more sauce is always a good idea.
For a single serving, plate a pocket alongside a simple, bright arugula salad dressed with lemon vinaigrette. The peppery greens cut through the richness perfectly. Pack one in a lunchbox with a small container of sauce; by lunchtime, it’ll be the perfect temperature. And remember, these are called “pockets” for a reason—they’re the ultimate edible, napkin-wrapped, eat-anywhere food. Breakfast on the go? Reheat one. Late-night snack? You know what to do.
Mix It Up! Flavor Twists & Dietary Swaps
The basic blueprint is just the beginning. Here are a few of my favorite ways to riff on these pockets:
- The “Everything But The Kitchen Sink”: Combine pepperoni, cooked sausage, sautéed mushrooms, onions, and black olives for a fully-loaded supreme experience.
- Spinach & Ricotta (A Lighter Classic): Mix 1 cup part-skim ricotta with ½ cup chopped thawed and thoroughly squeezed frozen spinach, ¼ cup grated Parmesan, a minced garlic clove, salt, and pepper. Use this as your main filling with a light layer of mozzarella.
- BBQ Chicken Bliss: Swap pizza sauce for your favorite BBQ sauce. Fill with shredded cooked chicken, diced red onion, a mix of mozzarella and cheddar cheese, and a sprinkle of fresh cilantro after baking.
- Breakfast Calzone Pockets: Fill with scrambled eggs, cooked bacon or sausage crumbles, and cheddar cheese. A dash of hot sauce inside? Yes, please.
- Gluten-Free/Vegan Friendly: Use your favorite store-bought gluten-free pizza dough. For a vegan version, use plant-based dough, vegan cheese shreds, and fillings like roasted veggies, vegan pepperoni, and dairy-free pesto instead of marinara.
Beau’s Kitchen Notes: The Evolution of a Pocket
I’ve made these pockets more times than I can count, and they’ve seen some… experiments. There was the “Triple Cheese Incident” of 2019 (leakage was inevitable). There was the time I tried to stuff an entire meatball inside (structural failure). Through it all, I learned that simplicity and a good seal are your best friends. This recipe has evolved from a weekend project to a weekly staple in my house. I often double the batch on a lazy Sunday. The act of filling and folding them is almost meditative, and the payoff—a freezer stocked with homemade comfort—is one of the best feelings in the world. Remember, cooking is about joy, not perfection. If one bursts a little, call it a “rustic style” and dip it in extra sauce. No one will complain.
Your Questions, Answered: Calzone Pocket FAQ
Q: My calzone pocket burst open in the oven! What did I do wrong?
A: Welcome to the club! This usually means one of three things: 1) Overfilling (the #1 culprit), 2) Not leaving enough dough border to seal properly, or 3) The filling was too wet. Next time, use less filling, press that fork seal extra firmly, and make sure your veggies are well-cooked and drained.
Q: Can I really freeze them? How do I reheat?
A: Absolutely! Let baked pockets cool completely. Wrap each one individually in plastic wrap or foil, then place them all in a freezer bag. They’ll keep for up to 2 months. To reheat: From frozen, bake at 375°F (190°C) for 20-25 minutes, or until hot all the way through. You can also microwave for 2-3 minutes, but the oven gives a crisper crust.
Q: The bottom of my pocket is a bit soggy. How can I prevent that?
A: A few tricks: 1) Ensure your sauce is thick, not runny. 2) Don’t put sauce directly on the dough—layer cheese first, then sauce, then more cheese. The cheese acts as a moisture barrier. 3) Bake on a parchment-lined sheet, not directly on a greased pan. 4) Cool them on a wire rack, not on the hot baking sheet.
Q: Can I make these ahead and bake later?
A: For sure! Assemble the raw pockets, place them on a parchment-lined sheet, and freeze until solid (about 2 hours). Then transfer to a freezer bag. When ready to bake, place frozen pockets on a sheet, brush with egg wash, add toppings, and bake. Add 5-10 extra minutes to the baking time.

Calzone Pockets : Handheld, Cheesy, and Freezer-Friendly
Ingredients
-
1 lb (450 g) pizza dough (store-bought or homemade)
-
1 cup pizza sauce or marinara (thick-style is best)
-
1½ cups shredded low-moisture mozzarella cheese
-
1–2 cups fillings of choice
(pepperoni, cooked sausage, sautéed veggies, olives, spinach, etc.) -
1 egg + 1 tablespoon water (for egg wash)
-
Optional toppings: grated Parmesan, dried oregano, garlic powder
Instructions
-
Preheat oven to 400°F (200°C). Line a baking sheet with parchment paper.
-
Divide dough into 6–8 equal pieces. Roll each into a 6–7 inch circle.
-
Fill: On one half of each circle, add a small layer of cheese, 1–2 tablespoons sauce, more cheese, and fillings. Leave a ½-inch border.
-
Fold & seal: Fold dough over to form a half-moon. Press edges firmly and crimp with a fork.
-
Brush & top: Whisk egg and water, brush over pockets, sprinkle with toppings if using.
-
Bake for 15–20 minutes until golden brown.
-
Cool 5 minutes before serving (the filling will be very hot).
Notes
-
Don’t overfill—too much stuffing causes leaks.
-
Keep fillings dry: Cook and drain veggies and meats first.
-
Cheese barrier trick: Put cheese down before sauce to avoid soggy dough.
-
Freezer-friendly: Cool baked pockets completely, wrap individually, and freeze up to 2 months. Reheat at 375°F (190°C) for 20–25 minutes from frozen.
A Quick Nutritional Glance
Let’s be real: this is hearty, comforting food. The following is a rough estimate for one calzone pocket (based on a recipe making 8, with a standard dough and fillings like cheese and pepperoni). It will vary widely based on your specific ingredients and portion size.
- Calories: ~350-450
- Protein: 15-20g (Thanks, cheese and meat!)
- Carbohydrates: ~35-40g
- Fat: 15-18g
- Fiber: 2-3g
- Sodium: ~650-800mg (Using lower-sodium cheese and sauce helps here!)
To lighten it up, use part-skim cheeses, load up on veggie fillings, opt for a whole-wheat dough, and watch your portion size. Balance it with a big green salad on the side.
Final Thoughts from My Kitchen to Yours
So there you have it, friends—your guide to creating your own little ecosystem of cheesy, portable joy. These Calzone Pockets are more than just a recipe; they’re a tool for easier, tastier days. They’re proof that a little time spent in the kitchen on your terms can yield dividends of comfort for weeks to come.
I hope you give them a try and make them your own. Tag me @feastical when you do—I love seeing your creations! Now, go forth, fill, fold, and seal. And remember, in a world that can be complicated, there’s something beautifully simple about food

Pizza Crescent Rolls : Easy, Cheesy, and Perfect for Dipping
Pizza Crescent Rolls: Your New Favorite Bite of Cheesy Joy
Hey friends, Beau here from Feastical! Let’s be real for a second. Is there anything in this world that combines sheer joy, communal eating, and cheesy, saucy goodness quite like pizza? I’m gonna go with a hard no. But sometimes, you want all that magic in a form that’s a little more… portable. A little more dippable. A little more “I-can-make-this-in-20-minutes-with-a-smile-on-my-face” easy.
That’s where these glorious Pizza Crescent Rolls come in. Imagine: flaky, buttery crescent dough hugging pockets of molten mozzarella and savory pepperoni, all baked until golden and served with a side of warm marinara for the ultimate dip. This isn’t just a recipe; it’s a ticket to Snack Paradise. They’re the hero of last-minute get-togethers, the savior of “I don’t know what’s for dinner” nights, and the guaranteed hit at any party. They’re proof that the best food doesn’t have to be complicated—it just has to be made with a dash of fun and a whole lot of flavor. So, tie on that apron (or don’t, no judgment here), and let’s turn your kitchen into the happiest little pizzeria on the block.
The Night We Embraced the “Fun Food” Philosophy
I’ll never forget the first time these rolls became a thing in my world. It was a rainy Friday night, the kind that makes you want to cancel all plans and build a fort. My niece and nephew were over, a movie marathon was queued up, and the universal cry of “I’m hungry!” echoed through the house. We had zero delivery budget and a pantry that seemed to mock us. But then, I spotted a lone can of crescent rolls in the fridge, some leftover pepperoni from a lunch, and a bag of cheese. It was a kitchen Hail Mary.
I called the kids into the kitchen and declared us the “Crescent Roll Pizza Factory.” Their job was assembly. What followed was a beautiful, cheesy, slightly messy disaster zone of deliciousness. Flour on noses, pepperoni slices used as temporary mustaches, the serious debate over how much cheese is “too much” (answer: there is no such thing). When those golden rolls came out of the oven and we all huddled around the dipping sauce, it wasn’t just a snack. It was an event. It was connection. That night cemented my belief that the meals we remember aren’t always the fanciest—they’re the ones we make together, with laughter and our hands a little dirty. These rolls are a edible memory, and I hope they become one for you, too.
Gathering Your Pizza Roll Toolkit
Here’s the beautiful part: the ingredient list is short, sweet, and probably already in your kitchen. Let’s break it down, because even simple ingredients deserve a little spotlight.
- 1 can refrigerated crescent roll dough: The undisputed champion of quick, flaky layers. Don’t try to unroll it too fast, or it might stick and tear. A little patience goes a long way! Chef’s Insight: Some brands now offer “sheet” dough instead of perforated triangles. If you find that, just cut it into 8 rectangles—it works like a charm and is sometimes even easier to seal.
- 24 slices pepperoni: Our salty, spicy flavor anchor. I like the standard slices, but mini pepperonis are fantastic if you can find them—they distribute the flavor more evenly in each bite. Substitution Tip: Not a pepperoni person? Diced ham, cooked Italian sausage, or even some sautéed mushrooms and bell peppers for a veggie version are all stellar swaps.
- 1 cup shredded mozzarella cheese: The glue that holds our happiness together. I recommend buying a block and shredding it yourself for the best melt. Pre-shredded bags often have anti-caking agents that can make the cheese a bit grainy when melted. Chef’s Insight: For a more complex flavor, use a blend of mozzarella and a sharp provolone or an Italian cheese blend.
- ½ teaspoon Italian seasoning: This is our flavor fairy dust! It’s that herby, aromatic kick that screams “pizza.” Rub it between your palms before sprinkling to wake up the dried herbs and release their oils.
- 1 tablespoon melted butter (optional, for brushing): The secret to that gorgeous, golden-brown, glossy finish. It adds a rich flavor and helps the seasoning stick. You can use olive oil if you prefer.
- Marinara sauce, for dipping: The essential sidekick! Use your favorite jarred sauce for ultimate ease, or warm up a homemade batch if you’re feeling fancy. Pro Tip: Warm the sauce in a small pan while the rolls bake. A warm dip is a game-changer.
Let’s Build Some Flaky, Cheesy Masterpieces
Ready? This is where the fun happens. I’ll walk you through each step with all my favorite hacks to ensure pizza roll perfection.
- Preheat & Prep: Fire up that oven to 375°F (190°C). This is the perfect temp for getting the crescents cooked through without burning. Line a baking sheet with parchment paper. Trust me on this—it prevents sticking and makes cleanup an absolute dream. No scrubbing pans tonight!
- The Great Unroll: Carefully pop open that can of dough (that sound never gets old, does it?). Unroll the dough sheet onto a clean surface, and gently separate it into the 8 triangles along the perforations. If a tear happens, just pinch it back together. No stress!
- The Art of Assembly: Here’s the magic formula. On the wider end of each triangle, place 3 slices of pepperoni (or a small handful of your chosen filling). Then, sprinkle a generous tablespoon of cheese over the pepperoni. Chef’s Hack: Leave a tiny border of dough at the very edges clean—it will help seal the roll better and prevent cheese explosions in the oven.
- Roll ‘Em Up! Start at the wide, filled end and roll the dough toward the narrow point. Tuck the filling in as you go, rolling snugly but not too tight—you want to leave a little room for the dough to expand. Once rolled, give it a gentle pinch to seal the very tip of the triangle to the roll so it doesn’t unfurl while baking.
- Season & Shine: Place each roll on your prepared baking sheet, seam-side down. If you’re using the melted butter, give each one a light brush. This is when you shower them with that fragrant Italian seasoning. That buttery, herby top is going to be incredible.
- Bake to Golden Perfection: Slide the sheet into your preheated oven and bake for 10-12 minutes. Ovens vary, so start checking at 10. You’re looking for a beautiful, deep golden brown color and you might even see a little cheese peeking out the sides, bubbly and irresistible. The smell in your kitchen will be your best indicator that it’s time.
- The Crucial Rest: This might be the hardest step. When they come out of the oven, let them cool on the pan for just 2-3 minutes. This allows the molten cheese to set slightly so you don’t get a third-degree-burn-level cheese pull on your first bite. It’s worth the wait, I promise.
How to Serve These Bad Boys (The Fun Part!)
Presentation is half the fun with finger food! Don’t just plop these on a plate. Create an experience. I love piling them high on a wooden board or in a rustic basket lined with a checkered napkin—it gives that casual, pizzeria vibe. Pour your warmed marinara sauce into a small, cute bowl right in the center for communal dipping. For a crowd, set out a few different dipping stations: classic marinara, a creamy garlic ranch, and maybe a spicy sriracha-mayo blend. Throw some extra pepperoni slices and fresh basil leaves around the platter for garnish. These are meant to be eaten with your hands, so have plenty of napkins ready and dig in while they’re warm and the cheese is at its ultimate stretchy peak!
Mix It Up! Your Pizza Roll Playground
The basic recipe is a classic for a reason, but your kitchen is your canvas! Here are a few of my favorite twists:
- Everything Bagel Supreme: Swap the Italian seasoning for everything bagel seasoning before baking. After brushing with butter, sprinkle generously. Serve with a side of scallion cream cheese for dipping. Mind. Blown.
- BBQ Chicken Twist: Use shredded cooked chicken tossed in your favorite BBQ sauce instead of pepperoni, and a blend of mozzarella and sharp cheddar cheese. Dip in extra BBQ sauce or ranch.
- Breakfast Pizza Rolls: Morning glory! Fill with cooked scrambled eggs, crumbled cooked sausage, and cheddar cheese. Perfect for brunch or a grab-and-go breakfast.
- Veggie Lover’s Delight: Sauté diced bell peppers, onions, and spinach until soft. Let the mix cool, then drain any excess liquid. Use this in place of the pepperoni, along with the mozzarella.
- Three-Cheese Spinach & Artichoke: Mix softened cream cheese with a little garlic powder, chopped spinach (thawed and squeezed dry), and chopped artichoke hearts. Use a dollop of this mixture with a sprinkle of mozzarella as your filling. Divine.
Beau’s Brain Dump & Kitchen Confessions
Over the years, I’ve learned a thing or two making these for everyone from picky toddlers to hungry football teams. First, these rolls are forgiving. A little cheese spillage? That’s just a bonus crispy cheese bit. Second, you can absolutely prep them ahead! Assemble the rolls, place them on the baking sheet, cover tightly, and refrigerate for up to 4 hours before baking. You might need to add a minute or two to the bake time since they’ll be going in cold. And my biggest confession? I almost never stop at one can. Doubling (or tripling!) the recipe is the wisest decision you’ll make for a gathering. They disappear faster than you can say “more marinara, please.”
Your Questions, Answered
Q: My cheese leaked out everywhere while baking! What did I do wrong?
A: Welcome to the Crispy Cheese Club! It happens to the best of us. Usually, it means the rolls weren’t sealed tightly enough, or there was cheese too close to the very edge of the dough. Next time, leave that tiny border clean and give the final seam a good pinch. But hey, those crispy, cheesy bits are a chef’s snack while cooking.
Q: Can I use puff pastry instead of crescent dough?
A> You sure can! Thaw a sheet of puff pastry, roll it out slightly, and cut it into rectangles. The result will be taller, flakier, and more like a pastry. Bake at the temperature the puff pastry package recommends. It’s a delicious, more elegant twist.
Q: How do I store and reheat leftovers?
A> They’re best fresh, but leftover rolls can be stored in an airtight container in the fridge for 2-3 days. Reheat in an air fryer or toaster oven at 350°F for about 5 minutes to keep them crispy. The microwave will work in a pinch, but it will soften the dough.
Q: Can I freeze unbaked rolls?
A> Absolutely! Assemble the rolls, place them on a parchment-lined sheet, and freeze until solid. Then transfer them to a freezer bag. When ready to bake, bake from frozen, adding 3-5 extra minutes to the baking time. Perfect for future snack emergencies.

Pizza Crescent Rolls : Easy, Cheesy, and Perfect for Dipping
Description
If pizza had a fun-size, dippable cousin, this would be it. These Pizza Crescent Rolls are flaky on the outside, gooey on the inside, and ready in about 20 minutes. Perfect for parties, game nights, or those “I need something cheesy now” moments—no stress, all smiles.
Ingredients
-
1 can refrigerated crescent roll dough (8 rolls)
-
24 slices pepperoni
-
1 cup shredded mozzarella cheese
-
½ teaspoon Italian seasoning
-
1 tablespoon melted butter (optional, for brushing)
-
Marinara sauce, warmed, for dipping
Instructions
-
Preheat the oven to 375°F (190°C). Line a baking sheet with parchment paper.
-
Unroll the dough and separate into 8 triangles.
-
Fill each triangle: Place 3 pepperoni slices and about 1 tablespoon of mozzarella on the wide end.
-
Roll up from the wide end to the tip, tucking filling inside. Place seam-side down on the baking sheet.
-
Brush & season: Brush with melted butter (if using) and sprinkle with Italian seasoning.
-
Bake for 10–12 minutes, or until golden brown and bubbly.
-
Cool briefly (2–3 minutes), then serve warm with marinara for dipping.
Notes
-
Seal the edges well to keep cheese from leaking out.
-
Don’t overfill—a little restraint = less mess, better rolls.
-
Try variations: Swap pepperoni for cooked sausage, ham, or veggies; add a pinch of red pepper flakes for heat.
-
Reheat like a pro: Use an air fryer or toaster oven at 350°F for 4–5 minutes to keep them crispy.
Nutritional Information (A Quick Note)
Hey, we’re all about balance here at Feastical! These Pizza Crescent Rolls are a treat, a party food, a joy-filled indulgence. Here’s a general breakdown per roll (approximate, based on standard ingredients): About 160 calories, 6g of protein, 13g of carbs, and 10g of fat. They do contain a moderate amount of sodium. To lighten things up if you wish, you can use low-fat cheese, turkey pepperoni, and brush with olive oil instead of butter. But my personal philosophy? When you’re enjoying a fun, homemade snack like this, savor every delicious, cheesy bite without overthinking it. Life’s too short for bland food!
The Last Bite
And that’s it, friends! You’re now armed with the knowledge to create pure, flaky, cheesy joy anytime the mood strikes. These Pizza Crescent Rolls are more than just a recipe; they’re a reminder that cooking doesn’t have to be hard to be good. It’s about sharing, laughing, and creating those little moments of happiness around the table (or the coffee table during movie night). I hope you make them, love them, and put your own spin on them. Tag me over on Feastical if you do—I love seeing your kitchen creations! Now, go forth and roll up some deliciousness.
With a full heart and a happy stomach,
Beau
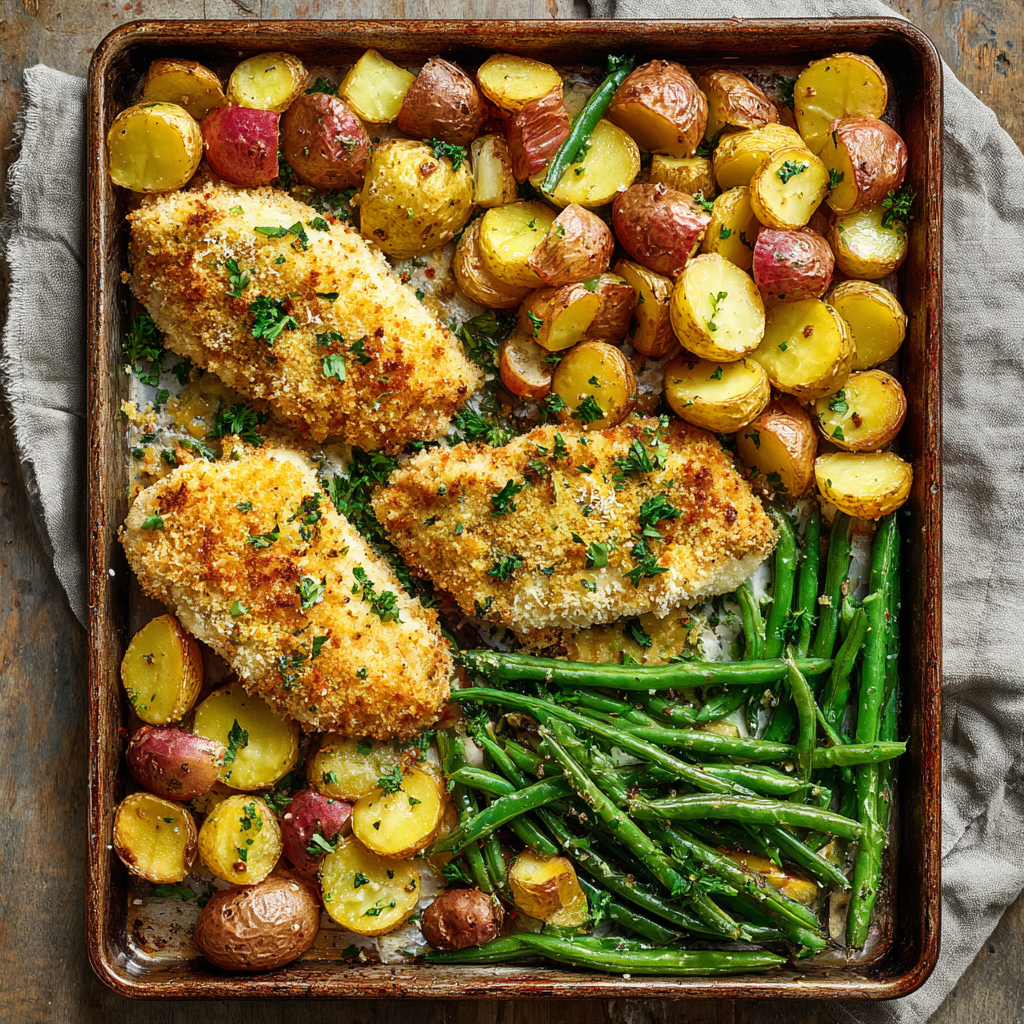
Parmesan-Crusted Roasted Veggies : Crispy, Golden & Flavor-Packed
Hey There, Hungry Friend! Let’s Talk About the Vegetable Glow-Up of the Century
Okay, raise your hand if you’ve ever been personally victimized by a sad, steamed vegetable. (My hand is SO high right now). You know the ones I mean—limp, flavorless, and sitting there on your plate like a culinary afterthought. For years, I thought that’s just how veggies were meant to be: the healthy, boring thing you choked down before you got to the good stuff. That is, until I discovered the magical, life-altering power of a hot oven, a slick of good oil, and a reckless shower of nutty, salty Parmesan cheese.
What comes out of that oven isn’t just a side dish. It’s a revelation. We’re talking about Parmesan-Crusted Roasted Veggies that shatter with a crispy, golden crust giving way to a tender, sweet, caramelized interior. It’s the kind of dish that makes you forget you’re eating your vegetables because you’re too busy fighting your family for the last perfectly crispy piece of broccoli. The best part? It’s embarrassingly easy. This isn’t fussy, chef-y cooking. This is “chop, toss, coat, roast” simplicity that delivers maximum flavor payoff every single time.
Whether you’re trying to get more veggies into your week, need a show-stopping side for your Sunday supper, or just want a snack that feels indulgent but is secretly wholesome, this recipe is your new best friend. So, preheat that oven, grab your favorite mixing bowl (the big, forgiving one), and let’s turn those humble vegetables into the star of the dinner table.
The Kitchen Memory That Changed Everything
This recipe takes me straight back to my tiny first apartment kitchen. I was broke, living on a diet that heavily featured ramen, and my mom had just dropped off a “care package” from her garden: a mountain of zucchini, broccoli, and carrots. I stared at it, overwhelmed. Steaming felt like a chore. Salads were getting old. Then I remembered a trick my Italian grandma would do with eggplant.
I sliced everything up, tossed it with the last of my decent olive oil, and then gazed into my nearly-empty fridge. Staring back at me was a wedge of Parmesan, the kind you grate yourself. In a moment of “what’s the worst that could happen?” inspiration, I mixed the grated cheese with some garlic powder and went for it, pressing each veggie piece into the mixture before laying it on a baking sheet. The smell that filled my 400-square-foot home was nothing short of transformative. That first bite—hot, crispy, insanely flavorful—was a lightbulb moment. Veggies weren’t the enemy; they were a blank canvas waiting for a little love and a lot of cheese. This recipe was born from that beautiful, delicious necessity, and it’s been a Feastical staple ever since.
Gathering Your Flavor Arsenal
Here’s the beautiful thing about this recipe: the ingredient list is short, sweet, and flexible. This is what you’ll need to create that crispy, golden magic.
- 4 cups chopped mixed veggies – This is your chance to play! My go-to mix is broccoli florets (for craggy edges that catch the cheese), zucchini or yellow squash (slices that get tender and sweet), bell peppers (for a pop of color and sweetness), and carrot sticks (for earthy, caramelized goodness). Chef’s Insight: Aim for similar-sized pieces so everything roasts evenly. Harder veggies (like carrots, potatoes) can be cut slightly smaller than softer ones (like zucchini).
- 2 tablespoons olive oil – This is our flavor conductor and crisping agent. A good extra-virgin olive oil adds fruitiness. Substitution Tip: Avocado oil is a fantastic high-heat alternative with a neutral taste.
- ¾ cup finely grated Parmesan cheese – The star of the show! Use the good stuff from the refrigerated section, grated off a block. The pre-grated stuff in shakers often has anti-caking agents that don’t melt or crisp up as nicely. Chef’s Insight: For a deeper flavor, try a mix of Parmesan and Pecorino Romano.
- 1 teaspoon garlic powder – This gives you consistent, mellow garlic flavor in every bite without the risk of burning that fresh garlic can have. Substitution Tip: In a pinch, ½ teaspoon of granulated garlic works, or add 2 minced fresh garlic cloves to the oil before tossing with the veggies.
- ½ teaspoon onion powder – The unsung hero that adds a savory, sweet depth. Trust me on this one.
- Salt & freshly cracked black pepper, to taste – Season as you go! Remember, Parmesan is salty, so go easy at first and adjust after coating.
- Optional garnish: chopped fresh parsley or a sprinkle of lemon zest – This isn’t just for looks. A hit of fresh herbs or citrus zest right at the end brightens up all the rich, savory flavors beautifully.
Let’s Get Crispy: Your Foolproof Roadmap to Veggie Victory
Follow these steps, and you’re guaranteed a tray of golden, crispy perfection. I’m sprinkling in my best chef hacks along the way!
- Preheat & Prep: Crank your oven to 425°F (220°C). This high heat is non-negotiable—it’s what gives us that quick caramelization and crisp edge without steaming the veggies. While it heats, line a large, rimmed baking sheet with parchment paper. Chef Hack: Parchment is your friend for easy cleanup, but for an even crispier bottom, try a bare sheet pan lightly coated with oil or use a silicone baking mat.
- Veggie Spa Treatment: Pile your chopped veggies into a large, spacious bowl. Drizzle with the olive oil. Now, get in there with your hands! Toss and massage until every single nook and cranny glistens. Chef Hack: Doing this in a large bowl with plenty of room ensures even coating. No oily, unseasoned stragglers allowed!
- Create the Magic Dust: In a separate, wide, shallow bowl or plate, combine the grated Parmesan, garlic powder, onion powder, a pinch of salt, and a few cracks of pepper. Mix it with a fork until it’s a uniform, delicious-looking powder.
- The Coating Station (This is the fun part!): Working with a handful of oiled veggies at a time, press them firmly into the Parmesan mixture. You want to create a solid, even coat. Don’t just sprinkle—press! Turn them to get all sides. Chef Hack: Let the oiled veggies sit in the cheese mix for a second before you lift them out; it helps the coating adhere better during roasting.
- Spread for Success: Transfer your beautifully coated veggies to the prepared baking sheet. This is critical: arrange them in a single layer with a little space between each piece. If they’re piled on top of each other, they’ll steam and get soggy. We want hot air circulating all around for maximum crisp. Use two sheets if you need to!
- Roast to Golden Glory: Slide the tray into your hot oven. Set a timer for 10-12 minutes. When it goes off, pull the tray out (close the oven door!) and carefully flip each piece with tongs. This ensures even browning on all sides. Return to the oven for another 10-13 minutes. You’re looking for deeply golden, even slightly dark brown, crispy edges and tender insides.
- The Finishing Touch: Pull that gorgeous, sizzling tray from the oven. Let the veggies rest for just a minute on the sheet—they’ll crisp up a touch more. Then, transfer to a serving platter and hit them with your optional garnish of fresh parsley or lemon zest. The smell alone will bring everyone running to the kitchen.
How to Serve Your Masterpiece
These veggies are social butterflies—they get along with everyone! For a simple, stunning presentation, pile them high on a warm platter. The mix of colors from the different veggies is part of the appeal. I love adding that final sprinkle of bright green parsley or yellow lemon zest right at the table for a little “chef’s kiss” drama.
They’re the ultimate sidekick to a juicy roasted chicken, a seared steak, or a simple piece of pan-seared fish like salmon or cod. Crumble them over a bed of greens for the world’s best warm salad, or toss them with cooked pasta, a splash of pasta water, and an extra handful of Parmesan for a killer 15-minute veggie pasta. And let’s be real: they’re also absolutely perfect straight off the baking sheet, standing over the kitchen sink. No judgment here.
Make It Your Own: Delicious Twists & Swaps
The basic formula is your launchpad. Once you’ve mastered it, try these fun variations!
- Spicy ‘Nduja Breadcrumbs: Mix the Parmesan with ¼ cup panko breadcrumbs and a tablespoon of finely chopped ‘nduja or Calabrian chili paste for a spicy, extra-crunchy coating.
- Everything Bagel Veggies: Swap half the Parmesan for 2 tablespoons of everything bagel seasoning. Instant flavor explosion!
- Lemon-Herb Brightness: Add the zest of one lemon and 2 teaspoons of dried Italian herbs (or 2 tablespoons fresh, chopped) to the Parmesan mixture before coating.
- Vegan & Dairy-Free: Use a high-quality vegan Parmesan cheese alternative (the kind that melts a bit is best). Nutritional yeast can add cheesy flavor but won’t crust the same, so mix it with the vegan Parm.
- Root Vegetable Focus: Try this with hearty veggies like cubed butternut squash, sweet potato, parsnips, and red onion. You might need to add 5-10 minutes to the roasting time for tender centers.
A Few More Thoughts From My Kitchen to Yours
This recipe has evolved in my kitchen from that first “aha!” moment. I used to just toss everything together in one bowl, but I found the coating was patchy. The “press and coat” method is a game-changer for that perfect, even crunch. Also, I’ve learned not to fear the dark bits! A little char on the edges of the broccoli or peppers is where the deep, sweet flavor lives. It’s not burnt; it’s “chef-style caramelization.”
One funny fail: I once tried this with wet, freshly-washed veggies I didn’t pat dry. The oil and cheese slid right off, and I ended up with a sad, steamy tray. Lesson learned: dry your veggies thoroughly! Now, I keep a dedicated kitchen towel just for giving my produce a quick pat-down. Little things make a big difference.
Your Questions, Answered!
Q: My cheese isn’t sticking to the veggies! What did I do wrong?
A: This usually means one of two things: 1) Your veggies weren’t dry enough after washing, or 2) You didn’t press firmly enough when coating. Make sure those veggies are bone-dry and really get in there with some pressure when you dunk them in the cheese mixture.
Q: Can I make these ahead of time?
A: They are absolute best served fresh and hot from the oven. The crisp texture softens as they sit. If you must prep ahead, you can chop and dry the veggies the day before. For reheating, spread leftovers on a sheet and pop them in a 400°F oven for 5-7 minutes to re-crisp. The microwave will make them soggy.
Q: My veggies came out soggy instead of crispy. Help!
A: The most common culprit is overcrowding the pan! If the pieces are touching, they steam instead of roast. Always use two baking sheets if needed to give them space. Also, ensure your oven is fully preheated—a hot start is crucial.
Q: Can I use other cheeses?
A> Absolutely! A sharp white cheddar, Asiago, or even a mix of Parmesan and Pecorino Romano are fantastic. Finely grate hard cheeses yourself for the best melt and crisp.

Parmesan-Crusted Roasted Veggies : Crispy, Golden & Flavor-Packed
Description
If you’ve ever thought vegetables were boring, this recipe is about to change your mind. A hot oven, good olive oil, and a generous sprinkle of Parmesan turn everyday veggies into a crispy, caramelized side dish everyone fights over. It’s simple, flexible, and packed with flavor—perfect for weeknights or special dinners.
Ingredients
-
4 cups mixed vegetables, chopped
(broccoli, zucchini, bell peppers, carrots, cauliflower all work well) -
2 tablespoons olive oil
-
¾ cup finely grated Parmesan cheese
-
1 teaspoon garlic powder
-
½ teaspoon onion powder
-
Salt and freshly ground black pepper, to taste
-
Optional garnish: chopped fresh parsley or lemon zest
Instructions
-
Preheat the oven to 425°F (220°C). Line a large baking sheet with parchment paper.
-
Prepare the veggies: Place chopped vegetables in a large bowl. Drizzle with olive oil and toss until evenly coated.
-
Mix the coating: In a shallow bowl, combine Parmesan, garlic powder, onion powder, a pinch of salt, and black pepper.
-
Coat the vegetables: Press each piece of oiled vegetable into the Parmesan mixture, coating all sides.
-
Arrange: Place vegetables in a single layer on the baking sheet, leaving space between pieces.
-
Roast: Bake for 10–12 minutes, flip the veggies, then roast another 10–13 minutes until golden and crispy.
-
Finish: Remove from oven, garnish if desired, and serve hot.
Notes
-
Dry your veggies well after washing—moisture prevents crisping.
-
Don’t overcrowd the pan. Use two baking sheets if needed.
-
Cut evenly so everything cooks at the same rate.
-
Use freshly grated Parmesan for the best flavor and crunch.
-
For extra brightness, add lemon zest right after baking.
Nutritional Info (A Per-Serving Breakdown)
Disclaimer: The following is an estimate for 1 of 4 servings, calculated using a standard online nutrition calculator. Values will vary based on your specific ingredients and portion sizes.
- Calories: ~180
- Protein: 7g (Hello, Parmesan!)
- Carbohydrates: 11g
- Dietary Fiber: 3g (Thanks, veggies!)
- Total Fat: 12g (Mostly from the heart-healthy olive oil and cheese)
- Sodium: ~330mg (Will vary based on the salt and cheese you use)
This dish is a nutrient-dense powerhouse, packing vitamins and antioxidants from the colorful vegetables, along with calcium and protein from the Parmesan. It’s a delicious way to turn “eating your veggies” from a duty into a genuine treat.
Final, Delicious Thoughts
At the end of the day, Feastical is all about food that makes you feel good—in your belly and in your soul. These Parmesan-Crusted Roasted Veggies are the perfect embodiment of that philosophy. They’re simple enough for a hectic Tuesday but special enough for a dinner party. They turn the everyday into something celebratory.
So, the next time you’re staring into your fridge, wondering what to do with that haul of vegetables, I hope you remember this recipe. Don’t just steam them. Roast them. Crust them. Love them. I promise, it’s a game-changer. Now, go forth and get crispy! And when you make them, tag me @feastical—I love seeing your kitchen creations.
Happy cooking, friends!
– Beau
“`

Pineapple Dream Dessert : A Light and Creamy No-Bake Delight
Pineapple Dream Dessert: Your New No-Bake Obsession
Hey friends, Beau here from Feastical! Tell me if this sounds familiar: the sun is shining, you’ve got people coming over, and you need a dessert that’s going to make everyone’s eyes light up without you spending the whole day in a hot kitchen. I hear you. That’s exactly why this Pineapple Dream Dessert has been my secret weapon for years.
This isn’t just a recipe; it’s a little slice of tropical vacation right on your spoon. We’re talking a buttery, crunchy graham cracker crust that gives way to a cloud-like, pineapple-speckled filling that’s so light, you’ll be tempted to call it a salad (but trust me, it’s 100% dessert). It’s sweet, it’s tangy, it’s creamy, and it requires exactly zero oven time. Just some simple mixing, a little patience while it chills, and boom—you’ve got a showstopper.
Whether you’re a seasoned pro who wants a hassle-free crowd-pleaser or you’re just starting your kitchen adventures and need a guaranteed win, this Pineapple Dream Dessert is for you. It’s the recipe I get asked for the most at family reunions and the one that always disappears first at potlucks. So, grab your mixing bowl and let’s make some magic happen.
The Potluck That Started It All
I have to take you back to my first-ever neighborhood summer potluck. I was new, wanted to make a good impression, and maybe show off a little. I planned this elaborate, three-layer cake. Of course, the humidity had other plans. It was a delicious, but slightly lopsided, mess. My lovely neighbor, Mrs. Henderson, took pity on me and slid a slice of this creamy, cool pineapple dessert onto my plate with a wink. “Try this, dear. No baking required.”
One bite and I was hooked. It was the perfect antidote to the sweltering day. I begged her for the recipe, a well-loved index card splattered with vanilla extract and butter stains. That card is now tucked in my recipe box, a reminder that sometimes the simplest, most humble dishes are the ones that truly bring people together. I’ve tweaked it a bit over the years (a touch more vanilla, always draining that pineapple well), but the soul of Mrs. Henderson’s kindness is in every bite. It’s a dessert that feels like community.
Gathering Your Sunshine Ingredients
Here’s the beautiful part: you probably have most of this in your kitchen right now. Let’s break it down. I’ll give you my chef notes and easy swaps so you can make this your own.
For the Crust:
- 2 cups graham cracker crumbs: The sweet, earthy foundation. You can buy them pre-crushed, but pulsing whole crackers in a food processor or sealing them in a bag and going to town with a rolling pin is oddly therapeutic. Chef’s Insight: For a deeper flavor, try using honey or cinnamon grahams!
- ½ cup (1 stick) unsalted butter, melted: This is the glue. It creates that iconic, crisp base that holds its shape against the creamy filling. Salted butter works in a pinch, but I prefer unsalted to control the overall saltiness.
- 2 tablespoons granulated sugar: A little extra sweetness to caramelize slightly with the butter. You can skip it if you like, but it gives the crust that little something extra.
For the Dreamy Filling:
- 8 oz cream cheese, softened: This is non-negotiable – SOFTEN IT. Leave it on the counter for a good hour. Room temp cream cheese blends into a silky-smooth filling, while cold cream cheese leaves you with frustrating lumps.
- ½ cup (1 stick) unsalted butter, softened: Same rule applies! Soft butter whips up beautifully with the cream cheese for an impossibly rich texture.
- 1 cup powdered sugar: Also called confectioner’s sugar. It dissolves instantly and sweetens without graininess. Sift it if it’s lumpy!
- 1 teaspoon pure vanilla extract: The flavor enhancer. It rounds out all the other ingredients. Use the good stuff if you have it.
- 8 oz crushed pineapple, WELL-DRAINED: The star of the show! This is the most important step. Press it in a fine-mesh strainer, even squeeze it in a clean kitchen towel. Extra liquid will make your filling runny. For more texture, you can use tidbits.
- 8 oz whipped topping (like Cool Whip), thawed: This gives our filling its dreamy, airy lift. Make sure it’s fully thawed in the fridge for easy folding. For a from-scratch touch, you can substitute with an equal amount of freshly whipped heavy cream sweetened with a tablespoon of powdered sugar.
Let’s Build the Dream: Step-by-Step
Ready? This is where the fun begins. Put on some music, clear a space, and let’s create.
Step 1: The Foundation (The Crust)
In a medium bowl, combine your graham cracker crumbs, melted butter, and sugar. Mix it with a fork until it resembles wet sand and holds together when you pinch it. Pro-Tip: I use the bottom of a flat glass or measuring cup to press the mixture firmly and evenly into the bottom of your 9×9 dish. Get it nice and compact—this prevents a crumbly crust later. Pop it in the fridge to set while you make the filling. This chills the butter, solidifying our base.
Step 2: The Creamy Heart (The Filling)
In a large mixing bowl, beat the softened cream cheese and softened butter together with an electric mixer on medium speed. Beat for a good 2-3 minutes until it’s completely smooth, creamy, and no lumps remain. Scrape down the sides of the bowl. This is the time to be patient—a smooth start means a smooth finish.
Add the powdered sugar and vanilla extract. Beat again on low at first (to avoid a sugar cloud!), then increase to medium until it’s fully incorporated and looks fluffy. Little Hack: Taste it now. This is your moment to adjust. Want it a touch sweeter? Add another tablespoon of powdered sugar. More vanilla? Go for it!
Step 3: Bringing in the Sunshine
Now, take your very well-drained crushed pineapple and add it to the cream cheese mixture. Use a spatula to fold it in gently at first. You want to distribute the pineapple without deflating the fluffiness you just created.
Step 4: The Final Fluff
Time for the whipped topping. Add your thawed whipped topping to the bowl. Here’s the key: fold, don’t stir. Use your spatula to cut down through the center, scoop along the bottom, and fold over the top. Rotate the bowl and repeat until no white streaks remain and the filling is one uniform, luscious, airy cloud. This gentle technique keeps the dessert light.
Step 5: Assembly & The Patience Game
Pull your chilled crust from the fridge. Spoon the pineapple dream filling on top and spread it into a beautiful, even layer. Smooth the top with your spatula. Now, cover it with plastic wrap and refrigerate for at least 4 hours, but overnight is truly best. I know, the wait is the hardest part! But this chilling time is what allows the flavors to marry and the dessert to set perfectly so you get clean slices. Trust the process.
How to Serve Your Tropical Masterpiece
When it’s finally time to serve, you have options! For clean squares, run a sharp knife under hot water, wipe it dry, and make your cuts. For a more rustic, family-style look, just dig in with a serving spoon.
I love plating it with a little extra flair. A dollop of extra whipped topping, a few fresh pineapple tidbits, or a sprinkle of toasted coconut or graham cracker crumbs adds texture and makes it look bakery-fancy. Serve it straight from the fridge—that cool, creamy texture is everything.
Make It Your Own: Dreamy Variations
The beauty of this dessert is its adaptability. Here are a few of my favorite twists:
- Piña Colada Dream: Fold in ½ cup of toasted sweetened coconut flakes with the pineapple. Use coconut extract instead of vanilla for a real tropical punch.
- Berry Bliss: Replace the crushed pineapple with 1 cup of well-drained, mashed strawberries or raspberries. You’ll get a gorgeous pink hue and a beautiful berry flavor.
- Lemon-Lime Zing: Swap the pineapple for 1 cup of well-drained lemon or lime pie filling (or curd). You’ll get a bright, citrusy, and utterly refreshing dessert.
- Chocolate-Dipped Twist: Use chocolate graham crackers for the crust. You could even add a handful of mini chocolate chips folded into the filling.
- Lighter Version: Use Neufchâtel cheese (⅓ less fat cream cheese), light butter, and light whipped topping. The texture will be slightly less rich but still delicious.
Beau’s Kitchen Notes & Stories
This recipe has seen it all in my kitchen. I’ve made it in a pie dish for a more elegant look, and I’ve doubled it for a crowd in a 9×13 pan (just increase the chill time). One time, in a pinch, I used digestive biscuits for the crust because that’s what I had—it was a delicious, slightly more “grown-up” variation!
The biggest lesson I’ve learned? DRAIN THAT PINEAPPLE. I can’t say it enough. I learned the hard way at a Fourth of July BBQ, ending up with a delicious but soupy dessert. Now, I’m militant about it. Also, letting the cream cheese and butter get truly soft is the secret to avoiding arm-ache from mixing and ensuring a flawless filling. This dessert is forgiving, but those two tips are game-changers.
Your Questions, Answered
My filling is runny. What happened?
99% of the time, it’s the pineapple. Even if you think it’s drained, drain it more. Press it in a strainer or squeeze it in a towel. The other culprit could be under-softened cream cheese/butter that didn’t incorporate fully, or not chilling it long enough. Give it a full overnight chill if you can.
Can I use fresh pineapple?
You can, but canned is actually better here. Fresh pineapple contains an enzyme (bromelain) that can break down dairy proteins, potentially making your filling watery or causing it to separate over time. Canned pineapple is heat-treated, deactivating that enzyme, making it the safer, more reliable choice for this no-bake dessert.
How long does it keep in the fridge?
Covered tightly, it keeps beautifully for 3-4 days. The crust may soften slightly by day 3 or 4, but it will still taste amazing.
Can I freeze Pineapple Dream Dessert?
I don’t recommend freezing the assembled dessert, as the texture of the whipped topping and cream cheese can become grainy and separate upon thawing. It’s best enjoyed fresh from the fridge.
Print
Pineapple Dream Dessert : A Light and Creamy No-Bake Delight
Description
Pineapple Dream Dessert
Your New No-Bake Obsession
Creamy, Cool, and Made for Sharing
Hey friends, Beau here from Feastical! When the sun is shining and people are coming over, I want a dessert that feels special without turning my kitchen into a sauna. That’s exactly why this Pineapple Dream Dessert has been my secret weapon for years.
Ingredients
For the Graham Cracker Crust
-
2 cups graham cracker crumbs
-
½ cup (1 stick) unsalted butter, melted
-
2 tbsp granulated sugar
For the Pineapple Dream Filling
-
8 oz cream cheese, fully softened
-
½ cup (1 stick) unsalted butter, softened
-
1 cup powdered sugar
-
1 tsp pure vanilla extract
-
8 oz crushed pineapple, VERY well drained
-
8 oz whipped topping (Cool Whip), thawed
(or equal amount freshly whipped cream, lightly sweetened)
Instructions
In a medium bowl, mix graham cracker crumbs, melted butter, and sugar until it resembles wet sand.
Press firmly into the bottom of a 9×9-inch dish, using the bottom of a glass to compact it evenly.
Refrigerate while you prepare the filling.
In a large bowl, beat softened cream cheese and butter together for 2–3 minutes until completely smooth and lump-free. Scrape down the bowl as needed.
Add powdered sugar and vanilla. Beat until fluffy and well combined.
Fold in the well-drained crushed pineapple using a spatula. (Drain it more than you think you need to!)
Gently fold in the whipped topping until the filling is light, airy, and uniform. Do not stir—folding keeps it cloud-like.
Spread filling evenly over the chilled crust. Smooth the top, cover, and refrigerate for at least 4 hours, preferably overnight, until fully set.
Notes
-
Drain the pineapple aggressively — excess juice = runny filling
-
Fully softened cream cheese and butter = silky texture
-
Overnight chilling gives the cleanest slices and best flavor
Nutritional Information*
*Please note: This is an estimated nutritional breakdown based on the specific ingredients listed and standard serving sizes. Values may vary depending on brands and any substitutions you make.
Per Serving (assuming 12 servings): Calories: ~290 | Total Fat: 18g | Saturated Fat: 11g | Carbohydrates: 30g | Sugar: 20g | Protein: 2g
This is a celebratory dessert, meant to be enjoyed in the context of a balanced diet. To lighten it up, see the “Lighter Version” variation above. Remember, sharing a homemade dessert like this is about joy and connection—that’s always good for the soul.
Final Thoughts from My Kitchen to Yours
And there you have it, friends—my beloved Pineapple Dream Dessert in all its no-bake glory. It’s more than just a recipe; it’s a ticket to easy entertaining, a guaranteed smile-inducer, and a reminder that the best food often comes from simple ingredients and a little bit of love.
I hope this becomes a staple in your home just like it is in mine. When you make it, I’d love to hear about it! Tag me on social @Feastical or drop a comment on the blog. Nothing makes me happier than seeing your kitchen creations.
Now, go enjoy that sunshine in a dish. You’ve earned it. Until next time, keep cooking (or not baking!) with joy.
— Beau

Keto Low Carb Salmon Patties : Crispy, Flavorful, and Packed with Protein
Keto Low Carb Salmon Patties: Your New Weeknight Hero (They’re Seriously Crispy!)
Who Says Comfort Food Can’t Be Keto?
Hey friends, Beau here from Feastical! Let’s talk about that magical intersection where “I need dinner NOW” meets “I want it to be crazy delicious AND fit my goals.” Sounds like a fantasy, right? Wrong. It’s exactly where these Keto Low Carb Salmon Patties live. We’re talking crispy, golden-brown exteriors giving way to a tender, herb-flecked, protein-packed interior that tastes like a hug for your taste buds. And the best part? They’re on your plate in about 20 minutes flat.
I know what you might be thinking: salmon paties? Aren’t those kinda… boring? Or worse, soggy? Friend, I am here to revolutionize your patty game. This isn’t a dry, crumbly hockey puck. This is a flavor-packed, juicy, crave-worthy main event that happens to be insanely good for you. Whether you’re fully keto, just watching your carbs, or simply want a lightning-fast, nutritious meal that doesn’t skimp on satisfaction, this recipe is your new kitchen sidekick. So, grab your favorite skillet and let’s turn a humble can of salmon into a meal you’ll make on repeat. Trust me, your spatula is ready for this.
The Fish Cake That Started It All
My love for a good salmon patty goes way back, but not to some fancy restaurant. Nope, it started in my Nana’s sun-drenched kitchen, with the smell of old-school coffee percolating and the *thwump-thwump* of her ancient can opener. She called them “salmon croquettes,” and they were her go-to “oops, I forgot to thaw something” dinner. She’d use saltines as binder, fry them in a shimmering pool of Crisco, and serve them with a mountain of mashed potatoes and peas.
They were pure, unadulterated comfort. But as I got older and my own cooking style evolved (and my metabolism started giving me side-eye), I wanted to capture that same crispy, soul-satisfying essence in a way that made my body feel as good as my heart. Swapping in almond flour for the crackers, loading up on fresh herbs, and using a good avocado oil was my modern, keto-friendly homage to Nana’s classic. Every time I flip one of these patties and hear that perfect sizzle, I’m right back at her linoleum table, and that’s the kind of kitchen magic I love to share with you.
What You’ll Need (It’s All About the Build!)
Simple ingredients, big flavor. Here’s the lineup and my little chef insights on each one:
- 2 (6 oz) cans salmon, drained and flaked – The star! I keep wild-caught canned salmon in my pantry for emergencies. It’s affordable, packed with omega-3s, and ready to go. Chef’s Tip: Don’t toss the bones and skin if they’re in there—they’re edible, loaded with calcium, and virtually disappear when mixed in. If you have leftover cooked fresh salmon, that’s a glorious upgrade!
- 2 large eggs – Our binder, holding our patty dreams together. They add richness and help create that perfect texture.
- 1/4 cup almond flour – The keto MVP that replaces breadcrumbs. It gives a subtle nuttiness and helps achieve a beautiful crust. Substitution: For a nut-free version, sunflower seed flour or crushed pork rinds work great.
- 2 green onions, finely chopped – Adds a mild, fresh oniony bite without the overpowering raw onion punch. The green parts make it pretty, too!
- 2 tbsp fresh parsley, chopped – A burst of fresh, grassy flavor. In a pinch, 2 teaspoons of dried parsley will do, but fresh really sings here.
- 1 tbsp lemon juice – The brightening agent! This little splash cuts through the richness and makes all the other flavors pop. Always use fresh if you can.
- 1 clove garlic, minced – Because everything is better with garlic. Feel free to grate it on a microplane for a more even distribution.
- Salt and pepper to taste – Season confidently! Salmon can handle it. I start with 1/2 tsp kosher salt and a few good cracks of black pepper.
- 2 tbsp olive oil or avocado oil (for frying) – My go-to is avocado oil for its high smoke point and neutral flavor, but a good olive oil works too. This gives us that essential, irresistible crisp.
Let’s Make Some Magic: Step-by-Step
Follow these steps, lean on my tips, and you’ll be a salmon patty pro in no time.
Step 1: The Big Mix
Dump your flaked salmon, eggs, almond flour, green onions, parsley, lemon juice, garlic, salt, and pepper into a medium mixing bowl. Now, get in there with a fork or your hands and mix until just combined. Chef’s Hack: Don’t overmix! You want a cohesive mixture, not a paste. A few stray flakes of salmon are perfectly fine—they promise great texture.
Step 2: Form & Firm Up
Divide the mixture into 6-8 equal portions. Scoop one up and gently form it into a patty about 3/4-inch thick. If the mixture feels a bit soft or sticky, don’t panic! That’s normal. Pro-Tip Alert: Place the formed patties on a plate and pop them in the fridge for 10-15 minutes. This chilling step is the SECRET to patties that don’t fall apart in the pan. It firms everything up beautifully.
Step 3: The Sizzle & Sear
Heat your oil in a large skillet (cast iron is king for crust!) over medium heat. You’ll know it’s ready when a tiny piece of the mixture sizzles upon contact. Gently place your patties in the pan, leaving a little room between them. Now, the hardest part: let them cook undisturbed for 3-4 minutes. Peek at the underside—you’re looking for a deep, golden-brown crust. Use a thin, flexible spatula to carefully flip them. Cook for another 3-4 minutes on the second side until equally gorgeous and cooked through.
Step 4: The Grand Finale
Transfer your beautifully bronzed patties to a plate lined with a paper towel (just to catch any excess oil). Let them rest for a minute—this helps them set fully. Then, it’s time to serve them up hot! That first crispy bite is your reward.
How to Serve These Golden Gems
These patties are incredibly versatile! For a classic, satisfying low-carb plate:
- Pile them on a bed of fresh baby arugula or mixed greens with a simple lemon vinaigrette.
- Add a wedge of lemon for squeezing—that fresh acid is non-negotiable for me.
- Dollop with a keto-friendly sauce. My favorites are a quick dill-yogurt sauce (full-fat Greek yogurt + lemon + fresh dill) or a spicy sriracha mayo (sugar-free mayo + a splash of hot sauce).
- Serve alongside some roasted asparagus, zucchini noodles, or a quick cauliflower mash for the ultimate comfort food feel.
They’re also fantastic cold the next day, chopped over a salad for lunch!
Mix It Up! 5 Delicious Twists
Once you master the base, the canvas is yours to paint. Try these fun variations:
- “Everything Bagel” Style: Add 1 tbsp of everything bagel seasoning to the mix. After frying, sprinkle a little more on top with a schmear of cream cheese on the side.
- Spicy Southwest: Mix in 1 tsp cumin, 1/2 tsp chili powder, and 1 finely chopped jalapeño (seeds removed). Serve with avocado slices and a lime wedge.
- Lemon-Dill Delight: Double the lemon juice to 2 tbsp and add 1 tbsp of freshly chopped dill. This is summer on a plate.
- Baked & Super Easy: For a hands-off approach, place chilled patties on a parchment-lined baking sheet, brush lightly with oil, and bake at 400°F for 12-15 minutes, flipping halfway. Less crispy, but still delicious.
- Paleo/Whole30 Swap: Use 1/4 cup mashed sweet potato or arrowroot powder instead of almond flour, and ensure your salmon has no added sugars.
Beau’s Kitchen Notes
This recipe is a living, breathing thing in my kitchen. I’ve made it probably a hundred times, and I still tweak it based on what’s in my fridge. Sometimes I add a handful of shredded zucchini (squeezed dry, always squeeze it dry!). Once, in a bold move, I mixed in some crumbled feta, and oh man, was that a happy accident. The key is to treat the recipe as your foundation. Respect the chilling step—it truly is the difference between a patty and a scramble—but don’t be afraid to play with the flavors. That’s how you make a recipe truly yours. And if one does break apart a little? You’ve just made delicious salmon hash. There are no failures here, only discoveries.
Your Questions, Answered
My patties are falling apart in the pan! Help!
The two most common culprits: not enough binder (egg) or skipping the chill time. Make sure your eggs are large, and never skip the 10-15 minute fridge rest. It firms up the almond flour and eggs, acting like culinary glue. Also, be gentle when flipping—use a thin spatula and commit to a confident flip.
Can I use fresh salmon instead of canned?
Absolutely! Use about 1.5 cups of cooked, flaked salmon. Leftover baked or poached salmon is perfect here. Just make sure it’s cooled and any skin is removed. The flavor will be fantastic.
Can I make these ahead of time?
Yes! You have two great options: 1) Mix the ingredients and form the patties, then store them covered in the fridge for up to a day before cooking. 2) Cook them completely, let them cool, and store in an airtight container in the fridge for 3-4 days. Reheat in a toaster oven or air fryer to keep them crispy.
Why almond flour? Can I use coconut flour?
Almond flour provides fat, protein, and a texture most similar to breadcrumbs. Coconut flour is highly absorbent and would make the patties dry and crumbly. I don’t recommend a direct swap. Stick with almond flour, sunflower seed flour, or crushed pork rinds.

Keto Low Carb Salmon Patties : Crispy, Flavorful, and Packed with Protein
Description
Keto Low Carb Salmon Patties
Your New Weeknight Hero (Seriously Crispy!)
Who Says Comfort Food Can’t Be Keto?
Hey friends, Beau here from Feastical! Let’s talk about that magical overlap where “I need dinner now” meets “I want it to be wildly delicious and still fit my goals.” That sweet spot? These Keto Low Carb Salmon Patties.
We’re talking crispy, golden edges, a tender herb-flecked center, and bold, comforting flavor—all on the table in about 20 minutes. No soggy fish cakes. No sad diet food. Just a fast, protein-packed dinner that feels like a win.
Ingredients
-
2 (6-oz) cans salmon, drained and flaked
(Skin and bones are edible—keep them for extra calcium and nutrition) -
2 large eggs
-
¼ cup almond flour
(Nut-free swap: sunflower seed flour or crushed pork rinds) -
2 green onions, finely chopped
-
2 tbsp fresh parsley, chopped
-
1 tbsp fresh lemon juice
-
1 clove garlic, minced or grated
-
½ tsp kosher salt, or to taste
-
Black pepper, to taste
-
2 tbsp avocado oil or olive oil, for frying
Instructions
In a medium bowl, combine salmon, eggs, almond flour, green onions, parsley, lemon juice, garlic, salt, and pepper.
Mix gently until just combined—don’t overwork it.
Divide mixture into 6–8 patties, about ¾-inch thick.
Place on a plate and refrigerate for 10–15 minutes to firm up (this step is key for structure!)
Heat oil in a large skillet over medium heat.
Cook patties for 3–4 minutes per side, undisturbed, until deeply golden and crispy.
Transfer to a paper towel–lined plate and rest for 1 minute before serving.
Notes
-
Chill time = non-negotiable for patties that hold together
-
Cast iron gives the best crust
-
Be confident when flipping—hesitation causes breakage
-
If one falls apart? Congrats, you made salmon hash
Nutritional Info (Because Knowledge is Power!)
Prep Time: 10 minutes | Cook Time: 10 minutes | Total Time: 20 minutes | Servings: 4 (2 patties per serving)
Please note: The following is an approximate estimate calculated for ingredients used and may vary based on specific brands and portion sizes.
Per Serving (Approximate):
- Calories: 210
- Protein: 22g (Fantastic for staying full!)
- Fat: 10g (Healthy, satisfying fats)
- Net Carbs: 2g (Yes, you read that right!)
- Fiber: 1g
This makes these patties an absolute powerhouse for a keto or low-carb lifestyle—high protein, moderate fat, and minimal carbs. It’s a meal that fuels you without the slump.
Final Thoughts from My Kitchen to Yours
And there you have it—my not-so-secret weapon for busy nights, keto goals, and just plain good eating. These Keto Low Carb Salmon Patties prove that healthy, fast, and delicious aren’t mutually exclusive. They’re a reminder that the best meals often come from humble ingredients and a little bit of know-how.
I hope you love making (and devouring) them as much as I do. When you give them a try, tag me over on Feastical or on social—I love seeing your kitchen creations! Now, go forth and get that skillet sizzling. Your delicious, crispy, protein-packed dinner awaits.
Happy cooking,
Beau

Buffalo Chicken Meatballs : Spicy, High-Protein Bites for Dinner or Game Day
Spicy, Saucy, and Seriously Satisfying: Your New Favorite Bite is Here!
Hey friends, Beau here from Feastical! Tell me if this sounds familiar: you’re craving that iconic, tangy, spicy kick of classic Buffalo wings, but you’re not in the mood for the mess (or the deep-fryer guilt). Maybe you’re looking for a killer game-day snack that won’t disappear in two seconds, or perhaps you need a simple, protein-packed dinner that actually excites your taste buds. I hear you. That exact craving is what had me rummaging through my fridge one Tuesday night, determined to create something that delivered all the flavor but felt a little brighter, a little easier, and a whole lot more versatile.
And let me tell you, these Buffalo Chicken Meatballs were a *victory*. They’re the beautiful love child of your sports bar favorite and your smart weekly meal prep. We’re taking lean ground chicken, loading it up with crunchy bits of green onion and celery (the secret flavor heroes!), and baking them to juicy perfection. Then, the grand finale: a glossy, fiery toss in that iconic Buffalo sauce. The result? A perfectly poppable, protein-packed bite that’s bold, zesty, and utterly irresistible. Whether you’re feeding a hungry crowd, prepping lunches, or just treating yourself to a fun dinner, these meatballs are about to become your go-to. So, grab your favorite bowl, and let’s make your kitchen smell absolutely incredible.
More Than Just Game Day: A Flavor That Feels Like Home
This recipe takes me right back to my college apartment—the kind with the questionable linoleum and the oven that only had two working temperatures: “Off” and “Inferno.” My roommates and I lived for Buffalo chicken dip. It was our culinary anchor for every major event, from finals week to the big game. But one Sunday, mid-sauce stir, I had a revelation. We loved the flavor, but we needed something… more substantial. Something we could actually put on a plate next to a salad and call it a real meal.
I spotted a pack of ground chicken, and the wheels started turning. What if we could get that same punchy, vinegar-spiked heat in a form we could fork? The first batch was… educational. Let’s just say without the proper binder, you get more of a “Buffalo chicken crumble.” But batch two? Magic. The moment we pulled those golden-brown beauties out of the oven, gave them a saucy bath, and took that first bite, we knew we’d leveled up. It wasn’t just snack food anymore; it was a *meal*. That’s the spirit I want to bring to you: taking the comforting flavors we adore and remixing them into something that fits real, delicious, everyday life.
Gathering Your Flavor All-Stars
Here’s everything you’ll need to create these spicy little wonders. The beauty is in its simplicity—most of this is probably already in your pantry!
- 1 lb ground chicken: I prefer a mix of dark and light meat for the best flavor and juiciness, but lean ground chicken breast works great too! Chef’s Tip: If you only have ground turkey, go for it! It’s a fantastic, flavorful swap.
- 1/3 cup breadcrumbs: These are our binder, keeping the meatballs tender and together. Easy Swap: For a low-carb or gluten-free version, almond flour or crushed pork rinds work like a dream.
- 1 large egg: Our other binding superstar, adding moisture and helping everything stick together beautifully.
- 1/4 cup finely chopped green onions: Don’t skip these! They add a fresh, mild onion flavor and little pops of color. The white and green parts both bring their A-game.
- 1/4 cup finely chopped celery (optional but recommended): This is the secret! It gives that authentic Buffalo-wing-platter crunch and a hint of earthy freshness right inside the meatball.
- 1/2 tsp garlic powder & 1/2 tsp onion powder: The dynamic duo of easy, all-encompassing savory flavor. They distribute way more evenly than fresh in this mix.
- Salt and black pepper to taste: I start with 3/4 tsp kosher salt and 1/4 tsp pepper. Season with love—it makes all the difference!
- 1/2 cup buffalo sauce (like Frank’s RedHot): The star of the show! Frank’s is the classic for a reason—that perfect balance of heat and tang. Use your favorite brand, but for true “Buffalo” flavor, you want a cayenne pepper-based hot sauce.
- 1 tbsp melted butter (optional): This is my pro-move for a richer, glossier, more restaurant-style sauce. It tames the sharpness of the hot sauce just slightly and helps it cling to every nook and cranny.
Let’s Get Rolling: Your Foolproof Guide to Perfect Meatballs
Ready to see how easy this is? Follow these steps, and you’ll be a Buffalo meatball master in no time.
Step 1: Preheat & Prep. Fire up that oven to a hot 400°F (200°C). This high heat gives us a nice golden exterior while keeping the inside juicy. Line a baking sheet with parchment paper or foil (and give it a quick spray!) for the world’s easiest cleanup. Trust me, you’ll thank yourself later.
Step 2: The Mix. In a large bowl, we’re going to gently combine our ground chicken, breadcrumbs, egg, green onions, celery, garlic powder, onion powder, salt, and pepper. Here’s my biggest hack: use your hands! But be gentle—overmixing is the fast track to tough, dense meatballs. Just mix until everything is evenly combined, no more. It’s okay if it’s a bit sticky.
Step 3: The Roll. Now for the fun part! Lightly wet your hands with cold water—this prevents the mixture from sticking to you like glue. Scoop out about a tablespoon and a half of the mixture and roll it into a 1.5-inch ball. You’re aiming for roughly the size of a walnut. Place each one on your prepared baking sheet, leaving a little space between them for hot air to circulate.
Step 4: The Bake. Slide that sheet into your preheated oven and let the magic happen for 15-18 minutes. You’re looking for them to be cooked through (an internal temperature of 165°F is perfect) and lightly golden on the outside. The smell at this point is absolutely tantalizing!
Step 5: The Saucy Toss. While the meatballs are baking, whisk together your buffalo sauce and that optional melted butter in a large bowl. As soon as the meatballs come out of the oven, carefully add them to the sauce bowl. Use a big spoon or toss the bowl gently to coat every single meatball in that glorious, spicy glaze. They’re ready to rock and roll!
Dishing Up the Deliciousness
How you serve these is half the fun! For the ultimate game-day spread, pile them high on a platter with a big bowl of cool, creamy ranch or blue cheese dressing for dipping. Scatter some extra chopped green onions and celery sticks around for that classic crunch. Want to make it a meal? You’ve got options! Serve them over a bed of crisp romaine lettuce as a protein-packed salad, or tuck them into warm, soft sub rolls with a drizzle of extra sauce and a handful of shredded lettuce for the most epic sandwich of your life. They’re also fantastic next to some simple roasted veggies or on top of a bowl of steamed rice to soak up all that extra sauce.
Make It Your Own: 5 Flavorful Twists
Love the base recipe? Here’s how to play with it!
- Sweet Heat BBQ: Swap the buffalo sauce for an equal amount of your favorite BBQ sauce mixed with a tablespoon of hot sauce. Glaze and bake for the last 5 minutes for a sticky-sweet finish.
- Blue Cheese Stuffed: Take a small cube of cold blue cheese, tuck it into the center of each meatball as you roll, and seal it in. When you bite in, you get a melty, tangy surprise!
- Asian Zing: Replace the buffalo sauce with a mix of 1/3 cup soy sauce, 2 tbsp honey, 1 tbsp sriracha, and 1 tsp grated ginger. Garnish with sesame seeds and sliced scallions.
- Italian Herb: Omit the buffalo sauce step. Add 1/2 cup grated parmesan, 1 tsp dried Italian herbs, and 1/4 cup chopped parsley to the meatball mix. Bake and serve with marinara for “meatball sub” vibes.
- Buffalo Cauliflower Power Bowl: For a vegetarian take, skip the meatballs! Toss roasted cauliflower florets in the buffalo sauce and serve over quinoa with avocado, chickpeas, and that essential ranch drizzle.
Beau’s Kitchen Chronicles: A Recipe That Grows With You
This recipe has been a living, evolving thing in my kitchen. That first “crumble” batch taught me the sacred importance of the egg-and-breadcrumb binder. The celery addition came from a desperate “what’s in the fridge?” moment that turned out to be genius. And the butter in the sauce? That was a tip from a fellow chef friend who said, “You want that wingshop gloss? That’s their secret.” She was right. The best home cooking isn’t about rigid perfection; it’s about tasting, tweaking, and making a dish sing for *your* table. Don’t be afraid to adjust the heat level, throw in some extra herbs, or double the batch for the freezer. These meatballs are your canvas now.
Your Questions, Answered!
Q: Can I make these ahead of time?
A: Absolutely! You can assemble the raw meatballs, place them on the baking sheet, cover tightly, and refrigerate for up to 24 hours before baking. You can also freeze the unbaked meatballs on the sheet, then transfer to a bag for up to 3 months. Bake from frozen, adding 5-10 extra minutes.
Q: My meatballs turned out dry. What happened?
A: The most common culprit is overmixing the meat or using ground chicken that’s *too* lean (like 99% fat-free breast). A bit of fat keeps them juicy. Also, a reliable oven thermometer is a chef’s best friend—an oven running too hot will dry them out fast.
Q: Can I cook these in an air fryer?
A: You bet! Air fry at 375°F for 10-12 minutes, shaking the basket halfway through. They get beautifully crisp all over!
Q: How do I store and reheat leftovers?
A: Store sauced or unsauced meatballs in an airtight container in the fridge for 3-4 days. Reheat gently in the microwave, in a skillet with a splash of water, or back in the oven at 350°F until warmed through.

Buffalo Chicken Meatballs : Spicy, High-Protein Bites for Dinner or Game Day
Description
If you love the bold, tangy heat of Buffalo wings but don’t love the fryer mess (or the regret), these Buffalo Chicken Meatballs are your new go-to. They’re baked, juicy, packed with protein, and tossed in that iconic fiery sauce we all crave. Perfect for game day, meal prep, or a fun weeknight dinner that actually feels exciting.
Ingredients
Meatballs
-
1 lb ground chicken (light + dark meat preferred)
-
⅓ cup breadcrumbs
-
1 large egg
-
¼ cup finely chopped green onions
-
¼ cup finely chopped celery (optional but highly recommended)
-
½ tsp garlic powder
-
½ tsp onion powder
-
¾ tsp kosher salt
-
¼ tsp black pepper
Buffalo Sauce
-
½ cup Buffalo sauce (Frank’s RedHot recommended)
-
1 tbsp melted butter (optional, for a richer finish)
Instructions
-
Preheat & Prep
Preheat oven to 400°F (200°C). Line a baking sheet with parchment paper or foil and lightly spray. -
Mix Gently
In a large bowl, combine all meatball ingredients. Use your hands and mix just until combined—don’t overwork the mixture. -
Roll
With lightly damp hands, roll mixture into 1½-inch meatballs (about walnut-sized). Place evenly spaced on the baking sheet. -
Bake
Bake for 15–18 minutes, until lightly golden and cooked through (internal temp 165°F / 74°C). -
Sauce & Toss
While meatballs bake, whisk Buffalo sauce with melted butter (if using).
Transfer hot meatballs to a bowl and toss until fully coated.
Notes
-
Dark meat = juicier meatballs, but lean chicken works too.
-
Celery adds classic Buffalo flavor inside the meatball — don’t skip it if you can help it.
-
Wet hands make rolling easy and mess-free.
-
Save extra sauce for drizzling or dipping.
Fueling Your Fun (Approximate Nutritional Info)
Let’s talk about what’s fueling all that flavor! Per serving of 5 meatballs (sauce included, without optional butter/dip), you’re looking at:
Calories: ~250 | Protein: ~22g | Fat: ~14g | Carbohydrates: ~7g | Fiber: ~1g | Net Carbs: ~6g
Remember, these are estimates and can vary based on your specific ingredients. The star of the show here is that high-quality protein from the chicken, keeping you full and satisfied. By baking instead of frying and using lean meat, we’re keeping things on the lighter side so you can enjoy that bold Buffalo flavor any day of the week.
The Final Bite
And there you have it, friends—my not-so-secret, always-requested recipe for Buffalo Chicken Meatballs. They’re proof that you don’t have to choose between flavor that knocks your socks off and food that makes you feel good. They’re messy in the best way, deeply satisfying, and endlessly adaptable. Whether they’re the star of your party platter, your meal prep hero, or your Tuesday night dinner win, I hope they bring as much joy to your kitchen as they have to mine.
I’d love to hear how yours turn out! Tag me on social @Feastical or drop a comment on the blog. Now, go forth and sauce responsibly!
With a full heart and a messy apron,
Beau