Strawberry Milk Protein Chia Pudding : A Sweet Boost for Your Mornings
Strawberry Milk Dreams Do Come True (And They’re Packed With Protein!)
Hey friends, Beau here from Feastical. Let me ask you a question that might just send a wave of pure, pink nostalgia right through you: remember strawberry milk?
Not just any strawberry milk, but that magical, almost-too-pink syrup you’d swirl into cold white milk at the school cafeteria or beg your mom to buy at the grocery store? That sweet, slightly artificial, utterly delightful flavor that tasted like a party in a carton. It was a treat, a reward, a little splash of joy in an otherwise ordinary day.
Now, what if I told you we could capture that exact same whimsical, sweet, and totally satisfying vibe… and turn it into a legitimately nutritious, protein-packed breakfast or snack that your adult self will high-five you for? That’s the magic we’re whipping up today.
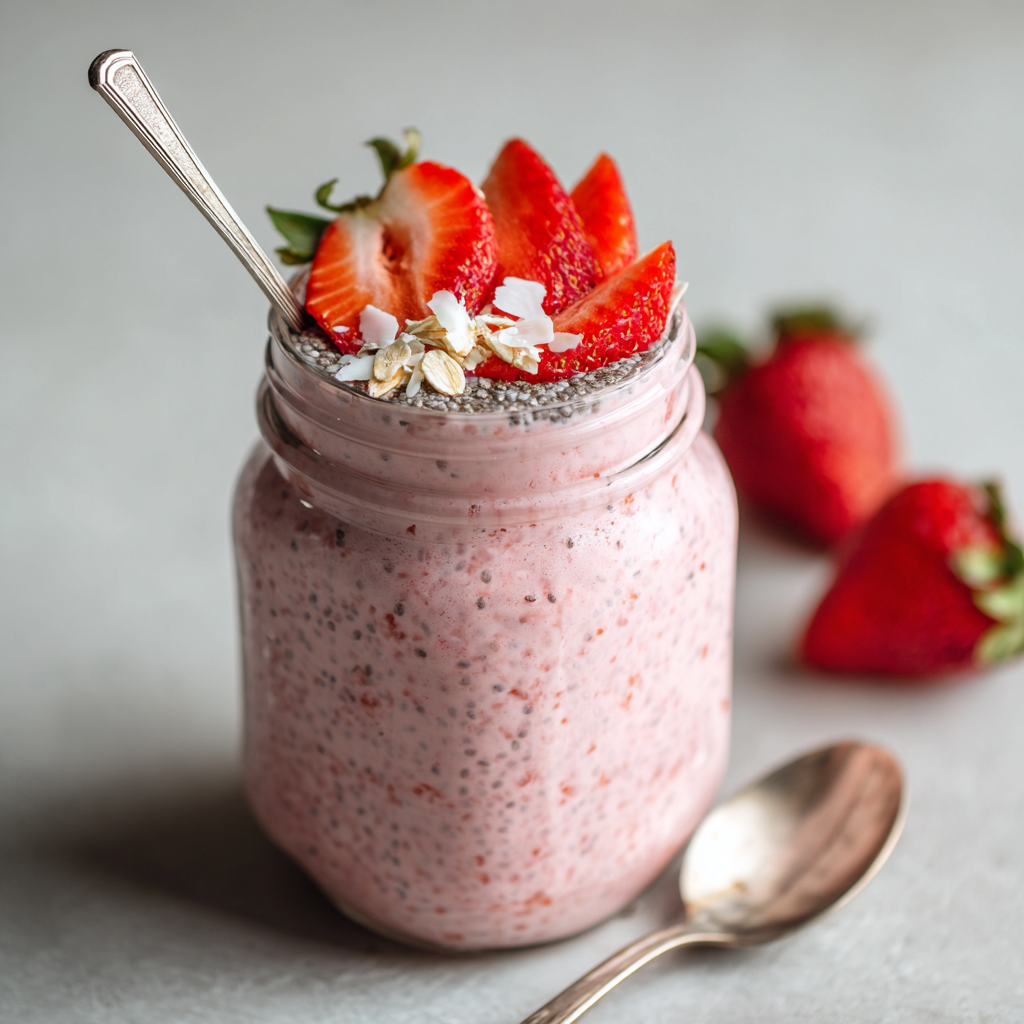
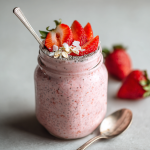
Welcome to my Strawberry Milk Protein Chia Pudding. This isn’t just a recipe; it’s a glow-up for your favorite childhood flavor. We’re taking the essence of that pretty pink drink and transforming it into a thick, creamy, spoonable pudding that’s loaded with good-for-you ingredients. Chia seeds bring their incredible fiber and omega-3 power, a scoop of protein powder keeps you fueled for hours, and real strawberries (fresh or frozen!) give it that honest-to-goodness fruity soul. It’s meal-prep magic, it’s deliciously aesthetic (yes, I’m looking at you, Instagram), and it tastes like a sweet, creamy hug. So, let’s ditch the chalky, forgettable breakfasts and make a morning treat that’s equal parts fun and functional. Your inner kid and your hungry adult self will thank you.
My Pink-Hued Kitchen Epiphany
This recipe was born on one of those “I-need-something-sweet-but-I-should-probably-eat-something-good-for-me” afternoons. I was staring into the fridge, my post-workout hunger hitting hard, and my eyes landed on a half-empty tub of protein powder and a slightly sad-looking pint of strawberries. Next to it, my giant bag of chia seeds sat patiently, as it always does.
In a flash, I was seven years old again, sitting at my grandma’s linoleum kitchen table. She’d never buy the store-bought syrup, oh no. She’d mash up a handful of ripe summer strawberries with a little sugar and a splash of milk, stirring it with a fork until it turned this gorgeous, speckled pink. She’d pour it over a glass of cold milk for me, and I’d watch, mesmerized, as the pink clouds swirled and danced before settling into the most perfect shade. It felt special. It felt like love.
Standing there in my own kitchen decades later, I grabbed my blender. I tossed in strawberries, milk, protein powder (my grown-up twist), and gave it a whirl. The sound, the color—it instantly transported me. When I stirred the chia seeds into that familiar pink liquid, I knew I was onto something. After a few hours in the fridge, I took a spoonful. It was creamy, sweet, nostalgic, and powerfully satisfying. It was my grandma’s love, my childhood joy, and my need for a protein hit, all in one perfect jar. And I just knew I had to share it with you.
Gathering Your Pink Power Ingredients
Here’s the beautiful part: this pudding comes together with just a handful of simple, wholesome ingredients. Each one plays a starring role. Let’s break it down:
- 1 cup unsweetened almond milk (or milk of choice): This is our liquid base. I love unsweetened almond milk for its light, neutral flavor that lets the strawberry shine. Chef’s Insight: Feel free to use any milk you love! Oat milk makes it extra creamy, dairy milk adds richness, or coconut milk gives a subtle tropical note. The world is your oyster… milk.
- ½ cup fresh or frozen strawberries: The heart of the flavor! Frozen berries work brilliantly here—they’re often picked at peak ripeness and are more affordable. Substitution Tip: No strawberries? Try raspberries or a mix of berries for a “berry milk” twist.
- 1 scoop vanilla or strawberry protein powder: Our secret weapon for staying power. This is what turns a light snack into a fuel-packed meal. Chef’s Insight: Vanilla is a versatile champ, but strawberry protein powder doubles down on that nostalgic flavor. For a plant-based option, a vanilla pea or brown rice protein blend works great. Just check that it blends well without grittiness.
- 1–2 tablespoons maple syrup or honey (optional): The sweetener bridge. Depending on the sweetness of your berries and protein powder, you might not need it! Chef’s Insight: Always taste your blend before adding chia seeds. Start with none, blend, then add a touch if you need it. Agave nectar or a pitted date blended with the milk are fantastic alternatives.
- ¼ cup chia seeds: The tiny but mighty pudding-makers. These little seeds are nutritional powerhouses that expand and gel to create the perfect pudding texture. Pro Tip: Don’t skip the second stir (you’ll see in the steps)! It’s the key to a smooth, clump-free pudding.
- Optional toppings: sliced strawberries, coconut flakes, granola: The fun part! Toppings add texture, flavor, and that beautiful finished look. A sprinkle of cacao nibs, a dollop of whipped cream, or a few mint leaves are also divine.
Let’s Make Some Magic: Step-by-Step
Ready to see how five minutes of active time turns into breakfast bliss? Let’s do this.
- Blend Until Dreamy: In your blender, combine the milk, strawberries, protein powder, and sweetener (if using). Pop the lid on and blend on high for 30-45 seconds until the mixture is completely smooth and a gorgeous, uniform pink. Little Chef Hack: If you’re using a less powerful blender, give your frozen strawberries a minute to thaw on the counter first, or add an extra splash of milk to get things moving.
- The Big Mix: Pour this beautiful pink strawberry milk into a medium-sized mixing bowl, a large glass measuring cup (makes pouring easier!), or directly into your final serving jars. Now, grab your chia seeds. Sprinkle them evenly over the liquid. IMMEDIATELY start whisking or stirring vigorously with a fork. This is non-negotiable, friends! Chia seeds clump like it’s their job if you let them sit. Stir for a good 30-60 seconds until you see no dry clumps and everything is beautifully combined.
- The “Second Stir” Secret: Set a timer for 5 minutes. Walk away, wash the blender, do a little dance. When the timer goes off, come back and give the mixture another really good stir. You’ll feel it starting to thicken already. This second stir breaks up any initial clumps that formed and ensures every single chia seed is suspended evenly for a perfectly smooth texture later. It’s my #1 tip for chia pudding success.
- Patiently Transform: Cover your bowl or jars tightly. I’m a fan of using mason jars with lids—they make storage and transport a breeze. Now, let the fridge work its overnight magic. Place it in the refrigerator for at least 2 hours, but for the absolute best, thickest, pudding-like texture, let it go overnight. The chia seeds slowly absorb all that flavorful liquid, swelling up and creating a luxurious, creamy consistency.
- The Grand Finale – Toppings! When you’re ready to serve, grab your jar. The pudding should be thick and spoonable. Give it one final stir. Now, unleash your inner artist! Pile on fresh strawberry slices for a fresh bite, sprinkle with coconut flakes for tropical crunch, or add a tablespoon of granola for hearty texture. Dig in and taste the nostalgia!
How to Serve Your Pink Pudding Masterpiece
This pudding is as versatile as it is delicious. Here’s how I love to enjoy it:
The Classic Jar: Serve it right in the mason jar you set in the fridge! It’s perfect for grab-and-go mornings. Layer it with fresh fruit and granola for a beautiful parfait effect—just add toppings right before you eat so they stay crunchy.
The Elegant Bowl: For a more decadent feel, spoon the pudding into a beautiful bowl. Swirl the top with the back of your spoon, creating a little well for a drizzle of extra maple syrup or a dollop of almond butter. Add your toppings artfully. It feels like a dessert you’d order at a chic café.
The Power Parfait: For the ultimate satisfying meal, create layers in a tall glass. Start with pudding, then a layer of Greek yogurt or coconut yogurt, another layer of pudding, then a generous handful of mixed berries and a sprinkle of nuts or seeds. It’s a textural adventure in every spoonful.
Pairing Idea: This pudding is rich and satisfying on its own, but it also pairs wonderfully with a side of whole-grain toast with avocado or a handful of hard-boiled eggs for a truly balanced breakfast that will keep you energized all morning long.
Make It Your Own: Flavor Twists & Swaps
The basic formula here is your canvas. Once you’ve mastered the classic strawberry milk vibe, try these delicious variations!
- Chocolate-Dipped Strawberry: Add 1 tablespoon of unsweetened cocoa powder or cacao powder to the blender with the other ingredients. Use chocolate protein powder if you have it. Top with dark chocolate shavings. Heaven.
- Tropical Sunrise: Swap the strawberries for ½ cup of mango chunks and use coconut milk as your liquid base. A scoop of vanilla protein powder works perfectly here. Top with toasted coconut flakes and a few pineapple tidbits.
- “Cookies & Cream” Remix: Use chocolate protein powder and blend with the milk and strawberries. After the pudding has set, stir in 1-2 crushed-up oreo cookies (or a healthier chocolate sandwich cookie alternative) just before serving for a fun, crunchy twist.
- Superfood Berry Boost: Add 1 tablespoon of dried butterfly pea flower powder to the blender for a stunning violet-blue color (it pairs with the pink for a galaxy effect!), or mix in a teaspoon of maca powder for an adaptogenic lift. The flavor remains mild but the benefits soar.
- Nutty & Nice (Dairy-Free Deluxe): Use a rich, homemade cashew milk as your base (it’s incredibly creamy). Swap the protein powder for 2 tablespoons of creamy cashew butter blended right in with the strawberries. The fat and protein from the nuts make it luxuriously satisfying.
Beau’s Kitchen Notes & Stories
This recipe has become a staple in my house, and it’s evolved in funny ways. The first time I made it, I got overzealous and added a full half-cup of chia seeds because “more is better, right?” Friends, I created something closer to edible cement than pudding. It was a hilarious, spoon-standing-straight-up disaster that taught me the perfect ratio through glorious failure.
I’ve also learned that the type of protein powder matters. Some blend into silky smoothness, while others can be a bit grainy. If yours is on the gritty side, try blending the powder with the milk first until super smooth, then add the strawberries and blend again. That extra step makes all the difference.
Most importantly, this recipe is about joy. It’s about taking something simple and fun and making it work for your life now. Don’t stress about exact measurements. Taste as you go. Make it yours. That’s what Feastical is all about.
Your Questions, Answered!
Q: My pudding is still really runny after 2 hours. What happened?
A: Don’t worry! This usually means one of two things: 1) You might need just a bit more chia seed. Stir in an extra tablespoon and let it sit for another hour. Or 2) It might just need more time. Chia seeds can take 4-6 hours, even overnight, to reach maximum thickness, especially in a cold fridge. Patience is key!
Q: Can I make this without protein powder?
A> Absolutely! Simply omit it. To make up for the lost sweetness and creamy body, you might want to add an extra ½ tablespoon of sweetener and consider blending in ¼ of a ripe banana or 2 tablespoons of Greek yogurt (if you eat dairy) for creaminess. The chia will still set beautifully.
Q: How long does it last in the fridge?
A> Stored in a sealed container, your chia pudding will stay fresh and delicious for 4-5 days. It’s a meal-prep superstar! Just add any fresh toppings (like sliced fruit or granola) right before you eat to maintain the best texture.
Q: My protein powder clumped up when I stirred it in. How do I avoid that?
A> Great question! The best way to avoid clumps is to blend the protein powder with the liquid first. Add your milk and protein powder to the blender and give it a good 15-second blitz before adding the strawberries and sweetener. This ensures it dissolves completely into a smooth base.
Strawberry Milk Protein Chia Pudding : A Sweet Boost for Your Mornings
Description
Bring the magic of childhood strawberry milk into your adult life—without the sugar crash. This creamy, protein-packed chia pudding combines fresh or frozen strawberries, protein powder, and chia seeds to make a healthy, satisfying breakfast or snack. Thick, pink, and nostalgic, it’s perfect for meal prep, post-workout fuel, or a fun, wholesome treat.
Ingredients
-
1 cup unsweetened almond milk (or milk of choice)
-
½ cup fresh or frozen strawberries
-
1 scoop vanilla or strawberry protein powder
-
1–2 tbsp maple syrup or honey (optional, to taste)
-
¼ cup chia seeds
-
Optional toppings: sliced strawberries, granola, coconut flakes, cacao nibs, mint leaves
Instructions
-
Blend Ingredients: In a blender, combine milk, strawberries, protein powder, and sweetener (if using). Blend 30–45 seconds until smooth and pink.
-
Add Chia Seeds: Pour the mixture into a bowl or jars. Sprinkle chia seeds evenly over the liquid and whisk vigorously for 30–60 seconds to prevent clumps.
-
Second Stir: After 5 minutes, stir again to break up any clumps.
-
Chill: Cover and refrigerate for at least 2 hours, or overnight for a thick, pudding-like consistency.
-
Serve: Stir again before eating. Top with fresh fruit, granola, or other toppings of choice.
Notes
-
Patience is key: Chia seeds take 4–6 hours to fully thicken, especially in cold milk.
-
Protein powder: Blend powder with liquid first to avoid clumps.
-
Frozen berries: No need to thaw; just blend a bit longer if your blender is weaker.
-
Storage: Keeps in the fridge for 4–5 days in a sealed container. Add fresh toppings before serving.
Breaking Down the Goodness
Let’s talk about why this pretty pudding makes you feel so good! (Note: The following is an estimate based on using unsweetened almond milk, 1 scoop of standard vanilla whey protein, 1 tbsp maple syrup, and no additional toppings. Values will vary with your specific ingredients.)
Per Serving (Recipe makes 2 servings):
~220 Calories | 8g Fat | 20g Carbohydrates (7g Fiber, 8g Sugar) | 15g Protein
Why It Rocks: This pudding is a fantastic balance of macronutrients. The protein from the powder helps repair muscles and keeps you feeling full. The healthy fats from
Final Thoughts:
So there you have it, friends. More than just a recipe, this Strawberry Milk Protein Chia Pudding is a little reminder that taking care of your adult body doesn’t mean leaving childhood joy behind. It’s proof that you can have that sweet, pink, nostalgic flavor and a powerful, protein-packed start to your day. No compromises.
It’s a celebration of simple ingredients transforming into something magical with just a little patience. It’s about the quiet joy of meal prepping on a Sunday and having a delicious treat waiting for you on a busy Wednesday morning. It’s about the fun of getting creative with toppings and making it your own.
Most of all, it’s a spoonful of self-care that tastes like a happy memory. So go ahead, blend up that pink potion, stir in those mighty seeds, and give yourself the gift of a breakfast that feels like a treat but fuels you like a champion.
Because yes, strawberry milk dreams really do come true—and they’re deliciously good for you.
Now I’d love to hear from you! Did this recipe spark a memory? What fun twists did you try? Tag me [@FeasticalBeau] with your pink pudding creations. Let’s keep the joy of good food going.
With a full heart and a happy spoon,
Beau from Feastical

Raspberry Almond Protein Muffins : Healthy, High-Protein Breakfast Treat
Raspberry Almond Protein Muffins: Your New Healthy Breakfast Obsession
Ditch the Sad Breakfast, Embrace the Muffin
Hey there, friend! Beau here from Feastical. Let’s talk about a little morning magic, shall we? You know the drill: the alarm screams, you’re already three steps behind, and the siren song of the drive-thru or that sad, lonely piece of toast starts calling your name. We’ve all been there. But what if I told you your new breakfast superhero is waiting, warm from the oven, packed with protein, and tastes like a sweet, juicy hug?
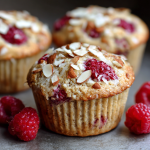
Enter my Raspberry Almond Protein Muffins. These aren’t your average, sugar-bomb bakery muffins that leave you crashing by 10 AM. Nope. These are the feel-good, fuel-you-up champions of the muffin world. Imagine the gentle nuttiness of almond, the bright, tart pop of raspberries, and a soft, tender crumb that somehow manages to be both incredibly satisfying and secretly good for you. They’re the perfect union of my two food philosophies: food should be a comfort, and it should make you feel amazing.
I bake these beauties almost weekly. They’re my grab-and-go breakfast saviors, my pre-gym energy boost, and my afternoon “I-need-something-sweet-but-not-a-cookie” lifesaver. And the best part? They come together in one bowl in about 10 minutes of active time. Seriously. So, tie on your apron (or don’t, I’m not the boss of you), preheat that oven, and let’s bake a batch of morning motivation together. Your future self, happily munching on a muffin at a red light, will thank you.
The Muffin That Saved My Mornings
This recipe wasn’t born in a moment of serene kitchen inspiration. It was born out of pure, unadulterated hangry desperation. A few years back, I was training for a charity bike ride, which meant early mornings and long rides. My old breakfast routine of cereal or a quick smoothie just wasn’t cutting it. I’d be pedaling along, and my stomach would stage a full-blown mutiny by mile ten.
One Sunday, staring into the pantry abyss, I saw a bag of almond flour, a tub of protein powder (my then-girlfriend’s), and a lonely pint of raspberries. Challenge accepted. That first batch was… experimental. Let’s just say some were hockey pucks, others were mush. But one version, with just the right balance of wet and dry, came out perfect. That first bite was a revelation—sweet, filling, and it actually sustained me. I packed two for my next ride and felt like I could conquer the world (or at least that brutal hill on Route 9). They became my ritual. Now, every time I smell these muffins baking, I don’t just smell almonds and berries. I smell victory over the morning scramble and the sweet promise of a powered-up day.
Gathering Your Flavor Crew
Here’s the beautiful, simple lineup. I love each of these ingredients for what they bring to the party. Let’s get to know them:
- 1½ cups almond flour: This is our gluten-free, grain-free base that gives the muffins a wonderfully moist, dense-yet-tender crumb and that lovely nutty flavor. Chef’s Insight: Make sure you’re using fine, blanched almond flour, not almond meal. The meal is coarser and will give you a gritty texture.
- ½ cup vanilla protein powder: The protein powerhouse! It also adds sweetness and structure. Sub Tip: Use a whey-casein blend or plant-based powder you love the taste of. A chalky or overly sweet powder will shine through in the final bake.
- 1 teaspoon baking powder: Our little leavening agent, giving these muffins their perfect lift and fluffy dome.
- ¼ teaspoon salt: Never skip it! Salt is the flavor enhancer that makes the almonds and berries sing.
- 2 large eggs: The binding superstars. They provide structure and richness. Sub Tip: For a vegan trial, I’ve had decent luck with flax eggs, but the texture is a bit more delicate.
- ¼ cup honey or pure maple syrup: Our natural sweeteners. Honey pairs beautifully with almond, while maple adds a deeper, caramel note. Chef’s Insight: This is a lightly sweetened muffin on purpose. The berries and protein powder add more sweetness. Trust the process!
- ¼ cup unsweetened almond milk: A splash of moisture to bring the batter together. Any milk works here.
- ¼ cup coconut oil, melted: Adds moisture and a hint of tropical flair. Sub Tip: Melted butter or a neutral oil like avocado oil works just as well if you’re not a coconut fan.
- 1 teaspoon almond extract: This is the secret weapon! It amplifies the almond flavor tenfold. Pure vanilla extract is a fine backup, but the almond is magic.
- ¾ cup fresh or frozen raspberries: The jewel of the recipe! Frozen work brilliantly—no need to thaw, and they bleed less into the batter. I often use frozen wild raspberries for an extra tart punch.
- Optional: Sliced almonds for topping: For a delightful crunch and pretty finish. A sprinkle of oats works too!
Let’s Get Baking: The Foolproof Method
Ready? This is where the fun happens. I’ll walk you through each step with all my favorite little hacks to ensure muffin perfection.
- Preheat & Prep. Fire up your oven to 350°F (175°C). This gives it time to get perfectly toasty while you mix. Line a muffin tin with 10 paper liners (not 12—this batter makes 10 perfect, generously-sized muffins). My hack? Give the liners a very light spray with oil. It prevents any sticking, especially with gluten-free bakes.
- Mix the Dry Team. In a large mixing bowl, grab a whisk and give the almond flour, protein powder, baking powder, and salt a good whirl. Whisking here isn’t just about mixing; it’s our chance to aerate the almond flour and break up any clumps in the protein powder. This guarantees a smooth, even texture. No one wants a pocket of plain protein powder!
- Unite the Wet Crew. In a medium bowl, whisk the eggs until they’re just broken up. Then, stream in the honey (or maple), almond milk, melted coconut oil, and almond extract. Whisk until it’s one harmonious, smooth, golden liquid. Pro Tip: If your coconut oil re-solidifies when it hits cold ingredients, just zap the whole wet mixture for 10 seconds and whisk again. No biggie.
- The Grand Merge. Pour your wet ingredients into the dry. Now, put the whisk away and grab a spatula or wooden spoon. Gently fold the two together. The key word is GENTLY. We’re mixing just until the last streaks of dry flour disappear. A few lumps are totally fine—overmixing is the enemy of tender muffins! The batter will be thick, but that’s exactly what we want.
- Berry Fold-In. Time for the star! Add your raspberries to the batter. Using the spatula, fold them in with just 3-4 turns. We want to distribute them without smashing them to oblivion. If you’re using frozen berries, they’ll turn the batter a cool shade of purple as you fold—it’s pretty and promises juicy bursts in every bite.
- Scoop & Top. Using a large cookie scoop or a spoon, divide the batter evenly among your 10 lined cups. They should be about ¾ full. If you’re using them, now’s the time to sprinkle on those sliced almonds and press them in lightly so they stick.
- Bake to Golden Perfection. Slide the tin into the center of your preheated oven. Set your timer for 18 minutes. At 18 minutes, do the toothpick test: stick one in the center of a middle muffin. If it comes out with a few moist crumbs (not wet batter), they’re done! If not, give them 2-4 more minutes. They should be golden on top and smell incredible. Chef’s Truth: Ovens vary, so trust the toothpick, not just the clock.
- The Crucial Cool Down. This is a test of willpower. Let the muffins cool in the pan for 5 full minutes. This allows them to set up. Then, carefully transfer them to a wire rack to cool completely. I know, I know, you want one NOW. But waiting helps the texture firm up perfectly.
How to Serve These Little Gems
Okay, they’re cooled (or, let’s be real, still warm because you couldn’t wait). How do we enjoy them? The beauty is in their versatility!
For the ultimate breakfast experience, I love splitting one warm muffin and slathering it with a dollop of creamy almond butter or a schmear of Greek yogurt cream cheese. It adds an extra hit of protein and feels downright decadent. Pair it with a hot cup of black coffee or a cold glass of almond milk.
For a post-workout refuel, grab one straight from the fridge (they’re delicious cold!) alongside a hard-boiled egg or a few slices of turkey for a complete protein-packed snack.
And for a simple, satisfying dessert, try warming a muffin for 10 seconds and topping it with a scoop of vanilla bean frozen yogurt or a drizzle of extra honey. Plate it on a cute little saucer with a few extra fresh berries on the side—it turns a healthy treat into a purposeful, pretty indulgence.
Make It Your Own: Delicious Twists & Swaps
Once you’ve mastered the base, the kitchen playground opens up! Here are a few of my favorite riffs on this recipe:
- Lemon Blueberry Bliss: Swap the almond extract for 1 tsp vanilla extract and add the zest of one lemon to the wet ingredients. Use blueberries instead of raspberries. It’s sunny, bright, and utterly refreshing.
- Chocolate Chip Crave: Fold in ½ cup of dark chocolate chips instead of (or with!) the raspberries. Who says protein muffins can’t taste like dessert? Use chocolate protein powder for a double-chocolate version.
- Nut-Free Version: Replace the almond flour with oat flour (you can make your own by blending rolled oats until fine). Use vanilla extract and a neutral oil. The texture will be slightly different but still delicious.
- Peanut Butter & Jelly: Replace the almond extract with vanilla. Swirl 2 tablespoons of natural peanut butter into the batter after scooping it into the liners. Use strawberries instead of raspberries for that classic PB&J vibe.
- Fall Spice: Add 1 tsp cinnamon, ¼ tsp nutmeg, and ¼ tsp ginger to the dry ingredients. Use chopped apples or pears instead of berries for a cozy, autumn-inspired muffin.
Beau’s Kitchen Confidential
This recipe is a living, breathing thing in my kitchen. I’ve learned a few things through many, many batches (and a few happy accidents). First, if your batter seems too thick after mixing, don’t panic. Add a tablespoon of extra almond milk. Different protein powders and almond flours have different absorbencies. Trust the texture, not just the measures.
Second, my dog, Biscuit, is obsessed with the smell of these. He’ll plant himself right in front of the oven and stare, drooling, until they’re done. It’s become part of the ritual. I haven’t caved and given him one (dogs and xylitol, a common sugar-free sweetener in some protein powders, are a big no-no), but his hopeful face is a sure sign they’re baking right.
Finally, these muffins freeze like a dream. That Sunday batch ritual means I’m set for weeks. It’s the ultimate act of weekday self-care.
Your Questions, Answered
Q: My muffins are dense/wet in the middle. What happened?
A: This usually points to two things: 1) Overmixing the batter, which overworks the almond flour. Fold gently! Or 2) Underbaking. Oven temps can be off. Use that toothpick—it should come out clean or with dry crumbs. If they’re consistently underdone, try baking at 325°F for a few minutes longer for a more even cook.
Q: Can I use a different flour?
A: Almond flour is key for the specific moist, tender texture. Substituting with regular all-purpose flour will change the liquid ratios and texture completely—it becomes a different recipe. For a grain-free option, sunflower seed flour can work in a 1:1 swap, but it may give a slightly green tint (harmless but surprising!).
Q: How do I store these, and how long do they last?
A: Once completely cool, store them in an airtight container at room temp for 2 days, in the fridge for up to 5 days, or in the freezer for up to 3 months. I freeze them in a single layer on a tray, then toss them in a bag for easy grab-and-go. Thaw at room temp or microwave for 20 seconds.
Q: My protein powder isn’t sweetened. Should I add more honey?
A> You can! Taste the batter (yes, it’s safe—no raw flour!). If you want it sweeter, add an extra tablespoon of honey or maple syrup to the wet ingredients. Remember, the raspberries add natural sweetness too.
Raspberry Almond Protein Muffins : Healthy, High-Protein Breakfast Treat
Description
Start your day the right way with these Raspberry Almond Protein Muffins! Soft, moist, and packed with protein, they’re a healthy breakfast that keeps you full and energized. Sweet, tart raspberries meet nutty almond flavor in a muffin that’s perfect for grab-and-go mornings, post-workout fuel, or a guilt-free treat.
Ingredients
-
1½ cups almond flour (fine, blanched)
-
½ cup vanilla protein powder
-
1 tsp baking powder
-
¼ tsp salt
-
2 large eggs
-
¼ cup honey or pure maple syrup
-
¼ cup unsweetened almond milk
-
¼ cup coconut oil, melted
-
1 tsp almond extract
-
¾ cup fresh or frozen raspberries
-
Optional: sliced almonds for topping
Instructions
-
Preheat Oven: 350°F (175°C). Line a 10-cup muffin tin with paper liners and lightly spray with oil.
-
Mix Dry Ingredients: Whisk together almond flour, protein powder, baking powder, and salt in a large bowl.
-
Mix Wet Ingredients: In another bowl, whisk eggs, honey/maple syrup, almond milk, melted coconut oil, and almond extract until smooth.
-
Combine: Pour wet ingredients into dry. Gently fold with a spatula until just combined. Batter will be thick.
-
Add Berries: Carefully fold in raspberries 3–4 times, just until distributed.
-
Scoop & Top: Divide batter evenly into muffin cups (~¾ full). Sprinkle with sliced almonds if desired.
-
Bake: 18–20 minutes. Check with a toothpick—it should come out with a few moist crumbs, not wet batter.
-
Cool: Let muffins cool in the pan for 5 minutes, then transfer to a wire rack to finish cooling.
Notes
-
Don’t overmix – keeps muffins tender.
-
Frozen berries work perfectly—no need to thaw.
-
Adjust sweetness – add more honey/maple if your protein powder is unsweetened.
-
Storage: Room temp 2 days, fridge 5 days, freezer up to 3 months. Thaw or microwave for a quick snack.
Feeling Good About What You’re Eating
I’m not a certified nutritionist, but I believe in transparency. Here’s a general breakdown per muffin (approximate, based on using the listed ingredients):
- Calories: ~180
- Fat: 12g (The healthy kind from almonds and coconut oil!)
- Carbohydrates: 8g
- Fiber: 2g
- Sugar: 4g (Naturally occurring from honey & berries)
- Protein: 9g
This macro profile is what makes these muffins so special. The combination of healthy fats, fiber, and a solid dose of protein helps balance your blood sugar, keeps
Final Thoughts: More Than Just a Muffin
So, there you have it. What started as a desperate, hangry experiment has become my—and hopefully will become your—blueprint for a better morning.
These Raspberry Almond Protein Muffins are more than a recipe. They’re a tool. A tool to take back your morning, fuel your adventures, and satisfy a sweet craving without the crash. They’re proof that “healthy” doesn’t mean bland, and “convenient” doesn’t have to come from a wrapper.
I bake them not just for the meal, but for the moment. The moment of peace while they’re in the oven, filling the kitchen with that incredible aroma. The moment of triumph when you pull out a perfect, golden batch. The moment of gratitude on a chaotic Tuesday when you have a delicious, homemade breakfast ready to go.
This is food as a form of self-respect. It’s choosing to nourish your body with something you made with your own hands, packed with ingredients you can feel good about. It’s the small, joyful ritual that sets a positive tone for the entire day.
Now, I’m passing the whisk to you. Make this recipe yours. Tweak it, play with it, and let it become a staple in your own kitchen story. Share them with someone you love, or selfishly hoard the whole batch in your freezer. I won’t judge.
Here’s to ditching the sad breakfast and embracing the muffin. Here’s to feeling amazing, one delicious, protein-packed bite at a time.
Happy baking, friend!

Red Velvet Brownie Hearts : Fudgy, Festive, and Perfectly Shareable
Red Velvet Brownie Hearts: Fudgy, Festive, and Perfectly Shareable
Hey friends, Beau here! Welcome back to the Feastical kitchen, where the coffee is always brewing and the oven is usually preheating for something wonderful. Today, we’re making magic. We’re taking two of the greatest dessert inventions known to humankind—the rich, crackly-topped brownie and the dramatic, beloved red velvet—and we’re smashing them together into the most adorable, shareable, and downright delicious treat: Red Velvet Brownie Hearts.
Picture this: a brownie so fudgy it practically winks at you, with that deep, cocoa-kissed flavor that red velvet is famous for. We’re baking them in a slab, then cutting out perfect, swoon-worthy heart shapes. They’re romantic without being fussy, impressive without being difficult, and they have this magical way of making any Tuesday feel like a celebration. Whether you’re surprising your sweetheart, treating your Galentine’s crew, or just showing *yourself* some love (the most important kind, honestly), these little hearts are my go-to. So, tie on that apron that might have a few flour smudges on it (same, my friend, same), and let’s bake something that feels as good as it tastes.
The Little Bakery That Started It All
My love affair with red velvet started not in a fancy restaurant, but in a tiny, family-owned bakery in my hometown. Every Saturday, my dad and I would go for our “donut run,” but I’d always drift past the glazed rings toward the glass case holding these stunning, crimson-frosted cupcakes. They looked so elegant, so *important*. One day, the baker, a woman named Marie with kind eyes and flour-dusted forearms, saw me staring. She handed me a small, leftover scrap of red velvet cake, unfrosted. “The secret,” she whispered with a conspiratorial smile, “isn’t just the color. It’s the touch of cocoa. It’s a chocolate cake in a party dress.” That first bite was a revelation—moist, tender, with a hint of something deeper than your average chocolate cake. These brownie hearts are my tribute to that moment. They capture that “party dress” drama in a fudgy, handheld form, and cutting them into hearts feels like sharing that same little secret spark of joy Marie gave me. It’s amazing how food can wrap a memory inside it, isn’t it?
Gathering Your Sweet Supplies
Here’s the beautiful part: you likely have most of this in your pantry right now. This is simple, honest baking at its best. Let’s break it down.
- ½ cup (1 stick) unsalted butter, melted – This is our richness foundation. Melting it gives us that dense, fudgy texture we crave in a brownie. Chef’s Insight: I use unsalted so I can control the salt level. If you only have salted, just reduce the added salt in the recipe by a pinch.
- 1 cup granulated sugar – Sweetness and structure. It helps create that gorgeous, shiny crust on top.
- 2 large eggs – Bring them to room temperature if you can! This helps them incorporate smoothly into the batter, creating a more uniform texture. No stress if you forget—I’ve made them with cold eggs in a pinch, and they’re still fantastic.
- 1 tablespoon red food coloring – The star of the visual show! For the most vibrant, true-red color, I highly recommend using gel food coloring. It’s more concentrated than liquid, so you use less and get a richer hue without watering down your batter.
- 1 teaspoon pure vanilla extract – The flavor enhancer. It rounds out the chocolate and adds warmth.
- ⅓ cup unsweetened cocoa powder – This is NOT the time for hot chocolate mix. Use a natural, unsweetened cocoa powder for that authentic, slightly tangy red velvet flavor. It’s Marie’s “secret” ingredient!
- ½ cup all-purpose flour – The gentle binder. We’re using just enough to hold our fudgy masterpiece together without turning it into cake.
- ¼ teaspoon fine salt – The flavor booster. Salt makes the chocolate and sweetness pop. Trust me on this.
- Optional for topping: Cream cheese glaze or powdered sugar – A drizzle of cream cheese glaze (thinned cream cheese frosting) is a classic pairing. A simple dusting of powdered sugar looks like a delicate snowfall and is effortlessly pretty.
Let’s Make Some Magic: Step-by-Step
Ready? This is where the fun happens. I’ll walk you through every step with the tips I’ve learned from (many) happy kitchen experiments.
- Prep Your Stage. Preheat your oven to 350°F (175°C). Take an 8×8-inch baking pan and line it with parchment paper, leaving some overhang on two opposite sides. This is my #1 kitchen hack for perfect brownies—it creates a “sling” so you can lift the entire baked slab out of the pan for easy, crumb-free cutting. No more awkward flipping or hacking squares out of the corner!
- Mix the Wet Team. In a medium bowl, whisk together your melted butter and granulated sugar. You’ll want to whisk for a good 30-45 seconds until it looks smooth and well-combined. Next, add your eggs, one at a time, whisking vigorously after each until the mixture is smooth and slightly shiny. Now, for the drama! Add your vanilla and that glorious red food coloring. Whisk until you have a consistently, breathtakingly red batter. Don’t be shy—this is the fun part!
- Bring in the Dry Crew. Sift your cocoa powder, flour, and salt directly into the red batter. (Sifting prevents lumps and ensures everything mixes evenly). Now, put the whisk away. Grab a spatula or a wooden spoon. We’re going to fold the dry ingredients in gently. Mix until you no longer see streaks of flour, but stop as soon as it’s combined. Overmixing is the enemy of fudgy brownies—it develops the gluten in the flour and can make them tough. A few tiny lumps are A-OK.
- Bake to Fudgy Perfection. Pour your gorgeous, velvety batter into your prepared pan. Use your spatula to spread it evenly into the corners. Slide it into the center of your preheated oven. Bake for 20-25 minutes. Here’s the key test: at the 20-minute mark, insert a toothpick into the center. For fudgy brownies, you want it to come out with a few moist crumbs clinging to it, not completely clean. A clean toothpick means you’ve ventured into cakey territory. Remember, they’ll continue to set as they cool!
- The All-Important Cool Down. This is the hardest step because your kitchen smells amazing. But patience, young padawan! Let the brownie slab cool completely in the pan on a wire rack. If you try to cut warm brownies, they’ll fall apart. I use this time to wash dishes or make that cream cheese glaze. Once cool, use the parchment paper sling to lift the entire brownie block onto a cutting board.
- Shape with Heart. Grab your heart-shaped cookie cutter (any size you like!). Press down firmly to cut out your hearts. If the cutter sticks, dip it in warm water and dry it between cuts. Pro-tip: gather the scraps, press them into a small dish, and you’ve got an instant “brownie scramble” for the chef to enjoy immediately. No waste here!
- Drizzle & Dream. If you’re glazing, whisk together 2 oz softened cream cheese, ½ cup powdered sugar, a splash of vanilla, and a tablespoon or two of milk until it’s a drizzle-able consistency. Use a spoon or a piping bag to zig-zag it over your hearts. Alternatively, place a little powdered sugar in a fine-mesh sieve and give it a gentle tap over the tops for a snowy, elegant finish.
Sharing the Love: How to Serve These Beauties
Presentation is where you get to have fun! Stack two hearts on a small plate for a double-decker delight. Arrange them on a vintage cake stand for a centerpiece that will have everyone reaching. For a party, line them up on a long platter—it’s a showstopper. I love serving them with a side of fresh berries (raspberries are a perfect tart contrast) or a small dollop of barely-sweetened whipped cream. And the ultimate pairing? A big mug of strong coffee or a cold glass of milk. These brownie hearts are rich, so a little beverage on the side is the perfect partner. They’re also incredible slightly warmed for about 10 seconds in the microwave, just until the glaze gets a little melty… okay, now I’m hungry again.
Make It Your Own: Delicious Twists & Swaps
The basic recipe is a dream, but kitchens are for playing! Here are a few ways to mix it up:
- White Chocolate Chip Hugs: Fold ½ cup of high-quality white chocolate chips into the batter before baking. The sweet, creamy chips create lovely little pockets of flavor that pair beautifully with the red velvet.
- Peppermint Kiss: Add ½ teaspoon of peppermint extract (not mint!) along with the vanilla. Top with a simple white glaze and crushed candy canes or peppermint candies. Instant holiday magic!
- Mocha Infusion: Dissolve 1 tablespoon of instant espresso powder into the melted butter before adding the sugar. It won’t make the brownies taste like coffee, but it will deepen the chocolate flavor incredibly.
- Gluten-Free & Still Fudgy: Swap the all-purpose flour for a 1:1 gluten-free baking blend. I’ve had great success with brands like Bob’s Red Mill or King Arthur. The texture remains perfect.
- “Black Velvet” Goth Hearts: For a dramatic twist, use black cocoa powder (the kind used in Oreos) instead of regular cocoa. You’ll get deep, dark, almost black-brownies with an intense chocolate flavor. Pair with a bright white glaze for stunning contrast.
Beau’s Kitchen Notes & Stories
This recipe has been my Valentine’s Day staple for years, but it’s evolved. The first time I made them, I was so eager I used the liquid food coloring from the grocery store. The result was… pinkish-brown. Still tasty, but not the vibrant red I dreamed of. That’s when I invested in a small bottle of gel color, and it was a game-changer. Another funny fail: I once tried to cut the hearts while the brownies were still warm because I was impatient for a photo. Let’s just say I ended up with “abstract art” brownie blobs instead of hearts. They were delicious abstract art, but it taught me the virtue of cooling! Now, this recipe is my reliable, never-fail friend. It’s been made for new neighbors, broken hearts, promotions, and “just because” Tuesdays. That’s the real goal of food, isn’t it? To be a delicious, edible hug.
Your Questions, Answered
Q: Can I make these ahead of time?
A: Absolutely! Bake, cool, and cut the hearts. Store them in an airtight container at room temperature for up to 2 days, or in the fridge for up to 5. Add glaze or powdered sugar just before serving for the freshest look.
Q: My brownies came out cakey, not fudgy. What happened?
A> This usually means two things: 1) The batter was overmixed after the flour was added, or 2) They were baked a few minutes too long. Remember, we want a few moist crumbs on the toothpick, not a clean one. Ovens vary, so your perfect time might be 22 minutes instead of 25.
Q: I don’t have a heart-shaped cutter. What can I use?
A> No problem! You can simply cut the slab into squares or triangles. For a freehand heart, find a small glass or round cookie cutter to make two circles side-by-side, then use a knife to cut a “V” shape out of the top where they meet. Or, get creative with other shaped cutters—stars, circles, or even diamonds work for any occasion!
Q: Is there a natural alternative to red food coloring?
A> You can try using beet powder for a red hue, though it will be more muted and may impart a slight earthy flavor. For about 1 tablespoon of gel color, you’d need roughly 2-3 tablespoons of beet powder whisked into the wet ingredients. The result will be more maroon than bright red, but still lovely and festive.

Red Velvet Brownie Hearts : Fudgy, Festive, and Perfectly Shareable
Description
Fudgy, vibrant red velvet brownies baked in a slab and cut into adorable heart shapes. Perfect for gifting, parties, or any day you want something special.
Ingredients
Brownies
-
½ cup (1 stick) unsalted butter, melted
-
1 cup granulated sugar
-
2 large eggs (room temperature preferred)
-
1 tbsp red gel food coloring
-
1 tsp vanilla extract
-
⅓ cup unsweetened cocoa powder
-
½ cup all-purpose flour
-
¼ tsp fine salt
Optional Topping
-
Cream Cheese Glaze:
-
2 oz softened cream cheese
-
½ cup powdered sugar
-
1–2 tbsp milk
-
Splash of vanilla
-
-
OR powdered sugar for dusting
Instructions
1. Prep the Pan
-
Preheat oven to 350°F (175°C).
-
Line an 8×8-inch pan with parchment paper, leaving overhang for lifting.
2. Mix Wet Ingredients
-
In a bowl, whisk melted butter and sugar until smooth (30–45 seconds).
-
Whisk in eggs one at a time until glossy.
-
Add vanilla + red food coloring and mix until fully red.
3. Add Dry Ingredients
-
Sift in cocoa powder, flour, and salt.
-
Gently fold with a spatula until just combined. Do not overmix.
4. Bake
-
Spread batter evenly in the pan.
-
Bake 20–25 minutes.
-
Toothpick should come out with moist crumbs, not clean.
5. Cool Completely
-
Cool fully in the pan on a rack.
-
Lift out using parchment once cooled.
6. Cut Into Hearts
-
Use a heart-shaped cookie cutter (any size).
-
If sticking, dip cutter in warm water and wipe dry between cuts.
-
Save scraps for snacking or layering into a parfait.
7. Add Topping (Optional)
-
Glaze: Whisk all ingredients until drizzle-able; zig-zag over hearts.
-
OR dust lightly with powdered sugar.
Notes
-
Use gel food coloring for bright red color (liquid may look dull).
-
Room-temperature eggs mix smoother for a fudgy texture.
-
Stop mixing as soon as the dry ingredients disappear.
-
For extra shine on top, whisk the sugar and eggs thoroughly.
Nutritional Information (Per Heart, without topping)
Let’s be real: these are a treat, meant to be savored and enjoyed. This info is for those who like to keep track. Based on a yield of 12 hearts from the 8×8 pan, each beautiful brownie heart contains approximately: 180 calories, 9g fat (5g saturated), 22g carbohydrates, 1g fiber, 17g sugar, and 2g protein. Remember, using a sugar substitute or a different flour will alter these values. My philosophy? Enjoy every single bite mindfully and without guilt. Food is joy.
Final Thoughts from My Kitchen to Yours
Well, friends, we did it. We turned simple ingredients into little edible valentines. I hope you feel empowered to bake these, to share them, and to maybe even create a new food memory of your own. The best part about cooking isn’t just the delicious result; it’s the process—the smell filling your home, the satisfaction of creating something with your own hands, and the smiles it brings to the people you love (including yourself!).
If you make these Red Velvet Brownie Hearts, I’d be over the moon if you tagged @Feastical on social media so I can see your gorgeous creations. Now, go preheat that oven and bake some love. Until next time, keep your spatula close and your appetite closer.
Cheers,
Beau

Raspberry White Chocolate Protein Cups : High-Protein Sweet Snack
Sweet Meets Strong: Your New Favorite Protein-Packed Treat
Hey friends, Beau here from Feastical! Grab your favorite mug of coffee (or tea, no judgment here) and pull up a chair. Let’s talk about one of life’s great kitchen conundrums: how do you satisfy that deep, undeniable sweet tooth without derailing your healthy habits? For the longest time, I felt like I had to choose. It was either a decadent dessert that made me feel like I needed a nap afterward, or a “healthy” snack that tasted about as exciting as cardboard. Sound familiar?
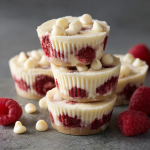
Well, I’m here to tell you that era is officially over. Enter the hero of our story today: Raspberry White Chocolate Protein Cups. Imagine the creamy, dreamy sweetness of white chocolate, the bright, tart zing of raspberries, and the satisfying, muscle-loving power of protein—all layered into one perfect, bite-sized cup. These aren’t just a “good-for-you” snack; they’re a downright celebration in your mouth. They’re the treat you reach for after a great workout, the little reward during a hectic afternoon, or the guilt-free dessert that proves eating well can—and should—be absolutely delicious. So, let’s ditch the compromise and make something that truly brings the joy. Your spatula and your sweet tooth are about to become best friends.
The Raspberry Revelation: A Story from My Kitchen
This recipe actually has its roots in a little kitchen disaster—or what I like to call a “happy accident.” A few summers back, I was obsessed with making homemade berry jams. One particularly ambitious batch of raspberry jam turned out… well, let’s just say it was more “raspberry soup” than spreadable delight. I was staring at this bowl of beautiful, tart, seedy liquid, not wanting to waste it, when my eyes landed on a bag of white chocolate chips and my protein shaker from that morning’s workout.
A lightbulb went off. What if I used the chia seeds sitting in my pantry to thicken this “soup” and layer it with something creamy and protein-packed? A few messy experiments later (involving a lot of licking spoons and a very patient dog waiting for drops), these cups were born. They remind me that sometimes the best creations come from not getting it right the first time, but from playing, tasting, and having fun with your food. Every time I make them now, I think of that sunny kitchen, my failed jam, and the delicious solution that came from it. Food has a funny way of working out like that, doesn’t it?
Gathering Your Flavor Arsenal
Here’s everything you need to create these little cups of joy. I’ve added my two cents on each ingredient because knowing the “why” behind the “what” makes you a more confident cook!
- For the Bottom & Top Layers:
- White Chocolate Chips (1 cup total): This is our sweet, creamy foundation. Chef’s Insight: Look for a brand with real cocoa butter for the best melt and flavor. Don’t have chips? A high-quality white chocolate bar chopped up works beautifully.
- Coconut Oil (2 tablespoons total): Our magic melter and texture maestro. It helps the chocolate melt smoothly and sets up firmly. Sub Tip: If you’re not a coconut fan, refined coconut oil has a neutral taste, or you can use a tiny bit of cocoa butter for a next-level experience.
- Vanilla or White Chocolate Protein Powder (1 scoop): The protein powerhouse! Chef’s Hack: Use a powder you love the taste of on its own. A whey/casein blend or a good plant-based vanilla protein gives a fantastic, creamy texture. This is where the “strong” in “sweet meets strong” comes from!
- For the Vibrant Raspberry Layer:
- Fresh or Frozen Raspberries (½ cup): The tangy heart of the cup. Frozen berries are perfect here—they’re often more affordable, available year-round, and mash up just as well. No need to thaw completely!
- Honey or Maple Syrup (1 teaspoon): A touch of natural sweetness to balance the raspberry’s tartness. Sub Tip: Agave nectar works too, or omit it if your berries are super sweet.
- Chia Seeds (1 tablespoon): Our natural thickener! These tiny seeds create a lovely jammy texture without any cooking. Chef’s Insight: They also add a bonus boost of fiber and omega-3s. A true kitchen superhero.
Let’s Build Some Magic: Step-by-Step
Okay, team. Aprons on? Let’s do this. This process is simple, but these little tips will make it foolproof.
- Prep Your Stage. Line a mini muffin tin with 12 paper liners. This is non-negotiable for easy removal! No mini tin? Use a regular muffin tin and make 6 larger cups—just adjust the layering amounts.
- Create the Creamy Base. In a microwave-safe bowl, combine ½ cup of the white chocolate chips and 1 tablespoon of coconut oil. Microwave in 20-second bursts, stirring well between each, until completely smooth. Chef’s Hack: Be patient! Burnt chocolate is sad chocolate. You can also do this over a double boiler if you prefer. Once melted, quickly stir in your scoop of protein powder until you have a thick, luscious mixture. It will thicken fast, so work quickly!
- Layer One: Spoon and Set. Spoon about 2 teaspoons of the white chocolate protein mixture into the bottom of each liner. Use the back of the spoon to spread it up the sides just a tiny bit—this helps “cup” the next layer. Pop the whole tin into the freezer for a solid 10 minutes. This sets the base so our raspberry layer doesn’t sink in.
- Make the Raspberry Heart. While the base chills, place your raspberries in a small bowl. Mash them with a fork until you get a chunky sauce. Stir in the honey and chia seeds. Let this sit for at least 5 minutes. You’ll see it start to thicken beautifully—that’s the chia seeds doing their gel-like thing!
- Layer Two: The Tart Middle. Pull your tin from the freezer. Give the raspberry chia jam a final stir, then place a small dollop (about 1 teaspoon) right in the center of each frozen white chocolate base.
- Seal the Deal with the Top Layer. Repeat the melting process with the remaining ½ cup white chocolate chips and 1 tablespoon coconut oil. Once smooth, carefully spoon it over each cup, covering the raspberry layer completely. A little swirl of the spoon creates a lovely finish. Pro Tip: Tap the tin gently on the counter to settle the top layer and remove any air bubbles.
- The Final Chill. Freeze the whole tray for 20-30 minutes, or until the tops are completely firm to the touch. And voila! You’ve just created a batch of portable, protein-packed perfection.
How to Serve & Savor Your Creation
These cups are incredibly versatile. I like to store them in a sealed container in the freezer—they have the most amazing firm-yet-creamy texture straight from the cold. They’re the ultimate grab-and-go snack from the freezer. If you prefer a slightly softer bite, store them in the fridge; they’ll hold their shape but be a touch creamier.
For serving, let them sit at room temperature for just a minute or two before you pop them in your mouth. This lets the flavors really bloom. I love having two with my afternoon coffee for a perfect pick-me-up, or packing a few in a small insulated bag for post-gym fuel. They feel indulgent, but you know exactly what’s inside: real, good-for-you ingredients.
Make It Your Own: Endless Flavor Twists!
The basic formula here is your playground. Once you master the classic, try one of these fun spins:
- Double Chocolate Dream: Use dark chocolate chips instead of white chocolate for both layers, and add a tablespoon of cocoa powder to the protein mix. For the middle, try a mashed cherry or strawberry chia jam.
- Peanut Butter Cup Remix: For the base and top layers, use milk or dark chocolate. For the middle layer, mix 2 tablespoons of powdered peanut butter (PB2) with a little water or milk to create a thick, peanut buttery paste. Heaven!
- Tropical Getaway: Keep the white chocolate layers. For the center, mash ½ cup of mango or passionfruit pulp with the chia seeds. Sprinkle a little toasted coconut on top before the final set.
- Mint Chocolate Chip: Add ¼ teaspoon of peppermint extract to the white chocolate protein base. Fold in a few mini dark chocolate chips for texture. So refreshing!
- Fully Plant-Powered: Ensure your chocolate chips are dairy-free, use maple syrup, and pick your favorite vegan vanilla protein powder. It works like a charm!
Beau’s Kitchen Notes
This recipe has evolved from my initial “jam rescue” mission. I found that adding the protein powder to the melted chocolate, rather than mixing it dry with other ingredients, prevents any grittiness and gives that irresistibly smooth texture. The coconut oil is the other secret weapon—it’s the reason these cups snap when you bite into them but melt so nicely in your mouth.
A funny side note: My dog, Biscuit, has developed a sixth sense for when I’m making these. He parks himself right under the kitchen island, waiting for me to “accidentally” drop a single raspberry. It’s our little ritual now. Cooking is always better with a furry (or human) friend nearby!
Your Questions, Answered
Q: My protein mixture got super thick and clumpy when I added the powder. What did I do wrong?
A: This happens if the melted chocolate cools down too much before adding the powder. Make sure your chocolate/oil mix is fully melted and *warm* (not hot) when you stir in the protein. If it seizes up, you can gently re-warm the whole mixture for 5-7 seconds in the microwave and stir vigorously to smooth it out.
Q: Can I use fresh fruit instead of chia seeds to thicken the raspberry layer?
A: Fresh fruit alone will be too runny and will make the layers soggy. The chia seeds are crucial for creating a gel-like, jammy texture without cooking. If you must omit them, you could reduce the raspberries on the stove with a little extra sweetener until thick, then cool completely before using.
Q: Why do I have to store them in the freezer/fridge? Can’t they stay on the counter?
A> Because of the coconut oil and melted chocolate, these cups are designed to be kept cool. At room temperature, they will become very soft and lose their shape. Think of them like a gourmet chocolate bar—best enjoyed cool!
Q: My top layer cracked when I bit into it. Is that normal?
A> A slight snap is perfect! But if it’s cracking into pieces, your top layer might have been a bit too thick or frozen too rapidly. Next time, try pouring the top layer when it’s slightly warmer and tap the tin to spread it thinly and evenly.
Raspberry White Chocolate Protein Cups : High-Protein Sweet Snack
Description
Sweet, creamy white chocolate layered with a bright raspberry–chia filling and boosted with protein. A perfect healthy snack or post-workout treat.
Ingredients
White Chocolate Protein Layers
-
1 cup white chocolate chips, divided
-
2 tbsp coconut oil, divided
-
1 scoop vanilla or white chocolate protein powder
Raspberry Chia Filling
-
½ cup fresh or frozen raspberries
-
1 tsp honey or maple syrup
-
1 tbsp chia seeds
Instructions
1. Prepare
-
Line a mini muffin tin with 12 paper liners.
-
For larger cups, use a regular muffin tin (makes 6).
2. Make the Bottom Layer
-
Melt ½ cup white chocolate chips + 1 tbsp coconut oil in 20-second microwave bursts, stirring until smooth.
-
Stir in protein powder until thick and creamy.
-
Spoon 2 teaspoons into each liner, spreading slightly up the sides.
-
Freeze 10 minutes.
3. Make the Raspberry Filling
-
Mash raspberries in a bowl.
-
Stir in honey and chia seeds.
-
Let sit 5 minutes to thicken.
-
Place 1 teaspoon of the raspberry mixture onto each frozen chocolate base.
4. Make the Top Layer
-
Melt the remaining ½ cup white chocolate + 1 tbsp coconut oil.
-
Spoon over each cup to fully cover the raspberry layer.
-
Gently tap the pan on the counter to remove air bubbles.
5. Chill
-
Freeze 20–30 minutes until fully set.
-
Store in the fridge or freezer.
Notes
-
If the chocolate becomes clumpy when adding protein powder, gently reheat for a few seconds and stir well.
-
The chia seeds are essential for thickening the raspberry layer.
-
Keep the cups chilled — room temperature will soften them too much.
Nutritional Highlights (Approximate, Per Cup)
Let’s be clear: I’m a cook, not a dietitian. But I love knowing what’s fueling my body. These values are estimates based on specific ingredients, but they give you a great idea of why these cups are such a smart choice.
- Calories: ~110 | Fat: 7g (the good kind from coconut oil and chocolate!)
- Carbohydrates: 8g | Fiber: 2g (thanks, chia seeds and berries!)
- Protein: 4g (the star of the show!)
They provide a balanced mix of macros to satisfy hunger, curb sugar cravings, and support your energy levels. It’s a snack that truly loves you back.
Final Thoughts from My Kitchen to Yours
And there you have it, friends—the full story behind my beloved Raspberry White Chocolate Protein Cups. More than just a recipe, I hope this is an invitation to play in your kitchen, to turn accidents into opportunities, and to make food that makes you feel amazing inside and out.
Remember, at Feastical, we believe food should be a feel-good hug, never a chore. These little cups embody that spirit for me: simple to make, soulfully satisfying, and packed with real-life flavor. I’d love to hear how your batch turns out! Tag me on social or drop a comment on the blog. Now, go enjoy that well-deserved, protein-packed treat. You’ve earned it.
With a full heart and a happy stomach,
Beau

Chocolate-Covered Strawberry Bar Squares : A Sweet & Simple Dessert Remix
When a Classic Gets a Cozy, Sliceable Upgrade
Hey there, friend! Beau here, welcoming you back to my kitchen corner at Feastical. You know that moment when a craving hits, but you’re torn between something elegantly delicious and something you can eat with your hands while curled up on the couch? I live in that delicious tension, and today, I’ve got the perfect solution that’s been my recent obsession: Chocolate-Covered Strawberry Bar Squares.
We all adore the romance of a classic chocolate-dipped strawberry, right? That glossy shell giving way to juicy berry sweetness is a flavor combo for the ages. But let’s be real—dipping a dozen strawberries can be a messy, “is-this-chocolate-setting-yet?” kind of affair. I wanted to capture that magic in a form that’s built for sharing, for gifting, for keeping in the fridge for a sweet little moment whenever you need it. Enter these dreamy dessert bars.
Imagine this: a buttery, shortbread-like crust that crumbles just right. A layer of sweet-tart strawberry filling that’s jammy but fresh, singing with real berry flavor. And finally, a sleek, crackly blanket of pure chocolate that ties it all together. It’s the entire chocolate-covered strawberry experience, but in a neat, portable, utterly moreish square. Whether you’re prepping for a book club, need a show-stopper for a potluck, or just want to treat yourself on a Tuesday afternoon, these bars are your new secret weapon. They taste like a celebration but feel as simple and comforting as your favorite weekend bake. So, tie on that apron—let’s make something wonderful.
A Berry Sweet Memory: My First (Slightly Melty) Success
This recipe takes me straight back to my first apartment kitchen, which was about the size of a postage stamp and twice as warm. I was determined to impress a group of friends with a fancy dessert on a budget. Fancy chocolates? Out of my price range. A fancy tiered cake? Out of my skill zone. But strawberries were in season, and I had a bag of chocolate chips. The original plan was the classic dip, but my kitchen was so hot the chocolate refused to set, leaving me with a plate of delicious but decidedly sloppy berries.
Not one to be defeated, I looked at the mess and thought, “What if I just lean into this?” I smashed the berries into a rough compote, crumbled some graham crackers I had on hand, and layered it all in a pan with the still-melty chocolate. After a frantic chill in the fridge, I sliced it into squares. They were messy, imperfect, and a total hit. My friends raved about the “deconstructed” vibe. That kitchen fail-turned-win was the spark for this recipe. I’ve refined it over the years (thank goodness for a proper crust!), but the soul of it—that joyful, improvisational, “make it work” spirit—is still baked right in.
Gathering Your Sweet Supplies
Here’s everything you’ll need to create these little squares of joy. I’ve tossed in some notes and swaps because I believe your kitchen, your rules!
For the Buttery Crust:
- 1 cup (2 sticks) unsalted butter, melted – Melted butter is our shortcut to a tender, crumbly crust without the fuss of cutting in cold butter. It creates that perfect sandy texture. Chef’s Insight: Let it cool for a minute after melting so it doesn’t cook the flour!
- ½ cup granulated sugar – Just enough sweetness to complement the tangy berries and rich chocolate.
- 2 cups all-purpose flour – The backbone of our crust. For a nuttier flavor, you could swap out ½ cup for almond flour.
- ¼ teaspoon salt – Never skip this! Salt is the flavor amplifier that makes the sweet elements truly pop.
For the Vibrant Strawberry Filling:
- 1 ½ cups chopped fresh strawberries – The star of the show! Use ripe, fragrant berries for the best flavor. Frozen work in a pinch—just thaw and drain them really well to avoid a soggy layer.
- 2 tablespoons strawberry jam – This is my little flavor-boosting hack. It intensifies the berry taste and helps the filling set beautifully. Any berry jam you love will do.
- 1 teaspoon cornstarch – Our thickening agent. It turns the juicy berries into a lush, spreadable layer that won’t soak the crust.
For the Luscious Chocolate Topping:
- 1 cup semi-sweet chocolate chips – I prefer semi-sweet to balance the sweetness, but dark or milk chocolate are fantastic choices. Use good-quality chips—you’ll taste the difference!
- 1 tablespoon coconut oil or butter – This is the magic trick for a glossy, sliceable chocolate layer that doesn’t crack into shards. Coconut oil gives a super-shiny finish, while butter adds a creamy richness.
Let’s Build Some Layers: Your Step-by-Step Guide
Ready to layer up the goodness? Follow these steps, and I’ll walk you through with all my favorite kitchen hacks.
- Prep & Preheat: First, let’s get organized—my grandma called it “mise en place” and it saves so much stress. Preheat your oven to 350°F (175°C). Line an 8×8-inch baking pan with parchment paper, leaving some overhang on two sides. This is your lifesaver for lifting the whole slab of deliciousness out later for easy slicing. No wrestling with the pan!
- Make the Crust: In a medium bowl, stir the melted (and slightly cooled) butter, sugar, flour, and salt together. It’ll look a bit like wet sand—perfect! Dump it into your prepared pan and press it down firmly and evenly. I use the bottom of a measuring cup to really pack it in; a solid crust is key. Pop it in the oven and bake for 15-18 minutes, just until the edges are lightly golden. It will smell like buttery dreams. Let it cool on a rack while you make the filling.
- Create the Strawberry Heart: In a small saucepan, combine your chopped strawberries, jam, and cornstarch. Cook this over medium heat, stirring often, for about 5-7 minutes. You’ll see it go from juicy and loose to thickened and glossy. The strawberries will soften but still have some texture. Pro Tip: Give it a taste! Want it tangier? A tiny squeeze of lemon juice is magic here. Let it cool for a few minutes off the heat, then spread it evenly over your slightly warm crust.
- Blanket It in Chocolate: Now for the fun part. Melt your chocolate chips and coconut oil (or butter) together. You can do this in a bowl over a pot of simmering water (a double boiler) or in the microwave in 30-second bursts, stirring well between each. Stir until it’s velvety smooth. Pour this gorgeous chocolate over the strawberry layer and gently tilt the pan to spread it into an even, luxurious coat.
- The Final Chill: This is the test of patience! Carefully transfer the pan to the refrigerator. Let it chill for at least 2 hours, until the chocolate topping is completely set. I know, it’s hard to wait, but this ensures you get those clean, beautiful squares. For the cleanest slices, I sometimes even pop a hot knife into a glass of hot water, wipe it dry, and cut.
How to Serve These Show-Stopping Squares
Presentation is part of the fun! Once fully set, use the parchment paper overhang to lift the entire block onto a cutting board. Slice into 16 squares (or 9 for more generous portions—no judgment here!).
These bars are gorgeous all on their own, but a little flair never hurts. For a fancy touch, dust them with a light shower of powdered sugar just before serving. Want to echo the classic strawberry vibe? Place a tiny sliver of fresh strawberry or a single raspberry on top of each square. Serving them at a party? Stack them on a cake stand for a beautiful, approachable centerpiece. They’re perfect with a cup of coffee for an afternoon pick-me-up or as the grand finale to a casual dinner with friends. Store any leftovers (a rare occurrence!) in an airtight container in the fridge.
Make It Your Own: Delicious Twists & Swaps
The beauty of this recipe is its versatility. Play with these ideas and create your own signature bar!
- Nutty Crunch: Add ½ cup of finely chopped toasted pecans or almonds to the crust mixture before pressing it in.
- Berry Medley: Swap the strawberries for raspberries, blackberries, or a mix! The jam should match or complement your berry choice.
- White Chocolate Dream: Use high-quality white chocolate chips for the topping. It’s a stunning, sweeter contrast to the berry filling.
- “Cheesecake” Style: For an ultra-creamy layer, blend 4 oz of softened cream cheese into the strawberry filling after it has cooled slightly.
- Dairy-Free/Vegan: Use a plant-based butter, ensure your chocolate chips are dairy-free, and swap the jam for a vegan-friendly brand. It works like a charm!
Beau’s Bench Notes
This recipe has been a living, evolving thing in my kitchen. The first time I made the “official” version for Feastical, I was so nervous about the filling being too runny that I used *double* the cornstarch. Let’s just say we ended up with more of a strawberry paste layer—still tasty, but not the juicy vibe I wanted. It was a great reminder that cooking is about feel. Trust the process and trust your eyes: when the filling coats the back of a spoon and leaves a clear path when you run your finger through it, you’re golden.
Also, a confession: I am notoriously impatient with the chilling step. I’ve tried to slice these after only an hour, and let’s just say it was more of a “spoon dessert” than bar squares. The wait is worth it for those clean, Instagram-worthy slices. But if you dig in with a fork straight from the pan? I won’t tell a soul.
Your Questions, Answered
Q: Can I use frozen strawberries?
A: Absolutely! Thaw them completely first, and drain off ALL the excess liquid. You might even want to pat them dry with a paper towel. Using frozen berries with too much liquid will make your filling too runny.
Q: My chocolate topping cracked when I sliced. What happened?
A: This usually means the chocolate got too cold or hardened too quickly. Next time, try using butter instead of coconut oil, as it stays a bit more pliable when chilled. Also, let the bars sit at room temperature for 5-10 minutes before slicing, and use a hot, dry knife.
Q: Can I make these ahead of time?
A: They are the *perfect* make-ahead dessert! They keep beautifully in the fridge, tightly covered, for up to 4 days. The flavors even meld and get better.
Q: The crust seems too crumbly when I mix it. Did I do something wrong?
A> Nope, that’s exactly right! That sandy, crumbly texture is what gives us that delicate, shortbread-like base once it’s baked. Just be sure to press it very firmly into the pan.
Chocolate-Covered Strawberry Bar Squares : A Sweet & Simple Dessert Remix
Description
A buttery shortbread crust, jammy strawberry layer, and glossy chocolate topping — all the flavors of a classic chocolate-covered strawberry in easy sliceable bars.
Ingredients
For the Crust
-
1 cup (2 sticks) unsalted butter, melted
-
½ cup granulated sugar
-
2 cups all-purpose flour
-
¼ tsp salt
For the Strawberry Filling
-
1 ½ cups chopped fresh strawberries (or thawed, well-drained frozen)
-
2 tbsp strawberry jam
-
1 tsp cornstarch
For the Chocolate Topping
-
1 cup semi-sweet chocolate chips
-
1 tbsp coconut oil or butter
Instructions
1. Prepare the Pan
-
Preheat oven to 350°F (175°C).
-
Line an 8×8-inch pan with parchment paper, leaving overhang for easy lifting.
2. Make the Crust
-
In a bowl, mix melted butter, sugar, flour, and salt until sandy.
-
Press firmly and evenly into the pan.
-
Bake 15–18 minutes, until edges are lightly golden.
-
Cool slightly.
3. Make the Strawberry Filling
-
In a small saucepan, combine strawberries, jam, and cornstarch.
-
Cook on medium heat 5–7 minutes, stirring, until thickened and glossy.
-
Let cool slightly, then spread over the warm crust.
4. Add the Chocolate Layer
-
Melt chocolate chips with coconut oil or butter (microwave in 30-second intervals or double boiler).
-
Stir until smooth.
-
Pour over strawberry layer and spread evenly.
5. Chill
-
Refrigerate for at least 2 hours, or until fully set.
-
Lift out using parchment and slice into squares.
Notes
-
Let the chocolate sit at room temp 5–10 minutes before cutting to prevent cracking.
-
Press the crust firmly — loose crust = crumbly slices.
-
For cleaner slices, heat your knife in hot water and dry between cuts.
Nutritional Information*
*Please note: This is an estimate provided for informational purposes. For precise dietary calculations, use your preferred nutrition calculator with the exact brands and quantities you use.
- Prep Time: 15 minutes
- Cook Time: 20 minutes
- Chill Time: 2 hours
- Total Time: 2 hours 35 minutes
- Servings: 16 squares
Per Square (approximate): ~210 calories, 12g fat (7g saturated fat), 25g carbohydrates, 1g fiber, 15g sugar, 2g protein.
One Last Sweet Thought…
And there you have it—my heartfelt homage to the chocolate-covered strawberry, reimagined for lazy Sundays, last-minute gatherings, and everything in between. What I love most about this recipe is how it turns a few simple, humble ingredients into something that feels truly special. It’s a reminder that great food doesn’t have to be complicated; it just has to be made with a little bit of joy.
I hope these bars find their way into your kitchen and become a part of your own story—the treat you make for a friend who needs cheering up, the sweet secret you keep in the back of the fridge, or the dessert that makes a regular Tuesday feel a little festive. If you make them, I’d love to hear about it! Tag me over on social or drop a comment on the blog. Now, go enjoy the fruits (and chocolate) of your labor. Happy baking!
With flavor,
Beau

Creamy Tuscan Chicken : Romantic Valentine’s Day Dinner Recipe
Turn Down the Restaurant Noise, Turn Up the Kitchen Romance
Hey friends, Beau here! Let’s talk about the pressure of Valentine’s Day for a second. The fancy reservations, the prix-fixe menus, the awkward silence when you both realize you’d rather be in sweatpants. Sound familiar? This year, I’m inviting you to ditch the overpriced champagne flutes and create something far more magical: your own candlelit corner of Italy, right on your stovetop.
I’m talking about my Creamy Tuscan Chicken. This isn’t just a recipe; it’s an experience. Imagine juicy, golden-seared chicken nestled in a luxuriously creamy parmesan sauce, studded with sweet sun-dried tomatoes and vibrant spinach. It’s elegant enough to feel like a splurge, yet comforting enough to make you sigh with happiness. The best part? It all comes together in one pan in about 30 minutes. That means less time stressing and more time slow-dancing in the kitchen while the sauce simmers.
Whether you’re cooking for your forever person, your best friend, or showing yourself some serious love (arguably the most important kind!), this dish speaks the language of care. It says, “I took the time to make something beautiful for us.” So, tie on your favorite apron, put on a great playlist, and let’s turn your kitchen into the most romantic spot in town. No reservation required.
The “Practice Run” That Stole My Heart
This recipe actually has its roots in a minor kitchen disaster that turned into one of my favorite memories. Years ago, I was planning a big, elaborate five-course meal for a date. I was young, ambitious, and wildly overconfident. By the third course (a risotto that refused to stop being soup), we were both starving, the kitchen looked like a hurricane hit it, and the romance was fading faster than my will to live.
In a panic, I scanned the fridge. Chicken breasts, cream, a nearly-empty jar of sun-dried tomatoes, and some wilting spinach. I threw them together with garlic and parmesan, praying for a miracle. What happened next was pure magic. As that creamy sauce bubbled and the spinach wilted, the stress melted away. We stood at the stove, sharing a wooden spoon to taste, laughing at the ridiculousness of it all. We ended up eating straight from the pan, perched on barstools, completely forgetting about the failed soufflé waiting in the wings.
That messy, unplanned, delicious meal taught me everything. Romance isn’t in perfect plating; it’s in the shared moment, the laughter, the act of creating something together. This Creamy Tuscan Chicken is that saving-grace dish for me. It’s proof that the best memories often come from the unscripted, cheesy, garlicky, absolutely perfect messes.
Your Flavor Toolkit: Simple, Soulful Ingredients
Great food starts with great ingredients, but don’t let “gourmet” scare you. We’re using simple, flavorful items that work together like a dream team. Here’s what you’ll need and why each one is a star player.
- 2 large boneless, skinless chicken breasts, halved lengthwise: This is our canvas. Halving them (butterflying) creates thinner cutlets that cook quickly and evenly, ensuring juicy meat in every bite. Chef’s Hack: Place the breast flat on your cutting board, press your hand firmly on top, and slice horizontally through the middle with a sharp knife. Feels pro, right?
- Salt and black pepper to taste: The foundation of flavor! Don’t be shy here. Seasoning the chicken well before searing is non-negotiable for a tasty crust.
- 1 tablespoon olive oil: Our searing workhorse. A good, fruity extra virgin olive oil adds a hint of flavor, but any high-heat oil like avocado oil works too.
- 3 cloves garlic, minced: The aromatic heart of the sauce. Fresh is best here—that pre-minced stuff just doesn’t sing the same song. Sub Tip: In a true pinch, ¾ teaspoon of garlic powder can stand in.
- 1 cup heavy cream: This is what creates that luscious, velvety sauce. For the richest texture, stick with heavy cream (also called heavy whipping cream). Lighter Swap: Half-and-half will work, but the sauce will be thinner. Avoid milk, as it can curdle.
- ½ cup grated parmesan cheese: Our flavor bomb. Please, for the love of all that is cheesy and good, grate it fresh from a block. The pre-grated stuff has anti-caking agents that can make your sauce grainy. Insight: A microplane makes the fluffiest, meltiest parmesan!
- ½ cup sun-dried tomatoes (drained and chopped): These little gems pack a punch of sweet, tangy, concentrated tomato flavor. If you’re using the ones packed in oil, drain them well. The dry-packed kind just need a quick soak in hot water to soften.
- 1 cup fresh spinach: A pop of color and freshness. It wilts down dramatically, so don’t worry if your cup looks overflowing. Baby kale or chopped regular kale (with a slightly longer cook time) are fantastic substitutes.
- ½ teaspoon Italian seasoning: A quick herb blend that whispers “Tuscany.” It’s usually a mix of oregano, basil, thyme, and rosemary. No blend? Use ¼ tsp dried oregano and ¼ tsp dried basil.
- Optional: crushed red pepper flakes for heat: My little secret for a grown-up kick. Just a pinch (⅛ to ¼ tsp) adds a warm, subtle heat that plays beautifully against the cream. Highly recommended!
Let’s Get Cooking: Your Roadmap to Delicious
Okay, team. Aprons on? Music playing? Let’s do this. Follow these steps, and you’ll have a restaurant-worthy dish with minimal fuss. I’ve packed each step with my favorite hacks to make you feel like a pro.
- Prep & Season the Chicken: Start by placing your halved chicken breasts between two pieces of plastic wrap or in a zip-top bag. Gently pound them to an even ½-inch thickness using a rolling pin, meat mallet, or even a heavy skillet. This ensures they cook evenly and stay tender. Pat them completely dry with paper towels—this is KEY for a good sear. Season both sides generously with salt and black pepper. Chef’s Chatter: “Dry chicken gets a golden sear, wet chicken steams.” It’s my kitchen mantra!
- Sear to Golden Perfection: Heat the olive oil in a large skillet (I love my cast iron or stainless steel for this) over medium-high heat. Once the oil is shimmering (test with a drop of water – if it sizzles, you’re ready), add the chicken. Don’t crowd the pan! You should hear a satisfying sizzle. Let it cook, undisturbed, for 4-5 minutes, until you can see the edges turning opaque and it releases easily from the pan. Flip and cook for another 4-5 minutes on the other side, until cooked through (165°F internal temp). Remove to a plate and tent loosely with foil. Pro Tip: Don’t move the chicken around while it’s searing! Let it develop that beautiful, flavorful crust.
- Build the Aromatic Base: Reduce the heat to medium. In the same glorious pan (with all those yummy browned bits from the chicken), add the minced garlic. Sauté for about 30 seconds to 1 minute, just until it becomes incredibly fragrant. Watch it closely! Burnt garlic is bitter, and we want sweet, aromatic goodness. Little Hack: If the pan seems too dry, add a tiny splash of the oil from the sun-dried tomato jar for extra flavor.
- Create the Creamy Dream Sauce: Pour in the heavy cream, then add the grated parmesan, chopped sun-dried tomatoes, Italian seasoning, and that optional pinch of red pepper flakes. Give it a good whisk to incorporate the parmesan into the cream. Let it simmer gently (small bubbles around the edges) for 2-3 minutes. You’ll see it start to thicken slightly and become cohesive. Chef’s Note: The sauce might look a little thin at first—it will continue to thicken as it cools and once you add the spinach and chicken back in. Trust the process!
- Wilt in the Greens: Stir in the fresh spinach. It will seem like a lot, but just keep gently folding it into the warm sauce. In about 1-2 minutes, it will wilt down into beautiful green ribbons. This is when the sauce turns from “great” to “wow.”
- The Grand Reunion: Slide the seared chicken breasts and any accumulated juices back into the pan. Spoon that luxurious sauce over the top of each piece. Let everything mingle and heat through for another 1-2 minutes on low heat. This allows the chicken to soak up some of that amazing flavor.
Plating Your Masterpiece: The Finishing Touches
Presentation is the final act of love! You’ve made this incredible dish—let’s serve it with style.
For a classic, restaurant-style plate, I love laying down a bed of creamy mashed potatoes or a swirl of fettuccine or pappardelle pasta. Place a saucy chicken cutlet right on top, then spoon extra sauce all over. The sauce is the star, so don’t be stingy! Garnish with an extra sprinkle of fresh parmesan, a few cracks of black pepper, and maybe a fresh basil leaf or a pinch of chopped parsley for a burst of color.
Going for a cozier, rustic vibe? Skip the plates altogether! Bring the whole skillet to the table (use a trivet!) with a big loaf of warm, crusty bread like ciabatta or a baguette on the side. Tear off pieces of bread and dive right in, using it to sop up every last drop of that incredible sauce. This is my personal favorite—it’s interactive, fun, and gloriously messy.
Don’t forget the ambiance! Light those candles, pour the wine (a crisp Pinot Grigio or a buttery Chardonnay pairs beautifully), and put your phones away. This meal is about connection.
Make It Your Own: Delicious Twists & Swaps
One of the best things about this recipe is its flexibility. Want to mix it up? Here are some of my favorite variations:
- The Seafood Swap: Not a chicken person? Use large shrimp or scallops! Sear them quickly (1-2 minutes per side for shrimp, 2-3 minutes per side for scallops) and set aside. Proceed with the sauce, then add the seafood back at the very end just to warm through.
- Mushroom & Sage Forest Feast: Add 8 oz of sliced cremini mushrooms when you sauté the garlic. Let them brown and release their liquid. Then, swap the Italian seasoning for 1 teaspoon of finely chopped fresh sage. Earthy, warm, and incredible.
- Dairy-Free Dream: You can still enjoy the creaminess! Use full-fat canned coconut milk in place of the heavy cream. For the parmesan, use a vegan parmesan alternative or 2 tablespoons of nutritional yeast for a cheesy, umami flavor.
- Protein Power-Up: Substitute the chicken with boneless, skinless chicken thighs for an even richer, more forgiving cut of meat. Or, try thin-cut pork chops, following the same searing method.
- Sun-Dried Tomato & Artichoke Heart: Love those jarred flavors? Add a ½ cup of drained, quartered artichoke hearts along with the sun-dried tomatoes. It adds another layer of tangy, Mediterranean flavor.
Beau’s Bench Notes: From My Kitchen to Yours
This recipe has been my trusty sidekick for years, and it’s evolved in little ways every time I make it. Sometimes I add a splash of white wine to the garlic before the cream (let it reduce by half for an extra flavor layer). Other times, I’ll stir in a tablespoon of tomato paste for a deeper red hue and richer tomato flavor.
A funny story: I once accidentally used a whole cup of sun-dried tomatoes instead of a half cup. It was intense, tomato-y, and honestly… we loved it. My point is, recipes are guides, not laws. Taste as you go! Love garlic? Add an extra clove. Want it herbier? Throw in some fresh thyme. The kitchen is your playground.
And remember my “practice run” story? I still sometimes deliberately make a mess, just for old time’s sake. The best meals are the ones filled with joy, not perfection.
FAQs & Kitchen Rescue Tips
Q: My sauce is too thin! What did I do wrong?
A: Don’t panic! First, let it simmer a bit longer to reduce. If it’s still too thin, make a quick slurry by mixing 1 teaspoon of cornstarch with 1 tablespoon of cold water. Whisk it into the simmering sauce and cook for another minute until thickened. Also, remember that freshly grated parmesan melts better and helps thicken the sauce more than pre-grated.
Q: Can I make this ahead of time for my dinner party?
A: You can! Cook the chicken and make the sauce completely. Store them separately in airtight containers in the fridge for up to 2 days. When ready to serve, gently reheat the sauce in a skillet, adding a splash of cream or broth if it’s too thick. Reheat the chicken in the sauce until warmed through.
Q: My chicken turned out tough. How can I prevent that?
A> Two common culprits: 1) Overcooking. Use a meat thermometer! Pull the chicken at 160-165°F—it will carryover cook a bit more. 2) Not pounding it to an even thickness. A thick end and a thin end will cook at wildly different rates, leading to dry, tough spots. Even thickness is everything.
Q: What’s the best way to reheat leftovers?
A> Gently is the key word. Reheat in a covered skillet over low heat with a splash of water, broth, or cream to loosen the sauce. You can microwave it, but do so at 50% power in short bursts to prevent the sauce from separating.

Creamy Tuscan Chicken : Romantic Valentine’s Day Dinner Recipe
Description
A rich, silky parmesan cream sauce with sun-dried tomatoes and spinach, all in one pan and ready in about 30 minutes.
Ingredients
-
2 large boneless, skinless chicken breasts, halved horizontally
-
Salt and black pepper, to taste
-
1 tbsp olive oil
-
3 cloves garlic, minced
-
1 cup heavy cream
-
½ cup freshly grated parmesan cheese
-
½ cup sun-dried tomatoes, drained and chopped
-
1 cup fresh spinach
-
½ tsp Italian seasoning
-
Optional: pinch of crushed red pepper flakes
Notes
-
Use freshly grated parmesan to prevent grainy sauce.
-
Don’t overcook the chicken—thin, even cutlets cook fast.
-
If the sauce is too thin, simmer longer or whisk in a 1 tsp cornstarch + 1 tbsp water slurry.
-
If the sauce gets too thick, add a splash of cream or chicken broth.
A Quick Look at the Good Stuff
While this is a celebratory dish, it’s nice to know what’s in your food! This nutritional breakdown is an estimate per serving (one chicken cutlet with sauce), based on the specific ingredients listed. Remember, variations will change these values.
Per Serving: Approximately 450 calories | 32g fat | 7g carbs | 35g protein
The protein from the chicken helps keep you satisfied, while the fats from the cream and olive oil carry the incredible flavors and help you absorb the fat-soluble vitamins from the spinach and tomatoes. The carbs are minimal and come mostly from the sun-dried tomatoes and a bit from the cream. It’s a wonderfully balanced, hearty meal. To lighten it up slightly, see the dairy-free or half-and-half swaps in the variations section!
Your Table, Your Romance
And there you have it, friends—my heart-on-a-plate, one-pan wonder: Creamy Tuscan Chicken. This recipe is more than just instructions; it’s an invitation to create a moment. An invitation to connect over the sizzle of garlic, the stir of a creamy sauce, and the simple joy of sharing a truly delicious meal made with your own two hands.
So this Valentine’s Day, or any Tuesday that needs a little sparkle, I hope you give it a try. Don’t worry about getting it perfect. Worry about having fun. Put on some music, pour a drink, and enjoy the process. Because the secret ingredient to every great meal is always, always the joy you cook it with.
Final Thoughts: Turn Down the Restaurant Noise, Turn Up the Kitchen Romance
Valentine’s Day—and any ordinary evening you choose to make special—should be about connection, not perfection. It’s easy to get swept up in the pressure of grand gestures, but sometimes the most meaningful moments happen quietly, around a pan of something simmering on the stove.
With this Creamy Tuscan Chicken, you’re not just making dinner. You’re crafting an experience: the scent of garlic meeting cream, the vibrant pop of sun-dried tomatoes, the warmth of a shared meal that says, I’m here, and this is for us.
Remember my kitchen disaster-turned-memory? That’s the heart of this dish. Romance isn’t in flawless execution—it’s in the laughter when things go sideways, the taste-testing from a wooden spoon, the decision to forget the plan and just be together.
So, as you tie on your apron and uncork the wine, remember:
You don’t need a reservation to create magic. You just need a skillet, a few simple ingredients, and the willingness to savor the process.
Here’s to slow-dancing in the kitchen, to meals that feel like hugs, and to the beautiful, unscripted messes that become our favorite stories.
Cook with joy, share with love, and always save a little bread for the sauce.
Chocolate Chip Cookie Bento Cakes : The Cutest Dessert Trend You Can Bake
Chocolate Chip Cookie Bento Cakes: Where Your Favorite Cookie Gets a Cute, Cakey Makeover
Hey there, friend! Beau here, welcoming you back to the Feastical kitchen. Today, we’re mixing up two of my favorite things: the unbeatable, soul-satisfying joy of a perfect chocolate chip cookie and the ridiculously charming, Instagram-worthy world of Korean bento cakes. If you’ve been scrolling lately and felt a pang of dessert envy over those tiny, beautifully decorated mini cakes, I’ve got fantastic news. We’re not just admiring them from afar—we’re baking them! And we’re doing it with the most iconic dessert of all time as our inspiration.
These Chocolate Chip Cookie Bento Cakes are the ultimate feel-good project. Imagine soft-baked, chewy cookie rounds stacked like little cakes, hugged by a cloud of vanilla buttercream, and finished with a personalized piped message or a cute doodle. They’re single-serving moments of pure happiness, perfect for birthdays, “just because” gifts, or that weekend when you need a creative, delicious pick-me-up. The best part? They look fancy but are built on the simple, forgiving foundation of classic cookie dough. No pastry degree required, just a love for good food and a little fun. So, preheat that oven, grab your favorite mixing bowl (you know, the one that feels just right), and let’s turn nostalgia into the cutest edible art you’ve ever made.
My First “Bento” Moment: A Lesson in Sweet Simplicity
This whole bento cake obsession? It takes me right back to my grandma’s kitchen, though she’d never call it that. She was the queen of “a little something sweet.” No occasion was too small. A good report card, helping with the weeds, even just a rainy Tuesday—all warranted a special treat. Her move was to bake one giant cookie in a cast-iron skillet, let it cool just enough, and then slice it into wedges. But for me, her number-one grandson (okay, her *only* grandson), she’d always save the center piece, the perfect bullseye of chocolate chips, and plop a tiny scoop of vanilla ice cream on top. She’d present it on a saucer with a flourish, saying, “There. A cake just for you.”
It wasn’t layered or piped, but in spirit, it was the original bento cake for me. It was personal. It was made with a specific person in mind. It transformed an everyday dessert into a celebrated mini event. That’s the magic we’re capturing here. We’re taking that universal love for the chocolate chip cookie and giving it that same “just for you” treatment. Every time I pipe a wobbly heart or a simple “YAY!” on top of these little cakes, I think of her. It’s not about perfection; it’s about the intention. And that intention, my friend, always tastes incredible.
Gathering Your Sweet Supplies
Here’s everything you’ll need to create these adorable mini masterpieces. I’ve tossed in some chef-y insights and swaps so you can bake with confidence!
For the Cookie Layers:
- 1 cup (2 sticks) unsalted butter, softened – This is our flavor foundation. Unsalted lets you control the salt level. Chef Tip: “Softened” means it gives easily when pressed but isn’t greasy or melted. Take it out of the fridge about an hour ahead.
- 1 cup packed brown sugar – Hello, moisture and that deep, caramel-like flavor! Using mostly brown sugar is the secret to a chewier, softer cookie cake layer.
- ½ cup granulated sugar – The white sugar helps with spreading and that classic crisp edge. For a deeper flavor, try using organic cane sugar.
- 2 large eggs – They bind everything together and add structure. Make sure they’re at room temperature to blend seamlessly with the butter and sugars.
- 2 teaspoons pure vanilla extract – The aromatic workhorse. Don’t skimp! A good vanilla makes the buttercream sing, too.
- 2 ½ cups all-purpose flour – The backbone. For a slightly more tender crumb, you can replace ¼ cup with cornstarch (often called a “cake flour hack”).
- 1 teaspoon baking soda – Our leavening agent, helping the cookies rise and become cakey, not dense.
- ½ teaspoon fine sea salt – Crucial! It balances the sweetness and makes all the other flavors pop. If you only have table salt, use a scant ½ teaspoon.
- 1 ½ cups semi-sweet chocolate chips – The stars of the show! I prefer a mix of chips and chopped chocolate bars for pools of melty chocolate. Feel free to use milk or dark chocolate based on your love language.
For the Vanilla Buttercream:
- 1 cup (2 sticks) unsalted butter, softened – Yes, more butter. This is a celebration. For the fluffiest frosting, ensure your butter is perfectly softened.
- 3 cups powdered sugar, sifted – Sifting is non-negotiable for a silky-smooth frosting. It prevents lumps and makes your piping life so much easier.
- 2 tablespoons milk or heavy cream – Heavy cream will give you a richer, more luxurious consistency. Milk works perfectly fine!
- 1 teaspoon vanilla extract – Keeping the flavor classic and comforting.
- Gel food coloring (optional) – If you want to add pastel colors for decorating, gel colors are best as they won’t thin out your frosting.
Let’s Build Some Mini Magic: Step-by-Step
Ready? Apron on, let’s do this. We’ll break it down into three acts: The Cookie, The Frosting, and The Grand Assembly.
Act 1: Baking the Perfect Cookie “Cake” Layers
Step 1: Preheat your oven to a nice, steady 350°F (175°C). Line two baking sheets with parchment paper. Trust me on the parchment—it prevents sticking and makes cleanup a dream.
Step 2: In a large bowl, cream together the softened butter, brown sugar, and granulated sugar. Use a hand mixer or stand mixer on medium speed for about 2-3 minutes. We’re not just mixing; we’re creaming. You want it light, fluffy, and pale in color. This step incorporates air, which is part of what gives our layers a lovely texture. Little Hack: Scrape down the sides of the bowl halfway through to make sure no butter is hiding.
Step 3: Add the eggs one at a time, beating well after each addition. Then beat in the vanilla. Your mixture might look a little curdled at this point—that’s totally normal! The flour will bring it all together.
Step 4: In a separate bowl, whisk together the flour, baking soda, and salt. This ensures the leavening is evenly distributed. With your mixer on low, gradually add the dry ingredients to the wet ingredients. Mix just until no white streaks remain. Overmixing at this stage can lead to tough cookies, and we want them tender.
Step 5: The best part: fold in the chocolate chips with a spatula. Use a gentle hand to avoid breaking the chips.
Step 6: Now, here’s the key to perfect bento cake layers: we’re making them uniform and slightly thicker than a normal cookie. I use a large cookie scoop (about 3 tablespoons) or I weigh the dough into 75-gram portions. Roll each portion into a ball, then place it on the parchment and gently flatten it into a disc about 3 inches wide and ½ inch thick. They should look like little hockey pucks. Leave about 3 inches between them, as they will spread. Bake for 10-12 minutes, just until the edges are set and golden but the centers still look slightly soft. They will firm up as they cool! Let them cool on the baking sheet for 5 minutes before transferring to a wire rack to cool completely. Patience is a virtue here—warm cookies and frosting are a messy business.
Act 2: Whipping Up the Dreamiest Buttercream
Step 1: In a clean bowl, beat the softened butter on medium-high speed for 3-5 minutes. Seriously, let it go. You want it super pale, fluffy, and almost whipped. This is the secret to a frosting that isn’t overly sweet or heavy.
Step 2: With the mixer on low, gradually add the sifted powdered sugar, about a cup at a time. Once incorporated, add the vanilla and milk/cream. Now, turn the mixer back up to medium-high and beat for another 2-3 minutes until it’s light, airy, and deliciously spreadable. If it’s too thick, add more milk a teaspoon at a time. Too thin? Add a little more powdered sugar.
Act 3: The Adorable Assembly & Decoration
Step 1: Match up your cooled cookie layers into pairs or trios of similar size. Place one layer on a small plate or cake board. Dollop about 1 ½ tablespoons of frosting in the center and spread it almost to the edges with an offset spatula or butter knife. Gently place the next layer on top and press down lightly. Repeat if you’re doing three layers. For a classic “naked cake” look, you can stop here and just add a dollop on top for piping.
Step 2: For a fully frosted look, apply a thin “crumb coat” of frosting all over the mini cake to seal in any crumbs. Pop it in the fridge for 15 minutes to set. Then, apply your final, smoother coat of frosting.
Step 3: DECORATE! This is where you shine. Fit a piping bag with a small round or star tip. You can pipe simple borders, dots, hearts, or write short messages like “HI,” “YUM,” or someone’s initial. Use a toothpick to lightly sketch your design first if you’re nervous. Add sprinkles, a single chocolate chip, or leave it beautifully minimalist. There are no rules, only delicious results.
How to Serve These Little Showstoppers
Presentation is half the fun with bento cakes! I love serving each one on a small, colorful dessert plate or a piece of pretty parchment paper. For the full aesthetic, place them in a simple, clean white or pastel lunchbox (the classic “bento” box) if you have one. A small paper doily underneath adds instant vintage charm.
Pair your cookie cake with a cold glass of milk, a cup of coffee, or even a scoop of vanilla ice cream on the side for the ultimate indulgence. These are meant to be personal, so hand them directly to your favorite person with a smile. Watch their face light up—it’s the best part of the recipe, I swear.
Mix It Up! 5 Fun Twists on the Classic
Once you’ve mastered the basic blueprint, the flavor playground is open! Here are some of my favorite spins:
- Salted Caramel Pretzel: Add ½ cup crushed pretzel pieces to the dough with the chocolate chips. Swap the vanilla buttercream for a salted caramel frosting, and drizzle with extra caramel sauce.
- Funfetti Celebration: Reduce chocolate chips to 1 cup and add ½ cup rainbow sprinkles to the dough. Use brightly colored frosting and more sprinkles on top for instant party vibes.
- Peanut Butter Cup: Use ½ cup creamy peanut butter in the dough (reduce butter to ¾ cup). Fold in chopped peanut butter cups instead of chocolate chips. Frost with a peanut butter buttercream.
- Mocha Chip: Add 1 tablespoon instant espresso powder to the dry ingredients. Use dark chocolate chips. A mocha frosting (add 1 tbsp cocoa powder and a bit more milk) would be incredible here.
- Gluten-Free & Dairy-Free Friendly: Use a 1:1 gluten-free flour blend and vegan butter sticks. For the chips, choose dairy-free chocolate. Use a plant-based milk in the frosting. The structure works beautifully!
Beau’s Kitchen Confidential
This recipe has become my go-to for last-minute “I need something impressive” moments. The first time I tried it, I was so focused on getting the cookies perfectly round that I overbaked them. They were more like biscuit layers! Lesson learned: a soft, slightly underbaked center is your friend for that cakey texture. My other favorite “oops” turned into a win: I once ran out of piping bags and used a small zip-top bag with the corner snipped off. It worked in a pinch, but let’s just say my “Happy Birthday” message got… abstract. Now I call that the “abstract expressionist” decoration style. Embrace the wobbles and the imperfections—they taste just as sweet and have way more personality.
Your Questions, Answered
Q: My cookie layers spread too much and aren’t round! What happened?
A: This usually means the butter was too warm or the dough wasn’t chilled. Next time, after shaping the discs, pop the entire baking sheet in the fridge for 15-20 minutes before baking. This solidifies the fat and helps them hold their shape. Also, make sure you’re measuring your flour correctly (spoon and level, don’t scoop!).
Q: Can I make any parts ahead of time?
A> Absolutely! The cookie layers can be baked, cooled completely, and stored in an airtight container at room temp for 2 days, or frozen for a month. The frosting can be made and refrigerated for up to a week—just let it come to room temp and re-whip before using. Assemble the cakes the day you plan to serve them for the freshest look and texture.
Q: My frosting is too runny/soupy. How can I fix it?
A> If your kitchen is warm, the butter might have gotten too soft. The quick fix is to chill the whole bowl of frosting in the fridge for 20-30 minutes, then re-whip. You can also add a bit more sifted powdered sugar, a tablespoon at a time, until it firms up.
Q: I don’t have piping tips. How can I decorate?
A> No problem! You can use a butter knife to create pretty swirls on top. Use the back of a spoon to make a small indentation and fill it with sprinkles. Or, simply press mini chocolate chips or M&M’s into the frosting in a fun pattern. A little grated chocolate or a dusting of cocoa powder looks elegant, too.

Chocolate Chip Cookie Bento Cakes : The Cutest Dessert Trend You Can Bake
Description
These adorable bento-style cookie cakes combine chewy chocolate chip cookie layers with fluffy buttercream, creating a single-serve treat that’s perfect for gifting, celebrating, or decorating just for fun. They’re simple to make, forgiving, and endlessly customizable.
Ingredients
For the Cookie Layers
-
1 cup (2 sticks) unsalted butter, softened
-
1 cup packed brown sugar
-
½ cup granulated sugar
-
2 large eggs, room temperature
-
2 tsp vanilla extract
-
2 ½ cups all-purpose flour
-
1 tsp baking soda
-
½ tsp fine sea salt
-
1 ½ cups semi-sweet chocolate chips (or chips + chopped chocolate)
Optional Tip:
Replace ¼ cup of the flour with cornstarch for extra tenderness.
For the Vanilla Buttercream
-
1 cup (2 sticks) unsalted butter, softened
-
3 cups powdered sugar, sifted
-
1–2 tbsp milk or heavy cream
-
1 tsp vanilla extract
-
Gel food coloring, optional
Instructions
ACT 1 — Bake the Cookie “Cake” Layers
-
Preheat oven to 350°F (175°C). Line baking sheets with parchment paper.
-
Cream butter, brown sugar, and granulated sugar for 2–3 minutes until fluffy.
-
Add eggs one at a time, then mix in vanilla.
-
Whisk flour, baking soda, and salt separately. Add to wet ingredients on low speed; mix just until combined.
-
Fold in chocolate chips.
-
Scoop dough into 3-inch, ½-inch-thick discs (about 3 tbsp or 75 g each).
-
Bake 10–12 minutes, until edges are golden and centers look soft.
-
Cool 5 minutes on the tray, then transfer to a rack to cool fully.
Tip:
Chill shaped dough discs for 15 minutes before baking if you want perfectly round layers.
ACT 2 — Make the Buttercream
-
Beat softened butter for 3–5 minutes until pale and fluffy.
-
Add powdered sugar gradually on low speed.
-
Add vanilla and 1 tbsp milk/cream. Beat on medium-high for 2–3 minutes until smooth.
-
Adjust consistency:
-
Too thick → add more milk 1 tsp at a time
-
Too thin → add more powdered sugar
-
-
Add gel colors if using.
ACT 3 — Assemble the Mini Cakes
-
Pair cookie layers by size (use 2 or 3 layers).
-
Spread 1–1½ tbsp frosting between each layer.
-
For a clean finish, apply a thin crumb coat, chill 15 minutes, then frost smoothly.
-
Decorate with piping, sprinkles, chocolate chips, or simple designs.
No piping tips?
Use a spoon to swirl frosting or a zip-top bag with the corner snipped.
Notes
Cookies spread too much?
• Butter was too soft or dough wasn’t chilled enough.
• Chill shaped discs 15–20 minutes next time.
• Make sure flour is measured correctly (spoon & level).
Frosting too runny?
• Chill 20–30 minutes, then re-whip.
• Add more powdered sugar if needed.
Make ahead:
• Cookie layers: 2 days at room temp or 1 month frozen.
• Buttercream: 1 week refrigerated; re-whip before using.
• Assemble the day you serve.
Final Thoughts
More than just a dessert, these Chocolate Chip Cookie Bento Cakes are a tiny, edible hug. They take the familiar, comforting soul of a classic chocolate chip cookie and wrap it in the joyful, personal whimsy of a celebration. This project proves that you don’t need complicated techniques or fancy tools to create something truly special—just a reliable recipe, a few simple supplies, and the desire to make someone’s day a little sweeter.
Remember, the magic isn’t in flawless piping or geometrically perfect layers. It’s in the intention behind them. It’s in the moment you hand a personalized, handheld cake to a friend, a family member, or even to yourself, as a testament to the beauty of small, crafted joys. Whether you’re celebrating a milestone or turning a Tuesday into a treat, these mini cakes transform simple baking into an act of connection.
So, embrace the wobbly letters, the slightly uneven layers, and the chocolate chips that peek out just where they want to. That’s where the charm lives. Thank you for letting me share this recipe and a little piece of my story with you. Now, go preheat that oven, and create some mini magic of your own.
Happy baking, friend!
Beau
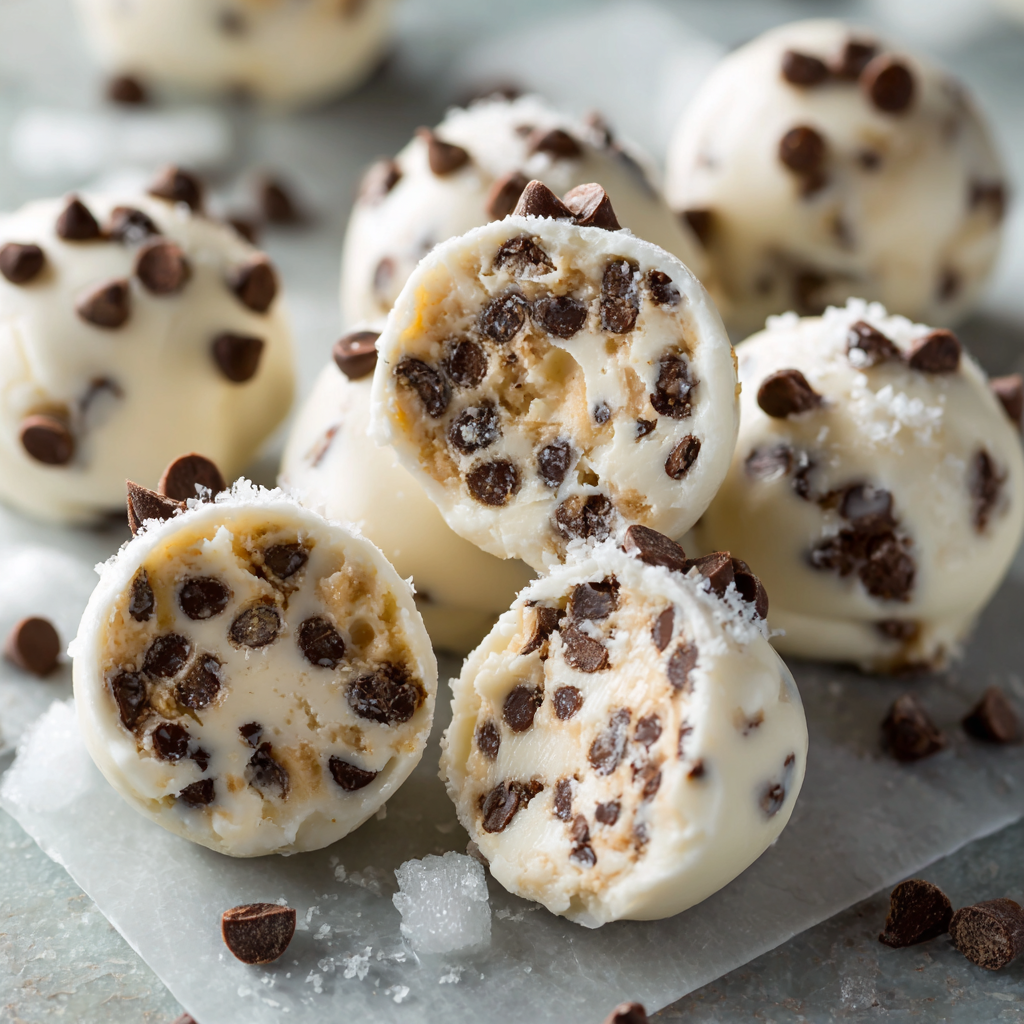
Frozen Chocolate Chip Yogurt Bites : Healthy No-Bake Summer Snack
Hey, Let’s Beat the Heat with a Healthy Frozen Treat!
Hey friends, Beau here from Feastical! Is it just me, or is the summer sun doing its absolute best to turn our kitchens into saunas? The thought of turning on the oven right now feels like a serious act of bravery. If you’re dreaming of something sweet, cold, and satisfying but don’t want to undo all that good summer energy, I’ve got you. Today, we’re stepping away from the stovetop entirely and heading straight to the freezer.
Let me introduce you to my latest obsession: Frozen Chocolate Chip Yogurt Bites. Imagine the best parts of cookie dough—that creamy, vanilla-kissed base and little bursts of chocolate—but light, refreshing, and packed with protein. These little frozen nuggets are the ultimate hack for when a sweet craving hits. They’re perfect for post-pool snacking, a quick after-dinner treat, or even stashing in a lunchbox to keep things cool. The best part? You only need a bowl, a spoon, and about 10 minutes of your time. No fancy equipment, no baking, just pure, feel-good deliciousness. So, let’s grab that tub of Greek yogurt and make a mess (a very small, tidy one, I promise) that ends in frosty, chocolatey bliss.
A Trip Down Memory Lane: Ice Cream Trucks & Kitchen Experiments
This recipe takes me right back to being a kid, glued to the window in the dead of summer, listening for the magical jingle of the ice cream truck. My allowance was always burning a hole in my pocket, ready for a rocket pop or a chocolate-dipped vanilla cone. But as I got older and started my own journey with food, I wanted to recreate that joy—that instant, cooling happiness—in a way that felt a bit more like the “grown-up” cook I was trying to be.
My first attempts were… interesting. Frozen banana blobs that turned brown, “nice cream” that melted in seconds, and let’s not talk about the granola bar incident. But then, one sweltering afternoon, I was staring into my fridge: a giant tub of Greek yogurt, a jar of almond butter from my morning toast, and a half-eaten bag of mini chocolate chips left over from cookies. In a moment of “why not?” genius, I stirred them all together, dolloped the mixture onto a tray, and crossed my fingers. Two hours later, I popped one in my mouth. It was cold, creamy, subtly sweet, and had that undeniable cookie dough vibe. It was a total “AHA!” moment. It wasn’t just a substitute for ice cream; it was its own wonderful thing. Now, I keep a container of these bites in my freezer at all times. Consider them my homemade, healthy answer to that childhood ice cream truck jingle.
Gathering Your Flavor Crew: Simple Ingredients, Big Impact
Here’s the beautiful part: this recipe is a masterclass in simplicity. Each ingredient plays a specific role, and together, they create magic. Let’s break it down.
- 1 cup plain or vanilla Greek yogurt: This is our superstar base. I prefer full-fat Greek yogurt for ultimate creaminess and staying power, but any fat level works. Chef’s Insight: The thickness of Greek yogurt is key—it freezes better than regular yogurt, which can get icy. If you’re dairy-free, a thick, plain coconut or almond milk yogurt will work, but check the texture after mixing.
- 2 tablespoons almond butter or peanut butter: This is the secret weapon! It adds richness, a hint of nutty flavor, and helps bind everything together for a perfect, fudgy texture. Substitution Tip: Any nut or seed butter you love works here. Sunflower seed butter is a fantastic nut-free option.
- 1 tablespoon honey or maple syrup: Just a touch of natural sweetness to balance the tang of the yogurt. Chef’s Insight: If your nut butter is very sweet or you’re using vanilla yogurt, you can reduce this to 2 teaspoons. For a vegan version, pure maple syrup is the way to go.
- ½ teaspoon vanilla extract: Non-negotiable for that classic, comforting cookie dough flavor. It rounds out all the other notes perfectly.
- ½ cup mini chocolate chips: The “chip” in our chocolate chip bite! I insist on mini chips. They distribute more evenly in each bite, so you get chocolate in every single one. Chef’s Insight: For a darker, richer flavor, use mini dark chocolate chips. If you need dairy-free, check for Enjoy Life brand chips.
- Optional: A tiny pinch of sea salt: This is my pro move. Salt makes sweet things taste sweeter and deeper. Just a pinch elevates these from “yum” to “WOW.”
Let’s Make Some Magic: Your Foolproof, No-Bake Guide
Ready? This is so easy, you’ll have it memorized after one batch. Let’s do this step-by-step, with all my favorite little hacks along the way.
Step 1: The Big Mix. Grab a medium-sized mixing bowl. Plop in your Greek yogurt, nut butter, honey (or maple syrup), and vanilla extract. Now, take a spatula or a sturdy spoon and stir, stir, stir until it’s completely smooth and homogeneous. You shouldn’t see any streaks of nut butter. Chef’s Hack: If your nut butter is super thick and cold from the fridge, warm it for 10 seconds in the microwave first. It’ll blend into the yogurt like a dream.
Step 2: Chocolate Chip Party. Pour in those glorious mini chocolate chips (and your optional pinch of salt). Fold them in gently but thoroughly. You want every scoop to be loaded with chocolate. Chef’s Tip: Reserve a small handful of chips for later. Trust me on this.
Step 3: Scoop & Shape. Line a baking sheet, plate, or tray with parchment paper. No parchment? A silicone baking mat works great too. Now, take a teaspoon or a small cookie scoop (my weapon of choice for uniform bites) and drop small mounds onto the sheet. They should be about the size of a heaping teaspoon. Chef’s Hack: For a prettier finish, after you scoop each mound, use the back of a clean spoon to gently flatten the top just a tad and press a few of those reserved chocolate chips on top. It makes them look bakery-fancy!
Step 4: The Big Chill. Carefully slide the tray into your freezer. We need a solid, uninterrupted freeze for at least 2 hours. They should be completely firm to the touch. Chef’s Pro-Tip: If you’re not in a rush, let them do a “flash freeze” for about 90 minutes on the tray first, *then* transfer them to an airtight container or bag. This prevents them from sticking together in one giant frozen clump in the container. Think of them like little frozen meatballs—you want them individual!
Step 5: Store & Enjoy! Once solid, pop your bites into a freezer-safe bag or container. They’ll keep happily for up to 2 months (if they last that long!). When a craving strikes, just grab a few and let them sit for a minute or two to take the hardest edge off the cold. Then, enjoy the creamy, cold, chocolatey satisfaction.
How to Serve These Frozen Gems: Get Creative!
Sure, you can eat them straight from the container (no judgment from me!), but let’s have a little fun with presentation.
For a quick, stunning dessert, pile a few into a small bowl and drizzle with a tiny bit of melted peanut butter or a dark chocolate shell. Add a few fresh berries on the side. Instant dessert plate! For kids (or kids at heart), stick a popsicle stick into each bite before freezing for a fun, handheld “frozen yogurt pop.” They’re also the perfect topping for a bowl of warm oatmeal or overnight oats—the contrast of hot and cold is incredible. My favorite summer move? Pack a small reusable container with them for a day at the beach or park. They act as both a snack and a cooler pack for other items, slowly thawing to the perfect eating texture by the time you’re ready for them.
Mix It Up! 5 Delicious Twists on the Classic
Once you’ve mastered the basic formula, the flavor world is your oyster! Here are a few of my favorite riffs:
- Berry Bliss: Swap the chocolate chips for ⅓ cup of freeze-dried strawberry or raspberry pieces (crushed slightly). The berries stay crunchy and add a fantastic fruity tang.
- Tropical Vacation: Use coconut yogurt, swap the nut butter for 2 tablespoons of coconut cream (the solid part from a can), and mix in ¼ cup of chopped dried mango and 2 tablespoons of toasted coconut flakes. Close your eyes, and you’re on a beach.
- Cookie Dough Deluxe: Add 2 tablespoons of oat flour (just blend rolled oats!) to the mix for a more dough-like texture. Fold in mini M&Ms along with the chocolate chips for a confetti cookie effect.
- Mocha Chip: Dissolve 1-2 teaspoons of instant espresso powder into the vanilla extract before adding it to the yogurt. Use dark chocolate chips. A perfect afternoon pick-me-up.
- Birthcake Batter: Use vanilla yogurt, swap the nut butter for 2 tablespoons of cashew butter (it’s milder), and add ¼ teaspoon of almond extract and a sprinkle of rainbow sprinkles. Funfetti, but make it healthy!
A Few Final Thoughts from My Kitchen to Yours
This recipe has become my go-off, my culinary security blanket for hot days. I’ve made it for book club, after yoga class, and for my neighbor’s kids who now call me “The Yogurt Bite Man.” The beauty is in its flexibility. Over time, I’ve learned that a tiny dash of cinnamon is amazing in the classic version, and that if you only have regular-sized chocolate chips, giving them a rough chop with a knife works just fine. The recipe evolves with you. One funny fail? I once tried to make a giant “yogurt bark” version by spreading the whole batch on a tray. It froze like a dream but shattered into chaotic, messy shards when I tried to break it. Stick to the bites—they’re portion-controlled perfection. Remember, cooking is about joy, not perfection. If your bites aren’t perfectly round, they’ll taste just as incredible.
Your Questions, Answered!
Q: My bites are really icy/hard. What did I do wrong?
A: This usually points to the yogurt. Make sure you’re using thick, strained Greek yogurt. Regular yogurt has more water, which forms ice crystals. Also, don’t skip the nut butter! Its fat content helps create a creamier freeze. Let them sit at room temp for 3-5 minutes before eating.
Q: Can I make these without any sweetener?
A> You can, but they’ll be quite tangy. The sweetener balances the yogurt’s acidity. If you want to skip it, I’d recommend using a pre-sweetened vanilla yogurt and maybe adding a few chopped dates or a mashed ripe banana for natural sweetness.
Q: How long do they really last in the freezer?
A> In an airtight container, they’re good for 1-2 months. After that, they might start to develop a little “freezer taste” or get frosty. But let’s be real—they’ve never lasted that long in my house!
Q: My mixture is too runny to scoop! Help!
A> No panic. Pop the whole bowl into the fridge for 20-30 minutes. The cold will firm up the yogurt and nut butter, making it much easier to handle. You can also add a tablespoon of oat flour or ground flaxseed to thicken it up.
Frozen Chocolate Chip Yogurt Bites : Healthy No-Bake Summer Snack
Description
These creamy, cookie-dough–style yogurt bites are sweet, cold, protein-packed, and super simple to make. No baking, no equipment — just mix, scoop, freeze, and enjoy!
Ingredients
-
1 cup plain or vanilla Greek yogurt
-
2 tbsp almond butter or peanut butter
-
1 tbsp honey or maple syrup
-
½ tsp vanilla extract
-
½ cup mini chocolate chips
-
Pinch of sea salt (optional)
Instructions
In a bowl, stir together Greek yogurt, nut butter, honey (or maple syrup), and vanilla until smooth and creamy.
Fold in the mini chocolate chips and a tiny pinch of salt.
(Optional: save a few chips to press on top.)
Line a tray or plate with parchment paper. Scoop small spoonfuls (about 1 heaping teaspoon each) onto the tray.
Freeze for 2 hours, or until completely firm.
Transfer the frozen bites to a container or freezer bag.
They keep well for up to 2 months.
Notes
-
Use Greek yogurt — regular yogurt will freeze icy.
-
Warm your nut butter for 10 seconds if it’s too thick.
-
If the mixture is too runny, chill it in the fridge for 20–30 minutes before scooping.
-
Let the bites soften for 1–2 minutes before eating for the best texture.
The Good Stuff: What’s In Your Bite?
I’m not a nutritionist, but I love knowing that what I’m eating is fueling me well. Here’s the general breakdown per bite (assuming the recipe makes about 20):
- Calories: ~60
- Fat: 3g (mostly the good kind from nut butter!)
- Carbohydrates: 5g
- Protein: 2g
- Sugar: 4g (primarily from the natural honey and chocolate)
Compared to a scoop of ice cream or a handful of candy, these are a powerhouse. That protein from the Greek yogurt and nut butter helps keep you full and satisfied, making them a smart snack choice. They’re a fantastic way to curb a sweet tooth with real, simple ingredients. Remember, these numbers can vary based on the specific brands and ingredients you use, but the core benefits remain: a satisfying, portion-controlled treat that feels indulgent but isn’t.
Wrapping It All Up with a Bow (or a Parchment Paper)
So there you have it, my friends—the simplest, most satisfying frozen treat in my arsenal. These Frozen Chocolate Chip Yogurt Bites are proof that you don’t need complicated techniques or hours in the kitchen to make something truly delightful. They’re about embracing simplicity, playing with flavors, and giving yourself permission to enjoy a cool, sweet bite that makes you feel good inside and out.
Final Thoughts: A Scoop of Summer Serenity
And that, my friends, is the full story of my beloved Frozen Chocolate Chip Yogurt Bites. From a desperate fridge forage to a freezer staple, this little recipe embodies everything I love about cooking: creativity born from limitation, joy found in simplicity, and the pure magic of turning a few basic ingredients into something that feels like a hug from the inside.
As we wrap up, I want to leave you with this thought: the best recipes aren’t just about feeding our bodies; they’re about nourishing our moments. This recipe is a pause button. It’s the few minutes of quiet stirring while the world outside shimmers with heat. It’s the shared smile over a cold, chocolatey bite with someone you love. It’s the personal victory of making something wonderful for yourself, exactly as you like it.
Don’t get bogged down in perfection. If your bites are lopsided, if you only have big chocolate chips, if you use peanut butter instead of almond—it’s all going to be delicious. Your kitchen, your rules. This is a formula for freedom and a foundation for endless fun. Let it be a starting point for your own experiments.
Thank you for letting me share this corner of my kitchen with you. I hope these frozen bites become your secret weapon for sweet, cool relief all season long. May your summer be filled with simple pleasures, cool treats, and the confidence to create your own delicious moments.
Stay cool, stay creative, and most importantly, stay kind to yourself in the process.
With gratitude and a freezer full of bites,
Beau
od food and cool treats,
mmerrecipes #frozentreats #nobakedessert #healthydessert #yogurtbites #mealprep #kidfriendly

Chocolate Chip and Pickle Cookies : The Sweet and Tangy TikTok Trend
Chocolate Chip & Pickle Cookies: The Sweet, Salty, Tangy Bite You HAVE to Try
Hey friends, Beau here! Grab a seat and maybe a glass of milk, because we’re about to dive into one of the most delightfully bizarre, conversation-starting, “did-he-really-just-say-that?” recipes to ever grace my kitchen at Feastical. We’re talking about Chocolate Chip and Pickle Cookies. Yes, you read that right. The sweet, the melty, the classic chocolate chip cookie… meets the crunchy, tangy, briny delight of a dill pickle.
I know, I know. Your brain is doing a backflip right now. “Pickles? In a COOKIE? Beau, have you finally lost your spatula?” Trust me, I was the biggest skeptic in the room when this TikTok trend first popped up. But as someone who lives for feel-good food that brings people together—even if it’s to gather ’round and say “WHY?”—I had to try it. And you know what? The weirdest part isn’t the idea. It’s the fact that it absolutely works.
This isn’t a gimmick; it’s a flavor revelation. It’s for the adventurous eater, the culinary daredevil, the person who believes rules in the kitchen are made to be gently, deliciously bent. Imagine the perfect, chewy-centered, crispy-edged chocolate chip cookie. Now give it a subtle, sophisticated twist—a bright, tangy note that cuts through the richness, a tiny salty crunch that makes the sweet chocolate sing even louder. That’s the magic. So, are you ready to break the rules with me and bake a batch of pure, unadulterated conversation? Let’s get mixing!
The Pickle Jar Epiphany: Why I Gave This Trend a Chance
This recipe takes me back. Not to pickles in cookies, thankfully—my grandma was a traditionalist—but to the sheer, unbridled joy of culinary curiosity. I remember being about ten, secretly sprinkling potato chips on my peanut butter sandwich when no one was looking. The salty crunch against the sweet, sticky PB was a world-shaking discovery. It felt rebellious and brilliant.
Fast forward to last month, seeing this pickle cookie trend everywhere. My first thought was, “That’s a hard no.” But then I remembered that ten-year-old with the potato chip sandwich. Who was I to dismiss a combo without trying it? The kitchen is our playground, our lab, our arena for happy accidents. So, with a deep breath and a jar of my favorite garlic dills, I embarked on a mission. The first batch was… interesting. The second batch, where I figured out the crucial step of draining and drying the pickles (more on that later!), was a “holy-smokes-this-is-actually-good” moment. It brought back that giddy feeling of breaking the “rules” and finding something wonderful. That’s the spirit I want to bring to you today.
Gathering Your Sweet & Tangy Squad: The Ingredients
Here’s your crew. Simple, classic cookie ingredients, plus one very special guest star. Read my notes—they’re your secret to success!
- 1 cup unsalted butter, softened: The foundation of flavor and that dreamy, chewy texture. Chef’s Tip: “Softened” means you can press a finger into it and leave a clear indent. Not melted, not cold. This is key for creaming!
- 1 cup brown sugar & ½ cup granulated sugar: The brown sugar brings molasses-y moisture and chew, the white sugar gives crispness. Teamwork.
- 2 large eggs: Our binders, bringing everything together. Make sure they’re room temp to play nice with the butter.
- 2 teaspoons vanilla extract: The flavor enhancer. It rounds out all the other notes. Don’t skimp!
- 2 ½ cups all-purpose flour: The structure. I spoon and level it into the cup to avoid a dense, dry cookie.
- 1 teaspoon baking soda: Our leavening agent, responsible for the perfect puff and spread.
- ½ teaspoon salt: CRUCIAL. Salt makes every flavor, especially chocolate and our tangy pickle, pop. It’s the conductor of the flavor orchestra.
- 1 ½ cups semi-sweet chocolate chips: The classic. I like the balance of semi-sweet, but milk chocolate leans into the sweetness, and dark chocolate adds sophistication. Your call!
- ½ cup finely chopped dill pickles, WELL drained and patted dry: The Star. Use classic, garlic, or Polish dills—whatever you love on a sandwich. NON-NEGOTIABLE HACK: After chopping, squeeze them in a paper towel or clean kitchen towel until no more liquid comes out. Excess pickle juice = soggy cookies. We want tangy crunch, not a wet dough!
Let’s Bake! Your Step-by-Step Guide to Cookie Alchemy
Follow these steps, soak in the tips, and you’re golden (brown, to be precise).
Step 1: Prep Like a Pro. Preheat your oven to 350°F (175°C). Line your baking sheets with parchment paper. Not grease, not wax paper—parchment. It guarantees easy release and even browning. While the oven heats, chop and THOROUGHLY DRY those pickles. I mean it. Squeeze ‘em like you’re trying to get the last bit of toothpaste out of the tube.
Step 2: Cream the Dream. In a large bowl, beat the softened butter, brown sugar, and granulated sugar together for a good 2-3 minutes with a hand or stand mixer. We’re not just mixing; we’re “creaming.” This incorporates air, which is what gives us a lighter texture and that perfect slight spread. You’ll know it’s ready when it looks pale, fluffy, and delicious.
Step 3: Bind with Love. Add the eggs one at a time, beating well after each addition. This ensures full emulsification. Scrape down the sides of the bowl. Now stir in that glorious vanilla.
Step 4: Dry Team Assemble. In a separate bowl, whisk together your flour, baking soda, and salt. This evenly distributes the leavening so you don’t get a bitter bite. Gradually add this dry mix to the wet ingredients, mixing on low speed just until the flour disappears. Overmixing at this stage = tough cookies. We want tender!
Step 5: The Big Fold. Now for the fun part! Dump in the chocolate chips and your bone-dry pickle bits. Use a sturdy spatula to fold them in with a gentle, turning motion until they’re evenly distributed. Admire the weird, wonderful dough.
Step 6: Scoop & Space. Use a tablespoon cookie scoop or two spoons to drop rounded balls of dough onto your prepared sheets. Leave about 2 inches between them—they will spread. For extra professional-looking cookies, roll the dough balls briefly in your hands to smooth them.
Step 7: Bake to Perfection. Bake for 10-12 minutes. Ovens vary, so look for the visual cues: the edges will be set and golden, but the centers will still look soft and puffy. They will firm up as they cool. This is the secret to a chewy center! Do not overbake.
Step 8: The Patient Cool. Let the cookies rest on the hot baking sheet for 5 full minutes. They’re still setting up. Then, gently transfer them to a wire rack to cool completely. This stops the cooking and lets the texture perfect itself.
How to Serve These Rule-Breaking Treats
Presentation is part of the fun! Plate these up on a rustic wooden board or a fun, vintage plate. I love serving them with a little side bowl of extra pickle chips for the truly brave to nibble alongside. A cold glass of whole milk is the ultimate classic pairing, cutting through the richness perfectly. For the adults, a sharp cheddar cheese slice or a sip of bourbon actually makes an incredible companion, highlighting the sweet-and-savory vibe. Most importantly, serve them with a big grin and a “Just try it!” attitude. The story is half the flavor.
Make It Your Own: 5 Tasty Twists on the Trend
Once you’ve mastered the base, the playground is open! Here are some spins:
- The “Dill-icious” Dive: Add 2 tablespoons of finely chopped fresh dill to the dough. It amplifies the herbal notes from the pickle and feels incredibly fresh.
- Sweet & Spicy Kick: Use bread-and-butter pickle chips instead of dills! Their sweet tang is a gentler introduction. Chop them up and pat dry just the same.
- Salty Crunch Supreme: Fold in ½ cup of crushed pretzel pieces or potato chips along with the pickles. Double down on the salty-crunchy element!
- Bacon Makes it Better: Add ½ cup of cooked, crumbled crispy bacon. Sweet, salty, tangy, smoky—it’s the ultimate flavor bomb for the adventurous.
- Gluten-Free Friendly: Swap the all-purpose flour for a 1:1 gluten-free baking blend. The texture will be slightly more delicate, but just as delicious.
Beau’s Kitchen Confidential Notes
This recipe has been a journey! My first batch was… damp. I learned the hard way that pickle juice and cookie dough are frenemies. Now I’m militant about drying. I’ve also tried every pickle under the sun. My personal favorite is a good, garlicky dill spear—it holds its crunch and flavor best. I’ve served these at three gatherings now. The first reaction is always stunned silence, then nervous laughter, then tentative tasting, and finally, “Wow… can I have another?” That sequence is almost as rewarding as the cookie itself. It’s a reminder that food is joy, experiment, and connection, all rolled into one.
Your Questions, Answered (Before You Even Ask!)
Q: Do the cookies actually TASTE like pickles?
A: Not overwhelmingly! The pickle bits provide a tangy, briny pop and a slight crunch, but the dominant flavor is still your beloved chocolate chip cookie. The pickle is more of a sophisticated, surprising background note that balances the sweetness.
Q: My cookies spread too much/flattened into a pancake. Help!
A> This usually means your butter was too warm or melted. Next time, ensure it’s just softened. Also, check your baking soda isn’t expired! And make sure you adequately dried the pickles—excess moisture can cause spreading.
Q: Can I use pickle relish instead of chopped pickles?
A: I don’t recommend it. Relish is too wet and often has added sugars and stabilizers that will throw off your dough texture and flavor. The crunch from a fresh chop is part of the experience.
Q: How do I store these? Do they get soggy?
A> Store them in an airtight container at room temperature for up to 3 days. If you dried the pickles well, they shouldn’t get soggy. You can also freeze the baked cookies or the raw dough balls for up to 2 months.
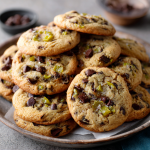
Chocolate Chip and Pickle Cookies : The Sweet and Tangy TikTok Trend
Description
These Chocolate Chip & Pickle Cookies combine the classic richness of chocolate chips with a bright, tangy pop from finely chopped dill pickles. It sounds unusual, but the balance of sweet, salty, and crunchy actually works beautifully. If you enjoy trying fun flavor mashups, this will be a new favorite!
Ingredients
-
1 cup unsalted butter, softened
-
1 cup brown sugar
-
½ cup granulated sugar
-
2 large eggs, room temperature
-
2 tsp vanilla extract
-
2 ½ cups all-purpose flour
-
1 tsp baking soda
-
½ tsp salt
-
1 ½ cups semi-sweet chocolate chips
-
½ cup finely chopped dill pickles, well drained and patted dry
Instructions
Preheat your oven to 350°F (175°C). Line baking sheets with parchment paper.
Beat the softened butter, brown sugar, and granulated sugar for 2–3 minutes until light and fluffy.
Mix in the eggs one at a time, then stir in the vanilla.
Whisk together the flour, baking soda, and salt in a separate bowl. Add this dry mixture to the wet ingredients and mix until just combined.
Using a spatula, fold in the chocolate chips and very dry pickle pieces.
Scoop the dough onto the baking sheets, spacing each cookie about 2 inches apart.
Bake for 10–12 minutes, until the edges are golden but the centers are still soft.
Let the cookies cool on the baking sheet for 5 minutes, then transfer to a wire rack to finish cooling.
Notes
-
Dry the pickles completely. Too much moisture will make the dough spread or turn soggy.
-
Use parchment paper. It helps the cookies bake evenly and prevents sticking.
-
Slightly underbake. When the edges are golden and the centers look soft, they’re perfect.
-
Chill the dough (optional). A 15–20 minute chill helps the cookies stay thicker.
Nutritional Snapshot (Because We’re Curious!)
Okay, let’s be real: this is a treat, through and through. But here’s a rough per-cookie breakdown (based on a yield of 24): Approximately 150 calories, 7g fat (4.5g saturated), 20g carbohydrates, 1g fiber, 12g sugar, and 2g protein. The pickles add a negligible amount of sodium and zero fat, but they do bring a tiny boost of probiotics and a satisfying crunch that might just help you savor one cookie slowly, rather than devouring three. As always, enjoy mindfully and as part of your unique feast!
The Final, Crunchy Bite
So there you have it, friends—the chocolate chip pickle cookie, demystified and delivered with a whole lot of heart. Whether you bake them for a dare, for a laugh, or for a genuine new favorite, I hope you step into the kitchen with a spirit of play. The best recipes, the meals we remember, are often the ones that come with a story. This cookie is a story starter, a rule-breaker, and a surprisingly delicious little miracle.
If you try them, I’d love to hear about it! Tag me @Feastical or shoot me a message with your thoughts—the good, the bad, and the “Beau, you’re nuts.” That’s what foodie community is all about. Now go preheat that oven and show those pickles who’s boss. Happy baking!
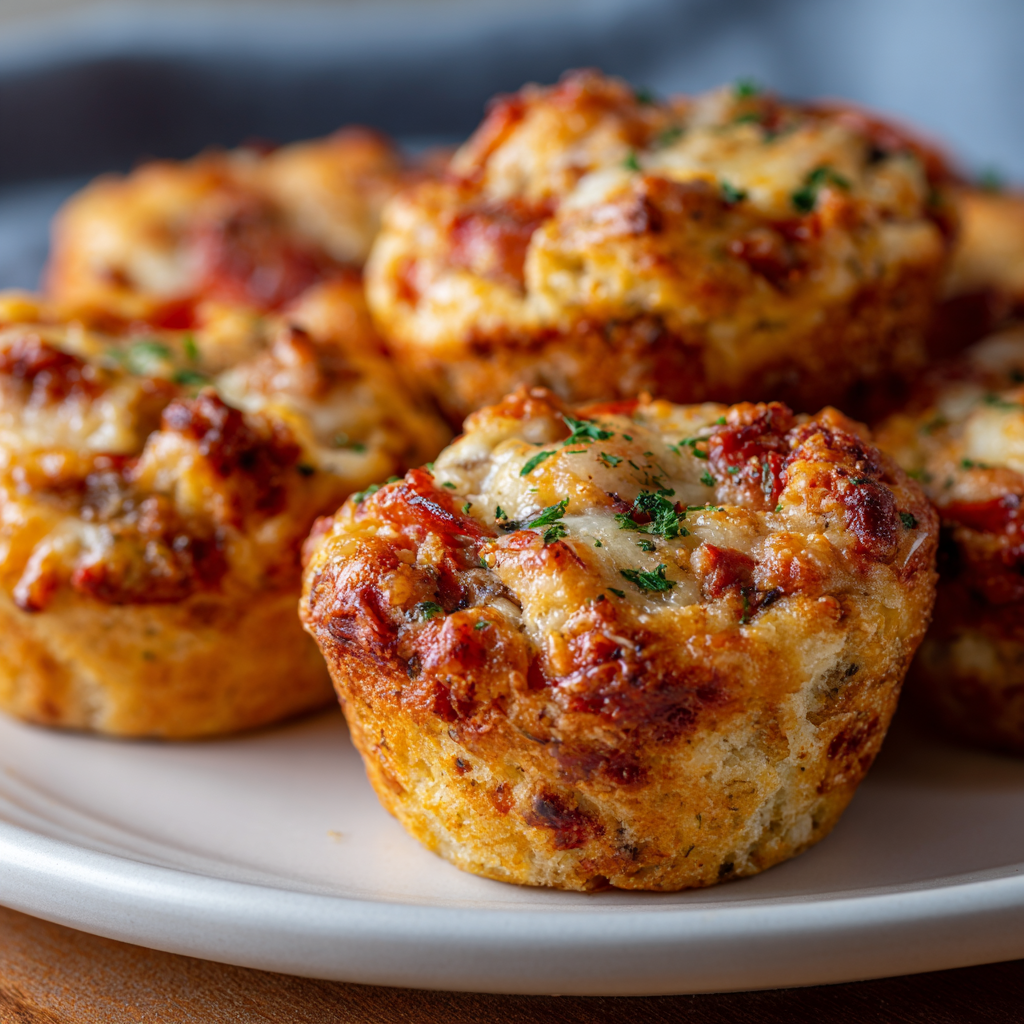
Sourdough Discard Pizza Muffins : Cheesy, Savory & Snackable
Sourdough Discard Pizza Muffins – Kid-Friendly Mini Savory Snack
Your New Favorite Snack is a Tiny Pizza Muffin
Hey friends, Beau here! Let’s talk about one of life’s little kitchen miracles: the moment you realize you can turn that jar of sourdough discard sitting on your counter into something utterly irresistible. If you’ve ever looked at your starter and thought, “There has to be a better use for you than just pancakes,” my friend, you are in for the happiest of treats.
I’m talking about Sourdough Discard Pizza Muffins. Imagine this: the cozy, tangy flavor of sourdough, baked into a fluffy, muffin-shaped vessel, and absolutely stuffed with melted mozzarella, zesty pizza sauce, and your favorite toppings. They’re like the love child of a pizza bagel and a popover, and they are here to solve your snack-time woes forever.
These little guys are the ultimate crowd-pleaser. They’re a hit in lunchboxes, a lifesaver for after-school hunger pangs, and the perfect finger food for game day gatherings. Best of all, they come together in about 10 minutes of active time. No kneading, no rising, no fuss. Just mix, scoop, bake, and bask in the cheesy, savory glory. So, let’s rescue that discard and make some magic happen!
The Night We Invented Pizza Muffins
This recipe was born out of a classic “What’s for dinner?” panic on a busy Wednesday night. My fridge was looking pretty sad, but I had my trusty jar of sourdough discard, a half-used bag of mozzarella, and a lone tube of pepperoni. My daughter, who was about six at the time, was adamant that pizza was the only acceptable answer.
As I stared into the abyss of my nearly empty pantry, inspiration struck. What if I could make a pizza… that you could eat with one hand… without the wait? I whipped up a quick batter, let her sprinkle in the cheese (and a few extra pepperonis for good luck), and popped them in the oven. The smell alone was a victory. When we pulled out those puffy, golden-brown muffins and she took her first bite, her eyes got wide. “Pizza cupcakes!” she declared. And just like that, a Feastical family staple was born. It’s a reminder that some of the best recipes aren’t planned—they’re discovered in a moment of happy, hungry chaos.
Gathering Your Pizza Muffin Squad
Here’s the dream team of ingredients that makes these muffins so special. I’ve included some chef-y insights and easy swaps so you can make this recipe your own.
- 1 cup sourdough discard (unfed): This is your secret weapon! It adds a wonderful tangy depth and tender crumb. Don’t have a full cup? You can scale the recipe down, or just use what you have—the recipe is very forgiving. Chef’s Insight: The thickness of your discard can vary. If it’s very thick, your batter will be thicker. If it’s quite runny, you might need a touch less milk.
- 1 large egg: Our binding agent and leavening helper. It gives the muffins structure and a lovely puff.
- ¼ cup milk: Whole milk will give you the richest flavor, but any milk—even a plant-based one like oat or almond—works perfectly here. It’s all about getting the right, spoonable batter consistency.
- ½ cup shredded mozzarella cheese: For that iconic, stretchy, gooey pizza pull. I like to shred my own from a block, as it melts better than the pre-shredded kind (which is coated in anti-caking agents).
- 2 tablespoons pizza sauce or tomato paste: This is where the “pizza” flavor really shines. Pizza sauce will give you a more robust flavor, while tomato paste will create a more concentrated, slightly tangier base.
- ½ teaspoon Italian seasoning: The aromatic soul of the dish! If you don’t have a blend, a pinch each of dried oregano, basil, and thyme will do the trick.
- ½ teaspoon baking powder: This is our rising star! It’s what gives these muffins their quick lift and airy texture, so make sure yours is fresh.
- Pinch of salt: Never forget the salt! It balances the tang of the sourdough and enhances all the other flavors.
- ¼ cup mini pepperoni or chopped cooked sausage (optional): The classic “za topping. Mini pepperonis are the perfect size, but chopped-up regular pepperoni or cooked Italian sausage are fantastic too.
- Optional Mix-ins (get creative!): Chopped olives, finely diced bell peppers, sautéed mushrooms, a handful of spinach, or even a few pineapple chunks if you’re feeling controversial!
Let’s Build These Flavor Bombs: A Step-by-Step Guide
Ready to see how easy this is? Follow these steps, and you’ll be snacking in no time. I’ve packed this section with my favorite kitchen hacks to ensure your pizza muffins are perfect every single time.
- Preheat and Prep: Fire up your oven to 375°F (190°C). While it’s heating, generously grease a mini muffin tin with butter or non-stick spray. Chef’s Hack: For super easy cleanup, I’m a huge fan of using those floured baking sprays—they create a non-stick dream! Don’t have a mini tin? A regular muffin tin works too; just increase the bake time by 5-7 minutes.
- The Wet Team Assembles: In a medium-sized bowl, grab a whisk and get to work on the sourdough discard, egg, milk, and pizza sauce. Whisk it until it’s smooth and beautifully homogenous. You’re looking for a consistency similar to a thick pancake batter. Chef’s Tip: If your discard is super thick and cold from the fridge, let it sit out for 15-20 minutes first. It will mix much more easily!
- Bring in the Flavor Crew: Now, switch to a spatula. Dump in the shredded mozzarella, Italian seasoning, baking powder, salt, and all your chosen mix-ins (pepperoni, veggies, etc.). Gently fold everything together until it’s just combined. Important Chef’s Note: Don’t overmix! A few streaks are totally fine. Overmixing can lead to tough muffins, and we want them light and tender.
- Scoop and Fill: Using a small cookie scoop or two spoons, portion the batter into your prepared muffin cups. Fill them almost to the top! Unlike traditional sweet muffins, this batter doesn’t rise dramatically, so a generous fill gives you a nice, substantial muffin top. Pro Tip: For an extra cheesy finish, press a couple of extra mini pepperonis or a small pinch of cheese on top of each muffin before baking.
- Bake to Golden Perfection: Slide the tin into your preheated oven and bake for 15-18 minutes. You’ll know they’re done when the tops are puffed, firm to the touch, and have a gorgeous golden-brown color around the edges. Chef’s Secret: Ovens can be sneaky. If you have a hot spot, rotate the pan halfway through baking for an even color.
- The Hardest Part: Let Them Rest! Pull the tin out of the oven and let it cool on a wire rack for at least 5 minutes. I know, the aroma is torture, but this rest period is crucial. It allows the muffins to set up, making them much easier to pop out without falling apart. Then, use a small offset spatula or a butter knife to gently loosen and lift them out.
How to Serve Your Savory Masterpieces
Now for the fun part: eating! These pizza muffins are incredibly versatile. Serve them straight from the oven while the cheese is gloriously molten and stretchy. They’re a fantastic standalone snack, but let’s kick it up a notch.
For a quick lunch or light dinner, pair them with a simple green salad dressed with a sharp Italian vinaigrette to cut through the richness. Dunking is highly encouraged! Serve a small bowl of warm marinara sauce or creamy ranch dressing on the side for the ultimate dipping experience.
They are also the undisputed champion of packed lunches. Let them cool completely before tucking them into a lunchbox. They taste fantastic at room temperature, making them a surefire win for kids and adults alike. For a party, pile them high on a platter and watch them disappear faster than you can say “Feastical!”
Mix It Up! 5 Tasty Twists on the Classic
Once you’ve mastered the basic recipe, the pizza muffin world is your oyster! Here are a few of my favorite variations to keep things exciting.
- Veggie Supreme: Skip the meat and load up with finely chopped mushrooms, black olives, bell peppers, and red onions. A handful of fresh spinach, roughly chopped, works wonders too.
- Hawaiian Delight: For all you pineapple-on-pizza lovers, this one’s for you! Fold in a ¼ cup of well-drained crushed pineapple and a few tablespoons of chopped ham alongside the mozzarella.
- Three-Cheese Italian: Amp up the cheese factor! Use a blend of mozzarella, freshly grated Parmesan, and a sprinkle of sharp provolone for a more complex, nutty flavor.
- Breakfast Pizza Muffins: Who says pizza is just for lunch? Swap the pizza sauce for a tablespoon of maple syrup, use cooked breakfast sausage or crumbled bacon, and add a handful of cheddar cheese. Perfect for on-the-go mornings!
- Spicy ‘Nduja Kick: For a grown-up twist, add a tablespoon or two of spicy ‘nduja or some chopped pepperoncini. A little chili flake mixed into the batter never hurt anybody either!
Beau’s Kitchen Notes & Stories
This recipe has seen a lot of love and experimentation in my kitchen. Over time, I’ve learned that it’s incredibly resilient. I once accidentally doubled the baking powder in a sleepy morning haze, and you know what? We got super-domed, extra-airy muffins that were a hilarious (but still delicious) success.
The beauty of this recipe is its flexibility. It’s a blank canvas for your fridge clean-out endeavors. That little bit of leftover taco meat? The last of the feta cheese? The last few spoonfuls of pesto? Toss it in! I’ve made a “Greek” version with feta, spinach, and oregano that was out of this world. Don’t be afraid to play with your food—that’s where the real magic happens.
Your Pizza Muffin Questions, Answered!
I’ve gotten a lot of questions about these over the years, so here are the answers to the most common ones.
- Q: Can I use active sourdough starter instead of discard?
A: Absolutely! The recipe works exactly the same. The discard just gives you that distinct, tangy sourdough flavor we all love. - Q: My muffins stuck to the pan! What did I do wrong?
A: Oh, we’ve all been there! First, make sure you greased the pan really, really well. Second, and this is key, let them cool in the pan for 5-10 minutes before trying to remove them. This allows the structure to set. Using a small silicone spatula to gently lift them out is my go-to move. - Q: Can I freeze these for later?
A: You bet! These are a freezer superhero. Let them cool completely, then pop them into a single layer on a baking sheet to “flash freeze” for an hour. Once solid, transfer them to a freezer bag. They’ll keep for up to 3 months. Reheat straight from frozen in a 350°F oven or toaster oven until warm and crispy. - Q: My batter seems too thick/thin. Help!
A: No worries! Sourdough discard consistency is the wild card here. If it’s too thick (like it won’t pour), add a tablespoon of milk at a time until it loosens up. If it’s too thin (like soup), you can add a tablespoon of all-purpose flour to thicken it, or just know you’ll have a slightly denser, more custardy muffin—which is also delicious!

Sourdough Discard Pizza Muffins : Cheesy, Savory & Snackable
Description
Turn your sourdough discard into irresistible mini pizza muffins! Tangy sourdough, gooey mozzarella, zesty pizza sauce, and your favorite toppings baked into muffin-shaped perfection. Ideal for lunchboxes, after-school snacks, or game day treats.
Ingredients
-
1 cup sourdough discard (unfed)
-
1 large egg
-
¼ cup milk (dairy or non-dairy)
-
½ cup shredded mozzarella cheese
-
2 tbsp pizza sauce or tomato paste
-
½ tsp Italian seasoning (or pinch each dried oregano, basil, thyme)
-
½ tsp baking powder
-
Pinch of salt
-
¼ cup mini pepperoni or chopped cooked sausage (optional)
-
Optional mix-ins: chopped olives, bell peppers, mushrooms, spinach, pineapple
Chef’s Tips:
-
Shred cheese from a block for best melt.
-
Leftovers or pantry finds can be tossed in—think feta, pesto, or taco meat!
Instructions
-
Preheat & Prep: Heat oven to 375°F (190°C). Grease a mini muffin tin generously with butter or non-stick spray.
-
Mix Wet Ingredients: In a medium bowl, whisk sourdough discard, egg, milk, and pizza sauce until smooth. The consistency should resemble thick pancake batter.
-
Add Flavor: Fold in mozzarella, Italian seasoning, baking powder, salt, pepper, and optional mix-ins. Fold gently—overmixing can make muffins tough.
-
Scoop & Fill: Portion batter into mini muffin cups, filling almost to the top. Optional: press a few extra mini pepperonis or cheese on top for a golden finish.
-
Bake: 15–18 minutes, until muffins are puffed, firm, and golden brown. Rotate pan halfway if needed for even baking.
-
Cool Slightly: Let muffins rest in the pan for 5 minutes before gently lifting onto a wire rack. This ensures they hold their shape.
Notes
-
Snack: Eat warm straight from the oven.
-
Lunch or Light Dinner: Pair with a simple green salad.
-
Dipping: Serve with warm marinara or ranch.
-
Lunchboxes: Let cool completely before packing.
Nutritional Information (A Quick Bite-Sized Breakdown)
Now, I’m a chef, not a dietitian, but I know many of you like to have a general idea of what you’re eating. The following is an approximate nutritional breakdown per mini muffin, based on a batch of 18, using the base recipe with mini pepperoni. Remember, this can vary based on your specific ingredients and any substitutions you make!
- Calories: 75
- Protein: 4g
- Fat: 4g
- Carbohydrates: 5g
- Fiber: 0.5g
- Sugar: 1g
- Sodium: 130mg
These muffins offer a nice balance of protein from the egg and cheese and carbs from the sourdough, making them a satisfying snack. To lighten them up, you can use part-skim mozzarella and load up on veggie mix-ins!
Final Thoughts
And there you have it, my friends—the humble, glorious Sourdough Discard Pizza Muffin. It’s a recipe that proves you don’t need fancy techniques or expensive ingredients to create something truly special and satisfying. It’s about having fun in the kitchen, reducing waste, and sharing delicious, feel-good food with the people you love.
So, the next time that jar of discard gives you a sad look from the fridge, you know exactly what to do. Whip up a batch of these cheesy, savory wonders. I have a feeling they’ll become a regular in your home, just like they are in mine.
Happy baking! And if you make them, I’d love to see your creations. Tag me @Feastical on social media so I can share in the cheesy, pizza-muffin joy!
– Beau
Prep Time: 10 minutes | Cook Time: 15-18 minutes | Total Time: 25-28 minutes | Servings: 18-20 mini muffins | Skill Level: Easy
Love this recipe? Save it for later!