Baja Fish Tacos : Crispy, Zesty, and Totally Crave-Worthy
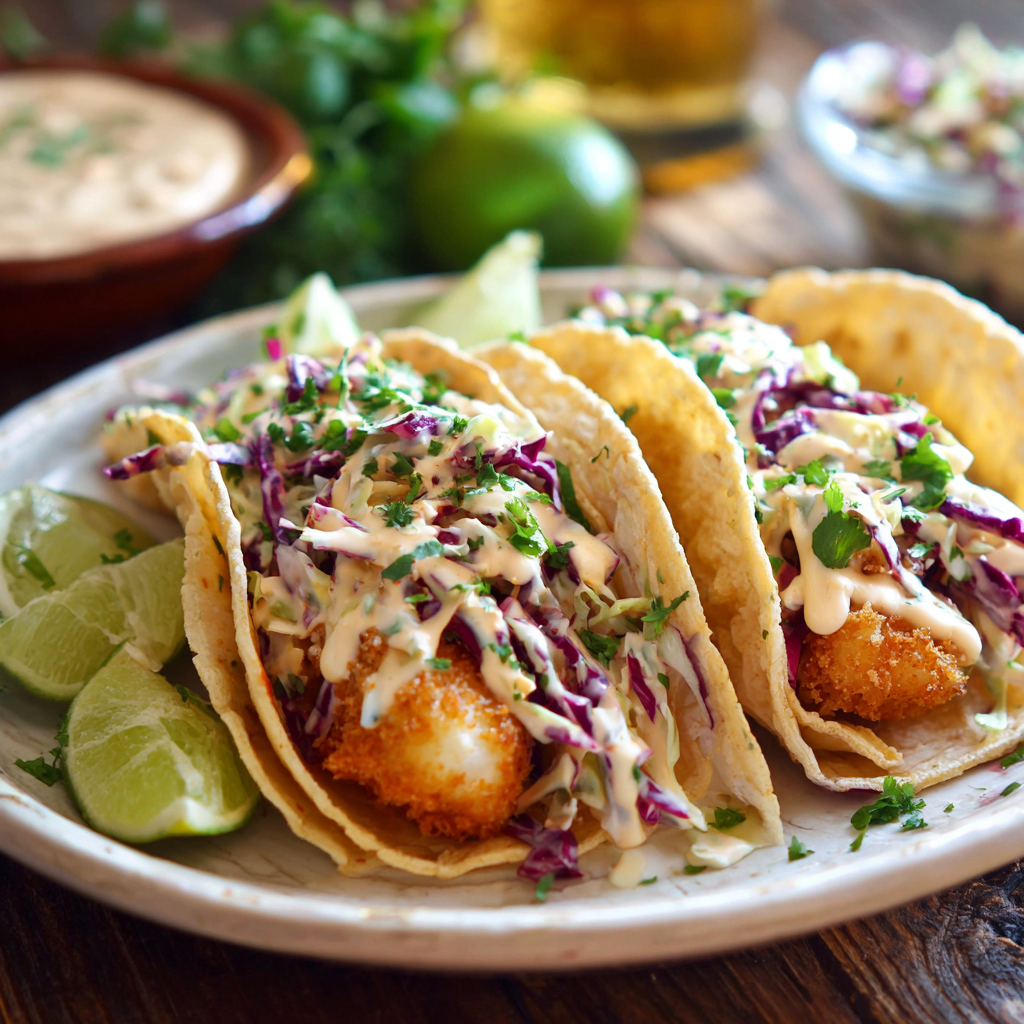
Baja Fish Tacos – Crispy, Zesty, and Totally Crave-Worthy
Hey there, friend! Beau here, from Feastical. Let’s talk about one of life’s greatest, most satisfying hand-held foods: the Baja fish taco. You know the one. It’s not just a taco; it’s a sun-drenched, ocean-breezy, pure joy kind of experience. We’re talking about a perfect, golden-crisp piece of beer-battered fish, tucked into a warm tortilla, then piled high with crunchy slaw and drizzled with a smoky, creamy chipotle sauce. It’s a symphony of textures and flavors that makes you close your eyes and just… smile.
Maybe you’ve had them on a dreamy vacation down the Baja coast. Maybe you’ve ordered them at that one amazing food truck and have been chasing that high ever since. Well, I’m here to tell you that the magic is absolutely, 100% replicable in your own kitchen. And the best part? It’s easy. No fancy techniques, no intimidating chef skills—just good ingredients coming together for a seriously delicious result. This recipe is my love letter to those flavors, designed for a fantastic weeknight dinner or a show-stopping weekend feast with friends. So, tie on your apron, grab a cold drink (maybe even the one you’ll use for the batter!), and let’s bring that Baja sunshine right to your table.
A Baja Memory That Sticks (Like a Perfect Batter)
My love affair with these tacos didn’t start in a fancy restaurant. It started at a rickety wooden stand on a dusty street in Ensenada, about a million years ago (or so it feels). I was traveling with some buddies, and the air was thick with the smell of frying fish and lime. We ordered a round of tacos from a vendor who moved with the calm, practiced ease of someone who’s made ten thousand of them. He handed them over on paper plates, and that first bite was a revelation. The fish was so hot and crisp, the slaw was bracingly fresh, and the crema had just the right kick. We stood there on the street, juice dripping down our wrists, grinning like fools. It was more than a meal; it was a moment of pure, uncomplicated happiness. That’s the feeling I try to capture every time I make these at home. It’s not just about feeding people; it’s about creating that same little pocket of joy, right at your kitchen counter.
Your Baja Taco Toolkit: Simple, Fresh Ingredients
Here’s everything you’ll need to build your taco masterpiece. I’ve added a few notes and swaps because I believe in making recipes work for you and what you’ve got in the fridge.
For the Crispy Beer-Battered Fish:
- 1 lb white fish fillets (cod, tilapia, or halibut): Cod is my go-to for its big, meaty flakes that hold up beautifully. Tilapia is a fantastic, affordable option. Thaw frozen fillets completely and pat them very dry – this is the secret to a crispy crust!
- 1 cup all-purpose flour: The base of our simple batter. For a slightly lighter texture, you can swap half for cornstarch.
- 1 teaspoon paprika & 1 teaspoon garlic powder: Our flavor boosters. Smoked paprika adds a wonderful depth if you have it!
- Salt and pepper to taste: Season every layer. Don’t be shy.
- 1 egg: Helps bind the batter and creates that gorgeous golden color.
- 1 cup beer (or sparkling water): The fizzy bubbles are what make the batter light and airy. A light lager or pilsner is perfect. For a non-alcoholic version, sparkling water or even club soda works like a charm.
- Vegetable oil for frying: Use a neutral oil with a high smoke point like canola, avocado, or peanut oil.
For the Tangy Cabbage Slaw:
- 2 cups shredded cabbage: I love a mix of green and purple for color. A bag of pre-shredded slaw mix is your best friend for speed.
- 1/4 cup chopped fresh cilantro: If you’re in the “cilantro tastes like soap” camp, just leave it out or use a little fresh parsley or chopped green onion instead.
- 1/4 cup mayonnaise: This creates a creamy, clinging slaw. For a lighter touch, sub with Greek yogurt.
- 1 tablespoon lime juice: Fresh squeezed, always! It wakes up the whole slaw.
For the Smoky Chipotle Crema:
- 1/2 cup sour cream: The cool, creamy base. Plain full-fat Greek yogurt is a great alternative.
- 1 chipotle pepper in adobo (minced): This is the flavor powerhouse! Start with one pepper and taste. You can always add more for extra heat. Mince it super fine so it blends beautifully.
- 1 tablespoon lime juice: Balances the smoky heat with bright acidity.
To Serve:
- 8 small corn or flour tortillas: Corn is traditional and gives a great texture contrast. Flour tortillas are softer and more pliable. Warm them up!
- Lime wedges & extra chopped cilantro: Non-negotiable garnishes for that final fresh squeeze and pop of green.
Let’s Build Some Taco Magic: Step-by-Step
Alright, let’s get cooking! We’ll work in stages: make the sauces and slaw first, then fry the fish last so it’s piping hot when you serve. Read through once, then let’s go.
- Prep Your Station. Cut your fish into strips, about 1-inch wide. Pat them incredibly dry with paper towels. This is TIP #1: Dry fish = crispy fish. Trust me on this. Set up three shallow dishes: one with the flour and spices (whisked together), one with the egg and beer (whisk until frothy), and an empty plate for the coated fish.
- Make the Slaw & Crema. In a medium bowl, toss the shredded cabbage, cilantro, mayo, lime juice, and a pinch of salt. Mix it up, cover, and pop it in the fridge to let the flavors mingle. In a small bowl, mix the sour cream, minced chipotle, lime juice, and a pinch of salt. Taste it! Need more heat? Add a little more chipotle or even a dash of the adobo sauce. Set this aside too.
- Batter Up! Here’s the fun part. Take a fish strip, dip it fully into the beer and egg batter, let the excess drip off, then dredge it in the seasoned flour. Really coat it well and place it on your clean plate. Repeat with all the strips. TIP #2: Use one hand for wet and one for dry to avoid “club finger” (a dreaded batter-covered hand!).
- Fry to Golden Perfection. In a large, heavy skillet (cast iron is king here), heat about 1/2 inch of oil over medium-high heat. To test if it’s ready, drop a tiny bit of batter in—it should sizzle and float immediately. Carefully add your fish strips in a single layer, don’t crowd the pan! Fry for about 3-4 minutes per side until they’re deeply golden and crispy. TIP #3: Don’t move them around right away. Let them fry for a full minute to set that beautiful crust before you even think about flipping. Drain on a wire rack over a baking sheet (this keeps them crispier than paper towels alone).
- Warm Your Tortillas. While the last batch fries, warm your tortillas. You can do this directly over a low gas flame (charred spots = flavor!), in a dry skillet, or wrapped in a damp towel in the microwave for 30 seconds.
- Assemble and Feast! Grab a warm tortilla. Add a generous scoop of that cool, crunchy slaw. Top with one or two pieces of hot, crispy fish. Drizzle (or dollop!) with the smoky chipotle crema. Finish with a squeeze of fresh lime and a sprinkle of cilantro. You did it!
How to Serve Your Baja Fish Tacos Like a Pro
Presentation is part of the fun! I love setting up a DIY taco bar on the kitchen island or dining table. Pile the crispy fish on a big platter, put the slaw and crema in bowls with serving spoons, stack the warm tortillas under a cloth napkin to keep them soft, and scatter lime wedges and extra cilantro everywhere. Let everyone build their own perfect bite. It’s interactive, relaxed, and just plain fun. These tacos are begging for simple sides: maybe some black beans simmered with cumin and garlic, a big bowl of chips and zesty salsa, or just some simple mango or watermelon slices to cut through the richness. And the drink pairing? A cold Mexican lager, a crisp lime margarita, or a refreshing agua fresca.
Make It Your Own: Delicious Twists & Swaps
The beauty of this recipe is its flexibility. Want to mix it up? Here are some of my favorite riffs:
- Grilled Fish Version: Not in the mood to fry? Skip the batter! Brush fish strips with olive oil, season with chili powder and cumin, and grill or pan-sear for a lighter, still-flavorful taco.
- Shrimp or Cauliflower: Swap the fish for peeled shrimp (fry for less time) or bite-sized cauliflower florets for a fantastic vegetarian option. The batter works on anything!
- Mango-Jalapeño Slaw: Add 1/2 cup of diced fresh mango and one finely sliced jalapeño to the slaw for a sweet-and-spicy kick. It’s incredible.
- Avocado Crema: Blend the chipotle crema ingredients with half a ripe avocado for an even creamier, dreamier green sauce.
- Gluten-Free: Use a 1:1 gluten-free flour blend for the batter and corn tortillas. Easy peasy.
A Few Things I’ve Learned Along the Way (Chef’s Notes)
This recipe has been a staple in my kitchen for years, and it’s evolved with every batch. I’ve learned that the oil temperature is key—if it’s too low, the fish gets greasy; too high, it burns before cooking through. A candy thermometer helps, but the sizzle test is your friend. I also used to be afraid of frying at home, thinking it was a huge mess. But with a splatter screen and that wire rack trick for draining, it’s a breeze. The biggest lesson, though? Don’t wait for a special occasion. A random Tuesday night is made infinitely better by the promise of crispy fish tacos. It turns an ordinary meal into a mini-celebration, and that’s what Feastical is all about.
Your Fish Taco Questions, Answered
Q: My batter isn’t sticking to the fish! What did I do wrong?
A: The #1 culprit is moisture. Make sure those fish strips are bone-dry before you start the dipping process. Also, a quick dusting of plain flour on the fish before dipping in the wet batter can create a helpful “glue.”
Q: Can I bake these instead of frying?
A: You can! For a “faux-fry,” place the battered fish on a well-oiled, parchment-lined baking sheet. Spray or brush the tops generously with oil and bake at 425°F (220°C) for 15-20 minutes, flipping halfway, until crispy. It won’t be *quite* the same as deep-frying, but it’s still delicious and healthier.
Q: How do I keep the fish crispy until serving?
A> Fry in batches and don’t cover them! Keeping them in a single layer on a wire rack in a low oven (around 200°F/95°C) will help them stay warm and crisp while you finish frying the rest.
Q: What’s the best beer to use?
A> A light, crisp lager or pilsner is perfect. You don’t want a dark, heavy stout or a super hoppy IPA, as those flavors can overpower the fish. The goal is lightness and bubbles!

Baja Fish Tacos : Crispy, Zesty, and Totally Crave-Worthy
Description
Baja Fish Tacos
Crispy, zesty, smoky, fresh — the ultimate crowd-pleasing taco.
Ingredients
For the Crispy Beer-Battered Fish
-
1 lb white fish fillets (cod, tilapia, or halibut), cut into strips
-
1 cup all-purpose flour
-
1 tsp paprika
-
1 tsp garlic powder
-
Salt & black pepper to taste
-
1 egg
-
1 cup beer (or sparkling water for non-alcoholic)
-
Vegetable oil, for frying
For the Tangy Slaw
-
2 cups shredded cabbage
-
¼ cup chopped cilantro (optional)
-
¼ cup mayonnaise (or Greek yogurt)
-
1 tbsp fresh lime juice
-
Pinch of salt
For the Chipotle Crema
-
½ cup sour cream (or Greek yogurt)
-
1 chipotle pepper in adobo, minced
-
1 tbsp lime juice
-
Pinch of salt
To Serve
-
8 small corn or flour tortillas
-
Lime wedges
-
Extra cilantro
Instructions
1. Make the Slaw
-
In a bowl, combine cabbage, cilantro, mayo, lime juice, and salt.
-
Mix well and refrigerate.
2. Make the Chipotle Crema
-
Stir together sour cream, minced chipotle, lime juice, and salt.
-
Taste and adjust spice as needed. Set aside.
3. Prepare the Batter
-
In one shallow bowl, whisk flour, paprika, garlic powder, salt, and pepper.
-
In another bowl, whisk egg and beer until frothy.
4. Batter the Fish
-
Pat fish very dry (crucial for crispiness).
-
Dip each strip into the wet mixture, let excess drip off, then dredge in the seasoned flour.
-
Place coated fish on a plate.
5. Fry
-
Heat ½ inch of oil in a skillet over medium-high.
-
When a drop of batter sizzles instantly, add fish without crowding.
-
Fry 3–4 minutes per side, until golden and crispy.
-
Drain on a wire rack (best for keeping fish crisp).
6. Warm Tortillas
Warm tortillas over a flame, in a skillet, or wrapped in a towel in the microwave for 30 seconds.
7. Assemble
-
Add slaw to a tortilla.
-
Top with hot crispy fish.
-
Drizzle with chipotle crema.
-
Finish with lime and cilantro.
Notes
-
Slaw can be made 1 day ahead.
-
Crema keeps up to 1 week in the fridge.
-
Batter should be mixed just before frying for best crispiness.
Nutritional Information (A Quick Note)
Okay, let’s be real: this is a fried, celebratory dish, and it’s meant to be enjoyed as such! That said, here’s a rough breakdown per serving (2 tacos), assuming you use all the ingredients as listed and fry the fish. Approx: 430 calories, 25g protein, 35g carbohydrates, 20g fat. You can lighten it up by using the baking option, swapping Greek yogurt for mayo/sour cream, and loading up on that fresh slaw. But my philosophy? Make it the classic, delicious way, savor every single bite, and balance it out with lighter meals throughout the week. Food is about joy, not just numbers.
Final Thoughts: Your Taco Awaits
There you have it, my friends—my roadmap to taco bliss. This recipe is more than just a list of steps; it’s an invitation to play in the kitchen, to get your hands a little messy, and to create something that’s guaranteed to bring smiles. The sizzle of the fish in the oil, the bright smell of lime, the collective “mmm” when everyone takes their first bite… that’s the good stuff. That’s the heart of Feastical. So I hope you give these Baja fish tacos a try. Make them for your family, for your friends, or just for yourself. You deserve a little beach vacation on a plate. Now, go on—get cooking! And be sure to tell me all about it. Tag me on social or drop a comment on the blog. I love seeing your kitchen creations!
Until next time, keep it simple, soulful, and satisfying.
– Beau

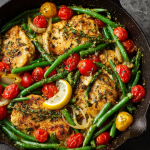
Lemon Dijon Chicken & Green Bean Skillet : Bright & Easy One-Pan Meal
When Life Gives You Lemons, Make a One-Pan Wonder!
Hey there, friend! Beau here, welcoming you back to my kitchen at Feastical. Tell me if this sounds familiar: it’s 5:30 PM, your stomach is growling a symphony, and the thought of a mountain of dishes after cooking is just…no. Absolutely not. We’ve all been there, stuck in the “what’s for dinner” spiral, torn between wanting something actually delicious and needing it to be stupidly simple.
Well, pull up a stool and let me introduce you to your new weeknight MVP: my Lemon Dijon Chicken & Green Bean Skillet. This isn’t just another chicken recipe. This is a 25-minute flavor explosion that happens in one single pan. Imagine juicy, golden chicken, crisp-tender green beans, and sweet, bursting cherry tomatoes all dancing together in a sauce that’s the perfect tangy, savory, herby hug. It’s bright, it’s lively, and it tastes like you fussed for hours. But between us? The secret is in a few brilliant, simple ingredients and one trusty skillet.
This dish is for the busy parent, the hustling professional, the “I-can’t-even” student – for anyone who believes a healthy, satisfying meal shouldn’t be a project. It’s low-carb, high-protein, gluten-free friendly, and packed with colors that’ll make your Instagram feed pop. So, grab your favorite skillet and let’s turn an ordinary evening into something Feastical.
The Picnic That Started It All
This recipe has a little bit of my heart baked into it (figuratively, of course!). It all started with a somewhat disastrous, completely wonderful picnic years ago. My wife and I were newly dating, and I, wanting to impress, promised a “gourmet al fresco experience.” I packed a wobbly lemon-herb chicken pasta salad. The sun was hot, the pasta got… interesting, and the sauce separated. A lovely mess.
But the flavor – that bright punch of lemon and the sharp, complex kick of Dijon mustard – was a hit. She loved it (bless her). Later, in my kitchen, I kept chasing that flavor combo but without the fuss. I wanted it faster, fresher, and without the “will it travel?” anxiety. I swapped pasta for crisp green beans, added pops of tomato, and made it all happen in one pan on the stovetop. It became our go-to “fancy-feeling but easy” dinner. Every time I make it now, I smile, thinking of that sunny, messy picnic and how the best recipes often come from a happy little kitchen accident and a desire to feed the people you love something truly good.
Gathering Your Flavor Team
Here’s the beautiful part: the ingredient list is short and sweet. Each one plays a starring role. Let’s break it down like we’re chatting at the farmer’s market.
- 2 boneless, skinless chicken breasts, sliced: The main event! Slicing them into cutlets or strips ensures quick, even cooking and maximizes that delicious surface area for browning. Chef’s Tip: For ultimate tenderness, place the breasts between two pieces of plastic wrap and gently pound them to an even thickness before slicing.
- Salt and pepper to taste: The foundation of flavor. Don’t be shy here! Seasoning the chicken well at the start is a non-negotiable step for tasty results.
- 1 tbsp olive oil: Our cooking workhorse. A good extra-virgin olive oil adds a fruity depth. Avocado oil is a great high-heat substitute if that’s what you have.
- 1 shallot, finely sliced: The flavor whisperer! Shallots are milder and sweeter than onions, melting into the sauce perfectly. No shallot? A quarter of a finely chopped sweet onion will do in a pinch.
- 2 tsp Dijon mustard: This is the magic ingredient. It’s not just tangy; it’s complex, slightly spicy, and acts as an emulsifier, helping to create a gorgeous, clingy sauce. Don’t substitute yellow mustard—it’s a different vibe entirely!
- 1 tsp lemon zest + 2 tsp lemon juice: Brightness in two forms! The zest holds the potent, aromatic lemon oils—it’s where the real sunshine lives. The juice gives us that direct tang. Always zest your lemon before juicing it—it’s way easier!
- 1 tsp fresh thyme leaves (or ½ tsp dried): Herby, earthy goodness. Fresh thyme is lovely, but dried works wonderfully here. Rosemary or oregano would also be delightful cousins in this recipe.
- 1 cup green beans, trimmed: Our fresh, crunchy green element. Look for beans that snap when you bend them! Asparagus spears (cut into pieces) make a fantastic seasonal swap.
- 1 cup cherry tomatoes, halved: Little pockets of sweetness that burst and mingle with the sauce. I love using a mix of red and yellow for extra color.
Let’s Get Cooking: Your Simple, Sizzling Steps
Ready to see the magic happen? Follow these steps, and you’ll have dinner on the table before your favorite show hits the second commercial break. I’m adding my little chef hacks along the way!
- Prep & Season: Pat your sliced chicken breasts completely dry with a paper towel. This is the #1 secret to getting a beautiful golden sear instead of steaming. Season generously on both sides with salt and pepper. While you do this, let your skillet heat up over medium heat. A hot pan = instant sizzle.
- Sear the Chicken: Add the olive oil to the hot skillet. Gently lay the chicken pieces in, giving them a little room to breathe. Don’t crowd the pan! Let them cook, undisturbed, for about 3-4 minutes per side, until they’re gorgeously golden brown and cooked through. Chef’s Hack: Resist the urge to move them around! Letting them sit creates that perfect crust. Remove them to a clean plate. They’ll finish cooking through later, promise.
- Build the Flavor Base: In that same glorious, flavorful pan (see? No wasted goodness!), toss in the sliced shallots. Sauté for about 2 minutes until they’re soft and fragrant. Now, reduce the heat to medium-low and add the Dijon mustard, lemon zest, lemon juice, and thyme. Stir it for just 30 seconds. Your kitchen will smell amazing—this is where the sauce is born!
- Cook the Veggies: Crank the heat back up to medium and add the green beans. Stir them well so they get coated in that fantastic mustardy-lemony mixture. Cook for 3-4 minutes, stirring often. You want them to be vibrant green and tender-crisp—still have a little snap!
- The Grand Reunion: Toss in the halved cherry tomatoes and return the cooked chicken (and any juices on the plate!) back to the skillet. Gently stir everything together for 2-3 final minutes, just until the tomatoes start to soften and release their juices and the chicken is reheated. The tomatoes will soften and mingle, creating a light, juicy sauce with the shallots and mustard.
- Finish & Serve: Take the skillet right off the heat. Do a final taste—maybe it needs another tiny pinch of salt or a squeeze of lemon? Now, dish it up directly from the pan!
Plating Up Your Masterpiece
This dish is a rainbow in a pan, so serving it is a joy! I love to spoon generous portions right onto warm plates or shallow bowls. Make sure you get all those delicious pan juices—that’s liquid gold!
For a little chef’s flourish, top it with an extra sprinkle of fresh thyme leaves, a few thin slices of lemon, or a crack of black pepper. If you’re feeling indulgent, a tiny sprinkle of crumbled goat cheese or feta right at the end is divine.
What to serve with it? It’s a complete, balanced meal all on its own. But if you want to round it out, here are my faves:
- A slice of crusty, toasted sourdough to sop up every last drop of sauce.
- A simple arugula salad with a light vinaigrette.
- For a heartier meal, a side of fluffy quinoa, couscous, or roasted baby potatoes.
Make It Your Own: Delicious Twists & Swaps
The beauty of this skillet is its flexibility. Play with it! Here are a few of my favorite riffs:
- Creamy Dreamy Version: After adding the mustard and lemon, stir in ¼ cup of heavy cream, chicken broth, or full-fat coconut milk. Let it simmer for a minute to create a luxurious, creamy sauce.
- Protein Swap: Not feeling chicken? This sauce is incredible with salmon fillets (add them skin-side down first) or large, peeled shrimp (they cook in just 2-3 minutes!).
- Veggie Power-Up: Add sliced mushrooms with the shallots, or throw in a handful of spinach or kale in the last minute of cooking until just wilted.
- Herb Garden Twist: Swap the thyme for fresh dill or tarragon. They pair beautifully with lemon and mustard for a more French-inspired flavor.
- Whole30/Paleo Friendly: Double-check your Dijon for no sugar or wine. You’re already good to go! Serve with cauliflower rice.
Beau’s Kitchen Notebook
Over the years, this recipe has seen many a happy evening in my house. I’ve learned that the best green beans are the ones you snap yourself, and that a little extra lemon zest never hurt anybody. Sometimes, if I’m feeling fancy, I’ll add a teaspoon of capers with the shallots for a briny pop. The recipe is forgiving—if your tomatoes aren’t super sweet, a tiny drizzle of honey in the sauce balances it perfectly. The biggest evolution? I now almost always double it. Leftovers are fantastic cold for lunch the next day, chopped up and tossed with greens. It’s a recipe that grows with you, and that’s what home cooking is all about.
Your Questions, Answered!
Q: My sauce seems dry or sticky. What happened?
A: No worries! This usually means the heat was a touch too high when you added the mustard. The tomatoes should release plenty of juice. If it looks dry, simply add a splash (2-3 tbsp) of chicken broth, white wine, or even water to the pan when you add the tomatoes, and let it simmer for a minute to create more sauce.
Q: Can I use chicken thighs instead of breasts?
A: Absolutely! Boneless, skinless thighs are my other go-to. They’re juicier and more forgiving. Just cook them a minute or two longer per side since they have a slightly higher fat content.
Q: How do I store and reheat leftovers?
A: Store in an airtight container in the fridge for up to 3 days. Reheat gently in a skillet over medium-low heat with a tiny splash of water or broth to keep it moist. Avoid the microwave, as it can make the green beans mushy.
Q: Is this recipe gluten-free?
A> Yes! Dijon mustard is typically gluten-free, but always check your specific brand’s label to be 100% sure, as some may contain trace ingredients.
Lemon Dijon Chicken & Green Bean Skillet : Bright & Easy One-Pan Meal
Description
Lemon Dijon Chicken & Green Bean Skillet
A bright, tangy, one-pan chicken dinner ready in 25 minutes.
Ingredients
For the Chicken & Veggies
-
2 boneless, skinless chicken breasts, sliced into cutlets or strips
-
Salt & black pepper, to taste
-
1 tbsp olive oil
-
1 shallot, finely sliced (or ¼ sweet onion)
-
2 tsp Dijon mustard
-
1 tsp lemon zest
-
2 tsp lemon juice
-
1 tsp fresh thyme leaves (or ½ tsp dried)
-
1 cup green beans, trimmed
-
1 cup cherry tomatoes, halved
Instructions
1. Prep the Chicken
-
Pat chicken dry.
-
Season well with salt and pepper.
-
Heat a large skillet over medium heat.
2. Sear
-
Add olive oil to the hot skillet.
-
Sear chicken 3–4 minutes per side until golden and cooked through.
-
Transfer to a plate.
3. Build the Sauce
-
In the same skillet, add sliced shallots.
-
Cook 2 minutes until softened.
-
Add Dijon mustard, lemon zest, lemon juice, and thyme.
-
Stir 30 seconds.
4. Cook the Vegetables
-
Add green beans and toss to coat in the sauce.
-
Cook 3–4 minutes until tender-crisp.
5. Bring It All Together
-
Add cherry tomatoes and return chicken (with juices) to the skillet.
-
Cook 2–3 minutes until tomatoes soften and chicken is heated through.
6. Serve
-
Taste and adjust with salt, pepper, or extra lemon.
-
Serve hot right from the pan.
Notes
-
Creamy version: Stir in ¼ cup heavy cream, chicken broth, or coconut milk.
-
Protein swap: Salmon fillets or shrimp cook beautifully with this sauce.
-
Extra veggies: Add mushrooms with shallots, or spinach/kale at the end.
-
Herb twist: Replace thyme with dill or tarragon.
-
Briny pop: Add 1 tsp capers with the shallots.
Nutrition
- Calories: 340 Cal Per Serving
- Carbohydrates: 14g
- Protein: 35g
Nourishment Notes (Because Feeling Good is Part of the Feast!)
While I’m all about flavor first, it’s a wonderful bonus when something this tasty is also genuinely nourishing. This skillet is a fantastic balance: it’s high in lean protein from the chicken to keep you satisfied, low in carbohydrates, and packed with vitamins and fiber from the fresh vegetables. The olive oil provides healthy fats. It’s a meal that fuels your body without weighing you down. Remember, nutritional info is an estimate based on the specific ingredients you use. If you’re following a strict dietary plan, it’s always best to calculate using your exact products.
Final Thoughts
And there you have it, my friend—your passport to a stress-free, flavor-packed dinner. This Lemon Dijon Chicken & Green Bean Skillet is more than just a recipe; it’s a reminder that cooking for yourself and your loved ones can be simple, joyful, and deeply satisfying. It’s about the sizzle, the bright smells, and the happy silence that falls over the table when everyone digs in.
I hope this recipe finds a regular spot in your weekly rotation and becomes one of those trusted, no-recipe-needed dishes you can whip up with your eyes closed. Give one of the fun variations a try next time and make it your own. And if you do, I’d love to hear about it! Tag me over on Feastical.com or on social media.
Now, go forth and conquer that kitchen. You’ve got this. And remember—keep it simple, soulful, and always, always delicious.
With a full skillet and a happy heart,
Beau
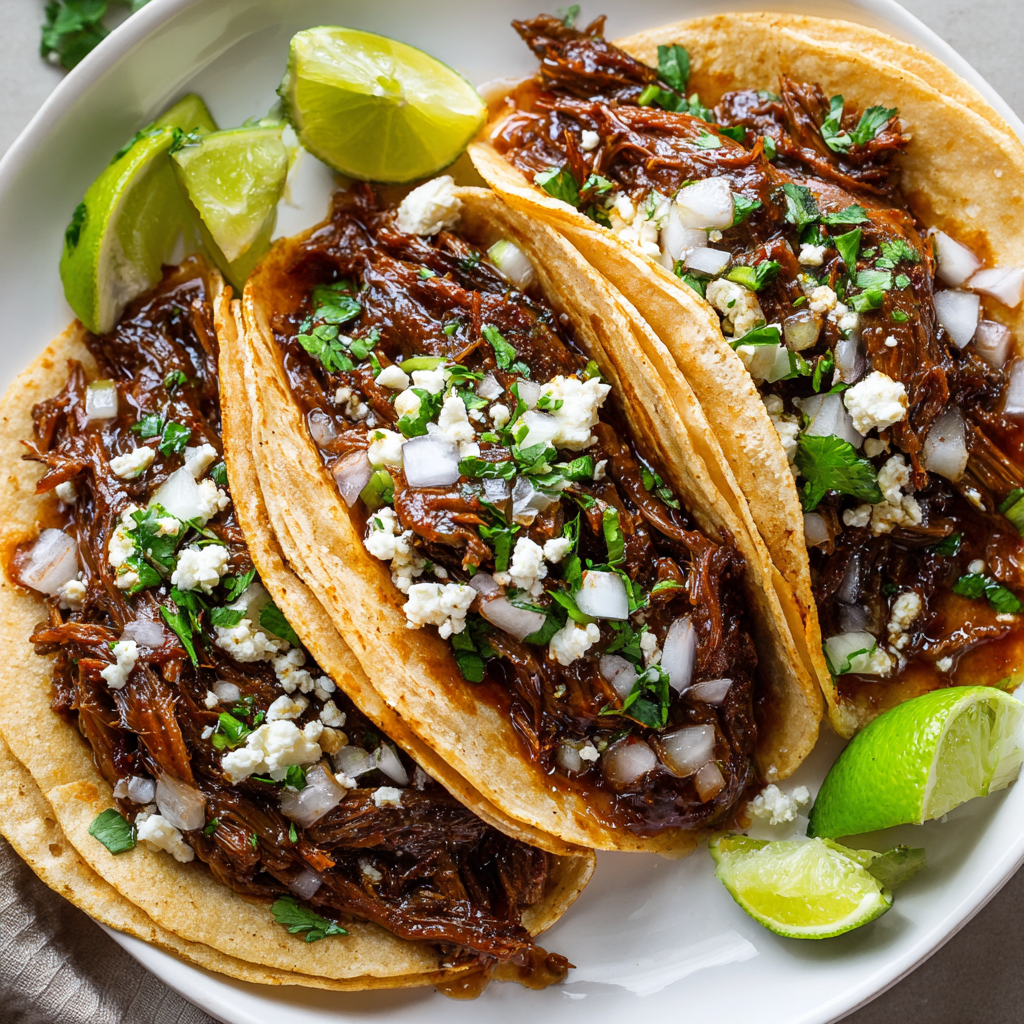
Barbacoa Beef Tacos : Bold, Tender & Bursting with Flavor
The Taco That Will Change Your Taco Tuesday Forever
Hey friends, Beau here! Let’s get real for a second. We’ve all had tacos. The quick-and-easy Tuesday night kind, the questionable late-night drive-thru variety, maybe even the fancy restaurant ones with ingredients you need a dictionary to pronounce. But I’m here to tell you about a different beast entirely. I’m talking about Barbacoa Beef Tacos – the kind of tacos that don’t just feed your stomach, they feed your soul. This isn’t just another recipe; it’s a flavor journey to the heart of traditional, slow-cooked goodness, and I’m so excited to guide you through it.
Imagine this: beef so tender it shreds at the mere sight of a fork, bathed in a sauce that’s smoky, spicy, earthy, and bright all at once. It’s been simmering for hours, filling your kitchen with an aroma that will have your family wandering in, asking “Is it ready yet?” on a loop. This barbacoa is the ultimate crowd-pleaser, the superstar of your meal prep, and the secret weapon for your next gathering. It’s deceptively simple to make but delivers a complexity of flavor that will have everyone thinking you trained under a Mexican abuela. So, tie on your apron, grab your slow cooker or Dutch oven, and let’s make some magic happen. This is feel-good food at its most spectacular.
My First Bite: A Flavor Revelation
My love affair with barbacoa started not in a fancy restaurant, but in a dusty parking lot at a farmers’ market in Austin, Texas. I was visiting a friend, and he insisted we get breakfast tacos from a little portable smoker that looked like it had seen a thousand battles. Skeptical but hungry, I ordered one. The vendor pulled meat from a deep, steaming pan – it was dark, glistening, and smelled like heaven had a spice rack. He piled it onto a fresh corn tortilla, topped it with raw onion and cilantro, and handed it over.
Friends, I took one bite, and my entire concept of what a taco could be just… exploded. The beef was impossibly juicy and rich, with a deep, smoky heat that built slowly. It wasn’t “hot,” it was flavorful. It was complex in a way that shouted of time, care, and tradition. I stood there, probably with sauce on my chin, in a state of pure culinary bliss. That single taco taught me more about the power of slow-cooked, well-spiced food than any cookbook ever had. This recipe is my heartfelt attempt to bring a slice of that parking-lot magic right into your kitchen. It’s the taste of a perfect memory, and I can’t wait for you to make it one of yours.
Gathering Your Flavor Arsenal
Here’s everything you’ll need to build these incredible barbacoa beef tacos. Don’t be intimidated by the list – it’s mostly spices and pantry staples coming together to create something extraordinary. I’ve added my notes so you know exactly why each ingredient is there and how you can play around with it.
- 3 lbs beef chuck roast, cut into large chunks: Chuck is the king here. It’s marbled with fat, which means it becomes unbelievably tender and flavorful during the long, slow cook. Chef’s Insight: Don’t trim off all the fat! It’s your flavor friend. If chuck isn’t available, beef brisket or cheek (if you can find it) are fantastic, authentic alternatives.
- 3 chipotle peppers in adobo sauce + 1 tbsp adobo sauce: This is the soul of the dish! Chipotles are smoked jalapeños, and they bring that essential smoky depth and gentle heat. The adobo sauce is tangy, sweet, and spicy all at once. Sub Tip: For less heat, use 2 peppers and scrape out the seeds. For no heat but still smoky flavor, use 1-2 tsp of smoked paprika instead.
- 1 tbsp ground cumin & 1 tbsp dried oregano: The earthy, warm base notes. Cumin is non-negotiable for that authentic taste. Use Mexican oregano if you have it—it’s a bit more citrusy than Mediterranean oregano.
- 1/2 tsp ground cloves: The secret weapon! This might seem like a tiny amount, but it adds a warm, sweet complexity that makes the flavor profile sing. Don’t skip it!
- 1 tbsp apple cider vinegar: A touch of acidity to balance the richness and help tenderize the meat. Lime juice or even a light vinegar like rice vinegar works in a pinch.
- 1/2 onion, chopped & 4 cloves garlic: The aromatic foundation. No need to get fancy here—just rough chops are fine, as they’ll be blended.
- 1 cup beef broth: This creates the braising liquid. Use low-sodium so you can control the salt. Chicken broth or even water works, but beef broth gives the deepest flavor.
- Juice of 1 lime: Fresh lime juice brightens everything up. We add it at the blending stage for a subtle lift.
- Salt & pepper to taste: Season as you go! Taste your sauce before pouring it over the beef.
For Serving (The Fun Part!):
- Corn or flour tortillas: Personally, I’m team warm corn tortillas for that authentic, slightly chewy texture, but soft flour tortillas are a delicious, pillowy alternative. Pro Hack: Warm them directly over a gas flame for a few seconds each side for a gorgeous, slightly charred flavor.
- Chopped onions & fresh cilantro: The classic, crunchy, fresh topping. It’s a non-negotiable contrast to the rich beef.
- Lime wedges: A final squeeze of fresh lime juice is a game-changer. It wakes up every single flavor.
- Crumbled queso fresco: A mild, salty, crumbly cheese that adds creaminess without overpowering. Cotija is a saltier, firmer alternative.
- Pickled onions or jalapeños (optional): My personal favorite add-on! The sharp vinegar from pickled onions cuts through the fat beautifully. A quick pickle is easy: just slice an onion, submerge in 1/2 cup vinegar, 1 cup warm water, 1 tbsp sugar, and 1 tsp salt for 30+ minutes.
Let’s Get Cooking: Low & Slow is the Way to Go
Okay, team. The prep is minimal; the patience is maximal. But trust me, every minute is worth it. Here’s your step-by-step guide to barbacoa bliss.
- The Flavor Bomb Sauce: Grab your blender. To it, add everything except the beef and serving ingredients: chipotle peppers, adobo sauce, cumin, oregano, cloves, vinegar, chopped onion, garlic, beef broth, lime juice, salt, and pepper. Now, blend until it’s as smooth as a salsa. Chef’s Hack: Take a quick taste with a clean spoon. This is your chance to adjust! Want more smokiness? Add another half pepper. More tang? A splash more vinegar. You’re the boss of this sauce.
- Meet Your Meat: Place your gorgeous chunks of beef chuck roast into your slow cooker or a large Dutch oven. Give them a quick seasoning with a pinch of salt and pepper. Then, pour that beautiful, smooth, brick-red sauce you just made all over the meat. Use a spoon or spatula to make sure every nook and cranny of the beef is acquainted with the sauce. Pop the lid on.
- The Long, Aromatic Wait (Slow Cooker Method): Set your slow cooker to LOW for 7-8 hours. This is the ideal method. The low, gentle heat breaks down the connective tissue in the chuck roast without toughening the meat, resulting in ultimate tenderness. (Dutch Oven Method): No slow cooker? No problem! Preheat your oven to 325°F (160°C). Cover your Dutch oven with a tight-fitting lid and place it in the oven. Cook for 3-4 hours. Either way, your job is to resist the urge to open the lid too often. Let the magic happen.
- The Grand Reveal & Shred: When the time is up, open that lid. You’ll be greeted by the most incredible smell and beef that literally falls apart when poked with a fork. Carefully remove the big chunks of beef to a bowl or cutting board. Use two forks (or your hands if it’s cool enough!) to shred all the meat. Discard any large, unrendered pieces of fat.
- Soak It All Up: Here’s a critical step for maximum flavor: return all that shredded beef back into the pot with all that amazing cooking liquid. Give it a good stir. Let it simmer on the “Warm” setting (or on the stovetop over low heat) uncovered for about 10-15 minutes. This lets the beef drink up more of that sauce and allows the liquid to thicken slightly into a perfect, juicy coating.
- Taco Assembly Time! Warm your tortillas. Pile high with that saucy, tender barbacoa beef. Now, top it like you mean it! I go in this order: beef, a sprinkle of onions and cilantro, a crumble of queso fresco, a few pickled onions, and a huge squeeze of fresh lime. Then, dive in.
How to Serve These Flavor-Packed Tacos
Presentation is part of the fun! I love setting up a DIY taco bar for friends and family. It’s interactive, relaxed, and lets everyone build their perfect bite. Place the big pot of shredded barbacoa beef right in the center (keep it warm on a trivet or a low warming setting). Surround it with bowls of all your toppings: the chopped onion, fresh cilantro, lime wedges, crumbled cheese, pickled veggies, and even some diced avocado or a drizzle of crema if you’re feeling fancy. Have a basket of warm tortillas wrapped in a kitchen towel nearby to keep them soft and pliable.
Don’t limit yourself to just tacos! This barbacoa is incredibly versatile. Serve it over a bowl of cilantro-lime rice for a hearty burrito bowl, stuff it into quesadillas with melty cheese, or pile it onto crispy tostadas. For a next-level comfort food move, spoon it over a baked potato or some creamy polenta. Leftovers (if you’re lucky enough to have any) are a gift to your future self.
Make It Your Own: Delicious Twists & Swaps
Once you’ve mastered the classic, play around! Here are a few of my favorite ways to mix it up.
- Pineapple & Habanero Twist: Add 1/2 cup of fresh pineapple chunks to the blender when making the sauce. Swap one chipotle pepper for 1 deseeded habanero (careful, it’s hot!) for a sweet, fiery, tropical barbacoa that’s absolutely incredible.
- “Carnitas-Style” Crispy Version: After shredding and simmering, spread the beef in a single layer on a baking sheet. Broil for 3-5 minutes, stirring once, until the edges get deliciously crispy. It adds a wonderful texture contrast.
- Instant Pot Speed Run: Short on time? Use your pressure cooker! Sear the beef chunks using the “Sauté” function. Add the sauce, seal the lid, and cook on High Pressure for 60-70 minutes. Let the pressure release naturally for 15 minutes, then shred and simmer.
- Lamb Barbacoa: For a truly traditional take, use a boneless lamb shoulder instead of beef. The gamey flavor of lamb pairs phenomenally well with these smoky, spicy spices.
- Leaner Option: Use beef round or bottom round roast. Just know it has less fat, so it might not be quite as melt-in-your-mouth tender as chuck, but it will still be full of flavor.
A Few Extra Nuggets from My Kitchen
This recipe has been a living, evolving thing in my kitchen for years. I’ve made it for everything from casual Sundays to big game-day parties. One time, I accidentally used a whole can of chipotles instead of three peppers (a classic “not enough coffee” morning). It was… intense. We called it “Dragon’s Breath Barbacoa,” and while my brother loved it, I learned to always measure the spicy stuff with a clear head! Over time, I’ve dialed in the perfect balance for my taste, but the beauty is that you can do the same. Make it once as written, then tweak it to be yours. Maybe you love more garlic, or maybe you want to add a bay leaf to the pot while it cooks. Trust your palate. That’s what home cooking is all about.
Your Questions, Answered
Q: My sauce seems too thin after shredding. How can I thicken it?
A: No worries! The simmering step after shredding usually does the trick. If it’s still too watery, mix 1 tablespoon of cornstarch with 2 tablespoons of cold water to create a slurry. Stir this into the beef and sauce in the pot and cook for another 5-10 minutes on a higher simmer until it thickens up.
Q: Can I make this ahead of time?
A: Absolutely, and it might even be better! The flavors deepen and marry overnight. Cook and shred the beef, then store it in its sauce in an airtight container in the fridge for up to 4 days. Reheat gently on the stove or in the microwave.
Q: Is it freezer-friendly?
A> You bet. Freeze the cooked and shredded barbacoa (with its sauce) in a sealed container or freezer bag for up to 3 months. Thaw overnight in the fridge before reheating.
Q: The beef is a bit tough. What happened?
A> This almost always means it needs more time. Chuck roast has tough connective tissue that needs a long, slow cook to break down into gelatin (which is what makes it tender and juicy). If it’s not shredding easily, just give it another 30-60 minutes and check again. Patience is key!

Barbacoa Beef Tacos : Bold, Tender & Bursting with Flavor
Description
Barbacoa Beef Tacos (Slow Cooker or Dutch Oven)
Tender, juicy, smoky, and unbelievably flavorful. The taco that transforms Taco Tuesday.
Ingredients
For the Barbacoa Beef
-
3 lbs beef chuck roast, cut into large chunks
-
3 chipotle peppers in adobo + 1 tbsp adobo sauce
-
1 tbsp ground cumin
-
1 tbsp dried oregano (Mexican preferred)
-
½ tsp ground cloves
-
1 tbsp apple cider vinegar
-
½ onion, roughly chopped
-
4 garlic cloves
-
1 cup beef broth (low-sodium)
-
Juice of 1 lime
-
Salt & pepper to taste
For Serving
-
Warm corn or flour tortillas
-
Chopped onions
-
Fresh cilantro
-
Lime wedges
-
Crumbled queso fresco or cotija
-
Optional: pickled onions, pickled jalapeños, avocado, crema
Instructions
1. Make the Sauce
-
Add to a blender:
-
chipotle peppers + adobo
-
cumin
-
oregano
-
cloves
-
vinegar
-
onion
-
garlic
-
beef broth
-
lime juice
-
salt & pepper
-
-
Blend until smooth.
2. Prep the Beef
-
Place beef chunks into your slow cooker or Dutch oven.
-
Season lightly with salt + pepper.
-
Pour the blended sauce all over the beef.
3. Cook Low & Slow
Slow Cooker:
-
Cook on LOW for 7–8 hours (best method).
Dutch Oven (Oven):
-
Preheat oven to 325°F (160°C).
-
Cover and cook 3–4 hours until tender.
4. Shred & Soak
-
Remove beef and shred with two forks.
-
Return shredded beef to the pot.
-
Stir it into the sauce.
-
Simmer on warm/low for 10–15 minutes to thicken and deepen flavor.
5. Serve
Warm your tortillas.
Fill with juicy barbacoa.
Top with onion, cilantro, lime, cheese, and anything you like.
Enjoy the BEST tacos ever.
Notes
-
Less spicy: Use 1–2 chipotles or remove seeds.
-
More smoky: Add ½ tsp smoked paprika.
-
Crispy version: Spread shredded beef on a sheet pan and broil 3–5 minutes.
-
Instant Pot option: High Pressure 60–70 min + 15 min natural release.
Nutritional Information*
*Please note: The following is an approximate estimate calculated for the barbacoa beef only (about 4-5 oz serving), not including tortillas or toppings. Values can vary based on specific ingredients and portion sizes.
- Calories: ~280
- Protein: 35g (Excellent source!)
- Fat: 14g (Mostly the good, flavorful marbling from the chuck roast)
- Carbohydrates: 4g
- Fiber: 1g
This barbacoa is a fantastic source of high-quality protein and iron. To keep your overall meal balanced, pair it with fiber-rich sides like black beans, a fresh corn salad, or a big helping of crunchy lettuce in your taco. Remember, the toppings are where you can add loads of fresh veggies!
Final Thoughts: The Taco That Will Change Your Taco Tuesday Forever
So here we are, at the end of our barbacoa journey. What started as a simple recipe has hopefully become an invitation—an invitation to slow down, to savor the process, and to gather people around a meal that’s made with more than just ingredients, but with intention.
This isn’t just about beef and spices. It’s about the patience that turns tough cuts into tender, shreddable perfection. It’s about the alchemy of smoke, acid, and earth that happens in your pot. It’s about the joy of building your own taco, exactly how you like it, and the shared silence that falls over a table when everyone takes that first, incredible bite.

Oven-Baked Cheesy Tacos : Crispy, Loaded & Irresistible
Oven-Baked Cheesy Tacos: The Ultimate Crispy, Gooey Comfort Food
Hey friends, Beau here from Feastical! Let’s talk about a universal truth: the best moments in life often happen around a table loaded with delicious, unpretentious food. You know the kind I mean—the dishes that make everyone’s eyes light up, that spark a chorus of “oh my gosh, you have to try this,” and leave you happily fighting over the last crispy corner. Today, we’re creating exactly that kind of magic with my Oven-Baked Cheesy Tacos.
If you’re dreaming of tacos with the perfect crunch, a seriously molten cheese pull, and a filling that’s bursting with flavor, you’ve landed in the right kitchen. This isn’t just another taco recipe; it’s a game-changer. We’re taking everything we love about taco night—the savory seasoned meat, the creamy beans, the sharp cheese—and giving it a crispy, oven-baked hug. The result? A taco that holds its shape, delivers maximum flavor in every bite, and, let’s be real, is way more fun to eat than a standard soft taco.
Whether you’re wrangling a hungry family on a busy Wednesday, prepping for a game-day feast that’ll have your friends singing your praises, or just satisfying a major comfort food craving, this recipe is your new secret weapon. It’s simple, endlessly customizable, and absolutely, 100% guaranteed to bring everyone to the table with a smile. So, preheat that oven, grab your favorite sheet pan, and let’s make a meal that’s basically a high-five for your taste buds.
The Taco That Started It All: A Kitchen Mishap Turned Masterpiece
I have to confess, the genesis of these crispy wonders was a happy accident. Picture this: It was a chaotic Tuesday evening, the kind where you’re rummaging through the fridge hoping dinner will magically assemble itself. I had taco filling simmering, but my tortillas were a day past their prime—stiff, a little dry, and threatening to crack if I looked at them wrong. My grand plan of a classic taco bar was crumbling faster than a bad pie crust.
In a moment of “what’s the worst that could happen?” inspiration, I decided to brush those sad tortillas with a little oil, fold them over the filling with a generous fistful of cheese, and throw them in the hot oven. I figured at best, we’d have edible nachos. At worst, well, we had a pizza place on speed dial. But what emerged 12 minutes later was nothing short of a revelation. The tortillas had transformed into golden, flaky shells. The cheese had fused everything into a perfect, gooey package. They were crispy, they were cheesy, they were *perfect*. That “mistake” became an instant family legend and the star of more gatherings than I can count. It taught me that sometimes, the best recipes come from a little kitchen chaos and a willingness to play with your food.
Gathering Your Flavor Arsenal: Ingredients & Insider Tips
Here’s everything you’ll need to build these epic tacos. I’ve tossed in some chef-y insights and swaps so you can make this recipe your own.
- 10 small flour or corn tortillas: The vessel of joy! Flour tortillas give a soft-but-crispy, slightly chewy result. Corn tortillas offer a more authentic, sturdy crunch. Chef’s Tip: If using corn, warm them for a few seconds in a dry skillet first to make them pliable and prevent splitting.
- 1 lb ground beef or ground turkey: The hearty base. I love 85/15 beef for flavor, but lean turkey works beautifully for a lighter option. For a vegetarian twist, see the variations below!
- 1 packet taco seasoning + ½ cup water: The flavor shortcut we all love. Feel free to use 2-3 Tbsp of your own homemade blend if you have one!
- 1 ½ cups shredded cheddar cheese (or Mexican blend): The glue that holds our dreams together. Pre-shredded bags are convenient, but shredding a block of sharp cheddar yourself melts creamier and doesn’t have anti-caking agents.
- 1 cup refried beans (optional but highly recommended): Our secret weapon for extra creaminess and heft. They add a wonderful texture and help keep the filling moist. Use canned for ease, or mash your own pinto beans with a bit of broth.
- Olive oil spray or brushing oil: The key to that irresistible golden-brown, crispy shell. Don’t skip it!
- Toppings (The Parade of Joy): This is where personality shines! I always set out a topping bar with diced tomatoes, shredded crisp lettuce, cool sour cream, zesty salsa or hot sauce, pickled jalapeños for heat, and a big bowl of guacamole for that creamy, dreamy finish.
Let’s Build Some Tacos: Your Step-by-Step Roadmap to Crispy Bliss
Follow these steps, and you’ll be a taco-baking pro in no time. I’ve sprinkled in my favorite hacks to ensure your success.
Step 1: Prep the Filling. Grab a large skillet and place it over medium-high heat. Crumble in your ground meat and cook it through, breaking it up as you go, until it’s nicely browned. Once cooked, drain off any excess fat. Now, sprinkle over that taco seasoning and pour in the ½ cup of water. Give it a good stir, reduce the heat to a simmer, and let it bubble away for 3-5 minutes until the liquid reduces and creates a glossy, flavorful coating on the meat. Chef’s Hack: Let this mixture cool for a few minutes before assembling—it prevents the tortillas from getting soggy!
Step 2: Assemble with Love. Preheat your oven to a hot 400°F (200°C). Line a large baking sheet with parchment paper or foil for easy cleanup. Now, lay out your tortillas. Spread a tablespoon or so of refried beans on one half of each tortilla—this acts as a delicious moisture barrier. Next, spoon a heaping portion of your taco meat over the beans. Finally, crown it with a generous pinch of that glorious shredded cheese. Gently fold the bare half of the tortilla over the filling to create a half-moon shape. Press down lightly and arrange them on your baking sheet, leaving a little breathing room between each one.
Step 3: Bake to Perfection. Here’s the magic step. Lightly but evenly spray or brush the tops of your folded tacos with oil. This is what gives you that gorgeous, crispy, blistered top. Slide the sheet into your preheated oven. Bake for 10-12 minutes, but here’s the pro move: flip them halfway through! At the 5-6 minute mark, carefully flip each taco over. This ensures even browning and crispiness on both sides. They’re done when they’re beautifully golden and you can see the cheese bubbling enthusiastically at the edges.
Step 4: The Grand Finale. Pull that sheet of golden, cheesy wonders out of the oven. Let them rest for just a minute or two—the filling is like molten lava! This brief pause lets the cheese set slightly, making them easier to handle. Then, transfer them to a platter and get ready for the fun part: the topping station!
How to Serve These Crispy Beauties
Presentation is part of the joy! I love serving these family-style on a big, rustic wooden board or platter, letting the golden edges of the tacos peek out. Place your topping bowls all around in a colorful, inviting spread. Encourage everyone to build their own perfect bite. The contrast of the hot, crispy taco with the cool, fresh toppings is what makes each mouthful an event. They’re fantastic with a side of Spanish rice, a simple black bean salad, or just a big pile of tortilla chips and extra salsa for dipping. Don’t forget the napkins—the good, messy kind of eating is mandatory here.
Make It Your Own: Delicious Recipe Variations
The beauty of this recipe is its flexibility. Once you’ve mastered the basic technique, the world is your taco! Here are a few of my favorite twists:
- “Buffalo Chicken” Style: Swap the taco meat for 2 cups of shredded rotisserie chicken mixed with ½ cup of buffalo sauce and 4 oz of softened cream cheese. Use a Monterey Jack and blue cheese crumble blend. Top with celery sticks and ranch dressing.
- Breakfast-for-Dinner Tacos: Fill with scrambled eggs, cooked breakfast sausage, diced potatoes, and cheddar cheese. Serve with salsa verde and a dollop of sour cream.
- Fully Loaded Veggie: Sauté a mix of bell peppers, onions, corn, and black beans with taco seasoning. Use pepper jack cheese and add a spoonful of corn salsa inside before baking.
- BBQ Pulled Pork: Use leftover or store-bought pulled pork tossed in your favorite BBQ sauce. Coleslaw makes an amazing crunchy topping instead of lettuce.
- Low-Carb/Keto-Friendly: Use sturdy, low-carb tortillas. Increase the meat and cheese, and skip the beans. Load up on avocado, sour cream, and pico de gallo for toppings.
Beau’s Chef Notes & Kitchen Stories
This recipe has been a work in progress ever since that fateful dry-tortilla night. I’ve learned that a light hand with the filling prevents burst seams, and that a really hot oven is non-negotiable for the perfect crunch. One time, I got overzealous with the cheese and created what my nephew lovingly called “Taco Volcanoes” as it erupted onto the pan. We just scraped the crispy cheese off the sheet—aka “taco lace”—and fought over those bits like they were gold. It’s now a requested add-on! The lesson? Embrace the little kitchen “flaws”; they often taste the best. These tacos have soundtracked so many movie nights, casual dinners, and last-minute gatherings in my home. I hope they become a reliable, joy-sparking recipe in yours, too.
FAQs & Troubleshooting: Your Questions, Answered
Q: Can I make these ahead of time?
A: You can! Assemble the tacos up to the point of baking, cover the sheet pan tightly, and refrigerate for up to 4 hours. Let them sit at room temp for 10 minutes and add 1-2 minutes to the bake time. For longer storage, freeze the unbaked tacos on the sheet pan, then transfer to a freezer bag. Bake from frozen, adding 4-5 extra minutes.
Q: My tacos came out soggy. What happened?
A: The usual culprits are: 1) Filling was too hot/wet when assembling. Let it cool slightly. 2) Not enough oil on the tortilla. That light coating is crucial for crisping. 3) Oven wasn’t hot enough. Use an oven thermometer to check! 4) They were overcrowded on the pan, steaming each other. Give them space.
Q: Can I use an air fryer instead?
A: Absolutely! They come out incredibly crispy. Air fry at 375°F for 6-8 minutes, flipping halfway. Work in batches to avoid crowding the basket.
Q: The edges are burning before the middle is hot.
A: Your oven might be running hot, or the rack is too high. Try lowering the temperature to 375°F and baking on a middle rack. Also, ensure your filling isn’t ice-cold when it goes in.

Oven-Baked Cheesy Tacos : Crispy, Loaded & Irresistible
Description
If you love tacos that are crispy on the outside, gooey with melted cheese, and packed with flavor, this recipe is for you. These oven-baked tacos are easy to assemble, great for weeknight dinners, and perfect for sharing. Just fill, fold, bake — and enjoy the crunch!
Ingredients
-
10 small flour or corn tortillas
-
1 lb (450 g) ground beef or ground turkey
-
1 packet taco seasoning
-
½ cup water
-
1–1½ cups shredded cheddar or Mexican-blend cheese
-
1 cup refried beans (optional but creamy and delicious)
-
Oil spray or 2–3 tbsp oil for brushing
Optional toppings:
Lettuce, tomatoes, salsa, sour cream, guacamole, jalapeños
Instructions
1. Make the Filling
-
Heat a skillet over medium-high heat.
-
Cook the ground meat until browned. Drain any extra fat.
-
Add taco seasoning + ½ cup water.
-
Simmer 3–5 minutes until thickened.
-
Let the filling cool slightly so the tortillas don’t get soggy.
2. Assemble the Tacos
-
Preheat oven to 400°F (200°C).
-
Line a baking sheet with parchment or foil.
-
Spread a thin layer of refried beans on half of each tortilla.
-
Add a spoonful of taco meat + some cheese.
-
Fold the tortillas in half and press gently.
3. Bake
-
Lightly spray or brush the tops with oil.
-
Bake for 10–12 minutes, flipping halfway for even crispiness.
-
Remove from the oven and let them rest 1–2 minutes.
4. Serve
Serve warm with your favorite toppings and enjoy the crispy, cheesy goodness!
Notes
-
Warm corn tortillas first so they don’t crack.
-
Don’t overfill the tacos — too much filling makes them burst.
-
For extra crispiness, bake for 1–2 extra minutes.
-
Try an air fryer: 375°F for 6–8 minutes (flip halfway).
Nutritional Info (A Quick Glance)
Here’s a rough nutritional breakdown per serving (2 tacos), calculated using 85/15 ground beef, flour tortillas, and cheese, but without optional toppings or beans. Remember, this is an estimate—your specific ingredients will vary!
Prep Time: 15 mins | Cook Time: 12 mins | Servings: 5
Approximate Per Serving: 390 calories | 22g protein | 23g fat | 25g carbohydrates
To lighten it up: Use lean ground turkey or chicken, low-fat cheese, and load up on fresh vegetable toppings. The beans add fiber and make the tacos more filling without a huge calorie jump!
Final Thoughts from My Kitchen to Yours
And there you have it, friends—my heart-on-a-sheet-pan recipe for Oven-Baked Cheesy Tacos. This is more than just a method for cooking tacos; it’s an invitation to make dinner fun, to gather without stress, and to create a meal that feels like a celebration, even on a random Tuesday. I love that this recipe empowers you to play, to adapt, and to feed the people you care about with something truly special and ridiculously tasty.
So, the next time you’re staring into the fridge, wondering what’s for dinner, I hope you remember these crispy, cheesy wonders. Give them a try, make them your own, and most importantly, share them with someone. Food tastes better together. Thanks for letting me share one of my all-time favorite Feastical creations with you. Now, go preheat that oven—your crispy, cheesy, irresistible taco night awaits!
With a full heart and a crispy shell,
Beau
Love this recipe? Save it for later!
Pin Title: Oven-Baked Cheesy Tacos: Crispy, Loaded & SO Easy!
Pin Description: The BEST Oven-Baked Cheesy Tacos recipe! These crispy folded tacos are loaded with seasoned ground beef, melty cheese, and refried beans, then baked to golden perfection. A huge hit for taco night, game day, or easy family dinners. This step-by-step guide includes make-ahead tips, air fryer instructions, and delicious variations like Buffalo Chicken and Fully Loaded Veggie. Learn how to get the perfect crispy shell every time with simple chef hacks. Save this easy, crowd-pleasing recipe from Feastical for your next fiesta! #bakedtacos #cheesytacos #taconight #easydinner #familydinner #gamefood #comfortfood #mealprep #feastical
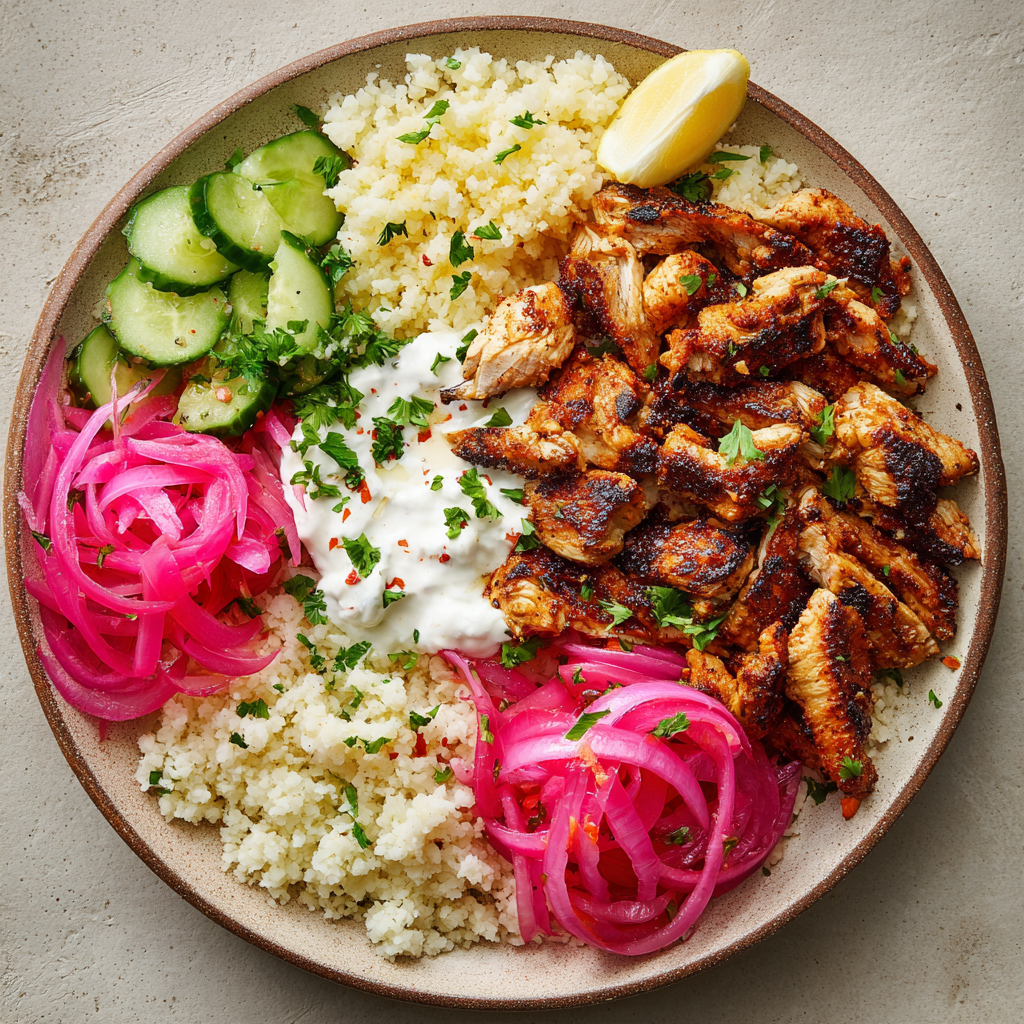
Greek Yogurt Chicken Shawarma Plates with Cucumber Salad & Cauliflower Rice
Greek Yogurt Chicken Shawarma: Your Ticket to a Flavor Vacation (No Passport Needed!)
Hey friends, Beau here! Let’s be real for a second. How many times have you stared into the fridge, willing it to magically produce something delicious, exciting, and *actually* good for you? You crave those big, bold takeout flavors, but you also want to feel amazing after eating. I get it. That tug-of-war between “I want a party in my mouth” and “I need to fuel my body” is real in my kitchen, too.
That’s exactly why I’m utterly obsessed with this Greek Yogurt Chicken Shawarma Plate. It’s my ultimate compromise-buster. Imagine tender, spiced chicken, marinated in a tangy, garlicky yogurt bath that keeps it incredibly juicy. Now, picture it piled high next to a crunchy, herb-flecked cucumber salad and a mound of light, fluffy cauliflower rice that soaks up all those incredible juices. It’s a symphony of textures and tastes—warm, cool, tangy, savory, and fresh—all dancing together on one very happy plate.
This isn’t just a recipe; it’s your secret weapon. It’s weeknight-easy but weekend-impressive. It’s meal-prep genius and crowd-feeding gold. We’re taking the soul-warming, street-food magic of shawarma and giving it a fresh, nourishing spin that you can feel great about serving any day of the week. So, tie on your apron, grab your favorite mixing bowl, and let’s turn your kitchen into the most delicious street corner in town.
The Spice Route That Led Me Here
My love affair with shawarma started not in a fancy restaurant, but out of a slightly dented food truck parked under a string of twinkling lights. I was traveling, hopelessly lost, and led entirely by my nose. The scent was irresistible—a cloud of cumin, charred meat, garlic, and something smoky weaving through the cool evening air. I followed it like a cartoon character floating on a scent line.
I ended up with a warm, overstuffed pita wrapped in paper, juices already threatening to escape. That first bite was a revelation. It was messy, vibrant, and layered with more flavor than I thought possible. But later, my stomach felt… heavy. I wanted to capture that lightning-in-a-bottle flavor, but in a way that left me energized, not ready for a nap.
Back in my own kitchen, the experiments began. The “aha!” moment came when I swapped in Greek yogurt for the usual oils in the marinade. Not only did it tenderize the chicken like a dream, but it created this gorgeous, creamy crust that clung to every spice. It was the missing link—all the bold, beautiful flavor of my memory, but lighter, brighter, and totally customizable on a plate. This recipe is that food truck magic, reimagined for our everyday lives.
Gathering Your Flavor Arsenal
Here’s the beautiful part: this recipe uses simple, whole ingredients. The magic is in how we combine them. Let’s break it down.
For the Life-Changing Chicken Marinade:
-
- 1 lb boneless, skinless chicken thighs: I’m team thighs all the way for shawarma. They stay juicier and more forgiving during cooking than breasts, and they have more flavor to stand up to the spices. Trust me on this! If you must use breasts, slice them thinly and reduce cooking time.
- 1 cup plain Greek yogurt (full-fat or 2%): This is our tenderizer and flavor-clinger. The natural acidity breaks down proteins for super-juicy chicken, and it helps the spices stick and caramelize. For a dairy-free version, a thick coconut yogurt works in a pinch.
- 2 tbsp olive oil: Adds richness and helps with browning. Avocado oil is a great high-heat alternative.
- 1 tbsp fresh lemon juice: Brightness! It cuts through the richness. Lime juice works too.
- 3 garlic cloves, minced: Non-negotiable for that authentic, aromatic base. Use a microplane for a paste-like consistency that melds seamlessly into the marinade.
- The Spice Squadron: This is where the personality shines.
-
- 1 tsp ground cumin: Earthy and warm, the backbone of the blend.
- 1 tsp smoked paprika: Provides that deep, subtle smokiness. Regular paprika works, but you’ll miss the smoky nuance.
- ½ tsp turmeric: Adds a warm, earthy note and a gorgeous golden hue.
½ tsp cinnamon: The secret weapon! It adds a whisper of sweet, complex warmth that makes people say, “What is *that*? It’s so good!”
-
½ tsp ground coriander: Lemony and floral, it brightens the whole mix.
- Salt & freshly cracked black pepper: Season with love. Don’t be shy.
For The Build-Your-Own Plate:
- 1 cup cucumber, diced: For the salad. I like English cucumbers for fewer seeds and thinner skin.
- ¼ red onion, thinly sliced: We’re quickly pickling these for a punch of tangy crunch that cuts the richness.
- 2 cups cauliflower rice: Our low-carb, veggie-packed base that soaks up sauce beautifully. Find it fresh or frozen! The other perfect vehicle? Warm whole-grain pita for a more traditional experience.
- Fresh parsley or dill, chopped (optional): A pop of green for freshness and color.
- For Quick-Pickling: ½ cup warm water, ¼ cup vinegar (white, apple cider, or red wine), 1 tbsp sugar or honey, 1 tsp salt.
Let’s Get Cooking: Building Layers of Flavor
Ready to make the magic happen? Follow these steps, and you’ll have a restaurant-worthy plate in no time.
Step 1: The Quick-Pickle (& Marinate!) Tango
First, let’s get your onions pickling. In a jar or bowl, combine the warm water, vinegar, sweetener, and salt. Stir until dissolved. Plunge in your thinly sliced red onions. They’ll start turning a fabulous pink in minutes. Set them aside—they’ll get better as you cook.
Chef’s Hack: Do this first. The pickling time is passive and makes all the difference.
Step 2: Marinate the Chicken (The Most Important Step!)
In a medium bowl, whisk together the Greek yogurt, olive oil, lemon juice, minced garlic, and all those glorious spices. Season generously with salt and pepper. Add your chicken thighs and massage that marinade into every nook and cranny. Get your hands in there—it’s the best tool you have!
Chef’s Hack: For insane flavor, marinate overnight. Minimum? Give it 30 minutes at room temperature. If marinating longer, always do it in the fridge.
Step 3: Cook to Perfection
You have options here, and they’re all great:
Grill/Pan-Sear (My Favorite): Heat a grill pan or heavy skillet (cast iron is perfect) over medium-high heat. Add a drizzle of oil. Cook the chicken for 5-7 minutes per side, until you get a beautiful char and the chicken is cooked through (165°F internal temp). Don’t move it around too much—let that crust form!
Bake: Great for meal prep! Place marinated chicken on a parchment-lined sheet pan. Bake at 425°F (220°C) for 20-25 minutes, flipping halfway.
Air Fry: Winner for speed and crispiness! Cook at 400°F (200°C) for 12-15 minutes, flipping halfway.
Chef’s Non-Negotiable: Once cooked, let the chicken rest for 5 minutes on a cutting board before slicing. This lets the juices redistribute, ensuring every bite is moist.
Step 4: Prep the Sides While the Chicken Rests
Dice your cucumber. If using cauliflower rice, sauté it in a pan with a little oil, salt, and pepper for 3-5 minutes until tender, or microwave according to package directions. Warm your pitas if using. Chop your fresh herbs.
Chef’s Hack: Toss the diced cucumber with a pinch of salt and a squeeze of lemon juice while you assemble everything else. It seasons it and pulls out a little excess water.
Step 5: The Grand Assembly
Slice your rested chicken against the grain into strips. Now, build your masterpiece! Start with a base of fluffy cauliflower rice or a warm pita. Pile high with the sliced, juicy chicken. Spoon over any resting juices from the cutting board (liquid gold!). Add a generous heap of cucumber salad and those vibrant pink pickled onions. Finish with a shower of fresh herbs.
How to Serve This Beauty
This dish is all about the interactive, build-your-own-bite experience. I love serving it family-style on a big platter or board. Pile the sliced chicken in the center, surround it with bowls of the cucumber salad, pickled onions, fresh herbs, and maybe even a little dish of extra Greek yogurt or a drizzle of tahini sauce.
For a full feast, add small bowls of olives, crumbled feta cheese, toasted pine nuts, or a simple tomato and red pepper salad. The goal is color, texture, and choice. Let everyone dive in and create their perfect plate. Don’t forget a stack of napkins—the best meals are often the messiest!
Make It Your Own: Flavor Twists & Swaps
The beauty of this template is its flexibility. Here are a few ways to run with it:
- Vegetarian Power Move: Swap the chicken for extra-firm tofu (pressed and cubed) or thick slices of halloumi cheese. The marinade works wonderfully on both!
- Keto/Low-Carb: You’re already winning with cauliflower rice. Double down by adding sliced avocado and a dollop of garlic-herb compound butter on the hot chicken.
- Mediterranean Mezze: Serve the chicken and all the fixings as a deconstructed “shawarma bowl” with hummus, baba ganoush, dolmas, and wedges of warm pita for dipping.
- Spice It Up: Add ½ tsp of cayenne pepper or a tablespoon of harissa paste to the marinade for a spicy kick.
- Lemon-Herb Brightness: Stir a handful of finely chopped fresh dill and mint into the cucumber salad for an extra refreshing lift.
Beau’s Kitchen Notebook
This recipe has become a weekly staple in my house, and it’s evolved in funny ways. Once, I accidentally used vanilla Greek yogurt (hey, it was early!). Disaster? Actually… it was weirdly delicious! The hint of vanilla played nicely with the cinnamon. Not my recommended path, but a good reminder that cooking is an adventure.
The biggest lesson I’ve learned is the power of the overnight marinade. I’ll often whip up a double batch of the marinade on Sunday, split it, and marinate chicken for two different meals. This shawarma is one, and the other might get grilled for salads. It’s my ultimate “future self” thank-you note.
Your Questions, Answered
Q: Can I make this ahead for meal prep?
A: Absolutely! It’s a meal-prep superstar. Cook and slice the chicken, and store it separately from your cauliflower rice and cucumber salad. The pickled onions get better with time! Assemble just before eating to keep textures perfect. It lasts 3-4 days in the fridge.
Q: My chicken turned out dry. What happened?
A: Two likely culprits: 1) You used chicken breasts and overcooked them. Thighs are much more forgiving. 2) You didn’t let it rest before slicing! Resting is crucial. Also, check your heat—if the pan is too hot, the outside can burn before the inside cooks through.
Q: I don’t have all the spices. Can I skip one?
A: You can, but the cinnamon and coriander are what make it taste uniquely “shawarma.” If you’re in a pinch, use a good-quality pre-mixed shawarma or garam masala seasoning (about 1.5 tbsp) in place of the individual spices listed.
Q: Is there a substitute for Greek yogurt in the marinade?
A: For dairy-free, a thick, unsweetened coconut yogurt works. You could also use buttermilk for tang, but the marinade will be thinner. In a real pinch, lemon juice + olive oil will work, but you’ll lose the incredible tenderizing power and creamy crust of the yogurt.
Final Thoughts: More Than a Meal, A Culinary Mindset
Friends, as we wrap up this flavor journey, I want to leave you with this: what we’ve created here is more than just a recipe. It’s a blueprint for joyful, nourishing cooking.
This Greek Yogurt Chicken Shawarma Plate represents a beautiful middle ground—a place where vibrant, world-inspired flavor shakes hands with thoughtful, wholesome ingredients. It proves you don’t have to choose between excitement and well-being. You can have the party and feel good when it’s over.
Remember the core lesson: Marination is magic, and contrast is king. The creamy-yogurt tenderizer, the warm spices, the tangy pickle, the cool crunch—these are principles you can carry far beyond this dish. Apply them to tofu, to fish, to roasted vegetables. Let this be your springboard.
I hope this recipe becomes a trusted friend in your kitchen—the one you turn to when you need a win, when you want to impress without stress, or when you simply crave a taste of somewhere else, right at your own table.
So here’s to delicious compromises, to bold flavors, and to meals that feed both your body and your spirit. Thanks for cooking with me.
Until next time,
Beau
P.S. If this recipe brings you as much joy as it does me, I’d love to hear about it! Tag me in your creations or share your own twists. The best recipes are the ones we make our own.

Creamy Garlic Parmesan Chicken Breast : Easy One-Pan Dinner
Creamy Garlic Parmesan Chicken Breast: Your New Weeknight Hero (Ready in 30!)
Hey friends, Beau here from Feastical! Let’s be real for a second. We’ve all had those nights. You’re staring into the fridge, the clock is ticking, stomachs are rumbling, and the call of the takeout menu is getting louder by the minute. You want something good—something that tastes like you fussed over it for hours—but you also want to be kicked back on the couch with your favorite show before the 8 o’clock hour hits. Sound familiar? I’ve been there more times than I can count.
That’s exactly why this Creamy Garlic Parmesan Chicken Breast has a permanent spot in my weekly rotation. It’s the culinary equivalent of a reliable best friend: always there for you, never lets you down, and makes everything better. We’re talking juicy, golden-seared chicken breasts swimming in a luxuriously creamy, garlicky, parmesan-laced sauce that clings to every single bite. The best part? It all happens in one pan and in under 30 minutes. No fancy techniques, no pile of dishes mocking you from the sink. Just straightforward, feel-good food that delivers a massive payoff in the flavor department.
This isn’t just a recipe; it’s your secret weapon. It’s for impressing a date on a cozy night in, for earning those “you’re the best, dad/mom!” cheers from the family, or for simply treating yourself to a restaurant-quality meal on a Tuesday. So, grab your trustiest skillet and let’s turn a regular weeknight into something a little bit special, shall we?
The Night This Recipe Saved My Bacon (Literally, Almost)
This recipe was born from pure, unadulterated hunger and a near-empty pantry. Picture it: a rainy Wednesday, me, my dog Baxter giving me the “I haven’t eaten in seven years” eyes, and a fridge that held little more than some chicken breasts, a lonely bulb of garlic, a nub of parmesan, and some cream I needed to use up. The classic “make it work” scenario.
I seared the chicken, and the smell alone perked us both up. As I started making a pan sauce with my scant ingredients, something magical happened. The garlic sizzled in the butter, filling my tiny kitchen with that unmistakable “good things are happening” aroma. The cream bubbled, the parmesan melted into a silky embrace, and when I dipped a spoon in for a taste? Boom. It was rich, savory, deeply comforting, and way more than the sum of its parts. Baxter got a tiny bite (sauce only, don’t worry!), and I swear he gave me a paw-bump of approval. That meal, thrown together from almost nothing, felt like a triumph. It’s been a cornerstone of Feastical ever since, a reminder that the most satisfying dishes often come from simplicity and a little kitchen courage.
Gathering Your Flavor All-Stars
Here’s the beautiful lineup. Using great-quality ingredients here makes a noticeable difference, but I’ll give you plenty of swaps to make it work with what you’ve got!
- 2 boneless, skinless chicken breasts: The main event! I look for ones that are similar in size so they cook evenly. Chef’s Insight: If yours are super thick, gently pound them to an even ½-inch thickness. It helps them cook faster and stay juicy.
- Salt and pepper to taste: The dynamic duo. Don’t be shy here—seasoning the chicken well is your first layer of flavor.
- 1 tbsp olive oil: For that perfect sear. Its high smoke point is perfect for getting a gorgeous golden crust without burning.
- 2 tbsp butter: Because flavor. Butter adds a rich, nutty depth to the sauce that oil just can’t match. Sub Tip: Unsalted is best so you can control the salt, but salted works in a pinch—just taste as you go!
- 4 garlic cloves, minced: The aromatic heart of the dish. Fresh is best! That pre-minced stuff in jars can have a bitter aftertaste. Chef’s Hack: Use a microplane for a super-fine mince that melts right into the sauce.
- 1 cup heavy cream: The base of our luscious sauce. For the best texture, don’t sub with half-and-half or milk—they’re more likely to curdle or separate when simmered. For a lighter option: Full-fat coconut milk can work for a dairy-free twist, but it will add a subtle coconut flavor.
- ½ cup chicken broth: Thins the sauce just enough and adds savory backbone. Low-sodium is my go-to. Vegetarian? Swap it for vegetable broth!
- ¾ cup freshly grated Parmesan cheese: This is non-negotiable for me. The pre-grated stuff in bags contains anti-caking agents that can make your sauce grainy. Take two minutes to grate a block yourself—it melts like a dream. Insight: Pecorino Romano is a sharper, saltier cousin that makes a fantastic stand-in.
- 1 tsp Italian seasoning: A quick herb blend shortcut! It’s usually a mix of oregano, basil, thyme, and rosemary. Fresh Herb Bonus: If you have fresh thyme or rosemary, use ½ tsp of either, finely chopped.
- Fresh parsley, chopped (for garnish): The finishing touch! That pop of green and fresh flavor makes the whole dish look and taste restaurant-ready.
Let’s Get Cooking: Your Foolproof Roadmap to Delicious
Ready? Tie on your apron, and let’s make some magic. We’re going step-by-step, with all my favorite hacks sprinkled in.
- Prep & Season the Chicken: Pat your chicken breasts completely dry with paper towels. This is the secret to a golden sear—water is the enemy of browning! Season both sides generously with salt and pepper. Let them sit for 5 minutes while your pan heats up; this helps the seasoning adhere.
- Sear to Perfection: Heat a large skillet (stainless steel or cast iron works great) over medium-high heat. Add the olive oil. Once the oil is shimmering (test with a tiny droplet of water—if it sizzles, you’re good!), carefully add the chicken. Listen for that satisfying sizzle! Don’t move it for a good 5-6 minutes. We’re building a flavorful crust. Peek underneath—when it releases easily and is beautifully golden, flip it. Cook for another 5-6 minutes on the other side, or until the internal temperature hits 165°F. Remove to a plate and tent loosely with foil. Chef’s Mantra: “If it’s sticking, it’s not ready to flip.”
- Build the Dreamy Sauce: Reduce the heat to medium. Add the butter to the same pan (all those tasty browned bits from the chicken are flavor gold!). Once melted, add the minced garlic. Sauté for just about 60 seconds until fragrant—do not let it brown! Burnt garlic turns bitter.
- Combine the Liquids: Pour in the chicken broth. Use a wooden spoon to scrape up all those delicious browned bits (fond) from the bottom of the pan. This is where the deep flavor lives! Let it bubble for a minute, then pour in the heavy cream. Give it a good stir to combine.
- Cheese, Please! Sprinkle in the grated Parmesan and Italian seasoning. Stir continuously until the cheese is fully melted and the sauce is smooth. Let it simmer gently for 4-5 minutes. It will thicken beautifully as it reduces. Pro Tip: Keep the heat at a gentle bubble, not a rolling boil, to prevent the sauce from breaking or becoming greasy.
- The Grand Reunion: Slide your seared chicken breasts and any accumulated juices back into the pan. Spoon that glorious sauce all over them. Let everything mingle and get cozy over low heat for 2-3 minutes, so the chicken soaks up the sauce and reheats gently.
- Finish & Serve: Remove from heat. Give it a final taste—does it need another pinch of salt or pepper? Now, shower it with that fresh chopped parsley for color and a burst of freshness. Dish it up straight from the pan with all that amazing sauce!
How to Serve It Up Like a Pro
This chicken is the ultimate team player and shines alongside so many things! Here’s how I love to plate it up:
For the Ultimate Comfort Bowl: Serve it over a big bed of fettuccine, pappardelle, or angel hair pasta. The noodles act as little sauce carriers in the best way possible. A simple side of steamed broccoli or a crisp green salad balances the richness perfectly.
The Carb-Lover’s Dream: Fluffy mashed potatoes, creamy polenta, or a pile of buttery rice are absolutely heavenly underneath that river of creamy sauce. They soak it up and make sure you get every last drop.
Keep it Simple & Chic: For a lower-carb option, pair it with roasted asparagus, zucchini noodles (“zoodles”), or a simple arugula salad with a lemon vinaigrette. Don’t forget a big, crusty piece of garlic bread or a warm baguette on the side for mopping—it’s practically a requirement in my house!
Make It Your Own: 5 Tasty Twists
Got the basic version down? Awesome! Now let’s play. Here are some of my favorite ways to riff on this classic:
- Sun-Dried Tomato & Spinach: After the garlic softens, stir in ⅓ cup of chopped sun-dried tomatoes (oil-packed and drained). Let the sauce simmer, then right before adding the chicken back, stir in a big handful of fresh baby spinach until just wilted. Adds a sweet-tart punch and vibrant color.
- Mushroom Lovers’ Edition: After removing the chicken, add 8 oz of sliced cremini mushrooms to the pan. Sauté until golden and their liquid evaporates. Then, proceed with the butter and garlic. Earthy, meaty, and incredible.
- Crispy Bacon Boost: Because bacon makes everything better. Cook 4 strips of chopped bacon first. Remove, then use the bacon fat (plus a little olive oil if needed) to sear your chicken. Crumble the bacon and stir it into the finished sauce for a smoky, salty crunch.
- Lighter, Zesty Lemon-Herb: Swap half the heavy cream for more chicken broth. After finishing the sauce, stir in the zest of one lemon and 2 tablespoons of its juice, along with a big handful of fresh chopped basil or dill. Bright, fresh, and a bit lighter.
- Spicy Cajun Kick: Season your chicken with a Cajun or Creole seasoning blend instead of just salt and pepper. Add ½ tsp of paprika and a pinch of cayenne or red pepper flakes to the sauce. Serve over pasta for a quick chicken Alfredo with attitude!
Beau’s Kitchen Notes & Stories
This recipe has evolved in my kitchen more times than I can count. The first time I made it, I was so eager I added the cheese while the heat was still too high, and it got a little clumpy. Lesson learned: low and slow for a silky sauce! Now, I always take the pan off the heat for a minute before stirring in the Parmesan—it’s a foolproof trick.
It’s also become my go-to “impress without stress” meal. I’ve doubled it for last-minute dinner parties, poured it over meatballs instead of chicken, and even used the sauce as a decadent dip for a pretzel bar during the big game. It’s that versatile. The biggest compliment I ever got? My niece, a notoriously picky eater, asked for “more of Uncle Beau’s fancy chicken sauce” on everything for a week. That’s a win in my book.
FAQs: Your Questions, Answered
Q: My sauce looks thin/watery. What did I do wrong?
A: No worries, this is fixable! The sauce thickens as it reduces (simmers) and as it cools slightly. If it’s still too thin after simmering for 5 minutes, you can create a quick slurry. Mix 1 teaspoon of cornstarch with 1 tablespoon of cold water, then whisk it into the simmering sauce. It should thicken up in about a minute. Alternatively, just let it simmer a bit longer.
Q: Can I use chicken thighs instead of breasts?
A> Absolutely! Bone-in, skin-on thighs would be amazing. Just increase the initial searing time to about 7-8 minutes per side to render the fat and crisp the skin. You may also need to finish them in the oven at 375°F for 10-15 minutes to ensure they’re cooked through before adding them back to the sauce.
Q: How do I store and reheat leftovers?
A> Store in an airtight container in the fridge for up to 3 days. Reheat gently on the stovetop over low heat, adding a splash of chicken broth or cream to loosen the sauce back up. The microwave can work, but do it in short bursts and stir well to prevent the sauce from separating.
Q: My sauce broke/separated and looks greasy. Help!
A> This happens if the heat was too high. Don’t panic! Remove the pan from heat. Let it cool for a minute, then vigorously whisk in a tablespoon of cold cream or broth. This can often bring it back together. If it’s really stubborn, blending it with an immersion blender will re-emulsify it.

Creamy Garlic Parmesan Chicken Breast : Easy One-Pan Dinner
Description
Creamy Garlic Parmesan Chicken Breast (Ready in 30 Minutes)
Ingredients
-
2 boneless, skinless chicken breasts
-
Salt and pepper, to taste
-
1 tbsp olive oil
-
2 tbsp butter
-
4 garlic cloves, minced
-
1 cup heavy cream
-
½ cup chicken broth (low-sodium)
-
¾ cup freshly grated Parmesan cheese
-
1 tsp Italian seasoning
-
Fresh parsley, chopped, for garnish
Optional Twists: sun-dried tomatoes, spinach, mushrooms, bacon, lemon zest, Cajun seasoning
Instructions
1️⃣ Prep & Season Chicken
-
Pat chicken dry. Season generously with salt and pepper.
-
Let sit 5 minutes while pan heats.
2️⃣ Sear Chicken
-
Heat olive oil in a skillet over medium-high heat.
-
Add chicken and sear 5–6 minutes per side until golden and internal temp reaches 165°F.
-
Remove chicken and tent with foil.
3️⃣ Make the Sauce
-
Reduce heat to medium. Melt butter in the same pan.
-
Add garlic, sauté 60 seconds (do not brown).
-
Pour in chicken broth, scraping up browned bits.
-
Add heavy cream, stir to combine.
-
Mix in Parmesan cheese and Italian seasoning. Simmer gently 4–5 minutes until thickened.
4️⃣ Combine & Finish
-
Return chicken to pan, spoon sauce over, and heat 2–3 minutes.
-
Taste, adjust salt/pepper.
-
Garnish with fresh parsley.
Serving Suggestions
-
Over pasta (fettuccine, angel hair)
-
With mashed potatoes, rice, or creamy polenta
-
With roasted vegetables or zucchini noodles for a low-carb option
-
Garlic bread or baguette for mopping up sauce
Notes
-
Thin or watery sauce? Reduce longer or whisk in 1 tsp cornstarch + 1 tbsp cold water.
-
Chicken thighs instead? Cook 7–8 min per side, possibly finish in 375°F oven 10–15 min.
-
Sauce separated? Remove from heat, whisk in 1 tbsp cold cream or broth, or blend briefly.
Nutrition
- Calories: 520Cal Per Serving
- Carbohydrates: 5 g
- Protein: 40 g
Nutritional Info (Per Serving)
Here’s a rough breakdown for one chicken breast with sauce (based on 2 servings). Remember, these are estimates and can vary based on specific ingredients and brands used.
- Calories: ~520
- Protein: 40g
- Carbohydrates: 5g
- Fat: 38g (Saturated Fat: 20g)
- Fiber: 0g
- Sodium: ~800mg (varies greatly with broth and cheese used)
Note: For a lighter version, refer to the “Lighter, Zesty Lemon-Herb” variation above, which significantly reduces the fat and calorie count by swapping half the cream for broth.
Final Thoughts from My Kitchen to Yours
Friends, that’s the beauty of this Creamy Garlic Parmesan Chicken. It’s more than just a recipe—it’s a confidence-builder, a weeknight warrior, and a guaranteed path to a happy, satisfied table. It proves that with a few good ingredients and a single pan, you can create something truly memorable.
So the next time that “what’s for dinner?” dread starts to creep in, I hope you remember this dish. Pull it out, get that pan sizzling, and fill your home with the incredible smell of garlic, butter, and possibility.
Strawberry Banana Pudding Dream: No-Bake, No-Stress Sweetness
Strawberry Banana Pudding Dream: Your New Favorite No-Bake Hug in a Dish
Hey friends, Beau here from Feastical! Let’s talk about that moment. You know the one. It’s been a long day, the sun is setting, and you’re craving something sweet. But the thought of preheating the oven, measuring flour, and waiting for a cake to bake feels… well, like a chore. That’s the exact moment your kitchen should whisper, “Psst… let’s make a dream instead.”
This Strawberry Banana Pudding Dream is my answer to dessert fatigue. It’s for the nights you want to feel like a pastry pro without any of the fuss. We’re talking about a glorious, cloud-like concoction of creamy pudding, ripe bananas, juicy strawberries, and those delightfully crisp vanilla wafers that somehow stay perfectly, magically textured even after a chill in the fridge. It’s a symphony of textures and tastes that feels indulgent, looks spectacular in a big trifle bowl, and honestly, couldn’t be simpler to pull together.
This isn’t just a recipe; it’s your secret weapon for potlucks, family gatherings, or treating yourself on a Tuesday. It’s the dessert that says, “I care,” without saying, “I slaved for hours.” So, tie on that apron (or don’t, no judgment here), grab your favorite mixing bowl, and let’s create some no-bake, no-stress sweetness together. Your spoon is waiting for this dream.
The Pudding That Built a Backyard Party
This recipe’s origin story is pure, happy chaos. Picture my first big summer barbecue at my new house years ago. I’d planned grilled classics, but for dessert, I wanted something cool and crowd-friendly. My grandma’s classic banana pudding was the inspiration, but I stared at my haul of gorgeous, peak-season strawberries and thought, “Why not both?”
I essentially fused her recipe with the vibe of a strawberry shortcake, layering it all haphazardly into the biggest bowl I owned. I was nervous—were the strawberries too juicy? Would it turn to soup? But when I pulled that giant, pink-and-white-speckled beauty from the fridge, the “oohs” and “aahs” were instant. Friends dove in for seconds, kids asked for “the pink part,” and one buddy famously said, “It tastes like summer feels.” That bowl was scraped clean, and a tradition was born. Now, no Feastical-worthy gathering is complete without it. It’s a reminder that the best recipes often come from a little improvisation and a lot of love.
Gathering Your Dream Team: Ingredients & Insights
Here’s the beautiful part: every ingredient here is a familiar friend. No wild goose chases in the grocery store! Let’s break them down with a few chef-y notes to make your pudding perfect.
- 2 boxes vanilla wafers: The foundation! They provide that essential crunch and soak up just enough creaminess. Chef’s Tip: For a deeper flavor, try using Nilla Wafers or a similar brand. For a nuttier twist, Anna’s Ginger Thins are a fun, zippy substitute!
- 6–8 bananas, sliced: Use bananas that are ripe but still firm (yellow with maybe a few freckles). Chef’s Insight: Too green, and they lack sweetness; too ripe (brown), and they’ll turn mushy. A splash of lemon juice on the slices can help prevent browning if you’re assembling way ahead.
- 1 container (16 oz) fresh strawberries, sliced: Fresh is best for that bright, juicy pop! Hull and slice them about ¼-inch thick. Substitution Tip: In a pinch, well-drained frozen strawberries (thawed and patted dry) can work, but fresh truly shines here.
- 2 cups cold milk: Whole milk creates the richest, creamiest pudding base. Chef’s Note: The colder the milk, the quicker and thicker your instant pudding will set. I don’t even take it out of the fridge until I’m ready to whisk!
- 1 (5 oz) box French vanilla instant pudding mix: The “instant” is key for our no-bake life. French vanilla has a richer, custard-like flavor that’s perfect. Regular vanilla works great too!
- 1 (8 oz) package cream cheese, softened: This is the secret weapon for structure and tangy depth. Crucial Tip: SOFTEN IT. Leave it on the counter for a good hour. Beating cold cream cheese is a bicep workout no one signed up for and leads to lumps.
- 1 (14 oz) can sweetened condensed milk: This sticky-sweet magic binds everything together and adds that iconic, silky texture. Don’t substitute with evaporated milk—it’s not the same!
- 1 (12 oz) tub whipped topping (like Cool Whip), thawed: This gives our pudding its dreamy, cloud-like fluff. Chef’s Hack: For a from-scratch touch, you can swap this with 3 cups of freshly whipped heavy cream sweetened with a few tablespoons of powdered sugar.
Crafting the Dream: Step-by-Step with Beau
Okay, team! Let’s build this beauty. Clear some counter space, put on a good playlist, and let’s get layering. Remember, this is fun—there’s no wrong way to stack joy.
- The Creamy Base: In a large bowl, beat that softened cream cheese with a hand mixer (or a mighty whisk and strong arms) until it’s completely smooth and creamy. This is your lump-prevention step! Now, pour in the entire can of sweetened condensed milk and beat them together until it’s one homogenous, deliciously thick, pale mixture. Set this aside.
- The Pudding Power-Up: In another large bowl, whisk the cold milk and the instant pudding mix together. Whisk vigorously for a good two minutes. You’ll feel it start to thicken beautifully right in the bowl. Now, pour your cream cheese mixture into the pudding mixture and fold or whisk it all together until no streaks remain.
- Fold in the Fluff: Here’s where we get gentle. Add about one-third of the thawed whipped topping to your pudding base. Use a spatula to fold it in—this lightens the dense mixture. Once incorporated, fold in the remaining whipped topping gently until the whole thing is smooth, creamy, and dreamy. Try not to over-mix and deflate all that airiness!
- Layer It Like You Mean It: Grab your serving dish—a big glass trifle bowl, a 13×9 pan, or even individual jars! Start with a layer of vanilla wafers (cover the bottom). Next, add a single layer of banana slices, then a layer of strawberry slices. Now, dollop and spread a generous layer (about one-third) of your pudding cream over the fruit, making sure to reach the edges to seal in the wafers.
- Repeat the Magic: Do it all again! Wafers, bananas, strawberries, pudding cream. Usually, two full, hearty layers are perfect, ending with a glorious, thick layer of the pudding cream on top. If you have a deep bowl, go for three!
- The Final Flourish & The Chill: If you like, garnish the top with a few artistic strawberry slices, banana coins, and a sprinkle of crushed vanilla wafers. This is your masterpiece—decorate it! Now, the hardest part: cover it tightly with plastic wrap and chill for at least 2 hours, but ideally 4 or overnight. This waiting time is non-negotiable—it lets the wafers soften into cake-like perfection and lets all the flavors marry into one incredible bite.
Serving Up the Sweetness
When it’s time to serve, you’ve got options! For a family-style vibe, just set the big beautiful bowl in the middle of the table with a large serving spoon and let everyone dig in. The layers look incredible through a glass trifle bowl.
For a more elegant presentation at a dinner party, you can pre-layer it in individual clear cups or mason jars. It’s a fantastic make-ahead move and looks so cute. No matter how you serve it, I recommend a light dusting of crushed wafer or a tiny mint leaf on top just before presenting—it makes all the difference.
This pudding is rich and satisfying. A standard serving is about a cup, but hey, I won’t tell if you go back for “just a little more.” It pairs wonderfully with a cup of black coffee to cut the sweetness or a glass of cold milk for the ultimate nostalgic trip.
Make It Your Own: Dreamy Variations
This recipe is a fantastic canvas! Play around with these twists to suit your taste or what’s in season.
- Tropical Dream: Swap strawberries for well-drained crushed pineapple and add a cup of toasted coconut flakes to the pudding cream. Hello, vacation!
- Mixed Berry Bliss: Use a combo of strawberries, blueberries, raspberries, and blackberries. The color is stunning, and the flavor is a vibrant berry punch.
- Chocolate-Banana Twist: Use chocolate pudding mix instead of vanilla, and swap the vanilla wafers for chocolate wafer cookies or even brownie bites. Omit the strawberries for a classic choc-banana combo.
- Lighter Version: Use Neufchâtel cheese (⅓ less fat cream cheese), fat-free milk, sugar-free pudding mix, and light whipped topping. The structure remains, just a bit lighter!
- Boozy Adult Dream: For a kick, fold 2-3 tablespoons of bourbon, rum, or strawberry liqueur into the cream cheese mixture. So good!
Beau’s Kitchen Notes & Stories
This recipe has evolved from that first chaotic barbecue. I’ve learned that the longer it chills (overnight is king), the better it gets. The wafers achieve this perfect, soft-yet-not-soggy texture that’s just *chef’s kiss*.
One time, I accidentally bought cook-and-serve pudding mix instead of instant. Let’s just say I had a very lumpy, warm pudding situation that did NOT work. We laughed, ordered pizza, and I now double-check every box in the store. Lesson learned: “Instant” is your friend here!
Don’t stress about perfect layers. Some of the best bites are where the strawberry juice slightly tints the cream or where a banana slice peeks out. It’s meant to be homemade, hearty, and full of character—just like the best home cooking.
FAQs & Smooth Sailing Tips
Q: Can I make this ahead of time?
A: Absolutely! It’s a make-ahead superstar. Assemble it up to 24 hours in advance. The flavors meld, and the texture just gets better. Cover it well so it doesn’t pick up fridge smells.
Q: My pudding seems runny/won’t set. What happened?
A: Two likely culprits: 1) The milk wasn’t cold enough, or 2) The pudding wasn’t whisked for the full 2 minutes. Instant pudding needs that initial vigorous whisk with cold liquid to activate the thickeners properly. If it’s a bit soft, just give it more chill time—it will firm up.
Q: Can I use fresh whipped cream instead of whipped topping?
A: 100% yes! Whip 3 cups of heavy cream with ¼ cup powdered sugar and 1 tsp vanilla until stiff peaks form. Fold it in just as you would the tub. It’s decadently delicious.
Q: How long do leftovers last?
A: Covered tightly in the fridge, it’s best within 2-3 days. The bananas will continue to soften and may brown a bit (though the lemon juice trick helps), but it will still taste wonderful.

Strawberry Banana Pudding Dream: No-Bake, No-Stress Sweetness
Description
A cloud-like, creamy pudding layered with ripe bananas, juicy strawberries, and crisp vanilla wafers. Perfect for potlucks, family gatherings, or an indulgent treat with zero baking. Quick, easy, and totally dreamy.
Ingredients
-
2 boxes vanilla wafers
-
6–8 bananas, sliced
-
1 pint (16 oz) fresh strawberries, sliced
-
2 cups cold whole milk
-
1 (5 oz) box French vanilla instant pudding mix
-
1 (8 oz) package cream cheese, softened
-
1 (14 oz) can sweetened condensed milk
-
1 (12 oz) tub whipped topping (like Cool Whip), thawed
-
Optional: lemon juice to prevent banana browning
Instructions
1️⃣ Make the Creamy Base
-
Beat the softened cream cheese in a large bowl until smooth.
-
Add sweetened condensed milk and mix until fully combined.
2️⃣ Prepare the Pudding
-
In another bowl, whisk cold milk with instant pudding mix for 2 minutes until thickened.
-
Pour the cream cheese mixture into the pudding and fold until smooth.
3️⃣ Fold in Whipped Topping
-
Add 1/3 of whipped topping to the pudding, fold gently.
-
Fold in the remaining topping until the mixture is smooth and airy.
4️⃣ Layer the Pudding
-
In a serving dish (trifle bowl, 13×9 pan, or individual jars), start with a layer of vanilla wafers.
-
Add a layer of banana slices, then strawberry slices.
-
Spread 1/3 of the pudding cream over the fruit.
-
Repeat layers: wafers → bananas → strawberries → pudding. End with a final layer of pudding cream.
-
Garnish top with strawberries, banana slices, or crushed wafers if desired.
5️⃣ Chill
-
Cover tightly and refrigerate for at least 2 hours (ideally 4 or overnight) to let flavors meld and wafers soften.
Notes
-
Use ripe but firm bananas; add a splash of lemon juice to prevent browning.
-
Cold milk helps pudding thicken faster.
-
Whipped topping should be folded gently to retain airiness.
-
Assemble up to 24 hours in advance for best flavor and texture.
Nutrition
- Calories: 320 Cal Per Serving
- Fat: 14g
- Carbohydrates: 45 g
Nutritional Nibbles (Per Serving)
Please note: This is an approximate estimate based on the specific ingredients listed and a yield of 12 servings. Values can vary based on brands and precise measurements.
- Calories: ~320
- Carbohydrates: 45g
- Fat: 14g
- Protein: 4g
This is a dessert, friends, meant for celebration and joy! It’s rich, so a little goes a long way. The fruit adds vitamins and fiber, and making it at home means you control the ingredients. Enjoy it as part of a balanced diet—because food, especially dessert, is about pleasure and community, too.
One Last Bite of Wisdom
And there you have it, my foodie friends—the Strawberry Banana Pudding Dream in all its no-bake glory. This recipe is more than just a list of ingredients and steps; it’s an invitation to create something joyful without stress. It’s proof that the most memorable dishes often come from simple ideas, quality ingredients, and the intention to share something sweet.
I hope this becomes a staple in your recipe box, the one you turn to when you need a guaranteed win. Remember, the best kitchen tool you have is your own sense of fun. So play with the layers, try a variation, and make it yours.
If you make it, I’d love to see your creation! Tag me @feastical or use #FeasticalDream so I can celebrate with you. Now, go forth, chill that pudding, and get ready for the compliments to roll in. Until next time, keep your spatula close and your joy closer.
Happy cooking,
Beau Collier

The Best Homemade Bread Pudding Recipe : Sweet, Creamy, and Comfort in Every Bite
The Best Homemade Bread Pudding Recipe: Sweet, Creamy Comfort in Every Bite
Hey there, friend! Beau here, welcoming you back to my cozy corner of the internet, Feastical. If you’ve ever stood in your kitchen, looking at a loaf of bread that’s just a little too dry for a sandwich and thought, “Well, now what?” – then you and I are about to become best pals. Today, we’re transforming that “problem” into the ultimate solution: the most soul-satisfying, custardy, melt-in-your-mouth Homemade Bread Pudding you’ll ever make.
This isn’t just a dessert; it’s a culinary hug. It’s the edible equivalent of your favorite worn-in sweater. In a world that often feels complicated, this recipe is gloriously, beautifully simple. We’re taking humble, everyday ingredients and working a little bit of kitchen magic to create something truly indulgent. Whether you’re planning a festive holiday table, need a show-stopping potluck contribution, or simply want to treat your family on a Tuesday night, this bread pudding answers the call. It’s rich, lightly spiced with cinnamon and nutmeg, and holds that perfect texture—crispy, caramelized edges giving way to a soft, creamy center. So, grab your favorite mixing bowl and let’s make the house smell absolutely incredible. Trust me, your spatula is about to become a hero.
A Stale Loaf and a Grandma’s Wisdom
This recipe takes me right back to my grandma’s linoleum-floored kitchen. She was a wizard with what she called “rescue cooking.” Nothing went to waste. I remember one afternoon, eyeing a rock-hard baguette on her counter with disdain. “That’s trash, isn’t it?” I asked, ever the blunt kid. She just smiled her knowing smile, whisk in hand. “Beau,” she said, “the best desserts often start with ingredients that seem past their prime. Stale bread is just thirsty bread, waiting for a good soak.”
What happened next felt like a miracle. That tough, inedible bread soaked up a rich custard, softened, and baked into a golden-brown, pudding-like masterpiece. She served it warm with a dollop of cold, melting butter instead of sauce. That first bite was a revelation—sweet, eggy, comforting, and profoundly resourceful. It taught me a lesson I carry into Feastical every single day: great food isn’t about the fanciest ingredients; it’s about heart, a little know-how, and seeing potential where others don’t. Every time I make this, I think of her, and I hope this recipe becomes part of your own kitchen story.
Gathering Your Bread Pudding Crew: Ingredients & Insights
Here’s your shopping list for comfort! Don’t stress about exact brands—this is about feel-good cooking.
- 6 cups cubed stale bread (French or brioche): This is the star! “Stale” is key—it soaks up the custard without turning to mush. Day-old French bread gives a classic, sturdy texture. Chef’s Splurge: Brioche makes it unbelievably rich and tender. No stale bread? Cube fresh bread and toast it in a low oven for 10-15 minutes to dry it out.
- 2 cups whole milk & 1 cup heavy cream: The dynamic duo for our custard base. The milk provides the liquid, while the cream brings the luxurious, velvety mouthfeel. For a slightly lighter (but still delicious) version, you can use half-and-half for the entire 3 cups of liquid.
- 4 large eggs: Our binding agents. They set the custard as it bakes, creating that perfect pudding structure. Make sure they’re at room temperature for smoother blending!
- 3/4 cup granulated sugar & 1/4 cup brown sugar: White sugar brings sweetness, while brown sugar adds a subtle molasses depth and helps create those gorgeous caramelized bits on top. It’s a flavor power couple.
- 2 teaspoons vanilla extract: Pure vanilla is worth it here! It’s the aromatic backbone. If you’re feeling fancy, scraping the seeds from a real vanilla bean pod takes it to another level.
- 1 teaspoon cinnamon & 1/4 teaspoon nutmeg: The warm, cozy spice brigade. They smell like happiness while baking. Freshly grated nutmeg is a game-changer if you have it.
- Pinch of salt: Never skip this! Salt is the flavor enhancer that makes all the sweetness and spice pop. It balances everything beautifully.
- Optional: 1/2 cup raisins, chocolate chips, or chopped nuts: Your chance to personalize! I love a mix of golden raisins and pecans. Hate raisins? Leave ‘em out! This is your pudding.
Let’s Get Baking: Your Step-by-Step Roadmap to Pudding Perfection
Ready? Tie on your apron, and let’s do this. I’ll walk you through every step with my favorite kitchen hacks.
Step 1: Preheat & Prep. Fire up your oven to a cozy 350°F (175°C). Take your 9×13-inch baking dish and give it a light but thorough coating of butter, baking spray, or a neutral oil. This is our pudding’s home, and we don’t want it sticking to the sides! Chef’s Hack: Doing this first means your dish is ready to go the moment your bread is.
Step 2: The Bread Base. Pile your 6 cups of cubed bread right into the greased dish. It should look generous—it’ll settle as it soaks. Now’s the time to scatter in any of your optional mix-ins. Tuck them in amongst the bread cubes so every scoop gets a surprise.
Step 3: The Custard Whisk-Off. In a large bowl, let’s make the magic potion. Crack in your 4 eggs and give them a preliminary whisk to break them up. Then, pour in the milk, cream, both sugars, vanilla, cinnamon, nutmeg, and that all-important pinch of salt. Whisk it all together with enthusiasm until it’s completely smooth and homogenous. You shouldn’t see any streaks of egg or specks of sugar. Pro Tip: Whisk by hand here. Over-whisking with a machine can incorporate too much air, which we don’t want for our dense, creamy pudding.
Step 4: The Soak (The Secret Step!). Slowly and evenly pour your beautiful custard over the bread pile. Now, take clean hands or a flat spatula and gently press down on the bread. You’ll hear a lovely squelching sound as it starts drinking up that liquid. This ensures every nook and cranny gets saturated. Here’s the non-negotiable part: Walk away. Let it sit on the counter for a full 10-15 minutes. I set a timer. This soaking time is what separates good bread pudding from legendary bread pudding.
Step 5: Bake to Golden Bliss. Slide your dish into the preheated oven’s center rack. Bake for 40-45 minutes. You’re looking for a uniformly golden-brown top that’s slightly puffed, and a center that’s set (it should jiggle just a tiny bit, like set gelatin, not like liquid). If the top is browning too fast, you can tent it loosely with aluminum foil for the last 10 minutes.
Step 6: The (Brief) Wait. I know, the aroma is torture. But pull the dish out and let it cool on a wire rack for at least 15-20 minutes before slicing. This allows the custard to finish setting fully, making serving so much easier. It will still be wonderfully warm.
Serving Your Masterpiece: The Grand Finale
Presentation is part of the fun! I like to slice my bread pudding into generous squares right in the dish. Then, using a flat spatula, I lift each portion onto a plate or into a shallow bowl.
Now, for the toppings—this is where personality shines! A simple dusting of powdered sugar through a fine-mesh sieve is elegant and sweet. A cloud of freshly whipped cream is classic and delightful. But my absolute favorite? A warm vanilla sauce or a drizzle of good bourbon caramel sauce. The contrast of warm pudding and a cool topping, or the synergy of warm-on-warm saucy goodness, is the final note of perfection. For a truly decadent breakfast-for-dessert vibe, a small scoop of vanilla ice cream melting over the top is absolutely acceptable. I won’t tell.
Make It Your Own: Delicious Recipe Variations
This recipe is a fantastic canvas. Here are a few of my favorite twists:
- Chocolate Chip Brioche Bread Pudding: Use brioche bread and a full cup of semi-sweet chocolate chips. You can even add a tablespoon of cocoa powder to the custard for a double chocolate hit.
- Apple Cinnamon Streusel: Fold 1 cup of finely chopped apples (like Granny Smith) into the bread. Before baking, top with a streusel made from 1/4 cup each of flour, brown sugar, cold butter cubes, and an extra pinch of cinnamon.
- Savory Bread Pudding (AKA Strata): Omit the sugars, cinnamon, and nutmeg. Add 1 cup of shredded cheese (gruyere is amazing), 1 cup of cooked sausage or bacon, and a handful of chopped herbs like chives or thyme to the custard. Perfect for brunch!
- Gluten-Free & Dairy-Free: Use your favorite gluten-free bread (toasted first) and swap the milk/cream for full-fat canned coconut milk. It’s incredibly creamy and has a lovely subtle coconut flavor.
- Tropical Escape: Swap raisins for chopped dried mango or pineapple, and add 1/2 cup of shredded sweetened coconut to the custard. A rum sauce on top is highly recommended here.
Beau’s Kitchen Notes: The Story Behind the Recipe
This recipe has evolved in my kitchen more times than I can count. I’ve made it in a cast-iron skillet over a campfire (carefully!), baked it in individual ramekins for a fancy dinner party, and even once accidentally used pumpkin pie spice instead of cinnamon. (Verdict: delicious accident!). The biggest lesson? Don’t fear the “stale.” I’ve used everything from leftover croissants and panettone to hot dog buns in a pinch. It all works. This dish is forgiving and kind—just like the best home cooking should be. It’s also my go-to “I need to bring a dessert” recipe because people are always so impressed, and they never guess how simple it truly is. The secret is our little friend, time, and that essential soaking period.
Your Bread Pudding Questions, Answered!
Q: My bread pudding came out too soggy in the middle. What happened?
A: The most likely culprit is not enough soaking time, or using bread that wasn’t dry enough. The custard needs time to penetrate. Next time, ensure your bread is truly stale/dry and let the mixture soak for the full 15 minutes. Also, double-check your oven temperature with a thermometer.
Q: Can I make this ahead of time?
A: Absolutely! You can assemble the whole dish—bread in the dish, custard poured over—cover it tightly, and refrigerate overnight. This is actually fantastic, as it allows for maximum absorption. Just let it sit on the counter for 20-30 minutes before baking the next day.
Q: What’s the best way to reheat leftovers?
A: To retain texture, reheat individual portions in the oven at 325°F for 10-15 minutes, or in an air fryer for about 5 minutes. The microwave will work in a pinch but can make it a bit rubbery.
Q: I don’t have a 9×13 dish. Can I use something else?
A> Of course! An 11×7 dish, a large oven-safe skillet, or even a deep-dish pie plate will work. Just keep an eye on the baking time—a deeper dish may take a few minutes longer, a shallower one a bit less.

The Best Homemade Bread Pudding Recipe : Sweet, Creamy, and Comfort in Every Bite
Description
Transform stale bread into a rich, custardy dessert with crispy edges and a soft, creamy center. Perfect for dessert, brunch, or a cozy treat any night of the week. Optional add-ins let you personalize it with chocolate, nuts, or fruit.
Ingredients
-
6 cups cubed stale bread (French, brioche, or day-old bread)
-
2 cups whole milk
-
1 cup heavy cream
-
4 large eggs (room temp)
-
¾ cup granulated sugar
-
¼ cup brown sugar
-
2 tsp vanilla extract
-
1 tsp ground cinnamon
-
¼ tsp ground nutmeg
-
Pinch of salt
-
Optional: ½ cup raisins, chocolate chips, or chopped nuts
Instructions
1️⃣ Preheat & Prep
-
Preheat oven to 350°F (175°C).
-
Grease a 9×13-inch baking dish with butter or nonstick spray.
2️⃣ Layer Bread
-
Place cubed bread in the dish.
-
Scatter optional mix-ins evenly among the cubes.
3️⃣ Make Custard
-
In a large bowl, whisk eggs lightly.
-
Add milk, cream, both sugars, vanilla, cinnamon, nutmeg, and salt.
-
Whisk until smooth.
4️⃣ Soak Bread
-
Pour custard evenly over the bread.
-
Press gently with spatula or hands to ensure all bread is soaked.
-
Let sit 10–15 minutes.
5️⃣ Bake
-
Bake 40–45 minutes until top is golden and center is just set.
-
If browning too fast, tent loosely with foil for the last 10 minutes.
6️⃣ Cool & Serve
-
Cool 15–20 minutes before slicing.
-
Optional toppings: powdered sugar, whipped cream, vanilla sauce, caramel, or ice cream.
Notes
-
Stale or toasted bread absorbs custard better than fresh bread.
-
Let the custard sit on the bread for full 10–15 minutes.
-
Baking times vary with pan size: deeper pans = slightly longer, shallower = slightly shorter.
-
Leftovers reheat best in oven at 325°F (10–15 mins) or air fryer (5 mins).
Nutritional Information (Because We’re Curious!)
Let’s keep it real—this is a celebratory comfort dessert. A serving (1/8th of the recipe, without optional add-ins or toppings) provides about 320 calories. It offers approximately 8g of protein from the eggs and milk, 38g of carbohydrates primarily from the bread and sugar, and 16g of fat from the cream and eggs. It also has about 1g of fiber. Think of it as a rich, occasional treat. The joy and community it brings to your table are priceless nutrients, too! For specific dietary needs, the variation swaps (like gluten-free or dairy-free) can help customize it.
Final Thoughts: Your Invitation to Comfort
And there you have it, friend—my heart-on-a-plate, my grandma’s wisdom, and my favorite way to turn simplicity into splendor. This Homemade Bread Pudding is more than a recipe; it’s an invitation to slow down, to be resourceful, and to create something that genuinely feeds the soul. It’s proof that the most memorable meals often come from the humblest beginnings.
I hope you bake it, share it, and make it your own. Tag me over at @Feastical if you do—I love seeing your kitchen creations. Remember, around here, food should always taste like a warm hug. Now, go preheat that oven. Your warm, sweet, creamy, comforting bite of heaven awaits.
Happy cooking,
Beau
Roasted Poblano Corn Relish : Smoky, Sweet, and Perfect for Tacos (or Anything Else)
Roasted Poblano Corn Relish – Your New Go-To For Smoky, Sweet Flavor
Hey friends, Beau here from Feastical! Let’s talk about that magic moment in a meal when one simple component completely steals the show. You know what I mean—the bright, crunchy slaw that makes the fish taco, the tangy pickled onion that lifts the heavy burger, the relish. Oh, the humble relish. But we’re not talking about the jarred stuff today. We’re crafting a superstar: Roasted Poblano Corn Relish.
This isn’t just a condiment; it’s a flavor explosion waiting to happen on your plate. Imagine the deep, smoky sweetness of fire-kissed poblano peppers, dancing with juicy, charred corn, all tossed in a zesty lime hug and finished with a confetti of fresh cilantro. It’s got texture, it’s got personality, and it plays well with everything. Seriously, I’ve been known to eat it straight from the bowl with a tortilla chip (or, you know, a spoon. No judgment here).
Whether you’re a weekend grill master, a taco Tuesday enthusiast, or just someone looking for a no-fuss way to jazz up a simple piece of chicken or fish, this relish is your secret weapon. It comes together in under 30 minutes, fills your kitchen with the most incredible aroma, and makes you look like a culinary genius. So, tie on your apron, and let’s make something spectacularly simple together.
The Backyard BBQ That Started It All
This recipe was born from a beautiful, chaotic summer evening. My buddy Mike had just gotten a new grill and was hosting an “everything must be charred” party. There were peppers blackening over the coals, corn roasting in its husks, and a general sense of smoky merriment. In the last-minute scramble to get food on the table, we hastily chopped the poblanos, sawed the kernels off the cobs, and tossed it all together with whatever we had on the picnic table—a lone lime, half a red onion, a sad-looking jalapeño.
What happened next was pure kitchen alchemy. That haphazard mix became the star of the night. People were spooning it onto their burgers, hot dogs, and even grilled pineapple. Someone dubbed it “flavor confetti,” and the name stuck in my head. It was a perfect lesson that the best food often isn’t meticulously planned; it’s fresh, it’s seasonal, and it’s made with a spirit of fun. Every time I make this relish, it takes me right back to that golden-hour light, the laughter, and the realization that sometimes, the messiest moments create the most memorable meals.
Gathering Your Flavor Power Team
Here’s the beautiful cast of characters you’ll need. I’ve included my chef-y notes and swaps because I want this to work in your kitchen, with what you have on hand.
- 4 Poblano Peppers: The soul of the dish! Poblanos have a mild, earthy heat and a gorgeous flavor that transforms when roasted. Chef’s Insight: Don’t fear the char—blackened skin = big flavor. If you can’t find poblanos, Anaheim peppers are a good sub, or for zero heat, use red bell peppers.
- 4 Ears of Corn (or 3 cups frozen, thawed): Sweet, juicy, and perfect for getting those little charred bits. Pro Tip: Fresh summer corn is dreamy, but frozen fire-roasted corn from the store is a brilliant, time-saving cheat I use year-round.
- 2 Tablespoons Olive Oil: Our simple dressing. It coats everything in richness and helps the flavors mingle. A good, fruity extra-virgin olive oil is perfect here.
- 1/4 Red Onion, finely diced: Adds a sharp, crunchy bite and a pop of color. Soaking the diced onion in cold water for 5 minutes tames the raw edge if you prefer a milder flavor.
- 1/2 Jalapeño, minced (optional): The optional kick! I leave the seeds in for more heat, or scrape them out for a gentle warmth. Feel free to skip it entirely or swap in a pinch of cayenne.
- Juice of 1 Lime: The bright, zippy wake-up call. Fresh lime juice is non-negotiable here—it balances the smoke and sweetness perfectly.
- 1/4 Cup Chopped Cilantro: The fresh, herbal finish. If cilantro tastes like soap to you (it’s a genetic thing!), flat-leaf parsley or even fresh chopped basil makes a lovely, if different, substitute.
- Salt and Pepper, to taste: The essential enhancers. Don’t be shy—seasoning is what makes all these individual flavors sing together.
Let’s Get Cooking: Building Your Relish, Step-by-Step
- Roast and Reveal the Poblanos. This is the most fun part! Place your poblanos directly over the flame of a gas stove, on a hot grill, or on a baking sheet under your broiler. Using tongs, turn them until the skin is blistered and blackened all over. They’ll look scary, but trust the process! Chef Hack: No open flame? No problem. A dry cast-iron skillet on high heat works too—just press and turn. Once charred, immediately transfer the peppers to a bowl and cover it tightly with a plate or plastic wrap. Let them steam for 10 minutes. This critical step loosens the skin, making it easy to peel off. Then, just rub away the skin with your fingers (a little running water can help), slice open, remove the stem and seeds, and dice the tender, smoky flesh.
- Char the Corn to Perfection. While the poblanos steam, heat a large, dry skillet (cast iron is king here) or grill pan over high heat. Add your corn kernels in a single layer and let them sit, undisturbed, for a minute or two to get some good color. Then, give them a stir and repeat until you see those beautiful, lightly charred, caramelized spots—about 5-7 minutes total. You’ll hear them sing a little “pop-pop” song. That’s the sound of flavor developing! Pro Tip: Don’t overcrowd the pan. Work in batches if needed to avoid steaming the corn.
- The Grand Mixing. In a large, welcoming bowl, combine your beautifully diced roasted poblanos, the charred (and slightly cooled) corn, the diced red onion, and the minced jalapeño if using. Drizzle with the olive oil and the fresh lime juice. Now, give it a generous sprinkle of salt and a few cracks of black pepper.
- Fold and Finish with Freshness. Toss everything together gently but thoroughly. Taste it right now—this is the cook’s privilege! Adjust the salt, lime, or pepper. Just before serving, fold in the chopped cilantro. This keeps it vibrant and green. And that’s it! You’ve just made magic.
How to Serve This Flavor Fiesta
Okay, the relish is chilling in the bowl, and you’re probably eyeing it with a chip. Go ahead, quality control is important! But here’s how to make it the life of the party:
The Ultimate Taco Topper: This is its destiny. Spoon it generously over grilled fish tacos (hello, Mahi-Mahi!), carnitas, shrimp, or even simple black bean tacos. The cool, smoky relish against warm, spiced meat is a match made in heaven.
Grill’s Best Friend: Serve it alongside or on top of grilled chicken breasts, steak, pork chops, or salmon. It cuts through richness and adds a fresh, juicy component.
Dip & Scoop: Grab the sturdiest tortilla chips you can find. This is a next-level salsa alternative for your snack board. It also makes an incredible topping for nachos.
Breakfast Brilliance: Trust me on this: a heaping spoonful on top of cheesy scrambled eggs or a breakfast burrito will change your morning.
Make It Your Own: Delicious Twists & Swaps
Once you’ve mastered the base, play with it! Here are a few of my favorite riffs:
- Southwest Creamy Relish: Fold in 1/2 cup of crumbled cotija or feta cheese and a dollop of sour cream or Mexican crema for a richer, creamy version perfect for dolloping.
- Peach & Poblano Summer Relish: Add 1 diced, firm ripe peach or nectarine in step 3. The sweet fruit with the smoky pepper is an unforgettable summer combo.
- Black Bean & Poblano Fiesta Salad: Add a can of rinsed black beans and an extra squeeze of lime. Suddenly, it’s a hearty, protein-packed salad or vegetarian filling.
- Avocado Lime Mash-Up: Just before serving, gently fold in one diced, ripe avocado. It adds incredible creaminess. (Note: Add avocado only to what you’ll eat immediately, as it doesn’t store well once mixed in).
- No-Grill, Quick Fix: Use a can of fire-roasted corn (drained) and a jar of roasted poblano peppers (also called “rajas”). Chop the peppers, mix everything in a bowl, and you’ve got instant relish in 5 minutes. It’s a lifesaver!
Beau’s Kitchen Notebook
This recipe has evolved from that backyard BBQ into my year-round staple. I’ve learned a few things: First, don’t stress about getting every last bit of pepper skin off. A few flecks add character. Second, this relish actually gets better after sitting for an hour or so, as the flavors marry—making it a fantastic make-ahead side. I once accidentally doubled the lime juice and, after a moment of panic, realized it created an even brighter, more punchy version that was fantastic on fish. So, treat the recipe as a friendly guide, not a strict rulebook. The best part about cooking is putting your own stamp on it. Oh, and a final confession: I’ve been known to use the leftover relish as an omelette filling the next day. Zero regrets.
Your Questions, Answered
- Can I make this ahead of time?
- Absolutely! In fact, I recommend it. Prepare the relish (hold the cilantro), cover, and refrigerate for up to 3 days. The flavors meld and deepen beautifully. Stir in the fresh cilantro just before serving.
- My relish turned out watery. What happened?
- This usually happens if the corn or peppers were still holding a lot of moisture when mixed. After charring the corn, let it cool in the hot pan—the residual heat will evaporate excess water. For the poblanos, after peeling and dicing, pat them gently with a paper towel to remove any lingering steam or moisture.
- How spicy is this?
- Poblanos are generally mild (a 1-2 on a 10-point heat scale). The real heat variable is the optional jalapeño. For a totally mild relish, skip the jalapeño and ensure you’ve removed all the white ribs and seeds from the poblanos. For more heat, keep the jalapeño seeds or add a pinch of smoked paprika or chipotle powder.
- Can I freeze roasted poblano corn relish?
- I don’t recommend freezing the fully assembled relish, as the texture of the onions, cilantro, and lime juice will suffer. However, you can absolutely freeze roasted, peeled, and diced poblanos separately in a freezer bag for up to 3 months. Thaw and use as needed!
Roasted Poblano Corn Relish : Smoky, Sweet, and Perfect for Tacos (or Anything Else)
Description
This roasted poblano corn relish is smoky, sweet, fresh, and incredibly versatile. Use it on tacos, chicken, steak, fish, burgers, or simply scoop it up with tortilla chips. It’s bright, colorful, and adds instant flavor to any meal — and it comes together quickly with simple ingredients.
Ingredients
-
4 poblano peppers
-
4 ears of corn (or 3 cups frozen, thawed)
-
2 tbsp olive oil
-
¼ red onion, finely diced
-
½ jalapeño, minced (optional)
-
Juice of 1 lime
-
¼ cup chopped cilantro (or parsley/basil if you prefer)
-
Salt & black pepper, to taste
Instructions
1. Roast the poblanos
-
Char the peppers over a gas flame, on a grill, under a broiler, or in a hot dry skillet.
-
Turn until the skin is blistered and blackened.
-
Place them in a covered bowl for 10 minutes to steam.
-
Peel off the skin, remove seeds, and dice the roasted flesh.
2. Char the corn
-
Cut kernels off the cobs (if using fresh).
-
Heat a dry skillet or grill pan over high heat.
-
Add corn in a single layer and cook 5–7 minutes, letting it sit long enough to get charred spots.
-
Stir occasionally. Don’t overcrowd the pan.
3. Combine
In a large bowl, mix:
-
roasted poblanos
-
charred corn
-
red onion
-
jalapeño (optional)
Add the olive oil, lime juice, salt, and pepper.
4. Finish
Gently fold in chopped cilantro.
Taste and adjust seasoning.
Notes
-
Don’t worry about removing every speck of pepper skin — a few roasted flecks add flavor.
-
For a milder relish, skip the jalapeño and remove the pepper ribs/seeds.
-
Letting the relish sit for 30–60 minutes makes the flavors even better.
-
Pat roasted peppers dry if they feel watery to avoid a runny relish.
Nutritional Info (A General Guide)
Friends, I’m a cook, not a dietitian, but I believe in knowing what’s going into our bodies. This relish is packed with wholesome, real-food ingredients. Here’s a general breakdown per serving (about 1/2 cup), but remember, variations will change this:
- Calories: ~110
- Protein: 3g (Thanks, corn!)
- Carbohydrates: 12g (Mostly complex carbs from the veggies)
- Fat: 6g (The good kind from olive oil)
- Fiber: 2g (Helping keep things moving!)
This is a vitamin C powerhouse from the peppers and lime, low in sugar, and naturally gluten-free and vegan. It’s a flavor-packed way to add vegetables and nutrients to any meal.
Your New Kitchen Staple Awaits
And there you have it—my love letter to Roasted Poblano Corn Relish. This little bowl of smoky, sweet, tangy goodness proves that big flavor doesn’t require complicated techniques or a pantry full of obscure ingredients. It’s about treating simple components with a little respect (and a little fire) and letting them shine.
I hope this recipe finds its way into your regular rotation, becomes your secret weapon for potlucks, and sparks your own happy kitchen memories. Food is about connection, and sharing these simple, joyful recipes with you is my favorite part of running Feastical.
Now, I’d love to hear from you! Did you add a fun twist? What did you serve it with? Tag me on social @feastical or drop a comment on the blog. Until next time, keep your knives sharp, your produce fresh, and your kitchen filled with laughter.

Best Chocolate Pudding Recipe: Rich, Creamy & Made from Scratch
The Best Chocolate Pudding Recipe: Your Spoonful of Pure, Unapologetic Joy
Hey, friends! Beau here, from my kitchen to yours. Let’s talk about a truth we can all agree on: sometimes, life just calls for a big, comforting bowl of chocolate pudding. Not the kind from a little plastic cup (though, no judgment here!), but the real deal—silky, deeply chocolatey, and warm from the stove. The kind that coats your spoon and tastes like a childhood memory and a hug all at once.
I’m a firm believer that magic happens in simple pots with simple ingredients. Today’s recipe is the poster child for that belief. This homemade chocolate pudding is a game-changer. It’s richer than any store-bought version, smoother than you ever dreamed, and comes together with just a handful of pantry staples in under 20 minutes. We’re talking about a dessert that’s equally perfect for a Tuesday night pick-me-up as it is for impressing dinner guests. It’s the culinary equivalent of your favorite cozy sweater. So, grab your favorite whisk and a trusty saucepan. We’re about to make a bowl of pure, unadulterated chocolate bliss that will ruin you for any other pudding forever. Let’s get cooking!
Why This Pudding? A Little Story From My Nana’s Table
This recipe isn’t just a list of ingredients to me. It’s a direct line back to my Nana Collier’s linoleum-floored kitchen. She wasn’t a fancy cook, but she was a real one. Her solution for a rainy day, a skinned knee, or a case of the “teenage mopes” (her words for my moods) was always the same: a pot of warm chocolate pudding.
I can still see her, humming an old tune, whisking that darkening mixture on her avocado-green stove. The ritual was everything. The gentle scrape of the whisk against the pot, the first incredible smell of cocoa hitting the warm milk, and the triumphant moment it thickened into velvety perfection. She’d pour it into mismatched teacups and we’d eat it warm, right at the kitchen table, while she told me stories. That pudding wasn’t just dessert; it was love, patience, and the simple promise that everything would be okay. Every time I make this, I’m right back there. I want you to have that feeling, too—to create your own little moments of sweet, chocolatey comfort. Let’s make some memories, one spoonful at a time.
Gathering Your Chocolate Dream Team: The Ingredients
Here’s the beautiful part: the magic comes from just a few everyday players. Let’s break them down. I like to measure everything out before I start—it’s called mise en place, and it makes the cooking process feel like a calm, organized dance instead of a frantic scramble.
- ½ cup granulated sugar: Our sweet foundation. It balances the bitterness of the cocoa. For a deeper flavor, you can swap half with light brown sugar.
- ¼ cup unsweetened cocoa powder: This is the star! Use a good-quality one—it makes all the difference. I prefer natural cocoa for a classic, fruity-chocolate flavor. Dutch-process works too, for a mellower, darker taste.
- 3 tablespoons cornstarch: This is our thickening wizard. It’s what transforms milky liquid into luscious, spoonable pudding. Make sure it’s fresh for maximum power!
- ¼ teaspoon fine salt: Don’t skip it! Salt is a flavor enhancer, not just a salty taste. It makes the chocolate flavor pop and rounds out the sweetness perfectly.
- 2¾ cups whole milk: The backbone of our creaminess. The higher the fat content, the richer the final pudding. For an ultra-decadent version, swap ¾ cup of the milk for heavy cream.
- 1 teaspoon pure vanilla extract: The aromatic finish. It adds a beautiful, warm note that complements the chocolate. A tiny splash of almond extract is also a fun secret twist.
- 2 tablespoons unsalted butter: Our finishing touch for gloss and mouthfeel. It adds a subtle richness and a beautiful sheen. For a dairy-free version, a good plant-based butter works great here.
- Optional: 2 ounces chopped dark chocolate or chocolate chips: My pro-chef move for extra depth. Stirring in real chocolate at the end sends the flavor into the stratosphere. It’s like turning the volume up to eleven.
Let’s Make It: Your Step-by-Step Roadmap to Pudding Perfection
Ready? Put on some good music, tie on your apron, and let’s do this. It’s a simple process, but a few key tricks ensure silky-smooth success every single time.
- The Dry Team Huddle: In a medium saucepan (off the heat), whisk together the sugar, cocoa powder, cornstarch, and salt. Whisk them really well until you see no more streaks of white cornstarch. This prevents those dreaded lumps later on. Think of it as getting everyone introduced and friendly before the party starts.
- The Gradual Pour: Now, slowly drizzle in about ½ cup of the cold milk while whisking constantly. You’ll get a thick, pasty mixture. This step, called making a “slurry,” is our ultimate anti-lump insurance. Once it’s smooth, confidently whisk in the rest of the milk until everything is beautifully combined.
- The Patient Cook: Place the saucepan over medium heat. Now, your mission is to whisk. Constantly. Not frantically, but with a steady, even rhythm, making sure to scrape the bottom and corners of the pot. You’ll see it start to steam, then get frothy, and then—magic!—it will begin to thicken. This takes about 5-8 minutes. Chef’s Key Hack: Don’t rush by cranking the heat. Medium heat allows the cornstarch to activate smoothly without scorching.
- The Bubble Watch: Keep whisking! Once you see the first big, lazy bubble *bloop* up in the center, let it bubble gently for a full 60 seconds. This cooks out the starchy taste from the cornstarch and ensures the perfect set. The pudding will be thick enough to coat the back of a spoon.
- The Flavor Finish: Pull the pot off the heat immediately. Now, stir in the vanilla, butter, and your optional chopped chocolate. The residual heat will melt it all into a glossy, luxurious pool. Whisk until the butter and chocolate are fully melted and incorporated. Taste it (carefully, it’s hot!). This is the moment of truth—isn’t it incredible?
- The Final Rest: Pour your beautiful pudding into serving cups or a large bowl. To prevent a “skin” from forming (though I love the skin!), press a piece of plastic wrap directly onto the surface of the pudding. This is the professional way to keep it perfectly smooth.
Serving It Up: From Simple to Spectacular
How you serve this pudding is half the fun! It’s a versatile superstar.
For the purest experience, dive in while it’s still warm. There’s something utterly divine about that just-made, slightly loose texture. Spoon it into your favorite mug and curl up on the couch.
For classic chilled pudding, pop the covered cups into the fridge for at least 2-3 hours, or overnight. It will set up firm and cool, perfect for layering in parfaits.
Want to dress it up? The options are endless! Top with a mountain of softly whipped cream, a sprinkle of flaky sea salt, some toasted nuts (hazelnuts are a dream!), fresh berries, or a few crunchy chocolate shards. You can even use it as a luxurious dip for strawberries or pretzels. Get creative and make it your own!
Make It Your Own: 5 Delicious Twists
Once you’ve mastered the classic, the playground is open! Here are a few of my favorite ways to riff on this recipe.
- Mocha Madness: Whisk 1-2 teaspoons of instant espresso powder or finely ground coffee in with the dry ingredients. It won’t taste like coffee, just like a deeper, more complex chocolate. Trust me on this.
- Peanut Butter Cup: After removing from heat, stir in ¼ cup of smooth peanut butter along with the butter. Swirl a little extra on top before serving.
- Vegan/Dairy-Free Delight: Super easy! Use full-fat canned coconut milk or your favorite unsweetened plant-based milk (oat and almond are great). Swap the butter for coconut oil or vegan butter. The result is incredibly rich and fantastic.
- Black Forest Parfait: Layer chilled pudding with lightly sweetened whipped cream and jarred morello cherries or a quick cherry compote in a glass. It’s a showstopper.
- Orange Chocolate Dream: Add the zest of one orange to the sugar and rub it together with your fingers before mixing with the other dry ingredients. The citrus oil perfumes the whole pudding beautifully.
Beau’s Kitchen Notes & Stories
This recipe has been my trusty sidekick for years. I’ve made it in tiny apartment kitchens and for huge holiday crowds. The funniest fail? The time I was chatting with a friend and got distracted, letting the heat get too high. I ended up with a few tiny “chocolate scrambled eggs” (lumps) in my pot. I just strained the pudding through a fine-mesh sieve into my cups—crisis averted, and no one knew! It’s a forgiving recipe.
Over time, I’ve learned that the quality of your cocoa is the single biggest flavor upgrade. And that taking the full minute to cook after the first bubble is non-negotiable for texture. This pudding has evolved from my Nana’s simple version to my own canvas for flavors, but its soul—that warm, comforting, chocolatey heart—has never changed.
Your Questions, Answered: FAQs & Troubleshooting
Q: My pudding is lumpy! What did I do wrong and can I fix it?
A: Lumps usually happen if the dry ingredients weren’t fully incorporated with the initial cold milk, or if the heat was too high. Don’t panic! The best fix is to immediately take it off the heat and grab your immersion blender or a regular blender (careful, it’s hot!). Blend until silky smooth. You can also press it through a fine-mesh sieve. It’ll save the day.
Q: Can I make this ahead of time?
A: Absolutely! In fact, it’s better if it chills for at least 3 hours to fully set. It keeps beautifully, covered tightly in the fridge, for up to 3 days.
Q: My pudding is too thin/runny after chilling.
A> This means the cornstarch didn’t fully activate, likely because it didn’t come to a full, bubbling boil for that full minute. Next time, be patient and let it bubble. For this batch, you can enjoy it as a delicious chocolate sauce over ice cream!
Q: What’s the difference between this and cooked pudding mix?
A> Taste and ingredients! Ours uses real cocoa (and optional real chocolate), butter, and vanilla for a complex, homemade flavor. The mix often contains stabilizers and artificial flavors. Once you go scratch, you never go back.

Best Chocolate Pudding Recipe: Rich, Creamy & Made from Scratch
Description
This homemade chocolate pudding is rich, velvety, and unbelievably easy. With just a few pantry ingredients and one saucepan, you get a warm, deeply chocolatey dessert that tastes way better than anything store-bought. Perfect for a quick treat, a cozy night in, or as a base for parfaits and layered desserts.
Ingredients
-
½ cup granulated sugar
-
¼ cup unsweetened cocoa powder (natural or Dutch)
-
3 tbsp cornstarch
-
¼ tsp fine salt
-
2¾ cups whole milk
-
1 tsp vanilla extract
-
2 tbsp unsalted butter
-
Optional: 2 oz chopped dark chocolate or chocolate chips (for extra depth)
Notes
-
Mocha: add 1–2 tsp instant espresso to dry ingredients
-
Peanut Butter: stir in ¼ cup smooth peanut butter at the end
-
Vegan/Dairy-Free: use coconut milk or oat milk + vegan butter
-
Orange Chocolate: add 1 tsp orange zest to the sugar
-
Black Forest: layer with cherries + whipped cream
Nutritional Information (A Quick Note!)
Alright, let’s keep it real. This is a dessert, a treat meant to be savored and enjoyed fully. It’s made with real, whole ingredients. A serving of this delicious homemade pudding (about ¾ cup) has approximately: 230 calories, 5g of protein, 30g of carbohydrates, and 10g of fat. Remember, these are estimates and can vary based on specific brands and any substitutions you make (like using lower-fat milk). The important thing is that you know exactly what’s in your food—no mystery chemicals, just good, honest chocolatey goodness. Enjoy it mindfully and without guilt!
Final Thoughts: Your Spoon Awaits
And there you have it, friends—your passport to the world’s best homemade chocolate pudding. This isn’t just a recipe; it’s a reminder that the most satisfying things in life are often the simplest to create. You have the power to make something extraordinary from a few basic ingredients and a little bit of love and whisking.
I hope this recipe finds its way into your regular rotation, becoming your go-to for bad days, celebrations, and everything in between. Make it, share it, top it with your favorite things, and most importantly, enjoy every single spoonful.
Thanks for cooking with me today. If you make it (and I really hope you do!), tag me @Feastical or drop a comment on the blog—I love seeing your kitchen creations! Now, go forth and pudding.
With a full heart and a happy spoon,
Beau