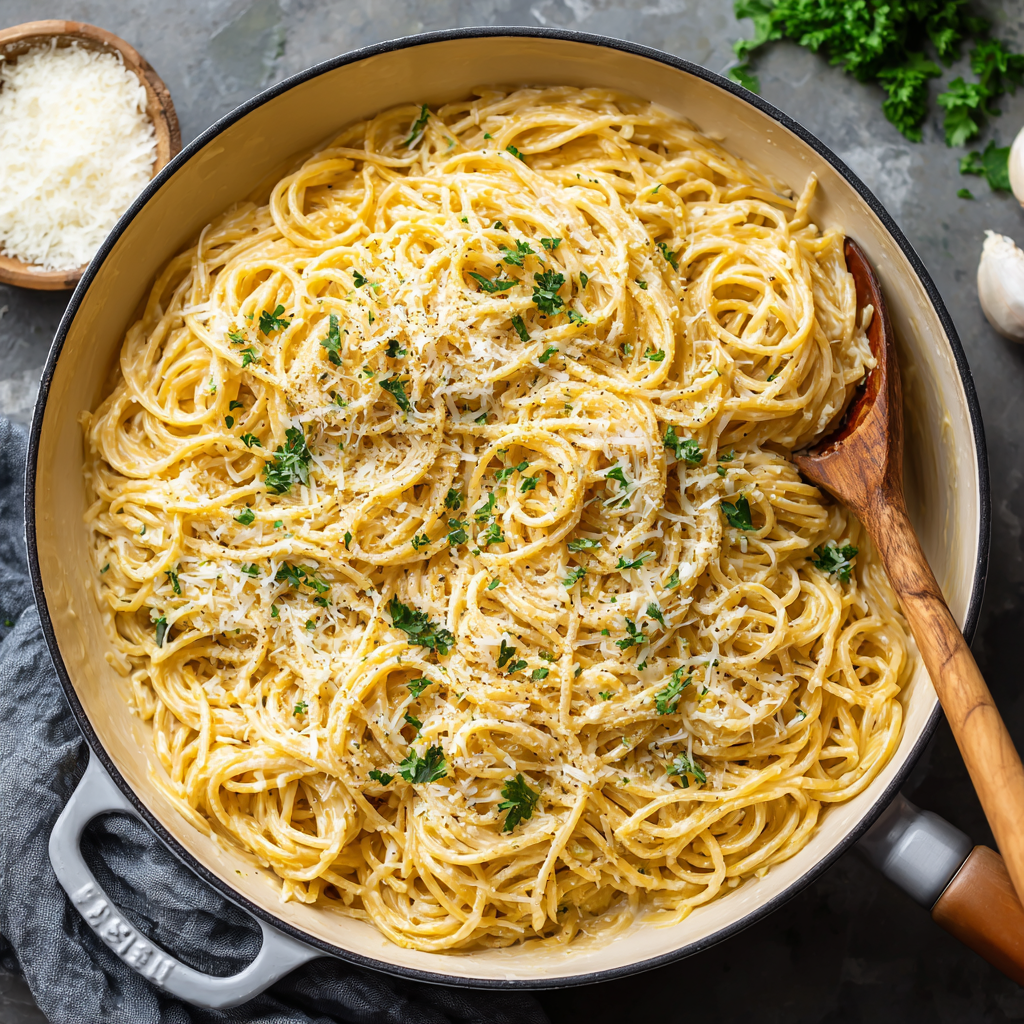
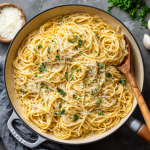
Creamy Garlic Parmesan Spaghetti : Cheesy Pasta Comfort in 20 Minutes
Creamy Garlic Parmesan Spaghetti: Your New 20-Minute Comfort Food Obsession
Introduction
Hey friend, Beau here. Let’s talk about that moment. You know the one. It’s been a *day*, the couch is calling your name, but so is your stomach—and it’s demanding something glorious, something creamy, something that tastes like a cheesy, garlicky hug. You could order takeout… or, you could work a little 20-minute magic right in your own kitchen.
I’m telling you, this Creamy Garlic Parmesan Spaghetti is that magic. It’s the culinary equivalent of your favorite cozy sweatshirt. It feels indulgent and fancy, like you really treated yourself, but the secret is it’s built on humble, pantry-friendly staples. We’re talking al dente spaghetti swirled in a luxuriously smooth sauce that’s rich from cream cheese, sharp and salty from real Parm, and fragrant with just the right amount of golden garlic.
This isn’t just another pasta recipe. This is your new weeknight superhero, your impress-a-friend-with-zero-stress secret weapon, and your ultimate blank canvas for delicious creativity. So, tie on your apron (or don’t, I’m not the boss of you), fill a pot with salted water, and let’s make a simple, soul-satisfying meal that proves comfort doesn’t have to be complicated.
The Night This Pasta Saved the Day
This recipe has roots in a seriously humble, slightly chaotic kitchen moment. Picture it: my best friend showed up at my door, completely unannounced, after a truly rotten day at work. She was hangry, I was unprepared, and my fridge was doing its best impression of a barren wasteland. We had that “what on earth can we make?” stare-down.
But then, we started digging. A lonely box of spaghetti in the pantry. A nub of Parmesan in the cheese drawer. A brick of cream cheese I’d bought for bagels. Garlic, always garlic. Butter, of course. In 20 minutes flat, with some laughter and a lot of stirring, we transformed our “nothing” into a bubbling, creamy dream. We ate it straight from the skillet, sitting on the kitchen floor, and I swear the world felt lighter with every forkful. That’s the power of this dish—it’s not just food; it’s a mood-lifter, a problem-solver, a tangible slice of comfort. It’s been a staple in my home ever since.
Gathering Your Flavor Arsenal
Here’s the beautiful part: the ingredient list is short, sweet, and powerful. Quality here makes all the difference, so let’s break it down.
- 8 oz spaghetti: The classic vehicle for our creamy sauce. The long strands are perfect for twirling and coating. Chef’s Insight: Don’t break the noodles! Let them soften in the boiling water and gently press them down as they cook—it’s more fun that way.
- 2 tbsp butter: Our rich, flavorful base for sautéing. It adds a nutty depth you just don’t get from oil alone.
- 4 cloves garlic, minced: The aromatic heart of the dish. Pro Tip: Fresh is best! That pre-minced jarred stuff just doesn’t have the same punch. Use a microplane for an almost paste-like consistency that melts seamlessly into the sauce.
- 4 oz cream cheese, softened: The secret weapon for instant creaminess and body. Substitution Tip: Full-fat is ideal for the silkiest texture, but Neufchâtel works great too. Just make sure it’s at room temp so it blends smoothly without lumps.
- ½ cup grated Parmesan cheese: The flavor king. Non-negotiable Chef’s Note: Please, for the love of all that is cheesy and good, grate it yourself from a block. The pre-grated stuff has anti-caking agents that can make your sauce grainy and less melty.
- ½ cup milk (or reserved pasta water): The liquid to bring it all together. Milk makes it extra rich. Lighter Hack: Using the starchy pasta water lightens the dish slightly and helps the sauce cling to every noodle like a dream.
- Salt and black pepper to taste: Your essential flavor adjusters. Remember, the Parmesan is salty, so taste before you add more salt at the end!
- Fresh parsley, chopped (for garnish): Not just a pretty green sprinkle! The fresh, slightly peppery bite cuts through the richness beautifully.
Let’s Get Cooking: Your Foolproof Roadmap to Creaminess
Ready? This is where the magic happens, and it’s a straight shot to deliciousness. Follow these steps, and you’ll be a pasta pro in no time.
- Cook the Pasta: Bring a large pot of heavily salted water to a rolling boil. Add your spaghetti and cook according to package directions until al dente—that means it should still have a slight bite to it. Critical Hack Alert! Before you drain it, use a mug or ladle to scoop out about 1 cup of the starchy pasta water. This liquid gold is your sauce insurance policy. Drain the pasta, but don’t rinse it! Rinsing washes away the starch that helps the sauce stick.
- Build the Flavor Base: While the pasta cooks, melt the butter in a large skillet or Dutch oven over medium heat. Once it’s foaming slightly, add the minced garlic. Now, here’s the key: sauté for just 1-2 minutes until it’s fragrant and *just* starting to turn golden. We want sweet, mellow garlic flavor, not bitter, burnt garlic. Stir it constantly—it cooks fast!
- Create the Creamy Dream: Reduce the heat to medium-low. Add the softened cream cheese to the garlic butter. It might look a little clumpy at first, but don’t panic! Use a whisk and stir patiently as it melts. Once it’s mostly smooth, slowly stream in your milk (or ½ cup of the reserved pasta water), whisking constantly. You’ll see it transform into a velvety, pale sauce.
- Cheese, Please! Turn off the heat. Sprinkle in your freshly grated Parmesan cheese and whisk until it’s completely melted and the sauce is uniform. The residual heat is perfect for melting the cheese without causing it to seize up. Season with a good crack of black pepper.
- The Grand Finale – The Toss: Add the drained, hot spaghetti directly into the skillet with the sauce. Using a pair of tongs or two forks, lift and toss the pasta aggressively, coating every single strand. If the sauce seems too thick, add a splash of your reserved pasta water, one tablespoon at a time, until it reaches a silky, clinging consistency. Taste it! This is your moment. Does it need a pinch more salt? A final crack of pepper? Adjust now.
- Serve with Love: Immediately divide the pasta among bowls or plates. Finish with a generous shower of chopped fresh parsley. That pop of color and fresh flavor is the perfect finishing touch.
How to Serve It Up Like a Pro
This pasta is a star all on its own, but a little presentation goes a long way! I love serving it in wide, shallow bowls that let you see all that creamy goodness. For a simple, elegant touch, use a carving fork to twirl a neat nest of spaghetti in the center of the bowl, then spoon a little extra sauce over the top and garnish.
Want to make it a full feast? It pairs beautifully with:
- A crisp, bright side salad with a lemony vinaigrette to balance the richness.
- Some garlic bread or a crusty baguette for… well, for mopping up every last drop of sauce. No judgment here.
- A simple side of roasted broccoli or asparagus – the caramelized edges are fantastic with the creamy cheese.
And for a casual, family-style vibe? Just plunk the whole skillet right in the middle of the table with the salad and bread. Let everyone dig in. It’s the most fun way to eat.
Make It Your Own: Fun Twists & Swaps
Once you’ve mastered the base, the kitchen playground opens up! Here are a few of my favorite ways to riff on this classic.
- Protein Power-Up: Add 1 cup of shredded rotisserie chicken or a pound of sautéed shrimp in the last minute of tossing. It becomes a complete, hearty meal instantly.
- Veggie Lover’s Delight: Sauté a cup of sliced mushrooms or spinach with the garlic until wilted. Sun-dried tomatoes (oil-packed, chopped) stirred in at the end add a fantastic sweet-tangy punch.
- Spicy Arrabbiata Twist: Love a little heat? Add ½ to 1 teaspoon of red pepper flakes to the garlic butter. Let them toast for 30 seconds before adding the cream cheese for a deep, infused spice.
- Lighter & Brighter: Swap the milk for the full ½ cup of pasta water and use a lighter cream cheese. Finish with a big squeeze of fresh lemon juice and zest for a surprisingly zingy, lighter version.
- Gluten-Free & Grain-Free: This sauce is a champion for any noodle! Use your favorite gluten-free spaghetti, zucchini noodles (salted and squeezed dry), or even chickpea pasta.
Beau’s Kitchen Notes & Stories
This recipe has seen some things in my kitchen! I once, in a hurry, added cold cream cheese straight from the fridge. Let’s just say I spent 10 minutes wrestling with little white lumps before finally giving up and using my immersion blender. Lesson learned: softened cream cheese is non-negotiable for smooth sailing.
Over the years, I’ve also played with the cheese blend. Sometimes I’ll do half Parmesan, half Pecorino Romano for a sharper bite. Or, for an ultra-decadent version, I’ll stir in a handful of shredded Gruyère. It’s evolved from a “what’s in the fridge?” scramble to my most-requested easy pasta by friends. The core remains the same: fast, creamy, garlicky bliss. Don’t be afraid to play with it and make it your family’s own signature dish.
Your Questions, Answered
Q: My sauce seems too thin/too thick. Help!
A: No worries! Sauce consistency is easily fixed. Too thin? Let it simmer on low for an extra minute or two to reduce. Too thick? This is where that reserved pasta water is your best friend. Add it a tablespoon at a time while tossing the pasta until it’s perfectly silky.
Q: Can I make this ahead of time or reheat leftovers?
A: It’s best fresh, but leftovers can be revived! Store in an airtight container in the fridge for up to 3 days. To reheat, add a splash of milk or water to a skillet over low heat and stir gently until warmed through. The microwave can work in a pinch, but it may separate a bit—just stir vigorously after heating.
Q: Why did my sauce get grainy or separate?
A: This usually happens if the heat is too high when adding the cheese, causing the fats to break. Always take the pan off the heat before adding the Parmesan. Also, pre-grated cheese is a common culprit due to the anti-caking agents. Freshly grated is the way to go!
Q: Can I use heavy cream instead of cream cheese?
A: You can, but it’s a different recipe! You’d make a roux (butter + flour), then add cream and cheese. This version with cream cheese is intentionally easier and gives a thicker, tangier cream base without needing a roux.
Creamy Garlic Parmesan Spaghetti : Cheesy Pasta Comfort in 20 Minutes
Description
When you’re craving comfort food but don’t want a complicated recipe, this Creamy Garlic Parmesan Spaghetti is the answer. It’s smooth, cheesy, garlicky, and incredibly satisfying—made with simple pantry ingredients and ready faster than takeout. Perfect for busy weeknights, last-minute guests, or whenever you need a little comfort in a bowl.
Ingredients
-
8 oz spaghetti
-
2 tablespoons butter
-
4 cloves garlic, minced
-
4 oz cream cheese, softened
-
½ cup milk (or reserved pasta water)
-
½ cup freshly grated Parmesan cheese
-
Salt and black pepper, to taste
-
Fresh parsley, chopped (optional garnish)
Instructions
-
Cook the Pasta
Bring a large pot of well-salted water to a boil. Cook spaghetti until al dente according to package directions. Reserve ½–1 cup pasta water, then drain. -
Sauté the Garlic
In a large skillet over medium heat, melt butter. Add minced garlic and sauté for 1–2 minutes, stirring constantly, until fragrant (do not brown). -
Make the Sauce
Lower heat to medium-low. Add softened cream cheese and whisk until melted and smooth. Slowly pour in milk (or pasta water), whisking until creamy. -
Add the Parmesan
Remove skillet from heat. Stir in Parmesan cheese until fully melted and smooth. Season with black pepper and salt as needed. -
Combine & Serve
Add spaghetti to the skillet and toss until well coated. Add small splashes of reserved pasta water if needed to loosen the sauce. Garnish with parsley and serve immediately.
Notes
-
Soften cream cheese first for a lump-free sauce.
-
Remove from heat before adding Parmesan to prevent graininess.
-
Use freshly grated cheese for better melting and flavor.
-
Pasta water is your secret weapon—it helps the sauce cling to noodles.
Nutritional Information*
*Please note: The following is an estimate provided by an online nutrition calculator. Values can vary based on specific ingredients and portion sizes.
Per Serving (based on 4 servings):
Calories: ~430 | Total Fat: 22g | Saturated Fat: 13g | Cholesterol: 65mg | Sodium: 450mg |
Final Thoughts
So, there you have it. In the time it takes to watch half a sitcom, you can create a bowl of pure, uncomplicated comfort. This Creamy Garlic Parmesan Spaghetti proves that you don’t need a laundry list of ingredients or complicated techniques to make something that feels truly special. It’s a testament to the magic that happens when a few simple, good-quality ingredients are treated with a little care and a lot of love.
What started as a kitchen scrapheap hero for a friend in need has become, for me, so much more than a recipe. It’s a reminder that the best meals are often the simplest ones, and that cooking for yourself or someone you care about is one of the most fundamental, nourishing acts of kindness there is.
I hope this recipe finds its way into your regular rotation, becoming your go-to for rough days, celebratory nights, and every hungry moment in between. I hope you tweak it, make it your own, and maybe even create your own kitchen-floor memory with it.
Now, go grab that fork. Your cozy, creamy, garlicky hug in a bowl is waiting.
With a full belly and a happy heart,
Beau
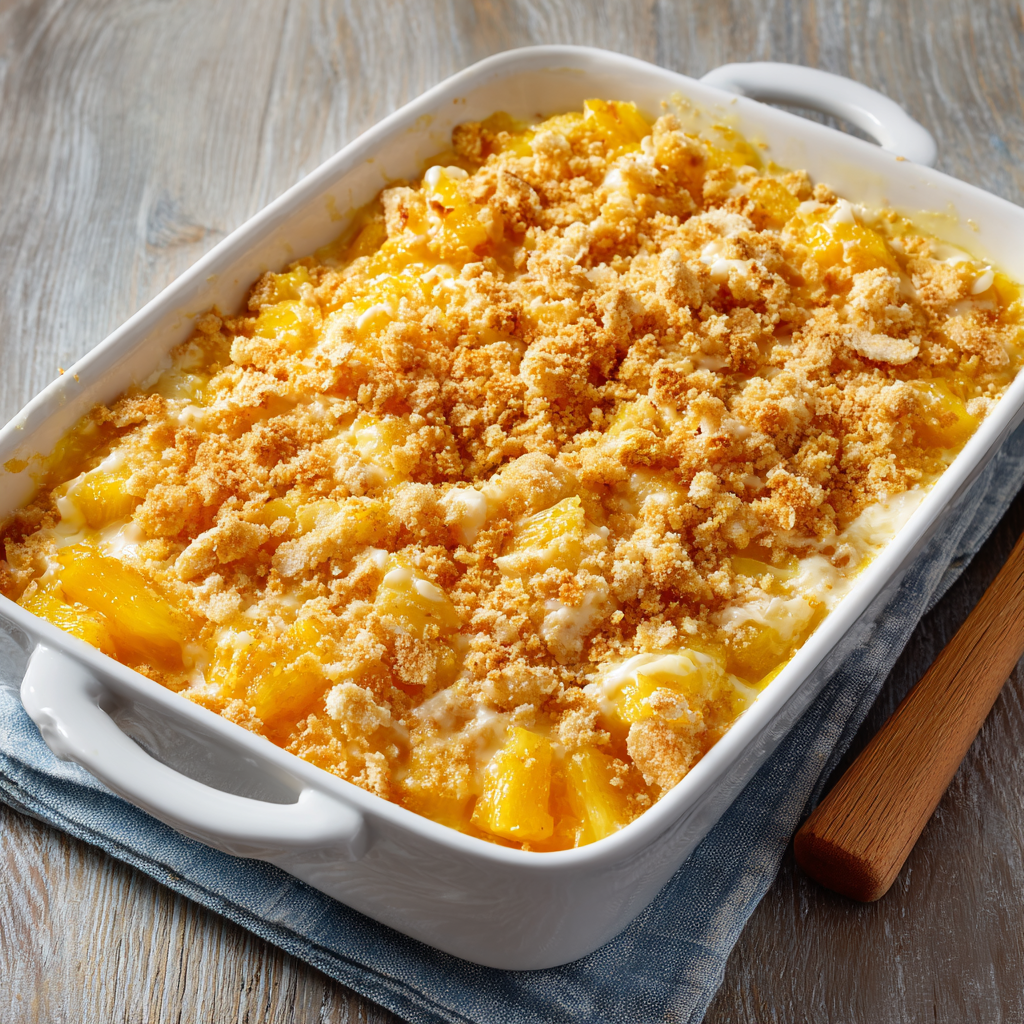
Southern Pineapple Casserole Recipe : Sweet, Savory & Irresistible
Southern Pineapple Casserole: The Sweet & Savory Side Dish That Steals Every Show
Hey friends, Beau here! Let’s talk about a dish that, at first glance, might make you tilt your head like a confused puppy. Pineapple… and cheddar cheese… baked together under a blanket of buttery crackers? I know, I know. It sounds like a culinary dare. But what if I told you this is one of the most beloved, fought-over, recipe-card-worn-out classics to ever grace a Southern table? Welcome to the wonderful, slightly whimsical world of Pineapple Casserole.
This isn’t just a recipe; it’s a personality test for your palate. It throws out the rulebook and creates something entirely its own: a glorious, bubbly, sweet-and-salvary hybrid that defies categorization. Is it a side dish? A dessert? A brunch superstar? The beautiful answer is: yes. It’s the dish that sits proudly next to your Easter ham, your Thanksgiving turkey, and your Sunday potluck fried chicken, holding its own and collecting empty plates and wide-eyed “What IS this?!” compliments all night.
Today, I’m pulling back the curtain on this iconic recipe. We’re going to make it together, step-by-step, and I’ll share all my little chef hacks to ensure yours is perfect. So, if you’re ready to be a kitchen rebel and create a dish that sparks joy and conversation, grab your favorite baking dish. We’re about to make magic.
The Potluck Prophet: How This Casserole Won Over the Skeptics
My love affair with this casserole started not in a fancy restaurant, but at a sprawling, everyone-bring-a-dish church potluck deep in Georgia. I was maybe twelve, a kid who thought his culinary horizons were pretty broad (read: I loved pizza). The buffet table was a sea of familiar green beans, mac and cheese, and fried chicken. And then there was this one dish, shimmering golden-brown, with little specks of pineapple peeking through a cracker crust. It looked… intriguing.
I took a small spoonful, next to a mountain of mashed potatoes for safety. One bite. My brain short-circuited. The initial buttery, salty crunch gave way to a warm, sweet, almost jammy pineapple center, punctuated by the sharp, creamy tang of melted cheddar. It was bizarre. It was incredible. I went back for a second, much larger helping, just as Mrs. Henderson, the lovely eighty-year-old who brought it, walked by. “See, baby?” she said with a wink. “Sometimes the best things in life are the ones that don’t seem to make sense until you try ‘em.” She was right. That casserole taught me a lifelong lesson about food and curiosity. It’s been a staple in my own home ever since, a delicious reminder to always try the mysterious dish on the table.
Gathering Your Cast of Characters
Here’s the beautiful part: this legendary dish requires just six simple ingredients. But as with any great performance, the quality of your cast matters. Let’s break them down.
- 2 cans (20 oz each) pineapple chunks in juice, drained: This is our star. We’re using chunks for perfect little bursts of flavor. Chef’s Insight: **Drain thoroughly!** This is the #1 secret to avoiding a soupy casserole. Let those chunks sit in a colander for a few minutes, or even give them a gentle press with a paper towel. We want the flavor, not the excess liquid.
- 1 cup granulated sugar: It seems like a lot, but it balances the tang of the pineapple and cheese. Substitution Tip: You can reduce it to ¾ cup if you prefer it less sweet, or for a deeper flavor, try using ½ cup white and ½ cup packed brown sugar.
- 6 tbsp all-purpose flour: Our trusty binder. It thickens the natural pineapple juices and sugar into a luscious sauce as it bakes.
- 2 cups shredded sharp cheddar cheese: The co-star! The “sharp” is non-negotiable here—its bold tang is essential to cut through the sweetness. Chef’s Hack: **Shred it yourself.** Pre-shredded cheese is coated to prevent clumping, which also prevents it from melting as gloriously. A block of extra-sharp cheddar and two minutes on a box grater makes a world of difference.
- 1 sleeve (about 30) Ritz crackers, crushed: The iconic, buttery topping. They create that irresistible salty-sweet crunch. Substitution Tip: In a pinch, butter crackers or even saltines work, but Ritz have a unique flavor that’s hard to beat.
- ½ cup (1 stick) unsalted butter, melted: This transforms our crushed crackers into a golden, crispy crust. Using unsalted lets you control the seasoning.
Let’s Build Some Magic: Your Step-by-Step Guide
Ready? Apron on, oven preheating to 350°F (175°C). Let’s do this.
- Prep Your Stage. Grease a 9×13-inch baking dish with a little butter or non-stick spray. This ensures easy serving and those coveted crispy edges. Put your well-drained pineapple chunks in a large mixing bowl.
- Create the Sweet Base. In a small bowl, whisk together the sugar and flour. This might seem like a boring step, but it ensures the flour distributes evenly and doesn’t clump up. Sprinkle this mixture over the pineapple chunks. Now, get in there with a big spoon or spatula and stir, stir, stir until every single pineapple piece is coated in the sugary, floury mixture. It’ll look a little like sparkly snow on tropical islands.
- Introduce the Cheese. Time for the plot twist! Add your 2 cups of glorious, freshly-shredded sharp cheddar to the bowl. Gently fold it in. Don’t overmix—just get it evenly distributed. You’ll see the cheese start to cling to the sugary pineapple. This is where the magic begins. Pour this entire mixture into your greased baking dish and spread it into an even layer.
- Make the Famous Topping. In a medium bowl, place your crushed Ritz crackers. (My method: put them in a zip-top bag and roll with a rolling pin—therapeutic and effective!). Pour the melted butter over the crumbs. Use a fork to mix it all together until every crumb is moistened and the mixture resembles wet sand. Now, sprinkle this evenly over the pineapple-cheese layer. Don’t press it down—let it stay loose and fluffy for maximum crunch.
- Bake to Golden Perfection. Slide the dish into your preheated oven, uncovered. Bake for 30-35 minutes. You’re looking for the topping to be a deep, golden brown and the edges to be actively bubbling with sweet, cheesy lava. Chef’s Watch-Out: Ovens vary! Start checking at 25 minutes. If the top is browning too fast, you can loosely tent it with foil for the last 10 minutes.
- The Crucial Rest. This is the hardest part. When you pull that golden, bubbly masterpiece from the oven, let it rest for 10-15 minutes. This allows the thick, gooey filling to set just enough so you can serve beautiful scoops, not a runny sauce. Trust me, it’s worth the wait.
How to Serve This Southern Legend
Presentation is part of the fun! I like to serve it right from the baking dish at the table—it’s rustic and inviting. Use a large spoon to get deep scoops, ensuring you get all the layers: that crispy top, the gooey middle, and the caramelized edges (the best part!).
What to serve it WITH? Oh, the possibilities!
- The Classic Holiday Spread: It’s absolute perfection alongside baked ham, glazed pork chops, or roast turkey. The sweetness complements the savory meat beautifully.
- Potluck Power Couple: Pair it with something green and fresh, like a big green bean salad or a tangy collard green dish, to balance the richness.
- Brunch Game-Changer: Serve it next to fluffy scrambled eggs, crispy bacon, and biscuits. It replaces your fruit compote and your cheesy grits in one glorious dish!
A little fresh parsley or thyme sprinkled on top adds a nice pop of color, but it’s certainly not required. This dish speaks for itself.
Make It Your Own: Delicious Twists & Tweaks
Once you’ve mastered the classic, feel free to play! Here are a few of my favorite riffs on the theme:
- The “Little Kick” Version: Add ¼ teaspoon of cayenne pepper or a few dashes of hot sauce to the pineapple mixture. The subtle heat playing with the sweet and savory is next-level.
- Nutty Crunch: Stir ½ cup of chopped pecans or walnuts into the buttery cracker topping before sprinkling. The extra toastiness is divine.
- Tropical Vacation: Use 1 can of pineapple chunks and 1 can of well-drained mandarin oranges. The citrus blend is bright and wonderful.
- Brown Butter Bliss: Take your melted butter one step further. Cook it in a saucepan over medium heat until it turns a nutty brown color and smells amazing, then mix it with the crackers. This adds a deep, toffee-like note.
- Dairy-Friendly Swap: For a slightly different flavor profile, swap the cheddar for a equal amount of grated Gruyère or Swiss cheese.
Beau’s Kitchen Notes & Stories
This recipe is a living thing in my kitchen. I’ve made it for skeptical in-laws (they asked for the recipe), for homesick friends (it worked like a charm), and once, in a comedic kitchen disaster, I accidentally used salt instead of sugar. Let me tell you, that was a version we do not speak of. Learn from my tears—always taste your ingredients!
The beauty of this casserole is its resilience. It travels like a dream to potlucks (just keep it warm in a carrier), reheats beautifully, and the leftovers? Controversial statement: they might be even better the next day, after the flavors have really gotten to know each other. It’s evolved from Mrs. Henderson’s classic to my own staple, and I hope it becomes a story in your kitchen, too.
Your Questions, Answered!
Q: Can I make this ahead of time?
A: Absolutely! You have two great options. 1) Assemble the entire casserole, cover tightly, and refrigerate for up to 24 hours before baking. You may need to add 5-10 minutes to the bake time since it’s going in cold. 2) Bake it fully, let it cool, cover, and refrigerate. Reheat in a 300°F oven until warmed through.
Q: My casserole came out really runny. What happened?
A: The culprit is almost always not draining the pineapple well enough. Really let those juices drip away! Also, that rest time after baking is crucial for the filling to set. If it’s still too loose, a little extra flour next time (7 tbsp instead of 6) can help.
Q: Can I use fresh pineapple?
A: You can, but canned pineapple in juice is actually ideal here. It’s consistently sweet and tender. Fresh pineapple can be more acidic and variable in sweetness, and it contains an enzyme that can break down dairy, potentially making your cheese texture a bit funky after baking.
Q: Is this a side dish or a dessert?
A: Yes. Officially, it’s a side dish in the South. But I’ve served it warm in a bowl with a scoop of vanilla ice cream melting over the top, and nobody complained. Not one bit.

Southern Pineapple Casserole Recipe : Sweet, Savory & Irresistible
Description
Pineapple casserole is one of those Southern recipes that sounds unusual until you taste it. Sweet pineapple, sharp cheddar cheese, and a buttery cracker topping come together to create a warm, comforting dish that’s rich, tangy, and slightly sweet. It’s a favorite for holidays, potlucks, and Sunday dinners, especially alongside ham or roasted meats.
Ingredients
-
2 cans (20 oz each) pineapple chunks in juice, well drained
-
1 cup granulated sugar
-
6 tablespoons all-purpose flour
-
2 cups sharp cheddar cheese, freshly shredded
-
1 sleeve (about 30) Ritz crackers, crushed
-
½ cup (1 stick) unsalted butter, melted
Instructions
-
Preheat the Oven
Preheat oven to 350°F (175°C). Lightly grease a 9×13-inch baking dish. -
Mix the Pineapple Base
Place drained pineapple chunks in a large bowl. In a separate bowl, whisk together sugar and flour. Sprinkle over the pineapple and stir until evenly coated. -
Add the Cheese
Gently fold in the shredded cheddar cheese. Spread the mixture evenly in the prepared baking dish. -
Prepare the Topping
In a bowl, mix crushed crackers with melted butter until all crumbs are coated. -
Assemble & Bake
Sprinkle the buttery cracker mixture evenly over the pineapple layer. Bake uncovered for 30–35 minutes, until golden on top and bubbling around the edges. -
Rest & Serve
Let the casserole rest for 10–15 minutes before serving so it sets slightly.
Notes
-
Drain the pineapple very well to avoid a watery casserole.
-
Use sharp cheddar, not mild—it balances the sweetness.
-
Shred cheese yourself for better melting.
-
Let it rest after baking so the filling thickens properly.
Nutritional Information & Prep Facts
While this is a celebration dish, it’s good to know what you’re enjoying! Here’s a breakdown per serving (based on 8 servings):
- Calories: 310
- Protein: 5g
- Fat: 18g
- Carbohydrates: 34g
Prep Time: 10 mins | Cook Time: 35 mins | Total Time: 45 mins | Servings: 8
One Last Bite of Wisdom
So there you have it, friends—the not-so-secret secret to the South’s most unexpectedly perfect dish. Southern Pineapple Casserole is more than a recipe; it’s a conversation starter, a comfort food rebel, and a guaranteed smile on a plate. It proves that the best moments in the kitchen often come from a little courage and a willingness to mix things up.
I hope you give it a try. Take it to your next gathering and watch the magic happen. And when someone asks, “What’s in this?!” just smile and say, “A little Southern hospitality.” Now, go preheat that oven. Your new favorite dish is waiting.
Happy cooking,
Beau

Crispy Air Fryer Baked Potato (Quick & Fluffy Inside)
The Unbelievably Crispy Air Fryer Baked Potato: Your Weeknight Hero Awaits
Hey, friend! Beau here, from Feastical. Tell me, have you ever had one of those days where you just need dinner to be simple, satisfying, and hands-off? You dream of that classic baked potato—the one with a crackly, salty skin that gives way to a cloud-like, steaming interior—but the thought of heating up the whole oven for an hour feels… well, like a chore. I hear you. I’ve been there, staring at the potatoes, then at the oven, then back at the clock.
But what if I told you the secret to the best baked potato of your life is already sitting on your counter? That magical little machine, the air fryer, isn’t just for fries and wings. It’s about to become your baked potato MVP. We’re tossing out the foil (seriously, don’t wrap it!), forgetting the pre-heat wait, and diving headfirst into the crispiest, fluffiest, most foolproof baked potato you’ve ever made. In less than an hour, with just a potato, a drizzle of oil, and a sprinkle of salt, you’ll have a blank canvas for a meal that feels like a warm hug. So, grab your favorite russets and let’s turn that craving into reality. Dinner is about to get seriously easy and unbelievably good.
Why This Potato? A Tale of Two Textures
This recipe isn’t just about convenience for me—it’s a full-circle kitchen memory. My grandma made the world’s most legendary oven-baked potatoes. They were an event. She’d prep them after lunch for a dinner side, and the anticipation would build all afternoon. The problem? When I moved into my first apartment with a finicky, ancient oven, recreating her masterpiece felt impossible. My attempts were either undercooked rocks or sad, steamed skins.
Then came the air fryer, a wedding gift I initially side-eyed. On a desperate weeknight, I tried a potato in it. The result? A revelation. The intense, circulating heat created a skin so crisp it shattered when I cut it open, revealing a center so fluffy it begged for a pat of butter. It was my grandma’s perfect texture, achieved in half the time. It was a game-changer. It turned a “sometimes” treat into an “anytime” staple. Now, it’s my go-to method, and I’m so excited to pass that little bit of weeknight magic on to you.
Gathering Your Simple, Magical Ingredients
See? I told you it was simple. This is about quality, not quantity. Here’s what you’ll need and why each one matters:
- 2 large russet potatoes: The star! Russets are ideal because of their high starch content and thick skin, which gets incredibly crispy. Look for ones that are firm and oval-shaped for even cooking. Chef’s Insight: Give them a good squeeze. If they’re firm, they’re fresh. A little green? Pass on that one.
- 1 tbsp olive oil: Our crispiness conductor. A light coating helps the salt stick and promotes that gorgeous, golden-brown, crackly skin. Substitution Tip: Avocado oil or even a light spray of cooking oil works great here. Melted butter or bacon fat? Now you’re talking flavor town.
- ½ tsp kosher salt: Don’t skip this! Kosher salt has larger flakes that adhere beautifully and give a delightful salty crunch in every bite. Chef’s Insight: If you only have fine table salt, use a bit less (about ¼ tsp) to avoid over-salting.
- Your Favorite Toppings (The Fun Part!): Sour cream, chives, shredded cheddar, bacon bits, butter, chili, broccoli cheese… the world is your oyster (or, well, your potato). This is where you make it your own.
Your Foolproof Roadmap to Potato Perfection
Ready? Let’s do this. I’ll walk you through each step with my favorite little hacks to guarantee success.
- Scrub & Dry Like a Pro: Scrub those potatoes clean under cold running water. We want to eat the skin, so let’s make it delicious! Then, take an extra minute to pat them completely dry with a kitchen towel or paper towels. Chef’s Hack: This is the secret for maximum crispiness. Any leftover water will create steam and soften the skin. Dry potatoes = crispy potatoes.
- Oil & Salt Massage: Drizzle the oil over the potatoes and use your hands to rub it all over, coasting every nook and cranny. Then, sprinkle the kosher salt evenly all around. Chef’s Commentary: Don’t be shy! Get in there. This hands-on step ensures every square inch is prepped for greatness. Feel free to add a crack of black pepper or garlic powder here too.
- Preheat for a Power Start: Preheat your air fryer to 400°F (200°C). Why? Starting with a hot “oven” gives the potatoes an instant blast of heat, kickstarting the crisping process. It’s like searing a steak!
- Basket Arrangement is Key: Place the potatoes in the air fryer basket, leaving a little space between them for the hot air to circulate. Chef’s Tip: No overcrowding! If they’re touching, they’ll steam each other. Cook in batches if you need to. It’s worth it.
- The Patient Cook & Flip: Cook for 40-45 minutes. Here’s the only “work” you’ll do: at the 20-minute mark, use tongs to flip each potato over. Why flip? This ensures even browning and crispness on all sides. They should be looking beautifully golden and dry.
- The Doneness Test: Your timer is a guide, but your knife is the boss. After about 40 minutes, carefully poke a potato with a sharp paring knife or a fork. If it slides in and out with zero resistance, you’re there! The skin should sound hollow if you tap it.
- Fluff & Load: Using a knife (careful, it’s hot!), slice an “X” into the top of each potato. Then, using a fork, gently fluff the insides from bottom to top. Chef’s Final Hack: Fluffing creates little pockets for your butter, sour cream, and toppings to melt right into the center. Now, load it up with your favorites and dig in!
How to Serve Your Masterpiece
Presentation is part of the fun! For a classic loaded potato, I like to set up a topping bar. Place the fluffy, opened potato on a plate, give it a good pinch of flaky salt, then let everyone go wild. For a heartier meal, split one open on a dinner plate and top it with a ladle of my hearty beef chili and a handful of sharp cheddar. It’s a full meal in a potato skin bowl! For a brunch twist, top with a fried egg, crispy bacon, and a drizzle of hot sauce. Remember, the potato is your canvas—make it beautiful and delicious.
Mix It Up! 5 Delicious Twists
Once you’ve mastered the basic, the world is your potato. Here are a few of my favorite riffs:
- Garlic-Herb Infused: Mix the olive oil with 2 minced garlic cloves and 1 tsp of dried rosemary or thyme before rubbing. The aroma is incredible.
- Everything Bagel Style: After oiling, roll the potato in Everything Bagel Seasoning. The onion, garlic, sesame, and poppy seeds create a next-level crust.
- Fully Loaded *Inside* the Skin: After fluffing, mix in shredded cheese, cooked crumbled bacon, and chives right into the potato flesh, then return to the air fryer for 2-3 minutes to melt. It’s a loaded potato bomb.
- Sweet Potato Swap: Use large sweet potatoes! They’re fantastic with a sprinkle of cinnamon and brown sugar before cooking, or go savory with chili and lime.
- Dairy-Free/Vegan Delight: Top with vegan sour cream, dairy-free cheese, chives, and maybe some smoky tempeh “bacon” bits. Just as satisfying.
A Few Final Thoughts from My Kitchen
This recipe has become such a staple in my house that my air fryer practically sighs when it sees me reaching for the russets. I’ve learned that size matters—try to pick potatoes that are similar in size for even cooking. And don’t stress if one is done before the other; just pull it out! The beauty of this method is its forgiving nature. I’ve also stopped poking them with a fork before cooking (an old oven habit). In the air fryer, leaving the skin intact helps keep all that fluffy steam inside where it belongs. Trust the process, and you’ll be rewarded every single time.
Your Questions, Answered
Q: My potato isn’t crispy. What did I do wrong?
A: The two most common culprits are not drying the potato thoroughly after washing, or overcrowding the basket. Make sure they’re bone-dry and have space to breathe! Also, ensure your air fryer is fully preheated.
Q: Can I cook more than two at a time?
A> You can, but space is still crucial. If your basket is large enough to fit 3-4 without them touching, go for it. The cook time might need a slight increase (5-10 mins). If they have to touch or stack, cook in batches for the best results.
Q: Do I really need the oil?
A> For ultimate crispiness, yes. The oil conducts heat directly to the skin, creating that perfect texture. A light spray can work if you’re counting calories, but a little fat goes a long way for flavor and texture here.
Q: My potato is cooked on the outside but hard in the middle.
A> This usually means the potato was very large or the air fryer was too hot, crusting the outside before heat penetrated the center. Next time, try lowering the temp to 380°F and adding 10-15 minutes to the cook time. The slow-and-steady approach works for bigger spuds.

Crispy Air Fryer Baked Potato (Quick & Fluffy Inside)
Description
Sometimes you just want comfort food without turning on the oven. This air fryer baked potato delivers everything you love—extra-crispy skin and a fluffy, cloud-like inside—in less time and with almost no effort. With just a few basic ingredients, you’ll have a versatile side or an easy main that everyone can customize.
Ingredients
-
2 large russet potatoes
-
1 tablespoon olive oil
-
½ teaspoon kosher salt
-
Optional toppings: butter, sour cream or Greek yogurt, shredded cheese, chives, bacon bits, chili, broccoli
Instructions
-
Wash & Dry
Scrub the potatoes well under cold water. Pat completely dry—this helps the skin get crispy. -
Season
Rub the potatoes all over with olive oil. Sprinkle evenly with kosher salt. -
Preheat Air Fryer
Preheat to 400°F (200°C) for best crisping. -
Air Fry
Place potatoes in the basket with space between them. Cook for 40–45 minutes, flipping halfway through. -
Check Doneness
A knife or fork should slide in easily with no resistance. -
Serve
Cut a slit on top, fluff the inside with a fork, and add your favorite toppings.
Notes
-
Dry potatoes = crispy skin. Moisture causes steaming.
-
Don’t overcrowd the basket. Hot air needs room to circulate.
-
Choose similar-sized potatoes so they cook evenly.
-
No foil needed. Foil traps steam and softens the skin.
Nutritional Breakdown (Per Potato, No Toppings)
Let’s talk facts! One large air-fried russet potato (prepared as written) is a great source of energy and nutrients. It provides complex carbohydrates for sustained energy, a good amount of Vitamin C and B6, potassium, and about 4 grams of fiber (mostly in the skin!). The olive oil adds healthy monounsaturated fats. Remember, this is a clean slate—the nutritional profile will change based on your toppings. Want to keep it lighter? Try Greek yogurt instead of sour cream and load up on veggies like salsa and green onions.
- Calories: ~180
- Protein: 4g
- Fat: 4g
- Carbohydrates: 33g
- Fiber: 4g
Prep Time: 5 minutes | Cook Time: 45 minutes | Total Time: 50 minutes
The Last Bite
And there you have it, friend—the humble potato, transformed by your air fryer into something truly spectacular. It’s proof that the best recipes aren’t about complexity; they’re about understanding how a few simple steps and the right tool can create pure comfort. This potato has saved my dinner more times than I can count, and I hope it becomes your reliable weeknight friend, too. So go on, make it, top it, and savor that perfect crunch and cloud-like fluff. And when you do, tag me over at @Feastical—I’d love to see your creation! Until next time, keep it simple, keep it soulful, and always make it delicious.

Creamy Bacon Carbonara Pasta : Classic Comfort in 25 Minutes
Creamy Bacon Carbonara Pasta – Classic Comfort in 25 Minutes
Hey there, friend! Beau here, from Feastical. Let’s talk about one of life’s greatest, simplest pleasures: a bowl of pasta that feels like a hug from the inside. You know the kind. It’s the end of a long day, your energy is on E, and the thought of a complicated recipe makes you want to order takeout. But then you remember… carbonara.
Smoky, creamy, and downright irresistible, a good Bacon Carbonara is a promise of comfort that’s just minutes away. It’s the culinary equivalent of your favorite cozy sweater. Now, I know the classic version can seem a bit intimidating—whispering about raw eggs and fancy guanciale. But here’s my kitchen philosophy: food should never feel like a chore. So, I’ve crafted a version that’s approachable, foolproof, and packed with all the soul-warming flavor you crave, using ingredients you likely already have.
This isn’t just about dumping cream in a pan (though we’ll talk about a little optional boost!). It’s about understanding the magic of the dish: how hot pasta, crispy pork, and a simple egg-and-cheese slurry come together to create a sauce so silky and luxurious, you’ll swear you’re in a Roman trattoria. I’ll walk you through every step, share my favorite chef hacks, and make sure you end up with a dinner that’s worthy of a standing ovation from your family—or just a very happy, satisfied sigh from yourself. Ready to turn your kitchen into the coziest spot in the house? Grab your favorite pasta pot and let’s dig in.
The Carbonara That Saved a Rainy Tuesday (and My College Reputation)
This recipe takes me back to my tiny apartment kitchen in college. My roommate, Leo, was a self-proclaimed “food connoisseur” (his words, after a trip to Italy). One miserably rainy Tuesday, our plans fell through, our wallets were empty, and the fridge held what seemed like nothing: a half-pack of bacon, some eggs, and a box of spaghetti. Desperation cuisine.
I vaguely remembered a food show describing carbonara. “It’s just eggs, cheese, and pasta water,” I said, trying to sound confident. Leo raised a skeptical eyebrow. “No cream? You’re going to make scrambled egg pasta, Beau.” The challenge was on. I fumbled through it, whisking furiously, praying I wouldn’t curdle the eggs. When I tossed it all together, a minor miracle happened. It wasn’t scrambled. It was creamy, glossy, and insanely good. We ate straight from the pan, rain pounding the windows, and Leo—with a mouth full of pasta—just nodded and gave a thumbs up. That silent approval was my first real “chef win.” It taught me that the most memorable meals aren’t about fancy ingredients; they’re about the magic you can make with what you’ve got, and the people you share it with.
Your Carbonara Toolkit: Simple Ingredients, Big Flavor
Here’s everything you need to create this masterpiece. I’ve added my little notes next to each one—think of me peeking over your shoulder with a helpful tip!
- 12 oz spaghetti or fettuccine: The vehicle for all that goodness. Spaghetti is classic, but fettuccine’s wider ribbons hold the sauce beautifully. Chef’s Insight: Always use a long pasta here—it twirls perfectly with the sauce and bacon bits.
- 6 slices bacon, chopped: This is our star flavor-maker. I prefer thick-cut for more substantial bites. Substitution Tip: Pancetta is the traditional Italian choice if you want to be authentic. Even diced ham or prosciutto can work in a pinch!
- 2 cloves garlic, minced: A subtle aromatic backbone. We’re just infusing the fat, not browning it. Chef’s Insight: Smash the cloves with the side of your knife first—the skins will slip right off.
- 2 large eggs: The heart of the creamy sauce. They cook gently from the residual heat of the pasta. Pro Tip: Use room temperature eggs if you can! They blend more smoothly and are less likely to cause temperature shock.
- ½ cup grated Parmesan cheese: Salty, nutty, essential. Chef’s Plea: Please, for the love of flavor, grate it fresh from a block. The pre-grated stuff in bags often has anti-caking agents that can make your sauce grainy.
- ¼ cup heavy cream (optional): My “security blanket” for extra creaminess and stability. Purists may gasp, but it guarantees a luscious sauce and is a great confidence-builder for first-timers.
- Salt & freshly ground black pepper, to taste: Season in layers! Salt your pasta water generously (it should taste like the sea), and finish with a hefty crack of black pepper. Chef’s Hack: Coarse black pepper is a flavor hero in carbonara.
- Fresh parsley, chopped (for garnish): A pop of color and fresh flavor to cut the richness. No parsley? A little fresh basil or chive works, or even just an extra sprinkle of cheese.
Let’s Make Magic: Your Foolproof Step-by-Step Guide
Don’t let the short ingredient list fool you—there’s a little technique here that makes all the difference. Read through once, then get cooking. You’ve got this!
- Prep Your Station & Cook the Pasta. Fill a large pot with water, salt it generously, and bring it to a rolling boil. Add your pasta and cook according to package directions until al dente (firm to the bite). Here’s the KEY STEP: Before you drain it, scoop out about 1 cup of the starchy pasta water. Set this liquid gold aside. Drain the pasta, but don’t rinse it! Rinsing washes away the starch that helps the sauce cling.
- Build Your Flavor Base with Bacon. While the pasta boils, cook your chopped bacon in a large skillet or Dutch oven over medium heat. Stir it occasionally until it’s beautifully crispy and the fat has rendered out. Use a slotted spoon to transfer the bacon to a paper-towel-lined plate. Leave about 1 tablespoon of that glorious bacon fat in the pan. This fat is now infused with smoky, porky flavor—it’s the foundation of your sauce.
- Infuse with Garlic & Kill the Heat. Add the minced garlic to the bacon fat in the pan. Cook for just 30-60 seconds until fragrant—you should smell it, but don’t let it brown or it will turn bitter. Immediately turn off the burner. We’re taking the pan off the active heat to prepare for the egg mixture. This prevents scrambling.
- Create the Creamy Sauce Mixture. In a medium bowl, whisk together the eggs, grated Parmesan cheese, and heavy cream (if using) until completely smooth and homogenous. Season this mixture with a good pinch of black pepper.
- The Grand Finale: The Toss! This is the exciting part! Working quickly, add the hot, drained pasta directly to the skillet with the garlic-infused bacon fat. Toss it thoroughly to coat every strand. Now, while continuously tossing and stirring vigorously, pour the egg and cheese mixture over the hot pasta. The residual heat from the pasta and the pan will gently cook the eggs into a smooth, creamy coating. If the sauce seems too thick or clumpy, add your reserved pasta water, a tablespoon or two at a time, until it reaches a silky, flowing consistency. The starch in the water acts as a magical emulsifier.
- Finish & Serve. Stir in most of the crispy bacon, reserving a little for garnish on top. Give it a final taste and adjust seasoning with more salt or pepper if needed. Plate it up immediately, garnished with the remaining bacon and a sprinkle of fresh parsley.
How to Serve It Like a Pro (Even in Your Sweatpants)
Carbonara waits for no one—it’s best served piping hot straight from the pan! I like to use warm, shallow bowls. Twirl a generous portion with a fork and spoon, creating a nice nest on the plate. The final sprinkle of reserved bacon and parsley on top isn’t just pretty; it adds a hit of texture and fresh flavor.
What to serve on the side? Keep it simple. A crisp, bright green salad with a lemony vinaigrette is the perfect counterpoint to the rich pasta. A few slices of crusty, warm bread are non-negotiable for me—they’re essential for mopping up every last bit of sauce from the bowl. Pour a glass of a crisp white wine like Pinot Grigio or a light red like Chianti, and you’ve got yourself a restaurant-quality meal right at your kitchen table.
Make It Your Own: Delicious Twists & Swaps
Once you’ve mastered the base, have fun with it! Here are a few of my favorite ways to mix things up:
- The “Green Goddess” Twist: Stir in a handful of baby spinach or arugula right after you add the sauce—the heat will wilt it perfectly. Add a handful of frozen peas to the pasta during the last minute of cooking for a sweet pop of color and veg.
- Mushroom & Herb Delight: Sauté 8 oz of sliced cremini mushrooms in the bacon fat after you remove the bacon. Cook until golden, then proceed with the garlic. Finish with fresh thyme instead of parsley.
- Lighter, Brighter Version: Swap the heavy cream for an extra egg yolk for richness without the dairy. Add the zest of one lemon to the egg mixture for a surprising and delightful zing.
- Protein Power-Up: Add cooked, shredded chicken or chickpeas when you toss in the bacon for a more substantial meal.
- Gluten-Free Goodness: Use your favorite gluten-free pasta (a brown rice or chickpea blend works well). Just ensure it’s a shape that holds sauce, and be extra careful not to overcook it.
A Few More Thoughts From My Kitchen to Yours
This recipe has been my reliable dinner hero for years, and it’s evolved with me. The optional cream was my “training wheels” when I started, and I still use it sometimes when I want an ultra-indulgent feel. Don’t let anyone shame you for it! The real key is confidence during the toss—stir like you mean it, and trust the process.
One funny fail I had early on? I once didn’t reserve enough pasta water, and my sauce turned into a delicious but thick paste. My friend called it “Carbonara Clay.” We laughed, added a pat of butter, and it was still gone in minutes. The point is, even the “mistakes” are usually edible and tasty. Cooking is about joy, not perfection. Now, this dish is my go-to for impressing last-minute guests. Nothing says “I’ve got this” like whipping up a creamy carbonara from basic pantry staples while chatting away. It’s a superpower, really.
Carbonara Questions? I’ve Got Answers!
Q: I’m worried about using raw eggs. Is this safe?
A: Great question! The eggs are gently cooked by the residual heat of the hot pasta and pan, reaching a safe temperature. Using fresh, properly stored eggs is important. If you’re pregnant, immunocompromised, or still concerned, you can use pasteurized eggs (found in some grocery stores) or stick with the cream-included version for extra peace of mind.
Q: My sauce turned into scrambled eggs! What did I do wrong?
A> The most common culprit is too much heat. Make sure you turn the burner OFF before adding the pasta back to the pan. If your skillet is cast iron or holds heat extremely well, you might even let it cool for a minute. Also, ensure you’re tossing and stirring vigorously and continuously when adding the egg mixture—this distributes the heat evenly.
Q: Can I make this ahead of time or reheat leftovers?
A> Carbonara is truly best served immediately. The sauce can break or become gummy upon reheating. If you have leftovers, gently reheat them in a skillet over very low heat with a tiny splash of milk or water, stirring constantly. It won’t be quite the same, but it’ll still be tasty!
Q: Is the pasta water really that important?
A> YES! It’s not just water—it’s starchy, seasoned liquid magic. It’s the key to loosening the sauce to the perfect silky consistency without making it watery. Never skip this step!

Creamy Bacon Carbonara Pasta : Classic Comfort in 25 Minutes
Description
Silky, smoky, and utterly comforting, this bacon carbonara comes together in 25 minutes. Hot pasta, crispy bacon, and an egg-and-cheese slurry create a rich, creamy sauce that clings perfectly to every strand. Optional cream adds extra silkiness without complicating the classic technique.
Ingredients
-
12 oz spaghetti or fettuccine
-
6 slices bacon, chopped (or pancetta)
-
2 cloves garlic, minced
-
2 large eggs
-
½ cup grated Parmesan cheese
-
¼ cup heavy cream (optional)
-
Salt & freshly ground black pepper, to taste
-
Fresh parsley, chopped, for garnish
Instructions
1. Cook Pasta:
-
Boil pasta in salted water until al dente. Reserve 1 cup pasta water, then drain (do not rinse).
2. Cook Bacon:
-
In a large skillet over medium heat, cook bacon until crispy. Remove with slotted spoon; leave 1 tbsp bacon fat in the pan.
3. Infuse Garlic:
-
Add minced garlic to the bacon fat. Cook 30–60 seconds until fragrant, then turn off heat.
4. Make Sauce:
-
Whisk eggs, Parmesan, and heavy cream (if using) in a bowl. Season with black pepper.
5. Combine:
-
Add hot pasta to the skillet; toss to coat in bacon fat. Quickly pour in egg mixture while tossing continuously. Add reserved pasta water, 1–2 tbsp at a time, to reach silky consistency.
6. Finish & Serve:
-
Stir in most of the bacon. Plate pasta, top with remaining bacon and chopped parsley. Serve immediately.
Notes
-
Mushroom & Herb: Sauté mushrooms in bacon fat before garlic; use thyme instead of parsley.
-
Lighter Version: Skip cream; add extra egg yolk for richness.
-
Protein Boost: Mix in shredded chicken or chickpeas.
-
Gluten-Free: Use gluten-free pasta; watch cooking time closely.
Nutritional Information (For Your Info!)
Okay, let’s keep it real: this is a comforting, indulgent dish. It’s not a salad. But part of a happy food life is enjoying these wonderful, satisfying meals mindfully. Here’s a rough breakdown per serving (based on 4 servings, without optional cream):
Calories: ~480 | Protein: 19g | Fat: 24g | Carbs: 45g
The protein comes from the eggs, bacon, and cheese, while the carbs are primarily from the pasta. The fat is what gives it that luxurious mouthfeel. To balance it out, I always serve it with a big green side salad and listen to my body’s fullness cues. You can also use whole-wheat pasta or add more veggies directly into the dish (like the pea variation) to boost the fiber and nutrient content. Remember, food is about nourishment AND joy—this dish delivers a hearty dose of both.
Final Thoughts
And there you have it—your passport to a seriously delicious, impressively quick dinner. This Creamy Bacon Carbonara Pasta proves that you don’t need a ton of time or fancy ingredients to create something truly special. It’s a recipe that builds kitchen confidence and delivers a payoff that’s 100% worth the (minimal) effort.
I hope this becomes a cherished recipe in your home, just like it is in mine. The next time a rainy day hits, or you just need a guaranteed win at the dinner table, remember this: you’re about 25 minutes and one fantastic toss away from pure comfort. Give it a try, and let me know how it goes! Tag me on social or drop a comment over at Feastical.com. I love seeing your creations.
Until
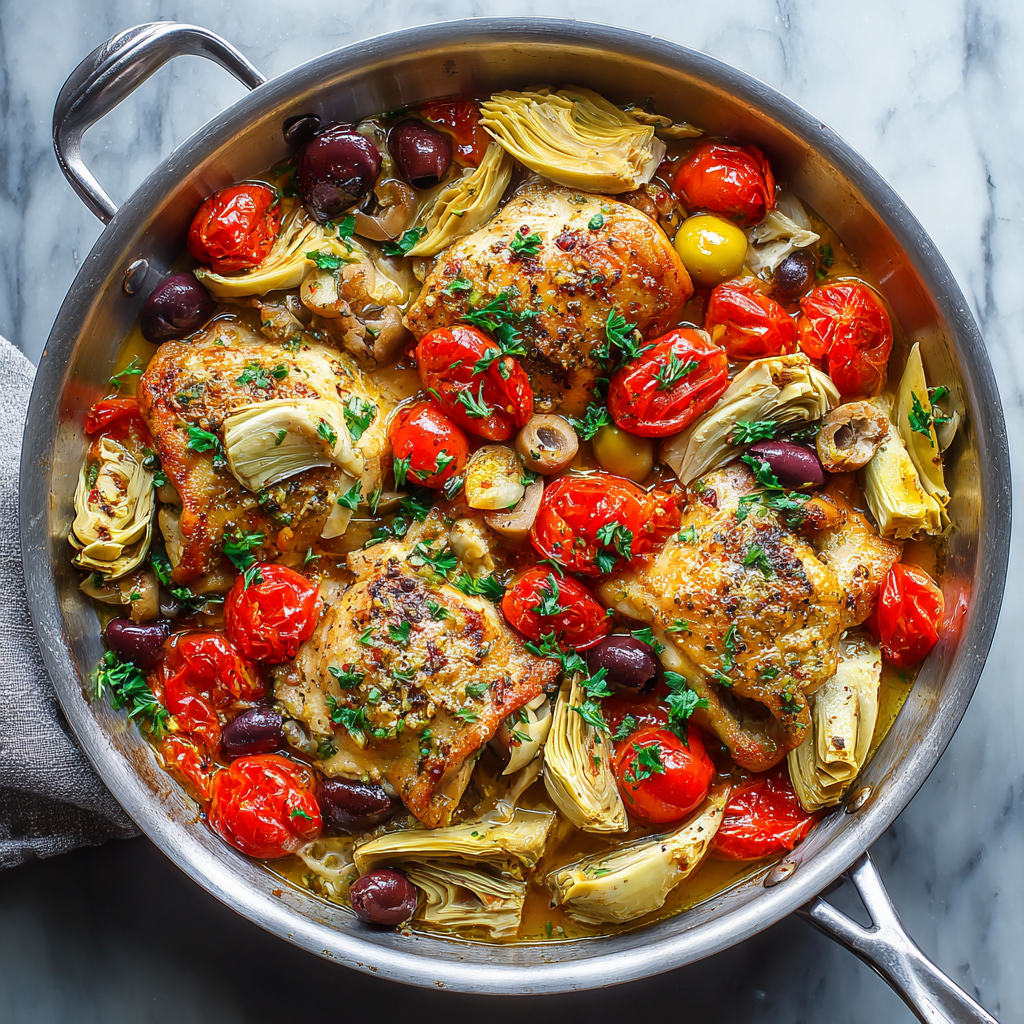
Mediterranean Chicken with Artichokes, Olives & Cherry Tomatoes
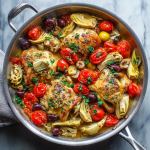
Mediterranean Chicken with Artichokes, Olives & Cherry Tomatoes: Your One-Pan Ticket to Sunshine
Hey friends, Beau here! Pull up a stool and let’s talk about the kind of meal that doesn’t just fill your belly—it fills your soul. You know the one. It’s the dish you make when you’re craving something vibrant, something bursting with flavor, but you also want to keep things simple enough for a busy Tuesday night. It’s the magic of turning a handful of humble ingredients into a transportive experience. That, right there, is the heart and soul of this Mediterranean Chicken.
Picture this: golden-seared chicken thighs nestled in a skillet with juicy cherry tomatoes that have just given up their bursts of sweetness, briny kalamata olives popping with flavor, and tender artichoke hearts soaking up a garlicky, oregano-kissed broth. The colors alone are a feast for the eyes—deep reds, vibrant greens, and rich browns all mingling together. It’s rustic, it’s real, and it smells like a sun-drenched Italian coastline or a breezy Greek taverna, right there on your stovetop.
The best part? This is a true one-pan wonder. We’re talking minimal cleanup, maximum flavor payoff. Whether you’re serving it to impress date night or whipping it up for a fuss-free family dinner, this dish is a guaranteed crowd-pleaser. So, grab your favorite trusty skillet, and let’s create a little Mediterranean magic together. No passport required, just an appetite for something truly delicious.
The Tiny Kitchen & The Big Flavor Memory
This recipe always takes me back to my first real apartment, which boasted a kitchen the size of a postage stamp. I’m talking “open the oven door and you’re blocking the fridge” tiny. But in that cozy chaos, I discovered the power of a single skillet. I had a friend coming over—a self-proclaimed “food snob” who had traveled all over the Mediterranean—and I was determined to make something that would wow her without the need for a brigade of pots.
I riffed on flavors I loved: the olives from a giant jar I kept in my fridge for snacking, the last of the cherry tomatoes from my windowsill plant (RIP, little guy), and some artichoke hearts I snagged from the pantry. The whole place filled with the scent of searing chicken and garlic, and I remember the moment she took her first bite. She closed her eyes, sighed, and said, “Tastes like my summer in Santorini.” That was the win. It wasn’t about fancy technique; it was about honest, good ingredients coming together in the most unpretentious, joyful way. That’s the spirit I want to bring to your kitchen today.
Gathering Your Mediterranean Bounty
Here’s your shopping list for sunshine. Remember, the quality of these simple ingredients really sings, so use the best you can find and afford!
- 4 boneless, skinless chicken thighs (or breasts): I highly recommend thighs for this. They stay incredibly juicy and tender through the braising process and carry the robust flavors beautifully. If you prefer white meat, use breasts, but keep a close eye on the cooking time to prevent dryness.
- 2 tbsp olive oil: A good extra-virgin olive oil is your flavor foundation here. It’s not just for cooking; it’s a key part of the sauce’s character.
- 3 garlic cloves, minced: Fresh is best! The minced garlic melts into the sauce, creating an aromatic base that is absolutely non-negotiable.
- 1 cup cherry tomatoes: Little bursts of sweetness! They soften and release their juices to form part of the incredible pan sauce. In a pinch, diced ripe Roma tomatoes work too.
- 1 cup canned or jarred artichoke hearts, quartered: Look for them in water or brine, not marinated. The marinated kind can add competing flavors. Give them a quick rinse and pat dry before using.
- ½ cup kalamata olives, pitted: That briny, salty punch is the signature of the dish. You can find them pitted to save time. No kalamatas? Green Castelvetrano olives offer a buttery, milder alternative.
- ½ cup low-sodium chicken broth: This creates the steam to cook the chicken through and forms our light sauce. Using low-sodium lets you control the final salt level, especially since the olives are salty.
- 1 tsp dried oregano: The classic Mediterranean herb. Rubbing it between your palms before adding it wakes up the oils and intensifies the fragrance.
- Salt & pepper to taste: Season as you go! I always season the chicken well before searing for a flavor-packed crust.
- Chopped fresh parsley (for garnish): This isn’t just a pretty green sprinkle. The fresh, slightly peppery flavor of parsley brightens up the entire rich dish right at the end.
- Farro or couscous, for serving: You need something to soak up that glorious sauce! Fluffy couscous is a 5-minute miracle, while chewy farro adds a wonderful, hearty texture. Or, go classic with crusty bread!
Let’s Get Cooking: Your Step-by-Step Journey to Flavor Town
Ready? Tie on your apron, and let’s turn these ingredients into a masterpiece. I’ll walk you through each step with all my favorite chef hacks.
- Prep & Season (5 mins): Pat your chicken thighs completely dry with paper towels. This is the secret to a perfect sear—wet chicken steams, dry chicken sears. Season them generously on both sides with salt, pepper, and that dried oregano you’ve just rubbed between your palms. Let them sit while you heat the pan.
- Sear the Chicken (8 mins): Heat the olive oil in a large skillet (with a lid!) over medium-high heat. You’ll know it’s ready when the oil shimmers. Carefully add the chicken, laying it away from you to avoid splatter. Don’t touch it! Let it cook, undisturbed, for a good 3-4 minutes until you see a gorgeous golden-brown crust form around the edges. Flip and repeat on the other side. The chicken won’t be cooked through yet—that’s perfect. Remove to a plate. This searing step builds fond, those delicious browned bits at the bottom of the pan, which is pure flavor gold for our sauce.
- Build the Aromatics (5 mins): In that same beautiful, flavorful pan, reduce the heat to medium. Add the minced garlic and stir for just 30 seconds until fragrant—don’t let it burn! Now, add the whole cherry tomatoes. Let them cook, shaking the pan occasionally, for about 4-5 minutes. You’ll hear them sizzle, their skins will wrinkle, and some will start to burst open, releasing their sweet juices. This is exactly what we want!
- The Big, Beautiful Braise (18 mins): Time to bring the band together! Add the quartered artichoke hearts and pitted olives to the pan. Pour in the chicken broth, and use your spatula to give a gentle scrape, loosening all those glorious browned bits from the bottom. This is called deglazing, and it’s where the sauce gets its deep flavor. Now, nestle the seared chicken thighs back into the pan, pouring in any juices that collected on the plate. Bring the liquid to a simmer, then cover the pan with a lid and reduce the heat to medium-low. Let it gently bubble away for 15-20 minutes, until the chicken is cooked through and tender. The smell in your kitchen right now is your reward.
- The Final Touch: While the chicken braises, cook your farro or couscous according to package directions. This is also the perfect time to chop that fresh parsley.
Plating Your Mediterranean Escape
This dish is a rustic beauty, so serving it is all about effortless charm. Spoon a generous bed of fluffy couscous or nutty farro onto each plate or into shallow bowls. Use tongs to place a chicken thigh (or two!) right on top. Then, ladle over all those incredible artichokes, olives, and burst tomatoes, making sure to get plenty of that light, garlicky broth. The final, non-negotiable flourish: a vibrant sprinkle of chopped fresh parsley. It adds a fresh color and flavor that cuts through the richness perfectly.
For the full experience, I love to add a simple side. A crisp green salad with a lemon vinaigrette, some roasted asparagus, or just a big basket of warm, crusty bread for mopping up every last drop of sauce completes the picture. Pour a glass of crisp white wine or sparkling water with lemon, and dinner is served.
Make It Your Own: Creative Twists & Swaps
The beauty of this recipe is its flexibility. Play with it and make it suit your taste!
- Lemon & Herb Brightness: Add the zest of one lemon to the pan with the garlic, and squeeze in the juice right before you cover to braise. Throw in a couple of sprigs of fresh thyme along with the oregano.
- Spanish-Inspired Twist: Swap the olives for manzanilla olives (the classic green cocktail olive), add a pinch of smoked paprika with the oregano, and stir in a few strips of roasted red pepper with the artichokes.
- Creamy Dreamy Version: For a richer, decadent sauce, stir in ¼ cup of heavy cream or full-fat coconut milk (for dairy-free) after braising. Let it warm through for a minute or two. Divine.
- White Wine Elegance: Replace half of the chicken broth with a dry white wine (like Sauvignon Blanc or Pinot Grigio) for a more complex, adult sauce. Let it simmer for a minute before adding the broth.
- Vegetarian/Pescatarian Power: Skip the chicken! Use hearty chickpeas (drained and rinsed) and chunks of firm white fish (like cod or halibut) added in the last 8-10 minutes of cooking, or large shrimp added in the last 5-6 minutes.
Beau’s Kitchen Notes & Stories
This recipe has been my reliable friend for years, and it’s evolved in little ways. I used to use chicken breasts exclusively until I got brave one night and tried thighs. Game changer! I also learned the hard way that salting the chicken ahead of time is key—once I forgot and the whole dish tasted flat, no matter how much I salted the sauce at the end. Season in layers, friends!
One of my favorite kitchen memories is of my niece, who claimed to “hate tomatoes and olives,” devouring two helpings. She said she liked the “little flavor bombs.” The magic of the burst tomato won her over. So, if you have picky eaters, you might just have a conversion on your hands. This dish has that power.
Your Questions, Answered
- Can I make this ahead of time? Absolutely! The flavors actually deepen overnight. Cook the dish completely, let it cool, and store it covered in the fridge for up to 3 days. Reheat gently on the stovetop with a tiny splash of broth or water to loosen the sauce. Cook your grain fresh when you’re ready to serve.
- My sauce is too thin/too thick. Help! Too thin? Remove the chicken and veggies, turn the heat up to high, and let the sauce simmer rapidly for 3-5 minutes until it reduces to your liking. Too thick? Simply stir in an extra splash of chicken broth or even a bit of water until it reaches the perfect saucy consistency.
- Can I use frozen artichoke hearts? You can! Thaw them completely and pat them very dry before adding. Frozen ones can release more water, which might thin your sauce slightly, so you may need that reduction step mentioned above.
- What’s the best skillet to use? A heavy-bottomed, oven-safe stainless steel or cast-iron skillet is ideal for getting a great sear and even cooking. If your skillet isn’t oven-safe, just keep it on the stovetop with the lid on—it works perfectly.
Mediterranean Chicken with Artichokes, Olives & Cherry Tomatoes
Description
Golden-seared chicken thighs braised with juicy cherry tomatoes, tender artichokes, and briny kalamata olives in a garlicky, oregano-infused sauce. One pan, minimal cleanup, maximum Mediterranean flavor. Serve with couscous, farro, or crusty bread.
Ingredients
-
4 boneless, skinless chicken thighs (or breasts)
-
2 tbsp olive oil
-
3 garlic cloves, minced
-
1 cup cherry tomatoes
-
1 cup artichoke hearts, quartered (canned or jarred, rinsed)
-
½ cup kalamata olives, pitted
-
½ cup low-sodium chicken broth
-
1 tsp dried oregano
-
Salt & pepper, to taste
-
Chopped fresh parsley, for garnish
-
½ cup cooked farro or couscous, for serving
Instructions
1. Prep & Season Chicken:
-
Pat chicken dry. Season generously with salt, pepper, and oregano.
2. Sear Chicken (8 min):
-
Heat olive oil in a large skillet over medium-high.
-
Add chicken; sear 3–4 min per side until golden. Remove to a plate.
3. Build Aromatics (5 min):
-
Reduce heat to medium. Sauté garlic 30 sec.
-
Add cherry tomatoes; cook 4–5 min until skins wrinkle and juices release.
4. Braise (15–20 min):
-
Stir in artichokes, olives, and chicken broth; deglaze pan.
-
Return chicken to pan, cover, reduce heat to medium-low, and simmer until cooked through (165°F / 74°C).
5. Rest & Serve:
-
Cook couscous or farro while chicken braises.
-
Plate grain, top with chicken, spoon over sauce, and garnish with parsley.
Notes
-
Lemon & Herb: Add zest and juice of 1 lemon before braising; add thyme sprigs.
-
Spanish Twist: Use manzanilla olives, add smoked paprika, and roasted red peppers.
-
Creamy Version: Stir in ¼ cup heavy cream or coconut milk after braising.
-
White Wine: Replace half the broth with dry white wine for extra depth.
-
Vegetarian/Pescatarian: Swap chicken for chickpeas, firm white fish, or shrimp; adjust cooking time.
Nourishment by the Numbers
While this dish tastes indulgent, it’s packed with wholesome ingredients. Here’s a general breakdown per serving (including ½ cup of cooked couscous):
- Calories: ~450 kcal
- Protein: 35g (Fantastic for muscle repair and keeping you full!)
- Carbohydrates: 28g (Mainly from the wholesome grain and veggies)
- Fat: 22g (Mostly from the healthy olive oil and olives)
- Fiber: 5g (Thanks to the artichokes, tomatoes, and whole grain)
- Sugar: 4g (Natural sugars from the tomatoes)
This is a balanced meal providing high-quality protein, complex carbs, and healthy fats. To lower carbs, serve over a bed of zucchini noodles or cauliflower rice. To reduce fat slightly, you can use a light spray of olive oil to sear, though I love the flavor and health benefits of a good glug!
Final Thoughts from My Kitchen to Yours
And there you have it, friends—my passport-free ticket to the Mediterranean, all in one skillet. This recipe is more than just a list of instructions; it’s an invitation to slow down, savor the process, and create something beautiful and nourishing. It’s proof that you don’t need complicated techniques or a mountain of ingredients to make a meal that feels like a celebration.
I hope this Mediterranean Chicken brings as much joy to your table as it has to mine over the years. It’s a recipe built for sharing, for stories, and for that happy silence that falls when everyone is too busy enjoying their food to talk. Don’t forget to tag @Feastical if you make it—I love seeing your creations! Now, go forth, cook with confidence, and remember: the best meals are the ones made with a generous pinch of love. Until next time, keep your spatula close and your appetite adventurous.
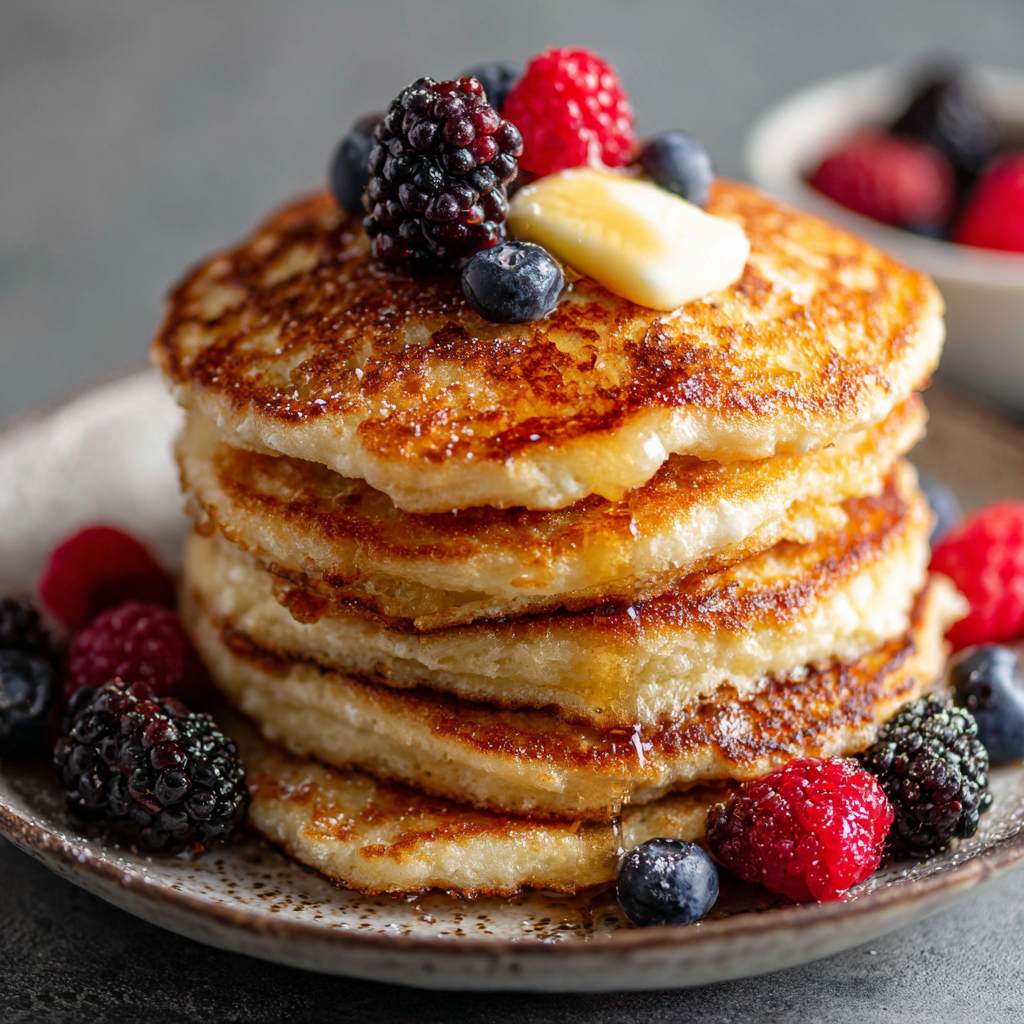
Amazing Fluffy Cottage Cheese Pancakes : Perfect for Breakfast or Brunch
Wake Up to a Stack of Pure Comfort
Hey friends, Beau here! Let’s talk about one of life’s simplest, most perfect pleasures: a tall, warm stack of pancakes on a slow morning. The sizzle of batter hitting a hot pan, that sweet, toasty aroma filling the kitchen, the quiet promise of a delicious meal shared (or blissfully savored solo) – it’s pure kitchen magic. But if you’re anything like me, you’ve also known the disappointment of a pancake that’s just… meh. Too dense, too dry, or so airy it disappears after two bites. We deserve better. Our mornings deserve better.
That’s why I’m so excited to pull you into my kitchen today to share a recipe that changed my pancake game forever: Amazing Fluffy Cottage Cheese Pancakes. Before you wrinkle your nose at the “cottage cheese” part, hear me out. This isn’t a health-food gimmick; it’s a total texture revelation. These pancakes are the beautiful lovechild of a classic buttermilk flapjack and a tender, creamy Dutch baby. They achieve this incredible height and a fluffy, melt-in-your-mouth crumb, while the cottage cheese works its silent magic, adding a subtle tang, a protein punch that keeps you full for hours, and a luxurious, moist tenderness inside.
They’re the perfect canvas for all your favorite toppings – a river of maple syrup, a tumble of fresh berries, a dollop of lemon curd – but honestly, they’re so good you could eat them plain. They’re weekend-special but easy enough for a Wednesday. They’re what I make when I want to treat my family, or when I need a protein-packed fuel-up before a busy day. So, tie on your apron, grab your favorite spatula (let’s hope you find it!), and let’s make a breakfast memory together. Trust me, once you go cottage cheese, you never go back.
The Happy Accident That Started It All
This recipe has a fun little origin story, as the best ones often do. It was a Sunday morning a few years back, and I was in full “clean-out-the-fridge” mode before the grocery run. The usual pancake suspects were MIA: no buttermilk, and my last egg was staring at me, lonely, in the carton. But I had a whole container of cottage cheese that needed using, and a serious pancake craving.
I remember standing there, fridge door open, letting the cold air hit my legs, thinking, “Well, it’s creamy… it’s kind of like ricotta… people put ricotta in pancakes…” With a “what’s the worst that could happen?” shrug, I tossed it into the blender with the lonely egg and a couple more I miraculously found. I added just enough flour to bring it together and crossed my fingers. The first one that hit the skillet puffed up like a little golden cloud. I was shocked! That first bite was the real revelation – incredibly light, yet somehow substantial, with a rich, almost custardy center. My wife took one bite, raised an eyebrow, and said, “What did you do? These are incredible.” That happy fridge-foraging accident is now a cornerstone of our brunch repertoire. It taught me that sometimes, the best recipes come from a little improvisation and a willingness to play with your food.
Gathering Your Kitchen Crew (Ingredients & Insights)
One of the things I love about this recipe is its beautiful simplicity. You likely have most of this in your kitchen right now. Here’s what you’ll need and my little chef’s notes on each:
- 1 cup cottage cheese: The star of the show! I prefer full-fat for the richest flavor and creamiest texture, but low-fat works perfectly well. Don’t use fat-free, as it can be a bit rubbery. If you have lumps and want a super-smooth batter, give it a quick blend or mash with a fork. I often leave the small curds for a bit of lovely texture.
- 3 large eggs: Our binding agent and a key source of that glorious fluff. They provide structure and richness. Make sure they’re at room temperature if you can – they incorporate more easily into the batter.
- 1/2 cup all-purpose flour: Just enough to give the pancakes structure without weighing them down. For a gluten-free twist, oat flour is a fantastic 1:1 swap and adds a lovely, nutty flavor.
- 1 tablespoon sugar (optional): A touch of sweetness to balance the tang of the cottage cheese. I usually include it, but you can skip it if you plan to drown your stack in syrup or if you’re watching sugar intake. A natural alternative like maple syrup or honey in the batter works too – just reduce other liquids a smidge.
- 1/2 teaspoon baking powder: Our leavening agent – the tiny miracle worker that gives these pancakes their lift. Make sure yours is fresh (less than 6 months old) for maximum puff power.
- 1/4 teaspoon salt: Never, ever skip the salt in baking. It enhances every other flavor in the pan. It’s the difference between “tasty” and “WOW.”
- 1/2 teaspoon vanilla extract: The warm, aromatic hug for your batter. Pure vanilla is always my go-to for that extra layer of cozy flavor.
- Butter or oil for cooking: Butter equals flavor, hands down. It gives the edges that lacy, crispy, golden-brown finish. For a higher smoke point, use avocado oil or ghee. A light, neutral oil like grapeseed works if you’re out of butter.
Let’s Get Flipping! (Step-by-Step with Beau’s Hacks)
Ready to make magic? Here’s my foolproof, chatty guide to pancake perfection. Read through once before you start – it makes the whole process feel like a breeze.
Step 1: The Gentle Mix. In a medium-sized bowl, combine your cottage cheese, eggs, vanilla extract, and sugar (if using). Use a sturdy fork or a whisk to mix this until it’s mostly smooth. You’ll still see some tiny white flecks from the cottage cheese, and that’s totally fine – we want character! Chef’s Hack: If you have an immersion blender or regular blender, you can blitz these wet ingredients for about 10 seconds for an ultra-smooth, crepe-like texture. Both methods are great!
Step 2: The Dry Team Joins In. Sprinkle the flour, baking powder, and salt right over the wet ingredients. Now, here’s the crucial tip for fluffy anything: mix until just combined. Use a gentle folding motion with a spatula. A few lumps in the batter are not the enemy; overmixing is! Overmixing develops the gluten in the flour and leads to tough, flat pancakes. We want tender, airy clouds. Your batter will be thick, creamy, and slightly stretchy – that’s perfect.
Step 3: Pan Prep is Key. Place a non-stick skillet or a well-seasoned griddle over medium heat. Not high, not low – medium is the sweet spot. Let it heat up for a good 3-4 minutes. This is the secret to even cooking and a beautiful golden crust. Test it by flicking a few drops of water onto the surface; they should skitter and dance. Add a small pat of butter or a drizzle of oil and swirl to coat.
Step 4: The Cook & Flip. Using a 1/4-cup measure or a large spoon, drop portions of batter onto the hot skillet. I like to make them about the size of my palm. They won’t spread much because the batter is thick. Now, be patient. Let them cook for 2-3 minutes. You’ll know it’s time to flip when the edges look set, the surface is dotted with several popped bubbles, and the bottom is a deep golden brown (peek gently with your spatula). Slide your spatula underneath with confidence and flip in one smooth motion. Cook for another 1-2 minutes on the second side until golden and puffed. Chef’s Hack: Don’t press down on the pancakes with the spatula after flipping! You’ll squeeze out all the lovely air we worked so hard to create.
Step 5: Keep ‘Em Cozy. As you cook in batches, transfer your finished pancakes to a wire rack set on a baking sheet in a warm oven (set to 200°F/95°C). This keeps them all perfectly warm and crisp until the whole family is ready to eat. Stacking them on a plate will trap steam and make the bottoms soggy – the wire rack prevents that tragedy!
Plating Up Your Masterpiece
This is the fun part! How you serve these can take them from amazing to absolutely legendary.
I’m a classicist at heart: a towering stack with a generous pad of good, salted butter melting into every layer, and a cascade of warm, pure maple syrup flowing down the sides. For a fresh twist, I love a tumble of mixed berries (blueberries, raspberries, sliced strawberries) and a dusting of powdered sugar.
Want to get fancy? Try a dollop of lemon curd and fresh raspberries for a bright, sunny flavor. Or go savory with a side of crispy turkey bacon and a drizzle of hot honey. For extra protein, a scoop of Greek yogurt and some toasted nuts on top is incredible. Serve them with a big pot of strong coffee, freshly squeezed orange juice, or a pot of herbal tea. Remember, presentation is part of the joy – use a pretty plate, add a sprig of mint, and make your morning feel special.
Make It Your Own: Delicious Twists & Swaps
The beauty of this base recipe is its versatility. Once you’ve mastered the classic, play around! Here are a few of my favorite riffs:
- Blueberry Lemon Zest: Fold 1/2 cup of fresh or frozen blueberries and the zest of one lemon into the batter right before cooking. The burst of berry and citrus is a classic for a reason.
- Chocolate Chip Comfort: A handful of semi-sweet or dark chocolate chips transforms these into a dessert-for-breakfast treat. Sprinkle the chips onto each pancake right after you pour the batter onto the skillet so they don’t all sink to the bottom.
- Savory Herb & Pepper: Omit the sugar and vanilla. Fold in 2 tablespoons of chopped fresh chives, 1/4 teaspoon of garlic powder, and lots of cracked black pepper. Serve with a dollop of sour cream and smoked salmon for an epic brunch.
- Gluten-Free & Hearty: Use 1/2 cup oat flour (just blend rolled oats until fine!) as mentioned. For extra fiber, add 2 tablespoons of ground flaxseed or chia seeds to the dry ingredients.
- “Ricotta-Style” Pancakes: Swap the cottage cheese for an equal amount of whole-milk ricotta for an even richer, slightly sweeter, and more uniform texture. It’s pure decadence.
Beau’s Kitchen Confidential Notes
This recipe has evolved in my kitchen from that initial “fridge forage” into a true staple. I’ve learned that the batter thickness can vary slightly based on your cottage cheese brand’s moisture content. If it feels too thick to scoop, add a splash of milk (just a tablespoon at a time). If it’s runny, add a spoonful more flour. Cooking is about feel!
One funny fail I had early on was using a pan that was too hot. The outside burned before the fluffy inside could set, leaving me with sad, dark pancakes that were raw in the middle. Patience with that medium heat is non-negotiable. Now, I use that waiting time to set the table, brew the coffee, and soak in the anticipation. That’s part of the ritual, too. These pancakes also freeze like a dream. Cool them completely on a rack, then layer between parchment paper in a freezer bag. Reheat in the toaster for a instant gourmet breakfast on a busy day!
Your Pancake Questions, Answered
Q: My pancakes aren’t fluffy. What went wrong?
A: The most common culprits are old baking powder (it loses its power over time) or overmixing the batter. Also, make sure your pan is properly preheated to medium, not high. High heat sets the outside too fast, preventing the lift from the baking powder.
Q: Can I make the batter ahead of time?
A: I don’t recommend it for the fluffiest results. The baking powder starts working as soon as it hits the liquid. For the best rise, cook the batter within 10-15 minutes of mixing it. You can, however, pre-measure all your dry and wet ingredients the night before for a super-fast morning assembly.
Q: My pancakes are sticking to the pan, even though it’s non-stick!
A: This usually means 1) the pan wasn’t hot enough before adding the batter, or 2) you tried to flip them too early. Wait for those bubbles and set edges. Also, ensure you’re using enough butter/oil to lightly coat the surface for each new batch.
Q: Can I use a blender for everything?
A> Absolutely! Blending all the ingredients together is my go-to method for a perfectly smooth, diner-style texture. Just pulse until combined—don’t over-blend. It’s also great for hiding the cottage cheese from skeptical kids (our secret!).

Amazing Fluffy Cottage Cheese Pancakes : Perfect for Breakfast or Brunch
Description
These cottage cheese pancakes are the ultimate weekend—or any day—treat: fluffy, tender, and rich with subtle tang. The cottage cheese keeps them moist and protein-packed, while the eggs and flour create a light, airy texture. Perfect with maple syrup, berries, or even savory toppings.
Ingredients
-
1 cup full-fat cottage cheese
-
3 large eggs
-
½ cup all-purpose flour (or oat flour for GF)
-
1 tbsp sugar (optional)
-
½ tsp baking powder
-
¼ tsp salt
-
½ tsp vanilla extract
-
Butter or oil, for cooking
Optional toppings: Maple syrup, fresh berries, lemon curd, Greek yogurt, toasted nuts, or savory sides.
Instructions
1. Mix Wet Ingredients:
-
In a medium bowl, combine cottage cheese, eggs, vanilla, and sugar. Mash lightly with a fork or blend briefly for a smooth texture.
2. Fold in Dry Ingredients:
-
Sprinkle in flour, baking powder, and salt. Gently fold until just combined. Some lumps are fine—overmixing = tough pancakes.
3. Heat the Pan:
-
Preheat a non-stick skillet or griddle over medium heat for 3–4 minutes. Test with a few water drops—they should skitter. Coat lightly with butter or oil.
4. Cook Pancakes:
-
Pour ¼ cup batter per pancake. Cook 2–3 minutes until edges look set and bubbles form. Flip carefully and cook another 1–2 minutes until golden. Don’t press them down!
5. Keep Warm:
-
Place cooked pancakes on a wire rack in a 200°F (95°C) oven while cooking the rest to avoid soggy bottoms.
6. Serve:
-
Stack, add your favorite toppings, and enjoy warm.
Notes
-
Blueberry Lemon Zest: Fold ½ cup blueberries + zest of 1 lemon into batter.
-
Chocolate Chip: Sprinkle semi-sweet chips onto batter in pan.
-
Savory: Skip sugar/vanilla, add 2 tbsp chopped chives + ¼ tsp garlic powder, serve with sour cream & smoked salmon.
-
Ricotta-Style: Swap cottage cheese for whole-milk ricotta for richer texture.
-
Freezing: Cool pancakes, layer with parchment in freezer bag. Reheat in toaster.
Nutritional Breakdown (A Chef’s Perspective)
While I’m all about flavor first, it’s nice to know what’s fueling your day! This is an approximate breakdown for one serving (about 3 pancakes) from the recipe as written, using full-fat cottage cheese. Please note, this does not include toppings like syrup or butter.
- Calories: ~280-320
- Protein: 17-20g (The cottage cheese and eggs make this a protein powerhouse!)
- Carbohydrates: 20-25g
- Fat: 12-15g
Compared to traditional pancakes, you’re getting significantly more protein and fewer refined carbs, which helps keep your energy stable and hunger at bay. It’s a satisfying meal that truly fuels you. Using low-fat cottage cheese and egg whites can adjust these numbers, but I always advocate for the balance and satiety that healthy fats from whole eggs and dairy provide.
The Last Bite
And there you have it, friends – my not-so-secret secret to the fluffiest, most satisfying pancakes around. This recipe is a testament to the joy of simple ingredients coming together to create something extraordinary. It’s about more than just breakfast; it’s about starting the day with a small act of delicious self-care, or gathering your people around the table

White Chocolate Strawberry Mousse Cake : Elegant, Creamy & Berry-Licious
The Ultimate Dessert Romance: White Chocolate Strawberry Mousse Cake
Hey there, friend! Beau here, welcoming you back to the Feastical kitchen. Today, we’re pulling out all the stops. We’re talking about a dessert that doesn’t just sit on the plate—it performs. It’s the kind of showstopper that makes people pause mid-sentence, the one that gets a collective “wow” when you bring it to the table. I’m thrilled to share my recipe for a White Chocolate Strawberry Mousse Cake that is, in my completely biased opinion, pure edible elegance.
This isn’t a fussy, complicated restaurant dessert. This is approachable elegance. We’re building layers of flavor and texture that sing in harmony: a tender, buttery vanilla cake base, a layer of vibrant, fresh strawberry mousse that tastes like summer in a spoon, and a cloud-like white chocolate mousse that’s so creamy and dreamy it should be illegal. It’s cool, it’s luxurious, and it’s bursting with berry-licious joy.
I know layered mousse cakes can seem intimidating, but trust me—we’re taking it one simple, happy step at a time. I’ve got all the chef hacks and friendly guidance you’ll need. Whether you’re making this for a birthday, an anniversary, or just a Tuesday that needs a little extra sparkle, this cake is your secret weapon. So, tie on your favorite apron, preheat that oven, and let’s create some magic together. The result? A dessert that tastes like a warm hug and looks like a million bucks.
Why This Cake? A Slice of Memory
This recipe holds a special place in my kitchen heart. It all started years ago, before Feastical was even a dream, when I was trying to impress a certain someone (who is now my forever sous-chef and taste-tester). Our first “fancy” date night at home was my chance to shine, and I wanted a dessert that whispered “I made an effort” without screaming “I’ve been stressed for two days.”
I remember the kitchen was a disaster zone—bowls everywhere, a light dusting of powdered sugar on the cat—but the moment we sliced into that chilled, beautiful cake, everything else faded away. The way the creamy layers held their shape, the bright pop of strawberry against the sweet white chocolate… it was a total win. That cake became our celebration staple. It’s seen birthdays, promotions, and even a few “sorry I burned the garlic bread” moments. For me, it’s proof that a little kitchen effort can create a whole lot of joy and a delicious tradition. Every time I make it, I get that same flutter of excitement. I hope it becomes a part of your story, too.
Gathering Your Delicious Cast of Characters
Here’s everything you’ll need. I’ve broken it down by layer so it’s super easy to shop and prep. Remember, quality ingredients make a happy cake!
For the Cake Base:
- ¾ cup all-purpose flour: The foundation. For a slightly denser, more tender crumb, you can swap in cake flour.
- ½ tsp baking powder: Our little lifter! Makes the cake layer light and airy.
- ¼ tsp salt: The secret flavor enhancer. It balances all the sweetness beautifully—never skip it!
- 2 large eggs: Bring them to room temperature. They’ll incorporate much better and give the cake a lovely structure.
- ½ cup granulated sugar: Just the right amount of sweetness for our base.
- ¼ cup whole milk: Whole milk adds richness. In a pinch, any milk or even buttermilk (for a tiny tang) works.
- ¼ cup vegetable oil: Keeps the cake incredibly moist. A neutral oil like canola or grapeseed is perfect here.
- 1 tsp pure vanilla extract: The aromatic soul of the base. Use the good stuff if you have it!
For the Strawberry Mousse Layer:
- 2 cups fresh strawberries, hulled: The star! Frozen works in off-seasons—just thaw and drain the excess liquid really well.
- ¼ cup sugar: Adjust to your berry sweetness. Taste your puree before adding the gelatin!
- 1 tbsp lemon juice: Brightens the berry flavor and keeps that gorgeous red color vibrant.
- 1 tbsp gelatin powder: This is our mousse magician, giving the layer its perfect, sliceable set. I use unflavored powdered gelatin.
- 2 tbsp cold water: For “blooming” the gelatin—a fancy term for letting it soften and hydrate.
- 1 cup heavy cream, whipped: Whipped to soft peaks. This is what makes the mousse light as air.
For the White Chocolate Mousse Layer:
- 1 cup white chocolate chips or finely chopped bar: Quality matters! A good baking bar melts smoother than chips, which have stabilizers.
- ½ cup heavy cream (hot): Heated just to a simmer to melt the chocolate gently.
- 1 tsp gelatin + 1 tbsp cold water: Same deal as before. This ensures our top layer is firm and creamy, not runny.
- 1 cup heavy cream, whipped: Whipped to soft peaks again. See a theme? Cream is our friend.
Let’s Build This Beauty: Step-by-Step
Follow along, take your time, and have fun with it. Cooking is a journey, not a race!
Step 1: The Cake Foundation
Preheat your oven to 350°F (175°C). Grease the bottom only of an 8-inch springform pan and line it with a round of parchment paper. (Trust me, the springform is non-negotiable for easy release later!).
In a medium bowl, whisk together the flour, baking powder, and salt. In a larger bowl, grab a hand mixer (or use some serious arm power) and beat the eggs and sugar for a good 2-3 minutes until they’re pale, thick, and ribbon-like. This incorporates air! Slowly beat in the milk, oil, and vanilla. Gently fold the dry ingredients into the wet ingredients until just combined—no overmixing! Pour this lovely batter into your prepared pan and smooth the top.
Bake for 18-20 minutes, until the top is golden and a toothpick comes out clean. Let it cool completely in the pan on a wire rack. Chef’s Hack: Once cool, I sometimes brush the top with a thin layer of simple syrup (equal parts sugar and water, heated until dissolved) to lock in extra moisture. It’s a game-changer!
Step 2: The Vibrant Strawberry Heart
While the cake cools, let’s make the strawberry mousse. In a blender or food processor, puree the strawberries, sugar, and lemon juice until completely smooth.
Pour this puree into a small saucepan and bring it to a gentle simmer over medium heat. Let it cook for about 5 minutes, stirring occasionally. This cooks off excess water and concentrates that amazing strawberry flavor! Remove it from the heat.
In a tiny bowl, sprinkle the 1 tbsp of gelatin over the 2 tbsp of cold water. Let it sit for 5 minutes—it will turn into a firm, spongy blob. Whisk this bloomed gelatin into the hot strawberry puree until it’s fully dissolved. Now, this is crucial: let this mixture cool down to room temperature. You can speed it up by setting the bowl in an ice bath and stirring, but don’t let it set! Once cool, gently fold in the 1 cup of whipped cream until no white streaks remain. Pour this beautiful pink cloud over your cooled cake base. Smooth the top, give the pan a gentle tap on the counter to settle it, and pop it in the fridge to set for at least 30 minutes.
Step 3: The Creamy White Chocolate Dream
Time for the grand finale! Place your white chocolate in a heatproof bowl. Heat the ½ cup of cream until it’s just simmering, then pour it over the chocolate. Let it sit for 2 minutes without touching it, then stir slowly until you have a smooth, glossy ganache.
Bloom the second portion of gelatin (1 tsp) in its tablespoon of cold water. Whisk this into the warm white chocolate ganache until smooth. Again, let this mixture cool to room temperature. If it’s too warm, it’ll melt the whipped cream. Once cool, fold in the second cup of whipped cream with a light hand. Pour this over the set strawberry layer, smooth the top artfully, and cover the whole pan.
This is the test of patience: refrigerate the cake for at least 4 hours, but ideally overnight. Overnight chilling gives you the cleanest, most perfect slices. Your future self will thank you!
How to Serve & Impress
The big reveal! Run a thin, hot knife (dip it in hot water and wipe it dry between each cut) around the inside of the springform pan before unlocking the clasp. Carefully lift off the ring.
For the finishing touches, I love a simple, elegant garnish. Arrange a ring of fresh, whole strawberries on top. Use a vegetable peeler to create delicate curls of white chocolate and scatter them over the top. A dusting of powdered sugar or a drizzle of reduced strawberry puree on the plate adds a professional touch.
Serve each slice on a chilled plate. The cool temperature ensures the mousse layers stay firm and picture-perfect. This cake is rich, so slices can be modest—it serves a happy crowd of 10-12!
Make It Your Own: Delicious Twists
Love the base recipe but want to play? Here are some of my favorite riffs:
- Raspberry Rendezvous: Swap the strawberries for raspberries. Their tartness is incredible with the white chocolate. You may want to add an extra tablespoon of sugar.
- Chocolate Lover’s Dream: Use a chocolate sponge for the base and replace the white chocolate mousse with a dark chocolate mousse. Instant decadence.
- Mango Passion: In the summer, try a mango puree layer instead of strawberry. It’s a tropical sunshine bomb!
- Boozy Berry: For a grown-up twist, fold 1-2 tablespoons of strawberry liqueur or Chambord into the cooled strawberry puree before adding the whipped cream.
- Dairy-Free Delight: Use full-fat coconut milk (chilled) for whipping the cream components and dairy-free white chocolate. The cake base can use a plant-based milk and oil. The flavor profile shifts slightly, but it’s still divine.
Beau’s Kitchen Notebook
This recipe has evolved like a fine wine over the years. The first version? Let’s just say the mousse was… soupy. I learned the hard way that properly blooming and fully dissolving the gelatin is the non-negotiable key to success. Also, patience truly is the secret ingredient you won’t find in the grocery store. Rushing the cooling steps or the final chill is the number one reason for layers that don’t set.
One funny fail: I once tried to unmold the cake without running a knife around the edge first. Let’s just say I ended up with a delicious, albeit abstract, dessert sculpture. We ate it with spoons and laughed the whole time. Even the “flops” are wins if they taste good and make a memory.
Your Questions, Answered
Q: Can I make this cake ahead of time?
A: Absolutely! In fact, I strongly recommend it. This cake needs its beauty sleep. Make it 1-2 days ahead. Keep it covered in the fridge until you’re ready to serve. The flavors meld and the texture becomes even more perfect.
Q: My mousse layer seems runny/not setting. What happened?
A> Don’t panic! The most common culprits are: 1) The puree/ganache was too warm when you folded in the whipped cream, causing it to melt. 2) The gelatin wasn’t fully dissolved. 3) It just needs more time. Pop it back in the fridge for another hour and check. If it’s truly not setting after hours, the gelatin measurement might have been off.
Q: Can I use frozen fruit?
A> Yes, but be smart about it. Thaw the berries completely in a strainer over a bowl to catch all the excess liquid. You might even need to reduce the puree a minute or two longer to cook off that extra moisture.
Q: I don’t have a springform pan. What can I use?
A> This is tricky, as unmolding is key. You could use a regular 8-inch cake pan lined with enough parchment paper to create “handles” to lift the whole cake out. It’s a bit more delicate, but doable with a gentle hand and confidence!
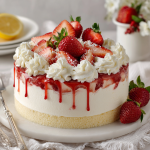
White Chocolate Strawberry Mousse Cake : Elegant, Creamy & Berry-Licious
Description
This White Chocolate Strawberry Mousse Cake combines a tender vanilla cake base with a bright, fresh strawberry mousse and a dreamy, cloud-like white chocolate mousse. Perfect for birthdays, anniversaries, or any special occasion, it’s elegant, approachable, and absolutely show-stopping.
Ingredients
Cake Base:
-
¾ cup all-purpose flour
-
½ tsp baking powder
-
¼ tsp salt
-
2 large eggs, room temperature
-
½ cup granulated sugar
-
¼ cup whole milk
-
¼ cup vegetable oil
-
1 tsp pure vanilla extract
Strawberry Mousse Layer:
-
2 cups fresh strawberries, hulled (or thawed frozen)
-
¼ cup sugar
-
1 tbsp lemon juice
-
1 tbsp gelatin powder
-
2 tbsp cold water
-
1 cup heavy cream, whipped to soft peaks
White Chocolate Mousse Layer:
-
1 cup white chocolate (chips or chopped)
-
½ cup heavy cream, hot
-
1 tsp gelatin + 1 tbsp cold water
-
1 cup heavy cream, whipped to soft peaks
Optional Garnish:
-
Fresh strawberries, white chocolate curls, powdered sugar, or strawberry puree drizzle
Instructions
1. Cake Base:
-
Preheat oven to 350°F (175°C). Grease bottom of an 8-inch springform pan, line with parchment.
-
Whisk flour, baking powder, and salt. In a separate bowl, beat eggs and sugar until pale and ribbon-like. Add milk, oil, vanilla. Fold in dry ingredients.
-
Pour into pan, smooth top, bake 18–20 minutes. Cool completely. Optional: brush with simple syrup to lock in moisture.
2. Strawberry Mousse:
-
Puree strawberries, sugar, and lemon juice. Simmer 5 minutes to concentrate flavor.
-
Bloom gelatin in cold water 5 minutes, then whisk into hot strawberry puree until dissolved. Cool to room temperature.
-
Fold in whipped cream gently. Pour over cooled cake, smooth, refrigerate 30+ minutes until set.
3. White Chocolate Mousse:
-
Pour hot cream over white chocolate, let sit 2 minutes, stir until smooth.
-
Bloom gelatin in cold water, whisk into chocolate mixture. Cool to room temperature.
-
Fold in whipped cream. Pour over set strawberry layer, smooth top, cover, refrigerate 4+ hours (ideally overnight).
4. Serve:
-
Run a hot knife around pan before removing the springform. Garnish with strawberries, white chocolate curls, or powdered sugar. Slice and enjoy!
Notes
-
Frozen Fruit: Thaw fully and drain excess liquid; reduce puree slightly if needed.
-
Layer Issues: Make sure mousse mixtures are cooled before folding in whipped cream; ensure gelatin is fully dissolved.
-
Pan Substitutes: A parchment-lined 8-inch cake pan works if springform isn’t available.
Flavor Twists:
-
Use raspberries instead of strawberries for tartness.
-
Swap the cake base for chocolate sponge and mousse for dark chocolate.
-
Add 1–2 tbsp liqueur to strawberry puree for a boozy version.
-
Dairy-free: use chilled coconut cream for whipping and dairy-free white chocolate.
Nutritional Information*
Okay, let’s be real—this is a celebration cake. It’s indulgent, creamy, and meant to be savored. But for those who like to know, here’s a rough breakdown per slice (based on 12 servings):
- Calories: ~320
- Fat: 18g
- Carbohydrates: 30g
- Protein: 4g
*This is an estimate based on the specific ingredients used. Values can vary depending on brands and precise measurements. My philosophy? Enjoy a slice mindfully, savor every bite, and share the rest with people you love. Balance is beautiful!
Final Thoughts from My Kitchen to Yours
And there you have it! My labor of love, my go-to showstopper, my White Chocolate Strawberry Mousse Cake. I hope the steps felt friendly and clear, and I hope you feel empowered to make it. Remember, cooking is about the joy of creation, not perfection. If your layers aren’t razor-straight or your garnish is a little wild, it just adds character. What matters is the love you put into it and the smiles it creates around your table.
If you make this (and I really hope you do!), tag me @Feastical or use the hashtag #FeasticalFeast. I love seeing your kitchen creations—they absolutely make my day. Now, go forth, chill that cake, and get ready for the compliments to roll in. You’ve got this, chef!
Until next time, keep your spatula close and your joy closer,
Beau
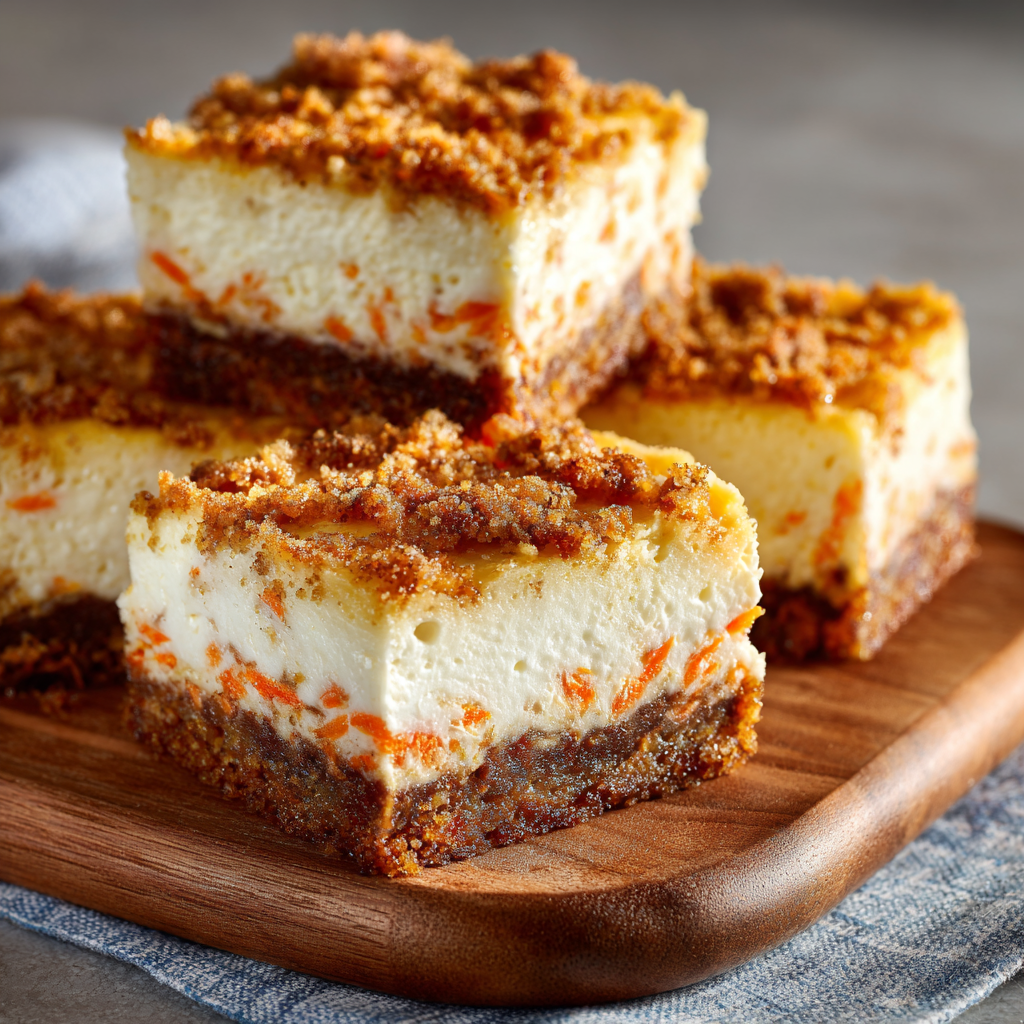
Carrot Cake Cheesecake Bars : The Ultimate Dessert Mashup
Carrot Cake Cheesecake Bars: Your New Favorite Dessert Dilemma Solver!
Hey friends, Beau here from Feastical! Let’s talk about one of life’s great, delicious dilemmas. You’re at a potluck, a birthday party, or just staring down a dessert menu. On one side, you’ve got classic carrot cake—spiced, comforting, and studded with little gems of sweetness. On the other, you have creamy, dreamy, decadent cheesecake. Your heart (and stomach) is torn. Which do you choose?
I’m here to tell you the best news you’ll get all week: you don’t have to choose. Not today, not ever again. My Carrot Cake Cheesecake Bars are the ultimate dessert mashup, the kitchen equivalent of having your cake and eating it too (literally!). Imagine the warm, cozy spices of the best carrot cake you’ve ever had, swirled right into a layer of velvety, tangy cheesecake. All of it baked into perfect, portable bars that are as at home on an Easter brunch table as they are in your lunchbox on a Tuesday.
This recipe is a Feastical favorite for a reason. It captures everything we stand for: feel-good food that’s big on flavor but doesn’t require a culinary degree or a full day to make. We’re talking minimal effort for maximum “wow.” These bars are the secret handshake of the dessert world—impressive, unique, and guaranteed to start conversations. So, tie on your apron, grab your favorite mixing bowl, and let’s turn two iconic desserts into one unforgettable treat. Trust me, your spatula is ready for this.
The Cake That Sparked a Kitchen Revolution
This recipe has its roots in a slightly chaotic, flour-dusted memory. Years ago, before Feastical was even a whisper of an idea, I was tasked with bringing dessert to my grandma’s big family Easter. My uncle, a devoted carrot cake purist, had already claimed that territory. My cousin, a New York cheesecake fanatic, was bringing hers. I, the young upstart, wanted to bring something that would stand out.
In a moment of either brilliance or madness (kitchen adventures often blur that line), I thought, “Why not both?” My first attempt was… ambitious. A full-sized layered monstrosity that nearly toppled over. But the flavor? Absolute magic. The way the spicy sweetness played off the cool creaminess had everyone at the table fighting for the last bite. That was the moment I knew I was onto something. These Carrot Cake Cheesecake Bars are the streamlined, no-fuss, brilliantly bar-ified version of that kitchen experiment. They’re my edible peace treaty between cake factions, and they’ve been a celebration staple ever since.
Gathering Your Flavor Toolkit
Here’s everything you need to make these dreamy bars. I’ve included some chef-y insights and swaps to make this recipe work for you!
For the Carrot Cake Layer:
- 1 cup all-purpose flour: The trusty foundation. For a slightly nuttier, whole-grain vibe, you can swap in half whole wheat pastry flour.
- ½ tsp baking powder & ¼ tsp baking soda: Our dynamic leavening duo. They work together to give the cake layer a perfect, tender lift. Make sure they’re fresh for best results!
- ½ tsp cinnamon & ¼ tsp nutmeg: The soul-warming spice team. Feeling adventurous? A tiny pinch of ginger or cardamom adds a wonderful, aromatic twist.
- ¼ tsp salt: The flavor enhancer. It makes all the other ingredients sing louder. Never skip it!
- 1 large egg: Our binder. Bring it to room temperature for easier mixing and a smoother batter.
- ½ cup brown sugar: This is key! Brown sugar brings molasses-y moisture and a deeper, caramel-like flavor that white sugar just can’t match.
- ¼ cup vegetable oil: For guaranteed moistness. Any neutral oil like canola or grapeseed works great.
- ¼ cup unsweetened applesauce: My little healthy hack! It adds moisture and natural sweetness, allowing us to use less oil without sacrificing texture.
- 1 tsp vanilla extract: The flavor backbone. Use the real stuff—it makes a difference.
- 1 cup finely grated carrots: The star of the show! Use the small holes on your box grater. Pro-Tip: After grating, give the carrots a gentle squeeze in a paper towel to remove excess liquid. This prevents a soggy cake layer!
For the Cheesecake Layer:
- 8 oz (one brick) full-fat cream cheese, softened: Non-negotiable. Full-fat gives us that lush, creamy texture. This is the most important step: let it soften completely at room temperature. Trying to beat cold cream cheese leads to lumps. Patience is a virtue here!
- ¼ cup granulated sugar: Just enough to sweeten and balance the tang.
- 1 large egg: Helps set the cheesecake layer into that perfect, sliceable consistency.
- ½ tsp vanilla extract: A little extra vanilla love to tie both layers together.
Let’s Build Some Bars: A Step-by-Step Dance
Ready to create? Follow these steps, and don’t skip my little commentary—it’s where all the kitchen magic tricks live!
- Prep Your Stage: Preheat your oven to 350°F (175°C). Line an 8×8-inch baking pan with parchment paper, leaving a slight overhang on two sides. This is your “slingshot” for lifting the entire batch of bars out later for perfect, clean cuts. Give the paper a light spray with baking spray—it’s the insurance policy against sticking.
- Mix the Dry Team: In a medium bowl, whisk together the flour, baking powder, baking soda, cinnamon, nutmeg, and salt. Whisking by hand here does two things: it combines everything evenly and it aerates the flour a bit, which is a good thing! Set this bowl aside.
- Wake Up the Wet Team: In a larger bowl, whisk the egg, brown sugar, vegetable oil, applesauce, and vanilla until it’s smooth and looks like a glossy, caramel-colored sauce. Now, fold in your finely grated carrots. The batter will look vibrant and speckled with orange.
- Form the Union: Add the dry ingredients to the wet carrot mixture. Gently fold them together with a spatula until just combined. A few streaks of flour are okay—overmixing is the enemy of a tender cake! This is your carrot cake batter. Give it a taste (chef’s privilege!). Isn’t that spice just heavenly?
- Lay the Foundation: This is a strategic move. Spoon about ¾ of the carrot cake batter into your prepared pan. Use your spatula to spread it into a smooth, even layer that covers the bottom. We’re saving that last ¼ for the beautiful swirl on top!
- Create the Creamy Dream Layer: In a clean bowl (I use my stand mixer, but a hand mixer works beautifully), beat the softened cream cheese on medium until it’s completely smooth and lump-free. This takes about 1 minute. Scrape down the bowl. Add the sugar, egg, and vanilla, and beat again on medium until the mixture is silky, creamy, and uniform. It should look like a luscious, spreadable cloud.
- The Pour & Swirl: Carefully pour the cheesecake batter over the carrot cake layer in the pan. Tilt the pan gently to help it spread evenly. Now, grab your reserved carrot cake batter. Drop dollops of it randomly over the white cheesecake layer. Take a thin knife or a wooden skewer and gently drag it through the batters in a zig-zag or swirling pattern. Don’t overdo it! 4-5 passes is plenty. You want beautiful marbling, not mud.
- Bake to Perfection: Slide the pan into the center of your preheated oven. Bake for 30-35 minutes. You’re looking for the edges to be lightly golden and the center to be just set. It should have a slight, gentle jiggle when you tap the pan, like a perfectly set custard. Overbaking leads to cracking and dryness. Remember, it will continue to set as it cools!
- The Patience Test: This is the hardest part. Let the pan cool completely on a wire rack. Then, cover it and refrigerate for at least 2 hours, preferably overnight. This chilling time is non-negotiable. It firms up the cheesecake layer, making the bars possible to slice cleanly. Think of it as flavor-melding, texture-perfecting magic time.
- The Grand Finale – Slicing: Use the parchment paper overhang to lift the entire slab of bars out of the pan onto a cutting board. Use a long, sharp knife dipped in hot water and wiped dry between each cut for the cleanest, most beautiful slices. Wipe, slice, repeat. Admire your handiwork!
How to Serve These Show-Stopping Bars
Presentation is the final, joyful step! You can absolutely serve these bars plain—they are stunning on their own. But if you want to take them to legendary status, here are a few ideas:
The Classic Crowd-Pleaser: Place a bar on a pretty plate and dust the top lightly with a shower of powdered sugar. It’s simple, elegant, and lets the beautiful swirls shine.
The Decadent Dive: Warm a dollop of cream cheese frosting (a simple mix of cream cheese, butter, powdered sugar, and vanilla) and drizzle it over the top. Add a sprinkle of toasted, chopped pecans or walnuts for crunch. This is my go-to for special occasions.
The Spring Fling: Serve alongside a scoop of vanilla bean ice cream or a cloud of freshly whipped cream. Garnish with a tiny, delicate edible flower or a thin curl of orange zest. Perfect for Easter or Mother’s Day!
The Coffee Date: These bars are incredibly delicious with a hot cup of coffee or a cold glass of milk. The creamy, spiced flavors are a match made in heaven for your favorite brew.
Make It Your Own: Delicious Twists & Swaps
The beauty of this recipe is its adaptability. Play with it! Here are some of my favorite variations:
- Nutty & Nice: Fold ½ cup of toasted chopped pecans or walnuts into the carrot cake batter. The toasty crunch is incredible against the creamy cheesecake.
- Tropical Escape: Add ⅓ cup of well-drained crushed pineapple to the carrot cake batter (reduce applesauce to 2 tbsp to compensate for liquid). Add ½ cup of sweetened shredded coconut too, if you’re feeling it. Hello, paradise bars!
- Raisin’ the Bar: Soak ⅓ cup of raisins in hot water for 10 minutes, drain, and pat dry. Toss them in a teaspoon of flour (to prevent sinking) and fold into the carrot cake batter. A classic, sweet surprise in every bite.
- Gluten-Free Friend: Swap the all-purpose flour for a 1:1 gluten-free baking blend. The texture works wonderfully.
- “Carrot Cake” Cheesecake Bars: For an even stronger spice kick, add ¼ tsp of ground ginger and a pinch of cloves to the dry ingredients. It deepens the flavor profile beautifully.
Beau’s Kitchen Notes & Stories
This recipe has evolved like a good friend. That first towering cake disaster taught me that simpler is often better—and more shareable! The applesauce trick came from a day I realized I was out of oil. Happy accidents, right?
My biggest lesson? The chill time. I once, in a fit of impatient hunger, tried to slice these after just an hour in the fridge. It was a delicious, creamy mess. A beautiful, tasty puddle, but a puddle nonetheless. Learn from my mistake. Let them set. Your future self, holding a perfect, neat bar, will thank your past, impatient self for the restraint.
Also, I’ve made these with my niece using rainbow carrots from the farmer’s market. The bars turned a faint, beautiful orange-yellow, and she declared them “magic fairy cake.” That’s a win in my book. Food is memory, friends. Make some good ones.
Your Questions, Answered!
Q: My cheesecake layer cracked on top! What did I do wrong?
A: Don’t worry, it’s still delicious! Cracking usually happens from overbaking or a sudden temperature change. To prevent it, make sure you’re baking just until the center is *set* but still slightly jiggly, and let the bars cool gradually on the counter before refrigerating. A crack just means it’s homemade—dust it with powdered sugar, and no one will ever know!
Q: Can I make these ahead of time?
A: Absolutely! In fact, I recommend it. These bars taste even better the next day after the flavors have fully melded. You can bake them, cool them, and keep them covered in the fridge for up to 3 days before slicing and serving.
Q: My carrot cake layer seems dense/soggy. Help?
A: Two likely culprits: 1) You overmixed the batter after adding the flour. Gently fold! 2) You didn’t squeeze the excess moisture from the grated carrots. That extra water weighs down the batter. A quick squeeze in a clean kitchen towel makes all the difference.
Q: Can I freeze these bars?
A> You bet! Once completely cooled and chilled, slice them. Place the bars in a single layer on a parchment-lined baking sheet and freeze until solid (about 2 hours). Then, transfer them to a freezer-safe bag or container. They’ll keep for up to 2 months. Thaw overnight in the fridge.

Carrot Cake Cheesecake Bars : The Ultimate Dessert Mashup
Description
Can’t decide between carrot cake and cheesecake? Now you don’t have to! These Carrot Cake Cheesecake Bars combine the warm spices of carrot cake with the creamy, dreamy texture of cheesecake in one portable, irresistible dessert. Perfect for brunches, potlucks, or just a special treat at home.
Ingredients
Carrot Cake Layer:
-
1 cup all-purpose flour
-
½ tsp baking powder
-
¼ tsp baking soda
-
½ tsp cinnamon
-
¼ tsp nutmeg
-
¼ tsp salt
-
1 large egg
-
½ cup brown sugar
-
¼ cup vegetable oil
-
¼ cup unsweetened applesauce
-
1 tsp vanilla extract
-
1 cup finely grated carrots
Cheesecake Layer:
-
8 oz cream cheese, softened
-
¼ cup granulated sugar
-
1 large egg
-
½ tsp vanilla extract
Optional Topping:
-
Powdered sugar or cream cheese frosting
-
Toasted chopped pecans or walnuts
Instructions
-
Prep: Preheat oven to 350°F (175°C). Line an 8×8-inch baking pan with parchment paper, leaving an overhang for easy removal. Lightly grease the parchment.
-
Carrot Cake Batter: In a medium bowl, whisk flour, baking powder, baking soda, cinnamon, nutmeg, and salt. In a separate bowl, whisk egg, brown sugar, oil, applesauce, and vanilla. Fold in grated carrots. Gently combine dry and wet ingredients, just until mixed.
-
Layer in Pan: Spread ¾ of the carrot cake batter evenly in the pan.
-
Cheesecake Layer: Beat cream cheese until smooth. Add sugar, egg, and vanilla; mix until creamy. Pour over carrot cake layer. Drop remaining carrot cake batter in dollops on top and gently swirl with a knife or skewer.
-
Bake: Bake 30–35 minutes until edges are lightly golden and center is slightly set. Cool completely on a wire rack. Refrigerate at least 2 hours, preferably overnight.
-
Slice & Serve: Lift bars using parchment overhang. Slice with a sharp knife (warm and dry between cuts for clean slices). Dust with powdered sugar, frost, or sprinkle nuts if desired.
Notes
-
Prevent Soggy Cake: Squeeze excess moisture from grated carrots. Fold flour gently into raisins or nuts to prevent sinking.
-
Flavor Twists: Add ½ cup crushed pineapple, ½ cup shredded coconut, or extra spices like ginger/cloves.
-
Gluten-Free: Swap flour for a 1:1 gluten-free baking blend.
-
Make Ahead: Bars taste even better after a night in the fridge.
-
Freezing: Slice cooled bars, freeze on a sheet, then transfer to a container for up to 2 months.
Nutritional Information*
*This is an approximate estimate calculated using online tools and specific brand ingredients. Values may vary.
Prep Time: 20 mins | Cook Time: 35 mins | Chill Time: 2 hrs | Total Time: ~3 hrs | Servings: 9 bars
Per Bar (1 of 9):
Calories: ~280 | Carbohydrates: 28g | Protein: 4g | Fat: 17g | Saturated Fat: 8g | Fiber: 1g | Sugar: 18g | Sodium: 160mg
Remember, these are a treat meant to be enjoyed and shared! The inclusion of carrots and applesauce adds a touch of wholesome goodness to every indulgent bite.
Final Thoughts from My Kitchen to Yours
Well, friend, we’ve reached the end of our bar-making journey. I hope you’re as excited to make these Carrot Cake Cheesecake Bars as I am every single time. This recipe embodies the heart of Feastical: creating food that feels special, tastes incredible, and brings people together without causing stress in the kitchen.
These bars are more than just a dessert. They’re a conversation starter, a potluck hero, and proof that the best ideas often come from not being able to choose. So bake them for someone you love, for a spring celebration, or just for a really great Wednesday. Share them, savor them,

Coconut Cream Mini Bundts : Moist, Tropical & Irresistibly Cute
Coconut Cream Mini Bundts – Your New Favorite Bite of Sunshine
Introduction
Hey friends, Beau here from Feastical! Let’s talk about a little magic trick I love: how to capture an entire tropical vacation in a single, adorable bite. I’m not kidding. Close your eyes for a second and imagine the scent of toasted coconut, the rich, velvety feel of coconut cream, and the tender crumb of a cake so moist it practically melts on your tongue. That’s the exact daydream we’re baking into reality today with these Coconut Cream Mini Bundts.
If you’ve ever felt intimidated by fancy-looking desserts, let me be the first to tell you – these mini marvels are your secret weapon. They look like you fussed for hours, but the truth is, they come together faster than a summer rain shower. The mini bundt pan does most of the glamour work for you, giving each little cake those gorgeous, swirly ridges that catch every drop of shimmering glaze.
This recipe is a hug in cake form. It’s for the potluck where you want to be the hero, the Saturday morning when the coffee deserves a worthy companion, or the “just because” treat that turns an ordinary day into a tiny celebration. We’re keeping the ingredients simple, the steps straightforward, and the vibes 100% joyful. So, tie on your favorite apron, cue up some island tunes, and let’s bake some happiness together.
The Day I Learned Coconut Could Cure Anything
This recipe’s soul comes from a truly soggy, grey, and miserable afternoon. Picture it: me, about 22, living in a tiny apartment where the kitchen was more of a suggestion than a room. It had been raining for what felt like 40 days and nights, and my dream of a beach vacation was feeling more like a cruel joke. I was rummaging through my pantry, a.k.a. the top shelf of a broom closet, when my hand landed on a can of coconut cream and a bag of shredded coconut I’d bought for a curry that never happened.
On a pure whim, I decided to bake my way out of the gloom. I threw ingredients into a bowl, using my one trusty muffin tin because fancy pans weren’t in the budget. What came out of that oven was a revelation. The apartment filled with a warm, sweet, tropical fragrance that instantly evaporated the dreariness outside. Those humble little cakes were dense, moist, and packed with coconut flavor. My roommate and I ate them straight from the pan, laughing, suddenly feeling like we were on a sun-drenched porch instead of in our leaky living room. That’s the power of food, friends. It’s not just fuel; it’s a mood, a memory, a teleportation device. This mini bundt version is that same spirit, all grown up and dressed for the party.
Gathering Your Tropical Toolkit: Ingredients & Insights
Here’s everything you’ll need to create this island escape. Don’t just toss them in the bowl – get to know them! Each one plays a starring role.
- 1 ½ cups all-purpose flour: The trusty foundation. For a slightly more tender crumb, you can swap in cake flour, but all-purpose works beautifully here.
- 1 tsp baking powder & ½ tsp baking soda: Our dynamic leavening duo. The baking powder gives initial lift, and the baking soda reacts with the sour cream to create a wonderfully tender, airy texture. Make sure they’re fresh for the best rise!
- ¼ tsp salt: The flavor enhancer. It’s not enough to taste “salty,” but it makes the sweet coconut and vanilla flavors pop. Never skip it.
- ½ cup unsalted butter, softened: This is where the rich, luxurious mouthfeel comes from. Pro Tip: “Softened” means it holds a slight indent when you press it. Leave it on the counter for an hour, or give cold butter 15-second bursts in the microwave until pliable.
- ¾ cup granulated sugar: Sweetness and structure. It helps create that light, fluffy texture when creamed with the butter.
- 2 large eggs: Our binding agents, adding richness and stability. Bring them to room temperature for a smoother, more emulsified batter.
- ½ cup canned coconut cream (NOT coconut milk): The MVP! This is the thick, luxurious cream from the top of the can. It gives an intense, authentic coconut flavor and incredible moisture. Shake the can well before opening.
- ¼ cup sour cream or full-fat Greek yogurt: The secret weapon for supreme moistness and a subtle tang that balances the sweetness. I adore the richness of sour cream here.
- 1 tsp pure vanilla extract: The warm, floral notes of vanilla are coconut’s best friend. It rounds out all the flavors beautifully.
- ½ cup shredded sweetened coconut: For that delightful chewy texture and bursts of coconut in every bite. Using sweetened adds a perfect touch of extra sweetness.
For the Optional (But Highly Recommended) Glaze:
- 1 cup powdered sugar: Creates a smooth, drizzle-able glaze. Sift it if it’s lumpy!
- 2–3 tbsp coconut cream: Thins the sugar into a glaze and doubles down on the coconut flavor. Start with 2 tbsp and add the third if needed.
- Extra shredded coconut for topping: A little toast on these makes them next-level. It adds crunch, color, and an amazing nutty aroma.
Let’s Get Baking: Step-by-Step with Chef Beau
Ready to work some magic? Follow these steps, and you’ll have perfect mini bundts every single time. I’m whispering all my best tips along the way.
- Preheat & Prep: Crank that oven to 350°F (175°C). This is non-negotiable – a properly preheated oven is key to even baking. While it heats, generously grease every nook and cranny of your mini bundt pan with butter or non-stick spray. Get into those swirls! This ensures a clean release later. Chef Hack: A pastry brush helps get butter into all the intricate details.
- Whisk the Dry Team: In a medium bowl, whisk together your flour, baking powder, baking soda, and salt. Whisking does two things: it combines them evenly, and it aerates the flour a bit, contributing to a lighter cake. Set this bowl aside – it’s ready for its grand entrance.
- Creaming is Key: In a large mixing bowl, use a hand mixer or stand mixer to beat the softened butter and granulated sugar together. We’re not just mixing; we’re “creaming.” Beat on medium-high speed for 2-3 minutes until the mixture is pale yellow, fluffy, and looks almost like whipped frosting. This step incorporates air, which is essential for lift.
- Incorporate the Eggs & Wet Ingredients: With the mixer on medium, add the eggs one at a time, beating well after each addition. This prevents the batter from breaking. Now, pour in the coconut cream, sour cream (or yogurt), and vanilla. Mix on medium until just combined. It might look a little curdled – that’s perfectly okay! The dry ingredients will bring it all together.
- Bringing It All Together: Reduce your mixer speed to low. Gradually add the dry ingredient mixture to the wet ingredients. Mix only until the flour disappears – a few streaks are fine. Overmixing at this stage develops gluten and leads to tough cakes. We want tender! Finally, use a spatula to gently fold in the shredded coconut by hand.
- Pan & Bake: Spoon or scoop the batter into your prepared pan cavities, filling each one about ¾ full. This gives them space to rise into their perfect bundt shape without overflowing. Smooth the tops gently. Slide the pan into the center of your preheated oven and bake for 18-22 minutes. They’re done when the tops are golden, the edges pull away slightly, and a toothpick inserted comes out with a few moist crumbs (not wet batter).
- The Cool Down: This is important! Let the cakes cool in the pan on a wire rack for exactly 10 minutes. This allows them to set and firm up just enough. Then, confidently invert the pan onto the rack. They should pop right out. Let them cool completely before glazing – otherwise, your beautiful glaze will just melt right off.
- Make the Glaze & Garnish: For the glaze, simply whisk the powdered sugar and 2 tablespoons of coconut cream in a small bowl. Want it thicker? Add a touch more sugar. Thinner? A few more drops of cream. Drizzle artfully over the cooled cakes. While the glaze is still wet, sprinkle on the extra shredded coconut. For a gorgeous finish, toast a handful of coconut in a dry pan over medium heat until golden brown and sprinkle it on top for color and crunch.
Serving These Sunny Little Cakes
Presentation is half the fun! These mini bundts are naturally stunning, but here’s how to make them sing:
Arrange them on a simple white platter or a rustic wooden board for a beautiful contrast. For a brunch spread, tuck a few amidst a platter of fresh tropical fruit like pineapple chunks, mango slices, and kiwi. The colors are incredible together.
Want to make them extra special? Serve each one on its own little dessert plate with a dollop of freshly whipped cream (fold a tablespoon of that coconut cream into it!) and a single maraschino cherry on top. Instant mini vacation. They pair perfectly with a cup of strong coffee, black tea, or even a glass of cold milk. For a truly decadent adult treat, a drizzle of dark rum or a splash of Malibu in the glaze takes it to the next level.
Make It Your Own: Delicious Variations
Once you’ve mastered the base, the tropical playground is open! Here are a few of my favorite twists:
- Pina Colada Bundts: Fold ½ cup of well-drained crushed pineapple (fresh or canned) into the batter with the coconut. Add a tiny drop of rum extract to the glaze for the full effect.
- Chocolate-Dipped Dreams: Skip the coconut glaze. Instead, melt semi-sweet chocolate chips with a teaspoon of coconut oil. Dip the top of each cooled bundt into the chocolate, let it set, and then sprinkle with coconut. Unreal.
- Lemon-Coconut Zing: Add the zest of one lemon to the batter when creaming the butter and sugar. The bright citrus cuts through the richness beautifully. A lemon juice-powered glaze (instead of coconut cream) is a fantastic tangy option here.
- Dairy-Free Delight: Easily done! Use vegan butter sticks, a dairy-free yogurt (coconut yogurt is perfect!), and ensure your coconut cream is dairy-free. The recipe is naturally egg-free adaptable using a “flax egg” (1 tbsp ground flax + 2.5 tbsp water per egg, let sit 5 mins).
- “Tropical Storm” Swirl: Before baking, add a tablespoon of batter to each cavity. Then, add a teaspoon of passionfruit curd or mango puree, and top with the remaining batter. You’ll get a gorgeous, flavorful surprise in the center.
Chef Beau’s Notes from the Kitchen
This recipe has been my happy-place bake for years, and it’s evolved from those first rainy-day muffins. The switch to a mini bundt pan was a game-changer – something about that elegant shape makes even a Wednesday feel celebratory.
A funny story: I once, in a sleepy pre-coffee haze, accidentally used cream of coconut (the super sweet stuff for cocktails) instead of coconut cream. Let me tell you, those were the sweetest, most syrupy cakes on planet Earth! We still ate them, of course, but it was a sugar rush for the history books. Let my mistake be your lesson: double-check that can!
These cakes freeze like a dream. Wrap unglazed cakes tightly in plastic wrap and freeze for up to 2 months. Thaw at room temperature and glaze fresh. It’s the best trick for always having something delightful on hand for unexpected guests (or unexpected cravings).
Your Questions, Answered
Q: My shredded coconut sank to the bottom! What happened?
A: Ah, the classic sinker! This usually happens if the batter is too thin or the coconut is too heavy. Toss your shredded coconut in a tablespoon of the measured flour from the recipe before folding it in. The light flour coating helps suspend it throughout the batter.
Q: Can I use a regular muffin tin instead of a mini bundt pan?
A: Absolutely! You’re baking the spirit of the recipe. A standard muffin tin will work just fine. Fill liners or greased cups ⅔ full and start checking for doneness around the same time (18-22 minutes). You’ll get lovely coconut cream cupcakes!
Q: I can only find coconut milk. Can I use that?
A: You can, but the result will be less rich and coconut-forward. If using canned coconut milk, don’t shake the can. Scoop the solid cream off the top until you have ½ cup. If it’s the refrigerated carton kind, it’s much thinner; your cakes will be lighter but may lack that intense moisture.
Q: How do I store these, and how long do they last?
A: Store them in an airtight container at room temperature for

Coconut Cream Mini Bundts : Moist, Tropical & Irresistibly Cute
Description
These Coconut Cream Mini Bundts are little tropical escapes in cake form! Tender, moist, and packed with coconut flavor, they’re perfect for brunch, a potluck, or a “just because” treat. Mini bundt pans do the fancy work, giving each cake elegant swirls while keeping the process simple and fun.
Ingredients
For the Cake:
-
1 ½ cups all-purpose flour
-
1 tsp baking powder
-
½ tsp baking soda
-
¼ tsp salt
-
½ cup unsalted butter, softened
-
¾ cup granulated sugar
-
2 large eggs, room temperature
-
½ cup canned coconut cream (NOT coconut milk)
-
¼ cup sour cream or full-fat Greek yogurt
-
1 tsp pure vanilla extract
-
½ cup shredded sweetened coconut
For the Glaze (optional but recommended):
-
1 cup powdered sugar
-
2–3 tbsp coconut cream
-
Extra shredded coconut for topping
Instructions
-
Preheat & Prep:
Preheat oven to 350°F (175°C). Grease mini bundt pan thoroughly, getting into all swirls. -
Mix Dry Ingredients:
In a medium bowl, whisk together flour, baking powder, baking soda, and salt. -
Cream Butter & Sugar:
In a large bowl, beat butter and sugar on medium-high for 2-3 minutes until pale and fluffy. -
Add Eggs & Wet Ingredients:
Beat in eggs one at a time. Then mix in coconut cream, sour cream, and vanilla until just combined. -
Combine Dry & Wet:
Slowly add dry ingredients to wet, mixing on low just until flour disappears. Fold in shredded coconut by hand. -
Fill & Bake:
Spoon batter into pan cavities, filling ¾ full. Bake 18-22 minutes, until golden and a toothpick comes out with a few moist crumbs. -
Cool:
Cool in pan for 10 minutes, then invert onto wire rack. Cool completely before glazing. -
Glaze & Garnish:
Mix powdered sugar and 2–3 tbsp coconut cream. Drizzle over cooled cakes and sprinkle with extra coconut. Toasted coconut adds extra crunch and aroma.
Notes
-
Prevent Sinking Coconut: Toss shredded coconut in 1 tbsp flour before folding in.
-
Substitutions: Use a muffin tin if needed. Use solid coconut cream from canned coconut milk if coconut cream isn’t available.
-
Flavor Twists: Add crushed pineapple for a pina colada twist, or lemon zest for citrus brightness.
-
Storage: Store in airtight container at room temperature for 3-4 days or freeze unglazed for up to 2 months.
Final Thoughts
Friends, what started as a simple craving on a rainy day has become one of my most cherished recipes—a little edible joy that never fails to brighten the moment. These Coconut Cream Mini Bundts are more than just dessert; they’re a reminder that sometimes the coziest happiness comes from our own kitchens. Whether you’re sharing them with people you love or savoring one quietly with a cup of coffee, they carry with them a sprinkle of sunshine, no matter the weather outside.
Don’t be fooled by their fancy appearance—these mini bundts are wonderfully forgiving and eager to please. They celebrate simplicity, reward a little creativity, and turn basic ingredients into something that feels special. So here’s to baking that feels like a getaway, to recipes that become your own, and to every small, sweet bite that turns an ordinary day into a celebration.
Thank you for baking with me. Now go enjoy that taste of sunshine—you’ve earned it.
Easy Easter Trifle Dessert : A Colorful, Creamy Spring Treat
Easy Easter Trifle Dessert – A Colorful, Creamy Spring Treat
Hey there, friends! Beau here, welcoming you back to Feastical. Can you feel it? That crisp, hopeful air that whispers of blooming flowers and longer days? Spring has officially sprung, and with it comes one of my absolute favorite holidays for gathering around the table: Easter. Whether you’re hosting a big, bustling brunch or a cozy dinner with your favorite people, I believe the perfect dessert should be two things: absolutely stunning to look at and a total joy to make. No stress allowed in my spring kitchen!
That’s exactly why I’m so excited to share this Easy Easter Trifle Dessert with you today. We’re talking about a glorious, sky-high creation layered with fluffy cake, dreamy vanilla cream, and cheerful pops of pastel candy. It’s a rainbow in a bowl! The best part? It’s seriously simple. We’re using smart shortcuts (no shame in my game!) that let you focus on the fun part—building those beautiful, Instagram-worthy layers. This trifle isn’t just a dessert; it’s a centerpiece, a conversation starter, and a guaranteed smile-maker for kids and adults alike. So, grab your prettiest glass bowl and let’s create a sweet memory together.
Why This Trifle Steals My Heart Every Spring
This recipe always takes me right back to my Grandma Lou’s house. Easter at her place was an event. The table groaned under platters of ham, but my eyes were always locked on the sideboard, waiting for her famous “Spring Surprise” bowl to make its grand appearance. It wasn’t a fancy trifle like we see now—hers was layers of leftover pound cake, fresh berries she’d macerated with a little sugar, and clouds of real whipped cream she’d beat by hand.
She’d let me help, of course. My job was the “architect of layers,” as she called it. I’d press the cake cubes down gently and she’d guide my little hands with the spoonfuls of cream. The moment of truth was when she’d lift the big glass bowl high for the whole family to see, the layers all jumbled and beautiful through the glass. The collective “Ooooh!” from the table was pure magic. My version here is a nostalgic nod to her—a bit more playful with candy and colors, but with the same spirit: food made with love, meant to be shared in a great, big, delicious mess of happiness.
Gathering Your Rainbow: Ingredients & Insider Tips
Here’s everything you’ll need to build your edible spring masterpiece. I’ve added my little chef notes next to each one because knowing the *why* makes you a more confident cook!
- 1 box vanilla or white cake mix (plus the ingredients listed on the box, usually oil, eggs, and water): This is our fantastic, no-fuss foundation. Chef’s Insight: White cake mix is a blank canvas. It lets our pastel food coloring shine without competing flavors. Feeling fancy? A lemon cake mix is a glorious, zingy twist!
- Food coloring gels (pink, yellow, green, purple – optional but so fun!): Pro Tip: I highly recommend gel food coloring over liquid. The colors are more vibrant and intense, so you need just a tiny drop to achieve gorgeous pastel hues without adding extra liquid to your batter.
- 2 (3.4 oz) boxes instant vanilla pudding: Our creamy, lush layer. Why Two? Trust me, one box just doesn’t give you that luxurious, thick layer we want. This ensures every bite is rich and satisfying.
- 4 cups cold, cold milk: This is non-negotiable! The pudding sets best with icy-cold milk. I sometimes even pop my measuring cup in the freezer for 10 minutes before I start.
- 1 (8 oz) tub whipped topping (like Cool Whip), thawed: The fluffy cloud layer. Substitution Tip: For a homemade touch, swap this with 2 cups of heavy cream whipped with ¼ cup of powdered sugar and a dash of vanilla.
- 1 cup mini marshmallows: These little guys add a delightful, pillowy texture and a hint of vanilla sweetness. They’re the fluffy bunnies of our edible garden!
- 1 cup pastel M&Ms or Easter candy eggs: The colorful confetti! Chef’s Fun Hack: Reserve a handful of the brightest, prettiest candies for the very top to make your decoration pop.
- Sprinkles, crushed vanilla wafers, or bunny graham crackers (for topping): This is where you get creative! The sprinkle crunch or cookie crumble adds the final layer of texture and theme.
Building Your Edible Masterpiece: Step-by-Step
Alright, team! Let’s roll up our sleeves and build something beautiful. Follow these steps, and you really can’t go wrong. I’m talking you through it like you’re right here in my kitchen.
Step 1: Bake & Color Your Canvas. First, bake your cake according to the package directions in a 9×13 pan. Let it cool completely—I mean it! A warm cake will turn your trifle into a soggy mess. Once cool, cut the cake into roughly 1-inch cubes. Now for the fun: divide the cubes into 4 bowls. Add a tiny drop of gel food coloring to each (pink, yellow, green, purple) and gently toss until you have beautiful pastel cake cubes. This step is optional, but it creates that stunning “Easter egg” effect in every layer.
Step 2: Whip Up the Creamy Dream. In a large bowl, pour in your ICE-COLD milk. Whisk in both boxes of instant pudding mix for a full 2 minutes. No shortcuts on the whisking time—this is what activates the thickening. Let it stand for 5 minutes to set up perfectly. It should be thick and luscious.
Step 3: The Grand Layering Assembly. Grab your trifle bowl or a large, clear glass serving dish. The visual is everything! Start with a layer of your pastel cake cubes. Don’t be too neat—a casual, tumbled look is charming. Next, spoon a generous layer of the set pudding over the cake, spreading it to the edges. Dollop a thick layer of whipped topping over the pudding. Now, the confetti: scatter a handful of mini marshmallows and pastel candies.
Step 4: Repeat & Conquer. Do it all again! Cake, pudding, whipped topping, candy. Keep going until your bowl is gloriously full, ending with a gorgeous top layer of whipped topping. This is your blank slate for decorating.
Step 5: The Finishing Flourish. Go wild with your toppings! Create a sprinkle border, make a nest of crushed cookies with a few candy eggs in the center, or artfully place your reserved brightest candies. This is your signature.
Step 6: The Essential Chill. Cover lightly and refrigerate for at least 1 hour before serving. This waiting period is magic—it lets the flavors mingle and the cake soften just slightly into the creamy layers. It’s worth the wait, I promise!
How to Serve This Showstopper
Presentation is key with a trifle! Carry that beautiful glass bowl right to the center of your Easter table and let it get the “oohs” and “ahhs” it deserves. To serve, use a large, deep spoon so you can dig all the way down to the bottom and get every single layer in one perfect scoop. I like to serve it in clear dessert cups or bowls so everyone can admire the rainbow stripes they’ve just been given.
This dessert is rich and sweet, so it pairs beautifully with a cup of strong coffee, a glass of cold milk, or even a crisp, bubbly Prosecco for the adults. It’s the ultimate finale to a spring feast, offering a little bit of everything: cake, cream, and candy in every bite.
Make It Your Own: Delicious Twists & Swaps
The beauty of a trifle is its versatility. Don’t be afraid to play! Here are a few of my favorite riffs on this classic:
- Berry Bliss: Swap the candies for layers of fresh strawberries, blueberries, and raspberries. Add a layer of lemon curd between the pudding and whipped topping for a bright, tangy kick.
- Chocolate Bunny Haven: Use a chocolate cake mix. Swap the vanilla pudding for chocolate pudding. Layer with chocolate chips and top with chocolate shavings and a few chocolate Easter bunnies.
- Lemon Berry Sunshine: Use a lemon cake mix. Fold a tablespoon of lemon zest into the whipped topping. Layer with lemon pudding (use 2 boxes) and fresh blueberries or raspberries.
- Dietary-Friendly Delight: Use a gluten-free cake mix and ensure your candies are gluten-free. For a dairy-free version, use plant-based milk (oat or almond work great for pudding), dairy-free whipped topping, and vegan candies.
- Carrot Cake Trifle: Bake a carrot cake (from a mix or your favorite recipe). Use cheesecake-flavored pudding. Layer the cake with the pudding, whipped topping, and crushed walnuts or pecans. Top with a sprinkle of cinnamon!
Beau’s Kitchen Notes
This recipe has been my Easter go-to for years, and it’s evolved with every batch. One year, I got a little too eager with the food coloring and ended up with neon-bright cake cubes that made us all laugh—turns out, less is more! Another time, I forgot to chill it and learned the hard way that the layers need that time to become best friends.
My biggest piece of advice? Have fun with it. Let your kids choose the sprinkle colors. Let your partner be in charge of the candy distribution. This dessert is about joy, not perfection. The slightly lopsided layer or the rogue sprinkle just adds to its homemade charm. After all, the most important ingredient is always the love and laughter you stir into it.
Your Questions, Answered!
Q: Can I make this trifle the night before?
A: You can *assemble* it the night before, but with one caveat: hold off on adding the final candy and sprinkle topping until just before serving. Otherwise, they might bleed color or get soggy. The cake and creamy layers actually get better with a long, cozy chill in the fridge!
Q: My pudding layer seems runny. What happened?
A: The usual suspect is not using cold enough milk, or not whisking for the full 2 minutes. Don’t panic! Pop the whole trifle bowl in the fridge for an extra 30-60 minutes. The pudding will continue to set firm.
Q: Can I use fresh fruit instead of candy?
A: Absolutely! Fresh berries are a fantastic, refreshing swap. Just know that very juicy fruits (like sliced strawberries) will release liquid. To prevent a soupy trifle, toss berry slices with a teaspoon of sugar and let them drain in a colander for 10-15 minutes before layering.
Q: What if I don’t have a trifle bowl?
A: No problem! A clear glass salad bowl, a large pitcher, or even individual parfait glasses work wonderfully. The goal is just to see those gorgeous layers!

Easy Easter Trifle Dessert : A Colorful, Creamy Spring Treat
Description
This bright and cheerful Easter trifle is everything a spring dessert should be—easy to assemble, beautiful to display, and absolutely delicious. With layers of fluffy cake, creamy vanilla pudding, whipped topping, and festive candies, it’s the perfect centerpiece for your Easter table. Plus, it uses simple shortcuts that make it totally stress-free!
Ingredients
Cake Layer
-
1 box vanilla or white cake mix
-
Ingredients listed on the cake box (usually eggs, oil, water)
-
Gel food coloring (pink, yellow, green, purple — optional)
Creamy Layer
-
2 boxes (3.4 oz each) instant vanilla pudding
-
4 cups very cold milk
-
1 tub (8 oz) whipped topping, thawed
-
Or use 2 cups heavy cream + ¼ cup powdered sugar + 1 tsp vanilla, whipped
-
Fun Mix-Ins
-
1 cup mini marshmallows
-
1 cup pastel M&Ms or candy eggs
-
Optional toppings: sprinkles, crushed vanilla wafers, bunny graham crackers
Instructions
1. Bake the Cake
-
Prepare the boxed cake according to package instructions.
-
Let it cool completely.
-
Cut into 1-inch cubes.
-
(Optional) Divide cubes into 4 bowls and toss each with a drop of gel food coloring for a pastel rainbow effect.
2. Make the Pudding
-
Whisk 2 pudding mixes with 4 cups COLD milk for 2 full minutes.
-
Let sit for 5 minutes to thicken.
3. Assemble the Trifle
In a large trifle bowl (or any clear bowl), layer in this order:
-
Pastel cake cubes
-
A thick layer of pudding
-
A layer of whipped topping
-
Sprinkle of mini marshmallows + pastel candies
Repeat layers until the bowl is full.
End with whipped topping on top.
4. Decorate
Add sprinkles, cookies, candy eggs, or anything festive. Make it fun and colorful!
5. Chill
Refrigerate for at least 1 hour before serving so the layers can set.
Notes
-
Cold milk = thick pudding. Make sure it’s very cold.
-
Don’t layer while the cake is warm — it will make the trifle soggy.
-
Add candy topping right before serving to avoid color bleed.
-
No trifle bowl? Use a clear salad bowl, pitcher, or individual dessert cups.
Nutritional Information*
Okay, friends, let’s keep it real—this is a celebratory dessert, meant to be enjoyed fully! But for those who like to know, here’s a general breakdown per serving (assuming 12 generous servings from this recipe):
Calories: ~320 | Fat: 12g | Carbohydrates: 48g | Sugar: 34g | Protein: 3g
*Please note: This is an estimate based on the specific brands and ingredients used. Values can vary significantly with substitutions (like using sugar-free pudding, a different cake mix, or homemade whipped cream). This info is provided as a courtesy, but for precise dietary tracking, I recommend calculating with your exact ingredients using a trusted app or calculator.
Final Thoughts from My Kitchen to Yours
And there you have it—my signature Easter Trifle, shared with you from my heart (and my kitchen) to yours. This recipe embodies everything I love about Feastical: it’s feel-good, it brings people together, and it proves that creating something spectacular doesn’t have to be complicated.
This Easter, I hope this colorful, creamy treat becomes a part of your family’s tradition. I hope it’s the dessert that disappears first, the one that has everyone asking for the recipe. Most of all, I hope your home is filled with the same warmth, joy, and delicious smells that inspired me to start this foodie journey.
If you make it, I’d love to see your creation! Tag me @feastical on social media. Now, go forth and build something beautiful. Happy Easter, and happy cooking!
With love and a full spoon,
Beau