
Brocc Mountain Super Caesar Salad : Loaded Parmesan Broccoli Caesar
Brocc Mountain Super Caesar Salad: The Ultimate Crunchy, Creamy Dream
Hey friends, Beau here! Let’s talk about a kitchen truth we’ve all faced: sometimes, a regular green salad just doesn’t cut it. You want something that feels like a meal, something with heft and crunch and flavor that makes you close your eyes and go, “Mmm, YES.” That’s exactly why I created this Brocc Mountain Super Caesar Salad. We’re taking everything we adore about a classic Caesar—that creamy, garlicky, Parm-kissed dressing, the savory crunch—and piling it high onto glorious, vibrant broccoli florets.
This isn’t a side salad timidly hanging out next to a steak. Oh no. This is the main event. It’s fresh yet indulgent, healthy-tasting yet deeply satisfying. The broccoli soaks up the dressing like a champ, turning into little flavor bombs, while the extra snowfall of cheese and those golden, crispy crumbs on top create a texture party in your mouth. Whether you’re looking to wow at a potluck, need a stunningly easy dinner party side, or just want to treat yourself to a lunch that actually excites you, this recipe is your new secret weapon. So, grab your biggest bowl and let’s build a mountain!
The Broccoli Breakthrough: A Tale of Two Salads
This recipe was born from a happy accident, as the best ones often are. A few summers back, I was hosting a big backyard BBQ. I’d made my famous classic Caesar, but I’d also roasted a huge sheet pan of broccoli with garlic and oil because, well, you gotta have veggies, right? In the last-minute chaos of getting everything to the table, a generous portion of that warm, char-kissed broccoli tumbled right into the Caesar bowl.
Instead of fretting, I just gave it a tentative toss. What emerged was a revelation! The warm broccoli softened just enough to hug the creamy dressing, creating a harmony that cool romaine never could. It was heartier, more substantial, and the flavors sang. My guests devoured it, asking what this “new creation” was. That “oops” moment became a staple. Over time, I refined it— opting for a quick blanch to keep that gorgeous green crunch and perfecting the topping ratios. It’s a reminder that the best cooking often happens when we’re not trying too hard, but just following where the flavor leads.
Gathering Your Peak-Performance Ingredients
Here’s what you’ll need to construct your own Brocc Mountain. Don’t just think of these as items on a list; each one plays a starring role in our crunch-and-cream symphony.
- 6 cups fresh broccoli florets: Look for tight, deep green heads with no yellowing. The florets are our mountain’s bedrock! Chef’s Insight: You can use broccolini here for a more elegant, long-stemmed vibe.
- 1/2 cup freshly grated Parmesan cheese (for topping): This is non-negotiable—get a block and grate it yourself. The pre-grated stuff has anti-caking agents that keep it from melting into that lovely, salty snow. Substitution Tip: A sharp Pecorino Romano will give you a bigger, bolder, saltier punch.
- 1/4 cup crispy breadcrumbs or toasted panko: This is our “crouton” reimagined. Toasting panko in a little olive oil or butter until golden brown is a game-changer for texture. Chef’s Hack: For a gluten-free version, use crushed gluten-free crackers or even roasted, salted sunflower seeds.
- Fresh cracked black pepper: For finishing. It adds a tiny bite and makes all the other flavors pop.
For the Can’t-Live-Without-It Caesar Dressing:
- 1/2 cup mayonnaise: The creamy base. Use a good-quality mayo for the best flavor. Substitution Tip: For a lighter version, you can swap half with full-fat Greek yogurt.
- 2 tablespoons fresh lemon juice: Brightness is key! Freshly squeezed makes all the difference versus the bottled stuff.
- 1 teaspoon Dijon mustard: Our secret flavor anchor. It adds depth, tang, and helps emulsify the dressing beautifully.
- 1–2 garlic cloves, minced: Adjust to your love level. I always go for two because I believe in garlic supremacy. For a smoother, mellower flavor, try grating the garlic on a microplane.
- 2 tablespoons grated Parmesan: Melting this right into the dressing builds a cheesy foundation.
- 1 teaspoon Worcestershire sauce: The umami magic. It gives that deep, savory, “what is that amazing taste?” quality. (For an anchovy-free version, this is your anchor!)
- Salt and pepper, to taste: Season as you go!
Building Your Flavor Mountain: Step-by-Step
Follow these steps, and you’re guaranteed a perfect Brocc Mountain every single time. I’m throwing in my favorite kitchen hacks along the way!
- Prep the Broccoli (The Foundation): Bring a large pot of salted water to a rolling boil. Have a big bowl of ice water ready nearby. Add your broccoli florets to the boiling water and let them blanch for just 1-2 minutes. You’re not cooking them through—just taking the raw edge off and locking in that insane emerald green color. Chef’s Hack: Throw the broccoli stems in for the last 30 seconds if you’ve saved them (you should! They’re delicious). Immediately use a slotted spoon to transfer the broccoli to the ice bath. This “shocks” it, stopping the cooking instantly so it stays perfectly crisp-tender. Drain thoroughly and pat dry with a clean kitchen towel. A wet broccoli will make a watery dressing—nobody wants that!
- Craft the Creamy Dressing (The Heart): While the broccoli is drying, let’s make the magic sauce. In a medium bowl, whisk together the mayonnaise, fresh lemon juice, Dijon mustard, minced garlic, the 2 tablespoons of grated Parmesan, and Worcestershire sauce until it’s completely smooth and dreamy. Chef’s Tip: Taste it right now! This is your moment. Want more garlic? Add it. More tang? A squeeze of lemon. More umami? A dash more Worcestershire. Make it yours. Season with salt and pepper.
- The Big Toss (Where Magic Happens): In your largest mixing bowl (seriously, give yourself room to work), combine the perfectly dried broccoli florets. Pour that glorious dressing over the top. Now, using your clean hands or two large spoons, toss, toss, TOSS! Get every single floret coated in that creamy, garlicky goodness. The dressing might seem thick, but the broccoli will welcome it. Chef’s Hack: Tossing with your hands is the best way to ensure even coverage without bruising the broccoli. It’s a tactile, fun part of cooking!
- Construct the Mountain (The Drama): Don’t just dump this into a salad bowl. We’re building! Transfer the dressed broccoli to a wide, shallow serving platter or a beautiful rustic board. Pile it high in the center, letting some florets cascade down the sides. This isn’t just food; it’s a presentation!
- The Grand Finale (Texture Time): Now, take that 1/2 cup of freshly grated Parmesan and let it snow generously over the entire mountain. Follow it with a hearty sprinkle of your golden, crispy breadcrumbs or toasted panko. Finish it all with several generous twists of fresh cracked black pepper. Look at that! You just created a masterpiece.
How to Serve This Masterpiece
Presentation is part of the fun with this dish! I love serving it family-style right on the platter I built it on, letting everyone dig in. It’s a fantastic shareable centerpiece. If you’re serving it as a main course for lunch, you can portion it onto individual plates—just make sure you get plenty of those cheesy crumbs from the bottom of the platter!
Perfect Pairings: This salad is incredibly versatile. It’s phenomenal alongside a simply grilled chicken breast or a piece of pan-seared salmon flaked right on top. For a vegetarian feast, pair it with a hearty lentil soup or a frittata. And because it’s so robust, it can even stand up to a juicy steak. For drinks, a crisp Pinot Grigio, a cold lager, or even a sparkling lemon water all work perfectly to cut through the richness.
Make It Your Own: Delicious Twists & Swaps
The beauty of this recipe is its adaptability. Here are a few of my favorite ways to riff on it:
- The “Everything but the Kitchen Sink” Protein Powerhouse: Turn this into a complete meal by adding shredded rotisserie chicken, crispy chickpeas, hard-boiled eggs, or even thinly sliced steak on top.
- Roasted & Toasty: Skip the blanch! Toss raw broccoli florets with a little oil, salt, and pepper, and roast at 425°F (220°C) for 18-20 minutes until tender with crispy edges. Let it cool slightly before tossing with the dressing. This adds a deeper, nuttier flavor.
- Anchovy Admirer’s Edition: For a more traditional Caesar punch, add 2-3 finely minced anchovy fillets (or a teaspoon of anchovy paste) to the dressing. It melts right in and adds an incredible layer of savory depth.
- Lemony Herb Freshness: Brighten it up by adding the zest of one lemon to the dressing and a handful of chopped fresh herbs (like chives, dill, or parsley) to the final toss.
- Dairy-Free & Delicious: Use a vegan mayonnaise, swap the Parmesan in the dressing for 2 tablespoons of nutritional yeast (adds a cheesy flavor), and top with a vegan Parmesan alternative or more toasted nuts/seeds.
Beau’s Brain Dump & Kitchen Stories
This recipe has become such a staple in my house that I barely measure anymore—I just go for the feel. The dressing, in particular, is my fridge’s MVP. I often double it and keep the extra in a jar; it’s incredible as a veggie dip, a sandwich spread, or, you guessed it, for a super-fast Brocc Mountain fix on a busy Tuesday.
One time, I was making this for friends and realized I was completely out of bread for crumbs. In a panic, I crushed up a handful of plain potato chips (the ridged kind!). Let me tell you, the salty, potato-y crunch was a hilarious and delicious victory. Cooking should be fun, not stressful. So if you forget an ingredient, get creative! The broccoli is your canvas.
Your Questions, Answered
- Can I make this ahead of time? Absolutely! You can blanch the broccoli and make the dressing up to a day ahead. Store them separately in the fridge. Combine, build, and top no more than 30 minutes before serving to keep the broccoli crisp and the crumbs crunchy.
- My dressing seems too thick. What did I do wrong? Nothing! It’s a thick, creamy dressing by design. If you’d prefer it a little looser, simply whisk in a teaspoon of water or extra lemon juice at a time until it reaches your desired consistency. The broccoli will also release a tiny bit of moisture once tossed, which will loosen it slightly.
- Is there a way to make this without mayonnaise? For sure. While mayo gives the classic texture, you can use full-fat plain Greek yogurt for a tangier, protein-packed version. The dressing will be slightly less rich but still deliciously creamy.
- Help! My broccoli turned out soggy. The two likely culprits are over-blanching or not drying it well enough. Remember, it’s just a 1-2 minute dip in boiling water, then a full stop in the ice bath. And pat, pat, pat it dry! A salad spinner is your best friend for this job.

Brocc Mountain Super Caesar Salad : Loaded Parmesan Broccoli Caesar
Description
If you’re tired of basic salads and want something bold, crunchy, and satisfying, this Brocc Mountain Super Caesar Salad is your answer. It swaps leafy greens for crisp-tender broccoli and coats every bite in a creamy, garlicky Caesar-style dressing. It works as a hearty side or a light main dish and stays crunchy longer than traditional salads — perfect for gatherings or meal prep.
Ingredients
For the salad
-
6 cups fresh broccoli florets
-
1/2 cup freshly grated Parmesan cheese
-
1/4 cup toasted panko or crispy breadcrumbs
-
Fresh cracked black pepper
For the Caesar dressing
-
1/2 cup mayonnaise
-
2 tablespoons fresh lemon juice
-
1 teaspoon Dijon mustard
-
1–2 garlic cloves, finely minced
-
2 tablespoons grated Parmesan
-
1 teaspoon Worcestershire sauce
-
Salt and pepper to taste
Instructions
-
Blanch the broccoli
Bring a pot of salted water to a boil. Add broccoli and cook 1–2 minutes until bright green and slightly tender. Transfer immediately to a bowl of ice water. Drain and dry very well. -
Make the dressing
In a bowl, whisk together mayonnaise, lemon juice, Dijon mustard, garlic, Parmesan, Worcestershire sauce, salt, and pepper until smooth. -
Toast the crumbs (if needed)
If using panko, toast in a small pan with a little oil for 2–3 minutes until golden and crisp. Cool. -
Toss
Put dried broccoli in a large bowl. Add dressing and toss until evenly coated. -
Finish and serve
Transfer to a serving dish. Top with grated Parmesan, toasted crumbs, and cracked black pepper. Serve immediately.
Notes
-
Dry the broccoli well after blanching so the dressing stays creamy, not watery.
-
Cut florets bite-size for easier eating and better coating.
-
Make ahead option: Prep broccoli and dressing separately up to 1 day ahead; combine just before serving.
-
Extra protein ideas: Add grilled chicken, chickpeas, or chopped boiled eggs.
-
Lighter version: Replace half (or all) of the mayo with plain Greek yogurt.
Nutritional Notes (Because Feeling Good Matters!)
While I’m all about flavor first, it feels great to know what’s fueling you. This Brocc Mountain is packed with benefits. Broccoli is a superstar, offering a huge dose of Vitamin C, fiber, and Vitamin K. Using a quality olive-oil based mayo provides healthy fats, and Parmesan adds a protein and calcium boost. A serving (based on 6 servings) comes in around 280 calories, with about 12g of carbs, 8g of protein, and 22g of fat (mainly from the mayo and cheese—the good, satisfying stuff). Remember, these are estimates. To lighten it up, see the Greek yogurt swap in the variations. This is a salad that nourishes you and satisfies your soul—the Feastical perfect combo.
Final Thoughts
And there you have it, friends—my love letter to broccoli and Caesar dressing all in one towering, delicious dish. This Brocc Mountain Super Caesar Salad is proof that with a few simple ingredients and a sense of fun, you can turn the everyday into the extraordinary. It’s hearty, it’s flavorful, and it’s guaranteed to make you look at broccoli in a whole new, glorious light.
I hope you build this mountain in your kitchen soon. When you do, tag me @feastical or use #BroccMountain so I can see your beautiful creations! Now, go forth and conquer that craving. Until next time, keep your whisks busy and your plates full of joy.
Cheers,
Beau

Pistachio Chocolate Lava Cakes : Gooey Center, Bakery-Style Dessert at Home
When a Dessert Feels Like a Standing Ovation
Hey friends, Beau here. Let’s talk about dessert magic for a second. You know the kind—the one that makes everyone at the table stop mid-conversation, their eyes going wide before they even take a bite. The dessert that feels less like a recipe and more like a delicious secret you’re letting everyone in on. That, right there, is the pure, unadulterated joy of a perfect lava cake.
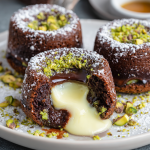
But today, we’re not just making any old chocolate lava cake. We’re leveling up. We’re adding a nutty, sophisticated, quietly brilliant twist that turns this classic from “wow” to “HOW did you make this?!” I’m talking about my Pistachio Chocolate Lava Cakes. Imagine this: a rich, dark chocolate shell that gives way to a river of molten white chocolate, all wrapped up in the subtle, elegant flavor of ground pistachios. It’s bakery-level impressive, but I promise you, the process is all about keeping it simple and soulful.
If the thought of a “molten center” has you nervous, don’t be. We’re walking through this together, step-by-step. This recipe is your ticket to becoming the undisputed dessert hero of your next dinner party, date night, or even your next “treat yourself” Tuesday. So grab your favorite mixing bowl, and let’s create some feel-good, fork-clinking magic.
The Cake That Started It All
My love affair with lava cakes started in the most unlikely place: a slightly chaotic, family-style Italian restaurant where I worked my first kitchen job. I was the “dessert guy,” which mostly meant plating tiramisu. But one slow Tuesday, the head chef—a man with forearms like tree trunks and a surprisingly soft spot for pastry—showed me his method for molten chocolate cakes. He didn’t use a recipe. He just *felt* it. The timing was everything, he said. “You wait for the cake to tell you it’s ready. It gets a little puffy around the edges and just *looks* set, but you can still sense the wobble in its soul.”
I must have made two dozen test batches that week, driving my roommates crazy with constant “taste tests.” The failures were either sad, solid chocolate muffins or, worse, chocolate soup. But that first successful one? The moment I turned it out onto a plate, dusted it with sugar, and cut into that oozing center… it was a revelation. It felt like I’d unlocked a chef’s superpower. This pistachio version is my homage to that feeling—that moment of kitchen triumph. It takes that simple, powerful technique and dresses it up with my favorite nut, creating a dessert that’s both nostalgic and brand new.
Gathering Your Flavor Arsenal
Here’s everything you’ll need to make four stunning individual cakes. The beauty is in the details, so I’ve added my two cents on each ingredient to set you up for success.
- ½ cup unsalted butter: The rich foundation. Unsalted lets you control the salt level. Make sure it’s at room temperature for smooth melting.
- 4 oz dark chocolate, chopped: Use a bar you love eating, chopped fine for even melting. I adore a 70% cocoa for a deep, not-too-sweet base. No chocolate chips here—they have stabilizers that can mess with our lava flow.
- 2 large eggs + 2 large egg yolks: The extra yolks are our secret for that decadent, custardy texture. Pro tip: crack your eggs into a separate bowl first to avoid any shell surprises in your batter.
- ⅓ cup granulated sugar: This might seem like less than other recipes, but the dark chocolate and white chocolate center provide plenty of sweetness. Trust me, it’s perfectly balanced.
- ¼ cup finely ground pistachios: This is our star! Grind shelled, unsalted pistachios in a food processor until they resemble fine sand. Not powder, not chunks—somewhere in between. This adds incredible flavor, a hint of color, and a lovely texture.
- ¼ cup all-purpose flour: Just enough to give the cake structure without making it bready. For a gluten-free swap, a 1:1 GF blend works like a charm.
- ¼ tsp salt: The flavor enhancer. It makes the chocolate taste more chocolatey and the pistachios pop.
- 4 tsp white chocolate spread or ganache: The “lava” in our volcano! A quality white chocolate spread (like Nutella’s cousin) is easiest. For a purist approach, a simple ball of solid white chocolate works too.
- Powdered sugar & chopped pistachios, for topping: The finishing flair. The snowy sugar and vibrant green nuts make it look straight out of a patisserie window.
Let’s Build Some Magic: Step-by-Step
Alright, team. Preheat that oven to a hot 425°F (220°C). This high heat is crucial—it sets the outside quickly while the inside stays gloriously gooey. Grease four 6-ounce ramekins REALLY well with butter or non-stick spray. Think of it as insurance for a clean release later.
- Melt the Chocolate & Butter: Combine the chopped dark chocolate and butter in a heatproof bowl. You can do this over a pot of simmering water (a double boiler) or in the microwave in 20-second bursts, stirring between each. We want it smooth and glossy. Once melted, take it off the heat and let it cool for a few minutes. We don’t want to scramble our eggs in the next step!
- Whip the Eggs & Sugar: In a separate bowl, whisk together the whole eggs, egg yolks, and granulated sugar. Now, go to town. Use a hand mixer or whisk vigorously by hand for a good 2-3 minutes until the mixture is pale, thick, and falls off the whisk in a slow ribbon. This step adds air, giving our cakes a slight lift.
- The Grand Unification: Gently pour the slightly cooled chocolate mixture into the egg mixture. Fold it in with a spatula—no aggressive stirring. We’re preserving that air. Once it’s mostly combined, sift in the flour and salt, and add the ground pistachios. Fold just until no dry streaks remain. The batter will be thick and luxurious.
- Assemble with Care: Spoon a heaping tablespoon of batter into each prepared ramekin, just enough to cover the bottom. Now, the heart of the operation: place 1 teaspoon of your white chocolate spread right in the center of each. Completely cover the chocolate “heart” with the remaining batter, dividing it evenly. Smooth the tops. (Chef’s Hack: Run your thumb around the inside rim of the filled ramekin. This helps the cake release cleanly and encourages a beautiful dome as it bakes.)
- Bake with Your Eyes (& Nose): Place the ramekins on a baking sheet (for easy handling) and bake for 10-12 minutes. Start checking at 10. You’re looking for: puffed tops, edges that look set and are pulling slightly away from the sides, but centers that still look soft and have a slight jiggle. If they look completely set, they’ve gone past the lava stage. Remember, they keep cooking a bit out of the oven!
- The Grand Reveal: Pull them out and let them rest on the stove for exactly 1 minute. This lets them settle. Then, wearing an oven mitt, place a small serving plate upside-down over a ramekin. In one confident, swift motion, flip it over. Gently lift the ramekin. There should be a satisfying “plop” as your masterpiece releases. Repeat with the others. A quick dusting of powdered sugar and a sprinkle of chopped pistachios, and you’ve done it.
How to Serve These Stunners
Presentation is half the fun with these cakes! Serve them immediately, while the centers are at peak lava-flow. Place each cake on a simple white plate to let the colors shine. That dusting of powdered sugar is non-negotiable—it’s like a fresh snowfall. The final sprinkle of bright green chopped pistachios adds texture and tells your guests exactly what delicious twist awaits.
For the full experience, add a small scoop of vanilla bean ice cream or a dollop of lightly sweetened whipped cream on the side. The contrast of hot and cold, rich and creamy, is absolute heaven. A few fresh raspberries add a lovely tart note that cuts through the richness beautifully. And don’t forget the coffee or a glass of dessert wine!
Make It Your Own: Fun Twists & Swaps
Once you’ve mastered the base, the world is your molten dessert oyster. Here are a few of my favorite riffs:
- Salted Caramel Surprise: Swap the white chocolate center for a small chunk of soft caramel or ½ tsp of thick salted caramel sauce. The salty-sweet combo with the pistachio is unreal.
- Orange Zest Dream: Add the zest of one orange to the egg-sugar mixture. The bright citrus cuts through the richness and pairs wonderfully with both chocolate and pistachio.
- Double Chocolate Hazelnut: Replace the ground pistachios with ground hazelnuts (filberts) and use a dark chocolate hazelnut spread for the center. It’s like a gourmet lava cake version of your favorite candy.
- Dairy-Free Delight: Use a high-quality vegan dark chocolate bar, vegan butter, and a dairy-free white chocolate spread. The structure from the eggs still works beautifully here.
- Espresso Kick: Dissolve 1 teaspoon of instant espresso powder into the melted chocolate-butter mixture. It won’t make it taste like coffee, but it will deepen the chocolate flavor dramatically.
A Few Notes from My Kitchen to Yours
This recipe has been my go-to “wow” dessert for years, and it’s evolved with every batch. I used to be terrified of under-baking, inevitably overdoing it. My friend finally told me, “Beau, you have to trust the jiggle!” She was right. That soft center at the 11-minute mark is your friend.
Another fun story: I once made these for a potluck and, in my rush, forgot to grease one ramekin. Let’s just say we had one “deconstructed” lava cake that we ate with spoons straight from the dish. It was still delicious, but it taught me the importance of that butter-and-a-prayer greasing method. The batter can be made up to a day ahead, kept covered in the ramekins in the fridge. Just add 1-2 minutes to the bake time if you’re starting from cold. Most of all, have fun with it. Cooking is about the joy, not perfection.
Your Questions, Answered
Q: My center didn’t flow! What happened?
A: The most common culprit is over-baking. Ovens vary, so yours might run hot. Start checking at 9 minutes. The edges should be set, but the center should look soft and jiggle when you gently shake the ramekin. Also, ensure your “lava” (white chocolate spread) is in a solid, cold state when you add it, not melted.
Q: Can I make these without ramekins?
A: Ramekins are ideal for the heat distribution and shape. In a pinch, a well-greased muffin tin works, but the baking time will be less—start checking at 8 minutes. The release and presentation are trickier, though.
Q: The cake stuck to the ramekin! How do I save it?
A> First, don’t panic. It’s still delicious! Run a thin knife around the edge again. If it’s being stubborn, you can always serve it in the ramekin with a spoon—call it a “deconstructed” or “rustic” presentation. Next time, be extra generous with the butter or spray.
Q: Can I use pistachio flour?
A> Absolutely! If you have store-bought pistachio flour, use a ¼ cup as a direct substitute for the ground pistachios. It will give a slightly finer texture and vibrant color.
Pistachio Chocolate Lava Cakes : Gooey Center, Bakery-Style Dessert at Home
Description
There’s something magical about breaking into a warm lava cake and watching the center flow. It feels fancy, dramatic, and restaurant-level — but it’s actually one of the most reliable impressive desserts you can make at home. This version adds finely ground pistachios and a creamy white-chocolate center for a nutty, elegant twist. If you can whisk and fold, you can make this. Let’s do it step by step.
Ingredients
-
½ cup (115 g) unsalted butter
-
4 oz (115 g) dark chocolate, finely chopped
-
2 large eggs
-
2 large egg yolks
-
⅓ cup (65 g) granulated sugar
-
¼ cup finely ground pistachios (unsalted)
-
¼ cup (30 g) all-purpose flour
-
¼ tsp salt
-
4 tsp white chocolate spread or small white chocolate pieces
-
Butter + cocoa powder (for greasing ramekins)
For topping (optional):
-
Powdered sugar
-
Chopped pistachios
-
Vanilla ice cream or whipped cream
Instructions
1️⃣ Prep
-
Heat oven to 425°F / 220°C.
-
Generously butter 4 small ramekins and dust with cocoa powder (or flour). Tap out excess.
2️⃣ Melt Chocolate & Butter
-
Melt butter and dark chocolate together in a bowl over gentle heat or in short microwave bursts.
-
Stir until smooth. Cool 3–4 minutes.
3️⃣ Whisk Eggs & Sugar
-
In another bowl, whisk eggs, yolks, and sugar for about 2–3 minutes until pale and slightly thick.
4️⃣ Combine
-
Gently fold melted chocolate into egg mixture.
-
Add flour, salt, and ground pistachios.
-
Fold just until combined — don’t overmix.
5️⃣ Fill & Add Center
-
Spoon batter halfway into each ramekin.
-
Place 1 tsp white chocolate spread (or a chocolate piece) in the center.
-
Cover with remaining batter.
6️⃣ Bake
-
Place ramekins on a tray.
-
Bake 10–12 minutes.
You want: set edges + soft, slightly jiggly centers.
7️⃣ Unmold
-
Rest 1 minute.
-
Run a knife around edges, flip onto plates, lift ramekin.
8️⃣ Finish
-
Dust with powdered sugar and sprinkle pistachios.
-
Serve immediately.
Notes
-
Use real chocolate bars, not chips — they melt smoother.
-
Slight jiggle in the center = lava success.
-
Overbaked = chocolate cake, not lava cake. Check early.
-
Room-temperature eggs whip better and give lighter texture.
-
You can refrigerate filled ramekins up to 24 hours — add 1–2 minutes to bake time.
Nutritional Information (Per Cake, Approximate)
Let’s be real—this is a celebratory dessert, and it’s meant to be enjoyed as such. Each individual pistachio chocolate lava cake packs rich, satisfying flavor. Based on the specific ingredients used, one cake comes in at roughly: 420 calories, 28g fat, 36g carbohydrates, and 8g protein. The majority of the fat comes from the butter, chocolate, and pistachios—ingredients that contribute to the luxurious mouthfeel and flavor we love. Remember, this is an estimate; for precise counts, use your preferred nutrition calculator with your exact brands. My philosophy? Enjoy every single bite mindfully and joyfully.
The Last Bite
And there you have it, friends—my heart-on-a-plate, the Pistachio Chocolate Lava Cake. This recipe is more than just a list of steps; it’s an invitation to play in the kitchen, to trust your instincts (and the jiggle), and to create a moment of pure, shared delight. That first crack of the spoon into the tender cake, watching that white chocolate lava mingle with the dark crumb and pistachio confetti… it’s a feeling I wish I could bottle.
I hope you make these, share them, and feel that little thrill of kitchen triumph I felt all those years ago. Remember, the best food always has a side of joy. If you make them, tag me over at @Feastical—I love seeing your creations! Now, go preheat that oven. Your standing ovation awaits.
With a full heart and a sweet tooth,
Beau

Dubai Pistachio Cheese Bomb : Luxurious Middle Eastern Dessert with Chocolate & Kunafa
Hey There, Dessert Lover! Ready for a Little Magic?
Picture this: a dessert that looks like it belongs in a Dubai luxury hotel, with a crisp, golden exterior that gives way to a cold, creamy heart, all wrapped up in ribbons of silky chocolate and the unmistakable, nutty whisper of pistachio. That, my friend, is the Dubai Pistachio Cheese Bomb, and I’m here to tell you that you can absolutely make this showstopper right in your own kitchen. I know it sounds fancy, but trust me—we’re going to break it down into simple, joyful steps. This isn’t just a recipe; it’s an experience, a conversation starter, and a delicious way to treat yourself and the people you love. So, tie on your favorite apron, clear a little counter space, and let’s create something spectacular together. Welcome to the Feastical kitchen—where every bite tells a story!
The Sweet Spark: Where This Love Affair Began
It all started on a trip that was equal parts chaotic and wonderful. I was wandering through a buzzing Dubai food hall, completely overwhelmed by the sights and smells, when a tiny pastry shop window stopped me in my tracks. Inside, a chef was meticulously assembling these glistening, pistachio-dusted domes. I watched, utterly mesmerized, as he drizzled chocolate over them with the focus of an artist. I ordered one, took a bite, and… wow. The contrast of temperatures and textures was a revelation—the warm, crunchy shell against the cool, velvety center was pure genius. It was more than dessert; it was a moment of pure, unadulterated joy. I knew right then I had to bring that feeling home. This recipe is my homage to that moment—a way to capture that travel magic and share it from my kitchen to yours. It’s my “welcome to the party” dish, and it never fails to make people’s eyes light up.
Gathering Your Treasure: A Guide to the Ingredients
Think of this like gathering your culinary treasure map. Each ingredient plays a starring role in creating the symphony of flavors and textures. Here’s exactly what you’ll need and why it matters.
- For the Cheese Filling:
- 250 g cream cheese, room temperature: This is our creamy dream base. Full-fat is non-negotiable here for that lush, rich texture. Pro tip: Let it sit out for a good hour. Room temp cheese blends smoothly without lumps!
- 200 ml heavy cream: We’re whipping this to soft peaks to give the filling body and a light, mousse-like quality. Chilled is best for whipping.
- ¼ cup sugar: Just enough sweetness to balance the tang of the cream cheese. You can use caster sugar for a faster dissolve.
- 1 tsp vanilla extract: The warm, aromatic backbone. A good quality vanilla makes all the difference.
- For the Pistachio Kunafa Shell:
- 250 g kataifi (kunafa dough): The star of the show! Find this in the freezer section of Middle Eastern or international grocers. It looks like shredded wheat. Don’t sub with phyllo—the texture is entirely different.
- 3 tbsp unsalted butter, melted: This is what gives our kunafa its glorious golden color and rich, toasty flavor. Ghee works beautifully here too for a deeper note.
- 1½ cups pistachio cream: This is the secret weapon! It’s a sweet, spreadable paste. If you can’t find it, you can make a quick version by blending shelled pistachios with a little honey and oil until super smooth.
- For the Chocolate Ganache:
- ⅔ cup milk chocolate chips or chopped bar: Milk chocolate provides a sweet, familiar contrast to the nutty pistachio. For a darker twist, use semi-sweet.
- 1 cup heavy cream: Heated and poured over the chocolate to create that luscious, pourable ganache.
- For the Pistachio Ganache:
- 50 g white chocolate chips or chopped bar: White chocolate is a perfect canvas for the pistachio flavor to shine.
- ½ cup pistachio cream: Doubling down on that beautiful green flavor and color.
- 1 cup heavy cream: Same technique, magical green result.
Let’s Build Some Magic: Step-by-Step Assembly
Don’t let the layers intimidate you! We’re going to tackle this one beautiful component at a time. Read through once, then put on some tunes and have fun with it.
- Cheese Filling – The Cold Heart: In a large bowl, beat the room-temperature cream cheese with the sugar and vanilla until completely smooth and no lumps remain. In a separate, chilled bowl, whip the 200ml of heavy cream to soft peaks. Gently fold the whipped cream into the cream cheese mixture. Be patient and fold gently to keep that airy texture. Pour this lovely mixture into your chosen molds (small bowls, ramekins, or dome molds work great). Tap them on the counter to release air bubbles, then pop them in the freezer for at least 3 hours, or until rock solid. This is crucial for easy assembly later!
- Pistachio Kunafa – The Golden Crunch: While the filling chills, let’s make the shell. Take your kataifi dough and roughly chop it with a knife or kitchen shears into 1-inch pieces—this makes it easier to work with. In a large skillet over medium heat, melt the butter. Add the chopped kataifi and toast, stirring constantly, for 5-7 minutes until it’s fragrant and a beautiful, even golden brown. Transfer it to a mixing bowl and let it cool for just a minute or two. Then, add the pistachio cream and mix thoroughly until every strand is coated and sticky. It will smell incredible!
- Ganache Galore – The Silky Drizzle:
- Chocolate Ganache: Place the milk chocolate in a heatproof bowl. Heat the 1 cup of cream in a small saucepan until it just begins to simmer (little bubbles around the edges). Pour the hot cream over the chocolate, let it sit for 3 minutes (no peeking!), then whisk slowly from the center out until you have a smooth, glossy ganache. Let it cool and thicken slightly at room temperature.
- Pistachio Ganache: Same dance! Place white chocolate and pistachio cream in a bowl. Heat the second cup of cream and pour it over. Let sit, then whisk until smooth and beautifully pale green.
- The Grand Assembly – Bringing It All Home: Grab your frozen cheese domes. Take about 60% of your pistachio kunafa mixture and press it into your serving molds (or you can free-form them on a parchment-lined tray) to create a nest. Working quickly, place a frozen cheese dome in the center of each nest. Use the remaining 40% of the kunafa mixture to cover the top and sides, pressing gently to encase the cheese filling completely. It’s like making a delicious, crunchy snowball! Chill these assembled bombs for at least 30 minutes to let everything set.
- The Finale – Unmold & Drizzle: When you’re ready to serve, run a thin knife around the edge of your molds (if using) and pop the bombs out onto serving plates. Take your two ganaches—they should be thick but still pourable—and drizzle them artistically over the top. I like to use two spoons or put them in squeeze bottles for control. There’s no wrong way here—be generous!
Plating Your Masterpiece: How to Serve with Style
Presentation is part of the fun! Place each unmolded bomb in the center of a clean, white plate—the contrast makes the colors pop. Drizzle not just on top, but let some ganache pool elegantly around the base. For the ultimate finishing touch, sprinkle a few extra chopped pistachios and maybe a tiny edible gold leaf flake or a delicate mint leaf right on top. Serve immediately with small dessert forks. The magic happens in that first crack of the kunafa shell into the cold, creamy center. Expect “oohs,” “aahs,” and requests for the recipe!
Make It Your Own: Delicious Twists & Swaps
Love the idea but want to mix it up? Here are a few of my favorite ways to play with this recipe:
- Chocolate-Hazelnut Dream: Swap the pistachio cream for high-quality chocolate-hazelnut spread (like Nutella) in both the kunafa and the ganache. Use dark chocolate for the main ganache drizzle.
- Rose & Cardamom Elegance: Infuse the cream for the cheese filling with 1 tsp of ground cardamom as it heats, then strain. Add ½ tsp of rose water to the filling. Garnish with dried rose petals.
- Lighter Berry Burst: For a slightly lighter filling, blend ½ cup of freeze-dried raspberry or strawberry powder into the cream cheese mixture. It adds a gorgeous pink hue and a tangy fruitiness.
- Dairy-Free Delight: Use a high-quality vegan cream cheese and coconut cream (chilled) for the filling. Substitute vegan butter and ensure your chocolate is dairy-free.
- Mini Party Bites: Skip the large domes! Use a mini muffin tin to create bite-sized cheese bombs. Perfect for parties—just reduce the freezing and assembly time.
Beau’s Kitchen Notes & Stories
This recipe has evolved so much since that first attempt in my kitchen, where I definitely used a towel to wrestle a frozen cheese ball into submission. My biggest lesson? Patience with the freeze. That solid center is your best friend during assembly. Also, don’t stress if your kunafa shell isn’t perfectly round—the rustic, “chef’s touch” look is part of the charm! I’ve made these for birthdays, holiday dinners, and just because it’s Tuesday. Every time, they feel like a celebration. They keep beautifully in the freezer (assembled, before ganache) for up to a month, so you can be a dessert hero on demand. Just thaw slightly and add your ganache before serving.
Your Questions, Answered!
Q: My kataifi is burning before it gets golden! What am I doing wrong?
A: Too high heat! Kataifi toasts quickly. Keep it at a solid medium and stir, stir, stir. It goes from pale to perfect to burnt in a flash. Low and slow wins the race here.
Q: Can I make this ahead of time?
A: Absolutely! You are a genius planner. Freeze the assembled bombs (without ganache) for up to a month. Thaw in the fridge for an hour before serving, then drizzle with ganache. You can also make the ganache a day ahead and gently re-warm it.
Q: My cheese filling is lumpy. How do I fix it?
A> This almost always means the cream cheese was too cold. Next time, give it more time on the counter. For now, you can press the filling through a fine-mesh sieve—a little extra work, but it’ll save the texture.
Q: I can’t find pistachio cream. Any other ideas?
A> No worries! Blend 1 ½ cups of shelled, unsalted pistachios with 3 tbsp of neutral oil (like grapeseed) and 2-3 tbsp of honey or sugar syrup in a food processor until it becomes a smooth, spreadable paste. It’ll be fresher and just as delicious!

Dubai Pistachio Cheese Bomb : Luxurious Middle Eastern Dessert with Chocolate & Kunafa
Description
Imagine cutting into a golden, crunchy shell and discovering a cold, creamy cheesecake center, finished with silky chocolate and nutty pistachio drizzle. These Dubai Pistachio Cheese Bombs look bakery-luxury but are totally doable at home. We’ll build them step by step — no stress, just fun — and the result is a true special-occasion dessert.
Instructions
1️⃣ Make the Creamy Center
-
In a bowl, beat cream cheese, sugar, and vanilla until completely smooth.
-
In a separate cold bowl, whip the heavy cream to soft peaks.
-
Gently fold whipped cream into the cream cheese mixture.
-
Spoon into dome molds or small bowls.
-
Freeze at least 3 hours until solid.
2️⃣ Prepare the Kunafa Shell
-
Chop kataifi into short strands (about 2–3 cm pieces).
-
Heat a skillet over medium heat and add melted butter.
-
Toast kataifi, stirring constantly, 5–7 minutes until evenly golden.
-
Cool slightly, then mix with pistachio cream until fully coated and sticky.
3️⃣ Make the Chocolate Ganache
-
Put milk chocolate in a heatproof bowl.
-
Heat cream until just simmering.
-
Pour over chocolate.
-
Wait 3 minutes, then whisk until smooth and glossy.
-
Let cool until thick but pourable.
4️⃣ Make the Pistachio Ganache
-
Combine white chocolate + pistachio cream in a bowl.
-
Heat cream and pour over.
-
Rest 3 minutes, then whisk smooth.
-
Cool to drizzle consistency.
5️⃣ Assemble the Bombs
-
Press about 60% of the pistachio kunafa into molds or shape into nests on parchment.
-
Place one frozen cheese dome in the center.
-
Cover with remaining kunafa, pressing gently to seal.
-
Chill 30 minutes to firm up.
6️⃣ Finish & Serve
-
Unmold onto plates.
-
Drizzle with chocolate ganache and pistachio ganache.
-
Sprinkle chopped pistachios on top.
-
Serve while shell is crisp and center is cold.
Notes
-
Freeze the filling solid — this makes assembly easy.
-
Toast kunafa on medium heat only — it browns fast.
-
If ganache gets too thick, warm gently for a few seconds.
-
Room-temperature cream cheese = smooth filling (no lumps).
-
You can freeze assembled bombs (without ganache) up to 1 month.
Nutritional Information (Per Serving, Approximate)
Please note: This is a special occasion dessert, and these values are estimates based on the specific ingredients used. For precise dietary needs, use your preferred nutritional calculator with your exact brands.
- Calories: 520
- Total Fat: 38g
- Saturated Fat: 20g
- Carbohydrates: 35g
- Fiber: 2g
- Sugars: 25g
- Protein: 10g
Prep Time: 15 minutes (plus freezing) | Cook Time: 45 minutes | Chill/Freeze Time: 3 hours+ | Servings: 4
Final Thoughts from My Kitchen to Yours
And there you have it—your passport to a seriously impressive dessert. Remember, cooking, especially baking and pastry, is part science and a whole lot of heart. If your drizzles aren’t perfect or your bomb is a little lopsided, it doesn’t matter one bit. What matters is the love you put into making it and the shared moment of delight when someone takes that first, unforgettable bite. This Dubai Pistachio Cheese Bomb is more than just a recipe; it’s a reminder that a little culinary adventure is always within reach. Thanks for cooking with me today. Now, go enjoy your masterpiece—you’ve earned it!
With love and a full spoon,
Beau
Spring Grazing Board : A Picture-Perfect Platter Full of Seasonal Charm
Welcome Spring with a Feast for the Eyes and the Appetite!
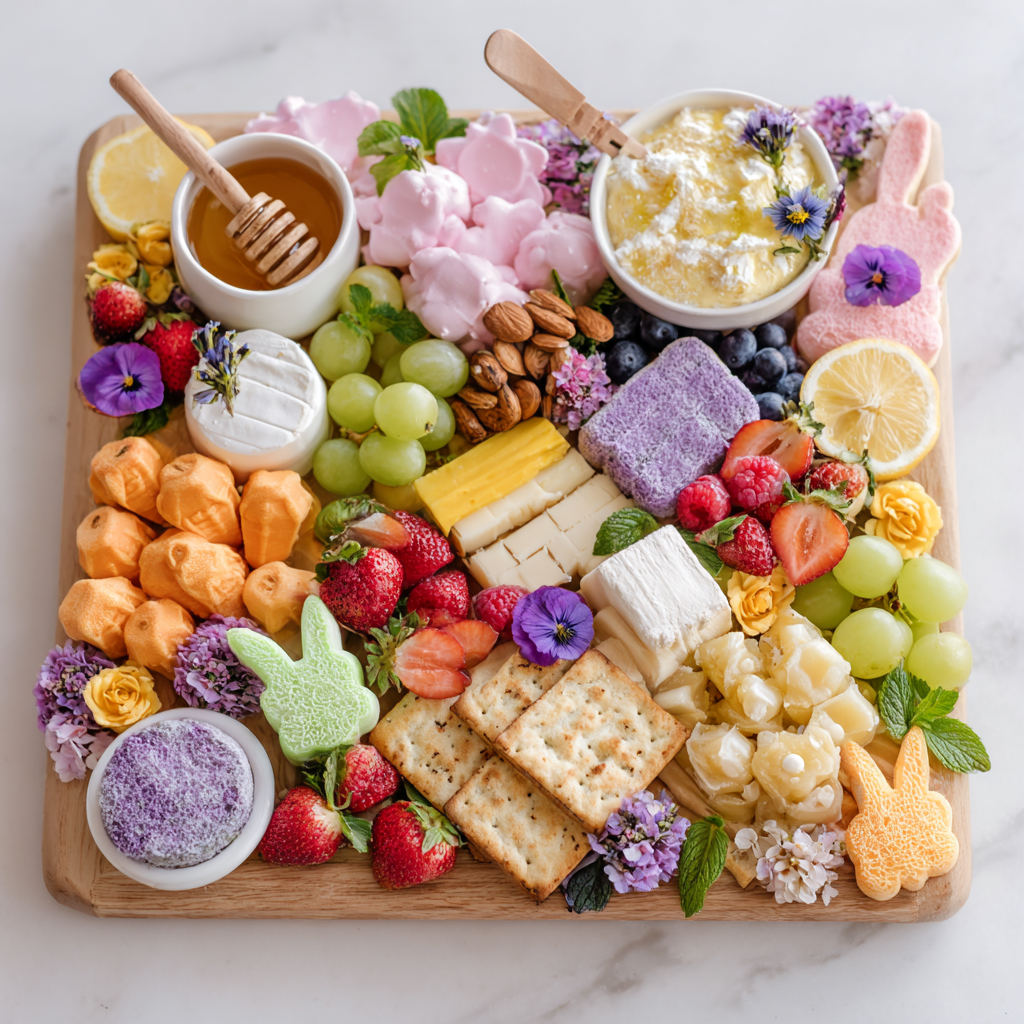
Hey friends, Beau here! Is there anything better than that first truly warm, sunshine-drenched day of spring? The birds are chirping, the flowers are peeking out, and suddenly, all I want to eat is food that looks as bright and cheerful as the world outside my window. That’s where the magic of a Spring Grazing Board comes in. Forget the rulebook—this isn’t just a cheese plate. It’s a sprawling, edible celebration of the season, designed for lazy afternoons, joyful gatherings, and yes, absolutely for snapping that perfect, envy-inducing photo for your feed.
I know what you might be thinking: “Beau, that looks complicated. I’m not a food stylist!” But trust me on this. Building a stunning grazing board is less about precision and more about joyful abundance. It’s about piling high the berries that taste like candy, showcasing cheeses in pretty pastel shades, and tucking in little surprises that make your guests smile. Whether you’re hosting Easter brunch, a baby shower, a garden party, or just treating yourself to a beautiful weekend snack, this board is your ticket to feeling like a culinary rockstar with minimal stress. So, grab your biggest board or platter, and let’s create something downright gorgeous together.
A Board Born from Berry Stains and Happy Chaos
My love for these sprawling feasts started years ago, back when my idea of hosting was inviting three friends over and nervously serving a slightly-lopsided lasagna. One particularly glorious spring Saturday, the plan was a simple picnic. But of course, I got carried away. I started pulling things from the fridge: some leftover herbed goat cheese from a dinner party, a half-pint of strawberries that were almost too perfect to eat, a bag of pistachios, and the last bits of a baguette. Instead of packing it neatly, I just threw it all on a big wooden cutting board and carried it outside.
The result was pure magic. We sat in the grass, sun on our faces, laughing and grazing for hours. There were no plates, just us passing the board around, dipping bread into honey, making outrageous cheese-and-berry combos. My friend’s toddler meticulously ate every single raspberry, staining her fingers pink with glee. It was messy, imperfect, and utterly perfect. That afternoon taught me that the best food isn’t about fussy recipes; it’s about creating a vibe. It’s about setting out a beautiful invitation to connect, to relax, and to savor the season, one delicious bite at a time. This Spring Grazing Board is my love letter to that day.
Gathering Your Spring Bounty: A Guide to Ingredients
Here’s the beautiful part: this isn’t a strict recipe, it’s a blueprint. Use this list as inspiration and swap in what looks good at your market or what you already love. The goal is variety in color, texture, and flavor—something creamy, crunchy, sweet, salty, and fresh!
- Lavender-Infused Goat Cheese: This is our star! Its subtle floral notes just scream spring. Chef’s Insight: If you can’t find it, buy plain goat cheese and roll it in dried edible lavender or a mix of herbs de provence.
- Lemon Ricotta or Ricotta Dollop: Bright, creamy, and slightly tangy. Spoon it into a small bowl and drizzle with olive oil and lemon zest. Sub Tip: Mascarpone or whipped cream cheese with a squeeze of lemon works beautifully too.
- White Cheddar Cubes: A reliable, crowd-pleasing sharpness. Cutting it into cubes makes it easy to grab. Chef’s Hack: Use a crinkle cutter for fun, wavy edges that catch the light!
- Edible Flower-Topped Brie: The showstopper. A wheel of brie looks incredible adorned with pressed edible flowers (find them in the produce section or online). Insight: Don’t stress the flowers—a ring of halved grapes or a pool of jam on top is just as lovely.
- Fresh Berries & Fruit: Strawberries, raspberries, blueberries. Add green grapes, sliced kiwi, or mango for color contrast. Pro Tip: Keep berries whole for a lush, abundant look and slice larger fruits for easy eating.
- Carrot-Shaped Crackers & Baguette Toasts: The playful crunch! Many stores sell veggie-shaped crackers seasonally. No luck? Use a small cookie cutter on slices of cheddar or just grab your favorite butter crackers.
- Candied Pecans or Pistachios: Sweet, salty, crunchy. They fill gaps and add texture. Easy Swap: Toasted almonds or honey-roasted peanuts are fantastic.
- Honeycomb & Fruit Preserves: Liquid gold! Honeycomb is visually stunning. A small jar of local honey or some vibrant raspberry jam is equally delicious for drizzling and dipping.
- White Chocolate Bark & Pastel Candies: Sweet, whimsical finishes. Break bark into chunks. Those pastel candy-coated chocolates are a nostalgic, colorful touch.
- Edible Flowers & Fresh Herbs: The final confetti! Pansies, violets, or small mint and basil leaves add professional flair and fresh flavor. Key Note: Only use flowers labeled as “edible.”
Building Your Masterpiece: A Step-by-Step Guide
Okay, let’s build! Clear a big space on your counter. Have all your ingredients prepped (cheeses cut, fruits washed, etc.) and let’s dive in. Remember, there are no mistakes here—only delicious choices.
- Anchor Your Vessels. Start by placing any bowls or small dishes onto your board. This is your foundation. Tuck your bowl of lemon ricotta and your jar of honey or preserves in opposite corners or slightly off-center. These act as anchors that everything else will flow around.
- Place the Cheeses. Arrange your cheeses around the board. Put the brie wheel proudly in an open space. Scatter the white cheddar cubes in a little cluster. Place the lavender goat cheese log on its side, maybe next to a knife. Give each cheese its own little “home” with room around it.
- Add the Fruit for Color Pops. Now, bring in the vibrancy! Create small piles or gentle cascades of berries. Fan the strawberry slices or kiwi. Let the reds, blues, and greens create a rainbow effect between the cheeses. Don’t be shy—fruit is your best friend for filling space beautifully.
- Incorporate the Crunch. Time for crackers and bread! Fan out your baguette toasts in a line or curve. Nestle the carrot crackers in a fun group spilling out of a bowl or tucked next to the brie. This adds height and variety.
- Fill the Gaps with Goodies. Here’s where the board comes to life. Sprinkle those candied pecans in any empty spaces. They’re like the edible glue that ties areas together. Add clusters of pistachios for a different green hue.
- Add Sweet Touches & Garnish. Artfully place chunks of white chocolate bark. Scatter a few pastel candies. Now, the magic final touch: tuck in fresh mint sprigs and sprinkle edible flowers over everything. This is what takes it from “snack plate” to “work of art.”
- Step Back and Assess. Literally, take three steps back and look at your board. See any huge gaps? Fill them with a few extra berries or nuts. Is there a color missing? Maybe add a few slices of green apple for a fresh pop. Adjust until it feels lush and abundant.
How to Serve Your Spring Grazing Board Like a Pro
Presentation is half the fun! Place your finished board in the center of a table, preferably where the natural light is best (for those photos, of course!). I like to put out a stack of small plates, plenty of napkins (spring-themed ones if you’re feeling festive!), and a bunch of cheese knives, spreaders, and small spoons for the honey and jams. Encourage everyone to dig in with their hands—it’s part of the communal, relaxed vibe.
For drinks, I love pairing this with a crisp rosé, a light Prosecco, or a big pitcher of sparkling water with lemon and cucumber slices. The key is to create an environment where people feel free to linger, chat, and keep coming back for “just one more cracker and a swipe of that amazing cheese.”
Make It Your Own: Delicious Twists & Swaps
The beauty of a grazing board is its versatility. Here are a few ways to mix it up:
- The Herbivore’s Dream: Add more veggie power! Include blistered snap peas, roasted rainbow baby carrots with the tops on, radishes with salt for dipping, and a bowl of green olive tapenade.
- Coastal Spring Vibes: Swap in smoked salmon or trout, a bowl of lemon-dill cream cheese, capers, and some thinly sliced cucumber rounds for building pretty bites.
- Sweeten the Deal (Dessert Board): Turn it into a full dessert! Feature mini cupcakes, macarons, chocolate-dipped strawberries, shortbread cookies, and multiple bowls of dipping sauces like chocolate and caramel.
- Go Gluten-Free: Easily done! Use gluten-free crackers and breads. Ensure any candies or processed items are GF. Load up on extra nuts, fruits, and cheeses for plenty of options.
- Mediterranean Spring: Focus on olives, marinated artichoke hearts, hummus, dolmas, pepperoncini, and slices of salty feta cheese. Use pita chips and fresh pita bread for scooping.
Beau’s Kitchen Confidential: Notes from My Counter
Over the years, I’ve learned a few unspoken rules for grazing board success. First, let your cheeses sit out for about 30 minutes before serving. They taste a million times better at room temperature! Second, don’t fear empty space. In food styling, they call it “negative space,” and it lets each beautiful item shine. Crowding everything together is the only real mistake you can make.
This board has evolved from my haphazard picnic into my go-to hosting secret. I’ve built them on baking sheets lined with parchment for huge crowds, and on tiny slate boards for intimate date nights. The principle is always the same: abundance, color, and joy. The most common compliment I get? “It looks too pretty to eat!” But trust me, once someone bravely takes that first cracker, the board will be demolished in the best way possible.
Your Questions, Answered!
Q: How far in advance can I assemble this?
A: You can prep all your components 1 day ahead (wash/cut fruit, cube cheese, toast bread, etc.) and store them separately in airtight containers in the fridge. Assemble the full board no more than 1 hour before guests arrive so crackers stay crisp and fruit stays fresh.
Q: Help! My board looks sparse and not lush.
A: This is the #1 worry, and the fix is easy: add more of what you already have! Double up on berry clusters. Add another handful of nuts. Fill a small ramekin with extra candies or olives. Abundance is key. Also, drape green grapes in vines rather than piling them—they take up more visual space beautifully.
Q: What’s the best board to use?
A: A large wooden cutting board, a marble slab, or even a clean ceramic platter all work wonderfully. For a budget-friendly option, a large, unpainted wooden tray or a piece of clean, food-safe slate is perfect.
Q: How do I handle leftovers?
A: Carefully deconstruct! Store cheeses, fruits, and meats separately in the fridge. Crackers and nuts go in airtight containers at room temperature. Most items will be good for 1-2 more days.
A Note on Nourishment & Balance
While I’m all about indulgence, I love that a grazing board naturally offers a balance of nutrients. You’ve got calcium and protein from the cheeses, vitamins and antioxidants from the fresh fruits, healthy fats from the nuts, and complex carbs from the crackers and bread. It’s the perfect example of how eating a variety of foods can be both incredibly satisfying and wonderfully nourishing. Listen to your body—dive into the creamy brie, but also enjoy the crisp, juicy berries. It’s all about the mix, and that’s what makes this such a feel-good way to eat and share.
Print
Spring Grazing Board : A Picture-Perfect Platter Full of Seasonal Charm
Description
When the weather turns warm and everything starts to bloom, it’s the perfect excuse to serve food that’s just as colorful and joyful as the season. A Spring Grazing Board is less of a strict recipe and more of a creative guide — a mix of cheeses, fruits, crunchy bites, and sweet touches arranged beautifully on one big board. It’s easy, flexible, and perfect for brunches, picnics, and family get-togethers.
Instructions
1️⃣ Place Small Bowls First
Add bowls for ricotta, honey, jam, or olives. Spread them out — they act as visual anchors.
2️⃣ Add Cheeses
Set whole cheeses (like brie) first, then place sliced or cubed cheeses nearby. Leave a little space around each type.
3️⃣ Arrange Fruit
Create small piles of berries and clusters of grapes between cheeses. Fan sliced fruit for color and shape.
4️⃣ Add Crackers & Bread
Fan crackers in curved lines and tuck bread slices along edges to add height and structure.
5️⃣ Fill Gaps with Nuts & Extras
Sprinkle nuts, olives, and small snacks into empty spaces to make the board look full and abundant.
6️⃣ Finish with Sweets & Garnish
Add chocolate pieces and candies last. Tuck in herbs or edible flowers for a fresh spring look.
7️⃣ Step Back & Adjust
Fill any empty spots with extra berries or nuts. Variety and fullness make the board look professional.
Notes
-
Let cheeses sit at room temperature for 20–30 minutes before serving for best flavor.
-
Keep colors balanced — spread bright items across the board, not all in one spot.
-
Pre-cut anything firm so guests can grab easily.
-
Use odd numbers of items (3 cheeses, 5 fruit types) — it looks more natural.
-
If your board looks sparse, add more small items (nuts, berries, crackers). That fixes it fast.
Final Thoughts
So there you have it, friends—your blueprint for creating a Spring Grazing Board that’s as fun to make as it is to eat. Remember, my first board was born from leftovers and a desire to be outside. It wasn’t perfect, but it was made with joy. That’s the only ingredient that truly matters.
I can’t wait to see what you create in your own kitchen. Tag me @Feastical or use #FeasticalSpringBoard when you share your gorgeous creations. Let’s inspire each other! Now, go raid your fridge, hit the farmer’s market, and get building. Here’s to long, lazy spring afternoons filled with good food and even better company. Happy grazing!
Cheers,
Beau
Honey-Glazed Easter Ham with Pineapple : Classic Holiday Centerpiece
The Sweet, Savory Star of Your Easter Table: Let’s Make Some Magic!
Hey friend, Beau here! Can you smell it? That incredible, unmistakable aroma that starts wafting through the house hours before the big meal? It’s the scent of sweet honey and smoky brown sugar caramelizing into a sticky glaze, mingling with the gentle spice of cloves and the tropical hint of pineapple. It’s the smell of family gathering, of laughter echoing from the living room, of spring finally deciding to show up. It’s the smell of an Easter ham, my absolute favorite holiday centerpiece.
There’s something wonderfully comforting about a beautifully glazed ham sitting proudly in the middle of the table. It’s not just dinner; it’s a showstopper, a tradition, a promise of deliciousness for days (hello, leftover ham sandwiches and scrambles!). But for some reason, a lot of home cooks get a little nervous about tackling it. They think it’s complicated or easy to mess up. I’m here to tell you, with a wink and a nudge, that it’s one of the most forgiving, rewarding dishes you can make. It’s already cooked! We’re just warming it through and giving it a personality—a sweet, shiny, utterly irresistible personality.
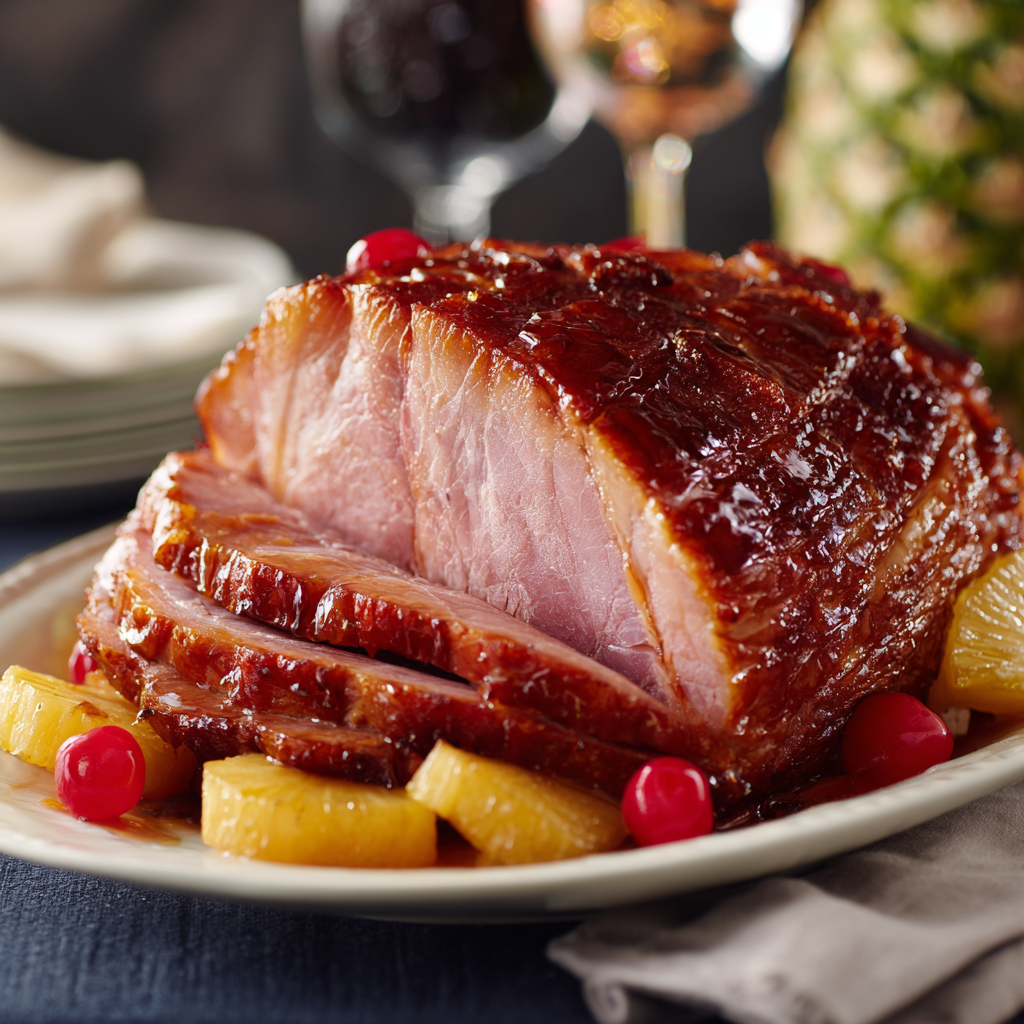
Today, I’m walking you through my go-to Honey-Glazed Easter Ham with Pineapple. This isn’t just a recipe; it’s a blueprint for creating a memory. We’ll keep it simple, soulful, and packed with those “chef-y” little hacks that make all the difference. So, tie on your favorite apron, preheat that oven, and let’s create a masterpiece that’ll have everyone reaching for their phones to take a picture before they even think about taking a bite. Get ready for the warmest, tastiest hug your Easter table has ever had.
My Grandma’s Glaze and the Power of a Pineapple Ring
My love for this ham is 100% rooted in my childhood. Every Easter, without fail, my Grandma Eleanor would be the commander-in-chief of the ham. I was her eager (and slightly messy) sous-chef. My job? The all-important “clove studder.” She’d hand me the jar of whole cloves and point to the diamonds she’d scored into the ham’s fat cap. “One in each intersection, Beau. Make it pretty.” I took my job so seriously, meticulously pressing each little woody bud into place, feeling like I was performing essential surgery.
But the real magic happened with the glaze. Grandma didn’t measure. She’d scoop brown sugar from the bag, squeeze honey from the bear, and whisk in mustard from a jar with a faded label. Then came her secret weapon: the juice from the can of pineapple rings. “It’s got the sweet and the acid, all in one,” she’d say, winking. As it baked, that glaze would bubble and thicken, dripping down the sides and forming these incredible, crackly bits around the pineapple rings. The smell was pure nostalgia. To this day, the scent of cloves and caramelizing sugar instantly transports me to her kitchen, standing on a step-stool, feeling like the most important chef in the world. That’s the feeling I want to help you create in your own kitchen.
Gathering Your Cast of Flavor Characters
Here’s everything you need to bring this sunny, savory showstopper to life. Think of each ingredient as a member of a band—they all play a crucial part in the final symphony!
- 1 fully cooked, bone-in ham (7–9 lbs): This is our star! “Fully cooked” means most of the work is done for us—we’re just heating and flavoring. I highly recommend bone-in for two reasons: the bone adds incredible depth of flavor to the meat as it heats, and leftover ham bones are gold for making the best split pea or bean soup you’ve ever had. If you can find a “spiral-cut” ham, that’s fantastic for easy serving, but a traditional one gives us a beautiful canvas for scoring and glazing.
- 1 can (20 oz) pineapple rings in juice: Don’t you dare drain that juice down the sink! The rings give us that classic, gorgeous presentation and their sugars caramelize beautifully. The juice is liquid gold for our glaze, adding a bright, fruity acidity that balances the sweetness. Chef’s Tip: If you’re feeling fancy, fresh pineapple works too! Just know it might release more water and won’t be as uniformly round.
- Whole cloves (about 20-30): These little guys are for studding, not for eating whole (they’re quite strong!). They infuse the ham with that warm, aromatic, quintessentially “holiday” spice that permeates the meat and makes your whole house smell amazing.
- ¾ cup packed brown sugar: Light or dark both work! Dark brown sugar has a deeper molasses flavor, which I love for a richer glaze. This is our primary caramelizer, creating that gorgeous, crackly crust.
- ¼ cup honey: The floral sweetness of honey is irreplaceable here. It adds a beautiful gloss and a flavor complexity that plain sugar can’t match. For a fun twist, try using a local wildflower or orange blossom honey!
- 2 tbsp Dijon mustard: “Wait, mustard?!” Trust me. This is the genius ingredient that keeps the glaze from being one-dimensionally sweet. The Dijon adds a subtle tang and sharpness that cuts through the fat of the ham, making every bite perfectly balanced. It’s the secret weapon.
Let’s Build That Beautiful Glaze & Bake!
Ready to roll up your sleeves? Follow these steps, and you’ll have a ham that’s not only gorgeous but also juicy and packed with flavor in every single slice.
Step 1: Preheat & Position. Fire up your oven to 325°F (165°C). Get out your roasting pan (a 9×13 baking dish can work in a pinch for a smaller ham). Place the ham in the pan, cut side down. This creates a stable base and allows the juices to baste the ham as it heats. No rack needed!
Step 2: Score & Stud for Flavor. Using a very sharp knife, score the surface fat of the ham in a diamond pattern. Don’t cut too deep—just about ¼ inch into the fat and outer layer. This does three wonderful things: it lets the glaze seep in, creates more surface area for caramelization, and makes it look professionally done. Now, channel your inner artist and press a whole clove into the center of each diamond. It’s oddly satisfying, I promise.
Step 3: Whisk Up the Glaze. In a small saucepan over low heat, combine the brown sugar, honey, Dijon mustard, and 2-3 tablespoons of the reserved pineapple juice. Whisk until it’s smooth, glossy, and just beginning to bubble at the edges. This should only take 3-5 minutes. Chef’s Hack: Taste it! Adjust to your liking—a tiny pinch of black pepper can be amazing here, or a splash of apple cider vinegar for more tang.
Step 4: Pineapple Party! Open your can of pineapple rings. Arrange them artistically over the top and sides of the ham, overlapping slightly if you like. If they’re sliding, you can secure them with toothpicks, but they usually stay put once you add the glaze. Now, take half of your warm glaze and brush it generously all over the ham and pineapple. Get it in those cracks!
Step 5: The Low & Slow Bake. Loosely tent the entire ham with aluminum foil. This creates a little steam oven inside, ensuring the ham heats through without drying out. Pop it in the oven. The rule of thumb is about 15 minutes per pound for a fully cooked ham to reach the perfect internal temperature of 140°F. For a 9-pound ham, that’s roughly 2 hours and 15 minutes. But we’re not just setting a timer and walking away!
Step 6: The Basting Ritual. Every 20-30 minutes, pull the ham out (carefully!), remove the foil, and brush on more of that glorious glaze. This is the key to building layers of flavor and that deep, sticky coating. Don’t skip this step! It’s your moment to connect with the dish.
Step 7: The Grand Finale – Caramelization. For the last 20 minutes of cooking, remove the foil for good. Crank the oven up to 375°F (190°C). Let that glaze bubble, darken, and caramelize into a stunning, glossy finish. Keep an eye on it—this is when the magic really happens!
Step 8: The Crucial Rest. Once the ham hits 140°F internally and looks like a jewel, take it out. LET IT REST for at least 15-20 minutes before you even think about slicing. This allows the frantic juices to redistribute throughout the meat, guaranteeing a moist, juicy slice instead of a dry one. It’s non-negotiable, my friend.
Plating Your Holiday Masterpiece
Presentation is part of the joy! Once rested, transfer your ham to a large serving platter or a cutting board with a groove to catch juices. Spoon any of the incredible pan drippings over the top for extra shine. I love to garnish the platter with fresh herbs like rosemary or thyme sprigs, and maybe a few extra pineapple rings or maraschino cherries for a pop of color.
Now, let’s talk about the supporting cast—the sides that make this meal sing! That creamy, rich Scalloped Potatoes are the ultimate comfort foil to the sweet ham. The bright, crisp Roasted Asparagus with Lemon cuts through the richness perfectly. And those soft, Buttery Dinner Rolls? They’re essential for making mini ham sliders at the table and for sopping up every last bit of glaze on the plate. Don’t forget a big, grainy mustard on the side for those who love an extra kick!
Make It Your Own: Delicious Twists on the Classic
This recipe is a fantastic foundation. Want to play? Here are a few of my favorite riffs:
- The Bourbon Brown Sugar Twist: Add 2 tablespoons of bourbon or whiskey to the glaze mixture. It adds a wonderful smoky, oaky depth that’s absolutely incredible with the ham.
- Spicy & Sweet: Add 1-2 teaspoons of chipotle powder or a few generous cracks of black pepper to your glaze. The heat plays so nicely with the sweet honey and sugar.
- Maple Mustard Magic: Swap the honey for pure maple syrup and use a grainy whole-grain mustard instead of Dijon. You’ll get a more rustic, robust flavor profile that screams autumn, but is just as welcome in spring.
- Citrus Zing: Replace the pineapple juice in the glaze with fresh orange juice and add a tablespoon of orange zest. Use orange slices instead of, or in addition to, the pineapple rings for a sunny citrus vibe.
- Pineapple-Ginger Buzz: Add 1-2 tablespoons of finely minced fresh ginger or 1 teaspoon of ground ginger to the glaze. The zingy warmth of ginger is a fantastic friend to both ham and pineapple.
A Few More Thoughts From My Kitchen to Yours
This recipe has evolved so much since my grandma’s “a little of this, a little of that” days, but the soul is the same. One year, I got overzealous with the broiler during the caramelization step and created a glaze that was… let’s call it “extra crunchy.” Lesson learned: watch it like a hawk! Another time, I tried using agave instead of honey, and while it was good, it just didn’t have that same nostalgic flavor. Stick with honey if you can.
The best part? This ham is arguably even better the next day. The flavors have more time to mingle and get to know each other. I always make sure I have a plan for the leftovers (think: ham fried rice, omelets, mac and cheese with ham, or that epic soup I mentioned). Cooking should be fun, a little messy, and always full of love. Don’t stress about perfection. If a pineapple ring slides, just nudge it back. If you forget to baste once, the world won’t end. You’re creating something wonderful.
Your Questions, Answered!
Q: Can I use a spiral-cut ham for this recipe?
A: Absolutely! It’s a great shortcut for serving. The only differences: you won’t need to score it (it’s pre-sliced), and be extra gentle when brushing on the glaze so you don’t tear the slices. Also, because it’s pre-sliced, it may heat a bit faster, so start checking the temperature a little earlier.
Q: My glaze is too thin/too thick! Help!
A: No panic! If it’s too thin, let it simmer on the stove for another minute or two to reduce and thicken. If it’s too thick (like a paste), simply whisk in another tablespoon or two of pineapple juice or even water until it’s a brushable consistency. It’s very forgiving.
Q: How can I make this ahead of time?
A: You can make the glaze up to 2 days ahead and store it in the fridge. Warm it slightly on the stove or in the microwave to loosen it up before using. You can also score and stud the ham the night before, cover it tightly, and refrigerate. On the day-of, just bring it out while the oven preheats, then glaze and bake as directed.
Q: How long do leftovers last, and how should I store them?
A: Once cooled, store leftover ham in an airtight container in the fridge for 3-4 days. For longer storage, you can freeze sliced ham in freezer bags for 1-2 months. The bone? Wrap it tightly and freeze it for your next pot of soup!

Honey-Glazed Easter Ham with Pineapple : Classic Holiday Centerpiece
Description
This honey-glazed pineapple ham is a classic holiday showstopper that looks impressive but is actually very simple to make. Since the ham is already cooked, your job is just to warm it gently and build a glossy, caramelized glaze packed with sweet, tangy, and lightly spiced flavor. Perfect for Easter lunch, spring gatherings, and amazing leftovers the next day.
Ingredients
-
1 fully cooked, bone-in ham (7–9 lb / 3–4 kg)
-
1 can (20 oz / 565 g) pineapple rings in juice (juice reserved)
-
¾ cup packed brown sugar
-
¼ cup honey
-
2 tbsp Dijon mustard
-
2–3 tbsp pineapple juice (from the can)
-
20–30 whole cloves (optional but traditional)
Instructions
1️⃣ Preheat & Prep
Heat oven to 325°F (165°C). Place ham cut-side down in a roasting pan.
2️⃣ Score the Surface
With a sharp knife, lightly score the fat in a diamond pattern (about ¼ inch deep). This helps the glaze soak in and caramelize.
3️⃣ Add Cloves (Optional)
Press one whole clove into the center of each diamond for classic holiday aroma.
4️⃣ Make the Glaze
In a small saucepan over low heat, whisk:
-
brown sugar
-
honey
-
Dijon mustard
-
pineapple juice
Heat 3–5 minutes until smooth and glossy.
5️⃣ Add Pineapple
Arrange pineapple rings over the ham. Secure with toothpicks if needed. Brush about half the glaze over everything.
6️⃣ Bake Covered
Tent loosely with foil and bake about 15 minutes per pound, until internal temperature reaches 140°F (60°C).
→ A 8-lb ham takes about 2 hours.
7️⃣ Baste Regularly
Every 25–30 minutes, uncover and brush with more glaze.
8️⃣ Caramelize Finish
For the last 20 minutes, remove foil and raise oven to 375°F (190°C) to caramelize the glaze. Watch closely so it doesn’t burn.
9️⃣ Rest Before Slicing
Rest 15–20 minutes before carving to keep it juicy.
Notes
-
Bone-in ham = more flavor and better leftovers for soup.
-
Don’t skip resting time — it keeps slices moist.
-
If glaze thickens too much, whisk in a little warm pineapple juice.
-
If browning too fast, loosely re-cover with foil.
-
Save the pan juices — they’re liquid gold for serving.
Final Thoughts
While holiday meals are about celebration and indulgence, I believe in mindful enjoyment. This information is an estimate per 4-ounce serving of the glazed ham (about the size of a deck of cards). Remember, a little goes a long way with such a flavorful centerpiece!
Approximate Nutrition (Per Serving):
Calories: 420 | Protein: 32g | Carbohydrates: 28g | Fat: 20g | Saturated
Easter Confetti Banana Bread : Colorful Spring Sprinkle Loaf
Easter Confetti Banana Bread: Your New Favorite Spring Tradition
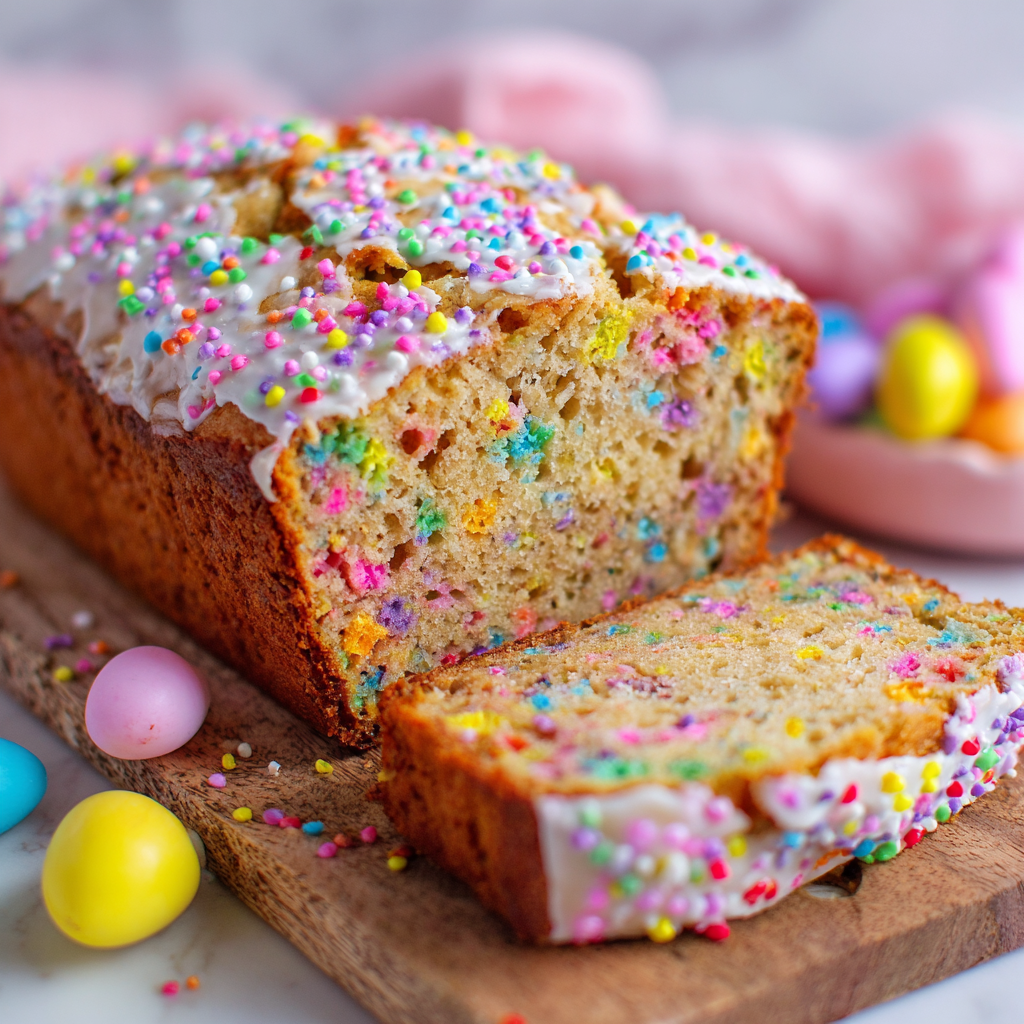
Hey there, friend! Beau here, from Feastical. Come on in, grab an apron, and let’s get something straight: banana bread is a forever classic. It’s the culinary equivalent of your favorite cozy sweater. But what if we took that beloved, comfy sweater and bedazzled it with every happy, pastel sprinkle we could find? That’s the spirit behind this Easter Confetti Banana Bread.
This isn’t just banana bread; it’s a celebration in a loaf pan. Imagine the moist, tender crumb you know and love, now speckled with cheerful bursts of color in every single slice. It’s sunshine on a cloudy day, the first blooms of spring, and the joy of an Easter egg hunt—all wrapped up in one delicious, sliceable package. Perfect for your holiday brunch table, amazing as a sweet afternoon pick-me-up with coffee, and absolutely guaranteed to make any baker, young or old, break into a grin.
The best part? It’s just as simple as my classic recipe. We’re not doing anything fancy or fussy. We’re just inviting a little party into the batter. So, if you’ve got some spotty bananas begging to be used (you know the ones!), you’re already halfway to creating this feel-good masterpiece. Let’s turn those humble bananas into the most festive, talked-about treat of the season!
A Sprinkle of Nostalgia: Where This Recipe Really Came From
This recipe hits super close to home for me. It’s basically a mash-up of my two favorite childhood food memories. Memory one: my grandma’s banana bread, always on the counter, still warm, the smell wrapping around you the second you walked through her door. It was pure, simple magic.
Memory two: the yearly Easter tradition of “sprinkle pancakes.” My mom would let my sister and me go wild, shaking colorful sprinkles into the pancake batter on Easter morning. Watching those colors swirl and bake into the cakes felt like we were creating edible joy. The idea that we could bake happiness right into our food stuck with me.
So one spring, staring at a bunch of overly ripe bananas, I had a “what if?” moment. What if I combined that soul-soothing comfort of Grandma’s banana bread with the unbridled, colorful joy of those Easter morning pancakes? The first loaf was a revelation. The sprinkles didn’t just sit on top; they baked right in, creating this confetti-like confetti effect that made every slice feel like a mini celebration. It was an instant hit with my family, and now, I’m so excited to share that same feeling of festive, delicious fun with you and yours.
Gathering Your Confetti: Ingredients & Chef Insights
Here’s everything you’ll need to create this springtime showstopper. I’ve tossed in some of my favorite tips and swaps so you can bake with confidence!
- 3 ripe bananas, mashed – The spottier, the better! Those black freckles mean maximum sweetness and banana flavor. This is your bread’s moisture secret agent. No super ripe bananas? Bake less-ripe ones at 300°F for 15-20 minutes until the skins blacken.
- ½ cup unsalted butter, melted – Unsalted lets you control the salt. Melted butter makes for an incredibly tender crumb and easy mixing. For a dairy-free twist, an equal amount of coconut oil works beautifully.
- ¾ cup granulated sugar – Sweetens the deal. You can reduce this to ⅔ cup if your bananas are super ripe, or swap in light brown sugar for a deeper, caramel-like flavor.
- 2 large eggs – Our binding agents, bringing structure and richness. Bring them to room temperature for a smoother, more cohesive batter. In a pinch, ½ cup of plain yogurt or applesauce can work as a partial binder, but the texture will be denser.
- 1 tsp vanilla extract – The flavor enhancer. It rounds out all the other ingredients. Don’t skip it!
- 1½ cups all-purpose flour – The foundation. For a lighter texture, spoon the flour into your measuring cup and level it off—don’t scoop directly from the bag!
- 1 tsp baking soda – Our leavening hero. It reacts with the acidic bananas to give the bread its perfect rise. Make sure yours is fresh (no clumps!).
- ½ tsp salt – The flavor booster. It makes the sweet notes pop and balances everything beautifully.
- ½ tsp cinnamon (optional) – My little secret weapon. It adds a whisper of warm, cozy depth that pairs magically with banana. Try it!
- ½ cup pastel sprinkles (jimmies work best) – THE STAR OF THE SHOW! Use “jimmies” (the long, cylindrical sprinkles) as they hold their color better during baking. Avoid nonpareils (tiny balls) if you can, as they tend to bleed color more easily.
For the Optional (But Highly Recommended) Glaze:
- 1 cup powdered sugar – The base of our sweet, drippy glaze.
- 1–2 tbsp milk – Any kind works—dairy, almond, oat. Add slowly to reach your desired consistency.
- ¼ tsp vanilla – A dash more flavor.
- Extra sprinkles for topping – Because more is more when it comes to confetti!
Let’s Bake! Your Step-by-Step Guide to Confetti Magic
Ready to make some magic? Follow these steps, and you’ll have a picture-perfect loaf in no time. I’ve packed each step with my best kitchen hacks to ensure your success.
- Preheat & Prep: Fire up your oven to a cozy 350°F (175°C). Now, take your 9×5-inch loaf pan and give it a good coat of butter, non-stick spray, or line it with parchment paper with some overhang. This “sling” makes removing the baked bread an absolute breeze—no sticking, no fighting!
- Mash & Mix (The Wet Team): In a large mixing bowl, peel and mash those ripe bananas with a fork. You want them mostly smooth with a few small lumps for texture—it’s all good! Pour in the melted (and slightly cooled) butter, sugar, eggs, and vanilla. Whisk it all together until it’s one happy, smooth, golden family. See how the sugar starts to dissolve? That’s a good sign!
- Whisk (The Dry Team): In a separate bowl, whisk together the flour, baking soda, salt, and that optional cinnamon. This isn’t just mixing; it’s ensuring our baking soda is evenly distributed for a perfect, even rise. No soda pockets here!
- The Grand Union (Fold, Don’t Fight!): Here’s the most important step for a tender loaf: gently add the dry ingredients to the wet ingredients. Use a spatula and fold them together with a light hand. Stop the moment the last streak of flour disappears. A few tiny lumps are FAR better than overmixing, which leads to tough, dense bread. You’ve got this!
- Confetti Time! Now for the fun part! Add your ½ cup of pastel jimmies to the batter. Gently fold them in just 3-4 times until they’re scattered throughout. Overmixing here can cause the colors to bleed, so be swift and confident.
- Bake to Golden Perfection: Pour your beautiful, speckled batter into your prepared loaf pan. Smooth the top with your spatula. Slide it into the center of your preheated oven and bake for 50-60 minutes. My pro tip: Start checking at 50 minutes by inserting a toothpick or thin knife into the very center. It should come out with a few moist crumbs, but not wet batter. The top will be a gorgeous golden brown, and the edges will just be pulling away from the pan.
- The Patient Cool Down: This is the hard part! Let the bread cool in the pan on a wire rack for a full 10 minutes. This allows it to set. Then, using the parchment sling or a gentle shake, lift it out and let it cool completely on the rack. I know it’s tempting, but slicing into a warm loaf can make it gummy. Trust me, the wait is worth it for the perfect slice.
- Drizzle & Decorate (Optional, but oh-so-Pretty): Once completely cool, mix your glaze. In a small bowl, combine powdered sugar, 1 tbsp of milk, and vanilla. Stir until smooth. Add more milk, a teaspoon at a time, until it’s a thick but pourable consistency. Drizzle artfully over the loaf and immediately shower it with more sprinkles. Let the glaze set for 15 minutes before slicing.
How to Serve Your Masterpiece
Presentation is part of the fun! For Easter brunch, place the whole loaf on a beautiful cake stand or a rustic wooden board. Slice it thick and arrange the slices in a fan pattern to show off all those beautiful bursts of color.
This bread is a dream alongside a cup of coffee or tea in the afternoon. For a next-level treat, lightly toast a slice and spread it with a little salted butter or cream cheese—the warmth makes the flavors sing! It’s also the perfect sweet addition to a brunch spread next to savory items like scrambled eggs and crispy bacon. The colorful slices make it a fantastic, edible centerpiece that’s sure to spark conversation and smiles.
Make It Your Own: Fun Twists & Swaps
Love the base recipe? Here are some delicious ways to play with it!
- Lemon Zest Brightness: Add the zest of one large lemon to the wet ingredients. The citrusy zing cuts the sweetness and makes the whole loaf taste even more like spring.
- “Bunny Tail” Mini Loaves: Divide the batter between 4-5 greased mini loaf pans. Reduce baking time to 25-35 minutes. These make adorable individual gifts or place settings!
- Nutty Crunch: Fold in ½ cup of chopped toasted walnuts or pecans along with the sprinkles for a wonderful texture contrast.
- Chocolate Chip Confetti: Swap out ¼ cup of the sprinkles for ¼ cup of white or semi-sweet chocolate chips. Double the chocolatey fun!
- Gluten-Free & Whole Wheat Options: For a GF loaf, use a 1:1 gluten-free all-purpose flour blend. For a heartier version, substitute up to ½ cup of the all-purpose flour with whole wheat flour.
Beau’s Kitchen Notes & Stories
This recipe has seen some fun experiments in my kitchen. One year, I accidentally used rainbow jimmies instead of pastel. The result was a wildly colorful, psychedelic loaf that my nephew declared “the best rainbow bread ever.” So, use what you have! The spirit is celebration.
I also learned the hard way about overmixing. In my early days, I’d stir the batter until it was completely smooth, wondering why my bread was so tough. Now, I embrace the “just combined” mantra, and the difference in texture is night and day. Remember, we’re making quick bread, not kneading dough. A light hand is your best friend. This loaf keeps beautifully wrapped at room temp for 2 days, or frozen for up to 3 months. Just slice it before freezing for easy toasting!
Your Questions, Answered (FAQs & Troubleshooting)
- Q: My sprinkles bled a lot, turning the batter grey/green. What happened?A: This usually means the sprinkles were folded in too vigorously or the batter was overmixed after adding them. It can also happen with certain brands that use less stable dyes. For best results, use jimmies (not nonpareils) and fold gently at the very last second before baking.
- Q: The center of my bread is still gooey, but the top is getting dark. Help!A: This is common! Just tent the loaf loosely with a piece of aluminum foil for the remaining bake time. This will slow down the browning on top while allowing the center to cook through without burning.
- Q: Can I make this into muffins instead?A: Absolutely! This batter makes about 12 standard muffins. Fill lined muffin cups ⅔ full and bake at 350°F for 18-22 minutes. Perfect for on-the-go Easter treats!
- Q: My bread is very dense. What did I do wrong?A: The #1 culprit is overmixing the batter after adding the flour. This develops the gluten, leading to a tough, dense texture. Other causes could be old baking soda or measuring the flour incorrectly (scooping it packs it down). Next time, remember: fold until just combined, no more!

Easter Confetti Banana Bread : Colorful Spring Sprinkle Loaf
Description
This Easter Confetti Banana Bread is soft, moist, and packed with banana flavor — with colorful sprinkles baked right into every slice. It’s a simple one-bowl style quick bread that turns overripe bananas into a cheerful spring treat. Perfect for brunch, snacks, or sharing with family.
Ingredients
Banana Bread
-
3 ripe bananas, mashed
-
½ cup (115 g) unsalted butter, melted (or coconut oil)
-
¾ cup (150 g) sugar
-
2 large eggs
-
1 tsp vanilla extract
-
1½ cups (190 g) all-purpose flour
-
1 tsp baking soda
-
½ tsp salt
-
½ tsp cinnamon (optional)
-
½ cup pastel sprinkles (jimmies style work best)
Optional Glaze
-
1 cup powdered sugar
-
1–2 tbsp milk
-
¼ tsp vanilla
-
Extra sprinkles
Instructions
1️⃣ Prep
Heat oven to 175°C / 350°F. Grease or line a 9×5-inch loaf pan.
2️⃣ Mix Wet Ingredients
In a large bowl, whisk mashed bananas, melted butter, sugar, eggs, and vanilla until smooth.
3️⃣ Mix Dry Ingredients
In another bowl, whisk flour, baking soda, salt, and cinnamon.
4️⃣ Combine
Add dry ingredients to wet. Gently fold just until combined — do not overmix.
5️⃣ Add Sprinkles
Fold in sprinkles with just a few strokes.
6️⃣ Bake
Pour batter into pan. Bake 50–60 minutes, until a toothpick in the center comes out with a few moist crumbs.
7️⃣ Cool
Cool in pan 10 minutes, then move to a rack to cool completely.
8️⃣ Glaze (Optional)
Mix glaze ingredients, drizzle over cooled loaf, and add extra sprinkles.
Notes
-
Use very ripe bananas for sweetness and moisture.
-
Stir the batter lightly — overmixing makes dense bread.
-
If the top browns too fast, loosely cover with foil near the end.
-
Use jimmies sprinkles, not tiny balls, to reduce color bleeding.
-
Great as muffins too: bake 18–22 minutes.
Nutritional Information*
*Please note: This is an approximate estimate calculated using generic ingredients and includes the optional glaze. Values will vary based on specific brands and ingredient sizes used.
Prep Time: 15 minutes | Bake Time: 50-60 minutes | Total Time: ~1 hour 10 minutes | Yield: 1 loaf (8-10 slices)
Per Slice (based on 10 slices with glaze):
Calories: ~300 | Total Fat: 11g | Saturated Fat: 7g | Carbohydrates: 48g | Fiber: 1g | Sugar: 32g | Protein: 4g
This is a treat, through and through! It’s wonderful for sharing and celebrating. For a slightly lighter version, you can omit the glaze or reduce the sugar in the batter by 2 tablespoons. Remember, food is about joy and connection, and this bread is packed full of both.
Final Thoughts from My Kitchen to Yours
And there you have it, friend—my heart-on-a-plate, Easter Confetti Banana Bread. This recipe is more than just a list of ingredients and steps; it’s an invitation to create a little moment of joy. It’s about taking something simple and making it special, about the smiles it brings when you bring it to the table, and about the delicious memories you’re baking right into your family’s story.
I hope this colorful loaf becomes a bright spot in your spring, whether it’s for Easter, a birthday, a just-because Tuesday, or whenever you need a sprinkle of happiness. Thank you so much for letting me share my kitchen and my stories with you. Now, go forth and bake something beautiful—and don’t forget the sprinkles!
With a full heart and a sweet tooth,
Beau Collier

“Nest” Granola Cups with Yogurt : A Wholesome, Fun Springtime Treat
Nest Granola Cups: Your New Favorite Springtime Ritual
Hey friends, Beau here! Can you feel it? That gentle shift in the air, the first brave blooms peeking through the soil, and the morning chorus of birds tuning up for their daily symphony? Spring isn’t just a season on the calendar; it’s a feeling. It’s the promise of sunshine, fresh starts, and food that’s as fun to look at as it is to eat. And that’s exactly where our kitchen adventure leads us today.
I want to introduce you to something that’s been putting a permanent smile on my face every morning this week: “Nest” Granola Cups. Imagine this: a perfectly crunchy, subtly sweet little cup, shaped just like a cozy bird’s nest, cradling a cloud of creamy yogurt and topped with a confetti of fresh, jewel-toned berries or a few playful mini eggs. It’s breakfast, it’s a snack, it’s a centerpiece for your spring brunch table—all wrapped up in one delightfully edible package.
This isn’t about fussy, complicated pastry. This is about joyful, wholesome eating that sparks a little bit of magic. Whether you’re serving these to wide-eyed kiddos, impressing your brunch crew, or simply treating yourself to a morning moment of joy, these granola nests deliver. They’re the culinary equivalent of finding the first robin’s egg of the season. So, tie on your apron (or don’t, I’m not the boss of you!), and let’s create some edible sunshine together.
A Kitchen Full of Nests & Nostalgia
This recipe takes me straight back to my grandma’s sun-drenched kitchen in April. She was a master of making the ordinary magical. I’d be at the table, a pile of crayons and construction paper before me, diligently cutting out paper birds for a school project. The smell of toasting oats and honey would start to drift from the oven, and I’d peek over my shoulder to see what she was up to.
With hands that could tell a thousand stories, she’d press the warm, fragrant granola mixture into her old muffin tin, using the back of a small spoon to carefully shape the sides. “We’re helping the birds get ready for spring, Beau,” she’d whisper with a wink. Of course, I knew our edible nests weren’t for the sparrows outside her window, but that sense of playful creation, of making something special with simple ingredients, stuck with me. When I pull these golden cups out of the oven now, that smell is a time machine. It’s the smell of creativity, of love, and of understanding that food is so much more than fuel—it’s a feeling. And that’s the feeling I want to share with you.
Gathering Your Nest-Building Supplies
Here’s the beautiful part: you likely have most of this in your pantry right now. This is simple, real-food magic. Let’s break it down.
- 2 cups rolled oats (old-fashioned): The backbone of our nest! Rolled oats give us the perfect chewy-yet-crunchy texture. Chef’s Insight: Don’t use quick oats here—they can get a bit mushy. The sturdy rolled oat holds its shape beautifully.
- ½ cup honey or pure maple syrup: Our natural sweetener and binding agent. Honey gives a classic, floral sweetness, while maple syrup offers a deeper, almost caramel-like note. Pro Tip: If your honey is super thick, warm it slightly for easier mixing.
- ⅓ cup coconut oil or unsalted butter, melted: This is what gives our nests their rich flavor and helps them crisp up. Coconut oil adds a lovely subtle tropical hint (great for dairy-free!), while butter gives that classic, comforting taste. Use what you love!
- ½ teaspoon cinnamon: The warm, cozy whisper in the background. It makes the whole kitchen smell like a hug.
- ¼ teaspoon fine sea salt: Never skip the salt in sweet recipes! It’s the secret weapon that makes all the other flavors pop and balances the sweetness perfectly.
- ½ teaspoon pure vanilla extract: The finishing touch that adds a layer of warm, aromatic depth. It’s the difference between “good” and “where have you been all my life?”
- For Filling & Topping:
- Yogurt: Greek yogurt for ultra-creamy and protein-packed, or regular yogurt for a lighter touch. Vanilla, honey, or plain all work—choose your adventure!
- Fresh Fruit or Mini Candy Eggs: Berries, kiwi slices, mango dice, banana coins… the springtime rainbow is yours! For a festive touch, especially around Easter, a few mini candy eggs nestled in the “yogurt snow” are pure joy.
Building Your Edible Masterpiece: Step-by-Step
Ready to get your hands deliciously dirty? Let’s do this. Remember, cooking is a vibe, not a stress test.
- Preheat & Prep: Fire up your oven to a cozy 350°F (175°C). Now, grab a standard 12-cup muffin tin. This is non-negotiable for me: grease that tin generously with cooking spray or butter. I’m talking every nook and cranny. These nests need to be released with love after baking. Trust me on this one—it’s the difference between perfect little cups and a frustrating crumble.
- The Big Mix: In a large mixing bowl, combine your rolled oats, honey (or maple syrup), melted coconut oil (or butter), cinnamon, salt, and vanilla. Get in there with a sturdy spoon or spatula and mix until every single oat is glistening and coated in that sweet, fragrant mixture. It should look uniform and feel slightly sticky. That’s the glue for our nests!
- Shape Those Nests! This is the fun, tactile part. Scoop up about 2-3 tablespoons of the oat mixture and plop it into a muffin cup. Now, using your fingers, a small glass, or the back of a spoon, press the mixture firmly from the bottom up the sides. You’re creating a cup shape with a nice, thick base and walls that go about ¾ of the way up the cup. Press, press, press! The more compact you make it, the better it holds together after baking. Think “bird building a sturdy home.”
- Bake to Golden Perfection: Slide your tin into the preheated oven and let the magic happen for 15-18 minutes. You’re looking for the edges to turn a beautiful, deep golden brown. They’ll smell incredible—toasty, sweet, and warm.
- The Crucial Cool Down: Here’s my #1 chef hack for success: LET THEM COOL COMPLETELY IN THE PAN. I know, the temptation is real. You’ll want to pop them out immediately. But fight it! As they cool, they firm up and set. Give them a good 20-30 minutes. Once they’re room temperature, you can gently run a butter knife around the edges to help lift them out. They should come out in perfect, intact little nests.
- Fill & Flourish: The grand finale! Right before serving, spoon your chosen yogurt into each nest. Then, unleash your inner artist with the toppings. Pile on the berries, artfully place a few kiwi slices, or tuck in those festive candy eggs. The contrast of the cool, creamy yogurt with the crunchy, warm-spiced nest is everything.
How to Serve These Sunny Little Nests
Presentation is half the fun with these! You can keep it casual or make it a show-stopper.
For a family breakfast, line them up on a big platter right down the center of the table with bowls of different toppings (sliced almonds, chia seeds, fruit salad, honey drizzle) so everyone can build their own dream nest. It turns breakfast into an interactive event!
Hosting a spring brunch? Place each nest on a small, colorful plate. Add a dollop of yogurt, a meticulous pile of mixed berries, a mint leaf for a pop of green, and a delicate dusting of bee pollen or a tiny drizzle of extra honey. Instant restaurant-worthy plating that’ll have your guests whipping out their phones for a pic.
And for snacks? Just fill ‘em and go! They’re perfectly portable for a sunny afternoon park date or a post-school pick-me-up. I’ve even been known to enjoy one with a cup of tea as a not-too-sweet afternoon treat.
Mix It Up! Creative Twists on the Classic Nest
The basic recipe is your canvas. Now let’s play with some colors and flavors!
- Tropical Getaway: Add ¼ cup of shredded coconut and 2 tablespoons of chopped macadamia nuts to the oat mix. Fill with coconut yogurt and top with mango and passionfruit.
- Chocolate Berry Bliss: Stir 2 tablespoons of unsweetened cocoa powder into the dry mix and use maple syrup as your sweetener. Fill with chocolate or vanilla yogurt and top with raspberries and a few dark chocolate chips.
- Peanut Butter & Jelly: Swap half the coconut oil for creamy natural peanut butter. Fill with Greek yogurt and top with a small spoonful of your favorite berry jam or fresh strawberry slices.
- Savory Herb & Cheese (Yes, really!): Omit the cinnamon and vanilla. Use olive oil and a touch of honey. Stir in ¼ cup grated Parmesan, 1 teaspoon of dried herbs (like Italian seasoning), and black pepper. Bake, then fill with herbed goat cheese or ricotta and top with a cherry tomato and fresh basil. A stunning appetizer!
- Superfood Power-Up: Add 2 tablespoons each of chia seeds and hemp hearts to the oat mixture. Fill with sky-high-protein Greek yogurt and top with blueberries and a sprinkle of cinnamon.
Beau’s Kitchen Notes & Stories
This recipe has evolved in my kitchen more times than I can count. The first batch I ever made, in my first tiny apartment, was a hilarious failure. I didn’t press the mixture firmly enough, used quick oats by accident, and tried to remove them from the pan while they were still warm. The result? A muffin tin full of delicious, but completely crumbled, granola. I ate it with yogurt and a spoon anyway, and learned three valuable lessons that are now baked into the instructions above!
Over the years, I’ve found these are best made the day you plan to serve them, though the unfilled baked cups can live in an airtight container for 2-3 days. The yogurt will soften them if left sitting too long, so fill them just before the party (or your morning bite). Most of all, this recipe is a reminder to play with your food. Get the kids involved in pressing the nests. Let your friends choose their toppings. Food is connection, and these little nests are some of the best connectors I know.
Your Questions, Answered!
Q: My nests fell apart when I tried to take them out! What did I do wrong?
A: The two most common culprits are: 1) Not greasing the pan enough (be generous!), and 2) Not letting them cool completely in the pan. They need that cooling time to set and firm up. Also, double-check that you’re pressing the mixture very firmly into the cups.
Q: Can I make these gluten-free or vegan?
A> Absolutely! For gluten-free, ensure your oats are certified GF. For vegan, use maple syrup (not honey) and coconut oil. Fill with a thick plant-based yogurt (coconut or almond milk yogurts work great).
Q: Can I prep these ahead of time?
A> You can! Bake the cups up to 3 days ahead and store them unfilled in an airtight container at room temperature. Assemble with yogurt and toppings right before serving for the best texture.
Q: My mixture seems too dry/crumbly to press into shape.
A> If your honey was very thick or you measured the oil a bit short, this can happen. Add an extra tablespoon of melted coconut oil or maple syrup and mix again. It should be cohesive and slightly sticky.
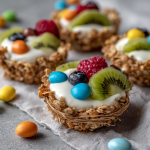
“Nest” Granola Cups with Yogurt : A Wholesome, Fun Springtime Treat
Description
These Nest Granola Cups are crunchy, lightly sweet, and perfect for spring breakfasts or snacks. Made with simple pantry ingredients, they bake into little edible “nests” that you can fill with creamy yogurt and fresh fruit. They’re easy, fun to shape, and great for brunch tables or make-ahead morning treats.
Ingredients
Granola Nests
-
2 cups rolled oats (old-fashioned)
-
½ cup honey or maple syrup
-
⅓ cup coconut oil or melted butter
-
½ tsp cinnamon
-
¼ tsp fine salt
-
½ tsp vanilla extract
For Filling
-
1½–2 cups Greek or regular yogurt
-
Fresh berries or chopped fruit
-
Optional: nuts, seeds, or mini chocolate/candy eggs
Instructions
1️⃣ Preheat & Prep
Preheat oven to 175°C / 350°F. Grease a 12-cup muffin tin very well.
2️⃣ Mix
In a large bowl, stir oats, honey (or maple syrup), melted oil (or butter), cinnamon, salt, and vanilla until evenly coated and slightly sticky.
3️⃣ Shape the Nests
Scoop 2–3 tablespoons into each muffin cup. Press firmly into the bottom and up the sides using your fingers or the back of a spoon to form a cup shape.
4️⃣ Bake
Bake 15–18 minutes until golden brown around the edges.
5️⃣ Cool Completely
Let nests cool fully in the pan (about 25 minutes). Carefully loosen with a knife and lift out.
6️⃣ Fill & Serve
Spoon yogurt into each nest and top with fruit or other toppings just before serving.
Notes
-
Press the mixture firmly so cups hold together.
-
Use rolled oats, not quick oats, for better texture.
-
If mixture feels dry, add 1 extra tablespoon honey or oil.
-
Cool completely before removing — this prevents crumbling.
-
Store unfilled cups airtight up to 3 days.
A Note on Nourishment
While I’m all about the joy first, it feels good to know what’s fueling you. Each unfilled granola cup (based on the recipe with honey and coconut oil) is a wholesome little package. It’s a source of energizing complex carbs and fiber from the oats, with the healthy fats from the coconut oil helping to keep you satisfied. Using Greek yogurt as a filling packs in a powerful protein punch, making this a truly balanced bite. Of course, toppings change the game—fresh fruit adds vitamins and antioxidants, while candy eggs are a pure fun treat. As with all things Feastical, it’s about balance. Enjoy the nourishment, savor the flavor, and always eat with joy.
Final Thoughts
And there you have it, friends—my heartfelt guide to creating a little edible springtime joy. These “Nest” Granola Cups are more than just a recipe; they’re an invitation to slow down, to create something beautiful with your own two hands, and to share a moment of simple, delicious happiness.
I hope you’ll bake up a batch and let that warm, cinnamon-and-honey scent fill your kitchen. I hope you’ll share them with someone you love, or simply savor one all for yourself with a quiet cup of coffee as the morning sun streams in. That’s what Feastical is all about. Now, go build some nests! And be sure to tag me @feastical if you share your creations—I live for seeing your kitchen wins.
With a full heart and an empty nest (plate),
Beau
Prep Time: 10 minutes | Cook Time: 18 minutes | Total Time: 28 minutes | Servings: 12 nests

Banoffee Pie Puff Pastry Bomb : Banana, Caramel & Chocolate Dessert
Banoffee Pie Puff Pastry Bomb: The Dessert That’s a Party in Every Bite
Hey there, friends! Beau here, from Feastical. Grab your favorite apron and pull up a stool, because today we’re not just making dessert—we’re building a showstopper. Imagine this: the nostalgic, creamy-banana-caramel magic of a classic banoffee pie, but instead of a crumbly crust, it’s hugged by layers of golden, buttery, flaky puff pastry. Then, we’re loading it up with rich dark chocolate cremeux, clouds of vanilla chantilly, and a salted caramel that makes your eyes roll back in your head. It’s a Banoffee Pie Puff Pastry Bomb, and it’s everything you love about dessert, all wrapped up in one gorgeous, shareable (or not, no judgment!) package.
I live for recipes that look like they came from a fancy bakery but are secretly built on simple, joyful techniques. This is one of those. We’re using store-bought puff pastry as our genius shortcut, because let’s be real—some days, we’re going for wow, not work-until-midnight. The rest is just layering incredible flavors you already adore. The result? A dessert that’s textural perfection: crisp, creamy, crunchy, and silky all at once. It’s the ultimate treat for a special weekend, a birthday, or just because Tuesday deserves a little celebration too. So, let’s turn up the music, clear some counter space, and create something spectacular together.
Why Banoffee Holds a Special Place in My Kitchen
This recipe takes me straight back to my first trip to London years ago. I wandered into a tiny, steamy pub to escape the drizzle, and there it was, sitting under a glass dome like a treasure: my first-ever slice of authentic banoffee pie. One forkful and I was a goner—the sweet, mushy bananas, that thick toffee, the billowy cream… it was pure comfort. I must have asked the bemused server about it three times, scribbling notes on a napkin.
But here’s the real story. When I got home, bursting to recreate it, I realized I’d lost the napkin. My first attempt was… a tragedy. Let’s just say I learned the hard way that condensed milk needs hours of boiling to become proper toffee, not a frantic 30-minute simmer. The resulting “soup” was a kitchen legend (for all the wrong reasons). This Puff Pastry Bomb is my love letter to that original pie and a happy evolution from my early kitchen fails. It captures all that glorious flavor but in a more forgiving, modern, and frankly, more fun format. It’s the banoffee of my dreams, no lost napkins required.
Gathering Your Flavor Arsenal
Here’s everything you’ll need to build this masterpiece. I’ve added my chef notes alongside each one because knowing the why makes you a more confident cook!
- Puff Pastry Base (4-6 baked shells or rounds): This is our golden, flaky foundation. I use good-quality all-butter puff pastry for the best flavor. You can find frozen pastry shells (like vol-au-vents) or simply cut and bake sheets of pastry into circles. Chef’s Insight: Bake them until deeply golden and crisp—they need to stand up to the creamy layers without getting soggy.
- Ripe Hom Thong Bananas (2, or any ripe bananas): The “bano” in banoffee! Hom Thong (or “regular” Cavendish) bananas are perfect. They must be ripe—sweet, speckled, and fragrant—but not mushy brown. Substitution Tip: If you’re not a banana fan, try sautéed sliced apples with a pinch of cinnamon for a “Toffee Apple” twist.
- Dark Chocolate, 70% (150g): For the luxurious chocolate cremeux. The high cocoa content balances the sweetness of the caramel and bananas beautifully. Chef’s Insight: Chop it finely so it melts smoothly and quickly into the hot cream mixture.
- Heavy Cream (for cremeux & chantilly): The workhorse of richness! We use it for the silky chocolate cremeux and the light chantilly. Pro Tip: Ensure it’s cold for whipping. I often pop my bowl and beaters in the freezer for 10 minutes before starting.
- Egg Yolks (2): These give body and a velvety richness to the chocolate cremeux, turning it from a simple ganache into something more decadent.
- Granulated & Powdered Sugar: Granulated for the caramel (it caramelizes best), and powdered (icing) sugar for the chantilly (it dissolves instantly, no grittiness!).
- Butter & Sea Salt: Butter adds gloss and flavor to the caramel. A good flaky sea salt for finishing creates that irresistible sweet-salty contrast.
- Crushed Almonds: For our salted caramel almond crumble. They add a crucial nutty, crunchy element. Substitution Tip: Any nut works—hazelnuts or pecans would be divine.
- White Chocolate Shards: The elegant finish! They look professional and add a sweet, creamy contrast to the dark chocolate. Use a vegetable peeler on a bar of white chocolate for easy, pretty curls.
Let’s Build This Beautiful Bomb: Step-by-Step
Don’t let the fancy name fool you—we’re tackling this in manageable, fun steps. Read through once, then dive in!
Step 1: The Chocolate Cremeux (Make this first, as it needs to chill). In a small saucepan, heat ¾ cup of heavy cream until it’s just steaming—little bubbles around the edges. While it heats, whisk your 2 egg yolks with 1 tbsp of sugar in a separate bowl until just combined. Here’s the key: temper the eggs. Slowly drizzle the hot cream into the yolk mixture, whisking constantly. This prevents scrambled eggs in your cream! Pour it all back into the pot and cook over low heat, stirring non-stop with a spatula, until it thickens just enough to coat the back of the spoon (about 3-4 minutes). Pour this hot custard over your finely chopped dark chocolate. Let it sit for a minute, then stir until it’s gloriously smooth and shiny. Pour into a bowl, press plastic wrap directly on the surface (to prevent a skin), and chill for at least 2 hours. Chef’s Hack: Speed this up by spreading it in a thin layer on a plate before chilling.
Step 2: The Salted Caramel. In a clean, light-colored saucepan (so you can see the color change!), melt ½ cup of sugar over medium heat. Don’t stir—just swirl the pan occasionally. It will clump, then melt into clear liquid, then turn a beautiful amber color. The moment it’s amber, take it off the heat and carefully (it will bubble violently!) whisk in ¼ cup of heavy cream. Once combined, whisk in 2 tbsp of butter and ½ tsp of sea salt until smooth. Let it cool and thicken slightly. Pro Tip: Have your cream and butter measured and ready before you start—caramel waits for no one!
Step 3: The Almond Crumble. In a small skillet over medium heat, melt 1 tbsp of butter. Add ½ cup of crushed almonds and 2 tbsp of sugar. Cook, stirring, for 3-5 minutes until the sugar melts and coats the nuts in a fragrant, toasty layer. Spread on parchment to cool. It will harden into delicious, crunchy clusters.
Step 4: The Chantilly Cream. In that chilled bowl, combine 1 cup of cold heavy cream, 2 tbsp of powdered sugar, and 1 tsp of vanilla. Whip until you have soft peaks—this means when you lift the beaters, the peak gently folds over. We want it pillowy, not stiff like buttercream.
Step 5: The Grand Assembly! Now for the fun part. Start with a baked, cool puff pastry base on your serving plate. Give the chilled chocolate cremeux a quick stir to loosen it. Layer in this order: a spoonful of cremeux, a layer of sliced bananas, a drizzle of salted caramel, a dollop of chantilly cream. Add another pastry layer and repeat! Build it as tall as you dare. Finish the top with a final cloud of chantilly, a generous sprinkle of the almond crumble, more caramel drizzle, and those pretty white chocolate shards. Chill for 30 minutes before slicing. This rest time lets the flavors marry and makes for a cleaner slice.
How to Serve It Like a Pro
Presentation is part of the joy! I love serving this on a simple, large cake stand or a rustic wooden board. Use a sharp, thin-bladed knife (run it under hot water and dry it for the cleanest cuts) to slice into wedges. Each piece should reveal all those gorgeous, distinct layers.
For the ultimate experience, add a little “à la minute” touch: warm up any leftover salted caramel and drizzle a fresh pool on each plate before placing the slice. A tiny sprinkle of flaky sea salt on top just before serving makes the flavors pop. This dessert is rich, so small slices go a long way—pair it with a cup of strong black coffee or a glass of cold milk for the perfect balance.
Make It Your Own: Delicious Twists & Swaps
The beauty of this bomb is its versatility. Here are some ways to play with the formula:
- Nutella Swirl: Fold a few generous spoonfuls of Nutella into the chocolate cremeux before chilling for a hazelnut-chocolate dream.
- Dairy-Free Delight: Use coconut cream (the solid part from a chilled can) for both the chantilly and in the cremeux. Opt for dairy-free puff pastry and dark chocolate. The result is incredibly lush and plant-based!
- Espresso Kick: Dissolve 1-2 teaspoons of instant espresso powder into the hot cream for the chocolate cremeux. It deepens the chocolate flavor and adds a wonderful coffee note.
- Ginger Snap Crunch: Replace the almond crumble with crushed ginger snap cookies mixed with a little melted butter. It adds a warm, spicy crunch that pairs amazingly with banana and caramel.
- Mini Bomb Individual Servings: Use smaller, pre-baked puff pastry shells (vol-au-vents) and assemble individual desserts. Perfect for dinner parties where everyone gets their own personal masterpiece.
A Few More Thoughts From My Kitchen to Yours
This recipe feels fancy, but it’s really about the assembly. You can break the work into parts: make the cremeux and caramel a day ahead, bake the pastry in the morning, and assemble a couple of hours before your guests arrive. It’s a stress-free path to glory.
The first time I tested this, I got so excited about the layers that I built it a foot high. It was magnificent… for about three minutes before it did a slow-motion topple onto my dog’s bed (he was thrilled). So, learn from my over-enthusiasm: a stable, two-layer build is perfect. The flavors are so big, you don’t need a skyscraper. Most of all, have fun with it. If your caramel drizzle looks wild and abstract, that’s art! If the crumble goes everywhere, that’s “rustic charm.” It’s going to taste incredible.
Your Questions, Answered
Q: My caramel seized up and got grainy when I added the cream. What happened?
A> This usually means the sugar got a bit too hot or the cream was too cold. To fix it, simply return the pan to low heat and whisk, whisk, whisk until the hard bits dissolve back into the sauce. It might take a minute, but it will come back together. Next time, ensure your cream is at room temp or even slightly warm.
Q: Can I make this completely ahead of time?
A> You can prep all components 1-2 days ahead, but I recommend assembling no more than 4-6 hours before serving. The puff pastry can lose its crispness if it sits with the creamy layers for too long. Store components separately in the fridge, then build and chill for that final 30 minutes before serving.
Q: My chantilly cream turned to butter! Help!
A> Ah, we’ve all been there. You over-whipped. If it’s just slightly over, you can gently fold in a splash of new, liquid cream to loosen it. If it’s full-on butter, sadly, there’s no going back. Use it on toast (it’s delicious!), and start again with a new, very cold bowl and cream. Watch it closely—soft peaks are your goal.
Q: What’s the best substitute for puff pastry if I can’t find it?
A> For a similar flaky effect, you could use pre-made pie crust, though it will be more crumbly than layered. For a fun, different base, try baking slabs of store-bought pound cake until toasted. It soaks up the caramel and cream wonderfully.
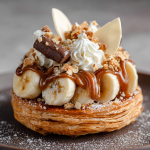
Banoffee Pie Puff Pastry Bomb : Banana, Caramel & Chocolate Dessert
Description
This Banoffee Pie Puff Pastry Bomb is a fun, bakery-style dessert made simple at home. Flaky puff pastry is layered with creamy chocolate filling, bananas, whipped cream, and salted caramel for a rich, crowd-pleasing treat. It looks impressive but uses easy techniques and a few smart shortcuts — perfect for weekends, birthdays, or special dinners.
Ingredients
Base
-
1 sheet store-bought puff pastry, thawed
Chocolate Cream Filling
-
150 g dark chocolate, chopped
-
¾ cup (180 ml) heavy cream
-
2 egg yolks
-
1 tbsp sugar
Salted Caramel
-
½ cup (100 g) granulated sugar
-
¼ cup (60 ml) heavy cream (room temp)
-
2 tbsp butter
-
½ tsp sea salt
Whipped Cream
-
1 cup (240 ml) cold heavy cream
-
2 tbsp powdered sugar
-
1 tsp vanilla extract
Layers & Topping
-
2 ripe bananas, sliced
-
½ cup crushed toasted almonds (or other nuts)
-
White or milk chocolate shavings (optional)
Instructions
1️⃣ Bake the Puff Pastry
-
Heat oven to 200°C / 400°F.
-
Cut pastry into 2–3 circles or squares.
-
Bake 12–15 minutes until deep golden and crisp.
-
Cool completely.
2️⃣ Make the Chocolate Cream
-
Heat cream until steaming.
-
Whisk yolks with sugar in a bowl.
-
Slowly pour hot cream into yolks while whisking.
-
Return to pan and cook on low, stirring, until slightly thick.
-
Pour over chopped chocolate, rest 1 minute, then stir smooth.
-
Cover surface and chill 2 hours.
3️⃣ Make the Salted Caramel
-
Melt sugar in a saucepan over medium heat (don’t stir, just swirl).
-
When amber, remove from heat and carefully whisk in cream.
-
Add butter and salt, whisk smooth. Cool.
4️⃣ Whip the Cream
-
Beat cream, powdered sugar, and vanilla to soft peaks.
5️⃣ Assemble
-
Place one pastry layer down.
-
Spread chocolate cream → banana slices → caramel drizzle → whipped cream → nuts.
-
Add next pastry layer and repeat.
-
Finish with whipped cream, caramel, nuts, and chocolate shavings.
-
Chill 30 minutes before slicing.
Notes
-
Bake pastry very crisp so it doesn’t get soggy.
-
Use ripe but firm bananas for best flavor and texture.
-
Warm your knife under hot water before slicing for clean layers.
-
You can prepare fillings a day ahead and assemble later.
-
Build only 2–3 layers for stability.
A Quick Note on Nutrition
Let’s be real, friends—this is a celebratory dessert, meant to be savored and enjoyed fully. Per generous serving, you’re looking at approximately: 510 calories, 34g fat, 42g carbohydrates, and 7g protein. The majority of the fat comes from the quality dairy, dark chocolate, and nuts, which contribute to the rich, satisfying mouthfeel. Remember, enjoying food is about balance and pleasure. Savor a slice of this luxurious bomb mindfully, and balance it with movement and meals you love throughout your week. Food is joy, and this dessert is pure, unapologetic joy on a plate.
Final Thoughts
And there you have it—your blueprint for a dessert that’s guaranteed to steal the spotlight. This Banoffee Pie Puff Pastry Bomb is more than just a recipe; it’s a chance to play, to create, and to share something made with love (and a whole lot of deliciousness).
I hope you bake it, share it, and tag me over at @Feastical so I can see your beautiful creations. Remember, the best kitchens are filled with laughter, a few spills, and the incredible smell of caramelizing sugar. Now go forth and bake something spectacular. Until next time, keep your spatula close and your appetite closer!
Happy cooking,
Beau

Homemade Marshmallow Easter Eggs : Soft, Fluffy & Chocolate Covered Treats
Homemade Marshmallow Easter Eggs: Your New Sweet Spring Tradition
Hey friends, Beau here from Feastical! Is there anything that says “spring is here” quite like a pastel-wrapped basket filled with goodies? For me, the crown jewel has always been those fluffy, melt-in-your-mouth marshmallow eggs, enrobed in a thin, crisp shell of chocolate. That first bite—the gentle crack of the chocolate giving way to a cloud of sweet, vanilla-kissed fluff—is a little bite of pure, unadulterated joy.
But here’s my chef’s secret: the store-bought versions can’t hold a candle to what you can make in your own kitchen. When you make marshmallow eggs at home, you control the fluffiness (maximum cloud-like texture, please), the chocolate quality (the good stuff!), and the love that goes into each one. These aren’t just candies; they’re edible memories waiting to be made. And the best part? They’re surprisingly simple. No fancy equipment needed, just a stand mixer or a good arm, a saucepan, and a willingness to get a little powdered sugar on your nose. So, tie on your favorite apron, cue up some happy tunes, and let’s turn your kitchen into the sweetest Easter candy workshop. I promise, the result is more than worth it.
The Marshmallow Egg That Started It All
My love for these treats goes way back. Every Easter, my grandma would have a special, slightly lopsided marshmallow egg waiting just for me, tucked beside the dyed eggs in my basket. She’d always say, “This one has extra fluff, just for my Beau.” I believed her completely. One year, I was finally deemed “old enough” to help. I remember standing on a step-stool, watching in awe as she poured a shimmering, hot syrup into her big, chrome mixer. The transformation from clear liquid to a towering, glossy, white mountain of marshmallow was nothing short of kitchen magic. My job was the all-important “vanilla pour” and, of course, the first taste test of the bowl scrapings. That sweet, sticky memory of connection, of learning that food magic is something you can make, is the heart of this recipe. Every time I shape these eggs, I’m back in her sunny kitchen, and I hope this recipe creates that same spark of magic and togetherness for you and your crew.
Gathering Your Sweet Supplies
Here’s everything you’ll need to create your own marshmallow masterpiece. Don’t let the gelatin scare you—it’s just the wizard behind the fluffy curtain!
For the Marshmallow Filling:
- 3 envelopes unflavored gelatin: This is our structure-giver! It’s what transforms the liquid syrup into that iconic, bouncy texture. Make sure it’s unflavored and fresh for the best set.
- 1 cup cold water, divided: We use half to “bloom” the gelatin (making it soft and spongy) and the other half in the syrup. Cold water for the bloom is key!
- 2 cups granulated sugar: The sweet soul of the operation. It caramelizes slightly when cooked, giving marshmallow its depth of flavor beyond just sweetness.
- 1 cup light corn syrup: Chef’s insight: This is the guardian against crystallization. It keeps the sugar syrup smooth and the final marshmallow tender, not gritty. For a swap, you can use agave nectar or honey, but note that honey will impart its own distinct flavor.
- ¼ teaspoon salt: A tiny bit to balance all that sweetness and make the vanilla flavor pop. Trust me on this.
- 1 teaspoon pure vanilla extract: The aromatic finish. For a fun twist, try almond or clear vanilla extract for that classic “marshmallow” scent.
For Coating & Finishing:
- 12–16 oz milk, dark, or semi-sweet chocolate, chopped or in chips: Use the best quality you love to eat! Chocolate chips work in a pinch, but bar chocolate (like Ghirardelli or Baker’s) melts and coats more smoothly. This is your chance to be the chocolatier.
- Cornstarch or powdered sugar, for dusting: Our non-stick superhero for shaping. I prefer cornstarch as it absorbs moisture better without adding extra sweetness to the outside.
- Optional decorations: Pastel sprinkles, toasted shredded coconut, or a contrasting drizzle of white chocolate. Let your inner artist play!
Crafting Your Fluffy Clouds: Step-by-Step
Ready to work some sugar magic? Follow these steps, and you’ll be a marshmallow master in no time.
- Bloom the Gelatin: In the bowl of your stand mixer (fitted with the whisk attachment), sprinkle the gelatin over ½ cup of cold water. Don’t stir it! Just let it sit and absorb for 10 minutes. It will look like a wrinkly, solid sponge—that’s perfect. This step ensures it dissolves evenly later.
- Cook the Syrup: Meanwhile, in a medium saucepan, combine the sugar, corn syrup, salt, and the remaining ½ cup of water. Stir just until the sugar looks wet. Chef’s hack: Brush down the sides of the pan with a wet pastry brush to prevent sugar crystals from forming. Now, bring it to a boil over medium-high heat without stirring. Attach a candy thermometer and let it cook until it reaches precisely 240°F (the soft-ball stage). This temperature is crucial for the right texture!
- The Magic Merge: With the mixer on low speed, carefully and slowly pour the blazing hot sugar syrup directly into the bloomed gelatin. Go slow to avoid splatters. Once it’s all in, crank the speed to high and whip for a full 10-12 minutes. Watch the transformation! It will go from watery, to opaque, to a thick, glossy, white wonder that forms stiff peaks. It should about triple in volume.
- Flavor & Prep: In the last minute of whipping, add the vanilla. While it whips, generously dust a baking sheet with cornstarch. This is your shaping station.
- Shape the Eggs: Dust your hands liberally with cornstarch. The marshmallow will be sticky! Scoop out a heaping tablespoon of fluff and gently form it into an egg shape between your palms. Place it on the dusted sheet. Repeat with remaining marshmallow, re-dusting your hands often. Don’t stress about perfection—homemade charm is the goal! Let them sit, uncovered, for 1-2 hours to form a slight “skin.”
- The Chocolate Dip: Melt your chocolate in a deep, narrow bowl (a liquid measuring cup works great) in 30-second bursts in the microwave, stirring well between bursts. Let it cool slightly so it’s not piping hot. One by one, drop a marshmallow egg into the chocolate. Use a fork to flip it, ensure it’s coated, then lift it out, letting excess chocolate drip back into the cup. Transfer to a parchment-lined sheet. Immediately add sprinkles if using. Let the chocolate set completely at room temperature (about 1 hour).
Sharing the Sweetness: How to Serve
These little gems deserve a special presentation! Nestle them in pastel paper cupcake liners for a classic candy shop look. They’re the star of any Easter basket—just tuck them in among the plastic grass. For a gorgeous dessert table, arrange them on a cake stand or a platter lined with edible Easter straw. I love pairing them with a strong cup of coffee after brunch or serving them as the grand finale to a spring dinner party. They also make the most heartfelt, handcrafted gift. Place a few in a cute cellophane bag tied with ribbon, and you’ve just made someone’s day sweeter.
Make It Your Own: Fun Flavor Twists
Once you’ve mastered the classic, the playground is open! Here are a few of my favorite riffs:
- Peanut Butter Paradise: Add ½ cup of smooth peanut butter to the mixer along with the vanilla. For the ultimate combo, coat in milk chocolate and roll in crushed peanuts.
- Fruity Fluff: Swap the vanilla for 1 teaspoon of strawberry, raspberry, or orange extract. Add a drop or two of gel food coloring for a pastel pink or orange center!
- Coconut Cream Dream: Fold ½ cup of finely shredded toasted coconut into the finished marshmallow before shaping. Coat in dark chocolate and roll in more coconut.
- Cookies & Cream: After whipping, gently fold in ¾ cup of crushed Oreo cookie pieces (creme and all). The speckled look is so fun!
- Dairy-Free/Vegan Option: Use agar-agar (follow package instructions for substitution amounts) instead of gelatin, and ensure your chocolate and corn syrup are vegan-friendly.
Beau’s Kitchen Notes & Stories
This recipe has been my springtime labor of love for years, and it’s evolved with every batch. My first attempt? Let’s just say the eggs looked more like abstract marshmallow blobs, and my chocolate was a grainy mess. I learned that patience with the syrup temperature and gently melting the chocolate are non-negotiable. I also learned that inviting friends over for a “Marshmallow Egg Decorating Party” is the best way to do it. Kids (and adults!) love shaping and decorating their own. The kitchen gets messy, there’s laughter, and the results are always hilariously beautiful. Don’t be afraid to make a mess—that’s where the best memories (and the best tasting notes for your blog) come from!
Your Questions, Answered
Q: My marshmallow is SO sticky! How do I handle it?
A: Dust, dust, and dust again! Cornstarch or powdered sugar is your best friend. Don’t be shy with it on your hands, the work surface, and the eggs themselves. A little cornstarch on the finished egg gets sealed in by the chocolate.
Q: Can I make these ahead of time?
A: Absolutely! Once fully set, store them in a single layer in an airtight container at room temperature for up to 1 week. They’re actually even better the next day as the flavors meld.
Q: Why did my chocolate get streaky or thick?
A: This usually means the chocolate got too hot and “seized.” The fix? Gently stir in a tiny amount of neutral oil (like coconut or vegetable) a teaspoon at a time until it smooths back out. For perfect dipping, consider tempering your chocolate or using high-quality “dipping” chocolate or candy melts.
Q: I don’t have a candy thermometer. Can I still make these?
A: For consistent results, a thermometer is highly recommended. However, in a pinch, you can use the “soft-ball stage” test: drop a bit of syrup into a cup of cold water. If you can roll it into a soft, pliable ball with your fingers, it’s ready.
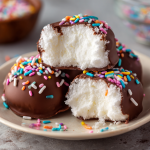
Homemade Marshmallow Easter Eggs : Soft, Fluffy & Chocolate Covered Treats
Description
These homemade marshmallow Easter eggs are soft, fluffy, and coated in a smooth chocolate shell. They have that signature crack-and-cloud bite everyone loves — but fresher, softer, and more flavorful than store-bought. While marshmallow sounds fancy, the process is straightforward and totally doable with a mixer and a saucepan. Perfect for Easter baskets, dessert tables, or gifting.
Ingredients
Marshmallow Filling
-
3 envelopes unflavored gelatin
-
1 cup cold water, divided
-
2 cups granulated sugar
-
1 cup light corn syrup
-
1/4 teaspoon salt
-
1 teaspoon vanilla extract
Chocolate Coating
-
12–16 oz milk, semi-sweet, or dark chocolate (chips or chopped bars)
-
Cornstarch or powdered sugar, for dusting
Optional Decorations
-
Sprinkles
-
Toasted coconut
-
White chocolate drizzle
Instructions
-
Bloom the Gelatin
Add 1/2 cup cold water to the bowl of a stand mixer. Sprinkle gelatin over the top. Let sit 10 minutes until spongy. Do not stir. -
Make the Sugar Syrup
In a saucepan combine sugar, corn syrup, salt, and remaining 1/2 cup water.
Heat over medium-high until boiling. Cook without stirring until it reaches 240°F / 115°C (soft-ball stage). -
Whip the Marshmallow
Turn mixer to low. Carefully pour the hot syrup into the gelatin.
Increase to high speed and whip 10–12 minutes until thick, glossy, and tripled in volume.
Add vanilla during the last minute. -
Prepare Shaping Surface
Generously dust a baking sheet with cornstarch or powdered sugar. -
Shape the Eggs
Dust hands well. Scoop about a heaping tablespoon of marshmallow and gently form an egg shape.
Place on the sheet. Repeat, re-dusting hands often.
Let sit uncovered 1–2 hours to form a light outer skin. -
Melt the Chocolate
Melt chocolate gently in the microwave in 30-second bursts, stirring between each, until smooth. Let cool slightly. -
Dip
Drop each marshmallow egg into chocolate, turn to coat, lift with a fork, and let excess drip off.
Place on parchment paper and decorate immediately if desired. -
Set
Let chocolate firm at room temperature about 1 hour or refrigerate 20 minutes.
Notes
-
A candy thermometer gives the most reliable texture
-
Dust your hands often — marshmallow is naturally sticky
-
Let chocolate cool slightly before dipping to avoid melting the marshmallow
-
Use good chocolate — it makes a big difference in flavor and finish
-
If chocolate thickens, stir in 1 teaspoon neutral oil to loosen it
A Note on Nutrition & Details
Prep Time: 30 minutes | Setting Time: 1-2 hours | Total Time: ~2 hours | Yield: About 18-24 eggs, depending on size
Nutritional Information (Per egg, approximate): Calories: 140 | Carbohydrates: 26g | Sugar: 22g | Fat: 4g | Saturated Fat: 2g | Protein: 1g | Sodium: 30mg
Remember, these are a special occasion treat, meant to be savored and shared. The joy they bring is the best ingredient of all!
Final Sweet Thoughts
And there you have it, friends—your ticket to creating the most unforgettable, fluffy, chocolatey homemade Easter treat. This recipe is more than a list of steps; it’s an invitation to slow down, get your hands a little sugary, and create something truly special. Whether you’re carrying on a family tradition or starting a brand new one, these marshmallow eggs are a delicious way to mark the season. I’d love to see your creations! Tag me @feastical or use #FeasticalEaster so I can share in your sweet success. From my kitchen to yours, Happy Easter and happy cooking!
Stay cozy,
Beau
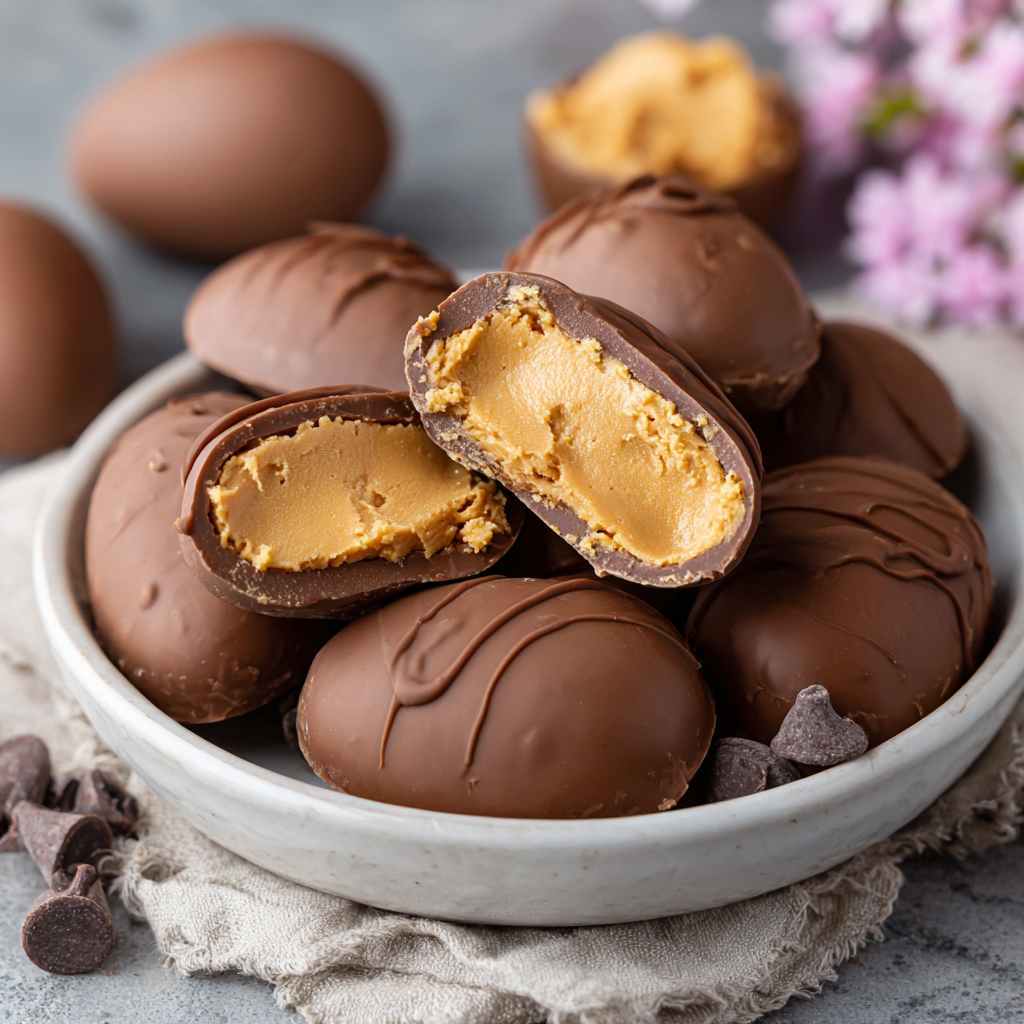
Homemade Reese’s Peanut Butter Eggs (Easy 6-Ingredient Recipe)
Homemade Reese’s Peanut Butter Eggs: Your New Easter Tradition (Easy 6-Ingredient Recipe!)
Hey friends, Beau here! Can we talk about the undisputed champion of the Easter candy bowl for a second? I’m not talking about those chalky marshmallow chicks (no offense, Peeps). I’m talking about that glorious, perfect marriage of sweet and salty, creamy and crunchy: the Reese’s Peanut Butter Egg. There’s just something about that egg shape that makes the peanut butter-to-chocolate ratio feel… sacred. Magical, even.
But what if I told you that you can create that magic right on your own kitchen counter? That with just six simple ingredients and zero oven time, you can whip up a batch of homemade Reese’s Eggs that might just outshine the classic? I’m here to tell you it’s not only possible, it’s an absolute joy. This isn’t about replicating a factory-made candy bar perfectly—it’s about capturing that soul-satisfying flavor with a touch of homemade love. The kind of treat that makes you close your eyes and hum after the first bite. So, grab your favorite mixing bowl and your trusty spatula. We’re about to make some memories, and more importantly, some incredibly delicious candy. Let’s get to it!
The Peanut Butter-Stained Apron: An Easter Memory
My love for these things goes way back. Picture a sunny spring kitchen, the smell of ham in the oven, and my grandma’s counter perpetually dusted with a fine layer of powdered sugar. One year, she decided our store-bought Easter candy needed a homemade companion. She pulled out her big stoneware bowl, a jar of Jif, and a bag of chocolate chips. I was appointed “Official Egg Shaper,” a title I wore with immense, flour-dusted pride.
We didn’t have fancy molds. It was just us, a lump of sweet peanut butter dough, and our hands. Mine were small and clumsy, making lopsided ovals that looked more like potatoes than eggs. Grandma’s, however, were swift and sure, turning out perfect, smooth eggs every time. She’d smile, her eyes crinkling, and say, “Taste is what matters, Beau. The shape is just the fun of it.” And oh, the taste. That first bite of a still-slightly-warm egg, the chocolate shell giving way to the rich, creamy center… it wasn’t just candy. It was connection. It was the thrill of making something wonderful from simple things. Every time I make this recipe now, I’m back at that counter, and that’s the feeling I hope this recipe brings to your kitchen.
Your Candy-Making Toolkit: The 6 Simple Ingredients
Here’s the beautiful part: you probably have most of this in your pantry already. This is minimalist magic at its finest. Let’s break down each player and why it’s here.
- 1 ½ cups creamy peanut butter: This is the STAR. Use a standard, no-stir creamy peanut butter like Jif or Skippy. The oils and consistency are predictable, which gives us that perfect, moldable filling. Natural peanut butter (the kind that separates) can make the filling too oily and soft. Chef’s insight: This is your one chance to be a brand loyalist—use your favorite!
- ¼ cup unsalted butter, melted: Our binding agent and flavor booster. Melt it and let it cool just slightly so it doesn’t melt the peanut butter. Unsalted lets us control the sweetness. Substitution tip: For a dairy-free version, a solid, unrefined coconut oil works beautifully and adds a subtle hint of coconut flavor.
- 1 tsp pure vanilla extract: The secret whisper in the background. It deepens all the other flavors and rounds out the sweetness. Don’t skip it! Chef’s insight: If you’re feeling fancy, a tiny splash (⅛ tsp) of almond extract is a game-changer.
- 2 cups powdered sugar (confectioners’ sugar): This is what transforms our gooey mixture into a shape-holding dough. It adds sweetness and structure. Pro tip: Sift it if it’s lumpy for a super smooth filling.
- 2 cups milk chocolate chips: The iconic shell. Chocolate chips are formulated to hold their shape, making them perfect for dipping. For a darker, richer shell, use semi-sweet chips.
- 1 tbsp coconut oil or shortening: Our chocolate’s best friend! Adding a bit of fat thins the melted chocolate just enough for a smooth, glossy, crack-free coating that sets beautifully. Coconut oil will harden faster and give a slight sheen.
Let’s Make Some Magic: Step-by-Step Instructions
Ready? This is where the fun happens. Clear some counter space, put on some good tunes, and let’s craft some candy.
- Create the Peanut Butter Dough: In a medium-sized bowl, combine the creamy peanut butter, slightly cooled melted butter, and vanilla extract. Stir with a sturdy spoon or spatula until it’s completely smooth and homogenous. It’ll look like a velvety peanut butter dream.
- Incorporate the Powdered Sugar: Here’s the trick: add the powdered sugar one cup at a time. Stir vigorously after the first cup. It will get thick and crumbly—that’s normal! Add the second cup and keep mixing. At first, it’ll seem impossible, but keep faith. It will eventually come together into a soft, pliable dough that looks like Play-Doh and smells like heaven. Chef Hack: If the dough feels too sticky to handle, add an extra tablespoon or two of powdered sugar. If it’s too dry and crumbly, add a tiny drizzle of melted butter or a teaspoon of peanut butter.
- Shape Your Eggs: Line a baking sheet or tray with parchment paper. Pinch off portions of dough (about 1½ – 2 tablespoons each) and roll them into a ball in your hands. Then, gently shape them into ovals, flattening them slightly to look like classic peanut butter eggs. Place them on the parchment-lined tray. Don’t stress about perfection! Part of the charm is their homemade shape. Pro Tip: If your hands are warm, a light dusting of powdered sugar on your palms can prevent sticking.
- The Key to Success: The Freeze! Pop the entire tray into the freezer for 20-30 minutes. This step is NON-NEGOTIABLE. Freezing firms up the peanut butter centers, which makes dipping them in warm chocolate a clean, easy process. It prevents the filling from melting or falling apart.
- Prep the Chocolate Coating: While the eggs chill, melt your chocolate. Use a double boiler (a heatproof bowl set over a pot of simmering water, ensuring the bowl doesn’t touch the water) or melt carefully in the microwave in 30-second bursts, stirring well between each burst. Once the chocolate is mostly melted, stir in the tablespoon of coconut oil or shortening until the mixture is completely smooth and fluid.
- The Dip: Remove your peanut butter eggs from the freezer. Using a fork or a dipping tool, gently lower an egg into the melted chocolate. Spoon chocolate over the top to ensure it’s fully coated. Lift it out, let the excess chocolate drip off for a second, then gently scrape the bottom of the fork on the edge of the bowl. Place it back on the parchment paper. Repeat with all eggs. Chef Hack: For that classic Reese’s crosshatch pattern, drag the tines of your fork across the top of the chocolate-coated egg before it sets!
- Set and Serve: Let the chocolate set at room temperature, or for faster results, pop the tray back in the fridge for 15-20 minutes. The chocolate will become firm and glossy. That’s it! You did it!
How to Serve Your Homemade Masterpiece
Presentation is part of the fun! Once set, these eggs are ready for their debut. You can arrange them on a festive platter lined with pastel paper or Easter grass for a classic candy bowl moment. For a more personal touch, place each one in a small candy cup (the frilly paper liners) and pack them into little gift boxes or clear cellophane bags tied with a ribbon. They make the most thoughtful, delicious homemade gift for neighbors, teachers, or friends. They’re rich, so I recommend serving them alongside some fresh fruit or berries to cut the sweetness. And a cold glass of milk? An absolute mandatory pairing, in my humble opinion.
Get Creative: Recipe Variations & Twists
Once you’ve mastered the classic, the playground is open! Here are a few of my favorite ways to mix it up:
- The Dark Side: Use dark chocolate chips for the coating. The deeper, less sweet chocolate creates an incredible contrast with the sweet filling.
- Crunch Time: Mix ½ cup of crushed pretzel pieces or rice krispies into the peanut butter dough before shaping. You get an amazing salty crunch in every bite.
- Nutty Swap: For a different flavor profile, use almond butter or cashew butter instead of peanut butter. It’s a delicious and elegant twist.
- “Healthier” Hack: Use natural peanut butter (just be prepared for a slightly softer texture), swap the butter for coconut oil, and use a reduced-sugar powdered sugar alternative. The shape might be a little less perfect, but the flavor will still be fantastic.
- Year-Round Fun: Who says these are just for Easter? Shape them into hearts for Valentine’s Day, circles for Christmas ornaments, or even just simple balls for a classic peanut butter cup experience any day of the year.
Beau’s Chef Notes & Kitchen Confessions
This recipe has been my Easter staple for over a decade, and it’s evolved from those lopsided eggs with my grandma. I’ve learned that a splash of flaky sea salt on top of the wet chocolate is a revelation. I’ve also learned the hard way that skipping the freezer step leads to a delicious but disastrous chocolate-peanut butter puddle—so learn from my mistakes! One year, I was out of vanilla and used a bit of bourbon instead. Let’s just say that “adults-only” batch was a hit at the family gathering. The beauty of a recipe like this is that it’s a foundation. Make it yours. Add a little love, a little laughter, and maybe a few finger-swipes of peanut butter dough along the way. That’s the real secret ingredient.
FAQs & Troubleshooting: Your Questions, Answered
Q: My peanut butter filling is too soft/sticky to shape. What did I do wrong?
A: Don’t panic! This is usually a measuring issue or due to the type of peanut butter. First, make sure you packed the peanut butter into the measuring cup. Add more powdered sugar, a few tablespoons at a time, until it’s moldable. If you used natural peanut butter, it will be softer; popping the mixed dough in the fridge for 20 minutes before shaping can help firm it up.
Q: My chocolate cracked when it set! Why?
A: This is likely a temperature shock. Your peanut butter centers were too cold when dipped, and the warm chocolate contracted too much as it cooled. Next time, let the frozen eggs sit out for 2-3 minutes before dipping to take the deep chill off. Also, adding that coconut oil/shortening to the chocolate helps make it more flexible.
Q: Can I use almond bark or candy melts instead of chocolate chips?
A> Absolutely! Candy melts and almond bark are designed for coating and set up very easily. Follow the package directions for melting. You won’t need to add the coconut oil, as they are already formulated to be fluid.
Q: How do I store these, and how long do they last?
A: Store them in an airtight container in the refrigerator for up to 2 weeks. They can also be frozen for up to 3 months! Just layer them between parchment paper in a freezer-safe container. Thaw in the fridge before serving.

Homemade Reese’s Peanut Butter Eggs (Easy 6-Ingredient Recipe)
Description
Creamy peanut butter filling wrapped in a smooth milk chocolate shell—these homemade Reese’s-style peanut butter eggs are rich, nostalgic, and dangerously easy to make. No oven, no fancy tools, just pure Easter magic made right on your kitchen counter.
Ingredients
-
1½ cups creamy peanut butter (no-stir, like Jif or Skippy)
-
¼ cup unsalted butter, melted and slightly cooled
-
1 teaspoon vanilla extract
-
2 cups powdered sugar (confectioners’ sugar)
-
2 cups milk chocolate chips (or semi-sweet)
-
1 tablespoon coconut oil or shortening
Instructions
-
Make the Peanut Butter Filling
In a medium bowl, mix peanut butter, melted butter, and vanilla until smooth. -
Add the Sugar
Stir in powdered sugar one cup at a time. The mixture will be thick at first, then come together into a soft, moldable dough. -
Shape the Eggs
Scoop about 1½–2 tablespoons of dough per egg. Roll into a ball, then gently shape into an oval.
Place on a parchment-lined baking sheet. -
Freeze (Very Important!)
Freeze shaped eggs for 20–30 minutes until firm. -
Melt the Chocolate
Melt chocolate chips with coconut oil using a double boiler or microwave (30-second intervals, stirring between). Stir until smooth and glossy. -
Dip the Eggs
Using a fork, dip each egg into melted chocolate. Let excess drip off, then place back on parchment.
Optional: Drag fork tines across the top for the classic look. -
Set & Enjoy
Let chocolate set at room temperature or refrigerate for 15–20 minutes until firm.
Notes
-
Use room-temperature peanut butter for smoother mixing
-
If dough is sticky, add powdered sugar 1 tablespoon at a time
-
Let frozen eggs sit out 2–3 minutes before dipping to prevent chocolate cracking
-
Sprinkle flaky sea salt on top before the chocolate sets for a gourmet touch
-
A fork works perfectly—no fancy candy tools required
A Quick Nutritional Glance
Let’s be real: this is a celebratory treat, meant to be savored and enjoyed. Each homemade egg (assuming you make about 14 from this batch) packs roughly 210-230 calories, with most coming from fats (the good kind from peanuts!) and carbohydrates. They contain about 5g of protein per serving, thanks to the peanut butter. While not an everyday health food, making them at home means you control the ingredients—no preservatives, no unpronounceable additives, just real, simple stuff. Enjoy them mindfully as part of your holiday fun!
Final Thoughts from My Kitchen to Yours
And there you have it, friends—the path to homemade Easter candy bliss. This recipe proves that the most beloved flavors are often the simplest to create. It’s not about intricate technique; it’s about the joy of making something with your own hands that brings a smile to someone’s face. Whether you’re making these for a crowd, as a gift, or just as a special treat for yourself (no judgment here!), I hope this recipe finds a spot in your tradition. So from my counter to yours, happy mixing, happy dipping, and most importantly, happy eating. Don’t forget to tag @Feastical if you share your creations—I love seeing your kitchen wins!
Until next time, keep it simple, soulful, and satisfying.
– Beau