
Cheesy Pizza Enchiladas with Ground Beef & Pepperoni
When Two Legends Collide: Meet Your New Favorite Comfort Food
Hey friends, Beau here from Feastical! Grab a seat at my virtual kitchen counter. I need to ask you a serious, life-altering question: have you ever been staring into your fridge, caught in the brutal crossfire of two incredible cravings? On one side, you’ve got the saucy, cheesy, roll-up-and-bake goodness of enchiladas. On the other, the unmistakable, pepperoni-topped, mozzarella-pull magic of a great pizza. Your stomach groans. Your heart races. What if… you didn’t have to choose?
Today, we’re ending that civil war for good. We’re smashing these two iconic dishes together in a glorious, bubbling, flavor-packed fusion that’s going to make your next weeknight feel like a Friday night party. I’m talking about my Cheesy Pizza Enchiladas with Ground Beef & Pepperoni. It’s everything you love about a loaded meat-lover’s pizza, wrapped in a soft tortilla, smothered in rich pizza sauce, and baked until the cheese is a glorious, golden blanket of joy.
This isn’t just a recipe; it’s a kitchen experiment that paid off big time. It’s for the busy parent who needs a crowd-pleaser, the couple looking for a fun date-night-in cook, or anyone who believes that melted cheese is one of life’s primary food groups. So, tie on that apron, ignore any silly rules about culinary authenticity, and let’s make a dish that’s pure, unadulterated, feel-good fun.
The Night the Leftovers Leveled Up
This recipe was born from what I like to call “beautiful kitchen chaos.” Picture it: a classic Collier family Taco Tuesday had left us with a few stray tortillas, a container of leftover homemade pizza sauce from Friday’s pie, and a rogue bag of pepperoni hiding in the cheese drawer. My daughter looked at the spread and said, “Dad, can’t we just have pizza tacos?”
Out of the mouths of babes, right? That simple, genius question lit the fuse. We browned some beef with Italian herbs instead of taco seasoning, used the pizza sauce like enchilada sauce, and went wild with the mozzarella and pepperoni. The moment we pulled that dish out of the oven—the cheese bubbling, the pepperoni crisping at the edges, the aroma of pizza night meeting fiesta night—we knew we’d stumbled onto something special. It was a messy, cheesy, triumphant victory for all creative cooks who dare to play with their food. Now, it’s a permanent fixture in our recipe rotation, and I’m so pumped to share that moment of delicious discovery with you.
Gathering Your Flavor Arsenal
Here’s what you’ll need to build this masterpiece. Don’t stress about exact brands—this is about spirit, not strictness!
- 1 lb ground beef: The hearty foundation. I use an 80/20 blend for the best flavor, but lean works great too! Chef’s Insight: For a fun twist, try Italian sausage or ground turkey.
- 1 tsp Italian seasoning: This is our flavor bridge! It instantly gives the beef that “pizza parlor” vibe. No blend? Use ½ tsp dried oregano and ½ tsp dried basil.
- Salt & pepper to taste: Always season as you go. Taste your filling before rolling!
- 1 cup mini pepperoni slices: These little guys are perfect for distributing pepperoni joy in every bite. If you only have regular, just give them a rough chop. Pro Tip: Save a handful for the top for that classic pizza look.
- 2 cups shredded mozzarella cheese: The glue of our dreams. I recommend shredding a block for superior meltiness, but pre-shredded works in a pinch.
- 1½ cups pizza sauce: The soul of the dish! Use your favorite jarred brand or your own homemade. Substitution Tip: In a true pinch, marinara sauce works just fine.
- 6 flour tortillas (8-inch): The trusty vessel. The soft, burrito-size ones are perfect for rolling. For a gluten-free option, your favorite GF tortillas will work wonderfully.
- Optional garnishes: This is your playground! Red pepper flakes for heat, chopped fresh parsley or basil for a pop of color and freshness, and a sprinkle of grated Parmesan for a salty, umami kick.
Let’s Get Rolling: Your Step-by-Step Guide
Ready? Let’s turn these ingredients into a legendary bake. I’ll walk you through every step with my favorite kitchen hacks.
- Fire Up the Oven & Skillet: First, preheat your oven to a cozy 375°F (190°C). This is the sweet spot for getting everything hot, bubbly, and beautifully melted without burning. While it heats, grab a large skillet and place it over medium-high heat. No oil needed yet—we’re going to render the fat from our beef for flavor.
- Build the Flavor Base: Crumble that ground beef right into the hot skillet. Sprinkle over the Italian seasoning, salt, and pepper. Listen to that sizzle! Cook it, breaking it up with your spatula, until it’s beautifully browned and no pink remains. Here’s a Beau Hack: Once it’s browned, I often drain about 90% of the fat, but leave a tiny bit. That residual fat carries all the seasoned flavor and will help marry the sauce to the meat.
- Create the Filling: Reduce the heat to low. Pour in 1 cup of that pizza sauce and half of your mini pepperoni. Give it a good, hearty stir. Let it simmer together for just 2-3 minutes. You’ll see it transform from separate components into a cohesive, fragrant, pizza-tastic filling. Take it off the heat and let it cool for a minute—this makes rolling much easier.
- The Art of the Roll: Lightly grease a 9×13 inch baking dish. Lay a tortilla flat on your work surface. Spoon a generous, even line of the beef mixture down the center, then top with a handful of mozzarella. Don’t overfill, or you’ll have a blowout! Roll it up snugly and place it seam-side down in the dish. Repeat until your dish is packed with delicious little parcels of joy.
- Top it Like a Pro: Now, for the sauciest move. Pour the remaining ½ cup of pizza sauce over the enchiladas. I like to use the back of a spoon to spread it evenly, making sure every tortilla gets some love. Top with the remaining mountain of mozzarella and scatter the rest of the pepperoni over everything. This double-cheese, double-pepperoni action is the key to maximum satisfaction.
- Bake to Golden Perfection: Slide the dish into your preheated oven, uncovered. Bake for about 20 minutes. You’re looking for the cheese to be fully melted, gloriously bubbly, and just starting to get those golden-brown spots. Final Chef’s Trick: If you want extra color and crispiness on top, hit it under the broiler for the final 1-2 minutes—but watch it like a hawk!
Plating Up the Fun
Presentation is part of the joy! Let these enchiladas rest for about 5 minutes after baking—this helps them set so they don’t fall apart when you serve them. Then, use a large spatula to carefully lift out one or two enchiladas per plate.
This is where those optional garnishes become essential. A bright sprinkle of chopped parsley or fresh basil cuts through the richness beautifully. A dusting of red pepper flakes adds a welcome kick. And a final shower of grated Parmesan? That’s the flavor equivalent of a mic drop.
What to serve alongside? Keep it simple and crunchy. A crisp green salad with a sharp Italian vinaigrette is my go-to. It cleanses the palate between each heavenly, cheesy bite. Garlic breadsticks are also a fantastic (and highly indulgent) partner for sauce-dipping. For a lighter option, some quick-pickled red onions or sliced black olives on the side add a great tangy contrast.
Make It Your Own: Delicious Twists & Swaps
The beauty of this mash-up is its adaptability. Here are a few ways to run with the concept:
- The Supreme: Add ½ cup each of diced green bell pepper and sliced black olives to the beef filling. Top the assembled enchiladas with thin onion rings before adding the cheese.
- White “Pizza” Enchiladas: Swap the pizza sauce for a creamy Alfredo or garlic Parmesan sauce. Use shredded chicken instead of beef, and add spinach or artichoke hearts to the filling.
- Breakfast Pizza Enchiladas: Scramble some eggs with cooked, crumbled breakfast sausage. Use that as your filling, and swap the pizza sauce for a creamy country gravy. Top with cheddar cheese and bake. Serve for a mind-blowing brunch.
- Vegetarian Delight: Ditch the meat! Use a mix of sautéed mushrooms, zucchini, and onions as your base. A plant-based ground “beef” crumble works incredibly well here too.
- Spicy Pepperoni & Jalapeño: Kick up the heat! Use spicy pepperoni and add 1-2 diced fresh jalapeños (seeds removed for less heat) to the filling. A drizzle of hot honey after baking is *chef’s kiss*.
Beau’s Kitchen Notebook
Over the many times I’ve made this, I’ve learned a few things. First, don’t fear the soft tortilla. Some folks worry about them getting soggy, but that’s part of the enchilada charm—they soak up the sauce and become tender pockets of flavor. If you prefer a firmer bite, you can quickly flash-fry each tortilla in a dry skillet for 10-15 seconds per side before rolling. It adds a lovely texture and helps them hold their shape.
Secondly, this recipe is a fantastic freezer friend. Assemble the enchiladas right up to the point of baking, cover tightly, and freeze. When a craving strikes, bake from frozen, adding about 20-25 extra minutes to the cooking time. It’s like giving your future self a delicious gift.
Your Questions, Answered
Q: My tortillas ripped when I tried to roll them. Help!
A: No sweat! First, make sure your filling isn’t piping hot when you start rolling—let it cool a bit. Second, don’t overfill. About ⅓ to ½ cup of filling per tortilla is perfect. If one does tear, just do your best to roll it and place it seam-side down. The cheese will melt and act as delicious, edible glue.
Q: Can I make these ahead of time?
A> Absolutely! Assemble the whole dish, cover it tightly, and refrigerate for up to 24 hours. When you’re ready, just pop it in the oven. You might need to add 5-10 minutes to the bake time since it’s going in cold.
Q: The top cheese isn’t browning much. What can I do?
A> This is where your broiler is your best friend. In the last 2-3 minutes of baking, switch your oven to broil (keep the rack in the middle). Watch it CLOSELY—the cheese will bubble and brown in under two minutes. It’s a game-changer for presentation.
Q: Is there a way to make this less greasy?
A> For sure! Use a leaner ground beef (93/7), drain the fat very well after browning, and opt for turkey pepperoni. You can also use part-skim mozzarella. It’ll still be incredibly flavorful.

Cheesy Pizza Enchiladas with Ground Beef & Pepperoni
Description
Can’t decide between pizza night and enchiladas? Now you don’t have to. These Cheesy Pizza Enchiladas combine the bold, familiar flavors of a meat-lover’s pizza with the cozy, saucy comfort of enchiladas. Soft tortillas are filled with seasoned beef, pepperoni, and mozzarella, then baked in pizza sauce until bubbly and golden. It’s fun, family-friendly, and perfect for busy weeknights or casual gatherings.
Ingredients
-
1 lb ground beef
-
1 teaspoon Italian seasoning
-
Salt and black pepper, to taste
-
1 cup mini pepperoni slices (or chopped regular pepperoni)
-
2 cups shredded mozzarella cheese, divided
-
1½ cups pizza sauce, divided
-
6 flour tortillas (8-inch)
-
Optional garnishes: chopped parsley or basil, red pepper flakes, grated Parmesan
Instructions
-
Preheat Oven
Preheat your oven to 375°F (190°C). Lightly grease a 9×13-inch baking dish. -
Cook the Beef
In a large skillet over medium-high heat, cook the ground beef with Italian seasoning, salt, and pepper until browned. Drain excess grease. -
Make the Filling
Lower heat and stir in 1 cup pizza sauce and ½ cup pepperoni. Simmer for 2–3 minutes, then remove from heat. -
Assemble the Enchiladas
Spoon beef mixture down the center of each tortilla. Sprinkle with mozzarella, roll tightly, and place seam-side down in the baking dish. -
Top & Bake
Pour remaining ½ cup pizza sauce over the enchiladas. Top with remaining mozzarella and pepperoni.
Bake uncovered for 20 minutes, until cheese is melted and bubbly. -
Optional Broil
For extra browning, broil for 1–2 minutes at the end—watch closely. -
Serve
Rest for 5 minutes. Garnish as desired and serve warm.
Notes
-
Don’t overfill the tortillas—this helps prevent tearing.
-
Let the filling cool slightly before rolling for easier handling.
-
Shred mozzarella from a block for better melting.
-
For a lighter version, use lean beef, turkey pepperoni, or part-skim mozzarella.
-
Serve with a crisp green salad to balance the richness.
Nourishment & Joy (A Quick Note)
Friends, at Feastical, I believe in balance. This dish is a celebration—a hearty, comforting, shareable feast. Here’s a general nutritional breakdown per enchilada (based on using 80/20 beef, regular flour tortillas, and whole-milk mozzarella), but remember, joy is an important nutrient too!
- Calories: ~420
- Fat: 24g
- Carbohydrates: 28g
- Protein: 25g
To lighten it up, refer to the swaps in the FAQ and variations sections. Using lean protein, loading up on veggie-based variations, and pairing with a big salad are all great ways to enjoy this fusion fun any day of the week.
Dig In & Share the Love
And there you have it, my foodie friends—the recipe that solves the great pizza vs. enchilada debate by declaring everyone a winner. This dish is more than just dinner; it’s a conversation starter, a family activity (get everyone on rolling duty!), and a guaranteed smile on a plate.
I hope you’ll make it, tweak it, and make it your own. That’s what cooking is all about. When you do, I’d love to hear about it! Tag me over on the Feastical social channels or leave a comment on the site. There’s nothing that makes this chef happier than seeing your kitchen triumphs.
Now, go forth and bake something feastical. Until next time, keep your spatula close and your cheese closer.
– Beau

Easter Bunny Bait : Sweet, Salty & No-Bake Spring Snack Mix
Spring’s Sweetest, Crunchiest Welcome: Let’s Make Some Bunny Bait!
Hey there, friend! Beau here, welcoming you back to the Feastical kitchen. Can you feel it? That’s the buzz of spring in the air—the daffodils are popping, the sun’s hanging around a little longer, and there’s a certain pastel-colored holiday hopping our way. It’s the season for gathering, for laughing a little louder, and, of course, for sharing food that’s as fun and vibrant as the day itself.
And let’s be real: sometimes you need a show-stopping treat that doesn’t ask you to preheat the oven, sift flour three times, or decipher the hieroglyphics of a complicated pastry recipe. You want something joyful, effortless, and downright delicious. That’s where our star of the show comes in: Easter Bunny Bait.
Imagine this: the perfect, crave-able crackle of salty pretzels, the airy pop of buttery popcorn, fluffy mini marshmallows, and those cheerful pastel candies, all brought together in a sweet, glossy hug of melted chocolate and a confetti explosion of sprinkles. This isn’t just a snack mix; it’s a textural party in a bowl. It’s the ultimate no-fuss, no-bake hero for your Easter basket stuffing, your spring brunch table centerpiece, or your “I-deserve-a-treat” movie night. It comes together in one big bowl, sets while you tidy up, and is guaranteed to disappear faster than you can say “happy spring.” So, grab your biggest mixing bowl and your favorite spatula—we’re about to make some magic.
Why This Mix Hops Straight to My Heart
This recipe always takes me right back to my grandma’s linoleum-floored kitchen, the scent of a slow-cooked ham in the air. Us cousins would be buzzing with sugar-fueled excitement, but the real pre-dinner activity wasn’t egg-dying—it was “snack mix assembly.” Grandma would lay out all the components in mismatched bowls: pretzels, cereal, broken-up popcorn from the stovetop pot. Our job was the grand mixology. There were no rules—if you thought gummy bears belonged in the savory mix, you fought for your right to add them (I was pro-gummy, by the way).
That chaotic, collaborative joy is the soul of this Bunny Bait. It’s less about precision and more about creation. It’s about letting the kids drizzle the chocolate (messily!) or letting your friend sneak a handful of extra M&M’s “for quality control.” This mix is a memory-maker, a simple ritual that says, “We’re together, and that’s worth celebrating with something sweet and silly.” Every time I break apart a big sheet of it, I hear that clatter of bowls and that chorus of kid laughter. Food should always taste that good.
Gathering Your Bunny Bait Brigade
Here’s the beautiful part: this is more of a formula than a rigid rulebook. Raid your pantry and have fun! Here’s what I love to use, with some insider tips to make it your own.
- 1 cup Pretzel Sticks or Twists: The salty backbone! Sticks give great crunch, but mini twists offer more nooks for chocolate to cling to. Chef’s Insight: If you’re gluten-free, there are amazing GF pretzel options out there that work perfectly.
- 1 cup Plain Popped Popcorn: Air-popped or lightly buttered stovetop is ideal. Avoid heavy kettle corn or overly buttered movie-theater style—we want a neutral, crispy base. Substitution Tip: No popcorn? Toss in an extra cup of cereal instead!
- 1 cup Mini Marshmallows: Little pillows of sweetness that hold their shape. They add a fantastic soft-chewy contrast to all the crunch.
- ½ cup Pastel M&M’s or Candy-Coated Chocolate Eggs: The seasonal stars! These give that iconic Easter color pop. Chef’s Insight: For a pop of tartness, swap in half with pastel jelly beans or Robin’s Eggs malted milk balls.
- 1 cup Cereal (Optional but Highly Recommended): I’m team Golden Grahams for a honey-kissed vibe or Rice Chex for a light, crisp texture. It bulks up the mix and adds another layer of flavor.
- 10 oz (about 1 ½ cups) White Chocolate Chips or Almond Bark: The glue that holds our happy chaos together! Almond bark sets firmer and is great for gifts, while high-quality chocolate chips taste divine. Pro Hack: Add a teaspoon of coconut oil to your chocolate while melting for a smoother, easier-to-drizzle consistency.
- ¼ cup Spring Sprinkles, Jimmies, or Nonpareils: This is the festive confetti! Use pastel colors, bunny-shaped sprinkles—go wild. Add them immediately after drizzling so they stick.
Let’s Build Some Snack-tacular Magic: Your Step-by-Step Guide
Ready? This is the fun part. Clear some counter space and let’s get mixing.
- The Big Mix. In the largest bowl you own (seriously, go big), combine the pretzels, popcorn, mini marshmallows, candies, and cereal (if using). Gently toss them with your hands or a spatula until they’re happily mingled. Chef’s Chat: “Gently” is the key word here—we don’t want to crush our pretzels or pulverize our popcorn. Think of it as introducing friends at a party.
- Melt with Love. Melt your white chocolate. You can use a double boiler for control, but my quick-fix method is a microwave-safe bowl. Heat in 30-second bursts, stirring vigorously between each, until it’s just smooth. DO NOT overheat or it will seize into a gritty mess. Life-Saving Hack: If your chocolate does get thick or clumpy, stir in that teaspoon of coconut oil or even a tiny bit of vegetable shortening. It can often bring it back to silky life.
- The Drizzle Dance. Here’s where artistry meets snack mix. Pour the melted chocolate over your dry ingredients. Now, using a spatula, fold and toss everything together. You want most things to have a light, pretty coating, not a thick, goopy shell. Some bare spots are perfect—it creates texture variation. Pro Tip: Hold back a spoonful of chocolate for a final decorative drizzle on top after you’ve spread it out.
- Sprinkle & Set. Immediately line a baking sheet with parchment paper (wax paper works in a pinch). Spread the mixture out in a somewhat even layer. Now, grab those sprinkles and shower them over the top with abandon! Let your inner artist out. Then, let the tray sit at room temperature until the chocolate is completely set. Chef’s Timing Tip: If you’re impatient (like me), you can pop the tray in the fridge for 15-20 minutes to speed things up.
- The Grand Finale: Break It Apart! Once set, lift the whole parchment sheet off the tray. Now, use your hands to break the mix into delightful, irregular clusters. Some big, some small—it’s all good. This is the most satisfying step. Listen to that snap, crackle, pop!
How to Serve Your Masterpiece
Presentation is half the fun! Dump your Bunny Bait into a big, colorful bowl for a casual gathering—let people grab handfuls. For Easter, I love packing cellophane bags tied with a ribbon for adorable (and edible) gifts. You can even layer it in a clear jar with pretty layers for a real “wow” factor on a dessert table.
Pair it with a pot of coffee for brunch, a glass of cold milk for the kids, or a sweet rosé for the adults. It’s also the perfect companion for a spring movie marathon. There are no wrong answers here—just get it into people’s hands and watch the smiles appear.
Make It Your Own: 5 Fun Twists on the Classic
The base recipe is a blank canvas. Here are some of my favorite ways to riff on it:
- Cookie Dunk Dream: Swap white chocolate for melted semi-sweet or milk chocolate. Use golden Oreo pieces, mini chocolate chips, and peanut butter M&M’s. A true crowd-pleaser.
- Spring Fling (Fruity Version): Use pastel candy melts (like pink or light blue). Mix in freeze-dried strawberries or raspberries, yogurt-covered raisins, and maybe even some white chocolate-covered pretzels.
- Salty-Sweet Supreme: For the salty snack fanatic, use salted peanuts or cashews, classic pretzels, and drizzle with a mix of melted white AND dark chocolate. Finish with a tiny sprinkle of flaky sea salt.
- “Bunny Food” Trail Mix: Healthier twist! Use dark chocolate drizzle. Mix in whole-grain cereal, unsweetened coconut flakes, dried pineapple bits, and a few dark chocolate chunks. It’s energy-packed and still festive.
- Birthday Bunny Bait: Not just for Easter! Use rainbow sprinkles and multi-colored M&M’s. It’s a perfect birthday party snack in any season.
A Few Notes from My Kitchen to Yours
This recipe has seen it all in my house. One year, my nephew decided to add a secret ingredient—a handful of his favorite rainbow goldfish crackers. You know what? The sweet-salty-cheesy combo was weirdly awesome. So, don’t be afraid to experiment.
I’ve also learned that while this mix keeps wonderfully in an airtight container for up to a week (if it lasts that long!), the popcorn can lose its ultimate crispness after a few days. For peak perfection, I like to make it the day before I plan to serve it. And a little secret: hiding a bag of it for yourself in the back of the pantry is not only allowed, it’s encouraged. You’ve earned it, chef.
Your Bunny Bait Questions, Answered!
Q: My chocolate got clumpy and gross when I melted it. What happened?
A: Ah, the dreaded “seized” chocolate! It was likely overheated. Chocolate is a delicate creature. Always melt it low and slow. To rescue it, try stirring in a tiny bit of neutral oil (coconut, vegetable) or even a pat of butter. If it’s beyond saving, no worries—start fresh. It happens to the best of us!
Q: Can I make this ahead of time for a party?
A: Absolutely! It’s a fantastic make-ahead treat. Just store it in an airtight container at room temperature for up to 5 days. For the crunchiest texture, avoid refrigerating the finished mix, as it can introduce moisture.
Q: The sprinkles didn’t stick! How do I get them to stay on?
A> Timing is everything! You have to add the sprinkles immediately after spreading the mix on the parchment, while the chocolate is still wet and sticky. Think of it as a sprinkle snowstorm right after the drizzle blizzard.
Q: Any nut-free options for school treats?
A> Of course! This base recipe is naturally nut-free. Just double-check that your chocolate chips and candy coatings are made in a nut-free facility if allergies are severe. Our “Spring Fling” variation with fruity elements is a perfect nut-free choice.

Easter Bunny Bait : Sweet, Salty & No-Bake Spring Snack Mix
Description
This Easter Bunny Bait is a fun, festive, no-bake treat that comes together in minutes. Sweet chocolate, salty pretzels, fluffy marshmallows, and pastel candies make it perfect for Easter baskets, spring parties, or easy gifting.
Ingredients
-
1 cup pretzels (sticks or mini twists)
-
1 cup plain popped popcorn
-
1 cup mini marshmallows
-
½ cup pastel M&M’s or candy-coated chocolate eggs
-
1 cup cereal (Rice Chex or Golden Grahams work great)
-
10 oz (about 1½ cups) white chocolate chips or almond bark
-
¼ cup pastel sprinkles
Instructions
-
Mix the base
In a large bowl, gently combine pretzels, popcorn, marshmallows, candy, and cereal. -
Melt the chocolate
Melt white chocolate in the microwave in 30-second intervals, stirring between each, until smooth. -
Coat the mix
Drizzle melted chocolate over the snack mix and gently toss until lightly coated. -
Add sprinkles
Spread mixture onto a parchment-lined baking sheet. Immediately sprinkle with sprinkles. -
Set & break
Let set at room temperature or refrigerate 15–20 minutes. Once firm, break into clusters.
Notes
-
Add sprinkles right away so they stick.
-
Don’t overheat the chocolate—low and slow is best.
-
Make it your own: swap candies, add cereal, or drizzle with dark chocolate too.
Nutritional Snapshot (Because Knowledge is Power!)
Let’s keep it real: this is a celebratory treat, a dessert snack meant for joy. Here’s a rough estimate per 1-cup serving, based on the core recipe: Calories: ~220 | Total Fat: 9g | Saturated Fat: 5g | Carbohydrates: 30g | Fiber: 1g | Sugar: 18g | Protein: 2g.
Remember, these numbers can vary based on your specific ingredients and brands. The beauty of making it yourself is you control the portions and can adjust the ratios—want less sugar? Go heavier on the popcorn and pretzels and lighter on the candies. It’s all about finding the balance that brings you happiness.
Wrapping It All Up with a Bow (Or a Sprinkle!)
And there you have it, my friend—your guide to creating the most joyful, no-bake snack of the season. This Easter Bunny Bait is more than just a recipe; it’s a reminder that the best food often comes from simple ingredients, a little creativity, and a whole lot of heart. It’s about the mess, the laughter, and the shared satisfaction of creating something delicious together.
I hope this recipe finds its way to your spring table, becomes a part of your family’s tradition, and maybe even inspires you to create your own signature twist. Remember, in my kitchen and yours, food is love, made edible. Now, go forth and make some magic—and be sure to save a piece for the Bunny!
If you make it (and I really hope you do!), tag me @feastical or use #FeasticalFeasts so I can see your beautiful creations. Happy mixing, and happy Easter!
With love and a full bowl,
Beau

Creamy Chicken Pot Pie Filling : Perfect Over Biscuits or Mashed Potatoes
Creamy Chicken Pot Pie Filling: Your New Favorite Comfort Food Shortcut
Hey there, friend! Beau here from Feastical. Let’s talk about one of life’s greatest culinary hugs: chicken pot pie. That glorious combination of tender chicken, soft veggies, and a creamy, savory sauce, all wrapped up in a flaky, buttery crust. It’s the epitome of comfort. But let’s be real for a second—sometimes, we just don’t have the time (or the energy) to mess with pastry. Between juggling work, life, and trying to remember where you left your car keys, rolling out a perfect crust can feel like a bridge too far.
That’s exactly why I created this recipe. This isn’t just a “filling.” This is the soul of the pot pie, the heart of the dish, freed from its pastry cage and ready to cozy up to whatever you have on hand. Think of it as pot pie’s greatest hits album—all the best tracks, no filler. We’re talking about a rich, velvety sauce loaded with juicy chicken, sweet carrots, and pops of peas, all coming together in one skillet in about 30 minutes. It’s the flavor you crave, delivered faster and with way more flexibility. Spoon it over a flaky biscuit, ladle it onto a mountain of mashed potatoes, or even pour it into a bread bowl. This, my friends, is comfort food that works for you, not the other way around. So grab your favorite wooden spoon, and let’s make magic happen.
The Pot Pie That Built a Kitchen
My love affair with pot pie started not in a fancy restaurant, but in my Grandma Ellie’s tiny, always-warm kitchen. She had this ancient, deep-dish pie plate, its ceramic edges slightly chipped from decades of love. Every Sunday after church, the smell would hit you first—a savory perfume of roasting chicken, thyme, and butter pastry that seeped into the very walls of her house. It was the signal that the whole family was about to gather.
But my favorite memory isn’t even of the finished pie. It was the “filling taste test.” As a kid, I’d perch on a stool, and she’d hand me a spoon after she’d stirred in the peas. “Is it right, Beau?” she’d ask, her eyes twinkling. That sneak preview, that creamy, chickeny spoonful straight from the pot, was my little secret prize. It felt like the essence of home itself. This recipe is my homage to that moment—to the heart of the dish that lives in the filling. It’s that same feeling of warmth and anticipation, simplified so you can spend less time building the crust and more time building the memories around the table.
Gathering Your Flavor Crew: Ingredients & Insights
Great food starts with great ingredients, but I’m a firm believer in keeping it simple and flexible. Here’s what you’ll need to build this bowl of comfort, along with my best chef tips and swaps.
- 2 tbsp butter: Our flavor foundation. Butter adds a rich, round flavor that oil just can’t match. It’s what makes the sauce taste… well, like Grandma’s. Chef’s Tip: For a deeper flavor, use a combination of 1 tbsp butter and 1 tbsp olive oil.
- 1 small onion, diced: The aromatic base. Dicing it small ensures it melts right into the sauce, adding sweetness without big chunks.
- 2 carrots, sliced: A pop of color and natural sweetness. I like to slice them into coins about ¼-inch thick so they cook evenly and still have a slight bite. No fresh carrots? Frozen sliced carrots work in a pinch!
- 2 celery stalks, chopped: The unsung hero of flavor. Celery adds a subtle, earthy note that builds complexity. Don’t skip it!
- 2 garlic cloves, minced: The flavor booster. Adding it after the other veggies cook prevents it from burning and turning bitter. Fresh is best here.
- ⅓ cup all-purpose flour: This is our thickening agent, and it’s crucial for making the roux. Chef’s Insight: Cooking the flour with the butter and veggies for a full minute or two gets rid of the raw flour taste and gives the sauce a lovely, nutty background note.
- 2 cups chicken broth: The liquid gold. This is where a lot of your savory depth comes from. Use a good-quality, low-sodium broth so you can control the salt level.
- 1 cup milk (or half-and-half for extra creaminess): For that classic creamy texture. Whole milk is perfect, but half-and-half or even heavy cream will make it incredibly luxurious. For a dairy-free version, unsweetened plain almond or oat milk works surprisingly well.
- 2 cups cooked, shredded chicken: The star protein! This is the ultimate use-up recipe. Use leftover roasted chicken, a store-bought rotisserie bird (my weeknight secret weapon!), or simply poach two chicken breasts. Shred it with two forks for the best texture.
- ½ cup frozen peas: My little green gems. I add them at the very end so they stay bright and sweet, just warming through. No need to thaw!
- Salt & pepper to taste: Season in layers! A pinch when sautéing the veggies, and then again at the end after you’ve added the broth and milk.
- Optional: thyme, parsley, or a splash of cream: The finishing touches. A teaspoon of dried thyme (or a tablespoon of fresh) added with the garlic is classic. A handful of fresh parsley stirred in at the end adds freshness. A final splash of cream right before serving makes it extra silky.
Let’s Get Cooking: Your Step-by-Step Roadmap to Comfort
Alright, team! Let’s fire up the stove. This process is simple, but each step builds the flavor. Follow along, and don’t worry—I’ve got hacks for you every step of the way.
- Sauté the Veggie Trinity: In a large skillet or Dutch oven, melt your butter over medium heat. Once it’s foaming slightly, add the onion, carrot, and celery. We’re not looking to brown them, just to soften and sweeten them up. Give them a good stir and let them cook for 5-7 minutes. You’ll know they’re ready when the onions are translucent and the carrots have brightened in color. Chef’s Hack: Add a tiny pinch of salt here. It helps draw out moisture from the veggies and speeds up the cooking process. Now, stir in the minced garlic and cook for just one more minute—until it’s fragrant. Burnt garlic is our enemy!
- Build Your Roux (The Secret to a Perfect Sauce): Sprinkle the flour evenly over the cooked veggies. Now, stir, stir, stir! You want every veggie piece to get coated in the buttery flour. Keep stirring and cooking this mixture for about 1-2 minutes. This cooks the raw taste out of the flour and creates the base for our thick, luscious sauce. It should look like a pasty paste clinging to the vegetables. Chef’s Tip: No need to whisk yet—your trusty spoon is perfect for this job.
- Create the Creamy Dream: Here’s where the magic happens. Pour in the chicken broth and milk slowly, while whisking constantly. I mean it—start with a slow stream! This prevents the flour from clumping up into little dumplings. Once all the liquid is in, switch back to your spoon. Bring the mixture to a gentle simmer (small bubbles around the edges). Let it bubble and thicken for 5-7 minutes, stirring often. The sauce will transform before your eyes, going from thin and milky to gloriously thick and coat-the-back-of-a-spoon creamy. Chef’s Hack: If you’re impatient (like me sometimes), you can turn the heat up to medium-high to get to the simmer faster, but then reduce it to maintain that gentle bubble.
- Bring It All Home: Your sauce is thick and happy. Now, stir in the star of the show—your shredded chicken—and those vibrant frozen peas. Let everything heat through for 3-4 minutes, just until the peas are warm and the chicken is heated. This is your final season moment! Taste it. Does it need more salt? A few cracks of black pepper? A sprinkle of thyme or a handful of parsley? Adjust now. If you’re using that optional splash of cream, stir it in right at the end for maximum silkiness.
- The Grand Finale – Serve It Up! Take the skillet off the heat. Your creamy chicken pot pie filling is ready to star in its many supporting roles! Ladle it generously over, into, or alongside your chosen vehicle. The beauty is in the versatility.
How to Serve Your Masterpiece: Beyond the Pie Plate
This is my favorite part—getting creative with how you enjoy this filling! It’s like the Swiss Army knife of comfort food.
- The Classic Comfort Bowl: Simply ladle it into a deep bowl and serve with a hunk of crusty, buttered bread for dipping. Pure, unadulterated bliss.
- Biscuit Bed: My personal weeknight go-to. Split open a few warm, flaky biscuits (homemade or your favorite store-bought brand) and spoon the filling right over the top. Let it cascade down the sides.
- The Mashed Potato Mountain: Create a majestic volcano on your plate with a heap of creamy mashed potatoes. Carve out a well in the center and fill it to the brim with the pot pie filling. Gravy optional—this is its own gravy!
- Puff Pastry Toasties: For a fancy twist, bake some puff pastry squares according to package directions. Place one on a plate and spoon the filling over it, or create a lid with a second square.
- Meal Prep Hero: Portion the filling into airtight containers for lunches. Reheat and serve over a quick microwave baked potato or a pouch of ready-made rice for an instant satisfying meal.
Mix It Up! Delicious Twists on the Theme
Once you’ve mastered the base recipe, the world is your oyster (or, well, your pot pie). Here are a few of my favorite riffs to keep things exciting.
- “Everything But The Kitchen Sink” Veggie Load: Clean out the fridge! Add a handful of chopped mushrooms with the initial veggies, or stir in some chopped spinach or kale right at the end. Frozen corn or green beans are fantastic additions too.
- Herb Garden Delight: Swap the thyme for different herbs. Tarragon gives it a lovely, slightly anise-like French bistro vibe. Rosemary (use just ½ tsp, dried) adds a woody, robust flavor. Or, go bright with a tablespoon of fresh dill at the finish.
- Turkey & Stuffing Style: Perfect for post-holiday leftovers! Use shredded roasted turkey instead of chicken. Add a teaspoon of poultry seasoning to the roux stage, and consider stirring in a handful of dried cranberries at the end for a sweet-tart pop. Serve over leftover stuffing.
- “White Wine” Creamy Upgrade: For a more sophisticated version, deglaze the pan after sautéing the veggies. Add ½ cup of dry white wine (like Sauvignon Blanc), let it simmer and reduce by half, then proceed with the flour. It adds incredible depth.
- Gluten-Free & Still Glorious: Replace the all-purpose flour with an equal amount of a 1:1 gluten-free flour blend. The roux method works exactly the same!
Beau’s Kitchen Notes & Stories
This recipe has been a Feastical staple since day one, and it’s evolved through countless dinners, last-minute potlucks, and even a few “oops” moments. I once accidentally used self-rising flour (note: don’t do that—it gets weirdly puffy!). Another time, my nephew declared it “chicken soup gravy” and demanded it on everything for a week. The biggest lesson? Don’t stress about precision. A little more chicken, a few less peas, a heavier hand on the pepper—it’s all good. This filling is forgiving. Its only job is to make you and whoever you’re feeding feel happy and nourished. That’s the real secret ingredient.
Your Questions, Answered (Let’s Troubleshoot!)
Over the years, you all have asked some brilliant questions. Here are the answers to the most common ones.
- Q: My filling turned out too thin! How can I fix it?
A: No panic! Two easy fixes. 1) Let it simmer a bit longer, uncovered, to reduce and thicken. 2) Make a “slurry”: Mix 1 tablespoon of cornstarch with 2 tablespoons of cold water or broth until smooth. Stir this into the simmering filling and cook for 1-2 minutes until thickened. - Q: Can I make this ahead of time?
A: Absolutely! It’s a fantastic make-ahead meal. Let it cool completely, then store it in an airtight container in the fridge for up to 3 days. Reheat gently on the stove over medium-low heat, adding a splash of broth or milk if it seems too thick. - Q: What’s the best way to cook chicken for this if I don’t have leftovers?
A: Easy poach method: Place 2 chicken breasts in a skillet, cover with broth or water, bring to a simmer, cover, and cook for 12-15 minutes until cooked through. Let rest, then shred. You can even use the poaching liquid as part of your 2 cups of broth for extra flavor! - Q: Can I freeze the filling?
A> You can, but with a note. Cream-based sauces can sometimes separate or become grainy when thawed. For best results, freeze it without the peas (add them fresh when reheating). Thaw overnight in the fridge and reheat slowly on the stove, whisking well to re-emulsify.

Creamy Chicken Pot Pie Filling : Perfect Over Biscuits or Mashed Potatoes
Description
All the cozy, creamy goodness of chicken pot pie—without the crust. This one-pan filling is rich, hearty, and ready in about 30 minutes. Spoon it over biscuits, mashed potatoes, rice, or toast for instant comfort any night of the week.
Ingredients
-
2 tbsp butter
-
1 small onion, diced
-
2 carrots, sliced
-
2 celery stalks, chopped
-
2 garlic cloves, minced
-
⅓ cup all-purpose flour
-
2 cups chicken broth (low sodium)
-
1 cup milk or half-and-half
-
2 cups cooked chicken, shredded
-
½ cup frozen peas
-
Salt and black pepper, to taste
Optional flavor boosts
-
1 tsp dried thyme or poultry seasoning
-
1–2 tbsp fresh parsley, chopped
-
Splash of cream for extra richness
Instructions
-
Sauté the veggies
Melt butter in a large skillet over medium heat. Add onion, carrots, and celery. Cook 5–7 minutes until softened. Stir in garlic and cook 1 minute. -
Make the roux
Sprinkle flour over the vegetables. Stir constantly and cook 1–2 minutes to remove raw flour taste. -
Create the sauce
Slowly whisk in chicken broth and milk. Bring to a gentle simmer, stirring often, until thickened (about 5–7 minutes). -
Add chicken & peas
Stir in shredded chicken and frozen peas. Simmer 3–4 minutes until heated through. -
Season & finish
Season with salt, pepper, and herbs if using. Add a splash of cream if desired. Remove from heat and serve.
Notes
-
Rotisserie chicken saves time and adds flavor.
-
If sauce is too thick, add a splash of broth or milk.
-
If too thin, simmer longer or stir in a cornstarch slurry.
-
Great for meal prep—stores well for 3 days in the fridge.
A Quick Look at the Nourishment
While we’re here for the soul-warming comfort, it’s nice to know what’s fueling us! This nutritional breakdown is for one serving (approximately 1 to 1.5 cups of filling), assuming the recipe serves 5 and is made with whole milk, butter, and no optional cream. Remember, these are estimates and can vary based on your specific ingredients and serving size.
- Calories: ~320
- Protein: 25g (Excellent source, thanks to that chicken!)
- Carbohydrates: 18g (Mostly from the veggies and a bit from the flour for thickening)
- Dietary Fiber: 3g (Helping keep things moving!)
- Total Fat: 16g (The source of that rich, satisfying mouthfeel)
- Saturated Fat: 8g
This dish is a balanced meal in a bowl, providing quality protein, essential vitamins from the colorful vegetables, and energy to keep you going. To lighten it up
Final Thoughts
And just like that, you’ve got it—a pot pie that skips the fuss but keeps all the heart. This filling isn’t just a recipe; it’s your new kitchen ally. It’s the answer to a busy Tuesday, the hero of a lazy Sunday, and the warm, savory hug you can make in about 30 minutes flat.
Remember, the magic isn’t in following these steps perfectly—it’s in making them your own. Use the rotisserie chicken. Toss in those extra veggies. Pour it over a baked potato or under a puff pastry lid. However you serve it, you’re serving up comfort, simplicity, and a little bit of that feeling I still get when I think of Grandma Ellie’s spoon.
Because at the end of the day, the best meals aren’t about perfection. They’re about gathering, savoring, and feeling nourished in every sense of the word. This creamy chicken pot pie filling is here to help you do exactly that—with less time at the counter, and more time at the table.
Now go on, grab that spoon and taste. Is it right? I have a feeling it is.
With love and a full skillet,
Beau

Banh Mi Chicken Wraps : Bold, Crunchy & Packed with Pickled Veggies
Banh Mi Chicken Wraps: Your New Favorite Lunch Adventure
Hey friends, Beau here from Feastical! Let me ask you a question: have you ever taken one bite of something and felt your entire day just… brighten up? That’s the magic I’m chasing in my kitchen every single day, and it’s exactly the feeling I want to share with you today. We’re talking about a flavor explosion so good, it’ll make your taste buds throw a little party. Forget the same-old, same-old lunch routine. We’re ditching the sad desk salads and bland sandwiches for something with serious personality, crunch, and zing.
Welcome to the glorious, messy, absolutely delicious world of Banh Mi Chicken Wraps. Now, if you’ve never had a classic Vietnamese Banh Mi sandwich, you’re in for a treat. Imagine: a crusty baguette piled high with savory meat, a riot of crunchy, tangy pickled veggies, fresh herbs, and a slick of spicy mayo. It’s a perfect harmony of textures and flavors. Our mission today? To capture all that incredible energy and wrap it up into something even easier, more portable, and just as crave-worthy. We’re keeping the soul of the street food classic but giving it a fun, no-fuss, wrap-format twist. Tender, savory chicken, a quick-pickled veggie crunch that will blow your mind, a creamy-spicy sauce, and all hugged by a soft tortilla. It’s a lunchtime game-changer, a dinner savior, and your new potluck superstar. So, grab your favorite sharp knife and a big bowl – we’re about to make some magic happen.
The Day a Sandwich Changed My Lunch Life
My love affair with Banh Mi flavors started not in a fancy restaurant, but on a rainy Seattle afternoon years ago. I was wandering a neighborhood I didn’t know very well, stomach grumbling, when I ducked into a tiny, unassuming shop with a line out the door. The air smelled like roasting meat, fresh herbs, and something tangy I couldn’t quite place. I pointed to the most popular-looking sandwich on the menu, paid my few dollars, and took my first bite standing on the damp sidewalk. Friends, it was a revelation.
It wasn’t just a sandwich; it was an experience. The crackle of the crusty bread, the juicy grilled pork, the startling crunch and sweet-vinegar punch of the pickled daikon and carrots, the freshness of cilantro, and the slow-building heat of the chili. Every element had a job, and they all showed up to work. I must have looked like a complete fool, grinning like a maniac with sauce on my chin in the drizzle. That sandwich taught me more about balance and boldness than a dozen cooking shows. This wrap recipe is my heartfelt, kitchen-tested homage to that moment. It’s my way of bringing that sidewalk joy into your kitchen, any day of the week, with ingredients you can find anywhere. It’s proof that the most memorable food often comes with a great story and even better flavor.
Gathering Your Flavor Crew: Ingredients & Chef Insights
Here’s the beautiful part – this recipe is all about smart, simple ingredients that do big things. Let’s break down the team that’s going to make your wrap unforgettable.
- 2 cups cooked chicken breast or thigh, sliced or shredded: The MVP of protein! Using pre-cooked chicken is our biggest time-saver hack. A rotisserie chicken from the store is your best friend here. Thighs will give you richer, more flavorful bites, while breasts keep it lean. No chicken? Leftover pork or even crispy tofu are fantastic swaps.
- 1 tablespoon soy sauce: Our umami booster. It seasons the chicken deeply. For a gluten-free option, tamari or coconut aminos work perfectly.
- 1 teaspoon sesame oil: Don’t skip this! That nutty, toasty aroma is a secret weapon. A little goes a very long way.
- ½ teaspoon garlic powder: It clings to the chicken better than fresh garlic here, giving every shred a subtle savory punch.
For the Quick-Pickled Veggies (The Star of the Show!):
- 1 cup shredded carrots: Buy them pre-shredded to save time, or use a box grater for a more rustic feel. They bring sweet, earthy crunch.
- ½ cup thinly sliced cucumber: I use English cucumbers for fewer seeds. Slice them thin so they pickle quickly. They add a cool, fresh contrast.
- ½ cup rice vinegar: The pickling liquid base. It’s mild and slightly sweet. White vinegar or apple cider vinegar can sub in a pinch.
- 1 tablespoon sugar & ½ teaspoon salt: This dynamic duo balances the vinegar’s sharpness and helps the veggies soften just right.
The Supporting Cast:
- 4 large flour tortillas or wraps: I love a spinach or sun-dried tomato wrap for extra color, but classic flour works great. For low-carb, use large lettuce leaves or gluten-free wraps.
- ½ cup fresh cilantro leaves: Non-negotiable for that authentic herbal zip! If you’re a cilantro-hater (we can still be friends), try fresh mint or basil.
- ½ cup sliced jalapeños (optional): For the heat seekers! Remove seeds for less fire. Sriracha in the mayo gives heat too, so adjust to your taste.
- ½ cup mayonnaise mixed with 1–2 teaspoons sriracha: Our creamy, spicy glue. Mix to your preferred heat level. For a lighter option, swap half the mayo with plain Greek yogurt.
Let’s Build Some Flavor: Step-by-Step Instructions
Ready to roll? (Pun totally intended.) This comes together faster than you can decide what to watch tonight. We’ll start with the quick-pickle because those veggies are the heart of the crunch.
- Pickle Your Veggies – The 15-Minute Miracle. In a medium bowl, whisk together the rice vinegar, sugar, and salt until the sugar dissolves. It’s like a tiny science experiment in your kitchen! Add the shredded carrots and sliced cucumber. Toss them until they’re all dressed in that tangy liquid. Let them sit on the counter for at least 15 minutes. This isn’t passive time—this is where the magic happens! The veggies will soften slightly, absorb the flavor, and become addictively crunchy-tangy. Give them a stir halfway through. Chef’s Hack: You can do this step a day or two ahead and keep them in the fridge. The flavor only gets better!
- Wake Up Your Chicken. While the veggies are getting fabulous, take your cooked chicken and place it in another bowl. Drizzle with the soy sauce and sesame oil, then sprinkle the garlic powder over the top. Use your hands or a fork to toss and massage those flavors into every piece. This step transforms plain leftover chicken into a savory, Asian-inspired delight. Let it hang out and marinate while you prep everything else.
- Whip Up Your Spicy Mayo. In a small bowl, mix the mayonnaise and sriracha. Start with 1 teaspoon of sriracha, taste, and add more if you want more kick. This is your sauce, make it yours! Set this aside. This creamy, spicy element is what ties the whole wrap together.
- Assemble & Conquer. Warm your tortillas for about 10 seconds in the microwave or a dry skillet. A warm tortilla is more pliable and less likely to tear. Lay one flat on your cutting board. Spread a generous tablespoon (or two!) of the sriracha mayo down the center, leaving a 2-inch border at the bottom and sides. Layer on a quarter of the seasoned chicken. Using a slotted spoon or your fingers, grab a hefty pile of the pickled veggies, letting excess liquid drip off (this keeps the wrap from getting soggy), and place them over the chicken. Top with a handful of fresh cilantro leaves and a few jalapeño slices if you’re using them.
- The Art of the Tight Roll. Here’s the wrap technique: Fold the bottom flap (that 2-inch border you left) up and over the fillings, tucking it snugly underneath them. Then, fold the left and right sides in towards the center. Now, roll the whole bundle tightly away from you, keeping the sides tucked in, until you have a sealed, burrito-style wrap. Place it seam-side down. Repeat with the remaining tortillas and fillings.
- Slice & Serve with Pride. For the prettiest presentation, use a sharp serrated knife to slice each wrap in half on a sharp diagonal. See all those beautiful, colorful layers? That’s your masterpiece. You can enjoy them immediately, or wrap them tightly in parchment paper or foil for a perfect packed lunch.
How to Serve Your Banh Mi Wrap Masterpiece
Presentation is part of the fun! These wraps are a complete meal in your hand, but a little styling goes a long way. I love serving them sliced in half on a big platter for a casual dinner, so everyone can see the gorgeous cross-section of colors. For a heartier meal, add a simple side. A light ginger-sesame slaw or a handful of sweet potato fries are my go-tos. If you’re packing them for lunch, wrap them tightly in parchment paper and secure with a bit of twine – it feels special and keeps everything contained. Don’t forget a little extra sriracha mayo on the side for dipping! These are fantastic served slightly warm right after making, but honestly, they’re just as delicious cold straight from the fridge, making them the ultimate next-day lunch.
Make It Your Own: Flavor Twists & Swaps
The beauty of this recipe is its flexibility. Once you master the basic formula, the world is your wrap! Here are a few of my favorite twists:
- The “Pork-tastic” Twist: Use shredded leftover pulled pork or thinly sliced grilled pork tenderloin instead of chicken. Brush the pork with a little hoisin sauce for extra depth.
- Go Veggie-Powered: For a vegetarian version, swap the chicken for marinated and baked tofu or sautéed sliced mushrooms. Crank up the protein with a handful of edamame beans in the filling.
- Kick Up the Crunch: Add thin slices of radish to the pickling mix, or throw in some crushed peanuts or crispy fried shallots right before you roll for an extra texture surprise.
- Herb Garden Delight: Beyond cilantro, try adding fresh Thai basil, mint, or even a few leaves of perilla for a more complex herbal note.
- Different Dip: Swap the sriracha mayo for a peanut sauce or a lime-crema (mix lime zest and juice into sour cream or Greek yogurt).
Beau’s Kitchen Notes & Stories
This recipe has lived many lives in my kitchen! It started as a desperate attempt to use up leftover Thanksgiving turkey (surprisingly great, by the way). Over countless tests and happy accidents, it evolved into this chicken version. The biggest lesson? Don’t fear the quick-pickle. I’ve had so many friends tell me they were intimidated by “pickling,” but this is the gateway drug. It’s so simple and the payoff is huge. Now, I always have a jar of these pickled veggies in my fridge – they go on salads, grain bowls, tacos, you name it. One funny fail: I once tried to use really thick, burrito-sized tortillas and overstuffed them so much they became impossible to eat without a forklift. Lesson learned: balance is key, both in flavor and in filling! These wraps are now a staple in my house, and I hope they become one in yours, too.
Your Questions, Answered: FAQs
Q: My wrap keeps getting soggy. What am I doing wrong?
A: The most common culprit is excess moisture from the pickled veggies! Always drain them well using a slotted spoon or even give them a gentle squeeze in a clean kitchen towel before adding to the wrap. Also, ensure your chicken isn’t overly wet. Assembling right before eating helps, too.
Q: Can I make these ahead of time?
A> Absolutely! Prep all the components separately. Store the pickled veggies (in their liquid), seasoned chicken, and sauce in separate containers in the fridge for up to 3 days. Assemble your wraps the morning you plan to eat them, or even the night before. If making them hours ahead, wrap them very tightly in parchment paper or foil to hold their shape.
Q: It’s too spicy for my kids! How can I adjust?
A> Easy! Make the sriracha mayo with just a tiny dab of sriracha or leave it out entirely for a plain mayo or yogurt sauce. Skip the jalapeño garnish. You can even set up a “wrap bar” and let everyone build their own with their preferred level of heat.
Q: What’s the best way to reheat one of these wraps?
A> For the best texture, I recommend reheating gently. Remove any foil, wrap in a slightly damp paper towel, and microwave for 30-45 seconds. For a crisper tortilla, you can reheat it in a dry skillet over medium heat for a minute or two per side, but be careful not to melt the mayo filling too much.

Banh Mi Chicken Wraps : Bold, Crunchy & Packed with Pickled Veggies
Description
These Banh Mi Chicken Wraps take all the bold, bright flavors of the classic Vietnamese sandwich and turn them into an easy, portable wrap. Savory chicken, quick-pickled veggies, fresh herbs, and spicy mayo come together for a fast lunch or dinner that never feels boring.
Ingredients
Chicken
-
2 cups cooked chicken breast or thigh, sliced or shredded
-
1 tbsp soy sauce
-
1 tsp sesame oil
-
½ tsp garlic powder
Quick-Pickled Veggies
-
1 cup shredded carrots
-
½ cup thinly sliced cucumber
-
½ cup rice vinegar
-
1 tbsp sugar
-
½ tsp salt
Wraps
-
4 large flour tortillas or wraps
-
½ cup fresh cilantro leaves
-
½ cup sliced jalapeños (optional)
Spicy Mayo
-
½ cup mayonnaise
-
1–2 tsp sriracha (to taste)
Instructions
-
Quick-pickle the veggies
In a bowl, whisk rice vinegar, sugar, and salt until dissolved. Add carrots and cucumber. Toss and let sit for 15 minutes, stirring once. -
Season the chicken
In another bowl, toss chicken with soy sauce, sesame oil, and garlic powder until evenly coated. -
Make the sauce
Mix mayonnaise and sriracha in a small bowl. Adjust heat to taste. -
Warm the wraps
Heat tortillas briefly so they’re soft and flexible. -
Assemble
Spread spicy mayo down the center of each wrap. Add chicken, drained pickled veggies, cilantro, and jalapeños if using. -
Wrap it up
Fold bottom edge up, tuck in sides, and roll tightly. Slice in half if desired and serve.
Notes
-
Drain pickled veggies well to avoid soggy wraps.
-
Rotisserie chicken is a great time-saver.
-
Make it ahead: prep all components and assemble when ready to eat.
-
Swap chicken for pork, tofu, or mushrooms if you like.
Nutritional Info (A Quick Glance)
Please remember, I’m a cook, not a dietitian! The following is an approximate estimate per wrap, calculated using standard ingredients and assuming 4 wraps total. This can vary greatly based on your specific ingredient brands and amounts (like how much mayo you use).
Per Wrap (approximate):
Calories: ~360 | Protein: 28g | Carbohydrates: 24g | Fat: 18g | Fiber: 2g | Sugar: 6g
For a lighter version, consider using low-carb tortillas, light mayonnaise mixed with Greek yogurt, and increasing the volume of pickled veggies and herbs. This recipe is naturally high in protein from the chicken, and the pickled veggies add a dose of vitamin A and gut-friendly probiotics from the vinegar.
Final Thoughts: Wrap Up Your Day with Flavor
And there you have it, friends – your passport to a seriously delicious, no-fuss meal that’s bursting with the kind of bright, bold flavors that make cooking (and eating!) so much fun. These Banh Mi Chicken Wraps are more than just a recipe; they’re a reminder that incredible food doesn’t have to be complicated

Mediterranean Chicken Pita Packs : Fresh, Flavorful & Tzatziki on the Side
Mediterranean Chicken Pita Packs: Your New Favorite Lunchtime Escape
Hey there, friend! Beau here, from the slightly flour-dusted, always-good-vibes kitchen of Feastical. Have you ever had one of those days where lunch feels like a total afterthought? You’re staring into the fridge, willing something delicious and satisfying to magically appear, but you’re met with a lonely jar of pickles and half an onion. We’ve all been there. That, my friends, is precisely why I’m so jazzed to share this recipe with you today.
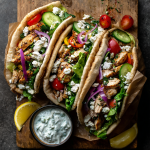
I’m talking about Mediterranean Chicken Pita Packs – your passport to a flavor-packed, sunshine-bright meal that’s ready in minutes. Imagine this: tender, herb-kissed chicken, a confetti of the crispiest veggies, a generous sprinkle of salty feta, all cozy-ed up in a soft, warm pita. And the pièce de résistance? A cool, creamy tzatziki sauce waiting on the side for the perfect dip or drizzle. This isn’t just lunch; it’s a mini-vacation for your taste buds.
What I absolutely adore about this recipe (besides the obvious deliciousness) is its genius flexibility. It’s a triumphant end to last night’s leftover roasted chicken, a superstar for your weekly meal prep ritual, and the undisputed champion of picnics and packed lunches. It’s fresh, it’s filling, and it proves that eating well doesn’t require a culinary degree or hours chained to the stove. So, grab your favorite cutting board and let’s turn that lunchtime frown upside down. Adventure awaits, and it fits perfectly in your hand.
The Pita Pack “A-Ha!” Moment
This recipe was born out of pure, unadulterated lunchtime desperation, with a side of nostalgia. A few summers back, I was helping my cousin move into her new apartment. Boxes were everywhere, the kitchen was in complete disarray, and by noon, we were all hangry enough to consider eating the packing peanuts. We scavenged and found some leftover grilled chicken from the night before, a sad-looking cucumber, a container of feta that thankfully hadn’t been packed yet, and a sleeve of pitas.
In a moment of inspiration (fueled by hunger), I chopped, tossed, and stuffed everything into those pitas. We didn’t have tzatziki, so I mashed some Greek yogurt with the dill from a windowsill plant and a squeeze of lemon. We wrapped our creations in paper towels and sat on the floor amidst the chaos. The first bite was pure magic. It was cool, savory, crunchy, and utterly satisfying. My cousin looked at me and said, “Beau, this is a MOVING miracle. We need to make this a thing.” That floor picnic, surrounded by cardboard, reminded me that the best meals often come from a little ingenuity and a lot of heart. It was a simple, packable, feel-good feast, and it’s been a “thing” in my kitchen ever since.
Gathering Your Mediterranean Sunshine
Here’s the beautiful cast of characters that’ll make your pita packs sing. The magic is in the freshness, so don’t be shy about grabbing the brightest veggies you can find!
- 2 cups cooked, seasoned chicken (shredded or chopped): This is your star player! I love using chicken I’ve grilled or roasted with a simple rub of dried oregano, minced garlic, lemon zest, salt, and pepper. Chef’s Insight: Leftover rotisserie chicken is a glorious, time-saving shortcut here. Just give it a quick chop!
- 4 soft pita pockets or flatbreads: The vessel for all this goodness. Look for pocket-less Greek-style pitas or flatbreads for easier stuffing. Substitution Tip: For a gluten-free option, large butter lettuce leaves or gluten-free wraps work wonderfully for a “pack-less” pack.
- 1 cup chopped cucumber: Adds that essential fresh crunch. I prefer English or Persian cucumbers for their thin skins and minimal seeds.
- 1 cup cherry tomatoes, halved: Little bursts of sweetness and acidity. Halve them just before assembling to keep their juicy goodness inside.
- ½ cup red onion, thinly sliced: Provides a sharp, peppery bite. Pro Hack: If raw onion is too intense for you, quick-pickle the slices in a splash of red wine vinegar and a pinch of sugar for 10 minutes. It tames the bite beautifully.
- ½ cup crumbled feta cheese: The salty, tangy cornerstone of Mediterranean flavor. Chef’s Insight: Buy a block of feta and crumble it yourself—it’s creamier and more flavorful than the pre-crumbled kind.
- 1 cup shredded lettuce or baby spinach: The fresh, green base. Romaine holds up well, but I’m a sucker for the tenderness of baby spinach.
- ½ cup tzatziki sauce: The creamy, cool, herby sauce that ties it all together. Store-bought is fine in a pinch, but homemade tzatziki is surprisingly easy and next-level good. We’ll keep this separate until serving to avoid sogginess!
Let’s Build Some Flavor Pockets!
Ready to assemble your edible sunshine? Follow these steps for pita pack perfection. It’s less about strict cooking and more about joyful assembly.
- Prep Your Station: Get all your ingredients chopped, sliced, and ready to go. This is your “mise en place” moment—having everything ready makes the assembly line a breeze. Place your chicken, chopped cucumber, halved tomatoes, sliced onion, crumbled feta, and greens in separate little bowls or piles on your board.
- Warm the Pitas: This is a CRUCIAL step for a tear-free experience! Cold pitas can be stiff and crack when you try to fill them. Warm them gently in a dry skillet over medium heat for about 30 seconds per side, just until they’re soft and pliable. You can also wrap them in a damp paper towel and microwave for 15-20 seconds. Chef’s Hack: Don’t overheat them, or they’ll become brittle as they cool.
- Layer with Strategy: Lay a warmed pita flat on a piece of foil or parchment paper (about 12×12 inches). Start with a handful of lettuce or spinach right in the center. This creates a protective leafy barrier between the juicy fillings and the pita, helping prevent a soggy bottom. Next, add a generous portion of your seasoned chicken. Then, artfully arrange your cucumbers, tomatoes, and red onions. Finally, crown it all with a hearty sprinkle of that glorious crumbled feta.
- The Wrap & Pack: Here’s where we secure our delicious bundle. Carefully fold the bottom of the pita up over the filling, then fold in the sides, and roll it forward into a tight bundle, using the foil or parchment to help you. Wrap it snugly, twisting the ends like a candy wrapper. This keeps everything secure and makes it totally portable. Pack your wrapped pita packs and your container of tzatziki side-by-side in your lunchbox. The separation is key for ultimate freshness!
- The Grand Finale – Serve & Enjoy: When you’re ready to eat, unwrap your pack just enough to expose the top. Now, take that cool, creamy tzatziki and either drizzle it generously over the exposed fillings or use it as a dip for each perfect bite. The combination of the warm, spiced chicken and the cool, herbal sauce is pure harmony.
How to Serve Your Culinary Masterpiece
The beauty of these pita packs is in their versatility. Sure, they’re the ultimate grab-and-go lunch, but let’s think bigger!
For a fantastic home lunch or light dinner, serve your wrapped pack right on the plate with the tzatziki in a small ramekin for dipping. Add a side of lemony couscous, a simple Greek salad, or crispy roasted chickpeas for a more complete meal. It’s casual, satisfying, and requires minimal cleanup—my kind of dinner.
Thinking of a picnic or potluck? These are your secret weapon. Prepare them ahead, keep them wrapped and chilled in a cooler, and let everyone grab one. They’re neat, self-contained, and universally loved. I like to bring a big bowl of extra tzatziki for the table because, let’s be real, you can never have too much.
And for the ultimate meal prep win, dedicate 20 minutes on a Sunday to chop all your veggies and cook/season your chicken. Store each component in its own airtight container in the fridge. Each morning, simply grab a pita, warm it, and assemble your pack in minutes. You’ll have a restaurant-quality lunch waiting for you, and your coworkers will be seriously jealous.
Make It Your Own: Endless Twists & Swaps
Once you’ve mastered the classic, the world is your pita pocket! Here are a few of my favorite ways to mix it up.
- The “Greener” Goddess: Swap the chicken for chickpeas or crispy baked falafel for a stellar vegetarian version. The heartiness of the chickpeas stands up perfectly to all the flavors.
- Spicy Fiesta: Give it a kick! Add a few slices of pickled jalapeños or banana peppers to the filling. You could also mix a little harissa or sriracha into the tzatziki for a spicy-creamy sauce.
- Lamb Lover’s Dream: Replace the chicken with seasoned ground lamb or shredded leg of lamb. The richer flavor of lamb paired with the fresh veggies and tzatziki is absolutely divine.
- Seaside Switch-Up: For a pescatarian option, use flaked grilled salmon or lemon-herb shrimp. The healthy fats and flavor are a match made in Mediterranean heaven.
- The Deconstructed Bowl: Skip the pita altogether! Pile all the ingredients (including a big dollop of tzatziki) into a bowl over a bed of quinoa or mixed greens. It’s just as delicious and perfect for a lower-carb option.
Beau’s Kitchen Confidential
This recipe has evolved from that chaotic moving-day snack into my most requested “lunch idea.” Over time, I’ve learned a few things. First, the order of layering is non-negotiable for structural integrity. Lettuce on the bottom is your best friend. Second, I once tried to make these a full day ahead WITH the tzatziki already inside… let’s just say I ended up with a delicious but very sad, soggy pita soup. Lesson learned! Keeping the sauce separate is the golden rule.
I also love adding a handful of kalamata olives or a sprinkle of fresh dill or mint to the filling when I’m feeling fancy. And never underestimate the power of a final squeeze of fresh lemon juice right before you take that first bite. It wakes up all the flavors like a splash of sunshine.
Your Questions, Answered!
Q: Can I make these pita packs the night before?
A: You absolutely can, with one critical rule: DO NOT add the tzatziki. Assemble the packs with all the dry ingredients, wrap them tightly in foil or parchment, and store them in the fridge. Keep the tzatziki in its own container. The veggies will stay crisp, and your pita will remain intact. Add the sauce just before eating.
Q: My pita keeps tearing! What am I doing wrong?
A: You’re likely missing the warm-up step! Cold pitas = crack city. Gently warming them makes them soft and pliable. Also, don’t overstuff them—aim for a hearty but manageable amount of filling. If tears happen, no sweat! Just use a little extra foil or parchment to hold everything together.
Q: What’s the best way to reheat the chicken if I’m using leftovers?
A: To keep the chicken juicy, I recommend reheating it gently. You can do a quick 30-second zap in the microwave with a damp paper towel over it, or warm it in a skillet over low heat with a tiny splash of water or broth. Let it cool just slightly before assembling your pack so the warm chicken doesn’t wilt the greens.
Q: How long will the components last in the fridge for meal prep?
A: Cooked, seasoned chicken will last 3-4 days. Chopped veggies (except tomatoes, which are best chopped fresh) are good for 2-3 days. Store everything in separate airtight containers. Tzatziki is good for up to 4 days. This makes it a perfect candidate for a mid-week meal prep session!
Mediterranean Chicken Pita Packs : Fresh, Flavorful & Tzatziki on the Side
Description
When lunch needs to be quick, filling, and actually exciting, these Mediterranean Chicken Pita Packs deliver. They’re loaded with herby chicken, crisp veggies, salty feta, and cool tzatziki, all wrapped up in a soft pita. Easy to prep, great for meal prep, and perfect for packed lunches, they turn everyday ingredients into a bright, satisfying meal.
Ingredients
-
2 cups cooked chicken breast, chopped or shredded
-
4 soft pita breads or flatbreads
-
1 cup cucumber, diced
-
1 cup cherry tomatoes, halved
-
½ cup red onion, thinly sliced
-
½ cup crumbled feta cheese
-
1 cup shredded romaine lettuce or baby spinach
-
½ cup tzatziki sauce (served on the side)
Optional seasonings for chicken:
-
½ tsp dried oregano
-
½ tsp garlic powder
-
Salt and black pepper, to taste
-
A squeeze of lemon juice
Instructions
-
Prepare the chicken
If needed, season cooked chicken with oregano, garlic powder, salt, pepper, and lemon juice. Toss to combine. -
Prep the vegetables
Chop cucumber, tomatoes, onion, and lettuce. Set aside. -
Warm the pitas
Heat pitas briefly in a dry skillet or microwave (15–20 seconds) until soft and flexible. -
Assemble
Place lettuce in the center of each pita. Top with chicken, cucumber, tomatoes, red onion, and feta. -
Pack and serve
Wrap pitas tightly in foil or parchment. Serve tzatziki on the side for dipping or drizzling just before eating.
Notes
-
Keep sauce separate to prevent soggy pitas, especially for packed lunches.
-
Use dry veggies: Pat cucumbers and tomatoes dry for better texture.
-
Meal prep win: Store all ingredients separately and assemble in minutes.
-
Swap proteins: Grilled shrimp, falafel, or chickpeas work beautifully.
Nourishment You Can Feel Good About
While I’m all about flavor first, it’s a wonderful bonus when something this tasty is also genuinely nourishing. These pita packs are a fantastic balance of macronutrients, thanks to the lean protein from the chicken, healthy fats from the feta and olive oil (in the chicken seasoning and tzatziki), and complex carbs from the whole-grain pita and veggies. They’re packed with vitamins from all the colorful vegetables, and the Greek yogurt in the tzatziki adds a dose of probiotics and calcium.
Approximate Nutrition Per Pita Pack (using whole wheat pita and skinless chicken breast): Calories: 410 | Protein: 30g | Carbohydrates: 30g | Dietary Fiber: 4g | Total Fat: 18g | Saturated Fat: 6g. Remember, these are estimates and can vary based on your specific ingredients and portion sizes. The most important ingredient is the joy of making and eating it!
Wrap It Up & Dig In!
And there you have it, friends—your new go-to recipe for beating the lunchtime blues and adding a burst of Mediterranean sunshine to your day. I hope these pita packs bring as much joy to your kitchen as they have to mine. They’re proof that incredible food doesn’t have to be complicated; it just has to be made with a little love and a sense of adventure.
Final Thoughts
So, there you have it—your ticket to transforming the humble lunch hour into something truly special. These Mediterranean Chicken Pita Packs are more than just a recipe; they’re a reminder that great food doesn’t have to be complicated. It’s about taking simple, fresh ingredients and weaving them into something that feels like a celebration—whether you’re sitting at your desk, enjoying a picnic in the park, or fueling up during a busy day.
What started as a makeshift meal on a chaotic moving day has become one of my go-to recipes for a reason. It’s versatile, vibrant, and deeply satisfying. It proves that with a little creativity, you can turn leftovers into a masterpiece and ordinary moments into mini escapes. Food has this incredible power to bring joy, comfort, and a splash of color to our routines, and these pita packs do exactly that.
I hope this recipe becomes a trusted friend in your kitchen—a reliable solution for those “what’s for lunch?” moments and a delicious way to nourish yourself and the people you love. Don’t be afraid to make it your own. Tweak it, swap it, and adapt it until it sings to your taste buds. That’s where the real magic happens.
Southwest Chicken Pinwheels : Creamy, Zesty & Ready to Roll
Southwest Chicken Pinwheels: Your New Go-To Party Hero
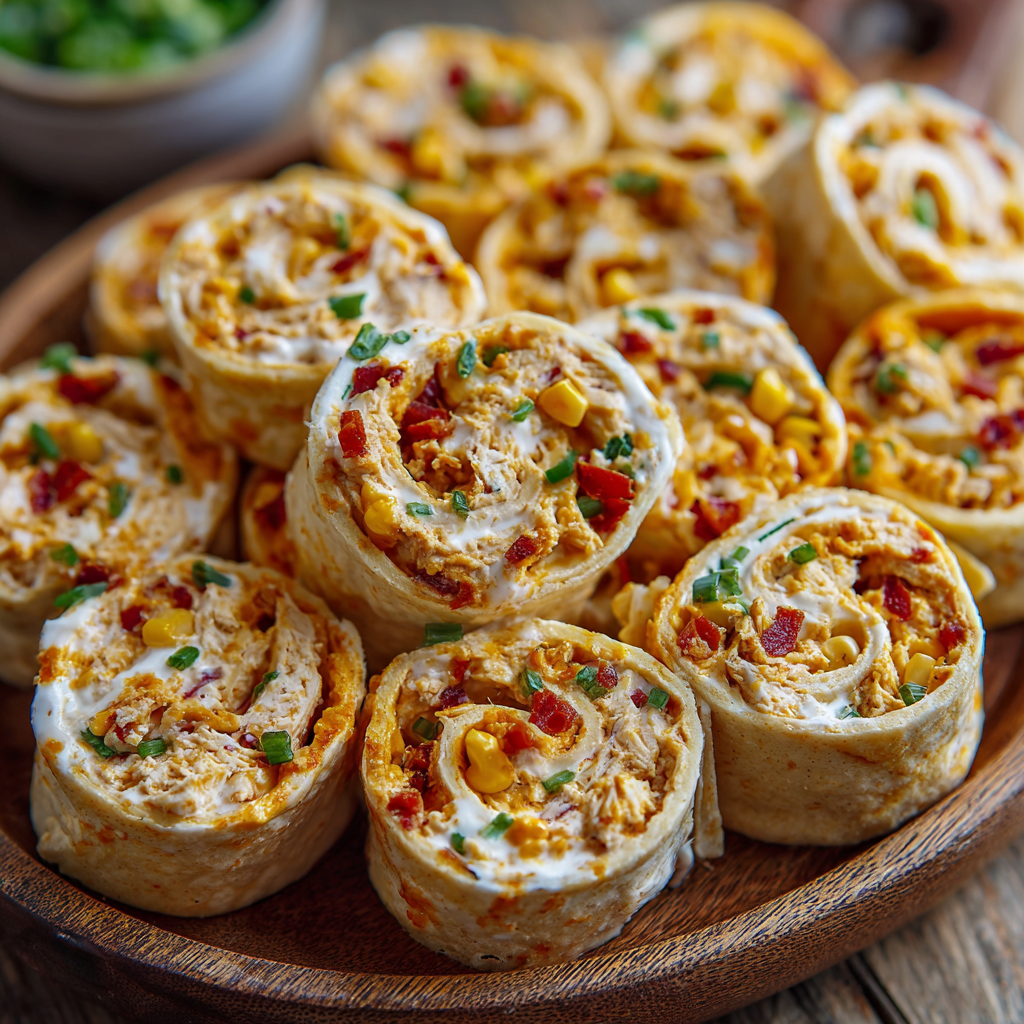
Hey friends, Beau here from Feastical! Grab a seat at the counter and let me tell you about the little culinary lifesaver we’re diving into today: Southwest Chicken Pinwheels. Ever been to a gathering where one platter of food gets absolutely mobbed? That’s these guys. They’re the first to vanish at potlucks, the star of the picnic blanket, and the secret weapon in your lunchbox that makes your coworkers peek over the cubicle with envy.
We’re talking about soft tortillas hugged around a creamy, zesty, and seriously satisfying filling of shredded chicken, cream cheese, salsa, and spices. No oven required, just a bowl, a spoon, and about 15 minutes of your time. The magic happens in the fridge, where they firm up into perfect, sliceable rolls of flavor. Whether you’re feeding a hungry game-day crowd, packing a no-fuss lunch, or just need a tasty snack that feels like a treat, these pinwheels are your answer. They taste like a fiesta, look like you fussed for hours, but are secretly one of the easiest things you’ll make all week. So, let’s roll up our sleeves—literally—and get to it!
The Potluck That Started It All
This recipe takes me straight back to my first “grown-up” potluck with friends after college. My kitchen was basically a studio apartment special: one pan, a wobbly cutting board, and a whole lot of enthusiasm. I wanted to bring something that looked impressive but wouldn’t break the bank or my fragile culinary confidence. I had some leftover roasted chicken, a few tortillas, and the standard fridge condiments. Throwing it all together felt like a kitchen Hail Mary.
I’ll never forget the moment I un-wrapped that log of tortilla and started slicing. Seeing those beautiful, swirled pinwheels appear felt like a magic trick. And the best part? They were the hit of the party. People kept asking, “What’s in these? Did you cater these?” That quiet victory, of creating something so beloved from such simple ingredients, is the heart of Feastical. It’s proof that the best food isn’t about being fancy; it’s about being flavorful, shareable, and made with a dash of joy. These pinwheels have been my potluck passport ever since.
Gathering Your Flavor Crew
Here’s everything you need to make about 20-24 perfect pinwheels. The beauty is in the flexibility—I’ll give you the superstar lineup and some awesome understudies.
- 2 large burrito-size tortillas (10-inch): The foundation! I prefer flour tortillas for their pliability. Chef’s Tip: Give them a quick 10-second zap in the microwave (wrapped in a damp paper towel) to make them extra soft and rollable without cracking.
- 1½ cups cooked, shredded chicken: The hearty core. A store-bought rotisserie chicken is your ultimate shortcut here—no shame in that game! Leftover grilled or baked chicken works beautifully too. For a vegetarian twist, see the variations below.
- 4 oz cream cheese, softened: The creamy glue that holds it all together. Leave it on the counter for 30-60 minutes before you start. Trying to mix cold cream cheese is a bicep workout nobody signed up for.
- 2 tbsp salsa: This is our flavor injector! Use your favorite kind, but try to choose one that’s not super watery. A thicker pico de gallo or restaurant-style salsa works best to keep the filling from getting soggy.
- ½ tsp chili powder & ½ tsp ground cumin: The dynamic duo of Southwest flavor. Toasting your own cumin seeds and grinding them is next-level, but the pre-ground stuff works just fine for our quick-and-delicious mission.
- ¼ cup shredded cheddar cheese: A little extra cheesy goodness never hurt anybody. Pepper jack cheese is a fantastic swap if you want a subtle kick.
- 2 tbsp chopped green onions: They add a necessary fresh, sharp bite that cuts through the creaminess. The green parts are pretty, but use the white parts too for maximum flavor!
- Optional MVP Add-Ins: This is where you make it yours! A tablespoon of chopped cilantro, a few diced jalapeños (seeds removed for less heat), 2-3 tbsp of drained black beans or corn, or even a squeeze of lime juice can take these from great to legendary.
Let’s Build Some Flavor Rolls! (Step-by-Step)
Follow these steps, and you’ll be a pinwheel pro in no time. I’m chatting you through each one with my best tips.
- The Creamy Base: In a medium mixing bowl, combine your softened cream cheese, salsa, chili powder, and cumin. Use a fork or a sturdy spatula to mash and mix it until it’s completely smooth and one cohesive, creamy, orange-tinted sauce. No cream cheese lumps allowed! Pro Hack: If you forgot to soften the cream cheese, pop the sealed block in a bowl of warm water for 10-15 minutes. It’s a kitchen save!
- Bring in the Team: To that creamy base, add your shredded cheddar cheese, chopped green onions, and shredded chicken. Now, fold everything together gently but thoroughly. You want every strand of chicken to get coated in that delicious cream cheese mixture. If you’re using any optional add-ins like beans or jalapeños, now’s the time!
- The Spread & Roll: Lay your first tortilla flat on a clean cutting board. Spoon half of the chicken mixture onto the center and spread it out evenly, using the back of your spoon or a small offset spatula. Leave about a 1-inch border at the top edge farthest from you. This empty space is crucial—it’s where the filling will press into when you roll, sealing the deal. Starting from the edge closest to you, roll the tortilla up tightly, tucking in the filling as you go. Don’t be shy, give it a firm but gentle roll.
- The Chill Factor: Wrap each tortilla log tightly in plastic wrap. This is non-negotiable! The wrap helps them hold their perfect cylindrical shape. Pop them in the fridge for at least 30 minutes, but 1-2 hours is ideal. This chilling time firms up the filling, sets the cream cheese, and makes slicing clean, beautiful pinwheels an absolute breeze. Trust me, it’s the difference between a neat swirl and a messy squish.
- Slice & Shine: Unwrap your chilled logs and place them on your cutting board. Using a sharp serrated knife, gently saw off the messy ends (cook’s treat!). Then, slice the rest of the log into 1-inch thick rounds. Wipe your knife clean between cuts for the prettiest presentation. Arrange them on a platter, and watch them disappear!
How to Serve These Crowd-Pleasers
Presentation is half the fun! For a party, arrange the pinwheels on a large platter or a rustic wooden board. You can fan them out in a circle or stack them in a pyramid. Tuck in a few lime wedges or sprigs of fresh cilantro around the edges for a pop of color. For a dip (because why not?), I love serving these with a side of extra salsa, a cool avocado crema (just blend an avocado with some sour cream, lime, and salt), or a simple chipotle ranch.
For packable lunches, place 4-5 pinwheels in a container with some crunchy veggies like bell pepper strips or cucumber slices. They’re perfectly portable and stay delicious cold. They’re also fantastic as a hearty, protein-packed snack after a workout or during that mid-afternoon slump.
Make It Your Own: 5 Tasty Twists
Once you master the basic roll, the flavor world is your oyster! Here are some of my favorite spins.
- Buffalo Blue Cheese: Swap the salsa for 2-3 tbsp of Buffalo sauce. Use shredded cooked chicken tossed in a bit more Buffalo sauce. Replace the cheddar with crumbled blue cheese and add a stalk of finely chopped celery for crunch.
- Ranch & Veggie: Use 1 tbsp of dry ranch seasoning mix instead of the chili powder and cumin. Add ¼ cup each of finely diced red bell pepper and shredded carrots to the filling for a veggie-packed version kids love.
- Turkey Club: Use shredded roast turkey or diced ham. Replace the salsa with 2 tbsp of mayonnaise. Add 2 tbsp of cooked, crumbled bacon and some finely shredded romaine lettuce (add the lettuce just before rolling to keep it crisp).
- Spicy Black Bean (Veggie): Omit the chicken. Use one 15-oz can of black beans, rinsed, drained, and slightly mashed. Keep the spices, add an extra ¼ cup of corn, and throw in some diced avocado right before serving.
- Everything Bagel: Mix 2 tbsp of everything bagel seasoning into the cream cheese base. Use smoked salmon (or keep the chicken) and add some thinly sliced red onion and capers. A divine brunch option!
Beau’s Kitchen Notes
This recipe is a living, breathing thing in my house. I’ve made it probably a hundred times, and it’s evolved from that first desperate potluck attempt. My wife’s favorite version now includes a hidden layer of mashed avocado spread under the chicken mixture—it adds an incredible creaminess. I also learned the hard way that using a super watery salsa makes for a soggy tortilla (lesson learned after one sad, falling-apart batch).
The biggest laugh came when I once accidentally used cinnamon instead of cumin. Let’s just say “Southwest” took on a very… unexpected, dessert-like dimension. Not my finest hour, but a great reminder to always smell your spices before dumping them in! Now, I keep my cumin on a different shelf entirely.
Your Questions, Answered
Q: Can I make these ahead of time?
A: Absolutely! They are the ultimate make-ahead appetizer. You can assemble the logs, wrap them tightly in plastic, and store them in the fridge for up to 24 hours before slicing and serving. You can also slice them and store the pinwheels in a single layer in an airtight container for a day.
Q: My tortillas keep cracking when I roll. Help!
A: This usually means the tortillas are too cold or dry. The microwave trick is key: wrap them in a slightly damp paper towel and heat for 10-15 seconds until pliable. Also, don’t overfill them—a thinner, even layer of filling rolls much more easily than a thick, chunky one.
Q: Can I use a different protein?
A: Of course! Shredded pork (carnitas style), drained canned tuna or chicken, or even finely chopped cooked shrimp are all fantastic. Adjust the seasonings to match your protein.
Q: Why is my filling mushy/runny?
A: Two likely culprits: the salsa was too liquidy, or you didn’t chill them long enough. Next time, drain your salsa in a fine-mesh strainer for a few minutes. And patience, young grasshopper! That chill time is essential for a clean cut.

Southwest Chicken Pinwheels : Creamy, Zesty & Ready to Roll
Description
These Southwest Chicken Pinwheels are the kind of recipe everyone asks for after the party. They’re creamy, zesty, and full of bold Tex-Mex flavor—yet they take just minutes to prep and don’t require an oven. Perfect for potlucks, game day, lunchboxes, or quick snacks, they’re proof that simple ingredients can deliver big results.
Ingredients
-
2 large flour tortillas (10-inch, burrito size)
-
1½ cups cooked chicken, shredded
-
4 oz cream cheese, softened
-
2 tablespoons salsa (thick style works best)
-
¼ cup shredded cheddar or pepper jack cheese
-
2 tablespoons green onions, finely chopped
-
½ teaspoon chili powder
-
½ teaspoon ground cumin
Optional add-ins:
-
Chopped cilantro
-
Diced jalapeños (for heat)
-
Drained corn or black beans
-
Instructions
-
Mix the base
In a bowl, stir together softened cream cheese, salsa, chili powder, and cumin until smooth. -
Add filling ingredients
Fold in shredded chicken, cheese, and green onions (plus any optional add-ins). -
Assemble
Lay tortillas flat. Spread the filling evenly over each tortilla, leaving about a 1-inch border at the top. -
Roll tightly
Starting from the bottom, roll each tortilla into a tight log. -
Chill
Wrap rolls in plastic wrap and refrigerate for at least 30 minutes (1–2 hours is best). -
Slice & serve
Use a sharp knife to slice into 1-inch pinwheels. Discard ends or save for snacking.
Notes
-
Warm tortillas briefly to prevent cracking when rolling.
-
Don’t overfill—a thinner layer rolls cleaner and slices better.
-
Use thick salsa or drain it slightly to avoid sogginess.
-
Chilling is key for neat, picture-perfect pinwheels.
Nutritional Snapshot
Please note: The following is an approximate estimate for 5 pinwheels (about ¼ of the recipe), calculated using standard ingredients. Values will vary based on specific brands and optional add-ins used.
- Calories: ~260
- Protein: 18g (Great for staying full!)
- Carbohydrates: 16g
- Fat: 15g
- Fiber: 2g
These pinwheels offer a good balance of protein, carbs, and fats, making them a satisfying snack or light meal. To boost the fiber, you can use a whole wheat or spinach tortilla and add those black beans or corn. Using reduced-fat cream cheese is an easy swap to lower the calorie count slightly, though I’m a fan of the full-flavor original.
Ready, Set, Roll!
And there you have it, friends—the complete guide to the most requested, easiest-to-make, flavor-packed party snack in my arsenal. These Southwest Chicken Pinwheels are more than just a recipe; they’re a reminder that cooking should be fun, flexible, and focused on bringing people together over seriously good food.
I hope you give them a whirl for your next gathering, lunch prep, or just because. When you do, I’d love to hear about it! Tag me on social @Feastical or drop a comment on the blog. Tell me which variation you tried or the story behind who you shared them with. Because that’s what this kitchen community is all about. Now, go forth and roll with confidence!
Final Thoughts: More Than Just a Recipe
Southwest Chicken Pinwheels aren’t just a snack; they’re a reminder of what makes sharing food so special. They represent that beautiful intersection where minimal effort meets maximum reward, where simple ingredients transform into something that genuinely brings people together.
In a world of complicated recipes and endless grocery lists, this dish is a testament to the power of pantry staples and a little creativity. It’s the recipe you’ll memorize, the one you’ll gift to a new neighbor, and the trusty fix you’ll turn to when life says, “You need to bring something in an hour.”
At Feastical, we believe the heart of a great meal isn’t perfection—it’s connection. It’s the story behind the first potluck attempt, the laugh over a spice mix-up, and the quiet pride of watching something you made become the centerpiece of a gathering. These pinwheels carry that spirit in every roll.
So, whether you’re sticking to the classic blueprint or embarking on your own flavorful twist, remember: the real secret ingredient is the joy you fold into it. Now go forth, roll up something delicious, and create your own little moments of shared happiness.
Happy cooking, friends!
Beau | Feastical
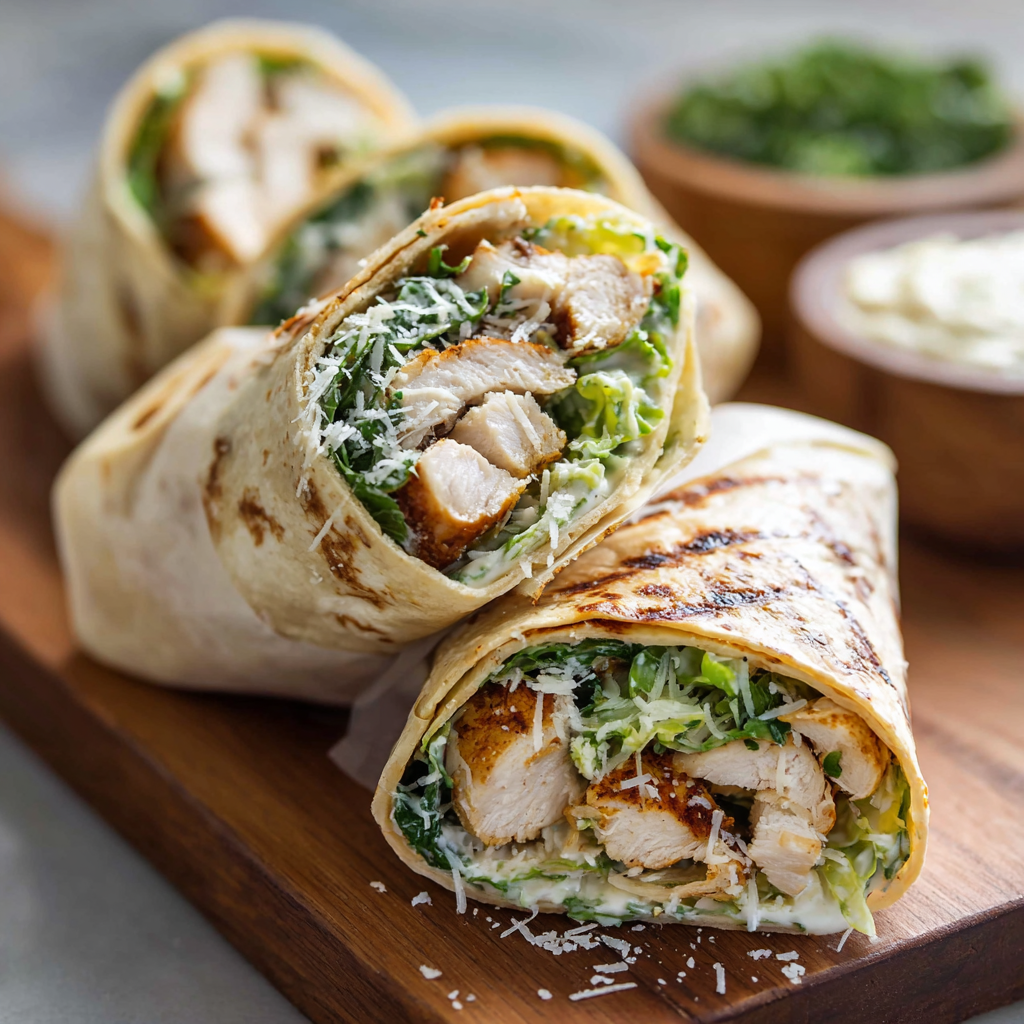
Chicken Caesar Wrap Boxes : Crisp, Savory & Perfect for Meal Prep
Chicken Caesar Wrap Boxes: Your Crispy, Savory Lunch Game-Changer
Hey friend, Beau here! Let’s get real for a second. How many times have you stared into the fridge on a Monday morning, hoping a delicious, satisfying lunch would magically appear? Or worse, you’ve committed to a sad desk salad that leaves you rummaging for snacks by 2 PM? I’ve been there more times than I care to admit. That exact cycle of lunchtime letdown is what sparked the creation of these little miracles: Chicken Caesar Wrap Boxes.
Imagine this: all the bold, creamy, tangy, and savory flavors of a classic Caesar salad—the one you love to order at that little Italian spot—but wrapped up tight and ready to hit the road. We’re talking juicy grilled chicken, shards of salty parmesan, and that signature dressing clinging to every crisp piece of romaine, all bundled in a soft, pliable tortilla. This isn’t just a wrap; it’s a complete, fuss-free meal you can pack with pride.
I built Feastical on the idea that good food should bring joy, not stress, and this recipe is that philosophy in lunchbox form. It’s for the busy parents, the work-from-home warriors, the students, the adventurers—anyone who needs a reliable, delicious fuel-up that doesn’t require a microwave or a fancy plate. The best part? By keeping the dressing on the side until the very last second, you guarantee every bite has that perfect CRUNCH. No soggy tortilla disasters here, my friend. So, grab your favorite meal prep containers and let’s build a lunch you’ll actually look forward to.
The Wrap That Saved a Rainy Day Picnic
This recipe was born from a classic “Plan B” moment, and honestly, those often lead to the best kitchen creations. A few summers back, I had planned an elaborate picnic for some friends—think checkered blanket, a wicker basket, the whole nine yards. The menu was a big, beautiful Caesar salad with grilled chicken breasts, lovingly packed in a giant glass bowl. You can probably see where this is going.
Five minutes after leaving my house, the skies opened up. Total downpour. Picnic: canceled. But friends were already on their way to my place, and the hunger was real. Staring at the pre-chopped romaine, chicken, and dressing, I had a lightbulb moment. I yanked some large tortillas from the fridge, warmed them up, and started piling everything in. We rolled them up, sliced them in half, and ate our “picnic” at the kitchen counter, laughing about the ruined plans.
The unanimous verdict? “This is WAY better than a salad!” The tortilla kept everything contained and mess-free, each hand-held half was packed with flavor, and we could all chat without balancing plates on our knees. That happy accident showed me the power of the wrap. It transformed a sit-down salad into a portable, shareable, utterly delightful experience. Now, I intentionally make them for easy lunches, knowing they carry that little memory of a perfectly imperfect day with friends.
Gathering Your Flavor Arsenal
Here’s what you’ll need to make four seriously satisfying wrap boxes. I’ve added my chef notes and swaps so you can make this recipe work with what you’ve got!
- 2 cups cooked chicken breast, sliced or shredded: This is your protein powerhouse! I love the smoky char from a grilled chicken breast, but a store-bought rotisserie chicken is the ultimate time-saver. Poached or baked works great, too. For a vegetarian twist, chickpeas or crispy baked tofu are fantastic stand-ins.
- 4 large flour tortillas or wraps (10-inch size): The vessel of joy! I prefer classic flour tortillas for their pliability, but spinach or sun-dried tomato wraps add great color and flavor. For a gluten-free option, look for sturdy GF wraps or even large collard green leaves for a fresh, crisp wrap.
- 4 cups chopped romaine lettuce: The CRUNCH factor. Romaine has the perfect structure—crisp and hearty enough to hold up to the dressing without wilting immediately. Hearts of romaine are the sweetest, most tender part. (Insider tip: After washing, spin your lettuce like crazy in a salad spinner and then pat dry with paper towels. Dry lettuce is the #1 secret to a non-soggy wrap!)
- ½ cup shaved parmesan cheese: Salty, nutty, umami magic. Please, for the love of flavor, get a block of Parmigiano-Reggiano or Pecorino Romano and shave it yourself with a vegetable peeler. The pre-grated stuff in a canister just won’t melt in your mouth the same way. In a pinch, a good crumbled feta can offer a similar salty punch.
- ½ cup Caesar dressing: The creamy, garlicky glue that binds it all together. Use your favorite brand, or go the extra mile with my easy 5-minute homemade version. Pack this in a separate small container or reusable sauce cup to maintain wrap integrity until lunchtime.
- Optional, but highly encouraged:
- Croutons on the side: For that final, epic crunch. Pack them separately so they stay crunchy.
- Halved cherry tomatoes: A pop of juicy sweetness that cuts through the richness.
- A squeeze of fresh lemon: A bright spritz right before eating elevates everything.
Let’s Build Your Lunchbox Masterpiece
This is the fun part! Follow these steps, and you’ll have four perfect wrap boxes ready in about 15 minutes flat.
- Prep Your Station: Get all your ingredients out and ready to go (chefs call this mise en place—it just makes everything smoother). If your chicken is cold from the fridge, give it a quick dice or shred. Chop your romaine, shave your parmesan. Having everything within arm’s reach turns you into a wrap-assembling ninja.
- Warm Your Tortillas: This is the BEST hack for crack-free wrapping! Simply heat a dry skillet over medium heat for 30 seconds, or microwave the stack of tortillas between damp paper towels for 15-20 seconds. The heat makes the tortillas soft and pliable, so they roll without splitting. No one wants a busted wrap!
- Layer with Love: Lay a warm tortilla flat on your cutting board. In the lower third (closer to you), create a hearty pile. Start with a generous handful of that super-dry romaine. Then, add a quarter of your chicken. Finally, scatter a good amount of shaved parmesan on top. Why layer in this order? The lettuce acts as a barrier between the moist chicken and the tortilla, providing an extra layer of sogginess protection.
- The Art of the Roll: Here’s the technique for a tight, secure wrap: Fold the left and right sides of the tortilla inward over the filling. Then, starting from the bottom edge closest to you, use your fingers to tuck the tortilla snugly over the filling and roll it forward tightly, away from you. Keep it firm and even. Once fully rolled, place it seam-side down. The weight of the wrap will help seal it. You can slice it in half on a sharp diagonal now (it looks prettier!) or leave it whole for packing.
- Pack Like a Pro: Grab your meal prep containers. Place your wrap (or halves) inside. If you’re adding tomatoes, put them in their own little section. Your croutons and dressing get their own separate, small containers or compartments. This modular approach is the golden rule for meal prep success—it keeps every element in perfect condition until you’re ready to eat.
How to Serve & Savor
When lunchtime hits, the real fun begins! Take your wrap box and your little container of dressing. The key move: drizzle the Caesar dressing directly into the open ends of the wrap roll. Tilt and rotate it so the dressing trickles down inside, coating the chicken and lettuce. If you sliced it in half, you can even peel the tortilla back slightly to get more dressing in there. Then, sprinkle your reserved croutons right into the wrap or over the top for that final satisfying crunch. Enjoy it straight from your hands—it’s the most delicious, mess-contained package!
If you’re serving these at home for a casual dinner or gathering, line them up on a big wooden board with bowls of extra dressing, croutons, and lemon wedges so everyone can customize. Pair it with a simple fruit salad or a cup of tomato soup for the ultimate comfort meal.
Mix It Up! 5 Delicious Twists
Once you’ve mastered the classic, try these fun variations to keep your taste buds dancing:
- Greek Chicken Wrap Box: Swap the Caesar for tzatziki sauce, use grilled chicken seasoned with oregano and lemon, and add diced cucumber, red onion, kalamata olives, and crumbled feta cheese.
- “Everything Bagel” Salmon Wrap: Replace the chicken with flaked smoked salmon or leftover grilled salmon. Use a cream cheese schmear mixed with a little lemon juice and dill as your “dressing,” and add capers, thinly sliced red onion, and a sprinkle of everything bagel seasoning on the lettuce.
- Buffalo Chicken Caesar: Toss your shredded chicken in ¼ cup of Buffalo wing sauce before assembling. Add a drizzle of blue cheese dressing alongside the Caesar, and pack some celery sticks on the side for dipping and crunch.
- Vegan Power Wrap: Use crispy chickpeas or marinated baked tofu. Make a vegan Caesar dressing (blended cashews or a vegan mayo base), and swap the parmesan for a sprinkle of nutritional yeast or vegan parm.
- Keto/Low-Carb Style: Ditch the tortilla and use large, sturdy romaine lettuce leaves as your wrap instead. You’ll get double the Caesar greens and all the flavor without the carbs. Just pack the filling and dressing separately and assemble at mealtime.
Beau’s Kitchen Notes
Over the years, this recipe has become a true workhorse in my kitchen. I’ve made it for countless clients, friends, and for myself on busy production days. The biggest evolution was learning that the separate dressing pack isn’t just a suggestion—it’s the commandment for wrap happiness. I once made the mistake of dressing them all ahead of time for a hiking trip… let’s just say we had a very sad, mushy lunch by the time we reached the summit. Lesson learned!
Also, don’t be afraid to play with the chicken seasoning. A simple sprinkle of garlic powder, smoked paprika, and salt before cooking can add a whole new dimension. This recipe is your canvas. Make it yours!
Your Questions, Answered
Q: How far in advance can I make these for meal prep?
A: The components will keep beautifully for 3-4 days in the fridge. The key is storing them UNASSEMBLED or at least with the dressing separate. Pack the chopped lettuce, chicken, and cheese in one container, the tortillas in a bag, and the dressing in its own cup. Assemble the wrap the morning you plan to eat it for the absolute best texture.
Q: My wrap always falls apart when I roll it. Help!
A: Two likely culprits! First, you might be overfilling it. Keep the filling snug in the lower third. Second, your tortilla might be too cold. Always warm it first—it makes a world of difference. And remember that folding-in-the-sides step; it creates a neat package to roll.
Q: Can I freeze these wrap boxes?
A: I don’t recommend freezing the fully assembled wraps, as the lettuce will turn to mush upon thawing. However, you can absolutely freeze the cooked, seasoned chicken in portions. Thaw it in the fridge overnight, and you’re halfway to a fresh wrap box in minutes.
Q: What’s the best store-bought Caesar dressing if I don’t want to make my own?
A: I’m a fan of brands that use anchovies for that authentic, savory depth (they’re traditional in Caesar dressing!). Look for options in the refrigerated section near the produce, as they often have cleaner ingredients. But truly, use what you love—even a simple garlic-herb mayo can work in a pinch.
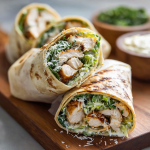
Chicken Caesar Wrap Boxes : Crisp, Savory & Perfect for Meal Prep
Description
If you love a classic chicken Caesar salad but want something more filling and portable, these Chicken Caesar Wrap Boxes are the answer. They’re fresh, satisfying, and easy to prep ahead—perfect for school, work, or busy days when you still want a lunch you’ll actually enjoy. Keeping the dressing on the side ensures every bite stays crisp and flavorful.
Ingredients
-
2 cups cooked chicken breast, sliced or shredded
-
4 large flour tortillas (10-inch wraps)
-
4 cups romaine lettuce, chopped and very dry
-
½ cup shaved Parmesan cheese
-
½ cup Caesar dressing (packed separately)
Optional add-ins (packed separately):
-
Croutons
-
Cherry tomatoes, halved
-
Lemon wedges
Instructions
-
Prepare ingredients
Chop the romaine, slice or shred the chicken, and shave the Parmesan. -
Warm tortillas
Lightly warm tortillas in a skillet or microwave (15–20 seconds) so they’re soft and easy to roll. -
Assemble wraps
Lay a tortilla flat. In the lower third, add romaine, chicken, and Parmesan. -
Roll tightly
Fold in the sides, then roll up firmly from the bottom. Slice in half if desired. -
Pack the boxes
Place wraps in meal prep containers. Pack Caesar dressing, croutons, and tomatoes separately to keep everything fresh. -
Serve
Drizzle dressing into the wrap just before eating, add croutons if using, and enjoy.
Notes
-
Dry lettuce is key: Wet lettuce causes soggy wraps—spin and pat dry well.
-
Dressing on the side: This keeps wraps fresh for meal prep (up to 3–4 days).
-
Shortcut chicken: Rotisserie chicken saves time and works perfectly.
-
Health swap: Use whole-wheat or low-carb tortillas if preferred.
Nutritional Information*
Here’s a general breakdown per wrap (using a standard large flour tortilla, 3oz chicken, and 2 Tbsp of a classic Caesar dressing). Remember, these are estimates—your specific brands and portions will vary!
Per Wrap (approximate): 380 calories | 30g protein | 22g carbs (2g fiber) | 18g fat
This wrap box is a fantastic balanced meal, offering a solid dose of lean protein to keep you full, healthy fats for satisfaction, and carbs for energy. To lower the calories or carbs, you can use a low-carb tortilla, a lighter dressing, or load up on extra veggies like spinach or shredded carrots.
*Nutritional information is provided as a courtesy and is an estimate based on online calculators. For precise dietary needs, please calculate using your specific ingredients.
Ready to Revolutionize Your Lunch?
And there you have it, friends—your passport to a week of lunches you’ll genuinely get excited about. These Chicken Caesar Wrap Boxes are more than just a recipe; they’re a strategy. A strategy for eating well, saving time, and bringing a little bit of café-quality flavor to your everyday routine.
The true beauty lies in their simplicity and flexibility. Make them exactly as written for a classic hit, or use the variation ideas to spin them into something new each week. Food should be fun, nourishing, and, above all, shared (even if you’re just sharing the idea with your future, well-fed self).
Final Thoughts
What started as a desperate kitchen rescue on a rainy day has become one of my most trusted, joy-spreading recipes. These Chicken Caesar Wrap Boxes are more than just a convenient lunch—they’re a little reminder that sometimes the best plans are the ones that fall apart, making space for something even better.
This isn’t about perfection. It’s about a delicious, reliable meal that fits into your real life. It’s for the mornings you’re rushing out the door, the afternoons you need a crunchy, savory pick-me-up, and the evenings you want something satisfying without a sink full of dishes.
The magic is in the method: keep it separate, keep it crunchy, and build it with love. That simple philosophy turns basic ingredients into a lunchbox you’ll actually crave. You’re not just packing food; you’re packing a moment of delight for your future self.
So here’s to ditching the sad desk lunch. To wraps that hold tight and flavors that pop. To meals that feel special without the stress. I hope this recipe becomes a staple in your rotation, adapting to your cravings and inspiring your own kitchen experiments.

Buffalo Chicken Nuggets : Spicy Bites with Endless Dip Combos
The Ultimate Dinnertime Win: Nuggets That Actually Pack a Flavor Punch
Hey friends, Beau here! Let’s talk about a universal truth: everyone loves chicken nuggets. From the littlest kitchen helper to the most seasoned foodie at the tailgate, there’s something irresistibly fun about picking up a perfectly crispy bite and diving it into something delicious. But let’s be real—sometimes, the freezer aisle version just… doesn’t hit the spot. They can be bland, boring, and leave you wondering where the actual chicken went.
That’s why I’m so fired up to share my recipe for homemade Buffalo Chicken Nuggets. We’re not just making nuggets; we’re crafting little golden vessels of joy, coated in a crispy, craggy exterior that gives way to juicy, tender chicken, all tossed in that iconic, tangy, spicy buffalo sauce. The magic, though, doesn’t stop with the sauce. The real game-changer here is the dip. This recipe is your canvas, and the dips are your palette. Want cool and creamy ranch one night and zesty garlic yogurt the next? Go for it! That’s the Feastical philosophy: food should be full of flavor, fun to make, and flexible enough to match your mood.
Imagine this: a platter of these glistening, spicy nuggets in the center of the table, surrounded by a rainbow of dipping bowls. It’s a meal that sparks conversation, satisfies cravings, and is secretly way easier to make than you think. So, tie on your apron, grab your favorite bowl for mixing, and let’s turn a classic concept into your new go-to comfort food masterpiece. Your spatula and your taste buds are gonna thank you.
More Than a Game Day Snack: A Sauce-Spattered Memory
This recipe takes me straight back to my first “grown-up” apartment, where the kitchen was so small you could practically stir the pasta from the couch. My buddies and I were glued to the TV for a huge game, and I, as the resident “food guy,” was on snack duty. Wings were the obvious choice, but they felt fussy for our cramped setup. Then, inspiration struck (probably born from desperation and a well-stocked pantry). What if I took the simple, crowd-pleasing shape of a nugget and drenched it in all the buffalo flavor we craved?
The result was a beautiful, sauce-splattered mess of triumph. We stood around my tiny counter, fingers glistening, debating the superior dip (I was team blue cheese, my friend Sam will forever swear by ranch), and going through napkins like they were going out of style. Those nuggets weren’t just food; they were the centerpiece of laughter, heckling at the refs, and that perfect feeling of togetherness. That’s the spirit I want to bring to your kitchen. You don’t need a fancy setup or a special occasion—just a craving for something deliciously fun.
Gathering Your Flavor Arsenal: It’s All About the Texture & Tang
Here’s everything you’ll need to create these crispy, spicy bites. I’ve added my two cents on each ingredient because knowing the “why” makes you a more confident cook!
- 1½ lbs boneless, skinless chicken breasts: The star of the show! I prefer breasts for their lean, even shape which makes for perfect nugget-uniformity. Chef’s Insight: For even more tender nuggets, you can use chicken thighs. They have more fat and will stay incredibly juicy.
- Salt & pepper to taste: The fundamental wake-up call for your chicken. Don’t be shy here—seasoning the meat itself is step one for great flavor.
- ½ cup all-purpose flour: Our first layer of the crispy-coat trifecta. It creates a dry base for the egg to stick to, which locks in the chicken’s juices. Sub Tip: For a gluten-free version, swap with almond flour or your favorite GF blend.
- 2 large eggs, beaten: The glorious, sticky “glue” that holds our crispy shell onto the chicken. Whisk them well with a fork until they’re fully blended.
- 1 cup panko breadcrumbs: The secret to an ultra-crispy, shatteringly good crust! Panko crumbs are airier and flakier than regular breadcrumbs. Chef’s Insight: For a deeper flavor, toast the panko in a dry skillet for a few minutes before using. It’s a game-changer!
- Oil for baking or air frying: A high-heat oil like avocado, canola, or light olive oil is perfect. We’re not deep-frying, but a light spray or brush helps achieve that golden brown color.
For The Signature Buffalo Sauce:
- ¼ cup hot sauce (like Frank’s RedHot): The non-negotiable heart of the sauce. Frank’s has the perfect vinegar-forward tang. Sub Tip: Any cayenne pepper-based hot sauce will work, but the flavor profile will change slightly.
- 2 tbsp unsalted butter, melted: Butter mellows the sharp heat of the sauce and helps it cling to every nook and cranny of the nuggets. It’s what makes the flavor rich and rounded.
- 1 tsp honey (optional but recommended): My little balancing act. A touch of sweetness cuts through the vinegar and heat beautifully. For a stricter traditional wing sauce, you can skip it.
Let’s Build Some Crunch: A Step-by-Step Dance in the Kitchen
Don’t let the three-step coating process intimidate you! Think of it as a simple, satisfying assembly line. I’ll walk you through each step with all my favorite hacks.
Step 1: The Setup & Chicken Prep. First, preheat your oven to 425°F (or your air fryer to 400°F). Line a baking sheet with parchment paper or foil for easy cleanup. Now, take your chicken breasts and pat them dry with a paper towel—this is crucial for the coating to stick! Cut them into 1 to 1.5-inch bite-sized pieces. Not too big, not too small. Think “perfect two-bite” size. Season them all over with salt and pepper. Chef’s Hack: Use one hand for your dry ingredients (flour, panko) and one hand for your wet (egg). This keeps you from getting “club hand” – you know, that dreaded glob of batter-covered fingers!
Step 2: The Coating Trifecta. Set up three shallow bowls or plates in a row. Bowl 1: flour. Bowl 2: beaten eggs. Bowl 3: panko breadcrumbs. Take a chicken piece, dredge it in the flour, and shake off any excess. Next, dunk it fully into the egg, letting the excess drip off. Finally, press it firmly into the panko, ensuring it’s fully coated on all sides. Place it on your prepared baking sheet. Repeat with all pieces, giving them a little space on the sheet so they crisp up evenly, not steam.
Step 3: The Bake (or Air Fry) & Sauce Toss. Lightly spray or brush the tops of your coated nuggets with oil. This promotes browning. Bake for 15-18 minutes, flipping them halfway through, until they are deeply golden brown and the chicken is cooked through (internal temp of 165°F). If using an air fryer, cook in a single layer (you may need batches) for about 12-15 minutes, shaking the basket halfway. While they cook, whisk together your buffalo sauce ingredients in a large bowl. As soon as the nuggets are out of the oven and hot, add them to the bowl with the sauce. Gently toss and fold until every nugget is gloriously coated. Pro Tip: Tossing them while hot helps the sauce seep into the crispy layers just a bit.
Plate It Pretty (or Just Dive In!)
Presentation is part of the fun! I love serving these family-style on a big, rustic wooden board or a vibrant platter. Scatter some celery sticks and carrot batons around the edge for that classic, crunchy, cooling contrast. Then, get creative with your dips! Use small ramekins, little jars, or even shot glasses to hold an array of dipping options. Label them with cute chalkboard tags if you’re feeling fancy. It transforms dinner into an interactive experience. For a casual weeknight, just pile them high on a plate with a big dollop of your favorite dip on the side. No rules, just enjoyment. The goal is to make it inviting and fun—because you’ve just made something amazing from scratch.
Make It Your Own: 5 Flavorful Twists
The beauty of this base recipe is its adaptability. Here are some ways to play with the formula:
- Sweet & Smoky BBQ Swap: Replace the buffalo sauce with ⅓ cup of your favorite BBQ sauce mixed with 1 tbsp of melted butter. Finish with a sprinkle of smoked paprika.
- Nashville Hot Style: After baking, toss nuggets in a spicy oil made with 3 tbsp melted butter or oil, 1 tbsp cayenne pepper, 1 tsp brown sugar, and ½ tsp garlic powder. Serve with pickles and white bread for the full experience.
- Parmesan Herb Crust: Mix ½ cup grated Parmesan into the panko breadcrumbs. Add 1 tsp each of dried oregano and garlic powder. Skip the buffalo toss and serve with marinara for a chicken parm nugget vibe.
- Gluten-Free & Air Fryer Favorite: Use almond flour and gluten-free panko. Cook in the air fryer for an unbelievably crispy result that’s also GF. The sauce is naturally gluten-free!
- Meal Prep Magic: After coating, freeze the uncooked nuggets in a single layer on a sheet, then transfer to a bag. Bake from frozen, adding 5-7 minutes to the cook time. Perfect for quick lunches or dinners!
Beau’s Corner: Notes from a Sauce-Splattered Apron
This recipe has evolved from that first messy apartment experiment. I’ve learned that doubling the sauce recipe is never a bad idea—some folks (me) like them extra saucy. I’ve also found that letting the coated nuggets rest on the sheet for 5-10 minutes before baking helps the coating really set, minimizing fallout. And a funny story? I once tried to “streamline” the process by mixing the flour, egg, and panko all in one bowl. Do not recommend. It created a bizarre, lumpy paste that turned into a singular, nugget-shaped monstrosity in the oven. We ate it anyway (waste not, want not!), but the three-bowl method is sacred for a reason. Trust the process!
Your Questions, Answered
Q: My coating is falling off! What did I do wrong?
A: The most common culprit is not shaking off the excess flour or egg. A light, even coat at each stage is key. Also, ensure your chicken is patted dry before you start. A wet surface is the enemy of adhesion.
Q: Can I make these ahead of time?
A: Absolutely! You can coat the nuggets and refrigerate them on the sheet pan, covered, for up to 4 hours before baking. You can also freeze them uncooked (see variation above) for future you.
Q: How do I keep them crispy after saucing?
A> Serve them immediately! The sauce will eventually soften the crust, which is part of its charm. If you need to hold them, keep the sauce and nuggets separate until just before serving. You can also keep cooked, unsauced nuggets warm and crisp in a 200°F oven.
Q: Are these too spicy for kids?
A> You control the heat! Set aside a few un-sauced nuggets for the kids, or use a milder hot sauce. The honey also really helps tame the spice level.
Buffalo Chicken Nuggets : Spicy Bites with Endless Dip Combos
Description
Everyone loves chicken nuggets—but these homemade Buffalo Chicken Nuggets bring real flavor. They’re crispy on the outside, juicy inside, and tossed in a tangy, buttery buffalo sauce. Easy enough for a weeknight, fun enough for game day, and perfect with your favorite dips.
Ingredients
For the nuggets
-
1½ lb boneless, skinless chicken breasts, cut into bite-size pieces
-
Salt and black pepper, to taste
-
½ cup all-purpose flour
-
2 large eggs, beaten
-
1 cup panko breadcrumbs
-
Cooking oil spray or 2 tbsp neutral oil (canola, avocado)
For the buffalo sauce
-
¼ cup hot sauce (Frank’s RedHot or similar)
-
2 tbsp unsalted butter, melted
-
1 tsp honey (optional, for balance)
For serving (optional)
-
Ranch or blue cheese dressing
-
Celery and carrot sticks
Instructions
-
Preheat
-
Oven: 425°F (220°C)
-
Or Air Fryer: 400°F (200°C)
-
-
Season the chicken
Pat chicken dry and season lightly with salt and pepper. -
Set up coating station
-
Bowl 1: flour
-
Bowl 2: beaten eggs
-
Bowl 3: panko breadcrumbs
-
-
Coat the chicken
Dredge each piece in flour → dip in egg → press into panko.
Place on a lined baking sheet, leaving space between pieces. -
Cook
-
Oven: Spray lightly with oil and bake 15–18 minutes, flipping halfway.
-
Air Fryer: Cook in a single layer for 12–15 minutes, shaking halfway.
Chicken should be golden and reach 165°F (74°C) internally.
-
-
Make the sauce
Whisk hot sauce, melted butter, and honey in a large bowl. -
Toss & serve
Add hot nuggets to the sauce and gently toss until coated. Serve immediately with dips.
Notes
-
Extra crispy: Toast panko breadcrumbs in a dry skillet for 2–3 minutes before coating.
-
No soggy nuggets: Toss in sauce right before serving.
-
Milder heat: Use less hot sauce or add extra honey.
-
Gluten-free option: Use gluten-free flour and GF panko.
-
Juicier nuggets: Chicken thighs work great if you prefer darker meat.
Nutritional Breakdown (Because Knowledge is Power!)
Here’s a general estimate per serving (about ¼ of the recipe), assuming baking and using all the sauce. Remember, dips will add to these numbers. Using an air fryer may slightly reduce fat content.
- Calories: ~350
- Protein: 30g (Excellent source! Chicken is a powerhouse.)
- Carbohydrates: 18g (Primarily from the panko and flour for that essential crunch.)
- Fat: 18g (Comes from the chicken, egg, butter in sauce, and coating oil.)
- Sugar: 1g (Only from the optional honey, making this a relatively low-sugar savory treat.)
This is a balanced meal when paired with veggie sticks and a sensible dip choice. Using lean chicken breast keeps the protein high and fat in check.
The Last Bite
And there you have it, friends—your new secret weapon for a guaranteed smile at the dinner table. These Buffalo Chicken Nuggets prove that a little effort in the coating department pays off in massive flavor and fun. They’re a celebration of texture, a playground for dips, and a recipe that’s as comfortable on a Tuesday night as it is at a Saturday gathering.
I hope this recipe brings as much laughter and satisfaction to your kitchen as it has to mine. Remember, cooking isn’t about perfection; it’s about the joy of creating and sharing. So if a little sauce drips on the floor, or your nuggets aren’t all geometrically identical, it’s all good. You made something delicious from scratch, and that’s always worth celebrating.
Now, I’ve gotta know—what’s your ultimate dip combo? Tag me over on @Feastical when you make these! Until next time, keep your kitchen messy and your heart full.
Happy cooking,
Beau
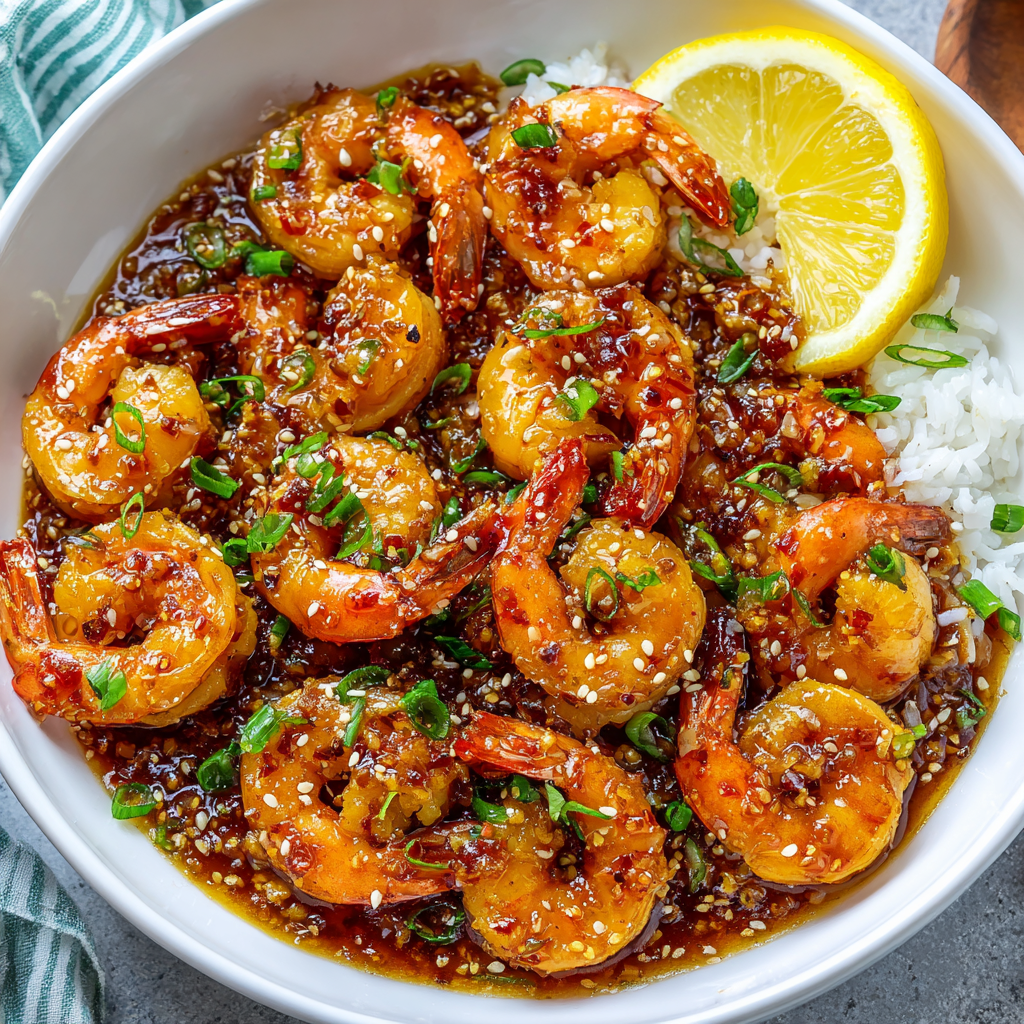
High-Protein Honey Garlic Shrimp : The Ultimate Sweet & Savory Power Meal
High-Protein Honey Garlic Shrimp – The Ultimate Sweet & Savory Power Meal
Hey there, friend! Beau here from Feastical, and I am so fired up to share this recipe with you today. You know that feeling when you’re staring into the fridge at 6 PM, your stomach is grumbling like a disgruntled bear, and you need something fast, flavorful, and actually good for you? Yeah, we’ve all been there. That’s precisely why this High-Protein Honey Garlic Shrimp is about to become your new weeknight superhero.
Imagine this: plump, juicy shrimp, seared to perfection, then glazed in a sticky, glossy sauce that’s the perfect dance of sweet honey, punchy garlic, and savory soy. It’s a flavor bomb that hits every single note. The best part? It comes together in under 20 minutes, from fridge to fork. Seriously. In the time it takes to order takeout and wonder where your driver is, you could be sitting down to a restaurant-quality meal that fuels your body with lean protein and smiles.
Whether you’re meal-prepping for the week ahead, need an impressive but easy dinner for friends, or just want to treat yourself to something truly delicious, this dish is your answer. It’s bold, balanced, and built to make you feel awesome. So, tie on your apron, grab your favorite skillet, and let’s make magic happen. Trust me, your taste buds will send you a thank-you note.
My First Shrimp-Scampi-Adjacent Adventure
This recipe always takes me back to my first “fancy” dinner attempt. I was maybe 19, trying to impress a date (spoiler: it worked!). I’d saved up for some jumbo shrimp and decided to wing a garlic-butter situation. Let’s just say, I learned a few critical lessons that night: one, garlic burns faster than you think, and two, a little sweetness can save the day.
My sauce turned a bit… aggressive. In a panic, I squirted in some honey from a bear-shaped bottle sitting on the counter. That sweet gloss tamed the bitter garlic and created something incredible. We licked the plates clean. That kitchen “rescue” taught me the power of the sweet-and-savory combo and that the best recipes often come from a little improvisation. This Honey Garlic Shrimp is the polished, protein-packed grandchild of that chaotic, delicious first try. It’s proof that great food doesn’t need to be complicated—just heartfelt and full of flavor.
Gathering Your Flavor Arsenal
Here’s everything you’ll need to create this simple masterpiece. I’ve included my chef-y notes and swaps so you can make it your own!
- 1 lb large shrimp, peeled and deveined – The star! I get “16/20 count” (that means 16-20 shrimp per pound). They’re meaty and cook evenly. Pro-tip: For ultimate ease, buy them already peeled and deveined. If they’re frozen, just thaw them overnight in the fridge or under cool running water. Pat them bone-dry with paper towels—this is the secret to a good sear!
- 1 tablespoon olive oil – Our cooking fat. Avocado oil works great here too for its high smoke point.
- Salt and pepper to taste – The essential seasonings. We go light on salt here because the soy sauce brings plenty.
- 1 tablespoon cornstarch (optional) – My little hack for extra crispiness! A light dusting creates a delicate, golden crust on the shrimp and helps the glorious sauce cling even better.
For the Legendary Honey Garlic Sauce:
- 3 tablespoons honey – Nature’s perfect sweetener. It creates that irresistible sticky glaze. For a deeper flavor, try pure maple syrup. For a sugar-free version, a monk fruit maple syrup works surprisingly well!
- 3 cloves garlic, minced – Don’t be shy! Fresh is best. The minced garlic infuses the sauce with that pungent, aromatic magic we all love.
- 2 tablespoons low-sodium soy sauce – The savory, umami backbone. For a gluten-free swap, use tamari or coconut aminos (which are also slightly sweeter).
- 1 tablespoon rice vinegar or lemon juice – The brightening agent! This little bit of acidity cuts through the richness and balances the sweetness perfectly. I love the mild tang of rice vinegar, but fresh lemon juice adds a fantastic zing.
- 1/2 teaspoon red pepper flakes (optional) – Your flavor, your rules! A pinch adds a subtle warmth that plays so nicely with the sweet and savory. Omit it if you’re sensitive to heat.
Garnish (Go on, dress it up!):
- Sliced green onions – For a fresh, crisp finish.
- Sesame seeds – A sprinkle adds a lovely nutty flavor and makes it look professionally plated.
Let’s Get Cooking: Your Foolproof Roadmap
Follow these steps, and you simply cannot fail. I’m talking with you the whole time, just like if we were in the kitchen together!
- Make the Magic Sauce. In a small bowl, whisk together the honey, minced garlic, soy sauce, rice vinegar (or lemon juice), and red pepper flakes (if using) until smooth and combined. Set this beautiful concoction aside. Chef’s Hack: Doing this first means you’re not scrambling later. It’s called “mise en place” (everything in its place), and it makes cooking feel like a calm, cool TV show.
- Prep Your Shrimp. Pat those shrimp extremely dry with paper towels. This is non-negotiable for a good sear—water is the enemy of crispness! Season them lightly with a pinch of salt and pepper. If you’re using the cornstarch, sprinkle it over the shrimp now and toss until they have a very light, even coating. It should look dusty, not pasty.
- Heat and Sear. Heat the olive oil in a large skillet (I love my trusty cast-iron or stainless steel for this) over medium-high heat. Wait until the oil is shimmering—this means it’s hot enough. Add the shrimp in a single layer, giving them some space. Don’t crowd the pan! If you need to, cook in two batches. Crowding steams them, and we want a sear. Let them cook, undisturbed, for 2-3 minutes.
- The Flip and Sizzle. You’ll see the edges turning pink and opaque. Flip each shrimp and cook for another 1-2 minutes on the second side until they’re pink all over and have a nice bit of color. They cook fast, so stay close! Remove them to a plate for a moment.
- Bring It All Together. Reduce the heat to medium. Pour your pre-made sauce into the hot skillet. It will bubble and sizzle gloriously! Let it simmer for about 30 seconds to a minute, letting the garlic cook through and the sauce thicken slightly.
- The Grand Glaze. Add the cooked shrimp back into the skillet. Toss and stir constantly for 1-2 minutes, letting that sauce reduce, thicken, and coat every single shrimp in a sticky, glossy blanket. You’ll know it’s ready when the sauce clings to the shrimp and looks luxuriously thick.
- Serve Immediately! Remove the skillet from the heat. Garnish with a flurry of green onions and sesame seeds. This dish is at its peak straight out of the pan, so have your plates ready!
How to Plate This Beauty
This shrimp is incredibly versatile! Here are my favorite ways to serve it up for a complete, satisfying meal:
The Classic Power Bowl: My go-to for meal prep! Start with a big base of fluffy brown rice or quinoa. Add a hefty scoop of honey garlic shrimp, then surround it with steamed broccoli, snap peas, and shredded carrots. Drizzle any extra sauce from the pan over everything. It’s a balanced, colorful, and utterly delicious power meal.
The Noodle Dream: Toss the shrimp and all that amazing sauce with a batch of cooked soba noodles, rice noodles, or even whole-wheat spaghetti. Add a handful of fresh spinach or bok choy in the last minute of tossing to let it wilt. It’s an instant, restaurant-worthy noodle bowl.
Simple & Elegant: For a lighter option, serve the shrimp over a big bed of crisp greens (like romaine or butter lettuce) or with a side of simply roasted asparagus or zucchini “noodles.” The warm shrimp and sauce make a fantastic warm salad dressing.
No matter how you serve it, have those garnishes ready! That pop of green onion and crunch of sesame seed makes every bite special.
Make It Your Own: Creative Twists
Love the base recipe? Amazing! Feel like playing? Even better. Here are some delicious ways to switch it up:
- Spicy Sriracha Kick: Add 1-2 teaspoons of sriracha to the sauce mixture. The garlicky heat from sriracha pairs perfectly with the honey.
- Ginger-Honey-Garlic: Add 1 tablespoon of freshly grated ginger to the sauce along with the garlic. It adds a bright, zesty warmth that’s incredibly refreshing.
- Pineapple Sweet & Sour Vibes: Add ½ cup of fresh pineapple chunks to the skillet when you add the sauce. Let them caramelize slightly for a tropical, sweet-and-sour twist.
- Protein Swap – Chicken or Tofu: Not a shrimp fan? Use 1 lb of chicken breast or thighs, cut into bite-sized pieces, or extra-firm tofu (pressed and cubed). Adjust the cooking time accordingly until fully cooked through.
- Creamy Coconut Version: Stir in ¼ cup of full-fat coconut milk into the sauce during the last minute of simmering. It creates a luscious, creamy, slightly tropical sauce that’s to die for.
A Few More Thoughts from My Kitchen
This recipe has been a workhorse in my rotation for years, and it’s evolved with me. The cornstarch trick was a happy accident when I was trying to thicken a soupy sauce and realized it made the shrimp themselves better! I also used to mince garlic with abandon, but I’ve learned that if you really love big garlic flavor, you can add an extra minced clove to the sauce and throw a few thinly sliced garlic cloves into the oil to infuse it before adding the shrimp. Garlic-forward, just how I like it.
A funny story: I once was filming this recipe and got so excited talking about the sauce that I completely forgot to reduce the heat before pouring it in. It splattered everywhere, and I spent the next five minutes wiping down my camera lens! The dish was still fantastic, but it served as a good reminder—respect the sizzle, and maybe wear an apron.
Your Questions, Answered
Q: My sauce didn’t get thick and sticky. What happened?
A: No worries! This usually means the heat was too low when you added the sauce, or there was too much liquid in the pan from the shrimp. Next time, make sure your shrimp are patted super dry. If your sauce is too thin at the end, you can push the shrimp to one side, let the sauce bubble by itself for an extra minute to reduce, or mix 1 teaspoon of cornstarch with 1 tablespoon of cold water and stir it in to thicken it up quickly.
Q: Can I make this ahead of time for meal prep?
A: Absolutely! Cook the shrimp and sauce as directed, let it cool completely, and store it in an airtight container in the fridge for up to 3 days. The sauce will thicken when cold. Reheat it gently in a skillet or microwave, adding a tiny splash of water if needed to loosen it up.
Q: My shrimp turned out rubbery. How do I avoid that?
A> Overcooking is the #1 culprit for rubbery shrimp. They cook incredibly fast. As soon as they turn opaque and form a loose “C” shape, they’re done. If they curl into a tight “O,” they’re overdone. Use a timer and keep a close eye on them—2-3 minutes per side is usually perfect for large shrimp.
Q: Is there a way to make this less sweet?
A> For sure! Start by reducing the honey to 2 tablespoons. You can also balance it with an extra half-tablespoon of rice vinegar or lemon juice. Taste and adjust until it hits your perfect sweet-savory balance.
High-Protein Honey Garlic Shrimp : The Ultimate Sweet & Savory Power Meal
Description
When you need a fast, flavorful dinner that actually fuels you, this High-Protein Honey Garlic Shrimp delivers in a big way. Juicy shrimp are quickly seared and tossed in a glossy honey-garlic glaze that hits the perfect balance of sweet, savory, and garlicky goodness. It’s ready in under 20 minutes, packed with lean protein, and versatile enough for bowls, noodles, or light plates. Weeknight hero status: unlocked.
Ingredients
Shrimp
-
1 lb large shrimp (16/20 count), peeled & deveined
-
1 tbsp olive oil
-
Salt & black pepper, to taste
-
1 tbsp cornstarch (optional, for extra crispness)
Honey Garlic Sauce
-
3 tbsp honey
-
3 cloves garlic, minced
-
2 tbsp low-sodium soy sauce (or tamari/coconut aminos)
-
1 tbsp rice vinegar or fresh lemon juice
-
½ tsp red pepper flakes (optional)
Garnish (optional)
-
Sliced green onions
-
Sesame seeds
Instructions
-
Make the Sauce
Whisk honey, garlic, soy sauce, vinegar (or lemon), and red pepper flakes in a small bowl. Set aside. -
Prep the Shrimp
Pat shrimp very dry. Season lightly with salt and pepper. Toss with cornstarch if using (light, even coating). -
Sear
Heat olive oil in a large skillet over medium-high until shimmering. Add shrimp in a single layer. Cook 2–3 minutes per side until pink and lightly golden. Remove to a plate. -
Glaze
Reduce heat to medium. Pour sauce into the skillet; simmer 30–60 seconds until bubbling and slightly thickened. -
Finish
Return shrimp to the skillet. Toss 1–2 minutes until coated in a sticky, glossy glaze. -
Serve
Garnish with green onions and sesame seeds. Serve immediately.
Notes
-
Dry shrimp = better sear. Moisture causes steaming.
-
Don’t crowd the pan. Cook in batches if needed.
-
Watch the cook time. Shrimp are done when opaque and shaped like a loose “C.”
-
Too thin? Let sauce bubble another minute, or add a quick cornstarch slurry (1 tsp cornstarch + 1 tbsp cold water).
Fueling Your Body Deliciously
Here’s a look at what’s powering this delicious meal (approximate values per serving, without sides or garnishes):
- Calories: ~280
- Protein: ~30g – The star of the show! Shrimp is an excellent source of lean protein to support muscle repair and keep you feeling full and satisfied.
- Carbohydrates: ~18g – Primarily from the honey, providing quick energy.
- Fat: ~10g – Mostly heart-healthy fats from the olive oil used for cooking.
- Sugar: ~14g – Naturally occurring from the honey. Using a sugar-free substitute like monk fruit syrup can drastically reduce this number.
This dish is naturally low-carb, high-protein, and can easily fit into various dietary patterns. Pair it with fiber-rich veggies and a complex carb like brown rice for a perfectly balanced plate.
You’ve Got This!
And there you have it, friend—your ticket to a ridiculously easy, insanely flavorful, and powerfully nutritious meal. This High-Protein Honey Garlic Shrimp is more than just a recipe; it’s a reminder that eating well doesn’t require hours in the kitchen or a laundry list of obscure ingredients. It’s about bold flavors, simple techniques, and the joy of creating something truly delicious for yourself and the people you love.
I hope this recipe finds its way into your regular rotation and becomes one of those trusty, go-to dishes you can make with your eyes closed (but maybe keep them open for the sizzle!). Give one of the fun variations a spin next time, and make it your own. That’s what cooking is all about.
Final Thoughts
This High-Protein Honey Garlic Shrimp is more than just a quick dinner—it’s proof that eating well doesn’t have to be complicated, time-consuming, or boring. In just 20 minutes, you can transform simple ingredients into a dish that feels like a restaurant splurge, all while fueling your body with lean protein and bold, balanced flavor.
It’s a recipe that meets you where you are: whether you’re scrambling on a busy weeknight, meal-prepping for success, or wanting to impress without stress. That sweet, sticky, garlicky glaze is pure magic—the kind that turns humble shrimp into something truly memorable. And the best part? It’s endlessly adaptable. Make it spicy, add ginger, swap in chicken or tofu, or keep it classic. It’s a canvas for your cravings.
Remember, cooking is about confidence, not perfection. My first garlic-burned, honey-rescued shrimp adventure taught me that the best meals often come from a little improvisation and a lot of heart. So don’t be afraid to make it your own. Trust the process, respect the sizzle, and enjoy the delicious results.
With a full heart and a full plate,
Beau
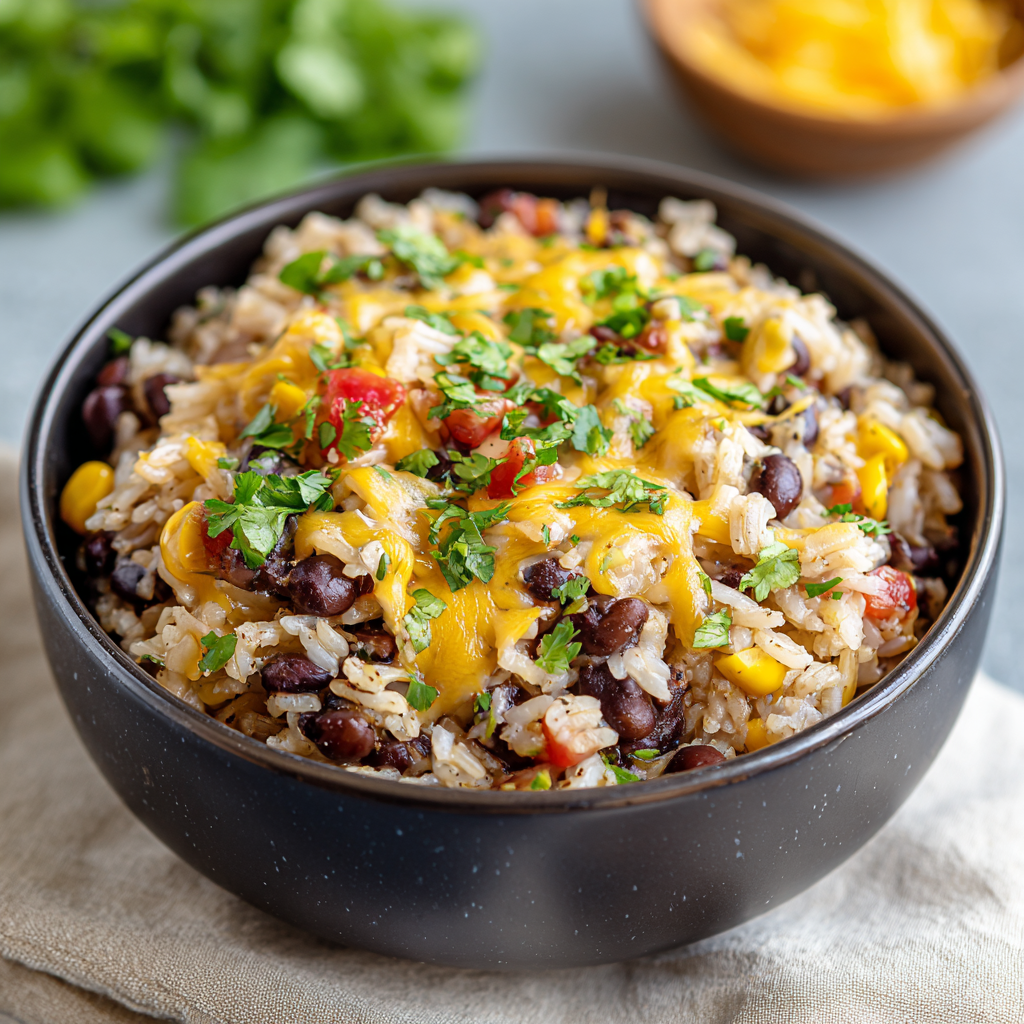
Cheesy Black Beans and Rice : The Ultimate One-Pot Comfort Dish
Easy Cheesy Black Beans and Rice: Your New Go-To Comfort Bowl
Hey there, friends! Beau here, welcoming you back to my cozy corner of the internet, Feastical. Let me paint you a picture: It’s been one of those days. The kind where your to-do list laughs at you, your energy is officially on “E,” and the thought of figuring out dinner feels like solving a complex algebra problem. You’re craving something that feels like a warm, delicious hug, but you need it to come together faster than you can say “takeout menu.”
Sound familiar? That, my friends, is precisely the moment this recipe was born for. I’m talking about my Cheesy Black Beans and Rice – the ultimate one-pot wonder that’s here to rescue your weeknight. This isn’t just food; it’s a 25-minute promise of comfort, packed with protein, fiber, and a glorious blanket of melted cheese. It’s hearty, soul-satisfying, and proves that the most incredible meals often come from the simplest ingredients hanging out in your pantry and fridge. So, let’s ditch the stress, grab our favorite skillet, and make something magical happen. Trust me, your taste buds (and your future self) will thank you.
Why This Dish Feels Like Home
This recipe always takes me back to my first apartment after culinary school. My kitchen was roughly the size of a postage stamp, and my budget was even smaller. I lived off what I could afford: big bags of rice, cans of beans, and whatever cheese was on sale. One particularly rainy Thursday, feeling a bit homesick, I started throwing things into my one decent skillet. Onions sizzling, spices blooming, the familiar *click-hiss* of a can of black beans opening. I stirred in some leftover rice from Chinese takeout, topped it with a handful of cheddar, and watched it melt into gooey perfection.
That first bite? Pure lightning. It was creamy, smoky, hearty, and so comforting. It wasn’t fancy, but it was mine. It was the dish I made for friends who stopped by unexpectedly, the one I meal-prepped for busy weeks, the edible proof that you don’t need a lot to make a lot of flavor. That humble skillet meal became a cornerstone of my cooking philosophy: great food is about feeling good, not showing off. Every time I make it, I get a little taste of that scrappy, hopeful joy from my early cooking days.
Gathering Your Flavor Friends
Here’s everything you’ll need to create this bowl of comfort. I’ve added a few chef-y notes and swaps so you can make it your own!
- 1 tablespoon olive oil – Our cooking fat of choice! It adds a subtle fruitiness and helps our aromatics shine. Avocado oil works great too.
- 1 small onion, diced – The sweet, foundational base of so many great dishes. No onion? A hefty pinch of onion powder in a pinch will do.
- 2 cloves garlic, minced – Non-negotiable for that savory depth. Pre-minced jarred garlic is a totally acceptable time-saver here.
- 1 teaspoon ground cumin – This is the secret weapon! It adds an earthy, warm, slightly nutty flavor that makes the whole dish sing.
- 1 teaspoon smoked paprika – Don’t skip this! It gives a subtle smokiness that mimics hours of cooking. It’s the “wow” factor.
- 1/2 teaspoon chili powder – For a gentle, building warmth. Adjust to your spice-love level.
- 1 can (15 oz) black beans, drained and rinsed – Rinsing removes the starchy canning liquid, giving you better texture and flavor. Kidney or pinto beans are fabulous substitutes.
- 1 cup cooked rice – White, brown, jasmine, or even cauliflower rice! Use what you have. Leftover rice is perfect here.
- 1/2 cup corn (optional) – I love the sweet pops of color and flavor. Frozen, canned (drained), or fresh off the cob all work.
- 1/2 cup diced tomatoes – Canned (drained) or fresh. They add a touch of acidity and moisture. A tablespoon of tomato paste is a good backup plan.
- Salt and black pepper to taste – Season in layers! Taste after adding the beans, then again after the cheese melts.
- 1 cup shredded cheddar cheese or cheese blend – The glorious glue! A Mexican blend, pepper jack, or Monterey Jack are all incredible. For a dairy-free version, a good melting vegan cheese does the trick.
- Fresh cilantro or green onions for garnish (optional) – The fresh finish that makes it look and taste restaurant-worthy. A dollop of sour cream or salsa is also a win.
Let’s Get Cooking: Your Foolproof Guide
Okay, team! Skittles on, music playing, let’s transform these simple ingredients into your new favorite meal. Follow these steps and you really can’t go wrong.
Step 1: The Aromatic Foundation. Heat that olive oil in a large skillet (one with a lid!) over medium heat. Toss in your diced onion and let it sauté for 3-4 minutes. We’re not looking for color, just translucency and sweetness. You’ll know it’s ready when your kitchen starts to smell amazing. Chef’s Hack: A pinch of salt here helps draw moisture out of the onions, speeding up the process.
Step 2: Spice Bloom. Add the minced garlic, cumin, smoked paprika, and chili powder right to the onions. Stir constantly for about 1 minute. This is called “blooming” your spices—toasting them in oil unlocks their essential oils and intensifies their flavor tenfold. It’s a game-changer!
Step 3: The Big Stir-In. Now, dump in your drained black beans, cooked rice, corn (if using), and diced tomatoes. Give everything a big, hearty stir until it’s beautifully combined and coated in those fragrant spices. Let it cook for 5-7 minutes, stirring occasionally, until everything is piping hot. This is where the flavors get to know each other. Chef’s Tip: If the mixture looks a little dry, add a splash of vegetable broth or water to loosen it up.
Step 4: Season & Cheese! Time to taste! Hit it with salt and pepper—remember, the cheese will add saltiness too. Now, the best part: turn off the heat. Sprinkle your shredded cheese evenly over the entire surface. Cover the skillet with a lid immediately. The residual heat will melt the cheese into the most perfect, gooey blanket in 2-3 minutes. No lid? A large baking sheet or even foil works in a pinch.
Step 5: The Grand Finale. Carefully remove the lid (steam is hot!). Marvel at your cheesy masterpiece. Scatter over some chopped fresh cilantro or green onions for a burst of color and freshness. And that’s it! Dinner is served, directly from the skillet to your bowl.
How to Serve This Cheesy Masterpiece
Presentation is part of the fun! I love serving this family-style, right from the skillet in the middle of the table. For individual bowls, give everyone a generous scoop, making sure to get that cheesy top layer. The beauty of this dish is its versatility. Want to make it a heartier meal? Top it with a fried or poached egg for an incredible breakfast-for-dinner vibe. A few slices of creamy avocado or a dollop of cool sour cream or Greek yogurt adds a lovely richness. For some crunch, tortilla chips on the side are mandatory for scooping! It’s also the perfect filling for burritos or a topping for a big, leafy green salad. However you serve it, keep it casual and comforting.
Mix It Up! Creative Twists on the Classic
Once you’ve mastered the base recipe, the world is your cheesy, beany oyster! Here are a few of my favorite ways to play with it:
- The “Southwest Fiesta”: Add a can of diced green chiles, use pepper jack cheese, and top with diced red onion, jalapeño slices, and a squeeze of lime.
- The “Green Goddess” (Veggie-Packed): Stir in a couple of handfuls of fresh baby spinach or chopped kale in Step 3, just until wilted. Swap the cheddar for goat cheese or feta crumbles.
- The “Enchilada Style”: Before adding the cheese, pour over ½ cup of your favorite red or green enchilada sauce and stir to combine. Top with cheese and melt as usual.
- Protein Power-Up: For a meaty version, brown ½ pound of ground beef, turkey, or chorizo with the onions in Step 1. Drain any excess fat before adding the spices.
- Whole30/Paleo Friendly: Omit the cheese and corn. Use cauliflower rice and add extra diced veggies like bell peppers and zucchini. Season generously!
Beau’s Kitchen Notes
This recipe has been my trusty sidekick for years, and it’s evolved in tiny ways. I used to just stir the cheese in, but letting it melt on top creates that irresistible, restaurant-quality presentation. One time, I accidentally used hot smoked paprika instead of regular… let’s just say we needed extra sour cream that night, but it was a delicious accident! The biggest lesson this dish taught me? Cooking shouldn’t be about rigid perfection. Forgot to buy an onion? No sweat. Only have mozzarella? It’ll still be delicious. It’s a forgiving, flexible friend in recipe form. Make it once, then make it yours.
Your Questions, Answered
Q: Can I make this in advance for meal prep?
A: Absolutely! It stores and reheats beautifully. Let it cool completely, then store in an airtight container in the fridge for up to 4 days. Reheat gently in the microwave or in a skillet with a tiny splash of water to keep it moist.
Q: My dish turned out dry. What happened?
A: This usually means the rice was a bit dry to begin with, or you cooked it a touch too long. Easy fix! Next time, add a ¼ cup of broth, water, or even the liquid from the canned tomatoes when you add the beans and rice. You can also stir in a bit more after reheating.
Q: Can I use uncooked rice in this recipe?
A: I don’t recommend it for this quick version. The cooking time and liquid needed would be different, and the spices might burn. Using pre-cooked rice is the key to the 25-minute promise! Cook a big batch of rice at the start of the week to use here.
Q: Is it freezer-friendly?
A: It can be, but with a note. The texture of the rice can become a bit softer upon thawing and reheating. If you do freeze it, store in a freezer-safe container for up to 2 months. Thaw overnight in the fridge before reheating.

Cheesy Black Beans and Rice : The Ultimate One-Pot Comfort Dish
Description
This Easy Cheesy Black Beans and Rice is the definition of weeknight comfort food. It’s warm, hearty, budget-friendly, and comes together in about 25 minutes using pantry staples you probably already have. Packed with protein, fiber, cozy spices, and finished with a glorious layer of melted cheese, this one-skillet meal feels like a hug in a bowl—no stress, no fuss, just pure comfort.
Ingredients
-
1 tbsp olive oil
-
1 small onion, diced
-
2 cloves garlic, minced
-
1 tsp ground cumin
-
1 tsp smoked paprika
-
½ tsp chili powder (adjust to taste)
-
1 can (15 oz) black beans, drained and rinsed
-
1 cup cooked rice (white, brown, or jasmine)
-
½ cup corn (optional, fresh, frozen, or canned)
-
½ cup diced tomatoes, drained
-
Salt and black pepper, to taste
-
1 cup shredded cheddar or Mexican-blend cheese
-
Fresh cilantro or green onions, for garnish (optional)
Instructions
-
Sauté the Base
Heat olive oil in a large skillet over medium heat. Add onion and cook 3–4 minutes until soft and translucent. -
Bloom the Spices
Stir in garlic, cumin, smoked paprika, and chili powder. Cook for 30–60 seconds until fragrant. -
Build the Bowl
Add black beans, cooked rice, corn, and tomatoes. Stir well and cook 5–7 minutes until everything is heated through. Add a splash of water or broth if the mixture seems dry. -
Season & Melt
Season with salt and pepper. Turn off heat, sprinkle cheese evenly over the top, cover with a lid, and let sit 2–3 minutes until melted. -
Serve
Garnish with cilantro or green onions and serve warm.
Notes
-
Use leftover rice for the best texture and fastest prep.
-
Smoked paprika is key for that cozy, slow-cooked flavor.
-
Too dry? Add a splash of broth or tomato juice.
-
Extra creamy: Stir in a spoonful of sour cream or Greek yogurt before serving.
Nutritional Breakdown (A Per-Serving Estimate)
Let’s talk about what’s fueling that comfort! This dish isn’t just tasty; it’s packed with good stuff. One serving (about 1/4 of the recipe) provides roughly: 320 calories, 13g of protein (thanks, beans!), and a solid 8g of fiber to keep you feeling full and satisfied. The 38g of carbohydrates are primarily complex carbs from the beans and rice, providing steady energy. The 14g of fat comes from the olive oil and cheese, adding richness and helping your body absorb the fat-soluble vitamins from the spices. Remember, these numbers can vary based on your specific ingredients and portion size, but it’s a wholesome, balanced meal you can feel good about eating.
Your New Kitchen Staple Awaits
And there you have it, friends – my heart-on-a-plate, the Cheesy Black Beans and Rice. It’s proof that incredible flavor doesn’t require a dozen fancy ingredients or hours of your time. It’s about the joy of creating something nourishing and delicious with your own two hands. I hope this recipe finds its way into your regular rotation, becoming your own quick-fix hero on busy nights. Give it a try, tag me @Feastical if you share it, and let me know what fun twists you come up with! Now, go forth and get your comfort on. Until next time, keep your skillet hot and your heart full.