
Easy Blueberry Turnovers : Flaky, Buttery & Bakery-Style Treat
Easy Blueberry Turnovers – Your New Secret Weapon for Sweet, Flaky Joy
Hey friends, Beau here from Feastical! Let me paint you a picture. It’s a lazy Sunday morning. The sun is streaming through the kitchen window, you’ve got your favorite mug of coffee in hand, and there’s a faint, incredible smell of butter and sweet fruit curling its way out of the oven. That, my friends, is the magic of homemade blueberry turnovers. And guess what? That blissful scene is about 35 minutes and a handful of simple ingredients away.
I’m a firm believer that the best baking shouldn’t feel like a high-stakes science experiment. It should feel like a hug for your soul and a high-five for your taste buds. These blueberry turnovers are exactly that. We’re talking about impossibly flaky, golden-brown pastry that shatters at the first bite, giving way to a warm, juicy, just-sweet-enough blueberry filling. They look and taste like you spent all morning in a fancy French patisserie, but the secret is we’re using a brilliant shortcut: store-bought puff pastry. I’m all for from-scratch glory, but sometimes, you just want the win without the wait.
Whether you’re surprising your family with a special breakfast, needing a show-stopping addition to a brunch spread, or just treating yourself because, well, Tuesday, this recipe is your ticket. So, tie on that apron, grab your spatula (I promise we’ll find it), and let’s bake up some seriously shareable, absolutely delicious joy.
The Little Blue Box & My Grandma’s Apron
This recipe always takes me right back to my grandma’s linoleum-floored kitchen. She wasn’t a fancy baker, but she was a practical one, armed with a deep well of love and a freezer full of blueberries she picked herself every summer. Her version of a turnover involved popping open a can of biscuit dough, smashing it thin, and plopping a spoonful of jam in the middle. They were lumpy, they were messy, and I thought they were the most sophisticated pastry in the world.
She’d let me help seal the edges with a fork, my small hands pressing down next to her wrinkled, flour-dusted ones. We’d watch them puff up in her ancient oven, the blueberry jam sometimes bubbling out and caramelizing into sticky, purple-black gems on the baking sheet. She’d always say, “The messy ones taste the best, Beau,” and she was right. That combo of warm, fluffy dough, sweet-tart fruit, and the sheer pride of having made it together? That’s the feeling I’m chasing every time I make these. My version is just a slightly polished love letter to hers—a little flakier, a little juicier, but with the same big heart.
Gathering Your Blueberry Treasure
Here’s the beautiful part: you probably have most of this in your kitchen right now. Let’s break it down.
For the Juicy Blueberry Filling:
- 1½ cups fresh or frozen blueberries: Frozen are my secret weapon! They’re picked at peak ripeness, available year-round, and work perfectly here. No need to thaw—they’ll break down beautifully as they cook. Fresh are fabulous in season, too.
- ¼ cup granulated sugar: Just enough to sweeten and help the berries release their juices. You can adjust this up or down by a tablespoon based on your berry’s sweetness.
- 1 tbsp cornstarch: This is our thickening hero. It transforms the berry juices into a glorious, glossy gel that won’t run all over the place when you bite in. No cornstarch? An equal amount of all-purpose flour works in a pinch.
- 1 tsp lemon juice: A bright, acidic spark that makes the blueberry flavor pop! It balances the sweetness perfectly. Fresh squeezed is ideal, but bottled is totally fine.
- ½ tsp vanilla extract: The warm, aromatic background note that makes everything taste more “bakery-style.” Pure extract is worth it here.
For the Flaky, Buttery Shell:
- 1 package (2 sheets) puff pastry, thawed: The superstar shortcut! Look for it in the freezer aisle. The key is to thaw it slowly in the fridge overnight, or on the counter for about 40 minutes. You want it pliable but still cold to the touch.
- 1 egg, beaten: Our “egg wash.” A simple brush of beaten egg gives the pastry its signature deep golden, glossy sheen. If you’re egg-free, heavy cream or even milk will give you a softer golden color.
For the Optional (But Highly Recommended) Drizzle:
- ½ cup powdered sugar: The base of our simple glaze. Sift it to avoid lumps!
- 1–2 tbsp milk or lemon juice: Milk gives a pure white, sweet glaze. Lemon juice makes a tangier, translucent glaze that complements the berries wonderfully. Add liquid one teaspoon at a time until you get a thick but drizzle-able consistency.
Let’s Build Some Magic: Step-by-Step
Ready? This is where the fun happens. Put on some tunes, and let’s get baking.
- Heat Things Up & Prep: First, preheat your oven to a hot 400°F (200°C). This high heat is crucial for getting that explosive “puff” in the pastry. Line a baking sheet with parchment paper—this is non-negotiable for easy cleanup and preventing sticky blueberry spills from welding themselves to your pan.
- Make the Filling: In a small saucepan, combine all of your filling ingredients: the blueberries, sugar, cornstarch, lemon juice, and vanilla. Give it a good stir. Cook this over medium heat, stirring often. You’ll watch the magic happen as the berries burst, the sugar dissolves, and the mixture goes from watery to thick and glossy in about 5-7 minutes. Once it’s thickened, scrape it into a bowl and let it cool for 10-15 minutes. A hot filling will melt the butter in your pastry and make it soggy before baking—patience is key!
- Shape Your Pastry: On a lightly floured surface, gently unfold one sheet of puff pastry. If your brand comes folded in thirds, just roll it out slightly with a rolling pin to smooth the seams and create an even square. Using a sharp knife or a pizza cutter, cut the sheet into 4 equal squares. Repeat with the second sheet. You now have 8 blank canvases for deliciousness.
- Fill & Fold: Spoon about 1.5 tablespoons of the cooled blueberry filling onto one half of each square, leaving a ½-inch border clean around the edges. Chef’s Hack: Use a pastry brush or your finger to dab a little water on the clean edges—this acts like glue for a super-secure seal. Fold the bare half of the pastry over the filling to create a perfect triangle. Press the edges firmly together.
- Seal the Deal: Here’s the step that makes them look pro. Take the tines of a fork and press firmly all around the sealed edges. This crimps them shut, ensuring no blueberry escapees during baking, and gives that adorable, classic turnover look.
- Give Them a Golden Glow: Transfer your beautiful triangles to the parchment-lined baking sheet. Beat your egg with a fork until smooth, and use a pastry brush to gently coat the top of each turnover. Avoid getting egg wash on the cut sides, as it can glue layers together and inhibit puffing. For extra sparkle, you can sprinkle them with a pinch of coarse sugar now.
- Bake to Golden Perfection: Slide the baking sheet into your preheated oven. Bake for 18 to 22 minutes. You’re looking for the turnovers to be puffed up like little pillows and a deep, golden brown all over. Don’t panic if you see some filling bubbling out—those are the “flavor crystals” my grandma talked about!
- Glaze & Grace: Let the turnovers cool on the baking sheet for at least 10 minutes. They are molten lava inside straight from the oven! While they cool, whisk your powdered sugar and liquid of choice for the glaze. Once the pastries are just warm, drizzle the glaze over them in a zig-zag pattern. And then… dig in.
How to Serve These Flaky Jewels
Honestly, they’re spectacular all on their own, still slightly warm from the oven. But if you want to elevate the moment (and why wouldn’t you?), here are my favorite ways to serve them:
- The Classic: On a big, welcoming platter, dusted with a little extra powdered sugar. Perfect for a brunch buffet or a family-style dessert.
- À la Mode: Place a warm turnover on a plate and crown it with a scoop of vanilla bean ice cream. The hot/cold, flaky/creamy contrast is a religious experience.
- With a Cuppa: My personal go-to. A blueberry turnover alongside a giant mug of strong coffee or a pot of herbal tea is the ultimate afternoon reset button.
- Fancy Brunch Plate: Serve one alongside a dollop of Greek yogurt, a sprinkle of granola, and some fresh berries. It feels decadent but balanced.
Make It Your Own: Delicious Twists & Swaps
The basic formula here is your playground. Here are a few ways to mix it up:
- Mixed Berry Bliss: Swap the blueberries for a mix of raspberries, blackberries, and chopped strawberries. Add an extra half-tablespoon of cornstarch as berries vary in juiciness.
- Lemon Blueberry: Add the zest of one lemon to the filling along with the juice. For the glaze, use lemon juice and add a little zest there, too. Sunshine in every bite!
- Cheese Please (Savory-Sweet): Before adding the blueberry filling, place a small cube of cold cream cheese or a spoonful of ricotta on the pastry. Top with berries and fold. The creamy, tangy center is unbelievable.
- Apple Cinnamon: Replace the berry filling with a cup of finely diced apples sautéed with butter, brown sugar, and a teaspoon of cinnamon until soft.
- Gluten-Free/Dairy-Free Friendly: Many brands make gluten-free puff pastry (check the freezer section). Use a vegan butter-based puff pastry and coconut milk in the glaze for a fully plant-based treat.
A Few More Thoughts from My Kitchen to Yours
This recipe has become a staple in my house, and like any good friend, it’s evolved. I once, in a sleepy morning haze, forgot the cornstarch. The result was a delicious but explosively runny “blueberry soup in a pastry bowl.” Lesson learned! Now I keep a sticky note on my spice cabinet that just says “THICKENER?” as a reminder.
You can also make the filling up to 3 days ahead and keep it in the fridge. It actually thickens up even more, making assembly a breeze. And while they’re best the day they’re made, you can freeze the unbaked, assembled turnovers on a sheet pan, then transfer them to a bag. Bake straight from frozen, adding 3-5 minutes to the bake time. Having ready-to-bake pastries in your freezer is a power move, trust me.
Your Questions, Answered
Q: My filling leaked out everywhere while baking! What happened?
A: The usual suspects are: 1) The filling was still too hot when you assembled, melting the pastry layers. 2) You didn’t leave enough of a border or seal the edges well enough with the fork. 3) You overfilled them (tempting, I know!). Cool your filling completely and be generous with that clean border.
Q: My pastry didn’t puff up very much. Why?
A: Puff pastry needs to start cold and bake in a hot oven. Make sure your pastry was still cool to the touch when you worked with it, and that your oven was fully preheated. Also, avoid handling it too much, as the heat from your hands can soften the butter layers.
Q: Can I use pie crust instead of puff pastry?
A: You can! The result will be a more tender, less shatteringly flaky turnover—think a handheld pie. It’s delicious, just different. Follow the same assembly steps.
Q: How do I store leftovers?
A: Keep them in an airtight container at room temperature for 1 day, or in the fridge for up to 3 days. They lose their peak flakiness but are still tasty. Reheat in a 350°F oven for 5-8 minutes to crisp them back up.

Easy Blueberry Turnovers : Flaky, Buttery & Bakery-Style Treat
Description
Golden, flaky puff pastry filled with juicy, lightly sweetened blueberry filling. Perfect for brunch, breakfast, or a special treat any day of the week.
Ingredients
For the Blueberry Filling:
-
1½ cups fresh or frozen blueberries (no need to thaw)
-
¼ cup granulated sugar (adjust to taste)
-
1 tbsp cornstarch (or all-purpose flour)
-
1 tsp lemon juice
-
½ tsp vanilla extract
For the Pastry:
-
1 package (2 sheets) puff pastry, thawed
-
1 egg, beaten (for egg wash)
Optional Glaze:
-
½ cup powdered sugar
-
1–2 tbsp milk or lemon juice
Notes
-
Cool filling before assembly to prevent soggy pastry.
-
Don’t overfill; leave a clear border for sealing.
-
Keep puff pastry cold; handle minimally to maintain flakiness.
-
Freeze unbaked turnovers on a sheet pan; bake from frozen, adding 3–5 minutes.
Nutritional Info (Per Turnover, without glaze)
Here’s a quick look at what’s in one of these delightful pastries. Remember, it’s a treat meant to be enjoyed and shared!
| Calories: | ~280 kcal |
| Carbohydrates: | 34 g |
| Sugar: | 15 g |
| Fat: | 15 g |
| Saturated Fat: | 6 g |
| Protein: | 4 g |
| Sodium: | 180 mg |
| Fiber: | 2 g |
Final Thoughts
And there you have it—your new go-to recipe for turning an ordinary moment into something sweetly memorable. What I love most about these blueberry turnovers isn’t just how amazing they taste (and oh, they do), but how they connect us. They connect me to my grandma’s kitchen, they connect you to your own family or friends as you share them, and they connect all of us to the simple, profound joy of making something delicious with our own two hands.
So, I hope you bake them, share them, and maybe get a little messy. Remember, the messy ones often taste the best. Thanks for letting me share this recipe with you. Now, go preheat that oven—your kitchen adventure awaits!
With a flaky, buttery

Halftime Snack Flight : Dips Edition for the Ultimate Game Day Spread
Halftime Snack Flight: The Ultimate Game Day Spread Just Got a Major Upgrade
Hey friends, Beau here. Let’s talk about the real MVP of any game day gathering. It’s not the star quarterback or the flashy halftime show. Nope. It’s the snack table. That glorious, crowded, chip-crumb-covered altar where we all worship between plays. But what if I told you we could take that chaotic, beautiful mess and turn it into a snackable masterpiece? Enter the Halftime Snack Flight.
This isn’t just a platter of dips. This is an experience. We’re taking the fun, interactive vibe of a craft beer tasting flight and swapping the brews for five absolutely crave-worthy, color-coordinated dips. Imagine a lineup of mini glasses, each holding a flavor adventure: creamy, spicy, cheesy, and sweet. It’s a centerpiece that sparks conversation, satisfies every craving, and lets your guests play culinary referee, sampling and scoring each delicious contender.
Whether you’re hosting a Super Bowl blowout, a casual Sunday football watch, or just need a seriously impressive appetizer for any party, this Dips Edition Flight is your playbook to success. It looks fancy but comes together with the ease of a no-huddle offense. So, tie on your favorite apron, grab your mixing bowls, and let’s build a snack table that’s going to get a standing ovation. Trust me, after this, you’ll be calling an audible on your usual spread every time.
The Game Day Snack Evolution: From Chaos to Flight
I have to confess, my early game day hosting strategy was… let’s call it “enthusiastically messy.” We’re talking a kitchen counter buried under a mountain of mismatched bowls, three bags of chips spilling onto the floor, and a frantic fourth-quarter dash to microwave more nacho cheese. It was delicious chaos, but it felt more like a snack scrum than a spread.
The “aha” moment hit me at a local brewery with my wife. We were sharing a flight, laughing and debating which hoppy IPA was our favorite. The small servings, the easy sampling, the shared experience—it was perfect. I looked at those little glasses and thought, “Why can’t snacks be this fun?”
That next game day, I swapped the jumble of big bowls for a neat row of mini mason jars filled with my best dips. I used food coloring in a cream cheese base and sprinkles to loosely match the teams playing. The reaction was instant and awesome. Friends gathered around the board, comparing notes, diving back for “just one more taste” of the buffalo chicken. The chaos was gone, replaced by a focused, fun, and incredibly tasty ritual. It transformed my hosting game, and I’ve been perfecting the flight lineup ever since. This recipe is that winning play, shared with you.
Gathering Your Dream Team: Dip Flight Ingredients
Here’s the roster for your all-star snack flight. The beauty of this is its flexibility—these are blueprints, not rigid rules. Feel free to sub in your favorites or what you have on hand!
- For the Guacamole (Green Team Energy):
- 2 ripe avocados: Look for ones that yield slightly to gentle pressure. Too hard? Speed-ripen in a paper bag with a banana. Too soft? You might be in guac emergency territory, but we can make it work!
- 1 tbsp fresh lime juice: The acid is non-negotiable—it adds bright flavor and keeps that gorgeous green color from browning too fast.
- 1/4 cup finely diced red onion: Soak the diced onion in cold water for 10 minutes if you want to mellow its sharp bite. It’s a great little chef’s hack!
- Salt to taste: Start with 1/4 tsp. Avocados need salt to truly sing.
- Chef’s Insider Add-In: A clove of minced garlic or a tablespoon of finely chopped cilantro kicks it up a notch.
- For the Buffalo Chicken Dip (Fiery Red):
- 1 cup shredded cooked chicken: A rotisserie chicken is your best friend here for ease. Plain canned chicken works in a pinch, too!
- 1/4 cup cream cheese, softened: Full-fat gives the creamiest, richest base. For a lighter version, Neufchâtel works perfectly.
- 1/4 cup buffalo sauce: Frank’s RedHot is the classic, but use your favorite brand. This is where you control the heat level!
- 1/4 cup shredded sharp cheddar: Adds a tangy, melty layer. Pre-shredded is fine, but block cheese you shred yourself melts smoother.
- For the Pizza Dip (Team Pepperoni):
- 1/4 cup marinara sauce: Use a good-quality jarred sauce you’d actually eat on pasta. It’s the flavor foundation.
- 1/4 cup cream cheese, softened: This creates that irresistible, creamy layer that mimics the richness of cheese on a pie.
- 1/4 cup shredded mozzarella: The gooey, stretchy top layer we all crave.
- Mini pepperoni or fresh basil for garnish: Mini pepperonis are adorable, but chopped regular ones work. Basil adds a fresh, fancy touch.
- For the Spicy Queso (Gold Rush):
- 1/2 cup Velveeta or cheddar cheese, cubed: Velveeta melts into that iconic, smooth queso. For a more “from-scratch” feel, use sharp cheddar but be prepared to add a little extra milk or cream to get it saucy.
- 1/4 cup milk or half-and-half: This is your melting liquid. Half-and-half makes it extra luxurious.
- 1 tbsp finely diced pickled jalapeños: Pickled add tang and heat without the raw vegetal flavor. Don’t forget a spoonful of the brine for an extra kick!
- Optional: Splash of hot sauce: For the heat seekers in the crowd.
- For the Dessert Dip (Sweet Victory):
- 1/4 cup whipped cream cheese, softened: Whipped is lighter and blends easier. Plain full-fat works too; just give it a good stir first.
- 2 tbsp marshmallow fluff: The secret to that nostalgic, fluffy sweetness. If you don’t have fluff, a tablespoon of powdered sugar + a splash of vanilla extract is a good backup.
- 1 tbsp mini chocolate chips: Mini chips distribute better in each bite.
- Sprinkles in your team colors: This is the fun part! It’s all about the spirit.
Your Game Plan: Step-by-Step Instructions
Let’s get cooking! We’ll tackle these one at a time. I recommend making the guacamole and dessert dip last to keep them looking fresh.
- Prep Your Station: First, get all your ingredients measured and prepped (cheese shredded, chicken shredded, veggies diced). This “mise en place” makes the process fly by faster than a Hail Mary pass. Set out five small mixing bowls—one for each dip.
- Make the Guacamole: In your first bowl, scoop out the avocado flesh. Add the lime juice and salt right away and mash with a fork to your desired consistency (I like it a little chunky). Fold in the red onion (and garlic/cilantro if using). Taste and adjust salt or lime. Chef’s Hack: Press plastic wrap directly onto the surface of the guacamole to limit air exposure and prevent browning until serving.
- Whip Up the Buffalo Chicken Dip: In a microwave-safe bowl or small saucepan, combine the shredded chicken, cream cheese, buffalo sauce, and cheddar. Heat over low heat on the stove or in 30-second bursts in the microwave, stirring in between, until everything is melted, warm, and beautifully combined. It should be scoopable and glorious. Set aside.
- Create the Pizza Dip: In another microwave-safe bowl, spread the softened cream cheese in an even layer. Gently spoon the marinara sauce over the top, spreading it almost to the edges. Sprinkle the mozzarella on top. Microwave for 45-60 seconds, or until the cheese is melted and bubbly. Tip: You can also do this in a toaster oven for a slightly browned, crispy cheese top!
- Craft the Spicy Queso: Combine the cubed cheese and milk in a microwave-safe bowl. Microwave in 30-second intervals, stirring vigorously after each, until completely smooth. Stir in the diced jalapeños and a splash of their brine. Add hot sauce if desired. If it thickens too much as it sits, just stir in a teaspoon of warm milk.
- Mix the Sweet Victory Dessert Dip: In your final bowl, stir together the softened whipped cream cheese and marshmallow fluff until smooth and uniform. Gently fold in the mini chocolate chips and most of your team-colored sprinkles, saving a few for the top.
- Assemble the Flight: Get your mini beer flight glasses, small mason jars, or even festive shot glasses. Spoon each dip into its own vessel. Wipe the rims for a clean look. Garnish the pizza dip with mini pepperoni or basil, and top the dessert dip with your reserved sprinkles.
- The Grand Finale Presentation: Place your dip flight glasses on a wooden board, a sleek tray, or even a chalkboard platter. Arrange an army of dippers around them: tortilla chips, pita chips, pretzel rods, carrot sticks, celery, and graham crackers or vanilla wafers for the dessert dip. Label each dip with a small flag or a cute tent card if you’re feeling fancy!
How to Serve Your Championship-Winning Spread
Presentation is key to the flight experience! Don’t just plop the bowls down. Create a moment. I love using a tiered stand or a long, rectangular wooden board to give everything height and dimension. Group the dippers in small bowls or baskets around the central flight.
Color-code everything to the max. Use green and blue tortilla chips if those are the team colors. Tie ribbons around the pretzel bags. The dessert dip is your best friend here—those sprinkles do all the thematic work for you.
Labeling is a fun and helpful touch. Simple toothpick flags with little tags (“Fiery Buffalo,” “Gold Rush Queso”) let everyone know what they’re diving into. Most importantly, place the flight somewhere central but with easy access from all sides. You want a natural gathering spot, not a traffic jam. Now, stand back and watch your friends become snack sommeliers, tasting, comparing, and declaring their personal favorites.
Mix It Up: Endless Flavor Variations
This concept is built for creativity. Here are a few audibles you can call to tailor your flight:
- The “Lighten Up” Flight: Swap cream cheese bases with Greek yogurt. Use black beans and salsa for a bean-based “queso.” Make the guacamole with just avocado, lime, and salt. Serve with baked chips and tons of fresh veggie dippers.
- The Vegan MVP: Use vegan cream cheese and shreds. For the buffalo dip, shredded jackfruit or chickpeas are amazing chicken substitutes. Nut-based queso is incredible (soaked cashews blended with nutritional yeast and jalapeño!). The dessert dip can be made with vegan cream cheese and dairy-free chocolate chips.
- Around-the-World Flight: Theme your dips globally! Offer a tzatziki (Greek yogurt, cucumber, dill), a French onion dip (caramelized onions in sour cream), an Italian bruschetta dip (chopped tomatoes, basil, garlic), a Mexican street corn dip, and a mango-lassi inspired sweet dip.
- All-Seasons Sweet Flight: Ditch the savory and do a dessert-only flight! Think chocolate hazelnut, birthday cake batter, lemon cheesecake, salted caramel, and strawberry cream. Serve with cookies, fruit, and shortbread sticks.
- The “Set-It & Forget-It” Slow Cooker Swap: For huge crowds, triple the buffalo chicken and queso recipes and keep them warm in small slow cookers or fondue pots on your buffet. The flight glasses can then hold the cold dips (guac, dessert) and other toppings.
Beau’s Kitchen Notes & Stories
This recipe has seen more iterations than my attempts to perfect sourdough during lockdown (we don’t need to talk about the “hockey puck” phase). The first time I made the pizza dip, I got overzealous with the mozzarella and created a cheese bubble that erupted like a tiny, delicious volcano. Lesson learned: a moderate cheese layer is your friend.
The dessert dip was actually my niece’s invention during a “kids in the kitchen” day. She wanted a pink dip with sprinkles, and the cream cheese-fluff base was born. It was such a hit with the adults that it earned a permanent spot on the roster.
My biggest piece of advice? Don’t stress about making everything from absolute scratch. A good-quality jarred marinara, a rotisserie chicken, and pre-shredded cheese are there to be your teammates, not the opponents. The goal is fun, flavor, and sharing—not kitchen exhaustion by the first quarter. This recipe evolves every time I make it, so please, make it your own and tell me what twists you discover!
Print
Halftime Snack Flight : Dips Edition for the Ultimate Game Day Spread
Description
Forget juggling a dozen bowls and chasing runaway chips across the coffee table. The Halftime Snack Flight turns your game day spread into an interactive, crowd-pleasing experience. Inspired by craft beer flights, this lineup features five crave-worthy dips served in mini glasses—each one bringing a different flavor vibe to the table: creamy, spicy, cheesy, savory, and sweet.
Instructions
Measure ingredients, shred cheese, dice veggies, and set out five small bowls. This makes assembly fast and stress-free.
Mash avocados with lime juice and salt until mostly smooth. Fold in red onion and any optional add-ins. Taste and adjust seasoning.
Tip: Press plastic wrap directly onto the surface to prevent browning.
Combine chicken, cream cheese, buffalo sauce, and cheddar. Heat gently on the stove or microwave in 30-second bursts, stirring until warm and creamy.
Spread cream cheese in a bowl. Layer marinara on top, then sprinkle with mozzarella. Microwave 45–60 seconds until bubbly, or bake briefly for a browned top.
Heat cheese and milk together in short intervals, stirring well until smooth. Stir in jalapeños and optional hot sauce. Add a splash of milk if needed.
Stir cream cheese and marshmallow fluff until smooth. Fold in chocolate chips and most of the sprinkles.
Spoon each dip into mini glasses, mason jars, or ramekins. Garnish pizza dip and dessert dip. Arrange in a row on a board or tray.
Notes
-
Use room-temperature cream cheese for smooth mixing
-
Keep warm dips warm, cold dips cold for best texture
-
Label dips for easy sampling and fun presentation
-
Mini glasses or jars make everything feel intentional and elevated
Final Thoughts
So, is it worth it? Turning your snack table from a free-for-all into a curated, interactive flight? Absolutely. This isn’t just about food—it’s about changing the vibe. It’s about creating a moment where everyone gathers, compares, and celebrates flavor together. The laughter over who loves the spicy queso and who’s guarding the dessert dip… that’s the real winning play.
Remember, this isn’t a fussy, strict recipe. It’s a playbook. Swap the dips, change the colors, use what you’ve got. The core idea is what matters: small tastes, big impact, and shared joy. Whether your team wins or loses, your snack game will be undefeated.
So here’s to good food, great friends, and turning every gathering into a championship event. Now get out there and build that flight. I can’t wait to hear which dip gets voted MVP in your house.
Cheers & happy snacking,
Beau

Buffalo Chicken Pinwheel Pops : The Ultimate Finger Food with a Kick
Buffalo Chicken Pinwheel Pops: The Ultimate Finger Food with a Kick
Hey friends, Beau here from Feastical! Tell me if this sounds familiar: you’re hosting a game day bash, a birthday party, or just a casual Friday night hang, and you need a snack that does it all. It has to be delicious (obviously), easy to eat while mingling, fun enough to get people talking, and simple enough that you’re not stuck in the kitchen all day while everyone else is having fun. If you’re nodding your head, I’ve got your new secret weapon.
Imagine all the bold, tangy, creamy goodness of your favorite Buffalo chicken dip… but we’ve rolled it up in a fluffy, buttery crescent dough blanket, baked it until golden, and popped it on a stick for maximum grab-and-go glory. That’s exactly what these Buffalo Chicken Pinwheel Pops are. They’re like the super-cool, portable cousin of the classic dip, and I promise you, they will disappear from the platter faster than you can say “touchdown.”
This isn’t just another appetizer recipe. It’s a blueprint for fun food. We’re taking simple, affordable ingredients and transforming them into something magical and interactive. Whether you’re a kitchen newbie or a seasoned pro, these pinwheel pops are your ticket to becoming the MVP of any gathering. So, let’s roll up our sleeves (and some dough) and create the finger food that will have everyone asking, “Can I have the recipe?” Spoiler: You can gladly send them right here to Feastical!
The Game Day That Started It All
This recipe was born out of a little bit of chaos and a whole lot of delicious necessity. A few seasons back, my buddies and I were crammed into my living room for the big game. The usual suspects were on the table: a bowl of tortilla chips, a vat of my classic Buffalo dip, and the inevitable, tragic casualty—a rogue chip spearing through the dip bowl, sending a creamy, orange splatter across my coffee table (RIP, remote control).
As I was cleaning up, I had a lightbulb moment. What if the dip came with its own edible vessel? What if you could hold your snack without double-dipping or creating a crumbly mess? I raced to the kitchen, fueled by inspiration (and maybe a little panic that we were running out of food). I had leftover rotisserie chicken, a tube of crescent dough in the fridge, and my trusty bottle of hot sauce. I mixed, rolled, sliced, and baked. When I walked back into the living room with a plate of these spiraled, cheesy pops on sticks, the game practically stopped. They were a total touchdown. No mess, all flavor, and just plain fun. That’s the spirit I want to bring to your kitchen.
Gathering Your Flavor Squad
Here’s the beautiful part: you probably have half of this already. Let’s break down what you need and why each ingredient is a star player. Don’t be afraid to make it your own with the substitution tips!
- 1 cup cooked, shredded chicken: The hearty base! I’m a huge fan of using leftover rotisserie chicken for its ready-made flavor and convenience. Shredded roast chicken or even canned chicken (drained well) works in a pinch. For a fun twist, try shredded turkey!
- 4 oz cream cheese, softened: Our creamy, tangy glue. Full-fat cream cheese gives the richest, smoothest texture. Let it sit on the counter for 30-60 minutes to soften—this is key for easy mixing! For a lighter version, Neufchâtel works perfectly.
- 1/4 cup buffalo wing sauce: The “kick” in our kick! I use a classic like Frank’s RedHot. The beauty? You control the heat. Love it fiery? Add an extra tablespoon. Want it milder? Use a “mild” wing sauce or even mix in a little melted butter to temper it.
- 1/2 cup shredded cheddar cheese: Melty, salty goodness. Sharp cheddar adds a great bite, but a Monterey Jack blend would be wonderfully gooey. Pre-shredded is fine, but block cheese you shred yourself melts a bit creamier (no anti-caking agents).
- 1 tablespoon ranch or blue cheese dressing: The cooling counterpoint. This tiny bit adds a layer of herbaceous flavor that balances the heat. If you’re Team Blue Cheese, go for it! It’s a classic Buffalo pairing.
- 1 tube (8 oz) crescent roll dough: Our golden, flaky vehicle. Seamless crescent dough sheets are a lifesaver here, but the classic perforated triangles work just fine—we’ll press them together. See my pro tip in the instructions!
- Oven-safe lollipop sticks: The “pop” in pinwheel pop! Find these in the baking aisle. If you can’t find them, you can absolutely make these as regular pinwheels—they’re just as tasty.
- Optional garnish: chopped green onions or fresh chives: A pop of color and fresh flavor for the finish. Don’t skip it if you have them—it makes the presentation *chef’s kiss*.
Let’s Make Some Magic: Step-by-Step
Ready to create? Follow these steps, and lean in for my little chef hacks along the way. They make all the difference between “good” and “OH WOW.”
Step 1: Preheat & Prep
Preheat your oven to 375°F (190°C). Line a baking sheet with parchment paper. This isn’t just for easy cleanup (though, bonus!). The parchment ensures the bottoms of our pops get perfectly golden without sticking. No parchment? A light spray of cooking oil will do.
Step 2: Create the Flavor Filling
In a medium mixing bowl, combine the shredded chicken, softened cream cheese, buffalo sauce, cheddar cheese, and dressing. Here’s my hack: use a hand mixer on low for about 30 seconds if your cream cheese isn’t super soft. It blends everything into a beautifully cohesive, spreadable filling in no time. Otherwise, a sturdy spatula and some elbow grease will get you there! Taste it (yum!) and adjust the heat level if you want.
Step 3: Master the Dough
Unroll the crescent dough. If using perforated triangles, firmly press the seams together to form one large rectangle. This is the MOST important step for neat pinwheels! Take an extra minute to really seal those seams by pinching and pressing. If you have a dough sheet, you’re already winning. Roll it out gently if needed to about a 10×14 inch rectangle.
Step 4: Spread & Roll
Spread the buffalo chicken mixture evenly over the dough, leaving about a 1/2-inch border along one long edge. That clean border is your “seal.” When you start rolling, the filling will push toward the edge, and that border will help contain it. Start rolling from the opposite long side, rolling as tightly as you can. Think “snug log,” not loose burrito. A tight roll means pretty, defined spirals.
Step 5: Slice & Stick
Using a sharp serrated knife, slice the log into 1-inch pieces. Pro Tip: For super clean cuts, pop the whole log in the freezer for 15-20 minutes before slicing. This firms up the filling and dough. Carefully insert a lollipop stick into the cut side of each pinwheel, pushing it about halfway through. If the dough seems soft, don’t worry—it firms up as it bakes and holds the stick perfectly.
Step 6: Bake to Golden Perfection
Arrange the pops flat on your prepared baking sheet, giving them a little room to breathe. Bake for 12-15 minutes, until the dough is puffed and a deep, gorgeous golden brown. The smell will be incredible. Let them cool on the sheet for 5 minutes—the filling is lava-hot straight out of the oven!
How to Serve These Show-Stopping Pops
Presentation is part of the fun! Don’t just plop these on a plate. Let’s make it an experience.
For a party, I love sticking the ends of the pops into a whole cabbage, a watermelon half, or even a upside-down colander covered with lettuce to create a stunning, tall centerpiece. Surround the base with celery sticks, baby carrots, and bowls of extra ranch or blue cheese dressing for dipping.
For a family snack night, lay them out on a wooden board or colorful platter. Sprinkle those chopped green onions over the top for that fresh, professional finish. The contrast of the green against the golden-brown spirals and orange filling is just *chef’s kiss*. Serve them warm, when the cheese is still delightfully gooey!
Make It Your Own: 5 Delicious Twists
Once you master the basic blueprint, the flavor world is your oyster! Here are some of my favorite spins:
- BBQ Ranch Chicken Pops: Swap the buffalo sauce for your favorite BBQ sauce and use all ranch dressing. Add a tablespoon of finely diced red onion to the mix.
- Everything Bagel Pops: Before baking, brush the tops with a little beaten egg or milk and sprinkle generously with everything bagel seasoning. Instant flavor upgrade!
- Spinach & Artichoke Pops: Replace the Buffalo chicken filling with a blend of cream cheese, chopped artichoke hearts, thawed & drained frozen spinach, garlic powder, and mozzarella cheese.
- Buffalo Cauliflower (Veggie!) Pops: For a meatless version, use 1 ½ cups of finely chopped roasted cauliflower florets instead of chicken. It’s shockingly good and a great way to sneak in veggies.
- Spicy Pepperoni Pizza Pops: Use chopped pepperoni, marinara sauce, and shredded mozzarella instead of the Buffalo ingredients. Add a pinch of Italian seasoning to the filling.
Beau’s Kitchen Notes & Stories
This recipe has evolved from that messy game day rescue mission into my most-requested party trick. One of my favorite memories is teaching my niece how to make them. She was all about “designing” them, carefully placing extra cheddar shreds on the dough before rolling. They baked up extra cheesy and she was so proud—that’s what Feastical is all about.
A key lesson learned: don’t overfill! I’ve been greedy with the filling before, and while it still tastes amazing, it can ooze out the sides during baking. A thin, even layer is the secret to picture-perfect spirals. Also, if your log is hard to slice, the freezer trick is a game-changer. Trust me on this one!
Your Questions, Answered
Can I make these ahead of time?
Absolutely! You have two great options: 1) Assemble the whole log, wrap tightly in plastic wrap, and refrigerate for up to 24 hours before slicing and baking. 2) Slice, place on the parchment-lined sheet, and freeze solid. Then transfer to a freezer bag. Bake from frozen, adding 3-5 minutes to the bake time.
My dough got soggy/too soft to handle. Help!
This usually happens if the filling is too warm or the dough is overworked. Make sure your cream cheese mixture is cool (not straight from the mixer if it got warm). If the dough becomes too soft after spreading, pop the whole baking sheet with the uncut log into the freezer for 10 minutes before slicing. It firms right up!
I don’t have lollipop sticks. What can I use?
No problem at all! Simply skip the sticks and bake them as regular pinwheels. They are just as delicious. You could also use short, sturdy pretzel sticks for a fun, edible handle—just insert them carefully after baking.
Can I use puff pastry instead of crescent dough?
You can, but it’s a different experience! Thawed puff pastry will give you a flakier, more buttery exterior. Roll it to a similar thickness, and you may need to bake for a few minutes longer. It’s a delicious, fancy twist!

Buffalo Chicken Pinwheel Pops : The Ultimate Finger Food with a Kick
Description
These Buffalo Chicken Pinwheel Pops take everything you love about classic Buffalo chicken dip—creamy, tangy, cheesy heat—and wrap it up in flaky crescent dough for the ultimate grab-and-go snack. Baked until golden and served on a stick, they’re fun, mess-free, and guaranteed to disappear fast at game days, parties, or casual get-togethers.
Ingredients
-
1 cup cooked, shredded chicken (rotisserie works great)
-
4 oz cream cheese, softened
-
¼ cup buffalo wing sauce (mild to hot, your choice)
-
½ cup shredded cheddar cheese
-
1 tablespoon ranch or blue cheese dressing
-
1 tube (8 oz) crescent roll dough
-
Oven-safe lollipop sticks
Optional Garnish
-
Chopped green onions or fresh chives
Instructions
-
Preheat & Prep
Preheat oven to 375°F (190°C). Line a baking sheet with parchment paper or lightly grease. -
Make the Filling
In a medium bowl, mix chicken, cream cheese, buffalo sauce, cheddar cheese, and dressing until smooth and well combined. Taste and adjust heat if needed. -
Prepare the Dough
Unroll crescent dough. If using perforated dough, firmly press seams together to form one rectangle. -
Fill & Roll
Spread filling evenly over dough, leaving a ½-inch border along one long edge. Roll tightly from the opposite long side into a log. -
Slice & Stick
Using a sharp knife, slice into 1-inch pinwheels. Insert a lollipop stick halfway into each pinwheel. -
Bake
Place pinwheels flat on prepared baking sheet. Bake 12–15 minutes, until golden brown and puffed. -
Cool & Garnish
Cool for 5 minutes before serving. Garnish with green onions or chives if desired.
Notes
-
Seal the seams well to prevent filling leaks
-
Don’t overfill—a thin, even layer rolls best
-
For clean slices, chill the rolled log for 15–20 minutes before cutting
-
Control the heat by adjusting the buffalo sauce or mixing in a little melted butter
Nutritional Information*
*Please note: The following is an estimate provided by an online nutrition calculator. Values may vary based on specific ingredients and brands used.
Per Serving (1 pop, recipe makes approximately 12):
Calories: ~110 | Total Fat: 6g | Saturated Fat: 3g | Cholesterol: 20mg | Sodium: 280mg | Total Carbohydrates: 7g | Dietary Fiber: 0g | Sugars: 2g | Protein: 6g
This snack packs a satisfying protein punch thanks to the chicken and cheese! To lighten it up, use low-fat cream cheese and reduced-fat crescent dough. Remember, these are meant to be a fun, shareable treat—so enjoy them in the spirit of good times and great food!
Final Thoughts
These pinwheel pops are the ultimate fusion of iconic flavor and foolproof fun. They transform everyday ingredients into an interactive, mess-free party staple that’s always the first to go. Remember the key tips: soften that cream cheese, seal those dough seams, and use the freezer trick for perfect slices.
Now you’re equipped to bring the kick, the creaminess, and the crunch to any gathering. Make them, share them, and own your status as a snack-time legend.

Touchdown Totchos Stadium : The Ultimate Game Day Snack Centerpiece
The Touchdown Totchos Stadium: Your Game Day Snack Just Called an Audible
Hey, foodie friend! Beau here, coming at you live from my kitchen – which, on game day, looks less like a culinary workshop and more like a sports bar command center. If your watch party snacks are stuck in the same old routine of bowls of chips and store-bought dip, I’ve got the play that’s going to change the entire game. I’m talking about the Touchdown Totchos Stadium, a snack so epic, so interactive, and so downright delicious that your guests might forget to watch the screen.
This isn’t just a pile of loaded tater tots (though that alone is a beautiful thing). This is architecture. This is a centerpiece. It’s a crunchy, cheesy, totally customizable football field built for maximum flavor and fun. It’s the conversation starter that turns your snack table into the main event, the dish that gets Instagrammed more than the final score, and the guaranteed MVP of your gathering. Best of all? It’s shockingly simple to pull off. We’re using smart shortcuts (frozen tots are our secret weapon!) and focusing on creative assembly. So, preheat your oven, clear off your biggest platter, and let’s build a snack stadium worthy of a championship celebration. This is feel-good food at its most festive, and I can’t wait to show you how it’s done.
A Tot-ally Nostalgic Beginning
My love for this ridiculous, wonderful dish started in my grandma’s den, circa 1998. Every Sunday, the whole family would cram onto her plaid sofa, a mismatched collection of TV trays holding an array of snacks. The star was always her “snack plate” – a baking sheet she’d load with whatever was in the fridge: leftover meatballs, cheese cubes, crackers, and, if we were lucky, some crispy tater tots. My brother and I would spend halftime meticulously building tiny forts and walls with the tots, creating moats of ketchup and cheese pull bridges. It was messy, it was creative, and it made the game our game.
The Touchdown Totchos Stadium is my full-grown, fully-realized tribute to those afternoons. It captures that same spirit of playfulness and community. Food isn’t just fuel; it’s the glue that holds the party together, the tactile joy of building something with your hands before you joyfully destroy it with your friends. This recipe takes that childhood memory and decks it out with all the bells and whistles – the sour cream yard lines, the jalapeño goalposts, the end zones of guac. It’s a little silly, a whole lot delicious, and 100% guaranteed to bring everyone to the table, both literally and figuratively.
Gathering Your All-Star Roster
Here’s your lineup! Remember, great food is flexible. Use this as your playbook and feel free to substitute based on what your team likes or what’s in your pantry.
- 2 bags (32 oz each) frozen tater tots – The undisputed foundation of our stadium. I’m a firm believer in the frozen tot here; they hold their shape perfectly during the bake-and-build phase. Chef’s Insight: Look for “extra crispy” or “mini” varieties for even better structural integrity.
- 2 cups shredded cheddar cheese – The melty, gooey binding agent that holds our flavor team together. Substitution Tip: A Monterey Jack blend adds a lovely creaminess, or pepper jack brings a subtle heat. Pre-shredded is fine for convenience, but a block you shred yourself melts more smoothly.
- 1 cup cooked, seasoned ground beef or your favorite chili (optional) – The protein powerhouse. Chef’s Insight: I like to brown my beef with a packet of taco seasoning for instant, deep flavor. For a vegetarian TD, swap in a can of rinsed black beans or plant-based “crumbles.”
- 1 cup sour cream – Our “field paint” for the yard lines! Pro Tip: Let it come to room temp and put it in a squeeze bottle or a zip-top bag with a tiny corner snipped off. Trust me, this is the hack for clean lines.
- 1/2 cup pickled jalapeño slices – They bring the tangy heat and make perfect, upright goalposts. Substitution Tip: Fresh jalapeños work if you love a sharper heat; just slice them thinly.
- 1/2 cup diced tomatoes – A fresh, juicy pop of color and acidity to cut through the richness. I deseed them to prevent a soggy field.
- 1/2 cup sliced green onions – The flavorful confetti! They add a necessary fresh, oniony bite and gorgeous green color.
- 1/2 cup guacamole (optional) – Perfect for creating lush, green “end zones.” Store-bought is your friend here, or mash a ripe avocado with a little lime and salt for a quick version.
- Cooking spray & Salt and pepper to taste – The essentials. A quick spritz on your baking sheet prevents any tot casualties.
Building Your Stadium: A Step-by-Step Playbook
Okay, team. Let’s huddle up and run through the game plan. Follow these steps, and you’ll be holding the snack championship trophy in no time.
Step 1: Bake Your Foundation. Preheat your oven and spread those frozen tots in a single layer on a baking sheet (or two!). Bake according to package directions, but maybe give them an extra 3-5 minutes. We want them GOLDEN and CRUNCHY – this is non-negotiable for a stadium that won’t collapse. Once they’re out, let them cool just enough to handle. A hot tot is a fragile tot!
Step 2: Construct the Walls. Grab your largest platter, cutting board, or even a clean baking sheet. This is your construction site. Start by creating a rectangular outline—this is the outer wall of your stadium. Place tots side-by-side, then stack a second layer on top, slightly staggered like bricks. Make the walls about 2-3 tots high. Don’t stress perfection; rustic charm is part of the appeal!
Step 3: Fill the Field and Add the Toppings. Inside your tot walls, create a solid, single layer of tots—this is the playing field. Now, the fun part: blanket that field with your shredded cheese. Sprinkle your cooked beef or chili evenly over the cheese, then scatter the diced tomatoes and most of the green onions (save some for garnish!). Pop the whole platter under the broiler for just 1-3 minutes, watching like a hawk until the cheese is magnificently bubbly.
Step 4: Decorate for the Win! This is where the magic happens. Take your room-temperature sour cream in its squeeze bottle and carefully draw on the yard lines. Start with the 50-yard line in the middle and work out! No one’s calling for measurement flags here—just have fun with it. At each end, press two jalapeño slices into the toppings to stand up as goalposts. Spoon your guacamole into the corners to create end zones. Finally, sprinkle the reserved green onions over everything like fresh turf.
Step 5: Serve Immediately and Celebrate! Carry your masterpiece to the table with a flourish. Provide small plates and lots of napkins. The beauty is in the sharing—guests can scoop directly from the stadium, grabbing cheesy, beefy, crunchy bites. Watch it disappear faster than a Hail Mary pass in the final seconds.
Presenting Your Championship Dish
Presentation is half the fun! I love placing the finished Totchos Stadium right in the center of the coffee table, surrounded by supporting players. Think of it as the star quarterback needing a good offensive line. On the side, offer bowls of extra sour cream, salsa, and maybe a queso dip for the truly decadent. A stack of small parchment paper liners or napkins makes grabbing a serving easy.
For drinks, keep it thematic. A crisp, cold lager or a pitcher of margaritas (or mocktails!) pairs perfectly. And don’t forget the utensils—a couple of sturdy spatulas or large spoons are perfect for serving. The goal is to make it accessible, interactive, and irresistibly photogenic. Encourage your friends to get their phones out before the first scoop!
Call Your Own Flavor Play: Delicious Variations
The basic play is a winner, but every great coach has a few trick plays. Here are some fantastic ways to customize your Touchdown Totchos Stadium:
- The Fully Loaded Breakfast Stadium: Perfect for a brunch game! Use crispy hash brown patties or tots. Top with scrambled eggs, cooked crumbled sausage or bacon, cheddar cheese, and after broiling, use sour cream for lines and dots of salsa for end zones.
- The Buffalo Chicken Bleachers: Toss shredded rotisserie chicken in buffalo sauce. Build your stadium, use a mix of Monterey Jack and blue cheese crumbles, top with the buffalo chicken, and after baking, drizzle with ranch dressing for the lines and add celery stick “goalposts.”
- The Veggie Lover’s Field: Ditch the meat and load up with color! After the cheese, add sautéed bell peppers and onions, black beans, corn kernels, and diced tomatoes. Finish with avocado slices and cilantro.
- The BBQ Pulled Pork Pit: Swap the beef for tender pulled pork tossed in your favorite BBQ sauce. Use a colby jack cheese blend, and after broiling, draw lines with a zigzag of cool ranch dressing or extra BBQ sauce.
- The “Everything But the Kitchen Sink” Keto Zone: For a lower-carb version, use cooked, crumbled cauliflower tots as your base. Load up with cheese, bacon, diced avocado, pulled chicken, and use a garlic aioli for your field markings.
A Few Notes from My Kitchen to Yours
This recipe has seen a few… structural failures in its R&D phase. Let my mistakes be your guide! The first time I tried it, I used soggy tots and built the walls too high. Let’s just say we had a “stadium collapse” that turned into a delicious, if messy, casserole. Hence my obsession with extra-crispy tots. Also, the sour cream lines? I once used cold sour cream straight from the fridge, and it just glopped. Room temp is the secret for smooth piping.
Over time, I’ve learned this dish is less about rigid rules and more about joyful assembly. My nephew once insisted we use French fries instead of tots and make it a “soccer pitch” with pesto as the grass. It was brilliant! So use this as your blueprint, then make it your own. The best part is the collective “WOW” when you bring it out and the shared experience of digging in together.
Your Game Day Questions, Answered
Q: Can I make any part of this ahead of time?
A: Absolutely! You can bake the tots up to an hour ahead and let them sit at room temp. Cook and season your beef or chili. Dice your veggies. Assemble the cold components (walls, field base) on the platter. Then, right before the game, add the cheese and warm toppings and give it a quick broil to melt. Decorate and serve!
Q: My tots got soggy! What happened?
A> The two main culprits are: 1) Under-baking the tots initially. They need to be seriously crispy. 2) Adding wet toppings (like fresh salsa or undrained tomatoes) before the final broil. Keep wet ingredients as garnishes on top after melting the cheese, or be sure to drain/seeds them well.
Q: How do I move this from the kitchen to the coffee table without disaster?
A> Build it directly on the platter you plan to serve it on. If you must move it, use a large, flat tray or cutting board with a non-slip bottom. And enlist a spotter! Clear a path to the table first.
Q: Any tips for cleaner sour cream lines?
A> Yes! Let the sour cream warm up. Use a bottle or bag with a very small tip opening. Practice a few lines on a plate first. Hold the bottle close to the cheese surface and apply steady, even pressure. If you mess up, just smile and call it “abstract field art.”

Touchdown Totchos Stadium : The Ultimate Game Day Snack Centerpiece
Description
If loaded tater tots are good, then a fully built Totchos Stadium is legendary. This interactive game-day centerpiece turns crispy tater tots into a cheesy, scoopable football field complete with sour cream yard lines, jalapeño goalposts, and customizable toppings. It’s crunchy, melty, fun to assemble, and even more fun to demolish—perfect for watch parties, tailgates, or any gathering that deserves a little spectacle.
Ingredients
Stadium Base
-
2 bags (32 oz each) frozen tater tots (extra-crispy preferred)
-
Cooking spray
-
Salt & pepper, to taste
Toppings
-
2 cups shredded cheddar cheese
-
1 cup cooked, seasoned ground beef or chili (optional)
-
½ cup sour cream, room temperature
-
½ cup diced tomatoes, seeds removed
-
½ cup sliced green onions
-
½ cup pickled jalapeño slices
-
½ cup guacamole (optional, for end zones)
Instructions
1. Bake the Tots
Preheat oven according to tater tot package directions. Spread tots in a single layer on baking sheets sprayed with cooking spray.
Bake until deeply golden and extra crispy, adding 3–5 minutes if needed. Let cool slightly so they’re easy to handle.
2. Build the Stadium Walls
On a large serving platter or cutting board, arrange tots into a large rectangle.
Stack tots 2–3 layers high around the edges to form sturdy walls, slightly staggering them like bricks.
3. Fill the Field
Inside the walls, add a single solid layer of tots.
Sprinkle evenly with shredded cheese, then scatter cooked beef or chili (if using), diced tomatoes, and most of the green onions.
4. Melt & Bubble
Place the platter under the broiler for 1–3 minutes, watching closely, until cheese is melted and bubbly.
5. Decorate the Field
-
Pipe sour cream into yard lines using a squeeze bottle or zip-top bag
-
Stand jalapeño slices upright as goalposts at each end
-
Spoon guacamole into corners for end zones (optional)
-
Sprinkle remaining green onions over the top
6. Serve Immediately
Bring to the table while hot and melty. Provide small plates, sturdy spoons or spatulas, and plenty of napkins.
Notes
-
Extra-crispy tots are non-negotiable for structure
-
Room-temperature sour cream = clean lines
-
Drain wet toppings well to avoid sogginess
-
Build on the serving platter to prevent disasters
-
Rustic is good—perfection is not required
Let’s Talk Nutrition (Real Talk!)
Friends, let’s be real: the Touchdown Totchos Stadium is an indulgence, a celebration food. It’s not a salad, and it’s not trying to be! It’s a shareable, fun-focused centerpiece for a special occasion. That said, being mindful is always good. A serving (about 1/10th of the recipe, which is a generous scoop) clocks in around 380-450 calories, depending on your specific toppings (using lean beef, light sour cream, and skipping the guac brings it to the lower end).
It provides a decent amount of protein from the cheese and meat, and the tomatoes and green onions add a dash of vitamins. The key, as with all game day spreads, is balance. Enjoy a hearty scoop of totchos, but also fill your plate with some veggie sticks, a lighter salad, or fruit from the spread. It’s all about the mix! This recipe is about joy, community, and flavor—so savor it guilt-free as part of a fun-filled gathering.
The Final Whistle
And that’s the play, folks! The Touchdown Totchos Stadium is more than a recipe; it’s an experience. It’s the laughter when you reveal it, the friendly argument over who gets the “50-yard line” scoop, and the satisfied silence that falls over the room as everyone digs in. It captures everything I believe in at Feastical: that food should be a warm hug, a reason to gather, and never, ever a chore.
So this weekend, whether your team wins or loses, you’ll be a champion in your own kitchen. You’ll have created a memory, a masterpiece, and one seriously empty platter. Now, go build something delicious. And hey—if you make it, tag me @Feastical online. I love seeing your culinary stadiums! Until next time, keep your ovens warm and your spirits high.
Hungry for more? Explore all my feel-good recipes and kitchen stories at Feastical.com!
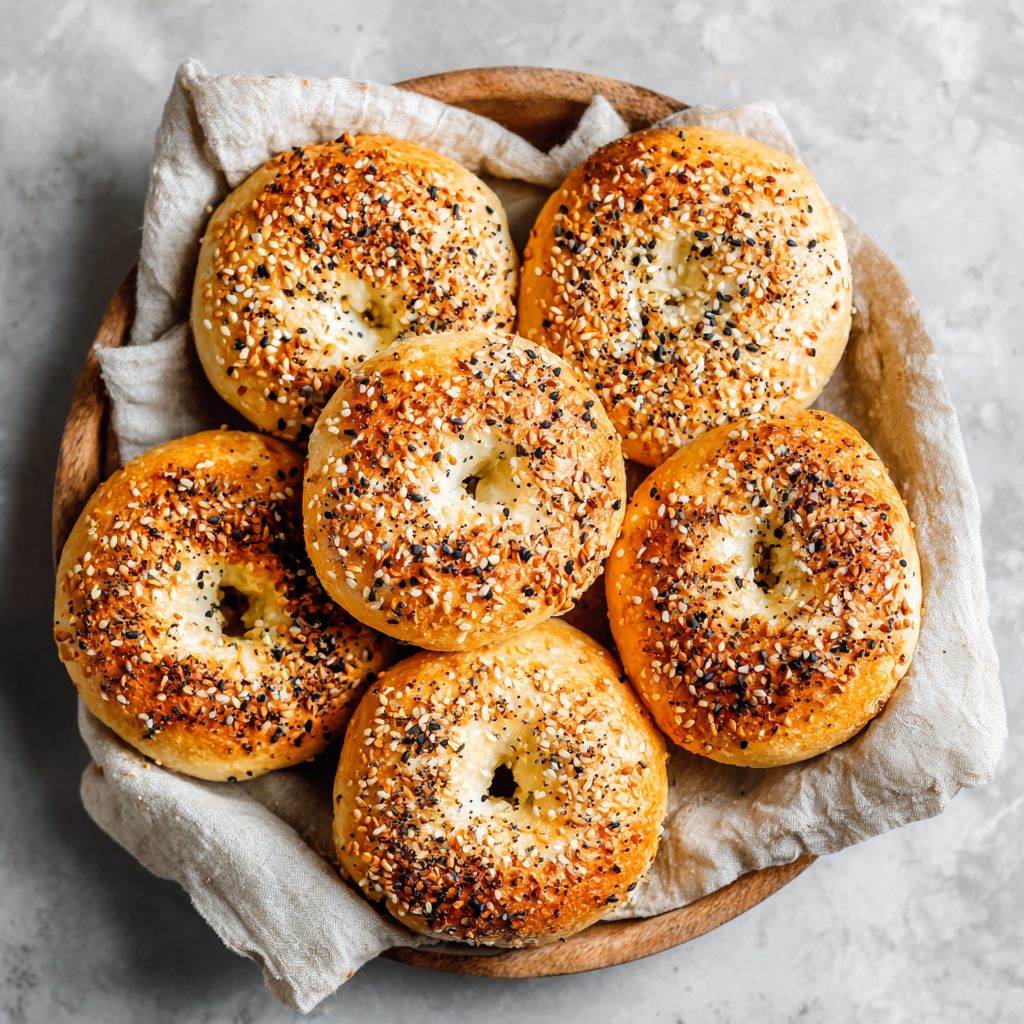
Easy New York-Style Sourdough Discard Bagels : Perfect for Beginners
Easy New York-Style Sourdough Discard Bagels – Your New Kitchen Win
Hey there, it’s Beau! Let’s talk about that little jar of sourdough discard sitting in your fridge. You know the one. It whispers guilt every time you open the door, a bubbly reminder of good intentions. For the longest time, I’d give mine a solemn salute before… well, letting it go. It felt like wasting a tiny bit of kitchen magic. But what if I told you that same discard is the secret key to the chewiest, shiniest, most satisfying homemade bagels you’ve ever tasted?
That’s right. Today, we’re transforming that “waste” into pure gold: Authentic New York-Style Sourdough Discard Bagels. Now, I can see you maybe leaning back, thinking, “Bagels? Beau, that’s professional bakery stuff.” I promise you, it’s not. If you can stir ingredients together and boil water, you are 100% qualified for this mission. We’re skipping the complicated, 3-day sourdough schedules and using our trusty discard to add incredible flavor and a perfect, tender-yet-chewy crumb. No fancy tools, no obscure ingredients—just you, your kitchen, and the incredible smell of baking bread.
This recipe is my go-to for a relaxed weekend bake. It’s therapeutic, impressive, and the results? Pure, unadulterated breakfast bliss. Imagine pulling a tray of golden, sesame-speckled bagels from your own oven, the crust snapping as you tear one open to slather with cream cheese. That’s not a bakery daydream; it’s about to be your Saturday morning reality. So, let’s roll up our sleeves, rescue that discard, and bake something spectacular together.
The Bagel That Started It All: A Brooklyn Memory
My love affair with bagels isn’t just about the taste—it’s wrapped up in a foggy, cold morning in Brooklyn years ago. I was visiting a friend, jet-lagged and bewildered, when he dragged me out of bed with one phrase: “We’re getting bagels.” We walked a few blocks to this unassuming little shop with a line trailing out the door. The air was thick with the scent of malt and baked flour. I watched, mesmerized, as someone behind the counter pulled a dozen from a giant boiling pot, slid them into the oven, and moments later, presented them in a simple paper bag, still almost too hot to hold.
That first bite was a revelation. It wasn’t just bread with a hole. It was a experience: a crisp, glossy shell that gave way to a dense, steaming, chewy interior with just the faintest tang. It was hearty, simple, and profoundly satisfying. I must have eaten three that weekend. When I got home, I was determined to capture that magic. After more… let’s call them “hockey puck” phases… than I’d like to admit, I realized my sourdough discard was the missing piece. It gave me that depth of flavor and perfect texture I was chasing. Now, every time I shape these dough rings, I’m right back on that Brooklyn street, about to taste a little bit of magic I made myself.
Gathering Your Bagel Toolkit: Simple Ingredients, Big Flavor
Here’s everything you need. The beauty of this recipe is in its simplicity. We’re using the sourdough discard as a flavor powerhouse, and a touch of yeast to guarantee a great rise without the long wait of a full sourdough fermentation. It’s the perfect cheat code for beginners!
- 1 cup (about 240g) sourdough discard – This is your star! Unfed, straight-from-the-fridge discard is perfect. It adds that complex, slight tang and incredible moisture to the crumb. No active starter? No problem. This recipe is designed for discard. Chef’s Insight: The thickness of your discard matters. If it’s very thick, you might need a splash more water. If it’s quite runny, hold back a few tablespoons of water when mixing.
- ¾ cup (180ml) warm water – Aim for around 100°F (38°C)—warm to the touch, not hot. This wakes up the yeast and helps everything come together smoothly.
- 2 tsp instant yeast (optional but recommended) – This is our insurance policy! It ensures a good, predictable rise and a lighter bagel. For a purely sourdough rise (more tang, longer wait), you can omit it, but I love the hybrid method for reliability. Substitution Tip: You can use an equal amount of active dry yeast. Just stir it into the warm water with the sugar and let it foam for 5 minutes before adding other ingredients.
- 2 tbsp sugar – Feeds the yeast and contributes to a beautiful golden-brown crust. Don’t worry, the bagels won’t taste sweet.
- 2 tsp salt – Crucial for flavor development. Use fine sea salt or kosher salt.
- 3 ½ cups (about 455g) bread flour – Bread flour has a higher protein content than all-purpose, which means more gluten. More gluten means that iconic, satisfying chew! Substitution Tip: In a pinch, all-purpose flour works. Your bagels will be slightly less chewy but still delicious.
- For Boiling: 1 tbsp sugar or honey – This creates a sticky surface on the bagel for toppings to cling to and gives that classic shiny, crisp crust.
- For Topping (Go Wild!): Everything Bagel Seasoning, sesame seeds, poppy seeds, dried garlic flakes, coarse salt, or just leave them plain and shiny!
Let’s Make Some Bagels: A Step-by-Step Journey
Ready? Put on some good music, clear a counter, and let’s get our hands in some dough. I’ll walk you through each step with all my favorite hacks.
Step 1: The Mix & Knead
In a large bowl, combine your sourdough discard, warm water, sugar, instant yeast (if using), and salt. Give it a good whisk until it looks like a smooth, messy batter. Now, start adding the bread flour, about a cup at a time, stirring with a sturdy spoon or dough whisk. Once it becomes too shaggy to stir, dump it onto a lightly floured surface. Chef’s Hack: Don’t add all the flour at once! You may not need the full amount, or you might need a touch more. We’re looking for a firm, smooth dough that’s slightly tacky but doesn’t stick to your clean hands.
Now, knead. Use the heel of your hand to push the dough away from you, then fold it back over itself. Give it a quarter turn, and repeat. Do this for 8-10 minutes. Yes, your arm might get a workout! This kneading develops the gluten, which is the secret to the chew. You’ll know it’s ready when the dough is super smooth, elastic, and passes the “windowpane test”: pinch off a small piece and gently stretch it. If you can stretch it thin enough to see light through it without it tearing immediately, you’re golden.
Step 2: The First Rest (The Easy Part)
Place your beautiful ball of dough back in the bowl (lightly oil the bowl first for easy removal), cover it with a damp kitchen towel or plastic wrap, and let it rest. Find a warm, draft-free spot. This is where the magic starts. Let it sit for 1-2 hours. It won’t necessarily double in size like a regular bread dough, but it should look visibly puffy and feel airy when you poke it. Time-Saving Tip: You can also stick the covered bowl in the fridge right now and let it rise slowly overnight (8-12 hours). This develops even more sourdough flavor! Pull it out about an hour before shaping to let it warm up slightly.
Step 3: Shaping Your Rings (Don’t Overthink It!)
Punch down the dough (always fun) and turn it out onto your counter. No need to flour it if the dough isn’t sticky. Use a sharp knife or bench scraper to divide it into 8 equal pieces. Now, to shape: roll each piece into a tight, smooth ball. Press it firmly against the counter, cupping your hand around it in a “C” shape, and make small circular motions until the top is taut. Let the balls rest for 5 minutes—this relaxes the gluten and makes the next step easier.
To form the hole, I use the “poke and stretch” method. Flour your index finger and poke it straight through the center of a ball. Then, gently swing the ring around your finger, stretching the hole to about 1.5 – 2 inches wide. Pro Tip: The hole will shrink during resting and baking, so make it bigger than you think! Place the shaped bagels on a parchment-lined baking sheet.
Step 4: The Quick Rest & The Big Boil (The Secret Step!)
Cover your shaped bagels with that damp towel again and let them rest for 30 minutes. Meanwhile, preheat your oven to a hot 425°F (220°C) and bring a large, wide pot of water to a rolling boil. Add the tablespoon of sugar or honey to the water. This is what gives New York bagels their signature crust!
Gently lower 2-3 bagels at a time into the boiling water using a slotted spoon or spider strainer. They’ll sink, then float. Boil for 30-60 seconds per side. The longer you boil, the thicker and chewier the crust. I do a full minute per side for that classic dense chew. Remove them, let the excess water drip off, and place them back on the parchment-lined sheet. Chef’s Hack: Immediately after boiling, while the surface is still wet and sticky, sprinkle on your toppings! They’ll adhere perfectly.
Step 5: Bake to Golden Perfection
Bake your bagels for 20-25 minutes. You’re looking for a deep, golden-brown color and a firm, crisp crust. Rotate the tray halfway through for even baking. Your kitchen will smell unreal. When you tap the bottom of a bagel, it should sound hollow. Transfer them to a wire rack immediately—this prevents the bottoms from steaming and getting soft. Now, the hardest part: try to let them cool for at least 20 minutes before tearing into one. I never make it.
Serving Up Your Homemade Masterpiece
Okay, they’re cooled (mostly). Now for the fun! A perfectly fresh bagel needs little more than a generous schmear of cream cheese. For the full experience, go for full-fat Philadelphia-style. But let’s get creative:
The Classic: Toasted, with a thick layer of scallion cream cheese, sliced tomato, red onion, capers, and lox. This is the ultimate weekend treat.
The Breakfast Slam: Slice and toast your bagel, then top with a fried egg, a slice of sharp cheddar, and a few slices of avocado. Maybe a dash of hot sauce.
The Simple Sweet: Lightly toasted with good butter and a drizzle of local honey or a sprinkle of cinnamon sugar.
These bagels are also fantastic for sandwiches at lunch. Their sturdy structure holds up to hearty fillings like turkey, mustard, and Swiss without getting soggy. Store them in a paper bag at room temp for a day, or slice and freeze them for up to 3 months. Just pop a frozen slice straight into the toaster!
Make It Your Own: Delicious Recipe Twists
Once you’ve mastered the basic recipe, the world is your bagel shop! Here are a few of my favorite spins:
- Everything But The…: This is the crowd-pleaser. Before baking, brush with a little water and press on a heavy coating of Everything Bagel Seasoning. The sesame, garlic, onion, and salt are just magic.
- Cinnamon Raisin Comfort: When mixing the dough, add 1.5 tsp of ground cinnamon to the dry flour. After the first rise, knead in ¾ cup of plump raisins (soak them in warm water for 10 minutes first to prevent burning). Boil as usual, then sprinkle with cinnamon sugar before baking.
- Savory Parmesan & Herb: Knead in ½ cup of finely grated Parmesan cheese and 2 tbsp of dried Italian herbs (like oregano, basil, thyme) into the dough. Top with more Parmesan and a pinch of flaky salt after boiling.
- Whole Wheat Honey: Swap out 1.5 cups of the bread flour for whole wheat flour. Replace the white sugar in the dough with honey. You’ll get a nuttier, heartier bagel that’s incredible with almond butter.
- “Everything” Vegan: The base recipe is already vegan (if you use sugar, not honey, in the boil)! Just ensure your toppings are plant-based, and slather with your favorite vegan cream cheese or avocado.
Easy New York-Style Sourdough Discard Bagels : Perfect for Beginners
Description
These New York–style sourdough discard bagels are the perfect way to turn leftover starter into something truly special. The discard adds a gentle tang, while a small amount of yeast guarantees a reliable rise—no multi-day fermentation required. With a classic boil-then-bake method, you’ll get that iconic chewy interior and glossy crust right from your own oven.
Ingredients
Bagel Dough
-
1 cup (240 g) sourdough discard, unfed
-
¾ cup (180 ml) warm water (about 100°F / 38°C)
-
2 teaspoons instant yeast
-
2 tablespoons sugar
-
2 teaspoons salt
-
3½ cups (about 455 g) bread flour
Boiling Bath
-
Water
-
1 tablespoon sugar or honey
Toppings (optional)
-
Everything bagel seasoning
-
Sesame seeds
-
Poppy seeds
-
Dried garlic or onion flakes
Instructions
-
Mix the Dough
In a large bowl, whisk together discard, warm water, sugar, yeast, and salt.
Add flour gradually and mix until a firm dough forms. -
Knead
Knead on a lightly floured surface for 8–10 minutes until smooth, elastic, and slightly tacky. -
First Rise
Place dough in a lightly oiled bowl, cover, and let rise 1–2 hours, until puffy. -
Shape
Divide dough into 8 equal pieces. Roll into balls, then poke a hole through the center and gently stretch to form bagels. -
Rest
Place shaped bagels on a parchment-lined tray, cover, and rest 30 minutes. -
Boil
Preheat oven to 425°F (220°C).
Bring a large pot of water to a boil and add sugar or honey.
Boil bagels 30–60 seconds per side, then return to tray and add toppings. -
Bake
Bake for 20–25 minutes, until deep golden brown.
Cool on a rack before slicing.
Notes
-
Bread flour matters: Higher protein = better chew.
-
Don’t skip the boil: This step creates the classic bagel crust.
-
Adjust hydration: If dough feels too sticky, add flour 1 tablespoon at a time.
-
Bigger holes are better: They shrink during baking.
A Few Final Thoughts From My Kitchen to Yours
This recipe has become a staple in my home, and it’s evolved with every batch. I once tried to speed up the rise by putting the bowl on a heating pad… and accidentally made a “warm spot” so hot it partially cooked one side of the dough. We don’t talk about the lopsided bagels that resulted. Lesson learned: patience (and room temperature) is a virtue.
I also love that this recipe builds confidence. Shaping gets easier every time. You’ll learn exactly how your dough should feel. And the moment you pull that first successful batch from the oven? That’s a victory you get to eat. It’s more than a bagel; it’s proof that you can create incredible things from simple, honest ingredients—even the ones you thought were just discard.
Bagel FAQs: Your Questions, Answered
Q: My dough is really sticky and hard to handle. What did I do wrong?
A: This usually means it needs a bit more flour or more kneading. Add flour a tablespoon at a time while kneading until it becomes smooth and only slightly tacky. Humidity plays a big role, so don’t be afraid to adjust!
Q: Can I skip the boiling step? It seems fussy.
A: I really don’t recommend it! Boiling is the non-negotiable step that sets the crust, gives the bagel its shiny, chewy exterior, and helps the interior stay dense and moist. It’s what makes a bagel a bagel, not a roll with a hole. It takes less than 5 minutes total—you’ve got this!
Q: My bagels came out dense and heavy. How do I fix that?
A: A few culprits: 1) The dough wasn’t kneaded enough to develop gluten. 2) The yeast might be old. Test it in some warm water with a pinch of sugar—it should foam. 3) They were over-boiled. Try 30 seconds per side next time. 4) The oven might not be hot enough—use an oven thermometer to check.
Final Thoughts: Your Kitchen, Your Victory
So, there you have it. What started as a guilty glance at a jar of sourdough discard has transformed into a tray of golden, chewy, impossibly satisfying homemade bagels. You didn’t just bake; you reclaimed a bit of kitchen alchemy, turning something often wasted into a tangible triumph.
Remember that first bite I described from Brooklyn? That feeling isn’t locked away in a special shop in New York. It’s in the warmth of your own kitchen, in the snap of a crust you created, in the quiet pride of a Saturday morning well spent. This recipe is more than a set of instructions—it’s an invitation to slow down, to get your hands in the dough, and to experience the profound joy of making something truly wonderful from scratch.
Don’t be discouraged by a lopsided shape or a batch that’s a little too chewy. Each one is a lesson, and every lesson makes the next batch even better. You’ve now got the knowledge, the tricks, and the confidence to make this a ritual. Freeze them, gift them, or devour them all yourself. You’ve earned it.
In the end, these bagels are a celebration of simplicity, resilience, and flavor. They’re proof that great food doesn’t need to be complicated—it just needs care, a few good ingredients, and a cook like you willing to give it a shot.
Now, go rescue that discard. Your next kitchen win is waiting to be boiled, baked, and blissfully enjoyed.
Happy Baking,
Beau

Quick Sourdough Discard Focaccia : Easy, Homemade & Perfectly Fluffy
Say Hello to Your New Favorite Way to Use Sourdough Discard
Hey there, friend! Beau here, welcoming you back to my kitchen at Feastical. If you’re anything like me, you’ve stared down that jar of sourdough discard on your counter with a mix of guilt and determination. Tossing it feels like a crime, but committing to another 12-hour baking project? Not always in the cards. That’s exactly why I need to tell you about this recipe. This isn’t just focaccia; this is your ticket to stress-free, glorious, fluffy bread that turns that “waste” into a masterpiece in about two hours, hands-off time included.
Let’s be real: the words “quick” and “sourdough” don’t often go together. But this Quick Sourdough Discard Focaccia is the beautiful exception. We’re using a little instant yeast as a trusty co-pilot to guarantee that iconic rise and airy crumb, while the discard brings that irreplaceable, subtle tang and depth of flavor that makes your soul (and your stomach) sing. The result? A golden, olive oil-crisped canvas that’s begging for your favorite toppings. It’s perfect for tearing apart with friends, sopping up soup, or building the ultimate sandwich. This recipe is my kitchen hug to you—simple, soulful, and incredibly satisfying. So, grab that discard jar, and let’s transform it into something feastical together.
Grandma’s Counter & The Magic of Simple Dough
This recipe always takes me back to my Grandma Ellie’s kitchen. She wasn’t a “sourdough person,” but she was a wizard with simple yeast doughs. Her counter was perpetually dusted with flour, and her hands moved with a calm, knowing rhythm. I remember one rainy afternoon, she plopped a bowl of sticky dough in front of me, coated my tiny fingers in oil, and said, “Now, Beau, you gotta poke it like you’re playing the piano for grumpy ghosts.” We dimpled that focaccia (though she just called it “herb bread”) together, scattering dried rosemary from her garden like confetti.
The smell that filled her kitchen as it baked—garlic, rosemary, and that unmistakable scent of baking bread—was pure magic. It was my first lesson that food isn’t about perfection; it’s about the feel of the dough, the smell in the air, and the joy of sharing something warm from the oven. This recipe is my homage to that feeling. It’s that simple, joyful magic, now with the wonderful complexity of sourdough discard added to the mix. Every time I make it, I think of her, and I hope it becomes a little moment of delicious memory-making in your kitchen, too.
Gathering Your Cast of Characters
Here’s the beautiful part: you likely have almost everything you need already. This is pantry-raiding at its finest!
- 1 cup (about 250g) sourdough discard, unfed – This is your flavor hero! Straight from the fridge is perfect. It can be thick or thin, recent or a few days old—this recipe is forgiving. Chef’s Insight: The acidity in the discard tenderizes the gluten, giving us that lovely, tender chew.
- 1 ½ cups (about 190g) all-purpose flour – The workhorse. I use plain, unbleached all-purpose for a reliable, fluffy crumb. Sub Tip: For a bit more rustic texture, swap in up to ½ cup of bread flour. Need it gluten-free? A 1:1 gluten-free AP blend works beautifully here.
- ¾ cup (about 180ml) warm water – The catalyst. Aim for “baby bathwater” warm, around 105°F (40°C). Too hot and it’ll upset the yeast; too cold and it’ll slow everything down.
- 1 tsp instant yeast – Our reliable co-pilot! This ensures a great rise without a long ferment. Chef’s Hack: If you only have active dry yeast, use the same amount but let it foam in the warm water for 5 minutes before adding the discard.
- 1 tsp fine sea salt – The flavor enhancer. Never skip it! It balances the tang and strengthens the gluten structure.
- 2 tbsp olive oil, plus a generous amount for the pan and drizzling – This is non-negotiable for authentic focaccia. It creates the irresistible crisp-bottomed crust and rich flavor. Use the good stuff for drizzling!
- Optional Toppings: This is your playground! Flaky sea salt, fresh rosemary sprigs, sliced garlic, halved cherry tomatoes, thinly sliced onion, or a sprinkle of everything bagel seasoning. Go wild!
Let’s Make Some Magic: Step-by-Step
Ready? We’re going to mix, rest, shape, and bake. It’s a peaceful process, I promise.
- The Mix-Up: In a large bowl, combine your sourdough discard, warm water, and instant yeast. Give it a good whisk until it looks like a slightly lumpy smoothie. Chef’s Commentary: Don’t overthink this step. We’re just waking up the yeast and welcoming the discard to the party.
- Bringing it Together: Add the all-purpose flour and salt to the bowl. Using a sturdy spatula or your hands, mix until there are no dry patches of flour left. The dough will be very sticky and shaggy—that’s exactly what we want! Pro Tip: Resist the urge to add more flour. This high hydration is the secret to those beautiful, airy bubbles later.
- First Rest (The Autolyse): Cover the bowl with a damp kitchen towel or plastic wrap and let it sit for 1 hour at room temperature. This is where the magic starts. The flour fully hydrates, and the gluten begins to develop on its own. You might see some bubbles already! Kitchen Hack: No warm spot? No problem. Just let it rest a little longer, maybe 1 hour 15 minutes.
- Prepare the Pan: While the dough rests, grab a standard 9×13 inch baking dish (or a similar-sized rimmed sheet pan). Pour in a generous 2-3 tablespoons of olive oil. Use your fingers or a pastry brush to coat the bottom and sides completely. This will give us that golden, fried-bottom crust.
- Shape & Second Rest: After the first rest, your dough will be puffy and bubbly. Pour/scrape it directly into the oiled pan. Now, with oiled fingers, gently stretch and nudge the dough towards the corners. Don’t fight it! It might not reach all the way immediately. That’s fine. Cover the pan and let it rest for another 30 minutes. It will relax and spread out more.
- Preheat & Dimple: Place a rack in the middle of your oven and preheat to 425°F (220°C). This is the fun part! Uncover the dough. Pour another tablespoon or two of olive oil right over the top. Now, oil your fingers again and press straight down to create deep dimples all over the surface, nearly to the bottom of the pan. You’re literally “playing the piano for grumpy ghosts.” This creates the classic focaccia look and traps pools of delicious oil.
- Top & Bake: Scatter your chosen toppings and a generous pinch of flaky salt over the dimpled dough. Slide the pan into the hot oven and bake for 20-25 minutes. It’s done when the top is a deep, golden brown and the edges are pulling away from the sides of the pan.
- The Grand Finale: Transfer the pan to a wire rack. For the ultimate crust, carefully run a spatula around the edges and under the focaccia to loosen it, then slide it directly onto the rack to cool slightly. This prevents the bottom from steaming and getting soggy. Let it cool for at least 15 minutes before you tear into it!
How to Serve Your Masterpiece
This focaccia is a star in so many ways! For the full experience, serve it warm, straight from the cooling rack. Place it on a big wooden board and let everyone tear off their own piece—it’s communal and fun. Pair it with a small bowl of your best olive oil and balsamic vinegar for dipping. It’s also the perfect sidekick to a big, hearty salad or a bowl of soup (imagine dunking it into tomato soup… heavenly).
Don’t forget its sandwich potential! The next day, slice it horizontally and build an epic Italian sub with cured meats, cheeses, and giardiniera. Or, cube up any leftovers, toss them with a bit more oil and herbs, and toast them into the most incredible croutons you’ve ever had.
Make It Your Own: Fun Flavor Twists
The basic recipe is a perfect canvas. Here are a few of my favorite ways to play:
- Everything Bagel Focaccia: Before baking, brush with a mix of olive oil and a teaspoon of everything bagel seasoning. After baking, sprinkle with more seasoning and sesame seeds.
- Sun-Dried Tomato & Parmesan: Fold ¼ cup chopped oil-packed sun-dried tomatoes into the dough during the final mix. Dimple, then top with grated Parmesan before baking.
- Vegan “Honey” & Herb: For a vegan sweet-savory twist, drizzle the dimpled dough with a mix of olive oil and a tablespoon of maple syrup or agave. Top with fresh thyme and flaky salt.
- Caramelized Onion & Goat Cheese: Spread a layer of quick-caramelized onions over the dimpled dough. Dot with small pieces of goat cheese and a sprinkle of fresh rosemary.
- Gluten-Free & Seeded: Use a certified gluten-free 1:1 flour blend. Mix 2 tablespoons of seeds (pumpkin, sunflower, sesame) into the dough for extra structure and crunch.
A Few More Thoughts From My Kitchen
This recipe has evolved from a “kitchen rescue” mission into a weekly staple. I’ve made it in vacation rentals with questionable oven temperatures and still had a triumph. One time, I was so eager I forgot the second rest and just dimpled and baked it immediately. You know what? It was still delicious, just a tad denser. This dough is wonderfully forgiving.
My biggest tip? Don’t skimp on the olive oil in the pan. That sizzle as the dough hits the oil is the sound of your future crispy crust. And if you have fresh herbs, they’re always better added halfway through baking or right after to prevent burning. Most of all, have fun with it! Baking should feel like a delicious experiment, not a chemistry exam.
Your Questions, Answered
Q: My dough didn’t get very bubbly or rise much during the rests. What happened?
A: This usually points to old yeast or cold conditions. First, check your yeast’s expiration date. Next time, try letting the dough rest in a slightly warmer spot (like inside an oven with just the light on). The yeast in the discard isn’t active, so we rely on the instant yeast—giving it a warm, cozy environment is key!
Q: The focaccia turned out dense. How can I make it lighter next time?
A: Density often comes from over-handling or using too much flour. Remember, it’s a sticky dough—that’s good! Also, ensure your water was warm enough to activate the yeast and that you gave it the full resting time. The dimpling step is also crucial; those pockets allow for expansion and airiness.
Q: Can I make this dough ahead of time?
A> Absolutely! After the first 1-hour rest, you can cover the bowl tightly and stash it in the fridge for up to 24 hours. When you’re ready, let it sit at room temp for 30 minutes, then proceed with shaping, the second rest, and baking. The flavor deepens wonderfully!
Q: My toppings burned before the bread was done. Help!
A> Delicate toppings like fresh herbs, garlic, and cherry tomatoes can burn. For garlic and herbs, add them halfway through baking. For tomatoes, press them cut-side up into the dimples—they’ll roast perfectly without charring.
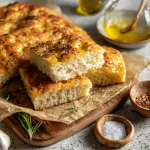
Quick Sourdough Discard Focaccia : Easy, Homemade & Perfectly Fluffy
Description
This quick sourdough discard focaccia is the easiest way to turn leftover starter into bakery-style bread—no long ferment, no fuss. A small amount of instant yeast guarantees a beautiful rise, while the discard adds that subtle sourdough tang we love. In about 2 hours total, you’ll have a pillowy, olive-oil-crisp focaccia perfect for dipping, sharing, or sandwich-making.
Ingredients
-
1 cup sourdough discard (unfed)
-
1½ cups all-purpose flour
-
¾ cup warm water (about 105°F / 40°C)
-
1 teaspoon instant yeast
-
1 teaspoon fine sea salt
-
2 tablespoons olive oil (plus more for pan and top)
-
Optional toppings: flaky salt, rosemary, sliced garlic, cherry tomatoes, onions
Instructions
-
Mix:
In a large bowl, whisk together discard, warm water, and yeast. Add flour and salt; mix until no dry spots remain. Dough will be sticky. -
First Rest:
Cover and rest at room temperature for 1 hour. -
Prepare Pan:
Generously oil a 9×13-inch baking pan (2–3 tablespoons olive oil). -
Shape & Second Rest:
Scrape dough into the pan. With oiled fingers, gently stretch toward corners. Cover and rest 30 minutes. -
Dimple & Top:
Preheat oven to 425°F (220°C). Drizzle dough with olive oil, dimple deeply with fingers, and add toppings. -
Bake:
Bake 20–25 minutes until deeply golden and crisp at the edges. -
Cool Slightly:
Remove from pan and cool on a rack for 10–15 minutes before slicing or tearing.
Notes
-
Sticky is good: High hydration = airy crumb. Don’t add extra flour.
-
Oil generously: This creates the signature crisp bottom and rich flavor.
-
Prevent burned toppings: Add delicate herbs or garlic halfway through baking.
-
Make ahead: After the first rest, refrigerate dough up to 24 hours for deeper flavor.
Nutritional Information*
Here’s a general breakdown per slice (assuming 8 slices from one 9×13 pan, without extra toppings). Remember, this is homemade goodness without any weird preservatives!
Calories: ~180 | Fat: 6g | Saturated Fat: 1g | Carbohydrates: 26g | Fiber: 1g | Sugars: 0g | Protein: 4g | Sodium: 290mg
*This is an estimate provided by an online nutrition calculator. Values can vary based on specific ingredients used and portion size. The olive oil is a source of heart-healthy monounsaturated fats.
Go Forth and Bake!
And there you have it, my friend—the simplest, most rewarding way to turn that jar of sourdough discard into a showstopping loaf of comfort. This Quick Sourdough Discard Focaccia is more than a recipe; it’s a reminder that the best food often comes from humble beginnings and a little bit of joyful poking.
I hope this bread brings as much warmth and delight to your table as it has to mine. Remember, the Feastical kitchen is always open. If you make it (and I truly hope you do!), tag me or send me a note. I love seeing your creations. Now, go preheat that oven and get ready for your kitchen to smell incredible. Happy baking!
With a full heart and an empty discard jar,
Beau

Easy 4-Ingredient Sourdough Discard Tortillas : Soft, Tangy & Homemade
Easy 4-Ingredient Sourdough Discard Tortillas – Soft, Tangy & Homemade
Who Knew Your Discard Could Taste This Good?
Hey friends, Beau here. Let me paint you a picture: It’s taco night. The fillings are sizzling, the salsa is fresh, but you’re reaching for that same old pack of store-bought tortillas from the back of the fridge. Sound familiar? What if I told you that the secret to the most soul-satisfying, flavorful, and soft tortillas you’ll ever taste is already sitting in your kitchen, probably bubbling away quietly in a jar? I’m talking about your sourdough discard.
These aren’t just any tortillas. These are your new kitchen superstars. With just four humble ingredients and about 40 minutes, you can transform that tangy, fermented discard into golden, bubbly, incredibly pliable wraps that will make every meal feel like a celebration. The best part? You’re not just making food; you’re honoring that sourdough starter you’ve been lovingly tending to. You’re turning potential waste into wonderful, wholesome nourishment. That’s the Feastical way—finding joy and flavor in the simple, smart choices.
So, if you’ve ever looked at your discard and thought, “There has to be more than just pancakes,” you’re absolutely right. Grab your jar, and let’s turn that tangy treasure into the star of your next meal. Trust me, once you go homemade, you’ll never look at a plastic-wrapped tortilla the same way again.
The Tortilla That Took Me Home
This recipe brings me right back to my grandma’s kitchen in Arizona. She wasn’t a sourdough baker, but she was a tortilla wizard. Her hands moved with a rhythm that was pure magic—pat, roll, a quick sizzle on the comal, and then that incredible puff. The smell of flour and heat filling the air is one of my core food memories. She’d always let me have the first one, slathered in butter and rolled up like a warm, edible cigar.
When I started my sourdough journey years later, I had that “aha!” moment. That slight tang in my starter? It reminded me of the fresh, fermented flavor in really good, traditional corn tortillas. My brain started whirring: could I merge my new sourdough obsession with my oldest food memory? After a few (dozen) delicious experiments, these sourdough discard tortillas were born. They’re my little kitchen homage—my sourdough spin on Nana’s classic. They have that same soft, pliable soul, but with a subtle, grown-up tang that makes them unforgettable. Every time I see them puff up in the skillet, I see her hands, and I feel that same rush of “I made this!” that she must have felt.
Your Fantastic Four: The Ingredients
See? I told you it was simple. Just four everyday ingredients team up to create something extraordinary. Here’s the breakdown, with a little chef’s insight on each one.
- 1 cup sourdough discard (unfed): This is your flavor MVP. The star of the show! Use discard that’s ripe, bubbly, and tangy—anywhere from freshly unfed to a week old (if it’s been stored in the fridge). Its acidity helps tenderize the dough, giving you that beautifully soft texture. Chef’s Tip: The thickness of your discard will affect hydration. If it’s super thick, like peanut butter, you might need a tiny splash of water. If it’s very runny, you might need a tablespoon or two more flour. We’re going for a smooth, slightly tacky dough.
- 1 ½ cups all-purpose flour (plus more for dusting): Our reliable structure-builder. All-purpose flour gives us the perfect balance of tenderness and strength for rolling. Chef’s Swap: Feel free to substitute half with whole wheat flour for a nuttier, heartier tortilla. For a fully whole wheat version, add an extra tablespoon of water or oil, as whole wheat flour soaks up more liquid.
- ¼ cup olive oil or melted butter: The secret to softness and richness! The fat coats the flour proteins, ensuring your tortillas stay pliable and don’t turn into cracker-like discs. Chef’s Insight: I love olive oil for its fruity notes, but melted butter (or even bacon fat!) adds a gorgeous, homey richness. Use what you love.
- ½ tsp salt: Never, ever skip the salt! It’s not just for flavor—it tightens the gluten structure just enough and makes all the other ingredients sing. If your discard is very old and acidic, the salt also helps balance that sharp tang beautifully.
Let’s Get Rolling: Your Foolproof Steps
Ready? Tie on your apron, clear a little counter space, and let’s make some magic. This process is meditative, simple, and so darn satisfying.
- The Mix & Knead: In a large bowl, combine the discard, flour, oil, and salt. Stir with a sturdy spoon or just dive in with your hands until a shaggy dough forms. Dump it onto a lightly floured surface. Now, knead it for just 3-4 minutes. You’re not trying to win a strength contest here—just fold, push, turn, repeat until the dough feels smooth, elastic, and only slightly tacky. Chef’s Hack: If the dough feels too dry and crumbly, wet your hands a little and keep kneading. The extra moisture from your hands is often all it needs to come together perfectly.
- The Rest & Relax: Divide the dough into 8 equal-ish balls. I like to roll it into a log and slice it like sushi for accuracy. Place the balls on a plate, cover them with a damp kitchen towel or a piece of plastic wrap, and let them rest for 20 minutes. This is NON-NEGOTIABLE. This rest period allows the gluten to relax, making the dough infinitely easier to roll out without it springing back like a rubber band.
- Roll It Out: On a lightly floured surface, take one ball and flatten it slightly with your hand. Using a rolling pin, roll from the center outwards, turning the dough a quarter turn after each roll. Aim for a thin circle, about 6-8 inches wide. Don’t stress about perfect circles! Rustic, hand-shaped tortillas have character. Chef’s Pro-Tip: If you’re struggling to get them thin enough, let the rolled-out tortilla sit for a minute. The gluten will relax further, and you can often give it another pass with the pin to get it paper-thin.
- Skillet Magic: Heat a dry, heavy skillet (cast iron is king!) or griddle over medium-high heat. No oil needed! Test the heat by flicking a tiny bit of water onto the surface—it should skitter and evaporate quickly. Lay a tortilla in the hot pan. Cook for 30-60 seconds. You’ll see bubbles form and the top look dry with some darker spots. Flip! Cook the second side for another 30-60 seconds until you get those beautiful golden-brown freckles. Watch for the Puff: If you’re lucky and your skillet is at the perfect temp, the tortilla might puff up like a balloon! This is a good sign of a well-rolled, well-cooked tortilla.
- Keep ‘Em Cozy: As each tortilla finishes, toss it into a clean kitchen towel folded over in a basket or bowl, or a tortilla warmer. Wrapping them up traps the steam and keeps them soft, flexible, and warm until you’re ready to serve.
How to Serve These Tangy Treasures
Okay, you’ve got a stack of warm, fragrant tortillas. Now the real fun begins! Their subtle tang pairs beautifully with so many flavors.
The Classic Taco Night: This is their destiny. Load them up with seasoned ground beef or turkey, black beans, crisp lettuce, pico de gallo, and a creamy avocado lime sauce. The tangy tortilla cuts through rich fillings perfectly.
Breakfast Wrap of Champions: Scramble some eggs with cheese and chorizo, wrap it up, and thank me later. The tanginess is brilliant with breakfast flavors.
Simple & Sublime: Sometimes, the best way is the simplest. Slather a warm tortilla with good butter, a drizzle of honey, and a sprinkle of cinnamon. Roll it up and enjoy with your morning coffee.
Hearty Veggie Burrito: Roast a medley of sweet potatoes, bell peppers, and onions. Add some rice, black beans, and a zesty cilantro crema. The sturdy, soft tortilla holds up to all those textures without falling apart.
Make It Your Own: Fun Variations
Once you’ve mastered the base, the world is your tortilla! Here are a few of my favorite spins.
- Herb & Garlic Infused: Add 1 teaspoon of dried oregano or Italian seasoning and ½ teaspoon of garlic powder to the dry ingredients. Fantastic for Mediterranean-style wraps with chicken and tzatziki.
- Spicy Jalapeño & Cheddar: Finely mince one jalapeño (seeds removed for less heat) and add it with ¼ cup of finely shredded sharp cheddar to the dough. Insanely good for quesadillas.
- 100% Whole Wheat: Swap the all-purpose flour for whole wheat flour and add an extra tablespoon of oil or water. You get a heartier, nuttier tortilla packed with fiber.
- Gluten-Free Friendly: Replace the all-purpose flour with a 1:1 gluten-free baking blend. The texture will be a bit more delicate, but they’re still utterly delicious and a great way to use discard for GF friends.
- Everything Bagel Twist: After rolling out the tortilla, sprinkle one side generously with everything bagel seasoning before cooking. Cook seasoning-side down first. Unbelievably good for breakfast sandwiches!
Beau’s Kitchen Notes
This recipe has become a weekly staple in my house. It’s evolved from a “can I do this?” experiment to a trusted friend. I’ve learned a few things along the way: First, the state of your discard is your co-pilot. A young, mild discard makes a milder tortilla; an old, hoochy discard gives you that serious tang that I personally adore with spicy fillings. Second, I stopped chasing the perfect circle. My lopsided, map-of-the-world-shaped tortillas taste just as incredible and remind me that homemade is about heart, not perfection. Finally, I once tried to rush the rest time. Big mistake. The dough fought me every roll. Now, I use that 20 minutes to clean up and prep my fillings. Lesson learned: let the dough (and yourself) breathe.
Your Questions, Answered
Q: My tortillas turned out tough. What happened?
A: The most common culprits are over-kneading or not letting the dough rest. We’re not making bread here—a brief, gentle knead is plenty. And that 20-minute rest is crucial for relaxing the gluten so the tortillas stay soft.
Q: Can I make these ahead of time?
A: Absolutely! Cook them completely, let them cool, then store in a sealed zip-top bag in the fridge for up to 5 days or freeze for 3 months. Reheat in a dry skillet for 20 seconds per side to bring back their soft, pliable magic.
Q: My dough is too sticky to handle!
A> No panic. Just add flour a tablespoon at a time while kneading until it becomes manageable. Remember, a slightly tacky dough is good, but if it’s sticking to everything, a bit more flour is your friend.
Q: Why didn’t my tortillas puff up?
A> Puffing is a happy bonus, not a requirement for deliciousness! It usually means the skillet was at the perfect hot temperature and the tortilla was rolled evenly. If they didn’t puff, they’ll still taste amazing. Check your heat and make sure you’re rolling them thinly and evenly.
Easy 4-Ingredient Sourdough Discard Tortillas : Soft, Tangy & Homemade
Description
These easy sourdough discard tortillas are a smart, delicious way to use up leftover starter. With just four basic ingredients and no yeast required, you’ll get soft, flexible tortillas with a gentle tang—perfect for tacos, wraps, and quesadillas. They cook quickly in a skillet and taste far better than store-bought.
Ingredients
-
1 cup sourdough discard (unfed)
-
1½ cups all-purpose flour (plus extra for dusting)
-
¼ cup olive oil or melted butter
-
½ teaspoon salt
Instructions
-
Make the Dough:
In a bowl, mix sourdough discard, flour, oil, and salt until a dough forms. -
Knead Briefly:
Turn onto a lightly floured surface and knead for 3–4 minutes until smooth and slightly tacky. -
Rest:
Divide into 8 balls. Cover and rest for 20 minutes to relax the dough. -
Roll:
Roll each ball into a thin 6–8 inch circle on a floured surface. -
Cook:
Heat a dry skillet over medium-high heat. Cook each tortilla 30–60 seconds per side until bubbles form and brown spots appear. -
Keep Warm:
Stack cooked tortillas in a clean towel to keep them soft.
Notes
-
Don’t skip the rest: Resting makes rolling easier and tortillas softer.
-
Adjust flour as needed: Discard thickness varies—add a little flour if sticky, or a splash of water if dry.
-
For extra softness: Keep tortillas covered while warm to trap steam.
-
Storage: Refrigerate up to 5 days or freeze up to 3 months. Reheat in a dry skillet.
Nutritional Nibbles
Let’s talk about what’s fueling you. These homemade tortillas are a cleaner, simpler choice compared to many store-bought versions, which can contain preservatives and added conditioners. Each tortilla (assuming the recipe makes 8) provides a good source of energy from complex carbs, with a bit of protein and fiber from the flour and sourdough fermentation. The olive oil adds heart-healthy monounsaturated fats. Using sourdough discard may also offer the benefits of prebiotics, which are great for gut health. Remember, this is about turning “waste” into wholesome, satisfying food you can feel great about serving your family. As always, specific values can vary based on your exact ingredients, but you’re in control of every single one that goes in.
Your New Kitchen Ritual
And there you have it, friends—the simplest way to fall in love with your sourdough discard all over again. This recipe is more than just a way to make tortillas; it’s a 40-minute lesson in slowing down, creating with your hands, and turning something simple into something special. That stack of warm, homemade tortillas on your table is a quiet victory. It’s a testament to the fact that the best food doesn’t need a mile-long ingredient list, just a little bit of heart and a jar of tangy starter.
So, the next time you’re about to feed your starter, save that discard with purpose. Know that it’s destined for greatness. I can’t wait for you to experience that first bite—the soft texture, the slight tang, the pure satisfaction of knowing, “I made this.” Share them, fill them, enjoy them. And don’t forget to tag @Feastical so I can see your beautiful creations! Now, go on. Your taco night just got a major upgrade.
Final Thoughts: More Than Just a Tortilla
If you’ve made it this far, you’re not just holding a recipe—you’re holding an invitation. An invitation to slow down, to create with intention, and to taste the quiet magic that happens when simple ingredients meet a little bit of care.
These tortillas are a beautiful lesson in kitchen alchemy. They remind us that what we might overlook as “discard” is actually a powerhouse of flavor and possibility. In a world of complicated recipes and lengthy ingredient lists, this humble four-ingredient ritual brings us back to the heart of cooking: transformation. You’re not just preventing waste; you’re crafting a conduit for connection—to your food, to your heritage, and to the people you’ll share these with.
I hope this recipe becomes more than just a way to use up starter for you. I hope it becomes a moment in your week where you feel the dough under your palms, smell that warm flour-toast scent in the air, and feel that deep, simple pride of making something real. Perfection isn’t the goal here; joy is. Whether your tortillas are picture-perfect circles or charmingly rustic, they are yours. They carry the unique fingerprint of your starter and your hands.
So here’s to the tangy, the soft, the homemade, and the heartfelt. Here’s to turning everyday rituals into small celebrations. May your skillet always be hot, your dough always relaxed, and your tacos always delicious.

Sourdough Peanut Butter Banana Chocolate Chip Muffins : Moist, Tangy & Irresistible!
Your New Favorite Muffin Just Walked Into the Kitchen
Hey there, friend! Beau here, welcoming you back to my cozy corner of the internet, Feastical. Let’s talk about two kitchen staples that seem to multiply when we’re not looking: overripe bananas and sourdough discard. One day, you’ve got a perfectly yellow bunch. Blink twice, and they’re staring back at you with freckled, almost-black skins, practically begging to be baked. And that sourdough starter you’re so lovingly tending? Its “discard” half is a golden opportunity waiting in a jar, not waste!
What if I told you we could solve both of those “problems” in one fell swoop, and end up with the most fantastically moist, tangy-sweet, and downright irresistible muffin you’ve ever sunk your teeth into? Enter my Sourdough Peanut Butter Banana Chocolate Chip Muffins. This isn’t just a recipe; it’s a kitchen miracle. The sourdough discard brings a subtle tang and incredible tenderness, the bananas ensure every bite is impossibly soft, the peanut butter adds a rich, savory depth, and the chocolate chips… well, they’re the joyful confetti that makes it a celebration.
Whether you’re packing lunchboxes, needing a quick breakfast on-the-go, or just craving a comforting snack with your afternoon coffee, these muffins are your answer. They’re simple, soulful, and proof that the best foods often come from a happy accident and a desire not to let good stuff go to waste. So, tie on your apron, grab that bowl of spotty bananas, and let’s make your kitchen smell like a warm, delicious hug.
The Muffin That Started It All
My love for banana muffins is deeply rooted, and it all traces back to my Grandma Lou’s sun-drenched kitchen. She wasn’t a fancy baker, but she was a practical one. Wasting food was a cardinal sin. Every Saturday morning, if there were browned bananas on the counter, you knew what was coming: her famous, humble banana muffins. The smell of cinnamon and toasting walnuts would weave through the house, a siren’s call that no kid could resist.
I’d perch on a stool, “helping” by mashing bananas into a gooey pulp with a fork, feeling so important. She never measured exactly, and she certainly didn’t have sourdough starter bubbling on her counter. But the spirit is the same. Her recipe was about comfort, resourcefulness, and sharing something warm from the oven. My version is a tip of the hat to her—just with a few twists (hello, peanut butter and sourdough!) that make it uniquely mine. Every time I bake these, I’m seven years old again, waiting for that first steamy, buttery bite. It’s nostalgia, baked into a perfect, portable package.
Gathering Your Flavor Crew
Here’s the beautiful cast of characters that’s going to make magic happen. I’ve tossed in my chefy insights and swaps so you can bake with confidence, no matter what’s in your pantry.
- 1 cup mashed ripe bananas (about 2–3 bananas): The spottier, the better! Black bananas are sugar bombs of moisture and flavor. Chef’s Tip: Don’t have quite enough? You can top up the cup with unsweetened applesauce or even pumpkin puree.
- ½ cup sourdough discard (unfed): This is your secret weapon for tender texture and that lovely, subtle tang. Straight from the fridge is fine! Chef’s Swap: No starter? Replace with ½ cup plain yogurt or buttermilk mixed with ¼ cup flour.
- ½ cup peanut butter (creamy or crunchy): Adds protein, richness, and that classic flavor partnership with banana and chocolate. Use natural, but stir it well first! Chef’s Swap: Any nut or seed butter works. Almond butter or sunflower seed butter are fantastic.
- ⅓ cup honey or maple syrup: Our natural sweetener. Honey gives a floral note, maple syrup a deeper, caramel vibe. Chef’s Insight: Using a liquid sweetener keeps these muffins super moist.
- ¼ cup oil (vegetable or coconut): The fat we need for that perfect crumb. Melted coconut oil adds a lovely fragrance. A neutral oil like avocado or light olive oil works too.
- 1 egg: The binder that brings the party together. Let it sit out for 10 minutes to come to room temp for better mixing.
- 1 tsp vanilla extract: The flavor enhancer. Don’t skip it! It rounds out all the other notes.
- 1 cup all-purpose flour: The trusty foundation. Chef’s Swap: For whole wheat, use ½ cup all-purpose and ½ cup whole wheat pastry flour to keep them light.
- ½ tsp baking soda & ½ tsp baking powder: Our dynamic leavening duo. The soda reacts with the acidic bananas and sourdough for lift. Check they’re fresh!
- ½ tsp cinnamon (optional): My “secret” ingredient. It whispers warmth in the background and makes everything cozier.
- ¼ tsp salt: Crucial for balancing sweetness and making flavors pop.
- ½ cup chocolate chips (plus more for topping): The non-negotiable confetti! I use semi-sweet, but dark or milk work too. Tossing them in a pinch of flour helps prevent sinking.
Let’s Get Baking: Your Step-by-Step Roadmap
Follow these simple steps, and you’re guaranteed muffin success. I’m chatting you through each one with my favorite kitchen hacks!
Step 1: Preheat & Prep. Fire up your oven to 350°F (175°C). This gives it time to reach a steady, even heat. Line your muffin tin with paper liners or give the cups a generous spritz of non-stick spray. My Hack: If you use liners, give them a tiny spray too. It ensures the muffins pop right out without taking any delicious crumb with them.
Step 2: The Wet Team Mix-Up. In a large bowl, combine your mashed bananas, sourdough discard, peanut butter, honey/maple, oil, egg, and vanilla. Grab a sturdy whisk or a spatula and mix until it’s mostly smooth and wonderfully gloppy. A few tiny banana lumps are A-OK—they promise little pockets of intense banana flavor! My Tip: If your peanut butter and honey are stubbornly thick, a quick 20-second zap in the microwave makes them much easier to blend in.
Step 3: The Dry Team Whisk. In a separate, medium bowl, whisk together the flour, baking soda, baking powder, cinnamon, and salt. This isn’t just mixing; you’re aerating the flour and ensuring the leaveners are evenly distributed, which is key for an even rise. No one wants a baking soda pocket!
Step 4: The Gentle Merge. This is the most important step! Pour the dry ingredients into the wet. Using your spatula, fold them together. Use a gentle, sweeping motion from the bottom of the bowl up and over. Stop when you no longer see streaks of flour. The batter will be thick and a bit lumpy. DO NOT OVERMIX. Overmixing develops gluten and leads to tough, dense muffins. We want tender, fluffy clouds!
Step 5: Chocolate Chip Celebration. Now, gently fold in your ½ cup of chocolate chips. Reserve a small handful for the tops.
Step 6: Portion & Top. Divide the batter evenly among the 12 muffin cups. I use a large cookie scoop for less mess and perfect portions. They should be about ¾ full. Sprinkle the reserved chocolate chips over the tops—this makes them look professionally pretty.
Step 7: Bake to Golden Perfection. Slide the tin into your preheated oven. Bake for 18-22 minutes. Start checking at 18 minutes—ovens vary! They’re done when the tops are springy to a light touch and a toothpick inserted into the center comes out clean (melted chocolate doesn’t count!).
Step 8: The Cool Down. Let the muffins cool in the tin for 5 minutes. This allows them to set. Then, carefully transfer them to a wire rack to cool completely… or, you know, grab one immediately and enjoy the warm, melty chocolate bliss. I won’t judge.
How to Serve These Beauties
These muffins are superstars all on their own, but a little presentation goes a long way! For a simple breakfast, just grab and go with a piece of fruit. Feeling fancy? Slice one warm muffin in half, toast it lightly in a pan or toaster oven until the edges are crisp and the chocolate gets melty again, and slather with a little extra peanut butter or a pat of salted butter. Oh my goodness, it’s next-level.
For a brunch spread, pile them high on a rustic wooden board or in a cheerful basket lined with a tea towel. They pair perfectly with a cup of strong coffee, a cold glass of milk, or a frothy latte. And for the kiddos (or the kid in you), crumbling one over a bowl of vanilla yogurt makes for an epic parfait. However you serve them, do it with a smile—it’s the best secret ingredient.
Make It Your Own: Delicious Twists & Swaps
The beauty of this recipe is its flexibility. Play around and make it suit your taste!
- The Triple Berry Blast: Replace the chocolate chips with a mix of fresh or frozen blueberries, raspberries, and chopped strawberries. The tang from the sourdough and berries is a match made in heaven.
- Elvis Special: Add 3-4 strips of cooked, crumbled bacon to the batter. Sweet, salty, peanut buttery perfection. Trust me on this one.
- Gluten-Free & Grand: Swap the all-purpose flour for a 1:1 gluten-free baking blend. Ensure your baking powder is GF, and you’re all set for a tender, celiac-friendly treat.
- Nutty Crunch Delight: Use crunchy peanut butter and fold in ¼ cup of chopped peanuts or walnuts along with the chocolate chips for an incredible texture experience.
- Double Chocolate Dream: Replace 2 tablespoons of the flour with unsweetened cocoa powder for a chocolate base, and use dark chocolate chunks. Peanut butter and chocolate times two!
A Few More Crumbs of Wisdom
This recipe has evolved more times than I can count! It started as a basic banana muffin, then one day I added a scoop of peanut butter on a whim. Later, when I jumped on the sourdough train during that “certain year we all baked,” I found myself with discard and thought, “Why not?” The first batch was so good I did a little dance right there in the kitchen. The sourdough doesn’t make them taste sour; it just makes them complex and incredibly moist. They keep for days in an airtight container, and they freeze like a dream. I often double the batch and stash half for future me—it’s the best gift. Remember, baking is about joy, not perfection. If your muffins aren’t picture-perfect but taste amazing, you’ve already won.
Your Questions, Answered
Q: My muffins turned out dense/gummy. What happened?
A: The most common culprit is overmixing the batter! Once you add the flour, mix just until combined. Also, ensure your baking soda and powder are fresh. An expired leavener won’t give you the lift you need.
Q: Can I use active, bubbly sourdough starter instead of discard?
A: Absolutely! The results will be very similar. Using a fed starter might give you a *tiny* bit more rise, but discard works flawlessly and is the point of this recipe.
Q: My chocolate chips all sank to the bottom. Help!
A: A classic muffin mystery! Next time, toss your chocolate chips in a small bowl with a teaspoon of the measured flour before folding them in. The light coating helps them “float” in the batter.
Q: How long do these stay fresh, and can I freeze them?
A: In an airtight container at room temp, they’re perfect for 2-3 days. To freeze, let them cool completely, then wrap individually in plastic wrap and pop into a freezer bag for up to 3 months. Thaw at room temp or warm in the microwave for 15 seconds.

Sourdough Peanut Butter Banana Chocolate Chip Muffins : Moist, Tangy & Irresistible!
Description
Moist, tender, tangy, and studded with chocolate chips—perfect for breakfast, snacks, or brunch. Uses overripe bananas and sourdough discard for maximum flavor and zero waste.
Ingredients
Wet Ingredients:
-
1 cup mashed ripe bananas (2–3 bananas)
-
½ cup sourdough discard (unfed)
-
½ cup peanut butter (creamy or crunchy)
-
⅓ cup honey or maple syrup
-
¼ cup vegetable or coconut oil
-
1 large egg, room temperature
-
1 tsp vanilla extract
Dry Ingredients:
-
1 cup all-purpose flour (or ½ cup AP + ½ cup whole wheat pastry flour)
-
½ tsp baking soda
-
½ tsp baking powder
-
½ tsp cinnamon (optional)
-
¼ tsp salt
Mix-ins:
-
½ cup chocolate chips (plus extra for topping)
Chef’s Notes / Swaps:
-
Substitute ½ cup sourdough discard with ½ cup yogurt or buttermilk + ¼ cup flour if needed.
-
Nut or seed butter works in place of peanut butter.
-
Toss chocolate chips in a teaspoon of flour to prevent sinking.
Instructions
1. Preheat & Prep
-
Preheat oven to 350°F (175°C).
-
Line a 12-cup muffin tin with paper liners or lightly grease.
2. Mix Wet Ingredients
-
In a large bowl, combine mashed bananas, sourdough discard, peanut butter, honey/maple, oil, egg, and vanilla.
-
Mix until mostly smooth; small banana lumps are fine.
3. Mix Dry Ingredients
-
In a separate bowl, whisk together flour, baking soda, baking powder, cinnamon, and salt.
4. Combine Wet & Dry
-
Fold dry ingredients into wet using gentle, sweeping motions.
-
Stop once no streaks of flour remain—overmixing leads to dense muffins.
5. Add Chocolate Chips
-
Gently fold in ½ cup chocolate chips. Reserve some for topping.
6. Portion & Top
-
Divide batter evenly among 12 muffin cups (about ¾ full).
-
Sprinkle reserved chocolate chips on top.
7. Bake
-
Bake 18–22 minutes, checking at 18 minutes.
-
Muffins are done when tops spring back to touch and a toothpick comes out clean.
8. Cool
-
Cool in the pan for 5 minutes, then transfer to a wire rack.
Serving Suggestions
-
Enjoy as-is for a quick snack or breakfast.
-
Slice and toast lightly, add a smear of peanut butter or butter.
-
Crumble over yogurt for a fun parfait.
Notes
-
Dense/Gummy muffins: Likely overmixing—fold just until combined.
-
Chocolate chips sank: Toss in a teaspoon of flour before folding in.
-
Using active starter: Works well, may give slightly more rise.
-
Storage: Airtight container, 2–3 days at room temp. Freeze individually for up to 3 months.
Nutritional Information (Per Muffin, Approximate)
Let’s be real—these are a treat, but they’re made with wholesome ingredients! This info is an estimate based on the standard recipe using honey, creamy peanut butter, and semi-sweet chips.
Calories: 210 | Protein: 5g | Fat: 11g | Carbohydrates: 24g | Sugar: 12g | Fiber: 2g
Remember, the peanut butter provides healthy fats and protein, the bananas offer potassium and fiber, and using sourdough discard can help increase nutrient bioavailability. It’s a satisfying snack that gives you real energy!
Final Thoughts: Bake, Share, Enjoy
And there you have it, my friend—the full story behind my beloved Sourdough Peanut Butter Banana Chocolate Chip Muffins. This recipe is more than just a list of ingredients; it’s an invitation to play in the kitchen, to not let good food go to waste, and to create a little moment of comfort for yourself or someone you love.
I hope you bake a batch and that your kitchen fills with that incredible, warm, sugary-banana scent. I hope you get that first bite of soft muffin, melty chocolate, and rich peanut butter. And most of all, I hope you share them. Wrap a couple up for a neighbor, tuck one into a lunchbox, or just enjoy one with your feet up, knowing you made something truly wonderful from simple, beautiful ingredients.
Thanks for baking with me today. Until next time, keep it simple, soulful, and always satisfying.
– Beau

Mini Sourdough Loaves : 3 Flavors with One Dough
Mini Sourdough Loaves: Bake 3 Flavors with One Magical Dough
Hey there, friend! Beau here, from Feastical. Pull up a stool and let me tell you about one of my all-time favorite kitchen tricks: turning one humble ball of sourdough dough into a trio of spectacular, personality-packed mini loaves. If you’ve ever stared at your bubbly starter and thought, “I want to bake, but I also want to have some fun,” then you and I are on the same page today.
We’re not baking just any bread. We’re crafting edible gifts, creating the ultimate bread basket for a picnic, or simply treating ourselves to a choose-your-own-adventure baking session. The beauty of these mini loaves is in their versatility. With one straightforward dough recipe as your canvas, you can paint with flavors like vibrant basil pesto, smoky cheddar and spicy jalapeño, or the beautiful, tangy simplicity of a classic plain sourdough. It’s the perfect project for a lazy weekend, and the payoff is huge: golden, crisp-crusted, cloud-soft mini loaves that fill your kitchen with that unforgettable “I-am-a-bread-baking-rockstar” aroma.
Whether you’re a sourdough savant or just getting your starter’s feet wet, this recipe is built for success and smiles. We’ll keep it simple, soulful, and absolutely satisfying. So, dust off your favorite apron, grab your mini loaf pans (they’re a game-changer, I promise!), and let’s make some magic together.
The Little Loaf That Could: A Story of Sharing
This whole mini loaf obsession started in my early days of sourdough, when my enthusiasm wildly outpaced my household’s ability to consume a full-sized boule. My starter, “Bubbles,” was prolific, and my counter was constantly adorned with giant, beautiful crusty rounds. My neighbors, initially thrilled, began politely suggesting I open a bakery.
One rainy afternoon, I decided to scale things down. I greased up some forgotten mini pans I’d inherited from my grandma and divided my dough. On a whim, I folded some leftover pesto from pasta night into one, and some cheddar scraps into another. What emerged from the oven wasn’t just bread; it was pure joy. These personal-sized loaves were adorable, deeply flavored, and, most importantly, meant for sharing. I wrapped them in simple parchment, tied them with twine, and delivered them door-to-door. It wasn’t a giant loaf saying “help me eat this,” but a thoughtful little gift saying “I thought you’d enjoy this.” That’s the spirit of Feastical, right there—food that connects, delights, and feels like a warm hug.
Gathering Your Flavor Toolkit
Here’s everything you’ll need. The dough ingredients are your non-negotiable foundation—the simple elements that create sourdough’s magic. The flavor inclusions are where you become the artist. Don’t be afraid to riff!
- 125g Active Sourdough Starter: This is the heart of the recipe! Make sure it’s bubbly, fragrant, and floats in water. If it sinks, give it a fresh feeding and wait a few hours. No starter? A poolish (100g water + 100g flour + a pinch of instant yeast, left overnight) can work in a pinch, but you’ll miss the tang.
- 320g Warm Water: Lukewarm to the touch, about 85°F (30°C). This cozy temperature helps wake up the wild yeast and gets the fermentation party started smoothly.
- 500g Bread Flour: I love the high protein content in bread flour—it gives our mini loaves fantastic structure and those lovely, chewy holes. All-purpose flour works too; your crumb will just be a tad more tender.
- 12g Fine Sea Salt: Salt does more than just season; it tightens the gluten structure and regulates yeast activity. Don’t skip it, and add it after the autolyse rest.
Flavor Inclusions (Choose Your Adventure!):
- For the Pesto Parmesan: 3-4 tablespoons of high-quality pesto (store-bought or homemade) and a big handful of freshly grated Parmesan. The oil in the pesto will make this loaf incredibly tender.
- For the Jalapeño Cheddar: ½ cup of shredded sharp cheddar and 2-3 finely chopped jalapeños (seeds removed for less heat). A pinch of smoked paprika mixed in is a killer secret hack!
- For The Classic (Plain & Perfect): Sometimes, you just need the pure, tangy taste of sourdough. This one’s for the purists, the butter-slatherers, and the avocado toast connoisseurs.
Crafting Your Mini Masterpieces: A Step-by-Step Guide
Ready to get your hands doughy? Follow these steps, and I’ll whisper all my best chef hacks along the way. This process is as much about feeling as it is about timing.
Step 1: The Autolyse (The “Let It Be” Step)
In a large bowl, combine your active starter and warm water. Use your fingers or a whisk to break up the starter until it’s pretty much dissolved. Add all the flour and mix with a sturdy spoon or your hands until no dry bits remain. It will be a shaggy, messy mass. That’s perfect! Cover the bowl and let it rest for 30 minutes. This autolyse allows the flour to fully hydrate, making the gluten development easier and giving you a better crumb. Use this time to prep your flavor add-ins!
Step 2: Incorporating the Salt & Building Strength
Sprinkle the salt over the top of your rested dough. Now, get in there with wet hands. The dough will be sticky—that’s normal! Use a “pinch and fold” method to work the salt in. Then, begin a series of stretch and folds: grab one side of the dough, stretch it upward, and fold it over the center. Rotate the bowl a quarter turn and repeat. Do this 4-5 times. Cover, and let it rest for 30 minutes. Repeat this stretch-and-fold process 3-4 more times over the next 1.5 to 2 hours. You’ll feel the dough transform from loose and sticky to smooth, strong, and elastic.
Step 3: The Bulk Fermentation (Let the Magic Happen)
After your final set of folds, cover the bowl tightly and let the dough rise at room temperature. This is the bulk fermentation. It’s done when the dough has roughly doubled in size, looks bubbly, and jiggles like a happy waterbed when you shake the bowl. This can take 4-6 hours, depending on your starter’s strength and your kitchen’s temperature. Don’t watch the clock; watch the dough.
Step 4: Dividing, Flavoring, and Shaping
Lightly flour your counter. Gently turn out your dough—you want to preserve all those beautiful air bubbles. Divide it into three equal pieces (a kitchen scale is your friend here for precision). Now, for each piece:
- Gently flatten it into a small rectangle.
- Sprinkle or spread your chosen fillings over the center.
- Fold the dough over the fillings like an envelope, then roll and tuck it into a tight little batard or log shape that fits your mini pan.
Chef’s Hack: When adding wet ingredients like pesto, use a light hand and spread thinly. Too much moisture can make the dough slippery and hard to shape.
Step 5: Final Proof & Preheating
Generously grease your three mini loaf pans. Place each shaped loaf into a pan, seam-side down. Cover lightly with plastic wrap or a damp tea towel. Let them rise again until they look puffy and have risen about 1-1.5 inches above the pan rim. This final proof usually takes 1-2 hours. About 45 minutes before baking, preheat your oven to a roaring 450°F (232°C). If you have a baking stone or steel, put it on the middle rack.
Step 6: Baking to Golden Perfection
If your pans have lids, put them on. If not, tent the pans tightly with foil. This creates steam, giving our loaves an awesome oven spring and a crisp initial crust. Bake with the tops/lids ON for 16 minutes. Then, carefully remove the tops/lids or foil. You’ll see the loaves have risen beautifully! Reduce the heat to 425°F (218°C) and bake for another 16 minutes to finish browning the crust. For the cheesy loaves, you can leave them in for an extra 1-2 minutes at the higher temp to get those gorgeous, bubbly, golden-brown cheese spots.
Step 7: The Crucial Cool-Down
Immediately turn the loaves out of their pans onto a wire cooling rack. I know it’s tempting, but you must let them cool for at least an hour before slicing. The bread is still cooking internally from residual heat. Slicing too early results in a gummy crumb. Use this time to clean up… or just stare lovingly at your creations.
Sharing the Sourdough Love: How to Serve
Presentation is part of the fun! Once cooled, these loaves are ready for their close-up. For a family-style meal, slice each mini loaf on a cutting board and let everyone grab their favorite flavor. They’re incredible simply slathered with good butter or dunked into a bowl of soup.
For gifting, let the loaves cool completely, then wrap them in parchment paper and tie them with rustic baker’s twine. Add a little tag noting the flavor. It’s a heartfelt, handmade gift that truly says “I care.” These mini loaves also make a stunning addition to a brunch or charcuterie board. Arrange sliced pieces alongside cheeses, cured meats, olives, and fruit for a show-stopping centerpiece that tastes as good as it looks.
Your Dough, Your Rules: Flavor Twists & Swaps
The “three flavors” idea is just the beginning. Here’s how to make this recipe truly your own:
- Everything Bagel Bliss: After the final proof, brush the top of a plain loaf with water or an egg wash and generously sprinkle with everything bagel seasoning before baking.
- Sun-Dried Tomato & Kalamata: Fold in ¼ cup chopped oil-packed sun-dried tomatoes and 2 tablespoons chopped Kalamata olives for a Mediterranean vibe. A little crumbled feta is divine here too.
- Whole Grain Wonder: Substitute 150g of the bread flour with whole wheat or rye flour for a nuttier, heartier loaf. You may need a touch more water.
- Sweet Cinnamon Raisin: For a breakfast treat, knead 2 teaspoons of cinnamon and ⅓ cup of raisins or dried cranberries into one portion. A simple powdered sugar glaze after baking takes it over the top.
- Dairy-Free & Vegan: Simply choose vegan fillings! A dairy-free pesto and nutritional yeast combo is fantastic. The base dough is naturally vegan.
Beau’s Baker’s Bench Notes
This recipe has become a staple in my kitchen, and it’s evolved with every bake. I once, in a sleepy 5 a.m. baking haze, accidentally used garlic-stuffed olives in one loaf and thought I’d ruined it. It was the first loaf gone! Sometimes the “mistakes” are the best discoveries. I’ve also learned that my pesto loaf bakes best on the bottom rack—the extra heat helps counteract the oil and gives it a better crust. Don’t be afraid to play with oven placement. Most importantly, remember that sourdough is a living process. Some days your dough will rise fast, some days slow. Work with it, not against it. The reward is always worth it.
Your Sourdough Questions, Answered
Q: My dough didn’t double in size during bulk fermentation. What went wrong?
A: This almost always comes down to starter strength or temperature. Was your starter truly active and bubbly? Is your kitchen cooler than 70°F (21°C)? You can try placing the dough in a slightly warm spot (like an oven with the light on) to encourage a faster rise. Patience is key!
Q: The fillings leaked out during baking and made a mess. How do I prevent that?
A> Two tips: 1) Ensure your shaped loaf is well-sealed. Pinch the seams tightly. 2) For extra-wet or greasy fillings (like pesto or olives), use a slightly lighter hand. You can also try a “lamination” technique: roll the dough out very thin, spread fillings, then roll it up tightly like a cinnamon roll before the final shaping.
Q: Can I refrigerate the dough overnight?
A> Absolutely! After bulk fermentation, you can shape the loaves, place them in their greased pans, cover tightly, and refrigerate for 12-16 hours. In the morning, let them sit at room temp for an hour or so while the oven preheats, then bake as directed. This cold proof often develops even more flavor!
Q: My crust is too hard/thick. How can I adjust it?
A> For a softer crust, brush the hot loaves with melted butter right when they come out of the oven. For a thinner, crisper crust, ensure you’re creating enough steam at the start (with the lidded pans/foil) and try baking at the higher rack position.

Mini Sourdough Loaves : 3 Flavors with One Dough
Description
Golden crust, cloud-soft crumb, and three unique personalities—all from one sourdough dough. Perfect for brunch, gifting, or an indulgent snack!
Ingredients
Sourdough Base:
-
125g active sourdough starter, bubbly and floating
-
320g warm water (about 85°F / 30°C)
-
500g bread flour (or all-purpose flour)
-
12g fine sea salt
Flavor Add-Ins (choose your adventure!):
-
Pesto Parmesan: 3–4 tbsp high-quality pesto + handful of grated Parmesan
-
Jalapeño Cheddar: ½ cup shredded sharp cheddar + 2–3 finely chopped jalapeños (seeds removed) + pinch smoked paprika
-
Classic Plain: No add-ins, just tangy sourdough perfection
Instructions
1. Autolyse
-
In a large bowl, combine starter and warm water. Break up the starter until mostly dissolved.
-
Add the flour and mix until no dry bits remain. Shaggy and sticky is perfect.
-
Cover and rest 30 minutes.
2. Add Salt & Build Strength
-
Sprinkle salt over the dough. Incorporate using wet hands with “pinch and fold.”
-
Stretch and fold: grab one side, stretch up, fold to center, rotate ¼ turn, repeat 4–5 times.
-
Cover and rest 30 minutes. Repeat stretch-and-fold every 30 minutes for 1.5–2 hours (3–4 more sets).
3. Bulk Fermentation
-
Cover the bowl and let rise at room temperature until doubled, bubbly, and jiggly (4–6 hours depending on starter & kitchen temp).
4. Divide, Flavor, Shape
-
Lightly flour counter and turn out dough gently.
-
Divide into 3 equal pieces.
-
Flatten each into a rectangle, add fillings, fold over like an envelope, then roll into mini batards/logs.
Tip: Spread wet ingredients thinly to prevent slipping and leakage.
5. Final Proof & Preheat
-
Grease mini loaf pans generously. Place loaves seam-side down.
-
Cover with plastic wrap or damp towel. Let rise until puffy, 1–1.5 inches above pan rim (1–2 hours).
-
Preheat oven to 450°F (232°C).
6. Bake
-
Cover pans with lids or tent with foil for steam. Bake 16 minutes.
-
Remove lids/foil, reduce heat to 425°F (218°C), bake another 16 minutes until golden brown.
-
For cheesy loaves, add 1–2 extra minutes for bubbly topping.
7. Cool
-
Remove loaves from pans onto a wire rack. Cool at least 1 hour before slicing.
Notes
-
Fillings leaked? Ensure tight seams and spread wet ingredients thinly.
-
Refrigerated overnight? After bulk fermentation, shape loaves, cover, refrigerate 12–16 hours. Let sit 1 hour at room temp before baking.
-
Crust too hard/soft? Brush hot loaves with butter for softer crust. For crisper, ensure steam at start and try higher rack position.
A Note on Nutrition
While I’m a chef, not a nutritionist, I believe in being transparent about what we’re eating! These estimates are for a single slice (about 1/8th of a plain mini loaf). Remember, adding cheese, pesto, or other inclusions will change these values, primarily increasing the fat content in the most delicious way possible.
- Calories: ~140
- Protein: 4g
- Carbohydrates: 28g
- Dietary Fiber: 1g
- Total Fat: 0.5g (Can increase significantly with pesto or cheese additions)
- Sugars: 0g
Sourdough’s natural fermentation can make it easier to digest for some people, and it typically has a lower glycemic index than commercial bread. But let’s be real—we’re here for the incredible flavor, tangy chew, and the joy of baking from scratch!
One Dough, Endless Possibilities
And there you have it! You’re now armed with the knowledge to create not just one, but three incredible, flavor-packed mini sourdough loaves from a single, simple batch of dough. This recipe is more than just instructions; it’s an invitation to play, to share, and to fill your home with the unbeatable smell of baking bread.

Vegan Chickpea Curry : Protein-Packed & Full of Flavor
Your New Favorite 30-Minute Wonder: Hearty Vegan Chickpea Curry
Hey friends, Beau here! Let’s talk about one of life’s great truths: nothing says “I’ve got this” on a busy weeknight quite like the incredible, aromatic smell of spices blooming in your kitchen. And if that smell is coming from a bubbling pot of hearty, protein-packed, downright dreamy vegan chickpea curry? Well, my friend, you’ve just won the dinner game without even breaking a sweat.
This isn’t just another recipe. This is your new kitchen secret weapon. We’re talking about a dish that’s soul-warming, incredibly satisfying, and so full of flavor you’ll swear it simmered for hours. But here’s the beautiful part—it comes together in about 30 minutes with ingredients you probably already have lounging in your pantry. It’s the culinary equivalent of a cozy blanket and your favorite socks, but you can eat it. (And let’s be real, that’s way better).
Whether you’re a lifelong vegan, a curious flexitarian, or just someone who loves a seriously delicious meal, this chickpea curry is for you. It’s rich, it’s creamy (without any dairy!), and those humble chickpeas soak up all that spiced tomato-coconut goodness like little flavor sponges. So, grab your favorite pot and let’s turn a regular Wednesday into a Feastical. Trust me, your taste buds are going to send you a thank-you note.
The Dorm-Room Epiphany: How a Can of Chickpeas Changed Everything
This recipe takes me right back to my college days. Picture a tiny, poorly ventilated dorm kitchenette, a single burner, and a budget that made canned beans look like gourmet fare. One particularly grim, rainy Tuesday, faced with yet another package of instant noodles, I rebelled. I scavenged a can of chickpeas, a sad-looking onion, and some basic spices my mom had thankfully sent in a “survival kit.”
I sautéed that onion until it was golden and sweet, shook in what seemed like a reckless amount of curry powder, and let it all sizzle. The moment I added those chickpeas and a splash of coconut milk from the dining hall coffee station (don’t judge!), the entire floor smelled… incredible. My roommate wandered in, sniffing the air, and asked what fancy takeout I’d ordered. That was the moment I realized powerful, feel-good food isn’t about fancy techniques or expensive ingredients. It’s about heart, a few good spices, and the magic that happens when you cook for the pure joy of it. That humble pot of curry fed us both, lifted our spirits, and became a weekly ritual. This recipe is that dish, all grown up—but with the same soul.
Gathering Your Flavor All-Stars
Here’s what you’ll need to create this cozy masterpiece. Don’t sweat it if you’re missing an item—I’ve got swaps and insights for you right here.
- 1 tablespoon coconut or olive oil: I love coconut oil here for its subtle tropical vibe that plays so nicely with the other spices. But a good olive oil works perfectly if it’s what you’ve got! The goal is just to get things sizzling.
- 1 yellow onion, finely chopped: This is our flavor foundation. Chopping it finely helps it melt into the sauce, creating a natural sweetness and body. No yellow onion? A white or red onion will do in a pinch.
- 3 garlic cloves, minced: The aromatic heartbeat of so many great dishes. Fresh is best here for that pungent, savory kick. In a true emergency, ¾ teaspoon of garlic powder can stand in.
- 1 tablespoon fresh grated ginger: This is the zippy, bright note that makes the whole dish sing. I highly recommend the fresh stuff—just keep a knob in your freezer and grate it frozen! If you must, use 1 teaspoon of ground ginger, but the flavor will be mellower.
- 1 tablespoon curry powder: Our main spice star! “Curry powder” is a blend, so brands vary. Find one you love. For a deeper kick, try a Madras-style blend.
- 1 teaspoon ground cumin: Adds an earthy, warm, and slightly nutty backbone. It’s a non-negotiable for depth.
- 1/2 teaspoon turmeric: Welcome that gorgeous golden color and its warm, slightly bitter flavor. It’s a powerhouse for looks and health!
- 1/4 teaspoon chili flakes (optional): This is your heat dial. I add them for a gentle warmth. Omit for mild, or double down if you like it fiery!
- 1 can (14 oz) crushed tomatoes: This gives us the rich, tangy base and beautiful body. Fire-roasted crushed tomatoes are an awesome upgrade for a smoky hint.
- 2 cans (15 oz each) chickpeas, drained and rinsed: Our protein-packed heroes! Rinsing them well gets rid of the excess sodium and that canned liquid, letting them absorb our sauce perfectly.
- 1/2 cup full-fat coconut milk: The key to lush, creamy luxury. The fat carries flavor and creates a silky sauce. For a lighter version, “lite” coconut milk works, but the sauce will be thinner. A splash of unsweetened soy or oat cream can also sub.
- Salt and pepper to taste: Your essential flavor finishers. Always season at the end, after everything has come together.
- Fresh cilantro for garnish: The confetti of the herb world! It adds a fresh, bright finish. Not a cilantro fan? Fresh chopped parsley or a squeeze of lime juice are great alternatives.
Let’s Get Cooking: Building Flavor, Step by Step
Okay, team—aprons on, music playing. Let’s transform these simple ingredients into something magical. Follow these steps, and you’ll be a curry champion in no time.
- The Sizzling Start: In a large, deep skillet or pot, heat your oil over medium heat. Add the chopped onion and sauté for 5-7 minutes. Chef’s Hack: Don’t rush this! We’re not just softening the onion; we’re caramelizing it slightly. Those golden edges equal sweet, deep flavor. Stir occasionally and let it do its thing.
- Aromatic Awakening: Add the minced garlic and grated ginger to the pan. Now, the kitchen should smell amazing. Cook, stirring constantly, for about 1 minute. Watch it closely! Garlic burns in a heartbeat, and burnt garlic is bitter. We’re just taking the raw edge off and waking up their beautiful fragrances.
- The Spice Toast (The Secret Step!): This is where the magic deepens. Add the curry powder, cumin, turmeric, and chili flakes (if using) right onto the onions and garlic. Stir and cook for about 30 seconds. You’ll see the spices become fragrant and maybe even darken a shade. This toasting process unlocks their essential oils and intensifies their flavor tenfold. It’s my #1 tip for restaurant-quality taste at home.
- Building the Base: Pour in the entire can of crushed tomatoes. It will sizzle gloriously. Stir everything together, scraping up any lovely browned bits from the bottom of the pan (that’s flavor gold!). Bring it to a gentle simmer and let it cook for about 5 minutes, stirring now and then. This cooks out the raw tomato tang and lets the sauce start to thicken and marry with the spices.
- The Grand Union: Time for our main players! Add the drained and rinsed chickpeas and the coconut milk. Stir it all together until the chickpeas are coated in that gorgeous orange sauce. Reduce the heat to medium-low, and let it simmer uncovered for 10-15 minutes. This simmer is crucial. It allows the chickpeas to heat through, absorb the flavors, and the sauce to reduce to a creamy, perfect consistency.
- The Finishing Touches: After simmering, take a taste. Now, season with salt and freshly ground black pepper. This is also your chance to adjust—want more heat? Add a pinch more chili flakes. More depth? A pinch more cumin. Make it yours!
- The Grand Finale: Remove from heat. Stir in a big handful of fresh cilantro right before serving for that pop of color and freshness. Ladle it up and get ready for the compliments.
How to Serve It Up (The Fun Part!)
Presentation is part of the joy! Here’s how I love to plate this curry for maximum enjoyment.
First, choose your vessel. For a classic, comforting experience, spoon a generous mound of fluffy basmati rice or jasmine rice right into the center of a shallow bowl. Use the back of your spoon to make a little well in the middle. Ladle that glorious, steaming curry right into the well, letting it cascade over the sides of the rice. The visual is just *chef’s kiss*.
If you’re a bread person (aren’t we all?), warm up some naan or roti in a dry skillet or the oven until it’s soft and pliable. Serve the curry in a deep bowl with the bread on the side, perfect for scooping and swiping up every last drop of sauce. No naan? Pita bread or even a crusty piece of sourdough will do the job in a delicious pinch.
For garnish, don’t be shy! A final scatter of fresh cilantro, a few thin slices of red chili for color, or a squeeze of fresh lime juice just before eating can brighten the whole dish. A dollop of vegan yogurt or a sprinkle of toasted coconut flakes are also fantastic additions. The goal is a bowl that’s as beautiful as it is delicious.
Make It Your Own: Creative Twists & Swaps
The beauty of this curry is its versatility. Once you’ve mastered the base, play around! Here are a few of my favorite riffs.
- The Greens Lover: About 5 minutes before the end of cooking, stir in a couple of big handfuls of fresh spinach or chopped kale. It wilts right down and adds color, texture, and nutrients.
- Vegetable Garden: Add more veggies! With the onion, try sautéing a diced bell pepper or carrot. After toasting the spices, stir in a cup of cauliflower florets or diced sweet potato and let them simmer in the tomato sauce for 5 minutes before adding the chickpeas.
- Protein Power-Up: While chickpeas are fantastic, feel free to swap in or add a can of rinsed lentils or some cubed firm tofu (pan-fry it first for extra texture!).
- Thai-Inspired Twist: Swap the curry powder for 2 tablespoons of red or yellow Thai curry paste. Use a full can of coconut milk and add a tablespoon of soy sauce or tamari and a squeeze of lime juice at the end. Serve with fresh basil.
- Nutty & Creamy: Instead of coconut milk, blend ¼ cup of raw cashews or almonds with ¾ cup of water until completely smooth. Stir this creamy nut mixture in with the chickpeas. It’s rich, decadent, and nutty!
Beau’s Kitchen Notes & Stories
This recipe has been a living, evolving thing in my kitchen for over a decade. That college version had exactly three spices and no fresh ginger in sight! Over the years, I’ve learned that the “toast your spices” step is the game-changer—it was a tip from an Indian friend’s grandma that I will forever be grateful for.
One funny fail? I once accidentally used a tablespoon of garam masala instead of curry powder. It was… intensely aromatic and completely different, but you know what? We still ate it! It taught me that these spice blends are forgiving friends. The most important lesson, though, is to trust your own taste. The recipe is a roadmap, but you’re the driver. Simmer it longer for thicker sauce, add more chili, throw in those extra veggies. Make it the curry that makes you happiest. That’s what home cooking is all about.
Your Questions, Answered!
Q: My sauce is too thin/watery. How can I thicken it?
A: No worries! The simplest fix is to let it simmer uncovered for an extra 5-10 minutes. The liquid will reduce. For a quicker thicken, mash a small spoonful of the chickpeas against the side of the pot with a fork and stir them in—the released starch works wonders. You can also mix a teaspoon of cornstarch with a tablespoon of cold water and stir it into the simmering curry.
Q: Can I make this in advance or freeze it?
A> Absolutely! This curry tastes even better the next day after the flavors have really melded. Let it cool completely, then store it in an airtight container in the fridge for up to 4 days. It freezes beautifully for up to 3 months. Thaw overnight in the fridge and reheat gently on the stove, adding a tiny splash of water if needed.
Q: I don’t have crushed tomatoes. What can I use?
A> You can use a can of diced tomatoes (just pulse them a few times in a blender or food processor if you want a smoother texture). Tomato passata or puree is also a great sub—you might want to simmer it a bit longer as it can be thinner. In a real pinch, a cup of good-quality marinara sauce can work!
Q: How can I make this in a slow cooker or Instant Pot?
A> For a slow cooker: Sauté the onion, garlic, ginger, and spices in a pan first (this step is key for flavor!), then transfer everything to the slow cooker and cook on LOW for 6-8 hours or HIGH for 3-4 hours. For an Instant Pot, use the Sauté function for steps 1-3, then add everything except the cilantro, seal, and cook on High Pressure for 8 minutes. Quick release, stir, and serve!

Vegan Chickpea Curry : Protein-Packed & Full of Flavor
Description
Comforting, creamy, and packed with protein, this chickpea curry is your new weeknight hero. Ready in just 30 minutes, it’s rich, aromatic, and endlessly adaptable.
Ingredients
Base & Aromatics:
-
1 tbsp coconut oil or olive oil
-
1 yellow onion, finely chopped
-
3 garlic cloves, minced
-
1 tbsp fresh grated ginger (or 1 tsp ground ginger in a pinch)
Spices:
-
1 tbsp curry powder
-
1 tsp ground cumin
-
½ tsp turmeric
-
¼ tsp chili flakes (optional)
Sauce & Protein:
-
1 can (14 oz) crushed tomatoes
-
2 cans (15 oz each) chickpeas, drained and rinsed
-
½ cup full-fat coconut milk (or unsweetened soy/oat cream)
-
Salt and pepper to taste
Garnish:
-
Fresh cilantro (or parsley/lime as alternatives)
Instructions
1. Sauté Aromatics
-
Heat oil in a large skillet or pot over medium heat.
-
Add onion and sauté 5–7 minutes until golden and slightly caramelized.
2. Wake Up the Flavors
-
Stir in garlic and ginger. Cook 1 minute, stirring constantly to avoid burning.
3. Toast the Spices
-
Add curry powder, cumin, turmeric, and chili flakes. Stir 30 seconds until fragrant.
4. Build the Sauce
-
Pour in crushed tomatoes, stir, and bring to a gentle simmer for 5 minutes to thicken.
5. Add Chickpeas & Cream
-
Stir in chickpeas and coconut milk. Simmer uncovered 10–15 minutes until sauce is creamy and chickpeas are tender.
6. Final Touches
-
Taste and adjust salt, pepper, or chili flakes.
-
Stir in fresh cilantro just before serving.
Notes
-
Greens Lover: Stir in spinach or kale 5 minutes before finishing.
-
Veggie Garden: Add bell pepper, carrot, cauliflower, or sweet potato with the tomatoes.
-
Protein Power-Up: Swap/add lentils or cubed tofu (pan-fried first).
-
Thai-Inspired: Use 2 tbsp red or yellow Thai curry paste, 1 can coconut milk, 1 tbsp soy sauce, and lime juice.
-
Nutty & Creamy: Blend ¼ cup raw cashews with ¾ cup water, stir in for a rich, nutty sauce.
Nutritional Info (A Happy Bonus!)
While I’m all about flavor first, it’s always nice to know you’re fueling your body with goodness. This dish is a nutritional powerhouse! One serving (about ¼ of the recipe, not including rice) provides approximately:
- Calories: ~320
- Protein: 13g – Thanks, mighty chickpeas! This plant-based protein helps keep you full and satisfied.
- Carbohydrates: 35g – A good source of complex carbs and fiber for steady energy.
- Fat: 15g – Primarily from the healthy fats in coconut milk, which help your body absorb all the fat-soluble vitamins from the spices (like the curcumin in turmeric!).
Final Thoughts
This hearty vegan chickpea curry is more than just a recipe—it’s a story in a bowl. It’s the quiet confidence of a busy weeknight conquered, the warmth of spices filling your kitchen, and the simple joy of creating something truly nourishing with your own two hands. It’s proof that incredible food doesn’t have to be complicated, expensive, or time-consuming. All it needs is a little intention, a handful of humble ingredients, and the willingness to savor the process.
Whether you’re cooking for one, feeding a family, or impressing friends, this dish meets you where you are. It’s adaptable, forgiving, and packed with the kind of soul-satisfying flavor that makes you pause and appreciate the moment. It’s the recipe you’ll return to again and again—when you need comfort, when you need a quick win, or when you just want to be reminded of how powerful a single pot of something good can be.
So here’s to the quiet magic of a well-stocked pantry, to the transformative power of toasted spices, and to the humble chickpea—the unassuming legume that can, with a little love, feel like a feast.