One-Pan Chicken Parmesan Skillet : Easy, Crispy, and Mess-Free
Ditch the Dishes, Keep the Flavor: Your New Favorite Chicken Parm
Hey friends, Beau here from Feastical. Let’s be real for a second. Who among us hasn’t craved the glorious, cheesy, soul-soothing goodness of Chicken Parmesan… only to remember the whole production? The dredging station that takes over your counter, the splatter of frying oil, the mountain of dishes that appears afterward. Suddenly, that craving feels less like a joy and more like a kitchen conquest you’re just not up for on a Tuesday night. Sound familiar?
Well, my fellow food lovers, I’ve got fantastic news. We can have our Parm and eat it too, without the culinary circus. This isn’t about cutting corners on flavor—it’s about being brilliantly efficient with our time and our dish soap. Enter the hero of your weeknight dinner lineup: the One-Pan Chicken Parmesan Skillet.
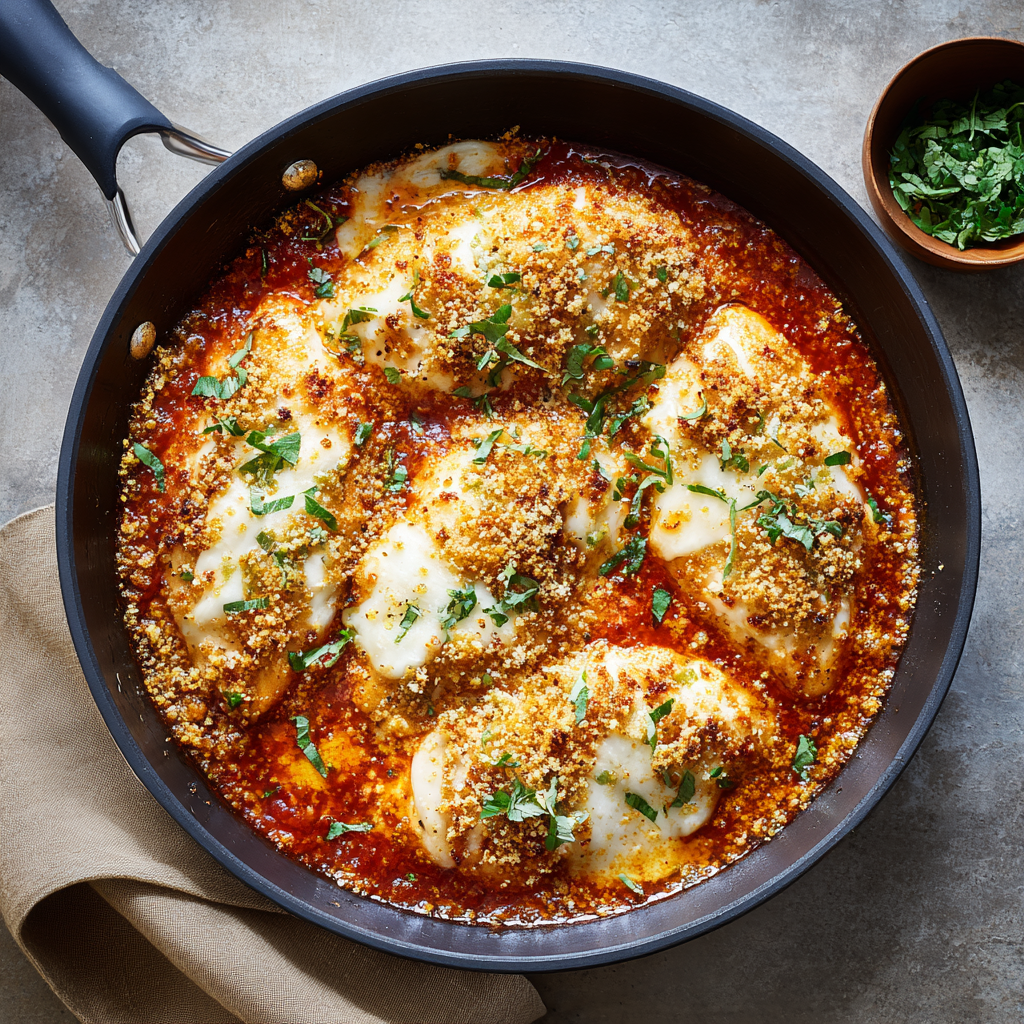
This recipe delivers every single thing we adore about the classic: juicy, tender chicken, tangy, herb-kissed marinara, a blanket of oozy, stretchy mozzarella, and that essential, satisfying crunch. But we’re trading the breading and deep-frying for a quick sear and a clever, crispy topping. All the magic happens in one single, trusty skillet, moving from stovetop to oven to table. In about 30 minutes, you’ll have a meal that looks and tastes like you fussed for hours. It’s the kind of recipe that makes you feel like a genius, leaving you more time to actually enjoy the meal with your people. So, grab your favorite skillet, and let’s make a mess-free masterpiece together!
My Kitchen Disaster That Sparked a Better Idea
This recipe was born, like many of my best ones, from a bit of a happy accident. Picture this: It’s years ago, and I’m determined to impress a date with my “signature” Chicken Parmesan. I’ve got three shallow bowls lined up for the breading, a pot of oil heating, and the confidence of a cooking show host. Fast forward twenty minutes: there’s a fine dusting of flour on every surface, a speckle of oil on my shirt, and my kitchen smells like a deep-fryer. I’m orchestrating the chicken fry, the pasta boil, and the sauce simmer like a frantic conductor. The chicken turned out great, but the process? Exhausting.
Afterward, washing what felt like every dish I owned, I had a lightbulb moment. The best part of Chicken Parm isn’t the laborious breading—it’s the perfect bite of tender chicken, savory sauce, melted cheese, and crunch. What if I could shortcut the messy part and double down on the good stuff? What if the “breading” was just a heavenly, garlicky, toasted sprinkle on top? The next time a craving hit, I grabbed my skillet and experimented. The result was faster, easier, and honestly, just as delicious. Sometimes, the best recipes come from simplifying, not complicating. This skillet Parm is my delicious proof.
Gathering Your Flavor Toolkit
Here’s everything you’ll need to build this flavor masterpiece. The beauty is in the simplicity!
- 4 boneless, skinless chicken breasts: The star of our show! Look for ones that are roughly the same thickness so they cook evenly. A quick tip? Place them between two pieces of plastic wrap and gently pound the thicker ends with a rolling pin or pan to even them out. Substitution: Chicken thighs work beautifully here too for even more juicy, forgiving meat.
- Salt and pepper, to taste: The foundational seasonings. Don’t be shy here—seasoning the chicken directly is your first and most important layer of flavor.
- 2 tablespoons olive oil: For searing. It adds a nice flavor and helps create those tasty golden bits in the pan. Chef’s Insight: A good, hot pan with oil is the secret to a perfect sear without sticking.
- 2 cups marinara sauce: Your favorite jarred sauce is 100% your friend here. Choose one you love to eat on its own! Substitution: Got 20 extra minutes? Sauté a little garlic and onion, then simmer a can of crushed tomatoes with basil for a quick homemade version.
- 1 1/2 cups shredded mozzarella cheese: The melty, stretchy glue that holds our dream together. I prefer to shred a block of low-moisture mozzarella—it melts better than pre-shredded (which has anti-caking agents).
- 1/4 cup grated Parmesan cheese: Our flavor booster. The salty, nutty punch of real Parmigiano-Reggiano or Grana Padano is irreplaceable.
For the “Magic” Breadcrumb Topping:
- 3/4 cup panko breadcrumbs: The key to our easy crunch! Panko is lighter and airier than regular breadcrumbs, giving you a spectacular golden, crispy topping. Substitution: Gluten-free panko works perfectly for a GF version.
- 1 tablespoon olive oil: This helps the panko toast up beautifully under the broiler.
- 1/2 teaspoon Italian seasoning: A little dried herb blend for that classic Parm aroma. No blend? Use a pinch each of dried oregano, basil, and thyme.
- Pinch of salt: Balances the topping and makes it tasty enough to eat on its own (which you might be tempted to do!).
Let’s Build It, Step-by-Step
Ready? Put on some tunes, and let’s cook. This is where the fun happens.
- Prep & Season: Pat your chicken breasts completely dry with paper towels. This is non-negotiable for a good sear! Generously season both sides with salt and pepper. While you’re at it, preheat your oven’s broiler on high and make sure one oven rack is positioned about 6-8 inches from the heat source.
- Sear to Perfection: Heat the 2 tablespoons of olive oil in a large, oven-safe skillet (cast iron or stainless steel are perfect) over medium-high heat. Once the oil is shimmering, carefully add the chicken. You should hear a nice sizzle. Let them cook, undisturbed, for 4-5 minutes, until you get a gorgeous golden-brown crust. Flip and sear the other side for another 4-5 minutes. The chicken won’t be cooked through yet—that’s perfect! We’re just building flavor and color here. Chef Hack: Don’t crowd the pan! If your skillet is smaller, sear in two batches. Crowded chicken steams instead of sears.
- Sauce Simmer: Reduce the heat to low. Pour the marinara sauce all around the chicken, spooning a little bit over the top of each piece. Let it gently simmer for about 5 minutes. This allows the chicken to finish cooking through in the sauce, keeping it incredibly juicy and letting the flavors marry.
- Create the Crispy Topping: While the chicken simmers, mix your panko breadcrumbs, 1 tablespoon of olive oil, Italian seasoning, and a pinch of salt in a small bowl. Stir until the panko is evenly coated with the oil. This is your “no-fuss breading.”
- The Cheesy Blanket: Sprinkle the shredded mozzarella and grated Parmesan evenly over each chicken breast, making sure to cover most of the surface. Then, evenly distribute the seasoned panko mixture over the cheese layer.
- Broil to Bubbly Glory: Carefully transfer the entire skillet to the oven under the broiler. WATCH IT CLOSELY! This only takes 2-3 minutes. You’re looking for the cheese to be completely melted and bubbly and the panko to transform into a deep, golden-brown crunch. Important Safety Tip: Remember that skillet handle is HOT! Always use a dry oven mitt.
- Serve & Swoon: Remove the skillet (again, with that mitt!) and let it rest for just a minute. Serve hot, spooning that delicious extra sauce from the pan right over each piece.
How to Plate Your Parm Perfection
Presentation is part of the fun, even on a busy night! I love placing a chicken breast right in the center of a shallow bowl. Spoon some of that glorious sauce from the skillet around it, not just on top. The contrast of the crispy topping against the saucy base is mouthwatering.
This dish begs for simple, complementary sides. A nest of cooked spaghetti or fettuccine tucked underneath is the classic move—the pasta soaks up the extra sauce beautifully. For a lighter option, a big, bright arugula salad with a lemon vinaigrette cut right through the richness. And let’s be honest, a slice of warm, garlicky bread or a soft breadstick on the side is never a wrong choice for sauce-dipping duties. Keep it simple and let the star of the show shine!
Make It Your Own: Fun Twists & Swaps
The beauty of this recipe is its adaptability. Here are a few ways to play with it:
- “Everything Bagel” Chicken Parm: Swap the Italian seasoning in the panko for 2 teaspoons of everything bagel seasoning. The garlic, onion, and sesame seed flavor is insane.
- Spicy Arrabbiata Twist: Use a spicy arrabbiata sauce instead of classic marinara. Add a pinch of red pepper flakes to the panko topping for an extra kick.
- Pesto-Parm Hybrid: After searing, spread a thin layer of basil pesto over each chicken breast before adding the marinara sauce. It adds a gorgeous herby depth.
- Veggie-Packed Version: After searing the chicken, sauté a handful of fresh spinach or sliced mushrooms in the pan for a minute before adding the sauce. An easy way to sneak in more greens!
- Dairy-Free Delight: Use your favorite vegan mozzarella shreds and a dairy-free Parmesan alternative. The method and the crunch remain perfect.
A Few Extra Thoughts From My Kitchen
Over the years, this recipe has become my ultimate “I need something impressive but have zero energy” dinner. I’ve made it for quiet nights alone, last-minute dinner parties, and everything in between. It never fails. One funny note: I’ve learned the hard way to always use a dry oven mitt for that skillet handle. A damp towel? It conducts heat. Ask me how I know! The recipe has evolved to include the panko-oil mix—it started as just dry breadcrumbs sprinkled on, but toasting them in oil first (even in a separate pan) took the crunch to a whole new level. This is your recipe now, so make it your own!
Your Questions, Answered
Q: My chicken breasts are huge and thick. Will they cook through?
A: Absolutely! The key is the simmer-in-sauce step. If they’re very thick (over 1.5 inches), you can add 2-3 more minutes to the simmering time before adding cheese. You can also use a meat thermometer; you’re aiming for 165°F at the thickest part.
Q: Can I make this ahead of time?
A: You can do some prep! Season and sear the chicken, then let the dish cool completely after adding the sauce (but before the cheese and topping). Cover and refrigerate for up to a day. When ready, add the cheese and panko, then broil, adding a couple extra minutes since you’re starting from cold.
Q: My panko topping is burning before my cheese melts!
A> This usually means your broiler is too intense or the rack is too close. Next time, position the rack a bit lower. You can also broil for a minute, then turn off the broiler and let the residual oven heat melt the cheese if the panko is browning too fast.
Q: What if I don’t have an oven-safe skillet?
A> No problem! Simply sear and simmer the chicken in any large skillet. Then, transfer the chicken and sauce to a baking dish before adding the cheese and breadcrumbs. Broil as directed.

One-Pan Chicken Parmesan Skillet : Easy, Crispy, and Mess-Free
Description
All the cheesy, tangy, crispy goodness of classic Chicken Parmesan—without the dredging, frying, and mountain of dishes. This one-pan version delivers juicy chicken, herby marinara, melted mozzarella, and a golden, crunchy panko topping in about 30 minutes. Perfect for weeknights or last-minute dinner parties.
Ingredients
Chicken & Sauce:
-
4 boneless, skinless chicken breasts
-
Salt & freshly cracked black pepper, to taste
-
2 tbsp olive oil
-
2 cups marinara sauce (jarred or homemade)
-
1 ½ cups shredded mozzarella cheese
-
¼ cup grated Parmesan cheese
Magic Panko Topping:
-
¾ cup panko breadcrumbs
-
1 tbsp olive oil
-
½ tsp Italian seasoning (or mix of oregano, basil, thyme)
-
Pinch of salt
Instructions
-
Prep Chicken & Oven:
Pat chicken dry and season generously with salt and pepper. Preheat your broiler and position a rack 6–8 inches from the heat source. -
Sear Chicken:
Heat 2 tbsp olive oil in a large, oven-safe skillet over medium-high heat. Sear chicken 4–5 minutes per side until golden brown. Chicken won’t be fully cooked yet—this step builds flavor. -
Simmer in Sauce:
Reduce heat to low and pour marinara sauce around the chicken, spooning some on top. Simmer 5 minutes until chicken finishes cooking and flavors marry. -
Prepare Topping:
In a small bowl, mix panko breadcrumbs, 1 tbsp olive oil, Italian seasoning, and a pinch of salt. -
Add Cheese & Crunch:
Sprinkle mozzarella and Parmesan over chicken, then evenly top with the panko mixture. -
Broil:
Place skillet under broiler 2–3 minutes, watching closely. Cheese should be bubbly and panko golden-brown. -
Serve:
Let rest 1 minute. Serve chicken hot with sauce from the skillet. Great over pasta, with salad, or alongside garlic bread.
Notes
-
Thicker Chicken: Simmer slightly longer or use a meat thermometer (165°F internal temp).
-
Make Ahead: Sear and simmer chicken, cool, and refrigerate up to 1 day. Add cheese/panko and broil when ready.
-
Panko Burns: Move rack lower or broil in shorter bursts to prevent burning.
-
No Oven-Safe Skillet: Use any skillet for searing/simmering, then transfer to a baking dish for broiling.
-
Twists:
-
Everything Bagel Topping: swap Italian seasoning for everything bagel seasoning.
-
Spicy: use arrabbiata sauce + red pepper flakes.
-
Pesto: spread a thin layer of pesto under the sauce.
-
Veggies: add spinach or mushrooms before sauce.
-
Dairy-Free: use vegan mozzarella & Parmesan alternative.
-
Nutritional Information (Per Serving, Approximate)
This information is an estimate provided for informational purposes. Actual values can vary based on specific ingredients used (e.g., brand of sauce, exact cheese amounts).
- Calories: 450
- Protein: 40g (Excellent source for muscle repair and keeping you full!)
- Fat: 23g
- Carbohydrates: 20g
- Fiber: 2g
- Sugar: 6g (Primarily from the tomatoes in the
Final Thoughts
So there you have it—the Chicken Parmesan that saves your craving without drowning you in dishes. It’s proof that a truly great meal doesn’t have to be a project. It’s about smart shortcuts that protect the soul of the dish: the juicy chicken, the tangy sauce, the irresistible cheese pull, and that essential crunch.
This skillet method has become more than just a recipe in my kitchen; it’s a reliable friend for busy nights. It’s the dinner that gives you a hug and tells you to go relax. I hope it earns a spot in your regular rotation, giving you back your time and your clean counters. Now, go make it, enjoy it, and remember: the best kind of cooking is the kind that leaves you happy, not hectic.
Let me know how it goes in the comments below—I’d love to hear what twists you try or who you wow with it!

Creamy Mushroom & Thyme Chicken Breast : Comfort in a Skillet
Creamy Mushroom & Thyme Chicken Breast: Comfort in a Skillet
Hey friend, Beau here! Can you smell that? That’s the sound of… wait, no, you can’t smell through the screen yet. But if you could, you’d be hit with the most incredible, soul-soothing aroma: golden, seared chicken mingling with earthy mushrooms, all wrapped up in a creamy, thyme-kissed sauce that’s basically a warm hug in a pan. This Creamy Mushroom & Thyme Chicken Breast is my absolute go-to when I need a dinner that feels fancy but comes together without the fuss. It’s the culinary equivalent of your favorite cozy sweater.
I’m a firm believer that the best meals aren’t about showing off with a hundred ingredients. They’re about taking a few fantastic, humble components and letting them sing in harmony. That’s exactly what happens here. The chicken gets a beautiful, flavorful crust. The mushrooms drink up all those delicious pan juices and get wonderfully meaty. The garlic and fresh thyme add that herby, aromatic punch. And the cream? It brings it all together into a sauce so good, you’ll be looking for excuses to eat it with a spoon. Whether you’ve had a long day and need some edible comfort, or you’re hosting a last-minute dinner for friends and want to impress, this skillet is your secret weapon. So, tie on your apron, grab your favorite pan, and let’s make some magic together. Dinner is 30 minutes away.
Why This Dish Feels Like Home
This recipe always takes me straight back to my grandma’s kitchen in the fall. She wasn’t a “celebrity chef,” but she was a wizard with a cast-iron skillet and whatever she had on hand. I remember one drizzly afternoon, I was maybe ten, “helping” (which mostly meant sneaking slices of mushroom). She was making her version of this—though she’d have called it “Chicken and Gravy.” The windows were fogged up from the stove’s heat, the radio was playing softly, and that smell… oh, that smell of mushrooms sautéing in butter and thyme. It was the smell of being cared for.
She taught me the real secret that day: “Beau, honey, it’s all in the fond.” I had no idea what that meant. She pointed to the little browned bits stuck to the bottom of the pan after searing the chicken. “That’s pure flavor, right there. Don’t you dare wash it away.” When she poured in the broth and scraped it all up, creating this incredible base for the sauce, it was like a lightbulb went off. Cooking wasn’t just following steps; it was building layers of flavor, one fond memory at a time. Every time I make this dish now, I think of her, and I make sure to get every last bit of that flavorful fond. It tastes like love, and it always will.
Your Flavor Toolkit: Ingredients & Chef Insights
Here’s everything you’ll need to create this masterpiece. Think of this list as your flavor building blocks—each one plays a crucial role!
- 4 boneless, skinless chicken breasts: The star of our show! Look for breasts that are roughly similar in size so they cook evenly. Chef’s Tip: If yours are super thick, place them between plastic wrap and gently pound them to an even ¾-inch thickness. It helps them cook faster and more uniformly.
- Salt & pepper to taste: The dynamic duo. Don’t be shy here—seasoning the chicken well is step one to great flavor. I use kosher salt and freshly cracked black pepper.
- 1 tbsp olive oil + 1 tbsp butter: Our cooking fat dream team. The oil has a higher smoke point for a good sear, and the butter adds irreplaceable, rich flavor. It’s the best of both worlds.
- 8 oz mushrooms (cremini or button), sliced: Earthy, savory goodness. I adore cremini (baby bellas) for their deeper color and slightly more robust flavor, but classic white buttons work beautifully too. Just slice them evenly so they cook at the same rate.
- 3 cloves garlic, minced: Aromatic gold. Fresh is best here! That punch of garlic cuts through the richness of the cream. Substitution: ¾ tsp of garlic powder in a pinch, but add it with the dried herbs.
- 1 tsp fresh thyme (or ½ tsp dried): The herby soul of the dish. Fresh thyme is woodsy and bright. If using dried, remember it’s more potent, so we use less. Rub it between your fingers before adding to wake up the oils.
- ½ cup chicken broth: Our deglazing hero! This liquid lifts all the flavorful browned bits (fond) from the pan to create our sauce base. Low-sodium is my preference so I can control the salt.
- ¾ cup heavy cream: For that luscious, silky texture. This is where the comfort comes in. For a lighter version, half-and-half works, but the sauce will be a bit thinner.
- ½ cup grated Parmesan (optional, for extra richness): The flavor booster. This isn’t just for topping—stirred into the sauce, it adds a salty, umami depth that’s incredible. Insight: Use freshly grated from a block if you can; it melts much smoother than the pre-shredded kind.
Let’s Get Cooking: Step-by-Step with Beau
Okay, team! Let’s fire up the stove. This is where the fun happens. I’ll walk you through each step with all my favorite kitchen hacks.
- Prep & Season Your Chicken: Pat your chicken breasts completely dry with paper towels. This is non-negotiable for a good sear—wet chicken steams. Season both sides generously with salt and pepper. Let them sit for 5 minutes while your pan heats up; this helps the seasoning adhere.
- Sear to Perfection: Heat a large skillet (stainless steel or cast iron is perfect) over medium-high heat. Add the olive oil and butter. Once the butter is melted and foaming, carefully add the chicken. You should hear a happy sizzle! Don’t move it! Let it cook, undisturbed, for 5-6 minutes, until you can see the edges turning golden brown and it releases easily from the pan. Flip and cook for another 5-7 minutes, or until cooked through (165°F internal temp). Transfer to a plate and tent loosely with foil. Chef’s Hack: If you’re worried about doneness, make a small cut into the thickest part to check—no shame in that!
- Work Your Mushroom Magic: In the same, now-flavor-packed skillet, add the sliced mushrooms. They might look crowded at first, but they’ll shrink! Sauté for 6-8 minutes, stirring occasionally. You’ll see them release their liquid (that’s good!), and then that liquid will evaporate, leaving you with beautifully browned, flavorful ‘shrooms.
- Build the Aromatics: Push the mushrooms to the side. Add the minced garlic and thyme to the center of the pan. Cook for just about 60 seconds—until incredibly fragrant. You’re toasting the herbs and mellowing the raw garlic bite. Now, mix everything in the pan together.
- The Great Deglaze: Pour in the chicken broth! As soon as it hits the hot pan, use your wooden spoon to scrape up all those delicious browned bits from the bottom. This is the flavor foundation. Let it simmer for 2 minutes to reduce slightly.
- Create the Creamy Dream: Lower the heat to medium. Pour in the heavy cream and stir gently to combine. Let it simmer (a gentle bubble, not a roaring boil) for 3-4 minutes. The sauce will thicken nicely as it reduces. If you’re using the Parmesan, stir it in now until melted and smooth.
- The Grand Finale: Slide the chicken breasts and any accumulated juices back into the skillet. Spoon that glorious sauce all over them. Let everything simmer together for 2 more minutes so the chicken reheats and soaks up some of that saucy love.
How to Serve It Up (Sauciness is Key!)
Presentation is part of the joy! Here’s how I love to plate this dish for maximum comfort and style.
First, choose your base. This is all about that sauce, so you need something to soak it up. A big, fluffy pile of garlic mashed potatoes is my top pick—it’s a classic for a reason. Alternatively, a bed of buttery egg noodles, creamy polenta, or even simple steamed rice works wonders. For a low-carb option, cauliflower mash is fantastic.
Place your saucy base on a warm plate or shallow bowl. Nestle a chicken breast right on top, then ladle a generous amount of the creamy mushroom sauce over everything. Make sure you get plenty of those mushrooms! Finish with a final flourish: a tiny sprinkle of fresh thyme leaves, a crack of black pepper, and maybe a little more Parmesan if you’re feeling extra. Don’t forget a piece of warm, crusty bread on the side for the ultimate sauce-mopping experience. Dinner is served, and it’s a beautiful thing.
Make It Your Own: Delicious Twists & Swaps
One of the best things about this recipe is its flexibility. Play with it! Here are some of my favorite riffs:
- “Sun-Dried” & Spinach: Add ¼ cup chopped sun-dried tomatoes (oil-packed, drained) and a big handful of fresh spinach to the sauce with the cream. The tomatoes add a sweet-tangy punch, and the spinach brings color and nutrients.
- Mustard & White Wine: For a brighter, tangier sauce, deglaze with ¼ cup dry white wine (like Sauvignon Blanc) before adding the broth. Let it reduce by half. Then, stir 1-2 tablespoons of whole-grain or Dijon mustard into the cream before adding it to the pan.
- Bacon Bliss: Chop 4 slices of bacon and cook them in the skillet first until crispy. Remove the bacon, then sear the chicken in the bacon fat (mind blown, right?). Use the bacon fat/butter combo. Stir the crispy bacon back in at the end with the chicken.
- Dairy-Free / Lighter: Swap the heavy cream for full-fat canned coconut milk for a rich, dairy-free version. For a lighter take, use half-and-half or whole milk, but add a slurry (1 tsp cornstarch mixed with 1 tbsp cold water) at the end to help thicken the sauce.
- Herb Garden: Swap the thyme for other fresh herbs. Tarragon gives a lovely anise note, rosemary is bold and woodsy (use half the amount), or a mix of chives and parsley is fresh and spring-like.
Beau’s Kitchen Notebook
This recipe has lived in my back pocket for years, and it’s evolved with me. In my early 20s, it was a “special occasion” meal because cream felt fancy. Now, it’s a Wednesday night lifesaver. I’ve learned a few things: First, don’t rush the mushroom browning—that’s where the deep flavor is. Second, if your sauce ever “breaks” or looks a little greasy, don’t panic! Remove it from the heat and whisk in a splash of cold cream or broth; it’ll usually come right back together.
Funny story: I once made this for a first date and was so busy talking that I completely forgot to add the garlic. I served it, we took a bite, and I knew instantly. I must have looked horrified because she asked what was wrong. I confessed, “I forgot the garlic!” She just laughed, took another bite, and said, “It’s still the best thing I’ve eaten all week.” (We’re still friends!). The moral? Even imperfect home-cooked food, made with good intentions, is a gift. So relax and enjoy the process.
FAQs & Kitchen Rescue
Q: My sauce is too thin! How can I thicken it?
A: No worries! Let it simmer a few minutes longer to reduce and concentrate. If you’re in a hurry, make a quick slurry: mix 1 teaspoon of cornstarch with 1 tablespoon of cold water until smooth. Whisk it into the simmering sauce and cook for 1-2 minutes until thickened.
Q: Can I use chicken thighs instead of breasts?
A: Absolutely! Bone-in, skin-on thighs would be incredible. Sear them skin-side down first to render the fat and get it crispy. They may need a few more minutes in the oven after the sauce step to finish cooking through. The richer dark meat pairs amazingly with the mushrooms.
Q: How do I store and reheat leftovers?
A: Store in an airtight container in the fridge for up to 3 days. Reheat gently in a covered skillet over low heat, adding a splash of broth or cream to loosen the sauce. The microwave works in a pinch, but go slow to prevent the cream from separating.
Q: My chicken turned out dry. What happened?
A> The most common culprit is overcooking. Chicken breasts cook fast! Using a meat thermometer is the best insurance—pull them at 160-165°F, as they’ll carry over cook a bit more while resting. Also, ensuring they’re an even thickness (through gentle pounding) helps them cook uniformly.

Creamy Mushroom & Thyme Chicken Breast : Comfort in a Skillet
Description
Tender, golden chicken breasts meet earthy mushrooms in a silky, thyme-kissed cream sauce. This skillet meal is quick, elegant, and comforting—a perfect midweek dinner or last-minute guest impressor. Ready in about 30 minutes, it’s cozy food that feels special.
Ingredients
-
4 boneless, skinless chicken breasts
-
Salt & freshly cracked black pepper, to taste
-
1 tbsp olive oil
-
1 tbsp butter
-
8 oz mushrooms (cremini or button), sliced
-
3 cloves garlic, minced
-
1 tsp fresh thyme leaves (or ½ tsp dried)
-
½ cup chicken broth (low-sodium recommended)
-
¾ cup heavy cream (or half-and-half for lighter)
-
½ cup grated Parmesan (optional, for extra richness)
Instructions
-
Prep & Season Chicken:
Pat chicken breasts dry. Season both sides generously with salt and pepper. Optional: pound to an even ¾-inch thickness for uniform cooking. -
Sear Chicken:
Heat a large skillet over medium-high heat. Add olive oil and butter. Once hot, add chicken and cook 5–6 minutes per side until golden and cooked through (165°F internal temp). Remove chicken and tent with foil. -
Cook Mushrooms:
In the same skillet, sauté sliced mushrooms 6–8 minutes until browned and most liquid has evaporated. -
Add Aromatics:
Push mushrooms aside, add garlic and thyme, and cook ~1 minute until fragrant. Stir everything together. -
Deglaze & Build Sauce:
Pour in chicken broth, scraping up the browned bits from the pan. Simmer 2 minutes. -
Create Creamy Sauce:
Lower heat to medium, stir in heavy cream, and simmer 3–4 minutes until slightly thickened. Add Parmesan if using, stirring until smooth. -
Finish Dish:
Return chicken to skillet, spoon sauce over, and simmer 2 more minutes to reheat and coat in sauce.
Notes
-
Sun-Dried & Spinach: Add ¼ cup chopped sun-dried tomatoes and a handful of spinach to the sauce.
-
Mustard & White Wine: Deglaze with ¼ cup dry white wine before broth, then stir 1–2 tbsp mustard into the cream.
-
Bacon Bliss: Cook 4 slices bacon first; sear chicken in bacon fat, stir bacon back in at the end.
-
Dairy-Free: Swap cream for full-fat coconut milk.
-
Herb Swaps: Use rosemary, tarragon, or a mix of chives and parsley instead of thyme.
Nutritional Information (Approximate)
Hey, we’re all about balance here! This is a rich, comforting dish, and here’s the nutritional breakdown per serving (1 chicken breast with sauce), based on the core recipe without optional Parmesan. Remember, these are estimates—your exact numbers will depend on specific brands and amounts used.
Per Serving: Calories: ~420 | Protein: 35g | Carbohydrates: 6g | Dietary Fiber: 1g | Sugars: 3g | Fat: 28g (Saturated Fat: 14g) | Cholesterol: 155mg | Sodium: 350mg (will vary with broth saltiness).
This dish is a great source of high-quality protein from the chicken. The mushrooms provide B vitamins and a touch of fiber. To make it part of a balanced plate, I love serving it with a big, bright side salad or some simply steamed green beans. It’s all about that cozy, satisfying enjoyment!
Final Thoughts from My Kitchen to Yours
And there you have it, friend—my heartfelt, go-to recipe for Creamy Mushroom & Thyme Chicken. It’s more than just a list of ingredients and steps; it’s a story in a skillet, a memory maker, and a guaranteed way to make an ordinary evening feel a little special. I hope you make it, share it, and maybe even put your own spin on it.
The real magic of cooking isn’t just in the eating (though that’s a big part of it!). It’s in the sizzle when the chicken hits the pan, the smell of thyme filling your kitchen, and the simple act of creating something nourishing and delicious with your own two hands. So, thank you for letting me share one of my favorites with you. Now, go forth, cook with confidence, and don’t forget to scrape up all that good fond. Until next time, keep your spatula close and your appetite closer!
Beau

Easter Chocolate Truffle Cake : A Decadent Showstopper for Spring Celebrations
Say Hello to Your New Easter Tradition: The Ultimate Chocolate Truffle Cake
Hey friends, Beau here! Can you smell that? It’s the scent of rich, melting chocolate, a hint of vanilla, and pure, unadulterated joy wafting from the oven. If there’s one thing I believe in, it’s that the best celebrations are built around a showstopping dessert, and for spring, that crown jewel is this Easter Chocolate Truffle Cake. This isn’t just a cake; it’s an experience—a decadent, melt-in-your-mouth, conversation-halting moment of bliss that’s perfect for your Easter table, a spring brunch, or any day that needs a little extra sunshine (and chocolate).
Imagine this: a deeply moist, tender chocolate cake that tastes like your favorite childhood memory, but all grown up. Now, picture it enveloped in a cloak of silky, luxuriously smooth chocolate truffle ganache that glistens like a spring rain. This ganache doesn’t just sit on top—it cascades down the sides in gorgeous, glossy drips, promising the kind of rich flavor that makes you close your eyes for a second after the first bite. It’s stunningly simple to look at, yet profoundly complex in flavor. Whether you’re a baking pro or this is your first cake from scratch, I’m walking you through every single step. We’re going to make a dessert that doesn’t just feed people; it makes them feel celebrated. So, tie on your favorite apron, put on some good music, and let’s create something spectacular together.
Why This Cake? A Little Story From My Kitchen
This recipe has roots that go way back for me, straight to my Grandma Eleanor’s linoleum-tiled kitchen. Easter at her house was an event. The table would groan under the weight of a glazed ham, scalloped potatoes, and deviled eggs with a secret dash of paprika. But the true center of attention, sitting proudly on her crystal cake stand, was always her “Fudge Cake.” It was legendary in our family—a dense, dark marvel that she’d only make for special occasions.
One year, I must have been about ten, she let me “help.” My job was to stir the chocolate into the warm cream for the frosting. I remember watching, mesmerized, as the solid chips slowly dissolved into a shiny, velvety pool. She called it “kitchen magic.” That moment, the warmth of the stove, the smell of chocolate filling the air, and her patient smile—that’s where my love for ganache was born. This Easter Chocolate Truffle Cake is my homage to her. I’ve tweaked the cake to be a bit lighter and fluffier, and I let that glorious ganache take center stage, just like that magical transformation I witnessed as a kid. Every time I make it, I think of her. Food is memory, my friends, and this cake is a delicious one.
Gathering Your Cast of Characters: Ingredients & Insights
Great ingredients make a great cake. Let’s break down what you’ll need and why each one matters. Don’t stress—I’ve got substitution tips so you can bake with what you’ve got!
For the Chocolate Cake:
- 1 cup all-purpose flour: The sturdy backbone of our cake. For a slightly lighter crumb, you can swap in cake flour, but all-purpose works beautifully here.
- 1 cup granulated sugar: Sweetness and tenderness! It helps create that soft, moist texture we’re after.
- ½ cup unsweetened cocoa powder: This is non-negotiable for deep flavor! Use a good-quality natural cocoa powder (like Hershey’s) for that classic, slightly acidic chocolate taste. Dutch-process will work but will give a darker, milder flavor.
- 1 tsp baking soda & ½ tsp baking powder: Our dynamic leavening duo. The baking soda reacts with the cocoa and buttermilk for a great rise.
- ½ tsp salt: The secret weapon! Salt makes the chocolate flavor pop and balances the sweetness. Don’t skip it.
- 1 large egg, at room temperature: Binds everything together and adds structure. Pro tip: if you forgot to take it out, place it in a bowl of warm water for 5 minutes.
- ½ cup buttermilk, at room temperature: The tangy superstar! Buttermilk tenderizes the crumb like nobody’s business. No buttermilk? Make a quick “sour milk”: mix ½ tbsp white vinegar or lemon juice with enough regular milk to make ½ cup. Let it sit for 5 minutes until curdled.
- ½ cup warm water: Helps “bloom” the cocoa powder, intensifying its flavor and creating a smooth, pourable batter.
- ¼ cup vegetable oil: Keeps this cake incredibly moist, even after chilling. Canola or any neutral oil works.
- 1 tsp pure vanilla extract: The aromatic high-five that makes all the other flavors sing.
For the Chocolate Truffle Ganache:
- 12 oz (about 2 cups) semi-sweet chocolate, finely chopped: This is the heart of the truffle experience. Use a baking bar (like Ghirardelli or Baker’s) chopped up, or high-quality chocolate chips. The better the chocolate, the better the ganache. For a darker, less sweet cake, use bittersweet.
- 1 cup heavy cream (also called double cream or whipping cream): This transforms our chocolate into that luxurious, pourable silk. Make sure it’s full-fat for the best set and shine.
- 2 tbsp unsalted butter, at room temperature: Added at the end for extra gloss, richness, and a smoother set.
For Easter Decorations (Optional but Fun!):
- Mini chocolate eggs, pastel sprinkles, edible flowers, or chocolate shavings: This is where you get playful! Let your inner artist out.
Let’s Get Baking: Step-by-Step with Chef Beau
Alright, team! Let’s do this. Read through once, then let’s get our hands (metaphorically) dirty. I’m with you at every step.
- Preheat & Prep: Crank that oven to 350°F (175°C). This is our baking sweet spot. Now, take an 8-inch round cake pan and grease it generously with butter or non-stick spray. Line the bottom with a circle of parchment paper—this is your insurance policy for a perfect, non-stick release. I never skip this!
- Whisk the Dry Team: In a large mixing bowl, grab your whisk and combine the flour, sugar, cocoa powder, baking soda, baking powder, and salt. Whisk it really well for a good 30 seconds. We’re not just mixing; we’re aerating and making sure those leaveners are evenly distributed for a uniform rise. No one wants a baking soda pocket!
- Unite the Wet Team: In a separate bowl or a large measuring jug, whisk together the room-temperature egg, buttermilk, warm water, vegetable oil, and vanilla until it’s one happy, homogenous liquid. See how the cocoa powder in the dry ingredients is just begging to meet this wet team?
- The Grand Batter Union: Pour the wet ingredients right into the center of the dry ingredients. Now, using a spatula or whisk, gently mix just until the batter is smooth and no dry streaks remain. This is crucial: DO NOT overmix. A few tiny lumps are far better than a tough, overworked cake. Think of it as folding the ingredients together with love, not beating them into submission.
- Bake to Perfection: Pour that beautiful, dark batter into your prepared pan and smooth the top. Slide it into the middle of your preheated oven. Set your timer for 30 minutes. The cake is done when the top springs back lightly to the touch and a toothpick inserted into the center comes out with just a few moist crumbs (not wet batter). Ovens vary, so it could take up to 35 minutes. Chef’s Hack: Resist the urge to open the oven door before the 30-minute mark! Let the cake do its thing.
- The Cool Down (Patience is a Virtue!): Once baked, let the cake cool in the pan on a wire rack for 15 minutes. Then, run a knife around the edge, invert it onto the rack, peel off the parchment paper, and let it cool completely. I mean it—completely cool. If the cake is even slightly warm, the ganache will melt into a puddle. This is the perfect time to clean up and make the ganache.
- Create the Truffle Magic (Ganache Time): Place your finely chopped chocolate in a medium, heatproof bowl. In a small saucepan, heat the heavy cream over medium heat until it’s just beginning to simmer—you’ll see small bubbles forming around the edges. Do not let it boil vigorously. Immediately pour the hot cream over the chocolate. Let it sit, untouched, for a full 3 minutes. This quiet time allows the heat to gently melt the chocolate. After 3 minutes, add the soft butter, and starting from the center, slowly stir until the mixture is gloriously smooth, shiny, and unified. You’ve just made truffle filling! Let it cool at room temperature for about 15-20 minutes, stirring occasionally, until it thickens slightly to a thick-but-pourable consistency, like warm pudding.
- The Grand Finale: Assembly & Decoration: Place your completely cooled cake on a serving plate or cake stand. I like to put a few strips of parchment paper under the edges to catch drips for a clean plate later. Pour the slightly thickened ganache onto the center of the cake. Using an offset spatula or the back of a spoon, gently push it to the edges and guide it over the sides in beautiful, drippy waves. Work quickly but calmly. Once covered, gently remove the parchment strips. Now, decorate! Scatter with mini eggs, sprinkles, or chocolate shavings. Chill the whole cake in the fridge for at least 1 hour to set the ganache perfectly.
How to Serve This Masterpiece
Presentation is part of the fun! For the cleanest slices, take a sharp, thin-bladed knife and dip it in hot water, wiping it dry between each cut. This slices through the firm ganache like a dream.
Serve each slice on its own plate. This cake is rich, so modest slices are absolutely acceptable (though seconds are highly encouraged). A little fresh raspberry or strawberry on the side adds a lovely, fresh contrast. For the ultimate indulgence, a small dollop of lightly sweetened whipped cream or a scoop of vanilla bean ice cream turns this into a next-level dessert experience. The combination of cool, creamy ice cream and the dense, room-temperature chocolate cake is simply divine. Pour the coffee, gather your people, and get ready for the compliments to roll in.
Make It Your Own: Delicious Twists & Swaps
Love the base recipe but want to play? Here are some of my favorite riffs:
- Orange Chocolate Bliss: Add 1 tbsp of finely grated orange zest to the cake batter and 1 tsp of orange extract to the ganache. Decorate with candied orange peel. It’s a classic, vibrant pairing that screams spring.
- Salted Caramel Swirl: Before chilling the cake, drizzle the top with ¼ cup of good-quality salted caramel sauce. Use a toothpick to swirl it gently into the ganache for a marbled effect. Sprinkle with flaky sea salt.
- Mocha Madness: Dissolve 1 tbsp of instant espresso powder into the warm water before adding it to the batter. The coffee doesn’t make it taste like coffee—it just makes the chocolate flavor deeper and more complex.
- Gluten-Free & Dairy-Friendly: Use a 1:1 gluten-free flour blend for the cake. For the ganache, use a high-quality dairy-free dark chocolate and full-fat coconut cream instead of heavy cream. The coconut adds a subtle, lovely note.
- Fruit Forest: After pouring the ganache, press a ring of fresh raspberries, strawberries, or even edible flowers (like violets or pansies) around the top border for a stunning, natural look.
Beau’s Kitchen Notebook
This cake has been a labor of love through many, many test batches. The biggest lesson? Temperature is everything. That ganache has a mind of its own. If it’s too warm, it’ll run right off the cake. If you let it cool too much, it becomes fudge and won’t drip. The sweet spot is when it coats the back of a spoon thickly. If you mess up? No sweat. If it’s too runny, chill it for 5 more minutes. If it’s too thick, gently re-warm it over a double boiler with a splash of extra cream. Baking is about adapting, not perfection. Also, this cake actually tastes even better on day two, after the flavors have had a chance to mingle and get cozy. So feel free to make it a day ahead—your Easter self will thank you!
Your Questions, Answered
Q: My ganache split/looks grainy! What happened?
A: Don’t panic! This usually means the cream was too hot and “seized” the chocolate. To fix it, whisk in a tablespoon of warm milk or cream, one at a time, until it comes back together. Next time, make sure the cream is just simmering, not boiling.
Q: Can I make this cake in a different pan?
A: Absolutely! A 9-inch pan will give you a slightly wider, thinner cake—check it at 25 minutes. You can also double the recipe to make a stunning two-layer cake. Just divide the batter between two 8-inch pans and reduce the bake time slightly. You’ll need to make 1.5x the ganache recipe to fill and cover the layers.
Q: How should I store leftovers?
A: Cover it loosely with a cake dome or invert a large bowl over it. It keeps beautifully at cool room temperature for 2 days, or in the fridge for up to 5 days. Let fridge-cold slices sit out for 20 minutes before serving to soften the ganache.
Q: My cake sunk in the middle! Help!
A> This is often due to under-baking or opening the oven door too early, causing a temperature crash. Make sure your toothpick test shows moist crumbs, not wet batter. It’s better to give it an extra 2-3 minutes. Even if it sinks a little, you’re pouring a ton of ganache over it—it will still taste incredible!

Easter Chocolate Truffle Cake : A Decadent Showstopper for Spring Celebrations
Description
Rich, tender chocolate cake meets silky, glossy truffle ganache—this Easter Chocolate Truffle Cake is a showstopper for brunch, dessert, or any celebration. Moist, chocolatey, and indulgent, it’s easier than it looks and perfect for impressing friends and family.
Ingredients
Chocolate Cake:
-
1 cup all-purpose flour
-
1 cup granulated sugar
-
½ cup unsweetened cocoa powder
-
1 tsp baking soda
-
½ tsp baking powder
-
½ tsp salt
-
1 large egg, room temperature
-
½ cup buttermilk, room temperature (or ½ cup milk + ½ tsp vinegar, let sit 5 min)
-
½ cup warm water
-
¼ cup vegetable oil
-
1 tsp pure vanilla extract
Chocolate Truffle Ganache:
-
12 oz (2 cups) semi-sweet chocolate, finely chopped
-
1 cup heavy cream
-
2 tbsp unsalted butter, room temperature
Optional Decorations:
-
Mini chocolate eggs, pastel sprinkles, chocolate shavings, or edible flowers
Instructions
-
Prep Oven & Pan:
Preheat oven to 350°F (175°C). Grease an 8-inch round pan and line the bottom with parchment paper. -
Mix Dry Ingredients:
In a large bowl, whisk together flour, sugar, cocoa, baking soda, baking powder, and salt. -
Mix Wet Ingredients:
In another bowl, whisk egg, buttermilk, warm water, oil, and vanilla until smooth. -
Combine Batter:
Pour wet into dry ingredients. Gently mix until smooth, being careful not to overmix. -
Bake:
Pour batter into prepared pan. Bake 30–35 minutes, or until a toothpick comes out with a few moist crumbs. Cool 15 min in pan, then invert onto wire rack and cool completely. -
Make Ganache:
Place chopped chocolate in heatproof bowl. Heat cream until simmering and pour over chocolate. Let sit 3 min. Add butter and stir until smooth. Cool 15–20 min until thick but pourable. -
Assemble Cake:
Place cooled cake on serving plate. Pour ganache over center and gently spread to edges for drips. Decorate with optional toppings. Chill 1 hour to set. -
Serve:
Slice with a sharp knife dipped in hot water, wiping between cuts. Optionally serve with whipped cream or ice cream.
Notes
-
Orange Chocolate: Add 1 tbsp orange zest to batter; 1 tsp orange extract to ganache.
-
Salted Caramel: Drizzle caramel over ganache and swirl with a toothpick; sprinkle flaky sea salt.
-
Mocha: Dissolve 1 tbsp instant espresso in warm water before mixing batter.
-
Gluten-Free/Dairy-Free: Use gluten-free flour and coconut cream with dairy-free chocolate.
-
Make Ahead: Bake cake 1 day prior; store ganache separately and assemble before serving.
Nutritional Information*
*Please note: This is a celebratory dessert, and the info below is an estimate per serving (1/8th of the cake) calculated using standard ingredients. For specific dietary needs, use a dedicated nutrition calculator with your exact brands.
- Calories: ~465
- Total Carbohydrates: 50g
- Dietary Fiber: 4g
- Sugars: 35g
- Protein: 5g
- Total Fat: 28g
- Saturated Fat: 15g
- Sodium: 250mg
Remember, it’s all about balance and joy. Savor every bite of this special treat!
Final Thoughts: More Than Just a Cake
As you wipe the last crumbs of chocolate from your plate and see the smiles around your table, I hope you feel it—that quiet, happy satisfaction that comes from creating something truly special. This Easter Chocolate Truffle Cake is more than a dessert; it’s a centerpiece for connection. It’s the quiet “wow” as you bring it to the table, the shared moment of indulgence, and the memory you’re baking into the story of your family.
Remember, friends, baking is an act of love, not a test of perfection. Whether your ganache drips perfectly or pools a little on the plate, whether you decorated it like a pastry chef or simply let its glossy beauty shine—it’s a triumph. You made it. You took simple ingredients and spun them into joy. That’s the real kitchen magic my grandma taught me, and it’s a magic you now hold.

Mini Corned Beef Sliders
Mini Corned Beef Sliders: Your New Party Hero (They’ll Vanish in Minutes!)
Hey there, friend! Beau here, from Feastical. Let’s talk about that magical moment at a gathering when a platter of food comes out of the oven and a hush falls over the room. All eyes track its journey to the table. There’s a collective lean-in. And then? Pure, unadulterated delicious chaos. That’s the power of a truly great slider.
Today, I’m handing you the keys to that kingdom with my Mini Corned Beef Sliders. We’re talking everything you crave in a Reuben sandwich—tender, savory corned beef, melty Swiss cheese, that punchy tang of sauerkraut, and a swipe of zesty mustard—all cozying up on a soft, pillow-y slider bun. But here’s the secret sauce (well, besides the mustard): the whole ensemble gets a luxurious bath of garlicky, oniony, buttery goodness and bakes until it becomes one gloriously unified, melty masterpiece.
Whether you’re staring down a St. Patrick’s Day spread, gearing up for game day, or just need a knockout Friday night snack that says “you’ve got this,” these sliders are your answer. They’re deceptively simple to make, completely customizable, and engineered for maximum crowd-pleasing. So, preheat that oven and let’s create some kitchen magic that’s guaranteed to have everyone asking, “Okay, but when are you making these again?”
The Deli Counter Daydream: Where My Slider Love Story Began
This recipe always takes me back to the worn-in vinyl booth of my grandpa’s favorite old-school diner. Every Saturday, like clockwork, we’d go for lunch. He’d always, without fail, order the Reuben. I’d watch, fascinated, as this towering, messy, glorious creation arrived, held together with what seemed like sheer will and a toothpick. He’d saw through it with his knife and fork (a controversial move, I know!), and the steam would rise, carrying that unmistakable scent of rye, corned beef, and caraway.
I was a kid with more modest appetites, usually tucked into a grilled cheese. But I’d always negotiate for one precious bite of his sandwich. That combo of flavors—salty, tangy, creamy, rich—felt like a secret adult world of sophisticated taste. These mini sliders are my homage to those Saturdays. They capture every bit of that iconic diner flavor, but in a friendly, shareable, no-fuss package. They’re the taste of a memory, designed for making new ones around your own table. And the best part? No toothpick surgery required.
Gathering Your Flavor Team: Ingredients & Pro Tips
Great food starts with great ingredients, but I’m a firm believer in keeping it stress-free. Here’s what you’ll need and my little chef insights to make each component shine.
- 12 Slider Buns or Hawaiian Rolls: The foundation! I love using the connected pack of Hawaiian rolls for ultimate softness and easy slicing. Their hint of sweetness is a fantastic counterpoint to the savory fillings. Chef’s Insight: If you prefer a savory bite, classic potato slider buns or small brioche buns are fabulous too.
- ¾ lb Sliced Corned Beef: The star of the show. Get the best quality your deli counter offers—it makes a difference! Ask for it sliced thin, but not shaved. You want some texture. Substitution Tip: In a pinch, good-quality packaged deli corned beef works perfectly. Leftover homemade corned beef brisket? Slice it thin and you’ve reached slider nirvana.
- 6 slices Swiss Cheese, halved: Our melty, nutty glue. Swiss and corned beef are a match made in heaven. Substitution Tip: Feel free to swap in Gruyère for a more pronounced flavor, or even a mild white cheddar if that’s what you have on hand.
- 1 cup Sauerkraut, drained: The essential tang! Drain it well—give it a gentle squeeze in a clean kitchen towel or paper towels. We want flavor, not excess liquid making our buns soggy. Chef’s Insight: For a next-level twist, try using a “craft” sauerkraut from the refrigerated section; flavors like caraway or juniper berry add incredible depth.
- 2–3 Tbsp Whole Grain or Dijon Mustard: The flavor accelerator. I adore whole grain for its texture and mild sharpness, but smooth Dijon is equally stellar. Pro Tip: Don’t skip the mustard! It cuts through the richness and brightens every single bite.
- For the Buttery Topping: This is the magic wand that transforms baked sliders from good to legendary.
- ¼ cup melted butter: The rich base.
- 1 tsp onion powder & 1 tsp garlic powder: Instant, no-chop flavor infusion.
- 1 tsp poppy seeds (optional): Adds a delightful little crunch and classic “everything bun” vibes. Don’t stress if you don’t have them!
Let’s Build Some Bite-Sized Bliss: Step-by-Step
Ready? Apron on, music up, let’s get building. This process is as satisfying as eating the final product, I promise.
- Preheat & Prep: Fire up your oven to 350°F (180°C). Grab a 9×13 inch baking dish and give it a very light spray with oil or line it with parchment paper. Chef Hack: A light spray on the parchment too ensures absolutely nothing sticks, for easy slider removal.
- The Great Slice: Take your whole sheet of connected slider buns (if using Hawaiian rolls) and, without separating them, slice the entire block horizontally in half using a long serrated bread knife. You’ll have a top “lid” and a bottom “base.” Place the bottom half in your prepared dish. Pro Tip: If your buns are separate, just arrange them snugly in the dish. They’ll cozy up in the oven.
- Layer It Up: Now for the fun part! Layer the corned beef evenly over the bottom buns, creating little ruffles and folds for texture. Next, scatter the well-drained sauerkraut over the beef. Finally, lay your halved slices of Swiss cheese over the top, covering as much area as possible. It’s okay if it overlaps!
- Mustard & The Lid: Spread your chosen mustard evenly over the cut side of the top bun “lid.” This gets the flavor right where it needs to be. Place the mustard-slathered top half over the cheesy, beefy mountain.
- Butter Bath Time: In a small bowl, whisk together the melted butter, onion powder, garlic powder, and poppy seeds (if using). Now, take a pastry brush and generously, lovingly, paint this golden elixir all over the top and sides of the buns. Get into every nook and cranny! This buttery soak is what creates that irresistible, soft-yet-crisp top. Chef’s Secret: Let the butter mix sit for a minute after brushing, then do a second quick coat. Flavor lock: achieved.
- Bake to Melty Perfection: Cover the entire dish tightly with aluminum foil. This creates a little steam chamber, gently warming the fillings and softening the buns without over-browning. Bake covered for 15 minutes. Then, remove the foil (hello, gorgeous aroma!) and bake for another 5-7 minutes, just until the cheese is utterly bubbly and the top is a beautiful, golden brown.
- The Final Act: Pull the dish from the oven. Let it rest for just 2-3 minutes—this lets the cheese set slightly so you can slice them cleanly. Then, use a sharp knife to slice along the bun lines, creating your perfect individual sliders.
Plating Up for Maximum Impact
Presentation is part of the fun! I love transferring these beauties to a large wooden board or a vibrant platter. Scatter a few extra cornichons or pickles around the edges, and maybe a little bowl of extra mustard or Thousand Island dressing for dipping on the side.
For a casual party, I just leave the whole baking dish right on the table with a stack of napkins and let folks dig in family-style. The informal, “help yourself” vibe is part of the charm. These sliders are rich, so serving them with something light and crunchy is genius. A simple side salad with a sharp vinaigrette, some crisp potato chips, or a bowl of chilled grapes are all perfect partners in crime.
Make It Your Own: Delicious Twists & Swaps
The beauty of this recipe is its flexibility. Play with it! Here are a few of my favorite riffs:
- The “Rachel”: Swap the corned beef for thinly sliced turkey or pastrami, and use coleslaw instead of sauerkraut. A different delight entirely!
- Spicy Kick: Add a layer of sliced jalapeños (pickled or fresh) under the cheese. Or, mix a tablespoon of horseradish into your mustard spread.
- Thousand Island Dream: Skip the plain mustard and spread a generous layer of Thousand Island or Russian dressing on the buns. This is the classic Reuben sauce and it’s utterly divine.
- Get Cheesy with It: Add a second cheese! A few thin slices of sharp cheddar or a sprinkle of grated Parmesan in with the Swiss creates an even more complex, gooey experience.
- Make it a “Melt”: For a non-slider, weeknight dinner version, use sourdough bread, build your sandwich, butter the outsides, and grill it in a pan like a classic grilled cheese. Heavenly.
Beau’s Kitchen Notes & Stories
I’ve made these sliders more times than I can count, and they’ve evolved along the way. The double-brush of the butter topping was a happy accident one busy game day when I got distracted by the score and went back to “touch up” the tops. The result was so good it’s now law in my kitchen.
One time, I completely forgot to put the mustard on the buns before assembling. Disaster? Nope! I just whisked it right into the melted butter mixture and brushed it on. It worked like a charm and infused the whole top with mustardy flavor. It just goes to show—cooking is about adapting, not panicking. The worst that can usually happen is you invent a new, delicious method!
Your Questions, Answered (Let’s Troubleshoot!)
- Q: Can I make these ahead of time?
A: Absolutely! You can assemble the entire dish (through step 5, including the butter brush), cover it tightly with plastic wrap and then foil, and refrigerate for up to 24 hours. When ready, bake straight from the fridge, adding about 5-10 extra minutes to the covered baking time since everything is cold. - Q: My buns got soggy on the bottom. What happened?
A: The main culprit is usually undrained sauerkraut. Give it a really good squeeze! Also, ensuring you use enough cheese as a barrier between the wet ingredients and the bun helps. Lastly, don’t let the assembled, unbaked sliders sit for too long before going in the oven. - Q: Can I use something other than butter for the topping?
A: For a dairy-free version, a high-quality olive oil or even a garlic-infused avocado oil works well. The flavor will be different but still delicious. - Q: How do I reheat leftovers?
A: The oven or toaster oven is your friend here! Reheat at 325°F for 8-10 minutes until warmed through. The microwave works in a pinch but can make the buns a bit rubbery.

Mini Corned Beef Sliders
Description
Love the flavors of a classic Reuben but want them in bite-sized, shareable form? These Mini Corned Beef Sliders combine tender corned beef, melty Swiss cheese, tangy sauerkraut, and zesty mustard on soft slider buns, baked with a buttery, garlicky topping until golden and irresistible. Perfect for St. Patrick’s Day, game day, or any crowd-pleasing occasion!
Ingredients
-
12 slider buns or Hawaiian rolls
-
¾ lb sliced corned beef
-
6 slices Swiss cheese, halved
-
1 cup sauerkraut, well-drained
-
2–3 tbsp whole grain or Dijon mustard
Buttery Topping:
-
¼ cup melted butter
-
1 tsp onion powder
-
1 tsp garlic powder
-
1 tsp poppy seeds (optional)
Instructions
-
Preheat & Prep:
Preheat oven to 350°F (180°C). Lightly grease a 9×13-inch baking dish or line with parchment. -
Slice the Buns:
Slice the connected buns horizontally into top and bottom halves. Place the bottom half in the prepared dish. -
Layer the Filling:
Evenly layer corned beef, then sauerkraut, then halved Swiss slices over the bottom buns. -
Top & Mustard:
Spread mustard evenly on the top bun half. Place it over the cheesy, beefy filling. -
Butter Bath:
Mix melted butter, onion powder, garlic powder, and poppy seeds. Brush generously over the top and sides of the buns. Optional: brush a second layer for extra flavor. -
Bake:
Cover tightly with foil and bake 15 minutes. Remove foil and bake 5–7 more minutes until the top is golden and cheese is bubbly. -
Rest & Serve:
Let rest 2–3 minutes. Slice along bun lines into individual sliders and serve. Optional: garnish with extra mustard, Thousand Island dressing, pickles, or cornichons.
Notes
-
Make Ahead: Assemble and refrigerate up to 24 hours. Add 5–10 extra minutes to bake from chilled.
-
Prevent Soggy Buns: Drain sauerkraut well and ensure enough cheese under it as a barrier.
-
Dairy-Free Option: Use olive oil or garlic-infused avocado oil in place of butter.
-
Flavor Twists:
-
The “Rachel”: Use turkey or pastrami with coleslaw instead of sauerkraut.
-
Spicy Kick: Add jalapeño slices or horseradish to the mustard.
-
Extra Cheese: Layer in sharp cheddar or Gruyère for a gooey, complex flavor.
-
Nutritional Snapshot (Because We’re Curious!)
Here’s a general breakdown per slider (based on the recipe as written, using Hawaiian rolls and including all optional ingredients). Remember, this is an estimate and your specific brands and modifications will alter it.
Per Slider: Calories: ~220 | Protein: 10g | Carbohydrates: 18g | Fat: 12g | Saturated Fat: 6g | Cholesterol: 40mg | Sodium: 680mg | Fiber: 1g | Sugar: 5g
These are hearty little bites! The protein from the corned beef and cheese makes them satisfying. The sodium is on the higher side (as is typical with cured meats and cheese), so if you’re monitoring intake, look for lower-sodium corned beef at the deli counter and rinse your sauerkraut lightly before draining. As always, enjoy these as part of a balanced spread with lighter sides.
Final Thoughts from My Kitchen to Yours
At the end of the day, recipes like this are about more than just food. They’re about the laughter around the table, the shared “mmm’s” after the first bite, and the simple joy of making something with your own hands that brings people pure happiness. These Mini Corned Beef Sliders are a guaranteed smile-inducer.
I hope you give them a try and make them your own. Tag me @Feastical if you do—I love seeing your kitchen creations! Now, go forth, bake, and bask in the glow of being the person who brought those amazing sliders. Until next time, keep your spatula close and your appetite closer.
Happy cooking,
Beau

Shepherd’s Pie Potato Skins : A Comfort-Food Mashup You’ll Love
Shepherd’s Pie Potato Skins – A Comfort-Food Mashup You’ll Love
When Two Classics Collide (Deliciously)
Hey friends, Beau here from Feastical! Pull up a chair and let me ask you something: have you ever found yourself staring at two incredible dishes on a menu, utterly torn between them? That’s the exact kitchen daydream that sparked this recipe. On one hand, you’ve got the soul-soothing, one-pan wonder that is shepherd’s pie—a symphony of savory meat, veggies, and clouds of buttery potato. On the other, you’ve got the crispy, cheesy, endlessly fun party hero: the loaded potato skin.
What if… we didn’t choose? What if we smashed them together into one epic, handheld, flavor-packed bite? That, my friends, is the magic of these Shepherd’s Pie Potato Skins. We’re taking everything you adore about that classic, cozy casserole and packing it into a crispy potato boat that’s perfect for game day, a fuss-free family dinner, or just impressing your crew without breaking a sweat. It’s a little bit Irish, a whole lot genius, and 100% the feel-good food we all crave. So, grab your favorite apron (the one with the questionable stains tells the best stories) and let’s turn some simple spuds into a meal that’s guaranteed to bring everyone to the table with a smile.
A Tale of Two Dinners (And One Happy Accident)
This recipe was born from a classic case of “kitchen fridge blindness.” Picture this: it was a chilly Sunday, the kind perfect for a lazy roast. I had planned a proper shepherd’s pie, but my crew was drifting in and out of the house—some watching the game, some running errands. I wanted that hearty flavor, but I also needed something people could grab and go. Then, I spotted the leftover baked potatoes from the night before, sitting there looking a little lonely. Lightbulb moment!
I remember thinking, “What’s the best part of a loaded potato skin? The crispy edge. What’s the best part of shepherd’s pie? That first spoonful where you get meat, veg, and potato in perfect harmony.” I started scooping, filling, and topping, not entirely sure what would happen. The result? Pure, crispy, savory joy. My kitchen became Grand Central Station, with everyone popping in to “just try one” and not leaving until the last skin was gone. It was one of those happy, unplanned moments that reminded me why I love cooking: sometimes, the best recipes aren’t planned, they’re discovered in the beautiful mess of a real kitchen.
Gathering Your Flavor Crew
Here’s the all-star lineup for our comfort food mashup. I’ve added a few notes and swaps because I believe in making recipes work for your kitchen, not the other way around!
- 4 large russet potatoes: These are our edible bowls! Russets have the perfect starchy, fluffy interior and a skin that crisps up beautifully. If you’re feeling adventurous, try sweet potatoes for a different vibe.
- 1 tablespoon olive oil: A simple brush to help our potato skins transform into golden, crispy vessels. Avocado oil works great here too.
- 1/2 lb ground beef or lamb: The hearty star of the show. Traditional shepherd’s pie uses lamb (hence the “shepherd”), but ground beef (which would technically make it a “cottage pie”) is just as delicious and often more accessible. Use what you love!
- 1 small onion, chopped: Our flavor foundation. A yellow or white onion adds that essential sweet, savory base note.
- 1 clove garlic, minced: Because a little garlic makes everything better. Don’t be shy—use two if you’re a fan!
- 1/2 cup frozen peas and carrots: The classic veggie duo! Using frozen is my ultimate kitchen hack—they’re pre-chopped, retain great color and nutrients, and cook in a flash. Fresh works too, just give them a quick sauté first.
- 2 tablespoons tomato paste: This is our secret weapon for deep, rich, umami flavor. It’s like a flavor concentrate! Look for the stuff in a tube so you can use a bit and save the rest.
- 1/4 cup beef broth: This creates a luscious, saucy filling that won’t dry out. No beef broth? A splash of red wine or even water with an extra pinch of salt will do in a pinch.
- Salt and pepper, to taste: Your essential seasonings. Season in layers—a little in the meat, a little in the potatoes—for the best flavor.
- 2 tablespoons butter: For our mashed potato topping. This is non-negotiable for that luxurious, creamy texture and flavor.
- 1/4 cup milk or cream: Cream will give you the richest, dreamiest mash, but whole milk works perfectly. Warm it up a little before mixing for an extra-smooth result.
- 1/4 cup shredded cheddar (optional): I say “optional,” but a little sharp cheddar folded into the mash adds a wonderful tang and helps the top get beautifully golden. Pepper Jack would be a fun twist!
- Chopped parsley for garnish: A fresh pop of color and a hint of brightness to cut through all that richness. Chives or green onions are fantastic here too.
Building Your Flavor Boats, Step-by-Step
Okay, team! Let’s get our hands dirty (in the best way). Follow these steps, and you’ll have a plate of crispy, savory perfection in about an hour. I’ve tucked my favorite chef hacks into each step.
- Bake Those Spuds: Fire up your oven to a hot 400°F (200°C). Give your potatoes a good scrub and pat them dry—we want crispy skin, not steam! Prick them all over with a fork (this lets the steam escape so they don’t explode… trust me, I’ve learned this lesson). Bake them directly on the oven rack for about 45-60 minutes, until they’re fork-tender all the way through. Chef’s Hack: For an even crispier skin, rub them with a tiny bit of oil and salt before baking.
- Scoop & Crisp: Let the potatoes cool just enough that you can handle them. Slice each one in half lengthwise. Now, take a spoon and gently scoop out the fluffy centers into a medium bowl, leaving a sturdy 1/4-inch border all around. This shell is your edible boat! Don’t throw that gorgeous potato you scooped out—that’s our topping gold. Brush the insides and outsides of the skins with your olive oil, place them skin-side up on a baking sheet, and pop them back in the oven for 10-15 minutes. We’re going for golden and crispy here.
- Create the Savory Filling: While the skins crisp, let’s make the magic happen on the stovetop. In a large skillet over medium heat, sauté your chopped onion until it’s soft and translucent, about 5 minutes. Add the garlic and stir for just 30 seconds until fragrant—don’t let it burn! Crumble in your ground meat and cook until it’s nicely browned. Stir in the tomato paste, coating all that meaty goodness. Pour in the beef broth and add your frozen peas and carrots. Let this simmer for 5-7 minutes, until the liquid reduces and creates a glossy, thick sauce. Season generously with salt and pepper. Taste it! This is your moment to adjust.
- Whip Up the Cloud Topping: Remember that bowl of fluffy potato innards? Add your butter, warm milk or cream, and a good pinch of salt. Mash it all together until it’s smooth and creamy. If you’re using the cheddar, fold it in now. This mixture should be a bit stiffer than regular mashed potatoes so it holds its shape when we pipe or spoon it on top.
- Assemble & Brown: Time for the fun part! Take your crispy potato skins and arrange them on a baking sheet. Evenly divide the savory meat filling among them, pressing it down gently. Now, top each one with a generous dollop (or pipe it for a fancy touch!) of your cheesy mashed potatoes. If you want that picture-perfect, golden-brown finish, turn your oven to broil and pop the sheet in for 2-3 minutes. WATCH IT CLOSELY—it goes from golden to charcoal in seconds!
- The Grand Finale: Pull your masterpiece from the oven. Let them cool for just a minute (the filling is molten lava hot!), then sprinkle with that fresh chopped parsley. Serve immediately and get ready for the “oohs” and “ahhs.”
How to Serve These Handheld Wonders
Presentation is part of the fun! Arrange these potato skins on a big, rustic wooden board or a simple platter. Let people grab their own—it makes the meal interactive and casual. For a full meal, I love serving them with a bright, simple side salad with a tangy vinaigrette to cut through the richness. A dollop of sour cream or a small bowl of gravy for dipping takes it over the top for a game-day snack spread. They’re also amazing as the main event for a cozy weeknight dinner, with maybe some steamed green beans on the side. No matter how you serve them, just make sure you have napkins handy—the best food is often the messiest!
Make It Your Own: 5 Tasty Twists
The beauty of this recipe is its flexibility. Don’t be afraid to play!
- The Full Irish: Use ground lamb for a truly traditional shepherd’s pie flavor. Add a teaspoon of fresh rosemary to the meat filling for an herby punch.
- Cozy Veggie Version: Skip the meat! Swap in 1 cup of cooked brown lentils or a plant-based ground “meat.” Use vegetable broth and add a handful of chopped mushrooms to the onion sauté for extra savory depth.
- Tex-Mex Fiesta: Season the ground beef with a packet of taco seasoning. Swap the peas and carrots for a 1/2 cup of frozen corn and a can of drained black beans. Top the mashed potatoes with a blend of cheddar and Monterey Jack before broiling, and finish with a sprinkle of fresh cilantro.
- Loaded Potato Style: After adding the meat filling, sprinkle on some cooked, crumbled bacon and a handful of extra shredded cheese. Then add the mashed potato topping. Broil as usual and finish with a drizzle of ranch and those chives.
- Sweet Potato Swap: For a nutrient-packed, slightly sweet twist, use large sweet potatoes. Their skin crisps up nicely, and the flavor pairs amazingly with the savory filling. Consider adding a pinch of smoked paprika to the meat mixture.
Beau’s Kitchen Confidential
This recipe has become a staple in my house because it’s a fantastic way to use leftovers. Had a big batch of mashed potatoes last night? Use them for the topping! Have a bit of leftover pot roast or meatloaf? Chop it up finely and use it in place of the ground meat. The first time I made these, I may have gotten a little overzealous with the broiler and created a few “extra-crispy” models. My dog, Biscuit, was the happy beneficiary of those. The lesson? Set a timer and don’t walk away! Over the years, I’ve found that letting the baked potatoes cool completely before scooping actually makes for a sturdier skin, but if you’re hungry (like I usually am), just be gentle and they’ll turn out great.
Your Questions, Answered
Q: My potato skins turned out soggy. What happened?
A: The most common culprit is not getting them crispy enough in that second bake before filling. Make sure you brush them well with oil and bake them skin-side up until they’re genuinely crisp to the touch. Also, pat your raw potato halves dry after scooping to remove any excess moisture.
Q: Can I make these ahead of time?
A> Absolutely! You can bake and scoop the potatoes up to a day ahead. Store the skins and the filling separately in the fridge. Let everything come to room temp for a bit, then crisp the skins, warm the filling, assemble, and broil. You can even fully assemble them (without broiling) a few hours ahead, then just broil before serving.
Q: Is there a faster way to cook the potatoes?
A> You can microwave them! Prick the potatoes, microwave on high for 10-12 minutes, flipping halfway, until tender. This gets you soft insides fast, but for the crispiest skin, you’ll still want to brush them with oil and finish them in a hot oven for 10-15 minutes.
Q: My mashed potato topping is too runny. Help!
A> No sweat! If your potato mixture seems too soft to hold its shape, you can stir in a tablespoon of grated Parmesan or a sprinkle of instant mashed potato flakes to help thicken it up without diluting the flavor.

Shepherd’s Pie Potato Skins : A Comfort-Food Mashup You’ll Love
Description
Can’t decide between shepherd’s pie and loaded potato skins? Why choose? These Shepherd’s Pie Potato Skins combine the best of both worlds: crispy potato shells filled with savory ground meat, veggies, and topped with creamy mashed potatoes. Perfect for game day, weeknight dinners, or casual gatherings.
Ingredients
-
4 large russet potatoes
-
1 tbsp olive oil
-
½ lb ground beef or lamb
-
1 small onion, chopped
-
1 clove garlic, minced
-
½ cup frozen peas and carrots
-
2 tbsp tomato paste
-
¼ cup beef broth
-
Salt and pepper, to taste
-
2 tbsp butter
-
¼ cup milk or cream
-
¼ cup shredded cheddar cheese (optional)
-
Chopped parsley for garnish
Instructions
-
Bake the Potatoes:
Preheat oven to 400°F (200°C). Scrub potatoes, prick with a fork, and bake 45–60 minutes until tender. Optional: rub with oil and salt for crispier skin. -
Scoop & Crisp:
Let potatoes cool slightly. Slice in half lengthwise and scoop out the insides, leaving a ¼-inch border. Brush skins with olive oil and bake skin-side up 10–15 minutes until crispy. -
Prepare the Filling:
In a skillet over medium heat, sauté onion until translucent, then add garlic for 30 seconds. Cook ground meat until browned. Stir in tomato paste, beef broth, and frozen peas and carrots. Simmer 5–7 minutes until thickened. Season with salt and pepper. -
Make Mashed Potato Topping:
Mash the potato insides with butter, warm milk or cream, and a pinch of salt. Fold in cheddar if using. The mash should be thick enough to hold its shape. -
Assemble & Broil:
Fill each potato skin with the meat mixture, then top with mashed potatoes. Broil 2–3 minutes until golden. Watch closely! -
Garnish & Serve:
Sprinkle with parsley and serve immediately. Optional: serve with sour cream or gravy.
Notes
-
Crispy Skins: Ensure skins are dry and bake them before filling.
-
Make Ahead: Bake and scoop potatoes up to 1 day ahead; store filling separately.
-
Quick Potato Hack: Microwave potatoes for 10–12 minutes, then crisp in the oven.
-
Thicker Mash: Add a tablespoon of Parmesan or instant potato flakes if too soft.
-
Variations:
-
Vegetarian: Use cooked lentils or plant-based meat, and vegetable broth.
-
Tex-Mex: Add taco seasoning, corn, black beans, and Monterey Jack cheese.
-
Sweet Potato Twist: Use sweet potatoes for a slightly sweet flavor.
-
Nourishment & Joy
While we’re all about flavor first at Feastical, I know many of you like to have a general idea of what’s on your plate. This info is for one potato skin (assuming 8 total, using 90% lean ground beef, 2% milk, and including the optional cheddar). Remember, recipes are guides, and your specific brands and measurements will cause variations. This is a hearty, balanced bite providing protein from the meat, energizing carbs from the potato, and vitamins from the veggies. It’s a satisfying meal that proves comfort food can absolutely be part of a joyful, well-rounded approach to eating.
Per Serving: Calories: ~290 | Protein: 12g | Carbohydrates: 26g | Fat: 15g | Fiber: 3g
Final Thoughts
And there you have it, friends—my ultimate cozy-casual mashup, straight from my kitchen to yours. These Shepherd’s Pie Potato Skins are more than just a recipe; they’re a reminder that cooking doesn’t have to be complicated to be incredibly rewarding. It’s about taking familiar flavors, having a little fun with them, and creating something that makes people gather, talk, and laugh. I hope this recipe becomes a new favorite in your home, the kind you tweak and make your own. If you give it a try, I’d love to hear how it turned out! Tag me over on the blog or social media with #Feastical so I can see your delicious creations. Now, go forth and get crispy! Until next time, keep your spatula close and your appetite closer.
– Beau

Spinach Artichoke Chicken Bake : Creamy Dip-Inspired Dinner
Your Favorite Party Dip, Now a Full-On Dinner
Hey friends, Beau here! Let me ask you something: have you ever been at a party, hovering near that irresistible, creamy, cheesy spinach artichoke dip, and thought, “Man, I wish this was my entire dinner?” Well, my fellow dip enthusiast, I am thrilled to tell you that today, that dream becomes a delicious, fork-and-knife reality. Welcome to the magic of my Spinach Artichoke Chicken Bake.
This recipe is my love letter to that iconic party starter, transformed into a cozy, satisfying, and downright comforting main dish. We’re taking juicy, seasoned chicken breasts and smothering them in a rich, garlicky, cheesy topping that’s packed with tender spinach and briny artichoke hearts. It bakes up into a golden, bubbly masterpiece that your whole family will beg for. The best part? It’s deceptively simple. We’re talking about 10 minutes of hands-on prep and one baking dish to wash. It’s the kind of meal that looks and tastes like you fussed for hours, but secretly, you got to spend that time doing, well, anything else. So, if you’re ready for a dinner that delivers all the feel-good, crowd-pleasing vibes of your favorite dip, preheat that oven and grab your favorite baking dish. We’re about to make magic happen.
The Dip That Started It All
This whole recipe was born from a serious case of “dip envy.” Picture this: It’s my friend Sam’s annual game day party. The spread is legendary—wings, sliders, you name it. But there’s always one undisputed star: Sam’s famous, secret-recipe spinach artichoke dip. It’s the centerpiece. People literally plan their plate-building strategy around it. One year, I kid you not, I saw my cousin discreetly tuck a tortilla chip under a celery stick on his plate, just to make an extra trip to the dip bowl without judgment.
Driving home that night, my brain wouldn’t quit. That flavor combo—creamy, savory, veggie-packed—was just too good to be confined to a chip. I wanted to sink my teeth into it. I wanted it to be a meal. The next day, I marched into my kitchen with a mission. A few experiments (and one slightly over-cheesed trial later), this bake was born. Now, it’s not just a weeknight hero in my house; it’s my go-to potluck dish. I love showing up, watching people’s eyes light up with recognition at the familiar flavors, and then blow their minds when they realize it’s the main event. It’s my little kitchen revolution, one cheesy, delicious bite at a time.
Gathering Your Flavor Allies
Here’s everything you’ll need to create this creamy, dreamy bake. I’ve included my little chef insights and swaps so you can make it your own!
- 4 boneless, skinless chicken breasts: The sturdy canvas for our masterpiece. For even cooking and maximum tenderness, I always give them a gentle pound with a rolling pin or skillet to an even thickness. Chef’s Swap: Chicken thighs work beautifully here for even more juicy flavor!
- Salt and pepper to taste: The essential building blocks. Don’t be shy—season that chicken well. It makes all the difference.
- 1 tablespoon olive oil: For getting that gorgeous golden sear on the chicken. It adds a layer of flavor you’ll taste in every bite.
- 1 (14 oz) can artichoke hearts, drained and chopped: The briny, tangy heart of the operation. I use canned in water for convenience. Pro Tip: Squeeze the chopped pieces in a paper towel to remove excess water and prevent a soggy topping.
- 1½ cups fresh spinach, chopped: Fresh gives the best texture here. Chef’s Swap: In a pinch, you can use a 10 oz box of frozen chopped spinach, thawed and squeezed *very* dry.
- 4 oz cream cheese, softened: The creamy, tangy base. Let it sit out for 30 minutes before you start. Trust me, mixing is a dream when it’s soft.
- ¼ cup sour cream or Greek yogurt: More tang and creaminess! I often use full-fat Greek yogurt for a little protein boost.
- ½ cup grated parmesan cheese: Use the good stuff from the refrigerated section, not the shelf-stable can. It melts and flavors like a dream.
- ½ cup shredded mozzarella cheese: Our melty, gooey, golden-brown topping. Pre-shredded is fine, but shredding your own from a block melts even smoother.
- 2 cloves garlic, minced: Fresh is non-negotiable for me here. That pungent, aromatic punch is key.
- ½ teaspoon onion powder: The stealth flavor enhancer. It adds a sweet, savory depth that rounds everything out perfectly.
Let’s Build Some Dinner Magic!
Okay, team! Let’s fire up the oven and get cooking. Follow these steps, and you’ll have a show-stopping dinner in no time.
- Preheat and Prep: Crank your oven to 375°F (190°C). Lightly grease a 9×13 inch baking dish with a little oil or butter. This is your one-pan wonder vessel! Chef’s Hack: While the oven heats, take your cream cheese out of the fridge. Softening it is the secret to a lump-free, easy-to-spread mixture.
- Sear the Chicken: Pat your chicken breasts completely dry with paper towels—this is the golden rule for a good sear. Season both sides generously with salt and pepper. Heat the olive oil in a large skillet over medium-high heat. Once the oil shimmers, add the chicken. Sear for 2-3 minutes per side, just until you get a beautiful golden-brown crust. Don’t worry about cooking it through! We’re just building flavor here. Transfer the chicken to your prepared baking dish.
- Create the Famous Topping: In a medium bowl, combine the softened cream cheese, sour cream (or yogurt), grated parmesan, minced garlic, and onion powder. Mix it until it’s smooth and dreamy. Now, fold in your chopped spinach and artichoke hearts. The mixture will be thick and packed with goodies. Pro Tip: Use your hands to gently squeeze the chopped artichokes in a paper towel before adding them. This little step prevents excess moisture from making your topping watery.
- Smother and Cheese: Divide the spinach-artichoke mixture evenly over the four chicken breasts. Use the back of a spoon or a small spatula to spread it all the way to the edges, creating a generous blanket. Now, sprinkle the shredded mozzarella cheese over the top like a final, delicious snowfall.
- Bake to Perfection: Slide the dish into your preheated oven, uncovered. Bake for 25-30 minutes. You’re looking for the chicken to be cooked through (an internal thermometer should read 165°F) and the topping to be hot, bubbly, and gloriously golden in spots. If you want more browning, pop it under the broiler for the last 1-2 minutes, but watch it like a hawk!
- The Crucial Rest: I know it’s tempting to dive right in, but let the bake rest for 5 minutes after pulling it from the oven. This allows the juices in the chicken to redistribute, ensuring every bite is moist and flavorful, not dry.
How to Plate Your Masterpiece
This dish is a star all on its own, but a little presentation goes a long way! I like to serve each saucy, cheesy chicken breast with a simple side that can soak up any extra creamy goodness that escapes onto the plate. A big scoop of fluffy garlic mashed potatoes or a pile of buttery egg noodles is pure comfort food heaven. For a lighter option, a simple crisp green salad with a lemon vinaigrette cuts through the richness perfectly. And don’t forget a wedge of crusty bread or some garlic toast on the side—it’s mandatory for wiping that plate clean. For a pop of color and freshness, garnish with a little extra chopped parsley or a tiny sprinkle of red pepper flakes.
Make It Your Own: Creative Twists
One of the best things about this recipe is its flexibility. Play with it! Here are a few of my favorite spins:
- The “Everything” Bake: Stir ½ cup of crispy, crumbled cooked bacon into the topping mixture before spreading. Top with the mozzarella and a sprinkle of everything bagel seasoning after baking.
- Sun-Dried Tomato & Feta Twist: Swap the parmesan for ½ cup of crumbled feta cheese. Add ¼ cup of chopped, oil-packed sun-dried tomatoes (drained) to the spinach-artichoke mix. The tang is incredible!
- Keto/Low-Carb Friendly: You’re already most of the way there! Just ensure your sour cream/yogurt has no added sugars. Serve over cauliflower rice or with a side of roasted zucchini noodles.
- Vegetarian Delight: Skip the chicken! Pour the spinach-artichoke mixture directly into the greased dish, top with cheese, and bake for 20-25 minutes until hot and bubbly. Serve as an epic dip or a super-rich veggie casserole.
- Spicy Southwest Version: Add a diced jalapeño (seeds removed for less heat) to the mix. Swap the mozzarella for a Monterey Jack or Pepper Jack blend. Serve with a dollop of cool avocado crema.
Beau’s Kitchen Notes
This recipe has seen a few evolutions in my kitchen. The first time I made it, I was so excited I forgot to sear the chicken. It was still tasty, but searing? That’s the game-changer. It adds a depth of flavor that takes it from “good” to “where has this been all my life?” I’ve also learned that the squeeze-dry step for the artichokes is non-negotiable unless you want a watery sauce. (Ask me how I know!). Over time, I started adding that pinch of onion powder—it’s the quiet hero that makes the garlic and cheese sing in harmony. This bake is now my ultimate “I don’t know what to make” dinner, and it never, ever lets me down.
Your Questions, Answered
Q: Can I make this ahead of time?
A: Absolutely! You can assemble the entire dish—seared chicken smothered with topping and cheese—cover it tightly, and refrigerate for up to 24 hours. When ready, bake it straight from the fridge, adding maybe 5-10 extra minutes to the cook time since it’s cold.
Q: My topping turned out watery. What happened?
A> This is almost always due to excess moisture from the veggies. Next time, be diligent about squeezing the chopped artichoke hearts in a paper towel. If using frozen spinach, you must thaw it and squeeze it in a clean kitchen towel until it’s *very* dry.
Q: Can I use frozen chicken breasts?
A> I don’t recommend it for this recipe. Thawing and patting them dry is crucial for proper searing and to prevent a ton of water from leaching out during baking, which will waterlog your beautiful topping. Always thaw first!
Q: How do I store and reheat leftovers?
A> Store leftovers in an airtight container in the fridge for up to 3 days. Reheat gently in the microwave at 50% power, or cover with foil and warm in a 325°F oven until heated through. The topping might not be as crisp, but it’ll still be delicious.

Spinach Artichoke Chicken Bake : Creamy Dip-Inspired Dinner
Description
Love spinach artichoke dip? Imagine that creamy, cheesy, garlicky goodness turned into a full, satisfying meal. This Spinach Artichoke Chicken Bake combines tender chicken breasts with a rich topping of spinach, artichokes, cream cheese, and melted mozzarella. It’s cozy, easy to make, and perfect for weeknight dinners or potlucks.
Ingredients
-
4 boneless, skinless chicken breasts
-
Salt and pepper, to taste
-
1 tbsp olive oil
-
1 (14 oz) can artichoke hearts, drained and chopped
-
1½ cups fresh spinach, chopped (or 10 oz frozen, thawed and drained)
-
4 oz cream cheese, softened
-
¼ cup sour cream or Greek yogurt
-
½ cup grated Parmesan cheese
-
½ cup shredded mozzarella cheese
-
2 garlic cloves, minced
-
½ tsp onion powder
-
Optional garnish: chopped parsley or red pepper flakes
Instructions
-
Preheat & Prep:
Preheat oven to 375°F (190°C). Grease a 9×13 inch baking dish. -
Sear the Chicken:
Pat chicken dry, season with salt and pepper. Heat olive oil in a skillet over medium-high heat. Sear chicken 2–3 minutes per side until golden. Transfer to the baking dish. -
Make the Topping:
In a bowl, mix cream cheese, sour cream (or yogurt), Parmesan, garlic, and onion powder until smooth. Fold in spinach and artichokes (squeeze out excess moisture). -
Assemble & Bake:
Spread the topping evenly over the chicken. Sprinkle mozzarella on top. Bake uncovered for 25–30 minutes, until chicken reaches 165°F and topping is bubbly and golden. Optional: broil 1–2 minutes for extra browning. -
Rest & Serve:
Let rest 5 minutes before serving. Serve with mashed potatoes, noodles, or a simple salad.
Notes
-
Avoid watery topping: Squeeze excess liquid from artichokes and spinach.
-
Make ahead: Assemble, cover, and refrigerate up to 24 hours. Add a few extra minutes to baking.
-
Vegetarian version: Skip chicken; bake the topping alone for a rich veggie casserole.
-
Flavor twists: Add sun-dried tomatoes, bacon, jalapeños, or swap mozzarella for Monterey Jack.
-
Keto/low-carb: Serve over cauliflower rice or zucchini noodles.
Nutritional Information*
Prep Time: 10 minutes | Cook Time: 30 minutes | Total Time: 40 minutes | Servings: 4
*Please note: Nutritional information is an estimate calculated using an online tool and will vary based on ingredient brands and specific amounts used.
Per serving (1 chicken breast with topping): Approximately 420 calories | 27g fat | 6g carbohydrates | 2g fiber | 38g protein.
This dish is a fantastic source of high-quality protein from the chicken and cheeses. The spinach and artichokes add valuable vitamins, minerals, and a bit of fiber. To reduce the fat content slightly, you can use reduced-fat cream cheese and mozzarella, though for the creamiest, most indulgent experience, I’m a fan of the full-fat versions in moderation.
Final Thoughts from My Kitchen to Yours
And there you have it, friends—the dip of your dreams, reimagined as the cozy, satisfying dinner you deserve. This Spinach Artichoke Chicken Bake is more than just a recipe; it’s a reminder that the best meals often come from taking a beloved flavor and giving it a new, heartier purpose. It’s simple enough for a hectic Wednesday but special enough for a casual weekend dinner with friends. I hope this bake finds its way onto your table again and again, creating its own little tradition of comfort and joy. Now, go forth and bake! And when you pull that golden, bubbly dish out of the oven, think of me, your friend Beau, cheering you on from my kitchen. Don’t forget to tag @Feastical if you share it—I love seeing your creations! Happy cooking!

Garlic Parmesan Chicken & Potato Soup : Creamy Comfort in a Bowl
Garlic Parmesan Chicken & Potato Soup: The Cozy Hug-in-a-Bowl We All Need
When Only a Bowl of Creamy Comfort Will Do
Hey there, friend. Beau here, welcoming you back to my kitchen at Feastical. Have you ever had one of those days where the world feels a little too loud, the wind a bit too chilly, and your soul is just whispering, “feed me something that feels like a blanket?” I have. In fact, I’m having one right now as I write this, which is why I’m stirring a pot of this very soup on my stove. It’s my edible antidote to the everyday grind.
This Garlic Parmesan Chicken & Potato Soup isn’t just a recipe; it’s a culinary comfort zone. Imagine tender bites of chicken and hearty potatoes swimming in a luxuriously creamy, savory broth that’s absolutely singing with garlic and nutty Parmesan cheese. It’s rich without being heavy, deeply flavorful but surprisingly simple to make. This is the one-pot wonder you’ll find yourself craving when you need a meal that truly satisfies, from the first spoonful to the very last delicious scrape of the bowl. So, grab your favorite pot and let’s make the kitchen the coziest room in the house.
The Soup That Started It All (Well, Almost)
This soup takes me back to my earliest catering gigs, where “kitchen confidence” was something I was faking until I made it. I was tasked with feeding a crowd on a blustery autumn evening, and my ambitious menu was… well, falling apart. In a panic, I looked at what I had on hand: some chicken, a sack of potatoes, onions, garlic, and a giant wedge of Parmesan. With a “nothing left to lose” attitude, I started throwing it all in a pot.
As the garlic began to sizzle and the soup started to bubble, a magic happened. The stress melted away, replaced by this incredible, welcoming aroma that drew everyone into the kitchen. That impromptu pot of soup was the first thing to disappear that night, and the recipe I got the most requests for. It taught me a powerful lesson: the best food often isn’t the fanciest; it’s the honest, hearty, and soul-soothing kind that brings people together. Every time I make it, I remember that chaos-turned-comfort, and it always makes me smile.
Gathering Your Flavor Dream Team
Here’s the beautiful part: this luxurious-tasting soup is built from humble, easy-to-find ingredients. Each one plays a starring role in building that deep, comforting flavor.
- 2 tablespoons olive oil: Our cooking fat of choice. It has a great flavor and can handle the heat. Chef’s Tip: Butter works fabulously here too for an even richer base.
- 1 pound boneless, skinless chicken breast or thighs: Thighs are my personal go-to for guaranteed juiciness and a more forgiving cook, but breasts work perfectly if that’s what you have. Dice them into bite-sized pieces for easy eating.
- 1 small onion, chopped: The sweet, aromatic foundation of our soup. No need for a perfect dice here—rustic chops are just fine.
- 4 garlic cloves, minced: Don’t be shy! We’re making *Garlic* Parmesan soup, after all. Fresh is best for that punchy, aromatic flavor.
- 4 cups chicken broth: The liquid gold that forms our soup’s body. Use low-sodium if you can, so you’re in control of the final seasoning.
- 2 cups diced potatoes: I adore Yukon Golds for their buttery texture and thin skin (no peeling needed!). Russets will also work—they’ll break down a bit more, naturally thickening the soup.
- 1 cup shredded carrots: They add a touch of sweetness, a pop of color, and a welcome veggie boost. I use the large holes on a box grater for quick work.
- 1 teaspoon Italian seasoning: Our little flavor shortcut! This dried herb blend adds depth and an herby whisper in the background.
- Salt and pepper to taste: The essential finishers. We’ll season at the end so we get it just right.
- 1 cup heavy cream or half-and-half: This is where the magic “creamy” happens. Heavy cream gives you the most luscious, velvety texture. Half-and-half lightens it up slightly but is still delicious.
- ¾ cup grated Parmesan cheese: Crucial note: Please, for the love of creamy soup, use real Parmigiano-Reggiano or a block of Parmesan you grate yourself. The pre-grated stuff in a canister often contains anti-caking agents that can make your soup grainy.
- Optional: chopped fresh parsley for garnish: A bright, fresh finish that makes the soup look as good as it tastes.
Let’s Build Some Flavor, Step-by-Step
This is where the alchemy happens. We’re building layers of flavor in one pot, and I’ll be right here with you, sharing my favorite hacks along the way.
- Brown the Chicken: Heat the olive oil in a large Dutch oven or heavy-bottomed pot over medium heat. Add your diced chicken, spreading it out in a single layer. Let it sear and get some golden-brown color—this isn’t just cooking it through; it’s building flavor in the bottom of the pot! Once cooked, remove the chicken to a plate and set aside. Chef’s Hack: Don’t overcrowd the pan. If needed, cook the chicken in two batches. Crowding steams the meat instead of browning it.
- Sweat the Aromatics: In that same glorious pot (with all those tasty browned bits still in there!), add the chopped onion. Cook for 4-5 minutes until it becomes soft and translucent. Now, add the minced garlic and cook for just 1 more minute until fragrant. That short cook time wakes up the garlic’s flavor without letting it burn and turn bitter.
- Simmer the Hearty Bits: Pour in the chicken broth, using your spoon to scrape up any of those delicious browned bits from the bottom of the pot. That’s pure flavor, right there! Add the diced potatoes, shredded carrots, and Italian seasoning. Bring the whole thing to a lively boil, then immediately reduce the heat to a gentle simmer. Let it bubble away for 15-20 minutes, or until the potatoes are fork-tender.
- Bring It All Together: Once the potatoes are perfect, stir the cooked chicken back into the pot. Now, pour in the heavy cream and add the grated Parmesan cheese. Stir gently and consistently until the cheese is completely melted and the soup is beautifully creamy and cohesive. Let it simmer on low for another 5 minutes to allow everything to get acquainted and for the flavors to marry. Chef’s Hack: Add the cream and cheese off the direct heat if you’re worried about curdling. Just let the soup cool for a minute before stirring them in, then return to very low heat.
- The Final Touch – Seasoning: This is the most important step! Taste your creation. Now season with salt and freshly cracked black pepper. Start with a little, taste, and add more until it sings. The salt will brighten all the flavors and make the Parmesan pop. Ladle into bowls, garnish with that fresh parsley if you like, and serve immediately.
How to Serve This Bowl of Sunshine
Presentation is part of the fun! I love serving this soup in deep, wide bowls that really show off its creamy texture. A final sprinkle of extra Parmesan and a crack of black pepper on top makes it look restaurant-worthy. For the full cozy-night-in experience, pair it with a thick slice of crusty, buttered sourdough bread for dipping, or a simple side salad with a bright vinaigrette to cut through the richness. It’s also fantastic with a side of garlic knots or soft, warm pretzel rolls. Honestly, just a spoon and a happy heart are the only truly mandatory accessories.
Make It Your Own: Delicious Twists & Swaps
The best recipes are templates for creativity. Here are a few ways to riff on this classic:
- The “Loaded Baked Potato” Version: Stir in a handful of crispy, crumbled bacon with the chicken. Top each bowl with a dollop of sour cream, extra cheddar cheese, and sliced green onions.
- Green & Garden-Veggie Boost: Add a couple handfuls of fresh spinach or chopped kale when you add the cream. It wilts down perfectly. Frozen peas or corn kernels are also fantastic additions for color and sweetness.
- Spicy Kick: Love heat? Add a pinch of red pepper flakes with the garlic, or stir in a tablespoon of your favorite hot sauce or a spoonful of chopped pickled jalapeños at the end.
- Lighter Swap: Use half-and-half or even whole milk instead of heavy cream. You can also swap half the potatoes for cauliflower florets to lower the carbs—they blend right into the creamy base!
- Gluten-Free & Keto-Friendly: This soup is naturally gluten-free! For a keto version, simply swap the potatoes for an equal amount of diced radishes (they lose their peppery bite and taste like mild potatoes when cooked) or turnips.
Beau’s Back-Pocket Kitchen Notes
Over the years, this soup has evolved from a panic-induced experiment to a trusted friend. I’ve learned a few things: First, it reheats like an absolute dream, often tasting even better the next day as the flavors deepen. Just warm it gently on the stove. Second, if you accidentally let it boil after adding the cream (we’ve all done it!), and it looks a little separated, a quick whisk with a splash of extra broth or cream will usually bring it right back together. Finally, this recipe is a fantastic “clean out the fridge” hero. That lone stalk of celery? Chop it up with the onion. That bit of leftover rotisserie chicken? Shred it in. Cooking is about intuition, not just instruction—trust yours.
Your Soup Questions, Answered
- Q: My soup turned out a bit thin. How can I thicken it?
A> No worries! Make a quick slurry by mixing 1 tablespoon of cornstarch with 2 tablespoons of cold water until smooth. Stir this into the simmering soup (after adding the cream) and let it cook for 2-3 minutes. It will thicken up beautifully. - Q: Can I make this in a slow cooker or Instant Pot?
A> Absolutely! For a slow cooker: Brown the chicken and onions on the stove first for best flavor, then add everything except the cream and cheese to the pot. Cook on LOW for 6-7 hours or HIGH for 3-4. Stir in cream and cheese at the end. For Instant Pot: Use the Sauté function for steps 1 & 2. Add broth, potatoes, carrots, and seasoning. Pressure cook on HIGH for 8 minutes. Quick release, then stir in chicken, cream, and cheese on Sauté mode until warm. - Q: Why did my cheese get clumpy or grainy?
A> This usually happens if the soup is boiling when you add the cheese, or if you used pre-grated Parmesan. Always add dairy off direct heat, and grate your own cheese from a block for a perfectly smooth melt. - Q: How long will leftovers last in the fridge?
A> Stored in an airtight container, this soup will keep well for 3-4 days. Reheat gently on the stove over low heat, adding a splash of broth or milk if it has thickened up too much.

Garlic Parmesan Chicken & Potato Soup : Creamy Comfort in a Bowl
Description
Nothing beats a bowl of warm, creamy soup on a chilly day. This Garlic Parmesan Chicken & Potato Soup is packed with tender chicken, hearty potatoes, and savory Parmesan, all swimming in a rich, garlicky broth. It’s comforting, easy to make, and perfect for weeknight dinners or a cozy weekend treat.
Ingredients
-
2 tbsp olive oil (or butter)
-
1 lb boneless, skinless chicken breasts or thighs, diced
-
1 small onion, chopped
-
4 garlic cloves, minced
-
4 cups chicken broth (low-sodium preferred)
-
2 cups diced potatoes (Yukon Gold or Russet)
-
1 cup shredded carrots
-
1 tsp Italian seasoning
-
Salt & black pepper, to taste
-
1 cup heavy cream or half-and-half
-
¾ cup grated Parmesan cheese (freshly grated recommended)
-
Optional garnish: chopped fresh parsley
Instructions
-
Brown the Chicken:
Heat olive oil in a large pot over medium heat. Add chicken in a single layer and cook until golden brown. Remove and set aside. -
Cook the Aromatics:
In the same pot, add onions and cook until soft, 4–5 minutes. Add garlic and cook 1 minute until fragrant. -
Simmer the Soup:
Add chicken broth, potatoes, carrots, and Italian seasoning. Bring to a boil, then reduce heat to a simmer for 15–20 minutes, or until potatoes are tender. -
Add Cream, Cheese & Chicken:
Stir in the cooked chicken, cream, and Parmesan over low heat. Simmer gently 5 more minutes until creamy and combined. -
Season & Serve:
Taste and adjust with salt and pepper. Serve hot, garnished with parsley if desired. Pair with crusty bread for extra comfort.
Notes
-
Thicker Soup: Mix 1 tbsp cornstarch with 2 tbsp water and stir into the soup after adding cream.
-
Veggie Boost: Add spinach, kale, peas, or corn when adding cream.
-
Spicy Kick: Add red pepper flakes or hot sauce to taste.
-
Lighter Option: Use half-and-half or milk instead of cream. Swap some potatoes for cauliflower for fewer carbs.
-
Make-Ahead: Store in the fridge 3–4 days; reheat gently.
Nutritional Information*
*Please note: The following is an estimate provided by an online nutrition calculator. Actual values will vary based on specific ingredients and brands used.
Per Serving (approx. 1.5 cups): Calories: ~320 | Total Fat: 18g | Saturated Fat: 9g | Cholesterol: 85mg | Sodium: 680mg | Total Carbohydrates: 20g | Dietary Fiber: 2g | Sugars: 3g | Protein: 22g
This soup is a great source of protein and provides a satisfying balance of carbs and fats, making it a complete and comforting meal. To reduce sodium, use a low-sodium broth and be mindful of added salt.
Final Thoughts from My Kitchen to Yours
And there you have it, friend—my go-to recipe for turning a regular evening into something special. This Garlic Parmesan Chicken & Potato Soup is more than just food; it’s a reminder that the simplest ingredients, cooked with a bit of heart, can create the most memorable moments. Whether you’re feeding your family, sharing with friends, or just treating yourself after a long day, I hope this soup fills your bowl and your home with warmth and goodness.
Did you try it? Did you add your own magical twist? I’d love to hear all about it! Tag me @Feastical or drop a comment on the blog. Now, if you’ll excuse me, my own bowl is calling. Until next time, keep your spatula close and your appetite closer.
Warmly,
Beau

Lemon-Capers Chicken Breast (Piccata Style) : Bright, Tangy, and Briny in One Skillet
Your Ticket to a Seriously Flavorful Weeknight (Without the Fuss)
Hey there, friend! Beau here. Can we talk about those nights when you’re staring into the fridge, craving something that feels both special and simple? You know the feeling: you want a meal that sings with flavor, makes the kitchen smell incredible, but doesn’t leave you with a mountain of dishes or a complicated recipe card covered in your frantic notes. If that’s your current mood, you and I are on the exact same page. And I’ve got just the thing to turn that mood around.
Let me introduce you to my go-to hero: Lemon-Capers Chicken Breast. This is my weeknight riff on the classic Chicken Piccata—bright, tangy, briny, and so darn satisfying. It’s the kind of dish that makes you feel like a kitchen rockstar with minimal effort. We’re talking tender, golden-seared chicken swimming in a pan sauce that’s a perfect little symphony of fresh lemon juice, punchy capers, and just enough rich butter to make it all hug your taste buds. It’s light enough to feel refreshing but substantial enough to be pure comfort food.
The best part? It all happens in one skillet. From stovetop to table in about 30 minutes, with flavors that taste like you fussed for hours. This recipe is my love letter to busy foodies who refuse to compromise on taste. So, grab your favorite skillet and let’s turn an ordinary Tuesday into something Feastical.
The Dinner Party That Almost Wasn’t
This recipe holds a special place in my heart because it literally saved a dinner party. Picture this: It’s a few years back, I’ve invited a bunch of friends over, and my grand plan (a complicated braised thing) has utterly failed. It’s 45 minutes until doorbell time, and I’m in full-on kitchen panic mode. My then-girlfriend, now wife, looked at the sad, overcooked mess, then at me, and simply said, “What’s in the fridge that’s fast and you know by heart?”
My eyes landed on some lemons, a jar of capers, and chicken breasts. I took a deep breath, remembered the basic steps my grandma taught me for pan sauces, and started cooking on instinct. The sound of the chicken sizzling in the pan calmed me down. The smell of garlic and lemon hitting the hot skillet? Magic. By the time my friends arrived, the air was filled with this incredible, inviting aroma. We sat around the table, dipped crusty bread into that tangy sauce, and laughed the night away. No one knew it was a “save the day” dish—they just raved about how amazing it was. That night taught me a powerful lesson: the best meals aren’t about complexity; they’re about confidence, good ingredients, and sharing the joy. This skillet chicken is that lesson, on a plate.
Gathering Your Flavor Team
Here’s what you’ll need to create this zingy masterpiece. I’ve included some chef insights and swaps so you can make it your own.
- 4 boneless, skinless chicken breasts: The main event! Look for ones that are similar in size so they cook evenly. Chef’s Tip: If yours are super thick, we’ll flatten them. It’s a great stress-reliever, honestly.
- Salt and pepper, to taste: The fundamental building blocks of flavor. Don’t be shy here—seasoning the chicken well is step one to a great dish.
- 1/4 cup all-purpose flour (for dredging): This gives the chicken a delicate, golden crust and helps thicken the sauce just a touch. Swap: For a gluten-free version, use a 1:1 GF flour blend or even almond flour for a nuttier crust.
- 2 tablespoons olive oil: Our searing fat. It has a higher smoke point than butter alone, giving us that perfect golden color without burning.
- 2 tablespoons unsalted butter, divided: Butter makes the world go ’round, especially in pan sauces. We use half for sautéing and half to finish the sauce, creating a silky, rich texture. Using unsalted lets you control the seasoning.
- 2 garlic cloves, minced: Aromatic powerhouse alert! Fresh is best here—that quick sauté unlocks its sweet, fragrant flavor without any bitterness.
- 1/2 cup chicken broth: The liquid base for our sauce. Pro Move: Use low-sodium broth so you’re in charge of the salt level. A splash of white wine here is also a fantastic addition if you have it!
- 1/3 cup fresh lemon juice (about 2 lemons): NON-NEGOTIABLE. Please, for the love of all that is bright and good, use fresh lemons. The bottled stuff just can’t compare. This is the “bright” in our bright, tangy, and briny trio.
- 2 tablespoons capers, drained: These little salty, briny buds are the flavor bomb! They pack a punch. If you only have brined capers (not in salt), give them a quick rinse to tame the saltiness a bit.
- 1 tablespoon chopped fresh parsley (optional but recommended): A sprinkle of green at the end adds a fresh, herbal note and makes the dish look restaurant-pretty. No parsley? A little fresh thyme or chive works too.
Let’s Build Some Flavor, Step by Step
Alright, team. Let’s fire up the skillet. Follow these steps, and you’ll have a flawless dish. I’m chatting you through each one with my best tips.
- Prep Your Chicken: Place your chicken breasts on a cutting board and cover them with a piece of plastic wrap or parchment paper. Using a rolling pin, meat mallet, or even the bottom of a heavy skillet, gently pound them to an even thickness—about 1/2 inch thick. This isn’t just for tenderizing; it ensures they cook quickly and evenly. Season both sides generously with salt and pepper. Place your flour on a plate and give each breast a light, even dredge, shaking off any excess. Chef’s Hack: Season the flour itself with a pinch of salt and pepper for an extra layer of flavor in the crust.
- Get That Golden Sear: In a large skillet (stainless steel or cast iron works great), heat the olive oil and 1 tablespoon of the butter over medium-high heat. Swirl it until the butter melts and the pan is nice and hot. Carefully add the chicken breasts. Listen for that beautiful sizzle! Don’t overcrowd the pan—if you need to, cook in two batches. Let them cook, undisturbed, for 4-5 minutes on the first side until you see a gorgeous golden-brown crust. Flip and cook for another 3-5 minutes on the other side, or until cooked through (internal temp of 165°F). Remove the chicken to a plate and tent loosely with foil. Big Tip: Don’t move the chicken around while it’s searing! Let the pan do its work to create that perfect crust.
- Create the Aromatic Base: Reduce the heat to medium. You should have delicious golden-brown bits (called “fond”) in the pan. That’s pure flavor gold! Add the minced garlic to the skillet and sauté for just about 30 seconds until fragrant. You want it to smell amazing but not brown—burnt garlic is bitter.
- Deglaze and Build the Sauce: Here’s where the magic happens. Pour in the chicken broth and fresh lemon juice. As the liquid hits the hot pan, use a wooden spoon or spatula to scrape up all those browned bits from the bottom of the pan. This is called deglazing, and it’s the secret to a deeply flavorful sauce. Let the mixture simmer for a minute.
- Add the Briny Punch & Reduce: Stir in the drained capers. Let the sauce simmer for 3-5 minutes, allowing it to reduce and concentrate slightly. You’ll notice it start to thicken a bit from the flour that was left in the pan. Taste it! This is your chance to adjust—a little more pepper? A pinch of salt?
- Bring It All Together: Return the cooked chicken breasts (and any accumulated juices) back to the skillet. Spoon that glorious sauce over the top of each piece and let everything heat through for a minute, allowing the chicken to soak up some of that lemony goodness.
- The Finishing Touch: Turn off the heat. Swirl in the remaining 1 tablespoon of cold butter. This final addition, called “monter au beurre,” gives the sauce a lovely sheen and velvety texture. Sprinkle with chopped fresh parsley if using. Serve immediately, making sure every plate gets plenty of that incredible sauce.
How to Plate Like a Pro (The Easy Way!)
Presentation is part of the fun, but let’s keep it real—it’s about making it look appetizing without extra stress. I like to place a chicken breast slightly off-center on a warm plate or shallow bowl. Generously spoon that lemony-caper sauce right over the top, letting some pool around the sides. The contrast of the golden chicken against the vibrant sauce is gorgeous.
Now, what to serve with it? You need something to soak up every last drop of that sauce. My absolute favorite is a big pile of buttered pasta (angel hair or linguine are perfect), creamy mashed potatoes, or soft polenta. For a lighter option, try it over a bed of quinoa or with a simple arugula salad dressed with lemon vinaigrette. A side of roasted asparagus, green beans, or broccolini is a fantastic veggie pairing. And don’t forget a slice of crusty, warm bread for the ultimate sauce-mopping experience. This dish is all about that sauce, so choose your vehicle wisely!
Make It Your Own: 5 Tasty Twists
Once you’ve mastered the base recipe, the kitchen playground opens up! Here are a few of my favorite ways to riff on this classic.
- The “Creamy Dreamy” Version: After you’ve reduced the sauce, stir in 1/4 cup of heavy cream, half-and-half, or even full-fat coconut milk for a dairy-free option. Let it simmer for another minute until slightly thickened. It creates a luxurious, creamy lemon-caper sauce that’s pure comfort.
- Piccata with a Punch: Add 1/4 teaspoon of red pepper flakes when you sauté the garlic for a subtle, warming heat. It balances the brightness of the lemon beautifully.
- Herb Garden Delight: Swap or add to the parsley. A teaspoon of fresh chopped thyme or rosemary added with the garlic, or a tablespoon of fresh chopped dill or tarragon stirred in at the very end, takes the flavor profile in a wonderfully fresh direction.
- Chicken Thighs for Maximum Flavor: Prefer dark meat? Use boneless, skinless chicken thighs. They’re more forgiving and have richer flavor. Follow the same method, adjusting cook time slightly as needed (they may take a minute or two longer).
- Fish Piccata: This sauce is incredible on white fish! Use 4 fillets of cod, halibut, or tilapia. Dredge lightly in flour, pan-sear for 3-4 minutes per side (depending on thickness), then remove and make the sauce as directed. Gently return the fish to the pan to finish.
Beau’s Kitchen Notes & Stories
This recipe has been my reliable friend for years, and it’s evolved in tiny ways. I used to be afraid of the sauce breaking if I added the butter at the wrong time, until I learned that taking the pan off the heat before swirling in that last pat of butter is the key to a smooth, emulsified sauce every single time. It’s a little trick that makes a big difference.
And about those capers—I have a funny story. I once accidentally used salted capers AND regular broth AND didn’t taste the sauce before serving. Let’s just say it was a… very memorable salt-bomb experience. My friend drank three glasses of water and still raved about the flavor (bless him). The lesson? Always taste as you go, and rinse your capers if they’re packed in salt! Cooking is a journey, and sometimes the “oops” moments teach us the most.
Your Questions, Answered
Q: My sauce is too thin! How can I thicken it?
A: No worries! If you want a thicker sauce, mix 1 teaspoon of cornstarch with 1 tablespoon of cold water (or chicken broth) to create a slurry. After you’ve simmered the sauce with the capers, whisk in the slurry and let it simmer for another minute until thickened. You can also just let it simmer a bit longer to reduce further.
Q: Can I make this ahead of time?
A> You can prep the chicken (pound and season) and make the sauce base ahead, but for the best texture, I recommend cooking the chicken fresh. If you do need to reheat, do it gently in a skillet over low heat with a splash of broth to loosen the sauce.
Q: I’m not a fan of capers. What can I use instead?
A> The briny punch is key, but you can try chopped green olives or even a tablespoon of chopped anchovies (they’ll melt into the sauce for deep flavor, not a fishy taste). If you want to skip it entirely, just lean into the lemon and add a pinch more salt at the end.
Q: Why do I need to dredge the chicken in flour?
A> It serves two purposes: 1) It creates a delicate, golden crust that adds texture. 2) The little bit of flour that ends up in the pan helps naturally thicken the sauce as it simmers, giving it a better body to cling to the chicken.

Lemon-Capers Chicken Breast (Piccata Style) : Bright, Tangy, and Briny in One Skillet
Description
This Lemon-Capers Chicken Breast is your weeknight shortcut to restaurant-level flavor. Inspired by classic chicken piccata, tender chicken breasts are lightly floured, pan-seared until golden, and finished in a vibrant lemon-butter sauce studded with punchy capers and fragrant garlic. It’s fresh, comforting, and ready in about 30 minutes—all in one skillet.
Ingredients
-
4 boneless, skinless chicken breasts
-
Salt and black pepper, to taste
-
¼ cup all-purpose flour (for dredging)
-
2 tablespoons olive oil
-
2 tablespoons unsalted butter, divided
-
2 cloves garlic, minced
-
½ cup chicken broth (low sodium preferred)
-
⅓ cup fresh lemon juice (about 2 lemons)
-
2 tablespoons capers, drained (rinse if very salty)
-
1 tablespoon chopped fresh parsley (optional)
Instructions
-
Prep the chicken
Pound chicken breasts to an even thickness (about ½ inch). Season both sides generously with salt and pepper. Lightly dredge in flour, shaking off excess. -
Sear until golden
Heat olive oil and 1 tablespoon butter in a large skillet over medium-high heat. Add chicken and cook 4–5 minutes per side, until golden and cooked through (165°F). Remove to a plate and tent loosely with foil. -
Build the sauce
Reduce heat to medium. Add garlic and sauté 30 seconds, just until fragrant. -
Deglaze
Pour in chicken broth and lemon juice, scraping up browned bits from the pan. Simmer 1–2 minutes. -
Add capers & reduce
Stir in capers and let sauce simmer 3–5 minutes, until slightly reduced. -
Finish & serve
Return chicken (and juices) to the skillet. Spoon sauce over the top and heat through. Remove from heat and swirl in remaining tablespoon of butter. Garnish with parsley and serve immediately.
Notes
-
Don’t skip pounding: Even thickness means juicy chicken and fast cooking
-
Fresh lemon only: Bottled juice won’t deliver the same brightness
-
Taste before serving: Capers vary in saltiness—adjust as needed
-
Butter off heat: This keeps the sauce silky, not greasy
Nutritional Information (A General Guide)
Here’s a general breakdown per serving (one chicken breast with sauce), based on the ingredients listed. Remember, this is an estimate and can vary based on specific brands, exact measurements, and any substitutions you make.
- Calories: ~380
- Protein: ~36g (Excellent source for keeping you full!)
- Fat: ~20g (The good fats from olive oil and butter that carry all our flavors.)
Final Thoughts
This Lemon-Capers Chicken Breast recipe is more than just a meal—it’s a reminder that extraordinary flavors don’t require extraordinary effort. In about 30 minutes and with just one skillet, you can transform simple ingredients into something that feels celebratory: tangy, briny, rich, and bright all at once.
It’s a dish built for real life. For the nights you need a win, for the dinners that have to impress without stress, and for the quiet moments when you just want to savor something truly good. It’s the recipe you’ll return to—the one friends ask for, the one that becomes your signature quick-but-special meal.
So here’s to less fuss, more flavor, and the simple joy of a great pan sauce. You’ve got this. Now go make your kitchen smell incredible.

Mediterranean Chicken Breast Bake with Tomatoes, Olives & Feta
Mediterranean Chicken Breast Bake: Your New Favorite One-Pan Wonder
Hey friends, Beau here! Let’s talk about that magical intersection where “incredibly delicious” meets “I actually have the energy to make it on a Tuesday.” You know the spot. It’s where flavor feels bright and lively, where your kitchen starts to smell like a sun-drenched terrace overlooking the sea, and where your baking dish does almost all the work for you. That, my friends, is the exact destination of this Mediterranean Chicken Breast Bake.
This isn’t just another baked chicken recipe. This is a one-pan symphony. We’re talking juicy, herb-kissed chicken breasts becoming impossibly tender as they snuggle up to blistered cherry tomatoes that burst with sweetness. Briny Kalamata olives pop in your mouth, while creamy, tangy feta cheese melts just enough to create little pockets of salty bliss. A simple drizzle of good olive oil and a sprinkle of oregano ties it all together in a way that feels both wonderfully exotic and deeply comforting.
The best part? You get all this vibrant, feel-good flavor without juggling multiple pans or complicated techniques. It’s a set-it-and-forget-it kind of meal that looks like you fussed for hours. Perfect for a family dinner, impressive enough for casual entertaining, and healthy enough to make you feel like a superstar. So, grab your favorite baking dish, and let’s turn your oven into a portal to the Mediterranean coast. Dinner is about to get a serious upgrade.
The Dinner That Taught Me to Slow Down
This recipe always takes me back to a tiny, family-run taverna on a Greek island, years ago. I was traveling with friends, and we were hopelessly lost down a maze of whitewashed alleyways. Just as hunger (and mild panic) set in, we stumbled upon this place, nothing more than a few tables under a vine-covered trellis. The proprietor, a smiling YiaYia (grandmother), didn’t hand us a menu. She just nodded and disappeared into the kitchen.
What emerged was a sizzling clay dish that looked—and smelled—like pure joy. It was her version of this bake. She pointed to the sun, the tomatoes growing by the door, and her olive trees, then simply said, “Eat. Be happy.” We tore into it with chunks of bread, laughing, not saying a word, just sharing food that tasted of place and passion. It was a masterclass in simplicity. No fancy garnishes, no complicated sauces—just incredible ingredients, cooked with care and shared with heart. That’s the spirit I try to bring to this dish every time I make it. It’s more than food; it’s a reminder that the best moments often come from slowing down, keeping it simple, and sharing something real.
Gathering Your Sunshine-In-A-Pan Ingredients
Here’s everything you’ll need to create this flavor fiesta. Don’t stress about perfection—cooking is about playing, not policing! I’ve added my chef-y notes and swaps so you can make this your own.
- 4 boneless, skinless chicken breasts: The main event! Look for breasts that are roughly the same size so they cook evenly. Chef’s Swap: Chicken thighs are fantastic here for even more juicy, forgiving flavor.
- Salt & pepper to taste: The foundational magic. I season my chicken pretty generously here—it’s a big canvas to flavor.
- 2 cups cherry tomatoes, halved: Little bursts of sweetness! Halving them lets their juices mingle with the olive oil and create a simple, incredible pan sauce. Chef’s Insight: Use the ripest, reddest ones you can find for maximum flavor.
- ½ cup Kalamata or black olives, pitted: I’m team Kalamata for their bold, briny, winey punch. They’re the salty counterpoint to the sweet tomatoes. Chef’s Tip: If you only have standard black olives, toss them with a tiny splash of red wine vinegar to wake them up.
- ½ cup crumbled feta cheese: The tangy, creamy crown. We add it late so it just warms and softens, not melts away. Chef’s Swap: For a dairy-free version, try a vegan feta or even some creamy, salted chickpeas.
- 2 tbsp olive oil: Use the good stuff! A nice extra virgin olive oil adds fruitiness and richness. This is the glue that brings the dish together.
- 1 tsp dried oregano: The quintessential Greek herb. Rubbing it between your palms before adding wakes up its aromatic oils. Chef’s Twist: A tablespoon of fresh oregano or chopped fresh rosemary is a stunning alternative.
- 2 cloves garlic, minced: Aromatic heaven. It infuses the oil and gets deliciously mellow and sweet as it roasts.
- Optional: lemon wedges & fresh parsley for serving: Not optional in my book! A squeeze of fresh lemon juice right at the end brightens every single flavor. Chopped parsley adds a fresh, green finish that makes the colors pop.
Let’s Build Some Flavor: Step-by-Step
Ready? Apron on, oven preheated, let’s do this. Follow these steps and you’re guaranteed a winner.
- Preheat & Prep: Crank that oven to 400°F (200°C). This hot temperature is key for getting a nice sear on the chicken and blistering those tomatoes quickly. While it heats, grab your baking dish—a 9×13 inch or similar shallow dish is perfect. No need to grease it; our olive oil will handle that.
- Season the Star: Pat your chicken breasts completely dry with paper towels. This is my #1 hack for better browning! Moisture is the enemy of a golden surface. Season both sides generously with salt, pepper, and about half of your dried oregano. Rubbing that oregano between your fingers as you sprinkle it releases its gorgeous aroma.
- Create the Flavor Nest: Place the seasoned chicken breasts in the center of your baking dish. Now, artfully (or just enthusiastically) scatter the halved cherry tomatoes, olives, and minced garlic all around them. You want the chicken to be surrounded by all that goodness. The tomatoes and olives will roast in the chicken juices and olive oil—this is where the magic sauce happens.
- The Drizzle: Give everything in the dish a loving, even drizzle of your good olive oil. Don’t skimp! This cooks the veggies and keeps the chicken moist. Sprinkle the remaining oregano over the entire pan.
- First Bake: Slide the dish into your hot oven, uncovered, for 25-30 minutes. We’re not covering it because we want some evaporation and concentration of flavor. The chicken is done when it reaches 165°F internally and the juices run clear. The tomatoes should be starting to collapse and release their juices.
- The Feta Finale: Carefully pull the dish out of the oven (it’ll be steamy and smell amazing!). Crumble the feta cheese evenly over everything, especially letting some nestle into the nooks between the chicken and tomatoes. Pop it back in for just 5 more minutes. This gently warms the feta, softening it and making it creamy without it melting into nothing.
- Rest & Finish: Let the bake sit for 5 minutes after it comes out of the oven. This allows the juices to redistribute back into the chicken, ensuring every bite is succulent. This is the perfect time to chop your fresh parsley and slice your lemon wedges.
How to Serve This Stunner
Presentation is part of the fun! I like to serve this right from the baking dish at the table—it’s rustic and inviting. Use a big spoon to ensure everyone gets plenty of those glorious pan juices, tomatoes, and olives with their piece of chicken.
Now, what to serve with it? You’ve got options!
- For Soaking Up Juices: Fluffy couscous, quinoa, or a simple orzo pasta are absolute sponges for that delicious oil and tomato sauce. A big pile of creamy mashed potatoes? Don’t mind if I do.
- For a Lighter Touch: A simple arugula or spinach salad with a lemon vinaigrette balances the richness perfectly.
- For the Ultimate Experience: Warm, pillowy pita bread or crusty baguette is non-negotiable for me. There’s no better tool for swiping up every last bit of flavor from your plate.
Finish each plate with a shower of chopped fresh parsley and a generous squeeze of fresh lemon juice. That bright, acidic zip is the final note that makes the whole dish sing.
Make It Your Own: Flavor Twists & Swaps
Got an idea? Run with it! Recipes are just roadmaps. Here are a few detours I love:
- Lemon & Herb Bomb: Add thin slices of a whole lemon (seeds removed) to the baking dish with the tomatoes. As it roasts, the lemon caramelizes and becomes edible, rind and all, adding an intense citrus punch. Throw in a few sprigs of fresh thyme.
- Spanish-Inspired: Swap the oregano for smoked paprika and add ½ cup of drained artichoke hearts and some sliced red onion. Use manchego cheese instead of feta for a different kind of salty kick.
- “Everything But the Kitchen Sink” Veggie: This dish is a great veggie cleaner! Add sliced bell peppers, red onion, zucchini, or mushrooms to the mix. Just be sure everything is cut to a similar size for even cooking.
- Seafood Swap: Not feeling chicken? Large shrimp or firm white fish fillets (like cod or halibut) are incredible here. Reduce the initial bake time to 10-15 minutes before adding the feta, as seafood cooks much faster.
- Low-Carb / Keto Friendly: This dish is already a superstar! Serve it over cauliflower rice or alongside roasted broccoli for a completely satisfying, low-carb meal.
Beau’s Kitchen Notes & Stories
This recipe has been on my weekly rotation for years, and it’s evolved in fun ways. I once, in a pre-coffee haze, used cinnamon instead of oregano. (Don’t ask how). Surprisingly… not terrible, but let’s stick with oregano. I’ve also learned that this is my ultimate “clean out the fridge before vacation” meal. Those handfuls of leftover veggies? They find a happy home here.
The biggest lesson this dish taught me? Trust the process. That moment when you pull the dish out and it looks a bit watery around the chicken? Don’t panic. Let it rest. The chicken will reabsorb those flavorful juices, and what’s left is liquid gold, not water. This recipe is forgiving and flexible—a true friend in the kitchen. Make it once as written, then start playing. That’s where your own kitchen story begins.
Your Questions, Answered
Q: My chicken breasts are huge/thick. Will they cook in time?
A: Great question! If your breasts are very thick (over 1.5 inches), I recommend pounding them to an even thickness (about ¾ inch) before seasoning. This ensures they cook through at the same rate as the veggies. You can also slice them in half horizontally to create two thinner cutlets.
Q: Can I make this ahead of time?
A> You can do all the prep ahead! Season the chicken, chop the veggies, and combine the tomatoes, olives, and garlic in a container. Keep them separate in the fridge. When ready to cook, assemble in the dish and bake. I don’t recommend baking it fully ahead, as the chicken can dry out upon reheating.
Q: My tomatoes are too watery/sour. What happened?
A> This usually means the tomatoes weren’t in season or were a bit under-ripe. In winter, I often use the best-quality canned cherry tomatoes I can find—drained well. Their flavor is more consistent year-round. A tiny pinch of sugar can also balance out excess acidity.
Q: Can I use frozen chicken breasts?
A> I highly recommend thawing them first. Baking from frozen will steam the chicken and release too much water, preventing browning and making the veggies soggy. For best results, thaw in the fridge overnight.

Mediterranean Chicken Breast Bake with Tomatoes, Olives & Feta
Description
This Mediterranean Chicken Breast Bake lives right at that sweet spot where bold, sun-soaked flavors meet effortless weeknight cooking. Juicy chicken breasts roast alongside bursting cherry tomatoes, briny olives, mellow garlic, and fragrant oregano, all finished with creamy feta and a squeeze of fresh lemon. It’s vibrant, comforting, and made entirely in one pan—because great food shouldn’t come with a sink full of dishes.
Ingredients
-
4 boneless, skinless chicken breasts
-
Salt and black pepper, to taste
-
2 cups cherry tomatoes, halved
-
½ cup Kalamata olives, pitted
-
½ cup crumbled feta cheese
-
2 tablespoons extra-virgin olive oil
-
1 teaspoon dried oregano
-
2 cloves garlic, minced
Optional for serving
-
Lemon wedges
-
Fresh parsley, chopped
Instructions
-
Preheat the oven
Preheat to 400°F (200°C). -
Season the chicken
Pat chicken breasts dry. Season both sides generously with salt, pepper, and half of the oregano. -
Assemble the pan
Place chicken breasts in the center of a baking dish (9×13-inch works well). Scatter tomatoes, olives, and garlic around the chicken. -
Drizzle & season
Drizzle olive oil evenly over everything. Sprinkle the remaining oregano across the pan. -
Bake
Bake uncovered for 25–30 minutes, until chicken reaches an internal temperature of 165°F (74°C) and tomatoes have burst. -
Add feta
Remove from oven and crumble feta over the dish. Return to the oven for 5 minutes, just until feta softens. -
Rest & finish
Let rest for 5 minutes. Garnish with fresh parsley and serve with lemon wedges for squeezing.
Notes
-
Even thickness matters: Pound thick chicken breasts to about ¾ inch for even cooking
-
Use good olive oil: It’s a key flavor, not just a cooking fat
-
Don’t overbake feta: It should soften, not fully melt
-
Let it rest: This keeps the chicken juicy and the sauce rich
Nutritional Information (Per Serving, Approximate)
Let’s chat about what’s fueling you! This is a wonderfully balanced meal. One serving (1 chicken breast with a quarter of the toppings and sauce) provides a powerful 36g of lean protein to keep you satisfied and support muscle health. The fats (22g) are primarily the heart-healthy monounsaturated kind from olive oil and olives. Carbs (7g) come naturally from the tomatoes and a touch from the garlic. It’s naturally low-carb, gluten-free, and packed with vitamins (like Lycopene from tomatoes) and antioxidants. It’s proof that food that tastes indulgent can also make you feel incredible.
- Calories: 380
- Protein: 36g
- Carbohydrates: 7g
- Fat: 22g
- Fiber: 2g
Note: Nutritional info is an estimate calculated using a database. Values can vary based on specific ingredient brands and sizes.
One Pan, Endless Happiness
And there you have it! My go-to recipe for when I want a meal that feels special without the special effort. This Mediterranean Chicken Bake is more than just dinner; it’s a reminder of how a few fantastic ingredients, treated simply, can create pure magic. It’s about the joy of sharing something vibrant and homemade, and the simple pleasure of a clean kitchen because you only used one dish.
Final Thoughts
This Mediterranean Chicken Breast Bake is more than a recipe—it’s a reminder of what cooking should be: joyful, soul-nourishing, and wonderfully simple. It’s the kind of dish that doesn’t just fill your plate, but fills your home with warmth and your table with conversation. From the sun-soaked aromas to the effortless elegance of that one-pan finish, this meal proves that you don’t need complexity to create something extraordinary.
Whether you’re cooking for a busy weeknight, a laid-back gathering, or just craving a taste of coastal sunshine, this bake delivers. It’s adaptable, forgiving, and rooted in the kind of honest ingredients that make every bite feel like a celebration.
So here’s to less stress and more flavor—to meals that feel like a getaway, even on a Tuesday. Thank you for letting me share one of my favorite stories and recipes with you. Now, it’s your turn. Gather your ingredients, preheat that oven, and create your own memory around this dish. And when you do, I’d love to hear about it.

Melt-In-Your-Mouth Chicken Breast : Creamy, Juicy & Effortlessly Delicious
Melt-In-Your-Mouth Chicken Breast: Your New Weeknight Best Friend
Hey there, friend! Beau Collier here, from Feastical. Let me ask you a question: have you ever stared down a package of chicken breasts and felt… well, a little bored? I get it. They’re the reliable, lean protein we all keep on hand, but sometimes “reliable” can feel a little bit like “predictable.” We dream of juicy, flavorful, restaurant-worthy chicken, but the fear of ending up with dry, bland hockey pucks keeps us stuck in a rut.
What if I told you the secret to the most tender, flavorful, melt-in-your-mouth chicken breast of your life is already in your fridge, and it takes about 10 minutes of hands-on work? This isn’t a fancy, fussy technique. It’s a simple, soulful recipe that uses a magical, creamy Parmesan blanket to lock in every single drop of moisture and flavor. The result is a chicken so succulent, so effortlessly delicious, that it will forever change your weeknight dinner game.
This recipe is for the busy parent, the tired professional, the new cook, and the seasoned foodie looking for a guaranteed crowd-pleaser. It’s about creating that “wow” moment without the stress. So, tie on your apron, grab your favorite baking dish, and let’s turn those everyday chicken breasts into a creamy, golden, effortlessly delicious masterpiece that truly lives up to its name. Your fork is waiting!
The Chicken That Started It All
This recipe takes me back to my early days of cooking for friends—a time of limited budgets, even more limited kitchen tools (I’m pretty sure my “baking dish” was a dented aluminum pan), and a desperate desire to impress. I was hosting a small dinner party, and in a classic case of ambition over skill, I had attempted something far too complicated. Let’s just say the main course was… not salvageable.
Panicked, I stared into my nearly empty fridge: some chicken breasts, a half-jar of mayo, and a sad-looking tub of grated Parmesan. With 90 minutes until my friends arrived, I had no choice but to experiment. I slathered everything together, popped it in the oven, and prayed. What emerged was nothing short of a miracle. The chicken was impossibly juicy, the top was gorgeously browned and bubbly, and the flavor was rich and comforting. My friends raved. They demanded the recipe, convinced I’d been holding out on some gourmet secret.
The secret, I learned that night, wasn’t complexity. It was trust. Trust in simple ingredients to do extraordinary things when you let them work together. This creamy Parmesan baked chicken became my culinary security blanket, a recipe I’ve shared a hundred times since, and the heartwarming story I get to tell you now.
Gathering Your Flavor Arsenal
Here’s the beautiful part: you likely have most of this lineup already. Let’s break down why each player is on the team.
- 4 boneless, skinless chicken breasts: The star of the show! Look for breasts that are similar in size for even cooking. Chef’s Insight: If yours are very large or thick, consider slicing them horizontally into cutlets—it speeds up cooking and makes for perfect portion sizes.
- 1 cup mayonnaise: This is the magic cloak. It bakes into a rich, tender crust that seals in the juices. Substitution Tip: For a tangier, lighter twist, swap with an equal amount of full-fat plain Greek yogurt. You’ll get a similar creamy texture with a protein boost!
- ½ cup grated Parmesan cheese: Use the good stuff from the refrigerated section, not the shelf-stable canister. It melts better and packs a serious umami punch. Chef’s Insight: Freshly grated Parmigiano-Reggiano is next-level if you’re feeling fancy.
- 1 teaspoon each of garlic powder & onion powder: These pantry heroes provide a consistent, mellow base flavor that permeates every bite without the risk of burning that fresh garlic can have.
- 1 teaspoon salt, ½ teaspoon black pepper: The essential enhancers. Don’t be shy with the pepper—it adds a wonderful warmth.
- Optional: ½ teaspoon paprika or Italian seasoning for topping: A little sprinkle before baking adds a pop of color and an extra layer of flavor. Smoked paprika is my personal favorite for a subtle, cozy depth.
Let’s Get Cooking: Your Path to Perfect Chicken
Follow these steps, and you’re guaranteed success. I’ve packed each one with my favorite hacks to make you feel like a pro.
- Preheat & Prep: Fire up your oven to 375°F (190°C). This moderate heat is perfect—hot enough to brown and bubble the topping, but gentle enough to cook the chicken through without drying it out. Lightly grease your 9×13 inch baking dish or line it with parchment paper for the world’s easiest cleanup. Little Chef Hack: A quick spray of olive oil on the dish prevents any cheeky bits of cheese from sticking.
- Pound for Perfection: Place your chicken breasts between two sheets of plastic wrap or in a large zip-top bag. Using a rolling pin, meat mallet, or even a heavy skillet, gently pound them to an even ¾-inch thickness. This is the #1 tip for juicy chicken! It ensures they cook at the same rate, so no thin edges are overcooked while the center is still raw.
- Mix the Magic Blanket: In a medium bowl, combine the mayonnaise (or yogurt), grated Parmesan, garlic powder, onion powder, salt, and pepper. Stir until it’s a luscious, uniform paste. Little Chef Hack: Taste your mixture! Yes, you can taste it. Adjust the seasoning now—want more pepper? A pinch more garlic? This is your moment to make it yours.
- Slather & Settle: Using a spoon or your hands (the best tools!), spread the creamy mixture generously over the top and sides of each chicken breast. Place them in your prepared dish, giving them a little room to breathe. The topping might seem thick, but that’s exactly what we want. Sprinkle that optional paprika or Italian seasoning over the top for a beautiful finish.
- Bake to Golden Glory: Slide the dish into your preheated oven, uncovered. Bake for 35-45 minutes. Do not rely on time alone! The chicken is done when its internal temperature reaches 165°F (74°C) on an instant-read thermometer, and the top is gloriously golden and bubbly. If the top is browning too quickly, you can loosely tent it with foil.
- The Crucial Rest: Once out of the oven, let the chicken rest in the dish for 5 full minutes. This is non-negotiable for max juiciness! It allows the hot juices to redistribute throughout the meat, so they end up in your mouth, not on your cutting board.
Plating Up the Comfort
Now for the fun part—making it a meal! This creamy chicken is incredibly versatile. For a classic, cozy dinner plate, I love serving it alongside:
- Fluffy Pillows of Carbs: A big scoop of garlic mashed potatoes, buttery egg noodles, or a simple rice pilaf. The creamy sauce from the chicken acts as an incredible gravy.
- Veggie Vibes: Roasted asparagus, green beans almondine, or a bright, crisp garden salad to cut through the richness. Steamed broccoli florets are also fantastic for catching any extra cheesy bits.
Want to dress it up? Slice the rested chicken breast and fan it over a bed of fresh arugula tossed with lemon vinaigrette. The warm chicken slightly wilts the greens, and the flavors sing together. No matter how you serve it, this dish says “home.”
Make It Your Own: Delicious Twists
Once you’ve mastered the base, the playground is open! Here are a few of my favorite riffs:
- The “Everything Bagel” Chicken: Add 1 tablespoon of everything bagel seasoning to the mayo mixture. Top with an extra sprinkle before baking. Unreal.
- Sun-Dried Tomato & Spinach: Fold ¼ cup chopped sun-dried tomatoes (oil-packed, drained) and a handful of fresh baby spinach into the mayo mixture. It’s a flavor explosion!
- Dairy-Free & Lighter: Use the Greek yogurt substitute, and swap the Parmesan for ⅓ cup of nutritional yeast. You’ll still get that cheesy, savory flavor without the dairy.
- Spicy Cajun Kick: Replace the garlic and onion powder with 2 teaspoons of your favorite Cajun or Creole seasoning. It’s a zesty, bold transformation.
- Mushroom Lover’s Dream: Before adding the chicken, sauté 8 oz of sliced mushrooms in the baking dish on the stovetop. Remove, then proceed. Place the topped chicken over the cooked mushrooms. They’ll soak up all the glorious juices as it bakes.
A Few More Thoughts From My Kitchen
This recipe has been a living, evolving friend in my kitchen for years. I’ve made it in a toaster oven in a tiny apartment, doubled it for a potluck of 20, and even grilled it (carefully!) in a cast-iron skillet over a campfire. It’s resilient and adaptable.
One funny fail turned win: I once accidentally used *whipped* cream cheese instead of mayo. In my 6 a.m. pre-coffee haze, the containers looked identical. The result was a bit thicker and tangier, but my family adored it. So don’t be afraid of happy accidents!
The biggest evolution? I used to be a strict “must use homemade mayo” purist. Now? I’m a “use what you have and make it delicious” realist. The goal is joy, not perfection. This dish delivers on that promise every single time.
Your Questions, Answered
Q: Can I use chicken thighs instead?
A: Absolutely! Bone-in, skin-on thighs are fabulous. You may need to add 5-10 minutes to the bake time. The skin gets wonderfully crispy under the topping.
Q: My topping seems too runny/thin. What happened?
A: This usually comes down to the mayo or Parmesan. Some store-brand mayos are thinner. If your mixture seems loose, add an extra tablespoon or two of Parmesan to thicken it up. It should be a spreadable paste, not a liquid.
Q: How do I store and reheat leftovers?
A: Store in an airtight container in the fridge for up to 3 days. To reheat, place it in a baking dish, cover with foil, and warm in a 325°F oven for about 15 minutes, until heated through. The microwave works in a pinch, but the oven keeps the texture best.
Q: Why is resting the chicken so important?
A: Think of the muscle fibers in the chicken as tight, tense straws full of juice. When they’re hot from the oven, they’re clenched tight. Resting allows them to relax and reabsorb those juices. If you cut immediately, all that precious flavor and moisture just runs out. Patience is a virtue that tastes delicious!

Melt-In-Your-Mouth Chicken Breast : Creamy, Juicy & Effortlessly Delicious
Description
If chicken breasts have ever felt boring or dry, this recipe is about to change everything. A simple creamy Parmesan topping bakes into a golden, flavorful crust that locks in moisture and delivers unbelievably tender, juicy chicken every single time. With just a handful of pantry staples and about 10 minutes of prep, this is the kind of no-fail dinner you’ll come back to again and again.
Ingredients
-
-
Preheat the oven
Preheat to 375°F (190°C). Lightly grease a 9×13-inch baking dish or line with parchment paper. -
Even out the chicken
Place chicken breasts between plastic wrap or inside a zip-top bag. Gently pound to about ¾-inch thickness for even cooking. -
Make the creamy topping
In a bowl, mix mayonnaise, Parmesan, garlic powder, onion powder, salt, and pepper until smooth and spreadable. -
Assemble
Place chicken in the baking dish. Generously spread the creamy mixture over the top and sides of each breast. Sprinkle with paprika or Italian seasoning if using. -
Bake
Bake uncovered for 35–45 minutes, until the chicken reaches an internal temperature of 165°F (74°C) and the topping is golden and bubbly. -
Rest before serving
Let the chicken rest for 5 minutes before serving to keep it ultra juicy.
-
Instructions
-
-
Preheat the oven
Preheat to 375°F (190°C). Lightly grease a 9×13-inch baking dish or line with parchment paper. -
Even out the chicken
Place chicken breasts between plastic wrap or inside a zip-top bag. Gently pound to about ¾-inch thickness for even cooking. -
Make the creamy topping
In a bowl, mix mayonnaise, Parmesan, garlic powder, onion powder, salt, and pepper until smooth and spreadable. -
Assemble
Place chicken in the baking dish. Generously spread the creamy mixture over the top and sides of each breast. Sprinkle with paprika or Italian seasoning if using. -
Bake
Bake uncovered for 35–45 minutes, until the chicken reaches an internal temperature of 165°F (74°C) and the topping is golden and bubbly. -
Rest before serving
Let the chicken rest for 5 minutes before serving to keep it ultra juicy.
-
Notes
-
-
Pounding matters: Even thickness prevents dry edges and undercooked centers
-
Use real Parmesan: Freshly grated melts better and adds richer flavor
-
Don’t skip resting: This keeps the juices inside the chicken
-
Too thin topping? Add an extra tablespoon or two of Parmesan
-
Nutritional Information (Per Serving)
This information is an estimate based on the standard recipe using full-fat mayonnaise. Remember, variations will change the numbers!
- Calories: ~380
- Protein: 35g (A fantastic source!)
- Carbohydrates: 2g
- Fat: 25g
- Saturated Fat: 5g
For a lighter version using non-fat plain Greek yogurt and reducing the Parmesan to ¼ cup, you can cut the calories to approximately 280 per serving and the fat to around 10g, while boosting the protein even further.
Your Cozy Kitchen Victory Awaits
And there you have it—the full story behind the recipe that turned my kitchen panic into a perennial favorite. This Melt-In-Your-Mouth Chicken Breast is more than just a set of instructions; it’s an invitation to experience how simple, honest cooking can create the most memorable moments. It’s proof that you don’t need a dozen exotic ingredients to make something truly special.
So the next time you’re standing in front of the fridge wondering what’s for dinner, I hope you remember this cozy, creamy, Parmesan-kissed dish. I hope you feel empowered to make it your own, to play with the variations, and most importantly, to share it with someone you love. Because food like this? It’s meant to be shared. It’s a warm hug on a plate.
Final Thoughts
This isn’t just a recipe—it’s a kitchen revelation. In a world of complicated techniques and endless ingredient lists, this Melt-In-Your-Mouth Chicken Breast stands as a delicious reminder that simplicity often wins. With a humble jar of mayo, a handful of Parmesan, and a few trusty spices, you can transform the most predictable protein into a tender, flavorful masterpiece that feels both comforting and special.
What I love most about this dish is its generosity—it meets you exactly where you are. Are you tired? It’s easy. Are you bored? It’s exciting. Are you cooking for picky eaters or foodie friends? It pleases them all. It’s the kind of recipe that builds confidence in new cooks and rekindles joy in seasoned ones. It proves that great food doesn’t have to be hard; it just has to be made with a little trust and a lot of flavor.
So here’s my final encouragement: don’t just make this once. Make it your own. Tweak it, adapt it, and let it become a canvas for your cravings. That’s how a recipe becomes a tradition—and how a simple weeknight dinner becomes a moment of genuine connection.
Because at the end of the day, the best meals aren’t just about what’s on the plate. They’re about the satisfaction of creating something wonderful, the warmth of sharing it, and the quiet victory of knowing you can always turn to something reliably delicious. This chicken is all of that, wrapped in a golden, creamy blanket.