Velveted Chicken Breast : Chinese Technique for Ultra-Tender, Juicy Perfection
Velveted Chicken Breast: The Chinese Secret to Unbelievably Tender Chicken
Say Goodbye to Dry, Chewy Chicken Forever
Hey friends, Beau here from Feastical! Let me ask you a question that might hit a little too close to home: have you ever stared at a plate of dry, sad, chewy chicken breast and wondered, “Why bother?” I know I have. You follow the recipe, you watch the timer, you do everything “right,” and yet… there it is. Chicken that tastes more like regret than dinner.
Well, my fellow foodie, I’m about to change your chicken game forever. Today, we’re pulling back the curtain on a brilliant Chinese restaurant technique called velveting. This isn’t a fancy sauce or a complicated spice rub. It’s a simple, almost magical prep method that transforms lean, bland chicken breast into something so silky, tender, and juicy, you’ll swear it snuck out of a five-star takeout box.
Velveting is my not-so-secret weapon for weeknight stir-fries, healthy lunch bowls, and anything else that deserves a protein upgrade. It’s the reason the chicken in your favorite Chinese dish melts in your mouth while yours sometimes feels like a workout for your jaw. The best part? It takes just a few pantry staples and about 30 minutes of mostly hands-off time. No special equipment, no culinary degree required. Just you, a few simple steps, and the promise of perfect chicken every single time. Ready to turn that kitchen frustration into pure, delicious triumph? Let’s get velveting!
The “Aha!” Moment in a Tiny Apartment Kitchen
My love affair with velveting started not in a fancy cooking class, but in my first post-college apartment kitchen. You know the one—the size of a postage stamp, with exactly one functional burner and a dream. I was determined to recreate the glorious Kung Pao Chicken from this little spot near campus, but no matter how perfect my sauce was, my chicken turned out tough and stringy. It was a culinary heartbreak!
Frustrated, I called my Aunt Marie, who spent years living in Hong Kong. She listened patiently to my plight and then laughed that warm, knowing laugh of someone who holds a secret. “Beau, honey,” she said, “you’re missing the velvet.” She walked me through the process over the phone, and I remember the sheer disbelief as I rinsed the baking soda off the chicken. “This feels weird,” I thought. But then, after the quick blanch in simmering water? Magic. I took a bite of a piece right out of the colander. It was tender. It was juicy. It was *silky*. I literally did a little dance in that tiny kitchen. That moment of discovery—that a simple trick could solve a universal cooking woe—is exactly why I started Feastical. To pass on those game-changing “aha!” moments that make cooking joyful, not frustrating.
Your Velveting Toolkit: Simple Ingredients, Spectacular Results
Here’s everything you need. Don’t let the short list fool you—each ingredient plays a starring role in creating that signature texture.
- 2 boneless, skinless chicken breasts (about 1 lb total): The canvas for our masterpiece. I prefer breasts for their lean, uniform shape, but you can absolutely use thighs if you want an even richer, more forgiving result. Chef’s Insight: Slice them thinly and against the grain *before* tenderizing. This shortens the muscle fibers, guaranteeing tenderness in every bite.
- 1 ½ tsp baking soda: This is the tenderizing powerhouse! A brief bath in baking soda (a mild alkali) changes the chicken’s protein structure, helping it retain incredible amounts of moisture during cooking. Key Tip: Don’t skip the rinse! Leaving it on will give you weird, soapy-tasting chicken, and nobody wants that.
- 1 tbsp cornstarch: Our coating agent. It creates a delicate, protective sheath around each piece of chicken during the velveting process, sealing in juices and giving that characteristic “silky” mouthfeel.
- 1 tbsp soy sauce: For depth of flavor and a bit of salt. Use light soy sauce if you have it for a more authentic touch, but your regular bottle works perfectly. For a gluten-free swap, tamari is your best friend.
- 1 tbsp Shaoxing wine: This Chinese cooking wine adds a subtle, complex sweetness that’s irreplaceable. Substitution: Dry sherry is the closest match. In a real pinch, you can use a splash of chicken broth with a tiny pinch of sugar, but try to find the wine—it makes a difference.
- 1 egg white (optional but glorious): The “extra credit” ingredient for maximum luxury. It adds an additional layer of protein that coats the chicken, resulting in an even silkier, more velvety texture. Highly recommended for special dishes!
- 1 tbsp neutral oil (like vegetable or canola), plus more for the water: A little oil in the marinade helps prevent sticking. We’ll also add a glug to the blanching water to keep the chicken pieces from clinging to each other.
- Water (for the blanching method): Just plain water! We’re going to gently poach the chicken to set the velvet coating.
Step-by-Step: Creating Silkiness, One Easy Step at a Time
Follow these steps, embrace the process, and get ready for the most tender chicken of your life.
Step 1: The Pre-Slice & Tenderizing Bath (15 mins)
First, place your chicken breast flat on the cutting board. Find the direction of the grain (those little white lines running along the breast) and slice *across* them, on a slight diagonal, into ¼-inch thick pieces. This is non-negotiable for tenderness! Toss all those slices into a bowl and sprinkle with the baking soda. Use your hands to massage it in evenly, ensuring every piece gets a light coating. Now, walk away for 15 minutes. Set a timer! This is when the science happens. When the time’s up, rinse the chicken thoroughly under cold water in a colander to wash away all the baking soda. Pat the slices completely dry with paper towels. This step is crucial for the marinade to stick properly.
Step 2: The Flavorful Marinade (20 mins – 1 hour)
In a clean bowl, whisk together the cornstarch, soy sauce, Shaoxing wine, and egg white (if using) until it’s a smooth, thin slurry. Add the rinsed and dried chicken slices and that tablespoon of oil. Toss, toss, toss until every single piece is beautifully coated. The oil might make it seem slippery, but that’s good—it’s creating a barrier. Let this marinate at room temp for 20 minutes, or cover and pop it in the fridge for up to an hour. Don’t go longer, or the texture can get a bit *too* soft.
Step 3: The Velveting Moment – Choose Your Method!
Blanching Method (My Go-To for Stir-Fries): Fill a medium pot about halfway with water. Bring it to a lively simmer (not a rolling boil—bubbles should be gentle). Add a generous tablespoon of neutral oil to the water. This is my little hack to keep the pieces separate. Gently drop in the chicken pieces one by one, stirring immediately so they don’t clump. They’ll cook FAST—in just 60-90 seconds, they’ll turn opaque and float to the top. The moment they’re all white, scoop them out with a slotted spoon or strainer. They will not be fully cooked inside, and that’s perfect! They’ll finish cooking in your stir-fry sauce later. Drain them well. You now have velveted chicken!
Stir-Fry Method (Quick & Direct): Heat a wok or large skillet over high heat until it’s very hot. Add 2-3 tablespoons of oil and swirl it around. Add the marinated chicken in a single layer (you may need to do two batches). Let it sear for just 30 seconds WITHOUT MOVING, then quickly stir-fry for another 1-2 minutes, just until the outside turns completely white. No browning! Immediately remove from the pan. This method is faster but requires more attention.
Step 4: Finish & Feast!
Your chicken is now velveted, tender, and ready for its final act. Add it to your sizzling stir-fry during the last 1-2 minutes of cooking just to heat through and coat in sauce. Toss it into a soup right before serving. Pile it on top of a salad or rice bowl. It’s your culinary playground now!
How to Serve Your Masterpiece: Beyond the Stir-Fry
Okay, you’ve got this bowl of incredibly tender chicken. Now what? The world is your oyster sauce!
My absolute favorite is, of course, a quick vegetable stir-fry. Sauté bell peppers, broccoli, and snap peas in a screaming hot wok, add a simple sauce of soy, garlic, ginger, and a touch of honey, then toss in the velveted chicken at the very end. Serve over steamed jasmine rice for a 15-minute miracle meal.
But don’t stop there! Chop it up and add it to fried rice for protein that stays juicy. Layer it into Asian-inspired noodle bowls with a rich broth, ramen noodles, and a soft-boiled egg. Let it star in a crispy lettuce wrap situation with hoisin sauce and crunchy water chestnuts. Or, keep it simple and elegant: arrange the warm, velveted slices over a bed of vibrant greens for a salad that will blow your mind. It turns an ordinary lunch into something truly special.
Get Creative: 5 Tasty Twists on Velveted Chicken
Once you master the basic velvet, the fun really begins. Here are a few ways to mix it up:
- Lemon-Herb Velvet: Swap the soy sauce for 2 tsp of fresh lemon juice and add 1 tsp of finely chopped rosemary or thyme to the marinade. Perfect for Mediterranean-style dishes or topping a Caesar salad.
- Spicy Szechuan Velvet: Add 1 tsp of Szechuan peppercorn powder and ½ tsp of chili crisp or crushed red pepper flakes to the marinade. Incredible for adding a numbing, fiery kick.
- Gluten-Free & Paleo Velvet: Easy! Use tamari instead of soy sauce, arrowroot powder instead of cornstarch, and omit the Shaoxing wine (or use a splash of apple cider vinegar). The technique works flawlessly.
- Velveted Shrimp or Beef: Yes, it works on other proteins! For shrimp, use ½ tsp baking soda and reduce the velveting time to 45 seconds. For thinly sliced beef (like flank steak), follow the chicken method exactly. A game-changer for Mongolian beef.
- Coconut Curry Velvet: Replace the Shaoxing wine with coconut milk and add 1 tsp of curry powder to the marinade. Velvet as usual, then use it in a Thai yellow curry. The texture is unreal.
Beau’s Kitchen Notes & Stories
This recipe has been a living, evolving part of my kitchen for years. I once, in a frantic “I-have-nothing-in-the-fridge” moment, tried velveting chicken with just baking soda, cornstarch, and water (no soy or wine). You know what? It still worked like a charm for texture! I tossed it in bottled teriyaki sauce later, and my kids couldn’t tell the difference. That’s the beauty of the technique—it’s flexible.
The biggest evolution for me was embracing the egg white. I avoided it for a long time, thinking it was an extra, fussy step. Then I tried it side-by-side with a batch without. Friends, the egg white version is like sliding into satin sheets. It’s next-level. So if you’re making this for a date night or just to treat yourself, crack that egg. You deserve the luxury.
Velveting Chicken FAQs: Solving Your Kitchen Mysteries
Q: My chicken came out a bit mushy. What went wrong?
A: This almost always means it marinated for too long, especially in the baking soda phase. Stick to the 15-minute timer for the baking soda bath like it’s a sacred rule. For the final marinade, 1 hour in the fridge is the max I’d recommend. The proteins break down quickly!
Q: Can I velvet a whole batch and freeze it for later?
A: You can, but with a caveat. After velveting (blanching method), drain and cool the chicken completely. Flash-freeze the pieces on a parchment-lined baking sheet, then transfer to a freezer bag. They’ll keep for 1-2 months. The texture will be slightly less perfect than fresh, but still miles better than un-velveted frozen chicken. Thaw in the fridge before using.
Q: Do I *have* to use baking soda? It seems weird.
A: The baking soda is the core of the “velveting” technique as it’s known in Chinese cooking. However, if you’re truly opposed, you can achieve a *good* (but not *great*) tender result with just the cornstarch, egg white, and oil marinade for 30 minutes. The texture will be smoother but not as profoundly transformed.
Q: I stir-fried it, but it stuck to my pan and browned. Help!
A: This means your pan wasn’t hot enough or was overcrowded. Make sure your wok or skillet is smoking hot before adding the oil, then immediately add the chicken in a single layer with space between pieces. Work in batches if you need to. We’re seizing the coating, not caramelizing the meat.

Velveted Chicken Breast : Chinese Technique for Ultra-Tender, Juicy Perfection
Description
Say goodbye to dry, chewy chicken forever! This classic Chinese technique, called velveting, transforms lean chicken breast into juicy, melt-in-your-mouth perfection. It’s simple, fast, and works for stir-fries, soups, salads, or rice bowls. Perfect for weeknight dinners or impressing friends without stress.
Ingredients
-
2 boneless, skinless chicken breasts (about 1 lb / 450 g)
-
1 ½ tsp baking soda
-
1 tbsp cornstarch
-
1 tbsp soy sauce (or tamari for gluten-free)
-
1 tbsp Shaoxing wine (or dry sherry / splash of chicken broth + pinch of sugar)
-
1 egg white (optional, for extra silkiness)
-
1 tbsp neutral oil (vegetable or canola), plus 1 tbsp for blanching water
-
Water (for poaching)
Instructions
1. Prep & Tenderize (15 min)
-
Slice chicken across the grain into ¼-inch thick pieces.
-
Toss with baking soda, coating evenly.
-
Let sit 15 minutes.
-
Rinse thoroughly under cold water, then pat dry.
Tip: Cutting against the grain ensures maximum tenderness.
2. Marinate (20 min – 1 hr)
-
In a clean bowl, whisk together cornstarch, soy sauce, Shaoxing wine, and egg white (if using).
-
Add chicken and 1 tbsp oil; toss until coated.
-
Marinate at room temperature for 20 minutes, or up to 1 hour in the fridge.
Tip: Don’t marinate too long—chicken can become too soft.
3. Velvet the Chicken
Option A: Blanching (recommended for stir-fries)
-
Bring a pot of water to a gentle simmer, add 1 tbsp oil.
-
Add chicken pieces in a single layer, stirring immediately to prevent sticking.
-
Cook 60–90 seconds until opaque and floating.
-
Drain; chicken will finish cooking in the stir-fry or final dish.
Option B: Stir-Fry (quick method)
-
Heat wok or skillet on high until very hot.
-
Add 2–3 tbsp oil.
-
Sear chicken in a single layer for 30 seconds without moving.
-
Stir-fry 1–2 more minutes until opaque. Remove immediately.
Tip: High heat and single layers prevent sticking and browning.
4. Serve
-
Add to stir-fries at the last 1–2 minutes to heat through.
-
Use in soups, noodle bowls, salads, or lettuce wraps.
-
Try creative twists like Lemon-Herb, Spicy Szechuan, or Coconut Curry Velvet (see notes below).
Notes
-
Egg White Magic: Optional, but creates the silkiest texture.
-
Freeze Ahead: Blanch, cool, flash-freeze, and store up to 2 months. Thaw before using.
-
Other Proteins: Works on shrimp and thinly sliced beef; adjust cooking times.
-
Flavor Boost: Don’t skip Shaoxing wine—it adds authentic depth.
Nutritional Information (A Pleasant Surprise!)
Here’s the fantastic thing about velveting: it makes lean chicken breast incredibly satisfying without adding a ton of extra calories or fat. The method is all about maximizing moisture and mouthfeel, not about drowning things in butter or oil.
Per Serving (approx. ¼ of the recipe):
Calories: ~180 kcal | Protein: 27g | Fat: 6g | Carbohydrates: 4g | Sodium: ~500mg (will vary based on soy sauce used).
Because the chicken stays so juicy and flavorful, you’ll find you’re perfectly happy with a reasonable portion. It’s a brilliant technique for healthy eating that doesn’t feel like a sacrifice. Pair it with a mountain of stir-fried vegetables and brown rice for a balanced, nutrient-packed meal that truly delights your taste buds.
Final Thoughts: Your Journey to Unbeatable Tenderness Begins Now
And there you have it—the simple, transformative secret that bridges the gap between home-cooked struggle and restaurant-quality triumph. Velveting isn’t just a recipe; it’s a fundamental shift in how you approach lean protein. It’s the realization that the most profound changes often come from the simplest techniques, not the longest ingredient lists.
Remember that feeling of cutting into a dry, chewy chicken breast? That’s a thing of the past. From this moment forward, you hold the key to consistently tender, succulent, and silky chicken. You’re not just following steps; you’re applying a piece of culinary wisdom passed down through generations—a humble, genius act of kitchen science that turns an everyday ingredient into something extraordinary.
So take this technique and make it your own. Start with that classic stir-fry you’ve always wanted to perfect, then get creative. Try those twists. Share it with a friend who’s given up on chicken breast. Experience that “aha!” moment for yourself, and then pass it on.
Because great cooking shouldn’t be a series of mysteries or disappointments. It should be a source of joy, connection, and pure, delicious satisfaction. You’ve got this. Now, go forth and velvet.
Tenderly yours,
Beau from Feastical

Confit-Style Chicken Breast : Slow-Cooked with Olive Oil, Garlic, and Herbs
Unbelievably Juicy Chicken, Without Any Fuss: Meet Your New Favorite Method
Hey there, friend! Beau here. Grab a stool and let’s talk about a little kitchen magic trick that sounds fancy but is secretly one of the easiest, most forgiving ways to cook chicken you’ll ever try. We’re talking about confit-style chicken breast. Now, I know what you might be thinking: “Confit? That’s duck legs swimming in fat in some fancy French bistro.” And you’re right, traditionally it is. But here at Feastical, we love taking those soul-warming, flavor-packed techniques and making them work for our real, sometimes chaotic, always hungry lives.
This method is a game-changer. Imagine the most succulent, tender, and melt-in-your-mouth chicken breast you’ve ever had. The kind that makes you close your eyes for a second after the first bite. We achieve that not by grilling or searing, but by gently slow-cooking the chicken, fully submerged in luxurious olive oil, with plenty of garlic and herbs. The oil acts like a cozy, temperature-controlled bath, cooking the chicken evenly and slowly so all the juices stay right where they belong—inside the meat. The result is chicken that’s rich, incredibly moist, and infused with the beautiful flavors of garlic, rosemary, and thyme in every single bite. It feels gourmet, it tastes like a million bucks, but I promise you, it’s as simple as pouring oil into a pot and letting time do the heavy lifting. Let’s dive in and turn an ordinary Tuesday into a mini culinary vacation.
The “Aha!” Moment in a Cozy Kitchen
This recipe always takes me back to my friend Leo’s tiny apartment kitchen. Leo is the kind of cook who believes the best meals are born from patience, not pressure. One rainy Sunday, he promised “the best chicken of my life,” and I was skeptical. He pulled out a pot, poured what seemed like a crazy amount of olive oil into it, and plopped in some chicken breasts. I raised an eyebrow. “You’re… boiling chicken in oil?” I asked. He just smiled. “Trust the process, Collier.”
An hour later, as the most incredible aroma of garlic and herbs filled the entire floor of his building, my skepticism vanished. That first forkful was a revelation. It wasn’t just cooked chicken; it was an experience—silky, deeply seasoned, and impossibly tender. It was a lesson in simplicity and technique over complexity. It taught me that sometimes, the most extraordinary flavors come from the gentlest, most patient methods. That’s the spirit I want to bring to your kitchen with this recipe. No stress, just incredible, feel-good food.
Gathering Your Flavor Allies
Here’s the beautiful part: the ingredient list is short and sweet. Quality really shines here, so use the best you have on hand. Don’t stress about perfection, though—this method is forgiving!
- 2 boneless, skinless chicken breasts: The star of our show! Look for breasts that are roughly the same size so they cook evenly. If they’re very thick, you can gently pound them to an even thickness for more consistent results. Chef’s Insight: This method also works wonders with chicken thighs for an even richer, more robust flavor.
- 1 cup extra virgin olive oil: Yes, a whole cup. Don’t panic! You’re not eating it all; it’s the cooking medium. A good, fruity extra virgin olive oil will impart lovely flavor. In a pinch, a neutral oil like avocado or a light olive oil works, but you’ll miss some of that depth.
- 6 garlic cloves, lightly crushed: Smash them with the flat side of your knife—just enough to crack them open and release their sweet, mellow flavor into the oil. No need to chop!
- 4 sprigs fresh thyme (or 1 teaspoon dried): Fresh herbs are fantastic here, releasing their oils slowly into the warm bath. If using dried, just sprinkle them right into the oil.
- 2 sprigs fresh rosemary (or 1 teaspoon dried): Rosemary and chicken are a match made in heaven. Its piney, fragrant notes are a backbone of flavor.
- Salt and black pepper to taste: Season confidently! The chicken needs a good coating on all sides. This is your primary seasoning, so make it count.
- Optional: lemon zest or red pepper flakes: Want to play? A few strips of lemon zest add a beautiful bright note. A pinch of red pepper flakes brings a subtle, warm heat. Toss them in with the herbs.
Your Roadmap to Juicy, Flavorful Perfection
Ready? Let’s cook. This is where we relax, take our time, and let the magic happen. Remember, low and slow is the name of the game.
- Prep the Chicken: Pat your chicken breasts completely dry with paper towels. This is a crucial step! Any surface moisture will cause the oil to sputter. Generously season both sides with salt and freshly ground black pepper. Let them sit for 5 minutes while you prep the oil—this helps the seasoning start to work its way in.
- Infuse the Oil: Choose a small saucepan, Dutch oven, or oven-safe dish where the chicken will fit snugly without too much extra space. Add the olive oil, smashed garlic cloves, thyme, and rosemary (and any optional additions like lemon zest). Warm this gently over the lowest possible heat on your stovetop for about 5 minutes. You’re looking for small bubbles around the garlic and a wonderfully fragrant kitchen. Chef’s Hack: Never let the oil boil or even simmer vigorously. We’re infusing, not frying. If it gets too hot, just pull it off the burner for a minute.
- The Gentle Bath: Carefully add the seasoned chicken breasts to the warm oil. They should be almost fully submerged. If they’re peeking out a bit, that’s okay—just spoon some of the hot oil over the tops every so often. Now, you have two fantastic options:
- Stovetop Method: Keep the heat on the absolute lowest setting. You should see tiny, lazy bubbles occasionally rising. Let the chicken poach gently for 50-70 minutes. No peeking every five minutes! Trust the process.
- Oven Method (My Favorite for Hands-Off Cooking): Preheat your oven to 250°F (120°C). Once the oil is warmed and infused on the stovetop, carefully transfer the whole pot (if it’s oven-safe) to the oven. Bake for 1 to 1.5 hours. The oven provides incredibly even, gentle heat.
The chicken is done when it reaches an internal temperature of 165°F (74°C) on an instant-read thermometer, and it feels incredibly tender when poked with a fork. It won’t be browned, and that’s perfect!
- The Golden Rule of Rest: Using tongs, carefully remove the chicken from the oil and place it on a cutting board or plate. Let it rest for a full 5-7 minutes. This allows the juices, which have been heated and excited, to relax and redistribute throughout the meat. If you slice it immediately, all those precious juices will run out. Patience pays off!
- Slice and Serve: Slice the chicken against the grain for the most tender bite. Drizzle a little of that now incredibly flavorful garlic-herb oil over the top. You are now a confit champion.
How to Plate This Beautiful Bird
This chicken is so versatile and rich, it pairs beautifully with simple, clean sides that can soak up or contrast that glorious infused oil.
- The Classic Plate: A big scoop of creamy mashed potatoes, fluffy rice, or buttery polenta is dreamy. Spoon some of the warm cooking oil right over the starch—it’s liquid gold.
- The Bright & Fresh Route: I love this alongside a huge, zippy arugula salad with a lemon vinaigrette, or a pile of simple roasted vegetables like asparagus, cherry tomatoes, or zucchini. The freshness cuts the richness perfectly.
- Next-Level Sandwich: Let the chicken cool slightly, then shred it with two forks. Pile it onto a crusty baguette with a smear of mayo, some arugula, and a drizzle of the garlic oil. Life-changing.
- Don’t Waste That Oil! Strain the leftover cooking oil through a fine-mesh sieve into a jar. Store it in the fridge for up to a week and use it to roast vegetables, sauté potatoes, or as the base for a killer salad dressing. It’s packed with flavor!
Make It Your Own: Flavor Twists & Swaps
Once you’ve mastered the basic method, the world is your flavor-infused oyster! Here are a few of my favorite twists:
- Sun-Drenched Mediterranean: Add strips of lemon zest, a couple of cracked fennel seeds, and a bay leaf to the oil. Serve the sliced chicken with a side of couscous and a dollop of tzatziki.
- Cozy Herbs de Provence: Swap the rosemary and thyme for a tablespoon of Herbs de Provence. The lavender notes make it feel extra special.
- Spicy ‘N’ Smoky: Add a teaspoon of smoked paprika and a pinch of red pepper flakes to the oil. This version is incredible shredded for tacos or on top of a corn and black bean salad.
- Dairy-Free & Decadent (Paleo/Whole30 Friendly): The recipe as written is already dairy-free! Just ensure your optional ingredients (like sausage for a variation) comply with your dietary needs.
- The Ultimate Comfort Bowl: After removing the chicken, toss some halved baby potatoes into the warm oil and roast them in the oven at 400°F until crispy. Serve the sliced chicken over the potatoes with steamed green beans.
A Few More Tidbits From My Kitchen
This recipe has become my go-to when I want to impress without stress. I’ve made it for first dates, busy weeknights, and lazy Sunday meal prep. It never fails. One time, I got distracted writing a recipe (the irony!) and left it in the oil for nearly two hours. You know what? It was still impossibly juicy and tender. That’s the beauty of this method—it’s incredibly forgiving as long as the heat stays low.
Over time, I’ve started adding a few more cloves of garlic because, why not? I also love throwing in a couple of whole black peppercorns for a subtle bite. The recipe evolves with your mood. The first time you make it, follow the steps. The tenth time, play with your favorite flavors. That’s how cooking becomes your own.
Your Questions, Answered
Q: I’m nervous about cooking with so much oil. Is it safe?
A. Totally valid! The key is gentle, low heat. We are not deep-frying. We are gently poaching. Use a heavy-bottomed pot, keep the heat on low (or use the oven), and you’ll have no issues. If you see the oil smoking or bubbling aggressively, the heat is too high.
Q: How do I know it’s done without overcooking it?
A. An instant-read thermometer is your best friend here. Insert it into the thickest part of the breast—it should read 165°F (74°C). Without a thermometer, the chicken will feel very tender when pierced with a fork, and the meat will be opaque all the way through when you cut into it after resting.
Q: Can I reuse the olive oil?
A. Yes! Let it cool, then strain it through a fine-mesh sieve or cheesecloth into a clean jar. Store it in the refrigerator for up to a week. Use it to add incredible flavor to roasted veggies, in a vinaigrette, or to start another confit. The flavor gets better!
Q: My chicken seems a bit bland. What happened?
A. This almost always comes down to seasoning. Be generous with the salt and pepper on the raw chicken. Also, ensure you’re using enough herbs and garlic to properly infuse the oil. Don’t be shy!

Confit-Style Chicken Breast : Slow-Cooked with Olive Oil, Garlic, and Herbs
Description
Slow-cooked in olive oil with garlic and herbs, this chicken is impossibly tender and packed with flavor. Hands-off, forgiving, and feels gourmet—perfect for weeknights or impressing guests.
Ingredients
-
2 boneless, skinless chicken breasts (even thickness recommended)
-
Salt & black pepper, to taste
-
1 cup extra virgin olive oil
-
6 garlic cloves, lightly crushed
-
4 sprigs fresh thyme (or 1 tsp dried)
-
2 sprigs fresh rosemary (or 1 tsp dried)
-
Optional: lemon zest or red pepper flakes
Instructions
-
Prep Chicken: Pat dry, season generously with salt and pepper. Let rest 5 minutes.
-
Infuse Oil: In a small saucepan or oven-safe pot, gently warm olive oil with garlic, thyme, rosemary, and any optional additions over very low heat for 5 minutes. Do not boil.
-
Cook Chicken:
-
Stovetop: Add chicken, keeping heat extremely low. Cook 50–70 minutes, spooning oil over chicken occasionally.
-
Oven (preferred): Preheat to 250°F (120°C). Add chicken to infused oil, bake 1–1.5 hours until internal temp reaches 165°F (74°C).
-
-
Rest & Slice: Remove chicken, rest 5–7 minutes. Slice against the grain. Drizzle some infused oil over the top.
Serving Suggestions
-
Classic: Mashed potatoes, rice, or polenta with garlic-herb oil.
-
Fresh & Bright: Arugula salad, roasted asparagus, cherry tomatoes, or zucchini.
-
Next-Level Sandwich: Shred and serve on a baguette with mayo, arugula, and a drizzle of oil.
Notes
-
Keep heat low—this is poaching, not frying.
-
Chicken is done at 165°F (74°C) or tender when pierced.
-
Reuse oil! Strain and refrigerate up to 1 week for roasting or dressings.
-
Generous seasoning = maximum flavor.
Nutritional Information (Per Serving)
Okay, let’s talk real talk. This is a rich, luxurious dish. It’s not a “diet” chicken recipe, but it’s made with wholesome, simple ingredients. The olive oil is a source of healthy monounsaturated fats. A serving (half a breast with a moderate amount of the infused oil) provides roughly:
- Calories: ~420
- Protein: 35g (Excellent for keeping you full!)
- Fat: 28g (Mostly the heart-healthy fat from the olive oil)
- Carbohydrates: 1g
- Fiber: 0g
Remember, a lot of the oil used in cooking is not consumed. For a lighter version, you can use slightly less oil (just enough to mostly cover) and be sure to let the chicken drain on a rack for a minute after cooking. Pair it with lots of veggies for a balanced, satisfying meal.
Your Ticket to Effortlessly Elegant Dinners
So there you have it—my not-so-secret secret for the most tender, flavorful chicken breast imaginable. This confit-style method is more than a recipe; it’s an invitation to slow down, to trust simple ingredients and gentle heat, and to create something that truly feels special. It’s proof that you don’t need a chef’s kitchen or complicated skills to make food that tastes like a warm, delicious hug.
I hope you give it a try and experience that same “aha!” moment I did in my friend’s kitchen all those years ago. When you do, I’d love to hear about it! Tag me over on Feastical or drop a comment. Now, go warm up that oil, and get ready for some serious, soul-satisfying goodness. Happy cooking, friend!
Final Thoughts: The Magic of Letting Go
There you have it—the not-so-secret secret to the most tender, flavorful chicken of your life. This isn’t just another recipe; it’s an invitation to slow down, trust the process, and embrace a different kind of cooking. In a world that often prizes speed and high heat, the gentle confit method is a quiet rebellion. It asks for your patience, not your panic. It rewards you with richness, not rush.
What I love most about this technique is how it mirrors a great life lesson: the best results often come from consistent, gentle pressure—not frantic force. You’re not searing, grilling, or stressing. You’re creating a cozy, flavorful environment and letting time work its magic. It’s forgiving, flexible, and deeply satisfying.
So, the next time you’re staring at a package of chicken breasts, wondering how to make them special without overcomplicating your evening, remember this pot of golden oil and herbs. Remember that extraordinary doesn’t have to be difficult. It can be as simple as turning the heat to low, walking away, and coming back to a kitchen filled with the aroma of garlic and rosemary, and chicken so juicy it feels like a celebration.
Give it a try. Make it your own. And most importantly, share it with someone you care about. Because food this good—simple, heartfelt, and made with a little bit of patience—is meant to be shared.

Avocado-Cucumber Salsa Chicken : Light, Fresh & Summer-Ready
Say Hello to Your New Favorite Summer Dinner
Hey friends, Beau here from Feastical! Can you feel it? That gorgeous, golden summer light stretching the evenings, the sound of a grill firing up down the street, and the undeniable craving for food that’s bright, fresh, and won’t weigh you down. If you’re nodding along, then you and I are on the exact same page. We want dinners that feel like a celebration of the season, not a sweaty, hours-long project in a hot kitchen.
That’s where this little masterpiece comes in. Let me introduce you to my Avocado-Cucumber Salsa Chicken. This isn’t just another chicken recipe; it’s a vibe. Imagine perfectly seared, juicy chicken breasts, still warm from the pan, getting absolutely buried under a mountain of cool, creamy, crunchy salsa. We’re talking ripe avocado, crisp cucumber, a zing of lime, and a confetti of fresh herbs. Every bite is a wild and wonderful contrast of warm and cool, savory and bright, hearty and refreshing.
It’s the dinner you make when you want something that tastes like you fussed, but secretly came together in under 30 minutes. It’s the meal that impresses dinner guests but is simple enough for a hectic Tuesday. It’s hydration and satisfaction in one gorgeous, colorful package. So, tie on your favorite apron (or don’t, I’m not the boss of you), grab your sharpest knife, and let’s make a dinner that tastes like summer on a plate.
The Cookout That Changed Everything
This recipe has a birthday, you know. It was born one sweltering July afternoon at my buddy Leo’s annual “Grill-Or-Be-Grilled” cookout. The rule was simple: bring a dish, but it couldn’t involve turning on his oven. The spread was legendary—heavy, saucy ribs, mountains of potato salad, decadent baked beans. It was all delicious, but about two plates in, under the blazing sun, we were all moving in slow motion, desperately wishing for something… light.
Then my friend Maria unveiled her contribution: a massive, chilled bowl of the chunki, most vibrant avocado-cucumber salsa I’d ever seen. She casually plopped a spoonful on top of her grilled chicken, and it was like a culinary lightning strike. That cool, creamy salsa cut through the richness of everything else on the plate. It was a revelation! I spent the rest of the party begging for her secrets (which were basically just great ingredients and a squeeze of lime). I went home obsessed, tweaking and testing until it became a full-fledged, chicken-topping, weeknight-saving star. Now, I can’t imagine summer without it.
Gathering Your Flavor Squad
Here’s the beautiful part: we’re working with simple, whole ingredients where freshness is the real superstar. Let’s break it down. You’ll need:
For the Chicken:
- 4 boneless, skinless chicken breasts: The canvas for our masterpiece. Look for breasts that are roughly the same size so they cook evenly. A quick pro-tip: if they’re super thick, place them between parchment paper and gently pound them to an even ½-inch thickness. It makes for faster, more uniform cooking.
- Salt & pepper to taste: The dynamic duo. Don’t be shy here—seasoning the chicken well is 80% of the flavor battle. I use coarse kosher salt and freshly cracked black pepper.
- 1 tbsp olive oil: Our cooking fat. It has a higher smoke point than butter for searing and adds a lovely, fruity note. Avocado oil works great here too.
- 1 tsp garlic powder: This is our flavor cheat code! While fresh garlic is king in the salsa, garlic powder adheres to the chicken and creates a delicious, golden crust without burning.
- 1 tsp paprika (optional, for color): Totally optional, but I love it. It doesn’t add much heat, but it gives the chicken a gorgeous, sun-kissed color and a tiny bit of smoky depth. Smoked paprika is a fun twist!
For the Avocado-Cucumber Salsa:
- 1 large avocado, diced: The heart of the salsa. Pick one that’s just ripe—it should yield slightly to gentle pressure. Too soft, and it’ll turn to mush. Pro tip: dice it last, right before mixing, to keep it looking pretty and green.
- 1 cup cucumber, diced: The crisp, hydrating crunch. I prefer English or Persian cucumbers because their seeds are smaller and less watery. If using a regular cucumber, I’ll often scoop out the watery seed core with a spoon before dicing.
- Juice of 1 lime: The magic spark! The acid not only adds zing but also helps slow down the avocado’s browning. Always use fresh lime juice—the bottled stuff just doesn’t compare in a fresh salsa.
- 1 tbsp olive oil: A little fat to bring the salsa together and add a silky mouthfeel. It helps the lime juice and herbs coat every cube beautifully.
- 1 tbsp chopped fresh cilantro or parsley: The fresh finish! Cilantro gives a classic, bright Mexican vibe. If you’re one of those folks who thinks cilantro tastes like soap (no judgment!), flat-leaf parsley is a fantastic, fresh substitute. Dill is also a surprisingly delicious option here.
- Salt to taste: Just a pinch to wake up all the flavors. Taste, then season.
Let’s Get Cooking: Your Foolproof Roadmap
Ready to make some magic? Follow these steps, and you’ll have a restaurant-quality dish with minimal fuss. Let’s do this!
- Prep Like a Pro. Before you even turn on the stove, take your chicken breasts out of the fridge. Pat them completely dry with paper towels. This is the single best trick for getting a gorgeous, golden sear instead of a steamed, pale chicken. While they’re coming to room temp for about 10 minutes (which helps them cook evenly), dice your cucumber and herbs.
- Season with Confidence. Drizzle the chicken breasts with a little olive oil and rub it all over. Now, season both sides generously with salt, pepper, garlic powder, and that optional paprika. Really let the seasoning coat every nook and cranny. This builds the flavor foundation.
- Sear to Perfection. Heat a large skillet (cast iron or stainless steel is ideal) over medium-high heat. Add the remaining olive oil. Once the oil is shimmering (not smoking!), carefully add the chicken breasts. Listen for that satisfying sizzle! Don’t touch them for 5-6 minutes. Let a beautiful, golden crust form. Peek at the edges—when they look browned, flip them over.
- Cook Through & Rest. Cook on the second side for another 5-7 minutes, depending on thickness. The safest way to check is with an instant-read thermometer inserted into the thickest part—you’re aiming for 165°F. Once done, transfer the chicken to a plate or cutting board and let it rest for 5 minutes. This is non-negotiable! It lets the juices redistribute, ensuring every bite is succulent, not dry.
- Make the Salsa (Quickly!). While the chicken rests, dice your avocado. In a medium bowl, gently toss together the avocado, cucumber, lime juice, olive oil, herbs, and a pinch of salt. I use my hands or a silicone spatula to be extra gentle and keep those avocado cubes intact. Taste and adjust—maybe it needs another squeeze of lime or pinch of salt.
- Assemble & Devour. Slice your rested chicken breasts if you like, or leave them whole. Place them on a serving platter or individual plates. Spoon a huge, generous mound of the chilled avocado-cucumber salsa over the top. The contrast is everything!
How to Plate Your Summer Masterpiece
This dish is a stunner all on its own, but a few thoughtful sides can turn it into a full-blown feast. Here’s how I love to serve it:
The Simple Bed: For a low-carb, super-fresh meal, serve the chicken and salsa over a big bed of crisp greens like romaine, butter lettuce, or arugula. The salsa acts as its own delicious dressing.
The Hearty Base: To make it more filling, spoon everything over a fluffy mound of cilantro-lime rice, quinoa, or couscous. The grains soak up any extra lime juice and avocado essence, and it’s absolutely delicious.
The Grill Master’s Spread: If you’re already outside grilling the chicken (highly recommended for smoky flavor!), round out the meal with grilled corn on the cob, zucchini, or asparagus. The smoky char from the grill pairs amazingly with the cool salsa.
Final Garnishes: Don’t forget the finishing touches! I always serve with extra lime wedges for squeezing and maybe a few extra herb leaves scattered over everything. A light drizzle of hot sauce or a sprinkle of chili flakes is also fantastic for those who like a kick.
Make It Your Own: Fun Twists & Swaps
One of the best things about this recipe is its flexibility. Play with it! Here are a few of my favorite riffs:
- Protein Swap: Not feeling chicken? This salsa is a universal delight. Try it on pan-seared salmon, grilled shrimp skewers, seared scallops, or even piled on top of black bean burgers for a meatless Monday.
- Fruity Fusion: Add a cup of diced mango or peaches to the salsa for a sweet-and-savory explosion. It’s next-level delicious.
- Spice It Up: Infuse some heat by adding a finely minced jalapeño or serrano pepper to the salsa. Start with half and taste! You can also add a pinch of cayenne or chili powder to the chicken seasoning.
- The “Everything” Salsa: Add texture with a handful of diced red bell pepper, sweet corn (fresh off the cob or thawed from frozen), or black beans for extra protein and fiber.
- Herb Garden Medley: Beyond cilantro and parsley, try fresh mint, basil, or chives for a completely different aromatic profile. Dill is particularly great with cucumber.
Beau’s Kitchen Confidential
Over the years, this recipe has become a trusted friend in my kitchen. The biggest lesson I’ve learned? Timing is everything. I used to make the salsa first, and by the time the chicken was done, the avocado had started to brown. Now, I always prep the salsa ingredients (except the avocado) while the chicken cooks, and dice the avocado at the very last second. Game changer.
Another funny fail turned win: I once accidentally used cumin instead of paprika on the chicken. It was a happy accident! The warm, earthy note of the cumin paired surprisingly well with the cool salsa. So don’t be afraid to experiment—sometimes the best recipes come from a little kitchen chaos.
Your Questions, Answered
Q: Can I make the salsa ahead of time?
A: You can prep the cucumber and herbs ahead and keep them chopped in the fridge. But for the love of all things green and beautiful, dice and add the avocado right before serving. If you must prep it all ahead, press a piece of plastic wrap directly onto the surface of the salsa to limit air exposure, but expect some slight browning.
Q: My chicken always turns out dry. What am I doing wrong?
A> I feel you! Two key things: 1) Don’t overcook it. Use that meat thermometer and pull it at 165°F. 2) LET IT REST. Those 5 minutes off the heat are crucial for juicy meat. Also, pounding thicker breasts to an even thickness prevents the thin parts from drying out while the thick part cooks.
Q: I don’t have fresh herbs. Can I use dried?
A: For the salsa, fresh is really non-negotiable for texture and bright flavor. In a pinch, you could add a tiny pinch (¼ tsp) of dried cilantro or dill to the salsa, but the texture will be different. For the chicken seasoning, dried herbs and spices are perfect.
Q: How do I store leftovers?
A> The chicken will keep separately in an airtight container in the fridge for 3-4 days. The salsa, unfortunately, is best enjoyed immediately. The avocado will brown and the cucumber will weep, making it soggy. I recommend only making as much salsa as you’ll eat that night.

Avocado-Cucumber Salsa Chicken : Light, Fresh & Summer-Ready
Description
A summer favorite! Juicy seared chicken breasts topped with a cool, creamy avocado-cucumber salsa. Light, flavorful, and perfect for weeknights or cookouts.
Ingredients
For the Chicken:
-
4 boneless, skinless chicken breasts (pounded to even ½-inch thickness if thick)
-
Salt & pepper, to taste
-
1 tbsp olive oil (or avocado oil)
-
1 tsp garlic powder
-
1 tsp paprika (optional, for color)
For the Salsa:
-
1 large avocado, diced
-
1 cup cucumber, diced (English or Persian preferred)
-
Juice of 1 lime
-
1 tbsp olive oil
-
1 tbsp fresh cilantro or parsley, chopped (dill optional)
-
Salt, to taste
Instructions
-
Prep chicken: Pat dry, season with salt, pepper, garlic powder, and paprika.
-
Cook chicken: Heat oil in a skillet over medium-high heat. Sear chicken 5–6 minutes per side until golden and cooked through (165°F internal temperature). Transfer to a plate to rest 5 minutes.
-
Make salsa: While chicken rests, gently toss avocado, cucumber, lime juice, olive oil, herbs, and salt in a bowl. Dice avocado last to prevent browning.
-
Serve: Place chicken on a platter or plates, spoon a generous amount of salsa on top, and enjoy immediately.
Serving Suggestions
-
Low-carb: Serve over a bed of greens.
-
Hearty: Spoon over cilantro-lime rice, quinoa, or couscous.
-
Grill-friendly: Pair with grilled corn, zucchini, or asparagus.
-
Garnish: Extra lime wedges, herbs, or a sprinkle of chili flakes.
Notes
-
Protein swaps: Salmon, shrimp, scallops, or black bean burgers all work beautifully.
-
Fruity twist: Add diced mango or peaches to the salsa.
-
Spicy: Add jalapeño, serrano, cayenne, or chili powder to taste.
-
Herb swaps: Mint, basil, or chives for a different aroma.
Feeling Good About What You’re Eating
This dish isn’t just delicious; it’s nourishing! It’s packed with lean protein from the chicken to keep you full, and healthy monounsaturated fats from the avocado and olive oil, which are great for heart health. The cucumber adds hydration and a bit of fiber, and the lime juice gives you a dose of vitamin C.
Estimated Nutritional Info (Per Serving):
- Calories: ~370
- Protein: 34g (Excellent for muscle repair and satiety!)
- Carbohydrates: 6g (Mostly from the veggies, making this a great low-carb option)
- Fat: 22g (The good kind, from avocado and olive oil)
- Fiber: 4g
Remember, these are estimates based on the specific ingredients used. For the most accurate counts, use a nutrition calculator with your exact brands and quantities.
Your Summer Kitchen Just Got Cooler
And there you have it, friends—my go-to recipe for when the sun is high and the appetite is for something spectacularly fresh. This Avocado-Cucumber Salsa Chicken is more than just dinner; it’s a reminder that the best meals are often the simplest, built on great ingredients and bold contrasts.
I hope this recipe finds its way to your table on a warm evening, maybe with some good music playing and even better company. Give it a try, make it your own with the variations, and most importantly
Final Thoughts: Say Hello to Your New Favorite Summer Dinner
This, right here, is more than just a recipe. It’s a promise. A promise that dinner can be both breathtakingly delicious and wonderfully simple. A promise that you don’t have to choose between food that feels like a celebration and food that fits into a busy life. In the time it takes for the evening light to turn golden, you can have a plate full of color, crunch, and cool satisfaction in front of you.
That’s the true gift of this Avocado-Cucumber Salsa Chicken. It’s a masterclass in contrasts—the warm, savory sear of the chicken meeting the cool, zesty salsa—that somehow creates perfect harmony. It’s a dish that listens to the season, delivering hydration, freshness, and flavor in every single bite.
So, as we wrap up, remember this: the best summer memories are often made at the table, with food that makes you feel good. This dish is your ticket to that feeling. It’s proof that a “vibe” can indeed be cooked in under 30 minutes.
Give it a try this week. Let it become your secret weapon for impromptu gatherings, your relief on sweltering nights, your answer to the question, “What’s for dinner?” I have a feeling it’s going to earn a permanent spot in your warm-weather rotation.

Creamy Chicken Marsala Breast : Rich Mushroom-Wine Sauce in 30 Minutes
Creamy Chicken Marsala Breast: Your New Favorite 30-Minute Comfort Food
Hey friends, Beau here! Let me paint a picture for you: It’s Tuesday evening. You’ve had a day, the family is asking that infamous question (“what’s for dinner?”), and you want something that feels special without spending hours chained to the stove. You want that restaurant-worthy sigh of satisfaction without the fuss. I see you, I’ve been you, and that’s exactly why this Creamy Chicken Marsala Breast recipe is about to become your weeknight superhero.
This isn’t just another chicken recipe. This is a golden, seared piece of comfort swimming in a velvety, deeply savory sauce packed with earthy mushrooms and the warm, nutty sweetness of Marsala wine. It’s elegant enough for a date night in but simple enough to whip up on a regular Wednesday. The magic happens all in one skillet, and in about the time it takes to watch a sitcom, you’ll have a meal that tastes like you fussed for hours.
So, tie on your apron (or don’t—no judgment here), grab your favorite skillet, and let’s transform your dinner routine. I’m walking you through every step, sharing all my little chef secrets, so you can nail this dish on the very first try. Get ready to make your kitchen smell incredible!
The Night Uncle Sal Taught Me About “The Glug”
This recipe always takes me back to my Uncle Sal’s tiny, always-steamy kitchen. He was the kind of cook who measured with his heart and his palm. The first time I saw him make Marsala, I was mesmerized. He seared the chicken until it sang in the pan, tossed in mushrooms like he was dealing cards, and then—the best part—he grabbed the bottle of Marsala.
“Listen, kid,” he said, with a dramatic pause. “The wine isn’t an ingredient. It’s a guest. You don’t just pour it; you welcome it.” And with that, he gave the pan a generous, confident glug-glug-glug. The sizzle, the burst of aromatic steam… it was culinary theater. That “glug” was his measurement, and it was always perfect. He taught me that good cooking isn’t about rigid precision; it’s about confidence, a little flair, and understanding how flavors live together. Every time I make this sauce and hear that sizzle, I think of him. It’s a recipe that’s not just in my skillet, but in my story.
Gathering Your Flavor Crew: Ingredients & Insights
Here’s your shopping list for deliciousness. Think of these not just as items, but as the team players that create the final, harmonious dish. I’ve added my notes so you know exactly what each one brings to the party.
- 4 Boneless, Skinless Chicken Breasts: The star of the show! We’re going to pound them to an even thickness. Why? It’s the #1 trick for preventing the dreaded dry, overcooked edges while the middle is still raw. It ensures quick, even cooking.
- 1/2 tsp Each of Salt & Black Pepper: Our simple but essential seasoning. We season the chicken directly—this is flavor building from the inside out.
- 1/4 Cup All-Purpose Flour: This quick dredge isn’t for a heavy batter; it’s for creating a beautiful, golden crust that also helps thicken our sauce later. Chef’s Tip: For a gluten-free version, a 1-to-1 GF flour blend works perfectly here.
- 2 Tbsp Olive Oil & 1 Tbsp Butter (for searing): The dynamic duo! Oil handles the high heat, while butter gives us that gorgeous, nutty browning and rich flavor. Don’t skip the combo.
- 8 oz Cremini or White Mushrooms, Sliced: Cremini (baby bellas) have a bit more depth than white buttons, but both are fantastic. They’re our “umami bombs,” releasing moisture and soaking up all the sauce’s goodness.
- 2 Garlic Cloves, Minced: Fragrant, pungent, and non-negotiable. Add it after the mushrooms so it doesn’t burn and turn bitter.
- 3/4 Cup Marsala Wine: The soul of the sauce! You can find it near the vinegar or fortified wines. “Dry” Marsala is more traditional and savory. “Sweet” Marsala gives a richer, rounder sweetness. Use what you like! Substitution: In a true pinch, a mix of 1/2 cup dry white wine + 2 Tbsp brandy or sherry + a tiny pinch of sugar can mimic the flavor.
- 1/2 Cup Chicken Broth: Our flavorful liquid base. Low-sodium is best so you control the salt. A good-quality stock makes a difference!
- 1/3 Cup Heavy Cream: This is what transforms the sauce from great to “oh-my-goodness” luscious. It creates a velvety, luxurious texture that clings to every bite. For a lighter version, half-and-half works, but the sauce will be a bit thinner.
Let’s Get Cooking: Your Foolproof Step-by-Step Guide
Ready? Let’s fire up the stove. Follow these steps, and you’re guaranteed a perfect dish. I’m chatting you through each one with my best tips.
- Prep the Chicken: Place each chicken breast between two pieces of plastic wrap or in a large zip-top bag. Using the flat side of a meat mallet, a rolling pin, or even a heavy skillet, gently pound them to an even ½-inch thickness. This is your secret weapon for tender, evenly cooked chicken! Season both sides generously with the salt and pepper, then lightly dredge each piece in the flour, shaking off any excess.
- Sear to Perfection: Heat the olive oil and 1 tablespoon of butter in a large skillet over medium-high heat. Once the butter is foaming (that’s your cue it’s hot enough), add the chicken. Don’t crowd the pan—cook in batches if needed. Let them cook, undisturbed, for 4-5 minutes per side until gloriously golden brown and cooked through. Transfer them to a clean plate. Chef’s Hack: That beautiful browned stuff stuck to the pan? That’s called “fond,” and it’s pure flavor gold. We’re using it next!
- Build the Sauce Base: In the same, now-empty skillet, melt the remaining 1 tablespoon of butter over medium heat. Add the sliced mushrooms and sauté for 5-7 minutes. You’ll see them release their water and then start to brown beautifully. This is where their flavor deepens. Now, stir in the minced garlic and cook for just 30 seconds until fragrant—don’t let it burn!
- The Grand “Glug” (Deglazing): Here comes the fun part! Pour in the Marsala wine. It will sizzle and steam dramatically. Use your spoon to scrape up all those delicious browned bits (the fond!) from the bottom of the pan. This is deglazing, and it’s the key to a sauce with deep, complex flavor. Let it simmer for 2-3 minutes to cook off the raw alcohol edge.
- Simmer and Reduce: Pour in the chicken broth and let the sauce bubble away for about 5 minutes. You’ll notice it start to reduce and thicken slightly. This concentrates all the wonderful flavors.
- Finish with Cream and Serve: Reduce the heat to low. Stir in the heavy cream. Now, lovingly return the chicken breasts and any accumulated juices back to the skillet. Spoon the sauce over them and let everything simmer together gently for 3-5 more minutes, allowing the sauce to thicken further and the chicken to heat through. The sauce should coat the back of a spoon. Give it a final taste and adjust salt and pepper if needed.
Plating Up: How to Serve Your Masterpiece
Presentation is the last little touch of love! I like to place a chicken breast right in the center of a shallow bowl or plate. Ladle a generous amount of that creamy mushroom sauce over the top, making sure every nook and cranny gets some love. The final flourish? A sprinkle of freshly chopped parsley or chives adds a pop of color and a fresh note that cuts through the richness beautifully.
Now, what to serve alongside? You’ve got options! My absolute favorite is a big pile of creamy mashed potatoes or soft polenta—they’re like edible spoons for that incredible sauce. Buttered egg noodles or fettuccine are a classic, easy choice. For something lighter, a simple roasted vegetable like asparagus or green beans, or a crisp arugula salad with a lemony vinaigrette works wonders. Don’t forget a crusty piece of bread for sopping up every last drop of sauce—that’s non-negotiable in my house!
Make It Your Own: Delicious Twists & Swaps
Once you’ve mastered the classic, have fun playing with it! Here are a few of my favorite ways to mix things up.
- Herb-Infused: Add 1 teaspoon of fresh chopped thyme or rosemary to the mushrooms as they sauté. It adds an aromatic, woodsy layer that’s just divine.
- Prosciutto & Peas: For a salty, savory kick, crisp up 2-3 ounces of diced prosciutto or pancetta before cooking the mushrooms. Remove, then proceed. Stir the crispy bits and a handful of frozen peas into the sauce with the cream.
- Dairy-Free/Deluxe: Swap the heavy cream for full-fat canned coconut milk for a rich, dairy-free alternative. The flavor is slightly different but wonderfully creamy. For an ultra-luxe version, use crème fraîche instead of cream for a lovely tang.
- Pork or Veal Marsala: The method works beautifully with thin pork chops or pounded veal cutlets. Adjust the searing time as they may cook faster than chicken.
- “More Mushroom” Madness: Use a mix of wild mushrooms like shiitake, oyster, and chanterelle for an incredible, restaurant-quality depth of flavor.
Beau’s Kitchen Notebook
Over the years, this recipe has seen some fun experiments. I once accidentally used sweet Marsala when I meant to use dry, and you know what? My dinner guests raved about it—it was a happy accident that stuck! I’ve also learned that letting the chicken rest for a few minutes after searing (while you start the sauce) keeps it incredibly juicy. And a word on that sauce: if it seems a bit thin after adding the cream, just let it simmer for an extra few minutes. It will thicken up as it reduces. If it gets too thick, a splash of extra broth will loosen it right up. Cooking is fluid, just like that sauce!
Your Questions, Answered
- Q: Can I make this ahead of time?
A: Absolutely! You can sear the chicken and make the sauce up to a day ahead. Store them separately in the fridge. To serve, gently reheat the sauce, add the chicken, and simmer until everything is heated through. You may need to add a splash of broth to the sauce if it’s too thick. - Q: My sauce broke/ looks curdled. What happened?
A: This usually happens if the heat is too high when you add the cream or if there’s too much acid (wine) in ratio to the fat. Don’t panic! Remove the pan from the heat and vigorously whisk in a tablespoon of cold butter or a splash more cream. It should come right back together. - Q: What’s the best substitute for Marsala wine if I don’t have any?
A: While Marsala is ideal, a combination of dry sherry or even a dry white wine like Chardonnay or Sauvignon Blanc, with a tiny teaspoon of brown sugar or maple syrup to mimic Marsala’s characteristic sweetness, works in a pinch. - Q: How do I know when the chicken is done?
A: The best way is to use an instant-read thermometer inserted into the thickest part. It should read 165°F (74°C). If you don’t have one, cut into the thickest piece—the juices should run clear, not pink.

Creamy Chicken Marsala Breast : Rich Mushroom-Wine Sauce in 30 Minutes
Description
Golden seared chicken, earthy mushrooms, and a velvety Marsala cream sauce—restaurant-worthy but simple enough for any night.
Ingredients
-
4 boneless, skinless chicken breasts, pounded to ½-inch thickness
-
½ tsp salt & ½ tsp black pepper
-
¼ cup all-purpose flour (or GF flour blend for gluten-free)
-
2 Tbsp olive oil
-
1 Tbsp butter (plus 1 Tbsp for sauce)
-
8 oz cremini or white mushrooms, sliced
-
2 garlic cloves, minced
-
¾ cup Marsala wine (dry preferred)
-
½ cup chicken broth (low-sodium)
-
⅓ cup heavy cream (or half-and-half for lighter version)
-
Optional: fresh parsley or chives, for garnish
Instructions
-
Prep the Chicken:
-
Pound breasts to even thickness.
-
Season with salt and pepper.
-
Lightly dredge in flour, shaking off excess.
-
-
Sear Chicken:
-
Heat oil + 1 Tbsp butter in a skillet over medium-high.
-
Cook chicken 4–5 min per side until golden and cooked through. Remove to plate.
-
-
Cook Mushrooms & Garlic:
-
In the same skillet, melt remaining butter.
-
Sauté mushrooms 5–7 min until browned.
-
Stir in garlic for 30 seconds.
-
-
Deglaze & Build Sauce:
-
Pour in Marsala wine. Scrape pan to lift fond.
-
Simmer 2–3 min to cook off alcohol.
-
Add chicken broth; simmer 5 min to reduce slightly.
-
-
Finish Sauce & Chicken:
-
Reduce heat to low, stir in cream.
-
Return chicken + juices to skillet; simmer 3–5 min until sauce coats a spoon.
-
Taste and adjust salt/pepper.
-
-
Serve:
-
Plate chicken, spoon sauce over top.
-
Garnish with parsley or chives.
-
Notes
-
Use a meat thermometer: 165°F (74°C) for perfect chicken
-
Don’t burn garlic—add after mushrooms
-
If sauce looks broken: remove from heat, whisk in cold butter or extra cream
Nutritional Information*
*This is an approximate estimate per serving (one chicken breast with sauce), calculated using standard ingredients. Values may vary based on specific brands and measurements used.
- Calories: 440
- Protein: 38g (That’s a fantastic, satisfying amount!)
- Fat: 26g
- Saturated Fat: 11g
- Carbohydrates: 9g
- Fiber: 1g
- Sugar: 3g
- Sodium: ~500mg (Can be lowered by using low-sodium broth and adjusting added salt)
This dish is a great source of high-quality protein and provides energy from both fats and carbohydrates. To lighten it up slightly, you can use half-and-half and reduce the butter by a tablespoon, though the richness will be less decadent.
Final Thoughts from My Kitchen to Yours
And there you have it, friends—my go-to recipe for turning an ordinary evening into something a little extraordinary. This Creamy Chicken Marsala is more than just dinner; it’s a reminder that incredible flavor doesn’t have to be complicated. It’s about the sizzle, the smell, the shared smiles around the table.
I hope this recipe brings as much joy to your kitchen as it has to mine (and Uncle Sal’s). Give it a try, make it your own, and most importantly, have fun with it. Cooking should feel like a creative hug, not a homework assignment.
If you make it, I’d love to hear how it turned out! Tag me over on Feastical or drop a comment. Now, go forth and cook something delicious. Until next time, keep your skillet hot and your heart full.
– Beau

Ground Chicken Burrito Bowls : Quick, Fresh, and Packed with Flavor
Ditch the Takeout Menu: Your 30-Minute Flavor Escape Awaits
Hey friends, Beau here! Let’s get real for a second. How many times this week have you found yourself staring blankly into the fridge at 6 PM, your stomach rumbling, and your energy tank on absolute empty? You want something good. Something that feels like a treat but doesn’t leave you in a food coma or scrolling through delivery apps for an hour. I see you, and I’ve been you. That’s exactly why I’m practically jumping out of my apron to share this recipe with you today.
Meet your new kitchen BFF: Ground Chicken Burrito Bowls. This isn’t just another “healthy bowl” recipe. This is a vibrant, textural fiesta in a dish that comes together faster than you can say “extra guac, please.” We’re talking tender, warmly spiced ground chicken piled high over fluffy rice, paired with cool, crisp romaine, sweet corn, hearty black beans, and those juicy little pops of cherry tomato. And the crowning glory? A tangy, creamy drizzle that ties every single glorious bite together.
The magic here is in the balance and the freedom. It’s wholesome without feeling restrictive, packed with protein and fiber to keep you fueled, and endlessly customizable to please every picky eater at your table (or just your own mood!). It’s the ultimate feel-good food that actually makes you feel good after eating it. So, grab your favorite big bowl—this is a recipe that’s about to earn a permanent spot in your weekly lineup. Let’s make dinner something to look forward to again!
The Bowl That Started It All: A Taste of Freedom
My love affair with the burrito bowl began long before it was a trendy menu staple. Picture a much younger Beau, fresh out of college, living in a tiny apartment with a kitchen the size of a postage stamp. My “gourmet” repertoire consisted of scrambled eggs and ramen. Then, a friend dragged me to this no-frills, order-at-the-counter spot. I watched, mesmerized, as they built this beautiful, architectural masterpiece in a bowl right before my eyes. Layer upon layer of color and texture. It wasn’t just food; it was an experience.
I took that first bite and had a full-on culinary epiphany. This was it! This was how I wanted to eat—big, bold flavors, everything fresh and distinct yet harmonizing perfectly. It felt nourishing and indulgent all at once. I went home and immediately tried to recreate it, starting with ground beef (it was all I had). Over the years, I’ve tweaked and played, landing on ground chicken as my personal favorite for its lighter feel and fantastic ability to soak up all those beautiful spices. That humble bowl taught me that incredible meals don’t need to be complicated. They just need heart, a few good ingredients, and the courage to pile everything you love into one dish. This recipe is my homage to that first, eye-opening bite.
Gathering Your Flavor Arsenal: Ingredients & Chef Insights
Here’s everything you need to build your masterpiece. Think of this as your flavor toolkit—every item has a purpose, and I’ve got some easy swaps in case you need to improvise!
For the Spiced Ground Chicken:
- 1 lb ground chicken: I prefer a mix of white and dark meat for the best flavor and moisture, but lean ground chicken breast works great too! Chef’s Insight: Don’t pack it too tightly in the pan—let it crumble and brown for perfect texture.
- 1 tbsp olive oil: Our cooking fat for that perfect sizzle. Avocado oil is a great high-heat alternative.
- 1 tsp chili powder, 1 tsp cumin, ½ tsp smoked paprika: The holy trinity of warmth, earthiness, and that subtle smokiness. This is your flavor base! No smoked paprika? Regular paprika works, but you’ll miss that depth.
- ½ tsp garlic powder: For that all-over garlicky goodness without worrying about burnt minced garlic. Fresh garlic (2 cloves, minced) is amazing if you have it—add it with the spices!
- Salt and pepper to taste: Never an afterthought. Season generously.
- 2 tbsp tomato paste: This is our secret weapon for rich, concentrated flavor and helping the spices cling to the chicken. Look for the stuff in a tube—it’s a fridge lifesaver!
- ¼ cup water: This deglazes the pan, picking up all the tasty browned bits (the “fond”), and creates a quick, glossy sauce for the chicken.
For the Bowl Assembly:
- 2 cups cooked white rice: Fluffy jasmine or basmati is my go-to. Pro Tip: Cook your rice with a bay leaf or a squeeze of lime juice for an extra flavor boost. Brown rice, quinoa, or cilantro-lime rice are fabulous healthy swaps!
- 1 cup canned black beans, rinsed: Adds protein, fiber, and a creamy texture. Rinsing them removes excess sodium and that starchy can liquid. Pinto beans are a delicious alternative.
- 1 cup corn kernels: I use frozen corn warmed in the microwave or a skillet for sweet pops of flavor. Fresh-off-the-cob corn in summer is *chef’s kiss*.
- 1 cup cherry tomatoes, chopped: They bring juicy, bright acidity. Halve them, quarter them, or leave them whole if they’re small!
- Fresh romaine lettuce, chopped: For that essential crisp, cool crunch. Shredded kale, spinach, or mixed greens work too.
- 1 lime, cut into wedges: Non-negotiable! A fresh squeeze of lime juice right at the end wakes up every single flavor.
For the Creamy Drizzle:
- ¼ cup Greek yogurt or sour cream: Greek yogurt gives you tang and protein, sour cream gives you classic richness. Either is perfect. For a dairy-free version, thin some avocado with lime juice.
- 1 tbsp lime juice: Freshly squeezed, please! It balances the creaminess.
- ½ tsp garlic powder: A little extra zip.
- Dash of hot sauce (optional): I love a few dashes of Cholula or Tapatío here. It’s your bowl—make it sing!
Let’s Build Your Bowl: A Step-by-Step Flavor Journey
Ready to cook? Put on some tunes, pour yourself a drink, and let’s have some fun. This is where the magic happens, and I’m walking you through every step.
- Prep Your Players (Mise en Place): Before you even turn on the stove, chop your tomatoes, rinse your beans, and get your spices measured and ready. This “mise en place” (everything in its place) is the secret to stress-free, smooth cooking. It turns dinner from a frantic race into a relaxed ritual. While you’re at it, whisk together your creamy drizzle in a small bowl and pop it in the fridge.
- Brown That Chicken: Heat the olive oil in a large skillet over medium-high heat. Add the ground chicken, using your spoon or spatula to break it up into small, bite-sized crumbles. Let it cook undisturbed for a minute to get some good browning—that’s FLAVOR! Then stir and continue cooking until it’s no longer pink. Chef Hack: If there’s a lot of liquid, just drain it off quickly. We want to brown, not boil.
- Spice It Up & Sauce It: Reduce the heat to medium. Push the chicken to one side of the skillet and add the tomato paste to the empty space. Let it cook for 30 seconds—this “toasts” it slightly and deepens its flavor. Now, add all your spices (chili powder, cumin, garlic powder, smoked paprika) right on top of the tomato paste, stir them into the paste for 10 seconds to awaken their oils, and then mix everything into the chicken. It should smell incredible! Pour in the water and stir, scraping up any browned bits from the bottom of the pan. Let it simmer for 5-7 minutes until the mixture is cohesive and the liquid has reduced to a glossy coating. Season with salt and pepper. Taste it! This is your moment to adjust.
- The Grand Assembly: This is the best part. Grab your bowls—the bigger, the better. Start with a warm base of fluffy rice. Then, artfully (or just enthusiastically!) pile on the spiced chicken, black beans, corn, and tomatoes. Top with a generous handful of crisp romaine lettuce for that fresh contrast.
- The Finishing Touches: Drizzle that cool, creamy sauce all over the top. Don’t be shy. Finally, squeeze a wedge of fresh lime juice over everything. This bright, acidic pop is the final chord that makes the whole symphony sing.
How to Serve & Savor Your Creation
Presentation is part of the joy! I love serving these bowls family-style. Pile the chicken in a serving dish, arrange all the toppings in little bowls (think: beans, corn, tomatoes, lettuce, extra lime wedges, maybe some shredded cheese or avocado), and let everyone build their own perfect bowl. It’s interactive, fun, and guarantees happy eaters.
For a solo dinner or meal prep, layer your ingredients in a glass container with the rice and chicken on the bottom, then veggies, then lettuce on top with the creamy drizzle in a separate small container. Keep the lime wedge on the side. When you’re ready to eat, just shake it up, squeeze the lime, and drizzle the sauce for a lunch that feels freshly made. Pair it with a cold glass of iced tea, a light beer, or a fizzy agua fresca!
Make It Your Own: 5 Delicious Twists
The beauty of this bowl is its versatility. Once you master the base, the world is your taco. Here are a few of my favorite riffs:
- Taco Tuesday Twist: Swap the spices for 1 packet of your favorite taco seasoning. Add a can of diced green chiles to the chicken and top with crushed tortilla chips and a spoonful of pico de gallo.
- Mediterranean Escape: Use ground lamb or turkey. Season with oregano, thyme, and a pinch of cinnamon. Swap the black beans for chickpeas, the corn for cucumber, and the creamy drizzle for a lemon-garlic tahini sauce.
- Asian-Inspired Bliss: Season the chicken with ginger, soy sauce (replace the salt), and a touch of sesame oil. Use cauliflower rice as a base, top with edamame, shredded carrots, and sliced scallions. Drizzle with a spicy sriracha-mayo sauce.
- Fully Loaded Nacho Bowl: Turn up the comfort! Use tortilla chips as your base instead of rice. Pile on the chicken, black beans, corn, and tons of shredded cheese. Pop under the broiler for 2 minutes until melty, then top with cold lettuce, tomatoes, sour cream, and jalapeños.
- Lean & Green Version: For a lower-carb option, use cauliflower rice or a big bed of shredded lettuce as your base. Double up on the veggies—add sautéed bell peppers and onions to the chicken mix. The creamy drizzle made with Greek yogurt keeps it light and protein-packed.
Beau’s Kitchen Confidential Notes
This recipe has seen it all in my kitchen—it’s been my solo dinner savior, my impromptu party food, and my #1 meal prep champion. Over the years, I’ve learned a few things: First, don’t skip toasting the tomato paste and spices. That 30-second step unlocks a depth of flavor you just can’t get by stirring them in cold. Second, the lime wedge is NOT a garnish. It’s a critical ingredient. Squeeze it with gusto!
Funny story: I once accidentally used cayenne pepper instead of smoked paprika (they look scarily similar in my unlabeled jars!). Let’s just say we had *very* fiery burrito bowls that night. We powered through with extra yogurt and lots of laughs. Moral of the story: label your spices, friends!
Your Questions, Answered
Q: Can I use ground turkey or beef instead of chicken?
A: Absolutely! Ground turkey is a seamless swap. For ground beef (85/15 is ideal), just drain any excess fat after browning before adding your spices. The cooking method stays the same.
Q: My chicken seems dry. What did I do wrong?
A: Two likely culprits: Overcooking or using ultra-lean chicken breast. Make sure you have that ¼ cup of water in there to create a saucy coating, and don’t cook it into oblivion—just until the liquid is absorbed and it’s cooked through. Using a chicken thigh/breast mix also helps.
Q: How long do leftovers keep in the fridge?
A: Stored in airtight containers, the components will keep for 3-4 days. For best results, store the lettuce, creamy drizzle, and lime separately from the warm components. Reheat the rice and chicken separately before assembling a fresh bowl.
Q: Is this recipe gluten-free and dairy-free?
A: It’s naturally gluten-free! Just ensure your spices and tomato paste are certified GF if you have celiac disease. For dairy-free, use the avocado-based drizzle suggestion instead of Greek yogurt/sour cream.

Ground Chicken Burrito Bowls : Quick, Fresh, and Packed with Flavor
Description
When you’re tired of takeout but still want something exciting, these Ground Chicken Burrito Bowls are the answer. They’re fast, colorful, and full of bold flavors—without feeling heavy. Juicy, spiced ground chicken is layered with fluffy rice, crisp lettuce, beans, corn, and fresh tomatoes, then finished with a creamy lime drizzle.
Ingredients
Spiced Ground Chicken
-
1 lb ground chicken
-
1 tablespoon olive oil
-
1 teaspoon chili powder
-
1 teaspoon ground cumin
-
½ teaspoon smoked paprika
-
½ teaspoon garlic powder
-
Salt and black pepper, to taste
-
2 tablespoons tomato paste
-
¼ cup water
Bowl Components
-
2 cups cooked white or brown rice
-
1 cup black beans, rinsed and drained
-
1 cup corn kernels (fresh or frozen)
-
1 cup cherry tomatoes, chopped
-
Chopped romaine lettuce
-
Lime wedges
Creamy Lime Drizzle
-
¼ cup Greek yogurt or sour cream
-
1 tablespoon lime juice
-
½ teaspoon garlic powder
-
Optional: dash of hot sauce
Instructions
-
Cook the Chicken
Heat olive oil in a large skillet over medium-high heat. Add ground chicken and cook, breaking it up, until lightly browned and cooked through. -
Add Flavor
Lower heat to medium. Stir in tomato paste and cook for 30 seconds. Add chili powder, cumin, smoked paprika, garlic powder, salt, and pepper. Mix well. -
Simmer
Pour in water and stir, scraping the pan. Let simmer 5–7 minutes until the chicken is juicy and coated in sauce. -
Make the Drizzle
In a small bowl, whisk together Greek yogurt, lime juice, garlic powder, and hot sauce if using. -
Assemble the Bowls
Divide rice into bowls. Top with chicken, black beans, corn, tomatoes, and lettuce. Drizzle with sauce and finish with fresh lime juice.
Notes
-
Don’t overcook the chicken: Remove from heat once saucy and tender.
-
Toast the tomato paste: This adds deeper flavor in just 30 seconds.
-
Meal prep friendly: Store chicken, rice, and toppings separately for best texture.
-
Low-carb option: Swap rice for cauliflower rice or extra lettuce.
Nourishment on Your Terms (Approximate per Serving)
This isn’t just about empty calories; it’s about fueling your body with delicious, real food. Here’s a rough nutritional breakdown for one bowl (based on using 93% lean ground chicken and nonfat Greek yogurt):
- Calories: ~420
- Protein: ~30g (Fantastic for staying full and supporting muscles!)
- Carbohydrates: ~35g (Energy-giving complex carbs from rice, beans, and veggies)
- Fat: ~18g (Mostly healthy, unsaturated fats from the chicken and olive oil)
- Fiber: ~7g (Thanks to the beans, corn, and veggies—great for digestion!)
Remember: These are estimates. Your exact numbers will vary based on specific ingredients, brands, and portion sizes. The beauty is you can easily adjust portions to meet your needs—more veggies for volume, more chicken for protein, less rice for lower carbs.
Final Thoughts
You didn’t just make dinner tonight. You reclaimed your evening. You traded the fluorescent glow of a delivery app for the warm, satisfying sizzle of spices hitting a hot pan. You chose flavor over convenience, nourishment over “just something quick.” That’s worth celebrating.
This recipe is more than a collection of ingredients—it’s a reminder. A reminder that you are capable of creating something vibrant and good, even on a tired Tuesday. A reminder that food can be both fuel and joy. A reminder that the best meals aren’t about perfection; they’re about the confident, slightly messy act of piling everything you love into a bowl and digging in.
So the next time that 6 PM emptiness hits, I hope you hear a little voice saying, “You’ve got this.” Because you do. Your flavor escape is 30 minutes away, and it’s better than any takeout menu could ever promise.
Keep your spices labeled, your lime wedges ready, and your biggest bowl handy. This is just the beginning.

Cheesy Ground Chicken Skillet : One-Pan, High-Protein Comfort Meal
The One-Pan Wonder That Saved My Weeknight Sanity
Hey there, friend! Beau here. Let’s be real for a second. Some nights, the thought of cooking feels about as appealing as doing a sink full of dishes. You’re hungry, everyone’s hangry, and you’re staring into the fridge hoping a fully-prepared, delicious, and healthy meal will magically assemble itself. We’ve all been there. That’s exactly why I created this Cheesy Ground Chicken Skillet—my go-to, no-fail, one-pan hero.
This isn’t just another recipe; it’s your ticket to a stress-free, mess-free, and utterly satisfying dinner in under 30 minutes. Imagine this: juicy, seasoned ground chicken, tangy tomatoes, creamy white beans, and vibrant spinach, all swimming in a pool of gloriously melted cheese. It’s cozy, it’s packed with protein to keep you fueled, and it tastes like a warm hug in a skillet. The best part? You literally cook everything in one pan. That means more time enjoying your meal (and your people) and less time scrubbing pots. So, grab your favorite skillet, and let’s turn a hectic weeknight into a feel-good feast.
The Skillet That Fed the Whole Crew
This recipe was born out of beautiful chaos. A few summers back, I had a last-minute crowd of friends show up at my door after a long day at the lake. We were sunburned, starving, and my kitchen looked… well, let’s just say it had seen better days. I rummaged through the pantry and fridge, pulling out the essentials you almost always have on hand: some ground chicken, a can of tomatoes, a lonely can of beans, and a bag of spinach that needed a purpose. I threw it all in my trusty cast-iron skillet, topped it with every shred of cheese I could find, and crossed my fingers.
The moment that lid came off, revealing that bubbling, cheesy masterpiece, and the smell hit everyone, the chaos settled into a happy, hungry hum. We passed the skillet around the table with a stack of tortillas, and it was pure, unplanned joy. That’s the spirit of this dish—it’s adaptable, it’s generous, and it’s made for sharing laughs and stories over. It’s been a staple in my home ever since, the recipe tweaked and loved into this perfect version I’m sharing with you.
Gathering Your Flavor Arsenal
Here’s everything you’ll need to create this simple masterpiece. Don’t stress if you’re missing an item or two—I’ve got your back with swaps and chef secrets.
- 1 lb ground chicken: Our lean protein star! I love chicken for its mild flavor that soaks up all the seasonings. Chef’s Tip: If you can, grab ground chicken thigh—it has a bit more fat and flavor than breast. Ground turkey is a perfect substitute here.
- 1 tbsp olive oil: Just enough to get our onions glossy and happy. Avocado oil works great too.
- 1/2 onion, diced: The sweet, savory foundation. Yellow or white onion is perfect. No onion? A teaspoon of onion powder stirred in with the spices will do in a pinch.
- 2 cloves garlic, minced: Flavor bomb alert! Please, for the love of all things tasty, use fresh garlic. That jarred stuff just isn’t the same. If you’re truly desperate, ½ teaspoon of garlic powder can sub for one clove.
- 1 (14 oz) can diced tomatoes: They bring juicy acidity and body. Don’t drain them! That liquid is flavor gold. Fire-roasted diced tomatoes are my secret upgrade for a smoky hint.
- 1 (15 oz) can white beans, drained and rinsed: Creamy, mild, and packed with fiber and protein. I used cannellini, but great northern or navy beans are all friends here.
- 2 cups baby spinach: Our veggie sneak-attack! It wilts down to almost nothing but adds color and nutrients. Kale (stems removed) or chopped Swiss chard are hearty alternatives.
- 1 tsp Italian seasoning: The dried herb dream team. No blend? Use ½ tsp dried oregano and ½ tsp dried basil.
- Salt and pepper to taste: Season in layers! A pinch when cooking the chicken, then adjust at the end.
- 1 cup shredded mozzarella or Italian blend cheese: The glorious, melty crown. Pre-shredded is convenient, but a block you shred yourself melts creamier (it lacks anti-caking agents). A Mexican blend or even cheddar would be deliciously rebellious.
- Fresh basil (optional, for garnish): The fragrant, fresh finish that makes it look and taste restaurant-worthy. Parsley or a sprinkle of red pepper flakes are great too.
Let’s Build That Skillet, Step-by-Step
Ready to cook? Follow these steps and you’ll have dinner ready in a flash. I’ve sprinkled in my favorite hacks to make it foolproof.
- Heat the Stage: Place your large skillet (I use a 10 or 12-inch oven-safe one) over medium heat and add the olive oil. Let it get shimmering hot—this prevents sticking and gives our onions a nice start. Chef Hack: If you’re using cast iron, you want it hot before the oil goes in!
- Build the Flavor Base: Add the diced onion. Cook, stirring occasionally, for about 4-5 minutes until they’re soft and translucent. You’ll smell that sweet aroma. Now, add the garlic and stir for just 30 seconds until fragrant. Don’t let it burn! Burnt garlic turns bitter.
- Brown the Chicken: Add the ground chicken to the skillet. Use your spatula to break it up into crumbles. Cook for 5-7 minutes until it’s no longer pink. Season here with a good pinch of salt and pepper. Pro Tip: Let the chicken get a little sear in spots before stirring—that’s where the flavor lives!
- Simmer the Goodness: Pour in the entire can of diced tomatoes (with their juices!), the drained white beans, Italian seasoning, and another pinch of salt and pepper. Give it all a big, happy stir. Let this simmer, uncovered, for about 5 minutes. This lets the flavors marry and the liquid reduce just slightly.
- Wilt the Greens: Pile the fresh spinach on top. It might look like a mountain, but don’t worry! Gently stir it into the hot mixture. In about 1-2 minutes, it will wilt down perfectly. This is the quickest way to get your greens in!
- The Cheesy Finale: Turn your heat down to low. Sprinkle the shredded cheese evenly over the entire surface of the skillet. Cover it immediately with a lid (or a large baking sheet if you don’t have one). Let it sit for 2-3 minutes—this traps the steam to melt the cheese into a gooey, perfect blanket. No peeking!
- Garnish and Serve: Remove the lid, scatter some torn fresh basil over the top if you’re using it, and behold your masterpiece. I like to bring the whole skillet right to the table—it’s part of the experience!
How to Serve This Skillet of Joy
Presentation is part of the fun, even with a rustic one-pan meal! Here are my favorite ways to dish it up:
The Classic Bowl: Spoon generous portions into deep bowls. The bowl contains all the cheesy, saucy goodness perfectly.
With a Side of Carbs: This dish is incredible over a bed of steamed rice, quinoa, or couscous to soak up the juices. For a low-carb option, try cauliflower rice. My personal favorite? Scooping it up with warm, buttered garlic bread or toasted pita wedges.
As a Filling: Let it cool slightly, then use it as a killer filling for tortillas, burritos, or even bell peppers for a next-night stuffed pepper remix.
Top It Off: Finish individual bowls with extra fresh herbs, a dollop of cool sour cream or Greek yogurt, a drizzle of hot sauce, or a sprinkle of everything bagel seasoning for crunch.
Make It Your Own: 5 Tasty Twists
This recipe is a fantastic canvas. Play with it based on what you love or what’s in your kitchen!
- Tex-Mex Fiesta: Swap the Italian seasoning for 1 tbsp of taco seasoning. Use black beans instead of white, and a blend of cheddar and Monterey Jack cheese. Top with avocado, cilantro, and a squeeze of lime.
- Mediterranean Vibes: Use ground lamb instead of chicken. Add a pinch of cinnamon and dried mint with the spices. Swap the mozzarella for crumbled feta cheese added at the very end.
- Creamy Dreamy: After simmering, stir in ¼ cup of cream cheese, mascarpone, or heavy cream for an extra-rich, decadent sauce. Divine!
- Spicy Arrabbiata Style: Add ½ teaspoon of red pepper flakes with the garlic. Stir in 2 tablespoons of tomato paste for a deeper tomato flavor before adding the diced tomatoes.
- Low-Carb/Keto-Friendly: Omit the white beans. Increase the ground chicken to 1.5 lbs and add an extra cup of chopped veggies like zucchini, mushrooms, or bell peppers when you cook the onion.
Beau’s Kitchen Notebook
This recipe has truly evolved with me. The first time I made it, I completely forgot the beans and used a frozen “spinach brick” I had to thaw and squeeze. It was… fine. But the beans add that creamy texture and heartiness that makes it a complete meal. I also learned the hard way that adding cold, pre-shredded cheese sometimes makes it a little grainy. Letting the skillet cool for just a minute off the heat before adding the cheese helps it melt silkily. Now, I almost always double it when I have friends over—it scales up perfectly in a larger pan. The only casualty? The fight for the crispy, cheesy bits stuck to the edges of the skillet. That’s the cook’s reward, in my opinion.
Your Questions, Answered
Q: Can I make this ahead of time?
A: Absolutely! You can cook the entire recipe through step 4 (simmering), then let it cool and refrigerate for up to 2 days. When ready to eat, reheat the mixture in the skillet until bubbly, then proceed with the spinach and cheese steps.
Q: My mixture is too watery. What did I do wrong?
A: No worries! This usually means we need a little more simmering time. After adding the tomatoes and beans, let it simmer uncovered for a few extra minutes to reduce and thicken. You can also create a quick slurry with 1 tsp of cornstarch and 1 tbsp of water, stir it in, and let it bubble for a minute to thicken up.
Q: Can I freeze this cheesy chicken skillet?
A> You can, but I recommend freezing it before adding the cheese and spinach. Thaw overnight in the fridge, reheat in a skillet, then add fresh spinach and cheese to finish. Dairy-based cheeses can get grainy when frozen and reheated.
Q: I don’t have a lid for my skillet. How do I melt the cheese?
A> Two great options: 1) Tent the skillet tightly with aluminum foil. 2) Simply pop the whole skillet under your oven’s broiler for 1-2 minutes (make sure your skillet handle is oven-safe!). Watch it like a hawk—it goes from melted to burned quickly!

Cheesy Ground Chicken Skillet : One-Pan, High-Protein Comfort Meal
Description
When you’re tired, hungry, and don’t want a pile of dishes, this Cheesy Ground Chicken Skillet comes to the rescue. Everything cooks in one pan and comes together into a cozy, protein-packed meal with tender ground chicken, tomatoes, creamy white beans, fresh spinach, and plenty of melted cheese.
Ingredients
-
1 lb ground chicken
-
1 tablespoon olive oil
-
½ onion, diced
-
2 cloves garlic, minced
-
1 (14 oz) can diced tomatoes (do not drain)
-
1 (15 oz) can white beans, drained and rinsed
-
2 cups baby spinach
-
1 teaspoon Italian seasoning
-
Salt and black pepper, to taste
-
1 cup shredded mozzarella or Italian-blend cheese
Optional garnish:
-
Fresh basil, parsley, or red pepper flakes
Instructions
-
Cook the Onion
Heat olive oil in a large skillet over medium heat. Add the diced onion and cook for 4–5 minutes until soft and translucent. -
Add Garlic & Chicken
Stir in the garlic and cook for 30 seconds until fragrant. Add the ground chicken, breaking it up as it cooks. Season with salt and pepper and cook until no longer pink, about 5–7 minutes. -
Simmer
Add the diced tomatoes (with juices), white beans, and Italian seasoning. Stir well and let simmer uncovered for about 5 minutes to slightly reduce. -
Add Spinach
Add the spinach and stir until wilted, about 1–2 minutes. -
Melt the Cheese
Reduce heat to low. Sprinkle cheese evenly over the skillet. Cover and let sit for 2–3 minutes until melted. -
Serve
Garnish with fresh herbs if desired and serve straight from the skillet.
Notes
-
Let the chicken brown: Don’t stir constantly—browning adds flavor.
-
Too watery? Simmer uncovered a few extra minutes to reduce liquid.
-
No lid? Cover with foil or place briefly under the broiler (oven-safe pan only).
-
Extra creamy: Stir in ¼ cup cream cheese or heavy cream before adding cheese.
-
Make it spicy: Add red pepper flakes or hot sauce to taste.
Nutritional Highlights (Per Serving)
This dish isn’t just about comfort; it’s about fueling your body well. Here’s a general breakdown per serving (based on 4 servings):
- Calories: ~350 kcal
- Protein: 30g – A fantastic amount to keep you full and support muscle health.
- Fat: 14g – Mostly from the olive oil and chicken, providing satiety.
- Carbohydrates: 20g – With about 6g of fiber from the beans and spinach, it’s a balanced, energizing carb count.
This meal is a great source of iron from the spinach and chicken, and the tomatoes provide a dose of vitamin C and lycopene. It’s a balanced plate of protein, complex carbs, and veggies—comfort food you can feel genuinely good about.
One Pan, Endless Possibilities
And there you have it, friend! My beloved Cheesy Ground Chicken Skillet in all its simple, glorious detail. This recipe is more than just a list of ingredients and steps; it’s a reminder that incredible food doesn’t have to be complicated. It’s about gathering flavors you love, using one pan to make cleanup a breeze, and creating a meal that feeds both the body and the soul.
Final Thoughts
This Cheesy Ground Chicken Skillet is more than just dinner—it’s a lifeline for those nights when time, energy, and inspiration are running low. It’s proof that a meal can be quick without sacrificing flavor, simple without feeling boring, and comforting without weighing you down. In a world full of complicated recipes and endless dirty dishes, this one-pan wonder is a small, delicious rebellion.
What I love most about this recipe is how it bends to fit your life. Forgot an ingredient? No problem. Want to make it heartier, lighter, spicier, or creamier? Go for it. It’s forgiving, flexible, and consistently rewarding. It’s the kind of dish that turns a stressful evening into a moment of joy—a shared skillet at the center of the table, a meal that invites conversation and contentment.
Cooking, at its best, shouldn’t feel like a chore. It should feel like an act of care—for yourself and for those you’re feeding. This skillet meal embodies that spirit. It’s nourishing, flavorful, and deeply satisfying, yet it leaves you with minimal cleanup and more time to enjoy the evening.
So here’s to less stress, more flavor, and the humble skillet that makes it all possible. May it become your weeknight hero, your impromptu gathering solution, and your reminder that great food doesn’t have to be complicated to be truly great.
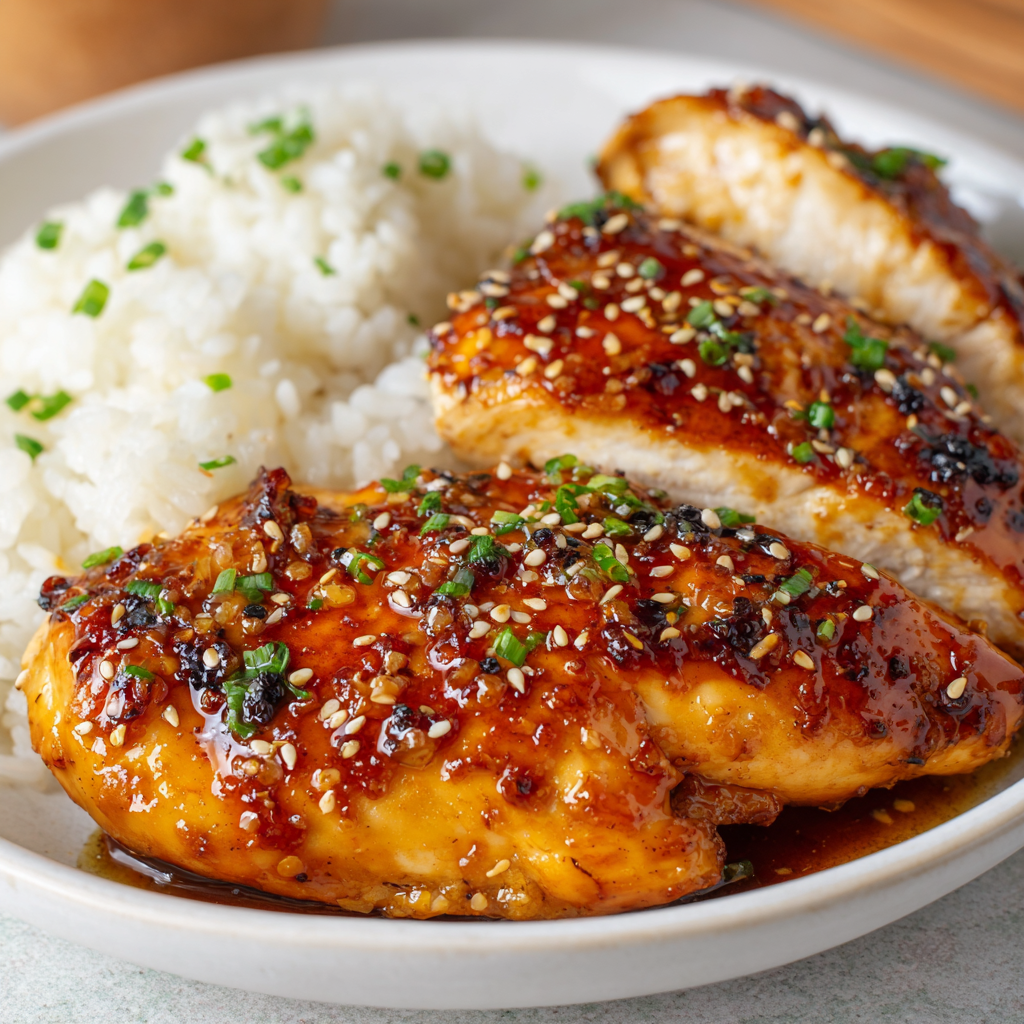
Honey Garlic Chicken Breasts : Sweet, Savory & Ready in 25 Minutes
Honey Garlic Chicken Breasts: Your New 25-Minute Weeknight Hero
Hey friends, Beau here! Let me paint you a picture: It’s been a day. You’re rummaging through the fridge, the clock is ticking, and everyone’s starting to get that “what’s for dinner?” look in their eyes. You could call for takeout… or you could whip up something that’s faster, fresher, and will make your kitchen smell like a cozy bistro.
That’s where this magic comes in. These Honey Garlic Chicken Breasts are my absolute go-to when I need a dinner win that feels special but demands zero special effort. We’re talking juicy, golden-seared chicken, slicked with a glaze that’s the perfect harmony of sweet, savory, and garlicky goodness. It clings to every bite in the most satisfying, sticky way.
The best part? It all happens in one skillet in about 25 minutes, start to finish. No fussy techniques, no laundry list of ingredients—just real, feel-good food that brings everyone to the table with a smile. This isn’t just a recipe; it’s your secret weapon for turning an ordinary Wednesday into a mini celebration. So, grab your favorite skillet and let’s create some deliciousness together!
The Night This Recipe Saved My Sanity (And My Dignity)
This recipe has roots in a little kitchen panic I like to call “The Great Impromptu Dinner Party Debacle.” A few years back, my partner casually mentioned they’d invited a couple of friends over… in about an hour. My fridge was sporting the “pre-grocery shop” vibe—a little lonely, a lot random.
I had chicken breasts, the eternal half-head of garlic, and the bear-shaped honey bottle. Desperation, they say, is the mother of invention (or in my case, a really tasty glaze). I threw them together with some soy sauce for depth and a splash of vinegar for zing, not knowing if I was creating dinner or a culinary crime.
Friends, the sizzle, the smell, the way that sauce reduced into a glossy, gorgeous coat… it was a revelation. Our guests raved, asking what fancy technique I’d used. I just smiled, swirling the pan. “Oh, a little something I whipped up,” I said, pretending I hadn’t been in a cold sweat 30 minutes prior. That night, this dish earned its permanent spot in my “Too Good & Too Easy” hall of fame. It’s proof that the most beloved meals often come from simple ingredients and a dash of kitchen confidence.
Gathering Your Flavor Arsenal
Here’s everything you’ll need to work this 25-minute magic. I’ve added my little chef insights and swaps so you can make this recipe work with what you’ve got!
- 2 boneless, skinless chicken breasts: The star of our show! Pro-Tip: We’re going to slice these horizontally into thinner cutlets. This ensures quick, even cooking and maximizes that glorious surface area for searing and saucing. If you’re in a rush, ask your butcher to do it, or buy thin-cut breasts.
- Salt and pepper, to taste: The fundamental wake-up call for any protein. Don’t be shy here—seasoning the chicken well is step one to big flavor.
- 2 tablespoons olive oil: Our trusty searing medium. Avocado oil works great too for its high smoke point. The goal is a beautiful golden crust.
- 3 cloves garlic, minced: The “garlic” in honey garlic! Fresh is best here for that pungent, aromatic kick. In a true pinch, ¾ teaspoon of good-quality garlic powder can stand in.
- 1/4 cup honey: Nature’s golden syrup brings the sweet, sticky glue that makes this sauce so irresistible. For a deeper flavor, try using buckwheat honey. Maple syrup is a fantastic 1:1 substitute if you need a vegan option.
- 2 tablespoons soy sauce: Our savory, salty, umami backbone. For a gluten-free version, tamari or coconut aminos are perfect swaps. If using coconut aminos, note it’s sweeter, so you might reduce the honey by a teaspoon.
- 1 tablespoon apple cider vinegar or lemon juice: This is the secret weapon! That touch of acidity balances the sweetness and saltiness perfectly, creating a complex, well-rounded glaze. White wine vinegar or rice vinegar also work beautifully.
- Optional: chopped green onions or sesame seeds for garnish: Not just for looks! A sprinkle of green onions adds a fresh, sharp finish, and sesame seeds give a delightful little crunch and nutty flavor. Highly recommended for the full experience.
Let’s Get Cooking: Your Foolproof Roadmap to Golden, Sticky Bliss
Ready? Tie on that apron, and let’s dance. We’re going to move with purpose, but there’s no stress here—just delicious steps forward.
- Prep & Season the Chicken: First, pat those chicken breasts completely dry with a paper towel. This is a non-negotiable step for a proper sear—water is the enemy of browning! Lay them flat on your cutting board. Using your hand to steady the top, carefully slice each breast horizontally through the middle to create two thinner cutlets. Generously season both sides with salt and pepper. Chef’s Hack: Doing this while your pan heats up saves time and lets the seasoning start to work its way in.
- Sear to Golden Perfection: Heat the olive oil in a large skillet (stainless steel or non-stick are perfect) over medium-high heat. Once the oil shimmers, add the chicken cutlets. You should hear a happy sizzle! Don’t crowd the pan—if you need to, cook in two batches. Let them cook, untouched, for 4-5 minutes on the first side until you see a beautiful golden-brown crust peeking up the edges. Flip and cook for another 4-5 minutes on the other side, or until cooked through (internal temperature of 165°F). Transfer the chicken to a clean plate. Little Story: Resist the urge to poke and prod! Letting them sear undisturbed is how you build flavor and keep them juicy.
- Create the Magic Glaze: Reduce the heat to medium-low. In that same glorious, flavorful pan (all those brown bits are liquid gold!), add the minced garlic. Sauté for just about 30 seconds until fragrant—you’ll smell it! Don’t let it burn. Quickly pour in the honey, soy sauce, and vinegar. Give it all a good whisk, scraping up any browned bits from the bottom of the pan. Let it simmer gently for 2-3 minutes. You’ll see it start to bubble and thicken slightly into a glossy sauce. Pro-Tip: This is your taste-and-adjust moment. Want more tang? Add a splash more vinegar. More salt? A dash of soy sauce.
- The Grand Glaze & Finish: Now for the grand finale! Return the chicken (and any accumulated juices) to the skillet, nestling it right into that bubbling glaze. Spoon the sauce over the top of each piece repeatedly for a minute or two, letting the chicken warm through and really soak up the flavor. The sauce will continue to thicken and cling to the chicken in the most dreamy way. Chef’s Hack: For extra gloss and a restaurant-style finish, add a tablespoon of cold butter to the sauce as you glaze the chicken and swirl it in until melted. Pure luxury!
Plating Up Your Masterpiece
You did it! Now, let’s make it a meal. I love serving this chicken straight from the skillet—it feels rustic and inviting.
Slide a cutlet onto each plate and don’t be stingy with that extra sauce! Drizzle every last drop over the top. A final flourish of finely sliced green onions or a sprinkle of white and black sesame seeds adds color, texture, and that “chef’s touch.”
For the sides, you can’t go wrong. My top picks are:
- Fluffy white or brown rice: The ultimate sauce-soaking vehicle.
- Quick-steamed broccoli or snap peas: The fresh, crisp contrast is perfect.
- A simple cucumber salad: Bright and acidic to cut through the richness.
- Garlic mashed potatoes: For the ultimate comfort food plate.
However you serve it, the goal is to gather, share, and enjoy the simple pleasure of a meal made with your own two hands.
Make It Your Own: Delicious Twists on the Classic
Once you’ve mastered the base, have fun playing with flavors! Here are a few of my favorite spins:
- Spicy Korean-Inspired: Add 1-2 teaspoons of gochujang (Korean chili paste) to the glaze mixture. Finish with a garnish of toasted sesame oil and those green onions.
- Ginger & Citrus Boost: Add 1 tablespoon of freshly grated ginger with the garlic. Swap the vinegar for fresh orange or lime juice for a brighter, zingier profile.
- Crispy Baked Version: For less hands-on time, skip the stovetop sear. Dredge seasoned chicken in a little cornstarch, place on a parchment-lined baking sheet, and bake at 400°F for 15 minutes. Whisk the sauce ingredients in a saucepan, simmer to thicken, then toss with the baked chicken.
- Pineapple Sweet & Sour Twist: Stir in ½ cup of small pineapple chunks (fresh or canned) into the glaze as it simmers. The fruit caramelizes slightly and adds a tropical sweetness.
- For the Slow Cooker Fans: Place chicken breasts in the slow cooker. Whisk sauce ingredients and pour over top. Cook on LOW for 3-4 hours. Thicken the sauce at the end with a cornstarch slurry for that sticky finish.
Beau’s Kitchen Notebook
This recipe is a living, breathing thing in my kitchen. Over the years, I’ve learned that the chicken cutlet trick is the real game-changer—it turns the often-tricky thick breast into a quick-cooking, tender delight. I’ve also been known to double, even triple, the sauce recipe because, let’s be real, it’s that good. My friends now jokingly demand “extra sauce on the side” when they come over.
The beauty of this dish is its resilience. Forgotten and left to simmer a minute too long? A splash of water or chicken broth brings it right back. Don’t have fresh garlic? Powder works in a pinch. It’s a forgiving recipe that wants you to succeed. Every time I make it, I think back to that first frantic dinner party and smile. From a scramble to a staple—that’s the power of a great, simple recipe.
Your Questions, Answered
Q: My sauce isn’t thickening up. What did I do wrong?
A: No worries! This usually means it just needs a little more simmer time. Let it bubble over medium-low heat for another 2-3 minutes, stirring often. If it’s still too thin, mix 1 teaspoon of cornstarch with 1 tablespoon of cold water and whisk it into the simmering sauce. It should thicken up almost instantly.
Q: How do I know when the chicken is cooked through without cutting into it?
A: The best tool is an instant-read meat thermometer! Insert it into the thickest part of the cutlet—you’re aiming for 165°F. If you don’t have one, make a small cut in the thickest piece; the juices should run clear, not pink.
Q: Can I use chicken thighs instead?
A: Absolutely! Bone-in, skin-on thighs are fantastic. You’ll need to cook them a bit longer (about 6-7 minutes per side) to render the fat and crisp the skin. The rich, dark meat pairs wonderfully with the sweet glaze.
Q: How should I store and reheat leftovers?
A: Store chicken and sauce together in an airtight container in the fridge for up to 3 days. Reheat gently in a covered skillet with a tiny splash of water over low heat, or in the microwave at 50% power to prevent the sauce from separating.

Honey Garlic Chicken Breasts : Sweet, Savory & Ready in 25 Minutes
Description
Some nights call for a dinner that’s quick, comforting, and guaranteed to please everyone at the table. These Honey Garlic Chicken Breasts are exactly that. Juicy pan-seared chicken is coated in a sticky-sweet, savory garlic sauce that tastes like it took way more effort than it actually did.
Ingredients
-
2 boneless, skinless chicken breasts
-
Salt and black pepper, to taste
-
2 tablespoons olive oil
-
3 cloves garlic, minced
-
¼ cup honey
-
2 tablespoons soy sauce (or tamari for gluten-free)
-
1 tablespoon apple cider vinegar or lemon juice
Optional garnish:
-
Chopped green onions
-
Sesame seeds
Instructions
-
Prepare the Chicken
Pat the chicken breasts dry. Slice each one horizontally to create thinner cutlets. Season both sides generously with salt and pepper. -
Sear the Chicken
Heat olive oil in a large skillet over medium-high heat. Add the chicken and cook for 4–5 minutes per side, until golden brown and cooked through (internal temperature of 165°F / 74°C). Remove chicken from the pan and set aside. -
Make the Sauce
Lower the heat to medium. Add the minced garlic to the same pan and sauté for about 30 seconds, just until fragrant.
Stir in honey, soy sauce, and vinegar. Simmer for 2–3 minutes until the sauce thickens slightly. -
Glaze the Chicken
Return the chicken to the skillet. Spoon the sauce over the chicken and let it simmer for 1–2 minutes until glossy and well coated. -
Serve
Garnish with green onions or sesame seeds if desired. Serve hot with your favorite sides.
Notes
-
Slice the chicken thin: Thin cutlets cook faster and stay juicier.
-
Don’t rush the sear: Let the chicken brown properly before flipping for best flavor.
-
Sauce too thin? Let it simmer longer, or add 1 teaspoon cornstarch mixed with 1 tablespoon water.
-
Extra flavor: Add a small knob of butter at the end for a richer, restaurant-style sauce.
-
Make it spicy: Add chili flakes or a teaspoon of hot sauce to the glaze
A Quick Note on Nutrition
Hey, I’m all about balance—indulgent comfort food and nourishing our bodies can absolutely go hand-in-hand! This dish is a fantastic source of lean protein, which helps keep you full and satisfied. The sauce, while flavorful, is made with simple, whole-food ingredients.
As a general guide, one serving (about one cutlet with sauce) comes in around: 310 calories, 30g of protein, 15g of carbohydrates, and 14g of fat. Remember, these numbers can vary based on the exact size of your chicken breast and specific brands of ingredients you use. To lighten it up, you can reduce the honey slightly or use a sugar-free substitute, and serve it over a big bed of veggies or cauliflower rice. But in my book, enjoying the real-deal version as part of a joyful meal is always worth it.
Final Thoughts From My Kitchen to Yours
So there you have it, friend—my heart-on-a-plate, 25-minute wonder. This Honey Garlic Chicken is more than just dinner; it’s a reminder that incredible flavor doesn’t require complexity. It’s about trusting simple ingredients, enjoying the process, and sharing the delicious results.
I hope this recipe finds its way into your regular rotation, becoming your own back-pocket solution for busy nights and unexpected guests. Give it a try, tweak it to your taste, and most importantly, have fun with it! That’s what Feastical is all about.
If you make it, I’d love to hear how it turned out! Tag me on social or leave a comment over on the blog. Now, go forth and conquer that skillet. You’ve got this.
With a full heart and a sticky spoon,
Beau

Lemon Chicken with Garlic Lemon Butter Sauce : Crispy, Quick, and Irresistible
Lemon Chicken with Garlic Lemon Butter Sauce – Crispy, Quick, and Irresistible
Your New Favorite 30-Minute Dinner is Here
Hey, friends! Beau here. Let’s talk about those nights. You know the ones I mean. The clock is ticking, stomachs are rumbling, and you’re staring into the fridge hoping for a dinner miracle that doesn’t involve a takeout menu or cereal. I hear you. That exact feeling is why this Lemon Chicken with Garlic Lemon Butter Sauce was born. It’s my kitchen’s answer to “I want something incredible, but I also want to be on the couch in an hour.”
This isn’t just another chicken recipe. This is a flavor explosion disguised as a weeknight dinner. We’re talking juicy, tender chicken breasts coated in a savory, golden Parmesan crust, seared until they’re crispy on the outside and perfectly cooked on the inside. And then—oh, and then—we drizzle the whole glorious thing in a pan sauce that will make you want to lick your plate. It’s a garlicky, lemony, buttery symphony that’s tangy, rich, and brighter than a summer day.
The best part? You likely have most of this stuff in your kitchen right now. We’re using simple, honest ingredients and transforming them into pure comfort food magic in about 30 minutes flat. So tie on your apron, grab your favorite skillet, and let’s make a meal that tastes like you fussed all day, when really, you’re just a kitchen rockstar with better things to do. Ready? Let’s get cooking!
The Little Black Dress of Dinners
This recipe takes me straight back to my early apartment days, when my “fine dining” table was a door propped on two sawhorses. My friend Sam would come over, we’d blast music, and the mission was always to outdo last week’s dinner without breaking our tiny budgets. One night, we had a sad-looking lemon, some bargain-bin Parmesan, and a pack of chicken breasts. Desperation (and hunger) is the mother of invention, right?
We crusted the chicken with what we had, pan-fried it, and then stared at the glorious, crispy bits stuck to the pan. “We can’t waste that flavor,” Sam said. So we threw in butter, garlic, and that lonely lemon. The smell that filled that tiny kitchen was nothing short of life-changing. We poured the sauce over our chicken, took a bite, and just looked at each other. No words needed. It was the moment I realized that the most legendary meals aren’t about fancy techniques or expensive ingredients—they’re about clever, soulful cooking with what you’ve got. This lemon chicken has been my reliable, go-to “wow” dish ever since.
Gathering Your Flavor Arsenal
Here’s everything you’ll need to create this masterpiece. I’ve included some chef-y insights and swaps so you can make it your own!
- 2 boneless, skinless chicken breasts (halved horizontally): This is our star! Halving them (or “butterflying”) creates thinner cutlets that cook fast and stay juicy. Chef’s Tip: Place the breast flat on your cutting board, hold it steady with your palm, and slice horizontally through the middle with a sharp knife. If you’re short on time, ask your butcher to do it, or buy thin-cut chicken cutlets directly.
- 1/4 cup grated Parmesan cheese: Not the powdery stuff in the shaker, please! Use freshly grated Parmigiano-Reggiano or a good-quality block you grate yourself. It melts into the crust for a deep, savory, umami punch that’s just *chef’s kiss*.
- 1/4 cup all-purpose flour: Our trusty binder. It helps the crust adhere and creates that initial delicate crisp. For a gluten-free version, a 1:1 GF flour blend works perfectly here.
- Salt and pepper to taste: The dynamic duo! Don’t be shy. Season your chicken and your flour mixture. This builds layers of flavor from the inside out.
- 2 tbsp olive oil + 2 tbsp butter (for searing): We’re using a hybrid fat situation. The olive oil has a higher smoke point for a good sear, and the butter adds incredible flavor and helps with browning. It’s the best of both worlds!
For the Garlic Lemon Butter Sauce:
- 2 tbsp butter: Because more butter is always a good idea. This forms the luxurious base of our sauce.
- 3 cloves garlic, minced: Fresh is best! The minced garlic will infuse the butter with its aromatic magic. If you’re in a pinch, ¾ teaspoon of good-quality garlic powder can work.
- Juice of 1 lemon (about 3-4 tbsp): The tangy soul of the dish. Roll your lemon on the counter firmly before juicing to get every last drop! Taste your lemon first—if it’s super tart, you can use a little less.
- 1/3 cup chicken broth: This deglazes the pan, lifting all those delicious browned bits (the “fond”) and creating the body of our sauce. Low-sodium is my go-to so I can control the salt.
- 1 tsp lemon zest: Don’t skip this! The zest holds the potent, sunny lemon oil that brightens the entire sauce without extra acidity. Use a microplane or the smallest holes on your grater.
- Fresh parsley for garnish (optional but recommended): A sprinkle of fresh green parsley adds a pop of color and a fresh, clean note that balances the richness beautifully.
Let’s Make Some Magic: Step-by-Step
Follow these steps, and you’ll have a restaurant-quality dish on your table in no time. I’ve packed each one with my best kitchen hacks!
- Prep Your Chicken & Dredging Station. First, take your halved chicken breasts and pat them bone-dry with paper towels. This is non-negotiable for a crispy crust! In a shallow dish (a pie plate works great), whisk together the grated Parmesan, flour, a big pinch of salt, and a few grinds of black pepper. Dredge each chicken cutlet in the mixture, pressing gently to make sure every nook and cranny gets coated. Shake off the excess and set them on a plate. Little Chef Hack: Use one hand for the dry ingredients and the other for handling the raw chicken. This keeps you from getting “breading fingers”!
- Sear to Golden Perfection. Place a large skillet (stainless steel or cast iron is ideal for browning) over medium-high heat. Add the olive oil and 2 tablespoons of butter. Once the butter is melted and the foam subsides a bit (that’s how you know it’s hot enough), carefully add the chicken. Don’t crowd the pan—cook in batches if needed. Let them cook, undisturbed, for 3-4 minutes. You’re waiting for that beautiful, golden-brown crust to form. Peek with a spatula; when it’s ready, flip and cook for another 3-4 minutes on the other side, or until the chicken is cooked through (165°F internal temp). Transfer to a clean plate and tent loosely with foil. Little Chef Hack: Resist the urge to move the chicken around! Let the pan do its work to create that perfect crust.
- Create the Legendary Sauce. Without wiping out the pan (those browned bits are FLAVOR GOLD!), reduce the heat to medium. Add the remaining 2 tablespoons of butter. Once melted, add the minced garlic and sauté for about 60 seconds until fragrant—don’t let it brown! Pour in the chicken broth, lemon juice, and lemon zest. Use your spatula to scrape up all the delicious fond from the bottom of the pan. Let the sauce simmer for 2-3 minutes. It will bubble and reduce slightly, thickening just enough to coat the back of a spoon beautifully.
- The Grand Finale: Bring It All Together. Slide your gorgeous chicken cutlets back into the pan, along with any juices that collected on the plate. Spoon that glorious garlic lemon butter sauce all over each piece, letting it seep into every crevice. Let everything cozy up together for just a minute to reheat the chicken. Little Chef Hack: Give the pan a gentle shake or a little jiggle to help the sauce embrace the chicken fully.
- Garnish and Serve Immediately! Transfer the chicken to serving plates, pour every last drop of sauce over the top, and finish with a sprinkle of fresh chopped parsley. The contrast is stunning and tastes even better than it looks.
How to Serve This Sunshine on a Plate
This lemon chicken is the ultimate team player—it goes with almost anything! Here’s how I love to plate it up for maximum satisfaction:
For a classic, feel-good meal, serve it over a big pile of garlic mashed potatoes or creamy polenta. The sauce acts as the most incredible gravy you’ve ever tasted. Seriously, you’ll want to drink it. If you’re keeping things lighter, a bed of fluffy quinoa, couscous, or angel hair pasta is fantastic for soaking up that buttery lemon goodness.
On the side? You can’t go wrong. A simple crisp green salad with a sharp vinaigrette cuts through the richness perfectly. Roasted asparagus, broccoli, or green beans tossed right in the same pan after the chicken is out is a genius one-pan trick. Or, keep it super simple with some crusty bread for mopping up the sauce—no judgment here, I’ll be right there with you, bread in hand!
Make It Your Own: Fun Twists & Swaps
Got an idea? Run with it! This recipe is a fantastic canvas. Here are a few of my favorite spins:
- Herb It Up: Add 1 teaspoon of dried Italian seasoning or 1 tablespoon of fresh chopped thyme or rosemary to the flour-Parmesan mixture for an earthy, aromatic crust.
- Creamy Dreamy: Want an even richer, velvety sauce? After simmering, stir in ¼ cup of heavy cream or half-and-half. Let it warm through for a decadent lemon-garlic alfredo vibe.
- Caprese Style: After saucing, top each chicken cutlet with a slice of fresh mozzarella and a halved cherry tomato. Pop the whole skillet under the broiler for 2-3 minutes until the cheese is bubbly. Finish with fresh basil instead of parsley.
- Panko Power: For an extra-crunchy crust, replace half of the flour with an equal amount of Panko breadcrumbs. You’ll get an incredible, shatteringly crisp texture.
- Dairy-Free/Vegan Twist: Use vegan Parmesan and butter substitutes. For the chicken, large, thick slices of pressed extra-firm tofu or cauliflower steaks work wonders! Dredge and pan-fry as directed.
Beau’s Kitchen Notes & Stories
This recipe has been with me through countless dinner parties, first dates (it’s a lucky charm!), and lazy Sundays. It’s evolved from that scrappy apartment version—I’ve learned that the Parmesan in the crust is the game-changer, and that letting the sauce reduce just a little makes all the difference in the world.
One time, I was so busy chatting with guests that I completely forgot the chicken in the pan. I thought I’d ruined it, but you know what? That extra sear created even more fond, which led to an even more intense, caramelized sauce. A happy accident that’s now my standard! The moral of the story? Don’t fear a little color on your chicken or the bottom of your pan. It’s not burning; it’s building flavor. Trust the process, trust your nose, and most importantly, have fun in there.
Your Questions, Answered
- Q: My sauce is too thin/runny. What did I do wrong?
A: No worries! This usually means it needs a bit more reduction. Let it simmer for another minute or two. If you’re really in a hurry, make a quick “slurry” by mixing 1 teaspoon of cornstarch with 1 tablespoon of cold water. Whisk it into the simmering sauce and it will thicken up in about 60 seconds. - Q: My chicken is browning too fast but isn’t cooked inside.
A: This means your pan is too hot! Reduce the heat to medium. If the crust is already perfect but the inside needs more time, you can finish the chicken in a 375°F (190°C) oven for 5-7 minutes after searing. Just pop the skillet right in (if it’s oven-safe) or transfer to a baking sheet. - Q: Can I use chicken thighs instead of breasts?
A: Absolutely! Boneless, skinless thighs are fantastic here. They’re more forgiving and stay super juicy. Just note they may need an extra minute or two of cooking per side due to their higher fat content. - Q: How do I store and reheat leftovers?
A: Store cooled chicken and sauce in an airtight container in the fridge for up to 3 days. To reheat, place it in a covered skillet over low heat with a tiny splash of broth or water to loosen the sauce. Microwaving can make the crust soggy, so the stovetop is best.

Lemon Chicken with Garlic Lemon Butter Sauce : Crispy, Quick, and Irresistible
Description
Hey friends, Beau here! This Lemon Chicken is my go-to answer for busy nights when I want big flavor without big effort. Crispy Parmesan-crusted chicken, pan-seared until golden, then finished in a silky garlic lemon butter sauce that tastes like it came straight from a restaurant kitchen—yet it’s on your table in about half an hour.
Ingredients
Chicken
-
2 boneless, skinless chicken breasts, halved horizontally
-
¼ cup grated Parmesan cheese
-
¼ cup all-purpose flour
-
Salt and black pepper, to taste
-
2 tablespoons olive oil
-
2 tablespoons butter
Garlic Lemon Butter Sauce
-
2 tablespoons butter
-
3 cloves garlic, minced
-
⅓ cup chicken broth (low sodium preferred)
-
Juice of 1 lemon (about 3–4 tablespoons)
-
1 teaspoon lemon zest
-
Fresh parsley, chopped (optional)
Instructions
-
Prep the chicken:
Pat chicken dry. In a shallow bowl, mix Parmesan, flour, salt, and pepper. Dredge chicken evenly, pressing lightly to coat. -
Sear:
Heat olive oil and 2 tablespoons butter in a large skillet over medium-high heat. Add chicken and cook 3–4 minutes per side, until golden and cooked through (165°F / 74°C). Remove and set aside. -
Make the sauce:
Reduce heat to medium. Add remaining butter and garlic; cook 30–60 seconds until fragrant. Pour in chicken broth, lemon juice, and zest, scraping up browned bits from the pan. Simmer 2–3 minutes until slightly reduced. -
Finish:
Return chicken to the skillet. Spoon sauce over the top and simmer 1 minute to reheat. -
Serve:
Garnish with parsley and serve immediately with extra sauce.
Notes
-
Dry chicken = crispy crust — don’t skip patting it dry
-
Don’t overcrowd the pan — sear in batches if needed
-
Let the sauce reduce slightly for richer flavor
-
Taste your lemon — very tart lemons may need a little less juice

End Zone Empanadas : Football-Shaped Hand Pies for Game Day
End Zone Empanadas: The MVP of Your Game Day Spread
Hey there, friends! Beau here, welcoming you back to the Feastical kitchen. You know what I love almost as much as a perfectly gooey grilled cheese? The electric, buzzing energy of game day. It’s not just about the sport on the screen—it’s about the huddle in the living room, the friendly smack-talk, and that beautiful, shared mission: to eat incredibly well for three straight hours.
But let’s be real. Sometimes the snack table can get a little… predictable. Another bowl of chips? Been there. A platter of wings? Absolutely delicious, but they can be messy. I wanted to create something that was the total package: fun to look at, incredibly delicious, easy to eat one-handed (so you can keep the other hand free for high-fives), and packed with the kind of bold, comforting flavors that make everyone gather around.
That’s how our End Zone Empanadas were born. These aren’t just any hand pies; they’re adorable, football-shaped pockets of joy. We’re talking golden, flaky pastry hugging your favorite game-day fillings—think smoky BBQ pulled pork, hearty chili, or a killer buffalo chicken mix. The best part? The little “stitches” you score on top. They’re surprisingly simple to make but look like you scored a culinary touchdown. So, tie on your apron (or just dust off that spatula), and let’s make this game day the most delicious one yet!
The Sound of Sizzle: My First Game Day Kitchen Memory
My love for game day food started young, in my grandma’s bustling kitchen. Every Sunday during football season, her small house would transform into Command Central. The game was on, but the real action was by the stove. My job, as the eager eight-year-old “sous chef,” was to stand on a step stool and carefully press the edges of her famous meat pies with a fork.
She never used fancy cutters—just an upside-down bowl for circles. But to me, they were magical. I’d watch her spoon a fragrant mix of ground beef, onions, and her secret spice blend onto each dough round. The sound of those pies hitting the hot oil in her cast-iron skillet is a core memory—a triumphant, happy sizzle that promised good things to come. We’d carry heaping plates into the living room, and for a few hours, the only debates were over referee calls and who got the last pie. It was about connection, flavor, and pure, uncomplicated joy. These End Zone Empanadas are my playful, shaped-with-love homage to those days. They capture that same spirit of sharing and celebration, with a fun twist that’s sure to become a new tradition in your home.
Gathering Your All-Star Roster: Ingredients & Insights
Think of this like building your dream team. Every player (ingredient) has a role, and smart substitutions can still get you to the championship. Here’s what you’ll need:
- 1 package refrigerated pie dough (or pre-made empanada dough rounds): This is our MVP for convenience and flaky texture. Chef’s Insight: Pie dough gives that classic, buttery flavor, while store-bought empanada discs (often found in the frozen or international aisle) are a bit sturdier and designed specifically for frying or baking. For today, pie dough is perfect—just keep it chilled until the last second!
- 1 cup thick, cooked filling (chili, BBQ pulled pork, etc.): The heart of the operation! Pro Tip: DRAIN ANY EXCESS LIQUID. We’re avoiding a soggy bottom at all costs. Your filling should be moist but not runny. Leftover chili (sans beans if they’re huge) or thick, shredded BBQ pork are absolute perfection here.
- 1 cup shredded cheese (cheddar, Monterey Jack, pepper jack): The glue that brings it all together and adds that glorious melt. Substitution Tip: A blend is fantastic. For a kick, use pepper jack. For a milder crowd, go for Monterey Jack. Pre-shredded bags are fine, but a block you shred yourself melts creamier (it doesn’t have anti-caking agents).
- 1 large egg: For the egg wash. This is our secret weapon for that deep, golden-brown, professional-looking shine. Just whisk it with a tablespoon of water or milk.
- All-purpose flour, for dusting: A light sprinkle on your work surface prevents a sticky fumble. Don’t go overboard—just enough to keep things moving.
- Optional: A small knife or DIY “stitching” tool: To create the iconic football laces. You can use the tip of a paring knife, a toothpick, or even the back of a fork tine. I’ve been known to use a clean, unused LEGO edge in a pinch!
Play-by-Play: Crafting Your End Zone Empanadas
Alright, team! Huddle up. Follow these steps, and you’ll have a tray of winners in no time.
- Preheat and Prep: Get your oven roaring to 375°F (190°C). This ensures it’s ready to go when your empanadas are assembled. Line a baking sheet with parchment paper—this is non-negotiable for easy cleanup and preventing any sticking. Trust me on this one.
- Shape Your Players: On a lightly floured surface, roll out your first dough sheet just slightly to smooth it. Now, for the fun part! Use a football-shaped cookie cutter or a cardboard template you’ve cut yourself. If you’re freehanding it, think of a plump oval with pointy ends. Cut out as many shapes as you can. Re-roll the scraps and repeat. You’ll need two matching shapes for each empanada—a top and a bottom.
- The Fill Formation: Lay your bottom “footballs” on the prepared baking sheet. Spoon about 1 to 1.5 tablespoons of your well-drained filling into the center of each. Top with a generous pinch of cheese. Here’s my #1 Chef Hack: Leave a clean border of about ½-inch around the entire edge. This is your sealing zone, and keeping it filling-free is the key to a tight, leak-proof seal.
- Seal the Deal: Place a matching dough top over each filled bottom. Gently press down around the filling to push out any air pockets. Now, crimp the edges! You can use the tines of a fork, pressing firmly all the way around. For a more polished look, you can fold and twist the edges, but the fork is fast, easy, and gives a great textured edge.
- Add the Signature Stitches: This is where the magic happens! Using the tip of a small, sharp knife or a toothpick, lightly score three or four short lines in the center of each empanada, and then two small arches on either side to mimic football laces. Don’t cut too deep—you just want to imprint the design onto the dough.
- The Golden Glow-Up (Egg Wash): In a small bowl, whisk your egg with a splash of water. Using a pastry brush (or your finger in a pinch), lightly brush the top of each empanada with the egg wash. This is what gives them that beautiful, bakery-worthy golden color and slight sheen. It’s the difference between looking good and looking great.
- Bake to Victory: Slide your tray into the preheated oven. Bake for 18 to 22 minutes. You’re looking for a glorious, deep golden brown color and a crisp appearance. The smell will be incredible. Once out, let them cool on the sheet for at least 5 minutes—the filling is like molten lava straight from the oven!
How to Serve Like a Pro: Presentation & Dipping Sauces
You’ve done the hard work. Now, let’s make these beauties shine on the table! I love serving these on a large, rustic wooden board or a simple platter lined with a clean tea towel or parchment. Stack them up like a mini football pile-up!
The dipping sauce game is where you can really get creative. Offer a few small bowls on the side:
- The Classic Trio: Cool, creamy ranch or blue cheese dressing, a smoky BBQ sauce, and a bowl of zesty salsa.
- Kick it Up: For spicy fillings, a cooling avocado crema (blend an avocado with sour cream, lime, and salt) is a dream.
- Cheese Lover’s Dream: A simple, warm queso dip for the ultimate cheesy double-down.
Garnish your platter with some green—chopped fresh cilantro, chives, or parsley adds a pop of color. Remember, we eat with our eyes first, and these little footballs are already the stars of the show!
Call an Audible! 5 Tasty Twists on the Classic
Got a different crowd or craving? This recipe is incredibly versatile. Here are some of my favorite game-day audibles:
- Buffalo Chicken: Mix shredded rotisserie chicken with your favorite buffalo sauce and a dollop of blue cheese or ranch dressing. Fill and top with a mix of cheddar and mozzarella. Serve with extra blue cheese dressing for dipping.
- Philly Cheesesteak: Sauté thin slices of ribeye with onions, bell peppers, and mushrooms. Season with a little Worcestershire. Fill and top with provolone cheese. A total crowd-pleaser.
- Breakfast Touchdown: Fill with scrambled eggs, cooked breakfast sausage, and shredded hash browns. A sprinkle of cheddar cheese. Perfect for a morning game!
- Vegetarian MVP: A mix of black beans, corn, sautéed spinach, diced green chiles, and pepper jack cheese. So flavorful, no one will miss the meat.
- Dessert Field Goal: Sweet version! Use a filling of apple pie filling or cherry pie filling. Sprinkle the tops with cinnamon sugar instead of doing an egg wash. Bake as directed. Serve with a side of vanilla ice cream—unexpected and delightful!
Beau’s Kitchen Chronicles: Notes from the Sideline
This recipe has seen a few iterations in my kitchen. The first batch? Let’s just say the “footballs” looked more like bloated amoebas, and my stitching looked like a toddler’s scribble. Practice makes perfect! I found that chilling the shaped empanadas for 10 minutes before baking helps them hold their shape even better.
A funny story: I once tried to make a giant, party-size “football” empanada for the Super Bowl. It was the size of a real football and looked impressive… until we tried to move it and the bottom split open, creating a delicious but very messy “food fumble” on the kitchen floor. My dog, Biscuit, was the real MVP that day. Lesson learned: stick to the cute, hand-held size!
The beauty of this recipe is in its playfulness. Don’t stress about perfect shapes. Lopsided footballs taste just as amazing. It’s all about the joy of making and sharing something special.
Your Questions, Answered: Huddle Here for Help
Q: Can I make these ahead of time?
A: Absolutely! You can assemble the empanadas, place them on the parchment-lined sheet, and freeze them solid before transferring to a freezer bag. Bake straight from frozen, adding 5-7 extra minutes to the bake time. You can also refrigerate assembled, unbaked empanadas for up to 24 hours.
Q: My filling keeps leaking out! What am I doing wrong?
A: Two likely culprits: 1) Too much filling or filling too close to the edge. Remember that ½-inch border! 2) Not sealing tightly enough. Really press that fork down with conviction along the entire edge. A good seal is your best defense.
Q: Can I fry these instead of baking?
A: You sure can! Heat about 1 inch of neutral oil (like canola or vegetable) in a heavy pot to 350°F. Fry in batches for 2-3 minutes per side until deep golden brown. Drain on a wire rack over paper towels. They’ll be extra crispy and indulgent!
Q: My dough got too soft and sticky while I was working. Help!
A: No panic! This is why we keep the dough chilled. If it gets warm, just pop the whole baking sheet with your shaped empanadas into the fridge for 10 minutes. This firms up the butter in the dough and will make handling them and getting clean cuts much easier.

End Zone Empanadas : Football-Shaped Hand Pies for Game Day
Description
Hey friends, Beau here from Feastical! When game day rolls around, I want snacks that are bold, fun, and easy to eat—no forks, no mess, just pure flavor. These End Zone Empanadas check every box. Golden, flaky pastry wrapped around cheesy, savory fillings and shaped like little footballs? That’s a guaranteed crowd win.
Ingredients
-
1 package refrigerated pie dough (or empanada dough rounds)
-
1 cup thick, cooked filling (BBQ pulled pork, chili, buffalo chicken, etc.)
-
1 cup shredded cheese (cheddar, Monterey Jack, pepper jack, or a blend)
-
1 large egg
-
1 tablespoon water or milk
-
All-purpose flour, for dusting
Optional:
Small knife, toothpick, or fork for “football stitching”
Notes
-
Drain fillings well – excess liquid causes leaks
-
Don’t overfill – less is more for a tight seal
-
Chill before baking (10 minutes) if dough gets soft
-
Make ahead: Freeze unbaked empanadas and bake from frozen (+5–7 minutes)
Nutritional Info: The Straight Talk
Hey, we’re all about balance here at Feastical, but let’s be real—these are a celebratory game-day treat! Here’s a general breakdown per empanada (using pie dough, a chili/cheese filling, and the baking method):
Estimated per empanada: Calories: 280 | Fat: 16g | Saturated Fat: 7g | Carbohydrates: 24g | Fiber: 1g | Sugar: 1g | Protein: 8g | Sodium: 480mg
These numbers can vary widely based on your specific fillings, cheese choices, and whether you bake or fry. Using a leaner filling like shredded chicken or a veggie mix, opting for reduced-fat cheese, and baking instead of frying are all great ways to lighten them up a touch. But remember, the goal is flavor and fun—enjoy them as part of the game day feast!
The Final Whistle: You’ve Scored a Culinary TD!
And there you have it, friends! Your playbook for the most fun, flavorful, and fuss-free game day snack around. These End Zone Empanadas are more than just food; they’re a conversation starter, a labor of love (that’s actually not much labor at all), and a guaranteed way to make your gathering memorable.
The real win is in the sharing—the groans of delight when your guests see the clever shape, the friendly debate over which filling is best, and the happy silence that falls over the room as everyone digs in. That’s the Feastical spirit: food that brings people together and creates those warm, fuzzy, full-bellied memories.
So give these a try this weekend. Tag me @Feastical if you do—I love seeing your kitchen creations! Now, go enjoy the game, the company, and your very well-deserved snack-time victory. Until next time, keep your spatula close and your appetite closer.
Hungry for more? Browse all my feel-good recipes for your next gathering!

Mexican Cheese Dip : Creamy, Spicy Queso in Minutes
The Ultimate Mexican Cheese Dip: Your New Secret Weapon for Joy
Hey there, friend! Beau here, welcoming you back to my kitchen. Pull up a stool. You smell that? It’s the sizzle of butter in a pan, the promise of cheese about to melt into something magical, and the faint, glorious echo of a crowd cheering… or maybe that’s just my stomach rumbling. We’re about to embark on a mission to create the heart and soul of every great gathering: the legendary, the irresistible, the downright glorious Mexican Cheese Dip.
This isn’t just any dip. This is the warm, creamy, slightly spicy hug that turns a bag of chips into a party, a quiet Tuesday into a fiesta, and a group of friends into a huddle of happy, chip-wielding foodies. It’s the queso of your dreams—made with real, honest-to-goodness cheese that melts into velvety perfection, kissed with just the right amount of spice and tang. Forget the gloppy, neon-yellow stuff. We’re crafting a dip with soul, one that comes together in minutes but tastes like you’ve been simmering it for hours. So, grab your favorite saucepan and your appetite. Let’s make some memories, one delicious, cheesy scoop at a time.
The Dip That Won the Game (And My Heart)
Let me paint you a picture. It’s a crisp autumn Saturday, college football is on, and my tiny apartment is packed wall-to-wall with friends. The energy is electric, but there’s a problem: we’re dangerously low on snacks. The chips are standing at attention, lonely on their platter. In a moment of pure, hungry inspiration, I raided the fridge. A block of cheddar, some forgotten Monterey Jack, a rogue can of tomatoes with chilies. I melted, stirred, and seasoned, not following a recipe, just following my gut. Ten minutes later, I presented this bubbling, golden concoction to the crowd.
Friends, the game on TV became the secondary event. That bowl of queso became the epicenter of laughter, debate, and pure, unadulterated joy. We cheered for touchdowns, but we swooned for the dip. It was the moment I truly understood the power of food to connect—to turn a simple snack into the star of the show. That dip, born from pantry scraps and a dash of desperation, is the direct ancestor of the recipe I’m sharing with you today. It’s proof that the best food isn’t always the fanciest; it’s the food made with heart and shared with people you love.
Gathering Your Flavor All-Stars
Great queso starts with great ingredients. Here’s your winning lineup. Don’t stress if you need to swap something out—I’ve got your back with tips.
- 2 tbsp butter – Our flavor foundation. It’s going to help us build a roux, which is just a fancy chef word for “the magic thickener.” Unsalted is best so we control the salt, but regular works in a pinch.
- 2 tbsp all-purpose flour – The other half of our dynamic thickening duo. It cooks with the butter to eliminate that raw flour taste and gives our dip a luscious, creamy body that won’t separate.
- 1 cup whole milk – For maximum creaminess and richness. The fat is your friend here! Lower-fat milks will work, but the texture won’t be quite as luxuriously smooth.
- 1 cup shredded cheddar cheese – The bold, tangy backbone of our dip. Chef’s Insight: Please, please shred it yourself! Pre-shredded cheese is coated to prevent clumping, which also prevents it from melting into a perfectly smooth sauce. A few minutes on the box grater makes a WORLD of difference.
- 1 cup shredded Monterey Jack cheese – Cheddar’s meltier, milder best friend. It brings incredible gooeyness and balances the cheddar’s sharpness. No Monterey Jack? Mozzarella or a Mexican cheese blend are fantastic stand-ins.
- 1/2 cup diced tomatoes with green chilies (like Rotel), drained – This is our secret weapon for flavor and texture! It adds little pops of juicy tomato and a gentle, built-in heat. Drained is key—we want the flavor, not extra liquid.
- 1/4 tsp each: garlic powder, onion powder, ground cumin – The flavor trifecta! They add depth and that “what is that amazing taste?” factor without any chopping. Smoked paprika (just a pinch) is a killer addition here too.
- Salt to taste – Start with a pinch, then taste after the cheese is melted. Cheeses vary in saltiness, so this is your moment to personalize.
- Optional for the brave: Chopped fresh jalapeños, a drizzle of hot sauce, or a shower of fresh cilantro. This is your dip—make it sing your song!
Let’s Get Melty: Your Foolproof Queso Blueprint
Ready? Put on some music, tie on your apron (or don’t, I’m not the boss of you), and let’s cook.
- The Foundation (Make the Roux): Grab a medium saucepan and place it over medium heat. Add your butter and let it melt, swirling the pan until it’s foamy and fragrant. Now, sprinkle in the flour. Here’s the move: use a whisk and stir it constantly for a full 1-2 minutes. You’re cooking out the raw flour taste and toasting it into a beautiful, pale blond paste. This is the secret to a smooth, non-grainy sauce. Chef Hack: If you accidentally get a few tiny lumps, don’t panic! Just keep whisking vigorously; they’ll usually smooth out when you add the milk.
- The Creamy Base (Add the Milk): Now, with your whisk still in hand, slowly pour in the milk. I mean slowly at first, just a splash, and whisk until it’s completely incorporated into the roux. This prevents lumps. Once that first bit is smooth, you can pour in the rest of the milk in a steady stream, whisking the whole time. Let this mixture simmer gently for 2-3 minutes. You’ll feel it thicken slightly as you whisk—it should coat the back of a spoon. This means it’s ready for the main event.
- The Main Event (Melt the Cheese): Turn the heat down to low. This is crucial! High heat can make cheese seize up and get greasy. Now, handful by handful, add your beautiful, freshly-shredded cheeses. Stir with a spoon or spatula in a figure-eight motion until each handful is completely melted before adding the next. Patience here rewards you with a sauce so silky, it’s almost drinkable. See? Told you that shredding was worth it!
- The Flavor Finish (Stir in the Good Stuff): Once your cheese is a pool of creamy perfection, stir in the drained tomatoes and green chilies, garlic powder, onion powder, and cumin. Give it a good, gentle stir to distribute all those flavors evenly. Now, taste it! This is the best part. Add salt as needed. Want more heat? Now’s the time for those jalapeños or a dash of hot sauce.
- Serve with Love (Keep it Warm): Your queso is ready for its grand debut! Pour it immediately into a serving bowl. For parties, I transfer it to a small slow cooker set to “WARM.” It keeps it perfectly dippable for hours without breaking or getting a skin. Garnish with a little extra color—cilantro, a few diced tomatoes, or a jalapeño slice.
Beyond the Chip: How to Serve This Cheesy Masterpiece
Of course, a big bowl of sturdy tortilla chips is the classic, and honestly, perfect, vehicle. But why stop there? Let’s get creative:
- The Ultimate Nachos Bar: Pour this queso directly over a sheet pan of loaded tortilla chips, black beans, and seasoned ground beef or chicken. It’s the glue that holds nacho heaven together.
- Breakfast Hero: Drizzle it over breakfast burritos, scrambled eggs, or hash browns. Trust me, it’s a game-changer.
- Baked Potato’s Best Friend: Swap out sour cream for a ladle of this warm queso on a fluffy baked potato. Add some crumbled bacon. You’re welcome.
- Veggie Dip Upgrade: Serve it warm with a platter of crisp veggies like bell pepper strips, broccoli florets, and cauliflower for a slightly lighter (but still indulgent) option.
- The “Frito Pie” Magic: Grab individual bags of Fritos, snip them open, and spoon in some queso, chili, and onions for the easiest, most nostalgic handheld meal.
Make It Your Own: 5 Delicious Twists
This recipe is your canvas. Here are a few ways to paint your own cheesy masterpiece:
- White Queso (Queso Blanco): Swap the cheddar and Monterey Jack for 2 cups of shredded white American cheese or white cheddar. Omit the tomatoes. Stir in a can of drained, chopped green chilies and a tablespoon of chopped pickled jalapeño juice for tangy heat.
- Spicy Chorizo Bomb: Brown 1/2 pound of Mexican chorizo (remove from casing) in a pan. Drain excess grease, then stir the cooked chorizo into the finished queso. The smoky, spicy sausage takes it to a whole new level of party food.
- “Clean Out the Fridge” Queso: Got leftover taco meat, some black beans, or roasted corn? Stir a 1/2 cup of any (or all!) of them in at the end for a heartier, meal-worthy dip.
- Green Chile & Lime: Use two 4-oz cans of diced green chilies instead of Rotel. After finishing the dip, stir in the zest and juice of one fresh lime for a bright, tangy kick.
- Lightened-Up Version: Use 1% milk and reduce the butter to 1 tbsp. Replace half the cheese with a 3/4 cup of pureed cauliflower or butternut squash (sounds wild, but it adds creaminess and nutrients!). You’ll still get incredible flavor with a lighter feel.
Beau’s Kitchen Confidential
This recipe has been my faithful companion for years, evolving from that frantic game-day experiment to the polished (but still easy!) version you see today. The biggest lesson learned? Low and slow with the cheese. I’ve had my share of broken, oily queso from rushing over high heat, and it’s a heartbreak we can avoid. Another funny story: I once accidentally used sweetened condensed milk instead of evaporated milk (they look similar in a hurry!). We ended up with a strangely sweet, caramelized cheese dip that we actually ate over ice cream later. It was… interesting. Let’s stick to regular milk, folks. The beauty of this dip is its simplicity and reliability. It’s my culinary security blanket for any event.
Your Queso Questions, Answered
Q: My queso got grainy/lumpy! What happened?
A: Don’t worry, this is usually a heat issue. Cheese can seize if heated too quickly or too high. Next time, keep the heat on low when adding cheese. If it happens, try blending it with an immersion blender or whisking in a splash of hot milk or cream to smooth it out.
Q: Can I make this ahead of time?
A: Absolutely! Make it up to a day ahead, let it cool, and store it covered in the fridge. Reheat it gently on the stovetop over low heat, adding a splash of milk to loosen it up as you stir.
Q: Why did my queso get a skin on top?
A> That’s just what happens when cheese sauce cools and is exposed to air. To prevent it, press a piece of plastic wrap directly onto the surface of the dip if you’re holding it for a bit. For serving, the slow cooker on “WARM” method is your best friend—no skin in sight.
Q: What’s the best cheese for melting?
A: Cheeses that are young and high in moisture melt best. Monterey Jack, young cheddar, Gruyère, Fontina, and American cheese are all champions. Avoid aged, hard cheeses like Parmesan as the primary melter (though a sprinkle on top is great).

Mexican Cheese Dip : Creamy, Spicy Queso in Minutes
Description
This Mexican Cheese Dip is the kind of recipe you pull out when you want instant joy on the table. It’s smooth, rich, and perfectly spiced—made with real cheese that melts into a velvety sauce in just minutes. Whether it’s game night, movie night, or a last-minute get-together, this queso is your no-fail crowd-pleaser.
Ingredients
-
2 tablespoons butter
-
2 tablespoons all-purpose flour
-
1 cup whole milk
-
1 cup shredded cheddar cheese
-
1 cup shredded Monterey Jack cheese
-
½ cup diced tomatoes with green chilies (drained)
-
¼ teaspoon garlic powder
-
¼ teaspoon onion powder
-
¼ teaspoon ground cumin
-
Salt, to taste
Optional add-ins or toppings:
Chopped jalapeños, hot sauce, fresh cilantro
Instructions
-
Make the base:
In a medium saucepan over medium heat, melt the butter. Whisk in the flour and cook for 1–2 minutes, stirring constantly, until smooth and lightly golden. -
Add milk:
Slowly whisk in the milk. Cook for 2–3 minutes, stirring, until slightly thickened. -
Melt the cheese:
Reduce heat to low. Add the cheddar and Monterey Jack a handful at a time, stirring until fully melted and smooth before adding more. -
Season:
Stir in diced tomatoes with chilies, garlic powder, onion powder, cumin, and salt to taste. -
Serve warm:
Transfer to a bowl and serve immediately with tortilla chips or your favorite dippers.
Notes
-
Low heat is key: High heat can make cheese grainy or oily.
-
Shred your own cheese: It melts smoother than pre-shredded cheese.
-
Too thick? Stir in a splash of warm milk.
-
Keep it warm: A small slow cooker on “warm” works perfectly for parties.
Nourishment & Joy (Because Food is Both)
Let’s be real: this is a celebratory dip, a treat meant to be shared and savored. It’s rich, comforting, and packed with flavor. Per serving (about 1/4 cup), you’re looking at approximately: 190 calories, 15g fat, 5g carbs, and 7g protein. The protein comes from the dairy, and the carbs are minimal. To balance it out, I love serving it with those fresh veggie sticks alongside the chips. Remember, food is about more than numbers—it’s about the experience, the shared laughter, and the pure happiness of a perfectly melted, cheesy bite. Enjoy it mindfully and joyfully.
Final Thoughts
And there you have it, my friend—the key to unlocking endless smiles and empty bowls. This Mexican Cheese Dip is more than a recipe; it’s a tool for connection, a guaranteed mood-lifter, and proof that the simplest things in the kitchen are often the most beloved. I hope this becomes a staple in your home, just like it is in mine. When you make it, I’d love to hear about it! Tag me on social or drop a comment over at Feastical.com and tell me about your game-day win, your movie-night success, or your own creative twist.
Now, go forth and dip fearlessly. Until next time, keep your knives sharp, your cheese shredded, and your heart full.
Happy cooking,
Beau