
Pineapple Chili Wings : Sticky, Sweet, and Spicy with Island Vibes
Pineapple Chili Wings: Your New Party Hero is Here!
Hey friends, Beau here! Let’s talk about that magical moment at any gathering when a platter of wings hits the table. The conversation dips for a second, eyes widen, and a unified, happy sigh fills the room. That’s the power of a truly great wing. It’s not just food; it’s an event. And today, I’m handing you the keys to create that exact moment in your own kitchen with my Pineapple Chili Wings.
We’re leaving basic buffalo in the dust and taking a flavor vacation. Imagine this: crispy, juicy chicken wings, fresh from the oven or air fryer, tossed in a glaze that’s the ultimate personality blend. It’s got the sunny, tropical sweetness of pineapple, the gentle kick of sweet chili, and the warm, grounding notes of fresh garlic and ginger. It’s sticky, it’s glossy, and it clings to every nook and cranny of the wing, promising a messily delicious experience with every single bite.
Whether you’re gearing up for game day, hosting a casual backyard hang, or just battling a serious case of the “I-want-something-awesome-for-dinner” blues, these wings are your answer. They come together with shockingly little fuss but deliver restaurant-level wow factor. So, tie on your favorite apron, grab a bowl for tossing, and let’s make some magic happen. Your fingers are about to get deliciously sticky, and your guests (or your couch-mates) are going to be so, so grateful.
The Backyard BBQ That Started It All
This recipe didn’t start in a test kitchen with measuring spoons and timers. Oh no. It was born out of a happy accident during one of my infamous “Clean Out The Fridge” Sundays. I had a half-empty bottle of pineapple juice calling my name from the door shelf, a lonely knob of ginger, and a party-sized pack of wings in the freezer. A bunch of friends had spontaneously decided my backyard was the place to be, and the pressure was on to feed the masses.
I started winging it (pun absolutely intended). I reduced the pineapple juice into a syrupy base, raided the condiment door for sweet chili sauce, and went to town with the garlic press. The smell alone brought everyone hovering around the grill. When I tossed those crispy wings in the glossy, amber-colored glaze and took the first bite, I knew we had something special. The sweet heat, the tang, the stickiness—it was an instant chorus of “WHAT IS THIS?!” and “You HAVE to make these again.” That messy, joyful, feed-your-friends feeling is what I’ve baked right into this recipe, and I can’t wait for you to experience it.
Gathering Your Flavor Crew
Here’s everything you need to build these flavor bombs. I’ve added my little chef notes next to each one because knowledge is power—and in the kitchen, power tastes really, really good.
- 2 lbs chicken wings, split, tips removed – Look for “party wings” at the store to save time. The split (drumette and flat) ensures even cooking and maximum sauce coverage. If you’re starting with whole wings, just snip the tip off and slice through the joint. Pat them really dry with paper towels—this is the #1 secret for crisp skin!
- Salt and pepper to taste – Don’t be shy here. This is your wing’s first layer of flavor. A good seasoning now makes every bite sing later.
- 1 tbsp neutral oil – Avocado, canola, or light olive oil are perfect. We just need a light coat to help the seasoning stick and promote browning. If you’re air frying, this little bit of oil is still key for that perfect texture.
- 1 cup pineapple juice – The star of our sauce! Using 100% juice (not “drink” or cocktail) gives us pure, concentrated sweetness to build on. In a pinch, orange juice can work, but you’ll lose that distinct tropical vibe.
- ⅓ cup sweet chili sauce – This is the “chili” in our name—it provides a gentle, sweet heat and amazing body. It’s usually found in the Asian foods aisle. For a spicier kick, use a spicy chili garlic sauce, but start with less!
- 2 garlic cloves, minced – Fresh is best! That pungent, aromatic bite cuts through the sweetness beautifully. About 1 teaspoon of pre-minced jarred garlic can sub in.
- 1 tsp fresh grated ginger – Ginger’s bright, zippy warmth is non-negotiable for that island feel. Grate it on a microplane right into the pan. In a real emergency, ¼ tsp of ground ginger will do.
- 1 tsp soy sauce (optional but awesome) – This is my little umami booster. It doesn’t make the sauce taste like soy, it just deepens all the other flavors and adds a savory balance. Use coconut aminos for a gluten-free version.
Let’s Make Some Magic: Step-by-Step
Follow these steps, and you’re guaranteed wing success. I’m chatting you through each one with all my favorite hacks!
- Prep & Preheat: First, get your wings out of the fridge and pat them bone-dry with paper towels. I can’t stress this enough—dry skin equals crispy skin. Toss them in a large bowl with the oil, a generous pinch of salt, and a few cranks of black pepper. Preheat your oven to 400°F (200°C). If you’re using an air fryer, no need to preheat just yet.
- The Crispy Base: For the oven, place a wire rack on a rimmed baking sheet (lined with foil for easy cleanup!). Arranging the wings on the rack allows hot air to circulate all around them, cooking them evenly and letting the fat drip away. This is the pro move for an all-over crunch. Bake for 40-45 minutes, flipping them halfway through. For air fryer fans: Cook at 375°F for about 22-25 minutes, shaking the basket at the halfway mark. You’re looking for golden brown and cooked through.
- Build the Glaze: While the wings work their crispy magic, let’s make that legendary sauce. In a medium saucepan, pour in the pineapple juice. Bring it to a simmer over medium heat and let it bubble away until it reduces by half. This concentrates the sweetness and creates a syrupy base for our glaze. You’ll know it’s ready when it coats the back of a spoon.
- Finish the Sauce: Stir in the sweet chili sauce, minced garlic, grated ginger, and that sneaky teaspoon of soy sauce. Let it all simmer together for another 5-7 minutes. It will thicken slightly and become beautifully glossy. Give it a taste—this is your moment to adjust! Want more heat? A pinch of red pepper flakes. More tang? A squeeze of lime. Make it yours!
- The Grand Toss: Once your wings are gloriously crispy and your sauce is hot and ready, it’s showtime. Add the hot wings to a large, clean bowl. Pour the warm glaze over the top. Using tongs or a big spoon, toss, toss, TOSS until every wing is lovingly coated in that sticky, shiny goodness. The warmth of the wings helps them absorb the sauce perfectly.
How to Serve These Sticky Wonders
Presentation is part of the fun! I love serving these on a big, rustic platter, maybe over a bed of fresh cilantro or sliced green onions for a pop of color. Have plenty of napkins—the good, thick ones—within arm’s reach. This is a hands-on, face-first kind of meal, and that’s the whole point.
For the full island-vibe experience, I like to offer little bowls of extra sauce for dipping, some cool and creamy ranch or blue cheese dressing on the side (the coolness is a fantastic contrast to the sweet heat), and maybe a big wedge of lime for squeezing. To round it out, keep the sides simple: a crisp cucumber salad, some coconut rice to soak up extra sauce, or classic celery and carrot sticks. The goal is to let the wings be the undisputed star of the show.
Mix It Up! Recipe Variations
Love the base recipe? Amazing! Want to play around? Even better. Here are a few of my favorite twists:
- Fiery Dragon Version: Add 1-2 tablespoons of sriracha or a minced fresh red chili (like a Fresno or Thai bird’s eye) to the sauce while it simmers. For extra smokiness, a teaspoon of chipotle in adobo paste is a game-changer.
- Sticky Pineapple Teriyaki: Swap the sweet chili sauce for ⅓ cup of a good teriyaki sauce. Add a tablespoon of honey to the glaze for extra lacquer. Garnish with toasted sesame seeds.
- Drumstick or Thigh Party: Not a wing person? Use this same glaze on bone-in, skin-on chicken drumsticks or thighs. Just adjust the cooking time (they’ll need longer, about 45-50 mins in the oven) until they reach 165°F internally.
- Mango-Habanero Twist: Replace the pineapple juice with mango nectar for a different tropical profile. Add a tiny bit of minced habanero pepper (wear gloves!) for a fruity, fiery blast.
- Slow Cooker/Crockpot Ease: For a fall-apart tender option, place raw wings in your slow cooker. Pour the unreduced sauce ingredients (juice, chili sauce, etc.) over top. Cook on low for 5-6 hours. Then, transfer wings to a baking sheet, broil for 3-5 mins to crisp up, and reduce the leftover sauce in a pan to glaze them.
Beau’s Kitchen Notes
This recipe has evolved from that frantic backyard BBQ into my most-requested party dish. One time, I accidentally used crushed pineapple instead of juice—it worked! It created a chunkier, more textured glaze that was actually incredible. Don’t be afraid of imperfections.
My biggest tip? Make a double batch of the sauce. Seriously. I always simmer an extra cup of juice and double the other sauce ingredients. I use half for tossing and keep the other half warm on the stove. Why? Because people always want more sauce for dipping, and having it ready makes you look like a total kitchen rockstar. It also keeps the wings from getting soggy if you’re serving them over a longer period. Just toss a few at a time in a bowl with a bit of the reserved sauce.
FAQs & Wing Rescue Tips
Q: My sauce isn’t thickening up! What do I do?
A: No panic! Just keep simmering. If you’re in a hurry, make a quick slurry: mix 1 tsp of cornstarch with 1 tbsp of cold water until smooth. Whisk it into the simmering sauce and cook for another minute until it thickens beautifully.
Q: Can I make these ahead of time?
A> You can prep the wings up to a day ahead: season them, arrange on the rack-covered sheet pan, cover tightly, and fridge them. Make the sauce and store it separately. Before guests arrive, bake the wings and reheat the sauce. Toss and serve for fresh, crispy perfection.
Q: My wings are sticking to the rack! Help!
A> A quick spritz of cooking spray on the rack before placing the wings down works wonders. Also, ensure you’re flipping them halfway—this helps them release naturally.
Q: I can’t find sweet chili sauce. Any substitutes?
A> You can make a quick version: mix ¼ cup honey or apricot jam, 2 tbsp rice vinegar, 1 tsp sriracha, and a pinch of red pepper flakes. Use this in place of the ⅓ cup sweet chili sauce. It’ll be a slightly different flavor but still delicious.

Pineapple Chili Wings : Sticky, Sweet, and Spicy with Island Vibes
Description
These Pineapple Chili Wings are everything you want in a crowd-pleasing dish: crispy chicken, a glossy tropical glaze, and that perfect balance of sweet and gentle heat. Pineapple juice brings sunny sweetness, sweet chili sauce adds a mild kick, and fresh garlic and ginger tie it all together. Easy to make, impossible to resist.
Ingredients
-
2 lb chicken wings, split and tips removed
-
1 tbsp neutral oil (avocado or canola)
-
Salt and black pepper, to taste
Pineapple Chili Glaze
-
1 cup 100% pineapple juice
-
⅓ cup sweet chili sauce
-
2 garlic cloves, minced
-
1 tsp fresh grated ginger
-
1 tsp soy sauce (optional, for umami)
Optional Garnish
-
Sliced green onions
-
Fresh cilantro
-
Lime wedges
Instructions
-
Prep the wings
Preheat oven to 400°F (200°C). Pat wings very dry. Toss with oil, salt, and pepper. -
Bake until crispy
Arrange wings on a wire rack set over a foil-lined baking sheet.
Bake 40–45 minutes, flipping halfway, until golden and crisp.
Air fryer option: 375°F for 22–25 minutes, shaking halfway. -
Make the glaze
In a saucepan, simmer pineapple juice over medium heat until reduced by half.
Stir in sweet chili sauce, garlic, ginger, and soy sauce. Simmer 5–7 minutes until glossy. -
Toss and serve
Add hot wings to a large bowl, pour over warm glaze, and toss to coat.
Garnish if desired and serve immediately.
Notes
-
Dry wings = crispy wings: Moisture prevents browning.
-
Reduce the juice: This concentrates pineapple flavor and thickens the sauce naturally.
-
Taste the glaze: Add lime juice for tang or chili flakes for extra heat.
-
Sauce on demand: Keep extra glaze warm and toss wings just before serving to avoid sogginess.
Nutritional Info (Because We’re Curious!)
Here’s a rough breakdown per serving (about 1/4th of the recipe). Remember, this is an approximation as ingredients can vary. The majority of the fat is from the chicken skin (where the flavor lives!), and the sugars come naturally from the pineapple juice and the sweet chili sauce.
- Calories: ~330
- Protein: 24g (Wings are a great protein source!)
- Fat: 18g
Final Thoughts
Here’s the honest truth about these Pineapple Chili Wings: they’re more than just a recipe. They’re a vibe. They’re that dish that makes people stop scrolling on their phones, lean in, and ask, “Okay, what’s in this?” They turn a regular Tuesday into a mini-celebration and make any gathering feel like a party worth remembering.
What I love most is how they balance fearless flavor with unfussy cooking. That sweet-tangy-sticky glaze feels fancy and special, but the process is just… fun. It’s the kind of cooking that doesn’t stress you out—it gets you excited. You get to watch plain wings transform into glossy, fragrant masterpieces, and you get to be the hero who made it happen.
So, whether you’re serving them up for a crowd of friends or just treating yourself to an epic night in, make these wings with confidence. Toss them with abandon, get your fingers sticky, and don’t skimp on the napkins. Embrace the happy mess. That’s where the real magic is.
After all, the best meals aren’t just about what’s on the plate. They’re about the shared “Mmmms,” the laughs over dripping sauce, and the simple joy of making something delicious for the people you care about. These wings deliver all of that, every single time.
Now go fire up that oven or air fryer. Your new party hero—and your new favorite kitchen moment—is waiting.

Brown Sugar Gochujang Wings : Sweet Heat with a Korean Kick
Brown Sugar Gochujang Wings – Sweet Heat with a Korean Kick
Hey there, friend. Beau here. Can you smell that? It’s the unmistakable, mouth-watering scent of chicken wings roasting to a golden-brown crisp in the oven. But wait—there’s something else in the air. It’s deep, it’s savory, it’s got a kick… it’s the magic of gochujang meeting brown sugar in a saucepan, and it’s about to change your wing game forever.
If you’ve been hanging around Feastical for a while, you know I live for those recipes that make you close your eyes and go, “Wow.” The ones that are somehow greater than the sum of their parts. These Brown Sugar Gochujang Wings are exactly that. They’re not just spicy, they’re not just sweet. They’re a whole flavor symphony. The gochujang brings this incredible fermented umami depth and a building, rounded heat. The brown sugar caramelizes into a sticky, glossy glaze that clings to every nook and cranny of a perfectly crispy wing. Add a hit of garlic, a splash of soy, and a finish of sesame, and you have a plate of wings that’s bold, trendy, and utterly, completely addictive.
This recipe is my love letter to the beautiful intersection of Korean flavors and American comfort food. It’s surprisingly simple to make but delivers a “chef-y” punch that will have everyone asking for your secret. So, tie on your apron, crank up some tunes, and let’s make some magic happen. These wings are built for sharing, but I won’t judge if you keep the whole batch for yourself. Let’s dig in!
The Night I Fell in Love with Gochujang
Let me take you back a few years. My friend Mina, who’s Korean-American, invited me over for a “wing night” that was different from our usual buffalo-and-bleu-cheese routine. I walked into her kitchen, and the air was thick with the most incredible aroma—spicy, sweet, deeply savory, and totally unfamiliar. She was stirring this gorgeous, brick-red paste in a pot, and she just grinned and said, “You’re about to meet your new favorite ingredient.”
That night, we devoured tray after tray of her family’s gochujang-glazed wings. They were sticky, they were messy (the best kind of food always is), and they had this complex heat that wasn’t just about burning your tongue—it was about flavor. It was a heat that sang alongside sweetness and savoriness. I was hooked. I spent the next week experimenting, adding my own twist with extra brown sugar for that caramelized edge and a hit of rice vinegar for balance. The recipe you’re about to make is the happy result of that delicious inspiration and a whole lot of happy taste-testing. It reminds me that the best food memories are made when we share and remix traditions with the people we love.
Gathering Your Flavor Arsenal
Here’s everything you need to create these sticky-sweet-spicy masterpieces. Don’t stress if you’re missing an item—I’ve got your back with substitutions.
- 2 lbs chicken wings, split into drums and flats – Pat them really dry with paper towels. This is the #1 secret to crispy skin, not steam! No wings? Chicken drumettes work perfectly.
- 1 tbsp vegetable oil – A neutral oil like avocado or canola works great. It’s just there to help the seasoning cling and promote browning.
- Salt and pepper to taste – We’re seasoning the canvas before we add the masterpiece glaze.
For the Legendary Glaze:
- 1/4 cup gochujang (Korean chili paste) – The star! Find it in the Asian aisle of most supermarkets. It’s a fermented paste made from chili peppers, rice, and soybeans. It’s spicy, salty, sweet, and umami all in one jar. Substitution Tip: In a pinch, mix Sriracha with a bit of miso paste and a touch of sugar, but seek out the real deal if you can—it’s worth it!
- 1/4 cup brown sugar, packed – Light or dark both work. Dark brown sugar has a deeper molasses flavor that I love here. It creates that incredible sticky, lacquered glaze.
- 2 tbsp soy sauce – Adds the necessary salty, umami backbone. Use low-sodium if you’re watching salt, or tamari for a gluten-free version.
- 1 tbsp rice vinegar or lime juice – A little acidity is crucial to balance the sweetness and richness. Rice vinegar is milder; lime adds a bright, zesty kick. Your choice!
- 2 garlic cloves, minced – Fresh is best here. That punch of aromatic garlic is non-negotiable for me.
- 1 tbsp water (to thin, if needed) – Your “control” ingredient. If the glaze gets too thick while simmering, a splash of water brings it back to a perfect coating consistency.
The Grand Finale:
- Toasted sesame seeds – Toasting them in a dry pan for a minute until fragrant makes a WORLD of difference. It’s nutty confetti!
- Green onions, thinly sliced (optional) – For a fresh, crisp finish and a pop of color. The green part is perfect.
Let’s Get Cooking: Your Path to Wing Perfection
Follow these steps, and you’ll be a wing-glazing wizard in no time. I’m throwing in my favorite chef hacks along the way.
- Prep & Crisp Those Wings! First, preheat your oven to a hot 425°F (220°C). Line a baking sheet with foil (for easy cleanup) and place a wire rack on top. This is HACK #1: The rack lets hot air circulate all around the wings, ensuring they get crispy on all sides instead of steaming in their own juices. Pat your wings aggressively dry with paper towels—I can’t stress this enough. In a big bowl, toss the very dry wings with the oil, salt, and pepper. Arrange them in a single layer on the rack. Roast for 40-45 minutes, flipping them halfway through. You want them golden brown and audibly crispy! Air Fryer Friends: You know the drill. Cook at 400°F for 20-25 minutes, shaking the basket halfway.
- Create the Magic Glaze. While the wings are getting gorgeous, make the glaze. In a small saucepan, combine the gochujang, brown sugar, soy sauce, minced garlic, and rice vinegar. Whisk it together over medium heat. Let it come to a gentle simmer and cook for 3-5 minutes, whisking often. You’ll see it go from a loose sauce to a thick, bubbling, lava-like glaze that coats the back of a spoon. HACK #2: Taste it! This is your moment. Want more heat? Add a pinch of gochugaru (Korean chili flakes). More tang? A squeeze of lime. Make it yours. If it gets too thick, whisk in that tablespoon of water.
- The Glaze Toss – A Sacred Ritual. As soon as the wings come out of the oven (they must be hot!), transfer them to a large, clean mixing bowl. Pour the warm glaze over the top. Using a sturdy rubber spatula or tongs, toss, toss, TOSS! Get every wing evenly coated in that glossy, sticky, beautiful sauce. The heat from the wings will help the glaze cling perfectly.
- Finish & Serve Immediately! Slide those glazed beauties onto your serving platter. Immediately shower them with the toasted sesame seeds and a flurry of sliced green onions. HACK #3: Serving immediately is key. That glaze is at its shiniest and stickiest right now. It’s a beautiful thing.
How to Serve Your Masterpiece
Presentation is part of the fun! I love using a big, rustic wooden board or a vibrant platter. Pile the wings high in the center for that abundant, feast-like feel. Scatter extra sesame seeds and green onions over the top for visual pop. Don’t forget the essentials: a big stack of napkins (these are gloriously messy) and maybe a small bowl of cool, creamy dipping sauce on the side. A simple mix of sour cream, a little lime juice, and a drizzle of honey is fantastic for cutting the heat. For sides, think fresh and crunchy: quick-pickled cucumber slices, a simple cabbage slaw, or just some crisp celery and carrot sticks. And of course, an ice-cold beer, a crisp lager, or a citrusy soda is the perfect beverage companion to this sweet heat.
Make It Your Own: Delicious Twists & Swaps
This recipe is a fantastic blueprint. Play with it!
- Honey Garlic Gochujang: Swap the brown sugar for an equal amount of honey. The flavor becomes a touch more floral and complex.
- Extra Fiery: Add 1-2 teaspoons of gochugaru (Korean chili flakes) to the glaze while it simmers, or a pinch of cayenne pepper for a sharper heat.
- Gluten-Free & Soy-Free: Easy! Use tamari or coconut aminos instead of soy sauce. Double-check your gochujang brand to ensure it’s gluten-free (many are!).
- Sticky Ginger Orange: Add 1 tbsp of freshly grated ginger and 2 tbsp of orange juice to the glaze ingredients. It’s a bright, zingy twist.
- Protein Swap: This glaze is incredible on cauliflower florets (roast them first!), tofu cubes, or even drizzled over grilled shrimp skewers.
Beau’s Kitchen Notes
This recipe has evolved from that first eye-opening night at Mina’s. I’ve learned that letting the glaze simmer just a bit longer makes it stick better. I’ve also had a few… *ahem*… learning experiences. Once, I was chatting so much I forgot the sugar entirely. Let’s just say we had some VERY salty, very spicy wings that night! Balance is everything. I also love making a double batch of the glaze and keeping it in a jar in the fridge. It’s amazing on grilled meats, stirred into fried rice, or even as a dip for egg rolls. It’s my not-so-secret weapon!
FAQs & Wing Rescue Tips
Q: My wings aren’t crispy! What did I do wrong?
A: The usual culprits are: 1) Not patting them dry enough before cooking. Moisture is the enemy of crispiness. 2) Not using a wire rack. If they sit directly on a pan, they steam. 3) Crowding the pan. Give them space! If you’re in a rush, a 5-minute blast under the broiler after cooking can help rescue soggy skin.
Q: Is gochujang super spicy?
A: It has a kick, but it’s a fermented, complex heat that builds slowly, not a face-melting burn. For milder wings, start with 3 tablespoons instead of 1/4 cup and add more to taste.
Q: Can I make these ahead of time?
A> You can prep the wings and the glaze separately. Cook the wings and let them cool. Store them unglazed in the fridge. Gently re-crisp them in a 400°F oven for 10 minutes, then toss with the reheated glaze. Glazing ahead of time will make the skin soft.
Q: My glaze is too thick/too thin. Help!
A> Too thick? Whisk in a splash of water, one teaspoon at a time. Too thin? Just let it simmer a little longer to reduce and concentrate. It will thicken as it cools.

Brown Sugar Gochujang Wings : Sweet Heat with a Korean Kick
Description
These Brown Sugar Gochujang Wings are sticky, crispy, sweet, and spicy in all the right ways. Gochujang brings deep savory heat, while brown sugar melts into a glossy glaze that clings to every wing. They’re easy enough for a weeknight and impressive enough for game day or guests.
Ingredients
Wings
-
2 lb chicken wings, split into flats and drumettes
-
1 tbsp neutral oil (vegetable, avocado, or canola)
-
Salt and black pepper, to taste
Gochujang Glaze
-
¼ cup gochujang (Korean chili paste)
-
¼ cup brown sugar (light or dark)
-
2 tbsp soy sauce (or tamari for gluten-free)
-
1 tbsp rice vinegar or lime juice
-
2 garlic cloves, minced
-
1 tbsp water (only if needed to thin)
To Finish
-
Toasted sesame seeds
-
Sliced green onions (optional)
Instructions
-
Prep & bake the wings
Preheat oven to 425°F (220°C). Line a baking sheet with foil and place a wire rack on top.
Pat wings very dry. Toss with oil, salt, and pepper. Arrange in a single layer.
Bake 40–45 minutes, flipping halfway, until golden and crispy. -
Make the glaze
In a small saucepan over medium heat, whisk together gochujang, brown sugar, soy sauce, garlic, and vinegar.
Simmer 3–5 minutes, stirring often, until thick and glossy. Add water if it gets too thick. -
Glaze the wings
Transfer hot wings to a large bowl. Pour glaze over and toss until fully coated. -
Finish & serve
Sprinkle with sesame seeds and green onions. Serve immediately.
Notes
-
Dry wings = crispy wings: Moisture is the enemy of crisp skin.
-
Use a wire rack: It lets hot air circulate so wings roast, not steam.
-
Taste the glaze: Add more vinegar for tang or a pinch of chili flakes for extra heat.
-
Air fryer option: Cook at 400°F (205°C) for 20–25 minutes, shaking halfway, then toss with glaze.
-
Make ahead: Bake wings in advance, re-crisp in oven, then glaze right before serving.
Nutritional Info (For the Curious Cook)
Please note: This is an estimate for 1 serving (approx. 1/4 of the recipe), calculated with standard ingredients. Values can vary based on specific brands and portion sizes.
- Calories: ~410
- Protein: 28g (Great for keeping you full!)
- Fat: 24g
- Saturated Fat: 6g
- Carbohydrates: 20g
- Sugar: 15g (Mostly from the brown sugar, which is part of the delicious glaze)
- Sodium: ~850mg (Use low-sodium soy sauce to reduce this if needed.)
This is indulgent comfort food, meant to be savored and shared. Balance it out with those fresh veggie sides!
Final Thoughts
And there you have it, my friend—my all-time favorite way to eat chicken wings. This Brown Sugar Gochujang recipe is more than just a list of ingredients; it’s a passport to big, bold, feel-good flavor. It proves that with a few great pantry staples and a little bit of love, you can create something truly spectacular that brings people together.
I hope you make these, get your fingers gloriously sticky, and create some fantastic food memories of your own. Tag me over on @Feastical if you do—I love seeing your creations! Now, go forth and glaze. Your taste buds will thank you.
Stay hungry,
Beau Collier
Prep Time: 10 minutes | Cook Time: 40 minutes | Total Time: 50 minutes | Servings: 4

Steak & Avocado Toast : Hearty, Flavor-Packed, and Totally Satisfying
Steak & Avocado Toast – The Hearty, Flavor-Packed Meal You Didn’t Know You Needed
Hey friends, Beau here! Let’s be real for a second. Sometimes, “avocado toast” gets a rep for being a little… well, light. A little too dainty for those days when your stomach is growling like a bear and you need something that truly sticks to your ribs. You know the feeling. You want that creamy avocado goodness, but you also want the savory, satisfying punch of a perfectly cooked steak. You want a meal that feels celebratory but comes together without a fuss.
That, my friends, is exactly why this Steak & Avocado Toast is my new obsession. It’s not just a snack; it’s a full, glorious, knife-and-fork experience. Imagine this: a thick slice of toasted, crusty bread slathered with lemony, peppery smashed avocado. On top of that, a tangle of spicy, fresh arugula. Then, the star of the show: thinly sliced, still-warm steak, resting right on top. And because we’re not messing around, we finish it all with a drizzle of golden, fragrant garlic butter that seeps into every nook and cranny.
This is the kind of dish that blurs the lines between brunch, lunch, and a killer easy dinner. It’s for the days you want to treat yourself without spending hours in the kitchen. It’s bold, it’s beautiful, and it’s packed with textures and flavors that sing in harmony. So, grab your favorite skillet and let’s turn the simple concept of toast completely on its head. Trust me, your taste buds will thank you.
The Toast That Started It All: A Kitchen Happy Accident
This recipe was born from one of those “what do I have left in the fridge?” moments that somehow turn into magic. It was a lazy Sunday after a small weekend grill-out. I had a beautiful, leftover piece of grilled flank steak staring back at me, and a couple of avocados that were hitting that perfect peak of ripeness. The usual salad felt boring.
I started toasting some bread, almost on autopilot, thinking I’d just do a quick avocado smash. But then I saw the steak. And the arugula. And the garlic. A lightbulb went off. What if I just… piled it all on? I quickly warmed the steak slices in a pan with a pat of butter and a grated garlic clove, and the smell that filled my kitchen was insane. That warm garlic butter became the sauce. I assembled my tower of goodness, drizzled that golden goodness over everything, and took a bite.
It was a revelation. The warm, savory steak against the cool, creamy avocado, the peppery bite of the greens, the crunch of the toast—it was a perfect bite. It felt indulgent and clever at the same time. It was the ultimate “clean out the fridge” win, and it immediately earned a permanent spot in my recipe rotation. It’s proof that the best meals often aren’t planned; they’re discovered with a little creativity and a willingness to play with your food.
Gathering Your Flavor-Packed Ingredients
Here’s everything you’ll need to create this masterpiece. I’ve added my little chef insights and swaps so you can make it your own, no matter what’s in your pantry.
- 1 ripe avocado – The foundation! Look for one that yields slightly to gentle pressure. Chef’s Tip: A squeeze of lemon or lime juice in your mash not only adds zing but keeps the avocado beautifully green.
- 2 slices hearty bread – This is your canvas. Choose something with structure: a thick-cut sourdough, a rustic country loaf, or a seeded whole-grain. It needs to hold up to the toppings without getting soggy.
- ½ lb steak (sirloin, flank, or ribeye) – This is where you can shine. I love flank for its beefy flavor, but a tender ribeye or sirloin works wonders. Substitution Tip: No steak? Leftover roast beef, grilled chicken, or even pan-seared mushrooms for a veggie version are fantastic!
- 1 cup fresh arugula – Its peppery punch cuts through the richness. Baby spinach or mixed greens are milder alternatives.
- Salt and freshly cracked black pepper – Season every layer! I use flaky sea salt for finishing.
- For the garlic butter drizzle:
- 1 tbsp butter – Unsalted is best so you control the seasoning. Good olive oil works in a pinch.
- 1 garlic clove, minced – Fresh is key here! The quick sauté in butter mellows its bite and creates an aromatic sauce.
Building Your Ultimate Steak & Avocado Toast: A Step-by-Step Guide
Follow these steps, and you’ll have restaurant-worthy toast in about 20 minutes flat. I’ve sprinkled in my favorite hacks to guarantee success!
- Cook & Rest Your Steak: If you’re starting with fresh steak, pat it dry and season generously with salt and pepper. Heat a skillet or grill pan over medium-high heat with a tiny bit of oil. Cook the steak to your preferred doneness (about 4-5 minutes per side for medium-rare flank). THE MOST IMPORTANT STEP: Transfer it to a plate, tent it loosely with foil, and let it rest for a full 5-7 minutes. This lets the juices redistribute, guaranteeing a tender, juicy slice. Then, slice it thinly against the grain.
- Create the Magic Garlic Butter: In a small pan (you can even use the same one from the steak for extra flavor!), melt the butter over low heat. Add the minced garlic and sauté for just 1-2 minutes until it’s fragrant and soft, but not browned. Browning makes it bitter. Pour this heavenly mixture into a small bowl and set aside.
- Toast & Prep Your Base: While the steak rests, toast your bread until it’s golden and crisp. This is crucial for texture contrast. Let the toast sit for a minute so it’s not scalding hot when you add the avocado.
- Smash That Avocado: Scoop the avocado flesh into a bowl. Add a pinch of salt, a crack of pepper, and a squeeze of citrus if using. Mash with a fork to your preferred consistency—I like it a little chunky for texture.
- The Art of Assembly: Spread the smashed avocado thickly over each piece of toast. Layer on a handful of fresh arugula. Artfully arrange your warm, sliced steak over the greens. Finally, take your garlic butter and drizzle every last drop over the top, letting it drip down the steak and onto the plate.
- Serve Immediately: This is not a “wait-around” dish. Grab a fork and knife (you’ll need them!), and dig in right away while the steak is warm and the toast is crisp.
How to Serve This Masterpiece
Presentation is half the fun here! I like to serve each loaded toast on its own plate. The garlic butter will pool deliciously at the bottom, so a plate with a slight rim is perfect for soaking it up with the last bits of bread. For a complete meal, pair it with something simple that won’t compete: a light, bright side salad with a vinaigrette, a bowl of tomato soup for dunking, or just some crisp radishes and cucumbers on the side. It’s rich and satisfying on its own, so you don’t need much else. And don’t forget a big, cold glass of iced tea, a crisp lager, or a bold red wine to wash it all down.
Make It Your Own: 5 Flavorful Twists
The beauty of this recipe is its flexibility. Here are some of my favorite ways to mix it up:
- The “Everything But The Bagel”: Swap the garlic butter for a schmear of plain cream cheese on the toast. Top with the steak and avocado, and finish with a generous sprinkle of Everything Bagel Seasoning.
- Spicy Sriracha Mayo Drizzle: Whisk together 2 tbsp mayo with 1 tsp sriracha and a squeeze of lime. Drizzle this over the top instead of (or in addition to!) the garlic butter for a creamy kick.
- Mediterranean Mood: Crumble some feta cheese into the avocado mash. Top the finished toast with chopped Kalamata olives, sliced cucumber, and a sprinkle of dried oregano.
- Breakfast-for-Dinner Style: Top your avocado toast with a perfectly fried or poached egg instead of (or in addition to!) the steak. The runny yolk becomes the ultimate sauce.
- The Plant-Powered Powerhouse: Replace the steak with thick slices of marinated and pan-seared portobello mushrooms or crispy roasted chickpeas. You still get that hearty, savory element without the meat.
Beau’s Kitchen Notes & Stories
This recipe has become my go-to for impressing last-minute guests. I once had a couple friends drop by unexpectedly right around dinnertime. The fridge was looking sparse, but I had these components. Twenty minutes later, I served these up, and you would have thought I’d been slaving away for hours. The look on their faces was priceless—it just feels fancy.
Over time, I’ve learned to always make a little extra garlic butter. It’s too good not to. Sometimes I’ll even add a tiny pinch of red pepper flakes to it as it cooks for a subtle heat. Also, if I’m cooking steak specifically for this, I’ll often marinate it for 30 minutes in a simple mix of soy sauce, olive oil, and a touch of honey. It takes the flavor to a whole new level. Remember, recipes are guidelines. Taste as you go and make it work for you!
Your Questions, Answered
Q: My avocado always turns brown before I eat. How can I prevent that?
A: The acid is your friend! Adding lemon or lime juice to your mash is the #1 trick. Also, assemble the toast just before serving. If you must prep ahead, press plastic wrap directly onto the surface of the mashed avocado in the bowl to limit air exposure.
Q: What’s the best way to reheat leftover steak for this?
A> To keep it tender, reheat it gently. I like to warm the slices in the garlic butter pan over low heat for just 30-60 seconds, flipping once. You just want to take the chill off, not cook it further. The microwave can make it tough and rubbery.
Q: Can I make this gluten-free or dairy-free?
A> Absolutely! Use your favorite gluten-free bread. For dairy-free, simply use a plant-based butter (or olive oil) for the garlic drizzle. The rest of the recipe is naturally dairy-free.
Q: My toast got soggy. What happened?
A> This usually means the toast wasn’t hearty/crisp enough or the avocado was spread on piping-hot bread, which creates steam. Let your toast cool for a minute, use a thick-cut bread, and assemble right before eating.

Steak & Avocado Toast : Hearty, Flavor-Packed, and Totally Satisfying
Description
If avocado toast ever felt a little too light, this version fixes that. Creamy smashed avocado meets juicy steak on crisp toast, finished with a quick garlic-butter drizzle. It’s perfect for brunch, lunch, or an easy dinner when you want something filling without a lot of work.
Ingredients
-
2 slices hearty bread (sourdough or whole-grain)
-
1 ripe avocado
-
½ lb steak (sirloin, flank, or ribeye)
-
1 cup arugula (or baby spinach)
-
Salt and black pepper, to taste
-
Optional: lemon or lime juice
Garlic Butter
-
1 tbsp butter (or olive oil)
-
1 garlic clove, minced
Instructions
-
Cook the steak:
Season steak with salt and pepper. Cook in a hot skillet with a little oil, about 4–5 minutes per side for medium-rare. Rest 5 minutes, then slice thinly against the grain. -
Make garlic butter:
Melt butter over low heat. Add garlic and cook 1–2 minutes until fragrant (do not brown). Set aside. -
Toast the bread:
Toast until golden and crisp. -
Mash the avocado:
Mash avocado with salt, pepper, and a squeeze of lemon or lime if using. -
Assemble:
Spread avocado on toast. Top with arugula, sliced steak, and drizzle with garlic butter. Serve immediately.
Notes
-
Use sturdy bread: Thick slices prevent soggy toast.
-
Cool the toast slightly: Hot toast can steam the avocado.
-
Customize it: Add a fried egg, chili flakes, or a drizzle of sriracha mayo for heat.
-
Leftover steak works great: Gently reheat in the garlic butter for 30–60 seconds.
Nutritional Information (Approximate, Per Toast)
While we’re all about flavor first, it’s nice to know what’s fueling you! This dish is a great balance of protein, healthy fats, and complex carbs. Please note, these values are estimates and can vary based on your specific ingredients and portion sizes.
- Calories: ~450
- Protein: 25g (Fantastic for muscle repair and keeping you full!)
- Fat: 28g (Mostly the heart-healthy monounsaturated fat from the avocado and the natural fats in the steak.)
- Carbohydrates: 22g
- Fiber: 7g (Thanks, avocado and whole-grain bread! That’s a solid boost for digestion.)
Final Thoughts from My Kitchen to Yours
So there you have it, friends—my not-so-humble take on avocado toast. It’s a recipe that proves a few simple, quality ingredients, treated with a little love and imagination, can create something truly spectacular. It’s for the days you want to feel like a chef without the complicated techniques, for when you want a meal that’s both nourishing and deeply satisfying.
I hope you give this Steak & Avocado Toast a try. Make it, share it, tag me over on Feastical with your creations, and most importantly, savor every single bite. Remember, the best kitchen is a happy one, full of good smells, good food, and even better company. Now, go forth and toast!
With a full heart and an even fuller plate,
Beau

Homemade Protein Trail Mix : Easy, Energizing, and Perfect for On-the-Go Fuel
Hey There, Snack Attack Hero! Let’s Make Some Power Pockets
You know that feeling. It’s 3:17 PM. Your energy has decided to take an unscheduled vacation, your focus is flickering like a candle in the wind, and your stomach is broadcasting a low, grumbly SOS. You could reach for that sad, sugary granola bar from the back of the pantry… or you could fuel up with something that actually makes you feel amazing. Friends, I’m talking about the ultimate snack MVP: Homemade Protein Trail Mix.
I’m Beau, and here at Feastical, we believe snacks shouldn’t be an afterthought. They’re tiny, delicious opportunities to take care of yourself. This trail mix isn’t just a handful of nuts and raisins; it’s a strategic, feel-good blend of crunchy, salty, sweet, and savory that’s engineered to keep you going. We’re packing in plant-based protein, healthy fats for sustained energy, and just enough natural sweetness to feel like a treat. The best part? You’re the boss. You pick the players. No mystery ingredients, no sugar crashes, just real food that tastes incredible and powers your adventures—whether that’s a mountain hike, a marathon work session, or chasing your kids around the backyard. So, grab your favorite mixing bowl, and let’s create your new go-to fuel!
My Trail Mix “Aha!” Moment on a Rainy Ridge
I’ll never forget the hike that turned me into a trail mix evangelist. A few years back, some buddies and I tackled a trail in the Smokies. The forecast promised sunshine, but the mountains, being their wonderfully mischievous selves, had other plans. Halfway up, the skies opened up. We were soaked, a little chilled, and our store-bought snack bags had become a soggy, unappealing mush of dissolved oats and sad chocolate.
That’s when my friend Mark, the prepared Eagle Scout of the group, pulled out a giant ziplock bag from his supposedly waterproof pack. “Homemade,” he said with a grin, handing out little clusters. It was a revelation. Roasted chickpeas that stayed crunchy, big almonds, dark chocolate chunks that hadn’t melted into a mess, and a hint of cayenne for a warming kick. That mix didn’t just give us a calorie boost; it gave us a morale boost. We laughed, we powered through the rain, and we reached the summit feeling like champions. Right then, I swore off sad, store-bought mixes for good. The snack you make yourself just hits different—it’s fuel with a story, with intention, and with way better texture.
Your Trail Mix Toolkit: Building the Dream Team
Here’s where the fun begins. Think of this list as a choose-your-own-adventure blueprint. The quantities are your perfect base camp, but feel free to explore!
- 1/2 cup Raw Almonds: My all-star for crunch and heart-healthy fats. Chef’s Insight: Give them a quick toast in a dry pan for 3-4 minutes until fragrant—it unlocks a deeper, nuttier flavor that’s a total game-changer.
- 1/2 cup Roasted Peanuts or Cashews: Peanuts bring that classic, salty protein punch, while cashews offer a buttery, rich luxury. Substitution Tip: Use unsalted if you’re watching sodium, or try walnuts for a boost of omega-3s.
- 1/4 cup Sunflower Seeds or Pumpkin Seeds (Pepitas): Tiny but mighty! These add essential minerals and a delightful texture. Chef’s Insight: Pepitas are my secret weapon for a vibrant green color and extra magnesium.
- 1/4 cup Roasted Chickpeas or Edamame: This is your protein powerhouse! They provide a satisfying crunch and keep you full for hours. Substitution Tip: No time to roast? Look for pre-roasted, unsalted versions at the store, or use shelled soy nuts.
- 1/4 cup Unsweetened Coconut Flakes (optional): They add a tropical, toasty note and a fun, flaky texture. Skip if you’re not a coconut fan!
- 1/4 cup Dark Chocolate Chips (70%+) or Cacao Nibs: The joy factor! Dark chocolate offers antioxidants, while cacao nibs are pure, sugar-free chocolate crunch. Chef’s Insight: If making a mix for hiking on a hot day, cacao nibs won’t melt!
- 1/4 cup Dried Cranberries or Raisins (optional): A pop of chewy, tart sweetness. Substitution Tip: Try chopped dried apricots, tart cherries, or goji berries for a different antioxidant profile.
- 1/4 cup Chopped Protein Bar or Protein Cereal: This is the modern hack for a mega protein boost! Chopping a plain protein bar or using a high-protein cereal (like a puffed brown rice or quinoa cereal) integrates seamlessly. Chef’s Insight: Look for bars/cereals with low added sugar to keep our mix clean.
Let’s Mix It Up: The 5-Minute Assembly Line
If you can stir, you can make elite-level trail mix. Here’s how we do it, with a few pro-tips sprinkled in.
- The Toast (Optional but Highly Recommended). In a dry skillet over medium heat, toss your almonds (and any other raw nuts/seeds you’re using) for 3-5 minutes. Shake the pan often! You’ll smell a gorgeous, nutty aroma when they’re ready. Pour them onto a plate to cool completely. Why? Cooling prevents steam from making your other ingredients soggy. This step is the difference between good and “can’t-stop-eating-this” great.
- The Big Combine. Grab your largest mixing bowl. I’m talking big enough to do the “toss” without sending pumpkin seeds flying across the kitchen. Add all your cooled, toasted ingredients, plus everything else—chickpeas, coconut, chocolate, dried fruit, and your chopped protein bits.
- The Gentle Toss. Using a large spoon or (clean) hands, gently fold everything together. Chef’s Hack: If you’re using delicate ingredients like puffed cereal, add them last and fold gently to avoid crushing them. We want a mix of textures, not powder!
- The Taste Test (The Most Important Step). Grab a small pinch. How is the balance? Need a touch more salt? Maybe a pinch of flaky sea salt. Want more sweet? Add a few more berries. This is your custom creation—adjust to your taste buds!
- Portion and Power Up. For ultimate grab-and-go convenience, I immediately portion the mix into small reusable bags or jars. About 1/3 to 1/2 cup per serving is perfect. Store the motherlode in a giant airtight container in a cool, dark pantry. Pro-Tip: If your kitchen is warm, you can store it in the fridge to keep the nuts and chocolate super fresh for weeks.
Beyond the Snack Bag: How to Serve Your Masterpiece
Sure, you can eat it straight from the bag (no judgment here), but let’s get creative with this versatile mix!
- The Classic: The obvious winner for hikes, road trips, gym bags, and desk drawers. It’s the perfect portion-controlled energy hit.
- Yogurt Parfait Power Layer: Spoon a layer over Greek yogurt and fresh berries for a breakfast that’s packed with protein and texture. The crunch against the creamy yogurt is everything.
- Salad Superstar: Sprinkle a handful over a simple green salad or a grain bowl. It adds heft, protein, and turns a side salad into a satisfying meal.
- “Nice” Cream Topper: After blending your frozen bananas into “nice” cream, crown your creation with a generous sprinkle of trail mix for a healthy, decadent-tasting dessert.
- Straight-Up Bowl: Sometimes, the best way is to pour yourself a little bowl, sit down, and actually enjoy each crunchy, chewy, chocolatey bite. Mindful snacking for the win!
Mix It Up: 5 Flavor-Boosting Twists to Try
Once you’ve mastered the classic, the flavor world is your oyster! Here are a few of my favorite themed mixes.
- Tropical Escape: Use cashews, macadamia nuts, coconut flakes, dried pineapple & mango, and white chocolate chips. Skip the chickpeas for a pure vacation vibe.
- Spicy Southwest: Start with toasted almonds and pepitas. Toss with roasted chickpeas seasoned with chili powder, cumin, and a pinch of salt. Add a few dark chocolate chips for a sweet-heat surprise.
- Everything Bagel: Sounds wild, but trust me! Use almonds, roasted chickpeas, and sunflower seeds. Toss everything with a teaspoon of everything bagel seasoning. Savory, salty, and utterly addictive.
- Double Chocolate Cherry: For the sweet tooths! Use almonds, cacao nibs, dark chocolate chips, dried tart cherries, and chopped pieces of a chocolate protein bar. It’s like a healthy candy bar in a bag.
- Purely Savory (Sugar-Free): Perfect for keto or low-sugar pals. Combine almonds, walnuts, roasted salted edamame, pumpkin seeds, roasted chickpeas (savory seasoned), and maybe some Parmesan crisps. Zero fruit, zero chocolate, all crunch and protein.
Beau’s Bench Notes: A Few Final Nuggets of Wisdom
This recipe has evolved more than my music taste since college. It started as just nuts and M&Ms (a solid starting point!), but over time, I learned that adding a dedicated protein element like chickpeas was a total energy game-changer. The biggest lesson? Moisture is the enemy of crunch. Always make sure your toasted ingredients are completely cool before adding chocolate or fruit. And if your dried fruit is particularly sticky, you can give it a light chop and toss it with a teaspoon of the nut flour from the bottom of the bag—it helps keep everything separate. Lastly, have fun! The day I accidentally used curry-spiced chickpeas was a happy accident that led to the “Savory Delight” version my wife now requests weekly.
Trail Mix Troubleshooting: Your Questions, Answered
Q: My chocolate chips keep melting together! How do I prevent this?
A: This is a classic! First, ensure your toasted nuts are 100% cool. Second, store your finished mix in the fridge or a very cool pantry. For hot weather or hiking, just swap the chips for cacao nibs—they’re heat-stable and give a great chocolate flavor without the mess.
Q: Can I make a big batch for meal prep? How long does it last?
A: Absolutely! This is a meal prep hero. In an airtight container in a cool, dark place, it’s good for 2-3 weeks. In the fridge, you can easily extend that to a month or more. The nuts’ oils can go rancid over time, so your nose is the best test—if it smells off, it’s time for a new batch.
Q: I want to keep sugar low. What are my best fruit and chocolate options?
A: Great goal! For fruit, look for “no-sugar-added” dried cranberries or apricots. Tart cherries are often lower in sugar too. For chocolate, choose cacao nibs (zero added sugar) or a very dark chocolate chip (85% or higher). Always check those labels—sneaky sugar hides everywhere!
Q: My trail mix tastes bland. What did I do wrong?
A: You likely just need a flavor boost! Next time, don’t skip toasting the nuts. Also, don’t be shy with seasoning. Tossing your roasted chickpeas in spices before adding them, or even adding a light sprinkle of flaky sea salt or cinnamon to the final mix, can wake all the flavors right up.
What’s In Your Fuel Tank? A Quick Nutrition Glance
Let’s be clear: I’m a cook, not a dietitian. But I care about what goes into my body, so here’s a general snapshot of what a 1/3-cup serving of our base recipe brings to the table. Remember, this is an estimate and will vary based on your specific ingredients and brands.
- Calories: ~220 | This is a satisfying, energy-dense snack meant to fuel activity or bridge the gap between meals.
- Protein: 9-12g | Thanks to our nuts, seeds, chickpeas, and protein bar boost! This is the macro that helps repair muscles and keeps you feeling full.
- Fat: ~14g | Primarily the healthy, unsaturated fats from nuts and seeds, which support heart health and provide slow-burning energy.
- Carbohydrates: ~14g | A balanced amount from the dried fruit and chickpeas, giving you quick-access fuel alongside the fiber.
- Fiber: ~3g | Every bit helps with digestion and sustained energy release. You can boost this by adding more seeds or high-fiber cereal.
This mix is designed to be a balanced, real-food snack. It’s not “low-calorie,” but it’s high-nutrient—and that’s what truly matters for feeling awesome.
Your Snack, Your Story
And there you have it—your passport to never having a boring, sluggish snack again. This homemade protein trail mix is more than just a recipe; it’s a reminder that taking care of yourself can be simple, delicious, and deeply personal. You get to create the blend that makes your taste buds sing and fuels your unique day.
I hope this becomes a staple in your kitchen, a reliable friend in your backpack, and maybe even the start of a few great stories of your own. Got a brilliant variation you invented? I’d love to hear about it! Share your creations and tag @Feastical so we can all get inspired.
Print
Homemade Protein Trail Mix : Easy, Energizing, and Perfect for On-the-Go Fuel
Description
Need a quick snack that actually keeps you full and focused? This Homemade Protein Trail Mix is crunchy, a little sweet, a little salty, and packed with protein and healthy fats. It’s perfect for school days, workouts, hikes, or that afternoon energy slump. Best of all, you can customize it with what you love.
Ingredients
-
½ cup raw almonds
-
½ cup roasted peanuts or cashews
-
¼ cup pumpkin seeds (pepitas) or sunflower seeds
-
¼ cup roasted chickpeas or roasted edamame
-
¼ cup unsweetened coconut flakes (optional)
-
¼ cup dark chocolate chips (70%+) or cacao nibs
-
¼ cup dried cranberries or raisins (optional)
-
¼ cup chopped protein bar or high-protein cereal (optional)
Instructions
-
Toast (optional but recommended):
Toast almonds and any raw nuts/seeds in a dry pan over medium heat for 3–5 minutes, stirring often, until fragrant. Let cool completely. -
Combine:
Add all ingredients to a large bowl. -
Mix:
Gently toss until evenly combined. -
Taste & Adjust:
Add a pinch of salt for more flavor or extra fruit/chocolate if you like it sweeter. -
Store:
Keep in an airtight container at room temperature (2–3 weeks) or in the fridge (up to 1 month).
Notes
-
Cool before mixing: Warm nuts can melt chocolate and make the mix clumpy.
-
Hot weather swap: Use cacao nibs instead of chocolate chips to prevent melting.
-
Boost protein: Add more roasted chickpeas, edamame, or protein cereal.
-
Low sugar option: Skip dried fruit and use extra nuts and seeds.
-
Portion smart: A serving is about ⅓–½ cup.
Final Thoughts: Your Adventure Awaits
What started as a desperate need to beat the 3 PM slump has turned into a ritual of self-care—a few intentional minutes in the kitchen that pay you back tenfold in energy, joy, and flavor. This homemade protein trail mix isn’t just a snack; it’s a small act of kindness to your future self. Whether you’re packing it for a summit attempt, powering through a project, or simply savoring a quiet moment, you’re not just eating—you’re fueling your story.
Remember, you’re the creator here. Swap, experiment, and make it yours. There are no wrong answers, only delicious discoveries. So here’s to less soggy snacks, more triumphant moments, and the simple pleasure of a handful of something made with your own hands.
Now, go stock that pantry, mix up a batch, and see where it takes you. I can’t wait to hear about your adventures—both on the trail and in the kitchen.

Buffalo Chicken Bacon Mozzarella Bombs : Crispy, Cheesy, and Flavor-Packed
Buffalo Chicken Bacon Mozzarella Bombs – Your New Favorite Game Day Snack
Hey friends, Beau here! Let’s cut right to the chase: if you’ve ever stared into your fridge, willing the perfect snack to magically appear, I’ve got your back. We’re talking about that magical craving that sits right between “I need something hearty” and “I want all the flavors, immediately.” Well, consider this your culinary wish granted. Today, we’re diving fork-first into one of my all-time most-requested party heroes: Buffalo Chicken Bacon Mozzarella Bombs.
Imagine this: a crispy, golden-brown exterior that gives way with the most satisfying crunch. Inside? A molten, tangy, spicy, smoky, and impossibly cheesy heart that just might make you do a little happy dance. It’s your favorite buffalo chicken dip, your go-to comfort casserole, and the best bacon-cheesy bread you’ve ever had, all rolled into one bite-sized, explosion-of-flavor package. This isn’t just a recipe; it’s an experience. It’s the dish that disappears from the platter before you can even say, “Wait, did you try the…?” and the one that has people quietly sneaking back to the kitchen for “just one more.”
Whether you’re hosting the big game, need a show-stopping appetizer for your next gathering, or are simply committed to treating yourself to an epic comfort food moment, these bombs are your secret weapon. They look impressive but are built on simple, honest ingredients and a method that’s way easier than you think. So, tie on that apron, grab your favorite mixing bowl, and let’s make some magic—and probably a delicious mess—together. Welcome to flavor town, population: you and these incredible bombs.
The Night the “Bomb” Was Born: A Kitchen Happy Accident
I have to confess: the very first iteration of these bombs was born from sheer, beautiful kitchen chaos. It was a few years back, during one of those legendary, too-many-people-crammed-into-my-apartment football Sundays. I’d made a massive batch of my slow-cooker buffalo chicken dip (a Feastical classic!) and, in a classic Beau move, I’d also gone overboard on bacon for BLTs. As the game went into double overtime, the dip was dwindling, but the hunger was not.
I found myself staring at leftover shredded chicken, a block of mozzarella, and that glorious bacon. The dip was almost gone, but the flavor inspiration was just getting started. “What if we could pick it up?” I thought. I started mushing things together with some cream cheese for glue, rolled them into balls, and gave them a quick fry. The result? Pure, unplanned joy. My friends descended on the plate like hawks. They were crunchy, messy, and the cheesy center oozed out in the most glorious way. That night, amidst high-fives and napkins covered in buffalo sauce, the “Bomb” was officially christened. It was a reminder that the best recipes often come from playing with your food, listening to your cravings, and feeding the people you love. That spirit is baked right into every step of this recipe.
Gathering Your Flavor Arsenal: Ingredients & Why They Matter
Great food starts with great ingredients, but understanding the “why” behind them is our little chef superpower. Here’s exactly what you’ll need and how each one plays a starring role in our flavor bomb.
- 2 cups cooked, shredded chicken: The hearty base! I love using the meat from a rotisserie chicken for its flavor and ease, but leftover grilled or baked chicken works perfectly. Chef’s Insight: Shred it finely so it binds together well.
- 1/2 cup buffalo sauce: The tangy, spicy soul of the dish. Use your favorite brand—mild, medium, or wild! Sub Tip: For a different twist, swap in BBQ sauce or a honey sriracha blend.
- 1 cup shredded mozzarella, plus extra for stuffing: The creamy, stretchy glue. Pre-shredded is convenient, but shredding a block yourself melts creamier. We use it in the mix and hide a surprise cube in the center. Double cheese = double joy.
- 1/4 cup cream cheese, softened: Our binding agent and richness booster. It cools the spice just enough and creates a lush texture. Chef’s Hack: Leave it on the counter for 30 minutes before you start for easy mixing.
- 1/4 cup cooked bacon, crumbled: The smoky, salty, crispy superstar! It adds a punch of umami. Reserve a little for the garnish—it makes a difference.
- 1/2 teaspoon garlic powder: An easy flavor depth-charge. It distributes evenly throughout the mixture.
- Salt and pepper to taste: Always taste as you go! Remember, your bacon and buffalo sauce add salt, so season judiciously.
- 1 cup all-purpose flour: The first layer of our crispy armor. It helps the egg wash stick.
- 2 large eggs, beaten: The “glue” that holds our breadcrumb coating securely in place.
- 1 1/2 cups breadcrumbs: The final, golden-crisp exterior. I prefer panko for an extra-crunchy shell, but regular Italian-style breadcrumbs work great too.
- Oil for frying: Canola, vegetable, or peanut oil are perfect for their high smoke points. You’ll need enough for about 1-2 inches in your pot or pan.
Let’s Build Some Bombs: Your Step-by-Step Blueprint
Ready to get your hands deliciously dirty? Follow these steps, and you’ll be a bomb-making pro in no time. I’ve sprinkled in my favorite hacks to ensure success.
- Mix the Heart & Soul: In a large mixing bowl, combine the shredded chicken, buffalo sauce, 1 cup of shredded mozzarella, softened cream cheese, half of your crumbled bacon, garlic powder, salt, and pepper. Get in there with clean hands or a sturdy spoon and mix until everything is uniformly incorporated. You want a cohesive, slightly sticky mixture. Chef’s Tip: Taste a tiny bit! This is your moment to adjust—more pepper? A dash more garlic? Make it yours.
- Form & Stuff: Scoop out portions (about 2 tablespoons each) and roll them into smooth balls. Now, the magic trick: press your thumb into the center of a ball, place a small cube of that reserved mozzarella inside, and carefully seal the meat mixture around it, rolling again to ensure it’s completely enclosed. This is your cheasy surprise! Place the finished bombs on a parchment-lined baking sheet. Chef’s Hack: If the mixture is too sticky, dampen your hands slightly with water.
- The Essential Chill: Pop the entire baking sheet into the freezer for 15 minutes or the fridge for at least 30. DO NOT SKIP THIS. This firms up the bombs, ensuring they hold their shape during the breading and frying process. It’s the secret to no-burst bombs!
- Create the Crispy Shell: Set up your breading station: one shallow dish with flour, one with beaten eggs, and one with breadcrumbs. Working with one chilled bomb at a time, roll it in flour (shake off excess), dunk it in the egg wash (let excess drip off), and finally, roll it in breadcrumbs, pressing gently to adhere. Place it back on the baking sheet. Chef’s Tip: Use one hand for dry steps (flour & breadcrumbs) and one for wet (egg) to avoid “club hand.”
- Fry to Golden Perfection: In a heavy-bottomed pot or deep skillet, heat 1-2 inches of oil to 350°F (175°C). A candy/deep-fry thermometer is your best friend here. If you don’t have one, test with a breadcrumb—it should sizzle vigorously. Carefully lower 3-4 bombs at a time into the hot oil using a slotted spoon. Don’t crowd the pan! Fry for 3-4 minutes, turning occasionally, until they are deeply golden brown and crispy all over.
- Drain & Garnish: Transfer the glorious, crispy bombs to a plate lined with paper towels to drain. Immediately sprinkle them with the remaining crumbled bacon. That hot exterior will make the bacon bits cling perfectly. Serve immediately while the cheese is gloriously molten!
Plate Like a Pro: Serving Your Masterpiece
Presentation is part of the fun! Don’t just dump these beauties in a bowl (though, honestly, they’d still get devoured). Let’s make them look as incredible as they taste. I love serving them on a large wooden board or a vibrant platter. Scatter some crisp celery sticks and carrot batons around the edges—they’re the classic, cooling counterpart to the spicy, rich bombs. Place a few small bowls of dipping sauces in the middle: extra buffalo sauce for the brave, a drizzle of creamy ranch or blue cheese dressing for the classic pairing, and maybe even a little side of honey for a sweet-and-spicy dip. Garnish with a few fresh chives or parsley for a pop of color. The goal is to create a welcoming, shareable spread that says, “Dig in, friends, and get ready for a flavor party.”
Make It Your Own: Delicious Twists & Swaps
The basic blueprint is perfect, but creativity is always welcome in my kitchen! Here are a few ways to riff on this recipe:
- The “Lightened-Up” Bake: Want to avoid frying? No problem! Arrange your breaded bombs on a parchment-lined baking sheet, spray generously with cooking spray, and bake at 400°F (200°C) for 20-25 minutes, flipping halfway, until golden and hot through.
- Jalapeño Popper Twist: Add 1/4 cup of finely diced jalapeños (seeds removed for less heat) and swap the mozzarella center for a cube of pepper jack cheese. Instant flavor upgrade!
- Ranch Everything: Swap the buffalo sauce for 1/2 cup of ranch dressing and add 1 tablespoon of dry ranch seasoning mix to the chicken mixture. A cool, herby delight.
- Sweet & Smoky BBQ: Use your favorite BBQ sauce instead of buffalo, and use shredded cheddar or gouda cheese. Top with extra BBQ sauce and crispy fried onions after frying.
- Gluten-Free Friendly: Use a 1:1 gluten-free flour blend and gluten-free panko breadcrumbs for the coating. The process is exactly the same!
Beau’s Kitchen Notes: The Inside Scoop
This recipe has seen a lot of love (and a few messy trials) over the years. A funny story: the first time I made a big batch for a family reunion, I was so excited I forgot the chill step. Let’s just say we had some delicious, but tragically flat, “Buffalo Chicken Pancakes” instead of bombs. Lesson learned! The chill is non-negotiable. I’ve also found that making the mixture a day ahead and letting it hang out in the fridge actually deepens the flavors beautifully—just assemble and bread before frying. And remember, the size of your cheese cube matters. Too big, and it might burst through; a modest 1/2-inch cube is the sweet spot for that perfect, contained cheesy eruption.
Your Questions, Answered: FAQ & Troubleshooting
Q: Can I make these ahead of time?
A: Absolutely! You can bread the bombs up to a day in advance and keep them covered in the fridge on their baking sheet. You can also freeze the breaded, uncooked bombs on the sheet, then transfer to a freezer bag. Fry from frozen, adding 1-2 extra minutes to the cook time.
Q: My cheese is leaking out while frying! What happened?
A> The two most common culprits are: 1) Not chilling long enough (the bomb softened in the oil before sealing), or 2) The cheese cube was too close to the surface. Ensure a good seal and a proper chill, and you’ll be golden (literally).
Q: Can I use an air fryer?
A: You can! Spray your breaded, chilled bombs generously with oil and air fry at 375°F (190°C) for 10-12 minutes, shaking halfway through, until crispy and hot.
Q: What’s the best way to reheat leftovers?
A> While best fresh, leftovers can be revived! Reheat in an air fryer or toaster oven at 375°F until re-crisped and warm through. The microwave will make them soggy.

Buffalo Chicken Bacon Mozzarella Bombs : Crispy, Cheesy, and Flavor-Packed
Description
Buffalo Chicken Bacon Mozzarella Bombs
Your ultimate game-day snack (or any-day treat!)
Golden, crispy outside. Cheesy, spicy, smoky inside. These bombs disappear fast—fair warning.
Ingredients
Filling
-
2 cups cooked, shredded chicken (rotisserie works great)
-
½ cup buffalo sauce (mild, medium, or hot)
-
1 cup shredded mozzarella (plus 12 small cubes for stuffing)
-
¼ cup cream cheese, softened
-
¼ cup cooked bacon, crumbled (reserve a bit for garnish)
-
½ tsp garlic powder
-
Salt & pepper to taste
Breading
-
1 cup all-purpose flour
-
2 large eggs, beaten
-
1½ cups breadcrumbs (panko preferred for extra crunch)
-
Oil for frying (canola, peanut, or vegetable)
Instructions
1. Mix the Filling
-
In a large bowl, combine shredded chicken, buffalo sauce, 1 cup mozzarella, cream cheese, half the bacon, garlic powder, salt, and pepper.
-
Mix until cohesive and slightly sticky. Taste and adjust seasoning.
2. Form & Stuff
-
Scoop ~2 tbsp of mixture and roll into a ball.
-
Press a small mozzarella cube into the center and seal completely.
-
Place on a parchment-lined baking sheet.
Pro Tip: If too sticky, dampen your hands slightly.
3. Chill
-
Freeze for 15 minutes or refrigerate 30 minutes. This keeps bombs intact during breading and frying.
4. Bread the Bombs
-
Set up three bowls: flour, beaten eggs, breadcrumbs.
-
Roll each chilled bomb in flour → egg → breadcrumbs, pressing gently to adhere.
-
Place back on baking sheet.
Pro Tip: One hand for dry, one for wet to avoid “club hand.”
5. Fry to Golden Perfection
-
Heat 1–2 inches of oil in a deep skillet or pot to 350°F (175°C).
-
Fry 3–4 bombs at a time, turning occasionally, 3–4 minutes until golden.
-
Transfer to paper towels to drain and sprinkle with remaining bacon. Serve immediately.
Alternative: Bake at 400°F (200°C) for 20–25 min, flipping halfway, lightly spraying with oil.
6. Serve Like a Pro
-
Arrange on a platter or wooden board.
-
Add celery sticks, carrot batons, and dipping sauces: ranch, blue cheese, extra buffalo, or honey.
-
Garnish with parsley or chives.
Notes
-
Cheese leaking? Ensure proper chill and seal; cheese cube too close to surface can burst.
-
Make ahead? Bread up to 1 day in advance, refrigerate. Freeze uncooked for longer storage; fry from frozen +1–2 min.
-
Air Fryer? Spray bombs with oil, air fry at 375°F for 10–12 min, shaking halfway.
-
Reheat leftovers? Air fryer or toaster oven for crisp; avoid microwave.
Nutritional Information (Per Bomb, Estimated)
Please note: This is an approximate estimate based on the ingredients used and a yield of 12 bombs, factoring in oil absorption during frying. Values can vary based on specific brands, ingredient choices, and exact portion sizes.
- Calories: ~180
- Protein: 12g
- Fat: 11g
- Carbohydrates: 9g
- Fiber: <1g
For a lighter option, try the baked variation and use a light cream cheese. Remember, these are a treat meant to be savored and shared joyfully!
Final Thoughts from My Kitchen to Yours
And there you have it, friends—your passport to snack-time glory. These Buffalo Chicken Bacon Mozzarella Bombs are more than just a recipe; they’re a little project of love, a guaranteed crowd-pleaser, and proof that the most memorable food often comes from a place of fun and flavor experimentation. I hope you have as much fun making them as I do, and I hope they bring your people together around the table (or the TV) with lots of laughter and maybe a few happy “oohs” and “aahs.”
If you make them (and I truly hope you do), tag me @Feastical or use the hashtag #FeasticalFeast. There’s nothing I love more than seeing your kitchen creations. Now go forth, cook with confidence, and make every bite count. Until next time, keep it flavorful!
Cheers,
Beau
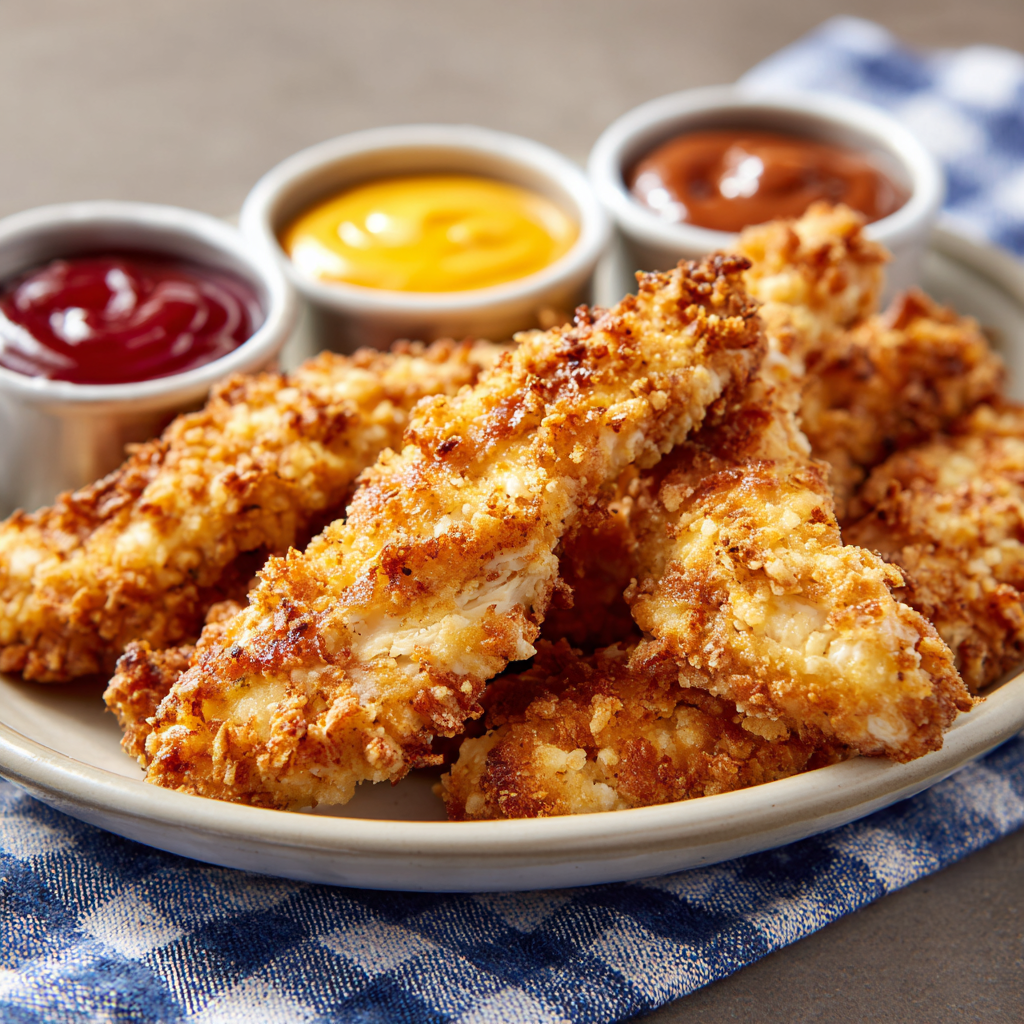
Dipping Chicken Breast Strips : Crispy, Juicy Strips with Bold Sauces
Hey, Friend! Let’s Talk About the Ultimate Crowd-Pleaser
Picture this: It’s Friday night. The game is on, friends are gathered, and the only thing missing is a plate of something utterly irresistible, crispy, and meant for sharing. Or maybe it’s just a Tuesday, and you deserve a dinner that feels like a celebration but cooks up in a flash. Enter my hero: the humble, yet heroic, Dipping Chicken Breast Strip.
This isn’t just another chicken tender recipe. This is your blank canvas for flavor, your ticket to crispy, juicy nirvana, and the reason your favorite dipping sauce exists. We’re taking simple chicken breast and transforming it into golden strips of joy that are lightly crisp on the outside, impossibly tender on the inside, and begging to be dragged through something bold and delicious.
Whether you pan-fry them for that classic, irresistible crunch or bake them for a lighter, just-as-satisfying bite, these strips are my go-to for bringing people together. They’re forgiving for new cooks, fun for experts to play with, and guaranteed to disappear faster than you can say “pass the sauce.” So, tie on your apron, grab your favorite spatula, and let’s make some magic happen. Food this good should always feel like a party, and you’re the host.
The Night That Cemented My Love for a Good Chicken Strip
My love affair with these strips started in a cramped college apartment, not a professional kitchen. My roommate, Dave, and I were broke, it was snowing outside, and our plans for a big night out had fizzled. The mission: feed four hungry friends with one package of chicken breasts and whatever we could scrounge from the pantry.
We sliced the chicken, dredged it in flour, egg, and some suspiciously stale breadcrumbs we crushed by hand. We fried them in a sketchy, warped pan and served them with a wild array of condiments—everything from ketchup and mustard mixed together to the last of a jar of salsa. It was chaos. But you know what? That platter of crispy, golden strips was the star of the night. We laughed, we dunked, we argued over the best sauce combo, and for a few hours, that tiny kitchen was the warmest, happiest place to be.
That’s the spirit I want to bring you today. It’s not about perfection; it’s about the joy of creating something simple and spectacular that gets everyone talking, laughing, and reaching for more. Every time I make these now, I think of that snowy night and smile. Food memories are the best kind.
Gathering Your Flavor Arsenal
Here’s everything you’ll need to build your masterpiece. Don’t stress about exact brands—this is about what you have and love!
- 2 boneless, skinless chicken breasts: The main event! Look for evenly sized breasts so your strips cook at the same rate. Chef’s Insight: If they’re very thick, you can gently pound them to an even ½-inch thickness before slicing for supremely tender results.
- ½ cup all-purpose flour: Our base coat. This initial layer helps the egg wash stick, creating the crucial foundation for our crispy shell. Substitution Tip: For a gluten-free version, swap with your favorite 1:1 GF flour or even fine cornmeal for a hint of sweetness and crunch.
- 2 eggs, beaten: The “glue” that holds our breading on. A good, thorough whisk is key here. Chef’s Hack: Add a tablespoon of milk or hot sauce to your eggs for extra flavor and a slightly lighter texture.
- 1 cup breadcrumbs: The crunch factor. I highly recommend panko for its legendary, airy, shatteringly crisp texture. Substitution Tip: Regular breadcrumbs work great too! For a deeper flavor, try crushing your own crackers, cornflakes, or even pretzels.
- ½ teaspoon garlic powder & ½ teaspoon paprika: Our simple seasoning squad. Garlic powder adds savory depth, while paprika gives a subtle sweetness and gorgeous color. Flavor Boost: Feel free to add onion powder, a pinch of cayenne for heat, or dried herbs like oregano.
- Salt and pepper to taste: The non-negotiable fundamentals. Season every layer—the chicken itself, the flour, maybe even the breadcrumbs. Taste as you go!
- Cooking oil for frying or baking: For frying, use a high-heat oil like avocado, canola, or vegetable oil. For baking, a light coating of olive oil or avocado oil spray will help them crisp up beautifully.
Let’s Get Cooking: Your Path to Crispy Perfection
Follow these steps, and you’ll be a breading pro in no time. I’ve packed each one with my favorite kitchen hacks to ensure success.
- Prep Your Chicken: Pat those chicken breasts completely dry with paper towels. This is the #1 secret for crispy breading—moisture is the enemy of crunch! Slice them into even strips, about 1-inch wide. Think “fat finger” size. Season them generously on all sides with salt, pepper, and a pinch of your garlic powder and paprika. Let them sit for 5 minutes to absorb the flavor.
- Create Your Breading Station: Set up three shallow bowls or plates in an assembly line. Bowl 1: Flour (season it with a little salt and pepper too!). Bowl 2: Beaten eggs. Bowl 3: Breadcrumbs mixed with the remaining garlic powder and paprika. Pro-Tip: Use one hand for dry ingredients (flour and breadcrumbs) and one hand for wet (egg). This keeps you from getting “clubhand,” a dreaded condition where your fingers become a breaded mess!
- The Sacred Breading Ritual: Take a chicken strip and dredge it in the flour, shaking off any excess. This gives the egg something to grip. Next, dunk it fully into the egg wash, letting the excess drip off. Finally, press it firmly into the breadcrumb mixture, coating it evenly and pressing the crumbs to adhere. Place the breaded strip on a clean plate or wire rack. Repeat! Chef’s Hack: For an extra-thick, crunchy coating, double-dip! After the first breadcrumb coat, give it a quick second dip in the egg and another press into the crumbs.
- Cooking – Choose Your Adventure!
- For Pan-Frying (The Classic Crisp): Heat about ¼ inch of oil in a large skillet over medium-high heat. To test if it’s ready, flick a tiny breadcrumb in—it should sizzle immediately. Carefully add strips in a single layer, not crowding the pan. Cook for 3-4 minutes per side until deeply golden brown and cooked through. Transfer to a wire rack set over a baking sheet (this keeps them crispy!).
- For Baking (The Lighter Love): Preheat your oven to 400°F (200°C). Place a wire rack on a baking sheet and spray it lightly with oil. Arrange breaded strips on the rack, giving them space. Lightly spray the tops of the strips with oil. Bake for 18-20 minutes, flipping halfway, until golden and the internal temperature hits 165°F.
- The Final, Crucial Step: Let them rest for a couple of minutes after cooking. This allows the juices to redistribute, ensuring every bite is juicy, not dry.
Plating Up the Fun
Presentation is part of the experience! Dump these beauties straight from the pan onto a big, rustic platter or a wooden board. Scatter them generously so everyone can grab one easily. Now, the sauce bar: don’t just dollop—serve your sauces in small bowls or ramekins right alongside. I love adding little garnishes for color: a handful of fresh chopped parsley or chives over the strips, or some carrot sticks and celery for a classic crunch.
This is finger food at its finest, so skip the fancy cutlery. Provide plenty of napkins, maybe some lemon wedges for a bright squeeze, and let everyone dig in family-style. It’s interactive, messy, and absolutely perfect.
Make It Your Own: 5 Flavorful Twists
Once you’ve mastered the basic blueprint, the world is your chicken strip. Here are some of my favorite riffs:
- “Everything Bagel” Crunch: Mix your breadcrumbs with 2 tablespoons of everything bagel seasoning. Serve with a quick dill and Greek yogurt sauce.
- Zesty Parmesan Herb: Add ½ cup of finely grated Parmesan and 1 teaspoon of Italian seasoning to the breadcrumbs. Bake until golden and serve with a warm marinara for dipping.
- Sweet & Spicy Glazed: Prepare the strips as baked. In the last 5 minutes of cooking, brush with a mix of honey and sriracha, then return to oven to caramelize slightly.
- Gluten-Free & Air Fryer Magic: Use gluten-free panko and flour. For the ultimate crisp with less oil, cook in an air fryer at 400°F for 10-12 minutes, shaking halfway.
- Kid-Friendly “Dino-Nugget” Style: Use cookie cutters on the chicken before breading to make fun shapes. It’s a guaranteed win.
From My Kitchen to Yours
This recipe has lived more lives than I can count. I’ve made it for toddlers, for fancy parties (served with champagne!), and everything in between. The biggest lesson? Don’t fear the breading process. Embrace the mess—it means you’re doing it right. I once accidentally used powdered sugar instead of flour in a late-night cooking frenzy (don’t ask). The resulting “dessert chicken” was… an experience. Learn from my mistakes: label your containers!
Over time, I’ve learned that the quality of your chicken and taking the time to pat it dry make more difference than any fancy ingredient. This recipe is a friend, not a finicky boss. It wants you to succeed and have a great time doing it.
Your Questions, Answered
Q: My breading is falling off! What did I do wrong?
A: The most common culprits are not patting the chicken dry (moisture breaks the seal), not shaking off excess flour, or crowding the pan during cooking. Also, make sure your oil is hot enough before adding the chicken—a gentle sizzle is key for the breading to set instantly.
Q: Can I make these ahead of time?
A> You can bread the strips and keep them covered on a parchment-lined tray in the fridge for up to 4 hours before cooking. For best results, cook just before serving. You can also freeze uncooked, breaded strips on a sheet pan, then transfer to a freezer bag. Cook from frozen, adding a few extra minutes to the cooking time.
Q: How do I keep them crispy if I’m serving a crowd?
A> The wire rack trick is essential! Never stack hot strips on a plate—they’ll steam and get soggy. If you need to keep them warm, place the wire rack with cooked strips in a 250°F oven until ready to serve.
Q: Is baking really as good as frying?
A> It’s different, but absolutely delicious. Baking gives a slightly lighter, still-crispy coating, while frying delivers that classic, rich crunch. Both are winners. For the *best* baked texture, that light spray of oil on the breading is non-negotiable.

Dipping Chicken Breast Strips : Crispy, Juicy Strips with Bold Sauces
Description
Crispy Dipping Chicken Breast Strips – The Ultimate Crowd-Pleaser
Golden, crispy outside. Juicy, tender inside. Perfect for dipping, sharing, and making any night feel like a celebration.
Ingredients
Chicken Strips:
-
2 boneless, skinless chicken breasts (even thickness, about ½-inch after pounding)
-
Salt & freshly ground black pepper
-
½ tsp garlic powder
-
½ tsp paprika
-
½ cup all-purpose flour (or gluten-free flour/cornmeal)
-
2 large eggs, beaten (optional: 1 tbsp milk or hot sauce)
-
1 cup breadcrumbs (panko preferred for extra crunch)
-
Cooking oil (for frying: avocado/canola/vegetable; for baking: olive or avocado oil spray)
Optional Garnishes & Dips:
-
Fresh parsley or chives
-
Lemon wedges
-
Your favorite dipping sauces (ranch, honey mustard, BBQ, ketchup, sriracha mayo…)
Instructions
1. Prep the Chicken
-
Pat chicken breasts dry. Slice into 1-inch “fat finger” strips.
-
Season generously with salt, pepper, garlic powder, and paprika. Let rest 5 minutes.
2. Set Up Breading Station
-
Bowl 1: Flour (season with a little salt & pepper)
-
Bowl 2: Beaten eggs
-
Bowl 3: Breadcrumbs + remaining garlic powder & paprika
Pro Tip: Use one hand for dry ingredients, one hand for wet to avoid “clubhand.”
3. Bread the Strips
-
Dredge each strip in flour, shake off excess.
-
Dip in egg, letting excess drip.
-
Press into breadcrumbs until evenly coated. Place on a plate or wire rack.
-
Optional: Double-dip for extra crunch (egg → breadcrumbs → egg → breadcrumbs).
4. Cook to Perfection
Pan-Frying (Classic Crunch):
-
Heat ¼ inch of oil over medium-high heat. Test with a breadcrumb—it should sizzle.
-
Fry strips 3–4 minutes per side until golden and cooked through. Drain on a wire rack over a baking sheet.
Baking (Lighter Option):
-
Preheat oven to 400°F (200°C).
-
Place strips on an oiled wire rack over a baking sheet. Lightly spray tops with oil.
-
Bake 18–20 min, flipping halfway, until golden and 165°F internal temp.
Chef’s Hack: Rest cooked strips 2–3 min before serving for juicy perfection.
5. Serve & Enjoy
-
Arrange on a platter or board with dipping sauces in small bowls.
-
Garnish with parsley/chives or lemon wedges.
-
Encourage hands-on dipping fun—messy, interactive, and delicious.
Notes
-
Breading falls off? Chicken too wet, excess flour not shaken off, pan crowded, or oil too cool.
-
Make ahead? Bread in advance (up to 4 hrs) or freeze uncooked strips. Cook from frozen, adding a few minutes.
-
Keep crispy for a crowd? Use a wire rack; hold in 250°F oven until serving.
-
Baking vs frying? Baking gives slightly lighter crunch; frying delivers rich, classic crisp. Both are delicious.
Feeding Your Body & Soul
While I’m all about the joy of food first, I know many of you like to have the facts! Here’s a general breakdown per serving (based on baking, serving 4):
- Calories: ~320
- Protein: 30g (Chicken is a fantastic lean protein source!)
- Carbohydrates: 25g
- Fat: 10g
Remember, these are estimates and can vary based on the exact size of your chicken, breadcrumbs used, and cooking method. The beauty of cooking at home is you control the ingredients—baking reduces fat, using whole-wheat panko adds fiber, and the sauces on the side let you manage added sugars and calories. It’s a balanced, satisfying meal that truly feeds the soul.
The Final Slice
And there you have it—your new secret weapon for deliciousness. These Dipping Chicken Breast Strips are more than just a recipe; they’re an invitation to slow down, get your hands a little messy, and share something wonderful. Whether it’s a quiet dinner for one (leftovers are amazing in salads!) or the centerpiece of a gathering, I hope this dish brings as much laughter and satisfaction to your table as it has to mine.
Don’t forget to tag @Feastical if you share your creations online—I love seeing your kitchen triumphs. Now, go forth, dunk boldly, and remember: the best meals are the ones shared with joy. Until next time, keep your spatula close and your appetite closer!
Cheers,
Beau

Chicken Breast Sauce Flight : 5 Irresistible Sauces to Elevate Your Chicken
Turn Your Tuesday into a Taste Adventure
Hey friends, Beau here from Feastical! Raise your hand if you’ve ever stared at a chicken breast and thought, “Alright, what are we doing with you this time?” 🙋♂️ I’ve been there, standing in front of the fridge, caught in the eternal loop of lemon-pepper, basic BBQ, or just… more lemon-pepper. It’s a universal kitchen truth: chicken is our reliable weeknight hero, but sometimes, it needs a little help to be the life of the party.
That’s exactly why I’m so pumped to share this idea with you today. Forget choosing just one sauce. Why not have them all? Welcome to the Chicken Breast Sauce Flight – your ticket to turning a simple piece of protein into a full-blown, interactive, flavor-packed experience. Imagine this: one beautifully cooked chicken breast, sliced and ready, surrounded by a constellation of little bowls, each holding a completely different, wildly delicious sauce. You get to be the chef, the artist, and the taste-tester all at once. Dip a bite in zesty, herby chimichurri, the next in creamy, tangy honey mustard. It’s fun, it’s social, and it banishes dinner boredom for good.
This isn’t about fancy techniques or hard-to-find ingredients. It’s about empowerment in your own kitchen. In less time than it takes to watch your favorite sitcom, you can whip up five incredible sauces that will make that chicken sing everything from a smoky Spanish ballad (hello, romesco!) to a bright, fresh Mediterranean melody (looking at you, lemon herb yogurt). So, grab your favorite cutting board and let’s turn a mundane meal into a culinary adventure. Your taste buds will thank you.
The Dinner Party That Started It All
This whole “sauce flight” idea was born from a bit of a kitchen panic, honestly. A few years back, I had a last-minute group of friends coming over. I had defrosted chicken breasts (of course), but I realized one of my guests was avoiding dairy, another wasn’t big on spice, and a third was, in their own words, “on a bold flavor journey.” My usual one-sauce-fits-all plan was crumbling faster than a poorly made meatball.
Instead of stressing, I started raiding the fridge and pantry. I had parsley that needed using, a jar of roasted red peppers, some Greek yogurt, the usual condiments… and a lightbulb went off. What if I just made a bunch of small batches of different sauces? I quickly chopped, whisked, and blended, arranging everything in little ramekins around a platter of simply grilled chicken. I called it a “Chicken Taste Test.”
The result was magical. Everyone was chatting, comparing notes, and laughing as they mixed and matched. “Ooh, try the red one with the green one!” “This ginger one is incredible!” The dinner wasn’t just about eating; it was an experience, a conversation starter. It took the pressure off me to pick the “perfect” flavor and put the power right on their plates. That night, I knew this wasn’t a salvage job—it was a new staple. And now, I’m so excited to pass that fun and flexibility on to you.
Your Flavor Arsenal: Ingredients & Insights
Here’s the beautiful part: most of this is probably already in your kitchen. We’re building a world of flavor from simple, fresh building blocks. Let’s break it down.
For the Chicken (The Canvas):
- 2 Boneless, Skinless Chicken Breasts: Our blank slate! I prefer breasts for this as they’re a neutral, lean base that lets the sauces shine. Chef’s Insight: If you’re feeling fancy, chicken thighs work wonderfully too—their richer flavor pairs amazingly with the spicy soy-ginger glaze.
- Salt & Pepper: The non-negotiables. Don’t be shy. Seasoning the chicken itself well is step one to great flavor.
- Olive Oil: For cooking. A good glug in a hot pan is all you need for a beautiful sear.
The Sauce Flight (The Masterpieces):
1. Zesty Chimichurri
- ½ cup fresh parsley, finely chopped: The grassy, fresh heart of the sauce. Sub Tip: Can use half parsley, half cilantro for a different twist!
- 2 garlic cloves, minced: For that essential punch. Fresh is best here.
- 2 tbsp red wine vinegar: Provides the tangy brightness. Sherry vinegar is a great swap.
- ½ tsp red pepper flakes: Just a warm hum of heat. Adjust to your bravery level.
- ⅓ cup olive oil: Brings it all together into a lush, spoonable sauce. Extra virgin gives the best flavor.
- Salt to taste: It will need a good pinch to balance the vinegar.
2. Creamy Honey Mustard
- 2 tbsp Dijon mustard: The sophisticated, tangy base. Yellow mustard will work in a pinch but is sharper and less complex.
- 1 tbsp honey: For sweetness and that beautiful gloss. Maple syrup is a fantastic vegan alternative.
- 1 tbsp mayo or Greek yogurt: Mayo makes it luxuriously creamy; Greek yogurt lightens it up with a pleasant tang. Your choice!
- Pinch of salt: Ties the sweet and tangy together.
3. Smoky Romesco
- 1 roasted red pepper (jarred is fine!): The sweet, smoky foundation. Chef’s Hack: Using jarred peppers is a huge time-saver and totally acceptable!
- ¼ cup toasted almonds: Adds body, richness, and a nutty depth. Sub Tip: Walnuts or pine nuts are also traditional and delicious.
- 1 garlic clove: A must for the base flavor.
- 1 tbsp tomato paste: Concentrates that rich, umami tomato flavor.
- 2 tbsp olive oil: Helps it blend into a saucy consistency.
- 1 tbsp red wine vinegar: The bright counterpoint to the smoke.
- Salt & Smoked Paprika to taste: The smoked paprika is non-negotiable for that classic romesco character!
4. Lemon Herb Yogurt
- ½ cup plain Greek yogurt: The cool, creamy, protein-packed base. Sub Tip: For dairy-free, a thick coconut yogurt works, or even tahini thinned with a little water and lemon.
- 1 tbsp lemon juice + zest: Zest is key! It packs an intense, aromatic lemon oil that juice alone can’t provide.
- 1 tsp garlic, minced: Just a hint in the background.
- 1 tbsp fresh dill or parsley: Dill is my favorite here—it screams “fresh.”
- Salt & pepper: Essential to wake up all the flavors.
5. Spicy Soy-Ginger Glaze
- 2 tbsp soy sauce: The salty, umami backbone. Use tamari for gluten-free.
- 1 tbsp honey or brown sugar: For caramelized sweetness. Agave works too.
- 1 tsp grated ginger: Fresh is phenomenal here—that spicy, floral kick is everything.
- 1 tsp sesame oil: A few drops add an incredible, nutty aroma. Don’t skip it!
- 1 tsp rice vinegar: A touch of mild acidity to balance.
- Optional: red chili flakes: For an extra kick.
Let’s Get Cooking: Your Step-by-Step Guide
Okay, team! Let’s fire up the stove (or grill, or oven) and make some magic. This process is super streamlined. We’ll get the chicken going, then whirl through the sauces. You’ll be done before you know it.
Step 1: Cook Your Chicken (The Main Event)
First, pat those chicken breasts dry with a paper towel. This is my number-one tip for a perfect sear—moisture is the enemy of browning! Drizzle them with a little olive oil and season generously on both sides with salt and pepper.
Chef’s Hack: For supremely juicy and even-cooking chicken, I often pound the thicker end of the breast gently with a rolling pin or pan until it’s a relatively uniform thickness. No more dry ends and undercooked centers!
Your Cooking Method Options:
- Pan-Seared (My Weeknight Go-To): Heat a tablespoon of oil in a skillet over medium-high heat. Add the chicken and cook without moving for 5-7 minutes per side, until golden brown and cooked through (internal temp of 165°F). Let it rest on a cutting board for 5 minutes before slicing. Tip: That rest time is crucial for juicy meat!
- Grilled: Perfect for summer! Grill over medium heat for 6-8 minutes per side.
- Oven-Baked: Great for hands-off cooking. Bake at 400°F (200°C) on a parchment-lined sheet for 18-22 minutes.
Step 2: The Sauce Sprint (The Fun Part!)
While the chicken cooks or rests, let’s make the sauce flight. You can do all of these in about 10 minutes flat. I like to go from lightest to darkest to avoid washing the bowl constantly.
- Lemon Herb Yogurt: Simply stir everything together in a small bowl. Taste and adjust—maybe it needs more zest? More dill? You’re the boss. Cover and pop it in the fridge.
- Honey Mustard: In another bowl, whisk the Dijon, honey, and mayo/yogurt until smooth. That’s it. Seriously.
- Chimichurri: Finely chop the parsley and garlic (a mini food processor makes this 10 seconds of work). Add to a bowl with the vinegar, red pepper flakes, and salt. Whisk in the olive oil. It should be vibrant and loose.
- Spicy Soy-Ginger Glaze: Whisk all ingredients in a small bowl. For a more glaze-like consistency, you can warm it gently in a small saucepan for a minute until it thickens slightly, but it’s wonderful as a cold dipping sauce too.
- Romesco: Here’s where your blender or small food processor earns its keep. Throw in the roasted pepper, toasted almonds, garlic, tomato paste, vinegar, and spices. Blend, streaming in the olive oil until it’s a chunky-smooth, spoonable sauce. Taste and adjust for salt and smoke!
Chef’s Commentary: Don’t stress about making these sauces perfectly smooth (except maybe the romesco). Rustic is charming! A little texture shows they’re homemade with love.
Step 3: Slice & Assemble Your Masterpiece
Take your rested chicken and slice it against the grain into ½-inch strips. This makes it tender and easy to dip. Arrange the slices on a large platter or wooden board. Take your five sauces and spoon them into small bowls, ramekins, or even just little piles directly on the board. Scatter some extra herbs or lemon wedges for a pop of color.
And just like that, you’ve created a restaurant-worthy experience right on your kitchen table. Stand back and admire your work for a second—you deserve it!
How to Serve & Savor Your Creation
Presentation is half the fun here! This dish is inherently beautiful and social. Here’s how I like to set the stage for maximum enjoyment:
The Platter: Use a large wooden cutting board, a rustic slate slab, or a big, beautiful plate as your canvas. Pile the sliced chicken in the center, fanning it out slightly.
The Sauce Vessels: Get creative! Use small mason jars, dipping bowls, espresso cups, or even clean, pretty jar lids. Arrange them around the chicken like delicious satellites.
The Supporting Cast: This meal is fantastic on its own, but if you want to round it out, here are my go-to pairings:
- For Soaking Up Sauce: A big pile of fluffy quinoa, couscous, or crusty bread is essential. That romesco and chimichurri are liquid gold and shouldn’t go to waste.
- For a Fresh Crunch: A simple arugula salad with a lemon vinaigrette, or some quick-pickled cucumber slices. The acidity cuts through the richness perfectly.
- For a Veggie Boost: Roasted asparagus, broccoli, or zucchini spears make great additional dippers alongside the chicken.
The real magic is in the interaction. Place the platter in the middle of the table and encourage everyone to dig in, mix flavors, and discover their favorite combo. Is it a bite of chicken dragged through both chimichurri and lemon yogurt? Go for it! That’s the whole point.
Make It Your Own: Flavor Twists & Swaps
The beauty of this concept is its infinite flexibility. Here are just a few ways to riff on the sauce flight to match your mood or dietary needs:
- The Herbivore’s Delight: Swap the chicken for crispy roasted cauliflower steaks, grilled portobello mushrooms, or pan-fried extra-firm tofu. All the sauces are vegan-friendly or easy to adapt (use maple syrup, dairy-free yogurt, etc.).
- Global Fusion Flight: Take a trip around the world! Swap in a Thai Peanut Sauce (peanut butter, lime, soy, coconut milk), a Quick Tzatziki (yogurt, cucumber, garlic, dill), and a Korean Gochujang Mayo (gochujang, mayo, a dash of rice vinegar).
- All-Creamy Dream Team: For a decadent, comfort-food vibe, focus on creamy sauces. Try a Sun-Dried Tomato Pesto, a Blue Cheese Chive Dip, and a Avocado Cilantro Lime Crema alongside the honey mustard and lemon yogurt.
- 5-Minute Pantry Raid: Super short on time? Your fridge door is your friend. Mix bbq sauce + a splash of bourbon, stir sriracha into mayo, and thin store-bought pesto with a little extra olive oil. Instant, delicious flight!
- Seafood Switch-Up: This concept is killer with shrimp! Serve a platter of grilled or sautéed shrimp with these same sauces for an incredible appetizer or light meal.

Chicken Breast Sauce Flight : 5 Irresistible Sauces to Elevate Your Chicken
Description
Chicken Breast Sauce Flight – Your Interactive Flavor Adventure
Turn a simple chicken breast into a weeknight game-changer with five easy sauces. Fun, social, and endlessly customizable—perfect for dinners, meal prep, or impressing friends.
Ingredients
For the Chicken:
-
2 boneless, skinless chicken breasts
-
Olive oil for cooking
-
Salt & freshly ground black pepper
Sauce Flight:
-
Zesty Chimichurri
-
½ cup fresh parsley (or half parsley, half cilantro)
-
2 garlic cloves, minced
-
2 tbsp red wine vinegar
-
½ tsp red pepper flakes
-
⅓ cup olive oil
-
Salt, to taste
-
-
Creamy Honey Mustard
-
2 tbsp Dijon mustard
-
1 tbsp honey
-
1 tbsp mayo or Greek yogurt
-
Pinch of salt
-
-
Smoky Romesco
-
1 roasted red pepper (jarred ok)
-
¼ cup toasted almonds (or walnuts/pine nuts)
-
1 garlic clove
-
1 tbsp tomato paste
-
2 tbsp olive oil
-
1 tbsp red wine vinegar
-
Salt & smoked paprika to taste
-
-
Lemon Herb Yogurt
-
½ cup plain Greek yogurt (or dairy-free alternative)
-
1 tbsp lemon juice + zest
-
1 tsp garlic, minced
-
1 tbsp fresh dill or parsley
-
Salt & pepper, to taste
-
-
Spicy Soy-Ginger Glaze
-
2 tbsp soy sauce (tamari for GF)
-
1 tbsp honey or brown sugar
-
1 tsp grated fresh ginger
-
1 tsp sesame oil
-
1 tsp rice vinegar
-
Optional: pinch of red chili flakes
-
Instructions
1. Cook the Chicken
-
Pat chicken dry, drizzle with olive oil, and season generously.
-
Optional: Pound thick ends for even cooking.
Cooking Options:
-
Pan-Seared (weeknight go-to): Medium-high heat, 5–7 min per side until 165°F. Rest 5 min.
-
Grilled: Medium heat, 6–8 min per side.
-
Oven-Baked: 400°F (200°C), 18–22 min.
2. Prepare the Sauces
-
Lemon Herb Yogurt & Honey Mustard: Whisk ingredients in small bowls.
-
Chimichurri: Chop herbs & garlic, combine with vinegar, red pepper flakes, olive oil, and salt.
-
Spicy Soy-Ginger Glaze: Whisk all ingredients; optionally warm slightly.
-
Romesco: Blend roasted pepper, nuts, garlic, tomato paste, vinegar, smoked paprika, and olive oil to a chunky-smooth consistency.
3. Slice & Assemble
-
Slice chicken against the grain into ½-inch strips.
-
Arrange on a large platter or cutting board.
-
Spoon sauces into small bowls or ramekins and arrange around the chicken.
-
Optional: scatter fresh herbs or lemon wedges for color.
Serving & Pairing Ideas
-
Platter Style: Center chicken, sauces around it; let everyone mix & match.
-
Accompaniments: Fluffy rice/quinoa, crusty bread, arugula salad, or roasted veggies.
-
Fun Twist: Try with shrimp, tofu, or roasted cauliflower for a flavor flight upgrade.
Notes
-
Herbivore-Friendly: Swap chicken for cauliflower steaks, portobello, or tofu.
-
Global Fusion Flight: Add Thai peanut, tzatziki, or Korean gochujang mayo.
-
Pantry Quick-Fix: Mix BBQ + bourbon, sriracha + mayo, thin pesto with olive oil.
-
Presentation: Wooden boards, slate slabs, or pretty jars elevate the interactive experience.
Final Thoughts: Turn Your Tuesday into a Taste Adventure
At its heart, cooking should be an act of joy—a chance to explore, connect, and savor. The Chicken Breast Sauce Flight is more than just a meal; it’s a reminder that creativity doesn’t require complexity, and that the most memorable dinners often come from a simple shift in perspective.
You’ve got everything you need right in your kitchen and within you. This isn’t about rigid recipes or perfection; it’s about playful experimentation. It’s about transforming the ordinary—the humble chicken breast, the condiments in your fridge—into an extraordinary, shared experience. It’s a celebration of choice, where everyone at the table gets to be the creator of their own perfect bite.
So the next time you find yourself facing that familiar pack of chicken, remember: you’re not just making dinner. You’re crafting an adventure. You’re building a moment of connection, a burst of laughter, and a symphony of flavors that turns a routine weeknight into something special.
Grab those ramekins, unleash your inner saucier, and let the feast begin. Here’s to breaking the monotony, one delicious dip at a time.

Pulled Chicken Breast : Juicy, Shredded Chicken Perfect for Bowls and More
Your New Kitchen MVP: The Secret to Perfectly Juicy Pulled Chicken Breast
Hey friends, Beau here from Feastical! Let’s talk about a universal truth: we’ve all been there. It’s 6 PM, the fridge is giving you the side-eye, and you need something good, fast, and that won’t dirty every dish in the cabinet. You dream of something versatile—a protein hero that can morph into tacos tonight, a salad tomorrow, and a killer sandwich by Friday.
Enter the humble chicken breast. Now, I can hear the collective groan. “Beau, chicken breast is so… boring.” Or worse, “Mine always turns out dry!” I get it. I’ve chewed on my fair share of cardboard chicken. But what if I told you there’s a foolproof, stovetop method that transforms those simple breasts into the most tender, succulent, flavor-soaked pulled chicken you’ve ever had?
This isn’t just shredded chicken. This is pulled chicken breast, re-sauced for maximum juiciness, ready to be the star of your bowl, the heart of your wrap, the MVP of your meal prep. It’s my absolute go-to for busy weeks, casual dinners with friends, or when I just need a big container of “good decisions” waiting for me in the fridge. So grab your favorite skillet and your two trusty forks. We’re about to make chicken breast the most exciting thing in your kitchen.
The Dinner That Started It All: A Tale of Two Forks
This method was born out of pure, Tuesday-night desperation. Picture it: me, a decade ago, in my first apartment with a kitchen the size of a postage stamp. I had two friends coming over, a budget that screamed “ramen,” and a desire to impress. All I had were a couple of chicken breasts, some broth, and a half-empty bottle of BBQ sauce a roommate left behind.
I pan-seared the chicken, added the broth to keep it from burning, and let it simmer while I frantically cleaned. When I went to shred it, I realized I’d left it in just a little too long. Instead of firm slices, it practically fell apart at the touch of a fork. “Disaster,” I thought. But then, in a stroke of hungry genius, I tossed those tender shreds back into the flavorful liquid left in the pan, added that BBQ sauce, and gave it a stir. What emerged was a revelation—chicken so moist and infused with flavor, it was like a completely different ingredient. My friends demolished it, wrapped in tortillas with whatever toppings we could scavenge. We called it “Fork-Tender Tuesday,” and a staple was born. It proved that the best recipes often come from happy accidents and a willingness to just go with it.
Gathering Your Flavor Squad: Simple Ingredients, Big Impact
Here’s the beautiful part: you likely have most of this already. This recipe is a blueprint, a canvas waiting for your personal splash of flavor.
- 2 boneless, skinless chicken breasts (about 1 to 1.5 lbs total). Chef’s Insight: Try to get ones that are similar in size so they cook evenly. If one’s a monster, just give it a gentle pound with a pan to even it out.
- 1 tablespoon olive oil or butter. Substitution Tip: Butter gives a richer, more luxurious base flavor, while olive oil is a great neutral option. Use what you love!
- Salt and pepper to taste. Chef’s Hack: Don’t be shy here. Seasoning the meat directly is your first layer of flavor. I like a good coarse kosher salt and freshly cracked black pepper.
- 1/2 teaspoon garlic powder (optional but recommended). Why? It adds a subtle, sweet garlic note that permeates the chicken while it simmers. No fresh garlic burning in the pan!
- 1 cup low-sodium chicken broth. Explanation: This is the magic potion! It creates a steamy environment that gently cooks the chicken, keeping it incredibly juicy, and forms the base of our “re-saucing” liquid. You can use water in a pinch, but broth adds a deeper flavor dimension.
- 1/2 cup of your favorite sauce. This is where you make it YOURS. Classic BBQ, zesty teriyaki, creamy chipotle mayo, tangy buffalo, even a simple mix of salsa. The world is your saucy oyster.
Let’s Get Cooking: Your Foolproof Roadmap to Juicy Chicken
Ready? This is so easy, you’ll have it memorized after one try. Let’s walk through it together, step-by-step.
- Season & Sear for Flavor. Pat your chicken breasts completely dry with a paper towel—this is crucial for a good sear! Season them generously on both sides with salt, pepper, and that garlic powder. Heat your oil or butter in a skillet (one that has a lid!) over medium heat. Once it’s shimmering, add the chicken. Let it cook, undisturbed, for 2-3 minutes per side until you get a lovely, light golden-brown crust. We’re not cooking it through here, just building flavor. Chef’s Tip: Hear that sizzle? That’s the sound of flavor being created. Don’t move it around!
- Simmer to Tenderness. Carefully pour in your chicken broth. It will bubble and steam up—that’s good! Immediately reduce the heat to low, cover the skillet with the lid, and let it simmer gently for 15-20 minutes. Little Hack: Set a timer! The exact time depends on the thickness of your breasts. The simmering broth is creating a mini steam-oven, cooking the chicken evenly and keeping every molecule hydrated.
- Shred It Up! After your timer goes off, use a fork to check. The chicken should be cooked through (no pink in the center) and very tender. Remove it to a clean plate or cutting board and let it rest for a full 5 minutes. This rest is non-negotiable! It lets the juices redistribute. Then, take two forks and go to town: one fork to anchor the chicken, the other to pull and shred. Shred it as finely or as chunkily as you like. I prefer finer shreds because they hold sauce better.
- The Game-Changing “Re-Sauce.” Here’s where the magic happens. Look at that flavorful liquid left in your skillet. We’re not dumping that gold! If there’s more than a few tablespoons, you can simmer it uncovered for a minute to reduce slightly. Then, add your shredded chicken back to the pan along with your 1/2 cup of chosen sauce. Toss, stir, and heat everything together over low heat for just 1-2 minutes until it’s all warmed through and beautifully coated. This step ensures every single strand is juicy and flavorful, not just the outside.
Dinner, Served Your Way: Endless Possibilities
Now for the fun part—how to eat this glorious pile of chicken! Here are a few of my favorite ways to serve it up:
- The Epic Bowl: Start with a base of cilantro-lime rice or quinoa. Add a big scoop of pulled chicken, black beans, roasted corn, diced avocado, a sprinkle of cheese, and a dollop of sour cream or Greek yogurt. Drizzle with extra sauce.
- Quick & Easy Wraps/Tacos: Warm some flour tortillas or crisp up some taco shells. Pile high with chicken, crunchy slaw, pickled red onions, and a squeeze of lime. Perfect for a hands-on dinner.
- The Classic Sandwich: Toast a brioche bun, pile on BBQ pulled chicken, and top with creamy coleslaw for that perfect sweet, smoky, crunchy, creamy combo. Messy napkins required.
- Meal Prep Hero: Divide into airtight containers with different sides (rice, roasted veggies, salad greens) for a week of no-stress lunches. The chicken reheats like a dream.
Mix It Up! 5 Flavor Twists to Try This Week
Don’t stop at one sauce! This method is a blank slate. Here are five ways to run with it:
- Tropical Teriyaki: Use a store-bought or homemade teriyaki sauce. After re-saucing, mix in some chopped pineapple and serve over rice with sesame seeds and green onions.
- Buffalo Blue Cheese: Toss the shredded chicken in buffalo sauce. Serve in a wrap with crisp romaine, diced celery, and a big crumble of blue cheese or ranch dressing.
- Creamy Pesto: Swap the sauce for 1/2 cup of basil pesto (mixed with a splash of the cooking broth to loosen it). Amazing on pasta, in a caprese-style sandwich, or on a pizza flatbread.
- Green Chile & Lime: Use a cup of tomatillo salsa (salsa verde) as your sauce. Add the juice of one lime and a handful of chopped cilantro after tossing. Perfect for enchiladas or nachos.
- Dietary Swap – Dairy-Free Creamy: Mix 1/2 cup of unsweetened coconut milk with a tablespoon of curry powder or smoked paprika for a rich, creamy, dairy-free option.
Beau’s Kitchen Notes: A Recipe That Grows With You
Over the years, this has become my most-adapted recipe. I’ve made it in a slow cooker (low for 3-4 hours) when I knew my day would be crazy, and I’ve even used the method with boneless chicken thighs for an even richer result. The core principle remains: gentle cooking in liquid + shredding + re-saucing = guaranteed juiciness.
A funny story: I once accidentally used apple juice instead of chicken broth (similar-looking cartons in a packed fridge!). I was mortified for a second, but you know what? With BBQ sauce, it created this incredible sweet-and-smoky vibe that my nieces now request as “Uncle Beau’s Apple Chicken.” So remember, friends, don’t fear the kitchen oops—embrace it! It might just be your next favorite thing.
Your Questions, Answered: Pulled Chicken 911
- Q: My chicken is still a little pink inside after 20 minutes. What do I do?
A: No panic! Just recover the skillet and let it simmer for another 3-5 minutes. Chicken breast thickness can vary wildly. The internal temperature should reach 165°F. If you’re unsure, a quick-read thermometer is a great kitchen investment. - Q: Can I make a larger batch?
A: Absolutely! Just use a larger skillet or pot and ensure the chicken is in a single layer. You may need to increase the broth slightly (enough to come about 1/3 up the sides of the chicken) and add a few extra minutes to the simmering time. - Q: How long does it last in the fridge?
A: Stored in an airtight container, your pulled chicken will stay fresh and tasty for 3-4 days. It also freezes beautifully for up to 3 months. Thaw overnight in the fridge. - Q: It’s a bit dry. Where did I go wrong?
A: Two likely culprits: 1) The heat was too high during simmering. Keep it at a bare, gentle bubble. 2) You skipped the “re-saucing” step! That final toss in the pan juices and sauce is essential for re-hydrating the shreds.

Pulled Chicken Breast : Juicy, Shredded Chicken Perfect for Bowls and More
Description
Pulled Chicken Breast – Juicy, Flavor-Packed, and Incredibly Versatile
Your weeknight MVP is here. Tender, juicy chicken breast that shreds effortlessly and soaks up every bit of flavor. Perfect for tacos, bowls, sandwiches, wraps, or meal prep.
Ingredients
-
2 boneless, skinless chicken breasts (about 1–1.5 lbs total; try to pick similar sizes)
-
1 tbsp olive oil or butter
-
Salt and freshly ground black pepper, to taste
-
½ tsp garlic powder (optional, adds subtle depth)
-
1 cup low-sodium chicken broth (or water in a pinch)
-
½ cup sauce of choice: BBQ, teriyaki, buffalo, pesto, salsa verde, etc.
Optional Garnishes / Serving Ideas:
-
Lemon/lime wedges
-
Fresh herbs (cilantro, parsley, thyme)
-
Cheese, sour cream, avocado, slaw
Instructions
1. Season & Sear
-
Pat chicken completely dry. Season generously with salt, pepper, and garlic powder.
-
Heat oil or butter in a skillet over medium heat until shimmering.
-
Add chicken and sear undisturbed 2–3 minutes per side until lightly golden.
Tip: We’re building flavor here, not cooking through.
2. Simmer to Tenderness
-
Pour in chicken broth.
-
Reduce heat to low, cover, and simmer 15–20 minutes. Chicken should be cooked through (165°F) and tender enough to shred.
3. Shred the Chicken
-
Remove chicken to a plate and let rest 5 minutes.
-
Use two forks to shred to desired consistency.
4. Re-Sauce for Juiciness
-
Simmer leftover pan liquid uncovered 1 minute to concentrate flavor (optional).
-
Add shredded chicken back to the pan with your chosen sauce. Toss over low heat 1–2 minutes until warmed and coated.
Serving Ideas
-
Bowl: Rice/quinoa, black beans, corn, avocado, cheese, sour cream, extra sauce.
-
Wrap/Taco: Flour tortillas or crispy taco shells, slaw, pickled onions, lime.
-
Sandwich: Toasted bun, pulled chicken, creamy coleslaw, drizzle of sauce.
-
Meal Prep: Divide into containers with grains and veggies; reheats beautifully.
Flavor Twists
-
Tropical Teriyaki: Teriyaki sauce + chopped pineapple, sesame seeds, green onions.
-
Buffalo Blue Cheese: Toss with buffalo sauce; add romaine, celery, blue cheese.
-
Creamy Pesto: Basil pesto + splash of cooking broth; perfect for pasta or sandwiches.
-
Green Chile & Lime: Salsa verde + lime juice + chopped cilantro.
-
Dairy-Free Creamy: Coconut milk + curry powder or smoked paprika.
Notes
-
Keep heat low while simmering; too high = dry chicken.
-
Don’t skip the re-sauce step—it rehydrates and maximizes flavor.
-
Larger batches? Use a bigger skillet/pot, keep chicken in a single layer, and add extra broth if needed.
-
Freezes well up to 3 months; thaw overnight in the fridge.
Nutritional Spotlight: Fuel Your Body, Feed Your Soul
Let’s be real—we eat to feel good, both in body and spirit. This pulled chicken breast is a fantastic lean protein base. Important Note: The numbers below are for the plain, sauced chicken using a generic BBQ sauce. They will change based on your specific sauce and serving style.
- Calories: ~280-350 per serving (depends heavily on sauce)
- Protein: A whopping 33g+! This is what makes it so filling and great for meal prep.
- Fat: ~12g (mainly from the cooking fat and sauce).
- Carbohydrates: Varies. Sauces like teriyaki or BBQ will add more than a buffalo or pesto sauce.
The beauty is in the customization. Serving it over a salad? You’ve got a low-carb meal. Piling it on a whole-wheat bun? That’s sustained energy. You’re in the driver’s seat.
Wrap-Up: Your New Kitchen Confidence
And there you have it—my not-so-secret secret to never suffering through dry chicken breast again. This pulled chicken method is more than a recipe; it’s a technique, a toolkit for countless delicious, stress-free meals. It’s the dinner that understands your busy life and still delivers a huge hug of flavor.
I want you to make this, make it your own, and then tell me all about it! What sauce did you use? Did you create an incredible bowl combo? Tag me @Feastical on social media so I can see your creations. Remember, the best kitchen is a played-in kitchen, full of experiments, laughter, and really, really good food.
Final Thoughts: Your Weeknights, Transformed.
This isn’t just another chicken recipe. It’s a fundamental technique—a kitchen hack that turns the most feared cut of poultry into a guaranteed source of juicy, flavorful meals all week long. By mastering the simple trio of sear, simmer, and re-sauce, you’ve unlocked a world of easy dinners. No more dry chicken, no more dinner panic. Just versatile, delicious protein ready to become whatever you crave. Give it a try this week, make it your own, and enjoy the confidence of knowing you’ve got a true Meal Prep MVP in your back pocket.
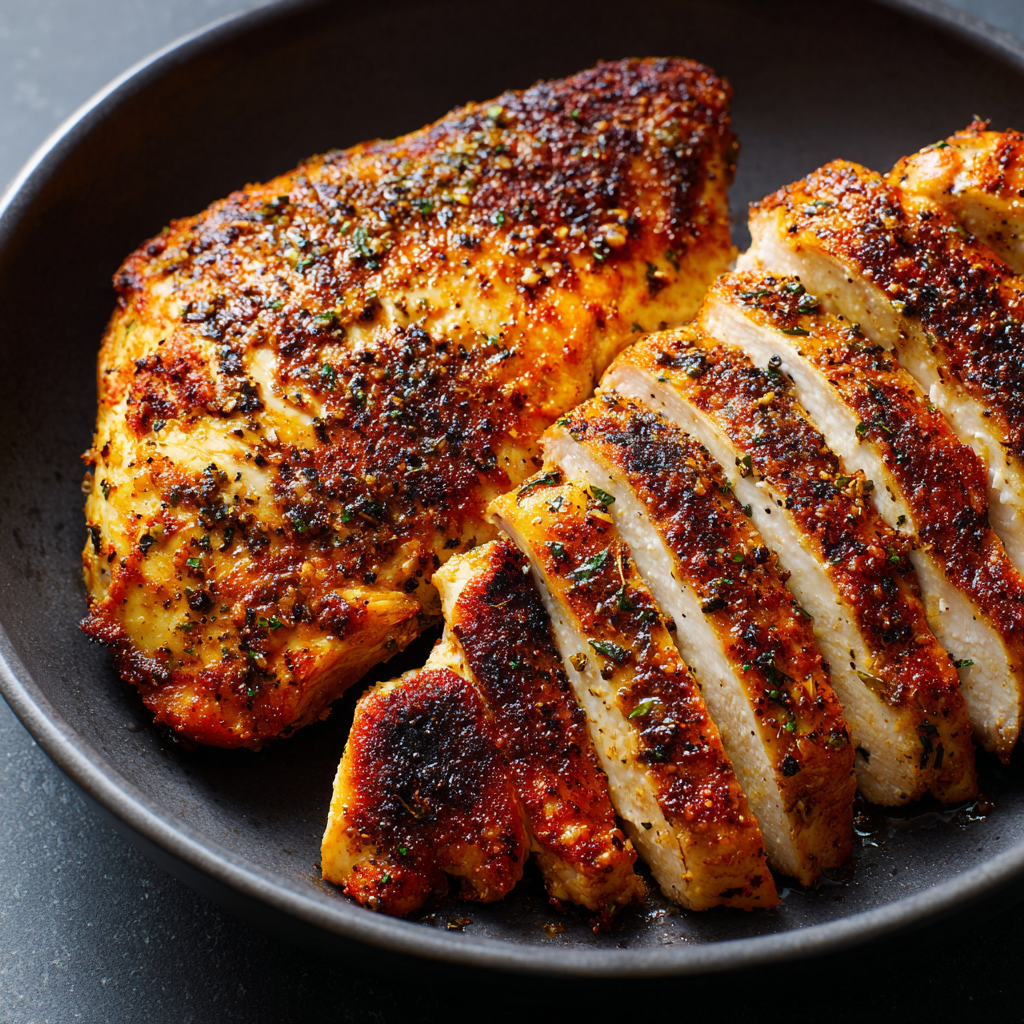
Crispy-Edge Chicken Breast : Hard Sear for the Perfect Juicy Bite
The Crispy-Edge Chicken Breast That Changed My Weeknights (And It’ll Change Yours Too!)
Hey friend, Beau here. Pull up a stool. Let’s talk about a kitchen miracle so simple, so downright satisfying, that it feels like you’ve unlocked a secret level in the game of dinner. I’m talking about the perfectly seared, crispy-edged, impossibly juicy chicken breast.
We’ve all been there. You’re hungry, you’ve got chicken breasts in the fridge, and you have…concerns. Will it be dry? Will it be bland? Will it be that sad, steamed-looking piece of protein that you have to douse in sauce just to get through? I raise my spatula and say NO MORE.
Today, we’re not just cooking chicken. We’re on a mission for contrast. That magical, mouthwatering contrast of a deep, golden, audibly crunchy crust giving way to a tender, moist, and flavorful interior. This isn’t fussy or fancy. It’s foundational. It’s the skill that turns a basic breast into the star of your salad, the hero of your sandwich, the centerpiece of your grain bowl.
The key? We’re going for a hard sear. We’re not gently nudging the chicken to doneness. We’re introducing it to serious, focused heat and having the patience to let magic happen. This method locks in every single drop of juice while building flavor layers you can actually see and hear. So, grab your favorite heavy skillet (you know the one), and let’s transform dinner from a question mark into an exclamation point. Ready? Let’s dig in.
The Sizzle That Started It All
My love affair with the hard-seared chicken breast started not in a fancy kitchen, but in my grandma’s tiny, always-warm kitchen on a busy weeknight. She’d be juggling three things at once, but when it was time for the chicken, the whole world stopped.
I remember the sound most of all. That unmistakable, aggressive SSSSHHHHZZZZTTT the moment the seasoned breast hit the hot cast iron. It wasn’t a timid sound; it was a promise. She’d point a finger at me, a mischievous glint in her eye, and say, “Now, Beau. Don’t you dare poke it. Let it make friends with the pan.” The aroma of toasting spices and caramelizing meat would fill the house, a dinner bell more effective than any ring.
When she finally flipped it, revealing that perfect, mahogany-brown crust, it was like uncovering treasure. She’d let it rest (a step I admittedly whined about as a hungry kid), then slice into it. The steam would puff out, and the juices would pool on the cutting board. That first bite was a revelation: crunch, then utter tenderness. It taught me that the best food isn’t about the most ingredients, but about the respect you give to the ones you have. That lesson, and that sound, is what I hear in my head every single time I heat up my skillet.
Your Flavor Toolkit: Simple Ingredients, Big Impact
Here’s the beautiful part: the ingredient list is short. This is about technique, not a shopping marathon. But each component plays a starring role. Let’s break it down:
- 2 boneless, skinless chicken breasts (about 6-8 oz each): The canvas. Pro-Tip: Look for breasts that are relatively even in thickness. If one end is super thick and the other is thin, it’s harder to cook evenly. We’ll fix that in a sec!
- Kosher salt & freshly ground black pepper: The non-negotiable dynamic duo. Why Kosher? Its flaky crystals season meat more evenly than fine table salt. And please, for the love of crispy edges, grind that pepper fresh. The pre-ground stuff has lost its soul.
- 1-2 tbsp high-heat cooking oil: Our heat conductor. Avocado oil, refined coconut oil, or a good quality olive oil are my go-tos. They have a high smoke point, meaning they won’t burn and get bitter when our pan gets screaming hot. Butter is delicious for flavor, but it burns. We’ll use it as a finisher instead!
- 1 tsp garlic powder OR smoked paprika (optional but highly recommended): The flavor booster. Garlic powder gives a savory, all-purpose kick. Smoked paprika is my secret weapon—it adds a subtle smokiness and a gorgeous red hue to the crust.
- Optional Garnish: Fresh herbs (thyme, rosemary), a pat of cold butter, or a squeeze of fresh lemon juice. These aren’t just pretty; they add a final bright layer of flavor that makes the whole dish sing.
The Step-by-Step Dance to Crispy Perfection
Okay, team. This is where we turn up the heat and build some confidence. Follow these steps, trust the process, and you’ll be a searing superstar.
- Prep the Chicken – The Dryness Secret: First thing’s first: pat those chicken breasts completely dry with paper towels. This is the MOST IMPORTANT STEP for a good sear. Water is the enemy of crispiness; it creates steam. We want direct contact between meat and hot metal. Next, check the thickness. If one side is much thicker, place the breast between two pieces of plastic wrap and gently pound the thick end with a rolling pin or pan until it’s mostly even. This ensures even cooking.
- Season with Gusto: Season both sides generously with salt, pepper, and your chosen spice (garlic powder or paprika). Don’t be shy! This seasoning forms the delicious crust. Do this right before cooking so the salt doesn’t draw out moisture onto the surface.
- Heat the Pan – Get it HOT: Place your heavy-bottomed skillet (cast iron is the undisputed champion here) over medium-high heat and let it sit empty for 2-3 minutes. Add your oil and swirl to coat. Let the oil heat until it shimmers and just starts to whisper a wisp of smoke. That’s your signal. The pan is ready.
- The Hard Sear – Practice Patience: Using tongs, gently lay the chicken breasts in the pan, laying them down away from you to avoid oil splatter. Here comes the hard part: DO NOT TOUCH THEM. Set a timer for 4-5 minutes. Let the magic happen. You’ll see the edges start to turn opaque. This is the crust forming. If you try to move it early, it will tear and stick. Trust the heat.
- The Flip & Finish: After 4-5 minutes, the edges should look cooked and the bottom should release easily from the pan. Flip! The cooked side should be a deep, golden brown. Cook on the second side for another 4-6 minutes. If the pan is getting too hot and the crust is darkening too fast, reduce the heat to medium. The chicken is done when it reaches 165°F at the thickest part (a quick-read thermometer is your best friend here!).
- The Crucial Rest: Immediately transfer the chicken to a clean plate or cutting board. DO NOT SLICE IT. Let it rest, loosely tented with foil, for 5-7 minutes. This allows the frantic, hot juices to redistribute throughout the meat. If you cut it now, all those precious juices will run out onto the board, leaving you with dry chicken. The wait is worth it, I promise.
How to Serve Your Masterpiece
You’ve waited. You’ve rested. Now for the fun part! Slice your rested chicken against the grain (look for the lines of muscle fiber and cut perpendicular to them) for the most tender bite.
Now, make it a meal! I love to deglaze that flavorful pan with a splash of chicken broth or white wine, scrape up the crispy bits (the “fond” – chef’s gold!), and let it reduce into a quick pan sauce. Pour that right over the top.
Plate it like a pro: For a simple dinner, place sliced chicken over a pile of creamy mashed potatoes or fluffy rice, drizzle with the pan sauce, and add a simple green veggie like roasted broccoli or a crisp salad. For meal prep, let the whole breast cool, then slice or cube it for salads, grain bowls, or wraps all week. It’s the ultimate versatile protein that actually tastes amazing.
Mix It Up! Flavor Twists & Dietary Swaps
Once you’ve mastered the basic method, the world is your crispy chicken oyster. Here are a few of my favorite riffs:
- Lemon-Herb Butter Bash: In the last minute of cooking, add 2 tbsp of cold butter, a few sprigs of thyme or rosemary, and two lemon slices to the pan. Tilt the pan and spoon the bubbling, fragrant butter over the chicken continuously. Heaven.
- The “Everything Bagel” Chicken: Swap the garlic powder for a hearty sprinkle of everything bagel seasoning before searing. The sesame seeds, garlic, and onion get toasty and incredible.
- Spicy & Sweet Glaze: After removing the chicken to rest, add ¼ cup of hot honey or a mix of honey and sriracha to the pan. Let it bubble for 30 seconds, then brush it liberally over the sliced chicken.
- Parmesan-Crusted: After seasoning, press one side of each breast into finely grated Parmesan cheese. Sear, cheese-side down first, to create an insane, cheesy, lacy crust. Flip and finish cooking.
- For Our Vegan Friends: This method works brilliantly on extra-firm pressed tofu or thick slabs of cauliflower steak. Pat them obsessively dry, follow the same searing rules, and season generously.
Beau’s Kitchen Notes & Stories
This recipe has been my weeknight wingman for years, but it wasn’t always perfect. I’ll admit, my early attempts were… tragic. I’d crowd the pan, poke the chicken incessantly, and slice it straight from the heat. The result was more “shoe leather surprise” than “crispy-edge delight.”
The real game-changer was learning to listen to the pan. That confident sizzle when you add the chicken tells you the heat is right. A weak sputter means it’s not hot enough. The way the chicken releases on its own when the crust is ready—it’s like it gives you a little nod. It’s a conversation between you, the food, and the heat. Now, I teach this method to every beginner cook I know because it builds fundamental skills and delivers a seriously impressive result. It’s the recipe that makes you feel like a real cook.
FAQs: Your Crispy Chicken Questions, Answered
Q: My chicken is sticking to the pan! What did I do wrong?
A: Two likely culprits: 1) The pan wasn’t hot enough before adding the chicken. Wait for that shimmering oil. 2) You tried to move it too soon. Be patient! A proper crust will release naturally. If it’s still stuck, give it another minute.
Q: How do I know it’s done without cutting into it?
A: Please, invest in an instant-read thermometer. It takes the guesswork out and is the single best tool for perfect proteins. 165°F at the thickest part is your target. No thermometer? The chicken should feel firm to the touch (not hard), and the juices should run clear.
Q: Can I use this method with chicken thighs?
A: Absolutely! Bone-in, skin-on thighs are DIVINE with this method. Just cook skin-side down first for 8-10 minutes to render the fat and crisp the skin, then flip and finish. They may take a few minutes longer.
Q: My crust is burning before the inside is cooked. Help!
A: Your heat is too high! After the initial flip, if the crust is getting too dark, simply reduce the heat to medium. You can also finish it in a 375°F oven for 5-8 minutes after searing both sides, which is a great trick for extra-thick breasts.
Crispy-Edge Chicken Breast : Hard Sear for the Perfect Juicy Bite
Description
This method gives you the best of both worlds: a crispy, golden-brown crust and a tender, juicy interior. Simple ingredients, focused heat, and a little patience transform ordinary chicken breasts into a dinner star. Perfect for salads, sandwiches, grain bowls, or just a satisfying weeknight meal.
Ingredients
-
2 boneless, skinless chicken breasts (6–8 oz each, even thickness)
-
Kosher salt & freshly ground black pepper, to taste
-
1–2 tbsp high-heat cooking oil (avocado, refined coconut, or light olive oil)
-
1 tsp garlic powder or smoked paprika (optional, for flavor and color)
-
Optional garnish: fresh herbs (thyme, rosemary), pat of cold butter, or a squeeze of lemon
Instructions
1. Prep the Chicken
-
Pat chicken completely dry with paper towels.
-
Check thickness. If uneven, place between plastic wrap and gently pound to an even thickness.
-
Season both sides generously with salt, pepper, and optional spice.
Tip: Dry chicken ensures a crisp, golden crust.
2. Heat the Pan
-
Place a heavy-bottomed skillet (cast iron is ideal) over medium-high heat for 2–3 minutes.
-
Add oil and swirl to coat. Heat until shimmering with a faint wisp of smoke.
Tip: Hot pan = perfect sear. Don’t rush it!
3. Sear the Chicken
-
Carefully lay the chicken breasts in the pan, away from you.
-
Do not touch for 4–5 minutes. Let the crust form naturally.
-
Flip the chicken and cook the second side for 4–6 minutes, adjusting heat if the crust browns too fast.
Tip: Use an instant-read thermometer; chicken is done at 165°F (74°C).
4. Rest Before Slicing
-
Transfer chicken to a cutting board and rest, loosely tented with foil, for 5–7 minutes.
-
Slice against the grain for maximum tenderness.
Tip: Resting allows juices to redistribute—skip it, and you’ll lose moisture.
Notes
-
Don’t overcrowd the pan; work in batches if necessary.
-
Let the pan tell you when it’s ready—the confident sizzle is your guide.
-
For thicker breasts, finish in a 375°F oven for 5–8 minutes after searing.
-
Chicken thighs work too! Skin-on, bone-in cooks beautifully with the same method (longer cook time).
Nutritional Info (Because Knowledge is Power!)
Let’s keep it real and simple. One serving (about 6 oz of cooked chicken breast prepared as written with 1 tbsp olive oil) provides a powerhouse of lean protein to keep you fueled. Approximate values are: ~280 calories, 35g of protein, 14g of fat (mostly from the healthy oil), and 0g of carbs.
This makes it an incredibly versatile base for any dietary style. Pair it with a complex carb like quinoa or sweet potato and a mountain of veggies for a balanced meal. The protein and healthy fats will keep you satisfied for hours. Remember, these are estimates—actual values can vary based on the exact size of your chicken breast and the amount of oil used.
Your New Weeknight Superpower
And there you have it, friend! The secret is out. A crispy, juicy, flavor-packed chicken breast isn’t a restaurant luxury; it’s a 15-minute reality in your own kitchen. It’s about embracing high heat, practicing a little patience, and treating a simple ingredient with respect.
So the next time you’re staring into the fridge, wondering what’s for dinner, I hope you hear that sizzle in your head. Grab that skillet, heat it with confidence, and give that chicken the hard sear it deserves. You’ve got this. And when you pull it off (which you will), slice into it, see those juices, and take a proud bite—you’ll know you’ve leveled up.
Final Thoughts
So there you have it. What seems like a simple piece of chicken is actually a masterclass in technique, patience, and trust—in your ingredients, your pan, and yourself.
This method is more than a recipe; it’s a shift in mindset. It’s about embracing high heat, respecting the process, and finding joy in the fundamentals. That glorious, crispy-edged chicken breast isn’t just dinner; it’s a victory. It’s the proof that you don’t need complicated tricks or a pantry full of exotic ingredients to make something truly exceptional. You just need to pay attention.
I started this journey in my grandma’s kitchen, captivated by a sound and a lesson. Now, I pass it to you. Let that assertive sizzle be your starting bell. Let the sight of that golden crust be your reward. Let the juicy, tender slice be your proof that the best weeknight wins are often the simplest ones.
Take this method, make it yours, and then go build a hundred different meals around it. That’s the real magic—once you’ve got this foundation down, you’re unstoppable.

Butter-Poached Chicken Breast : Tender, Juicy, and Full of Flavor
The Butter-Poached Chicken Secret: Your Ticket to Silky, Dreamy Dinners
Hey friends, Beau here from Feastical! Let me ask you a question: have you ever looked at a chicken breast and thought, “Okay, reliable… but maybe a little… boring?” I get it. We’ve all been there. It’s the culinary equivalent of a dependable beige sedan. But what if I told you there’s a magical, simple method hiding in plain sight that transforms that humble chicken breast into something so tender, so juicy, so luxuriously silky that it practically melts on your tongue? Welcome to the glorious world of butter-poached chicken.
If the term “poaching” makes you think of bland, boiled health food, wipe that image from your mind immediately. Butter-poaching is a whole different universe. We’re gently coddling the chicken in warm, fragrant, melted butter – not boiling it, not frying it. It’s a low-and-slow bath that coaxes out unbelievable moisture and infuses every single fiber with rich, savory flavor. The result is a chicken breast that cuts like soft butter (see what I did there?) and tastes like a warm, comforting hug. It’s a restaurant-worthy technique that requires almost zero fancy skills, just a little patience and trust. So, grab your favorite skillet and let’s turn that weeknight staple into a show-stopping masterpiece. You’re about to become a total poaching pro.
Grandma’s Kitchen & The Lesson of Low Heat
This technique always takes me back to my Grandma Eleanor’s kitchen. She wasn’t a fancy chef, but she was a wizard with simple ingredients. I remember one rainy afternoon, I was about to crank the stove to high to cook some chicken, impatient as any teenager would be. She gently placed her hand over mine and said, “Beau, honey, hurry ruins food. Let it get happy in the butter.” She showed me how to let the butter just barely shimmer, to add a sprig of thyme from her window box, and to let time do the work. That chicken was a revelation. It wasn’t just dinner; it was a lesson in patience and love. It taught me that the best flavors aren’t forced, they’re nurtured. Every time I butter-poach, I think of her, and I’m reminded that the most profound kitchen magic often happens on the lowest setting.
Gathering Your Flavor Toolkit
Here’s the beautiful part: the ingredient list is short and sweet. This is about quality, not quantity. Let’s break it down:
- 2 boneless, skinless chicken breasts: Look for ones that are similar in size and thickness so they cook evenly. A quick pro-tip: if one end is super thick, give it a gentle pound with a rolling pin or pan to even it out. This is called “butterflying” and it’s a game-changer for even cooking.
- 1 cup (2 sticks) unsalted butter, cut into chunks: Unsalted is key here, friends. It lets you control the salt level perfectly. We’re using a whole cup, and I know it seems like a lot, but stay with me. You’re not eating it all! The chicken absorbs just the flavor, not the entire fat content. The butter becomes a flavorful bath, not a sauce you consume in full.
- 2 garlic cloves, smashed: Just give them a good whack with the flat side of your knife. Smashing releases all those amazing aromatic oils better than mincing for this long, gentle cook.
- 2 sprigs fresh thyme or ½ tsp dried: Fresh thyme is fantastic, but dried works beautifully here too! The slow infusion will wake up those dried herbs wonderfully. Rosemary or sage sprigs are also incredible swaps.
- 1 bay leaf (optional but recommended): This little leaf adds a subtle, almost floral depth. Think of it as the background singer that makes the main vocal (the chicken) sound even better.
- Salt and freshly ground black pepper: Season your chicken generously. This is your primary seasoning, so make it count!
- Optional Flavor Boosters: A strip of lemon peel (just the yellow zest, avoid the white pith) adds a gorgeous bright note. A splash of dry white wine (like Sauvignon Blanc) added after the butter melts brings acidity and complexity. Start with a tablespoon or two!
Your Step-by-Step Guide to Silky Perfection
Ready? Let’s cook. This is less about hardcore technique and more about embracing calm in the kitchen.
- Season & Prep: Pat your chicken breasts completely dry with paper towels. This is crucial! Moisture on the chicken can make the butter sputter. Season both sides generously with salt and pepper. Let them sit for 5 minutes while you prep everything else – this helps the seasoning stick and start working its way in.
- Create Your Butter Bath: Choose a saucepan or skillet that’s just big enough to hold the chicken breasts snugly in a single layer. You want the butter to nearly submerge them. Add the butter chunks, smashed garlic, thyme, and bay leaf. Turn the heat to the lowest possible setting. We are melting and infusing, not cooking or frying. Let the butter melt slowly until it’s completely liquid and you see those little milk solids at the bottom. You should see tiny bubbles, but it should never simmer or bubble actively. If it does, immediately remove it from the heat for a minute. This low heat is the secret to the entire recipe.
- The Gentle Poach: Once the butter is melted and fragrant (smell it – it’s already amazing!), carefully slide in the chicken breasts. They should be almost covered. If they’re peeking out a bit, that’s okay; we’ll turn them. Now, walk away. Set a timer for 15 minutes. This is the trust fall. The butter should maintain a temperature between 140°F and 160°F (60°C-71°C) – warm to the touch but not hot enough to burn you. No need to hover!
- Turn & Finish: After 15 minutes, gently turn the chicken over using tongs. You’ll see it’s already becoming opaque. Let it poach for another 10-15 minutes. The total time will be 25-30 minutes depending on thickness. The best way to know it’s done? Use an instant-read thermometer. Pull the chicken at 155°F (68°C). The carryover heat will bring it to the safe 165°F (74°C) as it rests. If you don’t have a thermometer, make a small cut in the thickest part – the juices should run clear, and the meat should feel firm but not tough.
- The Essential Rest: Transfer the chicken to a cutting board and let it rest for 5 full minutes. I know, I know, you want to dig in! But resting allows the juices to redistribute throughout the meat. If you slice it immediately, all those precious juices will run out onto the board. Patience pays off in juiciness!
How to Serve This Buttery Masterpiece
Presentation is part of the fun! Slice the rested chicken breast against the grain (look for the lines in the meat and cut perpendicular to them) into beautiful, even medallions. This ensures each piece is tender. Fan the slices out on a plate. Now, take a spoonful of that glorious, infused poaching butter from the pan – it’s now a flavor-packed sauce! Drizzle a little over the chicken. The remaining butter can be strained and saved for cooking vegetables, brushing on bread, or using in another recipe – it’s liquid gold! Serve this chicken over a bed of creamy mashed potatoes, buttery egg noodles, or fluffy rice to soak up that sauce. A simple side of steamed green beans, asparagus, or a crisp green salad with a bright vinaigrette cuts through the richness perfectly.
Make It Your Own: Fun Flavor Twists
The basic formula is your canvas. Here are a few ways to paint with different flavors:
- Lemon-Herb Garden: Add 3-4 strips of lemon zest and a couple of sprigs of fresh tarragon or dill to the butter bath. Finish the sliced chicken with a fresh squeeze of lemon juice.
- Spicy Garlic-Lovers: Use 4-5 smashed garlic cloves and add ½ teaspoon of crushed red pepper flakes to the butter. The result is mellow, aromatic, and has a gentle warmth.
- Sun-Dried Tomato & Basil: Chop ¼ cup of oil-packed sun-dried tomatoes and add them to the butter with the garlic. Throw in a few fresh basil stems. The tomatoes add a sweet, tangy umami punch.
- Dairy-Free “Butter” Poach: You can still do this! Use a high-quality, flavorful extra-virgin olive oil or a plant-based butter that browns well. The technique is identical, and you’ll still get incredibly moist chicken.
- Go Global: Swap the thyme for a few slices of fresh ginger and a star anise pod for an Asian-inspired twist. Or use smoked paprika and a pinch of saffron threads for a Spanish flair.
Beau’s Kitchen Confidential
I’ve made this recipe a hundred times, and it’s evolved in tiny ways. At first, I was so nervous about the butter temperature I used a thermometer the whole time! Now I just use the “see tiny bubbles, no sizzle” visual cue. I also learned that adding just a tablespoon of water to the butter at the very start can help stabilize it and prevent any chance of burning during the melt. It evaporates away. My funniest fail? I once tried to speed up the melting by using high heat. I ended up with browned butter (delicious, but not right for this) and a smoky kitchen. Grandma’s voice echoed in my head: “Hurry ruins food, Beau.” She was, as always, right.
Your Questions, Answered
Q: Can I reuse the butter?
A: Absolutely! Let it cool, strain it through a fine-mesh sieve to remove the garlic and herbs, and store it in the fridge for up to a week or freeze it. Use it to cook eggs, sauté mushrooms, or roast potatoes. It’s packed with flavor!
Q: My butter got hot and bubbled a lot. Is the chicken ruined?
A: Not at all! You’ve essentially confited the chicken at a slightly higher temperature. It might be a bit more “shreddy” on the outside and won’t be quite as silky-textured, but it will still be delicious and moist. Just reduce the heat immediately and finish cooking.
Q: Can I use chicken thighs?
A: You can, but they already have more fat and are harder to overcook. The true magic of this method is how it transforms the lean, easy-to-dry-out breast. If you use thighs, poach them until they reach 175°F (80°C) for fall-apart tenderness.
Q: How do I know it’s done without a thermometer?
A: The chicken will feel firm to the touch (not hard or rubbery), and when you make a small cut in the thickest part, the meat will be opaque all the way through with clear, not pink, juices running.

Butter-Poached Chicken Breast : Tender, Juicy, and Full of Flavor
Description
Say goodbye to dry chicken forever! Butter-poaching gently cooks chicken in warm, melted butter, infusing it with incredible flavor and keeping it tender, juicy, and luxurious. This is a low-and-slow method that transforms ordinary chicken breasts into a show-stopping dish with almost no effort.
Ingredients
-
2 boneless, skinless chicken breasts (similar size and thickness)
-
1 cup (2 sticks) unsalted butter, cut into chunks
-
2 garlic cloves, smashed
-
2 sprigs fresh thyme (or ½ tsp dried thyme)
-
1 bay leaf (optional)
-
Salt and freshly ground black pepper, to taste
-
Optional: 1–2 strips lemon zest, 1–2 tbsp dry white wine
Instructions
1. Prep the Chicken
-
Pat chicken breasts completely dry.
-
Season generously with salt and pepper.
-
Let rest 5 minutes while preparing the butter bath.
Tip: Evenly sized breasts cook more consistently. Pound thicker areas lightly if needed.
2. Make the Butter Bath
-
Choose a skillet or saucepan just big enough for the chicken to fit in a single layer.
-
Add butter, garlic, thyme, bay leaf, and optional lemon zest or wine.
-
Melt over the lowest possible heat. The butter should be liquid with tiny bubbles—not simmering.
Tip: Low heat ensures chicken cooks gently and absorbs flavor.
3. Poach the Chicken
-
Slide chicken breasts into the butter bath.
-
Maintain a temperature of 140–160°F (60–71°C) for 15 minutes.
-
Turn chicken gently, then continue poaching another 10–15 minutes until the thickest part reaches 155°F (68°C). Carryover heat will bring it to 165°F (74°C).
-
Remove chicken and rest 5 minutes.
Tip: No thermometer? Cut a small slit—juices should run clear and meat feel firm but tender.
4. Serve
-
Slice against the grain into medallions.
-
Drizzle with some of the infused butter from the pan.
-
Serve over mashed potatoes, rice, egg noodles, or alongside steamed vegetables or a crisp salad.
Bonus: Save the remaining butter for cooking vegetables, spreading on bread, or flavoring sauces—it’s liquid gold.
Notes
-
Use unsalted butter to control salt.
-
Don’t rush! Low-and-slow is the key to silky chicken.
-
For chicken thighs, cook until 175°F (80°C) for tender, fall-apart meat.
-
Butter can be strained and stored for up to 1 week in the fridge or frozen.
A Note on Nutrition
Let’s talk honestly about the butter. Yes, there’s a lot of it in the pan. But remember, you are not consuming all of it. Most of it stays in the pan as a cooking medium. The chicken absorbs some of the fat and flavor, but a significant amount of the butter is left behind. The nutritional estimate provided (~480 calories per serving) accounts for about 2-3 tablespoons of the butter being absorbed/used per chicken breast. If you’re mindful, you can also use less butter in the bath (¾ cup works) or blot the chicken lightly before serving. The primary goal here is incredible flavor and foolproof juiciness, which this method delivers in spades.
The Final Slice
So there you have it, friends – your new secret weapon for impossibly tender chicken. Butter-poaching isn’t just a recipe; it’s a mindset. It’s about slowing down, trusting the process, and letting simple ingredients shine. It proves that you don’t need a dozen components to make something truly special. You just need a little time, a little butter, and the willingness to try something gently magical. I hope this recipe finds its way into your regular rotation and becomes a story you share in your own kitchen. Now, go forth and poach! And don’t forget to tag @Feastical if you make it – I love seeing your creations.
With a full heart and a buttery spoon,
Beau