
Vietnamese Summer Rolls with Chicken (Fresh & Healthy Rice Paper Rolls)
Meet Your New Favorite Summer Obsession
Hey friends, Beau here! Let’s talk about a meal that feels like sunshine on a plate. You know those days when you crave something utterly delicious but also want to feel light, energized, and maybe even a little virtuous? I’ve got you. Today, we’re diving fork-first into the world of Vietnamese Summer Rolls with Chicken. Forget heavy sauces and long oven times; this is all about fresh, vibrant ingredients coming together in a fun, hands-on way.
These translucent rice paper parcels are little bundles of joy—crisp veggies, tender chicken, soft noodles, and a riot of fragrant herbs, all wrapped up and ready for a dunk in the most addictive peanut sauce you’ll ever make. They’re not just a recipe; they’re an experience. Perfect for a lazy weekend lunch, a stunning appetizer that’ll wow your friends, or a make-ahead healthy dinner that actually excites you. The best part? No cooking heat required (well, barely any), making them the ultimate warm-weather kitchen win. So, clear some counter space, grab your favorite people, and let’s roll!
How a Street Food Stall Stole My Heart
I’ll never forget the first time I truly *got* a summer roll. It wasn’t in a fancy restaurant; it was on a sweltering afternoon in Hoi An, Vietnam, years ago. I was wandering through a bustling market, completely overwhelmed (in the best way) by the sights and smells, when a woman at a tiny stall smiled and gestured for me to sit. With lightning speed, she dipped a brittle sheet of rice paper into a bowl of water, laid it flat, and with a magician’s grace, assembled a perfect roll right before my eyes. She handed it to me with a small dish of sauce.
That first bite was a revelation. The cool, soft wrapper gave way to an incredible CRUNCH, followed by the savory chicken, the freshness of herbs I couldn’t even name yet, and then that sweet, salty, nutty sauce tying it all together. It was interactive, personal, and packed with more flavor and texture than I thought possible. It was food that made you smile. That’s the spirit I want to bring to your kitchen today—that sense of discovery, fun, and pure, unadulterated freshness. Let’s recreate that magic, right at home.
Gathering Your Fresh Crew: Ingredients & Why They Matter
Here’s the beautiful part: the ingredient list is a choose-your-own-adventure of freshness. This is your foundation, but feel free to make it yours!
- 8 Rice Paper Wrappers (Banh Trang): These are the edible glue of the operation! Find them in the Asian aisle. They start hard and brittle but transform into a soft, pliable sheet. Chef’s Tip: Don’t buy the “spring roll” wrappers meant for frying—those are different!
- 2 Cups Cooked Chicken Breast, Thinly Sliced: Leftover rotisserie chicken is your BEST friend here for ease. Poach or bake your own if you prefer. For maximum flavor, toss the cooked, sliced chicken with a tiny splash of soy sauce or fish sauce.
- 1 Cup Rice Vermicelli Noodles, Cooked & Cooled: Also called “bun” or rice sticks. They cook in just 3-5 minutes! Rinse them under cold water after cooking to stop the process and prevent stickiness.
- The Crunch Brigade:
- 1 Cup Shredded Lettuce: Butter or romaine adds great texture. It’s the hydrating base layer.
- 1 Cup Julienned Carrots: Sweet, colorful, and packed with beta-carotene. A julienne peeler makes this task a 30-second dream.
- 1 Cup Julienned Cucumber: Adds a fantastic, refreshing watery crunch. I like to seed them first for less moisture inside the roll.
- ½ Red Bell Pepper, Thinly Sliced: A pop of color and a mild, sweet flavor. Yellow or orange work beautifully too!
- The Herb Heroes:
- ¼ Cup Fresh Mint Leaves: Non-negotiable for that iconic, bright flavor. It’s the soul of the roll!
- ¼ Cup Fresh Cilantro Leaves: Love it or… well, if you’re in the “it tastes like soap” camp, just leave it out or use Thai basil instead.
For The “I Could Drink This” Peanut Dipping Sauce:
- ¼ Cup Creamy Peanut Butter: The rich, nutty backbone. Natural or regular both work—just stir well if using natural.
- 1 Tablespoon Hoisin Sauce: Adds depth, sweetness, and a touch of umami. This is the secret flavor booster!
- 1 Teaspoon Soy Sauce: For saltiness. Use tamari for a gluten-free version.
- 1 Teaspoon Lime Juice: The essential bright note to cut through the richness. Fresh is best!
- 1-2 Tablespoons Warm Water: Your sauce thickness regulator. Start with one and add until it’s a perfect dunkable consistency.
Let’s Get Rolling: Your Step-by-Step Roadmap to Success
Ready to play? Think of this as a fun kitchen assembly line. I recommend setting up a “rolling station” with all your fillings in little bowls. It makes the process smooth and almost meditative.
- Prep Your Fillings: This is the key to easy rolling. Cook your noodles according to package directions (usually a quick boil), drain, and rinse with cold water. Shred your chicken, julienne all your veggies, and wash your herbs. Having everything prepped, cooled, and within arm’s reach is 90% of the battle won. Chef’s Hack: Pat your veggies and herbs dry with a paper towel. Extra moisture can make the rice paper soggy and harder to handle.
- Soften the Rice Paper: Fill a large, shallow skillet or pie dish with warm (not hot) water. Take one rice paper wrapper and submerge it for about 10-15 seconds. You’ll feel it soften. The trick? It should still feel slightly firm when you pull it out—it continues to soften on your work surface. If it’s already floppy in the water, it’s gone too far and might tear. Do one wrapper at a time.
- Lay the Foundation: Gently lay the softened wrapper on a clean cutting board or plate. It will be sticky—that’s good! Now, imagine a horizontal line across the bottom third of the circle. This is where your filling goes. Start with a small bed of lettuce. This creates a protective layer between the sharper veggies and the delicate wrapper.
- Pile on the Goodness: On top of the lettuce, add a small clump of noodles, a few slices of chicken, and then a pinch each of carrots, cucumber, and bell pepper. Finish with 2-3 mint leaves and a few cilantro sprigs. Less is more! Overstuffing is the most common rookie mistake. You want enough to be satisfying, but not so much that you can’t seal the roll.
- The Roll Technique: Here’s the satisfying part. Fold the left and right sides of the wrapper inward over the ends of the filling. Then, lift the bottom flap (the part closest to you) up and over the filling, tucking it in tightly. Now, using both hands, roll the bundle forward firmly but gently until it’s completely sealed. It should feel snug, like a little edible burrito. Place it seam-side down on a serving plate. Pro Tip: If you rip one? No stress! Just double-wrap it with another softened rice paper. It’ll taste the same, I promise!
- Repeat & Sauce It Up: Continue with the remaining wrappers and filling, keeping the finished rolls from touching so they don’t stick. For the sauce, simply whisk the peanut butter, hoisin, soy sauce, and lime juice in a bowl. Add warm water a tablespoon at a time until it’s a silky, dippable consistency. Taste and adjust—want more tang? Add lime. More salt? A dash more soy.
Plating Up the Freshness
Presentation is half the fun with these! Don’t just pile them on a plate. Create a show-stopping platter. Arrange the rolls on a large plate or wooden board, maybe on a bed of extra lettuce leaves or herb sprigs. Slice one or two in half diagonally to show off the beautiful, colorful interior—it’s instant food blogger vibes! Place the bowl of that gorgeous peanut sauce right in the center for dipping.
For a full meal experience, I love serving these with a simple side like a mango and avocado salad or a light, brothy soup. They’re also fantastic as part of a larger “make-your-own-roll” spread. Just put all the components in separate bowls and let everyone dive in and create their own masterpieces. It’s interactive, delicious, and the cleanup is a breeze!
Make It Your Own: Delicious Twists & Swaps
The template is here, but the canvas is yours. Here are a few of my favorite ways to mix it up:
- Shrimp & Mango: Swap the chicken for cooked, peeled shrimp and add thin slices of ripe mango. The sweet mango with the herbs and peanut sauce is a game-changer.
- Totally Vegetarian: Ditch the chicken and add baked tofu (marinated in a little soy sauce), avocado slices for creaminess, and maybe some quick-pickled daikon radish for extra punch.
- Thai-Inspired: Use cooked, ground chicken or pork seasoned with a bit of lemongrass and fish sauce. Add thin rice noodles and lots of Thai basil instead of cilantro.
- “Cheater’s” Dipping Sauce: Short on time? Mix hoisin sauce with a sprinkle of crushed peanuts and a tiny splash of water to loosen. Simple and delicious!
- Low-Carb / Keto-Friendly: Skip the rice noodles entirely and double up on the crunchy veggies and herbs. The rolls will be just as flavorful and refreshing.
Beau’s Kitchen Confidential
Over the years, I’ve made approximately a zillion of these rolls. The first batch was… questionable. My rice paper was either a soggy mess or cracked like a desert floor. I overfilled them so much they looked like bursting sausages. But that’s the joy of cooking! You learn by doing. My biggest “aha” moment was realizing the fillings should be at room temperature or cool, not warm. Warm fillings steam the wrapper from the inside and turn it gummy.
Also, these are best eaten the day they’re made, but if you need to prep ahead, store them individually wrapped in damp paper towels and placed in a single layer in an airtight container in the fridge. They might lose a little texture, but the flavor will still be there. Mostly, just have fun with it. Put on some music, pour yourself a cool drink, and enjoy the process. That’s what Feastical is all about.
Your Summer Roll Questions, Answered
Q: My rice paper keeps tearing! What am I doing wrong?
A: Two likely culprits: 1) You’re oversoftening it. It should still have a hint of stiffness when you take it out of the water. 2) You’re using a rough surface. Make sure your board or plate is smooth. A ceramic plate or a clean, damp kitchen towel on the counter works wonders.
Q: Can I make these ahead of time for a party?
A: You can prep all the components hours ahead and store them separately. I’d recommend rolling them no more than 2-3 hours before serving. Keep them covered with a damp paper towel and then plastic wrap to prevent them from drying out.
Q: My peanut sauce is too thick / too thin. Help!
A> Too thick? Add warm water, just a teaspoon at a time, whisking until perfect. Too thin? Whisk in a bit more peanut butter or a tiny dash of hoisin to thicken it back up. It’s very forgiving!
Q: Are these gluten-free?
A: They can be! Rice paper and rice noodles are naturally gluten-free. Just ensure your soy sauce is tamari, and check that your hoisin sauce is a gluten-free brand (or substitute with a mix of tamari and a pinch of sugar).

Vietnamese Summer Rolls with Chicken (Fresh & Healthy Rice Paper Rolls)
Description
Vietnamese Chicken Summer Rolls – Fresh, Fun & 25-Minute Ready
Hey friends, Beau here! These summer rolls are crunchy, fresh, and bursting with herbs, chicken, and noodles—perfect for a light lunch, appetizer, or interactive dinner. Pair them with a silky peanut dipping sauce and you’ve got a meal that’s as fun to eat as it is delicious.
Ingredients
The Rolls:
-
8 rice paper wrappers (banh trang)
-
2 cups cooked chicken breast, thinly sliced (rotisserie works!)
-
1 cup rice vermicelli noodles, cooked & cooled
-
1 cup shredded lettuce (butter or romaine)
-
1 cup julienned carrots
-
1 cup julienned cucumber (seeded)
-
½ red bell pepper, thinly sliced
-
¼ cup fresh mint leaves
-
¼ cup fresh cilantro leaves (or Thai basil)
Peanut Dipping Sauce:
-
¼ cup creamy peanut butter
-
1 Tbsp hoisin sauce
-
1 tsp soy sauce (or tamari for gluten-free)
-
1 tsp lime juice
-
1–2 Tbsp warm water, to thin
Instructions
1. Prep Fillings
-
Cook noodles according to package instructions; rinse under cold water.
-
Shred chicken, julienne veggies, and wash herbs. Pat dry to avoid soggy wrappers.
2. Soften Rice Paper
-
Fill a shallow dish with warm water.
-
Submerge one wrapper 10–15 seconds until pliable but still slightly firm.
3. Assemble the Rolls
-
Lay wrapper on a smooth surface.
-
Place a small layer of lettuce near the bottom third.
-
Add a small clump of noodles, a few chicken slices, carrots, cucumber, bell pepper, and herbs.
-
Fold left and right sides over the filling.
-
Roll bottom flap over filling, then roll tightly to seal. Place seam-side down.
4. Make Peanut Sauce
-
Whisk peanut butter, hoisin, soy sauce, lime juice, and warm water until smooth. Adjust consistency.
5. Serve
-
Arrange rolls on a platter. Slice diagonally to show vibrant interiors. Serve with peanut sauce in the center.
Notes
-
Tearing rice paper? Don’t oversoften; use a smooth surface.
-
Make ahead? Prep ingredients separately; roll 2–3 hours before serving.
-
Peanut sauce too thick/thin? Adjust with warm water or extra peanut butter/hoisin.
-
Gluten-free? Use tamari and check hoisin sauce label.
Nourishment That Tastes This Good? Yes, Please.
Let’s talk about what you’re putting in your body—because it’s all fantastic stuff! These rolls are a beautifully balanced package. The lean chicken and peanut sauce provide satiating protein. The rice noodles offer quick energy from carbohydrates, while all those gorgeous vegetables deliver essential vitamins, minerals, and fiber to keep your digestion happy. The fats from the peanut sauce are the good, healthy kind. It’s a meal that fuels you without weighing you down. Remember, nutritional values are estimates and can vary based on specific ingredients and portion sizes, but you can feel great about enjoying every fresh, crunchy bite.
Approximate Per Roll (with sauce): Calories: 220 | Protein: 16g | Carbohydrates: 22g | Fat: 8g
The Last Bite
And there you have it, friends—your passport to a fresher, brighter way of eating. These Vietnamese Summer Rolls with Chicken are more than just a recipe; they’re a reminder that healthy food can be bursting with flavor, fun to make, and an absolute delight to share. Don’t be intimidated by the rice paper. Embrace the learning curve, laugh if one turns out a little wonky (the tastiest ones often are), and savor that moment when you dip your first homemade roll into that creamy peanut sauce.
I hope this recipe brings a little bit of that Hoi An market magic to your kitchen table. Give it a try, tag me over on @Feastical with your creations, and let me know how it goes! Until next time, keep your kitchen messy and your heart full. Happy rolling!
– Beau
Pin Title: Fresh Vietnamese Chicken Summer Rolls with Peanut Sauce | Easy & Healthy Recipe
Pin Description: Learn how to make vibrant & healthy Vietnamese Summer Rolls with Chicken! This easy, step-by-step recipe from Feastical features tender chicken, crisp veggies, fresh herbs, and

Apple Crescent Rollups (Easy Cinnamon Sugar Dessert)
Apple Crescent Rollups: Your New Favorite 35-Minute Dessert
Hey friends, Beau here from Feastical! Let me ask you a question that’s probably crossed your mind at least once this week: “How can I make something incredibly delicious, impressively cozy, and have it ready before my latest binge-watch session even hits the climax?” If you’re nodding, I’ve got your answer, and it involves zero fancy equipment and about 10 minutes of hands-on time.
I’m talking about Apple Crescent Rollups. Imagine this: sweet, tender slices of apple tossed in cozy cinnamon sugar, all snuggled up in a warm, flaky, buttery crescent roll blanket. They bake up golden and bubbly, filling your kitchen with a scent that smells like autumn happiness and pure comfort. This isn’t just a dessert; it’s a kitchen hug. It’s the treat you whip up when friends pop over unexpectedly, when the kids declare they need something sweet now, or when you, wonderful human, deserve a warm, gooey bite of simple joy after a long day.
We’re keeping it soulfully simple today. No pastry skills required. No chilling dough for hours. Just straightforward, feel-good food that brings everyone to the table with a smile. So, grab that can of dough hiding in the fridge, and let’s turn simple ingredients into pure magic.
The Story Behind the Rollup: Grandma Ellie’s “Quick-Fix” Philosophy
This recipe always takes me back to my Grandma Ellie’s kitchen. She was the queen of what she called “quick-fix wonders.” She believed with her whole heart that creating joy in the kitchen didn’t have to be complicated. One rainy afternoon, when my cousin and I were buzzing with boredom, she didn’t reach for a complex cookbook. She pulled out a can of biscuits (the ancestor of our crescent dough!), a couple of apples from her backyard tree, and a shaker of cinnamon sugar.
With a wink, she said, “Watch this, boys. We’re making pocket-sized apple pies in 20 minutes.” What emerged from her oven were these rustic, jammy, sugar-dusted parcels. They were imperfect, a little messy, and absolutely perfect. We ate them straight from the pan, burning our tongues because we couldn’t wait. That day, she taught me that the best recipes aren’t about perfection; they’re about the feeling you create. These Apple Crescent Rollups are my homage to her “quick-fix” philosophy—maximum joy, minimum fuss.
What You’ll Need: Simple Ingredients, Big Flavor
Here’s your short and sweet shopping list. I’ve added my chef-y notes and swap-outs so you can make this your own with what you’ve got.
- 1 (8 oz) can refrigerated crescent roll dough: The hero of our quick dessert! That magical, flaky, buttery canvas. Chef’s Tip: Keep it cold until the very second you’re ready to unroll. Warm dough is sticky and tricky.
- 1 large apple (Granny Smith or Honeycrisp recommended): Granny Smith gives us a lovely tartness that balances the sweet, while Honeycrisp is sweet and holds its shape beautifully. Substitution: Use what you love! Fuji, Braeburn, or Pink Lady all work great.
- 1/4 cup granulated sugar: This coats our apples and creates that delicious syrupy juice. Chef’s Insight: This isn’t just for sweetness; it draws moisture out of the apples to create the sauce inside the rollup.
- 1 tsp ground cinnamon: The soul of cozy flavor. Don’t be shy with it! Fun Twist: Add a tiny pinch of nutmeg or cardamom for a more complex spice profile.
- 2 Tbsp unsalted butter, melted: For that golden, crisp, and rich finish. Substitution: Salted butter works just fine; you can then omit any extra salt.
- 1/2 tsp vanilla extract: Our secret flavor booster! Stirred into the butter, it adds a beautiful, warm aroma. Pro Move: Use real vanilla bean paste if you have it for those gorgeous little specks.
- Optional: 1–2 Tbsp brown sugar for topping: Sprinkled on before baking, it creates a delightful, caramelized crunch. Highly recommended!
- Optional glaze: 1/2 cup powdered sugar + 1–2 Tbsp milk: The pretty (and tasty) finishing touch. Chef’s Hack: A drizzle of salted caramel sauce is an incredible alternative here.
Let’s Make Magic: Step-by-Step Instructions
Ready? Let’s roll (pun absolutely intended). Follow these steps, and you’ll be a rollup pro in no time.
- Prep Your Stage: Preheat your oven to 350°F (175°C). Lightly grease a small baking dish (an 8×8” or similar works perfectly). This isn’t just to prevent sticking; a snug dish helps the rollups bake evenly and steams them just a touch for tender apples. My Tip: While the oven heats, get everything else ready. We move fast once that dough is out!
- Create the Filling: Peel your apple, then slice it into thin, bite-sized pieces. I like slices about 1/4-inch thick. Toss them in a bowl with the granulated sugar and cinnamon until every piece is thoroughly coated. You’ll see the sugar start to look a little wet almost immediately—that’s the magic starting! Chef’s Hack: No peeler? That’s fine! Just give the apples a good scrub. The peel adds fiber and texture.
- The Grand Unroll & Assemble: Open the crescent roll can (that *pop* is so satisfying). Unroll the dough on a clean surface and gently separate it into the pre-cut triangles. Place a small pile of your cinnamon apples along the wide end of each triangle. Don’t overfill! About 4-5 slices is perfect. Now, start rolling from the wide end down to the point, gently tucking in the sides as you go to keep the filling secure. It should look like a little stuffed croissant. Pro Move: If the dough tears a little, don’t panic! Just pinch it back together. It’s all going to bake up beautifully.
- Flavor & Shine: Place each little rollup seam-side down in your prepared baking dish. They can be cozy and touching—it’s fine! Now, stir that 1/2 teaspoon of vanilla into your melted butter. Using a pastry brush (or the back of a spoon), generously brush this vanilla butter all over the tops of each rollup. This is KEY for flavor and that gorgeous golden color. For the final touch, sprinkle that optional brown sugar over the top. Trust me on this.
- Bake to Golden Perfection: Slide the dish into your preheated oven. Bake for 20-25 minutes. You’re looking for the tops to be a deep, golden brown and you should see some bubbly, caramel-colored juice peeking out from the seams. Your kitchen will smell unreal.
- The Finishing Touch: Let the rollups cool in the pan for about 5 minutes. They’re molten lava inside right out of the oven! If you’re using the glaze, whisk the powdered sugar and milk together until smooth, then drizzle it artfully (or enthusiastically!) over the warm rollups. The warmth will make the glaze melt into every nook.
How to Serve These Warm Hugs
Presentation is part of the fun! Here’s how I love to serve these up for maximum “wow” factor.
First, I always serve them warm. That’s non-negotiable for the best experience. Use a spatula to gently lift them onto a plate. For a solo treat, place one or two on a small plate with a big scoop of vanilla ice cream melting right over the top. The hot-and-cold combo is legendary.
For a family-style dessert, I keep them right in the baking dish, place it on a trivet in the middle of the table, and let everyone dig in. It’s cozy and communal. A side of whipped cream or a dollop of salted caramel sauce takes it to the next level. And don’t forget the coffee or a cold glass of milk—the perfect partners for this sweet, cinnamony delight.
Make It Your Own: Delicious Variations
Once you’ve mastered the classic, the world is your cinnamon-spiced oyster! Try one of these fun twists.
- Apple Berry Bliss: Add a handful of fresh raspberries or blueberries to the apple filling. The berries burst and create a gorgeous, jammy purple-pink sauce.
- Nutty Caramel Crunch: Sprinkle a few chopped pecans or walnuts into the filling. After glazing, top with an extra sprinkle of nuts for crunch.
- “Apple Pie” Upgrade: Add a tiny pinch of nutmeg and allspice to the cinnamon sugar. After brushing with butter, sprinkle with coarse sugar for a sparkling, crunchy top.
- Dairy-Free & Vegan: Use plant-based crescent roll dough (check labels!), swap butter for melted coconut oil or vegan butter, and use a simple powdered sugar + plant-milk glaze.
- Savory-Sweet Twist: Add a very light sprinkle of flaky sea salt over the glaze. It heightens all the flavors in the most incredible way.
Beau’s Chef Notes & Kitchen Confessions
This recipe is a living, breathing thing in my kitchen. I’ve made it probably a hundred times, and it’s evolved. Sometimes I get fancy with the apple cuts; sometimes I’m in a hurry and they’re more “rustic” (read: chunky). Both are delicious.
One time, I was filming a video for the site and was so busy chatting to the camera that I completely forgot to add the sugar to the apples. I realized it after they were rolled up! Kitchen disaster? Nope. I just sprinkled the sugar-cinnamon mix over the top before the butter. They baked up with a delightful sugary crust. It just goes to show—cooking is resilient. Don’t stress the small stuff. The goal is a delicious, happy kitchen, not a perfect one.
Your Questions, Answered (FAQs & Troubleshooting)
Q: My bottoms got a bit soggy. What happened?
A: This usually means the baking dish was a bit too crowded or the apples released a ton of juice. No worries—they still taste amazing! Next time, try a slightly larger dish so the rollups aren’t touching as much, and make sure your apple slices are thin, not thick chunks.
Q: Can I make these ahead of time?
A: You can assemble them up to a few hours ahead, cover tightly, and keep them in the fridge. Brush with butter and bake straight from the fridge, adding maybe 2-3 extra minutes to the bake time. For best results, I love baking them fresh.
Q: My crescent dough keeps splitting when I unroll it. Help!
A That darn perforated dough! If it’s tearing, it might be too warm. Pop the whole roll (in the tube) in the fridge for 10 more minutes. When unrolling, do it slowly and gently. If it still splits, just press it back together—it’s very forgiving.
Q: Can I use puff pastry instead?
A: Absolutely! Thaw a sheet of puff pastry, cut it into squares or rectangles, add filling, and fold/seal. Bake at 400°F until puffed and golden. It’s a flakier, more voluminous version—equally delicious!

Apple Crescent Rollups (Easy Cinnamon Sugar Dessert)
Description
Apple Crescent Rollups – Your 35-Minute Cozy Dessert
Hey friends, Beau here from Feastical!
Sweet, tender apple slices tossed in cinnamon sugar, all wrapped in buttery, flaky crescent rolls—this is comfort food at its simplest, fastest, and most heartwarming. Perfect for solo indulgence, family dessert, or impromptu guests.
Ingredients
-
1 (8 oz) can refrigerated crescent roll dough
-
1 large apple (Granny Smith or Honeycrisp recommended)
-
¼ cup granulated sugar
-
1 tsp ground cinnamon
-
2 Tbsp unsalted butter, melted
-
½ tsp vanilla extract
-
Optional: 1–2 Tbsp brown sugar for topping
-
Optional glaze: ½ cup powdered sugar + 1–2 Tbsp milk
-
Optional garnish: chopped nuts, coarse sugar, or sea salt
Instructions
1. Prep Your Oven & Dish
-
Preheat oven to 350°F (175°C).
-
Lightly grease an 8×8” baking dish.
2. Make the Apple Filling
-
Peel, core, and thinly slice your apple (~¼-inch thick).
-
Toss slices with granulated sugar and cinnamon until evenly coated.
3. Assemble the Rollups
-
Unroll crescent dough and separate into triangles.
-
Place 4–5 apple slices on the wide end of each triangle.
-
Roll from wide end to tip, tucking sides in. Place seam-side down in the baking dish.
4. Brush & Top
-
Stir vanilla into melted butter. Brush generously over rollups.
-
Sprinkle optional brown sugar over the tops for caramelized crunch.
5. Bake
-
Bake 20–25 minutes until golden brown and bubbly.
-
Let cool 5 minutes before serving.
6. Optional Glaze
-
Whisk powdered sugar with milk; drizzle over warm rollups.
Notes
-
Apple Berry: Add raspberries or blueberries to filling.
-
Nutty Crunch: Fold in chopped pecans or walnuts.
-
Apple Pie Upgrade: Add nutmeg/allspice; sprinkle coarse sugar on top.
-
Vegan: Use plant-based crescent dough, coconut oil or vegan butter, plant milk glaze.
-
Savory-Sweet: Light sprinkle of flaky sea salt over glaze.
Nutritional Information (Estimates)
Because knowledge is power, even with dessert! Here’s a rough estimate per rollup (without optional glaze or brown sugar topping). Remember, these are approximations and will vary based on specific ingredients used.
- Calories: ~180-200 kcal
- Carbohydrates: 25-28g
- Fat: 8-9g
- Protein: 2-3g
- Sugar: 12-14g
This treat is a wonderful source of joy and a little indulgence. Enjoy it mindfully as part of a balanced lifestyle. The apples provide fiber and vitamin C, and let’s be real—the happiness factor is off the charts, which is its own kind of nourishment.
Final Thoughts from My Kitchen to Yours
And there you have it, friends—the wonderfully simple, endlessly comforting Apple Crescent Rollup. This recipe is more than just a dessert; it’s a reminder that creating something special doesn’t require a culinary degree or all day. It requires a few good ingredients, a warm oven, and the intention to make a moment a little sweeter.
I hope this recipe finds its way into your regular rotation, becoming your own “quick-fix wonder” for years to come. When you make it, tag me @feastical or use #feastical so I can see your beautiful creations! Now, go preheat that oven. Your warm, cinnamony hug is waiting.
With a full heart and a happy plate,
Beau
Pin Title: Easy Apple Crescent Rollups | 35-Minute Cinnamon Sugar Dessert
Pin Description: The EASIEST apple dessert! These Apple Crescent Rollups are your secret weapon for a fast, feel-good treat. Tender cinnamon apples wrapped in flaky, buttery crescent dough, baked until golden and bubbly. Ready in just 35 minutes with minimal ingredients, this recipe is perfect for busy weeknights, last-minute guests, or a cozy family dessert. Includes step-by-step photos, chef tips for the perfect rollup, gluten-free and vegan variations, and delicious serving ideas with ice cream or caramel sauce. A simple, kid-friendly baking project that yields impressive results. Save this pin for your next dessert emergency! #easydessert #applerecipe #crescentrolls #quickdessert #

Tuscan White Beans on Toast (Creamy Garlic-Rosemary Beans)
Tuscan White Beans on Toast: Your New Favorite 20-Minute Comfort Food
Hey there, friend! Beau here from Feastical. Let’s talk about one of life’s simple, profound pleasures: something hot, savory, and deeply satisfying that you can whip up faster than you can decide what to stream tonight. We’re not just making beans on toast. Oh no. We’re embarking on a mini-vacation to a sun-drenched Tuscan kitchen, where simplicity is the ultimate sophistication and flavor is king.
This dish, my Creamy Garlic-Rosemary Tuscan White Beans on Toast, is my weeknight superhero. It’s the recipe I make when the cupboards seem bare, when I’m craving something that feels both rustic and elegant, or when I just want to treat myself to a warm, savory hug on a plate. It’s humble ingredients transformed into something magical. We’re talking creamy, dreamy white beans infused with fragrant garlic and earthy rosemary, all piled high on a slab of craggy, toasted bread that’s just begging to soak up every last drop of herby, lemony goodness.
Whether you’re cooking for one on a quiet evening or need a stunning, effortless appetizer for friends, this is your ticket. It’s vegetarian-friendly, endlessly adaptable, and proof that the most memorable meals don’t need a fancy pedigree or a laundry list of steps. They just need a little heart and a few fantastic flavors dancing together. So, grab your favorite skillet and let’s turn simple into spectacular.
The Little Flat in Florence: Where This Love Affair Began
This recipe always takes me back to a tiny, third-floor apartment in Florence, with shutters that creaked and a view of terracotta rooftops. I was there years ago, trying to live on a shoestring but eat like a prince. I’d wander the Mercato Centrale, dazzled by the produce, and always come back with a crusty loaf, a can of fagioli (beans), garlic, and a sprig of rosemary pinched from a public garden (shh… don’t tell the nonni!).
One rainy afternoon, too lazy to brave the streets for lunch, I threw those humble ingredients into a pan. I let the garlic sizzle, crushed some of the beans to create a creamy sauce, and slathered it all on toast. As I ate it, standing at the counter watching the rain roll off the rooftops, I had one of those perfect, quiet food moments. It wasn’t fancy. It wasn’t complicated. But it was everything. It was nourishment and joy and simplicity, all on one plate. That’s the spirit I want to bring to your kitchen today.
Gathering Your Tuscan Toolkit: Ingredients & Insights
Here’s the beautiful part: the ingredient list is short and sweet. This is where quality truly shines. Let’s break it down:
- 2 Tbsp Olive Oil: Use the good stuff here for finishing, but a decent extra-virgin for cooking. It’s the backbone of flavor. Chef’s Insight: That final drizzle at the end? Non-negotiable. It adds a fresh, fruity pop.
- 3 Garlic Cloves, Minced: Fresh is best! Minced fine so it melts into the oil without burning. Sub Tip: In a true pinch, ¾ tsp of good garlic powder works, but add it with the beans.
- 1 Small Shallot or ½ Onion, Finely Chopped (Optional): This adds a sweet, aromatic base. I love shallots for their mildness. Chef’s Hack: No shallot? A few thin slices of leek or a spoonful of onion jam are fabulous twists.
- 1 tsp Fresh Rosemary, Chopped: The soul of the dish! Fresh rosemary is piney and powerful. Sub Tip: If you only have dried, use ½ tsp and rub it between your fingers to wake it up before adding.
- Pinch Chili Flakes (Optional): Just a whisper for a hidden layer of warmth, not heat. Chef’s Insight: This is my secret for adding depth. It’s amazing what a pinch can do.
- 2 Cans (15 oz) White Beans, Drained & Rinsed: Cannellini or Great Northern are perfect—creamy and mild. Pro Tip: Rinsing removes the starchy canning liquid and lets our flavors shine.
- ½ Cup Vegetable or Chicken Broth (or Water): This creates our light sauce. Broth adds more flavor; water keeps it pure. Chef’s Hack: The bean liquid (aquafaba) can be used too, but it will make the final dish thicker.
- 1–2 tsp Lemon Juice + Zest (Optional but Amazing): The bright finish! Acid is the magic wand that lifts and balances the rich beans. Chef’s Insight: Add zest and juice at the very end to preserve their zing.
- Salt & Black Pepper: Season in layers. Taste after simmering!
- 4 Slices Crusty Bread, Toasted: The foundation. Sourdough, ciabatta, a rustic boule—something with heft and chew. Pro Tip: Toast it well! It needs to stand up to the saucy beans without getting soggy.
- Parmesan Shavings + Chopped Parsley (Optional): The flourish. Parmesan adds salty umami, parsley a fresh, green note. Sub Tip: Nutritional yeast for a vegan cheesy vibe, or try chopped mint for a different herb kick.
Let’s Get Cooking: Building Flavor, Step by Step
Ready? This is where the magic happens, and it’s so easy. Put on some music, pour yourself a little something, and let’s cook.
- Sauté the Aromatics – Build Your Flavor Base: Warm the olive oil in a medium skillet over medium heat. Add the chopped shallot or onion (if using) and cook for 2-3 minutes, until it’s softened and translucent. You’re not looking for color, just sweetness. Now, add the minced garlic, rosemary, and that sneaky pinch of chili flakes. Stir constantly for just 30 seconds—until incredibly fragrant. Watch it like a hawk! Burnt garlic is bitter, and we want it golden and happy.
- Simmer the Beans – Let Them Get Cozy: Add the drained and rinsed white beans to the skillet. Pour in the broth or water, and season generously with salt and black pepper. Give everything a gentle stir to combine. Let this simmer for 5-8 minutes. You’ll see the liquid reduce slightly and the beans become infused with all that garlic-rosemary goodness. Chef’s Hack: Use the back of your spoon to lightly mash a few beans against the side of the pan right in this step. It starts thickening the sauce early!
- Create the Creamy Sauce – The Magic Touch: Here’s the key to that rustic, creamy texture without any cream. Take your spoon or a potato masher and gently mash about one-third of the beans right in the pan. Leave the rest whole for texture. The mashed beans will thicken the liquid into a luscious, creamy sauce that clings to the whole beans. Stir in the lemon juice and zest now, if using. Taste! This is your moment. Adjust salt, pepper, or lemon until it sings.
- Toast & Build – The Grand Finale: While the beans simmer, toast your bread until it’s golden and crisp. Drizzle or brush the toast with a tiny bit of olive oil if you’re feeling fancy. Pile the warm, creamy beans high onto each slice. Finish with a final drizzle of your best olive oil, a few shavings of Parmesan, a sprinkle of chopped parsley, and another crack of black pepper. Pro Tip: For maximum enjoyment, serve immediately so the toast retains its crunch against the warm beans.
How to Serve It: From Simple to Sublime
This toast is a complete meal in itself, but oh, the ways you can dress it up! Here’s how I love to serve it:
For a hearty vegetarian lunch, just as it is, with a simple arugula salad dressed with lemon and olive oil on the side. The peppery greens are a perfect contrast.
Want to make it a more substantial dinner? Top each toast with a softly fried or poached egg. The runny yolk mixing with the beans is a little slice of heaven. Or, add a few slices of ripe heirloom tomatoes or a spoonful of slow-roasted cherry tomatoes under the bean pile.
For a stunning appetizer or party snack, slice a baguette into thinner rounds, toast them up, and spoon a smaller amount of beans on each for perfect bite-sized crostini. They disappear in a flash!
No matter how you serve it, the rule is simple: get it to the table fast, with big flavors and an even bigger smile.
Make It Your Own: 5 Flavorful Twists
This recipe is a beautiful canvas. Once you’ve mastered the basic melody, play with these riffs:
- The “Everything But The Kitchen Sink” Veggie Boost: Sauté a handful of chopped kale, spinach, or Swiss chard with the shallots. Or, stir in a quarter cup of sun-dried tomatoes (oil-packed, chopped) with the beans.
- Mediterranean Sunshine: Swap rosemary for 1 tbsp of chopped fresh oregano or thyme. Finish with crumbled feta cheese and a sprinkle of chopped Kalamata olives instead of Parmesan.
- Creamy Vegan Dream: It’s almost there! Just use water or veg broth. For extra richness, stir in a tablespoon of nutritional yeast or a splash of unsweetened plant-based cream at the end.
- Tuscan Soup Transformation: Double the broth (to 1.5-2 cups), don’t mash the beans as much, and you’ve got a fantastic rustic soup! Serve with the toast on the side for dipping.
- Spicy ‘Nduja Kick: For meat lovers, add a teaspoon of spicy ‘nduja or chorizo paste to the oil with the garlic. It will melt and create a deeply flavorful, spicy oil base.
Beau’s Kitchen Notes & Stories
This recipe has been my faithful friend for years, and it’s evolved in fun ways. I once made it on a camping trip using a can of beans, a packet of garlic powder, and a dried rosemary sprig from a tea bag—warmed over a campfire and scooped up with pita bread. It was still incredible. That’s the sign of a great formula!
The biggest lesson I’ve learned? Don’t skip the mashing step. For years I just simmered them whole, and it was good. But that one move of mashing a portion transforms it from “beans on toast” to “creamy Tuscan bean *ragout* on toast.” It’s a game-changer. Also, my husband now calls this my “band-aid” recipe because I make it whenever one of us needs a little culinary comfort. It never fails.
Your Questions, Answered: FAQs & Troubleshooting
Q: Can I use dried beans instead of canned?
A: Absolutely! You’ll need about 1 cup of dried cannellini beans. Soak them overnight, then simmer until tender (1-2 hours). Reserve about ½ cup of the starchy cooking liquid to use instead of broth for an ultra-creamy, flavorful sauce.
Q: My sauce is too thin/too thick. Help!
A: Too thin? Let it simmer uncovered for a few more minutes to reduce. You can also mash a few more beans. Too thick? Simply stir in a splash more broth, water, or even a bit of olive oil to loosen it up to your liking.
Q: How do I store and reheat leftovers?
A: Store the bean mixture separately from the toast in airtight containers in the fridge for up to 3 days. Reheat beans gently in a pan with a tiny splash of water to loosen. Make fresh toast for serving—re-toasted bread is essential for the right texture.
Q: What’s the best bread to use?
A: Any rustic, crusty bread with a firm crumb. Sourdough is my #1 for its tangy contrast. A hearty whole-grain, ciabatta, or a country boule all work beautifully. Avoid soft sandwich bread—it will get soggy immediately.

Tuscan White Beans on Toast (Creamy Garlic-Rosemary Beans)
Description
This isn’t just beans on toast—it’s a mini-vacation to a Tuscan kitchen, right in your own kitchen. Creamy white beans infused with garlic and rosemary, piled onto rustic toasted bread, with a drizzle of olive oil and a touch of lemon. Simple, quick, and absolutely comforting.
Ingredients
-
2 Tbsp olive oil (plus extra for finishing)
-
3 garlic cloves, minced
-
1 small shallot or ½ onion, finely chopped (optional)
-
1 tsp fresh rosemary, chopped (or ½ tsp dried)
-
Pinch of chili flakes (optional)
-
2 cans (15 oz each) white beans, drained & rinsed (cannellini or Great Northern)
-
½ cup vegetable or chicken broth (or water)
-
1–2 tsp lemon juice + zest (optional, for brightness)
-
Salt & black pepper, to taste
-
4 slices crusty bread, toasted (sourdough, ciabatta, or rustic boule)
-
Parmesan shavings + chopped parsley (optional, for garnish)
Instructions
1. Sauté the Aromatics
-
Heat olive oil in a skillet over medium heat.
-
Add shallot or onion, cook 2–3 minutes until soft.
-
Stir in garlic, rosemary, and chili flakes for 30 seconds until fragrant.
Watch carefully—burnt garlic is bitter!
2. Simmer the Beans
-
Add drained white beans and broth.
-
Season generously with salt and black pepper.
-
Simmer 5–8 minutes, letting flavors meld.
-
Optional: Mash about ⅓ of the beans for a creamy sauce that clings to the rest.
3. Toast & Assemble
-
Toast bread slices until golden and crisp.
-
Spoon warm, creamy beans on top.
-
Finish with a drizzle of olive oil, Parmesan, parsley, and extra black pepper.
-
Serve immediately to keep toast crunchy.
Notes
-
Mediterranean Style: Swap rosemary for oregano or thyme, finish with feta and Kalamata olives.
-
Vegan Creaminess: Use plant-based broth and stir in nutritional yeast or unsweetened plant cream.
-
Rustic Soup: Double broth, lightly mash beans, serve as soup with toast on the side.
-
Spicy Kick: Add 1 tsp spicy ‘nduja or chorizo paste to the oil with garlic.
Nutritional Information (A Rough Guide)
Please note: The following is an estimate for one serving (¼ of the total recipe, including beans and one slice of bread), calculated using online tools. Values can vary based on specific ingredients and brands used.
- Calories: ~300-420 kcal
- Protein: 12-18g (Beans are a fantastic plant-based protein source!)
- Carbohydrates: 40-55g (Mostly complex carbs from the beans and whole-grain bread, providing steady energy.)
- Fat: 8-14g (Primarily heart-healthy monounsaturated fats from olive oil.)
- Fiber: 8-12g (Thanks to the beans and whole grains, this dish is wonderfully filling and great for digestion.)
This dish is naturally vegetarian, packed with fiber and protein, and can easily be made vegan. It’s a balanced, satisfying meal that fuels you without weighing you down.
Final Thoughts: Your New Kitchen Staple Awaits
And there you have it, friend—my passport to Tuscany, my ultimate comfort food hack, and one of the recipes I’m most proud to share. It proves that you don’t need a lot of time, money, or ingredients to eat incredibly well. You just need to know how to treat those ingredients with a little love and respect.
I hope this recipe finds its way into your regular rotation, becoming your own quick fix for a rough day, your impressive last-minute lunch for a friend, or just a Tuesday night treat that feels special. That’s what Feastical is all about: food that feels good, tastes amazing, and brings us together, one simple, delicious bite at a time.
If you make it (and I really hope you do!), tag me @feastical or drop a comment on the blog. I love seeing your kitchen creations. Now, go forth, grab that crusty loaf, and make something beautiful.
With a full belly and a happy heart,
Beau
Pin Title: Creamy Tuscan White Beans on Toast | 20-Minute
Tasty Cucumber Ranch Crack Salad : Creamy, Crunchy & Irresistible Side Dish
Why This Salad is Called “Crack Salad” (And How to Make Your Own Batch!)
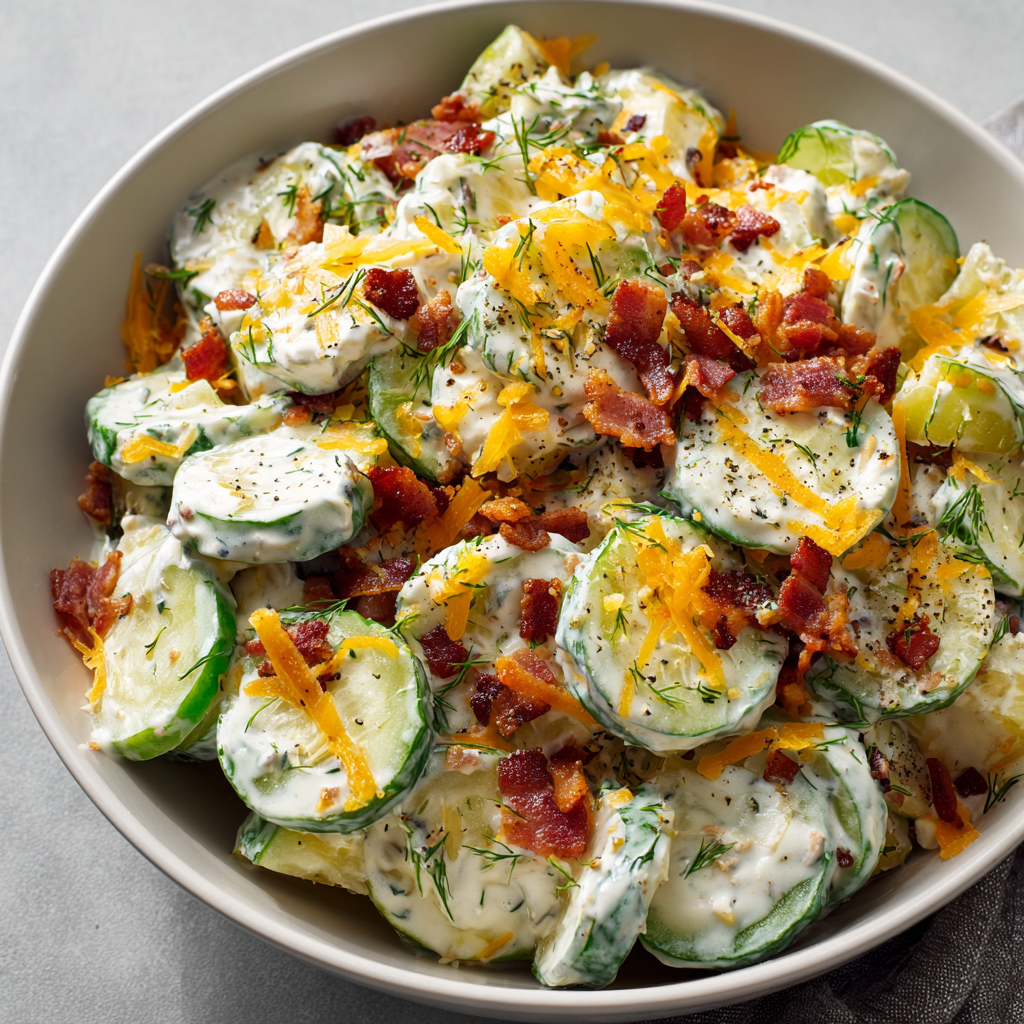
Hey friends, Beau here from Feastical! Tell me if this sounds familiar: you’re at a summer potluck, scanning the table of beautiful dishes, when your eyes lock onto a humble-looking bowl filled with something cool, creamy, and speckled with bacon and cheese. You take a polite spoonful onto your plate, just to be courteous. One bite later, you’re elbowing your way back to the table for a heaping second serving before it’s all gone. That, my friends, is the magic of Cucumber Ranch Crack Salad.
It’s not a fancy name, but it’s an honest one. Once you start, you just can’t stop. This salad is the glorious meeting point of the cool, crisp crunch of fresh cucumbers and the rich, savory, tangy embrace of a creamy ranch and bacon dressing. It’s a textural dream and a flavor bomb all in one refreshing bowl. It’s the side dish that often upstages the main, the recipe that gets whispered about and requested endlessly. And the best part? It comes together in about 10 minutes of active time. No fancy skills required, just a love for good, feel-good food that brings people together. So, grab your favorite mixing bowl and let’s create some kitchen magic that’s guaranteed to disappear faster than you can say “seconds, please!”
The Picnic That Started It All
This recipe takes me straight back to a lazy, sun-drenched Sunday at the lake with my family. My Aunt Margie, who believed no gathering was complete without at least seven side dishes, brought this unassuming cucumber salad. I, a then-teenage “food expert” who thought only complicated food was good food, almost passed it by. She practically shoved a forkful into my hand with a wink. The first bite was a revelation. The cool cucumber was a shock against the smoky, salty bacon and the sharp cheddar. The creamy dressing tied it all together in a way that was both light and indulgent. We all hovered around that bowl, forks clinking, laughing, and fighting for the last bits. It was more than a salad; it was the centerpiece of a perfect afternoon. I begged Aunt Margie for the recipe right there on the spot, and it’s been a cornerstone of my own hosting playbook ever since. It’s a reminder that the most memorable dishes are often the simplest ones, made and shared with love.
Gathering Your Cast of Characters
Here’s everything you need to build this legendary salad. I’ve added a few chef’s notes and swaps because I want this to work in *your* kitchen, with what *you* have on hand.
- 4 cups fresh cucumbers, sliced (about 3–4 medium cucumbers): This is our star! I prefer English or Persian cucumbers for their thin skins, minimal seeds, and extra crunch. No need to peel them unless you want to. If using standard garden cucumbers, you might scoop out the watery seed core with a spoon after slicing.
- ½ cup sour cream & ½ cup ranch dressing: The dynamic duo of creaminess. The sour cream adds a lovely tang and body, while the ranch brings that herby, garlicky flavor we all adore. Chef’s Insight: Use a good-quality bottled ranch you love, or for a next-level touch, try my 5-minute homemade ranch. For a lighter version, swap sour cream for plain Greek yogurt.
- 1 cup shredded cheddar cheese: Sharp cheddar is my go-to for a flavor punch that cuts through the cream. Pre-shredded bags are convenient, but shredding a block yourself melts better and avoids anti-caking additives. Feel free to use Colby Jack, pepper jack for a kick, or even gouda!
- ½ cup cooked bacon, crumbled: The salty, smoky MVP. Baking thick-cut bacon on a sheet pan at 400°F until crispy is my foolproof method. For serious time-saving, real bacon bits from the store work in a pinch, but the flavor of freshly cooked is unmatched.
- 1 tablespoon fresh dill, chopped (optional but highly recommended): This little green gem adds a pop of fresh, herbal brightness that lifts the whole dish. If you only have dried dill, use 1 teaspoon.
- Salt and black pepper, to taste: We season every layer! Always taste at the end. The bacon and cheese are salty, so you may not need much extra salt.
Let’s Build the Magic: Step-by-Step
This process is less about strict technique and more about joyful assembly. Follow these steps for the perfect texture and flavor every time.
- Prep Your Cucumbers Like a Pro: Wash and slice your cucumbers into thin, even rounds, about ¼-inch thick. Now, here’s the #1 CRUCIAL TIP for a non-watery salad: pat those cucumber slices absolutely dry with a clean kitchen towel or paper towels. This removes excess surface moisture so your creamy dressing stays gloriously thick and clings to every slice instead of getting diluted. Place the dried slices in your large serving bowl.
- Create the Creamy Dream Dressing: In a separate medium bowl, combine the sour cream and ranch dressing. Whisk them together until you have a smooth, homogenous, and luscious sauce. This is your blank canvas. Give it a taste—this is where you might add a crack of black pepper.
- Fold in the Flavor Bombs: To your creamy base, add the shredded cheddar, most of the crumbled bacon (save a little for garnish!), and the fresh dill. Stir it all together. You’ll get this thick, chunky, irresistible paste. The cheese and bacon will start to get cozy with the dressing right away.
- The Grand Union: Pour this cheesy, bacony, creamy mixture over your waiting bowl of dried cucumbers. Now, with a large spatula or spoon, gently fold everything together. I say “fold” because you want to coat every cucumber slice without mashing them into mush. Be gentle but thorough.
- The Patience-Pays-Off Step: Cover the bowl and pop it in the fridge for at least 30 minutes. I know, waiting is hard! But this chill time is non-negotiable. It allows the flavors to marry and mingle, the cucumbers to get slightly tender and infused with ranch flavor, and the whole thing to get perfectly cold and refreshing.
- Serve & Swoon: Right before serving, give it one more gentle stir. Transfer to a nice bowl, sprinkle the reserved bacon and maybe an extra pinch of dill on top for a pretty finish, and watch it vanish.
How to Serve This Superstar Salad
This salad is the ultimate team player. Here’s how to let it shine:
The Classic: It’s the undisputed champion of the picnic, BBQ, and potluck table. Serve it alongside grilled chicken, burgers, hot dogs, or pulled pork. Its cool creaminess is the perfect counterpoint to smoky, charred meats.
Weeknight Hero: Turn it into a light main course! Serve a generous scoop over a bed of crisp lettuce, add some grilled shrimp or shredded rotisserie chicken on top, and you’ve got a satisfying dinner in minutes.
Pretty Presentation: For a fancier look, serve it in individual little cups or glasses. Garnish with that extra bacon, a tiny sprig of dill, and a light dusting of cracked black pepper. It instantly elevates the whole experience!
Make It Your Own: Delicious Twists & Swaps
The basic blueprint is perfection, but your kitchen is your playground! Here are some fun ways to riff on it:
- Garden Veggie Load-Up: Add ½ cup of halved cherry tomatoes, ¼ cup of thinly sliced red onion (soak in cold water for 10 minutes to mellow the bite), or some finely chopped bell pepper for extra color and crunch.
- “Everything Bagel” Style: Swap the dill for everything bagel seasoning! Fold a tablespoon into the dressing and sprinkle another on top just before serving. The garlic, onion, and sesame seeds are incredible here.
- Light & Bright Version: Swap the sour cream for full-fat plain Greek yogurt. It adds a protein boost and fantastic tang. You can also use a light ranch dressing.
- Bacon Alternatives: Not a bacon person? Try swapping it for ½ cup of finely chopped ham, crispy pancetta, or even sun-dried tomatoes for a vegetarian smoky-sweet note.
- Herb Garden Delight: Mix in other soft herbs like fresh chives, parsley, or a little bit of tarragon for a more complex herbal profile.
Beau’s Kitchen Notes & Stories
This recipe has lived in my back pocket for years, and it’s evolved in tiny ways. I used to stir everything together in one bowl, but I found that mixing the dressing separately first creates a more uniform coat. I also learned the hard way about drying cucumbers—one soggy, weepy salad was all it took to make that lesson stick! Now, I treat my cucumbers like little jewels that need polishing before they get dressed.
The funniest thing? I’ve had more debates about the name “Crack Salad” than any other recipe. Some folks chuckle, some raise an eyebrow, but everyone, and I mean *everyone*, agrees on the addictive quality. At a neighborhood block party last summer, my friend’s kid called it “The Green Stuff with Bacon” and just stood by the bowl with a spoon. I consider that the highest compliment.
Your Questions, Answered!
Q: My salad got watery after a few hours. What happened?
A: This is almost always due to not drying the cucumbers enough! Cucumbers are over 95% water. The thorough pat-dry step is your best defense. Also, salting cucumbers and letting them drain in a colander for 20 minutes before rinsing and drying is a pro move for make-ahead versions.
Q: Can I make this ahead of time?
A: Absolutely, but with strategy. You can prep the dressing (steps 2 & 3) and slice/dry the cucumbers separately the day before. Store them in separate containers in the fridge. Combine them no more than 1-2 hours before serving for the best texture.
Q: What’s the best ranch to use?
A: Use your favorite bottled brand! A buttermilk ranch is classic. For a thicker, herb-forward dressing, look for a “restaurant style” or “zesty” ranch. Homemade is always a fantastic option if you have the time.
Q: Is there a vegan version?
A> Yes! Use a vegan ranch dressing and sour cream (brands like Kite Hill or Follow Your Heart work well). Skip the bacon or use a smoky coconut bacon or tempeh bacon. Use a vegan cheddar shred, or skip the cheese and add a handful of toasted sunflower seeds for crunch.

Tasty Cucumber Ranch Crack Salad : Creamy, Crunchy & Irresistible Side Dish
Description
Cucumber Ranch “Crack” Salad
Why It’s So Addictive (And How to Make It Perfect Every Time)
Hey friends, Beau here from Feastical!
You know that dish at a potluck that looks simple… almost too simple… and then suddenly it’s gone before the burgers even hit the grill?
That’s this salad.
Ingredients
-
4 cups fresh cucumbers, sliced (about 3–4 medium)
-
½ cup sour cream
-
½ cup ranch dressing
-
1 cup shredded sharp cheddar cheese
-
½ cup cooked bacon, crumbled
-
1 tablespoon fresh dill, chopped (optional but recommended)
-
Salt & black pepper, to taste
Notes
-
Best within 24 hours
-
Stir before serving
-
If watery, drain excess liquid and refresh with a spoonful of sour cream
Nutritional Breakdown (A Chef’s Perspective)
While I’m all about the joy of eating first, I know many of you like to have the facts. Here’s a general look per serving (based on 6 servings). Remember, these are estimates and can vary based on your specific ingredient brands and quantities.
- Calories: ~210
- Protein: 6g (Thanks, cheese and bacon!)
- Carbohydrates: 5g (Mostly from the cucumbers and a bit from the dressing)
- Fat: 18g (The source of all that creamy, satisfying flavor)
This salad is a fantastic lower-carb side dish option. To lighten it up, refer to the variations above, like using Greek yogurt and a light ranch. Food is about nourishment and pleasure, and this salad delivers on both!
Final Thoughts
And there you have it, friends—the full story behind the legendary Cucumber Ranch Crack Salad. It’s more than just a recipe; it’s a guaranteed happiness-bringer, a conversation starter, and the simplest way I know to make a meal feel special. It proves that with a few quality ingredients and a couple of smart tricks (dry those cukes!), you can create something truly unforgettable.
I hope you’ll whip up a batch soon. When you do, I’d love to hear about it! Tag me on social @feastical or leave a comment on the blog. Tell me about your twist, who you shared it with, or if you managed to snag the last bite. Now, go forth, create, and enjoy every delicious moment. Until next time, keep your spatula close and your appetite closer!
Pin Title: Cucumber Ranch Crack Salad | The Creamy, Crunchy Side Dish Everyone Loves!
Pin Description (400+ chars): Discover the ultimate potluck winner: Cucumber Ranch Crack Salad! This easy, no-cook recipe combines crisp cucumbers, smoky bacon, sharp cheddar, and creamy ranch dressing for an addictive side dish that’s always the first to disappear. Perfect for BBQs, summer picnics, or a quick weeknight side. Learn the secret to preventing a watery salad and get delicious recipe variations including a lighter version and vegan swaps. This crowd-pleasing salad comes together in just 10 minutes of prep! #cucumbersalad #ranchsalad #cracksalad #easysidedish #potluckrecipes #summersalad #bbqside #creamySalad #feastical
SEO Meta Description: Make the viral Cucumber Ranch Crack Salad! Creamy, crunchy, addictive side dish with bacon & cheddar. Ready in 40 mins. Perfect for BBQs & potlucks.
Mango Banana Pineapple Smoothie : Creamy Tropical Yogurt Drink
Sunshine in a Glass: Your New Favorite Tropical Escape
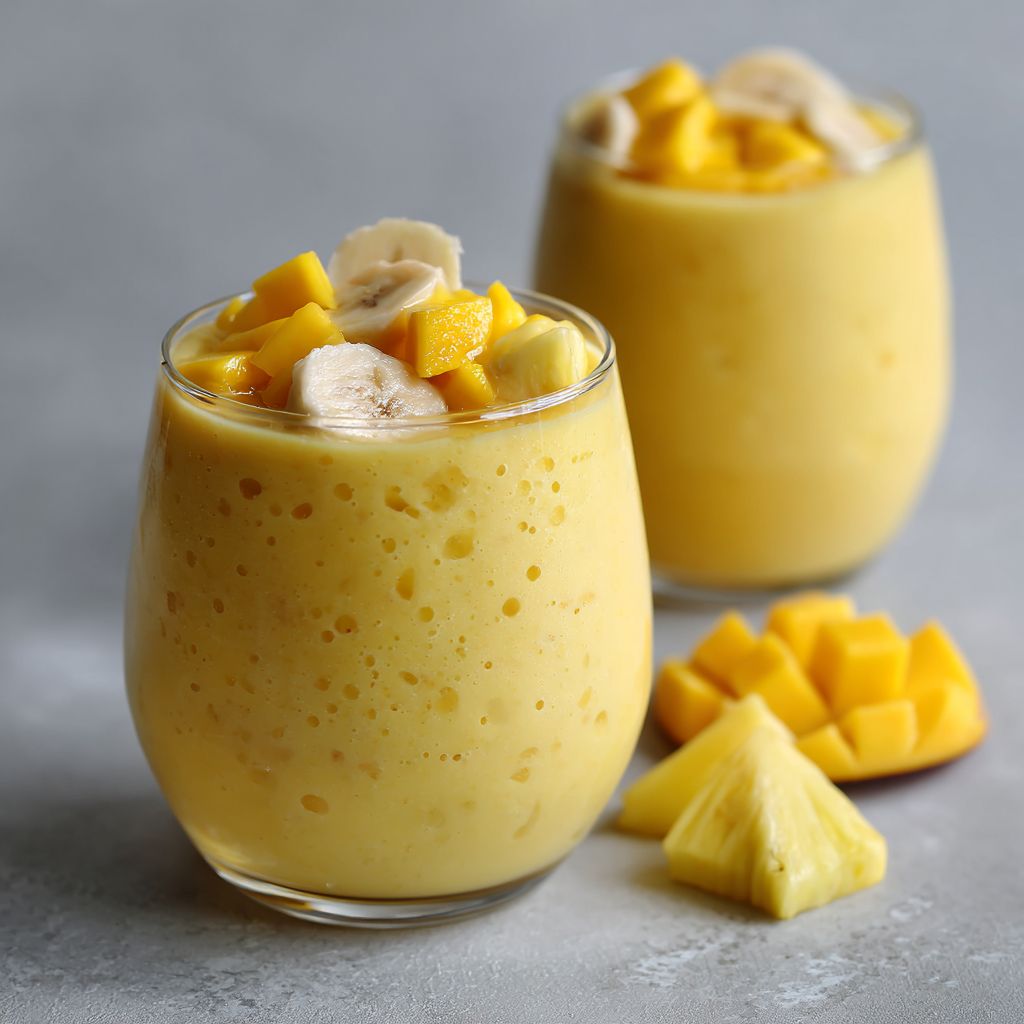
Hey friends, Beau here from Feastical! Tell me something: does your morning routine ever need a little… vacation? I’m not talking about booking a flight (though, sign me up), I’m talking about a flavor getaway that happens right in your kitchen, in about five minutes flat. Some days, the gray skies or the never-ending to-do list just begs for a burst of pure, unapologetic sunshine. And that’s exactly what this Mango Banana Pineapple Smoothie is all about.
This isn’t just a drink; it’s a creamy, dreamy, tropical hug. It’s the taste of sandy toes, warm breezes, and the feeling of having not a single care in the world. We’re blending juicy, sun-ripened mango, sweet banana, and tangy pineapple with creamy yogurt into a sip that’s so vibrant, it practically glows. It’s naturally sweet, packed with good-for-you stuff, and ridiculously easy to make. Whether you’re hustling through a busy morning, need a post-workout refresher, or just want to treat yourself to something that feels special, this smoothie is your ticket. So, let’s ditch the complicated recipes and blend up a little joy. Your blender is your passport, and paradise is waiting.
A Taste of Summer, Any Day of the Year
This recipe takes me straight back to my first real beach vacation as a kid. My family wasn’t big on fancy trips, but one summer, we piled into our station wagon and drove until the air smelled like salt and the trees looked… different. Palm trees! We stayed in a little rental, and every morning, the guy at the fruit stand down the road would blend up smoothies for the tourists. The sound of his blender was the sound of vacation starting.
I’d hand over my few dollars, and he’d give me a cup so cold it fogged up, filled with this shockingly bright yellow drink. That first sip was a revelation—it tasted like pure summer. It was sweet, it was creamy, and it felt like a celebration. I’ve been chasing that simple, perfect flavor ever since. My version, the one I’m sharing with you today, is my grown-up, kitchen-tested homage to that beachside magic. It’s my way of grabbing that vacation feeling, no matter the season or the weather report.
Gathering Your Tropical Toolkit
Here’s the beautiful part: you only need a handful of simple ingredients to create something spectacular. I’ll walk you through each one, because knowing your “why” makes the “how” even better.
-
- 1 cup fresh mango chunks (or frozen): The star of the show! Mango brings that deep, floral sweetness and gorgeous color. Chef’s Insight: Frozen mango is a fantastic, budget-friendly shortcut—it’s picked at peak ripeness and frozen immediately, plus it makes your smoothie gloriously thick and cold without needing ice.
- 1 ripe banana: Our natural sweetener and creaminess agent. The riper (spotted!) the banana, the sweeter and more flavorful your smoothie will be. Pro Tip: Have ripe bananas going soft? Peel, slice, and freeze them in a bag. They’re perfect for smoothies and reduce food waste!
- ½ cup fresh pineapple chunks: This is the tangy, bright note that cuts through the richness and screams “tropical.” It balances the mango’s sweetness perfectly.
¾ cup plain or vanilla yogurt: This is where we get that luxurious, creamy body and a protein boost. Substitution Tips: Use Greek yogurt for extra protein and thickness, dairy-free yogurt (like coconut or almond) for a vegan twist, or even a splash of kefir for added probiotics.
- ½–¾ cup milk of your choice: This is your texture control. Start with ½ cup; you can always add more. I love whole milk or oat milk for creaminess, but almond, coconut, or any milk works.
- 1 teaspoon honey (optional): Taste your blend first! Between the ripe banana and mango, you might not need it. But if your fruit isn’t super sweet, a drizzle of honey, maple syrup, or a pitted date can bring it all into harmony.
- Ice cubes (optional): Only needed if you’re using all fresh fruit to chill and thicken the mix. If using frozen fruit, you can skip the ice.
Let’s Get Blending: Your Path to Perfection
Ready? This is the fun part. I’ll guide you through each step with my favorite little hacks to ensure smoothie success every single time.
- Prep Your Fruit. If you’re using fresh mango and pineapple, chop them into roughly 1-inch chunks. No need to be perfect here, friends. For the banana, just break it into a few pieces. Chef’s Hack: If your blender isn’t a super-powered one, put the softer ingredients (banana, yogurt, liquid) in the blender jar first, followed by the harder frozen chunks. This helps the blades grab everything more easily and prevents frustrating blender stalls.
- Load the Blender. Add your mango, banana, and pineapple chunks to the blender. Spoon in the glorious yogurt. This is where the creaminess begins.
- Add Your Liquid. Pour in your milk, starting with just ½ cup. We can always add more, but we can’t take it out! This is the key to getting your perfect thickness. If you love a sippable smoothie, you’ll add more. If you prefer a thick, almost soft-serve consistency, stick with less.
- Sweeten (If Needed). Hold off on the honey or sweetener for now. Give the blender a quick pulse or blend on low for 10 seconds, then taste. Is it sunshine-sweet enough? If not, add your teaspoon of honey and blend again.
- Blend to Silky Smoothness. Secure the lid (sounds obvious, but we’ve all had that “oops” moment!). Start on low, then ramp up to high. Let it run for 30-45 seconds, or until the mixture is completely uniform, creamy, and has no chunks. You’re looking for a velvety, pourable texture.
- The Final Adjust. Stop the blender and take a look. Too thick? Add more milk, a tablespoon at a time, blending after each addition. Too thin? (This is rare, but it happens!) Add a few more frozen mango chunks or a handful of ice and blend again. You are the boss of your smoothie consistency!
- Serve Immediately. Pour that liquid sunshine into your favorite tall glass. I sometimes rim the glass with a little shredded coconut or add a tiny pineapple wedge on the side for flair. Then, take that first sip and transport yourself.
How to Serve Your Tropical Masterpiece
You can absolutely grab a straw and dive in straight from the blender, but let’s have a little fun with presentation! It tastes like a treat, so let it look like one.
For a casual breakfast, I love a big, sturdy mason jar with a fun paper straw. If I’m feeling fancy or serving this to guests, I go for a chilled tall glass. Want to make it Instagram-worthy? Here are my go-to garnishes: a thin slice of mango or pineapple perched on the rim, a sprinkle of toasted coconut flakes, a few chia seeds or hemp hearts for a nutrient boost and texture, or a fresh mint leaf. For an extra-thick smoothie, pour it into a bowl and top it like a smoothie bowl with granola, sliced banana, and a drizzle of nut butter. However you serve it, the goal is to slow down for just a second and savor the moment of pure, tropical bliss.
Mix It Up! Fun Twists on the Classic
Once you’ve mastered the base, the tropical playground is open! Here are a few of my favorite ways to riff on this recipe.
- The “Green Goddess” Twist: Sneak in a big handful of fresh spinach or kale. I promise, you won’t taste the greens over the powerful tropical fruits, but you’ll get a fantastic vitamin boost and a beautiful green hue.
- Piña Colada Vibes: Swap the milk for creamy coconut milk (the canned, full-fat kind for luxury, or the carton kind for lightness) and add a tablespoon of unsweetened shredded coconut to the blender. Close your eyes, and you’re on an island.
- Protein Powerhouse: Make this a complete meal by adding a scoop of your favorite vanilla or unflavored protein powder, or a big spoonful of nut butter (almond or peanut butter are amazing here).
- Anti-Oxidant Boost: Toss in a handful of mixed berries (strawberries, blueberries) with the tropical fruit. It creates a deeper, more complex flavor and a gorgeous color.
- Dairy-Free/Delight: Already mentioned it, but it’s easy! Use coconut yogurt and almond or oat milk. The result is just as creamy and delicious.
Beau’s Kitchen Confidential
This recipe has been my morning sidekick for years, and it’s evolved in the silliest ways. There was the “Great Smoothie Flood of 2018” where I overestimated my blender lid’s security and painted my kitchen wall a lovely shade of mango yellow. Lesson learned: always hold the lid down when you first hit that high button!
I’ve also learned that the best smoothie is the one you actually make. Don’t have pineapple? Use orange juice as part of the liquid. Yogurt all gone? A ripe avocado makes it insanely creamy. The spirit of this recipe is flexibility and joy. It’s less about exact measurements and more about blending fruits you love into a drink that makes you smile. That’s the real Feastical philosophy.
Smoothie Questions? I’ve Got Answers!
Let’s tackle a few common hiccups so you can blend with confidence.
Q: My smoothie is too thin/watery. What did I do wrong?
A: No worries! This usually means your fruit wasn’t frozen or you added too much liquid. Next time, use at least one frozen fruit (I always keep frozen mango on hand). To fix this batch, try blending in a few ice cubes, a handful of frozen fruit, or even a tablespoon of chia seeds (they’ll thicken it up as they sit for a minute).
Q: My smoothie is too thick—my blender is struggling!
A> This is a common one. First, stop the blender to avoid motor burn-out. Add a splash more liquid (milk, water, or even pineapple juice). For next time, remember the layering hack: liquids and soft stuff at the bottom, frozen hard stuff on top.
Q: Can I make this smoothie ahead of time?
A> You can, but it’s best fresh. If you must prep, blend and store it in a sealed jar in the fridge for up to 24 hours. Give it a vigorous shake or a quick re-blend before drinking, as it will separate. For a better make-ahead strategy, pre-portion your fruit into freezer bags. In the morning, just dump the bag in the blender, add your yogurt and liquid, and go!
Q: Is this smoothie healthy?
A> I’m a cook, not a doctor, but I can tell you what’s in it! It’s packed with whole fruits, which give you vitamins (like Vitamin C from the mango and pineapple), fiber, and natural energy. The yogurt provides protein and probiotics. It’s a far cry from a sugar-loaded juice or milkshake. It’s a nourishing, real-food choice that tastes like dessert.

Mango Banana Pineapple Smoothie : Creamy Tropical Yogurt Drink
Description
Mango Banana Pineapple Smoothie
Sunshine in a Glass
Hey friends, Beau here from Feastical! If your morning routine needs a little vacation—but your schedule says “absolutely not”—this Mango Banana Pineapple Smoothie is your five-minute tropical escape.
It’s creamy, bright, naturally sweet, and packed with vibrant fruit flavor. Think sandy toes, warm breezes, and that first sip of something ice-cold under the sun. No passport required—just your blender.
Ingredients
-
1 cup mango chunks (fresh or frozen)
-
1 ripe banana
-
½ cup pineapple chunks (fresh or frozen)
-
¾ cup plain or vanilla yogurt
-
½–¾ cup milk of choice (whole, oat, almond, coconut)
-
1 teaspoon honey (optional, to taste)
-
Ice cubes (only if using all fresh fruit)
Instructions
1️⃣ Layer Smart
Add milk and yogurt to the blender first.
Then add banana and fresh fruit.
Frozen fruit goes in last.
This helps your blender run smoothly.
2️⃣ Blend
Start on low, then increase to high.
Blend 30–45 seconds until silky smooth.
3️⃣ Taste & Adjust
-
Too thick? Add a splash of milk.
-
Too thin? Add frozen fruit or ice.
-
Not sweet enough? Add honey and blend briefly.
4️⃣ Serve Immediately
Pour into tall glasses and garnish with:
-
Pineapple wedge
-
Mango slice
-
Toasted coconut
-
Mint leaf
Or turn it into a smoothie bowl and top with granola and fruit.
Notes
-
Best enjoyed fresh
-
Can be stored in a sealed jar in the fridge for up to 24 hours
-
Shake or re-blend before drinking
A Peek at the Good Stuff
While I’m all about flavor first, it’s nice to know what’s fueling your day. This nutritional estimate is for one serving (assuming the recipe makes two servings) using 2% milk, plain yogurt, and no added honey. Remember, values will change with your specific ingredient choices (like using full-fat coconut milk or protein powder).
Per Serving (Approximate):
Calories: 210 | Carbohydrates: 40g | Fiber: 4g | Sugar: 30g (natural from fruit) | Protein: 6g | Fat: 3g
What I love about these numbers is the balance. You’re getting a good dose of fiber to keep you satisfied, natural carbohydrates for energy, and a bit of protein and fat to help it all stick. It’s a wholesome, complete snack or a light breakfast that powers you up without weighing you down.
Final Thoughts
And there you have it, friends—my not-so-secret formula for bottling up a little sunshine. This Mango Banana Pineapple Smoothie is more than just a recipe; it’s a reminder that a moment of joy and self-care can be just five minutes away. It’s proof that eating (or drinking!) well doesn’t have to be complicated or boring. It can be vibrant, exciting, and deliciously simple.
I hope you’ll blend up a batch and let those tropical flavors whisk you away, even if just for the length of a glass. And when you do, I’d love to hear about it! Tag me over on Feastical or share your creation. Now, if you’ll excuse me, my blender is calling, and I think it’s asking for a piña colada twist today. Happy blending!
Cheers,
Beau
Pin Title: Mango Banana Pineapple Smoothie | Creamy Tropical Yogurt Drink
Pin Description: This Mango Banana Pineapple Smoothie is like sunshine in a glass! This easy, healthy tropical smoothie recipe is your 5-minute vacation. Made with creamy yogurt, juicy mango, sweet banana, and tangy pineapple, it’s a naturally sweet and refreshing drink perfect for breakfast or a snack. Learn expert blending tips, fun variations (like Piña Colada style!), and how to make it dairy-free. This vibrant, feel-good smoothie is packed with vitamins and flavor. A must-try creamy fruit smoothie that brings island vibes straight to your kitchen. #smoothierecipe #tropicalsmoothie #mangosmoothie #healthybreakfast #easysmoothie #feastical
SEO Meta Description: Blend up sunshine! This creamy Mango Banana Pineapple Smoothie is a healthy, tropical yogurt drink perfect for breakfast. Ready in 5 minutes!
“`
Beetroot Banana Smoothie with Greek Yogurt : Creamy & Naturally Sweet
The Beetroot Banana Smoothie That Will (Actually) Make You Smile at 7 AM
Hey there, friend! Beau here, from Feastical. Can we have a real, quick chat about morning routines? Because mine used to be a chaotic symphony of snooze buttons, spilled coffee grounds, and the frantic search for a semi-clean coffee mug. Sound familiar? I used to think a “good breakfast” was a luxury saved for lazy weekend brunches. That is, until I stumbled into a love affair with my blender and discovered the magical, morning-saving power of a truly great smoothie.
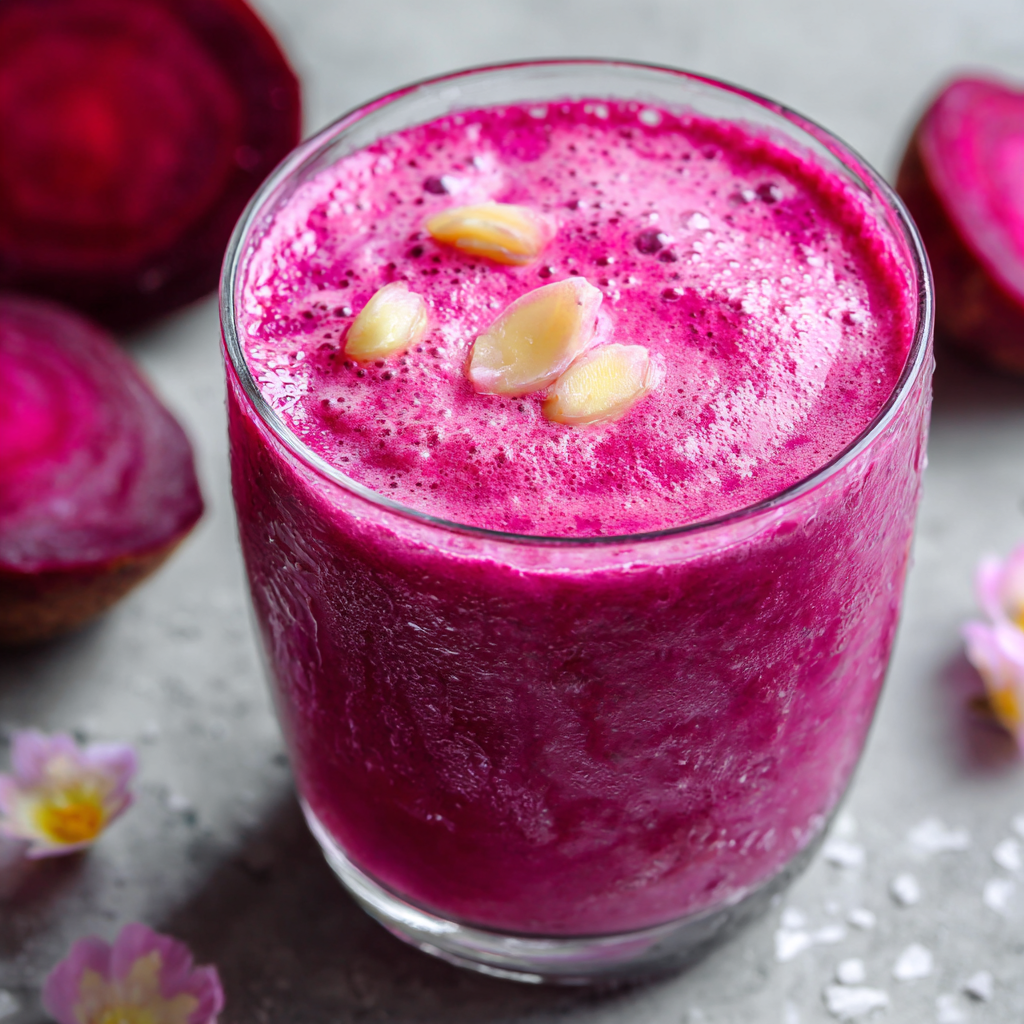
Not just any smoothie, though. I’m talking about a smoothie so vibrantly pink it looks like a sunrise in a glass. One that’s creamy, sweet without a lick of refined sugar, and keeps you full and focused straight ’til lunch. I’m talking, of course, about this glorious Beetroot Banana Smoothie with Greek Yogurt.
I know what you might be thinking: “Beetroot? In a smoothie? Beau, have you lost your spatula?” Trust me, I was skeptical too. But when blended with sweet, mellow banana and rich Greek yogurt, earthy beetroot transforms. It becomes subtly sweet, incredibly nutritious, and gives you the most stunning color that’s guaranteed to brighten your day. This isn’t just a drink; it’s a feel-good, energy-boosting hug for your insides. It’s proof that healthy can be indulgent, quick can be satisfying, and yes, even a weekday breakfast can feel like a tiny celebration. So, let’s dust off that blender and make a morning masterpiece together.
The Beet That Started It All (A Confession)
My beetroot awakening didn’t happen in some fancy kitchen. It happened in my grandma’s cluttered, sun-drenched pantry. As a kid, I’d only ever seen beets in sad, sliced form, hiding in the corner of a holiday salad plate. I’d politely push them aside. But one summer afternoon, Grandma was making her famous borscht—a soup that turned everything a shocking shade of magenta. She handed me a small, steamed beet cube. “Try it, just like candy,” she winked. With the deep suspicion only a ten-year-old can muster, I popped it in my mouth.
It wasn’t candy, but it wasn’t the dirt-flavored disappointment I expected either. It was earthy, sure, but also had a deep, gentle sweetness. That moment stuck with me. Years later, staring at a leftover roasted beet from dinner and a sad, spotty banana on the counter, Grandma’s voice echoed in my head. I threw them in the blender with some yogurt, gave it a whirl, and took a hesitant sip. The flavor was incredible—complex, sweet, and creamy. But more than that, the color! That brilliant, joyous pink made me laugh out loud. It was a happy accident that became a staple. Now, every time I make this smoothie, I think of Grandma and her magical pantry, reminding me that the best kitchen discoveries often come from a little courage and a willingness to play.
Your Vibrant Smoothie Toolkit: Ingredients & Insights
This recipe is beautifully simple, but each ingredient plays a starring role. Here’s the breakdown, with my favorite chef tips and swaps to make it your own.
- 1 small cooked beetroot, chopped: This is our color and nutrition MVP. Chef’s Insight: Using pre-cooked beets (steamed, roasted, or even the vacuum-packed kind from the produce section) is the ultimate hack. It gives a smoother texture and sweeter flavor than raw. Substitution Tip: No cooked beets? A handful of frozen beet chunks works perfectly!
- 1 ripe banana: Our natural sweetener and creamy base. Chef’s Insight: The spottier, the better! A super-ripe banana has converted more of its starch into sugar, giving incredible sweetness. Pro Hack: Peel and freeze overripe bananas in chunks for an instant creamy, frosty smoothie base.
- 1 cup Greek yogurt: This is what makes the smoothie luxuriously thick and packed with protein. Chef’s Insight: I use full-fat for maximum creaminess and satiety, but low-fat or non-fat works too. Substitution Tip: For a dairy-free version, swap in an equal amount of plain coconut yogurt or silken tofu.
- 1 tablespoon honey (adjust to taste): A touch of floral sweetness to tie everything together. Chef’s Insight: Always blend your other ingredients first, then taste! The sweetness of your beet and banana can vary. You might not need it all. Substitution Tip: Pure maple syrup, agave nectar, or a pitted Medjool date all work wonderfully.
- ½–1 cup cold water or milk: Our texture tuner. Chef’s Insight: I start with ½ cup of cold liquid to get the blender going, then add more until it reaches my preferred sipping consistency. Using milk (dairy or plant-based) makes it even richer.
- Ice cubes (optional): For instant chill and extra frostiness. Chef’s Hack: If you used frozen banana, you often won’t need extra ice!
Let’s Make Some Magic: Step-by-Step Smoothie Success
Ready? This is the easiest 5-minute project you’ll do all day. Follow these steps for a flawlessly smooth, perfectly blended result every single time.
- Prep Your Players. If your beet isn’t already chopped, give it a rough chop. Slice your banana. No need for perfection here—the blender will handle it. This is also the perfect time to grab your honey and liquid from the fridge. Starting with cold ingredients means no need for extra ice unless you really want it.
- The Layer Game. I add my ingredients to the blender in a specific order for happier blending. Start with the liquid (½ cup to begin), then add the softer items: yogurt, chopped beet, and banana. Drizzle the honey on top. Why? This gives the blades liquid to grab onto immediately, preventing dry ingredients from getting stuck at the bottom in a stubborn lump.
- Blend ‘Til Dreamy. Pop the lid on tight (a lesson I learned the messy way!). Start blending on low, then quickly ramp up to high speed. Let it run for a full 45-60 seconds. We’re not just mixing; we’re *aerating* and creating that beautifully smooth, creamy texture. You shouldn’t see any tiny flecks of beet.
- Taste & Tweak. Stop the blender and grab a spoon. Taste it! This is the most important step. Is it sweet enough? Add a touch more honey. Is it too thick for your liking? Add more liquid, a splash at a time, and blend for another 10 seconds to incorporate. You are the boss of your smoothie consistency.
- The Final Chill & Pour. If you love an extra-frosty sip, toss in 3-4 ice cubes now and blend on high until they’re completely crushed. Then, pour your gorgeous, pink creation into your favorite glass. I’m partial to a clear mason jar – watching that color shine is part of the joy.
Serving It Up With Style
You could absolutely chug this straight from the blender carafe (no judgment here!). But if you want to make it feel a bit more special, here are my go-to serving ideas:
The Simple Elevation: Pour into a beautiful glass and add a simple garnish. A thin slice of beet on the rim, a small banana slice on the foam, or a light sprinkle of chia seeds or coconut flakes adds that “café-ready” touch in two seconds.
Bowl Life: Make it extra thick by reducing the initial liquid to just ¼ cup. Pour it into a bowl instead of a glass! Then, go wild with toppings: a sprinkle of granola for crunch, a few fresh berries, a drizzle of nut butter, or some cacao nibs. You’ve just made a gorgeous, Instagram-worthy smoothie bowl.
The Perfect Pairing: This smoothie is a complete meal on its own. But if I’m having it as a mid-morning snack, I love it with a small handful of almonds or a couple of whole-grain toast soldiers for dipping. Pure bliss.
Make It Your Own: 5 Delicious Twists
The basic recipe is a masterpiece, but the kitchen is your playground! Here are a few ways to remix this smoothie:
- Chocolate Beet Dream: Add 1 tablespoon of unsweetened cocoa powder or cacao powder and a pinch of cinnamon. It’s like a healthy, decadent chocolate shake with a hidden veggie boost.
- Berry-Beet Blast: Add ½ cup of frozen mixed berries (strawberries, raspberries). The berries complement the earthiness of the beet beautifully and create an even deeper, ruby-red color.
- Tropical Sunrise: Swap the banana for ½ cup of frozen mango chunks and use coconut milk as your liquid. You’ll get a sweet, tropical flavor and a stunning coral-pink hue.
- Green Power-Up: Want to go super-green? Add a big handful of fresh spinach or kale. I promise, the beet and banana flavors are so strong you won’t taste the greens, but you’ll get an incredible nutritional kick.
- Protein Punch: For a post-workout powerhouse, add a scoop of your favorite vanilla or unflavored protein powder. It blends right in and makes this smoothie even more filling.
Beau’s Kitchen Notes & Stories
This recipe has been my morning sidekick for years, and it’s evolved in funny ways. There was the infamous “Pink Ceiling Incident” of 2019, where I forgot to secure the blender lid… let’s just say my kitchen looked like a modern art project for a week. Lesson learned: always hold the lid down with a towel on those first few pulses!
I’ve also learned that this smoothie is a fantastic “gateway” recipe for hesitant veggie eaters. I’ve served it to more than one friend who swore they hated beets, only to have them ask for the recipe. The magic is in the blend—the flavors mellow and marry into something entirely new and delightful. Don’t be afraid to play, adjust, and make it taste perfect for you. That’s what home cooking is all about.
Smoothie SOS: FAQs & Troubleshooting
Q: My smoothie turned out too thick! What do I do?
A: No worries, this is an easy fix. Simply stop the blender, add more liquid (water, milk, etc.) a tablespoon or two at a time, and blend again until it reaches your perfect sipping consistency.
Q: Can I make this smoothie ahead of time?
A: You can, but it’s best fresh. If you must prep ahead, blend it and store it in a sealed jar in the fridge for up to 24 hours. It will separate and may oxidize (turn a slightly duller brownish-pink) – just give it a vigorous shake or a quick re-blend before drinking.
Q: Can I use raw beetroot instead of cooked?
A: You can, but I don’t recommend it for beginners. Raw beet has a stronger, earthier flavor and a grainier texture. If you try it, peel it well, chop it very small, and be prepared for a more “vegetal” taste. Cooked is foolproof and sweeter!
Q: Is this smoothie kid-friendly?
A: Absolutely! The vibrant color is a huge selling point. You can even call it a “Princess Pink Potion” or a “Superhero Smoothie.” Let them add their own sprinkle of granola on top to get them involved.

Beetroot Banana Smoothie with Greek Yogurt : Creamy & Naturally Sweet
Description
Beetroot Banana Smoothie with Greek Yogurt
(The 5-Minute Pink Sunrise That Actually Fixes Your Morning)
If your mornings feel like a sprint from snooze button to coffee drip, this smoothie is your reset button.
It’s creamy. It’s naturally sweet. It’s shockingly beautiful. And yes — it has beetroot in it.
But before you raise an eyebrow, hear me out: when blended with ripe banana and rich Greek yogurt, beetroot turns mellow, gently sweet, and almost dessert-like. The result? A vibrant pink smoothie that tastes indulgent but fuels you like a champion.
Let’s blend.
Ingredients
-
1 small cooked beetroot, chopped
-
1 ripe banana (the spottier, the sweeter)
-
1 cup Greek yogurt
-
1 tablespoon honey (adjust to taste)
-
½–1 cup cold water or milk (dairy or plant-based)
-
Ice cubes (optional)
Instructions
1️⃣ Start with Liquid
Add ½ cup liquid to your blender first.
This helps everything blend smoothly.
2️⃣ Add the Good Stuff
Layer in:
-
Greek yogurt
-
Chopped beet
-
Banana
-
Honey
3️⃣ Blend Until Velvety
Blend on high for 45–60 seconds until completely smooth.
No flecks. No chunks. Just silky pink goodness.
4️⃣ Taste & Adjust
-
Too thick? Add more liquid.
-
Not sweet enough? Add a drizzle more honey.
-
Want it colder? Add ice and blend again.
5️⃣ Pour & Enjoy
Serve immediately in a clear glass (trust me — that color deserves attention).
Notes
-
Frozen banana = thicker, frostier smoothie
-
Pre-cooked vacuum-packed beets are perfect
-
Always secure your blender lid (learned that the messy way)
-
Best enjoyed fresh
A Note on Nourishment
While I’m a chef, not a nutritionist, I love knowing the good stuff going into my food. This smoothie is a nutritional home run. The beetroot is famous for its nitrates, which can support blood flow and energy levels. The banana provides potassium and fiber. The Greek yogurt delivers a hefty dose of protein and probiotics for gut health. And the honey offers natural antioxidants. Together, they create a balanced blend of complex carbs, protein, and healthy fats that provides sustained energy without a sugar crash. It’s a wholesome choice that truly makes you feel as good as it tastes.
Final Thoughts
And there you have it, friend—my not-so-secret weapon for brighter, more energized mornings. This Beetroot Banana Smoothie is more than just a recipe; it’s a reminder that taking a few minutes for yourself, to fuel your body with something colorful and kind, can set the tone for your whole day.
I hope you give it a try and fall in love with that gorgeous pink color and surprisingly delicious flavor. And if you do, I’d be absolutely thrilled if you tagged @Feastical on social media so I can see your creations! Now, go forth and blend something beautiful. Until next time, keep your kitchen messy and your heart full.
Cheers,
Beau
Pin Title: Vibrant Beetroot Banana Smoothie | Healthy 5-Minute Breakfast
Pin Description: This vibrant and creamy Beetroot Banana Smoothie with Greek yogurt is your new favorite healthy breakfast! Naturally sweet with no refined sugar, packed with protein and fiber, and ready in just 5 minutes. Learn how to make this gorgeous pink smoothie with step-by-step instructions, chef tips for the perfect texture, and easy recipe variations including chocolate, berry, and tropical twists. A perfect post-workout drink or energizing morning meal that tastes indulgent but is full of wholesome ingredients like cooked beetroot, ripe banana, and Greek yogurt. #smoothierecipe #healthysmoothie #breakfastsmoothie #beetrootsmoothie #healthydrink #easybreakfast #mealprep #healthyrecipes #feastical
Easter Homemade Yellow Cake Recipe : Rich, Moist & Fluffy from Scratch
Your New Favorite Easter Tradition Starts Right Here
Hey friends, Beau here from Feastical! Can you smell it? That incredible, warm, buttery-sweet scent that can only mean one thing: a classic yellow cake is in the oven. It’s the smell of celebration, of gathering around the table, of pure, uncomplicated joy. And let me tell you, when Easter rolls around, there’s no cake I’d rather have at the center of my dessert spread than this one.
This isn’t just any cake. This is the Easter Homemade Yellow Cake of your dreams. We’re talking about a cake that’s incredibly rich, impossibly moist, and cloud-level fluffy, all at the same time. It’s the kind of cake that makes you close your eyes for a second after the first bite. The kind that has everyone asking, “Can you send me the recipe?” before they’ve even finished their slice.
I know the siren call of a boxed mix is strong—it promises simplicity. But what it can’t promise is soul. It can’t give you that proud, beaming feeling when you present a cake made completely from scratch, knowing every single ingredient that went into it. This recipe is that happy middle ground: straightforward enough for a weekend baker but spectacular enough to become your signature showstopper. So, this Easter, let’s ditch the cardboard box and make some real magic. Grab your favorite mixing bowl, and let’s bake a memory.
The Cake That Started It All
My love affair with this yellow cake began not in a fancy restaurant kitchen, but in my Grandma June’s wonderfully cluttered, sun-drenched kitchen. Every Easter, without fail, she’d make her “Sunshine Cake.” It was always the same: two tender yellow layers, slathered in a whipped chocolate frosting that she’d let me lick from the beaters.
The ritual was everything. I’d stand on a stool, “helping” her measure the sugar (and sneaking a pinch). She’d tell me the secret to a happy cake was creaming the butter and sugar until it looked like “springtime daffodils.” To this day, when my stand mixer is whirring that pale, fluffy butter mixture, I’m seven years old again, covered in flour, and absolutely certain that cake is the best thing in the world. This recipe is my homage to her—a little more refined in technique, but with every bit of the same heart and buttery, vanilla soul.
Gathering Your Sunshine: The Ingredients
Great baking starts with great ingredients. Here’s everything you’ll need and exactly why each one matters. Don’t worry—I’ve got substitution ideas for almost everything!
- 2 ½ cups all-purpose flour: The sturdy-but-tender backbone of our cake. For a slightly lighter crumb, you can swap ½ cup with cake flour. Chef’s Insight: Always fluff your flour with a spoon before scooping and leveling it off with a knife. No packing it in!
- 2 ½ teaspoons baking powder: Our primary leavening agent. This is what gives the cake its beautiful lift and fluffy texture. Make sure yours is fresh (it should fizz vigorously when dropped in hot water).
- ½ teaspoon salt: The flavor enhancer! Salt isn’t here to make things salty; it’s here to make the vanilla and butter sing louder. Never skip it.
- ¾ cup unsalted butter, softened: The star of the show for flavor and texture. “Softened” is key—it should give easily when poked but not be oily or melted. Take it out of the fridge at least an hour ahead.
- 1 ¾ cups granulated sugar: Sweetness, yes, but it also helps create air pockets when creamed with butter, contributing to that perfect crumb.
- 4 large egg yolks + 2 large whole eggs: This combo is our secret weapon! The extra yolks add incredible richness, moisture, and that classic golden-yellow color, while the whole eggs provide structure. Sub Tip: Save those extra whites for a fantastic Swiss meringue buttercream or a healthy omelet tomorrow!
- 1 cup whole milk: For the best moisture and tenderness. The fat in whole milk gives us a more luxurious cake. In a pinch, 2% works, but avoid skim.
- 2 teaspoons vanilla extract: Use the good stuff! Pure vanilla extract makes a noticeable difference. For a next-level twist, try vanilla bean paste—you’ll see those beautiful little specks throughout the cake.
Let’s Bake: Step-by-Step to Perfect Layers
Follow these steps, and you’re guaranteed success. I’m walking you through every detail with my favorite kitchen hacks sprinkled in!
- Prep Like a Pro. Preheat your oven to 350°F (175°C). Now, grease your two 9-inch round cake pans. But don’t stop there! Line the bottoms with parchment paper circles. This is the single best trick to ensure your cakes release perfectly every single time. A light dusting of flour over the greased sides is the chef’s kiss.
- Combine the Dry Team. In a medium bowl, whisk together your flour, baking powder, and salt. Do this for a good 30 seconds. Why? We’re aerating the flour and making sure the leavening is evenly distributed. No one wants a bite with a clump of baking powder! Set this bowl aside.
- The Creaming Method – This is CRUCIAL. In your stand mixer or with a hand mixer, beat the softened butter and sugar on medium-high speed. We’re not just mixing; we’re CREAMING. Beat it for a full 3-5 minutes, until the mixture is very pale yellow, fluffy, and almost looks like whipped cream. This step incorporates air, which is essential for lift. Scrape down the bowl halfway through.
- Incorporate the Eggs, One at a Time. With the mixer on medium, add your 4 egg yolks and 2 whole eggs, one at a time. Let each egg fully incorporate before adding the next. This prevents the batter from breaking or curdling. Add the vanilla with the last egg. The batter should now look smooth, glossy, and dreamy.
- The Gentle Finale. Reduce the mixer speed to low. Add about one-third of your dry ingredients, mixing just until almost combined. Pour in half of the milk. Mix. Repeat: another third of dry, the rest of the milk, then the final third of dry. Stop mixing the second the last streaks of flour disappear. Overmixing at this stage develops gluten, which can lead to a tough cake. A few tiny lumps are perfectly fine.
- Divide and Conquer. Pour the batter evenly into your prepared pans. I like to use a kitchen scale for absolute precision, but eyeballing it works too. Give the pans a gentle tap on the counter to release any large air bubbles.
- Bake to Golden Perfection. Place the pans in the center of your preheated oven. Bake for 28-32 minutes. Do NOT open the oven door before 25 minutes! The cakes are done when they are golden, pull away from the sides slightly, and a toothpick inserted into the center comes out with a few moist crumbs (not wet batter).
- The Patience Play. Let the cakes cool in their pans on a wire rack for 15 minutes. Then, run a knife around the edge, invert them onto the rack, peel off the parchment paper, and let them cool completely before frosting. Seriously, completely cool. Warm cake melts frosting into a sad puddle.
How to Serve Your Easter Masterpiece
Presentation is part of the fun! For a classic Easter look, I love a tall layer cake. Spread a generous amount of your favorite frosting (a classic chocolate buttercream or a vanilla cream cheese frosting are my go-tos) between the cooled layers and all over the outside.
Get festive with the decorations! Press pastel-colored sprinkles onto the sides, create a “nest” of toasted coconut on top with a few chocolate egg candies nestled in, or adorn it with fresh edible flowers like violets or pansies. For a simpler approach, just dust the top with a snowfall of powdered sugar and serve with a bowl of fresh spring berries on the side. However you dress it, slice with a sharp knife dipped in hot water for clean, beautiful pieces.
Make It Your Own: Delicious Twists & Swaps
This recipe is a fantastic canvas. Here are a few ways to play with it!
- Lemon Sunshine Cake: Add the zest of two lemons to the butter-sugar mixture when creaming. Substitute the vanilla with 1 teaspoon of pure lemon extract and use lemon juice in place of 2 tablespoons of the milk. Frost with a tangy lemon cream cheese frosting.
- Almond-Vanilla Dream: Replace 1 teaspoon of the vanilla with pure almond extract. Fold ½ cup of finely chopped, toasted almonds into the batter. Frost with a simple vanilla buttercream and garnish with sliced almonds.
- Dairy-Free Delight: Use a high-quality vegan butter stick (for creaming) and plain, unsweetened almond or oat milk. The egg structure is important here, so for an egg-free version, I’d recommend a trusted egg-replacer powder suited for cakes.
- Funfetti Celebration: This is a crowd-pleaser! After mixing the batter, gently fold in ½ cup of rainbow sprinkles (not nonpareils, which bleed color). The result is pure, joyful confetti in every bite!
- Brown Butter Bliss: For a deeper, nutty flavor, brown your ¾ cup of butter before using it. Let it cool back to a softened state, then proceed with the recipe. It adds an incredible, sophisticated layer of flavor.
Beau’s Kitchen Notes
This recipe has been my trusty sidekick for years, and it’s evolved with me. I used to be terrified of overmixing, to the point where I’d have pockets of unmixed flour! I learned that low speed and paying attention are the real keys. One Easter, I was in such a hurry I forgot the baking powder. Let’s just say we had very dense, sad “yellow pancakes” that year—a hilarious lesson in reading the recipe twice! Now, I always line up my ingredients (mise en place) before I start. It turns baking from a frantic race into a calm, joyful ritual. Remember, the love and attention you put in truly translates to the first delicious bite.
Your Questions, Answered
Q: My cake domed a lot in the center. What happened?
A: A slight dome is normal, but a large one usually means your oven was running a bit hot, causing the edges to set too fast while the center continued to rise. An oven thermometer is a baker’s best friend for accuracy. You can also try using cake strips—you soak them in water and wrap them around the outside of the pan to insulate it for even baking.
Q: Can I make this into cupcakes?
A: Absolutely! This batter will make about 24 perfect cupcakes. Line your muffin tins, fill each liner about 2/3 full, and bake at 350°F for 18-22 minutes, or until a toothpick comes out clean.
Q: My cake is dense, not fluffy. Where did I go wrong?
A: The most common culprits are: 1) Not creaming the butter and sugar long enough (did you do the full 3-5 minutes?), 2) Overmixing the batter after adding the flour, or 3) Using old or ineffective baking powder. Check those three points next time!
Q: Can I make the layers ahead of time?
A: Yes! Once completely cool, wrap the cake layers tightly in plastic wrap, then in foil. They can sit at room temperature overnight or be frozen for up to 2 months. Thaw frozen layers in the fridge before frosting.
Easter Homemade Yellow Cake Recipe : Rich, Moist & Fluffy from Scratch
Description
Easter Homemade Yellow Cake (Rich, Fluffy & From Scratch)
Hey friends — if there’s one dessert that deserves the spotlight on your Easter table, it’s this classic yellow cake. But not the boxed kind. We’re talking buttery, golden, impossibly moist layers made completely from scratch.
This cake is soft, rich, and fluffy all at once — the kind that makes people pause after the first bite and ask for the recipe before they’ve finished their slice.
Let’s bake something unforgettable.
Ingredients
Dry Ingredients
-
2 ½ cups all-purpose flour
-
2 ½ teaspoons baking powder
-
½ teaspoon salt
Wet Ingredients
-
¾ cup unsalted butter, softened
-
1 ¾ cups granulated sugar
-
4 large egg yolks
-
2 large whole eggs
-
1 cup whole milk
-
2 teaspoons pure vanilla extract
Instructions
1. Prep the Pans
Preheat oven to 350°F (175°C).
Grease two 9-inch round cake pans, line the bottoms with parchment paper, and lightly flour the sides. This guarantees easy release.
2. Mix the Dry Ingredients
In a bowl, whisk together:
-
Flour
-
Baking powder
-
Salt
Set aside.
3. Cream Butter & Sugar (The Most Important Step)
Beat butter and sugar on medium-high for 3–5 minutes until very pale, fluffy, and light.
This step incorporates air — which means lift and softness.
Scrape down the bowl halfway through.
4. Add the Eggs
Add egg yolks and whole eggs one at a time, mixing well after each addition.
Add vanilla with the final egg.
The batter should look smooth and creamy.
5. Alternate Dry Ingredients & Milk
Reduce mixer speed to low.
Add:
-
⅓ of dry ingredients
-
½ of milk
-
⅓ dry
-
Remaining milk
-
Final ⅓ dry
Mix only until just combined.
Do not overmix.
6. Bake
Divide batter evenly between pans.
Bake for 28–32 minutes, until:
-
Golden on top
-
Slightly pulling from edges
-
Toothpick comes out with a few moist crumbs
Do not open oven before 25 minutes.
7. Cool Completely
Cool in pans for 15 minutes.
Turn out onto wire racks, remove parchment, and cool completely before frosting.
Warm cake will melt frosting.
Notes
Lemon Easter Cake
Add zest of 2 lemons to butter mixture.
Replace 2 tablespoons milk with lemon juice.
Almond Vanilla
Swap 1 teaspoon vanilla for almond extract.
Top with sliced almonds.
Funfetti
Fold in ½ cup rainbow sprinkles (not nonpareils).
Brown Butter Version
Brown the butter first, cool until softened again, then cream as directed for a nutty flavor boost.
Nutritional Information*
*Please note: This is an approximate estimate calculated using online software and is intended for informational purposes only. Variations will occur based on specific brands and measurements used.
Per Serving (1 slice, based on 12 slices per cake without frosting):
Calories: ~390 | Total Carbohydrates: 46g | Protein: 6g | Total Fat: 20g | Saturated Fat: 12g | Sugar: 28g | Sodium: 240mg
While this is a celebratory treat, remember that homemade allows you to control the quality of ingredients. Enjoy a slice mindfully as part of your festive gathering!
One Last Slice of Advice
And there you have it, friends—my heart-on-a-plate, my Grandma June’s legacy, your new go-to Easter Homemade Yellow Cake. This recipe is more than just flour, butter, and sugar; it’s a conduit for connection, a creator of smiles, and a guaranteed way to make any day feel special.
I hope you bake it with as much joy as I’ve had sharing it with you. Don’t stress the small stuff—a little lopsided layer just adds character! The important part is gathering, sharing, and savoring. I’d love to see your beautiful creations. Tag me @Feastical or use #FeasticalEaster so I can celebrate with you.
Wishing you a delicious, cozy, and wonderfully flavorful Easter. Happy baking!
– Beau
Pin Title: Ultimate Easter Homemade Yellow Cake Recipe | Moist & Fluffy from Scratch
Pin Description (400+ characters): Celebrate Easter with this perfect from-scratch Homemade Yellow Cake! This rich, moist, and fluffy vanilla layer cake is a classic dessert that’s easier than you think. Our step-by-step recipe includes chef tips for perfect layers, ingredient substitutions, and festive decorating ideas. Ideal for Easter brunch, birthdays, or any special occasion, this tender buttery cake will become your family’s new favorite. Learn how to cream butter and sugar like a pro, avoid common baking mistakes, and create a stunning centerpiece dessert. Bake a memory this holiday! #EasterBaking #YellowCakeRecipe #HomemadeCake #FromScratch #CelebrationDessert #LayerCake #EasyBaking #EasterDessert
SEO Meta Description (120 characters): Bake the ultimate Easter yellow cake from scratch! Rich, moist, fluffy layers with step-by-step tips. Your new celebration favorite.
Creamy Strawberry Agua Fresca : Refreshing Mexican-Inspired Drink
Sip, Smile, Repeat: My Creamiest, Dreamiest Strawberry Agua Fresca
Hey there, friend! Beau here, from Feastical. Is it just me, or is the sun turning up the heat a little earlier every year? I don’t know about you, but when that summer glow hits my kitchen windows, my mind goes to one place: something cool, fruity, and absolutely thirst-quenching. I’m talking about a drink that doesn’t just sit in your glass, but performs. A drink that makes you close your eyes and hum after the first sip. Today, I’m handing you the keys to my all-time favorite warm-weather elixir: my Creamy Strawberry Agua Fresca.
Now, if you’ve ever had a traditional agua fresca, you know the deal. It’s that light, refreshing fruit-and-water blend you find at every taquería worth its salt. It’s perfection in a cup. But a few years back, I started playing with the formula. What if we added a touch of creamy, dreamy indulgence? What if we made it taste like liquid strawberry ice cream, but without the heaviness? The result was a revelation in my pitcher. This version is still incredibly refreshing, but it has this luscious, smooth body that makes every sip feel like a special occasion. It’s the hug and the high-five of beverages, all in one. And the best part? It takes about 10 minutes of active time. So, grab your blender, your favorite pitcher, and let’s turn a pile of gorgeous strawberries into the star of your next backyard hang, porch-sitting session, or “I-deserve-this” afternoon break.
A Pitcher of Sunshine & Memories
This recipe always takes me straight back to my Aunt Lola’s backyard in Arizona. Her house was the unofficial family hub, and her kitchen door was a revolving door of cousins, neighbors, and stray dogs looking for a pat. Summer visits were defined by the heat rising off the patio bricks and the constant, blessed clinking of ice in giant plastic tumblers. Her go-to was always a simple watermelon agua fresca, and she’d make it by the gallon.
One particularly sweltering day, us kids had been running through the sprinkler for hours. We came in, parched and ravenous, only to find the watermelon was all gone. Aunt Lola didn’t blink. She looked at the flat of strawberries on the counter meant for shortcakes, shrugged, and said, “We’ll improvise.” She tossed them in the blender, but instead of just water, she added a glug of the evaporated milk from the pantry and a spoonful of the “sweet stuff” (her code for condensed milk) she used for her coffee. What emerged was a creamy, pink potion we’d never tasted before. We were skeptical for about two seconds. That first creamy, cold, strawberry-sweet sip was a game-changer. It wasn’t just a drink; it was an event. To this day, the taste of this agua fresca isn’t just about strawberries—it’s about cool tile under bare feet, the sound of laughter echoing in a crowded kitchen, and the magic that happens when someone looks at what they have and decides to make something wonderful with it.
Gathering Your Flavor Squad
Here’s the beautiful part: this recipe is all about simple ingredients doing extraordinary things. Let’s break down the team that’s going to make this magic happen.
- 1 lb fresh strawberries, hulled: The star of the show! Look for berries that are bright red, fragrant, and shiny. The better the berry, the sweeter and more vibrant your drink. Chef’s Tip: Can’t find good fresh ones? A 16-oz bag of frozen strawberries works in a pinch! No need to thaw—just blend a little longer. You’ll lose a touch of the fresh flavor, but you’ll gain a frostier, slushier texture that’s divine.
- 1 (12 oz) can evaporated milk: This is our secret weapon for creaminess without overwhelming thickness. It’s milk that’s had about 60% of the water removed, giving it a rich, slightly caramelized flavor. Substitution Insight: For a dairy-free version, full-fat canned coconut milk is a fantastic, tropical-tasting swap.
- ½ cup sweetened condensed milk: This is our sweetener and body-builder. It adds a lovely, velvety texture and that unmistakable, comforting milky sweetness. Pro Insight: Want to control the sugar? You can reduce this to ⅓ cup, especially if your strawberries are super sweet. You can always add more after blending!
- 6 cups cold water: We’re using it in two stages. The first bit helps the blender create a super smooth purée, and the rest we stir in to dilute and refresh. Chef’s Hack: For an extra-chilly result, use ice-cold water or even throw a handful of ice cubes into the blender with the first stage of water.
- For Serving:
- ½ cup fresh strawberries, diced: A little fresh garnish goes a long way for texture and visual pop.
- Ice cubes: The essential foundation for any proper agua fresca.
Let’s Make Some Magic: Step-by-Step
Ready to blend up some joy? Follow these simple steps, and I’ll walk you through all my little kitchen hacks to ensure perfection.
- Prep Your Strawberries: Give your strawberries a good rinse under cool water. To hull them (remove the green stem and core), I have two favorite tricks. You can use a paring knife to carve out a small cone-shaped section from the top. Or, my quick-and-dirty method: just poke a sturdy straw (like a reusable metal one) through the bottom of the berry and push it straight up—the stem and core pop right out! It’s oddly satisfying.
- Blend the Dreamy Base: Toss your hulled strawberries into the blender. Pour in the entire can of evaporated milk, the ½ cup of sweetened condensed milk, and 2 cups of the cold water. Now, put the lid on firmly—I’ve learned this lesson the messy way!—and blend on high for a good 45-60 seconds. You’re looking for a completely smooth, homogenous, pale pink liquid. No strawberry chunks allowed! This is the creamy heart of the drink.
- Dilute & Mix with Love: Grab your favorite large pitcher. I’m partial to a glass one so you can see that gorgeous color. Pour the blended strawberry cream through a fine-mesh strainer into the pitcher. Wait, strain it? This is my optional but highly recommended pro-move. It catches any tiny seeds or remaining pulp, giving you the silkiest, smoothest texture imaginable. If you don’t mind a bit of texture, you can skip it! Now, add the remaining 4 cups of cold water to the pitcher.
- Stir & Chill: Take a long spoon and give everything a gentle but thorough stir. This is where it all comes together. Now, for the hardest part: patience. Pop the pitcher in the fridge for at least 1 hour. This chilling time is non-negotiable, friends. It allows the flavors to marry, mellow, and become utterly irresistible. The creamy elements fully integrate with the fruit and water, transforming it from a blended mixture into a cohesive, incredible drink.
- Serve & Celebrate: When you’re ready to serve, grab some glasses and fill them to the brim with ice. Give the pitcher one last good stir (the cream can separate slightly as it sits, which is totally normal), and pour that beautiful pink elixir over the ice. Top each glass with a sprinkle of the diced fresh strawberries for that perfect finish. Now, take that first sip. See? I told you. Magic.
How to Serve It Like a Pro
Presentation is part of the fun! While this drink is a star in a simple mason jar, here are a few ways to make it feel extra-special:
First, choose your vessel. Tall, skinny highball glasses show off the beautiful color. Wide, stemless wine glasses feel elegant. For a party, I love using those large, colorful Mexican glass tumblers—they just feel right.
Next, garnish with gusto. Beyond the diced strawberries, try a small sprig of fresh mint or basil for an herbal aroma that plays beautifully with the strawberry. A thin slice of lime on the rim adds a nice touch. For a fun, sweet-and-salty rim, moisten the glass rim with a strawberry slice, then dip it in a mix of coarse sugar and a tiny pinch of Tajín chili-lime seasoning.
Finally, pair it perfectly. This Creamy Strawberry Agua Fresca is the ultimate partner for spicy foods like tacos al pastor or grilled fajitas—the cool creaminess is the perfect foil for heat. It’s also fantastic with a simple brunch spread, alongside breakfast burritos or a stack of pancakes. Honestly, it doesn’t need any accompaniment at all. A sunny spot and a good book will do just fine.
Make It Your Own: Fun Flavor Twists
Once you’ve mastered the classic, the kitchen playground opens up! Here are a few of my favorite riffs on this creamy theme:
- Tropical Creamsicle: Swap the strawberries for 2 cups of fresh or frozen mango and pineapple chunks. Add a ½ teaspoon of vanilla extract or vanilla bean paste to the blender. It’s a vacation in a glass.
- Berry Medley Bliss: Use a mix of strawberries, raspberries, and blackberries (still aiming for 1 lb total). The raspberries add a beautiful tartness, and the drink turns a stunning deep ruby color.
- Herbal Elegance: Add 4-5 large fresh basil leaves or a few sprigs of fresh mint to the blender with the strawberries. The herbaceous note cuts the sweetness and adds a wonderfully sophisticated layer of flavor.
- Dairy-Free Delight: As mentioned, use full-fat canned coconut milk instead of evaporated milk, and swap the sweetened condensed milk for an equal amount of coconut cream sweetened with a touch of agave or maple syrup to taste. It’s rich, tropical, and totally plant-based.
- Adult Upgrade: For a fun cocktail base, add a shot (1.5 oz) of vodka, white rum, or even tequila blanco to each glass before pouring in the agua fresca. Stir gently and garnish with a lime wedge.
Beau’s Kitchen Notes & Stories
This recipe has been a living thing in my kitchen. The first time I made it for a big family potluck, I was so nervous. Would people think it was too weird? Too creamy? I shouldn’t have worried. The pitcher was empty in 20 minutes, and I had three cousins asking for the recipe. My biggest “oops” moment came when I accidentally used a whole can of sweetened condensed milk instead of half a cup. Let me tell you, it was like drinking strawberry frosting! Delicious, but a one-sip wonder. We ended up diluting it with another can of evaporated milk and more water, which just meant we had double the batch. A happy accident!
Over time, I’ve learned that the quality of your strawberries makes the single biggest difference. If they’re bland, the drink will be bland. A tiny squeeze of fresh lime juice (about a tablespoon) can brighten up sub-par berries beautifully. Also, this drink’s flavor actually gets better on day two, so feel free to make it ahead for a party. Just remember to stir, stir, stir before serving!
Your Questions, Answered
Q: My drink separated after sitting in the fridge. Did I do something wrong?
A: Not at all! This is totally normal due to the dairy components. It’s not a mistake; it’s just science. Simply give the pitcher a vigorous stir or a few good shakes before pouring each time, and it will come right back together. No harm, no foul.
Q: Can I make this less sweet?
A> Absolutely. You have a couple of levers to pull. First, reduce the sweetened condensed milk to ⅓ cup. You can also add the juice of half a lime to the blender to balance the sweetness with a little acidity. Taste after blending with the water and see if you want to add a touch more sweetener.
Q: How long does it keep in the fridge?
A> It’s best enjoyed within 2-3 days. The fresh fruit flavor will be most vibrant on days 1 and 2. Always store it in a sealed pitcher or container. I don’t recommend freezing it, as the texture can become grainy when thawed.
Q: Can I use a different sweetener, like sugar or honey?
A> You can, but you’ll lose some of the signature creamy texture that the condensed milk provides. If you want to try, dissolve ½ cup of white sugar or honey in 1 cup of hot water to make a simple syrup. Let it cool, then use it in place of the sweetened condensed milk, and increase your evaporated milk by an extra ¼ cup for body.
Creamy Strawberry Agua Fresca : Refreshing Mexican-Inspired Drink
Description
Creamy Strawberry Agua Fresca (Strawberries & Cream in a Glass)
When classic agua fresca meets strawberries-and-cream magic, you get this: silky, refreshing, lightly indulgent perfection. It’s bright and fruity like traditional agua fresca, but with a dreamy smoothness that makes every sip feel special.
Best part? You’re 10 minutes away from pouring it over ice.
Ingredients
-
1 lb fresh strawberries, hulled
-
1 (12 oz) can evaporated milk
-
½ cup sweetened condensed milk (adjust to taste)
-
6 cups cold water, divided
-
Ice, for serving
-
½ cup diced fresh strawberries (optional garnish)
Instructions
1. Prep the Strawberries
Rinse and hull strawberries.
(Pro tip: Push a straw up through the bottom to pop the stem out cleanly.)
2. Blend the Creamy Base
In a blender, combine:
-
Strawberries
-
Evaporated milk
-
Sweetened condensed milk
-
2 cups cold water
Blend on high for 45–60 seconds until completely smooth.
3. Strain (Optional but Recommended)
Pour through a fine mesh strainer into a large pitcher.
This removes seeds and gives you an ultra-silky texture.
4. Add Remaining Water
Stir in the remaining 4 cups cold water.
Mix thoroughly.
5. Chill
Refrigerate at least 1 hour.
This step lets flavors fully meld and improves texture.
6. Serve
-
Fill glasses with ice
-
Stir pitcher well (separation is normal)
-
Pour and garnish with diced strawberries
Sip. Smile. Repeat.
Notes
-
For less sweet: use ⅓ cup condensed milk
-
Add 1 tablespoon fresh lime juice to brighten flavor
-
Taste before chilling and adjust
A Quick Nutritional Glance
Hey, I’m all about balance! This is a treat, a celebration in a glass. Here’s a rough estimate of what’s in each serving (based on 8 servings from the recipe). Remember, this is just an estimate, and your specific ingredients may vary slightly.
Per Serving: Calories: ~190 | Carbohydrates: 28g | Sugar: 24g (includes naturally occurring sugars from the strawberries and the added sweeteners) | Fat: 6g | Protein: 4g | Sodium: 80mg
The majority of the sugar comes from the natural fructose in the strawberries and the sweetened condensed milk. To reduce the sugar impact, you can use the less-sweet variation tips above, or simply savor a smaller glass! This drink is a wonderful source of vitamin C from the fresh strawberries, and it’s a hydration hero on a hot day.
Final Thoughts
And there you have it, friend. My not-so-secret, utterly delicious formula for turning a simple pound of strawberries into pure, drinkable joy. This Creamy Strawberry Agua Fresca is more than a recipe; it’s a vibe. It’s the sound of ice clinking, the feeling of a cold glass in your hand, and the taste of sunshine and sweet memories.
I hope this recipe finds its way into your summer rotations, your party pitchers, and your quiet afternoon moments of respite. The kitchen is my favorite place to connect, and sharing this with you feels like having you right here at the counter with me. If you make it—and I really hope you do—tag me over on @Feastical or shoot me an email. I love seeing your creations and hearing your stories.
Now, go blend up some happiness.
Clickable Pin Titles
Option 1 (Sensory & Emotional):
Sip, Smile, Repeat: The Creamiest Strawberry Drink of Summer
Option 2 (Descriptive & Keyword Rich):
Creamy Strawberry Agua Fresca (Better Than a Smoothie!)
Pinterest Pin Description (SEO-Optimized)
Cool off with the ultimate summer sipper! This Creamy Strawberry Agua Fresca is a delightful twist on the classic Mexican drink. Blended with fresh strawberries, evaporated milk, and sweetened condensed milk, it’s impossibly creamy, perfectly sweet, and incredibly refreshing. It tastes like a dreamy strawberry milkshake but light enough to enjoy all day long. Made in just 10 minutes with simple ingredients, this non-alcoholic drink is perfect for backyard BBQs, taco nights, baby showers, or lazy afternoons on the porch. Learn the secret to the silkiest texture and get tips for fun flavor twists. Save this pin for your next hot weather craving!
Homemade Sloppy Joe Recipe : A Comfort Food Classic Made Better
Your New Favorite Dinner Just Got a Glow-Up
Hey there, friend! Let’s talk about one of life’s great, messy pleasures. I’m not talking about a fancy five-course meal. I’m talking about that hearty, saucy, laugh-until-you-get-it-on-your-shirt kind of meal that turns an ordinary Tuesday into a mini-celebration. That’s right, we’re diving fork-first into the glorious world of Homemade Sloppy Joes.
Now, I know what you might be thinking. “Beau, I’ve had Sloppy Joes from a can. They’re… fine.” And you’re right. They are fine. But friend, “fine” isn’t the standard in my kitchen. We’re chasing “fantastic.” We’re aiming for “where-has-this-been-all-my-life” delicious. This recipe is my promise to you: everything you loved about that childhood classic—the sweet, tangy, savory sauce, the satisfying mess, the pure comfort—but made with real ingredients and a whole lot of love. It’s the taste of nostalgia, but all grown up.
This isn’t just a quick dinner; it’s a mood. It’s about gathering around the table, passing the napkins (you’ll need them), and sharing that “oh wow” look when everyone takes their first bite. In about 25 minutes, you can transform a humble pound of ground beef and a few pantry staples into a meal that feels like a warm hug. So, tie on your apron, grab your favorite skillet, and let’s make some magic happen. Your spatula and I are here to guide you every step of the way.
A Messy Memory & The Birth of a Better “Joe”
My love affair with Sloppy Joes started, like many great food stories do, in my grandma’s kitchen. Every Sunday after church, she’d fire up her big, well-seasoned cast iron skillet. The smell of onions and beef sizzling would mix with the sound of her humming an old hymn. She didn’t use a can; she’d shake a little of this and a dash of that with the confidence of a culinary wizard.
I was her official “spoon licker” (a title I wore with immense pride). The rule was simple: I could taste the sauce straight from the spoon, but I had to promise not to drip on my “good church clothes.” I think I broke that promise every single week. There was always a tiny, tell-tale splash of tomatoey goodness on my collar, a badge of honor from my kitchen apprenticeship. That sweet, tangy, deeply savory flavor wasn’t just food; it was the taste of family, of laughter, of a weekend well-spent.
This recipe is my tribute to those Sundays. It’s my attempt to bottle that feeling of pure, unpretentious joy. It’s a little more refined than Grandma’s (she was a heavy hand with the vinegar!), but the soul is exactly the same. It’s about creating that same warm, welcoming, and yes, slightly messy, memory in your own kitchen today.
Gathering Your Flavor Dream Team
Here’s the beautiful part: the magic comes from simple, honest ingredients. No mysterious “Sloppy Joe seasoning” packets here. Just real stuff that works together like, well, a dream team. Let’s break it down.
- 1 lb ground beef (or ground turkey): The foundation! I prefer 85/15 beef for a great balance of flavor and not too much grease. For a lighter twist, ground turkey is a fantastic substitute—just add an extra tablespoon of Worcestershire for a flavor boost.
- 1 small onion, finely chopped: Our aromatic MVP. It melts into the sauce, adding a sweet, savory depth. No green pepper? Use a little extra onion or even some finely diced celery.
- 1/2 green bell pepper, diced: This isn’t just filler! It adds a fresh, slightly sweet crunch and a pop of color. Red or yellow bell peppers work beautifully, too, for a sweeter note.
- 2 garlic cloves, minced: Because everything is better with garlic. It’s the secret whisper of flavor in the background. Pro tip: smash the clove with the flat of your knife first—the skin will practically fall off.
- 3/4 cup ketchup: Our sweet and tangy base. This is where a good-quality ketchup shines. In a pinch, you can use tomato sauce plus an extra teaspoon of brown sugar and a splash of vinegar.
- 1 tablespoon brown sugar: The ultimate flavor balancer. It doesn’t make it *sweet*; it just rounds out the acidity from the tomatoes and Worcestershire, creating that “can’t-stop-eating-it” quality.
- 1 tablespoon yellow mustard: Trust me on this. It adds a tangy, bright note that cuts through the richness. Dijon mustard is a great gourmet swap for a more complex kick.
- 1 tablespoon Worcestershire sauce: The umami powerhouse! This fermented condiment is the key to that deep, savory, “what-is-that-amazing-flavor” depth. Lea & Perrins is my go-to.
- 1/2 teaspoon salt & 1/4 teaspoon black pepper: Season as you go! We’ll add these with the sauce. Always taste at the end—you can add more, but you can’t take it out.
- 1/4 cup water: The simple secret to the perfect saucy consistency. It helps everything meld together and simmer into saucy perfection.
- 4 hamburger buns, toasted: The vessel for our masterpiece. Toasting is non-negotiable! It creates a crucial barrier against sogginess. Brioche, potato, or classic sesame seed—pick your favorite.
- Optional toppings: This is where you play! Pickles for crunch, shredded cheddar for melty goodness, a cool, creamy coleslaw for contrast… go wild!
Let’s Get Cooking: Building Your Saucy Masterpiece
Okay, team! Everything is prepped and ready. This is where the fun begins. We’re going to build layers of flavor, one simple step at a time. Follow along, and you’ll have a skillet full of happiness in no time.
- Brown the Beef: Grab your largest skillet (I love my trusty cast iron for this) and place it over medium heat. No oil needed—the beef has its own. Add the ground beef and, using a wooden spoon or spatula, break it apart into small crumbles. Cook until it’s no longer pink, about 5-7 minutes. This isn’t just about cooking it through; we’re creating little crispy, browned bits of flavor. Once it’s browned, carefully drain off the excess fat. I tilt the skillet and use a spoon, or pour it into an old can. Leave just a teaspoon or so for the next step.
- Sizzle the Veggies: Add the chopped onion, diced bell pepper, and minced garlic right into the skillet with the beef. The residual fat and heat will wake them up! Cook, stirring often, for 3-4 minutes. You’ll know they’re ready when the onions turn translucent and the whole kitchen smells incredible. This step softens their bite and lets their natural sugars start to caramelize.
- Create the Sauce: This is the magic moment! Reduce the heat to medium-low. Pour in the ketchup, sprinkle the brown sugar, add the mustard, Worcestershire sauce, salt, pepper, and that 1/4 cup of water. Now, stir it all together until every crumble of beef is coated in that glorious, ruby-red sauce. Take a second to admire your work. It already looks amazing.
- The Simmer (The Most Important Step!): Here’s my #1 chef hack: don’t rush the simmer. Let the mixture bubble gently, uncovered, for 8-10 minutes. Stir it occasionally to prevent sticking. Watch as it transforms from a loose, soupy mixture into a thick, glossy, perfectly clingy Sloppy Joe filling. The water evaporates, the flavors intensify and marry, and the sauce reduces to saucy perfection. This is what separates the “good” from the “great.”
- Toast & Assemble: While the filling is simmering, split your buns and toast them. Use a toaster, the broiler, or even a dry skillet over medium heat. A toasted bun is your best defense against a sandwich collapse! Give the filling one final taste—adjust salt or pepper if needed. Then, pile it high onto those warm, toasted buns. Top with your favorite extras and serve immediately with a huge smile.
How to Serve It Up in Style
Presentation matters, even with a gloriously messy dish like this! Here’s how I like to plate up these Sloppy Joes to make dinner feel like an event.
First, I always serve them open-faced. Pile the filling on the bottom bun, add your toppings (I’m a pickle and cheese guy), and place the top bun proudly to the side. It lets everyone see the gorgeous filling and build their perfect bite. For sides, you can’t go wrong with classic, crispy oven-baked steak fries or a handful of ridged potato chips for that ultimate crunch contrast. If you want to balance the richness, a simple vinegar-based coleslaw or a bright, crunchy green salad with a tangy vinaigrette is absolutely perfect. And napkins. Lots and lots of napkins. I like to put a whole stack in the middle of the table—it’s part of the fun!
Make It Your Own: 5 Delicious Twists
The beauty of this recipe is its flexibility. Once you’ve mastered the classic, the kitchen playground opens up! Here are a few of my favorite riffs.
- The “Sweet Heat” Joe: Add 1-2 finely chopped jalapeños (seeds removed for less heat) with the bell pepper, and swap the brown sugar for 2 tablespoons of maple syrup. The sweet, smoky, spicy combo is unbelievable.
- The “Almost BBQ” Joe: Replace half the ketchup with your favorite BBQ sauce, add a teaspoon of smoked paprika with the sauce ingredients, and serve with crispy onion strings on top. It’s a beautiful hybrid.
- The “Cozy Mushroom” Joe: Finely chop 8 oz of cremini mushrooms and cook them down with the onions until they release their liquid and brown. This adds an incredible earthy, umami depth and stretches the meat further.
- The “Shepherd’s Pie” Remix: Skip the buns! Spoon the finished filling into a baking dish, top with a layer of creamy mashed potatoes (leftovers work great), sprinkle with cheddar, and broil until golden and bubbly. Leftover heaven.
- The “Lentil & Veggie” Powerhouse: For a plant-based version, swap the beef for 2 cups of cooked brown or green lentils. Use a splash of soy sauce instead of Worcestershire (check for vegan versions), and add an extra 1/2 cup of diced veggies like carrots or zucchini. Hearty and delicious!
Beau’s Kitchen Confidential
This recipe has been my dinner-in-a-pinch superhero for years, and it’s evolved with me. The biggest lesson? Don’t skip the water. I once tried to make it “quicker” by leaving it out, and I ended up with a thick, pasty mixture that tasted more like seasoned meat than a saucy Sloppy Joe. The water is essential for giving the sauce time to develop and reduce properly.
Another funny story: I once tried to get fancy and serve these on little slider buns at a football party. Big mistake. They were so tiny and the filling so abundant that it was a comical, delicious disaster. People were laughing, sauce was everywhere, and it was honestly the hit of the party. Sometimes, the mess is the message. Embrace it!
Your Questions, Answered
Q: Can I make Sloppy Joes ahead of time?
A: Absolutely! In fact, I think they taste even better the next day. Let the filling cool completely, then store it in an airtight container in the fridge for up to 3 days. Reheat gently in a saucepan over low heat, adding a splash of water or broth if it seems too thick.
Q: My filling is too runny / too thick. Help!
A: No panic! If it’s too runny, just let it simmer uncovered for a few more minutes until it reduces to your liking. If it’s too thick (or if you’re reheating), stir in a tablespoon or two of water, broth, or even tomato juice until it’s saucy again.
Q: Can I freeze the Sloppy Joe filling?
A: You bet. Freeze the cooled filling in a freezer-safe container or bag for up to 3 months. Thaw overnight in the fridge and reheat as above. It’s a lifesaver for future busy nights.
Q: What’s the best bun to use?
A: You need a bun with structure! Soft, sturdy potato buns, brioche buns, or classic sesame seed hamburger buns are all winners. Avoid super airy or thin buns—they’ll disintegrate under the saucy weight. And remember: TOAST THEM!
Homemade Sloppy Joe Recipe : A Comfort Food Classic Made Better
Description
Homemade Sloppy Joes (Better-Than-the-Can Classic)
Your favorite messy, saucy sandwich just got a serious upgrade. This Homemade Sloppy Joe recipe keeps everything you loved as a kid — sweet, tangy, savory comfort — but swaps the can for real ingredients and bold, balanced flavor.
It’s nostalgic. It’s hearty. It’s ready in about 25 minutes. And yes… you’ll need extra napkins.
Ingredients
For the Filling
-
1 lb ground beef (85/15 recommended) or ground turkey
-
1 small onion, finely chopped
-
½ green bell pepper, diced
-
2 garlic cloves, minced
For the Sauce
-
¾ cup ketchup
-
1 tablespoon brown sugar
-
1 tablespoon yellow mustard
-
1 tablespoon Worcestershire sauce
-
½ teaspoon salt
-
¼ teaspoon black pepper
-
¼ cup water
For Serving
-
4 sturdy hamburger buns (potato, brioche, or sesame seed)
-
Optional toppings: pickles, shredded cheddar, coleslaw
Instructions
1. Brown the Beef
Heat a large skillet over medium heat.
Add ground beef and cook 5–7 minutes, breaking it into small crumbles, until no longer pink and nicely browned.
Drain excess grease, leaving about 1 teaspoon in the pan for flavor.
2. Sauté the Vegetables
Add chopped onion, bell pepper, and garlic to the skillet.
Cook 3–4 minutes, stirring often, until:
-
Onions are soft and translucent
-
Peppers are tender
-
Garlic is fragrant
3. Build the Sauce
Reduce heat to medium-low.
Add:
-
Ketchup
-
Brown sugar
-
Mustard
-
Worcestershire sauce
-
Salt & pepper
-
Water
Stir until everything is evenly coated.
4. Simmer (Don’t Skip This!)
Let the mixture simmer gently, uncovered, for 8–10 minutes, stirring occasionally.
This step:
-
Thickens the sauce
-
Deepens the flavor
-
Creates that perfect clingy texture
If it gets too thick, add a splash of water.
If too thin, let it simmer a little longer.
5. Toast the Buns
Toast buns in a toaster, under the broiler, or in a dry skillet.
Toasting creates a barrier that prevents soggy sandwiches.
6. Assemble
Spoon the hot filling generously onto the bottom bun.
Add toppings if desired, crown with the top bun, and serve immediately.
Notes
-
Fridge: Store filling up to 3 days
-
Freezer: Freeze up to 3 months
-
Reheat gently with a splash of water if needed
Sloppy Joes actually taste even better the next day.
Let’s Talk Nourishment
While this is pure comfort food, it’s also made with real, wholesome ingredients. Here’s a basic nutritional breakdown per serving (filling on a standard hamburger bun, without extra toppings). Remember, these are estimates—your specific ingredients may vary!
Approximate Nutrition Per Serving: Calories: 410 | Protein: 23g | Fat: 22g | Carbohydrates: 32g | Fiber: 2g | Sugar: 14g
To lighten it up, you can easily use 93% lean ground beef or ground turkey, reduce the brown sugar by half, and choose whole-wheat buns. But you know what? Sometimes, your soul needs nourishing, too. This meal is about balance, joy, and sharing good food with good people. Enjoy every delicious, messy bite.
Final Thoughts
And there you have it! Your guide to a Homemade Sloppy Joe that’s miles above anything from a can. This recipe is more than just a list of ingredients and steps; it’s an invitation to slow down, to create something with your own two hands, and to gather your people around the table for a meal that’s guaranteed to spark joy (and maybe a few laughs over spilled sauce).
I hope this recipe becomes a regular in your rotation, a dish your family requests by name, and your own go-to for feeding a hungry crowd without stress. Food has this incredible power to connect us, and a recipe like this is a perfect starting point. Now, I want to hear from you! Did you add a special twist? Did your kids go back for seconds? Snap a pic of your messy, beautiful creation and tag me over on Instagram @Feastical—I love seeing your kitchen wins.
Until next time, keep your skillet hot and your heart full. Happy cooking, friends!
– Beau
Pin Title: Homemade Sloppy Joe Recipe | Easy 25-Minute Comfort Food
Pin Description: This easy Homemade Sloppy Joe recipe is the ultimate comfort food dinner! Made from scratch with simple ingredients in just 25 minutes, it’s so much better than the canned version. Savory ground beef and veggies in a sweet, tangy, and perfectly seasoned sauce, piled high on a toasted bun. Discover step-by-step instructions, chef tips for the perfect saucy consistency
Sheet Pan Steak Fajitas: One-Pan Tex-Mex Flavor in 30 Minutes
Sheet Pan Steak Fajitas: Your New 30-Minute Weeknight Hero
Hey friends, Beau here! Let’s talk about the universal dinner dilemma: you want something that tastes like you fussed over it for hours, but you also want to be chilling on the couch with your favorite show in, oh, about 30 minutes flat. Sound familiar? I’ve been there more times than I’ve lost my favorite spatula (and that’s saying something).
That’s exactly why I’m head-over-heels for these Sheet Pan Steak Fajitas. This isn’t just a recipe; it’s your ticket to a vibrant, sizzling, flavor-packed fiesta with exactly one pan to wash. We’re taking juicy, marinated skirt steak and tossing it with rainbow bell peppers and sweet onions, then letting the oven work its magic. The result? Those crave-able, slightly charred edges, tender meat, and a kitchen that smells like your favorite Tex-Mex spot. It’s the kind of meal that turns an ordinary Tuesday into a mini celebration. So, tie on your apron, crank up the oven, and let’s make dinner the easiest, most delicious part of your day.
The Sizzle That Started It All
My love affair with fajitas began long before I ever picked up a chef’s knife. Picture this: a bustling, noisy family reunion in my grandma’s backyard, where the grown-ups were laughing and the kids were chasing fireflies. Then, you’d hear it—the legendary, thunderous *SSSSSSZZZZLE* as my uncle would bring a steaming, smoking cast iron platter of sizzling steak and peppers straight from the grill to the picnic table. That sound was the dinner bell, the call to arms. We’d all scramble, grabbing tortillas and forming an assembly line of toppings.
It was messy, it was loud, and it was pure joy. Everyone built their perfect bite. This sheet pan version is my weeknight love letter to that memory. It captures all that bold flavor and communal spirit but in a way that fits into our busy lives. No special platter needed—just a humble sheet pan and a crowd of happy people (or just one very happy you) ready to dig in.
Gathering Your Fiesta in a Bowl
Here’s the beautiful part: the ingredient list is simple, but each one plays a starring role. This is where the flavor foundation is built!
- 1.5 lbs flank or skirt steak: My go-to is skirt steak for its incredible beefy flavor and loose grain that soaks up marinade like a dream. Flank steak is a fantastic, leaner alternative. The key? Slice it against the grain later for maximum tenderness.
- 3 bell peppers (mixed colors): Don’t just grab green! Using red, yellow, and orange adds a sweetness and visual confetti that makes the dish pop. They caramelize beautifully in the oven.
- 1 large red onion: It holds its shape better than yellow onion when roasted and offers a milder, sweeter punch.
- 3 tbsp olive oil: Our cooking fat and marinade base. It helps the spices cling and promotes gorgeous char.
- 2 tbsp fresh lime juice: Non-negotiable! The acid tenderizes the steak and adds a bright, fresh zing. Bottled juice just doesn’t have the same magic.
- The Spice Brigade (2 tsp chili powder, 1.5 tsp cumin, 1 tsp smoked paprika, 1 tsp garlic powder, ½ tsp onion powder, 1 tsp kosher salt, ½ tsp black pepper): This is the soul of the dish. The smoked paprika is my secret weapon—it gives that “grilled” depth without a grill. Feel free to add a pinch of cayenne if you like heat!
- 8-10 flour or corn tortillas: Warm them up! It makes all the difference. I’ll show you how below.
- For Serving: This is where you shine! Fresh cilantro, lime wedges, sour cream, guacamole, shredded cheese—set it all out and let everyone go to town.
Let’s Make Some Magic (Step-by-Step)
Ready? This is where the fun happens. I’ll walk you through every step with my favorite chef hacks.
- Fire Up & Prep: Preheat your oven to a hot 425°F (220°C). This high heat is crucial for getting caramelization instead of steaming. While it heats, slice your steak against the grain into strips (about ½-inch thick). This shortens the muscle fibers, guaranteeing tender bites. Slice your peppers and onion into similar-sized strips so they cook evenly.
- The Flavor Toss: In a large bowl (bigger than you think you need!), combine the steak, peppers, and onion. Drizzle with the olive oil and fresh lime juice, and give it a quick toss. Now, in a small bowl, mix all your dry spices and salt together. This ensures every bit gets evenly coated. Sprinkle this spice mix over the meat and veggies. Now, roll up your sleeves and use your hands to toss and massage everything together. Chef’s Hack: Let it sit for 10 minutes if you have time. Even a short marinate makes a difference!
- Pan & Roast: Dump everything onto a large, rimmed baking sheet. Spread it out into a single, uncrowded layer. This is key! If things are piled on top of each other, they’ll steam. We want contact with the hot pan for that good char. Pop it into the preheated oven.
- The Perfect Roast: Set your timer for 8 minutes. When it goes off, pull the sheet pan out (careful, it’s hot!) and give everything a really good stir with a spatula. This moves the pieces around so they cook and brown evenly. Put it back in for another 7-10 minutes. You’re looking for the steak to be browned and cooked to your liking (I do about 15 mins total for medium) and the veggies to have some gorgeous blackened spots.
- Rest & Slice: Take the pan out and let the steak rest right there for 2-3 minutes. This lets the juices redistribute. Then, transfer the steak strips to a cutting board and quickly slice them into bite-sized pieces against the grain (yes, again! It’s that important).
- The Grand Finale: Toss those beautiful, juicy steak pieces right back onto the sheet pan with the peppers, onions, and all those incredible spicy pan juices. Give it one final gentle mix.
- Warm Your Tortillas: While the steak rests, warm your tortillas. My favorite methods: directly over a gas flame for a few seconds each side, or wrapped in a damp paper towel and microwaved for 30 seconds. You can also wrap them in foil and pop them in the oven for the last 5 minutes of cooking.
How to Serve It Up Feastical-Style
Presentation is part of the fun! I like to bring the sizzling sheet pan straight to the table (on a trivet, please!)—it always gets “oohs” and “aahs.” Pile the warm tortillas in a basket lined with a kitchen towel to keep them cozy. Then, set out all your toppings in little bowls: a big bowl of chunky guacamole, a dish of cooling sour cream, a heap of shredded cheese, a pile of fresh cilantro, and plenty of lime wedges for an extra squeeze.
Encourage everyone to build their own perfect fajita. My perfect bite? A warm flour tortilla, a generous scoop of the steak and veggie mix, a dollop of guac, a sprinkle of cheese, a few cilantro leaves, and a huge squeeze of lime. Fold it up and enjoy the masterpiece you just created with minimal cleanup!
Mix It Up! Delicious Twists on the Classic
This recipe is a beautiful canvas. Play with it!
- Chicken or Shrimp Fajitas: Swap the steak for 1.5 lbs of boneless, skinless chicken breasts (slice thin) or large peeled shrimp. Cook time is similar—just cook until chicken is 165°F or shrimp are pink and opaque.
- “Fajita Bowl” Style: Skip the tortillas! Serve the steak and veggie mixture over a bed of cilantro-lime rice or creamy black beans. Top with all the fixings for a fantastic, gluten-free meal.
- Vegetarian Power: Replace the steak with a can of drained and rinsed black beans and an extra bell pepper. You might want to add a tablespoon of taco seasoning to the veggies for an extra flavor boost.
- Spicy Chipotle Kick: Add 1-2 tablespoons of minced chipotle peppers in adobo sauce to the marinade. It adds an incredible smoky heat.
- Breakfast Fajitas: Leftovers are gold! Sauté them in a pan the next morning and serve with scrambled eggs for the ultimate breakfast tacos.
Beau’s Kitchen Notes
This recipe has become a Feastical staple because it’s so forgiving. The first time I tested it, I got a little overzealous with the chili powder and made my own eyes water! Lesson learned: you can always add more heat at the end. I also used to be nervous about overcooking the steak, but the high heat and quick cook time are foolproof. Over the years, I’ve learned that the real “hack” is in the slicing—against the grain, always!—and not crowding the pan. This dish has saved me on countless busy nights and even impressed my most food-snobby friends. If I can do it, you absolutely can.
Your Questions, Answered
Q: Can I make this ahead of time?
A: You can! Slice the steak and veggies and mix the dry spices up to a day ahead. Store them separately in the fridge. When ready to cook, combine, toss with oil and lime, and roast. Easy-peasy.
Q: My veggies are soggy. What happened?
A: The most common culprit is overcrowding the pan. If the pieces are piled on top of each other, they steam instead of roast. Use two sheet pans if needed! Also, make sure your oven is fully preheated.
Q: Can I use frozen bell peppers?
A: I don’t recommend it for this recipe. Frozen peppers release too much water and will prevent that beautiful, dry-heat char we’re after. Fresh is best here.
Q: How do I know when the steak is done?
A> The best tool is an instant-read thermometer. For medium-rare, aim for 130-135°F; medium is 140-145°F. Remember, it will continue to cook a bit while resting. Visually, the steak should be browned on the outside with no gray.
Sheet Pan Steak Fajitas: One-Pan Tex-Mex Flavor in 30 Minutes
Description
When you want bold, restaurant-style flavor without standing over the stove all night, these Sheet Pan Steak Fajitas deliver. Juicy strips of steak roast alongside colorful bell peppers and onions, all coated in smoky spices and bright lime. Everything cooks on one pan, which means easy prep and even easier cleanup.
Ingredients
For the Fajitas
-
1.5 lbs flank steak or skirt steak
-
3 bell peppers (mixed colors), sliced
-
1 large red onion, sliced
-
3 tablespoons olive oil
-
2 tablespoons fresh lime juice
Spice Mix
-
2 teaspoons chili powder
-
1½ teaspoons ground cumin
-
1 teaspoon smoked paprika
-
1 teaspoon garlic powder
-
½ teaspoon onion powder
-
1 teaspoon kosher salt
-
½ teaspoon black pepper
For Serving
-
8–10 flour or corn tortillas
-
Fresh cilantro
-
Lime wedges
-
Sour cream or Greek yogurt
-
Guacamole
-
Shredded cheese
Instructions
1. Preheat Oven
Preheat oven to 425°F (220°C).
Line a large rimmed baking sheet with parchment paper or foil for easy cleanup.
2. Slice the Steak
Slice steak into ½-inch strips against the grain for maximum tenderness.
Slice bell peppers and onion into similar-sized strips.
3. Season Everything
In a large bowl, combine:
-
Steak strips
-
Bell peppers
-
Onion
Drizzle with olive oil and lime juice.
In a small bowl, mix all spice ingredients together.
Sprinkle over the steak and vegetables. Toss well to coat evenly.
Let sit for 5–10 minutes if time allows.
4. Spread on Sheet Pan
Spread everything in a single layer on the baking sheet.
Do not overcrowd — use two pans if necessary.
5. Roast
Roast for 8 minutes, then stir.
Return to oven and cook another 7–10 minutes, until:
-
Steak reaches desired doneness
-
Vegetables are tender with slightly charred edges
For medium steak, aim for 140–145°F internal temperature.
6. Rest & Finish
Let steak rest 2–3 minutes.
If needed, slice into smaller bite-sized pieces (again, against the grain).
Toss everything together with the pan juices.
7. Warm Tortillas
-
Wrap in foil and heat in oven for 5 minutes
OR -
Microwave in a damp paper towel for 30 seconds
OR -
Warm directly over a gas flame for slight charring
Notes
-
Slice against the grain — this is the key to tender steak.
-
High heat is important for caramelization.
-
Don’t overcrowd the pan or the veggies will steam.
-
Use an instant-read thermometer for perfect doneness.
-
Add sliced jalapeños before roasting for extra heat.
Nutritional Info (A Quick Note!)
Here’s a general breakdown for one serving (approx. ¼ of the steak/veggie mixture with two corn tortillas), without toppings. Remember, your specific numbers will vary based on your cut of meat, exact ingredients, and toppings used.
- Calories: ~380
- Protein: 28g (Excellent for keeping you full!)
- Fat: 16g
- Carbohydrates: 28g
- Fiber: 4g (Thank you, peppers and onions!)
To lighten it up, use lean flank steak, load up on the veggie toppings like pico de gallo, and opt for light sour cream or Greek yogurt.
Final Thoughts
And that’s it, friends! You’ve just unlocked the secret to a ridiculously easy, outrageously flavorful dinner that delivers on every promise. These Sheet Pan Steak Fajitas are more than just a meal; they’re a reminder that great food doesn’t have to be complicated. It’s about gathering, sharing, and savoring the simple joys—like a perfectly charred pepper or a tortilla wrapped around a little bit of everything.
I hope this recipe finds its way into your regular rotation and brings as much fun and flavor to your table as it has to mine. Remember, the kitchen is your playground. Don’t be afraid to make it your own. Now, go forth and conquer dinner! And don’t forget to tag @Feastical if you make them—I love seeing your creations.
Until next time, keep it simple, soulful, and satisfying.
– Beau
Pin Title: Easy Sheet Pan Steak Fajitas (30-Minute Meal!)
Pin Description: These Easy Sheet Pan Steak Fajitas are your ultimate weeknight dinner solution! Juicy, marinated skirt steak and colorful bell peppers roast together on one pan for bold Tex-Mex flavor with minimal cleanup. Ready in just 30 minutes, this healthy dinner is perfect for busy families. Includes step-by-step instructions, chef tips for tender steak, and fun serving ideas. A gluten-free option with corn tortillas! #sheetpandinner #steakfajitas #easydinner #30minutemeals #texmex #weeknightdinner #feastical #onepanmeal #healthyrecipes #mealprep
SEO Meta Description: Easy sheet pan steak fajitas in 30 minutes! One-pan, juicy steak & charred veggies. Perfect weeknight Tex-Mex dinner.