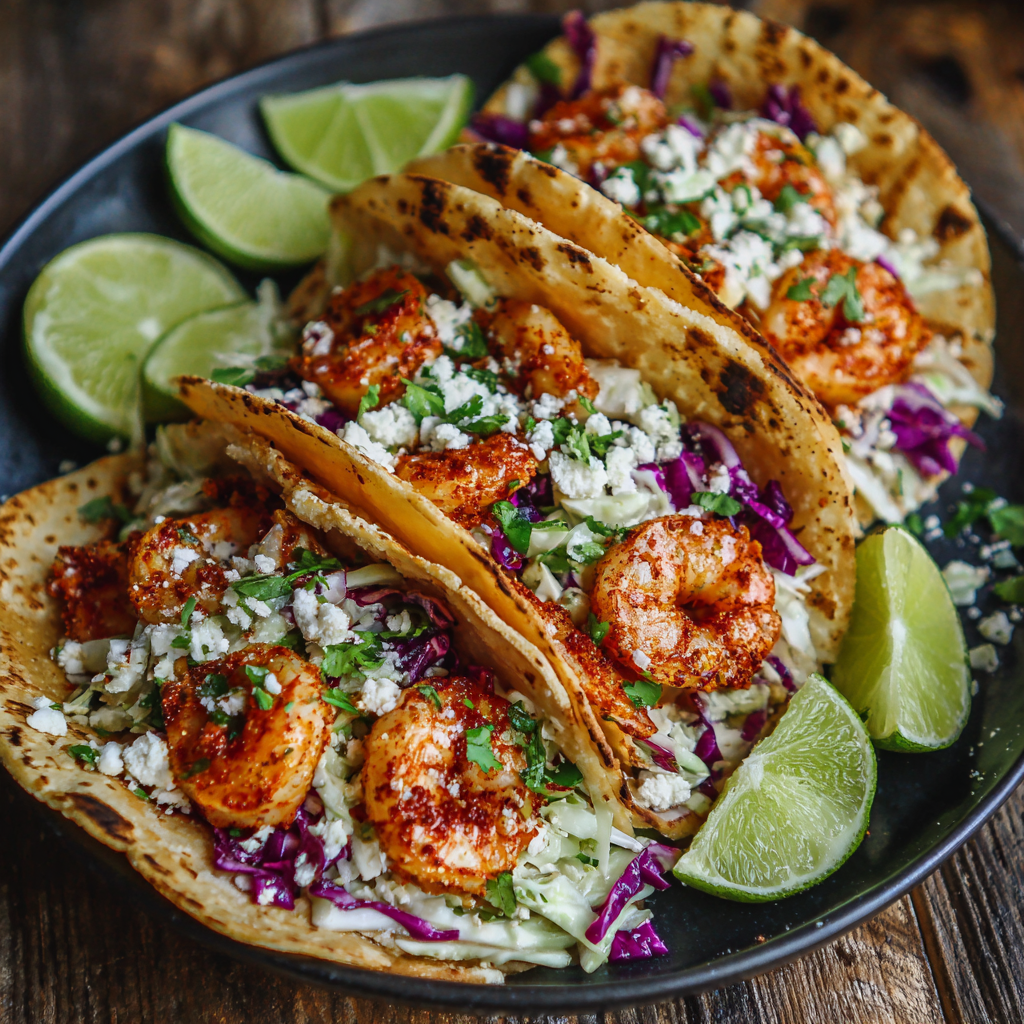
Spicy Shrimp Tacos with Garlic Cilantro Lime Slaw: Bold, Zesty, and Ready in Minutes
Spicy Shrimp Tacos with Garlic Cilantro Lime Slaw: Bold, Zesty, and Ready in Minutes
Let’s Make Taco Night Unforgettable!
Hey friends, Beau here from Feastical! Let’s talk about the magic that happens when a busy week meets a serious craving for something spectacular. You know those nights? You’re staring into the fridge, hoping for inspiration to strike, and you just want food that explodes with flavor but doesn’t tie you to the stove for hours. That, my friends, is precisely where these Spicy Shrimp Tacos swoop in to save the day.
Imagine this: plump, juicy shrimp, kissed with a smoky, spicy blend of chili and cumin, getting a gorgeous sear in a hot pan. Now, picture them nestled into a warm, soft tortilla, but here’s the genius part—they’re sitting on a cool, crunchy, tangy throne of Garlic Cilantro Lime Slaw. This isn’t just any slaw; it’s a creamy, zesty, garlicky miracle that cuts through the heat and makes every single bite a perfect harmony. It’s the yin and yang of the taco world.
This recipe is my go-to for impressing guests, treating my family, or just giving myself a delicious high-five after a long day. It’s fast, foolproof, and fantastically flavorful. We’re talking 20 minutes from fridge to table. Whether you’re a taco purist or an adventurer ready to jazz up your Tuesday, these tacos are your ticket to a seriously delicious meal. So, grab your favorite skillet, and let’s turn up the heat—both on the stove and in your taste buds!
The Beachside Taco Revelation
This recipe forever reminds me of a sun-bleached, sandy-toes kind of afternoon on the Gulf Coast. My buddy Leo, who fancies himself a “grill master,” was tasked with dinner. He vowed to make “the best shrimp tacos ever.” Confidence was high. Unfortunately, so was the wind, which promptly sent half his fancy spice rub into the dunes. Undeterred, he grabbed what was left in the cooler and pantry: some old-spice blend, a lime, a head of cabbage, and a container of plain yogurt.
What happened next was pure, unplanned kitchen alchemy. He tossed the shrimp with the remnants of the spice jar, whipped the yogurt with lime juice and garlic for a slaw, and chucked it all on the grill. We assembled our tacos sitting on a cooler, the sun setting, and took our first bite. Silence. Then, a unanimous, mouth-full “WHOA.” They were messy, vibrant, spicy, cool, and absolutely perfect. It was a lesson I’ve carried ever since: the best food isn’t about meticulous recipes; it’s about confident flavor combos and a spirit of fun. These tacos are my polished, home-kitchen homage to that perfectly imperfect beachside feast.
Gathering Your Flavor Arsenal
Here’s everything you’ll need to create this flavor fiesta. Don’t sweat the specifics too much—I’ve included my favorite swaps and chef secrets to make this your own.
For the Spicy Shrimp:
- 1 lb large shrimp, peeled and deveined – The stars of the show! I like the 26/30 count size for a hearty bite. Pro Tip: If using frozen, thaw them overnight in the fridge or in a sealed bag under cold running water for quick results.
- 1 tablespoon olive oil – Helps the spices stick and gives us a beautiful sear. Avocado oil works great here too.
- 1 teaspoon chili powder – This is our flavor foundation—earthy, slightly smoky, and warm.
- ½ teaspoon smoked paprika – The “smoked” part is my secret weapon! It adds a deep, charred flavor without any extra work.
- ½ teaspoon ground cumin – Brings a warm, nutty essence that just screams “taco.”
- ¼ teaspoon cayenne pepper – Optional, but highly recommended for my heat-seekers! Start with less if you’re sensitive.
- Salt and black pepper to taste – Never underestimate the power of proper seasoning!
For the Garlic Cilantro Lime Slaw:
- 2 cups shredded cabbage or pre-bagged slaw mix – The ultimate crunchy vehicle. Green cabbage, purple cabbage, or a mix—all are winners for color and crunch.
- ¼ cup plain Greek yogurt or mayonnaise – Greek yogurt is my healthy hack for creamy tang, but classic mayo gives a richer, decadent slaw. You can’t go wrong.
- 1 garlic clove, minced – Fresh is best! This adds a pungent kick that mellows beautifully with the lime.
- Juice of 1 large lime (about 2 tbsp) – The zesty heart of the slaw. Roll the lime on the counter before juicing to get every last drop!
- 2 tablespoons chopped fresh cilantro – If you’re in the “cilantro tastes like soap” camp, flat-leaf parsley is a lovely, herbaceous substitute.
- Salt to taste – A pinch to wake up all those bright flavors.
For Serving & Topping:
- 8 small corn or flour tortillas – I adore the toasty flavor of corn tortillas with shrimp, but use what you love! Flour tortillas are more pliable.
- Lime wedges – An extra squeeze at the end is non-negotiable.
- Sliced jalapeño, avocado, hot sauce, or crumbled cotija cheese – The playground! Go wild with your favorite toppings.
Let’s Get Cooking: Your Roadmap to Taco Bliss
Follow these steps, and you’ll be in taco heaven in no time. I’ve sprinkled in my favorite kitchen hacks to make the process smooth and fun.
- Marinate the Shrimp. In a medium bowl, combine the peeled shrimp, olive oil, chili powder, smoked paprika, cumin, cayenne (if using), salt, and pepper. Toss everything together until each shrimp is evenly coated in that gorgeous spice blend. Chef’s Hack: I like to do this with my hands (just make sure they’re clean!) to really massage the flavors in. Let it sit while you make the slaw—10 minutes is plenty for shrimp to soak up the good vibes.
- Make the Magic Slaw. In a large mixing bowl, combine the shredded cabbage, Greek yogurt (or mayo), minced garlic, lime juice, and chopped cilantro. Add a pinch of salt. Now, get in there and mix it all together until the cabbage is evenly dressed. Pro Tip: Let this slaw sit for at least 5-10 minutes. The salt and lime juice will gently soften the cabbage, making it more pliable and flavorful for your tacos. This is a game-changer!
- Cook the Shrimp to Perfection. Heat a large skillet (cast iron is amazing for this) or non-stick pan over medium-high heat. You want it nice and hot. Once the pan is shimmering, add the shrimp in a single layer. Don’t overcrowd the pan—cook in batches if needed. Cook for 2-3 minutes per side. You’re looking for the shrimp to turn pink and opaque with some lovely browned, slightly charred spots. Do not overcook! Shrimp cook lightning-fast and become rubbery if left too long. As soon as they’re pink and curled, transfer them to a plate.
- Warm Those Tortillas. While the shrimp rest, warm your tortillas. My favorite method is directly over the flame of a gas burner for a few seconds per side until lightly charred and pliable. No gas? A dry skillet over medium heat works beautifully—30 seconds per side. You can also wrap them in a damp paper towel and microwave for 30 seconds. The goal is warm, flexible tortillas that won’t crack when you fold them.
- Assemble and Conquer! This is the fun part. Take a warm tortilla. Add a generous scoop of the garlic cilantro lime slaw to the center. Top with 3-4 of those beautiful spicy shrimp. Now, finish it off with your chosen extras: a squeeze of fresh lime, sliced jalapeño, a drizzle of hot sauce, or a sprinkle of cheese. Repeat until you have a glorious taco feast ready to devour.
Serving It Up with Style
Presentation is part of the joy! I love serving these tacos family-style. Pile the warm tortillas on a plate, put the shrimp in a rustic bowl, and let the vibrant slaw shine in its own dish. Set out little bowls of toppings—diced avocado, lime wedges, hot sauces, extra cilantro—and let everyone build their own masterpiece. It’s interactive, fun, and means less work for you!
For a complete meal that feels like a true celebration, pair these zesty tacos with some simple, complementary sides. A big bowl of charred street corn salad (esquites) or classic black beans simmered with a bit of onion and cumin are perfect partners. Want something lighter? A simple cucumber and tomato salad or just some extra lime wedges and radish slices on the side are fantastic.
Don’t forget the drinks! A cold, crisp Mexican lager, a zesty margarita (on the rocks, please!), or even a sparkling agua fresca cut through the spice and make the whole meal sing. The goal is to create a relaxed, flavorful experience where the tacos are the undeniable star.
Make It Your Own: Delicious Twists & Swaps
One of the best things about this recipe is its flexibility. Here are some of my favorite ways to mix it up:
- Protein Swap – Hello, Fish or Chicken! Not a shrimp fan? No problem. Use the same spice blend on firm white fish like cod or tilapia (cook for 3-4 mins per side). For chicken, slice 1 lb of chicken breast into strips, use the same marinade, and cook for 5-7 minutes until cooked through.
- Creamy Chipotle Kick. Love smoky heat? Add 1-2 teaspoons of minced chipotle peppers in adobo sauce to the slaw dressing. It adds an incredible depth and a slow, smoky burn.
- Mango-Avocado Salsa Topping. For a sweet and creamy contrast, skip the slaw and top your spicy shrimp with a quick salsa of diced mango, avocado, red onion, lime juice, and cilantro.
- Go Gluten-Free or Low-Carb. This recipe is naturally gluten-free if you use corn tortillas (check labels). For a low-carb option, serve the shrimp and slaw in a bowl over a bed of lettuce as a vibrant taco salad, or use large butter lettuce leaves as fresh, crunchy “taco shells.”
- Bang Bang Style. Drizzle the cooked shrimp with a quick bang bang sauce (mix equal parts sweet chili sauce and mayo or Greek yogurt) before adding to the taco for a sweet, spicy, creamy explosion.
Beau’s Kitchen Notes
Over the years, this recipe has become a true Feastical workhorse. I’ve made it for dozens of friends, and it never fails to delight. The biggest evolution? Definitely the slaw. I started with a mayo base, then tried sour cream, and finally landed on Greek yogurt. It gives that same creamy tang with a protein boost, and I love it. Also, I used to meticulously measure the cayenne. Now? I just give the bottle a confident shake over the bowl. Sometimes you live dangerously!
A funny kitchen story: I once was filming a video for this recipe and got so into explaining the sear on the shrimp that I completely missed my smoke alarm going off in the background. My cat, Biscuit, was less than impressed and gave me the ultimate side-eye for hours. Moral of the story? Use your vent hood, friends. Your pets (and smoke alarms) will thank you.
Your Questions, Answered
Can I make the slaw ahead of time?
Absolutely, and it might even be better! You can prepare the slaw up to a day in advance. Store it in an airtight container in the fridge. The cabbage will soften slightly and the flavors will meld beautifully. Give it a quick stir before serving.
My shrimp turned out rubbery. What happened?
The number one culprit for rubbery shrimp is overcooking. Shrimp cook incredibly fast. As soon as they turn from translucent grey to opaque pink and form a loose “C” shape, they’re done. Remove them from the pan immediately. Also, ensure your pan is very hot before adding them so they get a quick sear without steaming.
What’s the best way to thaw frozen shrimp?
For the best texture, thaw them overnight in the refrigerator in a covered bowl. In a pinch, place the sealed bag in a large bowl of cold water for 30-60 minutes. Never thaw shrimp in warm water or the microwave, as this can start the cooking process and lead to a mushy texture.
Can I bake or grill the shrimp instead?
Yes to both! For baking, arrange the seasoned shrimp on a parchment-lined baking sheet and bake at 400°F for 6-8 minutes. For grilling, thread them onto skewers (or use a grill basket) and grill over medium-high heat for 2-3 minutes per side. That smoky grill flavor is phenomenal.
Print
Spicy Shrimp Tacos with Garlic Cilantro Lime Slaw: Bold, Zesty, and Ready in Minutes
Description
Spicy Shrimp Tacos with Garlic Cilantro Lime Slaw
Prep Time: 10 minutes
Cook Time: 10 minutes
Total Time: 20 minutes
Servings: 4 (2 tacos per person)
Ingredients
For the Spicy Shrimp:
-
1 lb large shrimp, peeled and deveined (26/30 count recommended)
-
1 tbsp olive oil (or avocado oil)
-
1 tsp chili powder
-
½ tsp smoked paprika
-
½ tsp ground cumin
-
¼ tsp cayenne pepper (optional, for heat)
-
Salt and black pepper, to taste
For the Garlic Cilantro Lime Slaw:
-
2 cups shredded cabbage (or pre-bagged slaw mix)
-
¼ cup plain Greek yogurt (or mayonnaise)
-
1 garlic clove, minced
-
Juice of 1 large lime (~2 tbsp)
-
2 tbsp chopped fresh cilantro (or parsley)
-
Salt, to taste
For Serving & Topping:
-
8 small corn or flour tortillas
-
Lime wedges
-
Optional toppings: sliced jalapeño, avocado, hot sauce, crumbled cotija cheese
Instructions
1. Marinate the Shrimp:
In a medium bowl, combine shrimp, olive oil, chili powder, smoked paprika, cumin, cayenne, salt, and pepper. Toss to coat. Let rest 10 minutes while you prepare the slaw.
2. Make the Slaw:
In a large bowl, mix shredded cabbage, Greek yogurt (or mayo), garlic, lime juice, cilantro, and salt. Let sit 5–10 minutes for flavors to meld and cabbage to soften slightly.
3. Cook the Shrimp:
Heat a skillet over medium-high heat. Add shrimp in a single layer (cook in batches if necessary). Cook 2–3 minutes per side, until shrimp turn pink and opaque with light browning. Remove immediately to prevent overcooking.
4. Warm the Tortillas:
Warm tortillas in a dry skillet (30 seconds per side) or over a gas flame until pliable. You can also wrap in a damp paper towel and microwave for 30 seconds.
5. Assemble the Tacos:
Place a scoop of slaw on each tortilla. Top with 3–4 shrimp. Finish with optional toppings: lime squeeze, avocado, jalapeño, hot sauce, or cotija cheese.
Notes
-
Make Ahead: Slaw can be prepared up to 1 day in advance. Store in an airtight container in the fridge.
-
Shrimp Cooking Tip: Remove from heat as soon as shrimp turn opaque pink and curl into a loose “C.”
-
Protein Swap: Use firm white fish (cod/tilapia) or chicken strips with the same spice blend.
-
Flavor Boost: Add 1–2 tsp minced chipotle in adobo to the slaw for smoky heat.
-
Low-Carb Option: Serve shrimp and slaw over a bed of lettuce instead of tortillas.
-
Sweet Twist: Top shrimp with mango-avocado salsa instead of slaw for a tropical variation.
Nutritional Information (Per Serving)
Disclaimer: The following is an estimate for 2 tacos (using corn tortillas and Greek yogurt) calculated with a nutrition database. Actual values may vary based on specific ingredients and portion sizes.
- Calories: ~310
- Protein: 25g
- Carbohydrates: 18g
- Dietary Fiber: 3g
- Sugars: 3g
- Total Fat: 16g
- Saturated Fat: 2.5g
- Cholesterol: 180mg
- Sodium: ~400mg (will vary based on salt added)
This dish is a fantastic source of lean protein from the shrimp and Greek yogurt, which helps keep you full and satisfied. The cabbage provides dietary fiber and valuable vitamins like C and K. Using healthy fats like olive oil and opting for Greek yogurt over mayo increases the nutrient density. Remember, you control the sodium and fat by adjusting the salt and your choice of slaw base. It’s a balanced meal that proves healthy eating can be incredibly exciting and delicious!
Final Thoughts from My Kitchen to Yours
And there you have it, friends—my all-time favorite Spicy Shrimp Tacos. This recipe embodies everything I love about cooking: it’s fast enough for a Wednesday, impressive enough for Saturday night, and flexible enough to become your own.
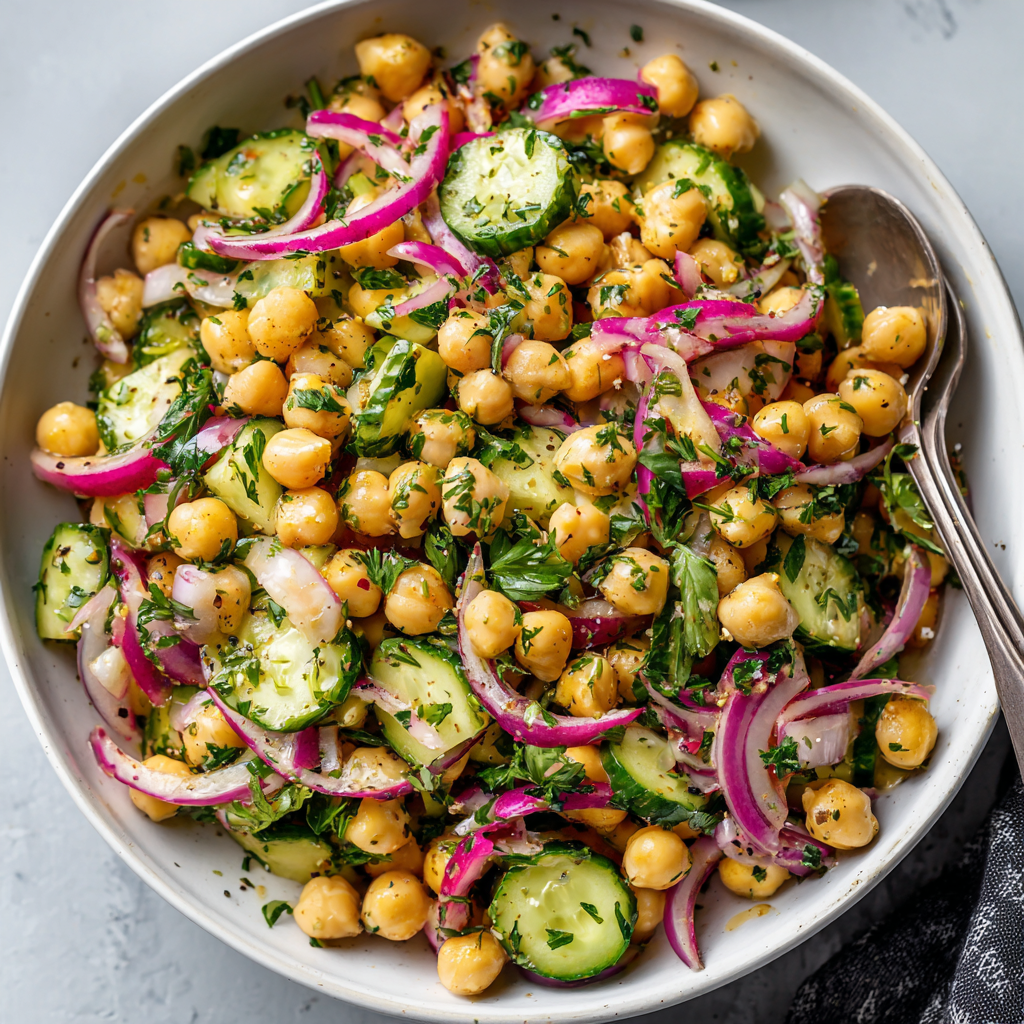
Mediterranean Chickpea Salad : Fresh, Zesty & Protein-Rich
Mediterranean Chickpea Salad: Your New Go-To for “Wow, That’s Good!” Vibes
Hey friends, Beau here from Feastical! Let me paint you a picture. It’s a sunny afternoon, you’re maybe a little peckish, and you open the fridge hoping for something that screams “fresh,” “flavorful,” and “won’t weigh me down.” You see the usual suspects, but nothing’s singing to you. Sound familiar? That, my friends, is the exact moment this vibrant, crunchy, utterly satisfying Mediterranean Chickpea Salad was born to solve.
This isn’t just another salad. This is a celebration in a bowl. We’re talking creamy chickpeas playing hopscotch with crisp cucumbers, sharp red onions mellowing out in a tangy lemon hug, and fresh parsley bringing that garden-party energy. Every forkful is a burst of sunshine, a texture party, and a serious dose of plant-powered protein and fiber that’ll keep you fueled and happy.
The best part? It comes together faster than you can decide what to watch on TV. No cooking, just chopping, shaking, and tossing. It’s the hero of meal prep, the star of potlucks, and the secret weapon for when you need a lunch that actually makes you look forward to 1 PM. So, grab your favorite chopping board and your sunniest bowl. We’re about to make magic that tastes like a vacation.
The Salad That Saved a Beach Day (And My Sanity)
This recipe has a special place in my heart because it’s a total kitchen “save.” Picture this: a few summers back, I promised to bring a dish to a big, chaotic, wonderful family beach picnic. I had grand plans for an elaborate pasta salad, but the day got away from me (you know how it goes). With an hour to spare and zero motivation to turn on the stove, I started frantically pulling things from the pantry and fridge.
A can of chickpeas winked at me. A lemon rolled forward. Before I knew it, I was throwing together this simple combo, crossing my fingers it would pass muster with my famously food-loving family. Well, let me tell you, that humble bowl of chickpea salad was the first thing to disappear. Between sandcastle builds and wave jumps, folks kept coming back for “just one more spoonful.” My cousin’s kid, who usually regards anything green with suspicion, asked for seconds. That’s when I knew this wasn’t just a last-minute fix—it was a forever recipe. It proved that the most memorable food isn’t about complexity; it’s about bright, honest flavors that make people feel good.
Gathering Your Sunshine Ingredients
Here’s the beautiful lineup. This is where the flavor foundation is built, and I’ve got some little chef insights for each one to make it truly yours.
- 1 can (15 oz) chickpeas, rinsed and drained: Our protein-packed star! Rinsing them well is non-negotiable—it gets rid of that extra sodium and any starchy liquid, letting the flavors cling perfectly. Chef’s Tip: For next-level texture, pop them out of their skins after rinsing. It takes a few extra minutes, but the result is incredibly creamy chickpeas.
- 1 cup cucumber, diced: The crunch factor! I prefer English or Persian cucumbers for their thin, tender skins and minimal seeds. Substitution Tip: No cucumber? Crisp diced bell pepper or chopped celery will bring a similar refreshing crunch.
- ¼ red onion, thinly sliced: That necessary sharp, zesty bite. Slicing it thin is key. Chef’s Hack: If raw onion is too intense for you, soak the slices in ice water for 10 minutes. It tames the bite beautifully while keeping all the flavor.
- 2 tbsp chopped fresh parsley: Don’t skip the fresh herb! Parsley is the burst of garden-fresh color and flavor that makes this salad sing. Substitution Tip: Fresh dill or mint (or a combo!) are fantastic alternatives that transport this salad to different corners of the Mediterranean.
- 2 tbsp extra virgin olive oil: The rich, fruity backbone of our dressing. Use the good stuff here—it makes a difference.
- 1 ½ tbsp fresh lemon juice: Our sunshine in liquid form. Please, please use fresh-squeezed. The bottled stuff just doesn’t have the same vibrant, wake-up-your-taste-buds zing.
- ½ tsp Dijon mustard (optional, but not really): My secret weapon! It doesn’t make the dressing taste like mustard; instead, it acts as an emulsifier, helping the oil and lemon juice become one creamy, dreamy dressing, and adds a subtle depth. Highly recommended.
- Salt & pepper to taste: The essential flavor enhancers. Season with love!
- Optional Superstars: Want to gild the lily? A handful of halved cherry tomatoes, a generous sprinkle of crumbled feta cheese, or a few pitted Kalamata olives take this from amazing to absolutely legendary.
Let’s Build Some Flavor: Your Step-by-Step Roadmap
Ready? This is the fun part. We’re not just making food; we’re creating a textural masterpiece.
- Prep Your Veggies: Dice your cucumber into cheerful, bite-sized chunks. Thinly slice that red onion. Give your parsley a rough chop—no need for perfection here, we’re going for rustic and lively. Add them all to a large, inviting mixing bowl. Chef’s Commentary: I use my biggest bowl. It gives everything room to dance when we toss it, and somehow, food just tastes better when it’s not crammed in a tiny dish.
- Welcome the Chickpeas: Drain that can of chickpeas into a colander and give them a thorough rinse under cool water. Shake off the excess water and let them join the veggie party in the bowl. Pro Tip: While they’re draining, pat them gently with a clean kitchen towel or paper towel. This helps the dressing stick to them instead of sliding off.
- Shake Up That Sunshine Dressing: Now, for the magic elixir! Grab a small jar with a tight lid (my favorite method) or a small bowl. Add the olive oil, fresh lemon juice, Dijon mustard, a good pinch of salt, and a few cracks of black pepper. Seal the jar and shake it like you’re celebrating something—until it’s creamy and combined. Or, whisk it vigorously in the bowl. Taste it! Little Chef Hack: Dip a cucumber chunk in. Does it make you smile? Adjust with more lemon for zing, salt for savoriness, or pepper for kick. This is your dressing, make it sing to you.
- The Grand Toss: Pour that gorgeous, emulsified dressing right over your bowl of ingredients. Using a large spoon or (clean) hands, toss everything together gently but thoroughly. You want every chickpea, every bit of onion, to get a little glossy coat of that lemony goodness. Watch the magic happen: The colors will start to pop and the most incredible smell will hit you. That’s the smell of success.
- The Patient Pause (The Hardest Step!): I know, I know. You want to dig in immediately. But trust me on this one. Let the salad sit at room temperature for 10-15 minutes before serving. Why? This allows the flavors to get to know each other. The sharpness of the onion mellows, the chickpeas drink in the dressing, and everything harmonizes into something greater than the sum of its parts.
How to Serve It Like a Pro (aka, Make It Look as Good as It Tastes)
Presentation is the final sprinkle of joy! You can absolutely eat this straight from the mixing bowl (no judgment), but if you’re serving it to others or just treating yourself, a little flair goes a long way.
I love serving this in a wide, shallow bowl that shows off all the gorgeous colors. Give it one final gentle toss and transfer it with a slotted spoon to avoid any excess dressing pooling at the bottom. Garnish is your friend here—a final sprinkle of chopped parsley, a lemon wedge on the side for those who love extra tang, and if you’re using feta or olives, scatter them artfully on top now so they stay beautiful.
This salad is the ultimate team player. Serve it as a mighty main course with some crusty bread for dipping. Let it be the vibrant sidekick to grilled chicken, fish, or lamb. Pack it in a sealed container for a lunch that’ll make your coworkers jealous. However it lands on your table, it’s bringing sunshine with it.
Make It Your Own: 5 Flavorful Twists
The beauty of this salad is its versatility. Feel like switching it up? Here are some of my favorite riffs on the theme:
- The Greek Island Getaway: Add ½ cup halved cherry tomatoes, ⅓ cup crumbled feta cheese, and ¼ cup pitted Kalamata olives. You’ve just teleported to a seaside taverna.
- Herb Garden Explosion: Swap the parsley for equal parts fresh mint and dill. This version is incredibly refreshing and pairs amazingly with grilled seafood.
- Heartier Harvest Bowl: Add ½ cup of cooked quinoa or bulgur wheat and a handful of baby spinach. You’ve just turned a side salad into a super-satisfying, fork-standing-up-on-its-own main dish.
- Creamy Dreamy Version: Whisk 2 tablespoons of plain Greek yogurt or tahini into the dressing. It becomes luxuriously creamy and adds another layer of protein and tang.
- Spicy & Smoky Kick: Add a pinch of smoked paprika or a finely chopped fresh red chili to the dressing. It adds a warm, intriguing depth that’s absolutely addictive.
Beau’s Kitchen Notebook
This recipe has lived in my back pocket for years, and it’s evolved in the best ways. I used to just whisk the dressing in the bottom of the big bowl before adding the veggies—still a great method if you’re minimizing dishes! The Dijon mustard was a happy accident one day when I was out of my usual vinegar; now I’ll never go back.
It’s also my #1 recommended meal prep recipe. I’ll often make a double or triple batch on Sunday, store the dressed salad in one big container, and divvy it up for lunches throughout the week. The flavors get even better by day two or three. Just hold off on adding any super-soft ingredients like fresh herbs if you’re prepping more than a day ahead—toss those in fresh when you’re ready to eat.
Remember, cooking is about joy, not stress. If you only have half a cucumber, use it. No red onion? Try shallots. The spirit of this salad is adaptability and freshness. Make it work for you!
Your Questions, Answered!
Q: Can I use dried chickpeas instead of canned?
A: Absolutely! You’ll need about 1.5 cups of cooked chickpeas. Soak ½ cup dried chickpeas overnight, then simmer them until tender (about 60-90 minutes). They’ll have an even better texture and flavor than canned—just plan for the extra time.
Q: My salad seems a bit watery after sitting in the fridge. What happened?
A: Cucumbers and salt release water over time. To prevent this, you can salt your diced cucumber lightly, let it sit in a colander for 10 minutes, then pat it very dry before adding it to the salad. Also, storing the salad in an airtight container helps.
Q: Can I make this vegan?
A: It’s naturally vegan if you skip the optional feta cheese! Just double-check your Dijon mustard to ensure it doesn’t contain honey or other non-vegan ingredients (most are vegan-friendly).
Q: How long will this keep in the refrigerator?
A: It stays delicious for 3-4 days in a sealed container. The onions will mellow further, and the chickpeas will continue to soak up flavor. It’s a true make-ahead champion.
Mediterranean Chickpea Salad : Fresh, Zesty & Protein-Rich
Description
Looking for a vibrant, refreshing lunch that’s bursting with flavor and plant-powered protein? This Mediterranean Chickpea Salad is your answer. Creamy chickpeas, crisp cucumbers, sharp red onions, and fresh parsley come together with a bright, lemony dressing. Quick to make, naturally vegan (unless you add feta), and perfect for meal prep, this salad is a midday game-changer.
Ingredients
-
1 can (15 oz) chickpeas, rinsed and drained
-
1 cup cucumber, diced (English or Persian cucumbers preferred)
-
¼ red onion, thinly sliced
-
2 tbsp fresh parsley, chopped
-
2 tbsp extra virgin olive oil
-
1 ½ tbsp fresh lemon juice
-
½ tsp Dijon mustard (optional)
-
Salt & pepper, to taste
Optional add-ins:
-
½ cup halved cherry tomatoes
-
⅓ cup crumbled feta cheese
-
¼ cup pitted Kalamata olives
Instructions
-
Prep the veggies: Dice the cucumber, thinly slice the onion, and roughly chop the parsley. Add to a large mixing bowl.
-
Add chickpeas: Drain and rinse the chickpeas, then gently pat dry. Add them to the bowl with the veggies.
-
Make the dressing: In a small jar or bowl, combine olive oil, lemon juice, Dijon mustard (if using), salt, and pepper. Shake or whisk until emulsified.
-
Dress the salad: Pour the dressing over the chickpeas and vegetables. Toss gently to coat everything evenly.
-
Let it rest: Allow the salad to sit 10–15 minutes at room temperature to let the flavors meld.
-
Optional garnish: Add cherry tomatoes, feta, or olives for extra Mediterranean flair. Serve as a main, side, or lunchbox favorite.
Notes
-
Make ahead: Keeps in an airtight container in the fridge for 3–4 days. Add delicate herbs like parsley or feta fresh before serving if prepping in advance.
-
Flavor twists:
-
Greek Island: Add tomatoes, feta, and olives.
-
Herb Garden: Swap parsley for mint and dill.
-
Hearty Harvest: Add cooked quinoa or bulgur wheat.
-
Creamy Version: Whisk in 2 tbsp Greek yogurt or tahini to the dressing.
-
Spicy Kick: Add smoked paprika or finely chopped fresh chili.
-
-
Vegan: Naturally vegan if you skip feta.
Feeling Good, Inside and Out
This salad isn’t just a treat for your taste buds; it’s fuel for your body. Chickpeas are a fantastic source of plant-based protein and fiber, which helps keep you full and satisfied. The olive oil provides healthy monounsaturated fats, great for heart health. Cucumbers add hydration, and the lemon juice gives you a dose of vitamin C.
Estimated Nutrition Per Serving (based on 3 servings, without optional add-ins): Calories: ~220 | Protein: 8g | Carbohydrates: 22g | Dietary Fiber: 6g | Total Fat: 12g (mostly the good kind!) | Sugar: 4g. Remember, these are estimates. For precise dietary tracking, use your preferred nutrition calculator with your exact ingredients and brands.
The Last Bite (For Now)
So there you have it, friends—my not-so-secret weapon for bright, easy, feel-good eating. This Mediterranean Chickpea Salad is proof that incredible food doesn’t have to be complicated. It’s about combining a few great ingredients with intention and a splash of sunshine.
I hope this recipe finds its way into your regular rotation, becoming your own picnic hero, lunchbox savior, or quick dinner side. If you make it, I’d love to hear how it turned out! Tag me on social or leave a comment over on Feastical.com. Now, go enjoy that crunch, that zest, that protein-rich goodness. You’ve earned it.
With a full heart and an empty bowl,
Beau
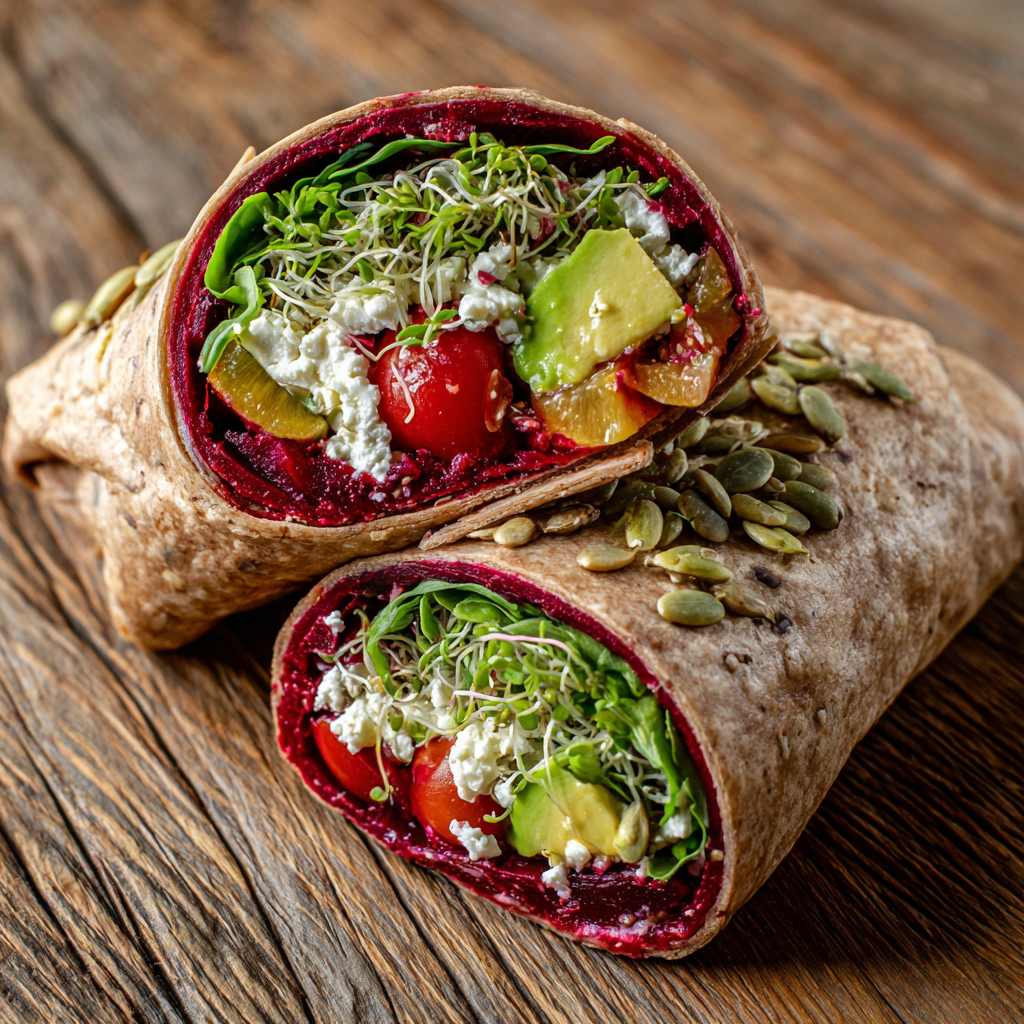
Roasted Beet and Avocado Wrap : Earthy, Creamy & Plant-Powered
Roasted Beet and Avocado Wrap: Your New Favorite Plant-Powered Lunch
Hey friends, Beau here from Feastical! Let’s talk about that midday meal slump. You know the one—where you’re staring into the fridge, hoping something delicious and energizing will magically assemble itself. You want something vibrant, something that makes you feel good, but you also need it to be ridiculously easy and deeply satisfying. Sound familiar? Well, pull up a chair, because I’ve got the solution that’s been rocking my world: The Roasted Beet and Avocado Wrap.
This isn’t just a wrap; it’s a handheld masterpiece of color, texture, and flavor. Imagine sweet, earthy roasted beets meeting that cool, creamy avocado. Add a pop of juicy tomato, a tangy kiss of feta, and the freshest greens you can find, all hugged by a hearty whole-grain tortilla. It’s a meal that’s as nourishing for your body as it is for your soul. The best part? It comes together in about 10 minutes flat, especially if you do a little prep ahead (a chef’s secret I’ll let you in on). Whether you’re packing it for work, whipping it up for a quick post-yoga lunch, or just craving a dose of colorful goodness, this wrap is your new kitchen bestie. So, let’s ditch the boring lunches and build something spectacular together!
Why This Wrap? A Tale of Color & Connection
This recipe takes me right back to my Grandma Lou’s kitchen. Now, Grandma Lou wasn’t a fancy chef, but she was a wizard with vegetables from her garden. I remember one hot summer afternoon, she pulled these wild-looking, dirt-covered orbs from the ground—beets. To my kid eyes, they were strange and a little intimidating. But she roasted them until they were tender, their skins slipping off like magic to reveal the most incredible, jewel-toned flesh. She’d slice them, drizzle them with a little vinegar, and let me try one. That first bite was a revelation: sweet, earthy, and deeply satisfying.
She’d always say, “Food that grows together, goes together.” She’d pair those beets with cool slices of cucumber or a dollop of cottage cheese. Today, when I slice into a roasted beet for this wrap, I’m right back at her sun-drenched table. I’ve just updated her wisdom with my favorite creamy counterpart—avocado—and the convenience of a wrap. It’s my little tribute to her, a way to carry that memory of simple, garden-powered food into my busy, modern life. Every bite is a little taste of nostalgia, wrapped up and ready to go.
Gathering Your Rainbow: Ingredients & Insights
Here’s the beautiful cast of characters for our wrap. I love treating each ingredient like a star player with its own special role. Feel free to swap and play—that’s where the kitchen fun begins!
- 1 Large Whole Grain Wrap or Tortilla: This is your foundation! I go for a whole-grain or spinach variety for extra fiber and nuttiness. Chef’s Insight: If your wraps are stiff, give them a quick 10-second warm-up in a dry skillet. It makes them pliable and prevents cracking when you roll.
- 1 Small Roasted Beet, Thinly Sliced: The earthy heart of the wrap. You can roast your own (see my hack below!) or use the pre-cooked vacuum-packed ones from the produce section for ultimate speed. Substitution Tip: No beets? Try roasted sweet potato slices for a different but equally delicious sweetness.
- 1/2 Ripe Avocado, Sliced or Mashed: Our creamy dreamy element. I like slicing it for pretty layers, but mashing it slightly helps it act as a “glue” to hold everything together. Pro Tip: Sprinkle a little lemon juice on your avocado slices right away to keep them that gorgeous green.
- 1/4 Cup Cherry Tomatoes, Halved: They bring the juicy, bright acidity. I love using a mix of colors if I can find them! Substitution Tip: Chopped roasted red peppers would add a fantastic smoky sweetness here.
- 1 Tablespoon Crumbled Feta Cheese: That salty, tangy punch that makes everything sing. Dietary Swap: For a vegan version, skip it or use a sprinkle of nutritional yeast or a vegan “feta” alternative.
- 1/4 Cup Microgreens or Baby Spinach: A fresh, peppery lift and a nutrient boost. Microgreens are my latest obsession—they’re like flavor confetti! Baby arugula would also be fantastic for a peppery kick.
- 1 Teaspoon Sunflower Seeds: Don’t skip this! They add the essential crunch. Chef’s Insight: Toasting them in a dry pan for a minute takes their flavor to a whole new level.
- Optional: A Drizzle of Lemon Juice or Balsamic Glaze: The finishing touch. Lemon adds bright freshness, while a thick balsamic glaze adds a sweet-tart complexity that pairs amazingly with the beets.
Let’s Build the Perfect Bite: Step-by-Step
Ready to roll? Literally! Follow these steps for wrap-building success. I’m tossing in all my favorite hacks to make this foolproof.
Step 1: The Warm-Up. Lay your whole-grain wrap flat on a clean cutting board or plate. If it feels stiff or cold from the fridge, pop it in a dry skillet over medium heat for about 10-15 seconds per side. This simple trick is a game-changer—it transforms a brittle wrap into a soft, pliable blanket for your fillings.
Step 2: The “Glue” Layer (Optional but Genius). Before you add anything else, think about spread! If you’re not mashing your avocado, consider a very thin schmear of hummus, Greek yogurt, or even a thin layer of mashed avocado right on the tortilla. This creates a sticky base that helps secure all your fillings when you roll.
Step 3: Strategic Stacking. Now, let’s layer. Place your sliced roasted beets in a slightly off-center horizontal line. Why off-center? It gives you a solid starting edge for rolling. Next, layer on your avocado (sliced or mashed). Then, scatter the tomato halves, greens, and crumbled feta. Pro Tip: Keep the fillings in a tight, horizontal pile rather than spreading them edge-to-edge. This is the secret to a tight, burrito-style roll.
Step 4: The Crunch & The Drizzle. Sprinkle those all-important sunflower seeds over the top. Now, if you’re using it, add a light drizzle of lemon juice or balsamic glaze. Go easy! You want flavor, not a soggy wrap.
Step 5: The Art of the Roll. Here’s where the magic happens. Fold the sides of the wrap inward over the ends of your filling pile. Then, starting from the edge closest to you, use your fingers to tuck the fillings in tightly as you roll forward, away from you. Apply gentle but firm pressure to create a compact, cylindrical wrap. It should feel secure.
Step 6: The Finale. If you’re eating it right away, I love slicing it in half on a sharp diagonal—it just looks so appetizing! If you’re packing it for later, wrap it tightly in parchment paper or foil, which holds its shape better than plastic wrap.
How to Serve This Vibrant Masterpiece
This wrap is a complete meal in your hand, but let’s talk presentation! For a cozy home lunch, I love slicing it in half and arranging it on a plate with a big, colorful side salad—maybe a simple lemon-dressed kale salad or just a handful of baby carrots and cucumber sticks. The contrast of the hearty wrap with fresh, raw veggies is perfect.
If you’re packing it to go, the parchment-paper wrap is your best friend. You can even tie it with a bit of kitchen twine for a cute, rustic look. Pack a little container of extra balsamic glaze or a zesty yogurt sauce for dipping on the side. For a picnic or a spread of food with friends, cut the wrap into one-inch pinwheels and secure them with toothpicks for a gorgeous, pop-able appetizer that will have everyone asking for the recipe!
Make It Your Own: 5 Flavorful Twists
The beauty of this formula is its flexibility. Once you’ve mastered the basic earthy-creamy combo, the world is your wrap! Here are a few of my favorite spins:
- The “Green Goddess”: Swap the beets for grilled or roasted asparagus spears. Add a spread of herbed goat cheese instead of feta, and use a big handful of watercress or arugula.
- The Mediterranean Escape: Replace the sunflower seeds with chopped Kalamata olives and add a few slices of cucumber. A swipe of garlicky hummus as the base ties it all together beautifully.
- Protein-Powered Punch: Crumble over some cooked quinoa or lentils, or add a layer of mashed chickpeas mixed with a little lemon and dill. For a non-veg option, shredded rotisserie chicken or flaked salmon would be incredible.
- Sweet & Smoky: Use roasted sweet potato instead of beet. Add a smear of chipotle mayo or a spicy black bean spread, and top with pickled red onions for a serious flavor explosion.
- Totally Vegan & Tangy: Skip the feta. Instead, make a quick “cheesy” sprinkle by combining nutritional yeast, a pinch of salt, and crushed walnuts. A drizzle of tahini-lemon sauce completes it.
Beau’s Kitchen Notes & Stories
This recipe has evolved more times than I can count. I first made it for a hiking trip years ago—I needed something that wouldn’t get soggy and would pack a nutritional punch. The first version was… messy. Beet juice everywhere! I learned the hard way that slicing beets *after* they’re roasted and cooled is the clean-fingered chef’s way.
My biggest “aha” moment was realizing I could roast a big batch of beets on a lazy Sunday. Once cool, I store them, unpeeled, in a container in the fridge. Throughout the week, I just grab one, slip off the skin under cold water, and slice. It turns a 60-minute process into a 60-second one. That’s the Feastical spirit: smart prep for joyful eating. Also, a confession: I have, on more than one occasion, eaten the filling straight from the bowl with a fork when I was too hungry to even bother rolling. No judgment here—it’s that good.
Your Questions, Answered!
Q: My wrap keeps falling apart when I roll it! Help!
A: This is the #1 issue, and I’ve been there! First, warm your wrap. Second, don’t overfill it—less is more. Third, make sure you have a “glue” element (mashed avocado, hummus, etc.) on the tortilla first. Finally, practice that tight tuck-and-roll motion. You’ve got this!
Q: Can I make this ahead of time for meal prep?
A: Absolutely! Assemble it, wrap it tightly in parchment paper and then foil, and store it in the fridge for up to 24 hours. The wrap may soften a bit, but the flavors will meld wonderfully. I don’t recommend freezing it.
Q: How do I roast beets from scratch?
A> It’s easy! Scrub beets, trim stems to 1 inch, and drizzle with oil. Wrap each in foil, place on a baking sheet, and roast at 400°F (200°C) for 45-60 mins until fork-tender. Let cool, then rub skins off under cold water. Your kitchen will look like a crime scene, but it’s worth it!
Q: The beets are staining everything! Any tips?
A> Welcome to the ruby-red club! Use a dedicated cutting board for beets, or put down parchment paper. Washing your hands and board with a little lemon juice or salt helps cut the stain. And wear an apron!

Roasted Beet and Avocado Wrap : Earthy, Creamy & Plant-Powered
Description
Need a quick, vibrant lunch that actually fuels you? This Roasted Beet and Avocado Wrap is a handheld powerhouse of flavor, color, and nutrition. Sweet roasted beets, creamy avocado, juicy tomatoes, tangy feta, and fresh greens all come together in a whole-grain wrap for a meal that’s satisfying, energizing, and ready in about 10 minutes (if your beets are pre-roasted!).
Ingredients
-
1 large whole-grain or spinach wrap/tortilla
-
1 small roasted beet, thinly sliced (or pre-cooked for speed)
-
½ ripe avocado, sliced or lightly mashed
-
¼ cup cherry tomatoes, halved
-
1 tbsp crumbled feta cheese (or vegan alternative)
-
¼ cup microgreens or baby spinach
-
1 tsp sunflower seeds (toasted if desired)
-
Optional: drizzle of lemon juice or balsamic glaze
Optional spreads (“glue layer” for easier rolling): hummus, Greek yogurt, mashed avocado
Instructions
-
Warm the wrap: Place the tortilla in a dry skillet for 10–15 seconds per side to make it soft and pliable.
-
Add a base (optional): Spread a thin layer of mashed avocado, hummus, or Greek yogurt to help the fillings stick.
-
Layer the fillings: Off-center, add beet slices, avocado, cherry tomatoes, microgreens, and crumbled feta. Keep the pile tight for easy rolling.
-
Add crunch & flavor: Sprinkle sunflower seeds and drizzle with lemon juice or balsamic glaze, if using.
-
Roll it up: Fold the sides inward, then roll tightly from the edge nearest you. Apply gentle pressure to secure the wrap.
-
Serve: Slice diagonally for a beautiful presentation. Wrap tightly in parchment paper for later, or enjoy immediately.
Notes
-
Roasting beets: Preheat oven to 400°F (200°C). Wrap scrubbed beets in foil and roast 45–60 minutes until tender. Cool, peel, and slice.
-
Make ahead: Wrap tightly in parchment + foil; store in the fridge up to 24 hours.
-
Flavor twists:
-
Green Goddess: Replace beets with roasted asparagus and feta with herbed goat cheese.
-
Mediterranean: Add Kalamata olives and cucumber with hummus base.
-
Protein-Packed: Include cooked quinoa, lentils, or chickpeas; or shredded chicken or salmon.
-
Sweet & Smoky: Swap beets for roasted sweet potato; add chipotle mayo and pickled red onions.
-
Vegan: Skip feta and use nutritional yeast with crushed walnuts; drizzle tahini-lemon sauce.
-
Nourishment at a Glance
Let’s talk about what’s fueling you! This wrap is a powerhouse of good stuff. The beets are rich in folate, fiber, and blood-pressure-friendly nitrates. Avocado brings heart-healthy monounsaturated fats and more fiber to keep you full. The whole-grain wrap adds complex carbs for sustained energy, while the microgreens are a concentrated source of vitamins. The feta provides a hit of calcium and protein. Together, it’s a balanced meal designed to satisfy your hunger and fuel your day without the afternoon slump. Remember, nutritional info is an estimate based on specific ingredients; your totals may vary based on brands and exact quantities used.
Wrapping It All Up (See What I Did There?)
So there you have it, friends—my not-so-secret weapon for a lunch that’s anything but boring. This Roasted Beet and Avocado Wrap is proof that eating well doesn’t have to be complicated, time-consuming, or bland. It’s a celebration of color, a harmony of textures, and a big, delicious dose of plant-powered goodness.
I hope this recipe finds its way into your regular rotation and brings a little extra joy to your table. Give one of the fun variations a try, and make it your own. And remember, the best meals are the ones shared—so if you make this, tag me over on Instagram @feastical! I love seeing your creations. Now, go roast some beets, grab that avocado, and build something beautiful. Happy cooking!
Final Thoughts
This Roasted Beet and Avocado Wrap is more than just a recipe—it’s an invitation. An invitation to slow down, even just for ten minutes, and create something that nourishes you in every sense. It’s a reminder that food can be both deeply comforting and vibrantly alive, a way to connect with memories—like my Grandma Lou’s garden—while fueling our present.
In a world that often asks us to choose between quick and healthy, delicious and wholesome, this wrap happily bridges the divide. It’s a testament to the magic that happens when simple, whole ingredients are treated with a little intention. The earthy sweetness of the beet, the creamy richness of the avocado, the salty tang of feta, and the final crunch—each element plays its part in creating a lunch that feels like a genuine act of self-care.
So, the next time you’re facing that midday slump or the siren call of another uninspired sandwich, remember this wrap. Remember that you have the power to make something beautiful, satisfying, and good for you, all wrapped up and ready to go. Don’t be afraid to get those pink-stained fingers, to try a new twist, or to simply eat the filling straight from the bowl when the mood strikes. Cooking is about joy, not perfection.
Thank you for letting me share this recipe and a piece of my story with you. I hope it becomes a trusted, flexible friend in your kitchen, just as it is in mine.
Now, go build your masterpiece. Your new favorite lunch is waiting.
With flavor,
Beau Collier
Founder, Feastical

Sardine Spread on Whole Grain Crackers : Protein-Packed Snack with a Zesty Twist
The Lazy Foodie’s Power Snack: My 5-Minute Sardine Spread That Converts Skeptics
Hey there, friend! Beau here, from Feastical. Let’s talk about something real for a second. We’ve all been there: it’s 3 PM, your energy is doing a dramatic swan dive, and the siren call of the snack cupboard is loud. But instead of reaching for another handful of whatever, what if you could grab something that actually fuels you? Something that’s creamy, zesty, savory, and packed with the kind of nutrition that makes your body say, “Hey, thanks for paying attention!”
That’s where my not-so-secret weapon comes in: the humble, often misunderstood, absolutely glorious sardine. Before you scroll on with a “fish? for a snack?,” hear me out. This isn’t about eating sardines straight from the tin (unless you’re into that, no judgment!). This is about transforming them into a spread so deliciously addictive, you’ll forget you’re being a nutritional superhero. We’re talking creamy texture, a bright pop of lemon, and a savory depth that pairs perfectly with the nutty crunch of a whole grain cracker. It’s a protein-packed, omega-3 loaded, no-cook wonder that’s ready faster than you can decide what to watch next. So, let’s turn that “ew” into a “wow” and make your next snack break one you’ll actually look forward to.
The Tin That Started It All: A Grandfather’s Wisdom
My love affair with canned sardines didn’t start in a fancy kitchen; it started on a rickety dock with my Grandpa Joe. He was a man of simple, profound pleasures: a good fishing line, the smell of saltwater, and a pocketknife to open a tin of “ocean candy,” as he called them. I’d sit beside him, legs dangling over the water, while he’d share them straight from the can on saltine crackers. To me, they tasted like adventure and quiet afternoons.
Years later, when I was a broke line cook working double shifts, I remembered those tins. They were affordable, required zero prep, and kept me going like nothing else. I started dressing them up with whatever was in the fridge—a squeeze of lemon from the bar, a spoonful of leftover cream cheese. That experimentation was the birthplace of this spread. It’s my kitchen-hack version of Grandpa Joe’s dock-side snack: a little fancier, but carrying the same soul—honest, satisfying food that doesn’t complicate your life. Every time I make it, I get a little flash of that sunshine on the water.
Gathering Your Flavor Squad: Simple Ingredients, Big Impact
Here’s the beautiful part: you only need a handful of pantry staples to create magic. Let’s break down this dream team:
- 1 can of sardines (in water or olive oil), drained: This is your MVP. Look for skinless and boneless if you’re new to the game—they’re incredibly tender and mild. Chef’s Insight: Sardines packed in olive oil yield a slightly richer, more luxurious spread, while water-packed lets the other flavors shine a bit brighter. Both are fantastic.
- 2 tbsp plain Greek yogurt: This is our creaminess agent, adding a lovely tang and protein boost. Substitution Tip: Sour cream, cream cheese, labneh, or even mashed avocado work beautifully if that’s what you have on hand.
- 1 tsp fresh lemon juice: Non-negotiable! This little zing cuts through the richness and makes all the flavors pop. Chef’s Hack: Roll the lemon firmly on the counter before juicing—you’ll get so much more out of it.
- Salt & pepper to taste: Start with a pinch of each. You can always add more, but you can’t take it out!
- Whole grain crackers for serving: The perfect vessel. Their hearty crunch and nutty flavor are the ideal contrast to the creamy spread.
- Optional Garnish Army: This is where you make it yours! Chopped fresh parsley or dill, a sprinkle of chili flakes, a few capers, a drizzle of good olive oil, or even a tiny bit of grated lemon zest.
Building Your Masterpiece: The 5-Minute Method
Ready? Aprons are optional for this one. Let’s get spreading.
- The Great Mash. Drain your sardines and plop them into a small mixing bowl. Now, take a fork and go to town! Mash them until you have a fairly uniform, flaky texture. A few bigger flakes are totally okay—we’re going for rustic, not a paste. Chef’s Commentary: I find this step weirdly therapeutic. It’s your chance to work out any pre-dinner frustration!
- Creamy Integration. Add your Greek yogurt and fresh lemon juice right on top of the mashed sardines. Now, fold and stir everything together with your fork until it’s beautifully combined and creamy. Pro Tip: If you want an ultra-smooth spread (great for piping or fancy plating), you can pulse this mixture a couple times in a mini food processor. I usually prefer the fork-method texture.
- Season to Perfection. Here’s your moment. Add a pinch of salt and a few cracks of black pepper. Stir, then taste. Does it need more brightness? A tiny bit more lemon. More savoriness? Another pinch of salt. This spread is your canvas. Little Chef Hack: If you’re using any of those optional add-ins like capers or chili flakes, fold half of them in now to distribute the flavor throughout.
- The Grand Assembly. Grab your favorite whole grain crackers. Use a spoon or a small knife to generously top each one with your sardine spread. Don’t be shy! Serving Thought: I like to arrange them on a simple board or plate—it instantly looks like you tried, even though we know the truth.
- The Finishing Flourish. This is what takes it from “snack” to “oh, you fancy, huh?”. Sprinkle with your chosen garnishes. A flurry of fresh herbs, a final crack of pepper, or that drizzle of olive oil makes all the difference. Enjoy immediately while the crackers are still crisp!
Beyond the Cracker: How to Serve This Spread
While piled high on a whole grain cracker is my first love, this spread is a versatile star. For a light lunch, slather it thick on a slice of toasted sourdough and top with sliced cucumber and microgreens. It makes an incredible, protein-rich filling for whole wheat wrap rolls or celery sticks. Want to impress guests? Present it in a small bowl surrounded by a *crudité* platter—sliced radishes, endive leaves, and bell pepper strips are perfect for scooping. For a more substantial meal, try it as a topping for a baked potato or stirred into warm, al dente pasta with a splash of pasta water for a quick, creamy sauce. See? So much more than just a snack!
Make It Your Own: 5 Flavor Twists to Try
The basic formula is your launchpad. Here are some of my favorite ways to fly:
- The “Everything Bagel” Remix: Swap the Greek yogurt for whipped cream cheese. Fold in a teaspoon of everything bagel seasoning. Garnish with thinly sliced scallions. Unreal.
- Mediterranean Sunshine: Add 1 tablespoon of finely chopped sun-dried tomatoes (packed in oil) and 1 teaspoon of chopped fresh oregano or basil. A crumble of feta on top is *chef’s kiss*.
- Spicy ‘nduja Style: Love heat? Mash in 1-2 teaspoons of ‘nduja paste or harissa for a smoky, spicy kick. A drizzle of honey on top balances it perfectly.
- Dairy-Free & Zingy: Use mashed ripe avocado instead of yogurt. Add an extra squeeze of lemon to prevent browning and a handful of chopped cilantro. It’s vibrant and rich.
- The Classic French Touch: Replace the yogurt with good Dijon mustard (start with 1 tsp) and a very small, finely minced shallot. Super elegant on toasted baguette rounds.
Beau’s Back-Pocket Notes & Kitchen Confessions
This recipe has lived in my back pocket for over a decade, evolving from that broke cook’s hack to my go-to for last-minute guests. One time, I served it at a gathering without telling anyone what it was first. The reviews were all “This dip is amazing!” and “What’s in this pâté?” The big reveal got laughs and a few shocked faces, but the bowl was empty. Lesson learned: sometimes, it’s better to ask for forgiveness than permission! Over the years, I’ve learned it’s virtually foolproof. The only real mistake is overthinking it. Use what you have, taste as you go, and trust your palate. It’s a forgiving, flexible friend in the kitchen.
Your Questions, Answered (Before You Even Ask!)
- Q: I’m worried about a “fishy” taste. How can I avoid that?
A: Great question! First, trust your sardines. Look for reputable brands and check the can for a recent date. Rinsing the drained sardines very briefly under cold water can help. The lemon juice and Greek yogurt in this recipe are specifically there to balance and brighten the flavor, which completely transforms it. Start here—you might be surprised! - Q: Can I make this ahead of time?
A: Absolutely! The spread itself can be made, stored in an airtight container in the fridge, for up to 2 days. The flavors actually meld and get even better. Just give it a quick stir before serving. I don’t recommend assembling it on the crackers more than 30 minutes ahead, as the crackers will lose their crucial crunch. - Q: What’s the best way to mash the sardines?
A: A simple fork is my weapon of choice—it gives you control over the texture. For a completely smooth, mousse-like consistency (great for fancy canapés), a mini food processor is your best bet. Pulse a few times until you reach the texture you want. - Q: Any other cracker recommendations?
A: Of course! While I love whole grain for its heartiness, this spread is also fantastic on rye crispbread, simple water crackers, cucumber slices, or even small, thick-cut potato chips for an indulgent treat.
Fueling Your Body: The Good Stuff Inside
Let’s talk about why this snack makes you feel so darn good. Sardines are a true nutritional powerhouse. A single serving of this spread (about ¼ of the recipe) delivers a robust **14 grams of protein** to keep you full and support your muscles. They’re one of the very best sources of **Omega-3 fatty acids (EPA & DHA)**, which are superstars for heart and brain health. Plus, you’re getting a significant dose of **calcium** (especially if you use the soft, edible bones), **Vitamin D**, and **Vitamin B12**. Paired with the probiotics and protein from Greek yogurt and the fiber from whole grain crackers, this isn’t just an empty-calorie bite. It’s a balanced, nutrient-dense choice that genuinely fuels your day. (Note: Nutritional info is an estimate based on sardines in water and standard ingredients.)
Print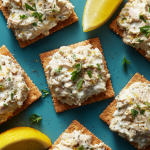
Sardine Spread on Whole Grain Crackers : Protein-Packed Snack with a Zesty Twist
Description
Looking for a snack that’s quick, creamy, savory, and actually good for you? This 5-minute sardine spread transforms the humble canned fish into a protein-packed, omega-3 rich delight. Brightened with lemon and creamy Greek yogurt, it’s perfect on whole grain crackers, toast, or veggie sticks. Even skeptics usually end up loving it!
Ingredients
-
1 can sardines (in water or olive oil), drained
-
2 tbsp plain Greek yogurt (or sour cream, cream cheese, or mashed avocado)
-
1 tsp fresh lemon juice
-
Salt & pepper, to taste
-
Whole grain crackers, for serving
Optional garnishes: chopped parsley or dill, chili flakes, capers, olive oil drizzle, lemon zest
Instructions
-
Mash the sardines: Place drained sardines in a small bowl and mash with a fork until mostly smooth but slightly flaky.
-
Add creaminess: Stir in Greek yogurt and lemon juice until fully combined. For a smoother texture, pulse briefly in a mini food processor.
-
Season: Add salt and pepper to taste. Fold in optional mix-ins like capers or herbs.
-
Serve: Spread generously on crackers, toast, or veggie sticks. Top with optional garnishes and enjoy immediately.
Notes
-
Creamy swap: Try cream cheese, labneh, or mashed avocado instead of Greek yogurt.
-
Flavor twists:
-
Everything Bagel: Add whipped cream cheese and everything bagel seasoning.
-
Mediterranean: Mix in sun-dried tomatoes, fresh herbs, and a sprinkle of feta.
-
Spicy: Add harissa or ‘nduja paste, balanced with a drizzle of honey.
-
-
Make ahead: Store the spread in an airtight container in the fridge up to 2 days. Stir before serving
Your New Snack-Time Secret Weapon
And there you have it—my full-hearted case for the mighty sardine spread. It’s proof that eating well doesn’t have to be complicated, time-consuming, or intimidating. In about five minutes, with zero cooking, you can create something that’s genuinely delicious, deeply nourishing, and oddly impressive. So next time that 3 PM slump hits, or you need a last-minute appetizer that wows, I hope you give this a shot. Channel your inner Grandpa Joe, embrace the simplicity, and get ready for your new favorite snack. Thanks for hanging out in the kitchen with me! Now, go grab a fork… or just a cracker.
Final Thoughts
This isn’t just a recipe—it’s a quiet revolution in a bowl.
It’s for anyone who’s ever thought, I should eat better… but I also don’t want to try that hard.
It’s for the 3 PM crash, the unexpected guests, the empty fridge, and the part of you that still believes food should be both joyful and kind to your body.
That humble tin of sardines isn’t just a can of fish—it’s a tiny treasure chest of flavor, nutrition, and nostalgia. It’s a connection to simpler times, a lifeline on busy days, and proof that the most satisfying foods often come with the least fuss.
So here’s my challenge to you:
Let curiosity win over hesitation.
Let flavor speak louder than preconceptions.
Take five minutes, mash a few things together, and taste what happens when convenience meets nourishment—and when a long-overlooked ingredient gets the bright, creamy, zesty makeover it deserves.
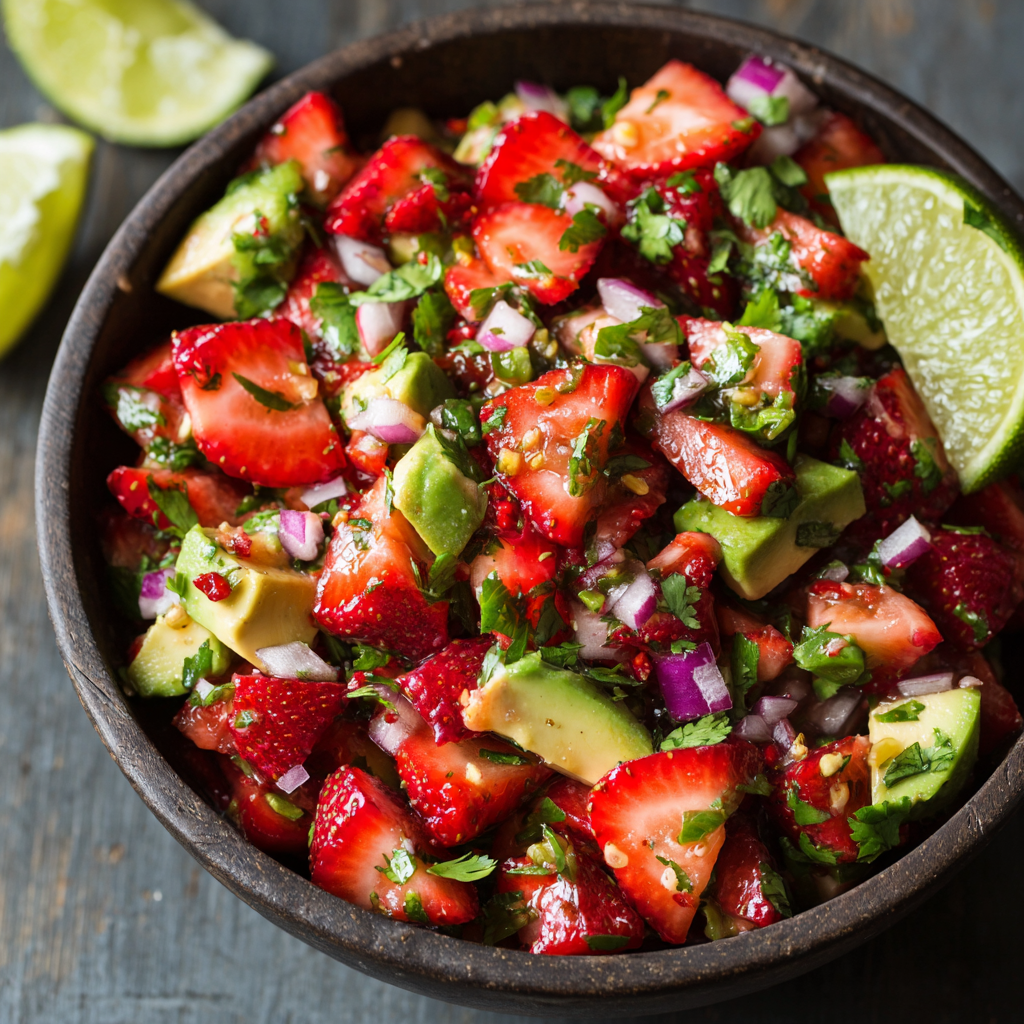
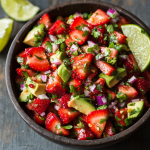
Savory Strawberry Avocado Salsa : Fresh, Colorful & Perfect for Summer
Savory Strawberry Avocado Salsa – Fresh, Colorful & Perfect for Summer
Hey there, friend! Beau here, welcoming you back to the Feastical kitchen. Today, we’re tossing out the rulebook and diving headfirst into a recipe that perfectly captures the magic of summer eating. I’m talking about my absolutely favorite, crowd-pleasing, conversation-starting Strawberry Avocado Salsa.
Now, I see that look. Strawberries… in salsa? Trust me, I was a skeptic once, too. We’re so used to strawberries playing the sweet role in desserts that we forget they’re a fantastic, juicy, slightly tart fruit that can hang with the savory crew. When you pair them with creamy avocado, a punch of red onion, the fresh zing of cilantro, and a generous squeeze of lime, something incredible happens. It’s not a dessert salsa. It’s a bright, refreshing, sweet-meets-savory explosion that makes your taste buds do a happy dance.
This isn’t just a dip (though, oh my, is it a good one with a sturdy tortilla chip). This is your secret weapon. It transforms simple grilled chicken or fish into a gourmet meal. It turns taco Tuesday into a vibrant fiesta. It makes a bowl of black beans and rice feel like a celebration. And the best part? It comes together in about 10 minutes flat, with zero cooking required. So, if you’re ready to bring a burst of summer to your table, grab your favorite cutting board and let’s make some magic.
The Picnic That Changed My Mind
I have to confess, I didn’t invent this combo. I owe that “aha!” moment to my friend Maya and a slightly disastrous, totally wonderful picnic a few summers back. We’d planned this elaborate spread, but the summer heat had other ideas. My intricate pasta salad was wilting, the cheese was sweating, and we were both getting a little… hangry.
Then Maya, ever the calm one, pulled out a mismatched Tupperware from her bag. “It’s just something I threw together,” she said, shrugging. Inside was this riot of red and green: chunks of strawberry and avocado, flecked with onion and cilantro. It looked like summer in a bowl. We dug in with chips, and I swear, the whole afternoon shifted. The cool, juicy sweetness of the strawberries against the rich avocado was a revelation. It was refreshing, it was satisfying, and it single-handedly saved the picnic. That’s the power of simple, good food made with great ingredients. It brings joy. This recipe is my homage to that day—to unplanned moments, good friends, and the delicious surprises that happen when we’re willing to play with our food.
Gathering Your Flavor Crew
This recipe is all about the quality and harmony of a few key players. Here’s what you’ll need and why each one matters:
- 1 cup fresh strawberries, diced – The sweet heart of the operation. Look for berries that are fragrant, bright red, and firm but not rock-hard. A little tip: if they smell like summer, they’ll taste like it. Chef’s Insight: Don’t use frozen and thawed berries here—they’ll be too mushy and watery.
- 1 ripe but firm avocado, diced – Our creamy counterpoint. You want an avocado that yields gently to a squeeze, like a ripe peach. If it’s mushy, it’ll turn to guacamole when you mix it. Substitution Tip: In a pinch, a ripe mango can offer a similar creamy-sweet contrast, but the flavor profile changes beautifully.
- ¼ small red onion, finely chopped – This brings the necessary sharp, savory bite. Chopping it finely ensures you get a little in every bite without it overwhelming the delicate strawberries. Chef’s Hack: Soak the chopped red onion in ice water for 5-10 minutes before adding. This tames the raw onion bite beautifully!
- Juice of 1 lime – The zesty conductor that ties the band together. Fresh lime juice is non-negotiable—it adds bright acidity and keeps the avocado looking fresh and green. Roll your lime on the counter under your palm before juicing to get every last drop.
- 2 tbsp chopped fresh cilantro – The herby, fresh finish. If you’re one of those folks who thinks cilantro tastes like soap (I’ve heard the tales!), simply swap it for fresh mint or basil. It’ll be a different, but equally fantastic, vibe.
- Salt & pepper to taste – Don’t underestimate these two! Salt makes all the individual flavors pop, and a crack of black pepper adds a subtle, earthy warmth.
- Optional: ½ a jalapeño or serrano pepper, seeds removed and finely diced – For my friends who like a little spark. This adds a wonderful, clear heat that cuts through the richness. Start with half and add more to your bravery level!
Let’s Build Some Deliciousness: Your Step-by-Step Guide
Ready? Let’s get chopping and mixing. This is the fun, easy part. I’ll walk you through it with all my favorite kitchen hacks.
- Prep Your Stars. Hull your strawberries and dice them into nice, bite-sized chunks—not too big, not too small. For the avocado, I like to make lengthwise and crosswise cuts right in the skin, then scoop the cubes out with a spoon. It gives you perfect little squares and is way easier than trying to peel it first. Toss them both into a medium-sized mixing bowl.
- Add Your Aromatics. Take your finely chopped red onion (remember the ice water bath trick if you want it milder!) and sprinkle it over the strawberries and avocado. Follow it up with your chopped cilantro or alternative herb. If you’re using the jalapeño, add it now too. A little heat is a wonderful thing.
- The Citrus Hug. Here’s a crucial step: squeeze that lime juice directly over everything immediately after adding the avocado. The acid in the lime slows down the browning process (that oxidation we want to avoid), essentially giving your avocado a protective, tasty coat. It also starts marinating the onions and strawberries, mellowing everything out.
- The Gentle Toss. Grab a large spoon or spatula. Now, gently—I mean gently—fold the mixture together. We’re coaxing the flavors to mingle, not making strawberry avocado mush. The goal is to coat everything in that glorious lime juice without crushing the beautiful chunks you just made.
- Season to Perfection. Now, taste it. Go on! Then add a pinch of salt and a few cracks of black pepper. Taste again. See how the salt makes the strawberry flavor brighter and the avocado richer? Add a little more if needed. Your palate is the best guide here.
- To Chill or Not to Chill. You can absolutely serve this right away—it’s fantastic immediately. But if you have 15-20 minutes, cover the bowl and let it hang out in the fridge. This short rest lets the flavors get to know each other, resulting in a more harmonious and deeper-tasting salsa.
How to Serve This Summer Rockstar
This salsa is incredibly versatile. Think of it less as just a dip and more as a vibrant, chunky sauce or relish that elevates everything it touches.
The Classic Move: Pile it high in a colorful bowl surrounded by your favorite sturdy tortilla chips. I’m partial to the lightly salted or blue corn varieties for their earthy flavor.
The Main Event Transformer: Spoon it generously over grilled chicken breasts, salmon fillets, or seared scallops. The cool salsa on hot protein is a textural dream. It’s also unbelievable on fish tacos or tucked into a burrito bowl with cilantro-lime rice and black beans.
The Salad Booster: Use it as a topping for a simple bed of greens instead of dressing. It adds moisture, flavor, and heft. Or, serve it alongside a cheese board with some creamy goat cheese or sharp cheddar—the pairings are divine.
Make It Your Own: Fun Flavor Twists
Once you’ve mastered the base, the playground is open! Here are a few of my favorite riffs on this recipe:
- Spicy & Smoky: Add the jalapeño, plus a pinch of smoked paprika or a few drops of chipotle hot sauce. The smokiness plays so well with the sweet berries.
- Herb Garden Swap: Swap cilantro for fresh mint or basil. Mint makes it incredibly refreshing, while basil gives it a more sophisticated, Italian-leaning twist.
- The Tropical Vacation: Add ½ cup of diced ripe mango or pineapple along with the strawberries. For extra crunch, throw in some diced cucumber right before serving.
- Protein Power Bowl: Turn it into a light meal by folding in a can of rinsed and drained black beans or chickpeas, and some cooked quinoa. It becomes a fantastic, filling salad.
- Creamy Dreamy: For an even richer dip, fold in ¼ cup of crumbled feta or cotija cheese right before serving. Salty, creamy, and perfect.
A Few Notes From My Kitchen to Yours
This recipe has become a Feastical staple, and like any good friend, it’s evolved over time. I used to be so precious about dicing everything exactly the same size. Now? I embrace a little rustic chunkiness—it feels more homemade and fun. I’ve also learned that this salsa is a fantastic “clean out the garden” recipe. A few cherry tomatoes halved? In. A leftover ear of corn, kernels sliced off? Absolutely. A lonely peach needing a home? You bet.
The biggest laugh in my kitchen with this recipe? The time I mistakenly used a habanero instead of a jalapeño. Let’s just say we called that batch “The Dragon’s Breath Salsa” and ate it with copious amounts of sour cream. A delicious, if tearful, lesson in pepper identification! Always taste your chili before adding the whole thing.
Your Questions, Answered
Q: How far ahead can I make this? Will the avocado turn brown?
A: Thanks to the lime juice, it holds up pretty well! For the best texture and color, I recommend making it no more than 2-3 hours ahead. Keep it covered tightly with plastic wrap pressed directly onto the surface of the salsa to limit air exposure. Give it a gentle stir before serving.
Q: Can I use balsamic vinegar instead of lime?
A: You could, but it will create a totally different, much heavier, sweeter flavor profile. The fresh lime is key for the bright, summery feel. If you’re out of limes, lemon juice is the best direct substitute.
Q: My salsa got a little watery after sitting. What happened?
A> No worries! Strawberries and salt both release moisture over time. This is natural. You can either drain off a little of the liquid from the bottom of the bowl before serving, or just stir it back in—it’s packed with flavor. Using firm, ripe fruit helps minimize this.
Q: Is this a salsa or a pico de gallo?
A> Great question! Technically, it’s a fruit salsa. Traditional pico de gallo is typically tomatoes, onion, chili, cilantro, and lime. Since our star is strawberry, we’re firmly in the fresh, chunky salsa category—and it’s a delicious category to be in.
Savory Strawberry Avocado Salsa : Fresh, Colorful & Perfect for Summer
Description
Savory Strawberry Avocado Salsa
Servings: ~4 (½ cup per serving)
Prep Time: 10 minutes
Total Time: 10 minutes
Ingredients
-
1 cup fresh strawberries, diced
-
1 ripe but firm avocado, diced
-
¼ small red onion, finely chopped
-
Juice of 1 lime
-
2 tbsp fresh cilantro, chopped (or mint/basil if preferred)
-
Salt and black pepper to taste
-
Optional: ½ jalapeño or serrano, seeds removed and finely diced
Instructions
-
Prep the Fruit & Veggies:
-
Hull and dice strawberries.
-
Dice avocado by cutting lengthwise and crosswise in the skin, then scoop out cubes.
-
-
Add Aromatics:
-
Add finely chopped red onion, cilantro (or alternative herb), and jalapeño if using.
-
-
Citrus Coat:
-
Squeeze lime juice over the mixture immediately to prevent avocado browning and start marinating.
-
-
Gentle Toss:
-
Carefully fold everything together so the ingredients are coated in lime juice without mashing the avocado or strawberries.
-
-
Season & Taste:
-
Add salt and pepper to taste. Adjust as needed.
-
-
Optional Chill:
-
Serve immediately or refrigerate 15–20 minutes for flavors to meld.
-
Notes
-
Use firm, ripe strawberries and avocado for best texture.
-
Soak red onion in ice water for 5–10 minutes to mellow the bite.
-
Keep lime juice handy—it brightens flavor and prevents browning.
-
If the salsa gets watery, drain or stir back in—the flavor remains excellent.
-
Make up to 2–3 hours ahead and cover tightly with plastic wrap pressed onto the surface.
Nutritional Highlights (Per Approx. ½ Cup Serving)
Let’s talk about the good stuff this brings to the table! This salsa isn’t just tasty; it’s packed with nutrients. Avocados provide heart-healthy monounsaturated fats and nearly 20 vitamins and minerals, including potassium (more than a banana!) and fiber. Strawberries are a fantastic source of Vitamin C, manganese, and antioxidants. The red onion and cilantro add their own phytonutrient boosts. It’s naturally gluten-free, dairy-free, and vegan. Remember, this is an estimate, as ingredient sizes can vary:
- Calories: ~120
- Fat: 9g (mostly the good, unsaturated kind from the avocado)
- Carbohydrates: 10g
- Fiber: 5g (That’s about 20% of your daily goal!)
- Sugar: 4g (natural sugars from the fruit)
- Protein: 1.5g
Final Thoughts
And there you have it—my not-so-secret weapon for making any summer meal feel special. This Strawberry Avocado Salsa is proof that the best recipes are often the simplest, and that the most memorable flavors come from bold, happy combinations.
I hope you give this a try and make it your own. Share it at your next BBQ, take it on a picnic, or just make a batch for yourself on a Tuesday night because you deserve something vibrant and delicious. Food is about joy, connection, and a little bit of playful adventure. This salsa is all three.
If you make it, I’d love to see your creation! Tag me on social @Feastical or drop a comment on the blog. Now, go grab those strawberries and avocados—your taste buds are waiting.
With a full heart and a full bowl,
Beau

Strawberry Tiramisu Cups : No-Bake Layered Dessert with a Fruity Twist
Strawberry Tiramisu Cups: A No-Bake, Sun-Kissed Hug in a Glass
Hey friends, Beau here from Feastical! Let’s get one thing straight right off the bat: I believe dessert should *always* feel like a celebration, but never, ever feel like a hassle. That’s why I’m head-over-apron in love with no-bake wonders, especially when the sun starts shining and berries are at their peak. Today, we’re throwing open the kitchen windows, ditching the oven, and giving a classic Italian dessert the brightest, berry-licious makeover it deserves.
Welcome to my world of Strawberry Tiramisu Cups. Imagine this: layers of fluffy, cloud-like mascarpone cream, delicate ladyfingers kissed with sweet strawberry juice, and pockets of juicy, fresh berries, all stacked up in a clear glass so you can see every beautiful, delicious stratum. It’s part dessert, part piece of art, and 100% guaranteed to make you look like a dessert rockstar with minimal effort.
This isn’t just a recipe; it’s your secret weapon for brunches, birthday parties, Mother’s Day, or those “I just need something gorgeous and sweet tonight” moments. It’s elegant enough for a dinner party but simple enough for a Tuesday. So, grab your favorite cups, and let’s create something magical that tastes like sunshine and joy.
The Day Tiramisu Got a Strawberry Smooch
My love affair with tiramisu started in a tiny, family-run trattoria years ago, but this strawberry version? It was born out of a happy little kitchen “oops.” One spring, I was planning a baby shower for a dear friend and had my heart set on a classic tiramisu. But as I was whipping the mascarpone, I glanced over and saw a giant, just-picked basket of strawberries sitting on the counter, practically begging to be involved.
In a moment of “what if?” I blended a few into a quick purée, dipped a ladyfinger in it, and took a bite. It was a revelation—bright, fruity, and so much lighter than the coffee version. I scrapped my original plan on the spot, layered everything into pretty cups I’d found at a thrift store, and crossed my fingers. The result? They were the first dessert to disappear, with guests asking for the recipe before they even left. It taught me that sometimes the best recipes aren’t meticulously planned; they’re the ones that come from a bit of playful improvisation and listening to what’s fresh and beautiful in front of you. That spirit of joyful, adaptable cooking is what Feastical is all about.
Gathering Your Sunshine Ingredients
Here’s the beautiful part: the ingredient list is short, sweet, and simple. Quality really shines here, so let’s break it down.
- 12 ladyfingers (savoiardi): These are the dry, oblong Italian cookies. Their delicate texture soaks up flavor perfectly without getting soggy. Chef’s Tip: Can’t find them? Soft sponge cake slices or pound cake cut into strips work in a pinch!
- 1 cup strawberry juice or puréed strawberries: This is our “coffee soak” substitute! If using fresh berries, purée and strain for a smooth juice. For a deeper flavor, a splash of orange liqueur or even a raspberry juice blend is divine.
- 1 cup mascarpone cheese: The luxurious, creamy heart of the filling. Let it sit at room temp for 15 minutes before using so it blends smoothly. Full-fat is non-negotiable for that dreamy texture.
- 1 cup whipped cream or whipped topping: For lightness. I prefer whipping my own heavy cream with a tbsp of sugar, but a quality store-bought whipped topping or even extra-thick coconut cream (for dairy-free) works.
- 1/4 cup powdered sugar: Sweetens the cream without graininess. Always sift it in to avoid lumps!
- 1 teaspoon vanilla extract: The warm, aromatic backbone. A scrape of vanilla bean paste would be incredible here.
- 1 1/2 cups chopped fresh strawberries: The star of the show! Use the reddest, sweetest berries you can find. Reserve a few perfect slices for the gorgeous top layer.
Let’s Layer Up the Goodness: Step-by-Step
Ready to build your edible masterpiece? Follow these steps, and don’t skip my little chef hacks along the way—they make all the difference.
- Make the Mascarpone Cream Dream: In a medium bowl, combine the room-temperature mascarpone, sifted powdered sugar, and vanilla extract. Use a hand mixer or a strong whisk to beat it until it’s completely smooth and silky. No lumps allowed! Now, gently fold in your whipped cream. “Folding” is key here—use a spatula and a light, turning motion to keep all that lovely air in the cream. You should have a thick, cloud-like, spreadable mixture. Taste it. Is it heaven? Yes, yes it is. Set this aside.
- The Great Ladyfinger Dip: Pour your strawberry juice or purée into a shallow dish (a pie plate works great). Here’s my golden rule: Dunk, don’t drown! Dip each ladyfinger into the juice for just 1-2 seconds per side. You want it to be moistened and flavorful, but not so soaked that it falls apart when you layer it. Think of it as a quick strawberry smooch.
- The Art of the Layer: Now for the fun, architectural part! Grab your clear cups, glasses, or even a trifle dish. Start with a layer of the dipped ladyfingers—you might need to break one to fit snugly. Next, spoon or pipe a generous layer of your mascarpone cream. Then, scatter a handful of those chopped strawberries. Repeat! I usually get two full, beautiful layers in a standard cup.
- The Patience Game (The Hardest Part): Once assembled, cover the cups gently and pop them in the fridge. Chill for at least 2 hours, but ideally 4 or even overnight. This wait is magical—it lets the flavors marry, the ladyfingers soften perfectly, and the whole dessert set into spoonable perfection.
- The Grand Finale – Toppings! Right before serving, add your crowning glory. A fan of fresh strawberry slices, a mint leaf, a light dusting of powdered sugar, or even a drizzle of reduced balsamic glaze takes it over the top.
How to Serve These Beauties
Presentation is half the fun with this dessert! I love using a mismatched set of vintage glasses or clear mason jars—it adds charm and shows off those gorgeous layers. Serve them straight from the fridge with a long-handled spoon or a cute dessert spoon.
For a party, line them up on a tray garnished with scattered strawberry tops and mint sprigs. They’re perfectly portable, so they’re fantastic for picnics or potlucks (just keep them cool). Pair with a glass of Prosecco for a truly celebratory touch, or a cup of hot coffee to complement the sweet berries. The contrast is divine.
Make It Your Own: Delicious Twists & Swaps
Got extra berries? Dietary needs? Feeling adventurous? Let’s play!
- Mixed Berry Bonanza: Swap strawberries for raspberries, blackberries, or blueberries. A mixed berry purée creates a gorgeous, deep purple hue.
- Lemon Zest Brightness: Add the zest of one lemon to the mascarpone cream. The citrus cuts through the richness and makes the strawberry flavor pop even more.
- Decadent Chocolate-Dipped: For a nod to chocolate-covered strawberries, drizzle each layer with a bit of melted dark chocolate or sprinkle with mini chocolate chips.
- Dairy-Free Delight: Use a high-quality vegan cream cheese and coconut whipped cream. Ensure your ladyfingers are egg-free (many store brands are!).
- Adults-Only Spike: Add a tablespoon of Grand Marnier, Chambord, or strawberry liqueur to your strawberry purée for a sophisticated kick.
Beau’s Kitchen Notes & Stories
Over the years, this recipe has become my go-to “impress without stress” dessert. I’ve made it in a giant trifle bowl for a summer block party and in tiny shot glasses for a wedding cocktail hour. The recipe scales up or down beautifully.
One time, I accidentally used frozen berries for the purée and didn’t thaw them all the way. The cold purée actually helped set the cream faster, and the dessert was ready an hour earlier! A happy accident, for sure. The moral of the story? Don’t be afraid to adapt. Cooking is about joy, not perfection. If your layers aren’t picture-perfect, I promise they’ll still taste incredible.
Your Questions, Answered
Q: Can I make this ahead of time?
A: Absolutely! That’s one of its best features. Assemble the cups up to 24 hours in advance. Just add the final fresh berry garnish right before serving so they don’t get watery.
Q: My mascarpone cream is runny. What happened?
A: This usually means either the mascarpone was too cold when mixed (let it warm up a bit) or the whipped cream was under-whipped. Make sure your whipped cream forms stiff peaks before folding it in. If it’s already assembled, just chill it longer—it will firm up.
Q: Are ladyfingers the same as sponge cake?
A: They’re similar, but ladyfingers are drier and more structured, designed for dipping. Sponge cake will work, but it’s more delicate. Dip it even more quickly!
Q: How long do leftovers last?
A: Enjoy them within 2-3 days, covered in the fridge. The ladyfingers will continue to soften but will still be delicious.

Strawberry Tiramisu Cups : No-Bake Layered Dessert with a Fruity Twist
Description
Strawberry Tiramisu Cups
Servings: 6
Prep Time: 15 minutes
Chill Time: 2–4 hours (overnight is best)
Total Time: 2–4 hours
Ingredients
For the Strawberry Layer
-
1 cup strawberry juice or puréed strawberries
-
1½ cups chopped fresh strawberries
For the Mascarpone Cream
-
1 cup mascarpone cheese, room temperature
-
1 cup whipped cream (or whipped topping)
-
¼ cup powdered sugar, sifted
-
1 tsp vanilla extract
For Assembly
-
12 ladyfingers (savoiardi)
-
Optional toppings: fresh strawberry slices, lemon zest, mint leaves, cocoa powder, or chocolate drizzle
Instructions
-
Make the Mascarpone Cream:
In a bowl, beat mascarpone, powdered sugar, and vanilla until smooth. Gently fold in whipped cream until fluffy. Set aside. -
Dip the Ladyfingers:
Pour strawberry juice into a shallow dish. Quickly dip each ladyfinger 1–2 seconds per side—moist but not soggy. -
Layer the Cups:
-
Spoon a thin layer of strawberry purée or juice at the bottom of each cup.
-
Add dipped ladyfingers.
-
Spoon or pipe a layer of mascarpone cream.
-
Scatter chopped strawberries.
-
Repeat for a second layer if desired.
-
-
Chill:
Cover and refrigerate for at least 2 hours or overnight. -
Garnish & Serve:
Add fresh strawberry slices, mint, lemon zest, or a drizzle of chocolate before serving. Enjoy straight from the cup!
Notes
-
Let mascarpone sit at room temperature for smooth cream.
-
Fold whipped cream gently to keep it airy.
-
Dip ladyfingers quickly to avoid sogginess.
-
Assemble up to 24 hours ahead; add fresh berries just before serving.
Nutritional Info (A Quick Note)
Hey, we’re all about balance here at Feastical! While this is a dessert meant for savoring and celebrating, here’s a general breakdown per serving (based on 6 cups). Remember, this is an estimate, and using different brands or substitutions will change the values.
- Calories: ~250
- Carbohydrates: 22g
- Fat: 15g
- Sugar: 10g
- Protein: 4g
- Fiber: 2g
The fresh strawberries provide vitamin C and a bit of fiber, making this a slightly lighter choice than many traditional desserts. Enjoy guilt-free!
Final Thoughts from My Kitchen to Yours
And there you have it, friends—my sunshiny, no-bake Strawberry Tiramisu Cups. This recipe is more than just a list of steps; it’s an invitation to play, to create, and to share something made with love (and lots of strawberries).
I love how it captures the essence of Feastical: food that brings people together, doesn’t stress you out, and tastes like a genuine moment of happiness. So, the next time you see those ruby-red berries at the market, grab an extra pint and treat yourself to this layered delight.
If you make it, I’d be over the moon if you tagged me @feastical or used the hashtag #feasticaleats so I can see your beautiful creations. Now, go forth and layer! Until next time, keep your kitchen messy and your heart full.
Warmly,
Beau
Love this recipe? Save it for later!
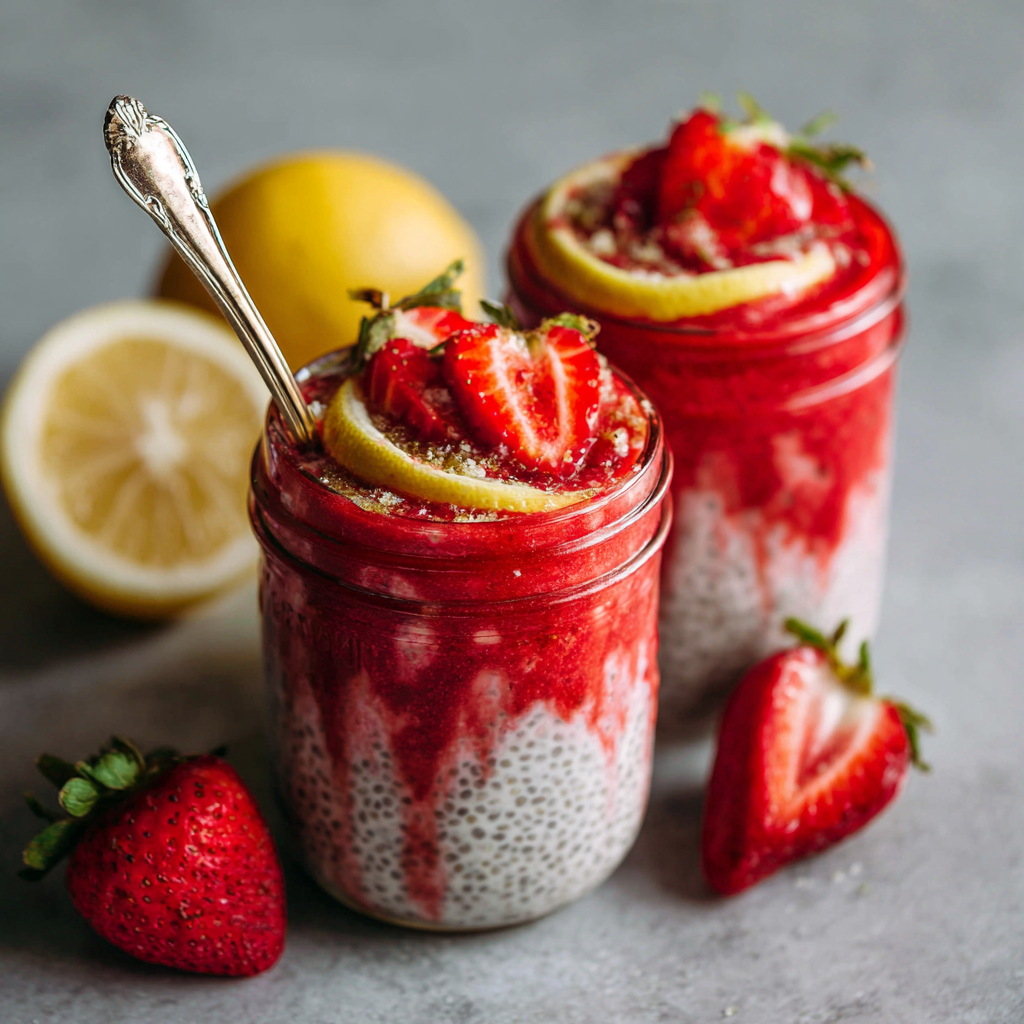
Strawberry Lemonade Chia Pudding Jars : Refreshing, Healthy & Meal-Prep Friendly
Strawberry Lemonade Chia Pudding Jars – Your New Favorite Sunny-Day Snack
Hey friends, Beau here! Can you feel it? That shift in the air, the longer days, the sheer *need* to have something bright, cool, and delicious waiting for you in the fridge. Summer isn’t just a season; it’s a feeling. And for me, that feeling tastes a lot like a perfect, tangy-sweet sip of homemade strawberry lemonade. But what if I told you we could turn that iconic summer sip into a spoonable, dreamy, and seriously good-for-you breakfast or snack? Enter the magic of these Strawberry Lemonade Chia Pudding Jars.
This isn’t just another chia pudding recipe. This is sunshine in a jar. We’re talking creamy, lemon-zested chia pudding that tastes like a cloud of citrus, layered with a vibrant, fresh strawberry purée that’s so good you might be tempted to eat it with a spoon straight from the blender. It’s a feast for your eyes and your taste buds, all packed into a portable mason jar. Whether you’re running out the door for a beach day, need a post-workout refuel, or just want a guilt-free dessert that feels like a treat, this recipe is your new best friend. It’s wellness that doesn’t feel like work. It’s a dessert that powers you through your morning. It’s, quite simply, everything I love about feel-good food. So, grab your favorite jar, and let’s make your kitchen smell like a summer picnic.
The Lemonade Stand That Started It All
This recipe takes me right back to being eight years old, sitting at a wobbly card table at the end of my driveway with my best friend. Our “gourmet” lemonade stand was legendary (in our own minds). We’d squeeze lemons until our hands hurt, stir in a truly irresponsible amount of sugar, and my secret weapon was always a handful of smashed strawberries from my mom’s garden for the “deluxe” version. That pink, slightly pulpy, utterly perfect strawberry lemonade was the taste of accomplishment, of sunny freedom, of sharing something you made with a big, goofy grin.
Years later, when I first started playing with chia seeds and their magical pudding-making abilities, I knew I had to capture that nostalgic flavor. The goal was never to create a “health food” replica, but to make something that genuinely sparked that same joy. The first time I layered that lemon-spiked pudding with fresh strawberry purée and took a bite? Bingo. It was like time travel with a spoon. It had all the bright, cheerful flavor of my childhood stand, but grown-up, nourishing, and ready to fuel a new kind of adventure. That’s the spirit I want you to taste in every single layer.
What You’ll Need: Simple Ingredients, Maximum Flavor
Here’s the beautiful part: this recipe is built on a handful of simple, wholesome ingredients. Each one plays a starring role, and I’ve got some easy swaps if you need them!
- For the Lemon Chia Pudding:
- ½ cup Chia Seeds: These tiny powerhouses are the whole show! They absorb liquid and create that amazing pudding texture. Don’t worry about them being bland; they’re a flavor canvas. Chef’s Insight: If you’re new to chia, trust the process! They need time to work their magic.
- 2 cups Almond Milk (or milk of choice): I love unsweetened almond milk for its light, neutral base. But this is your playground! Creamy oat milk, coconut milk (from a carton for drinking, not the can), or good ol’ dairy milk all work beautifully.
- 1–2 tbsp Pure Maple Syrup: Our natural sweetener. I start with 1 tablespoon because the strawberries add sweetness too. Taste and add more if you like it sweeter! Honey or agave are great substitutes.
- 1 tsp Pure Vanilla Extract: The secret background singer that makes the lemon and strawberry pop. It adds a warm, round note. Don’t skip it!
- Zest of 1 Lemon: This is NON-NEGOTIABLE for that true “lemonade” punch! The zest holds the most potent lemon oil and fragrance. Just be sure to stop before you hit the bitter white pith.
- For the Strawberry Layer:
- 1½ cups Fresh or Frozen Strawberries: Fresh summer berries are divine, but frozen are my year-round, budget-friendly hero. They blend into a thicker, almost sorbet-like purée, and they’re picked at peak ripeness.
- 1 tbsp Fresh Lemon Juice: A bright squeeze to enhance the berries’ natural tartness and keep that lemonade theme going strong.
- 1 tbsp Maple Syrup (Optional): Taste your strawberries! If they’re perfectly ripe and sweet, you might not need this. If they’re a bit tart or you’re using frozen without added sugar, a little drizzle balances it perfectly.
Let’s Make Some Magic: Step-by-Step
Ready to assemble your edible sunshine? Let’s do this. It’s less about precise technique and more about having fun.
- Wake Up the Chia Seeds. In a medium bowl or a large measuring jug with a spout (my favorite for easy pouring later!), combine the chia seeds, almond milk, 1 tbsp maple syrup, vanilla extract, and all of that glorious lemon zest. Now, here’s the crucial first step: whisk it like you mean it! Seriously, get in there and whisk for a good 30-60 seconds. This initial agitation helps prevent the seeds from clumping together in one giant, tapioca-like ball. You want them evenly distributed. Give it a taste. Want it sweeter or more lemony? Now’s the time to add another half-tablespoon of syrup or a little more zest.
- The First Rest. Cover the bowl and pop it in the fridge. Set a timer for 30 minutes. This is your one and only “work” for the pudding. When the timer goes off, pull it out and give it another really good whisk or stir. You’ll see it’s already starting to thicken. This second stir breaks up any clumps that tried to form and ensures a flawlessly smooth, creamy pudding later. Cover it again and let it chill for at least 4 hours, but honestly, overnight is the true game-changer. It becomes luxuriously thick and perfect.
- Create the Strawberry Sunshine. While the pudding chills (or right before assembly), make your purée. Add the strawberries, lemon juice, and optional sweetener to a blender. Blitz until completely smooth! If you prefer a little texture, you can pulse it a few times to leave some tiny bits. No blender? A food processor works, or you can even mash very ripe berries with a fork for a rustic vibe.
- The Art of the Layer. This is the fun part! Grab your clean mason jars, glasses, or even cute bowls. You’re the artist. Start with a spoonful of strawberry purée at the bottom. Then, gently spoon or pour a layer of the set chia pudding on top. Repeat! I love doing two layers of each for a stunning effect. Pro-tip: For super clean layers, pour the pudding slowly over the back of a spoon held just above the strawberry layer.
- Final Flourish & The Big Chill. Once your jars are layered, screw on the lids (if using) or cover with plastic wrap. Let them hang out in the fridge for another hour or so before serving. This lets the flavors mingle and the layers set just enough so your spoon gets a perfect bite of both.
How to Serve & Savor
Presentation is part of the joy! When you’re ready to dive in, pull your beautiful jar from the fridge. I love to add a final, fresh topping right before serving for a little texture and flair. Here are some of my go-to finishes:
- A few slices of fresh strawberry and a twist of lemon zest on top.
- A sprinkle of coconut flakes (toasted for extra nuttiness!).
- A small handful of granola for a crunchy contrast.
- A fresh mint leaf because it just *looks* like summer.
Enjoy it straight from the jar with a long spoon, or pour it into a bowl if you want to admire all those layers. It’s perfect for a leisurely weekend breakfast, a make-ahead snack to beat the afternoon slump, or even as a light, healthy dessert after a backyard BBQ.
Make It Your Own: Delicious Twists & Swaps
The beauty of this formula is its flexibility. Play with it! Here are some of my favorite riffs:
- Tropical Vibes: Swap the strawberries for mango and use coconut milk in the pudding. Add a tiny pinch of lime zest instead of lemon. Hello, vacation in a jar!
- Blueberry Lemonade: Use fresh or frozen blueberries for the purée. They create a stunning deep purple layer and have a wonderful, slightly floral tartness.
- Creamy Citrus Dream: For an extra-rich treat, use half almond milk and half full-fat canned coconut milk in the pudding base. It becomes incredibly decadent.
- Protein Power-Up: Want to make it more substantial post-workout? Stir a scoop of your favorite vanilla or unflavored collagen peptides or plant-based protein powder into the pudding base along with the chia seeds. You may need to add a splash more milk.
- Sugar-Free Option: Use unsweetened milk and swap the maple syrup for a few drops of liquid monk fruit or stevia to taste, both in the pudding and the purée.
Beau’s Kitchen Notes & Stories
This recipe has been a staple in my fridge for years, and it’s evolved in the silliest ways. There was the infamous “purple phase” where I got overzealous with the blending and mixed the strawberry purée *into* the pudding instead of layering. Tasted amazing, looked like… well, let’s just say it wasn’t Instagram-ready. Then there was the time I forgot the initial 30-minute stir and ended up with chia seed “meatballs” in thin liquid. A good, vigorous whisk salvaged it, but lesson learned!
The biggest evolution? Realizing this is the ultimate “kitchen sink” recipe. Got a handful of raspberries about to go soft? Toss ’em in the blend. Only have lime? Go for it! The core idea is bright fruit + zesty citrus + creamy chia. Everything else is just a delicious variation. Don’t stress about perfection. The best recipes are the ones that adapt to your life and your fridge.
Your Questions, Answered!
Q: My chia pudding is still runny after 4 hours! What happened?
A: Don’t panic! Two likely culprits: 1) You might need just a bit more time. Chia seeds thicken at different rates based on the brand and the liquid. Give it another hour or two. 2) The ratio might be off. If it’s *still* soupy after 6+ hours, you can whisk in another tablespoon of chia seeds and chill again. It’ll firm up.
Q: Help! My chia seeds are all floating/clumped at the top/bottom.
A: That’s the universe reminding you about the 30-minute stir! It’s the single most important tip for perfect texture. If you forgot, just give it the most aggressive whisk or shake you can manage. It will almost always come together.
Q: How long do these jars last in the fridge?
A> They keep wonderfully for 4-5 days when sealed tightly. The layers might bleed into each other a tiny bit after day 2, but the flavor only gets better as everything marries. It’s the ultimate meal prep champion.
Q: Can I use something other than maple syrup to sweeten?
A> Absolutely! Honey, agave nectar, date syrup, or even a bit of plain sugar dissolved in the milk first all work. For a sugar-free option, liquid monk fruit or stevia are great—just add a few drops at a time and taste.

Strawberry Lemonade Chia Pudding Jars : Refreshing, Healthy & Meal-Prep Friendly
Description
Strawberry Lemonade Chia Pudding Jars
Servings: 4
Prep Time: 10 minutes
Chill Time: 4+ hours (overnight best)
Total Time: 4–5 hours
Ingredients
Lemon Chia Pudding
-
½ cup chia seeds
-
2 cups almond milk (or milk of choice)
-
1–2 tbsp maple syrup (or honey/agave)
-
1 tsp vanilla extract
-
Zest of 1 lemon
Strawberry Layer
-
1½ cups fresh or frozen strawberries
-
1 tbsp fresh lemon juice
-
1 tbsp maple syrup (optional, depending on sweetness of strawberries)
Optional Toppings
-
Fresh strawberry slices
-
Lemon zest
-
Coconut flakes (toasted if desired)
-
Granola
-
Fresh mint leaves
Instructions
-
Make the chia pudding:
In a medium bowl, whisk together chia seeds, almond milk, maple syrup, vanilla extract, and lemon zest. Whisk 30–60 seconds to prevent clumps. Cover and refrigerate for 30 minutes, then stir again. Chill at least 4 hours or overnight until thickened. -
Prepare the strawberry purée:
Blend strawberries, lemon juice, and optional maple syrup until smooth. For a chunkier texture, pulse lightly or mash by hand. -
Layer the jars:
In clean mason jars or glasses, spoon a layer of strawberry purée, then chia pudding. Repeat for a second layer if desired. Pour pudding slowly over a spoon for clean layers. -
Chill and serve:
Cover jars and refrigerate for another hour before serving. Add optional toppings right before serving.
Notes
-
Stir the chia pudding after the first 30 minutes to prevent clumps.
-
Use fresh or frozen berries; frozen berries give a thicker purée.
-
Adjust sweetness to taste with maple syrup, honey, or sugar alternatives.
-
For a creamier pudding, try half almond milk, half coconut milk.
Nutritional Highlights (A Friendly Breakdown)
Let’s talk about what’s fueling you! This info is per jar (assuming the recipe makes 4 servings). Remember, it’s an estimate, and variations will change it. I’m not a dietitian, but I love knowing the good stuff in my food:
Each jar is a powerhouse of sustained energy. Those chia seeds are packed with omega-3 fatty acids, fiber (a whopping 9g per jar!), and protein to keep you full. The strawberries bring a big dose of Vitamin C and antioxidants. Using unsweetened almond milk keeps it light and low in calories, while the natural sweetness from the maple syrup and fruit means no refined sugar spikes. It’s a balanced snack or breakfast that truly satisfies your sweet tooth while nourishing your body. It’s food that loves you back!
Final Thoughts from My Kitchen to Yours
And that’s it, friends! My hope is that this Strawberry Lemonade Chia Pudding becomes more than a recipe for you—that it becomes a reliable, joyful little ritual. A few minutes of prep one evening that leads to multiple mornings or afternoons of feeling like you’ve got your act together, with a delicious, colorful reward waiting for you.
Food should be fun, flexible, and full of flavor. It should connect us to great memories and help us make new ones. This simple jar does all of that for me. I’d love to hear how it turns out for you! Tag me @feastical if you share a photo, or drop a comment on the blog. Did you try the tropical twist? Did your kids go crazy for the layers? That’s my favorite part. Now, go enjoy a spoonful of summer, any day of the week.
Stay hungry,
Beau

Bacon Macaroni Salad : A Smoky, Creamy Pasta Favorite
Bacon Macaroni Salad: Your New Go-To for Every Gathering
Hey friends, Beau here from Feastical! Let’s talk about a dish that’s more than just a side—it’s a mood. It’s the dish you sneak an extra scoop of before dinner’s even called. The one that makes people’s eyes light up when they lift the lid at a potluck. I’m talking about a macaroni salad that’s been hugged by the smoky, salty, utterly irresistible magic of bacon.
Now, I love a classic mac salad as much as the next person, but sometimes you just need to kick things up a notch. This Bacon Macaroni Salad is that notch. It’s creamy, it’s crunchy, it’s tangy, and it has that deep, savory flavor that turns a simple pasta salad into the star of the table. We’re taking tender elbow macaroni on a joyride with crispy bacon, fresh, snappy veggies, and a dressing that’s so good you might want to make extra just for dipping. Whether you’re firing up the grill for a backyard BBQ, need a no-fuss dish for a weeknight dinner, or are tasked with bringing “the thing everyone eats first” to a party, this recipe is your secret weapon. It’s simple, soulful, and packed with the kind of comfort that feels like a warm hug. So, grab your biggest mixing bowl and let’s make some memories, one delicious bite at a time.
The Picnic That Started It All
I’ll never forget the first time bacon crashed the mac salad party. It was my Uncle Leo’s annual 4th of July picnic, a legendary event where folding tables groaned under the weight of every family recipe imaginable. My mom always brought her classic, perfectly fine macaroni salad. But one year, my wildcard cousin Marla showed up with a giant Tupperware bowl she simply called “The Upgrade.”
The second the lid came off, you could smell it—that unmistakable, smoky scent of bacon weaving through the creamy dressing. It was a game-changer. The adults huddled around it, trading stories between bites, while us kids “sampled” it with such enthusiasm we nearly ruined our appetites for burgers. That salad disappeared faster than the fireworks at dusk. It taught me a simple, beautiful lesson: sometimes, the best recipes aren’t about reinventing the wheel; they’re about giving it an awesome new set of tires. This recipe is my homage to Marla’s genius move, refined through years of my own kitchen tinkering. It’s a celebration of how one incredible ingredient can turn the familiar into the unforgettable.
What You’ll Need: Building Flavor, One Ingredient at a Time
Here’s the cast of characters that makes this salad sing. I’ve included my little chef insights and swaps so you can make this recipe your own.
- 2 cups (about 8 oz) elbow macaroni: The classic shape that holds the dressing perfectly. Chef’s Insight: Don’t overcook it! We want it al dente (with a slight bite) so it doesn’t turn to mush when we mix everything.
- 6 slices thick-cut bacon, cooked crisp and crumbled: The star of the show. Pro Tip: Bake your bacon on a sheet pan at 400°F for 18-20 minutes. It cooks evenly, and you get all that glorious rendered fat you can save for another use (like frying potatoes!).
- 1/2 cup mayonnaise: The creamy base of our dressing. Use a good-quality mayo you love. For a tangier kick, try Duke’s or Kewpie.
- 1/4 cup sour cream: This adds a wonderful tang and a lighter creaminess than mayo alone. Substitution: Plain, full-fat Greek yogurt works in a pinch!
- 2 tablespoons apple cider vinegar: The bright, acidic backbone that cuts through the richness. Chef’s Insight: This is non-negotiable for that “slap-your-forehead-good” flavor balance.
- 1 teaspoon Dijon mustard: Adds depth and a subtle sharpness. It’s the flavor amplifier.
- 1/2 teaspoon garlic powder: We use powder here for even distribution of mellow garlic flavor without the harsh bite of raw garlic.
- 1/2 cup celery, finely chopped: For that essential, refreshing crunch. Don’t skip it!
- 1/2 cup red bell pepper, diced: Adds sweetness, color, and another layer of crunch.
- 1/4 cup red onion, finely chopped: Provides a sharp, peppery punch. Pro Tip: If raw onion is too strong for you, soak the diced pieces in cold water for 10 minutes, then drain. It mellows them right out.
- Salt and black pepper to taste: Season in layers. We’ll season the dressing AND the final salad.
Let’s Make It: Your Step-by-Step Roadmap to Delicious
Follow these steps, and you’re guaranteed a perfect salad every single time. I’m chatting you through each one like you’re right here in the kitchen with me.
Step 1: Cook the Pasta (The Foundation)
Bring a large pot of heavily salted water to a boil—it should taste like the sea. This is your only chance to season the pasta itself. Add your elbow macaroni and cook according to the package directions for al dente. Once done, drain it immediately in a colander. Here’s my key hack: rinse the pasta under cold running water. This stops the cooking process dead in its tracks, washes away excess starch that can make the salad gummy, and cools the pasta so it’s ready to soak up that creamy dressing. Give it a good shake to get rid of all the water.
Step 2: Build the Dressing (The Flavor Engine)
While the pasta cooks, let’s make the magic sauce. In a large mixing bowl—big enough to hold everything later—whisk together the mayonnaise, sour cream, apple cider vinegar, Dijon mustard, and garlic powder. Now, season this mixture with a good pinch of salt and a few cranks of black pepper. Taste it! Does it make you smile? It should be tangy, creamy, and well-seasoned. Remember, it will mellow slightly when it coats all the other ingredients, so don’t be shy.
Step 3: The Grand Assembly (Bringing It All Together)
To that same bowl with the waiting dressing, add your cooled, rinsed macaroni, the glorious crumbled bacon, and all your chopped veggies—celery, red bell pepper, and red onion. Here’s where you get your arm workout. Using a large spoon or rubber spatula, gently fold and mix until every single piece of pasta is glistening with that creamy dressing and the bacon and veggies are evenly distributed. Be thorough but don’t manhandle it; we want to keep those pasta shapes intact.
Step 4: The Chill Time (The Secret to Perfection)
This is the hardest but most important step: walk away. Cover the bowl tightly with plastic wrap or a lid and pop it in the fridge for at least 30 minutes, but ideally 1-2 hours. This chill time is non-negotiable. It allows the flavors to get to know each other, mingle, and become best friends. The pasta drinks in the dressing, the bacon flavor permeates everything, and the whole salad transforms from mixed ingredients into a cohesive, incredible dish. Trust me on this.
How to Serve This Crowd-Pleaser
When it’s time to serve, give the salad one last gentle stir. You can present it a few ways:
- The Classic Bowl: Pile it high into your favorite big, rustic serving bowl. Sprinkle a little extra black pepper and maybe a tiny bit of crumbled bacon on top for a gorgeous finish.
- Individual Servings: For a cute BBQ or picnic presentation, use a large ice cream scoop to mound individual servings into small cups or onto plates lined with butter lettuce leaves.
- The Perfect Pairings: This salad is the ultimate team player. It’s phenomenal next to grilled burgers, hot dogs, barbecue chicken, or pulled pork sandwiches. For a simple summer dinner, I love it with a juicy tomato sandwich or a perfectly seared steak. It’s rich, so it pairs beautifully with lighter, fresher sides like a simple green salad or grilled corn on the cob.
Make It Your Own: Fun Flavor Twists
Once you’ve mastered the base recipe, the playground is open! Here are a few of my favorite spins:
- Ranch Bacon Mac Salad: Swap the sour cream for buttermilk (2-3 tbsp) and add 1 tbsp of dried ranch seasoning (or a blend of dried dill, chives, and parsley) to the dressing. It’s a total crowd-pleaser.
- Loaded Baked Potato Style: Add 1/2 cup of sharp cheddar cheese cubes and 2 tablespoons of finely chopped fresh chives. A little sprinkle of smoked paprika on top ties it all together.
- Sweet & Smoky: Add 1/3 cup of sweet corn (thawed if frozen) and use a smoked Gouda cheese instead of (or in addition to) some of the bacon. It’s a beautiful flavor combination.
- Lighter & Brighter: Swap the mayo for mashed avocado for a healthier fat option (note: this version is best eaten immediately). Add a handful of baby spinach or arugula for a fresh, peppery bite.
- Spicy Kick: Add 1-2 finely chopped jalapeños (seeds removed for less heat) to the veggies, and mix a teaspoon of your favorite hot sauce into the dressing.
Beau’s Kitchen Notes
This recipe has been a constant in my repertoire for years, and like any good friend, it’s evolved. I used to just use mayo, but adding the sour cream was a revelation—it’s less cloying and more interesting. I also learned the hard way that skipping the rinse leads to a sticky, sad salad. The biggest laugh in my kitchen? The time I was so eager to taste it I forgot to add the bacon into the salad and just ate it straight from the pan. Let’s just say the first batch was vegetarian by accident! The beauty of this dish is its flexibility. Taste as you go, adjust the seasoning to your liking, and don’t stress. Cooking should be fun, and this recipe is a guaranteed good time.
Your Questions, Answered
- Can I make this ahead of time? Absolutely! In fact, I recommend it. Making it a day ahead allows the flavors to develop beautifully. Just keep it tightly covered in the fridge. If it seems a little dry after chilling, stir in a splash of milk or a tiny bit more mayo to loosen it up.
- My salad turned out a bit dry. What happened? This usually means the pasta absorbed a lot of the dressing. Next time, try reserving a tablespoon or two of the dressing to stir in just before serving. For this batch, just gently mix in a little extra mayo or a splash of vinegar thinned with water until it reaches your desired creaminess.
- What’s the best pasta to use? Elbow macaroni is the classic for a reason—its shape traps the dressing. But small shells, cavatappi, or rotini also work wonderfully. Just avoid long, thin pasta like spaghetti.
- How long will leftovers last? Stored in an airtight container in the refrigerator, it will keep for 3-4 days. The bacon may lose a bit of its crispness, but the flavor will still be fantastic.
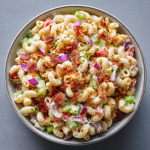
Bacon Macaroni Salad : A Smoky, Creamy Pasta Favorite
Description
Bacon Macaroni Salad
Yield: 8 servings
Prep Time: 15 minutes
Cook Time: 10 minutes
Ingredients
Salad
-
2 cups (8 oz) elbow macaroni
-
6 slices thick-cut bacon, cooked crisp and crumbled
-
½ cup celery, finely chopped
-
½ cup red bell pepper, diced
-
¼ cup red onion, finely chopped
Dressing
-
½ cup mayonnaise
-
¼ cup sour cream (or Greek yogurt)
-
2 tbsp apple cider vinegar
-
1 tsp Dijon mustard
-
½ tsp garlic powder
-
Salt and black pepper, to taste
Instructions
-
Cook the pasta: Boil macaroni in heavily salted water until al dente. Drain and rinse under cold water to stop cooking and remove excess starch. Shake off excess water.
-
Make the dressing: In a large mixing bowl, whisk together mayonnaise, sour cream, apple cider vinegar, Dijon mustard, garlic powder, salt, and pepper. Taste and adjust seasoning.
-
Assemble salad: Add the cooled macaroni, crumbled bacon, celery, red bell pepper, and red onion to the bowl with the dressing. Gently fold until evenly coated.
-
Chill: Cover and refrigerate for at least 30 minutes, ideally 1–2 hours, to allow flavors to meld.
-
Serve: Stir gently before serving. Optional: garnish with extra crumbled bacon or a sprinkle of black pepper.
Notes
-
Pasta swap: Small shells, rotini, or cavatappi work well. Avoid long thin pasta.
-
Make-ahead: Keeps in an airtight container for 3–4 days; bacon may soften but flavor remains.
-
Adjust creaminess: Add extra mayo or a splash of milk if pasta absorbs too much dressing.
Nutritional Information*
*Please note: This is an estimate for informational purposes, based on the specific ingredients listed. Values can vary based on product brands and specific substitutions used.
Per Serving (based on 8 servings): Calories: ~320 | Total Fat: 20g | Saturated Fat: 4.5g | Cholesterol: 20mg | Sodium: 280mg | Total Carbohydrates: 26g | Dietary Fiber: 1g | Sugars: 2g | Protein: 8g
This salad is a satisfying side dish that provides energy from carbs, richness from healthy and indulgent fats (depending on your mayo/bacon choices), and a bit of protein. To lighten it up, you can use center-cut bacon, light mayonnaise, and swap the sour cream for non-fat Greek yogurt. Remember, balance is key—enjoy it alongside plenty of colorful veggies and lean proteins!
<!–
Steak Pasta Salad : Hearty, Savory, and Perfect for Leftovers
Steak Pasta Salad: The Hero of Leftovers & Hearty Appetites
Hey friends, Beau here from Feastical! Let’s talk about that beautiful piece of steak you grilled last night. You savored every bite, but now you’re staring at a few glorious slices in the fridge, wondering, “What’s next?” Do not—I repeat, do not—just nuke it and call it a day. We’re about to level up those leftovers into something so spectacular, it might just become the main event.
Welcome to my Steak Pasta Salad. This isn’t your average, timid side dish. This is a bold, savory, seriously satisfying meal that brings tender steak, hearty pasta, crisp-tender asparagus, and bursts of juicy tomato together in one glorious bowl. It’s dressed in a punchy, garlicky parmesan vinaigrette that clings to every noodle and morsel. It’s the perfect union of “I need something substantial” and “I want it to taste incredible.” Whether you serve it slightly warm right after tossing or chilled for a fantastic make-ahead lunch, this salad has your back. It’s forgiving, flexible, and built for real life. So, grab that leftover steak (or cook some fresh, no judgment!), and let’s turn yesterday’s dinner into today’s masterpiece.
The Backyard BBQ That Started It All
This recipe was born from a classic Collier family scenario: my dad, the Grill Master, always overestimates. Every summer BBQ, he’d fire up enough ribeyes to feed a small army, “just in case.” We’d feast like kings, but the next day, Mom would open the fridge, see the foil-wrapped treasure, and give me The Look. “Beau, make this into something good.”
One particularly hot August afternoon, with a pile of pasta from last night’s dinner also hanging around, I got to work. I tossed the steak with the pasta, threw in whatever looked fresh from the garden—asparagus, cherry tomatoes, a bit of red onion for bite—and whisked up a dressing with my favorite trio: olive oil, balsamic, and a heap of parmesan. It was a throw-together act of kitchen salvation. But when my brother, the self-proclaimed “Leftover Hater,” took a bite and went back for thirds, I knew we had a winner. It became our signature post-BBQ ritual, proving that the best meals aren’t always planned—they’re created with a little ingenuity and a lot of love for good food.
Gathering Your Flavor Crew
Here’s everything you’ll need to build this powerhouse salad. I’ve added my little chef notes to help you shop, swap, and understand why each ingredient is a star player.
- 3 cups cooked pasta (shells, rotini, or penne): These shapes are my go-to because they have nooks and crannies that trap the dressing and little steak bits perfectly. Chef’s Tip: Cook it al dente! It holds up much better when tossed and won’t get mushy.
- 1 1/2 cups cooked steak, sliced thin: Leftover grilled steak (ribeye, strip, sirloin) is the MVP here. Chef’s Insight: Slice it against the grain for the most tender bite. No leftovers? Quickly pan-sear a small steak seasoned with salt and pepper.
- 1 cup roasted or sautéed asparagus, chopped: Adds a wonderful earthy crunch. Substitution Tip: No asparagus? Try broccolini, green beans, or even zucchini ribbons.
- 1 cup cherry tomatoes, halved: They bring juicy, sweet acidity that brightens the whole dish. Chef’s Tip: Give them a little sprinkle of salt after halting; it pulls out even more flavor.
- 1/4 cup red onion, finely sliced: Provides a necessary sharp bite. Quick Hack: If raw onion is too strong for you, soak the slices in ice water for 10 minutes. It tames the bite beautifully.
- 1/2 cup shredded or shaved parmesan cheese: Salty, umami, non-negotiable. Use a microplane for fluffy shreds or a vegetable peeler for elegant shavings.
For the Savory Parmesan Dressing:
- 1/3 cup extra virgin olive oil: The rich, fruity base of our dressing. A good EVOO makes a difference here.
- 2 tablespoons balsamic vinegar or red wine vinegar: Balsamic adds a touch of sweet depth, red wine vinegar is brighter and more tangy. Pick your personality!
- 1 teaspoon Dijon mustard: This is your secret weapon. It emulsifies the dressing (keeps it from separating) and adds a subtle, complex sharpness.
- 1 garlic clove, minced: Fresh is best! It infuses the oil with potent, aromatic flavor.
- Salt and freshly cracked black pepper to taste: Season confidently. This dressing needs to carry the whole salad.
Let’s Build That Bowl: A Step-by-Step Dance
Ready to assemble? Follow these steps, and I’ll walk you through with all my favorite kitchen hacks to ensure perfection.
- Pasta Prep is Key. Cook your pasta in well-salted water according to the package directions, but shave a minute off the suggested time for that perfect al dente bite. Drain it and give it a quick rinse under cold water. This stops the cooking instantly and washes away excess starch, so your noodles stay distinct and don’t clump together. Let it drain well while you prep the rest. Little Chef Hack: Drizzle a tiny bit of olive oil over the drained pasta and give it a toss to prevent sticking if you’re not assembling immediately.
- Veggie Victory. While the pasta cooks, tackle your asparagus. My favorite method is roasting: toss spears with a drizzle of oil, salt, and pepper, and pop them in a 425°F oven for 10-12 minutes until bright green and crisp-tender. Let them cool slightly, then chop into bite-sized pieces. For the tomatoes, halve them and do that little salt trick I mentioned. Thinly slice your red onion. Commentary: This is the “mise en place” moment—having everything prepped makes the final toss feel like magic, not work.
- Steak Spotlight. Take your beautiful leftover steak and slice it thinly against the grain. See those lines running through the meat? You want your knife to go perpendicular to them. This shortens the muscle fibers, making every piece melt-in-your-mouth tender. If the steak is cold from the fridge, that’s perfectly fine—it’ll come to room temp in the salad.
- Shake Up The Dressing. In a small bowl or—my preferred tool—a mason jar with a lid, combine the olive oil, vinegar, Dijon, minced garlic, a big pinch of salt, and several cracks of black pepper. Whisk vigorously or seal the jar and shake it like you’re cheering on your favorite team. Taste it! Dip a piece of asparagus or pasta in. It should be bold. Adjust with more salt, pepper, or a splash of vinegar until it makes your taste buds sing.
- The Grand Toss. In a large, spacious bowl (bigger than you think you need!), combine the cooled pasta, sliced steak, chopped asparagus, tomatoes, red onion, and most of the parmesan cheese (save a little for garnish!). Now, pour that fantastic dressing over the top. Using two large spoons or salad tongs, gently but thoroughly toss everything together. You want every single component to get a glossy, flavorful coat. Pro Tip: Toss from the bottom up to avoid crushing the tomatoes and to distribute the steak evenly.
- To Serve or to Savor Later? You have options! For immediate gratification, portion it out onto plates or into shallow bowls right now. The pasta will be cool, the steak slightly chilled, and the flavors bright. If you have time, cover the bowl and let it chill in the fridge for 30-60 minutes. This allows the flavors to marry and deepen incredibly. Either way, finish it with a final flourish of the reserved parmesan cheese.
Plating Up Your Masterpiece
How you serve this salad can turn a weeknight meal into a little occasion. For a casual family dinner, I pile it high in a big, rustic serving bowl and let everyone dig in family-style. If I’m feeling fancy for guests, I use a ring mold or a measuring cup to pack individual portions neatly onto plates, creating a beautiful, restaurant-worthy stack. Tuck a few extra parmesan shavings on top and maybe a fresh crack of pepper.
This salad is a complete meal on its own, but if you want to round things out, I love it with a simple side of garlic bread to sop up any extra dressing at the bottom of the bowl, or a light, crisp white wine like a Sauvignon Blanc. For lunch the next day? Pack it in a sealed container—it travels like a dream and tastes even better as the flavors continue to mingle.
Make It Your Own: Delicious Twists & Swaps
The beauty of this recipe is its flexibility. Play with it! Here are a few of my favorite riffs:
- The “Greek Gorgeous” Swap: Use crumbled feta instead of parmesan, add kalamata olives and cucumber chunks, and swap the dressing for a lemon-oregano vinaigrette. Bellissimo!
- Southwest Fiesta: Swap the asparagus for grilled corn and black beans. Use a lime-cilantro dressing with a pinch of cumin and chili powder. Queso fresco or cotija cheese would be fantastic here.
- No Steak? No Problem! (Protein Swaps): Grilled chicken, shrimp, or even chickpeas for a vegetarian version are stellar substitutes. The dressing works with just about anything.
- Go Green: Want to lighten it up? Swap half the pasta for hearty greens like chopped kale or spinach. Massage the kale with a bit of the dressing first to soften it.
- Creamy Dreamy Version: Stir a tablespoon of good mayonnaise or a dollop of Greek yogurt into the dressing for a richer, creamier texture that clings luxuriously.
Beau’s Kitchen Notes & Stories
This recipe has evolved in my kitchen more times than I can count. The first version was just steak, cold pasta, and bottled Italian dressing (we all start somewhere!). The asparagus came into play after a particularly good deal at the farmer’s market, and the homemade dressing was a game-changer. I’ve learned that letting it sit for at least 20 minutes after tossing is the real secret—it’s like the ingredients need a little time to get acquainted and become best friends.
One funny fail? I once tried to use angel hair pasta. Friends, do not recommend. It turned into a delicate, impossible-to-toss steak noodle sculpture. Stick with the sturdy, shape-holding pasta—it’s a salad, not an art project (unless you want it to be!).
Your Questions, Answered
Q: Can I make this ahead of time?
A: Absolutely, and it’s awesome for meal prep! Assemble the salad (hold back the tomatoes if you’re making it more than 4 hours ahead, as they can get a bit too soft) and store it in an airtight container in the fridge for up to 3 days. The flavors get better each day!
Q: My dressing isn’t emulsifying—it’s separating. Help!
A: No sweat! That little teaspoon of Dijon is your emulsifier. Make sure you’re whisking or shaking really well. If it separates again in the fridge, just give it another good shake before using.
Q: What’s the best way to reheat leftover steak if I don’t have any?
A: Great question. To keep it tender, bring it to room temp, then sear it in a very hot pan for just 30-60 seconds per side. Let it rest before slicing. Avoid the microwave if you can—it tends to toughen the meat.
Q: Is this salad good served warm?
A: Yes! If you prefer a warm pasta salad, skip the cold rinse on the pasta. Toss everything while the pasta and steak are still warm. The heat will slightly wilt the veggies and make the cheese deliciously melty. It’s a different, but equally delicious, experience.
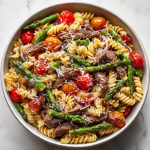
Steak Pasta Salad : Hearty, Savory, and Perfect for Leftovers
Description
Steak Pasta Salad
Ingredients
Salad
-
3 cups cooked pasta (rotini, penne, or shells), al dente
-
1½ cups cooked steak, thinly sliced (ribeye, sirloin, or strip)
-
1 cup asparagus, roasted or sautéed and chopped
-
1 cup cherry tomatoes, halved
-
¼ cup red onion, thinly sliced
-
½ cup shaved or shredded parmesan cheese
Parmesan Vinaigrette
-
⅓ cup extra virgin olive oil
-
2 tablespoons balsamic vinegar or red wine vinegar
-
1 teaspoon Dijon mustard
-
1 garlic clove, minced
-
Salt and freshly cracked black pepper, to taste
Instructions
-
Cook pasta in well-salted water until al dente. Drain and rinse briefly under cold water. Set aside.
-
Prepare asparagus by roasting at 425°F (220°C) with olive oil, salt, and pepper for 10–12 minutes, or sauté until tender-crisp. Chop once cooled.
-
Make dressing: In a small bowl or jar, whisk together olive oil, vinegar, Dijon mustard, garlic, salt, and pepper until emulsified.
-
Assemble salad: In a large bowl, combine pasta, sliced steak, asparagus, tomatoes, red onion, and most of the parmesan.
-
Dress & toss: Pour dressing over salad and toss gently until evenly coated.
-
Finish: Garnish with remaining parmesan and extra black pepper. Serve immediately or chill 30–60 minutes before serving.
Notes
-
Slice steak against the grain for tenderness
-
Chill for deeper flavor or serve slightly warm
-
Keeps well in the fridge for up to 3 days
Nutritional Information (Approximate)
Here’s a rough breakdown per serving (based on 4 servings). Remember, these are estimates and can vary based on specific ingredients and quantities used.
- Calories: 450
- Protein: 30g (A fantastic, satisfying source thanks to that steak!)
- Fat: 22g (Mostly from the healthy olive oil, steak, and cheese)
- Carbohydrates: 35g
- Fiber: 3g (From the asparagus, tomatoes, and whole-grain pasta if you use it)
- Sugar: 4g (Naturally occurring from the tomatoes and balsamic)
This salad is a wonderfully balanced meal, providing a great mix of protein for staying power, complex carbs for energy, and veggies for vitamins and fiber. To reduce calories or fat, you can slightly reduce the oil in the dressing or use a leaner cut of steak.
Final Bites of Wisdom
So there you have it, friends—my not-so-secret weapon for transforming humble leftovers or simple ingredients into a meal that feels special, satisfying, and straight-up delicious. This Steak Pasta Salad embodies everything I love about cooking: it’s resourceful, packed with flavor, and meant to be shared (or happily enjoyed solo on the couch, I won’t tell).
The next time you see that leftover steak, I hope you see possibility. I hope you hear the sizzle of the grill in memory and get excited to create something new. Cooking is a story, and every recipe is a chapter. Thanks for letting me share this one with you. Now, go make it, tweak it, love it, and tell me all about it over at Feastical!
Until next time, keep your knives sharp and your plates full,
Beau
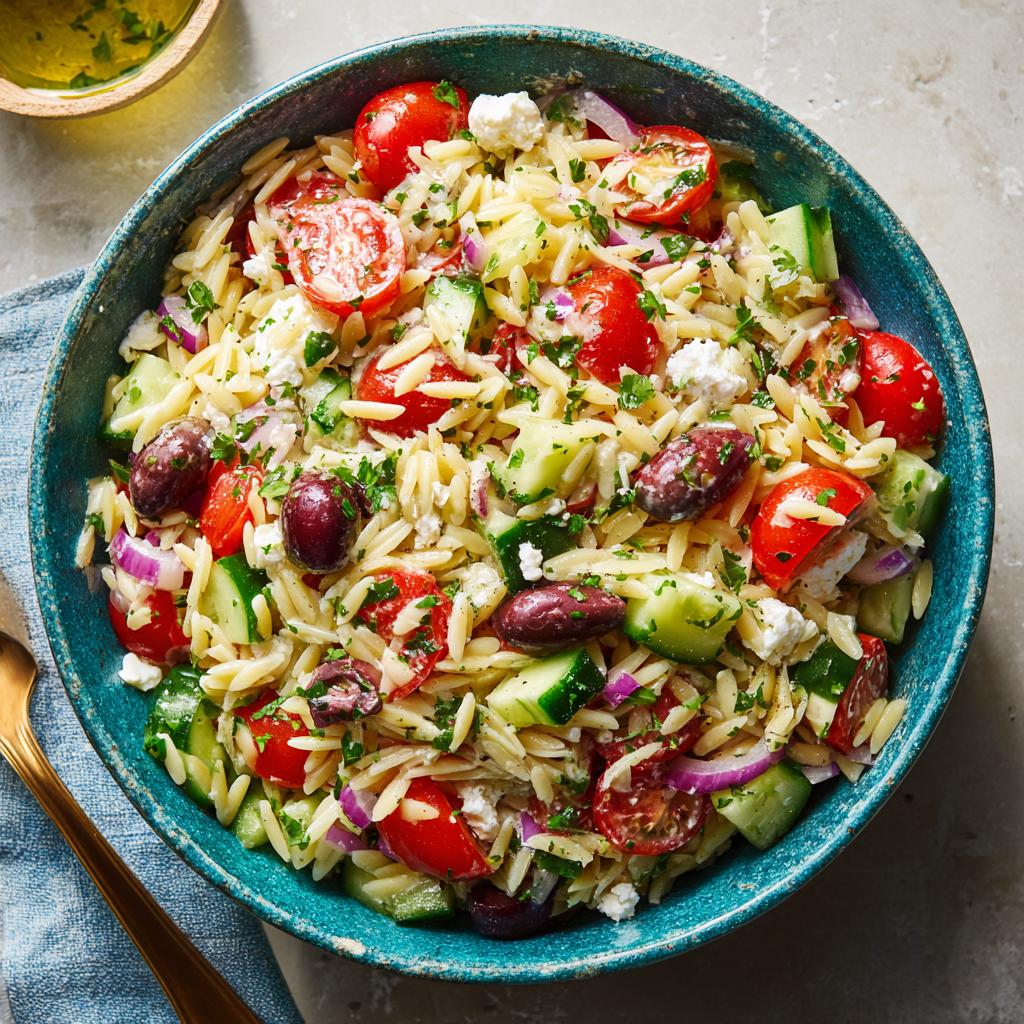
Mediterranean Orzo Salad : A Fresh Greek-Inspired Favorite
Sunshine in a Bowl: My Go-To Mediterranean Orzo Salad
Hey friends, Beau here! Let’s talk about that magical moment when you need a dish that does it all. You know the scene: a last-minute potluck invite, a backyard barbecue where you want to shine, or just a Tuesday where your soul (and your fridge) needs a serious dose of color and cheer. That’s when I turn to my absolute favorite, this Mediterranean Orzo Salad.
This isn’t just a side dish; it’s a vibrant, zesty, feel-good experience in a bowl. Imagine tender little orzo pearls, each one hugging a bright lemon-herb dressing, mingling with juicy tomatoes, crisp cucumbers, briny olives, and creamy pockets of feta. Every forkful is a mini-vacation to a sunny Greek isle. It’s the kind of recipe that makes people ask for the recipe before they’ve even finished their first helping. The best part? It comes together in about the time it takes to boil water for pasta. So, grab your favorite chopping board and your sunniest bowl. We’re about to make something truly special that tastes like a warm, flavorful hug.
The Picnic That Started It All
This recipe has a special place in my heart because it’s tied to one of my favorite food memories. A few summers back, some friends and I planned a spontaneous beach picnic. The rule was simple: everyone brings one thing that travels well and tastes great at room temperature. I panicked for a second, then raided my kitchen. I had some orzo, a lemon, and the usual veggie drawer suspects. I threw this salad together in a whirlwind, tossed it in my trustiest lidded bowl, and hoped for the best.
We spread out our blanket as the sun set, and when I popped the lid on this salad, the “oohs” and “aahs” were instant. The bright colors against the blue bowl looked like a painting. That tangy, herby aroma hit the salty sea air, and it was pure magic. We passed it around, forks clinking, laughing as we tried to get the perfect bite with a little bit of everything. It was the star of the spread, and it taught me a beautiful lesson: the best food isn’t always the most complicated. It’s fresh, it’s honest, and it’s made for sharing in good company. Now, every time I make it, I get a little taste of that perfect evening.
Gathering Your Sunshine Ingredients
Here’s everything you’ll need to create this flavor fiesta. Don’t stress if you’re missing an item—I’ve got your back with swaps and chef-y insights.
- 1 1/2 cups orzo pasta: Orzo is our starchy foundation. It’s like tiny rice-shaped pasta that holds dressing like a dream. Chef’s Tip: If you can’t find orzo, small pastina, ditalini, or even couscous will work in a pinch!
- 1 cup cherry tomatoes, halved: I love the sweet burst they give. Use the reddest, ripest ones you can find. Yellow or heirloom cherry tomatoes add gorgeous color!
- 1 cup cucumber, diced: For that essential crunch. I prefer English or Persian cucumbers as they have fewer seeds and a thinner skin, so no peeling needed.
- 1/2 cup Kalamata olives, sliced: These are the MVP for that salty, briny depth. Don’t substitute with canned black olives if you can help it—the flavor is worlds apart. If you’re not an olive fan, try chopped pepperoncini for a different zing.
- 1/3 cup red onion, finely chopped: A little goes a long way for sharpness. Pro Hack: Soak the chopped onion in ice water for 10 minutes before adding. It tames the bite beautifully!
- 1/2 cup crumbled feta cheese: The creamy, tangy treasure. Buy a block and crumble it yourself for better texture and flavor than pre-crumbled. For a vegan twist, a good vegan feta or even creamy white beans work wonderfully.
- 2 tbsp chopped fresh parsley: The fresh herbal finish. Flat-leaf (Italian) parsley has more flavor than curly. Don’t skip this—it’s the fresh pop the salad needs.
For the Lemon-Herb Dressing:
- 1/4 cup extra virgin olive oil: The rich, fruity backbone of our dressing. Use the good stuff here; you’ll taste the difference.
- 2 tbsp freshly squeezed lemon juice: Fresh is non-negotiable for that bright, sunny zing. Bottled juice just can’t compete.
- 1 garlic clove, minced: Our aromatic anchor. If you’re sensitive to raw garlic, you can grate it into a paste for a mellower, more integrated flavor.
- 1 tsp dried oregano: The classic Greek herb. Rubbing it between your palms before adding wakes up its essential oils. If you have fresh, use 1 tablespoon chopped.
- Salt and freshly cracked black pepper to taste: Season in layers! We’ll season the dressing and the salad for perfect balance.
Let’s Build Some Flavor: Step-by-Step
Alright, team! Let’s get cooking. Follow these steps, and you’ll have a flawless salad every single time.
- Cook the Orzo to Perfection: Bring a large pot of well-salted water to a rolling boil—it should taste like the sea. Add the orzo and cook according to package directions, usually 8-10 minutes, until it’s al dente (has a slight bite). My Big Tip: Set a timer! Pasta waits for no one. Once done, drain it in a colander and immediately give it a quick rinse under cold water. This stops the cooking, cools it down, and washes away excess starch so your salad isn’t gummy. Let it drain well.
- Whisk Up That Sunshine Dressing: While the orzo cooks, make your dressing. In a small bowl or a jar with a lid, combine the olive oil, fresh lemon juice, minced garlic, dried oregano, a big pinch of salt, and a few grinds of pepper. Whisk vigorously or shake the jar until the mixture is beautifully emulsified—thick and combined. Give it a taste. Need more zip? Add a splash more lemon. More herbiness? A pinch more oregano. This is your moment to tailor it.
- The Chopping Medley (The Fun Part!): Halve those juicy tomatoes, dice the cucumber into similar-sized pieces, slice your Kalamata olives, finely chop the red onion (remember the ice water bath trick!), and give your parsley a rough chop. I like to do all this on one big cutting board—it looks like a confetti party.
- The Grand Toss: In a large, beautiful serving bowl (this salad deserves to be shown off!), combine the well-drained, cooled orzo with the tomatoes, cucumber, olives, onion, and parsley. Now, pour that vibrant dressing all over everything. Using a large spoon or spatula, gently toss and fold everything together until every single piece is lovingly coated in that lemony, herby goodness.
- The Feta Finale: Here’s the key step—add the crumbled feta cheese last and fold it in gently. We want to preserve those lovely creamy crumbles, not turn them into mush. Once the feta is distributed, take one final taste. Does it need another pinch of salt or a crack of pepper? Now’s the time.
- The Patience Payoff: Cover the bowl and let the salad chill in the fridge for at least 15-30 minutes before serving. This is not punishment; it’s magic! This resting time allows the orzo to fully absorb the dressing and all the flavors to get to know each other and become best friends. Trust me, it’s worth the wait.
How to Serve This Star Dish
Presentation is part of the joy! Here’s how I love to serve this Mediterranean masterpiece:
I always bring it to the table in that big, beautiful bowl so everyone can admire its colors. For a simple family meal, it’s perfect as is with a piece of grilled chicken or fish nestled right on top. For a cookout or potluck, I’ll sometimes serve it in a hollowed-out large round bread (like a peasant boule) for a real “wow” factor—the bread soaks up the delicious dressing and gets eaten too!
Garnish with an extra sprinkle of fresh parsley, a few whole Kalamata olives, and maybe a thin lemon slice on the rim of the bowl. It’s a complete meal on its own, but it also pairs incredibly well with anything from the grill: lemon-herb chicken skewers, garlic shrimp, or even some smoky grilled eggplant for my veggie friends. Don’t forget some crusty bread on the side for scooping up every last bit.
Make It Your Own: Delicious Twists
One of the best things about this salad is its flexibility. Play with it! Here are some of my favorite riffs:
- The Protein Power-Up: Turn it into a hearty main course by adding a can of rinsed chickpeas, a cup of chopped grilled chicken, or a handful of cooked shrimp right at the end.
- The Garden Lover’s Dream: Add a handful of baby spinach or arugula (add just before serving), some roasted red pepper strips, or artichoke hearts for extra veggie goodness.
- The Herb Swap: Swap the parsley for fresh dill or mint. Dill gives a fantastic Greek-island vibe, and mint adds an incredible layer of freshness.
- The Vegan Delight: Skip the feta or use a vegan alternative. Add extra olives or some creamy avocado chunks for richness. For the dressing, a teaspoon of Dijon mustard adds great body and flavor.
- The Italian Cousin: Change the flavor profile! Use basil instead of parsley, sun-dried tomatoes instead of fresh, and mozzarella pearls instead of feta. Swap the oregano for a pinch of red pepper flakes.
Beau’s Kitchen Notes
This recipe has evolved in my kitchen over countless picnics, potlucks, and weeknight dinners. I used to add the feta with everything else, but I found it just dissolved into the background. Adding it last ensures you get those perfect salty, creamy pockets in every bite. I also learned the hard way that skipping the “rinse under cold water” step for the orzo leads to a clumpy, pasty salad. Don’t be like Past Beau—rinse that pasta!
It’s also become my ultimate make-ahead secret. I often whip it up the night before a gathering. The flavors marry and deepen overnight, making it even more delicious. Just hold back on adding the fresh parsley until you’re ready to serve to keep it bright green. Food, like the best memories, often gets better with a little time.
Your Questions, Answered
Q: Can I make this salad ahead of time?
A: Absolutely! It’s one of the best make-ahead dishes. Prepare it completely, cover, and refrigerate for up to 2 days. The orzo will continue to absorb the dressing, so you might want to have a little extra lemon juice and olive oil on hand to freshen it up before serving. Add extra fresh herbs then, too.
Q: My salad turned out a bit bland. What happened?
A: The two most common culprits are underseasoning and not using enough acid. Remember to salt your pasta water generously—it’s the first chance to season the orzo itself. Second, always taste your dressing before adding it. It should be bold and punchy on its own. If it’s bland, add more lemon juice, salt, or oregano until it sings.
Q: How do I prevent a soggy salad?
A> The cold-water rinse on the orzo is step one. Step two is ensuring your cucumbers and tomatoes are dry after washing. A quick pat with a paper towel works wonders. Also, if making far in advance, you can store the dressing separately and toss it in an hour before serving.
Q: What’s the best way to store leftovers?
A: Keep it covered in the fridge for 3-4 days. It may dry out a little as the orzo absorbs more liquid. A tiny drizzle of olive oil and a fresh squeeze of lemon will bring it right back to life.
Mediterranean Orzo Salad : A Fresh Greek-Inspired Favorite
Description
This Mediterranean Orzo Salad is the kind of dish that fits every occasion—potlucks, picnics, cookouts, or easy weeknight dinners. Tender orzo is tossed with juicy tomatoes, crisp cucumber, briny Kalamata olives, and creamy feta, all wrapped in a lemony herb dressing that tastes like summer vacation. It’s fast, fresh, and always a crowd favorite.
Ingredients
Salad
-
1½ cups orzo pasta
-
1 cup cherry tomatoes, halved
-
1 cup cucumber, diced (English or Persian preferred)
-
½ cup Kalamata olives, sliced
-
⅓ cup red onion, finely chopped
-
½ cup feta cheese, crumbled
-
2 tablespoons fresh parsley, chopped
Lemon-Herb Dressing
-
¼ cup extra virgin olive oil
-
2 tablespoons fresh lemon juice
-
1 garlic clove, minced
-
1 teaspoon dried oregano (or 1 tablespoon fresh)
-
Salt & freshly cracked black pepper, to taste
Instructions
-
Cook the orzo
Bring a large pot of well-salted water to a boil. Cook orzo according to package directions (8–10 minutes) until al dente. Drain and rinse briefly under cold water to stop cooking. Drain well. -
Make the dressing
In a small bowl or jar, whisk together olive oil, lemon juice, garlic, oregano, salt, and pepper until emulsified. Taste and adjust seasoning. -
Prep the vegetables
Halve tomatoes, dice cucumber, slice olives, finely chop onion, and chop parsley.
Tip: Soak chopped red onion in ice water for 10 minutes to mellow its bite. -
Assemble the salad
In a large bowl, combine cooled orzo, tomatoes, cucumber, olives, onion, and parsley. Pour dressing over the top and toss gently to coat. -
Add feta last
Fold in feta gently so it stays in creamy pockets instead of dissolving. -
Chill & serve
Cover and refrigerate for 15–30 minutes to let flavors meld. Taste once more before serving and adjust seasoning if needed.
Notes
-
Protein Boost: Add chickpeas, grilled chicken, or shrimp
-
Extra Veggies: Roasted red peppers, artichokes, spinach, or arugula
-
Herb Swap: Use dill or mint instead of parsley
-
Vegan: Skip feta or use vegan feta; add avocado for richness
-
Italian-Style: Swap feta for mozzarella pearls and oregano for basil
Nutritional Snapshot (Per Serving)
While I’m all about flavor first, it’s nice to know what’s fueling you! This information is per serving (based on 6 servings) and is an estimate. Remember, using high-quality olive oil provides healthy monounsaturated fats.
- Calories: ~290
- Protein: 7g (Thank you, orzo and feta!)
- Carbohydrates: 32g
- Fat: 15g (Mostly the good-for-you kind from olive oil and olives)
- Fiber: 2g (Add chickpeas to bump this up!)
- Prep Time: 10 minutes
- Cook Time: 10 minutes
- Total Time: 20 minutes (plus optional chilling)
Final Thoughts from My Kitchen to Yours
And there you have it, friends—my beloved Mediterranean Orzo Salad in all its glory. This recipe is more than just a list of ingredients and steps; it’s a passport to easy, joyful eating. It’s proof that a handful of simple, fresh ingredients can create something that feels like a celebration.
I hope this salad finds its way onto your picnic blankets, your dinner tables, and into your weekly lunch rotations. It’s a constant reminder of why I started Feastical: to share food that brings us together, feeds our bodies, and warms our hearts without ever feeling like a chore.
Now, I’d love to hear from you! Did you add a personal twist? Did it become the star of your party? Tag me or share your stories. Until next time, keep your kitchens messy, your flavors bold, and your hearts full. Happy cooking!
— Beau