Avocado Pasta Salad with Spinach Pesto : Creamy, Fresh & Wholesome
Let’s Make a Bowl of Sunshine: Avocado Pasta Salad with Spinach Pesto
Hey friends, Beau here! Tell me if this sounds familiar: the sun is blazing, your porch is calling, and the last thing you want to do is hover over a hot stove for hours. You need something for the neighborhood BBQ, the family picnic, or just a fridge-friendly lunch that makes you actually excited to open the fridge door. You want fresh, you want creamy, you want flavor that pops… but you also want to be out of the kitchen in, like, 20 minutes. I hear you. Loud and clear.
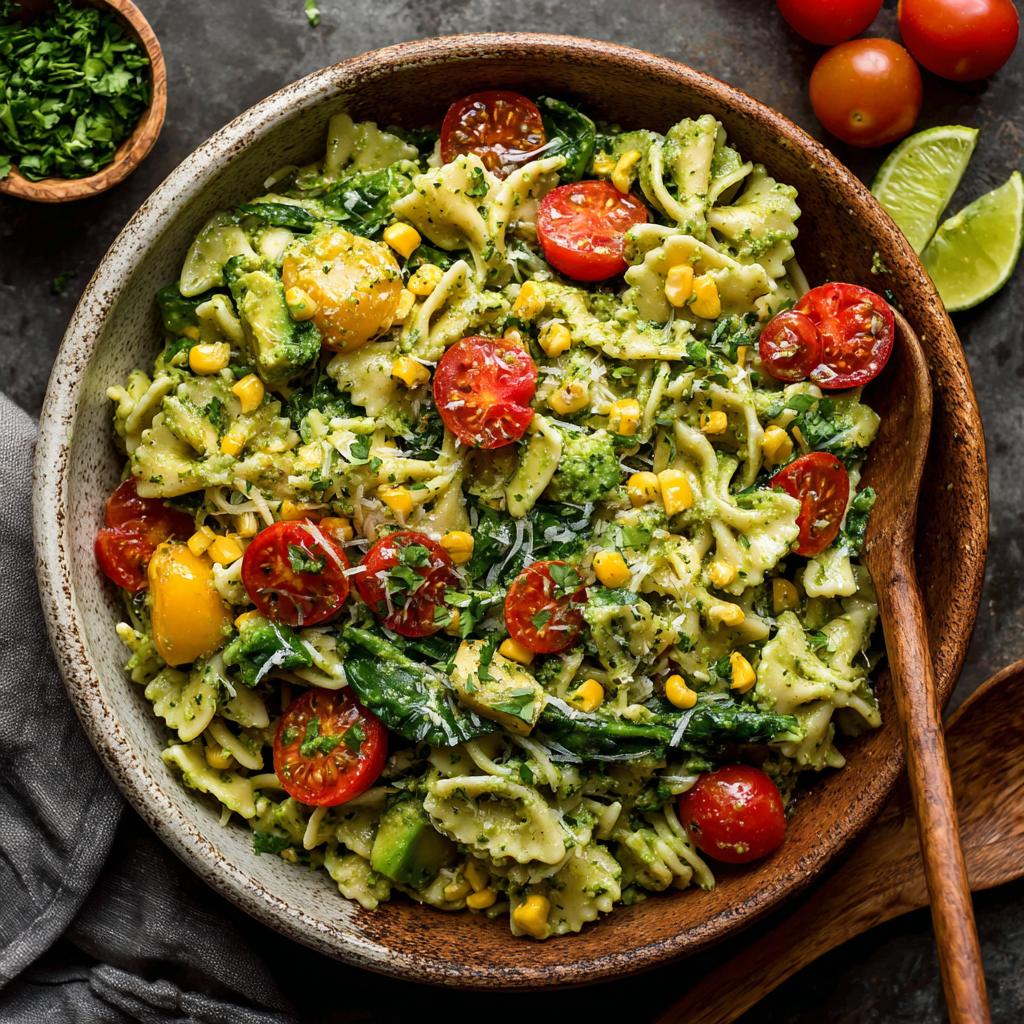
That’s exactly why I’m obsessed with this Avocado Pasta Salad with Spinach Pesto. This isn’t your average, mayo-heavy, kinda-sad deli pasta salad. Nope. This is a vibrant, feel-good twist that packs a serious nutritional punch without sacrificing an ounce of deliciousness. We’re talking twirly pasta hugged by the creamiest, greenest, most herbaceous avocado-spinach pesto you’ve ever tasted, tossed with juicy tomatoes, sweet corn, and extra chunks of buttery avocado. It’s a party in a bowl, and everyone’s invited.
This recipe is my go-to for bringing people together. It’s the dish that disappears first at potlucks, the one that gets recipe requests texted to you before you’ve even left the gathering. It’s vegetarian, easily customizable, and proof that “healthy” and “decadently creamy” can absolutely be best friends. So, tie on your favorite apron (or don’t—I won’t tell), and let’s make a batch of pure, uncomplicated joy.
The Picnic That Started It All
This recipe was born from a minor kitchen panic, and honestly, aren’t those the best kind? A few summers back, my wife and I were scrambling to put together a last-minute picnic at the park. The plan was a classic pesto pasta salad, but—plot twist—my basil plant looked… well, let’s just say it had seen better days. It was a sad, sun-scorched little thing. I had a gorgeous ripe avocado and a bag of fresh spinach on the verge of wilting. In a classic “use what you’ve got” moment, I threw it all in the blender with the remaining cilantro and a generous squeeze of lime.
The result was a revelation. The avocado created this unbelievably lush, creamy base that made the pesto cling to every nook of the rotini. The spinach kept it vibrantly green and added a fresh, earthy depth, while the lime cut through the richness perfectly. We tossed it with some quick pantry staples, and off we went. Sitting on that blanket, watching the sunset, digging into this cool, creamy, incredibly satisfying salad… it was a total “why haven’t I always done this?!” moment. Now, it’s less of a recipe and more of a summer tradition. It’s a reminder that the best dishes often come from a little improvisation and a lot of heart.
Gathering Your Feel-Good Ingredients (Serves 6)
Here’s the beautiful cast of characters for our starring dish. I love this lineup because it’s flexible—most of these items are pantry heroes or easy fridge finds.
- 12 oz rotini or fusilli pasta: Those twists and spirals are clutch for catching every drop of our creamy pesto. Chef’s Insight: Gluten-free? Swap in your favorite chickpea or brown rice pasta—it works beautifully.
- 1 large, perfectly ripe avocado, divided: The magic maker! We’ll use half in the pesto for creaminess and half diced into the salad for texture. Pro Tip: Your avocado is ready when it yields gently to a squeeze near the stem. Too hard? Speed-ripen it in a paper bag with a banana.
- 1 cup cherry tomatoes, halved: Little bursts of juicy sweetness. I love a mix of red and yellow for extra color!
- 1 cup corn kernels: Fresh off the cob is amazing in season, but no stress—frozen (thawed) or canned (drained) corn is a fantastic, year-round shortcut that adds a lovely sweet crunch.
- 1/2 cup fresh spinach leaves: The “green” in our green pesto! It’s mild, packed with nutrients, and helps us get an extra veggie boost without a strong flavor.
- 1/2 cup fresh cilantro, including tender stems: This brings a bright, citrusy herbaceous note. Not a cilantro fan? No drama! Fresh basil or even flat-leaf parsley are glorious substitutes.
- 1 clove garlic: For that essential, aromatic punch. If you’re sensitive to raw garlic’s bite, try roasting the clove first for a mellower, sweeter flavor.
- Juice of 1 lime: Fresh is key here! The acid brightens all the flavors and keeps our avocado pesto looking vibrant green. In a pinch, lemon juice works too.
- 2 tbsp extra virgin olive oil: This helps bring the pesto together and adds a fruity richness. Use the good stuff you love for drizzling.
- Salt & freshly cracked black pepper to taste: Your flavor anchors. Don’t be shy—seasoning wakes up every single ingredient.
Let’s Get Cooking: Step-by-Step with Chef Beau
This is where the magic happens, and it’s so simple. We’re basically boiling, blending, and tossing. My kind of cooking!
- Cook Your Pasta to Perfection. Bring a large pot of well-salted water to a rolling boil. Add your pasta and cook according to the package directions for “al dente”—it should have a pleasant bite to it. Why? Mushy pasta in a cold salad is a sad thing. Once cooked, drain it in a colander and immediately give it a quick rinse under cold water. This stops the cooking process, cools it down fast, and washes away excess starch so your salad isn’t gummy. Let it drain well while you make the pesto.
- Whip Up the Dreamy Green Pesto. In your blender or food processor, combine the fresh spinach, cilantro, garlic clove, lime juice, olive oil, and HALF of your ripe avocado (pit and skin removed, of course). Add a big pinch of salt and a few cracks of pepper. Chef’s Hack: Start by pulsing a few times to break everything down, then blend on high until it’s completely smooth and gorgeous. If it’s struggling to blend, add a single tablespoon of water or pasta cooking water to get it moving. Taste it! This is your moment. Adjust with more salt, lime, or pepper until it makes you do a little happy dance.
- The Grand Toss Assembly. Grab your biggest, most beautiful mixing bowl. To the cooled, drained pasta, add the halved cherry tomatoes, the corn, and the remaining avocado, diced into perfect, creamy chunks. Gentle reminder: Toss the diced avocado in a tiny squeeze of lime juice first if you’re worried about browning—though we’ll be eating this so fast, it’s rarely an issue!
- Marry the Pesto and Pasta. Pour that incredible, vibrant green pesto all over the pasta and veggies. Now, using a large spoon or silicone spatula, gently but thoroughly toss everything together. You want every single piece of pasta to be coated in that creamy green goodness. Get in there and make sure nothing’s hiding at the bottom of the bowl!
- The Final Touch (The Most Important Step!). Taste it. Again! Does it need another pinch of salt? A squeeze more lime? This is your dish, tailor it to your taste buds. Once it’s perfect, you can dive right in or pop it in the fridge to chill for 30 minutes, which lets the flavors get to know each other even better.
How to Serve This Star of the Show
Presentation is part of the fun! I love serving this salad in a wide, shallow bowl so all the colorful ingredients are visible. For a casual backyard feed, just set the big bowl on the table with a giant serving spoon and let everyone dig in. For individual plates, use a large spoon to twirl and lift the pasta into a nice mound, making sure to get plenty of those colorful veggies peeking through.
This salad is a fabulous main dish for a light lunch, but it also plays incredibly well with others at a spread. Pair it with grilled lemon-herb chicken or black bean burgers for a fuller meal. It’s the perfect sidekick to classic BBQ fare like ribs or pulled pork sandwiches, cutting through the richness with its fresh, creamy vibe. Don’t forget a final flourish—a little extra cracked pepper, a few cilantro leaves, or a light drizzle of olive oil right before serving makes it look restaurant-worthy.
Make It Your Own: 5 Flavorful Twists
The beauty of this recipe is its adaptability. Play with it! Here are some of my favorite riffs:
- The Protein Power-Up: Add 1-2 cups of shredded rotisserie chicken, a can of drained chickpeas, or a handful of crumbled feta or goat cheese for a more substantial meal.
- Herb Swap: As mentioned, if cilantro isn’t your thing, use fresh basil for a more classic pesto vibe, or parsley for a clean, bright flavor.
- Spice It Up: Add a jalapeño (seeds removed for less heat) to the blender with the pesto ingredients, or stir in a diced jalapeño with the veggies. A pinch of red pepper flakes works wonders too.
- Veggie Delight: Clear out the crisper! Thinly sliced bell peppers, crunchy cucumber, or blanched broccoli florets are fantastic additions.
- Dairy-Free Creamy Dream: It’s already vegan as written, but for an even richer, “cheesier” pesto without dairy, add 2 tablespoons of nutritional yeast to the blender. It adds a wonderful savory, umami depth.
Beau’s Chef Notes & Kitchen Confessions
Over the years, this recipe has seen some fun evolutions. I once accidentally used a whole serrano pepper instead of half, and let’s just say it was a… *spicy* surprise at a family reunion! My uncle still talks about it. Lesson learned: taste your peppers first.
I’ve also learned that this salad’s flavor is at its peak the day it’s made, but it’s still delicious the next day. The avocado in the pesto may darken slightly (it’s just oxidation—totally safe!), but the flavor remains fantastic. If I know I’m making it ahead, I’ll sometimes stir in the diced fresh avocado just before serving to keep it picture-perfect.
Most importantly, this recipe is a framework, not a rulebook. Don’t have lime? Use lemon. Out of spinach? Use arugula for a peppery kick. The goal is a delicious, no-stress dish that brings people to the table. That’s always a win in my book.
Your Questions, Answered!
Q: How do I keep the avocado from browning?
A: The lime juice in the pesto is the first line of defense! It acidulates the avocado, slowing down oxidation. For the diced avocado in the salad, toss it in a teaspoon of lime juice before adding it to the bowl. Storing the salad with plastic wrap directly on the surface (pressed onto the pesto) also helps limit air exposure. But honestly, it’s usually gone before it has a chance to brown!
Q: Can I make this ahead of time?
A: Absolutely! You can cook the pasta and make the pesto sauce up to a day in advance. Store them separately in airtight containers in the fridge. Combine everything (adding your fresh diced avocado at the last minute) 30 minutes to an hour before serving for the best texture and brightest color.
Q: My pesto is too thick! What did I do wrong?
A> Nothing’s wrong! Blenders and avocado sizes vary. Simply thin it out with a tablespoon of water, pasta cooking water, or a touch more olive oil or lime juice until it reaches a creamy, pourable consistency.
Q: Is this pasta salad healthy?
A> I’m so glad you asked! I believe “healthy” means nourishing your body with real, whole ingredients, and this salad is packed with them. Avocados provide heart-healthy fats and fiber, spinach is loaded with vitamins, and the veggies add antioxidants. It’s a balanced, satisfying dish that makes you feel great.

Avocado Pasta Salad with Spinach Pesto : Creamy, Fresh & Wholesome
Description
When the weather’s warm and the last thing you want is a heavy, mayo-laden salad, this Avocado Pasta Salad with Spinach Pesto delivers everything you’re craving. Twisty pasta is coated in a luxuriously creamy avocado-spinach pesto, then tossed with juicy tomatoes, sweet corn, and extra chunks of buttery avocado. It’s fresh, vibrant, naturally dairy-free, and comes together in about 20 minutes — perfect for picnics, BBQs, and fridge-friendly lunches.
Ingredients
Pasta Salad
-
12 oz rotini or fusilli pasta
-
1 large ripe avocado, divided
-
1 cup cherry tomatoes, halved
-
1 cup corn kernels (fresh, thawed frozen, or canned & drained)
Spinach Avocado Pesto
-
½ cup fresh spinach leaves
-
½ cup fresh cilantro (or basil or parsley)
-
1 clove garlic
-
Juice of 1 lime
-
2 tablespoons extra virgin olive oil
-
Salt and freshly cracked black pepper, to taste
Instructions
-
Cook the pasta
Bring a large pot of well-salted water to a boil. Cook pasta according to package directions until al dente. Drain and rinse briefly under cold water to stop cooking. Let drain well. -
Make the pesto
In a blender or food processor, combine spinach, cilantro, garlic, lime juice, olive oil, and half of the avocado. Season with salt and pepper. Blend until smooth and creamy, adding 1–2 tablespoons of water or pasta water if needed. -
Assemble the salad
Transfer cooled pasta to a large bowl. Add tomatoes, corn, and remaining avocado, diced. Pour pesto over the top. -
Toss and taste
Gently toss until everything is evenly coated. Taste and adjust seasoning with more salt, pepper, or lime juice as needed. -
Serve or chill
Serve immediately or refrigerate for 30 minutes to allow flavors to meld.
Serving Suggestions
-
Serve as a light main dish or hearty side
-
Pair with grilled chicken, shrimp, or veggie burgers
-
Finish with extra black pepper, herbs, or a drizzle of olive oil before serving
Notes
-
Toss diced avocado with a little lime juice to prevent browning
-
Chill pasta completely before mixing to avoid sogginess
-
Best enjoyed the day it’s made, but still tasty next day
Nutritional Information (Per Serving)
Let’s talk about the good stuff fueling your body! This nutritional breakdown is an estimate for one serving (about 1.5 cups) based on the standard recipe. Remember, variations will change these numbers.
- Calories: ~320
- Total Fat: 17g (Mostly the good, monounsaturated kind from avocado and olive oil!)
- Saturated Fat: 2.5g
- Carbohydrates: 36g
- Fiber: 6g (That’s over 20% of your daily goal—awesome!)
- Sugar: 4g (Naturally occurring from the veggies)
- Protein: 8g
- Sodium: Varies based on salting, but it’s easy to control.
This salad is a fantastic source of Vitamin C (from lime and spinach), Vitamin K, Folate, and Potassium. It’s a meal that truly tastes as good as it makes you feel.
Final Thoughts from My Kitchen to Yours
Well, friend, we’ve done it! We’ve taken a handful of simple, fresh ingredients and transformed them into a show-stopping pasta salad that’s guaranteed to become a warm-weather staple in your home. I hope this recipe brings as much easy joy to your table as it has to mine.
Remember, cooking isn’t about perfection. It’s about the laughter in the kitchen, the stories shared over the bowl, and the simple pleasure of creating something delicious with your own two hands. So, make this Avocado Pasta Salad your own. Tweak it, love it, and share it with someone special.
If you make it (and I really hope you do!), I’d love to see your creation. Tag me over on

Tuscan Tortellini Pasta Salad : Bold, Bright, and Bursting with Flavor
Tuscan Tortellini Pasta Salad: Bold, Bright, and Bursting with Flavor
Hey there, friend! Beau here, welcoming you back to my kitchen corner at Feastical. Have you ever needed a dish that does it all? I’m talking about the superstar that shows up to the backyard BBQ, shines at the potluck table, and saves the day on a “what’s-for-dinner-tonight?” Wednesday. Well, pull up a chair, because I’m about to share one of my all-time go-to recipes: my Tuscan Tortellini Pasta Salad.
This isn’t your average, timid pasta salad. No, sir. This is a vibrant, hearty, flavor-packed masterpiece that eats like a full meal. We’re combining plump, cheese-filled tortellini with the salty punch of salami, creamy bursts of fresh mozzarella, and a whole garden’s worth of crunchy, colorful veggies. The whole beautiful mess gets tossed in a garlicky, herb-flecked Italian dressing that soaks into every nook and cranny. It’s fresh, it’s satisfying, and it brings a serious dose of Mediterranean sunshine to your table.
The best part? It comes together in under 30 minutes. Seriously. While the pasta cooks, you can chop and whisk, and before you know it, you’ve created a culinary hug in a bowl. So, whether you’re a seasoned pro or you’re just figuring out that a spatula isn’t for digging in the garden, this recipe is for you. Let’s make something delicious that’s guaranteed to bring people together.
The Potluck That Started It All
This recipe has a special place in my heart, and it all started with a slightly chaotic, totally wonderful neighborhood block party years ago. My mission was simple: bring a dish that could please a crowd, from picky kids to foodie grandparents, and survive a few hours on a picnic table in the sun.
I remember standing in my kitchen, staring at an empty bowl, thinking about the flavors of Tuscany—rustic, bold, and unpretentiously delicious. I had some cheese tortellini in the fridge (a forever favorite), and the wheels started turning. I chopped, I whisked, and I tossed it all together with a hopeful heart. When I got to the party, I placed it next to the usual suspects—the potato salads and baked beans. Friends, it was gone in 20 minutes. People I’d never met were asking for the recipe! That’s when I knew this tortellini salad wasn’t just a side dish; it was a people connector, a conversation starter, and an instant mood-lifter. Every time I make it now, I think of laughing in the sunshine with good neighbors, and that’s the real secret ingredient.
Gathering Your Flavor All-Stars
Here’s everything you’ll need to create this masterpiece. Don’t stress if you’re missing an item—I’ve got swap ideas for you right here!
- 1 (20 oz) package cheese tortellini, cooked and cooled: The hearty foundation. Those little pasta pockets filled with creamy ricotta or cheese blend are flavor sponges. Chef’s Insight: For a gluten-free twist, many brands now offer fantastic GF tortellini!
- 1 cup cherry tomatoes, halved: They add juicy, sweet bursts. Use the reddest, ripest ones you can find for the best flavor.
- 1 cup cucumber, chopped: For a crucial, refreshing crunch. I like to leave the skin on for extra color and nutrients.
- 1/2 cup sliced black olives: They bring that briny, savory depth that screams “Mediterranean.” Not an olive fan? Try capers for a similar salty kick.
- 1/2 cup chopped salami or prosciutto: Our savory, salty star. I love the robust flavor of a good hard salami, but thinly sliced prosciutto torn into bits is an elegant swap.
- 1/2 cup diced bell pepper (any color): Color and crunch! I often use a mix of red and yellow for maximum visual pop.
- 1/2 cup fresh mozzarella balls (bocconcini), halved: Little pillows of creamy, mild cheese that balance the saltiness beautifully.
- 1/4 cup red onion, thinly sliced: A bit of sharp, peppery bite. Soaking the slices in cold water for 5 minutes tames their intensity if you’re sensitive to it.
- 1/4 cup chopped fresh parsley: This isn’t just garnish! The fresh, grassy flavor brightens the whole dish.
For the Zesty Italian Dressing:
- 1/3 cup extra virgin olive oil: The rich, fruity base of our dressing. A good EVOO makes a noticeable difference here.
- 3 tablespoons red wine vinegar: Our tangy backbone. It cuts through the richness and makes flavors sing.
- 1 teaspoon Dijon mustard: The secret weapon! It adds a subtle complexity and helps emulsify the dressing (fancy word for keeping it from separating).
- 1 garlic clove, minced: Fresh is best for that unmistakable aromatic punch.
- 1/2 teaspoon dried oregano: The classic Italian herb. Rubbing it between your palms before adding wakes up its oils.
- Salt and pepper to taste: Season boldly. This dressing needs to flavor a whole bowl of ingredients!
Let’s Build Some Deliciousness: Step-by-Step
Ready to cook? Follow these steps, and I’ll walk you through with all my favorite chef hacks to ensure perfect results.
- Cook & Cool Your Tortellini. Bring a large pot of salted water to a rolling boil and cook your tortellini according to the package directions—usually just 3-4 minutes. Pro-Tip: Don’t overcook! We want them al dente so they hold their shape in the salad. The second they’re done, drain them in a colander and give them a quick rinse with cold water. This stops the cooking instantly and washes away excess starch, preventing a gummy salad. Let them cool completely while you prep the veggies.
- Chop Your Veggies & Meats. This is the fun, therapeutic part! Halve those tomatoes, dice the cucumber and peppers, slice the onions, and chop the salami and parsley. Toss them all (except the parsley for now) into a large, spacious mixing bowl. Give your mozzarella balls a gentle halving. Chef’s Hack: Use kitchen shears to quickly snip the salami into small pieces—it’s faster than using a knife!
- Whisk Up That Magic Dressing. In a small bowl or a jar with a tight-fitting lid, combine the olive oil, red wine vinegar, Dijon mustard, minced garlic, oregano, and a big pinch of salt and pepper. Whisk vigorously until it’s beautifully smooth and slightly thickened, or shake that jar like you mean it! Taste it. Does it need more tang? Add a splash of vinegar. More richness? A drizzle of oil. Make it yours.
- The Grand Toss. Add your perfectly cooled tortellini to the bowl with all your colorful ingredients. Now, pour that glorious dressing over the top. Using a large spoon and fork (or clean hands, my favorite tools!), gently but thoroughly toss everything together. You want every single tortellini and veggie piece to get a shiny, flavorful coat.
- Chill & Garnish. Fold in most of your fresh parsley, saving a little for garnish on top. For the best flavor marriage, cover the bowl and let it chill in the fridge for at least 30 minutes before serving. This gives the pasta time to soak up all the dressing’s goodness. Right before serving, give it one more gentle toss, sprinkle with the remaining parsley, and get ready for the compliments!
How to Serve This Tuscan Masterpiece
Presentation is part of the fun! Here’s how I love to plate it up:
For a family-style feast, I bring the whole beautiful bowl to the table. The colors are so inviting, it’s a centerpiece in itself. If I’m feeling fancy for guests, I’ll serve individual portions in wide, shallow pasta bowls or even in large, sturdy mason jars for a portable picnic look.
What to serve it with? It’s a complete meal on its own, but it plays incredibly well with others. For a cookout, it’s the perfect partner to juicy grilled chicken, burgers, or lemon-herb shrimp skewers. For a lighter lunch, just add a hunk of crusty, warm bread for dipping into any extra dressing at the bottom of the bowl. Don’t forget a final flourish—a little extra crack of black pepper or a small drizzle of your best olive oil right before serving makes it restaurant-level special.
Make It Your Own: Creative Twists & Swaps
The beauty of this salad is its flexibility. Here are a few ways to riff on it:
- Go Vegetarian/Vegan: Simply omit the salami. For vegan fare, use vegan cheese tortellini (available in many stores), skip the mozzarella, and add a can of rinsed, drained chickpeas for protein and heartiness. A sprinkle of nutritional yeast in the dressing can add a cheesy flavor.
- Swap the Protein: Not a salami person? Try diced grilled chicken, flaked tuna, or even crispy pancetta. For a seafood twist, add some cooked, chilled shrimp at the end.
- Seasonal Veggie Switch-Up: Use what’s fresh! In spring, add asparagus tips (blanched). In summer, throw in some grilled zucchini or corn kernels. In fall, roasted butternut squash cubes are incredible.
- Dressing Detour: Love pesto? Swap the Italian dressing for 1/2 cup of homemade or high-quality store-bought basil pesto thinned with a tablespoon of olive oil or pasta water. Creamy fan? Mix 1/4 cup of mayo or Greek yogurt into the dressing for a richer, tangier coat.
- Cheese Please: Swap the mozzarella for crumbled feta (a saltier, tangier option) or shaved Parmesan for a more intense, nutty flavor.
Beau’s Chef Notes & Kitchen Chatter
Over the years, this recipe has become a true friend in my kitchen. It’s evolved from that first block party version—I started adding the Dijon after a happy accident one day when I ran out of my usual prepared dressing, and now I’ll never go back! It adds that “what is that amazing flavor?” layer.
A funny story: I once brought this to a friend’s potluck and accidentally used cinnamon instead of dried oregano. (Look, the jars were identical, and I was in a hurry!). We ended up calling it “Tuscan Fall Fusion Salad,” and you know what? It was… interesting. But let’s just say I now keep my spices VERY clearly labeled. The lesson? Always taste your dressing before committing!
This salad’s magic truly happens as it chills. Making it a few hours ahead, or even the night before, is not just okay—it’s encouraged. The flavors get to know each other and become best friends.
FAQs & Troubleshooting Your Tortellini Salad
Q: Can I make this salad ahead of time?
A: Absolutely! In fact, I recommend it. Prepare it up to 24 hours in advance, cover tightly, and store in the fridge. The flavors meld beautifully. If it seems a little dry after chilling, just stir in a fresh tablespoon of olive oil and a squeeze of lemon juice before serving.
Q: My salad seems a bit soggy. What happened?
A: The main culprit is usually adding warm tortellini to the salad. Ensure your pasta is completely cooled—even chilled—before mixing. Also, make sure your veggies (especially cucumbers and tomatoes) are thoroughly dried after washing. A salad spinner is your best friend here!
Q: What’s the best way to store leftovers?
A: Keep it in an airtight container in the fridge. It will stay delicious for 3-4 days. Note that the cucumbers may soften a bit after day two, but the flavor will still be fantastic.
Q: Can I use a different pasta?
A: Of course! Cheese ravioli works great. For a non-stuffed pasta, try rotini, farfalle (bow-ties), or penne. Just cook al dente and follow the same cool-down process.

Tuscan Tortellini Pasta Salad : Bold, Bright, and Bursting with Flavor
Description
This Tuscan Tortellini Pasta Salad is the kind of dish that shows up and steals the spotlight. It’s hearty enough to be dinner, vibrant enough for a potluck, and easy enough for a busy weeknight. Plump cheese tortellini are tossed with savory salami, creamy mozzarella, crisp vegetables, and a zesty homemade Italian dressing that clings to every bite. Fresh, satisfying, and ready in under 30 minutes—this is a true crowd-pleaser.
Ingredients
Pasta Salad
-
1 (20 oz) package cheese tortellini, cooked and cooled
-
1 cup cherry tomatoes, halved
-
1 cup cucumber, chopped
-
½ cup sliced black olives
-
½ cup chopped salami or prosciutto
-
½ cup diced bell pepper (any color or mix)
-
½ cup fresh mozzarella balls (bocconcini), halved
-
¼ cup red onion, thinly sliced
-
¼ cup fresh parsley, chopped
Zesty Italian Dressing
-
⅓ cup extra virgin olive oil
-
3 tablespoons red wine vinegar
-
1 teaspoon Dijon mustard
-
1 garlic clove, minced
-
½ teaspoon dried oregano
-
Salt and freshly cracked black pepper, to taste
Instructions
-
Cook the tortellini
Bring a large pot of well-salted water to a boil. Cook tortellini according to package directions until just al dente. Drain and rinse briefly under cold water to stop cooking. Set aside to cool completely. -
Prep the mix-ins
While the pasta cools, chop tomatoes, cucumber, bell pepper, red onion, salami, mozzarella, and parsley. Add everything except parsley to a large mixing bowl. -
Make the dressing
In a small bowl or jar, whisk together olive oil, red wine vinegar, Dijon mustard, garlic, oregano, salt, and pepper until smooth and emulsified. Taste and adjust seasoning. -
Assemble the salad
Add cooled tortellini to the bowl with the vegetables and meats. Pour dressing over the top and gently toss until evenly coated. -
Chill and finish
Fold in most of the parsley. Cover and refrigerate for at least 30 minutes to allow flavors to meld. Garnish with remaining parsley before serving.
Notes
-
Cool pasta completely before mixing to avoid sogginess
-
Dry vegetables well after washing
-
This salad tastes even better after a few hours (or overnight!)
-
Refresh leftovers with a splash of olive oil and lemon juice
Nutritional Information (Approximate)
Here’s a general breakdown per serving (based on 6 servings). Remember, this is a hearty, meal-worthy salad!
- Calories: 390
- Protein: 15g
- Fat: 22g
- Carbohydrates: 32g
- Fiber: 3g
- Sugar: 4g
Disclaimer: Nutritional info is an estimate calculated using online tools and can vary based on specific ingredient brands and portion sizes. For precise dietary needs, it’s best to calculate using your exact ingredients.
Final Thoughts
And there you have it, friends—my heartwarming, crowd-pleasing Tuscan Tortellini Pasta Salad in all its glory. This recipe is more than just a list of ingredients and steps; it’s a ticket to creating your own happy memories around the table. It’s proof that incredible food doesn’t have to be complicated.
I hope you’ll whip up a batch for your next gathering, a busy weeknight, or just because you deserve a vibrant, delicious meal. When you do, I’d love to hear about it! Tag me over on Feastical.com or share your photos. Nothing makes me happier than seeing my recipes come to life in your kitchen.
Now, go grab that fork (or your favorite serving spoon), and let’s dig into the good life, one flavorful bite at a time. Happy cooking!
— Beau
Thai Chicken Salad: Fresh, Crunchy, and Packed with Sweet Heat
Thai Chicken Salad: Your New Go-To for a Fresh & Flavorful Feast
Hey friends, Beau here from Feastical! Let’s be real for a second. How many times have you stood in front of the fridge, craving something… *alive*? Something that doesn’t come from a sad, floppy bag of pre-washed greens and a lonely bottle of ranch? I’ve been there more times than I can count, especially after a long day when the kitchen feels more like a chore zone than a creative space.
That’s exactly why I’m so pumped to share this recipe with you today. This isn’t just a salad. This is a flavor festival in a bowl. We’re talking about a Thai Chicken Salad that’s a total game-changer: wildly crunchy, perfectly balanced between sweet and spicy, and so satisfying it can easily be the main event. It’s the salad that makes you forget you’re eating a salad, you know?
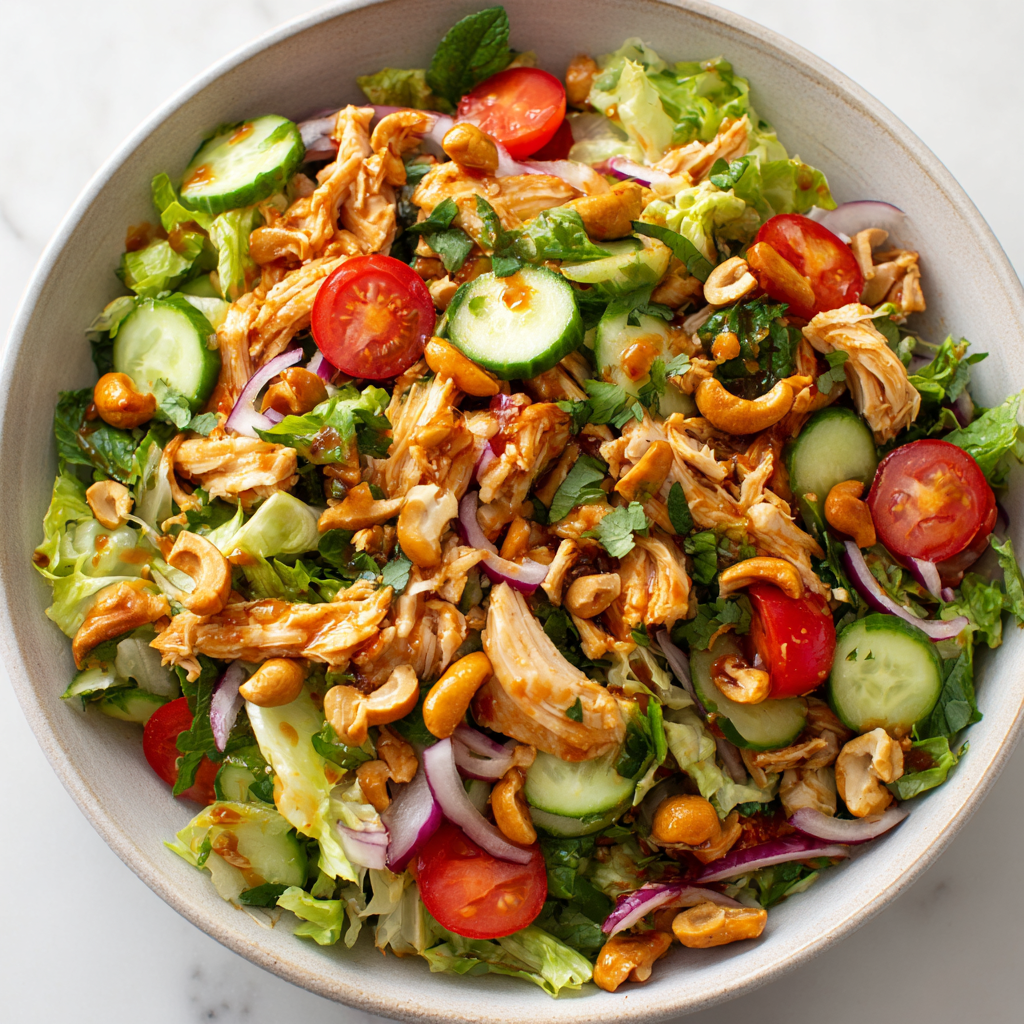
Imagine this: tender, savory shredded chicken tangled up with the crispest cucumbers and juicy tomatoes. Then, we’re throwing in a handful of buttery roasted cashews for that irresistible crunch. The magic, though, is all in the dressing—a bright, zingy, sweet-heat situation that hugs every single ingredient. It’s like sunshine for your taste buds. Best part? You can whip this vibrant, healthy meal together in about 15 minutes flat. No fancy skills required. Just you, a few simple ingredients, and a serious craving for something delicious. Let’s get that fork ready!
The Rainy Market Day That Inspired This Bowl of Sunshine
This recipe has a little story, as the best ones often do. A few years back, my wife and I got caught in a sudden, torrential downpour at a weekend farmers’ market. We dashed under the nearest awning, which happened to belong to a tiny, family-run Thai food stall. The incredible aroma of lemongrass, chili, and lime pulled us in like a tractor beam.
We ordered their special “market salad,” and the wonderful lady running the stall handed us two overflowing bowls. Sitting on a wet bench, watching the rain, we took our first bites. It was an explosion—cool, crunchy vegetables against a dressing so vibrant it practically sang. It was the exact opposite of the gloomy weather. That moment of pure, unexpected joy is what I try to capture every time I make this salad. It’s my kitchen hack for bringing a little bit of that sunny, market-day energy right to your table, no matter what the weather looks like outside.
Gathering Your Flavor Party: The Ingredients
Here’s the crew! This is a flexible, forgiving list. The goal is fresh textures and bold flavors. Don’t stress if you’re missing one thing—I’ve got swaps for you.
- 2 cups cooked, shredded chicken: The hearty star of the show. I’m a huge fan of using a rotisserie chicken here—it’s juicy, flavorful, and the ultimate time-saver. No shame in that game! Otherwise, poach or bake a couple of chicken breasts. Chef’s Insight: Save the broth from poaching! It’s liquid gold for soups or cooking rice.
- 4 cups mixed salad greens: The fresh, crisp base. I love a blend with some spinach or butter lettuce for tenderness and romaine for crunch. Anything sturdy works!
- ½ cup cherry tomatoes, halved: Little bursts of juicy sweetness. Sub Tip: No cherries? Dice any ripe tomato you have. Just squeeze out the excess seeds and juice so your salad doesn’t get watery.
- ½ cup cucumber, thinly sliced: For that essential cool, refreshing crunch. I like to use English cucumbers—no peeling or seeding needed! Chef’s Hack: Toss the slices with a tiny pinch of salt for 5 minutes, then pat dry. This “quick-pickle” step keeps them extra crisp.
- ¼ red onion, thinly sliced: A sharp, colorful bite. If raw onion is too intense for you, soak the slices in ice water for 10 minutes. It mellows the flavor beautifully.
- ⅓ cup roasted cashews: Our crunch factor and a source of creamy, rich flavor. Pro Move: Give them a quick chop so you get a bit of cashew in every forkful. Almonds or peanuts work great too!
- Fresh cilantro for garnish: The fragrant, herbal finish that screams “Thai cuisine.” If you’re one of those folks who thinks cilantro tastes like soap (no judgment!), fresh mint or Thai basil are incredible substitutes.
For the “Can’t-Live-Without-It” Thai Dressing:
- 2 tablespoons lime juice: The essential, puckery tang. Freshly squeezed is a million times better than bottled here.
- 1 tablespoon soy sauce or fish sauce: The savory, salty depth. Use soy sauce for a vegetarian version, or fish sauce (my personal pick) for that authentic, umami-rich punch.
- 1 tablespoon honey or maple syrup: The sweet to balance the sour and spicy. Agave nectar works too!
- 1 teaspoon sesame oil: A tiny amount makes a huge impact, adding a toasty, nutty aroma. Don’t skip it!
- 1 garlic clove, minced: The flavor backbone. A microplane grater gets it super fine so it melds perfectly into the dressing.
- 1 small red chili, finely chopped (optional): Our heat source! Remove the seeds for milder spice, or leave them in for a kick. A dash of sriracha or crushed red pepper flakes can stand in.
- 1 tablespoon chopped fresh herbs: I use cilantro and mint together. It’s like a flavor party in your dressing!
Let’s Build That Salad: Simple Steps to Deliciousness
This is where the magic happens, and it’s honestly more fun than work. Follow these steps, throw in my little hacks, and you’ll have a restaurant-quality salad in minutes.
- Make the Dressing First. In a small bowl or, better yet, a mason jar with a lid, combine the lime juice, soy/fish sauce, honey, sesame oil, minced garlic, chopped chili, and fresh herbs. Whisk vigorously or shake the jar until everything is beautifully emulsified and smooth. Chef’s Tip: Doing this first allows the flavors to get to know each other and mellow out while you prep the other ingredients. Taste it! Adjust to your liking—more honey for sweetness, more lime for zing.
- Prep Your Veggies & Chicken. Halve those tomatoes, thinly slice the cucumber and red onion, and chop your cashews if you like. If your chicken isn’t already shredded, go ahead and pull it into bite-sized strips or shreds using two forks. Time-Saving Hack: Do all this chopping and shredding right on your largest cutting board. You can just slide everything straight into the big salad bowl—less cleanup!
- Assemble the Base. In your largest mixing bowl (bigger than you think you need—tossing room is key!), add the mixed greens. Pile the shredded chicken, tomatoes, cucumber, and red onion right on top. Assembly Insight: I like to place the chicken in the center and arrange the colorful veggies around it. It just looks pretty and makes tossing even easier.
- The Grand Toss! Right before you’re ready to serve, pour about three-quarters of your fantastic dressing over the salad. Using clean hands or two large spoons, gently but thoroughly toss everything together. Lift from the bottom to coat every leaf and piece of chicken. Pro Tossing Move: Add the dressing gradually. You can always add more, but you can’t take it out! The goal is a light, glossy coat, not a swimming pool.
- Final Flourish. Transfer your gorgeous, dressed salad to a serving platter or individual bowls. Drizzle with the remaining dressing if you like it extra saucy. Scatter the roasted cashews over the top and finish with a generous handful of fresh cilantro leaves. This keeps the nuts crunchy and the cilantro bright and fresh.
Serving It Up Style
Presentation is part of the fun! Here’s how to make this salad shine:
For a family-style feast, pile it all onto a big, beautiful platter. Let everyone serve themselves. For individual lunches, layer it in wide, shallow bowls so you get a bit of everything in each bite. If you’re feeling fancy, serve it in little crisp lettuce cups (Butter lettuce or Romaine hearts work great) for a fun, hands-on appetizer.
What to serve with it? This salad is a complete meal on its own! But if you want to round things out, it’s fantastic with a side of steamed jasmine rice (to soak up any extra dressing), crispy spring rolls, or a simple bowl of coconut soup. For drinks, I love it with an ice-cold lager, a crisp white wine like Sauvignon Blanc, or a sparkling limeade.
Make It Your Own: Delicious Twists & Swaps
The beauty of this recipe is its versatility. Play with it!
- Tropical Twist: Add ½ cup of diced ripe mango or fresh pineapple. The sweet fruit against the spicy dressing is absolute heaven.
- Change Up the Protein: Not a chicken person? Try it with grilled shrimp, thinly sliced flank steak, or even crispy tofu cubes (press and pan-fry them for the best texture).
- Go Full Veggie/Vegan: Swap the chicken for a can of rinsed and drained chickpeas or edamame. Use maple syrup instead of honey and soy sauce instead of fish sauce. You’ve got a powerhouse vegan meal!
- Extra Crunch: Add shredded carrots, thinly sliced bell peppers, or even some crispy wonton strips on top.
- Peanut Lover’s Dream: Swap the cashews for peanuts, and add a tablespoon of creamy peanut butter to the dressing. Thin it out with a splash of warm water until it’s pourable.
Beau’s Kitchen Notes & Stories
This recipe has been a constant in my kitchen for years, and it’s evolved with me. The first time I made it, I was so heavy-handed with the fish sauce that my poor dog left the room. Lesson learned: taste as you go! Now, I make a double batch of the dressing almost every week and keep it in the fridge. It’s my secret weapon for instantly jazzing up grilled meats, noodles, or even just a simple bowl of steamed veggies.
I also learned the hard way that adding the nuts too early means soggy nuts—and nobody wants that. So now, they’re always the very last sprinkle, the grand finale. Cooking is all about these little lessons, and sharing them is my favorite part of running Feastical.
Your Questions, Answered
- Can I make this salad ahead of time? Absolutely! Prep is your friend. Keep all the components separate: dressing in a jar, chopped veggies and chicken in containers, nuts and herbs separate. Assemble and toss right before you eat. The dressed salad is best eaten immediately, but the components will stay fresh for 2-3 days in the fridge.
- My dressing is too spicy/sour/salty! Help! No panic! If it’s too spicy, add more honey and a splash of neutral oil. Too sour? Balance with more honey or a tiny pinch of sugar. Too salty? Add more lime juice and a bit more oil. The key is balancing the four flavor elements: sweet, sour, salty, spicy.
- What’s the best way to shred chicken? My two favorite methods: 1) Use two forks to pull it apart. 2) For super fine shreds, pop slightly cooled chicken into your stand mixer and use the paddle attachment on low speed for 20-30 seconds. It works like a charm!
- Can I use bottled dressing? You *can*, but I really encourage you to try the homemade version. It takes 2 minutes and tastes infinitely better, with no preservatives or weird additives. Promise it’s worth the tiny extra effort!
Thai Chicken Salad: Fresh, Crunchy, and Packed with Sweet Heat
Description
This Thai Chicken Salad is bright, bold, and incredibly satisfying. Tender shredded chicken, crisp vegetables, and crunchy cashews are tossed in a zesty lime dressing with just the right balance of sweet, salty, and heat. It comes together in about 15 minutes and works perfectly as a light dinner, hearty lunch, or make-ahead meal.
Ingredients
Salad
-
2 cups cooked chicken, shredded (rotisserie works great)
-
4 cups mixed salad greens (romaine, butter lettuce, or spinach)
-
½ cup cherry tomatoes, halved
-
½ cup cucumber, thinly sliced
-
¼ red onion, thinly sliced
-
⅓ cup roasted cashews, roughly chopped
-
Fresh cilantro (or mint), for garnish
Thai Lime Dressing
-
2 tablespoons fresh lime juice
-
1 tablespoon soy sauce or fish sauce
-
1 tablespoon honey or maple syrup
-
1 teaspoon sesame oil
-
1 garlic clove, minced
-
1 small red chili, finely chopped (optional)
-
1 tablespoon chopped fresh herbs (cilantro, mint, or both)
Instructions
-
Make the dressing
Whisk (or shake in a jar) lime juice, soy/fish sauce, honey, sesame oil, garlic, chili, and herbs until well combined. Taste and adjust as needed. -
Prepare the salad base
In a large bowl, add greens, shredded chicken, tomatoes, cucumber, and red onion. -
Toss
Pour most of the dressing over the salad and gently toss until evenly coated. -
Finish & serve
Top with roasted cashews and fresh herbs. Add extra dressing if desired and serve immediately.
Notes
-
Best texture: Add cashews just before serving so they stay crunchy.
-
Milder onion: Soak sliced red onion in cold water for 5–10 minutes, then drain.
-
Extra protein: Grilled shrimp, steak strips, or crispy tofu work beautifully.
-
Meal prep: Store salad components and dressing separately for up to 3 days.
-
More heat: Add chili oil, sriracha, or extra fresh chili to the dressing.
Nutritional Information (A General Guide)
Please note: The following is an approximate estimate per serving (recipe serves 3), calculated using rotisserie chicken (white meat), soy sauce, and honey. Values can vary based on specific ingredients and portion sizes.
- Calories: ~350
- Protein: 28g (Excellent for keeping you full and satisfied!)
- Carbohydrates: 14g
- Dietary Fiber: 3g
- Sugars: 8g (Mostly from natural sources like honey and tomatoes)
- Total Fat: 22g (Primarily healthy fats from cashews and sesame oil)
- Saturated Fat: 4g
This salad is a fantastic source of lean protein, healthy fats, and vitamins from all those fresh vegetables. It’s a balanced, energizing meal that won’t weigh you down.
Final Thoughts from My Kitchen to Yours
And there you have it, friends—my absolute favorite way to turn a simple salad into a moment of pure joy. This Thai Chicken Salad is more than just a recipe; it’s a reminder that healthy, feel-good food can be bursting with flavor and fun to make. It’s about embracing those bright, bold tastes and textures that make every bite an adventure.
I hope this recipe finds its way into your regular rotation, becoming your own quick fix for a delicious, no-fuss dinner or a show-stopping lunch. Give one of the fun variations a try, make it your own, and most importantly, enjoy the process. Thanks so much for letting me share this kitchen favorite with you. Now go grab that fork and dig into something spectacular!
With flavor and gratitude,
Beau
Turkey Taco Salad Recipe : Fresh, Flavorful, and Perfectly Satisfying
Healthy Turkey Taco Salad: Your New Favorite 20-Minute Meal
Hey friends, Beau here from Feastical! Let’s talk about that beautiful moment when a craving for big, bold flavor crashes headfirst into the desire for something actually good for you. For a long time, I thought those two things lived on opposite sides of the kitchen. Taco Tuesday meant indulgence, and “healthy” meant… well, often something a lot less exciting.
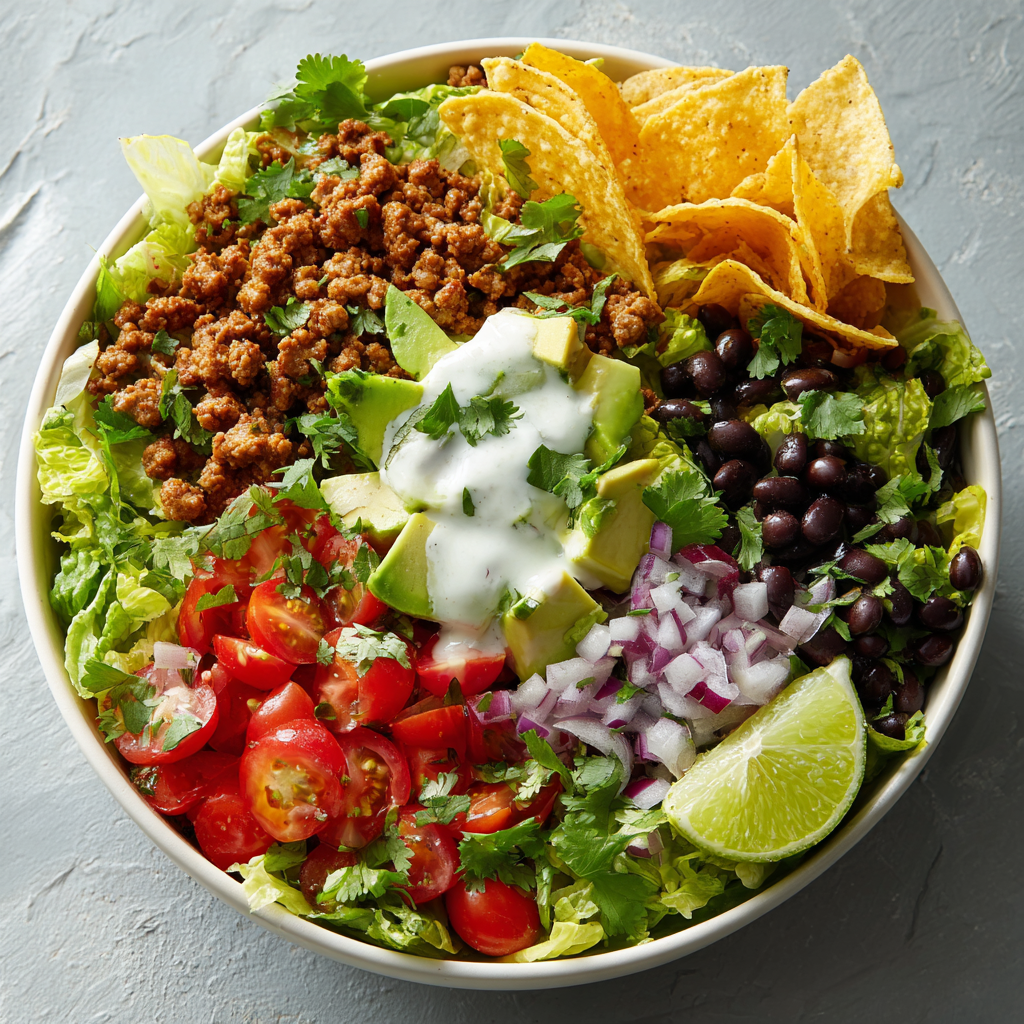
Then, this Turkey Taco Salad waltzed into my life and changed the game. We’re talking seasoned lean ground turkey, hearty black beans, and a confetti of the crispiest, freshest veggies, all wrapped up in a creamy, zesty cilantro-lime dressing that you’ll want to put on everything. It’s got all the soul-satisfying, fiesta-in-your-mouth vibes of your favorite tacos, but it comes together in a single bowl (or skillet!) in about 20 minutes flat.
This isn’t just a “salad.” This is a meal. It’s protein-packed, fiber-filled, and vibrantly delicious. It’s perfect for a fast weeknight dinner, a seriously impressive lunch, or even meal prep that you’ll actually look forward to. So, grab your favorite big bowl and let’s build something incredibly tasty, together.
Taco Night, Reinvented
This recipe was born out of pure, hilarious necessity. Picture this: It’s a sweltering summer weeknight, my tiny apartment kitchen feels like a sauna, and my friends are due to arrive for our standing “Taco Tuesday” hang in 45 minutes. The problem? I’d completely forgotten to buy tortillas. A chef’s nightmare, right?
Panic set in for about 30 seconds. Then, I looked at the spread on my counter: the sizzling turkey, the bright tomatoes, the cool avocado, and a giant bowl of romaine I was planning to use for side salads. Lightbulb moment. What if we just tossed it all together? I whisked up a quick dressing with the yogurt, lime, and cilantro I had, and the Turkey Taco Salad was officially invited to the party.
The result? Not a single person missed the tortillas. We passed around the big serving bowl, everyone built their own mountain of goodness, and there was nothing left but happy smiles and empty plates. It was a reminder that the best recipes often come from a little chaos, a lot of flavor, and the simple goal of feeding people you love.
Gathering Your Flavor Crew
Here’s everything you need to create this flavor fiesta. Don’t stress if you’re missing an item or two—I’ve got swaps and ideas for you right here.
For the Salad & Turkey:
- 1 lb lean ground turkey: I love the 93/7 blend here. It’s lean but still juicy, and it soaks up all those amazing spices. Chef’s Tip: Ground chicken or even extra-lean beef works great too!
- 1 tablespoon olive oil: Just enough to get our turkey browning nicely without sticking.
- The Spice Brigade (1 tsp chili powder, ½ tsp cumin, ½ tsp garlic powder, ¼ tsp paprika): This is your flavor foundation. No need for a packet! This blend gives you smoky, warm, savory depth. Feeling bold? Add a pinch of cayenne.
- Salt and pepper to taste: Always season as you go. Taste your turkey after it’s cooked and adjust!
- 1 (15 oz) can black beans, drained and rinsed: For plant-based protein and creamy, hearty texture. Rinsing removes excess sodium and that starchy can liquid.
- 4 cups chopped romaine lettuce: The crunchy, hydrating base. Kale or chopped butter lettuce are fantastic, sturdy subs.
- 1 cup cherry tomatoes, halved: Little bursts of sweet acidity. Use whatever tomatoes look best at the market.
- ¼ red onion, thinly sliced: For a sharp, crunchy bite. Soaking the slices in ice water for 5 minutes tames their intensity if you prefer.
- 1 avocado, sliced: Our creamy, healthy-fat hero. Add it right before serving to keep it pretty and green.
- Fresh cilantro & lime wedges: The finishing flourishes! They add a huge pop of fresh aroma and brightness.
For the Cilantro Lime Dressing:
- ½ cup plain Greek yogurt: The creamy, tangy, protein-packed base of our dressing. Sour cream is a direct 1:1 swap if that’s your preference.
- ½ cup fresh cilantro (stems are okay!): Don’t you dare toss those flavorful stems! They blend up beautifully. Not a cilantro fan? Try fresh parsley or even a mix of basil and mint.
- Juice of 1 lime: Fresh is key here for that vibrant zing. Start with one, you can always add more.
- 1 clove garlic: For a little savory backbone. If you’re sensitive to raw garlic, use ¼ tsp garlic powder instead.
- 1–2 tablespoons olive oil: This helps emulsify and smooth out the dressing.
- Salt & a splash of water: Salt to wake up all the flavors, and water just to thin it to a perfect drizzling consistency.
Let’s Build Your Masterpiece (Step-by-Step!)
This comes together so fast, it’s almost magic. I recommend getting all your veggies chopped first—it makes the process feel like a fun, professional cooking show.
Step 1: Spice & Sizzle the Turkey. Heat that olive oil in a large skillet over medium heat. Crumble in your ground turkey. Let it get a nice sear on one side before you start breaking it up—this builds flavor! Once it’s mostly browned, sprinkle over all your spices (chili powder, cumin, garlic powder, paprika, salt, and pepper). Stir like crazy, letting those spices toast and coat every morsel for about a minute. You’ll smell the magic happening. Chef’s Hack: If things look dry, add a tablespoon of water or broth to help the spices form a nice coating on the meat.
Step 2: Welcome the Beans. Toss in your drained and rinsed black beans. Stir them into the spiced turkey and let everything hang out and get friendly for 2-3 minutes, just until the beans are heated through. Take the skillet off the heat and let it cool slightly while you make the dressing. This prevents your crisp lettuce from wilting when you assemble.
Step 3: Whiz Up the Dressing. In your blender or small food processor, combine the Greek yogurt, cilantro, lime juice, garlic, olive oil, and a big pinch of salt. Blitz it until it’s smooth and gorgeously green. Check the consistency—if it’s too thick for drizzling, add a splash of water, one teaspoon at a time, until it’s perfect. Taste it! Need more lime? More salt? This is your moment to make it yours.
Step 4: The Grand Assembly. You can do this family-style on one big platter or build individual bowls. I’m a big platter person—it looks so abundant and inviting. Lay down your crisp romaine as the foundation. Artfully (or just enthusiastically!) scatter over the cherry tomatoes and red onion. Spoon the warm turkey and bean mixture right over the top. Nestle those creamy avocado slices in there. Now, the pièce de résistance: drizzle that vibrant green dressing over everything.
Step 5: Finish & Serve. A final shower of fresh cilantro leaves and a few lime wedges on the side for an extra squeeze, and you are DONE. Serve it immediately for the best mix of warm turkey, cool veggies, and creamy dressing.
How to Serve It Up Like a Pro
This salad is a beauty, so let it shine! I love using a wide, shallow bowl or a big wooden board for serving. The key is layering. Start with the lettuce, then the colder veggies, then the warm turkey mixture. This keeps the lettuce from getting soggy. Place the avocado on top where it can be seen, and always add the dressing last.
For a fun interactive meal, set up a “taco salad bar” with all the components in separate bowls. Include extra toppings like shredded cheese, crushed tortilla chips for crunch, sliced jalapeños, or a scoop of corn salsa. Let everyone build their own perfect bowl. It’s a guaranteed crowd-pleaser!
Pair it with a light, crisp beer, a citrusy margarita (skinny or regular!), or just a big glass of ice water with extra lime. It’s that versatile.
Make It Your Own: 5 Delicious Twists
Once you’ve got the basic blueprint down, the sky’s the limit. Here are a few of my favorite riffs on this recipe:
- The “Fiesta Bowl”: Serve it over a base of cilantro-lime rice or quinoa instead of lettuce for a heartier, scoopable bowl.
- Vegetarian Powerhouse: Skip the turkey entirely! Use two cans of black beans, or swap in a bag of plant-based ground “meat.” Add roasted sweet potato cubes for extra substance.
- Cheesy & Crunchy: Add a handful of shredded sharp cheddar or crumbled cotija cheese right before serving. A generous handful of crushed tortilla chips or strips adds the perfect textural contrast.
- Different Protein, Same Vibes: Leftover shredded chicken or rotisserie chicken works amazingly. Just warm it with the spices. For a seafood twist, try sautéed shrimp seasoned with the same spice mix.
- Creamy Avocado Dressing: Blend the avocado into the dressing! Add half the avocado to the blender with the other dressing ingredients for an ultra-creamy, dreamy green sauce.
Beau’s Kitchen Notes
This recipe has become a true workhorse in my kitchen. I’ve made it for post-gym lunches, last-minute dinners, and even packed it for picnics (I keep the dressing in a separate jar). The biggest evolution? The dressing. It started as a simple lime vinaigrette, but the Greek yogurt version stole the show with its creamy tang and protein boost.
A funny tidbit: I once accidentally used frozen ground turkey without fully thawing it. I ended up breaking it apart in the pan as it thawed and cooked, and you know what? It worked just fine in a pinch! Not my recommended method, but a good reminder that cooking is forgiving. The goal is to get a delicious meal on the table, not perfection.
FAQs & Quick Fixes
Q: Can I make this ahead for meal prep?
A: Absolutely! This is a meal prep superstar. Store the cooked (and cooled) turkey-bean mixture, chopped veggies, and dressing in separate containers in the fridge for up to 4 days. Assemble your bowl just before eating to keep everything crisp.
Q: My dressing is too thick/tangy/garlicky. Help!
A: No problem! Too thick? Add water, a teaspoon at a time. Too tangy? Balance it with a tiny drizzle of honey or maple syrup. Too garlicky? It will mellow slightly overnight, but for next time, use half a clove or garlic powder.
Q: The lettuce gets wilted and sad by the next day. What gives?
A: This is the #1 salad mistake! The enemy is moisture + time. The key is separation. Never store a fully dressed salad. Keep components apart, dress only what you’ll eat immediately, and you’ll have crisp leftovers.
Q: Can I use frozen corn or other veggies?
A: You bet! A cup of frozen corn (thawed or sautéed quickly in the turkey pan) is a fantastic addition. Diced bell peppers are great too—you can even sauté them with the turkey.

Turkey Taco Salad Recipe : Fresh, Flavorful, and Perfectly Satisfying
Description
This Healthy Turkey Taco Salad gives you everything you love about tacos—savory spices, creamy avocado, fresh crunch—without the heaviness. Lean ground turkey, black beans, and crisp veggies come together with a creamy cilantro-lime dressing for a fast, satisfying meal that’s great for busy weeknights or make-ahead lunches.
Ingredients
Turkey & Salad
-
1 lb lean ground turkey (93/7 recommended)
-
1 tablespoon olive oil
-
1 teaspoon chili powder
-
½ teaspoon ground cumin
-
½ teaspoon garlic powder
-
¼ teaspoon paprika
-
Salt and black pepper, to taste
-
1 (15 oz) can black beans, drained and rinsed
-
4 cups romaine lettuce, chopped
-
1 cup cherry tomatoes, halved
-
¼ red onion, thinly sliced
-
1 avocado, sliced
-
Fresh cilantro and lime wedges, for serving
Cilantro-Lime Dressing
-
½ cup plain Greek yogurt
-
½ cup fresh cilantro (leaves and tender stems)
-
Juice of 1 lime
-
1 clove garlic
-
1–2 tablespoons olive oil
-
Salt, to taste
-
1–3 tablespoons water (to thin)
Instructions
-
Cook the turkey
Heat olive oil in a skillet over medium heat. Add ground turkey and cook until browned, breaking it up as it cooks. -
Season
Stir in chili powder, cumin, garlic powder, paprika, salt, and pepper. Cook for 1–2 minutes until fragrant. -
Add beans
Mix in black beans and cook until heated through. Remove from heat and let cool slightly. -
Make the dressing
Blend Greek yogurt, cilantro, lime juice, garlic, olive oil, and salt until smooth. Add water as needed for a drizzleable consistency. -
Assemble
Divide romaine into bowls. Top with tomatoes, red onion, turkey-bean mixture, and avocado. -
Finish
Drizzle with dressing, garnish with cilantro, and serve with lime wedges.
Notes
-
Meal prep smart: Store turkey, veggies, and dressing separately for up to 4 days. Assemble just before eating.
-
Milder onion flavor: Soak sliced red onion in cold water for 5 minutes, then drain.
-
Extra crunch: Add crushed tortilla chips or toasted pepitas right before serving.
-
Protein swaps: Ground chicken, shredded rotisserie chicken, or seasoned shrimp work well.
-
Dairy-free option: Use a dairy-free yogurt or avocado-based dressing.
Nutritional Breakdown (A Approximate Per Serving)
This info is for one generous serving (about ¼ of the recipe), using lean ground turkey and the Greek yogurt dressing. Remember, this is fuel for your body that tastes incredible!
- Calories: ~350
- Protein: 25g (Helps keep you full and satisfied!)
- Carbohydrates: 20g
- Fiber: 8g (That’s a great boost for your daily goals!)
- Fat: 18g (Mostly the good, healthy fats from avocado and olive oil.)
As always, these are estimates. Your exact numbers will depend on the specific brands and amounts you use. The takeaway? This is a balanced, nutrient-dense meal that delivers on flavor and fuel.
Final Thoughts
So there you have it, friends—my go-to recipe for when I want a meal that feels indulgent but fuels me right. This Turkey Taco Salad is proof that healthy eating doesn’t have to be boring or restrictive. It’s vibrant, it’s packed with texture and flavor, and it comes together in the time it would take to wait for delivery.
I hope this recipe finds its way into your regular rotation and brings as much joy to your table as it has to mine. Remember, cooking is about playing, tasting, and sharing. Don’t be afraid to tweak it and make it your own. And when you do make it, I’d love to hear about it! Tag me over on Feastical or on social media.
Now, go forth and build the most epic taco salad bowl you can imagine. Happy cooking!
– Beau
Butternut Squash Buddha Bowl: Cozy, Colorful, and Naturally Nourishing
Butternut Squash Buddha Bowl: Your Ticket to Cozy, Colorful, & Naturally Nourishing Vibes
Hey there, friend! Beau here, welcoming you back to my cozy corner of the internet at Feastical. You know what I’m absolutely loving right now? That magical moment when dinner isn’t just a meal, but a giant, edible hug. It’s the kind of food that makes you feel vibrant from the inside out, looks like a piece of art on your table, and somehow manages to be wildly satisfying without weighing you down. Enter the star of today’s show: the Butternut Squash Buddha Bowl.
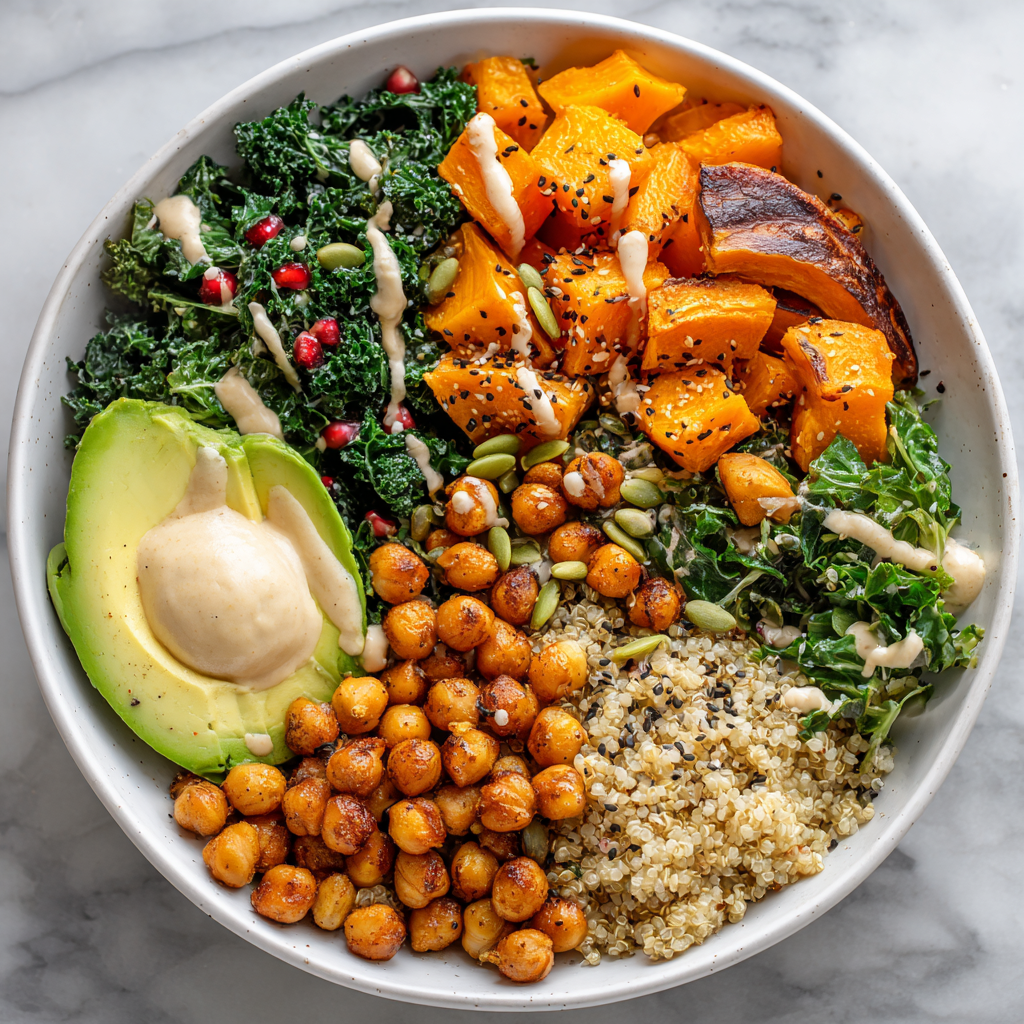
Now, if you’re picturing a bland pile of rabbit food, let me stop you right there. This bowl is anything but. We’re talking about sweet, cinnamon-kissed roasted squash, creamy avocado, protein-packed chickpeas, and fluffy quinoa, all coming together in a symphony of textures and flavors. It’s a warm, hearty, and completely plant-powered feast that proves nourishing yourself can be the most delicious part of your day. Whether you’re a veggie veteran or just looking to add more color to your plate, this bowl is your new best friend. So, tie on your favorite apron, and let’s build something beautiful together!
The Bowl That Saved My Weeknight Sanity
I have to confess, my love affair with Buddha bowls didn’t start in some fancy restaurant. It began in my own kitchen, during one of those chaotic weeks where my schedule was packed, my energy was low, and my creativity was running on empty. I was staring into the abyss of my fridge, willing something delicious to materialize, when I spotted a lone butternut squash rolling around in the crisper drawer.
I cubed it up, tossed it with the first things I grabbed—olive oil, a daring dash of cinnamon, salt, and pepper—and threw it in the oven. While it roasted, filling my kitchen with that incredible caramelized scent, I scrambled. I cooked some quinoa, rinsed a can of chickpeas, and sliced an avocado that was perfectly ripe (a true kitchen miracle!). I piled it all into a big, wide bowl, drizzled it with tahini, and took a bite. And just like that, the chaos of the week melted away. This simple, throw-together meal was exactly what I needed: grounding, gorgeous, and deeply satisfying. It became my go-to “reset button” meal, and I’ve been perfecting it ever since. It’s a reminder that the best food often comes from a place of simplicity and a little bit of kitchen intuition.
Your Buddha Bowl Blueprint: Ingredients & Insights
Here’s everything you’ll need to create this masterpiece. Think of this list as your palette—each ingredient adds a unique color, texture, and flavor to the final bowl. I’ve included my favorite chef notes and swaps so you can make it your own!
-
- 2 cups butternut squash, peeled and cubed: The sweet, nutty heart of the bowl. Chef’s Insight: Look for a squash that feels heavy for its size with a firm, matte skin. No time to wrestle with a whole squash? Pre-cubed from the grocery store is a total weeknight win!
- 1 tablespoon olive oil: For roasting our squash to caramelized perfection. Substitution Tip: Avocado oil or melted coconut oil work beautifully here too.
- ½ teaspoon cinnamon: My not-so-secret weapon! It amplifies the squash’s natural sweetness in the most magical way. Chef’s Insight: Don’t skip this! It’s the flavor twist that makes people go, “Wow, what’s in this?”
- Salt and pepper to taste: The essential flavor enhancers. Season every layer!
- 1 cup cooked quinoa or brown rice: The hearty, wholesome base. Chef’s Insight: I’m a quinoa guy for the extra protein, but brown rice brings a wonderful chewy, comforting texture. Cook it in veggie broth instead of water for a major flavor boost.
- 1 cup canned chickpeas, drained and rinsed: Our plant-powered protein for staying power. Chef’s Hack: Pat them super dry with a towel, then toss them on the baking sheet with the squash for the last 15 minutes to get them a little crispy! So good.
- 1 cup kale or spinach: A pop of green and nutrients. Chef’s Insight: If using kale, give it a quick 30-second massage with a tiny drop of oil and a pinch of salt. It transforms it from tough to tender and sweet.
- 1 small avocado, sliced: For that dreamy, creamy factor and healthy fats.
1 tablespoon tahini or hummus (for drizzle): The “sauce” that brings it all together. Substitution Tip: Tahini is my go-to for its rich, slightly bitter edge, but hummus thinned with a little lemon juice or water makes a fantastic, creamy drizzle too.
- Optional Toppings (The Fun Part!): Pumpkin seeds for crunch, pomegranate seeds for a juicy burst, microgreens for a fancy finish, or even a sprinkle of feta or goat cheese if you’re feeling it.
Let’s Build Your Bowl: A Step-by-Step Journey
Ready to cook? Follow these steps, and you’ll have a restaurant-worthy bowl in no time. I’ve sprinkled in my favorite kitchen hacks to make everything flow smoothly.
- Preheat and Prep (The Warm-Up): Fire up your oven to 400°F (200°C). This high heat is key for getting those gorgeous caramelized edges on your squash. While it heats, peel and cube your butternut squash. Pro-Tip: Line your baking sheet with parchment paper. It makes cleanup an absolute breeze and prevents any sticking.
- Season and Roast (The Main Event): In a bowl, toss your squash cubes with the olive oil, cinnamon, salt, and pepper. Get your hands in there and make sure every single cube is lovingly coated. Spread them out in a single layer on your baking sheet—crowding is the enemy of crispness! Roast for 25-30 minutes, giving them a stir halfway through. You’ll know they’re done when you can easily pierce a cube with a fork and the edges are tinged with golden-brown deliciousness.
- Multi-Task Like a Pro (The Symphony): While the squash works its magic, let’s tackle everything else. Cook your quinoa or rice if you haven’t already. Warm your chickpeas in a small pan over medium heat with a pinch of salt and maybe a sprinkle of paprika if you’re feeling fancy. Prep your greens—sauté your spinach or give that kale a good massage.
- The Art of Assembly (The Grand Finale): Here’s where the fun really begins. Grab your widest, prettiest bowls. Start with a fluffy bed of your grain. Then, artistically arrange your greens, the warm roasted squash, the chickpeas, and those lovely avocado slices. There’s no wrong way to do this—make it colorful and inviting!
- Drizzle and Devour (The Finishing Touch): Finish your creation with a generous drizzle of tahini or your thinned hummus sauce. Scatter over your chosen toppings (I’m a pumpkin seed guy myself). And just like that, you’ve created a nourishing masterpiece. Serve immediately while everything is warm and vibrant.
How to Serve Your Cozy Creation
Presentation is half the joy of a Buddha bowl! I love serving these in wide, shallow bowls so all the gorgeous colors and textures are on display. For a true “feast for the senses” moment, bring the whole spread to the table family-style. Set out the big bowl of roasted squash, the pot of quinoa, and all the toppings in little dishes. Let everyone build their own perfect bowl—it’s interactive, fun, and guarantees happy eaters. This dish is fantastic warm, but it’s also great at room temperature, making it a brilliant packed lunch for the next day. Just pack the avocado and sauce separately and add them right before you eat to keep things fresh.
Make It Your Own: 5 Flavorful Twists
The beautiful thing about this bowl is its versatility. Play with these variations and make it a weekly staple that never gets old!
- The “Harvest Harvest” Twist: Swap the butternut squash for cubed sweet potato or a mix of both. Add roasted Brussels sprout halves and a sprinkle of dried cranberries.
- The Protein Power-Up: For an extra protein kick, add a soft-boiled egg, a handful of baked tofu cubes, or even some seasoned ground turkey or chicken.
- The Zesty Mexican Fiesta: Season the squash and chickpeas with cumin and chili powder instead of cinnamon. Use cilantro-lime rice as your base, top with a salsa verde drizzle, and add a squeeze of lime.
- The Creamy Dream: Blend the tahini with lemon juice, a clove of garlic, and a little water for a more traditional, zippy tahini sauce. Or, go for a creamy cilantro-lime dressing.
- The Deconstructed Falafel Bowl: Crumble a few store-bought or homemade falafel balls over the top. Use a hummus base, add lots of diced cucumber and tomato, and finish with a generous dollop of tzatziki.
Beau’s Kitchen Notes & Stories
This recipe has been a living, evolving thing in my kitchen. I first made it exactly as written above, but then one day I was out of tahini. In a panic, I thinned out some roasted red pepper hummus with a splash of water, and a new favorite was born! My partner is obsessed with adding a drizzle of hot honey over the top for a sweet-heat combo that’s just incredible.
The biggest lesson this bowl taught me? Embrace the “clean-out-the-fridge” spirit. See a lonely bell pepper? Roast it. Half a red onion? Thinly slice and quick-pickle it. A handful of nuts? Toast ’em and sprinkle ’em. This template is your playground. The goal is a bowl full of things you love that make you feel amazing. Don’t overthink it—just build, taste, and enjoy.
Your Questions, Answered (Let’s Troubleshoot!)
- Q: My squash came out soggy, not caramelized. What happened?
A: The two most common culprits are overcrowding the pan (they steam instead of roast) and not having your oven fully preheated. Give those cubes space and make sure your oven is piping hot before they go in. Patting the cubes dry before oiling can also help! - Q: Can I meal prep this bowl?
A: Absolutely! It’s a meal prep superstar. Roast the squash, cook the grain, and store them separately in the fridge for up to 4 days. Keep the avocado, fresh greens, and sauce separate until you’re ready to assemble and eat to keep everything fresh. - Q: My bowl tastes a bit bland. How can I amp up the flavor?
A: Season every single component! Don’t just salt the squash—salt your quinoa as it cooks, season your chickpeas as you warm them. The magic is in the layers. Also, a big squeeze of fresh lemon juice over the finished bowl can brighten everything up instantly. - Q: What’s a good tahini substitute if I don’t like the flavor?
A> No problem! A simple lemon-garlic yogurt sauce (Greek yogurt, lemon, garlic, salt), a store-bought green goddess dressing, or even just a really good, high-quality extra virgin olive oil drizzled over the top would be delicious.
Butternut Squash Buddha Bowl: Cozy, Colorful, and Naturally Nourishing
Description
This Butternut Squash Buddha Bowl is warm, comforting, and full of vibrant plant-based goodness. Sweet roasted squash, fluffy quinoa, creamy avocado, and protein-rich chickpeas come together in one balanced, satisfying bowl. It’s easy to make, perfect for meal prep, and customizable with your favorite toppings or sauces.
Ingredients
-
2 cups butternut squash, peeled and cubed
-
1 tablespoon olive oil
-
½ teaspoon ground cinnamon
-
Salt and black pepper, to taste
-
1 cup cooked quinoa or brown rice
-
1 cup canned chickpeas, drained and rinsed
-
1 cup kale or spinach
-
1 small avocado, sliced
-
1 tablespoon tahini or hummus (for drizzling)
Optional Toppings
Pumpkin seeds, pomegranate seeds, microgreens, feta or goat cheese
Instructions
-
Roast the squash
Preheat oven to 400°F (200°C). Toss squash with olive oil, cinnamon, salt, and pepper. Spread on a baking sheet and roast for 25–30 minutes, stirring halfway, until tender and caramelized. -
Prepare the base
While squash roasts, cook quinoa or rice if not already prepared. -
Warm the chickpeas & greens
Lightly warm chickpeas in a pan with a pinch of salt. Sauté spinach briefly or massage kale with a little olive oil and salt. -
Assemble the bowls
Divide quinoa between bowls. Top with roasted squash, chickpeas, greens, and avocado. -
Finish & serve
Drizzle with tahini or hummus and add desired toppings. Serve warm.
Notes
-
For crispier squash: Don’t overcrowd the pan and make sure the oven is fully preheated.
-
Meal prep friendly: Store grains, squash, and chickpeas separately for up to 4 days. Add avocado and sauce just before eating.
-
Extra flavor: Add lemon zest, smoked paprika, or cumin to the squash.
-
Protein boost: Add tofu, a soft-boiled egg, or grilled chicken if desired.
-
Sauce upgrade: Thin tahini with lemon juice, garlic, and water for a classic drizzle.
Nourishment on Your Terms (A Quick Nutritional Glance)
While I’m all about flavor first, I also love knowing that what I’m eating is fueling my body well. This bowl is a fantastic balance of macronutrients. The complex carbs from the squash and quinoa give you sustained energy, the chickpeas and quinoa provide plant-based protein to keep you full, and the healthy fats from the avocado and olive oil help absorb all the wonderful fat-soluble vitamins from the veggies. It’s packed with fiber, vitamins A and C (thank you, squash!), and iron. Remember, these are estimates and can vary based on your specific ingredients and portion sizes. Most importantly, listen to your body and build a bowl that makes you feel fantastic!
Estimated Per Serving (Based on 2 servings): Calories: ~380 | Protein: 11g | Carbohydrates: 42g | Fat: 18g | Fiber: 12g
Final Thoughts: Your Bowl Awaits
And there you have it, friends—my ultimate guide to building a Butternut Squash Buddha Bowl that’s as cozy as it is colorful. This isn’t just a recipe; it’s a celebration of simple, wholesome ingredients coming together to create something truly greater than the sum of its parts. It’s proof that eating well can be an act of joy, creativity, and deep satisfaction.
I hope you give this a try and make it your own. Tag me over on @Feastical if you do—I love seeing your kitchen creations! Now, go forth, roast some squash, and build a bowl that feels like a warm hug. Until next time, keep your spatula close and your curiosity in the kitchen even closer.
Greek Chickpea Salad Recipe : Quick, Fresh, and Healthy Mediterranean Delight
Greek Chickpea Salad Recipe – Healthy, Quick, and Packed with Flavor
Hey there, friend! Beau here from Feastical. Ever have one of those days where you’re staring into the fridge, dreaming of something that’s both ridiculously good for you and tastes like a sun-drenched vacation? You want vibrancy. You want crunch. You want flavor that pops. But you also have approximately 20 minutes before your next meeting or your stomach starts staging a full-on rebellion.
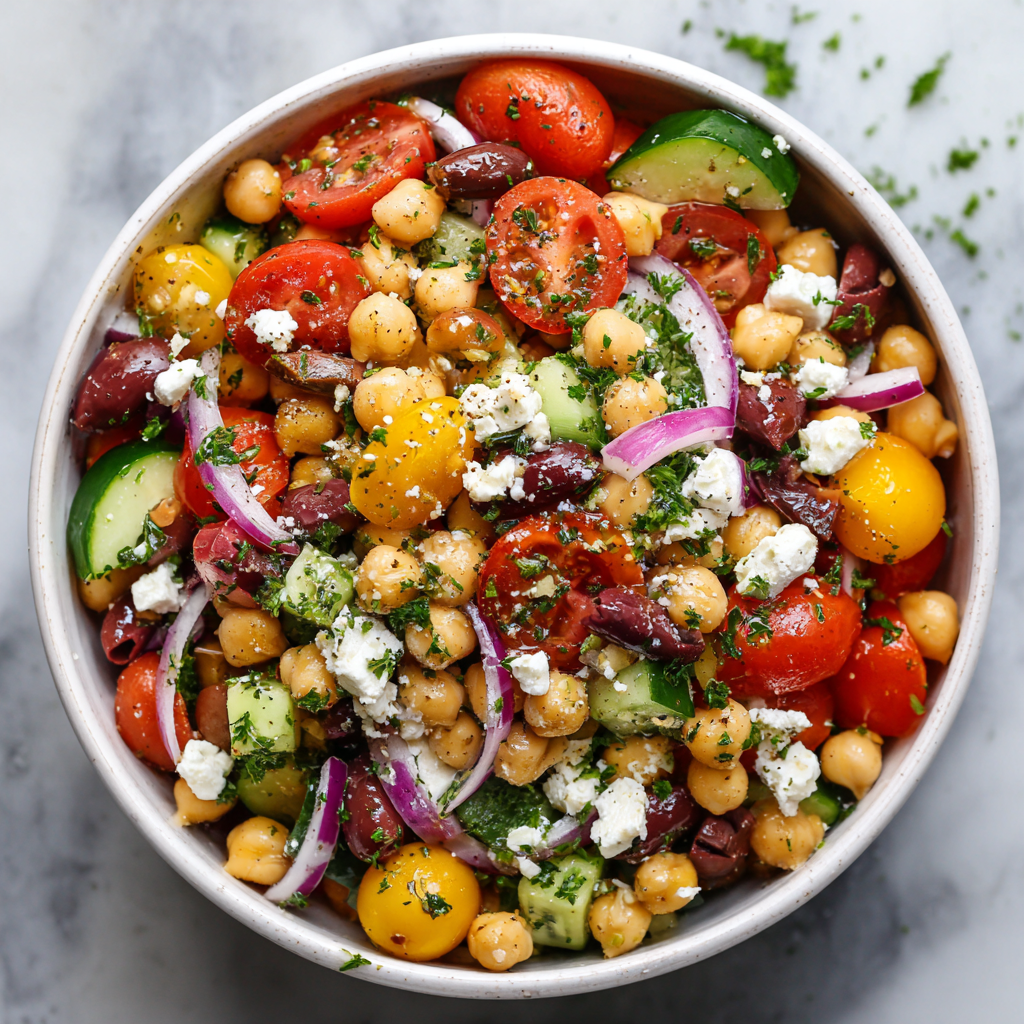
I hear you. That’s exactly why this Greek Chickpea Salad has become my go-to, my culinary superhero, my answer to the “what’s for lunch?” blues. It’s not just a salad; it’s a bright, refreshing, and incredibly satisfying Mediterranean party in a bowl. We’re talking plump chickpeas, juicy tomatoes, crisp cucumber, briny olives, and tangy feta, all dancing together in a simple, zesty lemon-oregano dressing.
This recipe is for the busy bee, the meal-prep champion, the “I-want-to-eat-better-but-don’t-want-to-sacrifice-flavor” foodie. It’s nourishing, colorful, and so simple to make that you’ll wonder why you ever settled for a sad desk lunch. So, grab your favorite chopping board and a big, welcoming bowl. We’re about to make something magical that’s as easy on the eyes as it is on your schedule.
Why This Salad Feels Like a Sunny Afternoon to Me
This recipe always takes me back to my first real taste of a Greek summer. I was fresh out of culinary school, backpacking with friends, and we found ourselves at a tiny, family-run taverna on a cliffside in Santorini. The air smelled like salt and oregano. We ordered a feast of small plates, but the star of the show was a massive, rustic bowl of horiatiki, the classic Greek village salad.
What stuck with me wasn’t just the stunning view (though, wow), but the stunning simplicity. The tomatoes tasted like candy, the cucumbers were impossibly crisp, the feta was creamy and sharp, and the olive oil was pure gold. There were no fancy techniques, just incredible ingredients treated with respect. I came home dreaming of those flavors but wanted to create something with a bit more heft, something that could be a full meal. Adding protein-packed chickpeas was my “aha!” moment. It transformed that beautiful memory into a sturdy, everyday delight I could enjoy in my own kitchen, no passport required. Every time I make this, I get a little taste of that sunny, carefree afternoon.
Your Shopping List for Sunshine in a Bowl
Here’s everything you’ll need. The beauty of this salad is in its flexibility, so I’ve packed each item with my favorite chef insights and swap ideas.
- 1 can (15 oz) chickpeas, drained and rinsed: Our hearty, plant-based protein base. Chef’s Tip: Give them a good rinse in a colander to remove the starchy canning liquid – it makes a world of difference in flavor and texture. For extra credit, pat them dry with a clean kitchen towel to help the dressing cling better. No chickpeas? White beans or even lentils work beautifully.
- 1 cup cherry tomatoes, halved: Little bursts of juicy sweetness. I love the color pop of a mix of red and yellow ones. If it’s peak summer, use the most gorgeous heirloom tomatoes you can find and chop them into chunks.
- 1 cucumber, diced: For that essential fresh crunch. I prefer English or Persian cucumbers for their thin, less-bitter skin and minimal seeds. If using a standard cuke, you might want to peel it and scoop out the seedy center.
- 1/4 red onion, thinly sliced: A sharp, peppery kick. Secret Hack: If raw onion is too intense for you, soak the slices in a small bowl of ice water for 10 minutes. It tames the bite perfectly!
- 1/2 cup Kalamata olives, pitted and halved: The salty, briny soul of the Mediterranean. Don’t skip these! They add incredible depth. If you only have black olives, use them, but Kalamatas are worth seeking out.
- 1/2 cup crumbled feta cheese: Creamy, tangy, and utterly irresistible. For the best flavor, buy a block of feta in brine and crumble it yourself. Pre-crumbled feta often has anti-caking agents that can make it drier.
- 2 tablespoons fresh parsley, chopped: A final herby lift. Flat-leaf (Italian) parsley has a more robust flavor than curly, but use what you have! Dill or mint are also fantastic additions here.
For the Zesty Lemon-Oregano Dressing:
- 3 tablespoons extra virgin olive oil: Use the good stuff here! It’s the backbone of the dressing.
- 1 tablespoon red wine vinegar: Adds a sharp, clean acidity. White wine vinegar or even a splash of balsamic (for a sweeter note) can sub in.
- Juice of 1 lemon: Freshly squeezed, always. This brings the sunshine. About 2-3 tablespoons.
- 1 teaspoon dried oregano: The quintessential Greek herb. Rubbing it between your palms before adding it to the dressing wakes up its oils and intensifies the aroma.
- Salt and black pepper to taste: Season with abandon, but remember the feta and olives are already salty, so taste as you go!
Let’s Build Your Masterpiece: Step-by-Step
Ready? This is the fun, no-stress part. We’re chopping, whisking, and tossing our way to happiness.
- Prep Your Stars: Drain and rinse your chickpeas thoroughly in a colander. Let them shake off the excess water while you chop. Halve the cherry tomatoes, dice the cucumber, thinly slice the red onion (remember the ice water bath trick if you’re sensitive!), and halve the olives. Chop your parsley. Add everything (except the feta!) to a large, beautiful mixing bowl. This is your canvas.
- Wake Up the Dressing: In a small bowl or a mason jar (my favorite – just screw on the lid and shake!), combine the olive oil, red wine vinegar, fresh lemon juice, and the dried oregano. Give it a good whisk or vigorous shake until it looks creamy and emulsified. Now, taste it! This is your moment. Does it need more zing? Add a squeeze of lemon. More herbiness? A pinch more oregano. Season with salt and pepper. The dressing should make you go “Mmm!” all on its own.
- The Grand Toss: Pour that glorious dressing right over your waiting vegetables and chickpeas. Using a large spoon or (clean!) hands, gently toss everything together. You want every nook and cranny of every chickpea to get a little love from the dressing. See how the colors start to glisten? That’s the magic happening.
- The Feta Finale: Here’s my pro move: hold the feta! Crumble it generously over the top of the tossed salad, but don’t mix it in just yet. This keeps those lovely crumbles distinct and creamy instead of getting smashed and dissolving into the dressing. It looks prettier this way, too.
- Let the Magic Happen: Walk away. Seriously, this is the hardest but most important step for flavor development. Let the salad sit at room temperature for 10-15 minutes. In that time, the acidic dressing will gently marinate the vegetables, the flavors will mingle and get to know each other, and everything will become even more delicious. If you’re prepping ahead, cover and refrigerate, but let it come close to room temp before serving for the best taste.
How to Serve Your Greek Chickpea Salad Like a Pro
Now for the best part: eating! This salad is incredibly versatile.
For a light, stand-alone lunch, pile it high into a deep bowl with a slice of crusty, warm pita bread on the side for scooping. The ultimate utensil!
As a vibrant side dish, it’s the perfect partner for simply grilled chicken, fish, lamb chops, or even some juicy burgers. It cuts through the richness and adds a fresh element to any plate.
My favorite way? Meal Prep Power! This salad keeps wonderfully in the fridge for 3-4 days. I portion it into airtight containers (again, keeping the feta on top if possible) for grab-and-go lunches all week. The flavors actually get better on day two and three.
Want to level up? Serve it over a bed of peppery arugula, stuff it into a pita pocket with a swipe of hummus, or spoon it onto grilled flatbread for a quick and easy Mediterranean-inspired pizza.
Make It Your Own: Delicious Twists & Swaps
Once you’ve mastered the base recipe, play with it! Here are a few of my favorite riffs:
- Protein Powerhouse: Add 1 cup of cooked, shredded chicken, a can of drained tuna, or a handful of grilled shrimp right on top. Instant, balanced main course.
- The Vegan Voyage: Simply omit the feta or swap it for a creamy vegan feta alternative. For extra umami, add a handful of toasted pine nuts or sunflower seeds.
- Herb Garden Explosion: Toss in a big handful of fresh chopped dill and mint along with the parsley. It brightens the entire salad to another level.
- Pepper & Artichoke Twist: Add 1/2 cup of chopped roasted red peppers and 1/2 cup of quartered marinated artichoke hearts. Drain them well, but their marinade adds another lovely layer of flavor.
- “Everything But The Kitchen Sink” Grain Bowl: Fold in 1-2 cups of cooked and cooled quinoa, farro, or couscous. It bulks up the salad, adds a wonderful chewy texture, and makes it even more filling.
A Few More Nuggets From My Kitchen
Over the years, this salad has seen many iterations. I’ve made it for last-minute potlucks (it’s always a hit), packed it for picnics, and even served it as a condiment next to slow-cooked lamb. The one constant? It never fails to make people smile.
A funny story: I once accidentally used a whole lemon’s worth of zest instead of juice in the dressing. It was intensely lemony, but in the best way possible! Now I often add a teaspoon of zest along with the juice for an extra fragrance punch. Don’t be afraid of happy accidents.
The recipe has evolved to be more of a guideline than a rigid rule. Got a bell pepper that needs using? Chop it in. A handful of spinach? Why not! This salad is forgiving and wants you to make it with what you love and have on hand.
Your Questions, Answered
- Can I make this ahead of time? How long does it keep? Absolutely! It’s a meal-prep dream. Store it in an airtight container in the fridge for 3-4 days. The veggies may release a little water, so just give it a stir before serving. I add the feta fresh each day if prepping for the whole week.
- My salad got a bit watery after sitting. What did I do wrong? No mistakes here! Cucumbers and tomatoes naturally release moisture, especially when salted. To prevent a pool at the bottom, you can salt your diced cucumber lightly in a colander, let it sit for 10 minutes, then pat it dry before adding to the bowl. Or, just embrace it – that flavorful liquid is great for dipping bread!
- I’m not a fan of feta. What else can I use? No problem! Creamy goat cheese (chèvre) crumbles are a fantastic substitute. For a dairy-free option, a sprinkle of nutritional yeast or some sliced avocado can provide that creamy, rich element.
- Can I use dried chickpeas instead of canned? For sure! Cook 3/4 cup of dried chickpeas according to package directions until tender (this yields about 1.5 cups cooked). Using dried gives you ultimate control over texture and is often more economical. Just factor in the soaking/cooking time.
Feeling Good About What You’re Eating
While I’m all about flavor first, it feels great to know this dish is nourishing you from the inside out. This isn’t just empty calories; it’s fuel with benefits.
Chickpeas are a stellar source of plant-based protein and fiber, which help keep you full and satisfied. The array of colorful vegetables provides a spectrum of vitamins, antioxidants, and hydration. The heart-healthy monounsaturated fats from the olive oil help your body absorb all those fat-soluble nutrients from the veggies. And while feta is a cheese, it’s typically lower in fat and calories than many others, while still delivering a big calcium punch.
It’s a balanced, wholesome dish that proves healthy eating doesn’t have to be boring or restrictive. It’s a celebration of real, good food.
Print
Greek Chickpea Salad Recipe : Quick, Fresh, and Healthy Mediterranean Delight
Description
This Greek Chickpea Salad is fresh, colorful, and incredibly easy to make. It comes together in about 15 minutes and is perfect for lunch, meal prep, or a light dinner. Made with protein-rich chickpeas, crisp vegetables, feta cheese, and a zesty lemon-oregano dressing, it’s a satisfying Mediterranean-style dish that’s both nourishing and full of bright flavor.
Ingredients
-
1 can (15 oz) chickpeas, drained and rinsed
-
1 cup cherry tomatoes, halved
-
1 cucumber, diced
-
1/4 red onion, thinly sliced
-
1/2 cup Kalamata olives, pitted and halved
-
1/2 cup feta cheese, crumbled
-
2 tablespoons fresh parsley, chopped
Lemon-Oregano Dressing
-
3 tablespoons extra virgin olive oil
-
1 tablespoon red wine vinegar
-
Juice of 1 lemon (about 2–3 tablespoons)
-
1 teaspoon dried oregano
-
Salt and black pepper, to taste
Instructions
-
Prepare the salad:
In a large bowl, add chickpeas, tomatoes, cucumber, red onion, olives, and parsley. -
Make the dressing:
In a small bowl or jar, whisk together olive oil, red wine vinegar, lemon juice, oregano, salt, and pepper. -
Combine:
Pour the dressing over the salad and toss gently until everything is well coated. -
Finish:
Sprinkle feta cheese over the top. Taste and adjust seasoning if needed. -
Rest (optional but recommended):
Let the salad sit for 10–15 minutes before serving to allow flavors to blend.
Notes
-
For milder onion flavor: Soak sliced red onion in cold water for 10 minutes, then drain.
-
Meal prep friendly: Store in an airtight container in the fridge for up to 4 days. Add feta just before serving if possible.
-
Extra flavor boost: Add a pinch of lemon zest or a splash of olive brine.
-
Make it a full meal: Add grilled chicken, shrimp, tuna, or cooked quinoa.
-
Vegan option: Skip the feta or use a plant-based alternative.
Final Thoughts
And there you have it, friend – my beloved, no-fuss, always-delicious Greek Chickpea Salad. It’s more than a recipe; it’s a reminder that the most satisfying food is often the simplest. It’s about fresh ingredients, bold flavors, and the joy of creating something beautiful and nourishing with your own two hands.
I hope this recipe finds its way into your regular rotation, bringing a little bit of Mediterranean sunshine to your busy days. Remember, the kitchen is your playground. Taste as you go, tweak it to your heart’s content, and most importantly, share it with someone you love.
If you make it, I’d be over the moon to hear how it turned out! Tag me @feastical on social or drop a comment on the blog. Now, go forth and enjoy every last crunchy, zesty, creamy bite. Until next time, keep cooking with heart!
– Beau

Matcha Green Tea Latte with Almond Milk : Calm, Creamy & Antioxidant-Rich
Your Daily Cup of Calm: The Ultimate Matcha Almond Milk Latte
Hey there, friend! Beau here, welcoming you back to my cozy corner of the internet at Feastical. Pull up a stool, grab your favorite mug, and let’s talk about one of my absolute favorite rituals that doesn’t involve turning on the oven. I’m a comfort food guy through and through, but sometimes the coziest, most feel-good creations aren’t a towering casserole or a gooey cookie—they’re a warm, soothing drink you cradle in your hands while the world slows down for a minute. That’s where our star today comes in: the Matcha Green Tea Latte with Almond Milk.
Now, I know “ceremonial grade” and “antioxidant-rich” can sound a little… serious. Maybe even intimidating. But trust me, this isn’t about being fancy or following a strict wellness trend. This is about creating a moment of delicious, intentional calm in your day. It’s that five-minute pause between meetings, that quiet companion for a good book, or that gentle nudge of focus you need without the coffee jitters.
This recipe is simplicity itself—just a few gorgeous ingredients dancing together in a cup. We’re talking earthy, vibrant matcha meeting the subtly sweet, creamy embrace of almond milk. It’s a hug in mug form, my friends. And the best part? It comes together faster than you can find that missing spatula in the back of your utensil drawer (we’ve all been there). So, whether you’re a matcha newbie or a seasoned sipper, let’s make something beautiful, healthy, and soul-satisfying together.
My First Sip: A Story of Serendipity & Green Tea
I’ll never forget my first real matcha experience. It wasn’t in a sleek café or a formal tea ceremony. Nope. It was in the cramped, steamy kitchen of my college apartment, during finals week. My roommate Kai, who was from Kyoto, found me buzzing like a hummingbird on my fourth cup of burnt, diner-style coffee. He gave me a look, silently walked over, and started whisking this brilliant green powder in a bowl. The sound was rhythmic, almost meditative.
He handed me the bowl. “Try this,” he said. “It’s focus, but quieter.” I took a sip. The flavor was… different. Grassy, rich, deep, but then it finished clean and smooth. The frantic energy faded, replaced by this incredible, calm alertness. I could actually *think*. We spent the rest of that week studying with our matcha “focus sessions,” and it became our little ritual. That experience taught me that food (and drink!) isn’t just fuel—it’s a feeling. It’s a tool for connection and creating the moment you need. Every time I make this latte, it takes me back to that tiny kitchen, the smell of textbooks, and the gift of a calmer mind. That’s the spirit I want to bring to your kitchen today.
Gathering Your Goodies: A Closer Look at the Ingredients
Great food starts with great ingredients, and this latte is no exception. Here’s everything you’ll need and why each one is a rockstar:
- 1 tsp Matcha Green Tea Powder: This is the heart of the drink! Look for ceremonial grade if you can—it’s made from the youngest tea leaves, has a sweeter, more delicate flavor, and vibrantly green color. Chef’s Insight: Avoid “culinary grade” for drinking straight; it’s better for baking. Your matcha should smell fresh and grassy, not stale or dull.
- 2 tbsp Hot Water (not boiling!): Crucial step! Water just under a boil (about 175°F/80°C) is perfect. Boiling water can scorch the delicate matcha, making it taste bitter. Think of it as gently waking up the tea, not shouting at it.
- 1 cup Unsweetened Almond Milk: Our creamy base. I love almond milk for its light, nutty sweetness that doesn’t overpower the matcha. Substitution Tip: Any plant milk works wonders! Oat milk creates an incredibly creamy, latte-shop texture. Coconut milk adds a tropical twist, and cashew milk is luxuriously smooth.
- 1–2 tsp Maple Syrup or Honey (optional): A touch of natural sweetness to balance matcha’s earthiness. I’m a maple syrup guy—its caramel notes are a dream with green tea. Chef’s Insight: Start with 1 tsp, whisk, taste, then add more. You can always add, but you can’t take away!
- Optional: A dash of vanilla extract or a pinch of cinnamon: The “secret handshake” of flavor. Vanilla adds a warm, bakery-like aroma, while cinnamon gives a subtle spicy kick. Try one, or be bold and skip them to savor matcha’s pure taste.
Let’s Make Magic: Your Step-by-Step Guide
Ready? Let’s transform these simple ingredients into your new favorite ritual. I’ll walk you through every step with my favorite kitchen hacks.
- Sift & Scoop: First, take your matcha powder and sift it through a fine-mesh strainer into your mug or a small bowl. This breaks up any clumps and ensures a silky-smooth latte. No sifter? Just give your matcha tin a good shake and tap it gently before measuring. Chef Hack: I use a dedicated little tea strainer for this—it lives right in my matcha tin!
- The Perfect Whisk: Add your 2 tablespoons of hot water (remember, not boiling!). Now, here’s where the fun begins. If you have a bamboo whisk (chasen), use a gentle “M” or “W” motion to whisk briskly until a lovely froth forms on top and no powder lumps remain. No traditional whisk? No panic! A small wire whisk, a milk frother, or even a small jar with a tight lid (shake it like a polaroid picture!) works beautifully. The goal is a smooth, vibrant green paste.
- Heat & Froth the Milk: While your matcha paste rests, heat your almond milk. You can do this in a small saucepan over medium heat until steaming, or in the microwave for 60-90 seconds. We want it hot but not boiling. Then, froth it! Use that same milk frother, a French press (pump the plunger up and down vigorously), or just whisk it by hand. Frothing creates that luxurious, café-style texture that makes this feel like a treat.
- The Grand Unification: Slowly pour your hot, frothy almond milk into your matcha paste. I like to pour it in two stages: first, a little splash to thin out the paste and whisk it smooth, then the rest in a steady stream. This guarantees no green tea lumps at the bottom of your mug!
- The Finishing Touches: Now, taste. Add your maple syrup or honey a teaspoon at a time, stirring gently between each addition. This is your moment. Add that dash of vanilla or sprinkle of cinnamon if you’re feeling it. Give it one final, gentle stir from the bottom up.
And there you have it. In less time than it takes to brew a pot of coffee, you’ve crafted a moment of wellness and warmth.
Serving with Soul: How to Enjoy Your Creation
This latte is a vibe all on its own, but how you serve it can make the ritual even sweeter.
First, choose your vessel wisely. I’m a big believer in drinking from what brings you joy. Is it a giant, hand-thrown ceramic mug you can wrap both hands around? A sleek, white espresso cup that makes you feel like a barista? Use that. The experience starts with the touch.
For a true café look, hold back a spoonful of that glorious milk froth with a spoon as you pour, then gently dollop it on top of the finished latte. It looks gorgeous and gives you that perfect first sip of foam. A final, light dusting of matcha powder or cinnamon right on top adds a professional flourish and a hint of aroma.
Pairing? Oh yes. This latte is fantastic with a buttery shortbread cookie, a simple piece of dark chocolate, or a lightly sweetened almond biscotti. The subtle sweetness and creamy fat complement the earthy tea notes perfectly. Find a sunny spot, take a deep breath, and sip slowly. That’s the Feastical way.
Make It Your Own: Delicious Twists & Swaps
Once you’ve mastered the classic, the kitchen playground opens up! Here are a few of my favorite riffs on this green tea theme:
- Iced Matcha Latte: My summer go-to! Whisk matcha with 2 tbsp of cold water. Fill a tall glass with ice, pour over your frothed cold almond milk (shake it in a jar for froth!), and sweeten. It’s refreshing, energizing, and gorgeous in a glass.
- Matcha “Golden Milk” Latte: Add ¼ tsp of turmeric, a pinch of black pepper (helps absorption!), and a pinch of ginger to the almond milk before heating. Sweeten with honey. Anti-inflammatory, warming, and so good for you.
- White Chocolate Matcha: For a decadent treat, stir in 1-2 squares of finely chopped quality white chocolate into the hot almond milk until melted before frothing. It’s creamy, dreamy, and subtly sweet.
- Protein-Powered Matcha: Blend your finished hot latte with a scoop of vanilla or unflavored collagen peptides or plant-based protein powder for a filling, post-workout sipper. Just be sure to use a blender for a smooth result.
- Coconut Matcha Dream: Use coconut milk beverage for the liquid and add a drop of coconut extract along with the vanilla. Sweeten with honey and imagine you’re on a beach.
Beau’s Kitchen Notes & Stories
This recipe has evolved so much since that first bowl in my college kitchen. Back then, we used whatever cheap matcha we could find and whisked it with a fork! The spirit was there, but the technique… needed work. Over the years, I’ve learned that the little things—the water temp, the sifting, the quality of the matcha—make a monumental difference in taking a drink from “good” to “where have you been all my life?”
One of my favorite kitchen fails turned happy accident was the day I ran out of almond milk and used chai-spiced oat milk instead. Whoa. It was a flavor explosion and inspired the “Golden Milk” variation above. So, don’t be afraid to play. The worst that happens is you make a drink you don’t love, and you learn for next time. The best that happens? You invent your new signature sip.
Your Questions, Answered (Let’s Troubleshoot!)
Q: My matcha is clumpy and won’t dissolve! Help!
A: No worries! This is the #1 issue. First, always sift your powder. Second, make sure you’re making a smooth paste with the hot water *before* adding the milk. If you still get clumps, try using a small blender or shaking everything in a sealed jar. Clump crisis averted.
Q: Why does my latte taste bitter?
A: Two likely culprits: 1) Your water was too hot (boiling water burns matcha), or 2) The matcha powder itself is lower quality or past its prime. Try cooler water and investing in a small tin of good ceremonial grade—it’s a game-changer.
Q: Can I make a bigger batch ahead of time?
A> For the best flavor and texture, I recommend making it fresh. However, you can mix the matcha paste (powder + water) and keep it covered in the fridge for a few hours. When ready, heat your milk, combine, and enjoy. I don’t recommend mixing the whole latte and reheating it, as the almond milk can separate.
Q: I don’t have any sweetener. Is it still good?
A> Absolutely! A high-quality ceremonial grade matcha is naturally slightly sweet and umami-rich. Try it straight first—you might find you love its pure, earthy character.
A Sip of Goodness: Nutritional Highlights
Let’s talk about why this latte makes your body feel as good as your taste buds. This is for the version made with 1 cup unsweetened almond milk and 1 tsp maple syrup.
Coming in at around 50-60 calories, this is a light yet satisfying drink. The star, matcha, is a nutritional powerhouse. Because you’re consuming the whole ground tea leaf, you get a mega-dose of antioxidants, specifically EGCg, which is renowned for its cellular health benefits. It also contains a unique amino acid called L-Theanine, which promotes calm, focused alertness—that’s the “quiet focus” I talked about! You’ll also get a gentle, sustained energy boost from its caffeine (about 1/3 the amount of a cup of coffee), without the jitters or crash.
The unsweetened almond milk keeps it low in sugar and carbs, while adding a bit of vitamin E and healthy fats. It’s naturally dairy-free, vegan-friendly (if you use maple syrup), and gluten-free. It’s less about counting anything and more about pouring a cup of pure, plant-based goodness.
Print
Matcha Green Tea Latte with Almond Milk : Calm, Creamy & Antioxidant-Rich
Description
Your Daily Cup of Calm: Matcha Almond Milk Latte
Earthy, creamy, and soothing—your five-minute ritual of calm.
Hey friends! This latte is comfort in a cup: earthy matcha meets creamy almond milk for a gentle, focused energy without coffee jitters. Perfect for a cozy pause, reading nook, or mid-afternoon reset.
Ingredients
-
1 tsp matcha green tea powder – ceremonial grade for sweetness & vibrancy
-
2 tbsp hot water (~175°F / 80°C) – just under boiling to avoid bitterness
-
1 cup unsweetened almond milk – sub: oat, coconut, or cashew milk
-
1–2 tsp maple syrup or honey (optional) – start small, adjust to taste
-
Optional: dash vanilla extract or pinch cinnamon – adds warm depth
Instructions
1. Sift & Make Matcha Paste
-
Sift matcha into a mug or small bowl to remove clumps
-
Add 2 tbsp hot water
-
Whisk briskly (M or W motion) until smooth and frothy
-
No bamboo whisk? Use a small wire whisk, frother, or shake in a jar
2. Heat & Froth Milk
-
Heat almond milk on stove (medium) or microwave (60–90 sec) until steaming
-
Froth with whisk, milk frother, or French press for creamy texture
3. Combine
-
Pour a small splash of hot milk into matcha paste; whisk to smooth
-
Pour in remaining milk steadily
-
Add maple syrup/honey teaspoon by teaspoon, then optional vanilla or cinnamon
-
Stir gently bottom-up for even flavor
4. Serve
-
Pour into your favorite mug
-
Top with froth, optional dusting of matcha or cinnamon
-
Sip slowly, enjoy the calm
Notes
-
Clumpy matcha: Always sift; make smooth paste before adding milk; blender or jar shake works
-
Bitter latte: Water too hot or matcha quality low; use cooler water and good ceremonial grade
-
No sweetener: High-quality matcha can be enjoyed straight for earthy, umami flavor
-
Make ahead: Matcha paste (powder + water) can be stored in fridge for a few hours; combine with milk fresh
Final Thoughts
Well, friends, we’ve reached the bottom of the mug. I hope this recipe brings a little slice of peaceful, delicious ritual into your daily hustle. At Feastical, it’s all about food that feels like a warm hug and never a chore, and this latte is exactly that—a warm hug you can drink.
The beauty of this recipe is in its simplicity and its power. It’s a five-minute act of self-care, a mindful break, and a delicious way to fuel your body with clean energy. So, the next time you need a reset, skip the noisy coffee run. Instead, heat some water, grab your whisk, and create your own moment of calm, creamy, antioxidant-rich joy.
Thanks for cooking (and sipping!) with me today. If you make this, I’d love to hear about it! Tag me over on social or drop a comment on the blog. Until next time, keep finding the feast in every moment.
Cheers,

Homemade Garlic Bread Recipe : Crispy, Buttery, and Irresistible
The Irresistible Magic of Homemade Garlic Bread
Hey friends, Beau here from Feastical! Let’s have a real talk for a second. Is there any smell in the world more downright joyful than garlic hitting warm butter? That sizzle, that instantly fragrant puff of steam that hits you right in the soul? It’s the universal signal that something deliciously comforting is about to happen. And today, we’re channeling that magic into the undisputed champion of side dishes: Homemade Garlic Bread.
Forget the sad, foil-wrapped, freezer-burnt sticks of your past. We’re crafting something legendary. Imagine a loaf of bread, transformed. A crust that shatters with a beautiful, golden cronch, giving way to a pillowy-soft interior that’s been thoroughly infused with rich, savory, garlicky butter. This isn’t just a vehicle for mopping up pasta sauce (though it excels at that); this is a star in its own right. It’s a snack, a side, a weeknight hero, and a party superstar all rolled into one beautiful, aromatic loaf.
The best part? This isn’t some fussy, chef-school project. This is easy, forgiving, and faster than ordering takeout. In about 20 minutes, with a handful of simple ingredients, you can create a family favorite that tastes like it came from your favorite Italian joint. So, tie on your apron, grab your favorite bread knife, and let’s turn up the flavor. Your kitchen is about to smell incredible.
A Slice of Memory: Why This Recipe Matters
This recipe takes me straight back to my grandma’s linoleum-floored kitchen. Every Sunday, without fail, the soundtrack was the same: Frank Sinatra on the radio, the giant pot of her “gravy” (never “sauce”!) bubbling for hours, and the inevitable moment she’d hand me a head of garlic and a little press. “Make yourself useful, Beau,” she’d say with a wink. My job was garlic duty for the bread.
She’d soften the butter on the back of the stove, and I’d press clove after clove into it, the sharp scent making my eyes water in the best way. She never measured—just a hearty glug of olive oil, a mountain of parsley from her window box, and a generous handful of “the good cheese” from the deli. We’d slather it on crusty bread and bake it until the cheese was blistered and the edges were nearly black. It was messy, it was potent, and it was pure love. That memory, of creating something so simple yet so deeply satisfying with someone I loved, is the heart of Feastical. It’s the feeling I want you to have in your own kitchen. This is more than garlic bread; it’s a warm, buttery hug from the past.
Gathering Your Flavor Arsenal
Great food starts with great ingredients, but don’t stress—this is all about simplicity and flavor. Here’s what you’ll need to work your own garlicky magic.
- 1 loaf of French or Italian Bread: This is your canvas! Look for a loaf with a crisp, sturdy crust and a soft, airy interior. A fresh bakery loaf is ideal, but a good-quality supermarket baguette works beautifully. Chef’s Insight: If your bread is super fresh, pop the halves in the toaster oven for just 2-3 minutes before buttering. This creates a barrier that helps prevent sogginess!
- 1/2 cup (1 stick) Unsalted Butter, softened: The creamy, rich foundation. Unsalted is key so you control the salt level. It MUST be soft to room temperature for easy spreading. Quick Tip: Forget to soften it? Cut it into chunks and microwave in 5-second bursts until spreadable, not melted!
- 3-4 Fresh Garlic Cloves, minced: The star of the show! Fresh is non-negotiable for that bright, punchy flavor. Substitution: In a true pinch, 1 ½ teaspoons of garlic powder can work, but the flavor will be mellower and less complex.
- 2 tablespoons Chopped Fresh Parsley (optional): This adds a pop of color and a fresh, grassy note that cuts through the richness. Chef’s Swap: Try fresh basil, chives, or a teaspoon of dried Italian seasoning for a different herb profile.
- 1/4 teaspoon Salt: Enhances all the other flavors. If you use salted butter, you can omit this.
- Optional: 1/4 cup Grated Parmesan or Shredded Mozzarella: The “why not?” factor. Parmesan adds a salty, umami kick, while mozzarella gives you that glorious, stretchy cheese pull. Use both for maximum effect!
Building Your Garlic Bread Masterpiece: Step-by-Step
Ready? Let’s get building. This process is as therapeutic as it is delicious. I’ll walk you through each step with my favorite little hacks to guarantee perfection.
Step 1: Preheat & Prep. Fire up your oven to 375°F (190°C). While it heats, line a baking sheet with foil or parchment paper for the world’s easiest cleanup. Trust me, you’ll thank yourself later. This is also the perfect time to get your bread ready. Using a serrated bread knife, carefully slice your loaf lengthwise. You want two even halves, like opening a book of deliciousness.
Step 2: Create the Garlic Butter Elixir. In a medium bowl, combine your room-temperature butter, minced garlic, chopped parsley, and salt. Now, get in there with a fork or a small spatula and mash it all together until it’s perfectly homogenous. Pro-Tip: For an extra-smooth, almost whipped consistency and to really infuse the garlic flavor, use a hand mixer on low for 30 seconds. Taste it! This is the fun part. Adjust the garlic or salt to your liking.
Step 3: Slather It On. Place your bread halves cut-side-up on your prepared baking sheet. Using a butter knife or offset spatula, spread the garlic butter mixture evenly over the entire surface, all the way to the edges. Don’t be shy! The edges will get fantastically crispy. If you’re going the cheesy route, now’s the time to sprinkle your Parmesan or mozzarella evenly over the butter.
Step 4: Bake to Golden Perfection. Slide your loaded baking sheet into the preheated oven. Bake for 10-12 minutes. You’re looking for the butter to be fully melted and bubbly, the edges of the bread to turn a light golden brown, and if you added cheese, for it to be melted and possibly just starting to spot with color.
Step 5: The Crispy Finale (Optional but Recommended). For that ultimate, pizzeria-style crunch, turn your oven to BROIL for the final 1-2 minutes. WATCH IT LIKE A HAWK! The line between perfectly bronzed and tragically burnt is thin under the broiler. You want a deep, golden brown crust and bubbly, spotted cheese. As soon as it hits that peak, pull it out!
Step 6: Slice & Serve Immediately. Let the bread rest for just a minute on the counter (so you don’t burn your fingers). Then, using a sharp chef’s knife, slice it into 1-inch thick pieces. Serve it piping warm. The symphony of that first crackly bite is what we live for.
How to Serve Your Garlic Bread (Beyond the Bread Basket)
Obviously, a big pile of these slices on a wooden board is a beautiful thing. But let’s get creative! Here are a few of my favorite ways to serve this versatile star.
The Classic Companion: It’s a match made in heaven with any pasta dish—think Spaghetti Bolognese, a creamy Fettuccine Alfredo, or a hearty Lasagna. It’s also the perfect tool for scooping up the last bits of soup, stew, or chili from the bowl.
Appetizer Upgrade: Cut the loaf into smaller, bite-sized pieces before baking for perfect party-friendly garlic bread “crostini.” Top them with a dollop of marinara sauce and a tiny basil leaf after baking.
Meal-Worthy Magic: Turn it into a simple meal! After adding the cheese, top with slices of pepperoni or salami before baking for a quick “garlic bread pizza.” Or, split a baked slice and load it with leftover meatballs and cheese for an epic sandwich.
Presentation Tip: Serve it in the basket lined with a checkered cloth napkin for that rustic, family-style feel. A little extra sprinkle of fresh parsley or flaky sea salt right after it comes out of the oven makes it look (and taste) extra special.
5 Delicious Twists on the Classic
Once you’ve mastered the basic blueprint, the world is your garlic-buttered oyster! Here are a few fun variations to keep things exciting.
- ‘Nduja & Honey: Mix 2 tablespoons of spicy ‘nduja (a spreadable Calabrian salami) into the butter. Drizzle the baked bread with a touch of warm honey for a killer sweet-heat situation.
- Everything Bagel: After buttering, generously sprinkle with everything bagel seasoning before baking. The sesame seeds, garlic, onion, and poppy seeds add incredible texture and flavor.
- Sun-Dried Tomato & Basil: Finely chop 3-4 oil-packed sun-dried tomatoes and a handful of fresh basil. Mix into the garlic butter for a vibrant, Mediterranean-inspired twist.
- Vegan Dream: Use your favorite plant-based butter (the block style works better than tubs) and swap the cheese for a sprinkle of nutritional yeast for a cheesy, umami flavor that’s completely dairy-free.
- Cheesy Pull-Apart Bread: Instead of slicing lengthwise, make crosswise cuts every inch, not cutting through the bottom crust. Spread garlic butter and cheese between every slice. Wrap the whole loaf in foil and bake for 15 minutes, then unwrap and bake 5 more for crispiness. Fun and interactive!
Beau’s Kitchen Notes & Stories
This recipe has been my reliable plus-one for countless potlucks, weeknight dinners, and “oops, I have guests coming over in an hour” moments. It’s evolved from my grandma’s “a little of this, a handful of that” method to this more structured (but still flexible!) guide.
One of my favorite kitchen fails-turned-wins involved this very bread. I once accidentally used salted butter AND added the salt. It was… intense. To save it, I grated a little lemon zest over the top after baking. The bright citrus cut the saltiness perfectly and created a new favorite flavor combo! The lesson? Don’t fear mistakes. Taste as you go, and remember you can often tweak things at the end.
Also, a word on garlic breath: it’s a badge of honor. Embrace it. We’re all in this together.
Your Garlic Bread Questions, Answered
Q: My garlic always burns and turns bitter in the oven. What am I doing wrong?
A: Ah, the classic pitfall! Burnt garlic is bitter indeed. The key is to ensure your butter layer is thick enough to insulate the minced garlic. Don’t skimp! Also, avoid broiling for too long. If you’re super worried, you can gently sauté the minced garlic in a tablespoon of the butter for just 30 seconds until fragrant (let it cool slightly), then mix it with the remaining butter. This “cooks” the garlic and mellows its bite.
Q: Why did my bread get soggy in the middle?
A: Sogginess usually comes from too much butter or butter that was too melted/liquid when applied. Make sure your butter is *softened*, not melted. Also, using a very soft, high-moisture bread can contribute. That’s why a crusty loaf is best. The pre-toasting hack mentioned in the ingredients is your best defense!
Q: Can I make this ahead of time?
A: Absolutely! You can assemble the bread—spread the butter and add cheese—wrap it tightly in plastic wrap or foil, and refrigerate for up to 24 hours. Let it sit at room temp for 20 minutes before baking as directed. You can also freeze the assembled, unbaked loaf for up to 2 months. Bake from frozen, adding 5-10 minutes to the baking time.
Q: What’s the best way to reheat leftovers?
A> The toaster oven or air fryer (at 350°F for 3-4 mins) is king for restoring crunch. A regular oven at 375°F for 5-7 minutes works too. The microwave will make it rubbery and soft—only use it as a last resort!

Homemade Garlic Bread Recipe : Crispy, Buttery, and Irresistible
Description
Hey friends, Beau here! Garlic hitting warm butter = instant joy. This homemade garlic bread isn’t just a side—it’s a snack, meal, party hero, and comfort food all in one. Forget foil-wrapped frozen sticks; this is crispy outside, pillowy inside, garlicky perfection.
Ingredients
-
1 loaf French or Italian bread – crisp crust, soft interior
-
½ cup (1 stick) unsalted butter, softened – room temp for easy spreading
-
3–4 garlic cloves, minced – fresh is key
-
2 tbsp fresh parsley, chopped (optional) – or basil, chives, or 1 tsp dried Italian seasoning
-
¼ tsp salt – omit if using salted butter
-
Optional: ¼ cup grated Parmesan or shredded mozzarella for cheesy goodness
Instructions
1. Preheat & Prep
-
Oven: 375°F (190°C)
-
Line baking sheet with foil or parchment
-
Slice loaf lengthwise into two even halves
2. Make Garlic Butter
-
Mix butter, garlic, parsley, and salt in a bowl until smooth
-
Optional: use hand mixer on low for 30 seconds for extra fluffy butter
-
Taste & adjust garlic or salt
3. Slather on Bread
-
Place cut-side up on baking sheet
-
Spread garlic butter evenly to edges
-
Sprinkle cheese, if using
4. Bake
-
Bake 10–12 minutes until butter is melted, edges golden, cheese bubbly
-
Optional: broil 1–2 minutes for a crispy, pizzeria-style crust (watch carefully)
5. Slice & Serve
-
Rest 1 minute, slice into 1-inch pieces
-
Serve immediately, warm and fragrant
Serving Ideas
-
Classic: With pasta, lasagna, or soup
-
Appetizer: Cut smaller, serve as crostini with marinara
-
Meal Upgrade: Add pepperoni or meatballs + cheese for a garlic bread pizza or sandwich
-
Presentation Tip: Sprinkle fresh parsley or flaky sea salt after baking
Notes
-
Burnt garlic: Keep butter thick, avoid over-broiling; sauté garlic 30 sec in butter if worried
-
Soggy bread: Use softened, not melted butter; pre-toast very fresh or soft bread
-
Make ahead: Assemble & refrigerate 24 hrs or freeze 2 months; bake from frozen +5–10 min
-
Reheat: Toaster oven or air fryer 350°F 3–4 min; oven 375°F 5–7 min; avoid microwave
A Quick Note on Nutrition
Let’s be real: this is a treat, a celebration of carbs and flavor. I believe in enjoying real food, mindfully. This nutritional information is an estimate based on the base recipe (with parmesan), divided into 10 slices, using standard online calculators. It will vary based on your specific ingredients, bread type, and how generously you apply the butter.
Per Slice (Approximate): Calories: 180 | Fat: 10g | Saturated Fat: 6g | Carbohydrates: 18g | Protein: 3g | Sodium: 220mg.
If you’re looking for a lighter option, you can lightly brush the bread with olive oil instead of butter, use a whole-grain baguette, or simply enjoy a smaller portion alongside a big, healthy salad. Balance, my friends, is what Feastical is all about!
Final Thoughts: Share the Warmth
And there you have it, friends—your new secret weapon for bringing instant joy to the dinner table. This homemade garlic bread recipe is more than the sum of its parts; it’s a ritual, a memory-maker, and proof that the simplest things, made with care, are often the most extraordinary.
I hope this recipe finds its way into your regular rotation, creating your own kitchen stories and filling your home with that unforgettable aroma. Did you try one of the fun variations? Tag me @feastical on social media—I love seeing your creations! Now, go forth, bake with love, and never underestimate the power of good garlic bread. Until next time, keep your butter soft and your ovens warm.

Easy Vegan Banana Bread : Moist, Fluffy & Naturally Sweet
The Ultimate Easy Vegan Banana Bread: Your Kitchen’s New Best Friend
Hey friends, Beau here! Let’s talk about a universal truth: a kitchen without the smell of baking banana bread is just a room with a bunch of appliances. It’s the ultimate comfort food alchemy, turning those sad, speckled bananas on your counter into a glorious, fragrant loaf that promises a slice of coziness with every bite. But what if you’re baking for a plant-based pantry, or just want to whip something up without running to the store for eggs? I’ve got you, and it’s about to become your new go-to.
This isn’t a “compromise” vegan recipe. Nope. This is the moist, fluffy, crackly-topped, banana-packed dream you remember, just made with simple, wholesome ingredients you likely already have. I’m talking one-bowl-simple, no-fuss, “I-can-make-this-before-my-coffee-gets-cold” easy. Whether you’re a seasoned vegan baker, have an egg allergy, or are just curious, this recipe is a warm hug from the oven. It’s naturally sweet, incredibly forgiving, and so delicious that it’ll have everyone asking, “Wait, this is VEGAN?” Let’s grab those ripe bananas and make your kitchen smell like pure happiness.
Why This Recipe Has My Heart (And My Grandmother’s Apron)
This recipe always takes me back to my grandma’s linoleum-floored kitchen. She wasn’t vegan, but she was a genius at “using up.” Wasting food was a cardinal sin. Those blackening bananas on her windowsill weren’t trash; they were destiny. She’d mash them with a fork in her big yellow bowl, humming some old tune, and like magic, an hour later there’d be a perfect, humble loaf cooling on a rack. It wasn’t fancy, but it was love.
When I started Feastical, I wanted to capture that spirit—the “make something wonderful from what you have” mentality. This vegan banana bread is my tribute to that. It’s about resourcefulness creating joy. I’ve tweaked and tested it a hundred times to get that same tender crumb and soul-warming flavor without dairy or eggs, and every time I pull it out of the oven, I swear I can smell her kitchen. It’s more than a snack; it’s a delicious little heirloom.
Gathering Your Flavor Squad: Simple Ingredients, Big Impact
Here’s the beautiful part: you probably have most of this in your pantry right now. Let’s break down the team players and why they work so well together.
- 3 Very Ripe Bananas, Mashed: This is the STAR. The blacker, the better. Those brown spots mean maximum sweetness and intense banana flavor. They also add natural moisture, which is key in vegan baking. No super-ripe bananas? Bake less-ripe ones at 300°F for 15-20 minutes until the skins blacken!
- 1/3 Cup Melted Coconut Oil or Neutral Oil: Coconut oil adds a hint of richness, but if you’re not a fan, avocado oil or light olive oil works great. This is our fat, replacing butter, for that tender mouthfeel.
- 1/2 Cup Brown Sugar or Pure Maple Syrup: Brown sugar gives a deeper, caramel-like sweetness and helps create a moist crumb. Maple syrup (the real stuff!) offers a lovely flavor and keeps things refined-sugar-free. Both are winners.
- 1/4 Cup Plant-Based Milk (Almond, Oat, Soy): Our liquid component to bring the batter together. Oat milk is my favorite here—it’s creamy and neutral. This also reacts with the baking soda for lift.
- 1 tsp Pure Vanilla Extract: The flavor enhancer. It rounds out the sweetness and makes everything taste more… baked. Don’t skip it!
- 1 1/2 Cups All-Purpose Flour or Whole Wheat Pastry Flour: The foundation. All-purpose gives a classic, light texture. For a nuttier, heartier loaf, swap in half whole wheat flour. If using all whole wheat, add an extra tbsp of plant milk.
- 1 tsp Baking Soda (NOT baking powder!): Our leavening hero. The acidity from the ripe bananas activates it, giving us that beautiful rise. Make sure it’s fresh!
- 1/2 tsp Salt: Crucial! It balances the sweetness and makes all the other flavors pop.
- 1/2 tsp Cinnamon (Optional but Highly Recommended): My chef’s insight? It’s not optional for me. It adds a warm, cozy depth that pairs perfectly with banana.
- 1/2 Cup Mix-Ins (Walnuts, Chocolate Chips, etc.): The fun part! Toasted walnuts are classic. Vegan chocolate chips turn it into dessert. Or go wild with dried cranberries or shredded coconut.
Let’s Bake! Your Foolproof, Step-by-Step Guide
See? I told you it was easy. Follow these steps, and you’re golden.
- Preheat & Prep: Fire up your oven to 350°F (175°C). Grease a standard 9×5-inch loaf pan well, or line it with parchment paper with overhanging edges for the ultimate easy lift-out. This is your “no-stick” insurance policy.
- Mash & Mix the Wet Team: In a large mixing bowl, take out any lingering stress on those ripe bananas. Mash them with a fork or potato masher until mostly smooth, with a few small lumps for texture. Pour in the melted (and slightly cooled) oil, your sweetener of choice, plant milk, and vanilla. Give it a vigorous stir with a wooden spoon until it’s one happy, homogenous, fragrant liquid. Chef Hack: If your coconut oil re-solidifies when it hits the cool bananas, just pop the whole bowl in the microwave for 15 seconds and stir.
- Add the Dry Crew: Right into the same bowl (hello, one-bowl wonder!), sprinkle the flour, baking soda, salt, and cinnamon directly over the wet mixture. This prevents the baking soda from clumping. Now, here’s the secret to a tender, not tough, loaf: mix until JUST combined. A few streaks of flour are okay! Overmixing develops gluten and leads to a gummy bread. We want fluffy.
- Fold in the Fun: Gently fold in your chosen mix-ins until they’re evenly distributed. This is the final stir—be gentle!
- Bake to Perfection: Pour the batter into your prepared loaf pan and smooth the top with your spoon. For a professional touch, run a wet finger down the center of the batter—this encourages an even split in the classic banana bread “crack.” Slide it into the center of your preheated oven and set a timer for 50 minutes. Chef’s Note: DO NOT open the oven door before 45 minutes! The rush of cold air can cause the center to fall.
- The Toothpick Test & The Cool Down: At 50 minutes, insert a toothpick or thin knife into the very center of the loaf. It should come out with a few moist crumbs, but not wet batter. If needed, bake in 5-minute increments. Once done, let the loaf cool in the pan on a wire rack for a full 10 minutes. This lets it set. Then, run a knife around the edges and carefully lift it out (using the parchment sling if you used it) to cool completely on the rack. I know it’s hard, but letting it cool ensures it slices cleanly!
How to Serve This Slice of Sunshine
This bread is a versatile superstar. For a simple, perfect breakfast or snack, a thick slice all on its own is heavenly. Want to level it up? Here are my favorite ways to serve it:
- Breakfast of Champions: Lightly toast a slice and slather it with vegan butter, almond butter, or a drizzle of tahini and a drizzle of maple syrup. Pair with a hot coffee for the ultimate morning ritual.
- Dessert Mode, Activated: Serve a warm slice à la mode with a scoop of vegan vanilla ice cream or a dollop of coconut whipped cream. Sprinkle with a pinch of flaky sea salt for a gourmet touch.
- The Afternoon Pick-Me-Up: Plate a slice on a cute plate with a handful of fresh berries and a dusting of powdered sugar. It instantly feels like a café treat.
- For Sharing (or Not!): This loaf makes a fantastic, heartfelt gift. Let it cool completely, wrap it in parchment, tie it with baker’s twine, and deliver some homemade joy.
Make It Your Own: 5 Delicious Twists
Once you’ve mastered the base, the canvas is yours to paint! Here are some of my favorite riffs on this classic.
- Chocolate Swirl Everything: Fold in 1/2 cup of vegan chocolate chips. Take it further by melting 1/4 cup more chips with a tsp of coconut oil and swirling it into the batter before baking for a marbled effect.
- Gluten-Free Friend: Swap the all-purpose flour for a 1:1 gluten-free baking blend (like Bob’s Red Mill). The result is just as moist and delicious.
- Protein-Packed Power Bread: Replace 1/4 cup of the flour with your favorite vanilla or unflavored plant-based protein powder. Add an extra splash of plant milk if the batter seems too thick.
- Tropical Vacation Loaf: Fold in 1/3 cup shredded coconut and 1/4 cup chopped dried pineapple or mango. A teaspoon of lime zest in the batter brightens it up beautifully.
- PB&J Remix: Swirl 1/3 cup of your favorite berry jam or peanut butter (or both!) into the batter before baking for a delightful surprise in every slice.
Beau’s Kitchen Confidential Notes
This recipe has lived in my back pocket for years, and it’s evolved from a simple experiment to my most-requested treat. A funny story: I once accidentally used baking POWDER instead of soda. The loaf rose like a majestic volcano in the oven, then collapsed into a sad, dense pancake the moment it cooled. Lesson learned—check your labels! I’ve also learned that the bananas truly are the boss. The riper they are, the less added sugar you can get away with. I’ve even made it with just a tablespoon of maple syrup when my bananas were practically liquid sugar themselves. Trust the process, and don’t be afraid to make it your own. That’s what home cooking is all about.
Your Questions, Answered
Q: My bread is gummy/wet in the middle. What happened?
A: The two most common culprits are underbaking or overmixing. Next time, ensure your toothpick test comes out clean and remember to mix the batter only until the flour disappears. Also, make sure your baking soda is fresh!
Q: Can I make this into muffins?
A: Absolutely! This batter makes about 10-12 standard muffins. Fill liners 2/3 full and bake at the same temperature (350°F) for 20-25 minutes. Perfect for on-the-go!
Q: How do I store it, and can I freeze it?
A: Keep it wrapped tightly at room temp for 2-3 days, or in the fridge for up to a week. It freezes beautifully! Wrap the whole loaf or individual slices tightly in plastic wrap and then foil. Freeze for up to 3 months. Thaw at room temp or pop a frozen slice right in the toaster.
Q: My bread didn’t rise much. Why?
A: Check the expiration date on your baking soda. If it’s old, it loses its power. Also, ensure your oven is fully preheated before the pan goes in.
Easy Vegan Banana Bread : Moist, Fluffy & Naturally Sweet
Description
Hey friends, Beau here! This vegan banana bread is not a compromise—it’s a one-bowl, no-fuss, plant-based dream. It’s naturally sweet, forgiving, and so delicious that everyone will wonder, “Wait… this is vegan?” Perfect for breakfast, snack time, or a comforting slice any time of day.
Ingredients
Wet Ingredients
-
3 very ripe bananas, mashed
-
⅓ cup melted coconut oil (or neutral oil like avocado)
-
½ cup brown sugar or pure maple syrup
-
¼ cup plant-based milk (almond, oat, soy)
-
1 tsp pure vanilla extract
Dry Ingredients
-
1½ cups all-purpose flour (or half whole wheat pastry flour for a nuttier loaf)
-
1 tsp baking soda
-
½ tsp salt
-
½ tsp cinnamon (optional but highly recommended)
Optional Mix-Ins (½ cup)
-
Walnuts, vegan chocolate chips, dried cranberries, shredded coconut, etc.
Instructions
1. Preheat & Prep
-
Oven: 350°F (175°C)
-
Grease a 9×5-inch loaf pan, or line with parchment paper for easy lift-out.
2. Mash & Mix Wet Ingredients
-
Mash bananas in a large bowl, leaving a few lumps.
-
Stir in melted oil, sweetener, plant milk, and vanilla until smooth.
3. Add Dry Ingredients
-
Sprinkle flour, baking soda, salt, and cinnamon over wet mixture.
-
Gently stir until just combined (a few streaks of flour are okay—overmixing = dense loaf).
4. Fold in Mix-Ins
-
Add your choice of walnuts, chocolate chips, or other fun mix-ins.
5. Bake
-
Pour batter into prepared pan and smooth top.
-
Optional: run a wet finger down the center for a classic “banana bread crack.”
-
Bake 50 minutes, do not open oven before 45 minutes.
-
Toothpick test: Insert into center—should come out with a few moist crumbs, not wet batter. Bake in 5-min increments if needed.
6. Cool
-
Cool in pan 10 minutes.
-
Run a knife around edges and lift out using parchment sling (if used) to cool completely on a wire rack.
Serving Suggestions
-
Breakfast: Toast slice with vegan butter or nut butter + maple syrup.
-
Dessert: Warm slice with vegan ice cream or coconut whipped cream.
-
Snack: Pair with berries and a dusting of powdered sugar.
-
Gift: Wrap cooled loaf in parchment and tie with baker’s twine.
Notes
-
Chocolate Swirl: Fold in ½ cup vegan chocolate chips; swirl in ¼ cup melted chips + tsp coconut oil for marble effect.
-
Gluten-Free: Use 1:1 GF flour blend.
-
Protein Bread: Replace ¼ cup flour with plant-based protein powder. Add extra milk if needed.
-
Tropical Loaf: ⅓ cup shredded coconut + ¼ cup dried pineapple or mango + 1 tsp lime zest.
-
PB&J Remix: Swirl in ⅓ cup jam or peanut butter before baking.
Nutritional Breakdown (A General Guide)
Please note: The following is an approximate estimate per slice (based on 10 slices) using all-purpose flour, coconut oil, maple syrup, and no add-ins. Values will vary with substitutions.
- Calories: ~180
- Total Fat: 7g
- Saturated Fat: 6g (from coconut oil)
- Carbohydrates: 28g
- Fiber: 2g
- Sugars: 10g (primarily natural from banana & maple syrup)
- Protein: 2g
This bread is a source of quick energy, potassium from the bananas, and, when made with whole wheat flour or add-ins like nuts, provides more fiber and healthy fats. It’s a satisfying treat that fits beautifully into a balanced diet.
One Last Slice of Wisdom
And there you have it, friends—the banana bread that proves plant-based baking can be utterly simple and spectacularly delicious. This recipe is more than just a list of instructions; it’s an invitation to slow down, to create something with your hands, and to fill your home with the kind of smell that makes people feel welcome. It’s forgiving, flexible, and founded on the beautiful principle of not letting good food go to waste. So the next time you see those bananas turning spotty, don’t sigh—smile. You’re just one bowl away from something wonderful. Now, go preheat that oven. I can’t wait for you to taste it.
Happy baking,
Beau

Homemade Oatmeal Cream Pies : Soft, Chewy & Better Than Store-Bought
Your Favorite Childhood Treat, All Grown Up (And Way More Delicious!)
Hey there, friend! Beau here. Let’s talk about one of life’s simple, magical pleasures: that perfect bite of a soft, chewy oatmeal cookie hugging a cloud of sweet vanilla cream. You know the one I mean. It came wrapped in cellophane, lived at the bottom of lunchboxes, and tasted like pure, unadulterated joy. For years, I thought that specific brand of happiness could only come from a store-bought box. Then, one rainy afternoon in my tiny apartment kitchen, I decided to try making them from scratch. Let me tell you, friends—the homemade version isn’t just a copy. It’s a revelation.
These Homemade Oatmeal Cream Pies are everything you loved about the original, but dialed up to eleven. The cookies are softer, with a deeper, more complex flavor thanks to a hint of molasses and cinnamon. The cream filling is silky, rich, and lacks that vaguely “mysterious” aftertaste. They taste like love, not a laboratory. And the best part? Making them is a total blast. It’s a forgiving, fun recipe that fills your kitchen with the most incredible smell. So, tie on your apron, find that spatula (check the dishwasher!), and let’s bake some happiness together.
The Lunchbox Swap That Started It All
My obsession with these treats goes way back to third grade. I was the kid with the “weird” homemade snacks—whole wheat date bars, zucchini muffins, you name it. My mom meant well (love you, Mom!), but all I wanted was what my friend Mike had: those perfectly uniform, cream-filled oatmeal cakes. One fateful Tuesday, we negotiated The Great Trade: my exceptionally wholesome apple-oat bran puck for his glorious, plasticky-wrapped pie. That first bite was a symphony of sugary, processed bliss. It was also, I later realized, the moment I became a food detective. Even at eight, I was trying to figure out what made things taste the way they did. Years later, recreating that memory from scratch—but better—felt like closing a delicious, sweet loop. Now, I get to share that upgraded nostalgia with you. No trades required.
Gathering Your Delicious Crew: Ingredients & Insights
Here’s the lineup for these legendary cookies and their fluffy filling. Don’t just grab and go—read my little chef notes! Knowing your ingredients is the first step to becoming a kitchen rockstar.
For the Soft & Chewy Oatmeal Cookies:
- 1 cup (2 sticks) unsalted butter, softened: This is non-negotiable for that tender crumb. “Softened” means it should give easily when pressed but not be oily or melted. Pro tip: if you forgot to take it out, cut it into chunks and let it sit for 15-20 minutes.
- 3/4 cup packed brown sugar & 1/2 cup granulated sugar: The brown sugar brings molasses notes and moisture for chewiness, while the white sugar helps with spread and crisp edges. Pack that brown sugar tight!
- 2 large eggs: They bind everything together and add richness. Make sure they’re at room temperature to blend seamlessly with the butter.
- 1 tablespoon molasses: THIS is the secret flavor agent! It gives that unmistakable, deep, almost-spicy note that makes you say “Yep, that’s the taste.” Don’t skip it! Blackstrap is too strong; light or golden molasses is perfect.
- 1 teaspoon pure vanilla extract: The flavor foundation. The better the vanilla, the better the cookie. It’s worth the splurge.
- 1 1/2 cups all-purpose flour: The structure-builder. For a slightly more tender cookie, you can swap 1/2 cup with cake flour.
- 1/2 teaspoon baking soda: Our leavening agent. It helps the cookies puff up and then settle into that perfect chew.
- 1/2 teaspoon salt: The flavor enhancer. It makes the sweet pop and balances everything. I use fine sea salt.
- 1 teaspoon ground cinnamon: Warmth and coziness in a powder. It whispers “hello” in every bite.
- 1 1/2 cups quick-cooking oats: They give the classic texture without being too bulky. If you only have old-fashioned rolled oats, give them a few pulses in the food processor. Do not use steel-cut.
For the Fluffy Vanilla Cream Filling:
- 1/2 cup (1 stick) unsalted butter, softened: Yes, more butter. This is the base of our filling, and it needs to be very soft for ultimate fluffiness.
- 1 1/2 cups powdered sugar (confectioners’ sugar): Sift it! I know it’s an extra step, but it prevents a gritty filling. Trust me on this.
- 1 teaspoon pure vanilla extract: Doubling down on that good vanilla flavor.
- 1-2 tablespoons milk or heavy cream: This is your consistency adjuster. Start with one, add more as needed. Heavy cream makes it extra rich.
- Tiny pinch of salt: Just a smidge to cut the sweetness and make the vanilla sing.
Let’s Get Baking: The Step-by-Step Fun
Okay, team! Let’s turn these ingredients into magic. Follow along, and don’t worry—it’s easier than you think.
- Preheat & Prep: Fire up your oven to 350°F (175°C). Line your baking sheets with parchment paper. This isn’t just for easy clean-up; it prevents the bottoms from over-browning and is a lifesaver. No parchment? A silicone baking mat works great too.
- Cream the Butter & Sugars: In a large bowl, use an electric mixer (hand or stand) to beat the softened butter, brown sugar, and granulated sugar together on medium-high speed. We’re going for light, fluffy, and almost pale in color. This should take a good 2-3 minutes. This step incorporates air, which is key for texture! Chef’s Hack: Scrape down the bowl halfway through to make sure everything is getting friendly.
- Add the Wet Team: Beat in the eggs, one at a time, making sure each is fully incorporated before adding the next. Then, add the molasses and vanilla. Mix until the batter looks smooth and cohesive. It might look a little curdled at first—that’s the molasses doing its thing. Keep mixing; it’ll come together.
- Whisk the Dry Crew: In a separate bowl, whisk together the flour, baking soda, salt, and cinnamon. This ensures the leavening and salt are evenly distributed so every cookie bakes the same. Give it a good whisk for about 30 seconds.
- Combine with Care: With your mixer on low speed, gradually add the dry ingredients to the wet ingredients. Mix just until no dry flour remains. Overmixing at this stage can lead to tough cookies. We want tender!
- Fold in the Oats: Using a sturdy spatula, fold in the quick oats by hand. This gives you control and ensures you don’t overwork the dough. The dough will be thick and spoonable—perfect!
- Scoop & Space: Use a tablespoon cookie scoop or a regular spoon to drop rounded tablespoons of dough onto your prepared sheets. Leave about 2 inches between them—they will spread! For perfectly uniform cookies, I weigh my dough balls to about 1.5 ounces each, but eyeballing is totally fine.
- Bake to Perfection: Bake for 9-11 minutes. You want the edges to be just set and lightly golden, but the centers should still look soft and slightly puffed. They will finish setting as they cool. Key Tip: Do not overbake! Taking them out when they look slightly underdone is the secret to a supremely soft, chewy cookie.
- The Cool Down: Let the cookies cool on the baking sheet for 5 minutes. This allows them to firm up enough to move. Then, transfer them to a wire rack to cool completely. They must be completely cool before you add the filling, or it will melt into a sad puddle.
- Make the Fluffy Cloud (The Filling!): While the cookies cool, make the filling. In a clean bowl, beat the very soft butter on medium speed until it’s smooth and creamy. Gradually add the sifted powdered sugar on low speed (unless you want a sugar blizzard in your kitchen). Once incorporated, add the vanilla, a pinch of salt, and 1 tablespoon of milk/cream. Whip on medium-high for 2-3 minutes until it’s very light, fluffy, and white. If it seems too thick, add the remaining liquid a teaspoon at a time. It should be spreadable but hold its shape.
- Sandwich Time! Flip half of your cooled cookies upside down. Spread or pipe a generous dollop (about 1.5 tablespoons) of filling onto the flat bottom of each. Gently press a second cookie on top, flat side down, to form a sandwich. Give it a slight squeeze so the filling peeks out the edges just a little. Perfection!
How to Serve Your Masterpiece
Presentation is part of the fun! These pies are stunningly casual. Pile them high on a rustic wooden board or a vintage cake stand for a real “bakery counter” feel. For a lunchbox throwback, wrap them individually in parchment paper and tie them with baker’s twine. They pair perfectly with a tall glass of cold milk (the classic move), a cup of strong black coffee to cut the sweetness, or even a mug of hot apple cider. They’re the ultimate shareable treat, but I won’t judge if you sneak one (or two) for yourself with your morning coffee. Your secret is safe with me.
Make It Your Own: Delicious Twists & Swaps
Once you’ve mastered the classic, the kitchen playground opens up! Here are a few of my favorite riffs:
- Salty Sweet Sensation: Add 1/2 cup of crushed potato chips (yes, really!) to the cookie dough along with the oats. The salt and savory crunch is mind-blowing.
- Chocolate Dream: Replace the vanilla filling with a chocolate buttercream: add 1/4 cup of sifted cocoa powder to the filling ingredients and an extra splash of milk.
- Peanut Butter Paradise: Add 1/2 cup of creamy peanut butter to the cookie dough (reduce butter to 3/4 cup). For the filling, mix 1/4 cup peanut butter into the vanilla cream.
- “Everything Nice” Spice: Boost the cozy factor by adding an extra 1/2 tsp cinnamon, 1/4 tsp nutmeg, and 1/4 tsp ginger to the dry ingredients.
- Gluten-Free Friendly: Use a 1:1 gluten-free all-purpose flour blend (like Bob’s Red Mill) and certified GF oats. The texture is fantastic!
Beau’s Kitchen Chronicles: A Few Parting Thoughts
This recipe has been my edible science project for years. I’ve learned that the molasses is truly the soul of the cookie flavor, and that letting the butter get truly soft for the filling is the difference between “good” and “cloud-like.” One time, I accidentally used baking powder instead of soda. The cookies puffed up like little mushroom caps and were cakey, not chewy—a happy accident that taught me to always label my jars! These pies also get even better after a few hours, once the filling has softened the cookies slightly from the inside out. If you can wait, it’s worth it. But let’s be real… who can wait?
Your Questions, Answered
Q: My cookies spread too much and got flat. What happened?
A: This usually means your butter was too warm or melted. Next time, ensure it’s just softened. Also, check that your baking soda is fresh and that you didn’t accidentally use baking powder.
Q: Can I make the dough ahead of time?
A: Absolutely! Scoop the dough balls onto a sheet, freeze them solid, then transfer to a freezer bag. Bake straight from frozen, adding 1-2 minutes to the bake time. Fresh cookies on demand!
Q: My filling is runny/gritty. Help!
A: Runny means your butter might have been too soft or warm. Pop the whole bowl in the fridge for 10 minutes, then re-whip. Gritty means the powdered sugar wasn’t sifted. You can try to beat it for longer, but sifting next time is the sure fix.
Q: How do I store these, and how long do they last?
A: Keep them in an airtight container at room temperature for up to 3 days. For longer storage (up to a week), refrigerate them. Let them come to room temp before eating for the best texture. They also freeze beautifully for up to 3 months.

Homemade Oatmeal Cream Pies : Soft, Chewy & Better Than Store-Bought
Description
XXK
Nutritional Info*
*Because knowledge is power, even with dessert! This is an approximate breakdown per finished cream pie (based on 12 pies).
- Calories: ~320
- Protein: 3g
- Total Fat: 15g
- Saturated Fat: 9g
- Carbohydrates: 45g
- Dietary Fiber: 1g
- Sugars: 25g
Remember, these are homemade with real ingredients—no preservatives, artificial flavors, or high-fructose corn syrup. Enjoying a treat you made yourself, with love, is always a win in my book. Balance is key, friends!
Final Thoughts from My Kitchen to Yours
And there you have it—the roadmap to your new favorite homemade treat. This recipe is more than just a list of steps; it’s an invitation to play, to create, and to reconnect with a simple joy. Whether you’re baking these for giggling kids, for a nostalgic book club, or just for a quiet moment with your favorite mug, I hope they bring a little extra sweetness to your day. Food is my love language, and sharing this recipe feels like passing along a big, warm, delicious hug. Thanks for letting me be part of your kitchen adventure. Now, go forth and bake! And be sure to tag @Feastical if you share your creations—I love seeing your masterpieces.
With a full heart and a happy spoon,
Beau
Loved this recipe? Save it for later!