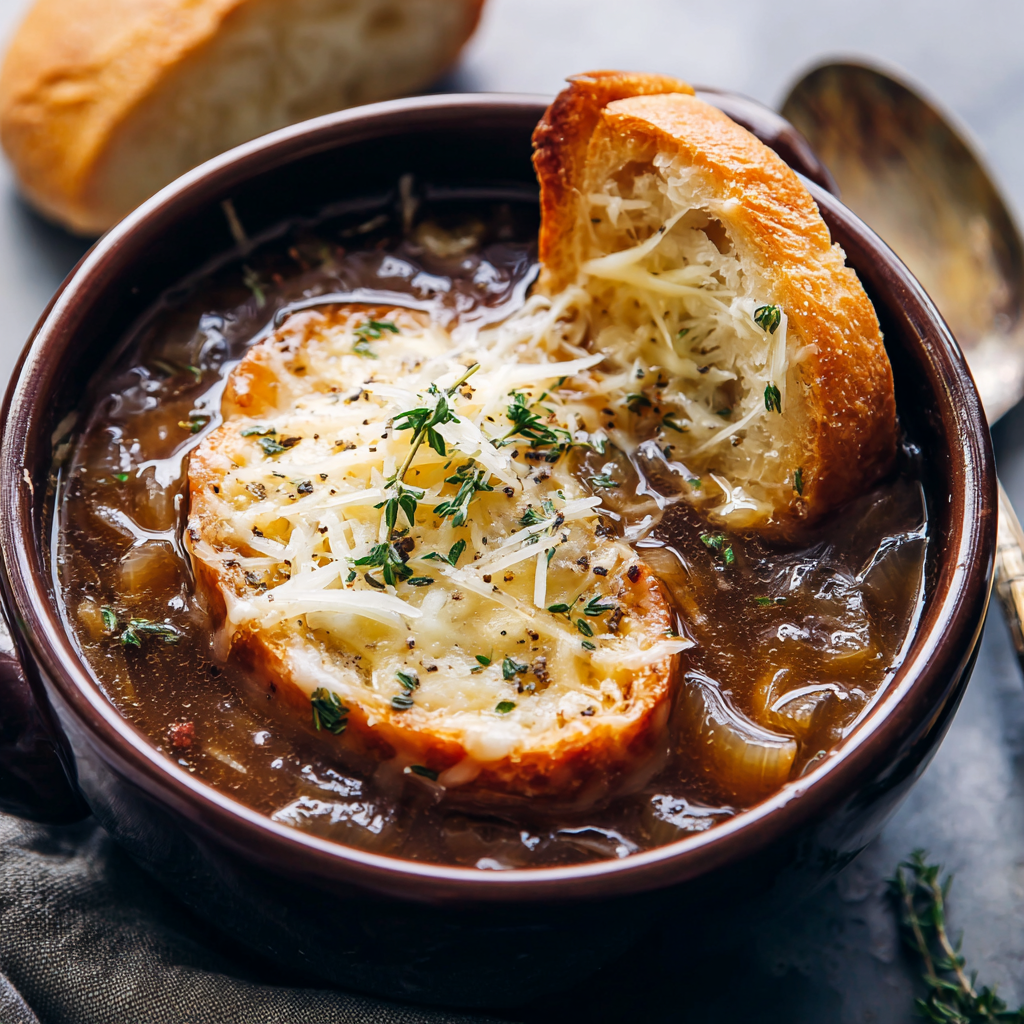
Slow Cooker French Onion Soup : Rich, Cozy & Caramelized to Perfection
Slow Cooker French Onion Soup – Rich, Cozy & Caramelized to Perfection
Hey friends, Beau here! Let’s talk about one of life’s greatest comfort-food mysteries: how does something as simple as an onion transform into a pot of liquid gold? French Onion Soup is that magic trick. It’s the culinary equivalent of a favorite, worn-in sweater—deeply comforting, incredibly satisfying, and it just makes everything feel right.
But let’s be real for a second. The classic method? Standing over a stove, stirring a pot of onions for what feels like an eternity, trying not to tear up (from both emotion and onion fumes). It’s a labor of love, and while I’m all for that on a lazy Sunday, most of my weeknights demand something simpler. That’s where our trusty kitchen sidekick, the slow cooker, swoops in to save the day.
This Slow Cooker French Onion Soup recipe is my go-to for delivering all that deep, sweet, savory, soul-warming flavor without the babysitting. We’re talking about onions that slowly, gently caramelize into a jammy, mahogany-brown tangle of sweetness over the course of a day. Your house will smell absolutely incredible. Then, we add a rich, savory broth and finish it with that iconic blanket of toasted bread and gooey, bubbly cheese. It’s classic comfort, achieved in the most laid-back, set-it-and-forget-it way possible. So, grab your crockpot, and let’s make a bowl of cozy that tastes like a warm hug.
The Soup That Bridges Generations
My love for this soup isn’t just about the taste; it’s tied to a memory. My Grandma Ruth wasn’t a fancy chef, but she was a feeder. Her kitchen was a haven of simmering pots and warm light. She made a mean French onion soup, the old-school way, in a heavy Dutch oven that seemed to weigh as much as I did. I’d sit at her counter, doodling on napkins, watching her stir with a patience I didn’t understand. “Beau, honey,” she’d say, wiping her hands on her floral apron, “good things take time. You can’t rush the sweet out of an onion.”
When I got my first slow cooker as a gift, I was determined to recreate her soup. I wanted that same profound, patient sweetness, but I needed it to fit into my busy life. The first time I lifted the lid after ten hours and saw those onions, dark and glistening like ribbons of toffee, I knew I’d found it. It was Grandma Ruth’s patience, captured in a crockpot. Now, every time I make this, I think of her. It’s my modern, slightly lazy tribute to her timeless kitchen wisdom. Some traditions are meant to be adapted, not abandoned.
Gathering Your Flavor Makers
Here’s everything you’ll need to build your pot of glory. Don’t be intimidated by the simplicity—each ingredient plays a starring role.
- 4 large yellow onions, thinly sliced – Yellow onions are our workhorse here. They have the perfect balance of sugar and sharpness for caramelizing. Chef’s Tip: Use a mandoline if you have one for even slices, but a sharp knife and a little time work just fine! No need for fancy Vidalias; we want that robust flavor.
- 3 tbsp butter & 1 tbsp olive oil – The dynamic fat duo! Butter gives us incredible flavor and richness, while the olive oil raises the smoke point and prevents the butter from burning during the long cook. It’s the best of both worlds.
- 1 tsp granulated sugar & 1 tsp salt – Our caramelization catalysts. The sugar jump-starts the browning process, and the salt draws out moisture from the onions, helping them break down and sweeten beautifully.
- 4 cups beef broth & 2 cups chicken broth – Using a combo creates a more complex, rounded broth than beef alone. The chicken broth lightens it just a touch. Substitution Tip: For a richer soup, use all beef broth. For a lighter version, use all chicken or vegetable broth.
- ½ cup dry white wine (like Sauvignon Blanc or Pinot Grigio) – Optional but highly recommended! The wine adds a wonderful layer of acidity and depth that cuts through the richness. If you prefer not to cook with wine, just add an extra ½ cup of broth and a small splash of apple cider vinegar or fresh lemon juice at the end for brightness.
- 1 tsp Worcestershire sauce – Our secret umami weapon. It adds a subtle depth and savoriness that makes the broth taste like it simmered for days.
- 1 bay leaf & 1 tsp dried thyme (or 3-4 fresh sprigs) – The classic aromatic herbs. They infuse the broth with an earthy, fragrant backbone. Remember to fish out the bay leaf and thyme sprigs before serving!
- 1 baguette, sliced and toasted – The sturdy vehicle for our cheesy roof. Toasting it first is crucial—it prevents a soggy, disintegrated mess in your soup.
- 1½ cups shredded Gruyère cheese – The non-negotiable crown. Gruyère melts beautifully and has that iconic nutty, slightly salty flavor. Substitution Tip: Swiss, Emmental, or a blend of Mozzarella (for melt) and Parmesan (for punch) are great backups.
Let’s Get Cooking: Your Effortless Roadmap
Follow these steps, and you’ll be a slow-cooker soup hero. I’ve packed each one with my favorite hacks to ensure your success.
Step 1: The Onion Foundation
Thinly slice all your onions. Don’t cry! Well, you might a little, but it’s worth it. Add them directly to the bowl of your slow cooker. Dot them with the butter, drizzle with olive oil, and sprinkle the sugar and salt over the top. Toss everything with your hands or a spoon until the onions are lightly and evenly coated. Chef’s Hack: For mega-easy cleanup, use a slow cooker liner. I’m all for less scrubbing!
Step 2: The Long, Sweet Slumber (Caramelization!)
Place the lid on your slow cooker. Here’s the magic: Cook on HIGH for 8-10 hours OR on LOW for 10-12 hours. Yes, that’s a long time, but you’re not doing a thing! This slow, gentle heat coaxes all the natural sugars out of the onions. You’ll know they’re ready when they’ve reduced significantly and turned a deep, golden-brown caramel color. They should be incredibly soft and sweet. Pro Tip: If after 8 hours on high they aren’t as brown as you’d like, give them a stir and let them go another hour or two. Patience is key!
Step 3: Building the Broth
Once your onions are perfectly caramelized, it’s time to add the liquid. Pour in the beef broth, chicken broth, white wine (if using), Worcestershire sauce, thyme, and tuck in the bay leaf. Give everything a good stir, scraping up any delicious browned bits from the bottom of the crock. Place the lid back on and cook on LOW for an additional 2 hours. This allows all the flavors to marry and deepen beautifully.
Step 4: The Grand Finale – Cheese, Please!
About 30 minutes before the soup is done, slice your baguette and toast the slices until crisp and dry. You can do this in a toaster, a 375°F oven, or even in a dry skillet on the stovetop. Preheat your broiler. Carefully remove the bay leaf and any thyme sprigs from the soup. Taste the broth—this is your moment! Add more salt or pepper if it needs it. Ladle the hot soup into oven-safe bowls or crocks. Top each with one or two baguette slices and a generous handful of shredded Gruyère, covering the bread and peeking over the edges of the bowl.
Chef’s Safety Note: Place the bowls on a sturdy baking sheet. This makes transferring them in and out of the oven much safer and prevents spills. Broil for 2-4 minutes, WATCHING CLOSELY, until the cheese is melted, bubbly, and gloriously spotted with brown. It happens fast!
How to Serve This Bowl of Sunshine
Presentation is part of the fun! Serve the soup immediately, right on the baking sheet or on small plates to catch any drips. Warn your guests that the bowls are piping hot! I love placing the baking sheet in the center of the table and letting everyone dig in—it’s rustic and communal.
This soup is a hearty meal all on its own, but if you want to make it a feast, pair it with a simple, crisp green salad dressed with a bright vinaigrette to cut through the richness. A glass of the dry white wine you used in the soup (or a light red like a Pinot Noir) is the perfect companion. For a truly cozy night in, just some crusty bread for dipping is all you need.
Make It Your Own: Delicious Twists & Swaps
Once you’ve mastered the classic, play around! Here are a few of my favorite riffs:
- The “Bistro” Upgrade: Add 1 tablespoon of cognac or brandy to the broth with the wine for an extra layer of sophisticated depth.
- Mushroom & Onion Bliss: Add 8 ounces of sliced cremini mushrooms to the slow cooker with the onions. They’ll caramelize together and add an incredible earthy flavor.
- Vegetarian/Vegan Friendly: Use all vegetable broth and swap the butter for vegan butter or more olive oil. For the topping, use thick slices of toasted sourdough and a fantastic melty vegan cheese (or a sprinkle of nutritional yeast for a cheesy flavor). Skip the Worcestershire (it contains anchovies) or use a vegan alternative.
- Beer Cheese Twist: Substitute the white wine with a dark beer like a stout or porter. Top with a blend of sharp cheddar and Gruyère for a pub-style twist.
- Lighter Lunch Version: Skip the broiling step! Simply ladle the hot soup into bowls, top with the toasted baguette slices and a light sprinkle of grated Parmesan. It’s less decadent but every bit as delicious.
Beau’s Kitchen Notebook
This recipe has become a living thing in my kitchen. I’ve made it for first dates (impressive but low-stress!), for sick friends (the ultimate cure-all), and for huge holiday gatherings where I simply double it and keep it warm in the slow cooker for a make-your-own-soup bar. One time, I forgot to plug in the slow cooker before I left for the day (we’ve all been there!). I came home to raw onions. Crisis? Nope. I cranked it to high, let it go for 6 hours, and they still caramelized—proof of this method’s resilience.
The beauty is in its flexibility. Don’t have 12 hours? Do the initial caramelization on high for 6-7 hours—it’ll still be fantastic. The soup base also freezes beautifully (just freeze before adding bread and cheese). Having a container of that deep, flavorful broth and onions in your freezer is like having a comfort food safety net.
Your Questions, Answered
Q: Can I caramelize the onions on the stove first to save time?
A: Absolutely! If you want to speed up the process, you can caramelize the onions in a large skillet or Dutch oven with the butter and oil over medium-low heat for 45-60 minutes, then transfer them to the slow cooker. Add the broth and other ingredients and cook on LOW for 4-6 hours. You’ll save a few hours, but you’ll also have a pan to wash!
Q: My soup tastes a little flat. What can I do?
A: No problem! This is usually a seasoning issue. First, make sure you added enough salt. If it’s seasoned but still lacking “oomph,” try adding a splash of Worcestershire or soy sauce for umami, a tiny bit of red wine vinegar or fresh lemon juice for brightness, or a pinch of extra dried thyme. Taste as you go!
Print
Slow Cooker French Onion Soup : Rich, Cozy & Caramelized to Perfection
Description
French Onion Soup is proof that patience turns simple ingredients into something extraordinary. Humble onions slowly transform into deep, mahogany sweetness, swimming in a savory broth and crowned with toasted bread and bubbling cheese. It’s comfort food at its finest.
Ingredients
Onion Base
-
4 large yellow onions, thinly sliced
-
3 tablespoons butter
-
1 tablespoon olive oil
-
1 teaspoon granulated sugar
-
1 teaspoon salt
Soup
-
4 cups beef broth
-
2 cups chicken broth
-
½ cup dry white wine (optional, see note)
-
1 teaspoon Worcestershire sauce
-
1 bay leaf
-
1 teaspoon dried thyme (or 3–4 fresh sprigs)
-
Black pepper, to taste
Topping
-
1 baguette, sliced and toasted
-
1½ cups shredded Gruyère cheese
Wine Substitute:
If skipping wine, add an extra ½ cup broth and finish with a small splash of apple cider vinegar or lemon juice for brightness.
Instructions
1. Start the Onions
Add sliced onions directly to the slow cooker. Dot with butter, drizzle with olive oil, and sprinkle with sugar and salt. Toss well to coat evenly.
2. Slow Cooker Caramelization
Cover and cook:
-
HIGH: 8–10 hours
-
LOW: 10–12 hours
Onions are ready when deeply golden-brown, very soft, and reduced significantly. Stir once or twice if you’re home, but it’s optional.
3. Build the Soup
Add beef broth, chicken broth, wine (if using), Worcestershire, thyme, and bay leaf. Stir well, scraping up any flavorful bits.
Cover and cook on LOW for 2 more hours to let flavors meld.
Remove bay leaf and thyme sprigs before serving.
4. Toast & Melt
About 30 minutes before serving:
-
Toast baguette slices until crisp
-
Preheat broiler
Ladle soup into oven-safe bowls. Top each with toasted bread and a generous handful of Gruyère. Place bowls on a baking sheet and broil 2–4 minutes, watching closely, until cheese is bubbly and golden.
Serving Suggestions
-
Serve immediately—bowls will be hot
-
Pair with a crisp green salad and vinaigrette
-
Enjoy with a glass of dry white wine or light Pinot Noir
-
Perfect for cozy nights, dinner parties, or holiday starters
Notes
-
Bistro Style: Add 1 tablespoon cognac or brandy with the wine
-
Mushroom Onion Soup: Add 8 oz sliced cremini mushrooms with onions
-
Vegetarian: Use vegetable broth and vegan butter; skip Worcestershire
-
Beer Version: Swap wine for stout or porter; top with cheddar + Gruyère
Final Thoughts
This Slow Cooker French Onion Soup is more than just a recipe—it’s a promise. A promise that deep, soul-satisfying flavor doesn’t have to come from a day of labor in the kitchen. It’s a testament to the magic of patience and the genius of the slow cooker, working together to transform humble ingredients into something extraordinary.
Every time I lift the lid and see those dark, jammy onions, I’m reminded that the best things in life—and in cooking—often can’t be rushed. Yet, with a little cleverness, they can be made easier. This soup captures the essence of a classic: the sweet, profound depth of caramelized onions, the rich, savory broth, and that iconic, bubbly cheesy crown. But it gifts you with your time and peace of mind in return.
Whether you’re making it for a quiet weeknight, a festive gathering, or as a modern homage to your own family memories, this soup delivers. It’s adaptable, forgiving, and universally loved. So here’s to cozy kitchens, to the smell of caramelizing onions filling your home, and to that first glorious, cheesy spoonful.
Now, it’s your turn. Grab those onions, trust the process, and make a little pot of liquid gold. You’ve got this.
With a full heart and an empty bowl,
Beau
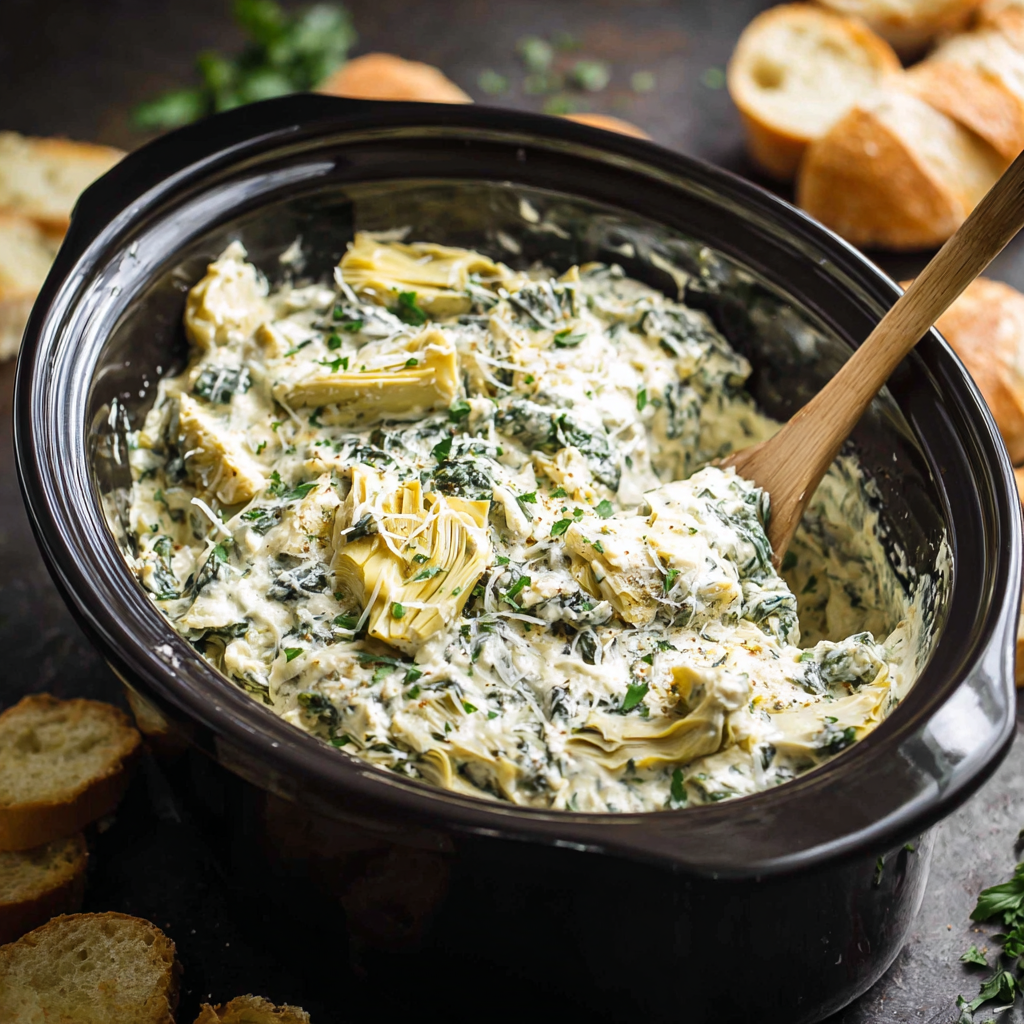
Slow Cooker Spinach Artichoke Dip : Creamy, Cheesy & Always a Hit
Slow Cooker Spinach Artichoke Dip: The Easiest Party Hero You’ll Ever Make
Hey friends, Beau here! Let’s talk about that magical moment at any gathering. You know the one. The tray comes out of the kitchen, steam rising in a delicious cloud, and suddenly the entire room goes quiet except for the sound of spoons scraping against a warm, creamy, cheesy vessel. A good party dip isn’t just a snack; it’s a mood-setter, an ice-breaker, and the undisputed MVP of the snack table. And today, we’re making the queen of them all: my legendary Slow Cooker Spinach Artichoke Dip.
Now, I’ve whisked, I’ve baked, and I’ve stirred my way through more dip recipes than I can count. But when I want a dip that’s not just good, but effortlessly, soul-warmingly, feed-a-crowd perfect every single time? I turn to my trusty slow cooker. This recipe is the culinary equivalent of a reliable best friend. It doesn’t demand your attention, it doesn’t stress you out, and it always comes through with flying, flavor-packed colors. We’re talking about a rich, velvety base of cream cheese, a tangy punch from sour cream and mayo, gooey pockets of melted mozzarella, the savory saltiness of parmesan, all woven together with tender spinach and those meaty, flavorful artichoke hearts. The best part? You literally dump everything in one pot, give it a stir, and let the slow cooker work its low-and-slow magic. So, whether you’re prepping for game day, hosting a holiday bash, or just treating yourself to a cozy night in with a great movie, this dip is your ticket to flavor town. Grab your favorite dippers and let’s get into it!
Why This Dip Holds a Special Place in My Heart (and Stomach)
This recipe takes me straight back to my first-ever “grown-up” football party I hosted in my early twenties. My apartment was tiny, my budget was tighter, and my cooking confidence was… let’s call it “developing.” I wanted to make something impressive but was terrified of burning everything or, worse, serving something that tasted like regret. A wise friend (shout-out to my buddy Marco) said, “Beau, just make a dip. Everyone loves a dip. And for the love of the game, use a slow cooker so you can actually hang out with us.”
I found a basic spinach artichoke recipe, tossed it all in my little crockpot, and spent the next two hours nervously pacing instead of actually letting it cook. When I finally lifted the lid? Pure, unadulterated glory. It was bubbly, cheesy, and smelled like a professional kitchen. That dip was the first thing to disappear that day. It wasn’t just the food; it was the feeling. My friends were gathered around it, laughing, dipping, and telling me how amazing it was. In that moment, I realized powerful food doesn’t have to be complicated. It’s about creating a delicious centerpiece that brings people together and lets you be part of the fun, not stuck in the kitchen. That little slow cooker dip was my first culinary victory, and this recipe is its evolved, perfected, even more delicious descendant. Every time I make it, I get a little taste of that victory—and so will you.
Gathering Your Flavor All-Stars
Here’s the beautiful lineup of ingredients that’ll transform into your new favorite dip. Remember, the quality of your team matters, so I’ve added some chef insights and easy swaps to make this recipe truly yours.
- 10 oz frozen chopped spinach, thawed & thoroughly drained – The frozen stuff is a champ here—it’s pre-chopped and retains its color and nutrients. The KEY step is getting as much water out as possible. I squeeze mine in a clean kitchen towel until it’s a tight, dry ball. Soggy spinach = watery dip. Chef’s Swap: An equal amount of fresh spinach, wilted and squeezed, works great too.
- 14 oz can artichoke hearts (in water), drained & chopped – Look for plain artichoke hearts, not marinated. We want their mild, slightly nutty flavor to shine through. Give them a rough chop for the perfect texture in every bite. Chef’s Insight: Don’t toss that artichoke water! It’s fantastic for adding to soups or cooking grains for a subtle flavor boost.
- 8 oz cream cheese, softened – This is our creamy foundation. Let it sit on the counter for 30-60 minutes before you start. Soft cream cheese blends into silky perfection. Chef’s Hack: In a pinch? Microwave it (out of the foil!) for 15-20 seconds.
- ½ cup sour cream – Adds a lovely tang and helps create that luscious, dippable texture. Full-fat will give you the richest result.
- ½ cup mayonnaise – Before you balk, hear me out! Mayo is just eggs and oil, and it brings an incredible richness and helps all the cheeses emulsify into one creamy dream. Use a good-quality one.
- 1 cup shredded mozzarella cheese – Hello, stretchy, gooey goodness! I prefer to shred a block myself for the best melt. Pre-shredded cheese often has anti-caking agents that can make sauces grainier.
- ½ cup grated parmesan cheese – The flavor powerhouse. Use the real, freshly grated Parmigiano-Reggiano if you can—it makes a world of difference. The pre-grated stuff in the canister works in a pinch, but the flavor is less complex.
- 2 cloves garlic, minced – Fresh is best here! It infuses the entire dip with a warm, aromatic punch. Chef’s Swap: ½ teaspoon of garlic powder can sub in if you’re truly desperate.
- Salt & pepper to taste – Don’t skip the final seasoning! The cheeses are salty, but you’ll likely need a pinch or two to make all the flavors pop.
Let’s Build Some Magic: Step-by-Step
Get ready for the easiest cooking session ever. I’m talking one-pot, minimal fuss, maximum reward. Follow along with my tips for dip-perfection.
- Prep Your Veggies Like a Pro. This is the only real “work.” Ensure your spinach is squeezed within an inch of its life—I can’t stress this enough. Chop your drained artichoke hearts into bite-sized pieces. Mince your garlic fresh. Doing this prep right sets the stage for a dip with perfect texture. Chef’s Hack: Use a potato ricer to squeeze spinach. It’s oddly satisfying and super effective!
- The Grand Dump & Stir. Literally, add everything—your drained spinach, chopped artichokes, softened cream cheese, sour cream, mayo, mozzarella, parmesan, and garlic—into the bowl of your slow cooker. No fancy order needed. Now, take a sturdy spoon or spatula and stir, stir, stir until it’s as combined as you can get it. The cream cheese will be clumpy at first, but that’s okay! The heat will smooth everything out. Chef’s Tip: If your cream cheese is still a bit cold, cut it into small cubes before adding—it’ll blend easier.
- Low & Slow is the Way to Go. Pop the lid on your slow cooker. Set it to LOW. Let it cook for 2 to 3 hours. I know, HIGH is tempting for speed, but LOW ensures everything melts together gently and evenly without any risk of scorching on the edges. Your patience will be rewarded with velvety texture. Chef’s Commentary: Resist the urge to open the lid constantly! Every peek lets out heat and adds to the cook time. Trust the process.
- The One & Only Stir. About halfway through (around the 1.5-hour mark), give the dip one good, thorough stir. This helps incorporate any cheese that’s settled and ensures even heating. You’ll see it transforming into a beautiful, homogenous, bubbly concoction. Smell that? That’s the smell of success.
- Taste & Triumph. After 2 hours, give it a taste (careful, it’s hot!). Is it perfectly melted and hot all the way through? Does it need a pinch more salt or a crack of black pepper? Adjust now. If it needs a bit more time, let it go for another 30-60 minutes. Once it’s hot, creamy, and perfect, switch your slow cooker to the WARM setting. It will hold beautifully for hours, ready for whenever your guests (or you) are ready to dive in.
Serving Your Masterpiece
Presentation is part of the fun! I like to keep the dip right in the slow cooker insert (if it’s presentable) or transfer it to a warm, shallow serving bowl. The goal is to keep it warm, so a small warming stand or candle underneath a serving dish is a great idea if you’re not using the slow cooker.
Now, for the supporting cast—the dippers! Create a colorful platter with:
- The Classics: Sturgy tortilla chips, crispy baguette slices (toasted or plain), and an array of crackers (water crackers, pita chips, and pretzel crisps are all fantastic).
- The Veggie Route: For a fresh crunch, offer carrot sticks, bell pepper strips, cucumber rounds, sugar snap peas, and endive leaves. It makes the whole spread feel balanced.
- Think Outside the Bowl: This dip is also incredible as a topping! Slather it on baked potatoes, use it as a sauce for grilled chicken, or stuff it inside chicken breasts before baking. It’s a multi-tasker!
Garnish with a little extra sprinkle of parmesan or a pinch of red pepper flakes for a pop of color and heat. Then, just set it out, step back, and watch the magic happen.
Make It Your Own: Delicious Twists & Swaps
Once you’ve mastered the classic, the playground is open! Here are a few of my favorite ways to riff on this recipe.
- Spicy ‘Kickin’ Artichoke Dip: Add 1/2 cup of chopped pickled jalapeños (with a little of their brine) and a teaspoon of smoked paprika when you mix everything. Top with crispy crumbled bacon for the ultimate sweet, spicy, smoky combo.
- Extra Lemony & Herb-aceous: Brighten it up! Zest one lemon and add the juice of half of it into the mix. Stir in 1/4 cup of finely chopped fresh herbs like parsley, dill, and chives right at the end for a fresh, vibrant flavor.
- The “Crab Rangoon” Dip: Swap the artichokes for a 6-8 oz can of lump crab meat, drained and picked over for shells. Add a tablespoon of soy sauce and a teaspoon of toasted sesame oil. Serve with fried wonton chips for the ultimate fusion appetizer.
- Lightened-Up Version: Use Neufchâtel cheese (the lower-fat cream cheese), light sour cream, and light mayo. You can also swap half the mayo for plain Greek yogurt. The flavor is still fantastic, just a bit lighter.
- Ultimate Cheesy Garlic Bread Dip: Stir in an extra 1/2 cup of shredded Italian cheese blend and 1/4 cup of softened butter mixed with 1 teaspoon of garlic powder. Pour the finished dip into a hollowed-out sourdough bread bowl for the ultimate edible serving dish.
Beau’s Kitchen Notes & Stories
This recipe has been my party wingman for over a decade, and it’s evolved. I used to swear by baking it until I was once in charge of dip for a 50-person family reunion. My oven space was zero. The slow cooker was my Hail Mary, and it turned out better—creamier and never dried out. Now it’s my only method.
A funny story: I once accidentally used marinated artichokes. The dip was… interesting. Very tangy and oily. My friends politely ate it, but one finally said, “Beau, did you get in a fight with a jar of Italian dressing?” Lesson learned: read your labels! The beauty of this recipe is its simplicity and flexibility. Don’t be afraid to make it your own, but trust the core process. And remember, the best ingredient you can add is your own relaxed, happy vibe. Stress is not a good seasoning!
Your Questions, Answered!
Q: My dip turned out watery. What happened?
A: Nine times out of ten, it’s the spinach! Frozen spinach holds a ton of water. You really, really need to squeeze it until no more liquid comes out. Using a kitchen towel or cheesecloth is the best method. Also, make sure your artichokes are well-drained.
Q: Can I make this ahead of time?
A: Absolutely! You have two great options. 1) Refrigerate Before Cooking: Mix everything in the slow cooker insert, cover, and refrigerate for up to 24 hours. Let it sit out for 30 minutes before cooking, then add 30-60 minutes to your cook time. 2) Cook and Reheat: Cook it fully, let it cool, refrigerate, and then reheat in the slow cooker on LOW, stirring occasionally, until hot throughout.
Q: My cream cheese is still a bit lumpy even after cooking. Help!
A> No worries—this is fixable! Simply give the dip a vigorous stir or whisk. The residual heat and stirring will almost always melt those last little bits. For next time, ensure your cream cheese is truly softened at room temperature before mixing.
Q: What size slow cooker is best?
A> A 3 to 4-quart slow cooker is perfect for this recipe. It gives the dip enough room to heat evenly without being too shallow. If you only have a large 6-quart, the dip layer will be shallow and may cook faster, so check it at the 1.5-hour mark.

Slow Cooker Spinach Artichoke Dip : Creamy, Cheesy & Always a Hit
Description
This creamy, cheesy spinach artichoke dip is everything a party snack should be: comforting, crowd-pleasing, and ridiculously easy. Made entirely in the slow cooker, it stays warm for hours and frees you up to actually enjoy your guests. Just dump, stir, and let the magic happen.
Ingredients
-
10 oz frozen chopped spinach, thawed and very well drained
-
14 oz can artichoke hearts (in water), drained and chopped
-
8 oz cream cheese, softened
-
½ cup sour cream
-
½ cup mayonnaise
-
1 cup shredded mozzarella cheese
-
½ cup grated Parmesan cheese
-
2 cloves garlic, minced
-
Salt & black pepper, to taste
Instructions
Squeeze the thawed spinach thoroughly using a clean kitchen towel or cheesecloth until completely dry. This step is essential to avoid a watery dip.
Add all ingredients to the slow cooker. Stir well to combine. The mixture will look thick and a bit lumpy—this is normal.
Tip: If cream cheese is still firm, cut it into small cubes to help it melt smoothly.
Cover and cook on LOW for 2–3 hours, stirring once halfway through.
Avoid using HIGH—low heat ensures a smooth, creamy texture without scorching.
Once hot and fully melted, taste and adjust seasoning with salt and pepper. Switch slow cooker to WARM for serving.
Notes
-
Lemon Herb: Add lemon zest + fresh parsley, dill, or chives at the end
-
Crab Dip: Replace artichokes with lump crab + splash of soy sauce
-
Lightened-Up: Use Neufchâtel cheese and swap half the mayo for Greek yogurt
-
Bread Bowl Upgrade: Serve inside a hollowed sourdough loaf
Nutritional Information (For Your Info!)
Okay, let’s be real: this is a celebration dip, meant to be enjoyed as part of a fun gathering. But I believe in transparency! This info is for approximately a 1/4-cup serving (and let’s be honest, servings may vary based on enthusiasm).
- Calories: ~180
- Protein: ~5g
- Carbohydrates: ~4g
- Fat: ~16g
- Fiber: ~1g
Remember, you can balance it out with those fresh veggie dippers! The spinach provides Vitamin A and iron, and the artichokes are a great source of fiber and antioxidants. So, while it’s a rich treat, it’s not without its nutritional merits. Enjoy it mindfully and deliciously!
Final Thoughts
And there you have it, friends! My not-so-secret, always-a-hit formula for the creamiest, dreamiest, most stress-free party dip imaginable. This Slow Cooker Spinach Artichoke Dip is more than a recipe; it’s a tool for connection. It lets you be the host who is relaxed, present, and enjoying the party right alongside your guests.
I hope this recipe becomes a trusted favorite in your home, creating its own set of delicious memories around your table. It’s a reminder from my kitchen to yours

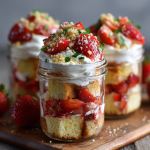
Strawberry Shortcake Parfaits in Mason Jars : Fresh, Layered, and Picnic-Perfect
The Joyful Jam Jar: Strawberry Shortcake Parfaits Made for Making Memories
Hey there, friends! Beau here, welcoming you back to my kitchen corner at Feastical. Tell me something: have you ever had a dessert that just feels like summer? Not just tastes like it, but embodies the whole sun-on-your-skin, grass-between-your-toes, laugh-until-your-side-hurts spirit of the season? For me, that dessert has always been strawberry shortcake. But let’s be real—sometimes assembling a towering, cream-laden shortcake at a picnic feels like a high-stakes architectural challenge. One wrong move and you’ve got a delicious, yet tragic, landslide on your blanket.
That’s exactly why I fell head-over-heels for these Strawberry Shortcake Parfaits in Mason Jars. We’re taking every single bit of that classic, soul-warming flavor—the sweet-tart berries, the tender cake, the cloud-like cream—and layering it up in the most charming, transportable, and downright fun way possible. These parfaits are my go-to for potlucks, porch sittings, and “just because” Tuesday treats. They’re individual servings of pure, uncomplicated joy. No slicing, no plating fuss, just you, a spoon, and layer upon layer of perfection. So, grab your favorite apron and a handful of jars. We’re about to create a dessert that’s as easy to make as it is to love.
A Shortcake Story: Picnics, My Grandma, and Leaky Berry Juice
This recipe takes me straight back to my grandma’s backyard. She was the queen of the “everything but the kitchen sink” picnic. One sweltering July afternoon, she decided to bring her famous strawberry shortcake. She assembled the whole magnificent thing at home, wrapped it in what seemed like a mile of plastic wrap, and proudly carried it to the park. Well, the summer heat and a bumpy car ride had other plans. By the time we unveiled it, the whipped cream had slumped, the berry juice had seeped into a single, soggy spot on the cake, and it looked… well, loved. But you know what? It was still the most delicious thing I’d ever eaten, eaten straight from the pie plate with six spoons fighting for the perfect bite.
That moment of delicious chaos was the spark for this recipe. I thought, “What if we could capture that magic but make it travel-proof? What if every bite had the perfect ratio, and the cake stayed tender, not soggy?” The mason jar was my “aha!” moment. It’s the perfect vessel for keeping layers neat, for letting everyone see the beautiful stripes of red and white and gold, and for making sure that every spoonful from top to bottom is its own perfect little dessert. It’s my tribute to Grandma’s legendary, if slightly deconstructed, masterpiece.
Gathering Your Sunshine: What You’ll Need
Here’s the beautiful part: this recipe is all about simplicity and quality. You don’t need a ton of ingredients, but each one plays a starring role. Let’s break it down.
- 2 cups fresh strawberries, hulled and chopped: The heart of the operation! Look for berries that are fragrant and bright red. Chef’s Insight: Don’t stress if they’re not perfectly sweet; the maceration step (fancy word for letting them hang out with sugar) will coax out their natural sugars and create that incredible syrup.
- 2 tablespoons granulated sugar: This is for the berries, not the cream. It draws out the juices and creates a light, glossy syrup that soaks into the cake just enough.
- 1 teaspoon lemon juice: A tiny bit of acid brightens the whole berry mixture and keeps the flavors from feeling one-dimensional. If you’re out, a tiny splash of orange juice or even balsamic vinegar (trust me!) works.
- 2 cups pound cake or shortcake, cubed: The foundation! A store-bought all-butter pound cake is a fantastic shortcut. Substitution Tip: Want a homemade feel without the work? Bake a simple vanilla sheet cake or buy unfrosted cupcakes and crumble them. For a gluten-free twist, use your favorite GF pound cake.
- 1½ cups heavy whipping cream: Please, for the love of fluffy clouds, use heavy whipping cream or double cream. The higher fat content is what gives you stable, luxurious peaks. Milk or half-and-half simply won’t whip.
- 2 tablespoons powdered sugar: I prefer powdered (icing) sugar in whipped cream because it dissolves instantly and helps stabilize the cream a tad. Granulated sugar can sometimes leave a slight grittiness.
- 1 teaspoon pure vanilla extract: The warm, aromatic soul of the whipped cream. If you have vanilla bean paste, use half a teaspoon for those gorgeous little specks.
- Optional Toppings: This is your playground! A fresh strawberry slice, a sprinkle of crushed graham crackers or crumbled cake for texture, or a tiny mint leaf for a pop of color and freshness.
Building Your Edible Sunshine Jars: A Step-by-Step Dance
Ready to layer up some happiness? This process is more like a relaxing kitchen rhythm than a rigid recipe. Put on some good music, and let’s get started.
- Macerate the Strawberries: In a medium bowl, gently toss your chopped strawberries with the 2 tablespoons of sugar and the lemon juice. Let it sit on the counter for 10-15 minutes. Chef’s Hack: Give it a gentle stir halfway through. You’ll see the magic happen as the berries get glossy and a lovely ruby-red syrup pools at the bottom. This syrup is liquid gold for flavor!
- Whip the Cream to Cloud-Nine Status: In a large, clean bowl, pour your heavy cream. Using a hand mixer or a whisk (channel your inner pastry chef!), beat the cream on medium-high speed. Once it starts to thicken, add the powdered sugar and vanilla. Keep beating until you get soft peaks. What’s a soft peak? When you lift the beaters, the cream should form a gentle peak that curls over just slightly at the tip. Don’t go to stiff peaks—it can get grainy and be harder to layer.
- The Cube & Layer Assembly Line: Now, the fun part! Have your jars, cake cubes, macerated berries (and their juice!), and whipped cream all lined up. Start with a base layer of cake cubes in each jar. Gently press them down just a touch. Next, spoon a generous layer of strawberries, making sure to get some of that amazing syrup in there—this is what keeps the cake moist! Then, dollop or pipe a layer of whipped cream. Repeat! Cake, berries, cream. Pro-Tip: I like to end with a beautiful, swoopy top layer of whipped cream and a final spoonful of berries and syrup for a gorgeous visual finish.
- The Chill Factor: You can absolutely eat these right away. But if you can wait 15-30 minutes in the fridge, the flavors meld beautifully. The cake soaks up a hint of the berry syrup without getting soggy, and the whole parfait sets up perfectly.
How to Serve These Portable Treasures
The beauty is in the simplicity! These parfaits are their own serving dish. Just hand out the jars with spoons. For a picnic or party, I love tying a cute ribbon or baker’s twine around the rim and tucking a vintage spoon into the bow. If you’re serving at home, you can still present them in the jars on a tray, or for a fancier feel, run a parfait knife or thin spatula around the inside of the jar and gently slide the whole layered cylinder onto a plate. But honestly? I’m team “eat-it-straight-from-the-jar.” It’s part of the charm. Pair it with a glass of iced tea, lemonade, or even a sparkling rosé for the grown-ups.
Make It Your Own: Endless Flavor Twists!
Once you master the basic formula, the world is your parfait jar! Here are a few of my favorite spins:
- Lemon Berry Bliss: Add the zest of one lemon to the whipped cream. Use a mix of strawberries, blueberries, and raspberries. It’s a citrusy, vibrant explosion.
- Chocolate-Dipped Strawberry: Toss your cake cubes with a tablespoon of cocoa powder, or use chocolate pound cake. Drizzle a little chocolate sauce between the layers. Decadence in a jar.
- Boozy Grown-Up Version: Add a tablespoon of Grand Marnier, Chambord, or bourbon to the macerating strawberries. It adds a wonderful depth of flavor.
- Vegan & Dairy-Free Delight: Use a vegan pound cake or angel food cake. For the cream, chill a can of full-fat coconut milk overnight, scoop out the solid cream, and whip it with powdered sugar and vanilla. It’s dreamy!
- Peaches & Cream Dream: In late summer, swap the strawberries for ripe, diced peaches. A tiny pinch of cinnamon in the whipped cream is heavenly here.
Beau’s Kitchen Confidential Notes
This recipe is a living thing in my kitchen. I’ve made it for probably a hundred different occasions. The biggest lesson? Don’t fear the syrup. That juicy liquid from the berries is NOT your enemy—it’s the secret ingredient that makes the cake bites so incredibly flavorful. Just don’t drown the cake layers in it; a spoonful does the trick. One time, I tried to get fancy and make individual mini shortcakes from scratch for the layers. They were delicious, but the rustic, homely cubes of store-bought pound cake? They actually work better—more consistent, easier to layer, and they hold their texture. It’s a beautiful reminder that in the kitchen, sometimes the simple, humble choice is the superstar.
Your Parfait Questions, Answered!
Q: Can I make these ahead of time?
A: Absolutely! You can assemble them up to 4-6 hours ahead. Keep them tightly covered in the fridge. For the best texture, add the final garnish (like a fresh berry) right before serving.
Q: My whipped cream turned grainy or into butter! What happened?
A> You likely over-whipped it. Once you see soft peaks, stop! If it starts to look curdled, you can sometimes salvage it by gently folding in another tablespoon or two of cold cream with a spatula. If it’s fully butter, well… you’ve just made sweet butter. Use it on toast and start your cream over!
Q: Can I use frozen strawberries?
A> You can, but thaw and drain them very well first, otherwise you’ll have too much liquid. I’d also chop them after thawing. The texture will be a bit softer, but the flavor will still be great.
Q: The cake got soggy. How do I prevent that?
A> Two tips: 1) Ensure your cake cubes aren’t too small (½-inch to 1-inch is perfect). 2) When assembling, don’t let the berries and syrup sit on the cake for hours before you plan to eat it. The short chill time is perfect; an overnight soak is too much.
Strawberry Shortcake Parfaits in Mason Jars : Fresh, Layered, and Picnic-Perfect
Description
These Strawberry Shortcake Parfaits capture everything we love about the classic dessert—sweet-tart berries, tender cake, and billowy whipped cream—without the stress of slicing or serving. Layered in mason jars, they’re charming, picnic-proof, and perfectly portioned. Every spoonful delivers the ideal ratio, from top to bottom.
Ingredients
Strawberry Layer
-
2 cups fresh strawberries, hulled and chopped
-
2 tablespoons granulated sugar
-
1 teaspoon lemon juice
Cake Layer
-
2 cups pound cake or shortcake, cut into ½–1 inch cubes
(Store-bought works beautifully)
Whipped Cream
-
1½ cups heavy whipping cream
-
2 tablespoons powdered sugar
-
1 teaspoon pure vanilla extract
Optional Garnishes
-
Fresh strawberry slices
-
Crushed graham crackers or cake crumbs
-
Mint leaves
Instructions
1. Macerate the Strawberries
In a medium bowl, gently toss strawberries with sugar and lemon juice. Let sit 10–15 minutes, stirring once, until glossy and juicy.
2. Whip the Cream
In a large, cold bowl, whip heavy cream on medium-high speed. Once it thickens, add powdered sugar and vanilla. Continue whipping until soft peaks form.
Soft peaks gently curl at the tip when the beaters are lifted.
3. Assemble the Parfaits
Set up an assembly line with jars, cake cubes, strawberries, and cream.
Layer in each jar:
-
Cake cubes (lightly pressed)
-
Spoonful of strawberries with syrup
-
Dollop of whipped cream
Repeat once more, finishing with whipped cream and a spoonful of berries.
4. Chill (Optional but Recommended)
Serve immediately or refrigerate 15–30 minutes to let flavors meld without sogginess.
Notes
-
Serve straight from the jar with a spoon—easy and charming
-
Tie baker’s twine or ribbon around jars for parties
-
Pair with lemonade, iced tea, or sparkling rosé
-
For plated service, carefully slide the parfait onto a dessert plate
A Note on Nourishment
Friends, this is a dessert, and it’s meant to be enjoyed as part of a happy, balanced life. It’s made with real ingredients: fruit, dairy, eggs (in the cake), and sugar. The portion control built into the individual jars is actually a great help. The nutritional information below is an estimate per jar (based on 6 servings) using a typical store-bought pound cake and full-fat dairy. If you use a lighter cake or lower-fat alternatives, the numbers will change. My philosophy? Savor every single delicious, joyful bite without a second thought.
- Calories: 280
- Total Fat: 17g
- Saturated Fat: 10g
- Cholesterol: 65mg
- Sodium: 130mg
- Carbohydrates: 28g
- Sugars: 18g
- Protein: 3g
One Last Spoonful of Thought
At the end of the day, these Strawberry Shortcake Parfaits are about so much more than dessert. They’re about creating something lovely with your own two hands. They’re about the anticipation of lifting that spoon and diving through the layers. They’re about sharing something homemade and heartfelt, whether it’s with family on the patio or with a friend who needs a little pick-me-up. So, I hope you’ll give them a try. Tag me @Feastical when you do—I love seeing your kitchen creations! Now, go make a mess, layer up some love, and remember: good food is always better shared. Until next time, keep your spoons ready and your hearts full.
Cheers,
Beau
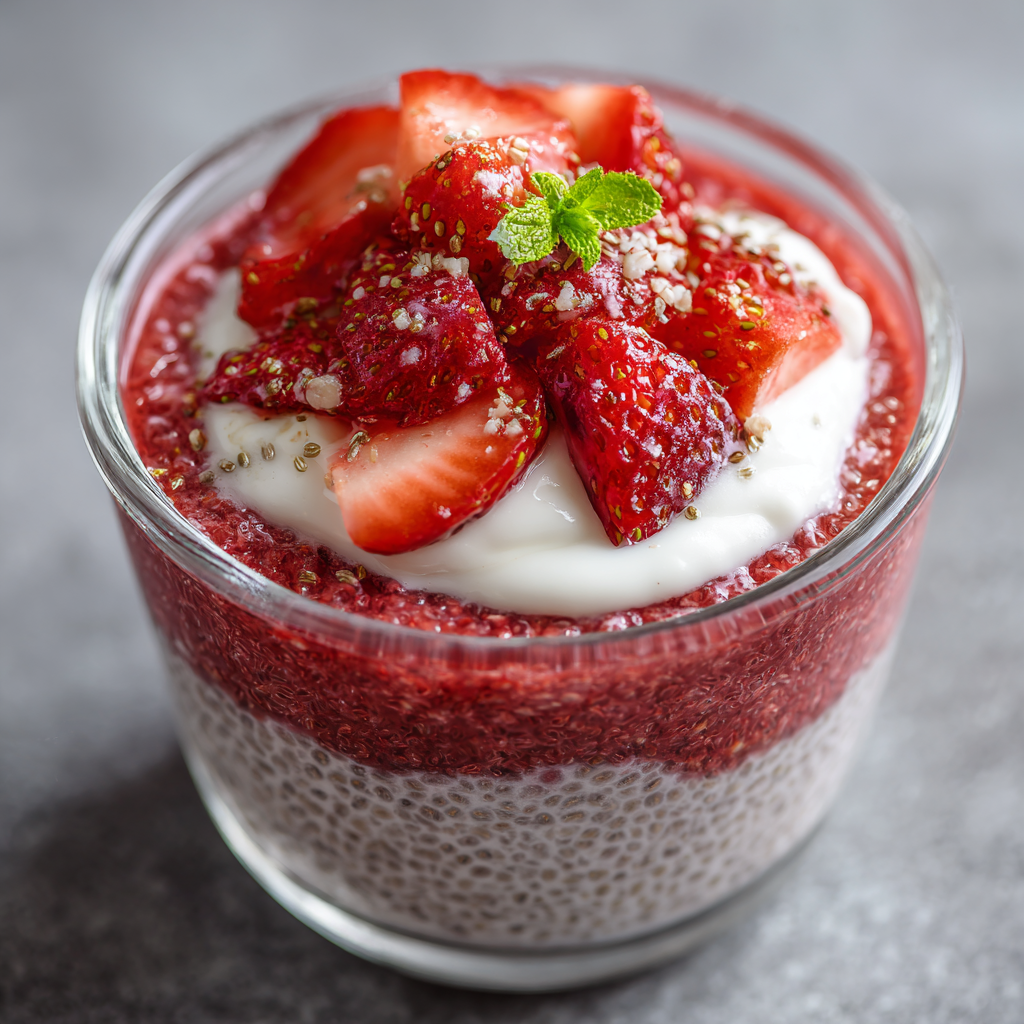
Strawberry Chia Pudding with Vanilla Cream : Fresh, Creamy, and Naturally Sweet
Strawberry Chia Pudding with Vanilla Cream: The Little Jar of Sunshine I Keep Coming Back To
Hey friends, Beau here from Feastical! Let’s talk about those mornings when you want something that feels like you’re treating yourself, but you also want to actually, you know, feel good afterward. You don’t want a sugar crash at 10 AM, and you definitely don’t want to spend an hour at the stove. Sound familiar? That exact craving—the one for a meal that’s equal parts nourishing and downright delightful—is what inspired this Strawberry Chia Pudding with Vanilla Cream.
This isn’t just another healthy recipe. This is a layered, creamy, dreamy little jar of happiness. It’s a treat that winks at you from the fridge, promising the sweet, bright flavor of fresh strawberries and the luxurious finish of a smooth vanilla cloud. And the best part? It’s secretly packed with the kind of fuel that keeps you buzzing with good energy. The chia seeds work their magic overnight, creating a pudding that’s satisfyingly thick and loaded with fiber and omega-3s, while the vanilla cream topping adds a protein-rich, creamy contrast that makes every spoonful an event.
Whether you’re a meal-prep champion looking for a grab-and-go breakfast hero, a parent sneaking something wholesome into a snack, or someone just wanting a light dessert that doesn’t weigh you down, this recipe is your new best friend. It’s plant-based adaptable, naturally sweetened, and so simple it practically makes itself. So, grab your blender and your favorite little jars—we’re about to make a breakfast (or dessert!) that tastes like a ray of sunshine and feels like a warm hug from the inside out.
The Little Red Bowl: A Nostalgic Nudge Towards Better Mornings
This recipe always takes me back to my grandma’s kitchen, though not in the way you might think. She wasn’t a chia seed pioneer (those were the land-of-butter-and-gravy years, bless her). No, it’s the strawberries. Every summer, she’d take me to a pick-your-own farm, and we’d come home with flats of berries so red they looked like jewels. Her rule was simple: whatever we didn’t eat straight from the colander, we had to use up. We’d make jam, shortcakes, and her famous “pink soup,” which was just blended berries and a splash of cream—a primitive smoothie, if you will.
Years later, when I was first experimenting with healthier eating, I’d stare at a container of strawberries in my city apartment and hear her voice: “Use it up, Beau.” One tired evening, instead of my usual sugary cereal, I just blended a handful of those berries with some almond milk, stirred in these weird little seeds I’d read about, and stuck it in the fridge. The next morning, I was stunned. It had transformed into this gorgeous, pudding-like texture. I dolloped some yogurt on top, and bam—a modern, healthy twist on grandma’s “pink soup” was born. It was a connection across generations, a little nod to her wisdom in my 21st-century jar. Now, every time I layer this pudding, it’s a sweet reminder that the best food memories don’t just live in the past; we get to reinvent them, one wholesome spoonful at a time.
Gathering Your Sunshine: Ingredients & Why They Work
Here’s the beautiful part: this recipe requires no fancy techniques or expensive ingredients. It’s all about letting simple, good-quality components shine. Let’s break down what you’ll need and why each one matters.
For the Strawberry Chia Layer:
- 1 ½ cups fresh strawberries, hulled – The star of the show! Look for berries that are fragrant and bright red. Chef’s Insight: Frozen strawberries work brilliantly here too—just thaw them first. They’re often picked at peak ripeness and can be more economical.
- 1 tablespoon maple syrup or honey (optional) – This is your sweetness booster. The riper your berries, the less you’ll need. I often skip it entirely in summer! Substitution Tip: Agave nectar, date syrup, or a pitted medjool date blended with the strawberries are all great alternatives.
- 1 teaspoon lemon juice – Don’t underestimate this! It’s not for tartness, but to brighten and enhance the strawberry flavor, keeping that gorgeous pink color vibrant. It’s the secret wake-up call for the berries.
- ½ cup milk of choice – This is the liquid that brings it all together. Chef’s Insight: I love unsweetened almond or oat milk for a neutral, plant-based base. Cream-top whole milk or canned coconut milk will make it incredibly rich and decadent. Choose your adventure!
- 3 tablespoons chia seeds – The magic makers! These tiny seeds absorb liquid and swell up, creating that perfect pudding texture. Pro Tip: Use black or white chia seeds interchangeably. There’s no taste difference, only color.
For the Vanilla Cream:
- ½ cup Greek yogurt (or coconut yogurt for dairy-free) – This creates the lush, creamy topping. Full-fat Greek yogurt gives a tangy, protein-packed richness. Substitution Tip: For a vegan version, use a thick, plain coconut yogurt. You can even blend soaked cashews with a splash of milk and vanilla for a supremely lush cream.
- 1–2 teaspoons maple syrup or honey – Just a touch to sweeten the cream and balance any tang from the yogurt. Adjust to your taste!
- ½ teaspoon vanilla extract – The soul of the cream. Use real vanilla extract for the best flavor. A little scrape of vanilla bean paste would be absolutely divine here.
Let’s Build Some Layers: Simple Steps to Pudding Perfection
Ready to make magic happen? It’s as easy as blend, stir, and dream (well, chill). Follow these steps, and you’ll be a chia pudding pro in no time.
- Make the Strawberry Base: Toss your hulled strawberries, optional sweetener, lemon juice, and milk into a blender. Blend on high until you have a completely smooth, vibrant pink puree. No chunks allowed! Chef’s Hack: Give the blender a good scrape down the sides with a spatula and blend for another 5 seconds to make sure everything is incorporated. This ensures every chia seed gets coated evenly later.
- Add the Chia Seeds: Pour the beautiful strawberry liquid into a mixing bowl, jar, or straight into your serving glasses. Now, sprinkle the chia seeds over the top. Grab a whisk or a fork and stir vigorously for a good 30 seconds. This is crucial! Chef’s Commentary: Chia seeds love to clump. Stirring well now prevents you from finding a gelatinous ball of seeds later. Trust me on this.
- The First Re-Stir: Set a timer for 5 minutes. Walk away, rinse the blender, then come back. You’ll see the seeds already starting to swell and suspend. Give the mixture another really good stir. This second stir is the ultimate insurance policy against clumps and ensures a perfectly smooth, uniform pudding.
- Chill Out: Cover your bowl or jars tightly and tuck them into the fridge. Let them set for at least 4 hours, but overnight is truly best. Pro Tip: This is the ultimate make-ahead move. While you’re sleeping, the chia seeds are doing all the work, thickening that puree into a spoonable, luxurious pudding.
- Prepare the Vanilla Cream: About 10 minutes before you want to serve, make the cream. In a small bowl, combine the yogurt, sweetener, and vanilla extract. Whisk or stir until it’s smooth, creamy, and dreamy. Taste it! Want it sweeter? Add a bit more syrup. Want more vanilla? Go for it. This is your cream.
- Assemble with Joy: Pull your set pudding from the fridge. It should be thick and jiggle slightly. If you used one big bowl, give it a final stir and spoon it into serving glasses. Now, dollop or gently spread a generous layer of the vanilla cream on top. Chef’s Flair: I like to use the back of a spoon to create a little swoosh or well in the cream for aesthetics.
- The Grand Finale: Top with a fresh strawberry slice, a mint leaf, or a sprinkle of chia seeds for texture. Then, dig in!
How to Serve Your Masterpiece
Presentation is part of the fun, and this pudding is a natural-born looker. I’m a huge fan of using clear glass jars, parfait glasses, or even wide-mouth mugs. Seeing those distinct, cheerful layers is half the appeal! For a casual family breakfast, you can absolutely mix it all together in one big bowl—it’ll taste just as incredible.
Think beyond the breakfast table, too. This pudding shines as an afternoon snack to beat the 3 PM slump. It’s a stunning, light dessert for a dinner party—layer it in elegant glasses for a “wow” factor. For the kiddos (or the kid in you), add some fun toppings: a sprinkle of granola for crunch, a few dark chocolate chips, or even a handful of blueberries for a red, white, and blue theme. It’s a versatile canvas for your cravings.
Make It Your Own: Delicious Twists & Swaps
Once you’ve mastered the basic strawberry-vanilla bliss, the flavor world is your oyster. Here are a few of my favorite ways to mix it up:
- Mixed Berry Bonanza: Swap the strawberries for a blend of raspberries, blueberries, and blackberries. The color will be a deep, gorgeous purple, and the flavor is complex and tart.
- Tropical Escape: Use pureed mango or pineapple as your base. For the cream, use coconut yogurt and add a tiny pinch of coconut extract along with the vanilla. Top with toasted coconut flakes. Instant vacation in a jar.
- Chocolate-Covered Strawberry: Add 1 tablespoon of unsweetened cocoa powder to the strawberry base before blending. For the cream, use chocolate protein powder instead of sweetener, or just stick with vanilla for a beautiful contrast.
- Green Machine: Sneak in a big handful of fresh spinach or baby kale into the blender with the strawberries. You won’t taste it, but you’ll get a powerful nutrient boost and a stunning deep pink color.
- Nutty & Nice Cream: Skip the yogurt cream. Instead, blend a frozen banana with a splash of milk and a dash of vanilla until smooth and creamy. Dollop this “nice cream” on top for a fully fruit-sweetened treat.
Beau’s Kitchen Notes & Stories
This recipe has evolved so much in my kitchen. My first attempt, as I mentioned, was a happy accident. But my biggest “failure” taught me the best lesson: I once got impatient and only let it chill for two hours. It was a sad, soupy mess. Chia pudding cannot be rushed! It needs that full time to set up properly. Now, overnight is my non-negotiable rule.
I also learned that the type of blender matters for the smoothest puree. If you have a high-powered one, you’re golden. If yours is older, just strain the strawberry puree through a fine-mesh sieve after blending to remove any pesky seeds before adding the chia. It’s an extra step, but it gives you a silkier texture.
Most importantly, this recipe has become my weeknight ritual. Making a batch on Sunday feels like a gift to my future self. When Monday morning rolls around and I’m bleary-eyed, seeing that bright pink jar in the fridge feels like a little act of self-care. It’s a reminder that good food doesn’t have to be complicated to feel special.
Your Questions, Answered
Q: My pudding is still runny after 4 hours. What happened?
A: Don’t worry! This usually means one of two things: 1) The ratio of liquid to chia seeds might have been a bit off (measurements are key the first few times), or 2) It just needs more time. Chia seeds can thicken at different rates depending on the brand and the temperature of your fridge. Stick it back in and give it a few more hours, preferably overnight. It will almost certainly set up.
Q: Can I use all yogurt instead of milk for the base?
A: I wouldn’t recommend it for the blending stage, as yogurt is too thick to puree the strawberries smoothly. However, you can make a fantastic “cheater” version by mashing the strawberries with a fork and mixing them directly with yogurt and chia seeds. The texture will be different—thicker and less smooth—but still delicious!
Q: How long does this last in the fridge?
A: The pudding base, once set, keeps beautifully for 4-5 days in a sealed container. I prefer to make the vanilla cream fresh each day I plan to eat it, as yogurt can sometimes separate a bit after a few days. Store them separately and assemble just before serving for the best texture.
Q: Is this recipe gluten-free and vegan?
A> It’s naturally gluten-free! To make it vegan, ensure you use a plant-based milk (like almond or oat), maple syrup instead of honey, and coconut yogurt for the vanilla cream. It’s an incredibly adaptable recipe for almost any dietary need.

Strawberry Chia Pudding with Vanilla Cream : Fresh, Creamy, and Naturally Sweet
Description
This Strawberry Chia Pudding with Vanilla Cream is the kind of recipe that looks indulgent but quietly fuels your day. It’s creamy, naturally sweet, layered, and satisfying—without a sugar crash or morning stress. The chia seeds thicken overnight into a luscious pudding, while the vanilla yogurt cream adds a soft, dessert-like finish.
Ingredients
Strawberry Chia Layer
-
1½ cups fresh strawberries, hulled
(Frozen & thawed work beautifully) -
½ cup milk of choice
(Almond, oat, dairy, or coconut) -
3 tablespoons chia seeds
-
1 tablespoon maple syrup or honey (optional)
-
1 teaspoon lemon juice
Vanilla Cream
-
½ cup Greek yogurt (or coconut yogurt for dairy-free)
-
1–2 teaspoons maple syrup or honey
-
½ teaspoon vanilla extract
Optional Toppings
-
Fresh strawberry slices
-
Mint leaves
-
Granola
-
Extra chia seeds
Instructions
Add strawberries, milk, sweetener (if using), and lemon juice to a blender. Blend until completely smooth and vibrant pink.
Pour the strawberry mixture into a bowl or jars. Add chia seeds and stir vigorously for 30 seconds to prevent clumping.
After 5 minutes, stir once more. This second stir ensures an evenly thick, creamy pudding.
Cover and refrigerate for at least 4 hours, preferably overnight, until thick and spoonable.
In a small bowl, whisk yogurt, sweetener, and vanilla until smooth and creamy. Taste and adjust sweetness if needed.
Spoon the chia pudding into jars or glasses. Top with vanilla cream and finish with your favorite toppings.
Notes
-
Serve in clear jars or glasses to show off the layers
-
Enjoy cold straight from the fridge
-
Perfect as breakfast, snack, or a light dessert
-
For kids: add chocolate chips or blueberries
A Quick Look at the Good Stuff
Let’s be clear: I’m a chef, not a dietitian. The following is an approximate estimate based on the recipe using unsweetened almond milk, full-fat Greek yogurt, and 1 tbsp of maple syrup, divided between two servings. But here’s the real “nutritional info” I care about: This dish is a powerhouse of sustained energy. The chia seeds provide fiber, plant-based omega-3s, and protein, which help keep you full and stabilize blood sugar. The strawberries are loaded with Vitamin C and antioxidants. The Greek yogurt adds a hefty dose of protein and probiotics. Together, they create a balanced meal that tastes decadent but fuels your body in the best way possible. It’s the definition of food that loves you back.
Per Serving (Approximate): Calories: 180 | Protein: 8g | Carbs: 16g | Fat: 8g | Fiber: 6g | Sugar: 9g
Final Thoughts from My Kitchen to Yours
At the end of the day, Feastical is about food that brings real joy and real nourishment to your everyday life. This Strawberry Chia Pudding with Vanilla Cream is a perfect example of that philosophy. It proves that eating well doesn’t mean sacrificing flavor or fun. It’s a recipe that’s forgiving, flexible, and full of potential.
I hope it becomes a reliable, bright spot in your routine, just like it has in mine. Maybe it’ll become your Sunday night ritual, or your secret weapon for busy mornings. However it fits into your life, I hope you enjoy making it (and eating it!) as much as I do.
If you give it a try, I’d love to hear about it! Tag me @feastical or shoot me a message with your creations and your own twists. Now, go forth and make something wonderful. Your future self will thank you at breakfast.
With a full heart and a happy spoon,
Beau

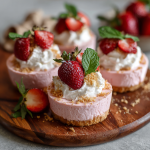
Strawberry Mascarpone Mousse Cups : Creamy, Elegant, and No-Bake Easy
Strawberry Mascarpone Mousse Cups – Creamy, Elegant, and No-Bake Easy
The Dessert That Whispers “You’ve Got This”
Hey friends, Beau here from Feastical! Let’s talk about one of life’s great kitchen miracles: the dessert that looks like you spent all day in a fancy patisserie but secretly comes together faster than you can find the TV remote. I’m talking about these stunning Strawberry Mascarpone Mousse Cups. We’re blending the lush, creamy magic of mascarpone cheese with the sunshiny sweetness of fresh strawberries, then folding it all into a cloud of softly whipped cream. No oven, no fuss, just pure, spoonable joy.
Picture this: a silky-smooth mousse, vibrant with real fruit flavor, nestled in a cute glass. It’s light yet indulgent, fancy but approachable—exactly the kind of treat I love to share with you. Whether you’re prepping for a bridal shower, planning a romantic date night at home, or just need a bright spot on a Tuesday afternoon, these little cups deliver. They’re a hug in dessert form. So, tie on your apron (or don’t—no judgment here), and let’s make something delicious that celebrates the simple, glorious strawberry.
Strawberry Fields and Grandma’s Apron
This recipe always takes me back to my grandma’s backyard in late spring. She had this wild, slightly overgrown strawberry patch that we’d raid every June. My brother and I would end up with more juice on our shirts than in our baskets, but Grandma didn’t mind. She’d take our haul, slice up the berries, and layer them with something creamy—sometimes yogurt, sometimes sweetened sour cream—in her old parfait glasses. It was our “fancy” dessert.
Those simple, layered treats were my first taste of how a few perfect ingredients can feel like a celebration. This mousse is my grown-up, slightly more elegant homage to those afternoons. It captures that same spirit of fresh-picked happiness and turns it into something you can serve to your own friends and family, creating new sweet memories with every bite.
Your Kitchen Line-Up: Simple Stars, Big Flavor
Here’s the beautiful part: the ingredient list is short and sweet. Every single one plays a crucial role in creating that perfect, airy texture and flavor. Let’s break it down.
- 1 cup fresh strawberries, chopped – This is our flavor anchor. Fresh is best here for that bright, authentic berry taste. If they’re a bit tart, no worries—we’re adding sugar. In a pinch, frozen (thawed and drained) will work, but the color and fresh punch might be softer.
- 2 tablespoons granulated sugar – This gets cooked with the berries to coax out their juices and create a simple syrup. Adjust up or down a teaspoon based on how sweet your berries are. Taste as you go!
- 1 teaspoon lemon juice – Our secret brightness booster! A little acid makes the strawberry flavor pop and prevents the purée from being one-note sweet.
- 1 cup heavy whipping cream – The key to our cloud. Make sure it’s very cold—I sometimes chill my bowl and beaters, too. This guarantees maximum volume and the dreamiest texture.
- ½ cup powdered sugar, divided – We’re splitting this. Powdered sugar dissolves instantly into our mascarpone and cream, preventing any graininess. It also helps stabilize the whipped cream a touch.
- 8 oz mascarpone cheese, softened – The star! This Italian cream cheese is richer, silkier, and less tangy than regular cream cheese. If you must substitute, use full-fat brick cream cheese, but mascarpone is worth seeking out for its luxurious mouthfeel. Let it sit on the counter for 20-30 minutes to soften.
- 1 teaspoon pure vanilla extract – The warm, floral notes of vanilla round out all the other flavors beautifully. It’s the cozy background note in our dessert symphony.
- Optional for serving: Crushed graham crackers, shortbread cookies, or even vanilla wafer crumbs for a bottom layer. Plus extra fresh strawberries and a sprig of mint for that “chef’s kiss” garnish.
Let’s Build Our Creamy Dream: A Step-by-Step Dance
Ready? This is more of a gentle fold than a hardcore workout. We’ll move step by step, and I’ll be right here with my best tips.
Step 1: The Strawberry Heart
Grab your small saucepan. Toss in the chopped strawberries, granulated sugar, and lemon juice. Cook this over medium heat, stirring occasionally, for about 5-7 minutes. You’re looking for the berries to break down and the liquid to become a light, ruby-red syrup. Chef’s Hack: Use a potato masher right in the pan to help them along! Once done, take it off the heat. You can blend it until smooth for an even pink mousse, or just mash it well for a more rustic purée with little bits of berry. Let this cool completely. I sometimes spread it on a plate to speed up the process—warm purée will melt our lovely cream.
Step 2: The Creamy Base
In a medium bowl, take your softened mascarpone, vanilla, and half (that’s ¼ cup) of the powdered sugar. Beat this with a hand mixer (or a determined whisk) just until it’s smooth and combined. Don’t over-beat mascarpone, or it can start to break and look grainy. Smooth is the goal. Set this aside.
Step 3: The Fluffy Cloud
Now, in a separate, clean, cold bowl, pour in your cold heavy cream and the remaining ¼ cup of powdered sugar. Whip it on medium-high speed until you get stiff peaks. What does that mean? When you lift the beaters straight up, the peak of cream should stand up straight without flopping over. This is non-negotiable for a mousse that holds its shape. Watch it closely— from perfect peaks to butter is a short trip!
Step 4: The Grand Union
This is the magic step. Take about one-third of your whipped cream and fold it into the mascarpone mixture. Use a rubber spatula and cut down through the center, then sweep up the sides. This first addition lightens the dense mascarpone, making it easier to fold in the rest without deflating it. Now, gently fold in the remaining whipped cream until you have a uniform, creamy, voluptuous base.
Step 5: The Swirl
Time for our strawberry star! Add the cooled purée to the bowl. Now, you have a choice: for a uniformly pink, beautiful mousse, fold it in until fully incorporated. For a stunning marbled effect with gorgeous red streaks, fold it just 3-4 times—don’t fully mix it. Both ways taste incredible.
Step 6: The Chill Pill
Spoon or pipe the mousse into your serving cups or glasses. If you’re using a cookie crumb layer, add that to the bottom first. Once filled, pop them in the fridge for at least 1 hour. This chill time lets the flavors marry and the texture set up perfectly, making each spoonful cool and decadent.
Dress to Impress (With Zero Stress)
Presentation is the fun part! Right before serving, grab your garnishes. A sprinkle of golden graham cracker crumbs adds a lovely texture contrast. Top with a fanned strawberry half or a whole small berry. A tiny, fresh mint leaf adds a pop of color and a whiff of freshness that makes the whole thing look professionally plated.
Serve these on a decorative tray or cake stand. For a party, you can even set up a little garnish bar with different toppings—chocolate shavings, toasted sliced almonds, or a drizzle of balsamic glaze—and let your guests customize their own cup. It’s all about making it feel special, just like you.
Make It Your Own: Delicious Twists & Swaps
Love the template? Let’s play! Here are a few ways to riff on this recipe:
- Mixed Berry Bliss: Swap the strawberries for raspberries, blackberries, or a mix. Raspberries will give you a stunning, vibrant color and a tangier kick.
- Lemon Blueberry Dream: Omit the strawberry purée. Fold in ½ cup of wild blueberry preserves and the zest of one lemon into the mascarpone base. Top with fresh blueberries.
- Chocolate Dipped Strawberry: Add 2 tablespoons of sifted cocoa powder to the mascarpone along with the powdered sugar. Proceed with the recipe and use the strawberry purée as a swirl or a layer on top.
- Boozy & Bold: For an adult version, add a tablespoon of Grand Marnier, Chambord, or a nice bourbon to the cooled strawberry purée. So sophisticated!
- Dairy-Free / Lighter Swap: Use a well-chilled, full-fat coconut cream instead of heavy whipping cream (whip just the solid part). For the mascarpone, blend 1 cup of soaked raw cashews until super smooth with a touch of lemon juice and maple syrup. The texture will be different but still deliciously creamy.
A Few Secrets from My Kitchen
This recipe is a living thing in my house. I’ve made it for book clubs where it vanished in minutes, and I’ve even layered it in a big trifle dish with pound cake for a last-minute potluck hero. The biggest evolution? The purée. I used to just macerate berries, but cooking them down concentrates that strawberry essence into something truly magical.
Funny story: I once tried to whip the cream in a blender because I couldn’t find my beaters. Do not recommend. Let’s just say I had to explain to my dog why the kitchen wall was suddenly splattered with cream. Stick to a mixer or a good old-fashioned whisk and a strong arm!
Your Questions, Answered
Q: Can I make this ahead of time?
A: Absolutely! These are perfect for making ahead. Prepare the cups, cover tightly, and refrigerate for up to 24 hours. Add any crunchy toppings (like cookie crumbs) right before serving so they stay crisp.
Q: My mascarpone mixture looks lumpy or curdled. What happened?
A: This usually means the mascarpone was too cold when you tried to mix it, or it was over-beaten. Make sure it’s properly softened at room temp. If it’s lumpy, try stirring in a tablespoon of the heavy cream (liquid, before whipping) to help smooth it out.
Q: Can I use frozen strawberries?
A: You can! Thaw them completely in a strainer over a bowl to catch all the excess liquid. Use the drained berries for the purée. You might need to reduce the liquid slightly longer on the stove.
Q: My whipped cream won’t get stiff. Help!
A: First, ensure everything is cold—cream, bowl, beaters. If it’s still not working, your cream might have a lower fat content, or your bowl might have a trace of grease. A tiny pinch of cornstarch (½ tsp) added with the powdered sugar can help stabilize it.
Strawberry Mascarpone Mousse Cups : Creamy, Elegant, and No-Bake Easy
Description
Hey friends, Beau here from Feastical! This is one of those magical desserts that looks patisserie-fancy but comes together with almost zero effort. These Strawberry Mascarpone Mousse Cups are light, creamy, fruity, and completely no-bake—perfect for entertaining, date night, or treating yourself on an ordinary Tuesday.
Ingredients
Strawberry Purée
-
1 cup fresh strawberries, chopped
-
2 tablespoons granulated sugar
-
1 teaspoon lemon juice
Mousse
-
1 cup cold heavy whipping cream
-
½ cup powdered sugar, divided
-
8 oz mascarpone cheese, softened
-
1 teaspoon pure vanilla extract
Optional for Serving
-
Crushed graham crackers, shortbread, or vanilla wafers
-
Fresh strawberries
-
Mint leaves
Instructions
1. Make the Strawberry Purée
In a small saucepan, combine strawberries, granulated sugar, and lemon juice. Cook over medium heat for 5–7 minutes, stirring occasionally, until berries break down and form a syrup. Mash or blend until smooth (or leave slightly chunky if preferred).
Cool completely.
2. Prepare the Mascarpone Base
In a medium bowl, beat mascarpone, vanilla, and ¼ cup powdered sugar until just smooth. Do not overmix. Set aside.
3. Whip the Cream
In a cold bowl, whip heavy cream with remaining ¼ cup powdered sugar until stiff peaks form.
4. Combine
Gently fold ⅓ of the whipped cream into the mascarpone to lighten it. Fold in the remaining whipped cream until smooth and airy.
5. Add Strawberry Flavor
Fold in cooled strawberry purée:
-
Fully mixed for a uniform pink mousse
-
Lightly swirled for a marbled look
6. Chill
Spoon or pipe into serving cups (add cookie crumbs first if using). Refrigerate at least 1 hour before serving.
Notes
-
Garnish with fresh strawberries and mint just before serving
-
Add crunchy toppings right before serving to keep them crisp
-
Serve in clear glasses for maximum visual impact
Nutritional Information*
*Please note: These are estimates provided for informational purposes based on a standard recipe calculator and will vary based on specific ingredients used and serving size.
Per serving (1 mousse cup, recipe makes 6, without cookie garnish):
Calories: ~260 | Total Fat: 20g | Saturated Fat: 12g | Cholesterol: 60mg | Sodium: 40mg | Total Carbohydrates: 14g | Sugars: 10g | Protein: 4g
This dessert is rich, so a little goes a long way! The primary sources are the dairy (mascarpone and cream), which provide calcium and vitamin A. Using fresh fruit adds a dose of vitamin C and antioxidants. For a lighter version, see the variation suggestions above.
Final Thoughts: Share the Sweetness
And there you have it, friends—your ticket to an effortlessly elegant dessert that’s all about joy, not labor. These Strawberry Mascarpone Mousse Cups prove that impressive treats don’t require complicated techniques or a mountain of dishes. They just require a love for good flavor and the desire to create a little moment of happiness.
I hope you make these, share them, and maybe even start your own strawberry-patch tradition. Remember, the best meals (and desserts!) are the ones made with a dash of love and a spoonful of fun. Thanks for letting me share my kitchen with you. Now, go enjoy the fruits of your (minimal) labor!
With a full heart and an empty mixing bowl,
Beau
Prep Time: 20 minutes | Chill Time: 1 hour | Total Time: ~1 hour 20 minutes
Difficulty: Easy | Yields: 6 small mousse cups

Strawberry Yogurt Bark with White Chocolate Drizzle : Light, Sweet, and Perfectly Crunchy
Strawberry Yogurt Bark with White Chocolate Drizzle – Light, Sweet, and Perfectly Crunchy
Hey friends, Beau here from Feastical! Tell me if this sounds familiar: it’s that mid-afternoon lull, or maybe a post-dinner “I need just a little something sweet” moment. You’re craving a treat that feels special but won’t leave you in a sugar coma, something refreshing that actually tastes like sunshine. For years, I’d stare into the freezer, willing a magical, guilt-free snack to appear. Then, one sweltering summer day, I decided to play mad scientist with a tub of Greek yogurt and a pint of perfect strawberries—and my freezer life changed forever.
I’m thrilled to share my go-to masterpiece with you today: Strawberry Yogurt Bark with a White Chocolate Drizzle. This isn’t just a recipe; it’s your new secret weapon. Imagine the creamiest, tangiest Greek yogurt, swirled with a kiss of honey and vanilla, studded with juicy, sweet strawberry slices, and all dressed up with delicate rivers of just-set white chocolate. Then, we freeze it and crack it into glorious, satisfying shards. The texture is everything—creamy, icy, fruity, with that final, irresistible *snap* from the chocolate.
Best part? You don’t need to turn on your oven. You barely need to dirty a bowl. It’s a brilliant make-ahead snack for kids (and let’s be real, adults who are just tall kids), a fantastic post-workout cool-down, or a stunningly simple dessert that looks like you fussed for hours. So, let’s ditch the complicated baking projects for a day and make something wonderfully simple, spectacularly delicious, and downright fun. Grab your favorite baking sheet, and let’s create some cool, crunchy magic together.
The Day My Freezer Saved Summer
This recipe was born out of sheer, sweaty desperation. Picture it: Georgia summer, humidity you could wear, and my air conditioner was putting in *overtime*. My niece and nephew were visiting, buzzing with that endless summer energy, and their pleas for ice cream were getting more creative by the hour. I wanted to give them a treat, but the thought of a sugar-fueled meltdown (theirs and mine) wasn’t appealing.
I looked at the gorgeous, ripe strawberries on the counter and the big tub of Greek yogurt I used for my morning parfaits. A lightbulb went off. “What if we make our own popsicles?” I said. But then I saw their impatient faces—nobody wants to wait for popsicle molds to freeze. So, I pivoted. “Actually… we’re making edible strawberry art. For the freezer.” I spread the yogurt on a pan like a canvas, let them artfully place the strawberry slices (some halves, some funny shapes, it was perfect), and we drizzled a little melted chocolate over the top. The anticipation while it froze was half the fun. When we finally cracked that first sheet of frozen yogurt bark, their eyes got huge. That triumphant *crack*, followed by the cool, creamy, sweet-tart bite… it was an instant classic. Now, it’s our official “Summer’s Here” ritual. It’s more than a snack; it’s a memory maker.
Gathering Your Sweet & Simple Ingredients
Here’s the beautiful part: this recipe is all about quality, not quantity. Each ingredient plays a starring role, and with a few simple swaps, you can make it your own. Let’s break it down.
- 2 cups plain or vanilla Greek yogurt: This is our foundation! I love full-fat Greek yogurt for its ultra-creamy texture and satisfying richness, but low-fat works great too. The tang balances the sweetness perfectly. Chef’s Insight: If you use vanilla yogurt, you can often skip the extra vanilla and sweetener—give it a taste first!
- 2–3 tablespoons honey or maple syrup (optional): This is your sweetening lever. I adore the floral notes of local honey, but pure maple syrup is a fantastic vegan alternative. Substitution Tip: Agave nectar or even a pinch of powdered sugar works. Start with less—you can always add more after tasting!
- 1 teaspoon vanilla extract (if using plain yogurt): A dash of vanilla is the warmth behind the scenes. It rounds out the flavor and makes the whole bark taste more “dessert-like.” Use the real stuff if you have it!
- 1 cup fresh strawberries, sliced: The ruby-red jewels! Ripe, sweet strawberries are key. Slice them about ¼-inch thick so they freeze beautifully into the bark. Chef’s Hack: If berries aren’t in season, frozen (and thoroughly thawed/drained) strawberries will work in a pinch.
- ¼ cup white chocolate chips or chopped bar: Our fancy finishing touch! Chopping a good-quality white chocolate bar gives you better control over the melt, but chips are super convenient. Pro Tip: Check the ingredients—real cocoa butter-based chocolate will set firmer and taste superior to “white baking chips.”
- 1 teaspoon coconut oil (for melting chocolate): This little secret ensures your drizzle is smooth, dippable, and sets with a perfect snap. It prevents the chocolate from seizing and makes it easier to drizzle.
Let’s Build Some Bark: Your Step-by-Step Blueprint
Ready? This is the easy, fun part. I’ll walk you through each step with my favorite kitchen hacks to ensure your bark is nothing short of spectacular.
- Prep Your Canvas: Line a standard baking sheet (roughly 9×13 inches or similar) with parchment paper. Don’t skip this! It’s the key to easy removal. Little Chef Hack: Give the paper a very light spritz of cooking spray or rub a tiny bit of oil on it. This guarantees zero stickage, making your life easier when it’s time to break the bark.
- Mix the Dreamy Base: In a medium bowl, combine your Greek yogurt, sweetener (if using), and vanilla. Stir, stir, stir until it’s silky smooth. My Tip: Taste it now! Dip a spoon in. Does it need a bit more honey? A tiny bit more vanilla? This is your moment to adjust. Remember, the flavors will mellow slightly when frozen.
- Spread It Out: Pour the yogurt mixture onto your prepared parchment. Using a spatula or the back of a spoon, spread it into an even layer, about ¼-inch thick. It doesn’t have to be a perfect rectangle—rustic is beautiful! Just try for consistent thickness so it freezes evenly. Pro Move: Gently lift and tap the tray on the counter a few times to settle the yogurt and remove any air bubbles.
- Artful Berry Arrangement: Scatter your strawberry slices across the surface. Press them down lightly so they’re partially submerged. This isn’t just for looks—it helps them stay put when you break the bark later. Get creative with patterns, or just let them fall where they may!
- Master the Drizzle: In a microwave-safe bowl, combine white chocolate chips and coconut oil. Microwave in 20-second bursts, stirring vigorously after each, until just melted and smooth. This should take 60 seconds max. CRUCIAL TIP: Don’t overheat! White chocolate is delicate and can burn or seize easily. If it seizes (gets clumpy), stir in a tiny bit more coconut oil to bring it back.
- The Grand Finale & Freeze: Using a fork or a small spoon, drizzle the melted chocolate in zig-zags, swirls, or loops all over the yogurt and strawberries. Now, the hardest part: patience. Carefully transfer the tray to a flat spot in your freezer. Freeze for at least 3-4 hours, or ideally overnight, until it’s completely firm to the touch.
- Crack & Conquer: Remove the tray from the freezer. Lift the parchment paper, with the giant bark slab on it, onto your counter. Using your hands, simply crack it into random, beautiful pieces. No knife required—the irregular shapes are part of the charm!
How to Serve Your Frozen Masterpiece
You’ve done it! Now, let’s talk about enjoying the fruits (and yogurt and chocolate) of your labor. This bark is incredibly versatile.
For the ultimate experience, serve it straight from the freezer on a chilled platter. It makes a stunning, colorful centerpiece for a brunch or a light dessert spread. I love piling the pieces high in a large bowl and letting everyone dig in with their hands—it’s interactive and fun!
For a more elegant touch, plate a few shards alongside a small glass of sparkling water or a cup of herbal iced tea. The contrast of the cold, creamy bark and a refreshing drink is *chef’s kiss*. It’s also a fantastic pre-workout or post-pool snack—just grab a piece and go. Store any leftovers (if you have any!) in an airtight container or a freezer bag with parchment between layers. It’ll keep its perfect texture for up to 2 weeks… though it never lasts that long in my house.
Make It Your Own: Delicious Twists & Swaps
The basic formula is a blank slate for your creativity. Here are a few of my favorite ways to riff on this recipe:
- Triple Berry Blast: Swap the strawberries for a mix of raspberries, blueberries, and blackberries. The color is incredible, and you get a symphony of flavors in every bite.
- Tropical Vibes: Use coconut-flavored yogurt (or add a dash of coconut extract to plain yogurt) and top with diced mango, kiwi, and toasted coconut flakes before drizzling. Skip the white chocolate and use a dark chocolate drizzle for contrast.
- Granola Crunch: After adding your fruit, sprinkle a handful of your favorite granola or chopped nuts (pistachios are gorgeous) over the top. This adds an amazing extra layer of texture and makes it even more satisfying.
- Chocolate Lover’s Dream: Use chocolate Greek yogurt, or swirl some Nutella or peanut butter into the plain yogurt base. Top with banana slices and a dark chocolate drizzle instead of white.
- Dairy-Free Delight: Easily make this vegan! Use a thick, plain dairy-free yogurt (cashew or coconut yogurt work best). Sweeten with maple syrup, and ensure your chocolate is dairy-free. A dreamy, inclusive treat for everyone.
Beau’s Kitchen Notes & Stories
This recipe has evolved in my kitchen more than any other. The first time, I used a cheap baking sheet without parchment… let’s just say we had to eat it straight off the pan with spoons (still delicious, but not the goal!). I’ve learned that a rimmed baking sheet is your friend—it prevents any potential yogurt escapes in the freezer.
One time, I got fancy and added a swirl of raspberry jam to the yogurt before freezing. It looked stunning but froze rock-hard! The lesson? Keep add-ins chunky or in pieces, not in thick swirls. The fun is in the experimentation. My dog, Biscuit, is now conditioned to the sound of the freezer door opening hours after I make this, hoping a piece of strawberry will magically fall his way. (Spoiler: he gets a plain strawberry slice, not the chocolate-covered bark!)
Your Questions, Answered
Q: My bark is too soft and doesn’t break cleanly. What happened?
A: This usually means it needs more freezing time. Ensure it’s frozen solid (4+ hours, or overnight is best). Also, using a thinner yogurt (like regular vs. Greek) can lead to a softer texture. Full-fat Greek yogurt freezes the firmest.
Q: Can I use other types of yogurt?
A: Absolutely! Just know that the texture will vary. Regular yogurt is thinner, so your bark will be more delicate. Skyr is a great thick alternative. Avoid yogurts with lots of liquid or additives that might separate when frozen.
Q: The white chocolate drizzle got clumpy when I melted it. Help!
A> Welcome to the club—white chocolate is tricky! It likely got too hot. Next time, use shorter bursts in the microwave and stir like crazy. If it seizes, try stirring in a tiny bit more neutral oil (coconut or vegetable) to smooth it out.
Q: How long does it last in the freezer?
A> Stored properly in an airtight container, it maintains great quality for 1-2 weeks. After that, it’s still safe to eat but might start to develop freezer burn or lose its perfect texture.
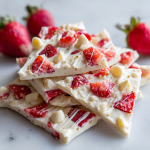
Strawberry Yogurt Bark with White Chocolate Drizzle : Light, Sweet, and Perfectly Crunchy
Description
When you’re craving something cold, sweet, and refreshing—but don’t want a heavy dessert—this Strawberry Yogurt Bark is the answer. Creamy Greek yogurt, juicy strawberries, and a delicate white chocolate drizzle come together in a frozen treat that’s as fun to eat as it is easy to make. No oven, no fuss, just pure freezer magic.
Ingredients
Servings
Makes about 10–12 bark pieces
Ingredients
-
2 cups plain or vanilla Greek yogurt
-
2–3 tablespoons honey or maple syrup (optional, to taste)
-
1 teaspoon vanilla extract (if using plain yogurt)
-
1 cup fresh strawberries, thinly sliced
-
¼ cup white chocolate chips or chopped white chocolate
-
1 teaspoon coconut oil
Instructions
-
Prepare the tray
Line a baking sheet with parchment paper. -
Mix the yogurt base
In a bowl, stir together yogurt, honey (or maple syrup), and vanilla until smooth. Taste and adjust sweetness if needed. -
Spread
Pour the yogurt onto the lined tray and spread into an even layer about ¼-inch thick. -
Add strawberries
Scatter strawberry slices evenly over the yogurt, gently pressing them in. -
Melt the chocolate
In a microwave-safe bowl, melt white chocolate and coconut oil in 20-second bursts, stirring between each, until smooth. -
Drizzle
Drizzle melted chocolate over the yogurt and strawberries using a spoon or fork. -
Freeze
Freeze for 3–4 hours, or until completely firm. -
Break & enjoy
Lift the bark from the tray and break into pieces. Serve straight from the freezer.
Notes
-
Sweeten lightly: The fruit and chocolate add natural sweetness—start small.
-
Don’t overheat white chocolate: Melt gently to keep it smooth.
-
Store smart: Keep bark in an airtight container with parchment between layers.
A Note on Nutrition
I’m all about food that makes you feel good, and this bark fits the bill! Using Greek yogurt packs a protein punch (about 5-7g per serving), which helps keep you full and satisfied. The natural sugars come primarily from the fruit and a touch of honey, so it’s a far cry from the processed sugar bomb of many frozen treats. The fats from the yogurt and a bit of coconut oil are the satisfying, creamy kind.
The nutritional info is an estimate and can vary based on your specific ingredients (like the type of yogurt or amount of sweetener). But generally, a piece of this bark is a balanced, wholesome choice for a snack or a light dessert that delivers on flavor without the guilt. It’s proof that eating well can be an absolute delight.
Final Thoughts from My Kitchen to Yours
Friends, I hope this recipe brings as much joy and cool relief to your kitchen as it has to mine. What I love most about this Strawberry Yogurt Bark isn’t just its taste or simplicity—it’s the feeling it creates. It’s the fun of making it with people you love, the anticipation as it freezes, and the pure satisfaction of that first sweet, crunchy, creamy bite.
It’s a reminder that the best recipes aren’t always the most complicated. Sometimes, they’re just a few brilliant ingredients, a little freezer magic, and a willingness to play with your food. So go on, make a batch, and stash it for a sunny day (or a rainy one that needs brightening). Don’t forget to tag me over on @Feastical if you make it—I love seeing your creations!
Until next time, keep it simple, keep it soulful, and always save room for a little something sweet.
With a full heart and a cool freezer,
Beau

Lemon Cream Cheese Cookies : Soft, Tangy, and Melt-in-Your-Mouth Delicious
Meet Your New Favorite Cookie: Sunshine in Every Bite
Hey friends, Beau here! Let’s be honest: sometimes life calls for chocolate. But other times? It calls for something bright, cheerful, and so darn refreshing that it feels like a burst of sunshine in your kitchen. That’s exactly where these Lemon Cream Cheese Cookies come in. Imagine the softest, most pillowy cookie you’ve ever had, but with a delightful tangy twist that makes it impossible to eat just one. These aren’t your average, crunchy lemon biscuit. Oh no. These are melt-in-your-mouth, cloud-like, little bites of pure joy.
I created this recipe for those days when you need a sweet lift but want something that feels a bit lighter and more sophisticated than a heavy frosted treat. The secret weapon? Cream cheese. It’s the magic ingredient that gives these cookies an incredible tenderness and a rich depth that balances the zingy lemon perfectly. They’re simple enough for a beginner baker to nail, yet impressive enough to be the star of any picnic, bake sale, or “just because” Tuesday. So, grab your favorite mixing bowl and let’s turn that real-life flavor into something Feastical. Your taste buds (and probably your neighbors) will thank you.
The Lemon Tree & Grandma Dot’s Apron
This recipe always takes me back to my Grandma Dot’s backyard in Florida. She had this giant, knobby lemon tree that seemed to produce fruit year-round. As a kid, I was less interested in the fruit and more in climbing the low branches. But Grandma? She saw potential in every single sun-warmed lemon. She’d send me out to pick a few, her apron pockets already dusted with flour from some upcoming creation.
One blistering summer afternoon, she decided we weren’t making her usual lemon bars. “Too much pan,” she declared. “We want little pockets of cool.” What emerged from her oven was the inspiration for these cookies—a batch of soft, faintly tart rounds that she dusted with snowy powdered sugar. We ate them on her screened porch, the tang cutting through the humid air, and I remember thinking food could actually change the weather inside you. That’s the feeling I chase with every batch I bake now. It’s not just a cookie; it’s a portable, edible breeze of happy memory.
Gathering Your Sunshine: The Ingredients
Here’s the beautiful part: you likely have most of this in your kitchen right now. Let’s gather our cast of characters. Using quality, simple ingredients is key here—each one plays a starring role.
- ½ cup (1 stick) unsalted butter, softened: This is our flavor foundation. I always use unsalted so I can control the salt level. Chef’s Tip: “Softened” means it should indent easily when you press it, but not be greasy or melted. Take it out of the fridge at least an hour before baking.
- 4 oz (half a block) full-fat cream cheese, softened: The secret to that legendary tender, moist texture! Full-fat is non-negotiable for the best results. Soften it right alongside your butter.
- ¾ cup granulated sugar: Sweetens the deal and helps create that lovely, slightly crisp edge when creamed perfectly with the fats.
- 1 large egg, at room temperature: Our binder. A room-temp egg incorporates more smoothly, creating a uniform dough. Just pop it in a bowl of warm water for 5 minutes if you forgot to take it out.
- 1 tablespoon fresh lemon juice & 1 tablespoon finely grated lemon zest: The dynamic duo of flavor! The zest holds the potent, aromatic oils, and the juice provides the bright tang. Substitution Insight: In a pinch, you can use bottled lemon juice, but fresh zest is irreplaceable. For a stronger lemon punch, add an extra half tablespoon of zest.
- 1 teaspoon pure vanilla extract: The flavor enhancer. It might seem odd with lemon, but it rounds out the sharp edges and adds a beautiful, warm depth.
- 1 ¾ cups all-purpose flour: The structure. Spoon and level your flour into the measuring cup—don’t scoop directly from the bag! This prevents dense, dry cookies.
- ½ teaspoon baking powder: Our leavening agent. It gives the cookies their gentle lift and soft, cake-like crumb.
- ¼ teaspoon fine salt: The flavor booster. It makes the sweet and tangy notes pop. If you only have table salt, use a scant ¼ teaspoon.
- Optional: Powdered sugar or lemon glaze: The finishing touch! A dusting of powdered sugar is classic and elegant, while a simple glaze (just mix powdered sugar with a little lemon juice) adds extra sweetness and shine.
Let’s Get Baking: Step-by-Step to Cookie Heaven
Ready to make some magic? Follow these steps, and don’t skip my little hacks in the commentary—they’re the difference between good cookies and “oh-my-gosh-what-is-this-sorcery” cookies.
Step 1: Preheat & Prep. Fire up your oven to 350°F (175°C). This gives it plenty of time to reach a steady, even temperature. Line your baking sheets with parchment paper. Trust me, this is the easiest cleanup you’ll ever do, and it prevents the bottoms from browning too fast. No parchment? A silicone baking mat works great too.
Step 2: The Creaming Ritual. In the bowl of a stand mixer fitted with the paddle attachment (or using a hand mixer), beat the softened butter and cream cheese on medium speed for a full 1-2 minutes until it’s completely smooth, creamy, and no lumps remain. Chef’s Hack: Scrape down the bowl and beater with a spatula halfway through. Now, add the granulated sugar. Beat on medium-high for another 2-3 minutes until the mixture is light, fluffy, and almost white in color. This step incorporates air, which is crucial for texture! Don’t rush it.
Step 3: Welcome the Wet Team. Beat in the room-temperature egg until fully combined. Now, add the fresh lemon juice, zest, and vanilla. Mix on medium until everything is beautifully incorporated. Your kitchen should already smell amazing.
Step 4: Bring in the Dry Crew. In a separate bowl, whisk together the flour, baking powder, and salt. This ensures the leavening and salt are evenly distributed. With your mixer on low speed, gradually add the dry ingredients to the wet. Mix just until the flour disappears and a soft, cohesive dough forms. Key Tip: Overmixing at this stage develops gluten, leading to tough cookies. A few flour streaks are okay—finish mixing by hand with a spatula.
Step 5: Scoop & Space. Using a tablespoon cookie scoop or a regular spoon, portion out dough into rounded tablespoons. Roll them gently between your palms if you want perfect circles, but I often just drop them—they’re charmingly rustic! Place them at least 2 inches apart on your prepared sheet. They don’t spread a ton, but they do puff up.
Step 6: Bake to Perfect. Bake for 10-12 minutes. You’re looking for the edges to be very lightly golden and set, while the centers still look soft and puffed. Don’t wait for them to brown! They will finish setting as they cool. This is the secret to a soft, tender bite.
Step 7: The Patient Cool-Down. Let the cookies cool on the baking sheet for 5 full minutes. This allows them to firm up enough to move. Then, gently transfer them to a wire rack to cool completely. I know it’s hard, but try to wait before glazing or dusting!
How to Serve These Sunbeams
Presentation is part of the fun! For a classic look, simply place the completely cooled cookies on a pretty plate and give them a generous dusting of powdered sugar using a fine-mesh sieve. It looks like a light snowfall and adds a hint of extra sweetness.
If you’re feeling fancy, whip up that easy lemon glaze: whisk together 1 cup of powdered sugar with 1.5-2 tablespoons of fresh lemon juice until smooth. Drizzle it artistically over the cookies with a spoon or fork. Let it set for 15 minutes before stacking or serving. These cookies pair beautifully with a cup of Earl Grey tea, a glass of cold milk, or a light, sparkling Prosecco for a brunch treat. I love serving them on a tiered stand at gatherings—they always disappear first!
Make It Your Own: Delicious Twists & Swaps
Once you’ve mastered the classic, the playground is open! Here are a few of my favorite ways to riff on this recipe:
- Blueberry Lemon Thyme: Gently fold ½ cup of dried blueberries and 1 teaspoon of finely chopped fresh thyme into the dough before scooping. The herbal note is incredible.
- Lavander Infused: Add ½ teaspoon of culinary-grade dried lavender buds to the dry ingredients. It creates a beautifully floral, sophisticated cookie perfect for a shower or tea party.
- Gluten-Free Friend: Swap the all-purpose flour for a 1:1 gluten-free baking blend (like Bob’s Red Mill or King Arthur). The result is just as tender!
- Lemon Raspberry Swirl: Before baking, make a small indent in the top of each dough ball and place a single fresh raspberry inside. As it bakes, it creates a jammy, tart surprise.
- Cream Cheese Frosted: For the ultimate indulgence, skip the glaze and frost cooled cookies with a simple cream cheese frosting (beat 4 oz soft cream cheese, 2 tbsp soft butter, 1 cup powdered sugar, and a splash of vanilla).
Beau’s Kitchen Notes
This recipe has been a living thing in my kitchen for years. The first time I made them, I was so worried about over-baking that I took them out too early. Let’s just say we had delicious lemon cream cheese *puddles*. They tasted great but looked… abstract. Lesson learned: that 10-12 minute window is your bible. Also, I once, in a pre-coffee haze, used salted butter and forgot to adjust the salt. They were… aggressively savory-lemon. Not my finest hour, but a good reminder that baking is a science with a heart! Over time, I’ve found that letting the dough chill for 30 minutes if your kitchen is very warm leads to even puffier cookies. But honestly, the “scoop and bake” method is what makes this recipe a weeknight hero.
Your Questions, Answered
Q: My cookies spread too much and got flat. What happened?
A: This usually points to butter and cream cheese that were too warm or melted. Ensure they are softened but still cool to the touch. Also, double-check your flour measurement—if you scooped it, you might have used too little. Always spoon and level!
Q: Can I make the dough ahead of time?
A: Absolutely! You can scoop the dough balls onto a sheet, freeze them solid, then transfer to a freezer bag. Bake straight from the freezer, adding 1-2 minutes to the bake time. Fresh cookies anytime!
Q: My cookies are dry or cakey. Why?
A: The most common culprit is over-measuring the flour. That “spoon and level” tip is crucial! Overmixing the dough after adding the flour can also develop too much gluten, leading to a tougher, drier texture.
Q: I don’t have a mixer. Can I make these by hand?
A> You bet! Use a sturdy wooden spoon and some elbow grease for the creaming step. Make sure your butter and cream cheese are very soft. It will take a bit longer, but it’s totally doable and honestly kind of therapeutic.

Lemon Cream Cheese Cookies : Soft, Tangy, and Melt-in-Your-Mouth Delicious
Description
When you’re craving something sweet but not heavy, these Lemon Cream Cheese Cookies are pure happiness. They’re soft, pillowy, and melt-in-your-mouth, with a bright lemon flavor that feels fresh and uplifting. Thanks to cream cheese, they stay tender for days and have a delicate tang that balances the sweetness perfectly. Easy to make, hard to resist—these cookies are little bites of sunshine.
Ingredients
-
½ cup (115 g) unsalted butter, softened
-
4 oz (115 g) cream cheese, softened
-
¾ cup granulated sugar
-
1 large egg, room temperature
-
1 tablespoon fresh lemon juice
-
1 tablespoon lemon zest
-
1 teaspoon vanilla extract
-
1¾ cups all-purpose flour
-
½ teaspoon baking powder
-
¼ teaspoon salt
Optional topping:
-
Powdered sugar for dusting or a simple lemon glaze
Instructions
-
Prep
Preheat oven to 350°F (175°C). Line a baking sheet with parchment paper. -
Cream the base
In a bowl, beat butter and cream cheese until smooth and creamy. Add sugar and beat until light and fluffy. -
Add wet ingredients
Mix in egg, lemon juice, lemon zest, and vanilla until fully combined. -
Add dry ingredients
In a separate bowl, whisk flour, baking powder, and salt. Add to the wet mixture and mix just until combined. -
Shape
Scoop tablespoon-sized portions and place them 2 inches apart on the baking sheet. -
Bake
Bake for 10–12 minutes, until edges are just set and lightly golden. Centers should remain soft. -
Cool & finish
Cool on the pan for 5 minutes, then transfer to a rack. Dust with powdered sugar or drizzle with lemon glaze if desired.
Notes
-
Don’t overbake: These cookies should stay pale—overbaking makes them dry.
-
Use softened, not melted butter: This prevents excess spreading.
-
Zest first, then juice: It’s much easier and gives maximum lemon flavor.
-
Extra lemony? Add an extra ½ tablespoon of zest to the dough.
Nutritional Info (Because We’re Curious!)
Okay, let’s keep it real—these are a treat, and we’re here to enjoy them mindfully. The following is an approximate estimate per cookie (without glaze), based on a yield of 20 cookies. Remember, actual values can vary based on specific ingredients and portion size.
- Calories: ~120
- Total Carbohydrates: 14g
- Protein: 1.5g
- Total Fat: 6g (Saturated Fat: 3.5g)
- Sugars: 8g
These cookies get their tender texture from the fats (butter and cream cheese), which is why using the full-fat versions is key for the experience. The sugar content comes from both the granulated sugar in the dough and the natural sugars in the dairy. Enjoy them as part of a balanced day—maybe with that afternoon cup of tea!
Final Thoughts: Share the Sunshine
And there you have it, friends—my go-to recipe for when the world needs a little more brightness. These Lemon Cream Cheese Cookies are more than just a dessert; they’re a reminder that simple ingredients, combined with a bit of love (and proper creaming technique!), can create something truly special. They’ve saved boring afternoons, wowed potluck crowds, and become a staple in my own family’s “happy food” lexicon.
I encourage you to bake a batch, share them with someone who needs a lift, or simply savor one with a quiet moment to yourself. That’s what Feastical is all about. Now, I’d love to hear from you! Did you add a twist? Did your kitchen smell like a lemon grove? Tag me or drop a comment over on the site. Until next time, keep your ovens warm and your hearts full. Happy baking!
– Beau
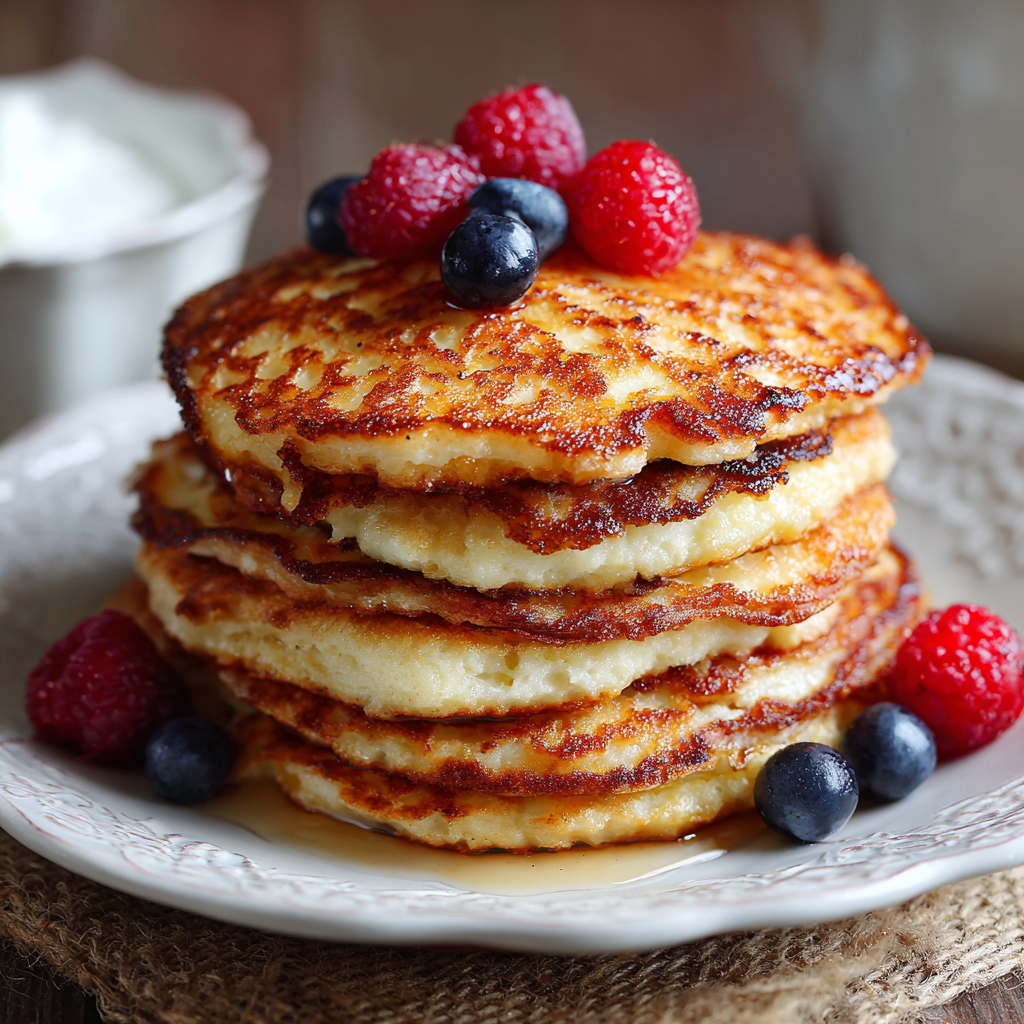
Cottage Cheese Pancakes : Fluffy, Protein-Packed, and Naturally Delicious
Unbelievably Fluffy Cottage Cheese Pancakes: The Secret’s in the Curds
Hey there, friend! Beau here, welcoming you back to my kitchen at Feastical. Let’s talk about something that might just change your morning routine forever: Cottage Cheese Pancakes. Now, I know what you might be thinking – cottage cheese? In pancakes? Stick with me here. If you’re like most folks, you’ve probably got a container of this humble ingredient sitting in your fridge right now, maybe destined for a lonely scoop on a salad. But what if I told you it holds the secret to the fluffiest, most satisfying, protein-packed pancakes you’ve ever flipped?
These aren’t your average, carb-heavy pancakes that leave you snoozing on the couch by 10 AM. Oh no. These little golden clouds are a different breed. They cook up impossibly light with a delicate texture, yet they’re secretly loaded with staying power thanks to all that glorious protein from the cottage cheese and eggs. The flavor is subtly tangy and creamy, a perfect canvas for all your favorite toppings. Whether you’re fueling up for a big day, looking for a brilliant post-workout refuel, or just craving a weekend breakfast that feels special without the guilt, this recipe is your new best friend. So, grab your blender (yes, blender!), and let’s turn that everyday ingredient into something truly magical.
The Pancake That Started It All: A Grandmother’s Secret
My love for these pancakes goes way back, and it all started in my Grandma Ellie’s sun-drenched kitchen. Grandma was a master of “kitchen magic” – taking simple, wholesome ingredients and turning them into something extraordinary. One sleepy Sunday morning, I watched her pull out a tub of cottage cheese. “Pancakes,” she declared with a wink. I was skeptical. To my seven-year-old mind, cottage cheese belonged in a bowl with pineapple, not on the griddle.
But then the smell hit me – sweet, buttery, irresistible. That first bite was a revelation. They were so light they almost floated off the plate, yet they had this rich, satisfying depth that my usual pancake mix never achieved. “The secret,” she whispered, leaning in, “is in the curds. They make them tender and give you strong bones!” She was right about the first part. Years later, as I started my own food journey, I tinkered with her simple recipe, adding a touch of vanilla, playing with oat flour, but her core principle remained: trust the humble ingredients. Every time I make these, I’m right back in her kitchen, and that’s the kind of food story I live for.
What You’ll Need: Simple Ingredients, Big Flavor
Here’s the beautiful part – you likely have most of this in your kitchen already. This recipe is a champion of simplicity.
- 1 cup cottage cheese: This is the STAR. It provides protein, moisture, and that signature creamy tang. Use full-fat for the richest flavor and best texture, but low-fat works in a pinch. If you’re dairy-free, a thick, plain almond or cashew milk yogurt can be a fun swap (see variations below).
- 2 large eggs: Our binding agents and another protein powerhouse. They help create that beautiful, airy structure. Let them sit out for 10 minutes before blending if you can – room temp eggs incorporate better.
- ½ cup oat flour or blended rolled oats: I adore oat flour here. It’s gluten-free, adds a nutty sweetness, and keeps the pancakes tender. Chef’s Hack: No oat flour? Just toss ½ cup of old-fashioned rolled oats into your blender and pulse into a fine powder first. Presto – homemade oat flour!
- ½ teaspoon baking powder: Our little lift agent. It gives the pancakes their rise and fluff. Make sure yours is fresh for the best results.
- 1 teaspoon vanilla extract: The warmth of vanilla balances the tang of the cheese beautifully. Pure extract is always worth it.
- 1 tablespoon honey or maple syrup (optional): I call this “optional” because the cottage cheese brings its own subtle sweetness, and your toppings will add more. But a tablespoon really rounds out the flavor. I use raw honey or pure maple syrup.
- Pinch of salt: Never, ever skip the salt! It magnifies every other flavor in the bowl.
- Butter or oil for the pan: Butter for unbeatable flavor, or a neutral oil like avocado or coconut for a higher smoke point. Your call!
Let’s Make ‘Em: Your Foolproof Flipping Guide
Ready? This comes together in about 15 minutes from start to stack. I promise.
Step 1: The One-Blender Wonder. Here’s where we keep it effortless. Dump everything – the cottage cheese, eggs, oat flour, baking powder, vanilla, your sweetener of choice, and that vital pinch of salt – straight into your blender. No separate bowls needed. Secure the lid and blend on medium-high for 30-45 seconds. You’re looking for a completely smooth, creamy batter with no visible oat bits. Give the sides a scrape if needed and blend for another 10 seconds. Chef’s Tip: The batter will be thicker than traditional pancake batter, but it should still pour. If it seems *too* thick (this can depend on your cottage cheese brand), add a tablespoon of milk or water to loosen it up.
Step 2: Heat It Right. Place a good non-stick skillet or griddle over medium heat. Let it get properly warm for a minute or two. Add a small pat of butter or a drizzle of oil and swirl to coat. You’ll know it’s ready when a drop of water sizzles gently.
Step 3: Pour & Patience. Using a ¼-cup measure or a ladle, pour the batter onto the hot skillet. I like to make 3-4 pancakes at a time, leaving space between them. Now, here’s the key: let them cook! Don’t rush the flip. You’ll see bubbles start to form on the surface and the edges will look matte and set. This usually takes a solid 2-3 minutes. If you flip too early, they might break apart.
Step 4: The Golden Flip. Slide your spatula underneath confidently and flip! The second side cooks faster – about 1 to 2 minutes, until it’s a lovely golden brown. Transfer your gorgeous pancakes to a warm plate and repeat with the remaining batter, adding more butter/oil to the pan as needed.
Stack ‘Em High: How to Serve Your Masterpiece
This is the fun part! These pancakes are a dream to dress up. I love serving them family-style on a big platter in the middle of the table, letting everyone build their own perfect stack.
For a classic touch, you can’t beat a generous drizzle of warm maple syrup and a pat of melting butter. To brighten things up, toss a handful of fresh berries (blueberries, raspberries, sliced strawberries) on top. For extra protein and a creamy contrast, a dollop of Greek yogurt or a sprinkle of chopped nuts is divine. Feeling decadent? A smear of almond butter and a few banana slices takes it over the top. They’re also fantastic simply dusted with powdered sugar and a squeeze of lemon juice. There are no wrong answers here!
Mix It Up: Your Pancake, Your Rules
Once you’ve mastered the base recipe, the world is your oyster (or, you know, your pancake). Here are a few of my favorite twists:
- Lemon Blueberry Bliss: Add the zest of one lemon to the blender. Gently fold ½ cup of fresh blueberries into the batter after blending. The lemon makes the cottage cheese flavor sing.
- Chocolate Chip Comfort: A classic for a reason. Fold in ⅓ cup of mini chocolate chips after blending. The slight tang with the sweet chocolate is incredible.
- Savory Herb & Spinach: Skip the vanilla and sweetener. Add a handful of fresh spinach to the blender, and fold in 2 tablespoons of chopped chives or dill after blending. Serve with a fried egg on top for the ultimate savory breakfast.
- Dairy-Free Delight: Swap the cottage cheese for 1 cup of thick, unsweetened plant-based yogurt (like coconut or almond). The texture will be slightly different but still delicious.
- “Everything Bagel” Style: Another savory route! Omit sweetener. After pouring the batter, sprinkle the top with everything bagel seasoning before flipping. Serve with smoked salmon and cream cheese.
Beau’s Bench Notes
This recipe is a living thing in my kitchen. I’ve made it a hundred different ways. Sometimes I’ll throw in a scoop of vanilla protein powder for an extra boost (if you do this, add an extra splash of milk). My wife loves when I add a dash of cinnamon to the batter. The beauty is in its flexibility.
A funny story: the first time I made these for a big group of friends, I didn’t tell them the secret ingredient. Everyone raved about how “rich” and “unique” they tasted. The reveal was priceless – total shock, followed by demands for the recipe. It just goes to show that sometimes the most unexpected ingredients create the biggest hits. Don’t be afraid to make it your own!
Your Questions, Answered
Q: My batter is super thick. Is that right?
A: Yes, it’s thicker than traditional pancake batter! But it should still be pourable. If it’s so thick it’s gloopy and won’t spread a little in the pan, thin it with a tablespoon of milk or water until it reaches a thick-but-pourable consistency.
Q: Can I make the batter ahead of time?
A: You can blend it and store it in the fridge in a sealed container for up to 24 hours. The baking powder will be less active, so they might be a tad denser, but still tasty. Give it a good stir before using.
Q: Why did my pancakes fall apart when I flipped them?
A: Two likely culprits: 1) The pan wasn’t hot enough, so they didn’t form a proper “sear” on the bottom. 2) You flipped them too early. Wait for those bubbles and set edges! A good, thin spatula also helps.
Q: Can I use all-purpose flour instead of oat flour?
A: Absolutely! Swap in ½ cup of all-purpose or whole wheat flour. The texture will be slightly more “bread-like” and less tender than the oat version, but still delicious.

Cottage Cheese Pancakes : Fluffy, Protein-Packed, and Naturally Delicious
Description
If you love pancakes that are light, tender, and actually keep you full, these cottage cheese pancakes are about to become your go-to. Blended smooth, the cottage cheese disappears into the batter, leaving behind ultra-fluffy pancakes with a subtle tang and a serious protein boost. They’re quick, wholesome, and perfect for busy mornings or slow weekends alike.
Ingredients
-
1 cup cottage cheese (full-fat or low-fat)
-
2 large eggs
-
½ cup oat flour (or blended rolled oats)
-
½ teaspoon baking powder
-
1 teaspoon vanilla extract
-
1 tablespoon honey or maple syrup (optional)
-
Pinch of salt
-
Butter or oil, for cooking
Instructions
-
Blend the batter
Add all ingredients to a blender. Blend for 30–45 seconds until completely smooth. The batter should be thick but pourable. If needed, add 1–2 tablespoons of milk or water. -
Heat the pan
Heat a non-stick skillet or griddle over medium heat. Lightly grease with butter or oil. -
Cook the pancakes
Pour about ¼ cup batter per pancake. Cook for 2–3 minutes until bubbles form and edges look set. Flip and cook another 1–2 minutes until golden. -
Serve warm
Repeat with remaining batter and serve immediately with your favorite toppings.
Notes
-
Blend well: A smooth batter is key—no curds left behind.
-
Don’t rush the flip: Wait for bubbles and set edges so pancakes don’t break.
-
Keep heat medium: Too hot and they’ll brown before cooking through.
-
Customize easily: Add blueberries, chocolate chips, or cinnamon after blending.
Fueling Your Day (The Nerdy, Good Stuff)
Let’s talk about why these pancakes make you feel so good! This nutritional breakdown is for a serving of about 3 small pancakes (roughly ¼ of the total recipe), made with full-fat cottage cheese and without added toppings.
You’re looking at around 190 calories, with a powerhouse 14 grams of protein to keep you full and energized. They have 13g of carbs (from the wholesome oats) and 8g of fat for sustained energy. Compared to traditional pancakes which are mostly refined carbs, these provide a balanced mix of macronutrients that support stable blood sugar and help curb those mid-morning snack cravings. It’s indulgence that actually fuels your adventures.
Final Thoughts
And there you have it! My not-so-secret secret for pancakes that are as nourishing as they are delicious. I hope this recipe finds a happy home in your kitchen and becomes a story you share, just like my grandma shared it with me. Food is about connection, creativity, and feeling good from the inside out.
So, did you give them a try? What wild and wonderful toppings did you use? Tag me @feastical on Instagram or Pinterest – I love seeing your kitchen creations. Until next time, remember: good food doesn’t have to be complicated, it just has to be made with a dash of joy. Now go flip some pancakes!
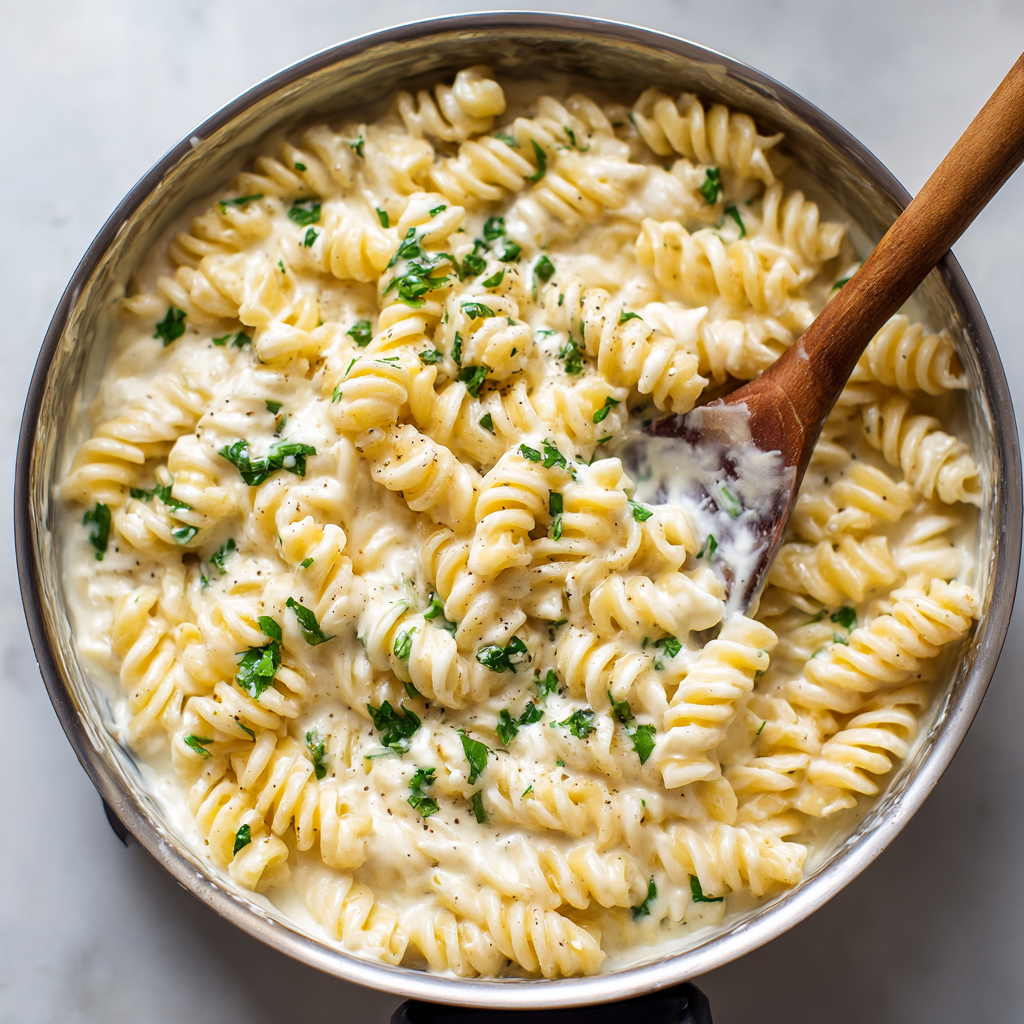
Creamy Cottage Cheese Pasta Sauce : High-Protein and Silky Smooth
The Creamy Pasta Sauce That’s Hiding a Healthy Secret
Hey friends, Beau here from Feastical! Let’s talk about that universal, deep-down craving: a big, comforting bowl of creamy pasta. You know the one. It’s the meal you dream about after a long day, when only a luscious, velvety sauce hugging every noodle will do. But sometimes, that dream comes with a side of regret—that heavy, weighed-down feeling that makes you want to curl up on the couch instead of tackling the rest of your evening.
What if I told you we could have it all? The indulgent texture, the satisfying richness, the pure joy of twirling that perfect forkful… but without the food coma? My friends, the kitchen fairy godmother we never knew we needed is here, and she comes in the form of a humble tub of cottage cheese. That’s right! This Creamy Cottage Cheese Pasta Sauce is about to change your pasta night game forever.
Blended until it’s impossibly smooth and whipped up with garlic, parmesan, and a glug of good olive oil, this sauce is a miracle of simplicity. It’s luxuriously creamy, secretly packed with protein to keep you fueled, and comes together in less time than it takes to boil your pasta water. It’s budget-friendly, endlessly customizable, and proof that feel-good food doesn’t have to be complicated. So, grab your blender and your favorite pasta shape—we’re about to make magic.
My Love Affair with a Humble Tub
My cottage cheese revelation didn’t happen in a fancy kitchen. It happened in my Nana’s sun-drenched breakfast nook, circa 1998. To me, cottage cheese was just the weird, lumpy stuff she ate with canned peaches. I didn’t get it. But Nana, a woman of quiet kitchen wisdom, once caught me grimacing and said, “Beau, darling, it’s not about what it looks like. It’s about what it can become.” She then proceeded to blend a scoop into her pancake batter, creating the fluffiest stacks I’d ever tasted. Mind. Blown.
That lesson stuck with me: don’t write off an ingredient at face value. Years later, deep in a “I-want-creamy-pasta-but-also-want-to-fit-into-my-pants” dilemma, Nana’s voice echoed in my head. I stared at that familiar tub in my fridge. “What can you become?” I tossed it in the blender with some staples, gave it a whirl, and poured out pure, silky gold. The first bite was a full-circle moment—a healthy, high-protein hug that tasted like indulgence, all thanks to a childhood memory and a willingness to experiment. It’s now my ultimate weeknight warrior.
Gathering Your Flavor Team
Here’s everything you’ll need to create this creamy wonder. I’ve added my little chef insights so you know exactly why each ingredient is a superstar.
- 1 cup cottage cheese (full-fat or 2%): This is our MVP. Full-fat will give you the richest, silkiest mouthfeel, but 2% works beautifully and keeps it lean. Chef’s Tip: Avoid fat-free if you can; a little fat is crucial for that luxurious texture and helps carry the flavors.
- ¼ cup grated parmesan cheese: Our flavor booster. It adds a salty, nutty, umami depth that makes the sauce taste complex and “expensive.” Substitution: Pecorino Romano is a fantastic, slightly sharper swap.
- 1 clove garlic: The aromatic backbone. For a mellow, sweet flavor, use a roasted garlic clove. For a brighter, more pungent kick, go raw. Chef’s Hack: Give the raw clove a rough chop before blending to ensure no big chunks sneak through.
- 1–2 tablespoons olive oil: This adds richness, helps emulsify the sauce, and creates a gorgeous glossy finish. Use the good stuff you love for drizzling!
- ¼–½ cup reserved pasta water: This is NOT optional! The starchy, salty water is the magic key that thins the sauce to the perfect clinging consistency and helps it stick to every noodle.
- Salt and black pepper to taste: Season with love at the end, especially since parmesan is already salty.
- Optional Boosters: A pinch of red pepper flakes for heat, a teaspoon of lemon zest for dazzling brightness, or a handful of fresh basil leaves blended right in for an herby vibe.
Let’s Make Some Silk: Your Step-by-Step Guide
Follow these simple steps, and in about 15 minutes, you’ll be in creamy pasta paradise. I’ve sprinkled in my favorite hacks to guarantee your success.
- Boil Your Pasta & Save That Water! Get a large pot of well-salted water boiling (it should taste like the sea!). Cook your favorite pasta shape (I love fusilli, rigatoni, or fettuccine for this) until al dente. Just before you drain it, use a mug or ladle to scoop out at least ½ cup of the starchy pasta water. This liquid gold is essential. Chef’s Commentary: “Al dente” means “to the tooth” – the pasta should still have a slight bite. It will continue to cook a little when we toss it with the sauce.
- The 60-Second Blitz. While the pasta cooks, add your cottage cheese, parmesan, garlic, olive oil, and about 2 tablespoons of the reserved pasta water to a blender or food processor. Secure that lid tightly and let it rip! Blend for a full 45-60 seconds, stopping to scrape down the sides if needed. We’re going for completely, utterly smooth—no graininess in sight. Chef’s Hack: If you have a high-powered blender, this is its time to shine. The vortex it creates makes the silkiest sauce imaginable.
- To Heat or Not to Heat? You have two great options here. For a no-cook, fresh-tasting sauce, you can simply toss the blended sauce straight with the hot pasta. The heat from the noodles will warm it through perfectly. OR, for a more cohesive, warm sauce, pour it into the empty, still-warm pasta pot. Heat it over low for just 1-2 minutes, stirring constantly, until it’s hot to your liking. My Tip: If heating, have your reserved pasta water nearby. The sauce will thicken as it heats; just add a splash at a time to bring it back to a creamy, flowing consistency.
- The Grand Toss. Add your drained pasta right back into the pot with the sauce. Over low heat, use tongs to vigorously toss and stir for about a minute. You’ll see the sauce transform, clinging to each noodle and becoming glossy. Add more pasta water, a tablespoon at a time, until the sauce coats everything beautifully without being gloppy or dry. This is where the magic happens!
- Season & Serve Immediately. Taste it! Now is the time to season with black pepper, a pinch of salt if needed, and any red pepper flakes. Give it one final toss and serve right away while it’s gloriously hot and creamy.
Plating Your Masterpiece
How you serve this dish can take it from “great weeknight dinner” to “I-feel-fancy.” Here are my favorite ways to present it:
I love using a warm, shallow bowl. Twirl a generous nest of the sauced pasta right in the center with tongs. The key is that final flourish. A fresh grating of parmesan over the top is a must. Then, choose your adventure: a scattering of microplaned lemon zest for a sunny pop, a few cracks of black pepper, a drizzle of your best olive oil, or a few torn fresh basil or parsley leaves. For a textural contrast that’s *chef’s kiss*, sprinkle on some toasted pine nuts or breadcrumbs. Serve it with a simple side salad of arugula with lemon vinaigrette to cut through the richness. It’s a complete, beautiful, and deeply satisfying plate.
Make It Your Own: Endless Twists
The beauty of this sauce is its adaptability. Here are a few of my favorite ways to play with the formula:
- Lemon Herb Garden: Blend in the zest of one whole lemon and a big handful of fresh basil or parsley. After tossing, stir in a couple tablespoons of fresh lemon juice for a sauce that’s bright, herby, and incredibly fresh.
- Sun-Dried Tomato & Spinach: Add ¼ cup of oil-packed sun-dried tomatoes (drained) to the blender. After tossing the pasta with the basic sauce, stir in a few big handfuls of fresh baby spinach until just wilted by the heat of the pasta. It’s a flavor and color powerhouse.
- Protein Power-Up: Turn this into a main course by adding a cooked protein directly to the pasta pot. Diced grilled chicken, flaked salmon, or a can of drained chickpeas (for a vegan option with the cheese omitted) are all fantastic.
- Dairy-Free/Different Cheese: For a dairy-free version, use a plain, unsweetened vegan cream cheese or silken tofu in place of the cottage cheese, and a vegan parmesan. For a different cheese profile, swap the parmesan for sharp cheddar or gouda in the blender.
- Roasted Garlic & Mushroom: Swap the raw garlic for 3-4 cloves of sweet, roasted garlic. Sauté a cup of sliced mushrooms in a pan while your pasta cooks, and fold them into the finished dish for an earthy, umami bomb.
Beau’s Kitchen Notebook
This recipe has become a true workhorse in my kitchen, and it’s evolved in fun ways. I once made it for a friend who swore they hated cottage cheese. They devoured two bowls and asked for the recipe for their “amazing cream sauce.” The reveal was priceless! I’ve also learned that while any blender works, letting it run for a full minute really is the secret to eliminating any graininess. Over time, I’ve started adding a tiny pinch of freshly grated nutmeg to the blender—it’s an old Italian trick that adds a warm, mysterious depth that people can never quite place. Give it a try!
Your Questions, Answered
Q: My sauce turned out grainy. What did I do wrong?
A: The most common culprit is not blending long enough. Cottage cheese needs a good, long whirl to become perfectly smooth. Blend for a full minute! Also, make sure you’re adding a splash of liquid (pasta water or olive oil) to help the blender do its job.
Q: Can I make this sauce ahead of time?
A> You can absolutely blend the sauce base (cottage cheese, parmesan, garlic, oil) 1-2 days ahead and keep it sealed in the fridge. When ready to eat, just give it a stir, warm it gently in a pan with a splash of milk or water to loosen it, and toss with your fresh pasta.
Q: What’s the best pasta shape to use?
A> Any shape that has good “sauce-grabbing” abilities is perfect. I love short shapes like rigatoni, penne, or shells, or long, textured shapes like fettuccine or pappardelle. Simpler shapes like spaghetti work but might not hold the sauce quite as well.
Q: The sauce seems too thick after I toss it. Help!
A> No problem at all! This is why we saved that pasta water. Just add it back to the pot over very low heat and splash in more pasta water, one tablespoon at a time, tossing continuously until it loosens up to your desired consistency.

Creamy Cottage Cheese Pasta Sauce : High-Protein and Silky Smooth
Description
If you love rich, creamy pasta but don’t love the heavy, sluggish feeling afterward, this recipe is for you. This silky pasta sauce gets its luxurious texture from cottage cheese, blended smooth with garlic, parmesan, and olive oil. It’s comforting, protein-packed, and ready in about 15 minutes—perfect for busy weeknights when you want something cozy and nourishing.
Ingredients
Serves
2–3 people
Ingredients
-
8 oz (225 g) pasta (penne, rigatoni, fusilli, or fettuccine)
-
1 cup cottage cheese (full-fat or 2%)
-
¼ cup grated parmesan cheese
-
1 clove garlic (raw or roasted)
-
1–2 tablespoons olive oil
-
¼–½ cup reserved pasta water
-
Salt and black pepper, to taste
Optional add-ins:
-
Red pepper flakes
-
Lemon zest
-
Fresh basil or parsley
Instructions
-
Cook the pasta
Bring a large pot of well-salted water to a boil. Cook pasta until al dente. Before draining, reserve about ½ cup of the pasta water. -
Blend the sauce
In a blender or food processor, add cottage cheese, parmesan, garlic, olive oil, and 2–3 tablespoons of pasta water. Blend for 45–60 seconds until completely smooth. -
Warm the sauce (optional)
You can toss the sauce directly with hot pasta, or gently warm it in the empty pasta pot over low heat for 1–2 minutes. -
Combine
Add pasta to the sauce and toss well. Add more pasta water, a little at a time, until the sauce coats the pasta smoothly. -
Season & serve
Season with salt, pepper, and any optional add-ins. Serve immediately with extra parmesan on top.
Notes
-
Blend longer than you think: A full minute ensures the sauce is ultra-smooth, not grainy.
-
Don’t skip pasta water: The starch helps the sauce cling beautifully to the noodles.
-
Use low heat if warming the sauce—high heat can cause it to thicken too fast.
-
Customize it: Add sautéed mushrooms, spinach, grilled chicken, or chickpeas to make it a full meal.
Nourishing Your Body & Soul
While I’m all about flavor first, it feels pretty great to know what’s fueling you. This sauce is a nutritional win, especially compared to traditional heavy cream or Alfredo-style sauces. The cottage cheese is the star, providing a serious protein punch (about 12 grams per serving for just the sauce!) with less fat and fewer calories. Protein helps keep you full and satisfied long after your meal. The parmesan adds calcium, and using the starchy pasta water instead of more cream or butter keeps it light. Remember, nutritional values are approximate and can vary based on the specific brands of ingredients you use and your portion sizes. It’s a dish that makes your taste buds and your body happy.
Final Thoughts
And there you have it, friends—your ticket to creamy pasta bliss, no regrets attached. This cottage cheese pasta sauce is more than just a recipe; it’s a little kitchen hack that feels like a superpower. It’s proof that the most satisfying meals often come from the simplest, most unexpected places. I hope it becomes a trusted, quick, and joyful solution in your kitchen, just like it is in mine. Don’t forget to play with the variations and make it your own. When you do, I’d love to hear about it! Tag me over on Feastical or on social media. Now, go forth, blend with confidence, and enjoy every delicious, protein-packed bite!
With a full belly and a happy heart,
Beau
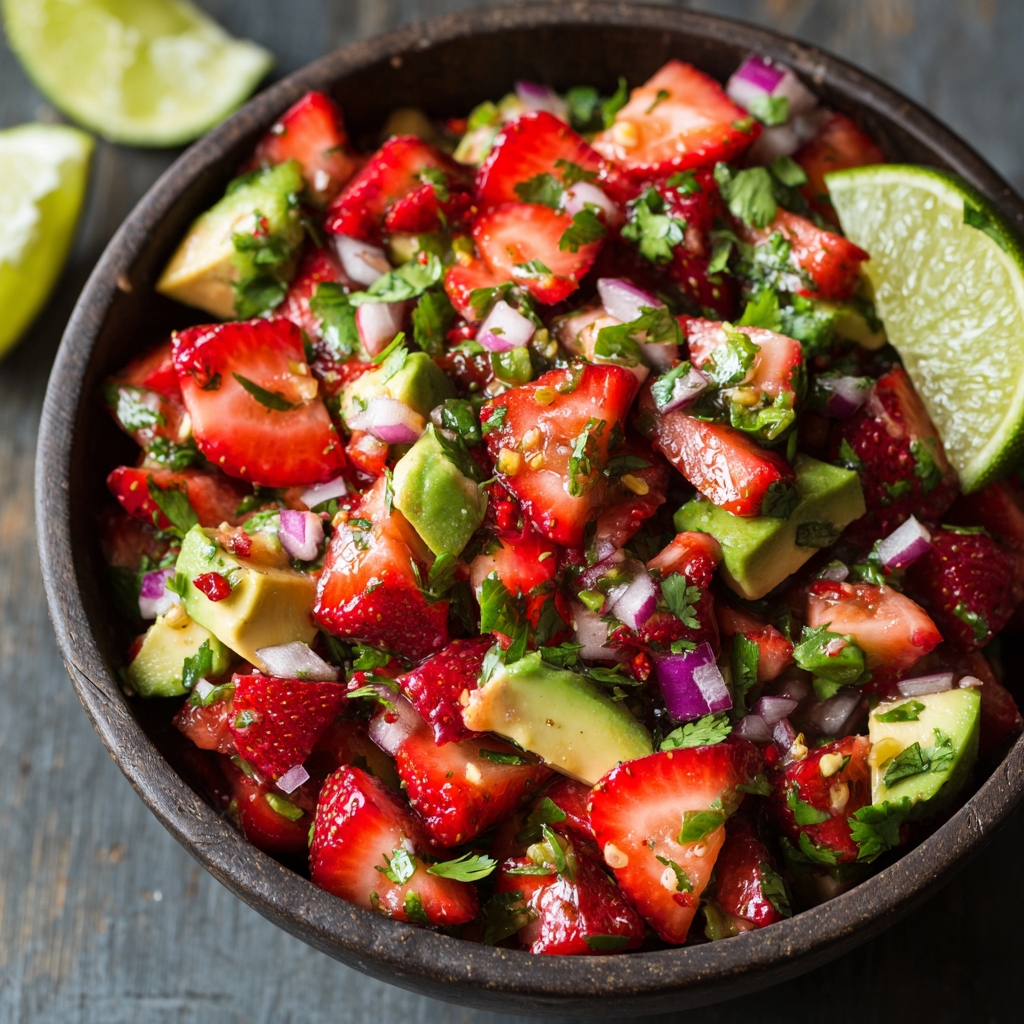
Savory Strawberry Avocado Salsa : Fresh, Colorful & Perfect for Summer
Savory Strawberry Avocado Salsa: Your New Favorite Summer Obsession
Hey friends, Beau here! Can we talk about the magic that happens when summer’s sweetest berry decides to go on a savory adventure? If your salsa game has been stuck in a tomato-and-onion loop, I’m about to blow your taste buds wide open. This isn’t just a dip; it’s a sunshine-bright, flavor-packed celebration you can whip up in the same amount of time it takes to find a good playlist.
Imagine this: juicy, ripe strawberries, their natural sweetness perfectly balanced against the cool, creamy richness of avocado. A punch of zesty lime, a bite of red onion, and the fresh, herbal lift of cilantro tie it all together in a bowl that’s as gorgeous as it is delicious. This Strawberry Avocado Salsa is the ultimate crowd-pleaser, the secret weapon for your weeknight grilled chicken, and the star of your next taco Tuesday. It’s proof that the best recipes are often the simplest, and that the most unexpected combinations are usually the most memorable. So, let’s ditch the complicated stuff and dive into a bowl of pure, uncomplicated joy. Your chips (and your grilled salmon, and your quesadillas…) will thank you.
The Picnic That Started It All
This recipe was born from a happy accident, as the best ones often are. A few summers back, I was scrambling to throw together a last-minute picnic. The mission: use whatever was languishing in the fridge. I had a pint of strawberries that needed eating, an avocado at peak perfection, and the usual salsa suspects. On a whim, I chopped them all together, gave it a generous squeeze of lime, and crossed my fingers.
Friends, the reaction was instant. One bite, and the whole blanket went quiet except for the sounds of enthusiastic crunching. “What IS this?” someone asked, already reaching for another chip. It was that perfect storm of sweet, savory, creamy, and crunchy. It turned a simple park picnic into a mini-feast and became a permanent staple in my summer rotation. It taught me that recipes don’t always need a rulebook—sometimes, you just need to trust what tastes good together.
Gathering Your Colorful Cast of Characters
Here’s the beautiful part: you only need a handful of fresh ingredients. Quality is key here, so choose the best you can find!
- 1 cup fresh strawberries, diced – The star of the show! Look for berries that are fragrant, bright red, and firm. Don’t use mushy ones—their texture won’t hold up. Chef’s Tip: A serrated knife is your best friend for cleanly dicing strawberries without squashing them.
- 1 ripe avocado, diced – Creamy counterpoint to the berry’s pop. Your avocado should yield slightly to gentle pressure. Swap Idea: In a pinch, a ripe mango can bring a similar creamy-sweet dynamic, though the flavor profile shifts beautifully.
- ¼ small red onion, finely chopped – This adds necessary bite and crunch. Pro Hack: Soak the chopped red onion in a bowl of ice water for 5-10 minutes before adding. This mellows the sharp raw flavor while keeping that fantastic crunch.
- Juice of 1 lime – The zingy conductor that makes all the flavors sing. Always use fresh lime juice! The bottled stuff just can’t compare. Roll the lime firmly on the counter before juicing to get every last drop.
- 2 tbsp chopped fresh cilantro – The herbal high note. If cilantro tastes like soap to you (it’s a genetic thing!), feel free to swap in fresh mint or basil for a completely different, but equally delicious, aromatic lift.
- Salt & pepper to taste – Don’t underestimate these! Salt doesn’t just make things salty; it unlocks and balances all the other flavors in the bowl.
- Optional: 1 small jalapeño, seeds removed and finely diced – For my friends who like a little heat. Removing the seeds and white ribs keeps the flavor without overwhelming fire. For more kick, leave some in!
Let’s Make Some Magic: Your Simple Steps to Salsa Heaven
This is less of a recipe and more of a joyful assembly. Ready? Let’s go.
- Prep Your Players. Give all your fruits and veggies a good wash. Hull and dice your strawberries into nice, bite-sized chunks. Halve, pit, and dice your avocado. Finely chop your red onion (remember the ice water bath trick!). Chop your cilantro. If using, carefully dice your jalapeño. I like to do all this on one big cutting board—it’s a rainbow in progress.
- The Gentle Combine. In a medium-sized mixing bowl, gently combine the strawberries, avocado, red onion, cilantro, and jalapeño (if using). I say “gently” because you want to keep those beautiful avocado cubes intact. Use a wide silicone spatula or a large spoon and fold the ingredients together. Chef’s Secret: Add the avocado last, right before the lime juice, to minimize handling and bruising.
- The Zesty Wake-Up Call. Cut your lime in half and squeeze the juice directly over the bowl. I like to do this through my fingers or a small sieve to catch any seeds. The acid in the lime juice isn’t just for flavor—it’s also a barrier against the avocado turning brown. Immediately after adding the lime, give everything another gentle fold to ensure every piece gets a glossy, zesty coat.
- Season to Perfection. Now, sprinkle a pinch of salt and a few cracks of black pepper over the top. Fold once more to distribute. This is the moment to taste! Grab a chip and scoop up a little bite. Need more lime? More salt? A tiny pinch of sugar if your berries were a bit tart? Adjust until it makes your taste buds dance.
- The (Brief) Rest. You can absolutely serve this immediately—it’s fantastic. But if you have 10-15 minutes, cover the bowl and let it hang out in the fridge. This short rest lets the flavors get to know each other, mellowing the onion and creating a more cohesive, incredible salsa.
So Many Ways to Dive In!
Sure, you can grab a bag of sturdy tortilla chips (my personal favorite vehicle), but this salsa is a culinary chameleon! Here are a few of my go-to ways to serve it:
- The Classic Chip Dip: Obvious, but never wrong. Serve with thick, restaurant-style tortilla chips or even homemade pita chips.
- Over Grilled Everything: Spoon it generously over grilled chicken breasts, salmon fillets, shrimp skewers, or even a simple grilled pork chop. The salsa acts as a fresh, vibrant sauce that cuts through rich flavors.
- Taco & Quesadilla Topper: Elevate your taco night! It’s incredible on fish tacos, carnitas, or black bean tacos. Melt it inside a quesadilla for a gooey, surprising burst of flavor.
- Salad in Disguise: Pile it onto a bed of greens for a instant, no-dressing-needed salad. Add some grilled chicken or chickpeas to make it a full meal.
- With Breakfast: Trust me on this—a spoonful on top of scrambled eggs or an omelet is a game-changer.
Make It Your Own: 5 Tasty Twists
Love the base recipe? Amazing! Want to play around? Even better. Here are some fun variations to try:
- Mango-Avocado Swap: Replace the strawberries with an equal amount of ripe, diced mango. You get a more tropical, sunshine-y vibe that’s equally addictive.
- Herb Swap: Not a cilantro fan? Use fresh mint for a cooling, garden-fresh twist, or basil for a slightly peppery, sweet note. It completely changes the personality of the salsa.
- Spicy & Smoky: Add that diced jalapeño, and also mix in ¼ teaspoon of smoked paprika or a pinch of chipotle powder. It adds a warm, smoky depth that’s irresistible.
- The “Everything” Salsa: Add ½ cup of fresh corn kernels (grilled first for extra flavor!) and ½ a diced red bell pepper. You get more crunch, color, and sweetness—it’s a full-on fiesta in a bowl.
- Cucumber Cool-Down: For extra crunch and hydration, fold in ½ cup of finely diced English cucumber right before serving. It lightens the whole mix and makes it even more refreshing.
Beau’s Kitchen Notes & Stories
This recipe has evolved in my kitchen from a “what’s in the fridge?” scramble to a requested staple. I’ve learned a few things along the way. First, the size of your dice matters. Keep everything roughly the same size for the perfect bite. Second, this salsa is best enjoyed the day it’s made. The avocado will eventually soften and the strawberries can get a little watery after a night in the fridge. It’s still tasty, but the texture is at its peak within a few hours.
One funny fail? I once tried to “save time” by using frozen strawberries. Big mistake. They released so much water when thawed that I ended up with strawberry avocado soup—still flavorful, but definitely not scoopable! Fresh is always, always best here. Now, it’s your turn to make memories with it!
Your Questions, Answered!
Q: How do I keep the avocado from turning brown?
A: The lime juice is your #1 defense! Coating the avocado in acid (lime or lemon juice) significantly slows oxidation. For extra security, press a piece of plastic wrap directly onto the surface of the salsa before refrigerating, limiting its contact with air. It’s still best eaten within a few hours.
Q: Can I make this salsa ahead of time?
A> You can do some of the work ahead! Chop your strawberries, onion, cilantro, and jalapeño. Store them combined in an airtight container. Dice your avocado and prepare the lime juice separately. Right before serving, combine everything. This “mise en place” method saves party-day stress!
Q: I’m sensitive to spicy food. Is the jalapeño necessary?
A> Not at all! The recipe is perfectly balanced without it. The salsa is wonderfully sweet and savory. The jalapeño is just a bonus for heat-seekers. You could also use a very small pinch of crushed red pepper flakes if you want just a hint of warmth.
Q: My strawberries aren’t very sweet. What can I do?
A> It happens! Before dicing, you can toss the berry pieces with a tiny sprinkle of sugar (like ½ a teaspoon) and let them sit for 5 minutes. This draws out their natural juices and enhances sweetness. Just be mindful of this when you season the final salsa with salt.
Savory Strawberry Avocado Salsa : Fresh, Colorful & Perfect for Summer
Description
Savory Strawberry Avocado Salsa – Sweet, Creamy, & Zesty
Prep Time: 10 minutes
Cook Time: None
Total Time: 10 minutes
Servings: 4
Ingredients
-
1 cup fresh strawberries, diced
-
1 ripe avocado, diced
-
¼ small red onion, finely chopped
-
Juice of 1 lime
-
2 tbsp chopped fresh cilantro (or mint/basil)
-
Salt & black pepper, to taste
-
Optional: 1 small jalapeño, seeds removed and finely diced
Optional add-ins:
-
½ cup fresh corn kernels (grilled for extra flavor)
-
½ diced red bell pepper
-
Instructions
1. Prep Ingredients
-
Wash and dice strawberries.
-
Dice avocado, finely chop onion and cilantro.
-
If using jalapeño, remove seeds and dice finely.
2. Combine Gently
-
In a medium bowl, fold together strawberries, red onion, cilantro, and jalapeño (if using).
-
Add avocado last to minimize bruising.
3. Add Lime & Season
-
Squeeze lime juice over the mixture.
-
Fold gently to coat all ingredients.
-
Season with salt and pepper. Taste and adjust.
4. Optional Rest
-
Cover and refrigerate 10–15 minutes for flavors to meld. Serve immediately for best texture.
Notes
-
Classic Dip: With tortilla or pita chips.
-
Grilled Protein Topper: Spoon over salmon, chicken, shrimp, or pork.
-
Tacos & Quesadillas: Fresh, creamy topping for tacos or melted inside quesadillas.
-
Salad Upgrade: Layer on greens with protein for a quick, no-dressing-needed salad.
-
Breakfast: Spoon over scrambled eggs or omelets for a fruity, fresh twist.
Nourishment That Tastes This Good?
Here’s the feel-good part: this salsa isn’t just a flavor explosion; it’s packed with good-for-you stuff. Avocados bring heart-healthy monounsaturated fats and fiber, which help keep you full. Strawberries are loaded with Vitamin C, antioxidants, and more fiber. Red onion and cilantro offer their own array of vitamins and plant compounds. It’s a snack or topping that genuinely fuels your body while delighting your senses. The estimated nutritional info per ¼ cup serving is about: 80 calories, 6g of fat (the good kind!), 6g carbs, 3g fiber, 2g sugar, and 1g protein. Now that’s what I call a win-win.
Ready, Set, Scoop!
And there you have it—my not-so-secret weapon for making any summer meal feel like a special occasion. This Strawberry Avocado Salsa is more than a recipe; it’s a reminder that cooking should be fun, flexible, and full of flavor. It’s about embracing colorful ingredients and sharing them with people you love.
I can’t wait for you to try it. Whip up a batch this weekend, call some friends over, and watch it disappear. And when you do, tag me @feastical or use the hashtag #feasticalfeast—I love seeing your kitchen creations! Now, go grab that ripe avocado and those beautiful berries. Your culinary adventure awaits. Happy cooking, friends!
– Beau