
Fluffy Blueberry Pancakes : Bursting with Juicy Berries & Morning Magic
Start Your Morning with a Stack of Sunshine
Hey friends, Beau here from Feastical! Is there anything in this world that smells more like a perfect morning than pancakes sizzling on a griddle? That sweet, buttery, slightly caramelized scent that drifts through the house, acting as the world’s best (and tastiest) alarm clock. It’s a universal signal for a slow, happy, delicious start. And when those pancakes are Fluffy Blueberry Pancakes, bursting with juicy berries that turn into little pockets of warm jam? Well, that’s not just breakfast. That’s morning magic on a plate.
I’m a firm believer that the best recipes are the ones that feel like a warm hug and come together without a fuss. This blueberry pancake recipe is exactly that. It’s my go-to, my forever favorite, the one I’ve made so many times I could probably do it in my sleep. It’s simple enough for a sleepy Wednesday, yet special enough for a celebratory weekend brunch. We’re talking cloud-like, tender interiors, golden-brown exteriors, and that glorious moment when you slice your fork through and a river of melted blueberry goodness mixes with maple syrup. It’s pure, unadulterated joy.
So, whether you’re a pancake pro or you’re just figuring out that the whisk isn’t just for decoration, I’ve got you. Grab your favorite bowl, your trusty spatula, and let’s make a memory—one fluffy, berry-filled bite at a time. Let’s dig in!
The Pancake Chronicles: A Sticky, Sweet Memory
This recipe always takes me back to my dad’s tiny, yellow-tiled kitchen on Saturday mornings. He wasn’t a fancy cook, but man, could he make pancakes. He’d wear this old apron with a faded chili pepper print, and I’d perch on the countertop, my job being the official blueberry distributor. He’d pour these wobbly circles of batter onto the electric griddle, and just as the bubbles would start to pop, he’d give me the nod. “Now, Beau!” I’d scramble to press the berries into each pancake with my small fingers, always trying to get an even distribution (and always sneaking a few fresh ones into my mouth).
The magic, though, was in his flip. He’d use that thin, flexible spatula like a surgeon’s tool, getting right under the edge with a confident *shhhk* sound. The pancake would sail through the air in a perfect half-rotation, landing with a gentle slap. To my six-year-old eyes, it was the greatest circus act I’d ever seen. We’d eat them stacked high, syrup pooling on the plate, talking about nothing and everything. Those mornings taught me that the best food isn’t about perfection; it’s about the laughter, the shared sticky fingers, and the love you fold into the batter. That’s the spirit I try to bring to every recipe I share with you here on Feastical.
Gathering Your Sunshine: What You’ll Need
Here’s the beautiful part: you likely have most of this in your pantry right now. Simple ingredients, extraordinary results. Let’s break them down.
- 1 cup all-purpose flour: The trusty foundation. It gives our pancakes structure. For a slightly nuttier, heartier taste, you can swap in ½ cup whole wheat flour, but keep at least ½ cup all-purpose for that classic fluffiness.
- 2 tablespoons sugar: Just enough to give the pancakes a gentle sweetness and help with that gorgeous golden-brown color. I use regular granulated, but cane sugar works beautifully too.
- 1 tablespoon baking powder: This is our FLUFF MAKER! It’s the chemical leavener that creates those lovely air bubbles. Make sure yours is fresh for maximum lift. If it doesn’t fizz when you add a drop of water to it, it’s time for a new can.
- ¼ teaspoon salt: The flavor enhancer. It might seem small, but it balances the sweetness and makes every other ingredient sing. Don’t skip it!
- 1 cup milk: The liquid that brings it all together. Whole milk gives the richest flavor, but any milk you have works. For a delightful tang, try buttermilk! If you go buttermilk, add a tiny pinch of baking soda (⅛ tsp) to the dry ingredients to balance the acid.
- 1 large egg: Our binder and extra richness provider. It gives the batter stability and a tender crumb. For a vegan swap, a “flax egg” (1 tbsp ground flax + 3 tbsp water, rested for 5 mins) works in a pinch.
- 2 tablespoons melted butter, plus more for the pan: Butter equals flavor and tenderness. Melt it and let it cool slightly so it doesn’t cook the egg when you mix it in. The extra for the pan gives us that irresistible, crispy, lacy edge.
- 1 teaspoon vanilla extract: The secret whisper of warmth. It adds a beautiful background note that makes the blueberries taste even more blueberry-ish. Pure extract is worth it here!
- ¾ cup fresh or frozen blueberries: The starring act! Fresh berries in season are sublime. Pro-Tip: If using frozen, do NOT thaw them. Toss them in a tablespoon of the measured flour first—this little hack prevents them from sinking to the bottom and bleeding too much purple into the batter.
Let’s Make Some Magic: The Step-by-Step
Alright, team! Let’s fire up the griddle and get cooking. Follow these steps, and you’ll be a pancake hero in no time.
Step 1: The Dry Team Assembly. In a large mixing bowl, whisk together your flour, sugar, baking powder, and salt. I mean really give it a good 30-second whisk. This isn’t just mixing; it’s aerating the flour and making sure our baking powder is evenly distributed. No one wants a pocket of pure baking powder in their pancake! Set this bowl aside.
Step 2: The Wet Team Huddle. In a separate medium bowl (or a large measuring cup—less cleanup!), whisk together the milk, egg, melted (and slightly cooled) butter, and vanilla. Whisk it until it’s completely smooth and homogenous. You’ll see little flecks of butter—that’s perfect.
Step 3: The Gentle Merge. Here comes the most important chef hack of the day: DO NOT OVERMIX. Make a well in the center of your dry ingredients. Pour the wet ingredients into the well. Using your whisk or a spatula, gently stir the two together. It’s okay if there are lumps! I repeat: Lumps are your friends. Overmixing develops the gluten in the flour, which leads to tough, chewy pancakes. We want tender, fluffy clouds. Mix just until the last traces of dry flour disappear. The batter will be thick and slightly lumpy—that’s the goal.
Step 4: The Berry Fold-In. Sprinkle your blueberries (flour-coated if frozen) over the batter. Using a rubber spatula, gently fold them in with just 2-3 turns. You want them incorporated, not smashed. Let the batter rest for 5 minutes. This allows the flour to fully hydrate and the baking powder to start working, which equals fluffier pancakes.
Step 5: Griddle Time! Heat a non-stick skillet, griddle, or cast-iron pan over medium heat. I test the heat by flicking a few drops of water onto the surface. If they dance and sizzle away, you’re good. Add a small pat of butter and swirl to coat. Use a ¼ cup measuring cup or a large ice cream scoop to pour your batter. This gives you perfectly uniform pancakes. Don’t crowd the pan.
Step 6: The Patient Cook & The Big Flip. Now, be patient. Cook the first side for 2-3 minutes. You’ll know it’s ready to flip when the edges look set, the surface is covered in bubbles that have popped and stayed open, and the bottom is a deep golden brown (peek with your spatula!). Slide your spatula all the way under, then flip with confidence! Cook for another 1-2 minutes on the second side until golden and puffed. Transfer to a plate. I like to keep mine in a single layer on a baking sheet in a 200°F oven while I finish the batch—this keeps everyone warm and perfect.
Plating Your Masterpiece: How to Serve
Presentation is part of the fun! I’m a firm believer in stacking pancakes high—it just feels more celebratory. Place 2-3 pancakes on a warm plate. Immediately add a pat of cold butter to the top so it starts melting into rivulets down the sides. Then, the syrup! Pour warm, pure maple syrup over the stack, letting it pool around the base. For a pretty finish, scatter a few extra fresh blueberries on top and give it a light dusting of powdered sugar through a fine-mesh sieve (it looks like a light snowfall).
Want to make it a feast? These pancakes love company! Serve them with crispy bacon or breakfast sausage for that sweet-salty combo. A dollop of whipped cream or a spoonful of Greek yogurt adds a lovely creamy element. And for the ultimate indulgence, swap the maple syrup for a homemade blueberry compote: just simmer ½ cup blueberries with a tbsp of maple syrup and a squeeze of lemon until jammy.
Mix It Up! Fun Flavor Twists
Once you’ve mastered the classic, the kitchen playground opens up! Here are a few of my favorite ways to riff on this perfect recipe:
- Lemon Blueberry Bliss: Add the zest of one lemon to the dry ingredients. The bright citrus makes the blueberries pop even more. A squeeze of lemon juice in the syrup is divine.
- Cozy Cinnamon Spice: Whisk 1 teaspoon of ground cinnamon into the dry ingredients. It adds a warm, comforting aroma that’s perfect for fall mornings.
- “Everything But The…” Pancake: Fold in a mix of berries! Raspberries, blackberries, and chopped strawberries work wonderfully. Just be gentle, as some berries are more delicate.
- Vegan Sunshine Cakes: Use a flax egg, your favorite plant-based milk (oat milk is fantastic here), and replace the butter with melted coconut oil or vegan butter. They’re still incredibly fluffy and delicious.
- Whole-Grain Goodness: Substitute ½ cup of the all-purpose flour with oat flour or whole wheat pastry flour. You get a heartier texture and a lovely nutty flavor.
Beau’s Kitchen Corner: Notes from My Counter
This recipe has been my faithful companion for years, and it’s evolved in tiny ways. I didn’t always add the vanilla, but once I tried it, there was no going back—it just rounds out the flavor so nicely. I also used to mix the blueberries right into the wet ingredients, which led to a purple-tinged batter. The “fold-in-at-the-end” method is a game-changer for picture-perfect (and tasty) pancakes.
One Saturday, I ran out of regular milk and had to use a vanilla-flavored almond milk. Guess what? It was delicious! It taught me that pancakes are forgiving and welcoming to improvisation. The most important tool in your kitchen isn’t the whisk or the pan—it’s a relaxed attitude. So if a pancake isn’t a perfect circle, or if you flip it a little too early, just laugh it off. Call it “rustic.” I promise, it will still taste amazing. That’s the real magic of homemade food.
Your Pancake Questions, Answered
Q: My pancakes are flat, not fluffy! What happened?
A: The usual suspects are old baking powder or overmixing. Check your baking powder’s freshness. And remember, mix the batter until just combined—lumps are welcome! Also, make sure your pan isn’t too hot; extreme heat can cause the outside to burn before the inside has a chance to rise.
Q: How do I keep the blueberries from turning the whole batter purple?
A: Two key tips! 1) Use fresh berries if possible. 2) If using frozen, do NOT thaw them, and toss them in a light coating of flour before folding in. This creates a barrier and helps them stay suspended in the batter.
Q: Can I make the batter ahead of time?
A: You can mix the dry and wet ingredients separately the night before and keep them in the fridge. In the morning, combine them and cook. I don’t recommend mixing the full batter and letting it sit overnight, as the baking powder will lose its oomph and the blueberries can bleed.
Q: What’s the best way to keep pancakes warm for a crowd?
A: Preheat your oven to 200°F (95°C). As you cook the pancakes, place them in a single layer on a baking sheet (you can use a wire rack on the sheet for extra crispness) and pop them in the oven. They’ll stay warm and perfect for up to 30 minutes.

Fluffy Blueberry Pancakes : Bursting with Juicy Berries & Morning Magic
Description
There’s nothing quite like a stack of warm blueberry pancakes to start the day right. These pancakes are light and fluffy on the inside, perfectly golden on the outside, and packed with sweet bursts of blueberries in every bite. Simple ingredients, minimal effort, and guaranteed morning happiness.
Ingredients
-
1 cup all-purpose flour
-
2 tablespoons sugar
-
1 tablespoon baking powder
-
¼ teaspoon salt
-
1 cup milk
-
1 large egg
-
2 tablespoons butter, melted and slightly cooled
-
1 teaspoon vanilla extract
-
¾ cup blueberries (fresh or frozen)
-
Butter or oil, for cooking
Instructions
-
Mix dry ingredients
In a large bowl, whisk together flour, sugar, baking powder, and salt. -
Mix wet ingredients
In a separate bowl, whisk milk, egg, melted butter, and vanilla until smooth. -
Combine gently
Pour wet ingredients into dry ingredients and stir just until combined.
Do not overmix—small lumps are perfectly fine. -
Add blueberries
Gently fold in blueberries. If using frozen berries, do not thaw them first. -
Rest the batter
Let the batter rest for 5 minutes for extra fluffy pancakes. -
Cook pancakes
Heat a non-stick skillet or griddle over medium heat and lightly butter it.
Pour about ¼ cup batter per pancake. -
Flip & finish
Cook until bubbles form and edges look set (2–3 minutes). Flip and cook another 1–2 minutes until golden. -
Serve warm
Stack high and serve immediately with butter and maple syrup.
Notes
-
Do not overmix – Overmixing makes pancakes dense instead of fluffy
-
Fresh baking powder matters – Old baking powder = flat pancakes
-
Frozen blueberry trick – Toss frozen berries with 1 tablespoon flour to prevent bleeding
-
Keep warm for a crowd – Hold cooked pancakes in a 200°F (95°C) oven
Nutritional Information (A Quick Note!)
Hey, I’m a chef, not a dietitian, but I believe in being transparent about what we’re enjoying! The following is an estimate per pancake (based on a batch of 8, using 2% milk and real butter). Remember, food is about nourishment and joy!
- Calories: ~120
- Protein: 3g
- Carbohydrates: 18g
- Fat: 4g
These pancakes offer a boost of energy from the carbs, a bit of protein to keep you satisfied, and the blueberries bring a dose of antioxidants and vitamin C. To balance the meal, I love serving them with a side of scrambled eggs or Greek yogurt for added protein. As always, listen to your body and enjoy every mindful, delicious bite!
The Last Bite: Until Next Time!
And there you have it, friends—my heart, my story, and my foolproof recipe for the fluffiest, most joyful blueberry pancakes around. I hope this recipe finds its way into your kitchen and becomes a part of your own family’s story, creating those slow, syrup-drizzled moments of connection that we all cherish.
Remember, cooking is a journey, not a destination. If your first pancake is a little wonky (we call those “chef’s samples”), just smile and try again. The most important ingredient is always the love you put into it. If you make these, I’d be absolutely thrilled if you tagged @Feastical on social media so I can see your beautiful stacks! Now go forth, get flipping, and make today delicious.
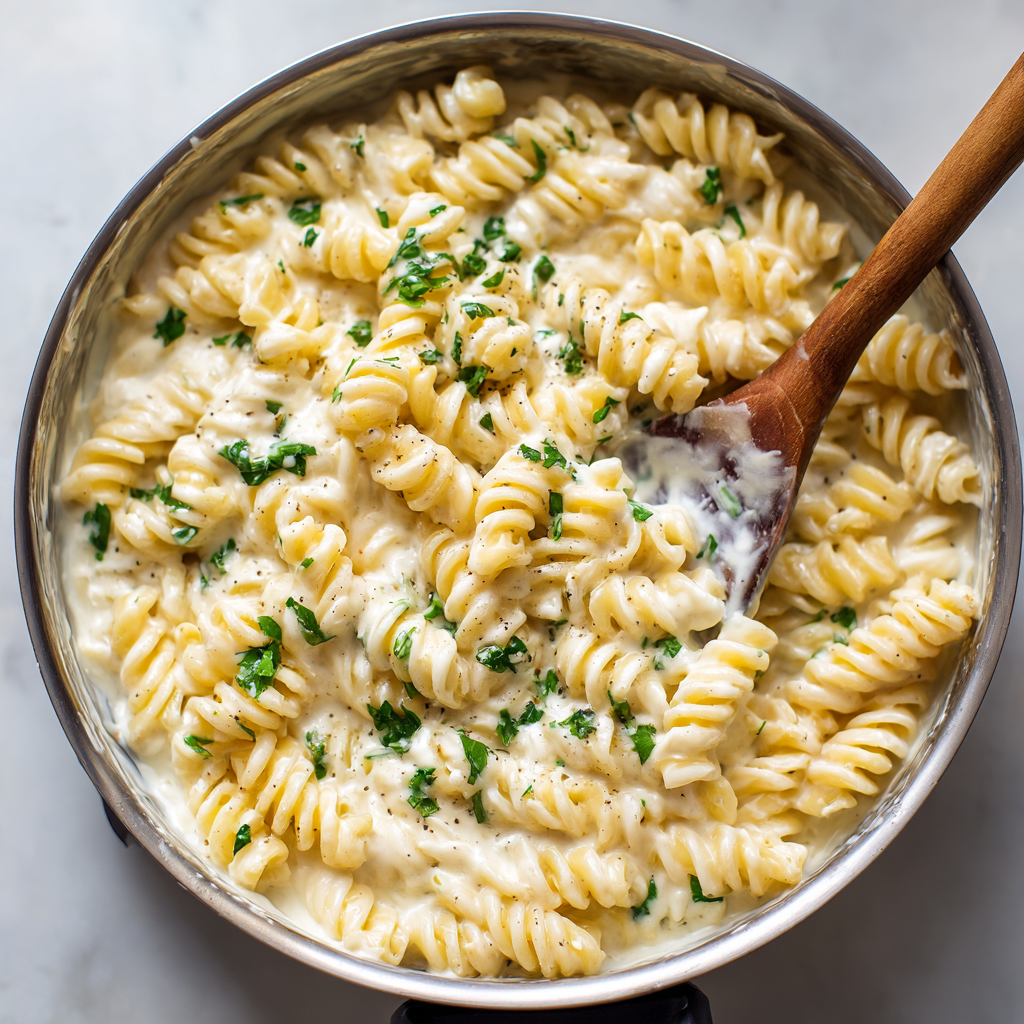
Creamy Cottage Cheese Pasta Sauce : High-Protein and Silky Smooth
Creamy Cottage Cheese Pasta Sauce: Your New High-Protein, Feel-Good Favorite
Hey friends, Beau here! Let’s talk about a little kitchen magic that’s about to change your pasta night forever. We all crave that dreamy, luxurious, coat-every-noodle creamy pasta sauce, right? But sometimes, the thought of all that heavy cream and butter can leave us feeling… well, a little weighed down before we even take a bite.
What if I told you the secret to a sauce that’s impossibly silky, satisfyingly rich, and secretly packed with protein has been sitting quietly in your fridge all along? Enter the humble, the mighty, the often-overlooked: cottage cheese.
I know, I know. You’re thinking, “Beau, cottage cheese? On my pasta?” Trust me on this one. When you blitz it in a blender with a few pantry heroes, it undergoes a complete transformation. It melts into a velvety, luscious sauce that clings to your fettuccine, rigatoni, or penne like a cozy blanket. It’s budget-friendly, it’s quick (we’re talking 15 minutes, tops), and it’s so versatile you’ll never get bored.
This isn’t about denying yourself comfort; it’s about reimagining it. It’s about creating a meal that feels indulgent but leaves you energized and happy. So, grab your blender and your favorite pasta pot. We’re about to whip up a dish that’s going to earn a permanent spot in your weekly rotation. Let’s get blending!
The Cottage Cheese Revelation: A Tale of Two Textures
My love affair with this sauce started, like many great kitchen discoveries, out of sheer necessity (and a near-empty fridge). It was a late Wednesday, the kind where takeout menus were calling my name. I had a container of cottage cheese I’d been eating with fruit for breakfast, a lonely heel of parmesan, and a serious pasta craving.
I’ll admit, I was skeptical. But I’d seen the “cottage cheese hack” whispers online and figured, worst case, I order that pizza. I boiled the pasta, tossed everything into my trusty blender, and gave it a whirl. What emerged wasn’t the lumpy, curdled mess I feared. It was smooth, pale, and gloriously creamy. I warmed it gently, tossed it with the hot noodles, and took a tentative bite.
Friends, it was a revelation. The flavor was mild, cheesy, and savory—a perfect blank canvas. The texture was pure silk. It was light yet satisfying, and I didn’t have that heavy, post-pasta nap feeling afterward. I’d accidentally created a powerhouse meal. I immediately texted a picture to my sister with the caption, “Guess what’s in this sauce?!” She couldn’t believe it. Now, it’s our little secret weapon for quick, nourishing, and downright delicious dinners. And today, I’m sharing that secret with you.
Gathering Your Dream Team: Ingredients for Silky Success
Here’s the beautiful part: this sauce requires minimal ingredients, but each one plays a starring role. Let’s break them down so you know exactly why they’re here and how you can swap them if needed.
- 1 cup Cottage Cheese (full-fat or 2%): This is our MVP. Full-fat or 2% will give you the creamiest, richest result. The fat content helps it blend into a luxurious sauce. Avoid fat-free if you can—it can sometimes be a bit gummy and lacks that lush mouthfeel. Chef’s Insight: Don’t stress about the curds; the blender will take care of them!
- ¼ cup Grated Parmesan Cheese: Our flavor booster. It adds that essential salty, nutty, umami depth that makes the sauce taste complex and “cheesy” in the best way. Freshly grated from a block is ideal, but the pre-grated stuff in a pinch works too.
- 1 clove Garlic: The aromatic heart. I love using a raw clove for a little pungent kick. For a sweeter, mellower flavor, try a roasted garlic clove—it’s a game-changer!
- 1–2 tablespoons Olive Oil: This adds richness, helps the blending process, and brings a fruity background note. A good extra-virgin olive oil is perfect here.
- ¼–½ cup Reserved Pasta Water: This is NOT optional! It’s the magic potion that brings your sauce together. The starchy, salty water helps emulsify the sauce, making it silky and helping it cling to the pasta. Always reserve more than you think you need!
- Salt and Black Pepper to taste: Season as you go! Remember, the parmesan and pasta water are already salty, so taste before you add more salt.
- Optional Boosters: This is where you make it yours! A pinch of red pepper flakes for heat, a teaspoon of lemon zest for bright acidity, or a handful of fresh basil blended right in or sprinkled on top.
Let’s Make Magic: Your Foolproof Step-by-Step Guide
Ready? This comes together faster than you can say “al dente.” Let’s walk through it together, with all my favorite chef hacks along the way.
- Cook Your Pasta & Save That Water!Bring a large pot of well-salted water to a boil (it should taste like the sea!). Add your favorite pasta—I’m partial to rigatoni or fettuccine for this one—and cook until al dente. Right before you drain it, grab a mug and scoop out at least ½ cup of that starchy pasta water. This is liquid gold! Drain the pasta but don’t rinse it; we want that starch to help the sauce stick.
- Blend Until Dreamy.While the pasta cooks, make the sauce. To your blender or food processor, add the cottage cheese, parmesan, garlic, olive oil, and about 2 tablespoons of the reserved pasta water. Blend on high for a full 45-60 seconds. Seriously, let it go! You want it completely smooth, with no graininess. Stop, scrape down the sides, and blend again if needed. It should look like a creamy, pourable alfredo sauce.
- Warm & Coax It Together (The Key Step!).Here’s a pro tip: pour the blended sauce into the empty, still-warm pasta pot (no need to wash it!). Place it over very low heat. We’re not trying to boil it, just warm it through gently. This step “wakes up” the flavors and mellows the raw garlic a touch. Now, start whisking in more of your reserved pasta water, a splash at a time, until the sauce reaches a beautiful, coating consistency. It should flow easily off a spoon.
- The Grand Toss.Add your drained pasta directly into the pot with the warmed sauce. Use tongs or a big spoon to toss, toss, toss! Get every noodle gloriously coated. The residual heat from the pasta and pot will thicken the sauce slightly as you work. If it gets too thick, add another splash of pasta water. Season with black pepper and a pinch of red pepper flakes now.
- Taste & Adjust.This is the most important step. Taste it! Does it need a pinch more salt? A squeeze of lemon juice? More parmesan? Make it perfect for your palate.
Plating Up the Comfort: How to Serve Your Masterpiece
Presentation is part of the fun! You’ve made something beautiful—let’s show it off.
I love using a pair of tongs to twirl a nest of pasta into a shallow bowl. The sauce should cling and pool just a little at the bottom. Now, finish it! A final shower of freshly grated parmesan is a must. From there, the world is your oyster.
For a pop of color and freshness, tear some fresh basil or parsley over the top. A tiny drizzle of your best olive oil adds a lovely sheen. If you added lemon zest to the sauce, a little more on top looks gorgeous. For a bit of texture, try a sprinkle of toasted breadcrumbs or pine nuts.
This sauce is rich enough to stand alone, but it also loves company. Serve it alongside a big, crisp green salad with a tangy vinaigrette to cut through the creaminess. A slice of crusty garlic bread is never a wrong answer for mopping up every last drop.
Make It Your Own: 5 Flavorful Twists to Try
The basic formula is your springboard. Once you’ve mastered it, try one of these delicious variations!
- The “Everything Garden” Pasta: Right after tossing the pasta with sauce, stir in a couple of big handfuls of baby spinach or arugula. The residual heat will wilt it perfectly. Add a cup of halved cherry tomatoes or chopped sun-dried tomatoes for sweetness and color.
- Lemon Herb Brilliance: Add the zest of one whole lemon and a tablespoon of its juice to the blender. Stir in a handful of chopped fresh dill, chives, or basil at the end. This version is incredibly bright and fresh.
- Protein Powerhouse: Add cooked, shredded rotisserie chicken, sautéed shrimp, or crumbled Italian sausage to the pot when you warm the sauce. It turns a side into a hearty, complete meal.
- Vegan-Friendly Dream: Use a plant-based cottage cheese (they exist!) or swap it for a cup of soaked raw cashews blended until smooth. Substitute nutritional yeast for the parmesan. You’ll get that same creamy, cheesy vibe.
- Roasted Garlic & Mushroom: Swap the raw garlic for 2-3 cloves of sweet, roasted garlic. While your pasta cooks, sauté a package of sliced mushrooms in olive oil until golden and crispy, then fold them in at the end. Earthy, savory, and deeply satisfying.
Beau’s Kitchen Notes: The Story Behind the Sauce
This recipe has become a living, evolving thing in my kitchen. My sister, the original taste-tester, now adds a splash of white wine to the blender and swears by it. I’ve been known to throw in a spoonful of ricotta with the cottage cheese for an even more decadent texture.
The biggest lesson? Don’t skip the blending time. I once rushed it for a hungry friend and ended up with a slightly grainy sauce. He still loved it, but I knew it wasn’t its silky best. Now, I set a timer! Also, this sauce is a fantastic fridge-cleaner. That little bit of pesto, the last tablespoon of sun-dried tomato oil, a few sprigs of wilting herbs—they all find a happy home in this blender. Cooking should be playful, and this recipe is the perfect playground.
Your Questions, Answered: FAQs & Quick Fixes
Q: My sauce turned out a bit grainy. What did I do wrong?
A: Most likely, it just needed more blending time! Cottage cheese needs a good, long blitz to become completely smooth. Make sure you’re blending for at least 45 seconds on high. Also, using a high-powered blender or food processor helps immensely.
Q: Can I make this sauce ahead of time?
A: Absolutely! Blend the sauce (without the pasta water) and store it in an airtight container in the fridge for up to 3 days. When ready to serve, warm it gently in a pan, thinning it out with a little milk, cream, or your reserved pasta water from your fresh pot of pasta.
Q: The sauce seems too thin/too thick. Help!
A: No worries—this is an easy fix! Too thin? Let it simmer on low for another minute or two; it will thicken as water evaporates. You can also add a touch more grated parmesan. Too thick? This is why we saved that pasta water! Add it back in, a tablespoon at a time, until it’s perfectly saucy.
Q: Can I use a different cheese instead of parmesan?
A> Of course! Pecorino Romano is a fantastic salty swap. For a milder flavor, try Asiago or even a sharp white cheddar. Just be mindful of the salt content and adjust accordingly.

Creamy Cottage Cheese Pasta Sauce : High-Protein and Silky Smooth
Description
Hey friends, Beau here from Feastical! If you love creamy pasta but don’t love the post-dinner heaviness, this sauce is about to become your weeknight hero. Blended cottage cheese transforms into a silky, luscious sauce that hugs every noodle—no heavy cream required. It’s fast (15 minutes!), budget-friendly, secretly protein-packed, and endlessly customizable. Let’s make comfort food that leaves you energized and happy.
Ingredients
-
1 cup cottage cheese (2% or full-fat for best texture)
-
¼ cup grated Parmesan (freshly grated melts best)
-
1 clove garlic (raw for punch, roasted for sweetness)
-
1–2 tbsp olive oil
-
¼–½ cup reserved pasta water
-
Salt & freshly ground black pepper, to taste
Optional boosters: red pepper flakes, lemon zest, fresh basil or parsley, pinch of nutmeg
Instructions
-
Cook pasta & save water
Boil pasta in well-salted water until al dente. Reserve at least ½ cup pasta water, then drain. -
Blend until dreamy
Add cottage cheese, Parmesan, garlic, olive oil, and 2 tbsp pasta water to a blender. Blend on high 45–60 seconds until completely smooth. -
Warm gently
Pour sauce into the warm pasta pot over low heat. Whisk in pasta water a splash at a time until it’s silky and pourable. -
Toss & finish
Add pasta, toss to coat. Season with pepper (and salt if needed). Add any boosters you love.
Notes
-
Grainy? Blend longer. High speed + patience = silk.
-
Too thick? Add pasta water, 1 tbsp at a time.
-
Too thin? Simmer gently 1–2 minutes or add a bit more Parmesan.
-
Make ahead? Blend without pasta water; refrigerate up to 3 days. Reheat gently and thin when serving.
Nourishment on Your Plate: A Quick Nutritional Glance
One of the best parts of this sauce is how nourishing it is! The numbers below are for the sauce only (about ½ cup serving), not including the pasta or add-ins. Using 2% cottage cheese and olive oil:
- Calories: ~150
- Protein: ~12g (That’s the power of cottage cheese!)
- Carbohydrates: ~3g
- Fat: ~10g
- Sugar: ~2g
- Fiber: 0g
This makes it a fantastic, high-protein, lower-carb base for your meal. By using whole-wheat or legume-based pasta, you can increase the fiber content. Remember, these are estimates. The exact values will depend on the specific brands and amounts you use. The key takeaway? You’re getting a creamy, comforting sauce with a serious protein punch that supports your energy levels and keeps you full.
Final Thoughts: A New Staple for Your Kitchen
And there you have it, friends—the creamy, dreamy, secretly healthy pasta sauce you never knew you needed. It’s proof that sometimes the most extraordinary meals come from the most ordinary ingredients, a little curiosity, and a willingness to hit the blender button.
This recipe is more than just a list of steps; it’s an invitation to play, to customize
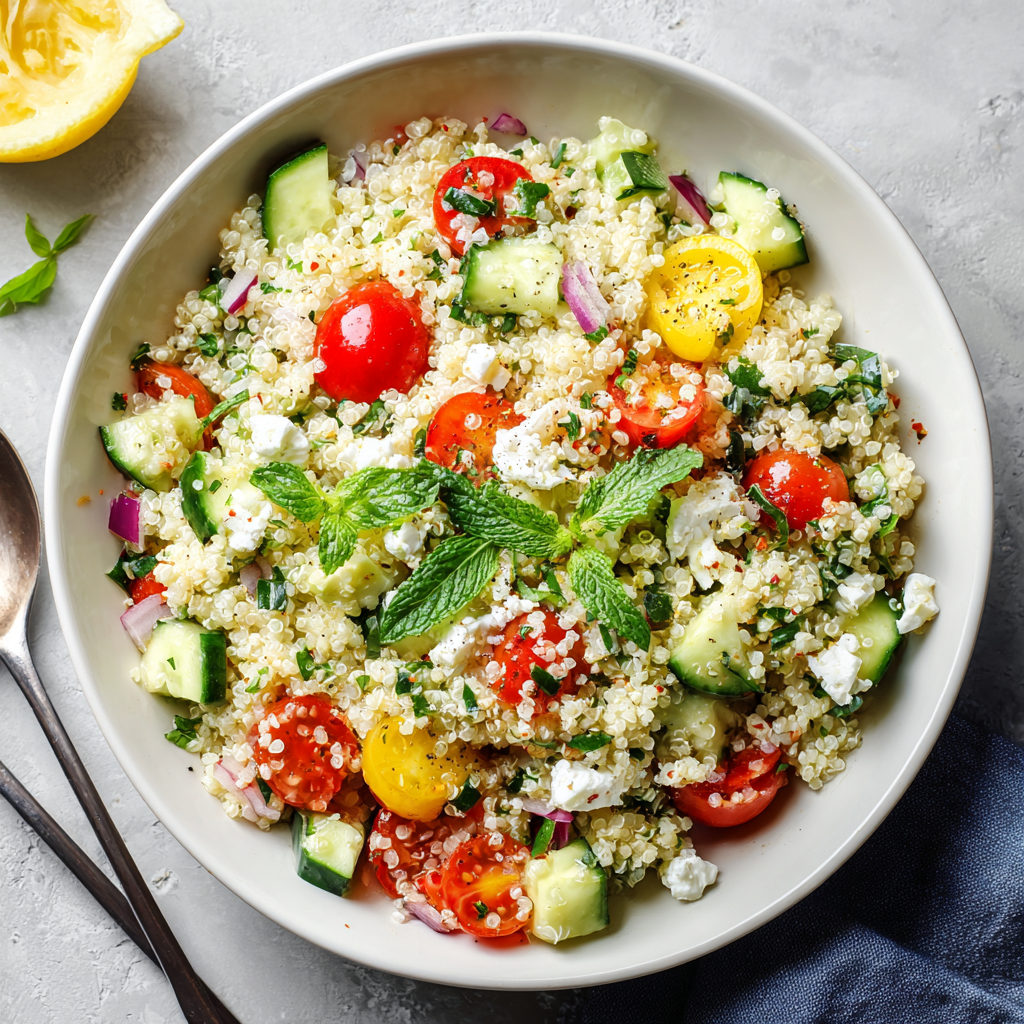
Creamy Quinoa Cottage Cheese Protein Salad : Fresh, Filling & Unexpectedly Delicious
Creamy Quinoa Cottage Cheese Protein Salad – Fresh, Filling & Unexpectedly Delicious
A Creamy, High-Protein Twist on a Classic Grain Salad That Will Become Your New Go-To
Forget Everything You Thought You Knew About “Healthy Salad”
Hey friends, Beau here! Let’s have a real talk for a second. When you hear “protein salad,” what pops into your head? Is it a dry, sad-looking bowl of grilled chicken on a mountain of lettuce? Or maybe a chalky, unidentifiable protein powder mess? Yeah, I’ve been there too. My fridge has seen its fair share of earnest but deeply disappointing meal-prep containers.
But what if I told you there’s a salad out there that’s actually creamy, satisfying, and tastes like a celebration of fresh ingredients? A salad you’ll crave, not just tolerate? That’s the magic of this Quinoa Cottage Cheese Protein Salad. It’s the culinary equivalent of finding a twenty-dollar bill in your old jeans—unexpected, delightful, and instantly improves your day.
This isn’t just a salad; it’s a texture party. You get the fluffy, nutty chew of quinoa, the cool, creamy tang of cottage cheese, and the juicy, crunchy pop of fresh veggies all in one forkful. It’s a powerhouse of nutrition that doesn’t shout “health food” from the rooftops—it just quietly fuels your body and makes your taste buds incredibly happy. Perfect for a post-workout refuel, a make-ahead lunch that actually survives until Thursday, or a light, bright dinner on a warm evening. So, grab your favorite mixing bowl and let’s make something that tastes as good as it makes you feel.
The “Accidental MVP” of My Fridge
This recipe was born from a classic “What on earth do I have left?” fridge situation. Picture it: a Tuesday evening, post-gym, and the hunger was real. The chicken I’d planned to cook was still frozen solid (we’ve all been there). I had a container of leftover quinoa from taco night, a tub of cottage cheese staring me down, and the usual veggie drawer suspects.
In a moment of hangry inspiration, I just… mixed it all together. I added a big squeeze of lemon, a crack of black pepper, and took a hesitant bite. Friends, it was a revelation. The creamy cottage cheese clung to the quinoa, creating this rich, dressing-like coating without any mayo or oil. The veggies added freshness and crunch. It was cool, satisfying, and packed a serious protein punch that kept me full for hours.
That humble, thrown-together bowl became an instant staple. It’s evolved a little since that first fateful Tuesday (I’ve gotten fancy with herbs and avocado), but its spirit remains the same: proof that the most delicious things often come from simplicity, a little creativity, and a well-stocked pantry.
Gathering Your Flavor Crew
Here’s the beautiful cast of characters that makes this salad sing. I love each one for a specific reason, and I’ll share why—plus how you can swap things in and out based on what’s in your kitchen.
- 1 cup cooked quinoa, cooled: This is our hearty, protein-packed base. I prefer tri-color quinoa for a little visual flair, but any color works perfectly. Chef’s Insight: Rinse your quinoa before cooking! It removes a natural bitter coating called saponin. Cook it in vegetable or chicken broth instead of water for an extra flavor boost.
- 1 cup cottage cheese: The creamy superstar! This is what makes the salad luxe without heavy dressings. Substitution Tip: Use full-fat for ultimate creaminess, low-fat for a lighter version, or even whipped cottage cheese for an extra-smooth texture. For a dairy-free twist, try a thick, plain, unsweetened almond or soy yogurt.
- ½ cup cherry tomatoes, halved: They bring juicy, sweet acidity. Chef’s Insight: If your tomatoes aren’t super flavorful, a tiny pinch of salt on them before adding to the bowl wakes them right up.
- ½ cup cucumber, diced: For that essential, refreshing crunch. I like English or Persian cucumbers for fewer seeds.
- ¼ cup red bell pepper, diced: A splash of color and sweet, grassy flavor. Yellow or orange peppers are gorgeous here too.
- 2 tbsp red onion, finely chopped: A little sharp bite to balance the creaminess. Pro-Tip: Soak the chopped onion in cold water for 5-10 minutes to mellow its intensity if you’re sensitive to raw onion.
- 2 tbsp fresh parsley or basil, chopped: The herbal “high note.” Parsley is bright and clean; basil adds a sweet, summery aroma. Don’t skip the fresh herbs—they make a huge difference!
- 1 tbsp fresh lemon juice: Our brightening agent. It cuts through the richness and ties all the flavors together. Always use fresh!
- Salt & black pepper to taste: The dynamic duo. Season in layers—a little when you combine the quinoa and cottage cheese, then again at the end.
- Optional garnishes: Avocado slices (for healthy fats), a drizzle of good olive oil, a sprinkle of everything bagel seasoning, sunflower seeds, or red pepper flakes for heat.
Let’s Build Your Masterpiece (It’s Easier Than You Think!)
This is less of a rigid recipe and more of a friendly assembly guide. I’ll walk you through each step with my favorite kitchen hacks to ensure perfect results every time.
- The Foundation: In a large, cozy-looking mixing bowl, plop in your cooled quinoa and cottage cheese. Grab a sturdy spoon or spatula and stir them together with enthusiasm until the cottage cheese is evenly distributed and creates a creamy cloak around every quinoa grain. This is your “dressing” moment! Tip: If your quinoa is still slightly warm, it’s okay! It will melt the cottage cheese a touch, making it even creamier. Just know it will thicken up again as it chills.
- The Crunch Factor: Now, lovingly add your halved cherry tomatoes, diced cucumber, bell pepper, and that finely chopped red onion. Scatter in your chopped fresh herbs. This is where the salad gets its personality and color, so have fun with it.
- The Brightening Touch: Drizzle that tablespoon of fresh lemon juice right over the top. Now, season with a good pinch of salt and several grinds of fresh black pepper. My golden rule: Start with a little, you can always add more. The salt will also help draw out some moisture from the veggies, creating a light, natural “juice” in the bowl.
- The Gentle Merge: Time to mix! Gently fold everything together until all the beautiful components are evenly acquainted. You want every spoonful to have a bit of everything. Take a taste. Need more zing? Add a squeeze more lemon. Need more depth? Another pinch of salt. Make it yours.
- The Patience Payoff (Optional but Recommended): You can absolutely dig in right now—it’s delicious. But if you have 15-30 minutes, cover the bowl and let it hang out in the fridge. This “marrying” time allows the flavors to meld beautifully and the salad to become wonderfully chilled. This is the meal-prep secret weapon!
- The Grand Finale: When you’re ready to serve, give it one last stir. Dish it into bowls and top with your chosen garnishes. I’m a sucker for creamy avocado slices and an extra crack of pepper.
How to Serve This Salad Like a Pro
This salad is wonderfully versatile. Here are a few of my favorite ways to plate it up:
The Simple Bowl: Honestly, it’s perfect straight out of the mixing bowl into your favorite deep dish. Eat it with a big spoon for maximum creamy-quinoa enjoyment.
The Protein-Packed Plate: Serve a generous scoop alongside a simply grilled chicken breast, a piece of pan-seared salmon, or some crispy roasted chickpeas for an extra protein boost. The cool salad is a fantastic contrast to warm protein.
The Lettuce Cup Upgrade: For a fun, low-carb presentation, spoon the salad into large, crisp butter lettuce or romaine leaves. It makes for a fantastic, hand-held lunch or appetizer.
The Picnic & Potluck Hero: This salad travels like a dream. Toss it in a sealed container, keep it cool in a cooler bag, and be prepared to share the recipe when everyone asks, “What is this? It’s amazing!”
Make It Your Own: 5 Tasty Twists
The basic formula is your playground. Here are some ways to switch it up based on your mood or what’s in season:
- Greek Goddess Vibes: Swap the parsley for fresh dill. Add a handful of chopped Kalamata olives and a sprinkle of crumbled feta cheese. A tiny pinch of dried oregano in the mix is divine.
- Southwest Fiesta: Use lime juice instead of lemon. Add a handful of black beans, some roasted corn (frozen and thawed works great), a diced jalapeño, and swap the parsley for cilantro. Top with a sprinkle of smoked paprika.
- Everything Bagel Style: Mix in a tablespoon (or two!) of everything bagel seasoning right into the salad. Top with extra and some thinly sliced scallions. Incredible.
- Spring Garden Fresh: Use peas (thawed frozen or blanched fresh), chopped radishes, and fresh mint instead of parsley. So light and bright!
- “Creamy Ranch” Version: Stir in a teaspoon of dried dill, a ½ teaspoon of garlic powder, and a ½ teaspoon of onion powder into the cottage cheese-quinoa base before adding the veggies. Tastes like your favorite ranch dip, in salad form!
A Few Things I’ve Learned Along the Way
This recipe has been a constant in my kitchen for years now, and it’s taught me a few things. First, cottage cheese quality matters! Try a few brands to find one you love the texture and taste of—it’s the heart of the dish. Second, don’t fear the “wetness.” As the salad sits, the salt and lemon will draw out moisture from the veggies, creating a lovely, light “broth” at the bottom of the container. Just stir it back in—it’s flavor!
Finally, this is the ultimate “clean-out-the-fridge” template. That lonely stalk of celery? Dice it up. A handful of spinach? Chop and toss it in. A few leftover roasted sweet potato cubes? Yes, please! This salad is forgiving and wants to be your canvas.
Your Questions, Answered
Q: Can I make this ahead of time for meal prep?
A: Absolutely! It’s a meal-prep champion. Store it in an airtight container in the fridge for up to 4 days. The flavors get even better by day two or three. If adding avocado, top each portion with it fresh when you’re ready to eat to prevent browning.
Q: My salad turned out a bit watery. What happened?
A: This usually comes from the veggies (especially cucumbers and tomatoes) releasing their natural juices. To prevent this, you can salt your diced cucumber and let it drain in a colander for 10 minutes, then pat dry before adding. Or, simply embrace it! That liquid is flavorful. You can also drain any excess from the container before giving it a final stir when you serve.
Q: I’m not a huge fan of the texture of cottage cheese. Any ideas?
A: Two great options: 1) Use a blender or food processor to puree the cottage cheese until completely smooth before mixing it in. It becomes a wonderfully thick, protein-packed creamy sauce. 2) Swap it for ricotta cheese or Greek yogurt. Ricotta is milder and creamier; Greek yogurt will give more tang.
Q: Can I use a different grain?
A: Of course! Farro, bulgur wheat, or even whole-grain couscous or orzo would be delicious. Just make sure it’s cooked and cooled before mixing.

Creamy Quinoa Cottage Cheese Protein Salad : Fresh, Filling & Unexpectedly Delicious
Description
Hey friends, Beau here from Feastical! If “protein salad” makes you think dry chicken and wilted lettuce, let’s reset expectations. This creamy quinoa cottage cheese salad is cool, satisfying, and packed with texture—fluffy quinoa, tangy cottage cheese, and crisp veggies all in one bowl. No mayo, no heavy dressing, just simple ingredients doing something magical together. It’s perfect for meal prep, post-workout fuel, or an easy lunch you’ll actually crave.
Ingredients
-
1 cup cooked quinoa, cooled
(any color; rinse before cooking for best flavor) -
1 cup cottage cheese
(full-fat for creaminess, low-fat for lighter; see tips for texture swaps) -
½ cup cherry tomatoes, halved
-
½ cup cucumber, diced
-
¼ cup red bell pepper, diced
-
2 tbsp red onion, finely chopped
-
2 tbsp fresh parsley or basil, chopped
-
1 tbsp fresh lemon juice
-
Salt & freshly ground black pepper, to taste
Optional garnishes: avocado slices, olive oil drizzle, sunflower seeds, everything bagel seasoning, red pepper flakes
Instructions
-
Create the creamy base
In a large bowl, mix the cooled quinoa and cottage cheese until the quinoa is evenly coated and creamy. -
Add the crunch
Fold in tomatoes, cucumber, bell pepper, red onion, and herbs. -
Brighten & season
Drizzle with lemon juice. Season with salt and pepper, starting light and adjusting to taste. -
Gently combine
Fold until everything is evenly distributed. Taste and tweak—more lemon for zing, more salt for depth. -
Chill (optional, but great)
Rest in the fridge 15–30 minutes for the flavors to meld. -
Serve
Finish with your favorite garnishes and enjoy!
Notes
-
Too watery? Dice cucumbers, salt lightly, let drain 10 minutes, then pat dry before adding.
-
Texture-sensitive to cottage cheese? Blend it smooth first, or swap with ricotta or Greek yogurt.
-
Warm quinoa okay? Yes—slightly warm quinoa makes it extra creamy; it thickens as it chills.
-
Season in layers: A little salt early, then adjust at the end for balance.
Feeling Good About What You’re Eating
While I’m a chef first and not a dietitian, I love knowing that what I’m eating is nourishing my body. This salad is a fantastic balance of macronutrients. The quinoa and cottage cheese team up to deliver a complete protein profile, meaning it contains all the essential amino acids your body needs. It’s rich in fiber from the quinoa and veggies, which aids digestion and keeps you feeling full. The healthy fats (especially if you add avocado or olive oil) help with nutrient absorption and satiety. It’s a balanced, energy-sustaining meal that truly tastes as good as it is for you.
Approximate Nutrition Per Serving (1 of 4, without optional garnishes): Calories: ~250 | Protein: 18g | Carbohydrates: 20g | Fat: 10g | Fiber: 3g
The Last Bite
And there you have it, friends—my secret weapon for a delicious, no-stress, powerfully nutritious meal. This Quinoa Cottage Cheese Protein Salad proves that eating well doesn’t have to be complicated, bland, or boring. It’s a recipe built on simplicity, powered by fresh ingredients, and designed to make you feel awesome.
I hope you give it a try and make it your own. Tag me @feastical on social media if you do—I love seeing your kitchen creations! Now, go forth, mix with abandon, and enjoy every creamy, crunchy, satisfying bite. Until next time, keep your spatula handy and your hunger for good food strong.
Cheers,
Beau

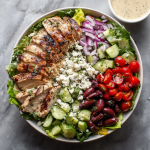
Mediterranean Protein Salad with Hummus Dressing : Fresh, Flavorful & Filling
Sunshine in a Bowl: Your New Favorite Mediterranean Protein Salad
Hey there, friend! Beau here, welcoming you back to my kitchen at Feastical. Is it just me, or does your soul sometimes crave a meal that’s both a vibrant party for your taste buds and a straight-up hug for your body? You know the feeling—you want something fresh that makes you feel light and energized, but also something hearty and satisfying that won’t leave you hunting for a snack an hour later. I’ve got you. Today, we’re ditching the dull and diving fork-first into a bowl of pure, sun-kissed joy: my Mediterranean Protein Salad with Hummus Dressing.
This isn’t just a “salad.” Let’s be real, that word can sometimes imply a sad pile of leaves you eat out of duty. Nope. This is a celebration in a bowl. Imagine perfectly grilled, savory chicken (or lamb!), crisp, cool vegetables, briny pops of olive, creamy tangs of feta, all wrapped up in a luscious, dreamy dressing made from humble hummus. It’s crunchy, creamy, savory, and bright all at once. It’s the kind of meal you make for a healthy lunch and end up craving for dinner, too. It’s protein-packed, fiber-filled, and loaded with the kind of flavors that transport you straight to a breezy seaside taverna. So, grab your favorite chopping board and your biggest, prettiest bowl. We’re about to create magic that’s as simple as it is spectacular. Let’s get into it!
A Taste of the Aegean Sea (No Passport Required)
This recipe has a little bit of my heart baked right into it. Years ago, I was lucky enough to spend a hazy, glorious afternoon on a Greek island. After a morning of wandering through whitewashed streets, my friends and I stumbled into a tiny family-run taverna overlooking the water. We pointed at a few things on the menu we couldn’t pronounce, and what arrived was a masterpiece on a platter: grilled meats, a mountain of village-style salads, warm pita, and this incredible, garlicky bean dip. It wasn’t fancy. It was real. We shared everything, talking and laughing for hours, soaking in the sun and the simplicity.
That meal was a lesson in how food brings people together and how the best flavors come from quality ingredients, not complicated techniques. My Mediterranean Protein Salad is my weekly homage to that feeling. It’s my way of capturing those bold, honest flavors and that sense of relaxed, shared joy. Every time I make it, whether it’s for a quick solo lunch or a casual dinner with my family, it brings a little of that Aegean sunshine right to my table. I hope it does the same for yours.
Gathering Your Flavor All-Stars
Here’s everything you’ll need to build your own Mediterranean masterpiece. I love using this section to share a few insider tips and swaps—cooking should be flexible and fun!
- 2 cups grilled chicken or lamb, sliced: The protein powerhouse! I often use leftover grilled chicken from last night’s dinner (a total time-saver). Chef’s Insight: For maximum flavor, marinate your meat for 30 minutes in a mix of olive oil, lemon juice, oregano, and garlic before grilling or pan-searing.
- 4 cups mixed greens or chopped romaine: Your fresh, crunchy base. I adore the peppery bite of arugula here, but a sturdy romaine or spring mix works perfectly. Sub Tip: No greens? Use cooked quinoa or couscous for a heartier grain bowl!
- 1 cup cherry tomatoes, halved: Sweet, juicy bursts of flavor. Chef’s Insight: Halve them just before assembling to keep all their lovely juices inside until you’re ready to eat.
- 1/2 cup cucumber, sliced: For that essential cool, crisp crunch. I like to use English cucumbers so I don’t have to peel or seed them.
- 1/4 cup kalamata olives, pitted: The salty, briny soul of the Mediterranean. Don’t skip these! They add a deep, complex flavor. Sub Tip: Not an olive fan? Try capers for a different kind of salty punch.
- 1/4 cup red onion, thinly sliced: A sharp, colorful bite. Chef’s Hack: To mellow the raw onion flavor, soak the slices in ice water for 10 minutes. They’ll stay crisp but lose that harsh edge.
- 1/4 cup crumbled feta (optional): Creamy, tangy, and utterly irresistible. The “optional” is only if you’re dairy-free—otherwise, I highly recommend it!
For the Hummus Dressing (The Secret Star!):
- 1/4 cup hummus: This is the genius base! It makes the dressing creamy, flavorful, and packed with protein. Use your favorite store-bought brand or homemade.
- 2 tbsp olive oil: Extra virgin, if you have it! It adds richness and helps emulsify the dressing into a silky-smooth consistency.
- 2 tbsp lemon juice: Freshly squeezed, please! This bright, acidic zing is non-negotiable for cutting through the richness.
- 1 tbsp water: Our magic thinning agent. Add it gradually until you reach your perfect, drizzly consistency.
- 1/2 tsp garlic powder: Gives a consistent, mellow garlic flavor without the bite of raw garlic. Sub Tip: A small minced fresh garlic clove works too, but use it sparingly!
- Salt & pepper to taste: Season with love, and always taste as you go.
Let’s Build Your Flavor Bowl: A Step-by-Step Journey
Follow these steps, and you’ll have a restaurant-worthy salad in about 20 minutes. I’m chatting you through each one with my best tips to ensure success!
- Conquer the Dressing First. In a small bowl or a mason jar with a lid, combine the hummus, olive oil, lemon juice, and garlic powder. Grab a whisk or put that lid on tight and shake with vigor! Chef’s Hack: Starting with the dressing lets the flavors meld while you prep everything else. Now, look at the consistency. Want it thicker for a dip? Stop here. Want it drizzle-able for a salad? Add the water, one teaspoon at a time, whisking/shaking after each addition, until it flows beautifully off your whisk. Season with salt and pepper. Give it a final taste—need more lemon? More garlic? Make it yours!
- Prep Your Veggie Squad. While your dressing hangs out, wash and chop all your vegetables. Halve the tomatoes, slice the cucumber, thinly slice the onion (remember the ice water trick if you want!), and pit your olives if they aren’t already. Chef’s Tip: I like to do all my chopping on one big cutting board for easy transfer. It feels efficient and chef-y.
- Handle the Protein. If you haven’t already grilled your chicken or lamb, now’s the time. Season it well and cook it in a hot pan or on the grill until beautifully browned and cooked through. Let it rest for 5 minutes on a cutting board before slicing. Why rest? This lets the juices redistribute so every bite is moist and delicious, not dry.
- Assemble with Abandon! In your large serving bowl (or individual meal prep containers), start with your greens. I like to create little “sections” or just toss everything together—there’s no wrong way! Scatter the tomatoes, cucumber, olives, and red onion over the top. Sprinkle generously with the crumbled feta. Presentation Tip: Layering the colorful ingredients on top of the greens makes for a stunning, Instagram-worthy bowl that’s almost too pretty to eat. Almost.
- The Grand Finale. Artfully arrange your sliced, warm grilled meat over the vegetable rainbow. Just before serving, take that gorgeous hummus dressing and drizzle it over everything. Meal Prep Wisdom: If you’re packing this for lunch tomorrow, keep the dressing in a separate small container and add it just before you eat to keep those greens perfectly crisp and not soggy.
How to Serve It Up Like a Pro
This salad is a complete meal in a bowl, but a few thoughtful touches can turn it into a true feast! For a casual weeknight dinner, I love serving it with warm, toasted pita bread or pita chips on the side—perfect for scooping up every last bit of dressing and feta. If you’re feeling fancy, add a small dish of marinated artichoke hearts or roasted red peppers on the table for people to add as they like.
For a heartier crowd or a weekend lunch, consider setting up a “Mediterranean Bowl Bar.” Put the greens in a big bowl, and all the toppings—the chopped veggies, olives, feta, grilled meat, even some extra options like chickpeas, pepperoncini, and toasted pine nuts—in separate dishes. Let everyone build their own perfect bowl. It’s interactive, fun, and guarantees happy eaters. Pour a glass of crisp white wine or sparkling water with lemon, and you’ve got a party!
Make It Your Own: Delicious Twists & Swaps
The beauty of this recipe is its flexibility. Play with it! Here are a few of my favorite riffs:
- The “No-Cook” Quick Fix: Use a rotisserie chicken from the store or canned chickpeas (rinsed and patted dry) for instant, no-cook protein. It turns this into a true 10-minute meal.
- Pescatarian Delight: Swap the chicken for pan-seared shrimp or flaky, baked salmon. The hummus dressing pairs amazingly with seafood.
- Vegan Power Bowl: Omit the meat and feta. Double down on chickpeas and add baked tofu cubes or lentil falafel. Use a vegan hummus for the dressing—it’s just as creamy and delicious.
- Different Dressing Vibes: Love tahini? Thin out a few tablespoons with lemon juice and water for a classic tahini sauce. Craving herby freshness? Blend the hummus dressing with a big handful of fresh parsley, dill, or basil.
- The Ultimate Greek Spin: Add 1/4 cup of chopped pepperoncini for heat and a tablespoon of dried oregano to your meat marinade or sprinkle it right over the salad before serving.
Beau’s Kitchen Notebook
This recipe has been a constant in my rotation for years, and it’s evolved in the best ways. I started with a basic vinaigrette, but one day I was out of oil and had a half-empty tub of hummus staring at me. A little lemon juice, a splash of water… and a star was born! The hummus dressing is now the non-negotiable heart of the dish for me. It’s thicker than a vinaigrette, so it clings to every ingredient instead of pooling at the bottom of the bowl.
A funny story: I once accidentally used spicy red pepper hummus for the dressing. My friends thought I was a culinary genius for adding such a “complex, subtle heat.” I didn’t have the heart to tell them it was a happy accident—now it’s a requested variation! The moral? Don’t be afraid to play and make mistakes in the kitchen. Sometimes, they lead to the best discoveries.
Your Questions, Answered
Q: Can I make this salad ahead of time for meal prep?
A: Absolutely! This is a meal prep champion. The key is to store components separately. Keep the dressing in its own jar, the chopped veggies (except tomatoes, which can get mushy) in one container, the greens in another, and the sliced meat in a fourth. Assemble your bowl the morning you plan to eat it, or keep the greens separate and combine everything at lunchtime. It will stay fresh and crisp for 3-4 days.
Q: My hummus dressing is too thick/too thin. Help!
A: No sweat! Too thick? Add more liquid—water, lemon juice, or even a touch more olive oil—a teaspoon at a time until it’s right. Too thin? Whisk in another spoonful of hummus to thicken it back up. Consistency is totally personal preference.
Q: What’s the best way to grill the chicken for this?
A: I love using boneless, skinless chicken thighs for their juiciness, but breasts work great too. Pound them to an even thickness so they cook evenly. A simple marinade of olive oil, lemon, garlic, oregano, salt, and pepper for 30 minutes makes all the difference. Grill or pan-sear over medium-high heat for 5-7 minutes per side until cooked through (165°F).
Q: I’m not a fan of raw red onion. Any ideas?
A: I hear you! Try the ice water soak trick mentioned above—it works wonders. Or, you can quickly pickle them! Soak thin slices in a mix of equal parts hot water and vinegar (red wine or white) with a pinch of sugar and salt for 15-20 minutes. They become sweet, tangy, and addictive.
Mediterranean Protein Salad with Hummus Dressing : Fresh, Flavorful & Filling
Ingredients
For the Salad
-
2 cups grilled chicken or lamb, sliced
-
4 cups mixed greens or chopped romaine (arugula is great too)
-
1 cup cherry tomatoes, halved
-
½ cup cucumber, sliced
-
¼ cup Kalamata olives, pitted
-
¼ cup red onion, thinly sliced
-
¼ cup crumbled feta (optional)
For the Creamy Hummus Dressing
-
¼ cup hummus (classic or flavored)
-
2 tbsp extra-virgin olive oil
-
2 tbsp fresh lemon juice
-
1–2 tbsp water, to thin
-
½ tsp garlic powder (or a small clove fresh garlic, minced)
-
Salt & black pepper, to taste
Instructions
-
Make the Dressing
Whisk hummus, olive oil, lemon juice, garlic powder, salt, and pepper until smooth. Add water a little at a time until it’s creamy and drizzle-able. Taste and adjust. -
Prep the Veggies
Wash and chop greens; halve tomatoes; slice cucumber and onion; pit olives.
Tip: Soak onion slices in ice water for 10 minutes to mellow the bite. -
Prepare the Protein
Grill or pan-sear chicken or lamb until golden and cooked through. Rest 5 minutes, then slice. -
Assemble
Add greens to a large bowl (or two bowls). Top with tomatoes, cucumber, olives, onion, and feta. Arrange sliced protein on top. -
Finish & Serve
Drizzle generously with hummus dressing and serve immediately.
Notes
-
Marinate for flavor: 30 minutes in olive oil, lemon, oregano, and garlic elevates the meat.
-
Consistency control: Too thick? Add water or lemon. Too thin? Whisk in more hummus.
-
Meal prep win: Store dressing separately; add just before eating to keep greens crisp.
Nourishment That Feels Good
Let’s talk about why this bowl makes your body sing. This isn’t just empty calories; it’s fuel designed to keep you satisfied and energized. The lean grilled chicken provides a hefty dose of high-quality protein, essential for building and repairing muscle and keeping you full. The olive oil and hummus contribute healthy monounsaturated fats, great for heart health. The mountain of vegetables delivers a spectrum of vitamins, minerals, and antioxidants, plus a good amount of fiber to aid digestion. The feta adds a bit of calcium. It’s a truly balanced plate (or bowl!) that proves healthy eating can be incredibly delicious and far from boring.
Approximate Nutritional Info per serving (with chicken, using 2 servings): Calories: ~450 | Protein: 35g | Carbs: 10g | Fat: 28g | Fiber: 5g. (Note: This is an estimate. Values can vary based on specific ingredients and portion sizes.)

Buffalo Chicken Protein Salad : Spicy, Crunchy & Creamy
Spicy, Crunchy, Creamy & Packed with Protein: Your New Favorite Salad is Here
Hey there, friends! Beau here, welcoming you back to my kitchen at Feastical. Today, we’re ditching the boring salad narrative for good. You know the one—a sad pile of leaves you eat because you “should.” Nope. Not in my house. We’re building a salad that you’ll actually crave. A salad that’s a meal, a flavor explosion, and a serious source of fuel all in one gorgeous, colorful bowl.
I’m talking about my Buffalo Chicken Protein Salad. This isn’t just a salad; it’s an experience. It’s the fiery kick of buffalo sauce holding hands with the cool, creamy dreaminess of a yogurt drizzle. It’s the satisfying crunch of fresh celery playing hide-and-seek with tender, shredded chicken. It’s bold, it’s balanced, and it proves that healthy eating can be the most exciting part of your day.
Whether you’re meal-prepping like a boss for the week ahead, needing a quick dinner that delivers maximum satisfaction, or just looking for a way to jazz up leftover rotisserie chicken, this recipe is your new best friend. It’s incredibly simple, endlessly adaptable, and, most importantly, it tastes like a victory. So, tie on your apron, grab your favorite big bowl, and let’s create something that packs a serious punch of flavor and protein. Your taste buds (and your muscles) will thank you.
Why This Salad? A Tale of Tailgates and Flavor Revelations
This recipe was born from a beautiful collision of necessity and nostalgia. Picture this: It’s a crisp fall Saturday, and my friends and I are in full tailgate mode. The air smells like charcoal and anticipation. We’ve got the classic spread: wings dripping with spicy buffalo sauce, a giant tub of cool ranch dip, and the obligatory veggie platter (mostly for decoration, let’s be honest).
As I went to build my plate, I had a revelation. I wanted everything—the spicy, the creamy, the crunchy, the fresh—in one perfect bite. But balancing a plate of messy wings, a dip cup, and celery sticks while cheering is… an athletic endeavor. Right there, in a parking lot surrounded by laughter and team spirit, the idea clicked: “What if I just put all those incredible flavors into one epic, handheld-adjacent salad?”
That next Monday, I hit my home kitchen with that tailgate energy. I swapped the usual heavy ranch for a protein-packed Greek yogurt drizzle, made sure every forkful had a bit of spicy chicken and cool crunch, and voilà. The Buffalo Chicken Protein Salad was born. It’s my happy reminder that the best recipes often come from life’s simple, joyful moments—and a desire to eat all your favorite flavors without needing ten napkins.
Gather Your Flavor Crew: Ingredients & Chef Insights
Here’s everything you need to build this powerhouse salad. Remember, great ingredients make a great dish, but flexibility is your friend! I’ve included my favorite tips and swaps so you can make this your own.
- 2 cups cooked, shredded chicken: The star of our protein show! I love using the meat from a rotisserie chicken for ultimate ease and flavor. Leftover baked or grilled chicken works perfectly, too. Chef’s Insight: For super tender shreds, toss slightly warm chicken in your stand mixer with the paddle attachment on low for 30 seconds. Game changer!
- ¼ cup buffalo sauce: This is where the personality lives. Use your favorite brand, from Frank’s RedHot (a classic) to something smokier or sweeter. Substitution Tip: For less heat, mix buffalo sauce with a little melted butter or a drizzle of honey. For a dairy-free version, use a vegan buffalo sauce.
- 4 cups chopped romaine or mixed greens: Our crunchy foundation. Romaine gives that perfect crisp texture, but a spring mix or baby kale adds different nutrients and a peppery bite. Chef’s Insight: Always dry your greens thoroughly after washing! A salad spinner is your best friend for a crisp, not soggy, base.
- 1 cup celery, thinly sliced: The classic buffalo wing companion. It adds essential hydration and a clean, satisfying CRUNCH. Don’t skip it! Substitution Tip: If you’re not a celery fan, try sliced jicama or even crisp, halved sugar snap peas for a different kind of snap.
- ½ cup cherry tomatoes, halved: Little bursts of juicy, sweet acidity that cut through the richness. Chef’s Insight: Halve them just before serving to keep their juicy goodness inside until the very last moment.
- ¼ cup red onion, thinly sliced: Adds a sharp, vibrant bite. Pro Tip: Soak the sliced onions in ice water for 10 minutes before using. It tames their harshness and makes them delightfully crisp!
- Optional: ½ avocado, sliced & crumbled blue cheese or feta: The luxury upgrades! Avocado adds creamy healthy fats, and the cheese brings a tangy, salty punch that sings with buffalo sauce. Choose blue for authenticity or feta for a slightly milder tang.
For the Cool & Creamy Yogurt Drizzle:
- ½ cup plain Greek yogurt: Our high-protein, gut-healthy base for the drizzle. It’s thick, tangy, and perfect. Substitution Tip: Sour cream or a dairy-free plain yogurt work great here too.
- 1 tbsp ranch or blue cheese dressing: A little cheat that injects big flavor instantly. Use bottled or your favorite homemade version. This bridges the yogurt to the classic wing dip flavor profile.
- 1 tbsp lemon juice or vinegar: The brightening agent! Fresh lemon juice is my go-to, but white wine or apple cider vinegar adds a nice twist. It wakes up all the other flavors.
- Salt & pepper to taste & a splash of water: Seasoning is key! Taste and adjust. The water is just to thin the drizzle to your desired pourable consistency.
Let’s Build Your Flavor Masterpiece: Step-by-Step
Ready to assemble? This comes together faster than you can say “more hot sauce, please.” Here’s your roadmap, complete with my favorite kitchen hacks along the way.
- Become Best Friends with the Chicken. In a medium bowl, toss your shredded chicken with the buffalo sauce. Don’t just drizzle—get in there with a fork or your hands and make sure every single nook and cranny of that chicken is coated in that beautiful, spicy orange hue. Chef’s Hack: Let it sit for 5-10 minutes if you have time. This allows the chicken to really drink in the sauce, making it more flavorful and tender.
- Whip Up the Magic Drizzle. In a small bowl, combine the Greek yogurt, your chosen dressing (ranch or blue cheese), and the lemon juice. Whisk it until it’s completely smooth and creamy. Now, season it with salt and pepper. Taste it! This is your moment. Want more tang? Add a squeeze more lemon. More herbaceous flavor? A pinch of dried dill or garlic powder works wonders. If it’s too thick for drizzling, add that splash of water, a teaspoon at a time, until it’s perfect.
- Build Your Crunchy Foundation. Grab your serving bowls or one big, beautiful salad platter for family-style serving. Start with a generous bed of your crisp, dry greens. This is your canvas.
- Artfully Arrange the Veggies. Scatter the sliced celery, halved cherry tomatoes, and those quick-soaked red onions over the greens. If you’re using avocado, add it now. Pro Tip: For visual appeal, I like to arrange the veggies in little piles or sections around the bowl—it looks restaurant-fancy with zero extra effort.
- Crown It with the Star. Pile that glorious, saucy buffalo chicken right in the center of your veggie kingdom. Let it be the hero it is.
- The Final, Creamy Flourish. Take your yogurt drizzle and, using a spoon or squeeze bottle, artistically zig-zag it over the entire salad. Don’t be shy! The contrast of the white drizzle on the vibrant salad is gorgeous.
- Garnish and Serve! A final sprinkle of crumbled blue cheese or feta, maybe a crack of black pepper, and you are DONE. Serve it immediately for the ultimate textural contrast between the warm(ish) chicken and the cool, crisp veggies.
How to Serve It Like a Pro
Presentation is part of the joy of food! Here’s how I love to serve this salad to make it feel extra special, whether it’s just for you or for a crowd.
For a stunning family-style meal, use a wide, shallow platter. Build it as directed, letting all the colorful components shine side-by-side. It’s a feast for the eyes. For individual lunches, I’m a huge fan of the meal-prep jar method. In a quart-sized mason jar, start with the yogurt drizzle at the bottom. Then, layer in the buffalo chicken, followed by the harder veggies (celery, onions, tomatoes), and pack the greens tightly on top. Screw the lid on and refrigerate. At lunchtime, just dump it into a bowl and toss—the dressing is already on the bottom, ready to coat everything perfectly!
Pairing ideas? Keep it light with a side of crisp cucumber slices or sweet apple wedges to complement the spice. If you’re extra hungry, a warm, crusty roll or a few whole-grain crackers on the side are perfect for scooping up any leftover drizzle and chicken bits (the best part!).
Make It Your Own: 5 Flavorful Twists
This salad is a fantastic template. Play with it! Here are some of my favorite riffs.
- The “No-Chicken” Champ: Vegetarian or just out of chicken? Canned chickpeas (rinsed and patted dry) or crispy roasted cauliflower florets are phenomenal. Toss them in buffalo sauce just like you would the chicken for a plant-powered punch.
- Swap the Sauce: Love different flavors? Try tossing the chicken in BBQ sauce for a sweet-and-smoky version, or go for a sriracha-honey mix for a sweet heat. The creamy drizzle still works perfectly!
- Grain Bowl Glory: Need more staying power? Add a scoop of cooked and cooled quinoa, farro, or brown rice under the greens. It transforms the salad into a hearty, fiber-rich grain bowl.
- Different Creamy Dream: Swap the yogurt drizzle for straight-up homemade avocado crema (blended avocado, lime, cilantro, salt) or a lighter store-bought green goddess dressing. Both are incredible with the buffalo spice.
- The “Everything Bagel” Upgrade: Garnish with a sprinkle of everything bagel seasoning, some extra sliced scallions, and use a ranch-based drizzle. It adds a delicious savory, oniony crunch that’s absolutely addicting.
Beau’s Kitchen Notes & Stories
This recipe has seen some things in my kitchen! Early on, I made the classic mistake of drizzling a watery, store-bought dressing over the whole prepped salad and letting it sit. Big yikes—soggy city. That’s when I developed the thicker, yogurt-based drizzle and learned the sacred rule: dress just before serving.
It’s also evolved based on who’s at my table. My nephew, who’s dairy-free, inspired the vegan buffalo sauce and avocado crema swap. My fitness-focused friend loves the exact version here for the macro breakdown. That’s the beauty of cooking—one recipe, a million ways to share the love. Don’t be afraid to tweak it until it sings your song.
Your Questions, Answered (Before You Even Ask!)
Q: Help! It’s too spicy for me. How can I tone it down?
A: No problem! The heat is easily adjustable. You can mix the buffalo sauce with an equal part of mild wing sauce or even a little olive oil before tossing with the chicken. Using a ranch-based drizzle (instead of blue cheese) and adding that creamy avocado will also help cool things down beautifully on your palate.
Q: Can I make this ahead for meal prep?
A: Absolutely, with one key strategy: keep components separate. Prep the saucy chicken, chop the veggies, and make the drizzle. Store each in its own airtight container in the fridge for up to 4 days. Assemble your bowl and drizzle right before eating. This keeps everything crisp and fresh.
Q: My yogurt drizzle is too thick/too thin. What now?
A> Too thick? Add liquid: water, milk, or a little more lemon juice, a teaspoon at a time, whisking until it’s pourable. Too thin? Thicken it up by whisking in a bit more Greek yogurt or a tiny pinch of cornstarch (dissolve it in a teaspoon of cold water first).
Q: What other proteins work besides chicken?
A> This flavor profile is magic with so many proteins! Try it with shredded cooked turkey (hello, Thanksgiving leftovers!), canned tuna (drained well), crispy baked tofu, or even cooked and peeled shrimp. The buffalo-creamy-crunchy combo is a universal winner.

Buffalo Chicken Protein Salad : Spicy, Crunchy & Creamy
Description
Hey friends, Beau here from Feastical! Let’s officially retire the idea that salads are boring. This Buffalo Chicken Protein Salad is bold, satisfying, and built to fuel you. It’s got that fiery buffalo kick, a cool and creamy yogurt drizzle, tons of crunch, and a serious protein boost—all in one colorful bowl. Perfect for meal prep, quick dinners, or leveling up leftover chicken, this salad proves that healthy food can be the most exciting thing on your plate.
Ingredients
For the Salad
-
2 cups cooked, shredded chicken (rotisserie works great)
-
¼ cup buffalo sauce (use your favorite heat level)
-
4 cups chopped romaine or mixed greens
-
1 cup celery, thinly sliced
-
½ cup cherry tomatoes, halved
-
¼ cup red onion, thinly sliced
-
Optional toppings: sliced avocado, crumbled blue cheese or feta
For the Creamy Yogurt Drizzle
-
½ cup plain Greek yogurt
-
1 tbsp ranch or blue cheese dressing
-
1 tbsp lemon juice or vinegar
-
Salt & black pepper, to taste
-
1–3 tbsp water, to thin (as needed)
Instructions
-
Season the Chicken
In a bowl, toss shredded chicken with buffalo sauce until evenly coated. Set aside to let the flavors soak in. -
Make the Drizzle
Whisk Greek yogurt, dressing, lemon juice, salt, and pepper until smooth. Add water a little at a time until it’s drizzle-able but still creamy. -
Build the Base
Add greens to a large bowl or individual serving bowls. -
Add the Crunch
Scatter celery, tomatoes, and red onion over the greens. Add avocado if using. -
Top & Drizzle
Spoon buffalo chicken over the salad and finish with the creamy yogurt drizzle. Add cheese if desired. -
Serve Immediately
Enjoy right away for the best crunch and contrast.
Notes
-
Too spicy? Mix buffalo sauce with a little honey or melted butter.
-
Extra tender chicken: Toss warm chicken with sauce and let it rest 5 minutes.
-
Meal prep smart: Store chicken, veggies, and dressing separately—assemble just before eating.
-
Not a celery fan? Swap with jicama, cucumber, or sugar snap peas.
Fueling Your Body (The Tasty Way)
Let’s talk about what’s powering you up! This salad isn’t just about incredible taste—it’s built to nourish. Based on the core recipe with chicken and yogurt drizzle (without optional cheese/avocado), each generous serving packs a powerful punch of approximately 32 grams of protein, thanks to the lean chicken and Greek yogurt. This helps keep you full, supports muscle repair, and fuels your day.
It’s also relatively low in carbohydrates (around 10g), with those coming primarily from the fibrous vegetables, making it a great option for many eating styles. The fats (around 18g) are a mix from the chicken, the sauce, and the yogurt, providing satiety and helping your body absorb all the fat-soluble vitamins from those beautiful veggies. Remember, adding avocado or cheese will increase the healthy fat content, which is fantastic for lasting energy. It’s a balanced, satisfying meal that proves healthy eating is anything but boring.
Final Thoughts from My Kitchen to Yours
And there you have it, friends—my not-so-secret, totally craveable formula for a salad that actually earns a spot on your weekly menu. This Buffalo Chicken Protein Salad is more than a recipe; it’s a reminder that eating well should be a joyful, flavorful, and deeply satisfying act. It’s about taking simple ingredients and combining them in a way that makes you excited to sit down and eat.
I hope this recipe becomes

Ultimate Creamy Garlic Parmesan Chicken Pasta : Restaurant Flavor at Home
Ultimate Creamy Garlic Parmesan Chicken Pasta – Restaurant Flavor at Home
Hey friends, Beau here from Feastical! Grab your favorite apron and get ready, because we’re about to make magic happen in your kitchen. Today’s recipe is the one I get asked for more than any other: my Ultimate Creamy Garlic Parmesan Chicken Pasta. This isn’t just a meal; it’s a warm, savory, soul-hugging experience that turns a regular Tuesday into a celebration.
You know that feeling when you’re at a cozy Italian restaurant, you take a bite of something so perfectly creamy and flavorful that you just close your eyes and smile? That’s what we’re recreating today, right on your stovetop. We’re talking tender, golden-seared chicken, pasta cooked just right, and a sauce so luxuriously smooth and packed with garlicky, cheesy goodness that you’ll want to lick the spoon (go ahead, I won’t tell). The best part? It’s deceptively simple. No fancy techniques, no hard-to-find ingredients—just real, feel-good food that brings everyone to the table. So, let’s turn up the music, pour yourself a little something to sip on, and let’s cook up a bowl of pure comfort together.
The Night This Pasta Saved the Day
This recipe has a permanent spot in my heart because it was my ultimate “kitchen sink hero.” Picture this: it was a rainy, gloomy Friday after a truly endless week. My friends were coming over, I was exhausted, and my grand plans for an elaborate feast had completely evaporated. I stared into my fridge with that “what on earth can I make?” panic. I saw some chicken, cream about to turn, a hunk of Parmesan, and always, always, garlic. In a leap of faith, I threw them together.
The moment that sauce came together—silky, fragrant, and coating the back of a spoon perfectly—I knew it was special. The whole house smelled like an Italian grandmother’s kitchen. My friends arrived, damp and tired, and the second they walked in, their faces lit up. We devoured that pasta straight from the pan, with crusty bread to swipe up every last drop of sauce. It wasn’t about being fancy; it was about connection, comfort, and the incredible power of a few simple ingredients to turn a dreary night into a cherished memory. That’s the spirit of Feastical, and that’s the spirit of this dish.
Your Flavor Lineup: Ingredients & Insights
Here’s everything you’ll need to build this masterpiece. Remember, great ingredients make a great dish, but I’ve got your back with swaps if you need them!
- 1 lb boneless, skinless chicken breast, sliced thin: Slicing it thin ensures quick, even cooking and makes every bite tender. Chef’s Tip: For even more flavor, use chicken thighs. They’re juicier and stand up beautifully to the rich sauce.
- Salt, pepper & Italian seasoning to taste: This is your flavor foundation. Don’t be shy! Season the chicken generously. Substitution: No Italian blend? Use ½ tsp each of dried oregano, basil, and a pinch of red pepper flakes.
- 2 tbsp olive oil: For searing that chicken to golden perfection. Chef’s Insight: Using a good, extra-virgin olive oil adds a fruity depth to the base of the dish.
- 3 cloves garlic, minced: The star of the show! Fresh is non-negotiable here. Pro Hack: Use a microplane to mince it super fine—it melts right into the sauce.
- 2 tbsp butter: Butter makes everything better, right? It adds a rich, nutty base for the sauce. Substitution: For a dairy-free start, use more olive oil or a plant-based butter.
- 2 cups heavy cream: This is what creates that dreamy, luxurious texture. Chef’s Note: For a slightly lighter version, you can use half-and-half, but the sauce will be thinner. Let it simmer a bit longer to thicken.
- 1 cup freshly grated Parmesan cheese: FRESHLY GRATED is the secret password. Pre-grated cheese has anti-caking agents that can make your sauce grainy. Insight: Use a microplane or the small holes on your box grater for cheese that melts into silky oblivion.
- 12 oz pasta (fettuccine, penne, or your favorite): A sturdy shape that can hold onto the sauce is key. I love fettuccine for that classic feel, but penne, rigatoni, or shells are all fantastic.
- 1/2 cup pasta water (reserved): This is your magic sauce thinner and binder! The starchy, salty water helps the sauce cling to every noodle.
- Optional: 1 cup spinach or chopped parsley for garnish: A pop of green for color and freshness. Spinach wilts beautifully into the warm sauce, and parsley adds a bright finish.
Let’s Get Cooking: Your Step-by-Step Guide
Follow these steps, and you’ll have a restaurant-worthy dish in no time. I’m right here with you, sharing all my little kitchen hacks!
- Pasta Prep with a Pro Move: Bring a large pot of well-salted water to a boil—it should taste like the sea. Cook your pasta according to package directions for al dente (it will finish cooking in the sauce). Before you drain it, use a mug to scoop out about ½ cup of that starchy pasta water. This liquid gold is crucial! Drain the pasta and set it aside. Chef’s Hack: Time it so the pasta is done just as you finish the sauce. Everything comes together hot and perfect.
- Chicken that Sings: Pat your sliced chicken breasts very dry with paper towels. This is the #1 trick for getting a beautiful golden sear, not a steam. Season both sides generously with salt, pepper, and Italian seasoning. Heat the olive oil in a large skillet or Dutch oven over medium-high heat. Add the chicken in a single layer (don’t crowd the pan—cook in batches if needed) and let it cook undisturbed for 3-4 minutes per side until beautifully browned and cooked through. Remove to a plate and tent with foil. Tip: That browned stuff left in the pan? That’s fond, and it’s pure flavor. We’re using it next!
- Building the Flavor Foundation: In the same pan, reduce the heat to medium. Add the butter and let it melt. Now, add your minced garlic. We’re just looking to wake it up and make it fragrant—about 1-2 minutes. Stir constantly! Burnt garlic is bitter, and we want sweet, aromatic perfection. You’ll smell the moment it’s ready.
- The Sauce of Dreams: Pour in the heavy cream. Use a wooden spoon to scrape up all those delicious browned bits from the chicken—this is where the deep flavor lives. Let the cream come to a very gentle simmer (small bubbles around the edges, not a rolling boil). Now, turn the heat down to low. Start whisking in your freshly grated Parmesan, a handful at a time, letting it fully melt before adding more. This patience gives you a smooth, velvety sauce. Season with a pinch of salt and pepper. Taste it! This is your moment to adjust.
- The Grand Finale: Add the cooked pasta and the chicken (and any juices from the plate) back into the pan with the sauce. Toss everything to coat evenly. Now, here’s the magic: add that reserved pasta water, a few tablespoons at a time, tossing continuously. The sauce will loosen up and become silky, clinging to every noodle and piece of chicken in the most gorgeous way. You may not need all the water—stop when it looks perfect to you.
Plating Your Masterpiece
This dish is a beauty straight from the pan, but a little flourish makes it feel extra special. I love using shallow bowls for pasta—they show off the sauce. Twirl a generous portion of pasta with tongs, making sure to get plenty of chicken pieces. Spoon a little extra sauce over the top. Finish with a final shower of fresh Parmesan cheese and a sprinkle of chopped parsley or a handful of fresh spinach leaves that will gently wilt from the heat. For the ultimate experience, serve it with a side of warm, crusty garlic bread or a simple, crisp green salad with a lemony vinaigrette to cut through the richness. Light some candles, pour the drinks, and get ready for the compliments!
Make It Your Own: Delicious Twists
Once you’ve mastered the classic, the fun begins! Here are a few ways to play with your food:
- Sun-Dried Tomato & Basil Bliss: Stir in ½ cup of chopped sun-dried tomatoes (oil-packed, drained) and a handful of fresh basil ribbons when you add the pasta back in. Their sweet, tangy punch is incredible.
- Mushroom Lover’s Dream: After cooking the chicken, sauté 8 oz of sliced cremini mushrooms in the same pan until golden before adding the butter and garlic. You’ll add an amazing earthy, umami depth.
- Lighter, Zesty Lemon Version: Swap half the heavy cream for whole milk or half-and-half. Add the zest of one lemon and a big squeeze of its juice to the finished sauce. It becomes bright, lively, and a little lighter.
- Protein Swap – Shrimp Scampi Style: Replace the chicken with 1 lb of large, peeled shrimp. Sear them quickly (1-2 min per side) and set aside. Proceed with the sauce, adding the shrimp back at the very end to avoid overcooking.
- Veggie-Packed Power Bowl: Add a cup of broccoli florets or asparagus pieces to the pasta water during the last 2 minutes of cooking. Drain with the pasta. You’ve got your veg and starch done in one pot!
Beau’s Kitchen Notes
This recipe has been my trusty sidekick for years, and it’s evolved in fun ways. I once accidentally used smoked paprika instead of Italian seasoning on the chicken, and you know what? It was a happy accident—a subtle, smoky twist that was a huge hit! Don’t be afraid to make it your own. The sauce might seem a bit thin when you first add the cheese, but as it sits on low heat and you add the starchy pasta water, it transforms into this glorious, creamy coating. And a funny story: I taught this to my nephew, who was convinced he couldn’t cook. He called me, so excited, yelling, “Uncle Beau, it’s actually creamy! It worked!” That’s the joy I want for you—that moment of proud, delicious success.
Your Questions, Answered
Q: My sauce turned out grainy. What happened?
A: This is almost always due to the cheese. Pre-grated Parmesan has cellulose to prevent clumping, which can seize up in a hot sauce. Always grate your own from a block! Also, make sure your heat is on *low* when adding the cheese, and add it gradually, letting each addition melt fully.
Q: Can I make this ahead of time?
A: You can prep components! Cook the chicken and make the sauce (hold the pasta water). Store separately in the fridge for up to 2 days. When ready, gently reheat the sauce, cook fresh pasta, and combine everything with a splash of fresh pasta water to bring it back to life.
Q: The sauce is too thick/thin. Help!
A: Too thick? Simply whisk in a bit more warm pasta water or cream, a tablespoon at a time, until it’s your desired consistency. Too thin? Let it simmer on low for a few more minutes to reduce and thicken. The pasta water also helps thicken as it sits.
Q: What’s the best substitute for heavy cream?
A> For a slightly lighter version, half-and-half works but simmer it gently to thicken. For a dairy-free option, full-fat canned coconut cream is a great rich substitute, though it will impart a mild coconut flavor.
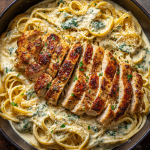
Ultimate Creamy Garlic Parmesan Chicken Pasta : Restaurant Flavor at Home
Description
Hey friends, Beau here from Feastical! This is the recipe I get asked for more than any other—and for good reason. It’s everything we love about a cozy Italian restaurant dinner: tender, golden chicken, perfectly cooked pasta, and a luxuriously creamy garlic-Parmesan sauce that clings to every bite. The best part? It’s simple, weeknight-friendly, and made with ingredients you probably already have. Let’s cook something that feels like a warm hug.
Ingredients
-
1 lb (450 g) boneless, skinless chicken breast, sliced thin
(Swap: chicken thighs for extra juiciness) -
Salt & black pepper, to taste
-
1 tsp Italian seasoning
(or ½ tsp oregano + ½ tsp basil) -
2 tbsp olive oil
-
2 tbsp butter
-
3 cloves garlic, finely minced
-
2 cups heavy cream
-
1 cup freshly grated Parmesan cheese
-
12 oz pasta (fettuccine, penne, rigatoni, or shells)
-
½ cup reserved pasta water
-
Optional: fresh parsley or spinach, for garnish
Instructions
-
Cook the Pasta
Bring a large pot of well-salted water to a boil. Cook pasta until al dente.
Reserve ½ cup pasta water, then drain and set aside. -
Sear the Chicken
Pat chicken dry and season with salt, pepper, and Italian seasoning.
Heat olive oil in a large skillet over medium-high heat.
Sear chicken 3–4 minutes per side until golden and cooked through.
Remove to a plate. -
Build the Sauce
Reduce heat to medium. Add butter to the same pan.
Stir in garlic and cook 1–2 minutes until fragrant (don’t brown). -
Make It Creamy
Pour in heavy cream, scraping up any browned bits from the pan.
Bring to a gentle simmer, then lower heat.
Whisk in Parmesan gradually, letting it melt smoothly. -
Bring It All Together
Add pasta and chicken back to the skillet.
Toss gently, adding reserved pasta water a little at a time until the sauce is silky and coats everything beautifully. -
Finish & Serve
Taste and adjust seasoning.
Garnish with parsley or spinach and extra Parmesan if desired.
Notes
-
Grate your own Parmesan – pre-shredded cheese can make sauces grainy.
-
Low heat for cheese – keeps the sauce smooth and glossy.
-
Pasta water is key – it helps the sauce cling like a dream.
-
Don’t rush the garlic – burnt garlic turns bitter fast.
Nutritional Information*
*Please note: This is an estimate for informational purposes, based on a single serving (assuming 6 servings) using the exact ingredients listed. Values can vary based on specific brands and portion sizes.
Per Serving: Calories: ~550 | Protein: 35g | Carbohydrates: 40g | Dietary Fiber: 2g | Total Fat: 30g (Saturated Fat: 16g) | Cholesterol: 145mg | Sodium: 450mg
This dish is a satisfying, balanced meal providing a good source of protein from the chicken and cheese, and energy from the pasta. To boost the fiber, consider using a whole-wheat or chickpea pasta blend. Remember, enjoying wholesome, homemade comfort food as part of a balanced lifestyle is what Feastical is all about!
Final Thoughts from My Kitchen to Yours
And there you have it, friends—my heart-on-a-plate, the Ultimate Creamy Garlic Parmesan Chicken Pasta. This recipe is more than just a list of ingredients and steps; it’s an invitation to create joy, to gather people you love, and to prove to yourself that incredible food doesn’t have to be complicated. The real secret ingredient is always the fun you have making it. So don’t stress about perfection. If the garlic toasts a little too much or you add a little extra cheese (my kind of person), it’s going to be delicious because you made it. Thanks for letting me share one of my all-time favorites with you. Now, go forth, cook with confidence, and make your kitchen the happiest room in the house. Don’t forget to tag @Feastical if you share your creation—I love seeing your masterpieces! Until next time, keep it flavorful.
Beau Collier
Feastical.com

Cheeseburger Meatloaf : All the Classic Flavors in One Juicy Slice
The Ultimate Comfort Food Mashup: Cheeseburger Meatloaf
Hey there, friend! Beau here from Feastical. Let’s be real for a second: who among us hasn’t stood in front of the fridge, craving the juicy, salty, pickly, cheesy perfection of a great cheeseburger, but maybe didn’t want to fire up the grill or fuss with individual patties? I’ve been there more times than I can count. That exact craving, paired with a deep-seated love for the humble, comforting meatloaf, is what sparked the creation of this glorious dish. This isn’t just any meatloaf. This is Cheeseburger Meatloaf, and it’s about to become your new weeknight hero.
Imagine all the iconic flavors of a classic diner burger—the melty sharp cheddar, the tangy bite of pickles and onions, the sweet-and-savory kiss of ketchup and mustard—all baked into one incredibly moist, sliceable, family-friendly loaf. It’s the best of both worlds: the nostalgic comfort of your grandma’s meatloaf (if your grandma was really into drive-thrus) and the irresistible fun of a backyard barbecue. It’s hearty, satisfying, and delivers that “warm hug” feeling we’re all about here. So, tie on your apron, and let’s turn that burger craving into a spectacular, oven-baked reality. This is feel-good food, reimagined.
Where It All Began: A Tale of Two Classics
This recipe has its roots in a little bit of kitchen desperation and a whole lot of nostalgia. Picture this: It’s a rainy Tuesday, the kind of day that makes you want to curl up with a blanket. My then-five-year-old nephew, Leo, was over, and his dinner request was, as always, “cheeseburger, no onions.” But I had a pound of ground beef thawed and a serious craving for the kind of meatloaf my dad used to make on Sundays—the kind that made the whole house smell like home.
I looked at Leo, I looked at the beef, and I had a lightbulb moment. “What if,” I thought, “we make a meatloaf that tastes exactly like your favorite cheeseburger?” He was skeptical (kids are the best critics), but the promise of extra pickles sealed the deal. As that loaf baked, filling the kitchen with the most incredible aroma, the magic happened. When I pulled it out, golden and glazed, and sliced into it to reveal pockets of gooey cheddar, his eyes went wide. “Uncle Beau,” he whispered, “it’s a cheeseburger… but a cake!” He wasn’t wrong. That “Cheeseburger Cake” became an instant legend in our family, and the recipe has been tweaked, perfected, and shared ever since. It’s proof that the best dishes often come from a simple desire to make someone smile.
Gathering Your Burger-Lover’s Toolkit
Here’s everything you’ll need to build this flavor masterpiece. Don’t just think of these as ingredients; think of them as the building blocks of your favorite burger, ready to be transformed.
- 2 lbs ground beef (80/20 blend): The star of the show! An 80% lean, 20% fat ratio is your friend here—it keeps the loaf incredibly juicy and flavorful. If you only have leaner beef, no sweat, just know your meatloaf might be a tad firmer.
- 1 cup breadcrumbs: Our binder and texture-giver. I use plain, unseasoned ones to control the salt. Panko works great for a slightly lighter texture, or gluten-free breadcrumbs are a perfect swap for dietary needs.
- 2 large eggs: The glue that holds our burger-inspired dream together. They add richness and help bind everything so it slices neatly.
- ½ cup milk: A little moisture magic! It soaks into the breadcrumbs, creating a panade that ensures a tender, never-tough loaf. Any milk you have works.
- 1 cup shredded sharp cheddar cheese: The cheese pull we live for! I strongly recommend shredding a block yourself. Pre-shredded cheese is coated to prevent clumping, which can make it less melty. Sharp cheddar gives that classic burger punch.
- ½ cup chopped dill pickles: The tangy, crunchy game-changer. Don’t you dare skip these! They are the signature burger bite. Chop them finely so they distribute evenly.
- ½ cup diced yellow onion: Sweet, aromatic, and essential. Sautéing them first is a chef’s hack for deeper, sweeter flavor, but raw works for a sharper punch if you’re in a rush.
- 1 tbsp yellow mustard + 1 tbsp ketchup: The dynamic duo, mixed right into the meat! This is where the burger soul starts. Use your favorite brands.
- 1 tsp salt & ½ tsp black pepper: The essential seasonings. Trust me, with all these flavors, you still need this foundation.
For the Glaze:
- ¼ cup ketchup: The base of our shiny, sticky, perfect glaze.
- 1 tbsp yellow mustard: Adds tang and cuts the sweetness.
- 1 tbsp brown sugar: The secret weapon! It caramelizes as it bakes, creating that iconic, slightly sweet burger-top flavor we all love.
Let’s Build This Flavor Loaf! (Step-by-Step)
Ready to play with your food? This process is simple, satisfying, and smells absolutely amazing. Follow these steps, and you’re golden.
- Preheat & Prep: Fire up your oven to 375°F (190°C). This is the perfect temp for cooking through without drying out. While it heats, grab a large mixing bowl and a standard 9×5 inch loaf pan. You can also free-form it on a parchment-lined baking sheet for more crusty edges—my personal favorite!
- The Flavor Foundation (Sauté!): Here’s my #1 pro-tip: take an extra 5 minutes to sauté your diced onions in a tiny bit of oil over medium heat until they’re soft and translucent. Let them cool slightly. This simple step tames the raw onion bite and unlocks a mellow, sweet depth that elevates the whole loaf. It’s a game-changer.
- Mix It Up, But Don’t Mash It: In your large bowl, combine the ground beef, breadcrumbs, eggs, milk, shredded cheese, pickles, cooled onions, mustard, ketchup, salt, and pepper. Now, roll up your sleeves and use your hands to mix. Here’s the key: mix just until everything is evenly incorporated. Over-mixing is the fast track to a dense, tough meatloaf. Think gentle combination, not kneading bread dough.
- Shape & Pan: Transfer your mixture to your loaf pan, pressing it in gently, or shape it into a firm, oval loaf on your prepared baking sheet. A baking sheet gives you more of that delicious caramelized surface area, which I’m always here for.
- Glaze It Good: In a small bowl, stir together the ketchup, mustard, and brown sugar for the glaze until smooth. Slather this all over the top and sides of your unbaked loaf. This isn’t just for looks; it creates that irresistible, tangy-sweet crust.
- Bake to Perfection: Slide your masterpiece into the preheated oven. Bake for 55 to 65 minutes. The true test? An instant-read thermometer inserted into the center should read 160°F. The glaze will be bubbly and caramelized, and your kitchen will smell like heaven.
- The Crucial Rest: This might be the hardest step: take the meatloaf out and let it rest for a full 10 minutes before slicing. This allows the juices to redistribute. If you cut in right away, all those delicious juices will run out onto the plate, and we can’t have that!
How to Serve Your Cheeseburger Masterpiece
Presentation is part of the fun! Slice your meatloaf into thick, hearty slabs. I love serving it on a warm platter, maybe with a little extra glaze drizzled over the top for good measure. Now, what to serve with it? We’re keeping the burger theme alive!
The Ultimate Feastical Plate: Pile a slice alongside some crispy oven fries or tater tots (because what’s a burger without fries?). Add a simple, cool side salad with a creamy buttermilk ranch dressing to mimic that burger-shop vibe. For the true experience, serve with extra dill pickle spears on the side and maybe even some toasted brioche bun halves for making mini open-faced sandwiches. Want to go all-in on comfort? A scoop of creamy mashed potatoes under that slice is pure bliss. Let everyone build their perfect bite!
Make It Your Own: Delicious Twists & Swaps
The beauty of this recipe is its flexibility. Play with it! Here are a few of my favorite riffs:
- The Bacon Blue Cheese Burger Loaf: Mix in ½ cup of crumbled cooked bacon into the meat mixture and swap the cheddar for bold, creamy blue cheese crumbles. Top the glaze with extra bacon bits before baking.
- The “Big Mac” Style: Add 1 teaspoon of onion powder and 1 teaspoon of paprika to the meat. For the glaze, mix ¼ cup ketchup, 1 tbsp mustard, 2 tbsp mayonnaise, 1 tbsp sweet pickle relish, and a pinch of garlic powder. Serve with shredded iceberg lettuce on the side.
- Turkey Burger Loaf (Lighter Option): Swap the ground beef for ground turkey (93% lean). To keep it moist, add an extra tablespoon of ketchup or a dash of olive oil to the mixture. It’s a fantastic, lighter take.
- Spicy Southwest Kick: Use pepper jack cheese instead of cheddar. Add a finely chopped jalapeño (seeds removed for less heat) and 1 tsp of chili powder to the mix. A touch of smoked paprika in the glaze is divine.
- Gluten-Free & Keto-Friendly: Easy! Replace the breadcrumbs with ¾ cup of crushed pork rinds or almond flour. They’ll bind everything beautifully without the carbs.
Beau’s Kitchen Notes & Stories
Over the years, this recipe has seen some fun experiments. I once tried stuffing the whole loaf with a core of cheese—it was glorious but erupted like a cheesy volcano (delicious, but messy!). The method of mixing the cheese throughout is way more reliable for that perfect bite every time.
A funny fail turned win: I ran out of yellow mustard once and used a grainy Dijon. The result was a more sophisticated, tangier flavor that my wife still asks for. Don’t be afraid to use what you have! The core idea is burger-in-a-loaf, and that’s hard to mess up. This dish also reheats like a dream. A slice in the skillet the next day gets the edges extra crispy—almost like a burger patty. Trust me, the “meatloaf sandwich” game just got a major upgrade.
Your Questions, Answered!
Q: My meatloaf is always crumbly and falls apart when I slice it. What am I doing wrong?
A: This usually points to not enough binder or overmixing. Make sure your eggs and breadcrumbs are evenly distributed. Letting it rest after baking is also non-negotiable for clean slices! If you’re still nervous, add one extra egg white.
Q: Can I make this ahead of time?
A: Absolutely! You can assemble the whole loaf (minus the glaze), cover tightly, and refrigerate for up to 24 hours. Let it sit at room temp for 20 minutes, add the glaze, and bake as directed. You may need a few extra minutes in the oven.
Q: The top of my glaze burned before the inside was cooked. Help!
A> Ovens can be sneaky! If the glaze is getting too dark too fast, simply lay a loose piece of aluminum foil over the top for the remaining bake time. This will protect the glaze while the inside finishes cooking.
Q: What’s the best way to store and reheat leftovers?
A> Store slices in an airtight container in the fridge for 3-4 days. Reheat gently in the microwave, or for the BEST texture, pan-fry a slice in a non-stick skillet over medium heat until warmed through and the edges are crispy. It’s next-level good.
Cheeseburger Meatloaf : All the Classic Flavors in One Juicy Slice
Description
Hey friend, Beau here from Feastical! If you’ve ever craved a juicy cheeseburger but wanted the cozy, sliceable comfort of meatloaf, this recipe is your answer. Cheeseburger Meatloaf brings together everything we love about a classic diner burger—melty cheddar, tangy pickles, ketchup and mustard—baked into one tender, family-friendly loaf. It’s easy, satisfying, and perfect for busy weeknights when you want something familiar but a little fun.
Ingredients
Meatloaf
-
2 lb (900 g) ground beef, 80/20 blend
-
1 cup breadcrumbs (plain or panko)
-
2 large eggs
-
½ cup milk (any kind)
-
1 cup shredded sharp cheddar cheese
-
½ cup dill pickles, finely chopped
-
½ cup yellow onion, diced (sautéed for best flavor)
-
1 tbsp ketchup
-
1 tbsp yellow mustard
-
1 tsp salt
-
½ tsp black pepper
Glaze
-
¼ cup ketchup
-
1 tbsp yellow mustard
-
1 tbsp brown sugar
Instructions
-
Preheat the Oven
Preheat to 375°F (190°C). Lightly grease a 9×5-inch loaf pan or line a baking sheet with parchment for a free-form loaf. -
Sauté the Onion (Optional but Recommended)
Cook diced onion in a little oil over medium heat until soft and translucent. Let cool slightly. -
Mix Gently
In a large bowl, combine ground beef, breadcrumbs, eggs, milk, cheddar, pickles, onion, ketchup, mustard, salt, and pepper. Mix just until combined—don’t overwork. -
Shape the Loaf
Press gently into the loaf pan or shape into an oval loaf on the baking sheet. -
Add the Glaze
Stir glaze ingredients until smooth and spread evenly over the top. -
Bake
Bake for 55–65 minutes, until an instant-read thermometer reaches 160°F (71°C). -
Rest Before Slicing
Let rest 10 minutes to keep it juicy and slice cleanly.
Notes
-
Use 80/20 beef for the juiciest result.
-
Shred cheese yourself for better melting.
-
Chop pickles finely so the flavor is evenly distributed.
-
Let it rest—this is key to avoiding crumbly slices.
-
If the glaze browns too fast, loosely tent with foil.
Nutritional Info (Because We’re Curious!)
Okay, let’s talk numbers for a sec. Remember, this is hearty, comforting food meant to be enjoyed as part of a balanced life. This estimated breakdown is for one serving (based on 6 servings per loaf).
- Calories: ~460
- Protein: 33g (Excellent source for staying satisfied!)
- Fat: 28g
- Carbohydrates: 18g
- Sugar: 7g (Mostly from the natural sugars in the ketchup and glaze)
- Sodium: ~720mg
Chef’s Note on Nutrition: You can easily tweak this! Using 90% lean beef, low-sodium ketchup, or reducing the cheese slightly can adjust these numbers to fit your needs. But sometimes, soul-satisfying comfort is the best nutrition of all.
Final Slice of Thought
And there you have it, my friend—the Cheeseburger Meatloaf in all its glorious, juicy, flavor-packed detail. This recipe is more than just a dinner; it’s a conversation starter, a smile-maker, and a testament to the fact that the best meals often come from blending the things we love most. It’s unpretentious, deeply satisfying, and proof that your kitchen is the best diner in town.
I hope this recipe finds its way to your table and becomes a requested favorite in your home, just like it has in mine. Don’t forget to have fun with it, make it your own, and most importantly, share it with someone you care about. Food is love, after all. Now, go forth and bake your burger! And if you make it, tag me over at @Feastical—I’d love to see your creation.
Until next time, keep it simple, soulful, and satisfying.
— Beau

Mediterranean Meatloaf : Bright, Herby & Packed with Bold Flavor
Say Hello to the Meatloaf That Ran Away to the Mediterranean
Hey friends, Beau here! Let’s talk about a beautiful little rebellion happening in your kitchen. We’re taking meatloaf—yes, that classic, sometimes-snoozy Sunday supper—and we’re giving it a one-way ticket to the sun-drenched coasts of the Mediterranean. What comes back is something altogether different: a juicy, vibrant, flavor-packed masterpiece that’s anything but ordinary.
This isn’t your grandma’s meatloaf (no offense to Grandma’s, which has its own perfect place!). This is a feel-good food adventure. Imagine the savory comfort of a perfect meatloaf, but every bite is bursting with salty feta, briny kalamata olives, sweet-tart sun-dried tomatoes, and a confetti of fresh herbs. It’s cozy and familiar, yet exciting and bright. It’s the dinner that makes you sit up and say, “Wow, *this* is meatloaf?”
I created this recipe for those nights when you crave something deeply satisfying but also crave a little sunshine on your plate. It’s incredibly simple to throw together—no fancy skills required—but the payoff is huge. It’s the kind of dish that turns a regular Tuesday into a small celebration. So, preheat that oven, pour yourself something refreshing, and let’s make a meatloaf that’s full of life, laughter, and a whole lot of flavor.
The Table Where It All Clicked
This recipe was born from a memory so vivid, I can still taste it. A few years back, I was lucky enough to spend an evening at a long, wooden table in a tiny seaside taverna in Greece. The air smelled of rosemary, sea salt, and grilling meat. Plates kept coming: bowls of olives, slabs of feta drenched in golden oil, roasted vegetables, and these incredible, herb-stuffed meatballs.
As I took that first bite, surrounded by new friends and staggering beauty, I had a total “aha” moment. This is the feeling I want to bring home. This brightness, this community, this utter joy in eating. I spent the rest of the trip (and many kitchen experiments since) trying to bottle that lightning. This Mediterranean Meatloaf is the result. It’s my way of bringing that warm, convivial, sun-soaked feeling to your table, no passport required. Every time I smell the oregano and lemon zest mixing as it bakes, I’m right back at that table, and I hope it brings a little of that magic to your home, too.
Gathering Your Mediterranean Flavor Crew
Here’s the cast of characters that makes this dish sing. Don’t stress about exact brands—this is about flavor spirit!
- 1 lb ground beef or lamb (or a mix): The hearty foundation. I love a 85/15 beef for flavor and juiciness, but lamb brings an authentic, robust richness that’s just incredible. A 50/50 split is my personal favorite for a special treat.
- ½ cup breadcrumbs: Our binder and texture-helper. Panko gives a lighter feel, but standard plain breadcrumbs work perfectly. For a gluten-free twist, gluten-free panko or even crushed gluten-free crackers are fantastic.
- 1 egg & ¼ cup milk: The dynamic duo of moisture. The egg binds everything together, and the milk keeps the lean meat from drying out. Any milk you have works—even a plain, unsweetened non-dairy milk.
- ½ cup crumbled feta: The salty, tangy star! Buy it in a block and crumble it yourself for the best texture and flavor. It melts into little pockets of creamy, briny goodness.
- ¼ cup chopped kalamata olives: Briny, deep, and essential. They add a complex saltiness that’s irreplaceable. If you only have green olives, use them! Just give them a rough chop.
- ¼ cup chopped sun-dried tomatoes (in oil, drained): Our sweet-and-tart secret weapon. The oil-packed ones are softer and more flavorful. Don’t toss that oil! Use it to sauté veggies for a side dish or in your glaze.
- 2 garlic cloves, minced: Because what’s a good meal without garlic? Fresh is best here for that pungent kick.
- 2 tbsp chopped fresh parsley & 1 tbsp chopped fresh oregano: The herbal sunshine! Fresh herbs are non-negotiable for that bright, authentic flavor. In a pinch, use 1 tsp dried oregano, but try to keep the parsley fresh.
- Zest of 1 lemon: This is the magic dust. It doesn’t make it taste lemony, just incredibly bright and fresh. Always zest your lemon before you juice it!
- Salt & pepper, to taste: Go easy on the salt at first—remember, the feta and olives are salty superstars.
- Optional glaze: 2 tbsp tomato paste mixed with 1 tbsp olive oil and a squeeze of lemon. This creates a beautiful, caramelized, tangy-sweet crust. Highly recommended!
Let’s Build Some Flavor, Step-by-Step
Ready? Let’s get our hands in there and make something beautiful. Put on some music, clear your counter, and let’s cook.
- Preheat & Prep: Fire up your oven to 375°F (190°C). This ensures it’s perfectly hot and ready when your loaf is shaped. Lightly grease a standard 9×5 loaf pan with olive oil or line a rimmed baking sheet with parchment paper for a free-form loaf (which gives you more crusty surface area—my preferred method!).
- The Great Mix-Off: In a large bowl, combine the ground meat, breadcrumbs, egg, and milk. I use my hands for this—it’s the best tool! Mix just until those wet ingredients are incorporated. Chef’s Hack: Don’t overmix! Overworking the meat can make the final loaf tough. We’re gently combining, not kneading bread.
- Fold in the Fun: Now, add the crumbled feta, chopped olives, sun-dried tomatoes, garlic, all those gorgeous herbs, and the lemon zest. Sprinkle on a little black pepper and a very light pinch of salt. Using a folding motion with your hands or a spatula, gently distribute all those colorful bits throughout the meat mixture. You want every slice to be a confetti of Mediterranean goodness.
- Shape & Shine: Turn your mixture out onto your prepared pan or baking sheet. Gently form it into a loaf shape, about 9 inches long. If you’re using the optional glaze (and you really should), mix the tomato paste, olive oil, and lemon juice in a small bowl until smooth. Using a spoon or brush, spread it evenly over the entire top and sides of the loaf. This is what creates that irresistible, slightly sticky, flavor-packed crust.
- Bake to Perfection: Slide your masterpiece into the middle of the oven. Bake for 45-55 minutes. The true test? An instant-read thermometer inserted into the thickest part should read 160°F (71°C). That’s your guarantee of juicy, safe-to-eat perfection. The glaze will be darkened and the edges slightly caramelized.
- The Crucial Rest: This might be the hardest step: let it rest for 10 full minutes after pulling it from the oven. This allows the juices to redistribute throughout the loaf. If you cut in immediately, all those beautiful juices will run out onto the cutting board, and we worked too hard for that! Use this time to finish your sides or whip up a quick yogurt sauce.
Plating Your Sunny Masterpiece
How you serve this can turn a great meal into a memorable one. We eat with our eyes first!
Use a sharp serrated knife to slice thick, beautiful pieces. I love serving it on a warm platter or directly on plates. For a true Mediterranean vibe, drizzle a little extra-virgin olive oil over the top and scatter with a few extra fresh parsley or oregano leaves. A wedge of lemon on the side for an extra squeeze is always a good idea.
Perfect Pairing Partners:
- A simple lemon-herb couscous or orzo pilaf to soak up the juices.
- A big, colorful salad of chopped cucumbers, tomatoes, red onion, and more feta with a red wine vinaigrette.
- Roasted vegetables like zucchini, bell peppers, and red onions tossed with oregano.
- A cool, creamy tzatziki or cucumber-yogurt sauce on the side for dipping. (Mix 1 cup Greek yogurt with ½ a grated cucumber, a minced garlic clove, lemon juice, salt, and dill.)
Make It Your Own: 5 Delicious Twists
This recipe is a fantastic blueprint. Play with it! Here are some of my favorite riffs:
- Greek Chicken Meatloaf: Swap the beef for ground chicken or turkey. Add an extra ¼ cup breadcrumbs to keep it moist, and consider adding a handful of chopped fresh spinach for color and nutrients.
- “Everything But the Kitchen Sink” Veggie Boost: Fold in ½ cup of finely chopped, sautéed mushrooms and spinach (squeezed dry) to add depth and stretch the meat further. A grated zucchini (squeezed dry) works wonders too.
- The Spicy Kick: Add ¼ teaspoon of crushed red pepper flakes to the mix and use a pepperoncini-infused feta. Serve with a spicy harissa mayo on the side.
- Italian Cousin: Swap the oregano for fresh basil, the feta for shredded mozzarella or parmesan, and the olives for chopped marinated artichoke hearts. Use a basil pesto as your glaze!
- Mini Meatloaf Muffins: Perfect for portion control or a fun appetizer! Press the mixture into a greased muffin tin, add the glaze, and bake for 20-25 minutes. Great for meal prep.
A Few Kitchen-Table Confessions
This recipe has seen some things in my kitchen! I once, in a frantic weeknight rush, forgot the breadcrumbs entirely. The result was denser but still tasty—a happy accident that taught me the recipe is forgiving. I’ve also learned that letting my kids add the “confetti” (the feta, olives, and tomatoes) is a surefire way to get them excited to eat it.
The biggest evolution? The glaze. It started as just tomato paste, but the addition of that sun-dried tomato oil and lemon juice was a game-changer. It creates a deeper, more complex crust that people always ask about. Don’t skip it! This meatloaf also makes killer next-day sandwiches on crusty bread with a smear of tzatziki and some arugula. Trust me on that.
Your Questions, Answered
Q: Can I make this ahead of time?
A: Absolutely! You can assemble the loaf (without baking) up to a day ahead. Cover tightly and refrigerate. Let it sit at room temp for 20-30 minutes before baking, and you may need to add 5-10 minutes to the bake time.
Q: Why is my meatloaf dry/crumbly?
A: Two likely culprits: 1) Overmixing the meat can develop too much protein structure, leading to toughness. Mix gently! 2) Overcooking. The thermometer is your best friend. Pull it at 160°F, and remember it will carry-over cook as it rests.
Q: Can I freeze it?
A: Yes, beautifully. Bake it completely, let it cool, then wrap the whole loaf or individual slices tightly in plastic wrap and foil. Freeze for up to 3 months. Thaw in the fridge overnight and reheat, covered, in a 300°F oven until warmed through.
Q: The feta and olives are so salty. Should I still add salt?
A: Great instinct! Always taste as you go. I add a very small pinch to the overall mix and rely on the saltiness of the feta and olives. You can always add a sprinkle of flaky salt at the table if needed.
Mediterranean Meatloaf : Bright, Herby & Packed with Bold Flavor
Description
A bright, juicy twist on a classic comfort food
Hey friends, Beau here! Today we’re giving humble meatloaf a sunny Mediterranean makeover. Think cozy, familiar comfort—now bursting with feta, olives, sun-dried tomatoes, fresh herbs, and a little lemony lift. It’s simple to make, deeply satisfying, and lively enough to turn an ordinary weeknight into something special. Let’s bring some sunshine to the table.
Ingredients
-
1 lb (450 g) ground beef or lamb (or a 50/50 mix; 85/15 beef is ideal)
-
½ cup breadcrumbs (panko preferred; gluten-free works too)
-
1 large egg
-
¼ cup milk (any kind)
-
½ cup crumbled feta cheese
-
¼ cup chopped kalamata olives
-
¼ cup chopped sun-dried tomatoes, oil-packed and drained
-
2 garlic cloves, minced
-
2 tbsp fresh parsley, chopped
-
1 tbsp fresh oregano, chopped (or 1 tsp dried)
-
Zest of 1 lemon
-
Black pepper, to taste
-
Salt, lightly, to taste (feta and olives are salty)
Optional Glaze (highly recommended):
-
2 tbsp tomato paste
-
1 tbsp olive oil
-
A squeeze of fresh lemon juice
Instructions
-
Preheat & Prep
Preheat oven to 375°F (190°C). Lightly grease a 9×5-inch loaf pan or line a baking sheet with parchment for a free-form loaf. -
Mix the Base
In a large bowl, gently mix the ground meat, breadcrumbs, egg, and milk just until combined. Avoid overmixing. -
Add the Mediterranean Magic
Fold in feta, olives, sun-dried tomatoes, garlic, parsley, oregano, lemon zest, black pepper, and a small pinch of salt. -
Shape & Glaze
Shape into a loaf and place in the pan or on the baking sheet. Stir glaze ingredients and spread evenly over the top. -
Bake
Bake for 45–55 minutes, until an instant-read thermometer reaches 160°F (71°C). -
Rest
Let rest for 10 minutes before slicing to keep it juicy.
Notes
-
Don’t overmix: Gentle mixing = tender meatloaf.
-
Zest before you juice: Lemon zest adds brightness without sourness.
-
Taste for salt: Feta and olives do most of the work.
-
Leftovers shine: Slice for sandwiches with arugula and yogurt sauce.
Nourishment & Joy
While I’m all about flavor first, it’s nice to know what’s fueling the fun. This nutritional information is an estimate per serving (based on 6 servings, using 85/15 ground beef and including the glaze). Remember, it’s packed with protein and the good fats from olives and olive oil.
- Calories: ~360
- Protein: 28g (Great for keeping you full!)
- Fat: 23g
- Carbohydrates: 10g
- Fiber: 1g
- Sugar: 2g
- Sodium: 550mg (Remember, those salty, flavorful bits contribute here!)
One Last Bite of Wisdom
Friends, that’s the story of my favorite Mediterranean Meatloaf. It’s more than just a recipe; it’s a reminder that the best meals are the ones that feed more than just our stomachs—they feed our memories, our connections, and our sense of adventure. This dish proves that you can teach an old classic new, delicious tricks.
I hope you make it, share it, and put your own spin on it. Most of all, I hope it brings a little bit of that sunny, feel-good Feastical spirit to your table. Now, go grab that fork and dig in. You’ve earned it.
Until next time, keep cooking with joy,
Beau

Pizza Meatloaf : Stuffed with Pepperoni, Marinara, and Melted Mozzarella
Pizza Meatloaf: Your New Family Favorite Dinner Is Here!
Hey friends, Beau here! Let’s talk about that beautiful moment when two of the world’s greatest comfort foods decide to join forces. We’re not talking about a subtle collaboration. We’re talking a full-on, flavor-packed, cheese-pull-inducing alliance. I’m telling you, this Pizza Meatloaf is the dinner hero you didn’t know you were missing.
Imagine this: a juicy, savory meatloaf, seasoned with all the garlic and herbs of your favorite pizza dough. Now, picture slicing into it and discovering a hidden treasure trove of melty mozzarella, tangy marinara, and spicy pepperoni. The top gets glazed with more sauce and cheese until it’s bubbly and glorious. It’s not just dinner; it’s an event. It’s the answer to “What should I make tonight?” that will have everyone grinning. It’s familiar enough to be cozy, but exciting enough to make an ordinary Tuesday feel like a Friday night pizza party. So, tie on your apron, preheat that oven, and let’s turn your kitchen into the best pizzeria-meets-diner in town.
The Night We Turned Leftovers Into Legend
This recipe was born from one of those beautiful, chaotic “fend-for-yourself” nights. You know the kind. The fridge held a half-pound of ground beef, a nub of mozzarella, and the last few slices of pepperoni from last weekend’s pizza night. My daughter, with the brilliant logic of a ten-year-old, looked at me and said, “Dad, can’t we just have pizza again?” And I looked at that lonely ground beef and thought, “Well… why not?”
We mixed, we stuffed, we crossed our fingers. What came out of the oven was pure magic. That first cheesy, saucy slice was a revelation. It wasn’t just a solution to a sparse fridge; it was a whole new category of awesome. It immediately went into our permanent rotation as “Pizza Loaf,” and it’s been the most-requested meal for game nights and sleepovers ever since. It proves that the best recipes often start with a little improvisation and a lot of heart.
Gathering Your Pizza Party Ingredients
Here’s everything you’ll need to create this masterpiece. I’ve added my little chef notes next to each one—because knowing the *why* makes you a better cook!
For the Meatloaf:
- 2 lbs ground beef (80/20 blend): The 80/20 ratio is your friend here! That bit of fat keeps the meatloaf incredibly moist and flavorful. If you only have leaner beef, no panic—just don’t overmix it.
- 1 cup Italian-style breadcrumbs: These are our secret flavor agents, already packed with herbs. They bind the meat and soak up moisture. Chef’s Swap: Use panko breadcrumbs mixed with 2 tsp of Italian seasoning for a lighter texture.
- 2 large eggs: Our trusty binder, holding our meaty masterpiece together.
- ½ cup milk: This adds tenderness and helps blend everything smoothly. Any kind you have works!
- ½ cup grated Parmesan cheese: The salty, umami kick that makes it taste truly Italian. Freshly grated is a game-changer, but the pre-grated stuff works in a pinch.
- 1 tsp Italian seasoning: The essence of pizza in a jar. Rub it between your palms before adding to wake up the dried herbs.
- 1 tsp garlic powder: For that all-over, mellow garlic goodness we all love.
- ½ tsp salt & ½ tsp black pepper: The fundamental flavor boosters. Season with confidence!
For the Filling & Topping:
- ¾ cup + ½ cup shredded mozzarella cheese: We use some inside for a gooey surprise and more on top for that iconic bubbly finish. Pro Tip: Low-moisture, whole-milk mozzarella melts the best without getting greasy.
- 15–20 slices pepperoni: The classic pizza champion. Feel free to use minis or stack a few extra on top for a crispy crown!
- ½ cup + ½ cup marinara sauce: Half goes inside, half glazes the top. Use your favorite jarred sauce for ease, or your own homemade if you’re feeling fancy.
- Optional garnish: Fresh basil or parsley: A sprinkle of green at the end makes it look restaurant-worthy and adds a fresh pop.
Let’s Build This Flavor Mountain: Step-by-Step
Ready? Let’s do this. I’ll walk you through each step with my favorite kitchen hacks to ensure perfect results.
- Preheat & Prep. Crank your oven to 375°F (190°C). Now, line a rimmed baking sheet with parchment paper. Why a sheet, not a loaf pan? This lets the heat circulate all around the meatloaf, creating more of those delicious caramelized edges. If you only have a 9×5 loaf pan, that’s totally fine—just place it on a sheet pan in case of bubble-overs.
- Mix the Meat. In a large bowl, combine all of the meatloaf ingredients: the ground beef, breadcrumbs, eggs, milk, Parmesan, and seasonings. Here’s the golden rule: mix with your hands (clean ones, of course!) until it’s *just* combined. Overmixing makes a dense, tough meatloaf. We want tender and juicy.
- Shape the Base. Take slightly more than half of the meat mixture and pat it into a rough oval or rectangle shape on your prepared pan, about 1-inch thick. Think of it as building a meaty pizza crust that will hold our toppings.
- Create the Cheesy Pocket. Now for the fun part! Spread the ½ cup of marinara over the meat base, leaving a 1-inch border all around. Next, sprinkle on the ¾ cup of mozzarella. Finally, lay your pepperoni slices in an even layer. You’re building a flavor lasagna inside your meatloaf!
- Seal the Deal. Gently pat the remaining meat mixture over the top of your filling. Carefully pinch and smooth the edges to seal everything in. A little water on your fingertips helps prevent sticking. We’re creating a delicious meaty vault for all that cheesy pepperoni goodness.
- Top it Off. Spread the remaining ½ cup of marinara over the top like you’re saucing a pizza. Sprinkle the final ½ cup of mozzarella evenly over the sauce. For extra fun, add a few more pepperoni slices on top—they’ll get crispy in the oven!
- Bake to Perfection. Slide your creation into the oven. Bake for 55-65 minutes. The real key? Use a meat thermometer! The internal temperature should hit 160°F in the center of the meat (not the cheese pocket). The top will be browned, the cheese bubbly, and your kitchen will smell incredible.
- The Crucial Rest. Once out of the oven, let the meatloaf rest for a full 10 minutes. I know it’s hard to wait, but this allows the juices to redistribute. If you slice it right away, all that delicious moisture will run out. Use this time to toss a quick salad or set the table.
- Slice & Serve! Use a sharp serrated knife to cut thick, beautiful slices, revealing that stunning cheesy layer. Garnish with fresh basil or parsley if you like. Then, get ready for the compliments.
How to Serve Your Masterpiece
This Pizza Meatloaf is the star of the show, but every star needs a good supporting cast! Here’s how I love to plate it up:
For the ultimate comfort food plate, slide a thick, warm slice onto a plate. Pair it with something light and fresh to balance the richness. A crisp Caesar salad or a simple garlic butter green bean sauté are perfect. My family also loves it with a side of roasted broccoli or zucchini—the veggies get a little charred and sweet, which is amazing with the savory meatloaf.
Want to double down on the cozy factor? Serve it with a side of creamy polenta or garlic mashed potatoes for a truly epic feast. And don’t forget a little extra warm marinara sauce on the side for dipping! Leftovers (if you have any!) make a phenomenal sandwich the next day on a toasted hoagie roll.
Make It Your Own: Fun Twists & Swaps
The beauty of this recipe is its flexibility. Play with it! Here are a few of my favorite riffs:
- “Supreme” Style: Sauté some diced green bell pepper, onion, and mushrooms. Add these to the filling layer along with the pepperoni for a loaded pizza experience.
- Spicy Hawaiian: Swap the pepperoni for diced Canadian bacon or ham. Add a layer of well-drained crushed pineapple to the filling. Top with a mix of mozzarella and provolone.
- Turkey & Chicken Swap: Use ground turkey or chicken for a lighter version. Just add an extra tablespoon of olive oil or an extra egg yolk to the mix to keep it moist, as poultry is leaner.
- Gluten-Free & Keto Friendly: Swap the breadcrumbs for crushed pork rinds or almond flour. They bind perfectly and keep it low-carb. Just check your marinara for added sugar.
- Breakfast Pizza Loaf: Crazy but delicious! Use breakfast sausage as the meat. Fill with scrambled eggs, cheddar cheese, and crumbled cooked bacon. Top with a drizzle of maple syrup after baking.
Beau’s Kitchen Notes & Stories
This recipe has evolved over many, many delicious trials. I learned the hard way that packing the meat too tightly makes it dense—gentle hands are key! I also tried adding the cheese only on top at first, but stuffing it inside? That was the “Eureka!” moment that defined the recipe.
One funny fail: I once tried to make a “deep dish” version in a springform pan. Let’s just say the cheese filling had other plans and staged a major escape all over my oven floor. We ate delicious, if slightly misshapen, slices that night while the oven cooled down for a clean. Moral of the story? Keep it simple. The free-form loaf on a sheet pan is the foolproof winner.
Your Questions, Answered
Q: My meatloaf is falling apart when I slice it. What did I do wrong?
A: This usually points to not enough binder or slicing too soon. Make sure your eggs and breadcrumbs are fully incorporated. And that 10-minute rest is NON-NEGOTIABLE! It lets the structure set. Using a very sharp knife to slice also helps.
Q: Can I make this ahead of time?
A: Absolutely! You can assemble the whole meatloaf (through step 6), cover it tightly, and refrigerate it for up to 24 hours. When you’re ready, just pop it in the oven—you may need to add 5-10 minutes to the bake time since it’s going in cold.
Q: The top cheese is browning too fast!
A: Ovens can be sneaky. If the cheese is getting too dark before the meat is cooked, simply lay a loose piece of aluminum foil over the top for the remainder of the baking time. This will shield it without trapping steam.
Q: Can I freeze Pizza Meatloaf?
A: For sure. Bake it completely, let it cool, then wrap the whole loaf or individual slices tightly in plastic wrap and foil. Freeze for up to 3 months. Thaw in the fridge overnight and reheat slices in the oven or toaster oven until warm through.
Pizza Meatloaf : Stuffed with Pepperoni, Marinara, and Melted Mozzarella
Description
Pizza night meets classic comfort food in this irresistible Pizza Meatloaf. It’s juicy and flavorful, stuffed with melty mozzarella, tangy marinara, and pepperoni, then topped with more sauce and cheese for that unmistakable pizza vibe. Familiar, fun, and incredibly satisfying, this is the kind of dinner that gets requested again and again.
Ingredients
Meatloaf
-
2 lbs ground beef (80/20 for best juiciness)
-
1 cup Italian-style breadcrumbs
-
2 large eggs
-
½ cup milk
-
½ cup grated Parmesan cheese
-
1 tsp Italian seasoning
-
1 tsp garlic powder
-
½ tsp salt
-
½ tsp black pepper
Filling & Topping
-
¾ cup shredded mozzarella cheese (for filling)
-
½ cup shredded mozzarella cheese (for topping)
-
15–20 slices pepperoni
-
½ cup marinara sauce (for filling)
-
½ cup marinara sauce (for topping)
-
Optional: fresh basil or parsley for garnish
Instructions
-
Preheat oven to 375°F (190°C). Line a rimmed baking sheet with parchment paper.
-
Mix meatloaf base: In a large bowl, gently combine ground beef, breadcrumbs, eggs, milk, Parmesan, Italian seasoning, garlic powder, salt, and pepper until just mixed.
-
Shape the base: Place a little over half the meat mixture on the baking sheet and shape into a 1-inch-thick oval or rectangle.
-
Add filling: Spread ½ cup marinara over the base, leaving a 1-inch border. Sprinkle with ¾ cup mozzarella and layer with pepperoni.
-
Seal: Gently cover with remaining meat mixture, sealing edges well.
-
Top: Spread remaining marinara on top and sprinkle with the remaining mozzarella. Add extra pepperoni if desired.
-
Bake: Bake for 55–65 minutes, until internal temperature reaches 160°F (71°C).
-
Rest: Let rest for 10 minutes before slicing. Garnish and serve.
Notes
-
Don’t overmix the meat—this keeps it tender, not dense.
-
Use a thermometer for perfect doneness without drying it out.
-
Rest before slicing to keep the layers intact and juicy.
-
Sheet pan vs. loaf pan: A sheet pan gives more caramelized edges, but a loaf pan works too.
Nutritional Information (Per Serving)
Disclaimer: The following is an estimate based on the specific ingredients listed and standard calculation methods. Values may vary depending on your exact ingredients and portion sizes.
- Calories: ~470
- Protein: 35g
- Total Fat: 30g
- Saturated Fat: 12g
- Carbohydrates: 15g
- Dietary Fiber: 1g
- Sugars: 4g
- Sodium: ~700mg
This is a hearty, protein-packed meal. To lighten it up, you can use 90/10 lean ground beef, part-skim mozzarella, and look for a lower-sodium marinara sauce. Pairing it with a large side salad is a great way to add volume and nutrients to your plate!
Final Thoughts from My Kitchen to Yours
Friends, this Pizza Meatloaf is more than a recipe. It’s a mood-lifter, a crowd-pleaser, and proof that the best meals are the ones that bring a little joy to the table. It takes something familiar and gives it a fun, delicious twist that’s guaranteed to start conversations.
I hope you give it a try and make it your own. Tag me @Feastical if you do—I love seeing your creations! Whether it’s for a busy weeknight or a casual gathering with friends, this dish is here to deliver big flavor and even bigger smiles. Now go on, get cooking, and remember: good food is always better when shared. Until next time, keep your ovens warm and your plates full!
– Beau
Crispy Fried Chicken Wings : Juicy, Golden & Crowd-Approved
The Secret to Seriously Crispy Fried Chicken Wings (They’re a Hug in Food Form)
Hey friend, Beau here. Grab a stool and pull up to the counter. Let’s talk about one of life’s greatest, simplest pleasures: a perfectly fried chicken wing.
You know the one. It’s the star of every game day spread, the hero of late-night cravings, the unspoken MVP of any potluck. It’s got that shatteringly crisp, golden-brown exterior that gives way with an audible crunch, followed by the juicy, steaming, flavor-packed meat inside. It’s a masterpiece of contrasts, and honestly? It tastes like a celebration.
But if you’ve ever tried to make wings at home only to end up with something soggy, pale, or (heaven forbid) dry, I feel your pain. I’ve been there. The great wing quest can feel elusive. Maybe you’ve wondered, “How do they get them so crispy at the joint down the street?”
Well, today, we’re pulling back the curtain. We’re going to make the crispiest, juiciest, most crowd-approved fried chicken wings right in your own kitchen. And the best part? No fancy equipment or mysterious ingredients are required. We’re using simple pantry staples and a couple of chef-approved tricks that guarantee success every single time. This isn’t just a recipe; it’s your new go-to wing blueprint. So, tie on your apron, and let’s make some magic—and a glorious, delicious mess.
The Wing That Started It All
My love affair with wings didn’t start in a restaurant. It started in my grandma’s kitchen on a blustery Sunday afternoon. She wasn’t making them for the big game; she was making them for my grandpa, who’d had a long week. The house would fill with the scent of frying oil and paprika—a smell that, to this day, feels like home.
She’d fry them in her old, heavy cast-iron skillet, her movements calm and certain. There was no recipe card, just instinct. She’d pull one out, blow on it carefully, and hand it to me, saying, “Taste tester, do your job.” That first, hot, salty crunch was a revelation. It was more than food; it was connection, care, and a whole lot of flavor packed into one little two-bite package. That’s the spirit I want to bring to your kitchen today. We’re not just frying chicken; we’re creating a moment, a memory, a reason for everyone to gather ’round and say, “Wow, you made these?”
Gathering Your Wing Arsenal
Here’s everything you need. Read the notes beside each one—they’re your first step to wing mastery!
- 2 lbs chicken wings, split, tips removed – Look for “party wings” or “wingettes and drumettes” to save time. If they’re whole, use kitchen shears to snip through the joint and discard the pointy tip (or save it for stock!).
- 1 cup buttermilk – This is our tenderizing secret weapon! The acidity gently breaks down proteins for juicier meat. Chef’s Swap: No buttermilk? Mix 1 cup regular milk with 1 tablespoon white vinegar or lemon juice. Let it sit for 5 minutes until it curdles slightly.
- 1 cup all-purpose flour – The foundation of our crispy coating. It creates that classic, craggy texture we all love.
- 1/2 cup cornstarch – The CRISPY GAME-CHANGER! Mixing cornstarch with flour is the pro trick for an incredibly light, shatteringly crisp crust that stays crunchy longer.
- 1 tsp salt – Seasoning from the inside out. Don’t be shy here.
- 1/2 tsp black pepper – Freshly ground adds the best warmth.
- 1 tsp garlic powder – Adds a savory, umami depth to the crust.
- 1 tsp paprika – For color and a sweet, smoky hint. Smoked paprika is a fantastic upgrade here.
- Optional: 1/4 – 1/2 tsp cayenne pepper – Want a little heat in the crust itself? Start with 1/4 tsp and go from there.
- Oil for frying (vegetable, canola, or peanut oil) – You’ll need enough to come about 2-3 inches up the side of your pot. These oils have high smoke points and neutral flavors, perfect for frying.
Let’s Get Frying: Your Step-by-Step Wing Masterclass
Follow these steps, and you’re golden. Literally.
- The Tenderizing Soak: In a large bowl or resealable bag, combine the wings and buttermilk. Make sure each wing is fully submerged. Pop it in the fridge for at least 30 minutes, but if you can swing it, 4 hours or even overnight is IDEAL. This isn’t just busywork; this soak is building juicy flavor and ensuring every single bite is tender. I often do this in the morning for dinner that night.
- Heat Your Oil: Pour your oil into a heavy-bottomed Dutch oven, deep cast-iron skillet, or deep fryer. You want it to be about 2-3 inches deep. Attach a deep-fry or candy thermometer to the side. Gradually heat the oil over medium-high heat to 350°F (175°C). This is the sweet spot—hot enough to crisp quickly without burning, but not so hot the outside cooks before the inside. Chef’s Hack: No thermometer? Toss a small cube of bread into the oil. If it turns golden brown in about 60 seconds, you’re good to go!
- The Dredge Station: While the oil heats, mix your dry ingredients—flour, cornstarch, salt, pepper, garlic powder, paprika, and cayenne (if using)—in another shallow bowl or a large paper bag. Whisk it all together thoroughly. Now, take your wings directly from the buttermilk, letting the excess drip off, and drop them into the flour mixture. Here’s the key: PRESS the coating on. Don’t just toss them. Get your hands in there and really press the flour mixture into every nook and cranny. This creates those beautiful, craggy bits that equal maximum crunch. Shake off the loose flour and place the coated wings on a wire rack while you finish the batch.
- The Fry: Working in batches (do NOT overcrowd the pot—this drops the oil temp and leads to soggy wings), gently lower the wings into the hot oil using tongs. I do about 6-8 wings at a time. They should bubble actively. Fry for 8-10 minutes, turning them occasionally with tongs for even browning. You’re looking for a deep, glorious golden brown and an internal temperature of 165°F. The first batch is your test; adjust time as needed.
- The Drain (The Most Important Step You Might Skip): As each batch finishes, transfer them to a wire rack set over a baking sheet. DO NOT drain them on paper towels alone. Paper towels trap steam, making the bottom of your wings soggy. The wire rack allows air to circulate all around, keeping every millimeter crispy. Let them rest for a few minutes here—they’re still cooking a bit inside!
Serving Up Your Golden Glory
Now for the fun part: presentation and dipping! Pile those crispy wings high on a big platter or in a rustic basket lined with parchment paper. Scatter some celery sticks and carrot sticks around for that classic, cool crunch contrast.
For sauces, I like to serve them two ways: Leave half naked and glorious in their crispy state, and toss the other half in a bowl with your sauce of choice. For saucing, add the warm wings to a big bowl, pour in your sauce, pop a lid on it, and give it a few confident shakes to coat evenly. Here are my go-to sauce starters:
- Classic Buffalo: Melt 1/2 cup hot sauce (like Frank’s) with 1/3 cup unsalted butter and a splash of vinegar.
- Sticky Garlic Parmesan: Toss with melted butter, minced garlic, chopped parsley, and a heavy shower of grated Parmesan.
- Honey BBQ Glaze: Warm up your favorite BBQ sauce with a big drizzle of honey.
Don’t forget the dip! Blue cheese or ranch are non-negotiable for me. A big bowl in the center of the table lets everyone dive in.
Make It Your Own: Delicious Wing Variations
Once you’ve mastered the classic, the world is your wing oyster! Try these fun twists:
- Nashville Hot Style: After frying, brush the wings with a spicy paste made from 1/2 cup hot oil (carefully taken from the fryer), 2 tbsp cayenne pepper, 1 tsp brown sugar, 1/2 tsp paprika, and a pinch of salt.
- Lemon Pepper Dry Rub: Skip the sauce. Toss hot wings in a mix of melted butter, then in a homemade rub of lemon zest, cracked black pepper, and salt.
- Gluten-Free & Crispy: Swap the all-purpose flour for your favorite 1:1 gluten-free flour blend. The cornstarch is already GF, so you’re all set for a celiac-safe crunch.
- Air Fryer Adaptation: Want less oil? Pat soaked wings dry, toss in oil, then coat in the flour/cornstarch mix. Spray with oil and air fry at 400°F for 20-25 mins, flipping halfway. You still get great crispiness!
- Asian-Inspired Sticky Wings: Toss in a sauce of soy sauce, honey, ginger, garlic, and a dash of rice vinegar. Garnish with sesame seeds and sliced green onions.
Beau’s Kitchen Notes
This recipe has been my football Sunday staple for years, but it’s evolved. I used to be terrified of frying—the splatters! the thermometer!—until I realized it’s just about confidence and a good heavy pot. The cornstarch trick was a happy accident when I ran low on flour one day; now, I’ll never go back.
A funny story: I once tried to fry a huge batch for a party without letting the oil temperature recover between batches. Let’s just say the last batch was… pale and sad. I learned patience the delicious, slightly embarrassing way. Now I fry in small, disciplined batches, and it makes all the difference. Remember, your kitchen, your rules. Have fun with it!
Wing Troubleshooting: Your Questions, Answered
- Q: My coating fell off! What happened?
A: This usually means the oil wasn’t hot enough when you added the wings, or you didn’t press the coating on firmly. Make sure your oil is a steady 350°F and really pack that flour mixture on. Letting them rest on the rack for 5 minutes before frying can also help the coating set. - Q: Can I bake these instead of frying?
A: You can! For a baked version, toss the coated wings in a bit of oil, place them on a wire rack over a baking sheet, and bake at 425°F for 40-50 minutes, flipping halfway. They’ll be crispy, but it’s a different, drier crisp than the juicy fry. The air fryer method (above) is a great middle ground. - Q: How do I keep them warm for a party?
A: After draining on the rack, place the finished wings on a clean baking sheet and keep them in a 250°F oven. This low heat will keep them warm and crisp without continuing to cook them. Don’t cover them, or they’ll steam! - Q: What’s the best oil to use?
A: Oils with a high smoke point and neutral flavor are best. Peanut oil is fantastic (and gives a flavor many restaurants use), but vegetable, canola, or corn oil work perfectly and are more wallet-friendly.

Crispy Fried Chicken Wings : Juicy, Golden & Crowd-Approved
Description
There’s nothing quite like a perfectly fried chicken wing. Crispy, crackly on the outside, juicy and flavorful on the inside—these wings are pure comfort and always a hit. This recipe uses simple pantry ingredients and one key trick (hello, cornstarch!) to guarantee wings that stay crunchy long after they leave the fryer.
Ingredients
-
2 lbs chicken wings, split (tips removed)
-
1 cup buttermilk
-
1 cup all-purpose flour
-
1/2 cup cornstarch
-
1 tsp salt
-
1/2 tsp black pepper
-
1 tsp garlic powder
-
1 tsp paprika (smoked if possible)
-
Optional: 1/4–1/2 tsp cayenne pepper
-
Oil for frying (vegetable, canola, or peanut oil)
Instructions
Pat wings dry with paper towels. Place in a bowl or zip-top bag with buttermilk. Cover and refrigerate at least 30 minutes (up to overnight for best flavor).
Pour oil into a heavy pot or deep skillet to about 2–3 inches deep. Heat to 350°F (175°C).
In a large bowl, whisk together flour, cornstarch, salt, pepper, garlic powder, paprika, and cayenne (if using).
Remove wings from buttermilk, letting excess drip off. Press firmly into the flour mixture, coating every surface. Shake off excess and place on a wire rack.
Carefully lower wings into hot oil (6–8 at a time). Fry 8–10 minutes, turning occasionally, until deep golden and internal temperature reaches 165°F (74°C).
Transfer wings to a wire rack set over a baking sheet (not paper towels). This keeps them crispy on all sides.
Enjoy plain and crunchy, or toss in your favorite sauce.
Notes
-
Cornstarch is the secret: It creates a light, shatter-crisp crust.
-
Keep oil hot: Let oil return to 350°F between batches.
-
Don’t crowd the pot: Overcrowding = soggy wings.
-
Wire rack > paper towels: Prevents steam from softening the crust.
-
Double dredge: For ultra-craggy wings, dip back into buttermilk and flour again.
Nutritional Information*
*Please note: This is an approximate estimate for 1 serving (about 4-5 wings) using vegetable oil for frying, without sauce. Values can vary based on specific ingredients and serving size.
- Calories: ~380
- Protein: 25g
- Carbohydrates: 12g
- Fat: 25g
- Saturated Fat: 5g
- Fiber: 0g
- Sugar
Final Thoughts: More Than Just a Wing
So there you have it—the roadmap to a perfect, crispy fried chicken wing. But let’s be honest: this recipe is about so much more than just a plate of food.
It’s about the confident sizzle when the chicken hits the oil. It’s about the satisfying crunch that makes everyone at the table stop talking. It’s about the messy fingers, the shared bowls of sauce, and the simple joy of making something incredible with your own two hands.
You’re not just following steps—you’re creating an experience. Whether it’s for a rowdy game day, a comforting weeknight dinner, or just because you deserve a treat, these wings are a little act of edible love. They’re a reminder that the best food isn’t about perfection; it’s about connection, a bit of shared happiness, and the courage to get a little flour on your shirt.
Remember my grandma’s kitchen? That’s the real secret ingredient. It’s the care, the patience, and the intention you bring to the process. So don’t stress over the fry time or the exact cayenne measurement. Cook with confidence, share with generosity, and enjoy the moment.
Now, go make some memories—and some seriously good wings. You’ve got this.
Beau