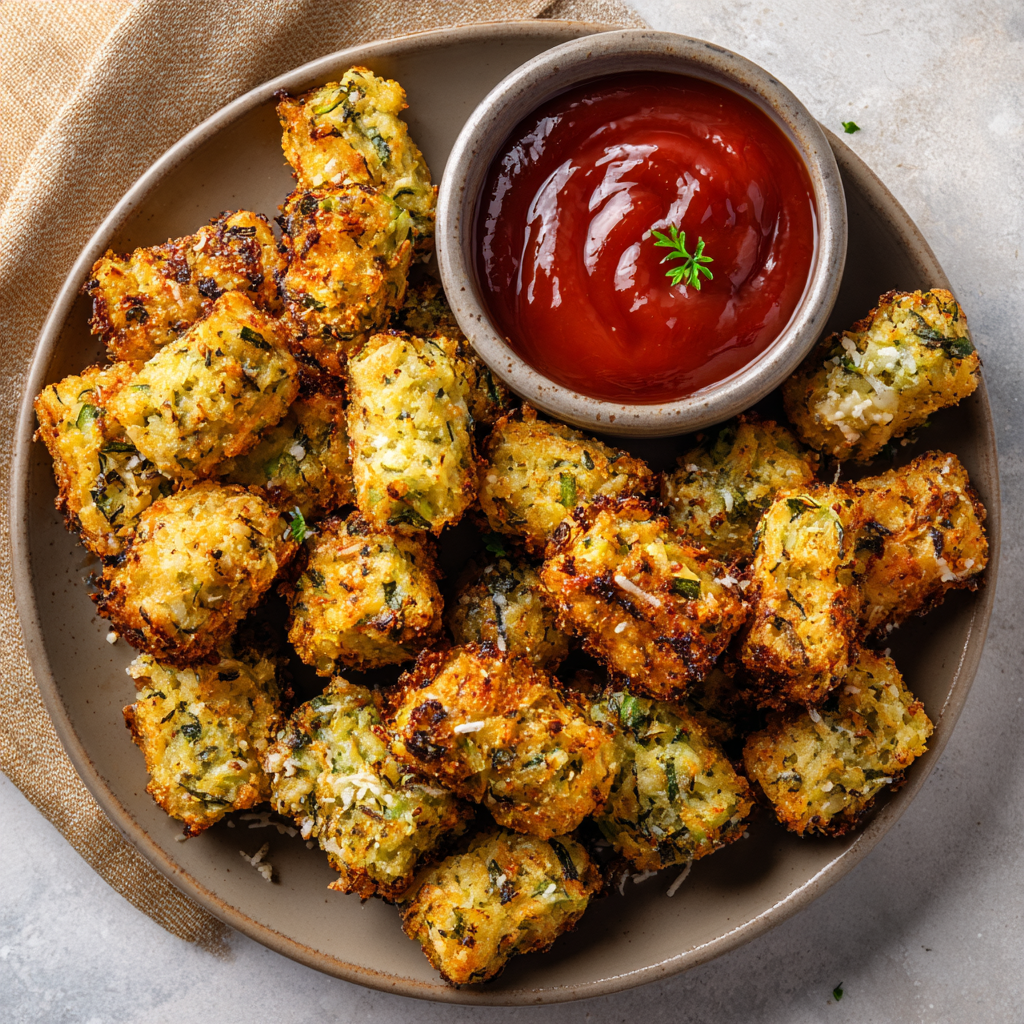
Crispy Veggie Tots : Healthy, Kid-Friendly Bites with Zucchini or Sweet Potato
Welcome to the Ultimate Veggie Tot Kitchen Party!
Hey there, friend! Beau here, from Feastical. Let’s be real for a second. How many times have you stood in the kitchen, staring into the abyss of snack options, hoping to find something that’s actually good for your crew, doesn’t take a culinary degree to make, and will disappear from the plate faster than you can say “pass the ketchup”? If you’re nodding along, you’ve just found your kitchen’s new MVP: Crispy Veggie Tots.
We’re talking about those magical, munchable, dippable bites that turn humble zucchini or sweet potato into pure, crispy gold. These aren’t just a “kid-friendly” recipe—they’re a life-friendly recipe. They’re for the busy weeknights, the game-day spreads, the “I-need-a-snack-now” moments, and the stealthy mission of getting more veggies into everyone (including yourself!) without a single complaint. The best part? You probably have everything you need already. We’re keeping it simple, soulful, and satisfying, just like we do here at Feastical. So, tie on your apron, grab your favorite mixing bowl, and let’s make some magic happen. These tots are about to become your new go-to, and I can’t wait for you to taste them!
The Garden Zucchini That Started It All
This recipe always takes me back to my grandma’s sprawling summer garden. It was a jungle of green, and the zucchini plants were the undisputed champions, producing these mammoth vegetables overnight. We’d have zucchini bread, zucchini noodles, grilled zucchini… you name it. One sweltering afternoon, facing yet another basket of them, my grandma winked and said, “Let’s make ’em fun.”
She shredded a mountain of it, mixed it with breadcrumbs and a generous heap of parmesan from her fridge, and formed little nuggets. She fried a few (divine!), but then tossed the rest in the oven. What came out were these crispy, savory, impossible-to-stop-eating bites. We ate them straight off the pan, burning our fingers and grinning. That day, a “problem” vegetable became the star of the show. This recipe is my baked, streamlined hug to that memory—proof that a little creativity turns everyday ingredients into something everyone gathers around.
Gathering Your Tot-Making Toolkit
Here’s the beautiful lineup. I’ve added my little chef-y insights to help you understand the “why” behind each item. Remember, cooking is part intuition, part science, and all heart!
- 2 cups shredded zucchini or sweet potato – This is our star! Zucchini is mild and perfect for sneaking in greens, while sweet potato adds a lovely natural sweetness and gorgeous color. Chef’s Tip: You can use a box grater or the shredding disk on your food processor. For sweet potato, peel it first!
- 1/2 cup breadcrumbs – Our crispy binder. I use plain, fine breadcrumbs. Substitution: For a gluten-free version, almond flour works wonders! Panko will give a slightly crunchier, airier texture.
- 1/4 cup grated Parmesan or shredded cheese – The flavor booster! Parmesan adds a salty, umami punch. Substitution: Any melty, shredded cheese works—cheddar, mozzarella, or a dairy-free shred for a vegan twist.
- 1 large egg – The glue that holds our little tots together. It binds the shredded veggie and breadcrumbs into a shapeable mixture. Substitution: For an egg-free version, a “flax egg” (1 tbsp ground flax + 2.5 tbsp water, left to thicken for 5 mins) is a great binder.
- 1/2 tsp garlic powder – Convenient, mellow garlic flavor without any chopping. Onion powder is a great buddy here too!
- Salt & pepper to taste – The essential seasoners. Don’t be shy—season as you go!
- Cooking spray or a bit of oil – For that perfect, golden, all-over crisp. I love avocado or olive oil spray.
- Ketchup, ranch, or your favorite dip for serving – The mandatory fun zone! Dipping is non-negotiable.
Let’s Build Some Crispy Bites: Your Step-by-Step Roadmap
Ready? Let’s transform these simple ingredients into snack-time royalty. Follow these steps, and lean in for my little hacks along the way.
Step 1: Preheat & Prep. Crank your oven to 400°F (200°C). Line a baking sheet with parchment paper. Trust me, this is the ultimate no-stick, easy-cleanup hero. No parchment? A silicone baking mat works too.
Step 2: Tackle the Veggie Moisture (The MOST Important Step!). Place your shredded zucchini or sweet potato in a clean kitchen towel, cheesecloth, or even a few strong paper towels. Twist it up and SQUEEZE over the sink with all your might. You’ll be shocked at how much liquid comes out. Chef’s Hack: This is the secret to crispy, not soggy, tots! Do not skip this. For sweet potato, you can skip the squeeze—just pat it very dry.
Step 3: The Big Mix. In a medium bowl, combine your thoroughly dried shredded veggie, breadcrumbs, cheese, egg, garlic powder, salt, and pepper. Get in there with a fork or your hands and mix until everything is evenly distributed and cohesive. The mixture should hold together when you pinch it.
Step 4: Shape Your Tots! This is the fun part. Scoop up about a tablespoon of the mixture. Roll it gently between your palms into a small cylinder or “tot” shape. If the mixture feels too wet to hold shape, add another sprinkle of breadcrumbs. Too dry? A tiny splash of water or another egg white can help. Place each tot on your prepared baking sheet, leaving a little space between them for air circulation.
Step 5: Bake to Golden Perfection. Lightly spray the tops of your tots with cooking spray or brush with oil. This gives them that all-over golden crunch. Bake for 18-22 minutes. The key move? Flip them halfway through! Around the 10-minute mark, use a spatula to carefully flip each one. This ensures even browning on all sides. They’re done when they’re firm and deeply golden.
Air Fryer Method: You know I love a good air fryer hack! Arrange shaped tots in a single layer in your air fryer basket (you may need to work in batches). Spritz with oil and cook at 375°F for 10-12 minutes, shaking the basket halfway through. They get insanely crispy!
How to Serve These Golden Gems
Presentation is part of the joy! Don’t just dump these in a bowl (though, no judgment, I’ve done it!). For a real feel-good moment, pile them high on a simple white platter or in a rustic wooden bowl. Place a few small ramekins of dips in the center—classic ketchup is a must, but branch out with creamy ranch, chipotle aioli, honey mustard, or even a quick garlic yogurt dip. Scatter some fresh chopped parsley or chives over top for a pop of color. These tots are the perfect side to burgers, grilled chicken, or a big, colorful salad. Or, make them the main event for a fun “tot bar” with multiple dip options! They’re best served warm, straight from the oven, when the exterior is at its crispiest.
Get Creative: Your Tot, Your Rules!
Once you’ve mastered the basic formula, the world is your veggie tot oyster. Here are a few of my favorite twists:
- The “Everything Bagel” Tot: Mix 1 tsp of everything bagel seasoning into the breadcrumb mixture. Divine!
- Spicy Southwest Sweet Potato Tot: Use sweet potato, add 1/4 tsp smoked paprika and a pinch of cumin. Swap the parmesan for pepper jack cheese and serve with avocado crema.
- Cauliflower Power Tot: Swap half the zucchini for riced cauliflower (make sure to squeeze it dry, too!). It’s a fantastic way to pack in even more veggies.
- Cheesier “Tater” Tot: Add an extra 1/4 cup of shredded sharp cheddar and a dash of onion powder. It’s like the classic, but better.
- Vegan & Gluten-Free Champion: Use sweet potato, almond flour, a dairy-free cheese shred, and a flax egg. Spritz with avocado oil. It’s incredibly inclusive and just as delicious.
A Few More Thoughts from My Kitchen to Yours
This recipe is a living, breathing thing in my house. I’ve made it probably a hundred times, and it’s evolved from my grandma’s fry-and-bake method to this streamlined baked (or air-fried) version. One hilarious kitchen fail early on? I forgot to squeeze the zucchini. Let’s just say I ended up with a pan of delicious but distinctly pancake-like veggie puddles. Lesson learned—squeeze with conviction! I also love making a double batch and freezing the uncooked tots on a parchment-lined tray before transferring them to a bag. Then, you can bake straight from frozen, adding a few extra minutes to the cook time. Instant win on crazy nights.
Your Veggie Tot Questions, Answered
Q: My tots are falling apart! What did I do wrong?
A: The usual suspects are 1) Not squeezing enough moisture from the veggie, making the mixture too wet, or 2) Not enough binder. The egg is crucial. If you’re still having issues after a good squeeze, try adding one more tablespoon of breadcrumbs to help absorb any residual moisture and bind it together.
Q: Can I make these ahead of time?
A: Absolutely! You have two great options: 1) Prep the mixture, cover, and refrigerate for up to 24 hours before shaping and baking. 2) Shape the tots, freeze them on a tray, then store in a freezer bag for up to 3 months. Bake from frozen, adding 5-7 minutes to the cook time.
Q: Sweet potato or zucchini—which is better?
A> It’s a matter of taste and texture! Zucchini has a milder flavor, making it the ultimate “sneaky” veggie. Sweet potato is sweeter, heartier, and holds its shape slightly more. I love them both equally for different moods!
Q: Are these actually crispy?
A> Yes! The combination of squeezing the veggies dry, using breadcrumbs, and the high-heat bake (or air fry) gives you a seriously satisfying crispy exterior with a tender, flavorful interior. The flip halfway is key for all-over crunch.

Crispy Veggie Tots : Healthy, Kid-Friendly Bites with Zucchini or Sweet Potato
Description
Simple, crunchy, and endlessly dippable—these Veggie Tots turn everyday zucchini or sweet potato into a snack everyone loves. They’re easy enough for weeknights, fun for game day, and sneaky-good at getting more veggies on the plate. No frying required, just golden crunch and cozy flavor.
Ingredients
-
2 cups shredded zucchini or sweet potato
(Zucchini must be squeezed very dry; sweet potato just pat dry) -
½ cup breadcrumbs (or panko; almond flour for gluten-free)
-
¼ cup grated Parmesan or shredded cheese (cheddar, mozzarella, or dairy-free)
-
1 large egg (or flax egg for egg-free)
-
½ tsp garlic powder
-
Salt & black pepper, to taste
-
Cooking spray or olive/avocado oil, for crisping
-
Dips for serving (ketchup, ranch, marinara)
Instructions
-
Preheat oven to 400°F (200°C). Line a baking sheet with parchment.
-
Prep the Veggies: Shred and squeeze zucchini until very dry (critical for crispiness).
-
Mix: In a bowl, combine veggies, breadcrumbs, cheese, egg, garlic powder, salt, and pepper. Mix until it holds together.
-
Shape: Roll 1 tablespoon of mixture into small tot shapes. Place on the sheet with space between.
-
Bake: Lightly spray with oil. Bake 18–22 minutes, flipping halfway, until golden and firm.
Air Fryer: 375°F for 10–12 minutes, shaking halfway. -
Serve warm with your favorite dip.
Notes
-
Dry = crispy: Squeeze zucchini hard—this makes or breaks the texture.
-
Don’t crowd the pan: Space lets steam escape.
-
Flip halfway: Ensures even browning.
-
Too wet? Add 1–2 tbsp breadcrumbs. Too dry? Add a splash of water or egg white.
Nourishment You Can Feel Good About
Let’s talk about what’s inside these delicious bites. While I’m all about the joy of eating first, it’s a wonderful bonus to know you’re fueling your body well. This nutritional breakdown is for one serving (about ¼ of the recipe) using zucchini, regular breadcrumbs, and parmesan. Remember, variations will change the numbers!
Each serving is approximately 130 calories, with about 5g of protein to help keep you satisfied, 10g of carbohydrates for energy, and 7g of fat (mostly from the cheese and egg, providing richness). Compared to traditional potato products, you’re getting a boost of vitamins from the zucchini (like Vitamin C and potassium) and far less empty carbs. It’s a snack or side that truly delivers on both flavor and substance.
Your New Go-To Recipe Awaits
And there you have it! The humble, glorious veggie tot in all its crispy, dippable glory. This recipe is more than just instructions—it’s an invitation to play in the kitchen, to make nourishing food fun, and to create those simple, happy moments around the table. I promise you, the first time you pull a tray of these golden beauties out of the oven and hear that collective “ooh,” you’ll feel like a kitchen rockstar.
So, what are you waiting for? Grab that zucchini or sweet potato and get shredding. I can’t wait for you to make them. And when you do, tag me over on Feastical or social media—I love seeing your kitchen creations! Until next time, happy cooking, and remember: good food is always better when it’s shared.
With a full heart and a crispy tot,
Beau
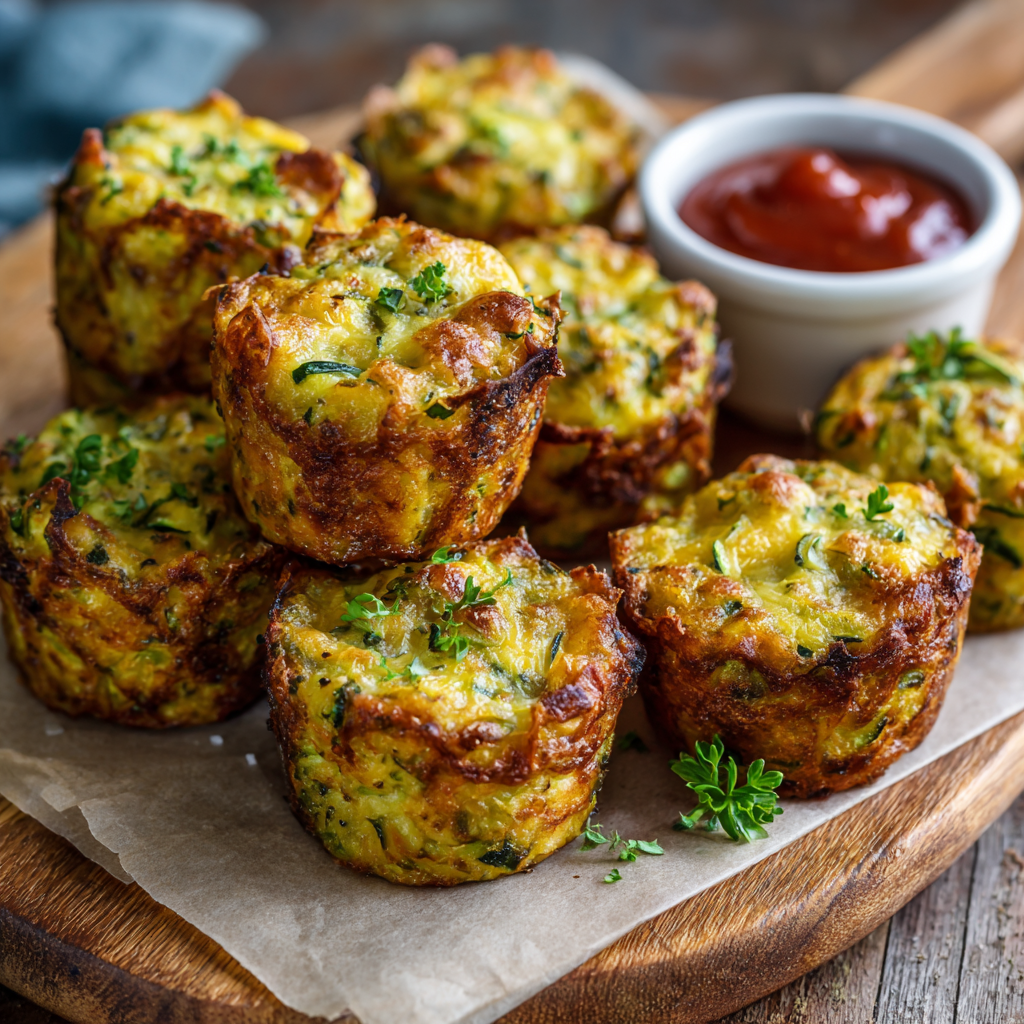
Crispy Baked Zucchini Tots : Healthy, Cheesy, and Kid-Approved
The Crunch That Converts Veggie Skeptics: My Ultimate Baked Zucchini Tots
Hey friends, Beau here! Grab a stool and pull up to the counter. I need to tell you about the little baked miracles that have become a permanent fixture in my kitchen: Crispy Baked Zucchini Tots. Now, I know what you might be thinking—”Beau, tots? Aren’t those a freezer aisle thing?” Trust me, these are a whole different universe. We’re talking about golden, crunchy, cheesy little bites that have the magical ability to make a vegetable disappear faster than cookies at a bake sale. They’re the perfect marriage of wholesome and indulgent, and they’ve saved dinner (and snack time) more times than I can count.
If you’ve ever stared at a pile of summer zucchini and wondered what magic you could work beyond another loaf of bread, this is your answer. These tots are my go-to for game day, a sneaky side dish, a lunchbox hero, or just a “hey, I deserve a tasty bite” treat. They bake up crispy on the outside without a drop of oil for frying, and stay wonderfully soft and flavorful inside. Best part? They’re a blank canvas for your favorite flavors and a genius way to make veggies the star of the show. So, preheat that oven, and let’s make your kitchen the most popular room in the house.
How a Garden Glut Created a Family Favorite
This recipe was born out of sheer necessity—and a little bit of chaos. A few summers back, my neighbor Frank, who has a garden the size of a small farm, showed up at my door with a box. Not a small basket, mind you, a full-on moving box. It was overflowing with the shiniest, greenest, most abundant zucchini I’d ever seen. “Beau,” he said, grinning, “I believe in sharing the wealth.” I was thrilled, but after the third batch of zucchini bread and a vat of soup, I needed a new plan.
My mission? Create something my niece and nephew would actually fight over. Something fun, dippable, and totally unlike the “green stuff” they usually pushed around their plates. I grated, I squeezed, I mixed, and I baked. The first batch was… okay. The second was better. But the third? The third batch vanished the second the pan hit the cooling rack. The kids were popping them like candy, and my sister-in-law was sneaking them straight from the fridge later that night. That’s when I knew: these weren’t just a solution to a zucchini surplus. They were a recipe for making memories, one crispy, cheesy tot at a time.
Gathering Your Flavor Arsenal
Simple ingredients, huge flavor—that’s the Feastical motto. Here’s everything you’ll need to build these veggie-packed bites. I’ve added my little chef insights because knowing the “why” makes you a better cook!
- 2 cups shredded zucchini: This is our star! Chef’s Tip: After shredding, you MUST squeeze out the excess moisture with your hands or a clean kitchen towel. Wet zucchini = soggy tots. This is the non-negotiable secret to crispiness.
- ½ cup shredded sharp cheddar cheese: For that gooey, melty, nostalgic flavor. Substitution: Try Monterey Jack for a milder bite, or pepper jack for a kick!
- ¼ cup grated Parmesan: The salty, umami powerhouse that amps up the savoriness. Chef’s Insight: The fine grating helps it blend and bind everything together seamlessly.
- ½ cup breadcrumbs: Our crispy coating from the inside out. Substitution: For a gluten-free or low-carb version, almond flour or gluten-free panko work beautifully.
- 1 large egg: The all-important binder that holds our little tot family together. Chef’s Tip: Whisk it in a small bowl first for easier, more even distribution.
- ½ tsp garlic powder & ½ tsp Italian seasoning: The dynamic duo of flavor! Garlic powder gives depth without raw bite, and Italian seasoning (a blend of oregano, basil, thyme) brings that herby, cozy vibe. Substitution: Use ¼ tsp each of dried oregano and basil if that’s what you have.
- Salt & pepper to taste: Don’t be shy! Seasoning every layer is key to delicious food.
Let’s Build Some Tots: A Step-by-Step Dance
Alright, team! Let’s get our hands dirty (figuratively, of course). This process is simple, satisfying, and smells amazing. Follow along with my commentary for tot success.
Step 1: Prep & Preheat. Crank that oven to 400°F (200°C). This high heat is crucial for maximum crisp. Line a baking sheet with parchment paper—not just for easy cleanup, but to prevent any sticking so you get every last bit of golden crunch. Little Hack: If you have a cooling rack that fits on the baking sheet, you can place it on top for even more airflow and crispiness on all sides!
Step 2: The Great Zucchini Squeeze. Shred your zucchini on the large holes of a box grater. Now, pile it into the center of a clean, thin kitchen towel or several layers of paper towels. Wrap it up and squeeze, twist, and squeeze some more over the sink. You’ll be amazed at how much liquid comes out. Your goal is dry, almost fluffy shreds. This, my friends, is the golden rule.
Step 3: The Big Mix. In a medium bowl, combine your thoroughly squeezed zucchini, cheeses, breadcrumbs, and seasonings. Give it a good toss with a fork. Now, add your pre-whisked egg. Use your hands or a spatula to mix until everything is evenly coated and holds together when pinched. The mixture should be moist but not wet. Chef’s Note: If it seems too dry, add a teeny splash of milk. Too wet? A sprinkle more breadcrumbs.
Step 4: Shape & Bake. Scoop up about a tablespoon of mixture. Roll it gently between your palms to form a small cylinder or oval—your classic “tot” shape. Place it on the prepared sheet. Repeat, giving them about half an inch of space to breathe. Bake for 20-25 minutes, but here’s the pro move: flip them halfway through! At the 10-12 minute mark, use tongs or a spatula to carefully turn each tot. This ensures an all-around, even, glorious golden-brown crust.
Step 5: The Crispy Reward. They’re done when they’re firm to the touch and beautifully browned. Let them cool on the pan for just 5 minutes—this lets them set and get even crispier. Then, dive in!
How to Serve These Golden Gems
Presentation is part of the fun! Don’t just dump these in a bowl (though, no judgment if you do). For the full experience, I love serving them in a shallow bowl or on a wooden board with small ramekins of dipping sauces scattered around. The classic is, of course, a warm marinara sauce—it’s a match made in heaven. But branch out! A cool, creamy ranch or garlic aioli is fantastic. For a tangy twist, try a quick sriracha mayo (just mix mayo with a squirt of sriracha).
They’re incredible as a side to a juicy burger (swap out the fries!), alongside a big, crisp salad for a light lunch, or piled high as the main appetizer at your next gathering. Pop a toothpick in each one for easy grabbing. Watch them disappear and just smile knowingly.
Mix It Up! Your Tot, Your Rules
Once you’ve mastered the base, the world is your zucchini-filled oyster. Here are a few of my favorite twists:
- The “Pizza Party”: Swap the cheddar for low-moisture, shredded mozzarella and add a tablespoon of minced pepperoni or a pinch of red pepper flakes into the mix. Serve with marinara for the full pizza effect.
- Southwest Fiesta: Use a Mexican blend cheese, add ¼ cup of finely chopped black beans and 2 tablespoons of minced cilantro. A chipotle lime crema for dipping is non-negotiable here.
- Everything Bagel Style: After shaping, roll the tots lightly in “Everything But The Bagel” seasoning before baking. The onion, garlic, sesame, and poppy seed crust is next-level.
- Dairy-Free Delight: Use your favorite vegan cheddar shred and a nutritional yeast “Parmesan” substitute. The egg can be replaced with a “flax egg” (1 tbsp ground flax + 2.5 tbsp water, set for 5 mins).
- Protein Power-Up: Add ½ cup of very finely chopped cooked chicken breast or crumbled cooked sausage to the mix for a more substantial snack.
Beau’s Behind-the-Scenes Notes
This recipe has evolved from that first “okay” batch in my kitchen. I used to chop the zucchini, but shredding makes it blend so much better. I tried frying them once, and while delicious, the baked version is just so darn easy and guilt-free that I never looked back. The flipping halfway trick was a game-changer I learned after a batch of slightly soggy-bottomed tots—live and learn!
A funny story: I once brought these to a potluck and labeled them “Gourmet Green Croquettes.” People were raving about them, asking about the sophisticated herb profile. When I finally fessed up and said they were just zucchini tots, there was a moment of stunned silence, followed by even more enthusiastic eating. Never underestimate the power of a fun name and a crispy exterior!
Your Tot Questions, Answered
Q: My tots came out soft, not crispy. What did I do wrong?
A: The number one culprit is not squeezing enough moisture out of the zucchini. Really go to town on it! The second is not baking them at a high enough temperature or on a crowded pan—they need space for steam to escape. That halfway flip is also key for all-around crisp.
Q: Can I make these ahead of time?
A: Absolutely! You have two great options: 1) Prep the mixture, cover, and store in the fridge for up to 24 hours before shaping and baking. 2) Shape and freeze the unbaked tots on a parchment-lined tray, then transfer to a freezer bag. Bake straight from frozen, adding 5-10 minutes to the cooking time.
Q: What’s the best tool for shredding the zucchini?
A: A simple box grater works perfectly. For a bigger job, the shredding disk on your food processor is a huge time-saver. Just pulse a few times until you have uniform shreds.
Q: Can I use another vegetable?
A> You can experiment! Shredded sweet potato (squeezed well) or cauliflower rice (steamed and squeezed VERY well) can work. The moisture content is different for each, so you may need to adjust breadcrumbs slightly to get the right consistency.

Crispy Baked Zucchini Tots : Healthy, Cheesy, and Kid-Approved
Description
If you’ve ever wished vegetables could disappear as fast as party snacks, these Baked Zucchini Tots are your answer. They’re crispy on the outside, tender and cheesy on the inside, and packed with flavor—no frying required. Perfect as a snack, appetizer, or side dish, these tots are a fun, approachable way to turn zucchini into something everyone actually wants to eat.
Ingredients
-
2 cups shredded zucchini, excess moisture squeezed out
-
½ cup shredded sharp cheddar cheese
-
¼ cup grated Parmesan cheese
-
½ cup breadcrumbs (regular, panko, or gluten-free)
-
1 large egg, lightly beaten
-
½ teaspoon garlic powder
-
½ teaspoon Italian seasoning
-
Salt and freshly ground black pepper, to taste
Instructions
-
Preheat the Oven
Preheat oven to 400°F (200°C). Line a baking sheet with parchment paper. -
Prep the Zucchini
Shred zucchini and squeeze out as much liquid as possible using a clean towel or paper towels. This step is crucial for crispiness. -
Mix the Ingredients
In a bowl, combine zucchini, cheddar, Parmesan, breadcrumbs, garlic powder, Italian seasoning, salt, and pepper.
Add the beaten egg and mix until the mixture holds together when pressed. -
Shape the Tots
Scoop about 1 tablespoon of mixture and shape into small oval “tots.” Place on the baking sheet with space between each. -
Bake
Bake for 20–25 minutes, flipping halfway through, until golden brown and crisp on both sides. -
Cool Slightly & Serve
Let cool for 5 minutes before serving to help them firm up.
Notes
-
Squeeze, squeeze, squeeze! Moisture is the enemy of crispiness.
-
Bake at high heat and avoid overcrowding the pan.
-
For extra crunch, place tots on a wire rack set over the baking sheet.
-
If the mixture feels wet, add a spoonful of breadcrumbs.
Feeling Good About What You’re Eating
Now, I’m not a nutritionist, but I am a chef who cares about feeling good. These tots are a fantastic way to enjoy a veggie-forward snack. Baking instead of frying saves a significant amount of fat and calories. Zucchini itself is low in carbs and calories but provides a bit of fiber, vitamin C, and potassium. The cheese offers protein and calcium, and the egg adds more high-quality protein to help keep you satisfied. Using almond flour instead of breadcrumbs can lower the carb count if that’s a priority for you. It’s all about balance—indulgent flavor doesn’t have to mean a heavy meal.
The Last Bite
So there you have it, my friends—my not-so-secret weapon for happy bellies and clean plates. These Crispy Baked Zucchini Tots are more than just a recipe; they’re a reminder that healthy, wholesome food can be the most fun, crowd-pleasing food at the table. They’ve brought joy to my kitchen, solved my neighbor’s zucchini dilemma, and hopefully, they’ll become a trusted friend in yours too.
Give them a try this week. Play with the variations. Get the kids involved in the shaping. Most importantly, share them with someone you love. Because food, especially the simple, crunchy, cheesy kind, is best when it’s a shared experience. Thanks for hanging out in my kitchen today. Until next time, keep it flavorful!
Cheers,
Beau

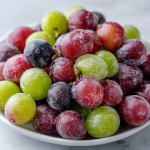
Frozen Grapes : The Easiest Healthy Snack You’ll Ever Make
Frozen Grapes: Your Secret Weapon for a Sweet, Healthy Crunch
Hey friends, Beau here! Let’s talk about a universal truth: we all get those mid-afternoon (or mid-morning, or post-dinner…) cravings for something sweet, cold, and satisfying. You’re staring into the fridge, willing a magical, guilt-free snack to appear. You’ve been there, right? I know I have. Maybe you reach for a cookie, a scoop of ice cream, or a sugary drink, only to be hit with that inevitable crash and a side of regret. What if I told you the perfect solution is already hiding in your produce drawer, waiting to be transformed?
Enter the humble grape. But not just any grape—a frozen grape. This isn’t just a snack; it’s a revelation. It’s nature’s answer to popsicles, a healthier stand-in for candy, and the ultimate hot-day refresher, all rolled into one tiny, bursting package. The process could not be simpler: wash, dry, freeze. That’s it. But the result? Pure magic. The texture transforms into a sorbet-like, juicy mini-ice pop that’s insanely refreshing and naturally sweet.
Today, I’m not just giving you a “recipe” (though we’ll get to the perfect method). I’m handing you a kitchen hack, a wellness tip, and a little bit of joy, all in one. This is for the busy parent needing a quick kid-pleaser, the fitness fanatic looking for a post-workout cool-down, or anyone who just wants to feel good about what they’re munching on. So, let’s turn off the oven, put away the complicated gadgets, and celebrate the stunning simplicity of frozen grapes. Your freezer is about to become your new best friend.
The Grape Escape: A Memory in Every Bite
My love for frozen grapes isn’t new. It’s rooted in sticky summer afternoons at my Grandma Ellie’s house. Her backyard felt like a kingdom, and her kitchen was the throne room. She wasn’t a fussy chef, but a wizard of simple, feel-good food. One blisteringly hot day, after my cousins and I had worn ourselves out running through the sprinkler, we stumbled inside, parched and begging for ice cream.
Grandma just smiled, said “I’ve got something better,” and pulled a mysterious metal bowl from the freezer. Inside were what looked like jeweled marbles—deep purple and dusted with a faint frost. Skeptical, I popped one in my mouth. The crunch gave way to an intense, cold burst of sweet-tart juice that instantly cooled me from the inside out. We were hooked. We’d race to see who could make a bowl last longer, savoring each one like a precious treasure. It felt like we’d discovered a secret, a loophole in the rules of snacks. It wasn’t just food; it was an experience, a tiny moment of pure, unadulterated joy. To this day, every time I hear the rattle of frozen grapes in a bowl, I’m ten years old again, feeling that first shocking, delightful chill. That’s the power of a simple food done right.
Your One-Ingredient Wonder: Choosing the Perfect Grapes
Here’s the beautiful part: the ingredient list is gloriously short. But as with all simple things, the quality of your one ingredient makes all the difference. Let’s break it down.
- 1 bunch of seedless grapes (red, green, or black) – This is your canvas!
- Chef’s Insight: Don’t just grab the first bag you see. Give the bunch a gentle shake. The grapes should feel firm and plump, not soft or wrinkled. They should be firmly attached to their stems—a sign of freshness.
- Flavor Guide: Red grapes are the classic sweet choice, freezing into something reminiscent of fruity candy. Green grapes offer a brighter, tangier pop, like a natural sour patch kid. Black grapes tend to be the sweetest and have a deeper, almost wine-like flavor when frozen. My personal favorite? A mix of all three for a flavor and color party!
- Pro Tip: If you can find them, “Cotton Candy” grapes are a game-changer for an extra-sweet treat. They freeze into literal, well, frozen cotton candy flavor. It’s wild!
That’s it. Seriously. No sugar, no syrup, no additives. Just pure, unadulterated fruit ready for its icy makeover. The magic is in the natural sugars and high water content—physics and nature doing the heavy lifting for you.
Step-by-Step: From Grape to Great (The No-Fail Method)
Okay, you could just toss a bag of grapes in the freezer. But for the *perfect* texture—where each grape is a distinct, non-sticky, glorious little ice gem—follow these steps. Trust me, the two extra minutes are worth it.
- Wash & De-Stem: Place your grape bunch in a colander and rinse thoroughly under cool water. We want to wash away any lingering natural yeasts or residues. Gently pluck the grapes from their stems. This is a perfect mindless task to do while chatting on the phone or listening to a podcast. Chef’s Hack: No need to painstakingly pinch each one. Hold the main stem in one hand and use the scissors of your other hand (thumb and forefinger) to gently “strip” the grapes off into your colander.
- The CRUCIAL Dry: This is the step that separates good frozen grapes from *great* ones. Spread the washed grapes on a clean kitchen towel or a stack of paper towels. Pat them gently but thoroughly until they are completely dry. Why it matters: Any leftover water on the skin will freeze into pesky ice crystals that glue the grapes together into one solid, grape-sicle lump. We want free-flowing, individual bites!
- Spread & Flash Freeze: Line a baking sheet, plate, or any flat tray with a piece of parchment paper (not wax paper!). This prevents sticking. Spread your dry grapes in a single, even layer, ensuring they aren’t touching. Pop the tray into the freezer, uncovered. Chef’s Commentary: This “flash freezing” step is our secret weapon. Freezing them individually first ensures they won’t fuse together later. It also helps them freeze faster, preserving that perfect juicy interior.
- Patiently Await Magic (3-4 Hours): Let nature do its thing! Freeze for at least 3-4 hours, or until the grapes are completely solid. You’ll know they’re ready when they feel hard like marbles and make a delightful “clink” sound when you shake the tray.
- Bag ‘Em Up: Once fully frozen, quickly transfer the grapes into a reusable freezer-safe bag or airtight container. Squeeze out excess air, label it if you’re fancy (I just write “🥶” on mine), and return it to the freezer. Final Tip: They’ll keep their best texture for about 2-3 months, but let’s be real—they’ll be gone long before then!
Serving Your Frosty Jewels: More Than Just a Handful!
Of course, eating them by the handful straight from the bag is a perfectly acceptable (and highly encouraged) method. But let’s get creative! Here are a few ways to serve frozen grapes that feel a bit more special:
- The Ultimate Cheese Board Accent: Scatter a handful of frozen red grapes on a charcuterie board next to sharp cheddar, brie, and nuts. The cold, sweet burst cuts through the rich cheese beautifully.
- Natural Drink Chiller: Drop a few frozen green grapes into your glass of white wine, sparkling water, or lemonade instead of ice cubes. They chill without diluting your drink, and you get a tasty snack at the end!
- “Ice Cream” Sundae Topper: Want to fancy up a bowl of vanilla yogurt or a scoop of sorbet? Top it with frozen black grapes and a drizzle of honey. The temperature and texture contrast is incredible.
- Pretty Party Bowl: For gatherings, serve a big bowl of mixed frozen grapes. They look stunning, stay cold for ages, and are a refreshing palate cleanser between richer foods.
Mix It Up! 5 Flavorful Twists on the Classic
Once you’ve mastered the basic, why not play with flavors? These simple additions take your frozen grapes to a whole new level with barely any extra effort.
- The Citrus Zest: After washing but BEFORE drying, toss your still-damp grapes in a bowl with the juice of half a lime or lemon and a teaspoon of zest. Toss to coat, then pat dry and freeze as usual. The citrus creates a light, tangy shell that’s irresistibly bright.
- Jolly Rancher Vibes: This is a kid (and adult) favorite. Dissolve one 3-oz package of Jell-O powder (like strawberry, lime, or orange) in a large zip-top bag. Add dry grapes, seal, and shake vigorously until evenly coated. Freeze on the tray as directed. They taste like grown-up, fruit-forward candy.
- Sweet & Salty: For a sophisticated snack, lightly mist your dry grapes with water (just a spritz!) and roll them in a mixture of fine sugar and a tiny pinch of flaky sea salt or Tajín chili-lime seasoning before freezing. The sweet-salty-spicy combo is addictive.
- Herbal Infusion: Soak your washed grapes in a simple syrup (equal parts water and sugar, heated until dissolved) that you’ve steeped with fresh rosemary or mint for 30 minutes. Drain, dry thoroughly, and freeze. The herbal note is subtle and incredibly refreshing.
- Frozen Grape Slushie (Bonus “Recipe”!): Add 2 cups of frozen grapes to a high-powered blender with a splash of coconut water or plain water. Blend until you get a slushie consistency. Pour into a glass for an instant, all-natural sorbet-style drink.
Beau’s Kitchen Notes: A Grape Evolution
This “recipe” has been my kitchen constant for decades. It’s evolved from my grandma’s simple bowl to a tested-and-perfected method. I’ve learned that the drying step is non-negotiable (I learned that the hard way after chiseling a grape boulder out of a bowl). I’ve also discovered that frozen grapes are a secret weapon for smoothing out a too-strong smoothie—just toss a handful in instead of ice!
The funniest kitchen story? The time I brought a giant container of frozen grapes to a potluck, labeled as “Adult Snacks.” Let’s just say a few guests were… surprised… by their non-alcoholic nature, but everyone absolutely raved about them. They were the first thing to disappear, even next to the fancy dips and desserts. It just goes to show that sometimes the simplest ideas, executed with care, are the biggest hits. Don’t overthink it—just freeze the grapes.
Frozen Grape FAQs: Solving Your Icy Dilemmas
Q: Why are my frozen grapes mushy/squishy inside instead of firm?
A: This usually means they didn’t freeze fast enough or long enough. Ensure your freezer is at 0°F (-18°C) or below, and always use the “flash freeze on a tray” method. Also, older grapes that are starting to lose firmness won’t freeze as well. Start with the freshest, crispiest bunch you can find.
Q: Can I freeze grapes with the stems on?
A: You can, but I don’t recommend it. The stems can become brittle and unpleasant, and the grapes won’t freeze as evenly. Taking them off pre-freeze is the way to go for the best snacking experience.
Q: My grapes are all stuck together in a big block! How do I fix it?
A: Don’t panic! You have two options. 1) Let the container sit at room temperature for just 2-3 minutes, then whack it firmly on the counter—they should break apart. 2) If they’re lightly stuck, you can run warm water over the *outside* of the bag/container for a few seconds to loosen the icy glue. Next time, remember the single-layer dry freeze!
Q: Are frozen grapes a choking hazard for little kids?
A: For toddlers and very young children, it’s safest to cut grapes in half (lengthwise) before freezing to mitigate any risk, just as you would with fresh grapes. For older kids and adults, they’re perfectly safe—just encourage mindful eating and savoring each one.
Frozen Grapes : The Easiest Healthy Snack You’ll Ever Make
Description
Your Secret Weapon for a Sweet, Healthy Crunch
A one-ingredient snack that eats like a popsicle, feels like candy, and cools you down instantly. Frozen grapes are nature’s simplest glow-up—no sugar, no prep stress, just pure refreshment.
Ingredients
1 bunch seedless grapes
(red, green, black, or a mix)
Instructions
-
Wash & De-Stem
Rinse grapes thoroughly under cool water and remove from stems. -
Dry Completely (Important!)
Spread grapes on a clean kitchen towel or paper towels. Pat dry until no surface moisture remains. -
Flash Freeze
Line a baking sheet or plate with parchment paper.
Arrange grapes in a single layer so they aren’t touching. -
Freeze Until Solid
Freeze uncovered for 3–4 hours, or until fully firm. -
Store
Transfer frozen grapes to a freezer-safe bag or airtight container.
Store up to 2–3 months for best texture.
Notes
-
Dry grapes = loose grapes. Any water causes icy clumps.
-
Single layer matters. This keeps them from freezing into a block.
-
Use fresh, firm grapes. Soft grapes freeze mushy.
-
Mix colors for flavor variety. Sweet, tart, and deep notes in one bowl.
The Sweet Deal: Nutritional Perks of Your New Favorite Snack
Let’s talk about why this snack feels so good, beyond just the taste. One cup of frozen grapes (about 150g) has approximately:
- Calories: ~100
- Fat: 0g
- Carbohydrates: 27g (primarily natural fruit sugars)
- Fiber: 1g
- Protein: 1g
- Vitamins & Minerals: A good source of Vitamin K and Vitamin C, plus antioxidants like resveratrol (especially in red/purple grapes).
The beauty is in the natural packaging. The freezing process doesn’t destroy these nutrients, so you’re getting all the benefits of fresh fruit. Because they’re so cold and take time to eat, they naturally slow down your snacking pace, helping with portion awareness. The high water content also helps with hydration. It’s a snack that truly nourishes and refreshes.
Final Thoughts: Your Freezer Awaits
So there you have it, friends—the complete guide to the easiest, most satisfying healthy snack in your culinary arsenal. Frozen grapes are more than a trick; they’re a mindset. They’re a reminder that incredible food doesn’t have to be complicated, that health and indulgence can absolutely shake hands, and that sometimes the best recipes are the ones with just one ingredient.
I hope this inspires you to see that humble bunch of grapes in a whole new light. Give it a try this week. Wash, dry, freeze, and experience that first magical, crunchy, juicy bite. I have a feeling your future self, on a hot day or during a snack attack, will thank you.
Did you try a fun variation? Have a kitchen story of your own? I’d love to hear about it! Drop a comment over on the blog at Feastical.com and let’s keep the conversation going. Now, if you’ll excuse me, I have a date with a bag of frosty, purple goodness.
Stay cool and keep it flavorful,
Beau
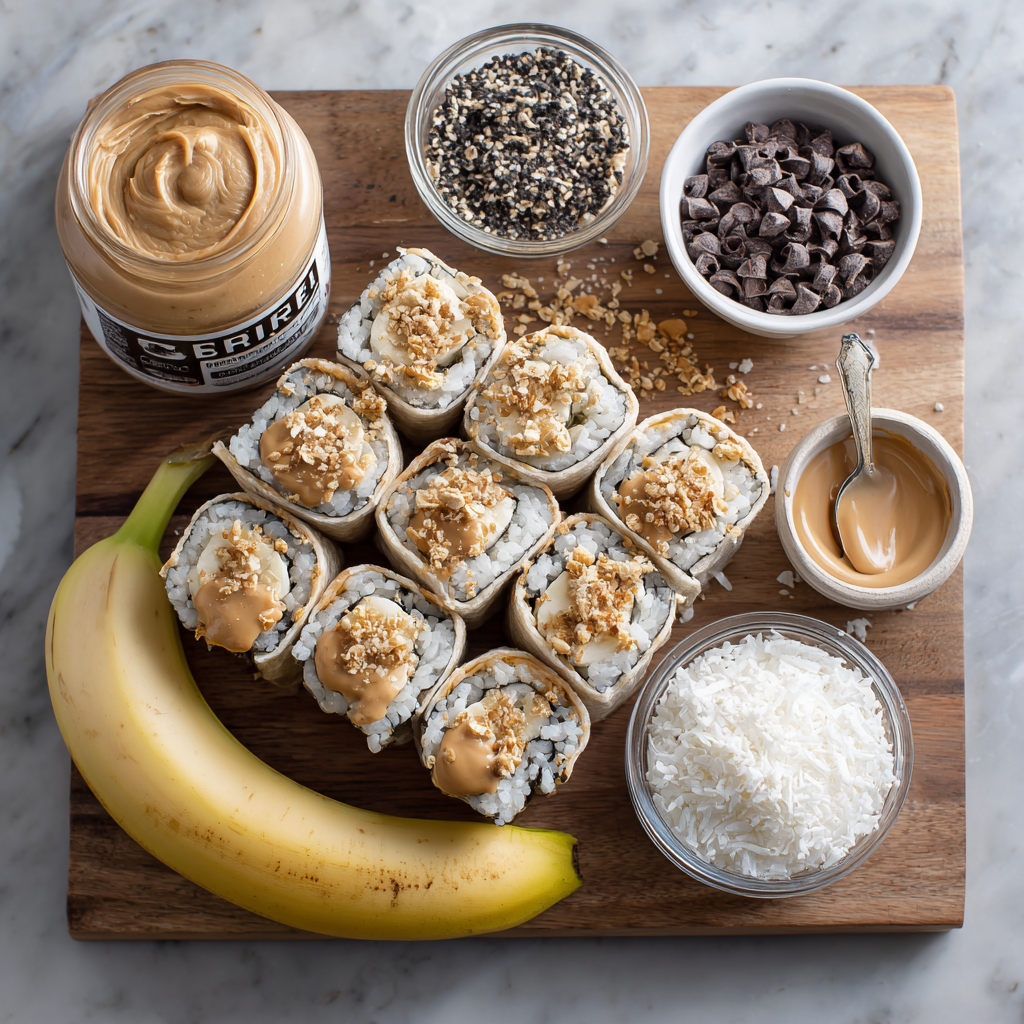
Banana Sushi Rolls : Fun, Healthy Snack for Kids and Grown-Ups
Banana Sushi Rolls: Your New Favorite 5-Minute Fun, Healthy Snack
Let’s Make Snack Time a Party!
Hey friends, Beau here! Let’s be real for a second. Some days, you want a snack that feels like a treat, but doesn’t leave you or the kiddos bouncing off the walls. You want something quick, wholesome, and let’s be honest, maybe a little bit fun to make. Enter the humble banana, stage left. But we’re not just peeling and eating today. Oh no. We’re giving it a full-blown, sushi-roll makeover.
These Banana Sushi Rolls are my go-to secret weapon. They’re the snack that looks like you fussed, but secretly took you less than five minutes. They’re the answer to “what’s for an after-school treat?” and “I need a little something sweet but good for me.” Imagine a creamy, sweet banana, hugged by your favorite nut butter, and then rolled in a crunchy, colorful confetti of toppings. You slice it into perfect little rounds, and just like that, snack time feels special.
This isn’t just a recipe; it’s a template for joy. It’s playtime with a delicious payoff. Whether you’re a parent looking to win the lunchbox game, someone needing a pre-workout bite, or just a human who loves food that makes you smile, you’ve found your new kitchen BFF. So, grab that slightly-too-ripe banana and your jar of peanut butter. Let’s roll up our sleeves and create some edible magic.
My “Aha!” Moment with a Banana and a Toddler
This recipe was born out of pure, unadulterated kitchen desperation. Picture this: It’s 4 PM. My niece, a tiny tornado of energy, is declaring she’s “staaaarving.” The “healthy snacks” I’d prepped were getting a hard side-eye. I had one sad-looking banana, a nearly-empty jar of almond butter I was scraping with a spatula, and a bag of granola on the counter.
In a moment of inspiration (or delirium), I spread the almond butter on the banana, rolled the whole thing in granola, and sliced it like a little log. “Whoa,” she said, eyes wide. “It’s like banana sushi!” She was hooked. The act of making it together—her choosing the toppings, me doing the slicing—turned a simple snack into an event. We weren’t just eating; we were creating. That’s the spirit I want to bring to your kitchen. The best recipes often come from a little chaos and a lot of heart, not from a perfectly staged pantry. This one’s for all the improvisers, the lunchbox heroes, and the believers that food should be fun.
Gathering Your Sushi Bar Staples
Here’s the beautiful part: You likely have 90% of this already. This is a choose-your-own-adventure list. I’ll give you the base and then all the delicious ways to riff on it.
- 1 Large, Firm Banana: Not too green, not too mushy. We want that gentle sweetness and a texture that holds up to rolling. A ripe-but-firm banana is your canvas. Chef’s Insight: Slightly underripe works better than overripe here!
- 2 Tbsp of Your Favorite “Glue”: This is the flavor anchor. I’m a classic creamy peanut butter guy, but the world is your oyster.
- Almond Butter: A slightly milder, richer vibe.
- Sunflower Seed Butter: The perfect nut-free school-safe option (hello, Wowbutter!).
- Cookie Butter or Chocolate Hazelnut Spread: For a truly decadent “dessert sushi” moment.
- 1 Whole Grain Tortilla or Flatbread (Optional): This is for the “wrapped” version, which is heartier and easier for little hands to hold. A low-carb wrap or a spinach tortilla adds a fun color pop!
- The Topping Bar (The Fun Part!): Prepare a small plate with any of these. Mix and match!
- Granola: Classic crunch. Use a finely chopped kind for best adhesion.
- Crushed Nuts: Walnuts, pecans, or sliced almonds add fantastic texture.
- Shredded Coconut: Toasted or untoasted, it gives a tropical feel.
- Mini Chocolate Chips: Because… chocolate. Need I say more?
- Chia or Hemp Seeds: A stealthy boost of omega-3s and protein.
- Cinnamon Sugar: A simple, magical mix (1 tsp sugar + ¼ tsp cinnamon).
- Crushed Freeze-Dried Strawberries: For a gorgeous pink color and tart flavor.
Let’s Get Rolling: Your Foolproof Guide
Ready? Set. Go! This is so easy, you’ll have it memorized after one try.
- Prep Your Station. Peel your banana. If using a tortilla, lay it flat on a cutting board. Get your nut butter and toppings ready in small, shallow dishes. Pro-Tip: Have a damp paper towel nearby for sticky fingers—it’s a game-changer.
- Choose Your Path: Naked or Wrapped?
- For the Classic (Naked) Roll: Using a butter knife or a small offset spatula, spread the nut butter evenly all over the banana. Try to get a nice, thin, even coat. This is your glue! Chef’s Hack: If your nut butter is super thick, microwave it for 5-7 seconds to make it more spreadable.
- For the Heartier (Wrapped) Roll: Spread the nut butter over the entire surface of the tortilla, leaving just a tiny border at the top. Place the peeled banana near the bottom edge.
- The Big Roll.
- Naked: Gently roll the nut-butter-coated banana in your topping plate. Use a spoon to help sprinkle and press the toppings on for full coverage. Think “rolling a log in glitter.”
- Wrapped: Tightly roll the tortilla around the banana, starting from the bottom. Try to keep it snug! Once rolled, you can give the outside a quick schmear of extra nut butter and roll it in toppings, or leave it as is.
- Slice & Serve. Using a sharp knife (serrated works great!), slice your banana log into ½-inch to 1-inch pieces. If you did the wrapped version, you’ll get beautiful sushi-like rounds with a swirl. Important Tip: Use a gentle sawing motion. Don’t press straight down or you’ll squish your masterpiece!
- Enjoy Immediately! These are best eaten right away. The banana can brown a bit if left out, and the wrap might get soggy. If you MUST prep ahead, assemble and slice, then store in a single layer in an airtight container in the fridge for up to 2-3 hours max.
How to Serve Your Banana Sushi Masterpiece
Presentation is half the fun! Arrange your sushi rounds on a simple plate or a fun bento box. For the full experience, serve them with:
- Little Dippers: A side of yogurt thinned with a touch of honey, or extra nut butter for double-dipping action.
- The Rainbow Platter: Surround your sushi with other snackable friends like berries, orange slices, or cheese cubes to make a complete snack plate.
- For a Party: Create a DIY Banana Sushi bar! Set out bananas, a few “glue” options, and 4-5 topping bowls. Let everyone build their own. It’s interactive, delicious, and a surefire hit for playdates or casual gatherings.
Remember, the goal is joy. Serve it with a smile and maybe a silly soy sauce dish (filled with yogurt, of course!).
5 Delicious Twists to Keep It Exciting
Once you master the basic roll, the sky’s the limit. Here are some of my favorite spins:
- Tropical Vacation Roll: Use almond butter, roll in shredded coconut and crushed macadamia nuts, and add a tiny sprinkle of lime zest. Aloha!
- Chocolate-Covered Pretzel Roll: Spread with chocolate hazelnut spread, roll in crushed pretzel bits and mini chocolate chips. Salty, sweet, crunchy perfection.
- Green Machine Roll (Sneaky Veggie!): Spread the tortilla with a thin layer of spinach or avocado hummus before adding the nut butter and banana. Roll in everything bagel seasoning. Savory-sweet magic.
- Berry Blast Roll: Before rolling the banana in a tortilla, add a line of thin strawberry slices or a drizzle of raspberry jam alongside the banana. Roll in freeze-dried berry powder.
- Protein Power Roll: Mix a scoop of vanilla or chocolate protein powder into your nut butter to thicken it slightly. Roll in hemp seeds and chopped nuts. The ultimate post-workout refuel.
A Few More Thoughts from My Kitchen to Yours
This recipe has evolved from that one desperate afternoon into a Feastical staple. I’ve made it with nieces, nephews, friends’ kids, and for myself more times than I can count. The biggest lesson? Don’t stress the mess. Toppings will go everywhere. Nut butter will get on your sleeves. It’s part of the charm.
I’ve also learned that the “wrong” banana often makes the best banana sushi. That single, lonely banana that’s a day past its prime for eating straight? It’s sweet, soft, and absolutely perfect for this. This recipe is a celebration of simplicity and using what you have. So, have fun with it. Make it your own. And if you come up with an incredible new topping combo, come tell me about it over on the blog or socials—I want to try it!
Your Questions, Answered
- Q: Can I make these ahead of time for lunchboxes?
A: This is the trickiest part. Bananas brown, and wraps can soften. For the best results, I recommend assembling and eating within an hour or two. For lunchboxes, your best bet is the “naked” roll without nut butter (to prevent sogginess). Pack the nut butter in a small container for dipping, and pack the toppings separately in another. Let them assemble at lunch! It keeps the banana fresh and makes lunch interactive. - Q: My nut butter is too thick to spread! Help!
A: No worries! A quick 5-10 second zap in the microwave will make it beautifully spreadable. You can also stir in a tiny drop of neutral oil (like avocado or coconut oil) to loosen it up. - Q: Toppings won’t stick! What am I doing wrong?
A: First, make sure your nut butter layer is even and not too thin. Second, roll the banana directly on the topping plate, and use clean, dry hands or a spoon to gently press the toppings into the “glue.” A little patience goes a long way. - Q: Any other nut-free “glue” ideas?
A: Absolutely! Sunflower seed butter is my #1 go-to. You can also use cream cheese (sweetened with a hint of honey if you like), Greek yogurt (strained thicker is better), or even a thin layer of mashed avocado for a super-creamy, neutral base.
Let’s Talk Nourishment (The Simple Version)
I’m not a nutritionist, but I am a chef who believes good food should make you feel good. Here’s the basic scoop on why this snack rocks:
Using a base of peanut butter and a banana gives you a fantastic balance: healthy fats and protein from the nut butter to keep you full and satisfied, paired with natural sugars, fiber, and potassium from the banana for quick and sustained energy. Skipping the wrap keeps it lower in carbs, while adding one makes it more substantial. The toppings are where you can boost nutrients—chia seeds for omega-3s, nuts for more protein, coconut for healthy fats.
It’s a snack that tastes like a treat but fuels your body like a champion. As always, these are estimates. Your exact numbers will vary based on the specific ingredients and toppings you choose. The most important ingredient? The joy of making and eating it.

Banana Sushi Rolls : Fun, Healthy Snack for Kids and Grown-Ups
Description
Banana Sushi Rolls are proof that a snack can be quick, healthy, and genuinely fun. In just a few minutes, a simple banana transforms into playful, bite-sized “sushi” rolls coated in creamy nut butter and crunchy toppings. They’re perfect for kids, great for a post-workout boost, and ideal when you want something sweet without going overboard.
Ingredients
Base
-
1 large, firm banana
-
2 tablespoons nut butter (peanut, almond, or sunflower seed butter)
Optional Wrap
-
1 whole-grain tortilla or flatbread (optional, for a heartier roll)
Toppings (choose 1–3)
-
Granola (finely chopped works best)
-
Shredded coconut
-
Mini chocolate chips
-
Chia seeds or hemp seeds
-
Crushed nuts
-
Cinnamon sugar
-
Crushed freeze-dried fruit
Instructions
-
Prep
Peel the banana. If using a tortilla, lay it flat on a cutting board. -
Spread
Spread nut butter evenly over the banana, or over the tortilla if using the wrapped version. -
Roll
-
Naked version: Roll the nut-butter-coated banana directly in your chosen toppings.
-
Wrapped version: Place the banana on the tortilla, roll it up snugly, then optionally coat the outside with toppings.
-
-
Slice
Using a sharp knife, gently slice into ½–1 inch rounds. -
Serve Immediately
Best enjoyed fresh for optimal texture and color.
Notes
-
Use a ripe but firm banana—too soft will squish.
-
If nut butter is thick, microwave it 5–10 seconds to loosen.
-
Press toppings gently so they stick without crushing the banana.
-
For school lunches, pack components separately and assemble just before eating.
Go Forth and Roll!
And there you have it, my friends—the complete guide to turning a banana into a moment of pure, unscripted delight. This recipe proves that you don’t need fancy equipment or complicated techniques to make food that brings a smile. You just need a little creativity and a willingness to play with your food.
So, the next time that 3 PM slump hits or you need a win in the kitchen, remember the banana sushi roll. It’s your edible high-five. It’s a reminder that cooking (and snacking!) should be fun, flexible, and full of flavor.
Thanks for hanging out in my kitchen today. If you give these a whirl, I’d love to see your creations! Tag me @Feastical or use #BananaSushiRoll so I can cheer you on. Now, go grab that banana and get rolling. Your new favorite snack is waiting.
With a full heart and a slightly sticky counter,
Beau
Clickable Pin Title:
Banana Sushi: 5-Minute Fun & Healthy Snack!
Pin Description:
Banana Sushi Rolls 🍌🥢 The EASIEST healthy snack! Just 3 ingredients & 5 minutes. Perfect for kids, lunchboxes, or a quick sweet treat. Customize with peanut butter, granola, chocolate chips & more! Kid-friendly, gluten-free options. Get the fun recipe!

Cheeseburger Tots : Crispy, Cheesy & Crowd-Pleasing Party Bites
Cheeseburger Tots: Your New Secret Weapon for Game Day & Gatherings
Hey friends, Beau here! Let’s cut straight to the chase: if you’re looking for a recipe that will disappear faster than you can say “more, please,” you’ve just hit the jackpot. Today, we’re taking a deep dive into one of my all-time favorite crowd-pleasers – Cheeseburger Tots. Imagine everything you adore about a perfectly messy, cheese-dripping, pickle-topped burger, but transformed into a crispy, poppable, finger-food masterpiece. That’s exactly what we’re creating.
These aren’t just another appetizer; they’re a conversation starter. They’re the dish that makes people hover around the oven, asking “Are they ready yet?” They’re the reason your party suddenly gets a whole lot louder and happier. The beauty of this recipe lies in its brilliant simplicity. We’re using a genius shortcut (hello, frozen tater tots!) to create edible little cups, then loading them up with savory, seasoned beef and a mountain of melty cheddar. A tangy pickle and a drizzle of special sauce finishes the whole delicious deal.
Whether you’re gearing up for the big game, hosting a casual backyard bash, or just want to turn Tuesday night dinner into a fun family affair, these Cheeseburger Tots deliver every single time. They’re approachable for kitchen newbies and impressive enough for seasoned cooks. So, preheat that oven, grab your favorite mini muffin tin, and let’s make some magic happen. Get ready for the ultimate crispy, cheesy, and totally addictive party bite!
The Game Day Lightbulb Moment
I have to be honest, this recipe was born from a bit of kitchen chaos and a serious craving. Picture this: It’s a quintessential autumn Sunday. My living room is packed with friends, all yelling at the TV, and my spread of usual game day snacks—wings, dips, chips—is starting to feel… predictable. I wanted something that captured the essence of classic game-day food but in a new, fun format. I also had a serious hankering for a cheeseburger but didn’t want to fire up the grill for just one.
Staring into my freezer, I saw a bag of tater tots. In my pantry, a sack of potatoes. (The eternal debate: shortcut or scratch? For speed and consistent crispiness, the tots won that day.) The idea just clicked. What if the tots were the bun? A crispy, potato-y vessel for all my favorite burger fixings? One experimental batch later, covered in melted cheese and a mess of burger sauce, and my friends declared them an instant legend. Now, they’re not just a recipe; they’re a ritual. No game day, no gathering, is complete without a tray of these golden, cheesy bites. They’re my edible memory of laughter, friendly rivalry, and the simple joy of really, really good food.
Gathering Your Flavor Squad: Ingredients & Chef Insights
Here’s the beautiful part: this recipe requires no fancy, hard-to-find ingredients. It’s all about taking simple, beloved components and assembling them with love and a few pro tips. Let’s break it down.
- 1 (32 oz) bag frozen tater tots: This is our foundation and brilliant shortcut. They bake into the perfect crispy cup. Chef’s Insight: Don’t thaw them! Straight from the freezer is best for structure. For a from-scratch version, you can use finely shredded russet potatoes, squeezed very dry, but for ease and consistency, frozen is my game-day MVP.
- 1 lb ground beef (80/20 blend recommended): The star of our burger filling. The 80/20 blend has enough fat to stay juicy and flavorful after baking. Substitution Tip: Ground turkey, chicken, or even a plant-based ground “meat” work wonderfully here. Just make sure to season well and add a touch of olive oil if using a very lean protein.
- 1/2 cup diced yellow onion: Sweetness and texture. We cook it right with the beef. Chef’s Insight: If you have an onion-hater in the crowd, you can grate it on a microplane. It will practically dissolve into the beef, adding flavor without detectable texture.
- 1 cup shredded sharp cheddar cheese: The glorious, melty glue. Pro Tip: Shred your own cheese from a block! Pre-shredded cheese contains anti-caking agents that can make it less melty and smooth. The extra minute of shredding makes a world of difference in that gooey factor.
- Dill pickle slices (for topping): The essential tangy, crunchy finish. I use classic hamburger dill chips. Fun Twist: Try spicy pickles, bread & butter chips for a sweet touch, or even a tiny spoonful of relish mixed into the beef filling.
- Burger sauce or Thousand Island dressing (for drizzle): The “special sauce” that ties it all together. Quick Hack: Make your own by mixing 1/2 cup mayo, 2 tbsp ketchup, 1 tbsp sweet pickle relish, 1 tsp white vinegar, and a pinch of paprika, garlic powder, and onion powder.
- Salt & freshly cracked black pepper to taste: Never underestimate the power of proper seasoning. Season your beef mixture generously.
- Nonstick cooking spray: Crucial for easy removal. Give that muffin tin a good spritz!
Let’s Build These Bite-Sized Burgers: Step-by-Step
Alright, team. Let’s get our hands (figuratively) dirty. Follow these steps, and you’ll have a tray of golden perfection in no time. I’m sprinkling in my favorite kitchen hacks along the way.
- Heat Things Up & Prep Your Pan: Crank your oven to 425°F (220°C). This high heat is key for maximum crispiness. While it warms, generously spray your mini muffin tin with nonstick spray. Don’t be shy here—we want easy, clean releases later.
- Form the Tot “Nests”: Place 3-4 frozen tater tots into each muffin cup. It might look a little messy and uneven—that’s perfect! Pop the tray into the preheated oven and bake for 10 minutes. This initial bake softens the tots so we can shape them.
- The Shaping Hack: Carefully pull the tray out (it’s hot!). Now, here’s my favorite trick: use the bottom of a small shot glass, a small spice jar, or the handle of a wooden spoon to press the softened tots down into the cup, pushing them up the sides. You’re creating a little potato cup. Press firmly! Once shaped, return the tray to the oven for another 10-15 minutes, until the edges are deep golden brown and crispy. This is the most important step for structure—don’t rush it!
- Cook the Savory Filling: While the tot cups crisp up, let’s make the filling. In a skillet over medium-high heat, cook the ground beef and diced onion together, breaking up the meat with a spoon. Cook until no pink remains and the onions are soft. Drain any excess grease (a little is fine for flavor). Season generously with salt and pepper. I sometimes add a pinch of garlic powder here too, because why not?
- The Grand Assembly: When your tot cups are gloriously crispy and golden, remove them from the oven. Leave the oven on! Immediately spoon the hot beef mixture into each cup, filling them nearly to the top. Then, pile on a generous pinch of your shredded cheddar cheese. The heat from the beef and tots will start melting it right away.
- The Final Melt: Slide the loaded tot cups back into the oven for just 3-5 more minutes, or until the cheese is completely melted, bubbly, and irresistible.
- Garnish & Serve with Flair: Pull the tray out and let it cool for just a minute (the cheese is molten lava!). Top each Cheeseburger Tot with a dill pickle slice and finish with a zig-zag drizzle of that burger sauce. Use a small spoon or squeeze bottle for control. Serve immediately while they’re hot, crispy, and magical!
How to Serve These Crowd-Pleasing Bites
Presentation is part of the fun! I like to transfer these to a large serving platter or a wooden board. Scatter a few extra pickle slices and fresh herbs like chopped chives or parsley around the edges for a pop of color. Place a small bowl of extra burger sauce in the center for dippers in the crowd.
For a true “burger bar” experience, set out small bowls of additional toppings and let people customize: crispy cooked bacon bits, diced tomatoes, a drizzle of yellow mustard or ketchup, even some caramelized onions for the adventurous. Serve them straight from the tray if you want that rustic, communal feel—just put a stack of napkins right next to it, because things are about to get deliciously messy.
Get Creative: 5 Fun Twists on the Classic
The basic recipe is a flawless 10, but part of being in the kitchen is playing with your food! Here are some of my favorite ways to mix it up.
- The Bacon Cheeseburger Tot: Mix 1/2 cup of finely chopped cooked bacon into the beef filling. Top with a blend of cheddar and smoked gouda cheese for an incredible smoky flavor.
- The “Big Mac” Style Tot: Add 1 teaspoon of mustard and 1 tablespoon of finely minced dill pickle to the beef filling. Use a blend of cheddar and American cheese. For the sauce, mix equal parts mayo, ketchup, and sweet relish with a dash of vinegar and a sprinkle of onion powder.
- The BBQ Ranch Burger Tot: Toss the cooked beef with 3 tablespoons of your favorite BBQ sauce instead of just salt and pepper. After the cheese melts, top with a drizzle of cool ranch dressing and a crispy fried onion string.
- The Breakfast Burger Tot: Perfect for brunch! Use seasoned breakfast sausage instead of beef. Top with a melty slice of American cheese and a tiny dollop of maple syrup or a sprinkle of maple pepper after baking.
- The Veggie-Lover’s Tot: Skip the meat! Sauté finely chopped mushrooms, bell peppers, and zucchini until tender. Mix in a can of drained black beans or lentils for protein. Season with taco or fajita seasoning, top with pepper jack cheese, and finish with avocado crema.
Beau’s Kitchen Notebook
This recipe has seen many iterations in my kitchen. The first time, I tried smashing a single tot flat—it was a disaster. The “nest” method was the game-changer. I’ve also learned that letting the shaped cups get really, really crispy before filling is non-negotiable. A soft cup will turn soggy under the weight of the juicy beef.
A funny story: I once made a triple batch for a huge party and, in my hurry, forgot to spray the muffin tins. Let’s just say we spent more time surgically extracting tots with spoons than we did eating them that first round. Learn from my mistake: SPRAY THAT PAN! These little guys have evolved from a game-day experiment to one of the most requested recipes I’ve ever created. That’s the power of combining familiar comforts in a new, shareable way.
Your Questions, Answered: FAQ & Troubleshooting
- Can I make these ahead of time? You can! Prepare the tot cups through step 3 (shaping and initial crisping). Let them cool, then store in an airtight container at room temp for a day. You can also cook the beef filling ahead and refrigerate it. When ready to serve, reheat the filling, assemble, and bake for the final 5 minutes to melt the cheese. The fresh assembly guarantees maximum crispiness.
- My tots are sticking to the pan! Help! First, ensure you’re using enough nonstick spray. Second, let them cool in the pan for about 2-3 minutes after the final bake. The cups will firm up and release more easily. A small offset spatula or a butter knife can help gently pry them out.
- Can I use a regular muffin tin? Absolutely! You’ll just get fewer, larger “burger bites.” Use 4-5 tots per cup and adjust baking times slightly (they may need a few extra minutes to crisp up). They become more of a hearty handheld snack.
- How do I keep them warm for a party? After the final bake, you can place them on a parchment-lined baking sheet and keep them in a 200°F (95°C) oven for up to 30 minutes. Add the cold pickle and sauce right before serving so they stay crunchy and fresh.

Cheeseburger Tots : Crispy, Cheesy & Crowd-Pleasing Party Bites
Description
These Cheeseburger Tots are everything you love about a classic cheeseburger—savory beef, melty cheese, tangy pickles—packed into crispy, bite-sized potato cups. They’re easy to make, fun to eat, and guaranteed to vanish fast at parties, game days, or casual family dinners. Thanks to frozen tater tots and a mini muffin tin, you get maximum crunch with minimum effort.
Ingredients
-
1 (32 oz) bag frozen tater tots
-
1 lb ground beef (80/20 recommended)
-
½ cup yellow onion, finely diced
-
Salt & freshly ground black pepper, to taste
-
1 cup sharp cheddar cheese, freshly shredded
-
Dill pickle slices, for topping
-
Burger sauce or Thousand Island, for drizzling
-
Nonstick cooking spray
Optional quick burger sauce:
Mix ½ cup mayonnaise, 2 tbsp ketchup, 1 tbsp sweet pickle relish, 1 tsp white vinegar, and a pinch of paprika, garlic powder, and onion powder.
Instructions
-
Preheat & Prep
Preheat oven to 425°F (220°C). Generously spray a mini muffin tin with nonstick spray. -
Make the Tot Cups
Place 3–4 frozen tater tots into each muffin cup. Bake for 10 minutes.
Remove carefully and press the softened tots down and up the sides using a small glass or spoon handle to form a cup.
Return to oven and bake another 10–15 minutes, until golden and crispy. -
Cook the Beef Filling
While tots bake, cook ground beef and onion in a skillet over medium-high heat until beef is browned and onions are soft.
Drain excess fat and season well with salt and pepper. -
Assemble
Spoon beef into each crispy tot cup and top with shredded cheddar cheese. -
Melt & Finish
Bake 3–5 minutes, just until cheese is melted and bubbly. -
Garnish & Serve
Top each bite with a pickle slice and a drizzle of burger sauce. Serve hot!
Notes
-
Don’t thaw the tots — frozen helps them hold their shape.
-
Press firmly when shaping the cups for sturdy, crispy edges.
-
Shred your own cheese for the best melt.
-
Let them cool 2–3 minutes before removing from the pan to prevent sticking.
A Quick Nutritional Glance
Please note: The following is an approximate estimate per Cheeseburger Tot bite, calculated using the standard ingredients. Values can vary based on specific brands, cheese fat content, and any modifications you make.
- Calories: ~120 kcal
- Fat: 7g
- Carbohydrates: 8g
- Protein: 5g
- Sodium: ~250mg (varies greatly with beef, cheese, and sauce seasoning)
Remember, these are appetizer bites meant for sharing and enjoyment! To lighten them up, you can use lean ground beef or turkey, opt for low-fat cheese, and go easy on the sauce drizzle. Balance them out with a big, fresh salad or veggie platter on the side.
Final Thoughts
Let’s be real—food is more than fuel. It’s memory, laughter, and connection. And that’s exactly what these Cheeseburger Tots are all about. They’re not just a clever mash-up of flavors; they’re an experience. They transform the humble tater tot into a crispy, edible canvas for everything we love about a classic burger, creating a bite-sized moment of pure joy.
Whether you’re feeding a rowdy game-day crowd, hosting a casual get-together, or simply treating your family to a fun weeknight dinner, this recipe delivers. It meets you where you are—forgiving for beginners, inspiring for seasoned cooks, and endlessly adaptable to your cravings. That’s the true beauty of it.
So, the next time you’re staring into the freezer wondering what to make, remember this little flavor powerhouse. Grab those tots, fire up the oven, and get ready for the compliments to roll in. You’re not just making an appetizer; you’re creating the highlight of the party.
Thanks for cooking with me today. Now go make some memories—one crispy, cheesy, totally addictive bite at a time.
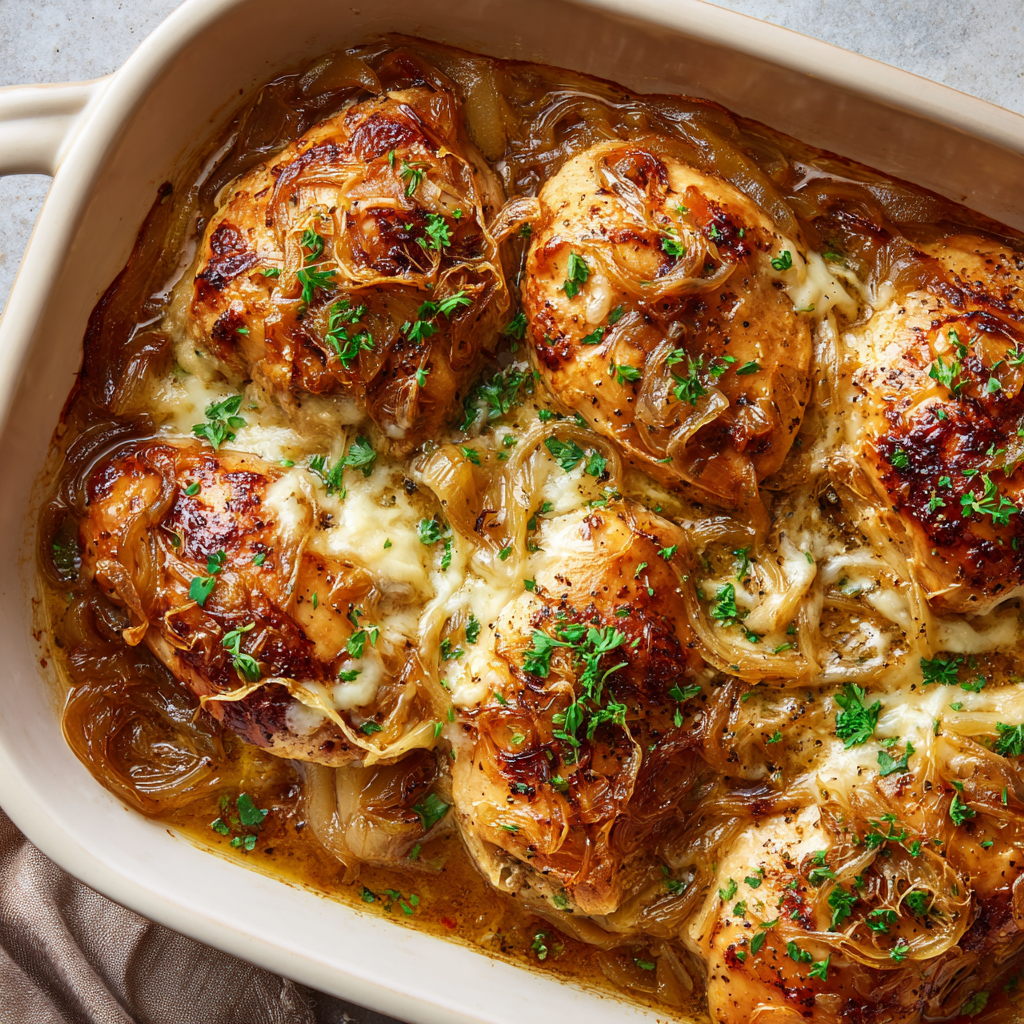
French Onion Chicken Bake: Cheesy, Caramelized Comfort in One Dish
The Dinner That Tastes Like a Hug: French Onion Chicken Bake
Hey friends, Beau here! Let’s be real for a second. Some nights, you just need a dinner that does all the heavy lifting for you. You want something that simmers with promise from the oven, fills your kitchen with an aroma that makes your stomach growl on cue, and delivers a flavor so deeply satisfying it feels like a culinary high-five. You want comfort, but you also want to keep it simple. Sound familiar? That’s exactly why I created this French Onion Chicken Bake.
We’re taking everything we adore about a steaming crock of French onion soup—the impossibly sweet, slow-caramelized onions, the rich, savory broth, that glorious blanket of melted cheese—and we’re turning it into a hearty, main-course superstar. Imagine juicy chicken breasts, nestled under a mountain of those golden onions and bubbly, gooey cheese. It’s elegant enough for company but straightforward enough for a Tuesday. It’s the kind of recipe that makes you look like a kitchen rockstar with minimal fuss, and that’s my absolute favorite kind of magic to share with you here on Feastical. So, tie on your apron, grab your favorite skillet, and let’s make a memory—and an incredible dinner—together.
Why This Dish Feels Like Home
This recipe always takes me back to my grandparents’ house in the fall. My grandma wasn’t a “fancy” cook, but she was a master of transformation. She could turn a bag of ordinary onions, a bit of patience, and a whole lot of love into something extraordinary. I’d sit at their Formica countertop, doing homework, watching the steam fog up the windows as those onions slowly turned from crisp and white to soft, golden, and impossibly fragrant. The smell was the definition of comfort. It meant family was gathering, stories were about to be told, and a seriously good meal was minutes away.
My version, this French Onion Chicken Bake, is my tribute to that feeling. It’s my way of capturing that soul-warming magic but building it into a complete, protein-packed meal that stands on its own. It’s the cozy essence of my grandma’s kitchen, updated for our busy lives. Every time I catch that first whiff of onions caramelizing, I’m right back at that counter, and I hope this dish creates that same sense of warm, delicious belonging for you and your crew.
Gathering Your Flavor Allies
Here’s the beautiful part: the ingredient list is short and sweet (and savory!). This is where quality and technique shine. Let’s break it down.
- 4 boneless, skinless chicken breasts: The hearty base of our bake. For the juiciest results, I aim for breasts that are roughly the same size so they cook evenly. Chef’s Tip: If yours are super thick, give them a gentle pound with a rolling pin or pan to an even thickness. It’s a great stress-reliever, too!
- 2 tbsp olive oil: Our cooking workhorse. It has a higher smoke point than butter for caramelizing and adds a lovely fruitiness.
- 2 large yellow onions, thinly sliced: The STARS of the show. Yellow onions have the perfect sugar content for caramelizing. Thin, even slices are key here—don’t rush it! This is where the flavor foundation is built.
- 1 tbsp balsamic vinegar or dry white wine (optional but awesome): This is your flavor booster rocket. A splash deglazes the pan, lifting all those tasty browned bits (the fond) and adding a layer of acidity that balances the sweetness. Balsamic adds a touch of dark fruitiness; white wine adds brightness.
- 1 cup beef or chicken broth: Creates the luxurious, saucy base. I love the deep, robust flavor of beef broth here (it’s very French onion soup!), but chicken broth works perfectly if it’s what you have.
- 1 tsp garlic, minced: Because garlic makes everything better. Add it after the onions caramelize so it doesn’t burn and turn bitter.
- 1 tsp fresh thyme or ½ tsp dried: That subtle, earthy note that whispers “French countryside.” If you have fresh, it’s gorgeous, but dried is totally fine and lives in your pantry for moments just like this.
- 1½ cups shredded mozzarella or Swiss cheese: The glorious, melty crown. Mozzarella gives you that epic cheese pull, while Swiss is the classic, nutty choice for true French onion vibes. A blend is fantastic too! Pro move: Shred it yourself from a block—it melts infinitely better than pre-shredded.
- Salt & pepper, to taste: Your essential flavor awakeners. Season your chicken and your onions as they cook.
- Fresh parsley, for garnish (optional): A little pop of green color and fresh flavor to finish it off beautifully.
Let’s Build Some Delicious: Your Step-by-Step Guide
Alright, team! Time to get cooking. We’re going to take this one simple, flavor-building step at a time. Read through first, then let’s dive in.
- Preheat & Prep: Fire up your oven to 375°F (190°C). This gives it plenty of time to get perfectly heated while we work on the stovetop magic. Lightly grease a 9×13 inch baking dish—a quick spray of oil does the trick. Pat your chicken breasts dry with a paper towel (this helps them get a better sear, though we’re not searing here, it’s just a good habit!) and season both sides generously with salt and pepper.
- The Art of the Onion (This is the Zen Part): In a large skillet, heat the olive oil over medium heat. Add all those beautiful sliced onions. Now, here’s the secret: don’t rush. We’re not frying, we’re coaxing. Stir them occasionally, letting them soften and slowly turn a pale gold. This takes a solid 15-20 minutes. If they start to brown too quickly, nudge the heat down a bit. You’ll know they’re ready when they’re slumped, silky, and the color of a perfect brown bag. This step is non-negotiable for that signature sweet-savory depth. Put on some music, pour yourself a drink, and enjoy the process.
- Deglaze & Create the Sauce: Once your onions are gloriously caramelized, add the minced garlic and stir for just about 60 seconds until fragrant. Now, pour in your balsamic vinegar or wine. It will sizzle and steam—use your spoon to scrape up any delicious browned bits stuck to the pan. This is FLAVOR, don’t leave it behind! Let it simmer for a minute to cook off the raw alcohol taste, then pour in the broth and sprinkle in the thyme. Let the whole mixture simmer together for 2-3 minutes. It will thicken slightly and become incredibly aromatic. Give it a taste and add a pinch more salt if needed.
- Assemble the Bake: Place your seasoned chicken breasts in your prepared baking dish in a single layer. Take your skillet and lovingly pour every last bit of the onion and broth mixture over the top of the chicken, ensuring each piece gets a generous heap of those onions.
- The Cheesy Finale: Sprinkle the shredded cheese evenly over everything. Go right to the edges! We want every bite to have that melty goodness.
- Bake to Perfection: Slide the dish into your preheated oven and bake for 25-30 minutes. You’re looking for the chicken to be cooked through (an internal thermometer should read 165°F) and the cheese to be melted, bubbly, and starting to get those irresistible golden spots.
- Garnish & Serve: Carefully remove the dish from the oven (it’ll be hot and heavenly smelling!). Let it rest for about 5 minutes—this lets the juices redistribute in the chicken, keeping it moist. Then, scatter some chopped fresh parsley over the top for that finishing touch. Dish it up hot and get ready for the compliments!
How to Plate This Masterpiece
This dish is a complete meal in a pan, but the right sides turn it into a feast! My absolute favorite way to serve it is over a big, fluffy pile of garlic mashed potatoes. The potatoes soak up that incredible oniony, cheesy sauce like a dream. For a lighter option, try it with a simple green salad dressed with a sharp vinaigrette to cut through the richness.
But let’s be honest, you also need something to swipe through that cheesy-onion goodness. A loaf of warm, crusty baguette or some toasted sourdough is non-negotiable in my house. For a low-carb route, roasted asparagus, green beans, or a medley of roasted carrots and parsnips are fantastic companions. However you serve it, make sure everyone gets plenty of those caramelized onions and that glorious sauce!
Make It Your Own: Delicious Twists & Swaps
One of my favorite things about this recipe is how easily it adapts. Play with it! Here are a few of my go-to variations:
- “Soup-er” It Up: Want it even saucier, like a true soup bake? Add an extra ½ cup of broth and stir in a tablespoon of Worcestershire sauce with the thyme for an extra umami kick.
- Go Gruyère Glam: Swap the mozzarella for Gruyère cheese. It’s the classic French onion soup cheese and melts into the most luxurious, nutty, flavorful topping imaginable.
- Mushroom Medley: Slice up 8 ounces of cremini mushrooms and sauté them with the onions. They add an earthy, meaty depth that’s absolutely incredible.
- Thighs for the Win: Prefer dark meat? Use 4-6 boneless, skinless chicken thighs instead of breasts. They’re juicier and more forgiving. You might need to add a few minutes to the bake time.
- Keep it Gluten-Free & Low-Carb: This recipe is naturally gluten-free! Just ensure your broth is a certified GF brand. For a low-carb side, skip the bread and serve over cauliflower mash or zucchini noodles.
Beau’s Kitchen Notes & Stories
This recipe has been a work-in-progress in my kitchen for years. The first time I made it, I was so impatient with the onions that I cranked the heat. Let’s just say I ended up with slightly blackened, bitter onions and a very sad chicken bake. Lesson learned: low and slow is the only way with caramelization. It’s a lesson in patience that pays off a thousandfold in flavor.
I’ve also found that this dish is a fantastic “clean out the fridge” vehicle. Got a half-used bag of Swiss? A few sprigs of rosemary about to wilt? Toss them in! Cooking should be fun and flexible. The core technique—caramelize, deglaze, bake—is what makes it magic. Everything else is just your personal signature.
Your Questions, Answered!
Q: Can I make this ahead of time?
A: Absolutely! You can caramelize the onions and assemble the whole dish in the baking dish up to a day in advance. Cover and refrigerate. When ready, let it sit on the counter for 20-30 minutes while the oven preheats, then bake as directed, adding maybe 5-10 extra minutes since it’s starting cold.
Q: My onions are burning before they caramelize! Help!
A: This means your heat is too high. Caramelization isn’t a sprint; it’s a leisurely stroll. Drop the heat to medium-low, add a tiny pinch of salt (which helps draw out moisture), and keep stirring. If they’re sticking, a tablespoon of water or broth can help loosen them.
Q: Can I use frozen chicken breasts?
A: I don’t recommend it for this recipe. Frozen breasts release a lot of water as they bake, which will water down your beautiful sauce and prevent proper browning. Thaw them completely first for the best texture and flavor.
Q: What can I use if I don’t have balsamic or wine?
A> No problem! Just skip that step. When you add the broth, still be sure to scrape the pan well. The flavor will still be amazing.

French Onion Chicken Bake: Cheesy, Caramelized Comfort in One Dish
Description
French Onion Chicken Bake
Juicy chicken breasts smothered in caramelized onions and melty cheese
A comforting, flavor-packed dinner that’s elegant enough for guests but simple enough for a weeknight.
Ingredients
-
4 boneless, skinless chicken breasts
-
2 tbsp olive oil
-
2 large yellow onions, thinly sliced
-
1 tbsp balsamic vinegar or dry white wine (optional)
-
1 cup beef or chicken broth
-
1 tsp garlic, minced
-
1 tsp fresh thyme or ½ tsp dried
-
1½ cups shredded mozzarella or Swiss cheese (or a blend)
-
Salt & pepper, to taste
-
Fresh parsley, chopped (optional, for garnish)
Instructions
-
Preheat & Prep:
-
Oven: 375°F (190°C).
-
Lightly grease a 9×13-inch baking dish.
-
Pat chicken dry, season both sides with salt and pepper.
-
-
Caramelize the Onions:
-
Heat olive oil in a large skillet over medium heat.
-
Add sliced onions, stir occasionally for 15–20 minutes until soft and golden.
-
-
Deglaze & Make the Sauce:
-
Stir in minced garlic for 60 seconds.
-
Add balsamic vinegar or wine to deglaze the pan, scraping up browned bits.
-
Pour in broth and sprinkle in thyme. Simmer 2–3 minutes to thicken slightly. Taste and season with salt as needed.
-
-
Assemble the Bake:
-
Place chicken breasts in prepared dish.
-
Pour onion and broth mixture evenly over the chicken.
-
Sprinkle shredded cheese over the top.
-
-
Bake:
-
Bake 25–30 minutes until chicken reaches 165°F internally and cheese is melted and golden.
-
-
Garnish & Serve:
-
Let rest 5 minutes.
-
Scatter chopped parsley over the top.
-
Notes
-
Over garlic mashed potatoes to soak up the oniony sauce.
-
With a fresh green salad to balance richness.
-
Accompanied by crusty bread or toasted sourdough.
-
Low-carb option: serve over cauliflower mash or roasted veggies.
Nutritional Information*
*Please note: This is an estimate based on the specific ingredients listed (using beef broth and mozzarella) and standard calculations. Your actual values may vary depending on brands and exact quantities used.
Per Serving (1 chicken breast with sauce & cheese):
Calories: ~370 | Protein: 38g | Fat: 18g | Carbohydrates: 12g | Fiber: 1g | Sugar: 6g
This dish is a fantastic source of lean protein to keep you full and satisfied. The carbohydrates come primarily from the naturally sweet caramelized onions. To make it a balanced meal, pair it with a complex carb like a whole-grain baguette or those mashed potatoes, and a big side of vegetables!
Final Thoughts from My Kitchen to Yours
Friends, this French Onion Chicken Bake is more than just a recipe—it’s a reminder that the most soul-satisfying meals often come from simple ingredients treated with a little care and a lot of love. It’s about the transformative power of patience (those onions, I’m telling you!) and the joy of gathering around a table to share something truly delicious.
I hope this dish becomes a star in your regular rotation, a go-to for busy nights and special occasions alike. Most of all, I hope it brings a little bit of that Feastical warmth and comfort to your home. If you make it (and I really hope you do!), tag me @feastical so I can see your masterpiece! Now, go forth and bake something awesome.
With a full heart and an empty pan,
Beau
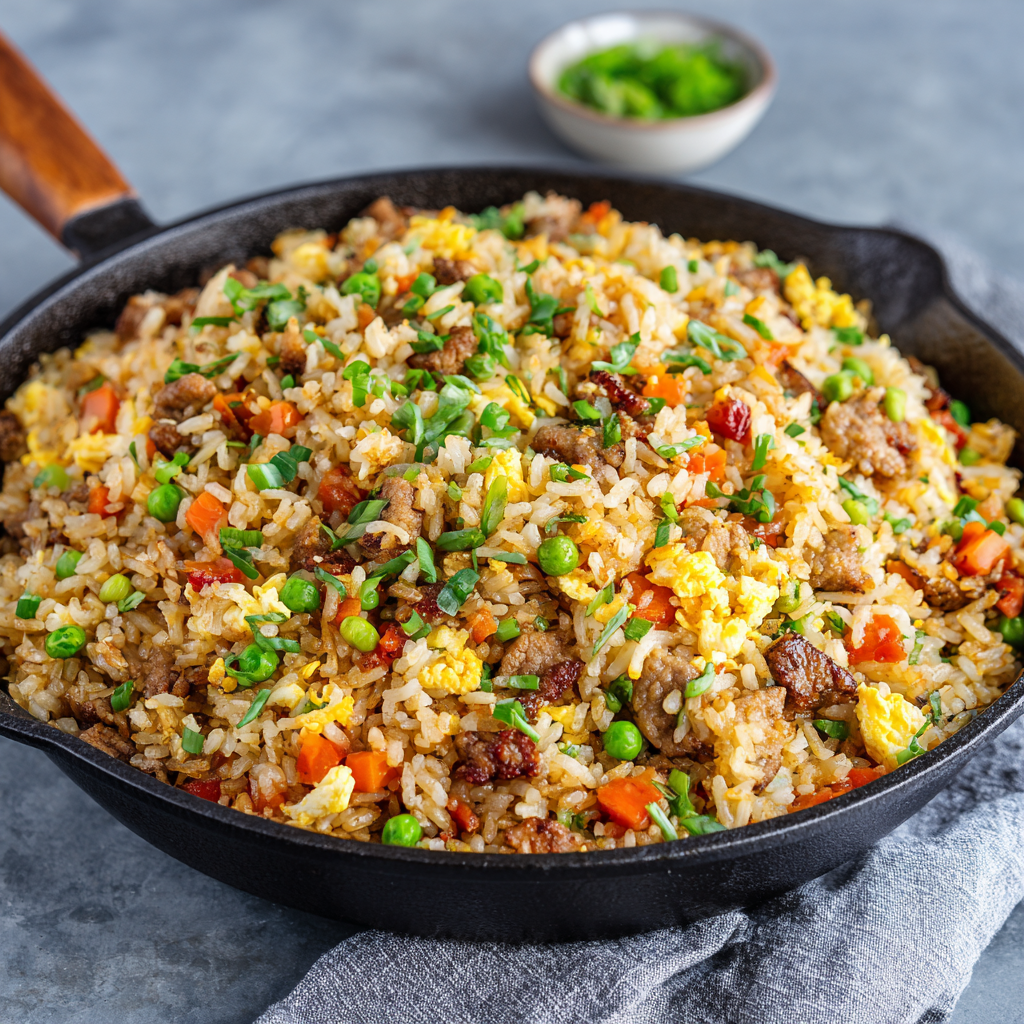
Blackstone Fried Rice : Fast, Flavorful & Better Than Takeout
There’s Magic Happening on That Blackstone: Let’s Make Fried Rice!
Hey friends, Beau here! Grab a drink and pull up a stool—I want to talk about one of life’s greatest kitchen joys. You know that moment when you’re staring into your fridge, surveying the landscape of leftover rice, a few lonely veggies, and maybe some cooked protein from taco Tuesday? That’s not a fridge full of leftovers, my friend. That’s a blank canvas. That’s destiny whispering, “It’s fried rice o’clock.”
But we’re not just making any fried rice today. We’re making Blackstone Fried Rice—the kind that crackles with that irresistible smoky sear, where every grain of rice gets its moment in the spotlight on that glorious, wide-open flat top. This isn’t the steamed, clumpy cousin of takeout. This is the star of the show, the reason you’ll start cooking extra rice on purpose. It’s fast, it’s forgiving, and I promise you, the flavor is so big and bold it’ll make you forget your favorite takeout joint’s phone number.
Whether you’re a Blackstone pro who named their griddle, or you’re just getting familiar with that sizzle, this recipe is your new weeknight superhero. We’re talking 25 minutes from fridge to feast, one gigantic batch that feeds a crowd (or just you, for glorious days of leftovers), and total control over every savory, delicious component. So, let’s fire up that griddle, embrace the beautiful chaos of a sizzling cooktop, and create something truly feastical together.
The Cold Rice Revelation: A Love Story
My love affair with fried rice didn’t start in a fancy restaurant. It started in my Nana’s kitchen, with a well-seasoned cast iron skillet and a lesson I’ve never forgotten. I was about ten, “helping” (read: making a mess), and I watched her pull a bowl of rock-hard, day-old rice from the fridge. “Beau, honey,” she said, wiping her hands on her apron, “The secret to good fried rice isn’t in the sauce. It’s in being patient enough to let the rice get good and bored in the fridge first.”
Back then, I didn’t get it. Bored rice? But then I saw the magic. In her hot skillet, that cold, separate rice didn’t turn to mush. Instead, each grain danced independently, soaking up the soy sauce and chicken fat, getting little crispy edges that made the whole dish sing. It was a texture revelation. When I got my first flat-top griddle years later, that lesson came rushing back. The Blackstone, with its vast, even heat, is the ultimate stage for that cold rice to perform. It’s the upgrade Nana never knew she needed, and every time I hear that initial sizzle as the rice hits the oil, I give a little nod to her and that magical, “bored” rice.
Your Flavor Toolkit: What You’ll Need
Here’s the beautiful part: this list is more of a guideline than a rulebook. Fried rice is the champion of adaptability. Let’s break down what goes in and why, so you can become a master of your own griddle domain.
- 4 cups cooked, cold rice (day-old is BEST): This is non-negotiable, folks! Cold, dry rice has less surface moisture, which means it fries instead of steams, giving you those perfect, separate grains. Jasmine or medium-grain white rice are my go-tos. Chef’s Insight: Spread fresh-cooked rice on a baking sheet and pop it in the fridge for 30 minutes to speed up the “drying” process in a pinch.
- 2 tbsp neutral oil (vegetable, avocado, or peanut): You need a high-smoke point oil to handle the griddle’s heat. Sub Tip: Save your fragrant sesame oil for the finish—its flavor is delicate and can burn at high temps.
- 1 small onion, diced & 2 carrots, finely diced: Our aromatic base. The fine dice ensures they cook quickly and evenly. Chef’s Hack: If you’re in a rush, a bag of pre-diced “sofrito” or “mirepoix” mix from the freezer aisle is a brilliant shortcut.
- 1 cup frozen peas (or mixed veggies): Little bursts of sweetness and color. Frozen is perfect because they’re pre-blanched and just need to heat through. No need to thaw!
- 3 eggs, lightly beaten: Our rich, creamy protein ribbon. Whisk them in a bowl with a tiny splash of water for extra fluffiness.
- 2–3 tbsp soy sauce (to taste): The salty, umami backbone. Use low-sodium if you’re watching salt, and always add to taste. Sub Tip: Tamari for gluten-free, or coconut aminos for a soy-free option.
- 1 tbsp oyster sauce (optional but HIGHLY recommended): This is the secret weapon for deep, savory, restaurant-quality flavor. It’s not fishy—it’s pure umami magic. Vegan Swap: Use mushroom stir-fry sauce.
- 1 tsp toasted sesame oil: The finishing touch. Drizzle this on at the end, off the heat, for an incredible nutty aroma.
- 2 green onions, sliced: Fresh, sharp flavor and a pop of green. Slice the whites thin for cooking, and the greens for garnish.
- Optional protein: 1-2 cups diced cooked chicken, shrimp, steak, or tofu: Fried rice is the ultimate leftover vehicle. Have some grilled chicken, leftover steak, or shrimp? Chop it up and toss it in! Pro Tip: If using raw protein, cook it first on the griddle, remove, then add it back in with the rice.
Let’s Get Sizzling: Your Step-by-Step Griddle Guide
Okay, team. Aprons on, spatulas ready. We’re doing this hot and fast, with confidence. The key to great griddle cooking is organization—have everything prepped and within arm’s reach before you even turn on the gas.
- Fire Up the Flattop: Preheat your Blackstone to medium-high heat. You want it nice and hot so everything sizzles on contact. Give it a minute to get evenly hot across the surface. While it heats, drizzle and spread your 2 tbsp of neutral oil over the cooking zone.
- Sauté the Aromatics: Add your diced onion and carrots to the oil. Use your spatulas to spread them out and let them cook, with a good stir every 30 seconds or so, for 2-3 minutes. You’re looking for the onions to turn translucent and the carrots to just start softening. Chef’s Hack: Don’t overcrowd! If your veggies are steaming instead of sizzling, push half to the cooler side of the griddle.
- Welcome the Peas: Scatter your frozen peas right over the onion-carrot mixture. The frozen bits will cool the spot they hit, so just keep stirring and spreading. In about 60 seconds, they’ll be thawed and hot.
- Scramble the Eggs: Here’s a fun move. Push all your veggies to one side of the griddle, creating a clear space. Pour your beaten eggs onto that empty space. Let them set for just 15-20 seconds, then use your spatula to scramble and chop them right on the griddle surface until they’re softly set. Now, mix them in with the waiting veggies!
- The Main Event: Add the Rice & Protein: Crumble your cold rice over the veggie-egg mix. If you’re using cooked protein, add it now. Here’s the crucial step: spread the entire mixture into a thin, even layer. Pat it down gently. WALK AWAY. Let it sear, untouched, for a full 1-2 minutes. This is where the magic happens—where you get those beautiful crispy, caramelized bits. Then, give it a big flip and stir, and let it sear for another minute.
- Season to Perfection: Reduce the heat to medium. Drizzle the soy sauce and oyster sauce (if using) evenly over the rice. Immediately start tossing and stirring to coat every grain. The sauce will sizzle and steam, infusing the rice with flavor. Cook for another 2-3 minutes until everything is piping hot.
- The Grand Finale: Turn off the heat. Drizzle the toasted sesame oil over the top and toss once more. Sprinkle generously with sliced green onions. Give it one final, triumphant mix.
Plating Up the Good Stuff
This isn’t a fussy dish, so serving is all about fun and flavor. I love using a big, wide bowl—it shows off all the colorful ingredients. For a family-style feast, pile it high on a large platter and let everyone dig in. Want to fancy it up? Garnish with extra green onions, a sprinkle of toasted sesame seeds, or even a few thin slices of chili or a lime wedge on the side for a bright squeeze. For a full “fakeaway” (fake takeout) experience, serve it in those classic white takeout containers with some egg rolls or dumplings on the side. The beauty is in its simplicity and its ability to be the comforting, hearty center of any meal.
Make It Your Own: 5 Flavorful Twists
The basic recipe is your launchpad. Here are some of my favorite ways to send it into new orbit:
- The Hawaiian Luau: Swap the protein for diced ham or Spam (trust me!), and add a cup of diced fresh pineapple in the last 2 minutes of cooking. The sweet and savory combo is unreal.
- Spicy Kimchi Kick: Stir in ¾ cup of chopped kimchi (with its juice!) when you add the sauces. Top with a fried egg and a drizzle of gochujang mayo for a serious flavor punch.
- Thai Basil Delight: Use a protein like chicken or shrimp. When you add the sauces, use a splash of fish sauce instead of oyster sauce. Right at the end, stir in a big handful of fresh Thai basil leaves.
- Breakfast Fried Rice: Use chopped cooked bacon or breakfast sausage as your protein. Skip the carrots and peas, and add a diced bell pepper with the onions. Serve with a side of hot sauce!
- Garden-Party Veggie Load: Make it a vegetarian feast! Use tofu for protein and load up on veggies: add diced bell peppers, chopped broccoli florets, and corn kernels along with the carrots. The more color, the better.
Beau’s Back-Porch Notes
This recipe has evolved more than my taste in kitchen aprons. It started as a simple skillet recipe, but the first time I made it on the Blackstone during a backyard hang, it was a game-changer. The sheer cooking surface means nothing steams—everything gets that perfect sear. I’ve also learned to embrace the “clean as you go” griddle method. While one section of rice is searing, I use my spatula to scrape the just-vacated zone clean. By the time the food is done, half my griddle is already clean! And a pro-tip from many hungry nights: if you don’t have a Blackstone, a large cast iron skillet or a heavy-duty electric griddle will work the same magic. The goal isn’t the tool, it’s the technique: high heat, cold rice, and the courage to let it sear.
Your Questions, Answered
Q: My rice turned out mushy! What did I do wrong?
A: The #1 culprit is using warm, freshly cooked rice. It’s too moist and will steam and clump. Always use cold, preferably day-old rice. If you’re in a bind, see my “baking sheet in the fridge” trick in the ingredients section.
Q: Can I make this vegetarian or vegan?
A> Absolutely! Skip the animal protein or use crispy tofu. Use the mushroom sauce swap for oyster sauce, and ensure your soy sauce is vegan (or use tamari/coconut aminos). It’s incredibly flavorful all on its own.
Q: The food is sticking to my griddle! Help!
A> This usually means 1) the griddle wasn’t hot enough before adding the oil/food, or 2) it needs a re-seasoning. Make sure your surface is properly seasoned and preheated. A well-seasoned Blackstone should be almost non-stick.
Q: Can I double this recipe?
A> You bet! That’s the glory of the flat top. Just make sure you don’t overcrowd it. Cook in two batches if you have to, keeping the first batch warm in a low oven. It’s better to have space for that crucial sear.

Blackstone Fried Rice : Fast, Flavorful & Better Than Takeout
Description
Perfect for leftover rice, veggies, and proteins—this fried rice sizzles on the griddle, giving you the ultimate restaurant-style texture and taste at home.
Ingredients
-
4 cups cooked, cold rice (day-old is best)
-
2 tbsp neutral oil (vegetable, avocado, or peanut)
-
1 small onion, diced
-
2 carrots, finely diced
-
1 cup frozen peas (or mixed veggies)
-
3 eggs, lightly beaten
-
2–3 tbsp soy sauce, to taste
-
1 tbsp oyster sauce (optional, or use mushroom stir-fry sauce for vegan)
-
1 tsp toasted sesame oil
-
2 green onions, sliced (whites for cooking, greens for garnish)
-
Optional protein: 1–2 cups cooked chicken, shrimp, steak, or tofu
Instructions
-
Preheat the Griddle
Set Blackstone to medium-high heat. Drizzle oil over the cooking zone and let it heat until shimmering. -
Cook Aromatics
Add onion and carrots. Stir every 30 seconds for 2–3 minutes until onions are translucent and carrots start to soften. -
Add Peas
Scatter frozen peas over the veggies and stir for 1 minute until heated. -
Scramble Eggs
Push veggies to the side of the griddle. Pour eggs into the cleared space, let them set for 15–20 seconds, then scramble and mix with veggies. -
Add Rice & Protein
Crumble cold rice over the veggie-egg mix. Add cooked protein if using. Spread mixture in a thin layer and let sear for 1–2 minutes undisturbed for those crispy edges. Flip and sear for another minute. -
Season
Reduce heat to medium. Drizzle soy sauce and oyster sauce over the rice. Stir and toss to coat every grain. Cook another 2–3 minutes until everything is hot. -
Finish & Garnish
Turn off heat. Drizzle toasted sesame oil and toss once more. Sprinkle with green onion tops.
Notes
-
Cold rice only—fresh rice is too moist and will clump.
-
High heat + patience = crispy, flavorful rice.
-
Protein tips: Cook raw protein first, remove, then add back with rice.
Nutritional Breakdown (A General Guide)
Please note: The following is an approximate estimate per serving (based on 6 servings), calculated using standard ingredients without optional added protein. Values will change based on your specific ingredients and substitutions.
- Calories: ~350
- Protein: 12g (Significantly higher if adding chicken, steak, etc.)
- Carbohydrates: 40g
- Fat: 15g
- Fiber: 2g
- Sodium: ~800mg (Varies greatly with soy sauce use. Use low-sodium to reduce.)
This dish is a balanced meal with carbs for energy, protein for staying power, and veggies for vitamins. To boost fiber, consider using brown rice (cook it a day ahead!) or adding more veggies like broccoli or edamame.
Final Thoughts
And there you have it, friends—your ticket to fried rice bliss, no delivery driver required. This Blackstone Fried Rice is more than just a recipe; it’s a mindset. It’s about seeing potential in leftovers, embracing the fun of outdoor cooking, and gathering people around food that’s made with a little bit of sizzle and a whole lot of heart.
I hope this recipe becomes a regular in your rotation, a dish you make without thinking, and one you customize to tell your own flavor story. Give it a try this week, and be sure to tag me over at @Feastical so I can see your masterpiece! Now, go fire up that griddle. Your feast is waiting.
Stay hungry,
Beau Collier
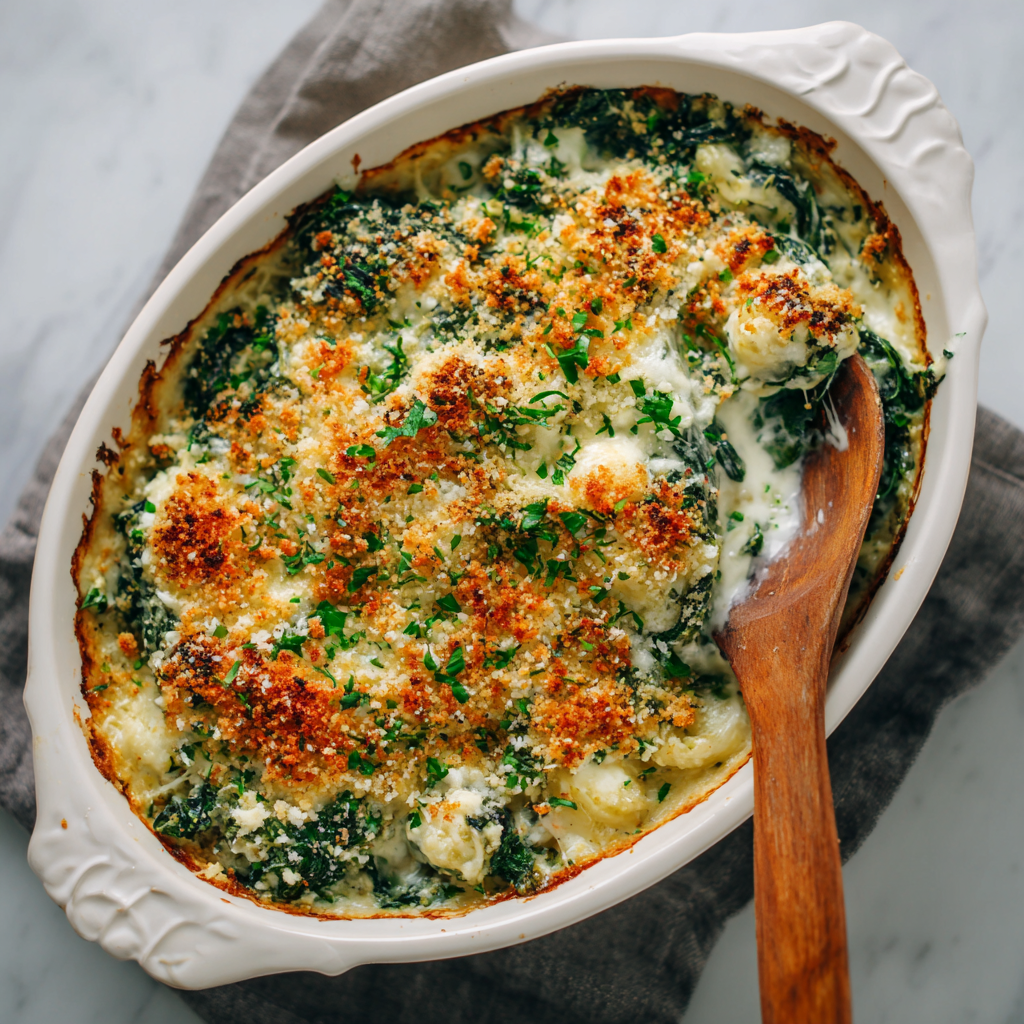
Baked Spinach Casserole : Creamy, Cheesy, and Comforting
Baked Spinach Casserole: Your New Go-To for Cozy, Cheesy Comfort
Hey friends, Beau here from Feastical! Let’s talk about that beautiful moment when you pull a dish from the oven that’s bubbling, golden, and smells like pure happiness. That’s exactly what I’m bringing to your table today with my ultimate Baked Spinach Casserole. This isn’t just a side dish; it’s a warm, creamy, cheesy hug in a baking dish. It’s the culinary equivalent of your favorite cozy sweater.
We’ve all been there—staring into the fridge, wondering how to turn a bag of spinach into something that makes everyone ask for seconds. Maybe you’re looking for a standout side for Sunday supper, a satisfying meatless Monday star, or a potluck dish that travels well and disappears fast. This casserole is your answer. It’s wonderfully simple, leaning on a few honest ingredients that, when baked together, become something truly magical. The fresh spinach mellows into tenderness, the ricotta and mozzarella create a luscious, creamy base, and that Parmesan-breadcrumb topping? It gives you that perfect, satisfying crunch with every spoonful.
So, whether you’re a kitchen newbie or a seasoned pro looking for a no-fuss, flavor-packed recipe, you’ve landed in the right spot. Grab your favorite baking dish, and let’s make your kitchen smell incredible. This is feel-good food at its finest, and I can’t wait for you to try it.
The Little Green Dish That Won My Heart
My love for this casserole started, like so many good things do, at my Grandma Eleanor’s Formica kitchen table. To my 8-year-old eyes, a casserole of green stuff didn’t exactly scream “fun.” I was all about hot dogs and mac ‘n’ cheese. But one chilly afternoon, worn out from playing outside, I watched her whip this together. She’d grown the spinach herself, and she talked to it as she washed it, thanking the little leaves. “They taste better when you’re grateful,” she’d say with a wink.
The smell of garlic and onion hitting the pan grabbed my attention first. Then came the cloud of steam as the mountain of fresh spinach wilted down into something manageable. But the real magic happened when she mixed it with the cheeses. She let me crack the eggs (and fish out a bit of shell, because that’s part of the learning!), and sprinkle the topping. When it came out of the oven, puffed and golden, she served me a spoonful alongside a crispy chicken leg. I took a skeptical bite… and then immediately asked for more. It was creamy, savory, and somehow tasted like home and garden all at once. That dish taught me that “green” could be delicious, comforting, and even exciting. Every time I make it now, I think of her, and I always, always thank the spinach.
Gathering Your Cast of Flavor Characters
Great food starts with great ingredients, but don’t stress about perfection here. This recipe is wonderfully forgiving. Here’s what you’ll need, along with my favorite chef insights and swaps to make it your own.
- 2 tablespoons olive oil or butter: Olive oil gives a fruity depth, while butter brings that classic, rich comfort. I use whichever I’m feeling that day!
- 1 small onion, finely chopped: This is our flavor foundation. A sweet Vidalia onion is fantastic here, but a yellow onion works perfectly.
- 2 cloves garlic, minced: Fresh is best! That punch of aroma is irreplaceable. In a pinch, ½ tsp of good-quality garlic powder can work.
- 1 pound fresh spinach (or 1 package frozen, thawed and drained): Chef’s Insight: A pound of fresh spinach looks like a mountain but wilts down dramatically. If using frozen, squeeze out the water *aggressively* with your hands—a soggy casserole is the only enemy here.
- 1 cup ricotta cheese: This is our creamy star. Whole-milk ricotta is richest, but part-skim works great too. For a tangier twist, try swapping in cottage cheese (small curd) or even farmer’s cheese.
- 1 cup shredded mozzarella cheese: The melty, stretchy glue! Pre-shredded is convenient, but block mozzarella you shred yourself melts creamier (no anti-caking agents).
- 1/2 cup grated Parmesan cheese: The salty, umami booster. Please, for the love of flavor, use real Parmigiano-Reggiano from the cheese section, not the shelf-stable canister. It makes a world of difference.
- 2 large eggs: Our binding agents. They set the casserole into a lovely, sliceable texture.
- Salt and pepper, to taste: Season as you go! Taste your spinach mixture before adding it to the cheese.
- 1/2 cup breadcrumbs (plain or seasoned): The golden crown. I love mixing my plain crumbs with a little of the Parmesan for extra flavor. Panko gives an amazing, extra-crispy crunch.
- Optional: pinch of nutmeg: This is my secret weapon. Just a tiny pinch (really, tiny!) enhances the spinach’s sweetness and adds a warm, complex note. Don’t skip it if you have it.
Let’s Build Some Deliciousness: Step-by-Step
Okay, team! Let’s fire up the oven and get cooking. I’ll walk you through each step with my favorite kitchen hacks to ensure your casserole is flawless.
- Preheat & Prep: Crank that oven to 375°F (190°C). This gives it time to come to the perfect temperature while we work. Lightly grease your 8×8-inch baking dish with butter, oil, or a quick spray. Chef’s Hack: Doing this first means you’re not scrambling with greasy hands later when your mixture is ready to go.
- Sauté the Aromatics: In a large skillet (big enough for all that spinach!), heat your oil or butter over medium heat. Add the chopped onion and a pinch of salt. Cook, stirring now and then, until they’re soft and translucent—about 5 minutes. The salt helps draw out their moisture and speeds up the cooking. Now, add the minced garlic and cook for just 60 seconds more until fragrant. Watch it! Garlic burns in a heartbeat and turns bitter.
- Wilt the Spinach: If using fresh spinach, add it all to the skillet. It will look impossibly full, but just use tongs to turn it as it wilts. In 3-4 minutes, it will be dark green and limp. If using frozen, ensure it’s thoroughly squeezed dry, then just warm it through with the onions and garlic for a minute.
- Mix the Cheesy Foundation: In a large mixing bowl, combine the ricotta, 3/4 cup of the mozzarella (save the rest for topping if you like extra gooeyness!), Parmesan, eggs, a good crack of black pepper, and that magical pinch of nutmeg. Stir until it’s one happy, creamy family.
- Combine & Season: Add the slightly cooled spinach and onion mixture to the cheese bowl. This is your last chance to season! Mix everything thoroughly. Give it a taste (it’s safe, the eggs are raw but you’re just tasting a tiny bit). Does it need more salt? More pepper? Adjust now.
- Top & Bake: Transfer the whole mixture to your prepared baking dish and spread it evenly. Sprinkle the top first with the remaining mozzarella (if you saved some), then with the breadcrumbs. For an insane golden top, I like to drizzle a tiny bit more olive oil over the crumbs. Bake for 25-30 minutes. You’re looking for bubbly edges, a set center, and a top that’s golden brown and glorious.
- The Most Important Step: LET IT REST. I know, it’s hard. It smells amazing. But take it out and let it sit on the stove for 5-10 minutes. This allows it to set fully, making it easier to slice and serve without turning into a cheesy lava pool. Patience rewards you with perfect slices!
How to Serve This Cozy Masterpiece
Presentation is part of the fun! Here’s how I love to plate this up for maximum “wow” factor.
For a family-style vibe, simply place the baking dish right in the center of the table with a big serving spoon. Let everyone dig in! For plated servings, use a sharp spatula to cut neat squares. I love placing a square on a warm plate alongside a simply roasted chicken thigh or a juicy baked salmon fillet. The creamy casserole is a dream with anything that has a crispy skin or a rich sauce.
Thinking vegetarian main? Make it the star! Serve a larger portion on a bed of lightly dressed mixed greens or with a bright, acidic tomato cucumber salad on the side to cut through the richness. A dollop of marinara or pesto for dipping is also a fantastic idea. And don’t forget the bread—a crusty baguette or some garlic knots are mandatory for scooping up every last cheesy bit.
Make It Your Own: Delicious Twists & Swaps
Once you’ve mastered the classic, the playground is open! Here are a few of my favorite ways to riff on this recipe.
- The “Everything but the Kitchen Sink” Veggie Boost: Sauté 1/2 cup of sliced mushrooms or a diced red bell pepper with the onions. Stir in a cup of chopped, roasted artichoke hearts or sun-dried tomatoes (oil-packed, drained) with the spinach.
- Protein Powerhouse: Make it a full meal by folding in 1 cup of diced, cooked chicken breast, shredded rotisserie chicken, or crumbled cooked Italian sausage with the spinach mixture.
- Keto/Low-Carb Friendly: Swap the breadcrumbs for a topping of 1/4 cup grated Parmesan mixed with 1/4 cup crushed pork rinds or almond flour. It gets just as crispy and golden!
- Lighter Take: Use part-skim ricotta and mozzarella. Substitute one of the eggs with two extra egg whites. It’ll still be creamy and delicious.
- Dairy-Free/Vegan Version: Use plant-based butter. For the cheese, swap ricotta for blended firm tofu (12 oz) with 1 tbsp nutritional yeast and a squeeze of lemon. Use your favorite vegan shreds for the mozzarella and a vegan Parmesan alternative.
Beau’s Kitchen Notes & Stories
This recipe has been a living, evolving thing in my kitchen. I’ve made it for fancy dinner parties in a cast-iron skillet and for weeknight dinners straight into a Pyrex dish. One time, I accidentally used a whole teaspoon of nutmeg (don’t ask how) and created a “holiday-spice” version that was… interesting. We still ate it, but lesson learned: a pinch means a pinch!
The biggest evolution was learning the power of the squeeze. My early versions with frozen spinach were a bit watery. Now, I take the thawed spinach in my hands and squeeze it over the sink like I’m trying to wring out the last bit of toothpaste. Get aggressive! Your casserole’s texture will thank you. This dish is a testament to how simple ingredients, treated with a little care, can become the most requested thing at the table. It’s a recipe that feels like mine, but I love that it becomes yours the moment you tweak it.
Your Questions, Answered!
Q: Can I make this casserole ahead of time?
A: Absolutely! You can assemble the entire casserole (through step 5), cover it tightly, and refrigerate it for up to 24 hours. When you’re ready, add the topping and bake. You may need to add 5-10 extra minutes since it’s going in cold.
Q: Why is my casserole watery/soggy?
A: This is almost always due to excess moisture in the spinach. For frozen spinach, squeeze it until it feels very dry. For fresh, let the wilted spinach cool in a colander so any residual liquid can drain off before mixing.
Q: Can I freeze baked spinach casserole?
A: You can, though the texture of the creamy filling can change slightly. Cool it completely, wrap individual portions or the whole dish tightly in plastic wrap and foil, and freeze for up to 2 months. Thaw in the fridge overnight and reheat in the oven until warmed through.
Q: I don’t have ricotta. What can I use instead?
A: No problem! Small-curd cottage cheese (drained) is the closest substitute. You can also use full-fat plain Greek yogurt in a pinch, though the flavor will be tangier.
Baked Spinach Casserole : Creamy, Cheesy, and Comforting
Description
Tender spinach, creamy ricotta, melty mozzarella, and a golden Parmesan-breadcrumb topping—this casserole is comfort food at its finest. Serve as a side or a vegetarian main; it’s simple, flavorful, and always a crowd-pleaser.
Ingredients
-
2 tbsp olive oil or butter
-
1 small onion, finely chopped
-
2 cloves garlic, minced
-
1 lb fresh spinach (or 1 package frozen, thawed and squeezed dry)
-
1 cup ricotta cheese (whole-milk or part-skim)
-
1 cup shredded mozzarella cheese (reserve 1/4 cup for topping if desired)
-
1/2 cup grated Parmesan cheese
-
2 large eggs
-
Salt & pepper, to taste
-
1/2 cup breadcrumbs (plain or panko)
-
Optional: pinch of nutmeg, for warmth and depth
Instructions
-
Preheat & Prep
Preheat oven to 375°F (190°C). Grease an 8×8-inch baking dish with butter, oil, or cooking spray. -
Sauté the Aromatics
In a large skillet, heat olive oil or butter over medium heat. Add onion and a pinch of salt; cook until soft, about 5 minutes. Add garlic and cook 30–60 seconds until fragrant. -
Wilt the Spinach
-
Fresh: Add all spinach to skillet and cook 3–4 minutes until wilted.
-
Frozen: Ensure it’s well-drained, then warm through 1–2 minutes.
-
-
Mix the Cheesy Base
In a large bowl, combine ricotta, 3/4 cup mozzarella, Parmesan, eggs, salt, pepper, and nutmeg. Stir until smooth. -
Combine Spinach & Cheese
Fold the sautéed spinach and onion mixture into the cheese mixture. Taste and adjust seasoning. -
Top & Bake
Spread mixture evenly in prepared baking dish. Sprinkle remaining mozzarella and breadcrumbs on top. Drizzle a little olive oil for extra golden crunch. Bake 25–30 minutes until bubbly and golden. -
Rest & Serve
Let cool 5–10 minutes before slicing. Serve alongside roasted chicken, salmon, or enjoy as a vegetarian main with salad or bread.
Notes
-
Squeeze the spinach dry! Extra moisture = soggy casserole.
-
Use fresh grated cheese for creamier texture.
-
Optional extras: sautéed mushrooms, bell peppers, or artichokes for added depth.
-
Make ahead: Assemble, refrigerate up to 24 hours, then top and bake.
Nutritional Information (Approximate, Per Serving)
While this is comfort food through and through, it’s packed with good-for-you stuff! This breakdown is for 1 of 6 servings, using whole milk ricotta and olive oil.
- Calories: 260
- Fat: 18g
- Saturated Fat: 8g
- Carbohydrates: 10g
- Fiber: 2g
- Sugar: 2g
- Protein: 16g
Remember, this casserole is a fantastic source of calcium from the dairy, iron and vitamins A, C, & K from the spinach, and high-quality protein. It’s a satisfying, nutrient-dense dish that truly fuels you with joy.
Final Thoughts from My Kitchen to Yours
And there you have it, friends—my heartwarming, belly-filling Baked Spinach Casserole. This dish proves that comfort food doesn’t have to be complicated, and that eating your greens can be the most delicious part of the meal. It’s about more than just feeding people; it’s about creating that moment of shared “mmmm” around the table.
I hope this recipe finds its way into your regular rotation, adapting to your seasons and cravings. Maybe you’ll add artichokes, maybe you’ll make it vegan for a friend, or maybe you’ll keep it classic, just like Grandma did. However you make it, make it with joy. And if you do, I’d love to hear about it! Tag me @Feastical or drop a comment on the blog. Nothing makes me happier than seeing my recipes become part of your own kitchen stories.
Now, go preheat that oven. Your cozy, cheesy, glorious dinner awaits. Happy cooking!
– Beau

Honey Butter Garlic Glazed Salmon Bites : Sweet, Savory & Ready in Minutes
The Bite-Sized Salmon Revelation: Your New Weeknight Hero
Hey, friend. Let’s talk about that magical, sometimes chaotic, 6 PM hour. You know the one. You’re hungry, maybe a little hangry, staring into the fridge hoping for inspiration to strike. You want something that feels like a treat, tastes incredible, but doesn’t require a culinary degree or two hours of your evening. You want a meal that says, “I’ve got this,” without the stress.
Well, pull up a stool, because I’m about to introduce you to your new weeknight superhero: Honey Butter Garlic Glazed Salmon Bites. This isn’t just another salmon recipe. This is a game-changer. We’re taking beautiful salmon, cutting it into irresistible, pop-in-your-mouth cubes, and giving it a crispy sear before drowning it (in the best way possible) in a glossy, dreamy glaze of honey, butter, and garlic. The result? Little flavor bombs that are caramelized and crispy on the outside, impossibly tender and flaky on the inside, and coated in a sauce so good you’ll want to drink it with a spoon.
This dish is the epitome of what I love about cooking: maximum flavor with minimal fuss. It’s fancy enough to serve to guests with pride (“Oh, this? Just a little something I whipped up!”), but quick and simple enough to be your go-to Tuesday night win. It’s protein-packed, wildly versatile, and ready from fridge to plate in about 20 minutes. So, let’s ditch the dinner drama and make something spectacularly simple. Grab your favorite skillet, and let’s get cooking!
A Glaze Born from Happy Accidents
This recipe has a little bit of my grandma’s spirit in it, though she never made salmon bites. Mimi was a firm believer in the holy trinity of butter, garlic, and a little sweetness to make things special. Her famous “company chicken” was essentially this principle on poultry. But the “bite-sized” idea? That’s all thanks to a chaotic, laughter-filled dinner with friends a few years back.
I was trying to sear a whole side of salmon in a pan that was decidedly too small. It was curling, the skin was sticking, and I was seconds from a kitchen meltdown. In a moment of “why not?” desperation, I grabbed my kitchen shears, cut the darn fillet right in the pan into jagged chunks, and kept cooking. To my shock, they seared faster, more evenly, and everyone could just grab a piece with their fork—no awkward slicing at the table. It was a mess-turned-miracle! That night, the casual, shareable, fun-to-eat vibe stuck with me. Pairing those quick-searing bites with Mimi’s timeless butter-garlic-honey logic? That was the eureka moment. Now, it’s not just dinner; it’s a tiny, delicious story on a plate.
Gathering Your Flavor Arsenal
Here’s everything you need to create this simple magic. I’ve tossed in some chef-y insights and swaps so you can make it your own.
- 1 lb salmon fillet, skin removed, cut into 1-inch cubes – The star! I prefer wild-caught for its flavor, but any fresh, sustainably sourced salmon works. Pro tip: Pat the cubes VERY dry with paper towels. This is the secret to getting that gorgeous, crispy sear instead of a steam.
- Salt & pepper to taste – The essential foundation. Don’t be shy here. Seasoning the salmon directly is key.
- 2 tbsp olive oil or butter (for searing) – Olive oil has a higher smoke point, but butter gives an incredible flavor base. I often use one tablespoon of each for the best of both worlds.
- For the Honey Garlic Glaze:
- 3 tbsp butter – Unsalted is best so you control the salt level. This is the rich, velvety base of our glaze.
- 3 tbsp honey – For that beautiful sweetness and glossy finish. Pure maple syrup makes a fantastic vegan/different-flavor swap.
- 4 cloves garlic, minced – Fresh is non-negotiable here, please! The pre-minced stuff just doesn’t sing the same song. We want that pungent, aromatic punch.
- 1 tbsp soy sauce – Our umami bomb and salt component. Use tamari for gluten-free, or coconut aminos for a soy-free option.
- 1 tbsp lemon juice – The bright, acidic pop that balances all the richness. Freshly squeezed makes all the difference.
- Optional for garnish: Red pepper flakes or chopped parsley – A pinch of flakes adds a welcome heat, and parsley gives a fresh, colorful finish.
Let’s Build Some Bites: A Step-by-Step Dance
Don’t let the gourmet result fool you—the process is a simple, satisfying dance. Read through once, then let’s get that skillet hot!
- Prep & Season Your Star. Take your salmon cubes and lay them on a plate or board lined with paper towels. Give them a really good pat-down until they’re thoroughly dry on all sides. This is THE most important step for browning, not boiling. Season generously on all sides with salt and pepper. Let them sit for a minute while you heat the pan.
- Get That Pan Screaming Hot. Place a large skillet (stainless steel or cast iron works great) over medium-high heat. Add your oil or butter. You’ll know it’s ready when the oil shimmers or a butter foam subsides. We want a good, hot surface for instant searing.
- Sear to Perfection. Carefully add the salmon cubes in a single layer, making sure they aren’t touching. Crowding the pan is the enemy of crispiness! Let them sear, untouched, for 2-3 minutes. You should hear a happy sizzle. Peek underneath—when they release easily and have a deep golden-brown crust, flip them. Sear the other sides for another 1-2 minutes, just until cooked through and flaky. Chef Hack: Use tongs to sear the “sides” of the cubes for about 30 seconds each for maximum crispiness all around! Remove the bites to a clean plate.
- Create the Magic Glaze. In the same, now-flavor-packed pan (all those browned bits are gold!), reduce the heat to medium. Add the 3 tbsp of butter. Once melted, add the minced garlic. Sauté for just 30-60 seconds until fragrant—don’t let it burn! Burnt garlic is bitter. Pour in the honey, soy sauce, and lemon juice. Give it a good whisk and let it bubble gently for 1-2 minutes. It will foam up and start to thicken slightly into a luscious, glossy sauce.
- The Grand Coating. Return the salmon bites to the pan, along with any juices that accumulated on the plate. Gently toss and fold them in the glaze for about 30 seconds, until every piece is beautifully coated and glistening. The residual heat will warm the salmon through perfectly.
Plating Up Your Masterpiece
Now for the fun part! These bites are incredibly versatile. For a simple, balanced bowl, I love them over a big bed of fluffy jasmine rice or quinoa to soak up every last drop of that glorious glaze. Spoon any extra glaze from the pan right over the top. Want to keep it light? Serve them on a platter with a vibrant lemony arugula salad or a pile of simple roasted asparagus or broccoli. The contrast of the warm, rich salmon with cool, crisp greens is divine.
For a party appetizer that will disappear in seconds, skewer each bite on a toothpick, drizzle with extra glaze, and scatter them on a platter with lemon wedges. No matter how you serve it, finish with a final flourish—a sprinkle of fresh chopped parsley or a light dusting of red pepper flakes adds that perfect “chef’s kiss” touch.
Make It Your Own: Flavor Twists & Swaps
Once you’ve mastered the basic ballet, feel free to freestyle! Here are a few of my favorite riffs on this recipe:
- The Spicy Dragon. Add 1-2 tsp of sriracha or gochujang to the glaze mixture. Garnish with sliced jalapeños and a drizzle of sriracha mayo for a kick.
- The Citrus Grove. Swap the lemon juice for fresh orange or lime juice. Add a teaspoon of orange or lime zest to the glaze for an extra bright, sunny flavor.
- Herb Garden Delight. Stir a tablespoon of finely chopped fresh herbs (dill, thyme, or chives are amazing) into the glaze right before adding the salmon back.
- Protein Swap. This glaze is a wizard! It works beautifully on seared chicken breast cubes or large shrimp/prawns. Just adjust the cooking time for your protein.
- Paleo/Whole30 Friendly. Use ghee instead of butter, swap honey for compliant maple syrup, and use coconut aminos instead of soy sauce. You’re golden!
Beau’s Kitchen Notes
This recipe has become a living, evolving staple in my home. I’ve made it for first dates (it’s impressive!), for tired friends who needed a lift, and for myself on countless “I deserve something good” nights. The biggest lesson? Don’t stress the perfect cube. Some pieces will be bigger, some smaller—that’s fine! It creates a wonderful mix of extra-crispy and super-tender bites. I’ve also learned that doubling the glaze recipe is never a bad idea… for, you know, “quality control” purposes (a.k.a. spoon-licking). It’s a recipe that encourages you to play, to taste, and to enjoy the simple, sizzling process of making something truly delicious.
Your Questions, Answered
Q: My salmon is sticking to the pan! Help!
A: Two likely culprits: 1) The pan wasn’t hot enough before adding the salmon. Wait for that shimmer! 2) The salmon wasn’t dry enough. Pat, pat, pat those cubes like it’s your job. If a piece sticks, don’t force it. Let it cook another 30 seconds; it will release naturally when a crust forms.
Q: How do I know when the salmon is cooked through?
A: Perfectly cooked salmon will be opaque and flake easily with a fork. The internal temperature should be about 125°F (for medium) to 145°F (for well-done). Remember, it will continue to cook a bit when you return it to the hot glaze.
Q: Can I make this with frozen salmon?
A> Absolutely! Thaw it completely in the fridge first, then follow the crucial drying step. Frozen salmon often retains more moisture, so be extra thorough with those paper towels.
Q: My glaze isn’t thickening. What did I do wrong?
A> Simmer it a little longer over medium heat. Also, make sure you’re using real honey, not a runny “honey sauce.” The reduction and the natural sugars will create the perfect clingy consistency.

Honey Butter Garlic Glazed Salmon Bites : Sweet, Savory & Ready in Minutes
Description
Crispy on the outside, tender and flaky inside, and coated in a glossy honey-garlic glaze—these salmon bites are a game-changer for busy evenings. Ready in about 20 minutes, they’re perfect over rice, salad, or as finger-friendly appetizers.
Ingredients
-
1 lb salmon fillet, skin removed, cut into 1-inch cubes
-
Salt & black pepper, to taste
-
2 tbsp olive oil or butter (or 1 tbsp each)
Honey Garlic Glaze:
-
3 tbsp butter
-
3 tbsp honey (or maple syrup)
-
4 cloves garlic, minced
-
1 tbsp soy sauce (or tamari/coconut aminos)
-
1 tbsp fresh lemon juice
-
Optional garnish: red pepper flakes, chopped parsley
Instructions
-
Prep the salmon
Pat salmon cubes dry with paper towels. Season generously with salt and pepper. -
Heat the pan
Place a large skillet over medium-high heat. Add oil or butter and heat until shimmering. -
Sear the salmon
Add cubes in a single layer, leaving space between them. Cook 2–3 minutes until golden-brown, then flip and cook 1–2 more minutes. Use tongs to sear sides for 30 seconds if desired. Remove salmon to a plate. -
Make the glaze
Reduce heat to medium. Add butter to the same pan, then sauté garlic for 30–60 seconds. Add honey, soy sauce, and lemon juice. Stir and simmer 1–2 minutes until glossy and slightly thickened. -
Coat the salmon
Return salmon to the pan and gently toss in the glaze for 30 seconds until evenly coated. -
Serve
Over rice, quinoa, or a salad. Garnish with parsley or red pepper flakes. Extra glaze can be drizzled on top.
Notes
-
Dry salmon cubes thoroughly – ensures crisp sear.
-
Don’t crowd the pan – gives even browning.
-
Glaze thickening – use real honey and simmer gently; adjust consistency with a little extra simmering if needed.
-
Frozen salmon? Thaw fully and pat dry before cooking.
Nourishment You Can Feel Good About
This dish isn’t just a treat for your taste buds; it’s fuel for your body. Salmon is an incredible source of high-quality protein and heart-healthy omega-3 fatty acids. Using wholesome ingredients like honey for natural sweetness and olive oil for good fats makes this a balanced choice. The provided nutritional info is an estimate per serving (about ¼ of the recipe), but remember, you’re in control of the exact amounts. Pair it with a mountain of veggies for a fiber boost, and you’ve got a meal that satisfies on every level.
The Last Bite
And there you have it! A recipe that’s deceptively simple, endlessly adaptable, and guaranteed to bring a smile to your table. This is what Feastical is all about—real food that makes real life a little tastier and a lot more joyful. I hope these Honey Butter Garlic Glazed Salmon Bites become a trusted friend in your kitchen repertoire, a 20-minute secret weapon for turning an ordinary evening into something a little special.
Did you try it? Did you add your own twist? I’d love to hear about your kitchen adventures! Tag me @feastical or drop a comment on the blog. Now, go forth and conquer dinner. You’ve got this, chef!
With a full heart and an empty skillet,
Beau

Stuffed Seafood Bread Bowls : Creamy, Cheesy, and Loaded with Flavor
Stuffed Seafood Bread Bowls: Your New Favorite Coastal Comfort Food
Hey friends, Beau here from Feastical! Let’s talk about that magical place where a warm, crusty loaf of bread meets the briny, sweet magic of the sea. I’m not talking about a fancy, fussy seafood tower. Nope. I’m talking about the kind of dish you can cradle in your hands, the kind where every spoonful is a creamy, cheesy, seafood-packed delight, and the bowl itself is part of the dinner. That’s the pure, unadulterated joy of these Stuffed Seafood Bread Bowls.
Picture this: a golden, hollowed-out sourdough boule, its walls sturdy enough to hold a treasure trove of plump shrimp, tender crab, and a sauce so luxuriously creamy it would make a lobster bisque blush. The top gets all bubbly and faintly crisp in the oven, while the inside stays soft and soaks up every last drop of that glorious filling. This is comfort food with a coastal passport. It’s a weeknight dinner that feels like a celebration, a conversation starter for guests, and the ultimate answer to “what feels good to eat tonight?”
Best part? It comes together faster than you can decide what to stream. We’re talking about 35 minutes from fridge to face-stuffing. So, whether you’re a seasoned pro who loves playing with seafood or you’re a little nervous about cooking shrimp (don’t be, I’ve got you!), this recipe is your ticket to a seriously delicious, impressively easy meal. Grab your favorite skillet, and let’s make your kitchen smell like a happy seaside bistro.
The Beach Picnic That Started It All
This recipe didn’t start in a test kitchen; it started on a slightly windy, perfectly sunny Oregon coast beach with my family. We’d packed a simple thermos of creamy seafood chowder and a bag of crusty sourdough rolls. When we went to eat, we realized we’d forgotten bowls. Classic Collier move. My dad, ever the pragmatic problem-solver, looked at the bread, looked at the chowder, and just started hollowing out the rolls right there on the blanket. He poured the steaming chowder straight into the bread.
It was a revelation. The bread bowl contained the mess, kept the chowder piping hot, and provided the most delicious, soup-soaked edible vessel you could imagine. We were all silent for a minute, just eating, listening to the waves, and then burst out laughing at how genius (and obvious!) it was. That messy, joyful, improvisational meal is the soul of this dish. I’ve just taken that beachside hack and dressed it up a bit for your home kitchen, adding extra cheese (because, cheese) and making the filling thick and lush enough to eat with a fork. It’s a taste of that simple, togetherness magic, no forgotten bowls required.
Gathering Your Seafood Treasure Trove
Here’s the lineup for flavor town. Don’t stress about perfection—cooking is about playing, not policing. I’ve got notes and swaps for you right here.
- 4 small round bread bowls (sourdough or French rolls): The vessel of destiny! Sourdough is my #1 for its tangy flavor and sturdy structure that won’t get soggy too fast. French rolls work beautifully, too. Look for ones that feel heavy for their size—that means a nice, dense crumb.
- 2 tablespoons butter: Our flavorful foundation. Unsalted is best so you control the salt, but use what you have.
- 1/2 small onion, finely chopped: Sweet, aromatic base flavor. A shallot works here too for a milder taste.
- 2 cloves garlic, minced: Non-negotiable for savory depth. Please, use fresh! It makes all the difference.
- 1/2 pound shrimp, peeled and chopped: I use medium-sized, tail-off for ease. Chopping them lets the shrimp flavor spread throughout every bite. Feel free to leave a few whole for presentation!
- 1/2 cup lump crab meat or imitation crab, shredded: Real lump crab is a luxurious treat. For an everyday, budget-friendly (and still delicious!) option, flaked imitation crab (surimi) is absolutely fantastic here and what I often use.
- 1/4 cup all-purpose flour: This is our thickener, making the creamy sauce possible. For a gluten-free version, a 1:1 GF flour blend works great.
- 1 1/2 cups milk (or half-and-half for extra creaminess): Whole milk gives you a rich sauce. Half-and-half or even a splash of heavy cream takes it to decadent, “special occasion” levels. You do you.
- 1/2 cup shredded mozzarella or Monterey Jack cheese: Melty, mild, and gooey. Monterey Jack has a buttery note I love with seafood.
- 1/4 cup grated Parmesan cheese: The flavor booster. It adds a salty, umami punch that makes the whole dish pop.
- 1/2 teaspoon Old Bay seasoning (or paprika): Old Bay is the classic seafood seasoning—a little celery salt, pepper, paprika magic. If you don’t have it, sweet paprika plus a tiny pinch of celery salt is a good stand-in.
- Salt and pepper, to taste: Season as you go! Taste after adding the cheeses before you finalize.
- Optional: chopped parsley or green onions for garnish: A pop of color and fresh flavor. Don’t skip it if you have it—it really finishes the dish.
Let’s Build Some Flavor Bowls! (Step-by-Step)
Ready? Apron on, music playing, let’s cook. Follow these steps and you’ll be a bread bowl hero in no time.
Step 1: Preheat & Prep. Crank that oven to 375°F (190°C). While it heats, take your bread bowls and slice off the tops—think of it like cutting a lid off a pumpkin. Set those lids aside; they’re your built-in dippers later! Now, carefully hollow out the inside of the rolls. My hack? Use a serrated bread knife to score a circle about 1/2-inch from the edge, then use your fingers to gently pull out the bread. Leave a sturdy wall! Tear that removed bread into chunks, toast it in the oven for 5 minutes, and you’ve got instant croutons for a salad tomorrow.
Step 2: Sauté the Aromatics. In a large skillet (I like a 10-inch), melt the butter over medium heat. Once it’s foaming, add the chopped onion. We’re not looking for color, just softness and sweetness. Give it 4-5 minutes, stirring occasionally, until it’s translucent. Now, add the garlic and stir for just 60 seconds until fragrant. Garlic burns fast, so keep it moving!
Step 3: Cook the Seafood. Time for the star players! Add the chopped shrimp and your crab to the skillet. Stir everything together and cook for 2-3 minutes. You’ll see the shrimp turn from grey to a lovely pink and opaque. Don’t overcook them here—they’ll get more time in the oven. We’re just getting the party started.
Step 4: Create the Creamy Sauce. This is the magic step. Sprinkle the flour evenly over the shrimp, crab, and onions. Stir constantly for about 1 minute. This cooks the raw flour taste out and coats everything in a pasty layer. Now, slowly pour in your milk (or half-and-half), whisking CONSTANTLY as you go. This prevents lumps and starts the thickening process. Keep whisking as the mixture comes to a gentle simmer. It will thicken beautifully in 3-4 minutes. You’re making a simple roux-based sauce, and you’re nailing it.
Step 5: Cheese, Please! Turn the heat down to low. Now, stir in both cheeses, the Old Bay, and a good pinch of salt and pepper. Keep stirring until the cheese is fully melted and the sauce is smooth, velvety, and incredibly inviting. Give it a taste—does it need more pepper? A pinch more salt? Adjust to your liking. Chef’s perk: you get to taste test first.
Step 6: Stuff & Bake. Place your hollowed bread bowls on a baking sheet. Evenly divide the hot, creamy seafood filling among them, piling it high! Bake for 10-15 minutes, until the filling is bubbly around the edges and the top of the bread has a gorgeous golden hue.
Step 7: Garnish & Devour. Pull them out of the oven (they’ll be piping hot!) and let them cool for just a minute or two. Sprinkle with your chopped parsley or green onions. Serve immediately, with the bread lids on the side for dipping and scooping. Dig in while it’s gloriously hot!
How to Serve These Beauties
Presentation is part of the fun with this dish! I like to place each bread bowl right on a dinner plate—no extra bowl needed. The rustic look is part of the charm. For a real “wow” factor at a dinner party, serve them on a large wooden board or a platter lined with parchment paper, scattered with lemon wedges and extra herbs.
What to serve on the side? Keep it simple and bright to balance the richness. A crisp, lemony arugula salad is my go-to. Steamed asparagus or green beans with a squeeze of lemon also work perfectly. And let’s be real: if you’re going full comfort mode, a side of crispy sweet potato fries or crunchy roasted broccoli is never a bad idea. The goal is to complement, not compete with, the star of the show.
Make It Your Own: Delicious Twists & Swaps
This recipe is a fantastic template. Play with it! Here are a few ideas to get your creative juices flowing:
- The “Surf & Turf” Bowl: Add about 1/2 cup of finely diced cooked andouille sausage or crispy pancetta when you sauté the onions. The smoky, spicy kick with the seafood is unbelievable.
- Lobster & Corn Luxe Version: Special occasion? Swap the crab for chopped cooked lobster tail meat and stir in 1/2 cup of sweet corn kernels (frozen and thawed is fine) with the seafood. A touch of fresh tarragon instead of parsley takes it over the top.
- Spinach & Artichoke Seafood Dip Bowl: Love that classic dip? Stir in a 1/2 cup of chopped frozen spinach (thawed and squeezed dry) and 1/2 cup of chopped marinated artichoke hearts into the cheesy sauce before stuffing. It’s a flavor powerhouse.
- Dairy-Free & Still Dreamy: Use vegan butter, your favorite unsweetened plant-based milk (oat or cashew milk are great for creaminess), and dairy-free shredded cheese. The roux method works the same!
- Cajun Spice Kick: Replace the Old Bay with 1 teaspoon of your favorite Cajun or Creole seasoning. You’ll get a beautiful, spicy depth that’s so addictive.
Beau’s Kitchen Notes
This recipe has lived in my back pocket for years, and it’s evolved with every batch. I once, in a hurry, tried to skip hollowing the bread and just piled the filling on top of a roll. Big mistake. The structural integrity is key! You need those bread walls to contain the creamy joy. Also, a confession: I’ve absolutely used frozen pre-cooked shrimp in a pinch. Just thaw them, chop, and add them at the very end of the sauce step just to heat through. It works like a charm and saves time. The real spirit of this dish is adaptability and sharing, not rigid rules. So have fun with it, and don’t forget to lick the spoon.
Your Questions, Answered
Q: My bread bowl got soggy. What did I do wrong?
A: The two main culprits are over-hollowing (leave a good 1/2-inch wall!) and letting the filled bowls sit too long before baking. Get them into the oven promptly after filling. A sturdy sourdough is your best defense against sogginess.
Q: Can I make the filling ahead of time?
A: Absolutely! Prepare the creamy seafood filling, let it cool, and store it in an airtight container in the fridge for up to a day. When ready, gently reheat it on the stove with a splash of milk to loosen it, then stuff and bake your fresh bread bowls. Don’t stuff the bread until just before baking.
Q: My sauce seems too thin/thick. Help!
A> Too thin? Let it simmer a few minutes longer; it will continue to thicken. You can also make a quick slurry by mixing 1 tsp of flour with 1 tbsp of cold milk and whisking it in. Too thick? Simply whisk in a little more milk, a tablespoon at a time, until it reaches your perfect creamy consistency.
Q: What can I use instead of shrimp or crab?
A> Get creative! Drained canned clams or chopped cooked scallops are fantastic. For a pescatarian mix, try flaked cooked salmon or firm white fish like cod. The recipe is very forgiving.

Stuffed Seafood Bread Bowls : Creamy, Cheesy, and Loaded with Flavor
Description
These Stuffed Seafood Bread Bowls are the ultimate comfort meal with a seaside twist. Crusty sourdough rolls are filled with a rich, creamy seafood mixture made with shrimp, crab, and melted cheese, then baked until bubbly and golden. Easy enough for a weeknight, impressive enough for guests.
Ingredients
-
4 small round bread bowls (sourdough or French rolls)
-
2 tablespoons butter
-
½ small onion, finely chopped
-
2 cloves garlic, minced
-
½ lb shrimp, peeled, deveined, and chopped
-
½ cup lump crab meat or imitation crab, shredded
-
¼ cup all-purpose flour
-
1½ cups milk or half-and-half
-
½ cup shredded mozzarella or Monterey Jack cheese
-
¼ cup grated Parmesan cheese
-
½ teaspoon Old Bay seasoning (or paprika)
-
Salt and black pepper, to taste
-
Optional garnish: chopped parsley or green onions
Instructions
-
Preheat oven
Preheat oven to 375°F (190°C). Slice the tops off the bread bowls and carefully hollow out the centers, leaving about a ½-inch wall. Place on a baking sheet. -
Sauté aromatics
Melt butter in a large skillet over medium heat. Add onion and cook 4–5 minutes until soft. Add garlic and cook 1 minute until fragrant. -
Cook seafood
Add shrimp and crab to the skillet. Cook 2–3 minutes, stirring, until shrimp turn pink. Do not overcook. -
Make the sauce
Sprinkle flour over the seafood and stir for 1 minute. Slowly whisk in milk. Simmer 3–4 minutes, stirring constantly, until thickened. -
Add cheese & seasoning
Reduce heat to low. Stir in mozzarella, Parmesan, Old Bay, salt, and pepper until smooth and creamy. Taste and adjust seasoning. -
Fill bread bowls
Spoon the hot seafood mixture evenly into the prepared bread bowls. -
Bake
Bake for 10–15 minutes, until bubbly and lightly golden on top. -
Garnish & serve
Sprinkle with parsley or green onions. Serve immediately with the bread tops on the side for dipping.
Notes
-
Don’t over-hollow – Thick walls keep the filling contained
-
Want extra richness? Use half-and-half instead of milk
-
Make ahead – Prepare filling up to 1 day in advance, reheat gently, then stuff and bake
Nutritional Information*
*Please note: The following is an approximate estimate per serving (1 stuffed bread bowl) based on the ingredients listed, using 2% milk, real crab meat, and mozzarella cheese. Values can vary significantly based on specific brands, ingredient swaps, and exact portion sizes.
- Calories: ~520
- Total Fat: 25g
Final Thoughts
These Stuffed Seafood Bread Bowls are more than just a meal—they’re an experience. They capture that cozy, hands-on joy of eating, where every bite is a perfect blend of creamy, briny, and crusty goodness. Whether you’re recreating a cherished memory or making a new one, this dish is designed to bring people together around the simple pleasure of really good food.
What I love most is how effortlessly it bridges the gap between “easy weeknight dinner” and “impressive weekend treat.” In just over half an hour, you can transform humble ingredients into something that feels special, satisfying, and deeply comforting. It’s a recipe that encourages you to play—swap the seafood, spice it up, or keep it classic—making it truly your own.
So, the next time you’re craving the taste of the coast but want the warmth of home, remember this: your favorite bread bowl is just a few steps away from becoming a treasure chest of flavor. Don’t be afraid to dig in, get a little messy, and savor that moment when the bowl itself becomes the best part.
Thanks for cooking with me, friends. Now, go make some magic—and don’t forget to save the lid for dipping.