
Creamy Queso Rotel Pasta : A Budget-Friendly Family Favorite
Creamy Queso Rotel Pasta: Your New Go-To Weeknight Wonder
Hey there, friend! Beau here, welcoming you back to my kitchen at Feastical. Let’s be real for a second. Some nights, you just don’t have the time or energy to wage war with a complicated recipe. You want something delicious, something that feels like a warm, cheesy hug, but you need it on the table faster than you can say “What’s for dinner?”
Well, pull up a chair and get ready to meet your new best friend: my Creamy Queso Rotel Pasta. This isn’t just a recipe; it’s a lifesaver. It’s the culinary equivalent of your favorite cozy sweater—familiar, comforting, and always a perfect fit. We’re talking about a one-pot wonder (okay, maybe two pots, but who’s counting?) that’s bursting with zesty, creamy, cheesy flavor and comes together in the time it takes to boil a pot of water.
What I absolutely adore about this dish is its magical ability to be both incredibly simple and wildly satisfying. It’s the kind of meal that has everyone asking for seconds, yet it’s so easy on your wallet you’ll feel like you’ve outsmarted the grocery bill. We’re feeding a family of five for around eight bucks! So, if you’re ready for a no-fuss, big-flavor dinner that delivers maximum comfort with minimal effort, grab your favorite pot and let’s get cooking.
The Happy Accident That Started It All
This recipe has a special place in my heart because it was born from a classic “empty pantry, creative desperation” situation. Picture this: It was a rainy Tuesday during my college years. My roommates and I had exactly $12 to our names and a serious case of the hangries. The cupboards were looking bleak—a half-box of pasta, a lonely jar of queso from a forgotten game night, and a can of Rotel that had been rolling around for weeks.
We looked at each other, shrugged, and decided to go for it. We boiled the pasta, dumped everything in, and crossed our fingers. What emerged from that pot was nothing short of a miracle. It was creamy, it was spicy, it was cheesy, and it was pure, unadulterated comfort. We ate it straight from the pot, laughing about how we’d somehow created a masterpiece from scraps. That’s the beauty of cooking, isn’t it? Sometimes the best recipes aren’t planned; they’re discovered in a moment of need, and they become a part of your story forever.
Gathering Your Flavor All-Stars
One of the best parts of this recipe is the short, sweet ingredient list. You probably have most of this hanging out in your pantry right now! Here’s what you’ll need to create this cheesy masterpiece.
- 1 box (16 oz) Rotini Pasta: I love rotini for this because all those little spirals are like flavor highways, trapping every bit of that creamy queso sauce. But honestly, any short pasta you have works—penne, fusilli, or even shells are all fantastic.
- 1/2 jar (about 8 oz) Queso Dip: This is our secret weapon! I’m a big fan of a smooth Monterey Jack queso for its mild, creamy base, but feel free to use a spicy jalapeño queso if you want to turn up the heat. No need to be fancy here; your grocery store’s brand works perfectly.
- 1 can (10 oz) Rotel Diced Tomatoes & Green Chilies, UNDRAINED: Do not, I repeat, DO NOT drain this can! The liquid is packed with flavor and is crucial for creating our sauce. Rotel gives us that perfect zesty kick and a little bit of texture. It’s the dynamic duo with the queso.
- 1 to 1 1/2 cups Shredded Mexican-Style Cheese Blend: Because more cheese is always the answer. We’re using this for a glorious, melty finish. I like the blend for its combination of cheddar, Monterey Jack, and other goodies, but a straight sharp cheddar is also a winner.
- Kosher Salt: For seasoning your pasta water. Trust me, salting your pasta water is the single most important step for building flavor from the inside out. It should taste like the sea!
- Optional Garnishes: A sprinkle of fresh chopped cilantro, a squeeze of lime juice, or a dollop of sour cream can really take this dish to the next level and add a fresh, bright contrast.
Let’s Make Some Magic: Your Step-by-Step Guide
Ready to see how this all comes together? It’s so simple, you’ll have it memorized after the first time. I’ll walk you through each step with a few of my favorite chef hacks to ensure perfection every single time.
- Boil Like a Pro: Fill a large pot with water, add a hearty tablespoon of kosher salt, and bring it to a rolling boil. Chef’s Tip: Don’t add oil to the water! It will prevent the sauce from clinging to the pasta later. The salt is all you need. Add your rotini and cook according to the package directions for al dente. We want a little bite to it so it doesn’t get mushy when we mix in the sauce.
- Reserve the Liquid Gold: Before you drain the pasta, grab a mug and scoop out about a 1/2 cup of the starchy pasta water. This stuff is pure culinary gold! If our sauce feels a little thick later, a splash of this starchy water will loosen it up beautifully and help the sauce emulsify and cling to every noodle.
- The Big Drain & Return: Now, drain the pasta in a colander and immediately return it to the warm pot you cooked it in. We’re going to build our sauce right in this same pot—fewer dishes is always a win in my book!
- The Flavor Party: Turn the heat down to low. Now, pour in that glorious, un-drained can of Rotel. Follow it up with half the jar of queso dip and about one cup of the shredded Mexican cheese. Chef’s Hack: Save a little cheese for sprinkling on top at the end for that perfect, cheesy finish.
- Mix with Love: Now, stir everything together gently but thoroughly. You’ll see the residual heat from the pasta and the pot melt the queso and cheese into a creamy, dreamy sauce that coats every single spiral. If the sauce seems a bit too thick for your liking, this is where you add that reserved pasta water, a tablespoon at a time, until it reaches your desired consistency.
- The Final Melt: Once everything is combined and creamy, sprinkle the remaining shredded cheese over the top. Put a lid on the pot for just a minute off the heat to let that cheese melt into a gooey, irresistible blanket. Give it one final stir to incorporate that last layer of cheesy goodness.
How to Serve It Up in Style
This pasta is a superstar all on its own, but a little presentation goes a long way! I love serving it family-style, right out of the warm pot in the middle of the table. It just feels homey and inviting.
For a complete meal that balances the richness, I always pair it with something fresh and crisp. A simple side salad with a tangy vinaigrette is my go-to. The acidity from the dressing cuts through the creaminess of the pasta perfectly. If you’re feeling the Tex-Mex vibe, some warm, crispy tortilla chips for scooping are an absolute must. And don’t forget those optional garnishes! A bright sprinkle of fresh cilantro and a cool dollop of sour cream or Greek yogurt not only looks beautiful but adds fantastic layers of flavor.
Make It Your Own: Delicious Twists & Swaps
The beauty of this recipe is its flexibility. It’s a fantastic canvas for your own culinary creativity! Here are a few of my favorite ways to mix it up.
- The Protein Power-Up: Stir in a pound of cooked, seasoned ground beef or turkey, some shredded rotisserie chicken, or a can of rinsed black beans for a heartier, more protein-packed meal.
- Veggie Lover’s Delight: Sauté some diced onions and bell peppers and mix them in with the Rotel. You can also add a cup of frozen corn (no need to thaw) for a pop of sweetness and color.
- Spice It Up (or Down): For a milder version, use a “Mild” Rotel and a plain queso. If you’re a heat-seeker like me, grab the “Hot” Rotel, use a spicy queso, and add a diced jalapeño or a few shakes of your favorite hot sauce.
- Smoky Sensation: Add a teaspoon of smoked paprika or chipotle powder to the sauce for a deep, smoky flavor that’s absolutely incredible.
- Gluten-Free & Lightened-Up: Easily make this gluten-free by using your favorite GF pasta. To lighten it up, use a light or reduced-fat queso and cheese blend—it will still be wonderfully creamy and satisfying.
Beau’s Kitchen Notes & Stories
This recipe has evolved so much from that desperate college night. I’ve made it for potlucks where it was the first dish to disappear, and I’ve whipped it up on busy weeknights for my family more times than I can count. My biggest piece of advice? Don’t stress about measuring the cheese perfectly. This is a “feel” recipe. Want it cheesier? Add more cheese! Want it saucier? Add a bit more queso or that pasta water. It’s forgiving and wants you to succeed. The funniest thing that ever happened was when my dog, Biscuit, somehow managed to snag a noodle from a bowl left on the coffee table. He’s been my biggest fan ever since!
Your Questions, Answered!
I’ve gotten a lot of great questions about this recipe over the years. Here are the most common ones to help you out.
- Q: Can I make this ahead of time?
A: Absolutely! You can assemble it completely, let it cool, and store it in an airtight container in the fridge for up to 3 days. When you’re ready, reheat it in the microwave or in a pot on the stove over low heat, adding a splash of milk or water to loosen the sauce back up. - Q: My sauce turned out a little grainy. What happened?
A: This can happen if the heat is too high when you’re melting the cheese. Cheese prefers a gentle, low heat to melt smoothly. Always make sure you’ve turned the burner off or to its lowest setting before stirring in the queso and shredded cheese. The residual heat is all you need! - Q: Can I use a different kind of pasta?
A: Of course! This recipe is very pasta-shape-agnostic. Elbow macaroni, penne, cavatappi, or farfalle (bow-ties) all work wonderfully. Just stick to a short pasta for the best sauce-to-noodle ratio. - Q: Is there a substitute for the jarred queso?
A: In a pinch, you can make a simple cheese sauce by melting 2 tablespoons of butter, whisking in 2 tablespoons of flour to make a roux, then slowly whisking in 1 1/2 cups of milk until thickened. Off the heat, stir in 1 1/2 cups of shredded cheese until melted. Then proceed with the Rotel!

Creamy Queso Rotel Pasta : A Budget-Friendly Family Favorite
Description
Creamy Queso Rotel Pasta
A quick, cheesy, zesty weeknight dinner that’s comfort food at its finest—ready in under 30 minutes and budget-friendly!
Ingredients
-
1 box (16 oz) rotini pasta (or any short pasta: penne, fusilli, shells)
-
1/2 jar (8 oz) queso dip (mild or spicy)
-
1 can (10 oz) Rotel diced tomatoes & green chilies, undrained
-
1–1 1/2 cups shredded Mexican-style cheese blend
-
Kosher salt (for pasta water)
-
Optional garnishes: fresh cilantro, lime juice, sour cream
Instructions
1. Cook Pasta
-
Fill a large pot with water, add a heaping tablespoon of kosher salt, and bring to a rolling boil.
-
Cook pasta according to package directions for al dente.
-
Reserve 1/2 cup of pasta water before draining. Drain pasta and return it to the pot.
2. Build the Sauce
-
Reduce heat to low. Add Rotel (undrained), half the jar of queso dip, and 1 cup shredded cheese.
-
Stir gently until the cheese melts and forms a creamy sauce.
-
If sauce is too thick, add reserved pasta water 1 tbsp at a time until desired consistency.
3. Finish & Serve
-
Sprinkle remaining cheese on top, cover for 1 minute off heat to melt.
-
Stir gently to incorporate.
-
Serve immediately with optional garnishes: cilantro, lime juice, sour cream.
Notes
-
Grainy sauce: Ensure heat is low; cheese melts best on gentle residual heat.
-
Different pasta: Any short pasta works; sauces cling best to spirals or tubes.
-
Make-ahead: Refrigerate up to 3 days, reheat gently with a splash of milk or water.
-
Queso substitute: Make a simple cheese sauce with butter, flour, milk, and shredded cheese if needed.
Nutrition
- Calories: 400 Cal Per Serving
- Fat: 18g
- Carbohydrates: 42g
- Protein: 13g
Let’s Talk Nutrition & Budget
While this is definitely a comfort food dish, it’s helpful to know what you’re enjoying! The estimated nutritional information per serving (about 1/5th of the recipe) is roughly:
- Calories: ~400
- Fat: ~18g
- Carbohydrates: ~42g
- Protein: ~13g
Remember, these are estimates and can vary based on the specific brands you use. The real star here is the cost! This entire meal comes in at around $8, making it just about $1.60 per serving. In a world of rising grocery prices, it’s a genuine victory to find a meal that’s this delicious, easy, and incredibly kind to your wallet. It’s proof that eating well doesn’t have to mean spending a lot.
Final Thoughts from My Kitchen to Yours
And there you have it! My beloved Creamy Queso Rotel Pasta in all its simple, glorious detail. This recipe is more than just a list of ingredients and steps; it’s a reminder that the best meals are often the easiest ones, made with a spirit of joy and a dash of creativity.
I hope this recipe finds its way into your regular rotation and becomes a reliable friend on those busy nights, just like it has for me. Cooking should be fun, freeing, and fulfilling. So don’t be afraid to make it your own. Add your favorite protein, play with the spice level, and most importantly, share it with people you love.
If you make it, I’d be absolutely thrilled to see your creation! Tag me @Feastical on social media so I can cheer you on. Now, go forth and conquer that kitchen! Until next time, happy cooking.
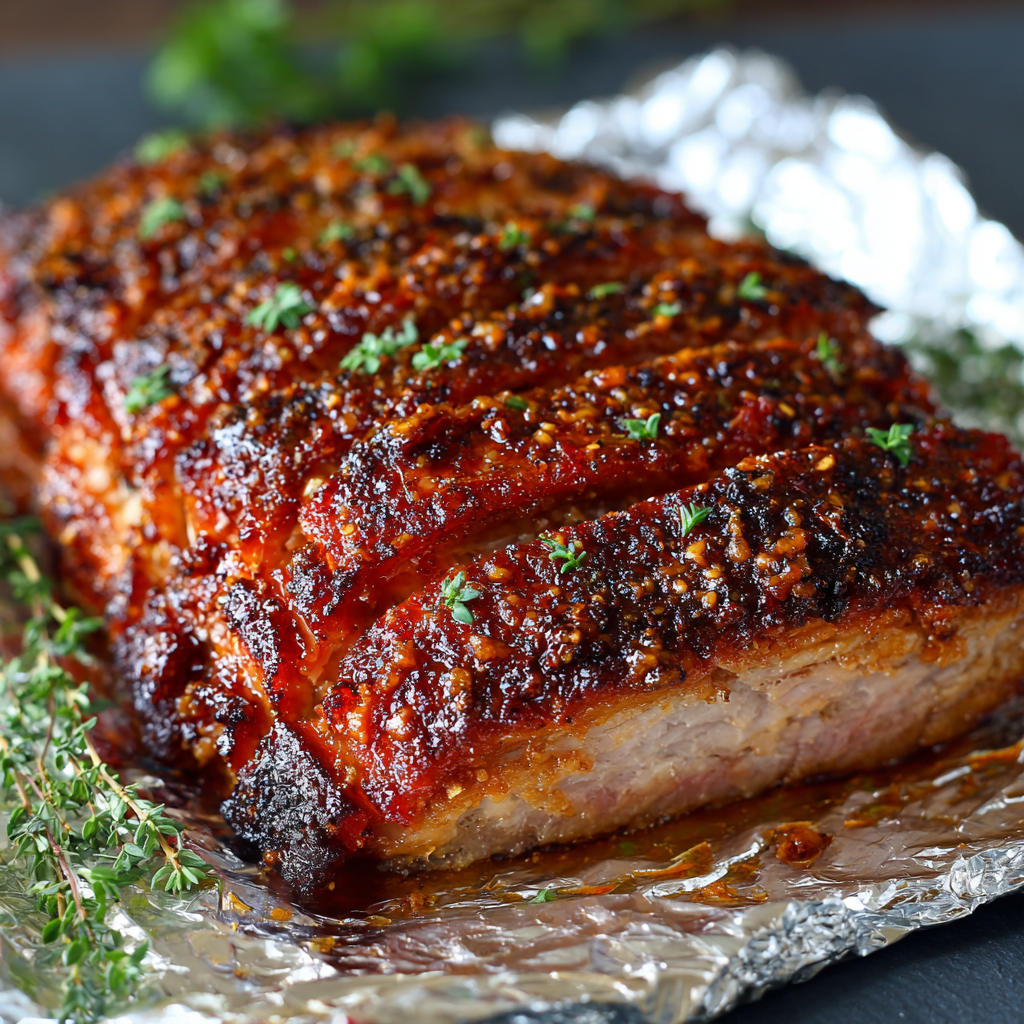
Brown Sugar and Dijon Baked Corned Beef Brisket (Tender & Juicy)
Brown Sugar and Dijon Baked Corned Beef Brisket: Your New Favorite Comfort Food
Hey friends, Beau here from Feastical! Let’s talk about a cut of meat that sometimes feels a little intimidating but is secretly one of the easiest, most forgiving, and downright delicious things you can make in your oven: corned beef brisket.
Now, I know what you might be thinking. “Beau, that’s a St. Paddy’s Day thing, right? Don’t I have to boil it for hours?” Well, I’m here to let you in on a little kitchen secret that will change your corned beef game forever. We’re skipping the boil and heading straight for the oven. Why? Because baking your brisket, all wrapped up in a cozy foil packet, is the ultimate ticket to meat that’s so tender, you could cut it with a spoon.
And to take it from simply “tender” to “absolutely-can’t-wait-for-leftovers” incredible, we’re giving it a simple, two-ingredient glaze that does all the heavy lifting. We’re talking about the dynamic duo of deep, molasses-kissed brown sugar and tangy, complex Dijon mustard. This combo creates a crust that’s sticky, slightly sweet, savory, and packs a flavor punch that seeps right into the beef. It’s a no-fuss, set-it-and-forget-it kind of recipe that delivers a meal worthy of a Sunday supper centerpiece or a killer weeknight dinner that makes you feel like a kitchen superstar. So, preheat that oven, grab your favorite baking sheet, and let’s make some magic happen.
A Messy Apron and a Lesson in Patience
This recipe always takes me back to my grandma’s kitchen. She was the queen of “low and slow” cooking long before it was a trendy food network term. I remember one chilly Sunday, I was about ten years old, buzzing around her like a gnat, desperate for whatever was making the house smell so incredible to be ready now. She had this massive piece of corned beef brisket, and she let me help her mix the glaze. I, of course, got brown sugar all over the floor and Dijon mustard on my shirt. But she just laughed, handed me a clean apron, and said, “Beau, the best things in life—and in the kitchen—take time. You can’t rush a good brisket.”
When she finally pulled that steaming, fragrant packet from the oven and unwrapped it, the sight of that glistening, dark-crusted beef is seared into my memory. That first bite was a revelation—savory, sweet, and so incredibly tender it practically melted on my tongue. It taught me that a little patience yields the most delicious rewards. This recipe is my homage to her, and to the simple, soul-satisfying power of a well-cooked piece of meat.
Gather Your Goods: The Simple Lineup
Here’s the beautiful part: you only need a few key players to create this masterpiece. The brisket itself comes pre-seasoned, so the hard work is already done for you!
- 1 (3-4 pound) Corned Beef Brisket: This is the star of our show! Look for one in the refrigerated meat section of your grocery store, usually around St. Patrick’s Day, but many stores carry it year-round. It typically comes with a little spice packet—we’ll be using that! Chef’s Insight: Don’t worry about rinsing the brisket; that salty brine is part of the flavor. Just pat it dry with paper towels so our glaze can stick.
- 1/3 Cup Brown Sugar: Light or dark works beautifully. Dark brown sugar has a deeper molasses flavor that pairs wonderfully with the savory beef, creating an almost barbecue-like crust. Substitution Tip: If you’re out of brown sugar, you can use coconut sugar for a less refined option, or even pure maple syrup, though the glaze will be a bit runnier.
- 3 Tablespoons Dijon Mustard: This isn’t your average yellow mustard! Dijon has a complex, sharp, and slightly white wine-like tang that cuts through the richness of the beef and sugar. Chef’s Insight: The mustard acts as a glue for the sugar and adds a fantastic savory depth. If you only have whole-grain Dijon, that will add a lovely texture and even more flavor.
- The Spice Packet: That little packet of goodness tucked in with your brisket! It’s usually a mix of peppercorns, coriander, mustard seeds, and bay leaves. We’ll sprinkle this right onto the meat before the glaze for an extra layer of flavor.
Let’s Get Cooking: Your Foolproof Roadmap to Perfection
Ready to make the most tender brisket of your life? Follow these steps, and you really can’t go wrong. I’ve included all my little chef hacks to ensure your success.
- Preheat and Prep. Fire up your oven to a steady 350°F (175°C). While it’s warming, grab a large baking sheet and a long piece of heavy-duty aluminum foil—you want it to be long enough to fully envelop the brisket. Chef’s Hack: Laying the brisket on the foil on the baking sheet now saves you from a messy transfer later!
- Meet Your Brisket. Take your corned beef out of its package and place it flat-side down on the foil. Pat it completely dry with a few paper towels. This is a CRUCIAL step! A dry surface means our glaze will cling on for dear life, creating that incredible crust. If there’s a thick, solid layer of fat on one side, you can trim a little off, but leave a good amount—it’s our built-in basting system that keeps everything juicy.
- Sprinkle the Spices. Open up that little spice packet and sprinkle the contents evenly over the top and sides of the brisket. Gently press the spices into the meat so they adhere.
- Create the Magic Paste. In a small bowl, combine the brown sugar and Dijon mustard. Stir it together until it forms a thick, spreadable paste. It might seem a little stiff at first, but that’s perfect. Chef’s Hack: If your brown sugar is a little hard, pop it in the microwave for 15 seconds with a damp paper towel over it to soften it up.
- Get Hands-On with the Glaze. Using a spoon or your hands (my preferred method—cooking is tactile!), slather that brown sugar and Dijon paste all over the top and sides of the brisket. Cover every nook and cranny you can. Don’t be shy! This is what’s going to create that beautiful, caramelized, flavor-packed bark.
- The Cozy Foil Blanket. Carefully bring the long sides of the foil up over the brisket and fold them down together in a series of tight folds, creating a sealed tent. Then, fold the short ends up and in, creating a completely sealed packet. Chef’s Insight: This sealed environment is the key to tenderness. It traps the steam and the brisket’s own juices, essentially braising it in its own glorious liquid. No dry brisket here!
- Bake to Melt-in-Your-Mouth Tenderness. Slide the baking sheet with the foil packet into your preheated oven. Now for the hardest part: the wait. For a 3-pound brisket, bake for about 2 hours and 30 minutes. If yours is closer to 4 pounds, aim for 3 hours. You’ll know it’s done when your whole house smells amazing and a fork inserted into the meat meets almost no resistance.
- The All-Important Rest. Once the timer dings, carefully remove the baking sheet from the oven. DO NOT OPEN THE FOIL. I know, the temptation is real! But let that brisket rest, still wrapped, for a solid 15-20 minutes. This allows the frantic, hot meat juices to relax and redistribute back throughout the brisket. If you skip this step, all those lovely juices will just run out onto the cutting board, leaving you with drier meat.
- Slice and Serve. Now you can unwrap your masterpiece! Be careful of the steam. Transfer the brisket to a cutting board. Here’s your final pro-tip: always slice against the grain. Look for the lines running through the meat (the “grain”) and cut perpendicular to them. This shortens the muscle fibers, making each bite incredibly tender instead of chewy.
Plating Up Your Masterpiece
Now that you have this gorgeous, glistening brisket, how do you serve it? The possibilities are endless!
For a classic, hearty plate, I love serving thick slices of the brisket alongside buttery, garlicky mashed potatoes and some simple steamed green beans or roasted carrots. The potatoes are the perfect vehicle for soaking up any of those incredible juices left in the foil packet—don’t you dare throw those away! Drizzle that liquid gold right over the top of the sliced beef and potatoes.
Feeling like a traditionalist? You can’t go wrong with the classic Boiled Dinner. About 45 minutes before your brisket is done, you can unwrap it (carefully!), toss in some chopped potatoes, carrots, and wedges of cabbage around it, re-seal the foil, and let everything roast together until the vegetables are tender.
And let’s not forget the king of all leftovers: the Reuben sandwich. Pile thin slices of this brisket on rye bread with Swiss cheese, sauerkraut, and Thousand Island dressing, then grill it up in a buttered pan until golden and crispy. It’s a life-changing experience, I promise you.
Mix It Up! Fun Flavor Twists
Once you’ve mastered the basic formula, have some fun with it! This recipe is a fantastic canvas for your own creativity.
- The Irish Whiskey Glaze: Add a tablespoon of Irish whiskey to the brown sugar and Dijon mix for a wonderfully deep, adult flavor. The alcohol cooks off, leaving just a beautiful, smoky warmth.
- Orange & Clove Zest: Stir the zest of one whole orange and a quarter teaspoon of ground cloves into your glaze. This gives the brisket a wonderfully bright, aromatic, almost holiday-like flavor profile.
- Spicy Maple Kick: Swap the brown sugar for pure maple syrup and add a teaspoon of smoked paprika and a pinch of cayenne pepper. You’ll get a sweet, smoky, and slightly spicy crust that’s absolutely addictive.
- Honey & Whole Grain Mustard: Use honey instead of brown sugar and whole-grain mustard instead of Dijon. You’ll get a lighter, fruitier sweetness and a fantastic pop of texture from the mustard seeds.
- Low-Carb/Keto Version: Simply replace the brown sugar with a brown sugar substitute like Swerve or Lakanto’s Golden Monkfruit Sweetener. The Dijon mustard is already low in carbs, so you’re good to go!
Beau’s Kitchen Chronicles
This recipe has been a staple in my kitchen for years, and it’s evolved in the funniest ways. There was the infamous “Great Brisket Incident of 2018” where I used parchment paper instead of foil (don’t do it—it leaks!) and ended up with a smoky kitchen and a very sad, dried-out brisket. Lesson learned the hard way! I’ve also found that the quality of the corned beef makes a difference. I tend to splurge on a flat-cut brisket from a good butcher when I can—it’s a bit leaner and slices up beautifully for sandwiches. But honestly, even the budget-friendly grocery store versions turn out phenomenal with this method. It’s a truly foolproof recipe.
Your Questions, Answered!
Q: My glaze seemed to melt off and mix with the juices. Did I do something wrong?
A: Not at all! This is totally normal. While some of the glaze will caramelize onto the top of the brisket, a good portion of it will melt into the cooking liquid. This is a *good* thing! It creates an incredibly flavorful au jus that you can spoon over the sliced meat. You’re still getting all the flavor, I promise.
Q: Can I cook this in a slow cooker instead?
A: You bet! This method translates beautifully to a crockpot. Prepare the brisket with the spice packet and glaze just as directed. Place it in the slow cooker (you might need to cut it in half to fit), and add about 1/2 cup of water or beef broth to the bottom. Cook on LOW for 8-9 hours or on HIGH for 5-6 hours. The result will be just as tender!
Q: Why is my corned beef still tough?
A: Tough meat almost always means it needs more time. The beauty of this method is that it’s very forgiving. If your brisket isn’t fork-tender after the initial cook time, just re-seal the foil and pop it back in the oven for another 20-30 minutes. Brisket is a tough cut that becomes tender through long, slow, moist cooking.
Q: How should I store leftovers?
A: Let the brisket cool completely, then store it in an airtight container in the refrigerator for up to 4 days. It makes the most incredible leftovers! You can also freeze it for up to 3 months. Slice it before freezing for easy sandwich-making later.

Brown Sugar and Dijon Baked Corned Beef Brisket (Tender & Juicy)
Description
Brown Sugar and Dijon Baked Corned Beef Brisket
Tender, flavorful corned beef with a sticky-sweet Dijon glaze—perfect for Sunday suppers, sandwiches, or a cozy dinner.
Ingredients
-
1 (3–4 lb) corned beef brisket (flat cut, with spice packet)
-
1/3 cup brown sugar (light or dark)
-
3 tbsp Dijon mustard
-
Spice packet included with brisket
Instructions
1. Prep the Oven & Brisket
-
Preheat oven to 350°F (175°C).
-
Line a large baking sheet with heavy-duty aluminum foil long enough to fully wrap the brisket.
-
Place the brisket flat-side down on the foil. Pat dry thoroughly with paper towels.
2. Season & Glaze
-
Sprinkle the spice packet evenly over the brisket, pressing lightly.
-
In a small bowl, mix brown sugar + Dijon mustard into a thick paste.
-
Spread the paste evenly over the top and sides of the brisket.
3. Wrap & Bake
-
Fold the long sides of the foil up and seal, then fold the short ends to create a fully sealed packet.
-
Place the foil-wrapped brisket on the baking sheet and bake:
-
3 lbs: ~2 hr 30 min
-
4 lbs: ~3 hr
-
-
Rest wrapped 15–20 minutes before slicing.
4. Slice & Serve
-
Slice against the grain for tender pieces.
-
Serve with mashed potatoes, roasted veggies, or in a Reuben sandwich.
Notes
-
Glaze melting: Some glaze mixes with cooking juices—this makes an incredible au jus.
-
Slow cooker option: Place glazed brisket + ½ cup water/broth in slow cooker. Cook LOW 8–9 hr or HIGH 5–6 hr.
-
Tough brisket: Simply wrap and bake 20–30 min longer until fork-tender.
-
Storing leftovers: Refrigerate in airtight container up to 4 days, or freeze up to 3 months (slice before freezing).
Nutrition
- Calories: 420Cal Per Serving
- Sugar: 8g
- Fat: 28g
- Carbohydrates: 10g
- Protein: 28g
Nutritional Information (A Quick Note!)
Hey, I’m all about feel-good food, and that includes being mindful of what we’re eating. This baked corned beef brisket is a rich, satisfying source of protein. A 4-ounce serving provides a great protein boost to keep you full and energized. It’s important to note that corned beef is cured, so it is higher in sodium than a regular beef brisket. The brown sugar adds carbohydrates and natural sugars, creating that delicious crust we all love.
As with any good thing, balance is key! I love serving this with lots of healthy, simple vegetables to create a well-rounded meal. If you’re watching your sodium intake, you can look for a lower-sodium corned beef option at the store, and remember that you don’t need to add any extra salt to this recipe. The estimated values per serving (about 4oz of meat) are: Calories: ~420 | Protein: ~28g | Fat: ~28g | Carbs: ~10g | Sugar: ~8g.
Final Thoughts from My Kitchen to Yours
Friends, this Brown Sugar and Dijon Baked Corned Beef Brisket is more than just a recipe—it’s a reminder that the most satisfying meals often come from the simplest techniques. It’s about taking a humble cut of meat and treating it with a little patience and a lot of love, transforming it into something truly spectacular. It’s the kind of dish that gathers people around the table, that fills your home with an irresistible aroma, and that leaves everyone asking for seconds.
I hope this recipe becomes a trusted favorite in your home, just like it is in mine. It’s proof that you don’t need fancy skills or a million ingredients to create a meal that tastes like a warm hug. So go on, give it a try. And when you do, I’d love to hear

Southern Caramel Cream Cheese Pound Cake with Rich Caramel Glaze
Southern Caramel Cream Cheese Pound Cake: A Slice of Sweet, Buttery Heaven
Welcome to Your New Favorite Cake
Hey friends, Beau here! Let’s get straight to the good stuff. If you’ve been hunting for a dessert that doesn’t just satisfy a sweet tooth but practically gives it a warm, buttery hug, you’ve landed in the right spot. Today, we’re diving headfirst into my all-time, never-fail, always-gets-raves Southern Caramel Cream Cheese Pound Cake.
This isn’t just a cake; it’s an experience. Imagine the dense, velvety crumb of a classic pound cake, but amplified with the tangy richness of cream cheese. Now, picture that same masterpiece drowned in a luxuriously rich, homemade caramel glaze that seeps into every single pore. This cake is the star of family reunions, the hero of potlucks, and the secret weapon you pull out when you really, really want to impress someone. It’s the definition of a feel-good food, and I’m so excited to guide you through it. So, tie on your favorite apron, and let’s create some magic together.
The Cake That Started It All
This recipe takes me right back to my grandma’s linoleum-floored kitchen. The air was always thick with the scent of something baking, but her caramel pound cake was the holy grail. She’d never use a mixer—just a big, yellow bowl and a wooden spoon, her arms moving with a rhythm that seemed as ancient as the hills. I’d sit at the table, legs swinging, watching her like it was the greatest show on earth.
One summer, she finally let me “help” by pouring in the vanilla. I was so nervous I nearly dropped the bottle, but her hand steadied mine. She said, “Beau, the secret isn’t in the recipe. It’s in the love you stir into it.” That moment, the smell of caramelizing sugar and the feel of her flour-dusted hand on my shoulder, is baked into my memory forever. My version adds the cream cheese for an extra layer of indulgence, but the soul? That’s all Grandma. Every time I bake this, it feels like she’s right there with me, and I hope it brings a little of that same warmth to your kitchen, too.
Gathering Your Golden Ingredients
Great cakes start with great ingredients, and this one is no exception. Let’s break down what you’ll need and why each one is a superstar. Having everything at room temperature is non-negotiable here—it’s the chef’s secret to a perfectly smooth, non-curdled batter that bakes up like a dream.
For the Pound Cake:
- 3 cups Cake Flour: This lower-protein flour gives us that tender, fine crumb we crave in a pound cake. Chef’s Tip: If you’re in a pinch, you can make a DIY version by measuring 3 cups of all-purpose flour, removing 6 tablespoons of it, and replacing that with 6 tablespoons of cornstarch. Whisk it well!
- 3 cups Granulated Sugar: It sweetens, sure, but it also helps create that beautiful, delicate crust.
- 3 sticks (1.5 cups) Unsalted Butter, softened: The foundation of flavor and that signature dense, moist texture. I use unsalted to control the salt level.
- 1 (8 oz) package Cream Cheese, softened: The magic ingredient! It introduces a subtle tang and incredible moisture, preventing the cake from being dry.
- 6 large Eggs, room temperature: They provide structure and richness. Room temperature eggs blend into the batter much more smoothly.
- 1 tablespoon Vanilla Extract: Use the good stuff! It adds a beautiful, warm aroma. Fun Swap: Try using 2 teaspoons of vanilla and 1 teaspoon of almond extract for a nuanced flavor.
For the Rich Caramel Glaze:
- 2 sticks (1 cup) Salted Butter: Using salted butter here balances the intense sweetness of the glaze and adds a wonderful buttery depth.
- 2 cups Granulated Sugar: This is what we’ll caramelize to create the deep, complex flavor of the glaze.
- 2 (12 oz) cans Evaporated Milk: Not to be confused with sweetened condensed milk! This gives the glaze its creamy, pourable consistency without making it overly sweet.
- 1 teaspoon Vanilla Extract: We stir this in at the very end to preserve its flavor.
Let’s Bake: The Step-by-Step Symphony
Okay, team. We’re all set. Follow these steps, and you’ll have a masterpiece. Remember, baking is a labor of love, so don’t rush it!
- Prep Like a Pro: First things first, preheat your oven to a steady 325°F (165°C). Grab your trusty 10-inch Bundt pan and give it a really good coating of butter or non-stick spray. Now, dust it with a little flour, tapping out the excess. This dynamic duo ensures your beautiful cake will release cleanly. Chef’s Hack: After flouring, pop the pan in the fridge for 10 minutes. The cold butter hardens and creates an even more non-stick surface!
- The Creaming Foundation: In the bowl of your stand mixer fitted with the paddle attachment (or a large bowl with a hand mixer), combine the softened butter, cream cheese, and sugar. Beat this on medium-high speed for a full 5-7 minutes. I’m not kidding—set a timer! You want it to be incredibly pale, fluffy, and almost white. This step incorporates air, which is crucial for the cake’s texture.
- Egg-cellent Incorporation: With the mixer on low, add your room-temperature eggs one at a time. Let each egg fully incorporate into the batter before adding the next. This patience prevents the batter from breaking and ensures a smooth, emulsified mixture. Scrape down the bowl halfway through.
- Bringing It All Together: Gradually add the cake flour to the wet ingredients, mixing on low speed just until the flour disappears. Do not overmix! Overworking the flour develops gluten, which can make the cake tough. Finally, stir in that glorious vanilla extract by hand.
- Bake to Perfection: Spoon the thick, luscious batter into your prepared Bundt pan and smooth the top. Place it in the center of your preheated oven and bake for 1 hour and 15 minutes. Start checking for doneness at the 1-hour mark. The cake is ready when a long toothpick or skewer inserted into the center comes out clean, and the top is a deep golden brown.
- The All-Important Cool Down: Once baked, let the cake cool in the pan on a wire rack for 20 minutes. This allows the structure to set. Then, carefully invert the pan onto the rack and lift it off. Let the cake cool completely before you even *think* about adding the glaze. A warm cake will absorb the glaze too quickly and can become soggy.
- Conquer the Caramel Glaze: While the cake cools, make your glaze. Use a heavy-bottomed, deep saucepan (this is key to preventing boil-overs). Melt the salted butter over medium heat. Add the sugar and evaporated milk, and stir constantly until the sugar dissolves. Now, the test of patience: continue cooking and stirring frequently for about 45 minutes. You’ll see it slowly thicken and turn a beautiful caramel color. It’s ready when it coats the back of a spoon. Remove it from the heat and stir in the vanilla. Let it cool slightly; it will thicken more as it sits.
- The Grand Finale: Place your completely cooled cake on a serving plate. Pour the warm (not piping hot) caramel glaze generously over the top, letting it cascade down the sides in delicious rivulets. Let it set for about 30 minutes before slicing.
How to Serve This Masterpiece
Presentation is part of the joy! I love serving this cake on a beautiful cake stand to really show it off. A simple, thin slice is incredibly rich, so you don’t need a huge piece. For an extra touch of decadence, warm the slice slightly in the microwave for 10 seconds and serve it with a small scoop of high-quality vanilla bean ice cream. The contrast of warm cake, cool ice cream, and gooey caramel is next-level. A cup of strong black coffee or a cold glass of milk is the perfect companion to cut through the sweetness.
Make It Your Own: Fun Recipe Twists
Once you’ve mastered the classic, feel free to get creative! Here are a few of my favorite variations:
- Bourbon-Spiked Caramel: Add 2 tablespoons of good bourbon to the caramel glaze along with the vanilla for a wonderfully grown-up, complex flavor.
- Apple-Cinnamon Delight: Fold 1 cup of finely chopped, toasted pecans and 1 teaspoon of ground cinnamon into the cake batter before baking. The nutty crunch and warm spice are a match made in heaven with the caramel.
- Sea Salt Sensation: Finish the glazed cake with a light sprinkling of flaky sea salt. The salty-sweet combo is absolutely irresistible.
- Chocolate Caramel Swirl: Pour half the batter into the pan. Drizzle with 1/2 cup of chocolate fudge sauce, then top with the remaining batter and swirl with a knife. You get a marbled effect that chocolate lovers will adore.
- Dairy-Free Version: Use plant-based butter and cream cheese, and replace the evaporated milk with canned full-fat coconut milk. The result is surprisingly rich and delicious!
Beau’s Chef’s Notes & Kitchen Stories
This recipe has been a living, evolving thing in my kitchen. The first time I made it by myself, I was so proud I took a picture and sent it to my mom. I also forgot the vanilla in the cake. It was still good, but it taught me to always line up my ingredients beforehand (we chefs call this mise en place). Another time, I got a phone call while making the caramel and let it boil over. Let me tell you, cleaning solidified caramel off a glass stovetop is a rite of passage I don’t wish on anyone! So, learn from my mistakes: stay focused during the caramel stage. The beauty of this cake is its resilience. Even with little hiccups, it almost always turns out delicious.
Your Questions, Answered!
I’ve gotten a lot of questions about this cake over the years. Here are the most common ones to help you succeed.
Q: My cake is browning too fast on top but isn’t cooked in the middle. Help!
A: This is a classic oven issue! Ovens can have hot spots. If you see the top browning too quickly, tent it loosely with a piece of aluminum foil for the remainder of the baking time. This will shield it from direct heat and allow the center to cook through without burning the top.
Q: Why is my caramel glaze grainy?
A: Graininess usually means the sugar crystallized. To prevent this, make sure you stir constantly until the sugar is fully dissolved at the beginning. Avoid scraping the sides of the pot with your spoon once you start cooking, as sugar crystals can form there and trigger a chain reaction.
Q: Can I make this cake ahead of time?
A: Absolutely! This cake actually gets better and more moist the next day. Bake and cool the cake completely, wrap it tightly in plastic wrap (without glaze), and store it at room temperature. Make the glaze the day you plan to serve it for the best texture and shine.
Q: My cake stuck to the pan! What now?
A: Don’t panic! First, let it cool a bit longer. Then, take a thin, flexible butter knife and gently work it between the cake and the pan all the way around. You can also try placing the bottom of the pan on a warm, damp towel for a minute to slightly loosen the butter. If a few pieces break off, just place them back and cover the evidence with a generous pour of caramel glaze. No one will ever know.
Southern Caramel Cream Cheese Pound Cake with Rich Caramel Glaze
Description
Southern Caramel Cream Cheese Pound Cake
A dense, velvety pound cake with cream cheese and a luscious homemade caramel glaze—pure Southern comfort in every bite.
Ingredients
For the Cake:
-
3 cups cake flour
-
3 cups granulated sugar
-
3 sticks (1½ cups) unsalted butter, softened
-
1 (8 oz) package cream cheese, softened
-
6 large eggs, room temperature
-
1 tbsp vanilla extract
For the Caramel Glaze:
-
2 sticks (1 cup) salted butter
-
2 cups granulated sugar
-
2 (12 oz) cans evaporated milk
-
1 tsp vanilla extract
Instructions
1. Prep
-
Preheat oven to 325°F (165°C).
-
Grease and flour a 10-inch Bundt pan. For extra release, refrigerate the pan 10 minutes after flouring.
2. Make the Cake
-
In a large bowl, cream butter, cream cheese, and sugar on medium-high for 5–7 minutes until pale and fluffy.
-
Add eggs, one at a time, mixing fully after each. Scrape down the bowl halfway through.
-
Gradually mix in cake flour on low speed until just combined. Stir in vanilla by hand.
-
Pour batter into prepared pan, smooth top, and bake 1 hour 15 minutes. Check at 1 hour; cake is done when a toothpick comes out clean.
-
Cool in pan 20 minutes, then invert onto a wire rack to cool completely.
3. Make the Caramel Glaze
-
In a heavy-bottomed saucepan, melt butter over medium heat.
-
Add sugar and evaporated milk, stirring constantly until sugar dissolves.
-
Continue cooking and stirring frequently ~45 minutes until thick and golden.
-
Remove from heat, stir in vanilla, and let cool slightly.
4. Glaze & Serve
-
Pour warm (not hot) caramel over completely cooled cake.
-
Let set 30 minutes before slicing.
-
Serve with ice cream, whipped cream, or a dusting of flaky sea salt if desired.
Notes
-
Prevent grainy glaze: Stir constantly until sugar dissolves; avoid scraping pot sides.
-
Avoid sinking: Don’t overmix flour; don’t open oven early.
-
Fast-browning tops: Tent with foil if necessary.
Nutrition
- Calories: 550–600 Cal Per Serving
- Sugar: 45g
- Fat: 30g
- Carbohydrates: 65g
A Little Note on Nutrition
Let’s be real, friends—this is a celebration cake, a treat to be savored and enjoyed with people you love. It’s not an everyday health food, and that’s perfectly okay! Food is about joy and connection, too. A standard slice (about 1/12th of the cake) will have roughly 550-600 calories, 30g of fat, 65g of carbohydrates, and 45g of sugar. It’s rich, so a little goes a long way. Enjoy it mindfully, and savor every single delicious, buttery, caramel-drenched bite without an ounce of guilt.
Final Thoughts from My Kitchen to Yours
Well, there you have it—my heart and soul in cake form. This Southern Caramel Cream Cheese Pound Cake is more than a recipe; it’s a tradition, a comfort, and a guaranteed smile-maker. I hope you feel empowered to bake it, share it, and make it a part of your own family’s story.
Remember, the best ingredient you can add is your own love. So don’t stress over a little spilled flour or a slightly lopsided cake. It’s all part of the beautiful, messy, and utterly delicious journey of cooking. Now, I’d love to hear from you! Did you add your own twist? Did your family go crazy for it? Share your stories and photos with me over on Instagram by tagging @Feastical. Happy baking!
With a full heart and an even fuller plate,
Beau

Easy Vanilla Pound Cake Recipe
Your New Favorite Slice of Sunshine: Easy Vanilla Pound Cake
Hey there, friend! Beau here, welcoming you back to my kitchen. Is there anything in the world that smells more like home than a vanilla pound cake baking in the oven? That sweet, buttery aroma just seems to hug every corner of the house, promising something truly special is on the way.
Today, I’m sharing what I honestly believe is the most perfect, foolproof, and downright delicious Vanilla Pound Cake recipe you’ll ever make. This isn’t just a dessert; it’s a blank canvas for your cravings, a reliable friend for last-minute potlucks, and the ultimate tea-time companion. We’re talking about a cake with a crackly, golden-brown crust that gives way to a melt-in-your-mouth, velvety crumb. It’s rich without being heavy, sweet without being cloying, and so incredibly moist you might just do a little happy dance after your first bite.
I know the word “from-scratch” can sometimes feel intimidating, but I promise you, this recipe is your new best friend. We’re keeping it simple, soulful, and satisfying—just like we do around here. So, tie on your favorite apron, find that trusty spatula, and let’s bake a cake that tastes like a warm, sunny afternoon.
A Slice of Memory: My Grandma Elsie’s Cake Stand
This recipe always takes me right back to my Grandma Elsie’s linoleum-floored kitchen. She didn’t have fancy gadgets or a designer kitchen, but she had a cake stand that was practically a family heirloom. It was a simple glass pedestal, but when that stand came out of the cupboard, you knew something good was happening.
She’d make this exact pound cake every Sunday. No fancy frosting, no elaborate decorations—just pure, unadulterated cake perfection. The ritual was everything. She’d let me cream the butter and sugar with her old wooden spoon, my small hands struggling to mix it until it was “pale and happy,” as she’d say. The sound of the mixer (a vintage model that weighed a ton) and the smell of vanilla and butter are my ultimate comfort sounds and smells. That cake wasn’t just about the ingredients; it was about the love and the tradition baked right in. Every time I pull out my own cake stand, I feel that connection, and I’m so excited to help you start your own delicious traditions.
Gathering Your Ingredients: The Dream Team
Part of the magic of this cake is its beautiful simplicity. You probably have most of these ingredients in your pantry right now! Here’s the lineup, with a few of my chef-y insights to help you understand the “why” behind the “what.”
- 1 cup (2 sticks) unsalted butter, softened: This is the heart and soul of our pound cake, providing that incredible richness and tender crumb. Using unsalted lets us control the salt level. Chef’s Tip: “Softened” is key! It should press easily with a finger but not be melted or greasy. Leave it on the counter for about an hour. In a pinch, you can cut it into tablespoons and microwave for 5-second bursts, but be careful!
- 1 ½ cups granulated sugar: Sweetness and structure! When creamed with the butter, it creates tiny air pockets that help the cake rise. For a deeper flavor, you can swap half for light brown sugar.
- 4 large eggs, at room temperature: Our binding agents and another source of lift and richness. Room-temperature eggs blend into the batter much more smoothly than cold ones, preventing a curdled look. Just place them in a bowl of warm water for 5-10 minutes before using.
- 2 teaspoons pure vanilla extract: The star of the flavor show! Don’t be shy here, and please use the real stuff. The artificial kind just can’t compete. For a next-level experience, try using vanilla bean paste—you’ll see those beautiful little specks throughout the cake.
- 2 cups all-purpose flour: The foundation of our cake. I always recommend spooning the flour into your measuring cup and leveling it off with a knife to avoid packing in too much, which can lead to a dense cake.
- ½ teaspoon baking powder: Our little rising helper, ensuring we get a nice, light texture.
- ½ teaspoon salt: A crucial flavor enhancer! It balances the sweetness and makes the vanilla flavor pop. Never skip the salt in baking.
- ½ cup whole milk, at room temperature: This adds moisture and helps bring the batter together. The fat in whole milk gives us a superior texture, but 2% will work in a pinch. Like the eggs, room temp is best for even mixing.
Let’s Get Baking: The Step-by-Step Magic
Ready to create some magic? Follow these steps, and you’ll be a pound cake pro in no time. I’ve sprinkled in my favorite kitchen hacks to make sure you succeed on the first try!
- Prep Your Pan and Oven: Start by preheating your oven to 350°F (175°C). This is non-negotiable for an even bake! Now, take your 9×5-inch loaf pan and give it a good coating of butter or non-stick spray. Add a tablespoon of flour and shake it around until the entire interior is coated, then tap out the excess. This “grease and flour” method is your best insurance policy against a stuck cake. Little Chef Hack: For extra-easy removal, you can line the bottom with a sling of parchment paper after greasing.
- Creaming is Key: In a large bowl, use an electric mixer (hand or stand) to beat the softened butter and sugar together. Now, don’t rush this! We’re not just mixing; we’re “creaming.” Beat on medium-high speed for a full 3-5 minutes until the mixture is light, pale yellow, and fluffy. This process incorporates air, which is essential for the cake’s texture. If you drag a spatula through it, it should look noticeably lighter.
- Incorporate the Eggs & Vanilla: With the mixer on medium speed, add your room-temperature eggs one at a time, beating well after each addition. Let each egg fully incorporate before adding the next. This patience prevents the batter from breaking and ensures a smooth, emulsified mixture. Once all the eggs are in, beat in the glorious vanilla extract until just combined.
- Whisk the Dry Goods: In a separate, medium-sized bowl, whisk together the flour, baking powder, and salt. This simple step ensures the leavening and salt are evenly distributed throughout the flour, so you get a uniform rise and flavor in every single bite.
- The Grand Finale: Combining Wet & Dry: Reduce your mixer speed to low. We’re going to add the dry ingredients and the milk alternately, starting and ending with the flour mixture. So, add about one-third of the flour, mix until *just* combined, then half the milk, another third of the flour, the rest of the milk, and finally the last of the flour. Mixing until *just* combined after each addition is crucial. Overmixing at this stage can develop the gluten in the flour and make your cake tough. A few streaks of flour are okay—they’ll get worked in at the end.
- Into the Pan & Smooth the Top: Pour the beautiful, thick batter into your prepared loaf pan. Use a spatula to spread it evenly and smooth the top. For that classic pound cake crack down the middle, you can run a spatula down the center, creating a slight indentation.
- Bake to Golden Perfection: Place the pan in the center of your preheated oven and bake for 55-65 minutes. Chef’s Truth: Ovens lie! Start checking at the 55-minute mark. The cake is done when it’s golden brown on top and a toothpick or skewer inserted into the very center comes out clean or with a few moist crumbs attached. If it has wet batter, it needs more time.
- The All-Important Cool Down: Once baked, remove the cake from the oven and let it cool in the pan on a wire rack for 10 minutes. This allows the structure to set slightly. Then, run a thin knife around the edges to loosen it, and carefully invert it onto the rack to cool completely. I know it’s tempting, but cutting into a warm pound cake can cause it to crumble. Letting it cool completely gives you the perfect, clean slice.
How to Serve Your Masterpiece
Now for the best part: eating it! This cake is a superstar all on its own, but here are a few of my favorite ways to dress it up.
Classic & Simple: A thick, room-temperature slice with a hot cup of coffee or tea is absolute perfection. It’s the ultimate afternoon pick-me-up.
Berry Bliss: Macerate some fresh strawberries or raspberries with a sprinkle of sugar and a dash of lemon juice. Spoon them and their glorious juices over a slice for a fresh, vibrant twist.
Indulgent & Creamy: A scoop of high-quality vanilla bean ice cream melting over a slightly warmed slice is a dessert dream come true. Drizzle with a little caramel or chocolate sauce for extra pizazz.
Whipped Cream Wonder: A dollop of freshly whipped cream and a dusting of powdered sugar is an effortlessly elegant way to serve this cake for guests.
Make It Your Own: Delicious Recipe Variations
Once you’ve mastered the classic, the world is your oyster! Here are a few fun twists to keep things exciting.
- Lemon Blueberry Burst: Add the zest of one lemon to the butter-sugar mixture and gently fold 1 cup of fresh or frozen (don’t thaw) blueberries into the finished batter. The bright lemon and juicy berries are a match made in heaven.
- Almond Joy: Substitute 1 teaspoon of the vanilla extract with pure almond extract. Fold in ½ cup of toasted sliced almonds and ½ cup of shredded coconut for a nutty, tropical flavor.
- Chocolate Chip Swirl: Toss ¾ cup of chocolate chips with a tablespoon of the flour mixture (this prevents them from sinking). Gently fold them into the batter at the very end.
- Brown Sugar Bourbon: Replace ½ cup of the granulated sugar with dark brown sugar and add a tablespoon of bourbon along with the vanilla. This creates a deeper, almost caramel-like flavor that’s incredible in the fall.
- Gluten-Free Friendly: You can usually substitute the all-purpose flour with a 1:1 gluten-free baking blend with great success. Just be sure the blend contains xanthan gum.
Beau’s Chef’s Notes & Kitchen Stories
This recipe has been my go-to for years, and it’s evolved with me. I once, in a frantic pre-party baking session, accidentally used salted butter and forgot the added salt. The cake was still delicious, but it taught me the importance of that salt balance! Another time, I was so impatient I didn’t let my butter soften enough, and I ended up with a denser, shorter cake. It was a tasty lesson in patience. The beauty of baking is that even the “mistakes” are usually still pretty wonderful. Don’t stress, just enjoy the process. The love you put in is the most important ingredient.
Your Pound Cake Questions, Answered!
Q: Why did my cake sink in the middle?
A: This is usually due to underbaking or opening the oven door too early. The cake’s structure hasn’t set yet, and the sudden temperature drop causes it to collapse. Use that toothpick test and try to resist peeking for at least the first 45 minutes!
Q: My cake is dense and heavy. What went wrong?
A: A few things can cause this: overmixing the batter after adding the flour (which develops gluten), not creaming the butter and sugar long enough, or using cold ingredients that don’t emulsify properly. Remember, “light and fluffy” in the creaming stage is your mantra!
Q: Can I make this in a Bundt pan?
A: Absolutely! This recipe fits perfectly in a standard 10-cup Bundt pan. Grease and flour the pan *very* thoroughly, especially all those nooks and crannies. The baking time might be slightly less, so start checking around the 45-minute mark.
Q: How should I store leftover pound cake?
A: Once completely cool, wrap it tightly in plastic wrap or store it in an airtight container at room temperature for up to 3 days. For longer storage, it freezes beautifully for up to 3 months. Just wrap it well in plastic and then foil.

Easy Vanilla Pound Cake Recipe
Description
Easy Vanilla Pound Cake
A classic, buttery pound cake with a crackly golden crust and melt-in-your-mouth crumb—perfect for tea, dessert, or anytime you need a little slice of sunshine.
Ingredients
-
1 cup (2 sticks) unsalted butter, softened
-
1 ½ cups granulated sugar
-
4 large eggs, room temperature
-
2 tsp pure vanilla extract
-
2 cups all-purpose flour
-
½ tsp baking powder
-
½ tsp salt
-
½ cup whole milk, room temperature
Optional Add-ins & Toppings:
-
Fresh berries, whipped cream, chocolate chips, lemon zest, toasted nuts, or powdered sugar
Instructions
1. Prep Pan & Oven
-
Preheat oven to 350°F (175°C).
-
Grease and flour a 9×5-inch loaf pan; line bottom with parchment paper for easy removal.
2. Cream Butter & Sugar
-
In a large bowl, beat butter and sugar on medium-high speed for 3–5 minutes until pale, fluffy, and light.
3. Add Eggs & Vanilla
-
Beat in eggs, one at a time, mixing fully after each.
-
Stir in vanilla extract.
4. Combine Dry Ingredients
-
Whisk together flour, baking powder, and salt in a separate bowl.
5. Mix Wet & Dry
-
Reduce mixer to low. Alternately add dry ingredients and milk to the butter mixture, starting and ending with flour.
-
Mix just until combined—avoid overmixing.
6. Bake
-
Pour batter into pan, smooth top, and optionally create a shallow center indentation.
-
Bake 55–65 minutes, checking at 55 minutes. Done when a toothpick comes out clean or with a few moist crumbs.
7. Cool
-
Let cake cool in pan for 10 minutes.
-
Run a knife around edges, invert onto a wire rack, and cool completely before slicing.
Serving Suggestions
-
Classic: Slice and enjoy with coffee or tea.
-
Berry Bliss: Top with macerated strawberries or raspberries.
-
Indulgent: Serve slightly warmed with vanilla ice cream and a drizzle of caramel or chocolate sauce.
-
Elegant: Add whipped cream and dust with powdered sugar.
Notes
-
Lemon Blueberry: Fold in lemon zest and fresh/frozen blueberries.
-
Almond Joy: Swap 1 tsp vanilla for almond extract; fold in toasted almonds & shredded coconut.
-
Chocolate Chip Swirl: Toss chocolate chips with a little flour and fold into batter.
-
Brown Sugar Bourbon: Replace ½ cup sugar with dark brown sugar + 1 tbsp bourbon.
-
Gluten-Free: Substitute flour with a 1:1 gluten-free blend (with xanthan gum).
Nutritional Information*
Hey, we’re all about balance here! It’s totally okay to indulge in a slice of something wonderful. Here’s the approximate nutritional breakdown per slice (based on 10 slices), so you can enjoy every bite mindfully.
- Calories: 340
- Total Fat: 17g
- Saturated Fat: 10g
- Cholesterol: 95mg
- Sodium: 150mg
- Total Carbohydrates: 40g
- Dietary Fiber: 0.5g
- Sugars: 25g
- Protein: 5g
*Please note: These values are estimates generated using a third-party calculator and will vary based on the specific brands of ingredients you use.
Final Thoughts from My Kitchen to Yours
And there you have it, my friends—the humble, glorious vanilla pound cake in all its buttery, vanilla-kissed glory. This recipe is more than just a list of ingredients; it’s a trusty companion for your baking journey. It’s the cake you can whip up for a birthday, a bad day, or just a beautiful Tuesday.
I hope this recipe brings as much joy to your kitchen as it has to mine. Remember, the best dishes are the ones made with a little bit of love and a whole lot of flavor. If you make it, I’d be absolutely thrilled if you tagged me @FeasticalBeau on social media so I can see your beautiful creation!
Now go forth and bake something Feastical!
With a full heart and an even fuller plate,
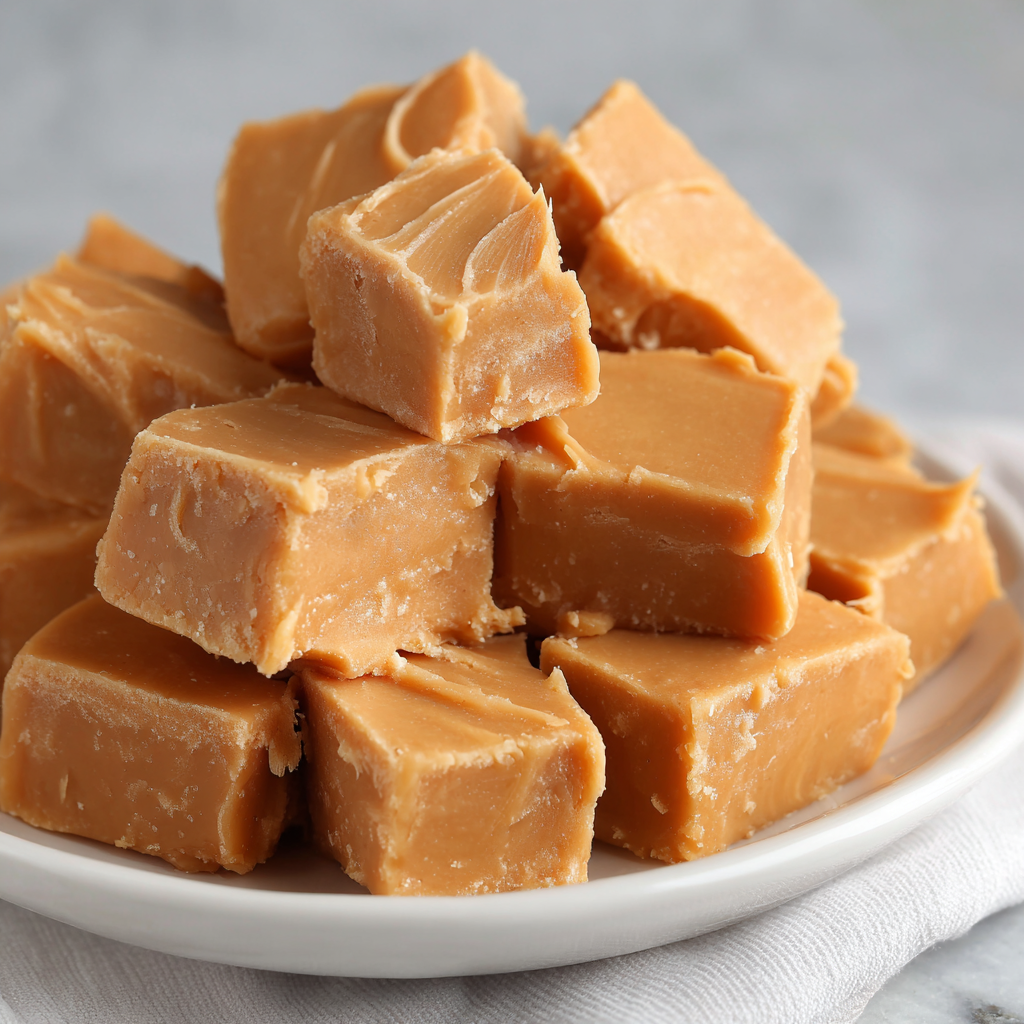
2-Ingredient Peanut Butter Fudge
Your New Go-To Dessert: 2-Ingredient Peanut Butter Fudge
Hey friends, Beau here from Feastical! Let’s be real for a second. We all have those moments. It’s 4 PM, the day is getting long, and a serious sugar craving hits you like a ton of bricks. Or maybe you just remembered you promised to bring a treat to your kid’s class party… tomorrow. Or perhaps a friend is stopping by, and you want to offer something sweet and homemade without spending the next two hours in the kitchen.
Whatever the scenario, I’ve got your back. Today, we’re making what might just be the easiest, most mind-blowingly simple dessert in my entire recipe arsenal: 2-Ingredient Peanut Butter Fudge. Yes, you read that right. Just two ingredients stand between you and a pan of creamy, rich, melt-in-your-mouth fudge that tastes like a little square of pure joy.
This isn’t just a recipe; it’s a kitchen miracle. It requires zero baking, almost no cleanup, and comes together in less than five minutes of active work. If you can stir two things together in a bowl, you can make this fudge. So, let’s banish the idea that making candy is hard or intimidating. Grab your favorite jar of peanut butter and let’s create some sweet, simple magic together.
The Happy Accident That Started It All
I’ll never forget the first time I stumbled upon this recipe. It was a blisteringly hot summer day, years ago, and my air conditioner had decided to take an unscheduled vacation. The last thing I wanted to do was turn on the oven, but my niece and nephew were visiting, and their little faces were begging for something sweet.
We were rummaging through the pantry, and all we had was a jar of peanut butter and a lonely container of vanilla frosting left over from a birthday months prior. In a moment of “what’s the worst that could happen?” inspiration, we melted the frosting, stirred in the peanut butter, and poured it into a pan. We crossed our fingers and waited.
What emerged from the fridge 20 minutes later was nothing short of legendary. It was smooth, it was sweet, it was undeniably fudge. The kids were ecstatic, and I was a believer. It became our little secret, our “magic trick” dessert. It’s a reminder that sometimes the most beloved recipes aren’t the complicated, fussy ones, but the simple, happy accidents that bring everyone together.
Gathering Your Two Magical Ingredients
This is the part where you’ll truly appreciate the beauty of this recipe. Here’s your shopping list—I promise it won’t break the bank or require a trip to a specialty store.
- 1 (16-ounce) jar of Creamy Peanut Butter: This is the star of the show, so choose wisely! I recommend using a standard, shelf-stable brand like Jif or Skippy. Their texture is perfect for this, and they’re already sweetened, which helps the fudge set up beautifully. Chef’s Insight: Avoid the “natural” kind that separates, as the extra oil can prevent the fudge from firming up properly. If it’s all you have, give it a really, really good stir first!
- 1 (16-ounce) can of Vanilla Frosting: The unsung hero that makes the magic happen. Any common brand like Betty Crocker or Pillsbury works perfectly. The frosting acts as the sweetener and the base that melts down to create that classic fudge texture. Substitution Tip: While vanilla is classic, feel free to experiment! Chocolate frosting makes for an incredible chocolate-peanut butter cup-style fudge. Just make sure it’s the same size can.
Let’s Make Some Magic: Your Foolproof Fudge Steps
Okay, team. Get ready to be amazed. This process is so fast, you might blink and miss it. I recommend having everything ready to go before you start.
- Prep Your Pan: First things first, grab an 8×8 or 9×9-inch baking pan. Lining it with parchment paper is my number one chef hack here. Just let a little extra paper hang over the sides. This creates “slings” that make it incredibly easy to lift the entire block of fudge out for clean, stress-free slicing later. No more wrestling with a stuck-on mess!
- The Great Emptying: Scoop the entire jar of creamy peanut butter into a large, microwave-safe mixing bowl. Using a bigger bowl than you think you need is another pro-tip—it gives you plenty of room to stir without making a mess on your countertops.
- Melt the Frosting: Now, take your can of vanilla frosting. This is crucial: remove the foil seal and the lid completely. Place the open can (you can pop the frosting out into a separate microwave-safe bowl if you prefer) into the microwave. Heat it on high for about 60 seconds. Keep an eye on it! You’re looking for it to be completely melted and pourable, almost like a thick glaze. Chef’s Note: If it’s not quite there, heat in 15-second bursts until it is. We don’t want it boiling, just melted.
- The Grand Stir-In: Carefully pour the hot, melted frosting directly over the peanut butter in the bowl. The heat from the frosting will slightly warm the peanut butter, making everything blend together like a dream. Now, take a sturdy spatula and stir, stir, stir! Keep going until the two ingredients are completely unified into one smooth, luscious, homogenous mixture. You shouldn’t see any streaks of frosting or lumps of peanut butter.
- Spread and Smooth: Working relatively quickly, pour your beautiful fudge mixture into your prepared pan. Use your spatula to spread it into an even layer. For that picture-perfect top, I like to dip the spatula in a little warm water and smooth it over the surface—this gives it a gorgeous, glossy finish.
- The Patience Part: Now, the hardest part: waiting. You can let the fudge set up at room temperature for about an hour, or for a faster set, pop it into the refrigerator for 15-30 minutes. It’s ready when it’s firm to the touch.
- Slice and Serve: Once set, use the parchment paper slings to lift the fudge block out of the pan and onto a cutting board. Using a sharp knife, slice it into small squares. I find that a 6×6 grid gives you 36 perfect, bite-sized pieces. Wiping the knife clean between cuts helps get those super clean edges.
How to Serve Your Fudge Masterpiece
You’ve done it! You’ve created a tray of pure happiness. Now, let’s talk about presentation. While eating it straight from the pan with your fingers is a totally valid (and time-honored) option, here are a few fun ways to make it extra special.
For a simple, classic look, arrange the little fudge squares on a beautiful plate or a rustic wooden board. If you’re gifting it, stack a few pieces in a clear cellophane bag, tie it with a cute ribbon, and you’ve got a heartfelt, homemade present that looks like it came from a fancy candy shop.
Feeling fancy? Give your fudge a little chef’s kiss right before serving. A tiny sprinkle of flaky sea salt on top of each square balances the sweetness perfectly. You could also press a single, whole roasted peanut into the center of each piece while the fudge is still soft for a decorative and delicious touch.
Mix It Up! Fun Flavor Twists
The beauty of this base recipe is that it’s a fantastic canvas for your creativity. Once you’ve mastered the classic, try one of these delicious variations!
- The Chocolate Lover: Swap the vanilla frosting for chocolate frosting! It’s like a Reese’s Peanut Butter Cup in fudge form. You can also stir in 1/2 cup of mini chocolate chips after you’ve combined the main ingredients.
- The Nutty Professor: Use crunchy peanut butter instead of creamy for a delightful texture. Or, stir in 1/3 cup of chopped peanuts, pecans, or walnuts for an extra crunch.
- The Sweet & Salty: This is my personal favorite. After spreading the fudge in the pan, generously sprinkle the top with coarse sea salt or even crushed pretzel pieces. The contrast is absolutely addictive.
- The Cookie Monster: Gently fold in 1/2 cup of crushed Oreo cookies or Nutter Butter biscuits for a fun, chunky fudge experience.
- Dairy-Free/Vegan Delight: This recipe is naturally dairy-free if you use a vegan-friendly frosting (many common brands are accidentally vegan—just check the label!) and a standard peanut butter. It’s an awesome inclusive treat!
Beau’s Kitchen Confidential
Over the years, this fudge has been my trusty sidekick for more potlucks, movie nights, and “I-need-a-dessert-STAT” emergencies than I can count. It’s evolved from that first hot-day experiment into a true Feastical staple. One of my favorite memories is bringing it to a neighborhood block party and watching people’s jaws drop when I told them it only had two ingredients. They didn’t believe me until I made a fresh batch right there on someone’s counter in under five minutes! It’s a recipe that builds confidence in the kitchen, and that’s what I love most about it.
Your Fudge Questions, Answered!
I’ve made this fudge a thousand times, and I’ve heard all your questions. Here are the answers to the most common ones.
- My fudge is too soft. What did I do wrong? This usually happens for one of two reasons. First, you might have used a “natural” peanut butter with lots of added oil. Second, it might just need more chilling time! Pop it back in the fridge for another 30-60 minutes. If it’s still soft, it will still taste delicious—just eat it with a spoon!
- Can I use a different nut butter? Absolutely! Almond butter or cashew butter work wonderfully. Just make sure they are the creamy, non-natural separation kind for the best results. The flavor will be different, but just as tasty.
- How should I store this fudge? Because of the frosting, this fudge is best stored in an airtight container in the refrigerator. It will stay perfectly fresh and firm for up to two weeks (if it lasts that long!). You can also freeze it for up to three months.
- Can I melt the frosting on the stovetop? You sure can! If you don’t have a microwave, simply empty the frosting into a small saucepan and melt it over low heat, stirring constantly, until it’s smooth and pourable.
2-Ingredient Peanut Butter Fudge
Description
2-Ingredient Peanut Butter Fudge
The quickest, creamiest fudge you’ll ever make—just peanut butter + frosting, zero baking, minimal cleanup, and ready in under 5 minutes of active prep.
Ingredients
-
1 (16 oz) jar creamy peanut butter – smooth and sweetened (avoid natural/separated varieties if possible)
-
1 (16 oz) can vanilla frosting – any common brand like Betty Crocker or Pillsbury
Optional Toppings:
-
Flaky sea salt
-
Whole roasted peanuts
-
Chocolate chips, crushed cookies, or pretzels
Instructions
1. Prep Your Pan
-
Line an 8×8 or 9×9-inch baking pan with parchment paper, leaving extra overhang for easy lifting later.
2. Melt the Frosting
-
Scoop frosting into a microwave-safe bowl.
-
Microwave on high for 60 seconds. Stir, then heat in 15-second bursts until pourable but not boiling.
3. Combine with Peanut Butter
-
Place peanut butter in a large mixing bowl.
-
Pour melted frosting over the peanut butter.
-
Stir vigorously until fully smooth and homogenous.
4. Spread in Pan
-
Pour mixture into prepared pan.
-
Smooth evenly with a spatula (dip spatula in warm water for a glossy finish).
5. Chill
-
Let fudge set at room temperature ~1 hour or refrigerate 15–30 minutes until firm.
6. Slice & Serve
-
Lift fudge using parchment paper overhang.
-
Slice into small squares (~6×6 grid).
-
Optional: sprinkle toppings or press in whole peanuts.
Notes
-
Use a dry bowl and utensils to prevent sticking or seizing.
-
Natural peanut butter may need extra chilling to firm up.
-
Store in an airtight container in the fridge for up to 2 weeks, or freeze up to 3 months.
Nutrition
- Calories: 140 Cal Per Serving
- Sugar: 13g
- Fat: 8g
- Carbohydrates: 15g
- Protein: 3g
Nutritional Information (Approximate)
Let’s keep it real—this is a treat, through and through. It’s all about indulgence and joy. Here’s a general nutritional breakdown per small square (based on a yield of 36 pieces), but please remember this can vary based on the specific brands you use.
- Calories: 140
- Fat: 8g
- Carbohydrates: 15g
- Sugar: 13g
- Protein: 3g
This fudge is a wonderful, portion-controlled way to satisfy a sweet craving. Just one little square is incredibly rich and satisfying!
Final Thoughts from My Kitchen to Yours
And there you have it, friends. The secret to impossibly easy, delightfully delicious peanut butter fudge is out of the bag. This recipe proves that you don’t need a culinary degree or a pantry full of obscure ingredients to make something truly special. All you need is a little know-how, a sense of adventure, and a deep, abiding love for peanut butter.
I hope this recipe becomes a trusted friend in your kitchen, just like it is in mine. It’s a reminder that cooking and baking should be fun, accessible, and always, always about sharing the love. So, what are you waiting for? Go whip up a batch, and don’t forget to tag me @Feastical on social media so I can see your beautiful creations! Happy cooking!
With a full heart and an even fuller plate,

Butter Cracker Peppermint Bark
Butter Cracker Peppermint Bark: Your New Holiday Obsession
Hey friends, Beau here! Can you smell it? That crisp, chilly air mixed with the sweet scent of sugar cookies and… is that a hint of peppermint? It’s officially that magical time of year, and my kitchen is buzzing with all the cozy, festive recipes that make the season so special. Today, I’m bursting with excitement to share one of my all-time favorite holiday hacks: Butter Cracker Peppermint Bark.
Now, I know what you might be thinking. “Beau, bark is just chocolate and candy. What’s the big deal?” Oh, my friend. Let me stop you right there. This isn’t just any bark. This is the ultimate sweet-and-salty symphony that will completely change your holiday dessert game. We’re taking humble, buttery crackers and transforming them into an impossibly delicious, crunchy base for a layer of creamy white chocolate and a festive avalanche of crushed peppermint.
The best part? This isn’t some fussy, day-long kitchen project. This is a “wow-factor” treat you can whip up in less than 30 minutes with zero baking required. It’s perfect for last-minute gifts, potlucks where you want to be the hero, or just for treating yourself during a cozy night watching holiday movies. So, grab your favorite apron and let’s make some magic happen. This Butter Cracker Peppermint Bark is about to become your most-requested holiday recipe.
The Accidental Discovery That Started It All
This recipe has a fun little origin story. A few years back, I was hosting a massive “Friendsgiving” potluck, and I was in charge of desserts. I’d planned an elaborate lineup, but at the last minute, I realized I had a whole crew of friends with various dietary preferences and a serious collective sweet tooth. I was scrambling, looking for something that could please everyone without requiring a trip to the store.
I opened my pantry and saw a sleeve of Ritz crackers, a bag of white chocolate chips from a previous baking spree, and a giant bag of candy canes left over from the previous Christmas. A lightbulb went off. I remembered seeing a version of a “cracker toffee” online and thought, “What if I gave it a major holiday upgrade?” I threw it all together, crossed my fingers, and set it out on the table.
Friends, it was the first platter to be completely demolished. People were raving about the “unbelievable texture” and the “genius salty-sweet combo.” They couldn’t believe it was made with crackers! That happy accident, born from pantry desperation, is now a Feastical holiday staple. It just goes to show that the best recipes often come from a little bit of chaos and a whole lot of heart.
Gathering Your Bark-Making Squad
One of the things I love most about this recipe is its beautiful simplicity. You only need a handful of ingredients to create something truly spectacular. Here’s your shopping list, complete with my chef-y notes to help you nail it.
- 110 butter crackers (such as Ritz): This is the foundation of our masterpiece! The subtle saltiness and incredible buttery flavor of Ritz crackers are the secret weapons here, cutting through the sweetness of the chocolate and creating a flavor that’s complex and utterly addictive. Chef’s Insight: Don’t sub with a bland cracker; that buttery taste is non-negotiable for the magic!
- 48 ounces white chocolate melting wafers or vanilla-flavored candy coating: This is our glorious glue. I highly recommend using high-quality melting wafers over regular white chocolate chips. Wafers are specifically designed to melt smoothly and set firmly, giving you that perfect “snap” when you break the bark. Substitution Tip: If you must use chips, add an extra teaspoon of oil to help them melt more evenly.
- ½ teaspoon peppermint extract (optional): This is your flavor booster! The candies on top give crunch and bursts of mint, but this extract infuses the entire white chocolate layer with a cool, refreshing peppermint essence. Chef’s Insight: A little goes a long way! Too much can taste medicinal, so measure carefully.
- 2 teaspoons vegetable or coconut oil: This is our little kitchen hack for achieving super-smooth, dippable chocolate. The oil helps thin the melted wafers just enough to make spreading over the crackers a total breeze.
- 50 soft peppermint candies, crushed: This is where the festive crunch and vibrant color come from! You can use candy canes, Starlight mints, or any soft peppermint candy. Chef’s Hack: Place them in a zip-top bag and use a rolling pin to crush them. It’s a fantastic way to work out any pre-holiday stress!
- Red and green sprinkles: Let’s get festive! Sprinkles add a pop of color and a fun, celebratory feel. Use jimmies, nonpareils, or even holiday-shaped quins.
- Optional: 4 ounces dark chocolate, melted for drizzling: I am a huge fan of this optional step. A zigzag of dark chocolate not only looks gorgeous and professional, but it adds another layer of deep, rich flavor that complements the white chocolate and peppermint beautifully.
Let’s Build Some Bark: Your Step-by-Step Guide
Ready to create? This process is fast, fun, and almost foolproof. I’ll walk you through each step with all my favorite tips and tricks to ensure your bark is absolutely perfect.
- Line a large baking sheet with parchment paper. Arrange crackers in a single, tight layer.This is our prep stage, and it’s crucial for a stress-free finish. Don’t skip the parchment paper! It guarantees your bark will lift off the pan easily without any sticking. When arranging your crackers, get them as close together as possible. We’re creating one solid base, so they should be touching on all sides. A little overlap is totally fine—we’re going for rustic and delicious, not necessarily perfect!
- In a microwave-safe bowl, melt white chocolate with oil in 30-second intervals, stirring until smooth. Add peppermint extract if using.Here’s where patience is your best friend. Do not try to melt the wafers in one long blast. The low-and-slow method is key. Microwave for 30 seconds, stir well, then another 30 seconds, and stir again. It might seem like it’s not melting at first, but keep stirring—the residual heat will do the work. Once it’s almost completely smooth, you can do a final 15-second blast if needed. Stir in the peppermint extract right at the end. Chef’s Hack: If your chocolate seems too thick, add another ½ teaspoon of oil until it’s a pourable, spreadable consistency.
- Pour the melted chocolate over the crackers and spread evenly with a spatula.Okay, work quickly but confidently here! Pour the melted chocolate right into the center of your cracker base. Using an offset spatula or the back of a spoon, gently spread the chocolate out to the edges, making sure every single cracker gets a generous coating. Don’t worry if it’s not perfectly smooth—the toppings will hide any imperfections, and it’s meant to look homemade and joyful!
- Immediately sprinkle crushed peppermint candies and holiday sprinkles over the top.Immediately is the key word here! You want to add your toppings while the chocolate is still wet and sticky so they adhere perfectly. Don’t be shy! Grab handfuls of the crushed peppermint and sprinkles and shower that bark with festive goodness. Cover every inch for maximum crunch and color.
- Optional: Drizzle with melted dark chocolate and add extra toppings for texture and flair.Feeling fancy? This is your moment. Melt your dark chocolate with a tiny bit of oil (same method as before), then transfer it to a zip-top bag. Snip a very tiny corner off the bag and wave it back and forth over your bark to create beautiful, professional-looking drizzles. You can also add a sprinkle of flaky sea salt or crushed pretzels at this stage for an extra salty kick.
- Let cool completely at room temperature or refrigerate until set. Break into pieces and enjoy.The hardest part: waiting! You can let the bark set up at room temperature if your kitchen is cool, but I usually pop it in the refrigerator to speed things up. It should be firm to the touch and make a satisfying “crack” when you break it. Once set, use your hands to break it into rustic, uneven pieces. I love the organic, fun look of hand-broken bark!
How to Serve Your Festive Masterpiece
You’ve made this gorgeous bark, now how do you show it off? This treat is incredibly versatile. For a casual family treat, I just pile the pieces high on a beautiful wooden board or in a big festive bowl right in the middle of the kitchen counter—it never lasts long!
If you’re gifting it, you can get really creative. Stack pieces in clear cellophane bags tied with a pretty ribbon for a simple, sweet present for neighbors, teachers, or your mail carrier. For a real showstopper gift, layer the pieces in a decorative tin between sheets of parchment paper. It travels well and looks incredibly thoughtful.
And let’s not forget the party platter! Arrange this bark alongside other holiday cookies, some cheese and fruit, and maybe a few of my No-Fuss Chocolate Dipped Shortbread cookies. The variety of textures and flavors will make your dessert spread the talk of the town.
Mix It Up! Fun Flavor Twists
Once you’ve mastered the classic, the fun really begins. This recipe is a fantastic canvas for your creativity. Here are a few of my favorite ways to mix it up:
- The Salty Sweet Supreme: Swap out half of the peppermint candies for crushed, salty pretzel pieces. The combo of peppermint, white chocolate, and pretzel is a next-level flavor explosion.
- Chocolate Lover’s Dream: Use a base of chocolate crackers (like Famous Chocolate Wafers) instead of Ritz. Top with semi-sweet or milk chocolate and then the peppermint. It’s a deep, rich chocolate experience.
- Nutty Noel: Add a half-cup of finely chopped toasted almonds or pecans to your sprinkle mix. The nuttiness adds a wonderful warmth and complexity that feels very grown-up and elegant.
- Fruity Festive: Not a huge peppermint fan? No problem! Use crushed freeze-dried strawberries or raspberries instead of the peppermint for a beautiful pink hue and a tangy, fruity flavor.
- Dairy-Free Delight: You can easily make this vegan! Use a high-quality dairy-free white chocolate and ensure your crackers are vegan-friendly (check the label). The method remains exactly the same.
Beau’s Kitchen Confidential
This recipe has evolved so much since that first Friendsgiving panic-attack batch. I’ve learned that a heavier hand with the peppermint crushing (I like some bigger chunks for texture) is a good thing. I’ve also started using a pizza cutter to score the bark lightly before it fully sets if I want neater, more uniform pieces for gift boxes—a little pro-tip for you!
One of my favorite kitchen memories involving this bark was the year my nephew, who was about four at the time, “helped” me by taste-testing every single sprinkle. His face was covered in red and green, and he declared it “the best sparkle candy ever.” That’s the spirit of this recipe—it’s about fun, family, and a little bit of mess. Don’t stress over perfection. Embrace the delicious chaos!
Your Bark Questions, Answered!
Over the years, I’ve gotten a lot of questions about this recipe. Here are the answers to the most common ones to ensure your success.
Q: My chocolate seized up and got clumpy! What did I do wrong?
A: Ah, the dreaded seize! This usually happens if a tiny bit of steam or water gets into your melting chocolate. Always make sure your bowl and utensils are completely dry. If it happens, don’t panic! Try stirring in a bit more vegetable oil, one teaspoon at a time, until it smooths out again.
Q: Can I use chocolate chips instead of melting wafers?
A: You can, but it’s trickier. Chocolate chips have stabilizers to help them hold their shape, so they don’t melt as smoothly. If you use them, be sure to add the full 2 teaspoons of oil (or even a touch more) and stir like crazy to get it smooth. Melting wafers are still my #1 recommendation for foolproof results.
Q: How far in advance can I make this?
A> This bark is a fantastic make-ahead treat! Stored in an airtight container at cool room temperature (or in the fridge if your house is warm), it will stay fresh and delicious for up to 2 weeks. The crackers may soften slightly over time, but it will still taste amazing.
Q: My bark is sticky and won’t break. Help!
A> This means it hasn’t set completely. Pop it back in the refrigerator for another 30-60 minutes. If you used a chocolate that doesn’t set firmly (like some chocolate chips), it might remain a bit softer. It will still be delicious, just a bit messier to eat!

Butter Cracker Peppermint Bark
Description
A quick, no-bake holiday treat featuring buttery crackers, creamy white chocolate, and festive peppermint crunch. Perfect for gifting, party platters, or just indulging during cozy winter nights.
Ingredients
-
110 butter crackers (e.g., Ritz) – buttery, salty, perfect for crunch
-
48 oz white chocolate melting wafers or vanilla candy coating
-
½ tsp peppermint extract (optional, for extra minty flavor)
-
2 tsp vegetable or coconut oil (helps smooth chocolate for spreading)
-
50 soft peppermint candies, crushed (candy canes or Starlight mints)
-
Red and green sprinkles (for festive flair)
-
Optional: 4 oz dark chocolate, melted, for drizzling
Instructions
1. Prep
-
Line a large baking sheet with parchment paper.
-
Arrange crackers in a single, tight layer (touching is fine; slight overlap okay).
2. Melt Chocolate
-
In a microwave-safe bowl, melt white chocolate with oil in 30-second intervals, stirring in between until smooth.
-
Stir in peppermint extract, if using.
3. Spread Chocolate
-
Pour melted chocolate evenly over crackers.
-
Use a spatula to spread to edges, ensuring all crackers are coated.
4. Add Toppings
-
Immediately sprinkle crushed peppermint candies and holiday sprinkles over the chocolate.
-
Optional: Drizzle melted dark chocolate over the top and add extra toppings (like flaky sea salt or crushed pretzels).
5. Set
-
Let bark cool completely at room temperature or refrigerate until firm.
-
Once set, break into rustic, uneven pieces.
Notes
-
Use a dry, clean bowl and utensils to prevent chocolate from seizing.
-
For chocolate chips, add extra oil for smooth melting.
-
Store in an airtight container at cool room temperature or fridge for up to 2 weeks.
Nutrition
- Calories: 80–100 Cal Per Serving
- Sugar: ~8–10g
- Fat: 5–7g
- Carbohydrates: 10–12g
Nutritional Info (For Your Peace of Mind)
Now, let’s be real—this is a celebratory treat, and it’s all about indulgence! But I believe in transparency, so here’s a general breakdown. Remember, these are estimates and can vary based on the specific brands you use and the size of your bark pieces.
Yield: About 100 bite-sized pieces
Prep Time: 15 minutes
Cook Time: 10 minutes (melting time)
Total Time: 25 minutes, plus setting time
Per Piece (approximate):
Calories: 90 | Fat: 5g | Carbs: 9g | Sugar: 7g
The beauty of making it yourself is that you control the portions and ingredients. You can use a sugar-free chocolate alternative if you prefer, or simply enjoy a piece or two to satisfy your sweet tooth as part of a balanced diet. Life’s too short not to enjoy a little festive sparkle!
Final Thoughts from My Kitchen to Yours
Well, there you have it, friends—my complete guide to the most addictive, easy, and festive Butter Cracker Peppermint Bark on the planet. This recipe is a perfect example of what Feastical is all about: taking simple, feel-good ingredients and turning them into something magical that brings people together.
I hope this recipe fills your kitchen with laughter, your home with the wonderful smell of peppermint, and your holiday season with a whole lot of delicious joy. If you make it (and I really hope you do!), I’d love to see your creation. Tag me on social @Feastical or @BeauCollier so I can share in the fun.</p

Salmon Balls with Creamy Avocado Sauce
Your New Favorite Bite: Crispy Salmon Balls with Dreamy Avocado Sauce
Hey friends, Beau here! Let’s get straight to it: if you’re looking for a recipe that’s going to make you feel like a kitchen superstar without any of the usual stress, you’ve just hit the jackpot. We’re talking about my Crispy Salmon Balls with a Creamy Avocado Sauce. Just saying the name makes me smile. This isn’t just another recipe; it’s your new secret weapon for a quick, healthy, and downright delicious meal that works for a fancy-ish dinner party or a casual Tuesday night.
Imagine this: tender, flaky salmon, all jazzed up with fresh herbs and a zing of lemon, formed into perfect little golden-brown orbs. They’re crispy on the outside, incredibly moist on the inside, and they pack a serious protein punch. And then, we take things to a whole new level of yum with a sauce so smooth and dreamy, you’ll want to put it on everything. We’re blending ripe, buttery avocado with tangy Greek yogurt and a hint of garlic for a cool, creamy dip that cuts through the richness of the salmon in the most perfect way.
This dish is the epitome of what we stand for here at Feastical: food that feels good, tastes even better, and brings a little joy to your table. It’s approachable enough for a beginner but impressive enough for any seasoned cook. So, tie on your apron, find that trusty spatula, and let’s make some kitchen magic happen together.
A Recipe Born from a Happy Accident
I have to confess, this recipe wasn’t born from some grand, pre-meditated plan. It came from one of those “what on earth am I going to do with this?” moments we all have. I had a beautiful piece of leftover grilled salmon from a backyard BBQ the night before. It was too good to waste, but just sitting there in the fridge, looking a little lonely.
My grandma’s voice popped into my head, as it often does. She was the queen of “waste not, want not,” and her salmon croquettes were the stuff of legend. They were simple, pan-fried, and always served with a big dollop of tartar sauce. I wanted to capture that same cozy, nostalgic feeling but give it a fresh, modern spin. I decided to bake them for a lighter, crispier bite and, in a moment of pure inspiration (and because I was out of mayo), I whipped up an avocado-yogurt sauce. The second I dipped that first warm salmon ball into that cool, creamy green goodness, I knew I had stumbled onto something special. It was a happy accident that instantly felt like a classic.
Gathering Your Flavor All-Stars
One of the best things about this recipe is its simplicity. We’re using straightforward ingredients that pack a massive flavor punch. Here’s your shopping list, complete with a few chef-y insights to make you feel like a pro.
For the Salmon Balls:
- 1 lb fresh, skinless salmon fillets (cooked and flaked): This is our star player! I love using leftover grilled or baked salmon for an incredible depth of flavor, but poaching a fresh fillet for 10-12 minutes works beautifully too. Chef’s Tip: Canned salmon is a fantastic, budget-friendly shortcut here. Just make sure to drain it well!
- 1 cup plain breadcrumbs: These are our binding agent and crunch-creator. I prefer Panko for an extra-crispy texture. Chef’s Tip: For a gluten-free version, gluten-free breadcrumbs or even crushed gluten-free crackers work like a charm.
- 1 large egg: This is the glue that holds our delicious little balls together. It ensures they don’t fall apart in the oven.
- 2 tablespoons fresh dill or parsley, chopped: Herbs bring a burst of freshness that cuts through the richness of the salmon. Dill is a classic pairing with fish, but parsley is a wonderful, vibrant alternative. Chef’s Tip: If you’re in a pinch, 2 teaspoons of dried dill will work, but fresh really makes a difference.
- 2 tablespoons lemon juice: A little acidity is key! It brightens up the entire dish and makes all the flavors pop.
- Salt and pepper to taste: Don’t be shy here! Seasoning is what transforms good food into great food. I start with ½ tsp of salt and a few good cracks of black pepper.
For the Creamy Avocado Sauce:
- 1 ripe avocado: Look for an avocado that yields gently to a squeeze. This is the base of our lush, creamy sauce.
- ½ cup plain Greek yogurt: This adds a wonderful tang and creaminess while boosting the protein. Chef’s Tip: For a dairy-free sauce, swap in unsweetened coconut or almond-based yogurt.
- ½ teaspoon garlic powder: We’re using powder here for a smooth, mellow garlic flavor without the sharp bite of raw garlic. It blends seamlessly into the sauce.
- 1 tablespoon lemon juice: This keeps the avocado a vibrant green and adds a necessary zing to balance the sauce’s richness.
- Salt and pepper to taste: A pinch of each to tie all the sauce flavors together beautifully.
Let’s Get Cooking: Crafting Your Culinary Masterpiece
Ready to see how these beauties come together? It’s an incredibly satisfying process. Follow these steps, and you’ll have a plate of golden perfection in no time.
- Preheat and Prep. First things first, get that oven roaring. Preheat it to 375°F (190°C). This is a crucial step for that instant crispiness we’re after. While it’s heating up, line a baking tray with parchment paper. Not only does this prevent sticking, but it also makes cleanup an absolute dream. I’m all about those little kitchen wins!
- Combine the Goodness. In a large mixing bowl, add your flaked salmon, breadcrumbs, egg, fresh herbs, lemon juice, salt, and pepper. Now, roll up your sleeves and get in there with your hands! Gently mix everything until it’s just combined. Chef’s Hack: The key word here is gently. You don’t want to overwork the mixture and make the salmon pasty. A light touch makes for a more tender salmon ball.
- Form the Balls. Now for the fun part! Scoop up about a tablespoon of the mixture and roll it between your palms to form a 1-inch ball. I like to use a small cookie scoop for this to keep them all uniform, which means they’ll cook evenly. Place each one on your prepared baking tray, giving them a little space to breathe. If you find the mixture is a bit sticky, a quick rinse of your hands under cold water makes rolling much easier.
- Bake to Golden Perfection. Slide that tray into your preheated oven and let the magic happen. Bake for 20-25 minutes. Here’s the secret for all-around crispiness: about halfway through, at the 10-minute mark, give the tray a quick turn and flip each salmon ball over. You’ll know they’re done when they’re firm to the touch and have a gorgeous, golden-brown color.
- Whip Up the Sauce. While the salmon balls are getting their tan on, let’s make that legendary sauce. It could not be easier. Simply scoop the flesh of your ripe avocado into a blender or food processor. Add the Greek yogurt, garlic powder, lemon juice, salt, and pepper. Blend it all up until it’s silky smooth and irresistibly creamy. If you don’t have a blender, you can mash the avocado with a fork and whisk everything together vigorously in a bowl—it’ll be just as delicious, with a slightly more rustic texture.
- Serve and Savor! Take those gorgeous, crispy salmon balls out of the oven and let them rest for just a minute. Then, transfer them to a platter with a bowl of that vibrant green avocado sauce right in the middle. Dig in immediately while they’re still warm and the contrast with the cool sauce is at its peak.
How to Serve These Flavor Bombs
Presentation is part of the fun! You’ve worked hard, so let’s make it look as good as it tastes.
For a stunning appetizer, pile the warm salmon balls high on a beautiful wooden board or a white platter to make the colors pop. Place the bowl of avocado sauce in the center and scatter some extra fresh dill or a few lemon wedges around for a restaurant-worthy look. Don’t forget a handful of toothpicks for easy grabbing!
To turn this into a satisfying main course, I love serving them over a bed of fluffy quinoa, a simple arugula salad, or with a side of roasted asparagus. The salmon balls and the sauce essentially become the most incredible dressing. Drizzle that extra sauce over everything on the plate—trust me, you won’t want to waste a single drop.
Make It Your Own: Delicious Twists & Swaps
This recipe is like a blank canvas for your culinary creativity. Feel free to play around and make it suit your mood or dietary needs!
- Spicy Sriracha Kick: Add 1-2 tablespoons of Sriracha or your favorite hot sauce to the salmon mixture. For an extra punch, swirl a little into the avocado sauce as well.
- Lemon-Herb Zest: Boost the freshness by adding the zest of one lemon to the salmon mix, along with a tablespoon of chopped fresh chives.
- Mediterranean Vibe: Stir in ¼ cup of crumbled feta cheese and 2 tablespoons of chopped Kalamata olives into the salmon mixture. The salty, briny flavor is incredible.
- Paleo/Whole30 Friendly: Swap the breadcrumbs for ⅓ cup of almond flour and use a “flax egg” (1 tbsp ground flaxseed mixed with 3 tbsp water, let sit for 5 mins) to bind. Ensure your hot sauce and yogurt are compliant for the sauce.
A Few More Thoughts from My Kitchen to Yours
This recipe has become a real workhorse in my own home kitchen. I’ve made it for picky toddlers (just shape them into fun “fish sticks”), for last-minute guests, and for healthy meal prep. I often double the batch and freeze the uncooked salmon balls on a tray before transferring them to a freezer bag. Then, I can bake them straight from frozen, adding just a few extra minutes to the cooking time. It’s a lifesaver!
The biggest evolution has been the sauce. I started with just avocado and lemon, but adding the Greek yogurt was a game-changer. It made the sauce creamier, tangier, and more stable. It’s a testament to the fact that the best recipes are living things—don’t be afraid to tweak them until they’re perfect for you.
Your Questions, Answered!
I’ve gotten a lot of great questions about this recipe over time. Here are the ones that pop up most often.
Q: My salmon balls are falling apart! What did I do wrong?
A: Don’t worry, this is a common fix! The most likely culprit is not enough binding agent. Make sure you’re using a large egg. If your mixture still seems too wet, add another tablespoon or two of breadcrumbs until it holds together nicely when you squeeze it in your hand. Chilling the mixture in the fridge for 15-20 minutes before rolling can also work wonders.
Q: Can I pan-fry these instead of baking them?
A> Absolutely! Baking is my go-to for ease and health, but pan-frying gives you an incredible, extra-crispy exterior. Just heat a few tablespoons of olive or avocado oil in a skillet over medium heat and cook the salmon balls, turning occasionally, until they’re golden brown on all sides, about 8-10 minutes total.
Q: My avocado sauce turned brown overnight. Is it still safe to eat?
A> It’s perfectly safe! Avocados oxidize when exposed to air, which causes that browning. The lemon juice helps slow it down. To store leftovers, press a piece of plastic wrap directly onto the surface of the sauce to limit air exposure. It will keep for about a day in the fridge. For the best color and flavor, I always recommend making the sauce fresh.

Salmon Balls with Creamy Avocado Sauce
Description
A quick, healthy, and delicious appetizer or main dish featuring golden-baked salmon balls served with a silky avocado-yogurt dip. Perfect for dinner parties, family meals, or meal prep.
Ingredients
For the Salmon Balls:
-
1 lb fresh, skinless salmon fillets (cooked and flaked)
-
1 cup plain breadcrumbs (Panko recommended)
-
1 large egg
-
2 tbsp fresh dill or parsley, chopped
-
2 tbsp lemon juice
-
½ tsp salt (or to taste)
-
Freshly ground black pepper (to taste)
For the Creamy Avocado Sauce:
-
1 ripe avocado
-
½ cup plain Greek yogurt (dairy-free alternative: coconut or almond yogurt)
-
½ tsp garlic powder
-
1 tbsp lemon juice
-
Salt and pepper to taste
Instructions
1. Preheat & Prep
-
Preheat oven to 375°F (190°C).
-
Line a baking tray with parchment paper for easy cleanup.
2. Combine Salmon Mixture
-
In a large bowl, mix flaked salmon, breadcrumbs, egg, herbs, lemon juice, salt, and pepper.
-
Gently fold until just combined—avoid overmixing to keep salmon balls tender.
3. Form the Balls
-
Scoop ~1 tablespoon of mixture and roll into 1-inch balls.
-
Place on prepared tray with space between each.
-
Tip: Rinse hands with cold water if the mixture is sticky.
4. Bake
-
Bake for 20–25 minutes, flipping halfway through at 10 minutes.
-
Balls are done when golden brown and firm to the touch.
5. Make the Avocado Sauce
-
Blend avocado, Greek yogurt, garlic powder, lemon juice, salt, and pepper until smooth.
-
Alternative: Mash avocado with a fork and whisk in remaining ingredients for a rustic texture.
6. Serve
-
Arrange salmon balls on a platter with avocado sauce in a small bowl in the center.
-
Optional: Garnish with extra fresh dill or lemon wedges.
Serving Suggestions
-
Appetizer: Pile balls on a board or platter with toothpicks.
-
Main Course: Serve over quinoa, arugula salad, or roasted veggies. Drizzle extra sauce over the plate.
Variations & Twists
-
Spicy Sriracha: Add 1–2 tbsp Sriracha to the salmon mix and/or avocado sauce.
-
Lemon-Herb Zest: Add zest of 1 lemon and 1 tbsp chopped chives to the salmon mixture.
-
Mediterranean Style: Mix in ¼ cup crumbled feta and 2 tbsp chopped Kalamata olives.
-
Paleo/Whole30 Friendly: Replace breadcrumbs with ⅓ cup almond flour and the egg with a flax egg.
Notes
-
If salmon balls fall apart: add more breadcrumbs or chill mixture 15–20 min before rolling.
-
Pan-frying option: cook in 2–3 tbsp oil over medium heat, turning until golden (~8–10 min).
-
To prevent avocado browning: press plastic wrap directly onto surface; best made fresh.
-
Make ahead: Freeze uncooked balls on a tray, then store in freezer bags. Bake from frozen, adding a few extra minutes.
Nourishing Your Body & Soul
One of the things I love most about this dish is that it’s a true powerhouse of nutrition, proving that healthy eating doesn’t have to be boring. Salmon is loaded with high-quality protein and those famous Omega-3 fatty acids, which are fantastic for heart and brain health. The avocado brings a dose of healthy monounsaturated fats and fiber, while the Greek yogurt adds a bonus hit of protein and probiotics. Using the baking method instead of frying keeps the fat content in check while still delivering that crave-worthy crispy texture. It’s a meal that will leave you feeling satisfied, energized, and happy.
Yield: Approx. 12 servings (about 24-26 balls)
Prep Time: 15 minutes
Cook Time: 25 minutes
Total Time: 40 minutes
Per Serving (approximate, 2 balls with sauce):
Calories: 120 | Protein: 10g | Carbohydrates: 6g | Fat: 7g
You Did It!
And there you have it! You’ve just created a dish that’s bursting with flavor, packed with goodness, and sure to become a regular in your recipe rotation. I hope these crispy salmon balls and that dreamy avocado sauce bring as much joy to your table as they have to mine.
Remember, cooking is all about sharing, experimenting, and enjoying the process. Did you put your own spin on it? I’d love to hear about it! Tag me on social @Feastical or drop a comment on the blog. Now, go on and enjoy every last bite. You’ve earned it!
With a full heart and an even fuller plate,

Festive Christmas Puppy Chow (Reindeer Chow) : Easy No-Bake Holiday Treat
Festive Christmas Puppy Chow (Reindeer Chow) – Your New Holiday Obsession!
Hey friends, Beau here! Can you smell it? That magical mix of melting chocolate, a hint of peppermint, and pure, unadulterated holiday joy wafting from the kitchen? That, my friends, is the sound of Christmas Puppy Chow coming to life. Now, if you’ve never experienced the wonder of this no-bake treat, you are in for a serious delight. And if you’re a seasoned pro, get ready to fall in love all over again with our festive twist we like to call Reindeer Chow!
We’re taking the classic muddy buddy mix and giving it a full-blown, tinsel-and-all holiday makeover. Imagine this: crunchy Chex cereal coated in a velvety blanket of chocolate and peanut butter, then tossed in a blizzard of powdered sugar. But we don’t stop there. Oh no. We’re loading it up with cheerful red and green M&M’s, fluffy mini marshmallows, a confetti of festive sprinkles, and a cool, minty kick from crushed peppermint. The result is a sweet, crunchy, and ridiculously addictive snack that’s perfect for holiday parties, stuffing into gift bags for neighbors, or just munching on during a cozy Christmas movie marathon.
The best part? You don’t need to be a pastry chef to pull this off. This is a zero-bake, one-bowl (okay, maybe two bowls) wonder that comes together in about 15 minutes flat. It’s the ultimate kitchen project that’s just as fun to make as it is to eat. So, grab your biggest mixing bowl, rally the family, and let’s create some delicious, memory-filled magic together.
The Year the “Puppy Chow” Saved Christmas Eve
This recipe always takes me right back to my first Christmas hosting my entire, wonderfully chaotic family. I had the turkey timed, the potatoes mashed, and the pies perfectly golden. I was feeling like a real culinary champion. Then, my then six-year-old nephew, Leo, looked up at me with big, hopeful eyes and asked, “Uncle Beau, where are the *fun* snacks?”
My heart sank. In all my “fancy chef” planning, I’d completely forgotten the kid-friendly, hands-on food! Panic set in for a solid minute until I remembered a bag of Chex cereal tucked away in the pantry. With Leo as my head taste-tester, we whipped up a batch of what he called “people chow.” We melted chocolate, shook the bag of powdered sugar until a sweet cloud filled the kitchen, and tossed in every festive sprinkle and candy we could find. That giant bowl of Reindeer Chow was the undisputed star of the night. It brought everyone together, laughing and grabbing handfuls, and it taught me a beautiful lesson: the best holiday food isn’t always the most complicated. It’s the food made with joy and shared with love.
Gather Your Ingredients: Let’s Build Some Flavor!
Here’s everything you need to create this holiday masterpiece. I’ve included a few of my favorite chef-y insights and substitutions to make this recipe your own.
- 18 cups Chex cereal (rice, corn, or a mix): This is our crunchy foundation. I love a mix of rice and corn for the best texture. Chef’s Insight: The nooks and crannies in the cereal are perfect for catching all that chocolatey goodness. If you’re gluten-free, just make sure to use the certified GF Corn or Rice Chex!
- 2 cups semi-sweet chocolate chips: Provides a deep, rich chocolate base that isn’t overly sweet. Substitution Tip: Feel free to use milk chocolate for a sweeter vibe, or dark chocolate chips for a more sophisticated, less sweet flavor. Even white chocolate chips work for a fun “snowy” variation!
- 1 cup smooth peanut butter: This is our binding agent, adding creaminess and that classic, beloved flavor. Substitution Tip: No peanut allergies or preferences? Any nut or seed butter works wonderfully—try almond butter, SunButter, or even cashew butter.
- ½ cup unsalted butter: Adds richness and helps create a smooth, pourable coating. Using unsalted lets you control the salt level. Chef’s Insight: Don’t skip the butter! It’s the secret to a coating that hardens into a perfect, non-greasy shell.
- 2 tsp pure vanilla extract: The flavor enhancer! It rounds out the chocolate and peanut butter, adding a warm, aromatic depth.
- 4 cups powdered sugar: This creates the iconic “puppy chow” look and a sweet, melt-in-your-mouth coating. Chef’s Hack: Sift your powdered sugar if it’s lumpy to avoid any sugary clumps in your final mix.
- 2 cups festive sprinkles (holiday jimmies or quins): This is where the Christmas magic really shines! They add color and a fun, crunchy texture.
- 1 cup red & green M&M’s: For those classic, chocolatey, colorful pops. Chef’s Insight: We add these *after* the mix has cooled so they don’t melt and lose their vibrant color.
- 1 cup mini marshmallows: These little pillows provide a soft, chewy contrast to all the crunch. They’re like tiny, sweet surprises!
- ½ cup crushed peppermint candies or peppermint chips (optional): This is our “grown-up” twist. The cool peppermint cuts through the sweetness and screams “holidays.” Substitution Tip: If you’re not a mint fan, leave it out or swap in crushed pretzels for a sweet-and-salty situation.
Let’s Get Mixing: Your Foolproof Guide to Perfect Reindeer Chow
Ready? This is the fun part. Put on some Christmas tunes, and let’s do this!
- Prep Your Station. Before you even turn on the microwave, get your giant mixing bowl ready with all 18 cups of Chex cereal. I’m talking the biggest bowl you own. Trust me, you’ll need the space. Also, lay out a couple of baking sheets lined with parchment paper or wax paper. This is where our chow will cool and set. Chef’s Hack: If you don’t have a bowl big enough, use a clean, large paper grocery bag or two extra-large zip-top bags. It makes for a super fun shaking step later!
- Create the Chocolate Coating. In a large, microwave-safe bowl, combine the chocolate chips, peanut butter, and butter. Now, the key to perfectly smooth chocolate is patience. Microwave on high for 30 seconds, then take it out and stir. Repeat this process—30 seconds, stir, 30 seconds, stir—until the mixture is completely smooth and glossy. This usually takes about 90 seconds to 2 minutes total. Rushing this with high heat will scorch your chocolate, and we don’t want that! Once it’s smooth, stir in the 2 teaspoons of vanilla extract. Your kitchen should already smell incredible.
- Coat the Cereal. Pour the warm, velvety chocolate mixture over the waiting Chex cereal. Now, using a large spatula, gently fold and toss the cereal until every single piece is lovingly coated. Be gentle! We want to maintain the integrity of our crunchy cereal, not turn it into crumbs. Chef’s Hack: If you’re using the bag method, pour the chocolate into the bag, seal it tight (very tight!), and have a mini dance party while you gently shake and massage the bag to coat everything evenly.
- The Powdered Sugar Blizzard. Now for the signature snowy look! Sprinkle the 4 cups of powdered sugar over the chocolate-coated cereal. If you’re in a bowl, toss and fold again until the powdered sugar envelops every piece. If you’re in a bag, add the powdered sugar to the bag, seal it, and shake, shake, shake! It’s like a winter snow globe, but you can eat the contents.
- Cool and Set. Dump the coated cereal onto your prepared baking sheets and spread it into an even layer. This allows it to cool completely and for the chocolate shell to harden. Let it sit at room temperature for at least 30 minutes. You can pop it in the fridge to speed this up if you’re impatient, but room temp is perfect.
- Add the Festive Finishing Touches. Once the mix is completely cool to the touch, transfer it back to your giant clean bowl. Now, shower it with the festive sprinkles, M&M’s, mini marshmallows, and crushed peppermint. Gently fold everything together to distribute all that holiday cheer evenly.
- Store and Serve! Transfer your finished Christmas Puppy Chow to airtight containers or festive cellophane bags for gifting. It will stay fresh and crunchy at room temperature for up to a week… if it lasts that long!
How to Serve Your Holiday Masterpiece
This stuff is so versatile, it’s happy just about anywhere! Here are a few of my favorite ways to serve it up:
The Casual Snack Bowl: Pile it high in a big, beautiful festive bowl right in the center of your holiday spread. Stick a serving scoop in it and watch it disappear.
The Ultimate Foodie Gift: This is my go-to neighbor and teacher gift. Layer it in a clear mason jar, tie a ribbon around it, and attach a cute tag that says “Reindeer Chow.” For an extra touch, include the recipe so they can make their own!
Dessert Charcuterie Board: Create a stunning holiday dessert board! Pile the Reindeer Chow in one section and surround it with cookies, fruit, cheeses, and nuts. It adds amazing texture and color.
The Movie Night Essential: Serve it in individual bowls or mugs for a cozy night watching your favorite Christmas films. It pairs perfectly with a mug of hot cocoa (and maybe a sneaky splash of peppermint schnapps for the adults).
Mix It Up! 5 Fun Variations on Reindeer Chow
Once you master the base recipe, the sky’s the limit! Here are a few delicious twists to keep things interesting.
- White Christmas Chow: Swap the semi-sweet chocolate for white chocolate chips. Use holiday-colored M&M’s and maybe even some dried cranberries for a red-and-white theme. It’s visually stunning and deliciously sweet.
- Sweet & Salty Elf Mix: Add 2 cups of mini pretzel twists and 1 cup of roasted, salted peanuts in with the Chex cereal at the very beginning. The combination of sweet, salty, and crunchy is absolutely irresistible.
- Gingerbread Spice Chow: Stir 1 teaspoon of ground ginger, ½ teaspoon of cinnamon, and a pinch of nutmeg and cloves into the powdered sugar before tossing. It tastes just like a gingerbread cookie!
- Tropical Escape Chow (For a Warm-Weather Holiday): Use white chocolate, substitute the peanut butter with coconut cream, and mix in chopped macadamia nuts and dried pineapple bits instead of the peppermint and M&M’s.
- Triple Chocolate Monster: For the ultimate chocoholic, use chocolate Chex cereal, melt down a combination of milk and dark chocolate chips, and toss in some chocolate chips along with the M&M’s. You can’t go wrong!
Beau’s Chef’s Notes & Kitchen Confessions
This recipe has evolved so much since that first frantic Christmas Eve. I’ve learned that the best batches are the ones made with a little bit of mess and a whole lot of laughter. Don’t stress about perfection. So what if a little powdered sugar gets on the floor? That’s just more holiday spirit!
One of my favorite kitchen fails turned into a win: I once accidentally used crunchy peanut butter because it was all I had. The tiny peanut bits added such a fantastic texture that it’s now my preferred way to make it! The recipe is a guideline, not a rigid rulebook. Make it your own. That’s what cooking is all about.
Your Reindeer Chow Questions, Answered!
Over the years, I’ve gotten a few repeat questions about this recipe. Here are the answers to help you succeed!
Q: My Puppy Chow turned out soggy. What happened?
A: The most common culprit is adding the extras (like M&M’s and marshmallows) before the chocolate mixture has fully cooled and set. If they’re added while the coating is still warm, the candies can melt and the marshmallows can deflate, releasing moisture. Always let it cool completely first! Also, make sure you’re storing it in an absolutely airtight container.
Q: Can I make this ahead of time?
A: Absolutely! In fact, it’s a fantastic make-ahead treat. It stays perfectly fresh and crunchy in an airtight container at room temperature for 5-7 days. You can even make the base mix (without the add-ins) and freeze it for up to a month! Thaw it at room temperature, then stir in your festive candies.
Q: I need a nut-free version. What can I use instead of peanut butter?
A> No problem! SunButter (made from sunflower seeds) is my top recommendation. It has a similar texture and a subtly nutty flavor that works beautifully. You could also use soy nut butter or even Wowbutter.
Q: Can I melt the chocolate on the stovetop instead of the microwave?
A> Of course! I actually prefer this method for maximum control. Use a double boiler, or simply place a heatproof bowl over a pot of gently simmering water (make sure the bottom of the bowl doesn’t touch the water). Stir the chocolate, peanut butter, and butter until melted and smooth. This method is virtually foolproof and prevents scorching.

Festive Christmas Puppy Chow (Reindeer Chow) : Easy No-Bake Holiday Treat
Description
A sweet, crunchy, no-bake holiday treat that’s perfect for parties, gifts, or cozy movie nights. Chex cereal gets coated in chocolate and peanut butter, dusted with powdered sugar, and finished with festive candies.
Ingredients
Base
-
18 cups Chex cereal (rice, corn, or a mix)
-
2 cups semi-sweet chocolate chips
-
1 cup smooth peanut butter (or nut/seed butter of choice)
-
½ cup unsalted butter
-
2 tsp vanilla extract
-
4 cups powdered sugar
Festive Add-Ins
-
2 cups holiday sprinkles
-
1 cup red & green M&M’s
-
1 cup mini marshmallows
-
½ cup crushed peppermint candies or chips (optional)
Instructions
1. Prep
-
Place Chex cereal in a large mixing bowl.
-
Line two baking sheets with parchment or wax paper.
2. Melt Chocolate Mixture
-
In a microwave-safe bowl, combine chocolate chips, peanut butter, and butter.
-
Microwave in 30-second intervals, stirring each time, until smooth (about 1.5–2 minutes).
-
Stir in vanilla extract.
3. Coat Cereal
-
Pour chocolate mixture over Chex cereal.
-
Gently fold or toss until all pieces are coated.
-
Tip: If using a large zip-top bag, pour the mixture inside, seal tightly, and shake gently to coat evenly.
4. Add Powdered Sugar
-
Sprinkle powdered sugar over coated cereal.
-
Toss or shake until every piece is fully covered.
5. Cool and Set
-
Spread coated cereal in a single layer on prepared baking sheets.
-
Let cool at room temperature for at least 30 minutes to harden the chocolate.
6. Add Festive Toppings
-
Once cooled, transfer back to a clean bowl.
-
Fold in sprinkles, M&M’s, marshmallows, and crushed peppermint.
7. Store & Serve
-
Store in an airtight container or festive bags at room temperature for 5–7 days.
-
Serve in bowls, mason jars, or on a holiday dessert board.
Notes
-
Let chocolate-coated cereal cool completely before adding M&M’s or marshmallows to prevent melting.
-
Nut-free? Use SunButter, soy nut butter, or Wowbutter.
-
Prefer stovetop melting? Use a double boiler for smooth, even chocolate.
-
For a festive gift, layer in a mason jar, tie with ribbon, and attach a tag.
Nutrition
- Calories: 260 Cal Per Serving
- Sugar: 22g
- Fat: 12g
- Carbohydrates: 35g
- Protein: 3g
Let’s Talk Nutrition (The Fun Stuff!)
Look, we’re all friends here. This is a holiday treat, through and through. It’s meant to be enjoyed in joyful handfuls during the most wonderful time of the year. It’s not a salad, and that’s perfectly okay!
That said, I believe in transparency. The nutritional info below is an approximate estimate per serving (about ¾ cup), and it can vary based on the specific brands you use. The beauty of this recipe is that you can tweak it to your preferences. Using dark chocolate can add antioxidants, and the peanut butter provides a bit of protein. But mostly, it provides happiness, and that’s a nutrient we could all use more of during the holidays.
Approximate Per Serving: Calories: 260 | Fat: 12g | Carbs: 35g | Sugar: 22g | Protein: 3g
Final Thoughts from My Kitchen to Yours
Well, there you have it! My ultimate guide to the most festive, fun, and downright delicious Christmas Puppy Chow on the planet. This recipe is more than just a list of ingredients; it’s a ticket to creating sweet memories in your kitchen. It’s about the laughter that comes from shaking a bag of powdered sugar, the joy on your kids’ faces when they sneak a warm piece, and the warmth of sharing something you made with love.
So, from my Feastical family to yours, I hope
Rich French Onion Short Rib Soup : Hearty, Herby, and Packed with Bold Flavor
Rich French Onion Short Rib Soup: Your New Favorite Comfort Food
Hey friends, Beau here from Feastical! Let’s be real for a second. Sometimes, a regular bowl of soup just doesn’t cut it. You know those days when the wind is howling, your schedule has been a marathon, and your soul is begging for something that feels like a warm, hearty, and deeply satisfying hug from the inside out? Yeah, me too. And that’s exactly why I created this masterpiece.
We’re taking the cozy, familiar vibes of a classic French onion soup and turning the volume all the way up to eleven. How? By slow-simmering rich, bone-in beef short ribs right in the pot until they’re so tender, they practically fall apart if you look at them too hard. This isn’t just a soup; it’s a culinary event in a bowl. We’re building layers of flavor with slowly caramelized onions, aromatic herbs, and a few of my secret umami-boosting ingredients that make this dish truly unforgettable.
So, if you’re ready to fill your kitchen with the most incredible aromas and treat yourself (and your lucky crew) to a meal that’s both impressively gourmet and wonderfully simple to make, you’re in the right place. Grab your favorite Dutch oven, and let’s make some magic happen.
The Story Behind the Soup: A Happy Kitchen Accident
This recipe was born from one of my favorite kinds of kitchen moments: a happy accident. A few winters back, I was planning to make my classic French onion soup for a big family gathering. I had my onions slowly caramelizing, filling the house with that sweet, heavenly scent. At the same time, I had a giant tray of beef short ribs I’d just seared for a different project, resting on the counter.
My nephew, who was about six at the time, came running through the kitchen and, in a whirlwind of little-kid energy, bumped my arm just as I was moving the ribs. Before I knew it, two of those beautiful, meaty ribs slid right off the tray and landed with a gentle plop into my pot of onions and broth. I was about to fish them out, but I stopped. The smell was incredible. The rich beef fat from the ribs was already mingling with the sweet onions, creating a broth that smelled better than anything I’d ever made.
I decided to throw caution to the wind. I added the rest of the ribs to the pot, let it all simmer for hours, and the result was pure magic. That “mistake” is now one of the most-requested dishes in my repertoire. It just goes to show you that sometimes, the best recipes come from a little bit of chaos and a whole lot of curiosity.
Gathering Your Flavor Powerhouses
Here’s your shopping list for this flavor adventure. Don’t be intimidated by the number of ingredients—each one plays a specific role in building the deep, complex flavor profile that makes this soup so special. I’ve also included my go-to substitutions so you can make it work with what you have.
- 12 tbsp Salted Butter: This is our caramelizing workhorse. Salted butter adds a rich, savory base and helps draw the moisture out of the onions. Chef’s Insight: Don’t sub for oil here; the butter is non-negotiable for that classic, luxurious French onion flavor.
- 8 Medium Yellow Onions & 4 Shallots, thinly sliced: The stars of the show! Yellow onions bring a robust sweetness, while shallots add a more delicate, nuanced flavor. Sub Tip: You can use all yellow onions if needed, but the shallots are worth it!
- 8 Cloves Garlic, chopped: Because what’s a cozy soup without plenty of garlic? It adds a pungent, aromatic backbone.
- 4 tbsp Fresh Thyme & 4 tbsp Chopped Fresh Sage: This herby duo is a match made in heaven. Thyme is earthy and classic, while sage brings a slightly peppery, warm flavor. Sub Tip: If using dried, use 1 tbsp of each, as dried herbs are more potent.
- Red Chili Flakes & Fresh Ground Black Pepper: A little heat and bite to balance all the richness. Start with ½ tsp of chili flakes and adjust to your taste.
- 12-14 cups Low Sodium Chicken Broth: Using low-sodium gives you control over the salt level, especially since we’re adding tamari. Sub Tip: Beef broth works great too for an even beefier flavor.
- 1 cup Tamari or Low-Sodium Soy Sauce: This is our secret umami weapon! It adds a deep, savory saltiness that elevates the broth beyond the ordinary.
- 8 lbs Bone-In Beef Short Ribs: The bone is key here—it releases gelatin as it cooks, giving the soup an incredible, velvety body. Chef’s Insight: Look for ribs with good marbling for the most tender result.
- 4 Bay Leaves & 2 Star Anise (optional): Bay leaves add a subtle, floral depth. Star anise introduces a whisper of licorice-like sweetness that makes the broth truly complex.
- 4 cups Baby Carrots: They add a touch of natural sweetness and a lovely pop of color.
Flavor Twists (Don’t Skip These!)
- 2 tsp Worcestershire Sauce: Amplifies the savory, umami notes.
- 1 tbsp Balsamic Vinegar: A splash of acidity to brighten everything up and cut through the richness.
- ½ tsp Smoked Paprika: Imparts a subtle, smoky undertone that’s just divine.
- 1 cup Dry Red Wine (Optional): For ultimate richness. A Cabernet Sauvignon or Merlot works perfectly.
Let’s Get Cooking: Building Your Masterpiece
Okay, team. This is where the fun begins. We’re not just throwing everything in a pot; we’re building flavors layer by layer. Put on some good music, pour yourself a little of that red wine (for the cook, of course), and let’s get started.
- Caramelize Those Onions (The Heart of the Soup): In your largest, heaviest Dutch oven or stockpot, melt the butter over medium-low heat. Add all your sliced onions and shallots with a generous pinch of salt. Now, here’s the most important part: be patient. This isn’t a 5-minute job. Stir them often and let them cook low and slow for 30-40 minutes. You’re looking for a deep, golden-brown color and a wonderfully sweet aroma. Chef’s Hack: Don’t crank the heat to speed this up! You’ll burn them. Low and slow is the only way to achieve that perfect, jammy caramelization.
- Bloom the Aromatics: Once your onions are beautifully golden, stir in the chopped garlic, fresh thyme, sage, chili flakes, and a good amount of black pepper. Cook for just 2-3 minutes, until the garlic is fragrant. You’re waking up all those essential oils and toasting the spices—this step makes a world of difference.
- The Optional (But Highly Recommended) Wine Deglaze: If you’re using the red wine, now’s the time! Pour it into the pot. It will sizzle and steam gloriously. Use your wooden spoon to scrape up all those tasty browned bits from the bottom of the pot. Let the wine bubble and reduce by about half. This cooks off the alcohol and leaves behind a concentrated, fruity richness.
- Build the Broth: Now, pour in the chicken broth, tamari (or soy sauce), Worcestershire, balsamic vinegar, and smoked paprika. Add the bay leaves, star anise (if using), and the baby carrots. Give it all a good stir and bring it up to a gentle simmer.
- Nestle in the Star Ingredient: Carefully place your beef short ribs into the simmering broth, making sure they’re mostly submerged. Put the lid on your pot, reduce the heat to low, and let it all bubble away peacefully for 3 to 4 hours. Chef’s Hack: You’ll know it’s ready when you can easily pull a piece of meat away from the bone with a fork. The long, slow cook time is what transforms the tough connective tissue into melt-in-your-mouth goodness.
- Shred and Return: Using tongs, carefully remove the short ribs from the pot. They will be incredibly tender, so be gentle! Let them cool just until you can handle them, then shred the meat, discarding the bones and any large chunks of fat. Return all that glorious, tender beef back to the soup.
- The Final Simmer: Let the soup simmer for another 10 minutes with the shredded meat back in the pot. This allows the meat to soak up all the flavors of the broth. Now is the time to taste it! Adjust the seasoning—add more black pepper, a pinch of salt, or another dash of balsamic if you think it needs it.
How to Serve This Hearty Masterpiece
Presentation is part of the fun! You’ve put in the work, now let’s make it look as good as it tastes. I love serving this soup in deep, wide bowls—the kind you can really cradle in your hands. The classic move is to ladle a generous amount of soup into each bowl, making sure everyone gets plenty of beef, carrots, and those silky onions.
Then, top it with a thick, crusty slice of toasted sourdough or a baguette. For the ultimate indulgence, you can even toast your bread, rub it with a garlic clove, and sprinkle it with Gruyère or Swiss cheese before popping it under the broiler until bubbly and golden. Placing that cheesy toast right on top of the steaming soup is pure heaven. It soaks up the incredible broth and adds a wonderful textural contrast. Don’t forget a sprinkle of fresh thyme leaves on top for a pop of color and freshness!
Make It Your Own: Delicious Recipe Twists
One of the best things about this recipe is how adaptable it is. Feel free to play around and make it suit your taste or dietary needs!
- The “Stew” Variation: Want it even heartier? After shredding the beef, stir in a cup of frozen peas and a cup of pearl barley about 30 minutes before the end of cooking. It turns into a fantastic, complete meal-in-a-bowl.
- Slow Cooker Simplicity: You can absolutely make this hands-off! Caramelize the onions and shallots in a skillet, then transfer everything to your slow cooker. Cook on LOW for 7-8 hours or on HIGH for 4-5 hours.
- Bone Broth Boost: For an extra nutrient-packed punch, swap the chicken broth for beef bone broth. The collagen and richness will take the soup to a whole new level of comfort.
- Mushroom Lover’s Dream: For a deeper, earthier flavor, add a pound of sliced cremini mushrooms when you add the carrots. They’ll soak up all the herby, beefy goodness.
- Wine-Free Version: No wine? No problem! You can deglaze the pot with an additional ½ cup of broth instead. The soup will still be absolutely delicious.
Beau’s Kitchen Notes & Stories
This recipe has evolved so much since that first accidental drop of a short rib! I’ve found that the soy sauce (or tamari) was the real game-changer—it adds a depth that Worcestershire sauce alone can’t achieve. I also started adding the star anise after being inspired by a Vietnamese pho recipe, and I love the subtle, aromatic complexity it brings.
A funny kitchen story? The first time I made the final version of this for my family, my dad, who is a man of few words, took one bite, put his spoon down, looked me dead in the eye, and said, “Son, you can’t ever *not* make this again.” I think that’s the highest compliment a home cook can get. It’s a recipe that creates its own memories around the table, and that’s what Feastical is all about.
Your Questions, Answered!
I’ve gotten a few questions about this recipe over the years, so I figured I’d answer the most common ones right here.
Q: My soup broth is a bit thin. How can I thicken it?
A: No worries! The easiest way is to make a quick slurry. Mix 2 tablespoons of cornstarch or all-purpose flour with ¼ cup of cold broth or water until smooth. Stir this into your simmering soup and let it cook for another 5-10 minutes until it thickens up beautifully.
Q: Can I make this ahead of time?
A: Absolutely! In fact, I think soups like this taste even better the next day after the flavors have had more time to mingle. Let it cool completely and store it in an airtight container in the fridge for up to 4 days. Reheat gently on the stovetop.
Q: Can I use boneless short ribs?
A> You can, but the bone-in ribs will give you a richer, more gelatinous broth. If you use boneless, the cook time might be slightly less, so start checking for tenderness around the 2.5-hour mark.
Q: It tastes a little flat. What did I miss?
A> This usually means it needs a hit of acidity or salt. Try adding another splash of balsamic vinegar or a pinch more salt. Sometimes, a final squeeze of fresh lemon juice right at the end can also brighten all the flavors perfectly.

Rich French Onion Short Rib Soup : Hearty, Herby, and Packed with Bold Flavor
Description
A luxurious, hearty soup that combines the sweet, caramelized flavors of French onion soup with tender, melt-in-your-mouth short ribs. Perfect for cozy nights and impressing guests!
Ingredients
Soup Base
-
12 tbsp salted butter
-
8 medium yellow onions, thinly sliced
-
4 shallots, thinly sliced
-
8 cloves garlic, chopped
-
4 tbsp fresh thyme, chopped
-
4 tbsp fresh sage, chopped
-
½ tsp red chili flakes (adjust to taste)
-
Freshly ground black pepper, to taste
-
12–14 cups low-sodium chicken or beef broth
-
1 cup tamari or low-sodium soy sauce
-
2 tsp Worcestershire sauce
-
1 tbsp balsamic vinegar
-
½ tsp smoked paprika
-
1 cup dry red wine (optional)
-
4 bay leaves
-
2 star anise (optional)
-
4 cups baby carrots
Short Ribs
-
8 lbs bone-in beef short ribs
Serving
-
Crusty sourdough or baguette slices
-
Gruyère or Swiss cheese, grated
-
Fresh thyme, for garnish
Instructions
1. Caramelize Onions
-
Melt butter in a large Dutch oven over medium-low heat.
-
Add onions, shallots, and a pinch of salt. Cook low and slow, stirring often, 30–40 minutes until deep golden brown.
2. Bloom Aromatics
-
Stir in garlic, thyme, sage, chili flakes, and black pepper. Cook 2–3 minutes until fragrant.
3. Deglaze (Optional)
-
Pour in red wine, scraping browned bits from the bottom. Reduce by half.
4. Build the Broth
-
Add broth, tamari, Worcestershire sauce, balsamic vinegar, smoked paprika, bay leaves, star anise, and carrots. Stir and bring to a gentle simmer.
5. Add Short Ribs
-
Nestle ribs into the broth. Cover, reduce heat to low, and simmer 3–4 hours until meat is tender and falling off the bone.
6. Shred Ribs
-
Carefully remove ribs. Shred meat, discarding bones and large fat chunks. Return meat to soup. Simmer 10 more minutes.
7. Serve
-
Ladle soup into deep bowls.
-
Top with toasted bread slices and melted cheese under the broiler.
-
Garnish with fresh thyme.
Notes
-
Thicker Broth: Mix 2 tbsp cornstarch or flour with ¼ cup cold broth. Stir in and simmer 5–10 min.
-
Make Ahead: Soup tastes even better the next day. Store in airtight container up to 4 days.
-
Boneless Short Ribs: Slightly shorter cook time; bones give richer broth.
-
Extra Veggies: Add mushrooms, pearl barley, or peas 30 min before finishing.
-
Wine-Free: Substitute with extra broth for deglazing.
Nutrition
- Calories: 490 kcal per serving
- Fat: 28g
- Carbohydrates: 18g
- Protein: 36g
Nutritional Information (Approximate)
Okay, let’s talk fuel. This is a hearty, protein-packed soup designed to satisfy. Remember, these numbers are per serving (and this recipe makes a lot!) and are just an estimate. Using low-sodium broth and tamari helps control the salt content.
Per Serving (based on 12 servings):
Calories: 490 | Protein: 36g | Fat: 28g | Carbohydrates: 18g | Fiber: 2g
This soup is an excellent source of high-quality protein from the beef, which is great for muscle repair and keeping you full and satisfied. The onions and carrots provide dietary fiber, vitamins, and antioxidants. The fat content comes from the butter and the marbling in the short ribs, which is what gives the soup its incredible richness and mouthfeel. It’s a balanced, wholesome meal that’s as nourishing as it is delicious.
Final Thoughts from My Kitchen to Yours
Well, there you have it, my friends—my all-time favorite Rich French Onion Short Rib Soup. This recipe is a labor of love, but I promise you, every minute is worth it. It’s the kind of dish that turns a regular Tuesday into a celebration and makes a dinner party unforgettable.
I hope you feel empowered to give this a try. Don’t be afraid to make it your own. That’s the true joy of cooking. If you do make it, I’d be absolutely thrilled to see your creation! Tag me on social @Feastical or @BeauCollier with the hashtag #FeasticalFeast so I can see the warm, delicious hugs you’re serving up in your kitchen.
Until next time, keep your spoons handy and your hearts
Sticky Chili-Garlic Chicken Bowls with Yum Yum Sauce : Bold, Spicy & Better Than Takeout
Sticky Chili-Garlic Chicken Bowls: Your New Takeout Obsession
Hey friends, Beau here from Feastical! Let’s be real for a second. We’ve all been there. It’s been a long day, your stomach is growling, and the siren song of the takeout app is getting louder by the minute. The promise of something saucy, spicy, and delivered right to your door is a powerful one. But what if I told you that you could create a meal at home that’s even better than takeout? A meal that’s bursting with bold, sticky, chili-garlic flavor, packed with fresh, crunchy toppings, and drizzled with a sauce so good we literally named it “Yum Yum”?
That’s exactly what these Sticky Chili-Garlic Chicken Bowls are all about. This isn’t just a recipe; it’s a full-sensory experience. Imagine tender, juicy chicken coated in a glaze that’s the perfect balance of sweet, spicy, and savory. We’re talking about a sauce that caramelizes into sticky, gorgeous perfection on the grill or in your pan. Then, we balance all that fiery goodness with fluffy jasmine rice, cool slices of avocado and cucumber, and the tangy punch of kimchi. And the pièce de résistance? A generous, creamy, utterly addictive drizzle of our homemade Yum Yum sauce that ties the whole party together in your bowl.
This recipe is designed for real life. It’s for weeknight wins, for feeding a crowd without stress, and for those moments when you want a meal that feels like a celebration. So, let’s put those takeout menus aside for one night and create some magic together. I promise, your kitchen is about to smell incredible, and your taste buds are in for the ride of their lives.
The Night We Invented “Yum Yum” Sauce
This recipe has a special place in my heart because it was born out of a happy kitchen accident. A few years back, a bunch of my friends showed up unannounced, ravenous after a long hike. My fridge was… let’s call it “creatively stocked.” I had some chicken thighs, a motley crew of condiments, and a whole lot of determination to avoid ordering ten different pizzas.
I whipped up a quick marinade with what I had—soy sauce, a squirt of honey, a heaping spoonful of chili paste, and a whole lot of garlic. While the chicken was sizzling away, I stared into the abyss of my condiment shelf: mayo, ketchup, Worcestershire. In a moment of “what’s the worst that could happen?” I mixed them all together. My friend Sam took one bite of the chicken dipped in this mystery pink sauce, her eyes went wide, and all she could say was, “Yum. YUM.” The name stuck instantly. That chaotic, thrown-together meal turned into one of the most-requested recipes in my arsenal, and I’m so excited to finally share the polished, perfected version with you.
Gathering Your Flavor Arsenal
Here’s everything you’ll need to create these epic bowls. Don’t be intimidated by the list—a lot of this is pantry staples, and I’ve included plenty of swaps and chef insights to make it your own.
For the Sticky Chili-Garlic Chicken:
- 3 lbs boneless, skinless chicken (breasts or thighs): I’m a thigh guy myself—they’re more forgiving and stay juicier, but breasts work beautifully if that’s your preference. Just keep an eye on them so they don’t dry out!
- 2 tbsp + ⅔ cup tamari or soy sauce: We use a little to marinate the chicken briefly before adding the rest to the sauce. Tamari is a great gluten-free option with a slightly richer, smoother flavor.
- 4 tbsp orange juice (fresh if possible!): The bright, subtle acidity from the OJ cuts through the richness and helps create that incredible sticky glaze. No fresh oranges? The bottled stuff works in a pinch.
- ½ cup honey: This is our sweet backbone. For a deeper flavor, try maple syrup. For a vegan version, agave nectar works perfectly.
- 4–5 tbsp chili paste (like Sambal Oelek or Gochujang): This is your heat control! Start with 4 tbsp for a medium kick, and go up from there if you’re feeling brave. Gochujang will add a lovely, fermented depth.
- 2 tbsp fresh ginger, chopped & 4 cloves garlic, chopped: Non-negotiable flavor bombs! Please, please use fresh. The jarred stuff just doesn’t bring the same vibrant punch.
- 4 tbsp olive oil: Helps the marinade cling to the chicken and prevents sticking during cooking.
- Black pepper, to taste: Freshly cracked is always best.
- Optional Twists: A tbsp of rice vinegar or lime juice adds a fantastic zing right at the end. A tsp of toasted sesame oil stirred into the marinade gives an incredible nutty, deep flavor.
For the Famous Yum Yum Sauce:
- ⅔ cup olive oil mayo: The creamy base. I like the flavor of olive oil mayo, but any good-quality mayo will do.
- 4 tbsp ketchup: Don’t knock it ’til you’ve tried it! It adds sweetness, tang, and that iconic pink color.
- 2 tbsp Worcestershire sauce: The secret umami weapon. It adds a complex, savory depth that makes the sauce truly irresistible.
- 2 tsp seasoned salt: I use Lawry’s. It’s the perfect blend of salt and spices that makes this sauce so moreish.
- ½ tsp cayenne pepper: A little warmth to balance the creaminess. Adjust to your taste!
- Optional Twist: A tsp of lemon juice or a dash of sriracha can brighten things up or add an extra kick.
For Serving & Building Your Bowl:
- 6–7 cups cooked jasmine or basmati rice: Their fragrant, fluffy texture is the perfect bed for our bold chicken.
- 1–2 cucumbers, thinly sliced & 2 avocados, sliced: Our cool, fresh elements that provide a lovely contrast to the spicy chicken.
- 1 cup kimchi: The tangy, fermented crunch is a game-changer. If you’re new to kimchi, start with a small amount!
- Handful of fried wontons or crispy shallots: The textural MVP! That final crunch makes every bite exciting.
- Optional extras: Pickled red onions or shredded carrots add a gorgeous pop of color and another layer of flavor and crunch.
Let’s Get Cooking: Building Your Flavor Masterpiece
Okay, team! Aprons on, music playing, let’s transform these ingredients into a meal you’ll be dreaming about. We’re going to work in a logical flow so everything comes together hot and delicious at the same time.
- Marinate the Chicken (The Flavor Foundation): In a medium bowl, grab your 2 tbsp of soy sauce and toss your chicken in it. Let it sit for just 10-15 minutes while you make the main marinade. This little pre-seasoning step helps the chicken absorb flavor deeply. Now, in a separate, larger bowl, whisk together the remaining ⅔ cup soy sauce, orange juice, honey, chili paste, ginger, garlic, olive oil, and a good crack of black pepper. This is your magic potion! Chef’s Hack: Always reserve about ¼ cup of this marinade in a small bowl before you add the chicken. This is your clean, safe basting glaze for later—no cross-contamination!
- Get Your Grill or Pan Screaming Hot: Whether you’re grilling outdoors or using a grill pan or cast-iron skillet on the stove, get it nice and hot over medium-high heat. You want to hear a confident sizzle when that chicken hits the surface. If you’re baking, preheat your oven to 400°F (200°C).
- Cook to Caramelized Perfection:
- Grill/Pan Method: Shake off excess marinade and lay the chicken down. Don’t touch it! Let it sear for 5-7 minutes per side until you get those beautiful grill marks and the chicken releases easily. In the last 2-3 minutes of cooking, brush the reserved, clean marinade onto the cooked side. Flip, brush the other side, and let it caramelize into a sticky, glossy glaze. Cook until the internal temperature hits 165°F (74°C).
- Bake Method: Place the marinated chicken on a parchment-lined baking sheet. Bake for 20-25 minutes, brushing with the reserved glaze in the last 5-10 minutes to get that sticky finish.
- Rest is Best: Once cooked, transfer the chicken to a cutting board and let it rest for 5-10 minutes. This is non-negotiable for juicy chicken! It allows the juices to redistribute throughout the meat. If you cut into it right away, all those beautiful juices will run out onto your cutting board. While it rests, you can slice your avocado and cucumber.
- Whip Up the Yum Yum Sauce: This couldn’t be easier. In a small bowl, combine the mayo, ketchup, Worcestershire sauce, seasoned salt, and cayenne. Whisk until it’s smooth, creamy, and uniformly pink. Give it a taste and adjust the seasoning if needed. Pop it in the fridge until you’re ready to assemble.
- Slice and Dice: After the chicken has rested, slice it against the grain into bite-sized strips or chunks. Slicing against the grain ensures every piece is tender and easy to eat.
Bowl Assembly: The Grand Finale
This is where the art happens! Building the bowl is part of the fun and makes the meal feel extra special. Here’s my favorite way to layer it up for maximum visual and flavorful impact.
Start with a generous fluffy base of warm jasmine rice. Then, artfully arrange your sliced sticky chili-garlic chicken over one section of the rice. Next, create little “flavor stations” around the bowl: a neat pile of cool cucumber slices, a fan of creamy avocado, a vibrant mound of tangy kimchi. Scatter a handful of those crispy fried wontons or shallots over everything for that essential crunch factor.
Now, the moment we’ve all been waiting for. Take that bowl of Yum Yum sauce and drizzle it liberally over the entire creation. Don’t be shy! You can even serve extra on the side for dippin’. The final result is a beautiful, colorful, textural masterpiece that’s as Instagram-worthy as it is delicious. Grab a big fork, dig down to get a bit of everything in one bite, and prepare for your mind to be blown.
Make It Your Own: Delicious Twists & Swaps
The beauty of a bowl recipe is its flexibility. Here are a few ways to mix it up and keep things exciting!
- Go Veggie! Swap the chicken for extra-firm tofu (pressed and cubed) or thick slices of halloumi cheese. The marinade and cooking method work beautifully for both.
- Turn Up the Heat (or Turn It Down): For a five-alarm fire, add a teaspoon of Sriracha or a chopped fresh Thai chili to the marinade. For a milder, family-friendly version, reduce the chili paste to 2 tablespoons and use a mild ketchup-based Yum Yum sauce without the cayenne.
- Korean BBQ Vibe: Replace the chili paste with Gochujang and the honey with brown sugar for a deeper, fermented, sweet-and-spicy flavor that’s classic Korean BBQ.
- Different Grain, Different Gain: Not feeling rice? Serve this over quinoa, cauliflower rice for a low-carb option, or even a bed of crunchy shredded romaine lettuce for a deconstructed salad bowl.
- Pineapple Punch: Add ½ cup of crushed pineapple (juice and all) to the marinade. It adds a wonderful tropical sweetness and helps tenderize the chicken.
Beau’s Brain Dump & Kitchen Stories
This recipe has evolved so much from that first chaotic night. I’ve learned that marinating the chicken for at least 4 hours (or even overnight) makes the flavor penetrate down to its very soul. I also started adding that splash of rice vinegar at the end for brightness, and it was a total game-changer. One funny fail: I once tried to blend the Yum Yum sauce in a blender to make it extra smooth. Let’s just say it turned into a pink, mayo-based soup. A whisk and a little elbow grease are all you need! The moral of the story? Don’t overcomplicate the good stuff.
Your Questions, Answered!
Q: My sauce isn’t getting “sticky.” What am I doing wrong?
A: The stickiness comes from the sugar in the honey caramelizing. Make sure your heat is high enough when you apply the reserved glaze at the end. If you’re baking, you can even pop the chicken under the broiler for the last 1-2 minutes to really bubble and caramelize that glaze. Just watch it like a hawk!
Q: Can I make this ahead of time?
A> Absolutely! You can marinate the chicken for up to 24 hours. The Yum Yum sauce actually gets better after sitting in the fridge for a few hours, as the flavors meld. You can also cook the chicken, let it cool, slice it, and store it in an airtight container for up to 3 days. Reheat gently in the microwave or a skillet.
Q: My chicken is cooking too fast on the outside but is raw inside!
A> This usually means your heat is too high. You want a good sear, but if the outside is burning before the inside cooks, lower the heat to medium and cook for a longer time. If grilling, you can move the chicken to a cooler part of the grill to finish cooking through after you get a good sear. Using a meat thermometer is the best way to avoid guesswork!
Q: Is there a substitute for Worcestershire sauce in the Yum Yum sauce?
A> For a vegetarian version, you can use coconut aminos or a extra teaspoon of soy sauce, though the flavor will be slightly different. In a real pinch, a tiny bit of balsamic vinegar mixed with a dash of soy sauce can mimic the tangy-savory notes.

Sticky Chili-Garlic Chicken Bowls with Yum Yum Sauce : Bold, Spicy & Better Than Takeout
Description
These bowls are sweet, spicy, savory, and utterly addictive. Juicy chicken, sticky chili-garlic glaze, creamy Yum Yum sauce, fresh veggies, and crispy toppings—better than takeout, guaranteed.
Ingredients
Sticky Chili-Garlic Chicken
-
3 lbs boneless chicken (thighs or breasts)
-
2 tbsp soy sauce (for pre-marinating)
-
⅔ cup soy sauce (for main marinade)
-
4 tbsp orange juice
-
½ cup honey (or maple syrup for vegan)
-
4–5 tbsp chili paste (Sambal Oelek or Gochujang)
-
2 tbsp fresh ginger, chopped
-
4 cloves garlic, chopped
-
4 tbsp olive oil
-
Black pepper, to taste
-
Optional: 1 tbsp rice vinegar or lime juice, 1 tsp toasted sesame oil
Yum Yum Sauce
-
⅔ cup mayonnaise (olive oil or vegan)
-
4 tbsp ketchup
-
2 tbsp Worcestershire sauce (or vegetarian alternative)
-
2 tsp seasoned salt
-
½ tsp cayenne pepper
-
Optional: 1 tsp lemon juice or sriracha
Bowls & Toppings
-
6–7 cups cooked jasmine or basmati rice
-
1–2 cucumbers, thinly sliced
-
2 avocados, sliced
-
1 cup kimchi
-
Handful fried wontons or crispy shallots
-
Optional: pickled red onions, shredded carrots
Instructions
1. Pre-Marinade Chicken
-
Toss chicken with 2 tbsp soy sauce for 10–15 min.
2. Make Main Marinade
-
Whisk together remaining soy sauce, orange juice, honey, chili paste, ginger, garlic, olive oil, black pepper.
-
Reserve ¼ cup for basting.
3. Cook Chicken
Grill/Pan:
-
Preheat pan or grill to medium-high. Sear chicken 5–7 min per side.
-
In last 2–3 min, brush reserved marinade, flip, brush other side. Cook until 165°F (74°C).
Bake:
-
Preheat oven to 400°F (200°C). Bake 20–25 min, brushing reserved marinade during last 5–10 min.
4. Rest & Slice
-
Let chicken rest 5–10 min, then slice against the grain.
5. Make Yum Yum Sauce
-
Whisk mayo, ketchup, Worcestershire, seasoned salt, cayenne until smooth. Chill until serving.
6. Assemble Bowls
-
Layer rice, chicken, cucumber, avocado, kimchi, and crispy toppings.
-
Drizzle generously with Yum Yum sauce. Serve extra on the side.
Notes
-
Marinate Longer: 4 hours or overnight for deeper flavor.
-
Vegetarian/Vegan: Swap chicken for pressed tofu or halloumi.
-
Heat Control: Add extra chili paste or sriracha to taste.
-
Grain Swap: Quinoa, cauliflower rice, or shredded lettuce.
-
Tropical Twist: Add ½ cup crushed pineapple to the marinade.
Final Thoughts: Your New Kitchen Staple Awaits
So, there you have it. What started as a desperate attempt to feed my hungry friends has become one of my all-time favorite recipes, and I have a feeling it’s about to become one of yours, too.
These Sticky Chili-Garlic Chicken Bowls are more than just a meal; they’re a testament to the magic that can happen in your own kitchen. They prove that you don’t need a delivery driver to get a dinner that’s bursting with excitement, texture, and flavor. This is the kind of recipe that builds confidence—the one you’ll pull out when you want to impress, when you need a reliable weeknight hero, or when you simply want to treat yourself to something truly special.
It’s a complete experience. From the sizzle of the chicken in the pan and the incredible aroma of garlic and chili filling your kitchen, to the joyful, messy art of building your own perfect bowl. That final drizzle of Yum Yum sauce isn’t just a garnish; it’s a victory lap.
So, the next time that takeout craving hits, I hope you remember this recipe. Remember that you have the power to create something not just as good, but better—fresher, more vibrant, and made exactly to your taste.