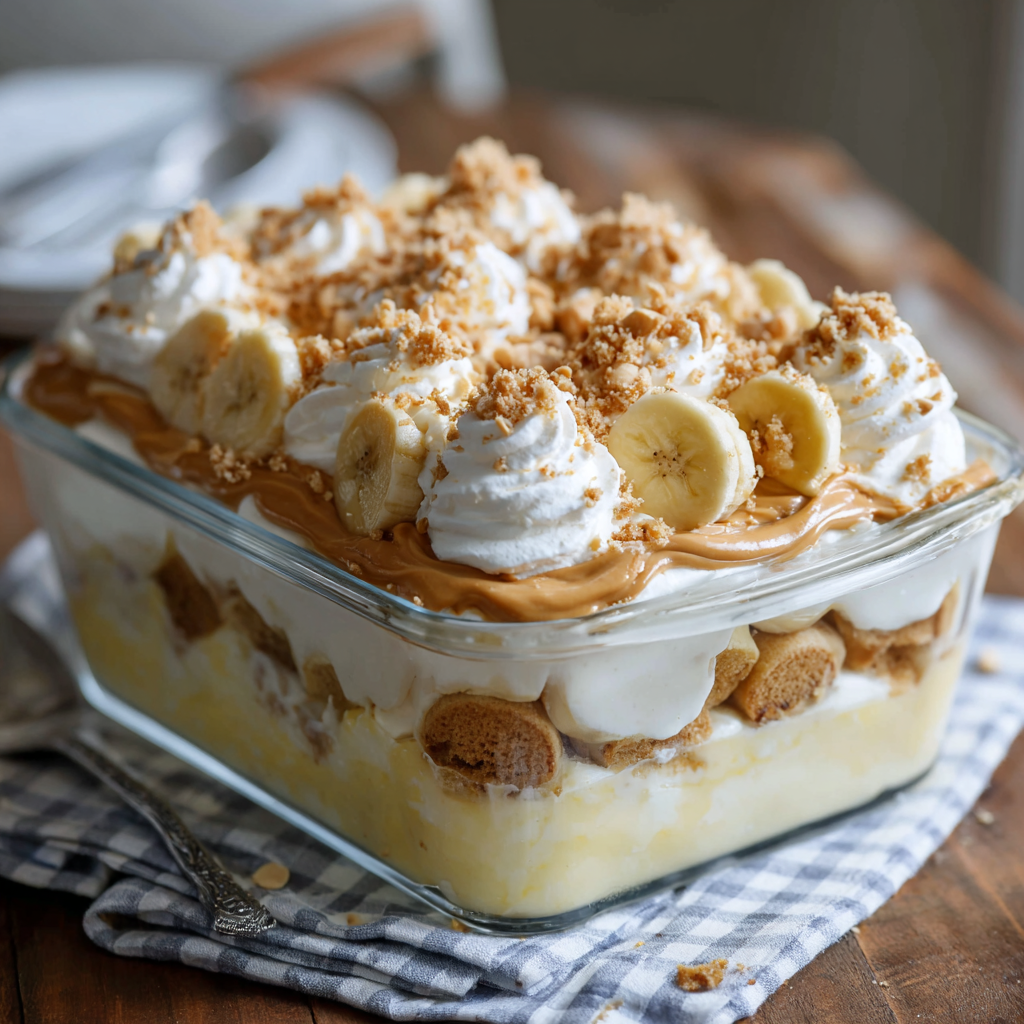
Peanut Butter Banana Pudding : A Creamy, Dreamy Southern Dessert Twist
Peanut Butter Banana Pudding: The Creamy, Dreamy Dessert That Feels Like a Hug
Hey, friends! Beau here, welcoming you back to my kitchen. You know me—I’m all about those recipes that don’t just fill your belly but also warm your soul. The ones you can whip up without a fancy culinary degree, the ones that make your people gather around the table a little longer, laughing a little louder. Today, we’re diving headfirst into one of those magical, no-fuss desserts that I absolutely live for: Peanut Butter Banana Pudding.
Now, if you’ve ever had classic Southern banana pudding, you know it’s a masterpiece in its own right. It’s nostalgia in a bowl, a sweet, creamy, and comforting treat that feels like a Sunday afternoon at your grandma’s house. But what happens when you take that beloved classic and give it a little *Feastical* twist? You add a generous, glorious swirl of creamy peanut butter, that’s what.
This isn’t just a recipe; it’s a flavor experience. Imagine layers of vanilla wafers getting soft and cake-like, ripe bananas adding their sweet, mellow fruitiness, and a cloud-like pudding that’s somehow even creamier and more decadent than the original. And then, the star of the show: that rich, nutty, and deeply satisfying peanut butter flavor weaving through every single spoonful. It’s the perfect marriage of two iconic comfort foods, and I promise you, it’s a game-changer for potlucks, family dinners, or those “I just need a little something sweet” moments. So, grab your favorite mixing bowl and let’s make some magic happen!
The Day I Accidentally Created a Family Legend
I have to share a quick story about where this recipe really came from. It was a classic “Beau in the kitchen” moment—a happy accident born from a serious craving and a near-empty pantry. A few years back, I was tasked with bringing dessert to a big family potluck. I had my heart set on banana pudding, but as I started gathering ingredients, I realized I was short on cream cheese, which I sometimes use for extra richness. Panic mode? Almost. But then, my eyes landed on a nearly-full jar of the good stuff: creamy peanut butter.
In a moment of “what’s the worst that could happen?” inspiration, I scooped a big dollop right into the pudding mixture. I gave it a whisk, took a tentative taste, and my eyes just about popped out of my head. It was INCREDIBLE. The peanut butter didn’t overpower the vanilla and banana; it complemented them, adding a salty, nutty depth that made the whole dessert taste… well, more like *itself*, but better. I layered it up, crossed my fingers, and brought it to the party. Let me tell you, it was the first dish to disappear. My cousin’s kids still ask for “Uncle Beau’s Peanut Butter Pudding” at every gathering. It just goes to show that some of the best creations come from a little improvisation and a whole lot of love.
Gathering Your Dream Team: The Ingredients
One of the best things about this recipe is its beautiful simplicity. You probably have most of this in your kitchen right now! Here’s the lineup that creates this creamy dream.
- 1 (5.1 oz) box instant vanilla pudding mix: This is our foundation. It gives us that classic, creamy pudding texture without any fuss. Chef’s Insight: I use instant because it sets quickly and stays light. If you only have cook-and-serve, you can use it, but let it cool completely before moving to the next steps!
- 2 cups cold milk: The key word here is cold. It helps the pudding mix thicken up properly and quickly. Whole milk will give you the richest result, but 2% works great, too.
- 1 (14 oz) can sweetened condensed milk: This is the secret weapon for ultra-creamy, decadent pudding. It adds a lovely caramel-like sweetness and a smooth, thick body that’s just irresistible.
- ½ cup creamy peanut butter: Use a standard, no-stir creamy peanut butter for the smoothest incorporation. Substitution Tip: If you’re a crunchy peanut butter fan, go for it! It will add a wonderful little textural surprise in every bite.
- 1 (8 oz) container whipped topping (like Cool Whip), thawed: This folds in to make our pudding mixture light, fluffy, and cloud-like. Chef’s Insight: You can absolutely use an equal amount of freshly whipped heavy cream if you prefer! Just whip 1 ½ cups of heavy cream with a tablespoon of sugar until you get stiff peaks.
- 4 ripe bananas, sliced: Look for bananas that are yellow with a few brown spots—they’re at their peak sweetness and flavor. Pro Tip: Don’t slice them until you’re ready to assemble to prevent browning!
- 1 box vanilla wafer cookies: The classic choice! They provide that iconic soft-yet-slightly-chewy layer that soaks up all the pudding goodness.
- Optional for topping: Crushed peanuts or extra cookies: This is your chance to add a final flourish! A little crunch on top makes for a beautiful presentation and a fantastic textural contrast.
Let’s Build the Dream: Step-by-Step Instructions
Ready to assemble this masterpiece? It’s so simple. Put on some good music, clear a space in your fridge, and let’s get layering.
- Create the Pudding Base: Grab a large mixing bowl and pour in the cold milk. Sprinkle the entire box of instant vanilla pudding mix over the milk. Now, take your whisk and get to work! Whisk steadily for about 2 minutes. You’ll see it transform from a liquid into a lovely, thick pudding. Chef’s Hack: Don’t over-whisk here! Two minutes is usually perfect. Over-whisking can sometimes make it a bit thin.
- Incorporate the Richness: Now, pour in that entire can of sweetened condensed milk. See that thick, sweet stream? That’s pure magic right there. Next, add your half-cup of creamy peanut butter. Chef’s Hack: To make the peanut butter easier to mix, give it a quick stir in its jar first. It incorporates into the pudding like a dream. Whisk everything together until it’s completely smooth, creamy, and uniform in color. No streaks of peanut butter left behind!
- Fold in the Fluff: Time to lighten things up! Grab your thawed whipped topping. Using a spatula, gently fold it into the peanut butter pudding mixture. Chef’s Hack: “Folding” is key here. Instead of stirring vigorously, which would deflate the whipped topping, use a gentle, sweeping motion—down the side of the bowl, across the bottom, and up and over the top. Repeat until you see no more white streaks. Your mixture will be incredibly light and fluffy.
- The Grand Layering: Get out your trusty 9×13-inch dish—this is the classic vessel for a reason; it gives you the perfect ratio of layers. Start by spreading a thin, even layer of the pudding mixture on the very bottom. This just helps anchor everything. Now, create your first proper layer: a single layer of vanilla wafers, followed by a layer of banana slices (use about half of them), and then a third of your remaining pudding mixture, spreading it gently to cover the bananas. Repeat the layers—wafers, bananas, pudding—one more time. For your final top layer, finish with the remaining pudding mixture, spreading it out beautifully. Pro Tip: Save a few of your best-looking wafers and banana slices for a pretty garnish on top right before serving!
- The Patience Game (Aka Chilling): This is the hardest part, I know! But trust me, it’s non-negotiable. Cover the dish tightly with plastic wrap and pop it in the fridge for at least 4 hours, but ideally overnight. This waiting period is when the alchemy happens. The wafers soften and become almost cake-like, the bananas release their sweet juice into the pudding, and all the flavors marry into one harmonious, creamy, incredible bite.
- The Final Flourish: Right before you’re ready to serve, it’s topping time! Sprinkle on some crushed peanuts for a salty crunch, crumble a few extra wafers over the top, or artfully arrange a few fresh banana slices. Then, stand back and admire your creation before you dive in with a big spoon.
How to Serve This Slice of Heaven
Presentation is part of the fun! You can absolutely serve this family-style right from the baking dish—it’s cozy and inviting. But if you want to get a little fancy, here are a few of my favorite ways to plate it up.
For a stunning individual dessert, use a large mason jar or a clear trifle bowl. Simply build the layers directly in the jar for a beautiful, visible parfait effect. It’s a total showstopper at parties!
You can also use a large ice cream scoop to dollop generous servings into wide, shallow bowls. The soft, creamy texture looks gorgeous this way. No matter how you serve it, I love pairing this pudding with a hot cup of coffee or a cold glass of milk. The contrast is just perfect. And remember, this dessert is rich! A little goes a long way, making it perfect for feeding a crowd.
Make It Your Own: Delicious Recipe Variations
One of the best things about a recipe like this is its flexibility. Feel free to play around and make it suit your taste buds or dietary needs!
- The Chocolate Lover’s Dream: Swap the vanilla wafers for chocolate wafer cookies or even crushed Oreos. You could even add a tablespoon of cocoa powder to the pudding mix for a chocolate-peanut butter cup vibe.
- Nutty Twist: Use almond butter or cashew butter instead of peanut butter for a different, equally delicious nutty flavor. Top with toasted sliced almonds or chopped cashews.
- Boost the Banana: For an extra banana punch, mash one very ripe banana and whisk it into the pudding mixture along with the sweetened condensed milk. It intensifies the flavor beautifully.
- Lighter Version: You can use sugar-free instant pudding mix, fat-free milk, and a light whipped topping to cut down on calories and sugar without sacrificing the creamy texture.
- Boozy Banana Pudding (For the Grown-Ups): Add a tablespoon or two of bourbon or banana liqueur to the pudding mixture when you add the sweetened condensed milk. It adds a wonderful, warm depth of flavor.
Beau’s Chef’s Notes & Kitchen Confessions
This recipe has evolved so much since that first panicked potluck creation. I’ve learned that letting it sit overnight is truly the key to transcendent banana pudding. The texture becomes something else entirely—softer, more unified, and just… better.
I also have a funny kitchen confession: I once, in a hurry, tried to use frozen bananas that I had thawed. Big mistake! They released way too much water and made the whole pudding soupy. Learn from my error—always use fresh, ripe (but not mushy) bananas! This dish is a testament to the beauty of simple, high-quality ingredients. It doesn’t need to be complicated to be absolutely unforgettable.
Your Questions, Answered: FAQs & Troubleshooting
I’ve gotten a lot of questions about this pudding over the years, so let’s tackle the most common ones!
Q: Can I make this peanut butter banana pudding ahead of time?
A: Absolutely! In fact, I highly recommend it. Making it the day before you need it is the best way to go. Just hold off on adding any crunchy toppings (like peanuts) until right before serving so they stay crisp.
Q: My pudding seems runny. What happened?
A: Don’t worry! This can happen for a couple of reasons. First, did you use cold milk? Warm milk can prevent the pudding from setting. Second, it might just need more time to chill. The pudding and wafers need those full 4+ hours to set up properly. Pop it back in the fridge and give it more time. It will almost always firm up.
Q: How long will the leftovers last?
A: This pudding is best enjoyed within 2-3 days. The bananas will start to brown and get very soft after that. It’s still safe to eat, but the texture and appearance won’t be at their peak.
Q: Can I use homemade pudding instead of instant?
A: You sure can! Make your favorite cooked vanilla pudding recipe (about 3 cups worth) and let it cool completely to room temperature. Then, proceed with the recipe from step 2, adding the sweetened condensed milk and peanut butter to the cooled homemade pudding.
Peanut Butter Banana Pudding : A Creamy, Dreamy Southern Dessert Twist
Description
Peanut Butter Banana Pudding: Creamy, Dreamy, Soul-Warming Dessert
A luscious twist on the classic Southern banana pudding, layered with peanut butter, bananas, and soft vanilla wafers. Perfect for potlucks, family dinners, or a sweet treat anytime!
Ingredients
-
1 (5.1 oz) box instant vanilla pudding mix
-
2 cups cold milk
-
1 (14 oz) can sweetened condensed milk
-
½ cup creamy peanut butter
-
1 (8 oz) container whipped topping, thawed (or 1 ½ cups whipped heavy cream)
-
4 ripe bananas, sliced
-
1 box vanilla wafer cookies
-
Optional topping: crushed peanuts or extra vanilla wafers
Instructions
-
Make the Pudding Base:
In a large bowl, whisk cold milk and instant pudding mix for 2 minutes until thickened. -
Add Peanut Butter & Sweetness:
Stir in sweetened condensed milk and peanut butter until smooth. -
Fold in the Whipped Topping:
Gently fold in the whipped topping to keep the mixture light and airy. -
Layer the Dessert:
-
Spread a thin layer of pudding in a 9×13-inch dish.
-
Layer vanilla wafers, half of the banana slices, and a third of the pudding mixture.
-
Repeat: wafers, bananas, pudding.
-
Top with remaining pudding. Reserve a few bananas or wafers for garnish.
-
-
Chill:
Cover and refrigerate for at least 4 hours, preferably overnight. -
Add the Final Touch:
Before serving, sprinkle crushed peanuts or extra wafers on top for texture and visual appeal.
Notes
-
Use fresh, ripe bananas—not frozen—to avoid a watery pudding.
-
Make ahead for best flavor and texture. Add crunchy toppings just before serving.
-
Cold milk ensures instant pudding sets correctly.
Nutrition
- Calories: 310 Cal Per Serving
- Fat: 14 g
- Carbohydrates: 40 g
- Protein: 6 g
Let’s Talk Nutrition (The Real Talk)
Now, I’m a firm believer that dessert is meant to be enjoyed soulfully and without guilt! This Peanut Butter Banana Pudding is a treat, through and through. It’s rich, satisfying, and packed with flavor. Here’s a general breakdown per serving (remember, this is an estimate and can vary based on your specific ingredients).
Per Serving (Approximately):
Calories: 310 | Fat: 14g | Carbs: 40g | Protein: 6g
It does provide a bit of protein from the peanut butter and milk, and bananas offer potassium and fiber. But let’s be real—we’re here for the comfort and the joy it brings. My philosophy is always about balance. Enjoy a generous serving of this at your family BBQ, savor every bite, and then maybe have a lighter meal the next day. Food is fuel, but it’s also love, memory, and celebration. This dessert is definitely a celebration.
Final Thoughts from My Kitchen to Yours
Well, there you have it, my friends—my heart and soul in a pudding dish. This Peanut Butter Banana Pudding is more than just a recipe; it’s a reminder that the best meals and memories are often the simplest ones. It’s about taking a classic, adding your own personal twist, and sharing it with the people you love.
I can’t wait for you to try this. I can already picture you pulling that chilled dish out of the fridge, seeing those perfect layers, and watching the smiles spread around your table. That’s what Feastical is all about. So, go on, make it, share it, and tag me on social media with #Feastical so I can see your beautiful creations! Until next time, happy cooking!
With a full heart and an even fuller spoon,
Beau
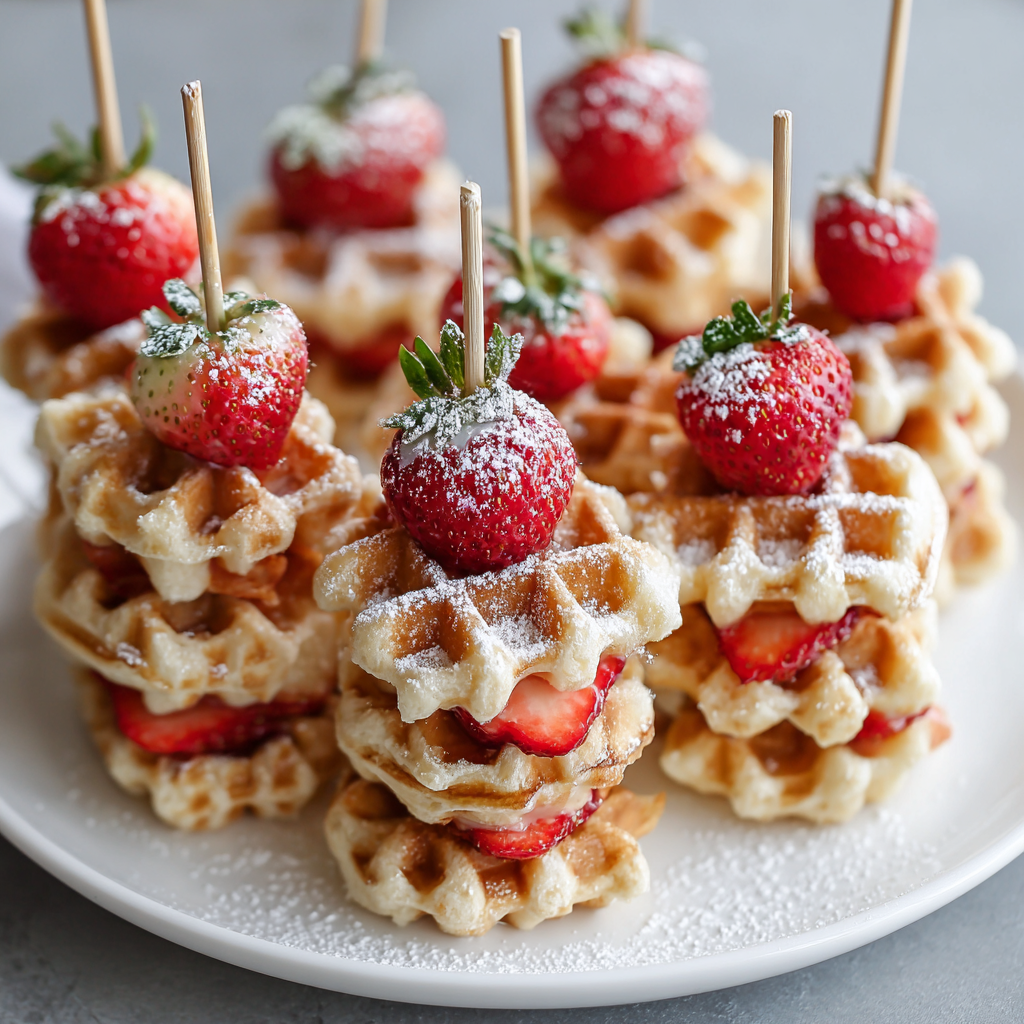
Mini Waffle Skewers with Berries : Fun, Bite-Sized Brunch Treat
Mini Waffle Skewers with Berries: The Brunch Showstopper You Need
Hey friends, Beau here! Let’s talk about brunch. We’ve all been there, right? You want to whip up something that feels special, something that makes your people’s eyes light up when they see it. But you also don’t want to spend your entire Saturday morning chained to the stove, juggling twelve different pans while your coffee gets cold. I hear you. I’ve lived it.
That’s exactly why I’m so head-over-heels in love with these Mini Waffle Skewers with Berries. They are the ultimate solution to the “fancy-but-easy” brunch dilemma. Imagine this: golden, buttery mini waffles, stacked high with juicy, sweet strawberries, all dusted with a snowy blanket of powdered sugar. They’re fun, they’re portable, and they are an absolute joy to eat. This isn’t just a recipe; it’s a whole vibe. It’s the kind of dish that turns a regular morning into a mini-celebration, and I’m so excited to share it with you. So, let’s ditch the stress and create some edible magic that’s as fun to make as it is to devour.
A Skewer of Sweet Memories
This recipe takes me right back to my grandma’s kitchen. She wasn’t a fancy chef, but she was a wizard at making everyday moments feel magical. One sleepover weekend, she decided our standard stack of pancakes was due for an upgrade. She dug out her ancient waffle iron, whipped up a quick batter, and started making the tiniest waffles I’d ever seen. Instead of piling them on a plate, she handed me a box of toothpicks and a bowl of fresh berries from her garden. “Let’s build something, Beau,” she said.
We spent the next half-hour constructing wobbly towers of waffles and berries, laughing as some toppled over before we could even spear them. It was less about cooking and more about creating together. That’s the spirit I want to bring to your kitchen with this recipe. It’s an invitation to play with your food, to get a little creative, and to turn a simple meal into a sweet, shared memory. Every time I make these skewers, I can still smell her kitchen and hear her laugh. Food is love, my friends, especially when it’s served on a stick.
Gathering Your Brunch Brigade
Here’s the beautiful part: you only need a handful of simple ingredients to create this masterpiece. This is where we keep it real and soulful. I’ll walk you through each one, because knowing your ingredients is the first step to cooking with confidence.
- 12 Mini Waffles (store-bought or homemade): This is your foundation! I’m a huge fan of using high-quality frozen mini waffles for ultimate convenience—they toast up perfectly golden and crisp. But if you’re feeling ambitious, whipping up a batch of my simple buttermilk waffles from scratch makes them extra special. Chef’s Insight: If using frozen, look for a brand with real butter in the ingredients for that classic, rich flavor.
- 6 Fresh Strawberries, hulled and halved: The juicy, ruby-red jewels of our skewer! They add a burst of freshness that cuts through the richness of the waffle. Substitution Tip: No strawberries? No problem! Blueberries, raspberries, or even thin slices of banana or peach would be absolutely delicious.
- Powdered Sugar, for dusting: This is the fairy dust that makes everything look (and taste) incredible. It adds a lovely, melt-in-your-mouth sweetness. Chef’s Hack: For a super fine, professional-looking dusting, place the powdered sugar in a fine-mesh sieve and gently tap it over the skewers.
- 6 Toothpicks or Mini Skewers: Our trusty construction tools! Standard toothpicks work great, but if you want to make a longer, more impressive skewer, 4-inch mini skewers are perfect. Safety Note: If you’re serving these to little ones, you can break off the sharp tips of the toothpicks after assembling.
Let’s Build Some Brunch Magic!
Okay, team, it’s go time. This is where we turn those simple ingredients into a brunch legend. I’ll be with you every step of the way, sharing my favorite little hacks to ensure your skewers are nothing short of perfect.
- Toast the Waffles to Golden Perfection. Fire up your toaster or toaster oven! We’re aiming for a beautiful golden-brown color with a crisp exterior. If you’re using a regular oven, spread them on a baking sheet and pop them in at 375°F for about 5-7 minutes. Chef’s Tip: Don’t be shy with the toasting! A crisp waffle is key—it provides the structural integrity to hold up the strawberry and prevents the skewer from getting soggy. I like to give mine an extra minute for maximum crunch.
- Prep Your Strawberry Stars. While the waffles are getting toasty, wash your strawberries and hull them (that’s just a fancy word for removing the green leafy top). Slice each one in half from top to bottom. You’ll see they look like little hearts—how adorable is that? Chef’s Insight: Pat the strawberry halves dry with a paper towel. This extra second of effort prevents any extra moisture from making our beautiful waffles soft.
- The Grand Assembly! This is the fun part! Grab your toothpicks or mini skewers. We’re building from the bottom up. Start by carefully pushing a mini waffle onto the skewer. Next, add one of your strawberry halves, placing it cut-side down so it sits nicely. Then, top it all off with a second mini waffle. You’ve just created a delicious, edible sandwich on a stick! Chef’s Hack: If the waffles are resisting the skewer, gently wiggle it back and forth as you push—it helps it glide through without cracking.
- The Final Flourish. Arrange your completed skewers on a beautiful platter. Now, for the magic touch: grab your powdered sugar and that fine-mesh sieve I mentioned. Hold it a few inches above the skewers and give it a gentle tap-tap-tap. Watch as a beautiful, snowy dusting settles over everything. It’s instantly gorgeous. Pro Move: Always dust right before serving to keep that picture-perfect look.
- Serve with a Smile (and Maybe Some Syrup). Your masterpiece is ready! Serve these immediately while the waffles are still warm and crisp. I love placing a small bowl of warm maple syrup or even a vanilla yogurt dip in the center of the platter for dunking. Dive in and enjoy the fruits of your (minimal) labor!
How to Serve These Skewered Sensations
Presentation is half the fun with a dish like this! You’ve put in the love, now let’s make it look stunning. I like to arrange my skewers standing upright in a tall glass or a small vase—it creates a beautiful, edible centerpiece for your brunch table. If you’re laying them flat, fan them out on a rustic wooden board or a bright, colorful platter for a pop of color.
Now, let’s talk dipping sauces. While they are phenomenal on their own, a little dip takes them to the next level. Here are my go-to’s:
- Classic Maple Syrup: You can’t go wrong. Warm it up for a cozy, comforting touch.
- Vanilla Greek Yogurt Dip: Just mix some Greek yogurt with a splash of vanilla extract and a drizzle of honey. It’s creamy, tangy, and adds a protein boost.
- Chocolate Hazelnut Spread: Thin out some chocolate hazelnut spread with a little warm milk for a decadent, dessert-like dip. The kids (and let’s be honest, the adults too) will go wild for this.
Get Creative! 5 Fun Twists on the Classic
Once you’ve mastered the basic blueprint, the culinary world is your oyster! Or, in this case, your waffle. Here are a few of my favorite ways to mix things up and make this recipe your own.
- Chocolate Lover’s Dream: Use chocolate chip mini waffles. In between the waffles, add a few chocolate chips along with the strawberry. Drizzle with melted chocolate instead of dusting with powdered sugar. You’re welcome.
- Tropical Vacation Skewers: Swap the strawberries for chunks of fresh pineapple and mango. A dusting of toasted coconut flakes on top will transport you straight to the islands.
- Lemon Blueberry Bliss: Use blueberry-flavored mini waffles or add fresh blueberries to the skewer. Right before serving, add a tiny drizzle of a simple lemon glaze (just mix powdered sugar with a little lemon juice). It’s bright, zesty, and incredible.
- PB&J Style: This one is a game-changer. Lightly spread a thin layer of peanut butter or almond butter on the inside of the waffles before you skewer them. The combination with the berry is a nostalgic flavor bomb.
- Gluten-Free & Vegan Friendly: Easily adapt this for any diet! Simply use your favorite gluten-free or vegan mini waffles. For a vegan option, ensure your powdered sugar is vegan (some brands use bone char) and serve with a plant-based yogurt dip.
Beau’s Kitchen Notes & Stories
This recipe has become a staple in my home, especially when friends come over. I’ll never forget the time I set up a “build-your-own-waffle-skewer” bar for a brunch potluck. It was chaos in the best way possible—people were mixing and matching ingredients, laughing, and creating their own wild combinations. My buddy Dave even tried to build a five-waffle-high skyscraper. It, predictably, collapsed in a delicious heap, but the memory is a classic.
The beauty of this recipe is its evolution. It started in my grandma’s kitchen as a fun project and has morphed into my go-to for effortless entertaining. Don’t be afraid to play around with it. The best recipes aren’t just written in stone; they’re written in butter, sugar, and a whole lot of love.
Your Waffle Skewer Questions, Answered!
I know you might have a question or two before you get started, so I’ve gathered the most common ones right here. Think of this as our little pre-brunch huddle.
Q: Can I make these ahead of time?
A: You can do some prep! You can hull and slice the strawberries a few hours ahead and keep them in the fridge. However, I highly recommend toasting the waffles and assembling the skewers right before serving. This ensures the waffles stay crisp and don’t get soft from the berry juices.
Q: My waffles are cracking when I skewer them. Help!
A> No worries, this happens! It usually means the waffles are a bit too crisp (which is a great problem to have). Just make sure you’re using a sharp toothpick or skewer and gently wiggle it as you push it through. A little crack won’t affect the taste one bit!
Q: What’s the best way to hull a strawberry?
A> My favorite method is to use a small paring knife. Just angle the knife inward around the stem and pop it out in a cone shape. If you don’t have a knife, you can also use a sturdy straw—push it through the bottom of the berry up through the top, and it will push the hull right out!
Q: Can I use a different fruit?
A> Absolutely! Get creative with what’s in season. Raspberries, blackberries, sliced kiwi, or mandarin orange segments all work beautifully. Just make sure the pieces aren’t too heavy or juicy, as they can make the waffle soggy faster.
Mini Waffle Skewers with Berries : Fun, Bite-Sized Brunch Treat
Description
Mini Waffle Skewers with Berries
A fun, colorful, and utterly delicious brunch treat that’s as easy to make as it is to eat. Perfect for sharing or serving as a showstopper centerpiece!
Ingredients
-
12 mini waffles (store-bought or homemade)
-
6 fresh strawberries, hulled and halved
-
Powdered sugar, for dusting
-
6 toothpicks or mini skewers
-
Optional dips: warm maple syrup, vanilla Greek yogurt, or chocolate-hazelnut spread
Instructions
-
Toast the Waffles:
Toast waffles in a toaster or toaster oven until golden and crisp (or bake at 375°F for 5–7 minutes). A crisp exterior helps the skewer stay sturdy. -
Prep the Strawberries:
Wash, hull, and slice strawberries in half. Pat dry to avoid soggy waffles. -
Assemble the Skewers:
-
Start with one mini waffle on a toothpick.
-
Add a strawberry half, cut-side down.
-
Top with another mini waffle. Repeat for remaining skewers.
-
Tip: Gently wiggle the skewer through the waffles if needed to avoid cracks.
-
-
Dust with Powdered Sugar:
Use a fine-mesh sieve for an even, snowy finish. Do this right before serving. -
Serve & Dip:
Arrange skewers on a platter or in a tall glass. Serve with maple syrup, yogurt dip, or chocolate-hazelnut spread for extra indulgence.
Notes
-
Fruit swaps: Blueberries, raspberries, bananas, or peaches.
-
Chocolate twist: Use chocolate chip waffles or drizzle with melted chocolate.
-
Tropical version: Pineapple and mango with toasted coconut.
-
PB&J style: Spread peanut or almond butter inside waffles.
-
Gluten-free/Vegan: Use GF/vegan mini waffles and plant-based yogurt.
A Quick Bite on Nutrition
Now, I’m all about feel-good food that tastes great, and I believe part of that is knowing what you’re eating. Here’s a general breakdown of the nutritional profile for one classic skewer (using standard frozen mini waffles). Remember, these are estimates and can vary based on your specific ingredients.
These skewers are a fantastic source of quick energy, thanks to the carbohydrates from the waffles and fruit. The strawberries pack a powerful punch of Vitamin C and antioxidants. To boost the nutritional value, opt for whole-grain mini waffles for added fiber, or serve with a protein-rich Greek yogurt dip to help keep you full and satisfied longer. It’s all about balance and joy!
Approximate Nutrition Per Skewer: Calories: 100 | Carbs: 14g | Fat: 3g | Sugar: 4g | Protein: 2g
Your New Go-To Brunch Best Friend
And there you have it, my friends! Your complete guide to creating the most delightful, stress-free, and downright delicious Mini Waffle Skewers. This recipe proves that you don’t need complicated techniques or a million ingredients to create something truly special. All you need is a little creativity and a willingness to have fun in the kitchen.
I hope this recipe brings as much laughter and joy to your table as it has to mine. It’s a reminder that the best meals are often the simplest ones, shared with the people we love. Now, I’d love to hear from you! Tag me @FeasticalBeau on Instagram when you make your skewers. I can’t wait to see your beautiful creations.
Until next time, keep your spatula close and your kitchen full of love.
Final Thoughts: Your New Go-To Brunch Best Friend
And there you have it, my friends! Your complete guide to creating the most delightful, stress-free, and downright delicious Mini Waffle Skewers.
This recipe is more than just a list of ingredients and steps; it’s a reminder. A reminder that you don’t need complicated techniques or a million ingredients to create something truly special and memorable for the people you care about. All you need is a little creativity, a willingness to have fun, and a few humble ingredients.
It’s a recipe built on a foundation of love, laughter, and a belief that food should be a joy, not a chore. From my grandma’s kitchen to yours, I hope these skewers become a catalyst for your own sweet, shared moments. They’re proof that the best meals are often the simplest ones, served with a generous side of love.
Now, I’d love to hear from you! Did you stick with the classic or try a fun twist? Tag me @FeasticalBeau on Instagram when you make your skewers. I can’t wait to see your beautiful creations and the smiles that go with them.
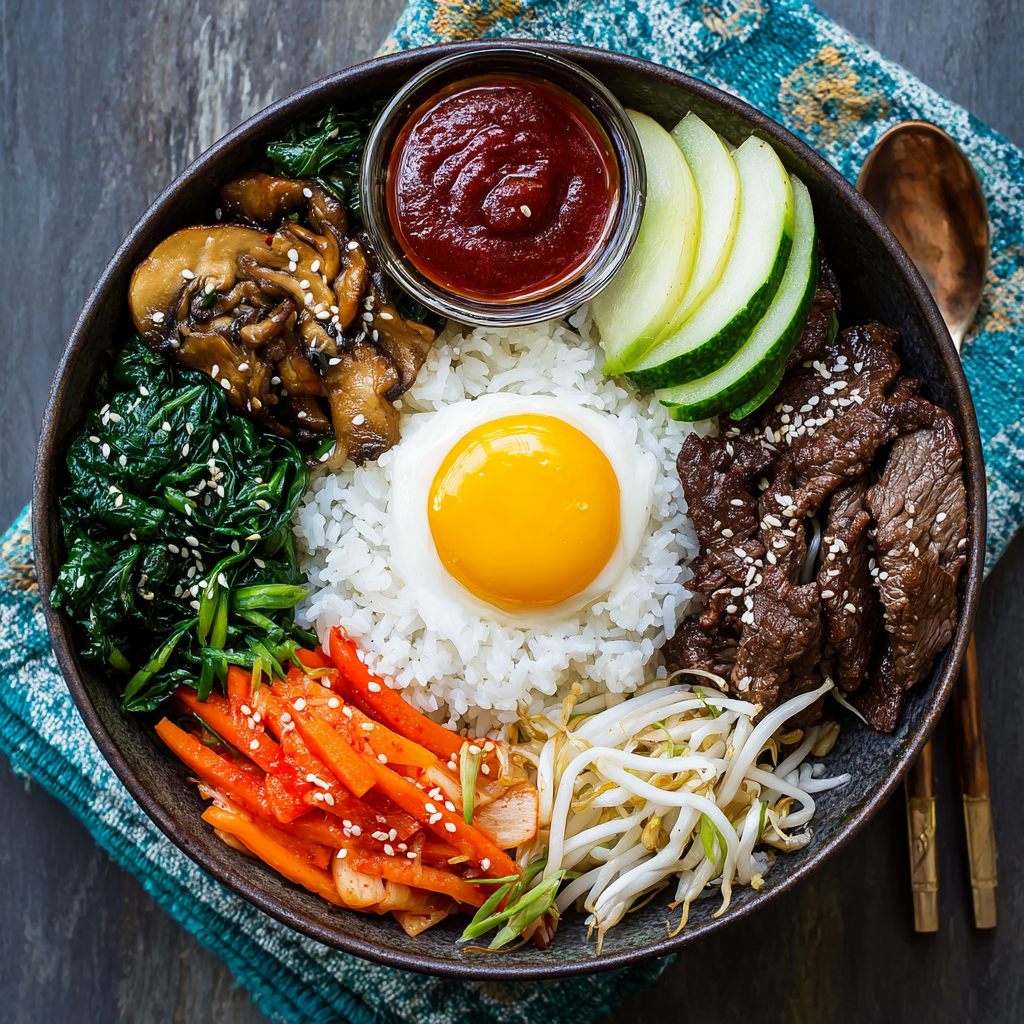
Authentic Korean Bibimbap Recipe : Beef, Veggies, and Spicy Gochujang Sauce
Your New Favorite Bowl of Sunshine: Authentic Korean Bibimbap
Hey friends, Beau here from Feastical! Let’s talk about one of life’s greatest joys: a meal that’s a total party in a bowl. I’m not talking about just throwing leftovers together (though we’ve all been there, and no judgment!). I’m talking about a dish that’s a vibrant, intentional, and beautiful symphony of flavors and textures. A dish that feels like you’re creating edible art, but that’s secretly way easier to pull off than it looks.
That dish, my friends, is Bibimbap (pronounced bee-bim-bap).
If you’ve never had the pleasure, let me paint you a picture. Imagine a bowl of steaming, fluffy white rice acting as a blank canvas. Arranged on top, like colorful spokes on a wheel, are an array of separately sautéed, seasoned, and perfectly cooked vegetables. In the center sits a nest of savory, sweet, and tender marinated beef, crowned with a glorious sunny-side-up egg, its yolk just waiting to become a rich, golden sauce. The final flourish? A big, bold dollop of spicy-sweet gochujang sauce that ties this entire flavor festival together.
The magic of bibimbap isn’t just in its stunning appearance; it’s in the action. You get to be the maestro of your meal, grabbing your spoon and chopsticks and mixing everything together with gusto. The hot rice, the runny egg yolk, the crisp veggies, and that spicy sauce all become one incredible, harmonious bite. It’s a feel-good food experience that’s nourishing, exciting, and downright fun. So, are you ready to bring this Korean classic into your kitchen? Let’s dig in!
The Seoul-Food Bowl That Stole My Heart
My love affair with bibimbap didn’t start in a fancy restaurant. It started in a tiny, hole-in-the-wall spot in Seoul during a trip I took years ago. I was jet-lagged, a little overwhelmed, and desperately seeking something that felt like a warm hug. A local friend dragged me to this bustling place where the sound of sizzling stone pots and the lively chatter of diners filled the air.
I pointed at a picture on the wall—a bowl that looked like a rainbow had exploded in it. When it arrived, dolsot bibimbap in a scorching hot stone bowl, it was sizzling and crackling. The server gestured for me to mix it fast. As I did, the bottom layer of rice turned into this incredible, crispy, golden crust. That first bite was a revelation. It was warm, comforting, and packed with so many different textures and flavors—it was a complete meal and a total adventure in one bowl. It was the moment I truly understood that food is the universal language of comfort and connection. I’ve been chasing that perfect, crispy-bottomed bite in my own kitchen ever since.
Gathering Your Bibimbap Brigade: The Ingredients
Don’t let the list of ingredients intimidate you! Part of the beauty of bibimbap is its flexibility. Think of this as your blueprint. We’re building layers of flavor, and each component is simple on its own. Here’s what you’ll need, with a little chef-ly insight for each.
For the Beef Marinade:
- 8 oz beef tenderloin, finely sliced: Tenderloin is fantastic because it’s lean and tender, but you can also use ribeye or sirloin for a richer flavor. The key is to slice it against the grain as thinly as you can. Pro-tip: pop it in the freezer for 15-20 minutes first to firm it up, making slicing a breeze!
- 1/4 green apple, grated: This is my secret weapon! The natural enzymes in the apple help tenderize the beef, and it adds a subtle, sweet background note that balances the soy and garlic. It’s a game-changer.
- 3 garlic cloves, minced: Because what’s a good marinade without garlic? It’s the soul of this savory base.
- 1 tbsp soy sauce: For that essential salty, umami depth. Use tamari for a gluten-free version.
- 1 tbsp brown sugar: To caramelize and create a beautiful glaze on the beef as it cooks.
- 2 tsp sesame oil: We’re finishing the marinade with this nutty, aromatic oil. It’s the signature scent of so many Korean dishes.
For the Vibrant Veggies:
- 1 carrot, cut into matchsticks: Adds a gorgeous orange color and a lovely crunch. A julienne peeler is your best friend here!
- 1 zucchini, cut into matchsticks: Brings a gentle, fresh flavor and soft texture once sautéed.
- 1 bunch spinach, blanched and squeezed dry: This gives us our dark, leafy green component. Blanching it quickly in boiling water then shocking it in ice water keeps it vibrant and tender.
- 8 dried shiitake mushrooms, rehydrated and sautéed: Dried shiitakes have an intensely savory, almost meaty flavor that’s far superior to fresh here. Save the soaking liquid for a future soup!
- 2 cups bean sprouts, lightly boiled: They offer a fantastic, clean, and crisp texture. A quick boil (about 2 minutes) is all they need.
For the Legendary Gochujang Sauce:
- 3 tbsp gochujang (Korean chili paste): The star of the show! This fermented chili paste is spicy, sweet, and deeply complex. Find it in the Asian aisle of most grocery stores. There’s no true substitute, but sriracha can work in a pinch.
- 3 tbsp rice vinegar: Cuts through the richness and adds a necessary tang.
- 1 tsp soy sauce: A little extra umami boost for the sauce.
- 3 tsp white sugar: Balances the heat and vinegar. Adjust to your taste!
- 1 garlic clove, finely grated: Because we can never have too much garlic.
- 1 tsp sesame oil: Ties the sauce together with its signature aroma.
To Serve & Assemble:
- Steamed white rice (2 to 3 cups): Short-grain white rice is traditional—it’s nice and sticky. But brown rice or quinoa are great healthy swaps.
- 2 to 4 fried eggs (sunny-side-up preferred): The crown jewel! That runny yolk is non-negotiable for me. It’s the sauce that brings everything to life.
- Sesame seeds, for garnish: For a little toasty, visual flair.
Let’s Build Your Masterpiece: Step-by-Step Instructions
Okay, team! This is where the magic happens. We’re going to tackle this like a well-orchestrated kitchen dance. We’ll work on components one by one, and before you know it, you’ll be ready to assemble your beautiful bowls. Read through all the steps first—it’s the chef’s secret to a stress-free cooking experience.
Step 1: Marinate the Beef. In a medium bowl, combine the thinly sliced beef with the grated apple, minced garlic, soy sauce, brown sugar, and sesame oil. Use your hands to really massage those flavors into the meat. Let it hang out on the counter while you prep your veggies (15-30 minutes). This short marinating time is all it needs! Chef’s Hack: While the beef marinates, this is the perfect time to get your rice cooking and start rehydrating your dried shiitake mushrooms in hot water.
Step 2: Conquer the Vegetables. We cook each veggie separately to honor its unique texture and flavor. Don’t worry, it goes fast!
- Spinach & Bean Sprouts: Bring a pot of water to a boil. Blanch the spinach for 30 seconds, then remove with a slotted spoon and plunge into a bowl of ice water. Squeeze it completely dry, then season with a tiny pinch of salt and a few drops of sesame oil. In the same boiling water, cook the bean sprouts for 1-2 minutes until slightly softened but still crunchy. Drain and season the same way.
- Sautéed Veggies: Heat a drizzle of neutral oil (like vegetable or canola) in a skillet or wok over medium-high heat. Sauté the carrot matchsticks with a pinch of salt for about 1-2 minutes until they’re slightly softened but still snappy. Remove to a plate. Do the same with the zucchini. Finally, squeeze the water from your rehydrated shiitakes (slice them if they’re large), and sauté them until they’re browned and fragrant.
Chef’s Hack: No need to wash the pan between veggies—a little flavor crossover is a good thing! Just give it a quick wipe if there are any burnt bits.
Step 3: Cook the Beef. Using the same skillet (see a theme? Less cleanup!), cook the marinated beef over high heat. Spread it out in a single layer and let it sear without moving it for a minute to get a good caramelization. Then, stir-fry until it’s just cooked through, about 2-3 minutes total. You don’t want to overcook it! Remove it from the pan and set aside.
Step 4: Whisk the Gochujang Sauce. This is the easiest part. In a small bowl, whisk together the gochujang, rice vinegar, soy sauce, sugar, grated garlic, and sesame oil until it’s smooth and glorious. Taste it! Want it sweeter? Add a pinch more sugar. More tang? A splash more vinegar. You are the boss of your bibimbap sauce.
Step 5: Fry Those Perfect Eggs. Last but not least, fry up your eggs sunny-side-up. We want the whites to be fully set and the yolks to be gloriously runny and golden. A little crispy lace around the edges is always a welcome bonus.
Step 6: The Grand Assembly! Place a generous serving of warm, steamed rice into the bottom of each bowl. Artfully arrange your vegetable components and the beef in little piles around the edge of the rice. It’s okay to be fancy here! Place your beautiful fried egg right in the center. Drizzle with the gochujang sauce and sprinkle with sesame seeds.
Step 7: The Most Important Step. Serve immediately, and instruct everyone to dive in with their spoons and chopsticks, mixing everything together thoroughly. This is where the separate elements become one incredible, unified dish. Enjoy the symphony!
How to Serve Your Bibimbap Like a Pro
Presentation is half the fun with bibimbap! I love using wide, shallow bowls so you have plenty of room to create your colorful landscape. The traditional way is to arrange the veggies and beef in distinct sections around the perimeter, almost like the hands of a clock, with the egg as the centerpiece. It’s a real “wow” moment when you bring it to the table.
But hey, if you’re serving a hungry crowd and don’t have time for art, consider a bibimbap bar! Set out a big pot of rice, and all the components—the beef, each vegetable, the sauce, and a plate of fried eggs—in separate bowls. Let everyone build their own perfect combination. It’s interactive, fun, and ensures everyone gets exactly what they want.
For drinks, a crisp, cold lager or a dry Korean beer like Hite pairs wonderfully. If you’re not drinking, an iced barley tea or even sparkling water with a squeeze of lime is incredibly refreshing against the spicy, savory flavors.
Make It Your Own: Delicious Bibimbap Variations
The beauty of this recipe is its adaptability. Don’t be afraid to play with it based on what you have or what you’re craving!
- Go Veggie: Skip the beef and make it a vegetable bibimbap! You can add sautéed bell peppers, sliced onions, or even some crispy baked tofu or tempeh for protein.
- Spicy Pork Swap: Love pork? Swap the beef for thinly sliced pork belly or shoulder and marinate it the same way. It’s a fantastic, rich alternative.
- Dolsot (Stone Pot) Bibimbap: This is the ultimate experience. Heat an oven-safe stone or ceramic bowl in a 450°F oven for 30 minutes. Carefully remove it, coat the inside with a little sesame oil, add your rice, and assemble your bibimbap. The sizzling hot bowl will create an incredible crispy rice crust on the bottom. (Be super careful—the bowl will be extremely hot!)
- Korean Fusion Twist: Love Mexican flavors? Try a version with a base of cilantro-lime rice, use black beans and corn as your veggies, and mix the gochujang with a little lime juice and crema for the sauce. It’s a wild, delicious fusion!
- Lower-Carb Option: For a lighter version, swap the rice for cauliflower rice. Just be sure to sauté it to remove as much moisture as possible so your bowl isn’t soggy.
Beau’s Kitchen Chronicles: A Few Parting Thoughts
This recipe has been a living, evolving thing in my kitchen. The first time I made it, I was so focused on getting the vegetables perfectly straight that I forgot to cook the egg! We had to pause the whole assembly line to fry them up. My friends still give me a hard time about it. The moral of the story? It doesn’t have to be perfect. It just has to be delicious.
Over time, I’ve learned that the grated apple in the marinade was my own happy accident that stuck, and that a little extra sesame oil on the spinach is never a bad thing. Cooking is about making a recipe your own. So take this blueprint, run with it, and create a bibimbap that sings your song.
Bibimbap FAQs: Your Questions, Answered!
Q: My bibimbap sauce is too spicy! How can I tone it down?
A: No worries! The easiest way is to add a little more sugar or even a teaspoon of honey to balance the heat. You can also thin it out with a tablespoon of water or a touch more rice vinegar. Taste as you go!
Q: Can I make the components ahead of time?
A: Absolutely! This is a fantastic meal-prep dish. Cook all your vegetables and the beef, let them cool, and store them in separate airtight containers in the fridge for up to 3 days. The sauce can be made weeks ahead and kept in the fridge. When you’re ready to eat, just reheat the rice and veggies, fry a fresh egg, and assemble!
Q: My rice is getting cold by the time I assemble everything. Help!
A: This is a common one! The key is to have your rice ready and kept warm. Time your veggie cooking so it all finishes around the same time. Use a hot skillet for the beef and eggs right at the end. And remember, the hot rice will slightly warm the room-temp veggies when you mix it all together. For the best experience, use warm bowls—you can pop your empty serving bowls in a warm oven
Authentic Korean Bibimbap Recipe : Beef, Veggies, and Spicy Gochujang Sauce
Description
Your New Favorite Bowl of Sunshine: Korean Bibimbap
A vibrant, nourishing, and totally customizable Korean classic that’s as fun to assemble as it is to eat.
Ingredients
For the Beef Marinade:
-
8 oz beef tenderloin, thinly sliced
-
1/4 green apple, grated
-
3 garlic cloves, minced
-
1 tbsp soy sauce
-
1 tbsp brown sugar
-
2 tsp sesame oil
For the Vegetables:
-
1 carrot, julienned
-
1 zucchini, julienned
-
1 bunch spinach, blanched
-
8 dried shiitake mushrooms, rehydrated & sautéed
-
2 cups bean sprouts, lightly boiled
For the Gochujang Sauce:
-
3 tbsp gochujang (Korean chili paste)
-
3 tbsp rice vinegar
-
1 tsp soy sauce
-
3 tsp sugar
-
1 garlic clove, finely grated
-
1 tsp sesame oil
To Serve:
-
2–3 cups steamed short-grain rice
-
2–4 fried eggs (sunny-side-up preferred)
-
Sesame seeds for garnish
Instructions
-
Marinate the Beef:
Combine beef, apple, garlic, soy sauce, brown sugar, and sesame oil. Let rest 15–30 minutes. -
Prep Vegetables:
-
Blanch spinach 30 sec, shock in ice water, squeeze dry, season with salt & sesame oil.
-
Boil bean sprouts 1–2 min, drain, season.
-
Sauté carrot, zucchini, and mushrooms separately with a pinch of salt.
-
-
Cook the Beef:
Sear marinated beef in a hot skillet 2–3 minutes until just cooked. -
Make the Sauce:
Whisk together gochujang, rice vinegar, soy sauce, sugar, garlic, and sesame oil. Adjust to taste. -
Fry Eggs:
Sunny-side-up with set whites and runny yolks. -
Assemble Bowls:
-
Layer rice in bowls.
-
Arrange vegetables and beef around the rice.
-
Top with a fried egg.
-
Drizzle sauce and sprinkle sesame seeds. Mix before eating.
-
Notes
-
Prep ahead: Cook veggies and beef in advance; assemble fresh at mealtime.
-
Vegetarian option: Swap beef for tofu or extra mushrooms.
-
Crispy rice magic: Use a hot stone pot or cast iron for a golden crust.
-
Mild spice: Adjust gochujang with sugar or a splash of water.
Nutrition
- Calories: 450–500 kcal Per Serving
- Fat: 14 g
- Carbohydrates: 60 g
- Fiber: 6 g
- Protein: : 28 g
Final Thoughts: More Than a Meal, It’s an Experience
So, there you have it. Bibimbap isn’t just a recipe; it’s a invitation to play with your food, to celebrate color and texture, and to create something truly special from a handful of simple, wholesome ingredients. It’s the culinary equivalent of a burst of sunshine in a bowl—nutritious, vibrant, and guaranteed to lift your spirits.
Remember, the goal isn’t perfection. It’s the joy of the process. Whether you arrange your vegetables with artistic precision or simply pile them on with hungry abandon, the final, glorious mix is what it’s all about. That moment when the runny yolk, spicy gochujang, and warm rice become one is a little bit of magic you can create any night of the week.
Don’t be afraid to make it your own. Use this recipe as your trusted blueprint, but listen to your cravings. Swap the veggies, change the protein, or adjust the sauce to your preferred level of fire. This is your kitchen, and your bibimbap is your masterpiece.
Now, it’s your turn. Gather your ingredients, put on some music, and treat yourself to a bowl of pure, unadulterated joy. Your new favorite meal is waiting.
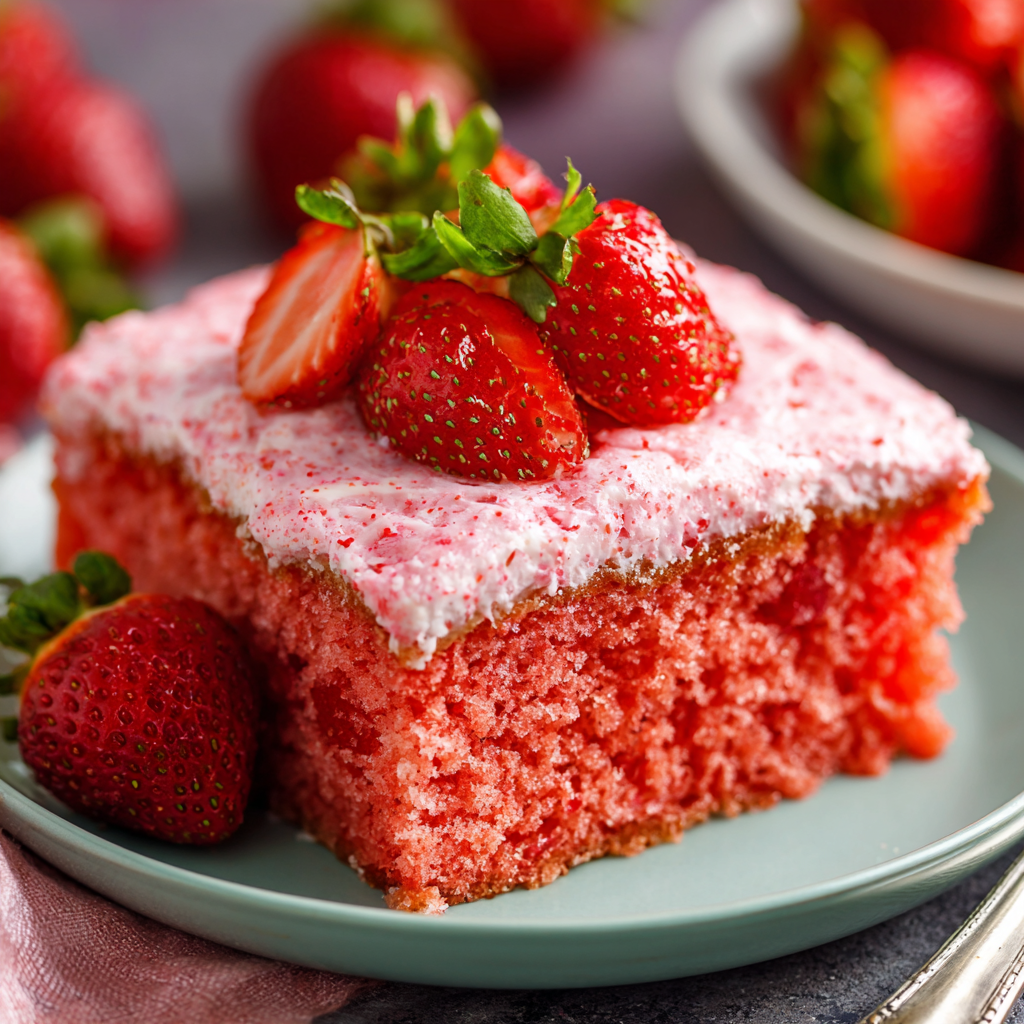
Best Ever Strawberry Cake : Moist, Fruity, and Totally Irresistible
The Best Ever Strawberry Cake: A Slice of Sunny Nostalgia
Hey friends, Beau here! Welcome back to the Feastical kitchen, where the coffee is always on and the oven is usually preheating for something wonderful. Today, we’re diving headfirst into a recipe that holds a special place in my heart and, I’m willing to bet, will quickly earn one in yours. We’re making my absolute Best Ever Strawberry Cake.
Now, I know what you might be thinking. “Beau, another strawberry cake?” And to that I say, oh yes. But this isn’t just any strawberry cake. This is the one that makes people’s eyes light up. The one that tastes like the very essence of a ripe, sun-warmed strawberry field, captured in an incredibly moist, tender, and vibrantly pink crumb. It’s the cake you bring to a potluck and leave with an empty pan and a dozen new friends asking for the recipe.
We’re using a little kitchen magic with a box mix base (no shame in my game—it’s a fantastic shortcut!) and amplifying it with real, pureed strawberries and a hint of strawberry Jell-O for that unforgettable flavor and color. Then, we’re crowning this beauty with a luscious, creamy, strawberry-speckled cream cheese frosting that is quite literally the icing on the cake. So, tie on your favorite apron, grab your mixing bowl, and let’s bake a memory together.
A Sweet Slice of Memory
This cake always takes me right back to my Grandma Dot’s linoleum-floored kitchen. Every summer, when the local strawberry patches were bursting with red, juicy gems, she’d let me tag along to pick them. I’d end up with a red-stained shirt and a belly full of berries, but she never minded. Back in her kitchen, the air thick with the sweet, jammy scent of cooking fruit, she’d let me press the pulse button on her old beige food processor to puree our haul.
She’d whip up this very cake, and the wait for it to cool felt like an eternity. The reward, though, was a thick layer of pink frosting and a slice so soft and fruity it felt like summer itself. It was more than dessert; it was a celebration of the season, of family, and of the simple, profound joy that comes from sharing something you made with love. That’s the spirit I want to bring to your kitchen today.
Gathering Your Sunshine Ingredients
This recipe is a beautiful blend of convenience and from-scratch heart. Here’s everything you’ll need to create this masterpiece. I’ve included my chef-y insights and easy swaps to make this cake your own!
For the Strawberry Cake:
- 1 box white cake mix: This is our trusty foundation. I prefer a simple white mix because it lets the strawberry flavor shine without competing with vanilla or butter notes.
- 3 tablespoons all-purpose flour: A little secret weapon! This helps balance the extra moisture from the puree, giving the cake a better structure and that perfect, moist-but-not-dense crumb.
- 1 (3 oz) box strawberry gelatin (Jell-O): This is the flavor and color powerhouse. It gives the cake its signature vibrant pink hue and an intense strawberry punch that pure fruit alone can’t always achieve.
- ½ cup water: Just plain water to help bring the batter together.
- ¾ cup canola oil: Oil keeps this cake supremely moist for days, far better than butter would in this particular recipe. For a different flavor, you can use an equal amount of melted coconut oil.
- 4 large eggs: Make sure they’re at room temperature! This helps them incorporate more easily, creating a smoother, more emulsified batter and a lighter cake texture.
- 2 cups fresh or frozen pureed strawberries (divided): The star of the show! We use 1 cup in the cake and save the other for the frosting. If using frozen, just thaw them first. No need to drain—that liquid is pure flavor!
For the Cream Cheese Frosting:
- 1 stick (½ cup) butter, softened: Unsalted is my go-to, so I can control the salt. “Softened” means it should give slightly when you press it, but not be greasy or melted.
- 1 (8 oz) package cream cheese, softened: Full-fat cream cheese gives the frosting the best structure and richest flavor. Let it sit on the counter alongside the butter for at least 30 minutes.
- 1 cup fresh or frozen pureed strawberries (reserved from above): This gives our frosting that beautiful pink color and real fruit flavor. Pro-tip: If your puree is very watery, you can simmer it for 5-10 minutes to reduce it slightly and concentrate the flavor.
- 3 cups powdered sugar: This sweetens and thickens the frosting. You can adjust this to your taste—a little more if you like it sweeter, a little less if you prefer a tangier frosting.
Let’s Bake! Your Step-by-Step Guide to Strawberry Bliss
Ready to make some magic? Follow these steps, and you’ll be a strawberry cake hero in no time. I’ve sprinkled in my favorite chef hacks to ensure your success.
- Preheat and Prep: Fire up your oven to 350°F (175°C). Now, take your 9×13-inch pan and give it a good greasing with butter or baking spray. I’m a big fan of the “baker’s goop” method—a quick brush of oil followed by a light dusting of flour—for a perfectly non-stick release every time.
- The Dry Team Assembles: In a large mixing bowl, whisk together the white cake mix, your 3 tablespoons of flour, and the entire box of strawberry Jell-O. Whisking these dry ingredients first ensures everything is evenly distributed, so you don’t get any pockets of plain cake mix or gelatin. This is the secret to that consistent, beautiful pink color throughout.
- Bring in the Wet Crew: Pour in the water and canola oil. Crack in your room-temperature eggs one at a time, mixing well after each addition. I like to use my hand mixer on medium speed for this. Why one egg at a time? It allows each egg to fully emulsify into the batter, which gives the cake a stable and tender structure. Your batter should be looking thick and luscious at this point.
- The Star Ingredient Enters: Now, for the grand finale—gently fold in 1 cup of your strawberry puree. Once it’s mostly incorporated, crank that mixer back up to medium and beat for a full 2 minutes. I know it seems like a long time, but this is crucial! It aerates the batter, giving your cake a wonderfully light and fluffy texture. You’ll see the batter turn a gorgeous, uniform pink.
- Bake to Perfection: Pour the beautiful pink batter into your prepared pan and smooth the top with a spatula. Slide it into the center of your preheated oven and bake for 40-45 minutes. You’ll know it’s done when the top is springy to the touch and a toothpick inserted into the center comes out clean or with a few moist crumbs attached. No wet batter!
- The Patience Test: This is the hardest part, I swear! Place the cake pan on a wire rack and let it cool completely. I mean it—completely. If you frost a warm cake, that glorious cream cheese frosting will melt into a sad, runny puddle. Let’s avoid the heartbreak, folks.
While the Cake Cools, Make the Frosting:
- In a medium bowl, combine the softened butter and softened cream cheese. Beat them together with a hand mixer until they are completely smooth, creamy, and no lumps remain. Scrape down the sides of the bowl to make sure everything is incorporated.
- Add in your reserved 1 cup of strawberry puree and mix on low speed until just combined. We’re adding liquid here, so starting on low prevents a pink shower of frosting from covering your kitchen!
- Gradually add the powdered sugar, one cup at a time, mixing on low speed until incorporated after each addition. Once all the sugar is in, turn the mixer up to medium-high and beat for 1-2 minutes until the frosting is fluffy, smooth, and dreamy.
How to Serve This Stunner
Once that cake is cool and frosted, the fun begins! For a classic, homey feel, you can serve it right from the pan. I love to add a few fresh, sliced strawberries on top for a pop of color and a hint of what’s inside.
If you’re feeling a little fancy, you can slice it into squares and plate it individually. A little dollop of freshly whipped cream and a single, perfect mint leaf on the side turns it into a restaurant-worthy dessert. This cake is perfectly happy paired with a cold glass of milk, a hot cup of coffee, or even a glass of bubbly Prosecco for a real celebration.
Make It Your Own: Fun Recipe Twists
One of the best things about this recipe is its versatility. Feel free to play with it! Here are a few of my favorite variations:
- Strawberry Lemonade Cake: Add the zest of one lemon to the cake batter and a tablespoon of fresh lemon juice to the frosting. The bright, tangy lemon is a fantastic partner for the sweet strawberries.
- Chocolate-Dipped Strawberry Version: Fold ½ cup of mini chocolate chips into the cake batter. You can even drizzle the frosted cake with a simple chocolate ganache.
- Layer Cake Extravaganza: Feel like a baking rockstar? Double the recipe and divide the batter between three greased and floured 8-inch round cake pans. Bake for 25-30 minutes, then cool completely. Use the frosting between the layers and all over the outside for a spectacular birthday or celebration cake.
- Dairy-Free Delight: Use a vegan cream cheese and plant-based butter stick for the frosting. The cake itself is already dairy-free!
Beau’s Chef’s Notes
This recipe has been a living, evolving thing in my kitchen for years. I originally found a version of it scribbled on an index card at a flea market, and I’ve tweaked and tuned it ever since. Adding the extra flour was a game-changer I discovered after one particularly dense (but still delicious!) cake fail. The first time I made it for a big family reunion, my uncle ate three pieces and then tried to hire me as his personal baker. I consider that a win. Don’t be afraid to make it your own—that’s where the real magic happens.
Your Questions, Answered!
I’ve made this cake a hundred times, and I’ve heard all your brilliant questions. Here are the answers to the most common ones.
Q: Can I use fresh strawberries instead of frozen?
A: Absolutely! Fresh, ripe strawberries are fantastic. Just hull them, puree them, and you’re good to go. If they’re very juicy, you might get a slightly wetter batter, but it bakes up just fine.
Q: My frosting is a little runny. What can I do?
A> This can happen if your puree is very watery or if your cream cheese/butter was too soft. The best fix is to pop the frosting bowl into the fridge for 20-30 minutes to firm up, then whip it again. If it’s still too soft, you can add a bit more powdered sugar, a quarter cup at a time, until it reaches a spreadable consistency.
Q: Why did my cake sink in the middle?
A> This is usually an issue with leavening or under-baking. Make sure you’re beating the batter for the full 2 minutes as directed—this incorporates air. Also, be sure your oven is fully preheated and don’t open the oven door during the first 30 minutes of baking. Use that toothpick test to ensure it’s fully baked!
Q: Can I make this cake ahead of time?
A> You sure can! The cake itself (unfrosted) can be baked, cooled, wrapped tightly in plastic wrap, and stored at room temperature for a day. You can also freeze it for up to 3 months. The frosted cake must be stored in the refrigerator due to the cream cheese frosting and will keep beautifully for 2-3 days.
Best Ever Strawberry Cake : Moist, Fruity, and Totally Irresistible
Description
Hey friends! Today we’re making a strawberry cake that’s bright, moist, and absolutely bursting with flavor. This cake combines the ease of a box mix with the natural sweetness of fresh strawberries, all crowned with a creamy strawberry-speckled cream cheese frosting. Perfect for birthdays, potlucks, or any day that needs a little sunny sweetness.
Ingredients
For the Strawberry Cake:
-
1 box white cake mix
-
3 tbsp all-purpose flour
-
1 (3 oz) box strawberry gelatin (Jell-O)
-
½ cup water
-
¾ cup canola oil (or melted coconut oil)
-
4 large eggs, room temperature
-
2 cups fresh or frozen strawberries, pureed (divide: 1 cup for cake, 1 cup for frosting)
For the Cream Cheese Frosting:
-
½ cup (1 stick) unsalted butter, softened
-
1 (8 oz) package cream cheese, softened
-
1 cup reserved strawberry puree
-
3 cups powdered sugar
Instructions
1. Prepare and Preheat
-
Preheat oven to 350°F (175°C).
-
Grease a 9×13-inch baking pan with butter or non-stick spray, lightly dust with flour.
2. Mix Dry Ingredients
-
In a large bowl, whisk together cake mix, flour, and strawberry Jell-O until well combined.
3. Add Wet Ingredients
-
Pour in water and oil, then beat in eggs one at a time. Mix until smooth.
4. Fold in Strawberry Puree
-
Gently fold in 1 cup of strawberry puree. Beat on medium speed for 2 minutes to aerate the batter.
5. Bake the Cake
-
Pour batter into the prepared pan and smooth the top.
-
Bake 40–45 minutes, until a toothpick comes out clean or with a few moist crumbs.
-
Let the cake cool completely on a wire rack before frosting.
6. Make the Frosting
-
Beat butter and cream cheese together until smooth.
-
Mix in reserved strawberry puree on low speed.
-
Gradually add powdered sugar, one cup at a time, until frosting is fluffy.
7. Frost and Serve
-
Spread frosting evenly over cooled cake.
-
Optional: Top with fresh strawberry slices or a mint leaf for garnish.
-
Serve with milk, coffee, or sparkling water for a refreshing treat.
Notes
-
Room temperature eggs create a smoother batter and lighter cake.
-
If frosting is too runny, chill for 20–30 minutes and re-whip.
-
Cake sinking? Ensure the oven is fully preheated and don’t open the door during the first 30 minutes of baking.
-
Make ahead: Cake can be baked and frozen unfrosted for up to 3 months. Frosted cake stores in the fridge for 2–3 days.
Nutrition
- Calories: 410 Cal Per Serving
- Fat: 22g
- Carbohydrates: 48g
- Protein: 4g
Nutritional Information*
Okay, let’s talk real life. This is a celebratory dessert, a treat to be enjoyed with joy and zero guilt. Here’s a general breakdown per serving (based on 12 servings), but please remember this is an estimate and can vary based on specific ingredients used.
- Calories: ~410
- Carbohydrates: 48g
- Fat: 22g
- Protein: 4g
*This information is provided as a courtesy and is an estimate only. For precise dietary needs, please calculate using the specific brands and ingredients you use.
Final Sweet Thoughts
And there you have it, my friends—my heart and soul poured into one perfect, pink, and utterly irresistible strawberry cake. It’s a recipe built on nostalgia, perfected with a few kitchen hacks, and designed to bring people together. I truly believe that the best meals and the best desserts aren’t just about the food; they’re about the connection, the stories, and the warm, full-bellied happiness that follows.
So, I hope you’ll give this recipe a try. I hope it becomes a staple in your home, the star of your summer picnics, and the dessert that your own family requests for years to come. When you make it, tag me @Feastical online—I’d love to see your beautiful creations!
Until next time, keep your whisks busy and your hearts full.
– Beau
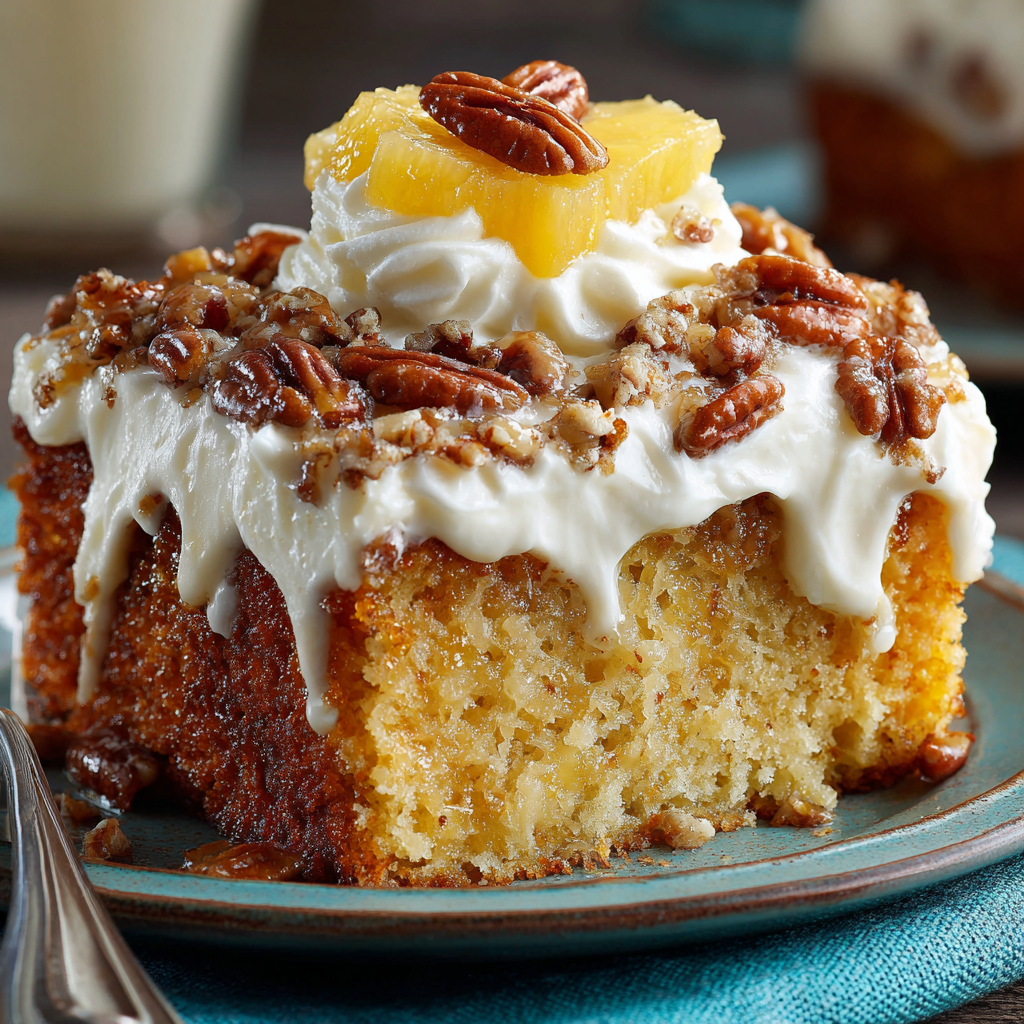
Elvis Presley Pineapple Cake : Sweet, Tangy & Southern Classic
Elvis Presley Pineapple Cake: A Sweet Slice of Southern Legend
Hey friends, Beau here! Welcome back to the Feastical kitchen, where the coffee’s always on and the oven is permanently preheated for something wonderful. Today, we’re whipping up a dessert that’s as big on personality as the man it’s named after. We’re talking about the one, the only, the utterly irresistible Elvis Presley Pineapple Cake.
Now, if you’ve never experienced this Southern classic, you are in for a treat that will make your taste buds sing “Hound Dog” with joy. Imagine this: a supremely moist white cake, still warm from the oven, gets poked all over and drenched in a sweet-and-tangy pineapple syrup that soaks right down to the bottom. Then, while it’s cooling and dreaming of its glorious future, we whip up a frosting that could probably solve world peace—a lush, tangy cream cheese frosting loaded with buttery, toasted pecans. This isn’t just a cake; it’s an experience. It’s a poke cake, a dump cake, a sheet cake, and a piece of culinary history all rolled into one glorious 9×13 pan.
So, whether you’re headed to a potluck, celebrating a Tuesday, or just need a dessert that feels like a warm, sugary hug from the King himself, you’ve come to the right recipe. It’s simple, soulful, and guaranteed to bring everyone together. Let’s get baking!
A Cake That Whispers Stories
This cake takes me right back to my grandma’s linoleum-floored kitchen. She wasn’t a fancy baker, but boy, did she have a roster of legendary desserts. The first time I saw her make this, I was mesmerized. She’d just taken a golden cake out of the oven, and before I could even ask for a corner piece, she was stabbing it with the tines of a fork like it had personally offended her.
“What are you doing, Nana?” I whispered, horrified. She just winked, her hands moving with a practiced ease I now recognize as pure kitchen confidence. Then came the bubbling pineapple and sugar mixture, which she poured over the entire thing. The cake gulped it down, drinking in every last drop of that syrupy goodness. The smell that filled her kitchen—sweet pineapple, vanilla, and that unmistakable scent of a well-loved oven—is a core memory for me. She’d let me lick the cream cheese frosting bowl clean, and we’d wait, somewhat impatiently, for the cake to cool enough to frost and slice. That first bite was always a revelation: impossibly moist, tangy, sweet, and nutty all at once. It taught me that the best recipes aren’t just about taste; they’re about the stories and the people we share them with.
Gathering Your Band: The Ingredients
Part of the beauty of this cake is its beautiful simplicity. We’re starting with a trusty box mix to keep things easy, but we’re transforming it into something completely homemade and spectacular. Here’s your lineup:
- 1 box white cake mix (plus the ingredients listed on the box, typically eggs, oil, and water). Chef’s Insight: The neutral flavor of a white cake mix is the perfect canvas for our pineapple star. Using the mix lets us focus our energy on the from-scratch syrup and frosting that truly make this cake legendary.
- 1 (8 oz) can crushed pineapple, WITH the juice. Chef’s Insight: Do not drain this! The juice is liquid gold for our soaking syrup. It provides the tangy, tropical flavor that cuts through the sweetness and makes this cake so uniquely delicious.
- 1 cup granulated sugar. Why it’s here: We’re cooking this with the pineapple to create a simple syrup that will soak into the cake, giving it that signature moist texture and flavor in every single bite.
- 1 (8 oz) package cream cheese, softened. Pro Tip: Softened is key! Leave it on the counter for at least 30-60 minutes before you start. If it’s too cold, you’ll end up with lumpy frosting, and we’re going for smooth and dreamy here.
- ½ cup (1 stick) butter, softened. Chef’s Insight: Like the cream cheese, your butter needs to be at room temp for a silky, spreadable frosting. I use unsalted, but salted will work just fine and add a nice little salty contrast.
- 3 cups powdered sugar. Why it’s here: This gives our frosting its structure and sweet, melt-in-your-mouth quality.
- 1 teaspoon pure vanilla extract. Chef’s Insight: A splash of vanilla is the secret handshake of good baking. It rounds out the flavors in the frosting and makes everything taste more… well, more like home.
- 2–3 cups chopped pecans. Substitution Tip: Not a nut person? You can leave them out, but they add a fantastic buttery crunch. If you’re not a fan of pecans, walnuts would be a great substitute. For the ultimate flavor, toast them in a dry skillet for a few minutes until fragrant before chopping!
Let’s Make Some Magic: Step-by-Step Instructions
Alright, team! Aprons on, ovens preheating, and let’s create some kitchen magic. Follow these steps, and you’ll have a show-stopping dessert in no time.
- Bake That Base: Start by preheating your oven to the temperature specified on your cake mix box (usually 350°F). Grease and flour a 9×13-inch baking pan, or give it a good spray with baking spray. Prepare the cake mix according to the package directions. Pour the beautiful, smooth batter into your prepared pan and pop it in the oven. Bake for the time listed on the box, or until a toothpick inserted into the center comes out clean. Chef’s Hack: For an extra-moist crumb, I sometimes substitute the water called for on the box with an equal amount of whole milk or even buttermilk!
- The Great Poke: As soon as the cake comes out of the oven, place the pan on a wire cooling rack. Now, take a fork, a wooden skewer, or even the handle of a wooden spoon, and poke holes all over the top of the warm cake. Get enthusiastic about it! You want plenty of channels for that pineapple syrup to dive deep into the cake’s layers. Little Chef Story: This is my favorite part. It feels a little destructive and a whole lot of fun. Don’t be shy!
- Create the Pineapple Syrup: While the cake is baking (or cooling slightly), let’s make the magic potion. In a medium saucepan, combine the entire can of crushed pineapple (with its juice) and the 1 cup of granulated sugar. Stir it together over medium heat until the sugar completely dissolves. Bring it to a gentle boil, letting it bubble for a minute or two until it thickens slightly and becomes syrupy. Pro Tip: Keep stirring to prevent the sugar from sticking and burning on the bottom of the pan.
- The Soaking Ceremony: Slowly and carefully, pour the hot pineapple syrup evenly over the warm, hole-y cake. Use a spatula to gently spread it and encourage it into all those little holes. Watch as the cake eagerly drinks it all in. This is the step that transforms a simple box mix into a moist, flavor-packed masterpiece. Let the cake cool completely in the pan on the wire rack. Patience is a virtue here!
- Whip Up the Frosting: Once the cake is completely cool, it’s frosting time! In a large mixing bowl, beat the softened cream cheese and softened butter together with an electric mixer on medium speed until it’s completely smooth, creamy, and lump-free. This should take about 2 minutes. Scrape down the sides of the bowl. Add the vanilla extract. Now, gradually add the powdered sugar, one cup at a time, beating on low speed at first to avoid a powdered sugar snowstorm in your kitchen, then increasing to high until the frosting is light and fluffy. Chef’s Hack: If your frosting seems a bit thick, add a teaspoon of milk or pineapple juice to thin it. If it’s too thin, add a little more powdered sugar.
- Fold in the Pecans & Frost: Switch to a spatula and gently fold in the chopped pecans, reserving a handful for sprinkling on top if you’d like. Now, spread that glorious, nut-studded frosting evenly over the completely cooled cake. Why we wait: If you frost the cake while it’s still warm, the frosting will melt into a sad, runny puddle. Letting the cake cool ensures a beautiful, thick layer of frosting that holds its shape.
How to Serve This Southern Stunner
This cake is a beautiful, rustic dessert that doesn’t need a lot of fuss to shine. I like to serve it right from the pan—it feels homey and inviting. For a picture-perfect slice, use a sharp knife and wipe it clean between cuts.
While it’s absolutely divine all on its own, a little flair never hurt anybody. For a special occasion, serve each square with a dollop of freshly whipped cream and a maraschino cherry on top for a real “Elvis in Vegas” vibe. A sprinkle of extra toasted pecans over the top adds a nice textural contrast. And a cold glass of milk or a hot cup of black coffee is the non-negotiable, perfect beverage pairing for this sweet, rich treat. It’s the ultimate crowd-pleaser for picnics, potlucks, and family dinners alike.
Make It Your Own: Recipe Variations
One of the best things about this recipe is how adaptable it is! Feel like mixing it up? Here are a few of my favorite twists:
- Coconut Dream: Elvis loved peanut butter and banana, but he was also a fan of coconut! Fold 1 cup of sweetened shredded coconut into the frosting along with the pecans for a tropical tornado of flavor.
- Banana Split Upgrade: Mash one very ripe banana and add it to the cake batter along with the other ingredients called for on the box. You’ll get a wonderful banana bread-like flavor that pairs incredibly with the pineapple.
- The “No-Nut” Navigator: Have a nut allergy? Simply leave out the pecans! The cake is still phenomenal. You could also substitute with a cup of toasted coconut for a different kind of crunch.
- Bourbon Caramel Drizzle: For a truly grown-up version, add a tablespoon of good bourbon to the cream cheese frosting. Then, right before serving, drizzle the slices with a warm salted caramel sauce. You’re welcome.
- From-Scratch Swagger: Feeling ambitious? Use your favorite homemade vanilla cake recipe instead of the box mix. Just bake it in a 9×13 pan until a toothpick comes out clean, and proceed with the recipe as written.
Beau’s Kitchen Chronicles: Chef’s Notes
This recipe has been on quite a journey in my own kitchen. I’ve made it for heartbroken friends, jubilant birthday parties, and sleepy Sunday afternoons. One time, I was so eager to taste it that I frosted it while it was still slightly warm. Let’s just say I ended up with more of a “pineapple cream cheese soup cake.” It still tasted amazing, but it was a hilarious, delicious mess. Lesson learned: let the cake cool!
Over the years, I’ve found that toasting the pecans is the single biggest flavor upgrade you can make for minimal effort. It unlocks their natural oils and gives the frosting a deep, buttery, nutty flavor that is just unforgettable. This cake also gets even better the next day, as the flavors continue to meld and marry in the fridge. Trust me on that.
Your Questions, Answered: FAQs & Troubleshooting
Q: My syrup is super runny and pooled at the bottom of the cake. What happened?
A: This usually means the cake was too cool when you added the syrup, or the syrup wasn’t thick enough. Make sure the syrup comes to a genuine gentle boil and let it cook for a full 1-2 minutes to thicken. And pour it over the cake the *moment* it comes out of the oven while it’s still very warm.
Q: Can I make this cake ahead of time?
A: Absolutely! In fact, I often do. Bake it, soak it, and let it cool completely. Then, cover it tightly and store it in the refrigerator for up to 2 days. Make the frosting separately and store it in an airtight container in the fridge. Let the frosting soften at room temp for 30 minutes before spreading it on the cake the day you plan to serve it.
Q: My frosting is lumpy! How can I fix it?
A> Lumpy frosting is almost always due to the cream cheese and/or butter not being soft enough. To salvage it, let the frosting sit at room temperature for a bit longer and then beat it again with your mixer. If that doesn’t work, you can press it through a fine-mesh sieve—it’s a bit of a workout, but it will smooth it out!
Q: Can I use a different pan, like two 9-inch rounds?
A> You can, but the baking time will be shorter, so keep a close eye on it. The real trick will be poking and pouring the syrup over two layers. You’ll want to divide the syrup evenly between them. It makes for a beautiful layered cake, but the classic 9×13 is definitely the easiest route.

Elvis Presley Pineapple Cake : Sweet, Tangy & Southern Classic
- Total Time: 1.5 hrs
Description
Meet the Elvis Presley Pineapple Cake—a dessert so luscious, it could make the King himself swoon. This Southern classic combines a moist white cake soaked in warm pineapple syrup and topped with a rich, tangy cream cheese frosting loaded with buttery toasted pecans. It’s sweet, tangy, nutty, and utterly soul-satisfying. Whether for potlucks, family gatherings, or a little weekday indulgence, this cake brings all the nostalgia and flavor of a Southern kitchen right to your table. Get ready for a dessert that sings in perfect harmony!
Ingredients
-
1 box white cake mix (plus ingredients listed on the box)
-
1 (8 oz) can crushed pineapple with juice
-
1 cup granulated sugar
-
1 (8 oz) package cream cheese, softened
-
½ cup (1 stick) butter, softened
-
3 cups powdered sugar
-
1 tsp vanilla extract
-
2–3 cups chopped toasted pecans
Instructions
-
Bake the Cake: Prepare cake mix per box instructions. Bake in a greased 9×13 pan at 350°F until a toothpick comes out clean.
-
Poke the Cake: While hot, poke holes all over the top with a fork or skewer.
-
Make Pineapple Syrup: In a saucepan, combine crushed pineapple (with juice) and sugar. Bring to a gentle boil for 1–2 minutes until syrupy.
-
Soak the Cake: Pour the hot syrup evenly over the warm cake, spreading gently. Let cool completely.
-
Frosting Time: Beat softened cream cheese and butter until smooth. Add vanilla, then gradually mix in powdered sugar until fluffy.
-
Add the Crunch: Fold in chopped pecans (reserve some for topping) and spread frosting evenly over the cooled cake.
-
Chill & Serve: Refrigerate at least 30 minutes before slicing.
Notes
-
Substitute milk or buttermilk for the water in the cake mix for extra richness.
-
Toast pecans for a deeper flavor.
-
For a tropical twist, add shredded coconut to the frosting.
- Prep Time: 15 min
- Cook Time: 30 min
Nutrition
- Calories: 420 Cal Per Serving
- Fat: 23g
- Carbohydrates: 48g
- Protein: 5g
Nutritional Info (A Slice of Reality)
Now, let’s be real, y’all. This is a celebration cake, a treat, a slice of pure joy. It’s not a health food, and it doesn’t pretend to be! But I believe in transparency, so here’s a general estimate of what you’re looking at per serving (based on 12 servings).
Remember, these are estimates and can vary based on the specific brands of ingredients you use. If you need precise dietary information, I always recommend using a trusted online nutrition calculator with your exact ingredients.
Per Serving (estimate):
Calories: ~430 | Total Carbohydrates: 42g | Fat: 27g | Protein: 4g
Final Sweet Thoughts
And there you have it, my friends—the legendary Elvis Presley Pineapple Cake in all its sweet, tangy, nutty glory. This recipe is more than just a list of ingredients; it’s a ticket to creating your own kitchen memories. It’s a testament to the fact that the most beloved dishes are often the simplest ones, made with a little bit of love and a whole lot of flavor.
I hope you bake this cake, share it with people you adore, and maybe even start a new tradition of your own. If you make it, I’d be thrilled to hear about it! Tag me on social @Feastical or drop a comment on the blog. Now, go forth and bake something Feastical!
With a full heart and an even fuller plate,
Beau
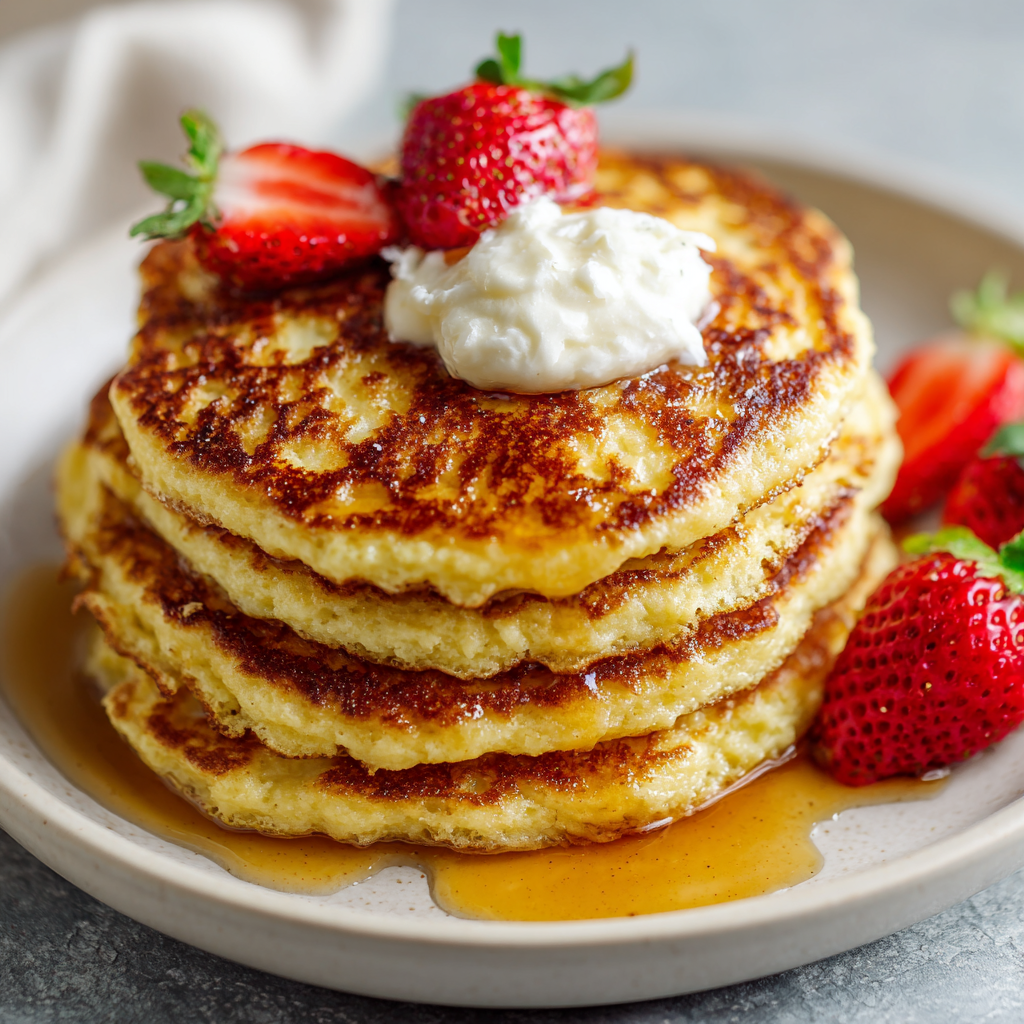
Cottage Cheese Pancakes : Fluffy, Low Carb, and Protein-Packed
Say Goodbye to Sad, Floppy Pancakes: Hello Fluffy Cottage Cheese Pancakes!
Hey there, friend! Beau here, welcoming you back to my cozy corner of the internet, Feastical. Let’s talk about a classic morning dilemma. You’re standing in your kitchen, stomach rumbling, dreaming of a stack of warm, fluffy pancakes. But then that little voice in your head chimes in, reminding you that in about an hour, that sugar rush is going to crash and burn, leaving you hangry and hunting for a snack before lunch even rolls around. Sound familiar?
For the longest time, I thought I had to choose between a breakfast that tasted like a weekend treat and one that actually fueled my day. But then, I discovered a secret weapon hiding in plain sight in my fridge: cottage cheese. I know, I know. It might not sound like the most glamorous pancake ingredient, but trust me on this. When you blend it up, it performs absolute magic.
These Cottage Cheese Pancakes are the holy grail of breakfast. They’re naturally low in carbs, packed with a serious protein punch, and they cook up with this incredible golden-brown crisp on the edges and a melt-in-your-mouth, fluffy interior that will absolutely blow your mind. They’re the satisfying, feel-good food you crave, without the mid-morning slump. They come together in one bowl in about 15 minutes flat, and they’re so versatile, you can dress them up sweet or take them in a savory direction. So, grab your favorite mixing bowl and let’s turn that morning dilemma into your new favorite breakfast victory.
The Accidental Pancake That Changed My Mornings
This recipe has a fun little origin story, as the best kitchen discoveries often do. It was a lazy Sunday morning, and I was determined to clear out the fridge before my weekly grocery run. Staring back at me was a almost-finished container of cottage cheese, a half-dozen eggs, and a bag of almond flour from a previous baking experiment. The classic “clean-out-the-fridge” scramble felt a little too predictable.
On a whim, I decided to throw caution to the wind. I dumped everything into my blender, gave it a whir, and hoped for the best. What came out of that skillet was a revelation. They were the lightest, most protein-packed pancakes I’d ever tasted. They didn’t feel heavy in my stomach, but they kept me full and energized all the way until a late lunch. It was a total “Aha!” moment. It reminded me that the best recipes aren’t always found in fancy cookbooks; sometimes, they’re born from a little kitchen creativity and a willingness to play with your food. Now, this happy accident is a staple in my home, and I’m just so thrilled to share it with you.
Gathering Your Pancake Power Players
One of the best things about this recipe is its beautiful simplicity. You probably have most of this in your kitchen right now! Here’s the lowdown on what we’re using and why each ingredient is a superstar.
- 1 Cup Cottage Cheese: This is our secret weapon! It’s the source of our major protein boost and creates an incredibly tender, moist crumb. Chef’s Insight: Don’t stress about the curds! We’ll blend the batter until smooth, so no one will ever know our secret. For the creamiest result, I like to use 4% milkfat, but low-fat works great, too.
- 3 Large Eggs: Our binding agents and structure-builders. Eggs give these pancakes their lovely lift and rich, satisfying texture. They’re essential for that perfect flip!
- ½ Cup Almond Flour: This is my go-to for a low-carb, gluten-free base that adds a wonderfully nutty, buttery flavor. Substitution Tip: No almond flour? No problem! Oat flour works beautifully for a slightly higher-carb option, and all-purpose flour will do in a pinch (use ⅓ cup).
- ¼ Teaspoon Baking Powder: Our little lift agent! It gives the pancakes an extra bit of fluffiness and helps them achieve that perfect, airy interior.
- Pinch of Salt: Never, ever skip the salt! It’s the flavor enhancer that makes all the other ingredients sing, balancing the richness of the eggs and cheese.
- Optional Flavor Boosters: This is where you make it your own! For a sweet version, a splash of vanilla extract or a sprinkle of cinnamon is divine. For a savory twist, think fresh chives or a crack of black pepper.
Let’s Get Flipping! Your Foolproof Pancake Method
Ready to see how easily this all comes together? I’ll walk you through every step, sharing my favorite little chef hacks to ensure pancake perfection every single time.
- Combine the Wet Team. In a mixing bowl, add your cottage cheese and eggs. Now, here’s my first pro-tip: use a blender or an immersion blender for this step if you have one. Blending for just 15-20 seconds will give you an impeccably smooth, lump-free batter that cooks evenly. If you’re going the manual route, just whisk with gusto until the mixture is as smooth as you can get it!
- Bring in the Dry Squad. To your smooth cottage cheese and egg mixture, add the almond flour, baking powder, salt, and any of your chosen flavorings (vanilla, cinnamon, etc.). Gently fold everything together with a spatula until just combined. Chef’s Hack: A few small lumps are totally fine! Overmixing can make pancakes tough. We want tender, not rubbery.
- The Power of the Pause. Let the batter rest for about 5 minutes. This is a non-negotiable, friends! It allows the almond flour to fully hydrate and the baking powder to start doing its thing. You’ll see the batter thicken up slightly, which is exactly what we want for fluffy, well-shaped pancakes.
- Heat Things Up. While the batter rests, place a non-stick skillet or griddle over medium heat. Let it get properly hot. To test if it’s ready, flick a few drops of water onto the surface – if they sizzle and dance, you’re good to go. Lightly grease the pan with your favorite cooking spray, butter, or a touch of avocado oil.
- Cook to Golden Perfection. Using a ¼-cup measuring cup for consistency, pour the batter onto the hot skillet to form small rounds. Cook for 2-3 minutes. You’ll know it’s time to flip when the edges look set and you see little bubbles forming and popping on the surface. Flip with Confidence: Slide your spatula completely underneath and commit to a quick, smooth flip. The second side will cook faster, usually about 1-2 minutes, until it’s a beautiful golden brown.
- Keep ‘Em Warm. As you cook subsequent batches, transfer your finished pancakes to a wire rack on a baking sheet in a warm (200°F / 95°C) oven. This keeps them perfectly warm and crisp for everyone without getting soggy.
Dish ‘Em Up: Sweet, Savory, You Decide!
This is the fun part! These pancakes are a blank canvas for your culinary creativity. Here’s how I love to serve them up.
For the Sweet Tooth: This is the classic route and oh-so-satisfying. I love a generous dollop of Greek yogurt, a mountain of fresh mixed berries (their tartness is perfect with the slightly savory pancake), and a light drizzle of pure maple syrup or honey. A sprinkle of chopped nuts or a swipe of almond butter adds a fantastic crunch and extra protein.
For the Savory Soul: Don’t sleep on this option! These pancakes have a subtle cheesy flavor that works incredibly well with savory toppings. Top them with a couple of sunny-side-up eggs for a ultimate protein-packed meal, a few slices of creamy avocado, a sprinkle of everything bagel seasoning, and a handful of fresh herbs like chives or dill. It’s a breakfast-for-dinner dream come true!
Mix It Up! 5 Delicious Twists on the Classic
Once you’ve mastered the base recipe, the world is your oyster pancake! Here are a few of my favorite ways to keep things exciting.
- Lemon Blueberry Bliss: Add the zest of one lemon to the batter and fold in a handful of fresh or frozen blueberries right before cooking. The bright, sunny flavor is absolutely irresistible.
- Chocolate Chip Celebration: A family favorite! Fold in 2-3 tablespoons of dark chocolate chips. It feels like a decadent treat but is still packed with wholesome fuel.
- “Everything Bagel” Savory Pancakes: Skip the vanilla. To the batter, add one tablespoon of everything bagel seasoning, a tablespoon of finely chopped chives, and a pinch of garlic powder. Serve with smoked salmon and cream cheese for the ultimate brunch.
- Apple Cinnamon Comfort: Fold in ½ a cup of finely diced apple (like Honeycrisp or Granny Smith) and an extra ½ teaspoon of cinnamon. It tastes like a warm slice of apple pie for breakfast.
- Dairy-Free Swap: Use a plain, unsweetened dairy-free yogurt (like coconut or almond-based) in place of the cottage cheese. The texture will be slightly different but still delicious!
Beau’s Kitchen Confidential
This recipe has truly evolved in my kitchen. I started out meticulously mashing the cottage cheese with a fork, then graduated to the whisk, and finally saw the light with the immersion blender—it’s a total game-changer for texture. My partner, who was initially skeptical of “cheese in pancakes,” is now the number one requester of this recipe. It just goes to show that the best dishes are the ones that become part of your story. Don’t be afraid to make it your own! The first time I made these, I may or may not have eaten them straight from the skillet, leaning over the counter. No regrets. Some meals are just too good to wait for a plate.
Your Pancake Questions, Answered!
I’ve made these pancakes more times than I can count, and I’ve helped plenty of friends through their first batch. Here are the most common questions and how to solve them.
Q: My batter seems too thin. What did I do wrong?
A: Don’t worry! Different brands of cottage cheese and almond flour can have varying moisture levels. If your batter seems runny, just let it rest for a full 10 minutes—the almond flour will continue to absorb liquid. If it’s still too thin, add another tablespoon of almond flour until it reaches a scoopable, pancake-batter consistency.
Q: Can I make the batter ahead of time?
A: You can, but with a caveat. The baking powder will start to activate as soon as it hits the liquid, so for the fluffiest results, I recommend cooking the pancakes immediately. If you must, you can mix the dry and wet ingredients separately the night before and combine them in the morning for a super-fast breakfast.
Q: Why did my pancakes stick to the pan?
A: This almost always comes down to heat and fat. Make sure your pan is properly preheated before adding the batter, and don’t be shy with that little bit of grease! A well-seasoned cast-iron or a reliable non-stick skillet is your best friend here.
Q: Are these pancakes freezer-friendly?
A: Absolutely! They freeze like a dream. Let them cool completely, then lay them in a single layer on a baking sheet to “flash freeze” for an hour. Once solid, transfer them to a freezer bag. They’ll keep for up to 3 months. Reheat straight from the freezer in a toaster or a 350°F oven until warm and crisp.
Cottage Cheese Pancakes : Fluffy, Low Carb, and Protein-Packed
- Total Time: 15 minutes
Description
Say goodbye to floppy pancakes and hello to Fluffy Cottage Cheese Pancakes—your new breakfast obsession. These beauties are light, golden, and packed with protein to keep you full and energized all morning long. Blending cottage cheese into the batter gives them a dreamy, cloud-like texture with crisp edges and a melt-in-your-mouth center. They’re simple, fast (ready in under 15 minutes!), and endlessly versatile—sweet or savory, the choice is yours. It’s time to turn your breakfast into a feel-good ritual that actually fuels your day.
Ingredients
-
1 cup cottage cheese (4% milkfat preferred)
-
3 large eggs
-
½ cup almond flour (or oat flour/all-purpose substitute)
-
¼ tsp baking powder
-
Pinch of salt
-
Optional: ½ tsp vanilla extract or cinnamon (sweet) OR chives & pepper (savory)
Instructions
-
Blend: Combine cottage cheese and eggs in a blender until smooth.
-
Mix: Stir in almond flour, baking powder, salt, and any flavor add-ins. Don’t overmix!
-
Rest: Let batter sit for 5 minutes to thicken.
-
Cook: Heat a non-stick skillet over medium heat and lightly grease. Pour ¼ cup batter rounds and cook 2–3 min per side until golden and fluffy.
-
Serve: Stack high and top with Greek yogurt and berries for sweet vibes—or avocado and eggs for savory bliss.
Notes
-
Resting the batter = fluffier pancakes.
-
Use a blender for silky-smooth texture.
-
Freeze leftovers and reheat in the toaster for quick weekday breakfasts.
- Prep Time: 5 min
- Cook Time: 10 min
Nutrition
- Calories: 250 Cal Per Serving
- Fat: 15g
- Carbohydrates: 7g
- Protein: 20g
The Feel-Good Fuel Breakdown
Now, let’s talk about why these pancakes make you feel so amazing. This isn’t about restrictive dieting; it’s about nourishing your body with food that truly satisfies. The magic here is in the macros. Traditional pancakes are primarily simple carbohydrates, which can cause a quick spike and crash in your blood sugar.
These cottage cheese pancakes flip the script (pun intended!). By using almond flour and cottage cheese as the base, we dramatically increase the protein and healthy fats while reducing the refined carbs. This powerful combo provides a slow, steady release of energy, keeping you full, focused, and satisfied for hours. It’s a breakfast that truly works for you. Remember, nutritional values can vary based on the specific brands you use, but here’s a general idea per serving (approx. 3 pancakes):
Calories: ~250 | Protein: ~20g | Carbs: ~7g | Fat: ~15g
Your New Breakfast Tradition Starts Now
And there you have it! Your complete guide to making the fluffiest, most satisfying, protein-packed cottage cheese pancakes you’ve ever tasted. This recipe is a testament to the Feastical philosophy: food should be a joy, not a chore. It should make you feel good from the first bite to the last hour of your energized morning.
I really hope this recipe becomes a beloved staple in your kitchen, just like it is in mine. I’d love to hear how you make it your own! Did you go for the lemon-blueberry twist? Or did you blow everyone’s mind with the “everything bagel” savory version? Tag me on social @Feastical or drop a comment on the blog—sharing your kitchen wins is my favorite thing.
Now, go forth and flip with confidence! Until next time, happy cooking.
– Beau

Crockpot Breakfast Tacos : Easy Morning Favorite
Wake Up to the Easiest, Coziest Morning Ever
Hey friends, Beau here! Let’s be real for a second. Mornings can be… a lot. The alarm blares, the to-do list starts screaming, and the last thing you want to do is stand over a hot stove, trying to juggle a sizzling skillet of eggs, sausage, and potatoes without burning your toast. I’ve been there more times than I’d like to admit, usually while still wearing my ridiculously fluffy slippers.
But what if I told you there’s a better way? A way where your entire, glorious, hearty breakfast cooks itself while you’re still tucked in, dreaming of sunbeams and the smell of freshly brewed coffee. Sounds like a fantasy, right? Well, pull up a chair, because today we’re making that fantasy a delicious, taco-shaped reality.
I’m talking about my legendary Crockpot Breakfast Tacos. This isn’t just a recipe; it’s your new secret weapon for stress-free mornings. Imagine fluffy, set eggs, savory chorizo, tender potatoes, and gooey melted cheese, all mingling together in your slow cooker, ready to be scooped into a warm tortilla and loaded with all your favorite toppings. It’s a feel-good food hug that powers you through your day, and the best part? You did almost nothing to make it happen. So, let’s grab that crockpot and get ready to revolutionize your A.M. routine. Your future well-fed, well-rested self will thank you.
The Camping Trip That Started It All
This recipe has a special place in my heart, and it all started on a chilly, misty morning in the Blue Ridge Mountains. A few buddies and I were on a camping trip, and let’s just say our campfire cooking skills were… optimistic. We had grand plans for a massive breakfast feast, but the reality was a chaotic mess of undercooked potatoes, scrambled eggs with bits of ash, and one very sad, deflated tube of biscuits.
We were cold, hungry, and laughing at our own culinary failure. That’s when I had a lightbulb moment. I remembered I’d brought my little portable slow cooker (a glamping essential, I swear!). We threw in the rest of our ingredients—eggs, some pre-cooked sausage, a handful of cheese—and let it do its thing while we warmed up by the fire. An hour later, we were devouring the most incredible, hot, and satisfying breakfast tacos right out of tortilla bags. It was a game-changer. That moment of turning a potential disaster into a triumphant, delicious meal is the soul of this recipe. It’s about making life easier and tastier, no matter where you are.
Gathering Your Taco Triumph
Here’s the dream team of ingredients that’s going to make your morning magical. Don’t stress if you’re missing something—I’ve got plenty of swaps and chef-y insights for you!
- 8 large eggs: The star of the show! They create that fluffy, custardy base that holds everything together. For an even richer texture, try using farm-fresh eggs if you can find them.
- 1 lb chorizo, casing removed: This is where the big, bold flavor comes from. I love the spicy, paprika-kissed kick it gives. Chef’s Tip: If you’re sensitive to heat, swap it for mild Italian sausage or even classic breakfast sausage. For a leaner option, turkey chorizo works beautifully!
- 2 cups frozen diced hash brown potatoes: The ultimate time-saver. No peeling, no dicing! They cook up tender and soak up all the wonderful flavors from the chorizo and eggs. Insight: Using frozen ensures they don’t turn to mush during the long cook time.
- 1 ½ cups shredded cheddar or Mexican blend cheese: Because everything is better with melty, glorious cheese. I’m a sucker for a sharp cheddar, but a Mexican blend with Monterey Jack and queso quesadilla is a fantastic fiesta in your mouth.
- ½ cup milk: This is our secret weapon for extra fluffy and creamy eggs. It adds a bit of richness and prevents them from becoming too rubbery. Whole milk is great, but 2% works just fine.
- Salt and pepper to taste: The classic seasonings. Go easy on the salt initially, as the chorizo and cheese can be plenty salty on their own. You can always add more at the end!
- 8–10 small flour or corn tortillas: The vessel for our masterpiece! I’m team flour for breakfast tacos (they’re so pliable!), but corn tortillas are a delicious gluten-free option. Just warm them up right before serving—it makes a world of difference.
- Optional toppings: This is where you make it your own! Think salsa for acidity, avocado for creaminess, cilantro for a fresh pop, sour cream to cool down the spice, and jalapeños for those who like to live on the edge.
Let’s Build Your Breakfast Masterpiece
Alright, team. This is where the magic happens. It’s so simple, you’ll have it prepped before your coffee finishes brewing. Let’s do this!
- Brown That Chorizo: Crank a skillet up to medium heat. Crumble in your chorizo (casings removed, remember!) and cook it until it’s beautifully browned and cooked through, about 8-10 minutes. Chef’s Hack: Once it’s cooked, drain off the excess grease. This little step prevents your final taco filling from being overly greasy. Your tortillas will thank you.
- Whisk the Egg Base: While the chorizo is doing its thing, grab a large bowl and crack in those 8 eggs. Add the milk, and a good pinch of salt and pepper. Now, whisk it like you mean it! You want it to be uniform and a little frothy. This incorporates air, which is the first step to achieving that dreamy, fluffy texture we’re after.
- Grease Your Crockpot: This is a non-negotiable, friends. Give the inside of your slow cooker a quick but thorough spray with cooking spray or a wipe with a bit of oil or butter. This is your insurance policy for easy cleanup later. Trust me on this one.
- The Layering Station: Now for the fun, no-fuss assembly! Scatter the frozen hash browns evenly over the bottom of the crockpot. Next, layer on the cooked, drained chorizo. Finally, shower everything with that glorious mountain of shredded cheese. The layers aren’t just for looks—they help everything cook evenly.
- The Big Pour: Slowly and evenly, pour your whisked egg mixture over the layers in the crockpot. Try to cover as much surface area as possible. You don’t need to stir! Let the eggs seep down through the layers on their own. This is what creates that wonderful, cohesive casserole-like texture.
- Let the Crockpot Work Its Magic: Pop the lid on, and you’re done! Now, you have a choice. For the “set it and forget it” overnight or all-day method, cook on LOW for 6-7 hours. If you’re in more of a hurry, HIGH for 3-4 hours will do the trick. It’s done when the eggs are fully set and the edges are lightly golden.
- The Grand Finale Stir: Once the cooking time is up, take off the lid and give the mixture one gentle but thorough stir. You’ll see the fluffy eggs, chorizo, potatoes, and cheese come together in perfect harmony. It’s a beautiful sight.
- Serve & Devour: Scoop that warm, hearty filling into your warmed tortillas, load up with your favorite toppings, and dig in immediately. You’ve earned this!
How to Serve These Taco Superstars
Presentation is part of the fun, even for a casual breakfast! I love setting up a “Breakfast Taco Bar” when I have friends over or for a fun family weekend. I keep the warm filling in the crockpot on the “warm” setting and arrange all the toppings in little bowls on the counter. It lets everyone build their own perfect taco creation and turns a simple meal into an event.
For a cozy morning for two, I just pile the filling high on a warm tortilla, add a generous dollop of cool sour cream and a sprinkle of fresh cilantro, and maybe a few slices of avocado on the side. Don’t forget a big mug of strong coffee or a zesty Michelada for the ultimate brunch vibe. It’s all about creating a moment of joy, one delicious, messy, perfect taco at a time.
Make It Your Own: Delicious Twists & Swaps
The beauty of this recipe is its flexibility. Think of this base as a blank canvas for your culinary creativity! Here are a few of my favorite ways to mix it up:
- The Veggie Lover’s Delight: Skip the chorizo and sauté a mix of bell peppers, onions, and mushrooms until soft. Add a can of drained black beans or pinto beans for extra protein. It’s a colorful and satisfying vegetarian option.
- Southwest Fiesta: Stir a can of diced green chiles and a teaspoon of cumin into the egg mixture before pouring it in. Top your finished tacos with a vibrant corn and black bean salsa for a real flavor party.
- Everything Bagel Twist: Swap the chorizo for cooked, crumbled bacon or diced ham. Instead of cheddar, use a Swiss or Gouda cheese, and stir a tablespoon of everything bagel seasoning into the egg mix. Unbelievably good!
- Keto/Low-Carb Version: This is a dream for low-carb eaters! Simply replace the hash browns with diced cauliflower rice (no need to thaw if frozen) and use your favorite low-carb tortillas or serve the filling in a bowl with all the toppings.
- Spicy “Rancheros” Style: Before adding the layers, spread a thin layer of your favorite red or green enchilada sauce on the bottom of the greased crockpot. Proceed with the recipe as written. The sauce will infuse the entire dish with a zesty, spicy kick.
Beau’s Kitchen Corner: A Few Parting Thoughts
This recipe has evolved so much since that fateful camping trip. I’ve learned that the key is truly in the “no-stir” method. I know it’s tempting to peek and give it a mix, but resist! Let the slow cooker do its thing. The layers will cook perfectly, and you’ll be rewarded with the ideal texture.
One of my favorite kitchen memories is the time I accidentally used a whole bag of extra-spicy chorizo. Let’s just say we were fanning our mouths and reaching for every drop of sour cream in the fridge, but we were also laughing our heads off. It’s a reminder that even the “mistakes” can lead to great stories and, sometimes, a new favorite recipe! So don’t be afraid to play around and make this dish your own.
Your Questions, Answered!
I get a lot of questions about this recipe, so I’ve gathered the most common ones right here to ensure your taco success.
Q: Can I prep this the night before?
A: Absolutely! You have two great options. 1) Cook the chorizo and whisk the egg mixture the night before, storing them separately in the fridge. In the morning, just layer everything in the crockpot and go. Or 2) Assemble the *entire thing* in the crockpot insert, cover it tightly, and refrigerate overnight. In the morning, just place the cold insert into the base and start cooking. You may need to add 30-60 minutes to the cook time since it’s starting from cold.
Q: My filling turned out a bit watery. What happened?
A: This usually happens if there’s condensation from the lid dripping back in, or if your chorizo was particularly greasy even after draining. No worries! Just leave the lid off for the last 15-30 minutes of cooking to let some of the moisture evaporate. Giving it a good stir at the end also helps redistribute any liquid.
Q: Can I use fresh diced potatoes instead of frozen?
A: You can, but I don’t recommend it for this specific recipe. Fresh potatoes release more starch and water during the long cook time and can result in a gummier texture. The frozen hash browns are par-cooked and frozen, which gives them a much better structure for slow cooking.
Q: Help! I overcooked it and the edges are brown and crispy.
A: First of all, congratulations, you’ve accidentally made the best part! I personally love the crispy, caramelized edges. But if it’s more than you’d like, just focus your scooping on the center, softer part. The crispy bits are amazing sprinkled on top for a little textural contrast!

Crockpot Breakfast Tacos : Easy Morning Favorite
Description
Tired of morning chaos? These Crockpot Breakfast Tacos are here to save the day. Imagine waking up to the irresistible aroma of fluffy eggs, spicy chorizo, tender potatoes, and melty cheese—all ready and waiting in your slow cooker. No stress, no skillet juggling—just warm, hearty tacos that make every morning feel like a weekend brunch. Whether you’re feeding a crowd, meal prepping for the week, or just craving a cozy start to your day, this recipe is your secret to effortless comfort.
Ingredients
-
8 large eggs
-
1 lb chorizo (or breakfast sausage), casing removed
-
2 cups frozen diced hash browns
-
1½ cups shredded cheddar or Mexican blend cheese
-
½ cup milk (2% or whole)
-
Salt & pepper to taste
-
8–10 small flour or corn tortillas
-
Optional toppings: salsa, avocado, cilantro, sour cream, jalapeños
Instructions
-
Brown chorizo: Cook in a skillet until browned; drain excess grease.
-
Whisk eggs: In a bowl, combine eggs, milk, salt, and pepper.
-
Grease crockpot: Spray or butter a 4–6 qt slow cooker.
-
Layer: Add hash browns, chorizo, and cheese in layers.
-
Pour: Gently pour egg mixture over the top—no stirring needed!
-
Cook: Cover and cook on LOW for 6–7 hours (overnight) or HIGH for 3–4 hours, until eggs are set.
-
Stir & serve: Give a gentle stir, then scoop into tortillas and add your favorite toppings.
Nutrition
- Calories: 270 Cal Per Serving
- Fat: 18g
- Carbohydrates: 15g
- Protein: 14g
Nutritional Information (A Quick Note!)
Hey team, just a friendly heads-up! I’m a chef, not a registered dietitian, so please treat this as a rough estimate. The values can change based on the specific brands of chorizo, cheese, and tortillas you use, and of course, your toppings.
Per Serving (1 taco, without toppings, based on 8 servings):
Calories: ~270 | Protein: 14g | Carbohydrates: 15g | Fat: 18g
This is a hearty, protein-packed breakfast designed to keep you full and satisfied for hours. To lighten it up, you can use turkey chorizo, reduced-fat cheese, and egg whites (use the liquid from a carton for easy measuring). Remember, food is fuel, but it’s also joy. So build your taco how you love it!
Final Thoughts
And there you have it, my friends. Your ticket to easier, happier, and infinitely more delicious mornings. This recipe is more than just a list of ingredients and steps; it’s a promise that a fantastic, homemade breakfast doesn’t have to be hard. It’s about giving yourself the gift of time—time to sleep in, time to sip your coffee in peace, or time to chat with your family before the day gets crazy.
I hope these Crockpot Breakfast Tacos become a regular in your rotation, the star of your brunch parties, and your go-to for effortless meal prep. Give one of the fun variations a try, and don’t forget to tag me @Feastical on social media when you make them! I love seeing your creations. Now go forth, set that crockpot, and conquer your day, one amazing taco at a time. Happy cooking!
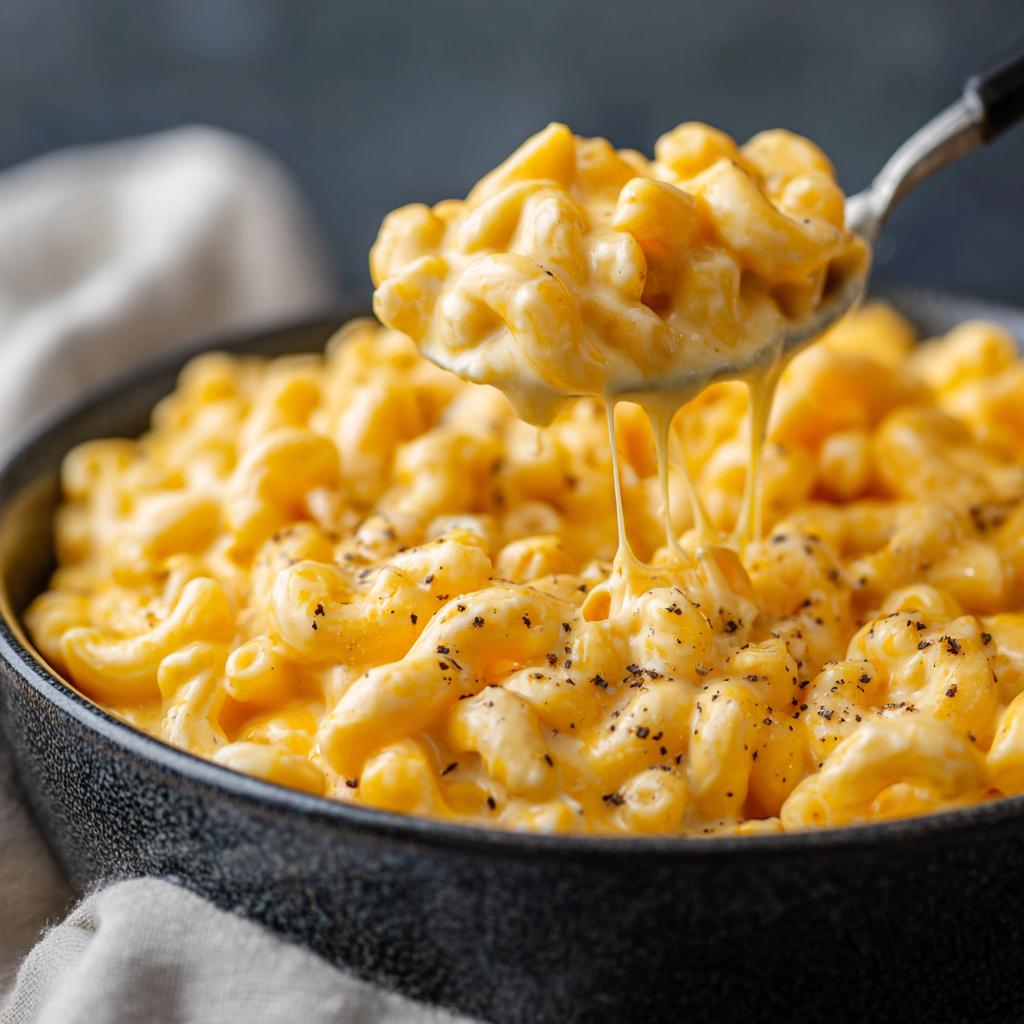
Crockpot Mac and Cheese : Ultra Creamy, Super Easy Comfort Food
Crockpot Mac and Cheese – Ultra Creamy, Set-It-and-Forget-It Recipe
Your New Favorite Comfort Food is Just a Plug-In Away
Hey friends, Beau here! Let’s talk about one of life’s greatest simple pleasures: a big, steamy bowl of mac and cheese. I’m not talking about the kind from a blue box (though we’ve all been there and it has its charm!). I’m talking about the real deal—creamy, decadent, soul-warming mac and cheese that’s so rich it practically hugs you from the inside out.
Now, I know what you might be thinking. “Beau, from-scratch mac and cheese is a project. It involves roux, constant stirring, and a watchful eye.” Well, my friend, I’m here to change the game for you. Today, we’re making the ultimate Crockpot Mac and Cheese. This recipe is the culinary equivalent of a trusty best friend—it’s reliable, requires minimal effort, and is always, always there for you when you need it most.
Imagine this: you toss a handful of simple ingredients into your slow cooker, give it a stir, and a few hours later, you’re greeted by the most luxurious, velvety, and insanely cheesy mac and cheese you’ve ever tasted. No standing over a hot stove, no last-minute panic. It’s the perfect solution for busy weeknights, potlucks where you want to be the hero, or those days when you just need a big, comforting carb-and-cheese hug. So, let’s grab our slow cookers and make some magic happen!
A Potluck Savior and a Lesson in Cheese
This recipe holds a special place in my heart because it literally saved my reputation. Picture this: it’s my first big neighborhood potluck after moving into a new apartment. I, the self-proclaimed “food guy,” signed up to bring a main dish. I had grand plans for an elaborate baked mac and cheese with a fancy breadcrumb topping. But, as fate would have it, my oven decided to call it quits the morning of the party.
Panic mode: engaged. I was staring at a raw pasta casserole and a dead appliance. But then, my eyes landed on my grandma’s old, slightly chipped crockpot sitting in the back of the cupboard. In a moment of sheer desperation (and genius, if I do say so myself), I pivoted. I cooked the pasta, cubed all the cheese I had, and threw it all into that trusty slow cooker with a silent prayer. Four hours later, I walked into that potluck with a dish that was not only saved but was the undisputed star of the show. It was gone in minutes, and I’ve been making it this way ever since. Sometimes the best recipes are born from a little kitchen chaos!
Gathering Your Cheesy All-Stars
This recipe is all about the beautiful, melty synergy of a few key players. Here’s what you’ll need to create this creamy dream:
- 16 oz (450g) Elbow Macaroni, cooked al dente: The classic choice! Its little tubes are perfect for cradling all that cheesy sauce. Chef’s Insight: Cooking it al dente (meaning it still has a slight bite) is non-negotiable. It prevents the pasta from turning to mush as it finishes cooking in the slow cooker.
- 6 tablespoons Butter: The foundation of richness and flavor. It helps create a luscious, smooth sauce and adds that irreplaceable, buttery goodness.
- 1 (12 oz) can Evaporated Milk: This is our secret weapon for ultra-creaminess without any graininess! Evaporated milk is milk that’s had about 60% of its water removed, making it thicker and richer. It’s a stabilizer’s dream. Substitution Tip: In a pinch, you can use half-and-half, but evaporated milk really gives it that perfect, classic diner-style mac and cheese texture.
- 2½ cups Milk (2% or whole preferred): This thins our sauce to the perfect, spoonable consistency. Using a milk with a bit of fat (2% or whole) gives you a richer final product than skim milk would.
- 2 cups Shredded Sharp Cheddar Cheese: The flavor backbone! I highly recommend using a block of cheddar and shredding it yourself. Pre-shredded bags are coated with anti-caking agents that can make your sauce a little grainy and less smooth. Trust me, the extra minute of shredding is worth it.
- 8 oz Velveeta Cheese, cubed: Don’t you dare turn your nose up! Velveeta is a “processed cheese product” for a reason—it melts like an absolute dream and gives our sauce that signature, velvety, cling-to-the-pasta quality that we’re after.
- 8 oz Cream Cheese, cubed: Our third cheese superstar! Cream cheese adds a subtle tang and an incredible layer of creaminess that takes this dish from great to “OH WOW.” Pro Tip: Let it sit out for 15-20 minutes to soften before cubing—it’ll incorporate much easier.
- ½ teaspoon Black Pepper: A simple but essential flavor enhancer that cuts through the richness. Feel free to add a pinch of paprika or garlic powder if you’re feeling adventurous!
Let’s Get This Cheesy Party Started
Alright, team, this is where the magic happens. It’s so simple, you’ll have it memorized after one try. Let’s walk through it together.
- Cook Your Pasta: Bring a large pot of salted water to a rolling boil. Add your elbow macaroni and cook it for about 1-2 minutes less than the package directions state for al dente. We want it firm because it’s going to hang out in the slow cooker for a while. Once it’s done, drain it thoroughly but don’t rinse it—we want that starch to help thicken our sauce! Chef’s Hack: Time this so your pasta is ready just as you’re assembling everything. Hot pasta helps start the melting process faster!
- Grease Your Slow Cooker: This is a small step with a big payoff. Give the inside of your 4-6 quart slow cooker a quick spray with non-stick cooking spray or a light rub with butter. This creates a non-stick surface that will make serving and cleanup an absolute breeze.
- The Big Dump (and Stir): Now for the fun, no-fuss part! Add the drained, hot pasta to the slow cooker. Plop in the butter, and pour in both the evaporated milk and the regular milk. Then, scatter in all three of your cheeses—the shredded cheddar, cubed Velveeta, and cubed cream cheese. Finally, sprinkle that black pepper over the top. Now, take a large spoon or spatula and give everything a really good, hearty stir. You want to try and distribute the cheeses and butter as evenly as possible throughout the pasta.
- Slow Cook to Perfection: Pop the lid on securely and set your slow cooker to LOW. I know it’s tempting to crank it to high, but patience is key here! Low and slow allows the cheeses to melt gently and evenly into a smooth sauce, without any risk of the dairy scorching on the edges. Let it cook for 2 to 4 hours. Chef’s Note: I always give it a gentle stir every hour or so, just to help the melting process along and make sure nothing is sticking to the bottom. It’s usually perfectly creamy and ready around the 2-hour mark, especially if you cubed your cheeses small.
- The Grand Finale: Once everything is melted, bubbly, and irresistibly creamy, give it one final stir. You’ll see the sauce has thickened and is lovingly coating every single piece of pasta. It’s time to serve it up immediately while it’s hot and glorious!
How to Serve Up This Cheesy Masterpiece
You’ve done it! You’ve created a pot of golden, cheesy goodness. Now, let’s talk about how to present it. This mac and cheese is a star all on its own, but a little presentation goes a long way.
For a family-style meal, I love serving it right from the crockpot (set to “warm,” of course!) with a big, beautiful wooden spoon. It creates such a cozy, communal vibe. For individual plates, use a large spoon or a small ladle to scoop it into shallow bowls. The creamy sauce pools so invitingly!
Want to take it to the next level? Right before serving, sprinkle a little extra shredded sharp cheddar over the top and let it melt in for a fresh, gooey finish. A light dusting of chopped fresh chives or parsley adds a pop of color and a hint of freshness that beautifully contrasts the richness. And if you’re like me and believe everything is better with a little crunch, a sprinkle of crispy, crumbled bacon is always a winning move.
Make It Your Own: Delicious Twists & Swaps
The beauty of this recipe is its incredible versatility. Once you’ve mastered the base, feel free to get creative and make it your own! Here are a few of my favorite riffs:
- The Protein Packer: Stir in 1-2 cups of cooked, diced ham, shredded rotisserie chicken, or crumbled cooked sausage during the last 30 minutes of cooking. It turns this side dish into a full, satisfying meal.
- The Veggie Lover: Add a pop of color and nutrition by mixing in 1-2 cups of steamed broccoli florets, thawed frozen peas, or sautéed mushrooms when you stir in the final hour.
- The Spice Seeker: Give it a kick! Add a few dashes of your favorite hot sauce, a tablespoon of chopped pickled jalapeños, or a teaspoon of smoked paprika along with the black pepper.
- The Gourmet Touch: Swap out half of the cheddar for another flavorful cheese like Gruyère, Gouda, or Fontina. You’ll get a more complex, sophisticated cheesy flavor.
- The Lighter Version: You can lighten it up a bit! Use reduced-fat cream cheese and Velveeta, and swap the whole milk for 2% or even skim. The texture will be slightly less rich, but it’ll still be deliciously creamy.
Beau’s Behind-the-Scenes Notes
Over the years, this recipe has become a Feastical staple, and I’ve learned a thing or two. The biggest lesson? Do not, I repeat, DO NOT cook the pasta all the way through initially. I learned this the hard way with a slightly mushy batch. Al dente is your best friend here.
Also, the type of slow cooker you use can affect the cooking time. Older models that run a bit hotter might be done closer to 2 hours, while newer ones might take the full 3. Your nose and eyes are the best tools—when it smells amazing and looks perfectly creamy, it’s done! This dish is a testament to the fact that the best food doesn’t have to be complicated. It just has to be made with a little love (and a lot of cheese).
Your Crockpot Mac and Cheese Questions, Answered!
I’ve gotten a lot of questions about this recipe over time, so I’ve gathered the most common ones right here for you.
- Can I cook this on HIGH instead of LOW? I don’t recommend it. Cooking on high heat can cause the dairy to separate or scorch, giving you a grainy texture and potentially burning the bottom. The low-and-slow method is crucial for that ultra-creamy, dreamy result.
- My sauce seems a little thin. What can I do? No worries! First, give it a good stir—sometimes the cheeses just need to be fully incorporated. If it’s still too thin, you can make a quick slurry by mixing a tablespoon of cornstarch with two tablespoons of cold milk. Stir this into the mac and cheese, cover, and cook for another 15-20 minutes on high until thickened.
- Can I prepare this ahead of time? Absolutely! You can cook the pasta al dente and cube all your cheeses the day before. Store them separately in the fridge. When you’re ready, just assemble everything in the crockpot as directed. You may need to add an extra 15-30 minutes to the cook time since you’re starting with cold ingredients.
- How do I store and reheat leftovers? Store any leftovers in an airtight container in the fridge for up to 4 days. Reheat gently in the microwave, stirring every 30 seconds, with a splash of milk to help loosen the sauce back up. It reheats like a champ!

Crockpot Mac and Cheese : Ultra Creamy, Super Easy Comfort Food
Description
Meet your new comfort food hero: Crockpot Mac and Cheese—the ultimate “set it and forget it” recipe that delivers maximum creamy, cheesy bliss with minimum effort. This dish takes everything you love about classic mac and cheese and makes it easier than ever. No roux, no babysitting the stove—just rich, velvety cheese sauce that practically stirs itself. Perfect for potlucks, weeknight dinners, or cozy weekends, this slow cooker version guarantees comfort in every bite.
Ingredients
-
16 oz (450g) elbow macaroni, cooked al dente
-
6 tbsp butter
-
1 (12 oz) can evaporated milk
-
2½ cups milk (2% or whole)
-
2 cups shredded sharp cheddar cheese
-
8 oz Velveeta, cubed
-
8 oz cream cheese, cubed
-
½ tsp black pepper
-
Optional: paprika, garlic powder, or chopped chives for garnish
Instructions
-
Cook pasta 1–2 minutes shy of al dente. Drain (don’t rinse).
-
Grease crockpot with butter or nonstick spray.
-
Combine everything: Add pasta, butter, evaporated milk, regular milk, cheeses, and pepper to the slow cooker. Stir well to coat evenly.
-
Slow cook: Cover and cook on LOW for 2–4 hours, stirring once or twice. The cheese will melt into a thick, creamy sauce.
-
Final touch: Stir one last time before serving. Garnish with extra cheddar, bacon bits, or herbs if desired.
Notes
-
Always cook pasta al dente—soft noodles turn mushy in the crockpot.
-
Shred your own cheese for a smoother sauce.
-
Want extra flavor? Swap cheddar for gouda or Gruyère.
Nutrition
- Calories: 480 Cal Per Serving
- Fat: 30g
- Carbohydrates: 35g
- Protein: 16g
Let’s Talk Nourishment
Friends, let’s be real: this is a celebration of comfort food. It’s rich, cheesy, and indulgent, and it’s meant to be enjoyed as such! While it’s packed with calcium and protein from all that glorious dairy, it’s also a hearty dish.
This nutritional info is an estimate per serving (assuming 8 servings), but it can vary based on the specific brands of ingredients you use. A single serving provides a good amount of protein (around 16g) to help keep you full, and the carbs from the pasta give you that wonderful energy boost. To balance out your meal, I love serving it alongside a big, crisp green salad or some roasted green veggies. Remember, food is about joy and connection, and this dish delivers both in spades!
Final Thoughts
Well, there you have it, my friends—the secret to the easiest, creamiest, most crowd-pleasing mac and cheese you’ll ever make. It’s a recipe built for real life: busy schedules, hungry families, and those moments when you just need a guaranteed win in the kitchen.
I hope this recipe finds its way into your regular rotation and becomes a source of joy and comfort in your home, just like it has in mine. Cooking should be fun, freeing, and fulfilling. So plug in that crockpot, embrace the simplicity, and get ready for the compliments to roll in.
I’d love to hear how it turns out for you! Tag me on social @Feastical or shoot me an email with your photos and your own creative twists. Now, go forth and get your cheese on!
With a full heart and an even fuller bowl,
Beau

Ultra Creamy 5-Cheese Baked Macaroni
Your New Go-To Comfort Food: Ultra Creamy 5-Cheese Baked Macaroni
Hey friends, Beau here from Feastical! Let’s have a real chat for a second. We all have that one dish, right? The one that feels like coming home after the longest day. The one that promises everything is going to be okay, with just one bite. For me, and I’m guessing for a lot of you, that dish is a truly epic, soul-warming, ultra-creamy baked macaroni and cheese.
But we’re not talking about the boxed stuff today (no shame, we’ve all been there!). We’re talking about a mac and cheese that’s a full-on event. A version that’s so rich, so melty, and so packed with flavor that it might just steal the show at your next family dinner, potluck, or cozy night in. This is my Ultra Creamy 5-Cheese Baked Macaroni, and it’s the recipe I get asked for more than any other.
What’s the secret? It’s all about the cheese symphony. We’re blending five different cheeses, each playing a crucial role in creating a harmony of flavor and texture that’s simply unforgettable. We’re talking sharp cheddar for that classic bite, melty mozzarella for its legendary stretch, smoky gouda for a touch of depth, nutty parmesan for a salty kick, and creamy, dreamy cream cheese to bring it all together into the silkiest, most luxurious sauce you’ve ever tasted. No complicated roux required! So, preheat your ovens and grab your favorite baking dish. We’re about to create some serious magic.
The Mac and Cheese That Started It All
My love affair with this dish started in my Nana’s kitchen. Every Sunday, without fail, the whole Collier clan would descend upon her house. The air would be thick with the smell of roasting chicken and the sound of laughter. And right there, always in the center of the table, was her famous mac and cheese. It wasn’t fancy, but it was legendary. It had this golden, almost crispy top that gave way to a pool of pure, cheesy joy underneath.
I remember standing on a stool, “helping” her stir the pot, my small hands struggling with the big wooden spoon. She’d let me sprinkle the extra cheese on top, a responsibility I took very seriously. To me, that dish wasn’t just about the ingredients; it was about the connection. It was the way my uncle would tell a joke and my mom would laugh so hard she’d snort, all while reaching for a second helping. It was the warmth, the chaos, and the love all baked into one perfect casserole dish. This recipe is my homage to those Sundays. It’s my Nana’s spirit, leveled up with a few chef-y tricks I’ve picked up along the way. It’s more than food; it’s a edible hug.
Gathering Your Cheesy All-Stars
Here’s the dream team! The beauty of this recipe is in its simplicity and the quality of its stars. Don’t be intimidated by the cheese list—this is where the fun begins.
- 1 lb Elbow Macaroni: The classic choice! Its small, tube-shaped curves are perfect for trapping all that cheesy goodness. Chef’s Insight: I like to use a larger elbow macaroni for a heartier bite.
- 2 cups Shredded Sharp Cheddar Cheese: This is the backbone of our flavor. Its sharp, tangy profile cuts through the richness. Substitution Tip: Feel free to use medium cheddar if you prefer a milder flavor, but the sharp is my go-to for a bolder taste.
- 1 cup Shredded Mozzarella Cheese: The king of meltiness! Mozzarella is our secret weapon for that incredible, photogenic cheese pull. Chef’s Insight: I recommend buying a block of low-moisture mozzarella and shredding it yourself. The pre-shredded stuff is coated to prevent clumping, which can make your sauce less smooth.
- 1 cup Shredded Smoked Gouda Cheese: This is the flavor game-changer. Smoked gouda adds a subtle, savory, almost bacony note that takes this mac from great to “OH WOW.” Substitution Tip: If you can’t find smoked gouda, regular gouda or even a good Swiss cheese like Gruyère would be fantastic.
- 1 cup Grated Parmesan Cheese: Our salty, nutty flavor booster. Parmesan adds a complexity that makes the sauce taste like it simmered for hours. Chef’s Insight: Please, for the love of all things cheesy, grate it fresh from a wedge! The flavor and meltability are worlds apart from the canned powder.
- 1 cup (8 oz block) Softened Cream Cheese: This is the magic ingredient for ultra-creaminess without a roux. It melts into the hot pasta and creates a luxuriously smooth, velvety base that binds all the other cheeses together.
- ½ cup Whole Milk: This helps to loosen the sauce just enough to make it pourable and perfectly creamy. Substitution Tip: 2% milk will work, but the extra fat in whole milk contributes to a richer, more decadent final product.
Let’s Get Cooking: Building the Ultimate Comfort Food
Okay, team! It’s showtime. This process is straightforward, but a few little tricks along the way will ensure mac and cheese perfection.
- Preheat and Prep: First things first, get that oven preheating to 350°F (175°C). This gives it plenty of time to come to the perfect temperature. While it’s warming up, grab a 9×13 inch baking dish and give it a light coating of butter or a non-stick spray. Trust me, you don’t want to be chiseling cheesy bits off the pan later!
- Cook the Pasta: Bring a large pot of generously salted water to a rolling boil. Add your elbow macaroni and cook it until it’s just al dente—that means it should still have a slight bite to it. This is crucial! We’re going to bake this pasta, and if you cook it until it’s soft now, it’ll turn into mush in the oven. Check the package directions and subtract a minute or two. Once it’s done, drain it well, but do not rinse it! The little bit of starch left on the pasta helps the cheese sauce cling to every nook and cranny.
- The Big Cheese Mix (This is the fun part!): Immediately after you drain the pasta, transfer it back to the hot pot (off the heat) or into a large mixing bowl. The residual heat is your best friend here. Now, start adding your cheeses and milk. I like to start with the cream cheese, breaking it up into chunks so it melts evenly. Then, add all the other shredded cheeses and the milk. Chef’s Hack: Reserve about a half cup of the cheddar and mozzarella mix to sprinkle on top later for an extra-cheesy, golden-brown crust.
- Stir with Soul: Now, grab a sturdy spoon or spatula and stir, stir, stir! You want to work relatively quickly while the pasta is still very hot. You’ll see the cheeses slowly melting and combining with the milk and the heat from the pasta to form a gorgeous, creamy sauce that coats every single piece. Keep stirring until everything is beautifully combined and you see a consistently creamy texture.
- Into the Dish & Top It Off: Pour the cheesy macaroni mixture into your prepared baking dish and spread it out into an even layer. Now, take that reserved cheese you set aside and sprinkle it generously over the top. This is what’s going to give you that beautiful, bubbly, golden top we all dream about.
- Bake to Perfection: Carefully place the dish in your preheated oven and bake for 25-30 minutes. You’re looking for the cheese on top to be completely melted, the sauce to be bubbling around the edges, and the top to have those gorgeous golden-brown spots. If you want an extra-crispy top, you can pop it under the broiler for the last minute or two—but watch it like a hawk! It can burn in a flash.
- The Hardest Part: Let It Rest: I know, I know. The smell is intoxicating, and you just want to dive in with a fork. But patience, my friend! Let the mac and cheese sit for about 5-10 minutes after pulling it out of the oven. This allows the sauce to thicken up slightly and set, making it easier to serve and saving you from a molten-lava-cheese burn on the roof of your mouth. It’s worth the wait, I promise.
How to Serve This Cheesy Masterpiece
Presentation is part of the fun! You’ve just created a show-stopping dish, so let’s serve it with style.
For a family-style meal, I love placing the whole baking dish right in the middle of the table on a trivet. There’s something so welcoming and communal about letting everyone dig in from the same dish it was baked in. Use a large spoon to get those perfect, clean scoops.
For individual plates, use an ice cream scoop! It sounds silly, but it gives you a beautiful, round quenelle of mac and cheese that looks super chef-y. Garnish with a little sprinkle of fresh chopped parsley or chives for a pop of color and a fresh flavor contrast.
What to serve with it? This mac is rich, so it pairs wonderfully with simple, fresh, or acidic sides. Think a crisp green salad with a tangy vinaigrette, some simple roasted green beans, or my personal favorite, a juicy roasted chicken. It’s also the ultimate companion to any BBQ spread, like pulled pork or burgers.
Make It Your Own: Delicious Recipe Variations
Once you’ve mastered the base recipe, the world is your cheesy oyster! Here are a few of my favorite ways to mix it up.
- The Carnivore’s Dream: Stir in 1 cup of cooked, crumbled bacon or diced ham along with the cheeses. For a spicy kick, use andouille sausage!
- Veggie Lover’s Delight: Add 1-2 cups of your favorite steamed or roasted vegetables. Broccoli florets, caramelized onions, sautéed mushrooms, or even some roasted cherry tomatoes are fantastic additions that add flavor and nutrition.
- Spicy Buffalo Twist: For all my heat-seekers! Stir in ½ cup of your favorite buffalo sauce along with the milk. Fold in 1-2 cups of shredded cooked chicken and top with a mix of cheeses and a drizzle of blue cheese dressing after baking. Unreal.
- Lobster Mac for a Special Occasion: Feeling fancy? Fold in 1-1.5 cups of chopped, cooked lobster meat right before baking. It transforms this homey dish into a restaurant-worthy entrée.
- Gluten-Free & Lighter Swap: This recipe is easily adaptable! Use your favorite gluten-free pasta (the brown rice or chickpea ones work great). For a lighter version, you can use low-fat cheeses and milk, though the texture will be slightly less rich.
Beau’s Chef Notes & Kitchen Confessions
This recipe has been a living, evolving thing in my kitchen for years. The first time I made it, I was so excited that I forgot to reserve cheese for the top. The result was delicious, but it lacked that iconic crust. Lesson learned! Now, I always set my topping cheese in a little bowl before I even start mixing.
Another funny story: I once tried to “get creative” and added blue cheese. A lot of it. Let’s just say it was… an acquired taste that not everyone at the table acquired. My brother still gives me a hard time about my “stinky sock mac.” So, we stick with the winning five-cheese combo you see here. It’s a crowd-pleaser through and through, and that’s what Feastical is all about.
Your Mac and Cheese Questions, Answered!
I’ve gotten a lot of questions about this recipe over the years. Here are the most common ones to help you avoid any kitchen mishaps.
Q: My sauce turned out a bit grainy/oily. What happened?
A: This is usually due to the cheese being overheated or cooked too aggressively. The key is to let the residual heat from the pasta do most of the melting off the heat, and to avoid over-baking. Also, always shred your own cheese when possible—the anti-caking agents in pre-shredded bags can sometimes lead to a less smooth melt.
Q: Can I make this mac and cheese ahead of time?
A: Absolutely! Assemble the entire dish up to the point of baking, cover it tightly, and refrigerate for up to 24 hours. When you’re ready, you may need to add 5-10 minutes to the baking time since you’re starting with a cold dish. You can also freeze the unbaked casserole for up to 3 months. Thaw in the refrigerator overnight before baking.
Q: How do I reheat leftovers without it drying out?
A: The best way is to reheat it gently. Add a tiny splash of milk to the portion, cover it with a damp paper towel, and microwave in 30-second intervals, stirring in between. For the oven, reheat covered with foil at 325°F until warm, again with a splash of milk.
Q: My pasta absorbed all the sauce after baking. Help!
A> This can happen if the pasta was overcooked initially or if the dish was baked for too long. Ensuring your pasta is very al dente and not letting the baked mac rest for too long before serving will help keep it saucier. You can also increase the milk by a couple of tablespoons next time.

Ultra Creamy 5-Cheese Baked Macaroni
Description
Craving the kind of mac and cheese that makes the whole table go quiet after the first bite? This Ultra Creamy 5-Cheese Baked Macaroni is that dish. A bubbling, golden pan of cheesy perfection layered with sharp cheddar, smoky gouda, melty mozzarella, nutty parmesan, and silky cream cheese—it’s indulgence at its finest. No roux, no fuss, just pure, soul-hugging comfort. Whether it’s a weeknight pick-me-up, a holiday showstopper, or the centerpiece of your next potluck, this mac and cheese promises warmth, nostalgia, and second helpings every single time.
Ingredients
-
1 lb elbow macaroni
-
2 cups shredded sharp cheddar cheese
-
1 cup shredded mozzarella cheese
-
1 cup shredded smoked gouda
-
1 cup grated parmesan
-
1 block (8 oz) cream cheese, softened
-
½ cup whole milk
-
Salt & pepper to taste
-
Optional: fresh parsley or chives for garnish
Instructions
-
Preheat oven to 350°F (175°C). Grease a 9×13-inch baking dish.
-
Cook pasta until just al dente. Drain (don’t rinse).
-
Mix cheeses: In a large bowl, combine hot pasta, cream cheese, milk, and remaining cheeses (reserve ½ cup of cheddar and mozzarella for topping). Stir until melted and creamy.
-
Assemble: Spread mixture evenly in the prepared dish. Sprinkle reserved cheese on top.
-
Bake for 25–30 minutes until bubbling and golden. For an extra crisp crust, broil for 1–2 minutes at the end.
-
Rest & serve: Let sit 5–10 minutes before serving. Garnish with herbs for a touch of color.
Notes
-
Shred cheese fresh for the smoothest melt.
-
Add cooked bacon, lobster, or veggies for fun twists.
-
Use al dente pasta—overcooked noodles will absorb too much sauce.
Nutrition
- Calories: 490Cal Per Serving
- Fat: 31g
- Carbohydrates: 32g
- Protein: 21g
Nutritional Information (Because We’re Curious!)
Okay, let’s be real—this is a celebratory, indulgent dish, and we love it for exactly that reason! It’s pure comfort. But for those who like to keep track, here’s a general breakdown per serving (based on 8 servings). Remember, these are estimates and can vary based on the specific brands of ingredients you use.
Per Serving (est.):
Calories: 490 | Protein: 21g | Carbohydrates: 32g | Fat: 32g | Saturated Fat: 18g | Cholesterol: 95mg | Sodium: 750mg
To lighten it up a bit, you can use whole wheat pasta, reduced-fat cheeses, and low-fat milk. The flavor will still be fantastic, though the texture will be slightly less decadent. My philosophy? Enjoy the real deal in moderation as part of a balanced diet. Life’s too short for bad mac and cheese!
Final Thoughts from My Kitchen to Yours
Well, there you have it, my friends. My heart and soul in a baking dish. This Ultra Creamy 5-Cheese Baked Macaroni is more than just a recipe; it’s a reminder of the power of food to bring us together, to comfort us, and to create lasting memories.
I hope this recipe becomes a staple in your home, just like it is in mine. I hope you make it for your family on a busy weeknight, bring it to a potluck to share with friends, or whip it up just for yourself on a day when you need
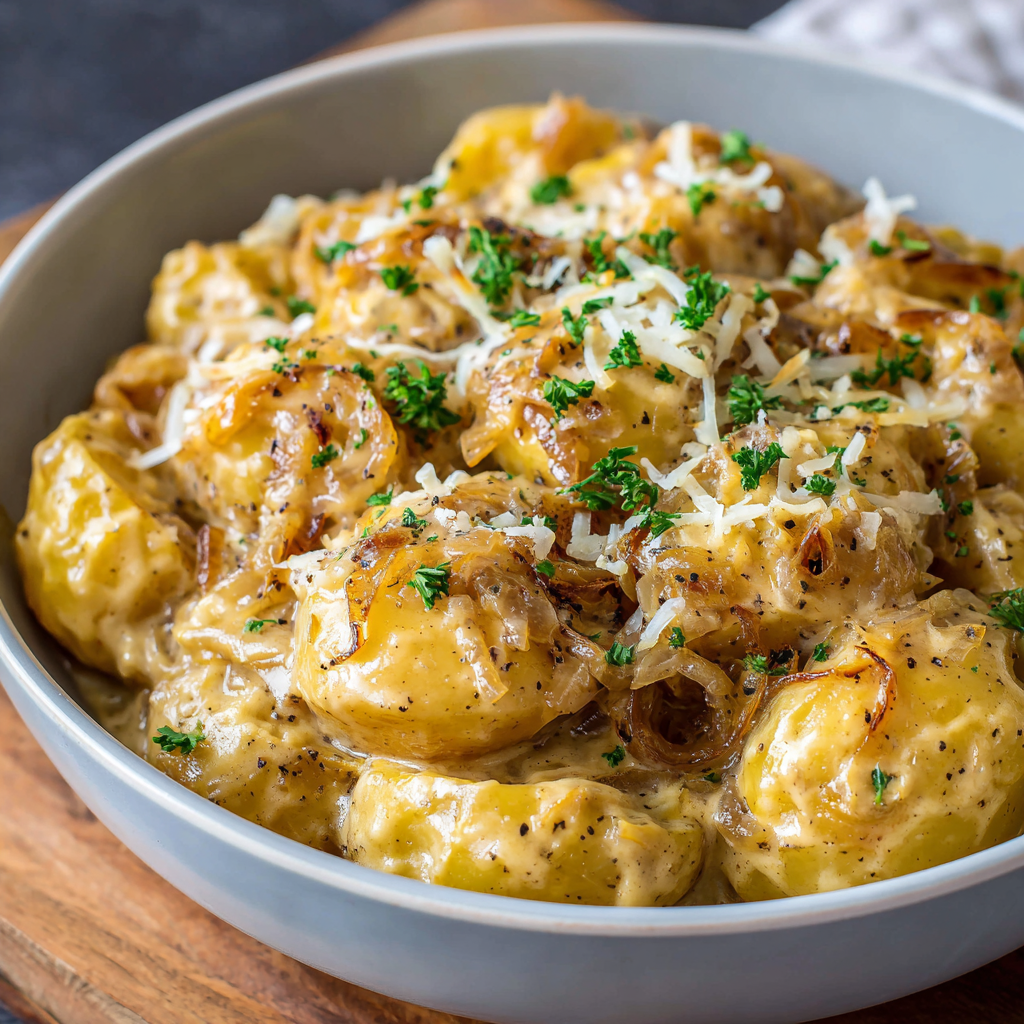
Slow Cooker Amish Savory Onion Potatoes : Buttery, Creamy, and Packed with Flavor
Your New Favorite Side Dish is Waiting in the Slow Cooker
Hey there, friend! Beau from Feastical here. Can we talk for a minute about the unsung hero of the dinner table? I’m not talking about the main course—I’m talking about that one side dish that somehow steals the show. The one that has everyone asking for the recipe before they’ve even finished their first bite. You know the one. For me, that dish, the one I turn to time and time again when I need a guaranteed win, is these incredibly creamy, dreamy, and soul-satisfying Slow Cooker Amish Savory Onion Potatoes.
Imagine this: tender slices of potato, slow-cooked for hours until they’re melt-in-your-mouth perfect, swimming in a rich, buttery sauce that’s tangy from sour cream and deeply savory from onion soup mix. The onions sweeten and caramelize, the garlic powder adds a warm hum, and the whole thing comes together in a way that feels like a warm hug from your grandma. The best part? Your slow cooker does 98% of the work. You get to be the kitchen hero with about ten minutes of actual effort. Whether you’re prepping for a hectic weeknight, a packed potluck, or a big holiday feast, this recipe is your secret weapon for creating that “everyone feels at home” kind of meal. So, let’s ditch the stress and dig into the good stuff. Your fork is waiting!
A Potluck Promise and a Recipe That Never Fails
I’ll never forget the first time I brought these potatoes to a neighborhood potluck. I was new to the area and, like any sane person, I was a little nervous about making a good impression. My go-to chocolate chip cookies felt too safe, and a main course felt like too much pressure. Then I remembered this recipe, scribbled on a notecard from a friend’s Amish grandmother years prior. It was simple, humble, and promised maximum comfort. I threw it all in my slow cooker that morning, crossed my fingers, and hoped for the best.
Well, let me tell you, I showed up with my slow cooker in tow, lifted the lid, and the aroma alone created a line. Within minutes, the entire dish was scraped clean. I spent the rest of the evening not as the “new guy,” but as the “potato guy,” fielding questions and recipe requests. It was the dish that broke the ice, sparked conversations, and made me feel like part of the community. That’s the power of food done right—it doesn’t just fill bellies; it connects people. This recipe has been my potluck promise ever since, and now, I’m so excited to share that same magic with you.
Gathering Your Flavor All-Stars
One of the things I love most about this recipe is its beautiful simplicity. We’re using humble, easy-to-find ingredients and letting the slow cooker work its transformative magic. Here’s what you’ll need to gather up.
- 2½ lbs Potatoes, peeled and sliced: I’m a Russet potato guy for this recipe—they break down a bit and give us that perfect, creamy texture. Chef’s Insight: No Russets? Yukon Golds are a fantastic substitute! They’re naturally buttery and will hold their shape a little more, giving you a slightly different, but equally delicious, creamy bite.
- 1 packet Dry Onion Soup Mix: This is our flavor powerhouse! It’s a brilliant blend of dehydrated onions, salt, and savory spices that creates an incredible depth of flavor with zero fuss. Substitution Tip: Want to control the sodium? You can make your own blend with dried minced onions, onion powder, parsley, paprika, and a touch of celery salt!
- ½ cup Unsalted Butter, melted: Butter is love in solid form, and here it adds that rich, luxurious mouthfeel we’re after. Using unsalted lets you control the final seasoning perfectly.
- ½ cup Sour Cream: This is our secret weapon for tangy, creamy goodness. It gets stirred in at the beginning, melting into the sauce and making it irresistibly silky.
- 1 small Onion, chopped: A fresh onion adds another layer of sweet, aromatic flavor that complements the soup mix beautifully. Yellow or white onions work great here.
- 1 teaspoon Garlic Powder: Don’t sleep on the garlic powder! It adds a warm, savory base note that makes the entire dish feel more rounded and complex than fresh garlic sometimes can in a slow cooker.
- Salt & Pepper to taste: Always, always season as you go! Because the soup mix is salty, I like to add a little pepper at the start and then do a final taste-test for salt at the very end.
- Optional: Chopped Parsley or Shredded Cheese for topping: A sprinkle of fresh parsley adds a pop of color and freshness, while a handful of shredded sharp cheddar or Colby Jack cheese takes this right over the top into ultimate indulgence territory.
Let’s Get Cooking: Effortless, Flavor-Packed Steps
Ready to see how this all comes together? It’s so easy, you’re going to laugh. The key is in the slow, gentle cooking that coaxes out all the flavors and creates that magical, creamy texture.
- Prep Your Slow Cooker: Start by giving the inside of your slow cooker a light coating of butter, cooking spray, or a quick wipe with oil. Chef’s Hack: This little step is a game-changer for easy cleanup later. Trust me, your future self, scrubbing the pot, will thank you profusely.
- The Big Mix: In a large bowl, combine your peeled and sliced potatoes, the chopped onion, sour cream, melted butter, garlic powder, and the entire packet of onion soup mix. Now, get in there with a big spoon or (my preferred method) clean hands, and mix it all up until every single potato slice is gloriously coated in that creamy, savory mixture. Pro Tip: Don’t worry if it looks a little thick or pasty at this stage. The potatoes will release moisture as they cook, and all that goodness will melt down into the most incredible sauce.
- Into the Pot: Carefully transfer the whole potato mixture into your prepared slow cooker. Spread it out into a somewhat even layer. Now, take a moment to season it with a few good cracks of black pepper. Go easy on the salt for now—remember, that soup mix is doing a lot of the heavy lifting.
- The Magic Happens: Pop the lid on, and that’s it! You’re done with the active work. Now, you have a choice. For the most tender, fall-apart texture, set it to LOW for 5-6 hours. If you’re short on time, HIGH for 2.5-3 hours will get you there. You’ll know they’re done when you can easily pierce a potato slice with a fork with no resistance.
- The Grand Finale: Once the potatoes are perfectly tender, give everything a gentle stir. You’ll see how the sauce has thinned out and become beautifully cohesive. This is your moment to taste and decide if it needs that final pinch of salt. Then, scatter over your chopped fresh parsley or a generous handful of shredded cheese, put the lid back on for a few minutes just to let the cheese melt, and you are ready to serve up some serious comfort.
How to Serve These Creamy Dreamy Potatoes
This dish is the ultimate team player on your dinner table. It’s rich and comforting, so it pairs beautifully with simpler mains that can stand up to its bold flavor. I love serving it family-style, right out of the slow cooker (set on a trivet, of course!), to keep that warm, communal vibe going.
For a classic, down-home feast, plate it up next to a juicy rotisserie chicken or some oven-baked pork chops. The potatoes soak up the juices beautifully. During the holidays, it’s a show-stopping side next to your holiday ham or roasted turkey—it gives mashed potatoes a run for their money! For a lighter pairing, a simple green salad with a sharp vinaigrette helps cut through the richness perfectly. And don’t forget a big, crusty loaf of bread for mopping up every last bit of that incredible buttery sauce.
Make It Your Own: Delicious Twists & Swaps
One of my favorite things about a great recipe is how it can become a canvas for your own creativity. Here are a few of my favorite ways to mix things up with these Amish potatoes.
- The “Fully Loaded” Bake: Stir in ½ cup of cooked, crumbled bacon and 1 cup of shredded sharp cheddar cheese during the last 30 minutes of cooking. Top with more cheese, some sliced green onions, and a dollop of sour cream. It’s like a loaded baked potato casserole!
- Cheesy Garlic Lover’s Dream: Add an extra teaspoon of garlic powder and a full 1 ½ cups of a shredded cheese blend (like mozzarella and Parmesan) into the mix before cooking. The cheesy, garlicky crust that forms on top is absolutely divine.
- Lighter & Brighter: To lighten it up, swap the sour cream for plain Greek yogurt and cut the butter back to ¼ cup. The result is still wonderfully creamy but with a tangier, fresher profile and a bit of a protein boost.
- Cream of Something Wonderful: For an even richer, more casserole-like consistency, add one can of condensed cream of mushroom or cream of chicken soup to the mixture before cooking. It makes it extra decadent and perfect for a special occasion.
- Herb Garden Fresh: Stir in 2 tablespoons of fresh, chopped herbs like thyme, rosemary, or chives along with the other ingredients. The fresh herbs will perfume the entire dish with a wonderful, aromatic quality.
Beau’s Kitchen Notes & Stories
This recipe has been a part of my life for so long, it’s practically evolved on its own. I remember one time, in a pre-coffee haze, I accidentally used French onion dip instead of sour cream. Guess what? It was a happy accident! It added an even deeper onion flavor that was a huge hit. So don’t be afraid to play around.
The other thing I’ve learned is that slow cookers can vary in temperature, so the first time you make this, just keep an eye on it. If you’re around the house, give it a stir halfway through if you can—it’s not strictly necessary, but it helps everything cook evenly. This dish also holds beautifully on the “warm” setting for over an hour, making it the most forgiving guest at any party.
Your Questions, Answered!
Over the years, I’ve gotten a lot of great questions about this recipe. Here are the answers to the most common ones to ensure your potato success!
Q: Can I prepare this dish the night before?
A: Absolutely! You can do what I call the “night-before shuffle.” Peel and slice your potatoes, then store them completely submerged in cold water in the fridge to prevent browning. In a separate container, mix the sour cream, melted butter, onion soup mix, and garlic powder. In the morning, just drain the potatoes, mix everything together, and cook as directed. Easy!
Q: My potatoes are still a bit firm. What happened?
A: No worries! This usually means the potato slices were a little on the thick side, or your slow cooker runs a bit cool. Just pop the lid back on and give them another 30-45 minutes on high. They’ll get there! For next time, just aim for slices about ¼-inch thick for perfectly even cooking.
Q: Can I freeze the leftovers?
A: You can, but with a caveat. Because of the dairy (sour cream and butter), the texture can become a little grainy upon thawing and reheating. It will still taste great, but the silky creaminess might be slightly compromised. I highly enjoy these as leftovers within 3-4 days, reheated gently in the microwave or a covered dish in the oven.
Q: Is there a way to make this without a packaged soup mix?
A: For sure! To make your own quick blend, combine: ¼ cup dried minced onion, 2 tablespoons beef bouillon powder (or 4 crumbled beef bouillon cubes), 1 teaspoon onion powder, ¼ teaspoon paprika, and a pinch of celery seed and pepper. Use this in place of the packaged mix.

Slow Cooker Amish Savory Onion Potatoes : Buttery, Creamy, and Packed with Flavor
Description
Tired of juggling too many dishes at dinner? Meet your new secret weapon: Slow Cooker Amish Savory Onion Potatoes. This side dish quietly steals the show with tender potatoes bathed in a buttery, tangy, onion-infused sauce—all made effortlessly in your slow cooker. Think of it as comfort food with class: rich, velvety, and impossible to stop eating. Whether for weeknights, holidays, or potlucks, this dish guarantees compliments (and zero leftovers). Let your slow cooker do the work—your guests will think you spent hours in the kitchen.
Ingredients
-
2½ lbs potatoes, peeled & sliced (Russet or Yukon Gold)
-
1 packet dry onion soup mix
-
½ cup unsalted butter, melted
-
½ cup sour cream
-
1 small onion, chopped
-
1 tsp garlic powder
-
Salt & pepper to taste
-
Optional: fresh parsley or shredded cheese for topping
Instructions
-
Prep slow cooker: Grease lightly with butter or cooking spray.
-
Mix it up: In a large bowl, combine potatoes, onion, sour cream, melted butter, garlic powder, and soup mix. Stir until evenly coated.
-
Load the slow cooker: Spread mixture evenly inside. Season with pepper.
-
Cook low & slow: Cover and cook on LOW for 5–6 hours or HIGH for 2½–3 hours, until potatoes are fork-tender.
-
Finish strong: Stir gently, adjust seasoning, and top with parsley or melted cheese. Serve straight from the slow cooker for cozy, family-style dining.
Notes
-
Keep potato slices around ¼-inch thick for even cooking.
-
Want to prep ahead? Assemble ingredients the night before and refrigerate.
-
For a “loaded” version, stir in bacon and cheddar near the end.
Nutrition
- Calories: 260 Cal Per Serving
- Fat: 17g
- Carbohydrates: 23g
- Protein: 3g
Nutritional Information (For Your Info!)
Hey, we’re all about feel-good food here, and that includes feeling good about what we’re eating! This is a rich, comforting side dish, and it’s helpful to know what’s in it. This is a rough estimate per serving (if you get 8 servings out of the batch) and can vary based on your specific ingredients.
- Calories: ~260
- Fat: 17g
- Carbohydrates: 23g
- Protein: 3g
Remember, this is meant to be a celebratory side, not an everyday green salad. It’s all about balance! To lighten it up, check out the “Lighter & Brighter” variation above using Greek yogurt and less butter. Enjoy it mindfully as part of a delicious, balanced meal.
Final Thoughts from My Kitchen to Yours
Well, friend, there you have it—my go-to, never-fail, always-impresses recipe for Slow Cooker Amish Savory Onion Potatoes. It’s more than just a recipe to me; it’s a reminder that the most memorable meals aren’t about perfection. They’re about simplicity, big flavor, and the joy of sharing something truly delicious with the people you care about.
I hope this recipe finds its way into your regular rotation and becomes a source of as much comfort and connection for you as it has for me. If you make it (and I really hope you do!), I’d love to hear about it. Tag me over on @Feastical or shoot me an email with your photos and stories. Now, go forth, get that slow cooker humming, and fill your home with the incredible smell of comfort. Happy cooking!
With a full heart and an even fuller plate,
Beau