
Homemade Frosted Brown Sugar Cinnamon Pop Tarts
Hey, Let’s Bake Some Nostalgia: Homemade Frosted Brown Sugar Cinnamon Pop Tarts!
Picture this: It’s Saturday morning. Sunlight’s pouring into your kitchen, cartoons are murmuring in the background, and you’re clutching a toaster pastry that tastes like pure, cinnamony joy. That’s the magic of brown sugar cinnamon Pop Tarts, friends. But what if I told you the homemade version blows the boxed stuff out of the water? Imagine flaky, buttery pastry hugging a molten, spiced filling, all draped in a sweet cinnamon glaze. No artificial aftertaste, no crumbly disappointment—just pure, unapologetic comfort. At Feastical, we’re all about turning kitchen moments into soul-warming wins, and these pop tarts? They’re a hug in pastry form. Whether you’re baking with kiddos, treating your inner child, or just craving something irresistibly cozy, this recipe’s your golden ticket. Grab your rolling pin—let’s make magic!
My Pop-Tart Epiphany (And a Smoke Alarm Symphony)
My love affair with these tarts started… ironically… with a kitchen fail. Age 10, I tried “improving” Mom’s store-bought Pop Tarts by stuffing extra cinnamon sugar inside. Result? A volcanic eruption in the toaster, a symphony of smoke alarms, and a very unimpressed mom. Fast-forward 15 years: I’m a pastry chef in a busy bakery, and my boss dares me to recreate that childhood flavor from scratch. Challenge accepted! Batch one? Dry as sawdust. Batch two? Filling leakage apocalypse. But batch three… oh, batch three. That first bite—crisp, fragrant layers giving way to gooey cinnamon bliss—transported me right back to that sunlit kitchen. No smoke alarms this time (phew), just pure, buttery triumph. That’s when I knew: homemade isn’t just better—it’s a time machine.
Gather Your Squad: Ingredients & Why They Matter
For the Pastry:
- 2½ cups (313g) all-purpose flour – The foundation! Keeps things sturdy yet tender. For flakier results, swap ½ cup with pastry flour.
- 1 cup (226g) unsalted butter, CHILLED and cubed – Non-negotiable cold! This creates steam pockets for flakiness. Vegan? Use frozen coconut oil or plant-based butter.
- ½ cup (120ml) ice water – Keeps butter cold. Add 1 tsp at a time—you might not need it all!
- 2 tsp granulated sugar – Just a whisper of sweetness in the crust.
- 1 tsp salt – Balances the sweetness and enhances flavor.
For the Filling:
- ½ cup (100g) packed brown sugar – Light or dark works! Dark adds deeper molasses notes. Pack it tight!
- 2 tsp ground cinnamon – The star! For extra warmth, add a pinch of cardamom or nutmeg.
- 1 tbsp (8g) all-purpose flour – Thickens the filling so it doesn’t turn into lava. Cornstarch works too.
- Egg wash (1 egg + 2 tsp milk) – Our edible glue! Brush edges to seal. Vegan? Use maple syrup or plant-based milk.
For the Glaze:
- ¾ cup (90g) confectioners’ sugar, sifted – Lumps are the enemy! Sifting = silky glaze.
- 1 tbsp (15ml) milk – Adjust for thickness. Heavy cream makes it richer.
- ½ tsp ground cinnamon – Double the spice, double the fun.
- ¼ tsp vanilla extract – The flavor booster. Almond extract is fun too!
Let’s Build Some Tasty Magic: Step-by-Step
Step 1: Pastry Perfection
Whisk flour, sugar, and salt in a big bowl. Now, attack that butter! Toss chilled cubes into flour, then use a pastry cutter or fingers to smash them into pea-sized bits. Chef’s hack: Grate frozen butter for faster, even cutting! Drizzle ice water gradually, mixing with a fork just until dough clumps. Don’t overwork—it makes pastry tough! Divide dough in half, flatten into discs, wrap in plastic, and chill 1 hour (or freeze 20 mins if impatient like me).
Step 2: Filling Fun
While dough chills, stir brown sugar, cinnamon, and flour in a small bowl. Taste it (chef’s privilege!). Want more spice? Go wild! Set aside. Whisk egg and milk for egg wash.
Step 3: Assembly Line Joy
Roll one dough disc on a floured surface to ⅛-inch thick—think thin but sturdy. Cut into rectangles (3×4 inches). Re-roll scraps! Place half on a parchment-lined baking sheet. Brush edges with egg wash (this is your glue!). Spoon 1 heaping tbsp filling in the center, leaving a ½-inch border. Pro tip: Overfill slightly—they shrink! Top with second dough piece. Press edges with fingers, then crimp with a fork. Poke top vents (prevents explosions!). Repeat. Chill 10 mins—trust me, it prevents leakage!
Step 4: Bake to Golden Glory
Brush tops with egg wash. Bake at 375°F (190°C) for 22-25 mins until golden and puffed. Rotate pan halfway! Cool completely on a rack—glazing warm tarts = sad, melty glaze.
Step 5: Glaze Game Strong
Whisk all glaze ingredients until smooth. Drizzle with a spoon or fork. Add sprinkles NOW if desired—they stick better!
The Science of Flaky Layers: Why This Recipe Works
Ever wonder why homemade Pop-Tarts have that irresistible, buttery flake while store-bought ones often taste like cardboard? It’s all about science—specifically, how fat, water, and heat interact. Here’s why this recipe nails it:
1. Cold Butter = Steam Pockets = Flakiness
When chilled butter hits a hot oven, the water inside evaporates, creating steam. That steam pushes apart layers of dough, forming delicate flakes. The key? Keeping everything cold. If butter melts before baking, you lose those air pockets. That’s why we cube and chill the butter, use ice water, and even freeze the dough briefly before rolling. Pro tip: If your kitchen is warm, chill your rolling pin and flour too!
2. Flour Power: Protein Matters
All-purpose flour strikes the perfect balance between tenderness (thanks to its moderate protein content) and structure. Pastry flour (lower protein) makes a more delicate crust, while bread flour (high protein) would make it tough. For gluten-phobes: A light hand when mixing prevents overdevelopment, which leads to chewiness—not what we want here.
3. Sugar’s Dual Role
The sprinkle of sugar in the dough isn’t just for sweetness; it tenderizes by interfering with gluten formation. Meanwhile, the brown sugar filling contains molasses, which attracts moisture, keeping the center gooey instead of dry. The dash of flour in the filling? It absorbs excess liquid, preventing a sugary lava flow.
4. The Egg Wash Edge
Brushing the pastry edges with egg wash isn’t just for shine—it’s a glue. The proteins in the egg create a tight seal when baked, locking in the filling. Skipping this step? Risk a Pop-Tart eruption. Vegan bakers can mimic this with sticky alternatives like maple syrup or agave.
5. Venting Is Vital
Those fork holes on top aren’t decorative; they’re pressure valves. Without vents, steam builds up inside, leading to bulging, splitting, or worse—filling explosions. (Ask my smoke detectors about Batch #2.)
Fun Experiment: Try laminating the dough (folding butter layers like croissants) for extra flakiness. It’s labor-intensive but worth it for pastry nerds!
Pop-Tart Culture: A Bite of Americana
Pop-Tarts aren’t just food—they’re a cultural icon. From Saturday mornings to dorm-room hacks, here’s why this pastry holds a special place in our collective nostalgia:
1. The Breakfast Revolution
Invented in 1963 by Kellogg’s, Pop-Tarts capitalized on America’s post-war obsession with convenience. The original flavors (strawberry, blueberry, and brown sugar cinnamon) required no refrigeration—a game-changer before microwaves. The frosted version debuted in 1967, sparking debates: Is it a pastry or dessert? (Spoiler: It’s both.)
2. Cartoon Fuel
For Gen X and millennials, Pop-Tarts were synonymous with Saturday morning cartoons. The combo of sugary pastry and animated adventures (think: Looney Tunes or Pokémon) is etched into memory. Fun fact: In the ‘90s, Kellogg’s launched limited-edition “Wild Berry” flavors with tie-in commercials featuring Tony the Tiger—blurring the line between cereal and pastry marketing.
3. The Toaster Controversy
Toasting instructions have divided households for decades. Some swear by the crispy edges; others (like me as a kid) eat them frozen for a chewy texture. Kellogg’s even released “Pop-Tarts Crunch,” a cereal mimicking the un-toasted version—because why not?
4. DIY Renaissance
The 2010s saw a homemade Pop-Tart boom, with artisanal bakeries offering gourmet versions (bacon-maple, matcha-white chocolate). Foodies realized: Scratch-made beats processed. This recipe taps into that movement—elevating a supermarket staple into something worthy of a brunch spread.
Pop Culture Moment: In 2012: The Musical, a Pop-Tart mascot sings about being “brown sugar cinnamon, baby!”—proof they’ve reached meme status.
Beyond Breakfast: Creative Uses for Leftover Pop-Tarts
Yes, leftovers are possible (though unlikely). Here’s how to repurpose them into next-level treats:
1. Pop-Tart Ice Cream Sandwich
Slice a baked, cooled tart horizontally. Sandwich a scoop of vanilla ice cream in between, then re-freeze. The pastry softens slightly but holds its shape—like an ice cream cake meets toaster pastry.
2. Bread Pudding Upgrade
Cube stale Pop-Tarts and use them in place of bread in pudding. Soak in a custard mix (eggs, milk, cinnamon), bake until set, and top with caramel sauce. Serve warm with whipped cream.
3. Crumbled Parfait Topping
Pulse Pop-Tarts in a food processor into coarse crumbs. Layer with Greek yogurt and fresh fruit for a breakfast parfait. The crumbs add crunch and nostalgia—kids love it!
4. boozy Milkshake
Blend a Pop-Tart with vanilla ice cream, milk, and a shot of bourbon or cinnamon schnapps. Rim the glass with crushed Pop-Tart crumbs. Decadent? Absolutely.
5. Savory-Sweet Crostini
Sounds wild, but trust me: Top toasted tart halves with whipped goat cheese, a drizzle of honey, and chopped rosemary. The tangy-sweet-spicy combo is unexpectedly addictive.
6. Campfire S’mores
Swap graham crackers for Pop-Tarts! Toast over a fire, add marshmallow and chocolate, and sandwich with a second tart. The cinnamon flavor pairs perfectly.
Pro Tip: Stale Pop-Tarts revive beautifully in an air fryer (3 mins at 350°F). Crispy outside, warm inside—ideal for any of the above!
How to Serve These Beauties
Serve slightly warm or room temp! Stack ’em high on a rustic board for brunch flair. Pair with cold milk for classic vibes, or dunk in a latte for adulting points. Fancy upgrade? Add a scoop of vanilla ice cream and call it dessert—pop-tart à la mode is a revelation. Store leftovers (ha!) in an airtight container for 3 days. Reheat in a toaster oven for that just-baked crispness.
Shake It Up: Delicious Twists!
- Fruity Explosion: Swap filling with ½ cup jam (strawberry or raspberry) mixed with 1 tsp cornstarch.
- Chocoholic’s Dream: Add 2 tbsp mini chocolate chips to the cinnamon filling. Drizzle glaze with melted chocolate.
- Nutty Buddy: Mix 3 tbsp finely chopped pecans into filling. Top glaze with crushed candied nuts.
- Vegan Vibes: Use plant-based butter and coconut milk. Egg wash = maple syrup + plant milk.
- Maple-Bacon Bliss: Add 1 tbsp maple syrup to filling. Top baked tarts with crumbled cooked bacon before glazing.
Beau’s Bonus Bites
These tarts have evolved more than my taste in aprons! Early versions used pre-made dough (sacrilege, I know), but scratch pastry is WORTH IT. Funny story: Once subbed cayenne for cinnamon by accident—spicy pop tarts are… an acquired taste. Learned my lesson: label spices! Over years, I’ve tweaked filling ratios to prevent sugar tsunamis and added the flour thickener. Biggest win? The freeze-ahead trick: Assemble unbaked tarts, freeze solid on a tray, then bag ’em. Bake straight from frozen—add 5 mins. Boom, instant homemade breakfast!
Pop-Tart Pitfalls? We’ve Got Answers!
Q: My filling leaked everywhere! Help?
A: Three culprits: 1) Dough edges not sealed well (egg wash is key!), 2) Filling too close to edge (leave ½-inch border), 3) Skipped chilling before baking (firms up butter). Chill those assembled tarts!
Q: Pastry’s tough, not flaky. What went wrong?
A: Overworked dough or warm butter. Keep everything cold, mix water until JUST combined, and handle dough minimally. It’s not bread—no kneading needed!
Q: Can I make these ahead?
A: Absolutely! Unbaked tarts freeze beautifully for 3 months. Bake from frozen (add 5-7 mins). Baked tarts? Freeze unglazed; warm in oven, then glaze.
Q: Glaze too thin/thick?
A: Thin: Add more sifted powdered sugar, 1 tbsp at a time. Thick? Drizzle in milk, ½ tsp at a time. Aim for “honey” consistency.

Homemade Frosted Brown Sugar Cinnamon Pop Tarts
- Total Time: 45 min
Description
Skip the store-bought box and bake real nostalgia instead! These flaky, buttery pastries are stuffed with gooey brown sugar cinnamon filling and topped with a sweet spiced glaze. Whether you’re baking for the kids or your inner child, one bite of these will take you straight back to carefree Saturday mornings—only better. Grab your rolling pin—your kitchen’s about to smell amazing!
Ingredients
Pastry:
-
2½ cups all-purpose flour
-
1 cup unsalted butter, chilled & cubed
-
½ cup ice water (as needed)
-
2 tsp granulated sugar
-
1 tsp salt
Filling:
-
½ cup packed brown sugar
-
2 tsp ground cinnamon
-
1 tbsp all-purpose flour
-
1 egg + 2 tsp milk (egg wash)
Glaze:
-
¾ cup powdered sugar, sifted
-
1 tbsp milk (adjust as needed)
-
½ tsp ground cinnamon
-
¼ tsp vanilla extract
Instructions
1️⃣ Make Dough: Whisk flour, sugar & salt. Cut in cold butter until pea-sized. Drizzle ice water gradually, mixing just until dough clumps. Divide, flatten, wrap & chill 1 hour.
2️⃣ Make Filling: Stir brown sugar, cinnamon & flour in a small bowl. Whisk egg & milk for egg wash.
3️⃣ Shape Tarts: Roll dough to ⅛-inch thick. Cut into 3×4 inch rectangles. Place half on a baking sheet. Brush edges with egg wash. Add 1 tbsp filling in center. Top with second rectangle. Press edges, crimp with fork, vent tops. Chill 10 mins.
4️⃣ Bake: Brush tops with egg wash. Bake at 375°F (190°C) for 22–25 mins until golden. Cool fully.
5️⃣ Glaze: Whisk glaze ingredients until smooth. Drizzle over cooled tarts. Let set—then enjoy warm or room temp!
Notes
✔️ Keep butter cold for maximum flakiness.
✔️ Chill assembled tarts before baking—prevents leaks!
✔️ Freeze unbaked for up to 3 months. Bake from frozen, adding 5 mins.
- Prep Time: 20 min
- Cook Time: 25 min
Nutrition
- Calories: 340 Cal per tart
- Sugar: 18g
- Carbohydrates: 40g
- Protein: 4g
Nutritional Info (Per Tart)
Calories: 340 | Fat: 18g | Carbs: 40g | Sugar: 18g | Protein: 4g
Note: Approximate values. For lower sugar, reduce glaze by half or skip!
Final Thoughts: More Than Just a Pastry
Homemade brown sugar cinnamon Pop-Tarts aren’t just a recipe—they’re a time machine. One bite can transport you back to lazy weekends, lunchbox trades, or even kitchen disasters (RIP, my childhood toaster). But beyond nostalgia, baking them from scratch is a rebellion against processed shortcuts. It’s a reminder that joy often lives in the process: the scent of cinnamon filling the kitchen, the satisfaction of crimping dough edges, the glee of drizzling glaze like Jackson Pollock with a sweet tooth.
Pin This Recipe For Later!

Chocolate Coffee Cake
The Ultimate Chocolate Coffee Cake: Where Cocoa Meets Caffeine Bliss
Hey there, fellow flavor adventurer! Beau here from Feastical, and I’ve got something that’ll make your taste buds do a happy dance. Imagine this: the deepest, darkest chocolate cake you’ve ever tasted, hugged by a cloud of coffee-kissed buttercream that melts on your tongue. This isn’t just dessert—it’s a caffeine-charged love letter to cocoa lovers. Whether you’re celebrating a big win or just surviving Monday, this Chocolate Coffee Cake is your edible victory lap.
Now, I know what you’re thinking: “Coffee IN cake? Isn’t that overkill?” Trust me, friend—that espresso powder isn’t here to jolt you awake. It’s the secret amplifier that makes chocolate sing louder and richer, like turning up the bass on your favorite song. The result? Moist crumbs that practically beg to be swiped through that silky frosting. And don’t sweat the fancy techniques—we’re keeping it real with simple steps and my favorite “blooming” trick that unlocks insane flavor. Ready to bake magic? Preheat those ovens and let’s make some memories!
My Espresso Epiphany: Why This Cake Tastes Like Home
Picture this: It’s 3 AM in my first tiny apartment kitchen, rain lashing the windows. I was stress-baking for a catering gig, desperate to impress. My chocolate cake felt… flat. Like it needed a backstage crew. In a sleep-deprived haze, I grabbed my cold brew instead of milk. What happened next? Pure alchemy. The cake woke up—suddenly vibrant, complex, humming with depth.
But the real magic happened when my grandma visited. That fierce Southern lady who measured love in pound cakes took one bite, closed her eyes, and whispered: “Beau-baby, this tastes like joy.” Right then, I knew this wasn’t just cake. It was heritage and hustle in one bite—the grit of coffee meeting the comfort of cocoa. Now, every time I bake it, I smell rain on city windows and feel her hand on my shoulder. Food isn’t just fuel; it’s time travel with frosting.
Gather Your Delicious Arsenal
Pro tip: Room temp ingredients party better together! Pull eggs/dairy out 1 hour before baking.
Chocolate Cake:
- 2 cups + 2 tbsp cake flour – Lighter than AP flour for that dreamy crumb. Swap with AP flour in a pinch, but replace 2 tbsp per cup with cornstarch.
- 1½ cups granulated sugar – Sweet backbone. For deeper flavor, try coconut sugar!
- ½ cup dark brown sugar, packed – Moisture MVP. That molasses tang hugs the chocolate.
- 1½ tsp baking powder + ¾ tsp baking soda – The rise squad. Check expiration dates—flat cakes = sad days.
- 2 tbsp espresso powder – Flavor turbocharger! Not instant coffee. Chef’s secret: Dissolve in hot water first if gritty.
- 1 tsp fine sea salt – Balances sweetness. Table salt? Use ¾ tsp.
- 6½ tbsp unsalted butter, room temp – Richness agent. Salted butter? Skip added salt.
- 1 cup sour cream, room temp – Moisture magic. Greek yogurt works too!
- ¼ cup vegetable or canola oil – Keeps it tender. Melted coconut oil adds a fun twist.
- 2 large eggs, room temp – Binds the joy. Cold eggs = lumpy batter.
- ½ cup whole milk, room temp – Liquid luxury. Any milk works, but whole = extra lush.
- 1½ tsp vanilla extract – Flavor harmonizer. Try almond extract for nutty vibes.
- 1 cup hot coffee + ¾ cup unsweetened dark cocoa powder – The STAR duo. Blooming these together is non-negotiable. Dutch-process cocoa? Yes please!
Chocolate Coffee Buttercream:
- 1½ cups unsalted butter, softened – Whip it good! Cold butter? Grate it.
- 2 cups powdered sugar – Silky sweetness. Sift it to avoid lumps!
- 2 tbsp cocoa powder – Double chocolate danger.
- 2 tbsp brewed coffee, cooled – Flavor enhancer. Decaf works if you’re sensitive!
Chocolate Coffee Syrup:
- ⅛ cup cocoa powder + 3 tbsp water + 2½ tbsp sugar – The “soak” for next-level moistness. Skip if rushed, but your cake will miss it.
Bake It Like a Boss: Step-by-Step
Follow these steps and you’re golden—like perfectly baked cake edges!
1. Prep Like a Pro
Preheat oven to 350°F (175°C). Grease AND flour two 9-inch cake pans—trust me, parchment paper circles are lifesavers for easy release. Cold pans? Warm them slightly so batter spreads evenly.
2. Bloom That Cocoa (The Game-Changer!)
Whisk hot coffee and cocoa powder in a bowl until it looks like liquid velvet (1 min). Let it cool 10 min—this “blooming” unlocks cocoa’s hidden depths! No clumps allowed.
3. Dry Team Mix
In a large bowl, combine flour, both sugars, baking powder, baking soda, espresso powder, and salt. Whisk like you mean it—we want no baking soda pockets! Add room-temp butter. Mix until crumbly (like damp sand). This coats the flour = tender crumbs.
4. Wet Team Unite!
Add sour cream, oil, eggs, milk, and vanilla. Mix on medium until JUST combined (overmixing = tough cake). Now pour in that gorgeous bloomed cocoa. Fold gently until batter is satiny. It’ll be thin—that’s perfect!
5. Bake to Perfection
Divide batter evenly between pans (I use a kitchen scale for fairness!). Tap pans hard on the counter 3x to burst air bubbles. Bake 30-35 minutes. Rotate pans halfway for even baking. Done when toothpick comes out clean or with a few moist crumbs. Let cakes cool in pans 10 min, then flip onto wire racks. Patience alert: Cold cakes won’t soak up syrup!
6. Syrup Situation
While cakes bake, simmer syrup ingredients in a small saucepan for 5 min until slightly thickened. Cool completely. Brush generously on warm cake layers—this is your moisture insurance!
7. Frosting Fluff
Beat butter until pale and fluffy (3-4 mins). Gradually add powdered sugar and cocoa. Pour in coffee, cream, vanilla, and salt. Whip 5 full minutes—this aerates it into cloud-like goodness. Too thick? Add cream 1 tsp at a time.
8. Glorious Assembly
Place first layer on cake stand. Spread ¾ cup frosting. Top with second layer. Crumb coat first (thin frosting layer to trap crumbs), then chill 15 min. Frost all over with remaining buttercream. Swirls > perfection!
Serving: Where Joy Meets Plate
Slice with a warmed knife (run under hot water!) for clean cuts. Serve slightly chilled—the flavors pop more! Garnish with espresso beans, chocolate shavings, or a dusting of cocoa. Pair with cold milk for kids or a bold café cubano for adults. Leftovers? (Ha!) Store covered at room temp 2 days or fridge 5 days.
Shake It Up: Delicious Twists
This cake plays well with others! Try these riffs:
- Mocha Madness: Fold ½ cup chocolate chips into batter + sprinkle on frosting.
- Spiced Rebel: Add 1 tsp cinnamon + ¼ tsp cayenne to dry ingredients for Mexican hot chocolate vibes.
- Gluten-Free Glow-Up: Swap cake flour with 1:1 GF flour blend + ½ tsp xanthan gum.
- Vegan Victory: Use plant butter, flax eggs (2 tbsp flax + 5 tbsp water), and coconut yogurt. Brew strong chicory coffee!
- Mini Marvels: Bake in muffin tins (20 min) for portable joy. Frost with espresso-spiked whipped cream!
Beau’s Backstage Notes
This recipe evolved from my “Great Cocoa Experiment” of 2018—I tested 27 versions! The sour cream? Total accident. I ran out of buttermilk mid-bake and grabbed sour cream. Best. Mistake. Ever. Pro tip: Freeze unfrosted layers for up to 3 months! Thaw, syrup, frost—boom, instant celebration. One time, my dog Buster stole a whole layer off the counter… my “layer thief” story still kills at dinner parties. Remember: cakes crack? Frosting covers all sins. This isn’t about perfection—it’s about sharing something made with your hands and heart.
Your Questions, My Answers
Q: Can I use instant coffee instead of espresso powder?
A: Technically yes, but flavor won’t punch as hard! Use 3 tbsp instant coffee dissolved in 1 tbsp hot water. Espresso powder is concentrated—it’s the MVP here.
Q: Why did my cake sink in the middle?
A: Three likely culprits: 1) Overmixed batter (develops too much gluten—fold gently!), 2) Opened oven door too early (wait 25 min!), or 3) Old baking powder/soda (check dates!).
Q: Can I make this ahead?
A: Absolutely! Bake layers, cool, wrap tightly in plastic, and freeze up to 1 month. Frosting lasts 5 days refrigerated. Assemble day-of for freshest flavor.
Q: My frosting split! Help!
A: Butter too warm? Chill bowl 10 min, then re-whip. Added liquid too fast? Warm 2 tbsp frosting in microwave, then slowly beat back into main batch. You’ve got this!
Print
Chocolate Coffee Cake
- Total Time: 1 hour
Description
Craving a dessert that’s rich, bold, and guaranteed to impress? Meet your new favorite: moist chocolate cake layered with coffee-kissed buttercream and brushed with a silky chocolate syrup. It’s a chocolate lover’s dream with a subtle caffeine kick—perfect for celebrations, late-night cravings, or turning an ordinary day into something deliciously extra. Fire up that oven—sweet victory is waiting!
Ingredients
For the Cake:
-
2 cups + 2 tbsp cake flour
-
1½ cups granulated sugar
-
½ cup packed dark brown sugar
-
1½ tsp baking powder
-
¾ tsp baking soda
-
2 tbsp espresso powder
-
1 tsp fine sea salt
-
6½ tbsp unsalted butter, room temp
-
1 cup sour cream, room temp
-
¼ cup vegetable oil
-
2 large eggs, room temp
-
½ cup whole milk, room temp
-
1½ tsp vanilla extract
-
1 cup hot coffee + ¾ cup unsweetened dark cocoa powder (bloomed together)
For the Buttercream:
-
1½ cups unsalted butter, softened
-
2 cups powdered sugar, sifted
-
2 tbsp cocoa powder
-
2 tbsp brewed coffee, cooled
For the Syrup:
-
⅛ cup cocoa powder
-
3 tbsp water
-
2½ tbsp sugar
Instructions
1️⃣ Preheat oven to 350°F (175°C). Grease & line two 9-inch pans.
2️⃣ Bloom cocoa: Whisk hot coffee + cocoa powder until smooth. Cool 10 min.
3️⃣ Whisk dry ingredients. Add butter—mix to crumbs.
4️⃣ Add sour cream, oil, eggs, milk & vanilla. Fold in bloomed cocoa.
5️⃣ Divide batter, tap pans to release air. Bake 30–35 min. Cool 10 min, then invert to racks.
6️⃣ Make syrup: Simmer cocoa, water & sugar 5 min. Cool, brush over warm cakes.
7️⃣ Beat butter for frosting until fluffy. Gradually add sugar, cocoa & coffee. Whip 5 min!
8️⃣ Frost cooled layers. Chill if needed. Slice & serve with coffee or cold milk!
Notes
✔️ Always bloom cocoa—flavor game changer.
✔️ Use room temp ingredients for even mixing.
✔️ Chill layers briefly for easy frosting.
✔️ Slice with a warm knife for clean cuts.
- Prep Time: 25 min
- Cook Time: 35 min
Nutrition
- Calories: 510 Cal Per Slice
- Sugar: 42g
- Fat: 29g
- Carbohydrates: 59g
- Protein: 5g
Nutritional Nibbles (Per Slice)
Calories: 510 • Fat: 29g • Carbs: 59g • Sugar: 42g • Protein: 5g
Note: Values are estimates. For lower sugar, try Swerve in frosting!
Final Thoughts: More Than Just a Cake
This Chocolate Coffee Cake isn’t just a dessert—it’s a mood. It’s the cake you bake for birthdays, breakups, or “just because” Tuesdays. It’s the one that makes people pause mid-bite, close their eyes, and sigh.
What I love most is how forgiving it is. Cracked layers? Frosting covers all. Overbaked a bit? The syrup saves it. No fancy tools? A butter knife and love will do.
So whether you’re a baking newbie or a seasoned pro, this recipe meets you where you are. It’s a reminder that the best food isn’t about perfection—it’s about the hands that make it and the people who share it. Now go preheat that oven and bake some joy.
Save This Recipe for Later!
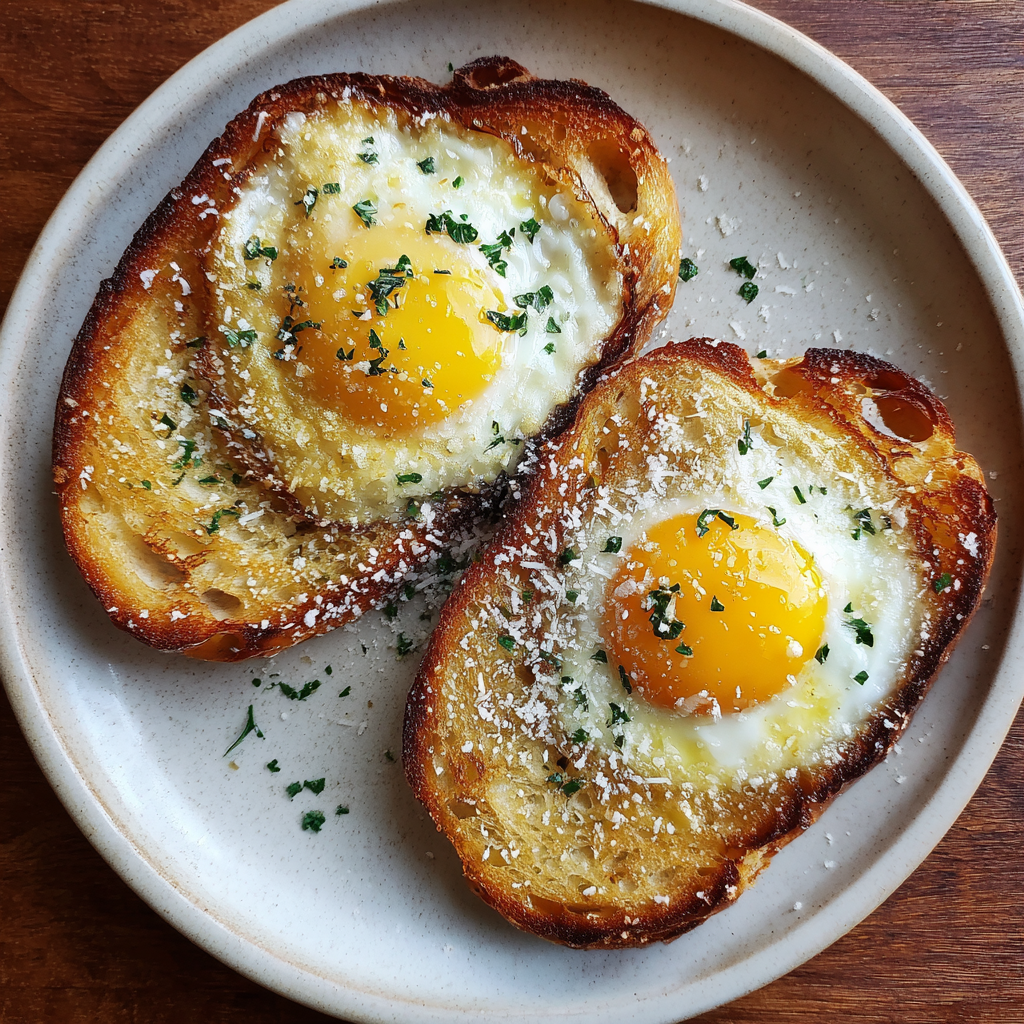
Parmesan with Honey Butter Sourdough Toast
Morning Magic: Crispy Eggs, Cheesy Dreams & Toast That Tastes Like Sunshine
Hey there, breakfast adventurer! Beau here from Feastical, ready to share one of my all-time favorite morning rituals. Picture this: golden-edged fried eggs with a cloud of melty Parmesan, snuggled next to sourdough toast slathered in honey-kissed butter. It’s sweet, salty, crispy, and gooey—all in one bite. This isn’t just breakfast; it’s a 10-minute hug on a plate that turns ordinary mornings into tiny celebrations. Whether you’re rushing out the door or savoring a lazy Sunday, this dish is your secret weapon for instant joy. No fancy skills needed—just a skillet, your trusty toaster, and that glorious runny yolk waiting to turn your toast into edible art. Let’s make magic happen!
The Midnight Snack That Started It All
This recipe? It’s got roots in my college days. One foggy 2 a.m. after pulling an all-nighter, I raided my near-empty fridge: eggs, stale sourdough, a Parmesan heel, and wildflower honey from Mom’s care package. Desperation led to revelation—I fried the eggs extra crispy, showered them with Parmesan shavings, and drizzled honey on buttered toast. That first bite? Pure lightning. The salty cheese played tag with sweet honey, and the yolk became liquid gold. My roommate stumbled in, took one forkful, and declared it “breakfast wizardry.” Now, 12 years later, it’s my go-to when life feels chaotic. It’s proof that the best kitchen adventures often start with “What the heck, let’s try this.”
Your Flavor Toolkit: Simple Staples, Big Impact
- Eggs (2): Farm-fresh if possible! Room temp eggs fry more evenly. Vegan? Swap in crispy tofu slices.
- Olive oil or butter (1 tbsp): Butter = richness, olive oil = crispier edges. Use bacon fat for smoky flair!
- Parmesan (freshly grated): Skip the green can! Real Parmigiano-Reggiano melts silkily. Vegetarians: check for rennet-free brands.
- Sourdough bread (2 slices): Stale bread toasts better! No sourdough? Ciabatta or rye add fun twists.
- Butter (1-2 tbsp): Kerrygold or cultured butter makes it sing. Dairy-free? Coconut oil works surprisingly well.
- Honey (a drizzle): Wildflower for floral notes, buckwheat for depth. Maple syrup or agave for vegan versions.
- Flaky salt (pinch): Maldon’s my MVP. The crunch lifts everything! Sub coarse sea salt in a pinch.
Let’s Cook: Crispy Edges, Runny Yolks & Happy Taste Buds
Step 1: Heat the Pan (Chef’s Secret Weapon!)
Warm your skillet over medium heat—not high!—for 90 seconds. Add oil/butter; it should shimmer but not smoke. Pro tip: Throw in a tiny bread crumb. If it sizzles calmly, you’re golden. Too hot? Your eggs will lace like doilies (pretty but tough).
Step 2: Fry Those Eggs Like a Boss
Crack eggs into a small bowl first (shell rescue is easier!). Slide them into the pan. Listen for that happy sssshh! Cook undisturbed until whites set (2-3 mins). Hack: Tilt the pan, spoon hot oil over yolks to set the film faster. Want lacy edges? Baste those whites!
Step 3: Cheese Blizzard Time
Generously grate Parmesan over eggs now—don’t wait! Cover with a lid for 30 seconds. The steam melts cheese into a savory blanket. Watch closely: Over-covering turns yolks hard. We want “jammy,” not hockey pucks!
Step 4: Toast TLC
While eggs cook, toast sourdough until deeply golden. Game-changer: Rub a raw garlic clove on warm toast pre-butter for subtle zing. Spread butter immediately so it melts into nooks. Drizzle honey in zigzags—no glugging! Finish with flaky salt crystals.
The Science Behind the Perfect Crispy Egg
Ever wonder why this simple combo of eggs, cheese, and toast tastes like a symphony? There’s actual science at play! Let’s break down why this dish works so well—from the Maillard reaction to the magic of emulsification.
1. The Maillard Reaction: Where Crispy Edges Are Born
When your egg hits that properly preheated pan, the proteins and sugars in the egg white undergo the Maillard reaction—a chemical process that creates hundreds of new flavor compounds. That’s what gives your eggs those golden, crispy lace edges. Too much heat? The proteins tighten too fast, squeezing out moisture and leaving rubbery eggs. Too little? You get pale, soggy whites. The sweet spot? Medium heat with just enough fat (butter or oil) to conduct heat evenly.
2. Parmesan’s Umami Power
Parmesan isn’t just salty—it’s packed with glutamates, natural compounds that trigger our umami taste receptors. When melted, these glutamates bind with the fats in the egg yolk, amplifying its richness. Aged Parmesan (24+ months) has even more of these flavor bombs. Fun fact: This is why the dish still tastes satisfying even without meat—umami fills that savory void.
3. The Honey-Butter Emulsion
When you slather warm toast with butter and drizzle honey, something magical happens: the butter’s fat and honey’s sugars create a temporary emulsion. This coats your tongue evenly, so you taste sweet, salty, and creamy all at once. Using cultured butter (with its tangy notes) balances the honey’s sweetness, preventing cloyingness.
4. The Yolk’s Perfect Viscosity
A runny yolk isn’t just about texture—it’s a flavor carrier. The liquid yolk coats the toast, ensuring each bite has the ideal ratio of bread to egg. For the perfect “jammy” yolk, cook until the edges are crispy but the center jiggles slightly when shaken. Covering the pan with a lid for 30 seconds steams the top gently, setting the yolk’s outer layer without overcooking it.
5. Sourdough’s Tangy Contrast
Sourdough’s natural acidity (from its fermentation) cuts through the dish’s richness. The toast’s crispness also provides a textural counterpoint to the eggs’ creaminess. Stale bread works better here because it’s lost some moisture, allowing it to crisp up faster without burning.
Pro Tip: For extra crunch, sprinkle a pinch of grated Parmesan directly into the hot oil before adding the eggs. It fries into crispy cheese “frico” that sticks to the eggs.
Global Twists on the Classic
This dish is a blank canvas—here’s how to take it around the world with five international flavor spins:
1. Italian “Uova al Purgatorio” Style
Add a spoonful of spicy tomato sauce (like arrabbiata) to the pan after flipping the eggs. Top with Pecorino Romano and basil. The acidity of the tomatoes brightens the dish, while the cheese adds a sharp bite.
2. Middle Eastern “Shakshuka Lite”
Swap Parmesan for crumbled feta, and drizzle the toast with date syrup instead of honey. Sprinkle with za’atar (a thyme-sesame blend) and smoked paprika for warmth.
3. Korean “Gyeran-ppang” Inspired
Mix gochujang (fermented chili paste) with butter for a spicy spread. Top eggs with toasted sesame seeds and quick-pickled cucumbers for crunch.
4. French “Croque Madame” Vibe
Use Gruyère instead of Parmesan, and layer the toast with béchamel sauce (or a quick mayo-mustard mix). Add a slice of ham if you’re feeling fancy.
5. Indian “Masala Egg Toast”
Sauté minced garlic, cumin seeds, and chopped green chili in the oil before adding eggs. Garnish with cilantro and a squeeze of lime. Serve with chutney-spiked butter.
Why These Work: Each twist respects the original formula—crispy eggs + cheesy richness + sweet toast—while introducing regional flavors. The key is balancing acidity (tomatoes, lime), heat (chili, gochujang), and texture (pickles, seeds) to keep every bite dynamic.
Pro Tip: For a Japanese “Oyako Don” twist, replace honey with mirin (sweet rice wine) and add a dash of soy sauce to the eggs. Top with scallions and nori strips.
The Psychology of Comfort Food
Why does this dish feel like a hug? Let’s explore the emotional alchemy behind its appeal:
1. Nostalgia on a Plate
For many, eggs and toast are childhood staples—simple, familiar, and safe. The addition of honey taps into early memories of sweetness as reward (think: buttered toast after school). Parmesan’s umami depth subconsciously signals “home-cooked,” even if it’s a 10-minute meal.
2. Texture Therapy
The combo of crispy (toast, egg edges), creamy (yolk, butter), and melty (cheese) textures engages multiple pleasure centers in the brain. Studies show varied textures make food more satisfying, as they mimic the diversity of a full meal in one bite.
3. The “Effort vs. Reward” Ratio
This dish delivers luxury (golden yolks, artisanal cheese) with minimal effort, creating a sense of accomplishment. In psychology, this is called “small wins”—tiny victories that boost mood. It’s why the sizzle of eggs or the sound of crunching toast feels so gratifying.
4. Sensory Anchoring
The aroma of toasted sourdough, the visual of a runny yolk, and the sound of a fork scraping crispy cheese create a multisensory experience. These cues anchor us in the present moment, offering a break from stress—a form of edible mindfulness.
5. The Sharing Factor
Food psychologist Brian Wansink found that meals eaten with others (even virtually) taste better. This dish is inherently shareable—whether you’re passing the pan to a roommate or posting a #yolkporn photo online.
Pro Tip: To amplify the comfort factor, serve on a warm, colorful plate. Research shows red and yellow dishes enhance perceived flavor intensity.
Plating: Keep It Simple, Keep It Happy
Slide eggs onto a warm plate (cold plates = sad eggs). Place toast beside them—slightly overlapping so yolk can waterfall onto it. No fancy garnishes needed; this is rustic charm at its best. Serve immediately with strong coffee or orange juice. Bonus cozy points: Eat straight from the skillet with toast as your edible spoon!
Mix It Up: 5 Delicious Twists
- Spicy Sunrise: Add red pepper flakes to eggs or chili-infused honey.
- Green Goddess: Top eggs with arugula or fresh basil.
- Umami Bomb: Swap Parmesan for aged Gouda or truffle salt.
- Protein Power: Layer toast with smashed avocado or prosciutto.
- Sweet Tooth: Dust toast with cinnamon before honey.
Beau’s Backstory: From “Meh” to “More!”
This recipe evolved from my “lazy bachelor chow” to a family favorite. My toddler calls it “Daddy’s confetti eggs” (Parmesan = edible glitter). One hilarious disaster: I once used salted butter AND flaky salt, creating a salt-lick toast. Lesson learned! Now I keep butter unsalted. Over the years, I’ve learned the honey must be local—its terroir changes the whole vibe. If you make it once, you’ll tweak it forever. That’s the beauty!
Your Questions, My Answers
Q: Why won’t my eggs get crispy edges?
A: Heat’s too low or pan’s overcrowded! Use a small skillet (8-inch max), ensure oil is shimmering, and don’t move eggs until edges brown. Room-temp eggs help too.
Q: Can I make this vegan?
A: Absolutely! Sizzle firm tofu slices in nutritional yeast (for cheesy flavor). Use coconut oil and agave. Vegan “Parm” shreds work but grate them thin!
Q: My cheese clumps instead of melting. Help!
A: Freshly grate it—pre-grated has anti-caking agents. Cover the pan ONLY 30 seconds. Too long = rubbery cheese blanket.
Q: Is sourdough essential?
A: Nope! But its tang balances sweetness. Try brioche for decadence or whole grain for nuttiness. Just avoid soft sandwich bread—it turns soggy.

Parmesan with Honey Butter Sourdough Toast
- Total Time: 10 minutes
Description
Turn any morning into a mini celebration with this 10-minute breakfast that’s sweet, salty, crispy, and downright soul-hugging. Farm-fresh eggs, melty Parmesan, buttery sourdough, and a drizzle of honey—simple staples that make you wonder why you ever settled for soggy cereal. Ready to make your morning taste like sunshine? Grab that skillet!
Ingredients
-
2 eggs (room temp)
-
1 tbsp butter or olive oil
-
2 slices sourdough bread
-
1–2 tbsp good butter (for toast)
-
Freshly grated Parmesan (to taste)
-
Drizzle of wildflower honey
-
Pinch flaky salt
Instructions
1️⃣ Heat: Warm skillet on medium. Add oil or butter—should shimmer, not smoke.
2️⃣ Fry: Crack eggs in a bowl, slide into pan. Cook 2–3 mins until whites set. Spoon hot oil over yolks for a jammy top.
3️⃣ Cheese: Shower eggs with Parmesan. Cover 30 secs to melt into gooey bliss.
4️⃣ Toast: Toast bread golden. Rub with garlic (optional). Butter while hot. Drizzle honey in zigzags, finish with flaky salt.
5️⃣ Serve: Plate eggs with toast so that runny yolks spill onto bread. Grab a fork—or use toast as your spoon!
Notes
✔️ Use stale bread for crunchier toast.
✔️ Room temp eggs = even fry.
✔️ Try garlic rub on toast for subtle zing.
✔️ Swap honey for maple syrup for a twist!
- Prep Time: 5 min
- Cook Time: 5 min
Nutrition
- Calories: 370 Cal per serving
- Sugar: 5g
- Fat: 23g
- Carbohydrates: 24g
- Protein: 16g
Nutrition Per Serving (Approx):
Calories: 370 • Protein: 16g • Fat: 23g (Sat: 9g) • Carbs: 24g • Fiber: 1g • Sugar: 5g (mostly from honey)
Final Thoughts: More Than Just Breakfast
This crispy egg toast isn’t just fuel—it’s a masterclass in simplicity, a lesson in how pantry staples can become poetry. It teaches us to embrace imperfections (so what if the yolk breaks?), play with contrasts (sweet vs. salty, crisp vs. gooey), and find joy in the everyday.
Whether you’re a college kid with a hot plate or a home chef with a fancy skillet, this dish meets you where you are. It’s resilient (forgiving substitutions) yet refined (elevated by quality ingredients). Most importantly, it’s a reminder that the best meals aren’t about complexity—they’re about connection.
So tomorrow morning, take those 10 minutes. Fry the eggs a little slower. Drizzle the honey with intention. And when that first bite hits—crispy, creamy, sweet, salty—you’ll taste more than food. You’ll taste a tiny, delicious rebellion against the rush of life.

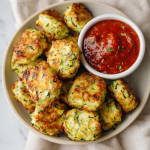
Cheesy Zucchini Tots
Cheesy Zucchini Tots: Your New Favorite Bite-Sized Comfort Food!
Hey there, Feastical friends! Beau here, and I’ve gotta say—nothing makes me happier than sharing a recipe that turns “meh” veggies into “MORE, PLEASE!” magic. Today, we’re diving into Cheesy Zucchini Tots: crispy little flavor bombs that’ll make you forget you’re eating something green. Imagine golden-brown edges hugging a melty cheddar heart, with just enough zucchini to keep things light and sneaky-nutritious. They’re the ultimate crowd-pleaser—whether you’re wrangling picky eaters, hosting game night, or just treating yourself to a snack that feels like a high-five. I tested these bad boys for weeks (tough job, I know), and the secret’s in the squeeze (more on that later!). No fancy skills needed—just a bowl, a baking sheet, and that trusty spatula you finally found behind the blender. Ready to turn that summer zucchini glut into pure joy? Let’s get tot-alicious!
Sunshine, Squash, and Grandma’s Sneaky Genius
Every time I make these tots, I’m back in my Grandma Lou’s kitchen—July heat, screen door slamming, and that giant zucchini plant taking over her garden like a leafy Godzilla. She’d hand me a grater and say, “Beau-bear, make yourself useful!” while humming Patsy Cline. I’d groan, eyeing that green monster. But then? She’d transform it into something miraculous. One summer, she invented “zucchini coins” (her proto-tots!) to bribe my veggie-phobic cousins. We’d dunk them in marinara, crumbs flying everywhere, and suddenly… we were begging for seconds. That’s the magic, right? Taking humble stuff—maybe even stuff we gripe about—and turning it into shared joy. Now, I make these tots with my niece, and her “Ew, zucchini!” melts into “Uncle Beau, can we bake more?” That’s the Feastical spirit: food that hugs you back.
Gather Your Squad: What You’ll Need
Here’s your dream team (plus my chef-y whispers):
- 1 medium zucchini – Grated & squeezed DRY! This is non-negotiable—wet zucchini = soggy tots. Chef hack: Pick one about 8 inches long; bigger = watery, smaller = not enough bulk.
- 2 large eggs – Your glue! They bind everything. Substitute: For egg-free, mix 2 tbsp ground flaxseed + 5 tbsp water; let sit 5 mins until gooey.
- ¼ cup panko bread crumbs – Lighter, crispier crunch! Insider tip: Panko’s irregular flakes create air pockets for extra crunch.
- ¼ cup regular bread crumbs – The steady backbone for structure. Swap: Use gluten-free crumbs if needed—they work great!
- 1 tsp salt (optional) – I use it, but if your cheese is salty, taste first. Fun twist: Swap in garlic salt for extra oomph!
- ¼ tsp black pepper – Freshly cracked is chef’s kiss.
- ¾ tsp garlic powder – Not fresh garlic! Powder disperses evenly without making tots weepy.
- 1 cup shredded cheddar cheese – Sharp cheddar = bold flavor. Pro move: Hand-shred it! Pre-shredded has anti-caking agents that can dull melting.
- Marinara sauce (for dipping) – Store-bought is fine! Or try my 5-min marinara hack.
Why this combo rocks: Zucchini brings moisture (controlled!), eggs bind, breadcrumbs crisp, cheese oozes—and spices make it SING. Simple, but each piece matters!
Let’s Build Some Tasty Tots: Step-by-Step
Prep Zucchini (The Squeeze Heard ‘Round the Kitchen!):
Grate your zucchini on the large holes of a box grater. Now—squeeze like it owes you money! Pile shreds into a clean kitchen towel (cheesecloth works too), twist, and wring HARD over the sink. You’ll be shocked how much water gushes out. Chef’s truth bomb: Skipping this = floppy tots. Do it twice if needed! Pat dry with paper towels afterward. This step is your tot foundation—make it count.
Mix It Up (Party in a Bowl!):
In a large bowl, combine your bone-dry zucchini, eggs, panko, regular breadcrumbs, salt, pepper, garlic powder, and cheddar. Mix with a fork or hands until fully combined. Watch for: No dry pockets! But don’t overmix—it should feel like damp sand holding together. Secret weapon: Let the mix sit 5 mins. Breadcrumbs absorb moisture, making shaping easier!
Shape Those Tots (Channel Your Inner Potter!):
Scoop a heaping tablespoon of mix. Roll gently into a ball, then shape into a mini log (like a tater tot!). Aim for uniform size—about 1.5 inches long—so they bake evenly. Game-changer tip: Lightly oil your hands to prevent sticking! Place tots on a parchment-lined baking sheet. No parchment? Heavy-duty foil + light oil spray works.
Bake to Golden Perfection (The Magic Happens!):
Preheat oven to 400°F (200°C). Bake tots 10-12 mins, then FLIP THEM! This ensures all-around crispiness. Bake another 10-13 mins until deeply golden and firm. Pro hack: Spritz lightly with oil before baking for extra crunch. If they sizzle softly, you’re winning! Let cool 2 mins on the sheet—they crisp up as they rest.
The Science Behind the Perfect Zucchini Tot – Why These Work (And Others Don’t)
Ever bitten into a veggie tot only to get a mouthful of mush? The secret to crispy, cohesive zucchini tots lies in understanding the science of moisture control, binding agents, and heat distribution. Here’s why this recipe works—and how to avoid common pitfalls.
Moisture Management: The Squeeze Factor
Zucchini is 95% water, which is great for hydration but terrible for crispiness. Grating and squeezing removes excess liquid, preventing a soggy texture. But there’s a trick: salt the grated zucchini first. Sprinkle ½ tsp salt over the shreds, let them sit for 5 minutes, then squeeze. Salt draws out water via osmosis, making the squeezing even more effective. Rinse the salt off if needed, but ensure you’re left with bone-dry shreds.
Binding Agents: Eggs vs. Alternatives
Eggs are the MVP here—their proteins coagulate during baking, acting as glue. For egg-free versions, flax eggs (ground flax + water) work, but they lack the structural power of eggs. If your tots crumble, try adding 1 tbsp grated Parmesan to the mix. Its natural glutamates act as a binder while adding umami.
Breadcrumbs: The Texture Architects
Panko’s irregular flakes create air pockets for crunch, while regular breadcrumbs provide density. For gluten-free, crushed rice cereal or cornmeal adds crispiness but may require extra egg or cheese to compensate for dryness.
Cheese Chemistry: Melting Matters
Low-moisture cheeses (cheddar, Monterey Jack) melt without separating. High-moisture cheeses (mozzarella, feta) release oils and water, leading to greasy tots. Pre-shredded cheese contains cellulose to prevent clumping, which can inhibit melting. Always shred your own!
Baking vs. Frying: Heat Distribution
Baking at 400°F ensures Maillard reaction (browning) without excessive oil. For extra crispiness, place a wire rack on the baking sheet to allow air circulation. Frying (350°F oil for 2–3 minutes) yields crunchier tots but sacrifices the “health halo” of baking.
Pro Tip: For a hybrid approach, spritz tots with olive oil before baking. The oil conducts heat evenly, mimicking fryer crispiness.
Beyond the Basics – Elevating Your Zucchini Tots for Every Occasion
These tots are a blank canvas for creativity. Here’s how to adapt them for holidays, meal prep, and global flavors.
Holiday Showstoppers
-
Thanksgiving: Add ¼ cup finely chopped turkey bacon and 1 tsp sage. Serve with cranberry mayo.
-
Christmas: Mix in 2 tbsp diced roasted chestnuts and rosemary. Pair with fig jam.
-
Game Day: Fold in ¼ cup blue cheese crumbles + 1 tbsp hot sauce. Dunk in ranch.
Meal Prep Hacks
-
Freezer-Friendly: Shape and freeze raw tots on a tray. Once solid, transfer to a bag. Bake straight from frozen (+5 minutes).
-
Lunchbox Stars: Pack cold tots with hummus or tzatziki. They’re sturdy enough to survive a lunch bag.
-
Salad Toppers: Reheat and toss on a kale Caesar salad instead of croutons.
Global Flavor Twists
-
Mediterranean: Swap cheddar for feta, add 1 tbsp chopped Kalamata olives and oregano. Serve with tzatziki.
-
Indian: Mix in 1 tsp garam masala and 2 tbsp paneer. Dip in mint chutney.
-
Thai: Use coconut flour instead of breadcrumbs, add 1 tsp lemongrass paste, and dip in sweet chili sauce.
Presentation Pro Tip: Skewer tots with decorative toothpicks for parties. For kids, arrange them in a “tot train” on the plate with ketchup “tracks.”
The Nutritional Lowdown – Why These Tots Are a Win for Everyone
Are these “healthy”? Let’s break it down without diet-culture nonsense.
Macro Balance
Per 5 tots:
-
180 calories – Lighter than potato tots (250+ calories for 5).
-
9g protein – Thanks to eggs and cheese. Pair with Greek yogurt dip for a protein boost.
-
12g carbs – Half of traditional tots. Swap panko for almond flour to reduce further.
Veggie Boost
Zucchini provides:
-
Vitamin C (14% DV): Immune support.
-
Fiber (1g/serving): Aids digestion (add flaxseed for more).
-
Potassium (8% DV): Balances sodium.
Dietary Adaptations
-
Keto: Use almond flour + extra cheese. Net carbs: 3g/serving.
-
Vegan: Flax eggs + dairy-free cheese (Violife cheddar works best).
-
Paleo: Coconut flour + nutritional yeast for cheesiness.
Real Talk: These aren’t a “superfood,” but they’re a smarter way to enjoy comfort food. The combo of protein, fat, and fiber keeps you full longer than processed snacks.
Serve ‘Em Up: Dip, Dunk, Devour!
Slide these golden beauties onto a platter while warm—that cheese is gloriously gooey! Nestle a bowl of warm marinara in the center for dipping. Feastical flair: Sprinkle with chopped parsley or chives for color. Pack them cold in lunchboxes (they reheat well!), or pile them high next to grilled chicken. Kids love ’em as “green nuggets,” and adults? They’ll hover by the tray. For parties, stick toothpicks in ’em and watch ’em vanish!
Shake It Up: 5 Tasty Twists
Got a craving? Try these spins:
- Pizza Party: Swap cheddar for mozzarella, add 1 tbsp Italian herbs + 2 tbsp minced pepperoni to the mix. Dip in pizza sauce!
- Southwest Fiesta: Use pepper jack cheese + 1 tsp cumin + 2 tbsp canned green chiles. Serve with chipotle mayo.
- Keto-Friendly: Replace breadcrumbs with ⅓ cup almond flour + 2 tbsp grated Parmesan. Bake same time!
- Veggie Boost: Add ¼ cup finely grated carrot or sweet potato with the zucchini (squeeze both!).
- Air Fryer Crunch: Cook at 380°F for 8-10 mins, shaking halfway. Faster + crispier!
Beau’s Backstage Notes
Okay, real talk: My first batch of these was a zucchini puddle. I didn’t squeeze enough, and they wept all over the pan—RIP, crispy dreams. But that’s cooking! Now I double-squeeze like my rep depends on it. Over the years, I’ve learned: Size matters. Too big? They crumble; too small? Dry nuggets. Tablespoon scoops are your BFF. And cheese? Low-moisture wins. I tried fancy brie once… don’t. Stick with cheddar, Monterey Jack, or that pepper jack twist. Funny story: My dog, Biscuit, once stole a tot off the counter. He’s now my official “crumb inspector.” Moral: Guard your tots fiercely—they’re that good.
FAQs: Your Tot Troubles, Solved!
Q: My tots fell apart! What did I do wrong?
A: Two likely culprits: 1) Not enough squeezing—zucchini must be DESERT-DRY. Or 2) Skipping the 5-minute mix rest. Breadcrumbs need time to absorb moisture. If still crumbly, add 1 extra tbsp breadcrumbs.
Q: Can I freeze these before or after baking?
A: Absolutely! Freeze unbaked tots on a sheet until solid (1 hour), then bag them. Bake frozen—add 3-5 mins. Already baked? Reheat frozen tots at 375°F for 10 mins. They’re freezer superheroes!
Q: Why no fresh garlic?
A: Fresh garlic releases water and can burn, causing bitter spots. Garlic powder gives even, mellow flavor without the risk. Trust me—I learned the hard way with charred garlic bits!
Q: Can I use almond flour instead of breadcrumbs?
A: Yes (see Keto variation!), but note: Almond flour browns faster. Reduce oven temp to 375°F and check at 15 mins. They’ll be softer but still delish!
Cheesy Zucchini Tots
- Total Time: 40 mins
Description
Turn ordinary zucchini into crispy, cheesy flavor bombs everyone will crave! These tots are golden on the outside, melty inside, and sneakily veggie-packed—perfect for picky eaters, party trays, or guilt-free snacking. Ready to make veggies irresistible? Let’s get tot-alicious!
Ingredients
-
1 medium zucchini, grated & squeezed dry
-
2 large eggs (or flax egg substitute)
-
¼ cup panko breadcrumbs
-
¼ cup regular breadcrumbs (or gluten-free)
-
1 tsp salt (optional)
-
¼ tsp black pepper
-
¾ tsp garlic powder
-
1 cup shredded sharp cheddar cheese
-
Marinara sauce for dipping
Instructions
1️⃣ Prep: Grate zucchini and squeeze out all excess moisture with a towel—no soggy tots!
2️⃣ Mix: In a bowl, combine zucchini, eggs, both breadcrumbs, salt, pepper, garlic powder, and cheddar. Let rest 5 mins.
3️⃣ Shape: Scoop a heaping tablespoon, roll into a tot shape. Place on parchment-lined baking sheet.
4️⃣ Bake: Preheat oven to 400°F (200°C). Bake 10–12 mins, flip, then bake another 10–13 mins until golden and crisp.
5️⃣ Serve: Cool 2 mins, dunk in warm marinara, and enjoy!
Notes
✔️ Squeeze zucchini TWICE for best crunch.
✔️ Oil your hands to shape tots easily.
✔️ For extra crisp, spritz tots with oil before baking.
✔️ Try air-frying: 380°F for 8–10 mins!
- Prep Time: 15 mins
- Cook Time: 25 mins
Nutrition
- Calories: 180 per 5 tots
- Fat: 10g
- Carbohydrates: 12g
- Fiber: 1g
- Protein: 9g
Nutritional Nibbles
Prep: 15 min | Cook: 25 min | Makes: ~20 tots
Per 5 tots (approx.): Calories 180 • Protein 9g • Fat 10g • Carbs 12g • Fiber 1g
Note: Stats include marinara dip (2 tbsp). For lower fat, use reduced-fat cheese and egg whites!
Final Thoughts: More Than Just a Recipe
Cheesy Zucchini Tots aren’t just a snack—they’re a gateway to kitchen confidence. They teach foundational skills: moisture control, balancing textures, and the joy of improvising. Most importantly, they prove that “healthy” doesn’t mean sacrificing flavor. Whether you’re a parent sneaking veggies into picky eaters, a meal prepper looking for freezer wins, or just someone who loves crispy-cheesy bites, these tots deliver. So grab that zucchini, channel Grandma Lou’s ingenuity, and remember: The best recipes aren’t just about feeding stomachs—they’re about feeding connections. Now go forth and squeeze the day!
Loved this recipe? Save it for later!
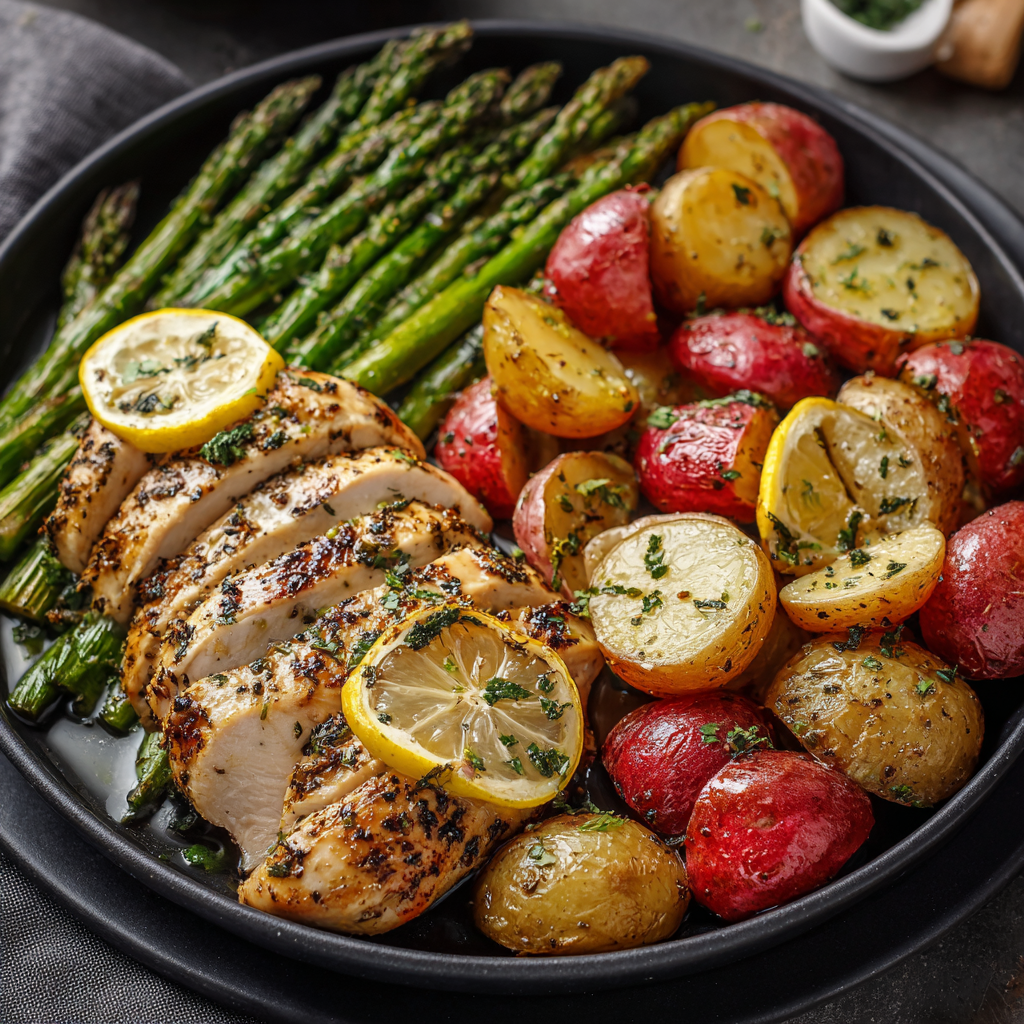
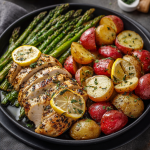
Lemon and Herb Chicken with Asparagus & Roasted Red Potatoes
Hey there, Feastical friends! Beau here, back in your kitchen (virtually, at least!) with a dish that’s basically sunshine served on a plate. Ever have one of those days where you crave something that feels *special* but also… totally doable on a Tuesday? Where you want bright, vibrant flavors that also wrap you up in comfort? That’s exactly the sweet spot this **Lemon & Herb Chicken with Crisp Asparagus & Golden Roasted Red Potatoes** hits. It’s not just dinner; it’s a little moment of delicious calm.
Picture this: juicy chicken cutlets bathed in a buttery, lemony pan sauce that’s just tangy enough to make your taste buds sing. Alongside, tender-crisp asparagus and those gorgeous, crispy-edged red potatoes roasted with garlic and herbs until they’re little nuggets of golden perfection. Everything cooks up surprisingly fast (we’re talking 40 minutes!), uses one sheet pan and one skillet for minimal cleanup, and tastes like you fussed way more than you actually did. It’s balanced, satisfying, and has that magical “impress-your-friend-or-significant-other” quality without any stress. So, tie on your favorite apron, grab your trusty skillet, and let’s turn up the flavor dial!
This recipe? It whispers of springtime picnics and lazy Sunday suppers at my grandma’s farmhouse table. She wasn’t a fancy chef, but oh, could she make simple ingredients sing. I vividly remember helping her snap fresh asparagus from her garden, the satisfying *pop* echoing in the quiet afternoon. She’d toss potatoes with olive oil and dried herbs from her pantry – always that classic Italian blend – and the smell as they roasted would fill the whole house with anticipation. The chicken was usually whatever was freshest, simply seasoned and pan-seared to juicy perfection. The lemon sauce was her magic trick, though. She’d deglaze the pan with broth and a generous squeeze of lemon, scraping up all those delicious browned bits (the *fond*, as we chefs call it!), creating a sauce that tied everything together in a bright, silky embrace. It felt like pure love on a plate. Making this now always takes me back to that sun-drenched kitchen, the clatter of plates, and the sound of her laughter. It’s more than a meal; it’s a warm hug from the past, and I’m so excited to share that feeling with you.
### What You’ll Need to Make This Sunshine Feast
Gather these simple, flavorful ingredients – flexibility is key here!
* **5 small red potatoes, rinsed and quartered:** These are the perfect roasting potato! Waxy and creamy, they hold their shape and get beautifully crispy edges. *No reds?* Yukon Golds are a great sub. Size matters! Quartering ensures even cooking.
* **1 tbsp + 1 tsp olive oil:** We use the tablespoon for the potatoes and the teaspoon for the chicken. Extra virgin gives the best flavor, but any olive oil works. *Tip:* Good olive oil makes a difference in the sauce later!
* **½ tsp garlic powder:** Convenient flavor bomb for the potatoes. *Fresh fan?* Mince 1 clove and mix it in, but powder ensures no burning during roasting.
* **Salt & ground black pepper, to taste:** The backbone of flavor! Season generously at every step. Kosher salt is my go-to for its clean taste and easy pinch-ability.
* **1 tsp Italian seasoning:** That classic herb blend (oregano, basil, thyme, rosemary, marjoram) is perfect for the potatoes. *No blend?* Use ½ tsp dried oregano + ¼ tsp dried thyme + ¼ tsp dried basil.
* **1 large chicken breast, halved into 2 cutlets:** Halving ensures quick, even cooking and makes it feel more elegant! *Pounding tip:* Place breast between plastic wrap and gently pound to an even thickness (about ½ inch) before halving for extra tenderness. *Sub:* Boneless, skinless chicken thighs work wonderfully (cook 4-5 mins/side).
* **2 tbsp unsalted butter:** For the luscious sauce. Unsalted lets you control the salt level. *Dairy-free?* Use vegan butter or 1.5 tbsp olive oil (sauce will be thinner).
* **2 tbsp all-purpose flour:** Our sauce thickener. *Gluten-free?* A 1:1 GF blend works perfectly.
* **1 cup chicken stock:** The flavorful liquid base for the sauce. Low-sodium is best so you can control seasoning. *Homemade stock?* Chef’s kiss! *Vegetable stock* works in a pinch.
* **Zest of 1 lemon + juice of ½ lemon (more to taste):** BRIGHTNESS! Zest first before juicing. Use a microplane for super-fine zest packed with oils. Fresh lemon is non-negotiable here – bottled juice just doesn’t compare. Taste and add more juice if you love that tang!
* **½ lb asparagus, cut into thirds:** Look for firm, bright green spears with tight tips. Cutting into thirds makes them easy to eat and ensures they cook quickly alongside the chicken later. *Snap them:* Bend each spear near the end; it naturally breaks where the tough part begins.
### Let’s Get Cooking: Your Step-by-Step Guide to Deliciousness
Ready? Let’s turn these ingredients into pure comfort! Watch that oven and skillet work their magic.
1. **🔥 Roast Those Potatoes to Perfection:** Crank that oven to **400°F (200°C)** – this high heat is key for crispy outsides and fluffy insides! Grab a rimmed baking sheet (parchment paper optional for easier cleanup). Toss your quartered potatoes with the **1 tbsp olive oil, ½ tsp garlic powder, a good pinch of salt and pepper, and the 1 tsp Italian seasoning.** Get your hands in there and massage that flavor in! Spread them out in a single layer – **don’t crowd them!** This ensures they roast, not steam. Pop them in the hot oven. Set your timer for **15 minutes.** *Chef’s Hack:* Preheating the sheet pan in the oven for 5 minutes before adding the potatoes can give an even crispier start!
2. **🍗 Sear the Chicken Like a Pro:** While the potatoes start roasting, season both sides of your chicken cutlets **generously** with salt and pepper. Heat the **remaining 1 tsp olive oil** in a large skillet (stainless steel or non-stick work great) over **medium heat.** You want it shimmering but not smoking. Carefully lay the chicken in the pan. **Resist the urge to move it!** Let it sear undisturbed for **3-4 minutes** until you get a beautiful golden-brown crust. Flip and cook the other side for another **3-4 minutes**, or until the chicken is cooked through (internal temp 165°F/74°C). Transfer the chicken to a clean plate and **tent loosely with foil** – it keeps it warm and juicy. *Tip:* That golden-brown stuff left in the pan? Flavor gold! Don’t wash it out!
3. **🌱 Sauté the Asparagus Speedy-Gonzales Style:** Using the **same skillet** (with all that delicious chicken flavor still in it!), add the asparagus pieces. Toss in **a splash of water (about 2 tbsp)** – this creates a bit of steam to help cook them quickly and keeps them vibrant green. Cook, stirring occasionally, for **3-4 minutes** until they are **tender-crisp** – they should still have a pleasant snap. You want them bright green, not army green! Remove them to the plate with the chicken.
4. **🍋 Whip Up That Lemony Pan Sauce Magic:** Now for the showstopper! In that same skillet (still over medium heat), melt the **2 tbsp butter.** Once it’s foamy, whisk in the **2 tbsp flour.** Keep whisking constantly for **about 1 minute** – you’re cooking out the raw flour taste and making a “roux.” It should smell nutty and look like a smooth paste. **Gradually** pour in the **1 cup chicken stock**, whisking constantly to prevent lumps. Bring it to a gentle simmer. Now, whisk in the **lemon zest** and **juice of ½ lemon.** Let it bubble gently for **2-3 minutes**, whisking often, until it thickens slightly to a lovely gravy-like consistency that coats the back of a spoon. *Chef’s Tip:* Taste it NOW! Add more salt, pepper, or a squeeze more lemon juice if it needs a brighter punch.
5. **✨ Bring It All Home:** Time for the grand reunion! Slide the cooked chicken and asparagus back into the skillet with that glorious lemon sauce. Gently turn them to coat everything in that sunny, buttery goodness. Let it all heat through for just **1 minute.**
6. **🥔 Plate Up the Sunshine:** By now, your potatoes should be perfectly golden and tender (give them a poke with a fork!). Pull them out of the oven. Divide the roasted potatoes between two plates. Top with the saucy lemon herb chicken and asparagus. **Spoon extra sauce over everything!**
### Serving Up Comfort & Joy
Presentation is easy-peasy here because the dish is naturally beautiful! I love using warm, shallow bowls or simple white plates to let those vibrant colors – the golden potatoes, bright green asparagus, and saucy chicken – really pop. Spoon any extra lemony sauce pooling in the skillet right over the chicken and potatoes – it’s liquid gold! For a final touch of freshness, a tiny sprinkle of fresh parsley or chives adds a lovely green note (if you have some handy). This meal is complete as is – it’s got your protein, veg, and starch all covered! But if you *really* want to gild the lily, a warm, crusty baguette for mopping up that incredible sauce is never a bad idea. Pour a glass of crisp white wine (a Sauvignon Blanc or Pinot Grigio loves lemon!) or sparkling water with a lemon wedge, and dinner is served.
### Make It Your Own: Fun Flavor Twists
This recipe is a fantastic canvas! Here are a few ways to riff on it:
1. **Mediterranean Magic:** Add ¼ cup chopped sun-dried tomatoes (oil-packed, drained) and 2 tbsp chopped Kalamata olives to the sauce with the chicken and asparagus. Sprinkle with crumbled feta cheese just before serving.
2. **Creamy Dreamy:** Stir 2-3 tbsp of heavy cream, half-and-half, or full-fat coconut milk into the sauce right after it thickens for a richer, velvety texture.
3. **Spice It Up:** Love heat? Add a pinch of red pepper flakes to the chicken while searing, or whisk a teaspoon of Dijon mustard or a dash of hot sauce into the lemon sauce.
4. **Veggie Swap:** Not an asparagus fan? Swap in trimmed green beans, halved Brussels sprouts, or even broccoli florets (adjust cooking time slightly as needed).
5. **Herb Garden Fresh:** Swap the dried Italian seasoning on the potatoes for 1 tbsp of your favorite fresh herbs (rosemary, thyme, oregano) finely chopped. Stir another tbsp of fresh herbs (parsley, basil, dill) into the finished sauce.
### Beau’s Back-Porch Kitchen Musings
This recipe has been a constant in my kitchen repertoire for years, evolving from those early days at Grandma’s table. Honestly, the biggest “evolution” was realizing halving the chicken breast was a total game-changer for weeknight ease! I’ve made this for first dates (success!), comforting friends after tough days (always appreciated), and lazy solo dinners where I deserved something nice. One slightly chaotic memory involves my dog, Biscuit, getting *very* interested in the roasting potatoes and nearly causing a sheet-pan avalanche! Lesson learned: keep the oven door firmly closed around curious pups.
The beauty is in its simplicity and adaptability. Don’t stress over perfection – slightly overcooked asparagus or potatoes that could be crispier? It’s still gonna taste amazing with that lemony sauce. The key is that bright lemon balancing the rich butter and savory chicken and herbs. It just *works*. It’s the kind of dish that feels like you’re treating yourself, without needing a special occasion. That’s the Feastical spirit!
### Your Lemon-Herb Chicken Questions, Answered!
**Q: My sauce turned out lumpy! What happened?**
A: Don’t panic! Lumps usually happen if the stock is too cold when added or if you add it too fast. **Fix it:** Remove the pan from heat. Pour the sauce through a fine-mesh sieve into another container, pressing out lumps. Return the smooth sauce to the pan and gently reheat. Whisk in a splash more stock if needed. Next time: Ensure your stock is at least room temp (warming it slightly helps!), and whisk *constantly* while adding the stock *very gradually*, letting it incorporate fully before adding more.
**Q: My potatoes aren’t crispy enough. Help!**
A: Crispy potatoes need space, heat, and dry surfaces! **Troubleshoot:** 1. **Overcrowding:** Were the potatoes piled up? Spread them out more next time. 2. **Moisture:** Make sure they are dried well after rinsing. 3. **Oven Temp:** Is your oven running cool? Use an oven thermometer to check. 4. **Flip & Patience:** Flip them halfway! If still soft after 30 mins, crank the heat to 425°F for the last 5-10 mins (watch closely!). Preheating the sheet pan (as mentioned in the hack) is a game-changer!
**Q: Can I make this ahead of time?**
A: You can prep components! Roast the potatoes fully and reheat in the oven (5-10 mins at 350°F). Trim and cut the asparagus. Halve and season the chicken (store covered in the fridge). Make the sauce base (roux + stock) up to the point before adding lemon – cool, cover, and refrigerate. When ready: Reheat sauce gently, whisk in lemon zest/juice, then proceed with reheating chicken/asparagus in the sauce.
**Q: Is there a way to make this dairy-free?**
A: Absolutely! **Butter:** Substitute vegan butter sticks (like Miyoko’s or Earth Balance) or use 1.5 tbsp olive oil. **Sauce:** The sauce will be slightly thinner without butter, but still delicious. Whisking in ½ tsp cornstarch mixed with 1 tbsp cold water (instead of the flour roux) *after* adding the stock and bringing to a simmer can help thicken it if using oil. Proceed with lemon as usual!
Lemon and Herb Chicken with Asparagus & Roasted Red Potatoes
- Total Time: 40 mins
Description
Ready for a dinner that tastes like sunshine and feels like a warm hug? This Lemon & Herb Chicken brings juicy, golden chicken, crispy garlic-herb potatoes, and vibrant asparagus together in a silky, zesty pan sauce—just like Grandma made, but with easy weeknight vibes. One skillet, one sheet pan, endless comfort.
Ingredients
-
5 small red potatoes, quartered
-
1 tbsp + 1 tsp olive oil
-
½ tsp garlic powder
-
1 tsp Italian seasoning
-
Salt & black pepper, to taste
-
1 large chicken breast, halved into 2 cutlets
-
2 tbsp unsalted butter
-
2 tbsp all-purpose flour
-
1 cup chicken stock
-
Zest of 1 lemon + juice of ½ lemon
-
½ lb asparagus, cut into thirds
Instructions
1️⃣ Roast Potatoes: Preheat oven to 400°F (200°C). Toss potatoes with 1 tbsp olive oil, garlic powder, Italian seasoning, salt & pepper. Spread on a sheet pan. Roast 15 mins.
2️⃣ Sear Chicken: Season chicken cutlets with salt & pepper. In a skillet, heat 1 tsp olive oil over medium. Sear chicken 3–4 mins per side until golden & cooked through. Set aside, tent with foil.
3️⃣ Cook Asparagus: In the same skillet, add asparagus + splash of water. Sauté 3–4 mins until tender-crisp. Remove, keep warm.
4️⃣ Make Sauce: Melt butter in skillet, whisk in flour for 1 min. Gradually add stock, whisking until smooth. Add lemon zest & juice. Simmer 2–3 mins until thickened.
5️⃣ Bring It Together: Return chicken & asparagus to the sauce, coat well. Serve hot with crispy potatoes on the side—spoon that luscious sauce over everything!
Notes
-
Preheat sheet pan for ultra-crispy potatoes.
-
Pound chicken for even cooking.
-
Swap asparagus for green beans or broccoli!
Nutrition
- Calories: 420 cal Per serving
- Fat: 22g
- Carbohydrates: 25g
- Protein: 30g
Nutrition at a Glance (Per Serving – Approximate)
* **Calories:** ~420
* **Protein:** 30g
* **Carbohydrates:** 25g
* **Fat:** 22g (Saturated Fat: 8g)
* **Fiber:** 4g
* **Sugar:** 3g
* **Sodium:** Varies based on stock and seasoning – use low-sodium stock and season to taste!
**Prep Time:** 10 mins | **Cook Time:** 30 mins | **Total Time:** 40 mins | **Servings:** 2
Final Thoughts: Why This Recipe Is a Keeper
This Lemon & Herb Chicken with Crisp Asparagus & Golden Roasted Red Potatoes is more than just a meal—it’s a celebration of simplicity, balance, and comfort. Whether you’re cooking for yourself, a loved one, or friends, it delivers:
-
Bright, vibrant flavors that wake up the palate.
-
Satisfying textures in every bite.
-
Minimal cleanup for maximum enjoyment.
-
Nostalgic warmth that feels like home.
The best part? It’s flexible. Swap ingredients, adjust seasoning, or play with the sauce—it’s a recipe that invites creativity. So next time you need a little sunshine on your plate, give this one a try. Happy cooking, Feastical friends!
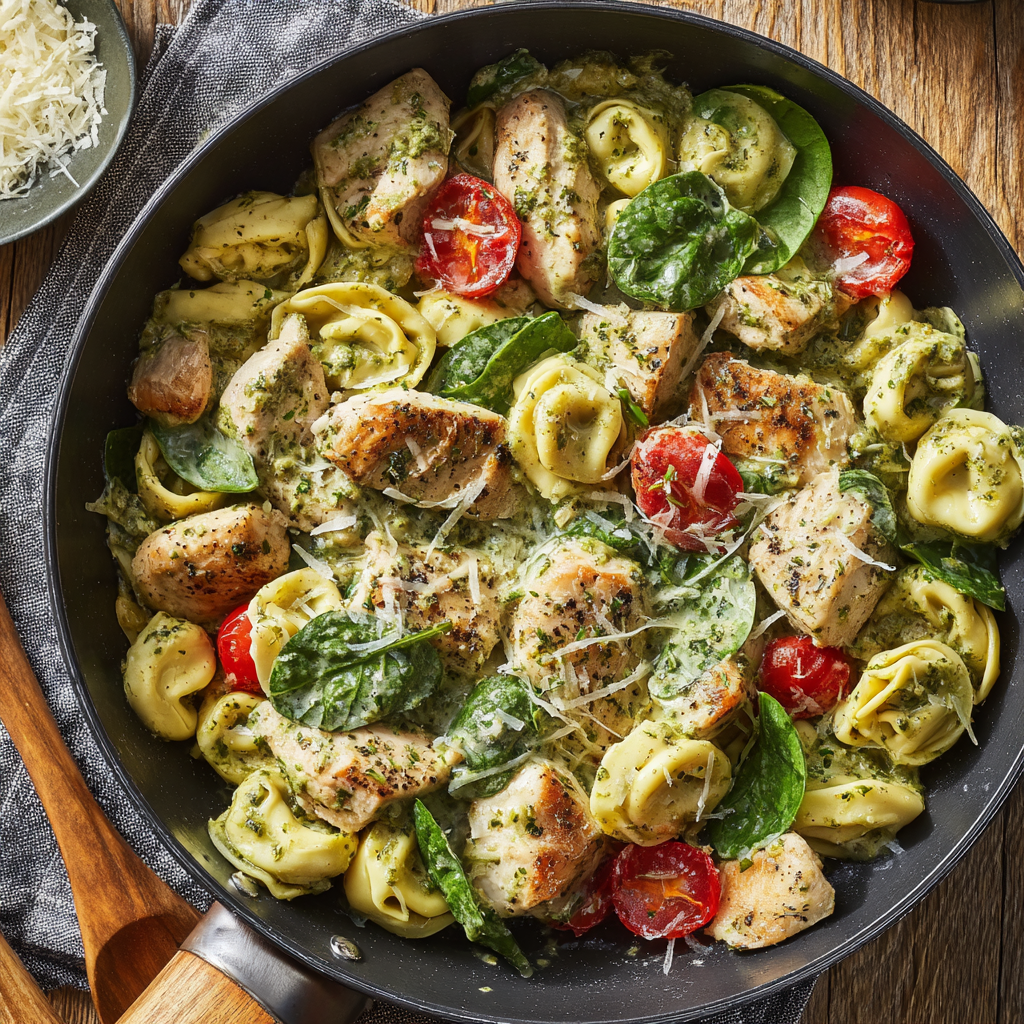
Chicken and Tortellini Pesto Skillet
One Skillet, Infinite Comfort: Chicken & Tortellini Pesto Skillet
Hey friends! Beau here from Feastical, and I’ve got a confession: I’m obsessed with dinners that feel like a cozy blanket but taste like a fancy Italian bistro. That’s why this Chicken and Tortellini Pesto Skillet is my weeknight superhero. Imagine this: juicy chicken, plump cheese tortellini, and sun-kissed tomatoes swimming in a creamy pesto sauce that hugs every bite. It’s vibrant, velvety, and packed with herby freshness—all in one pan, ready in under 30 minutes! Whether you’re juggling a chaotic family schedule or just craving soul-warming comfort without the fuss, this dish delivers. No fancy skills needed—just a skillet, a hungry heart, and maybe some crusty bread for sauce-mopping emergencies. Let’s turn your kitchen into the happiest little trattoria this side of Tuesday!
Why’s this recipe a Feastical favorite? It’s the ultimate flavor trifecta: protein-packed chicken for staying power, pillowy tortellini for carb-lovers’ joy, and that luscious pesto-cream sauce that makes veggies (yes, spinach counts!) disappear like magic. Plus, it’s infinitely adaptable—swap ingredients based on what’s in your fridge or dietary needs. Trust me, one bite and you’ll be doing the “happy fork dance.” Ready to cook? Let’s go!
My Pesto Epiphany: A Tale of Sauce & Serendipity
Picture this: It’s 2018, and I’m crammed in a tiny Rome apartment kitchen with my Nonna’s cousin, Gabriella. She’s teaching me her “sacred” pesto method—basil from her balcony, pine nuts toasted in a cast-iron pan, the works. Suddenly, her cat knocks over a pitcher of cream… right into the pesto! Gabriella gasps, then laughs wildly: “Mamma mia, now we make magic!” She tossed in leftover chicken and tortellini, and boom—this skillet dream was born. That chaotic moment taught me two things: 1) Imperfect kitchen accidents often create the best memories, and 2) Cream + pesto = culinary soulmates. Every time I make this dish, I smile at that cream-covered cat and Gabriella’s wise words: “Good food is like life—messy, rich, and better shared.”
Your Flavor Toolkit: Ingredients & Genius Swaps
Gather these goodies! Pro tip: Use refrigerated tortellini—it’s fresher and cooks faster than frozen. Here’s why each ingredient rocks:
- Olive oil (2 tbsp): Our flavor foundation! Extra virgin adds fruity depth. Swap: Butter or avocado oil.
- Chicken breast (1.5 lbs, cubed): Lean, quick-cooking protein. Insight: Cut uniform 1-inch cubes for even browning! Swap: Shrimp or chickpeas (veg-friendly).
- Salt & black pepper: Simple but essential. Chef’s trick: Season chicken generously—it builds layers!
- Chicken broth (½ cup): Thins the sauce without diluting flavor. Swap: Veggie broth or white wine (adds zing!).
- Prepared pesto (½ cup): The HERB HERO! Store-bought is fine (I love Costco’s), but homemade? *chef’s kiss*. Insight: Basil-based classic pesto works best—avoid sun-dried tomato versions here.
- Heavy cream (½ cup): Creates silky luxury. Swap: Half-and-half (lighter) or coconut milk (dairy-free).
- Parmesan cheese (1 cup, divided): Salty umami bomb! Chef’s secret: Reserve half for topping—it adds texture! Swap: Pecorino Romano (bolder) or nutritional yeast (vegan).
- Baby spinach (1 cup): Wilts into velvety goodness. Swap: Arugula (peppery kick) or kale (sturdier).
- Cherry tomatoes (½ cup, halved): Bursty sweetness! Insight: Halve them—they release juices faster.
- Cheese tortellini (16 oz): The carb MVP! Refrigerated cooks in 3-4 mins. Swap: Ravioli or gnocchi.
Let’s Get Sizzling: Your Foolproof Steps
Don’t rinse that skillet—we’re building flavor layers! Total time: 25 mins (yes, really).
- Brown that chicken: Heat olive oil in a large skillet over medium-high heat. Season chicken cubes with salt and pepper like you mean it! Cook 5-7 mins until golden and cooked through. Chef’s hack: Don’t crowd the pan—cook in batches if needed! Remove chicken; set aside. (Psst: Those browned bits left behind? FLAVOR GOLD.)
- Create the sauce: In the same skillet (see? No washing!), add chicken broth, pesto, and heavy cream. Stir like you’re painting rainbows! Simmer 2-3 mins until slightly thickened. Tip: Lower heat if bubbling too fiercely—cream can split!
- Cheese please!: Stir in HALF the Parmesan. Watch it melt into gooey perfection—about 1 min. Insight: Grate your own Parm if possible; it melts smoother than pre-shredded (which has anti-caking agents).
- Veggie power: Add spinach and tomatoes. Simmer 2-3 mins until spinach wilts and tomatoes soften. Chef’s whisper: Toss in a pinch of red pepper flakes here for subtle heat!
- Tortellini time: While sauce simmers, cook tortellini in boiling salted water per package directions (usually 3-4 mins). Drain—don’t rinse!—then add directly to the skillet. Pro move: Undercook tortellini by 1 min—it’ll finish absorbing sauce!
- Reunite & rejoice: Return chicken to the skillet. Gently fold everything together until coated in that glorious green sauce. No vigorous stirring—tortellini are delicate!
- The grand finale: Sprinkle remaining Parmesan over the top. Let it sit 1 min off-heat—the residual warmth will melt it dreamily. Done!
The Science Behind the Perfect Pesto Cream Sauce
Pesto and cream might seem like an unlikely duo, but when combined, they create a luscious, velvety sauce that coats every bite of chicken and tortellini with herby richness. So, what makes this combination so magical? Let’s break it down.
1. The Emulsion Factor
Traditional pesto is an emulsion—a blend of oil (from olive oil and nuts) and water (from fresh basil and garlic). When you introduce heavy cream, you’re adding fat and liquid, which stabilizes the sauce, preventing it from breaking. The key is to temper the cream—meaning, warm it gently rather than boiling it, which can cause separation.
2. The Role of Parmesan
Parmesan isn’t just for flavor; it’s a natural emulsifier. The cheese contains casein proteins that help bind fat and water, ensuring a smooth, cohesive sauce. That’s why we add it in two stages: half melted into the sauce for creaminess, and half sprinkled on top for texture.
3. Acidity Balance
Pesto is bright and tangy (thanks to lemon juice or vinegar in some recipes), while cream is rich and mellow. Together, they create a harmonious balance—the acidity cuts through the cream’s heaviness, making the dish feel indulgent but not cloying.
4. Why Fresh Spinach Works
Adding spinach at the end ensures it wilts just enough to soften but not turn mushy. Spinach also releases water as it cooks, which helps loosen the sauce slightly without diluting flavor.
Pro Tip: If your sauce ever looks too thin, let it simmer a minute longer. Too thick? A splash of reserved pasta water or broth will save the day!
The Art of One-Skillet Cooking (And Why It’s a Game-Changer)
One-skillet meals aren’t just convenient—they’re flavor powerhouses. Here’s why this method works so well for our Chicken & Tortellini Pesto Skillet:
1. Layered Flavor Development
By cooking the chicken first, we create fond—those delicious browned bits stuck to the pan. When we deglaze with broth, those caramelized bits dissolve into the sauce, adding deep, savory notes.
2. Fewer Dishes, More Efficiency
No juggling multiple pots! Cooking everything in one vessel means:
-
Less cleanup (a win for busy nights).
-
Better heat control (the skillet retains warmth, keeping ingredients hot as you build the dish).
-
Infused flavors (each ingredient picks up traces of what came before).
3. Texture Control
Pasta cooked separately (but finished in the sauce) ensures it doesn’t overcook. The tortellini absorbs just enough pesto cream to stay plump and tender without becoming gummy.
Common Mistakes to Avoid:
-
Overcrowding the pan: If you add too much chicken at once, it steams instead of browns. Cook in batches if needed!
-
Rinsing the skillet: Those browned bits = free flavor. Keep ’em!
-
Overcooking the tortellini: They’ll continue softening in the sauce, so undercook slightly in boiling water.
The Psychology of Comfort Food (Why This Dish Feels Like a Hug)
Ever wonder why some meals just feel soothing? This skillet checks all the boxes for culinary comfort:
1. Nostalgia on a Plate
Cheese-filled pasta and creamy sauces evoke childhood memories for many (think: mac and cheese, but grown-up). The familiar textures—tender chicken, pillowy tortellini—trigger positive associations.
2. Balanced Umami
Pesto (basil + garlic + nuts) + Parmesan + seared chicken = umami overload. These savory elements stimulate dopamine, the brain’s “feel-good” chemical.
3. Effort vs. Reward Ratio
Minimal prep + quick cooking = instant gratification. The dish feels indulgent but doesn’t require hours in the kitchen, making it a stress-free win.
4. Customizable Comfort
Dietary restrictions? Swaps like coconut milk (dairy-free) or chickpeas (vegetarian) let everyone enjoy it, reinforcing inclusivity = comfort.
Fun Fact: Studies show that green foods (hello, pesto!) are subconsciously associated with freshness and vitality, boosting mood.
Plate It Pretty: Serving Up Joy
This dish is a colorful showstopper! Spoon it straight from the skillet (rustic charm!) into shallow bowls. Garnish with extra basil leaves, cracked black pepper, or a Parmesan snowstorm. Pairings: Crusty garlic bread for sauce-dunking emergencies, and a simple arugula salad with lemon vinaigrette to cut the richness. For drinks? Crisp Pinot Grigio or sparkling lemonade. Family-style or date night—it’s all about sharing the comfort!
Mix It Up: 5 Tasty Twists
This skillet is your canvas! Try these riffs:
- Mediterranean: Swap chicken for artichoke hearts & kalamata olives; add feta instead of Parm.
- Spicy Arrabbiata: Stir 2 tbsp tomato paste + 1 tsp chili flakes into the sauce; use red pepper tortellini.
- Vegan Delight: Use coconut cream, vegan pesto, mushroom “chicken,” and dairy-free tortellini.
- Lemon-Herb: Add zest of 1 lemon + 2 tbsp fresh dill with the spinach.
- Protein Powerhouse: Add crispy pancetta or white beans for extra heft.
Beau’s Backstage Notes
This recipe evolved from my “lazy fridge cleanout” nights! Originally, I used jarred Alfredo + pesto stirred with rotisserie chicken—delicious but heavy. After Gabriella’s cream incident (RIP her linoleum), I lightened it with broth and fresh spinach. Funny story: Once, I subbed cilantro pesto by mistake—my kid called it “green goblin pasta” 😂. Lesson learned: Stick to basil! Over time, I’ve learned this dish thrives on simplicity. Don’t overcomplicate it! Use quality store-bought pesto if homemade isn’t happening. And hey—leftovers? Even better next day (if they last!).
Your Questions, Answered!
Q: Can I use frozen tortellini?
A: Absolutely! Cook frozen tortellini 1-2 mins longer than the package says, then drain well. Avoid adding frozen directly to sauce—it’ll waterlog everything.
Q: Why did my sauce separate?
A: Cream can “break” if overheated. Keep the sauce at a gentle simmer (not boil!), and always add cold cream to warm (not scorching) liquid. If it splits, whisk in 1 tbsp cold butter—it’ll often rescue the texture!
Q: Can I prep this ahead?
A: Yes—but smartly! Cook chicken and sauce (hold the spinach/tomatoes/tortellini). Store separately in the fridge. Day-of, reheat sauce, add veggies, cook tortellini fresh, and combine. Adding tortellini too early makes them mushy.
Q: Not a fan of tomatoes? Omit them?
A: 100%! Try roasted red peppers or zucchini instead. Or skip veggies entirely—just add an extra handful of spinach at the end.
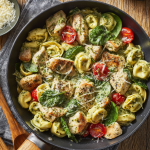
Chicken and Tortellini Pesto Skillet
- Total Time: 25 mins
Description
Bring the cozy vibes of an Italian trattoria straight to your kitchen! This creamy, herby Chicken & Tortellini Pesto Skillet is your shortcut to comfort—juicy chicken, pillowy tortellini, fresh spinach, and a velvety pesto sauce, all ready in under 30 minutes. One pan, zero stress, and endless “mmm” moments. Grab some crusty bread and let’s make your weeknight shine!
Ingredients
-
2 tbsp olive oil
-
1.5 lbs chicken breast, cubed
-
Salt & black pepper, to taste
-
½ cup chicken broth
-
½ cup prepared pesto
-
½ cup heavy cream (or half-and-half)
-
1 cup Parmesan cheese, divided
-
1 cup baby spinach
-
½ cup cherry tomatoes, halved
-
16 oz cheese tortellini (refrigerated)
Instructions
1️⃣ Heat olive oil in a large skillet over medium-high heat. Season chicken with salt & pepper; cook 5–7 mins until golden and cooked through. Remove; set aside.
2️⃣ In the same skillet, stir in broth, pesto, and cream. Simmer 2–3 mins until slightly thickened.
3️⃣ Add HALF the Parmesan; stir until melted. Add spinach & tomatoes; cook 2–3 mins until wilted.
4️⃣ Cook tortellini per package instructions, drain, then fold into skillet with the chicken.
5️⃣ Sprinkle remaining Parmesan, rest 1 min off-heat, then serve!
Notes
-
Undercook tortellini by 1 min—finishes perfectly in sauce.
-
No cream? Use coconut milk for dairy-free.
-
Add chili flakes for a spicy twist!
Nutrition
- Calories: ~520 cal Per serving
- Fat: 28g
- Carbohydrates: 28g
- Protein: 35g
Nutritional Nibbles (Per Serving)
Calories: ~520 • Protein: 35g • Carbs: 28g • Fat: 28g
Note: Stats vary based on ingredient brands and swaps. Using half-and-half vs. cream? Saves ~50 calories/serving!
Final Thoughts: More Than Just a Meal
This Chicken & Tortellini Pesto Skillet isn’t just dinner—it’s a celebration of simplicity, flavor, and shared joy. Whether you’re cooking for one or a crowd, it proves that great food doesn’t need to be complicated.
Remember:
-
Embrace imperfections (like Gabriella’s spilled cream—happy accidents happen!).
-
Make it yours (swap ingredients, adjust spice levels, or add a squeeze of lemon).
-
Share the love (food tastes better with good company).
Now, grab that skillet and create your own delicious memories. And hey—if you end up with a cream-covered cat? Just call it “extra flavor.” 😉 Buon appetito!

Maple Dijon Chicken and Vegetables
Maple Dijon Chicken & Veggies: Your New Favorite Feel-Good Feast
Hey there, kitchen pals! Beau here from Feastical, ready to share one of those magical recipes that feels like slipping into your comfiest sweater. You know those nights when you crave something wholesome, flavorful, and absolutely effortless? When takeout menus tempt you but that little voice whispers, “Homemade would taste so much better”? That’s exactly where this Maple Dijon Chicken and Vegetables swoops in like a dinnertime superhero.
Picture this: juicy chicken breasts and vibrant veggies caramelizing in your oven, bathed in a glossy glaze that’s equal parts sweet maple warmth and tangy Dijon punch. It’s not just dinner – it’s a golden-brown, sheet-pan symphony that makes your kitchen smell like a cozy autumn afternoon, even in July! The beauty? You’re literally 15 minutes away from popping this beauty in the oven. No fancy techniques, no obscure ingredients hiding in the back of your spice drawer. Just pure, uncomplicated deliciousness that brings everyone running to the table. Whether you’re wrangling hungry kids, impressing a date, or treating yourself to a nourishing solo feast, this dish delivers feel-good flavor in every single bite. Ready to make your oven do the heavy lifting? Let’s get roasting!
A Sweet & Tangy Trip Down Memory Lane
This recipe? Oh, it takes me straight back to my early catering days – a whirlwind of clattering pans and nervous energy! I was assisting at a rustic fall wedding in Vermont. The main course was a fancy herb-crusted pork loin, but the chef whispered, “Kid, whip up something quick for the crew to eat before service.” Panic set in! All I had were chicken breasts, some sad-looking carrots, and half a bag of broccoli. Then I spotted it: a tiny bottle of local maple syrup next to a giant tub of Dijon. Desperation breeds genius, folks! I whisked them together with olive oil and garlic, dumped it all on a sheet pan, and crossed my fingers. Twenty-five minutes later… magic. The crew devoured it, sauce-smeared grins all around. The bride even caught a whiff and begged for a bite! That humble “staff meal” taught me a priceless lesson: sometimes the simplest combinations, born from necessity (and a near-panic attack!), become the most beloved recipes. Every time I make this now, I taste that Vermont kitchen – and remember that good food doesn’t need to be complicated to be extraordinary.
Gather Your Flavor Squad
Here’s your grocery list for this symphony of sweet and savory! Don’t stress about exact measurements – cooking’s an adventure, not a science exam.
- 2 lbs boneless, skinless chicken breasts (Pounded to ½-inch thickness! Trust me, this ensures juicy, even cooking. No meat mallet? Use a rolling pin or heavy skillet!)
- 10 oz large carrots, peeled and chopped (~2¼ cups. Go for thick cuts so they don’t turn to mush! Parsnips make a fun swap for extra earthiness.)
- 8 oz broccoli florets (~4 cups. Broccolini or cauliflower florets work great too if that’s what’s lurking in your crisper.)
- 1 large red onion, chopped (¾-inch chunks! They sweeten beautifully when roasted. Yellow onions work, but red adds gorgeous color.)
- 3 tbsp extra-virgin olive oil (The glue that binds our glaze! Avocado oil is a good high-heat alternative.)
- 2 tbsp maple syrup (Use the REAL stuff, pals! The fake pancake syrup won’t caramelize right. Honey works in a pinch, but the flavor profile shifts.)
- 1 tbsp Dijon mustard (My tangy secret weapon! Whole grain mustard adds fun texture, but yellow mustard is too harsh here.)
- 3 cloves garlic, minced (Fresh is best! Jarred minced garlic works in a hurry, but use 1.5 tsp.)
- ½ tsp kosher salt + ½ tsp black pepper (Seasoning superstars! Kosher salt dissolves better than table salt. Freshly cracked pepper? *Chef’s kiss*)
- ½ tsp dried oregano + ¼ tsp dried thyme (Herb power couple! Rosemary or herbes de Provence can sub in.)
- 1 tbsp balsamic vinegar (The “secret sauce” ingredient! Adds depth and balances the sweetness. Apple cider vinegar works too.)
- 3 tbsp fresh parsley, chopped (For garnish! That pop of green makes it Insta-worthy. Chives or basil are lovely too.)
Let’s Build Your Flavor Masterpiece (It’s Easier Than You Think!)
Ready to transform these humble ingredients into golden glory? Follow these simple steps – I’ve tucked my favorite kitchen hacks alongside!
- Preheat & Prep (5 mins): Crank that oven to 425°F (220°C)! This high heat is KEY for getting gorgeous caramelization without steaming. While it heats, line your baking sheet with parchment paper. (Beau’s Hack: No parchment? A light spray of olive oil works, but parchment = zero cleanup! Feeling fancy? Use a rimmed sheet pan for extra sauce-catching goodness.)
- Whisk That Magic Glaze (3 mins): Grab a small bowl. Whisk together the olive oil, maple syrup, Dijon mustard, minced garlic, salt, pepper, oregano, thyme, and balsamic vinegar until it’s smooth and emulsified. (Beau’s Insight: Taste it! Adjust if needed – more maple for sweetness, a pinch more Dijon for tang. This glaze is your flavor paintbrush!)
- Sheet Pan Party! (7 mins): Arrange the pounded chicken breasts, chopped carrots, broccoli florets, and red onion chunks on your prepared baking sheet. Drizzle EVERYTHING generously with that gorgeous maple Dijon glaze. Now, get your hands in there (or use tongs) and toss, toss, toss! Make sure every nook and cranny is coated. (Pro Tip: Spread things in a single layer! Overcrowding = soggy veggies. If your pan’s small, use two!)
- Roast to Golden Perfection (25-30 mins): Slide that pan into your hot oven. Set a timer for 15 minutes. When it dings, carefully flip the chicken breasts using tongs. (Beau’s Hack: Flipping ensures even browning and prevents drying out! Give the veggies a little shuffle too if they look crowded.) Roast for another 10-15 minutes. You’ll know it’s done when the chicken is cooked through (internal temp 165°F – a meat thermometer is your best friend!), the carrots are tender-crisp, and the broccoli and onions have those irresistible charred edges. (Look for the glaze bubbling and caramelizing – that’s the flavor gold!)
- Garnish & Devour! (2 mins): Pull that glorious pan out of the oven. Immediately sprinkle the chopped fresh parsley over the top. (Beau’s Touch: The parsley isn’t just pretty – its bright freshness cuts the richness perfectly!) Let it rest for just 2-3 minutes (this lets the juices settle back into the chicken). Then? Dig in!
Plating Up the Goodness
This dish is a complete meal superstar all on its sheet pan! For serving, I love using wide, shallow bowls – they cradle everything beautifully. Spoon a generous portion of those gorgeous glazed veggies onto the bottom, top with a juicy piece of chicken, and drizzle any extra pan juices over everything. Simple sides let the maple Dijon flavors shine: a scoop of fluffy quinoa or brown rice soaks up the sauce amazingly, or a simple green salad with a light vinaigrette adds freshness. Feeling decadent? A hunk of crusty bread for mopping is *chef’s kiss*. Serve it family-style right on the pan for ultimate cozy vibes – just plonk it in the middle of the table and watch hands reach!
Shake Up Your Sheet Pan!
This recipe is your delicious canvas! Try these fun twists:
- Protein Swap: Use boneless chicken thighs (roast 5 mins longer) or pork chops (pound thin!). Salmon fillets work brilliantly too (add them in the last 12 mins).
- Veggie Vortex: Swap broccoli for Brussels sprouts (halved), sweet potatoes (1-inch cubes), bell peppers, or zucchini (add delicate veggies like zucchini in the last 10 mins).
- Flavor Fiesta: Stir 1 tsp smoked paprika into the glaze for a smoky kick. Add a pinch of red pepper flakes for heat. Swap thyme for rosemary for a woodsy note.
- Diet-Friendly: Make it gluten-free by ensuring your Dijon is GF (most are!). Lower sugar? Use 1 tbsp maple syrup. Vegan? Use chickpeas or tofu (press it well!) and maple syrup.
- Fancy Finish: Crumble goat cheese or feta over the hot dish before serving. Toasted pecans or walnuts add amazing crunch!
Beau’s Backstage Kitchen Notes
This recipe has been my weeknight workhorse for years! It started with that Vermont panic, evolved through countless “What’s in the fridge?” experiments, and landed here – perfected through hungry friends and happy accidents. One hilarious fail? I once used WAY too much balsamic trying to be fancy. Let’s just say my chicken looked like it survived a tar spill! Lesson learned: balance is key. The beauty is its flexibility. Don’t have broccoli? Raid the freezer for green beans. Only have yellow mustard? Use half the amount and add a squeeze of lemon juice. The soul of this dish is that sweet-tangy glaze hugging simple ingredients. It’s also my go-to for easy entertaining – double it on two pans! Watching guests go quiet, focused only on their plates… that’s the Feastical magic right there. Food that connects, comforts, and makes you lick the pan (no judgment!).
Your Maple Dijon Questions, Answered!
Let’s tackle those common kitchen hiccups before they happen!
Q: My veggies are done but my chicken isn’t cooked through! Help!
A: Ah, the uneven cooking gremlin! This usually means your chicken pieces were too thick. Pound them evenly next time! If it happens, simply remove the veggies to a plate, tent with foil, and pop just the chicken back in for 5-7 mins. Using a meat thermometer is the ultimate safeguard – aim for 165°F in the thickest part.
Q: My glaze is burning before everything cooks! What went wrong?
A: Oven temperatures can be sneaky liars! First, ensure your rack is in the middle position. If things are browning too fast, tent the entire pan loosely with aluminum foil for the last 10-15 minutes of cooking. Also, double-check your oven temp with a standalone thermometer – it might be running hot!
Q: Can I prep this ahead of time?
A: Absolutely! You can chop the veggies and make the glaze up to 24 hours ahead – store them separately in the fridge. Keep the glaze at room temp before using. Assemble (coat everything) right before roasting for best texture. Pre-assembling can make veggies soggy.
Q: The sauce seems too thin. How do I make it thicker?
A: The glaze naturally thickens and caramelizes as it roasts! If you want it even thicker for serving, carefully pour the pan juices into a small saucepan after cooking. Simmer for 2-4 minutes until reduced slightly. Drizzle this liquid gold back over the plated dish. You can also whisk ½ tsp cornstarch into the cold glaze before tossing if you know you love a thicker coating.
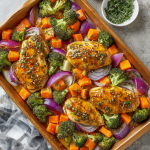
Maple Dijon Chicken and Vegetables
- Total Time: 40 mins
Description
Meet your new weeknight hero: tender chicken, caramelized veggies, and a sweet-tangy glaze that turns your oven into a cozy flavor factory. No fuss, no fancy tricks—just a simple sheet-pan dinner that fills your kitchen with mouthwatering aromas and brings everyone to the table. Get ready to roast, relax, and savor every bite!
Ingredients
-
2 lbs boneless, skinless chicken breasts (pounded to ½-inch thick)
-
10 oz carrots, peeled & chopped
-
8 oz broccoli florets
-
1 large red onion, chopped
-
3 tbsp olive oil
-
2 tbsp pure maple syrup
-
1 tbsp Dijon mustard
-
3 cloves garlic, minced
-
½ tsp kosher salt
-
½ tsp black pepper
-
½ tsp dried oregano
-
¼ tsp dried thyme
-
1 tbsp balsamic vinegar
-
3 tbsp fresh parsley, chopped (for garnish)
Instructions
1️⃣ Preheat oven to 425°F (220°C). Line a baking sheet with parchment.
2️⃣ In a small bowl, whisk olive oil, maple syrup, Dijon, garlic, salt, pepper, oregano, thyme, and balsamic until smooth.
3️⃣ Arrange chicken, carrots, broccoli, and onion on the sheet pan. Pour glaze over everything, toss well, and spread into a single layer.
4️⃣ Roast 25–30 mins, flipping chicken halfway, until veggies are tender and chicken reaches 165°F inside.
5️⃣ Rest 2–3 mins, sprinkle with fresh parsley, and dig in!
Notes
-
Pound chicken evenly for juicy results.
-
No broccoli? Use Brussels sprouts or cauliflower!
-
Add smoked paprika for a twist.
-
Leftovers make an amazing salad topper!
- Prep Time: 15 mins
Nutrition
- Calories: 380 cal Per serving
- Fat: 18g
- Carbohydrates: 20g
- Fiber: 4g
- Protein: 35g
Nourishment Notes (Because Feeling Good Matters!)
This isn’t just tasty, it’s packed with goodness! Here’s the scoop per serving (approx.):
- Calories: ~380
- Protein: 35g (Chicken power for muscles!)
- Carbs: 20g (Energy from veggies & a touch of maple)
- Fat: 18g (Mostly heart-healthy olive oil)
- Fiber: 4g (Thanks, broccoli & carrots!)
- Vitamins & Minerals: Loads of Vitamin A (carrots!), Vitamin C (broccoli!), and more.
Note: Nutritional info is an estimate based on specific ingredients. Values may vary slightly based on brands and exact portions.
Final Thoughts: Why This Recipe Deserves a Spot in Your Rotation
In a world of complicated recipes and endless takeout options, this Maple Dijon Chicken & Veggies is a beacon of simplicity and satisfaction. It’s proof that great food doesn’t require fancy gadgets or hours of labor—just a handful of quality ingredients and a trusty sheet pan.
Whether you’re a busy parent, a cooking newbie, or a seasoned chef looking for a reliable staple, this dish checks all the boxes:
-
Nutritious: Packed with protein, fiber, and vitamins.
-
Customizable: Endless variations to suit cravings and cuisines.
-
Crowd-Pleasing: Wins over picky eaters and foodies alike.
Most importantly, it’s a reminder that cooking should be joyful, not stressful. So preheat that oven, grab your ingredients, and let the aroma of maple and Dijon work its magic. Here’s to many cozy, delicious meals ahead—one sheet pan at a time!
Loved this recipe? Share the Feastical love!
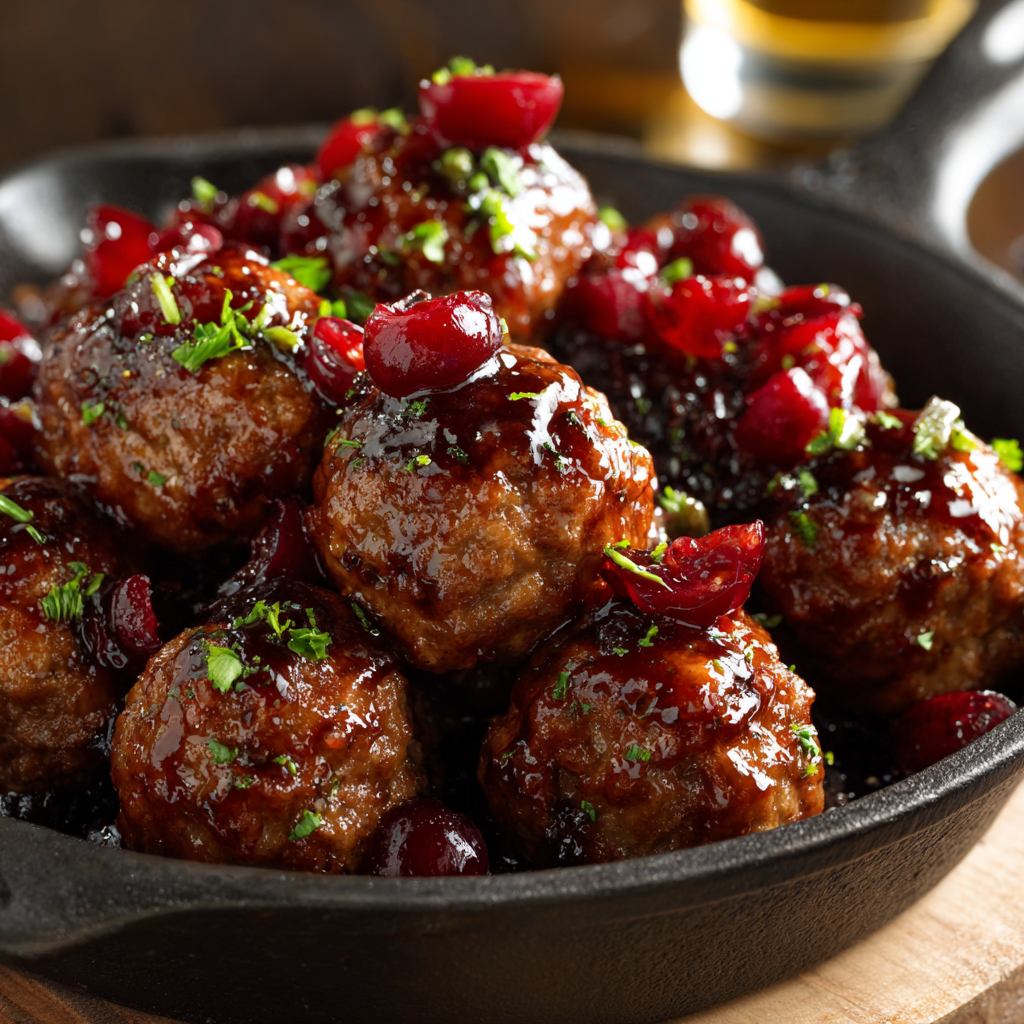
Balsamic Cherry Glazed Mini Meatballs
Why These Little Bites Will Steal the Show
Hey friends! Beau here from Feastical, and let me tell you—I live for those moments when a dish makes everyone at the table go completely silent… except for the happy little “mmm” sounds. That’s exactly what happens when I bring out a platter of these Balsamic Cherry Glazed Mini Meatballs. Imagine this: juicy, tender pork-and-beef meatballs, caramelized to perfection, then tossed in a sticky, glossy glaze that’s tangy, sweet, and deeply savory all at once. It’s like your favorite cozy meatball met a fancy charcuterie board and decided to throw a flavor party in your mouth.
Whether you’re hosting game night, prepping for the holidays, or just jazzing up Tuesday dinner, these mini bites are your secret weapon. They’re ridiculously easy (no fancy skills required!), ready in 35 minutes, and guaranteed to make you look like a kitchen rockstar. Plus, that glaze? Oh, it’s magic. Dried cherries simmered with balsamic and brown sugar create this rich, complex sauce that clings to every nook of the meatballs. Trust me, your spatula won’t know what hit it. So grab your apron—let’s turn simple ingredients into unforgettable memories!
A Cherry-Stained Memory: My First Big Kitchen Win
Picture this: It’s 2010, and I’m a nervous 22-year-old, hosting my first “grown-up” dinner party for my new boss and his wife. I’d spent days stressing over the menu, and at the last minute, panic set in. My planned appetizer felt… blah. Then I spotted a forgotten bag of dried cherries in the pantry (leftover from my trail mix phase) and a bottle of balsamic vinegar. Hail Mary time! I whipped up mini meatballs with whatever ground meat I had, simmered those cherries into a jammy glaze, and crossed my fingers.
When my boss’s wife took her first bite? Her eyes widened. “Beau, this is incredible!” she said. I swear, I floated for a week. That scrappy little experiment became my go-to party trick—the dish friends request by name. It taught me that great food isn’t about perfection; it’s about passion and a dash of bravery. Every time I make these, I’m back in that tiny apartment kitchen, heart racing, realizing food could be my superpower. And yours too!
Gathering Your Flavor Arsenal: The Ingredients
Don’t sweat the details—this is all about flexibility! Here’s what you’ll need, with my chef hacks to make it your own:
For the Meatballs:
- 1 lb ground pork – Adds juicy fat and sweetness. Swap with ground turkey if you’re feeling lean, but pork’s flavor is *chef’s kiss*.
- ½ lb ground beef (80/20 blend) – Brings rich, savory depth. Too lean? Your meatballs might get tough. Chicken works in a pinch!
- 1 egg, beaten – Our glue! Binds everything so meatballs don’t crumble. Vegan? Use 1 tbsp flaxseed + 3 tbsp water.
- ½ cup breadcrumbs – Locks in moisture. Panko gives crunch, gluten-free crumbs work great, or crush up crackers in a pinch.
- 1 tbsp minced garlic – Fresh is best, but 1 tsp garlic powder works. Pro tip: Sauté it first for mellower flavor!
- 1 tsp dried parsley – For color and a grassy note. Fresh parsley? Use 1 tbsp. No parsley? Try oregano or thyme.
- 1 tsp salt + ½ tsp black pepper – Essential flavor boosters! Season boldly—meat needs it.
For the Balsamic Cherry Glaze:
- 1 cup dried cherries, chopped – The star! Their tartness balances the glaze. Craisins work, but reduce sugar—they’re sweeter.
- 1½ cups water – Hydrates cherries and builds the sauce. Swap half with red wine for extra depth (adults only!).
- 2 tbsp balsamic vinegar – Adds tangy sophistication. Cheap balsamic? Simmer longer to concentrate flavor.
- 2 tbsp brown sugar – Caramelizes into sticky goodness. Honey or maple syrup are tasty naturals subs.
- 1 tbsp cornstarch – Thickens the glaze. Arrowroot powder works too (use 2 tsp).
- 1 tbsp soy sauce – Our umami bomb! Coconut aminos keep it gluten-free.
- Pinch salt & pepper – Taste and adjust! Glazes need balance.
Crafting Your Mini Masterpieces: Step-by-Step
Ready? Let’s roll (literally!). Follow these steps for meatball nirvana:
- Preheat & Prep: Crank that oven to 400°F (200°C). Line a baking sheet with parchment paper—trust me, cleanup is a breeze. Chef hack: Lightly oil the paper for extra crispiness!
- Mix the Meatball Magic: In a big bowl, gently combine pork, beef, egg, breadcrumbs, garlic, parsley, salt, and pepper. Key tip: Don’t overmix! Use your hands for 30 seconds max—overworking = tough meatballs. If it feels sticky, chill the mix for 10 minutes.
- Shape with Love: Scoop about 1 tbsp of meat and roll into 1-inch balls. Pro move: Wet your hands with cold water—meat won’t stick! Space them evenly on the sheet. You’ll get 24-30 beauties.
- Bake to Golden Bliss: Pop them in the oven for 15-18 minutes. They’re done when browned and internal temp hits 160°F (71°C). No thermometer? Cut one open—no pink!
- Simmer the Glaze: While meatballs bake, combine chopped cherries, 1 cup water, balsamic, brown sugar, soy sauce, salt, and pepper in a saucepan. Bring to a simmer over medium heat. Let it bubble gently for 10 minutes—cherries will plump up like tiny flavor balloons!
- Thicken to Glory: Whisk cornstarch into the remaining ½ cup water until smooth. Pour into the simmering cherry mix, stirring constantly. Cook 3-5 minutes until it coats the back of a spoon. Too thick? Add 1 tbsp water. Too thin? Simmer longer!
- The Big Toss: Add baked meatballs to the glaze. Gently fold with a spatula until every inch is glossy and gorgeous. Chef secret: Let them sit 5 minutes off-heat—they’ll soak up more flavor!
Serving Up the Goodness
Presentation time! Slide these gems into a shallow bowl or onto a platter. Spear them with toothpicks for easy grabbing—party mode activated! For a cozy dinner, pile them over creamy mashed potatoes, polenta, or fluffy rice. Garnish with fresh parsley or thyme for a pop of color. Feeling fancy? Add a sprinkle of goat cheese crumbles or toasted almonds. And don’t forget the napkins—this glaze is deliciously sticky!
Shake It Up: Recipe Variations
Make this recipe your own with these fun twists:
- Spicy Kick: Add 1 tsp red pepper flakes to the glaze or ½ tsp cayenne to the meatballs.
- Herb Garden Vibes: Mix 2 tbsp fresh basil or rosemary into the meatball blend.
- Slow Cooker Ease: Skip baking! Brown meatballs in a skillet, then simmer in glaze on LOW for 2 hours.
- Vegetarian Swap: Use plant-based ground “meat” and veggie broth instead of water.
- Boozy Upgrade: Swap ½ cup water with bourbon or red wine in the glaze—sheer elegance!
Chef’s Notes: From My Kitchen to Yours
This recipe is my kitchen survivor—it’s evolved through countless parties, one near-disaster (I subbed cherry pie filling once… don’t ask!), and even a camping trip where we cooked them over a fire. The biggest lesson? Embrace the mess. Glaze on your shirt? A badge of honor. Meatballs not perfectly round? They taste just as amazing. Over the years, I’ve learned to double the batch (they freeze beautifully!) and always, ALWAYS make extra glaze for drizzling. Funny story: My dog, Biscuit, once stole a whole tray cooling on the counter. Now he sits like a statue whenever I make these, hoping for a “accidental” drop. Sorry, buddy—these are for humans! But really, that’s the joy: food that creates stories. So make it, share it, and make it yours.
FAQs and Troubleshooting
Q: Can I make these ahead?
A: Absolutely! Bake meatballs and make glaze separately. Store in the fridge for up to 2 days. Reheat meatballs in the oven at 350°F (175°C) for 10 minutes, then toss in warmed glaze.
Q: My glaze isn’t thickening—help!
A: No panic! Mix 1 tsp cornstarch with 1 tbsp cold water, then whisk into simmering glaze. Cook 2 more minutes. If it’s too thick? Stir in a splash of water or broth.
Q: Can I use fresh or frozen cherries?
A: Dried work best for concentrated flavor and texture. Fresh cherries release too much liquid—simmer longer and add 1 extra tbsp cornstarch. Frozen? Thaw and drain first.
Q: Meatballs falling apart?
A: Three culprits: 1) Overmixed meat (be gentle!), 2) Not enough binder (add 1 extra tbsp breadcrumbs), or 3) Skipped chilling (if meat is warm, chill mix 20 mins before rolling).

Balsamic Cherry Glazed Mini Meatballs
- Total Time: 35 mins
Description
These little bites of juicy, sticky goodness will steal the show at any gathering! Sweet-tart dried cherries, rich balsamic, and tender pork-and-beef meatballs come together for a flavor bomb you’ll crave again and again. Whether it’s game night or holiday feasting, roll up your sleeves and make these crowd-pleasers—your guests will beg for the recipe!
Ingredients
For the Meatballs:
-
1 lb ground pork
-
½ lb ground beef (80/20)
-
1 egg, beaten
-
½ cup breadcrumbs
-
1 tbsp minced garlic
-
1 tsp dried parsley
-
1 tsp salt
-
½ tsp black pepper
For the Balsamic Cherry Glaze:
-
1 cup dried cherries, chopped
-
1½ cups water (divided)
-
2 tbsp balsamic vinegar
-
2 tbsp brown sugar
-
1 tbsp soy sauce
-
1 tbsp cornstarch
-
Pinch salt & pepper
Instructions
1️⃣ Preheat oven to 400°F (200°C). Line a baking sheet with parchment.
2️⃣ In a large bowl, gently mix pork, beef, egg, breadcrumbs, garlic, parsley, salt & pepper. Don’t overmix!
3️⃣ Roll into 1-inch balls (about 24–30). Arrange on the sheet.
4️⃣ Bake 15–18 mins, until golden and cooked through (160°F/71°C inside).
5️⃣ Meanwhile, in a saucepan, simmer cherries, 1 cup water, balsamic, brown sugar, soy sauce, salt & pepper for 10 mins.
6️⃣ Whisk cornstarch into remaining ½ cup water. Stir into glaze. Simmer 3–5 mins until thickened.
7️⃣ Toss baked meatballs in the warm glaze until glossy. Rest 5 mins, then serve!
Notes
-
Wet hands when rolling meatballs—less sticky!
-
Add red pepper flakes for a spicy twist.
-
Swap half the water with red wine for grown-up flavor.
-
Double the batch—leftovers freeze beautifully!
- Prep Time: 20 mins
- Cook Time: 15 mins
Nutrition
- Calories: 220 cal Per 4 meatballs
- Sugar: 8g
- Fat: 13g
- Carbohydrates: 12g
- Protein: 14g
Nutritional Info
Approximate per serving (4 meatballs): Calories: 220 • Protein: 14g • Carbs: 12g • Fat: 13g • Fiber: 1g • Sugar: 8g. Note: Values vary based on ingredients used. Enjoy as part of a balanced feast!
—
Final Thoughts: More Than Just a Recipe
These Balsamic Cherry Glazed Mini Meatballs aren’t just about feeding people—they’re about creating moments. The first time I made them, I learned that cooking is equal parts creativity and courage. That “what if I ruin it?” fear? It’s drowned out by the sound of someone murmuring, “Wow, you made this?”
This recipe is forgiving. Swap ingredients, burn a batch (we’ve all been there!), or turn the glaze into a dipping sauce. What matters is the joy of sharing something made with your hands. And hey, if my dog Biscuit’s unwavering vigilance near the stove is any indication, even the pickiest eaters (or pets) will be converts.
So here’s to sticky fingers, second helpings, and the stories we tell over food. Make these. Share these. And remember: The best dishes aren’t just tasted—they’re remembered.
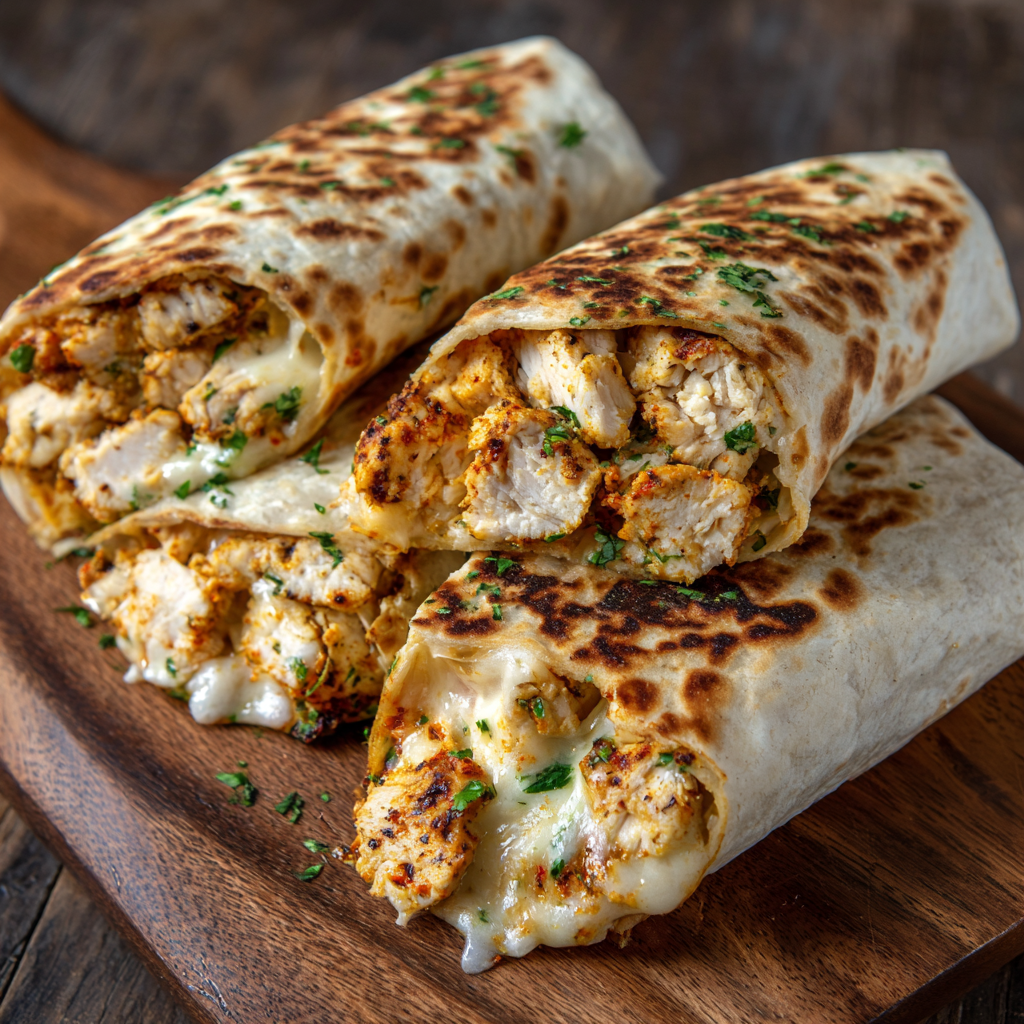
Cheesy Garlic Chicken Wraps
Hey Cheese Lovers, Meet Your New Weeknight Hero!
Picture this: golden tortillas hugging juicy garlic-kissed chicken and rivers of melted cheddar-mozzarella bliss. That’s your dinner in 20 minutes flat, friends. I’m Beau Collier from Feastical, and if there’s one thing I live for (besides my dog stealing spatulas), it’s recipes that turn “ugh, cooking?” into “heck yes, EATING!” These Cheesy Garlic Chicken Wraps? They’re my love letter to flavor chasers and busy humans. No fancy skills needed—just a skillet, your hungriest self, and zero patience for complicated dinners. They’re crunchy outside, ooey-gooey inside, and taste like your favorite garlic bread got a delicious glow-up. Whether you’re feeding hangry teens or treating yourself after a long day, this is the kind of food that high-fives your soul. Ready to make magic happen? Grab that skillet—we’re diving in!
The Midnight Snack That Started It All
This recipe? It’s basically my college survival story with a gourmet twist. Back in my dorm days, my roommate Leo and I would raid the communal kitchen at midnight after epic study sessions. One freezing Tuesday, all we had was sad-looking chicken strips, tortillas, and a half-eaten bag of shredded cheese. Desperation breeds genius, my friends! We tossed the chicken with garlic powder (the only spice in Leo’s “kitchen”), pan-fried it, and made cheese-stuffed wraps in a waffle iron (true story!). They were messy, cheesy chaos—but that first bite? Pure euphoria. We high-fived so hard we woke the RA. Now, 10 years later, I’ve polished our scrappy masterpiece with paprika’s warmth and mozzarella’s stretchy magic, but that rebellious, soul-warming joy? Still baked right in. Some recipes are born in fancy kitchens; this one was born in desperation at 2 AM. And honestly? That’s why it’s perfect.
What You’ll Need (and Why!)
Gather these flavor heroes—I’ve added chef notes to make your life tastier:
- 2 large chicken breasts, diced → Pro tip: Partially freeze them for 20 minutes first—dices like butter! Swap: Thighs for extra juiciness.
- 1 tbsp olive oil → Our cooking MVP. Adds richness without overpowering. Swap: Avocado oil for higher smoke point.
- 2 tsp garlic powder → The flavor backbone! Powder won’t burn like fresh garlic here. Chef secret: Add ½ tsp more if you’re a garlic fiend (no judgment).
- 1 tsp onion powder → Deepens the savoriness. Omit if sensitive, but it’s a game-changer!
- 1 tsp paprika → Sweet or smoked? I use sweet for color, but smoked adds campfire vibes—your call!
- Salt and pepper, to taste → Season like you mean it! I do ¾ tsp salt + ½ tsp pepper.
- 1 cup shredded cheddar → Sharp cheddar = bold tang. Pre-shredded? Sure! Block cheese melts creamier though.
- ½ cup shredded mozzarella → The stretch-factor queen! Low-moisture works best so wraps don’t get soggy.
- 4 large flour tortillas → Burrito-size (10-inch). Warm briefly in a dry skillet first—more flexible, no cracks!
Why no fresh garlic? In quick-cooking dices, fresh burns fast. Powder coats every nook evenly—trust me on this!
Let’s Build Flavor Bombs (Step-by-Step!)
Follow these foolproof steps—I’ve tucked chef hacks into every fold:
1. Season Like a Boss → In a bowl, combine chicken, olive oil, garlic powder, onion powder, paprika, salt, and pepper. Massage it like you’re kneading pizza dough! This isn’t just mixing—it’s building flavor layers. Chef hack: Let it sit 5 minutes. The chicken soaks up spices like a tasty sponge!
2. Sear That Chicken → Heat a non-stick skillet over medium. No oil needed—the chicken has its own! Add chicken in a single layer (crowd it, and you’ll steam instead of sear). Cook 6-8 minutes, flipping once, until golden with no pink inside. Chef secret: DON’T stir constantly! Let it sit 3 minutes per side for a caramelized crust. That’s where the magic lives.
3. Cheese Party Assembly → Lay tortillas on a clean surface. Divide chicken down the center (leave 2-inch borders!). Top with cheddar first—its sharpness cuts through—then mozzarella for stretch. Pro move: Sprinkle a pinch of extra garlic powder over the cheese. Thank me later.
4. Fold & Toast to Glory → Fold sides inward, then roll tightly burrito-style. Heat the same skillet (no need to wash!) over medium. Place wraps seam-side down. Cook 2-3 minutes per side until golden and audibly crispy. Game-changer hack: Press gently with a spatula—this melts cheese faster and creates epic crunch. Listen for that sizzle!
5. Slice & Devour → Rest wraps 1 minute (melts cheese further), then slice diagonally with a serrated knife. See that cheese pull? You’ve earned it.
The Science Behind the Perfect Cheese Pull
There’s something undeniably magical about stretching a bite of food and watching cheese follow in a glorious, gooey strand. That perfect cheese pull isn’t just luck—it’s science. And in these Cheesy Garlic Chicken Wraps, we’ve engineered it for maximum satisfaction.
Why Mozzarella? The Stretch Factor
Mozzarella is the undisputed champion of meltability. Its unique protein structure (casein) and high moisture content allow it to stretch without breaking. When heated, the proteins unwind and form elastic bonds, creating those Instagram-worthy cheese pulls. Combine it with cheddar, which brings sharpness and a creamy melt, and you’ve got a textural dream team.
Pro Tip: Low-moisture mozzarella works best here—it melts smoothly without making the tortilla soggy. Fresh mozzarella? Too watery for this application.
The Role of Heat (and Why Skillet-Toasting Matters)
Melting cheese isn’t just about temperature—it’s about how you apply heat. A dry skillet over medium heat ensures even toasting, allowing the cheese to melt gradually while the tortilla crisps. If the heat’s too high, the cheese burns before it properly melts. Too low? You’ll end up with a sad, greasy mess.
Chef Hack: Pressing the wrap gently with a spatula increases contact with the skillet, speeding up cheese melt and creating an extra-crisp exterior.
The Fat Factor
Cheese needs fat to melt smoothly. That’s why pre-shredded cheeses (often coated in anti-caking agents) can sometimes behave oddly. For the best results, shred your own cheese—it melts more evenly and delivers superior flavor.
Bonus Science: The oil in the chicken mix doesn’t just add flavor—it also helps distribute the garlic and spices evenly, ensuring every bite is packed with taste.
The Psychology of Comfort Food (Why This Recipe Works)
Ever notice how some foods just feel like a hug? These Cheesy Garlic Chicken Wraps tap into deep-seated comfort food psychology. Here’s why they hit all the right notes.
Nostalgia in Every Bite
This recipe’s origin story—midnight dorm-room experiments—is part of its charm. Comfort foods often have emotional ties, whether it’s childhood memories or shared experiences. The simplicity of garlic, cheese, and crispy tortilla evokes universal joy.
Fun Fact: Studies show that people under stress crave crunchy foods (like the toasted wrap exterior) because the act of chewing helps relieve tension.
The Flavor Umami Bomb
Garlic, cheese, and chicken are a trifecta of umami—the savory “fifth taste” that makes food deeply satisfying. Umami triggers dopamine release, literally making us happier with each bite.
Pro Tip: Adding a pinch of MSG (or Parmesan) to the chicken mix amplifies umami without altering flavor. (No shame—even chefs use this trick!)
Speed = Satisfaction
In our busy lives, quick meals that don’t sacrifice taste are gold. A 20-minute recipe that feels indulgent? That’s a psychological win. The brain registers speedy meal prep as a “reward,” reducing mealtime stress.
Upgrade: Play upbeat music while cooking—it tricks the brain into perceiving the process as even faster and more enjoyable.
Global Wrap Inspirations (Beyond the Basic Cheese)
Wraps are a universal concept—every culture has its own spin. Here’s how to take this recipe around the world with simple twists.
1. Mexican Fiesta
-
Swap seasonings for taco blend (cumin, chili powder, oregano).
-
Add black beans, corn, and pickled jalapeños.
-
Cheese: Queso Oaxaca (ultimate stretch) or pepper jack.
-
Serve with lime crema (sour cream + lime zest).
2. Indian-Inspired
-
Toss chicken with garam masala and turmeric.
-
Add sautéed spinach and paneer (or halloumi) for extra chew.
-
Dip in mint chutney or mango yogurt sauce.
3. Greek Gyro Style
-
Season chicken with lemon, oregano, and garlic.
-
Stuff with tzatziki, diced cucumbers, and feta.
-
Wrap in grilled pita for authenticity.
Why It Works: Wraps are the ultimate blank canvas. The base recipe’s simplicity lets global flavors shine without extra effort.
Serving: Where Joy Meets the Plate
Slide those golden wraps onto a board—rustic vibes! Cut halves on a bias to show off the cheesy core. Pair with quick fixes: dollop of cool sour cream, chunky salsa for acidity, or quick-pickled onions (thinly slice red onion + 5 mins in lime juice!). For greens? A simple arugula salad with lemon dressing cuts the richness. And hey, no shame in eating them straight from the skillet—I won’t tell!
Shake It Up: 5 Tasty Twists
Customize your wrap adventure with these spins:
- Buffalo Bleu → Toss chicken in 3 tbsp hot sauce + 1 tsp honey pre-cook. Swap cheddar for crumbled bleu cheese!
- Mediterranean Magic → Add spinach, chopped sun-dried tomatoes, and feta instead of mozzarella. Oregano in the seasoning!
- Breakfast Wrap → Scramble eggs into the chicken mix. Cheese: pepper jack! Serve with avocado.
- Veggie Power → Skip chicken, use roasted chickpeas + smoked paprika. Add zucchini ribbons pre-toasting.
- Low-Carb Love → Butter lettuce cups instead of tortillas. Or low-carb wraps—toast extra-crispy!
Beau’s Backstage Notes
This recipe’s evolved from my dorm-room disaster to a family favorite—my niece calls them “Cheesy Hugs.” The biggest upgrade? Toasting. Early versions were just warmed tortillas… tragic! One Tuesday, I got lazy and tossed a folded wrap in the skillet. The CRUNCH changed everything. Funny story: Last month, I tested adding broccoli (trying to be virtuous). My dog, Biscuit, stole one off the counter and spat out every floret. Even he knows some things shouldn’t be messed with! Moral: Keep it simple, embrace the cheese, and always warm your tortillas. P.S. Leftover chicken mix? Toss it in mac ’n’ cheese. You’re welcome.
Your Questions—Answered!
Q: My cheese leaks everywhere while toasting! Help?
A: Overfilling’s the culprit! Use ¾ cup filling max per wrap. Seal seams tightly, and start seam-side down—melting cheese “glues” it shut. If some oozes out? That’s called “flavor confetti.”
Q: Can I meal prep these ahead?
A: Cook chicken + seasonings up to 3 days ahead. But assemble wraps JUST before toasting—storing them assembled turns tortillas gummy. Pro tip: Freeze cooked chicken for quick future wraps!
Q: Tortillas crack when I roll. Sadness!
A: Cold tortillas = breakage. Warm them 10 seconds per side in a dry skillet until pliable. Also, don’t skip the oil in the chicken mix—it keeps meat moist and adds flexibility!
Q: Chicken’s dry. What did I do wrong?
A: Two fixes: 1) Don’t overcook! Chicken’s done at 165°F (it keeps cooking while resting). 2) Dice evenly—smaller pieces (½-inch) cook faster and stay juicier.

Cheesy Garlic Chicken Wraps
- Total Time: 20 mins
Description
Hey food lover! I’m Beau from Feastical, here to rescue your weeknight with something warm, cheesy, and soul-hugging: Cheesy Garlic Chicken Wraps. Think juicy garlic-spiced chicken wrapped in golden tortillas with rivers of melty cheddar and mozzarella—crunchy on the outside, gooey inside, and ready in 20 minutes flat. No fuss, no fancy tricks, just comfort food magic that’ll make everyone at the table cheer for seconds. Ready to crisp up some happiness? Let’s roll!
Ingredients
-
2 large chicken breasts, diced (or thighs for extra juiciness)
-
1 tbsp olive oil
-
2 tsp garlic powder
-
1 tsp onion powder
-
1 tsp paprika (sweet or smoked)
-
Salt & black pepper, to taste
-
1 cup shredded cheddar
-
½ cup shredded mozzarella
-
4 large flour tortillas (10-inch)
Instructions
1️⃣ Season: Toss diced chicken with olive oil, garlic powder, onion powder, paprika, salt & pepper. Let it sit 5 mins.
2️⃣ Sear: Heat a skillet over medium. Cook chicken in a single layer for 6–8 mins until golden & cooked through. Don’t stir too much—let it caramelize!
3️⃣ Assemble: Lay tortillas out. Add chicken down the center, top with cheddar & mozzarella.
4️⃣ Wrap & Toast: Fold sides in, roll tight burrito-style. Toast in the same skillet seam-side down, 2–3 mins per side until golden & crispy.
5️⃣ Serve: Let rest 1 min, slice in half, and dive in!
Notes
-
Try the Buffalo Bleu version: toss cooked chicken in hot sauce + honey, swap cheddar for bleu cheese.
-
Go Mediterranean: add spinach, sun-dried tomatoes & feta.
-
Meal prep the chicken ahead, but assemble wraps fresh for the best crunch!
- Prep Time: 5 mins
- Cook Time: 15 mins
Nutrition
- Calories: 420 Cal
- Fat: 22g
- Carbohydrates: 28g
- Fiber: 2g
- Protein: 32g
Nutritional Details (Per Wrap)
Calories: ~420 | Protein: 32g | Carbs: 28g | Fat: 22g | Fiber: 2g
Note: Stats vary with swaps. Using low-fat cheese? Reduce calories by ~70.
Final Thoughts: More Than Just a Recipe
This isn’t just about cheesy chicken in a tortilla—it’s about reclaiming weeknight dinners with joy, nostalgia, and a little culinary science. Whether you stick to the classic or globe-trot with variations, the core appeal remains: food should be fun, fast, and unapologetically delicious.
So here’s to crispy edges, molten cheese, and the kind of meal that makes everyone ask, “When are you making these again?” Now go forth, wrap fiercely, and remember: the best recipes aren’t just fed—they’re felt.
Save This Recipe for Later!
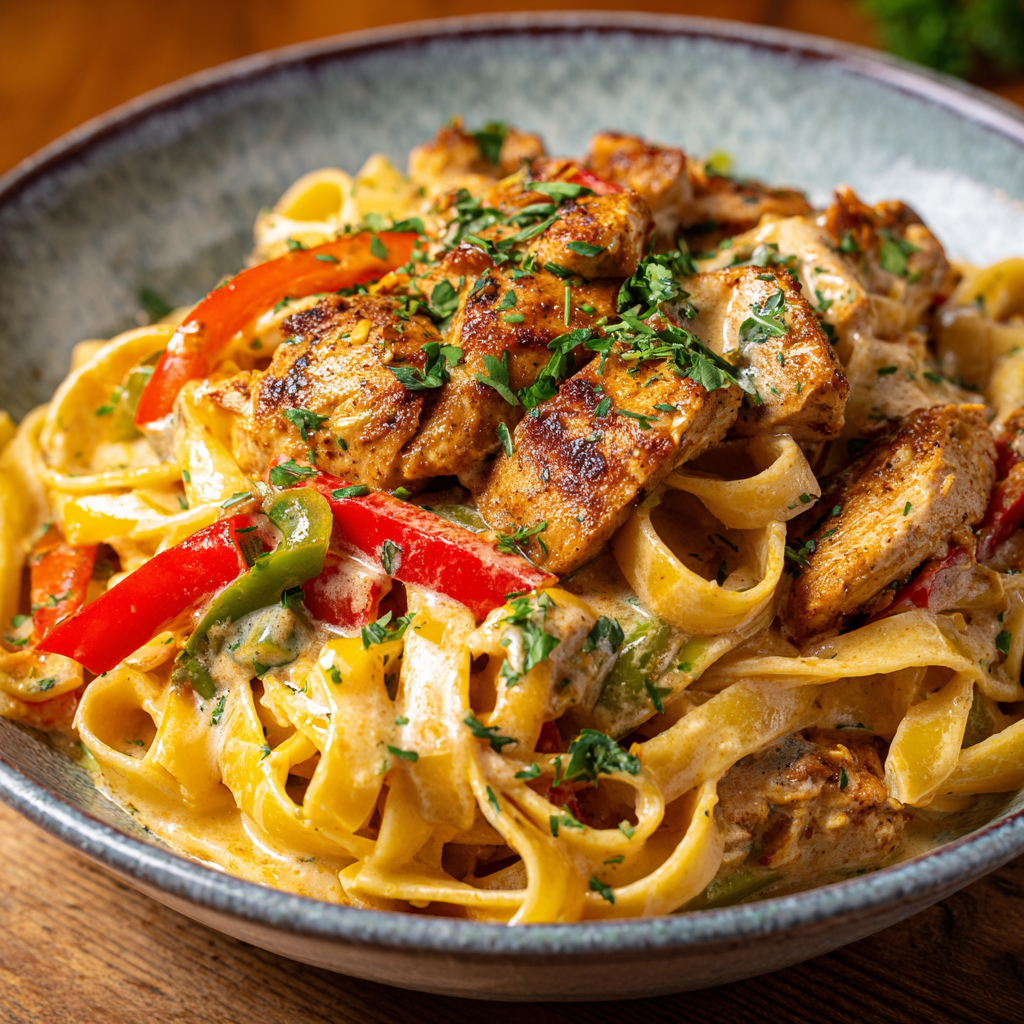
Creamy Cajun Chicken Pasta
Spice Up Your Weeknights with Creamy Cajun Chicken Pasta!
Hey foodie friends! Beau here from Feastical, and I’ve got a confession: some days, my kitchen feels less like a culinary playground and more like a survival zone. Between filming recipe videos and chasing my hyperactive terrier, Biscuit, I need dinners that deliver BIG flavor without demanding a PhD in cooking. That’s where this Creamy Cajun Chicken Pasta swoops in like a superhero in an apron! 🌶️🍝 Imagine juicy chicken, bronzed with smoky-spicy Cajun magic, tangled in silky pasta coated with a Parmesan cream sauce that’ll make you close your eyes and sigh. Sweet bell peppers add crunch, fresh parsley brings the vibrancy, and the whole thing comes together faster than you can say “second helping.” Whether you’re feeding hungry teens, impressing a date, or just treating yourself (you deserve it!), this dish turns ordinary weeknights into a festive New Orleans-inspired feast. No fancy skills required – just a skillet, a spoon, and your appetite for adventure. Ready to make your taste buds dance? Let’s fire up that stove!
That One Rainy Night in Baton Rouge…
This recipe always takes me back to a drizzly evening during my first food blogging road trip. My GPS died, I was hangry, and I stumbled into this tiny, steam-clouded diner near Baton Rouge. The chef, a guy named Marcel with biceps like canned hams, saw my soggy state and slid a bowl of “Yankee-Proof Cajun Pasta” across the counter. One bite – BAM! – the warmth hit me like a hug from a grandma who secretly lifts weights. The creamy sauce mellowed the spice just enough, the chicken was tender, and those sweet peppers were little bursts of sunshine. Marcel laughed at my wide eyes and said, “Cher, good food ain’t about complexity. It’s about making your soul sit up and say ‘Oui!’” I scribbled notes on a napkin (still have it!), tweaked it over the years with more herbs and Parmesan punch, but that soul-warming magic? That’s Marcel’s gift. Every time I make this, I’m back on that vinyl stool, rain pattering outside, feeling utterly found.
Your Flavor Toolkit: Ingredients & Smart Swaps
Grab these pantry pals – flexibility is our friend!
For the Chicken:
- 1 lb (450g) boneless chicken breast, cut bite-size – Thighs work great too for extra juicy goodness! Pro tip: Partially freeze for 20 mins for cleaner slicing.
- 2 tbsp Cajun seasoning – Store-bought is fine (check sodium!), or make your own blend (paprika + garlic powder + onion powder + oregano + cayenne). Spice wimp? Start with 1 tbsp!
- Salt & pepper to taste – Go easy on salt if your Cajun blend is salty. Freshly cracked pepper = flavor fairy dust!
- 2 tbsp olive oil – Avocado or canola oil also love high-heat searing.
For the Pasta & Sauce:
- 8 oz (225g) fettuccine or penne – Fettuccine hugs sauce; penne catches bits. Gluten-free? Brown rice pasta rocks here.
- 1 tbsp butter – Adds rich depth. Vegan? Use olive oil or plant-based butter.
- 1 small onion, diced – Yellow or white – their sweetness balances heat. No onion? Use 1 tsp onion powder in sauce.
- 2 garlic cloves, minced – FRESH is non-negotiable! Jarred garlic? Use 1.5 tsp.
- 1 cup (240ml) heavy cream – Half-and-half works but sauce will be thinner. Coconut cream for dairy-free (adds subtle sweetness).
- 1 cup (240ml) chicken broth (or reserved pasta water) – Broth = flavor boost! Pasta water’s starch thickens sauce beautifully. Low-sodium recommended!
- 1 cup (100g) shredded Parmesan – GRATE IT YOURSELF. Pre-shredded has anti-caking agents that can make sauce grainy. Pecorino Romano adds zing!
- 1/2 cup (75g) diced red/green bell peppers – Colorful crunch! Frozen peppers? Thaw & pat dry first.
- 1/4 cup fresh parsley, chopped – The bright finish! Dried? Use 1 tbsp (add with dried spices).
Let’s Get Cooking: Your Foolproof Roadmap
Follow these steps for creamy, spicy perfection every time!
- Pasta Power: “Cook pasta in well-salted water (tastes like the sea!) al dente per package. CHEF HACK: Reserve 1 cup pasta water BEFORE draining! It’s liquid gold for sauce consistency. Drain pasta, toss with a drizzle of oil to prevent sticking, set aside.
- Chicken Charm: Toss chicken pieces with Cajun seasoning, salt, and pepper. Heat olive oil in a large skillet over medium-high. CRUCIAL TIP: Don’t crowd the pan! Cook chicken in batches if needed. Sear 5-7 mins until golden brown and cooked through (165°F internal). “Hear that sizzle? That’s flavor being born!” Remove chicken to a plate.
- Veggie Vibes: In the same skillet (keep those tasty brown bits!), melt butter over medium heat. Add onion – sauté 3 mins until soft. Add garlic – cook 1 min until fragrant (WATCH CLOSELY! Burnt garlic = bitter tears). Toss in bell peppers, sauté 2 mins for slight crunch.
- Sauce Sorcery: Pour in heavy cream and chicken broth (or 1 cup reserved pasta water). Bring to a gentle simmer (NOT boil – cream can break!). Sprinkle in Parmesan gradually, stirring constantly until melted and smooth. SAUCE SAVVY: Too thick? Add splash of broth/milk. Too thin? Simmer 2-3 mins more or sprinkle in 1 tsp cornstarch slurry (1 tsp cornstarch + 1 tsp water).
- The Grand Union: Add cooked pasta and chicken back to the skillet. Gently toss EVERYTHING for 1-2 mins until coated and heated through. Sauce should cling lovingly to each noodle. “This is where the magic happens, folks!”
- Finishing Flourish: Kill the heat! Stir in 3/4 of the fresh parsley. Taste – adjust salt/pepper/Cajun spice if needed.
Plating Like a Pro (Minimal Effort, Max Wow!)
Slide that glorious pasta into shallow bowls. Top with remaining fresh parsley and an extra snowdrift of Parmesan. Crave crunch? Garlic breadcrumbs (toast panko in butter + garlic powder) are *chef’s kiss*. Pair with a simple green salad with lemon vinaigrette to cut the richness, or roasted asparagus. Serve IMMEDIATELY while it’s gloriously hot and creamy! 🍴✨
Shake It Up: 5 Tasty Twists!
Make it YOUR signature dish:
- Seafood Sensation: Swap chicken for 1 lb shrimp or scallops (add in last 2 mins of cooking).
- Veggie Delight: Skip chicken! Add sautéed mushrooms, zucchini, and spinach (toss in wilt at the end). Use veggie broth.
- Smoky & Spicy: Add 1/2 cup chopped andouille sausage with the chicken. Or stir in 1 tbsp chipotle paste for smokier heat.
- Lighter Love: Use half heavy cream, half evaporated milk. Swap 1/2 pasta for zucchini noodles (add raw at the end).
- Sun-Dried Swagger: Stir in 1/4 cup chopped sun-dried tomatoes (oil-packed, drained) with the peppers.
Beau’s Backstage Kitchen Notes
This recipe’s evolved more than my taste in aprons! Early versions used jarred Alfredo (shudder) until I realized homemade creaminess took only minutes more. Lesson learned: good foundations matter. One chaotic Tuesday, I subbed pasta water for forgotten broth – happy accident! Now it’s standard. Funny fail? Once used “hot” paprika instead of sweet… my firefighter neighbor politely asked for milk refills twice. 😅 Biscuit (the terrier) goes WILD for dropped pepper pieces – his version of Cajun spice! Pro tip: Double the batch. Leftovers (though rare!) reheat gently with a splash of milk. This dish? It’s resilience, joy, and a reminder that sometimes, the best meals are born from life’s little messes.
Your Questions, Answered!
Let’s tackle those kitchen curveballs:
- Q: My sauce broke/looks grainy! Help?!
A: Don’t panic! High heat is usually the culprit. Remove from heat immediately. Whisk in 1 tbsp cold butter or 1-2 tbsp hot pasta water/broth vigorously. Should come back together. Prevent it: Keep sauce at a gentle simmer, not boil, when adding dairy/cheese. - Q: Can I make this ahead?
A: Best fresh! Cooked components (chicken, pasta, chopped veggies) store separately in fridge for 1-2 days. Reheat chicken/sauce gently in skillet, then combine with pasta. Add extra liquid (milk/broth) when reheating sauce. - Q: Too spicy for my crew! How to tame it?
A: Easy fixes! Use mild Cajun seasoning. Stir in 1-2 tbsp cream cheese or mascarpone at the end. Serve with extra Parmesan and a dollop of sour cream or cool avocado slices. - Q: Pasta soaked up all my sauce! Fix?
A: Pasta’s thirsty! Have reserved pasta water? Add 1/4 cup at a time while tossing over low heat until saucy again. No pasta water? Warm broth or milk works.
Creamy Cajun Chicken Pasta
- Total Time: 30 mins
Description
Hey flavor chaser! Beau here from Feastical, ready to rescue your weeknights with a bowl of bold, smoky, creamy goodness. Picture juicy Cajun-spiced chicken, tender pasta, and a dreamy Parmesan cream sauce, all tangled up with sweet peppers and fresh herbs—ready in about 30 minutes, no culinary degree required. This dish transforms an ordinary night into a mini Cajun celebration. Grab your skillet and let’s make your taste buds dance!
Ingredients
For the Chicken:
-
1 lb chicken breast, bite-size pieces
-
2 tbsp Cajun seasoning (store-bought or homemade)
-
Salt & pepper to taste
-
2 tbsp olive oil
For the Pasta & Sauce:
-
8 oz fettuccine or penne
-
1 tbsp butter
-
1 small onion, diced
-
2 garlic cloves, minced
-
½ cup diced red/green bell peppers
-
1 cup heavy cream
-
1 cup chicken broth (or reserved pasta water)
-
1 cup shredded Parmesan (freshly grated)
-
¼ cup fresh parsley, chopped
Instructions
1️⃣ Cook Pasta: Boil pasta in salted water until al dente. Reserve 1 cup pasta water, then drain.
2️⃣ Sear Chicken: Toss chicken with Cajun seasoning, salt, and pepper. Heat oil in a skillet over medium-high, sear chicken 5–7 mins until golden and cooked through. Remove and set aside.
3️⃣ Build Flavor: In the same skillet, melt butter over medium heat. Sauté onion 3 mins, add garlic 1 min, then stir in bell peppers for 2 mins.
4️⃣ Make Sauce: Pour in cream and broth. Bring to a gentle simmer, then gradually stir in Parmesan until smooth.
5️⃣ Finish: Add pasta and chicken to the skillet. Toss until everything’s coated and heated through. Stir in most of the parsley.
6️⃣ Serve: Plate hot, garnish with extra parsley and Parmesan. Dig in while it’s creamy and spicy!
Notes
-
Swap chicken for shrimp or andouille sausage for a smoky twist.
-
For less heat, use mild Cajun spice or stir in a spoonful of cream cheese.
-
Double up—leftovers reheat beautifully with a splash of broth or milk!
- Prep Time: 10 mins
- Cook Time: 20 mins
Nutrition
- Calories: 580 Per Serving
- Fat: 30g
- Carbohydrates: 35g
- Protein: 38g
Nutritional Nibbles (Per Serving, Serves 4)
Calories: ~580 | Protein: 38g | Carbs: 35g | Fat: 30g | Fiber: 2g
Note: Values are estimates. Use specific brands/substitutions for precise tracking.
Prep: 10 mins | Cook: 20 mins |
Final Thoughts: More Than Just a Pasta
This Creamy Cajun Chicken Pasta isn’t just dinner—it’s a celebration of adaptability. From Marcel’s diner to your kitchen, it proves that great food thrives on simplicity, memory, and a dash of courage. Whether you stick to the classic or spin it into a Thai-Indian hybrid, the core lesson remains: Cooking is about joy, not perfection. So grab that skillet, tweak fearlessly, and let every bite remind you that the best meals are the ones that taste like life.