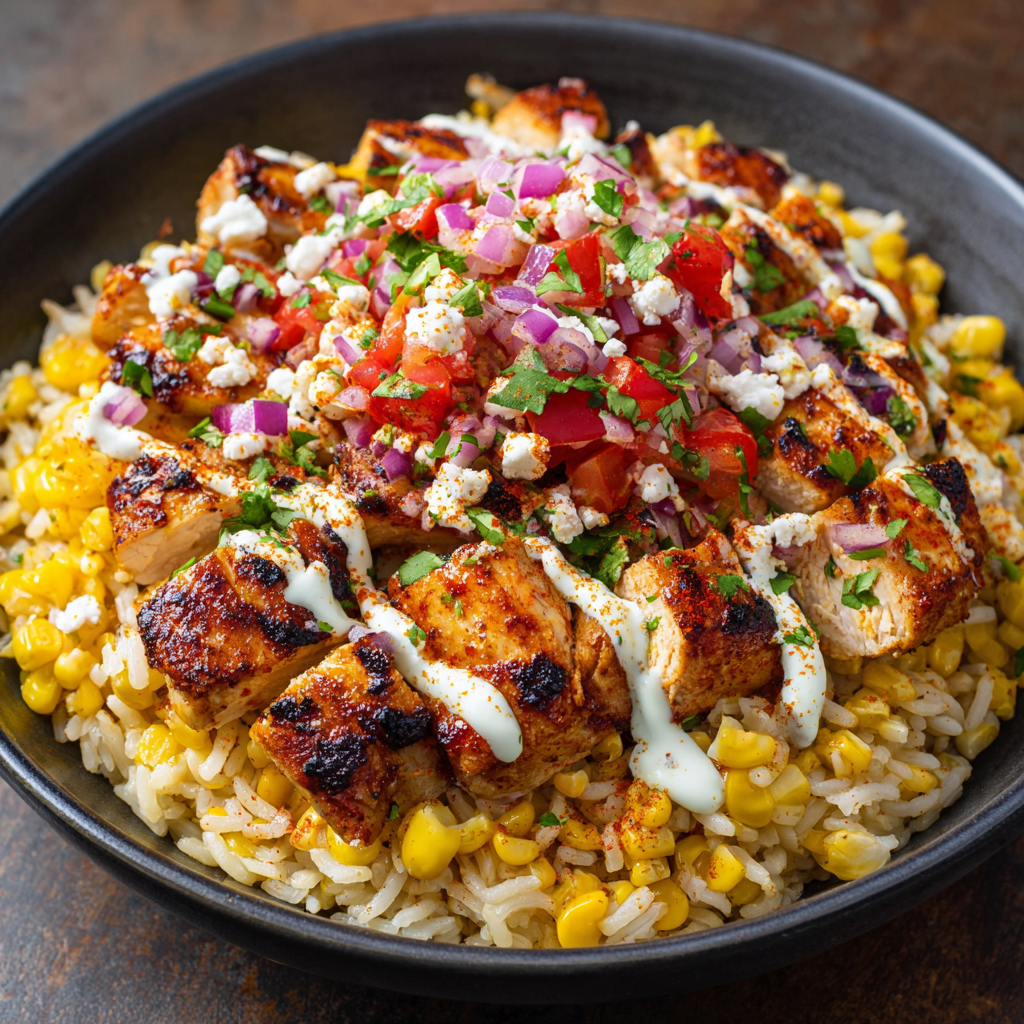
Street Corn Chicken Rice Bowl
Let’s Taco ’Bout Your New Favorite Bowl
Hey friends, Beau here! Ever had one of those magical food moments where every bite tastes like a fiesta exploding in your mouth? That’s exactly what happened when I first whipped up this Street Corn Chicken Rice Bowl in my kitchen. Picture this: smoky grilled corn slathered in zesty lime crema, juicy chili-kissed chicken, and fluffy rice all piled high like a flavor volcano. It’s the kind of meal that makes you do a little happy dance while you’re cooking—trust me, my dog Biscuit gives me side-eye every time.
This isn’t just dinner; it’s a vacation in a bowl. Inspired by those irresistible Mexican street carts (shoutout to that life-changing trip to Oaxaca!), it’s got that addictive charred-sweet-crunchy-creamy thing going on. Perfect for when you’re craving something vibrant but don’t wanna wrestle with complicated recipes. We’re talking 40 minutes flat—faster than ordering takeout! Whether you’re meal-prepping for the week or feeding a hangry crowd, this bowl’s your golden ticket. So tie on that apron, crank up the mariachi tunes, and let’s make magic happen!
Pro Tip: The secret weapon? Cotija cheese. It’s like feta’s sassier cousin that crumbles like a dream and adds salty punch. Don’t skip it!
How a Rainy Day & Leftovers Changed Everything
Okay, real talk: this recipe was born from a “clean out the fridge” miracle. Picture a gloomy Seattle Tuesday. Rain tapping the windows, me staring into the abyss of my near-empty fridge—just sad leftover grilled chicken, half an ear of corn, and some wilting cilantro. But then… inspiration struck! I remembered this incredible street corn I’d devoured from a vendor in Mexico City years ago. The way he slathered those charred cobs with mayo and chili powder? Pure genius.
So I diced the chicken, tossed the corn with mayo and spices (cotija to the rescue!), piled it all on rice, and drizzled lime like my life depended on it. One bite and I was transported back to that sun-soaked plaza—the mariachi bands, the laughter, the smoky aroma in the air. Biscuit (my ever-hopeful lab mix) got the first taste-test and practically high-fived me with his tail. Now it’s my go-to “I need joy STAT” meal. Food memories? They’re the best souvenirs.
Gather Your Flavor All-Stars
Here’s your grocery list—think vibrant, fresh, and flexible! Swap freely based on what’s in your pantry:
- Chicken breasts (3–4) – The MVP! Thighs work too for extra juiciness. Chef hack: Pound ’em slightly for even cooking.
- Cooked rice (4 cups) – Day-old jasmine or basmati is perfect. Rice cooker warriors, unite! Sub: Quinoa or cauliflower rice.
- Corn (2 cups) – Fresh grilled (hello, smokiness!) or frozen/thawed. Pro move: Char it in a dry skillet for street-cart vibes.
- Mayo (⅓ cup) – The creamy glue! Lighter sub: Greek yogurt or avocado crema.
- Lime juice (2 tbsp) – Fresh-squeezed only! Bottled stuff? Nuh-uh.
- Minced garlic (1 tbsp) – Because vampires aren’t invited to dinner.
- Chili powder + paprika (2 tsp each) – Smoky-sweet magic. Ancho chili powder kicks it up!
- Garlic powder (1 tbsp) – Double garlic = double happiness.
- Salt & pepper – Season like you mean it!
- Diced red onion (½ cup) – Soak in ice water for 5 mins if raw onions bite back.
- Cotija cheese (½ cup) – Non-negotiable! Sub: feta in a pinch.
- Toppings! Cilantro, avocado, sour cream, cherry tomatoes, black beans—go wild!
Why these ratios? I tested this six times to nail the creamy-to-zesty balance. That mayo-lime-cotija trio? *chef’s kiss*
Let’s Build Flavor Town!
Ready to rock? Follow these steps (and my sneaky hacks) for bowl perfection:
- Season Chicken: Mix 1 tbsp chili powder, 1 tbsp paprika, 1 tbsp garlic powder, salt, and pepper in a bowl. Rub that spicy love all over your chicken like you’re giving it a massage. Hack: Add 1 tsp cumin for extra earthiness!
- Bake Chicken: Place chicken in a baking dish (line it with foil for easy cleanup!). Roast at 400°F for 20–25 mins until it hits 165°F internally. Watchdog tip: Don’t overcook! Pull it at 160°F—it’ll coast to 165° while resting.
- Dice Chicken: Let it rest 5 mins (juices = flavor!). Chop into bite-sized cubes. Confession: I snack on a piece straight from the cutting board. Zero regrets.
- Make Street Corn Mix: In a big bowl, combine corn, mayo, minced garlic, remaining chili powder and paprika, lime juice, salt, pepper, onion, and cotija. Mix gently but thoroughly. Game-changer: Fold in a handful of chopped cilantro here!
- Assemble Bowls: Layer rice, chicken, then that glorious corn mix. Presentation pro-tip: Use a wide bowl—show off those colors!
- Garnish: Crown your masterpiece! Avocado slices, extra cotija, cilantro confetti, or a lime wedge. Overachiever move: Drizzle with sriracha mayo.
Timing hack: While chicken bakes, prep the corn mix and toppings. Multitasking = more eating time!
The Secret to the Perfect Street Corn Mix
Let’s dive deep into the heart of this bowl—the street corn mix. This isn’t just any corn salad; it’s a symphony of textures and flavors that makes every bite unforgettable. The key? Char and contrast.
First, the corn. If you’re using fresh corn, don’t just boil it—grill or blister it for that authentic street-cart smokiness. No grill? No problem. A screaming-hot cast-iron skillet or even your oven’s broiler will do the trick. Toss the kernels in a dry pan until they get those sexy blackened spots. Frozen corn? Thaw it, pat it dry, and char it the same way. That little bit of maillard reaction (fancy term for delicious browning) is what separates “meh” corn from “heck yes” corn.
Next, the dressing. Mayo-haters, hear me out—this isn’t your sandwich spread. Mixed with lime juice, chili powder, and garlic, it transforms into a tangy, creamy glaze that clings to every kernel. For a lighter twist, Greek yogurt or blended avocado works, but trust me, the mayo version is the OG crowd-pleaser. The lime juice is non-negotiable—it cuts through the richness and brightens everything up. Taste as you go; you might want an extra squeeze!
Now, the crunch factor. Red onion adds bite, but if raw onions bully your taste buds, soak them in ice water for 5-10 minutes to mellow them out. Cotija cheese is the MVP here—it’s salty, crumbly, and doesn’t melt into oblivion. If you can’t find it, feta is a decent understudy, but cotija’s dry texture is irreplaceable.
Pro Tip: Fold in fresh cilantro just before serving to keep it vibrant. And if you’re feeling extra, add a pinch of smoked paprika or tajín for a fruity-chili kick. This mix is so good, you’ll catch yourself eating it straight from the bowl with a spoon (no judgment here).
Meal Prep Magic: How to Keep It Fresh All Week
Confession: I’m a meal-prep fanatic. There’s something deeply satisfying about opening the fridge to a lineup of ready-to-assemble flavor bombs. This Street Corn Chicken Rice Bowl is a meal-prep dream—here’s how to keep it tasting fresh for days.
1. Store Components Separately
-
Chicken: Let it cool completely before dicing. Store in an airtight container with a tiny splash of broth to prevent dryness (3-4 days).
-
Street Corn Mix: Keep it in a separate container with a paper towel on top to absorb excess moisture (2-3 days max—the lime juice helps, but fresh is best).
-
Rice: Day-old rice is ideal! Portion it into containers and sprinkle a few drops of water before reheating to revive fluffiness.
2. Reheat Like a Pro
-
Microwave: Cover the bowl with a damp paper towel to steam the rice gently. Heat chicken separately to avoid rubberiness.
-
Cold Bowl Option: Pack it like a salad—rice on the bottom, cold corn mix on top, chicken in the middle. Drizzle with lime crema (mayo + lime juice + water) just before eating.
3. Freezer-Friendly? Sort Of
-
The chicken and rice freeze well (up to 1 month), but the corn mix turns watery after thawing. If you must freeze it, omit the mayo and add it fresh later.
4. Upgrade Your Lunch Game
-
Mason Jar Layers: Rice → black beans → chicken → corn mix. Seal tight, and it’ll stay fresh for 2 days. Shake it up before eating!
-
Wrap It Up: Stuff the mix into a tortilla with extra greens for a portable burrito.
Pro Tip: Double the corn mix recipe—it’s killer on tacos, nachos, or even as a dip with chips.
The Ultimate Pairings: What to Serve With Your Bowl
This bowl is a star on its own, but why stop there? Here are next-level pairings to turn dinner into a fiesta.
Drinks:
-
Classic Margarita: The lime and salt complement the bowl’s zest.
-
Agua Fresca: Try cucumber-lime or hibiscus for a refreshing sip.
-
Mexican Lager: A cold cerveza (like Modelo or Pacifico) cuts through the richness.
Sides:
-
Chips and Guac: Because avocado is life.
-
Charred Shishito Peppers: Tossed with lime and sea salt—addictively easy.
-
Black Bean Soup: Serve a small cup for extra protein and warmth.
Dessert:
-
Churro Bites: Dust with cinnamon sugar and dunk in chocolate sauce.
-
Mango Sorbet: A light, fruity palate cleanser.
For a Crowd:
Set up a DIY topping bar with:
-
Pickled red onions
-
Sliced radishes
-
Crumbled bacon (trust me)
-
Extra lime crema in a squeeze bottle
Pro Tip: Serve the bowls on colorful Mexican pottery or even a repurposed wooden cutting board for that street-food vibe.
Serve It Like a Superstar
This bowl is a canvas! Pile ingredients high so every scoop gets all the layers. For parties, set up a “build-your-own-bowl” bar with toppings in little bowls—kids (and adults!) go nuts customizing. Pair it with icy horchata or a crisp lager. Leftovers? Pack ’em in mason jars (rice → chicken → corn mix) for Instagram-worthy lunches that’ll make coworkers drool.
Mix It Up, Chef!
Customize your bowl with these fun twists:
- Seafood Swap: Replace chicken with shrimp or blackened salmon.
- Veggie Delight: Use grilled portobellos or crispy tofu + swap mayo for vegan mayo.
- Tex-Mex Twist: Add black beans, pickled jalapeños, and crushed tortilla chips.
- Breakfast Bowl: Top with a fried egg and swap rice for crispy hash browns.
- Elote Style: Serve corn mix warm + slather extra mayo on the bowl rim!
Beau’s Behind-the-Scenes Scoop
This recipe’s evolved more than my taste in kitchen aprons (R.I.P. my neon 90’s one). Originally, I grilled everything—but baking the chicken made it weeknight-friendly. One time, I accidentally used cinnamon instead of chili powder… let’s just say Biscuit got extra treats that night. Now I label my spice jars with giant letters! The corn mix also started as a straight-up elote copycat, but adding garlic and extra lime made it POP. Moral: Mistakes can be delicious detours. Share your kitchen wins (or fails!) with me @Feastical—I’ll feature the funniest ones!
Your Questions, Answered!
Q: Can I make this ahead?
A: Absolutely! Store components separately: chicken (3 days), corn mix (2 days), rice (up to 5 days). Assemble cold or microwave gently. Pro tip: Add fresh lime juice after reheating!
Q: My corn mix is too runny. Help!
A: Easy fix! Drain corn WELL if using frozen/canned. If it’s still loose, add extra cotija or a sprinkle of cornstarch.
Q: Cotija’s MIA at my store. Alternatives?
A: Feta works! Or try queso fresco for milder tang. In a pinch? Parmesan + pinch of salt.
Q: Chicken’s dry. What did I do wrong?
A: Two culprits: Overcooking or not resting. Use a meat thermometer! Pull at 160°F, cover loosely with foil, and let it chill for 5-10 mins.
Street Corn Chicken Rice Bowl
- Total Time: 40 minutes
Description
Inspired by Mexican street corn (elote) and those flavor-packed street carts, this rice bowl layers juicy chili-lime chicken, creamy street corn, fluffy rice, and punchy toppings. It’s dinner, meal prep, or party food—all done in 40 minutes!
Ingredients
For the Chicken:
-
3–4 boneless, skinless chicken breasts (or thighs for juicier option)
-
1 tbsp chili powder
-
1 tbsp paprika
-
1 tbsp garlic powder
-
Salt & cracked black pepper to taste
-
Optional: 1 tsp cumin for earthy depth
For the Street Corn Mix:
-
2 cups corn kernels (fresh grilled preferred; frozen & thawed works)
-
⅓ cup mayo (or Greek yogurt for lighter version)
-
1 tbsp minced garlic
-
2 tbsp lime juice (fresh-squeezed only!)
-
1 tsp chili powder
-
1 tsp paprika
-
Salt & cracked black pepper to taste
-
½ cup diced red onion (soak in ice water 5 mins to mellow)
-
½ cup crumbled Cotija cheese (feta or queso fresco works)
-
Handful fresh cilantro, chopped (optional but highly recommended)
For the Bowls:
-
4 cups cooked rice (jasmine, basmati, or sub quinoa/cauliflower rice)
-
Garnishes: Avocado slices, extra Cotija, lime wedges, cilantro, sriracha mayo, black beans, cherry tomatoes
Instructions
Preheat oven to 400°F (200°C).
Mix chili powder, paprika, garlic powder, salt, pepper, and cumin if using. Rub generously over chicken.
Place in foil-lined baking dish. Bake 20–25 mins until internal temp reaches 165°F. Pro tip: Pull at 160°F and let rest 5 mins—carryover cooking finishes the job!
While chicken cooks, combine corn, mayo, minced garlic, lime juice, chili powder, paprika, salt, pepper, onion, Cotija, and cilantro in a large bowl. Mix gently. Optional: Char corn in a dry skillet for extra smoky flavor.
Once rested, chop chicken into bite-sized pieces. Sneak a taste—you’ve earned it!
Layer rice, chicken, and a generous scoop of street corn mix. Garnish with avocado, extra Cotija, lime wedges, cilantro, or sriracha mayo.
Nutrition
- Calories: 470 Cal Per Serving Approx
- Fat: 18g
- Carbohydrates: 38g
- Fiber: 4g
- Protein: 38g
Fuel Your Fiesta (Approx per serving)
Calories: 470 | Protein: 38g | Fat: 18g | Carbs: 38g | Fiber: 4g
Note: Toppings add extra calories. Love avocado? Worth every bite!
Final Thoughts: Why This Bowl Wins Every Time
This Street Corn Chicken Rice Bowl isn’t just a recipe—it’s a celebration of contrasts. Charred and creamy, spicy and tangy, hearty and fresh. It’s the kind of meal that makes you pause mid-bite to say, “Dang, I made this?!”
Whether you’re cooking for one, meal-prepping like a boss, or feeding a hungry family, this bowl adapts to your needs. It’s forgiving (swap ingredients freely!), fast (40 minutes tops), and packed with flavors that transport you somewhere sunnier.
So grab that skillet, crank up the music, and let’s taco ’bout how good dinner’s about to be. And hey—if you accidentally double the chili powder or burn the corn a little? That’s just your signature twist. Cooking’s an adventure, and this bowl’s your ticket to flavor town.
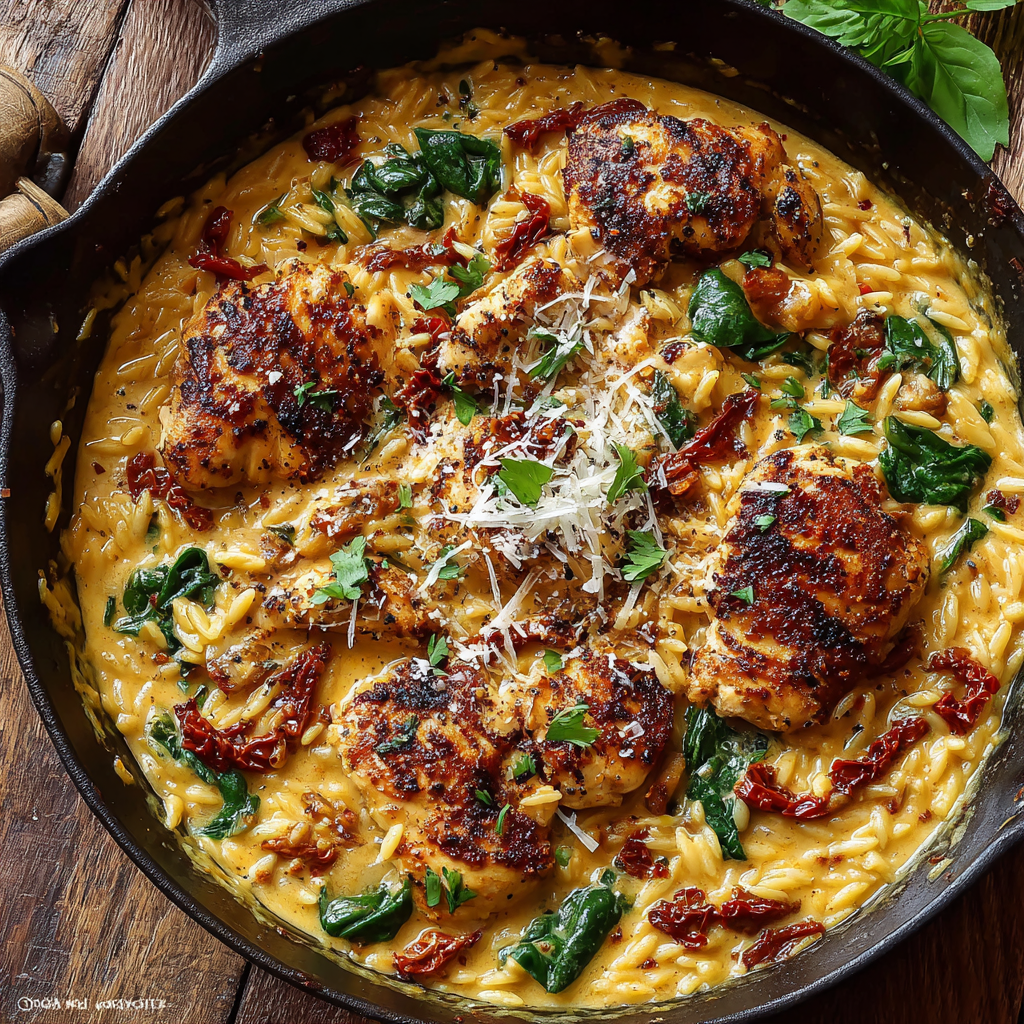
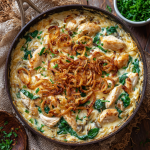
One-Pan “Marry Me” Chicken Orzo
Why This Dish Will Steal Hearts (And Appetites!)
Hey friends, Beau here from Feastical! Raise your hand if you’ve ever stared into your fridge after a long day, dreaming of something that tastes like a gourmet hug but cooks like a weeknight superhero? 🙋♂️ That’s exactly why I’m bubbling over with excitement to share this One-Pan “Marry Me” Chicken Orzo. Picture this: tender chicken cubes bronzed to perfection, swimming in a creamy, sun-drenched orzo sea flecked with garlicky confetti and emerald spinach. It’s luxuriously rich, yet ridiculously simple—all cooked in ONE pan because, let’s be real, nobody wants a sink mountain after dinner.
Why the “Marry Me” name? Legend has it that this dish is so swoon-worthy, it’s sparked actual proposals. (Okay, maybe that’s food-lore magic, but I’ve seen it make eyes widen and forks duel over the last bite.) Whether you’re cooking for your soulmate, your squad, or just treating yourself like the royalty you are, this recipe delivers big flavor without big effort. It’s weeknight comfort meets date-night elegance—no Michelin skills required. Ready to make your kitchen smell like an Italian nonna’s dream? Let’s grab that skillet!
The Night My Risotto Went Rogue (And Birthed This Beauty)
Flashback to my early cooking days: I was attempting risotto for a fancy dinner date. The broth was hot, the wine was poured (mostly into me), and my nerves were… simmering. Then disaster struck. I knocked the entire Arborio rice bag into the pot! Instead of creamy perfection, I had a starchy tsunami threatening to engulf my stove. Panicked, I tossed in shredded rotisserie chicken, sun-dried tomatoes from a jar, and a glug of cream. Twenty minutes later? My date took one bite, clutched my arm, and whispered, “If you cook like this every night, I’ll marry you tomorrow.” We didn’t walk down the aisle, but the dish stuck around—evolving into this orzo-based wonder. Moral of the story? Sometimes kitchen “oops” moments lead to your greatest hits. That’s cooking, baby—pure, delicious chaos.
Your Flavor Dream Team (Plus Clever Swaps!)
- 1.5 lbs boneless, skinless chicken breast, cubed – Cut evenly for uniform cooking! Thighs work too for extra richness.
- 2 tbsp olive oil – Our flavor foundation. Avocado oil works if you’re searing hot!
- 4–5 garlic cloves, mashed – Smash ’em with your knife flat for max aroma. Jarred minced garlic? 1.5 tsp in a pinch.
- ¾ cup sun-dried tomatoes, drained – Oil-packed add silkiness; dry-packed? Soak in warm water first. Fire-roasted red peppers make a zippy swap!
- 2 tsp Italian seasoning – No blend? Mix 1 tsp oregano + ½ tsp basil + ½ tsp thyme.
- 2 tsp paprika – Smoked paprika adds campfire depth! Sweet paprika keeps it mild.
- ½ tsp kosher salt + 1 tsp black pepper – Season in layers—we’ll add more later! Table salt? Use half the amount.
- 1 cup orzo – Looks like rice, cooks like pasta. Arborio rice works but needs extra broth.
- 2¾ cups chicken broth – Homemade gold? Use it! Water + 1 bouillon cube works too.
- ¾ cup full-fat coconut milk or heavy cream – Coconut milk adds subtle sweetness; cream = decadence. Half-and-half lightens it up.
- 2 large handfuls fresh spinach – Sturdy kale or arugula add peppery kick.
- ¾ cup freshly grated Parmesan – **Crucial:** Grating your own melts smoother. Pecorino Romano kicks up the saltiness!
Let’s Build Flavor, One Sizzle at a Time
1. Sear Chicken: Heat olive oil in a deep 12-inch skillet or Dutch oven over medium-high heat. Add chicken in a single layer (work in batches if needed—don’t crowd the pan or it steams instead of sears!). Sprinkle with salt, pepper, Italian seasoning, and paprika. Cook 5–7 minutes until golden with crispy edges. Pro tip: Resist stirring for the first 3 minutes to get that gorgeous crust! Transfer to a plate.
2. Add Flavor Foundations: Reduce heat to medium. Add mashed garlic and sun-dried tomatoes. Sauté 1–2 minutes until garlic is fragrant (but not brown!). This is where magic happens—the tomatoes release their oil, creating a flavor paste. Stir constantly!
3. Toast Orzo: Add orzo to the skillet. Stir vigorously for 1 minute, coating every grain in the tomato-garlic oil. Toasting unlocks a nutty depth—you’ll smell it! Pour in broth, scraping any browned bits (aka “flavor gold”) from the pan bottom. Bring to a lively boil.
4. Simmer to Tenderness: Return chicken (and any juices!) to the skillet. Reduce heat to low. Cover and simmer 10–12 minutes, stirring halfway. Peek at 10 minutes—orzo should be al dente with minimal liquid pooling. If it looks dry, add ¼ cup broth.
5. Creamy Grand Finale: Stir in coconut milk (or cream), spinach, and Parmesan. Cook uncovered 3–4 minutes until spinach wilts and sauce thickens to velvet. **Chef’s secret:** Remove from heat before adding cheese—it prevents graininess! Taste. Need more oomph? Add a pinch of salt or lemon zest.
Plate It Like a Pro (Minimal Effort, Max Style)
Spoon this golden beauty into shallow bowls—the creamy orzo deserves to shine! Top with extra Parmesan, a crack of black pepper, and a sprinkle of fresh basil or parsley. For *chef’s kiss* elegance, drape a few extra sun-dried tomatoes on top. Pair with crusty bread (to mop up every drop!) or a crisp arugula salad with lemon vinaigrette to cut the richness. Dinner party flex? Serve with chilled Prosecco. Netflix night? Pajamas mandatory.
Make It Uniquely Yours!
1. Mediterranean Twist: Swap chicken for shrimp. Add artichoke hearts and kalamata olives with the spinach. Finish with feta instead of Parmesan.
2. Mushroom Lover’s Dream: Replace chicken with 16 oz sliced cremini mushrooms. Add 1 tsp truffle oil at the end. Vegan? Use veggie broth, coconut milk, and nutritional yeast.
3. Spicy Sunset: Add ½ tsp red pepper flakes with the garlic. Stir in 2 tbsp Calabrian chili paste with the cream. Top with pickled jalapeños.
4. Lemon-Herb Brightness: Zest 1 lemon over the finished dish. Swap spinach for fresh baby kale. Use dill in place of Italian seasoning.
5. Protein Power-Up: Fold in 1 cup white beans (cannellini or chickpeas) with the chicken. Perfect for stretching servings!
Beau’s Backstage Kitchen Confessions
This recipe’s a living thing in my kitchen! My first version used heavy cream only… until my lactose-intolerant buddy raided my fridge and swapped in coconut milk. Mind. Blown. Now I keep both options. Over the years, I’ve learned: freshly grated Parmesan is non-negotiable (the pre-shredded stuff has anti-caking agents that turn sauce gritty). And don’t stress the spinach—if it wilts down to nothing, toss in another handful! My funniest fail? Once used cinnamon instead of paprika (similar jars, dim lighting). We dubbed it “Mystery Marry Me”—surprisingly not terrible, but stick to paprika, folks.
Your Burning Questions, Answered!
Q: Can I use frozen spinach?
A: Absolutely! Thaw and squeeze it DRY (like, really dry—wet spinach makes sauce watery). Use about ½ cup packed.
Q: Help! My orzo is mushy/sticky.
A: Overcooked orzo = glue city. Next time: 1) Use broth at room temp (cold slows cooking unevenly), 2) Set a timer—10 mins max before checking, 3) Stir gently once halfway. Rescue gluey batches by stirring in extra broth or cream to loosen.
Q: Can I prep this ahead?
A: Cook the chicken and mix-ins (steps 1-2). Store separately from dry orzo/broth. When ready, pick up at step 3—add 2-3 extra minutes simmering time since ingredients are cold.
Q: Why coconut milk? Does it taste tropical?
A: Full-fat coconut milk adds lush texture without overpowering sweetness. The garlic, Parmesan, and tomatoes dominate—it just tastes creamy! Heavy cream is classic if you prefer.

One-Pan “Marry Me” Chicken Orzo
- Total Time: 35 minutes
Description
Legend says this dish is so irresistible, it sparks proposals. Whether you believe the food-lore or not, one thing’s certain—this creamy, cheesy, sun-dried tomato orzo with juicy chicken and spinach will steal hearts (and forks). All in ONE pan, minimal cleanup, max flavor!
Ingredients
-
1.5 lbs boneless, skinless chicken breast, cubed (or thighs for extra richness)
-
2 tbsp olive oil (or avocado oil)
-
4–5 garlic cloves, smashed (1½ tsp jarred minced garlic in a pinch)
-
¾ cup sun-dried tomatoes, drained (oil-packed preferred; soak dry-packed in warm water)
-
2 tsp Italian seasoning (or mix: 1 tsp oregano, ½ tsp basil, ½ tsp thyme)
-
2 tsp paprika (smoked for depth, sweet for mild version)
-
½ tsp kosher salt + 1 tsp cracked black pepper
-
1 cup orzo pasta (looks like rice, cooks like pasta)
-
2¾ cups chicken broth (homemade or water + bouillon works)
-
¾ cup full-fat coconut milk or heavy cream (coconut milk adds subtle sweetness, cream = classic decadence)
-
2 large handfuls fresh spinach (or ½ cup thawed, squeezed-dry frozen spinach)
-
¾ cup freshly grated Parmesan (Pecorino Romano for saltier kick)
Instructions
Heat oil in a large skillet or Dutch oven over medium-high. Add chicken in a single layer (work in batches if needed). Season with salt, pepper, Italian seasoning, and paprika. Sear 5–7 minutes until golden with crispy edges. Pro tip: Don’t stir for the first 3 minutes—let that crust form! Remove chicken to a plate.
Lower heat to medium. Add garlic and sun-dried tomatoes to the same pan. Sauté 1–2 minutes until fragrant, stirring constantly.
Add orzo. Stir 1 minute to toast lightly. Pour in broth, scraping browned bits from the pan bottom (flavor jackpot!).
Return chicken (plus any juices) to the pan. Cover, reduce heat to low, and simmer 10–12 minutes, stirring halfway. Orzo should be tender with minimal liquid remaining. Too dry? Add ¼ cup broth.
Stir in coconut milk or cream, spinach, and Parmesan. Cook uncovered 3–4 minutes until spinach wilts and sauce thickens. Remove from heat before adding cheese to avoid grainy texture. Taste—add salt or lemon zest if desired.
Notes
Q: Can I prep ahead?
A: Yep! Cook chicken & flavor base (steps 1–2), store separately. Finish with orzo & broth when ready.
Q: Why coconut milk?
A: Adds creamy texture without tasting tropical—garlic, tomatoes, and Parmesan dominate flavor.
Q: Spinach options?
A: Fresh preferred; frozen works if squeezed super dry.
Q: Rescue sticky orzo?
A: Stir in extra broth or cream to loosen. Avoid overcooking next time—set a timer!
Nutrition
- Calories: 450
- Fat: 20g
- Carbohydrates: 30g
- Protein: 38g
Nutritional Snapshot (Per Serving, Serves 6)
Calories: 450 | Fat: 20g (Sat: 8g) | Carbs: 30g | Fiber: 3g | Sugar: 4g | Protein: 38g
Note: Using coconut milk reduces sat fat to 6g. Values approximate—your ingredients may vary!
Final Thoughts: More Than Just a Meal
“Marry Me” Chicken Orzo isn’t just dinner—it’s a reminder that the best recipes are born from chaos, perfected with love, and meant to be shared. Whether you’re cooking for a partner, a family, or just your glorious self, this dish delivers joy in every bite. It’s the kind of meal that turns weeknights into celebrations and mistakes into masterpieces. So grab that skillet, embrace the delicious chaos, and let the aroma of garlic, Parmesan, and sun-drenched tomatoes work its magic. Who knows? Maybe it will inspire a proposal… or at least a standing ovation from your taste buds.
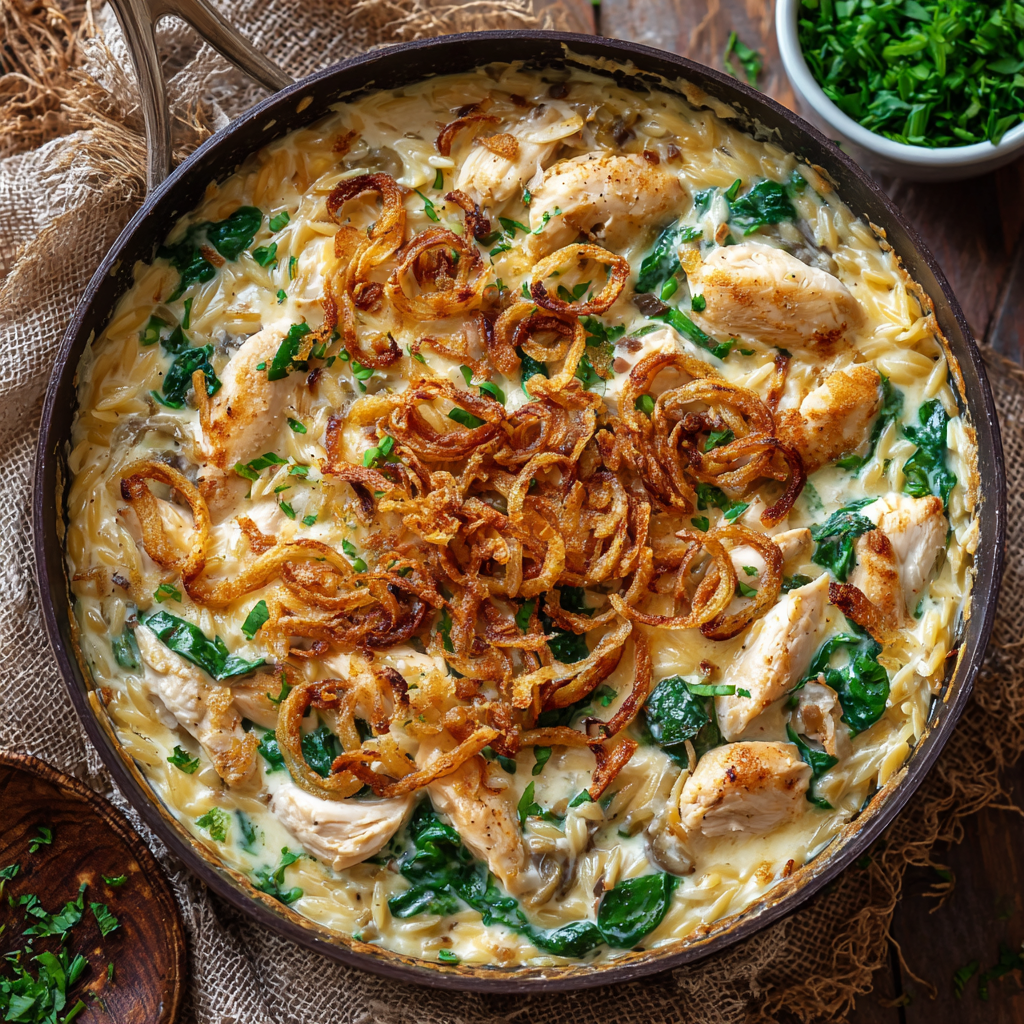
Monterey Chicken One-Pan Orzo
Hey, Hungry Friends! Let’s Talk Cozy Comfort in One Pan
Picture this: It’s 6 PM. You’re tired, the family’s hangry, and the thought of juggling three pots while wrestling with a sink full of dishes makes you want to order pizza. *Again*. But what if I told you there’s a hero in a skillet? Meet my Monterey Chicken One-Pan Orzo—your new weeknight MVP. Creamy orzo hugs tender rotisserie chicken and garlicky spinach, all smothered in gooey Monterey Jack and crowned with crispy fried onions. It’s like a warm hug from your favorite flannel shirt, and the only cleanup is one glorious pan. Seriously, this dish is the culinary equivalent of finding an extra hour in your day. Whether you’re feeding teens, impressing a date, or just treating yourself (you deserve it!), this bake is soul-soothing magic. Ready to ditch the stress and dig into cheesy, crunchy perfection? Let’s roll.
My Love Affair with Monterey Chicken: A Tale of Chaos & Comfort
This recipe? It’s got roots in pure, unplanned chaos. Last Thanksgiving, my oven decided to quit mid-turkey crisis. Panic mode! I grabbed leftovers—rotisserie chicken, random herbs, half a bag of orzo—and threw them into my trusty cast iron with a “please work” prayer. What emerged was a bubbling, golden miracle that had my cousins fighting over the crispy onion topping. My aunt whispered, “This beats dry turkey.” That’s when it hit me: the best meals aren’t fussy showstoppers. They’re the ones born from pantry raids and real life. Now, this orzo bake is my go-to for game nights, blizzards, and “I can’t adult today” evenings. It’s resilience in a skillet—proof that deliciousness thrives in beautiful messes.
Your Flavor Squad: Simple Stars with Chef Secrets
- 1 (10.5 oz) can cream of chicken with herbs – The creamy backbone! Chef hack: Swap in mushroom soup for veggie friends.
- 16 oz sour cream – Tangy richness. Greek yogurt works in a pinch, but add extra herbs for zing.
- 2½ cups chicken stock – Liquid gold! Use homemade or low-sodium to control salt. Why? It plumps the orzo like a dream.
- 5 garlic cloves, minced – Non-negotiable. Fresh is best—pre-minced jars lack that punch!
- 1 tsp all-purpose seasoning* – My secret weapon! (*Mix equal parts salt, pepper, garlic powder, onion powder, paprika.) Feeling fancy? Add a pinch of smoked paprika.
- 3 cups fresh spinach – Wilted greens = guilt-free goodness. Frozen? Thaw and squeeze dry first!
- 16 oz dry orzo – The tiny pasta that soaks up flavor. No sub here—it’s the star!
- 3 cups freshly grated Monterey Jack – Key word: freshly grated. Pre-shredded won’t melt as creamy. Pepper Jack kicks up the heat!
- 2 cups rotisserie chicken, shredded – Weeknight cheat code! Save drippings for stock.
- 1 (6 oz) can French’s crispy fried onions – The CRUNCH factor. Don’t skip—they’re the “wow” finish!
Let’s Build Your Flavor Masterpiece: Easy Does It!
Step 1: Fire up that oven to 375°F (190°C). Chef tip: Slide a rack to the middle—even heat = no burnt edges!
Step 2: In your largest oven-safe skillet or 9×13” dish, whisk together cream of chicken, sour cream, stock, garlic, all-purpose seasoning, salt, and pepper. Pro move: Taste! Adjust pepper if you’re spicy-curious.
Step 3: Dump in orzo, spinach, chicken, and 2 cups cheese. Stir until every orzo bit is coated. Watch the magic: Spinach wilts as you mix—no pre-cooking!
Step 4: Cover TIGHTLY with foil. Bake 30 minutes. No peeking! Steam cooks the orzo. If your skillet handle isn’t ovenproof, wrap it in foil too.
Step 5: Uncover—hello, bubbly goodness! Gently stir (scrape any sticky bits—they’re flavor bombs). Top with remaining cheese and ALL the crispy onions. Why wait? Adding onions now keeps them crunchy.
Step 6: Bake uncovered 10-15 minutes until golden and bubbly. Don’t walk away: Onions go from golden to Gandalf’s beard fast!
Rest 5 minutes (crucial step!). This lets the sauce thicken. Resist diving in—I dare you.
The Science Behind the Perfect One-Pan Meal
Ever wonder why one-pan meals like this Monterey Chicken Orzo Bake just work? There’s actual science behind the magic. Let’s break it down.
1. The Maillard Reaction & Flavor Layering
When you bake this dish, three key reactions happen:
-
The Maillard Reaction: As the cheese browns and the fried onions crisp, amino acids and sugars combine at high heat, creating deep, savory flavors. That golden crust? Pure chemistry.
-
Starch Gelatinization: Orzo absorbs liquid (stock + sour cream) and swells, releasing starch that thickens the sauce into velvety perfection. Undercook it? Crunchy disaster. Overcook? Mush. The 30-minute foil-covered bake is crucial for even absorption.
-
Emulsification: Sour cream and melted cheese create a stable emulsion, preventing separation. Greek yogurt can work, but its lower fat content risks graininess—hence the “extra herbs” hack.
2. The Psychology of Comfort Food
Why does this dish feel like a hug? Studies show creamy, carb-heavy foods trigger dopamine release (hello, happiness hormone). The crispy onions add sonic crunch—a texture contrast that makes your brain pay attention. Rotisserie chicken? It’s a time-saving win that tricks you into feeling like a kitchen hero without the effort.
3. The Practical Genius of One-Pan Cooking
-
Fewer Dishes = Less Decision Fatigue: A University of Minnesota study found that cluttered kitchens increase stress. One pan = more mental bandwidth for Netflix.
-
Even Heat Distribution: Cast iron or ceramic dishes retain heat, ensuring no cold spots. Metal pans? Preheat before adding ingredients to avoid undercooked edges.
Pro Tip: For extra depth, toast the dry orzo in the skillet with 1 tbsp butter before adding liquids. Nutty flavor boost!
The Global Cousins of Monterey Chicken Orzo
This dish is a remix of global comfort foods. Let’s travel the world in a skillet:
1. Italy’s Orzo Pastina
Orzo (“little barley” in Italian) traditionally stars in pastina in brodo—a soothing soup. Italians would gasp at baking it, but the technique mirrors risotto al forno (oven risotto), where broth absorption does the work.
2. Greece’s Kritharaki
Greek kritharaki (orzo’s cousin) is baked with tomatoes, feta, and olives. Swap Monterey Jack for feta, add oregano, and you’ve got a Mediterranean spin.
3. America’s Green Bean Casserole
The crispy fried onions? A nod to Midwestern casseroles. Fun fact: French’s created them in the 1950s as a topping for green bean casserole—now a Thanksgiving staple.
4. India’s Chicken Biryani
Layered rice dishes like biryani use similar principles: protein + starch + steam. Replace orzo with basmati, add turmeric and cardamom, and top with fried shallots.
Cultural Hack: Try Japanese yaki udon vibes—sub orzo for udon noodles, use teriyaki sauce, and top with bonito flakes.
The Leftover Alchemy Guide
This bake is arguably better as leftovers. Here’s how to reinvent it:
1. Breakfast Orzo Frittata
Whisk 4 eggs with 1/4 cup milk, fold in chopped leftover bake, and cook in a greased skillet. Top with extra cheese. Crispy edges guaranteed.
2. Stuffed Peppers
Hollow bell peppers, stuff with reheated orzo mix, sprinkle with breadcrumbs, and bake at 375°F for 20 minutes.
3. Creamy Orzo Soup
Simmer leftovers with 2 cups chicken broth and 1/2 cup cream. Add kale and a squeeze of lemon.
4. Fried Orzo Balls (Arancini Style)
Mix with 1 egg and 1/4 cup flour, form balls, stuff with mozzarella cubes, and deep-fry. Dip in marinara.
Freezing Tip: Portion into muffin tins, freeze, then pop out and store in bags. Reheat as single servings!
Plate It Like a Pro: Comfort with Flair
Scoop this beauty straight from the skillet—rustic charm wins! Garnish with chopped parsley or chives for color pop. Pair with a crisp green apple salad (toss arugula, apple slices, lemon vinaigrette) to cut the richness. For drinks? A chilled Chardonnay or sparkling lemonade. Leftovers? Pile into lunch bowls topped with a fried egg. Brunch victory!
Shake It Up: Your Recipe, Your Rules
1. Tex-Mex Twist: Swap Monterey for pepper jack, add 1 cup corn and 1 diced jalapeño. Top with crushed tortilla chips + cilantro.
2. Veggie Delight: Skip chicken, use cream of mushroom soup + 1 cup sautéed mushrooms. Boost protein with white beans!
3. Mediterranean Mood: Add sun-dried tomatoes, kalamata olives, and feta. Finish with lemon zest.
4. Light & Bright: Use low-fat sour cream, reduced-sodium stock, and halve the cheese. Still decadent!
5. Bacon Lover’s: Mix in ½ cup crumbled bacon before baking. Because bacon.
Beau’s Backstage Secrets & Shenanigans
This recipe’s evolved more than my taste in aprons! First attempt? I forgot the foil, and the orzo turned into crunchy pebbles. Lesson: STEAM IS KEY. Now I double-check foil seals like a paranoid squirrel. Funny story: My dog, Biscuit, once stole an entire rotisserie chicken off the counter mid-prep. We used canned chicken (gasp!) and it… worked? (But rotisserie’s still king.) Biggest win: Adding fried onions was a happy accident—I mistook them for breadcrumbs. Best. Mistake. Ever. Make it yours: Swap cheeses, play with herbs, or add heat. Cooking’s a conversation, not a monologue!
Your Burning Questions, Answered
Q: Can I make this ahead?
Absolutely! Assemble (minus onions), cover, and fridge for 24 hours. Add 5-10 minutes to bake time. Add onions last 15 minutes.
Q: Why is my orzo still crunchy?
Ah, the foil culprit! Ensure it’s sealed tight. If using a deep dish, stir midway. Low on liquid? Add ¼ cup hot stock before re-covering.
Q: Can I freeze it?
Yes—but skip the onions. Freeze pre-baked or cooked. Thaw overnight, reheat at 350°F covered. Add fresh onions after baking.
Q: Help, it’s too thick!
Stir in warmed broth or milk, 1 tbsp at a time, after baking. Cream soups vary in thickness—no sweat!
Monterey Chicken One-Pan Orzo
- Total Time: 45–50 minutes
Description
Hey Hungry Friends! You know those nights when cooking feels impossible? This cozy one-pan wonder swoops in like a weeknight superhero. Imagine creamy orzo, juicy rotisserie chicken, garlicky spinach, melted Monterey Jack, and crispy fried onions—all baked to bubbling, golden perfection. Minimal dishes, maximum comfort, and big flavor in under an hour!
Ingredients
-
1 (10.5 oz) can cream of chicken with herbs (sub cream of mushroom for veggie version)
-
16 oz sour cream (or Greek yogurt, but add extra herbs)
-
2½ cups chicken stock (homemade or low-sodium recommended)
-
5 garlic cloves, minced
-
1 tsp all-purpose seasoning* (equal parts salt, pepper, garlic powder, onion powder, paprika)
-
3 cups fresh spinach (or 1½ cups thawed, squeezed-dry frozen spinach)
-
16 oz dry orzo pasta
-
3 cups freshly grated Monterey Jack cheese (pepper jack for heat lovers)
-
2 cups rotisserie chicken, shredded (save drippings for stock if available)
-
1 (6 oz) can crispy fried onions (French’s style)
Instructions
Step 1 — Prep
Preheat oven to 375°F (190°C). Place rack in the center for even cooking.
Step 2 — Mix the Base
In a large oven-safe skillet or 9×13″ baking dish, whisk together:
-
Cream of chicken soup
-
Sour cream
-
Chicken stock
-
Garlic
-
All-purpose seasoning
Taste and adjust salt or pepper if desired.
Step 3 — Build the Bake
Stir in:
-
Orzo pasta
-
Spinach (watch it wilt as you mix)
-
Chicken
-
2 cups shredded cheese
Step 4 — Bake Covered
Cover tightly with foil (essential for steaming the orzo). Bake for 30 minutes, no peeking!
Step 5 — Golden Finish
Uncover, stir gently, scraping any sticky bits from edges (flavor jackpot!). Top with:
-
Remaining 1 cup cheese
-
All crispy fried onions
Bake uncovered for 10–15 minutes until bubbly and onions are golden brown. Watch closely to prevent burning!
Step 6 — Rest & Serve
Let sit 5 minutes to thicken. Scoop straight from the skillet and enjoy with your favorite salad or crusty bread.
Notes
✅ Spinach wilts in the mix—no need to pre-cook.
✅ Freshly grated cheese melts smoother—skip pre-shredded if possible.
✅ Seal foil well to steam orzo perfectly—steam = creamy texture.
✅ Use leftover roast chicken or turkey for variety.
✅ Fried onions go on LAST for maximum crunch.
Nutrition
- Calories: 450 Cal Per Serving Approx
- Fat: 24g
- Carbohydrates: 34g
- Protein: 24g
Nutritional Highlights (Per Serving)
Calories: ~450 | Protein: 24g | Carbs: 35g | Fat: 25g
Note: Stats are estimates. For lower calories, try light sour cream and reduced-fat cheese.
Final Thoughts: Why This Recipe Wins Every Time
This Monterey Chicken Orzo Bake isn’t just food—it’s a strategy. It solves the “what’s for dinner?” panic, bends to your cravings, and turns leftovers into adventures. It’s proof that great cooking isn’t about perfection; it’s about adaptability. Whether you’re a kitchen newbie or a seasoned cook, this dish meets you where you are. So grab that skillet, embrace the chaos, and let flavor lead the way. After all, the best meals aren’t just fed—they’re felt.
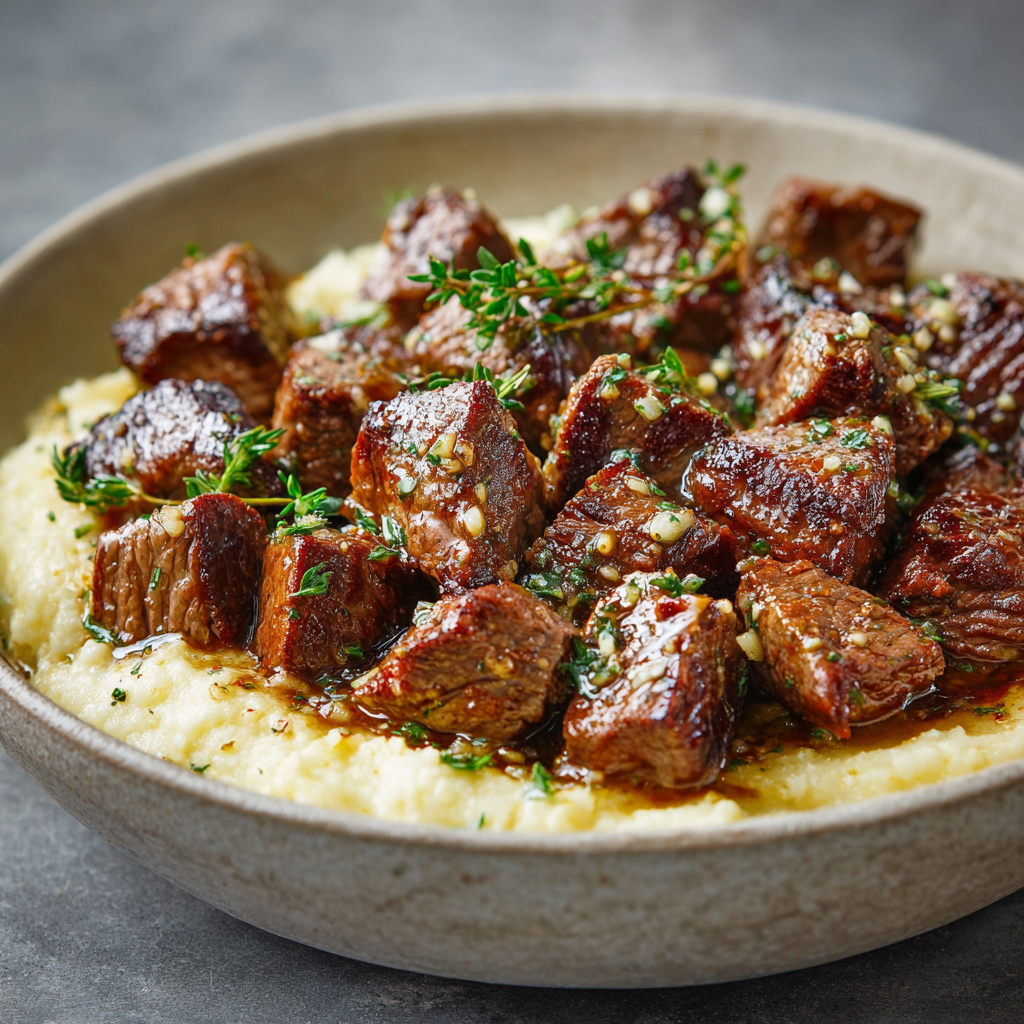
Garlic Butter Steak Bites
The Magic of Garlic Butter Steak Bites: Your New Weeknight Hero
Hey friends, Beau here! Let’s talk about that glorious moment when dinner feels like a high-five for your soul. You know the one—when the kitchen smells like a steakhouse, your skillet’s sizzling like a standing ovation, and you’ve somehow whipped up something luxurious in less time than it takes to watch an episode of your favorite show. That’s the magic of these Garlic Butter Steak Bites. Imagine tender, seared sirloin cubes swimming in a golden pool of garlicky, thyme-kissed butter, all draped over creamy polenta or fluffy mashed potatoes. It’s bold, buttery comfort that’s shockingly simple to master. Whether you’re cooking for a date night, feeding hungry teens, or just treating yourself after a long day, this dish is your ticket to flavor town. No fancy skills needed—just a hot pan, a few trusty ingredients, and the kind of aromas that’ll make your neighbors peek over the fence. Ready to turn ordinary into extraordinary? Let’s fire up that skillet and make some memories!
That One Rainy Night & a Sizzling Skillet
Picture this: It’s a stormy Friday, my fridge is looking sadder than a wilted salad, and my bestie texts, “Emergency! Need comfort food STAT.” All I had was a lone sirloin steak, some butter, and a head of garlic (always). So, I cubed that steak, blasted my cast iron until it was screaming hot, and threw it all together with reckless hope. The kitchen filled with this insane garlic-butter perfume—like a warm hug from your Italian grandma. My friend arrived soaked, took one bite, and literally did a happy dance right there at the counter. We ended up splitting the whole pan, mopping up every last drop of sauce with crusty bread, laughing about terrible exes and life plot twists. That’s the thing about these steak bites: They’re not just food. They’re tiny, juicy lifelines that turn “meh” moments into spontaneous kitchen parties. Every time I make them, I swear I taste a little bit of that rainy-night magic.
Your Flavor Arsenal: Simple Ingredients, Big Impact
- 2 lbs sirloin steak, cubed – Sirloin’s my go-to for balance: lean but marbled enough to stay juicy. Chef hack: Freeze it for 20 mins before cubing for cleaner cuts!
- 1 tbsp olive oil (plus more for cooking) – Helps the seasoning cling. Use avocado oil for higher smoke points during searing.
- 1½ tbsp Gaby’s Everyday Seasoning – My fave shortcut! Swap: Mix 1 tbsp each garlic powder, smoked paprika + 1 tsp black pepper.
- ½ cup unsalted butter – Unsalted lets you control salt levels. Grass-fed adds extra richness!
- 1 shallot, finely chopped – Softer than onion, melts into the sauce. No shallot? Use ¼ cup sweet onion.
- 6 cloves garlic, finely chopped – Non-negotiable! Fresh is best—jarred lacks punch.
- 2 tsp fresh thyme, chopped – Earthy notes cut the butter. Dried works (use 1 tsp), but fresh sings.
- 2 tbsp Worcestershire sauce – Secret umami bomb! For gluten-free, try coconut aminos.
- Kosher salt & cracked black pepper – Season in layers. Kosher salt sticks better than table salt!
- Polenta or mashed potatoes – Sauce sponges! Instant polenta works in a pinch.
Cooking Up Joy: Step-by-Step Perfection
- Pat steak dry + season. Why? Moisture is the enemy of sear! Toss cubes with olive oil and seasoning. Let them chill 10-15 mins—this tenderizes and amps flavor absorption. Chef hack: Use a zip-top bag for mess-free tossing!
- Sear like a pro. Heat a large skillet (cast iron is MVP) over high heat. Add a drizzle of oil. Cook steak in batches—don’t crowd the pan! Crowding = steaming, not browning. Sear 2-3 mins per side until crusty but pink inside (they’ll finish cooking later). Tip: Listen for that fierce sizzle—it’s your cue the pan’s hot enough.
- Butter alchemy time. Reduce heat to medium. Melt butter in the same pan (those browned bits = flavor gold!). Add shallot, garlic, and thyme. Sauté 2-3 mins until golden and fragrant—don’t burn the garlic! Stir constantly. Burnt garlic tastes bitter, and we’re not about that life.
- Bring it home. Stir Worcestershire into the butter. Return steak bites (and any juices!) to the pan. Toss 1-2 mins until coated and heated through. Chef move: Kill the heat just before steak hits medium-rare—residual heat finishes it gently.
The Science Behind the Perfect Sear
There’s something almost magical about the moment steak hits a scorching-hot pan—the furious sizzle, the way the edges curl into a caramelized crust, the aroma that floods the kitchen. But achieving that perfect sear isn’t just luck; it’s science. Let’s break down what’s happening in your skillet and how to master it every time.
The Maillard Reaction: Flavor’s Best Friend
When steak bites hit a hot pan, the amino acids and sugars on the surface undergo the Maillard reaction—a complex chemical process that creates hundreds of new flavor compounds. This reaction starts around 285°F (140°C) and is responsible for that deep, savory crust we crave. Without it, steak would taste bland and boiled, no matter how much seasoning you add.
Pro Tip: Pat your steak cubes bone-dry before seasoning. Excess moisture lowers the pan’s temperature, leading to steaming instead of searing. A paper towel press is your first step to crusty perfection.
The Role of Fat & Smoke Points
Not all oils are created equal. Olive oil adds flavor but has a low smoke point (~375°F), meaning it can burn during high-heat searing. For a foolproof sear, opt for avocado oil (smoke point: 520°F) or ghee (485°F). These fats withstand the heat without turning acrid, ensuring a clean, golden sear.
Common Mistake: Adding butter too early. Butter burns at 350°F, so it’s added later for basting. Start with a high-heat oil, then finish with butter for that rich, nutty depth.
Batch Cooking: Why Crowding is the Enemy
Overloading the pan drops the temperature dramatically, causing meat to release juices and steam instead of sear. For even browning, cook steak bites in a single layer with space between them. If your skillet’s small, work in batches and let it reheat between rounds.
Chef’s Secret: After searing, let steak bites rest on a warm plate (not paper towels—they’ll trap steam and soften the crust). This keeps them juicy while you build the sauce.
Garlic Butter Alchemy – Why This Combo Works
Garlic and butter are a match made in culinary heaven, but there’s an art to balancing them without overpowering the steak. Here’s how to elevate your sauce from good to “I need the recipe!” status.
The Garlic Factor: Fresh vs. Pre-Minced
Fresh garlic is non-negotiable. Jarred garlic lacks the pungent, aromatic oils that infuse the butter with depth. For optimal flavor:
-
Chop, don’t crush. Crushing releases more allicin (garlic’s sharp compound), while chopping gives a mellower, sweeter profile.
-
Cook low and slow. Sauté garlic over medium heat just until golden (~2 minutes). Burnt garlic turns bitter and ruins the sauce.
Flavor Boost: Add a pinch of sugar to the butter as the garlic cooks. It counteracts bitterness and enhances caramelization.
Butter’s Role: More Than Just Fat
Butter isn’t just a carrier for garlic—it’s a flavor amplifier. Unsalted butter lets you control sodium levels, while cultured butter (like European-style) adds tangy complexity. For a next-level twist:
-
Brown your butter. Cook it until the milk solids turn nutty and amber. It adds a toffee-like richness that pairs beautifully with thyme.
-
Emulsify with pan drippings. After searing, deglaze the skillet with a splash of broth or wine before adding butter. This merges the fond (those crispy browned bits) into the sauce.
Acid & Umami: The Secret Weapons
Worcestershire sauce is the stealth MVP here. Its fermented anchovies and tamarind add umami depth without tasting fishy. For a brighter finish:
-
Squeeze of lemon. A teaspoon at the end lifts the heaviness.
-
Capers or pickled shallots. Adds a briny contrast to the butter’s richness.
Pairing & Leftover Wizardry
Beyond Polenta: Unexpected Pairings
While mashed potatoes and polenta are classic, try these creative bases:
-
Crispy Smashed Potatoes: Their craggy edges catch every drop of sauce.
-
Cheesy Grits: Stir in sharp cheddar for Southern vibes.
-
Charred Bread: Grill thick slices of sourdough and pile steak bites on top—open-faced sandwich heaven.
Vegetable Power Moves:
-
Blistered Cherry Tomatoes: Toss them into the skillet post-sear for a burst of acidity.
-
Sautéed Spinach: Wilt it in the residual garlic butter for a one-pan meal.
Leftover Reinventions
Day-old steak bites? Transform them:
-
Breakfast Hash: Fry with diced potatoes, top with a runny egg.
-
Philly Cheesesteak Tacos: Wrap in tortillas with caramelized onions and provolone.
-
Pasta Toss: Fold into fettuccine with Parmesan and a splash of cream.
Storage Tip: Keep steak and sauce separate. Reheat steak gently in the butter sauce to prevent overcooking.
Plating Like a Boss: Comfort in a Bowl
Scoop creamy polenta or mashed potatoes into shallow bowls. Pile steak bites high on top, then drown everything in that sexy garlic butter sauce. Garnish with extra thyme or a crack of black pepper. Pair with a simple arugula salad (lemon vinaigrette cuts the richness) or roasted asparagus. For “wow” factor, serve in a cast iron skillet family-style—let everyone dig in straight from the pan! And please, don’t forget crusty bread for sauce-swiping emergencies.
Mix It Up: Your Recipe, Your Rules
- Spicy Fiesta: Add 1 tsp chili flakes to the butter + finish with lime zest.
- Mushroom Lovers: Sauté 8oz sliced creminis with the shallots. Hello, umami overload!
- Creamy Dreamy: Stir 2 tbsp heavy cream into the sauce at the end for decadence.
- Keto/Paleo: Swap polenta for cauliflower mash. Use ghee instead of butter.
- Surf ‘n’ Turf: Toss in cooked shrimp during the last minute of tossing.
Beau’s Backstage Tips & Confessions
This recipe? It’s my kitchen workhorse. I’ve made it while camping (over a fire pit!), for 20-person potlucks (triple the batch), and yes, even after a few glasses of wine—pro tip: set timers if you’re sipping! Originally, I used ribeye, but sirloin’s wallet-friendly and still delish. One time, I accidentally used salted butter and Worcestershire made it SO salty we laughed and dubbed it “The Ocean Bite.” Lesson learned! Now I taste before adding extra salt. Over the years, I’ve learned the real key is patience with the sear. Don’t rush batches. That crust is your flavor foundation. Also, if you’re feeding garlic fiends? Double the cloves. Always double the cloves.
FAQs: Navigating Steak Bite Triumphs
Q: My steak’s tough! What went wrong?
A: Two culprits: Overcooking or wrong cut. Sirloin should be medium-rare. If it’s chewy, try tenderizing cubes with 1 tbsp pineapple juice (15 mins max!) before seasoning.
Q: Can I use chicken instead?
A: Absolutely! Swap sirloin for chicken thighs (more forgiving). Cook to 165°F internal temp. Bonus: Add rosemary to the butter for poultry vibes.
Q: Sauce broke/separated. Help!
A> Pan was too hot when adding butter. Next time, reduce heat and let pan cool 1 min before melting butter. If it splits, whisk in 1 tsp cold water off-heat to emulsify.
Q: Make-ahead tips?
A: Sear steak bites ahead, then refrigerate. Reheat gently in the butter sauce (don’t boil!). Garlic butter keeps 3 days sealed—just re-melt slowly.
Nutritional Per Serving (Approx)
- Calories: 480
- Protein: 38g
- Fat: 34g
- Carbs: 3g
- Prep: 10 mins | Cook: 15 mins | Serves: 4

Garlic Butter Steak Bites
- Total Time: 25✅ Dry steak well: Moisture prevents searing. Pat dry for best crust. ✅ Batch cook: Overcrowding steams the steak — cook in stages for golden edges. ✅ Sauce rescue: If sauce separates, whisk in 1 tsp cold water off-heat to emulsify. ✅ Want more garlic? Always double the cloves — no judgment here. ✅ Make it creamy: Stir 2 tbsp heavy cream into the butter sauce for extra decadence. mins
Description
Hey friends, Beau here! If your dinner goals include bold flavor, juicy steakhouse vibes, and minimal effort, meet your new obsession: Garlic Butter Steak Bites. Imagine tender sirloin cubes seared to golden perfection, swimming in rich, garlicky, thyme-infused butter — all in under 30 minutes. Serve these beauties over creamy polenta, fluffy mashed potatoes, or straight from the skillet with crusty bread. Perfect for date night, family dinners, or anytime you crave steak without the hassle.
Ingredients
-
2 lbs sirloin steak, cut into bite-sized cubes (freeze 20 mins for easier slicing)
-
1 tbsp olive oil (plus more for searing)
-
1½ tbsp all-purpose seasoning* (see below for DIY version)
-
½ cup unsalted butter
-
1 shallot, finely chopped (or ¼ cup sweet onion)
-
6 garlic cloves, finely chopped
-
2 tsp fresh thyme, chopped (or 1 tsp dried thyme)
-
2 tbsp Worcestershire sauce
-
Kosher salt & cracked black pepper, to taste
Instructions
-
Prep & Season:
Pat steak cubes very dry with paper towels. Toss with olive oil and seasoning mix. Let rest 10–15 minutes for flavor absorption. -
Sear the Steak:
Heat a large cast iron skillet over high heat. Add a drizzle of oil. Sear steak in batches (don’t overcrowd) for 2–3 minutes per side until browned and crusty but pink inside. Transfer to a plate — they’ll finish cooking later. -
Make the Garlic Butter Sauce:
Reduce heat to medium. In the same skillet, melt butter, scraping up browned bits. Add shallot, garlic, and thyme. Sauté 2–3 minutes until fragrant and golden — stir constantly to avoid burning. -
Finish the Steak Bites:
Stir in Worcestershire sauce. Return steak (and juices) to the pan, tossing for 1–2 minutes until coated and heated through. Remove from heat before overcooking. -
Serve:
Pile steak bites over polenta, mashed potatoes, or your favorite base. Spoon extra garlic butter sauce on top. Garnish with fresh thyme or cracked pepper. Pair with a salad or roasted veggies.
Notes
✅ Dry steak well: Moisture prevents searing. Pat dry for best crust.
✅ Batch cook: Overcrowding steams the steak — cook in stages for golden edges.
✅ Sauce rescue: If sauce separates, whisk in 1 tsp cold water off-heat to emulsify.
✅ Want more garlic? Always double the cloves — no judgment here.
✅ Make it creamy: Stir 2 tbsp heavy cream into the butter sauce for extra decadence.
- Prep Time: 10 mins
- Cook Time: 15 mins
Nutrition
- Calories: 480 Cal Per Serving
- Fat: 34g
- Carbohydrates: 3g
- Protein: 38g
Final Thoughts: Why This Recipe Wins
Garlic Butter Steak Bites are more than a meal—they’re a vibe. They’re the dish you make when you want to impress without stress, when a Tuesday feels like it deserves a celebration, or when you need a edible hug after a rough day. The beauty lies in its flexibility: fancy enough for date night, easy enough for a solo Netflix binge, and universally loved by picky eaters and food snobs alike.
So here’s my challenge to you: Make it once as written, then make it yours. Tweak the spices, play with the protein, or drown it in extra garlic (no judgment). Because the best recipes aren’t just about feeding people—they’re about creating moments. And trust me, sizzling steak bites in golden butter? That’s a moment worth repeating.

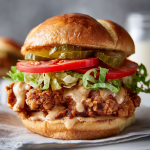
Fried Chicken Sandwich (with Pickle Brine)
Get Ready for the Crispiest, Juiciest, Most Flavor-Packed Fried Chicken Sandwich of Your Life
Hey friends, Beau here from Feastical! Pull up a stool and let’s talk about something serious: fried chicken sandwiches. Not just any sandwich, mind you—we’re crafting a crunchy, tangy, soul-hugging masterpiece that’ll make you forget every dry, bland bird you’ve ever suffered through. Picture this: juicy chicken thighs, marinated in pickle brine until they’re practically singing with flavor, then fried until the crust shatters like golden glass. Top it with cool lettuce, ripe tomato, and a swipe of creamy mayo? Heaven. And if you’re feeling feisty (you should!), we’ll drizzle it with a spicy hot butter sauce that’ll make your taste buds dance. No fancy skills needed—just a love for crispy comfort and maybe a napkin (or three). Let’s turn your kitchen into the best dang sandwich shop in town!
That Time Pickle Juice Saved Dinner (and My Pride)
Okay, confession time: this recipe was born from a happy accident. Years ago, I was hosting a backyard cookout and ran out of buttermilk for my famous fried chicken. Panic mode! All I had was a giant jar of dill pickles staring at me. In a Hail Mary move, I dumped the pickle brine into the marinade, crossed my fingers, and prayed. Friends, when those thighs hit the oil? Magic. The brine didn’t just tenderize—it gave the chicken this zingy, savory depth that had everyone raiding the fry basket. My buddy Jax, mid-bite, mumbled, “Dude, this tastes like Nashville hot chicken’s cooler cousin.” And just like that, my pickle-brine obsession began. Now I always keep a jar in the fridge… partly for sandwiches, partly for emergency brilliance.
Your Fried Chicken Sandwich Toolkit (No Fancy Gear Required!)
Pro tip: Read this whole list before you start—trust me, it’s a game-changer.
- Buttermilk & Pickle Brine (1 cup each): The dynamic duo! Buttermilk tenderizes, while pickle brine (use leftover juice from your dill pickles) adds tangy zing. No buttermilk? Mix 1 cup milk + 1 tbsp lemon juice/vinegar and wait 5 mins.
- Vinegar-Based Hot Sauce (1 tsp): Frank’s or Tabasco work great. Adds brightness, not just heat.
- Garlic Cloves (2, smashed): No need to mince—just crush ’em and let ’em infuse the brine.
- Chicken Thighs (8 boneless, skinless): Thighs stay juicier than breasts when fried. For a leaner swap, use chicken cutlets (pound ’em thin!).
- Flour + Cornstarch (1¾ cups + ¾ cup): Cornstarch = ultra-crisp magic. Swap with potato starch if needed.
- Spices (Onion powder, paprika, cayenne, garlic powder): Your flavor backbone! Smoked paprika adds a fun twist.
- Oil for Frying (3 cups): Peanut or vegetable oil handles high heat best. Chef hack: Save used oil in a jar—filter it through cheesecloth for next time!
- Hot Butter Sauce Ingredients (optional but life-changing): Butter, brown sugar, cayenne, etc. (full list above). Skip if you’re spice-shy, but I double-dog dare ya.
Let’s Fry Like Legends: Step-by-Step with Beau’s Best Hacks
Step 1: Brine Like It’s Summer Camp
Mix buttermilk, pickle brine, hot sauce, and smashed garlic in a bowl. Add chicken thighs, cover, and refrigerate at least 2 hours (overnight = MVP move). Why? The acidity tenderizes, while the salt seasons deep into the meat. Hack: Use a ziplock bag—less mess, more marinade contact!
Step 2: Dredge Like You Mean It
Whisk all dredge ingredients (flour, cornstarch, spices) in a shallow dish. Remove chicken from brine—shake off excess but DON’T rinse. Pat very dry with paper towels (wet chicken = soggy crust!). Dredge each piece, pressing the flour mix into every nook. Pro move: Double-dredge for extra crunch! Dip back in brine, then flour again.
Step 3: Fry to Golden Glory
Heat oil in a heavy pot (like Dutch oven) to 350°F (175°C). Use a thermometer—temp is non-negotiable. Too cool = greasy; too hot = burnt outside, raw inside. Fry 3-4 thighs at a time (don’t crowd!). Cook 6-8 mins until deep golden and internal temp hits 165°F. Drain on a wire rack over paper towels—never a plate (steam = soggy bottom!).
Step 4: Spicy Butter Sauce (Optional Fireworks)
While chicken rests, melt butter, oil, brown sugar, honey, cayenne, hot sauce, and spices in a saucepan. Simmer 2 mins until glossy. Brush generously over hot chicken. Warning: This stuff is addictive—make extra for fries!
Step 5: Build Your Masterpiece
Toast buns lightly in a skillet (10 secs per side!). Schmear mayo on both halves, then layer lettuce, tomato, pickles, and that glorious chicken. Crown it with the top bun and press gently—you want that crunch to sing!
How to Serve It: Go Full Diner Mode
Slide these bad boys onto checkered paper or a rustic board—messy is mandatory! Pair with cold beer, sweet tea, or a zesty cucumber salad to cut the richness. Extra pickles on the side? Obviously. And napkins. So many napkins.
The Science Behind the Perfect Fried Chicken Sandwich
Ever wonder why some fried chicken sandwiches are life-changing while others are just… meh? It all comes down to science—yes, even comfort food has rules. Let’s break down the key elements that make Beau’s sandwich a crispy, juicy masterpiece.
1. The Brine: Flavor & Moisture Lockdown
Pickle brine isn’t just a quirky hack—it’s a powerhouse. The acidity (from vinegar) breaks down muscle fibers, tenderizing the chicken, while the salt ensures deep seasoning. Buttermilk adds lactic acid, which further tenderizes and adds richness. Together, they create a juicy, flavorful base that plain saltwater brines can’t match.
Pro Tip: If you’re short on time, even a 30-minute brine helps. But for maximum impact, overnight is king.
2. The Dredge: Engineering the Crispiest Crust
The flour-cornstarch blend isn’t arbitrary. Cornstarch has finer particles than flour, creating a delicate, ultra-crisp texture. The double-dredge method (wet → dry → wet → dry) builds a thicker, craggier crust that shatters beautifully.
Why It Works:
-
First flour layer: Acts as glue for the wet brine.
-
Second dip: Adds more liquid for extra flour to cling to.
-
Cornstarch: Prevents gluten overdevelopment (which can make crust tough).
3. The Fry: Temperature is Everything
Oil at 350°F (175°C) is the sweet spot. Too low? Greasy, soggy chicken. Too high? Burnt outside, raw inside. A heavy pot (like cast iron) maintains steady heat, while a wire rack prevents sogginess by letting steam escape.
Bonus Hack: After frying, rest the chicken on a rack in a 200°F (95°C) oven to keep it warm and crisp while you prep the rest.
The Art of Balancing Flavors & Textures
A great sandwich isn’t just about the chicken—it’s a symphony of contrasts. Here’s how to nail every layer.
1. The Chicken: Bold & Zesty
The pickle brine and hot sauce in the marinade add tang and heat, while the fried crust brings salt and crunch. The hot butter sauce (if using) adds sweetness and spice—balancing the richness of the mayo.
Flavor Hack: Add 1 tsp MSG to the dredge for next-level savoriness (don’t knock it till you try it).
2. The Toppings: Fresh & Cool
-
Lettuce: Iceberg for crunch or butter lettuce for tenderness.
-
Tomato: Thick slices, salted lightly to enhance juiciness.
-
Pickles: Dill for brightness or bread-and-butter for sweetness.
-
Mayo: Duke’s or Kewpie for creaminess (or mix mayo with a bit of brine for extra tang).
Pro Move: Toast the bun in chicken fat (saved from frying) instead of butter for insane flavor.
3. The Bun: Structure Matters
A soft brioche or potato bun holds up to juiciness without disintegrating. Toasting is non-negotiable—it prevents sogginess and adds a slight crispness.
Gluten-Free? Use a sturdy GF bun or even a thick lettuce wrap for a low-carb twist.
Troubleshooting Common Fried Chicken Disasters
Even pros run into issues. Here’s how to fix (or avoid) them.
1. Soggy Crust
Causes:
-
Not patting chicken dry before dredging.
-
Overcrowding the fryer (lowers oil temp).
-
Letting fried chicken sit on a plate (steam softens it).
Fix: Drain on a wire rack, not paper towels. If reheating, use an oven or air fryer—never a microwave.
2. Bland Chicken
Causes:
-
Skipping the brine or under-seasoning the flour.
-
Not salting toppings (tomatoes, lettuce).
Fix: Season every layer—add salt to the brine, dredge, and even a pinch on the tomatoes.
3. Burnt or Uneven Cooking
Causes:
-
Oil too hot (or not using a thermometer).
-
Chicken pieces too thick.
Fix: Use a deep-fry thermometer and pound thighs to even thickness if needed.
4. Greasy Chicken
Causes:
-
Oil too cold (chicken absorbs oil instead of frying).
-
Not letting oil reheat between batches.
Fix: Maintain 350°F and fry in small batches.
Shake It Up: 5 Tasty Twists
1. Nashville Hot: Double the cayenne in the sauce and add 1 tsp chili powder.
2. Gluten-Free: Swap flour/cornstarch for 1:1 GF flour + extra cornstarch.
3. Korean BBQ: Replace brine with gochujang-spiked buttermilk. Top with kimchi slaw!
4. Breakfast Sammy: Add a fried egg and swap mayo for sriracha aioli.
5. Vegan Hack: Use thick cauliflower steaks or marinated tofu. Brine works wonders!
Beau’s Backstage Notes: The Evolution of a Legend
This recipe’s been through more makeovers than my hair in the 90s! Originally, I skipped the brine—big mistake. Then I tried brining breasts… cue sad, dry chicken. Thighs? Game-changer. The hot butter sauce was born after a wild night experimenting with bourbon-infused honey (don’t ask). Funny story: My dog, Biscuit, once stole a thigh off the counter. He gave me this look like, “Worth it.” Can’t blame him. Moral? Embrace the chaos. Cook with joy, taste as you go, and always brine your chicken!
FAQs: Let’s Solve Your Sandwich Woes
Q: Why is my crust falling off?
A: You didn’t pat the chicken dry! Moisture = flour glue failure. Dry it like a desert. Also, let dredged chicken rest 5 mins before frying—it helps the coating stick.
Q: Can I air-fry this?
A: Sure! Spray dredged chicken with oil, air-fry at 400°F for 12-15 mins (flip halfway). But… it won’t be quite as shatteringly crisp. Fried is love, fried is life.
Q: Help! My oil temp keeps dropping.
A: Frying too many pieces at once! Keep it to 3-4 thighs max. Let oil rebound to 350°F between batches. And use a heavy pot—it holds heat better.
Q: How long does leftover chicken keep?
A: Eat it fresh—seriously. But if you must, store un-sauced chicken in the fridge (2 days max). Reheat in a 400°F oven for 10 mins to revive crispness. Microwaving = sadness.
Nutritional Snapshot (Per Sandwich)
Calories: ~620 | Protein: 32g | Carbs: 38g | Fat: 38g
Note: Includes hot butter sauce & mayo. Skip sauce to save ~150 calories.
Fried Chicken Sandwich (with Pickle Brine)
- Total Time: About 2.5 hours
Description
Hey friends, Beau here from Feastical! If you crave the crispiest, juiciest, most flavor-packed fried chicken sandwich ever, you’re in the right place. Tender chicken thighs soak up tangy pickle brine, then get coated in a perfectly seasoned flour-cornstarch crust and fried until golden-crunchy perfection. Top it with fresh lettuce, ripe tomato, mayo, and if you dare — a spicy hot butter sauce that makes your taste buds dance. No fancy tools, no fuss — just pure sandwich joy. Let’s get frying!
Ingredients
For the Brine & Chicken:
-
1 cup buttermilk (or 1 cup milk + 1 tbsp lemon juice, rested 5 mins)
-
1 cup pickle brine (leftover juice from dill pickles)
-
1 tsp vinegar-based hot sauce (Frank’s or Tabasco)
-
2 garlic cloves, smashed
-
8 boneless, skinless chicken thighs
For the Dredge:
-
1¾ cups all-purpose flour
-
¾ cup cornstarch (or potato starch)
-
1 tsp onion powder
-
1 tsp smoked paprika
-
½ tsp cayenne pepper (adjust to taste)
-
1 tsp garlic powder
-
Salt & pepper to taste
For Frying:
-
3 cups peanut or vegetable oil
Optional Hot Butter Sauce:
-
¼ cup butter
-
1 tbsp oil
-
1 tbsp brown sugar
-
1 tbsp honey
-
1 tsp cayenne pepper
-
1 tsp vinegar-based hot sauce
-
Pinch of smoked paprika
To Assemble:
-
Toasted sandwich buns
-
Mayonnaise
-
Leafy lettuce
-
Sliced tomato
-
Dill pickle slices
Instructions
-
Brine the chicken: In a large bowl or ziplock bag, combine buttermilk, pickle brine, hot sauce, and smashed garlic. Add chicken thighs, seal, and refrigerate for at least 2 hours or overnight. This tenderizes and infuses flavor.
-
Mix dredge: In a shallow dish, whisk together flour, cornstarch, spices, salt, and pepper.
-
Prepare for frying: Remove chicken from brine, shaking off excess (don’t rinse!). Pat very dry with paper towels for a crisp crust.
-
Dredge chicken: Coat each thigh in flour mixture, pressing to adhere well. For extra crunch, double-dredge: dip back into brine then flour again.
-
Heat oil: In a heavy pot or Dutch oven, heat oil to 350°F (175°C). Use a thermometer for accuracy.
-
Fry chicken: Fry 3-4 thighs at a time, avoiding crowding. Cook 6-8 minutes until golden brown and internal temp reaches 165°F. Drain on a wire rack set over paper towels.
-
Make hot butter sauce (optional): In a small saucepan, melt butter and oil. Stir in brown sugar, honey, cayenne, hot sauce, and paprika. Simmer 2 minutes until glossy. Brush sauce over hot chicken.
-
Assemble sandwiches: Lightly toast buns. Spread mayo on both halves, layer lettuce, tomato, pickles, then chicken. Top with bun and press gently.
Notes
-
Pat dry, pat dry, pat dry! Moisture kills crunch.
-
Double dredge for max crunch. Dip back into brine before second flour coat.
-
Use a heavy pot and thermometer. Stable oil temp = crispy, not greasy.
-
Don’t overcrowd the pan. Fry in batches for best results.
-
Leftover oil? Strain and save for next fry session.
-
Make it spicy: Double cayenne or add chili powder to dredge.
-
Air fryer option: Spray coated chicken with oil, air-fry at 400°F for 12-15 minutes, flipping halfway.
- Prep Time: 15 mins (plus 2+ hrs brining)
- Cook Time: 20 mins
Nutrition
- Calories: 620 Cal Per Sandwich with sauce & mayo
- Fat: 38g
- Carbohydrates: 38g
- Protein: 32g
Final Thoughts: Why This Sandwich Will Ruin All Others for You
Once you’ve had a perfectly brined, double-dredged, hot-sauced fried chicken sandwich, there’s no going back. It’s the kind of meal that turns a random Tuesday into a celebration. The beauty of this recipe? It’s forgiving. Forgot the buttermilk? Use yogurt. No pickle juice? Try lemon brine. Want it spicier? Double the cayenne.
At its core, this sandwich is about joy—the kind that comes from crispy, juicy, messy bites shared with people you love (or happily devoured solo). So grab that jar of pickles, heat up the oil, and let’s make some magic.
Loved this recipe? Save it for later!
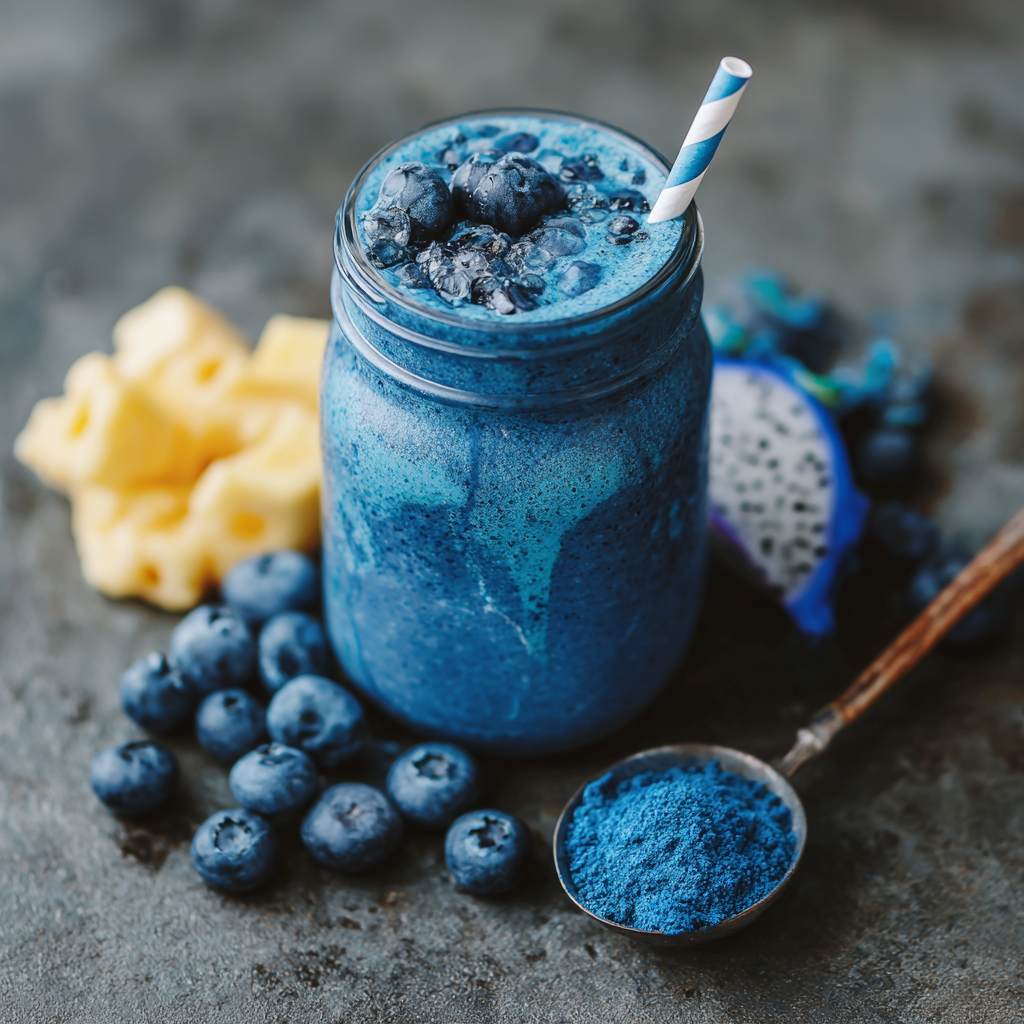
Blue Spirulina Protein Smoothie
Wake Up Your Mornings with Liquid Sunshine
Hey foodie friends! Beau here from Feastical, coming at you with a blender full of pure joy. You know that moment when you need breakfast to be three things at once: lightning-fast, crazy-nutritious, and downright gorgeous? That’s exactly why I created this electric-blue dream of a smoothie. Imagine sipping on a tropical lagoon that secretly moonlights as a protein powerhouse – that’s our Blue Spirulina Protein Smoothie! We’re talking creamy banana hugs, berry high-fives, and a superhero boost from blue spirulina that’ll make your Instagram feed pop while flooding your body with antioxidants. Whether you’re rushing to a meeting or savoring a slow Saturday, this five-minute wonder turns “blah” mornings into “heck yes!” moments. And trust me – that vibrant color? It’s 100% natural magic that’ll make you feel like you’re drinking liquid sunshine. Let’s make your taste buds dance!
My Bahama-Blue “Aha!” Moment
Picture this: It’s 6 AM in my tiny Miami apartment kitchen, humidity already cranked to “sauna mode.” I’m staring at sad oatmeal, wishing breakfast could feel more like vacation. Then I remember the pitaya bowl I’d obsessed over at a beach shack last week – that crazy-bright pink! But here’s the twist: my local market was fresh out of dragonfruit. Cue my chef-curiosity kicking in. I started riffing with what I had: frozen blueberries for sweetness, lemon for zing, and this intriguing blue powder my yoga teacher swore by. When that blender whirred to life? Friends, I swear angels sang. The color was pure Caribbean sea meets Van Gogh painting. First sip transported me right back to salty breezes and palm trees. Now, this blue beauty’s my daily ritual – a mini-vacation in a glass that reminds me food should be as fun as it is nourishing. Who knew a color could taste so happy?
Your Grocery List of Good Vibes
- 1 banana (fresh or frozen): Our creamy backbone! Frozen gives that milkshake thickness. Chef hack: Peel/brown bananas? Chop and freeze them in bags for smoothie emergencies.
- ½ cup blueberries: Bursting with antioxidants and subtle sweetness. Swap with blackberries or raspberries if your fridge rebels.
- Juice of ½ lemon: Brightens all flavors and balances sweetness. No fresh? 1 tsp bottled works – but fresh is zingier!
- 1 tsp omega-3 oil or flaxseed oil: Secret brain-booster! Avocado oil works too. Pro tip: Store in fridge to prevent fishy aftertaste.
- ½ cup dragon fruit (pitaya): Gorgeous color and mild kiwi-like flavor. Find it frozen in smoothie packs! Skip it? Add ¼ cup extra banana.
- 1 scoop vanilla protein powder: Muscle-loving base. Vegan? Use pea protein. Allergic? Try collagen peptides.
- ½ tsp blue spirulina powder: Our star! Packed with B12 and antioxidants. Warning: A little goes far – it’s potent stuff!
- ¾ cup water or milk of choice: Almond milk makes it creamier; coconut water adds tropical vibes. Adjust for your perfect thickness.
- Ice cubes (optional): For frosty sippers. Already using frozen fruit? Skip it!
Blender Therapy: Let’s Get Smooth(ie)!
- Prep Party: Grab your blender – high-speed works best for that silky texture. Toss in banana chunks first (frozen ones love to hug the blade!). Chef secret: Add liquids BEFORE powders to prevent clumping disasters!
- Liquid Love: Pour in water/milk first – it creates a whirlpool effect for smoother blending. If using flax oil, add it now so it emulsifies beautifully.
- Powder Power: Sprinkle protein powder and spirulina evenly over liquids. Hack alert: Tap the blender jar to settle powders away from the sides!
- Fruit Fiesta: Pile in blueberries, dragon fruit, lemon juice, and ice (if using). Want Instagram stripes? Reserve 1 tsp spirulina!
- Blend Ballet: Start LOW for 10 seconds (saves your blender’s motor!), then rocket to HIGH for 45-60 seconds. Watch magic happen: It’ll turn from purple to vibrant blue as spirulina activates!
- Texture Check: Pause. Scrape sides if needed. Too thick? Add liquid 1 tbsp at a time. Too thin? More frozen fruit or ice.
- Final Whirl: Blend another 15 seconds until it’s smoother than a jazz sax solo. Listen for that creamy “whoosh” – no ice chunks allowed!
The Science Behind the Superfood: Why Blue Spirulina is a Game-Changer
If you’ve ever wondered how a single ingredient can turn an ordinary smoothie into a nutrient-packed, Insta-worthy masterpiece, let’s talk blue spirulina. Unlike its green cousin (which has a stronger, earthier taste), blue spirulina is extracted from algae and purified to retain only the brightest, most vibrant blue pigment—phycocyanin. This compound isn’t just for show; it’s a potent antioxidant that fights inflammation, supports immune function, and may even boost brain health.
Why It’s Worth the Hype
-
No Fishy Taste: Unlike green spirulina, blue spirulina is virtually flavorless, so you get all the benefits without the “ocean floor” aftertaste.
-
Natural Food Coloring: Forget artificial dyes—this plant-based powder gives your smoothie that surreal blue lagoon hue naturally.
-
Protein Punch: Spirulina is about 60% protein by weight and contains all essential amino acids, making it a favorite among vegans and athletes.
But Does It Really Work?
Studies suggest spirulina may help lower cholesterol, reduce oxidative stress, and even combat allergies. The B12 content (a rare find in plant-based foods) makes it a go-to for energy support. Pro tip: Pair it with vitamin C-rich ingredients (like lemon in this recipe) to enhance iron absorption!
Where to Find It
Look for 100% pure blue spirulina powder at health food stores or online. A little goes a long way—just ½ tsp per serving. Store it in a cool, dark place to preserve its potency.
Smoothie Bowls vs. Drinking Smoothies: Which Wins?
The eternal debate: sip or spoon? While this recipe is designed as a drink, let’s break down the pros and cons of each style to match your mood.
Smoothie Bowls (The Instagram Darling)
-
Texture: Thicker, almost like soft-serve ice cream. Achieve this by reducing liquid to ½ cup and adding a splash more frozen fruit.
-
Toppings Galore: Load up with granola, chia seeds, coconut flakes, or fresh berries for crunch and extra nutrients.
-
Slow Down: Eating with a spoon encourages mindfulness, making it perfect for leisurely weekends.
Drinking Smoothies (The On-the-Go Hero)
-
Speed: Ready in 5 minutes and portable—ideal for busy mornings.
-
Hydration Boost: More liquid content helps with hydration, especially if you use coconut water or almond milk.
-
Less Mess: No topping avalanches to clean up!
Pro Tip: Use the same recipe for both! For bowls, blend thicker and pour into a shallow dish. For drinks, add an extra ¼ cup liquid.
The Psychology of Color: How Blue Food Boosts Your Mood
Did you know the color of your food can influence how you feel? Blue is rare in nature (outside of blueberries and some fish), so our brains associate it with novelty and excitement. Here’s why this smoothie does more than fill your stomach:
1. The “Happy Plate” Effect
Research shows vibrant-colored meals increase perceived flavor and satisfaction. That electric blue makes every sip feel like a treat, even though it’s packed with nutrients.
2. Mindful Eating
Unusual colors slow us down, making us more present. You’re less likely to chug this smoothie mindlessly while scrolling through emails.
3. The Blue-Appetite Myth
While blue plates are said to suppress appetite (hence their use in diet programs), naturally blue foods like this smoothie defy that rule by pairing the color with sweet, familiar flavors (banana, berries).
Fun Experiment: Serve this smoothie in a white cup vs. a clear glass. Notice how the color pops more in clear glassware, enhancing the experience!
Serve It Like Sunshine
This beauty deserves a stage! Pour into a clear glass or mason jar to show off that electric blue hue. Garnish with a dragon fruit slice on the rim or a sprinkle of coconut flakes. For serious wow factor, make “smoothie stripes”: blend everything except ½ tsp spirulina first, then pour ¾ into glasses. Mix reserved spirulina with 2 tbsp smoothie, then gently swirl on top. Pop in a reusable metal straw – it’s sippable art! Best enjoyed immediately while frosty. Pair with morning podcasts or a porch swing for full bliss effect.
Shake Up Your Sip: 5 Tasty Twists
- Tropical Escape: Swap blueberries for ¼ cup mango + ¼ cup pineapple. Add lime instead of lemon!
- Berry Bliss: Use mixed berries instead of blueberries. Top with fresh raspberries post-blend.
- Green Machine: Add 1 cup spinach (trust me, you won’t taste it!) + swap water for green tea.
- Creamy Dream: Replace water with coconut milk + add ¼ avocado. Like drinking velvet!
- Spice It Up: Add ¼ tsp ginger or turmeric for an anti-inflammatory kick.
Beau’s Blender Confessions
Okay, real talk: my first spirulina batch looked like swamp water. I’d dumped in a FULL tablespoon – rookie mistake! The taste was… aggressively oceanic. Lesson learned: measure that blue gold carefully! Now I keep a dedicated “smoothie spoon” in my spirulina jar. Another evolution? I started using frozen dragon fruit puree packets after my fresh pitaya experiments led to a fuchsia kitchen counter (that stuff stains!). Funny story: My dog, Biscuit, now associates the blender sound with “possible blue mustache cleanup duty.” He sits waiting like it’s his job! Pro tip: Double the batch and freeze leftovers in popsicle molds – instant healthy fudgsicles!
Smoothie SOS: Fixing Common Hiccups
Q: Help! My smoothie tastes like pond scum.
A: Whoops – likely too much spirulina! Stick to ½ tsp max. Balance it with an extra squeeze of lemon or a pitted date for sweetness.
Q: Why isn’t it bright blue? Mine looks purple/gray.
A: Blame the blueberries! Their purple pigments can dominate. Solution: Use fewer berries or add 1 tsp extra spirulina. Also, blend longer – color deepens over 20 seconds!
Q: Can I make this ahead?
A> Absolutely! Store in airtight jars for up to 24 hours. Separation is normal – just shake or re-blend. Add fresh lemon juice before serving to brighten flavors.
Q: My protein powder won’t blend – gritty city!
A: Two tricks: 1) Add liquids FIRST, then powders. 2) If using plant-based powders, blend with liquid alone for 10 sec before adding fruit. Game-changer!
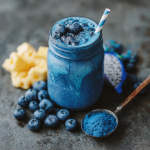
Blue Spirulina Protein Smoothie
- Total Time: 5 minutes
Description
Hey foodie friends! If you need breakfast that’s lightning-fast, super nutritious, and dazzlingly colorful, this Blue Spirulina Protein Smoothie is your new best friend. It’s creamy, tropical, and packed with antioxidants plus a protein punch to power your day. Whether you’re dashing out the door or enjoying a relaxed weekend morning, this 5-minute smoothie turns blah into “heck yes!” moments with every sip.
Ingredients
-
1 banana (fresh or frozen)
-
½ cup blueberries (fresh or frozen)
-
Juice of ½ lemon (about 1 tbsp)
-
1 tsp omega-3 oil (flaxseed, avocado, or similar)
-
½ cup frozen dragon fruit (pitaya) — or substitute extra banana if unavailable
-
1 scoop vanilla protein powder (vegan or collagen options work)
-
½ tsp blue spirulina powder
-
¾ cup water or milk of choice (almond, coconut water, oat milk)
-
Ice cubes (optional)
Instructions
-
Layer liquids first: Pour water or milk into your blender.
-
Add oils and powders: Add omega-3 oil, protein powder, and blue spirulina. Tap the jar lightly to settle powders away from the sides.
-
Add fruit: Toss in banana chunks, blueberries, dragon fruit, and lemon juice. Add ice if you want it extra frosty.
-
Blend: Start blending on low for 10 seconds, then ramp up to high for 45–60 seconds. The smoothie will change from purple to electric blue!
-
Adjust texture: Pause, scrape sides, and add more liquid if needed. Blend again 10–15 seconds until creamy smooth.
-
Serve: Pour into a clear glass or mason jar. Garnish with a dragon fruit slice or coconut flakes for extra flair. Sip immediately!
Notes
-
Frozen bananas: Keep ripe bananas peeled and chopped in the freezer for ready-to-go smoothie bases.
-
Avoid clumps: Always add liquids before powders for smooth blending.
-
Color fix: If your smoothie looks purple or gray instead of blue, add a little more spirulina and blend longer.
-
Flavor balance: A squeeze of fresh lemon brightens flavors and cuts any bitterness from spirulina.
-
Storage: Make ahead? Store in airtight jars up to 24 hours. Shake or re-blend before drinking.
- Prep Time: 2 minutes
- Cook Time: 3 minutes
Nutrition
- Calories: 210 Cal Per Serving
- Fat: 6 g
- Carbohydrates: 18 g
- Fiber: 4 g
- Protein: 15 g
Fuel Facts (Per Serving)
Calories: 210 | Protein: 15g | Carbs: 18g | Fiber: 4g | Fat: 6g
Superstar nutrients: Antioxidants (hello, spirulina + berries!), Vitamin B12, Omega-3 fatty acids, Potassium. This sip delivers sustained energy without sugar crashes!
Final Thoughts
This Blue Spirulina Protein Smoothie isn’t just a meal—it’s a mood-lifting, energy-boosting ritual. From the science-backed benefits of spirulina to the playful psychology of color, every element is designed to make healthy eating joyful. Whether you’re team bowl or team sippy cup, this recipe adapts to your lifestyle without sacrificing nutrition or flavor. So next time you’re stuck in a breakfast rut, remember: a burst of blue might be the reset button you need. Now, go blend up some sunshine!
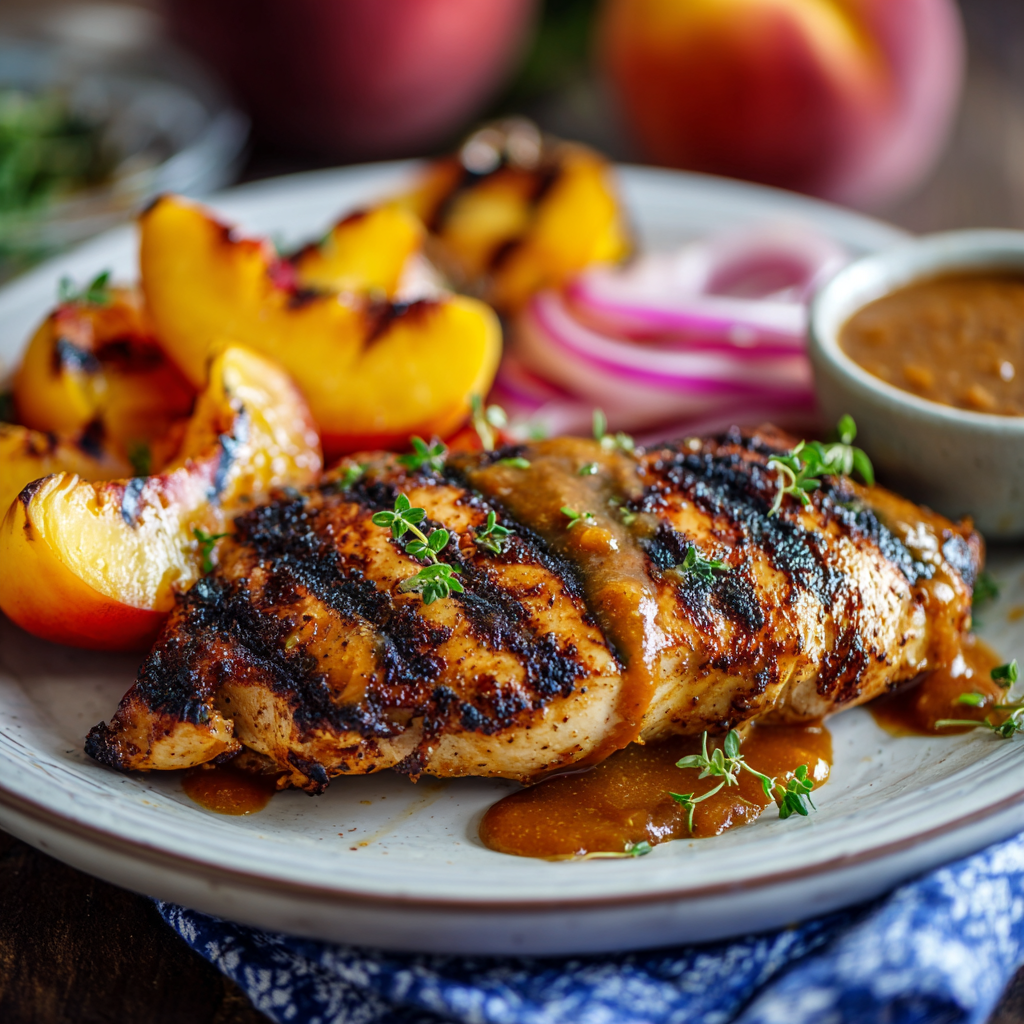
Grilled Peach BBQ Chicken with Chipotle Peach Sauce
Fire Up the Flavor: Grilled Peach BBQ Chicken That Tastes Like Summer Magic
Hey friends, Beau here from Feastical! If your grill’s been whispering sweet nothings to you lately, I’ve got the answer to those smoky daydreams: **Grilled Peach BBQ Chicken with Chipotle Peach Sauce**. Picture this: juicy chicken kissed by fire, slathered in a sauce that’s equal parts sticky-sweet sunshine and smoky-spicy sass. It’s like summer vacation on a plate, and trust me—your spatula’s about to become your new best friend.
We’re talking about that magical moment when ripe peaches hit the flames, caramelizing into jammy perfection before blitzing into a bold BBQ sauce that’ll make store-bought bottles weep. The chipotle peppers? They’re not just heat—they’re that deep, soulful hum that turns “yum” into “OH. YES.” Perfect for lazy Sunday cookouts, Tuesday night escapes, or whenever you need a flavor vacation. Ready to make your grill the neighborhood superstar? Let’s dive in!
How a Rotten Peach Pit Started My BBQ Obsession
Okay, confession time: This recipe was born from a near-disaster. Picture 19-year-old me at my first apartment grill party. I’d bought gorgeous peaches for dessert… only to realize one had a secret rotten spot. Panicking, I chucked the “good” half on the grill to salvage it. The smell of caramelizing peach stopped me mid-freakout. On impulse, I mashed it into my sad bottled BBQ sauce. The result? My buddy Carlos took one bite of the glazed chicken and yelled, “Dude, you’ve been holding out on us!” That smoky-sweet Frankenstein sauce became our summer obsession. Now, years later, I’ve perfected that happy accident into the silky, spicy masterpiece we’re making today. Funny how kitchen “oops” moments become family legends, right?
Your Flavor Toolkit: Simple Ingredients, Big Personality
Grab these pantry heroes—each one’s a team player:
For the Chicken:
- 2 lbs boneless, skinless chicken breasts or thighs → Thighs = juicier! Breasts = leaner. Both rock.
- 1 tsp chili powder → Adds earthy warmth. Smoked paprika works too!
- 1 tsp garlic powder → Our umami anchor. Fresh minced garlic? Yes, but reduce to 2 cloves.
- ½ tsp paprika → Sweet or smoked—your flavor call. Smoked = extra campfire vibes!
- Kosher salt & black pepper → Season like you mean it—about 1 tsp salt, ½ tsp pepper.
- Avocado oil → Grill’s BFF (high smoke point!). Canola or grapeseed oil sub great.
For the Chipotle Peach BBQ Sauce:
- 1 medium peach, halved & pitted → Ripe but firm! No peaches? Canned in juice (drained) work.
- ½ small yellow onion → Grilling it unlocks crazy sweetness. White onion works in a pinch.
- 3 chipotle peppers in adobo sauce → Spice MVP! Start with 2 if heat-shy. Save leftover peppers + sauce in a jar!
- ⅓ cup brown sugar → Balances acidity. Maple syrup or honey? Absolutely—use ¼ cup.
- ¼ cup apple cider vinegar → Tangy backbone. White vinegar subs, but ACV’s fruitiness shines.
- ¼ cup ketchup → Our sweet-tart base. Tomato paste + 1 tbsp maple syrup works too.
- 2 tsp Worcestershire sauce → Secret umami bomb. Vegan? Use coconut aminos.
- Kosher salt & black pepper → Always taste before adding! Sauce needs about ½ tsp salt.
Let’s Get Grilling: Juicy Chicken, No Guesswork Required
Step 1: Fire up that grill to medium-high (400°F). Brush grates with avocado oil—pro move: use tongs + folded paper towel dipped in oil. Prevents flare-ups!
Step 2: Pat chicken DRY (crucial for sear!). Rub with spices. Chef’s hack: Toss chicken with 1 tbsp oil first—helps spices cling!
Step 3: Grill chicken 5–6 minutes per side. Don’t peek! Flipping once = epic grill marks. Chicken’s done at 165°F.
Step 4: While chicken cooks, grill peach halves + onion cut-side down until charred (about 4 minutes). Watch peaches—they caramelize FAST!
Step 5: In a blender, combine grilled peach, onion, chipotles, brown sugar, vinegar, ketchup, Worcestershire, salt, and pepper. Blend until smoother than your favorite playlist. Texture tip: Add 1 tbsp water if too thick!
Step 6: In the last 2 minutes of grilling, brush chicken generously with sauce. Double-glaze: Brush, wait 60 secs, brush again. Sticky perfection!
Step 7: Pull chicken off grill. REST 5 minutes (patience = juiciness!). Serve with extra sauce for dipping. Sauce too spicy? Stir in 1 tsp honey to mellow.
The Science Behind the Sizzle: Why This Recipe Works
Grilling isn’t just about slapping meat on flames—it’s a dance of chemistry, timing, and texture. Let’s break down why this Grilled Peach BBQ Chicken is foolproof and packed with flavor.
1. The Maillard Reaction: Where Magic Happens
When chicken hits a 400°F grill, the sugars and proteins on its surface undergo the Maillard reaction—the same process that turns toast golden and sears steaks. This creates hundreds of new flavor compounds, adding depth to every bite. Rubbing the chicken with oil first ensures even browning, while the sprinkle of sugar in the BBQ sauce amplifies caramelization during the final glaze.
2. Fruit Enzymes & Tenderness
Peaches aren’t just for sweetness; they contain enzymes (like pectinase) that gently break down proteins. In the sauce, these enzymes help soften the chicken’s surface, letting the smoky-spicy flavors penetrate deeper. Grilling the peaches first intensifies their natural sugars, balancing the heat from chipotles.
3. Fat = Flavor Carrier
Thighs trump breasts here because their higher fat content keeps them juicy, but the real MVP is the sauce’s oil-soluble compounds (like capsaicin in chipotles and allicin in garlic). Blending grilled onions and peaches with vinegar and oil emulsifies the sauce, ensuring it clings to the chicken instead of sliding off.
4. The Resting Rule
Skipping the 5-minute rest? Big mistake. As chicken rests, its fibers reabsorb juices redistributed by heat. Cut too soon, and those precious fluids end up on your plate instead of in your bite.
Pro Tip: For extra-tender chicken, brine it for 30 minutes (1 tbsp salt + 1 cup water) before grilling. Even breasts stay succulent!
From Backyard to Gourmet: Elevating Your Presentation
This dish deserves more than a paper plate! Here’s how to turn smoky, sticky chicken into a showstopper.
The Plating Playbook
-
Rustic Charm: Slice chicken diagonally and fan it over a slate board. Drizzle sauce in zigzags, then scatter with microgreens for a pop of color.
-
Family-Style Feasts: Pile whole thighs on a platter with grilled peaches (halved), charred lemon wedges, and fresh thyme sprigs. Serve sauce in a hollowed-out peach for whimsy.
-
Salad Integration: Thinly slice leftover chicken and toss with arugula, goat cheese, and a peach vinaigrette (blend 1 grilled peach, 2 tbsp olive oil, 1 tbsp vinegar).
Sidekick Stars
-
Grilled Corn & Zucchini Ribbons: Toss with olive oil, salt, and a pinch of smoked paprika. Grill alongside the chicken.
-
Buttermilk Coleslaw: The cool creaminess cuts through the heat. Add diced peaches for sweetness.
-
Cornbread Croutons: Cube day-old cornbread, toast in a skillet with butter, and sprinkle over slaw.
Sauce as a Centerpiece
-
Dipping Station: Offer three sauces—original chipotle peach, a cooled yogurt version (mix ½ cup Greek yogurt + 2 tbsp sauce), and a spicy bourbon reduction (simmer sauce with 1 oz bourbon).
-
Edible Garnishes: Top chicken with quick-pickled jalapeños (soak in vinegar + sugar for 10 mins) or crispy fried shallots.
Pro Tip: Chill plates for cold sides (like slaw), but serve chicken on warm plates to keep the sauce glossy.
Beyond Chicken: Creative Uses for Chipotle Peach Sauce
This sauce is too good to limit to poultry! Here are 5 unexpected ways to use it:
1. Glazed Pork Belly Bites
Cube pork belly, roast at 375°F until crispy, then toss in warmed sauce. Skewer with grilled pineapple chunks for a sweet-heat appetizer.
2. BBQ Peach Pizza
Spread sauce on pizza dough, top with smoked mozzarella, red onions, and shredded chicken. Post-bake, add fresh basil and peach slices.
3. Stuffed Sweet Potatoes
Bake potatoes, fluff the insides with butter, then load with black beans, pulled pork, and a generous drizzle of sauce.
4. Breakfast Upgrade
-
Eggs Benedict: Swap hollandaise for warmed sauce over poached eggs and Canadian bacon.
-
Avocado Toast: Mix sauce into mashed avocado, top with fried eggs and cilantro.
5. Cocktail Mixology
-
Spicy Peach Margarita: Muddle 2 tbsp sauce with lime juice, tequila, and ice. Rim glass with chili salt.
-
BBQ Bloody Mary: Stir 1 tbsp sauce into your mix, garnish with bacon and pickled veggies.
Storage Hack: Freeze sauce in ice cube trays for portioned use. Toss a cube into stir-fries or melt over grilled salmon.
Plating Like a Pro: Where This Chicken Shines
Slide those glazed beauties onto a rustic wooden board or chilled plates (hot chicken = wilted greens!). Pile high with grilled corn + zucchini ribbons. For ultimate summer vibes, serve alongside buttermilk coleslaw (the cool crunch cuts the heat!) and cornbread croutons. Don’t forget extra sauce in a tiny mason jar—drizzle tableside for drama! Paper napkins mandatory; this gets gloriously messy.
Shake It Up: Your Flavor, Your Rules!
1. Tropical Twist: Swap peaches for grilled pineapple + add 1 tsp ginger. Hello, luau chicken!
2. Bourbon Bliss: Stir 1 tbsp bourbon into sauce pre-blend. Adults-only sophistication!
3. Vegan Vibes: Use cauliflower steaks or portobellos. Skip Worcestershire (or use vegan sub).
4. Peach-Jalapeño Spark: Replace 1 chipotle with 2 fresh jalapeños (seeded!). Brighter heat!
5. 10-Minute Simmer Hack: Simmer sauce 10 mins post-blend for deeper flavor fusion. Worth it!
Behind the Apron: Real Talk from My Kitchen
This recipe’s evolved more than my taste in aprons! Early versions used canned peaches (still tasty!)—but grilling fresh? Game-changer. One hilarious fail: I once subbed habaneros for chipotles. Let’s just say we needed a fire extinguisher… and milk. Biggest lesson? Always taste your sauce pre-blend! Peaches vary in sweetness. Now, I keep a jar of this sauce in my fridge YEAR-ROUND—toss with pulled pork, glaze meatballs, or swirl into mayo for fries. P.S. Leftovers? Shred chicken + mix with extra sauce for next-level BBQ sandwiches!
Your Burning Questions (Besides the Grill!), Answered
Q: My sauce tastes too vinegary! Help?
A: Easy fix! Stir in 1 tsp honey or maple syrup. Balance is key—acids mellow when heated. Simmer sauce 5 mins if time allows.
Q: Can I make this sauce ahead?
A: Absolutely! Stores in fridge 1 week or freezer 3 months. Pro tip: Make a double batch—you’ll thank me later.
Q: Chicken drying out on grill?
A: Two tricks: 1) Pound thicker breasts to even thickness. 2) Grill thighs instead—they’re forgiving! Also—DON’T OVERCOOK. Pull at 160°F; carryover heat hits 165°F.
Q: No grill? Pan or oven option?
A: Cast-iron skillet on high heat = great sear! Or bake chicken at 400°F for 20-25 mins. Broil peaches/onions 5 mins before blending sauce.
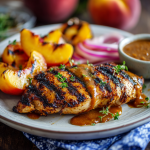
Grilled Peach BBQ Chicken with Chipotle Peach Sauce
- Total Time: 25 min
Description
Hey grill hero! Meet your new signature dish—Grilled Peach BBQ Chicken with Chipotle Peach Sauce. Sweet, smoky, juicy, and kissed by caramelized peaches and a spicy kick—this is summer on a plate. Whether it’s Sunday cookouts or Tuesday night flavor therapy, your grill’s about to earn legendary status!
Ingredients
For the Chicken:
-
2 lbs boneless chicken breasts or thighs
-
1 tsp chili powder
-
1 tsp garlic powder
-
½ tsp paprika
-
1 tsp kosher salt
-
½ tsp black pepper
-
1 tbsp avocado oil
For the Chipotle Peach BBQ Sauce:
-
1 medium ripe peach, halved & pitted
-
½ small yellow onion
-
3 chipotle peppers in adobo (use 2 for milder heat)
-
⅓ cup brown sugar (or ¼ cup maple syrup)
-
¼ cup apple cider vinegar
-
¼ cup ketchup
-
2 tsp Worcestershire sauce (or coconut aminos for vegan)
-
Salt & pepper to taste
Instructions
1️⃣ Preheat grill to medium-high (400°F). Oil grates well.
2️⃣ Pat chicken dry. Toss with oil, chili powder, garlic powder, paprika, salt & pepper.
3️⃣ Grill chicken 5–6 min per side. Don’t peek too soon!
4️⃣ Grill peach halves & onion cut-side down until charred (about 4 min).
5️⃣ Blend peach, onion, chipotles, sugar, vinegar, ketchup & Worcestershire until smooth. Thin with a splash of water if needed.
6️⃣ Brush chicken generously with sauce in the last 2 mins. Double glaze = magic!
7️⃣ Rest 5 min, serve with extra sauce on the side. Get messy!
Notes
✅ Use thighs for juicier results.
✅ Too spicy? Stir honey into sauce.
✅ No grill? Pan-sear or bake at 400°F for 20–25 mins.
- Prep Time: 10 min
- Cook Time: 15 min
Nutrition
- Calories: 320 cal Per Serving
- Fat: 14g
- Carbohydrates: 15g
- Fiber: 1g
- Protein: 28g
Nutrition Snapshot (Per Serving):
Calories: ~320 | Protein: 28g | Carbs: 15g | Fat: 14g | Fiber: 1g
Note: Stats include sauce. Using thighs? Add ~50 calories. Sugar-conscious? Reduce brown sugar to 3 tbsp—peaches bring natural sweetness!
Final Thoughts: More Than a Recipe
This Grilled Peach BBQ Chicken isn’t just dinner—it’s a celebration of summer’s boldest flavors. From the smoky kiss of the grill to the saucy, sticky fingers it leaves behind, every bite tells a story of happy accidents and shared meals. Whether you’re feeding a crowd or treating yourself, remember: The best dishes aren’t about perfection. They’re about the joy of creating, the messiness of experimenting, and the memories made around the table. Now fire up that grill, and let the magic happen!

Raspberry Pistachio Power Bowl
Wake Up Your Taste Buds: Raspberry Pistachio Power Bowl
Hey foodie friend! Ever have one of those mornings where you need something equally nourishing and indulgent? Where your body screams “fuel me right!” but your taste buds whisper “make it taste like dessert”? That’s exactly why I created this Raspberry Pistachio Power Bowl. Picture this: cold, creamy Greek yogurt swirled with jewel-toned raspberries, crunchy cacao nibs dancing with chewy dates, all crowned with lush pistachio crème that tastes like liquid joy. It’s a texture party in your bowl – creamy, crunchy, tart, sweet – that comes together in just 5 minutes flat. No fancy equipment, no cooking, just pure, feel-good deliciousness. Whether you’re sprinting out the door or savoring a slow morning, this bowl’s got your back with 14g of protein and 5g of fiber. It’s not just breakfast; it’s a vibrant, edible mood booster. Trust me, once you try this combo, you’ll be hooked. Let’s make your mornings magical!
Why This Bowl Tastes Like Sunshine
This recipe actually started as a happy accident during a chaotic farmers’ market morning last summer. I’d bought a giant crate of raspberries (couldn’t resist!) and was testing pistachio crème for a cake recipe. Mid-snack-attack panic, I dumped some Greek yogurt in a bowl, threw in frozen berries, splattered pistachio crème everywhere, and grabbed the nearest toppings – dates and cacao nibs from my baking stash. That first bite? Pure lightning. It tasted like sunshine and nostalgia – reminded me of childhood summers picking berries at my grandma’s farm, but with a sophisticated twist. The pistachio crème? Total game-changer. It felt luxurious, like dessert-for-breakfast rebellion. Now it’s my go-to when life gets hectic. My kids call it my “magic confetti bowl” because it turns grumpy mornings into happy dances. Funny how the best creations come from beautiful messes!
Gather Your Flavor Squad
Here’s what you’ll need (and why each ingredient rocks):
- ½ cup 2% Fage Greek yogurt – The MVP! Fage has the creamiest texture and highest protein punch. Chef hack: Full-fat works if you want extra richness, but avoid non-fat (it gets watery). Vegan? Swap with coconut yogurt!
- ¼ cup frozen raspberries – These bleed gorgeous color into the yogurt as they thaw. Insider tip: Frozen > fresh here! They keep the bowl chilled and create a natural “sauce.” Swap with cherries or blueberries.
- 1 tbsp chopped Medjool dates – Nature’s caramel! They add gooey sweetness and fiber. Chef insight: Soak in warm water for 5 mins if they’re firm. Swap with figs or a drizzle of honey.
- 1 tsp cacao nibs – Crunchy, bitter chocolate essence without sugar crashes. Why I love ’em: They’re packed with antioxidants! Swap with dark chocolate chips if you want sweeter crunch.
- 1 tbsp pistachio crème – The STAR! It’s like nut butter’s elegant cousin. DIY hack: Blend ½ cup roasted pistachios + 1 tbsp maple syrup + 1 tsp coconut oil until smooth. Almond butter works in a pinch.
- 1 tsp freeze-dried raspberries – The flavor bomb finish! They add intense tartness and a crispy crunch. Pro tip: Find them in the snack aisle! Swap with crushed freeze-dried strawberries or edible rose petals.
Let’s Build Your Power Bowl!
Step 1: The Creamy Foundation
Scoop your Greek yogurt into a wide, shallow bowl (trust me, surface area = more topping fun!). Smooth it gently – no perfection needed! Chef hack: For extra-thick yogurt, strain regular Greek yogurt overnight in a cheesecloth. Your spoon will stand up straight!
Step 2: Berry Blastoff
Scatter frozen raspberries around the edges like little rubies. Why frozen? As they thaw, they create a stunning pink swirl in the yogurt without making it soggy. Hot tip: Let them sit for 2 mins before eating – they’ll soften into jammy perfection!
Step 3: Texture Party Time
Sprinkle chopped dates and cacao nibs over the center. Toss ’em like confetti! Why this order? Dates stick to yogurt, while cacao nibs stay crispy on top. Chef secret: Lightly crush nibs with a spoon for more chocolate coverage!
Step 4: Pistachio Cloud
Dollop that glorious pistachio crème right in the middle. Don’t be shy – this is the “wow” factor! Hack for pretty presentation: Use the back of your spoon to swirl it slightly. Feeling fancy? Pipe it through a ziplock with a corner snipped!
Step 5: Crunchy Finale
Crumble freeze-dried raspberries between your fingers over everything. They add POP and a satisfying crackle. Pro move: Add these LAST so they stay crunchy. Store extras in the freezer to keep ’em fresh!
Step 6: Dig In, Your Way!
Now, the fun part: stir it into a pink-hued masterpiece or savor distinct layers. I do a half-stir for maximum texture contrast! Chef confession: I always lick the pistachio crème spoon. Zero shame.
The Science Behind the Raspberry Pistachio Power Bowl – Why It Works So Well
Have you ever wondered why certain food combinations just click? The Raspberry Pistachio Power Bowl isn’t just delicious—it’s a carefully balanced symphony of flavors, textures, and nutrients designed to satisfy your body and mind. Let’s break down why this bowl is such a powerhouse.
1. The Perfect Protein-Fat-Carb Balance
Greek yogurt is the MVP here, packing 14g of protein per serving, which helps stabilize blood sugar and keeps you full for hours. The healthy fats from pistachio crème slow digestion, preventing energy crashes, while the natural sugars from raspberries and dates provide quick, clean energy. This trio mimics the ideal macronutrient balance found in many Mediterranean diets—proven to support metabolism and brain function.
2. Texture Psychology: Why Crunchy + Creamy = Happiness
Food scientists have found that contrasting textures make eating more pleasurable. The silky yogurt, jammy raspberries, chewy dates, and crunchy cacao nibs create a multi-sensory experience that tricks your brain into feeling more satisfied. (Ever notice how potato chips are engineered to be crispy? Same principle!)
3. The Flavor Synergy You Didn’t Know You Needed
Raspberries and pistachios are a match made in culinary heaven. Raspberries bring bright tartness (thanks to malic acid), while pistachios contribute earthy sweetness (from their natural oils). Add the bitter cacao nibs, and you’ve hit all five tastes: sweet, sour, salty (from the nuts), bitter, and umami (from the yogurt’s fermentation).
4. The Hidden Health Perks
-
Gut Health: Greek yogurt’s probiotics support digestion.
-
Brain Boost: Pistachios contain lutein and vitamin E, linked to cognitive function.
-
Antioxidant Power: Raspberries and cacao nibs are loaded with polyphenols that fight inflammation.
Pro Tip: For an extra nutrient kick, sprinkle flaxseeds or chia seeds on top—they add omega-3s and fiber without altering the flavor!
The Art of Food Styling – How to Make Your Bowl Insta-Famous
Let’s be real—we eat with our eyes first. A beautifully styled Raspberry Pistachio Power Bowl isn’t just breakfast; it’s a miniature masterpiece. Here’s how to elevate your bowl from “meh” to Michelin-worthy in seconds.
1. Choose the Right Bowl
-
Wide & Shallow: Shows off layers (try a pastel ceramic or clear glass bowl).
-
Color Contrast: A white or pastel base makes the raspberries pop.
2. The Swirl Technique
Instead of dumping toppings haphazardly:
-
Use a spoon to create a gentle swirl in the yogurt for dimension.
-
Place raspberries asymmetrically—like they “fell” naturally.
-
Drizzle pistachio crème in a zigzag motion for artistic flair.
3. The Topping Rule of Three
Odd numbers are more visually appealing. Stick to three main toppings (e.g., cacao nibs, dates, freeze-dried raspberries) and sprinkle smaller accents (like crushed pistachios) sparingly.
4. Lighting & Angles
-
Natural Light: Shoot near a window for soft, bright photos.
-
Overhead Shot: Perfect for flat lays.
-
45-Degree Angle: Shows off layers without shadows.
Pro Styling Hack: Spray a little water on the berries for a dewy, fresh-out-of-the-garden look.
The Cultural Roots of the Ingredients – A Global Flavor Journey
This bowl might feel modern, but its ingredients have deep cultural roots spanning centuries. Let’s take a quick trip around the world!
1. Pistachios: The Royal Nut of Persia
Pistachios were a favorite of Queen Sheba and were cultivated in ancient Persia (modern-day Iran). The word “pistachio” comes from the Persian pesteh. Fun fact: Iran still produces 50% of the world’s pistachios!
2. Raspberries: Europe’s Wild Jewel
Wild raspberries grew in ancient Greece and Rome, where they were believed to have healing powers. The red variety we love today was cultivated in medieval European monasteries.
3. Yogurt: A 5,000-Year-Old Superfood
Yogurt likely originated in Mesopotamia and was used by Genghis Khan’s armies for stamina. The thick Greek style? Invented when a Strainer was left in yogurt overnight by accident!
4. Dates: The Ancient Sweetener
Dates were a staple in ancient Egypt (they were found in King Tut’s tomb!) and were called “the bread of the desert” by Bedouins.
Why This Matters: Every bite of this bowl connects you to centuries of culinary tradition—a reminder that good food is timeless.
Making It Instagram-Worthy
Serve this beauty immediately in a pastel-colored or clear glass bowl to show off those vibrant layers! Pair it with hot mint tea or cold brew coffee for ultimate vibes. Garnish pro-tip: Add extra crushed pistachios or mint leaves for a pop of green. Perfect for breakfast in bed, post-workout refueling, or as a healthy dessert in a fancy coupe glass – it’s basically edible confetti!
Mix It Up, Make It Yours
This bowl is your flavor playground! Try these twists:
- Tropical Twist: Swap raspberries for mango chunks, pistachio crème for coconut butter, and add toasted coconut flakes.
- Chocoholic’s Dream: Use chocolate protein yogurt, swap dates for chocolate-covered almonds, and add extra cacao nibs.
- Savory-Sweet: Add a pinch of flaky sea salt over the pistachio crème and use blackberries instead of raspberries.
- Protein Power-Up: Stir 1 scoop of vanilla collagen peptides into the yogurt before assembling.
- Autumn Vibes: Use pumpkin puree mixed into yogurt, pecans instead of pistachios, and dried cranberries instead of dates.
Beau’s Backstage Bowl Secrets
This recipe has evolved more than my taste in kitchen aprons! Originally, I used almond butter, but pistachio crème made it sing. And those freeze-dried raspberries? Total happy accident – I knocked a bag into the bowl during a 6AM zombie moment. Best spill ever! Funny story: My dog, Biscuit, once stole a whole bowl off the counter. Now he gets a tiny “pup version” (plain yogurt, no cacao!) while I eat mine. Pro tip: Double the batch and layer ingredients in a mason jar for a “grab-and-go” version (just add freeze-dried berries last minute). It’s been a lifesaver during recipe photo shoots – my kids swipe ’em constantly!
Your Bowl Questions, Answered!
Q: Can I use fresh raspberries instead of frozen?
A: You bet! But add 2-3 ice cubes to the bowl first. Frozen berries give that perfect chill and saucy texture fresh ones can’t match.
Q: Help! I can’t find pistachio crème anywhere.
A: No stress! Blend ¼ cup roasted pistachios + 1 tsp honey/maple syrup + 1 tsp melted coconut oil until smooth. Or use almond butter mixed with a pinch of cardamom for that exotic vibe.
Q: My yogurt tastes too tart. Rescue mission?
A: Easy fix! Stir ½ tsp honey or maple syrup into the yogurt BEFORE adding toppings. Or use vanilla Greek yogurt – it’s slightly sweeter.
Q: Can I prep this ahead for meal prep?
A: Absolutely! Layer yogurt, frozen berries, dates, and cacao nibs in a jar. Keep pistachio crème and freeze-dried berries separate. Add them right before eating so textures stay perfect!

Raspberry Pistachio Power Bowl
- Total Time: 5 min
Description
Hey breakfast lover! Meet your new 5-minute mood booster: a Raspberry Pistachio Power Bowl that tastes like dessert but fuels you like a champ. Creamy Greek yogurt, tart berries, crunchy cacao, gooey dates, and that luscious pistachio crème—every bite is a sweet, nourishing texture party. No stove, no fuss, just pure sunshine in a bowl!
Ingredients
-
½ cup 2% Greek yogurt (or coconut yogurt)
-
¼ cup frozen raspberries
-
1 tbsp chopped Medjool dates
-
1 tsp cacao nibs (or dark choc chips)
-
1 tbsp pistachio crème (or almond butter)
-
1 tsp freeze-dried raspberries
Instructions
1️⃣ Scoop yogurt into a bowl, smooth it out.
2️⃣ Scatter frozen raspberries—let ’em thaw slightly for a jammy swirl.
3️⃣ Sprinkle chopped dates & cacao nibs over the top.
4️⃣ Dollop pistachio crème in the center, swirl gently.
5️⃣ Crumble freeze-dried raspberries for a crispy finish.
6️⃣ Dig in immediately—stir it up or layer every bite!
Notes
✅ Frozen berries make a natural sauce—don’t skip!
✅ DIY pistachio crème: blend pistachios + maple syrup + coconut oil.
✅ For meal prep, layer in a jar—add crunchy toppings last minute.
- Prep Time: 5 min
Nutrition
- Calories: 280 cal Per Bowl
- Fat: 14g
- Carbohydrates: 22g
- Fiber: 5g
- Protein: 14g
Fuel Your Body Right
Approximate nutritional boost per bowl:
Calories: ~280 | Protein: 14g | Carbs: 22g | Fiber: 5g | Fat: 14g
Note: Values may vary based on specific brands/substitutions. This powerhouse combo delivers probiotics, antioxidants, and healthy fats to keep you full and focused!
Final Thoughts: More Than Just a Breakfast Bowl
The Raspberry Pistachio Power Bowl isn’t just a meal—it’s a celebration of contrasts: sweet and tart, creamy and crunchy, ancient and modern. It proves that healthy eating doesn’t have to be boring, and that the best recipes often come from happy accidents.
Whether you’re a busy parent, a fitness enthusiast, or just someone who believes breakfast should taste like dessert, this bowl adapts to you. So next time you make it, take a second to savor not just the flavors, but the joy of creating something beautiful in minutes.

Healthy Carrot Cake Oatmeal Cookies
Carrot Cake in Cookie Form? Yes, Please!
Hey friends, Beau here! Grab your favorite mixing bowl and let’s talk about the ultimate kitchen magic trick: turning cozy carrot cake vibes into a wholesome, grab-and-go cookie. Picture this: the warm hug of cinnamon, the earthy sweetness of carrots, and that irresistible chew of oatmeal—all packed into a golden little disk you can munch anytime. No fancy equipment or pastry chef skills needed! These Healthy Carrot Cake Oatmeal Cookies are my go-to for sneaking veggies into snack time (shh, I won’t tell!), fueling busy mornings, or satisfying that 3 p.m. sweet tooth without the sugar crash. They’re soft, they’re secretly nourishing, and they taste like nostalgia in the best way possible. Whether you’re baking with kids, meal-prepping wins, or just treating yourself, these cookies are your new kitchen BFF. Ready to make your house smell like a hug? Let’s roll!
Why Carrot Cake Steals My Heart Every Time
Okay, real talk: my love affair with carrot cake started in my grandma’s sun-drenched kitchen. Every spring, she’d grate mountains of carrots for her famous layer cake—the one with cream cheese frosting so thick, you needed a shovel. I’d sit cross-legged on the linoleum floor, sneaking shreds of carrot while she hummed Sinatra. Fast-forward to my college days, when I’d crave that cozy spice but had zero time for layer cakes. Cue the “aha!” moment: what if I mashed up carrot cake and my dad’s oatmeal cookies? After a few… let’s call them “creative experiments” (one batch tasted like spiced cardboard, bless it), I landed on these gems. Now, baking them feels like a high-five to Grandma Collier. It’s that perfect blend of comfort and playfulness—just like food should be.
Your Cookie Toolkit: Simple, Wholesome & Flexible
Gather these goodies:
- 1 cup (100g) instant oats – The MVP for chewiness! Chef’s hack: Gluten-free? Swap in certified GF oats. No instant oats? Pulse rolled oats in a blender for 3 seconds.
- ¾ cup (90g) whole wheat flour – Adds nutty depth. Feeling flexible? All-purpose or 1:1 gluten-free flour work great too!
- 1½ tsp baking powder – Our lift-off crew. Ensure it’s fresh—stale powder = sad, flat cookies.
- 1½ tsp ground cinnamon – The soul of carrot cake! Add a pinch of nutmeg or ginger if you’re feeling spicy.
- ⅛ tsp salt – Balances sweetness. Sea salt or kosher, both rock.
- 2 tbsp (28g) coconut oil or unsalted butter – Melted and cooled. Coconut oil keeps ’em dairy-free; butter adds richness. Pro tip: Don’t sub olive oil—its flavor clashes.
- 1 large egg, room temp – Binds everything. Cold eggs = clumpy batter. Vegan? See variations below!
- 1 tsp vanilla extract – Pure stuff only, friends! Imitation vanilla weeps in the corner.
- ½ cup (120mL) pure maple syrup – Nature’s candy! Room temp blends smoother. No maple? Honey or agave work (flavor shifts slightly).
- ¾ cup (68g) freshly grated carrots – Non-negotiable: Grate them yourself! Pre-shredded bags are too dry. Use the small holes on your grater.
See? Nothing weird or wallet-breaking—just pantry heroes doing delicious work.
Cookie Alchemy: Let’s Bake Some Joy!
Step 1: Preheat oven to 350°F (175°C). Line a baking sheet with parchment paper. Why parchment? No sticking + easy cleanup. Win-win!
Step 2: In a medium bowl, whisk together oats, flour, baking powder, cinnamon, and salt. Chef’s secret: Whisk dry ingredients WELL—no one wants a baking powder pocket explosion!
Step 3: In another bowl, mix melted coconut oil (or butter), egg, vanilla, and maple syrup. Watch the magic: Whisk until silky-smooth. If oil clumps, warm mix briefly (10 sec in microwave).
Step 4: Pour wet ingredients into dry. Stir gently until just combined. Overmixing alert: Stir only until no flour streaks remain—tough cookies are sad cookies.
Step 5: Fold in grated carrots. Gently does it! Use a spatula in folding motions to keep carrots fluffy.
Step 6: Scoop dough into 12 balls (I use a 2-tbsp cookie scoop). Place on sheet, then flatten slightly. Why flatten? These cookies won’t spread much—help them become perfect little disks!
Step 7: Bake 12–14 minutes. Doneness test: Edges should be golden and set; centers look soft (they firm up while cooling). Rotate sheet halfway for even baking!
Step 8: Cool on tray 5 minutes (critical step!—they’re still baking inside). Transfer to wire rack. Resist nibbling… or don’t. I won’t judge.
The Surprising Health Benefits of Carrot Cake Oatmeal Cookies
When you think of cookies, “healthy” might not be the first word that comes to mind. But these Healthy Carrot Cake Oatmeal Cookies are a game-changer! Packed with nutrient-dense ingredients, they offer more than just delicious flavor—they actually fuel your body in ways traditional desserts don’t. Let’s break down why these cookies deserve a spot in your snack rotation.
1. Carrots: The Sneaky Superfood
Carrots aren’t just for salads—they bring natural sweetness, moisture, and a hefty dose of beta-carotene (which converts to vitamin A in the body). Vitamin A supports vision, immune function, and skin health. Plus, the fiber in carrots keeps digestion smooth and helps regulate blood sugar, preventing that dreaded sugar crash.
2. Oats: The Ultimate Fiber Boost
Oats are a whole grain powerhouse, loaded with soluble fiber (beta-glucan) that helps lower cholesterol and keeps you full longer. Unlike refined flour, oats provide slow-releasing energy, making these cookies a smart choice for sustained focus—perfect for workdays or pre-workout snacks.
3. Coconut Oil vs. Butter: A Healthier Fat Swap
While butter adds richness, coconut oil offers medium-chain triglycerides (MCTs), which are metabolized differently than other fats—some studies suggest they may support energy and metabolism. Plus, coconut oil is dairy-free, making these cookies accessible to lactose-intolerant folks.
4. Maple Syrup: A Natural Sweetener Win
Refined sugar? No thanks. Maple syrup is a less processed sweetener that contains antioxidants and minerals like zinc and manganese. While it’s still sugar, it has a lower glycemic index than white sugar, meaning it won’t spike blood sugar as drastically.
5. Egg Power: Protein & Structure
Eggs bind the ingredients while adding high-quality protein (about 2g per cookie). Protein helps with muscle repair and keeps hunger at bay—way better than a sugar-loaded pastry that leaves you starving an hour later.
Final Thought: These cookies prove that indulgence and nutrition can coexist. Whether you’re looking for a post-workout snack, a lunchbox treat, or just a guilt-free dessert, they deliver flavor and function.
The Science Behind the Perfect Cookie Texture
Ever wondered why some cookies are cakey, others chewy, and some spread into sad, flat puddles? The texture of these Carrot Cake Oatmeal Cookies is no accident—it’s all about ingredient chemistry and technique. Let’s geek out on what makes them just right.
1. The Role of Baking Powder
Unlike baking soda (which requires acid to activate), baking powder is a complete leavening agent. It creates tiny air bubbles when heated, giving these cookies a soft, slightly pillowy texture without excessive spread.
Pro Tip: If your cookies turn out dense, your baking powder might be expired. Test it by mixing ½ tsp with hot water—if it doesn’t bubble, toss it!
2. Flour Power: Whole Wheat vs. All-Purpose
Whole wheat flour adds nutty depth and fiber, but its higher protein content can make baked goods denser. That’s why this recipe uses a mix of oats and whole wheat—oats keep them tender while adding chewiness.
Gluten-Free Note: A 1:1 GF flour blend works, but cookies may be more delicate. Adding ½ tsp xanthan gum helps mimic gluten’s structure.
3. Fat Matters: Melted vs. Creamed
Recipes calling for creamed butter (beat with sugar) tend to be lighter and cakier. Here, melted coconut oil creates a denser, fudgier texture—ideal for a hearty, portable cookie.
4. Moisture Balance: Carrots & Maple Syrup
Too much moisture = gummy cookies. Too little = dry hockey pucks. Freshly grated carrots (not pre-shredded) release just enough water during baking to keep them soft without sogginess.
Storage Hack: If cookies soften over time, pop them in the oven at 300°F for 5 minutes to revive crispness.
Final Thought: Baking is equal parts art and science. Understanding these tiny tweaks can help you customize future batches—like adding nuts for crunch or reducing syrup for a firmer bite.
The Psychology of Nostalgic Baking (Why We Love These Cookies)
Food isn’t just fuel—it’s memory, comfort, and identity. These Carrot Cake Oatmeal Cookies tap into something deeper than taste buds: emotional connection. Let’s explore why recipes like this resonate so powerfully.
1. The Comfort of Spice
Cinnamon isn’t just a flavor; it’s a scent-linked memory trigger. Studies show that smells tied to positive experiences (like grandma’s kitchen) evoke stronger emotional responses than visuals alone. That’s why these cookies feel like a hug—they smell like childhood.
2. The Joy of “Sneaky” Healthy Swaps
There’s a playful satisfaction in “hiding” veggies in treats (ask any parent!). These cookies let us indulge while secretly feeling virtuous—a psychological win-win.
3. The Ritual of Baking
In a fast-paced world, baking forces mindfulness. Measuring, stirring, waiting—it’s a meditative act. For many, this recipe isn’t just about cookies; it’s about creating a moment of calm.
4. Sharing = Connection
Cookies are meant to be shared, whether with kids, coworkers, or neighbors. Gifting food releases oxytocin (the “bonding hormone”), strengthening relationships.
Fun Idea: Bake a batch with a friend and swap stories—**food + conversation = instant happiness*.
Serving Up Smiles: How to Enjoy These Gems
Warm cookies = instant joy. Serve ’em fresh from the oven with a cold glass of almond milk for dunking! For a “wow” brunch move, crumble two over Greek yogurt with extra cinnamon. Kid-approved hack: Sandwich cookies with a smear of cream cheese or cashew butter. Packing lunches? Tuck them into bento boxes—they stay soft for days. And hey, no shame in the midnight snack game: these babies taste epic with a cup of chai tea while binge-watching baking shows. Your call, chef!
Shake It Up: 5 Fun Twists to Try
1. Raisin Revelry: Fold in ¼ cup plump raisins or dried cranberries with the carrots.
2. Nutty Crunch: Add ⅓ cup chopped walnuts or pecans. Toast ’em first for extra flavor fireworks!
3. Tropical Vibes: Swap carrots for ½ cup mashed ripe banana + ¼ cup shredded coconut.
4. Vegan Delight: Replace egg with 1 flax egg (1 tbsp ground flax + 2.5 tbsp water, sit 5 mins). Use coconut oil.
5. Protein Power: Stir 2 tbsp vanilla protein powder into dry ingredients. Hello, gym fuel!
Beau’s Backstage Tips & Bloopers
Confession: my first test batch looked like carrot-colored hockey pucks. Why? I used steel-cut oats (nope!) and cold maple syrup that seized the coconut oil. Lesson learned! Over the years, I’ve tweaked this recipe for foolproof goodness: grating carrots fine is KEY (big shreds = soggy spots), and room temp ingredients are non-negotiable. Storage tip: Keep cookies in an airtight container for 5 days, or freeze dough balls for instant bakes! Funny story: My dog, Biscuit, once stole a whole tray off the counter. Now I bake with the oven door locked—true story. These cookies evolve with you, so make ’em your own!
Your Questions, Answered!
Q: Can I use honey instead of maple syrup?
A: Absolutely! Swap equal amounts. Flavor will be more floral, and cookies may brown faster—check at 10 mins.
Q: Why are my cookies flat/crumbly?
A: Flat cookies? Your baking powder might be expired (test it with hot water—it should bubble!). Crumbly? Over-measuring flour is the culprit. Spoon flour into the cup, don’t scoop!
Q: Can I add pineapple like in carrot cake?
A: Love the spirit! But fresh pineapple adds too much moisture. If you must, use 2 tbsp drained crushed pineapple—pat it dry with paper towels first.
Q: How do I make these nut-free?
A: They’re naturally nut-free! Just ensure your oats and flour are certified nut-free if cross-contamination is a concern.

Healthy Carrot Cake Oatmeal Cookies
- Total Time: 25 min
Description
Hey, sweet tooth squad! Beau here—bringing you the warm, spiced comfort of Grandma’s carrot cake, all wrapped up in a soft, wholesome oatmeal cookie you can snack on anytime. These Healthy Carrot Cake Oatmeal Cookies sneak in veggies, satisfy cravings, and make your house smell like a bakery hug. Bake once, snack happy all week!
Ingredients
-
1 cup (100g) instant oats
-
¾ cup (90g) whole wheat flour (or AP/GF)
-
1½ tsp baking powder
-
1½ tsp cinnamon
-
⅛ tsp salt
-
2 tbsp (28g) melted coconut oil or butter
-
1 large egg (room temp)
-
1 tsp pure vanilla extract
-
½ cup (120mL) maple syrup (or honey/agave)
-
¾ cup (68g) freshly grated carrots
Instructions
1️⃣ Preheat oven to 350°F (175°C). Line a baking sheet with parchment.
2️⃣ Whisk oats, flour, baking powder, cinnamon, and salt.
3️⃣ In another bowl, whisk melted oil/butter, egg, vanilla, and maple syrup until smooth.
4️⃣ Combine wet + dry. Stir gently—no overmixing!
5️⃣ Fold in grated carrots.
6️⃣ Scoop dough into 12 balls, flatten slightly.
7️⃣ Bake 12–14 min until edges are golden and centers soft.
8️⃣ Cool 5 min on tray, then move to rack. Enjoy warm or store for later!
Notes
✅ Use freshly grated carrots for max moisture.
✅ Add nuts, raisins, or shredded coconut for a fun spin.
✅ Vegan? Swap egg for a flax egg + coconut oil.
✅ Store airtight 5 days or freeze dough for cookie emergencies!
- Prep Time: 10 min
- Cook Time: 12–14 min
Nutrition
- Calories: 110 cal Per Cookie
- Fat: 4g
- Carbohydrates: 16g
- Fiber: 2g
- Protein: 2g
Nutritional Per Cookie (Makes 12)
Calories: ~110 | Protein: 2g | Carbs: 16g | Fiber: 2g | Fat: 4g
Prep: 10 mins | Bake: 12–14 mins | Total: 25 mins
Final Thoughts: More Than Just a Cookie
What started as a carrot cake remix has become a versatile, nourishing, memory-filled treat. These cookies are:
✅ Nutrient-packed (veggies + whole grains)
✅ Meal-prep friendly (freeze dough or baked batches)
✅ Customizable (add nuts, swap sweeteners)
✅ Emotionally satisfying (comfort food at its best)
Whether you’re baking for health, nostalgia, or pure deliciousness, this recipe is a celebration of simplicity. So preheat that oven, grate those carrots, and savor the magic—one wholesome bite at a time.
Share the Cookie Love!
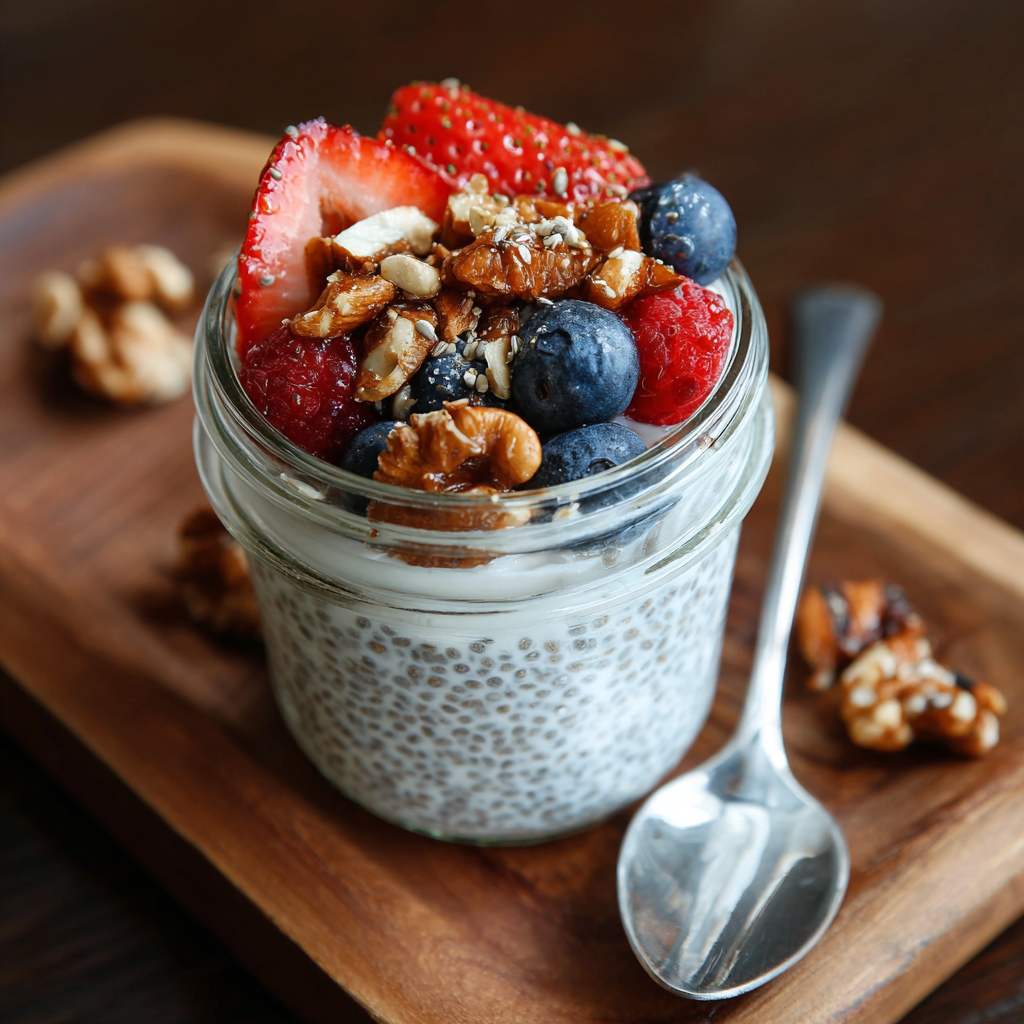
Simple Overnight Chia Pudding
Whip Up Magic While You Sleep: Your New Favorite Breakfast Awaits!
Hey foodie friends! Beau here from Feastical, your partner-in-crime for kitchen adventures that taste like joy and feel like coming home. Ever have one of those mornings where your alarm feels like a personal insult, your brain’s still foggy, and the thought of cooking breakfast makes you want to crawl back under the covers? Yeah, me too. That’s exactly why I’m practically evangelical about this Simple Overnight Chia Pudding. Imagine waking up to a creamy, dreamy treat that’s already waiting for you in the fridge—no cooking, no chaos, just pure nourishing deliciousness that feels like dessert but fuels your day like a champ.
This isn’t just breakfast; it’s your secret weapon. Whether you’re rushing to work, wrangling kids, or savoring a slow Sunday, this pudding is your edible hug. Chia seeds are tiny nutritional powerhouses (more on that soon!), and when they meet liquid overnight? Pure alchemy happens. You get a silky, spoonable delight that’s endlessly customizable. Top it with summer berries, crunchy nuts, or a dollop of nut butter—it’s your canvas! Best part? You literally spend two minutes the night before stirring things together. If that’s not kitchen sorcery, I don’t know what is. So grab your favorite jar, and let’s make tomorrow morning the easiest (and tastiest) one yet!
The Midnight Snack That Sparked a Breakfast Revolution
Picture this: It’s 2 AM. I’m jet-lagged, ravenous, and rummaging through my friend Lena’s fridge after a food conference in Melbourne. All I find is a lonely jar of something gelatinous with seeds floating in it. “Trust me,” Lena mumbled, half-asleep. Skeptical but starving, I took a bite… and had a full-blown tastebud epiphany. Creamy, subtly sweet, and ridiculously satisfying. Turns out, Lena, queen of busy ER shifts, lived off this “weird seed gloop.”
Back home, I became a chia mad scientist. Batch after batch filled my fridge—some tragically lumpy (RIP, forgotten stir-less experiment), others too thin (lesson: patience is key!). My kids dubbed it “Dad’s frog spawn,” but even they couldn’t resist berry-topped versions. The real win? Watching my non-cook brother nail it on his first try and text me: “Dude. I made magic.” That’s the beauty of this pudding—it turns anyone into a kitchen rockstar. It’s not just food; it’s a tiny jar of confidence and convenience that started with a foggy midnight snack and became a family staple.
Gather Your Magic Makers: Simple Ingredients, Big Impact
Here’s the beautiful part: you only need three core ingredients to start your chia journey! Think of this as your blank canvas—we’ll talk epic toppings later.
- Chia Seeds (2 tbsp): These unassuming black specks are fiber and omega-3 superheroes! They absorb liquid up to 10x their weight, creating that gorgeous gel. Chef’s Insight: Always use fresh seeds. Stale chia won’t plump properly! If you hate the texture, try white chia seeds—they’re identical nutritionally but visually smoother.
- Almond Milk (1/2 cup): My go-to for a light, nutty base. Substitution Power: ANY liquid works! Dairy milk, coconut milk (for ultra-creamy richness), oat milk (sweeter), or even fruit juice (cut the sweetener if you try this!). Just ensure it’s unsweetened if watching sugar.
- Honey or Maple Syrup (1 tsp drizzle): A kiss of natural sweetness. Pro Tip: Stir sweetener INTO the liquid BEFORE adding chia seeds. It dissolves evenly, preventing clumps! For a vegan twist, pure maple syrup is perfection. Agave works too!
Bonus Canvas Starters (Pick Your Faves!): Vanilla extract (1/4 tsp), pinch of cinnamon, dash of sea salt (enhances all flavors!), or 1 tbsp cocoa powder for chocolate dreams. These aren’t mandatory, but they’re flavor game-changers!
Creating Your Creamy Masterpiece: Effortless Steps
Ready for the world’s easiest “cooking”? Let’s transform those humble ingredients!
- The Foundation Shake-Up: Grab a jar, glass, or bowl (I love mason jars for no-mess shaking!). Pour in your almond milk. Add your sweetener (honey/maple syrup) and ANY bonus flavors (vanilla, cinnamon, etc.) NOW. Whisk or seal the jar and shake vigorously for 10 seconds. Why? This dissolves the sweetener completely and evenly disperses flavors before the chia thickens things up. No one wants a honey sinkhole!
- Chia Time – Stir Like You Mean It! Sprinkle the chia seeds into your liquid. IMMEDIATELY start whisking or shaking (jar lid on tight, please!). Stir/shake for a full 60 seconds. Beau’s Non-Negotiable Hack: Walk away for 5 minutes, then come back and stir/shake vigorously AGAIN for 30 seconds. This breaks up any sneaky clumps trying to form, ensuring silky-smooth pudding. Clumps are the enemy of joy here!
- The Patient Pause (Overnight Magic): Cover your jar or bowl. Tuck it lovingly into the fridge. Let it chill for at least 4 hours, but honestly? Overnight (8+ hours) is GOLD. Science Fun: The chia seeds release soluble fiber (mucilage) that forms a gel matrix around each seed – that’s your pudding! Longer soak = thicker, creamier texture.
- The Grand Reveal & Fluff: Open the fridge! You might see a slightly separated layer of liquid on top – totally normal. Grab a spoon and give it a really good stir, scraping the sides and bottom. This reincorporates everything into velvety perfection. Texture Check: Too thick? Stir in 1 tsp extra milk. Too thin? Add 1/2 tsp chia seeds, stir, wait 30 mins.
- Top It Like It’s Hot: This is where your personality shines! Spoon the pudding into a bowl or enjoy it straight from the jar. Pile on your favorite toppings (see suggestions below!). Dig in and taste the victory of effortless, healthy deliciousness!
Dress to Impress (Your Taste Buds!)
Presentation is edible joy! Serve chilled in a clear glass to show off those gorgeous layers. Go minimalist with a drizzle of honey and three perfect raspberries. Channel decadence with sliced bananas, crunchy granola clusters, and a peanut butter swirl. Morning protein boost? Add Greek yogurt and hemp seeds. Feeling tropical? Mango chunks and toasted coconut flakes! The rule is simple: Contrast is Key. Mix textures (creamy pudding + crunchy nuts + juicy fruit) and flavors (sweet + tart + earthy) for maximum satisfaction. It’s your edible art project!
Make It Uniquely Yours: 5 Flavor Twists
Once you master the base, the chia world is your oyster! Try these easy spins:
- Chocolate Decadence: Add 1 tbsp unsweetened cocoa powder + pinch of salt to the milk before chia seeds. Top with sliced strawberries and cacao nibs. (Kid-approved!)
- Tropical Sunrise: Use coconut milk instead of almond milk. Stir in 2 tbsp crushed pineapple (drained) after overnight soak. Top with mango, kiwi, and toasted coconut.
- Berry Vanilla Swirl: Layer the plain pudding with a quick compote (simmer 1/2 cup frozen berries + 1 tsp maple syrup until thick). Swirl gently with a knife.
- Protein Powerhouse: Stir 1 scoop vanilla protein powder into the milk before adding chia. Use slightly less milk (start with 1/3 cup). Top with almond butter and chia seeds.
- Pumpkin Spice Latte (Seasonal Fave!): Add 2 tbsp pumpkin puree + 1/2 tsp pumpkin pie spice to the milk before chia seeds. Sweeten with maple syrup. Top with pecans.
Beau’s Backstage Pass: Chia Wisdom & Whimsy
This recipe is my kitchen workhorse, but it wasn’t always smooth sailing! Early on, I’d forget the second stir, leading to “chia boulders” my kids used as edible ammunition (do not recommend). Lesson learned: stir twice, thank yourself later. Over the years, I’ve embraced the “no rules” vibe. Sometimes I layer pudding, yogurt, and fruit in jars for grab-n-go parfaits. Other times, I blend soaked seeds with frozen fruit for instant “nice” cream! The chia seed is incredibly forgiving.
Fun fact: My record is 7 distinct flavors in the fridge simultaneously during recipe testing week. My partner finally declared a “chia intervention.” Worth it! The biggest evolution? Realizing its power beyond breakfast. It’s my go-to post-workout refuel, a brilliant thickener for smoothies, even a healthy “frosting” base blended with avocado and cocoa. Play, experiment, and make it yours—that’s the Feastical spirit!
Chia Chat: Solving Your Pudding Puzzles
Let’s tackle those head-scratchers before they happen!
Q: Help! My pudding is still runny after 4 hours. Did I fail?
A: Don’t panic! Chia seeds are hydration divas. Two likely culprits: 1) Not Enough Stirring: They clumped early, reducing surface area. Break it up & stir vigorously! 2) Seed Age/Old Liquid: Stale chia or overly acidic liquids (like some juices) absorb slower. Give it more time (overnight is best!) or add 1/2 tsp extra seeds, stir, wait. Next batch, use fresher seeds and stir twice!
Q: Can I make a big batch for the whole week?
A: Absolutely! Scale up in a big jar or bowl. It keeps beautifully for 4-5 days covered in the fridge. Stir well before serving each portion. The texture might thicken slightly over time – just stir in a splash of milk.
Q: Why does it taste bland? Did I miss something?
A: The base is intentionally subtle! It NEEDS flavor boosts. Always add a pinch of salt (enhances everything!) and vanilla or spice. Sweeten to taste – start with 1 tsp honey/maple, adjust later. Remember: toppings add huge flavor! Blandness usually = under-seasoning.
Q: Can I use something besides chia seeds? Flax maybe?
A: Flax seeds (ground) can make a pudding, but the texture is gummier and less stable. They also don’t pack the same omega-3 punch. Stick with chia for foolproof, nutrient-dense results. Hemp seeds add great texture/nutrition on top but won’t gel like chia.

Simple Overnight Chia Pudding
- Total Time: Hands-off magic
Description
Ever wish breakfast made itself? Meet your dreamy overnight chia pudding—creamy, nourishing, endlessly customizable, and ready to greet you like a hug in a jar. Fuel your morning with dessert vibes and powerhouse nutrition in just two minutes of prep. Grab a spoon and see what a tiny seed can do!
Ingredients
-
2 tbsp chia seeds (black or white)
-
½ cup almond milk (or milk of choice)
-
1 tsp honey or maple syrup
-
Optional: ¼ tsp vanilla, pinch of cinnamon, or 1 tbsp cocoa powder
Instructions
1️⃣ Mix – In a jar, whisk milk + sweetener + any extras (vanilla, spices).
2️⃣ Stir – Add chia seeds, whisk well for 60 sec. Wait 5 min, stir again.
3️⃣ Chill – Cover and refrigerate at least 4 hours, ideally overnight.
4️⃣ Fluff – Stir well. Adjust texture with more milk if too thick.
5️⃣ Top & Enjoy – Add fruit, nuts, yogurt—your breakfast, your rules!
Notes
✅ Always stir twice—no clumps!
✅ Use fresh chia seeds for best gelling.
✅ Batch it for 4–5 days of grab-n-go magic!
- Prep Time: 2 min
Nutrition
- Calories: 180 cal Per Base Serving
- Fat: 10g
- Carbohydrates: 12g
- Fiber: 8g
- Protein: 4g
Fueling Your Day (The Nerd-Friendly Bit!)
Per Serving (Base Recipe Only – No Toppings):
Calories: ~180 | Protein: 4g | Carbs: 12g (Net Carbs: ~4g due to high fiber!) | Fat: 10g (Mostly healthy Omega-3s!) | Fiber: 8g (That’s nearly 30% of your daily goal!)
Why This Rocks: This pudding is a fiber bomb, keeping you full for hours. The healthy fats (omega-3 ALA from chia) support brain health. It’s naturally low in sugar (control your sweetener!) and packed with calcium (if using fortified milk) and antioxidants. A true breakfast superhero!
Final Thoughts: Why This Recipe Is a Life-Changer
In a world where mornings feel like a race against time, overnight chia pudding is the ultimate hack—a breakfast that practically makes itself while you sleep. It’s:
✔ Healthy (packed with fiber, protein, and omega-3s).
✔ Customizable (sweet, savory, crunchy, creamy—you decide!).
✔ Effortless (2 minutes at night = a ready-to-eat meal).
Whether you’re a busy parent, a meal-prep fanatic, or just someone who hates cooking at dawn, this recipe gives you back precious morning minutes without sacrificing nutrition or flavor. So tonight, take two minutes to stir, sleep like a champ, and wake up to a jar of magic. Your future self will thank you!
Save This Recipe For Later!