
Sausage Egg Muffins
Rise & Shine with the Ultimate Grab-and-Go Breakfast!
Mornings. Am I right? Whether you’re herding kiddos toward the school bus, prepping for back-to-back Zoom calls, or just craving five more minutes under the covers, breakfast often gets shoved to the sidelines. But what if I told you there’s a delicious, protein-packed hero waiting in your muffin tin? Friends, meet your new morning MVP: Sausage Egg Muffins! Imagine this: a fluffy, savory muffin hugging a jammy soft-boiled egg, loaded with crispy sausage and melted cheddar. It’s like breakfast casserole decided to put on a portable, handheld party outfit. I created these golden gems after one too many “coffee-for-breakfast” days left me hangry by 10 AM. They’re freezer-friendly, reheat like a dream, and make you feel like a kitchen wizard with minimal effort. No more sad desk pastries—let’s bake happiness into your a.m. routine!
The Campfire Epiphany
Picture this: It’s 6 AM in the Smoky Mountains. Dew clings to my sleeping bag, and my brother’s snoring sounds like a chainsaw chorus. We’d planned a sunrise hike, but our cooler held… well, disappointment (read: stale granola bars). That’s when our camp neighbor, a grizzled guy named Hank, waved us over. He pulled steaming muffins from his Dutch oven, each hiding a molten egg center. “Protein bombs,” he winked. One bite—savory sausage, egg yolk like liquid gold—and I was hooked. Back home, I spent weeks perfecting my version. Failed attempts? Oh yeah. (Note: Raw eggs in muffin batter = yolk puddles. Oops.) But finally, nailing that soft-boiled center? Pure triumph! Now, every time I bake these, I’m back at that campfire, tasting adventure.
Your Flavor Toolkit (Let’s Get Chatty!)
- 6 large soft-boiled eggs, peeled: The surprise inside! Cook them jammy (6-7 mins boiling). Chef’s hack: Add 1 tbsp vinegar to boiling water—peels glide off!
- 2 cups all-purpose flour: Our trusty base. For gluten-free, swap in Cup4Cup blend—it won’t betray you.
- 1 tbsp baking powder: Lift-off magic! Ensure it’s fresh (test with hot water—if it fizzes, you’re golden).
- 2 tsp sugar: Balances savoriness. Maple syrup works too for a whisper of warmth.
- ½ tsp salt: Flavor amplifier. Kosher salt is my MVP for even distribution.
- 1¼ cups whole milk: Richness central! Buttermilk adds tang, or almond milk keeps it light.
- ½ cup butter, melted & cooled: Lush texture. Coconut oil makes a dairy-free friend.
- 1 large egg (for batter): Binder extraordinaire. Flax eggs (1 tbsp ground flax + 3 tbsp water) for vegan twist.
- 1 cup cooked breakfast sausage: Crispy MVP! Turkey sausage or plant-based crumbles rock too.
- 1 cup shredded cheddar: Melty joy. Pepper Jack? Yes, please! Gruyère? Fancy upgrade.
- 1 tbsp fresh chives: Color & freshness. Freeze-dried chives in a pinch? Absolutely.
Let’s Bake Some Magic (No Chef Hat Required!)
Step 1: Preheat & Prep
Fire up that oven to 375°F (190°C). Grease a 12-cup muffin tin like you mean it—spray or butter every nook. Trust me, nobody likes a stuck muffin. (Or use parchment liners for easy-peasy removal.)
Step 2: Dry Team Unite!
In a big bowl, whisk together flour, baking powder, sugar, and salt. Channel your inner scientist—no lumps allowed! Pro tip: Sift if your baking powder’s clumpy. Lazy hack? Whisk aggressively while singing your favorite hype song.
Step 3: Wet Team Assemble!
In another bowl, whisk milk, melted (but cooled!) butter, and that lone egg. Cooling the butter is KEY—hot butter = scrambled eggs in your batter. Not cute. Whisk until it’s smoother than a jazz playlist.
Step 4: The Grand Mix
Pour the wet squad into the dry team. Gently fold with a spatula—do NOT overmix. Lumps are FINE! Overmixing = hockey pucks. Fold just until no dry spots remain. It should look shaggy, like a cozy blanket.
Step 5: Party Time!
Add cooked sausage (crumbled!), shredded cheddar, and chives. Fold gently again. Chef’s secret: Reserve a sprinkle of cheese for topping—extra gooey payoff!
Step 6: Egg-Cavation Mission
Spoon batter into cups until half full. Nestle a peeled soft-boiled egg in each like a treasure. Cover completely with more batter—seal that egg in! No yolk leaks allowed. Top with reserved cheese.
Step 7: Bake It Golden
Slide into the oven for 20-25 mins. Rotate the tin halfway for even browning. They’re done when tops are golden and a toothpick near the egg comes out clean. (Not INTO the egg—that’s cheating!)
Step 8: Cool & Release
Let muffins cool 5 mins in the tin. Then, run a knife around edges and gently lift. If you rush, the egg might stage a great escape! Patience = perfect portable breakfasts.
Plate Like a Pro (Or Just Grab & Run!)
Serve these bad boys warm! I love them split open to reveal that jammy yolk—dusted with extra chives and flaky salt. For brunch, pair with a zesty arugula salad or roasted tomatoes. On-the-go? Wrap in parchment paper for a no-mess commute. Dunk in hot sauce or sriracha mayo if you’re spicy-inclined. Coffee or OJ mandatory!
Shake It Up, Sugar!
1. Veggie Lover: Swap sausage for sautéed mushrooms, spinach, and feta.
2. Southwest Fiesta: Add diced green chiles, corn, and pepper Jack cheese. Top with avocado!
3. Bacon Bliss: Crispy bacon bits instead of sausage. Maple syrup in the batter? Don’t mind if I do.
4. Keto-Friendly: Use almond flour (1:1 swap) and heavy cream instead of milk.
5. Mediterranean Twist: Sun-dried tomatoes, kalamata olives, and feta. Fresh basil garnish!
Confessions from My Kitchen
Okay, real talk: My first batch looked like muffin-shaped volcanoes—egg yolks erupting everywhere! Why? I used raw eggs instead of soft-boiled. Facepalm. Lesson learned: pre-cook those eggs! Over time, I’ve tweaked this like a favorite song. Adding chives? Inspired by my herb garden’s glory days. Using melted butter instead of oil? A happy accident when I ran out of canola. Now, these muffins are my weekly ritual—I make a double batch Sundays while dancing to 80s hits. They freeze like champs: just microwave 60 seconds straight from the freezer. Breakfast salvation!
Your Questions, My Answers (Let’s Troubleshoot!)
Q: Can I use hard-boiled eggs?
A: You can, but the jammy yolk is LIFE! Hard-boiled gives a fully set yolk—still tasty, but less swoon-worthy.
Q: Why did my egg burst in the oven?
A: Two culprits: 1) Egg wasn’t fully covered with batter (seal it tight!). 2) Overcooked the soft-boiled egg initially. Aim for 6-7 minutes max in boiling water.
Q: Can I make these ahead?
A: Absolutely! Bake, cool completely, then freeze in ziplock bags for 3 months. Reheat: 60-90 secs in microwave (from frozen) or 10 mins in a 350°F oven.
Q: My muffins are dense—what went wrong?
A: Overmixing is the usual suspect! Fold batter gently until *just* combined. Also, check your baking powder’s expiration date—old powder won’t rise properly.

Sausage Egg Muffins
- Total Time: 40 mins
Description
Busy mornings don’t mean skipping out on joy. These hearty, golden muffins wrap savory sausage, melty cheese, and a jammy soft-boiled egg inside a fluffy, portable hug. Whether you’re conquering carpool or clocking into Zoom, these protein-packed bites keep you fueled, full, and feeling like a breakfast boss.
Ingredients
-
6 large soft-boiled eggs (6–7 min boil, peeled)
-
2 cups all-purpose flour
-
1 tbsp baking powder
-
2 tsp sugar
-
½ tsp salt
-
1¼ cups whole milk
-
½ cup melted butter (cooled)
-
1 large egg (for batter)
-
1 cup cooked breakfast sausage (crumbled)
-
1 cup shredded cheddar cheese
-
1 tbsp chopped chives
Instructions
-
Preheat oven to 375°F (190°C). Grease or line a 12-cup muffin tin.
-
Mix dry ingredients: flour, baking powder, sugar, salt.
-
Mix wet ingredients: milk, butter, and egg.
-
Combine wet and dry. Gently fold—don’t overmix!
-
Add in sausage, cheddar, and chives. Reserve some cheese for topping.
-
Fill cups halfway with batter, place an egg inside, cover with more batter.
-
Top with cheese, bake 20–25 mins until golden.
-
Cool 5 mins, gently remove from tin.
Notes
-
Jammy eggs = 6–7 mins boil + vinegar in water = easy peel.
-
Don’t overmix—muffins stay light and fluffy.
-
Fully cover the eggs to avoid eruptions.
-
Freeze after cooling—reheat 60 secs for weekday wins!
- Prep Time: 20 mins
- Cook Time: 20 mins
Nutrition
- Calories: 270 cal Per Muffin
- Fat: 17g
- Carbohydrates: 17g
- Protein: 11g
Fuel Your Morning Right
Per Muffin: Calories: ~270 kcal | Protein: ~11g | Fat: ~17g | Carbs: ~16g
Note: Stats vary with swaps like turkey sausage or almond milk.
Final Thoughts: Why This Recipe Wins Mornings
The Sausage Egg Muffin isn’t just a recipe—it’s a morning revolution. It solves the eternal breakfast dilemma: “I need something fast, filling, and delicious.” Whether you’re a busy parent, a work-from-home warrior, or just someone who values extra sleep, these muffins deliver.
The Ultimate Convenience
-
Portable – No fork required.
-
Customizable – Sweet, savory, spicy—make it yours.
-
Meal-Prep Hero – One hour on Sunday = breakfast for the week.
A Flavor & Texture Masterpiece
The contrast of fluffy muffin, crispy sausage, melty cheese, and oozy yolk is breakfast nirvana. It’s diner-quality satisfaction without leaving your kitchen.
A Recipe That Grows With You
From campfire inspiration to kitchen experiments, this dish adapts. Failed batches? Learning moments. Successful ones? Tiny victories.

Chicken, Spinach & Mushroom Low-Carb Oven Dish
## Creamy Low-Carb Chicken Bake: Your New Weeknight Hero!
Hey friends, Beau here from Feastical! 👋 Remember that magical feeling when you dig into a dish that’s simultaneously indulgent *and* guilt-free? Like finding your missing spatula right when the pan starts smoking? That’s exactly the vibe we’re cooking up today. Picture this: juicy chicken breasts swimming in a velvety green-onion cream cheese sauce, tangled with earthy mushrooms and vibrant spinach, all crowned with a golden mozzarella blanket. It’s comfort food that hugs your soul *without* weighing you down—no carb coma in sight! Perfect for chaotic weeknights, lazy Sundays, or when you just need a delicious win. Grab your favorite baking dish—we’re making magic happen!
### Why This Dish Stole My Heart
This recipe? It’s my kitchen MVP, born during a *very* chaotic “snowed-in-with-no-groceries” weekend. My pantry was bare except for a lonely pack of chicken, cream cheese, and some wilting spinach. Desperate times! I tossed everything together praying for edible alchemy… and wow. The creamy sauce bubbling around tender chicken, the way spinach and mushrooms melded into something luxe—it felt like a warm hug in dish form. My family devoured it, and my kiddo (the “veggie skeptic”) actually asked for seconds. *That’s* the moment I knew: this humble bake wasn’t just dinner. It was a reminder that simple ingredients + a little courage = pure, uncomplicated joy. Now, it’s my go-to when life feels extra. Let’s recreate that magic for you!
### Your Flavor Toolkit: Ingredients & Pro Hacks
Gather these heroes! Flexibility is key—swap based on what’s in your fridge.
- 6 thin-sliced chicken breasts → Chef’s tip: Pound thicker cuts to ½-inch for even cooking! Sub: Chicken thighs (juicier, bake 5 mins longer).
- 1 (8 oz) container green onion cream cheese → Game-changer! The herbaceous tang lifts the whole dish. Sub: Plain cream cheese + 2 tbsp chopped chives.
- ¼ cup olive oil → Divided: some for sautéing, some for greasing. Sub: Avocado oil for higher smoke point.
- ½ cup chicken broth → Secret weapon for silky sauce! Sub: Bone broth for extra protein punch.
- 1 large package sliced mushrooms (8-10 oz) → Baby bellas add depth. Swap: Shiitakes for umami fireworks!
- 1 small bag fresh baby spinach (5 oz) → Wilts down to nothing—don’t skip! Sub: 1 cup thawed frozen spinach (squeeze DRY).
- 1 dash Weber Herb & Garlic Seasoning → My flavor cheat code! Sub: 1 tsp garlic powder + ½ tsp dried thyme + ½ tsp rosemary.
- 8 oz shredded mozzarella cheese → The gooey crown! Part-skim works. Add parmesan for nutty notes.
### Let’s Build Flavor Town: Step-by-Step!
Ready? Aprons on, oven preheating to 375°F (190°C)! Active time = 15 mins. Promise.
- Prep Your Stage: Lightly grease a 9×13″ baking dish with olive oil. Why? Prevents sticking AND adds flavor. No dish scrubbing later!
- Chicken Foundation: Arrange chicken in the dish—no overlapping! Sprinkle generously with Weber seasoning. Hack: For max flavor, rub seasoning under chicken too!
- Sauté the Aromatics: Heat 2 tbsp oil in a skillet over medium-high. Add mushrooms—sizzle alert! Cook 5-7 mins until golden and fragrant. Tip: Don’t crowd the pan—mushrooms need space to brown, not steam!
- Wilt the Greens: Toss in spinach. Stir 1-2 mins until just wilted—it’ll look like a mountain now, but shrinks fast! Chef’s secret: Add a pinch of salt here to draw out moisture.
- Create the Lush Sauce: Reduce heat to low. Add cream cheese and broth. Stir constantly for 2-3 mins until velvety smooth. Watch the magic! If too thick, splash in 1 tbsp broth.
- Blanket the Chicken: Spoon saucy veg mix evenly over chicken. Pro move: Slide some sauce under chicken too for extra moisture!
- Cheese It Up: Shower mozzarella over everything. For extra crisp: Add 2 tbsp grated parmesan!
- Bake to Perfection: Bake uncovered 45-50 mins. Chicken’s done at 165°F (internal). Golden Rule: Let rest 5 mins! Sauce thickens, chicken reabsorbs juices.
### Serving: Make It Shine!
Slide that dish straight to the table—it’s a showstopper! For color, scatter fresh parsley or chives over the bubbly cheese crust. Keep it low-carb with a crisp side salad (try my lemon-avocado dressing!) or roasted asparagus. Feeling fancy? Serve in shallow bowls with a spoon to capture every drop of that luscious sauce. Perfect with chilled sparkling water + lemon. Comfort in every bite!
### Mix It Up: 5 Tasty Twists
- Keto Power-Up: Stir ¼ cup crumbled bacon into sauce + top with blue cheese crumbles.
- Mediterranean Mood: Swap spinach for sun-dried tomatoes + kalamata olives. Top with feta!
- Spicy Fiesta: Add 1 tsp cumin + ½ tsp chipotle powder to sauce. Garnish with jalapeños.
- Dairy-Free Dream: Use Kite Hill almond cream cheese + dairy-free mozzarella. Swap broth for veg stock.
- Pesto Swirl: Dollop 3 tbsp basil pesto into cream cheese sauce before baking.
### Chef Beau’s Corner: Real Talk
Okay, full disclosure: my first test batch was… saucy soup. 😂 I’d drowned the chicken in broth! But here’s the beauty: mistakes lead to genius. I learned that letting the sauce rest thickens it beautifully, and *thin* chicken is non-negotiable. Over the years, I’ve added tricks—like sautéing mushrooms hard for deep flavor, or adding a parmesan crust for crunch. My kids now call it “Dad’s Green Clouds” (thanks, spinach!). It’s evolved, but the soul remains: simple, forgiving, and deeply satisfying. Pro tip? Double the sauce—it’s killer over zucchini noodles tomorrow!
### FAQs: Solving Kitchen Mysteries
Q: My sauce split! How to fix?
A: Don’t panic! Whisk in 1 tbsp cold broth or cream. If baked, stir vigorously—the cheese will rebind it.
Q: Can I use frozen spinach? How?
A: Absolutely! Thaw 10 oz frozen spinach, then SQUEEZE out all liquid (seriously—get aggressive!). Use in step 4.
Q: Chicken dry? What went wrong?
A: Likely overbaked or too thick. Use a meat thermometer (165°F max). Pound uniformly next time—or try thighs!
Q: Make ahead? Storage tips?
A: Assemble (unbaked) 1 day ahead—cover, refrigerate. Add 5-10 mins bake time. Leftovers? Reheat covered at 350°F. Freezes great for 3 months!

Chicken, Spinach & Mushroom Low-Carb Oven Dish
- Total Time: ~1 hr 5 mins
Description
What if comfort food didn’t come with a carb crash? This creamy chicken bake wraps juicy chicken, earthy mushrooms, and tender spinach in a green onion cream cheese sauce—then crowns it all with melty mozzarella. It’s rich, easy, and weeknight-friendly. One bite and you’ll see why it’s the MVP of dinner time!
Ingredients
What if comfort food didn’t come with a carb crash? This creamy chicken bake wraps juicy chicken, earthy mushrooms, and tender spinach in a green onion cream cheese sauce—then crowns it all with melty mozzarella. It’s rich, easy, and weeknight-friendly. One bite and you’ll see why it’s the MVP of dinner time!
Instructions
-
Preheat oven to 375°F (190°C). Grease a 9×13″ dish.
-
Season chicken and lay in dish.
-
Sauté mushrooms in 2 tbsp oil until golden (5–7 mins). Add spinach, stir until wilted (2 mins).
-
Make sauce: Lower heat, stir in cream cheese + broth until smooth (2–3 mins).
-
Assemble: Spoon veggie sauce over chicken. Sprinkle mozzarella and optional parmesan.
-
Bake uncovered 45–50 mins. Rest 5 mins before serving.
Notes
-
Pound chicken for even cooking.
-
Don’t crowd mushrooms—they need space to brown.
-
Resting time = thickened sauce + juicier chicken.
-
Frozen spinach? Thaw & squeeze dry!
-
Double sauce for leftovers—perfect on zucchini noodles!
- Prep Time: 15 mins
- Cook Time: 50 mins
Nutrition
- Calories: 410 Cal
- Fat: 27g
- Carbohydrates: 5g
- Protein: 38g
Nutrition Per Serving (Serves 6)
Calories: 410 | Protein: 38g | Net Carbs: 5g | Fat: 27g | Fiber: 2g
Final Thoughts
This Creamy Low-Carb Chicken Bake isn’t just a recipe—it’s a versatile, forgiving, and endlessly customizable canvas for your culinary creativity. Whether you’re snowed in with a bare pantry, meal prepping for a hectic week, or craving global flavors, this dish delivers. It proves that eating low-carb doesn’t mean sacrificing comfort or flavor. So grab that baking dish, trust the process, and let every bite remind you that the best meals are the ones made with a dash of courage and a sprinkle of love. Happy cooking, friends!
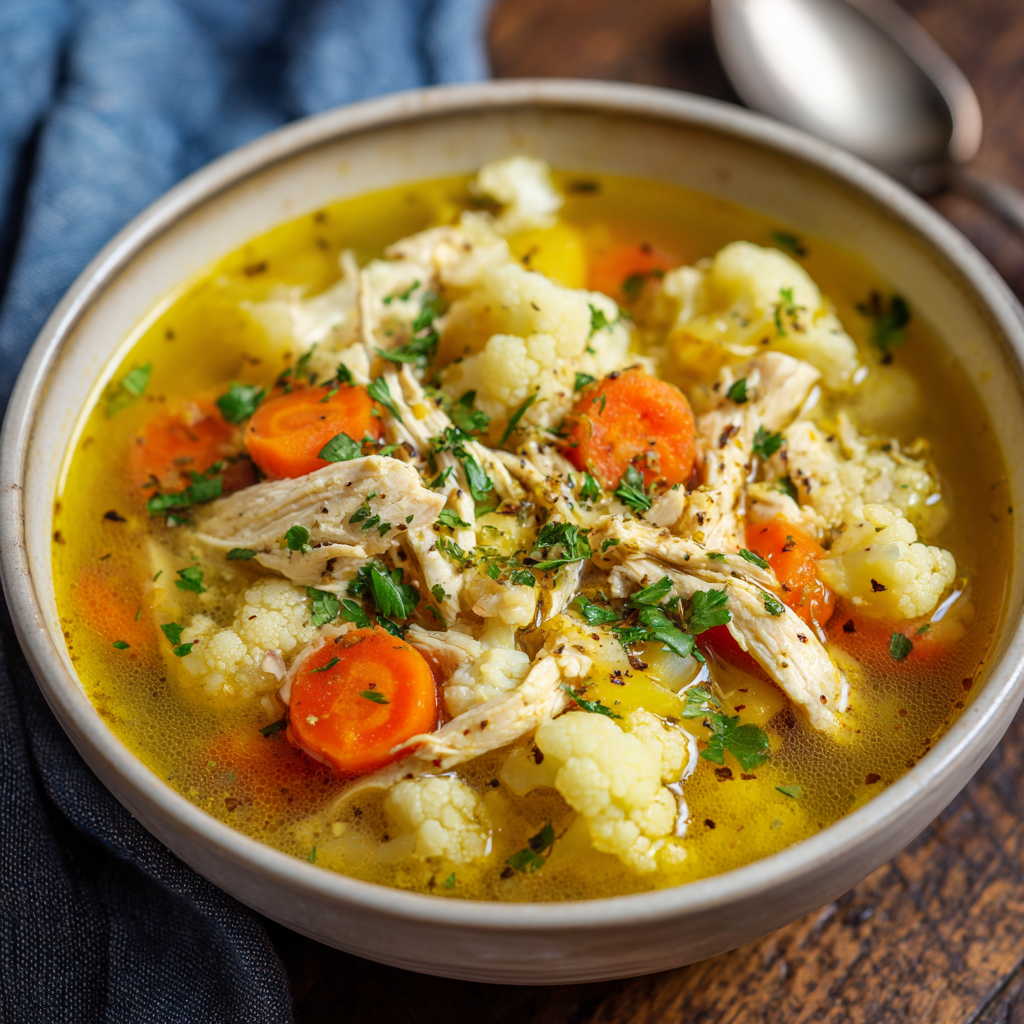
Cauliflower Chicken Soup
When Life Gives You Chills, Make Cauliflower Chicken Soup
Hey friends, Beau here from Feastical! Grab your coziest sweater and that trusty soup pot – we’re diving into a bowl of pure comfort today. You know those days when the wind howls like a hungry wolf, or you’re feeling just a bit under the weather? That’s when my Cauliflower Chicken Soup becomes your edible security blanket. This isn’t just any soup; it’s a golden-hued hug in a bowl that marries tender chicken with cauliflower’s creamy magic, all sparked with ginger’s zing and turmeric’s earthy warmth. What makes it extra special? It’s light enough that you won’t feel weighed down, yet satisfying enough to make your taste buds dance. And here’s the kicker – it’s packed with anti-inflammatory superheroes to gently boost you when you need it most. Whether you’re battling a cold or just craving something soul-nourishing, this 30-minute wonder has saved many a gloomy day in our house. So tie on that apron – we’re making magic happen with simple ingredients and maximum flavor!
My Snowed-In Soup Epiphany
Picture this: Vermont, 2018. A surprise blizzard trapped my wife and me in our cabin with nothing but a sad-looking cauliflower, some frozen chicken, and dwindling groceries. As the snow piled up, so did our desperation for something warm. I started tossing things in a pot – ginger for kick, turmeric because my grandma swore by it, and that lone cauliflower. When we finally tasted it? Game changer. The cauliflower melted into velvety submission, the chicken became tender clouds, and the spices wove this golden warmth through every spoonful. We spent three days by the fire eating that soup, and here’s the funny part: when the roads cleared, we missed it! That accidental recipe became our winter lifeline. Now, whenever frost paints the windows, I make this soup and smile at how a little kitchen improv can turn desperation into delicious tradition. Food memories? They stick to your ribs better than any blizzard snow!
Your Flavor Toolkit: Ingredients & Smart Swaps
- 8 oz cooked chicken breast – Rotisserie chicken works wonders here! Shred it juicy. Chef hack: Swap with turkey or chickpeas for vegetarian.
- 2½ cups cauliflower florets – Frozen works in a pinch! Cauli’s the stealth cream-maker. Insight: Break small for faster cooking.
- 1 chopped carrot – Adds natural sweetness. No carrots? Try sweet potato cubes.
- 1½ tbsp grated ginger – Fresh is fire! Sub tip: ½ tsp dried ginger in emergencies.
- 1 small onion + 2 garlic cloves – Flavor foundation. Red onion adds fun zing!
- ½ tsp turmeric + ½ tsp black pepper – Dynamic duo! Pepper boosts turmeric’s benefits. Chef insight: Don’t skip the pepper!
- 1 tsp dried mint – The secret bright note. Swap: Fresh dill or basil.
- 2 tbsp olive oil – EVOO rules, but avocado oil works too.
- Salt + extra black pepper – Season like you mean it!
Let’s Make Soup Magic: Your Foolproof Roadmap
Step 1: Heat olive oil in your favorite Dutch oven over medium heat. Toss in onions, garlic, and ginger. Sizzle for 3-4 minutes until they’re fragrant and dancing – that aroma? That’s your flavor base singing! Pro tip: Stir constantly to avoid garlic bitterness.
Step 2: Add carrots and cauliflower florets. Sprinkle turmeric, black pepper, dried mint, and a generous pinch of salt. Stir like you’re painting rainbows – coat every veggie in those golden spices! Hack: Let spices toast for 30 seconds to wake up their oils.
Step 3: Pour in 4-5 cups water or broth (bone broth = extra richness!). Crank heat to high until it boils, then immediately reduce to a gentle simmer. Cover that pot like tucking in a baby! Chef secret: Swirl the pot instead of stirring to keep veggies intact.
Step 4: Simmer covered for 20-25 minutes. Peek occasionally – cauliflower should pierce easily with a fork. Troublesaver: If liquid evaporates, add ½ cup hot water.
Step 5: Stir in shredded chicken. Simmer uncovered 5 more minutes – just enough to warm the bird through. Taste! Need more pep? Add lemon zest or red pepper flakes.
Step 6 (Optional but glorious): Grab a potato masher. Gently crush about ⅓ of the soup against the pot wall. Instant creaminess without a blender! Texture tip: Leave some chunks for happy spoonful surprises.
The Science Behind the Comfort: Why This Soup Heals
Ever wonder why chicken soup is hailed as a cure-all when you’re sick? This Cauliflower Chicken Soup isn’t just delicious—it’s packed with science-backed benefits that make it a true wellness warrior. Let’s break it down:
1. Ginger’s Firepower
Fresh ginger isn’t just for zing—it’s a natural anti-inflammatory and antiviral powerhouse. Studies show gingerol, its active compound, can help reduce nausea, fight respiratory infections, and even ease sore throats. When simmered, it infuses the broth with warmth that soothes from the inside out.
2. Turmeric’s Golden Magic
Turmeric isn’t just trendy; curcumin, its star component, has potent anti-inflammatory and antioxidant effects. But here’s the catch: curcumin needs black pepper to unlock absorption. That’s why this recipe insists on the turmeric-pepper duo—it’s a bioavailability hack straight from Ayurvedic medicine!
3. Cauliflower’s Stealth Health Boost
Unlike heavy cream-based soups, this recipe uses cauliflower to create a velvety texture while sneaking in fiber, vitamin C, and choline (a nutrient that supports brain health). When cooked, cauliflower releases compounds called glucosinolates, which may help detoxify the body—perfect for flu season.
4. Bone Broth Bonus
If you opt for bone broth (highly recommended!), you’re adding collagen, glycine, and minerals like magnesium. These support gut health, joint repair, and even sleep quality. Homemade broth? Even better—simmer bones with apple cider vinegar to extract maximum nutrients.
5. The Comfort Factor
Beyond biochemistry, there’s psychology. The aroma of onions, garlic, and herbs triggers nostalgia and serotonin release. Warm liquids also loosen mucus (thanks, steam!), while salt helps hydrate your cells. It’s a triple threat: physiological, emotional, and sensory relief.
Pro Tip: For an extra immune kick, add a splash of apple cider vinegar at the end—its acidity brightens flavors and aids digestion.
Global Twists: How the World Would Make This Soup
This recipe is a blank canvas—here’s how different cultures might riff on it with local flavors:
1. Thai-Inspired
Swap turmeric for red curry paste and add lemongrass, kaffir lime leaves, and coconut milk. Top with cilantro, lime, and a drizzle of chili oil.
2. Italian Grandma Style
Add cannellini beans, rosemary, and a Parmesan rind to the broth. Finish with a swirl of pesto and crusty ciabatta.
3. Indian Comfort
Toast cumin, coriander, and mustard seeds in the oil first. Stir in garam masala with the turmeric and finish with a dollop of yogurt.
4. Mexican Caldo
Add diced tomatoes, cumin, and oregano. Serve with avocado, radishes, and a squeeze of lime.
5. Japanese Umami
Use dashi broth instead of water, add miso paste at the end (never boil it!), and garnish with nori strips and scallions.
Why It Works: Every culture has a “sick-day soup” template—aromatics + protein + healing spices + carbs. The base recipe is adaptable because it follows universal comfort principles.
Fun Experiment: Try the “United Nations Soup Challenge” — make a batch, divide it into portions, and season each differently. Taste-test your way around the world!
Soup for the Soul: The Emotional Alchemy of Cooking
This soup isn’t just about ingredients—it’s about the ritual. Here’s why the act of making it is as therapeutic as eating it:
1. The Zen of Chopping
Peeling garlic, dicing onions, breaking cauliflower—repetitive motions can be meditative. It’s a form of “active rest” for an anxious mind.
2. The Alchemy of Transformation
Watching raw veggies soften into a golden elixir mirrors life’s struggles turning into wisdom. There’s metaphor in that pot!
3. The Gift of Nurturing
Bringing a steaming bowl to a sick loved one (or yourself) is an act of care. You’re literally serving warmth and hope.
4. The Power of Scent Memory
Smells trigger memories more vividly than any other sense. One whiff of ginger and turmeric might transport you to a snowy cabin or your grandma’s kitchen.
5. The Joy of Imperfection
Burnt the onions? Too much pepper? No stress—soup forgives. It’s a reminder that flaws can still taste wonderful.
Try This: Next time you make this soup, put on a cozy playlist, light a candle, and savor the process as much as the meal. Cooking isn’t just nourishment—it’s love made visible.
Now, go forth and ladle out joy. And remember—every bowl is a fresh start.
Bowl Appeal: Serving Your Masterpiece
Ladle that sunshine-bright soup into deep bowls. Drizzle with extra virgin olive oil for luxurious sheen, then crown it with something fresh: chopped parsley, chives, or a mint sprig. For crunch? Toasted pumpkin seeds or garlicky croutons. Pair it with crusty sourdough for dipping – because soup without bread is like a hug without a squeeze! Serve immediately while steam curls up like cozy invitations. Bonus: Garnish with lemon zest for a bright wake-up call!
Remix Your Bowl: 5 Flavor Adventures
1. Coconut Dream: Swap 1 cup water with coconut milk + add 1 tbsp curry powder. Top with cilantro.
2. Creamy Lovers: Blend entire soup until smooth. Stir in ¼ cup Greek yogurt at the end.
Toss in 2 cups spinach or kale with the chicken.
4. Spicy Fiesta: Add diced jalapeños with onions + finish with lime and avocado.
5. Whole30/Paleo: Use ghee instead of olive oil + ensure broth is sugar-free.
Beau’s Backstage Scoop
This recipe’s evolved more than my taste in aprons! Originally, I’d boil chicken in the broth, but using pre-cooked saved 15 minutes – genius for sick days. One hilarious fail? I once used purple cauliflower. Let’s just say gray soup isn’t appetizing! Now I stick to white florets. Over time, I learned two game-changers: 1) Toasting spices in oil unlocks insane depth (try it with cumin seeds!), and 2) Adding chicken at the end keeps it silky, not rubbery. Funny story: My dog, Biscuit, goes nuts for this soup’s aroma – I now keep a chicken-free “pup portion” simmering just for him! Moral? Good food brings everyone together, paws included.
Your Soup Queries, Solved!
Q: Can I use frozen cauliflower?
A: Absolutely! No need to thaw – just add 5 extra minutes to simmer time. Avoid frozen medleys with broccoli; they muddy the flavor.
Q: My soup tastes flat. Help!
A: Flavor rescue mission! Try: 1) Squeeze of lemon juice 2) 1 tsp fish sauce (sounds wild, but umami magic!) 3) Pinch of MSG or extra salt. Remember: broths vary, so taste before serving!
Q: How long does it keep?
A: 4 days refrigerated in airtight containers. Freezes beautifully for 3 months! Thawing tip: Reheat from frozen on low with a splash of broth.
Q: Can I make it creamy without dairy?
A: Yes! Blend 2 cups soup with ¼ cup raw cashews until smooth, then stir back in. Silky heaven!

Cauliflower Chicken Soup
- Total Time: 30 mins
Description
This is your go-to soup when you need warmth from the inside out. A velvety blend of cauliflower, tender chicken, vibrant ginger, and turmeric creates a feel-good potion that’s nourishing, comforting, and ready in just 30 minutes. Light yet satisfying, this anti-inflammatory bowl of sunshine is like a weighted blanket for your soul—without the heaviness.
Ingredients
-
8 oz cooked shredded chicken (or chickpeas for veg version)
-
2½ cups cauliflower florets
-
1 chopped carrot
-
1½ tbsp fresh grated ginger (or ½ tsp dried)
-
1 small onion, chopped
-
2 garlic cloves, minced
-
½ tsp turmeric + ½ tsp black pepper
-
1 tsp dried mint (or dill/basil)
-
2 tbsp olive oil
-
Salt to taste
-
4–5 cups water or broth
-
Optional: lemon zest, fresh herbs for topping
Instructions
-
Sauté onion, garlic, and ginger in olive oil (3–4 mins).
-
Add cauliflower, carrot, turmeric, pepper, mint, and salt. Stir to coat.
-
Pour in water/broth. Bring to boil, then simmer 20–25 mins covered.
-
Add chicken. Simmer uncovered 5 mins.
-
Optional: Mash ⅓ of soup in pot for creaminess.
-
Serve hot with fresh herbs, olive oil drizzle, or crusty bread.
Notes
-
Use frozen cauliflower (add 5 mins simmer time)
-
Add greens like spinach or kale in last 5 mins
-
Coconut milk + curry = cozy twist
-
Blend smooth for creamy texture without dairy
- Prep Time: 5 mins
- Cook Time: 25 mins
Nutrition
- Calories: 180 Ca Per Serving
- Sodium: 380mg
- Fat: 8g
- Carbohydrates: 10g
- Fiber: 3g
- Protein: 18g
Nourishment in Numbers (Per Serving)
Calories: 180 • Fat: 8g • Carbs: 10g • Fiber: 3g • Protein: 18g • Sodium: 380mg
Note: Stats use water, not broth. Bone broth adds 10g protein/serving!
Final Thoughts: More Than Just Soup
This Cauliflower Chicken Soup is a quiet revolution in a bowl. It proves that healing food doesn’t require fancy techniques or expensive ingredients—just intention. Whether you’re snowed in, sniffling, or simply soul-tired, it’s a reminder that comfort is always within reach.
So here’s to blizzards that inspire recipes, to spices that do double duty as medicine, and to the magic that happens when we trust our instincts. Life will always give us chills, but with a pot of this soup simmering on the stove? We’ve got warmth to spare.

Easy Lasagna Soup
Ditch the Layers, Keep the Love: Your New Favorite Lasagna Soup is Here!
Hey friends, Beau here from Feastical! Let’s talk about those nights when you’re craving the cozy, cheesy hug of lasagna but *absolutely* don’t have time for the whole layering, baking, and dish-washing marathon. (Raise your spatula if you’ve ever lost an hour wrestling with slippery noodles!) That’s exactly why I created this soul-warming Easy Lasagna Soup – it’s everything you adore about classic lasagna, simmered up in one pot and ready in about 30 minutes flat. Imagine: savory ground beef, fragrant herbs, tender pasta swimming in a rich tomato broth, all crowned with creamy ricotta and salty Parmesan. It’s like your favorite Italian grandma hugged a weeknight dinner. No fuss, no stacks, just pure, spoonable comfort that’ll have everyone asking for seconds. Grab your favorite soup pot and let’s turn “I’m too tired to cook” into “Wow, I’m a genius!” together.
Lasagna Night SOS & The Birth of a Lifesaver
This soup was born from pure, unplanned kitchen chaos. Picture it: My nephew’s birthday, pouring rain, and a beautifully assembled lasagna ready for the oven… until my dog, Biscuit (yes, really), decided the kitchen floor was a race track. *Crash.* Glass baking dish, lasagna layers, and my sanity – everywhere. With guests arriving in 45 minutes, panic set in! I stared at the saucy, beefy wreckage and had a lightbulb moment: “What if this was meant to be soup?” I tossed everything into a pot, added extra broth, broke up the noodles, and let it bubble. The result? A ridiculously delicious, slurpable miracle that had everyone raving. Now, Biscuit’s “help” is a running joke, and this soup is my go-to lifesaver for crazy nights. Sometimes the best recipes come from happy accidents (and slightly naughty pups)!
Gather Your Flavor Squad
Here’s what you’ll need for this cozy pot of magic (plus my chef-y secrets!):
- 1 tbsp olive oil – Our flavor-starter! Extra virgin adds fruitiness, but any works. Tip: Swirl it until it shimmers before adding onions!
- 1 lb ground beef – (I love ButcherBox for quality!) Chef’s Swap: Ground turkey, Italian sausage, or lentils for a veggie twist.
- ½ cup minced onion – Yellow or white for sweetness. Frozen works in a pinch!
- 2 tbsp minced garlic (about 6 cloves) – Fresh is fire! Jarred is okay, but double it for punch.
- 28 oz crushed tomatoes – Low/no sodium lets YOU control salt. San Marzano = flavor gold!
- 1 bay leaf – The quiet hero! Removed before serving, but adds earthy depth.
- 1 tsp each dried basil, parsley, oregano – The Italian trifecta! Rub them between your palms to wake up the oils.
- ½ tsp black pepper + ¼ tsp red pepper flakes (optional) – Heat level’s your call! Flakes add a warm buzz.
- 4 cups low-sodium beef broth – Chef’s Secret: Better Than Bouillon paste + water = mega flavor boost!
- 2 cups water – Helps balance richness. Need more broth? Go for it!
- 2 cups reginetti pasta or broken lasagna noodles (approx. 5 oz) – Reginetti looks like mini lasagna sheets! Mafalda or broken regular noodles work too.
- For Serving: ¼ cup ricotta + ¼ cup grated Parmesan (optional but HIGHLY recommended) – The “cheesy magic” finish! Dollop, don’t stir!
Let’s Build Some Deliciousness! (Step-by-Step)
Follow these simple steps for guaranteed soup success:
- Heat & Sizzle: Grab your largest pot or Dutch oven. Heat that olive oil over medium heat until it shimmers like a summer pond. Toss in your minced onion and cook for about 3 minutes, stirring occasionally, until they turn soft and translucent. Chef’s Tip: Don’t rush this! Sweet, soft onions = flavor foundation.
- Brown the Beef: Crumble in the ground beef. Cook it up, breaking it into small bits with your spoon or spatula, until it’s beautifully browned and no pink remains (about 5-7 mins). Hack Alert! If there’s lots of excess fat, tilt the pot and spoon some out – keeps things flavorful but not greasy.
- Garlic & Herb Party: Time for aroma! Stir in the garlic, basil, parsley, oregano, black pepper, and red pepper flakes (if using). Cook for just 1 minute – you’ll smell the magic! Key Insight: Blooming dried herbs in fat unlocks SO much more flavor than adding them straight to liquid.
- Liquid Gold: Pour in the crushed tomatoes, beef broth, and water. Plop in that bay leaf. Give it a good stir, scraping any tasty bits off the bottom of the pot. Bring it all to a lively boil. Watch the pot bubble – it’s soup therapy!
- Pasta Power: Stir in the pasta (broken lasagna noodles or reginetti). Let it cook uncovered, stirring occasionally, for 10-12 minutes, or until the pasta is perfectly tender (al dente is fine too!). Pro Tip: Keep an eye on the liquid level. Pasta absorbs a lot! Add a splash more broth or water if it gets too thick.
- Final Flourish: Fish out and discard the bay leaf (it did its job!). Give the soup a taste. Need more salt? Pepper? A pinch of sugar to balance the tomatoes? Adjust now! Remember: The cheeses add salt later, so under-season slightly if topping generously.
Bowl Up the Comfort!
Ladle that steaming, fragrant soup into deep, cozy bowls. Now, the grand finale: Drop generous dollops of cool, creamy ricotta cheese right on top – like little flavor clouds. Follow with a snowfall of freshly grated Parmesan. For serious wow factor, add a sprinkle of chopped fresh basil or parsley and a crack of black pepper. Serve immediately with crusty bread for dipping (garlic bread? Yes please!). The hot soup melts the cheeses just slightly, creating that iconic “lasagna” ribbon effect in every spoonful. Pure comfort!
Make It Your Own! (Fun Twists & Swaps)
This soup is your culinary canvas! Try these tasty spins:
- Meat Lover’s Dream: Swap half the beef for spicy Italian sausage. Hello, depth!
- Veggie-Packed: Add 1 cup diced zucchini, bell peppers, or spinach with the onions. Use veggie broth and lentils instead of beef for a hearty plant-based version.
- Cheesy Extravaganza: Stir in 1 cup shredded mozzarella with the pasta for ultimate gooeyness. Top with extra!
- Creamy Tuscan: Stir in ½ cup heavy cream or full-fat coconut milk at the end for luxurious silkiness.
- Shortcut Supreme: Use a jar of your favorite marinara sauce instead of crushed tomatoes + herbs. Adjust broth if needed.
Beau’s Kitchen Chronicles
This recipe has truly evolved! The first version was purely post-Biscuit-disaster survival mode. Over time, I learned the bay leaf trick adds surprising depth, and using low-sodium broth is non-negotiable for flavor control. I also discovered that letting the soup sit for 10-15 minutes off heat before serving (lid on!) lets the flavors meld beautifully – the pasta absorbs more broth, making it even more “lasagna-like.” Funny story: Once, during a live demo, I forgot the garlic entirely! We laughed it off, added roasted garlic paste at the end, and it was still delicious. Moral? Soup is forgiving. Make it yours, embrace the happy accidents, and always keep extra cheese on hand!
Your Lasagna Soup Questions, Answered!
Q: Can I make this ahead of time?
A: Absolutely! Cook the soup without the pasta. Cool, store in the fridge for up to 3 days. When ready, reheat, bring to a simmer, add the pasta, and cook until tender. Pasta added ahead gets too mushy.
Q: My soup turned out too thick! Help?
A: No worries! Simply stir in a little extra warm broth, water, or even a splash of tomato juice until it reaches your perfect soupy consistency. Remember, it will thicken slightly as it sits.
Q: Can I freeze lasagna soup?
A: Yes, but freeze it without the pasta for best texture. Cooked pasta can become grainy when frozen and reheated. Freeze the base soup for up to 3 months. Thaw overnight, reheat, then cook fresh pasta right in the hot soup.
Q: The ricotta just sinks! How do I make it pretty?
A: Great question! For picture-perfect dollops, make sure your ricotta is cold and slightly thickened (full-fat works best). Use a small spoon to gently place it on the hot soup right before serving – don’t stir! The heat will soften it slightly without making it disappear.

Easy Lasagna Soup
- Total Time: 35 mins
Description
All the comfort of classic lasagna—none of the fuss. This one-pot Lasagna Soup delivers that savory, saucy, cheesy magic in under 30 minutes. It’s rich, herby, hearty, and spoon-slurpable with dollops of creamy ricotta and a sprinkle of parmesan that melt right into the tomato broth. Whether you’re feeding a hungry crew or just your craving, this dish brings the warmth of lasagna night—without the stack!
Ingredients
-
1 tbsp olive oil
-
1 lb ground beef (or turkey/Italian sausage)
-
½ cup minced onion
-
2 tbsp minced garlic
-
28 oz crushed tomatoes
-
4 cups beef broth + 2 cups water
-
1 bay leaf
-
1 tsp each dried basil, oregano, parsley
-
½ tsp black pepper + red pepper flakes (optional)
-
2 cups reginetti pasta or broken lasagna noodles
-
Optional: ¼ cup ricotta + ¼ cup grated parmesan for topping
Instructions
-
Heat olive oil in a large pot. Sauté onion 3 mins.
-
Add ground beef; cook until browned. Drain excess fat.
-
Stir in garlic and dried herbs. Sauté 1 min.
-
Pour in tomatoes, broth, water, bay leaf, salt, pepper. Bring to boil.
-
Add pasta. Simmer 10–12 mins, stirring, until tender.
-
Remove bay leaf. Adjust seasoning.
-
Serve hot with ricotta and parmesan dollops on top!
Notes
-
Add sautéed veggies like zucchini or spinach
-
Stir in mozzarella for extra cheesy vibes
-
Sub lentils + veggie broth for a plant-based twist
-
Freeze without pasta for easy meal prep
- Prep Time: 10 mins
- Cook Time: 25 mins
Nutrition
- Calories: 340Cal Per Serving
- Fat: 14g
- Carbohydrates: 28g
- Fiber: 3g
- Protein: 24g
Nutrition & Prep Details
Prep time: 10 minutes | Cook time: 25 minutes | Servings: 6
Approx. per serving (without optional cheeses):
Calories: 340 | Fat: 14g | Carbs: 28g | Protein: 24g | Fiber: 3g | Sodium: 400mg
Final Thoughts
This lasagna soup is more than a time-saver—it’s a celebration of adaptability. It proves that great food doesn’t need complexity, just heart (and maybe a mischievous dog). Whether you’re a busy parent, a cooking newbie, or an Italian-food fanatic, this pot of comfort bridges the gap between craving and reality. So next time you’re eyeing that lasagna recipe but dreading the dishes, remember: Love isn’t measured in layers. It’s measured in shared bowls, laughter over spilled soup, and the courage to turn accidents into traditions. Now, go forth and simmer with confidence!

Keto Creamy Tuscan Zucchini Noodles with Sausage
Keto Comfort That Tastes Like a Tuscan Dream
Hey friends, Beau here from Feastical! Let’s talk about that moment when you’re craving a big, soul-warming bowl of pasta but your keto goals are giving you the side-eye. We’ve all been there, right? That’s exactly why I created this Keto Creamy Tuscan Zucchini Noodles with Sausage – it’s like wrapping yourself in a cozy Italian blanket without the carb coma. Imagine plump garlic sausage sizzling in olive oil, tangled in bright zucchini ribbons, all swimming in a velvety parmesan sauce studded with sun-dried tomatoes and spinach. It’s rich, luscious, and packs just 5g net carbs per serving. Best part? You’ll go from hungry to happily fed in 25 minutes flat. This isn’t just “diet food” – it’s a flavor explosion that’ll make your taste buds dance the tarantella. Whether you’re keto-curious or a low-carb lifer, this dish proves comfort food can absolutely play nice with your goals. So grab your skillet and let’s turn zucchini into magic!
Sunshine, Sausage & A Happy Kitchen Accident
This recipe? It’s basically my edible love letter to a rainy afternoon in my tiny Austin apartment. Picture this: I’d just gotten home from a grueling catering gig, soaked to the bone, dreaming of the creamy Tuscan pasta I’d devoured on a trip to Florence. But my pantry laughed at my carb-loaded fantasy – all I had was zucchini, some lonely sausage links, and a wilting spinach bunch. Challenge accepted! As I started improvising, something magical happened. The cream and parmesan melted into this unplanned luscious sauce, the sun-dried tomatoes popped like flavor fireworks, and those zucchini noodles? They soaked up the richness without turning to mush. My roommate wandered in, sniffed the air, and demanded a plate. One bite in, he mumbled through a full mouth: “Dude, this is BETTER than pasta.” That’s when I knew – sometimes the happiest kitchen accidents become staples. Now, every time I make this, I’m back in that steamy kitchen, turning a “what’s in the fridge?” moment into pure gold.
Your Flavor Dream Team (Plus Easy Swaps!)
- 1 package Kiolbassa Roasted Garlic Sausage – Smoky, garlicky, and pre-cooked for convenience! Chef’s Tip: Swap with spicy Italian chicken sausage or ground pork seasoned with 1 tsp garlic powder + ½ tsp fennel seeds.
- 2 tbsp olive oil – Our flavor foundation. Substitute: Butter or avocado oil work beautifully!
- 3 garlic cloves, minced – Non-negotiable for that authentic Tuscan punch. Insider Hack: Use ¾ tsp garlic powder if fresh isn’t handy!
- 1 cup heavy cream – Creates that luxurious, velvety base. Dietary Swap: Full-fat coconut milk for dairy-free (add 1 tsp nutritional yeast for cheesy vibes).
- ¼ cup chicken broth – Thins the sauce perfectly and adds depth. Pantry Rescue: Vegetable broth or even a splash of white wine (cook off the alcohol!) works.
- 1 tsp Italian seasoning – Your herbaceous flavor shortcut. Mix Your Own: ½ tsp dried oregano + ¼ tsp each dried basil, rosemary, and thyme.
- ½ cup grated Parmesan cheese – Salty, umami magic! Pro Move: Always grate it fresh – the pre-shredded stuff won’t melt as smoothly.
- 1 cup chopped spinach – Fresh pop of color and nutrients. Flex Tip: Kale or arugula add peppery zing!
- ½ cup sun-dried tomatoes (oil-packed) – Little bursts of tangy sweetness. Chef’s Secret: Pat them dry with paper towels to avoid oily sauce.
- Salt & pepper, to taste – Season in layers!
- 12 oz zucchini noodles – Our low-carb hero. Time-Saver: Buy pre-spiralized, or use a julienne peeler for wider “pappardelle” style.
- Fresh basil, for topping – The fragrant, Instagram-worthy finish!
See? Simple, flexible ingredients doing BIG things! This combo delivers maximum flavor with minimal fuss.
Let’s Get Sizzling: Your Foolproof Roadmap
- Brown That Beautiful Sausage: Heat olive oil in a large skillet (I adore my cast iron for this!) over medium heat. Add sliced sausage in a single layer – don’t crowd the pan! Cook 3-4 minutes per side until gorgeously browned and slightly crispy. Chef’s Golden Rule: Remove sausage now and set aside. This keeps it juicy and prevents overcooking! You’ll thank me later.
- Wake Up the Garlic: In that same glorious skillet (all those sausage bits = flavor gold!), toss in minced garlic. Sauté just 30 seconds until fragrant – DO NOT let it brown or it turns bitter! It should smell like Italy is calling your name.
- Build Your Creamy Dream Sauce: Pour in heavy cream and chicken broth. Sprinkle Italian seasoning and whisk in grated parmesan. Critical Tip: Keep heat at medium-low! Boiling cream can separate. Stir gently for 3-5 minutes until sauce thickens just enough to coat the back of a spoon.
- Veggie Power Play: Add chopped spinach and sun-dried tomatoes. Stir until spinach wilts down – about 1-2 minutes. Hack Alert: If sauce seems too thick now, splash in 1 extra tbsp broth!
- Bring It All Home: Return the sausage to the skillet. Add zucchini noodles. Gently toss everything together with tongs for just 2-3 minutes! Zucchini Wisdom: Zoodles cook FAST. Stop when they’re tender-crisp (“al dente”) – they’ll soften more off heat. Overcooking = sad, watery mush.
- The Grand Finale: Season generously with salt and pepper. Taste and adjust – maybe another pinch of Italian seasoning? Transfer to bowls and shower with fresh basil. Pro Presentation: A final sprinkle of parmesan and a basil leaf on top makes it restaurant-worthy!
See? Effortless elegance in under 20 minutes of cook time. You’ve got this!
Plating Perfection & Pairings
This dish shines bright all on its own, but let’s make it a feast! Grab shallow pasta bowls – they show off those gorgeous zucchini ribbons and vibrant sauce. Spoon it generously, making sure everyone gets plenty of sausage and sun-dried tomatoes. Top with that fresh basil and maybe an extra crack of black pepper. For a restaurant-worthy touch, drizzle a tiny bit of high-quality olive oil over the top right before serving. Pair it with a simple side salad tossed in lemon vinaigrette to cut the richness, or some roasted asparagus. If you’re feeling fancy (and not strictly keto), a crisp glass of Sauvignon Blanc loves these flavors. Mostly? Just serve it hot, with big smiles and maybe some crusty bread for the carb-lovers at your table (we don’t judge!).
Shake It Up: Delicious Twists!
This recipe is your canvas – paint it deliciously!
- Chicken & Artichoke Twist: Swap sausage for diced chicken breast. Add ½ cup chopped artichoke hearts with the spinach. Hello, Mediterranean vibes!
- Mushroom Lover’s Dream: Brown 8 oz sliced cremini mushrooms with the garlic. Use veggie broth and omit sausage for a hearty vegetarian version (add ¼ tsp smoked paprika for depth).
- Spicy Arrabbiata Style: Kick it up! Add ½ tsp red pepper flakes with the garlic and stir in 2 tbsp tomato paste with the cream. Top with extra parm!
- Seafood Sensation: Replace sausage with 1 lb peeled shrimp or scallops added in the last 3 minutes of cooking. Lemon zest in the sauce? Yes, please!
- Dairy-Free Delight: Use full-fat coconut milk instead of cream, nutritional yeast + 1 tbsp lemon juice instead of parmesan, and coconut oil. Still dreamy creamy!
Don’t be afraid to play – that’s where kitchen joy lives!
Beau’s Behind-the-Scenes Scoop
Confession time: My first attempt at this? Total sauce fail. I dumped all the cheese in at once while the cream was too hot, and it turned into a grainy mess. Lesson learned: lower heat + gradual whisking is key for silky parmesan bliss! Also, I used to salt the zucchini noodles beforehand to draw out water, but honestly? With this quick cook time, it’s unnecessary and adds a step. Skip it! Over the years, I’ve found Kiolbassa sausage is the MVP here – its garlicky punch elevates everything. But the BEST evolution? Convincing my pasta-obsessed nephew this is “just as good.” He now requests it weekly! Funny thing: my dog, Biscuit, sits RIGHT by the stove every time I make this, hoping for a rogue sausage slice. (He usually gets one… shhh!). This recipe proves simple ingredients + bold flavors = pure happiness. Make it your own!
Your Questions, Answered!
Q: My sauce turned out thin/watery! Help!
A: No sweat! Likely culprits: Zucchini released too much liquid (don’t overcook them!), or sauce needed more reducing. Fix: Simmer sauce a minute or two longer BEFORE adding zucchini. If it’s already watery, mix 1 tsp xanthan gum with 1 tsp cold water, whisk into sauce, and simmer 1 min. Thickens like magic!
Q: Can I prep zucchini noodles ahead?
A> Tread carefully! Raw zoodles stored in a sealed container with paper towels absorb moisture can last 1-2 days, but they’ll soften. For best texture, spiralize max 1 hour before cooking. Better Hack: Prep all other ingredients ahead (chop veggies, slice sausage), then spiralize & cook fresh!
Q: Is there a lower-calorie substitute for heavy cream?
A> You bet! Half-and-half works, but sauce will be thinner (simmer longer!). For ultra-light, try ⅔ cup unsweetened almond milk + ¼ cup cream cheese blended smooth. It won’t be *as* rich, but still tasty!
Q: My cheese clumped up! What happened?
A> High heat is usually the villain! Ensure your cream mixture is just simmering (tiny bubbles at the edge), not boiling vigorously. Remove pan from heat for 30 seconds, then gradually whisk in grated parmesan. Pre-shredded cheese has anti-caking agents that cause clumping – always grate fresh!

Keto Creamy Tuscan Zucchini Noodles with Sausage
- Total Time: 25 mins
Description
When that pasta craving hits but carbs aren’t invited, this dish delivers a creamy, cozy, flavor-packed hug in a bowl—no noodle guilt required. Juicy garlic sausage, tender zucchini noodles, sun-dried tomatoes, and spinach twirl together in a parmesan cream sauce that feels downright indulgent… yet clocks in at just 5g net carbs. It’s fast, flexible, and wildly satisfying—your new keto favorite is ready in under 25 minutes!
Ingredients
-
1 pkg Kiolbassa Roasted Garlic Sausage, sliced
-
2 tbsp olive oil
-
3 garlic cloves, minced
-
1 cup heavy cream
-
¼ cup chicken broth
-
1 tsp Italian seasoning
-
½ cup grated parmesan
-
1 cup chopped spinach
-
½ cup oil-packed sun-dried tomatoes, patted dry
-
Salt & pepper, to taste
-
12 oz zucchini noodles (pre-spiralized or homemade)
-
Fresh basil, for garnish
Instructions
-
Brown Sausage: In a hot skillet with olive oil, brown sausage slices 3–4 mins per side. Remove and set aside.
-
Sauté Garlic: In the same skillet, sauté garlic 30 secs until fragrant.
-
Build Sauce: Add cream, broth, seasoning, and parmesan. Stir over medium-low heat until thickened (3–5 mins).
-
Add Veggies: Stir in spinach and sun-dried tomatoes. Wilt 1–2 mins.
-
Combine: Return sausage to pan. Add zoodles and toss gently. Cook 2–3 mins until just tender.
-
Finish: Season to taste, garnish with basil, and serve hot!
Notes
-
Swap sausage for shrimp, chicken, or mushrooms
-
Use full-fat coconut milk + nutritional yeast for dairy-free
-
Add red pepper flakes for heat, or artichokes for Mediterranean flair
-
Don’t overcook zoodles—they soften fast!
- Prep Time: 10 mins
- Cook Time: 15 mins
Nutrition
- Calories: 430 Cal Per Serving
- Fat: 36g
- Carbohydrates: 7g
- Fiber: 2g
- Protein: 20g
Nutritional Breakdown (Per Serving)
Prep: 10 mins | Cook: 15 mins | Servings: 4
Calories: 430 | Fat: 36g | Total Carbs: 7g | Fiber: 2g | Net Carbs: 5g | Protein: 20g
Note: Values are approximate. For precise counts, use your specific brands with a nutrition calculator.
Final Thoughts: Keto Without Compromise
This Creamy Tuscan Zucchini Noodle dish isn’t just a “substitute” for pasta—it’s a celebration of keto’s possibilities. It proves that low-carb eating can be luxurious, flavorful, and deeply satisfying. Whether you’re a keto veteran or just starting, recipes like this make the journey delicious.
Remember:
-
Flexibility is key. Swap ingredients to suit your tastes or pantry.
-
Texture matters. Don’t overcook the zoodles!
-
Fat = flavor. Embrace it.

Keto Bread Rolls
The Keto Bread Roll Revelation: Your Low-Carb Comfort Food Dreams, Solved!
Hey there, Feastical fam! Beau here, and I’ve got a confession: I used to think keto bread was destined to taste like cardboard confetti. Then these little golden miracles changed EVERYTHING. Picture this: a warm, chewy roll fresh from the oven, crisp on the outside, pillowy-soft inside, with that irresistible buttery aroma… and *zero* guilt. No, really! These keto bread rolls are the superheroes of low-carb living—they’re your burger’s soulmate, your soup’s sidekick, and your breakfast sandwich’s best friend. Made with just 5 simple ingredients (plus a sneaky chef trick for extra fluffiness!), they’re gluten-free, sugar-free, and packed with cozy flavor. Whether you’re keto-curious or a carb-counting pro, these rolls are about to become your kitchen’s MVP. Ready to make magic? Let’s roll! (Pun absolutely intended 😉)
The Midnight Miracle That Started It All
Flashback to 3 a.m. last winter: I was filming a holiday special, craving my grandma’s potato rolls, but committed to keto. After three failed batches (one resembled hockey pucks, another morphed into a cheese puddle), I was ready to surrender. Then I remembered Nonna’s trick for fluffy gnocchi—steam trapped in the dough. I tweaked the cheese blend, added a dash of baking powder for lift, and held my breath as they baked. When those rolls puffed up like tiny golden clouds? I did a happy dance right there in my floured apron! My cameraman caught it all—now it’s our running gag. But that’s the beauty of kitchen fails: they lead to epic wins. These rolls? They’re my edible victory lap.
Your Simple, Soul-Satisfying Toolkit
Pro tip: Use room-temp ingredients! Cold eggs or cream cheese can seize up the melted cheese. Here’s your lineup:
- 2 cups shredded cheese – Mozzarella keeps it neutral (perfect for burgers!), but sharp cheddar adds a funky kick. Chef hack: Pre-shredded bags work in a pinch, but block cheese melts smoother!
- ¼ cup softened cream cheese – The secret glue! It adds moisture and binds everything. Swap: Dairy-free cream cheese works if you’re lactose-sensitive.
- 1½ cups almond flour – Super-fine blend is crucial for that bread-like texture. Don’t sub coconut flour—it’s a moisture vampire!
- 3 large eggs, divided** – Two for dough structure, one for that glossy finish. Farm-fresh eggs make the goldest wash!
- 1 tsp baking powder – My “fluff booster”! Optional but HIGHLY recommended for lift. Ensure it’s fresh—test it with hot water to see if it fizzes!
Let’s Bake Some Happiness: Step-by-Step
Preheat oven to 350°F (175°C). Line a baking sheet with parchment—trust me, no sticking dramas today!
Step 1: Melt the cheese duo. In a microwave-safe bowl, combine shredded cheese and cream cheese. Nuke in 30-second bursts, stirring vigorously between each. Watch closely! Overheated cheese turns rubbery. Aim for lava-like smoothness.
Step 2: Create the dough. Let the cheese mix cool for 1 minute (scrambled eggs aren’t the goal here!). Add almond flour, baking powder, and 2 eggs. Mix with a spatula—it’ll look shaggy at first. Hot tip: Wet your hands to avoid sticky chaos when kneading! Once combined, dive in with clean hands and knead 1-2 minutes until supple.
Step 3: Shape your rolls. Divide dough into 6-8 balls (I do 7 for burger-sized perfection). Roll gently—don’t compact them! Place 2 inches apart on the sheet. Flatten slightly if using for sandwiches.
Step 4: Egg wash glory. Beat the last egg with 1 tsp water. Brush generously on rolls—this creates that crackly-golden crown! Extra flair: Sprinkle everything bagel seasoning now!
Step 5: Bake & transform. 18-22 minutes until deeply golden. Chef test: Tap the bottom—it should sound hollow. Cool 10 minutes on the sheet. RESIST cutting immediately—they’re still setting!
Serving: Where Comfort Meets Creativity
Slice ’em warm and slather with grass-fed butter—simple heaven! For next-level vibes: make mini sliders with juicy beef patties and sugar-free ketchup. Morning rush? Fry an egg, add avocado, and nestle it inside a split roll. Soup season? Tear one into chunks for “croutons” that soak up broth like a dream. My favorite: dunk ’em in buffalo chicken dip!
The Science Behind the Fluff: Why These Keto Rolls Actually Work
Most keto bread recipes fail because they lack gluten—the protein that gives traditional bread its elasticity and rise. So how do these rolls achieve that perfect, airy texture without it? The secret lies in the chemistry of cheese, eggs, and almond flour.
The Cheese Factor
Mozzarella and cream cheese act as the “glue” in this recipe. When melted, mozzarella becomes stretchy, mimicking gluten’s binding properties. Cream cheese adds moisture and fat, preventing dryness. Together, they create a pliable dough that holds its shape while baking.
Eggs: The Structure Keepers
Eggs provide structure through coagulation—when heated, their proteins firm up, giving the rolls stability. The extra egg wash isn’t just for shine; it forms a thin protective layer that traps steam, helping the rolls rise and preventing cracks.
Almond Flour’s Role
Unlike wheat flour, almond flour doesn’t absorb liquid the same way. Super-fine almond flour ensures a smooth texture, while its natural oils keep the rolls tender. (Note: Coconut flour would absorb too much moisture, leading to a dense result—hence why it’s a no-go here.)
Baking Powder: The Unsung Hero
While not all keto bread recipes use it, baking powder is crucial here. When heated, it releases carbon dioxide gas, creating tiny air pockets. This, combined with steam from the cheese and eggs, gives the rolls their signature lift.
Pro Tip: For even more rise, try the “double-baking” method:
-
Bake rolls for 10 minutes, then remove and quickly slash the tops with a knife.
-
Return to the oven for the remaining time. This releases trapped steam and encourages extra puffiness!
Keto Bread Rolls vs. Traditional Rolls: A Flavor & Nutrition Showdown
Let’s settle the debate: How do these keto rolls really compare to classic bread?
Texture & Taste
-
Traditional Rolls: Light, airy, and slightly sweet from the natural sugars in wheat.
-
Keto Rolls: Slightly denser but still soft, with a rich, buttery flavor from the cheese. The crust is crispier, thanks to the egg wash.
Nutritional Differences
| Per Roll | Keto Version | Traditional Wheat Roll |
|---|---|---|
| Calories | 210 | 150 |
| Net Carbs | 2g | 25g |
| Protein | 10g | 4g |
| Fiber | 2g | 1g |
Why Keto Wins:
-
Blood Sugar Control: With only 2g net carbs, these rolls won’t spike glucose levels.
-
Satiety: Higher fat and protein keep you full longer—no post-bread crash!
-
Gluten-Free: Ideal for those with sensitivities or celiac disease.
The Trade-Offs:
-
Cheese Dominance: If you dislike the taste of dairy, these won’t mimic plain white bread.
-
Cost: Almond flour and quality cheese are pricier than all-purpose flour.
The Verdict: While they’re not identical to wheat rolls, keto rolls deliver where it counts—flavor, function, and macros. For low-carb eaters, they’re a game-changer!
Beyond the Basics: Advanced Tips for Keto Bread Mastery
Ready to level up? Here’s how to perfect your technique and troubleshoot like a pro.
1. Cheese Melting Mastery
-
Microwave Method: Best for speed, but stir every 15 seconds to avoid hotspots.
-
Double Boiler: More effort, but ensures even melting without risk of overcooking.
2. Dough Consistency Fixes
-
Too Sticky? Chill for 10 minutes or dust hands with almond flour.
-
Too Dry? Add 1 tsp water or an extra egg yolk.
3. Flavor Boosters
-
Umami Bomb: Add 1 tsp nutritional yeast for a “bready” depth.
-
Sweet Version: Swap cheddar for mild mozzarella, add 1 tbsp erythritol and cinnamon for a “dinner roll” vibe.
4. Storage Hacks
-
Room Temp: Keeps for 2 days in an airtight container (but they’re best fresh!).
-
Freezing: Wrap individually in foil, then freeze for up to 3 months. Reheat at 325°F for 10 minutes.
5. Recipe Variations
-
Baguette Style: Shape dough into logs, bake, then slice for keto bruschetta.
-
Breadsticks: Roll into thin ropes, brush with garlic butter, and bake until crisp.
Common Pitfalls & Fixes:
-
Flat Rolls: Check baking powder freshness (it expires after 6 months!).
-
Gummy Texture: Overmixing or underbaking—knead less and bake longer.
Mix It Up: 5 Delicious Twists
1. Everything Spice: Fold 2 tbsp of everything seasoning into the dough before shaping.
2. Rosemary-Parm: Swap cheddar for parmesan, add 1 tbsp fresh rosemary.
3. Jalapeño Cheddar Bombs: Mix in ¼ cup diced jalapeños + 2 tbsp crumbled bacon.
4. Seeded Sandwich Loaf: Press dough into a loaf pan, top with sunflower + pumpkin seeds.
5. Dairy-Free: Use vegan cheddar, coconut cream cheese, and flax eggs (1 tbsp ground flax + 2.5 tbsp water per egg).
Beau’s Backstage Bites
These rolls evolved from my “great keto bread quest” of 2020. Batch 4 was edible; batch 7 made my neighbor yell “Holy carbs!” through the window (she’s keto too). The baking powder was the game-changer—it gives that airy crumb we all crave. Storage tip: Freeze extras in a ziplock! To revive, pop ’em in a 300°F oven for 8 minutes. They also make KILLER garlic bread—slice, butter, garlic powder, broil 90 seconds. You’re welcome.
FAQs: Solving Your Roll Dilemmas
Q: Why are my rolls dense/flat?
A: Likely culprit: cheese was too hot when eggs were added (cooking them). Cool cheese mix slightly! Over-kneading or expired baking powder can also cause sadness.
Q: Can I use pre-shredded cheese?
A: Yes, but it has anti-caking agents that sometimes make dough gummy. For silkier texture, shred your own!
Q: How do I prevent cracking?
A: Don’t skip the egg wash! It creates a flexible “skin.” Also, ensure dough isn’t too dry—add 1 tsp water if crumbly.
Q: Can I make these dairy-free?
A: Absolutely! Use vegan cheese shreds (choose melt-friendly ones like Violife) and coconut cream cheese. Texture varies slightly, but still delish!

Keto Bread Rolls
- Total Time: 28 mins
Description
Golden, fluffy, buttery – and only 2g net carbs? Yes, these keto bread rolls are the warm hug your low-carb lifestyle has been missing. Whether you’re building burgers, dipping into soup, or crafting the ultimate breakfast sandwich, these gluten-free, grain-free beauties deliver the soft, satisfying bite of “real” bread—without the carb crash. Made in under 30 minutes with just 5 main ingredients, they’re the perfect way to say, “I’ve got this.” Let’s roll!
Ingredients
-
2 cups shredded mozzarella or cheddar
-
¼ cup softened cream cheese
-
1½ cups super-fine almond flour
-
3 large eggs (2 for dough, 1 for egg wash)
-
1 tsp baking powder
Instructions
-
Preheat oven to 350°F (175°C). Line a baking sheet with parchment.
-
Melt cheese: Combine shredded cheese and cream cheese in a microwave-safe bowl. Microwave in 30-sec bursts until melted and smooth.
-
Mix dough: Let cheese cool slightly, then mix in almond flour, baking powder, and 2 eggs. Knead until dough forms.
-
Shape rolls: Divide into 6–8 balls, place on baking sheet, and slightly flatten.
-
Egg wash: Beat 1 egg with 1 tsp water and brush over tops.
-
Bake for 18–22 mins until golden and hollow-sounding when tapped. Cool 10 mins before serving.
Notes
-
Add herbs or cheese: Mix in rosemary or jalapeños for extra flavor
-
Make garlic rolls: Slice and broil with butter + garlic powder
-
Freeze extras: Reheat in oven for fresh-from-the-bakery feel
- Prep Time: : 8 mins
- Cook Time: 20 mins
Nutrition
- Calories: 210 Ca Per Roll
- Fat: 17g
- Carbohydrates: 4g
- Fiber: 2g
- Protein: 10g
Nutritional Perks (Because Knowledge is Yummy)
Per roll (based on 7 rolls/batch):
Calories: 210 | Fat: 17g | Carbs: 4g | Fiber: 2g | Net Carbs: 2g | Protein: 10g
Carbs come mostly from almond flour—these keep you full thanks to all that protein + healthy fats!
Final Thoughts: Why This Recipe is a Keto Game-Changer
These keto bread rolls aren’t just a substitute—they’re a revelation. They prove that low-carb eating doesn’t mean sacrificing comfort food. Whether you’re craving a burger bun, a side for soup, or a vehicle for almond butter, this recipe delivers.
The Bigger Picture:
-
Sustainability: Unlike many keto products (which rely on processed ingredients), these use whole, real foods.
-
Versatility: From savory to sweet, the customization options are endless.
-
Community Impact: Since sharing this recipe, I’ve gotten hundreds of messages from people who’ve rediscovered joy in keto baking. One reader even used them for her wedding sliders!
So, roll up your sleeves (pun intended), embrace the cheese-scented magic, and take a bite of carb-free happiness. Your taste buds—and your macros—will thank you.

Buffalo Chicken Flatbread
The Ultimate Buffalo Chicken Flatbread: Your New Go-To Game Day Hero
Hey friends, Beau here! Ever have one of those days where you’re craving that spicy-tangy-creamy magic of buffalo wings but don’t want the sticky fingers or fuss? That’s exactly why this Buffalo Chicken Flatbread has become my MVP for game nights, impromptu gatherings, and “I-deserve-comfort” evenings. Picture this: crispy flatbread layered with saucy chicken, molten mozzarella, cool blue cheese drizzle, and fresh green onions – it’s basically a flavor touchdown on a baking sheet! What I love most? It transforms pantry staples into something extraordinary in under 25 minutes. Whether you’re feeding a rowdy football crowd or treating yourself after a long day, this recipe delivers big flavors without complicated techniques. Trust me, once you try this crowd-pleaser, you’ll be making it on repeat like I do! Let’s turn that buffalo craving into a crispy, cheesy reality.
How a Kitchen Mishap Became My Signature Game Day Snack
Okay, confession time: This recipe was born from pure kitchen chaos! Picture Super Bowl Sunday 2019. My apartment was packed, the wings were running low, and panic set in. All I had left? Some leftover rotisserie chicken, sad-looking flatbreads, and half-empty condiment bottles. In a Hail Mary move, I tossed everything together and slid it into the oven. Friends, when I pulled out that golden, bubbling creation? The room went silent… then erupted in cheers. My buddy Dave (who famously hates blue cheese) even asked for seconds! That happy accident taught me two things: 1) Great food doesn’t need perfection, just passion, and 2) When life gives you leftovers, make flatbread! Now, it’s not just a recipe – it’s a reminder that the best memories happen when we improvise. Every time I smell that buffalo sauce hitting hot cheese, I’m right back in that loud, joyful kitchen surrounded by my favorite people.
Gathering Your Flavor All-Stars
Here’s what you’ll need to create this crispy masterpiece. Don’t stress about exact brands – cooking should feel like jazz, not math class!
- Flatbreads (14.5 oz total): The MVP of our dish! I grab store-bought naan or pocketless pitas when I’m short on time. Chef’s hack: Lightly toast them before topping for extra crunch.
- Light olive oil (2 tsp): Our flavor conductor! It helps the crust get golden and crispy. Substitute with avocado oil if that’s your jam.
- Buffalo wing sauce (½ cup + more for drizzling): Choose your heat level! Mild for families, atomic for daredevils. Fun fact: The vinegar cuts through richness – that’s why it pairs so well with cheese!
- Cooked chicken (1½ cups): Rotisserie chicken is my weeknight hero here. Shred it juicy-style rather than dicing for maximum sauciness.
- Shredded mozzarella (1 cup): Our melty glue! Pre-shredded works fine, but block cheese melts smoother. Pro tip: Freeze for 10 minutes before grating!
- Blue cheese dressing (⅓ cup): The creamy counterpoint to spicy heat. If blue cheese isn’t your thing, ranch or Greek yogurt mixed with chives makes a killer swap.
- Sliced green onions (⅓ cup): Freshness factor! They add color and a gentle bite. No green onions? Try minced celery leaves for that classic wing vibe.
Crafting Your Crispy Masterpiece: Step-by-Step
Ready to make magic? Follow these steps (and my sneaky chef tricks!) for flatbread glory:
- Preheat & Prep (425°F/220°C): Crank that oven up! Why so hot? We want bubbly cheese and crispy edges FAST. Chef’s hack: Put your baking sheet in the oven while preheating – a hot start = extra crunch!
- Oil Those Bases: Lightly brush both flatbreads with olive oil. This isn’t just anti-sog insurance – it creates golden, restaurant-worthy crust! Watch those edges: They crisp up first, so focus oil there.
- Chicken Tango Time: In a bowl, toss cooked chicken with buffalo sauce until every piece is gloriously coated. Pro tip: Let it marinate for 5 minutes while the oven heats – flavors mingle like old friends!
- Saucy Assembly: Spread chicken evenly over flatbreads. Leave a ½-inch border – nobody wants saucy overflow on their baking sheet! Fun twist: Swirl some extra sauce on top for heat seekers.
- Cheese Blanket: Sprinkle mozzarella generously over chicken. Chef secret: Put a little cheese UNDER the chicken too – it acts as a moisture barrier for crispier crust!
- Drizzle Drama: Zig-zag blue cheese dressing over everything. Want pretty presentation? Use a squeeze bottle or zip-top bag with a corner snipped.
- Bake to Perfection (10-12 mins): Bake until cheese is molten and edges are golden-brown. Don’t walk away! Flatbreads go from perfect to burnt fast. Check at 8 minutes – ovens vary!
- Green Onion Grand Finale: Pull it out (careful – that cheese is lava!), and immediately scatter green onions. The residual heat wakes up their flavor.
- Slice & Serve: Use pizza cutter or sharp knife. Genius move: Let it rest 90 seconds before cutting – prevents cheese avalanche!
The Science Behind the Perfect Crispy Flatbread
What makes this Buffalo Chicken Flatbread so irresistibly crispy? It’s not just luck—it’s science! Understanding the mechanics behind the perfect flatbread can elevate your game-day snack from good to legendary.
The Maillard Reaction: Your Secret Weapon
That golden-brown crust? Thank the Maillard reaction—a chemical process that occurs when proteins and sugars in food are exposed to heat, creating complex flavors and textures. Brushing the flatbread with olive oil before baking accelerates this reaction, ensuring a crispier base. A hot oven (425°F/220°C) is crucial because high heat rapidly evaporates moisture, preventing sogginess.
Cheese: The Melt Master
Mozzarella is the ideal cheese for flatbread because of its superb meltability. The key? Low moisture content. Pre-shredded cheese contains anti-caking agents that can affect texture, so grating your own ensures a smoother melt. If you’re using fresh mozzarella, pat it dry to avoid excess moisture making your flatbread limp.
Sauce Distribution: Less Is More
Buffalo sauce is acidic, which tenderizes the chicken but can also make the flatbread soggy if overused. Tossing the chicken in sauce rather than drenching the flatbread ensures flavor without sacrificing crispness. A light post-bake drizzle adds extra punch without compromising texture.
The Hot Pan Trick
Preheating your baking sheet mimics the effect of a pizza stone, instantly crisping the bottom of the flatbread upon contact. This technique prevents the dreaded “soggy middle” syndrome, ensuring every bite has the perfect crunch.
Resting Time Matters
Letting the flatbread rest for 90 seconds after baking allows the cheese to set slightly, preventing a molten cheese avalanche when slicing. It also gives the crust time to firm up, ensuring clean cuts.
Pro Tip: For extra crunch, sprinkle a thin layer of grated Parmesan under the chicken—it adds a nutty depth and an additional crispy layer.
Buffalo Sauce Breakdown: Choosing Your Heat Level
Not all buffalo sauces are created equal! The right sauce can make or break your flatbread. Here’s how to pick (or customize) your perfect match.
Mild & Approachable (For Crowds)
Brands like Sweet Baby Ray’s Buffalo Wing Sauce or Frank’s RedHot Mild offer a gentle heat with a buttery finish. These are great for family gatherings or those sensitive to spice.
Medium Heat (The Crowd-Pleaser)
Frank’s RedHot Original is the gold standard—balanced heat with a tangy vinegar kick. For a richer flavor, mix it with melted butter (classic wing-style) or honey for a sweet-heat twist.
Hot & Bold (For Daredevils)
Texas Pete Hotter Hot Sauce or Melinda’s Ghost Pepper Wing Sauce bring serious heat. Use sparingly, or temper with a dollop of Greek yogurt in the blue cheese drizzle to cool things down.
DIY Buffalo Sauce (Chef’s Secret)
For ultimate control, make your own:
-
½ cup hot sauce (like Crystal or Louisiana)
-
¼ cup melted butter (adds richness and tames heat)
-
1 tsp garlic powder
-
1 tsp Worcestershire sauce (for depth)
-
½ tsp smoked paprika (optional, for a smoky note)
Fun Twist: Add 1 tbsp honey or maple syrup for sweet-heat balance, or 1 tsp cayenne for extra fire.
Non-Traditional Alternatives
-
Nashville Hot Chicken Style: Use cayenne-infused oil for a spicy, crispy finish.
-
Korean Gochujang: Swap buffalo sauce for a mix of gochujang, honey, and rice vinegar for a sweet-spicy-umami bomb.
-
BBQ Buffalo Hybrid: Mix equal parts buffalo sauce and BBQ sauce for a smoky-sweet version.
Pro Tip: Always taste your sauce before adding it to the chicken—adjust heat and acidity to your preference!
Leftover Magic: Reinventing Your Buffalo Flatbread
Got extra buffalo chicken or leftover flatbread? Don’t let it go to waste! Here are five genius ways to repurpose your ingredients.
1. Buffalo Chicken Salad
Chop leftover flatbread into croutons and toss with romaine, cherry tomatoes, avocado, and shredded buffalo chicken. Drizzle with blue cheese dressing for a deconstructed wing salad.
2. Breakfast Flatbread Pizza
Reheat a slice in a skillet, top with a fried egg, and sprinkle with chives. The runny yolk merges with the buffalo sauce for a spicy breakfast masterpiece.
3. Buffalo Chicken Grilled Cheese
Butter two slices of sourdough, layer with shredded buffalo chicken and extra mozzarella, then grill until golden. Dip in ranch or extra blue cheese dressing.
4. Loaded Buffalo Fries
Spread crispy fries on a sheet pan, top with buffalo chicken and cheese, then broil until bubbly. Finish with green onions and dressing—game-day nachos’ cousin!
5. Buffalo Chicken Stuffed Peppers
Halve bell peppers, stuff with buffalo chicken mix, top with cheese, and bake at 375°F (190°C) for 20 minutes. Low-carb, high-flavor!
Pro Tip: Freeze leftover buffalo chicken in portioned bags for quick flatbreads, quesadillas, or even omelet fillings later.
Plating Like a Pro (Minimal Effort, Maximum Wow!)
Presentation matters, even for casual eats! Slice into triangles or squares – smaller pieces = easier game-day grazing. Pile them rustic-style on a wooden board with celery sticks and extra blue cheese dressing for dipping. For parties? Keep whole flatbreads on cutting boards and let guests DIY slices. Pair with an ice-cold lager or a crisp celery-lime mocktail to tame the heat. Remember: That vibrant green onion confetti makes it Instagram-ready!
Delicious Detours: Make It Your Own!
This recipe loves a remix! Try these crowd-tested twists:
- Ranch Lovers: Swap blue cheese for cool ranch dressing + add crispy bacon bits
- Veggie Boost: Top with thin red onion rings and diced bell peppers pre-baking
- Gluten-Free: Use GF flatbreads or cauliflower crusts (pre-bake 5 mins first!)
- Buffalo-Chickpea (Veggie): Replace chicken with roasted chickpeas tossed in buffalo sauce
- Breakfast Edition: Add fried eggs after baking – runny yolks = next-level sauce!
Beau’s Backstage Notes
This recipe has evolved more than my taste in aprons! Originally, I piled ingredients sky-high… leading to structural collapse (RIP, dinner). Now I keep layers thin but flavorful. Funny story: Once subbed blue cheese crumbles for dressing without adjusting amounts – created a blue-cheese-lava-flow that set off my smoke alarm! Lesson learned: Dressings > crumbles for meltability. Biggest game-changer? The hot-pan trick mentioned earlier – total texture revolution. Now my kids demand “daddy’s spicy pizza” every Friday. That’s the real win: watching people light up over something so simple. Remember, friends: Cooking isn’t about perfection. It’s about that moment when someone takes a bite, closes their eyes, and says, “Oh wow.”
Buffalo Flatbread SOS: Your Questions Answered
Q: Can I prep this ahead for parties?
A: Absolutely! Prep components separately: Store sauced chicken in fridge for up to 2 days. Assemble JUST before baking – otherwise, you’ll get soggy-bottom sadness!
Q: Help! My flatbread got soggy in the middle.
A: Three common culprits: 1) Over-saucing (stick to ½ cup buffalo max!), 2) Cold toppings on room-temp base (let chicken cool slightly before assembling), or 3) Undercooking (bake until edges DARK golden). Hot baking sheet trick helps too!
Q: Ranch or blue cheese? And can I use fresh mozzarella?
A: Team Ranch is always welcome! For fresh mozz: Pat balls VERY dry, slice thin, and use sparingly – its high moisture can make things wet. Part-skim low-moisture mozz is still my #1 for meltability.
Q: How spicy is this really?
A: Control your heat! Mild sauce = kid-friendly. For medium heat, I mix ¼ cup hot sauce + ¼ cup melted butter + 1 tsp garlic powder. Too hot? Serve with cooling sides!

Buffalo Chicken Flatbread
- Total Time: 22 mins
Description
Craving wings but not the mess? This Buffalo Chicken Flatbread is your flavor-packed fix — crispy naan, saucy chicken, melty cheese, and a creamy blue cheese drizzle, all in under 25 minutes. It’s the perfect shareable dish for game nights, lazy evenings, or when you need big taste with low effort. It’s comforting, bold, and totally customizable. Ready to make your oven the MVP? Let’s go.
Ingredients
-
2 flatbreads (approx. 14.5 oz)
-
2 tsp light olive oil
-
½ cup buffalo wing sauce + extra for drizzling
-
1½ cups cooked chicken, shredded
-
1 cup shredded mozzarella
-
⅓ cup blue cheese dressing (or ranch)
-
⅓ cup sliced green onions
Instructions
-
Preheat Oven to 425°F (220°C). Place baking sheet inside for crispy base.
-
Prep Flatbreads: Lightly brush both sides with olive oil.
-
Mix Chicken: Toss with buffalo sauce and let marinate for 5 mins.
-
Assemble: Spread chicken over flatbreads, leaving a border. Top with cheese and drizzle dressing.
-
Bake 10–12 mins until cheese is bubbly and edges golden.
-
Finish & Serve: Top with green onions, rest 90 secs, slice, and serve hot!
Notes
-
Use ranch instead of blue cheese for a milder bite
-
Add veggies like bell peppers or red onions before baking
-
Swap chicken for roasted chickpeas for a veggie version
-
Top with fried eggs post-bake for a brunch twist
- Prep Time: 10 mins
- Cook Time: 12 mins
Nutrition
- Calories: 320 Cal Per Serving
- Sodium: 680mg
- Fat: 17g
- Carbohydrates: 18g
- Protein: 21g
Nutritional Highlights (Per Serving)
Approx per serving (based on 5 slices): Calories: 320 | Fat: 17g | Carbs: 18g | Protein: 21g | Sodium: 680mg
Smart swaps: Use Greek yogurt dressing (-50 cals), low-fat mozzarella (-30 cals), or load up veggies for fiber boost!
Final Thoughts: Why This Flatbread Wins Every Time
This Buffalo Chicken Flatbread isn’t just a recipe—it’s a flavor experience built on crispy textures, spicy-tangy sauce, and creamy-cool contrasts. It’s versatile (swap proteins, sauces, or cheeses), quick (under 25 minutes), and crowd-approved (even blue cheese skeptics convert).
Most importantly, it’s a reminder that the best dishes often come from happy accidents (like my Super Bowl panic!) and that cooking should be fun, not fussy. Whether you’re feeding a party or just treating yourself, this flatbread delivers big satisfaction with minimal effort.

Keto Grilled Cheese (with 90-Second Bread)
When Grilled Cheese Dreams Meet Keto Reality
Hey friends! Beau here from Feastical, and let’s get real for a sec: who doesn’t have a primal, soul-deep relationship with grilled cheese? That golden crunch? That ooey-gooey cheese pull? It’s culinary nostalgia in sandwich form. But when I went keto years ago, I thought my grilled cheese days were over. Spoiler alert: they weren’t! After more microwave experiments than I’d care to admit (RIP, that tragically soggy “bread” attempt in 2018), I cracked the code. This isn’t just “good for keto” – it’s legitimately crave-worthy. Our magic weapon? Fluffy, buttery 90-second bread that’s faster than takeout and has just 3g net carbs per serving. Imagine: crispy-edged, cheese-stuffed perfection ready in under 10 minutes flat. Whether you’re keto-curious, carb-cutting, or just want a lightning-fast comfort fix, this sandwich is about to become your emergency snack BFF. Pro tip: Wear stretchy pants. The joy is real.
Why does this work when other keto breads taste like cardboard? Simple: We treat the bread like the star it is. Almond flour gives nutty richness, an egg binds it into cloud-like fluff, and melted butter? Well, that’s the hug in every bite. And the best part? You probably have every ingredient in your pantry right now. No fancy binders, no obscure flours – just real food making magic happen. So grab your favorite skillet (and maybe a napkin… things get messy), and let’s make those grilled cheese dreams sizzle!
Midnight Meltdowns & Microwave Miracles
Picture this: It’s 11 PM. My stomach’s growling like a hangry badger. Pre-keto me would’ve demolished a grilled cheese with extra crusty sourdough. Newly keto me? Staring mournfully at a block of cheddar. That night, desperation became innovation. I whisked almond flour, an egg, and butter in a mug, nuked it, and sliced the slightly suspicious-looking puck in half. Into the skillet it went with cheese screaming for freedom. Two minutes later… euphoria. Was it pretty? Debatable. Did it taste like victory? Absolutely. That ugly-delicious prototype sparked a 2-year obsession. I tweaked ratios (more butter!), tested spices (garlic powder = game changer), and even convinced my carb-loving niece it was “cloud bread” (she stole three bites). Now, it’s my go-to when life needs edible comfort – rainy days, deadlines, or just celebrating Tuesday. Some foods nourish your body. This one? It feeds your soul with a side of crispy nostalgia.
Your Shortcut to Bliss: The Ingredients
Here’s the beautiful part – everything fits in one little bowl! No fancy gear, no rare ingredients. Let’s break it down:
For the 90-Second Bread (The Hero!)
- 3 tbsp almond flour – Our flour swap superstar! Finely ground works best (Bob’s Red Mill is my ride-or-die). Chef’s Tip: Pack it lightly into the spoon for accuracy. Too much = dense bread!
- ½ tsp baking powder – The lift master! Make sure yours is fresh (test it with hot water – if it fizzes, you’re golden).
- 2 tbsp butter, melted – Flavor AND moisture! Salted butter adds depth. Vegan? Coconut oil works in a pinch, but butter’s richness is key.
- 1 large egg – The binder! Room temp blends smoother. Pro Hack: Whisk it first in a separate bowl for extra airy bread.
- Optional Seasonings – This is your playground! A pinch of garlic powder, smoked paprika, or everything bagel seasoning? *chef’s kiss*.
For the Grilled Cheese (The Meltdown!)
- 1.5 oz Cheddar cheese (or any meltable cheese) – Sharp cheddar is classic, but gouda, mozzarella, or pepper jack are glorious! Chef’s Secret: Shred it yourself! Pre-shredded has anti-caking agents that hinder meltiness.
- Optional: 1-2 slices deli meat – Turkey, ham, or crispy salami add protein punch. Fold them for better cheese coverage!
- Extra butter or avocado oil – For skillet-slathering. Butter = flavor, avocado oil = higher smoke point.
Let’s Build Some Magic: Step-by-Step
Ready for sandwich alchemy? Follow these steps – and my crispy-edged secrets – for guaranteed success!
- Bread Bowl Blitz: Grab a small microwave-safe dish (I use a 4×4″ square glass container – ramekins work too!). Whisk together almond flour, baking powder, and any seasonings until lump-free. Pour in the melted butter and egg. Whisk like you mean it! Pro Tip: Scrape the sides with a spatula. Unmixed flour = weird pockets!
- Microwave Marathon (Sort Of): Nuke it for 90 seconds on high. It should look puffed, set, and slightly moist on top. WAIT! Let it cool 2 minutes. Seriously – rushing = crumbly disaster. It firms as it rests. Chef’s Hack: Run a knife around the edge before flipping it onto a cutting board.
- Slice & Conquer: Using a serrated knife (gentle sawing motion!), slice the bread horizontally into two thin, even slices. Admire your fluffy creation! Thicker slices = more breadiness, thinner = crispier. You do you.
- Skillet Sizzle: Heat a non-stick skillet over medium heat (not high! Almond flour burns fast). Add ½ tbsp butter or oil. Swirl to coat. Secret Weapon: Brush melted butter directly onto the bread slices for EXTRA golden crunch.
- Cheese Assembly: Place one bread slice in the skillet. Layer cheese (and meat if using) evenly, leaving a tiny border. Top with second bread slice. Press down lightly with your spatula. Genius Move: Add a pinch of cheese directly to the skillet around the bread – it creates a crispy frico skirt!
- Golden Glory: Grill for 2-3 minutes per side. Peek underneath – you want deep golden brown, not pale yellow. Flip carefully! A wide, thin spatula is your friend. Cover the skillet briefly after flipping to trap heat and melt cheese faster.
- The Grand Finale: Slide that beauty onto a plate. Let it rest 60 seconds (agonizing, I know!). This lets the cheese settle, preventing a lava-hot mouth explosion. Cut diagonally – it’s scientifically proven to taste better.
Dishing Up the Comfort
This sandwich is a solo superstar, but let’s make it a moment! Plate it hot with:
- A side of sugar-free dill pickles for tangy crunch.
- A small bowl of roasted tomato soup (check my keto version on Feastical!). Dunking is mandatory.
- A simple side salad with lemon vinaigrette to cut the richness.
- On a warmed plate – cold plates zap the heat from your masterpiece!
Shake Up Your Sandwich!
This recipe is your blank canvas! Try these killer twists:
- Pizza Party: Mix ¼ tsp Italian herbs into the bread batter. Fill with mozzarella, pepperoni, and a smear of sugar-free marinara.
- Tex-Mex Fiesta: Add ½ tsp taco seasoning to the bread. Use pepper jack cheese, sliced jalapeños, and leftover shredded chicken.
- Everything Bagel Bliss: Stir 1 tsp everything bagel seasoning into the batter. Cream cheese + lox inside? Yes, please!
- Dairy-Free Delight: Use dairy-free cheese (Violife cheddar shreds melt amazingly!). Swap butter for refined coconut oil.
- “Bacon & Brie” Bougie: Crispy bacon + creamy brie + a drizzle of sugar-free fig jam inside. Trust me.
Beau’s Behind-the-Scenes Scoop
Okay, confession time: My first attempt at this bread looked (and tasted) like a sad sponge. The key? Whisking like your sandwich depends on it – getting air into that batter makes it rise. Also, microwave wattages vary! If yours runs hot, try 75 seconds first. If it’s underpowered, add 10-second bursts until set. This recipe evolved from a “meh” mug bread to cloud-like perfection by adding that extra tablespoon of butter – never underestimate fat’s power in keto baking! One hilarious fail involved using a too-small dish; the bread volcanoed over the sides like edible lava. My dog was thrilled. Now, I always use a dish with room to rise. Make it your own! Add herbs, swap cheeses, throw in leftover pulled pork… this is your feel-good food journey. Tag me @Feastical with your creations – I live for your cheesy masterpieces!
Grilled Cheese 911: Fixing Common Oopsies
Don’t sweat the small stuff! Here’s how to troubleshoot like a pro:
Q: Why is my bread gummy or eggy?
A: Usually means undercooking! Microwaves vary. If the top looks wet after 90 sec, add 10-15 sec bursts. Also, ensure your baking powder is fresh (it loses lift over time). Letting it cool fully before slicing is CRUCIAL – patience, grasshopper!
Q: Can I make this without a microwave?
A: Absolutely! Pour batter into a small greased oven-safe dish. Bake at 350°F (175°C) for 12-15 mins until set. It’ll be slightly less “airy” but still delicious.
Q: My cheese isn’t melting before the bread burns! Help!
A: Two tricks: 1) Shred your cheese finely – bigger chunks take longer. 2) Cover the skillet after flipping! Trapped heat melts cheese faster. Also, ensure your heat is medium, not medium-high.
Q: Can I meal prep the bread?
A: Yes! Make the bread ahead. Cool completely, wrap tightly in plastic, and refrigerate for 3 days or freeze for 1 month. Toast slices lightly in a skillet or toaster oven before assembling – it revives the crispiness!

Keto Grilled Cheese (with 90-Second Bread)
- Total Time: 8 mins
Description
Meet your new 10-minute obsession: a buttery, melty grilled cheese built on fluffy 90-second almond flour bread. With only 3g net carbs, this keto sandwich doesn’t just scratch the comfort food itch – it kicks it up with crispy edges, serious cheese pull, and customizable fillings. Whether you’re craving a midnight snack or need a rainy-day pick-me-up, this grilled cheese is your golden ticket to keto bliss.
Ingredients
For the Bread
-
3 tbsp almond flour
-
½ tsp baking powder
-
2 tbsp butter, melted
-
1 large egg
-
Optional: garlic powder, smoked paprika, or everything bagel seasoning
For the Filling
-
1.5 oz shredded cheddar (or melty cheese of choice)
-
Optional: 1–2 slices deli turkey, ham, or crispy salami
-
½ tbsp butter or avocado oil for grilling
Instructions
-
Mix Bread: In a small microwave-safe bowl, whisk almond flour, baking powder, and seasonings. Add melted butter and egg, mix well.
-
Microwave: Cook on high for 90 seconds. Let cool 2 mins, then slice horizontally into 2 thin pieces.
-
Assemble: In a skillet over medium heat, melt butter. Place one bread slice, add cheese and optional meat, then top with second slice.
-
Grill: Cook 2–3 mins per side until deep golden. Cover skillet briefly to melt cheese faster. Let rest 1 minute before slicing.
Notes
-
Freshly shred cheese for ultimate meltiness
-
Add a pinch of cheese to the skillet edges for a crispy “cheese skirt”
-
Cool bread fully before slicing to avoid crumbles
- Prep Time: 3 mins
- Cook Time: 5 mins
Nutrition
- Calories: 380 Cal Per Serving
- Fat: 32g
- Carbohydrates: 5g
- Fiber: 2g
- Protein: 17g
Quick Bite, Smart Numbers
(Per serving, using cheddar only & no added skillet fat)
- Calories: 380
- Fat: 32g (Hello, healthy fats!)
- Total Carbs: 5g
- Fiber: 2g
- Net Carbs: 3g (Keto Win!)
- Protein: 17g
Note: Adding meats, oils, or different cheeses changes values. Use an app like Cronometer for custom calculations!
Final Thoughts: Why This Recipe is a Keto Game-Changer
This 90-second keto grilled cheese isn’t just a recipe—it’s a lifeline for anyone missing comfort food. It proves that keto doesn’t have to mean bland or complicated. With simple ingredients, a microwave, and a skillet, you can enjoy a nostalgic favorite without guilt.
The Best Part? It’s endlessly customizable. Sweet or savory, breakfast or dinner—this bread adapts to your cravings.
So, the next time a grilled cheese craving strikes, don’t mourn the carbs. Celebrate the keto upgrade. Because now, you get the best of both worlds: melty, crispy, buttery perfection—and a body that thanks you for it.
Share the Cheesy Love!

Biscuits and Chorizo Gravy
Wake Up Your Taste Buds: Biscuits & Chorizo Gravy
Hey friends! Beau here from Feastical, and I’ve got a confession: I’m a breakfast renegade. Today we’re ditching boring routines and diving fork-first into my Biscuits and Chorizo Gravy – the sassy Mexican cousin of your classic Southern comfort dish. Imagine fluffy buttermilk biscuits smothered in a velvety, rust-colored gravy packed with smoky chorizo magic. This isn’t just breakfast; it’s a fiesta on a plate that’ll make your tastebuds do the cha-cha! I know what you’re thinking: “Beau, chorizo in gravy? That’s wild!” But trust me, once you try that spicy, paprika-kissed pork mingling with creamy gravy, you’ll wonder why you ever settled for plain sausage. It’s perfect for lazy Sunday brunches, “wow me” breakfast-for-dinner nights, or whenever you need edible sunshine. So grab your favorite cast iron skillet (and maybe a cold horchata) – we’re turning up the heat!
The Midnight Experiment That Started It All
Picture this: It’s 2 AM after my cousin’s Cinco de Mayo bash. We’re ravenous, staring at leftover chorizo tacos and day-old biscuits. Inspiration struck like a jalapeño seed to the eye! “What if…?” I mumbled, crumbling chorizo into a skillet. My skeptical buddy Carlos watched as I whisked milk into the spicy pork rubble. The moment that first biscuit half-drowned in crimson gravy hit our mouths? Silence. Then synchronized moaning. Carlos grabbed my shoulder: “Dude. This changes EVERYTHING.” That messy midnight mashup became legendary in our crew – the “Hangover Holy Grail.” Now it’s my go-to when I crave comfort with personality. It’s not just food; it’s a delicious reminder that kitchen experiments (even sleep-deprived ones) can create magic. Every bite takes me back to that linoleum-lit “aha!” moment!
Your Flavor Toolkit: Simple Ingredients, Big Personality
Gather these kitchen amigos – they’re about to become your breakfast dream team:
- 10 prepared biscuits (homemade or store-bought): Go for flaky buttermilk ones! Insider Tip: Bake biscuits while making gravy – that oven warmth makes ’em extra welcoming for saucy hugs.
- 2 (9 oz) tubes Cacique pork chorizo: My MVP! Cacique’s blend has that perfect garlic-cumin-paprika punch. Sub Alert: Soyrizo works great for vegetarian pals – just add extra smoked paprika.
- ½ medium yellow onion, finely diced: The chorizo’s sweet-talking sidekick! Chef Trick: Chop ’em small so they melt into the gravy like flavor ninjas.
- 3 tbsp all-purpose flour: Our gravy thickener. Gluten-Free Swap: Cornstarch or GF flour blend works (use 1.5 tbsp cornstarch + 2 tbsp water slurry).
- 2½ cups whole milk: Creaminess commander! Pro Move: Warm it slightly first – no cold milk shocks in our gravy! Half-and-half makes it luxe for special occasions.
Cooking the Magic: Let’s Build That Gravy!
- Biscuit Boot Camp: Bake biscuits per package or recipe. Beau’s Hack: Brush hot biscuits with honey-butter for a sweet-spicy contrast!
- Chorizo Tango: In a large skillet over medium heat, crumble chorizo with diced onion. Cook 6-8 mins until chorizo’s crispy-browned and onions are soft. Watchdog Tip: Chorizo releases crazy oil – drain HALF if it looks like a grease pool (save flavor, ditch excess).
- Flour Power: Sprinkle flour over the mixture. Stir constantly 1-2 mins until it smells toasty and coats every crumb. Golden Rule: This cooks out raw flour taste – don’t rush it!
- Milk Magic: Reduce heat to medium-low. Gradually whisk in milk in ½ cup batches. Secret Weapon: Whisk like you mean it! Lumps fear confidence. Sauce should thicken slightly with each addition.
- Bubble & Brew: Simmer 5-7 mins, stirring often. Gravy will thicken to lush, coat-the-spoon glory. Fix-It Fast: Too thick? Add milk 1 tbsp at a time. Too thin? Simmer longer or sprinkle in ½ tsp flour.
- Taste Check: Chorizo’s usually salty enough – but try it! Need more kick? Pinch of cayenne. Balance? Drizzle of honey.
- Grand Finale: Split warm biscuits, smother with chorizo gravy. Chef’s Oath: Serve IMMEDIATELY – gravy waits for no one!
The Chorizo Chronicles: A Spicy History Lesson
Before we drown our biscuits in glory, let’s pay homage to chorizo—the smoky, paprika-laced hero of this dish. Originating in the Iberian Peninsula, chorizo traveled to Mexico via Spanish colonization and morphed into something entirely its own. Unlike its Spanish cousin (which is dry-cured and eaten sliced), Mexican chorizo is raw, heavily spiced with chili peppers and vinegar, and demands to be cooked. It’s a flavor bomb that transforms humble gravy into a fiesta.
Why Chorizo Works in Gravy
-
Fat = Flavor: Chorizo renders rich, red-hued oil infused with garlic, cumin, and smoked paprika—built-in seasoning for our gravy base.
-
Texture Play: Unlike crumbly breakfast sausage, chorizo breaks down into tiny, crispy bits that cling to every nook of your biscuits.
-
Sweet Heat: The subtle sweetness from Mexican chorizo’s vinegar balance cuts through creamy gravy like a tangy backbeat.
Chorizo Buying Guide
-
Fresh vs. Pre-Cooked: Always grab raw, uncooked chorizo (typically sold in tubes). Pre-cooked versions lack the fat needed for gravy.
-
Spice Levels: Brands vary! Cacique offers mild to hot; if sensitive to heat, mix chorizo with mild Italian sausage.
-
Vegetarian Hack: Soyrizo (like Trader Joe’s) works surprisingly well—add a dash of smoked paprika and a pat of butter to mimic richness.
Fun Fact: In my early tests, I accidentally used Spanish chorizo (the hard, salami-like kind). The gravy turned into a greasy, chewy mess—lesson learned! Stick to Mexican-style for that melt-in-your-mouth magic.
Biscuit Science: The Art of Flaky Layers
Gravy’s soulmate? A biscuit that can hold its own. Whether you’re team “homemade” or “store-bought hustle,” here’s how to ensure your biscuits are worthy of chorizo glory.
Homemade Biscuit Pro Tips
-
Cold Butter = Flaky Layers: Grate frozen butter into your flour for even distribution. Warm butter makes dense biscuits.
-
Buttermilk’s Tang: The acidity reacts with baking soda, creating lift. No buttermilk? Mix 1 cup milk + 1 tbsp lemon juice, wait 5 mins.
-
Don’t Overwork: Stir until just combined. Overmixing = hockey pucks.
Store-Bought Shortcuts
-
Revive Stale Biscuits: Wrap in damp paper towel, microwave 10 secs, then bake at 350°F for 5 mins.
-
Upgrade Canned Biscuits: Brush tops with melted butter + garlic powder before baking.
Biscuit Styles for Every Mood
-
Classic Buttermilk: Neutral canvas for bold gravy.
-
Cheesy Jalapeño: Amplifies the chorizo’s spice.
-
Sweet Potato: Adds earthy-sweet contrast (perfect for fall!).
Confession: My first homemade biscuits could’ve doubled as doorstops. The key? Practice—and accepting that lopsided biscuits taste just as good.
Leftover Alchemy: 5 Ways to Reinvent Chorizo Gravy
Got extra gravy? Don’t let that gold go to waste! Here are my favorite next-day hacks:
-
Chorizo Poutine
-
Pour gravy over crispy fries, top with cheese curds and a fried egg. Breakfast poutine = life changed.
-
-
Huevos Rancheros Remix
-
Smear gravy on tortillas, add fried eggs, avocado, and cotija cheese.
-
-
Savory Bread Pudding
-
Mix cubed biscuits, gravy, shredded cheese, and beaten eggs. Bake at 375°F for 25 mins.
-
-
Stuffed Peppers
-
Fill halved bell peppers with gravy + cooked rice, bake until bubbly.
-
-
Ultimate Breakfast Sandwich
-
Slather gravy on a biscuit with egg, bacon, and pepper jelly. Messy. Magnificent.
-
Pro Tip: Freeze gravy in ice cube trays for single-serving portions. Reheat with a splash of milk—good as new!
Plating: Where Comfort Meets Color
This dish screams “feed me” energy! I split biscuits open on rustic plates – that fluffy interior soaks up gravy like a dream. Pour generously so crimson gravy cascades over the sides. Garnish with bright green chopped cilantro or chives for pop. Pair with: crispy hash browns (for crunch contrast), fresh mango slices (sweet relief from heat), or a fried egg perched on top (because runny yolks = edible gold). Coffee’s classic, but a spicy Bloody Mary or creamy avocado smoothie takes it next-level!
Mix It Up: Gravy Playground
This recipe’s a canvas! Try these twists:
- Green Chile Fiesta: Stir in ¼ cup diced roasted Hatch chiles + lime zest
- Cheesy Chorizo Hug: Fold ½ cup shredded pepper jack into gravy off-heat
- Breakfast Tacos 2.0: Skip biscuits – spoon gravy into tortillas with scrambled eggs
- Lighter Love: Use turkey chorizo + almond milk (add extra smoked paprika)
- Dinner Deluxe: Top poutine fries or mashed potatoes instead of biscuits
Beau’s Backstage Gravy Gossip
This recipe’s evolved more than my taste in aprons! Early versions used bulk sausage + chili powder – good, but missing chorizo’s depth. Then came “The Great Grease Flood of 2019” (RIP white t-shirt). Lesson learned: drain some fat! My pro tip? Make extra gravy – it reheats beautifully. Just add splash of milk when warming. Funny story: I once subbed cinnamon for cumin mid-zoom call (don’t ask). My cat licked the bowl clean while I filmed – true endorsement! Now it’s my most-requested recipe at family campouts. The secret? Embracing chorizo’s boldness without apology. It’s not “traditional,” but hey – neither was Elvis!
Gravy Rescue Squad: Your FAQs
Q: Help! My gravy’s lumpy!
A: DON’T PANIC. Remove from heat and whisk viciously. Still lumpy? Blend with immersion blender or strain. Next time, warm milk first and whisk gradually!
Q: Can I make this ahead?
A: Biscuits are best fresh. Cook chorizo mixture (stop before flour), refrigerate 2 days. When ready, reheat, add flour/milk, and finish. Gravy alone keeps 3 days – reheat low and slow with extra milk.
Q: Too spicy for my kids?
A: Use mild chorizo or half chorizo/half breakfast sausage. Stir in 1 tbsp honey or maple syrup at the end to mellow heat. Serve with cooling sides like yogurt!
Q: Why Cacique specifically?
A: Its texture crumbles perfectly and spice blend rocks. If unavailable, choose fresh Mexican-style chorizo (not Spanish cured). Avoid “chouriço” – different flavor profile!

Biscuits and Chorizo Gravy
- Total Time: 20 mins
Description
Flaky buttermilk biscuits meet smoky, paprika-loaded chorizo gravy in this bold breakfast fusion. It’s comfort food with personality—perfect for brunch, breakfast-for-dinner, or those “I need flavor NOW” mornings. Grab a skillet and bring the fiesta to your plate!
Ingredients
-
10 prepared biscuits (homemade/store-bought)
-
2 (9 oz) tubes Cacique pork chorizo (or soyrizo for veggie version)
-
½ medium yellow onion, finely diced
-
3 tbsp all-purpose flour (or GF alternative)
-
2½ cups whole milk (warmed slightly)
Instructions
-
Bake Biscuits per package or recipe. For flair, brush with honey-butter after baking.
-
Cook Chorizo & Onion: In a large skillet over medium, crumble chorizo with onion. Sauté 6–8 mins until browned. Drain half the grease if too oily.
-
Add Flour: Stir in flour for 1–2 mins until nutty and golden.
-
Whisk in Milk: Gradually add warm milk in batches, whisking constantly to avoid lumps.
-
Simmer: Let gravy bubble on low for 5–7 mins, stirring until thick. Adjust thickness with milk or more simmer time.
-
Taste & Serve: Adjust salt, add cayenne or honey as needed. Split biscuits and smother with gravy. Garnish with cilantro or chives.
Notes
-
Add roasted green chiles + lime zest for a fiesta kick
-
Stir in pepper jack cheese for extra indulgence
-
Swap biscuits for tortillas or mashed potatoes
-
Use turkey chorizo + almond milk for a lighter version
- Prep Time: 5 mins
- Cook Time: 15 mins
Nutrition
- Calories: 480 Cal Per Serving
- Fat: 32g
- Carbohydrates: 28g
- Protein: 18g
Nutritional Breakdown (Per Serving)
Prep: 5 mins | Cook: 15 mins | Serves: 5 (2 biscuits + gravy)
- Calories: 480
- Fat: 32g
- Carbs: 28g
- Protein: 18g
- Sodium: 950mg
Note: Values are estimates. Homemade biscuits or swaps change numbers. Want lighter? Try turkey chorizo + skim milk (saves ~100 cals).
Final Thoughts: Embrace the Delicious Chaos
Biscuits and chorizo gravy isn’t just a meal; it’s a rebellion against boring breakfasts. It’s for those mornings when you crave comfort with a side of adventure—where Southern tradition shakes hands with Mexican spice. Will your gravy be perfect on the first try? Maybe not. (Mine sure wasn’t!) But that’s the joy of cooking: every “oops” is a chance to innovate.
So here’s to midnight kitchen experiments, to stains on your apron, and to the friends who’ll fork-fight you for the last biscuit. Whip up this dish, turn up the mariachi music, and let every bite remind you that the best flavors come from taking risks. Now go forth and gravy responsibly!
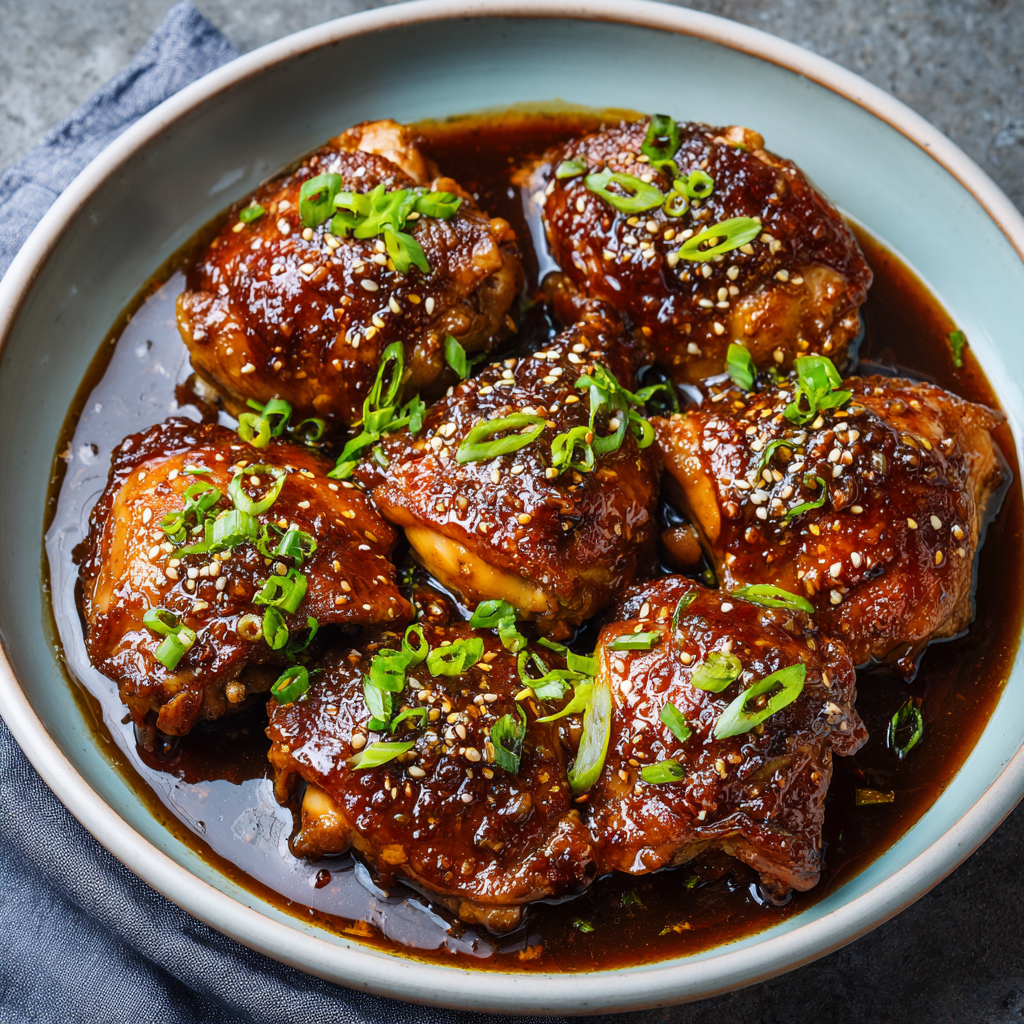
Slow Cooker Honey Garlic Chicken
Hey, Let’s Make Your Slow Cooker Do the Heavy Lifting!
Picture this: It’s been one of those days. Your to-do list is laughing at you, the laundry’s staging a rebellion, and the thought of cooking dinner feels like climbing Everest in flip-flops. Enter your trusty slow cooker and this magical Honey Garlic Chicken—your culinary superhero. Seriously, folks, this dish is the edible equivalent of a cozy blanket fort. Sweet, sticky, garlicky goodness that hugs your taste buds while practically cooking itself. Whether you’re a meal-prep maestro or just discovered your slow cooker’s “ON” button, this recipe is your golden ticket to flavor town. No fancy skills needed—just dump, set, and forget. By dinnertime? Tender chicken swimming in a glossy glaze that’ll make you wanna lick the spoon (no judgment here). Trust me, your future self—lounging on the couch while dinner bubbles away—will thank you. Ready to turn chaos into comfort? Let’s roll!
That Time My Slow Cooker Saved Thanksgiving (Sort Of)
So, confession: This recipe was born during a kitchen disaster of epic proportions. Picture Thanksgiving 2019. My oven decided to quit—mid-turkey roast. Panic? Oh yeah. But then I spotted my dusty slow cooker hiding behind the blender. In a frenzy, I threw chicken thighs (the turkey’s understudy) into the pot, eyeballed honey and garlic from the pantry, and hit “HIGH.” Four hours later? A miracle. That sticky-sweet chicken vanished faster than the actual turkey! My aunt even whispered, “Beau, this is better than Mom’s.” (Sorry, Grandma.) Now, this Honey Garlic Chicken is my go-to when life gets messy. It’s proof that sometimes the best memories—and meals—come from happy accidents. And hey, no oven required.
Your Flavor Dream Team (Plus Swaps!)
Gather these pantry pals. Pro tip: Measure everything before you start—it takes 5 minutes, I promise!
- 8 chicken thighs – Bone-in, skin-on for insane juiciness (they’re like flavor sponges!). Swap: Boneless thighs work too, but reduce cook time by 1 hour. Chicken breasts? Sure, but they’re leaner—add ¼ cup broth to prevent dryness.
- ½ cup honey – The “honey” in honey garlic! Use raw for depth or regular for ease. Vegan? Maple syrup works, but the glaze will be thinner.
- ½ cup soy sauce – Salty-savory base. Gluten-free? Tamari or coconut aminos (use ⅓ cup—it’s saltier!).
- ¼ cup water – Thins the sauce so it coats every nook. Chef hack: Swap with pineapple juice for a tropical twist!
- 2 tbsp apple cider vinegar – Brightens the richness. No ACV? White vinegar or lemon juice in a pinch.
- 1 tbsp minced garlic – Fresh is best! Jarred works, but use 1.5 tbsp—it’s milder. Garlic-phobes? Start with 2 tsp.
Optional magic: Toss in 1 tsp grated ginger with the garlic, or a pinch of red pepper flakes for heat. You do you!
Let’s Build Your Masterpiece (Zero Fuss, I Swear!)
Follow these steps—and my snarky commentary—for guaranteed wins:
- Layer the chicken thighs in your slow cooker like they’re sunbathing. No stacking! Overcrowding = uneven cooking. Skin-side up if using skin-on—it’ll crisp slightly (yes, even in a slow cooker!).
- Whisk the sauce in that measuring cup you just used for honey (less dishes!). Chef hack: Microwave honey for 10 seconds first—it blends smoother. Pour it over the chicken like you’re baptizing it in flavor.
- Cook LOW and SLOW: Lid on! Set to LOW for 6-7 hours (ideal for melt-in-your-mouth texture) or HIGH for 4 hours (for when hangry strikes). Resist peeking! Every lift releases steam and adds 15 minutes to cook time. I set a phone alarm—because #distractable.
- Optional glaze upgrade: Fish out the chicken with tongs. Pour sauce into a saucepan. Mix 1 tbsp cornstarch + 1 tbsp cold water, whisk into sauce. Simmer 3-5 minutes until it coats the spoon. Game-changer for rice-soaking!
- Serve it pretty: Plate chicken, drown it in glaze. Optional garnish: Sesame seeds or chopped green onions. Cue the applause!
Psst: If your sauce seems too thin post-cook, skip the cornstarch—just blast it uncovered on HIGH for 20 minutes. Slow cooker magic!
How to Make This Meal Shine (Minimal Effort, Max Vibes)
This chicken is a social butterfly—it plays well with everything. For a cozy night: Fluffy jasmine rice (the glaze soaks in like a dream) and steamed broccoli. Feeling fancy? Swap rice for quinoa or cauliflower rice. Noodle lovers: Toss with udon or soba—add extra sauce! Summer vibes? Serve chilled over crisp romaine with cucumber ribbons. My fave “lazy gourmet” move: Pile it on toasted brioche buns with quick-pickled carrots. Dinner = done.
Shake It Up! 5 Tasty Twists
Don’t be shy—customize this bad boy:
- Spicy Dragon Style: Add 1 tbsp sriracha + 1 tsp grated ginger to the sauce. Top with sliced jalapeños.
- Tropical Vacation: Swap water for pineapple juice. Add ½ cup diced bell peppers in the last hour.
- Cozy Autumn: Stir 2 tbsp apple butter into the sauce. Serve with roasted sweet potatoes.
- Keto-Friendly: Use sugar-free maple syrup instead of honey. Add ¼ cup cream cheese at the end—stir until creamy!
- Veggie Power: Replace chicken with 2 cans chickpeas (drained) + 1 cup cubed sweet potato. Cook on LOW 5 hours.
Why Slow Cooking is the Ultimate Kitchen Hack (And Why You’ll Never Go Back)
Let’s talk about the unsung hero of weeknight dinners: the slow cooker. It’s not just a countertop appliance—it’s a lifestyle upgrade. If you’ve ever stared into your fridge at 5 p.m. and felt the crushing weight of dinner decisions, the slow cooker is your golden ticket to sanity. Here’s why:
-
Time Travel for Busy People
Slow cookers let you bend time. At 8 a.m., you’re a meal-prepping wizard. By 6 p.m., you’re a relaxed host serving fork-tender chicken without breaking a sweat. The “set it and forget it” magic means you can tackle work, errands, or even a nap while dinner cooks itself. No frantic stirring, no timers—just a house smelling like a gourmet bistro by sunset. -
Flavor That Can’t Be Rushed
Unlike quick sautés or pressure cooking, slow cooking coaxes out deep, layered flavors. The honey garlic chicken’s sauce reduces slowly, caramelizing into a sticky glaze that clings to every bite. Collagen in chicken thighs breaks down over hours, turning into silky, melt-in-your-mouth goodness. Try replicating that in 30 minutes—I dare you. -
Forgiveness Factor
Burned grilled cheese? We’ve all been there. But slow cookers are famously forgiving. Overcook by an hour? The chicken stays juicy. Forgot an ingredient? Toss it in late (except dairy—RIP). Even the sauce can be tweaked post-cook: Too thin? Reduce it. Too thick? Add broth. It’s the culinary equivalent of a safety net. -
Energy and Budget Friendly
Slow cookers use less energy than ovens and won’t heat up your kitchen—a win in summer. Plus, they transform cheap cuts (like chicken thighs) into luxe meals. That $5 pack of thighs becomes a restaurant-worthy dish, saving you from takeout bills. -
The Ultimate Social Lubricant
Nothing says “I’ve got my life together” like serving a slow-cooked meal to guests. The best part? You’re not stuck in the kitchen. Instead, you’re sipping wine, laughing at your aunt’s stories, and casually mentioning, “Oh, the chicken? Just something I threw together.” Cue impressed gasps.
Bottom Line: If your slow cooker’s collecting dust, it’s time for a reunion. This honey garlic chicken recipe is the gateway drug to a slower, tastier life.
The Science Behind the Perfect Honey Garlic Sauce (And How to Fix Common Mistakes)
Ever wondered why this honey garlic chicken tastes so darn good? It’s not magic—it’s science. Let’s geek out over the chemistry of the sauce and troubleshoot common pitfalls:
The Flavor Alchemy
-
Honey’s Role: Honey isn’t just sweet; it’s hygroscopic (it attracts water). During cooking, it pulls moisture from the chicken, concentrating flavors and creating that glossy glaze. Raw honey adds floral notes, while regular honey keeps it simple.
-
Soy Sauce’s Umami Bomb: Fermented soy sauce packs glutamates—natural flavor enhancers that make your taste buds sing. Tamari (gluten-free soy sauce) works similarly but is saltier, so adjust accordingly.
-
Acid Balance: Apple cider vinegar (or lemon juice) cuts through richness, preventing the dish from tasting cloying. No acid? Your chicken might taste like candy.
Common Sauce Disasters (And Fixes)
-
Too Thin: If your glaze resembles soup, strain the liquid into a saucepan, simmer uncovered for 10–15 minutes, or add a cornstarch slurry (1 tbsp cornstarch + 1 tbsp water).
-
Too Salty: Overdid the soy sauce? Add a teaspoon of brown sugar or a splash of water. Serve with bland sides (rice, potatoes) to balance it.
-
Burned Edges: If the sauce scorches (usually from high heat or lack of liquid), salvage the unburnt chicken and mix with fresh sauce. Next time, add more water or use LOW heat.
Pro Tips for Sauce Nerds
-
Deglaze for Depth: After removing the chicken, scrape the slow cooker’s browned bits (fond) into the sauce. These caramelized bits add complexity.
-
Fat = Flavor: Skin-on thighs render fat into the sauce, making it richer. Skim excess fat post-cooking if needed, but don’t toss it all—it’s flavor gold.
-
Fresh Garlic FTW: Pre-minced garlic lacks allicin (the compound that gives garlic its punch). For bold flavor, mince fresh cloves right before adding.
Fun Fact: The Maillard reaction (browning) happens even in a slow cooker, just slower. That’s why the edges of your chicken get those delicious caramelized bits!
Slow Cooker vs. Instant Pot: Which Wins for Honey Garlic Chicken?
The age-old debate: Is this recipe better in a slow cooker or Instant Pot? Let’s compare:
Slow Cooker Pros:
-
Hands-Off Ease: Dump ingredients, leave for 6 hours, return to perfection. No babysitting.
-
Texture: Chicken thighs become impossibly tender without drying out.
-
Sauce Control: Slow reduction yields a thicker, stickier glaze.
Cons:
-
Time commitment (not for last-minute meals).
-
Less browning unless you sear chicken first (but who has time?).
Instant Pot Pros:
-
Speed: 25 minutes on high pressure (plus natural release).
-
Browning Option: Use the sauté function to sear chicken before pressure cooking for deeper flavor.
Cons:
-
Sauce may be thinner (quick-thicken with cornstarch after cooking).
-
Risk of overcooking if you don’t adjust times (breasts can turn rubbery).
The Verdict:
-
Weekends/Meal Prep? Slow cooker. Let flavors develop.
-
Weeknight Rush? Instant Pot. Nearly identical taste in a fraction of the time.
Hybrid Hack: Use the Instant Pot’s slow cooker function (but note: it heats differently, so check doneness early)
Beau’s Backstage Secrets (and Bloopers)
This recipe’s been through stuff. Like that time I used buckwheat honey—tasted like a campfire (stick to mild honey!). Or when my cat tried to “help” by sitting on the slow cooker (RIP, Mr. Whiskers’ tail). Over the years, I learned: Bone-in thighs = flavor VIPs. And adding vinegar? Non-negotiable—it cuts the sweetness so you don’t feel like you ate candy for dinner. Pro tip: Double the sauce and freeze half—it’s killer on salmon or roasted carrots! Funny thing? My nephew calls this “Dragon Chicken” because he thinks the sticky glaze is dragon spit. Kids, man. Whatever gets ’em eating!
Your Questions? Answered!
Q: Can I use frozen chicken?
A: Technically yes—but thaw it first! Frozen chicken lowers the cooker’s temp, risking bacteria growth. And nobody wants food poisoning. Thaw overnight in the fridge or use the defrost setting on your microwave.
Q: My sauce is too salty! Help!
A: Been there! Stir in 1 tbsp honey or a squeeze of lime juice. Too late? Serve with unsalted rice or potatoes—they’ll absorb the salt. Next time, use low-sodium soy sauce!
Q: Can I cook this faster?
A: If you’re in a rush, do HIGH for 3 hours—but check for doneness! Chicken should hit 165°F internally. Overcooked chicken thighs? Still tender. Overcooked breasts? Shoe leather. Choose wisely.
Q: Why no veggies in the pot?
A: They turn to mush after 4+ hours! Add hardy veggies (carrots, potatoes) in the last 2 hours. Delicate ones (snow peas, zucchini)? Toss ’em in 20 minutes before serving.

Slow Cooker Honey Garlic Chicken
Description
Sweet, Sticky, Garlicky Comfort with Zero Stress
This set-it-and-forget-it classic delivers fall-apart tender chicken glazed in a rich, garlicky honey sauce—all with minimal effort. Weeknight winner, meal prep hero, or crowd-pleaser for your laziest days.
Ingredients
-
8 bone-in, skin-on chicken thighs (Juiciest option! See swaps below)
-
½ cup honey (Raw for depth, regular works fine. Maple syrup = vegan option)
-
½ cup soy sauce (Low-sodium or tamari for gluten-free)
-
¼ cup water (Or pineapple juice for tropical vibes)
-
2 tbsp apple cider vinegar (Brightens! Sub: white vinegar or lemon juice)
-
1 tbsp minced garlic (Fresh preferred. Jarred? Use 1.5 tbsp)
Optional Flavor Boosts:
-
1 tsp grated fresh ginger (Adds warmth)
-
¼–½ tsp red pepper flakes (For heat lovers)
Cornstarch Slurry (Optional, for thicker glaze):
-
1 tbsp cornstarch + 1 tbsp cold water
Instructions
-
Layer Chicken: Arrange thighs in your slow cooker in a single layer, skin-side up for best texture.
-
Mix Sauce: Whisk honey, soy sauce, water, vinegar, garlic, and any optional add-ins. Pour over chicken evenly.
-
Cook:
-
LOW for 6–7 hours (ultimate tenderness)
-
HIGH for 4 hours (if you’re short on time)
Resist peeking! Every lid lift adds ~15 minutes to cook time.
-
-
Optional Glaze Upgrade: Transfer cooked chicken to a plate. Pour sauce into a saucepan, bring to a simmer. Whisk in cornstarch slurry. Simmer 3–5 minutes until glossy and thickened.
-
Serve: Plate chicken, drizzle with sauce, and garnish with sesame seeds or green onions if desired.
Notes
✅ Bone-in thighs = best flavor, but boneless works—reduce cook time by ~1 hour.
✅ Skin-on crisps slightly, but for saucier bites, use skinless.
✅ Sauce too thin? Blast uncovered on HIGH 20 minutes or use cornstarch slurry.
✅ Sauce too salty? Stir in extra honey or fresh lime juice.
✅ Double the sauce—it’s magic on salmon, veggies, or rice bowls!
Nutrition
- Calories: ~320 | Cal Per Serving
- Fat: 12g
- Carbohydrates: 20g
- Protein: 28g
Nutritional Info (Approximate Per Serving)
Serves 4–6 | Calories: 320 | Protein: 28g | Fat: 12g | Carbs: 20g
Note: Stats vary based on chicken cuts and exact ingredients. Using skin-on thighs? Add ~50 calories. Skinless? Subtract ~30. Gluten-free version with tamari? Carbs stay similar.
Final Thoughts: Why This Recipe Deserves a Spot in Your Rotation
This honey garlic chicken isn’t just a recipe—it’s a lifeline for chaotic days, a crowd-pleaser for gatherings, and a canvas for creativity (looking at you, spicy dragon version). It proves that the best meals don’t require chef skills, just patience and a trusty slow cooker. Whether you’re a busy parent, a meal-prep newbie, or someone who just loves sticky-sweet comfort food, this dish delivers every time. So dust off that cooker, embrace the simplicity, and let dinner take care of itself. Your future self (and your taste buds) will thank you.