
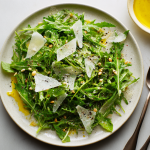
Elegant Arugula Parmesan Salad : Bright, Peppery, and Effortlessly Chic
Elegant Arugula Parmesan Salad – Your New Go-To for Effortless Chic
Hey friends, Beau here from Feastical! Let me ask you something: do you ever feel like salads can be… well, a lot? Don’t get me wrong, I love a loaded, crunchy, ingredient-packed bowl as much as the next person. But sometimes, in the rush of getting dinner on the table or when you want something that feels special without the fuss, you need a different kind of salad hero.
You need a salad that understands the assignment. One that whispers “sophistication” but shouts “I came together in five minutes flat.” A salad that isn’t just a sidekick but a star in its own right. That, my friends, is the magic of this Elegant Arugula Parmesan Salad.
This isn’t just a pile of greens. This is a study in beautiful contrasts. Imagine: the bright, peppery kick of fresh arugula, playing perfectly against the rich, nutty, savory depth of shaved Parmigiano-Reggiano. A generous squeeze of sunny lemon juice cuts through it all, while a drizzle of really good olive oil ties everything together with a luxurious, fruity hug. A crack of black pepper on top is the final, non-negotiable flourish.
It looks minimalist and chic on the plate—the kind of salad you’d pay $18 for at a sleek little bistro. But the secret (which we’re totally sharing!) is its breathtaking simplicity. It’s proof that with a few incredible ingredients and zero stress, you can create something truly memorable. So, let’s ditch the complicated and fall in love with simple, bold flavors. Grab your biggest bowl, and let’s make some magic happen.
The Salad That Saved Dinner (and My Reputation)
I have to tell you about the first time this salad became my kitchen lifeline. Years ago, my now-wife invited her boss and their partner over for a last-minute dinner. I was tasked with the main course—a herb-crusted rack of lamb that I was maybe a tiny bit too confident about. Long story short, the lamb took longer than expected, the kitchen looked like a culinary tornado hit it, and I realized I had completely forgotten to plan a starter.
Panic mode: engaged. I frantically opened the fridge. There, hiding in the crisper, was a bag of slightly-wilted-at-the-edges arugula, a nub of parmesan, and a lonely lemon. On the counter, my trusty bottle of olive oil. With about 90 seconds to spare before our guests walked in, I threw it all together in a bowl, gave it a frantic toss, and prayed.
You know what? It was the hit of the night. Her boss raved about the “perfect, peppery start” and asked for the recipe. My wife shot me a look that said, “You lucky genius.” In that moment, this salad taught me a lifelong lesson: great food isn’t about the number of ingredients; it’s about the quality and balance of them. This humble combo saved my dignity and became a permanent fixture in our home. It’s my little reminder that elegance often wears the simplest clothes.
Gathering Your A-List Ingredients
Here’s where the philosophy of “less but better” really shines. Each component here has a starring role, so let’s choose our players wisely. This is the fun part!
- 4 cups fresh arugula (about 5 oz): This is your foundation! Look for perky, bright green leaves with no yellowing. The peppery punch is key. Chef’s Insight: If your arugula is very spicy, it’s a sign of freshness and peak flavor—embrace it! For a milder taste, you can mix in some baby spinach.
- Juice of ½ a fresh lemon: Please, for the love of all that is bright and good, use a real lemon. Bottled juice just won’t give you that same vibrant, aromatic zing. Substitution Tip: In a true pinch, a good quality white wine vinegar or champagne vinegar can work, but start with half the amount and adjust.
- 2 tbsp extra virgin olive oil: This is your chance to use the good stuff—the bottle you save for finishing dishes. A fruity, slightly peppery olive oil will complement the arugula beautifully. Chef’s Insight: Taste your oil! If it tastes vibrant and green on a spoon, it’ll sing in the salad.
- ¼ cup shaved Parmigiano-Reggiano: Not the gritty, pre-grated stuff. Get a wedge and shave it yourself with a vegetable peeler. The difference in flavor, texture, and how it melts on your tongue is night and day. Substitution Tip: A high-quality Pecorino Romano will give a sharper, saltier kick, which is also delicious.
- Cracked black pepper to taste: Freshly cracked is non-negotiable. The pre-ground powder has lost its soul. The floral, spicy notes of fresh pepper are part of the dressing itself.
Optional Superstar: A small handful of toasted pine nuts or slivered almonds. They add a gorgeous crunch and nutty richness that takes this salad to another dimension.
Building Your Masterpiece: Step-by-Step
Ready? This is the fastest, most satisfying process. Let’s do it with intention and a little chef-style flair.
- Prep Your Greens: Place your arugula in a large, wide salad bowl. Not a small one! We need room for the gentle, graceful tossing action. If the arugula is wet from washing, spin it very dry or pat gently with a kitchen towel. Water is the enemy of a good dressing—it will dilute the flavor and make the greens soggy. Chef Hack: I often wash and spin my greens hours ahead, then store them in the fridge wrapped in a dry paper towel inside the salad spinner bowl. Crisp perfection, on demand.
- Season First: Before you add the oil, squeeze that glorious lemon juice directly over the arugula. Now, take your sea salt and crack some over the leaves. Why now? Seasoning the greens directly with acid and salt before adding oil helps the flavors penetrate and brightens every single bite. It’s a tiny step with a huge payoff.
- The Luxurious Drizzle: Pour your 2 tablespoons of gorgeous olive oil over the greens. At this stage, I like to add a tiny drizzle (maybe half a teaspoon) more directly from the bottle after tossing, just for that glistening finish on top. It’s all about layers of flavor and sheen.
- The Art of the Toss: Here’s where you channel your inner Italian nonna. Using salad tongs or two large spoons, lift, fold, and turn the greens gently from the bottom of the bowl up. You’re not stirring, you’re coating. You want every leaf to glisten lightly, but not drown. This should take about 15-20 seconds. Taste a leaf! Does it need a pinch more salt or a tiny extra squeeze of lemon? Adjust now.
- The Grand Finale: Scatter your beautiful, shaved parmesan ribbons over the top. Don’t toss it in yet! We want those lovely shavings to be visible. Now, take your pepper mill and give the whole salad several confident cracks of fresh black pepper. Chef’s Presentation Tip: If you added toasted nuts, add them now too. For the final touch, I sometimes add one last, whisper-thin parmesan shave right on the very top for visual drama.
See? No cooking, no complex techniques. Just mindful combining of fantastic ingredients. You’ve just created restaurant-level elegance in your own kitchen.
How to Serve It: From Simple to Showstopping
This salad is the ultimate versatile player. Here’s how to let it shine:
The Solo Star: Pile it high on a chilled plate or shallow bowl for a stunning, light lunch. I love it with a slice of crusty, warm sourdough bread for dipping into any lemony-olive oil juices left at the bottom. (The best part, honestly).
The Perfect Partner: This salad is a match made in heaven with so many mains. Serve it alongside a creamy fettuccine alfredo – the peppery greens cut through the richness perfectly. It’s incredible next to grilled steak or chicken, a simple lemon-butter salmon, or even perched on top of a warm, cheesy pizza Margherita for a gourmet touch.
Company’s Coming: For a dinner party, consider plating individual portions. Use a pair of tongs to create a high, fluffy mound of the dressed arugula on each plate, then artfully drape the parmesan shavings and nuts around it. It looks incredibly professional and shows you care about the details.
Play With Your Food: Delicious Twists & Swaps
Once you’ve mastered the classic, have fun making it your own! Here are a few of my favorite riffs:
- Prosciutto & Melon Twist: Add thin ribbons of salty prosciutto and sweet, ripe cantaloupe or honeydew balls. The sweet-salty-peppery combo is a classic for a reason.
- Summer Stone Fruit Bliss: In peak season, add sliced fresh peaches, nectarines, or cherries. A sprinkle of toasted sliced almonds and a tiny drizzle of honey in the dressing works wonders here.
- Hearty Grain Bowl Base: Transform it into a meal by serving the dressed arugula and parmesan over a bed of warm farro, quinoa, or couscous. The grains soak up the dressing deliciously.
- Dairy-Free Delight: Swap the parmesan for creamy, marinated artichoke hearts or slices of ripe avocado. The goal is still that creamy element to balance the pepper.
- Citrus Burst: Add segments of blood orange or grapefruit in the winter months for a stunning, colorful, and super-tangy variation. A few red onion slivers are fantastic here too.
Beau’s Kitchen Notebook
This recipe has been my faithful companion for years, and it’s evolved in tiny, personal ways. I almost always add the toasted pine nuts now—I love that extra texture. And I’ve become a zealot about seasoning in the right order (acid and salt first!).
One funny thing: I used to be so precious about the shaving, trying to make every parmesan piece identical. Then one day, a piece broke into a big, craggy chunk. I ate it and realized those thick, crunchy bits of pure parmesan are the best part. Now, I intentionally make a mix of elegant ribbons and hearty chunks. Perfection is overrated; flavor and fun are not.
Remember, this salad waits for no one. Dress it right before serving. If you need to prep ahead, have your greens washed and dried, cheese shaved, and lemon juiced. Combine at the last possible moment for that perfect, crisp, vibrant bite.
Your Questions, Answered
Q: My arugula is sometimes super spicy/peppery and other times mild. Why?
A: You have a good palate! Arugula’s pepper level varies with the season, its maturity, and growing conditions. Younger, smaller leaves (often sold as “baby arugula”) are milder. Larger, more mature leaves pack more heat. If it’s too strong for you, blend it 50/50 with butter lettuce or spinach.
Q: Can I make this ahead of time for a party?
A: You can prep everything ahead, but don’t dress it! Keep the dried arugula, shaved cheese, and dressing (oil and lemon juice mixed together) in separate containers in the fridge. Toss it all together the second before you walk it to the table. A dressed arugula salad wilts and loses its sparkle within 10-15 minutes.
Q: What’s the best way to shave parmesan without a special tool?
A: A standard Y-shaped vegetable peeler is your best friend! It creates those beautiful, wide, delicate ribbons perfectly. If you only have a box grater, use the side with the largest holes, but know the texture will be different—more snow-like than ribbon-like.
Q: My salad tastes flat. What did I miss?
A: Flat flavor usually needs one of two things: acid or salt. Add another small squeeze of lemon juice first. If it’s still lacking, add a tiny pinch of flaky sea salt, toss, and taste again. Also, ensure your olive oil and parmesan are fresh and flavorful—they carry a lot of the weight.
Elegant Arugula Parmesan Salad : Bright, Peppery, and Effortlessly Chic
Description
Hey friends, Beau here! Sometimes you want a salad that’s not overstuffed with ingredients, not fussy, but still feels elevated. That’s exactly what this Elegant Arugula Parmesan Salad delivers: bright, peppery arugula, rich Parmigiano-Reggiano, a squeeze of fresh lemon, a drizzle of fruity olive oil, and a crack of black pepper. It’s minimalist, chic, and comes together in just five minutes—perfect as a light lunch, starter, or side for dinner.
Ingredients
-
4 cups fresh arugula (about 5 oz)
-
Juice of ½ a fresh lemon
-
2 tbsp extra virgin olive oil (use your best-quality oil)
-
¼ cup shaved Parmigiano-Reggiano (or Pecorino Romano for a sharper taste)
-
Freshly cracked black pepper, to taste
-
Optional: 2 tbsp toasted pine nuts or slivered almonds
Instructions
-
Prep the Greens
-
Place arugula in a large salad bowl. Make sure it’s very dry; water will dilute the dressing and make leaves soggy.
-
-
Season First
-
Squeeze lemon juice over the arugula. Sprinkle lightly with sea salt. Seasoning the greens first ensures the acid and salt penetrate every leaf.
-
-
Drizzle the Olive Oil
-
Add 2 tablespoons of olive oil. Toss gently to coat the leaves evenly. For a glistening finish, you can drizzle a tiny bit more on top after tossing.
-
-
Toss with Intention
-
Using tongs or large spoons, fold the greens from the bottom up, coating each leaf without crushing it. Taste and adjust lemon juice or salt if needed.
-
-
Add Parmesan & Nuts
-
Scatter shaved parmesan ribbons over the top. Add toasted nuts if using. Finish with a few generous cracks of black pepper.
-
Notes
-
Always dress right before serving; arugula wilts quickly.
-
Wash and spin greens well ahead of time and store dry in the fridge for convenience.
-
Use a Y-shaped vegetable peeler for perfect parmesan ribbons.
-
If flavor tastes flat, add extra lemon juice or a pinch of flaky sea salt.
Final Thoughts
This Elegant Arugula Parmesan Salad is more than a recipe—it’s a philosophy on a plate. In a world that often equates “more” with “better,” this salad stands as a quiet, confident reminder that true impact lies in simplicity, quality, and balance. It’s the culinary equivalent of a little black dress or a perfectly tailored white shirt: timeless, adaptable, and effortlessly chic.
What I hope you take away from this isn’t just a delicious side dish, but a newfound confidence in your kitchen. You don’t need a pantry full of exotic ingredients or hours of prep to create something memorable. Sometimes, all you need is the bright, peppery bite of arugula, the savory depth of real Parmesan, the sunshine of lemon, and the lush embrace of good olive oil. It’s a lesson in trusting ingredients to speak for themselves.
This salad has been my dinner-party savior, my lazy-lunch hero, and my go-to when I need a reminder that cooking should be a joy, not a chore. It’s proof that a few mindful minutes can yield something truly beautiful. So, the next time you’re staring into the fridge, wondering what to make, remember this combination. Let it be your foundation, your canvas, your secret weapon for effortless style.
Now, I’d love to hear from you. Did you stick to the classic, or try one of the fun twists? What did you serve it with? Tag me over on Instagram @Feastical with your creations—I cheer on every single one.
Until next time, remember: cook with your senses, eat with joy, and never underestimate the power of a great salad.
With gratitude,
Beau
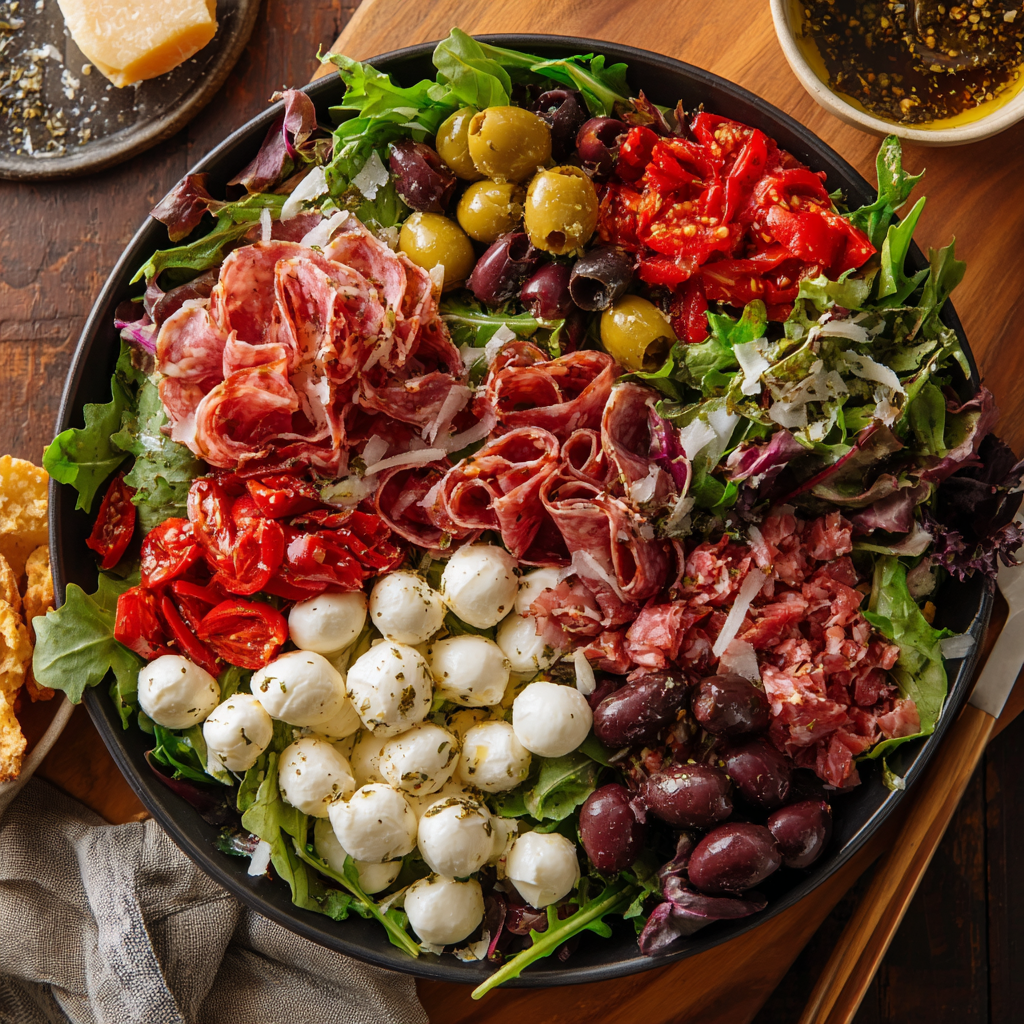
Italian Antipasto Salad : Charcuterie Board Flavor in Every Bite
Italian Antipasto Salad: Your Charcuterie Board, In Bowl Form!
Hey there, friend! Beau here, from Feastical. Can we talk for a second about the great appetizer plate dilemma? You know the scene: you’re at a fantastic Italian restaurant, and they bring out that stunning wooden board. It’s a masterpiece of salty meats, tangy cheeses, briny olives, and sweet-tart roasted peppers. You and your crew dig in, forks clinking, everyone trying to get a perfect bite of everything. It’s the best part of the meal… and then, poof, it’s gone. Wouldn’t it be amazing if you could have that incredible, bold flavor combination as an entire meal?
Well, grab your favorite big ol’ salad bowl, because that’s exactly what we’re doing today. This Italian Antipasto Salad isn’t just a side dish—it’s the main event. It takes everything you adore about that starter plate, tosses it with some crisp, fresh greens and a zippy homemade dressing, and turns it into the most satisfying, no-fuss lunch or dinner you’ll make all week.
Think of this as your permission slip to eat appetizers for dinner. It’s protein-packed, low-carb, bursting with color and texture, and comes together in about 10 minutes flat. No cooking, no fuss, just maximum flavor with minimal effort. It’s the kind of recipe that makes you look like a kitchen rockstar, whether you’re feeding your family on a busy Tuesday or impressing guests at a summer potluck. So, let’s channel those Italian trattoria vibes and build a salad that eats like a celebration!
The Antipasto Plate That Started It All
My love for these flavors goes way back. One of my first “fancy” dinners out as a young adult was at this tiny, family-run Italian spot. The walls were covered in vintage photos, the garlic smell was heavenly, and the nonna in the back was definitely the boss. Before we even ordered, the server plunked down a massive, family-style antipasto platter in the center of our checkered tablecloth. It wasn’t just food; it was an experience. We were forced to talk, to share, to point and ask “what’s that?” and “can you pass the prosciutto?”
That shared platter broke the ice, sparked conversation, and set the tone for the whole meal. It was communal, unpretentious, and deeply delicious. I wanted to bottle that feeling. This salad is my way of doing just that. It captures that same spirit of sharing and big, unapologetic flavor, but in a format that’s perfect for any night of the week. It’s my kitchen homage to that checkered tablecloth and the simple joy of eating really, really good food with people you like.
Gathering Your Cast of Flavor Characters
Here’s where the magic starts. Antipasto means “before the meal,” and traditionally, it’s a showcase of preserved, cured, and pickled items. We’re honoring that tradition while adding some fresh vibrancy. Think of this as your shopping list for a flavor party—every guest brings something unique to the table!
- 4 cups Mixed Greens (Arugula, Romaine, or Spring Mix): This is our fresh, crisp foundation. I love a blend for texture and flavor. Chef’s Insight: Arugula adds a lovely peppery kick that pairs perfectly with the salty meats. If you want a sturdier base that won’t wilt as quickly, go for hearts of romaine.
- 1 cup Mozzarella Pearls (Ciliegine): Little bursts of creamy, mild freshness. They’re like edible pillows! Substitution Tip: No pearls? No problem! Fresh mozzarella torn into bite-sized chunks works beautifully. For a sharper twist, try small cubes of provolone or fontina.
- ½ cup Sliced Salami (Genoa or Hard): Our first hit of savory, garlicky goodness. I like to roll a few slices together and slice them into ribbons for more surface area. Chef’s Insight: Look for a good-quality, thinly sliced salami from the deli counter—it makes all the difference.
- ½ cup Sliced Prosciutto: The elegant, salty, melt-in-your-mouth superstar. Tear it into rustic pieces for a more authentic feel. Substitution Tip: If prosciutto isn’t handy, a good serrano ham or even some thinly sliced pancetta (crisped up!) would be delicious.
- ½ cup Roasted Red Peppers, Sliced: These bring a sweet, smoky, and slightly tangy element that brightens everything up. Chef’s Hack: Jarred peppers are a total kitchen lifesaver here. Just give them a quick rinse and pat dry to remove any excess brine or oil.
- ½ cup Mixed Olives (Kalamata, Castelvetrano, or Stuffed): The briny, salty backbone. I use a mix for color and flavor. Castelvetranos are my fave for their buttery, mild taste. Substitution Tip: Use whatever olives you love! Even a simple can of sliced black olives will do in a pinch.
- ¼ cup (or to taste) Homemade Italian Dressing: Store-bought is fine, but a 2-minute homemade version elevates this to another level. See my quick recipe below!
Quick Homemade Dressing: Whisk together ¼ cup extra virgin olive oil, 2 tbsp red wine vinegar, 1 minced garlic clove, 1 tsp dried oregano, ½ tsp dried basil, ¼ tsp red pepper flakes, and a big pinch of salt and pepper. Taste and adjust! It’s infinitely better.
Let’s Build the Flavor Bowl! (Step-by-Step)
This is less about cooking and more about joyful assembly. We’re building layers of texture and taste. Follow these steps, and you’ll have a perfect salad every single time.
- Prep Your Players: Before anything goes in the bowl, get all your ingredients prepped and ready. Slice the peppers, roll and slice the salami, tear the prosciutto, drain the mozzarella pearls and olives. This “mise en place” (everything in its place) makes the assembly a breeze and lets you enjoy the process. Chef’s Hack: If your olives have pits, give them a gentle smash with the flat side of your knife—the pit pops right out!
- Choose Your Battle Bowl: Grab the biggest, most beautiful serving bowl you own. This salad is a showpiece! Start by adding your mixed greens. Gently fluff them with your hands to create an airy, welcoming bed for all the goodies. Tip: If you’re making this ahead, hold the dressing and keep the greens separate until serving time to avoid sogginess.
- Artful Arrangement (or Just Toss It!): Here’s your choice: for a stunning presentation, artfully arrange the mozzarella, meats, peppers, and olives in little piles or stripes over the greens. For a more rustic, family-style vibe, just scatter everything generously over the top. There’s no wrong way—it all gets mixed up in the end! Chef’s Insight: I like to add the meats last so they rest on top and don’t get hidden.
- The Dressing Moment: Give your homemade dressing a final whisk. Starting with just half of it, drizzle the dressing around the edge of the bowl and then in a zig-zag across the center. This distributes it more evenly than dumping it in one spot. Pro Tip: You can always add more dressing, but you can’t take it away. Start light!
- The Grand Toss: Using a pair of large salad tongs or two big serving spoons, gently lift and toss the salad from the bottom up. You want to coat everything evenly without bruising the greens or smushing the mozzarella. A few confident turns should do it.
- The Final Flourish: Taste a bite! Need more salt? Pepper? A extra splash of dressing? Adjust now. Right before serving, I love to finish with a final crack of black pepper, a tiny sprinkle of flaky sea salt, and maybe a few fresh basil leaves if I have them.
How to Serve This Stunner
Presentation is half the fun with this salad! Here are a few of my favorite ways to serve it up:
- The Family-Style Centerpiece: Serve the entire big bowl right in the middle of the table with the tongs. Let everyone dig in family-style. It encourages sharing and conversation—just like that original antipasto platter!
- Individual Lunch Jars (Meal Prep Hero): For a brilliant make-ahead lunch, layer the ingredients in a mason jar. Start with dressing at the bottom, then harder veggies (peppers, olives), then meats and cheese, and pack the greens tightly on top. When you’re ready to eat, just shake and pour into a bowl.
- Plated for a Dinner Party: Use a large, shallow bowl or plate for each guest. Pile the salad high, ensuring every plate gets a bit of everything. Add a slice of crusty, grilled ciabatta bread brushed with garlic oil on the side for the ultimate experience.
- With the Perfect Partners: This salad is a full meal on its own, but it also loves company. Serve it alongside a simple marinara pasta, a bowl of hearty soup (minestrone, anyone?), or as the star of a picnic with some cold fried chicken.
Make It Your Own: 5 Delicious Twists
The beauty of this recipe is its flexibility. Don’t be afraid to swap based on what’s in your fridge or your dietary needs!
- The “Everything But The Kitchen Sink” Version: Add a handful of pepperoncini, some marinated artichoke hearts, a few slices of red onion (quickly pickled in the dressing vinegar!), and some canned chickpeas for extra heft.
- The Seafood Swap: Channel coastal Italy! Swap the meats for a can of high-quality tuna (packed in olive oil), some chopped boiled shrimp, and a handful of capers. Use a lemon-herb vinaigrette instead.
- The Vegetarian Delight: Skip the meats and add more plant-based power. Think marinated white beans, sliced steamed asparagus, sun-dried tomatoes, and roasted walnuts for crunch. A sprinkle of nutritional yeast or vegan parm can mimic that cheesy flavor.
- The Spicy ‘Nduja Kick: For heat lovers, chop up a teaspoon or two of spicy ‘nduja sausage (it’s spreadable!) and whisk it into your dressing. It adds an incredible, smoky depth of heat.
- The Grilled Veggie Summer Salad: Fire up the grill! Add chunks of grilled zucchini, eggplant, and red onion along with the peppers. The charred flavor takes this salad to a whole new level.
Beau’s Kitchen Notes & Stories
Over the years, this salad has become my go-to “I-have-no-time-but-need-something-awesome” recipe. It’s evolved from a strict list of ingredients to a forgiving formula: Greens + Creamy Cheese + Salty Meat + Briny Things + Sweet/Tangy Veg + Zesty Dressing = Happiness.
One of my favorite kitchen memories is of my niece, who claimed she “hated salad,” devouring two huge helpings of this. She called it “pizza salad” because of the pepperoni-esque salami and mozzarella. I didn’t correct her! If it gets veggies into people with a smile, mission accomplished. The lesson here? Sometimes, the best recipes aren’t about precision; they’re about joy, adaptability, and creating something that makes everyone around the table happy.
Your Questions, Answered!
Q: Can I make this salad ahead of time?
A: Absolutely! Prep all the components separately. Keep the dressing in a jar, the chopped veggies/meats/cheese in containers, and the greens in a bag with a paper towel. Assemble and dress just before serving to keep everything crisp and fresh.
Q: My salad got soggy. What happened?
A: The most common culprit is dressing the salad too early, especially if your greens are wet. Always ensure your washed greens are thoroughly dried (a salad spinner is your best friend!). Also, ingredients like roasted peppers and olives can carry extra moisture—give them a quick pat dry before adding.
Q: What’s the best cheese besides mozzarella?
A: You can’t go wrong with other Italian cheeses! Cubed provolone is sharper, fresh burrata torn on top is decadent, and shaved Parmesan or Pecorino Romano adds a salty, nutty punch. Mix and match!
Q: Is this salad actually filling enough for dinner?
A: 100% yes. Between the protein-rich meats and cheese and the healthy fats from the olives and dressing, this salad is surprisingly substantial. For an even heartier meal, add a can of rinsed cannellini beans or a handful of quinoa.

Italian Antipasto Salad : Charcuterie Board Flavor in Every Bite
Description
Hey friends, Beau here! Ever wish you could eat an entire Italian appetizer platter for dinner? Salty meats, creamy cheeses, briny olives, sweet roasted peppers—all in one bite? That’s exactly what this Italian Antipasto Salad is: a fresh, vibrant, and satisfying way to turn a classic antipasto plate into a full meal. It’s quick, protein-packed, low-carb, and loaded with flavor. No cooking required—just chop, toss, and enjoy!
Ingredients
Salad Base:
-
4 cups mixed greens (arugula, romaine, spring mix)
Cheese:
-
1 cup mozzarella pearls (ciliegine) – or bite-sized fresh mozzarella
-
Optional: provolone or burrata for variation
Meats:
-
½ cup sliced salami (Genoa or hard), cut into ribbons
-
½ cup sliced prosciutto, torn into pieces
Veggies & Briny Elements:
-
½ cup roasted red peppers, sliced
-
½ cup mixed olives (Kalamata, Castelvetrano, or stuffed)
Dressing:
-
¼ cup homemade Italian dressing (or store-bought)
Quick Homemade Dressing:
-
¼ cup extra virgin olive oil
-
2 tbsp red wine vinegar
-
1 garlic clove, minced
-
1 tsp dried oregano
-
½ tsp dried basil
-
¼ tsp red pepper flakes
-
Salt & freshly cracked black pepper, to taste
Instructions
-
Prep Your Ingredients
-
Slice roasted peppers, roll and slice salami, tear prosciutto, drain mozzarella pearls and olives.
-
Optional: pit olives or give them a gentle smash for easier eating.
-
-
Make the Dressing
-
Whisk all dressing ingredients in a small bowl or shake in a jar until emulsified. Taste and adjust seasoning.
-
-
Build the Salad
-
Place mixed greens in a large serving bowl. Fluff gently.
-
Either arrange the toppings (meats, cheese, olives, peppers) in rows/piles for a beautiful presentation or scatter them for a rustic look.
-
-
Dress & Toss
-
Drizzle half of the dressing evenly over the salad.
-
Gently toss using tongs or large spoons to coat all ingredients without bruising the greens. Add more dressing if needed.
-
-
Final Touches
-
Taste and adjust salt, pepper, or dressing.
-
Optional: finish with fresh basil leaves or a sprinkle of Parmesan for extra flair.
-
Notes
-
Keep greens dry and dress just before serving to prevent sogginess.
-
Pat jarred roasted peppers and olives dry before adding.
-
Use high-quality deli meats and cheeses—flavor matters here!
-
Can be made ahead: store ingredients separately and assemble just before eating.
A Quick Nutritional Glance
While I’m all about flavor first, it’s nice to know what’s fueling you! This salad is naturally low-carb and packed with high-quality protein from the meats and cheese, which helps keep you full. The olive oil and olives provide heart-healthy monounsaturated fats. The mixed greens offer a dose of vitamins A, C, and K, along with fiber. Using a homemade dressing lets you control the quality of oil and the amount of added sugar (often high in store-bought versions). As a general estimate, a generous serving like we’ve built here comes in around 280-350 calories, making it a nutrient-dense, satisfying choice for any meal. Remember, these are estimates—your specific ingredients will vary!
Final Thoughts from My Kitchen to Yours
So there you have it, friend—your new secret weapon for a delicious, impressive, and incredibly easy meal. This Italian Antipasto Salad is more than just a recipe; it’s a reminder that the best food is often the simplest. It’s about combining bold, honest flavors and sharing them with good people.
I hope this recipe brings as much joy to your table as it has to mine. Give it a try, make it your own with the variations, and most importantly, have fun with it! Food is meant to be a celebration, not a chore. Now, go forth and make your inner (and outer) Italian nonna proud. And if you do, I’d love to hear about it! Tag me over on Feastical or on social media.

Omelet Muffins : High-Protein, Veggie-Packed Breakfast on the Go
The Morning Magic of Omelet Muffins: Your Busy-Day Breakfast Savior
Hey friends, Beau here! Let’s have a real talk for a second. How many of you have stumbled out of bed, bleary-eyed, and faced that dreaded morning question: “What’s for breakfast?” You’re caught between the siren call of the snooze button and the grumbling reality of your stomach. Cereal feels boring, toast is… just toast, and who has time to whip up a full omelet with a side of home fries when you’ve got a million things to do? I’ve been there more times than I’d like to admit, my friends. That’s exactly why I became obsessed with creating the perfect solution: Omelet Muffins.
Imagine all the fluffy, savory, veggie-packed goodness of your favorite diner-style omelet, but baked into a perfect, portable, single-serving cup. No flipping, no fussing, just spoon, bake, and go. These little guys are the ultimate high-protein, veggie-loaded secret weapon for your week. They reheat like a dream, freeze beautifully, and are so wildly customizable that you’ll never get bored. Whether you’re dashing to the office, getting the kids out the door, or just need a solid, satisfying snack to fuel your day, these omelet muffins are about to become your new best friend. So, grab your favorite mixing bowl and let’s turn that chaotic morning scramble into a delicious, grab-and-go victory.
Why Omelet Muffins? A Tale of Two Kitchens
This recipe didn’t start in some fancy test kitchen. Nope, it was born out of pure, unadulterated breakfast chaos at my friend Jamie’s house. Picture it: a Saturday morning, three hungry kids under the age of six zooming around like tiny, syrup-demanding tornadoes, two sleep-deprived parents, and one very hopeful golden retriever waiting for scraps. Jamie was trying to make individual omelets for everyone, which, as you can imagine, was a recipe for a short-order cook meltdown. The skillet was a battlefield, and everyone wanted something different in theirs.
In a moment of “let’s try anything” inspiration, we just started cracking eggs into a big bowl, letting each kid toss in their chosen mix-ins (some… questionable choices were made), and poured the whole colorful mess into a muffin tin. Twenty minutes later? Kitchen magic. The chaos settled as everyone got their own personalized, puffy, cheesy breakfast cup. It was a revelation! No more short-order cooking, no more cold eggs for the person who eats last. Just warm, happy, and full bellies all around. That’s the spirit of Feastical right there—taking a stressful moment and turning it into something simple, soulful, and shared. These muffins carry that same energy: a little bit for everyone, exactly how they like it.
Gathering Your Flavor Crew: What You’ll Need
Here’s the beautiful part: this is less of a strict recipe and more of a delicious template. I’m giving you my favorite combo, but your fridge is the limit! This makes about 6 standard muffins.
- 6 large eggs: The star of the show! They’re the protein-packed glue that holds our muffin world together. For a richer flavor, I love using pasture-raised when I can.
- 1/4 cup milk (any kind!): This is our secret for extra fluffiness. Whole milk makes them decadent, but almond, oat, or even a splash of heavy cream works wonders. It’s all about that tender texture.
- 1/2 cup bell peppers, finely diced: I use a mix of red and green for sweetness and crunch. They add a brilliant color pop and a dose of vitamin C. No peppers? Diced zucchini or mushrooms are fantastic stand-ins.
- 1/4 cup red onion, diced: A little zing! Red onion is milder when baked, offering a sweet sharpness. If you’re sensitive, a quick 2-minute sauté in the pan tames the bite perfectly.
- 1/2 cup spinach, chopped: My stealthy veggie move. It wilts down beautifully, adding nutrients and a vibrant green fleck without overpowering. Kale or Swiss chard work great too—just chop them finely.
- 1/2 cup shredded sharp cheddar cheese: The melty, gooey prize in every bite! Sharp cheddar has the best flavor punch. Feel free to swap for pepper jack, mozzarella, or feta for a tangy twist.
- Salt & freshly cracked black pepper: Don’t be shy! Season your egg mixture well. I also love a pinch of garlic powder or smoked paprika for a flavor boost.
- The “Make It Yours” Options: This is where you shine. Got some leftover diced ham? A few crumbles of cooked bacon or sausage? A sprinkle of green onions or diced tomatoes? Toss ’em in! About 3/4 cup of extra add-ins is the sweet spot.
Let’s Build Some Breakfast Magic: Step-by-Step
Ready to see how easy this is? Preheat that oven to 375°F (190°C) and let’s get cooking. I’ll walk you through every step with my favorite chef hacks along the way.
- Prep Your Stage: First, grab a standard 12-cup muffin tin. Give it a really good coating of non-stick spray or brush it with a little oil or melted butter. Beau’s Pro-Tip: For ultimate non-stick insurance and easy cleanup, I’m a huge fan of using silicone muffin liners. They pop out like a dream every single time.
- The Fluffy Base: In a large mixing bowl, crack in your 6 eggs. Add the 1/4 cup of milk. Now, take your whisk or even a fork and go to town! You want to whisk vigorously for a good 30-45 seconds until the mixture is completely uniform and slightly frothy. This incorporates air, which is what gives us that lovely, light texture. Season generously with salt and pepper here.
- Mix-In Party: To your beautiful, frothy eggs, add your diced bell peppers, red onion, chopped spinach, shredded cheese, and any of your chosen extras (bacon, ham, etc.). Gently stir everything with a spatula until it’s evenly distributed. Don’t overmix—we just want everyone introduced!
- Portion with Love: Using a ladle, a measuring cup, or even a large spoon, carefully divide the egg mixture among your prepared muffin cups. Fill them about 3/4 of the way full. This leaves just the right amount of room for them to puff up beautifully without spilling over. Beau’s Pro-Tip: For super even portions, I sometimes use a liquid measuring cup with a spout to pour—it’s a game-changer!
- Bake to Perfection: Slide your muffin tin into the preheated oven and let the heat work its magic. Bake for 18 to 22 minutes. You’re looking for the tops to be set, the edges just starting to turn a light golden brown, and a gentle press in the center should spring back. Resist the urge to open the oven door early! That rush of cold air can make them fall.
- The Grand Finale: Take the tin out of the oven and let it cool on a rack for at least 5 minutes. This is crucial! It lets the muffins firm up and makes removal infinitely easier. Then, run a small butter knife around the edges of each muffin and gently lift them out. Ta-da! Your breakfast heroes are ready.
How to Serve Your Omelet Muffin Masterpieces
Okay, you’ve got a dozen perfect, puffy, golden muffins. Now what? The beauty is in the versatility!
For the ultimate hot and fresh experience, serve them right away on a big platter. A little extra sprinkle of cheese and a few slices of avocado on the side never hurt anybody. They’re fantastic with a dollop of salsa, a drizzle of hot sauce (my personal move), or a spoonful of cool sour cream or Greek yogurt.
For the meal prep champions, let the muffins cool completely on a wire rack. Then, store them in an airtight container in the fridge for up to 4 days. When you’re ready, just pop one on a microwave-safe plate for 30-45 seconds. They also freeze like a dream! Wrap each cooled muffin individually in plastic wrap, toss them all in a freezer bag, and they’ll be good for up to 2 months. Reheat from frozen in the microwave for 60-90 seconds.
Don’t just think breakfast! These make a fantastic high-protein snack, a great addition to a lunchbox, or even a quick dinner paired with a simple green salad. They’re your culinary Swiss Army knife!
Switch It Up! 5 Tasty Twists on the Classic
Once you master the basic formula, the world (or at least your fridge) is your oyster. Here are a few of my favorite spins to keep things exciting.
- The “Everything But The Kitchen Sink” Frittata Muffin: Use up those weekend leftovers! Diced roasted potatoes, bits of steak, leftover sautéed broccoli, and a mix of cheeses. It’s a whole new meal in muffin form.
- Mediterranean Sunshine: Swap the cheddar for crumbled feta cheese. Add in some chopped sun-dried tomatoes (oil-packed, drained), a handful of chopped Kalamata olives, and a teaspoon of dried oregano. *Chef’s kiss*.
- Southwest Fiesta: Add a handful of black beans (rinsed and drained), a diced jalapeño (seeds removed if you’re sensitive), use pepper jack cheese, and swap the bell pepper for some roasted corn. Serve with salsa and guac!
- Dairy-Free & Still Delicious: Easy! Use your favorite unsweetened non-dairy milk (almond is great) and skip the cheese or use a dairy-free shred. Load up on savory veggies and maybe a splash of nutritional yeast for a cheesy flavor.
- Low-Carb “Everything Bagel” Bite: Skip the starchy add-ins. Use full-fat cream instead of milk, add extra cheese, and sprinkle the top of each unbaked muffin with a generous pinch of everything bagel seasoning before they go in the oven.
Beau’s Kitchen Notes & Stories
This recipe has evolved more than my taste in kitchen aprons (remember when everyone had the frilly ones?). I started out making them with just eggs and cheese, but over the years, I’ve learned a few things. First, sautéing wetter veggies like mushrooms or zucchini first is a game-changer. It cooks off the excess water so your muffins aren’t soggy. Second, if you’re using a particularly salty meat like bacon or ham, go easy on the added salt in the egg mix—you can always add more at the table.
My funniest fail? I once got overzealous with fresh herbs and added a full cup of chopped, un-dried parsley. Let’s just say they turned out… aggressively green and tasted like a lawn. Lesson learned: with potent fresh herbs, a tablespoon or two is plenty! Now, these muffins are a Sunday ritual. I make a double batch, and my week is instantly better. I hope they become a happy little ritual in your kitchen, too.
Your Omelet Muffin Questions, Answered!
Q: My muffins stuck to the pan! Help!
A: We’ve all been there. Next time, don’t skimp on the greasing. Non-stick spray is good, but using melted butter or oil brushed into every nook is better. Silicone liners are the ultimate foolproof solution—they’re my #1 recommendation.
Q: Why did my muffins deflate or get rubbery?
A: Two likely culprits: overmixing the eggs or overbaking. Whisk just until blended, and pull them out as soon as they’re set. The carryover heat will finish the job. Also, letting them cool in the tin for 5 minutes helps them set structure.
Q: Can I make these without milk?
A> Absolutely! The milk adds tenderness, but you can use water, a dairy-free milk, or even a tablespoon of mayo or sour cream thinned with a little water for incredible richness.
Q: How do I know they’re fully cooked?
A> The tops should be dry to the touch and lightly golden. The classic “toothpick test” works here too—insert it into the center of a muffin, and it should come out clean or with just a few moist crumbs attached.

Omelet Muffins : High-Protein, Veggie-Packed Breakfast on the Go
Description
Hey friends, Beau here! Let’s be real—mornings can be chaotic. Snooze buttons are tempting, your stomach is growling, and you’re staring at the eternal breakfast question: “What should I eat?” Toast? Meh. Cereal? Boring. A full omelet? Ain’t nobody got time for that.
Ingredients
Egg Base:
-
6 large eggs (protein-packed stars)
-
1/4 cup milk (any kind—whole milk, almond, oat, or cream)
Veggie & Cheese Mix:
-
1/2 cup bell peppers, finely diced (red, green, or yellow)
-
1/4 cup red onion, diced
-
1/2 cup spinach, chopped (or kale/Swiss chard)
-
1/2 cup shredded cheddar cheese (or mozzarella, feta, pepper jack)
Seasoning:
-
Salt & freshly cracked black pepper
-
Optional: garlic powder, smoked paprika
Optional Add-Ins:
-
Cooked bacon, ham, sausage, diced tomatoes, green onions (~3/4 cup total)
Instructions
-
Prep Oven & Muffin Tin
-
Preheat oven to 375°F (190°C).
-
Grease a 12-cup muffin tin or line with silicone muffin cups for easy removal.
-
-
Whisk the Eggs
-
In a large bowl, crack the eggs and add milk.
-
Whisk 30–45 seconds until smooth and slightly frothy.
-
Season with salt, pepper, and optional spices.
-
-
Add Veggies & Cheese
-
Gently fold in bell peppers, onion, spinach, cheese, and any extras.
-
Don’t overmix—just enough to distribute everything evenly.
-
-
Portion & Bake
-
Divide mixture evenly among muffin cups, filling about 3/4 full.
-
Bake for 18–22 minutes until tops are set and lightly golden.
-
-
Cool & Serve
-
Let muffins cool in the pan 5 minutes before removing.
-
Serve warm, or store cooled muffins in an airtight container in the fridge for up to 4 days.
-
Freeze individually for up to 2 months; microwave 60–90 seconds to reheat.
-
Serving Ideas
-
Sprinkle extra cheese or fresh herbs on top.
-
Pair with avocado, salsa, or Greek yogurt.
-
Great for breakfast, lunchbox snacks, or a quick dinner with a side salad.
Notes
-
Sauté wet veggies (like mushrooms or zucchini) first to avoid soggy muffins.
-
Go light on salt if using cured meats like bacon or ham.
-
Overmixing eggs or overbaking can make muffins rubbery—stop whisking once combined and bake until just set.
-
Silicone liners are the ultimate tool for easy removal.
Nutritional Breakdown (Per Muffin, Basic Recipe)
While I’m all about flavor first, it’s nice to know what’s fueling your day! This info is for one muffin using the core recipe with 2% milk and full-fat cheddar. Remember, adding meats or using different cheeses will alter these numbers.
- Calories: ~90
- Protein: 7g (Hello, muscle fuel!)
- Carbohydrates: 2g
- Fat: 6g
- Fiber: 0.5g
These are a fantastic, balanced option for a low-carb, high-protein start. To boost the fiber, try adding in some finely chopped broccoli or mushrooms. They’re naturally gluten-free and can easily be adapted for Whole30 or keto diets by choosing your add-ins wisely.
Wrapping It Up With a Bow (Or a Fork!)
And there you have it, friends—your ticket to stress-free, delicious mornings. These Omelet Muffins are more than just a recipe; they’re a strategy. A strategy for more sleep, more flavor, and more high-fives from your future self at 7 AM. I love that they bring people together, let everyone customize their perfect bite, and turn the often-rushed morning meal into something you can actually look forward to.
So, give them a whirl this weekend. Play with the flavors, clean out the veggie drawer, and make a batch that’s uniquely yours. Then, come back and tell me all about it over on Feastical.com or tag me on social—I live for your kitchen creations! Now, go forth and conquer your day, one delicious, protein-packed muffin at a time. Happy cooking!
– Beau
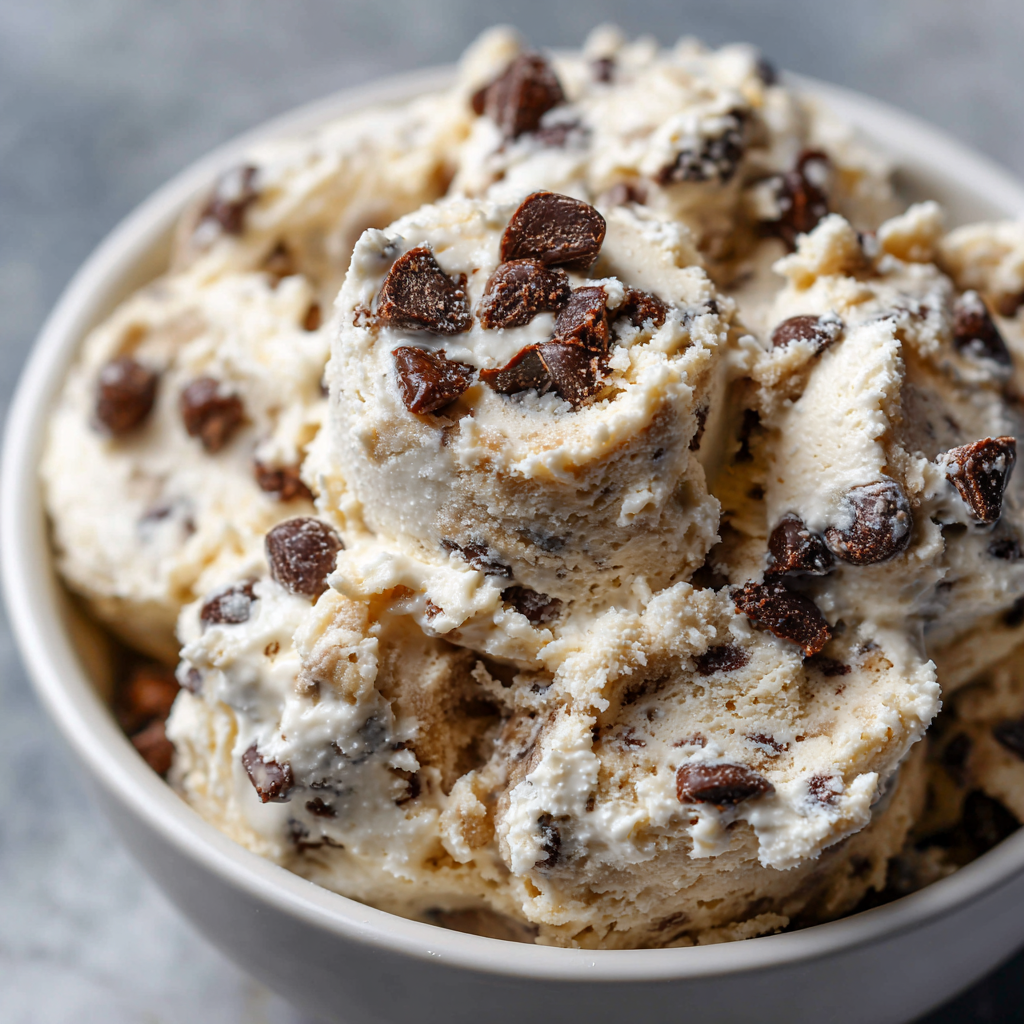
Protein Fluffy Yogurt Crumbl Cookie Dough : No-Bake, High-Protein Dessert Magic
The No-Bake, High-Protein Dessert That’s About to Change Your Snacking Game
Hey friends, Beau here from Feastical! Let me tell you about the little miracle that happened in my kitchen last week. You know those days when the craving for something sweet, something decadent, something cookie dough hits you like a freight train, but your sensible side is whispering about protein goals and not wrecking your meal prep? Yeah, me too. Constantly.
Well, I’ve spent years chasing that magical intersection where “totally delicious” meets “actually good for you,” and I think I’ve finally parked my spatula right in the sweet spot. What started as a desperate fridge raid—yogurt, a lonely box of pudding mix, some leftover protein pastries—turned into a revelation. In about eight minutes flat, I created something so thick, so creamy, and so satisfyingly cookie-dough-like, I had to triple-check that I hadn’t actually baked anything.
This, my fellow food lovers, is my Protein Fluffy Yogurt Crumbl Cookie Dough. It’s not “healthy-ish” dessert. It’s a straight-up, no-bake, high-protein powerhouse that tastes like you’re getting away with something. Each generous serving packs a whopping 26 grams of protein for under 200 calories. It’s meal-prep friendly, endlessly customizable, and requires exactly zero oven time. Think of it as your secret weapon for sweet cravings, post-workout fuel, or a “why is this so good?!” afternoon pick-me-up. So, ditch the guilt, grab a bowl, and let’s whip up some magic.
The Night the Stars (and Cookie Dough) Aligned
This recipe’s origin story is pure, unplanned kitchen joy. It was one of those balmy summer evenings where the light lingers forever. My partner, Megan, and I were planning to watch a meteor shower from our backyard. The plan: cozy blankets, star charts, and a little sweet treat. The problem: I’d been recipe testing all day and the kitchen was a “creative mess.” There was no grand dessert prepared.
I opened the fridge, stared at the usual suspects, and my eyes landed on a big tub of Greek yogurt. Next to it, a box of sugar-free pudding mix from a previous baking experiment. A lightbulb went off. I remembered the texture of my grandma’s vanilla pudding, how it thickened up just by whisking. I thought, “What if I skip the milk and just use yogurt?” I whisked them together, skeptical it would work. Two minutes later, I had this impossibly thick, cloud-like cream. It needed texture, a crunch, a mix-in. On the counter sat a bag of Legendary Foods protein pastries—the little, sweet, doughy protein bites. I chopped a couple up, folded them in, and took a hesitant taste.
My eyes must have gone wide. Megan wandered in, asking what the noise was. I just handed her the spoon. The look on her face said it all. It was thick, sweet, vanilla-y, with little chewy, pastry bits throughout. We took our bowls outside, under the first few stars, and ate this incredible “cookie dough” while watching shooting stars streak across the sky. It was one of those perfect, simple moments where a happy kitchen accident creates a memory—and a recipe I just had to share with all of you.
Gathering Your High-Protein Toolkit
Here’s the beautiful part: the core of this recipe is just three ingredients. That’s it! But as with any simple recipe, the quality and choice of each component matters. Let’s break it down.
- 32 oz (about 907g) Fat-Free Greek Yogurt: This is your protein and creamy texture base. I strongly recommend Oikos Triple Zero Vanilla. It’s already lightly sweetened and flavored, which works perfectly here. The “triple zero” means no added sugar, no fat, and no artificial sweeteners, which keeps our stats clean. Chef’s Insight: The thickness of Greek yogurt is non-negotiable. Regular yogurt will make a sad, runny mess. If you can’t find the vanilla Triple Zero, use plain fat-free Greek yogurt and add a teaspoon of vanilla extract and a touch more sweetener if desired.
- 1 Family-Size (5.1 oz) Box Sugar-Free Instant Pudding Mix: This is the magic thickener and flavor booster. It’s not just for pudding! The combination of modified cornstarch and flavorings in the mix, when whisked with the acidic yogurt, creates an instant chemical reaction that thickens it into a mousse. Substitution Tip: Vanilla is the classic, but feel free to experiment! Cheesecake flavor is phenomenal. Chocolate or pistachio would be incredible. Just ensure it’s the instant or “cook & serve” will not work here. If you’re not concerned about sugar, a regular instant pudding mix works exactly the same way.
- 2 Legendary Foods Protein Pastries, any flavor, chopped: These are our “cookie chunks” and they add that essential texture. They’re soft, slightly sweet, and pack extra protein. Chopping them gives you little bursts of flavor in every bite. Substitution Tip: No protein pastries? No problem! Try: 1/2 cup of crushed high-protein cereal (like Magic Spoon), 2 chopped-up protein bars, or even 1/4 cup of mini chocolate chips and a handful of nuts for a different kind of crunch.
Let’s Make Some Magic: Your Foolproof Steps
If you can whisk and fold, you’ve mastered this recipe. Let’s walk through it together, with all my little chef hacks to ensure perfection.
- The Big Whisk. Grab your largest mixing bowl. Dump in the entire tub of yogurt. Sprinkle the entire box of pudding mix evenly over the yogurt. Now, take a whisk (not a spoon—a whisk is key for aeration!) and start combining. At first, it will seem like too much powder, but trust the process. Whisk vigorously for a full 1 to 2 minutes. You’re not just mixing; you’re incorporating air and activating the thickening agents. You’ll see it transform from grainy to lush and incredibly thick, like a dense cloud or the world’s best frosting. Chef Hack: If you have a hand mixer, you can use it on low for about 45 seconds. It makes it even fluffier!
- The Flavor Fold. While your “dough” is thickening up, take your two protein pastries and chop them into small, bite-sized pieces—think chocolate chip size. Now, add them to the bowl. Use a flexible spatula to gently fold them in. Why fold? We’ve worked hard to create that airy, fluffy texture. Aggressive stirring will deflate it. Use a sweeping motion, turning the bowl as you go, until the pastry bits are evenly distributed.
- The Patience Payoff (Optional, but Recommended). Your creation is ready to eat right now, and it will be delicious—like a super thick mousse. But if you want that authentic, fudgy “cookie dough” experience, show a little restraint. Portion the mixture into 5 containers (I like small glass jars or reusable containers). Pop them in the fridge for 30 to 60 minutes. The cold allows the thickening process to complete, making it denser and scoopable. Pro-Tip: The texture is absolute perfection on day two. It firms up beautifully, becoming exactly like edible cookie dough. Make it ahead for the ultimate experience.
How to Serve This Protein-Packed Wonder
This isn’t a fussy dessert, so serving is all about maximizing your joy. Here are my favorite ways to enjoy it:
The Classic Scoop: After it’s chilled, grab a spoon and dig right in from the jar. It’s thick, cold, and satisfying. This is my go-to for a post-gym treat at my kitchen counter.
The Bowl of Toppings: Turn it into a protein sundae! Scoop a serving into a bowl and top with a drizzle of sugar-free chocolate syrup, a sprinkle of crushed nuts, a few fresh berries, or a dollop of whipped cream. It feels incredibly indulgent.
The Meal Prep MVP: Those five portioned containers are gold. Grab one for a balanced afternoon snack at work, a pre-bedtime protein fix, or a quick breakfast alongside a piece of fruit. It’s the most delicious form of meal prep I’ve ever created.
Make It Your Own: 5 Delicious Twists
The base recipe is a blank canvas for your cravings. Don’t be afraid to play!
- Chocolate Peanut Butter Cup: Use chocolate sugar-free pudding mix. Fold in 2 tablespoons of powdered peanut butter (PB2) along with the pudding mix, and use chopped chocolate-flavored protein pastries or a few dark chocolate chips.
- Lemon Berry Bliss: Use cheesecake-flavored pudding mix. Add the zest of one lemon to the yogurt before whisking. Fold in 1/4 cup of freeze-dried raspberries (they stay crunchy!) instead of the pastries.
- Cookies & Cream: Use vanilla pudding. Fold in 3-4 crushed-up Oreo Thins or a similar lower-sugar chocolate sandwich cookie for those iconic black-and-white bits.
- Tropical Escape: Use vanilla pudding. Fold in 2 tablespoons of crushed pineapple (well-drained) and 2 tablespoons of unsweetened shredded coconut. A little chopped macadamia nut on top? Chef’s kiss.
- Brownie Batter (Gluten-Free/Dairy Option): Use chocolate pudding mix. Make sure your yogurt is a dairy-free, high-protein vanilla alternative (like Kite Hill’s almond milk yogurt). Use chopped, gluten-free brownie bites or a crumbled protein bar as your mix-in.
Beau’s Kitchen Confidential Notes
This recipe has become a staple in my house so fast, it’s embarrassing. We’ve made it four times in two weeks. Megan now refers to it as “The Miracle Mix.” I’ve learned a few things along the way. First, the brand of yogurt does matter slightly for final thickness. Some are just runnier than others. If yours seems softer than you’d like after whisking, don’t panic—just give it that full chill time. It will set up.
Second, I tried doubling the recipe once in a truly huge bowl. My arm got a workout, and my hand mixer overheated. I recommend making a single batch at a time for best texture and ease. Finally, this recipe is a gateway. Once you see how the yogurt+pudding mix works, you’ll start dreaming up other flavors. I’m currently plotting a pumpkin spice version for fall. The possibilities are, seriously, endless.
Your Questions, Answered
Q: My mixture is runny, even after whisking! What did I do wrong?
A: The most common culprit is using regular yogurt, not thick, strained Greek yogurt. There’s no fix for this, unfortunately—you need the Greek variety. Also, ensure you’re using the full box of pudding mix and whisking for the full 1-2 minutes. If it’s still a bit soft, the fridge is your best friend. Chill it for several hours or overnight.
Q: Can I use a different sweetener or make it without pudding mix?
A: The pudding mix is crucial for the chemical reaction that causes thickening. You can’t substitute it with just protein powder or cornstarch and get the same result. For a different approach, you could blend cottage cheese, protein powder, and a splash of milk, but the texture and ease won’t be the same as this magical method.
Q: How long does this last in the fridge?
A: It keeps beautifully for up to 4-5 days in airtight containers. The texture just keeps improving! I’ve never had it last long enough to test beyond that.
Q: Is this safe to eat “raw” since it has pudding mix?
A> Yes! Instant pudding mix is designed to be eaten without cooking. It contains modified cornstarch, which thickens with liquid and agitation, not heat. So, dig in without worry.

Protein Fluffy Yogurt Crumbl Cookie Dough : No-Bake, High-Protein Dessert Magic
Description
Looking for something sweet, creamy, and satisfying without turning on the oven? This no-bake high-protein cookie dough yogurt dessert comes together in minutes and makes a perfect snack, post-workout treat, or light dessert. It’s thick, fluffy, customizable, and packed with protein to keep you full longer.
Ingredients
-
32 oz (900 g) fat-free Greek yogurt (vanilla or plain)
-
1 family-size (5.1 oz / 144 g) box instant sugar-free pudding mix (vanilla or cheesecake flavor)
-
2 high-protein pastries or protein bars, chopped
(or ½ cup high-protein cereal or mini chocolate chips + nuts)
Instructions
-
Mix the base:
Add Greek yogurt to a large bowl. Sprinkle the dry instant pudding mix over the top. -
Whisk until thick:
Whisk for 1–2 minutes until the mixture becomes very thick and fluffy. A hand mixer works too (about 45–60 seconds on low). -
Add mix-ins:
Gently fold in the chopped protein pastries or other add-ins with a spatula. -
Chill (recommended):
Divide into containers and refrigerate 30–60 minutes for a thicker, cookie-dough-like texture. -
Serve:
Eat as-is or top with berries, nuts, or a light drizzle of chocolate syrup.
Notes
-
Use thick Greek yogurt only — regular yogurt will be too runny.
-
Make sure the pudding mix is instant, not cook-and-serve.
-
If using plain yogurt, add 1 tsp vanilla extract and a little sweetener to taste.
-
Texture gets even better after several hours in the fridge.
-
Great for meal prep — keeps well 4–5 days refrigerated.
Nutritional Information (Approximate, Per Serving)
One of the best parts of this recipe is that you can indulge with total clarity. Here’s what you’re getting in one serving (about 1/5th of the batch), calculated using the specified ingredients (Oikos Triple Zero Vanilla, Sugar-Free Jell-O Vanilla Pudding, Legendary Foods Apple Pie Pastries):
- Calories: 186
- Protein: 26g (This is the star! It fuels your muscles and keeps you full.)
- Carbohydrates: 19g
- Dietary Fiber: 3g (Thanks to the pudding mix and pastries.)
- Sugars: 7g (Mostly from the natural sugars in the yogurt.)
- Fat: 3g
This macro profile makes it an excellent choice for anyone focused on high-protein, moderate-carb eating, whether you’re managing weight, building muscle, or just looking for a satisfying and balanced treat. It’s a dessert that truly supports your goals.
The Final Scoop
So there you have it, friends—my not-so-secret secret for conquering sweet cravings with a protein-powered smile. This Protein Fluffy Yogurt Cookie Dough is more than just a recipe; it’s proof that eating well doesn’t mean giving up on joy or flavor. It’s about getting creative, having fun in the kitchen, and making food that makes you feel amazing, inside and out.
I hope this recipe finds its way into your weekly rotation and becomes the thing you’re excited to snack on. Give it a try, tag me on social with #Feastical so I can see your creations, and don’t forget to play with those variations! Now, if you’ll excuse me, I have a jar of “dough” in the fridge calling my name. Happy mixing!
With a full heart and a full spoon,
Beau
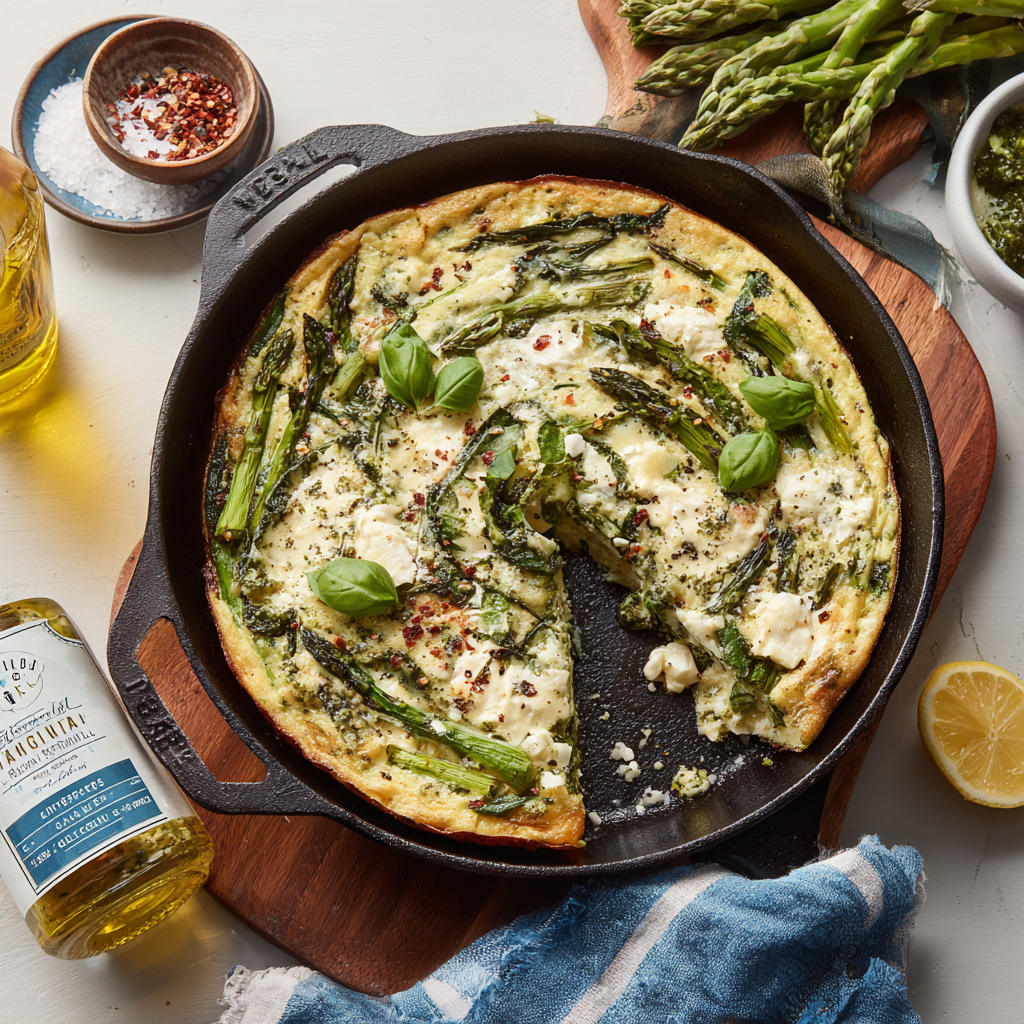
High-Protein Spring Veggie Frittata with Asparagus : Fresh, Fast, and Perfectly Balanced
High-Protein Spring Veggie Frittata with Asparagus: Fresh, Fast, and Perfectly Balanced
Welcome Spring to Your Table, One Delicious Slice at a Time
Hey friends, Beau here! Can you feel it? That little shift in the air, the extra hour of sunlight, the sudden appearance of bright, cheerful produce at the market? Spring isn’t just a season; it’s a mood. And my kitchen mood right now is all about food that feels as light, bright, and full of potential as a sunny April morning. But let’s be real—we’re also busy. We need food that fuels our adventures, not slows us down. That’s exactly why I’m so obsessed with this High-Protein Spring Veggie Frittata.
Think of this as your culinary canvas for all things spring. It’s a celebration of tender-crisp asparagus, savory onions, and the rich, nutty kiss of Gruyère cheese, all held together by fluffy, protein-packed eggs. The best part? It all happens in one pan, in about 30 minutes flat. This isn’t a fussy weekend-only project. This is a “I-need-something-spectacular-for-breakfast-tomorrow” or a “What’s-for-dinner-tonight-oh-wait-I-haven’t-planned-anything” lifesaver. It’s equally at home on a brunch buffet surrounded by mimosas as it is on a Tuesday night dinner plate with a simple side salad. So, grab your favorite oven-safe skillet and let’s turn those gorgeous spring vibes into your next favorite meal. Trust me, your spatula (wherever it’s hiding) is going to thank you.
The Frittata That Fed a Hungry Moving Crew (A.K.A. My Family)
This recipe always takes me back to my first “real” apartment. I was 22, armed with a diploma, a dream, and a kitchen the size of a postage stamp. My family had just helped me haul a dubious IKEA sofa up three flights of stairs, and we were all sweaty, tired, and seriously hangry. My mom looked at my bare cabinets and said, “Well, chef, what’s for lunch?” Talk about pressure!
All I had were the essentials: a carton of eggs, a leftover nub of cheese, and a few straggler veggies from my last grocery run—including a lonely bunch of asparagus. In a moment of inspiration (or desperation), I chopped everything up, threw it in my one decent pan, and popped it in the oven. Twenty minutes later, I presented this puffed, golden frittata. We ate it right out of the skillet, standing around my tiny counter. No one spoke for a solid minute—just the sound of happy chewing. My dad finally said, “Kid, you can cook.” That frittata did more than fill our bellies; it felt like a declaration. A promise that no matter how small your kitchen or how chaotic the day, you can always whip up something that feels like a warm, delicious hug. That’s the spirit I bring to every recipe on Feastical.
Gathering Your Springtime Squad: Ingredients & Insights
Great food starts with great ingredients, but let’s keep it flexible and fun. Here’s what you’ll need, plus my little chef secrets for each one.
- 1 tablespoon olive oil: Our cooking fat of choice! It adds a subtle fruitiness. Chef’s Tip: A good extra-virgin olive oil is perfect here, but if you want a more neutral flavor, avocado oil or even butter works beautifully for a richer taste.
- 1 bunch asparagus, trimmed and chopped into 1-inch pieces: The star of the show! Look for bright green, firm stalks with tight tips. Chef’s Tip: To trim, just bend a stalk near the end—it’ll snap naturally at the tough part. No knife needed!
- 1/2 cup chopped yellow onion: Sweetness and savoriness in one. Substitution: Red onion, shallots, or even a handful of chopped leeks (just the white/light green parts) are fantastic swaps.
- 1 garlic clove, minced: The flavor booster. Don’t skip it! It adds a depth that makes the whole dish sing.
- 8 large eggs: Our protein-packed foundation. Chef’s Insight: For an even richer flavor, I sometimes use 7 eggs and add 1/4 cup of plain Greek yogurt to the whisking step. It’s incredible!
- 1/4 cup milk (any kind): The secret to a creamy, tender texture. Whole milk is luxurious, but 2%, almond, oat—whatever you have works. It’s about the liquid, not the fat.
- 1/2 teaspoon salt & 1/4 teaspoon black pepper: The essential seasoners. Season your eggs well! It makes all the difference.
- 1/2 cup shredded Gruyère cheese: My favorite for its nutty, slightly sweet flavor that melts like a dream. Substitution: Sharp white cheddar, Swiss, mozzarella, or even a good feta crumbled on top are all winners.
- Optional: 2 tablespoons fresh parsley, chopped: The confetti! A fresh herb garnish at the end adds a pop of color and a bright, clean flavor that cuts through the richness.
Let’s Get Cooking: Your Step-by-Step Roadmap to Frittata Glory
Ready? Tie on your apron (or just roll up your sleeves—I’m not judging), and let’s transform these simple ingredients into something magical. We’re using the stovetop-to-oven method for the perfect set and puff.
- Preheat and Prep: Crank your oven to 375°F (190°C). Pro Tip: Do this first! A properly preheated oven is non-negotiable for that perfect rise. Grab your trusty 10-inch oven-safe skillet (cast iron is my MVP here) and place it on the stove. No oven-safe pan? No sweat! Just sauté the veggies in any pan, then transfer them to a greased pie dish or cake pan for baking.
- Sweat the Aromatics: Heat the olive oil in your skillet over medium heat. Add the chopped onion and let it sizzle gently for 3-4 minutes. You’re not looking for color, just softness and sweetness. This step, called “sweating,” builds a flavor foundation. You’ll smell the magic start to happen.
- Awaken the Spring Veggies: Toss in your asparagus pieces and that minced garlic. Give everything a good stir. Now, cook for 5-7 minutes, stirring occasionally. We want the asparagus to be tender-crisp—bright green with a little snap, not mushy. Little Hack: If you hear a lot of sizzling and things are cooking too fast, just lower the heat a touch. We’re coaxing out flavor, not racing.
- The Egg Bath: While the veggies are getting happy, crack your 8 eggs into a medium bowl. Add the milk, salt, and pepper. Now, whisk with gusto! You want this completely homogeneous and maybe even a little frothy on top. This incorporates air, which helps with that lovely final texture.
- Combine and Cheese: Make sure your veggies are evenly distributed in the skillet. Slowly pour the egg mixture over them. It should settle around all the veggie pieces. Immediately sprinkle the glorious shredded Gruyère evenly over the top. Watch it start to melt already from the pan’s heat—so satisfying.
- Set the Stage: Leave the skillet on the stovetop over medium-low heat for just 2-3 minutes. Don’t stir! You’re simply letting the bottom and edges start to set. This creates a “crust” that helps the whole frittata release beautifully later. When you see the very edge look opaque, you’re ready for the grand finale.
- Bake to Perfection: Using an oven mitt (handle will be hot!), carefully transfer the skillet to your preheated oven. Bake for 15-20 minutes. You’re looking for a beautifully puffed top, a golden-brown color, and a center that’s just set (no jiggle when you gently shake the pan).
- Rest and Revel: Pull it out of the oven—behold your masterpiece! Let it cool in the pan for a solid 5 minutes. This is crucial. It allows the eggs to finish setting gently and makes slicing a breeze. Sprinkle with that fresh parsley, slice into wedges, and serve right from the pan.
How to Serve Your Springtime Masterpiece
Presentation is part of the joy! This frittata is stunningly versatile. For a cozy breakfast, slide a wedge onto a plate alongside some juicy cherry tomatoes and a piece of buttered whole-grain toast. Brunch calling? This is the centerpiece. Surround it with a bowl of mixed berries, a platter of crispy bacon or sausage links, and maybe a pitcher of mimosas. You’ll be a hero.
For a light dinner, my go-to is a simple, zippy side salad. Toss some peppery arugula with lemon juice, a drizzle of olive oil, salt, and pepper. The bright acidity of the salad cuts through the richness of the eggs and cheese perfectly. And don’t forget—leftovers are a gift! A cold slice straight from the fridge makes for an amazing grab-and-go lunch. Tuck it into a container with a handful of greens, and you’re set for the day.
Make It Your Own: 5 Delicious Twists to Try
The beauty of a frittata is its flexibility. Once you’ve mastered the base, the world is your oyster (or your artichoke heart!). Here are some of my favorite spins:
- The Garden Party: Add 1/2 cup of halved cherry tomatoes and 1/4 cup of frozen peas (no need to thaw) with the asparagus. The pops of color and sweetness are pure joy.
- The “Clean Out the Fridge” Special: Swap asparagus for 1 cup of chopped broccoli florets or zucchini. Throw in any leftover roasted potatoes or bell peppers. This recipe is zero-waste friendly!
- Mediterranean Sunshine: Use crumbled feta instead of Gruyère and add a handful of chopped Kalamata olives and a teaspoon of dried oregano to the egg mixture. Serve with a dollop of tzatziki.
- Dairy-Free & Delicious: Simply omit the milk (or use unsweetened plant milk) and cheese. Amp up the flavor with sun-dried tomatoes, sautéed mushrooms, and a sprinkle of nutritional yeast for a cheesy vibe.
- Spicy Southwest Kick: Add a diced jalapeño with the onions, use pepper jack cheese, and top the finished frittata with avocado slices and a drizzle of hot sauce. Serve with salsa on the side.
A Few More Thoughts From My Kitchen to Yours
This recipe has been with me for years, evolving with each season and every new ingredient I fall in love with. The version you see here is my springtime love letter, but trust me, come fall, I’m swapping in roasted butternut squash and sage. That’s the real magic of cooking—it grows with you.
One funny kitchen story: I once was so excited to serve this to guests that I forgot the oven mitt and grabbed the skillet handle with my bare hand. Let’s just say I learned the meaning of “oven-safe” the hard way, and we had a very memorable (and slightly chaotic) dinner! So please, let my mistake be your reminder: ALWAYS use that mitt. Your taste buds—and your palms—will thank you.
Your Frittata Questions, Answered
Q: My frittata came out watery. What happened?
A: This is usually due to excess moisture from the veggies. Make sure you’re sautéing them until tender-crisp, not just warmed through. Especially watery veggies like zucchini or mushrooms should be cooked until they release their moisture and it evaporates.
Q: Can I make this ahead of time?
A: Absolutely! You have two great options. 1) Prep the veggies: Sauté them the night before and store in the fridge. In the morning, just reheat them in the pan before adding the eggs. 2) Bake the whole thing: The fully baked frittata keeps beautifully in the fridge for 3-4 days. Serve it cold, at room temp, or gently rewarmed in a low oven.
Q: My center wasn’t set but the top was getting too brown. Help!
A: This means your oven might run hot, or your skillet is darker/more conductive. Next time, try lowering the oven temp to 350°F and tenting the top loosely with foil for the last 5-10 minutes of baking to prevent over-browning while the center finishes.
Q: I don’t have an oven-safe skillet. Can I still make this?
A> 100% yes! Follow the recipe through step 3, then transfer your sautéed veggies into a well-greased 9-inch pie plate or 8×8 baking dish. Pour the egg mixture over, add cheese, and bake. The texture will be slightly different but just as delicious.

High-Protein Spring Veggie Frittata with Asparagus : Fresh, Fast, and Perfectly Balanced
Description
Spring produce makes cooking feel easy, and this high-protein veggie frittata is one of the quickest ways to turn fresh asparagus and eggs into a satisfying meal. It’s light but filling, great for breakfast, lunch, or dinner, and comes together in one pan in about 30 minutes. Perfect for meal prep and just as good warm or cold.
Ingredients
-
1 tablespoon olive oil
-
1 bunch asparagus, trimmed and cut into 1-inch pieces
-
½ cup chopped yellow onion
-
1 clove garlic, minced
-
8 large eggs
-
¼ cup milk (any kind)
-
½ teaspoon salt
-
¼ teaspoon black pepper
-
½ cup shredded Gruyère or Swiss cheese
-
Optional: 2 tablespoons chopped fresh parsley or chives
Instructions
-
Preheat oven to 375°F (190°C).
-
Sauté vegetables:
Heat olive oil in a 10-inch oven-safe skillet over medium heat. Add onion and cook 3–4 minutes until softened. Stir in asparagus and garlic and cook 4–6 minutes until asparagus is tender-crisp. -
Mix eggs:
In a bowl, whisk eggs, milk, salt, and pepper until well combined. -
Combine:
Spread vegetables evenly in the pan. Pour egg mixture over them. Sprinkle cheese on top. -
Set on stovetop:
Cook 2 minutes on medium-low without stirring, just until the edges begin to set. -
Bake:
Transfer skillet to oven and bake 15–20 minutes until center is set and top is lightly golden. -
Rest and serve:
Cool 5 minutes, add herbs if using, slice, and serve.
Notes
-
Use an oven-safe skillet (cast iron works great). If not, transfer veggies to a greased baking dish before adding eggs.
-
Don’t overcook asparagus on the stove — it will cook more in the oven.
-
Whisk eggs well to get a lighter, fluffier texture.
-
Add 2–3 egg whites extra if you want even more protein with less fat.
-
Great for leftovers — stores in the fridge up to 4 days.
Nutritional Information (Per Serving, Approximate)
This info is for guidance and will vary based on specific ingredients used (like type of milk and cheese). This frittata is designed to be a balanced, satisfying meal.
- Calories: ~210
- Protein: 20g – The star of the show! Eggs and cheese deliver high-quality protein to keep you full and energized.
- Carbohydrates: 4g – Mostly from the vegetables, making this a wonderfully low-carb option.
- Fat: 14g – Healthy fats from the eggs, olive oil, and cheese, which are essential for nutrient absorption and flavor.
This dish is naturally gluten-free and can easily be adapted for keto or low-carb diets. For a lower-fat version, use 1 extra egg white in place of 1 whole egg and a reduced-fat cheese.
Final Slice of Wisdom
And there you have it, friends—my go-to spring fling in a pan. This High-Protein Spring Veggie Frittata is more than just a recipe; it’s a reminder that cooking doesn’t have to be complicated to be spectacular. It’s about embracing what’s fresh, having fun in the kitchen, and creating something that nourishes both body and soul.
I hope this recipe becomes a reliable favorite in your home, just like it is in mine. Give it a try, play with the variations, and make it yours. And when you do, I’d love to hear about it! Tag me over on Feastical or drop a comment below. Now, go enjoy that
Sausage Breakfast Casserole : Hearty, Cheesy, and Crowd-Pleasing
The Ultimate Crowd-Pleaser: Let’s Bake a Legendary Sausage Breakfast Casserole!
Hey there, friend! Beau here, welcoming you back to my cozy corner of the internet, Feastical. If you’ve ever found yourself staring into your fridge on a sleepy weekend morning, wondering how to magically feed a hungry crowd (or just your wonderfully hungry self) without turning into a short-order cook, I have your answer. It’s sitting right here, in all its golden, bubbly, soul-satisfying glory: the Sausage Breakfast Casserole.
This isn’t just a recipe; it’s a kitchen secret weapon. Imagine this: savory sausage, fluffy eggs, and gooey melted cheese all baked together over a soft, custardy bread base. It’s the hug your taste buds need on a slow Sunday, the superstar of holiday brunches, and the lifesaver for busy weekday meal prep. The best part? You throw it together the night before, pop it in the oven in the morning, and by the time the coffee is brewed, your home smells like a dream and breakfast is served. No fuss, no stress, just pure, delicious comfort. So, tie on your favorite apron, grab that trusty mixing bowl, and let’s make a memory (and a phenomenal meal) together.
Why This Casserole Holds a Special Place in My Heart
This recipe takes me straight back to my grandma’s farmhouse kitchen. Every Christmas morning, without fail, the scent of browning sausage and baking eggs would weave its way upstairs, acting as a far better alarm clock than any jingle bell. We’d all stumble down, still in our pajamas, and gather around a table where this steaming casserole held center stage. It was the delicious, cheesy glue that held our chaotic, wrapping-paper-flying morning together. No one was stuck at the stove; we were all present, laughing, and diving in for seconds. That’s the magic I want to bring to your table. It’s more than ingredients; it’s a dish that lets you be part of the fun, not just the chef. It says, “Sit down, relax, enjoy the people you’re with.” And that, to me, is the true flavor of comfort food.
Gathering Your Cast of Flavorful Characters
Here’s everything you’ll need. Think of this as your culinary toolkit for building the ultimate breakfast experience. I’ve added my two cents on each one because a little insight goes a long way!
- 1 lb breakfast sausage: The flavor foundation! I love a good sage-forward pork sausage for that classic taste. Chef’s Insight: For a lighter twist, try turkey or chicken breakfast sausage. Feeling spicy? A hot Italian sausage will wake up the whole dish!
- 6 large eggs: Our creamy binder. They create that lush, quiche-like texture. Pro Tip: Always whisk your eggs well in a separate bowl before adding the milk. It makes for a smoother, more uniform custard.
- 2 cups milk: Whole milk gives the richest result, but 2% works beautifully too. This is what gives the casserole its lovely, soft set.
- 1½ cups shredded cheddar cheese: The melty, glorious glue. I prefer to shred a block of sharp cheddar myself—it melts so much better than pre-shredded (which has anti-caking agents). Substitution: A Monterey Jack, Gruyère, or a blend would be fantastic.
- 4 cups cubed bread (day-old is best!): The unsung hero that soaks up all the goodness. Stale bread is actually perfect here—it holds its structure and won’t get mushy. My Favorites: A rustic sourdough adds tang, brioche brings buttery luxury, and a simple French loaf is always reliable.
- ½ teaspoon garlic powder & ½ teaspoon salt & ¼ teaspoon black pepper: Our simple but mighty seasoning squad. The garlic powder adds a subtle, savory depth without the fuss of fresh garlic burning. Don’t skip the S&P!
- Optional: ¼ cup green onions or chopped parsley: The fresh finish! A sprinkle of green onions adds a pop of color and a slight bite, while parsley keeps it classic and bright.
Let’s Build Your Brunch Masterpiece, Step-by-Step
Ready? Let’s do this. I’ll walk you through each step with all my favorite little hacks so yours turns out perfectly.
- Preheat & Prep: Fire up your oven to 350°F (175°C). Take a 9×13-inch baking dish and give it a light but thorough coating of butter, oil, or non-stick spray. This is your canvas! Beau’s Tip: Doing this first means your pan is ready to go when you are—no last-minute scrambling.
- Brown the Sausage: In a skillet over medium heat, cook your sausage. Break it up with a spatula until it’s beautifully browned and cooked through. Once done, drain off the excess fat. Why? We want flavor, not greasiness. Let it cool for a minute while you move to the next step.
- Whisk the Egg Custard: In a large bowl, crack in your eggs. Give them a vigorous whisk until they’re pale and frothy. Then, pour in the milk and add the salt, pepper, and garlic powder. Whisk it all together until it’s one happy, homogenous mixture. This is the “pour” that makes the magic happen.
- Layer it Up: Time to assemble! Spread your bread cubes evenly in the bottom of your prepared dish. This is our cozy base. Next, scatter the cooked sausage over the bread. Follow that with a generous, even blanket of your shredded cheese. See how easy this is?
- The Big Pour & Soak: Slowly and evenly, pour your egg mixture over the entire layered creation. Now, here’s a key hack: Take a fork or clean hands and gently press down on the top layer, especially the bread corners peeking out. This helps every nook and cranny soak up that custardy goodness for an evenly baked, non-dry result.
- Bake to Golden Perfection: Slide your masterpiece into the preheated oven. Bake for 40-45 minutes. You’re looking for a beautifully golden top, puffed edges, and a center that’s firmly set (a knife inserted should come out clean). Don’t fret if it puffs up! It will settle as it rests.
- The Crucial Rest: This might be the hardest step! Pull the casserole out and let it rest on the stove for 5-10 minutes. This allows everything to settle, making it easier to slice into neat squares. It also lets the flavors meld perfectly. Use this time to brew coffee or set the table!
- Garnish & Serve: Finish with a vibrant sprinkle of chopped green onions or parsley for that fresh, chef-y touch. Then, slice, plate, and watch the smiles appear.
How to Serve It Up Like a Pro
This casserole is a complete meal in a dish, but the right accompaniments turn it into a feast! I love slicing it into big, hearty squares. For a classic brunch, plate it alongside a fresh fruit salad or some juicy orange slices—the brightness cuts through the richness beautifully. A dollop of salsa or hot sauce on the side is a must for my spice-loving friends. If you’re going full holiday mode, pair it with crispy hash browns and a stack of fluffy buttermilk pancakes. And let’s be real: a big mug of strong coffee or a pitcher of tangy orange juice is the non-negotiable beverage sidekick. Serve it straight from the dish at the table for that warm, family-style vibe.
Make It Your Own: 5 Delicious Twists
The basic recipe is a champion, but have fun with it! Here are a few ways to mix things up:
- The “Garden Lover”: Add 1 cup of chopped veggies to the sausage as it cooks. Bell peppers, onions, and mushrooms are a classic combo. Just sauté them until soft before adding to the layers.
- The “Southwest Fiesta”: Swap the breakfast sausage for chorizo, use a pepper Jack cheese, and stir a 4-ounce can of diced green chiles into the egg mixture. Serve with avocado and sour cream.
- The “Make-Ahead Marvel”: Assemble the entire casserole (up through step 5) the night before. Cover tightly and refrigerate. In the morning, let it sit on the counter for 20-30 minutes while the oven preheats, then bake. You may need to add 5-10 extra minutes.
- Bread Swap: Use cubed croissants for an ultra-buttery, decadent version. It’s incredible for a special occasion.
- Dairy-Free/Delicious: Use your favorite plant-based sausage, dairy-free cheese shreds, and unsweetened almond or oat milk. The structure and method stay exactly the same!
A Few More Thoughts From My Kitchen
This recipe has evolved so much since those farmhouse mornings. I’ve made it in a cast-iron skillet for a rustic look, doubled it for a massive church brunch (bake in two pans!), and even tried it with sweet apple chicken sausage and sharp white cheddar—a surprising win. One time, I accidentally used cinnamon-raisin bread (don’t ask how that happened mid-morning). It was… an experience. Let’s call it a sweet-and-savory experiment that didn’t make the blog! The point is, this casserole is forgiving and adaptable. It’s a recipe that wants you to succeed. So, cook with confidence and a dash of fun.
Your Questions, Answered
Q: Can I make this completely the night before?
A: Absolutely! That’s one of its superpowers. Follow the “Make-Ahead Marvel” variation above. Letting it sit allows the bread to fully absorb the custard, leading to an even more cohesive dish.
Q: My casserole turned out watery in the middle. What happened?
A> This usually means it needed more bake time. Ovens vary! Ensure the center is fully set (no jiggle) and a knife comes out clean. Also, make sure your bread wasn’t super fresh or damp—day-old is best. Finally, draining the sausage fat well is key.
Q: What’s the best way to reheat leftovers?
A> To maintain the texture, reheat individual slices in a toaster oven or conventional oven at 325°F until warmed through (about 10-15 mins). The microwave works in a pinch, but it can make the texture a bit softer.
Q: Can I freeze this breakfast casserole?
A> You can! Bake it completely, let it cool fully, then wrap slices or the whole pan tightly in plastic wrap and foil. Freeze for up to 2 months. Thaw overnight in the fridge and reheat in the oven.

Sausage Breakfast Casserole : Hearty, Cheesy, and Crowd-Pleasing
Description
Mornings go a lot smoother when breakfast actually keeps you full. This Protein Breakfast Bowl is warm, savory, and packed with nutrients to give you steady energy instead of a mid-morning crash. It’s built with fluffy quinoa, sautéed greens, eggs, and a creamy tahini drizzle — simple ingredients that come together fast and taste like something from a café.
Ingredients
Bowl
-
1 cup cooked quinoa (warm)
-
4 large eggs
-
2 cups baby spinach or chopped kale
-
1 tablespoon olive oil
-
Salt and black pepper, to taste
Tahini Drizzle
-
2 tablespoons tahini (stirred well)
-
1 tablespoon fresh lemon juice
-
1–2 teaspoons maple syrup or honey
-
1–2 tablespoons warm water
-
Pinch of salt
Instructions
1️⃣ Cook the Eggs (Soft-Boiled Method – Recommended)
-
Bring a small pot of water to a boil.
-
Gently lower in eggs and cook 6½–7 minutes.
-
Transfer to an ice bath for 5 minutes.
-
Peel and set aside.
(You can also poach or fry the eggs if preferred.)
2️⃣ Sauté the Greens
-
Heat olive oil in a skillet over medium heat.
-
Add spinach or kale.
-
Cook until just wilted and tender (about 1–3 minutes).
-
Season with salt and pepper.
Tip: Add a small splash of water and cover for 30 seconds to steam tougher greens like kale.
3️⃣ Make the Tahini Drizzle
-
In a small bowl, whisk tahini, lemon juice, sweetener, and salt.
-
Slowly whisk in warm water, a little at a time, until smooth and pourable.
Important: It may look thick at first — keep whisking and adding warm water gradually.
4️⃣ Assemble the Bowls
-
Divide warm quinoa between bowls.
-
Top with sautéed greens.
-
Add halved eggs.
-
Drizzle with tahini sauce.
-
Finish with black pepper or extra lemon.
Notes
-
✅ Use warm water for tahini sauce to keep it smooth.
-
✅ Season each layer lightly — base, greens, and eggs.
-
✅ For extra flavor, sauté greens with a little minced garlic.
-
✅ Like firm yolks? Boil eggs 9–10 minutes instead.
Nutritional Information*
*Please note: This is an estimate based on the standard ingredients. Values will change with substitutions.
Serves: 6-8 | Prep Time: 15 mins | Cook Time: 45 mins | Total Time: 1 hour
Per Serving (based on 1/8 of the pan):
Calories: ~320 | Protein: 18g | Carbohydrates: 12g | Fat: 22g | Saturated Fat: 9g | Cholesterol: 195mg | Sodium: 680mg | Fiber: 0.5g | Sugar: 3g
This casserole is a great source of high-quality protein to keep you full and energized through the morning. To lighten it up slightly, consider using turkey sausage, reduced-fat cheese, and 2% milk. Remember, it’s a comforting, hearty dish meant to be enjoyed as part of a balanced diet!
Final Thoughts & A Big Thank You
And there you have it, friends—my go-to, never-fail, always-impressive Sausage Breakfast Casserole. It’s more than just a recipe; it’s a ticket to more relaxing mornings and joyful gatherings. I hope it finds a spot in your recipe box and becomes a part of your own family’s traditions. Remember, the kitchen is for creating, for connecting, and for filling bellies with love. Thanks so much for letting me share this one with you. Now, go forth and bake something beautiful!
Until next time, keep your whisks busy and your hearts full,
Beau

Breakfast Sushi Rolls : Fun, Wholesome, and Kid-Approved
Breakfast Sushi Rolls: Your New Favorite Morning Adventure
Hey friends, Beau here from Feastical! Let me ask you something: are you tired of the same old breakfast routine? You know the drill—cereal, toast, maybe a rushed smoothie. It’s fine, it’s functional, but where’s the fun? Where’s the little spark of joy that makes you actually look forward to your morning fuel? If your breakfast game needs a serious upgrade, you have absolutely come to the right place.
Today, we’re throwing the rulebook out the kitchen window and playing with our food in the best possible way. I’m talking about Breakfast Sushi Rolls. Before you raise an eyebrow, hear me out. Imagine all your favorite wholesome breakfast ingredients—creamy nut butter, sweet fruit, hearty oats or rice—rolled up into a playful log and sliced into adorable, bite-sized rounds. It’s nutritious, it’s delicious, and it turns eating into an experience. This isn’t just food; it’s a conversation starter, a kid-magnet, and proof that healthy eating doesn’t have to be boring.
Whether you’re trying to coax a picky eater into trying something new, need a grab-and-go option that actually holds together, or just want to inject a little whimsy into your weekday, these rolls are your secret weapon. They come together in about 10 minutes, require zero cooking if you plan ahead, and are endlessly customizable. So, grab your favorite apron (or don’t—we’re keeping it real casual), and let’s roll up something spectacular together!
The “Aha!” Moment: How Breakfast Sushi Was Born
This recipe was born out of pure, unadulterated kitchen desperation—and a four-year-old’s stubborn refusal to eat. My nephew, Leo, was going through a phase where if it wasn’t shaped like a dinosaur or involved dipping, it was a hard pass. One sleepy Saturday, staring at a sad bowl of oatmeal and a banana, I had a flashback to making sushi rolls for a dinner party. The gears started turning… what if we rolled the oatmeal with the banana inside?
I spread the cool oats on some parchment, swiped on some almond butter, let him place the banana slices, and showed him how to roll it up. His eyes got huge. “Uncle Beau, is that breakfast sushi?” he whispered, as if I’d just performed magic. We sliced it together, and he gobbled up every single “sushi” piece, asking for “more rolls, please!” That was the moment I knew I was onto something. It wasn’t about fancy techniques or exotic ingredients; it was about presentation and play. It was about turning fuel into fun. That little victory in my kitchen is the heart and soul of Feastical—making food that connects, delights, and simply makes life a little tastier.
What You’ll Need: A Tour of the Ingredients
Here’s the beautiful part: you probably have most of this in your pantry right now. This isn’t a fussy recipe. It’s a blueprint for creativity. Let’s break it down.
- 1 cup cooked sticky brown or white rice OR 1 cup thick rolled oats (cooked and cooled) – This is your canvas! Sticky rice (like sushi rice or short-grain) gives that authentic, chewy texture and holds together incredibly well. Rolled oats, cooked until very thick and porridge-like, offer a fantastic, fiber-packed gluten-free alternative with a comforting, hearty flavor. Chef’s Insight: If using rice, let it cool completely so it’s not too sticky to handle. For oats, cook them with a bit less liquid than usual for a firmer, rollable consistency.
- 2 tablespoons nut butter (peanut, almond, or cashew) – This is your glue and your flavor booster! It adds healthy fats, protein, and that rich, creamy element. Substitution Tip: For a nut-free version, sunflower seed butter works amazingly and turns a fun green hue when rolled! Tahini (sesame paste) can be used for a more savory twist.
- 1 banana or sliced strawberries – The sweet, fresh heart of the roll. Banana is classic, easy, and provides the perfect log shape. Strawberries add a gorgeous pop of color and a tart sweetness. Chef’s Insight: Make sure your fruit isn’t overly ripe or juicy, as excess moisture can make the roll soggy.
- 1 teaspoon honey or maple syrup (optional) – A little drizzle of liquid gold! This is totally optional if your fruit is sweet enough or your nut butter is already sweetened. I love a touch of raw honey or pure maple syrup for that extra kiss of flavor.
- Pinch of cinnamon – The warmth factor. This tiny sprinkle ties everything together with a cozy, familiar aroma that just says “breakfast.”
- Optional: chia seeds, hemp hearts, shredded coconut – This is where you make it your own! A roll in chia seeds adds crunch and omega-3s. A sprinkle of hemp hearts boosts protein. Toasted shredded coconut adds a tropical, festive feel. Go wild!
Let’s Roll! Your Foolproof Step-by-Step Guide
Ready to become a breakfast sushi master? Follow these steps, and you’ll be a pro in no time. I’ve packed each one with my best tips to ensure your rolls are Instagram-worthy (but, you know, still destined for your belly).
Step 1: Prep Your Canvas. Lay a piece of parchment paper or wax paper on your counter—about 12 inches long. This is your non-stick rolling assistant. Plop your cup of cooled, cooked rice or oats onto the paper. With slightly damp fingers (this is the key hack to prevent sticking!), press and spread the mixture into a thin, even rectangle, roughly 8×6 inches. Don’t worry about perfection here; just aim for uniform thickness so it rolls evenly.
Step 2: The Glue Layer. Take your nut butter. If it’s super thick, you can warm it for 5-10 seconds in the microwave to make it more spreadable. Using a spoon or a small spatula, spread a thin, even layer across the entire surface of your rice/oats rectangle, leaving about a half-inch border on the side farthest from you. This border will seal the roll!
Step 3: The Filling Lineup. Now for the fun part! Peel your banana and place it whole (or slice your strawberries) along the edge of the rectangle closest to you. If you’re using a banana, it’s the perfect natural sushi roll core. Drizzle your optional honey or maple syrup over the fruit, and give it all a confident little pinch of cinnamon.
Step 4: The Roll-Up. Here’s the only slightly tricky part, but you’ve got this. Using the parchment paper to help you, lift the edge closest to you and start folding the base over the banana, tucking it in snugly. Now, continue rolling forward, using the paper to guide and compress the roll gently but firmly. Think “confident hug,” not “death squeeze.” Roll until you reach the end. The nut butter border should seal it shut. Give the whole log a gentle roll back and forth on the counter to smooth it out.
Step 5: Slice & Serve. Grab a sharp knife (a serrated bread knife works wonders here). If you want super clean slices, pop the whole roll, still wrapped in parchment, into the freezer for 5-7 minutes. This firms it up perfectly. Unwrap, and slice into 1-inch thick “sushi” rounds. Wipe your knife between slices for the cleanest cuts. Arrange them on a plate, and prepare for the “oohs” and “aahs.”
How to Serve These Beauties
Presentation is half the fun with this dish! For a true sushi bar experience, arrange the rounds on a rectangular plate or a wooden board. Place little bowls of “dipping sauces” on the side—think extra thinned nut butter, Greek yogurt, or a tiny dish of extra maple syrup. Scatter some extra chia seeds, coconut, or fresh berry slices around the plate for color.
For kids, make it interactive. Let them build their own “sushi boat” by placing the rounds on a plate and using raisins or chocolate chips as “cargo.” Pack them in a lunchbox—they hold up surprisingly well nestled in a container. For a brunch spread, stack them on a tiered stand alongside other finger foods. They’re delightful with a hot cup of coffee or a cool glass of milk. However you serve them, the goal is smiles first, sustenance a very close second.
Mix It Up! 5 Delicious Variations to Try
Once you master the basic roll, the world is your sushi-roll oyster. Here are a few of my favorite twists:
- Chocolate-Berry Bliss: Use chocolate-hazelnut spread instead of nut butter, and fill with raspberries or sliced strawberries. A roll in crushed graham crackers or cocoa powder takes it over the top.
- Tropical Sunrise: Spread with coconut butter, use mango strips as your fruit core, and roll the finished log in toasted coconut and chopped macadamia nuts.
- Savory Sunrise Roll: Swap the sweet for savory! Use cooled quinoa or rice, spread with mashed avocado or cream cheese, and fill with a line of scrambled eggs, diced ham, or smoked salmon. A sprinkle of everything bagel seasoning is a must.
- Apple Pie Roll: Cook your oats with a dash of apple pie spice. Spread with almond butter, fill with very thin apple matchsticks (tossed in a little lemon juice), and a sprinkle of raisins. Drizzle with caramel after slicing.
- Protein Power Roll: Stir a scoop of your favorite vanilla or chocolate protein powder into your nut butter before spreading. Fill with banana. Roll the finished slices in crushed nuts or granola for maximum crunch and fuel.
Beau’s Kitchen Notes
This recipe has evolved so much since that first morning with Leo. I’ve learned that the ripeness of the banana is crucial—too ripe and it’s a messy, overly sweet situation. I’ve also become a firm believer in the “freezer firm-up” method for slicing. It’s the difference between a tidy round and a squished masterpiece.
One of my favorite kitchen stories involves me trying to make a giant “sushi cake” log for a birthday breakfast. Let’s just say my ambition outweighed my structural engineering skills, and it turned into more of a breakfast “burrito bowl” situation. Still delicious, but a humbling reminder that sometimes, keeping it simple is the real chef’s move. The best part of this recipe is its flexibility. It’s a method, not a mandate. Make it yours!
Your Questions, Answered
Q: My roll is falling apart when I slice it. Help!
A: No worries! This usually means 1) Your base (rice/oats) was too wet, 2) You didn’t roll it tightly enough, or 3) You didn’t let it firm up. Next time, make sure your grains are cooled and not mushy. Use that parchment paper to roll as tightly as you can without squishing the fruit. And that quick chill in the freezer is a game-changer for clean slices.
Q: Can I make these ahead of time?
A: Absolutely! You can assemble the whole roll, wrap it tightly in its parchment paper, and then again in plastic wrap, and store it in the fridge for up to 24 hours. Slice just before serving. I don’t recommend pre-slicing and storing, as the cut edges can dry out.
Q: What’s the best nut-free alternative?
A> Sunflower seed butter is my top pick! It has a similar texture and a lovely, mild flavor. Just be aware it can react with baking soda/powder in other recipes (but that’s not a issue here!). For a totally different vibe, try mashed ripe avocado for a creamy, savory base.
Q: Is this actually filling enough for breakfast?
A> For most adults, one full roll (sliced) is a satisfying breakfast, especially paired with a side of yogurt or a hard-boiled egg. For bigger appetites or post-workout fuel, double the recipe or enjoy it as part of a bigger spread. The combo of complex carbs, healthy fats, and fiber will keep you going all morning.

Breakfast Sushi Rolls : Fun, Wholesome, and Kid-Approved
Description
Breakfast Sushi Rolls: A Fun, Fast Morning Upgrade
If breakfast has been feeling a little repetitive lately, these Breakfast Sushi Rolls are a simple way to make it fun again. They’re sweet, nutritious, no-cook (if your grains are pre-cooked), and ready in minutes. Made with oats or rice, nut butter, and fresh fruit, they’re great for kids, meal prep, or anyone who wants a playful but balanced start to the day.
Ingredients
-
1 cup cooked thick oats or sticky rice, cooled
-
2 tablespoons nut butter (peanut, almond, or cashew)
-
1 banana or ½ cup sliced strawberries
-
1 teaspoon honey or maple syrup (optional)
-
Pinch of cinnamon
Optional coatings or add-ins:
-
Chia seeds
-
Hemp hearts
-
Shredded coconut
-
Crushed nuts or granola
Instructions
-
Prepare your base:
Lay a sheet of parchment or wax paper on the counter. Place cooled oats or rice on it and press into a thin rectangle (about 8×6 inches). Lightly damp fingers help prevent sticking. -
Spread nut butter:
Spread nut butter evenly over the surface, leaving a small border at the far edge. -
Add fruit:
Place the banana (whole) or a line of sliced strawberries along the edge closest to you. Drizzle with honey or maple syrup if using. Sprinkle cinnamon. -
Roll:
Using the parchment to guide you, roll tightly into a log. Press gently to seal. -
Chill for clean slices (tip):
Chill in the freezer 5–7 minutes to firm up. -
Slice:
Use a sharp knife to cut into 1-inch rounds. Add optional coatings by rolling the outside edges if desired.
Notes
-
Oats should be extra thick, not runny — use less liquid when cooking.
-
Let rice or oats cool fully before rolling.
-
Roll firmly but gently to keep the shape tight.
-
Wipe the knife between cuts for neat slices.
-
Best eaten fresh, but the whole roll can be wrapped and refrigerated up to 24 hours before slicing.
A Note on Nutrition
Let’s talk about what’s fueling you here. This is a balanced, energy-sustaining meal. Using oats or brown rice provides complex carbohydrates and fiber for steady energy release—no mid-morning sugar crash. The nut butter delivers healthy fats and plant-based protein, which helps keep you full and satisfied. The fruit adds vitamins, minerals, and natural sweetness, and the optional seeds boost the nutrient profile even further with omega-3s and micronutrients.
Estimated nutritional info per serving (based on 1 roll made with oats, almond butter, banana, and no optional toppings): Calories: ~280, Protein: 7g, Carbohydrates: 35g, Dietary Fiber: 6g, Sugars: 12g (mostly natural from fruit), Fat: 12g. Remember, these are estimates. Your specific numbers will vary based on your exact ingredients and portion size. The real win is that you’re eating real, whole foods in a fun, delicious way.
Final Thoughts: Roll With It!
Friends, if you take one thing away from our kitchen chat today, let it be this: food should be a source of joy, not just a task on your to-do list. These Breakfast Sushi Rolls are more than a recipe; they’re an invitation to play, to experiment, and to start your day with a smile. They remind us that even the simplest ingredients can be transformed into something magical with a little creativity.
I hope you’ll give them a try. Make them with your kids, your partner, or just for yourself. Change up the fillings with the seasons, and don’t be afraid to get a little messy. That’s where the best kitchen memories are made. As always, I’d love to see your creations! Tag me over on Feastical.com or on social media with your beautiful rolls.
Now, go roll up something wonderful. Until next time, keep your spatula close and your sense of adventure closer.
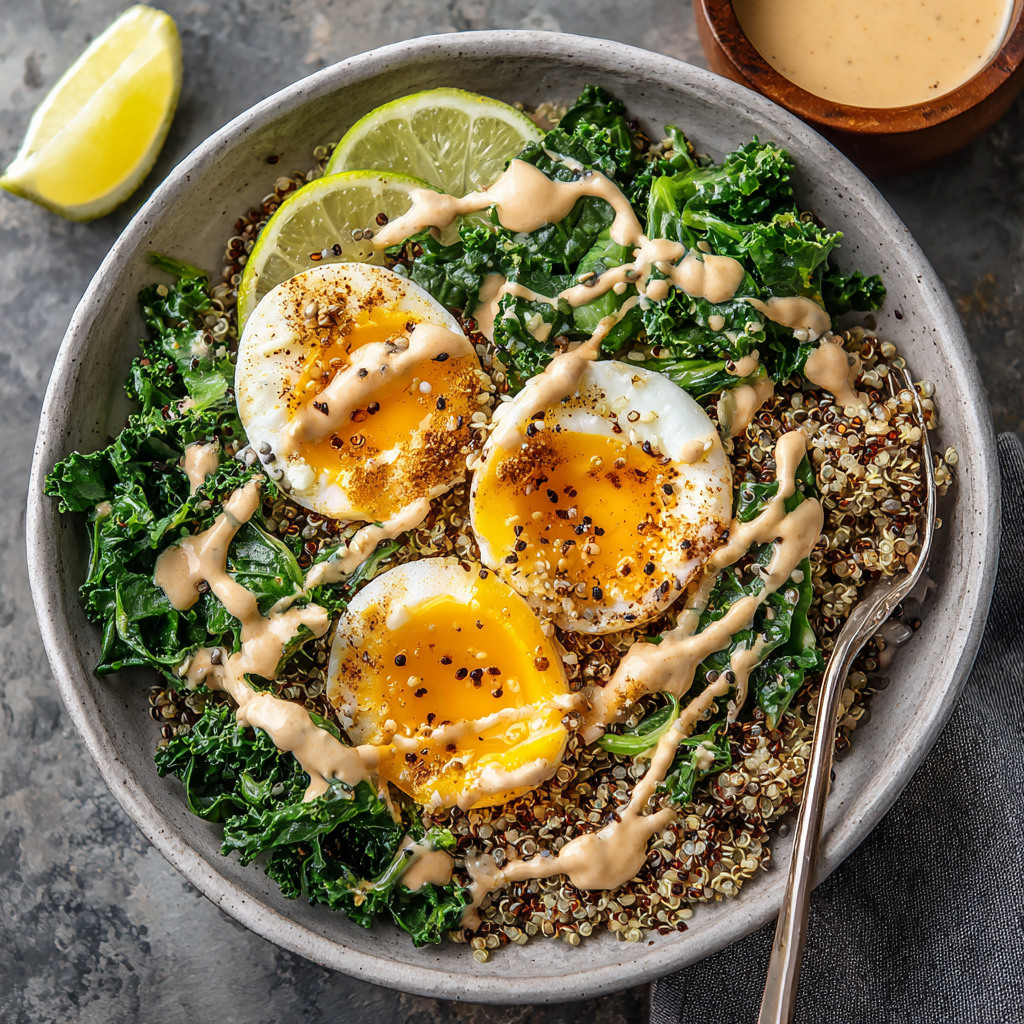
Protein Breakfast Bowls with Quinoa, Eggs & Greens : Hearty, Fresh, and Ready to Fuel Your Day
Protein Breakfast Bowls: Your New Favorite Way to Conquer the Morning
Hey friends, Beau here from Feastical! Let’s talk about the most important meal of the day. I don’t know about you, but I used to be stuck in a breakfast rut so deep, I could have planted potatoes in it. It was either a frantic piece of toast or a sad, lonely granola bar. I’d be starving by 10 AM, reaching for anything in sight, and my energy would crash harder than a toddler denied a second cookie.
That’s when I decided mornings needed a serious upgrade. Something that felt like a treat but fueled my body like a champ. Enter: The Protein Breakfast Bowl. This isn’t just food; it’s a delicious declaration that you’re ready to own your day.
Imagine this: a warm, fluffy bed of nutty quinoa, topped with vibrant, garlicky greens, a perfectly jammy egg with a yolk that acts as its own luxurious sauce, all finished with a creamy, dreamy tahini drizzle. It’s savory, it’s satisfying, it’s packed with protein and fiber to keep you full and focused, and friends? It’s ready in about 20 minutes. This bowl is the ultimate feel-good food that proves healthy eating can be anything but boring. It’s a warm hug for your taste buds and a high-five for your body. So, grab your favorite bowl—you know, the big one with the funky pattern—and let’s make a morning masterpiece together.
The Bowl That Saved My Mornings (And My Sanity)
This recipe was born out of pure, beautiful chaos. A few years back, I was helping my sister with her newborn twins. Mornings in that house were a symphony of crying (sometimes the babies, sometimes us), spilled coffee, and the eternal search for clean burp cloths. One particularly wild morning, we were ravenous but had zero time or brainpower for a complicated meal.
I stared into her fridge and saw the usual suspects: a carton of eggs, a bag of spinach starting to wilt, and some leftover quinoa from dinner. In a moment of “what-do-we-have-to-lose” inspiration, I threw it all together in a skillet, topped it with a quick sauce I whisked from tahini and lemon, and called it breakfast. We ate it straight from the pan, standing up in the kitchen, while juggling babies. And you know what? It was fantastic. It was hearty, comforting, and gave us the sustained energy to tackle the twin-tornado until naptime. That messy, improvisational bowl became our go-to. It evolved into this precise recipe, but it’ll always remind me that the best meals often come from a little chaos and a lot of love.
Gathering Your Bowl Building Blocks
Here’s the beautiful part: this recipe is a template for genius. You probably have most of this already. Let’s break it down.
- 1 cup cooked quinoa: Your powerhouse base! Quinoa is a complete protein, meaning it has all nine essential amino acids. It’s also fluffy and absorbs flavors like a dream. Chef’s Tip: Cook a big batch at the start of the week! It keeps beautifully in the fridge for 4-5 days. No quinoa? Brown rice, farro, or even roasted sweet potato cubes make a great stand-in.
- 4 large eggs: The protein-packed stars. We’re going for soft-boiled, poached, or sunny-side-up here because that runny yolk is nature’s best sauce. Chef’s Insight: For the creamiest yolk, use eggs that are a few days old rather than super fresh. They peel easier if boiling, too!
- 2 cups baby spinach or kale: Your dose of green goodness. Spinach wilts down in seconds and has a mild flavor. Kale is heartier and packs more of a nutritional punch. Substitution Tip: Swiss chard, arugula (for a peppery kick), or even shredded Brussels sprouts work wonderfully.
- 1 tablespoon olive oil: For sautéing our greens to tender, flavorful perfection. Avocado oil or butter also work beautifully here.
- Salt and pepper to taste: The dynamic duo. Don’t be shy—season in layers!
For The Magic Tahini Drizzle:
- 2 tablespoons tahini: This sesame seed paste is the secret to creamy, dairy-free richness. It’s packed with healthy fats and a subtle nutty flavor. Chef’s Hack: Always stir your tahini jar well before using! The oil separates, and you want that creamy paste at the bottom.
- 1 tablespoon lemon juice: Freshly squeezed, please! It brightens up the entire bowl and cuts through the richness.
- 1–2 teaspoons maple syrup or honey: A tiny touch of sweetness balances the lemon and tahini perfectly. Trust me on this.
- 1–2 tablespoons warm water: This is key to transforming thick tahini into a silky, pourable sauce. Add slowly!
- Pinch of salt: Brings all the sauce flavors together.
Let’s Build Your Breakfast Bowl: A Step-by-Step Journey
Ready to cook? Put on some tunes, pour yourself a cup of coffee, and let’s do this. We’re going in a logical flow so everything is ready at the same time.
- First, the Eggs (Your Way!). This is the step that takes the longest, so we start here. My absolute favorite method for these bowls is the 6.5-minute soft-boiled egg. Bring a pot of water to a boil, gently lower in your eggs with a spoon, and set a timer for 6.5 minutes. While they cook, prepare an ice bath (a bowl of water with ice cubes). When the timer goes off, immediately transfer the eggs to the ice bath to stop the cooking. This gives you a firm white and a gorgeously jammy, liquid yolk. Chef’s Commentary: The ice bath is non-negotiable for easy peeling! Let them cool for at least 5 minutes before gently tapping and rolling to peel. If you prefer poached or fried, get those going now too.
- Wake Up the Quinoa. If you’re using pre-cooked, cold quinoa from the fridge, give it some love. I like to warm mine in the microwave for 60 seconds or toss it in the skillet for a minute after the greens are done. A little warmth makes the bowl so much more comforting.
- Sauté Those Greens. Heat your olive oil in a skillet over medium heat. Toss in your spinach or kale. If using kale, I’ll sometimes add a minced garlic clove for 30 seconds first—hello, flavor town! Sauté until just wilted and bright green. For spinach, this is about 60 seconds; for kale, maybe 2-3 minutes until tender. Season with a pinch of salt and pepper right in the pan. Little Chef Hack: A tiny splash of water or broth in the pan with the greens creates steam and helps them wilt evenly without burning.
- Whisk the Tahini Drizzle. In a small bowl, add the tahini, lemon juice, maple syrup, and pinch of salt. Start whisking. It will look weirdly thick and might even seize up—don’t panic! This is normal. Start adding warm water, one tablespoon at a time, whisking vigorously after each addition. Like magic, it will turn from a thick paste into a smooth, creamy, pourable sauce. Taste and adjust: want more tang? Add lemon. More sweetness? A drip more maple syrup.
- The Grand Assembly. This is the fun part. Divide your warm quinoa between two bowls. Top with a generous mound of your sautéed greens. Carefully place your peeled and halved soft-boiled eggs (or your poached/fried eggs) on top. Now, drizzle that gorgeous tahini sauce all over everything. Let it cascade over the eggs and pool into the quinoa. Finish with another crack of black pepper.
How to Serve & Savor Your Creation
Presentation is part of the joy! I’m a firm believer that food tastes better when it looks beautiful. For these bowls, I like to create little sections or piles—a neat bed of quinoa on one side, a vibrant green mound on the other, the glorious eggs taking center stage, and the tahini drizzle artfully swirled over the top.
Now, for the optional, but highly recommended, topping bar! Set these out and let everyone customize:
- Avocado slices or chunks: For extra creamy, healthy fats.
- Microgreens or sprouts: A pop of fresh, crunchy texture.
- A sprinkle of everything bagel seasoning, sesame seeds, or red pepper flakes: For flavor and a little heat.
- Crumbled feta or goat cheese: If you’re not dairy-free, this adds a lovely salty tang.
- A squeeze of extra lemon wedge on the side.The key is to get a bit of everything in one bite. Pierce that yolk, let it mingle with the tahini and quinoa, scoop up some greens, and enjoy the symphony of textures and flavors. It’s a sit-down-and-savor kind of meal, even on a busy morning.
Make It Your Own: Endless Delicious Twists
The true beauty of this bowl is its flexibility. Play with it! Here are some of my favorite riffs:
- The “Everything But The Kitchen Sink” Veggie Boost: Add sautéed mushrooms, cherry tomatoes, roasted bell peppers, or red onion to your greens while they cook.
- Mediterranean Sunshine Bowl: Swap the tahini drizzle for a lemony Greek yogurt sauce. Top with diced cucumber, kalamata olives, and fresh dill.
- Spicy Southwest Fiesta: Use black beans instead of quinoa (or mix them!). Top with a fried egg, salsa, sliced jalapeño, avocado, and a lime crema.
- Vegan Power Bowl: Replace the egg with seasoned, baked tofu cubes or a hearty scoop of savory lentil stew. Ensure your sweetener in the sauce is maple syrup to keep it vegan.
- Smoked Salmon Luxe Bowl: Perfect for a weekend brunch! Top your quinoa and greens with flaky smoked salmon, everything bagel seasoning, capers, and a dollop of dairy-free or regular cream cheese mixed with a little lemon zest.
Beau’s Kitchen Notes & Stories
This recipe has lived on my fridge for years, and it’s covered in splatters and notes—the sign of a true kitchen favorite. I’ve learned a few things along the way. First, the tahini sauce evolution: it started as just tahini and water, which was fine, but adding that touch of lemon and maple syrup was a game-changer. It went from good to “wow, what IS that sauce?!”
Also, a funny story: I once tried to multitask and make the sauce while also talking on the phone. I accidentally used cold water instead of warm. Let me tell you, cold water and tahini do not become friends easily. I whisked for what felt like an hour trying to get rid of the lumps. The moral? Warm water is your sauce’s best friend, and maybe don’t try to be a kitchen hero while on a call.
Finally, this bowl is a meal-prep superstar. Cook a big batch of quinoa, whisk a double-batch of tahini sauce (it keeps for a week!), and wash your greens. In the morning, all you do is sauté, cook an egg, and assemble. You’re out the door with a gourmet breakfast in less time than it takes to find your keys.
Your Questions, Answered
Q: My tahini sauce is super thick and lumpy. Did I mess up?
A: Absolutely not! This happens to everyone. Tahini has a mind of its own. The key is warm water and patience. Add the water slowly, whisking vigorously after each spoonful. If it seizes, just keep whisking and adding water—it will smooth out. If it’s too thin, whisk in a bit more tahini.Q: Can I make this ahead of time for meal prep?
A: 100%! Prep all the components separately. Store cooked quinoa, washed greens, and tahini sauce in airtight containers in the fridge. Cook your eggs fresh in the morning for the best texture (a soft-boiled egg takes less than 7 minutes!). You can also pre-peel soft-boiled eggs and keep them in cold water in the fridge for 1-2 days.Q: My quinoa is soggy. How can I avoid that?
A> The golden rule for fluffy quinoa: use the correct water ratio (1 cup quinoa to 2 cups liquid) and let it steam. After cooking, remove it from the heat, keep the lid on, and let it sit for 10 minutes. Then fluff with a fork. For meal prep, spread it on a plate to cool quickly before refrigerating to prevent condensation from making it mushy.Q: I don’t like runny yolks. What’s the best way to cook the eggs for a firm yolk?
A> No problem! For a fully set hard-boiled yolk, cook your eggs for 9-10 minutes before plunging into the ice bath. For fried, simply cook them over medium heat until the yolk is completely set, or flip them for an “over hard” egg. The bowl will still be delicious! - Print
Protein Breakfast Bowls with Quinoa, Eggs & Greens : Hearty, Fresh, and Ready to Fuel Your Day
Description
Protein Breakfast Bowls: Your New Favorite Way to Conquer the Morning
Mornings go a lot smoother when breakfast actually keeps you full. This Protein Breakfast Bowl is warm, savory, and packed with nutrients to give you steady energy instead of a mid-morning crash. It’s built with fluffy quinoa, sautéed greens, eggs, and a creamy tahini drizzle — simple ingredients that come together fast and taste like something from a café.
Ingredients
ScaleBowl
-
1 cup cooked quinoa (warm)
-
4 large eggs
-
2 cups baby spinach or chopped kale
-
1 tablespoon olive oil
-
Salt and black pepper, to taste
Tahini Drizzle
-
2 tablespoons tahini (stirred well)
-
1 tablespoon fresh lemon juice
-
1–2 teaspoons maple syrup or honey
-
1–2 tablespoons warm water
-
Pinch of salt
Instructions
1️⃣ Cook the Eggs (Soft-Boiled Method – Recommended)
-
Bring a small pot of water to a boil.
-
Gently lower in eggs and cook 6½–7 minutes.
-
Transfer to an ice bath for 5 minutes.
-
Peel and set aside.
(You can also poach or fry the eggs if preferred.)
2️⃣ Sauté the Greens
-
Heat olive oil in a skillet over medium heat.
-
Add spinach or kale.
-
Cook until just wilted and tender (about 1–3 minutes).
-
Season with salt and pepper.
Tip: Add a small splash of water and cover for 30 seconds to steam tougher greens like kale.
3️⃣ Make the Tahini Drizzle
-
In a small bowl, whisk tahini, lemon juice, sweetener, and salt.
-
Slowly whisk in warm water, a little at a time, until smooth and pourable.
Important: It may look thick at first — keep whisking and adding warm water gradually.
4️⃣ Assemble the Bowls
-
Divide warm quinoa between bowls.
-
Top with sautéed greens.
-
Add halved eggs.
-
Drizzle with tahini sauce.
-
Finish with black pepper or extra lemon.
Notes
-
✅ Batch-cook quinoa for the week — it keeps 4–5 days refrigerated.
-
✅ Use warm water for tahini sauce to keep it smooth.
-
✅ Season each layer lightly — base, greens, and eggs.
-
✅ For extra flavor, sauté greens with a little minced garlic.
-
✅ Like firm yolks? Boil eggs 9–10 minutes instead.
-
-
Nutritional Highlights (Per Serving)
Let’s talk about what’s fueling you! This approximate breakdown is for one bowl (half the recipe), including the full tahini drizzle.
- Calories: ~390 | This is a substantial, balanced meal to power your morning.
- Protein: ~21g | A fantastic amount from the powerhouse combo of eggs and quinoa.
- Carbohydrates: ~28g | Primarily complex carbs and fiber from the quinoa and greens, providing steady energy.
- Fat: ~20g | Mostly healthy, unsaturated fats from the olive oil, egg yolks, and tahini, crucial for nutrient absorption and satiety.
This bowl is naturally gluten-free and dairy-free (as written). It’s a balanced mix of macronutrients designed to keep you full, stabilize your blood sugar, and give you long-lasting energy without the mid-morning crash. It’s food that loves you back!
Final Thoughts: Why This Bowl Isn’t Just Breakfast, It’s a Morning Revolution
Let’s be real—mornings can be hard. But they don’t have to be joyless, rushed, or fueled by regret and a rumbling stomach by 10 AM. This Protein Breakfast Bowl is more than just a recipe; it’s an invitation to reclaim your morning.
It’s the reminder that taking a few intentional minutes for yourself isn’t a luxury—it’s the foundation of a great day. It’s the proof that “healthy” doesn’t mean bland, and “quick” doesn’t mean boring. This bowl is texture, flavor, color, and energy all in one place. It’s the savory, satisfying answer to the sweet breakfast rut so many of us get stuck in.
But beyond the nutrition and the speed, this bowl carries a spirit I love: flexibility. It’s a perfect template. It invites you to play, to use what you have, to make it yours. It’s as comfortable on a chaotic Tuesday as it is on a lazy Sunday. It’s a meal that adapts to your life, not the other way around.
So, I encourage you: give it a try. Experience that moment when the jammy yolk breaks and swirls with the creamy tahini into the fluffy quinoa and garlicky greens. Feel the difference it makes in your energy and focus. Notice how something so simple can feel so profoundly nourishing.
This is how we build better habits—not with strict rules, but with delicious, reliable joys. This bowl became my morning anchor, and I have a feeling it might just become yours.
Here’s to conquering the morning, one delicious, protein-packed bite at a time.
With love and a well-drizzled bowl,
Beau from Feastical

Colorful Easter Trifle Dessert Recipe
Easy Easter Trifle Dessert with Colorful Cake and Creamy Layers
Hey friends, Beau here from Feastical! Is there anything better than a dessert that’s both a total showstopper and secretly easy to pull off? I don’t think so. That’s exactly why this Colorful Easter Trifle has become my go-to for spring celebrations. We’re talking layers of soft, pastel-hued cake, a cloud-like creamy filling, and all the festive vibes your table can handle.
This isn’t just a dessert; it’s an experience. It’s the “ooh” and “aah” moment when you bring it to the table. It’s the fun of getting creative with food coloring. And most importantly, it’s the joy of digging into a spoonful that tastes like a celebration. Whether you’re hosting a big family Easter brunch or just want to bring a little extra sunshine to your week, this trifle is your ticket. So, tie on your favorite apron, cue up some good music, and let’s make something magically delicious together. Trust me, this is one recipe where playing with your food is not only allowed – it’s encouraged!
A Dessert That Sparked a Family Tradition
This recipe takes me straight back to my grandma’s kitchen, which was always buzzing before a holiday. One Easter, when I was about ten, she decided we were going to make a “rainbow cake.” Well, let’s just say our ambitious layer cake turned out… a bit lopsided. But my grandma, never one to waste a single crumb of something sweet, looked at our colorful, leaning tower of cake and declared, “We’re not making a cake, Beau. We’re making a parfait!”
She grabbed her big glass bowl, crumbled up those pastel cake layers, and layered them with whatever whipped cream and berries she had. That accidental trifle was the hit of the dinner. It was messy, it was vibrant, and it was made with a whole lot of love (and a little improvisation). This recipe is my polished, cream-cheese-enriched homage to that day. It captures that same spirit of playful, colorful, shareable joy. It proves that sometimes the best memories – and the best desserts – come from happy little kitchen “oops” moments.
What You’ll Need to Build Your Easter Masterpiece
Here’s your shopping list! I’ve added my little chef notes next to each one because knowing the why makes you a more confident cook.
- 2 boxes of white cake mix (plus required ingredients: Usually oil, water, and eggs. White cake is our perfect blank canvas for those beautiful pastel colors. Feel free to use your favorite from-scratch vanilla cake recipe if you prefer – you’ll need enough batter for two 8-inch rounds.
- Gel food coloring in Red, Blue, Yellow, & Green: I strongly recommend gel colors over liquid. They’re more potent, so you need less, and they won’t throw off the consistency of your batter. They give you those vibrant, bakery-style hues without any fuss.
- 8 oz whipped cream cheese, softened: The “secret weapon” in our filling! It adds a tangy depth and incredible stability that plain whipped cream can’t match. Full-fat is best for flavor and texture. Make sure it’s truly softened to room temp so it blends seamlessly.
- 1 can (14 oz) sweetened condensed milk: This is the sweet, rich, sticky-smooth glue that holds our creamy filling together. It’s non-negotiable for that classic, lush trifle texture. Don’t substitute evaporated milk – it’s not the same!
- 12 oz Cool Whip, thawed: The fluffy foundation of our filling. Using Cool Whip keeps it stable and easy. For a from-scratch vibe, you can substitute with an equal amount of homemade stabilized whipped cream (heavy cream whipped with a little sugar and a splash of vanilla).
Let’s Build It, Layer by Beautiful Layer
Alright, team! This is where the magic happens. We’re baking, coloring, and assembling. Read through once, then just have fun with it.
Step 1: Bake Your Rainbow of Cakes
Prepare your two cake mixes according to the package directions. Now, here’s the fun part: divide the total batter evenly among four separate bowls.
Chef Beau’s Color Mixing Guide:
Purple: 6 drops red + 5 drops blue gel color.
Yellow: 5 drops yellow gel color.
Pink: 6 drops red + 1 tiny drop blue gel color (the blue knocks it back from orange to a perfect pink).
Blue: 4 drops blue + 2 drops green gel color (this gives it a lovely Easter egg aqua tone).
Stir each thoroughly until the color is uniform. Don’t be shy – get those colors bright!
Pour each colored batter into its own greased 8-inch round cake pan. Bake according to the mix’s time (usually 23-28 minutes), but start checking early. A toothpick inserted in the center should come out clean. Let the cakes cool completely in the pans on a wire rack. Pro Hack: Once cool, you can pop them in the freezer for 30 minutes. This makes them much easier to crumble neatly!
Step 2: Whip Up the Dreamy Filling
In a large mixing bowl, beat the softened cream cheese with an electric mixer until it’s smooth and fluffy, about 1 minute. Scrape down the sides. With the mixer on low, slowly pour in the entire can of sweetened condensed milk. Beat until it’s completely combined and silky.
Now, gently fold in the thawed Cool Whip. I use a big rubber spatula and a “fold and turn” motion to keep all that airy fluffiness. Mix just until no white streaks remain. You should have a big bowl of luscious, spreadable cream. Cover and pop it in the fridge while you handle the cake.
Step 3: The Grand Assembly (The Best Part!)
Take your cooled cakes and crumble them with your hands into a large bowl. You want a mix of chunkier pieces and finer crumbs for great texture. Before you start layering, set aside about ¼ cup of each cake color in small separate piles for your garnish.
Grab your large, clear trifle bowl (the show is in the layers!). Start with a generous scoop of the cream mixture on the very bottom – this anchors everything. Then, add your first layer of cake crumbs. I like to go in rainbow order: purple, then yellow, then pink, then blue. Press the crumbs down gently. Add another thick layer of cream, spreading it to the edges so the colors show.
Repeat! Cake, cream, cake, cream. Build it up until you run out, finishing with a beautiful, swoopy top layer of the cream filling. Now, artfully sprinkle your reserved cake crumbs on top. You can make stripes, a color burst, or just a joyful confetti sprinkle.
Step 4: The Patient Part (It’s Worth It!)
Cover the trifle tightly with plastic wrap and refrigerate for at least 3-4 hours, ideally overnight. This waiting time is crucial. It lets the cake soften just enough and allows all the flavors to marry into one incredible, cohesive dessert.
How to Serve Your Easter Showstopper
Presentation is everything with a trifle! Use a large, clear-glass serving spoon to dig all the way down to the bottom, so each serving gets every glorious layer. For individual servings, use pretty clear glasses or mason jars to build mini trifles – kids love having their own personal rainbow.
I love to add a few fresh touches right before serving. A scattering of fresh berries (strawberries, raspberries, blueberries) adds a pop of freshness. A few sprigs of mint makes it look extra elegant. And if you really want to go for it, a light dusting of powdered sugar over the top looks like a spring morning frost. Place it right in the center of your table and watch the smiles appear.
Make It Your Own: Fun Twists & Swaps
One recipe, endless possibilities! Here are a few ways to play with your trifle:
- Lemon Berry Bliss: Add 2 teaspoons of lemon zest to the creamy filling. Between the cake layers, add fresh raspberries or blueberries. The citrus brightens up the whole dessert.
- Spring Confetti: Skip the solid colored layers and make one big batch of “confetti” cake! Mix a few drops of each color into one bowl of batter for a swirled, tie-dye effect before baking.
- Angel Food Lighten-Up: Use a store-bought or homemade angel food cake instead of white cake. Tear it into pieces. The result is lighter and airier, and the colors still look gorgeous against the white cake.
- Dairy-Free Delight: Use a vegan cake mix, dairy-free cream cheese, coconut whipped topping, and a can of full-fat coconut milk (chilled, the solid part only) mixed with sugar as a swap for sweetened condensed milk.
- Cookie & Cream: For a non-cake version, use crumbled pastel-colored Oreos or shortbread cookies as your layers. So simple and so good.
Beau’s Kitchen Confidential
This recipe has evolved so much since that first lopsided cake with my grandma. The cream cheese filling was my own addition – I found it held up better for a crowd and had that perfect sweet-and-tangy balance. A funny note: one year, I got a little too enthusiastic with the blue food coloring and ended up with a slightly Smurf-esque layer. The lesson? Always add color gradually! No one has ever complained, though. In fact, the more colorful, the more kids (and let’s be honest, adults) seem to love it. This trifle is forgiving, flexible, and full of joy. That’s what Feastical is all about.
Your Questions, Answered
Q: Can I make this ahead of time?
A: Absolutely! In fact, I recommend it. Assemble the trifle the night before, cover, and refrigerate. The flavors blend and the texture becomes perfect. It’s the ultimate stress-free holiday dessert.
Q: My filling seems runny. What happened?
A: This usually means the cream cheese wasn’t fully softened or the Cool Whip wasn’t completely thawed. If it’s too runny to layer nicely, just pop the whole bowl of filling into the fridge for 30 minutes to firm up before assembling.
Q: I don’t have four 8-inch pans. Can I still make it?
A: Yes! You can bake the colors in batches, washing the pan in between. Just let the pan cool completely before re-greasing and adding the next batter. Or, bake all the batter in a 9×13 sheet pan, then cut it into quarters to color each quarter separately in a bowl (this is a bit more work but totally doable!).
Q: How long will leftovers last?
A: Covered tightly in the fridge, your trifle will stay delicious for 3-4 days. The cake will continue to soften, but it’s still a delightful treat.

Colorful Easter Trifle Dessert Recipe
Description
Easy Easter Trifle Dessert with Colorful Cake and Creamy Layers
Looking for a spring dessert that gets big “wow” reactions but is actually simple to make? This Easy Easter Trifle is your answer. With soft pastel cake, fluffy cream layers, and a bright, festive look, it’s perfect for Easter brunch, family gatherings, or any spring celebration. It’s also make-ahead friendly — which means less stress and more fun.
Ingredients
Cake Layers
-
2 boxes white cake mix (plus eggs, oil, and water as package directs)
-
Gel food coloring: red, blue, yellow, green
Creamy Filling
-
8 oz cream cheese, softened
-
1 can (14 oz) sweetened condensed milk
-
12 oz whipped topping (like Cool Whip), thawed
Optional Garnish
-
Fresh berries
-
Easter candy or sprinkles
-
Mint leaves
-
Powdered sugar dusting
Instructions
1️⃣ Color and Bake the Cakes
-
Prepare cake batter according to package directions.
-
Divide batter evenly into 4 bowls.
-
Tint each bowl with gel food coloring to create pastel shades (pink, yellow, purple, blue, etc.).
-
Pour into greased pans (8-inch rounds or bake in batches if needed).
-
Bake according to package time.
-
Cool completely. For easier crumbling, chill or freeze cakes 20–30 minutes.
2️⃣ Make the Cream Layer
-
Beat softened cream cheese until smooth.
-
Slowly mix in sweetened condensed milk until silky.
-
Gently fold in whipped topping until fully combined.
-
Refrigerate while preparing cake.
3️⃣ Crumble the Cake
-
Break each colored cake into chunks and crumbs.
-
Reserve a small handful of each color for the top garnish.
4️⃣ Assemble the Trifle
In a clear trifle bowl or large glass dish:
-
Spread a layer of cream on the bottom.
-
Add a layer of mixed cake crumbs (or color-by-color stripes).
-
Add another cream layer.
-
Repeat layers until used up.
-
Finish with cream on top.
-
Sprinkle reserved colored crumbs over the top.
5️⃣ Chill
-
Cover and refrigerate at least 3–4 hours (overnight is even better).
This helps the layers soften and the flavors blend.
Notes
-
Use a deep spoon to scoop all layers in each serving.
-
Add fresh berries or candy eggs right before serving.
-
For parties, build mini trifles in clear cups or jars.
A Note on Nutrition
Let’s keep it real, friends: this is a celebratory, special-occasion dessert meant to be shared and savored. The nutritional information provided is for the recipe as written, making about 12 generous servings. It’s rich, sweet, and indulgent – and that’s okay! For those looking to lighten it up, please see the variations above (like using angel food cake or incorporating fresh fruit). Remember, food is about joy and connection, especially around the holidays. Enjoy a slice, share it with people you love, and savor every colorful bite.
- Servings: 12
- Prep Time: 30 minutes
- Chill Time: 3-4 hours (or overnight)
- Calories per Serving: ~1716 kcal*
- Carbohydrates: 313g | Protein: 22g | Fat: 44g | Sugar: 166g
*Please note: This is a large, celebratory dessert. Nutritional info is an estimate from a third-party calculator based on specific brands used. Values can vary widely.
Final Thoughts from My Kitchen to Yours
And there you have it – my heart-on-a-plate (or rather, in a bowl) Easter Trifle. It’s more than just a dessert recipe; it’s an invitation to be playful, to create something beautiful with your hands, and to share a whole lot of sweetness. I hope this recipe becomes a part of your family’s traditions, sparking its own funny stories and happy memories.
If you make it (and I truly hope you do!), tag me @Feastical or use #FeasticalEaster so I can see your beautiful creations. Nothing makes me happier than seeing your kitchen wins. From my festive table to yours, have a wonderful, delicious, and joy-filled Easter. Now, go grab that trifle bowl and get layering!
Happy Cooking,
Beau Collier
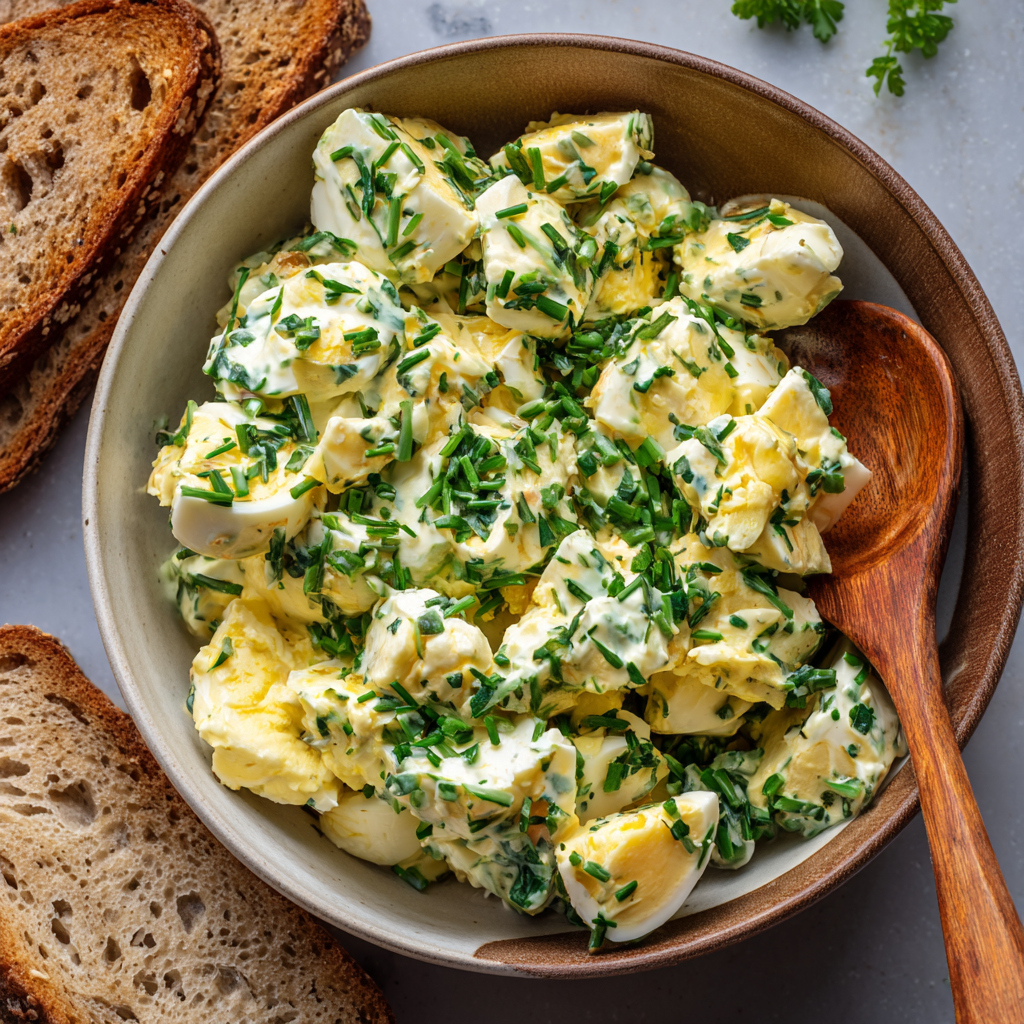
Spring Egg Salad with Herbs & Dijon : Light, Creamy, and Garden-Fresh
The Egg Salad That Changed My Spring Game (And It’s About to Change Yours)
Hey friends, Beau here from Feastical! Can we just take a moment to appreciate that glorious moment when winter finally, finally loosens its grip? The sun sticks around a little longer, the air smells like damp earth and possibility, and my kitchen cravings do a complete 180. Out go the heavy stews, and in marches the brigade of all things light, bright, and bursting with fresh flavor.
But let’s be real—sometimes we need a bridge. A recipe that understands our deep-seated love for creamy, comforting textures but is ready to put on some pastel colors and dance in the sunshine. Enter my Spring Egg Salad with Herbs & Dijon. This isn’t the heavy, mayonnaisy picnic salad of yesteryear. Oh no. This is its cooler, fresher, more sophisticated cousin who just came back from a garden tour.
We’re taking the humble hard-boiled egg and giving it a full spring makeover. With a lighter dressing base, the sophisticated tang of Dijon, and a confetti of garden-fresh herbs, this salad is a total vibe shift. It’s the perfect filling for your sandwich, a gorgeous topping for crispy toast, or a deliciously dippable centerpiece for a veggie platter. It comes together in minutes, tastes like a sunny day, and is guaranteed to make you look at egg salad in a whole new light. So, grab your favorite bowl and let’s make something that tastes like a warm hug from spring itself.
More Than Just a Sandwich: A Story of Grandma Jo & The Picnic Basket
This recipe always takes me straight back to my Grandma Jo’s backyard. She was a firm believer that the first truly warm weekend of the year demanded an inaugural picnic. No fancy plans, just a scratchy wool blanket thrown on the grass, a jug of sun tea, and a wicker basket that smelled like magic.
Inside that basket? You guessed it. Her “Fancy Egg Salad,” as she called it. To my kid palate, the “fancy” part was the tiny, jewel-like pieces of celery and the occasional sprinkle of paprika on top. But what I loved most was the ritual. She’d let me mash the eggs with an old-fashioned potato masher, my small hands wrapped around hers. She’d whisper her secret: “Beau, the secret isn’t in the mayo. It’s in the mustard. A good dollop of the grainy kind gives it spirit.”
My Spring Egg Salad is my grown-up homage to hers. I’ve swapped the celery for a chorus of fresh herbs I can now grow on my own patio, and yes, that “spirit” from the Dijon is front and center. Every time I make it, I’m seven years old again, sitting on that blanket, listening to bees buzz, and understanding for the first time that food isn’t just fuel—it’s a memory maker.
Gathering Your Sunshine Squad: The Ingredients
Simple food is all about quality ingredients. Here’s your lineup for the freshest, brightest egg salad you’ll ever make. Think of this as assembling your flavor A-team.
- 6 large eggs, hard-boiled and peeled: The stars of the show! I prefer large eggs for a hearty salad. Pro-Tip: Older eggs (about 7-10 days old) peel more easily than super-fresh ones. If you’re buying them fresh, plan your salad for a few days later.
- 3 tablespoons light mayonnaise: This gives us that classic creamy base but keeps things feeling spring-light. Chef’s Swap: For a tangier, protein-packed twist, swap half the mayo for plain Greek yogurt. Or, use all yogurt for a super-light version!
- 1 teaspoon Dijon mustard: This is the “spirit” my Grandma talked about. It adds a complex, sharp tang that cuts through the richness. Don’t skip it! Insight: A good, quality Dijon makes a difference here—it’s a supporting actor that needs to be strong.
- 1 tablespoon fresh chives, finely chopped: Their delicate onion flavor is spring in herb form. They’re mild, pretty, and essential. Substitution: If you can’t find chives, the green parts of a green onion (scallion) minced very fine will work in a pinch.
- 1 tablespoon fresh parsley, chopped: Don’t use the dried stuff here, friends! Fresh flat-leaf (Italian) parsley adds a clean, grassy note that brightens everything up. It’s the fresh breath of the salad.
- 1 teaspoon lemon juice (optional, for brightness): I say “optional,” but I almost never skip it. A tiny squeeze brightens all the other flavors and adds a layer of freshness you can’t get otherwise. Freshly squeezed, please!
- Salt and black pepper, to taste: The dynamic duo. Season in layers—a little in the dressing, then again at the end after you’ve mixed everything. Freshly cracked black pepper is a non-negotiable for me.
- Bread, crackers, or lettuce cups for serving: Your canvas! A crusty artisan bread, buttery crackers, or crisp butter lettuce leaves—it’s all good.
Let’s Build Some Flavor: Step-by-Step Instructions
This is where the magic happens, and it’s so easy. I’ll walk you through each step with my favorite little kitchen hacks to guarantee perfection.
Step 1: The Perfect Hard-Boiled Egg Mission. Place your eggs in a single layer in a saucepan and cover them with cold water by about an inch. Bring the pot to a rolling boil over high heat. Once boiling, immediately cover the pot, remove it from the heat, and set a timer for 10-12 minutes (I find 11 minutes is my sweet spot for a fully set yolk with no gray ring). Chef’s Hack: While they cook, prepare an ice bath—a big bowl filled with ice and water. The moment the timer goes off, transfer the eggs to the ice bath with a slotted spoon. Let them chill for at least 5 minutes. This stops the cooking and makes peeling a absolute breeze. Crack, roll, and peel under cool running water.
Step 2: Chop & Conquer. Chop your peeled eggs to your desired consistency. I like a medium chop—not too chunky, not too pasty. You want little pops of yolk and white. Place them in a medium-sized mixing bowl. Tip: Using a pastry blender or a simple fork is a fantastic, quick way to get a great texture.
Step 3: Whisk the “Dressing of Dreams.” In a separate, smaller bowl, combine your light mayo, Dijon mustard, and that squeeze of lemon juice. Whisk it until it’s smooth and homogenous. Now, fold in your freshly chopped chives and parsley. Why mix separately? This ensures every single herb and bit of mustard is evenly distributed throughout the dressing before it hits the eggs, so every bite is perfectly seasoned.
Step 4: The Gentle Fold. Pour your vibrant green dressing over the chopped eggs. Now, with a flexible spatula, gently fold everything together. I say “fold” because you want to combine it without mashing the eggs into oblivion. We’re going for cohesion, not egg paste. Watch the magic: The yellow eggs get coated in that pale, herby dressing and instantly look more delicious.
Step 5: Season & Rest. Now, taste it! This is crucial. Add salt and freshly cracked black pepper a little at a time, folding and tasting as you go. Once it’s perfect for you, cover the bowl and pop it in the fridge for at least 15 minutes. This is the secret step! Chilling lets the flavors get to know each other, mellow, and marry into something truly special. The salad firms up slightly, making it perfect for scooping or spreading.
How to Serve This Springtime Star
Okay, the hard part is over (and it wasn’t hard at all!). Now for the fun part: eating. This salad is incredibly versatile.
The Classic Sandwich: Pile it high on thick, toasted sourdough or soft whole wheat bread. Add a layer of crisp butter lettuce or peppery arugula for an extra fresh crunch. This is lunchbox gold.
The Elegant Toast: Spoon it onto a slice of rustic, toasted artisan bread. Drizzle with a tiny bit of good olive oil and an extra sprinkle of chives. Perfect for a light lunch or fancy-ish brunch.
The Gluten-Free/Garden Fresh Option: Use large, cup-shaped leaves of butter lettuce, romaine hearts, or endive as little edible spoons. It’s refreshing, crunchy, and feels incredibly healthy.
The Party Platter Hero: Surround a big bowl of this egg salad with an array of crackers, sliced cucumbers, bell pepper strips, and pretzel crisps. It’s a guaranteed crowd-pleaser that looks gorgeous.
Make It Your Own: Delicious Twists & Swaps
Got an idea? Run with it! Here are a few of my favorite ways to riff on this basic, brilliant formula.
- The “Everything but the Bagel” Twist: Fold in 1-2 teaspoons of Everything Bagel seasoning when you mix. Serve on a toasted bagel with a thin slice of red onion. Unreal.
- The Keto/Ultra-Creamy Version: Replace the light mayo with full-fat avocado oil mayonnaise and add 1/4 of a perfectly ripe avocado, mashed. It’s insanely rich, creamy, and packed with good fats.
- The French Bistro Style: Add 1 teaspoon of finely chopped fresh tarragon (it has a lovely anise-like flavor) and 1 tablespoon of finely minced cornichons or capers. Serve on a baguette. Très chic!
- The Protein Powerhouse: Add 1/2 cup of finely diced, cooked chicken breast or a drained can of flaked albacore tuna. It turns the salad into a more substantial, meal-prep ready main course.
- The Dairy-Free/Vegan-ish Hack: For a plant-based version, use your favorite vegan mayo (I like the ones made with avocado oil). The star here becomes “Just Egg” scrambled and cooled, or crumbled firm tofu pressed and dried well. Season the tofu generously with a pinch of turmeric and kala namak (black salt) for an “eggy” flavor.
Beau’s Kitchen Notebook: A Few Parting Thoughts
This recipe has been on quite a journey with me. It started as a faithful copy of Grandma Jo’s, then went through a phase where I added every herb under the sun (dill is fantastic, by the way). I’ve made it for fancy baby showers served in endive cups and for last-minute beach trips scooped straight from the container with a bag of chips. It never lets me down.
The biggest lesson? Don’t rush the chill time. I know it’s tempting to dig in right away, but giving those flavors 15-30 minutes in the fridge is the difference between “good” and “where-has-this-been-all-my-life” good. Also, trust your taste buds at the end. You know how much pepper you love. Make it yours!
Your Questions, Answered (Let’s Troubleshoot!)
Q: My eggs are impossible to peel! Help!
A: I feel your pain. The ice bath trick is #1. Also, try using slightly older eggs (see ingredient note). If all else fails, peel them under a small trickle of cool running water—the water helps get under the membrane.
Q: Can I make this ahead of time? How long does it last?
A: Absolutely! Making it a day ahead is actually ideal for flavor. Store it in an airtight container in the fridge. It’s best eaten within 3 days.
Q: My egg salad turned out a bit wet/runny. What happened?
A: This can happen if the eggs are still warm when mixed, or if they were slightly undercooked. Ensure eggs are fully chilled before chopping. If it’s already mixed, you can try draining any excess liquid or folding in a little extra chopped egg white to soak it up next time.
Q: I don’t like Dijon. Can I use yellow mustard?
A> You can, but the flavor profile will be simpler and sharper. Start with 1/2 teaspoon of yellow mustard and taste. A whole grain mustard would be a great middle-ground alternative with a milder, nuttier flavor.

Spring Egg Salad with Herbs & Dijon : Light, Creamy, and Garden-Fresh
Description
When the weather starts warming up, it’s time for lighter, brighter meals — and this Spring Egg Salad with Herbs & Dijon is exactly that. It keeps the creamy comfort you love but adds fresh herbs, tangy Dijon, and a squeeze of lemon for a clean, vibrant flavor. Perfect for sandwiches, toast, wraps, or lettuce cups, and great for meal prep too.
Ingredients
-
6 large eggs
-
3 tablespoons light mayonnaise (or half mayo + half Greek yogurt)
-
1 teaspoon Dijon mustard
-
1 tablespoon fresh chives, finely chopped
-
1 tablespoon fresh parsley, chopped
-
1 teaspoon fresh lemon juice (optional but recommended)
-
Salt, to taste
-
Black pepper, to taste
For serving (optional):
-
Bread or toast
-
Crackers
-
Lettuce cups
-
Sliced cucumbers
Instructions
1️⃣ Cook the Eggs
-
Place eggs in a saucepan and cover with cold water by about 1 inch.
-
Bring to a boil.
-
Once boiling, cover, remove from heat, and let sit 11 minutes.
-
Transfer eggs to an ice bath for 5 minutes.
-
Peel and cool completely.
2️⃣ Chop the Eggs
-
Chop eggs to medium-small pieces (not too chunky, not mashed).
-
Add to a mixing bowl.
3️⃣ Make the Dressing
In a small bowl, whisk:
-
Mayonnaise
-
Dijon mustard
-
Lemon juice
-
Chives
-
Parsley
Mix until smooth.
4️⃣ Combine
-
Add dressing to chopped eggs.
-
Gently fold until evenly coated.
-
Season with salt and black pepper to taste.
5️⃣ Chill (Flavor Boost Step)
-
Refrigerate at least 15 minutes before serving to let flavors blend.
Notes
-
✔️ Slightly older eggs peel easier than very fresh ones.
-
✔️ Always cool eggs fully before mixing — warm eggs can make the salad watery.
-
✔️ Mix dressing separately first for even flavor.
-
✔️ Fresh herbs make a big difference — dried herbs won’t give the same brightness.
-
✔️ Taste and adjust salt after chilling.
A Quick Look at the Nourishment (Approximate)
Just the facts, friend! This info is for one serving (roughly 1/3 of the recipe) without bread or crackers. Remember, these are estimates based on the specific ingredients listed.
- Calories: ~180
- Protein: 10g (Eggs are a fantastic, complete protein source!)
- Carbohydrates: 2g
- Fat: 14g (Primarily from the egg yolks and mayo—using light mayo keeps this in check)
- Fiber: 0g
- Key Nutrients: This salad is a great source of Choline (from eggs, super important for brain health), Vitamin D, and Selenium. The fresh herbs also provide a sprinkle of antioxidants.
Your Next Favorite Spring Ritual Awaits
And there you have it! My go-to, soul-satisfying, spring-ready egg salad. It’s proof that a few simple, quality ingredients and a couple of chef-approved tricks can transform a classic into something that feels brand new and perfectly in-season.
I hope this recipe finds its way onto your picnic blanket, into your lunchbox, or onto your brunch table. It’s more than just a recipe to me—it’s a flavor of sunshine and a spoonful of memory. I’d love to hear how you make it your own. Tag me over on Feastical or drop a comment with your favorite twist!
Until next time, keep your spatula close and your appetite for adventure closer. Happy cooking!
Beau
Love this recipe? Save it for later!