
PINEAPPLE MANGO SALSA
Bring the Beach to Your Bite: Pineapple Mango Salsa!
Hey, friends! Beau here from Feastical, and I’ve got sunshine in a bowl for you today. Imagine this: You’re kicking back on a swaying hammock, salty breeze in your hair, toes in the sand… and in your hand? A big, colorful scoop of my Pineapple Mango Salsa piled high on a crispy tortilla chip. That’s the magic we’re whipping up today! This isn’t just salsa; it’s pure, unadulterated vacation vibes. We’re talking juicy pineapple chunks dancing with sweet mango, crunchy bell peppers, zippy red onion, a cheeky jalapeño kick, all wrapped up in fresh cilantro and tangy lime. It’s sweet, tangy, spicy, and ridiculously refreshing. Whether you’re dunking chips, topping tacos, crowning grilled fish, or (no judgment!) eating it straight from the spoon, this salsa transforms any meal into a fiesta. Best part? It takes mere minutes to make – seriously, you spend more time picking out a Netflix show! No fancy skills needed, just a sharp knife and a happy heart. So, ditch the winter blues (or just Tuesday’s doldrums), grab your favorite chopping board, and let’s bring those island feels right into your kitchen. Trust me, one bite, and you’ll hear the ocean.
A Salsa That Saved the (Rainy) Day
This salsa? Oh, it’s got stories! My absolute favorite involves a beach trip gone sideways. Picture it: My buddies and I planned this epic coastal BBQ. We had visions of grilling under palm trees… and then the skies opened up. Torrential rain! Our grill master was soaked, the charcoal was sulking, and morale? Damp. But I’d prepped a giant tub of this Pineapple Mango Salsa earlier. As we huddled under a leaky gazebo, passing chips and that bright, cheerful salsa, something shifted. The tangy sweetness, the vibrant colors against the grey sky – it was like sunshine in every bite. Laughter replaced grumbles. We ended up piling it onto hastily-made wraps with whatever cold cuts we had. It wasn’t the gourmet feast we planned, but it became this hilarious, unforgettable memory fueled by tropical flavors. That’s the power of good food, right? It doesn’t just feed the belly; it lifts spirits and turns a soggy disaster into a legendary hangout. Every time I make this salsa now, I think of that rainy beach day and smile. It’s a reminder that sometimes, the simplest things bring the most joy.
Your Tropical Treasure Trove: The Ingredients
Gathering your ingredients is like collecting little bursts of sunshine! Here’s what you’ll need – and my pro tips to make it shine:
- 3 cups fresh pineapple, diced: This is the golden star! Fresh pineapple gives unbeatable juicy sweetness and texture. Look for one that smells fragrant at the base. Sub: 1 (20oz) can pineapple chunks in juice (NOT syrup!), well-drained. Avoid frozen if possible – it gets mushy.
- 1 ripe mango, diced: Sweetness with a velvety hug. Choose a mango that yields slightly to gentle pressure near the stem. Feeling stumped? Ask your grocer for help picking a ripe one! Sub: 1 large ripe peach or 2 ripe nectarines.
- 1 red bell pepper, diced: The crunch factor! Adds vibrant color and a fresh, grassy note. Yellow or orange bell peppers work great too. Avoid green – they can be bitter here.
- ½ cup red onion, finely diced: Zingy bite! Finely dicing ensures flavor without overwhelming chunks. Soak diced onion in cold water for 5-10 mins if you want milder flavor, then drain well. Sub: Sweet onion.
- 1 jalapeño, finely chopped (seeded for less heat): The friendly firecracker! ALWAYS wash hands after handling! For mild heat, remove seeds and white membranes. Want more kick? Leave some seeds in! Sub: 1/2 serrano pepper (hotter!) or 1/4 tsp red pepper flakes.
- ⅓ cup chopped cilantro: The fresh herby hug! If you’re part of the “cilantro tastes like soap” club (no shame!), swap in fresh parsley or basil for a different vibe.
- 2 tbsp fresh lime juice: Essential zing! Bottled just doesn’t cut it. Roll your limes on the counter firmly before juicing to get every precious drop! About 1-2 limes needed.
- ¼ tsp salt: The flavor booster! Kosher salt or sea salt is best. It magically makes all the other flavors pop. Taste and adjust at the end!
Let’s Chop, Toss, and Taste! Your Easy Steps
Ready to create some magic? Grab your sharpest knife (safety first!) and your biggest, happiest bowl. Let’s do this!
- Prep Party Time! Wash all your produce. Pat the pineapple, mango, and bell pepper dry – wet ingredients dilute flavor. Core and dice the pineapple into 1/4-1/2 inch chunks. Aim for bite-sized joy! Pro Hack: Slice off the pineapple skin, stand it upright, and slice down the core in four sections – then dice the flesh. Dice the mango similarly, avoiding the flat pit. Dice the red bell pepper and red onion to about the same size as the pineapple bits. Finely chop the jalapeño – remember the seed rule for heat! Roughly chop the cilantro leaves and tender stems.
- The Big Toss! Dump your glorious diced pineapple, mango, bell pepper, red onion, and jalapeño right into your big bowl. Sprinkle in the chopped cilantro like confetti! Pro Tip: Add about 3/4 of the cilantro now, saving a sprinkle for garnish later for extra freshness.
- Zest & Juice (The Flavor Liftoff!) Juice those limes! Aim for 2 tablespoons. Pour it over the fruity veggie mix. Sprinkle the salt evenly across the top. Chef’s Secret: Before juicing, zest one lime! A little zest (about 1 tsp) adds an incredible fragrant punch. Stir it in with the juice.
- Gently Does It! Grab a large spoon or spatula. Gently, lovingly fold everything together. Think “coaxing,” not “mashing.” We want to keep those beautiful chunks intact! Pro Insight: Over-mixing makes it mushy and watery. A few gentle folds are all you need.
- The Patience Test (Optional but Awesome!) Cover the bowl tightly with plastic wrap or a lid. Pop it in the fridge for at least 15 minutes, ideally 30. Why? This “marry time” lets the flavors mingle, mellow, and become best friends. The salt draws out juices, the lime mellows the onion, the heat spreads gently. It’s worth the wait! But hey, if you absolutely can’t wait? Dig in immediately – it’s still fantastic!
- Taste & Triumph! Before serving, give it one last gentle stir. Taste it! Does it need a pinch more salt? A tiny squeeze more lime? Adjust to YOUR palate. You’re the boss! Sprinkle that reserved cilantro on top for a fresh, green flourish.
Sunshine on a Plate: How to Serve It Up!
This salsa is the ultimate social butterfly! Serve it chilled (if you waited!) or straight from the bowl. For chips, pair it with sturdy restaurant-style tortilla chips – they can handle the juicy goodness. Spoon it generously over grilled fish (hello, mahi-mahi!), shrimp tacos, or coconut-lime chicken. It transforms a simple rice bowl or even grilled pork chops into something special. For a show-stopping appetizer, serve it in a hollowed-out pineapple half! Garnish with extra cilantro leaves and maybe a thin lime wheel on the side. The bright colors are part of the fun – let them shine!
Make It Your Own: Tropical Twists!
This recipe is your canvas! Get creative:
- Creamy Dream: Fold in 1 diced ripe avocado just before serving. Adds luscious creaminess! (Note: Best eaten day-of).
- Fiesta Fusion: Add 1/2 cup rinsed black beans and 1/2 cup fresh or thawed corn kernels for a heartier, protein-packed version perfect for salads or burrito bowls.
- Peachy Keen: Swap the mango for 2 ripe, diced peaches or nectarines in summer for a stone fruit delight.
- Spice Island: Add a finely minced habanero (seeds removed!) or a pinch of cayenne pepper alongside the jalapeño for serious heat lovers.
- No-Onion Nice: Skip the red onion and add 1/4 cup finely diced cucumber for extra crunch and a milder profile.
Beau’s Backstage Bites: Chef’s Notes
This salsa has been my kitchen sidekick for years! It started as a simple party dip but quickly became my go-to for brightening up *everything*. I learned the hard way about jalapeño seeds once – let’s just say one batch was dubbed “Volcano Salsa”! Now I’m meticulous about deseeding unless my crew requests fire. The lime zest trick? Stolen from a beach shack in Mexico – game changer! It’s evolved to be incredibly forgiving. Don’t have exact measurements? Eyeball it! Fruit not perfectly ripe? A tiny drizzle of honey can help. The beauty is in its freshness and flexibility. My biggest tip? Use the best, ripest fruit you can find. A sad pineapple makes a sad salsa. And honestly? The biggest compliment is when people scrape the bowl clean. It happens every time. Make it, share it, and watch the smiles appear!
Your Salsa Questions, Answered!
Let’s tackle those common kitchen curiosities:
- Q: How long does this salsa actually last in the fridge?
A: Honestly, it’s best enjoyed within 24 hours for peak freshness and texture. The fruits release juice, and the cilantro wilts. It’s still safe to eat for 3-4 days if stored airtight, but it gets softer. If adding avocado, eat it the same day! - Q: Can I use frozen pineapple or mango? Fresh is expensive right now!
A: You *can*, but thaw it COMPLETELY first and drain it VERY well in a colander, even pressing gently to remove excess liquid. Frozen fruit is softer, so expect a slightly mushier texture. Fresh really is ideal for that perfect bite. - Q: Help! My salsa is too watery! What did I do wrong?
A: No panic! A few culprits: 1) Fruit was very overripe/juicy. 2) Didn’t drain canned fruit well enough. 3) Over-mixed and broke down the fruit. Fix: Drain the salsa in a colander for a few minutes before serving. Next time, ensure fruit is ripe but firm, drain thoroughly, and mix gently. - Q: I made it ahead, but the cilantro looks sad and the onion is strong. Fixes?
A: This is why I add most cilantro just before serving! Stir in a fresh handful of chopped cilantro to revive it. If the onion bite is too strong after sitting, drain off a little excess liquid and stir in an extra squeeze of lime juice to balance it.
Nutritional Sunshine (Approx per 1/2 cup serving)
- Calories: ~90
- Carbs: 22g (Natural sugars from fruit!)
- Fat: 0g
- Protein: 1g
- Vitamin C: A boatload! (Thanks pineapple, mango, pepper!)
Prep Time: 10 mins | Chill Time (optional): 15–30 mins | Serves: 4–6
Print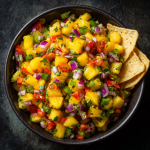
PINEAPPLE MANGO SALSA
Description
Hey, friend! Picture this: the sun is shining, waves are crashing, and you’re holding a crispy chip topped with a heap of bright, juicy pineapple mango salsa. That’s not just a snack—it’s a tropical escape in every bite.
Whether you’re hosting a backyard BBQ, meal-prepping for the week, or just craving something fun and fresh, this quick recipe is your ticket to island flavor with zero travel time. Ready in minutes, full of color, and even healthy? Let’s get chopping!
Ingredients
-
3 cups fresh pineapple, diced (or 1 can, drained)
-
1 ripe mango, diced (or 1 large peach / 2 nectarines)
-
1 red bell pepper, diced (orange or yellow works too!)
-
½ cup red onion, finely diced (optional: soak 5 min in cold water for milder flavor)
-
1 jalapeño, finely chopped (seeded for mild, leave seeds for spice!)
-
⅓ cup fresh cilantro, chopped (or parsley/basil if you’re a cilantro-skipper)
-
2 tbsp fresh lime juice (from 1–2 limes)
-
¼ tsp salt, or to taste
-
Optional zest from 1 lime for extra zing!
Instructions
1. Prep the Goods (5–7 minutes)
-
Wash and dry all your ingredients.
-
Dice pineapple, mango, and bell pepper into small, equal chunks.
-
Finely dice red onion and jalapeño.
-
Chop cilantro.
2. Mix the Magic (2 minutes)
-
In a large bowl, combine pineapple, mango, bell pepper, onion, jalapeño, and most of the cilantro.
3. Add the Zing (1 minute)
-
Pour in lime juice, sprinkle salt, and (if using) stir in lime zest.
4. Gently Toss (1 minute)
-
Use a large spoon to gently fold everything together. Keep it chunky, not mushy!
5. Chill & Mingle (Optional but worth it!)
-
Cover and refrigerate 15–30 minutes to let flavors develop.
6. Serve & Smile!
-
Top with remaining cilantro and serve with chips, tacos, grilled fish, or eat it straight with a spoon.
Nutrition
- Calories: 90Cal per ½ cup serving
- Carbohydrates: 22g
- Fiber: 0g
- Protein: 1g
Final Thoughts: More Than Just a Dip
Pineapple mango salsa isn’t just a recipe—it’s a mood booster, a party starter, and a kitchen lifesaver. It turns mundane meals into mini-vacations and proves that the best food is both simple and vibrant. Whether you’re scooping it up with chips, piling it on tacos, or eating it straight from the bowl (we’ve all been there), it’s a reminder that cooking should be fun, flexible, and full of flavor.
So grab that knife, embrace the mess, and let every bite transport you to sunnier days. And hey, if it doesn’t look perfect? No stress—taste beats aesthetics every time. Now go forth and salsa like nobody’s watching! 🌴🍍

Garlic Butter Meatballs
Introduction: Where Garlic Butter Dreams Come True
Hey friends, Beau here from Feastical! Can we talk about magic for a sec? Not the wand-waving kind (though I’ve burned a few kitchen towels attempting “flambé magic”). I mean that glorious moment when humble ingredients transform into something that makes everyone at the table go silent except for happy chewing sounds. That’s exactly what happens with these Garlic Butter Meatballs. Imagine: juicy, fork-tender meatballs swimming in a pool of golden, garlic-infused butter, with fresh parsley dancing on top like confetti. It’s low-carb comfort food that hugs your soul without weighing you down. Perfect over zoodles? Absolutely. Heavenly on cauliflower mash? You bet. But honestly? Grab a toothpick and eat ’em straight from the skillet—I won’t judge. This isn’t just dinner; it’s a 20-minute flavor explosion that turns chaotic weeknights into something you’ll actually look forward to. Let’s make your kitchen smell like an Italian grandma’s happy place!
My Garlic Butter “Aha!” Moment (Spoiler: It Involved a Snowstorm)
Picture this: It’s a blustery Chicago night, snow piled higher than my spice rack, and my pantry’s looking… creative. Ground beef? Check. A sad-looking head of garlic? Check. Butter? Always. My original plan (fancy stuffed meatballs) went out the frosty window. Desperation birthed genius: I whipped up these simple garlic butter meatballs, figuring they’d be “fine.” Friends, they were more than fine. My wife took one bite, closed her eyes, and whispered, “This tastes like a hug.” Our snowed-in neighbors, lured by the garlicky aroma drifting down the hall, showed up with wine. We ended up with an impromptu meatball feast on the floor, surrounded by board games and empty plates. That’s the magic of this dish—it’s uncomplicated joy. No fancy techniques, just big flavor that turns strangers into friends and blizzards into cozy memories. Now, every time I make them, I think: good food doesn’t need to be complicated to be extraordinary.
Let’s Gather Your Flavor Arsenal
For the Meatballs:
- 1 lb ground beef (80/20 blend): Fat = flavor friends! Leaner beef dries out faster. Swap: Ground turkey or chicken for lighter vibes (add 1 tbsp olive oil to keep ’em juicy).
- ¼ cup almond flour: Our low-carb binder! It adds moisture without breadcrumbs’ sogginess. Swap: Crushed pork rinds for keto, or gluten-free panko if carbs aren’t a concern.
- 1 egg: The glue! Binds everything so meatballs don’t crumble mid-sizzle.
- 1 tsp garlic powder: Double garlic? Always. Powder gives depth to fresh garlic in the sauce.
- 1 tsp onion powder: Sweetness and savoriness without onion chunks. Chef hack: Smoked onion powder for a subtle campfire kiss.
- Salt and pepper, to taste: Start with ¾ tsp salt! Underseasoned meatballs are a sad affair.
For the Garlic Butter Sauce:
- ¼ cup butter (real deal, unsalted): Salted butter works too—just taste before adding extra salt! Insider tip: European-style butter (higher fat) makes the sauce silkier.
- 4 cloves garlic, minced: FRESH IS NON-NEGOTIABLE. Pre-minced garlic in jars? We forgive you… but fresh sings louder.
- 1 tbsp fresh parsley, chopped: That pop of color & freshness! Emergency swap: 1 tsp dried parsley (add with garlic).
- Salt, to taste: Likely just a pinch! Butter and beef bring their own saltiness.
Why these ingredients work: Almond flour keeps carbs low while locking in juices, and fresh garlic in butter creates a quick, luxurious pan sauce using the meatballs’ flavorful drippings. It’s efficiency meets indulgence!
Cooking Up Bliss: Let’s Get Sizzling!
- Make the Meatball Mixture: “In a large bowl, combine the ground beef, almond flour, egg, garlic powder, onion powder, salt, and pepper. Use your hands! Gently mix just until combined—overworking makes tough meatballs. Think “lightly folded,” not “wrestled into submission.” Pro Tip: Wet your hands with cold water before rolling to prevent sticking!
- Roll Like a Pro: “Scoop about 1½ tablespoons of mixture (an ice cream scoop works great!) and gently roll into balls. Aim for golf-ball size (about 1.5 inches). Uniform size = even cooking. No-stress hack: Not perfectly round? They’re ‘rustic’ and full of character!”
- Sear to Perfection: “Heat a large skillet (non-stick or stainless steel) over medium heat. No oil needed—the beef fat will render. Add meatballs, giving them space! Crowd the pan, and they’ll steam. Brown for 2-3 minutes per side, turning gently with tongs, until golden all over and cooked through (about 8-10 mins total). Transfer to a plate. Golden Rule: Don’t move them for the first 2 mins! Let that crust form.”
- Create the Garlic Butter Nirvana: “In the same skillet (keep those flavorful browned bits!), melt the butter over medium-low heat. Add the minced garlic. Cook, stirring constantly, for just 1-2 minutes until fragrant and lightly golden—DO NOT let it burn! Burnt garlic is bitter heartbreak. Stir in parsley and a tiny pinch of salt.”
- The Grand Reunion: “Return the meatballs to the glorious garlic butter bath. Gently spoon the sauce over them for 1-2 minutes, letting them soak up all that buttery, garlicky goodness. Final Chef Kiss: Baste them like they’re royalty! Tilt the pan and spoon sauce over the tops repeatedly.”
Plating Your Masterpiece: Dive In!
This is where the fun begins! Slide those glistening garlic butter meatballs onto a warm platter. Pour every last drop of that irresistible sauce over top. Sprinkle with extra fresh parsley for a vibrant finish. For a low-carb feast, pile them over a mountain of zucchini noodles (zoodles) sautéed in a touch of that garlic butter, or creamy cauliflower mash. Feeling fancy? Shave Parmesan on top. Need comfort? Serve with crusty (low-carb optional!) bread for sauce-mopping emergencies. They’re also phenomenal as a party appetizer—stick toothpicks in ’em and watch them vanish! Just promise me you’ll serve them piping hot. That butter sauce is life.
Shake It Up: Delicious Twists!
- Italian Sunshine: Add 1 tsp dried oregano and ½ tsp red pepper flakes to the meatball mix. Stir 1 tbsp lemon zest and 1 tbsp capers into the finished sauce.
- Creamy Dreamy: After basting the meatballs, stir ¼ cup heavy cream or full-fat coconut milk into the sauce. Simmer 1 min for luxurious richness.
- Parmesan Powerhouse: Mix ¼ cup finely grated Parmesan cheese into the meatball mixture. Garnish with more Parm and fresh basil.
- Asian Fusion: Swap garlic powder in meatballs for 1 tbsp ginger. For sauce: Use 2 tbsp each soy sauce (or coconut aminos) and rice vinegar + 1 tsp sesame oil with the butter/garlic. Garnish with green onions and sesame seeds.
- Pork Lover’s Delight: Use ½ lb ground beef + ½ lb ground pork. Add ½ tsp fennel seeds to the meatball mix for sausage-like vibes.
Beau’s Backstage Kitchen Notes
This recipe has seen more iterations than my attempts at sourdough! Early versions used breadcrumbs, but switching to almond flour was a game-changer for moisture and keeping it low-carb. The real evolution? Learning patience with the garlic. I used to crank the heat, leading to tragic burnt-butter moments. Low and slow is the garlic butter gospel! A funny fail: Once, I used “hot” Italian sausage by mistake in the mix. Let’s just say we needed copious milk with that dinner—spicy surprise! These meatballs freeze beautifully too. Cook them through, let cool, freeze on a tray, then bag. Reheat gently in a skillet with a splash of broth or water before bathing in fresh garlic butter sauce. They’re my weeknight superhero.
Your Meatball Questions, Answered!
Q: My meatballs fell apart! Help!
A: Three likely culprits: 1) Overmixing the meat (be gentle!), 2) Skipping the egg (it’s essential for binding), or 3) Flipping too soon. Let them get a good crust before turning. If using lean meat, adding 1 tbsp olive oil to the mix helps.
Q: Can I bake these instead of pan-frying?
A: Absolutely! Bake meatballs on a parchment-lined sheet at 400°F (200°C) for 15-18 mins. BUT—you’ll miss the glorious fond (browned bits) for the sauce. Make the sauce separately in a skillet while they bake, using 1 tsp beef bouillon paste for depth if needed.
Q: Is the sauce supposed to look separated?
A: Butter can sometimes “break” (look oily). Keep the heat medium-low. If it happens, remove from heat and vigorously whisk in 1 tsp cold water or lemon juice. It usually comes right back together!
Q: Can I make these ahead?
A: Yes! Form the raw meatballs and refrigerate (covered) for up to 24 hours. Cook as directed. Cooked meatballs (without sauce) freeze beautifully for 3 months. Sauce is best made fresh—it only takes minutes!

Garlic Butter Meatballs
- Total Time: 25minutes
Description
These juicy, golden meatballs bathed in garlic-infused butter are weeknight comfort on demand. They’re keto-friendly, melt-in-your-mouth tender, and bursting with garlicky bliss. Whether you serve them over zoodles, cauliflower mash, or just straight from the skillet (toothpick optional, enthusiasm required), they’ll transform your kitchen into a cozy Italian trattoria—without the carbs or fuss.
Ingredients
For the Meatballs
-
1 lb ground beef (80/20 for juiciness)
-
¼ cup almond flour (or crushed pork rinds / GF panko)
-
1 egg
-
1 tsp garlic powder
-
1 tsp onion powder (or smoked onion powder for depth)
-
Salt & pepper to taste (start with ¾ tsp salt + ¼ tsp pepper)
For the Garlic Butter Sauce
-
¼ cup unsalted butter (European-style if you’re feeling fancy)
-
4 cloves garlic, freshly minced
-
1 tbsp fresh parsley, chopped (or 1 tsp dried in a pinch)
-
Salt, to taste (usually just a pinch)
Instructions
In a bowl, combine ground beef, almond flour, egg, garlic powder, onion powder, salt, and pepper.
Pro Tip: Mix with your hands until just combined—overmixing = tough meatballs.
Roll into 1½-inch balls (about 1.5 tbsp each). Uniform size = even cooking.
Hack: Wet your hands to prevent sticking!
Heat a large skillet over medium. No oil needed—beef fat will render.
Add meatballs in a single layer. Don’t crowd!
Brown for 2–3 mins per side, gently turning until fully cooked (~8–10 mins). Transfer to plate.
Golden Rule: Don’t flip too soon! Let that crust form.
In the same skillet, melt butter over medium-low heat.
Add garlic and stir constantly for 1–2 minutes—just until fragrant and lightly golden.
Avoid the heartbreak of burnt garlic! Stir in parsley and a tiny pinch of salt.
Return meatballs to skillet. Spoon sauce over them for 1–2 mins.
Tilt the pan and baste repeatedly for maximum buttery bliss.
Serve hot and watch eyes light up.
Notes
-
Don’t skip the chill: If prepping ahead, chill raw meatballs up to 24 hrs for better shape retention.
-
Freeze like a pro: Cooked meatballs freeze well. Reheat in a skillet with broth, then finish in fresh garlic butter.
-
Avoid sauce separation: If butter breaks, whisk in 1 tsp cold water or lemon juice to emulsify.
- Prep Time: 10 minutes
- Cook Time: 15minutes
Nutrition
- Calories: 340 Cal (Per Serving: ~5 meatballs + sauce)
- Fat: 25g (12g saturated)
- Carbohydrates: 3g
- Protein: 25g
Nutritional Info (Per Serving – Approx. 5 meatballs + sauce)
- Calories: ~340
- Protein: 25g
- Carbs: 3g (Net Carbs: 2g)
- Fat: 25g (Saturated Fat: 12g)
- Prep Time: 10 min
- Cook Time: 15 min
- Serves: 4
Final Thoughts: Why This Recipe Wins Every Time
This dish is more than a recipe—it’s a lesson in simplicity yielding extraordinary results. In 20 minutes, you transform basic ingredients into something that feels indulgent yet wholesome. The key takeaways:
-
Fat = Flavor: Embrace the 80/20 beef ratio for juicy meatballs.
-
Fresh Garlic is King: It makes the sauce sing.
-
Low and Slow Wins: Patience with the butter prevents bitterness.
-
Versatility Rules: Adapt the flavors to suit any craving (Italian, Asian, spicy, creamy).
Whether it’s a blizzard-induced comfort feast or a last-minute dinner hero, these garlic butter meatballs deliver every time. Now go forth, make memories, and let that golden, garlicky aroma work its magic!
Pro Tip: Double the batch. Trust me, you’ll want leftovers.

Salmon Balls with Creamy Avocado Sauce
Hey There, Flavor Explorer! Let’s Make Magic with Salmon
Picture this: golden-brown salmon balls, crisp on the outside and flaky-tender inside, dunked into a pool of vibrant green avocado sauce that tastes like sunshine and lime kisses. If your stomach just did a happy little growl, we’re already best friends. I’m Beau Collier, and today at Feastical, we’re turning humble salmon into bite-sized joy bombs that’ll make your taste buds throw a confetti parade. Seriously, these aren’t just salmon balls—they’re your new secret weapon for everything from lazy Tuesday dinners to “wow-I-made-that?!” party moments.
Why do I obsess over this recipe? Because it’s the culinary equivalent of your favorite cozy sweater: comforting but surprisingly chic. The salmon stays moist and herb-packed, while that creamy avocado sauce? It’s like a zesty hug for your senses. And here’s the kicker—it’s sneaky-good for you! Packed with omega-3s, protein, and good fats, it’s indulgence without the guilt. Whether you’re a kitchen newbie nervously eyeing your spatula or a seasoned pro looking for fresh inspo, this dish is your golden ticket. So tie on that apron, crank up your feel-good playlist, and let’s turn simple ingredients into pure deliciousness together. Trust me, your fork’s about to become your new best friend.
That One Rainy Seattle Day & My Salmon Ball Epiphany
Okay, story time! Picture teenage Beau, soaked to the bone after getting caught in a surprise Seattle downpour. I stumbled into Pike Place Market, shivering and cranky, when this heavenly aroma hooked me like a fish (pun intended!). At a tiny stall, a grandma-type was frying these gorgeous golden orbs while telling jokes in Italian. She handed me one on a napkin—”Try, bambino!”—and drizzled it with green sauce. One bite, and boom! The crispy exterior gave way to fluffy salmon bright with herbs, while the cool, garlicky sauce balanced everything perfectly. I stood there in my soggy shoes, grinning like an idiot. Turned out, Nonna Rosa learned the recipe from her Sicilian fisherman husband but used Pacific salmon. “Fish balls,” she winked, “make strangers family.”
That moment stuck with me. Years later, when I started Feastical, I recreated her magic but made it *mine*—adding smoked paprika for warmth and Greek yogurt to lighten the sauce. Now, every time I make these, I’m back at that market stall, rain dripping off my nose, tasting pure joy. Food isn’t just fuel; it’s time travel with flavor. And these salmon balls? They’re my edible love letter to serendipity.
Gather Your Flavor Squad (Ingredient Intel Inside!)
Don’t sweat the small stuff—this is a flexible recipe! Here’s your grocery list with pro hacks:
Salmon Balls Dream Team:
- 1 lb (450g) fresh salmon fillet, skin off – Chef’s tip: Wild-caught sockeye packs bold flavor, but any fresh salmon works. Skinless is crucial! Sub: 2 cans of drained salmon in a pinch (pat it dry!).
- ¼ cup fresh parsley, chopped – Why fresh? It adds grassy brightness dried can’t match. Swap with dill if cilantro’s not your jam.
- ¼ cup fresh cilantro, chopped – Love it or hate it? If it tastes soapy to you, use all parsley or basil.
- ½ cup breadcrumbs – Panko = extra crunch! GF? Almond flour works beautifully (adds nutty notes).
- 1 large egg – Our binder MVP. Vegan? Use 1 tbsp flaxseed meal + 3 tbsp water.
- 2 garlic cloves, minced – Pro move: microplane it for invisible flavor bombs!
- 1 tsp smoked paprika – Not regular! Smoked adds campfire depth. Hot paprika kicks up heat.
- 1 tsp lemon zest – Brightens everything! Use a Microplane—skip the bitter white pith.
- Salt & black pepper – Season aggressively—salmon needs it!
- 2 tbsp olive oil – For frying. Avocado oil works too (higher smoke point).
Creamy Avocado Sauce Stars:
- 1 ripe avocado – Must be soft! Hard avocados won’t blend creamy. No sub—it’s the star!
- ¼ cup fresh cilantro – Stems add flavor too—toss ’em in!
- ¼ cup Greek yogurt – Adds tang + creaminess. Sour cream = richer, mayo = vegan (if needed).
- 2 tbsp lime juice – Fresh-squeezed only! Bottled tastes flat.
- 1 garlic clove – Half if sensitive to raw garlic bite.
- Salt & pepper – Season in layers—taste as you blend!
Let’s Get Cooking: Crispy Balls, Happy Dance Guaranteed
Ready for the fun part? Follow these steps—I’ll be right beside you with spatula-waving encouragement!
Step 1: Prep Your Salmon
Chop salmon into rough chunks. Chef Hack: Freeze it for 15 mins first—it chops cleaner! Pulse in a food processor until it looks like coarse gravel (about 5 pulses). No processor? Dice finely with a sharp knife. Toss it into a big bowl.
Step 2: Mix It Up Like a Party
Add parsley, cilantro, breadcrumbs, egg, garlic, smoked paprika, lemon zest, 1 tsp salt, and ½ tsp pepper. Now get hands-on! Gently mix with your fingers—don’t overwork it or balls get tough. Pro tip: Want test flavor? Fry a tiny patty! Adjust seasoning now.
Step 3: Ballin’ Time
Wet your hands (stops sticking!). Scoop 1 tbsp mix, roll into 1.5-inch balls. Place on a plate. Size matters: Too big = raw inside, too small = dry. Aim for golf balls! Chill 10 mins—this prevents crumbling.
Step 4: Sear to Perfection
Heat olive oil in a non-stick skillet over medium heat. Test with a breadcrumb—it should sizzle gently. Add balls (don’t crowd!). Fry 3-4 mins per side until GOLDEN (not brown!). Flip gently: Use two spoons! They’re done when internal temp hits 145°F (63°C). Drain on paper towels.
Step 5: Whip Up That Dreamy Sauce
While balls cook, pit the avocado. Scoop flesh into a blender. Add cilantro, yogurt, lime juice, garlic, ½ tsp salt, and a pinch of pepper. Blend until velvety. Too thick? Add 1 tsp water. Taste—need more zing? Add lime! Pour into a cute bowl.
Plating Like a Pro (Minimal Effort, Max Style!)
Time for the grand reveal! For appetizers: Spear each salmon ball with a toothpick, artfully drizzle sauce over the top, and scatter with extra cilantro leaves. Party-ready! For dinner: Nestle 4-5 balls on a bed of lemony quinoa or crisp greens. Swipe sauce underneath like a runway, place balls on top, and add lime wedges. Bonus points: Serve extra sauce in a mini pitcher for epic dipping action. Pair with icy cucumber water or a crisp Pinot Grigio. Boom—restaurant vibes at home!
Shake It Up: 5 Tasty Twists
Play with your food! Try these fun spins:
- Spicy Thai: Add 1 tbsp red curry paste to salmon mix + swap cilantro sauce with coconut milk, lime, and basil.
- Mediterranean: Use dill/mint instead of cilantro, add 2 tbsp feta to salmon + sauce with yogurt, lemon, and cucumber.
- Keto Power: Swap breadcrumbs for crushed pork rinds + serve sauce with veggie sticks.
- Salmon Burgers: Form mix into patties, grill, and slather sauce on brioche buns.
- Kid-Friendly: Skip herbs in salmon, add ¼ cup shredded cheddar + serve sauce as “green dip.”
Beau’s Backstage Kitchen Confessions
This recipe’s come a long way, pals. First attempt? Let’s just say my salmon “blobs” crumbled into pan-confetti while my too-thin sauce resembled swamp water. Cue kitchen tantrum! But practice makes delicious—I learned chilling the mix is non-negotiable, and blending the sauce while the avocado’s RIPE is key. Now, it’s my go-to for last-minute guests. One time, I subbed smoked trout for salmon (don’t ask why—desperate times!), and surprise—it was incredible! Moral: Recipes are roadmaps, not rules. Make it yours! P.S. If your balls fall apart mid-fry? Scoop it up, call it “deconstructed salmon hash,” and serve with a wink. We don’t judge at Feastical.
Salmon Ball SOS: Fixes for Common Hiccups
Q: Can I use canned salmon?
A: Absolutely! Drain two 6-oz cans well, remove bones/skin, and pat SUPER dry. Texture will be denser—add an extra egg or 1 tbsp mayo for moisture.
Q: Why did my balls crumble?!
A) Too much filler (ease up on breadcrumbs!) B) Not enough binder (add another egg yolk) C) Skipped chilling (always chill 10 mins!).
Q: Can I bake these instead of fry?
A: Yes! Bake at 400°F (200°C) on oiled parchment for 15-18 mins, flipping halfway. They won’t get as crisp, so finish with 2 mins under the broiler.
Q: Sauce turned brown overnight—help!
A: Avocados oxidize! Press plastic wrap directly on sauce surface to block air. It’ll stay green 24 hrs. Still brown? Stir in 1 tsp lime juice—flavor’s fine!

Salmon Balls with Creamy Avocado Sauce
- Total Time: 30 minutes
Description
These salmon balls are crisp on the outside, flaky inside, and loaded with herbs, spices, and citrusy brightness. Paired with a cool, velvety avocado-lime sauce, they deliver big flavor with better-for-you ingredients—perfect for a weeknight dinner, a fancy appetizer, or even packed lunch glory.
Instructions
1. Prep the Salmon
-
Pulse salmon in a food processor into a coarse mix (5–6 pulses) OR finely chop with a knife. Add to a mixing bowl.
2. Mix It Up
-
Add parsley, cilantro, breadcrumbs, egg, garlic, smoked paprika, lemon zest, salt, and pepper. Gently combine with hands or fork—don’t overmix.
3. Form the Balls
-
Wet your hands. Roll into 1½-inch balls (about 1 tbsp mixture each). Chill in the fridge for 10 minutes to firm up.
4. Fry to Golden Goodness
-
Heat olive oil in a skillet over medium. Fry balls 3–4 mins per side until golden and cooked through (internal temp 145°F/63°C). Drain on paper towels.
5. Make the Sauce
-
In a blender or food processor, combine avocado, cilantro, Greek yogurt, lime juice, garlic, salt, and pepper. Blend until smooth. Thin with water if needed. Taste and adjust lime/salt.
Notes
Q: Can I use canned salmon?
Yes! Use two 6-oz cans, drained and patted dry. Mix will be softer—add extra egg or a spoon of mayo for moisture.
Q: Can I bake these?
Bake at 400°F (200°C) for 15–18 mins on parchment, flipping halfway. Finish with 2 mins broil for extra crisp.
Q: Sauce turned brown?
Oxidation! Press plastic wrap directly on surface to prevent. Add a splash of lime to refresh color/flavor.
- Prep Time: 20 minutes
- Cook Time: 10–12 minutes
Nutrition
- Calories: 350 Cal Per Serving
- Fat: 22g
- Carbohydrates: 9g (5g with almond flour)
- Protein: 30g
Quick Nutrition Snapshot (Per Serving: 4 balls + sauce)
Calories: ~350 | Protein: 30g | Carbs: 9g | Fat: 22g (Mostly healthy omega-3s & avocado monounsaturated fats!)
Note: Using almond flour? Carbs drop to ~5g. Greek yogurt sauce? Lower fat than sour cream!
Final Thoughts: Why This Recipe is a Keeper
These salmon balls are more than just a meal—they’re a celebration of texture, flavor, and versatility. Whether you’re cooking for one, hosting friends, or meal-prepping for the week, they deliver every time. The crispy exterior, tender interior, and creamy avocado sauce create a harmony that’s hard to resist.
Remember: Cooking is an adventure. Forgot an ingredient? Improvise. Sauce too thick? Adjust. Salmon balls fell apart? Call it a “deconstructed bowl” and own it. The best recipes are the ones you make your own.
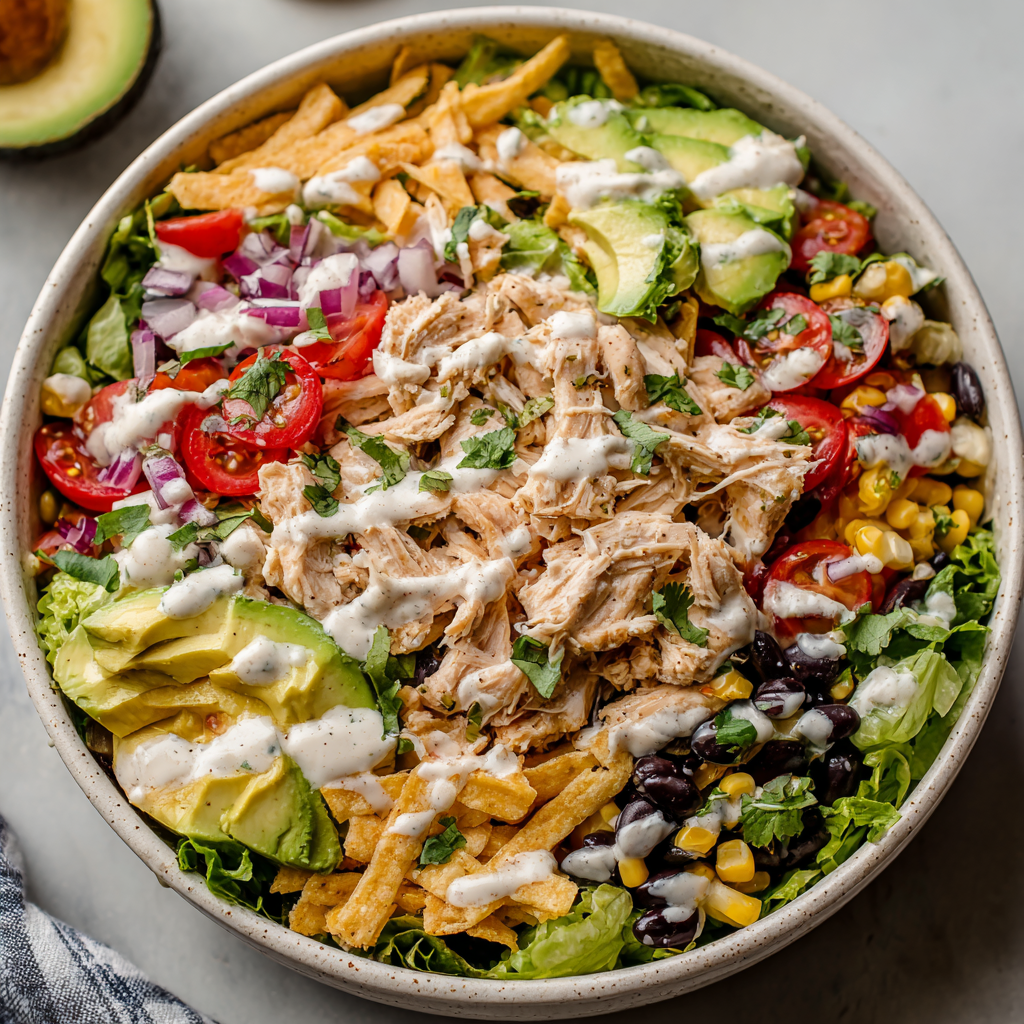
Zesty Southwest Chicken Salad
Zesty Southwest Chicken Salad: Your New Go-To Flavor Fiesta!
Hey friends, Beau here from Feastical! Picture this: It’s a sunny afternoon, your kitchen windows are open, and you’re craving something fresh yet satisfying—something that tastes like a celebration but feels like a breeze to make. That’s where this Zesty Southwest Chicken Salad struts in like a mariachi band at a picnic! This isn’t just another salad; it’s a confetti cannon of Tex-Mex flavors—juicy chicken, creamy avocado, crunchy veggies, and that tangy lime dressing that’ll make your taste buds salsa dance. Perfect for meal prep, potlucks, or when you need a 15-minute hero to rescue your weeknight dinner rut. Whether you’re a grill master or a microwave maestro, this recipe’s got your back. So grab your favorite bowl (mine’s that chipped turquoise one I thrifted in Santa Fe), and let’s turn ordinary ingredients into an extraordinary fiesta!
Why This Salad Feels Like a Backyard Hug
This recipe? It’s got roots. Picture me, age 10, at my abuela’s ranch in New Mexico. Her kitchen smelled like roasting chiles and mischief. One scorching summer day, she tossed leftover grilled chicken, garden tomatoes, and canned beans into a bowl, drenched it in lime-spiked crema, and yelled, “¡Oye, Beau! ¡Comida mágica!” We ate it under a mesquite tree, crunchy tortilla strips scattering everywhere like edible confetti. That messy, joyful chaos stuck with me. Years later, when I launched Feastical, I recreated that “magic food” for city friends during a rooftop BBQ. Their eyes lit up like fireworks—same as mine did back then. Now, every time I make it, I taste sunshine, laughter, and abuela’s secret: great food isn’t about perfection; it’s about sharing the vibrancy of life, one zesty bite at a time.
Gather Your Flavor Crew
Here’s your dream team—colorful, flexible, and ready to party! Pro tip: Use leftovers (rotisserie chicken, taco night beans) to make this even faster.
- 2 cups cooked chicken breast, shredded or chopped – Leftover grilled chicken adds smoky depth! Rotisserie works wonders. Veggie swap? Try black beans or crispy tofu.
- 1 can (15 oz) black beans, rinsed & drained – Rinsing removes that starchy can liquid. Kidney beans work too—just avoid mushy varieties!
- 1 cup corn kernels – Fresh-off-the-cob is summer gold! Frozen? Thaw and pat dry. Canned? Drain well so your salad isn’t soggy.
- 1 red bell pepper, diced – Color and crunch! Orange or yellow bells bring sweetness. No peppers? Try crunchy jicama.
- ¼ cup red onion, finely chopped – Soak in ice water for 5 minutes if raw onion bites too hard. Green onions work for milder vibes.
- 1 avocado, diced – Wait to dice this until step one—it hates turning brown! No avocado? A dollop of guac saves the day.
- ½ cup cherry tomatoes, halved – These sweet bombs burst better than big tomatoes! Grape tomatoes? Just as fun.
- ¼ cup fresh cilantro, chopped – Love it or leave it! Flat-leaf parsley or basil make fresh backups.
- ⅓ cup shredded cheddar or Mexican blend cheese – Cotija cheese crumbles add salty punch! Vegan? Nutritional yeast or dairy-free shreds.
- Optional crunch: tortilla strips or crushed chips – My chef hack? Air-fry leftover tortillas with chili powder!
The Dressing (aka Liquid Sunshine):
- ¼ cup sour cream or Greek yogurt – Greek yogurt lightens it up; sour cream = richer. Vegan? Cashew cream or avocado mayo.
- 2 tbsp lime juice – Fresh-squeezed is non-negotiable! Bottled lacks that bright zing.
- 1 tbsp olive oil – Balances the tang. Any neutral oil works.
- 1 tsp ground cumin – Smoky warmth! Toasted cumin seeds (crushed) elevate it.
- ½ tsp chili powder – Ancho chili powder = deeper flavor. Add cayenne for heat!
- Salt & pepper, to taste – Season in layers—dressing AND salad.
Let’s Build Flavor Town!
Ready? This comes together faster than a TikTok trend. Remember: salads are better when tossed with confidence—no timid mixing allowed!
- Chop & Drop: In your biggest bowl (I use my retro Pyrex!), combine chicken, black beans, corn, bell pepper, onion, tomatoes, cilantro, and cheese. Chef hack: Keep the avocado aside for now—we add it last to avoid browning! Toss gently with clean hands or a spatula. Hear that crunch? That’s the sound of happiness.
- Whisk the Magic Dressing: In a small bowl, whisk sour cream, lime juice, olive oil, cumin, chili powder, salt, and pepper. Pro tip: Taste it! Need more zip? Add lime. More kick? Chili powder. Whisk until smooth like a desert horizon.
- Dress to Impress: Pour that golden dressing over your salad. Now, channel your inner DJ—toss everything like you’re mixing a hit song! Fold, don’t smash. We want every ingredient coated but not bruised. Watch your wrist action: Over-mixing = sad, mushy salad.
- Avocado’s Grand Entrance: Gently fold in diced avocado. Timing matters: Adding it now keeps it pretty and prevents it from vanishing into green sludge.
- Crunch Time: Top with tortilla strips or crushed chips RIGHT before serving. Why? Soggy chips = culinary heartbreak. Bonus hack: Serve chips on the side for DIY crunch control!
Total time? 15 minutes if you’re focused. 20 if you’re dancing to Selena (always encouraged).
How to Serve It Like a Pro
Presentation is your playground! Scoop this salad into halved bell peppers for edible bowls, layer it over crisp romaine, or stuff it into warm tortillas as hearty wraps. For gatherings, I pile it high on a platter, crown it with extra chips and lime wedges, and let guests dig in family-style. Pair it with icy agua fresca or a cheeky margarita—it’s basically a party in bowl form!
Shake It Up: 5 Tasty Twists
This salad is your canvas—paint it bold!
- Fiesta Grain Bowl: Add 1 cup cooked quinoa or cilantro-lime rice. Suddenly, it’s a hearty meal!
- Spicy Devil: Toss in pickled jalapeños or a dash of chipotle powder. Cool it down with extra avocado.
- Seaside Swap: Replace chicken with grilled shrimp or flaked salmon. Hello, coastal vibes!
- Veggie Power: Skip chicken, double the beans, and add roasted sweet potatoes. Vegan? Use cashew cream dressing.
- Breakfast Remix: Top with a fried egg and hot sauce. Yes, salad for breakfast is genius.
Beau’s Backstage Tips
This recipe’s evolved more than my taste in kitchen aprons! Originally, I used mayo-heavy dressing, but Greek yogurt won for tangy lightness. Funny story: Once, I accidentally used cinnamon instead of cumin (yikes!). My friends politely chewed while I died inside—now I label my spices! Lesson learned: Taste as you go. Also, this salad gets better after 30 minutes in the fridge (dressing soaks in!), but add chips and avocado last-minute. Abuela’s wisdom? “Always make extra—hungry neighbors appear like cactus blossoms!”
Your Questions, Answered!
Q: Can I make this ahead?
A: Absolutely! Mix everything except avocado, chips, and dressing. Store salad base and dressing separately in the fridge for up to 2 days. Combine + add the “green guys” and crunch just before serving.
Q: Help! My salad’s watery. 😭
A: Veggie juice is the culprit! Always drain beans/corn thoroughly. Salt tomatoes separately, let them sit 10 minutes, then pat dry. If it’s too late, toss in extra tortilla chips—they’ll soak up moisture like flavor sponges!
Q: No fresh limes. Can I use lemon?
A: Lemon works in a pinch, but it’s brighter and less earthy. Reduce to 1 tbsp—lemons are stronger! For real Southwest soul, fresh lime is worth the grocery run.
Q: How long do leftovers last?
A: 1-2 days max (avocado turns sad). Store undressed salad base airtight in the fridge. Dressing stays fresh 4 days. Revive leftovers by stuffing into quesadillas!

Zesty Southwest Chicken Salad
- Total Time: 15–20 minutes
Description
This isn’t your average chicken salad—it’s bold, creamy, crunchy, and bursting with lime-kissed Southwest flavor. Think: juicy grilled chicken, sweet corn, zippy black beans, and buttery avocado all dancing under a smoky cumin-lime crema. Whether you’re meal-prepping or feeding a sun-soaked crowd, this colorful bowl brings fiesta energy with zero fuss.
Instructions
In a large bowl, combine chicken, beans, corn, bell pepper, onion, tomatoes, cilantro, and cheese. Leave avocado and chips for later!
In a separate bowl, whisk sour cream (or yogurt), lime juice, olive oil, cumin, chili powder, salt, and pepper until smooth and creamy. Taste and adjust—add more lime for zing, chili powder for heat.
Pour dressing over the salad base. Gently toss everything to coat evenly without smashing the ingredients.
Carefully fold in diced avocado just before serving to keep it fresh and pretty.
Top with crushed tortilla chips or strips just before serving. Optional: serve with chips on the side for DIY crunch control.
Notes
Q: Can I make it ahead?
Yes! Mix everything except avocado, chips, and dressing. Store separately and combine just before serving.
Q: How do I avoid a watery salad?
Drain beans and corn well. Salt and blot tomatoes if needed. If things get soggy, crushed chips can save the day!
Q: No fresh limes—use lemon?
Yes, but use just 1 tbsp. Limes bring a more authentic Southwest flavor.
Q: Leftovers—how long?
Undressed salad base lasts 2 days. Dressing lasts 4 days. Add avocado/chips fresh. Bonus: turn leftovers into quesadillas!
- Prep Time: 15 minutes
Nutrition
- Calories: 380 Cal Per Serving
- Fat: 20g
- Carbohydrates: 22g
- Protein: 28g
Nutritional Highlights (Per Serving, Serves 4)
Calories: ~380 | Protein: 28g | Carbs: 22g | Fat: 20g
Note: Stats include dressing and cheese. Using Greek yogurt reduces fat by ~3g/serving.
Prep Time: 15 minutes | Serves: 4 hungry humans
Final Thoughts: Why This Salad Deserves a Spot in Your Rotation
The Zesty Southwest Chicken Salad isn’t just another recipe—it’s a celebration of flavor, texture, and versatility. It’s quick enough for busy weeknights but impressive enough for guests. It’s healthy without feeling like a compromise. And most importantly, it’s a dish that invites creativity. Whether you stick to the classic version or spin it into nachos, stuffed peppers, or breakfast tacos, it’s guaranteed to bring a little fiesta to your table. So grab that bowl, toss with abandon, and savor every vibrant bite. ¡Buen provecho!

Keto Philly Cheesesteak Rolls
Hey There, Hungry Friend! Let’s Roll Into Keto Comfort Food Heaven
Picture this: It’s game night. Your crew’s huddled around the TV, and that familiar craving hits—juicy, cheesy, onion-kissed Philly cheesesteak vibes. But then… the bun guilt sets in. Sound familiar? Been there, wrestled with that carb-counting angel on my shoulder too! That’s exactly why I spent months perfecting these Keto Philly Cheesesteak Rolls. No compromise. No “meh” substitutes. Just pure, unapologetic flavor bombs that’ll make you forget carbs ever existed.
Here’s the magic: We’re wrapping that iconic beef-and-pepper filling in crispy, golden Monterey Jack cheese shells. Yep—CHEESE is the bun! It’s like your skillet and your favorite diner had a genius love child. Perfect for keto warriors, gluten-free pals, or anyone who believes comfort food should hug your soul without wrecking your goals. And the best part? You’re 25 minutes away from these beauties hitting your plate. So tie on that apron (or don’t—I won’t judge), and let’s turn your kitchen into a Philly-inspired playground!
Why This Recipe Feels Like a Late-Night Victory Dance
Flashback to my college days in Philly. After gigs with my band (shout-out to my air-guitar skills!), we’d pile into a neon-lit cheesesteak joint at 2 a.m. I’d always order mine “whiz wit”—that’s Cheez Whiz with onions for the uninitiated—and devour it leaning against my dented van. It was messy, glorious, and tasted like belonging.
Years later, when I went keto, I missed those nights. Store-bought “low-carb wraps” just didn’t cut it—they’d crack or taste like cardboard. One rainy Tuesday, I got stubborn. I roasted cheese into crispy disks as an experiment… and when I scooped that sizzling beef-pepper mix onto one? EUREKA. My kids did a living-room touchdown dance when they tasted them. Now, these rolls are my go-to for game days, potlucks, and “I deserve awesome” nights. They’re my edible high-five to flavor-first keto living!
Your Flavor Dream Team (Plus Swaps for Kitchen MacGyvers!)
- Shredded Monterey Jack (2 cups): Our “bun” MVP! Melts into lacy, crispy perfection. Chef hack: Buy blocks and shred yourself—pre-bagged stuff has anti-caking starch! Swap with mozzarella for milder vibes, or pepper jack for heat.
- Ground beef (16 oz): 80/20 fat ratio is ideal—it stays juicy without greasing out. Insider tip: Freeze beef 15 minutes before cooking for easier crumbling!
- Onion + bell pepper (½ onion, 1 pepper): The classic “wit” duo! Slice thin so they soften fast. Green peppers are traditional, but red/yellow add sweetness.
- Worcestershire sauce (1 tsp): Our umami secret weapon! Adds depth without carbs. Vegetarian? Use coconut aminos.
- Cream cheese (4 oz): Makes the filling luxuriously creamy. Pro move: Soften at room temp first—no lumps! Dairy-free? Try Kite Hill almond cream cheese.
- Salt + pepper: Season in layers—don’t be shy!
Let’s Build These Bad Boys (Without Losing a Pinky to Hunger Panic!)
Step 1: Cheese Shell Prep
Preheat oven to 375°F (190°C). Line a baking sheet with parchment paper (NOT wax paper—trust me, I learned the smoky way). Form cheese into 8 flat piles (¼ cup each). Pro spacing tip: Leave 3 inches between—they spread like gossip! Bake 5-6 min until golden-edged and bubbly. Watch closely—cheese goes from perfect to scorched in 30 seconds!
Step 2: Beef & Veggie Fiesta
While cheese bakes, brown beef in a skillet over medium-high heat. Hack alert: Don’t stir constantly! Let it develop a crust for max flavor. Drain fat (leave 1 tbsp for sautéing veggies). Add onions and peppers—sauté 4-5 min until they’re tender-crisp with a little char. Hit ’em with Worcestershire, salt, and pepper. Kill the heat, then stir in cream cheese until it’s velvety and clings to the beef like a foodie hug.
Step 3: The Grand Roll-Up
Pull cheese shells from oven. WAIT 30 SECONDS—this is crucial! Too hot, and they tear; too cool, they harden. Spoon filling onto one half of each shell. Using a spatula, gently fold cheese over filling—it’ll self-seal like a savory pastry. Chef confession: My first batch looked like abstract art. If they crack, press gently—they’ll still taste insane!
Step 4: The Patient Pause
Let rolls rest 5 minutes. Resist mouth-burning temptation! This lets the cheese firm up so you get that satisfying crunch.
Plating Like a Pro (Or Just Fork-Fight Your Family!)
Slide these golden rolls onto a rustic board—they’re too pretty to hide! Garnish with chopped chives or parsley for color pop. Pairing genius: Serve with a crisp side salad (ranch dressing FTW), roasted garlic zucchini fries, or tangy pickles to cut the richness. For parties, stick toothpicks in ’em and watch them vanish faster than my willpower near warm bread!
Shake It Up, Sugar-Free Style!
1. “Pizza Steak” Twist: Stir ¼ cup low-carb marinara into the beef mix. Top rolls with pepperoni before baking cheese shells.
2. Chicken Philly: Swap beef for ground chicken or turkey. Add a pinch of smoked paprika!
3. Mushroom Madness: Sauté 1 cup sliced mushrooms with the peppers. Umami overload!
4. Spicy Southwest: Mix in diced jalapeños and swap Monterey Jack for pepper jack. Serve with avocado crema.
5. Dairy-Free Hero: Use Violife mozzarella shreds and Kite Hill cream cheese. Beef fat is your flavor BFF here!
Confessions from My Keto Test Kitchen
These rolls are my most-stolen recipe by friends—even carb-lovers swipe ’em! Early versions used almond flour wraps… shudder. Too brittle. Then I tried cheese “taco shells,” and the lightbulb exploded! Now, I double the batch and freeze unbaked cheese piles between parchment. Crazy-busy night? I’ll bake shells straight from frozen (+1 min), fill, and dinner’s done. True story: My dog once stole a roll off the counter. He looked so guilty, I couldn’t even mad—just took photographic evidence for Instagram. #WorthIt
Your Burning Questions, Answered!
Q: Why did my cheese shells spread into one giant blob?
A: Overcrowding is the culprit! Space them like introverts at a party—3 inches apart. Also, ensure cheese is finely shredded (chunky shreds don’t melt evenly).
Q: Can I use deli roast beef instead of ground?
A: Absolutely! Chop it small, and add it with the peppers just to warm through. Ground beef gives better texture, though—it soaks up all those juices!
Q: How do I stop the filling from leaking?
A: Two tricks: 1) Drain beef WELL (soupy filling = leaks). 2) Don’t overstuff! 2-3 tbsp filling per shell is plenty. If leaks happen, embrace the “deconstructed cheesesteak” vibe!
Q: Can I meal prep these?
A: Yes! Store unfilled baked shells and filling separately for 3 days. Assemble and reheat at 350°F for 8-10 min. Avoid microwaving—they’ll get soggy.

Keto Philly Cheesesteak Rolls
- Total Time: 25 minutes
Description
Hey there, hungry friend! If you’re craving all the comfort of a melty, beefy Philly cheesesteak but want to keep it low-carb (and gluten-free), you’re about to fall hard for these Keto Philly Cheesesteak Rolls. Picture this: crispy Monterey Jack cheese shells cradling a rich, creamy beef-pepper-onion filling that hits all the right notes—smoky, savory, satisfying. Ready in just 25 minutes, these flavor bombs will make your carb cravings vanish like a cheesesteak at a tailgate. Let’s roll!
Ingredients
For the Cheese Shells
-
2 cups shredded Monterey Jack cheese (¼ cup per shell)
Tip: Shred it yourself for perfect melting!
For the Filling
-
1 lb ground beef (80/20 recommended)
-
½ medium onion, thinly sliced
-
1 bell pepper (any color), thinly sliced
-
4 oz cream cheese, softened
-
1 tsp Worcestershire sauce
-
Salt and pepper, to taste
Instructions
1. Cheese Shell Magic
-
Preheat oven to 375°F (190°C).
-
Line a large baking sheet with parchment paper.
-
Drop ¼ cup cheese into 8 piles. Flatten slightly.
-
Leave 3 inches of space between piles—cheese spreads!
-
Bake 5–6 minutes until bubbly and golden at the edges.
-
Let cool 30 seconds (not more!) before filling.
2. Filling Time
-
In a skillet, cook ground beef over medium-high heat.
-
Let it sear—don’t stir too much! Drain excess fat.
-
Add onions and peppers, sauté 4–5 min until soft and lightly charred.
-
Stir in Worcestershire sauce, salt, pepper, and cream cheese. Mix until creamy and combined.
3. Roll & Rest
-
Spoon 2–3 tbsp of filling onto one side of each cheese shell.
-
Use a spatula to gently fold over and seal the roll.
-
Let rest 5 minutes before serving—this helps the cheese firm up.
Notes
Q: My cheese shells fused into one giant blob!
A: You likely overcrowded the tray. Always leave at least 3 inches between piles.
Q: Can I use sliced deli roast beef instead?
A: Totally! Chop and warm it with the veggies—though ground beef holds flavor better.
Q: Filling’s leaking—what gives?
A: Drain meat well, don’t overfill, and let cheese shells rest before rolling.
- Prep Time: 10 minutes
- Cook Time: 15 minutes
Nutrition
- Calories: 210 Cal Per Roll
- Fat: 17g
- Carbohydrates: 2g
- Protein: 14g
Nutritional Perks (Because Knowledge is Yummy Power!)
Per roll (recipe makes 8): Calories: ~210 | Protein: 14g | Net Carbs: 2g | Fat: 17g. Macros calculated with MyFitnessPal using standard ingredients. Your numbers may vary slightly based on brands!
Final Thoughts: Why This Recipe is a Keto Game-Changer
These Keto Philly Cheesesteak Rolls aren’t just a substitute—they’re an upgrade. They prove that low-carb eating doesn’t mean sacrificing flavor, nostalgia, or fun. Whether you’re keto, gluten-free, or just looking for a delicious twist on a classic, these rolls deliver:
-
Speed: 25 minutes from fridge to plate.
-
Versatility: Endless filling variations (pizza steak, anyone?).
-
Crowd-Pleasing Power: Even carb-lovers will fight for the last one.
So next time that cheesesteak craving hits, skip the bun guilt—you’ve got cheese shells now. And trust me, once you’ve tasted that crispy, beefy, melty magic, there’s no going back.

Chipotle Ranch Grilled Chicken Burrito
Smoky, Creamy, Crunchy Bliss: Your New Favorite Burrito Awaits!
Hey foodie friends! Beau here from Feastical, and I’ve got a confession: I’m borderline obsessed with turning simple ingredients into handheld happiness. Today? We’re diving fork-first into my Chipotle Ranch Grilled Chicken Burrito—a flavor explosion that’s like a high-five for your taste buds. Imagine smoky chipotle tangoing with cool ranch, wrapped around juicy grilled chicken, all hugged by a crispy tortilla with melty cheese and crunchy surprises. This isn’t just dinner; it’s a celebration in foil paper! Whether you’re feeding a hungry crowd or meal-prepping like a pro, this burrito’s magic lies in its balance: fiery but not overwhelming, indulgent but fresh, and ready in 20 minutes flat. Trust me, once that chipotle ranch hits the warm chicken? Game over. Your kitchen’s about to smell like a beachside taqueria. Let’s roll!
The Backyard BBQ That Started It All
Picture this: It’s a sticky July evening at my buddy Marco’s annual grill-a-palooza. I’m manning the chicken station, and Marco—bless his spontaneous heart—dumps leftover ranch into a bowl of chipotle sauce for dipping. Lightbulb moment! I tossed grilled chicken strips in that pink-hued wonder, slapped ’em into tortillas with whatever fixings we had (hello, crushed tortilla chips!), and—bam—the “accidental hero” burrito was born. What cracked me up? Grown adults literally elbowing each other for seconds. My neighbor Karen (who “never eats carbs”) demolished two and whispered, “Don’t tell my yoga instructor.” That messy, laughter-filled night taught me: The best recipes aren’t perfect—they’re alive. Every time I make these now, I taste sunshine, friendship, and Karen’s guilty grin.
Gather Your Flavor Squad 🌯
Here’s your tasty task force! Pro tip: Prep everything before assembling—it’s a burrito rollercoaster, not a scramble.
- 8 large (10-inch) flour tortillas – The cozy blanket! Chef’s hack: Warm them slightly—cold tortillas crack. Swap: Use spinach or tomato tortillas for color.
- ½ head iceberg lettuce, chopped (4 cups) – Crunch central! Iceberg’s water content keeps things fresh. Swap: Romaine or shredded cabbage for extra bite.
- 1¼ cup diced tomatoes – Juicy confetti! Drain excess liquid to avoid soggy burritos. Swap: Fire-roasted tomatoes for smokiness.
- 16 oz grilled chicken breast strips – The MVP! Use pre-grilled for speed, or DIY: toss raw chicken in 1 tbsp taco seasoning + 1 tsp smoked paprika before cooking.
- 16 oz shredded cheddar cheese – Melty gold! Chef’s insight: Mexican blend or pepper jack kicks up the fun. Grate it yourself for better melt!
- 3 oz crunchy tortilla strips – The surprise crunch! Found near salad toppings. Swap: Crushed tortilla chips or even Fritos.
- ½ cup ranch dressing + ½ cup Taco Bell Creamy Chipotle Sauce – The DYNAMIC DUO! Mix them first—it’s creamier. Swap: DIY ranch + 2 minced chipotles in adobo.
Let’s Build Flavor Bombs! 🔥
Follow these steps like a burrito sensei—I’ve packed ’em with pro tricks.
- Coat that chicken! In a large bowl, toss grilled chicken strips with ranch and chipotle sauce until every nook is blushing pink. Chef’s hack: Let it sit 5 minutes—the flavors marry like old friends.
- Warm your tortillas – KEY STEP! Microwave them for 15 seconds draped with a damp paper towel, OR heat in a dry skillet 10 seconds per side. Warm = flexible = no splits!
- Layer like a boss – Place tortilla flat. Near the center (not dead middle!), layer: lettuce → tomatoes → cheese → tortilla strips → saucy chicken. Pro move: Leave 2-inch borders on sides! Overstuffing = burrito blowouts.
- Fold with finesse – Fold sides inward, then roll bottom edge tightly away from you, tucking ingredients in like a baby burrito. Confidence is key!
- Grill to glory – Heat skillet over medium. Place burritos seam-side down. Press gently with spatula—1-2 minutes until golden with sexy grill marks. Flip and repeat! Chef’s secret: Brush burritos lightly with oil or melted butter for extra crisp.
Plate It Like a Pro 🍽️
Serve these bad boys hot off the grill! Slice diagonally to show off those layers—trust me, the oohs and aahs are worth it. Pair with extra chipotle ranch for dipping (duh), and keep sides simple: elote-style corn or a zesty black bean salad. For parties? Wrap burritos in foil, label with Sharpie (🌶️ for spicy lovers), and let guests unwrap their joy. Add lime wedges for a bright squeeze!
Shake It Up! 5 Tasty Twists
This recipe’s your playground! Try these riffs:
- Breakfast Bonanza: Swap chicken for scrambled eggs + crispy bacon. Add hash browns!
- Veggie Fiesta: Grilled portobello mushrooms or black beans instead of chicken. Use vegan ranch + chipotle sauce.
- Buffalo Ranch: Replace chipotle sauce with buffalo sauce + extra ranch. Add blue cheese crumbles!
- Low-Carb Love: Skip tortillas—serve as a bowl! Layer ingredients over cilantro-lime cauliflower rice.
- Seafood Sensation: Use grilled shrimp or chili-lime salmon. Top with avocado crema.
Beau’s Burrito Banter 😄
Funny story: My first attempt at these? I used cold tortillas. They cracked so bad, I called them “burrito tacos” and served ’em with a side of shame. Lesson learned! Over the years, I’ve tweaked this recipe like a mad scientist—adding pickled jalapeños (do it!), testing air fryer crisping (works!), even stuffing in sweet potato fries (epic). The chipotle ranch ratio is sacred though—too much heat drowns the ranch’s cool vibe. Pro tip: Make extra sauce—it’s killer on salads or as a burger spread. And hey, if your burrito isn’t Instagram-pretty? Who cares. Flavor trumps perfection. Now go forth and roll recklessly!
Burrito SOS: Fixes for Common Oops!
Q: My burrito won’t stay rolled! Help?
A: Two culprits: overfilling or dry tortillas. Use less filling (1/2 cup max per burrito) and WARM THOSE TORTILLAS! If it unravels, toothpick the seam before grilling.
Q: Can I make these ahead?
A: Totally! Assemble (don’t grill), wrap in foil, and fridge for 24 hours. Grill straight from cold—add 1 extra minute per side. Freezing? Wrap in parchment + foil. Reheat in oven at 375°F for 20 mins.
Q: Too spicy for my kids?
A: Dial back the chipotle sauce. Use 1/4 cup chipotle + 3/4 cup ranch. Or skip chipotle—mix ranch with mild salsa!
Q: Why is my cheese not melting?
A: Pre-shredded cheese has anti-caking agents (it’s treason!). Shred your own—it melts like a dream.

Chipotle Ranch Grilled Chicken Burrito
- Total Time: 20 minutes
Description
Hey foodie friends! Beau here from Feastical, and if you’re anything like me, burritos are your love language. But not just any burrito—this Chipotle Ranch Grilled Chicken Burrito is the triple threat of handheld heaven: smoky from chipotle, creamy from ranch, and crunchy from those surprise tortilla strips. Whether you’re meal-prepping for the week or feeding a hangry crew on the fly, this recipe brings the backyard BBQ vibe to your kitchen in just 20 minutes.
Instructions
-
Mix the Magic Sauce
In a bowl, toss grilled chicken with ranch and chipotle sauce until fully coated. Let sit 5 minutes so flavors really hug. -
Warm the Tortillas
Microwave wrapped in a damp paper towel for 15 seconds, or toast briefly on a dry skillet. This step prevents cracking! -
Assemble Like a Burrito Boss
On each tortilla, layer:-
½ cup lettuce
-
2 tbsp tomatoes
-
2 tbsp shredded cheese
-
A sprinkle of tortilla strips
-
~½ cup saucy chicken
Leave a 2-inch border on all sides!
-
-
Roll with Confidence
Fold in the sides, then roll from the bottom up tightly. Tuck it in like a burrito baby! If it wants to open, use a toothpick. -
Grill to Crispy Perfection
Heat a skillet to medium. Grill burritos seam-side down 1–2 minutes until golden. Flip and repeat. Optional: Brush with oil or butter for next-level crunch.
Notes
Q: My burrito falls apart—why?!
A: Likely too full or cold tortillas. Use ½ cup filling max and always warm your tortillas.
Q: Can I make these ahead?
A: Absolutely! Assemble (don’t grill), wrap in foil, refrigerate up to 24 hours. Grill when ready.
Q: Too spicy for my kiddos?
A: Use less chipotle! Try ¼ cup chipotle + ¾ cup ranch—or replace with salsa for a milder flavor.
Q: Why won’t my cheese melt?
A: Pre-shredded cheese has anti-caking agents. Shred it fresh for ooey-gooey meltiness.
- Prep Time: 10 minutes
- Cook Time: 10 minutes
Nutrition
- Calories: 450 Cal Per Burrito
- Fat: 22g
- Carbohydrates: 32g
- Fiber: 2g
- Protein: 30g
Nutritional Nibbles*
*Per burrito (serves 8):
Calories: ~450 | Protein: 30g | Carbs: 32g | Fat: 22g
Psst—use Greek yogurt ranch, light cheese, or extra veggies to lighten it up!
Final Thoughts: Why This Burrito Wins Every Time
This Chipotle Ranch Grilled Chicken Burrito isn’t just a meal—it’s a flavor and texture symphony. From the smoky-spicy sauce to the gooey cheese, the crisp lettuce, and the golden, grilled tortilla, every element plays a part.
It’s also versatile: swap proteins, adjust heat, or make it veggie-friendly. Plus, it’s fast (20 minutes!), meal-prep friendly, and crowd-pleasing (even carb-avoiding Karen couldn’t resist).

Creamy Cucumber Shrimp Salad
Let’s Make Your Taste Buds Dance: Creamy Cucumber Shrimp Salad
Hey friends, Beau here! Pull up a stool at my virtual kitchen counter. You know those days when the sun’s blazing, your apron feels like a winter coat, and you crave something that tastes like a cool ocean breeze? That’s exactly when this Creamy Cucumber Shrimp Salad swoops in like a culinary superhero. Imagine plump, tender shrimp doing the tango with crisp cucumbers in a zesty, herb-kissed dressing—it’s light yet satisfying, fancy but no-fuss. Whether you’re meal-prepping lunches, hosting a porch picnic, or just dodging the oven on a hot day, this salad’s your golden ticket. It’s gluten-free, low-carb, and packed with protein (helloooo, 28g per serving!), but honestly? You’ll love it because it’s downright delicious. Ready to make your kitchen feel like a seaside escape? Let’s roll!
Sun, Sandwiches, and a Salad That Started It All
Picture this: It’s 2018, and I’m sweating through my shirt at a beach potluck. My famous smoked ribs? Still smoldering in the smoker back home (rookie move, Beau). Panic mode! I raided my cooler: leftover grilled shrimp, a cucumber, and some herby dip. Chopped, tossed, and served on crusty bread—boom. The crowd went wild. That thrown-together miracle became our go-to for lake days, baby showers, even my niece’s graduation party. Why? Because it tastes like sunshine and happy accidents. Every bite takes me back to that sandy rescue mission, where a kitchen “oops” turned into my most requested warm-weather warrior. Food’s funny like that—it’s not just fuel, it’s memory with flavor.
Gather Your Flavor Dream Team
Here’s the beauty—no fancy ingredients! Pro tip: Quality shrimp and fresh herbs make all the difference.
- 2 lbs large raw shrimp (21–30 count) – Frozen’s totally fine (thaw overnight in the fridge!), but splurge on wild-caught if you can. They’re sweeter and cook up juicier. Swap with lump crab for a luxury twist!
- ¼ cup mayo + ¼ cup Greek yogurt – The dynamic duo! Yogurt cuts richness while adding tang. Sour cream works too, but Greek yogurt gives extra protein. Vegan? Use avocado mayo + coconut yogurt.
- 2 tbsp EACH fresh chives + dill – Non-negotiables for that garden-fresh zing! Dried herbs weep in comparison here. No dill? Try tarragon or basil.
- 2 tbsp lemon juice – Freshly squeezed, friends! Bottled stuff tastes like regret. Lime works in a pinch.
- 2 tsp Dijon mustard – Our flavor depth-charge. Yellow mustard’s too sharp; Dijon emulsifies like a dream.
- 1 English cucumber or 6 Persian cukes – English = less seeds, Persian = extra crunch (and adorable!). Skip peeling—the skin adds color and nutrients.
- 2 celery stalks – The crunch conductor! Dice small so it doesn’t hijack bites.
- ½ tsp kosher salt + pepper – Diamond Crystal kosher salt dissolves evenly. Table salt? Use half!
Let’s Build Your Flavor Masterpiece
Don’t rush the chill time—it’s where the magic happens! Total active time: 20 minutes.
- Boil shrimp like a boss: Bring a large pot of heavily salted water (think seawater!) to a rolling boil. Add shrimp. Wait for the curl—they’re done in 2-3 minutes when opaque and pink. Chef’s hack: Toss a lemon wedge in the water for extra brightness!
- Shock & dry: Drain immediately and plunge shrimp into an ice bath (equal parts ice + water). This stops cooking and keeps ’em snappy. Pat bone-dry with paper towels—wet shrimp = watery salad. Sad.
- Dressing alchemy: In your largest bowl, whisk mayo, yogurt, lemon juice, Dijon, chives, dill, salt, and pepper. Taste! Want more zip? Add lemon zest. Pro insight: Whisking the lemon + mustard first helps emulsify.
- Veggie prep: Thinly slice cucumbers (a mandoline on setting 2 is perfect) and finely dice celery. Blot cukes gently with a towel if they’re extra juicy.
- The grand toss: Add cooled shrimp, cucumbers, and celery to the dressing. Fold gently with a spatula—don’t massacre the shrimp! Stop when everything’s coasted in that creamy goodness.
- Chillax and meld: Cover and refrigerate 30+ minutes. This isn’t downtime; it’s when flavors become BFFs. Stir once halfway through.
The Science of Succulence: Why This Salad Works
Let’s geek out for a sec—because this salad isn’t just tasty; it’s a masterclass in texture and flavor chemistry. The magic lies in balancing opposites: creamy dressing vs. crisp veggies, briny shrimp vs. bright herbs, and cold refreshment vs. savory depth. Here’s why it’s foolproof:
1. The Shrimp Secret:
Boiling shrimp in seawater-salty water (1 tbsp salt per quart) seasons them from the inside out, while the ice bath (a.k.a. “shocking”) tightens proteins for that perfect snap. Patting them dry isn’t just busywork—water repels fat, so soggy shrimp = broken, greasy dressing. Pro tip: Smaller shrimp (31–40 count) absorb dressing better, but larger ones feel luxe. Your call!
2. Cucumber Calculus:
English or Persian cukes? It’s about cell structure. English cukes have thinner skins and fewer seeds, so they hold shape longer. Persians are crunchier but release more water—salting slices (10 mins, then blotting) can help. Mandoline slices (1/8″ thick) maximize surface area for dressing adhesion without turning mushy.
3. Dressing Dynamics:
Mayo + yogurt isn’t just about calories—it’s emulsion science. Mayo’s egg yolks bind fat and water, while yogurt’s acidity (lactic acid) tenderizes shrimp slightly. Dijon’s mustard seeds act as emulsifiers, preventing separation. Whisking lemon juice into mustard first creates a stable base, so your dressing won’t “weep” in the fridge.
4. Herb Power:
Fresh dill and chives aren’t just pretty—they contain volatile oils (carvone for dill, allicin for chives) that amplify over time. Chopping herbs right before mixing preserves these oils, unlike dried herbs, which lose 80% of their flavor during dehydration.
Fun Experiment: Try splitting the salad into two batches—one eaten immediately, one chilled 2 hours. The chilled version will taste significantly better as the dressing’s acids gently “cook” the shrimp (like ceviche) and herbs infuse the mayo.
Meal Prep Magic & Leftover Hacks
This salad’s a meal-prepper’s dream—with a few tweaks to keep it fresh all week. Here’s your game plan:
1. The Prep-Ahead Blueprint:
-
Shrimp: Cook, shock, and dry 3 days max ahead. Store in a paper-towel-lined container to absorb moisture.
-
Dressing: Mix and refrigerate separately for up to 5 days. The flavors deepen—like a quick “aging” process.
-
Veggies: Slice cucumbers and celery 1 day ahead; store in water (yes, water!) to maintain crunch. Drain and blot before mixing.
2. Assembly Strategy:
Combine components in portioned containers the morning you’ll eat them. Layer from bottom: dressing, shrimp, then veggies. Shake hard before eating to mix. This prevents sogginess better than store-bought salads!
3. Leftover Reinventions:
Day-old salad past its prime? Transform it!
-
Shrimp Salad Melt: Pile onto sourdough with cheddar; broil 3 minutes.
-
Stuffed Tomatoes: Hollow out beefsteaks; fill with salad + quinoa.
-
Asian-Inspired Wrap: Mix with shredded cabbage, sriracha mayo, and wrap in rice paper.
-
Chilled Soup: Blend with avocado and buttermilk for a quick gazpacho.
4. Freezing? Here’s the Deal:
Freezing cooked shrimp alone works (up to 3 months), but the salad as a whole turns watery. Better to freeze shrimp separately and remake dressing fresh.
Pro Tip: If your leftover salad looks watery, drain liquid, stir in 1 tsp cornstarch slurry (1:1 cornstarch + water), and heat gently while stirring to thicken. Cool before eating—it’ll taste like remoulade!
Pairings & Party Playbook
This salad shines as a team player. Here’s how to build a spread around it:
1. Beverage Pairings:
-
Wine: A citrusy Albariño or Vinho Verde mirrors the salad’s acidity. Beer lovers? Try a Belgian witbier with coriander notes.
-
Non-Alcoholic: Sparkling lemonade with muddled basil or cucumber-mint spa water.
2. Sidekick Dishes:
-
For a Light Lunch: Pair with chilled watermelon-feta skewers or a charred corn salad.
-
BBQ Spread: Serve alongside smoked pulled pork sliders and vinegar-based coleslaw.
-
Brunch Bonanza: Add deviled eggs and buttery croissants for a coastal twist.
3. Crowd-Pleasing Presentations:
-
Salad Bar Style: Set out bowls of toppings—crispy shallots, diced avocado, toasted almonds—for DIY customization.
-
On-the-Go Cups: Layer salad in mason jars with dressing at the bottom (great for picnics!).
-
Seafood Tower: Elevate it literally—pile salad on a tiered stand with oysters and cocktail sauce.
4. Global Flavor Bridges:
-
Caribbean: Add mango chunks and a pinch of jerk seasoning.
-
Nordic: Swap dill for fresh parsley; serve with rye crisps.
-
Italian: Fold in chopped sun-dried tomatoes and basil; serve on ciabatta.
Plate It Pretty (Or Just Grab a Spoon!)
This salad’s a social butterfly! For a light lunch: pile it onto butter lettuce cups with extra dill sprigs. Fancy brunch? Serve in avocado halves. Backyard BBQ? Scoop onto toasted baguette slices or alongside grilled corn. My Tuesday move? Straight from the bowl with kettle chips for scooping. Want color? Edible flowers or paprika dust make it Insta-worthy. Keep it cold—set your serving bowl on ice if outdoors!
Make It Your Own Delicious Adventure
This recipe’s a canvas—paint it your way!
- Mediterranean Twist: Add ¼ cup chopped Kalamatas, feta crumbles, and swap dill for oregano.
- Spicy Coastal Kick: Mix 1 tsp smoked paprika + ½ minced jalapeño into dressing. Top with crispy chorizo bits.
- Dairy-Free Delight: Use avocado mayo + coconut yogurt. Add diced avocado before serving.
- Crunch Fest: Toss in ½ cup diced jicama or radishes for extra texture.
- Seafood Swap: Replace shrimp with lump crab or cooked scallops. Feeling thrifty? Canned tuna works (drain well!).
Beau’s Backstory & Pro Secrets
This recipe evolved from my beach-blunder into a Feastical fan favorite. Originally, I used all mayo (so heavy!), but Greek yogurt was a game-changer for lightness. Funny story: Once subbed cilantro for dill by accident—my fishing buddies still tease me about “shrimp salsa.” Lesson learned! Over time, I’ve nailed two things: 1) Dry those shrimp like your salad’s life depends on it (it does), and 2) Fresh herbs are non-negotiable—they’re the soul of this dish. Make it the day of for peak crispness, though leftovers still rock. P.S. My dog Blue’s obsessed with shrimp… so I guard this bowl fiercely!
Your Questions, My Answers!
Q: Can I use pre-cooked shrimp?
A: Absolutely! Save time by using high-quality cooked shrimp (31-40 count). Skip boiling, but still ice-bath them to firm up. Pat EXTRA dry—pre-cooked shrimp often retains more water.
Q: Why is my dressing watery after chilling?
A> Three culprits: 1) Shrimp or cukes weren’t dried enough, 2) Over-stirring breaks down cukes, 3) Skipped the chill-time stir. Fix it: Drain excess liquid, stir in 1 tbsp extra mayo, and serve stat. Next time, blot veggies and shrimp like it’s your job!
Q: How long does it keep?
A> 2 days max in airtight containers. Cucumbers get soggy after that. Freezing? Nope—texture goes rubbery. If meal-prepping, store dressing separately and combine day-of.
Q: Can I add other veggies?
A> Go wild—but keep ratios tight! Bell peppers, blanched asparagus, or cherry tomatoes work (remove seeds!). Avoid watery veg like zucchini. Max ½ cup extras so flavors stay balanced.
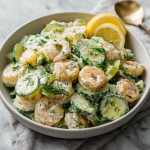
Creamy Cucumber Shrimp Salad
- Total Time: 30–45 minutes
Description
Hey friends, Beau here! Ever wish your lunch could teleport you straight to a breezy beach café—without the airfare or oven heat? This Creamy Cucumber Shrimp Salad is your answer. It’s the ultimate warm-weather win: chilled, creamy, crunchy, and packed with protein. Think juicy shrimp tossed with crisp cucumber and fresh herbs, all wrapped in a lemony, tangy dressing that’s as refreshing as a summer breeze.
Ingredients
Shrimp & Salad:
-
2 lbs large raw shrimp (21–30 count), peeled and deveined
-
1 English cucumber (or 6 Persian), thinly sliced
-
2 celery stalks, finely diced
Dressing:
-
¼ cup mayonnaise
-
¼ cup Greek yogurt (or sour cream)
-
2 tbsp fresh chives, chopped
-
2 tbsp fresh dill, chopped (or 1 tbsp tarragon or basil)
-
2 tbsp fresh lemon juice
-
2 tsp Dijon mustard
-
½ tsp kosher salt
-
Freshly cracked black pepper to taste
Instructions
-
Boil the Shrimp
Bring a large pot of salted water to a boil. Add shrimp and cook for 2–3 minutes, or until they turn pink and opaque.
Chef’s tip: Throw in a lemon wedge for subtle citrus flavor. -
Ice Bath the Shrimp
Immediately transfer shrimp to an ice bath (cold water + ice). This stops cooking and firms the texture.
Pat shrimp dry thoroughly with paper towels. -
Make the Dressing
In a large mixing bowl, whisk together mayo, Greek yogurt, lemon juice, mustard, chives, dill, salt, and pepper. Taste and adjust—zest a little lemon if you like extra zing! -
Prep the Veggies
Slice cucumber thinly (mandoline works great). Dice celery small for even crunch.
Optional: Gently blot cucumbers with a paper towel to reduce extra moisture. -
Toss & Chill
Fold shrimp, cucumbers, and celery into the dressing. Stir gently to coat everything evenly. Cover and refrigerate for at least 30 minutes so the flavors meld. Stir once halfway through.
Notes
-
Spoon into lettuce cups for a low-carb lunch
-
Serve in halved avocados for brunch elegance
-
Pile onto toasted sourdough or crostini for a backyard BBQ
-
Pair with cauliflower rice or pasta salad for a complete meal
- Prep Time: 10 minutes
- Cook Time: 5 minutes
Nutrition
- Calories: 220Cal Per Serving
- Fat: 10g
- Carbohydrates: 4g
- Fiber: 1g
- Protein: 28g
Fuel Your Fun (The Healthy Way!)
Per Serving (1 of 6): Calories: ~220 kcal • Protein: ~28g • Fat: ~10g • Carbs: ~4g • Fiber: ~1g. Naturally gluten-free, low-carb, and keto-friendly! Using Greek yogurt boosts protein while cutting saturated fat. For lower calories, try light mayo.
Final Thoughts: More Than a Recipe
This Creamy Cucumber Shrimp Salad isn’t just food—it’s a vibe. It’s the dish you’ll crave when summer hits hard, the one friends beg you to bring to potlucks, and the recipe that turns “I can’t cook” skeptics into kitchen converts. What makes it special isn’t just the balance of flavors or the protein punch—it’s the memories you’ll make with it. Maybe it’ll be the salad you pack for beach trips, the one you sneak from the fridge at midnight, or the dish your kids associate with lazy Sunday lunches.
So here’s my challenge to you: Make it once as written, then tweak it fearlessly. Burn the Dijon? Use horseradish. No shrimp? Try chicken. Recipes aren’t rules—they’re launchpads. And this one’s ready to catapult you into a lifetime of cool, creamy, crunchy joy. Now go forth and make those taste buds dance!
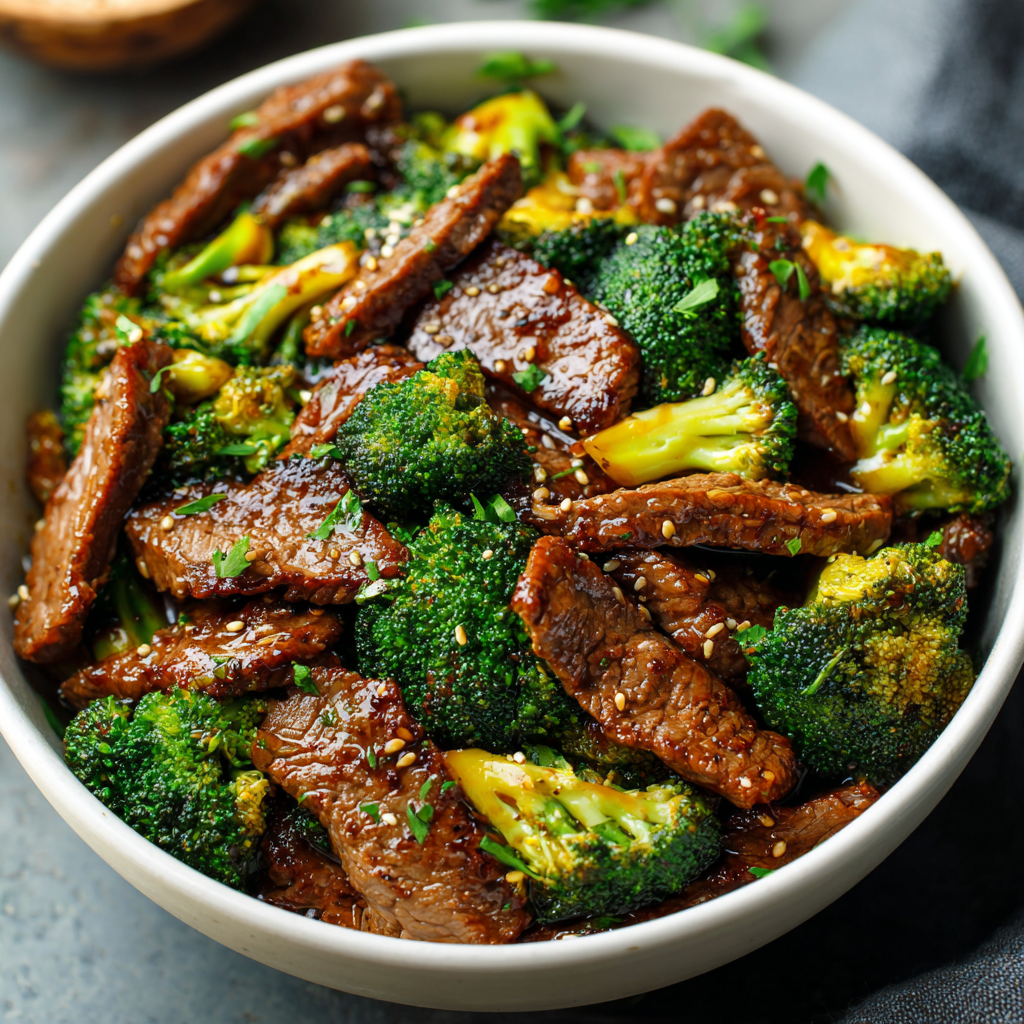
Keto Low Carb Beef and Broccoli
Ditch the Takeout Guilt: My Keto Beef & Broccoli That Tastes Like a Victory Lap
Hey friends, Beau here! Raise your hand if you’ve ever stared longingly at that glossy takeout menu, craving that saucy, savory beef and broccoli… only to remember your keto commitment and sigh dramatically. *Raises both hands wildly!* I feel you. That exact craving – that deep, umami hug in a bowl – is exactly why I’ve spent weeks perfecting this recipe. Forget sad, steamed broccoli and bland beef. This Keto Low Carb Beef and Broccoli is a full-on flavor FIESTA that happens to be ridiculously good for you. It’s got tender, seared steak that practically melts, broccoli with just the right snap, and a sauce so rich and savory you’ll swear it’s cheating (spoiler: it’s totally not!). The magic? A killer ginger-garlic marinade that works overtime, and a couple of secret-weapon pantry staples (looking at you, fish sauce!) that build layers of flavor faster than you can say “second helping.” Best part? It cooks up faster than waiting for delivery on a rainy Friday night. Seriously, 10 minutes of active cook time. So, grab your favorite wok or trusty skillet, crank up the heat, and let’s turn that takeout craving into a triumphant, low-carb victory you’ll make again and again. This isn’t just dinner; it’s proof that eating keto can be downright delicious and deeply satisfying. Ready to make your kitchen smell like a five-star Asian bistro? Let’s roll!
That One Takeout Box That Started It All
This recipe? It’s got roots in a slightly embarrassing, sauce-splattered memory. Picture this: It’s finals week during my culinary school days, circa 2007. I’m buried under textbooks, surviving on coffee fumes and sheer willpower. My then-roommate, Dave (bless his carb-loving heart), orders a mountain of Chinese takeout. The smell of that beef and broccoli box he cracked open? Pure torture. It was like a siren song of soy sauce and nostalgia, instantly transporting me back to Friday nights as a kid, sharing those iconic white boxes with my family, everyone fighting over the last piece of beef. The craving hit me like a freight train. But I was deep into experimenting with low-carb eating, trying to combat the dreaded “pastry chef weight gain.” Desperate, I raided our sad student fridge: a lonely steak, half a head of broccoli, some aging garlic. I whipped up a version using liquid aminos and a splash of vinegar, praying it wouldn’t taste like cardboard. The result? Not perfect, but the *essence* was there – that comforting, savory punch. Dave took one bite of my creation, then looked mournfully at his now-greasy takeout. “Dude,” he mumbled, mouth full of my keto beef, “this is… shockingly not sad.” That clumsy kitchen victory became my mission: to create a keto version that didn’t just mimic the takeout, but *eclipsed* it in flavor. This recipe is that mission, accomplished. Every bite tastes like winning that long-ago battle against the takeout box!
Your Flavor Arsenal: Simple Ingredients, Big Impact
Gather these heroes! Don’t sweat substitutions – I’ve got your back with options:
- 1 lb flat iron steak, thinly sliced against the grain: This cut is my MVP! It’s incredibly tender, flavorful, and budget-friendly. Chef’s Hack: Pop it in the freezer for 20 minutes before slicing – it makes cutting paper-thin against the grain SO much easier! Swap: Flank steak or sirloin work great too, just slice extra thin.
- ½ lb broccoli, cut into small florets: Small florets = faster cooking and better sauce coverage! Chef’s Insight: Don’t toss those stems! Peel the tough outer layer and slice them thin – they add awesome crunch.
- ¼ cup coconut oil: Gives a fantastic high-heat sear and a subtle, clean sweetness. Swap: Avocado oil works perfectly if you prefer neutral flavor.
- 1 tsp toasted sesame oil: Our flavor bomb finisher! Adds that deep, nutty aroma. Chef’s Warning: Don’t cook with this over high heat – add it at the end!
- 1 tsp fish sauce: The SECRET WEAPON! It doesn’t taste fishy here; it adds incredible savory depth (umami!). Swap: Use ½ tsp soy sauce (if not strict keto) or a pinch more salt.
- ¼ cup coconut aminos: Our keto soy sauce hero! Salty-sweet perfection. Swap: Tamari (ensure gluten-free if needed).
- 1 tsp fresh root ginger, peeled and grated: Fresh is non-negotiable for that zingy brightness! Chef’s Tip: Grate it frozen for zero mess.
- 2 cloves garlic, chopped: The aromatic backbone. Chop, don’t mince, for bigger flavor bursts that won’t burn as easily.
See? Nothing weird or hard-to-find. Just real ingredients doing delicious work!
Let’s Get Sizzling: Your Foolproof Roadmap
This cooks FAST! Have everything prepped and ready (mise en place, chefs!).
- Marinate the Magic: In a bowl (or a ziplock bag for easy cleanup!), combine your thinly sliced steak, coconut aminos, grated ginger, and chopped garlic. Get your hands in there and massage it gently – this helps the flavors penetrate faster! Chef’s Timing Tip: 20 minutes is the sweet spot for weeknights, but if you’ve got time, let it hang out in the fridge for up to 2 hours. The flavor deepens beautifully! Hack: Doing this while you prep the broccoli? Multitasking win!
- Sear Like a Boss: Heat your large skillet or wok over medium-high heat until it’s seriously hot – a drop of water should sizzle and dance. Add the coconut oil and swirl to coat. Carefully add the beef in a single layer (work in batches if needed – don’t crowd the pan!). Chef’s Golden Rule: LET IT SIT! Resist stirring for a good 2 minutes. This builds an amazing, flavorful crust (the Maillard reaction, baby!). Flip and sear the other side for another 1-2 minutes until browned but still slightly pink inside (it cooks more later!). Remove the beef to a clean plate. Hack: That browned stuff stuck to the pan? Flavor gold! We’re using it next.
- Broccoli Brilliance: No need to clean the pan! There’s so much goodness left. Add the broccoli florets (and sliced stems if using!) and immediately add a splash of water (about 2 tbsp). Chef’s Science Bit: The water creates steam, helping the broccoli cook quickly and stay vibrant green while scraping up those tasty browned bits (deglazing!). Stir-fry for 3-4 minutes. You want it tender-crisp – a slight bite is perfect! If it dries out, add another tiny splash of water.
- The Grand Reunion: Slide that beautiful seared beef and any accumulated juices back into the pan with the broccoli. Drizzle in the toasted sesame oil and fish sauce. Chef’s Flavor Boost: This is where the magic melds! Stir-fry everything together for just 1-2 minutes more. The beef finishes cooking, the sauce coats every nook and cranny, and the sesame oil’s aroma fills your kitchen. Heaven!
- Final Flourish: Kill the heat! Taste and marvel. Seriously, just stop and smell it. Perfection.
See? Quick, simple, and absolutely packed with technique-driven flavor!
Plating Perfection: Serve It Up with Style!
This dish shines bright on its own, but a little flair never hurts! Pile it high into warmed bowls – the steam rising is part of the experience. For that authentic touch, sprinkle generously with toasted sesame seeds (white or black, or both for drama!) and finely sliced green onions (the green parts add fresh bite, the white parts add sharpness). Feeling fancy? A tiny drizzle of extra toasted sesame oil right at the end adds visual gloss and aroma. While it’s a complete keto meal solo (hello, fat and protein!), it’s also fantastic spooned over a small bed of cauliflower rice to soak up every drop of that incredible sauce. Want a contrasting crunch? Serve with a simple side of quick-pickled cucumber slices. Grab those forks and dig in immediately – this is peak freshness!
Mix It Up! Flavor Adventures Await
Love this base? Try these tasty twists to keep it exciting:
- Spicy Szechuan Kick: Add 1-2 tsp chili garlic paste or ½ tsp crushed red pepper flakes to the marinade. Finish with a sprinkle of Szechuan peppercorns (toasted and crushed) for that tingly numbing heat!
- Mushroom & Bamboo Boost: Sauté ½ cup sliced shiitake mushrooms with the broccoli. Stir in ½ cup canned bamboo shoots (drained) with the beef at the end for extra texture and earthy flavor.
- Chicken or Pork Swap: Replace the beef with thinly sliced boneless chicken thighs (more flavor!) or pork loin. Marinate the same way. Chicken might cook a minute faster.
- Creamy Coconut Dream: Stir in ¼ cup full-fat coconut milk with the sesame oil and fish sauce for a richer, slightly Thai-inspired sauce. Divine!
- Nutty Crunch: Garnish with a handful of chopped roasted cashews or peanuts (watch carbs if strict) for added texture and richness.
Get creative – it’s your kitchen adventure!
Beau’s Backstory: From “Meh” to “MORE!”
This recipe? It’s been on quite the journey! That first dorm-room attempt was… optimistic. Over the years, I’ve learned the hard way that overcooked broccoli turns to mush (sad trombone), and using ground ginger instead of fresh? Yeah, tastes like dusty potpourri. The biggest evolution was discovering the power of the *double fat* – coconut oil for the high-heat sear and sesame oil for the finish. Game-changer! And the fish sauce? That came after a hilarious disaster trying to use oyster sauce (way too sugary!). My buddy Marco tasted batch #10, raised an eyebrow, and said, “Needs… funk?” Fish sauce was the answer. Now, it’s my most-requested keto recipe by friends – even the non-keto ones! One time, my niece declared it “better than Panda Express,” which is the highest compliment a 9-year-old can bestow. The beauty is its simplicity. It’s evolved into a dish that feels indulgent but is secretly nourishing. That’s the Feastical spirit!
Your Beef & Broccoli Questions, Answered!
Let’s tackle those common kitchen hiccups:
- Q: My beef turned out tough! What went wrong?
A: Two likely culprits: 1) You didn’t slice against the grain. Look for those long muscle fibers and cut perpendicularly – this shortens them, making each bite tender. 2) You overcooked it during the sear. Remember, we’re just browning it quickly (2-3 min per side max on high heat); it finishes cooking later with the broccoli. Thin slices are key! - Q: Can I make this ahead of time?
A: You can prep ahead! Slice the beef and marinate it in the fridge up to 24 hours (flavor bonus!). Cut the broccoli florets and store them separately in the fridge. Cook it fresh though – reheating can make the broccoli soggy and the beef chewy. It cooks so fast anyway! - Q: My sauce isn’t very saucy. Help!
A: No worries! The magic is in the coating, not a pool of liquid. If it seems dry: 1) Ensure you’re adding the splash of water with the broccoli – this creates steam and loosens pan bits. 2) When you add the beef back, include ALL the juices from the plate. 3) If still dry, add 1-2 tbsp of beef broth or water when combining everything at the end. - Q: Is fish sauce really necessary? It smells intense!
A: I get it! Trust me, once cooked, it loses the sharp smell and adds an irreplaceable savory depth (umami). It won’t taste fishy! If you’re truly hesitant, substitute with ½ tsp soy sauce/tamari (check carbs) or just a pinch more salt. But try it once with the fish sauce – you might be amazed!

Keto Low Carb Beef and Broccoli
- Total Time: 25–35 minutes
Description
You know that craving—the one that hits right when you’re trying your best to stick to keto. That steamy, savory beef and broccoli from your favorite Chinese place? I’ve been there, and instead of caving, I crafted this Keto Beef & Broccoli recipe that delivers all the bold flavors you love without the sugar, carbs, or regret.
Ingredients
For the Beef & Marinade:
-
1 lb flat iron steak (or flank/sirloin), thinly sliced against the grain
-
¼ cup coconut aminos
-
2 cloves garlic, chopped
-
1 tsp fresh ginger, grated
For Cooking:
-
¼ cup coconut oil (or avocado oil)
-
½ lb broccoli florets (with sliced stems if desired)
-
1 tsp toasted sesame oil (added at the end)
-
1 tsp fish sauce (or ½ tsp soy sauce + pinch salt)
Optional Toppings:
-
Toasted sesame seeds
-
Sliced green onions
-
Cauliflower rice for serving
Instructions
-
Marinate Steak
-
In a bowl or ziplock bag, combine steak, coconut aminos, garlic, and ginger. Let sit for 20 minutes (or up to 2 hours refrigerated).
-
-
Sear the Beef
-
Heat skillet or wok over medium-high. Add coconut oil.
-
Add beef in a single layer (work in batches if needed).
-
Don’t stir for 2 minutes—this creates a golden crust. Flip and sear another 1–2 minutes.
-
Remove to a plate (keep the juices!).
-
-
Cook the Broccoli
-
In the same pan, add broccoli and 2 tbsp water. Stir-fry and steam for 3–4 minutes until vibrant green and crisp-tender.
-
-
Bring It All Together
-
Return beef (plus juices) to the pan.
-
Stir in sesame oil and fish sauce.
-
Toss for 1–2 minutes until coated and heated through.
-
-
Serve
-
Plate hot, garnish with sesame seeds and green onions.
-
Add a spoonful of cauliflower rice if desired.
-
Notes
-
Freeze steak for 20 minutes before slicing for paper-thin perfection.
-
Don’t skip the sesame oil—add it at the end for bold aroma.
-
Steam & stir-fry broccoli in the same pan—maximum flavor, minimal cleanup.
-
Use all beef juices from the resting plate—don’t waste flavor!
-
Customize it: Add chili flakes for heat or mushrooms for extra umami.
- Prep Time: 15 minutes
- Cook Time: 10 minutes
The Good Stuff: Fueling Your Body Right
Here’s the breakdown per serving (recipe makes 4 generous servings):
- Calories: 340
- Fat: 25g (Healthy fats from coconut oil & steak!)
- Total Carbs: 6g
- Fiber: 2g
- Net Carbs: 4g (Perfect for keto!)
- Protein: 24g (Building & repairing!)
Prep Time: 15 minutes + marinating
Cook Time: 10 minutes
Total Time: 25 minutes + marinating
Servings: 4
Final Thoughts: More Than Just a Meal
This recipe isn’t just about replacing takeout—it’s about redefining what keto eating can be. Too often, low-carb meals feel like sacrifices. But this? It’s a celebration.
-
For beginners: It proves keto doesn’t mean bland or complicated.
-
For veterans: It’s a reminder that cravings can be conquered deliciously.
-
For everyone: It’s a fast, flavorful, and fun way to eat well.
So the next time that takeout craving hits, don’t sigh—start slicing that steak. Your taste buds (and your health) will thank you.

CORN AVOCADO SALSA
Sunshine in a Bowl: My Go-To Corn Avocado Salsa
Hey friends! Beau here, back with another Feastical favorite that’s basically summer vacation in a dish. Picture this: golden corn kernels popping with sweetness, buttery avocado chunks, juicy tomatoes doing a happy dance with zesty lime, and just enough jalapeño kick to make things interesting. This isn’t just salsa—it’s a confetti explosion of fresh flavors that turns any meal into a fiesta. Whether you’re hosting a backyard bash, prepping Taco Tuesday, or just craving something bright on a dreary day, this Corn Avocado Salsa is your culinary BFF. No fancy skills needed, just a knife, a bowl, and about 10 minutes (seriously—I timed it while my dog, Biscuit, begged for scraps). Grab those chips, and let’s make magic!
Why This Salsa Tastes Like Home
This recipe takes me straight to my grandma’s rickety porch swing in Georgia. Every August, we’d shuck corn straight from her garden, the summer heat sticking to our skin like honey. One sweltering Sunday, I dumped leftover grilled corn into her famous guacamole instead of running back to the farmer’s market. Chaos? Absolutely. But that happy accident became our family’s secret weapon. We’d devour it with saltines (fancy chips were for city folks!), laughing as juice dribbled down our chins. Now, when I make it, I still hear her saying, “Beau, darlin’, good food’s gotta be messy.” She was right—this salsa’s a glorious, colorful mess that tastes like love and lazy afternoons. Pass the napkins!
Your Colorful Shopping List
Grab these fresh players (measurements are flexible—I eyeball life):
- 2 cups sweet corn – Fresh-off-the-cob is MVP (grill it for smoky depth!), but frozen/thawed or canned works in a pinch. Chef hack: char it in a dry pan for 2 minutes!
- 2 ripe avocados, diced – Look for slight give when squeezed. Rock-hard? Bury in rice overnight. Mushy? Make guac instead!
- 1 cup diced tomato – Roma tomatoes are less watery, but any juicy heirloom works. Pro tip: Scoop seeds out with a spoon to avoid salsa soup!
- ½ cup finely diced red onion – Soak in ice water for 5 minutes to tame the bite if you’re onion-shy.
- 1 jalapeño, diced – Seeds in = fire alarm. Seeds out = gentle warmth. Sub with poblano for zero heat!
- 1 tbsp chopped fresh cilantro – Haters? Swap flat-leaf parsley. But really, give cilantro a chance!
- Juice of 1 lime – Bottled lime juice? I’ll pretend I didn’t see it. Fresh is non-negotiable for zing!
- Salt & pepper to taste – Start with ½ tsp salt. Taste. Dance. Repeat.
Let’s Build Flavor Town!
Ready? Aprons optional, enthusiasm mandatory:
- The Chop Squad: Dice tomatoes, onion, jalapeño, and cilantro. Throw ’em in a big bowl. Chef secret: Cut onions smaller than corn so they don’t dominate!
- Corn’s Grand Entrance: Add corn. If using fresh, slice kernels downward with a sharp knife (cob flat on the board). Frozen? Thaw, then pat dry—soggy salsa is sad salsa.
- Avocado TLC: Halve avocados, remove pits, score flesh in a grid, then scoop out with a spoon. Gently fold into the mix. HACK: Spritz avocado chunks with extra lime juice to prevent browning!
- Zest & Season: Drizzle lime juice over everything. Sprinkle salt and pepper. Fold like you’re turning pillowcases—no smashing! Taste. Need more lime? More kick? Adjust now.
- The Chill Factor: Let it sit 10–15 minutes in the fridge. Why? Flavors get cozy and the lime works its anti-browning magic. Impatient? Eat immediately—I won’t judge!
The Science Behind the Freshness: Why This Salsa Works
Ever wonder why this Corn Avocado Salsa tastes so alive? It’s not just the ingredients—it’s chemistry and texture working in harmony. Let’s geek out for a sec:
Acid Magic (Lime Juice MVP)
The lime juice isn’t just for zing—it’s a multitasker. The citric acid slows down enzymatic browning in avocados (science speak: it inhibits polyphenol oxidase). Translation: no sad, mushy brown guacamole vibes. It also brightens the corn’s natural sweetness and mellows the red onion’s sharpness. Pro tip: If you’re prepping ahead, add lime juice to the onions first—they’ll lightly pickle, softening their bite.
Texture Play
Great salsa is a symphony of crunch, cream, and pop. The corn’s firmness contrasts the avocado’s silkiness, while tomatoes burst with juiciness. For optimal texture:
-
Corn: Charring it (even in a dry pan) adds smoky depth and a subtle crunch.
-
Avocado: Dice it slightly larger than the corn so it doesn’t turn to mush when mixed.
-
Jalapeño: Finely mince it to distribute heat evenly without overwhelming bites.
Salt’s Role
Salt isn’t just seasoning—it’s a flavor enhancer. It suppresses bitterness (bye, overly earthy cilantro haters!) and amplifies sweetness (hello, corn!). Kosher salt is ideal because its flakes dissolve evenly. Sprinkle it in layers: a pinch on the tomatoes first to draw out excess moisture, then more to taste after mixing.
Fun Experiment: Try adding a teaspoon of honey next time. The fructose bonds with the lime’s acidity, creating a rounder, more complex flavor—like a quick cheat for “aged” salsa.
Beyond Chips: Unexpected Ways to Devour This Salsa
Sure, tortilla chips are a classic, but this salsa’s versatility is its superpower. Here’s how to repurpose it like a kitchen wizard:
1. Breakfast Remix
-
Avocado Toast 2.0: Smash it onto sourdough, top with a fried egg, and drizzle with hot honey.
-
Omelet Filling: Fold it into eggs with a sprinkle of cheddar—breakfast tacos without the effort.
-
Yogurt Parfait (Savory Edition): Layer Greek yogurt, salsa, and crushed pepitas for a protein-packed start.
2. Main Dish Hero
-
Grilled Fish Crown: Pile it onto blackened salmon or cod—the fat in the avocado complements oily fish.
-
Taco Truck at Home: Swap out taco toppings entirely; this salsa IS the topping (add cotija cheese for extra credit).
-
Grain Bowl Glue: Mix with quinoa, black beans, and shredded cabbage for a no-dressing-needed lunch.
3. Salad Reinvented
-
Deconstructed Guac Salad: Toss with romaine, grilled shrimp, and a lime vinaigrette.
-
Pasta Salad Twist: Stir into chilled orzo with olive oil and feta—carb lovers, rejoice.
4. Party Hacks
-
Stuffed Mini Peppers: Fill halved sweet peppers for a gluten-free appetizer.
-
Bruschetta Upgrade: Spoon onto toasted baguette slices with a smear of goat cheese.
Pro Tip: Freeze leftover salsa in ice cube trays (without avocado), then thaw and mix with fresh avocado later for a quick fix.
The Cultural Roots: A Love Letter to Global Salsas
This recipe is a mash-up of traditions—a tribute to the global love affair with fresh, bold condiments. Let’s take a flavor journey:
Mexico: The OG Salsa
The word “salsa” literally means “sauce,” and Mexican salsas (like pico de gallo) prioritize texture and freshness. Key differences:
-
Traditional pico avoids avocado (too rich for their bright, lean style).
-
Often uses serrano peppers instead of jalapeño for sharper heat.
Peru: The Citrus Connection
Their salsa criolla (onions, lime, cilantro) inspired our lime-heavy approach. Fun fact: Peruvian ceviche leans on lime’s acidity to “cook” fish—similar to how we “cook” onions in lime juice here.
Southern U.S.: The Corn Obsession
As a Georgia boy, I’ll argue corn is our culinary mascot. Southern “relish” (think chow-chow) balances sweet, tangy, and crunchy—just like this salsa.
Why This Fusion Works
-
Balance: The creaminess of avocado (a Mexican staple) tempers the sharpness of lime (a Peruvian move).
-
Seasonality: Corn and tomatoes peak in summer everywhere from Iowa to Oaxaca.
-
Adaptability: Like all great salsas, it’s a canvas. Add mango for Caribbean flair, or roasted garlic for Mediterranean vibes.
Cultural Pro Tip: Serve it with elote-style grilled corn—slather the cob with mayo, roll in cotija, and top with salsa. Fusion chaos = delicious.
Where to Plop This Sunshine
This salsa’s a social butterfly! Serve it in a rustic bowl with:
- Chips: Thick tortilla chips are ideal scoopers.
- Tacos/Bowls: Spoon over grilled chicken, fish tacos, or grain bowls.
- Grilled Everything: Top burgers, salmon, or even pizza (trust me!).
- Solo Star: Eat it with a spoon straight from the bowl—your secret’s safe with me.
Mix It Up, Maverick!
Customize your fiesta:
- Bean Bonanza: Add 1 cup black beans for extra protein.
- Fruit Fiesta: Toss in diced mango or peaches for sweet heat.
- Creamy Dream: Swirl in ¼ cup cotija or feta cheese.
- Smoky Twist: Use chipotle powder instead of fresh jalapeño.
- Vegan Vibes: Already there! Just confirm chips are vegan-friendly.
Beau’s Backstage Tips
This salsa’s evolved more than my taste in music (RIP, my neon band phase). Originally, I’d drown it in garlic until a picnic incident left everyone… aromatic. Now, garlic’s optional (add 1 minced clove if you dare!). Storage truth: It’s best fresh but lasts 1 day max in the fridge. Press plastic wrap directly on the surface to fight browning. Funny story: Once subbed lemon for lime during a midnight snack emergency. Biscuit the dog stole the bowl. Lesson? Citrus matters, and dogs have excellent taste.
Your Salsa SOS, Solved!
Q: Why’s my salsa watery?
A: Tomatoes are juicy rebels! Seed them first, or drain in a colander for 5 minutes pre-mixing.
Q: Can I make this ahead?
A: Absolutely! Prep everything except avocado up to 4 hours early. Add avo and lime juice right before serving.
Q: Help—my avocados turned brown!
A: Acid is your armor! Lime juice slows oxidation. If it browns slightly, stir gently—flavor’s still golden.
Q: Too spicy? Too bland?
A: For heat overload, add extra avocado or a drizzle of honey. Bland? More salt, lime, or a pinch of cumin wakes it up!
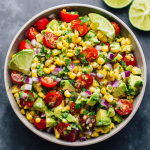
CORN AVOCADO SALSA
Description
Hey friends! Beau here, with a bowlful of summer sunshine. This Corn Avocado Salsa bursts with sweet corn, creamy avocado, juicy tomatoes, and a jalapeño kick—bright, fresh, and totally addictive. Perfect for chips, tacos, grilled meats, or just spooning straight from the bowl (no judgment here). Ready to fiesta? Let’s go!
Ingredients
-
2 cups sweet corn (fresh grilled is best; frozen or canned work too)
-
2 ripe avocados, diced (spritz with lime to keep fresh)
-
1 cup diced tomato (Roma or heirloom, seeds removed)
-
½ cup finely diced red onion (soak in ice water 5 mins if you want milder)
-
1 jalapeño, diced (seeds in for heat, out for mild)
-
1 tbsp chopped fresh cilantro (or parsley if you’re not a fan)
-
Juice of 1 fresh lime (non-negotiable zing!)
-
Salt & pepper to taste (start with ½ tsp salt)
Instructions
-
Dice tomatoes, onion, jalapeño, and cilantro. Toss in a big bowl.
-
Add corn kernels (fresh off the cob or thawed & drained).
-
Fold in avocado gently to keep it chunky and creamy.
-
Drizzle lime juice all over. Sprinkle salt & pepper.
-
Fold carefully—no mashing! Taste and adjust lime, salt, or heat.
-
Chill 10-15 minutes if you can—flavors get cozy and avocado stays bright.
Notes
-
Garlic is optional—start without, add 1 minced clove if you want more punch.
-
Best fresh but lasts 1 day in fridge with plastic wrap pressed on top.
-
Avoid watery salsa by seeding tomatoes and draining if needed.
-
If avocado browns a bit, a quick stir revives it.
-
For too much heat, mellow with extra avocado or a drizzle of honey.
Nutrition
- Calories: 180 Cal (Per ½ cup serving
- Fat: 11g
- Carbohydrates: 18g
- Fiber: 6g
- Protein: 3g
Nutritional Perks (Because Balance!)
Serving: ½ cup | Serves: 6 | Prep: 10 mins
Calories: ~180 | Carbs: 18g | Fat: 11g (healthy monounsaturated!) | Protein: 3g | Fiber: 6g
Gluten-free, dairy-free, naturally vegan. Mic drop.
Final Thoughts: More Than a Recipe
This Corn Avocado Salsa isn’t just a dish—it’s a mindset. It’s about embracing imperfection (hello, messy chips!), celebrating seasonal abundance, and stealing tricks from kitchens worldwide. It’s the kind of food that doesn’t just fill your belly; it sparks joy, memories, and maybe a little dance in your chair (or is that just me?).
So make it your own. Burn the corn a little. Forget the cilantro. Let the dog lick the bowl. Because the best recipes aren’t about rules—they’re about flavor, laughter, and the courage to toss it all together and call it sunshine.
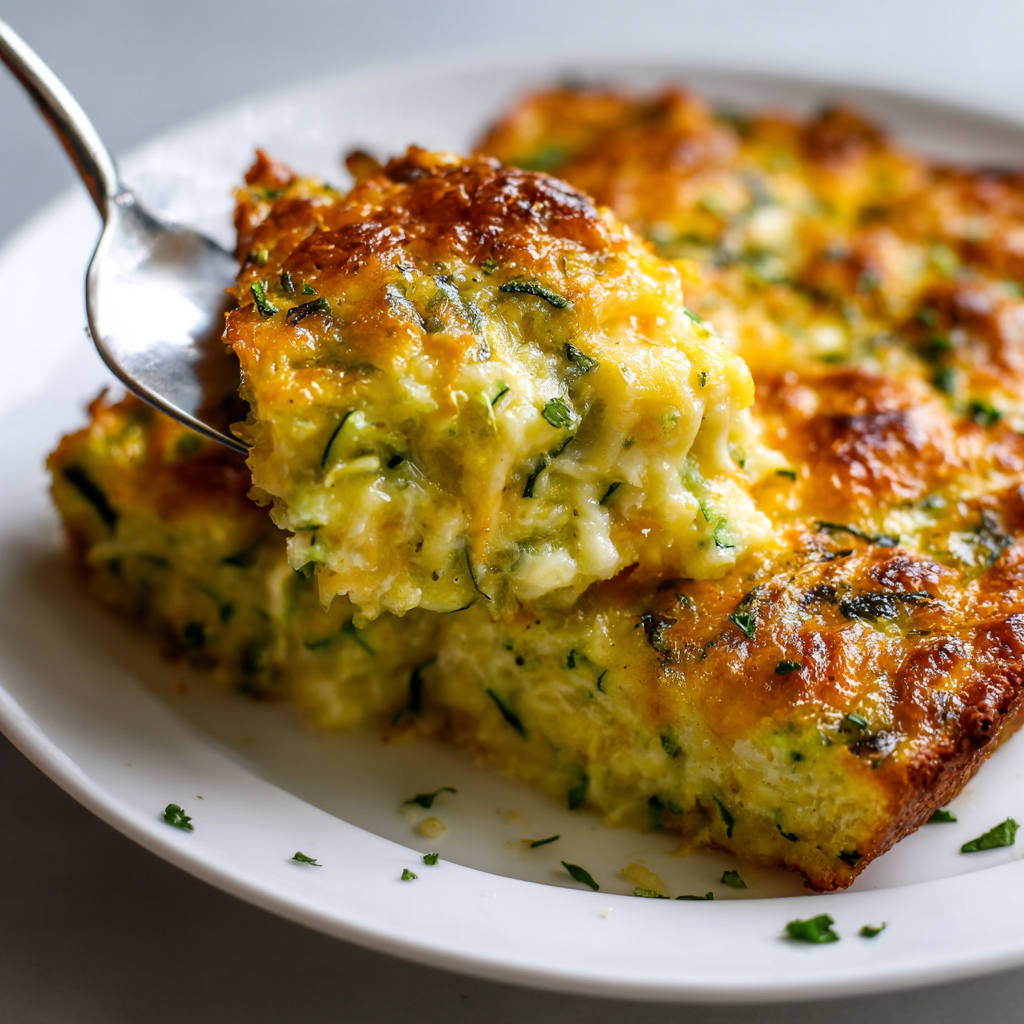
Cheesy Zucchini Bake
Cheesy Zucchini Bake: Your Secret Weapon for Sneaky Veggie Victory!
Hey friends, Beau here! Ever stared down a mountain of summer zucchini and thought, “What magic can I create today?” Or maybe you’re just hunting for that perfect side dish that makes everyone go quiet at the dinner table – you know, the kind where forks are the only sound? Well, pull up a stool because this Cheesy Zucchini Bake is about to become your new best friend in the kitchen. Imagine golden, crispy edges giving way to a melty, savory center packed with three kinds of cheese and garlicky goodness. The best part? It’s mostly veggies playing dress-up as decadent comfort food! Whether you’re drowning in garden bounty or just craving something soul-warming, this bake turns humble zucchini into pure gold. It’s perfect for potlucks, weeknight dinners, or convincing veggie-skeptics that “hidden” can mean “heavenly.” So grab your favorite bowl – and that rogue spatula hiding in the drawer – because we’re about to turn simple ingredients into pure, cheesy joy. Let’s make your kitchen smell like a hug!
Zucchini Chaos & Grandma’s Lifesaver
Picture this: eight-year-old me, dwarfed by zucchini plants taller than my dad’s old pickup truck. Every summer, our garden went wild, and by August, we’d have zucchinis hiding under bedsheets like fugitives! One sweltering afternoon, Mom handed me a grater and a mountain of green. “Grate or walk the plank,” she joked. As I transformed zucchinis into confetti, sweat mixing with vegetable juice, Grandma swooped in like a culinary superhero. She took my soggy pile, squeezed it like she was wrestling an alligator, then mixed it with cheese and breadcrumbs. Into the oven it went. What emerged was pure wizardry – golden, bubbling, and smelling like cheesy paradise. That bake vanished faster than ice cream in July, and I learned two life lessons: 1) Never underestimate a zucchini, and 2) Cheese is the ultimate peace treaty between kids and vegetables. Every time I make this, I’m back in that steamy kitchen, grinning at Grandma’s wink as she served victory on a melty plate.
Your Flavor Dream Team: Ingredients & Smart Swaps
- 4 cups shredded zucchini (about 3.5 medium) – Star of the show! Pro tip: Skip watery giants; smaller zucchinis = sweeter flavor.
- ½ tsp salt – Not just for taste! This draws out moisture so your bake isn’t a soggy mess.
- ½ cup finely chopped onion – Sweet or yellow onions work best. Swap with 1 tsp onion powder in a pinch!
- 1 tbsp finely chopped garlic (about 3 cloves) – Fresh is magic, but 1 tsp garlic powder works too. Go wild if you’re a garlic fiend!
- 2 large eggs – Our binder! Room temp blends smoother. For vegan? Try flax eggs (2 tbsp ground flax + 5 tbsp water).
- ½ cup grated Parmesan + 2 tbsp for topping – Salty umami boost! Grana Padano or Pecorino rock as subs.
- 1 cup shredded mozzarella – The melty queen! Low-moisture part-skim works best. Fontina’s a fun twist.
- ½ cup shredded cheddar – Adds tangy depth. Sharp white cheddar or Gouda are killer alternatives.
- ½ cup panko breadcrumbs – For that golden crunch! Gluten-free? Use GF panko or crushed pork rinds.
- 2 tbsp melted salted butter – Richness and crisp factor. Olive oil or ghee work for dairy-free.
Chef’s insight: Salt your zucchini like it owes you money – squeezing out liquid is KEY to texture. Trust me, your future crispy edges will thank you!
Building Your Golden Masterpiece: Step-by-Step
- Preheat & Prep: Fire up your oven to 375°F (190°C). Grease an 8×8-inch baking dish with butter or non-stick spray. Why? Hot oven + cold dish = sad bake! Pro hack: Rub dish with a cut garlic clove for extra flavor.
- Zucchini TLC: Shred zukes (skin on for nutrients!) into a colander. Sprinkle with salt, toss, and let weep 10 minutes. DO NOT SKIP: Grab handfuls and SQUEEZE like you’re juicing a lemon. Get aggressive – you’ll remove ½ cup liquid! Pat dry with paper towels. Soggy zucchini = weepy bake.
- The Big Mix: In a large bowl, combine squeezed zucchini, onion, garlic, eggs, all cheeses (save 2 tbsp Parmesan!), breadcrumbs, and melted butter. Mix with hands or spatula until it resembles cheesy confetti. Chef secret: Let mix rest 5 minutes – breadcrumbs absorb moisture for perfect texture!
- Bake & Bubble: Spread mixture evenly in dish. Sprinkle reserved Parmesan on top. Bake 35-40 mins until edges are golden and center is set. Watch for the cheese “lava bubbles” – that’s your cue! For next-level crunch, broil 2 minutes at the end. Guard oven with your life – broiling is a quick trip from golden to charcoal!
- Patience, Padawan: Let bake cool 10 minutes before slicing. Resist cutting immediately! Resting lets eggs set so slices hold shape. Use a sharp knife dipped in hot water for clean cuts.
Hot tip: Place baking dish on a sheet pan to catch any rogue cheese drips – saves oven cleanup!
The Science Behind the Perfect Zucchini Squeeze
If you’ve ever ended up with a watery, sad zucchini bake, you know the pain of soggy disappointment. But fear not—there’s a scientific method to ensuring your dish stays crisp, golden, and structurally sound. The secret? Proper moisture extraction.
Why Salt & Squeeze?
Zucchini is 96% water, which means if you don’t take control, your bake will turn into a swamp. Salt acts as a natural osmotic agent, pulling water out of the zucchini cells. Here’s the breakdown:
-
Salt Application – Coating shredded zucchini in salt disrupts the cell structure, forcing liquid to the surface.
-
Resting Time – Waiting 10 minutes lets osmosis work its magic.
-
The Squeeze – This is where you take charge. Wringing the zucchini like a wet towel removes up to ½ cup of excess water, preventing a mushy bake.
Texture Matters: Small vs. Large Zucchinis
-
Small to medium zucchinis = firmer flesh, sweeter flavor, less water.
-
Overgrown zucchinis = spongy texture, bitter seeds, excess moisture.
Pro Tip: If stuck with a giant zucchini, scoop out the seedy core before shredding.
The Cheese Factor: Melting & Stability
Not all cheeses behave the same when baked:
-
Mozzarella – High meltability but can release oil if overheated.
-
Cheddar – Adds sharpness but needs a partner (like Parmesan) for structure.
-
Parmesan – Low moisture, high umami, helps bind the bake.
Chef’s Secret: A mix of cheeses ensures gooeyness without separation.
Breadcrumbs: The Crisp Architect
Panko breadcrumbs aren’t just filler—they’re moisture regulators:
-
Absorb residual liquid.
-
Create a golden crust.
-
Add crunch without heaviness.
For gluten-free: Crushed pork rinds or almond flour mimic the effect.
Final Thought: Treat zucchini like a sponge—salt it, squeeze it, dry it—and you’ll never fear a soggy bake again.
The Psychology of Sneaky Veggie Wins
Convincing picky eaters to devour vegetables isn’t just about taste—it’s about strategy. Here’s why this zucchini bake works like a charm on veggie skeptics:
The Flavor Illusion: Cheese as the Trojan Horse
Studies show that fat and umami (hello, cheese!) trigger dopamine responses, making the brain associate veggies with pleasure. This bake uses:
-
Three cheeses for layered richness.
-
Garlic and butter for aromatic allure.
-
Golden-brown crust for visual appeal.
Texture Tricks: Crunch vs. Creamy
Picky eaters often reject veggies due to texture issues. This bake solves that by:
-
Crispy top (thanks to panko and broiling).
-
Tender middle (from squeezed zucchini and melted cheese).
-
No “slimy” mouthfeel (proper prep eliminates mush).
The “Hidden but Present” Balance
Unlike pureed veggie hacks, this dish lets zucchini shine without screaming “HEALTH FOOD.” Shredding ensures:
-
Even distribution.
-
Mild sweetness (no overpowering veggie taste).
-
Familiar casserole comfort.
Kid-Tested Tactics
-
Let them sprinkle cheese – Involvement increases acceptance.
-
Call it “Cheesy Bake” – Avoid leading with “zucchini.”
-
Serve with a favorite dip – Marinara or ranch boosts familiarity.
Final Thought: This isn’t just a recipe—it’s a psychological veggie victory.
Global Zucchini Bake Variations
Why stop at classic cheesy goodness? Zucchini is a global culinary chameleon. Here’s how to take this bake around the world:
1. Italian-Inspired
-
Add 1/2 cup marinara sauce to the mix.
-
Layer with sliced pepperoni for a pizza twist.
-
Swap Parmesan for Pecorino Romano.
2. Greek-Style
-
Mix in 1/2 cup crumbled feta + 1 tsp oregano.
-
Top with chopped Kalamata olives.
-
Serve with tzatziki drizzle.
3. Mexican Fiesta
-
Stir in 1 diced jalapeño + 1/2 tsp cumin.
-
Swap cheddar for pepper jack cheese.
-
Garnish with cilantro + lime crema.
4. French Provençal
-
Add 1 tbsp herbes de Provence.
-
Use Gruyère instead of mozzarella.
-
Top with sautéed shallots.
5. Indian Spiced
-
Fold in 1 tsp garam masala + 1/2 cup paneer cubes.
-
Garnish with fresh cilantro + mint chutney.
Final Thought: Zucchini’s mild flavor makes it the perfect canvas for global flavor adventures.
Plating Perfection: How to Serve It Up!
Slide those golden squares onto plates with a crispy spatula edge facing up – show off that crunch! Pair with grilled lemon-herb chicken or garlicky shrimp for a protein-packed meal. Feeling brunchy? Top with a poached egg and hot sauce. For veggie-forward feasts, serve alongside a tangy arugula salad with lemon vinaigrette to cut the richness. Garnish with fresh basil ribbons or microgreens for a pop of color. And hey, no judgment if you eat it straight from the dish with a spoon – we’ve all been there!
Mix It Up: 5 Delicious Twists
- Meat Lover’s: Fold in ½ cup cooked crumbled bacon, diced ham, or Italian sausage.
- Mediterranean: Add ¼ cup chopped sun-dried tomatoes, kalamata olives, and swap cheddar for feta.
- Garden Harvest: Mix in 1 cup shredded carrots or yellow squash with the zucchini.
- Keto-Friendly: Replace panko with ⅓ cup crushed pork rinds or almond flour.
- Spicy Kick: Stir in 1 diced jalapeño or ½ tsp red pepper flakes with the garlic.
Beau’s Backstage Notes
This recipe evolved from my grandma’s “kitchen sink” approach – she’d throw in leftover corn or wilted herbs! My funniest fail? Once used watery grocery-store mozzarella… it became “Zucchini Soup Bake.” Lesson learned! Now I always squeeze zucchini like I’m mad at it and use low-moisture cheese. Leftovers? They reheat beautifully! Store covered in fridge 3-4 days. Reheat in oven at 350°F (avoid microwave sogginess) or crisp slices in an air fryer. Freeze before baking: assemble in dish, wrap tight, and freeze. Thaw overnight before baking as directed. Hungry for more? Try adding fresh dill or swapping Parmesan for smoky Gruyère!
FAQs: Your Zucchini Bake SOS
Q: Why is my bake watery?
A: Squeezing is non-negotiable! Salt draws water out, but you must physically squeeze it. Also, avoid giant zucchinis (more water) and high-moisture cheeses like fresh mozz.
Q: Can I use yellow squash instead?
A: Absolutely! Swap half or all zucchini with yellow squash. Same prep – salt, squeeze, rejoice! They’re flavor twins.
Q: How do I make it crispier?
A: Three tricks: 1) Broil 2 mins at the end (watch closely!), 2) Mix 1 tbsp olive oil into panko before adding, 3) Bake on oven’s lower rack for better browning.
Q: Can I freeze leftovers?
A: Yes! Cool completely, slice, then freeze portions in airtight containers. Reheat frozen slices at 375°F on a sheet pan 15-20 mins. Texture stays perfect!

Cheesy Zucchini Bake
- Total Time: 55 mins
Description
Hey friends, Beau here! Ever stared down a mountain of summer zucchini and wondered how to turn it into magic? This Cheesy Zucchini Bake is your answer — golden, crispy edges give way to a melty, garlicky, triple-cheese center. Mostly veggies, all comfort. Perfect for weeknights, potlucks, or convincing veggie skeptics that “hidden” means heavenly. Let’s get baking!
Ingredients
-
4 cups shredded zucchini (about 3.5 medium) — skip watery giants!
-
½ tsp salt
-
½ cup finely chopped onion (yellow or sweet) — or 1 tsp onion powder
-
1 tbsp finely chopped garlic (3 cloves) — garlic powder works too
-
2 large eggs (room temp) — vegan? Use 2 flax eggs (2 tbsp ground flax + 5 tbsp water)
-
½ cup grated Parmesan + 2 tbsp reserved for topping (or Grana Padano/Pecorino)
-
1 cup shredded mozzarella (low-moisture part-skim best)
-
½ cup shredded cheddar (or sharp white cheddar/Gouda)
-
½ cup panko breadcrumbs (GF? Use gluten-free panko or crushed pork rinds)
-
2 tbsp melted salted butter (or olive oil/ghee)
Pro tip: Salt your zucchini and squeeze out as much liquid as you can—this is the key to crispy edges!
Instructions
-
Preheat & Prep: Oven to 375°F (190°C). Grease an 8×8-inch dish. Bonus: rub with garlic clove for extra aroma.
-
Zucchini TLC: Shred zucchini (skin on for nutrients) into a colander. Toss with salt, let sit 10 minutes. Grab handfuls, squeeze hard—like juicing a lemon. Pat dry with paper towels.
-
Mix It Up: In a big bowl, combine squeezed zucchini, onion, garlic, eggs, cheeses (save 2 tbsp Parmesan!), breadcrumbs, and melted butter. Mix well, then rest 5 minutes for perfect texture.
-
Bake & Bubble: Spread evenly in dish. Sprinkle reserved Parmesan on top. Bake 35-40 minutes till edges golden and center set. For extra crunch, broil 2 minutes—watch carefully!
-
Patience, Padawan: Cool 10 minutes before slicing for clean, firm pieces. Use a sharp knife dipped in hot water for neat cuts.
Pro tip: Place baking dish on a sheet pan to catch any drips and save your oven!
Notes
-
Serve squares with grilled lemon-herb chicken or garlicky shrimp.
-
Brunch mode? Top with poached egg and hot sauce.
-
Pair with arugula salad dressed in lemon vinaigrette to cut richness.
-
Garnish with fresh basil or microgreens.
-
No shame in eating it straight from the dish with a spoon!
- Prep Time: 15 mins
- Cook Time: 40mins
Nutrition
- Calories: 210 Cal Per Serving
- Fat: 15g
- Carbohydrates: 6g
- Protein: 12g
Nutritional Highlights (Per Serving)
Serves 6 | Prep: 15 mins | Cook: 40 mins | Total: 55 mins
Calories: ~210 | Net Carbs: 6g | Fat: 15g | Protein: 12g
Packed with Vitamin C (zucchini!) and calcium. Carbs stay low thanks to veggie base!
Final Thoughts: More Than Just a Side Dish
This Cheesy Zucchini Bake isn’t just a recipe—it’s a kitchen philosophy. It teaches us to:
-
Respect ingredients (squeeze that zucchini!).
-
Play with flavors (cheese is your friend).
-
Adapt and conquer (picky eaters, meal prep, global twists).
Whether you’re drowning in garden zucchinis or just craving comfort food with a veggie boost, this dish delivers. So grab your grater, channel your inner grandma, and bake your way to cheesy, crispy victory.