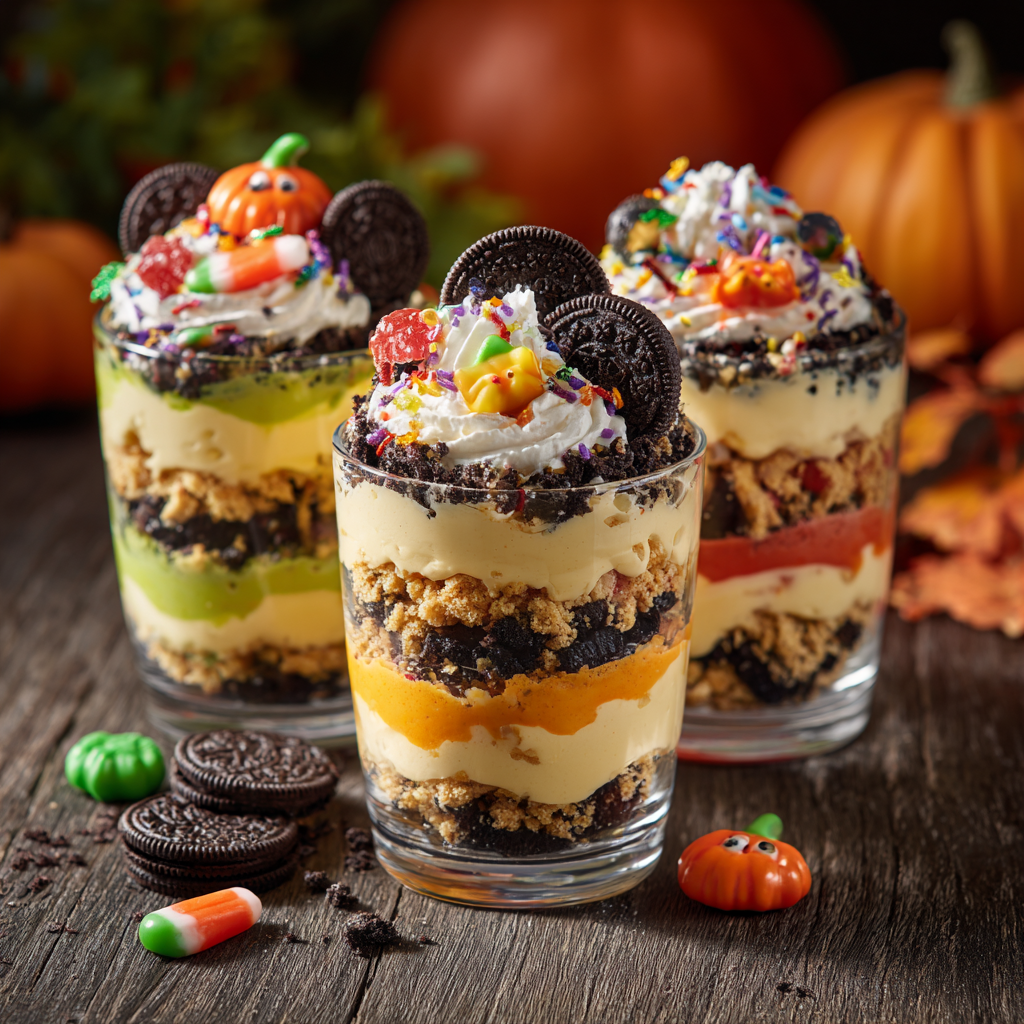
HALLOWEEN PARFAITS
Spooky, Sweet, and Seriously Simple: Your New Favorite Halloween Parfaits!
Hey there, friends! Beau here from Feastical, welcoming you back to my kitchen – the place where we turn simple ingredients into memories and where every recipe feels like a warm hug. Can you feel it? That crisp, cool air, the rustle of brightly colored leaves, and the undeniable buzz of excitement? That’s right, Halloween is creeping up on us, and my mind is swirling with all things fun, festive, and fantastically delicious.
Now, I’m a firm believer that holiday treats should be two things: incredibly tasty and an absolute joy to make. The last thing you need on a busy October day is a recipe that requires a degree in advanced pastry arts and a kitchen that looks like a flour bomb went off. You want something easy, something that brings a smile to every face around the table, and something that captures that magical, spooky-sweet spirit of the season.
Well, my foodie friends, have I got the perfect recipe for you. These Halloween Parfaits are my go-to, my secret weapon, my never-fail crowd-pleaser. They’re layered with creamy pudding, crunchy cookie “dirt,” fluffy whipped cream, and all the festive sprinkles your heart desires. They look like you fussed for hours, but the secret is… they come together in about 15 minutes flat. Whether you’re hosting a full-blown monster mash or just want a fun after-school snack, these parfaits are about to become your Halloween MVP. So, grab your favorite mixing bowl and let’s create some kitchen magic together!
A Spooky (and Sticky) Trip Down Memory Lane
This recipe always takes me right back to my childhood, specifically to my mom’s chaotic, wonderful, and always slightly sticky Halloween parties. She was the queen of festive treats, and her enthusiasm was absolutely contagious. One year, she decided we were going to make “worm-filled dirt cups” for all my classmates. Picture it: a tiny version of me, covered in chocolate pudding, enthusiastically crushing Oreos with a rolling pin while gummy worms “accidentally” found their way into my mouth.
The best part wasn’t even the eating (though that was a close second). It was the assembling. Mom would line up all the clear plastic cups and let me and my friends be the architects of our own delicious dirt. We’d argue over who got the most worms, who could make the spookiest layers, and we’d inevitably end up with more pudding on our faces than in the cups. That feeling of creative, messy, joyful fun is exactly what I want to bring to you with this recipe. It’s more than just a dessert; it’s an activity, a memory in the making, and a delicious tribute to the simple, silly joys of the season.
Gathering Your Spooky Squad: The Ingredients
Here’s the beautiful part: this recipe is brilliantly simple and incredibly flexible. You probably have most of this in your pantry right now! Let’s break down the cast of characters for our ghoulishly good dessert.
- 1 box (3.4 oz) instant vanilla or chocolate pudding mix: This is our superstar base. I usually go with vanilla because it’s a blank canvas for spooky colors, but chocolate is a classic for a reason—it’s rich, decadent, and makes for amazing “mud.”
- 2 cups cold milk: Whole milk will give you the absolute creamiest, richest texture, but 2% works perfectly fine too! The key is cold milk. It helps the pudding set up quickly and firmly.
- Orange or green food coloring (if using vanilla pudding): This is where the Halloween magic happens! Gel food coloring gives you those vibrant, electric shades without thinning out your pudding. Don’t be shy—go for that perfect pumpkin orange or slime-green monster hue!
- 8 crushed Oreo cookies (for “dirt”): The classic! The black cookie against the bright pudding is a visual delight. Chef’s Hack: Toss them in a zip-top bag and let your kids (or your inner child) go to town with a rolling pin. No rolling pin? A heavy-bottomed pot or wine bottle works in a pinch!
- 1 cup whipped cream or whipped topping: I’m a from-scratch guy most days, but for speed and stability, a good quality store-bought whipped topping is a lifesaver here. If you’re feeling fancy, whip up your own heavy cream with a tablespoon of sugar and a splash of vanilla.
- Halloween sprinkles: The more the merrier! Bats, pumpkins, ghosts—this is your chance to really lean into the theme. They add a fantastic little crunch, too.
- Gummy worms or candy pumpkins for garnish: The pièce de résistance! Gummy worms peeking out of the “dirt” are a non-negotiable classic. Candy corn, little chocolate bats, or even plastic ring toppers make it extra special for the kids.
Building Your Edible Masterpiece: Step-by-Step
Alright, team! Let’s get assembling. This is the fun part, so put on some spooky tunes and get creative with your layers.
Step 1: Conjure the Creamy Base
In a large mixing bowl, whisk your instant pudding mix with the two cups of cold milk. Now, whisk like you mean it! You want to beat it for a good solid two minutes until it’s smooth, starting to thicken, and utterly lump-free. If you’re using vanilla pudding and want those iconic Halloween colors, now’s the time to add your food coloring. Start with a few drops, whisk, and add more until you hit that perfect shade of orange or green. Once it’s ready, pop it in the fridge to chill for at least 5 minutes. This short rest lets it firm up just enough to make layering a breeze.
Step 2: Create the “Dirt”
While your pudding is chilling, let’s make the dirt. Take your Oreos (creme filling and all!) and place them in a sturdy zip-top bag. Seal it tightly, removing as much air as possible. Now, grab your rolling pin and crush them into fine, dusty crumbs. You can also pulse them in a food processor if you want to keep things neat, but honestly, the bag method is just more fun. You’re aiming for a texture that looks like garden soil—some finer crumbs with a few slightly bigger chunks for texture.
Step 3: The Art of the Layer
Time for the main event! Grab your clear cups, glasses, or even mason jars. The clear sides are key—you gotta show off those awesome layers! Here’s my preferred assembly line:
-
- Layer 1: A generous spoonful of your colored pudding. Smooth it out to create a solid base.
Layer 2: A hearty sprinkle of your Oreo dirt. Pat it down gently to make it flat for the next layer.
Layer 3: A fluffy cloud of whipped cream.
Then, just repeat! Pudding, dirt, cream. I usually get two full cycles in my cups. The beauty is, there’s no wrong way to do this. Let the kids create their own layered patterns—it’s all part of the experience.
Step 4: The Grand Finale (Garnish!)
You can’t have a Halloween parfait without a spectacular top hat. Finish your final whipped cream layer with one last glorious dollop. Then, go wild! Add a final sprinkle of Oreo crumbs, a blizzard of Halloween sprinkles, and strategically place your gummy worms so they’re crawling out of the dirt. A candy pumpkin perched on top looks adorable too.
Step 5: The (Brief) Chill
If you can resist eating them immediately, pop the finished parfaits in the fridge for 10-15 minutes before serving. This lets the layers settle and meld together just slightly, making them even more delicious.
How to Serve These Spooky Sweets
Presentation is half the fun with these! I love serving them in clear plastic tumblers for parties—they’re lightweight and perfect for guests to carry around. For a more rustic feel, wide-mouthed mason jars are absolutely charming. Line them up on a tray, maybe alongside a platter of my Easy Monster Cookie Bars, and you’ve got an instant dessert spread that’s both spooky and spectacular. Don’t forget long spoons so everyone can dig all the way down to the bottom to get a taste of every single layer!
Mix It Up! Spooky Variations
The best recipes are the ones you can make your own. Here are a few of my favorite twists on this classic:
- Cookies and Cream: Use chocolate pudding instead of vanilla and mix in some of the Oreo crumbs right into the pudding itself for a double-dose of cookie goodness.
- Pumpkin Spice Delight: Fold a half cup of pumpkin puree and a teaspoon of pumpkin pie spice into the vanilla pudding before layering. It’s a fall flavor explosion!
- Boo-berry Blast: Make a batch of vanilla pudding and swirl in some blueberry or blackberry pie filling for a purple, “monster mash” effect.
- Dairy-Free Friendly: Easily adaptable! Use your favorite plant-based milk (oat or almond work great) and dairy-free whipped topping. Check that your cookies are vegan-friendly (many generic sandwich cookies are!).
- Protein-Packed “Dirt”: For a slightly healthier hack, try crushing chocolate protein bars or graham crackers instead of Oreos for the dirt layer.
Beau’s Chef’s Notes & Kitchen Stories
This recipe has evolved so much since those first messy kitchen days with my mom. I’ve made these parfaits for probably a hundred Halloween events since then, and I’ve learned a thing or two. One year, I got a little *too* enthusiastic with the green food coloring and created a pudding shade so vibrantly neon that it practically glowed in the dark. The kids loved it, but let’s just say it turned a few tongues a very interesting shade for a day or two! Lesson learned: a little gel coloring goes a long way.
The real magic of this recipe, though, is its flexibility. It’s a formula more than a rigid rulebook. Don’t have Oreos? Use chocolate graham crackers. Out of vanilla pudding? Use butterscotch for a caramel-like layer. The goal is to have fun and not stress. The best kitchen memories are made when you’re laughing, maybe a little messy, and creating something delicious together. That’s the real Feastical spirit.
Your Parfait Questions, Answered!
Q: Can I make these parfaits ahead of time?
A: You can, but with a caveat! The Oreo crumbs will eventually start to soften and lose their “dirt” texture if they sit in contact with the moist pudding for too long. For the best results, I recommend prepping the components ahead of time—make the pudding, crush the cookies, have the whipped cream ready—and then assemble them no more than an hour or two before your party. Keep them chilled until you’re ready to serve!
Q: My pudding is runny! What did I do wrong?
A: The most common culprit is not using cold enough milk or not whisking for the full two minutes. Instant pudding relies on the reaction between the powder and the cold liquid to set properly. If it’s still a bit thin after the 5-minute chill, just give it a few more minutes in the fridge. It will continue to firm up.
Q: Any tips for making this with young kids?
A: Absolutely! This is the perfect kid-friendly recipe. Assign them jobs: they can be in charge of putting the cookies in the bag, crushing them (supervised, of course!), adding sprinkles, and placing the gummy worms. I lay down a cheap plastic tablecloth first to catch the inevitable mess, and everyone wears aprons. Embrace the chaos—it’s part of the fun!
Q: Can I use homemade pudding instead of instant?
A: You sure can! A cooked vanilla or chocolate pudding would be incredibly delicious and rich. Just make sure you allow it plenty of time to cool completely in the fridge before you try to layer it, otherwise it will melt the whipped cream.

HALLOWEEN PARFAITS
- Total Time: 15 min
Description
Layers of creamy pudding, crunchy cookie “dirt,” fluffy whipped cream, and all the sprinkles your heart desires—these parfaits are festive, fast, and guaranteed to delight little ghouls and grown-up goblins alike. Perfect for parties, after-school treats, or a fun Halloween kitchen activity.
Ingredients
-
1 box (3.4 oz) instant vanilla or chocolate pudding mix
-
2 cups cold milk
-
Orange or green gel food coloring (if using vanilla pudding)
-
8 Oreo cookies, crushed (for “dirt”)
-
1 cup whipped cream (homemade or store-bought)
-
Halloween sprinkles (bats, pumpkins, ghosts)
-
Gummy worms or candy pumpkins, for garnish
Instructions
-
Whisk pudding: In a bowl, whisk pudding mix with cold milk for 2 minutes until smooth and thick. Chill 5 minutes. Add food coloring if desired.
-
Make dirt: Crush Oreos in a bag with a rolling pin until crumbly.
-
Layer: In clear cups or jars, add pudding → Oreo crumbs → whipped cream. Repeat layers until cups are full.
-
Top it off: Finish with whipped cream, Oreo crumbs, sprinkles, and gummy worms.
-
Chill briefly: Refrigerate 10–15 minutes before serving for best texture.
Notes
-
Pumpkin Spice: Stir pumpkin puree + spice into vanilla pudding.
-
Cookies & Cream: Use chocolate pudding + mix Oreos right in.
-
Monster Mash: Swirl in blueberry or blackberry pie filling for a creepy purple effect.
-
Dairy-Free: Use almond or oat milk + dairy-free whipped topping.
- Prep Time: 10 min
Nutrition
- Calories: 260 Cal
- Carbohydrates: 34g
- Protein: 4g
Nutritional Information*
*This is a rough estimate based on the specific ingredients listed and will vary greatly with substitutions.
Per Parfait (approx.): Calories: 260 | Protein: 4g | Carbohydrates: 34g | Fat: 12g | Sugar: 23g
Prep Time: 10 min | Chill Time: 5 min | Total Time: 15 min
Final Thoughts: A Spooky-Sweet Success Story
And there you have it, my friends—your ticket to the easiest, most festive Halloween treat on the block. This isn’t just a recipe; it’s a memory-making activity, a guaranteed smile-inducer, and proof that the most magical creations often come from the simplest ingredients.
Remember, the true spirit of Halloween isn’t about perfection; it’s about fun, creativity, and a little bit of delightful mess. So what if your layers aren’t perfectly even? So what if you end up with more sprinkles on the floor than on the parfaits? Those aren’t mistakes; they’re memories in the making. This recipe is your playground. Own it, customize it, and make it spook-tacularly your own.
You’ve got all the tricks and treats you need to whip up a dessert that’s as fun to make as it is to eat. So gather your little ghosts and goblins, put on a scary movie, and build a parfait that’s screaming with flavor.
From my haunted kitchen to yours, I wish you a Halloween filled with joy, laughter, and dangerously delicious desserts. Now go out there and create some spooky magic!
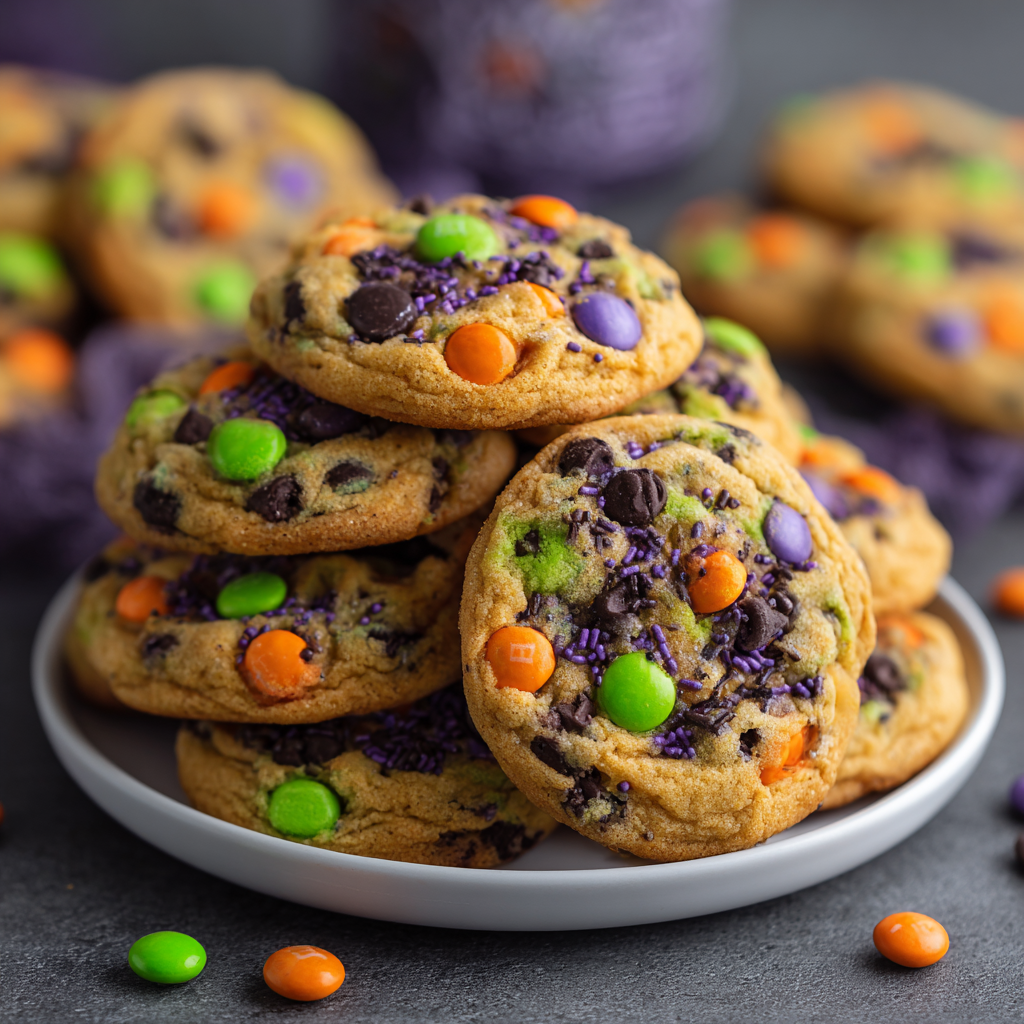
HOCUS POCUS HALLOWEEN COOKIES
Brew Up Some Magic with These Hocus Pocus Halloween Cookies!
Hey friends, Beau here from Feastical! Can you feel it? That crisp, autumn air is starting to whisper, the leaves are putting on their final fiery show, and you know what that means—Halloween is just around the corner. And for me, Halloween isn’t just about the costumes and the candy; it’s about the feeling. It’s about cozying up on the couch with a big, fluffy blanket, the smell of something spooky-sweet baking in the oven, and the iconic opening credits of Hocus Pocus rolling on the screen.
If your family is anything like mine, this movie is a non-negotiable annual tradition. It’s the official kickoff to the holiday season! So this year, I decided our movie night needed a snack that was just as full of personality, charm, and a little bit of witchy magic as the Sanderson Sisters themselves. Enter these absolutely spellbinding Hocus Pocus Halloween Cookies!
We’re not just talking any ordinary chocolate chip cookie here. Oh no. We’re creating a cookie that looks like it was plucked right from a cauldron in the Sanderson sisters’ cottage. They’re soft, they’re chewy, and they’re absolutely loaded with colorful Halloween M&Ms, rich chocolate chips, and a generous sprinkle of spooky sprinkles in all the right shades of purple, green, orange, and black. One bite, and you’ll be saying “Boo-ook!” instead of “Book!” These cookies are that good. So, grab your favorite mixing bowl, put on your apron (the one with the cute ghosts on it, you know the one), and let’s turn our kitchens into a little bakery of magical mischief!
A Cookie That Brings Back Every Halloween
You know, every time I bake these, the smell alone sends me right back to being a kid. I remember one Halloween, I must have been about ten, and my mom decided we were going to have a full-blown Hocus Pocus marathon. She went all out—decorations, themed snacks, the whole nine yards. But the thing I remember most vividly was her pulling a batch of chunky, colorful cookies out of the oven just as Winifred Sanderson started belting out “I Put a Spell on You.”
They weren’t called “Hocus Pocus Cookies” back then; they were just “Mom’s Halloween Cookies.” But to me, they were pure magic. We all sat there, munching on these warm, melty cookies, completely engrossed in the movie, and I remember feeling so unbelievably happy and content. That’s the power of food, isn’t it? It’s a time machine. It’s a comfort blanket. It’s the star of the memory. That’s the feeling I’ve tried to bottle up in this recipe. It’s my grown-up, slightly more chef-fied version of my mom’s legendary cookies, and I am so excited to share that magic with you and your family.
Gathering Your Magical Ingredients
Alright, let’s get our potion-making station—I mean, our kitchen—prepped! Here’s everything you’ll need to conjure up two dozen of these delightful cookies. Remember, baking is part science, part art, so I’ve included my little chef insights to help you understand the “why” behind the “what.”
- 2 1/4 cups all-purpose flour: This is the foundation of our cookie structure. For a slightly chewier cookie, you can swap out 1/4 cup of the all-purpose flour for bread flour. It makes a world of difference!
- 1/2 tsp baking soda: Our leavening agent! This is what gives the cookies their perfect rise and that lovely, craggy top. Make sure yours isn’t expired for maximum lift.
- 1/2 tsp salt: Do not skip this! Salt is the flavor enhancer that makes all the sweetness pop and balances the chocolate perfectly. I use fine sea salt.
- 3/4 cup unsalted butter, softened: The key word here is softened, not melted. Leave it on the counter for an hour or two before you start. It should be cool to the touch but yield easily when you press it. This creams with the sugar to create air pockets for a perfect texture.
- 3/4 cup brown sugar & 1/2 cup granulated sugar: The dynamic duo! Brown sugar brings that deep molasses flavor and moisture for chewiness, while white sugar helps with spread and crispness. This combo is cookie perfection.
- 2 large eggs: They bind everything together and add richness. Make sure they’re at room temperature to emulsify properly with the butter and sugar. Just pop them in a bowl of warm water for 5 minutes if you forgot!
- 2 tsp vanilla extract: The secret weapon! Use the real stuff, not imitation. It adds a warm, complex flavor base that makes the cookies taste bakery-level amazing.
- 1 cup semi-sweet chocolate chips: I love the rich, not-too-sweet flavor of semi-sweet here. But feel free to use milk chocolate or dark chocolate chunks if that’s your potion of choice!
- 1 cup Halloween M&Ms (purple, green, orange): The star of the show! These give our cookies that iconic Sanderson Sisters color scheme. If you can’t find the Halloween mix, just buy the separate colors and mix your own!
- 1/4 cup Halloween sprinkles: This is where the real magic (and color!) happens. The sprinkles bake into the dough, creating little bursts of color and a fun, crunchy texture. Go for the jimmies or quins, not nonpareils, as they hold their color better.
Brewing Your Cookie Spell: Step-by-Step
Okay, team! It’s go time. Follow these steps, and you’ll have a kitchen that smells like a witch’s cottage (in the best way possible) in no time. I’ve packed this section with all my favorite kitchen hacks to ensure your cookies are absolutely foolproof.
Step 1: Preheat & Prep
Preheat your oven to 350°F (175°C). Line your baking sheets with parchment paper. Chef’s Hack: Don’t have parchment? A silicone baking mat is even better for even browning and no sticking. This little step is a game-changer and makes cleanup a breeze.
Step 2: The Dry Potion
In a medium-sized bowl, whisk together your all-purpose flour, baking soda, and salt. Chef’s Insight: Whisking is crucial here! It evenly distributes the baking soda and salt so you don’t get a bitter bite in one cookie and a bland one in another. We’re aiming for consistent magic in every single bite.
Step 3: The Wet Potion
In a large bowl, using a hand mixer or a stand mixer fitted with the paddle attachment, beat the softened butter, brown sugar, and granulated sugar together on medium speed for a good 2-3 minutes. Chef’s Hack: You want this mixture to become light, pale, and fluffy. This is called “creaming,” and it incorporates air into your dough, which is the secret to a cookie with the perfect texture. Don’t rush this step!
Step 4: Bring It Together
Add the eggs one at a time, beating well after each addition. Then beat in the vanilla extract. Scrape down the sides of the bowl with a spatula to make sure everything is homogenous. Now, with your mixer on low speed, gradually add the dry flour mixture to the wet ingredients. Chef’s Insight: Mix just until the flour disappears. Overmixing at this stage is the number one cause of tough, cakey cookies. A few streaks of flour are okay—they’ll get incorporated in the next step.
Step 5: The Grand Finale (Mix-Ins!)
This is the fun part! Take your spatula and gently fold in the chocolate chips, Halloween M&Ms, and Halloween sprinkles. Chef’s Hack: I like to reserve a handful of the M&Ms and sprinkles to press onto the tops of the cookie dough balls right before baking. This makes the finished cookies look professionally decorated and extra colorful!
Step 6: Scoop & Space
Using a medium cookie scoop (about 1.5 tablespoons of dough), drop rounded balls of dough onto your prepared baking sheets, spacing them about 2 inches apart. They need room to spread their magical wings! Chef’s Hack: For an even thicker, chewier cookie, pop the entire baking sheet of scooped dough into the refrigerator for 15-20 minutes before baking. This chills the butter, preventing the cookies from spreading too much.
Step 7: Bake to Perfection
Bake for 9-11 minutes. Now, listen closely, because this is the most important part: THE COOKIES WILL LOOK UNDONE. You want the edges to be lightly golden and set, but the centers should still look soft, puffy, and underbaked. They will continue to cook on the hot baking sheet out of the oven. This is the secret to an irresistibly soft and chewy center!
Step 8: The Cool Down
Let the cookies cool on the baking sheet for a full 5 minutes. This allows them to set up so they don’t fall apart when you move them. Then, transfer them to a wire rack to cool completely… or, you know, grab a glass of cold milk and enjoy one (or two) warm. I won’t tell.
How to Serve These Spellbinding Sweets
Presentation is part of the fun! Pile these magical cookies high on a rustic wooden board or a vintage cake stand for a real “Welcome to the Coven” vibe. For your Hocus Pocus movie night, serve them alongside mugs of rich hot chocolate or spiced apple cider. They’re the ultimate hand-held treat for passing around during the best scenes. Want to really go all out? Place a few cookies on a small, black plate and dust them with a little edible green or purple glitter for that extra touch of Sanderson sister sorcery. Abracadabra, you’ve got a show-stopping dessert!
Brew Your Own Twist: Recipe Variations
Feel like playing mad scientist? This recipe is a fantastic base for all kinds of magical creations!
- Gluten-Free Ghouls: Swap the all-purpose flour for a 1:1 gluten-free baking blend. Bob’s Red Mill or King Arthur Flour blends work wonderfully here.
- Salty & Sweet Sorcery: Fold in 1/2 cup of crushed pretzel pieces along with the chocolate chips. The salty crunch is a spellbinding contrast to the sweet dough.
- Candy Cauldron: Swap the chocolate chips for other Halloween candies! Chopped-up Reese’s Peanut Butter Cups, Rolos, or even candy corn (for the brave!) would be delicious.
- White Witch Version: Use white chocolate chips and vanilla M&Ms for a “lighter” magic cookie that’s just as enchanting.
- Double, Double Toil & Trouble: Make it a double chocolate cookie by replacing 1/4 cup of flour with 1/4 cup of unsweetened cocoa powder.
Beau’s Chef Notes & Kitchen Stories
This recipe has evolved so much since that first batch my mom made all those years ago. I’ve tweaked the sugar ratios, perfected the bake time, and learned the hard way that yes, you really do need to let the butter soften properly (I once tried to microwave it and ended up with cookie puddles—tasty, but not pretty!).
The funniest kitchen fail I ever had with these was the year I decided to use black cocoa powder to make them “spookier.” I added a bit too much and didn’t adjust the liquid. Let’s just say the cookies came out looking like little lumps of coal and had the texture of a dry brownie. My friends still call them my “Witch’s Charcoal” cookies. We laughed about it while eating them anyway, because even a “failed” cookie is still a cookie! The moral of the story? Don’t be afraid to experiment, but maybe test your potions on a small batch first.
FAQs & Spell Troubleshooting
Q: My cookies spread too much and became flat. What happened?
A: The usual suspects are butter that was too warm or melted, an oven that wasn’t hot enough, or not enough flour. Make sure your butter is softened but still cool, accurately measure your flour (spoon it into the measuring cup and level it off, don’t scoop!), and always preheat your oven. Chilling the dough balls for 15-20 minutes before baking is your best defense against flat cookies!
Q: My cookies are cakey and puffy, not chewy. How can I fix that?
A: Cakey cookies are often caused by overmixing the dough once the flour is added, which develops too much gluten. Remember to mix on low and only until the flour is just incorporated. Using more brown sugar than white sugar also promotes chewiness, so double-check your measurements.
Q: Can I make the dough ahead of time?
A: Absolutely! This dough is fantastic for make-ahead magic. Scoop the dough balls onto a baking sheet, freeze them solid, then transfer them to a freezer bag. They’ll keep for up to 3 months. You can bake them straight from the freezer; just add 1-2 minutes to the baking time.
Q: The bottoms of my cookies are burning! Help!
A: This is almost always an oven issue. Ovens can run hot, and dark-colored baking sheets absorb more heat. Try doubling up your baking sheets (place one inside the other) to insulate the bottom, or move your rack to a higher position in the oven. Using parchment paper or a silicone mat also helps create a buffer.

HOCUS POCUS HALLOWEEN COOKIES
- Total Time: 25 min
Description
Soft, chewy, and packed with chocolate chips, colorful Halloween M&Ms, and spooky sprinkles—these cookies are pure Sanderson Sister magic. Perfect for a cozy movie night, Halloween party, or anytime you want a little festive fun.
Ingredients
-
2 ¼ cups all-purpose flour
-
½ tsp baking soda
-
½ tsp salt
-
¾ cup unsalted butter, softened
-
¾ cup brown sugar
-
½ cup granulated sugar
-
2 large eggs, room temperature
-
2 tsp vanilla extract
-
1 cup semi-sweet chocolate chips
-
1 cup Halloween M&Ms (purple, green, orange)
-
¼ cup Halloween sprinkles
Instructions
-
Preheat oven to 350°F (175°C). Line baking sheets with parchment or silicone mats.
-
Mix dry: In a medium bowl, whisk flour, baking soda, and salt.
-
Cream butter & sugars: Beat butter, brown sugar, and granulated sugar 2–3 min until light and fluffy.
-
Add eggs & vanilla: Beat in eggs one at a time, then vanilla. Scrape sides of bowl.
-
Combine: Slowly mix in dry ingredients until just combined (don’t overmix!).
-
Stir in mix-ins: Fold in chocolate chips, M&Ms, and sprinkles. Reserve a few for topping.
-
Scoop dough into 1.5 tbsp balls, spacing 2 inches apart. Press extra M&Ms on top.
-
Bake 9–11 minutes, until edges are set but centers look slightly soft.
-
Cool 5 min on sheet, then transfer to wire rack.
Notes
-
For thicker cookies, chill scooped dough 15–20 minutes before baking.
-
Use a mix of purple, green, orange, and black sprinkles for the ultimate Hocus Pocus vibe.
-
Store in an airtight container at room temp up to 5 days.
- Prep Time: 15 min
- Cook Time: 10 min
Nutrition
- Calories: 200Calo per cookie
- Carbohydrates: 28g
- Protein: 2g
Nutritional Information (Approximate, Per Cookie)
Calories: 200 | Protein: 2g | Carbohydrates: 28g | Fat: 9g | Saturated Fat: 5g | Sugar: 18g
Note: This is an estimate provided by an online nutrition calculator. Values will vary based on ingredient brands and sizes.
Prep Time: 15 min | Cook Time: 10 min | Total Time: 25 min
Final Thoughts: Share the Magic
And there you have it! Your kitchen is now officially a portal to Salem, and you’ve just baked a batch of pure, nostalgic joy. These cookies are more than just a treat; they’re an experience. They’re the crunchy sprinkle between your teeth, the melty chocolate on your tongue, and the shared smile with someone you love as you both watch Winifred, Mary, and Sarah cause their iconic chaos.
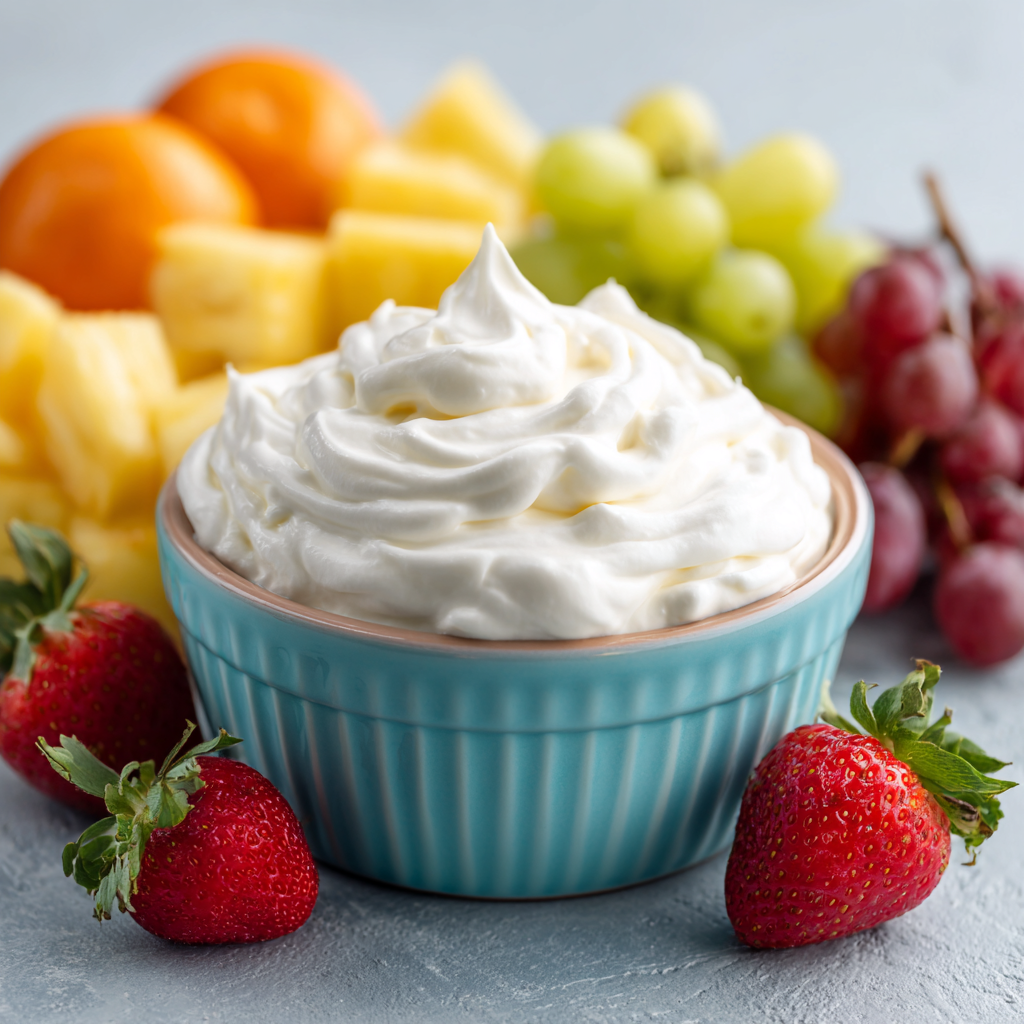
FRUIT DIP WITH MARSHMALLOW FLUFF
Your New Go-To Party Hero: 3-Ingredient Magic Fruit Dip
Hey friends, Beau here! Let’s be real for a second. We’ve all been there. The doorbell rings, you’ve got friends popping over in, oh, twenty minutes, and you realize you have absolutely nothing to serve them. The pantry is looking bleak, and the fruit bowl is starting to give you the side-eye. Panic mode? Not on my watch. Not when I have this little jar of magic in my back pocket.
I’m talking about my legendary, no-fuss, 3-ingredient Fruit Dip with Marshmallow Fluff. This isn’t just a recipe; it’s a lifesaver. It’s the culinary equivalent of a trusty spatula—always there when you need it. In the time it takes to choose a movie, you can whip up a bowl of something creamy, dreamy, and irresistibly sweet that will have everyone gathered around the platter, fruit sticks in hand, wondering what your secret is.
This dip is more than just a quick fix; it’s a feel-good food moment. It turns a simple bowl of strawberries or apple slices into a celebration. It’s the kind of simple, soulful, and always satisfying recipe that I built Feastical on. So, if you’re ready to become the undisputed champion of last-minute hosting, grab a bowl and let’s make some memories together. This is one of those recipes you’ll keep coming back to, I promise.
The Sticky-Sweet Spoonfuls of My Childhood
This recipe takes me right back to my grandma’s linoleum kitchen floor, my little legs swinging from a chair that felt way too big. My Nana was a wizard with simple ingredients, and her secret weapon was always a jar of marshmallow fluff. She didn’t use it for fancy desserts; she used it for joy. I’d watch, utterly mesmerized, as she’d dollop that glossy, white cloud into a bowl, her wooden spoon sinking into its sticky sweetness.
She’d let me have a tiny taste straight from the spoon—a memory that still makes me smile. It was pure, unadulterated sugar magic. This fruit dip is my grown-up, slightly more sophisticated (but let’s be honest, not by much!) homage to her. I’ve just added a couple of things to turn that singular sweet flavor into a creamy, balanced dip that lets the fruit shine. Every time I make it, I’m seven years old again, covered in a fine dusting of powdered sugar and beaming from ear to ear. Food should always taste this good and feel this good.
Gathering Your Dream Team: Just Three Ingredients!
The beauty of this recipe is in its simplicity. You likely have these staples in your kitchen right now. Here’s what you’ll need and my chef-ly two cents on each one:
- 1 block (8 oz) Cream Cheese, softened – This is the tangy, rich base that balances the intense sweetness of the fluff. Chef’s Insight: Full-fat cream cheese gives you the creamiest, most luxurious texture. Low-fat can work but might make the dip a little less stable. The real key here is softened. Leave it on the counter for a good hour before you start. If you’re in a pinch, take it out of the foil wrapper, pop it on a plate, and microwave it for 15-20 seconds. You want it pliable, not melted!
- 1 jar (7 oz) Marshmallow Fluff – The star of the show! This is what gives the dip its iconic flavor and airy texture. Substitution Tip: In a real bind, you can melt down about 2 cups of mini marshmallows with a tiny splash of milk, but it won’t be quite as smooth. The fluff is worth it, trust me.
- 1 tsp Pure Vanilla Extract – This is the flavor enhancer, the secret weapon that makes everything taste more… well, everything. It adds a warm, complex depth that cuts the sweetness perfectly. Chef’s Insight: Don’t you dare use the imitation stuff! Splurge on the good, pure vanilla extract. You’ll taste the difference, I swear.
- Optional: 1–2 tbsp Orange Juice or Zest – My little upgrade. A bit of citrus zest or a splash of fresh juice introduces a fantastic bright note that really makes the whole dip pop. It’s not traditional, but it’s a pro move I highly recommend.
Let’s Get Whipping: Your Foolproof Dip Blueprint
Okay, team, let’s do this. I’ll walk you through each step. It’s so easy, but a few little tricks will make it absolutely perfect.
- The Softening Mission (The Most Important Step!). First, ensure your cream cheese is at room temperature. I can’t stress this enough. If it’s cold, you’ll end up with a lumpy dip, and we’re going for smooth and cloud-like. Place the block in a medium mixing bowl and beat it with an electric hand mixer (or a stand mixer with the paddle attachment) on medium speed for about 1 minute. You’re looking for it to be completely smooth, pale, and slightly fluffy. Chef’s Hack: No mixer? No problem! A sturdy whisk and some serious elbow grease will get you there. Think of it as your arm workout for the day.
- Welcome the Fluff. Now, add the entire glorious jar of marshmallow fluff and that teaspoon of beautiful vanilla extract to the bowl with your whipped cream cheese. If you’re using the orange juice or zest, add it now. Chef’s Commentary: Scraping that jar clean is oddly satisfying, isn’t it? Pro tip: a small rubber spatula is your best friend for getting every last bit out.
- The Grand Unification. Start beating on low speed at first—unless you want a confetti of sugar and cream cheese all over your kitchen! Once the ingredients are roughly combined, crank the mixer up to medium-high and beat for another 1-2 minutes. Stop to scrape down the sides of the bowl once halfway through. You’ll know it’s done when the mixture is utterly smooth, uniform in color, and has a light, spreadable consistency. There should be zero streaks of white cream cheese or marshmallow left.
- The Patience Game (Optional, but Recommended). You can absolutely serve this dip right away—it will be delicious. But for the best experience, transfer it to a cute serving bowl, cover it with plastic wrap, and let it chill in the fridge for at least 30 minutes. This allows the flavors to really get to know each other and marry, and it firms up the texture just enough to make it perfect for dipping.
Plating Up the Perfect Bite
Presentation is part of the fun! I love serving this dip in a colorful, wide-rimmed bowl so everyone can get their fruit in there for a good scoop. Place it right in the center of a large platter or board and artfully arrange your chosen fruits around it. Think of it as your delicious, edible sunburst. Provide some cocktail forks or small skewers for easy, mess-free dipping. It’s not just food; it’s a centerpiece that invites conversation and connection.
Mix It Up! Creative Twists on a Classic
Once you’ve mastered the base, the flavor world is your oyster! Here are a few of my favorite riffs:
- Lemon Berry Bliss: Swap the vanilla for 1/2 tsp of almond extract and add the zest of one whole lemon. Incredible with blueberries and raspberries.
- Ginger Snap: Fold in 1/4 cup of crushed gingersnap cookies and a pinch of ground ginger. Amazing with apple and pear slices.
- Chocolate Hazelnut Swirl: After mixing, swirl in two tablespoons of chocolate-hazelnut spread (like Nutella) for a decadent, dessert-like dip. Serve with bananas and strawberries.
- Piña Colada Vibes: Use 1/2 tsp of coconut extract instead of vanilla and fold in 2 tbsp of finely chopped dried pineapple. A tropical getaway on a platter.
- Lighter Option: Use Neufchâtel cheese (the 1/3 less fat kind) and a sugar-free marshmallow fluff if you can find it. The texture will be slightly less rich, but still totally tasty!
Beau’s Behind-the-Scenes Notes
This recipe has been on quite a journey with me. I first scribbled it down on a napkin during a potluck panic attack years ago. It was a hit, but it’s evolved since then. The orange zest was a happy accident—I was making it for a brunch and had some zest left over from mimosas. I figured, why not? Best decision ever.
One of my favorite kitchen stories involves this dip and my nephew, Leo. He decided he was going to be my “sous-chef” and, in his enthusiasm, added what felt like a whole cup of rainbow sprinkles to the batch. It looked… interesting. But you know what? The kids at the party went absolutely wild for it. So don’t be afraid to get creative and have fun with it. Sometimes the best recipes are the ones with a little extra “help” and a lot of love.
Your Questions, Answered!
Q: My dip is lumpy! What did I do wrong?
A: Ninety-nine times out of a hundred, this is because the cream cheese was too cold. Next time, give it more time to soften on the counter. If you’re stuck with a lumpy dip now, all is not lost! You can press it through a fine-mesh sieve with a spatula—it’s a bit of a workout, but it will smooth it out.
Q: Can I make this dip ahead of time?
A: Absolutely! In fact, I encourage it. It keeps beautifully covered in the fridge for up to 3 days. Just give it a quick stir before serving to fluff it back up.
Q: What are the best fruits to serve with this?
A: You want fruits that are sturdy and can hold up to a good dip! My top picks are: strawberry halves, apple slices (a quick toss in lemon juice prevents browning), firm banana chunks, pineapple spears, whole grapes, and pear slices. Avoid very watery fruits like watermelon or oranges, as they can make the dip runny.
Q: Is there a way to make this dairy-free or vegan?
A> You bet! Use your favorite plant-based cream cheese (the kind that comes in a tub, not a block, tends to be softer and mix better). For the marshmallow fluff, check the label, but most standard jars are actually accidentally vegan! So you’re good to go.

FRUIT DIP WITH MARSHMALLOW FLUFF
- Total Time: 5–35 min
Description
Your New Go-To Party Hero: 3-Ingredient Magic Fruit Dip
Hosting panic? Not anymore. This 3-ingredient fruit dip is your instant crowd-pleaser—creamy, fluffy, and ready in minutes. It transforms everyday fruit into a party-worthy treat that feels fun, nostalgic, and a little magical. Perfect for last-minute guests or just because you deserve something sweet.
Ingredients
-
1 block (8 oz) cream cheese, softened (full-fat recommended)
-
1 jar (7 oz) marshmallow fluff
-
1 tsp pure vanilla extract
-
Optional: 1–2 tbsp orange juice or zest for a citrusy twist
Instructions
-
Whip the base – Beat softened cream cheese in a medium bowl until smooth and fluffy (about 1 min).
-
Add the magic – Mix in marshmallow fluff and vanilla. Beat until silky, uniform, and cloud-like.
-
Flavor upgrade – Stir in orange zest/juice if using.
-
Chill & serve – For best flavor, refrigerate 30 minutes. Serve with fresh fruit for dipping.
Notes
-
Lumps? Cream cheese wasn’t soft enough. Next time, let it fully come to room temp.
-
Make ahead – Stays fresh in the fridge up to 3 days. Stir before serving.
-
Dairy-free swap – Use plant-based cream cheese; most marshmallow fluff is vegan-friendly.
- Prep Time: 5 min
Nutrition
- Calories: 90Cal per 2 tbsp
- Carbohydrates: 12g
- Protein: 1g
Nutritional Information*
*This is an estimate provided for informational purposes only. I’m a chef, not a dietitian!
Per 2 tbsp serving (approx., 16 servings per recipe):
Calories: 90 | Protein: 1g | Carbohydrates: 12g | Fat: 4g | Saturated Fat: 2.5g | Sugar: 11g
Final Thoughts: Your Secret Weapon for Spreading Joy
So there you have it. More than just a recipe, this 3-ingredient wonder is a testament to the idea that the best moments around food don’t have to be complicated. They just have to be made with a little bit of intention and a whole lot of heart.
This dip is your new secret handshake into the club of effortless hosts. It’s the promise that you’re always just minutes away from creating a moment of shared, sticky-sweet happiness. It’s the taste of nostalgia for some and a new tradition for others.

ALMOND FLOUR BROWNIES
You Won’t Believe These Are Gluten-Free: The Ultimate Almond Flour Brownies
Hey friends, Beau here! Let’s have a real talk for a second. Is there anything in this world quite as magical, as deeply satisfying, as a perfect, fudgy brownie? That glossy, crackly top. That rich, chocolatey interior that’s somehow both dense and melt-in-your-mouth tender. It’s the dessert equivalent of your favorite cozy sweater—comforting, reliable, and always, always a good idea.
But I know that for some of my favorite foodies out there, that classic brownie bliss can feel just out of reach. Maybe you’re avoiding gluten, or perhaps you’re just looking for a way to sneak a little more wholesome goodness into your treats without sacrificing an ounce of flavor. Well, my friend, consider your search over. Today, we’re diving fork-first into what might just become your new favorite recipe: my outrageously good Almond Flour Brownies.
These aren’t just a “good for being gluten-free” brownie. Oh no. These are a straight-up, no-holds-barred, chocolate-lover’s dream. They’re fudgy, intensely chocolatey, and have that signature chewy texture we all crave. And the best part? They’re made with simple, real ingredients you can feel good about. So, preheat that oven, grab your favorite mixing bowl, and let’s make some kitchen magic happen. I promise, one bite and you’ll be a believer.
A Pan of Brownies and a Side of Nostalgia
This recipe takes me right back to my grandma’s kitchen. Her house always smelled like a beautiful mix of fresh coffee and something baking in the oven. She was a wizard with desserts, but her brownies? They were legendary. They were the kind of treat that would make all us cousins stop our chaotic games and silently congregate around the pan, hoping for a corner piece.
When I first started experimenting with gluten-free baking years ago, recreating her brownie recipe was my white whale. I tried every flour blend under the sun, and while some were okay, they never quite captured that specific fudgy-chewy alchemy. Then, I tried almond flour. The moment I pulled that first test batch out of the oven, I knew I had it. The aroma was identical—that deep, roasty, chocolate scent that filled my grandma’s house. It wasn’t just a good gluten-free alternative; it was a direct portal back to those warm, happy afternoons. It proved that the heart of a great recipe isn’t in the wheat, it’s in the love and the chocolate you pour into it.
Gathering Your Brownie Brigade: The Ingredients
Part of what makes this recipe so special is its beautiful simplicity. We’re letting high-quality chocolate do the heavy lifting. Here’s your shopping list—think of it as gathering your kitchen squad for a delicious mission.
- 1 cup semisweet chocolate chips: This is your flavor foundation! I like using a good-quality chip here—it really makes a difference. Chef’s Insight: For an even deeper chocolate experience, chop up your favorite dark chocolate bar instead.
- 1/2 cup butter or coconut oil: Butter gives that classic, rich flavor, while coconut oil keeps things dairy-free and adds a subtle, lovely note. Substitution Tip: If using coconut oil, make sure it’s unrefined (virgin) for a neutral taste, or refined if you want to avoid any coconut flavor.
- 3/4 cup sugar (or coconut sugar): We’re using just enough sugar to sweeten the deal without overpowering the chocolate. Chef’s Insight: Coconut sugar is my go-to for a less refined option. It creates a darker, almost caramel-like depth that pairs incredibly with the almond flour.
- 2 large eggs: Our binding agents and the secret to that gorgeous, shiny, crackly top. Make sure they’re at room temperature for a smoother, more emulsified batter.
- 1 tsp vanilla extract: The trusty sidekick that amplifies all the other flavors. Don’t you dare skip it!
- 1/2 cup almond flour: The star of the show! This is what makes our brownies gluten-free and gives them an incredibly moist, tender crumb. Pro Tip: Make sure you’re using blanched almond flour, not almond meal. Almond meal is more coarse and will give you a grainier texture.
- 1/4 cup cocoa powder: This double-chocolate punch ensures our brownies are intensely fudgy and rich. Use natural, unsweetened cocoa powder for the best results.
- 1/4 tsp salt: Crucial for balancing the sweetness and making the chocolate flavor pop. If you’re using salted butter, you can reduce this to a pinch.
- Optional: extra chocolate chips or chopped nuts for topping: I’m a purist, but my partner swears by a handful of walnuts folded into the batter. This is your canvas—decorate it!
Let’s Get Baking: Your Foolproof Brownie Blueprint
Okay, team! Aprons on. This is where the fun begins. Follow these steps, and you’ll be a brownie hero in no time.
Step 1: Preheat & Prep
Preheat your oven to 350°F (175°C). This isn’t just a suggestion—a properly preheated oven is key to getting those perfect, set edges. While it’s warming up, line an 8×8-inch baking pan with parchment paper. I like to leave a little overhang on two sides. Why? This creates “handles” that will let you lift the entire slab of brownies out of the pan later for super clean, crumb-free slicing. A little kitchen hack that makes a huge difference!
Step 2: Melt the Chocolate Goodness
In a microwave-safe bowl or using a double boiler, melt the chocolate chips and butter (or coconut oil) together. If using the microwave, do it in 30-second bursts, stirring well between each one. Watch it like a hawk! Burnt chocolate is a sad, sad thing. We want it just melted and smooth. Give it a good stir until it’s one gloriously shiny, chocolatey pool.
Step 3: The Whisking Workout
Let the chocolate mixture cool for just a minute or two—you don’t want it so hot that it cooks the eggs when you add them! Now, whisk in the sugar. Then, add the eggs one at a time, whisking vigorously after each addition. This is the moment you’re building the structure and that signature shiny crust. Keep whisking for a good minute until the batter becomes thick and glossy. Now, whisk in the vanilla. See how it’s already starting to look like brownie batter? We’re getting close!
Step 4: Gently Does It
Switch to a spatula for this part. We’re going to gently fold in the almond flour, cocoa powder, and salt. The key word here is fold. Don’t aggressively stir! We want to incorporate the dry ingredients without deflating all the air we just whisked into the eggs. Mix until just combined and no dry streaks remain. A few lumps are totally fine—overmixing is the enemy of fudgy brownies.
Step 5: Pan & Sprinkle
Pour that beautiful, thick batter into your prepared pan and use your spatula to spread it into an even layer. Now, for the grand finale: sprinkle the top with those extra chocolate chips or nuts. This isn’t just for looks; it gives little pockets of molten chocolate in every bite.
Step 6: The Bake-Off
Slide that pan into the center of your preheated oven and set your timer for 22 minutes. This is the hardest part: do not open the oven door! We need that steady heat. At 22 minutes, take a peek. The edges should look set and the center should still look soft, but not raw. A toothpick inserted into the center should come out with some moist crumbs, not clean batter. If it needs more time, go in 2-minute increments. For super fudgy brownies, 22-25 minutes is usually the sweet spot.
Step 7: The Patience Test
This is the ultimate test of willpower. You must let the brownies cool completely in the pan on a wire rack. I know, the smell is intoxicating. But if you cut into them while they’re warm, they’ll be a gooey mess (a delicious mess, but still a mess). Cooling allows them to set up properly, giving you those clean, sharp slices we all love. For best results, I sometimes even pop the whole pan in the fridge for an hour after they’ve cooled to room temperature. Trust me, it’s worth the wait.
How to Serve Up These Beauties
Once they’re completely cool, use your parchment paper handles to lift the entire brownie block onto a cutting board. Slice them into 12 perfect squares (or 9 if you’re feeling generous!). These brownies are a masterpiece all on their own, but if you want to take them over the top, serve them slightly warm with a scoop of vanilla bean ice cream melting over the top. A drizzle of salted caramel or a dusting of flaky sea salt also works wonders. For a simpler treat, just grab one with a tall glass of cold milk or a hot coffee. Pure bliss.
Make Them Your Own: Delicious Variations
The beauty of this base recipe is how adaptable it is! Here are a few of my favorite twists:
- Salted Caramel Swirl: Before baking, drizzle 1/4 cup of warmed store-bought or homemade caramel sauce over the batter and use a knife to swirl it beautifully into the top. Sprinkle with flaky sea salt.
- Peppermint Patty: Add 1/2 tsp of peppermint extract along with the vanilla. Fold in 1/2 cup of chopped dark chocolate or chocolate chunks for a cool, refreshing twist.
- Espresso Infusion: Whisk 1 tablespoon of instant espresso powder or finely ground coffee into the melted chocolate mixture. This doesn’t make them taste like coffee—it just makes the chocolate flavor deeper and more intense.
- Rocky Road: After folding in the dry ingredients, stir in 1/2 cup of mini marshmallows and 1/2 cup of chopped walnuts or almonds.
- Double Chocolate Chip: For the ultimate chocoholic, fold an additional 1/2 cup of chocolate chips into the batter before pouring it into the pan.
Beau’s Kitchen Notes
This recipe has been through more iterations than I can count! The first time I made it, I was so excited I definitely underbaked it. We ended up eating brownie soup with spoons—which, let me tell you, is not the worst problem to have. I’ve learned that the perfect bake time can vary slightly depending on your oven and even the type of pan you use (glass vs. metal). My advice? Get to know your oven. That first batch is a learning experience. And if they do come out a little too gooey, just call them “brownie truffles,” scoop them into balls, and roll them in cocoa powder. No one will complain!
Over time, I’ve also started using a mix of chocolate chips and a chopped dark chocolate bar for even more complexity. This recipe is your foundation—feel free to build on it and make it your own. That’s what cooking is all about!
Your Brownie Questions, Answered
Q: My brownies are too cakey and dry. What did I do wrong?
A: The most common culprit here is overbaking. Remember, we’re going for fudgy, so the toothpick should have moist crumbs, not be clean. Another possibility is overmixing the batter after adding the almond flour, which can incorporate too much air. Finally, make sure you’re measuring your almond flour correctly—spoon it into the measuring cup and level it off. Packing it down can lead to using too much flour, resulting in a drier brownie.
Q: Can I make these dairy-free?
A: Absolutely! This recipe is incredibly easy to make dairy-free. Simply use dairy-free chocolate chips and substitute the butter with an equal amount of coconut oil. You’ll still get incredibly rich and fudgy results.
Q: Why didn’t I get a shiny, crackly top?
A: That shiny top is created by properly dissolving the sugar into the fat and eggs. The key is to whisk the sugar and eggs into the warm chocolate mixture really, really well. You’re essentially creating a simple emulsion. If your chocolate was too hot, it could have started to cook the eggs, and if it was too cool, the sugar might not dissolve properly. Getting that mixture to a glossy stage is the secret handshake to a perfect crackly top.
Q: How should I store these brownies?
A> Once cooled, store them in an airtight container at room temperature for up to 3 days. They also freeze like a dream! Just wrap individual squares in plastic wrap and place them in a freezer bag for up to 3 months. Let them thaw at room temperature or pop one in the microwave for 15 seconds for a warm, gooey treat.

ALMOND FLOUR BROWNIES
Description
Almond Flour Brownies (Gluten-Free & Irresistibly Fudgy)
Rich, chocolatey, fudgy brownies that taste indulgent but are gluten-free.
Ingredients
-
1 cup semisweet chocolate chips (or chopped dark chocolate)
-
1/2 cup butter (or coconut oil for dairy-free)
-
3/4 cup sugar (or coconut sugar)
-
2 large eggs, room temperature
-
1 tsp vanilla extract
-
1/2 cup almond flour (blanched, not almond meal)
-
1/4 cup cocoa powder (unsweetened)
-
1/4 tsp salt
-
Optional: extra chocolate chips, chopped nuts, mini marshmallows
Instructions
1. Prep
-
Preheat oven to 350°F (175°C).
-
Line an 8×8-inch pan with parchment paper, leaving a slight overhang for easy lifting.
2. Melt Chocolate & Fat
-
Melt chocolate chips and butter (or coconut oil) together in a microwave (30-second bursts) or double boiler until smooth.
3. Whisk Sugar & Eggs
-
Let chocolate mixture cool slightly.
-
Whisk in sugar, then eggs one at a time until thick and glossy.
-
Stir in vanilla extract.
4. Fold in Dry Ingredients
-
Gently fold in almond flour, cocoa powder, and salt until just combined. Avoid overmixing.
-
Optional: fold in extra chocolate chips, nuts, or mini marshmallows.
5. Bake
-
Pour batter into prepared pan and spread evenly.
-
Bake 22–25 minutes until edges are set and center has moist crumbs.
-
Toothpick should come out with a few crumbs, not wet batter.
6. Cool & Slice
-
Cool completely on a wire rack (or refrigerate for 1 hour for cleaner slices).
-
Lift using parchment overhang and cut into 12 squares.
Notes
-
Don’t overbake; fudgy is the goal.
-
Avoid overmixing after adding almond flour.
-
For a shiny, crackly top, whisk eggs and sugar well into slightly cooled chocolate.
Nutrition
- Calories: 210 Cal per brownie
- Carbohydrates: 19g
- Fiber: 2g
- Protein: 4g
Nutritional Information*
*This is an estimate provided for informational purposes only. Actual values will vary based on specific ingredients used.
Per Brownie (based on 12 brownies): Calories: 210 | Protein: 4g | Carbohydrates: 19g | Fiber: 2g | Sugar: 15g | Fat: 14g
Prep Time: 10 min | Cook Time: 25 min | Total Time: 35 min
Final Thoughts: More Than Just a Brownie
So there you have it—the recipe that changed my gluten-free baking game and brought a piece of my grandma’s kitchen into my own. These almond flour brownies are proof that you don’t have to choose between mindful ingredients and decadent, soul-satisfying flavor. They’re a testament to the fact that the best recipes aren’t about restriction, but about rediscovery.
I hope this batch brings as much joy to your kitchen as it has to mine. I hope it fills your home with that unforgettable chocolatey aroma and gives you that same feeling of triumph I felt when I finally nailed the recipe. Most importantly, I hope it reminds you that no dietary tweak should ever mean missing out on life’s simple, delicious pleasures.
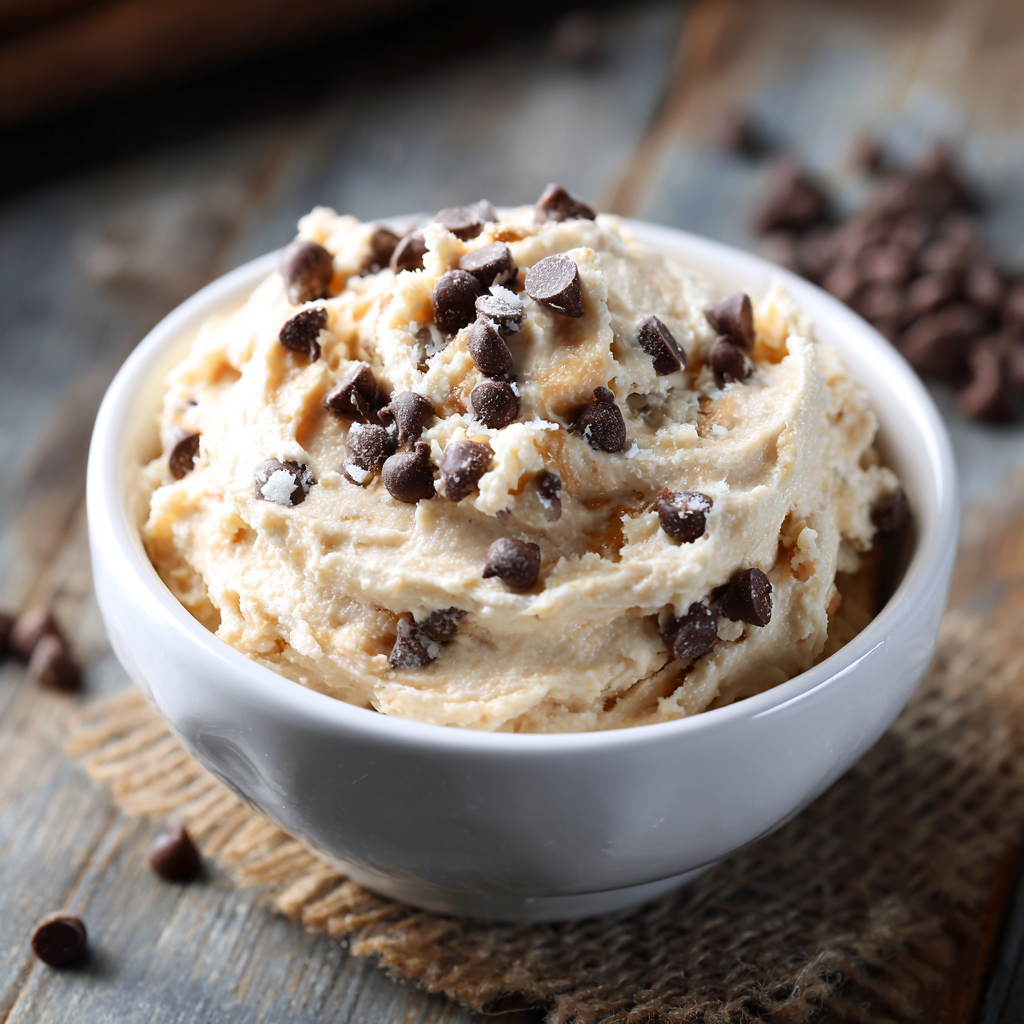
COTTAGE CHEESE COOKIE DOUGH
Ditch the Guilt, Grab a Spoon: Your New Favorite Protein-Packed Treat is Here!
Hey friends, Beau here! Let’s get real for a second. How many times have you been elbow-deep in a baking project, only to find yourself hovering over the mixing bowl, spatula in hand, absolutely *aching* to dive into that irresistible raw cookie dough? I’ve been there more times than I can count. There’s something magical about that sweet, buttery, slightly salty concoction that feels like a direct injection of joy. But then that little voice in the back of your head (or maybe it’s your mom’s voice, forever etched in your memory) pipes up: “Don’t eat that! Raw eggs! Raw flour! You’ll regret it!”
Talk about a buzzkill, right? For years, I thought I had to choose between a moment of blissful indulgence and being a responsible adult. But what if I told you you don’t have to choose? What if I told you that you could have a spoonful of something that tastes exactly like that nostalgic, crave-worthy cookie dough, but it’s actually good for you? Sounds like a food dream, I know. But my friends, this dream is 100% real and it’s sitting in my fridge right now.
I’m talking about my legendary Protein-Packed Cottage Cheese Cookie Dough. This isn’t a “healthy alternative” that tastes like cardboard and disappointment. This is a creamy, dreamy, chocolate-chip-studded masterpiece that’s whipped up in about five minutes flat. It’s the snack that fuels my afternoons, satisfies my post-dinner sweet tooth without the crash, and has become my absolute go-to for a quick treat that feels indulgent but is secretly packed with protein. So, grab your blender and your favorite bowl—we’re about to make all your cookie dough dreams come true, no regrets attached.
The Midnight Mixer Mishap That Started It All
This recipe was born out of a serious late-night craving. Picture this: It was a rainy Tuesday, well past midnight. I was editing photos for a big casserole recipe (coming soon to the blog!) and I hit a wall. I needed a sweet hit of something, anything, to keep me going. The pantry was bare except for some oats and chocolate chips. The fridge wasn’t much better—eggs, milk, and a lonely tub of cottage cheese staring back at me.
Now, I’ve always been a cottage cheese fan. It’s a blank canvas! But in that moment of desperation, a wild idea hit me. I’d seen folks blending it into smoothies for creaminess… so why not into a sweet treat? I threw that cottage cheese into the blender with a glug of maple syrup and a splash of vanilla, crossed my fingers, and hit puree. What emerged was this shockingly smooth, sweet, and creamy base. I stirred in some blitzed-up oats and those chocolate chips, gave it a taste, and I swear I heard angels sing. It was cookie dough! Actual, honest-to-goodness, eat-it-with-a-spoon cookie dough. My wife, Sam, came downstairs, drawn by the noise, took one bite, and her eyes went wide. “Beau. This is it. This is the one.” And just like that, a Feastical legend was born in my midnight kitchen.
Gathering Your Cookie Dough Dream Team
The beauty of this recipe is in its simplicity. You only need a handful of pantry staples to create pure magic. Here’s the lineup:
- 1 cup cottage cheese (2% or full-fat): This is our MVP, our star player, the secret weapon! The curds break down into an incredibly rich and creamy base that mimics the fat content of butter. Chef’s Insight: Don’t skimp and go for fat-free here. The fat is what gives it that luxurious, satisfying mouthfeel. Full-fat is dreamy, but 2% works perfectly. For the smoothest texture, I recommend a “small curd” variety.
- 1/4 cup maple syrup or honey: Our natural sweetener. Maple syrup lends a deeper, almost caramel-like note, while honey is a touch brighter and floral. Substitution Tip: Agave nectar works great too! If you want to use a sugar-free syrup, that will also work perfectly in this no-heat application.
- 1 tsp vanilla extract: The flavor enhancer. It provides that classic, warm bakery aroma we all know and love. Pro Hack: If you really want to level up, use vanilla bean paste. Those little black specks make it look and taste incredibly gourmet!
- 1/2 cup oat flour: This acts as our “flour,” giving the dough its perfect, fudgy body. Chef’s Insight: You can easily make this yourself by blending rolled or quick oats in a high-speed blender or food processor until they form a fine powder. It’s cheaper, and you probably already have oats in your pantry! Almond flour also works for a gluten-free option.
- A generous pinch of salt: Never, ever forget the salt! It balances the sweetness and makes all the other flavors pop. Trust me on this.
- 1/3 cup mini chocolate chips: The iconic mix-in! Why mini? They distribute more evenly in every single bite. Feel free to use standard-sized chips, chunks, or even chopped-up dark chocolate bars. Dairy-free chips work wonderfully here too!
Let’s Make Some Magic: Your Foolproof Guide
If you can press a button and stir, you can absolutely master this recipe. Let’s walk through it together, step-by-step.
Step 1: The Great Blend-Off.
Grab your blender or food processor. I’m a blender guy for this—it just gets everything silky smooth. Toss in your cottage cheese, maple syrup (or honey), and that glorious vanilla extract. Now, secure the lid tightly (learned that lesson the messy way!) and blend on high for a good 45-60 seconds. Stop, scrape down the sides if you need to, and blend again until it’s completely smooth, with no visible curds remaining. This step is non-negotiable for that perfect cookie dough texture! You’re aiming for a consistency like a thick, luscious yogurt.
Step 2: The Stir-Down.
Pour your beautifully smooth, creamy mixture into a medium-sized bowl. Now, add your homemade oat flour and that crucial pinch of salt. Take a spatula and fold everything together. You’ll see it start to thicken up almost immediately. Keep stirring until no dry spots remain and it looks, well, like cookie dough! If it seems a little too soft, don’t panic. It will firm up as it chills. If it’s too thick, you can add a teaspoon of milk to loosen it up, but I’ve rarely found this necessary.
Step 3: The Chip Fold.
This is the best part. Sprinkle your mini chocolate chips over the dough and gently fold them in until they’re evenly distributed. Try not to eat it all right now—I believe in you.
Step 4: The Patience Test (Optional but Recommended).
You can 100% grab a spoon and dig in immediately. It’s deliciously soft and creamy. But if you’re like me and you love a firmer, more scoopable cookie dough experience, cover the bowl and pop it into the fridge for at least 30 minutes. This allows the oat flour to fully absorb the moisture, giving you that classic, fudgy cookie dough consistency we’re after.
How to Serve Up This Superstar Snack
The beauty of this dough is in its versatility! I love eating it straight from the bowl with a spoon (no judgment here). For a more composed dessert, scoop it into a small bowl and top with an extra sprinkle of chocolate chips and a tiny pinch of flaky sea salt. It also makes an incredible dip for fresh fruit like apple slices, strawberries, or banana chips. Want to get really fancy? Layer it in a glass with some berries and granola for a stunning protein parfait!
Mix It Up! 5 Delicious Twists to Try
Once you’ve mastered the base, the flavor world is your oyster! Here are a few of my favorite riffs:
- Peanut Butter Paradise: Add two tablespoons of creamy peanut butter (or any nut butter) to the blender in step one. Fold in chopped peanut butter cups instead of chocolate chips.
- Funfetti Birthday Cake: Swap the chocolate chips for a hefty tablespoon of rainbow sprinkles. Add ¼ teaspoon of almond extract along with the vanilla for that true birthday cake flavor.
- Mint Chocolate Chip: Add ¼ teaspoon of peppermint extract to the blender. Use dark chocolate chips for a classic combo.
- Snickerdoodle Style: Omit the chocolate chips. Fold in two tablespoons of cinnamon chips and a teaspoon of cinnamon into the oat flour.
- Double Chocolate: Add two tablespoons of cocoa powder or cacao powder to the oat flour before stirring it in. Use white chocolate chips for a stunning contrast!
Beau’s Kitchen Chronicles: A Dough That Grows
This recipe has evolved so much since that first midnight experiment. I’ve tried it with Greek yogurt (a great sub, but tangier!), I’ve forgotten the salt (don’t be like me), and I’ve even accidentally used garlic-and-herb cottage cheese once—0/10, do not recommend. The biggest game-changer was realizing I could make my own oat flour in seconds. It’s cheaper, it means one less thing to buy, and it honestly tastes fresher.
This dough has also become a staple in our house for more than just snacking. My kiddos love it spread on a whole-wheat tortilla, rolled up, and sliced into “sushi” rolls for their lunchboxes. It’s a total win. It’s a recipe that feels alive, and I love hearing how you all make it your own. Food, at its best, is about adaptation and joy, and this little bowl of dough is just bursting with both.
Your Questions, Answered!
Q: My dough turned out a bit runny. What did I do wrong?
A: The most common culprit is not blending the cottage cheese long enough. Those hidden curds hold moisture that gets released later. Make sure you blend until it’s completely, 100% smooth. Also, different cottage cheese brands have slightly different moisture contents. If it’s too soft after stirring, just add another tablespoon of oat flour until it reaches your desired consistency. Remember, it will also firm up significantly in the fridge!
Q: Can I make this dairy-free?
A: Absolutely! For a dairy-free version, use a plant-based cottage cheese (Kite Hill makes a great one) or swap the cottage cheese for a cup of plain, unsweetened dairy-free yogurt (a thicker coconut or soy yogurt works best). Use dairy-free chocolate chips, and you’re all set!
Q: How long does this keep in the fridge?
A: Stored in an airtight container, it will stay fresh and delicious for up to 5 days. The oat flour will continue to absorb moisture, so it might get a bit thicker over time—just give it a stir before serving.
Q: Can I bake this into actual cookies?
A: Ah, the eternal question! Unfortunately, no. This recipe is designed specifically to be eaten as a no-bake, edible cookie dough. It lacks the binding agents and structure needed to bake properly. You’d likely end up with a puddle of melted chocolate and cottage cheese (not the vibe we’re going for!). For baked cookies, stick to a traditional recipe.
Print
COTTAGE CHEESE COOKIE DOUGH
- Total Time: 5 min (plus optional chill)
Description
Who says cookie dough is off-limits? This dreamy, creamy, chocolate-chip-studded treat tastes just like the classic dough we all sneak spoonfuls of—but with a protein boost that makes it guilt-free. It’s smooth, satisfying, ready in 5 minutes, and guaranteed to keep your sweet tooth (and your energy levels) happy.
Ingredients
-
1 cup cottage cheese (2% or full-fat, small curd)
-
¼ cup maple syrup or honey (agave or sugar-free syrup also works)
-
1 tsp vanilla extract (or vanilla bean paste for extra flair)
-
½ cup oat flour (DIY by blending rolled oats until fine; almond flour works too)
-
Pinch of salt (don’t skip—it makes the flavor pop!)
-
⅓ cup mini chocolate chips (or chopped dark chocolate)
Instructions
-
Blend it smooth – In a blender, combine cottage cheese, maple syrup, and vanilla. Blend 45–60 seconds until completely creamy.
-
Mix it up – Transfer to a bowl, stir in oat flour and salt until doughy.
-
Add the magic – Fold in mini chocolate chips.
-
Spoon & enjoy – Eat right away for soft dough or chill 30 minutes for a firmer, scoopable texture.
- Prep Time: 5 min
Nutrition
- Calories: 190Cal per serving
- Sugar: 13g
- Carbohydrates: 21g
- Protein: 11g
Nutritional Information*
*Please note: This is an estimate provided by an online nutrition calculator. Values will vary based on your specific ingredients and brands.
Per Serving (approx. 1/4 of the recipe): Calories: 180 | Protein: 10g | Carbohydrates: 20g | Fat: 7g | Fiber: 2g
Final Thoughts: Your Spoon Awaits
So, there you have it. The story of a midnight mishap that turned into a kitchen triumph, all for you. This recipe is more than just a list of ingredients; it’s a permission slip to indulge joyfully, to play with your food, and to finally silence that nagging voice of guilt.
It’s proof that the line between “healthy” and “heavenly” doesn’t have to exist. With a little creativity, you can have a treat that fuels your body and delights your soul—a snack that’s as perfect for a 3 PM slump as it is for a post-dinner celebration.
This Protein-Packed Cottage Cheese Cookie Dough isn’t just a recipe; it’s your new secret weapon. It’s the answer to a craving, the star of a snack plate, and the beginning of your own flavor adventures. I’ve shared my base recipe and my favorite riffs, but now it’s your turn. Make it your own.
GOOGLY EYES MONSTER CUPCAKES
Let’s Make Some Monster Magic: Googly Eyes Monster Cupcakes!
Hey friends, Beau here from Feastical! Can you feel it? That crispness in the air, the smell of pumpkin spice everywhere, and the sheer, unadulterated excitement of kids (and let’s be real, us adults too) plotting their perfect costumes. Halloween is just around the corner, and my kitchen has officially turned into a laboratory for all things spooky, silly, and spectacularly sweet. And let me tell you, if you’re looking for a show-stopping dessert that’s an absolute blast to make, you’ve landed on the right recipe.
Today, we’re whipping up a batch of my Googly Eyes Monster Cupcakes. These aren’t your average cupcakes, my friend. We’re talking supremely moist, deeply chocolatey cupcakes packed with melty chocolate chips, all topped with a cloud of vibrantly colored buttercream and, of course, an army of wobbly, googly candy eyes. They’re creepy-cute, a little bit silly, and 100% guaranteed to be the life of any Halloween party. The best part? They’re incredibly easy to make. You don’t need any fancy piping skills—just a love for fun food and a willingness to get a little colorful. So, grab your favorite mixing bowl, and let’s create some edible monsters together!
A Kitchen Filled with Giggles and Googly Eyes
This recipe takes me right back to one of my first Halloweens after starting Feastical. I was determined to create a dessert that was more fun than frightening, something that would make my little niece and nephew squeal with delight, not hide behind the couch. I remember the kitchen counter was a disaster zone of sprinkles, food coloring, and about five different batches of frosting experiments. The moment I placed the first candy eye on a bright green frosted cupcake and it stared back at me, I knew we had a winner.
But the real magic happened when the kids came in. Their eyes went wide, not with fear, but with pure, unfiltered joy. They spent the next ten minutes naming each cupcake monster before gleefully “defeating” them by taking a big bite. That’s the heart of Feastical right there—it’s not just about the food, it’s about the memories you make while creating it and the smiles it brings. These cupcakes are a little bite of that happy chaos, and I hope they bring the same laughter to your kitchen.
Gathering Our Monster-Making Supplies
Here’s everything you’ll need to conjure up a dozen of these delightful little monsters. I’ve included some of my favorite chef insights and swaps to make this recipe your own!
For the Chocolate Chip Cupcakes:
- 1 cup all-purpose flour: The trusty foundation of our cupcake. For a slightly denser, tender crumb, you can swap it for cake flour.
- 1/2 cup cocoa powder: Use natural, unsweetened cocoa powder for that classic, robust chocolate flavor we all love.
- 1 tsp baking soda: Our leavening agent that gives the cupcakes their perfect rise and dome.
- 1/4 tsp salt: Never skip this! Salt is the flavor enhancer that makes the chocolate taste richer and deeper.
- 1/2 cup granulated sugar & 1/2 cup brown sugar: The white sugar provides sweetness, while the brown sugar adds a hint of molasses and keeps the cupcakes incredibly moist. It’s my secret weapon for the best texture!
- 1/2 cup vegetable oil: This keeps the crumb moist for days, far better than butter in this recipe. Melted coconut oil works great too.
- 2 large eggs: Bring them to room temperature! This helps them incorporate smoothly into the batter for a uniform texture.
- 1 tsp vanilla extract: The supporting actor that makes the chocolate star shine even brighter.
- 1/2 cup buttermilk: The key to a tender, fluffy cupcake! The acidity reacts with the baking soda for a great lift. No buttermilk? No problem! Make a quick substitute by adding 1/2 tbsp of lemon juice or white vinegar to a 1/2 cup measuring cup, then fill the rest with regular milk. Let it sit for 5 minutes until it curdles.
- 1/2 cup chocolate chips: Because more chocolate is always the answer. I use semi-sweet, but dark or milk chocolate work too!
For the Monster Frosting & Decorations:
- 1/2 cup (1 stick) unsalted butter, softened: “Softened” is key here! It should leave a slight indent when you press it. This ensures a smooth, lump-free, creamy frosting.
- 3 cups powdered sugar: Also known as confectioner’s sugar. We sift it to avoid any lumps in our perfectly smooth frosting.
- 2–3 tbsp milk: Whole milk is great, but any milk you have on hand will work. We add it a tablespoon at a time to get the perfect spreading consistency.
- 1 tsp vanilla extract: A little dash for the frosting, too!
- Gel food coloring (orange and green): I highly recommend gel over liquid. The colors are more vibrant and intense without thinning out your frosting.
- Candy googly eyes (various sizes): The star of the show! You can find these in the baking aisle of most craft or grocery stores. The variety pack with different sizes makes your monsters look even more fun and dynamic.
Let’s Build Some Monsters: Step-by-Step
Follow these steps, and you’ll have a crew of cute creepy cupcakes in no time. I’m chatting right alongside you with all my best tips!
- Preheat and Prep: Fire up your oven to 350°F (175°C). This gives it plenty of time to reach the perfect temperature while you make the batter. Line your cupcake pan with those fun festive liners—this is the first step to making them look the part!
- Combine the Dry Team: In a medium bowl, grab your whisk and thoroughly combine the flour, cocoa powder, baking soda, and salt. Whisking now does two things: it combines everything evenly, and it sifts the ingredients, which means no more lumps! Set this bowl aside.
- Unite the Wet Team: In a larger mixing bowl, whisk together the granulated sugar, brown sugar, and vegetable oil. Once it looks like wet sand, add in the room-temperature eggs, one at a time, whisking well after each. Then pour in the vanilla and buttermilk and whisk until it’s a smooth, gorgeous, chocolate-brown liquid.
- The Grand Batter Merge: Here’s a chef hack: pour the dry ingredients into the wet ingredients. Why? It minimizes overmixing! Gently fold the dry into the wet with a spatula until the flour streaks are almost gone. It’s okay if there’s a spot or two of flour left.
- Fold in the Chocolate Chips: Now, dump in those chocolate chips and fold just until everything is combined and no dry pockets remain. Do not overmix! Overmixing develops gluten and leads to tough, dense cupcakes. A few lumps are A-okay.
- Bake to Perfection: Using a spoon or ice cream scoop, fill each liner about 2/3 of the way full. This is the perfect amount for a beautiful dome without overflow. Pop the pan in the oven and bake for 18-20 minutes. You’ll know they’re done when a toothpick inserted into the center comes out with a few moist crumbs (not wet batter). Let them cool in the pan for 5 minutes before moving them to a wire rack to cool completely. This is non-negotiable! Frosting a warm cupcake is a recipe for a melty, sad mess.
- Create the Fluffy Monster Fur: While the cupcakes cool, make the frosting. In a stand mixer or with a hand mixer, beat the softened butter on medium speed for 2-3 minutes until it’s pale, creamy, and smooth. Gradually add the sifted powdered sugar on low speed (unless you want a sugar cloud explosion in your kitchen!). Once incorporated, add the vanilla and 2 tablespoons of milk. Beat on high for 2-3 minutes until light and fluffy. If it’s too thick, add the remaining milk a teaspoon at a time. Divide the frosting evenly between two bowls and tint one orange and one green with your gel food coloring.
- Assembly and Decoration! This is the fun part! You can spread the frosting on with a knife for a messy-fun monster look, or use a piping bag with a star tip for some texture. Be generous! Once frosted, immediately press on the candy googly eyes. Get creative—make cyclops monsters, aliens with multiple eyes, or silly cross-eyed creatures!
How to Serve Your Spooky Squad
Presentation is part of the fun! Pile these cupcakes high on a cake stand or a spooky platter. I love using a black slate board or a rustic wooden tray to make the bright colors of the frosting really pop. Let them be the centerpiece of your Halloween spread! They pair perfectly with a cold glass of milk for the kids or a strong cup of coffee for the adults supervising the sugar rush.
Monster Mash-Up: Recipe Variations
The beauty of these monsters is that they are endlessly customizable! Here are a few twists to try:
- Cookies & Cream Monster: Use vanilla cupcakes instead of chocolate and fold in crushed Oreo pieces. Frost with black (or gray!) frosting and use white chocolate chips as pupils for the eyes.
- Vampire Bite: Make a red velvet cupcake base and frost with white cream cheese frosting. Add two candy eyes and a strawberry jam “blood” trickle from the bottom.
- Gluten-Free Ghouls: Swap the all-purpose flour for a 1:1 gluten-free baking blend. The result is just as fudgy and delicious!
- Different Beasties: Use purple, blue, and red frosting to create a whole ecosystem of different-colored monsters!
Beau’s Chef’s Notes
This recipe has evolved from a simple chocolate cupcake into a Halloween tradition. One year, I was in a huge rush and tried to frost the cupcakes while they were still slightly warm. Let’s just say my monsters looked like they were melting in a swamp! Lesson learned: patience is a virtue, especially in baking.
Another time, my dog, Biscuit, managed to sneak up and snag a cupcake right off the counter. He spent the rest of the day with a single green-frosted nose and a very proud look on his face. So, guard your monsters closely from all creatures, real and imagined!
Most importantly, have fun with it. Don’t stress about making them perfect. The wonky, crazy-looking monsters often have the most personality.
FAQs & Troubleshooting
Q: My cupcakes turned out dense and didn’t rise much. What happened?
A: The most common culprit is overmixing the batter after adding the flour. Once you add the dry ingredients, switch to a spatula and fold gently until just combined. Also, make sure your baking soda is fresh! If it’s old, it won’t have the power to lift your cupcakes.
Q: My frosting is too runny! How can I fix it?
A: No worries, this is an easy fix. Gradually add more sifted powdered sugar, a quarter cup at a time, and beat until it thickens up to your desired consistency. If it’s really runny, you can chill it in the fridge for 20-30 minutes to let the butter firm up before re-beating.
Q: Can I make these ahead of time?
A: Absolutely! The unfrosted cupcakes can be baked, cooled completely, and stored in an airtight container at room temperature for up to two days. You can also make the frosting ahead and store it in the fridge for up to 3 days. Just let it come to room temperature and re-whip it with your mixer for a minute before frosting.
Q: The food coloring isn’t vibrant enough. What can I do?
A: Liquid food coloring will give you pastel shades. For the electric, monster-worthy colors you see in the photos, gel food coloring is essential. You only need a tiny bit to achieve deep, vibrant color without affecting the frosting’s texture.

GOOGLY EYES MONSTER CUPCAKES
Description
Halloween is all about fun in the kitchen—and these Googly Eyes Monster Cupcakes bring it in spades! Imagine supremely moist, fudgy chocolate chip cupcakes topped with fluffy, brightly colored buttercream and crowned with candy eyes that stare right back at you. They’re not scary—they’re silly, playful, and guaranteed to spark giggles before the first bite. Perfect for parties, bake sales, or just a cozy night of monster-making with family.
Ingredients
For the cupcakes:
-
1 cup all-purpose flour
-
½ cup cocoa powder
-
1 tsp baking soda
-
¼ tsp salt
-
½ cup granulated sugar
-
½ cup brown sugar
-
½ cup vegetable oil (or melted coconut oil)
-
2 large eggs, room temp
-
1 tsp vanilla extract
-
½ cup buttermilk (or milk + ½ tbsp lemon juice/vinegar)
-
½ cup chocolate chips
For the frosting & decorations:
-
½ cup unsalted butter, softened
-
3 cups powdered sugar, sifted
-
2–3 tbsp milk
-
1 tsp vanilla extract
-
Gel food coloring (orange & green)
-
Candy googly eyes (various sizes)
Instructions
-
Preheat oven to 350°F (175°C). Line a muffin tin with festive liners.
-
Dry mix – Whisk flour, cocoa, baking soda, and salt.
-
Wet mix – Beat sugars and oil until sandy. Add eggs, vanilla, and buttermilk.
-
Combine – Gently fold dry into wet until just blended.
-
Fold in chips and divide batter into liners, filling ⅔ full.
-
Bake 18–20 min, until a toothpick comes out with crumbs. Cool fully.
-
Make frosting – Beat butter until creamy. Add sugar gradually, then vanilla and milk. Beat until fluffy. Divide, tint with gel colors.
-
Decorate – Spread or pipe frosting generously, then press on googly eyes to bring your monsters to life.
Nutritional Information (Per Cupcake – approx.)
Calories: 320 | Protein: 4g | Carbs: 44g | Fat: 16g | Sugar: 32g
Please note: This is an estimate provided by an online nutrition calculator. It will vary based on specific ingredients and portion sizes.
Prep Time: 20 min | Cook Time: 20 min | Total Time: 40 min
Final Thoughts: Unleash Your Inner Monster Maker
And there you have it, friends! Your very own squad of silly, spooky, and seriously delicious Googly Eyes Monster Cupcakes. From that first whiff of chocolatey goodness in the oven to the final, wobbly-eyed stare-down on your platter, I hope this recipe brought as much laughter and light to your kitchen as it does to mine every year.
Remember, the true magic of this recipe isn’t just in the taste—it’s in the experience. It’s in the colorful frosting smudges on little fingers, the creative debates over how many eyes a monster should have, and the shared giggles as you all take that first monstrous bite.
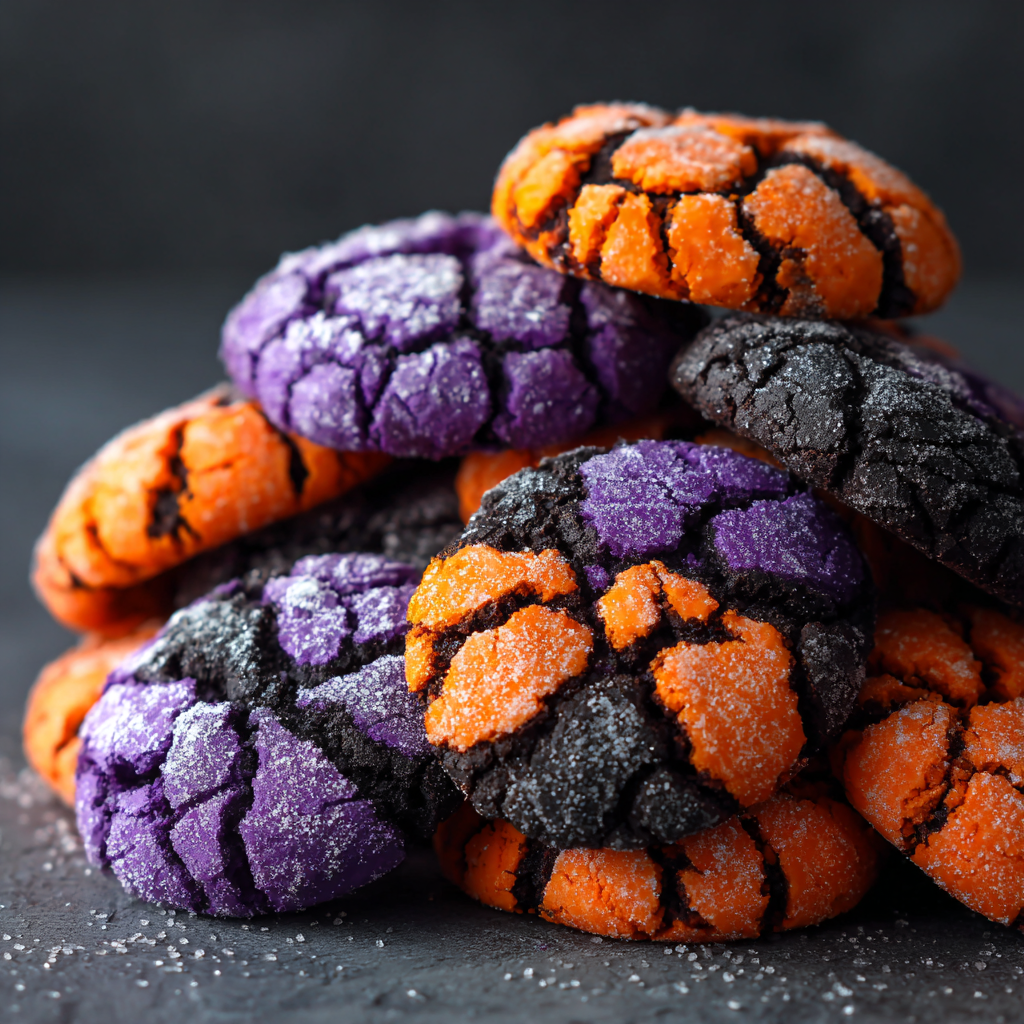
HALLOWEEN CRINKLE COOKIES
Spooky, Soft, and Seriously Delicious: Your New Favorite Halloween Cookie!
Hey friends, Beau here from Feastical! Is there anything better than the smell of something sweet baking in the oven? Now, imagine that smell, but with a spooky, fun Halloween twist. I’m talking about cookies that look like they’ve been dusted with ghostly powdered sugar and have these incredible, web-like cracks revealing a burst of color underneath. That’s the magic of Halloween Crinkle Cookies, and let me tell you, they are about to become the star of your Halloween party spread.
These aren’t just any cookies. They’re the perfect blend of rich, fudgy texture and a melt-in-your-mouth sweetness that both kids and adults go absolutely wild for. The best part? They’re deceptively easy to make. Whether you’re a baking pro or someone who considers ordering takeout a form of “cooking,” this recipe is for you. We’re keeping it simple, soulful, and oh-so-satisfying.
So, put on your favorite apron (the one with the questionable stain from last year’s frosting fight), cue up your spooky season playlist, and preheat that oven. We’re about to create a batch of cookies that are equal parts delicious and delightfully creepy. They’re soft, they’re chewy, and they’re about to bring so much joy to your kitchen. Let’s get baking!
A Cookie That Casts a Spell: My First Crinkle Cookie Memory
You know, every great recipe has a story, and this one takes me back. It wasn’t even Halloween. I was about ten years old, rummaging through my grandma’s kitchen—a place that always smelled like cinnamon and unconditional love. She was a wizard with a whisk, and on this particular day, she was making what she called her “Crackled Snowball” cookies. They were these simple, pale vanilla cookies rolled in a mountain of powdered sugar.
I watched, mesmerized, as she pulled the baking sheet from the oven. The cookies had transformed! They’d magically cracked open, creating a beautiful, craggy landscape against the stark white sugar. I was convinced it was actual magic. She let me have one straight from the sheet, and I burned my tongue because I was too impatient to wait. That first hot, soft, sugary bite was pure bliss. Years later, I started playing with her recipe, adding cocoa for a chocolate version, and then, the real fun began with food coloring for Halloween. Every time I make these, I think of her and that magical kitchen. It’s my little way of keeping her spirit—and her incredible talent for creating joy through food—alive and well in my own kitchen.
Gathering Your Magical Ingredients
Part of the fun of baking is gathering your tools and ingredients—it’s like preparing a potion! Here’s everything you’ll need to conjure up two dozen perfectly spooky cookies. Don’t worry, I’ve included some chef insights and easy swaps to make this recipe work for you.
- 1 cup all-purpose flour: The trusty foundation of our cookie. It gives them structure. For a gluten-free twist, a 1:1 gluten-free baking blend works wonderfully here.
- 1/2 cup unsweetened cocoa powder: This is what gives our cookies that deep, dark, rich chocolatey base that makes the colors pop! Use natural cocoa powder for the best flavor. If you’re making vanilla-based cookies (see variations below!), you’ll simply omit this.
- 1 tsp baking powder: Our leavening agent! This is the secret helper that gives the cookies a little lift and helps create those iconic crinkles as they bake and expand.
- 1/4 tsp salt: Never, ever skip the salt! It’s not to make things salty; it’s a flavor enhancer that makes the chocolate taste richer and the sweetness feel more balanced.
- 1 cup granulated sugar: Sweetness and tenderness! The sugar dissolves into the dough, helping create that wonderfully chewy texture we’re after.
- 1/4 cup vegetable oil: Oil keeps these cookies incredibly moist and fudgy, more so than butter would. I use a neutral oil like canola or vegetable. Melted coconut oil also works if you like a subtle coconut hint.
- 2 large eggs: Our binding agent. They bring the dough together and contribute to the structure. Make sure they’re at room temperature for a smoother, easier-to-mix dough!
- 1 tsp pure vanilla extract: The classic flavor booster. It adds a warm, comforting depth that pairs perfectly with chocolate.
- Gel food coloring (orange, purple, or black): This is where the Halloween magic happens! I strongly recommend gel food coloring over liquid. It’s more concentrated, so you get vibrant, bold colors without throwing off the liquid balance of your dough.
- 1/2 cup powdered sugar (for rolling): This creates the iconic “crinkle” or cracked effect. As the cookie expands in the oven, the powdered sugar coating cracks, revealing the colorful dough beneath. It’s edible theater!
Brewing the Batch: Your Step-by-Step Guide to Cookie Magic
Alright, let’s get our hands dirty (probably literally, if you’re using that black food coloring!). Follow these steps, and you’ll have perfect crinkle cookies every single time.
Step 1: The Dry Team Assemble!
In a medium-sized bowl, grab your whisk and combine the all-purpose flour, cocoa powder, baking powder, and salt. Whisk it all together until it’s one uniform, chocolaty powder. This isn’t just about mixing; it’s about aerating the dry ingredients and making sure the baking powder and salt are evenly distributed. No one wants a bite of just baking powder! Set this bowl aside. Chef’s Hack: I like to sift the cocoa powder if it’s particularly lumpy to ensure a super smooth dough.
Step 2: The Wet Team Unite!
In a larger mixing bowl, combine the granulated sugar, vegetable oil, eggs, and vanilla extract. Use a hand mixer or a sturdy whisk to beat this together for a good 1-2 minutes. You want it to be smooth, slightly pale, and well-incorporated. Now, for the fun part: add your gel food coloring! Start with a small amount (a toothpick’s worth for gel) and mix it in. You can always add more to intensify the color. Remember, the color will darken slightly as it bakes. Chef’s Hack: If you’re going for black, be patient! It can take quite a bit of black gel to overcome the brown of the chocolate. You might end up with a very dark gray, which is perfectly spooky!
Step 3: Bring the Teams Together!
Gradually add your dry ingredient mixture to your wet, colorful mixture. I usually do this in two or three batches, folding it in with a spatula. Mix until *just* combined and no streaks of dry flour remain. Do NOT overmix! Overmixing develops gluten and can lead to tougher cookies. We want fudgy, not toughy. The dough will be gloriously shiny and thick. Chef’s Hack: If the dough feels too sticky to handle, that’s perfect! It’s supposed to be. The chilling step is coming to rescue us.
Step 4: The All-Important Chill Session
This is the step you absolutely cannot skip! Cover the bowl with plastic wrap and pop it into the refrigerator for at least 1 hour, or up to 3-4 hours. This does a few crucial things: it chills the fat, which prevents the cookies from spreading too much in the oven. It also allows the flour to hydrate fully, giving us that dense, fudgy center. Most importantly, a cold dough is MUCH easier to handle and roll into balls later. Chef’s Hack: In a serious time crunch? You can pop the dough into the freezer for about 30 minutes instead, but the fridge is best.
Step 5: Preheat and Prepare!
Once your dough is nicely chilled, preheat your oven to 350°F (175°C). This ensures it’s at the perfect temperature when your cookies are ready to go. Line two baking sheets with parchment paper. Trust me, this prevents sticking and makes cleanup a dream.
Step 6: Roll, Coat, and Place!
Place your powdered sugar for rolling in a small bowl. Using a tablespoon or a small cookie scoop (my personal favorite for uniform cookies), portion out the dough. Roll each portion between your palms into a smooth, compact ball. Now, roll each ball generously in the powdered sugar until it’s completely coated. You want it to look like a little ghost! Place the sugar-coated balls about 2 inches apart on your prepared baking sheets. They need room to spread and crinkle! Chef’s Hack: For an extra-thick, snowy coating, roll the balls in powdered sugar a second time right before baking. It creates a more dramatic contrast!
Step 7: Bake to Crackled Perfection!
Bake for 10-12 minutes. The cookies are done when they have spread out and the surfaces have cracked beautifully. The centers should still look slightly soft and underbaked—this is the secret to a chewy cookie! They will firm up as they cool. Chef’s Hack: Ovens can vary, so keep an eye on them after the 9-minute mark. It’s better to pull them out a little early than overbake them.
Step 8: The (Hardest Part) Patience!
Remove the baking sheets from the oven and let the cookies cool on the sheet for at least 5 minutes. They are very delicate when hot. After that, you can transfer them to a wire rack to cool completely. This stops the cooking process and lets them set up perfectly.
How to Serve These Spooky Sensations
Presentation is part of the fun! Pile these crackled cookies high on a rustic wooden board or a stark black plate to make the colors really stand out. For a real party vibe, create a platter with all three colors—orange, purple, and black—together. They look fantastic nestled next to other Halloween treats like popcorn balls or chocolate-dipped pretzel rods. Serve them with a cold glass of milk, a mug of hot cocoa, or even a pumpkin spice latte for the ultimate fall experience. They’re the perfect hand-held dessert for a Halloween party, a lunchbox surprise, or just a cozy night in watching scary movies.
Spooky Swaps & Creative Twists
Feel like playing mad scientist? Here are a few fun ways to mix up this classic recipe:
- Vanilla Bean Crinkles: Omit the cocoa powder and add an extra 1/4 cup of flour. Use the seeds from one vanilla bean or an extra 1/2 tsp of vanilla extract for a beautiful, classic vanilla crinkle cookie.
- Peanut Butter Boo-nanza: Replace the vegetable oil with 1/4 cup of creamy peanut butter. The dough will be thicker, but you’ll get a amazing chocolate-peanut butter flavor combo.
- Minty Monster Mash: Add 1/2 tsp of peppermint extract along with the vanilla for a cool, refreshing twist that pairs wonderfully with chocolate.
- Gluten-Goblin Free: As mentioned, swap the all-purpose flour for your favorite 1:1 gluten-free baking blend. The result is just as fudgy and delicious!
- Spice It Up! Add 1 tsp of cinnamon or even a pinch of cayenne pepper to the dry ingredients for a warm, unexpected kick.
Beau’s Chef Notes & Kitchen Tales
This recipe is a living thing in my kitchen—it’s evolved so much from my grandma’s original! The first time I tried to make black cookies, I used liquid food coloring. Big mistake. I ended up with a soupy, gray mess that stained everything it touched, including my favorite apron and my dog’s nose (don’t ask). That’s when I learned the golden rule: gel coloring for the win!
I also used to be impatient and skip the chill time. My cookies would spread into thin, flat pancakes in the oven. They still tasted good, but they looked more like spooky lace doilies than plump, crackled cookies. Chilling the dough is truly the magic spell that makes this recipe work. These days, I often make the dough the night before, let it chill overnight, and then bake them fresh the next day. The flavor is even better! So learn from my messy, impatient mistakes, and you’ll have perfect cookies on the first try.
Your Crinkle Cookie Questions, Answered!
Q: My cookies didn’t crinkle much. What went wrong?
A: The most common culprit is not chilling the dough long enough. A warm dough will spread too quickly in the oven, before the surface has time to set and crack. Make sure your dough is thoroughly chilled! Another reason could be old baking powder. If it’s lost its potency, it won’t create the lift needed for those beautiful cracks.
Q: Can I make this dough ahead of time?
A: Absolutely! This dough is a great make-ahead candidate. You can keep it covered in the fridge for up to 2 days. You can also roll the dough into balls, coat them in powdered sugar, and freeze them on a baking sheet. Once frozen solid, transfer them to a freezer bag. You can bake them straight from the freezer, just add 1-2 minutes to the baking time.
Q: My powdered sugar coating disappeared into the dough. How do I prevent that?
A: This usually happens if the dough is too wet or sticky when rolled. Ensuring a full 1-hour chill will help firm up the dough. Also, make sure you’re rolling the balls in a really thick, generous layer of powdered sugar. A second roll right before baking creates a more defined, white coating.
Q: Are these cookies soft or crispy?
A: When baked correctly (pulled out when the centers are still soft), these cookies are wonderfully soft and fudgy on the inside with a slightly crisp edge from the powdered sugar. If you prefer a crispier cookie, you can bake them for a minute or two longer, but watch them carefully!
Print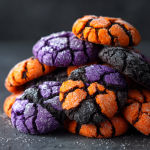
HALLOWEEN CRINKLE COOKIES
- Total Time: 32 minutes
Description
These Halloween crinkle cookies are the perfect mix of spooky fun and fudgy flavor. With their crackled powdered-sugar tops revealing vibrant orange, purple, or black dough beneath, they’re the star of any Halloween spread. Soft, chewy, and melt-in-your-mouth delicious—these cookies are easy enough for beginners and magical enough to impress every ghost and goblin at your table.
Ingredients
-
1 cup all-purpose flour (or 1:1 GF blend)
-
½ cup unsweetened cocoa powder
-
1 tsp baking powder
-
¼ tsp salt
-
1 cup granulated sugar
-
¼ cup vegetable oil (or melted coconut oil)
-
2 large eggs (room temp)
-
1 tsp vanilla extract
-
Gel food coloring (orange, purple, or black)
-
½ cup powdered sugar (for rolling)
Instructions
-
Mix dry – Whisk flour, cocoa, baking powder, and salt.
-
Mix wet – Beat sugar, oil, eggs, and vanilla until smooth. Add gel coloring.
-
Combine – Stir dry ingredients into wet until just combined.
-
Chill – Cover and refrigerate at least 1 hr (or 30 min in freezer).
-
Prep – Preheat oven to 350°F (175°C). Line baking sheets with parchment.
-
Shape – Roll dough into 1 tbsp balls. Coat generously in powdered sugar.
-
Bake – Place 2″ apart and bake 10–12 min until cracked but soft in the center.
-
Cool – Let sit on baking sheet 5 min before transferring to a rack.
Notes
-
Chill the dough fully for dramatic cracks.
-
Double-roll in powdered sugar for bolder contrast.
-
For variety, make three colors (orange, purple, black) and serve together for a spooky platter.
- Prep Time: 20 min
- Cook Time: 12 min
Nutrition
- Calories: 90 Cal per cookie
- Fat: 3g
- Carbohydrates: 14g
- Protein: 2g
Nutritional Information (Approximate, per cookie)
Calories: 90 | Protein: 2g | Carbohydrates: 14g | Fat: 3g | Saturated Fat: 0.5g | Sugar: 9g
Final Thoughts: A Spellbinding Treat for All
So there you have it, friends—your complete guide to creating cookies that are as fun to make as they are to eat. These Halloween Crinkle Cookies are more than just a dessert; they’re a experience. They’re a chance to create a little magic in your kitchen, to get your hands a little colorful, and to fill your home with the incredible aroma of chocolate and Halloween spirit.
Whether you’re baking them for a party, for your family, or just for yourself as a spooky season treat, this recipe is designed to deliver joy. It’s a beautiful blend of simple technique and spectacular results, a treat that honors tradition while encouraging you to play with color and make it your own.

Chocolate Filled Cookies
Your New Favorite Cookie Just Walked In: Say Hello to Chocolate-Filled Wonders!
Hey friends, Beau here from Feastical! Let’s be real for a second. Is there anything in this world quite as magical as breaking open a warm cookie to find a river of molten, decadent chocolate waiting inside? I’m talking about that moment of pure, unadulterated joy. The kind of moment that turns a regular Tuesday into a mini-celebration. That’s the exact feeling I wanted to bottle up and share with you today with these insanely good Chocolate Filled Cookies.
We’re not just making cookies here, folks. We’re crafting little pockets of happiness. These beauties are the ultimate crowd-pleaser, the secret weapon for bake sales, and the perfect “I-deserve-this” treat. On the outside, they’re everything you love about a classic, soft-baked cookie: slightly crisp edges, a golden-brown surface that begs to be broken into, and a tender, cake-like crumb. But then… you take that first bite. The warm, soft cookie gives way to a hidden core of rich, melted chocolate that just oozes out. It’s a surprise every single time, and it never, ever gets old.
I know what you might be thinking: “Beau, that sounds incredible, but is it complicated?” My answer? Absolutely not. If you can make a basic chocolate chip cookie, you can 100% master this recipe. I’ve packed this guide with all my favorite chef hacks and tips to ensure your baking adventure is as fun and foolproof as possible. So, preheat those ovens, grab your favorite mixing bowl, and let’s create some kitchen magic together. Your spatula and your sweet tooth are about to become best friends.
The Cookie That Started It All: A Sweet Slice of Nostalgia
This recipe takes me right back to my grandma’s kitchen, a place that always smelled like cinnamon, love, and something baking in the oven. She was the queen of “doctored-up” box mixes and simple desserts that felt like a million bucks. One rainy afternoon, I was “helping” her make a batch of her famous chocolate chip cookies (my job was predominantly taste-testing the raw dough, a sacred duty I took very seriously).
We were almost done when she got a mischievous glint in her eye. She rummaged through her pantry and pulled out a half-eaten bar of fancy chocolate my grandfather had brought home. “Let’s make them extra special,” she whispered, like we were planning a heist. She showed me how to pinch a little dough, nestle a square of that chocolate inside, and seal it all up like a precious secret. When those cookies came out of the oven, they were transformed. That first pull-apart, gooey bite wasn’t just a cookie; it was a moment of pure, shared magic. It taught me that the best recipes aren’t just about ingredients—they’re about the stories and the surprises we bake into them. This is my homage to her and that perfect, chocolatey surprise.
Gathering Your Cookie Crew: The Ingredients
Here’s the dream team that’s going to make these chocolate-filled wonders happen. Using quality ingredients is key, but I’ve also included my favorite swaps so you can use what you’ve got!
- 1 cup (2 sticks) unsalted butter, softened – This is the foundation of our rich, tender cookie. Softened is key! It should leave a slight indent when you press it, not be melty. Chef’s Tip: For a deeper flavor, try browning one stick of the butter and mixing it with one stick of softened butter. It adds a nutty, almost caramel-like note that’s incredible with chocolate.
- ¾ cup brown sugar & ¼ cup granulated sugar – The dynamic duo! Brown sugar brings moisture and that deep, caramel/molasses flavor, while granulated sugar helps with spreading and crispness. Using mostly brown sugar is my secret for an extra-chewy cookie.
- 2 large eggs – Our binding agent. Make sure they’re at room temperature to emulsify properly with the butter and sugar, creating a smooth, not greasy, dough.
- 2 tsp vanilla extract – The flavor enhancer. Don’t be shy with it! A good quality vanilla makes a world of difference.
- 2 ¼ cups all-purpose flour – The structure of our cookie. For a lighter cookie, fluff your flour with a spoon, sprinkle it into your measuring cup, and level it off. Don’t pack it down!
- 1 tsp baking soda – Our leavening agent. It helps the cookies rise and become beautifully puffy. Check the expiration date! Old baking soda won’t work its magic.
- ½ tsp salt – The flavor balancer. Salt cuts the sweetness and makes the chocolate taste even more chocolatey. I use fine sea salt.
- ½ cup chocolate chips – These are for the dough itself, giving you little pockets of chocolate in every bite, even before you hit the center! I prefer semi-sweet for balance, but milk or dark work too.
- 12–14 chocolate squares or chunks – The STAR of the show! This is your filling. You can use baking chocolate squares (like Ghirardelli), Lindt truffles, Reese’s Peanut Butter Cups, or even a chunk cut from a chocolate bar. The higher the quality, the better the melt!
Let’s Get Baking: The Step-by-Step Guide to Gooey Glory
Alright, team, let’s roll up our sleeves and make some magic. Read through these steps once before you start—it’s like getting the lay of the land before a fun road trip!
- Preheat and Prep: Fire up your oven to 350°F (175°C). This is non-negotiable for even baking. Line your baking sheets with parchment paper. Chef’s Hack: Parchment is your best friend here. It prevents sticking and makes cleanup a breeze. Silicone mats work great too!
- Creaming is Believing: In a large bowl, beat together the softened butter, brown sugar, and granulated sugar. Use an electric mixer (hand or stand) on medium speed for a good 2-3 minutes. We’re not just mixing; we’re “creaming.” This process incorporates air into the dough, which is what gives us a light, tender texture instead of a dense hockey puck. You’ll know it’s ready when the mixture turns pale, fluffy, and looks almost like a light caramel frosting.
- Eggs-cellent Addition: Add the eggs one at a time, beating well after each one. Then pour in that glorious vanilla extract. Scrape down the sides of the bowl with a spatula to make sure everything is getting to know each other.
- Dry Team Assemble: In a separate, smaller bowl, whisk together the flour, baking soda, and salt. This isn’t just busywork—whisking ensures the baking soda is evenly distributed so every cookie rises perfectly. No one wants a baking soda pocket!
- The Gentle Merge: Gradually add the dry ingredients to the wet ingredients, mixing on low speed just until the flour disappears. Chef’s Golden Rule: DO NOT OVERMIX. Overworking the dough develops gluten, which leads to tough, cakey cookies. A few streaks of flour are okay; we’ll take care of them in the next step.
- Chip Party: Switch to a sturdy spatula or wooden spoon and fold in the ½ cup of chocolate chips. This is where you make sure everything is incorporated without over-mixing.
- The Chill Factor: This might be the hardest step—patience! Cover the bowl and pop the dough into the fridge for at least 15-20 minutes. Why? Chilling the dough solidifies the butter, which prevents the cookies from spreading too thin and melting into sad, flat puddles in the oven. It also allows the flour to hydrate, giving us a chewier, more flavorful cookie. Trust me, it’s worth the wait.
- Stuff and Seal: Now for the fun part! Scoop out about a tablespoon of dough. Flatten it slightly in the palm of your hand. Place one of your chocolate squares right in the center. Take another slightly smaller scoop of dough, flatten it, and place it on top like a little hat. Gently pinch and press the edges together, then roll it between your palms to form a seamless ball. Make sure that chocolate is completely enclosed—if it peeks out, it will leak during baking!
- Bake to Perfection: Place your dough balls on the prepared baking sheet, leaving about 2 inches between them. They need room to spread! Bake for 10-12 minutes. Chef’s Secret: They will look underdone. This is what we want! The edges should be set and lightly golden, but the centers will still look soft and puffy. They will continue to cook on the hot baking sheet out of the oven. This is the secret to a soft, not crunchy, cookie.
- The Cool Down: Let the cookies cool on the baking sheet for a full 5-10 minutes. I know, the temptation is real. But this allows them to set enough so you can transfer them to a wire rack without them falling apart. If you try to move them too soon, that molten center will become a molten mess on your counter.
How to Serve These Chocolate-Filled Masterpieces
Okay, they’re baked, they’ve cooled just enough… now what? For the full experience, serve these cookies warm. The chocolate inside will be luxuriously lava-like. Place one in a small bowl, maybe add a small scoop of vanilla bean ice cream on top, and watch it start to melt into the cracks. A glass of cold milk is their classic partner in crime. For a next-level dessert, crumble one over a bowl of ice cream or even enjoy it slightly reheated for 10 seconds in the microwave to bring back that just-baked, gooey magic.
Mix It Up! Delicious Recipe Variations
The fun doesn’t stop here! This recipe is a fantastic canvas for your creativity.
- Peanut Butter Paradise: Use a miniature Reese’s Peanut Butter Cup as your center instead of a plain chocolate square. You could even add ½ cup of chopped peanuts to the dough.
- Mint Chocolate Chip: Add ½ tsp of peppermint extract to the dough along with the vanilla. Use an Andes mint or a square of mint baking chocolate for the center.
- Salted Caramel Delight: Place a soft caramel (like a Kraft square) alongside your chocolate square in the center. After baking, while still warm, sprinkle the tops with a little flaky sea salt.
- Double Nutty: Fold ½ cup of toasted chopped pecans or walnuts into the dough and use a chocolate-nut bar square for the center.
- Gluten-Free Friendly: Swap the all-purpose flour for a 1:1 gluten-free baking blend. I’ve had great success with Bob’s Red Mill and King Arthur blends.
Beau’s Chef Notes & Kitchen Stories
This recipe has evolved so much since that first batch with my grandma. I’ve learned a few things the hard way so you don’t have to! The first time I tried it, I used chocolate chips for the center. Big mistake. They don’t melt into that same smooth, liquid pool—they just get soft. You need a chocolate bar or a truffle designed to melt beautifully.
Another time, I was in a huge rush and skipped the chill time. My cookies turned into one giant, flat, cookie-cake with chocolate lava lakes. It was delicious, but not exactly the presentation I was going for! The chill time is your secret weapon for the perfect thick-and-chewy texture. These cookies have become my go-to for potlucks. I love watching someone take their first bite, their eyes go wide, and they say, “Whoa, there’s chocolate inside!” It never fails to bring a smile. That’s the real recipe right there.
Your Questions, Answered: FAQs & Troubleshooting
Q: My chocolate leaked out everywhere while baking! What did I do wrong?
A: Ah, the great leak! This usually happens for one of two reasons: 1) The chocolate center was too close to the surface. Make sure you seal the dough ball completely and that the chocolate is truly in the center. 2) The filling itself. Some chocolates have a lower melting point. If this happens, try a different brand of baking chocolate or truffle next time.
Q: My cookies came out flat and thin. How can I prevent that?
A: Flat cookies are almost always a temperature issue. The most common culprits are: butter that was too soft or melted, not chilling the dough, or an old baking soda that’s lost its potency. Make sure your butter is just softened (not melted or greasy), never skip the chill step, and always check your baking soda’s expiration date!
Q: Can I make the dough ahead of time and bake it later?
A: Absolutely! This dough is great for make-ahead. After you’ve formed the stuffed dough balls, place them on a plate or tray and freeze until solid. Then, transfer them to a freezer bag. You can bake them straight from the freezer—just add 1-2 minutes to the baking time. Fresh, warm cookies anytime!
Q: How do I store these cookies, and how long do they last?
A: Once completely cool, store them in an airtight container at room temperature for up to 4 days. The texture is best within the first 2 days. The microwave trick (10 seconds) works wonders for reviving that gooey center. You can also freeze the baked cookies for up to 3 months.
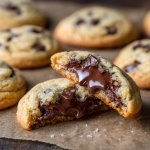
Chocolate Filled Cookies
- Total Time: 32 minutes
Description
Breaking into a warm cookie only to discover a molten river of chocolate inside? That’s happiness in its purest form. These cookies are soft, golden, and slightly crisp on the outside, but hide a surprise chocolate core that makes every bite a little celebration. Perfect for bake sales, potlucks, or those “I deserve this” moments—these are cookies with a story.
Ingredients
-
1 cup (2 sticks) unsalted butter, softened (brown 1 stick for deeper flavor, optional)
-
¾ cup brown sugar
-
¼ cup granulated sugar
-
2 large eggs (room temp)
-
2 tsp vanilla extract
-
2 ¼ cups all-purpose flour
-
1 tsp baking soda
-
½ tsp salt
-
½ cup chocolate chips (semi-sweet or preferred)
-
12–14 chocolate squares/truffles (for filling)
Instructions
-
Preheat oven – 350°F (175°C). Line trays with parchment.
-
Cream butter & sugars – Beat until fluffy, 2–3 min.
-
Add eggs & vanilla – Mix well.
-
Whisk dry ingredients – Flour, baking soda, salt in a separate bowl.
-
Combine gently – Add dry mix to wet, just until blended.
-
Fold in chips – Stir in chocolate chips.
-
Chill dough – Cover and refrigerate 15–20 min.
-
Stuff cookies – Scoop dough, flatten, place chocolate square in center, cover with more dough, roll into a sealed ball.
-
Bake – 10–12 min until edges are golden but centers soft.
-
Cool – Rest on tray 5–10 min before transferring.
Notes
-
Use chocolate bars or truffles for a gooey core (chips won’t melt as well).
-
Chill the dough—no skipping! It keeps the cookies thick and chewy.
-
Serve warm with ice cream or a cold glass of milk for the ultimate treat.
- Prep Time: 20 min
- Cook Time: 12 min
Nutrition
- Calories: 260 Cal per cookie
- Sugar: 18g
- Fat: 14g
- Carbohydrates: 32g
Nutritional Information*
*This is an estimated nutritional breakdown per cookie, based on a yield of 14 cookies. Values will vary based on specific ingredients used.
- Calories: ~260
- Fat: 14g
- Saturated Fat: 8g
- Carbohydrates: 32g
- Sugar: 18g
- Protein: 3g
- Sodium: 150mg
Prep Time: 20 min | Bake Time: 12 min | Chill Time: 15 min | Yield: 12–14 cookies
Final Thoughts: Your Journey to Gooey Greatness
Well, friends, there you have it—your complete guide to creating pure, unadulterated joy in cookie form. This isn’t just another recipe; it’s an experience. It’s the thrill of the reveal, the warmth of a shared memory, and the simple, profound happiness of a dessert made with a little bit of love and a whole lot of chocolate.
Remember, baking is an adventure, not a test. So what if a little chocolate leaks out? That just means you get to taste-test a little sooner. Embrace the process, from the creamy fluff of the butter and sugar to the final, triumphant pull-apart shot. You’re not just making cookies; you’re creating moments. You’re crafting the story that someone else might tell years from now, about that time you made the most magical cookies they’d ever eaten.
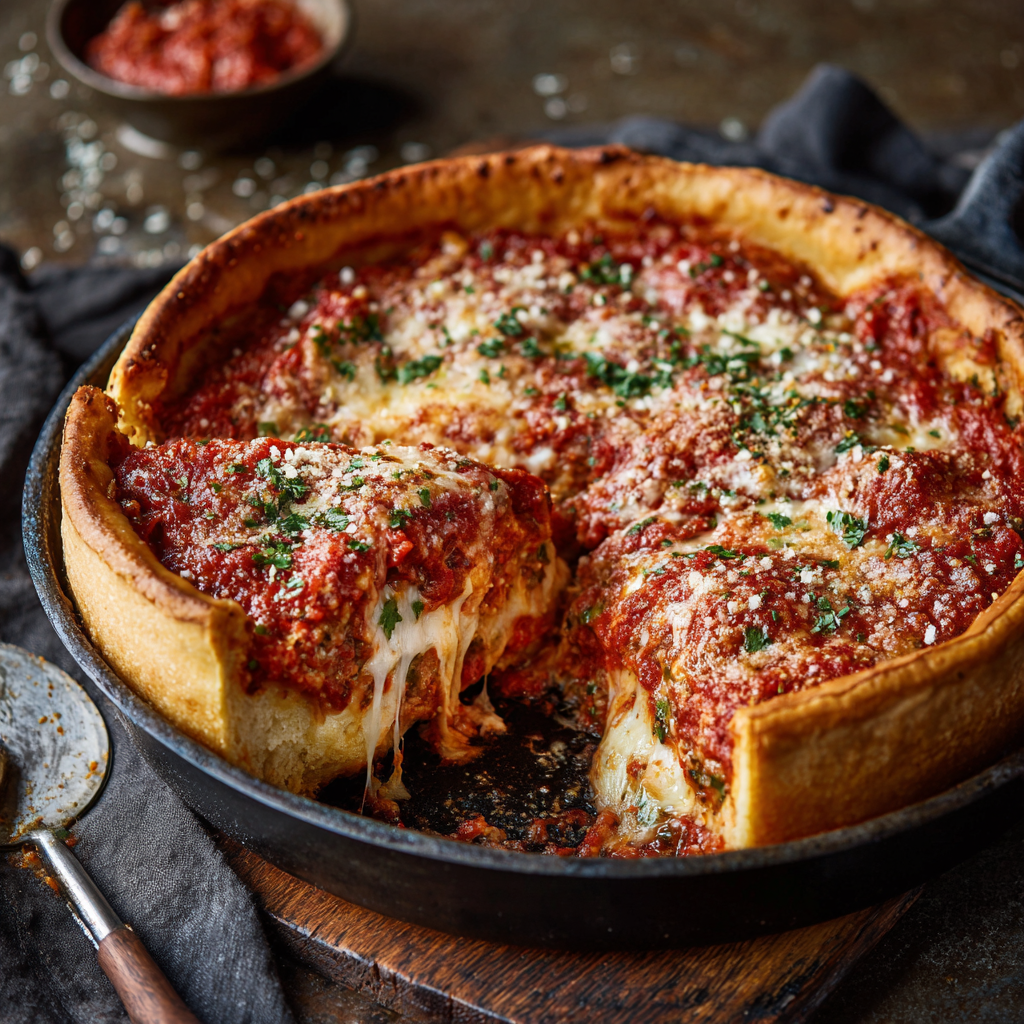
Deep Dish Pizza
Forget Everything You Thought You Knew About Pizza: Let’s Make Deep Dish!
Hey friends, Beau here! Let’s talk about pizza. Not just any pizza, but the kind of pizza that’s a meal, an experience, a delicious, cheesy, saucy event. I’m talking about the legendary, the mighty, the one-and-only Chicago Deep Dish Pizza.
If you’ve never had a proper slice, let me paint a picture for you. Imagine a buttery, crisp, almost shortbread-like crust that cradles a generous layer of molten, stretchy mozzarella. On top of that, a hearty, chunky tomato sauce, simmered with garlic and oregano, bubbles away, sealing in all that incredible flavor. This isn’t a pizza you fold; it’s a pizza you dig into with a fork and knife, and you savor every single, soul-satisfying bite. It’s comfort food that’s bold, unapologetic, and built to bring a smile to your face.
I know it can seem intimidating—like something only pizzerias in the Windy City can master. But I’m here to tell you, with a little patience and a lot of love, you can absolutely create this masterpiece in your own kitchen. So, preheat those ovens, grab your favorite cast-iron skillet, and let’s make a memory together. This is more than a recipe; it’s a project of passion, and I’m so excited to guide you through it.
The Slice That Started It All
My love affair with deep dish didn’t start in a fancy restaurant. It started on a brutally cold, windy night in Chicago—shocker, right?—during a college road trip. My friends and I, frozen to the bone and starving, stumbled into a tiny, steamy pizzeria that smelled like heaven. We ordered a small pie, not quite grasping the scale of the undertaking.
When it arrived, it wasn’t a pizza; it was a pie. A glorious, inch-and-a-half tall, cast-iron skillet of wonder. We were silent for the first five minutes, just eating. The combination of that rich sauce, the generous cheese pull, and the crisp, cornmeal-kissed crust was a revelation. It wasn’t just food; it was warmth, it was community, it was the exact thing we needed. We left stuffed, happy, and bonded over that shared culinary experience. That’s the magic I want to bring to your table. It’s not just about eating; it’s about feeling completely and utterly satisfied.
Gathering Your Deep Dish Toolkit: The Ingredients
Great food starts with great ingredients. Here’s everything you’ll need to build your deep dish masterpiece. Don’t stress about finding super specialized stuff—this is about feel-good cooking, remember?
For the Legendary Crust:
- 2 ¼ tsp active dry yeast: This is our little engine that could. It’s what gives our crust its lift and airy structure. Make sure your yeast is fresh! If it doesn’t get foamy after 10 minutes in warm water, it’s time for a new jar.
- 1 ¼ cups warm water: Not hot, not cold—think baby-bottle warm (around 105-115°F). Too hot and you’ll kill the yeast; too cold and it won’t wake up.
- 2 tsp sugar: A little snack for the yeast to get it excited and working. It’s not for sweetness.
- 3 cups all-purpose flour: The workhorse. I like unbleached all-purpose for a sturdy yet tender crust.
- ½ cup cornmeal: This is the SECRET WEAPON! It gives the crust that iconic gritty, crisp texture and a wonderful, toasty flavor. Don’t skip it!
- 1 tsp salt: For flavor. Always add it separately from the yeast so it doesn’t inhibit its growth.
- ¼ cup olive oil + extra for the pan: The oil enriches the dough, making it tender and giving it a beautiful golden color. And we’re going to be VERY generous with oil in the pan to get that fried, crispy edge we all crave.
For the glorious filling & sauce:
- 2 cups shredded mozzarella cheese: I highly recommend buying a block of low-moisture, whole-milk mozzarella and shredding it yourself. The pre-shredded stuff is coated in anti-caking agents that can make your cheese layer grainy and less melty.
- 1 ½ cups crushed tomatoes: The star of the top layer! I prefer San Marzano tomatoes if you can find them—they’re less acidic and sweeter. Give them a quick drain in a sieve so your pizza isn’t watery.
- 1 tsp dried oregano: A classic pizza herb. Rubbing it between your palms before adding it wakes up its essential oils and makes it more fragrant.
- 1 tsp garlic powder: It blends seamlessly into the sauce for a consistent garlicky punch. You can use fresh minced garlic too, but sauté it first to mellow the raw flavor.
- ½ tsp sugar: Just a pinch to balance the acidity of the tomatoes. Trust me on this one.
- Salt and pepper to taste: Season boldly! Taste your sauce before it goes on.
- Optional toppings: This is your playground! Pepperoni (try placing it under the cheese to get crispy), Italian sausage (brown it first!), sautéed mushrooms, thinly sliced onions, or spinach (wilt it and squeeze out ALL the water first!).
Building Your Masterpiece: Step-by-Step
Alright, team, let’s get our hands dirty! This is where the magic happens. Read through these steps once before you start—it’s like having me right there in the kitchen with you.
- Wake Up the Yeast: In a large bowl, dissolve your yeast and sugar in the warm water. Give it a gentle stir and walk away for 5-10 minutes. You’ll know it’s ready when it looks creamy and foamy on top. If nothing happens, your yeast might be old—time to restart!
- Make the Dough: Add the flour, cornmeal, salt, and olive oil to the yeasty water. Stir with a wooden spoon until a shaggy dough forms. Turn it out onto a floured surface and knead for 5-7 minutes. You’re looking for a smooth, slightly elastic dough. It’s a great arm workout! Pro Tip: If the dough is too sticky, add a tablespoon of flour at a time. If it’s too dry, add a teaspoon of water at a time.
- The First Rise: Place your beautiful ball of dough into a lightly oiled bowl, turn it over to coat, and cover it with a damp kitchen towel or plastic wrap. Let it rise in a warm, draft-free spot for 1 to 1.5 hours, or until it has doubled in size. (My favorite trick? Heat your oven for just one minute, turn it off, and let the dough rise in there!).
- Prep the Pan: Once the dough is nearly risen, preheat your oven to 425°F (220°C). Now, take your 9-inch cast iron skillet or deep-dish pan and pour in a good glug of olive oil—about 1-2 tablespoons. Use your fingers or a pastry brush to coat the bottom and sides generously. This is non-negotiable for that crispy, fried crust!
- Shape the Crust: Punch the risen dough down to release the air. Place it in your oiled pan and start pressing it out. Work from the center out, pushing the dough up the sides of the pan. You want it to come all the way up to the rim! If it keeps snapping back, let it rest for 5 minutes and try again—the gluten is just tense and needs to relax.
- The Layer-Up (This is KEY!): Here’s the deep dish secret: we layer backwards! First: Place all your shredded mozzarella cheese directly onto the dough, covering the bottom. Second: Add your chosen toppings (pepperoni, sausage, etc.) right on top of the cheese. Third: Spoon your well-drained crushed tomatoes over everything. Spread it gently to cover the top. Finally: Sprinkle the oregano, garlic powder, sugar, salt, and pepper over the sauce. Drizzle a little more olive oil on top for good measure.
- Bake to Perfection: Pop that beautiful creation into your preheated oven and bake for 25-30 minutes. You’re looking for a golden-brown crust that you can see peeking above the sauce, and a sauce that’s thick and bubbly. Your whole house will smell incredible.
- The hardest part – Wait! I know, I know. You want to dive in. But you MUST let the pizza rest and cool in the pan for at least 5-10 minutes. This allows the layers to set, making it possible to slice without everything oozing out. Use a thin spatula to loosen the edges from the pan before slicing.
How to Serve This Beast of Beauty
This is a knife-and-fork situation, my friends. Slice it into hearty wedges right in the pan. I like to serve it straight from the cast iron skillet placed on a trivet in the middle of the table—it’s a real showstopper. A simple green salad with a sharp vinaigrette is the perfect sidekick to cut through the richness. And don’t forget the napkins! This is a joyfully messy affair.
Make It Your Own: Delicious Variations
The classic is perfect, but playing with flavors is half the fun! Here are a few twists:
- The “Supreme”: Brown some Italian sausage, and add sautéed green peppers and onions under the sauce layer.
- Spinach & Artichoke Dip Pizza: Mix a cup of chopped frozen spinach (thawed and squeezed dry) and a ½ cup of chopped marinated artichoke hearts into the cheese layer. So good!
- Spicy ‘Nduja: Swirl a few tablespoons of spicy ‘nduja (a spreadable Italian sausage) into the tomato sauce before topping.
- White Pizza: Skip the tomato sauce. Layer with ricotta cheese mixed with garlic and parmesan, then mozzarella, and top with sliced mushrooms and fresh rosemary before baking.
- Gluten-Free: Use your favorite 1:1 gluten-free flour blend and ensure your cornmeal is certified GF.
Beau’s Chef Notes & Kitchen Stories
This recipe has evolved so much since I first tried to replicate that Chicago pizza in my tiny apartment kitchen. My first attempt… well, let’s just say the crust was more like a soggy biscuit. I learned the hard way that draining the tomatoes and oiling the pan are the two commandments of deep dish.
One time, I was so excited to show off for friends that I forgot the sugar in the sauce. The resulting pizza was so tart we all puckered up! Now, I taste everything as I go. Cooking is a journey, not a destination. Every “mistake” is just a lesson learned. This version is the culmination of all those lessons—a foolproof path to deep dish glory. Don’t be afraid of it. Embrace the process, put on some good music, and have fun. That’s what cooking is all about.
Your Deep Dish Questions, Answered!
Q: My crust turned out soggy on the bottom. What happened?
A: The usual suspects are: 1) Not draining the tomatoes enough. They should be well-drained, almost dry. 2) Not using enough oil in the pan. Be generous! 3) Not preheating your pan. While not essential, placing your oiled cast iron skillet in the oven as it preheats can give you an even crispier bottom crust. Just be careful when pressing the dough into the hot pan!
Q: Can I make the dough ahead of time?
A: Absolutely! After the first rise, punch the dough down, wrap it tightly in plastic wrap, and stash it in the fridge for up to 24 hours. When you’re ready, let it sit at room temperature for about 30 minutes before shaping into your pan. You can also freeze the dough ball for up to 3 months. Thaw overnight in the fridge before using.
Q: I don’t have a cast iron skillet. What can I use instead?
A: No problem! A 9-inch springform pan works beautifully. Just be sure to wrap the bottom in foil before you start, as some butter/oil might sneak out. A regular cake pan or pie dish will work in a pinch, but it won’t be as deep.
Q: My dough is too tough and keeps snapping back when I try to shape it.
A: This means the gluten is overworked and tense. Just walk away! Cover the dough in the pan with a towel and let it rest for 10-15 minutes. The gluten will relax, and you’ll be able to stretch it easily.
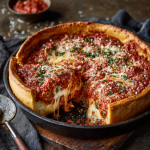
Deep Dish Pizza
Description
Nothing says comfort quite like Chicago’s legendary deep dish pizza. With its golden, buttery crust, molten mozzarella, and rich tomato sauce, this is more than a pizza—it’s a meal to savor. Think of it as a pie packed with warmth, flavor, and pure joy. Grab your skillet, rally the appetite, and let’s make a pizza that tells a story at your table.
Ingredients
For the crust:
-
2 ¼ tsp active dry yeast
-
1 ¼ cups warm water (105–115°F)
-
2 tsp sugar
-
3 cups all-purpose flour
-
½ cup cornmeal
-
1 tsp salt
-
¼ cup olive oil + extra for pan
For the filling & sauce:
-
2 cups shredded mozzarella (whole milk, low moisture)
-
1 ½ cups crushed tomatoes (drained)
-
1 tsp dried oregano
-
1 tsp garlic powder
-
½ tsp sugar
-
Salt & pepper to taste
-
Optional toppings: sausage, pepperoni, mushrooms, onions, spinach
Instructions
-
Activate yeast – Mix yeast, sugar, and warm water. Let sit 5–10 min until foamy.
-
Make dough – Stir in flour, cornmeal, salt, and olive oil. Knead 5–7 min until smooth.
-
First rise – Place in oiled bowl, cover, and let rise 1–1.5 hours until doubled.
-
Prep pan – Preheat oven to 425°F (220°C). Generously oil a 9-inch cast iron skillet.
-
Shape crust – Punch down dough, press into pan, and work it up the sides.
-
Layer backwards – Cheese first, toppings second, tomato sauce last. Season with oregano, garlic, sugar, salt, pepper. Drizzle olive oil.
-
Bake – 25–30 min until crust is golden and sauce is bubbling.
-
Rest & serve – Let cool 5–10 min before slicing.
Notes
-
Drain tomatoes well to avoid soggy crust.
-
Always oil the pan generously for that signature crispy edge.
-
Let the pizza rest before slicing—it sets the layers beautifully.
Nutrition
- Calories: 430 Ca per slice
- Sugar: 4g
- Fat: 20g
- Carbohydrates: 44g
- Protein: 18g
Nutritional Information*
*This is an estimate per slice (based on 6 slices, without extra meat toppings) and will vary based on specific ingredients used.
Calories: ~430 | Fat: 20g | Saturated Fat: 8g | Carbohydrates: 44g | Sugar: 4g | Protein: 18g | Sodium: 650mg
Final Thoughts: You’ve Earned This Slice
Well, friends, there you have it. You’re no longer just a pizza eater—you’re a pizza creator, a culinary architect of the highest order. You’ve taken simple ingredients and transformed them into something truly spectacular.
Remember, this deep dish pizza is more than the sum of its parts. It’s the patience of letting the dough rise, the generosity of oiling the pan, the love stirred into the sauce, and the joy of sharing the final, bubbling masterpiece with people you care about. It’s a reminder that the best things in life are worth the wait.
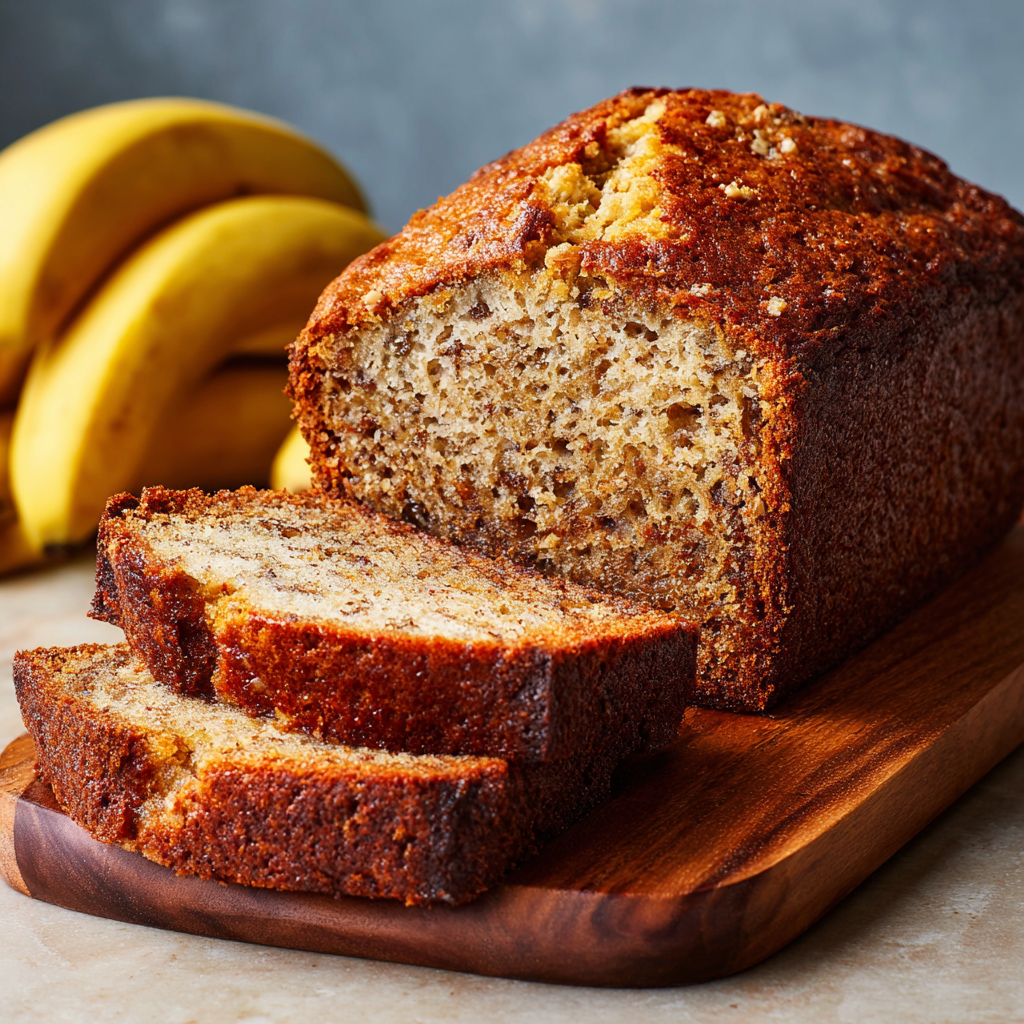
Brown Butter Banana Bread
Brown Butter Banana Bread: Your New Go-To Comfort Recipe
Hey friends, Beau here! Let’s talk about that universal kitchen dilemma: the sad, overripe bananas sitting on your counter. You know the ones. They’ve gone from bright yellow to speckled brown, and they’re begging for a second act. Most of us see banana bread—and don’t get me wrong, I love a classic loaf. But today, we’re not making most banana bread. We’re making the banana bread. The one that will make your entire house smell like a cozy bakery and have everyone asking for your secret.
This is my Brown Butter Banana Bread, and it’s a total game-changer. We’re taking that familiar, comforting recipe and giving it a serious flavor upgrade with one simple, magical step: browning the butter. If you’ve never tried it, brown butter (or beurre noisette if you want to get fancy) is melted butter that’s cooked just until the milk solids turn a toasty brown. It adds this incredible, nutty, almost caramel-like depth that makes everything taste… more. It’s the difference between a nice hug and a warm, lingering bear hug from your favorite person.
This loaf is incredibly moist, perfectly sweet, and has a complexity that makes it feel a little gourmet, without any of the fuss. It’s the kind of recipe that’s perfect for a slow Sunday morning, a thoughtful gift for a neighbor, or just because you deserve a delicious slice of something wonderful. So, let’s grab those spotted bananas and turn them into something spectacular. Trust me, your future self, happily munching on a warm slice, will thank you.
A Little Slice of Home
This recipe takes me right back to my grandma’s kitchen. She was the queen of “waste not, want not,” and a bowl of brown bananas on her counter never stood a chance. Her banana bread was a staple, always reliably good. But the first time I decided to tinker with her recipe and brown the butter, it was a complete happy accident. I was melting butter for her recipe and got distracted by a text (sound familiar?). I looked back at the saucepan and saw it foaming and sputtering, those little brown bits starting to form at the bottom.
Instead of starting over, I crossed my fingers and used it. The aroma that filled the kitchen was entirely different—deeper, richer, nuttier. When that first loaf came out of the oven, I knew I’d stumbled onto something special. It tasted like my childhood, but dressed up in its Sunday best. It’s my little twist on a classic, a nod to tradition with a big wink of modern flavor. Now, it’s the only way I make it, and it’s my absolute pleasure to share that happy little accident with you.
Gathering Your Ingredients
Simple ingredients, incredible results. That’s the Feastical motto! Here’s what you’ll need to create this masterpiece. Remember, the quality of your ingredients truly shines in a simple recipe like this.
- ½ cup (1 stick) unsalted butter: Using unsalted lets you control the salt level in the final bake. Browning salted butter can sometimes be trickier as the salt content varies by brand.
- 1 cup mashed ripe bananas (about 2–3 bananas): The spottier, the better! Black bananas are sugar bombs waiting to happen. They mash easier and give the bread incredible moisture and natural sweetness.
- ¾ cup brown sugar: I prefer brown sugar here for its molasses notes, which complement the brown butter beautifully. Light or dark brown works—dark will give a slightly deeper flavor.
- 2 large eggs: Always bring your eggs to room temperature! They incorporate into the batter more evenly, leading to a better rise and crumb. In a hurry? Place cold eggs in a bowl of warm water for 5 minutes.
- 1 tsp vanilla extract: The supporting actor that makes all the other flavors pop. Use the real stuff if you can!
- 1 ½ cups all-purpose flour: The foundation. For a slightly lighter texture, you can swap in ½ cup with whole wheat pastry flour.
- 1 tsp baking soda: Our leavening agent. Make sure it’s fresh for a good rise!
- ½ tsp salt: Crucial for balancing the sweetness and enhancing all the flavors. I use fine sea salt.
- ½ tsp cinnamon (optional): I say “optional,” but I highly recommend it. It adds a warm, cozy spice that’s just *chef’s kiss*.
- ½ cup chopped walnuts or chocolate chips (optional): The fun part! Walnuts add a fantastic crunch, while chocolate chips make it a treat for kids (and kids at heart).
Let’s Get Baking: Step-by-Step
Ready to make some magic? Follow these steps, and you’ll have a perfect loaf in no time. I’ve packed this section with all my favorite chef hacks to set you up for success.
Step 1: Preheat and Prep. Start by preheating your oven to 350°F (175°C). This ensures it’s perfectly hot and ready when your batter is. Grease a 9×5 inch loaf pan well with butter or non-stick spray. I like to add a parchment paper sling for the sides too—it makes removing the loaf an absolute breeze!
Step 2: Brown That Butter! This is the star of the show! Melt the butter in a light-colored saucepan or skillet over medium heat. Swirl the pan occasionally. It will foam and crackle—that’s the water cooking off. Keep a close eye. Soon, you’ll see golden brown specks forming at the bottom, and it will smell incredibly nutty and delicious. This whole process takes about 5-8 minutes. Chef’s Hack: Immediately pour the brown butter into a heatproof bowl to stop the cooking. This prevents it from burning. Let it cool for about 10-15 minutes. It should be warm, not hot, when you add it to the other ingredients.
Step 3: Combine the Wet Goods. In a large bowl, whisk the slightly cooled brown butter with the mashed bananas, brown sugar, eggs, and vanilla extract. Whisk until it’s all beautifully combined and smooth. Don’t worry if it looks a little separated at first; it’ll come together.
Step 4: Whisk the Dry Team. In a separate bowl, whisk together the flour, baking soda, salt, and cinnamon. This ensures the leavening and salt are evenly distributed throughout the flour, preventing little bitter pockets of baking soda in your finished loaf.
Step 5: Bring It All Together. Gently add the dry ingredients to the wet ingredients. Use a spatula and fold until just combined. A few streaks of flour are okay! Overmixing is the enemy of tender banana bread—it develops gluten and makes it tough. Now’s the time to fold in your walnuts or chocolate chips, if using.
Step 6: Bake to Perfection. Pour the batter into your prepared loaf pan and smooth the top. For a pretty, professional look, sprinkle a few extra banana slices or walnuts on top before baking. Pop it in the oven and bake for 50-60 minutes. Chef’s Hack: Start checking at 45 minutes. The bread is done when a toothpick inserted into the center comes out with a few moist crumbs attached, not wet batter.
Step 7: The All-Important Cool Down. Let the loaf cool in the pan on a wire rack for at least 10 minutes. This allows it to set up. Then, run a knife around the edges and carefully lift it out (see? Parchment paper sling!). Let it cool completely on the wire rack before slicing. I know it’s hard to wait, but this prevents it from becoming gummy!
How to Serve This Beauty
This banana bread is sublime all on its own, still slightly warm from the oven. But let’s be real, everything is better with a little extra love. For the ultimate experience, slather a thick slice with good salted butter. The slight saltiness against the sweet, nutty bread is divine. For a decadent breakfast or dessert, toast a slice and add a dollop of vanilla bean ice cream or a drizzle of caramel sauce. And of course, it’s best enjoyed with a hot cup of coffee or a cold glass of milk shared with good company.
Make It Your Own: Fun Variations
Once you’ve mastered the base, get creative! Here are a few of my favorite twists:
- Chocolate Lover’s: Fold in ½ cup chocolate chips AND ¼ cup cocoa powder with the dry ingredients.
- Tropical Twist: Add ½ cup shredded coconut and ¼ cup chopped macadamia nuts instead of walnuts.
- Gluten-Free Friendly: Swap the all-purpose flour for a 1:1 gluten-free baking blend. The result is just as moist and delicious!
- Streusel Topping: Mix ¼ cup flour, ¼ cup brown sugar, 2 tbsp cold butter, and a pinch of cinnamon with a fork until crumbly. Sprinkle over the batter before baking for a crunchy, sweet finish.
Beau’s Chef Notes
This recipe has evolved so much from my grandma’s original, and I love that it’s still a work in progress. I’ve learned a few things along the way: First, always use a light-colored pan to brown your butter. It’s impossible to see the color change in a dark pan, and you’ll likely burn it. Second, if your bananas aren’t quite ripe enough, you can “fake it” by baking them (in their peels!) on a baking sheet at 300°F for 15-20 minutes, until the skins are black. They’ll be perfectly soft and sweet.
And a funny story? I once was so excited to bake this for friends that I forgot the baking soda. The result was a delicious, but incredibly dense, banana brick. We still ate it with a spoon and laughed the whole time. So if your bake doesn’t go perfectly, just call it a “pudding” and serve it with ice cream. No stress in this kitchen!
FAQs & Troubleshooting
Q: My butter burned! What do I do?
A: It happens to the best of us! If your butter smells acrid and the bits are black, it’s best to start over. Clean the pan thoroughly to avoid any burnt flavor transferring to your new batch. Medium heat and constant attention are key.
Q: Why is my banana bread dry?
A: The most common culprits are overmeasuring the flour (always spoon and level it into your measuring cup, don’t scoop!) or overbaking. Oven temperatures can vary, so start checking for doneness early. Remember, a few moist crumbs on the toothpick are what you want.
Q: Can I make this into muffins?
A: Absolutely! This batter makes fantastic muffins. Divide the batter into a lined muffin tin and bake at 350°F for 18-22 minutes, or until a toothpick comes out clean.
Q: How should I store it?
A: Once completely cool, store it wrapped tightly in plastic wrap or in an airtight container at room temperature for up to 3 days. For longer storage, it freezes beautifully! Wrap the whole loaf or individual slices in plastic wrap and then foil. Freeze for up to 3 months. Thaw at room temperature.
Brown Butter Banana Bread
- Total Time: 1 hr 15 min
Description
Moist, nutty, and bursting with banana flavor—this loaf takes classic banana bread to the next level with the magic of brown butter.
Ingredients
-
½ cup (1 stick) unsalted butter
-
1 cup mashed ripe bananas (2–3 bananas)
-
¾ cup brown sugar
-
2 large eggs, room temperature
-
1 tsp vanilla extract
-
1 ½ cups all-purpose flour
-
1 tsp baking soda
-
½ tsp salt
-
½ tsp cinnamon (optional)
-
½ cup chopped walnuts or chocolate chips (optional)
Instructions
1. Prep
-
Preheat oven to 350°F (175°C).
-
Grease a 9×5-inch loaf pan and line with parchment paper if desired.
2. Brown Butter
-
Melt butter in a light-colored saucepan over medium heat.
-
Swirl until foaming and golden brown specks form (~5–8 min).
-
Pour into a heatproof bowl to stop cooking and let cool 10–15 min.
3. Wet Ingredients
-
Whisk the cooled brown butter with mashed bananas, brown sugar, eggs, and vanilla until smooth.
4. Dry Ingredients
-
In a separate bowl, whisk flour, baking soda, salt, and cinnamon.
5. Combine
-
Gently fold dry ingredients into wet until just combined.
-
Fold in walnuts or chocolate chips, if using.
6. Bake
-
Pour batter into prepared pan, smooth top, and optionally sprinkle extra banana slices or walnuts.
-
Bake 50–60 min, checking at 45 min. Toothpick should come out with a few moist crumbs.
7. Cool
-
Let cool in pan 10 min, then lift out using parchment paper sling and cool completely on a wire rack before slicing.
Notes
-
Butter burned? Start over with medium heat and constant attention.
-
Bread dry? Avoid overmeasuring flour and overbaking.
-
Make muffins? Bake at 350°F for 18–22 min.
-
Storage: Room temperature 3 days in airtight container; freeze up to 3 months.
- Prep Time: 15 min
- Cook Time: 50–60 min
Nutrition
- Calories: 230 Calo per slice
- Sugar: 18g
- Sodium: 200mg
- Fat: 10g
- Carbohydrates: 33g
- Protein: 3g
Nutritional Info*
Prep Time: 15 min | Bake Time: 55 min | Yield: 10 slices
*This is an estimate for 1 slice without optional add-ins. Values may vary based on specific ingredients used.
- Calories: ~230
- Fat: 10g
- Saturated Fat: 5g
- Carbs: 33g
- Sugar: 18g
- Protein: 3g
- Sodium: 200mg
Final Thoughts: A Loaf Full of Love
There’s something profoundly comforting about the ritual of baking banana bread. It’s a act of transformation—taking something past its prime and turning it into a masterpiece of warmth and nourishment. This recipe, with its nutty, complex brown butter twist, is my favorite way to honor that tradition.
It’s more than just a quick bread; it’s a reminder that the smallest changes can have the biggest impact. That a little extra patience (looking at you, browning butter) can yield incredible rewards. It’s the smell of home, the taste of comfort, and the joy of sharing something made with your own hands.