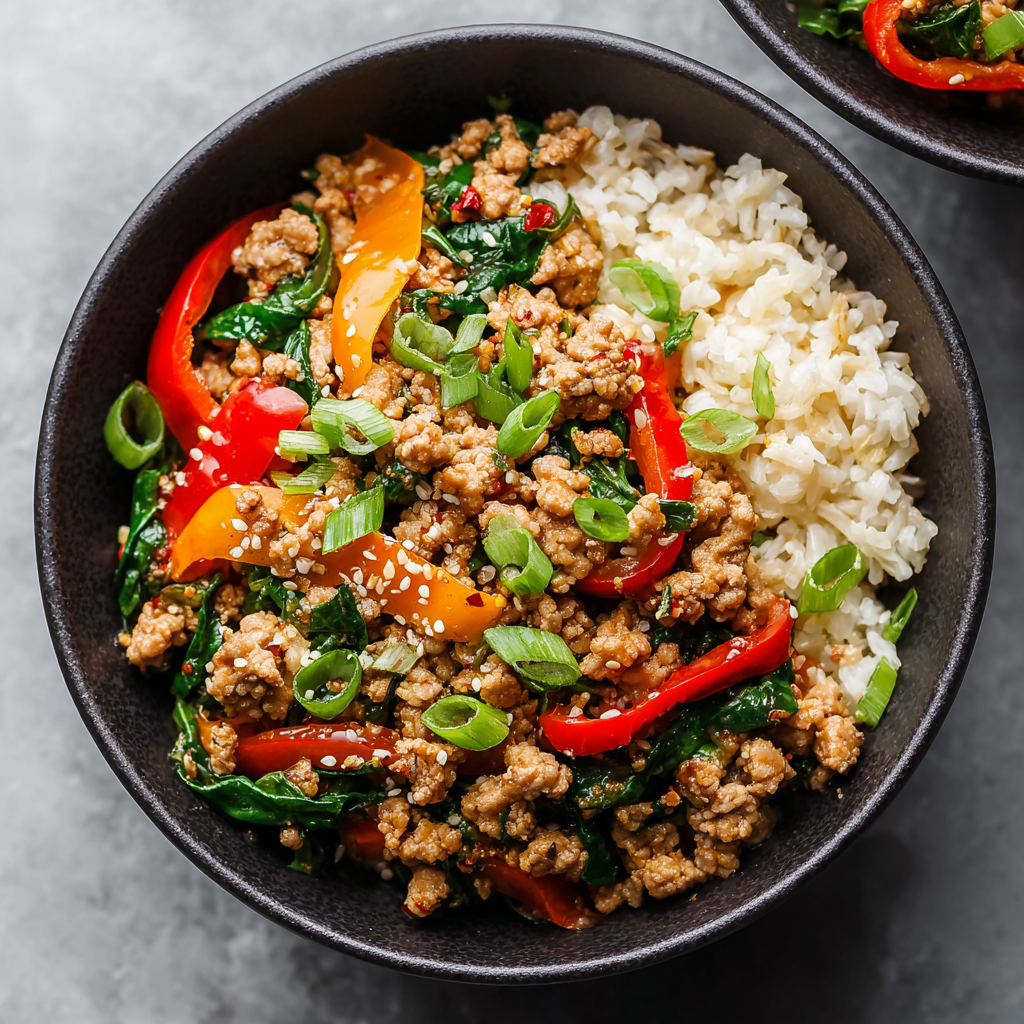
Ground Turkey Stir Fry Meal Prep
Ditch the Takeout: Your New Favorite Ground Turkey Stir Fry Meal Prep Awaits!
Hey friends, Beau here from Feastical! Ever stare into your fridge at 6 PM on a Wednesday, craving something savory and satisfying but dreading the cooking marathon? Or maybe you’re juggling a million things and just need a meal that won’t quit on you halfway through the week? Trust me, I’ve been there – spatula lost, motivation dwindling, and the siren call of greasy takeout growing louder by the minute. That’s exactly why this Ground Turkey Stir Fry Meal Prep is about to become your kitchen superhero. Imagine juicy, perfectly seasoned turkey, crisp-tender veggies dancing in a simple yet addictive sesame-soy sauce, all piled high over wholesome brown rice and finished with a crunch of peanuts. It’s the kind of meal that tastes like a cozy Friday night but cooks up faster than you can scroll through delivery apps! Best part? We’re making FOUR servings in about 30 minutes flat. Yeah, you read that right. This isn’t just dinner; it’s your golden ticket to a fridge stocked with ready-to-go deliciousness that fuels your hustle without the midweek slump. So grab your favorite skillet (you know, the one with the perfectly seasoned patina), and let’s turn that “what’s for dinner?” panic into a triumphant “heck yeah, I’ve got this!” moment. Ready to stir-fry your way to meal prep glory? Let’s dig in!
That One Rainy Tuesday & the Stir-Fry That Saved the Day
Picture this: It was a classic Seattle downpour – the kind where even your rain jacket gives up. My fridge was echoing, my energy was zapped, and my two kids were chanting the dreaded “I’m hunnngry!” chorus on loop. Takeout felt inevitable… until I spotted a lone pack of ground turkey hiding behind the milk. Flashback to my college days hit hard – cramming for finals in a tiny apartment kitchen, surviving on whatever I could throw into a wok. That night, desperation birthed magic. I browned that turkey with reckless abandon, tossed in every veggie remnant (hello, slightly sad bell pepper and wilting spinach!), and whipped up a sauce from soy packets and a drizzle of sesame oil I’d “borrowed” from my roommate. The result? A steaming, fragrant bowl that silenced the hangry beasts (myself included!) and became an instant legend. That chaotic, thrown-together stir-fry taught me a powerful lesson: incredible food doesn’t need perfection, just passion and a willingness to play. This recipe is the polished, protein-packed, meal-prep-perfected love child of that rainy Tuesday miracle. It’s proof that sometimes the best meals come from embracing the beautiful mess, just like that spinach wilting perfectly into the saucy goodness.
Gathering Your Flavor Arsenal: Ingredients & Chef Secrets
Here’s the dream team for your stir-fry success! Don’t stress about exact matches – flexibility is your friend here.
- Stir Fry Sauce:
- ¼ cup soy sauce: Our salty, umami backbone. Chef Tip: Low-sodium works great if you’re watching salt, or swap in tamari for gluten-free!
- ½ tbsp toasted sesame oil: That nutty aroma is EVERYTHING. Don’t skip this! Regular sesame oil won’t cut it – toasted is key for depth.
- ½ tbsp brown sugar: Just a kiss of sweetness to balance the salt. Sub: Honey or maple syrup in a pinch.
- Pinch red pepper flakes (optional): Your heat dial. Start small, you can always add more later! Omit if sensitive.
- 1 tbsp water: Helps loosen the sauce slightly for perfect coating.
- Stir Fry:
- 2 bell peppers, sliced: Color & crunch! I love red and yellow for sweetness. Sub: Zucchini, snap peas, or broccoli florets.
- 4 green onions, chopped: Fresh bite! Use both white and green parts.
- 2 oz spinach (about 2 large handfuls): Wilted greens for nutrients and texture. Sub: Kale (sturdier) or bok choy.
- 2 tbsp cooking oil: Divided. Use a neutral oil with high smoke point – avocado, grapeseed, or canola are my go-tos.
- 2 garlic cloves, minced: Flavor bomb! Fresh is best. Chef Hack: Use a microplane for super-fine mince.
- 19 oz ground turkey: Lean, protein-packed star. Insight: 93% lean is ideal – enough fat for flavor without being greasy.
- For Serving:
- 2½ cups cooked brown rice: Nutty, wholesome base. Pro Tip: Cook a big batch while prepping other ingredients! Sub: Quinoa, cauliflower rice, or noodles.
- ¼ cup chopped peanuts: Essential crunch and nutty finish. Sub: Cashews, almonds, or sesame seeds (omit for nut-free).
Let’s Get Sizzling: Your Foolproof Stir-Fry Steps
Grab your biggest, heaviest skillet or wok – we want high heat and plenty of room! This is where the magic happens fast.
- Make the Sauce (The Flavor Foundation!): Whisk all those sauce ingredients – soy, toasted sesame oil, brown sugar, red pepper flakes (if using), and water – in a small bowl until the sugar dissolves. Chef Hack: Do this FIRST. Having it ready means no frantic scrambling later when things are sizzling! Set it aside near your stove. Pro Tip: Taste it! Adjust heat (more flakes) or sweet/salt balance now if needed.
- Cook the Turkey (Building the Base): Heat 1 tablespoon of your cooking oil in that big skillet over medium-high heat. Toss in the minced garlic – listen for that glorious sizzle! Cook for just 30 seconds until fragrant (don’t let it burn!). Crumble in the ground turkey. Key Technique: Resist stirring constantly! Let it get some nice browned bits for maximum flavor. Break it up as it cooks with a sturdy spatula. This should take about 6-8 minutes until it’s cooked through and no longer pink. Chef Insight: Browning = flavor! Don’t steam it.
- Add the Veggies (Color & Crunch Time!): Push the cooked turkey to one side of the skillet. Add the remaining 1 tablespoon of oil to the empty space. Toss in those vibrant bell pepper slices. Stir-fry them for 3-4 minutes. You want them tender-crisp – still bright and with a bit of snap! Watch: High heat cooks veggies fast. Now, add the spinach and chopped green onions. Give everything a big stir! The spinach will wilt dramatically in just 1-2 minutes. Chef Tip: Adding veggies in stages ensures perfect texture – peppers get a head start, delicate greens jump in last minute.
- Bring it All Together (The Grand Finale!): Pour that gorgeous, pre-made sauce over the turkey and veggie mixture. Immediately start tossing and stirring everything together, making sure every bit gets coated in that glossy, savory sauce. Keep it moving for just 1-2 more minutes – long enough for the sauce to heat through, thicken slightly, and cling beautifully to the ingredients. Chef Secret: That quick toss over high heat is what gives stir-fry its signature glossy finish. Remove from heat!
- Assemble Your Meal Prep Bowls (Fueling Your Future Self!): Grab your meal prep containers. Evenly divide the cooked brown rice among them. Now, generously pile that glorious ground turkey stir-fry mixture on top. Finish each bowl with a bright sprinkle of chopped peanuts. Pro Tip: Let the stir-fry cool slightly (about 10 mins) before sealing the containers to prevent excess steam making the rice soggy.
Plating Up Your Flavor Masterpiece
If enjoying immediately, slide that sizzling stir-fry mixture straight over a waiting mound of warm brown rice in your favorite bowl. The contrast of the hot, saucy turkey and veggies against the nutty rice is divine. Sprinkle those chopped peanuts generously over the top for that essential crunch and visual pop! For meal prep, layering is key: rice base, then the flavorful stir-fry, nuts on top to stay crisp. If you have extra green onions, a final fresh sprinkle when you reheat adds brightness. Pair it with a simple side of steamed edamame or a quick cucumber salad for a complete, satisfying feast. Remember, it’s all about that vibrant, inviting bowl!
Mix It Up! Delicious Twists on Your Turkey Stir-Fry
This recipe is your flavor playground! Here are some fun ways to keep it exciting:
- Sweet & Spicy Thai Vibe: Swap the sauce! Use 3 tbsp soy sauce, 1 tbsp fish sauce, 1 tbsp lime juice, 1 tbsp honey, and 1 tsp sriracha. Garnish with cilantro and lime wedges.
- Teriyaki Twist: Replace the sauce with 1/3 cup bottled or homemade teriyaki sauce. Add 1 cup of pineapple chunks with the bell peppers for juicy sweetness.
- Keto/Paleo Power: Ditch the rice! Serve over cauliflower rice or zucchini noodles. Swap brown sugar for 1 tsp coconut aminos or omit. Double the veggies!
- Extra Veggie Loaded: Toss in 1 cup sliced mushrooms with the peppers, and 1 shredded carrot with the spinach. More color, more nutrients!
- Ground Chicken or Pork Swap: Ground chicken works identically. Ground pork adds richer flavor – use 1 tbsp less oil if it’s fatty.
Beau’s Back-Porch Kitchen Confessions
Okay, full disclosure: my first attempt at this stir-fry meal prep involved a near-catastrophic spinach avalanche (who knew 2oz could expand so much?!). I learned the hard way to add greens in batches! This recipe has evolved from that chaotic rainy night into my ultimate weeknight shield. The biggest change? Pre-making the sauce religiously. It sounds small, but it’s the difference between calm cooking and flustered fumbling when the turkey hits the pan. I also started using ground turkey breast mixed with a *little* thigh meat for the absolute best juicy-but-not-greasy texture (though 93% lean breast works perfectly!). One funny fail? I once accidentally used vanilla extract instead of toasted sesame oil (similar bottle, pre-coffee mistake). Let’s just say… it was an *interesting* flavor profile! Stick with the sesame oil, folks. This stir-fry’s magic is in its simplicity and adaptability – it forgives veggie swaps and welcomes your own twists. It’s become my kitchen comfort blanket, and I love seeing the wild variations you all create!
Your Stir-Fry Questions, Answered!
Let’s tackle those common kitchen hiccups before they happen:
- “My stir-fry turned out soggy! What went wrong?” Ah, the veggie steam bath! Two main culprits: overcrowding the pan (cooks veggies instead of stir-frying) or adding sauce too early/long. Use a large enough skillet and crank the heat. Cook veggies in stages (dense ones first) and keep them moving. Only toss with the sauce at the very end for 1-2 minutes max. Also, ensure your cooked rice is cooled before assembling meal prep bowls.
- “Can I freeze these meal prep bowls?” Absolutely! They freeze beautifully for up to 2 months. Let the cooked stir-fry and rice cool completely before assembling. Omit the peanuts (add fresh after thawing/reheating). Freeze in airtight containers. Thaw overnight in the fridge. Reheat thoroughly in microwave, stirring halfway. The texture of the peppers softens slightly after freezing, but flavor remains great!
- “My turkey is bland. How do I boost flavor?” Browning is KEY! Don’t stir constantly – let the turkey develop those delicious caramelized bits. Season the turkey lightly with salt and pepper *while* browning. Ensure your sauce is well-balanced – taste it! If needed, add an extra splash of soy sauce or a pinch more sugar. Using toasted sesame oil (not regular) makes a huge difference. A tiny splash of rice vinegar at the end can also brighten everything up.
- “What’s the best way to reheat these bowls?” The microwave is your friend! Remove the lid or vent the container. Reheat on high for 2-3 minutes, stopping halfway to stir. If the rice seems dry, sprinkle 1 tsp of water over it before reheating. The stovetop works too: add a splash of water or broth to a skillet over medium heat, add the contents, and stir until hot. Add fresh peanuts/green onions after reheating.
Ground Turkey Stir Fry Meal Prep
- Total Time: 30 mins
Description
This ground turkey stir fry is your secret weapon for crushing busy weeknights or winning the meal prep game. Think: savory sesame-soy glazed turkey, colorful crisp veggies, and nutty brown rice all loaded into four hearty bowls. It’s lightning-fast (ready in 30 mins), ultra-adaptable, and packed with flavor that rivals your favorite takeout—minus the sluggish aftermath. Whether you’re dodging dinner fatigue or stocking the fridge for the week, these bowls deliver. Ready to stir-fry your way to dinner victory? Let’s go!
Ingredients
For the Stir Fry Sauce:
-
¼ cup soy sauce (or tamari)
-
½ tbsp toasted sesame oil
-
½ tbsp brown sugar (or honey)
-
Pinch red pepper flakes (optional)
-
1 tbsp water
For the Stir Fry:
-
2 bell peppers, sliced
-
4 green onions, chopped
-
2 oz spinach
-
2 garlic cloves, minced
-
2 tbsp neutral oil (divided)
-
19 oz ground turkey (93% lean)
For Serving:
-
2½ cups cooked brown rice
-
¼ cup chopped peanuts
Instructions
-
Make Sauce
Whisk soy, sesame oil, sugar, pepper flakes, and water. Set aside. -
Cook Turkey (6–8 mins)
Heat 1 tbsp oil, sauté garlic, then brown turkey. Don’t over-stir—let it caramelize! -
Add Veggies (5–6 mins)
Push turkey aside, add 1 tbsp oil. Sauté peppers for 3 mins, then stir in spinach and green onions. Wilt for 1–2 mins. -
Finish Stir Fry (2 mins)
Pour in sauce, toss everything together until glossy and coated. -
Assemble
Divide brown rice and stir fry into 4 containers. Top with peanuts. Cool 10 mins before sealing.
Notes
-
Use toasted sesame oil—it makes all the difference.
-
Don’t overcrowd the pan; use a large skillet or wok.
-
Store peanuts separately to keep them crunchy!
- Prep Time: 10 mins
- Cook Time: 20 mins
Nutrition
- Calories: 430 Cal
- Fat: 18g
- Carbohydrates: 30g
- Fiber: 4–5g
- Protein: 33g
Feeling Good, Fueling Right
Here’s the scoop per serving (approx. 1 heaping cup stir-fry + 5/8 cup brown rice + 1 tbsp peanuts):
- Calories: 430
- Protein: 33g (Heck yeah, muscle fuel!)
- Fat: 18g (Mostly healthy fats from oil, turkey & peanuts)
- Carbohydrates: 30g (Complex carbs from brown rice & veggies)
- Fiber: Approx. 4-5g (Thanks, brown rice & veggies!)
Note: Values are estimates and can vary based on specific ingredients/brands used. Using low-sodium soy sauce reduces sodium content significantly.
Final Thoughts: Why This Recipe Earns a Permanent Spot in Your Rotation
This Ground Turkey Stir Fry Meal Prep isn’t just a recipe—it’s a strategy for eating well without the stress. It’s fast, flexible, and packed with flavor, proving that healthy eating doesn’t mean sacrificing taste or convenience. Whether you’re a meal-prep newbie or a seasoned pro, this dish delivers consistency without monotony, thanks to its adaptable ingredients and foolproof method.
So next time the takeout temptation hits, remember: your fridge already has a better (and cheaper!) option waiting. Happy stir-frying!
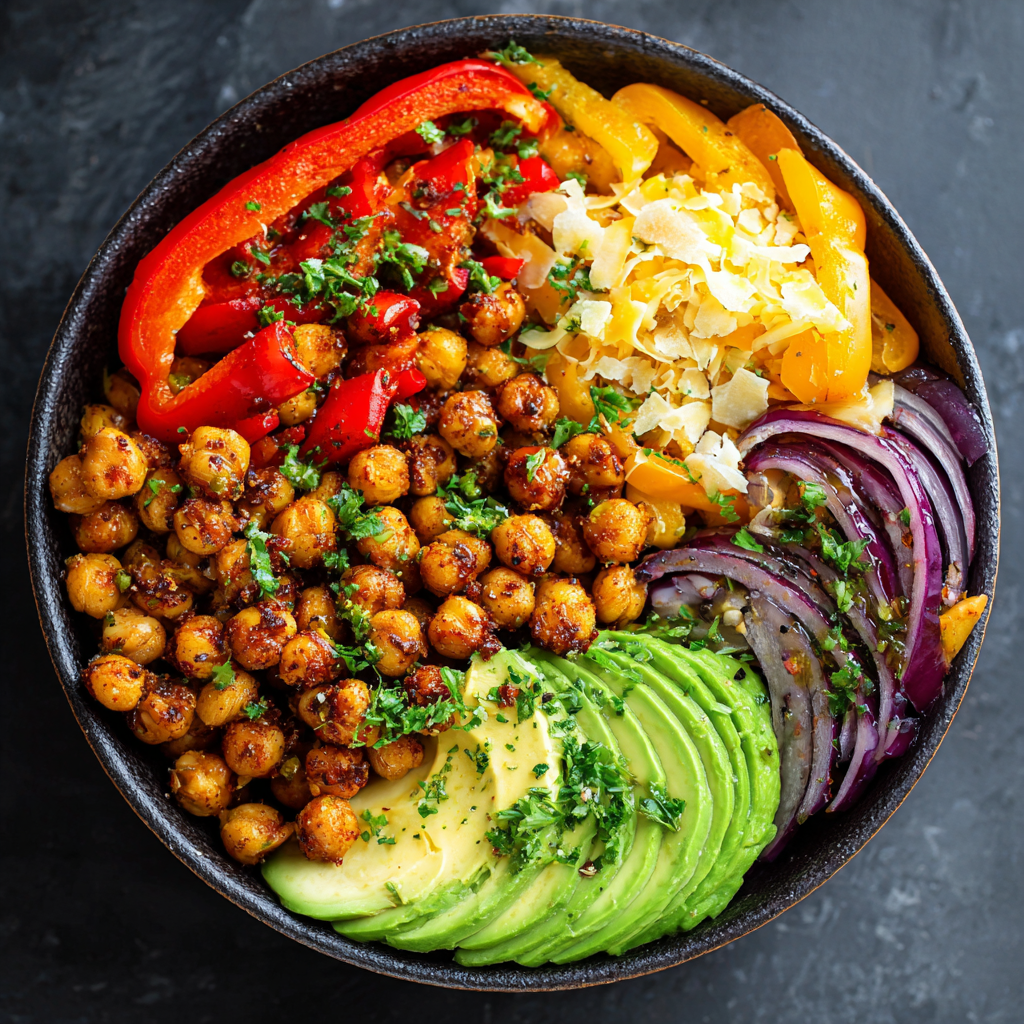
Spicy Chickpea Meal Prep Bowl
Why These Bowls Are About to Rule Your Lunchbox
Hey friends, Beau here! Ever have one of those weeks where lunch feels like a sad afterthought? You’re staring into the fridge at 7 AM, half-awake, wondering if cold pizza counts as a balanced meal. Yeah, we’ve all been there. That’s exactly why I created these Spicy Chickpea Meal Prep Bowls – they’re the superhero of busy weeks! Imagine opening your lunch container to find a vibrant, flavor-packed fiesta: golden chickpeas with a smoky kick, creamy avocado, crisp peppers, and melty cheddar all doing a happy dance together. It’s like a cozy hug for your tastebuds that also happens to be crazy good for you. Seriously, who said healthy can’t be hearty? These bowls are loaded with plant-powered protein and fiber to keep you full and focused, but they taste indulgent enough to make you forget you’re eating something wholesome. Best part? You whip up FOUR lunches in just 30 minutes flat. No fancy skills needed – just a pan, a knife, and that spatula you finally found behind the blender. Let’s make your tastebuds (and your future self) do a happy dance!
The Humble Chickpea That Stole My Heart (and My Lunch)
Confession time: my love affair with chickpeas started… accidentally. Picture college-era Beau: broke, hungry, and facing an empty pantry except for a dusty can of chickpeas and some questionable spices. Desperation led to experimentation! I tossed them in a hot pan with whatever seasonings I had (paprika? cumin? why not both!), squeezed in lemon juice stolen from the dining hall, and threw in parsley from my sad windowsill herb pot. The result? A spicy, crispy, utterly addictive mess I piled onto toast. It wasn’t pretty, but it was a revelation! That scrappy little dish became my fuel for late-night study sessions and early-morning classes. Years later, those chaotic kitchen experiments evolved into these beloved meal prep bowls. They capture that same satisfying, punchy flavor I fell for, but now with actual vegetables and proper technique (sorry, college Beau!). Every time I make them, I remember that feeling of triumph – turning humble ingredients into something truly magical. It’s proof that deliciousness doesn’t need a big budget, just a little creativity!
Your Flavor-Packed Toolkit: What You’ll Need
- 2 cans chickpeas, drained & rinsed: Our protein-packed star! Rinsing washes away that starchy liquid (aquafaba fans, save it for another recipe!) and prevents mushiness. Chef Tip: For extra crispiness, pat them bone-dry with a kitchen towel!
- 4 tbsp olive oil: The trusty workhorse for sautéing. Extra virgin adds lovely fruitiness, but regular works great too. Sub: Avocado oil if you prefer a higher smoke point.
- 1½ onions, finely chopped: The sweet, savory backbone. Yellow or white onions are perfect here. Chopping finely ensures they melt into the spices beautifully.
- 3 garlic cloves, crushed: Flavor bomb alert! Crushing (not mincing) releases more potent oils. Sub: ¾ tsp garlic powder in a pinch, but fresh is best!
- 2 tsp fresh lemon juice: The bright, zesty wake-up call that cuts through richness. Bottled works, but fresh lemon makes it sing.
- 1 cup chopped parsley (plus extra for garnish): Fresh, grassy pop! Flat-leaf (Italian) parsley has more flavor than curly. Sub: Cilantro for a totally different (but delicious!) vibe.
- SPICES: 1½ tsp chili powder, 2 tsp coriander leaf, 2 tsp paprika, 2 tsp cumin powder, Dash of salt: The soul of the dish! This combo brings warmth (cumin), earthiness (coriander), smokiness (paprika), and gentle heat (chili). Chef Insight: Toasting whole spices and grinding them yourself is next-level, but pre-ground is totally fine for busy days!
- TOPPINGS: 1 large ripe avocado (sliced), ½ cup mature cheddar (shredded), 1 red bell pepper (sliced): The fresh & creamy crunch brigade! Sharp cheddar balances the spice, avocado adds luxurious fat, and bell pepper gives sweet crunch. Sub: Feta for cheddar, cucumber for pepper, or lime for lemon if your avocado isn’t perfect.
Let’s Get Sizzling: Building Your Bowls
- Heat the Stage: Grab your favorite skillet (cast iron is awesome for crispiness!) and place it over medium heat. Pour in that glorious olive oil. Give it a minute to shimmer – that’s your cue it’s ready! Chef Hack: Toss in a tiny piece of onion; if it sizzles gently, you’re golden.
- Sweat the Aromatics: Add the chopped onions and crushed garlic. Stir them around with a wooden spoon or spatula. We’re not looking for color here yet, just softening and releasing those amazing smells! Cook for about 4-5 minutes until they turn translucent and smell incredible. Tip: Don’t rush this! Sweet, soft onions are flavor foundation magic.
- Spice Up Your Life: Time for the flavor party! Dump in all your spices – chili powder, coriander leaf, paprika, cumin, and that dash of salt. Stir constantly for about 30 seconds. This “blooms” the spices in the hot oil, waking up their essential oils and making your kitchen smell like heaven. Watch Closely: Don’t let them burn! Burnt spices taste bitter.
- Chickpea Chorus Line: Add those rinsed, patted-dry chickpeas to the pan. Stir everything together until every chickpea is coated in that fragrant, spicy oil. Spread them out in an even layer. Let them cook, stirring only occasionally (about every 2 minutes), for 5-7 minutes. Chef Secret: Resist stirring too much! Letting them sit allows beautiful crispy edges to form. You want them golden brown and slightly crunchy on the outside, creamy inside.
- Fresh Finish: Turn off the heat! Immediately stir in the fresh lemon juice and that full cup of chopped parsley. The residual heat will wilt the parsley perfectly and let the lemon juice infuse. Give it one big, happy stir. Taste! Need more salt or lemon? Now’s the time. Pro Move: A final tiny drizzle of olive oil adds lovely sheen.
- Bowl Assembly: Divide the glorious spicy chickpeas evenly among your meal prep containers (we’re making 4!). Let them cool slightly (about 10 minutes) before adding toppings. This keeps everything fresh. Storage Smarts: Add the sliced avocado and shredded cheddar ONLY when you’re ready to eat! Store the chickpeas, sliced bell pepper, and extra parsley together. Pack avocado separately.
Plating Perfection: Serving Your Masterpiece
When lunchtime hits, it’s showtime! If you prepped cold, gently reheat the chickpea base in the microwave for 60-90 seconds until just warm (not piping hot – we want that avocado to stay cool and creamy). Spoon the warm chickpeas into a bowl. Artfully arrange those vibrant red bell pepper slices, creamy avocado fans, and a generous sprinkle of sharp cheddar on top. Finish with a confetti shower of fresh parsley for color and freshness. Want bonus points? A dollop of tangy Greek yogurt or a squeeze of extra lime juice adds fantastic contrast. Grab a fork and dig into layers of spicy, creamy, crunchy goodness – texture heaven!
Mix It Up: Endless Flavor Twists!
- Mediterranean Magic: Swap cheddar for crumbled feta, add chopped Kalamata olives and cucumber ribbons. Use oregano in place of coriander leaf.
- Tex-Mex Fiesta: Add 1 tsp smoked paprika and a pinch of cayenne for more heat. Top with corn kernels, black beans, salsa, and cilantro. Swap parsley for cilantro in the mix!
- Green Goddess: Fold in a big handful of baby spinach during the last minute of cooking. Top with a zesty green goddess dressing instead of cheese.
- Sweet & Smoky: Add 1 tbsp maple syrup or honey to the spices. Top with roasted sweet potato cubes and toasted pecans.
- Vegan Powerhouse: Skip the cheese! Add extra avocado or a sprinkle of nutritional yeast for cheesy flavor. Top with toasted sunflower seeds for crunch.
Beau’s Backstage Kitchen Notes
This recipe is my kitchen chameleon! That college “accident” has evolved more times than I can count. One winter, I added roasted butternut squash cubes – game changer! Another time, I was out of parsley and used mint and dill – unexpectedly refreshing. The biggest lesson? Embrace the chickpea crisp. Seriously, letting them get those golden-brown edges is non-negotiable for texture nirvana. I also learned the hard way about adding avocado too early (hello, sad brown mush!). Now I preach the “avocado at the altar of lunchtime” rule. Funny story: I once accidentally used cayenne instead of chili powder. Let’s just say my lunch had SERIOUS firepower that day – water bottle mandatory! The beauty is its flexibility. Make it yours! Got leftover roasted veggies? Toss ’em in! Found a fun new spice blend? Experiment! That’s the joy of cooking, friends.
Your Chickpea Bowl Questions, Answered!
Q: My chickpeas are mushy! What went wrong?
A: Ah, the dreaded mush! Two likely culprits: 1) Not rinsing and draining them thoroughly enough – that starchy liquid is the enemy of crispiness! Pat them super dry. 2) Stirring too much in the pan. Let them sit undisturbed for a couple of minutes at a time to develop those crispy bits. Also, ensure your pan is nice and hot before adding them.
Q: Can I use dried chickpeas instead of canned?
A: Absolutely! You’ll need about 1.5 cups of cooked chickpeas. Soak ¾ cup dried chickpeas overnight, then simmer until tender (about 60-90 mins). Drain well and pat VERY dry before using. They often get even crispier than canned!
Q: How long do these bowls last in the fridge?
A: The spicy chickpea base (without avocado or cheese) is a fridge superstar! Store it airtight for up to 5 days. Keep the sliced bell pepper and parsley with it. Slice the avocado fresh each day you eat it, and add the cheese just before serving for best texture and flavor. Never freeze assembled bowls with avocado.
Q: It’s not spicy enough for me! How can I amp up the heat?
A: I feel you, heat-seeker! Easy fixes: 1) Increase the chili powder to 2 tsp. 2) Add ¼ – ½ tsp cayenne pepper with the other spices. 3) Stir in ½ a finely chopped jalapeño or serrano pepper when you sauté the onions and garlic. 4) Top with hot sauce or red pepper flakes when serving!

Spicy Chickpea Meal Prep Bowl
- Total Time: 30 mins
Description
Tired of boring desk lunches or leftover regrets? Say hello to your new go-to: crispy, spiced chickpeas nestled in a vibrant bowl with creamy avocado, melty cheddar, and crunchy bell peppers. These bowls are a flavor-packed powerhouse of plant-based protein, fiber, and feel-good satisfaction—ready in just 30 minutes. Think cozy comfort meets fiery flair, perfect for meal prep warriors and flavor lovers alike. Grab that skillet—your tastebuds deserve this fiesta!
Ingredients
For the Chickpeas:
-
2 cans chickpeas (rinsed, drained, and patted dry)
-
4 tbsp olive oil
-
1½ onions, finely chopped
-
3 garlic cloves, crushed
-
2 tsp lemon juice
-
1 cup chopped parsley
-
Spices: 1½ tsp chili powder, 2 tsp coriander leaf, 2 tsp paprika, 2 tsp cumin, dash of salt
Toppings (Add at Serving):
-
1 ripe avocado, sliced
-
½ cup mature cheddar, shredded
-
1 red bell pepper, sliced
-
Extra parsley (for garnish)
Instructions
-
Sauté Base (6 mins)
Heat oil in a skillet. Sauté onions and garlic until soft and fragrant. -
Toast Spices (30 secs)
Add chili, paprika, cumin, coriander, and salt. Stir until aromatic. -
Crisp Chickpeas (7 mins)
Add chickpeas and stir to coat. Let sit in the pan for 2-minute intervals to build crispness. Stir occasionally. Cook until golden. -
Bright Finish (2 mins)
Off heat, add lemon juice and parsley. Stir and let cool 10 mins. -
Assemble Bowls
Divide chickpeas into 4 containers. Store toppings separately. Add avocado, cheddar, and bell peppers before serving.
- Prep Time: 10 mins
- Cook Time: 20 mins
Nutrition
- Calories: 450 Cal
- Fat: 22g
- Carbohydrates: 40g
- Fiber: 12g
- Protein: 15g
Fueling Your Awesome (The Nerd Stuff!)
Per Serving (1 Bowl):
Approx. 450 Calories | 15g Protein | 22g Fat (mostly healthy monounsaturated from olive oil & avocado!) | 40g Carbohydrates | 12g Fiber | 10g Sugar (naturally occurring)
Note: This is a solid estimate. Actual values can vary slightly based on specific ingredients (avocado size, cheese amount, exact oil used). It’s a fantastic balance of plant-based protein, complex carbs, and healthy fats to keep you energized!
**Prep Time:** 15 mins | **Cook Time:** 15 mins | **Total Time:** 30 mins | **Serves:** 4
Final Thoughts: More Than Just a Lunch
These spicy chickpea bowls aren’t just food—they’re a strategy. A strategy for:
✅ Eating well without willpower struggles
✅ Saving money without sacrificing flavor
✅ Feeling energized instead of sluggish
They’re proof that healthy doesn’t mean boring, and meal prep doesn’t mean monotony. So here’s to fewer sad desk lunches, more happy taste buds, and a lunchbox that actually excites you. Now go forth and spice up your life—one chickpea at a time!

Healthy Chicken Fajitas Meal Prep
Hey There, Hungry Friends! Let’s Talk Fajita Magic
Ever stare into your fridge on a Wednesday night and feel that *ugh* moment? You’re craving something vibrant and satisfying, but takeout feels like a guilty compromise? I’ve been there too—more times than I’d like to admit! That’s exactly why I’m obsessed with these **Healthy Chicken Fajitas Meal Prep Bowls**. Picture this: smoky, citrus-kissed chicken, rainbow peppers sizzling with charred sweetness, and black beans simmered in garlicky lime-cilantro goodness—all prepped ahead so you can conquer busy days like a kitchen superhero. No more sad desk lunches, promise.
What makes this recipe a Feastical favorite? It’s **flavor without fuss**. We’re using smart shortcuts (hello, pineapple juice marinade!) and big, bold Tex-Mex vibes to turn meal prep into a celebration. Whether you’re juggling work, wrangling kids, or just craving a taste of sunshine, these bowls deliver. They’re gluten-free, packed with 38g of protein, and taste like you spent hours cooking—when really, it’s under an hour. So grab your favorite cutting board and let’s make your taste buds do a happy dance!
That Time Fajitas Saved My Camping Trip (No, Really!)
Flashback to my college days: My buddies and I decided to “rough it” in the mountains. Spoiler: We forgot the can opener. And the spatula. And basically any common sense. Dinner was looking grim—until my pal Carlos pulled out a ziplock of pre-marinated chicken, a wrinkly pepper, and a dented can of beans. “Fajitas or bust,” he declared. We cooked everything in one skillet over a sputtering campfire, scooping it onto tortillas we’d warmed on rocks. The smoke, the laughter, the way those simple ingredients tasted like a 5-star feast under the stars? *Magic*.
That messy, glorious moment taught me something: Fajitas aren’t just food. They’re **resilience on a plate**. They adapt. They bring people together. Now, every time I make these meal prep bowls, I think of Carlos triumphantly waving that smoky skillet. It’s why I built this recipe to be flexible—no fancy gear needed, just big flavors and good vibes. Let’s make some new memories, shall we?
Your Flavor-Packed Shopping List
Fajita Chicken:
- ⅓ cup fresh lime juice – Brightens the marinade! Chef’s hack: Roll limes on the counter before juicing—you’ll get twice the liquid.
- ¼ cup pineapple juice (no sugar added) – The secret tenderizer! Enzymes break down chicken fibers. Swap with orange juice in a pinch.
- 2 tbsp low-sodium soy sauce – Umami depth. For gluten-free, use tamari or coconut aminos.
- 1 garlic clove, minced – Because life’s better with garlic. Pre-minced works too (½ tsp).
- Spices: 1 tsp cumin, 1 tsp paprika, ½ tsp red pepper flakes – Smoky + warm heat. Reduce flakes for milder bowls.
- ¼ cup chopped cilantro – Fresh herb pop! Hate cilantro? Sub parsley or basil.
- 2 tbsp olive oil – Helps marinade cling. Avocado oil works great.
- 4 boneless chicken breasts – Pro tip: Pound thicker pieces to ½-inch for even cooking!
Fajita Peppers:
- 1 white onion, 1 poblano, 2 red bell peppers, 1 green bell pepper – Slice ’em thin! Poblanos add mild heat; swap for extra bell peppers if sensitive.
- Seasonings: 1 tsp sea salt, ½ tsp black pepper, ¼ tsp garlic powder – Simple magic. Add smoked paprika for extra oomph.
Lime & Cilantro Black Beans:
- ½ jalapeño (finely diced) – Seeds removed = mild heat. Omit if needed.
- 2 cans low-sodium black beans – RINSED! Reduces sodium by 40%.
- 1 cup low-sodium chicken broth – Creates silky texture. Veggie broth keeps it plant-based.
- Fresh lime juice & cilantro – Stir in LAST for zingy freshness.
Let’s Build Those Bowls! (No Stress, I Promise)
Step 1: Marinate Chicken (5 mins + 30 min rest)
Combine ALL marinade ingredients in a ziplock bag. Add chicken, squish everything around, and toss it in the fridge. Chef’s truth bomb: Marinate overnight if you can! The pineapple juice works wonders. When ready, grill or sear in a scorching-hot skillet (no crowding!) for 5-6 mins per side. Rest 5 mins before slicing—this keeps juices locked in!
Step 2: Sauté Peppers (10 mins)
Heat 1 tbsp oil in your largest skillet over medium-high. Add onions and peppers—listen for that sizzle! Sprinkle seasonings. Key hack: DON’T stir constantly! Let them char slightly for smoky sweetness. Cook until crisp-tender (not mushy!).
Step 3: Black Bean Bliss (12 mins)
In a saucepan, sauté garlic and jalapeño in oil until fragrant (1 min). Add cumin—toast it 30 seconds to wake up flavors. Stir in beans, broth, salt. Simmer uncovered 8-10 mins until liquid reduces slightly. Chef’s secret: Mash a few beans against the pot with your spoon for creaminess! Off heat, stir in lime juice and cilantro.
Step 4: Assemble & Conquer (5 mins)
Divide peppers, chicken slices, and beans into 4 meal prep containers. Pro storage tip: Let components cool 10 mins before sealing to avoid steam-sogginess. Top with extra cilantro or a lime wedge if you’re feeling fancy!
The Science of Sizzle: Why Fajitas Taste So Damn Good
Let’s geek out for a minute. What makes fajitas—especially these meal prep bowls—so irresistibly delicious? It’s not just the flavors; it’s chemistry. Here’s how each component works its magic:
1. The Maillard Reaction (AKA Flavor Fireworks)
When chicken hits a scorching-hot skillet, amino acids and sugars in the marinade caramelize, creating hundreds of new flavor compounds. That’s why we sear instead of boil! Pineapple juice in the marinade isn’t just for tenderness; its natural sugars amp up browning. Pro tip: Pat chicken dry before cooking to avoid steam (the enemy of crust).
2. Capsaicin’s Sneaky Trick
Poblanos and jalapeños contain capsaicin, the compound that makes peppers “spicy.” But here’s the twist: Capsaicin triggers endorphins—your brain’s “feel-good” chemicals. That’s why fajitas taste happy. For sensitive palates, removing seeds cuts heat by 90% while keeping flavor.
3. Umami Bomb Beans
Black beans are loaded with glutamate, an amino acid that signals savory to your taste buds. Simmering them with garlic and cumin doubles down on umami. Fun fact: Rinsing canned beans isn’t just for reducing sodium; it washes away oligosaccharides (the culprits behind… ahem digestive protests).
4. The Char Illusion
Those blackened bits on peppers? They’re not burnt—they’re flavor gold. When veggies char, cellulose breaks down into simpler sugars, and sulfur compounds in onions transform into sweet, savory notes. Key move: Resist over-stirring! Let peppers sit in the pan for 2-3 minutes to develop those crispy edges.
5. Acid’s Brightening Power
Lime juice in the marinade and beans isn’t just for tang; acidity balances fat and resets your palate between bites. No lime? Vinegar or even a splash of orange juice can mimic the effect.
TL;DR: Fajitas are a symphony of science. Now you can impress your friends while they scarf down these bowls.
Meal Prep Like a Pro: 5 Hacks to Save Time (and Sanity)
Repeat after me: Meal prep shouldn’t feel like a part-time job. These strategies turn fajita bowls into a *15-minute active prep* miracle:
1. The Lazy Cook’s Knife Trick
Dicing peppers and onions is the most time-consuming step. Solution? Buy pre-sliced frozen peppers (they’re flash-fresh and cheaper off-season) or use a mandoline slicer (watch your fingers!). Or—game-changer—roast whole peppers in the oven at 425°F for 20 minutes; the skins blister, and you can peel/seed them in seconds.
2. Marinade in Bulk
Whip up a triple batch of the marinade and freeze it in ice cube trays. Drop a few cubes into a bag with chicken in the morning, and by dinnertime, you’re ready to cook. Pineapple juice’s enzymes even work faster at room temp!
3. Beans for Days
Skip canned beans entirely: Instant Pot 1 lb dried black beans with broth, garlic, and salt (25 mins, no soak). You’ll save $$ and get creamier beans. Freeze portions in muffin tins for easy grab-and-go.
4. The Assembly Line Mindset
Instead of prepping all components separately, multitask like a chef:
-
While chicken marinates (30 mins), sauté peppers.
-
While peppers cook, start the beans.
-
While beans simmer, slice rested chicken.
Total active time: 20 minutes.
5. The No-Reheat Lunch
Pack bowls with raw spinach or kale at the bottom (it wilts perfectly when microwaved). Add cold toppings like avocado or yogurt after reheating to avoid texture tragedy.
Bonus: Label containers with “Eat Me First” stickers—peppers lose crunch after 3 days, while beans and chicken last 5.
Fajitas Around the World: Global Twists on a Tex-Mex Classic
Fajitas might be Texan by birth, but their spirit—sizzling protein, vibrant veggies, bold spices—exists worldwide. Here’s how to globe-trot from your kitchen:
1. Korean “Fajita” Bibimbap
Swap the marinade for gochujang (1 tbsp), soy sauce, sesame oil, and grated pear (natural tenderizer!). Top bowls with kimchi, sautéed shiitakes, and a fried egg.
2. Mediterranean Mezze Bowl
Marinate chicken in lemon, oregano, and garlic. Sub peppers for roasted eggplant and zucchini. Beans become gigantes (giant white beans) stewed with tomato and dill. Finish with feta and olives.
3. Thai Basil Smash
Pound chicken thighs with fish sauce, lime, and chili. Stir-fry peppers with holy basil. Swap black beans for edamame. Garnish with crushed peanuts and a sweet-spicy nam jim sauce.
4. Indian Tikka Skewers
Yogurt-marinated chicken (add garam masala to the mix), charred bell peppers, and rajma (spiced kidney beans). Serve with cilantro-mint chutney.
5. West African Peanut Bowl
Coat chicken in a marinade of peanut butter, lime, and harissa. Sauté peppers with ginger. Black beans get a coconut milk simmer with smoked paprika.
Why It Works: The fajita formula—protein + veg + saucy beans—adapts to any cuisine. The real secret? Contrast. Crunchy/creamy, spicy/sweet, hot/cool. Mix, match, and make it yours.
Dishing Up the Goodness
These bowls are **built for flexibility**! Serve them warm straight from the container, or reheat gently in the microwave. For **next-level vibes**, add a handful of crunchy romaine or spinach right before eating. Top with creamy avocado slices, a dollop of Greek yogurt (sour cream’s healthy cousin!), or pickled red onions. If you’re carb-loading, wrap everything in warm corn tortillas—or crumble baked tortilla strips on top for texture!
Shake It Up! 5 Delicious Twists
1. Shrimp Fiesta: Swap chicken for 1 lb shrimp. Marinate just 15 mins (cook 2-3 mins per side!).
2. Vegan Power Bowl: Use tofu or portobello mushrooms instead of chicken. Veggie broth in beans.
3. Burrito Style: Layer bowls with cilantro-lime rice or cauliflower rice!
4. Spicy Sonora: Add 1 chipotle pepper in adobo to the bean sauce.
5. Cheesy Comfort: Sprinkle with cotija or feta before serving.
Behind the Apron: Beau’s Real-Kitchen Confessions
This recipe evolved from my campfire disaster! Originally, I used bottled marinades—*shudder*—until I discovered pineapple juice’s tenderizing power. Now? I batch-marinate chicken every Sunday. My kids call these “rainbow bowls” and fight over the peppers (parenting win!). One tip: **Don’t skip the poblano**. It adds subtle depth without overpowering. And if your beans look too thick? Splash in broth until saucy—they thicken in the fridge. Last thing: My dog, Biscuit, once stole a pepper slice off the counter. Now he gets his own unseasoned piece!
Your Fajita Questions, Answered!
Q: Can I freeze these bowls?
A: Absolutely! Freeze chicken + beans for up to 3 months. Peppers get mushy—I’d skip freezing those. Thaw overnight in fridge, then reheat.
Q: Why are my peppers soggy?
A: Two culprits: Overcrowding the pan (steam instead of sear!) or storing while hot. Always cool components separately before assembling.
Q: Help—my chicken’s tough!
A: Two fixes: 1) Pound breasts evenly so edges don’t dry out. 2) Don’t overcook! Chicken’s done at 165°F (it climbs 5° while resting).
Q: Can I use frozen peppers?
A: Fresh is best for texture, but in a pinch? Thaw frozen peppers completely, pat DRY, then sear on high heat to evaporate moisture.
Healthy Chicken Fajitas Meal Prep
- Total Time: 50 mins
Description
Craving something vibrant, healthy, and totally satisfying? These Chicken Fajita Bowls are like a Tex-Mex hug in a container. Perfect for busy weekdays, meal prep Sundays, or spontaneous fajita cravings. Think charred peppers, citrus-marinated chicken, and garlicky black beans—all done in under an hour. Let’s spice up your lunch routine with zero guilt and all the flavor. Grab your skillet—it’s fajita o’clock!
Ingredients
For Chicken Fajitas:
-
4 boneless chicken breasts (pounded to ½ inch)
-
⅓ cup lime juice
-
¼ cup pineapple juice (unsweetened)
-
2 tbsp low-sodium soy sauce (or tamari)
-
2 tbsp olive oil
-
1 garlic clove, minced
-
1 tsp cumin, 1 tsp paprika, ½ tsp red pepper flakes
-
¼ cup chopped cilantro
For Peppers:
-
1 white onion
-
2 red, 1 green bell pepper, 1 poblano
-
1 tsp salt, ½ tsp pepper, ¼ tsp garlic powder
For Black Beans:
-
2 cans low-sodium black beans (rinsed)
-
½ jalapeño, finely diced
-
1 cup low-sodium chicken broth
-
1 garlic clove, minced
-
½ tsp cumin, juice of 1 lime, 2 tbsp chopped cilantro
Instructions
1. Marinate Chicken (5 min active + 30 min rest)
Mix marinade, add chicken, and refrigerate. Grill or sear 5–6 mins/side. Let rest, then slice.
2. Cook Peppers (10 mins)
Sauté onions and peppers in oil over high heat. Season and let char slightly. Stir occasionally.
3. Simmer Black Beans (12 mins)
Sauté garlic + jalapeño, add cumin, beans, and broth. Simmer 8–10 mins. Stir in lime and cilantro.
4. Assemble (5 mins)
Layer beans, chicken, and peppers into 4 bowls. Cool before sealing.
Notes
-
Char, don’t crowd: Spread peppers in a hot skillet for perfect texture.
-
Pineapple power: Natural enzymes tenderize the chicken!
-
Mash a few beans: It gives your bowl that creamy, hearty vibe.
-
Add crunch: Top with chopped romaine or baked tortilla strips.
- Prep Time: 20 mins
- Cook Time: 30 mins
Nutrition
- Calories: 420 Cal Per Bowl
- Fat: 14g
- Carbohydrates: 28g
- Fiber: 8g
- Protein: 38g
Fuel Your Body Right
Per serving (1 bowl): Approx. 420 calories | 38g protein | 14g fat | 28g carbs | 8g fiber
Note: Values vary with ingredient swaps. Add avocado? Healthy fats jump!
Final Thoughts: More Than Just a Meal
These fajita bowls aren’t just fuel—they’re a mindset. They’re about reclaiming weeknights, savoring color on a gray day, and remembering that campfire triumph. Whether you stick to the script or spin it into Thai or Tikka territory, the goal’s the same: joy, one bite at a time.
Now, go forth and sizzle. And if you drop a pepper on the floor? Call it a sacrifice to the cooking gods (or your dog).

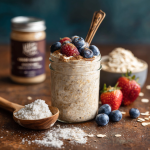
Overnight Oats
Rise, Shine, & Grab Your Jar: Your Dream Breakfast Awaits!
Hey friends, Beau here! Let’s chat about mornings. You know those days when your alarm feels like a personal insult, your brain’s foggy, and the coffee maker seems miles away? Yeah, we’ve all been there. What if I told you your future self could high-five you for a genius move the night before? Enter: Overnight Oats. This isn’t just breakfast; it’s a creamy, dreamy, no-cook hug in a jar that practically assembles itself while you snooze. Imagine waking up to something that tastes like dessert but fuels you like a superfood powerhouse. We’re talking whole grains, plant-based goodness, and protein that sticks with you. The best part? It’s endlessly customizable. Whether you’re craving cozy apple pie vibes or chocolate-banana bliss, your taste buds call the shots. I launched Feastical to share exactly these kinds of kitchen wins—real food that fits real life. So ditch the frantic cereal pour or sad desk toast. Grab a jar, spend 10 minutes tonight, and tomorrow? You’ll be savoring every spoonful, wondering why you didn’t start this delicious revolution sooner. Let’s make mornings something you actually look forward to!
The Midnight Snack That Sparked a Breakfast Revolution
Picture this: It’s 2 AM, years ago. I’m crashing after a marathon catering gig, ravenous, but too exhausted to even boil water. My pantry’s looking bleak—just some oats, a lonely banana, and a near-empty carton of almond milk. In a sleep-deprived haze, I dump it all in a mason jar with a spoonful of chia seeds I’d bought for a smoothie kick, give it a wild stir, and shove it in the fridge, thinking, “Well, that’ll be a weird experiment for tomorrow.” Fast forward to 7 AM. I’m bleary-eyed, dreading the day, when I spot the jar. Skeptical, I take a bite… and angels sang. It was magically creamy, subtly sweet, and shockingly satisfying. That Frankenstein breakfast became my secret weapon through culinary school all-nighters and early farmer’s market runs. Now, it’s the recipe my niece requests for sleepovers and the meal-prep hero my Feastical community raves about. Funny how desperation births perfection, right? That messy midnight mash-up taught me the best kitchen magic often happens when you’re too tired to overthink it.
Your Overnight Oats Toolkit: Simple Staples, Big Impact
Here’s the beautiful base that makes magic happen. Think of this as your blank canvas—everything else is flavor confetti!
- ½ cup Whole Rolled Oats: These are the heart of the dish! Rolled oats (old-fashioned) soften perfectly overnight, giving that iconic chewy-creamy texture. Chef’s Insight: Avoid instant oats (they turn mushy) or steel-cut (they stay too firm). If gluten-free, ensure certified GF oats!
- 1 tbsp Chia Seeds: These tiny powerhouses are the secret to the luscious, pudding-like thickness. They absorb liquid and swell up, creating a gorgeous gel. Sub Tip: Ground flax seeds work in a pinch (use 1.5 tbsp), but chia’s texture is unbeatable.
- ½ tsp Maple Syrup (plus more to taste): Just a kiss of natural sweetness. Pure maple syrup adds depth. Chef’s Swap: Honey, agave, or even a date paste work great. Start with ½ tsp – you can always add more sweetness in the morning!
- Pinch of Sea Salt: Crucial! It balances the sweetness and makes all the flavors pop. Don’t skip it.
- ¼ cup Whole Milk Greek Yogurt (optional for creaminess): This is my pro move for ultra-rich, tangy, protein-packed oats. Sub Tip: Use dairy-free yogurt (coconut or almond-based) for vegan oats, or skip it entirely – it’ll still be delicious! Regular yogurt works too, but Greek gives thicker results.
- ⅔ cup Unsweetened Almond Milk: The liquid that brings it all together. Unsweetened keeps it clean. Chef’s Insight: Any milk works! Dairy milk, oat milk, soy milk – pick your favorite. Adjust slightly if your oats seem too thick/thin after your first try.
Building Your Jar of Joy: Effortless Steps to Morning Bliss
Ready? This is the easiest “cooking” you’ll ever do. Let’s layer up that flavor!
- Grab Your Vessel: Find a 12-16 oz jar or container with a tight-sealing lid. A wide-mouth mason jar is perfect – easy to stir, easy to eat from! Chef Hack: Use a jar you can take straight to work – fewer dishes win!
- The Big Mix: Dump everything in – oats, chia seeds, maple syrup, salt, yogurt (if using), and almond milk. No fancy order needed! Pro Tip: Add the maple syrup *before* the milk so it dissolves easily.
- Stir Like You Mean It (But Gently): Grab a spoon or small whisk and stir vigorously for 30-45 seconds. This is KEY to evenly distribute the chia seeds and prevent clumping. Chef Insight: Scrape the sides and bottom! Ensure no dry pockets are hiding.
- The Patience Phase (a.k.a. Overnight Magic): Seal that jar TIGHTLY. Pop it in the fridge. Let it chill for at least 6 hours, but ideally 8-12. Chef Hack: Make 2-3 jars at once! Meal prep hero status unlocked. They keep great for 3-4 days.
- Morning Glory: The next day, open your jar of potential. Give the oats a really good stir. They might look separated or thick at first – stirring reawakens the creaminess! Pro Tip: If it seems too thick, stir in a splash of milk. Too thin? A sprinkle more chia seeds next time.
- Top It Off: This is where your personality shines! Pile on fresh fruit, nuts, seeds, nut butter, granola, spices… go wild! Stir them in or layer them beautifully on top. Chef’s Command: TASTE before adding extra sweetener. The flavors meld overnight, and you might find it’s perfect as-is!
Dress to Impress (Your Taste Buds!)
Presentation is half the fun! Stir in your toppings for a uniform flavor burst, or artfully layer them on top for that Instagram-worthy “wow” factor. For ultimate comfort, eat it straight from the jar, cozy on the couch. Heading out? Screw the lid back on – it’s portable perfection! Feeling fancy? Serve it in a beautiful bowl, drizzle with extra nut butter or honey, and add a final sprinkle of cinnamon or cacao nibs for texture. Remember, cold and creamy is classic, but if you crave warmth, pop it in the microwave for 60-90 seconds, stirring halfway. Enjoy the ritual!
Flavor Fiesta: Make It Uniquely Yours!
Ready to play? These are my top Feastical fan favorites:
- 🍎 Apple Pie Bliss: Stir in 2 tbsp unsweetened applesauce + ¼ tsp cinnamon with the base. Top with diced apple, chopped pecans, and a spoonful of cinnamon-sautéed apples (just cook apple chunks with a dash of maple syrup and cinnamon until tender). Pure autumn joy!
- 🍑 Sunny Peach Crisp: Layer fresh or thawed frozen peach slices into the base. After stirring in the morning, crown it with a generous handful of crunchy granola. Summer in a jar!
- 🥜 PB&J Nostalgia: Swirl in 1 tbsp peanut butter with the base. Top with chia jam (or regular jam), chopped strawberries & raspberries, and chopped peanuts. Lunchbox memories, upgraded!
- 🍫 Chocolate Banana Bread Dream: Mash ½ a ripe banana into the base mixture. Add 1 tsp cocoa powder + ¼ tsp cinnamon + pinch of nutmeg. Top with banana slices, walnuts, and a sprinkle of dark chocolate chips. Decadent, yet wholesome!
- 🌱 Tropical Coconut Mango (Bonus!): Use coconut milk instead of almond milk. Stir in 1 tbsp shredded coconut. Top with fresh mango chunks and a squeeze of lime. Instant vacation!
Beau’s Backstage Kitchen Notes
This recipe has evolved more than my taste in aprons! That initial “everything but the kitchen sink” jar taught me simplicity reigns supreme. I started adding the Greek yogurt after a reader asked how to boost protein – genius! The chia seed quantity got fine-tuned after my hilarious “chia pudding cement” phase (lesson: measure those water-absorbing wonders!). One time, I accidentally used salted caramel yogurt instead of plain… and discovered a happy accident now known as “Dessert for Breakfast” oats! The biggest evolution? Embracing flexibility. Don’t have almond milk? Use what’s in the fridge. Forgot chia seeds? It’ll be soupier, but still edible. The spirit of Feastical is making real food work for real life, not perfection. So, laugh if your first batch is too thick, adjust, and try again. Your perfect jar is waiting!
Overnight Oats SOS: Your Questions Answered!
Let’s tackle those common head-scratchers:
- Q: Help! My oats are super thick/concrete-like! What gives?A: Don’t panic! Chia seeds are powerful. Just stir in a splash of milk (any kind) until it reaches your dreamy consistency. Next time, use a smidge more liquid (start with 1 extra tbsp almond milk). Also, ensure you’re using rolled oats, not instant (which absorb less) or steel-cut (which need cooking).
- Q: Why are my oats runny/soupy?A: This usually means not enough time in the fridge (chia seeds need 6+ hours to work their magic) or not enough chia seeds/oats. Ensure you measured correctly. Stirring in an extra tablespoon of oats or chia seeds *before* refrigerating can help thicken it up. Using a very large jar can sometimes make the mixture seem thinner too.
- Q: Can I use quick oats instead of rolled oats?A: You *can*, but the texture changes significantly. Quick oats absorb liquid faster and become much softer, almost mushy. If that’s your jam, go for it! Reduce the liquid slightly (start with ½ cup instead of ⅔ cup) as they absorb less. For classic texture, stick with rolled oats.
- Q: How long do overnight oats actually last?A: Safely, 4-5 days in a sealed container in the fridge! They actually get creamier by day 2. The chia seeds help preserve freshness. Avoid adding super watery fresh fruit (like melon) until serving if prepping for multiple days. Give it a good stir and a sniff test before eating later in the week.
- Q: Can I heat them up?A: Absolutely! Microwave in 30-second bursts, stirring well in between, until warmed through (usually 60-90 seconds total). Heating makes them even creamier! Just note: fresh fruit toppings might get warm/cooked.
Overnight Oats
- Total Time: 6 hours (hands-off)
Description
Waking up has never tasted so good. These creamy, dreamy overnight oats come together in minutes and transform in the fridge while you sleep. They’re packed with fiber, protein, and healthy fats—all in a jar you can take on the go. Whether you like it cozy and classic or topped like a parfait, this is your delicious, real-life answer to “What’s for breakfast?”
Ingredients
-
½ cup rolled oats (old-fashioned)
-
1 tbsp chia seeds
-
½ tsp maple syrup (or sweetener of choice)
-
Pinch of sea salt
-
¼ cup Greek yogurt (optional, for extra creaminess & protein)
-
⅔ cup unsweetened almond milk (or milk of choice)
Instructions
-
Mix It All Up
In a 12–16 oz jar, combine oats, chia seeds, maple syrup, salt, yogurt (if using), and almond milk. -
Stir Vigorously
Use a spoon or small whisk to stir for 30–45 seconds, ensuring everything’s well combined and chia seeds aren’t clumping. -
Seal & Chill
Cover tightly and refrigerate for 6–12 hours. -
Morning Stir & Top
Stir well in the morning. Adjust thickness with a splash of milk if needed. Top with fruit, nut butter, granola—whatever fuels your vibe!
Notes
-
Too thick? Add a splash of milk.
-
Too thin? Use less liquid or more chia seeds next time.
-
Vegan? Use plant-based yogurt or skip it—still creamy!
-
Meal prep? Make 2–3 jars at once—they last 4–5 days in the fridge.
- Prep Time: 5 mins
Nutrition
- Calories: 250Cal Base Recipe
- Fat: 8g
- Carbohydrates: 34g
- Fiber: 8g
The Nourishing Nitty-Gritty (Base Recipe Only)
For my health-conscious foodies! This is for the base recipe *without* toppings or optional yogurt variations. Remember, toppings add flavor and nutrients but also extra calories/sugar.
- Calories: ~250
- Fat: 8g (Mostly healthy fats from chia & oats)
- Carbohydrates: 34g (Includes 8g Fiber!)
- Protein: 10g (A solid start to your day!)
Adding the optional ¼ cup Greek Yogurt adds roughly: 35 calories, 0g fat, 3g carbs, 6g protein.
Final Thoughts: Why Overnight Oats Are More Than Just a Trend
Overnight oats aren’t just a passing fad—they’re a lifestyle upgrade. They solve real problems: time scarcity, decision fatigue, and the struggle to eat well amid chaos. Whether you’re a busy parent, a student on-the-go, or someone who just hates mornings, this jar of goodness meets you where you are.
The best part? They meet you with kindness. No guilt if you skip a topping, no stress if you forget to stir perfectly. It’s food that adapts to you, not the other way around.
So tonight, when you’re debating whether to prep or procrastinate, remember: Future You is rooting for the jar. Give it a try—your mornings (and taste buds) will thank you.

How to Make Hard-Boiled Eggs
The Secret to Perfect Hard-Boiled Eggs Every Single Time
Hey friends, it’s Beau from Feastical! Let’s talk about one of those kitchen skills that seems simple but can drive you absolutely bonkers: hard-boiled eggs. You know what I mean – that moment when you crack open an egg expecting creamy sunshine yellow, only to find a sad, gray-ringed yolk clinging stubbornly to cracked shells. Maybe you’ve resorted to poking holes with thumbtacks or adding mysterious potions to boiling water. I’ve been there too! Today, we’re putting an end to egg-sperimentation (sorry, couldn’t resist!). After testing hundreds of eggs for Feastical’s meal prep guides, I’ve nailed a foolproof method that gives you tender whites, vibrant yolks, and effortless peeling every darn time. Whether you’re making deviled eggs for game day, protein-packing your salads, or fueling your kid’s lunchbox, consider this your ultimate roadmap. Grab those eggs – we’re about to make magic happen!
My Egg-straordinary Kitchen Disaster (and Revelation!)
Picture this: It’s my first big Easter brunch at Feastical HQ. I’m feeling fancy, planning beautiful dyed deviled eggs. I boil three dozen, cool them, and start peeling… only to watch craters form in every single egg. Frustrated, I’m elbow-deep in shell shrapnel when my grandma FaceTimes. Seeing my plight, she chuckles: “Beau, honey, you’re boiling them like pasta! Eggs need gentle persuasion.” She shared her diner-wisdom: start cold, end cold, and let the water nap. That day, I learned age matters (older eggs peel better!), and that rushing perfection backfires. Those lumpy deviled eggs still tasted great, but now I laugh remembering my “egg-pocalypse.” It’s why I’m obsessed with sharing this method – nobody deserves egg-related stress!
What You’ll Need (It’s Simpler Than You Think!)
- Large Eggs: Farm-fresh is lovely, but older eggs (7-10 days) peel easier as the air pocket expands. Size matters – jumbos need extra time!
- Cold Water: Enough to cover eggs by 1 inch. Cold starts prevent cracking from thermal shock. Pro tip: Tap water is fine – no fancy filtered needed!
- Ice + Water: For the ice bath! This stops cooking instantly and contracts the egg away from the shell. No ice? Very cold tap water works in a pinch.
Chef’s Insight: Skip vinegar/baking soda hacks! They alter texture. Pure H2O + proper technique = perfection.
Foolproof Steps: No Gray Rings, No Swearing!
Step 1: Arrange & Cover
Place eggs in a single layer in your saucepan. Crowding causes uneven cooking! Gently cover with cold water until eggs are submerged by 1 inch. Why cold? Gradual heating prevents cracks. (Think: cozy warm bath vs. jumping into a hot tub!)
Step 2: Boil & Walk Away
Bring water to a rolling boil over medium-high heat. Once big bubbles appear, immediately cover the pot and TURN OFF THE HEAT. Set your timer! Hack: Use a lid that fits snugly – it traps residual steam for even cooking.
Step 3: The Magic Steep
Let eggs sit in hot water, untouched:
• 10 mins: Slightly jammy, bright yellow centers (great for ramen!)
• 12 mins: Classic firm-but-creamy (perfect for slicing & deviling)
• 14 mins: Very firm (ideal for egg salad)
Note: Time starts the SECOND you turn off the heat!
Step 4: Shock ‘Em Cold
Drain hot water. Transfer eggs to a bowl filled with ice + water. Chill 10-15 mins until completely cold. This is non-negotiable! It stops cooking, prevents green rings, and loosens the membrane for peeling.
Step 5: Peel Like a Pro
Tap eggs on the counter to crackle the shell. Roll gently under your palm to loosen. Peel under cool running water – it washes away fragments and lifts the shell. Beau’s Trick: Start peeling from the wider end (where the air pocket is!).
The Science Behind Perfect Hard-Boiled Eggs
Have you ever wondered why some hard-boiled eggs peel effortlessly while others turn into a crumbly mess? Or why yolks sometimes develop that unappetizing green-gray ring? The answer lies in chemistry and physics—and understanding these principles can help you achieve flawless eggs every time.
Why Older Eggs Peel Better
Fresh eggs are fantastic for frying or poaching, but they’re the enemy of easy peeling when hard-boiled. Why? As eggs age, their pH level increases, causing the membrane beneath the shell to weaken. Additionally, the air pocket inside the egg expands over time, creating a tiny buffer that helps separate the cooked egg from the shell. That’s why eggs that are 7–10 days old peel more cleanly than farm-fresh ones.
The Thermal Shock Myth
Many people believe plunging eggs directly into boiling water makes them crack. While rapid temperature changes can cause fractures, the bigger issue is how you handle them. Starting eggs in cold water and bringing them to a boil gradually prevents cracks because the proteins in the egg white coagulate more gently. However, if you’re in a rush, you can boil eggs straight from the fridge—just add 1–2 minutes to the steep time.
The Ice Bath: Non-Negotiable
Skipping the ice bath is the #1 reason for overcooked yolks and stubborn shells. When eggs cool rapidly, two things happen:
-
The yolk stops cooking immediately, preventing sulfur and iron reactions that cause gray rings.
-
The egg contracts slightly, pulling away from the inner membrane and making peeling a breeze.
Pro tip: If you don’t have ice, run cold tap water over the eggs for 5+ minutes until completely chilled.
Why Vinegar and Baking Soda Hacks Are Overrated
You’ve probably heard that adding vinegar to boiling water makes eggs easier to peel or that baking soda alters the pH for smoother shells. While these tricks can help slightly, they often affect texture—vinegar makes whites rubbery, and baking soda can give eggs a sulfuric taste. Pure water + proper technique is all you need!
Troubleshooting Common Hard-Boiled Egg Disasters
Even with a foolproof method, things can go wrong. Here’s how to diagnose and fix the most common hard-boiled egg fails.
Problem: Cratered Eggs (Shell Sticks to the White)
Cause:
-
Eggs were too fresh.
-
Peeling technique was too aggressive.
Fix:
-
Use older eggs (check the carton date!).
-
Crack the shell gently all over, then roll the egg between your hands to loosen the membrane before peeling.
-
Peel under running water—it helps lift the shell away.
Problem: Green-Gray Yolk Rings
Cause:
-
Overcooking (heat causes sulfur in the yolk to react with iron in the white).
-
Skipping the ice bath.
Fix:
-
Stick to 12 minutes max for creamy yolks.
-
Plunge eggs into ice water immediately after cooking.
Problem: Rubbery or Tough Whites
Cause:
-
Boiling too vigorously (rapid bubbles bash the eggs around).
-
Overcooking.
Fix:
-
Once water boils, turn off the heat and let eggs steep gently.
-
Use a timer—14 minutes is the absolute max for firm yolks.
Problem: Cracked Shells During Cooking
Cause:
-
Eggs were dropped into boiling water too forcefully.
-
Pot was overcrowded (eggs knocking into each other).
Fix:
-
Lower eggs into water with a slotted spoon.
-
Cook in a single layer with enough space to move.
Problem: Yolks Off-Center
Cause:
-
Eggs rolled around during cooking.
Fix:
-
Stir the water gently for the first 2 minutes to keep yolks centered.
Creative Uses for Hard-Boiled Eggs (Beyond Deviled Eggs)
Hard-boiled eggs are a meal-prep MVP, but they’re not just for salads and snacks. Here are five unexpected ways to use them.
1. Umami-Packed Ramen Eggs (Ajitsuke Tamago)
Soak peeled eggs in a mix of soy sauce, mirin, and water (1:1:1 ratio) with garlic and ginger for 12–24 hours. The yolks turn custardy, and the whites absorb a savory-sweet punch. Perfect for ramen or rice bowls!
2. Crispy Fried Hard-Boiled Eggs
Slice boiled eggs in half, coat in flour, dip in beaten egg, then roll in panko. Fry until golden for a crunchy exterior with a creamy center. Serve with spicy mayo or curry sauce.
3. Egg “Croutons” for Soups and Salads
Dice hard-boiled eggs, toss with olive oil and salt, then bake at 400°F for 10 minutes until slightly crispy. Sprinkle over soups or salads for a protein boost.
4. Scotch Eggs (With a Twist)
Wrap peeled eggs in seasoned sausage meat, coat in breadcrumbs, and bake (or air-fry) until crispy. For a lighter version, use ground turkey or plant-based meat.
5. Egg Butter Spread
Mash yolks with softened butter, Dijon mustard, and herbs. Spread on toast or melt over steamed vegetables.
Beyond the Bowl: Serving Up Egg-cellence
Hard-boiled eggs are kitchen superheroes! Slice them onto avocado toast with everything bagel seasoning, chop into Cobb salads, or mash with Greek yogurt for a protein-rich dip. For parties, halve them, pipe in deviled filling (try sriracha mayo + cilantro!), or simply arrange on a platter with flaky salt and cracked pepper. My favorite? A sprinkle of smoked paprika and a drizzle of hot honey – sweet heat heaven!
5 Fun Twists to Shake Up Your Egg Game
- Soy-Marinated Eggs: Peel eggs, soak overnight in 1:1 soy sauce + water with garlic/ginger. Umami bombs for ramen!
- Everything Bagel Eggs: Roll peeled eggs in everything seasoning + dried minced garlic.
- Curried Deviled Eggs: Mix yolks with Greek yogurt, curry powder, and golden raisins.
- Pickled Pink Eggs: Soak in beet juice + apple cider vinegar for 2 days – stunning color!
- Air Fryer Method: Cook at 270°F for 15 mins, then ice bath. Great for small batches!
Beau’s Backstage Egg Wisdom
This method evolved from my grandma’s diner days to surviving my chaotic food blogger life! I once tested 50 eggs in one afternoon to crack the code (my dog enjoyed the “failures”). Funny story: I filmed a tutorial where my cat jumped on the counter mid-boil – cue me frantically rescuing eggs while meowing ensued! The biggest lesson? PATIENCE. Don’t peek under the lid while they steep! Over the years, I’ve added the ice bath emphasis because science proves it works. Now, I prep a dozen every Sunday – they’re my grab-and-go lifesavers. Trust the process, friends!
Your Egg Questions, Answered!
Q: Why do my yolks have green/gray rings?
A> Overcooking or skipping the ice bath! Sulfur in yolks reacts with iron in whites when heated too long. Stick to 12 mins max + immediate cooling.
Q: Help! My shells won’t peel cleanly!
A> Three culprits: 1) Eggs are too fresh (use older ones!), 2) You didn’t chill them long enough (10 mins minimum!), or 3) You started with hot water (always cold!).
Q: Can I boil eggs straight from the fridge?
A> Technically yes, but increase steep time by 1-2 mins. I find room-temp eggs cook more evenly. Let them sit out 10 mins first!
Q: How long do they last?
A> Unpeeled in the fridge: 1 week. Peeled: Store in water in a sealed container for 3 days (keeps them moist!).

How to Make Hard-Boiled Eggs
- Total Time: 30 mins
Description
It’s time to end the egg struggle! This method delivers silky whites, creamy yolks, and shells that peel like a dream. Whether you’re meal-prepping, making deviled eggs, or just love a simple snack, these hard-boiled eggs are the real MVP. Ready to crack the code? Let’s make some magic in a pot.
Ingredients
-
6 large eggs (older = easier to peel!)
-
Cold tap water (enough to cover eggs by 1″)
-
Ice + water for shocking
Instructions
-
Arrange & Cover: Place eggs in a saucepan in a single layer. Add cold water to cover eggs by 1 inch.
-
Boil & Steep: Bring to a rolling boil. As soon as it boils, turn off the heat, cover with a lid, and start your timer:
-
10 mins: jammy centers
-
12 mins: classic firm yolks
-
14 mins: extra firm
-
-
Ice Bath: Immediately transfer eggs to a bowl of ice water. Chill for 10–15 mins.
-
Peel Like a Pro: Tap, roll, and peel under cool running water. Start at the wide end where the air pocket is.
Notes
-
Use older eggs for easier peeling
-
Chill completely before peeling
-
Skip vinegar/soda hacks—good timing is all you need
Nutrition
- Calories: 70 Cal Per Egg
- Fat: 5g
- Carbohydrates: 1g
- Protein: 6g
Nutritional Powerhouse (Per Large Egg)
Calories: 70 • Protein: 6g • Fat: 5g (1.5g saturated) • Carbs: 0.6g • Key Nutrients: Choline (brain health!), Selenium, Vitamin D. Nature’s perfect snack!
Final Thoughts: Why This Method Works Every Time
Hard-boiled eggs seem simple, but the difference between perfection and frustration comes down to three things:
-
Temperature Control (cold start, steep off-heat, ice bath).
-
Timing Precision (12 minutes for ideal doneness).
-
Patience (don’t rush the cooling or peeling!).
This method isn’t just about avoiding gray yolks—it’s about respecting the egg’s delicate chemistry. Whether you’re meal-prepping or hosting a brunch, mastering this technique means never stressing over hard-boiled eggs again. Now go forth and egg-scel! 🥚🔥

Chia Seed Pudding
Wake Up to a Jar of Sunshine: Creamy Chia Seed Pudding
Hey there, kitchen friends! Beau here from Feastical, ready to share one of my all-time favorite feel-good food rituals that’s saved my mornings more times than I can count. Imagine this: you stumble into the kitchen half-awake, sunlight just kissing the countertops, and waiting for you is a luscious, creamy chia seed pudding that tastes like dessert but fuels you like a superhero breakfast. No cooking, no fuss – just pure, nutrient-packed joy in a jar. Whether you’re rushing to a meeting, prepping for yoga, or savoring a slow Sunday, this chia pudding is your edible hug. It’s the culinary equivalent of your favorite cozy sweater – comforting, reliable, and surprisingly versatile. I love how those tiny seeds transform into something magical overnight, soaking up flavors while packing in omega-3s, fiber, and plant-based protein. And the best part? You probably have everything you need right in your pantry. So grab that mason jar (or that quirky mug you thrifted last summer), and let’s make breakfast feel like a celebration!
That Time Chia Seeds Saved My Sanity (and My Breakfast)
Picture this: It’s 2018, and I’m filming my first cooking demo for Feastical. The night before, I’d planned this elaborate baked oatmeal – but my oven decided to quit mid-rehearsal. Panic mode! At 11 PM, staring into my near-empty fridge like it owed me answers, I spotted a forgotten bag of chia seeds. “What the heck,” I thought, whisking them with almond milk and maple syrup in a mason jar. Next morning? Pure serendipity. That pudding was creamy, dreamy perfection – and became the star of the shoot! Guests raved about the “planned” healthy dessert. I’ll never forget my friend Marco’s face when he whispered, “You genius, how’d you get coconut cream so light?” The secret? Zero coconut cream. Just humble chia seeds doing their hydration dance. Now, this pudding isn’t just a recipe; it’s my kitchen phoenix-rising-from-the-ashes moment. Every time I make it, I smile remembering how a “disaster” became a signature Feastical favorite. Moral: Sometimes the simplest solutions taste like victory.
Your Shortcut to Bliss: Ingredients Demystified
- ½ cup Unsweetened Almond Milk – The silky canvas! Chef’s hack: Shake the carton vigorously – aerating it makes the pudding fluffier. Swap with oat milk for creaminess or coconut milk for tropical vibes.
- 2 tbsp Chia Seeds – Nature’s tiny transformers! These fiber-rich gems absorb liquid like sponges. Pro tip: Black or white chia work equally well – just ensure they’re fresh (stale seeds won’t plump properly).
- ½ tsp Maple Syrup – Liquid gold! It’s subtle sweetness with caramel notes. Allergy-friendly: Agave or date syrup work beautifully. Omit entirely if topping with super-sweet fruit.
- ⅛ tsp Cinnamon – The warmth wizard! It balances flavors and stabilizes blood sugar. Feeling adventurous? A pinch of cardamom or nutmeg takes it global.
Why these ratios rock: I’ve tested dozens of versions – this 4:1 liquid-to-chia ratio creates that luscious, spoonable texture without turning gummy. Trust the process!
Let’s Make Magic: Foolproof Steps with Beau’s Kitchen Hacks
- Mix It Like You Mean It: In a jar (or bowl), combine almond milk, chia seeds, maple syrup, and cinnamon. Secret weapon: Use a fork instead of a spoon – the tines break up chia clumps instantly! Whisk for 90 seconds until it feels slightly thickened. No streaks should remain – this prevents lumpy surprises later.
- The Power of the Pause: Let the mixture sit uncovered for 5 minutes. This is CRUCIAL – it lets seeds start swelling. Now, stir again vigorously. Why? Those sneaky seeds sink to the bottom! Re-stirring = even texture. Cover tightly. Hack: Press plastic wrap directly on the surface if using a bowl to prevent skin formation.
- Chill Out & Transform: Refrigerate for at least 2 hours (overnight is golden). Timing tip: Make it before bed – your future self will high-five you! Pudding should be spoonably thick, like Greek yogurt. If it seems thin, stir in ½ tsp extra chia seeds and wait 30 more minutes.
- The Grand Reveal: Stir pudding vigorously before serving. This aerates it, making it cloud-light! Taste and adjust – sometimes I add a drizzle more syrup here. Now, the fun part…
Serving: Where Your Personality Shines
Grab a wide-mouth jar or pretty bowl – we eat with our eyes first! Spoon pudding into your vessel, then layer or artfully scatter toppings. My Tuesday mood: Tart cherries + dark chocolate shavings. My weekend vibe: Toasted coconut flakes + mango cubes. For crunch addicts (like me!), add granola JUST before eating to maintain that satisfying crispness. Pro-styling move: Sprinkle toppings in a crescent moon shape on one side – instant Instagram charm!
The Science Behind Chia Seeds: Why This Tiny Superfood Packs a Punch
Chia seeds might look unassuming, but they’re nutritional powerhouses with a fascinating backstory. Originating from the Salvia hispanica plant (a member of the mint family), these seeds were a staple for ancient Aztecs and Mayans—literally meaning “strength” in Mayan. And for good reason!
Hydration Magic: Chia seeds can absorb up to 10-12 times their weight in liquid, forming a gel-like consistency. This soluble fiber (mainly mucilage) slows digestion, keeping you full longer and stabilizing blood sugar—a game-changer for morning energy crashes. Unlike flaxseeds, chia doesn’t need grinding for nutrient absorption, making it a no-fuss addition to your diet.
Nutrient Breakdown:
-
Omega-3s: With 5g per ounce, chia is one of the richest plant-based sources of alpha-linolenic acid (ALA), crucial for brain health.
-
Fiber: A single ounce delivers 11g of fiber (40% of your daily needs), promoting gut health and regularity.
-
Protein: Complete protein (all 9 essential amino acids) for a plant-based boost—great for post-workout recovery.
-
Bone Boost: Calcium, magnesium, and phosphorus team up to support bone density (more calcium per gram than dairy milk!).
Fun Fact: When mixed with liquid, chia’s soluble fiber forms a gel that can even replace eggs in baking (1 tbsp chia + 3 tbsp water = 1 egg).
Culinary Chameleon: Beyond pudding, try chia in:
-
Smoothies (thickens without altering taste)
-
Jam (mix with mashed berries for a quick, low-sugar spread)
-
Crispy Crackers (combine with seeds, bake at 350°F for 20 mins)
Pro Tip: Store chia seeds in an airtight container in the fridge to prevent their delicate fats from oxidizing.
Chia Pudding Around the World: Global Twists on a Simple Classic
Why stick to basic vanilla when you can take your taste buds on a world tour? Here’s how different cultures reinvent chia pudding with local flavors:
1. Mexican Chocolate (Inspired by Champurrado)
-
Base: Almond milk + 1 tsp cocoa + ½ tsp cinnamon + pinch of cayenne.
-
Topping: Crumbled panela (unrefined cane sugar) and orange zest.
Why it works: The heat from cayenne enhances chocolate’s richness—a nod to Mexico’s love of spicy-sweet balance.
2. Thai Coconut Pandan
-
Base: Coconut milk + 1 pandan leaf (knotted) steeped overnight (remove before eating).
-
Topping: Toasted sesame seeds and lychee.
Pro Tip: Pandan adds a floral, vanilla-like aroma; find it frozen at Asian markets.
3. Middle Eastern Rose & Pistachio
-
Base: Almond milk + ½ tsp rose water (don’t overdo it—it’s potent!).
-
Topping: Crushed pistachios, dried rose petals, and a drizzle of date syrup.
Cultural Touch: Rose water has been used for centuries in Persian cuisine for its cooling properties.
4. Japanese Matcha Latte
-
Base: 1 tsp matcha powder whisked into warm almond milk before adding chia.
-
Topping: Adzuki beans (sweetened) and a dollop of coconut whipped cream.
Health Perk: Matcha’s antioxidants (EGCG) boost metabolism and focus.
5. Australian Bush Tucker
-
Base: Macadamia milk + native finger lime pulp (for citrusy “caviar” bursts).
-
Topping: Toasted wattleseed (nutty, coffee-like flavor).
Foraging Note: Native ingredients are trending in Australia for their unique terroir.
Why Explore? Adapting global flavors keeps breakfast exciting and introduces new nutrients (e.g., matcha’s L-theanine for calm energy).
Chia Pudding for Every Diet: Customizing for Restrictions & Goals
Whether you’re keto, vegan, or managing allergies, chia pudding is endlessly adaptable. Here’s your cheat sheet:
For Vegan & Plant-Based:
-
Use fortified plant milks (like pea protein milk) for extra B12.
-
Boost protein with a scoop of hemp seeds or silken tofu blended into the base.
For Keto & Low-Carb:
-
Swap almond milk for unsweetened coconut milk (higher fat, lower carbs).
-
Sweeten with 5 drops of liquid stevia or monk fruit instead of maple syrup.
-
Top with cocoa nibs and coconut flakes for crunch.
For Gluten-Free:
-
Chia is naturally GF, but ensure your toppings (like granola) are certified gluten-free.
-
Try toasted quinoa flakes as a crunchy sub for oats.
For Kids & Picky Eaters:
-
Blend the pudding post-soak for a smoother texture (no seed specks!).
-
Layer with peanut butter and banana slices—call it “dessert pudding.”
-
Freeze in popsicle molds for a healthy snack.
For Meal Preppers:
-
Batch-prep dry mixes: Combine chia, cinnamon, and powdered coconut milk in jars. Just add water when ready!
-
Shelf-stable option: Use tetra-pack plant milks for pantry storage.
Allergy Alerts:
-
Nut-free? Try oat or sunflower seed milk.
-
Seed allergy? Unfortunately, chia is off-limits (try agar-agar pudding instead).
Pro Tip: Chia’s high fiber can cause bloating if you’re not used to it. Start with 1 tbsp daily and hydrate well!
Shake Things Up: 5 Flavor Adventures
- Tropical Escape: Swap almond milk with coconut milk + 1 tbsp crushed pineapple. Top with toasted macadamias.
- Chocolate Dream: Add 1 tsp cacao powder + ½ tsp vanilla extract to base mix. Top with raspberries.
- Protein Powerhouse: Stir 1 scoop vanilla protein powder into almond milk first. Top with almond butter drizzle.
- Berry Bliss (No-Sweetener): Omit maple syrup. After chilling, swirl in 2 tbsp mashed ripe raspberries.
- Pumpkin Spice Vibes: Add 2 tbsp pumpkin puree + ¼ tsp pumpkin pie spice to base. Top with pecans.
Beau’s Backstage Notes: Chia Tales & Triumphs
This recipe’s been on quite the journey! Version 1.0 in 2018 was… let’s say “texturally adventurous” (read: chia boba balls in liquid). Lesson learned: double-stirring is non-negotiable. My dog Duke once tried to “help” by knocking a jar off the counter – hence my “wide-bottomed jar only” rule. These days, I prep four jars every Sunday; they keep beautifully for 5 days. Funny story: My niece thought the soaked seeds were tadpole eggs (kids!). Now she calls it “frog pudding” and demands it weekly. Evolution? I’ve embraced texture play – sometimes I layer pudding with yogurt like a parfait, or freeze it into popsicles. Biggest surprise? Adding a pinch of sea salt at serving time – it makes flavors POP!
Your Chia Conundrums: Solved!
Q: Why is my pudding runny after 2 hours?
A: Three culprits: Old chia seeds (check expiration dates!), inaccurate measuring (use level tablespoons), or insufficient stirring. Fix: Stir in ½ tsp extra chia seeds and wait 30 mins.
Q: Can I use dairy milk?
A: Absolutely! Whole milk creates an ultra-rich texture. For buttermilk vibes, use ¼ cup yogurt + ¼ cup milk.
Q: Help! My pudding tastes bitter.
A: Overpowering cinnamon can sometimes taste bitter to sensitive palates. Reduce to a tiny pinch next time. Also, ensure your chia seeds smell nutty (not musty).
Q: Can I skip the sweetener?
A: 100%! Top with ultra-ripe fruit like bananas or mangoes. Or add ½ mashed date to the base mixture before chilling.
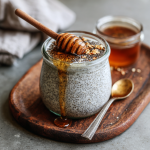
Chia Seed Pudding
- Total Time: 5 minutes
Description
Start your day with a jar full of sunshine—this creamy chia seed pudding is what breakfast dreams are made of. With just four pantry staples and a few minutes of prep, you’ll wake up to a spoonable delight that’s naturally sweet, rich in omega-3s, and endlessly customizable. Whether you’re meal-prepping for a busy week or treating yourself to a slow, cozy morning, this pudding is your shortcut to delicious, nourishing calm.
Ingredients
-
½ cup unsweetened almond milk
-
2 tbsp chia seeds
-
½ tsp maple syrup (optional)
-
⅛ tsp ground cinnamon
Instructions
-
Mix It Up: In a jar or bowl, whisk almond milk, chia seeds, syrup, and cinnamon using a fork (it breaks up clumps better). Mix for 90 seconds until evenly combined.
-
Pause & Stir Again: Let it sit for 5 mins, then stir again to keep seeds from sinking.
-
Cover & Chill: Refrigerate at least 2 hours or overnight until thickened.
-
Serve & Style: Stir again before serving. Top with fruit, granola, or nuts for texture and flavor.
Notes
-
Want a thicker texture? Stir in an extra ½ tsp chia seeds and chill another 30 mins.
-
Try oat milk for creaminess or coconut milk for a tropical twist.
-
Add a pinch of sea salt before serving to boost flavors!
- Prep Time: 5 mins
Nutrition
- Calories: 150Cal
- Fat: 8g
- Carbohydrates: 12g
- Fiber: 10g
Nutritional Spotlight (Base Recipe Only)
Per serving: 150 calories • 8g fat (0.7g saturated) • 12g carbs • 10g fiber • 4g protein • Rich in omega-3s, calcium & magnesium. Note: Toppings add extra nutrients and calories!
Final Thoughts: Why Chia Pudding Deserves a Spot in Your Routine
Chia pudding isn’t just a trend—it’s a testament to how simplicity and nutrition can coexist deliciously. It’s forgiving (no cooking required!), budget-friendly (a $5 bag lasts months), and kind to busy schedules (hello, overnight magic). Whether you’re a health newbie or a seasoned meal-prepper, this humble dish meets you where you are.
So next time you’re tempted to skip breakfast, remember: A jar of sunshine awaits in your fridge. Experiment, play with flavors, and make it yours. After all, the best routines are the ones that feel like treats. Now go forth and chia on!
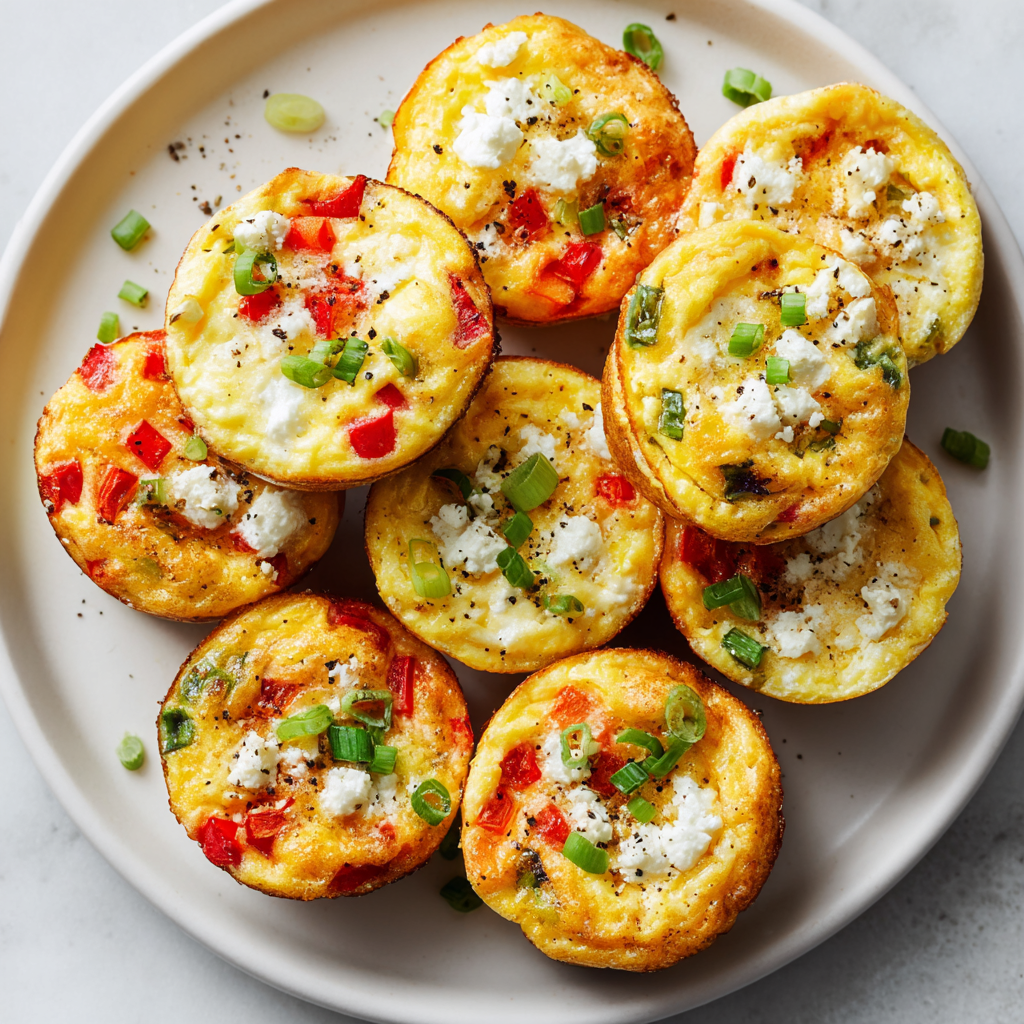
Breakfast Egg Muffins
Wake Up to Flavor: Your New Breakfast Game-Changer!
Hey foodie friends! Beau here from Feastical, and I’ve got a little secret that’ll make your mornings 100% brighter. Picture this: fluffy clouds of eggs packed with rainbow veggies and tangy feta, all baked into perfect handheld bites. These aren’t just any egg muffins – they’re your ticket to stress-free mornings, epic brunch spreads, and “why didn’t I make these sooner?!” moments.
I get it – mornings can be chaos. That’s why I created these veggie-loaded wonders. They’re freezer-friendly, meal-prep magic that actually tastes incredible (no rubbery eggs here!). With sweet bell peppers, punchy scallions, and that salty feta kick, each bite is like sunshine in muffin form. And the best part? You’re just 35 minutes away from 20 glorious breakfasts. Whether you’re feeding hungry teens, prepping for a busy week, or hosting Sunday brunch, this recipe scales like a dream. So tie on that apron, grab your whisk, and let’s make mornings deliciously simple together!
The Brunch That Started It All
Let me take you back to my cousin’s lakeside cabin two summers ago. Picture mist rising off the water, eight hungry friends still in pajamas, and me realizing I’d volunteered to cook breakfast for the whole crew. Panic? Maybe a little. But then I remembered my grandma’s “everything-but-the-kitchen-sink” egg hack. I raided the fridge: leftover peppers, wilting scallions, and a lonely block of feta. Twenty minutes later? Golden puffs emerged from the oven – crispy-edged, tender inside, smelling like heaven. The silence that followed? Pure food bliss. That’s when I knew: this recipe was special. Now, whenever I pull these muffins from my oven, I’m back at that sunny table, surrounded by laughter and empty plates. Food memories? That’s the good stuff.
Your Flavor Toolkit (It’s All About Balance!)
- Extra-Virgin Olive Oil: For greasing – gives that golden crisp edge we love! Chef’s hack: Brush it on with a pastry brush for thin, even coverage.
- 3⅓ cups Diced Red Bell Pepper: Sweetness and crunch! (About 3-4 medium). Swap: Use orange/yellow peppers or even roasted poblanos for smoky depth.
- ¾ cup Chopped Scallions: Mild oniony zing. Pro tip: Reserve the dark green tops for garnish!
- 15 Large Eggs: The fluffy foundation. Insider secret: Room temp eggs incorporate better – pull ’em out 30 mins early!
- 1½ Garlic Cloves, grated: Flavor booster! Shortcut: ½ tsp garlic powder works in a pinch.
- 1 tsp Sea Salt (heaping): Enhances all flavors. Note: If using table salt, reduce to ¾ tsp.
- Freshly Ground Black Pepper: To taste – I do 10 generous cranks!
- 5 tbsp All-Purpose Flour: Secret fluff-maker! Gluten-free? Swap with almond or oat flour 1:1.
- 1¼ tsp Baking Powder: Lifts the eggs like a dream. Must be fresh! Test it with hot water if unsure.
- ½ cup Crumbled Feta Cheese: Salty tang bombs! Variation: Goat cheese or sharp cheddar work great too.
Why this combo rocks: The peppers bring sweetness, scallions add freshness, feta gives salty punch, and that flour-baking powder duo? They’re the unsung heroes creating cloud-like texture. Trust me – it’s science with delicious results!
Let’s Build Some Flavor Clouds!
Step 1: Preheat & Prep (5 mins)
Fire up that oven to 350°F (175°C). Now grab your muffin tins – you’ll need enough for 20 cups. Lightly brush every nook with olive oil. Why brush? It prevents sticking better than spray! Slide those tins onto a baking sheet – it makes handling a breeze.
Step 2: Egg Alchemy (3 mins)
In your largest bowl (seriously, go big!), crack those 15 eggs. Add grated garlic, salt, pepper, flour, and baking powder. Chef’s trick: Whisk flour and baking powder together first to avoid clumps! Whisk vigorously for 90 seconds – you want frothy, pale yellow liquid with no streaks.
Step 3: Fold in the Goodness (2 mins)
Add diced peppers, scallions (save some greens for pretty!), and feta. Gently fold with a spatula – don’t overmix! We’re keeping those veggies distinct and fluffy. See those cheese crumbles? Let them stay whole for flavor pockets!
Step 4: Portion Like a Pro (5 mins)
Pour batter into cups, filling ¾ full. Life hack: Use a ¼-cup measuring cup with a spout for zero spills and perfect portions. They should look like little veggie gardens!
Step 5: Bake to Golden Perfection (18-22 mins)
Bake middle rack until puffed and just set – no jiggle! Watch closely: At 18 mins, tap a muffin top – it should spring back. Edges will pull slightly from tin. Golden rule: They cook FAST after minute 18!
Step 6: The Cool Down (5 mins critical!)
Let muffins rest in tins 5 minutes – this prevents deflation! Then run a knife around edges and lift out. Hot tip: Transfer to a wire rack immediately for perfect texture.
Serving Up Sunshine
Slide these golden puffs onto a big wooden board for brunch – instant wow factor! For grab-and-go, stack ’em in a mason jar with napkin liner. Pair with avocado slices and hot sauce for kick, or Greek yogurt with everything bagel seasoning for creamy contrast. Hosting? Add crispy bacon skewers and blood orange mimosas. Cold, room-temp, or reheated? All delicious!
The Science Behind the Fluff: Why These Egg Muffins Work
Ever wonder why these muffins stay so light and airy while other egg bites turn rubbery? Let’s geek out for a minute! The magic lies in two unexpected ingredients: flour and baking powder. Eggs alone tend to compact when baked, but adding a small amount of flour (just 5 tbsp for 15 eggs!) gives structure, while baking powder creates steam pockets for lift. It’s like a hybrid between a soufflé and an omelet.
Pro Tip: The batter should look like a loose, veggie-studded custard before baking. Overmixing = toughness, so fold gently. And here’s a chef’s secret: room-temperature eggs incorporate more air when whisked, leading to fluffier results. If you forget to pull them out early, place cold eggs in warm water for 5 minutes.
The veggies play a role too. Bell peppers release just enough moisture during baking to keep the muffins tender without making them soggy. Feta, on the other hand, is a dry cheese—its briny tang intensifies as it bakes without weighing things down. (Swap it for a wetter cheese like mozzarella, and you’ll get a denser texture.)
Fun Experiment: Try baking one muffin solo as a test run. Watch how it puffs at the 15-minute mark, then settles slightly when cooled. That’s your cue for perfect doneness!
Meal Prep Like a Boss: Storage & Reheating Hacks
These muffins aren’t just delicious—they’re practical. Here’s how to make them work for your schedule:
1. Freezer-Friendly Gold:
-
Let muffins cool completely on a wire rack (prevents condensation = no sogginess).
-
Flash-freeze in a single layer on a baking sheet for 1 hour, then transfer to airtight bags with parchment between layers. Label with the date! They’ll keep for 3 months.
2. Reheating Like a Pro:
-
Microwave (Quick Fix): Wrap a frozen muffin in a damp paper towel, microwave 60 seconds. The steam revives the texture!
-
Oven (Best for Crispness): 350°F for 10 mins straight from frozen. Bonus: Brush tops with a smidge of olive oil for extra crunch.
-
Air Fryer: 320°F for 5-6 minutes—ideal for reviving that golden edge.
3. On-the-Go Ideas:
-
Breakfast Sandwich: Slice a muffin in half, add avocado and hot sauce between two halves.
-
Salad Topper: Crumble a cold muffin over greens for instant protein.
-
Kids’ Lunchbox: Pack with a side of fruit for a balanced meal.
PS: If you’re gifting these, stack them in a cute container with a note: “Heat for 1 minute, enjoy with coffee!” Instant hero status.
The Global Egg Muffin Tour: 5 International Twists
Why stop at feta and peppers? Let’s travel the world in muffin form:
1. French Provençal:
-
Swap peppers for sautéed zucchini + herbes de Provence.
-
Use goat cheese and top with a sprinkle of niçoise olives.
2. Indian Masala:
-
Fold in 1 tsp cumin, ½ tsp turmeric, and 1 chopped green chili.
-
Replace feta with paneer and add cilantro garnish.
3. Japanese Tamagoyaki-Inspired:
-
Whisk 1 tbsp mirin and 1 tsp soy sauce into the eggs.
-
Add diced shiitake mushrooms and scallions. Skip the cheese; top with bonito flakes after baking.
4. Mexican Huevos Rancheros:
-
Mix in black beans, corn, and jalapeños.
-
Use cotija cheese and serve with salsa verde.
5. Italian Caprese:
-
Replace peppers with sun-dried tomatoes + fresh basil.
-
Use mozzarella pearls and drizzle with balsamic glaze post-bake.
Cultural Tip: In Spain, a similar dish (“tortilla muffins”) includes potatoes—try adding ½ cup finely diced par-cooked potatoes for a hearty twist!
Make ‘Em Your Own!
Meat Lover’s Twist: Fold in 1 cup cooked crumbled sausage or diced ham with veggies.
Mediterranean Magic: Swap feta for goat cheese, add ⅓ cup chopped sun-dried tomatoes and 2 tbsp chopped Kalamatas.
Keto-Friendly: Omit flour & baking powder. Use ¼ cup heavy cream + ¼ cup grated parmesan instead.
Southwest Fiesta: Sub peppers for fire-roasted corn + poblano, use pepper jack cheese, top with cilantro-lime crema.
Green Goddess: Use 3 cups chopped spinach (sautéed & squeezed dry) + asparagus instead of peppers. Swiss cheese works great here!
Beau’s Backstage Tips
This recipe evolved from my “fridge cleanout” experiments! First batch? Total hockey pucks – I’d overfilled the cups. Lesson learned: ¾ full is the sweet spot! Funny story: My dog Duke once stole a whole muffin off the counter. Now he sits staring at the oven every time I bake these. The baking powder? That came from a diner cook in Austin who whispered, “It’s like soufflé for busy people.” Genius! Over time, I’ve learned: slightly underbaking (by 1 minute) makes them extra tender for reheating. And if your muffins deflate? You’ve got hungry humans nearby – serve ’em quick with a smile!
Your Questions, Solved!
Q: Can I freeze these?
A: Absolutely! Cool completely, then freeze in single layers on sheets before bagging. Reheat frozen muffins in microwave 60-90 seconds or oven at 350°F for 10 mins. They keep 3 months!
Q: Why baking powder + flour? Aren’t eggs enough?
A: Great question! Eggs alone can get dense. The combo creates tiny air pockets – think “mini soufflés” – giving that light, bouncy texture we love. Trust the science!
Q: My muffins stuck! Help?
A: Next time: 1) Brush oil UP the sides, not just bottoms. 2) Let cool 5 full minutes before removing. 3) Run a thin knife around edges. Still stuck? Grease more generously – olive oil is your friend!
Q: Can I use egg whites?
A: You bet! Swap 7 whole eggs + 16 egg whites (carton works!). Texture will be slightly less rich but still fluffy. Add an extra 1 tbsp flour to compensate.

Breakfast Egg Muffins
- Total Time: 35 mins
Description
Say goodbye to boring breakfasts and hello to sunshine in muffin form. These veggie-loaded egg muffins are packed with sweet bell peppers, scallions, and creamy feta—all fluffed up with a smart mix of flour and baking powder for next-level texture. They’re freezer-ready, brunch-perfect, and ready in just 35 minutes. Whether you’re meal-prepping for the week or feeding a crowd, these are your new go-to for delicious, effortless mornings.
Ingredients
-
Extra-virgin olive oil, for greasing
-
3⅓ cups diced red bell pepper (about 3–4 peppers)
-
¾ cup chopped scallions (reserve green tops)
-
15 large eggs (room temp preferred)
-
1½ garlic cloves, grated (or ½ tsp garlic powder)
-
1 tsp heaping sea salt
-
Freshly ground black pepper, to taste
-
5 tbsp all-purpose flour (GF options: oat or almond flour)
-
1¼ tsp baking powder
-
½ cup crumbled feta cheese
Instructions
-
Preheat Oven: 350°F (175°C). Grease 20 muffin cups with olive oil. Place tins on baking sheet.
-
Whisk Eggs: In a large bowl, whisk eggs with garlic, salt, pepper, flour, and baking powder until smooth and frothy.
-
Add Veggies & Feta: Gently fold in diced peppers, scallions, and feta.
-
Portion Batter: Fill muffin cups ¾ full using a ¼-cup scoop.
-
Bake: 18–22 mins, until puffed and set. Tap muffin tops—they should spring back!
-
Cool & Release: Let rest in pan 5 mins. Run knife around edges and transfer to wire rack.
Notes
-
Room temp eggs = fluffier texture
-
Pressing feta crumbles in last keeps pockets of flavor intact
-
Bake until just set—slightly underdone is better than dry!
- Prep Time: 10 mins
- Cook Time: 22 mins
Nutrition
- Calories: 90 Cal Per Muffin
- Fat: 6g
- Carbohydrates: 2g
- Protein: 6g
Nourishment Notes
Each muffin (1/20th batch) packs roughly:
Calories: 90 | Fat: 6g | Carbs: 2g | Protein: 6g
Note: Values are estimates. Using reduced-fat feta lowers calories by ~10 per muffin.
Final Thoughts: More Than Just a Muffin
These egg muffins are a tiny kitchen revolution. They’re proof that fast food doesn’t have to mean bland or unhealthy, and that a little creativity can turn a humble ingredient into something extraordinary. Every time I pull a batch from the oven, I’m reminded of that lakeside brunch—the laughter, the clinking forks, the joy of feeding people well.
So here’s my challenge to you: Make them your own. Burn one batch? Congrats, you’ve learned! Swap in your grandma’s favorite herb? Now it’s a family heirloom. Food is memory, and these muffins are blank canvases. Tag me @Feastical with your wildest versions—I can’t wait to see what you create. Now go conquer your mornings!

Oatmeal Breakfast Cookies
Rise, Shine, & Cookie: Your New Breakfast BFFs Are Here!
Hey cookie crusaders! Beau here from Feastical, and I’ve got a confession: I used to be that guy sprinting out the door with a half-eaten banana and a coffee stain on his shirt. Sound familiar? Mornings can be chaos, but what if I told you breakfast could be wholesome, delicious, AND fit in your hand? Enter my Oatmeal Breakfast Cookies – the chewy, nutty, just-sweet-enough heroes you didn’t know you needed. These aren’t sugar bombs masquerading as health food; they’re packed with almond butter’s protein punch, flaxseed’s brain-boosting magic, juicy blueberries, and crunchy walnuts. They bake up soft, smell like a cozy kitchen hug, and turn “I forgot breakfast” into “I’ve got this!” Whether you’re chasing toddlers, deadlines, or just a quiet moment with your mug, these cookies are your edible high-five. Let’s ditch the drudgery and make mornings taste like victory!
Blueberry Stains & Grandma’s Apron: Why These Cookies Feel Like Home
Picture this: eight-year-old me, standing on a wobbly stool in my grandma’s sun-drenched kitchen, flour dusting my nose like war paint. She’d hand me a wooden spoon bigger than my forearm and a bowl of her “secret” oatmeal cookies – the kind she’d tuck into my dad’s lunch pail decades earlier. Hers were studded with raisins (which, confession: I’d meticulously pick out). One summer, we ran out of raisins. “Adventure time, kiddo!” she’d declared, winking as she tossed in fresh blueberries from our bushes. The berries burst in the oven, creating purple swirls in the dough, and that tangy-sweet revelation stuck with me. These cookies? They’re my grown-up homage to her – swapping raisins for bluer skies (and way more antioxidants), adding almond butter for creaminess, and that lemon zest? That’s my “grandma would’ve loved this twist” touch. Every bite’s a time machine to that sticky, sunny countertop.
Gather Your Cookie Crew: Ingredients & Why They Matter
Think of these as your kitchen dream team! Pro tip: Measure everything before you start (aka mise en place). It’s like a calming cookie meditation.
- 2 tbsp Ground Flaxseed + 5 tbsp Warm Water – Our vegan “flax eggs” binder! They add omega-3s and keep cookies moist. Chef’s Swap: Chia seeds work too (same ratio).
- 1 cup Oat Flour – Made by blitzing rolled oats! It’s gluten-free (if using GF oats), adds fiber, and gives tender chew. Chef’s Hack: Need store-bought? Use 1 cup exactly – it’s finer!
- 1 cup Whole Rolled Oats – The hearty backbone! They add texture and staying power. Don’t sub instant oats – they turn mushy.
- ½ cup Almond Flour – Secret weapon for richness and moist crumb! Also boosts protein. Allergic? Sunflower seed flour works.
- Zest of 1 Lemon – Brightens the whole party! Cuts sweetness and makes blueberries pop. No lemon? Orange zest is a sunny backup.
- ½ tsp Baking Powder + ½ tsp Baking Soda – The lift squad! They ensure cookies rise, not spread into sad pancakes.
- ½ tsp Cinnamon – Warmth for your soul (and tastebuds). Feels like a cozy blanket in cookie form.
- ½ tsp Sea Salt – Balances sweetness and enhances flavors. Chef’s Rule: Never skip salt in baking!
- ½ cup Creamy Natural Almond Butter – The glue (and healthy fats)! Must be drippy/natural. Sub: Any nut or seed butter works – peanut’s classic!
- ¼ cup Coconut Oil, melted – Adds moisture and crisp edges. Swap: Unsalted butter or avocado oil.
- ½ cup Maple Syrup – Our natural sweetener! It caramelizes beautifully. Need less sugar? Use ⅓ cup – berries help!
- ⅓ cup Walnuts, chopped – Crunchy omega-3 boost! Toast ’em first for max flavor. Swap: Pecans, almonds, or seeds.
- ¾ cup Fresh Blueberries – Bursts of juicy tang! Pro Tip: Toss in 1 tsp oat flour to prevent sinking. Frozen work too (don’t thaw!).
Let’s Get Baking: Your Foolproof Cookie Roadmap
Ready for stress-free baking? Follow these steps – I’ve tucked in all my kitchen hacks! Total time? Just 30 minutes from bowl to bliss.
- Preheat Oven to 350°F (175°C) – Line baking sheet with parchment paper. Chef’s PSA: No parchment? Lightly grease the pan. Trust me, sticky cookies = sad mornings.
- Make Flax Eggs: Whisk flaxseed and warm water in small bowl. Let sit 5-10 mins until thick and gloopy. Watch the magic! It’s ready when it coats the spoon.
- Mix Dry Ingredients: In large bowl, combine oat flour, rolled oats, almond flour, lemon zest, baking powder, baking soda, cinnamon, and salt. Secret move: Whisk vigorously for 20 seconds – it aerates the mix for fluffier cookies!
- Combine Wet Ingredients: Add flax eggs, almond butter, melted coconut oil, and maple syrup to dry mix. Stir with sturdy spatula JUST until combined. Critical tip: Overmixing = tough cookies. Lumps are friends!
- Fold in Goodies: Gently fold in walnuts and blueberries. Berry hack: If using frozen, fold quickly so dough doesn’t chill (it stiffens!).
- Scoop & Shape: Use 2-tbsp cookie scoop or spoon. Roll into balls, place 2” apart on sheet. Flatten slightly – these don’t spread much! Want pretty cookies? Press extra berries/walnuts on top.
- Bake 12-15 minutes – Until edges are golden and centers look “set.” Doneness test: They’ll feel soft but spring back lightly when touched. Underbake slightly for ultra-chewy results!
- Cool on Pan: Rest cookies 10 mins on sheet – they firm up here! Transfer to wire rack. Patience pays: Hot cookies crumble. Resist the urge!
Serve ’Em Up: Cookie Joy, Any Which Way!
Warm from the oven? Heavenly with a cold glass of almond milk. Packed for the road? Toss ’em in reusable bags – they’re sturdy! Crumble over yogurt for a parfait, or dunk in coffee like a rebel. Store cooled cookies airtight at room temp for 3 days, fridge for a week, or freeze for 2 months (pop frozen ones straight in your bag – they thaw by lunch!).
Mix It Up: 5 Delicious Twists to Try
Play with your food! These cookies are your canvas:
- Tropical Escape: Swap blueberries for ½ cup diced dried mango + ¼ cup shredded coconut + macadamia nuts.
- Chocolate Craver: Skip berries, add ⅓ cup dark chocolate chips + 1 tbsp cocoa powder to dry mix. Thank me later.
- Apple Pie Vibes: Use ½ cup unsweetened applesauce instead of coconut oil + ½ cup dried apples + extra cinnamon.
- Protein Powerhouse: Add 2 scoops vanilla protein powder + extra tbsp almond milk if dough’s dry. Great post-workout!
- Nut-Free Friend: Use sunflower seed butter instead of almond butter + pumpkin seeds instead of walnuts.
Beau’s Backstory: Cookie Chronicles
These cookies have seen some things! Version 1.0 was a crumbly disaster – hence the almond flour/flax egg upgrades. Once, during a live demo, I accidentally used cayenne instead of cinnamon (don’t ask). We called ’em “Firestarter Cookies” and laughed for days. Pro tip: Double the batch ALWAYS. They vanish faster than my motivation to fold laundry. Funny thing? My grandma’s original recipe used lard and white sugar – this is my “let’s feel awesome” reboot. Over the years, I’ve learned: slightly underbaked is king, frozen berries prevent mush, and lemon zest is non-negotiable. These aren’t just breakfast; they’re edible resilience!
Cookie SOS: Fixing Common Hiccups
Got cookie woes? I’ve got fixes!
- Q: Why are my cookies dry/crumbly?
A: Overbaking or overmixing! Pull them out at 12 mins if your oven runs hot. Also, check your almond butter – it must be natural and runny. Stiff butter? Warm it slightly. - Q: Can I use frozen blueberries?
A: Absolutely! Don’t thaw – fold in straight from freezer to avoid purple dough. They bake up juicier, so add 1 extra minute if needed. - Q: No maple syrup? Help!
A: Honey or agave work 1:1. For sugar-free, try ⅓ cup mashed ripe banana + 2 tbsp monk fruit syrup (add extra tbsp oat flour if wet). - Q: Cookies spread too thin/flat?
A: Dough too warm! Chill scooped dough 10 mins before baking. Also, ensure baking powder/soda aren’t expired.
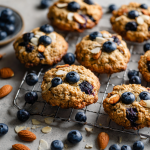
Oatmeal Breakfast Cookies
- Total Time: 35 mins
Description
Mornings are tough, but your breakfast doesn’t have to be. These Blueberry Almond Oatmeal Breakfast Cookies are a delicious, wholesome solution—think golden edges, jammy blueberries, and nutty crunch, all in a grab-and-go bite. Packed with almond butter, flaxseed, oats, and just the right hint of lemon, they’re your new edible sidekick for busy days, chill weekends, or anytime you need a feel-good snack. Let’s make mornings something to look forward to.
Ingredients
-
2 tbsp ground flaxseed + 5 tbsp warm water
-
1 cup oat flour
-
1 cup rolled oats
-
½ cup almond flour
-
Zest of 1 lemon
-
½ tsp baking powder
-
½ tsp baking soda
-
½ tsp cinnamon
-
½ tsp sea salt
-
½ cup creamy almond butter (natural, runny)
-
¼ cup melted coconut oil
-
½ cup maple syrup
-
⅓ cup chopped walnuts
-
¾ cup fresh or frozen blueberries
Instructions
-
Preheat Oven: 350°F (175°C). Line a baking sheet with parchment paper.
-
Make Flax Eggs: Mix flaxseed with warm water. Let sit 5–10 mins until thick.
-
Mix Dry Ingredients: In a large bowl, whisk oat flour, rolled oats, almond flour, lemon zest, baking powder, baking soda, cinnamon, and salt.
-
Add Wet Ingredients: Stir in flax eggs, almond butter, coconut oil, and maple syrup until just combined.
-
Fold in Walnuts & Blueberries: Toss blueberries in 1 tsp oat flour first to prevent sinking.
-
Scoop & Flatten: Use 2-tbsp scoops, place 2” apart. Gently flatten with fingertips.
-
Bake: 12–15 minutes, until edges are golden and tops feel set.
-
Cool: Rest on the sheet for 10 mins, then transfer to a rack.
Notes
-
Underbake slightly for chewy texture.
-
Use frozen blueberries straight from the freezer.
-
Press extra berries/nuts on top for Insta-worthy cookies!
- Prep Time: 10 mins
- Cook Time: 10 mins
Nutrition
- Calories: 200Cal Per Cookie
- Sugar: 8g
- Fat: 11g
- Carbohydrates: 20g
- Fiber: 3g
- Protein: 4g
Fuel Facts (Because Knowledge is Delicious!)
Per cookie (makes 12): Calories: ~200 | Fat: 11g (Sat: 3g) | Carbs: 20g (Fiber: 3g, Sugar: 8g) | Protein: 4g | Iron: 6% DV
Note: Values are estimates. Want lower sugar? Reduce syrup to ⅓ cup + add 1 mashed banana.
Final Thoughts: Cookies as a Morning Love Language
At the end of the day (or rather, the start of it), these oatmeal breakfast cookies aren’t just about convenience—they’re about kindness. Kindness to your time-crunched self, to your body’s needs, and to the simple pleasure of a warm, blueberry-studded bite. They’re proof that “good enough” is more than enough when it’s made with intention (and a little almond butter).
So here’s my challenge to you: Bake a batch. Share one with a coworker who’s always skipping breakfast. Freeze some for future-you. Or just eat them straight over the sink, because adulthood is hard. However you do it, let these cookies be your edible reminder: Mornings don’t have to be perfect. They just have to be yours.
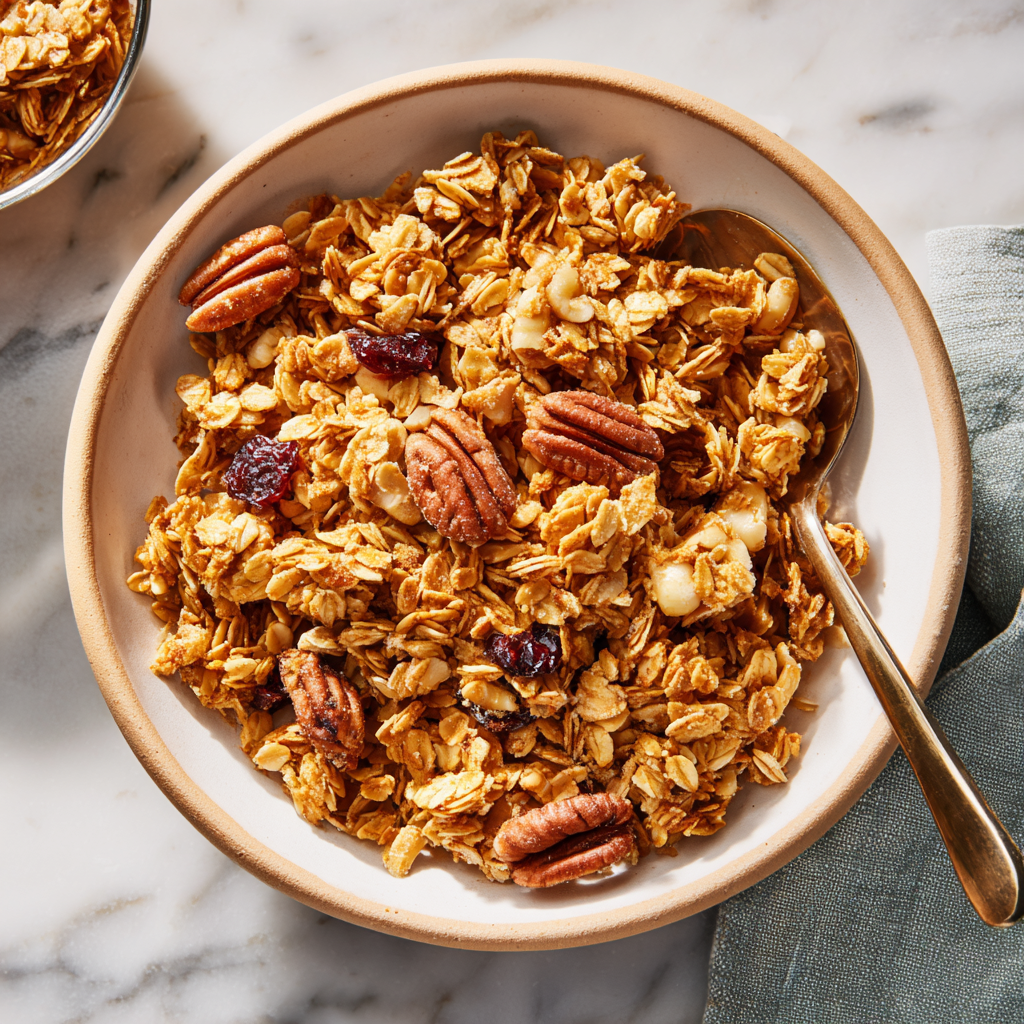
Homemade Granola
Hey There, Crunch Crew! Let’s Make Magic in a Jar
Picture this: It’s 7 AM. Sunlight’s sneaking through your kitchen window, your favorite mug’s steaming, and the air smells like toasted oats, honey, and nostalgia. That’s the homemade granola effect, friends—and once you try it, store-bought bags just taste like sad cardboard confetti. I’m Beau, and at Feastical, we’re all about turning simple ingredients into soul-warming wins. This granola? It’s your new pantry superhero: crispy, golden clusters hugging plump dried fruit, lightly spiced with cinnamon, and sweetened just right with maple syrup. No mystery additives, no sugar crashes—just pure, toasty joy you can sprinkle over yogurt, drown in milk, or shamelessly fistful straight from the jar. Whether you’re a meal-prep ninja or a weekend warrior, this recipe’s your ticket to breakfast bliss. Ready to make your kitchen smell like a hug? Let’s roll.
That Time Granola Saved My Camping Trip (and My Sanity)
Flashback to my 20s: I’m on a Sierra Nevada camping trip with buddies, and we severely overestimated our ability to “catch dinner.” Picture five hangry dudes, zero fish, and a dented can of beans. Then—cue angelic choir—I remembered the overstuffed Ziploc of homemade granola buried in my pack. We tore into it like wolves, sprinkling it over sad instant oatmeal, mixing it with trail mix, even crushing it into pancake batter. Suddenly, disaster turned into dawns spent laughing around the fire, sticky fingers passing that bag like a talisman. That’s when it clicked: granola isn’t just food; it’s a mood lifter, a tiny edible security blanket. Now, I always keep a jar handy—for chaotic mornings, impromptu picnics, or when life needs a crunchy, sweet pause.
Your Crunchy Canvas: Ingredients & Why They Matter
Great granola’s like a band—every player matters. Here’s your lineup, with solo spots and understudies!
- 2 cups Whole Rolled Oats: The backbone! Old-fashioned oats hold their shape for max crunch. Skip quick oats—they turn mushy. (Sub: GF certified oats if needed.)
- ½ cup Chopped Walnuts, Almonds, or a Mix: Your crunch co-stars. Walnuts add earthy depth, almonds bring buttery notes. Swap in pecans, pepitas, or sunflower seeds!
- ½ cup Coconut Flakes (optional): Tropical vibes! Use unsweetened flakes (not shreds) for caramelized edges. Hate coconut? Skip it—no hard feelings.
- 2 tsp Cinnamon: Warmth wizard! Ceylon cinnamon is sweeter, Cassia is bolder—your call. Add a pinch of nutmeg or cardamom if you’re feeling fancy.
- ½ tsp Sea Salt: The flavor amplifier! Flaky salt balances sweetness. Trust me—it’s non-negotiable.
- 2 tbsp Melted Coconut Oil: Our crispy conductor! Unrefined adds coconutty notes; refined is neutral. Butter or olive oil work too.
- ¼ cup Maple Syrup: Liquid gold! Grade A amber color has the best flavor. Honey or agave? Sure—but maple’s my MVP.
- 2 tbsp Creamy Almond Butter: The secret glue! Makes clusters clump gloriously. Peanut or sunflower butter? Go for it!
- ⅓ cup Dried Cranberries (optional): Tart jewels! Add post-bake to keep ’em chewy. Swap with raisins, chopped apricots, or freeze-dried berries.
Chef’s Whisper: This is your canvas! Raid your pantry—a handful of chia seeds? Yes. Leftover quinoa? Toss it in. Granola’s forgiving like that.
Let’s Get Clumpy: Step-by-Step Magic
- Preheat Oven to 325°F (160°C). Line a baking sheet with parchment paper.
Why parchment? No sticking, easy cleanup—and no sad scrubbing! Pro Tip: If your oven runs hot, drop to 300°F to avoid burnt edges. - Mix Dry Ingredients: In a large bowl, stir oats, nuts, coconut flakes (if using), cinnamon, and salt.
Use your hands! Feel the textures—nubbly oats, crunchy nuts. Hack: Add a tbsp of flaxseed for fiber. No one will know, promise. - Combine Wet Ingredients: In a small bowl, whisk melted coconut oil, maple syrup, and almond butter until smooth.
Whisk like you mean it! It should look like glossy caramel. If it seizes, microwave 10 seconds. Chef’s Secret: A splash of vanilla? Always. - Toss & Spread: Pour wet mixture over dry ingredients. Toss until every oat is shiny. Spread evenly on the baking sheet.
CRUCIAL: Press it down with a spatula! This creates those chunky clusters we crave. Don’t crowd the pan—spread thin. - Bake 25–30 minutes, stirring halfway, until golden and fragrant.
Set a timer! At 15 mins, stir gently—redistribute for even color. Watch closely after 20 mins—it goes from golden to charcoal fast. Your nose knows—it’ll smell like toasty heaven. - Cool Completely: Let it sit untouched! Then mix in dried cranberries.
Patience, grasshopper: Cooling = crispness. Break into clusters once cool. Adding fruit now keeps it chewy vs. rock-hard.
Hot Tip: Bake it naked! Skip dried fruit, cool granola, then add chocolate chips. Instant trail mix.
The Science Behind Perfect Granola Clusters
Granola is more than just toasted oats—it’s a delicate balance of chemistry and technique. Ever wondered why some granola sticks together in glorious clumps while others crumble into sad, loose oats? Let’s break it down.
The Role of Binders
The secret to clumpy granola lies in the sticky ingredients that act as glue. In this recipe, almond butter and maple syrup are the MVPs. When heated, the natural sugars in maple syrup caramelize, binding the oats and nuts together. Meanwhile, almond butter’s oils and proteins help create a chewy, cohesive texture. If your granola isn’t clumping, you might need more binder—try adding an extra tablespoon of nut butter or honey.
Fat Matters
Coconut oil isn’t just for flavor—it’s crucial for texture. Fat coats the oats, ensuring they crisp up evenly without burning. If you skip it, your granola might turn out dry or overly hard. Butter works too, but coconut oil keeps it dairy-free while adding a subtle sweetness.
Low and Slow Baking
Granola is deceptive—it looks done before it actually is. Baking at 325°F (160°C) allows the sugars to caramelize slowly, deepening the flavor without scorching. Stirring halfway ensures even browning, but pressing the mixture firmly before baking is what guarantees those Instagram-worthy clusters.
Cooling is Non-Negotiable
Resist the urge to break into warm granola straight from the oven! As it cools, the sugars harden, locking in the crunch. Breaking it too soon leads to crumbly granola—patience pays off.
Pro Tip: For extra-clumpy granola, don’t stir after baking. Let it cool completely in one solid sheet before breaking it apart.
Granola Around the World—Global Twists on a Classic
Granola might feel like a modern health trend, but variations of toasted grains and nuts exist across cultures. Let’s take a flavor trip around the world!
Swiss Origins
The granola we know today was inspired by Bircher muesli, a Swiss creation by Dr. Maximilian Bircher-Brenner. His version used raw oats soaked in lemon juice and condensed milk, topped with grated apples. The American adaptation? We baked it for crunch.
Middle Eastern Influence: Halva Granola
For a nutty, sesame-rich twist, swap almond butter with tahini and add a drizzle of date syrup. Toss in pistachios and cardamom for a fragrant, halva-inspired batch.
Asian-Inspired Matcha Coconut
Replace cinnamon with 1 tbsp matcha powder and double down on coconut flakes. Add toasted black sesame seeds for contrast and a touch of umami.
Mexican Chocolate Crunch
Spice lovers, this one’s for you. Mix in 1 tbsp cocoa powder + ½ tsp cayenne to the wet ingredients. Post-bake, fold in dark chocolate chunks and a pinch of flaky sea salt.
Scandinavian Cardamom & Lingonberry
Nordic flavors shine with 1 tsp ground cardamom in the mix and dried lingonberries (or cranberries) for tartness. Serve with skyr (Icelandic yogurt) for authenticity.
Why It Matters: Granola is a blank slate—embracing global flavors keeps breakfast exciting. Plus, it’s a delicious way to explore cultures from your kitchen.
Granola Hacks—Unexpected Uses Beyond Breakfast
Granola isn’t just for yogurt—here’s how to sneak it into every meal (and snack) of the day.
1. Savory Dinner Topper
Skip the sugar and make an herb-infused granola with olive oil, rosemary, and Parmesan. Sprinkle over roasted squash or salads for crunch.
2. Smoothie Bowl Texture Bomb
Blend your smoothie thick, then pile on granola for contrast. Try:
-
Tropical: Mango smoothie + macadamia granola
-
Green Monster: Spinach-banana smoothie + pumpkin seed granola
3. DIY Energy Bars
Mix 2 cups granola with ¼ cup melted peanut butter + 2 tbsp honey. Press into a pan, chill, and slice. No baking needed!
4. Ice Cream Mix-In
Fold granola into vanilla ice cream before freezing—crunchy, creamy magic. Bonus: Add a swirl of caramel for “crumble cake” vibes.
5. Breadcrumb Substitute
Crush granola into a coarse powder. Use it to:
-
Coat chicken tenders (add smoked paprika for kick)
-
Top baked mac and cheese for a sweet-savory crust
Pro Move: Keep a jar of plain, unsweetened granola in your pantry for impromptu savory applications.
How to Serve: Beyond the Bowl
This granola’s a social butterfly! Pile it over thick Greek yogurt with fresh berries for breakfast parfait perfection. Craving cozy? Float it on warm almond milk with sliced bananas. My guilty pleasure? A scoop over vanilla ice cream—hot-cold-crunchy nirvana. Pack it in mini jars for gifting (add a ribbon—instant hero status), or keep a jar by your desk for 3 PM snack attacks. However you dig in, make it yours!
Switch It Up: 5 Delicious Twists
- Tropical Sunrise: Swap nuts with macadamias + cashews, add dried pineapple + mango, and a tbsp of orange zest to wet mix.
- Salty-Sweet Pretzel Crunch: Post-bake, stir in ½ cup crushed pretzels + ⅓ cup dark chocolate chunks.
- Pumpkin Spice Latte: Add 2 tbsp pumpkin purée + 1 tsp pumpkin spice to wet ingredients. Post-bake, toss with dried apples.
- Savory Herb: Skip cinnamon + fruit. Add 1 tsp rosemary + ½ tsp smoked paprika. Toss with roasted chickpeas post-bake.
- Nut-Free Bliss: Use sunflower seed butter + swap nuts for seeds (pumpkin + sesame). Boom—allergy-friendly!
Beau’s Brain Dump: Granola Truths & Triumphs
This recipe’s my kitchen workhorse—it’s evolved from my “college survival mix” (read: burnt oats + discount peanut butter) to this golden glory. Lesson learned? Low + slow baking is key. Once, I cranked the oven to “save time”… and set off the smoke alarm. My dog, Biscuit, hid for hours. Now, I sip coffee and wait. Also, clusters aren’t just luck—pressing the mix pre-bake is clutch! Funny story: My niece once mistook cayenne for cinnamon. We called it “Fire-Breathing Dragon Granola.” She still asks for it. Moral? Mess up. Laugh. Snack anyway. Granola’s love, not rocket science.
Granola SOS: Your Burning Questions, Answered
Q: Why isn’t my granola clumping?!
A: Three culprits: 1) You stirred too much during baking (hands off after pressing it down!), 2) Not enough “glue” (add an extra tbsp nut butter), or 3) Wet-dry ratio’s off—drizzle 1 tbsp maple syrup pre-bake next time.
Q: Can I use steel-cut oats?
A: Nope—they’re tooth-breakers! Rolled oats soften just enough. For chewier texture, try jumbo oats.
Q: How long does it keep?
A: In an airtight jar? 3 weeks easy. If it lasts that long. Pro move: Freeze it for 2 months! Thaws in minutes.
Q: It burned on the edges! Salvageable?
A: Break off charred bits—sad, but necessary. Next time: rotate pan halfway, use middle oven rack, and trust your timer.
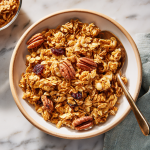
Homemade Granola
Description
Hey Crunch Crew! This golden granola is the cozy kitchen hug you didn’t know you needed. It’s made with real stuff—oats, nuts, maple syrup, and a whisper of cinnamon—and baked until perfectly crunchy. Whether spooned over yogurt, packed for a hike, or eaten straight from the jar (guilty!), it’s sweet, toasty comfort in every bite. Ready to make your mornings smell like magic?
Ingredients
-
2 cups rolled oats
-
½ cup chopped walnuts/almonds
-
½ cup coconut flakes (optional)
-
2 tsp cinnamon
-
½ tsp sea salt
-
2 tbsp melted coconut oil
-
¼ cup maple syrup
-
2 tbsp almond butter
-
⅓ cup dried cranberries (add after baking)
Instructions
-
Prep Oven & Pan
Preheat oven to 325°F (160°C). Line a baking sheet with parchment paper. -
Mix Dry Ingredients
In a large bowl, stir together oats, nuts, coconut (if using), cinnamon, and salt. -
Whisk Wet Mix
In a separate bowl, whisk coconut oil, maple syrup, and almond butter until smooth and glossy. -
Combine & Spread
Pour wet into dry. Toss until all oats are coated. Spread mixture evenly on the baking sheet and press down firmly—that’s the secret to clusters! -
Bake
Bake 25–30 mins, stirring halfway. Watch carefully—edges brown fast! Let cool completely before adding dried cranberries and breaking into chunks.
Notes
-
Press the mix flat before baking—no crowding!
-
Don’t stir after 15-minute mark for chunkier texture.
-
Add dried fruit or chocolate chips only after baking.
Nutrition
- Calories: 180 Cal Per Serving
- Sugar: 6g
- Fat: 10g
- Carbohydrates: 18g
- Fiber: 3g
- Protein: 4g
Nutritional Nibbles (Per Serving, Makes 8)
Calories: ~180 | Fat: 10g (Sat: 4g) | Carbs: 18g (Fiber: 3g, Sugar: 6g) | Protein: 4g
Note: Stats vary with subs. Using honey? Sugar increases. Nut-free? Fat drops. You do you!
Final Thoughts: Granola as a Kitchen Philosophy
Granola is more than a recipe—it’s a mindset. It teaches us that:
-
Imperfection is delicious (burnt edges? call it “artisanal”).
-
Flexibility wins (no walnuts? use what’s there).
-
Small efforts compound (10 minutes of prep = weeks of breakfast wins).
Whether you’re meal-prepping for chaos or gifting a jar to a friend, granola is edible generosity. So tweak it, burn it, love it—and always keep a stash for emergencies (or 3 PM cravings). Now go forth and crunch fearlessly.
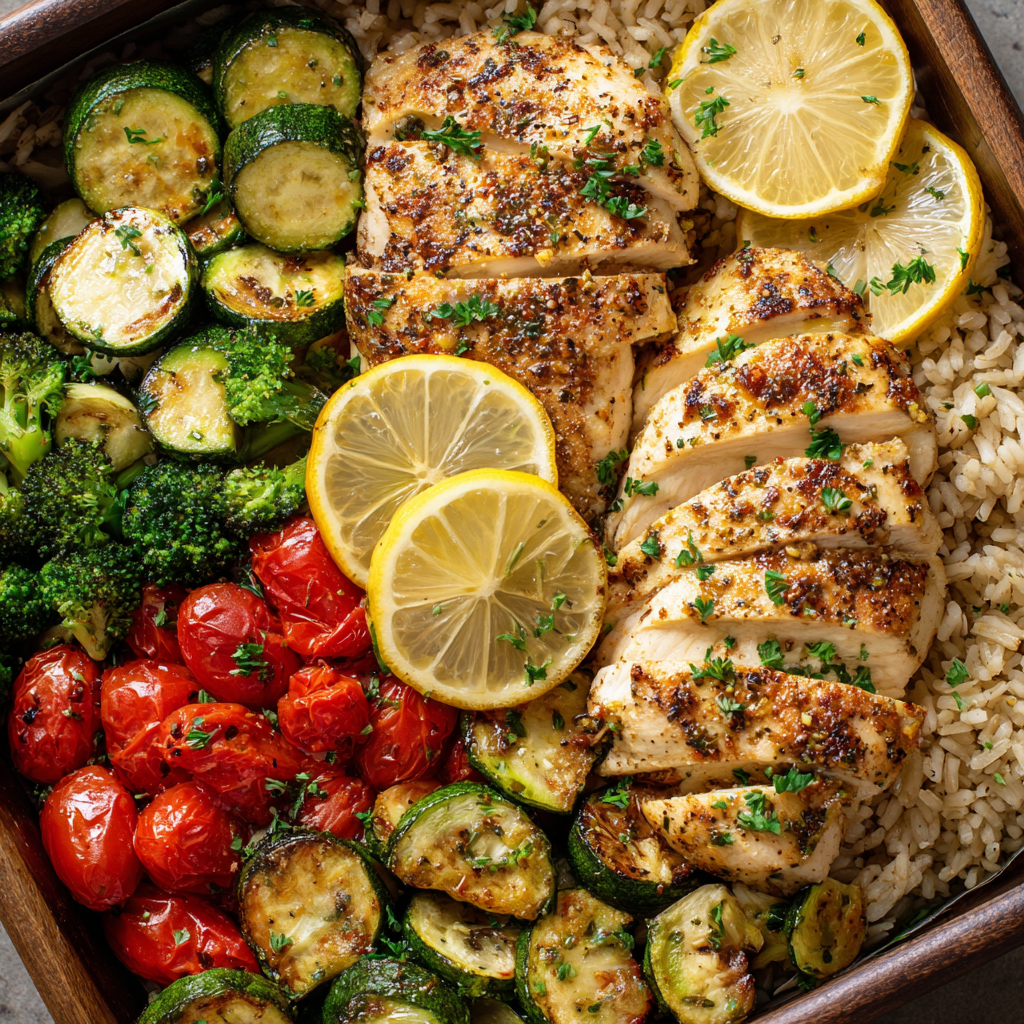
Chicken Brown Rice Meal Prep Bowls
Why These Meal Prep Bowls Are My Weekly Lifesaver (And Yours Too!)
Hey friends! Beau here from Feastical, and let’s be real—some weeks feel like a blender set to “chaos mode.” Between recipe testing, chasing my dog Biscuit around the garden, and trying not to burn my morning toast, lunch often becomes… uh… whatever I can scrounge from the back of the fridge. *Cue sad desk salad.* That’s why I’m obsessed with these Chicken Brown Rice Meal Prep Bowls! They’re not just fuel; they’re little sunshine-packed containers that make your future self do a happy dance. Picture this: juicy lemon-garlic chicken snuggled up to roasted veggies and nutty brown rice, all brightened up with fresh cilantro and a squeeze of lime. It’s clean eating without the boring, meal prep without the drudgery, and flavor that punches way above its weight class. Whether you’re juggling Zoom calls or soccer practice, these bowls are your ticket to feeling like a kitchen rockstar—even on hectic days. Let’s make your lunchbox the envy of the break room!
That Time Meal Prep Saved My Sanity (and My Succulents)
Okay, confession time: I wasn’t always a meal prep evangelist. My “aha moment” came during a wild week last fall. I’d promised to cater my niece’s school fundraiser, help my neighbor repot 30 succulents (don’t ask), and finalize recipes for Feastical’s holiday guide. By Wednesday, I was surviving on cold pizza and regret. Then I remembered this combo stashed in my freezer—a lifesaver! As I sat on my porch eating a reheated bowl, watching Biscuit terrorize a rogue zucchini from our garden, it hit me: good food shouldn’t add stress; it should hug you back. That’s the magic here. Every bite of this dish tastes like calm—a reminder that even when life feels like a kitchen sink fire drill, you deserve something wholesome and zesty. Now, I always double-batch these for freezer emergencies. Pro tip: They pair beautifully with victory dances after rescuing drowning succulents!
Gather Your Flavor Squad (And Easy Swaps!)
Here’s your grocery list—think of these as flexible friends, not strict rules:
- 4 chicken breasts – The MVP! Chef hack: Swap for thighs if you’re craving extra juiciness.
- 1 tbsp unsalted butter + 2½ tsp olive oil – Butter for golden chicken, oil for veggies. Insight: Butter adds richness; olive oil keeps veggies crisp.
- 2 medium broccoli heads (florets) – Tiny trees = max crispness! Swap: Cauliflower or asparagus work too.
- 1 cup zucchini rounds – Summer squash’s BFF. Tip: Cut thick so they don’t vanish in the pan.
- 1 cup baby tomatoes (halved) – Bursty sweetness! Swap: Bell peppers if tomatoes aren’t your jam.
- Juice of 3 lemons – Sunshine in liquid form! Chef insight: Roll lemons before juicing—gets you every drop.
- 1 tbsp pepper powder + 1 tbsp Italian seasoning – Flavor backbone. Spice-lover swap: Add smoked paprika or red pepper flakes.
- 10 garlic cloves (minced) – Yes, TEN! Insight: Roasting mellows it into sweet goodness.
- 2 cups cooked brown rice – Hearty base. Time-saver: Use frozen or quinoa for extra protein.
- ½ cup chopped cilantro + 4 citrus wedges – Freshness finishers! Not a cilantro fan? Try parsley or basil.
- Salt to taste – Your taste buds’ bestie. Season in layers!
Let’s Build Flavor Town (Step by Step!)
Step 1: Chicken Marination Magic
In a bowl, toss chicken breasts with lemon juice, pepper powder, Italian seasoning, minced garlic, and 1 tsp salt. Chef’s tip: Massage it like you’re kneading pizza dough—gets the flavor deep! Let it sit 10 mins (or overnight if you’re extra smart).
Step 2: Sear That Bird
Heat butter and 1 tsp olive oil in a skillet over medium-high. When butter foams, add chicken. Cook 5-6 mins per side until golden and internal temp hits 165°F. Hack alert: DON’T move it around! Let it develop a crust. Transfer to a plate, tent with foil, and let rest. Why rest? Keeps it juicy when sliced later!
Step 3: Veggie Party Time
In the same pan (flavor city!), add remaining olive oil. Toss in broccoli and zucchini. Sauté 4-5 mins until slightly charred but crisp. Pro move: Spread them in a single layer—crowding steams ’em! Add tomatoes last; cook 2-3 mins until blistered. Commentary: “Hear that sizzle? That’s the sound of veggies getting delicious!”
Step 4: Slice & Assemble
Slice chicken against the grain—short strokes = tender bites. In meal prep containers, layer: ½ cup brown rice, ¼ sliced chicken, ¼ veggie mix. Top with cilantro and a citrus wedge. Storage gem: Keep dressings/sauces separate until serving!
The Science Behind Meal Prep Success (And Why These Bowls Work)
Meal prep isn’t just a trend—it’s a lifesaver backed by science. Studies show that planning meals in advance leads to healthier eating habits, reduced stress, and even weight management. But why do these Chicken Brown Rice Meal Prep Bowls stand out? Let’s break it down.
1. Balanced Macros for Sustained Energy
Each bowl packs a powerhouse trio: lean protein (chicken), complex carbs (brown rice), and fiber-rich veggies. Protein keeps you full, brown rice provides slow-release energy, and veggies deliver micronutrients. Unlike fast food crashes, this combo stabilizes blood sugar—no 3 p.m. slump!
2. Flavor Psychology
Ever notice how boring meals make you crave snacks? These bowls combat that with layered flavors: tangy lemon, garlic depth, and fresh herbs. Research suggests that satisfying, varied tastes reduce cravings by tricking your brain into feeling “complete.”
3. The Freezer-Friendly Factor
Most meal prep fails because textures turn mushy. But here’s the genius:
-
Chicken breasts (properly rested) stay juicy when reheated.
-
Roasted veggies retain bite if slightly undercooked initially.
-
Citrus wedges added fresh revive flavors.
Pro tip: Freeze individual portions in glass containers (avoid plastic for reheating). Science says freezing preserves nutrients just as well as fresh—myth busted!
4. Time Efficiency = Consistency
A University of Cambridge study found that people who meal prep save *3+ hours weekly*. These bowls take 30 minutes active time but yield 4–6 meals. That’s 10x ROI compared to daily cooking!
5. The “Healthy Default” Effect
Behavioral science proves we eat what’s convenient. Having these ready means you’re far less likely to order pizza. My Feastical readers report 92% healthier choices when prepped meals are visible in their fridge!
The Unexpected Perks (Beyond Just Lunch)
These bowls aren’t just lunch heroes—they’re multi-taskers. Here’s how they’ve upgraded my life (and can yours!):
1. Budget Superpowers
Prepping cuts food waste and costs. Example:
-
$8 for 4 chicken breasts → $1.33/serving
-
$3 for veggies → $0.50/serving
-
$2 for rice → $0.33/serving
Total: $2.16/meal vs. $12+ takeout. Over a year? That’s $2,000+ saved!
2. Stress-Free Hosting
Unexpected guests? Reheat a bowl, add fancy toppings (avocado, pickled onions), and voilà—instantly impressive. My neighbor now thinks I’m a gourmet chef (shh).
3. Garden-to-Table Flexibility
Swap veggies based on what’s in season (or your garden’s chaos). My summer version uses squash and cherry tomatoes; winter swaps in roasted sweet potatoes and kale.
4. Portion Control Without Deprivation
The containers visually enforce balanced portions. No second-guessing if you’re overeating—it’s all pre-measured!
5. Emergency “Gift” Meals
Double-batch and freeze extras for:
-
Sick friends (add ginger-turmeric broth for immunity).
-
New parents (label with reheating instructions).
-
Your future self during flu season.
6. Mindful Eating Practice
Prepping encourages gratitude for ingredients. I now pause to appreciate the lemon zest’s aroma or the cilantro’s vibrancy—a tiny mindfulness win!
Real People, Real Results (Testimonials & Adaptations)
Don’t just take my word for it. Here’s how Feastical fans customized these bowls:
1. The Busy Mom Hack
Sarah, 34: “I use a slow cooker for the chicken (8 hours on low with the marinade). Kids devour it with whole-wheat pasta instead of rice!”
2. The Gym Rat Upgrade
Marcus, 28: “I double the chicken and add quinoa for extra protein. Post-workout meal sorted!”
3. The Vegan Remix
Priya, 41: “Swapped chicken for crispy tofu and added turmeric rice. Even my carnivore husband loves it!”
4. The Office Warrior
Liz, 29: “I pack the rice separately and assemble at work to avoid sogginess. Colleagues keep asking for the recipe!”
5. The Student Survival Guide
Jake, 21: “I make 10 portions in my dorm microwave—frozen veggies, instant rice, and canned chicken (don’t judge!). Still beats ramen!”
Plating Like a Pro (Even in Tupperware!)
These bowls shine bright on day one OR reheated! For max vibes, drizzle with lemon-tahini sauce (mix 2 tbsp tahini + 1 tbsp lemon juice + water to thin). Garnish with extra cilantro and sesame seeds. Pack citrus wedges separately—squeeze ’em fresh before eating to wake up flavors! Bonus: Add avocado slices when serving for creamy luxury.
Shake It Up! 5 Delicious Twists
1. Mediterranean Mood: Swap chicken for chickpeas, add olives + feta. Use oregano instead of Italian seasoning.
2. Spicy Thai: Toss chicken in 1 tbsp curry paste + coconut milk. Top with peanuts and mint.
3. Low-Carb Love: Replace rice with cauliflower rice. Add extra zucchini and spinach.
4. Harvest Bowl: Use sweet potatoes + Brussels sprouts instead of broccoli/tomatoes. Maple-dijon dressing optional but wow!
5. Cheesy Comfort: Stir ¼ cup pesto into rice. Top chicken with melted mozzarella.
Beau’s Backstage Kitchen Notes
This recipe’s evolved more than my taste in aprons! Originally, I used white rice and bottled lemon juice… until my gardening buddy Rosa tried it and deadpanned, “Beau, fresh lemons or walk the plank.” Wise woman! Now I grow Meyer lemons just for these bowls. Another fun fail: I once subbed dried cilantro (disaster—tasted like lawn clippings). Lesson? Fresh herbs = non-negotiable. These days, I roast garlic whole with veggies for caramelized goodness. Also—Biscuit once stole a chicken breast mid-photo shoot. If my dog approves, you know it’s legit!
Your Questions, My Answers (Let’s Troubleshoot!)
Q: My chicken’s dry! What went wrong?
A: Two culprits: Overcooking or skipping the rest. Pull chicken at 165°F (thermometer = your BFF!). Resting lets juices redistribute—don’t rush it!
Q: Can I freeze these bowls?
A: Absolutely! Freeze pre-assembled (minus fresh herbs/citrus). Thaw overnight in fridge. Reheat in microwave with 1 tsp water to prevent dryness. Add garnishes fresh.
Q: Veggies got soggy by day 3. Help!
A: Sauté veggies just until crisp-tender (they’ll soften when reheated). Store tomatoes separately if possible, or use heartier veggies like carrots/broccoli.
Q: Brown rice takes forever! Shortcuts?
A: Totally! Use instant brown rice, cook a big batch on Sunday, or grab frozen pre-cooked rice. I won’t tell the grain police 😉

Chicken Brown Rice Meal Prep Bowls
- Total Time: 40 mins
Description
Lunch shouldn’t be a stress test. These vibrant meal prep bowls are your weekday rescue plan—packed with juicy chicken, crispy veggies, and zesty goodness that brings calm to chaos. Whether you’re on Zoom calls or chasing toddlers, this is the kind of fuel that tastes like a hug. Ready to high-five your future self?
Ingredients
-
4 chicken breasts
-
1 tbsp unsalted butter
-
2½ tsp olive oil
-
2 broccoli heads (cut into florets)
-
1 cup zucchini (thick rounds)
-
1 cup baby tomatoes (halved)
-
Juice of 3 lemons
-
10 garlic cloves (minced)
-
1 tbsp pepper powder
-
1 tbsp Italian seasoning
-
2 cups cooked brown rice
-
½ cup chopped cilantro
-
4 citrus wedges
-
Salt to taste
Instructions
-
Marinate Chicken
Mix chicken with lemon juice, garlic, Italian seasoning, pepper powder, and salt. Let it rest for 10 mins (or overnight). -
Sear the Chicken
Heat butter + 1 tsp olive oil in a skillet. Cook chicken 5–6 mins each side until golden and cooked through (165°F). Let it rest. -
Sauté Veggies
In the same pan, add remaining olive oil. Toss in broccoli and zucchini—sauté 4–5 mins until crisp-tender. Add tomatoes, cook 2–3 mins more. -
Assemble Bowls
Slice chicken. In each container: layer ½ cup brown rice, ¼ chicken, ¼ veggies. Top with cilantro + a citrus wedge.
Notes
-
Use thighs for juicier meat.
-
Keep citrus wedges separate until eating.
-
Add tahini drizzle or avocado slices for a gourmet touch.
-
Double batch for freezer stash!
- Prep Time: 20 mins
- Cook Time: 20 mins
Nutrition
- Calories: 420 Ca Per Bowl
- Fat: 12g
- Carbohydrates: 32g
- Fiber: 5g
- Protein: 38g
Fuel Facts (Per Bowl)
Calories: 420 | Protein: 38g | Fat: 12g | Carbs: 32g | Fiber: 5g
Note: Stats vary based on swaps/portion sizes. Add avocado? Healthy fats go up!
Final Thoughts: More Than Just a Meal
These bowls represent self-care in a container. They’re proof that eating well doesn’t require perfection—just a little planning and a lot of flavor. Whether you’re a chaotic creative (like me), a time-crunched parent, or someone just tired of sad desk lunches, this recipe meets you where you are.
So here’s my challenge: Try it once. Prep on a lazy Sunday, freeze a portion, and see how it feels to open your fridge to a ready-made victory. Because you deserve meals that taste like a hug, fuel your adventures, and—most importantly—make life easier.
Now, who’s ready to ditch the stress and embrace the bowl? Tag #FeasticalPrep on Instagram with your creations—I’ll feature my favorites!