
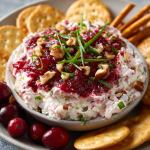
Easy 4-Ingredient Cranberry Cream Cheese Dip
The Easiest, Most Crowd-Pleasing Appetizer You’ll Make This Year
Hey friends, Beau here from Feastical! Let’s be real for a second. The holiday season, for all its twinkling lights and joyful chaos, can be a seriously stressful time for the person in charge of the food. You’re juggling a turkey that’s determined to dry out, relatives asking if you need help every five minutes (bless their hearts), and a dozen side dishes all demanding oven space at the exact same time. The last thing you need is an appetizer that requires a chemistry degree and a full pantry to pull off.
That’s exactly why I’m swooping in today with your new secret weapon: my legendary 4-Ingredient Cranberry Cream Cheese Dip. This isn’t just a recipe; it’s a lifeline. It’s the culinary equivalent of that one friend who shows up exactly when you need them, no questions asked. We’re talking about a dip that is tangy, sweet, creamy, and boasts a fantastic contrasting crunch, all while requiring the culinary skill of… well, being able to open a package and spread something. It’s the perfect last-minute appetizer that looks like you fussed for hours. I’ve watched this dip vanish from platters in minutes, surrounded by a crowd of very happy, very impressed guests. So, take a deep breath, grab your favorite serving plate, and let’s make something incredibly delicious, together.
A Sauce-Splattered Memory: Where My Love for This Dip Began
This recipe takes me right back to my first “official” Thanksgiving as an adult. I was hosting a “Friendsgiving” in my tiny apartment, feeling the immense pressure to prove I could actually cook. The turkey was… fine. The gravy was lumpy. But the star of the show, the thing everyone raved about, was this ridiculously simple dip I’d thrown together at the last second because my cheese board looked a little sad.
I remember my friend Sarah, a notorious foodie, stopping mid-sentence, her cracker hovering in the air. “Beau. What. Is. This?” she demanded, her eyes wide. I laughed, a little embarrassed, and confessed it was just cream cheese and canned cranberry sauce. She refused to believe me. “No, there’s something else. It’s too good!” That moment was a lightbulb for me. It cemented a core belief I still hold dear at Feastical: the best food isn’t about the most complicated techniques or the rarest ingredients. It’s about flavor, joy, and bringing people together. This dip, in all its glorious simplicity, does exactly that. It’s become a non-negotiable staple on my holiday table ever since, a delicious reminder that sometimes, the easiest solutions are the most brilliant ones.
Gathering Your Fantastic Four
See? I told you it was simple! But just because the ingredient list is short doesn’t mean we can’t talk shop about each component. Choosing the right players makes all the difference in building a flavor superstar.
- 1 (8 oz) block of Cream Cheese, softened: This is our rich, tangy, creamy base. Chef’s Insight: Use full-fat cream cheese for the best texture and flavor—it stands up to the chill and spreads like a dream. Letting it soften at room temperature for a good 30-60 minutes is non-negotiable. Trying to spread cold cream cheese is a one-way ticket to a lumpy, broken-looking dip. If you’re in a pinch, you can microwave it on a plate for 10-15 seconds, but watch it like a hawk!
- ½ cup Whole Berry Cranberry Sauce: This provides the sweet, tart, and fruity heart of the dip. Substitution Tip: While jellied sauce will work in a pinch, I highly recommend whole-berry sauce. Those little bursts of real cranberry add incredible texture and a more sophisticated, homemade feel. If you’re feeling ambitious, by all means, use your own homemade cranberry sauce! It’s a fantastic way to use up leftovers.
- ¼ cup chopped Green Onions: Don’t skip these! They are the unsung hero, adding a necessary pop of sharp, savory flavor and a gorgeous green color that cuts through the richness. Substitution Tip: Not a fan of green onions? Thinly sliced chives would be a lovely, milder substitute.
- ¼ cup chopped Walnuts or Pecans (optional but highly recommended): This is where we introduce the CRUNCH. It’s the textural contrast that takes this dip from great to “can’t-stop-eating-it” incredible. Substitution Tip: Allergic to nuts? Toasted pumpkin seeds (pepitas) are a fantastic, nut-free alternative that gives you that same satisfying crunch.
Let’s Build This Beauty: Your Foolproof Guide
Alright, team. Time to assemble our masterpiece. This is less of a cooking lesson and more of a construction project. Let’s do this.
Step 1: The Perfect Base
Take your beautifully softened cream cheese and place it right in the center of your serving plate or in a shallow bowl. Using a spoon or a small offset spatula, gently spread it into an even layer. We’re going for a thickness of about ½ to ¾ of an inch. Chef’s Hack: Don’t worry about making it look perfect! A few swoops and swirls make it look more rustic and homemade. If you’re using a plate with a lip, spread it almost to the edge to create a beautiful canvas for our toppings.
Step 2: The Cranberry Cascade
Give your cranberry sauce a quick stir in its can or container to loosen it up. Now, spoon it right over the center of the cream cheese. Using the back of your spoon, gently push the sauce outward toward the edges, leaving a little hint of the white cream cheese border showing. This creates a gorgeous, professional-looking presentation. Pro Tip: If your cranberry sauce is too thick or chunky, you can give it a quick pulse in a food processor or mash it lightly with a fork for a more spreadable consistency.
Step 3: The Green confetti
Grab your chopped green onions and sprinkle them evenly over the vibrant red cranberry layer. We’re adding color, flavor, and a little bit of that savory kick right here. See how it’s already starting to look like something from a fancy food magazine?
Step 4: The Crunchy Crown (The Pièce de Résistance!)
If you’re using nuts, now’s the time for their grand entrance. Take your chopped walnuts or pecans and scatter them generously over the top. They’ll add that final element of texture and a toasty, rich flavor that ties the whole dip together. Chef’s Hack: For next-level flavor, toast your nuts in a dry skillet over medium heat for 3-5 minutes before chopping them. It wakes up their natural oils and makes them infinitely more fragrant and delicious.
Step 5: The Patience Payoff (Optional but Recommended)
You can absolutely serve this dip right away, and it will be delicious. But if you have just 15 extra minutes, pop the whole plate, uncovered, into the refrigerator. This short chill allows the flavors to get to know each other and mingle beautifully. The cream cheese firms up just enough to make it the perfect spreading consistency.
How to Serve Your Masterpiece
Presentation is part of the fun! I love serving this dip on a large, rustic wooden board or a beautiful colorful platter. Arrange an array of dippers around the base of the dip to create a bountiful, inviting spread. The goal is to create a centerpiece that invites people to gather around and dig in.
My Top Dipper Recommendations:
- The Classic Crew: Buttery round crackers (like Ritz), wheat crackers, or sturdy water crackers.
- The Savory Bunch: Pretzel crisps, pretzel rods, pita chips, or even thin slices of a toasted baguette.
- The Healthy Squad: Apple slices (a fantastic sweet contrast!), pear slices, or even crisp celery sticks for a low-carb option.
Place a few small spreading knives nearby so guests can load up their chosen vehicle. Then, just stand back and watch the magic happen.
Make It Your Own: Delicious Twists & Swaps
The beauty of this framework is that it’s a canvas for your creativity. Here are a few of my favorite ways to mix it up.
- The “Everything Bagel” Remix: Swap out the green onions for a generous sprinkle of everything bagel seasoning. The garlic, onion, and sesame seeds add an incredible savory depth that is absolutely addictive.
- Spicy Pepper Jelly Swap: For a sweet-heat situation, replace the cranberry sauce with red pepper jelly or jalapeño jelly. It creates a stunning color and a flavor that will have everyone asking for the recipe.
- Orange Zest Zing: Add the finely grated zest of one orange to the cranberry sauce before spreading it. The citrus brightens all the flavors and makes the dip taste even fresher.
- Fresh Herb Garden: Feel free to add a tablespoon or two of fresh, finely chopped herbs like rosemary or thyme along with the green onions for a more aromatic, sophisticated profile.
- Dairy-Free Delight: You can easily make this vegan! Use your favorite plant-based cream cheese (Kite Hill and Miyoko’s are great) and ensure your cranberry sauce and other add-ins are vegan-friendly.
Beau’s Kitchen Confidential
This recipe has been on quite a journey with me. I’ve made it for fancy parties, casual potlucks, and even just for myself on a random Tuesday because, well, I wanted to. One of my favorite kitchen fails involved me trying to “elevate” it by using a fancy, artisanal cranberry-orange relish. I didn’t drain it, and the excess liquid turned the whole dip into a pink, runny puddle. Lesson learned: sometimes, the simple, canned stuff is perfect exactly as it is. The recipe has evolved to be forgiving and flexible. Don’t have measuring cups? Eyeball it. Want to double it for a crowd? Do it! This dip is here to make your life easier, not harder. Embrace its simplicity.
Your Questions, Answered!
Q: Can I make this dip ahead of time?
A: Absolutely! You can assemble the entire dip (minus the nut topping if you’re worried about them getting soft) up to 24 hours in advance. Just cover it tightly with plastic wrap and store it in the fridge. Add the nuts right before serving to keep them crunchy.
Q: My dip turned out a little runny. What happened?
A: This usually happens for one of two reasons: 1) The cream cheese wasn’t fully softened, so it didn’t spread evenly and might have broken, or 2) The cranberry sauce had a lot of extra liquid. Next time, you can drain your cranberry sauce in a fine-mesh strainer for a few minutes to remove excess syrup.
Q: I’m not a fan of tartness. How can I make it sweeter?
A: Great question! You can use a sweetened dried cranberry relish instead of the traditional sauce, or stir a teaspoon of honey or maple syrup into the cranberry sauce before spreading it over the cheese.
Q: What’s the best way to soften cream cheese quickly?
A: Remove the foil wrapper and place the block on a microwave-safe plate. Microwave on DEFROST (low power) for 15-second intervals, checking after each one. It should be soft but not melted or hot.
Easy 4-Ingredient Cranberry Cream Cheese Dip
Description
This dip is creamy, tangy, sweet, and has a delightful crunch—all while being ridiculously simple. Perfect for holidays, potlucks, or last-minute entertaining.
Ingredients
-
1 (8 oz) block cream cheese, softened to room temperature
-
½ cup whole-berry cranberry sauce (canned or homemade)
-
¼ cup chopped green onions (or chives)
-
¼ cup chopped walnuts or pecans (optional, for crunch)
Instructions
-
Create the Base:
Place softened cream cheese on a serving plate or shallow bowl. Spread into a ½–¾-inch-thick layer. Rustic swoops and swirls are perfect—it looks homemade and inviting. -
Add Cranberries:
Spoon cranberry sauce over the cream cheese, pushing slightly toward the edges to leave a bit of the white base visible. For easier spreading, mash slightly or pulse briefly in a food processor. -
Add Green Onions:
Sprinkle chopped green onions evenly over the cranberry layer for a pop of color and savory flavor. -
Add Crunch (Optional):
Scatter chopped nuts over the top. Toasted nuts add a rich, nutty aroma and texture contrast. -
Optional Chill:
Refrigerate for 10–15 minutes to allow flavors to meld and cream cheese to firm slightly before serving.
Notes
-
Full-fat cream cheese gives the best flavor and texture.
-
Toast nuts in a dry skillet 3–5 minutes for extra aroma and crunch.
-
Whole-berry cranberry sauce gives a more interesting texture than jellied.
Nutrition
- Calories: 130 Cal approx. per 2-tbsp serving, with nuts
- Sugar: 4g
- Fat: 11g
- Carbohydrates: 6g
- Protein: 2g
Nutritional Note*
*Please remember, I’m a chef, not a dietitian! This is a rough estimate based on the specific ingredients I used and can vary wildly based on your brands and any substitutions you make. This info is provided as a courtesy for those who are curious.
Per serving (approx. 2 tablespoons, assuming 8 servings and including nuts):
- Calories: 130
- Protein: 2g
- Fat: 11g
- Carbohydrates: 6g
- Sugar: 4g
To lighten it up, you can use a reduced-fat or Neufchâtel cream cheese, and feel free to load up your plate with those apple slices and celery sticks for dipping!
Your New Go-To Party Trick
And there you have it! Your secret is out. You are now the proud owner of the recipe for the easiest, most impressive, most conversation-starting appetizer in your arsenal. This Cranberry Cream Cheese Dip is more than just food; it’s a tool for creating joy and freeing up your time so you can actually enjoy your own party.
I hope this recipe becomes a cherished, stress-free part of your holiday traditions, just like it is for me. If you make it (and I really hope you do!), I’d love to see your creation. Tag me @Feastical on social media so I can share in your success. Now, go forth and spread some creamy, cranberry-filled joy. Until next time, happy cooking!
Beau
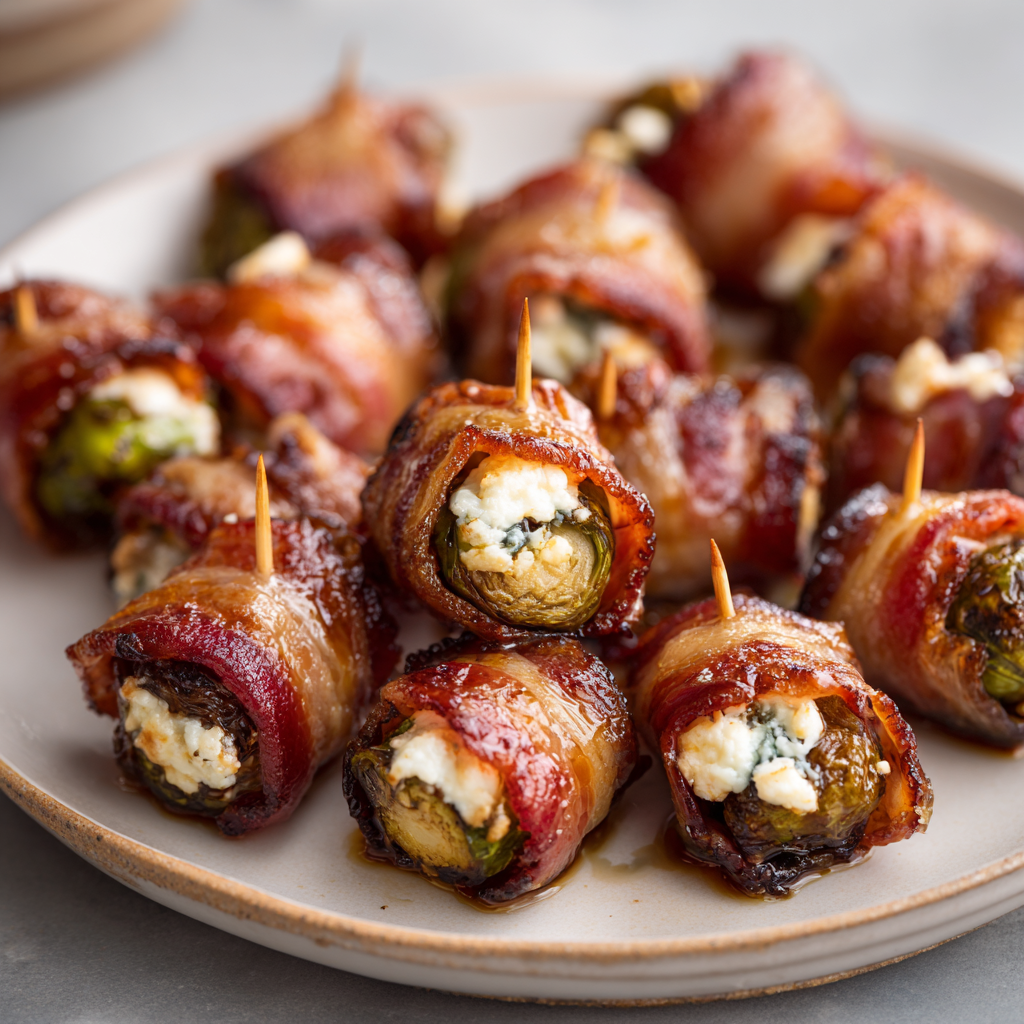
Bacon-Wrapped Dates or Brussels Sprouts
Your New Party Secret: The Bite That Disappears First
Hey friends, Beau here from Feastical! Let’s talk about that magical moment at a gathering. You know the one. You’ve just put out a platter of something delicious, you turn around to grab a drink, and by the time you look back… it’s gone. Poof! Vanished into thin air, leaving nothing behind but a few crumbs and a crowd of very happy, slightly guilty-looking people. If you’re nodding along, then you, my friend, are ready to master the art of the ultimate crowd-pleasing appetizer: Bacon-Wrapped Dates or Brussels Sprouts.
This isn’t just a recipe; it’s a culinary magic trick. It’s the perfect harmony of salty and sweet, crispy and tender, fancy and utterly simple. We’re talking about just three main ingredients transforming into something so much greater than the sum of their parts. Whether you’re a seasoned entertainer or prepping for your first big potluck, this is your go-to, your secret weapon, your guaranteed hit. I’m talking minimal effort for maximum “oohs” and “aahs.” So, preheat that oven, grab your favorite baking sheet, and let’s create some kitchen magic that’ll have your friends begging for the recipe.
A Tale of Two Bites: My First Feast-ical Disaster (That Wasn’t)
I’ll never forget the first time I made these. It was years ago, for a holiday party in my first tiny apartment. The kitchen was the size of a postage stamp, and my culinary confidence was… well, let’s just say it was still in the oven preheating. I wanted to impress my new friends with something that looked sophisticated but that I couldn’t possibly mess up. I settled on bacon-wrapped dates because, honestly, how bad can anything wrapped in bacon be?
I remember my hands being a sticky mess of honey and bacon grease, toothpicks everywhere, and a moment of sheer panic when I realized I’d bought dates with pits. But I powered through, pitting them with a butter knife (a story for another day!), and popped them in the oven. The smell that filled that little apartment was nothing short of transformative. It was the smell of success, of caramelizing sugar, of smoky bacon, of pure, unadulterated joy. The tray was empty in minutes, and I’ve been hooked ever since. That’s the beauty of this recipe—it turns a kitchen novice into a culinary hero.
Gathering Your Cast of Characters
Part of what makes this recipe so brilliant is its simplicity. Here’s what you’ll need to make about 24 irresistible bites. Don’t just think of these as ingredients; think of them as your partners in crime for the perfect party snack.
- 12 slices bacon, cut in half: This is your star. I recommend a standard-cut bacon, not thick-cut. Thick-cut can be too chewy and won’t get as crispy in the short baking time. For a deeper flavor, try applewood-smoked bacon! Chef’s Insight: If your bacon is very fatty, you can par-cook it for just a few minutes in the oven first to render some fat, but it’s not strictly necessary.
- 24 pitted dates OR 24 small Brussels sprouts, trimmed: The great divide! You have to choose your fighter.
- For Dates: Medjool dates are king here. They’re larger, softer, and have a rich, almost caramel-like sweetness that pairs divinely with the salty bacon. Make sure they’re pitted to save yourself a major headache!
- For Brussels Sprouts: Go for small, tight sprouts. They’ll cook through and become tender and sweet by the time the bacon crisps up. Trim the dry end stem and remove any loose or yellow outer leaves.
- 2 oz goat cheese or cream cheese (optional, but highly recommended for dates!): This is the secret surprise that takes the date version to a whole new level. The cool, tangy creaminess cutting through the rich sweetness and saltiness is a game-changer. Goat cheese adds a lovely sharpness, while cream cheese is a mellower, crowd-pleasing option.
- 2 tbsp maple syrup or honey (optional, for glaze): This is your finishing touch, your edible glitter. A light brush in the last few minutes of baking adds an incredible glossy sheen and a layer of caramelized flavor that will have people swooning.
- Toothpicks, for securing: Your tiny culinary scaffolding. Soak them in water for 10-15 minutes before using to prevent them from burning in the oven.
Let’s Get Wrapping: Your Foolproof Guide
Okay, team, let’s do this. It’s assembly-line time. Put on some music, pour yourself a little something, and let’s get these beauties ready for their oven debut.
- Preheat and Prep: Fire up your oven to 400°F (200°C). This is the perfect temperature to crisp the bacon and cook the sprout or warm the date through without burning. Line a baking sheet with parchment paper – do not skip this! It makes cleanup an absolute breeze and prevents a ton of sticking. (Chef’s Hack: If you have a wire rack that fits inside your baking sheet, place it on top of the parchment. This elevates the bites and allows hot air to circulate all around, resulting in evenly crispy bacon on all sides with no flipping needed!)
- The Stuffing Station (For Dates): If you’re going the cheesy route, let’s stuff! Take your block of goat or cream cheese and pinch off little pea-sized pieces. Using your fingers, gently pry open one end of the date and nestle the cheese inside. Don’t overstuff, or it’ll ooze out during baking. No need to be perfect here—rustic is charming!
- The Main Event: Wrap It Up: Take your half-slice of bacon and wrap it snugly around one date or one Brussels sprout. The key is to overlap the bacon just enough so that it doesn’t unravel. You want the bacon to hug its filling tightly. Place the bundle seam-side down on your prepared baking sheet. This weight, plus the toothpick you’re about to add, will keep it from unfurling in the heat of the oven.
- Secure the Deal: Spear each bundle with a toothpick, aiming diagonally through the bacon seam and into the filling. This acts like a little stitch, holding everything perfectly in place.
- Bake to Perfection: Slide that tray into your preheated oven. Bake for 20-25 minutes. Now, if you didn’t use a wire rack, you’ll want to flip these halfway through (around the 10-12 minute mark) to ensure even crisping on all sides. Keep an eye on them—all ovens vary! You’re looking for golden brown, crispy, delicious bacon.
- The Glaze (Optional, but Oh-So-Good): In the last 5 minutes of baking, pull the tray out. Carefully brush each bite with a little maple syrup or honey. This adds a beautiful glaze and promotes incredible caramelization. Pop them back in for those final 5 minutes. Watch them closely now, as the sugar can burn quickly.
- The Hardest Part: Restrain Yourself: Remove the tray from the oven. I know, I know, you want to eat one immediately. But trust me, let them cool for just 5 minutes. The fillings become molten lava hot and need a minute to settle down. This also allows the bacon to set into its perfect crispy form.
Plating Your Masterpiece
Presentation is part of the fun! You don’t need fancy china to make these look incredible. Simply arrange your warm, glistening bites on a simple wooden board, a sleek slate slab, or even a vibrant colorful platter. Scatter a few extra toothpicks nearby for easy grabbing.
For a little extra flair, sprinkle the platter with some flaky sea salt (like Maldon) and a few fresh herb leaves—rosemary or thyme work beautifully. If you went the Brussels sprouts route, a very light drizzle of balsamic glaze right before serving adds a fantastic tangy contrast. Serve them warm and watch the magic happen.
Mix It Up: Endless Flavor Possibilities
The basic formula is a blank canvas for your creativity. Once you’ve mastered the classic, try one of these delicious twists!
- The “Everything Bagel” Sprout: Before wrapping, toss your trimmed Brussels sprouts in a little everything bagel seasoning. The garlic, onion, and sesame seeds add an incredible savory crunch.
- Spicy & Smoky Date: Love heat? Add a tiny slice of jalapeño inside the date along with the cheese. Or, for a smoky kick, use a pinch of smoked paprika mixed into your cream cheese before stuffing.
- The “Pig in a Blanket” Upgrade: Swap the Brussels sprout for a little smoked cocktail sausage or a chunk of pre-cooked chorizo. It’s a meat-lover’s dream.
- Veggie-Friendly & Paleo: For a Whole30 or Paleo version, use sugar-free bacon (check the label!) and skip the glaze. The natural sweetness from the dates or caramelized sprouts is more than enough.
- Blue Cheese Bliss: Not a goat cheese fan? Stuff those dates with a bold, creamy blue cheese like Gorgonzola for a powerful flavor punch that stands up to the bacon beautifully.
Beau’s Kitchen Notes
Over the years, I’ve made these more times than I can count, and they’ve never once failed me. They’ve been to Super Bowl parties, fancy dinners, and everything in between. One time, I even made a massive batch for a friend’s wedding shower—we’re talking over 200 of these things. My kitchen looked like a bacon-wrapping factory, but the compliments were worth every second.
The recipe has evolved, too. I started with just bacon and dates. The cheese was a happy accident one day when I had some leftover goat cheese that needed using. The glaze was another “what if?” moment that turned into a permanent part of the routine. Don’t be afraid to play with your food. That’s where the best recipes are born!
Your Questions, Answered
Q: Can I make these ahead of time?
A: Absolutely! You can assemble the bundles (wrap and toothpick) up to a day in advance. Keep them covered on the baking sheet in the fridge until you’re ready to bake. You might need to add a minute or two to the baking time since they’ll be going in cold.
Q: My bacon isn’t getting crispy. What did I do wrong?
A: The most common culprit is overcrowding the pan. If the bites are too close together, they steam instead of bake. Give them a little space! Also, ensure your oven is fully preheated. If you’re still having issues, finishing them under the broiler for a minute (watch them like a hawk!) can help crisp things up.
Q: Can I make these in an air fryer?
A: You bet! Air fryers are fantastic for this. Cook at 375°F for about 10-12 minutes, shaking the basket halfway through. They come out incredibly crispy!
Q: My toothpicks burned! Help!
A: This is why we soak them! Dunk your toothpicks in a bowl of water for 10-15 minutes before using. The waterlogged wood is much less likely to char in the oven.

Bacon-Wrapped Dates or Brussels Sprouts
Description
These bite-sized wonders are the first to disappear at any gathering. Sweet, savory, crispy, tender—they’re minimal effort for maximum “oohs” and “aahs.” Choose between decadent dates or caramelized Brussels sprouts, and let your oven do the magic.
Ingredients
-
Bacon: 12 slices, cut in half (standard cut; applewood-smoked recommended)
-
Dates: 24 pitted Medjool dates or Brussels sprouts: 24 small, trimmed and halved if needed
-
Cheese (optional, for dates): 2 oz goat cheese or cream cheese
-
Glaze (optional): 2 tbsp maple syrup or honey
-
Toothpicks: Soaked in water 10–15 min to prevent burning
Instructions
-
Preheat Oven: 400°F (200°C). Line a baking sheet with parchment paper. Optional: place a wire rack on top for even crisping.
-
Stuff Dates (Optional): Gently open each date and stuff with a pea-sized piece of goat or cream cheese.
-
Wrap: Wrap each date or Brussels sprout with a half-slice of bacon, overlapping slightly. Place seam-side down on the prepared sheet. Secure with a soaked toothpick.
-
Bake: 20–25 minutes, flipping halfway if not using a wire rack. Bacon should be crispy and golden brown.
-
Glaze (Optional): Brush with maple syrup or honey during the last 5 minutes of baking.
-
Rest: Let cool 5 minutes before serving to avoid molten-hot fillings.
Notes
-
For Brussels sprouts, choose small, tight ones—they’ll cook evenly with the bacon.
-
Par-cook very fatty bacon for a few minutes if desired, but it’s optional.
Nutrition
- Calories: 90 Cal per bite, approximate
- Fat: 3g
- Carbohydrates: 12g
- Protein: 1g
A Note on Nutrition
Let’s be real—this is a treat, an appetizer, a party food. It’s not meant to be a health food, but it’s made with whole, real ingredients. Dates are a great source of natural fiber and potassium. Brussels sprouts are a nutritional powerhouse, packed with vitamins C and K. And bacon? Well, everything in moderation, friends! The provided estimates are per bite to help you enjoy them mindfully. The joy and community they bring to your table are good for the soul, and that counts for something, too.
The Last Bite
So there you have it. Your new secret weapon for effortless, impressive entertaining. This recipe is more than just instructions; it’s an invitation to have fun in the kitchen, to create something simple yet spectacular, and to share that joy with others. That’s what Feastical is all about.
I’d love to hear how your bacon-wrapped adventures turn out! Did you go for dates or sprouts? What fillings did you try? Tag me on social @feastical with your creations. Now, if you’ll excuse me, all this talk has made me hungry. I think it’s time to go preheat my oven.
Happy cooking,

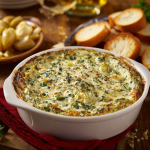
Hot Spinach & Artichoke Dip
Your New Party Superpower: The Ultimate Hot Spinach & Artichoke Dip
Hey friends, Beau here! Let’s talk about that magical moment at any gathering. You know the one. The room gets a little quieter, heads turn toward the kitchen, and a wave of happy murmurs follows a single, glorious dish as it’s carried into the room. That, my friends, is the power of a truly incredible Hot Spinach & Artichoke Dip. It’s not just an appetizer; it’s a conversation starter, a crowd-pleaser, and frankly, the hero of any party spread.
I’m a firm believer that the best recipes are the ones that bring people together, and this dip is the poster child for that philosophy. It’s creamy, it’s cheesy, it’s packed with flavorful spinach and artichokes, and it has that irresistible, bubbly, golden-brown top that makes you want to dive right in with the nearest piece of crusty bread. The best part? It’s deceptively simple to make. You don’t need any fancy chef skills—just a bowl, a spoon, and a serious love for good food.
So, whether you’re prepping for game day, hosting a book club, or just having a cozy night in that deserves a spectacular snack, this recipe is your go-to. I’m sharing my absolute favorite version, packed with all the little tips and tricks I’ve learned over years of making this for everyone I know. Let’s get ready to make a dip that’ll have everyone asking you for the recipe!
A Dip That Built a Tradition
This recipe isn’t just a list of ingredients to me; it’s woven into the story of Feastical. I’ll never forget the first big Friendsgiving I hosted in my tiny apartment. The oven was too small, I was using a folding table as a counter, and I was nervously trying to impress my new foodie friends. I needed a surefire hit, an appetizer that would break the ice and get everyone chatting. Enter this dip.
I remember pulling it out of the oven, the cheese still sizzling around the edges. The aroma of garlic and parmesan filled the entire apartment. I placed it on the table with a basket of toasted baguette slices and held my breath. The silence was broken by a collective “Ooooh!” Within minutes, the entire dish was scraped clean, and a circle of happy, dip-covered friends had formed around the table, laughing and sharing stories. It was in that messy, joyful, cheesy moment that I knew this recipe was something special. It became our unofficial tradition, the mandatory opener to every gathering since. It’s more than a dip; it’s the catalyst for connection, and that’s what cooking is all about.
Gathering Your Dip Dream Team
Here’s everything you’ll need to create this masterpiece. I’ve included some of my favorite insights and swaps to make this recipe your own!
- 1 (10 oz) package frozen spinach, thawed and drained: Frozen is the way to go for convenience and consistency. The most important step here is to squeeze out ALL the excess water. I mean, really get in there with your hands! A dry spinach ensures your dip is creamy, not watery. Chef’s Swap: You can use one large bunch of fresh spinach, wilted and thoroughly drained, but frozen is my go-to.
- 1 (14 oz) can artichoke hearts, drained and chopped: Look for artichoke hearts packed in water or brine, not marinated. We’re adding our own flavors here! Give them a rough chop for the perfect texture in every bite.
- 8 oz cream cheese, softened: This is the lush, creamy base of our dip. Let it sit on the counter for an hour before you start. Soft cream cheese blends smoothly and prevents a lumpy dip. Chef’s Insight: Using full-fat cream cheese gives the richest flavor and creamiest texture.
- ½ cup sour cream: Adds a wonderful tanginess and helps loosen up the mixture. Greek yogurt makes a great lighter substitute here.
- ¼ cup mayonnaise: Don’t skip this! Mayo adds a unique richness and helps create that gorgeous golden-brown top when baked. It’s the secret weapon for depth of flavor.
- 1 cup shredded mozzarella cheese: Our classic, stretchy, melty cheese. I like to shred my own from a block because pre-shredded bags often contain anti-caking agents that can make the texture a bit grainy. But in a pinch, the bagged stuff works just fine!
- ½ cup grated parmesan cheese: The flavor powerhouse! Parmesan brings that salty, nutty, umami kick. Freshly grated from a wedge is always best for flavor, but the canned stuff will do in a hurry.
- 2 cloves garlic, minced: Fresh is best! The sharp, aromatic punch of fresh garlic is irreplaceable. If you must, ½ teaspoon of garlic powder can sub in.
- ½ tsp salt & ¼ tsp black pepper: Essential seasonings to make all the other flavors pop. Always taste and adjust!
- Pinch of red pepper flakes (optional): My little signature. It doesn’t make the dip spicy, just adds a very subtle warmth and complexity in the background. Highly recommend!
Let’s Get Mixing & Baking!
Ready to make some magic? Follow these steps for a flawless, crowd-worthy dip every single time.
Step 1: Preheat and Prep. Fire up your oven to 375°F (190°C). Take a moment to lightly grease your baking dish—a 9-inch pie dish, an 8×8 square dish, or any small (1 to 1.5 quart) oven-safe dish works perfectly. This little greasing step ensures easy serving and cleanup later. Chef’s Hack: If you’re prepping ahead, you can do everything up to the baking step, cover the dish, and pop it in the fridge. Just add a few extra minutes to the baking time if it’s going in cold!
Step 2: The Creamy Base. In a large mixing bowl, combine your softened cream cheese, sour cream, and mayonnaise. Use a sturdy spatula or a hand mixer on low to beat this until it’s completely smooth and lump-free. This is the foundation of your dip, so taking a minute here to get it super creamy is worth it!
Step 3: The Flavor Party. Now for the fun part! Add your thoroughly squeezed-dry spinach, chopped artichoke hearts, shredded mozzarella, grated parmesan, minced garlic, salt, pepper, and those optional red pepper flakes. Now, roll up your sleeves and fold everything together until it’s beautifully combined. I like to use my hands for this sometimes—it’s the best tool to make sure everything is evenly distributed!
Step 4: Bake to Perfection. Transfer your delicious mixture to your prepared baking dish and spread it out into an even layer. Pop it into your preheated oven and bake for 20-25 minutes. You’re looking for it to be hot all the way through, bubbly around the edges, and with those gorgeous golden spots on top. Chef’s Tip: For an extra crispy, cheesy top, you can switch the oven to broil for the last minute or two—but don’t walk away! It can burn in a flash.
Step 5: The (Hardest) Part: Rest. I know, I know. The aroma is incredible and you just want to dig in. But trust me on this: let the dip rest for about 5 minutes after pulling it out of the oven. This allows it to set slightly, making it easier to scoop and saving your guests from molten-lava-level burns on their tongues. It’s a gesture of love, I promise.
How to Serve This Cheesy Masterpiece
Presentation is part of the fun! Here’s how I love to serve this dip to make it truly irresistible.
First, choose your vessel. I’m a huge fan of serving this dip right in the dish it was baked in—it’s rustic, homey, and keeps it warm longer. Place the baking dish on a trivet or a sturdy wooden board in the center of your spread.
Now, the dippers! This is where you can get creative. I always offer a variety:
- The Classic: Thinly sliced and toasted baguette pieces are my #1 choice. The crunch is the perfect textural contrast to the creamy dip.
- The Crunchy: A big bowl of sturdy tortilla chips or robust crackers like pita chips or pretzel crisps.
- The Fresh: For a lighter option, offer a platter of colorful veggie sticks—carrots, celery, bell peppers, and cucumber all work wonderfully.
Garnish with a little extra sprinkle of red pepper flakes or some chopped fresh parsley for a pop of color. Then, just set it out, provide a few small plates and spreaders, and watch the crowd gather!
Make It Your Own: Delicious Variations
This recipe is incredibly versatile. Feel free to play around and customize it to your taste!
- The Seafood Lover: Fold in a cup of lump crab meat or small cooked shrimp for a decadent spin. It feels instantly fancy!
- The Spicy Fiend: Kick up the heat! Add a finely chopped jalapeño (seeds removed for less heat, kept for more!) or a few dashes of your favorite hot sauce into the mix.
- The Herb Garden: Brighten it up with a handful of fresh herbs. I love adding two tablespoons of chopped fresh dill or chives. They add a wonderful freshness that cuts through the richness.
- The Lighter Version: You can easily lighten it up by using reduced-fat cream cheese, low-fat Greek yogurt instead of sour cream, and light mayonnaise. It’ll still be delicious!
- The Slow Cooker Method: Heading to a potluck? Mix all ingredients in a bowl, transfer to your slow cooker, and cook on low for 2-3 hours, stirring occasionally. It’s the ultimate keep-warm option.
Beau’s Chef Notes & Kitchen Stories
This recipe has evolved over countless parties and potlucks. I once, in a pre-coffee haze, accidentally used marinated artichokes instead of plain. The result was… interestingly oily. We laughed it off and ordered pizza, but it taught me to always double-check the label! Another time, a friend who claimed to hate spinach tried it without knowing what it was and ended up eating a quarter of the dish herself. It’s now her most-requested recipe. That’s the power of a good dip—it converts even the veggie-hesitant!
My biggest tip? Don’t stress about perfection. Cooking is about joy and sharing. Even if your dip is a little lopsided or you forget the pepper, it’s made with love, and that’s what people will truly remember.
Your Dip Questions, Answered!
Q: Can I make this dip ahead of time?
A: Absolutely! This is a fantastic make-ahead appetizer. Prepare the dip completely, cover the unbaked dish tightly with plastic wrap, and refrigerate for up to 24 hours. When you’re ready, just bake it straight from the fridge, adding 5-10 extra minutes to the baking time since it will be cold.
Q: Why is my dip watery?
A: The number one culprit is not squeezing the spinach enough. Frozen spinach holds a ton of water, and if you don’t wring it out in a clean kitchen towel or with your hands, that water will leach out during baking. The second culprit could be the artichokes—make sure they are thoroughly drained after chopping.
Q: Can I use fresh spinach instead of frozen?
A: You can! Sauté about 10-12 ounces of fresh spinach in a pan until wilted. Let it cool, then gather it in a kitchen towel and squeeze out every last drop of liquid you can. Then, chop it and use it as directed.
Q: My dip is too thick. How can I thin it out?
A: If your mixture seems too thick before baking, you can stir in another tablespoon or two of sour cream or a splash of milk to reach your desired consistency.
Hot Spinach & Artichoke Dip
Description
Hey friends! This creamy, cheesy Hot Spinach & Artichoke Dip is a guaranteed crowd-pleaser. It’s rich, bubbly, and full of flavor—perfect for game day, parties, or just a cozy night in. The best part? It’s simple to make with pantry staples and comes together in about 30 minutes.
Ingredients
-
1 (10 oz) package frozen spinach, thawed and thoroughly drained
-
1 (14 oz) can artichoke hearts, drained and chopped
-
8 oz cream cheese, softened
-
½ cup sour cream (or Greek yogurt)
-
¼ cup mayonnaise
-
1 cup shredded mozzarella cheese
-
½ cup grated Parmesan cheese
-
2 cloves garlic, minced
-
½ tsp salt
-
¼ tsp black pepper
-
Pinch of red pepper flakes (optional)
Tip: Make sure the spinach is as dry as possible to avoid a watery dip.
Instructions
-
Preheat Oven: Set to 375°F (190°C). Lightly grease a 9-inch oven-safe dish.
-
Mix Creamy Base: In a large bowl, beat cream cheese, sour cream, and mayonnaise until smooth.
-
Add Flavor & Veggies: Fold in spinach, artichokes, mozzarella, Parmesan, garlic, salt, pepper, and optional red pepper flakes until evenly combined.
-
Bake: Spread mixture evenly in the prepared dish. Bake for 20–25 minutes, until hot and bubbly with golden-brown edges. For extra browning, broil 1–2 minutes, watching closely.
-
Rest & Serve: Let cool 5 minutes before serving to set slightly. Serve with toasted baguette slices, crackers, tortilla chips, or veggie sticks.
Notes
-
Make-Ahead: Assemble and refrigerate up to 24 hours; bake straight from fridge, adding 5–10 minutes.
-
Seafood Twist: Fold in 1 cup lump crab meat or cooked shrimp.
-
Spicy Kick: Add chopped jalapeño or hot sauce.
-
Herb Boost: Mix in fresh herbs like dill or chives.
-
Lighter Version: Use reduced-fat cream cheese, Greek yogurt, and light mayonnaise.
Nutrition
- Calories: 160 Cal
- Fat: 13g
- Carbohydrates: 4g
- Fiber: 1g
- Protein: 6g
Nutritional Information*
Okay, let’s be real: this is a celebratory, indulgent dish meant for sharing and joy. But if you’re curious about the details, here’s a rough breakdown per serving (about a ¼ cup scoop), based on the specific ingredients listed. Remember, your exact numbers may vary based on the brands you use and any substitutions.
- Calories: ~160
- Fat: 13g
- Carbohydrates: 4g
- Fiber: 1g
- Sugar: 1g
- Protein: 6g
*This information is provided as a courtesy and is an estimate only. For precise nutritional data, I recommend using your preferred online calculator with the exact brands and quantities you use.
Final Thoughts
And there you have it, friends—my all-time favorite, never-fail, always-requested Hot Spinach & Artichoke Dip. It’s more than just a recipe; it’s a tool for connection, a guarantee of good times, and a reminder that the simplest foods often bring the most happiness.
I hope this recipe becomes a staple in your home, creating its own stories and traditions around your table. If you make it (and I really hope you do!), tag me @Feastical on social media or leave a comment below. I love seeing your creations and hearing about the memories you make with them.
Now go preheat that oven, grab your favorite mixing bowl, and get ready to make something incredible. Happy cooking!
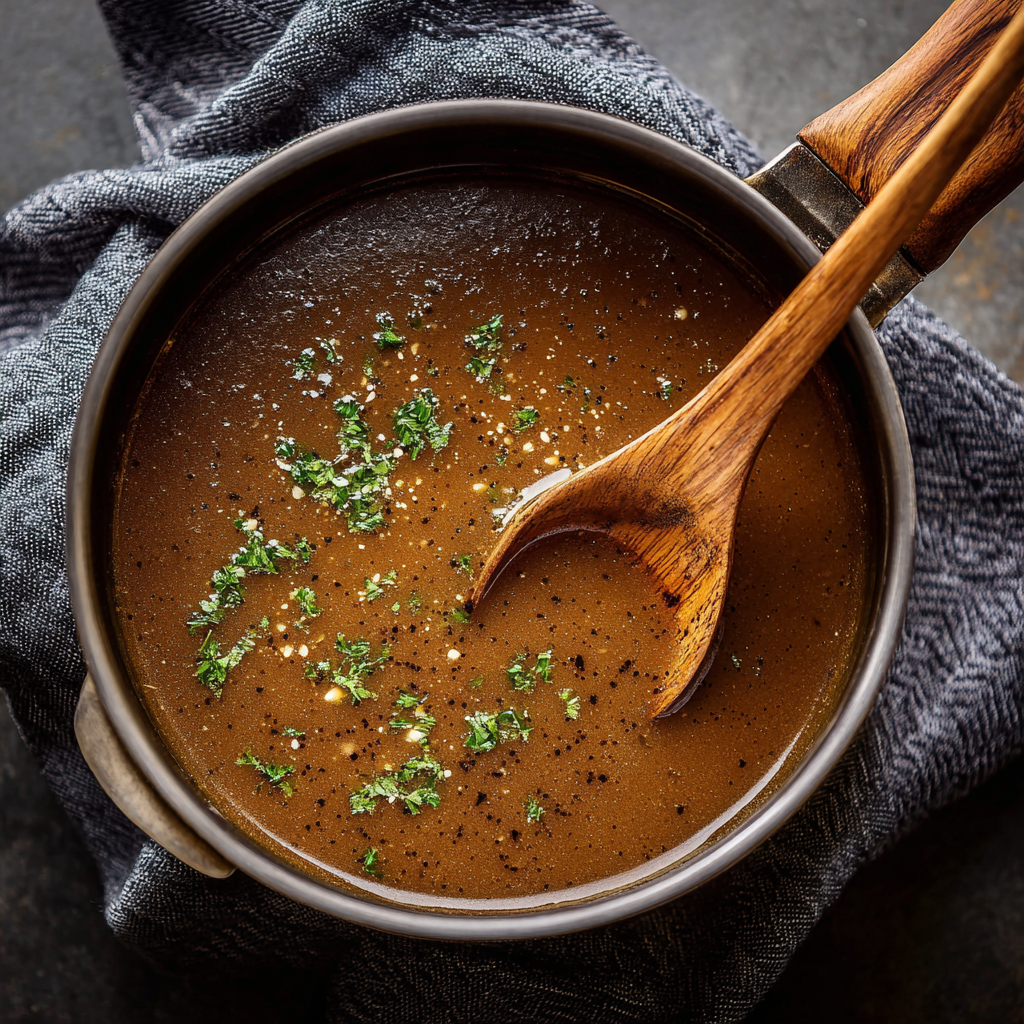
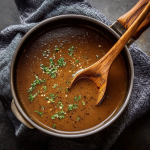
Homemade Brown Gravy
Forget the Lumps: Your Guide to Silky, Savory, Homemade Brown Gravy
Hey friends, Beau here from Feastical! Let’s talk about something magical. It’s not a fancy sauce with a unpronounceable name. It’s not a delicate foam or a fancy reduction. Nope. I’m talking about the humble, the glorious, the absolutely essential homemade brown gravy. This is the liquid gold that brings a Thanksgiving turkey to life, that turns a pile of mashed potatoes into a meal, and that makes a simple roast chicken feel like a celebration. If you’ve ever been stuck with a packet of powdery, salty, “just-add-water” disappointment, I’m here to tell you that your days of gravy woes are over.
This recipe is my kitchen superhero. It’s rich, deeply savory, and has that silky-smooth texture that only comes from making it yourself. The best part? You probably have everything you need in your pantry right this second. We’re talking about a 15-minute miracle, my friends. No drippings required (though we’ll talk about that upgrade later!), no special skills, just a good whisk and a little bit of love. So, whether you’re prepping for the biggest food holiday of the year or just want to elevate your Tuesday night meatloaf, grab your favorite saucepan. We’re about to make a gravy so good, you’ll want to drink it from the mug.
The Gravy Boat of My Dreams
My love affair with gravy started, like most good things, at my grandma’s table. Her kitchen was a place of wonder, always smelling of roasting meat and fresh-baked bread. But for me, the main event was always the gravy boat. It was this beautiful, old, white porcelain boat that seemed to hold liquid magic. She’d let me be the official “gravy pourer,” a title I wore with immense pride. I’d carefully navigate that boat around the table, ladling its rich, brown goodness over everything on my plate—yes, even the green beans. It was the unifying force of the meal.
One year, I must have been about ten, I asked her what her secret was. She winked, pulled me into the kitchen, and showed me. It wasn’t a secret ingredient from some far-off land. It was butter, flour, broth, and knowing when to stop whisking. That moment, standing on a step-stool watching her transform simple ingredients into something extraordinary, stuck with me. It was my first real lesson in alchemy—the magic that happens in a pan. This recipe is hers, with a few of my own Beau-isms added in. Every time I make it, I’m right back in her kitchen, and that’s a feeling worth sharing.
Gathering Your Gravy A-Team
Here’s the beautiful part: the ingredient list is short, sweet, and simple. This is all about technique and flavor-building. Let’s break it down.
- ¼ cup unsalted butter – This is our fat base and what gives the gravy its rich, luxurious mouthfeel. Using unsalted lets us control the sodium level perfectly. Chef’s Insight: If you only have salted butter, that’s okay! Just taste diligently before adding any extra salt at the end.
- ¼ cup all-purpose flour – Our thickening agent. When cooked with the butter, it forms a “roux,” which is the backbone of any great sauce or gravy. Substitution Tip: For a gluten-free version, a 1:1 gluten-free flour blend works wonderfully. I don’t recommend almond or coconut flour here, as they behave very differently.
- 2 cups beef broth – The star of the flavor show. Beef broth gives us that classic, deep, brown gravy taste. Substitution Tip: Chicken or turkey broth makes a fantastic, slightly lighter-colored but equally delicious gravy. For a richer flavor, use a combination of broth and pan drippings from your roast! Vegetable broth works for a vegetarian option.
- ½ tsp onion powder & ½ tsp garlic powder – These are our flavor power-ups. They dissolve perfectly into the gravy, giving us a well-rounded savory base without any chopping required. Chef’s Insight: If you have an extra minute, sautéing 2 tablespoons of finely minced fresh onion and garlic in the butter before adding the flour is an incredible upgrade!
- ½ tsp Worcestershire sauce – Our secret weapon! This adds a complex umami depth, a little tang, and a ton of savory character. Substitution Tip: If you don’t have any, a splash of soy sauce or even a teaspoon of balsamic vinegar can provide a similar complexity.
- Salt and black pepper to taste – Essential for seasoning. Always add at the end, after your broth has reduced, so you don’t over-salt it.
- Optional: A splash of soy sauce or a dash of browning sauce – If your gravy isn’t as dark as you’d like, these are your go-to color fixers. Soy sauce adds salt and umami, while browning sauce (like Kitchen Bouquet) is purely for color. A little goes a long way!
Let’s Make Some Magic: The Foolproof Method
Ready? This is where the magic happens. It’s a simple process, but paying attention to each step is the key to lump-free, restaurant-quality gravy. Let’s do this.
- Melt the Butter: Grab a medium saucepan and place it over medium heat. Toss in your butter and let it melt completely, swirling the pan occasionally. You want it to be fully liquid and just starting to foam, but not browning. Chef’s Hack: Using a light-colored saucepan helps you see the color of your roux more easily!
- Create the Roux: This is the most important step! Once the butter is melted, add your flour all at once and immediately start whisking. You’ll create a thick paste. Keep whisking constantly for 2-3 minutes. You’re looking for it to become a light golden brown color and smell a bit nutty and toasty. This cooks out the raw flour taste and is the foundation of your gravy’s flavor. Chef’s Commentary: Don’t walk away from your roux! It can go from perfect to burnt in a flash. This is your moment to shine. Put on some music and whisk like you mean it.
- Whisk in the Broth: Now, slowly—and I mean slowly—start pouring in your broth while whisking constantly. Add just a splash at first and whisk until it’s completely incorporated into the roux. This initial patience is the absolute key to preventing lumps. Once that first splash is smooth, you can gradually pour in the rest of the broth in a steady stream, never stopping your whisking motion.
- Add the Flavor Boosters: Once all the broth is incorporated and the mixture is smooth, whisk in your onion powder, garlic powder, Worcestershire sauce, and any optional add-ins like soy sauce. Your gravy will look a bit thin at this point. That’s perfect! It needs time to thicken up.
- Simmer to Perfection: Bring the gravy to a gentle simmer, then reduce the heat to medium-low. Let it bubble away for 5-8 minutes, stirring occasionally with your whisk. You’ll feel it start to thicken beautifully on the back of your spoon. Chef’s Hack: To test if it’s ready, dip a spoon in, draw a line through the gravy on the back of it with your finger. If the line holds its shape, it’s perfectly thickened!
- Season and Serve: Take the gravy off the heat. Now is the time to taste it and season with salt and black pepper. Remember, your broth might already be salty, so start with a little and add more as needed. Give it one final whisk, and you are done!
How to Serve Your Homemade Masterpiece
You did it! You’ve created a vessel of savory deliciousness. Now, let’s put it to work. The classic move is, of course, in a warm gravy boat. Pouring that silky gravy over a mountain of fluffy mashed potatoes is a rite of passage. But let’s think bigger!
This gravy is the ultimate companion for a Sunday roast—beef, chicken, pork, you name it. Drizzle it right over the sliced meat for maximum juiciness. Don’t forget the side of roasted vegetables! A little gravy turns simple carrots and Brussels sprouts into a star attraction. Leftover turkey after the holidays? This gravy is the key to the world’s best turkey pot pie or an incredible open-faced sandwich. And honestly? Don’t discount the power of a bowl of gravy and a piece of crusty bread for dipping. I won’t judge.
Mix It Up: 5 Delicious Twists
The basic recipe is a blank canvas. Once you’ve mastered it, the world of gravy is your oyster! Here are a few of my favorite ways to play with the formula.
- The “Thanksgiving Special”: Instead of plain broth, use the pan drippings from your roasted turkey! Skim off most of the fat, then add enough broth to the drippings to make 2 cups of liquid. The flavor will be out-of-this-world good.
- Mushroom Gravy: Before making the roux, sauté 1 cup of finely chopped cremini mushrooms in the butter until they’re golden brown and have released their moisture. Then, proceed with the recipe as written. Earthy, umami-rich, and perfect for vegetarians (if you use veggie broth).
- Herb-Infused Gravy: Add a teaspoon of fresh chopped rosemary or thyme (or ½ teaspoon dried) when you add the broth. For a more subtle flavor, you can also steep a whole sprig of rosemary or a few thyme sprigs in the simmering gravy and remove them before serving.
- Spicy “Kickin'” Gravy: Add a pinch of cayenne pepper or a few dashes of your favorite hot sauce along with the other seasonings. It adds a wonderful warmth that cuts through the richness.
- Creamy Onion Gravy: Sauté a thinly sliced large onion in the butter over low heat for 15-20 minutes until deeply caramelized. Then, add your flour and proceed. Stir in a tablespoon of heavy cream at the end for extra decadence. This is incredible on sausages and mash.
Beau’s Kitchen Notes
This recipe has evolved with me over the years. I’ve made it in a tiny apartment kitchen with a wobbly stove and in the middle of a chaotic family Thanksgiving with three nephews underfoot. The biggest lesson? Don’t stress. Gravy is forgiving. If it gets lumpy, just pour it through a fine-mesh sieve—your secret is safe with me. If it’s too thin, let it simmer a bit longer. Too thick? Whisk in a splash more broth until it’s just right.
I once made a double batch for a friendsgiving and accidentally grabbed the powdered sugar instead of the flour. Let’s just say we had a very… unique sweet and savory gravy that year. We laughed it off and ordered pizza. The moral of the story? Even a “mistake” can make a great kitchen story. But definitely label your containers!
Gravy FAQs: Solving Your Saucy Problems
Q: My gravy is lumpy! What did I do wrong and how can I fix it?
A: The most common culprit is adding the broth too quickly. The roux needs time to absorb the liquid. But don’t worry! All is not lost. The easiest fix is to grab an immersion blender and give it a quick blitz right in the pot. No immersion blender? Pour the gravy through a fine-mesh strainer, pushing it through with the back of a spoon. It’ll be smooth as silk.
Q: My gravy is too thin. How do I thicken it up?
A: Just keep cooking! Simmering over low heat will continue to evaporate water and thicken it. If you’re in a real rush, you can make a “slurry.” Mix a tablespoon of cornstarch with two tablespoons of cold water until smooth, then whisk it into the simmering gravy. Let it cook for a minute—it will thicken quickly.
Q: My gravy is too thick. It’s like a paste! Help!
A> No problem! This is an easy one. Just gradually whisk in more broth, a few tablespoons at a time, until it reaches your desired consistency. Remember, it will also thicken slightly as it cools.
Q: Can I make this gravy ahead of time?
A: Absolutely! Let it cool completely, then store it in an airtight container in the fridge for up to 3 days. When you’re ready, reheat it gently in a saucepan over low heat, whisking in a little extra broth or water if it’s become too thick.
Homemade Brown Gravy
Description
Hey friends! Let’s talk about the magic of homemade brown gravy. This isn’t some fancy, intimidating sauce—this is the stuff that turns mashed potatoes into heaven, roast chicken into a feast, and leftover turkey into the stuff of dreams. With just a few pantry staples, a whisk, and 15 minutes, you can have gravy so smooth and rich you’ll want to sip it straight from a mug.
Ingredients
-
¼ cup unsalted butter
-
¼ cup all-purpose flour (or gluten-free flour blend)
-
2 cups beef broth (or chicken/turkey/vegetable broth)
-
½ tsp onion powder
-
½ tsp garlic powder
-
½ tsp Worcestershire sauce
-
Salt and black pepper, to taste
-
Optional: splash of soy sauce or browning sauce for color
Tip: For extra flavor, sauté minced onion and garlic in butter before adding flour.
Instructions
-
Melt the Butter: In a medium saucepan over medium heat, melt butter until foamy but not browned.
-
Make the Roux: Add flour and whisk constantly for 2–3 minutes until golden and nutty-smelling.
-
Add the Broth Slowly: Pour in a splash of broth, whisk until smooth, then gradually add the rest, whisking constantly to avoid lumps.
-
Flavor Boost: Stir in onion powder, garlic powder, Worcestershire sauce, and optional soy or browning sauce.
-
Simmer: Reduce heat to medium-low, simmer 5–8 minutes, stirring occasionally, until thickened.
-
Season & Serve: Taste and add salt and pepper as needed. Serve over mashed potatoes, roasted meats, or vegetables.
Notes
-
Lumpy Gravy? Use an immersion blender or strain through a fine-mesh sieve.
-
Too Thin? Simmer longer or whisk in a cornstarch slurry (1 tbsp cornstarch + 2 tbsp cold water).
-
Too Thick? Gradually whisk in extra broth until desired consistency.
-
Make Ahead: Store in fridge up to 3 days; reheat gently with a little broth if needed.
Nutrition
- Calories: 85 Cal per ¼ cup serving
- Fat: 6g
- Carbohydrates: 6g
- Protein: 1g
Nutritional Information (Per Serving)
Let’s be real—gravy isn’t a health food, but it’s a glorious condiment that makes healthy foods like turkey and vegetables even more enjoyable! This homemade version is a far better choice than store-bought packets, as you control the sodium and quality of ingredients. Here’s a rough breakdown per ¼ cup serving (recipe makes about 8 servings):
- Calories: ~85 kcal
- Carbohydrates: 6g
- Fat: 6g
- Protein: 1g
- Sodium: ~380mg (will vary greatly based on the broth you use)
Your New Kitchen Staple
And there you have it, my friends. The secret to perfect, foolproof, homemade brown gravy is out of the bag. It’s a simple process that yields incredible results and will instantly make you feel like a kitchen rockstar. This is the kind of recipe that builds confidence—the one you’ll turn to again and again for weeknight dinners and holiday feasts alike.
I hope this recipe finds its way into your kitchen and becomes a part of your own family’s story. Food is about so much more than just eating; it’s about the connection, the memories, and the joy of creating something delicious with your own two hands. So go on, give it a try. And when you do, I’d love to hear about it! Tag me @Feastical on social media so I can see your beautiful, saucy creations.
Until next time, happy cooking!
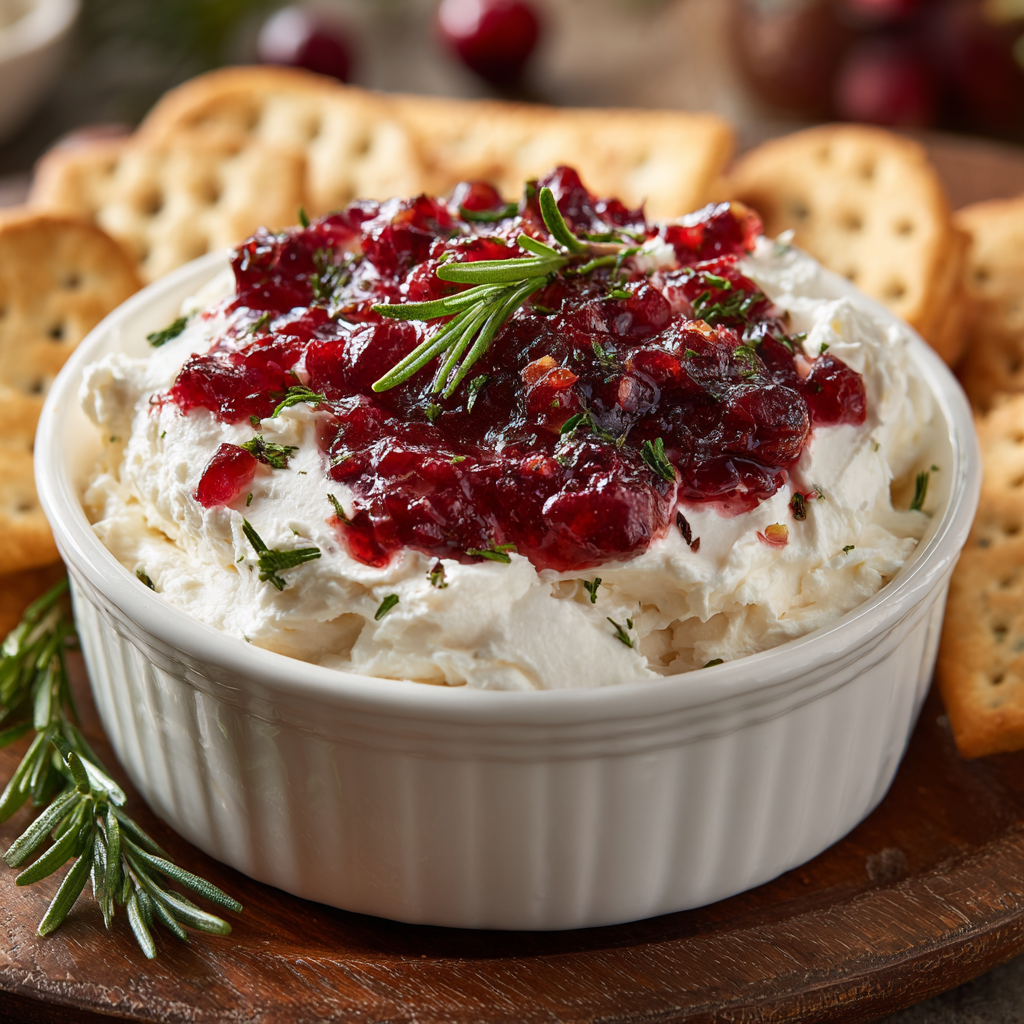
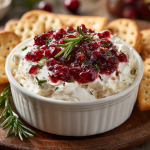
Cranberry Cream Cheese Dip
The Easiest, Most Show-Stopping Appetizer You’ll Make This Season
Hey friends, Beau here from Feastical! Let’s talk party food. We’ve all been there: you’re hosting, or you’re tasked with bringing an appetizer, and the pressure is on. You want something that looks like you fussed for hours, tastes incredible, and secretly comes together in minutes so you can actually enjoy the party instead of sweating over the stove. Sound familiar? Well, pull up a chair, because I’m about to share my absolute go-to, never-fail, crowd-pleasing secret weapon: my legendary Cranberry Cream Cheese Dip.
This dip is the holy grail of holiday entertaining. Imagine this: a luxuriously smooth, slightly tangy cloud of whipped cream cheese, slathered with a vibrant, sweet-tart cranberry chutney, and finished with a whisper of earthy, aromatic rosemary. You get this incredible symphony of textures and flavors in every single bite—creamy, chewy, sweet, tangy, and herbaceous. It’s the dip that disappears faster than you can say “Happy Holidays,” and I promise, it will earn you a permanent spot on the “must-bring an app” list.
The best part? This isn’t some fussy, complicated recipe. It’s about as simple as it gets, but the final result is pure elegance. It’s the kind of dish that makes people’s eyes light up. So, whether you’re a seasoned kitchen pro or just figuring out your whisk from your spatula, this recipe is for you. Let’s make something fantastic together.
A Dip Born from a Happy Accident
I have to tell you about the first time this beauty came to life. It was years ago, right before a last-minute Friendsgiving. I’d volunteered to bring a cheeseball, but my timing was… optimistic, to say the least. I was running so late that I knew I’d never have time to let a block of cream cheese soften, mix in a million ingredients, shape it, and chill it again. I was staring into my fridge, willing a solution to appear, when I saw a jar of homemade cranberry sauce from a well-meaning aunt and a container of whipped cream cheese I’d bought for bagels.
In a moment of pure “what if?” desperation, I smeared the whipped cream cheese into a dish, plopped the cranberry sauce on top, and threw on some rosemary from a windowsill plant because it looked festive. I grabbed some crackers and ran out the door, fully expecting it to be a flop. But you know what? It was the first dish to be completely devoured. People raved about the “complex layers” and the “inspired flavor pairing.” I just smiled and nodded, the secret hero of a happy kitchen accident. It’s been my not-so-secret weapon ever since.
Gathering Your Cast of Characters
One of the joys of this recipe is its simplicity. You only need a handful of key players to create magic. Here’s what you’ll need:
- 8 oz Cream Cheese, softened: This is our base, our creamy canvas. Using full-fat cream cheese is my chef’s tip here—it provides the richest, most luxurious texture and flavor that won’t get watery. Let it sit on the counter for a good 30-60 minutes before you start. If you’re in a pinch, you can microwave it for 15-20 seconds on low power, but be careful not to melt it!
- 2 tbsp Sour Cream or Greek Yogurt: This little addition is a game-changer! It lightens up the dense cream cheese, making it wonderfully fluffy and spreadable. Sour cream gives a classic tang, while plain Greek yogurt offers a slightly healthier twist with a similar effect.
- ½ tsp Vanilla Extract (optional): “Vanilla in a savory dip?!” Trust me on this one. A tiny splash doesn’t make it taste like dessert; instead, it works in the background to round out the tanginess of the dairy and enhance the sweetness of the cranberries. It’s a subtle pro-move for balance.
- 1 cup Cranberry Chutney: The star of the show! You can use a high-quality store-bought version (look for ones with whole berries and a good ingredient list) or go the homemade route. A great chutney has a balance of sweet, tart, and spicy flavors, often with hints of orange or warm spices like cinnamon and cloves.
- 1 tsp Fresh Rosemary, finely chopped: Please, please use fresh rosemary for this. Dried rosemary is too piney and tough. The fresh herb provides an incredible aromatic, earthy note that cuts through the richness and makes the whole dish sing. You’ll also need a small sprig for a gorgeous garnish.
- For Serving: Crackers, crostini, or a thinly sliced and toasted baguette. I love using a variety for texture—something sturdy like a water cracker, something seedy for nuttiness, and something simple like a classic baguette crostini.
Let’s Build This Masterpiece: Step-by-Step
Alright, team! Let’s get mixing. This process is so simple and satisfying. Follow these steps, and you’ll have a dip worthy of a magazine cover in no time.
Step 1: Whip It Good!
Grab a medium-sized mixing bowl and plop in your softened cream cheese, sour cream (or Greek yogurt), and that optional-but-highly-recommended vanilla extract. Now, take your hand mixer (or a sturdy whisk and some elbow grease) and beat it on medium speed until it’s completely smooth, light, and fluffy. This should only take about 1-2 minutes. Chef’s Hack: Scrape down the sides of the bowl with a spatula halfway through to ensure no stubborn lumps of cream cheese are left behind. We’re going for cloud-like perfection here.
Step 2: Create Your Creamy Canvas
You can serve this right in the bowl if it’s pretty enough, but I love the visual appeal of a shallow serving dish or a small platter. Using a spatula, spread the whipped cream cheese mixture into an even layer. I like to make the layer about ½ to ¾-inch thick. You can make the top perfectly smooth or create gentle swirls—the cranberry topping will hide any “imperfections,” so don’t stress!
Step 3: The Grand Topping
Time for the vibrant cranberry chutney! Give it a quick stir in its jar or bowl first to make sure it’s well-combined. Now, carefully spoon it over the cream cheese base. Using the back of your spoon, gently spread it out, leaving a little border of the white cream cheese showing around the edges. It creates a beautiful “frame” and looks incredibly professional.
Step 4: The Finishing Touch
Take your finely chopped fresh rosemary and sprinkle it evenly over the crimson cranberry layer. The smell at this point is just incredible. Finally, place a beautiful little sprig of rosemary right in the center as your garnish. It signals to everyone that this is a fresh, herbaceous dish.
Step 5: Dig In!
You can serve this immediately (the contrast between the cool dip and the room-temp topping is lovely) or cover it loosely with plastic wrap and pop it in the fridge for up to 2 hours before your party. Serve it with your chosen crackers or bread on the side and watch it vanish.
How to Serve Your Sensational Dip
Presentation is part of the fun! This dip is so gorgeous, it deserves a little spotlight. I love using a white or neutral-colored ceramic dish or a rustic wooden board to really make the red cranberries pop. For the dippers, offer a variety on a separate plate or in a small basket. Think about texture and flavor:
The Classic Crew: Buttery round crackers, simple water crackers, or crispy baguette slices.
The Gourmet Gang: Toasted crostini rubbed with a hint of garlic, hearty seeded crackers, or even pretzel crisps for a salty crunch.
The Healthy Squad: Don’t forget our friends who might be avoiding gluten or carbs! This dip is also amazing with apple slices, pear slices, or even sturdy endive leaves for a refreshing, low-carb option.
Place a small spreading knife or a few cute little cheese spreaders next to the dish to make it easy for guests to serve themselves. Then, just step back and wait for the compliments to roll in!
Make It Your Own: Delicious Variations
The beauty of this recipe framework is that it’s a blank slate for creativity. Once you’ve mastered the classic, try one of these fun twists!
- Jalapeño Cranberry Kick: Love a little heat? Add 1-2 tablespoons of finely minced jalapeño (seeds removed for less heat, kept for more!) to the cranberry chutney before spooning it on. The sweet-heat combo is unbelievable.
- Orange Zest Brightness: Add the zest of one orange to the cream cheese mixture while whipping it. The citrus aroma pairs perfectly with the cranberry and makes the whole dip taste even brighter and fresher.
- Candied Pecan Crunch: For incredible texture, sprinkle a handful of chopped candied pecans or walnuts over the top along with the rosemary. The sweet, crunchy nuts take this dip to a whole new level.
- Brie & Cranberry Layer: Feeling decadent? Replace the cream cheese layer with a layer of softened brie cheese! Simply remove the rind from an 8 oz wheel of brie, let it soften, and whip it with the sour cream. Ultra-rich and delicious.
- Thanksgiving Leftover Dip: Got leftover cranberry sauce from the big day? This is its glorious destiny! If your sauce is on the simpler side (just cranberries and sugar), stir in a pinch of orange zest and a tiny pinch of cinnamon to mimic the complexity of a chutney before using it.
Beau’s Chef Notes & Kitchen Stories
Over the years, this recipe has become a Feastical staple, and it’s evolved in the best ways. I once brought it to a summer picnic (using a fantastic ginger-spiced cranberry chutney) and it was a hit even in July! It just goes to show that good flavor knows no season.
A funny story: I once accidentally used a jar of spicy pepper jelly instead of cranberry chutney because the jars looked identical in my fridge. It was a complete accident, but my friends loved the spicy twist so much that it inspired the “Jalapeño Kick” variation above. So remember, some of the best dishes come from happy little kitchen mistakes. Don’t be afraid to experiment!
Your Questions, Answered!
Q: Can I make this dip ahead of time?
A: Absolutely! You can whip the cream cheese base and keep it covered in the fridge for up to 2 days. You can also prepare your cranberry chutney ahead of time. However, I recommend assembling the dip no more than 2-3 hours before serving. If it sits too long, the juices from the cranberries can start to bleed into the cream cheese layer. It’ll still taste great, but it won’t have that pristine, layered look.
Q: My cream cheese is still cold and lumpy! Help!
A: No worries, this happens to the best of us. The key is patience and softening. If you’re in a serious time crunch, try this: take the cold block of cream cheese out of its foil and place it on a microwave-safe plate. Microwave on 30% power for 15-second intervals, flipping it each time, until it’s slightly soft to the touch but not melting. For lumpy already-whipped mixture, just keep beating! The lumps will eventually smooth out.
Q: I can’t find cranberry chutney. What can I use instead?
A: Whole-berry cranberry sauce is the next best thing! Just give it a taste. If it’s very sweet, you might want to add a squeeze of fresh lemon juice or a tiny pinch of salt to balance it. You could also use a high-quality fig jam or a tart cherry preserves for a different but equally delicious flavor profile.
Q: Is there a lighter version of this recipe?
A: For sure! Use Neufchâtel cheese (the lower-fat cousin of cream cheese) and plain, non-fat Greek yogurt. The texture will be slightly less rich but still wonderfully creamy and delicious.
Cranberry Cream Cheese Dip
Description
A gorgeous, crowd-pleasing holiday dip that comes together in minutes! Smooth, whipped cream cheese layered with sweet-tart cranberry chutney and a hint of rosemary makes a dip that disappears faster than you can say “Happy Holidays.” Perfect for crackers, crostini, or fresh veggies.
Ingredients
-
8 oz cream cheese, softened
-
2 tbsp sour cream or Greek yogurt
-
½ tsp vanilla extract (optional)
-
1 cup cranberry chutney (homemade or store-bought)
-
1 tsp fresh rosemary, finely chopped (plus a small sprig for garnish)
For Serving:
Crackers, crostini, toasted baguette slices, apple or pear slices, or endive leaves
Instructions
Step 1: Whip the Cream Cheese
-
In a medium bowl, beat cream cheese, sour cream, and vanilla (if using) with a hand mixer or whisk until smooth and fluffy, about 1–2 minutes.
-
Scrape down the sides of the bowl to ensure no lumps remain.
Step 2: Spread the Base
-
Spread the whipped cream cheese evenly in a shallow serving dish, about ½–¾ inch thick.
Step 3: Add the Cranberry Layer
-
Spoon cranberry chutney on top and gently spread it, leaving a small border of cream cheese around the edges for a polished look.
Step 4: Garnish
-
Sprinkle finely chopped rosemary evenly over the top.
-
Add a small sprig of rosemary in the center for a festive touch.
Step 5: Serve
-
Serve immediately or cover loosely and refrigerate for up to 2 hours before serving.
-
Pair with crackers, crostini, or fresh vegetables for dipping.
Notes
-
Soften cream cheese before whipping for smooth, lump-free results.
-
Assemble no more than 2–3 hours before serving to keep layers distinct.
-
Can use Neufchâtel or Greek yogurt for a lighter version.
-
Whole-berry cranberry sauce is a fine substitute for chutney; balance very sweet versions with lemon juice or a pinch of salt.
Nutrition
- Calories: 120 Calories per ~2 tbsp serving
- Fat: 9g
- Saturated Fat: 5g
- Carbohydrates: : 8g
Nutritional Information*
Okay, let’s talk nutrition real quick. Remember, this is a treat, a celebration dish! This info is for a serving size of about 2 tablespoons of the dip with topping.
Per Serving:
Calories: ~120 | Fat: 9g | Saturated Fat: 5g | Carbohydrates: 8g | Fiber: 0g | Sugar: 6g | Protein: 2g
*Please note: This is an estimate based on the specific ingredients I used. Values can vary significantly depending on the brand of cream cheese and cranberry chutney you choose. If you’re following a specific diet, it’s always best to calculate nutrition using your exact ingredients with an online calculator.
Final Thoughts from My Kitchen to Yours
Well, there you have it, my friends. My all-time favorite, ridiculously easy, always-impressive Cranberry Cream Cheese Dip. It’s more than just a recipe; it’s a reminder that the best food doesn’t have to be complicated. It’s about bringing people together over flavors that make them smile.
I hope this recipe becomes a trusted friend in your entertaining arsenal, just like it is in mine. It’s a little bite of joy, a warm hug on a cracker. So the next time you’re asked to bring something, walk in with this, a big smile, and all the confidence of a chef who knows they’ve nailed it.
If you make it (and I really hope you do!), tag me on social @feastical—I love seeing your creations! Now, go forth and dip.
With love and a full plate,

Caramelized Onion Dip
Forget the Packet: This Homemade Caramelized Onion Dip is a Holiday Game-Changer
Hey friends, Beau here from Feastical! Let’s talk about the elephant in the room at every holiday party: the snack table. You know the one. It’s usually anchored by a bowl of that classic onion dip, the one made from a powdered soup mix. And hey, no judgment—I’ve definitely scooped my fair share onto a ridged potato chip. It’s a nostalgic flavor we all know. But what if I told you that with just a little bit of patience and a whole lot of love, you can create an onion dip so deeply flavorful, so irresistibly creamy, and so downright magical that it will completely redefine your holiday snacking experience?
This Caramelized Onion Dip is that recipe. It’s the dip that makes people stop mid-conversation, look at their cracker, and ask, “Wait, what IS this?” It’s the dish you’ll find your uncle secretly hovering over in the corner of the kitchen. It’s the ultimate feel-good food that transforms simple, humble ingredients—onions, shallots, a few herbs—into a creamy, savory masterpiece. This isn’t just a dip; it’s a statement. It says, “I care enough to caramelize onions for you,” and let me tell you, that’s the culinary equivalent of a warm hug. So, if you’re ready to become the undisputed MVP of your Thanksgiving, Christmas, or game-day gathering, grab your favorite skillet and let’s make some magic happen together.
The Thanksgiving That Almost Wasn’t (Thanks to This Dip)
I have to share a quick story about the first time I truly understood the power of this dip. It was years ago, my first time hosting Friendsgiving. I had the turkey brining, the pies cooling, and the table set. My mission was to impress, and I decided this caramelized onion dip would be my secret weapon for the pre-feast munchies. As the onions were slowly working their magic, filling my apartment with that incredible sweet-and-savory aroma, my doorbell rang. It was a few early birds. We got to chatting, I poured some drinks, and we were laughing… until I smelled it. Not the beautiful caramelization I was aiming for, but the acrid, heart-sinking scent of burnt onions.
I had completely forgotten to stir them! I rushed to the stove, my heart sinking faster than a bad soufflé. The bottom layer was a lost cause. I was sure my hosting career was over before it began. But instead of panicking, I took a deep breath. I carefully scooped out the good, deeply golden onions from the top, started a new batch in a clean pan, and combined the two. That little near-disaster taught me a valuable lesson: patience and attention are your best ingredients. The resulting dip, born from a mistake, was still the hit of the night. It was a reminder that cooking is never about perfection; it’s about passion, adaptation, and sharing something deliciously real. Now, I never leave my onions unattended—and I always have a fun story to tell when I serve this dip.
Gathering Your A-Team: The Ingredients
This recipe is all about building layers of flavor, and it starts with incredible ingredients. Here’s your shopping list and my chef-ly insights on each one.
- 3 large shallots, thinly sliced – Shallots are the secret superstar here. They have a more delicate, sweet, and less pungent flavor than onions, which adds a beautiful complexity to the final dip. Chef’s Tip: Don’t have shallots? You can use an extra small onion, but trust me, the shallots are worth it!
- 1 small onion, thinly sliced – I like using a standard yellow onion for its robust, all-purpose flavor that forms a perfect base. The combination with shallots is magic.
- 2 tbsp butter & 1 tbsp olive oil – We’re using both! The butter delivers unmatched rich flavor, while the olive oil has a higher smoke point, preventing the butter from burning during the long, slow cook time.
- 2 cloves garlic, minced – Fresh is best! We add it at the end to gently cook and perfume the onions without letting it burn and become bitter.
- 1 tsp fresh thyme leaves (or ½ tsp dried) – Thyme and onion are a match made in heaven. Its earthy, slightly minty flavor cuts through the richness. Fresh is wonderful, but dried works in a pinch!
- 1 cup sour cream – This gives the dip its classic tangy creaminess. For a lighter version, full-fat Greek yogurt is a fantastic substitute.
- ½ cup mayonnaise – This adds a rich, velvety texture and helps bind everything together. Use a good-quality mayo you love the taste of.
- 4 oz cream cheese, softened – The hidden weapon! This gives the dip a luscious, slightly thick body that makes it perfect for clinging to chips and veggies. Pro Tip: Let it sit out on the counter for an hour before you start to ensure it blends smoothly without lumps.
- ½ tsp salt & ¼ tsp black pepper – Seasoning is key. We’ll season at the end once we can taste the combined mixture.
Let’s Get Cooking: The Step-by-Step Lowdown
Alright, team. This is where the magic happens. Put on some good music, because we’re going low and slow. This isn’t a rush job; it’s a labor of love.
Step 1: The Main Event – Caramelizing Your Onions
In a large skillet (I like using cast iron for even heating), heat the butter and olive oil over medium-low heat. Once the butter has melted and foamed slightly, add your thinly sliced shallots and onion. Now, here’s the most important part: do not turn up the heat! We are not sautéing; we are caramelizing. This is a gentle, slow process that coaxes the natural sugars out of the alliums. Stir them to coat them in the fat, then let them cook, stirring only every 4-5 minutes. You’ll need to give them a good 20-25 minutes. They’ll go from raw, to translucent, to soft, to a pale gold, and finally to a deep, golden-brown glory. If they seem to be cooking too fast, lower your heat. This patience is what separates a good dip from a legendary one.
Step 2: The Flavor Finish
When your onions are a beautiful deep golden color and are sweet and tender, add the minced garlic and thyme. Cook for just 1-2 minutes more, until the garlic becomes fragrant. You’ll smell the thyme blooming in the heat. Remove the skillet from the heat and let this mixture cool slightly. This is crucial—if you add piping hot onions to your cold dairy, it could make the dip runny. Let it cool for about 10-15 minutes.
Step 3: The Creamy Base
While the onions are cooling, grab a medium mixing bowl. Add the sour cream, mayonnaise, and that softened cream cheese. Use a spatula or a whisk to blend it all together until it’s completely smooth and no lumps of cream cheese remain. This is the blank canvas for our masterpiece.
Step 4: Bring It All Together
Scrape every last bit of your slightly cooled onion mixture into the bowl with the creamy base. This includes all the delicious buttery bits from the pan—that’s pure flavor! Add the salt and pepper. Now, fold everything together gently until it’s fully combined. Taste it! This is your moment. Does it need more salt? A crack more pepper? Adjust to your liking.
Step 5: The Patience Payoff
I know, I know. You want to dig in immediately. But trust me on this: cover the bowl with plastic wrap and chill it in the refrigerator for at least 30 minutes, though an hour is even better. This waiting period is non-negotiable. It allows the flavors to meld and marry, the dip to firm up to the perfect scoopable consistency, and the sharp edges of the onion and garlic to mellow into something harmonious and incredible.
How to Serve This Dip Like a Pro
Presentation is part of the fun! You’ve made this gorgeous dip, so let’s show it off. I love serving this in a shallow, wide bowl so people can get a good scoop. For a rustic touch, a small bread bowl is always a crowd-pleaser. Simply hollow out a small round sourdough loaf, pour the dip inside, and use the torn bread pieces as dippers alongside the other options.
Now, for the dippers! The classic pairing is with good, sturdy ridged potato chips—they have the salt and the structure to handle a hearty scoop. For a more elegant vibe, offer a basket of crostini (little toasted baguette slices), pita chips, or crackers. And for our health-conscious friends (or just for a delicious crunch), a platter of fresh vegetable sticks is mandatory. Think carrot sticks, celery, bell pepper strips, cucumber rounds, and radishes. The cool, crisp veggies are a fantastic contrast to the rich, creamy dip.
Make It Your Own: Delicious Recipe Variations
The beauty of this base recipe is that it’s a perfect playground for your own creativity. Here are a few of my favorite twists:
- Bacon & Cheddar Twist: Crumble 4-5 strips of cooked, crispy bacon and fold it into the dip along with a half cup of shredded sharp cheddar cheese. It’s a heartier, smokier version that’s perfect for a crowd.
- French Onion Inspiration: Add a tablespoon of Worcestershire sauce and a quarter cup of grated Gruyère cheese to the mix. It’ll taste just like your favorite soup in dip form!
- Green Goddess Version: Brighten it up! Fold in two tablespoons of chopped fresh chives, one tablespoon of chopped fresh parsley, and a squeeze of lemon juice after combining everything.
- Vegan-Friendly Swap: You can absolutely make this plant-based! Use vegan butter and olive oil for caramelizing. For the creamy base, use a combination of vegan sour cream, vegan mayo, and a soft vegan cream cheese alternative (Kite Hill and Miyoko’s make great ones).
- Spicy Kick: Like a little heat? Add a pinch of cayenne pepper, a few dashes of your favorite hot sauce, or even a finely minced jalapeño (seeds removed for less heat) to the onions when you add the garlic.
Beau’s Chef Notes & Kitchen Stories
This recipe has evolved in my kitchen more times than I can count. I started out being very precious about it, meticulously stirring the onions every 60 seconds. I’ve learned that they actually benefit from a little uninterrupted time in the pan to develop those beautiful browned bits (the fond) on the bottom. Another evolution? I sometimes deglaze the pan with a splash of white wine or even a tablespoon of balsamic vinegar after the onions are done. It lifts all those tasty browned bits and adds another layer of incredible flavor. The best kitchen tip I can give you is to make a double batch. The caramelized onions freeze beautifully, and having them on hand makes whipping up this dip a 5-minute affair. It’s my not-so-secret secret for last-minute hosting!
Your Questions, Answered: FAQs & Troubleshooting
Q: My onions are burning instead of caramelizing! What did I do wrong?
A: The heat is almost certainly too high. Caramelization is not a speedy process. You must keep the heat at medium-low or even low. If they’re cooking too fast, add a tablespoon of water to the pan to slow things down and lower the heat immediately. Patience is key!
Q: Can I make this dip ahead of time?
A: Absolutely! In fact, I highly recommend it. Making it a full day ahead allows the flavors to develop and deepen even more. Just store it covered tightly in the refrigerator and give it a good stir before serving.
Q: My dip turned out a bit runny. How can I fix it?
A> This usually happens if the onions were added to the dairy while still too warm. Don’t worry! The best fix is simply more chilling time. Pop it back in the fridge for another hour or so. If it’s still too loose, you can gently fold in a little more softened cream cheese to help thicken it up.
Q: Can I use a food processor to chop the onions?
A> I don’t recommend it for the initial slicing. A food processor can make the pieces too uneven and can bruise the onions, releasing too much water. For the best texture and control, use a sharp knife and take your time with a nice, thin slice. However, if you prefer a smoother dip (less chunky), you can pulse the cooled caramelized onion mixture a few times in the processor before adding it to the dairy base.
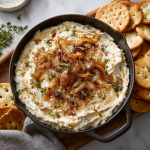
Caramelized Onion Dip
Description
Skip the powdered mixes and make a dip that will steal the show at your next holiday party! This Caramelized Onion Dip is creamy, savory, and bursting with flavor from slowly caramelized shallots and onions, blended with sour cream, mayo, and cream cheese. It’s the ultimate snack that turns ordinary chips, crackers, or veggies into a celebration.
Ingredients
-
3 large shallots, thinly sliced
-
1 small yellow onion, thinly sliced
-
2 tbsp butter
-
1 tbsp olive oil
-
2 cloves garlic, minced
-
1 tsp fresh thyme leaves (or ½ tsp dried)
-
1 cup sour cream (or Greek yogurt for lighter option)
-
½ cup mayonnaise
-
4 oz cream cheese, softened
-
½ tsp salt
-
¼ tsp black pepper
Optional garnishes & dippers: potato chips, crackers, crostini, pita chips, fresh veggie sticks (carrots, celery, cucumber, bell peppers, radishes)
Instructions
Step 1: Caramelize the Onions
-
Heat butter and olive oil in a large skillet over medium-low heat.
-
Add shallots and onion, stirring to coat. Cook slowly, stirring every 4–5 minutes for 20–25 minutes until deep golden brown. Patience is key—don’t rush!
Step 2: Add Garlic and Thyme
-
Stir in minced garlic and thyme for 1–2 minutes until fragrant.
-
Remove from heat and let cool 10–15 minutes to avoid curdling the dairy.
Step 3: Prepare Creamy Base
-
In a medium bowl, whisk together sour cream, mayonnaise, and softened cream cheese until smooth.
Step 4: Combine
-
Gently fold in the caramelized onion mixture and all the flavorful pan bits.
-
Season with salt and pepper to taste.
Step 5: Chill
-
Cover and refrigerate at least 30 minutes (1 hour preferred) for flavors to meld and dip to firm up.
Notes
-
Bacon & Cheddar: Add crumbled bacon and shredded cheddar for a smoky, hearty version.
-
French Onion Style: Mix in 1 tbsp Worcestershire sauce and ¼ cup grated Gruyère.
-
Herb Boost: Add chopped chives, parsley, or a squeeze of lemon juice.
-
Vegan-Friendly: Use vegan butter, sour cream, mayo, and cream cheese alternatives.
-
Spicy Twist: Add cayenne, hot sauce, or minced jalapeño.
Nutrition
- Calories: 150 Caper ¼ cup serving
- Sodium: 180mg
- Fat: 13g
- Saturated Fat: 6g
Nutritional Information (Because Knowledge is Power!)
Okay, let’s keep it real: this is a holiday indulgence, a celebratory treat. It’s meant to be rich, creamy, and enjoyed in the spirit of the season. That said, here’s a rough breakdown per serving (about a ¼ cup), so you can snack smartly. Remember, these are estimates and can vary based on the specific brands of ingredients you use.
Per Serving: Calories: ~150 | Fat: 13g | Saturated Fat: 6g | Cholesterol: 25mg | Sodium: 180mg | Carbohydrates: 6g | Fiber: 1g | Sugar: 3g | Protein: 2g
To balance it out, I always serve it with those fresh veggie sticks. You still get that incredible flavor payoff with every bite, but you’re also adding vitamins and fiber to your snack. It’s all about balance and joy!
Final Thoughts from My Kitchen to Yours
There you have it, my foodie friends. My ultimate, soul-satisfying, party-winning Caramelized Onion Dip. This recipe is more than just a list of ingredients and steps; it’s an invitation to slow down, to savor the process, and to create something truly special to share with the people you love. The smell of onions slowly caramelizing on your stove is the smell of a home filled with warmth and anticipation. It’s a gesture of care that people can literally taste.
I hope this recipe becomes a new tradition in your home, just like it has in mine. It’s a reminder that the best food often comes from the simplest ingredients, treated with a little patience and a lot of heart. So go forth, caramelize with confidence, and get ready to accept all the compliments coming your way. And if you make it, I’d love to hear about it! Tag me @Feastical on social media so I can see your beautiful creations.
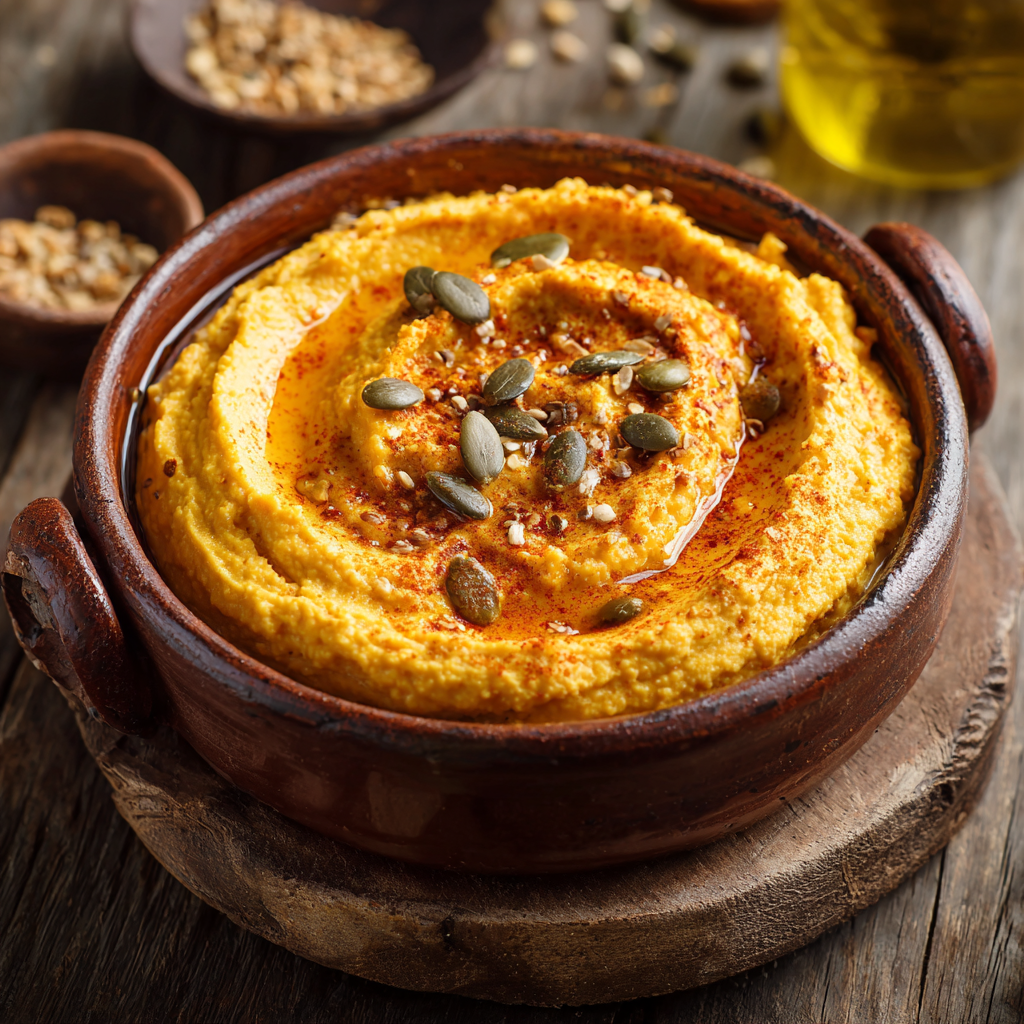
Pumpkin Hummus
Fall’s Coziest Appetizer: Your New Favorite Pumpkin Hummus
Hey friends, Beau here from Feastical! Let’s talk about the best part of fall. No, not the questionable sweater choices (though I’m a fan of a good flannel), but the incredible, soul-warming food. It’s the season of spice, everything nice, and dipping things into other, even more delicious things. And that, my friends, is exactly where today’s star player comes in: Pumpkin Hummus.
Now, I know what you might be thinking. “Pumpkin? In my hummus? Isn’t that for pies and lattes?” Trust me on this one. This isn’t a dessert dip masquerading as savory. This is a smooth, creamy, dreamy fusion of earthy chickpeas and sweet, roasted pumpkin, all hugged tight by the warm spices we know and love—cumin, a touch of cinnamon, and that magical smoked paprika. It’s a flavor experience that feels both familiar and excitingly new. It’s the perfect centerpiece for your game day spread, the talk of your holiday party, or just a ridiculously good snack to make your Tuesday afternoon feel a little more special. So, grab your food processor (or your trusty blender), and let’s whip up a batch of this autumnal magic together.
A Happy Little Kitchen Accident
I’ll let you in on a little secret: this now-famous recipe started as a beautiful kitchen mishap. A few years back, I was hosting a big Friendsgiving potluck. My mission was to make a massive batch of my classic hummus. I had the music going, the chickpeas drained, the tahini measured… and then I saw it. A lonely container of leftover roasted pumpkin from a pie test-run, sitting right next to my bowl of lemon juice. In a moment of pure, “why not?” energy, I just scooped a big spoonful into the food processor with everything else.
The result was a silent, then roaring, standing ovation from my friends. The pumpkin added this incredible velvety texture and a subtle sweetness that balanced the garlic and lemon perfectly. It was gone in minutes, and the requests for the “recipe” started flooding in. It taught me one of my favorite kitchen lessons: some of the best creations come from a place of playful experimentation, not rigidly following the rules. That happy accident is now a Feastical fall tradition, and I’m so pumped to share it with you.
Gathering Your A-Team: The Ingredients
This recipe is all about simple, wholesome ingredients that work together in perfect harmony. Here’s your shopping list, complete with my chef-y notes to set you up for success.
- 1 can (15 oz) chickpeas, drained and rinsed – The hearty, protein-packed base of any great hummus. Pro tip: For the absolute smoothest texture, take 30 seconds to pop the skins off each chickpea. It’s a little extra work, but oh man, does it make a difference. If you’re short on time, no sweat—it’ll still be delicious!
- 1 cup roasted pumpkin (or canned pumpkin purée) – The autumnal star! Using canned purée is the ultimate no-fuss, totally delicious option—just make sure it’s 100% pure pumpkin, not pumpkin pie filling. For a deeper, caramelized flavor, roasting your own sugar pumpkin (or pie pumpkin) is a game-changer.
- 2 tbsp tahini – This sesame seed paste adds essential richness and that authentic hummus flavor. Give the jar a really good stir before you measure, as the oil loves to separate. If you’re in a pinch, a natural, runny peanut butter or almond butter can work, but the flavor will shift.
- 2 tbsp olive oil – Plus more for drizzling! Use a good extra-virgin olive oil here—its fruity, peppery notes will shine through in the final dip.
- 2 tbsp lemon juice – The bright, zesty kick that cuts through the richness and brings all the flavors to life. Freshly squeezed is always best!
- 1 clove garlic, minced – For that essential savory punch. If raw garlic is a bit too intense for you, try roasting the clove first for a sweeter, mellower flavor.
- 1 tsp cumin – Earthy, warm, and absolutely non-negotiable. It’s the soul of the spice blend.
- ½ tsp smoked paprika – This is my secret weapon. It adds a subtle smokiness that makes the dip taste like it’s been slow-cooking for hours.
- ½ tsp cinnamon – This is the surprise guest that ties the pumpkin and chickpeas together beautifully. It whispers “fall” without shouting “dessert.”
- Salt and black pepper, to taste – Seasoning is key! Don’t be shy.
- 2–3 tbsp water (to thin if needed) – Your tool for achieving that perfect, dippable consistency.
Let’s Get Blending: Your Foolproof Steps
This is where the magic happens, and it’s incredibly easy. I’ll walk you through each step to ensure hummus perfection.
- Prep Your Pumpkin (If Roasting). If you’re going the fresh route, preheat your oven to 400°F (200°C). Cut a small sugar pumpkin in half, scoop out the seeds (save them for roasting later!), and place the halves cut-side down on a baking sheet lined with parchment. Roast for about 45 minutes, or until the flesh is super tender. Let it cool, then scoop out one cup of flesh. Chef Hack: You can do this a day or two ahead and keep it in the fridge!
- Combine the Core Ingredients. In the bowl of your food processor, add the drained chickpeas, your one cup of pumpkin, tahini, olive oil, lemon juice, minced garlic, cumin, smoked paprika, cinnamon, a good pinch of salt, and a crack of black pepper. Chef Hack: If you’re sensitive to raw garlic’s bite, add just half the clove to start. You can always add more after tasting.
- Blend Until Smooth. Secure the lid on your processor and let it rip! Blend for a good minute, then stop and scrape down the sides with a spatula. This ensures everything gets incorporated evenly. Blend again for another minute or two. You’re looking for a thick, mostly smooth paste.
- Adjust the Consistency. With the processor running, slowly stream in the water, one tablespoon at a time, through the feed tube. Watch the magic happen as it transforms from a thick paste into a luxuriously smooth and creamy dip. Stop when it reaches your perfect dippable consistency.
- Taste and Tweak. This is the most important step! Grab a spoon and taste your creation. Does it need more salt? A extra squeeze of lemon for brightness? Another pinch of smoked paprika? Adjust the seasonings to make it your own. Blend one last time for 10 seconds to incorporate any changes.
- The Rest (Optional but Recommended). For the absolute best flavor, transfer your hummus to a bowl, cover it, and let it hang out in the fridge for at least 30 minutes. This allows the flavors to get to know each other and mingle beautifully.
How to Serve This Autumnal Masterpiece
Okay, it’s creamy, it’s spiced, it’s perfect. Now what? Let’s make it look as good as it tastes.
Transfer your hummus to a wide, shallow bowl. Use the back of a spoon to create beautiful swoops and swirls on the surface—these little grooves are perfect for catching all the delicious garnishes. Speaking of which, give it a generous drizzle of your best extra-virgin olive oil. Then, sprinkle on some toasted pumpkin seeds (pepitas) for a delightful crunch, and a final dusting of smoked paprika or a tiny pinch of cinnamon for a gorgeous color contrast.
Now, surround that beautiful bowl with an array of dippers! I love a mix of:
- Warm pita chips or torn pieces of flatbread
- Fresh, crunchy veggie sticks: carrot, cucumber, bell pepper, and radish are all fantastic.
- Apple slices for a sweet and savory combo that’s unexpectedly amazing.
- Pretzels or crackers for a classic move.
It also makes an incredible spread for a turkey or veggie sandwich instead of mayo. Get creative!
Make It Your Own: Delicious Variations
Once you’ve mastered the base recipe, the fun really begins. Here are a few of my favorite ways to mix it up.
- Spicy Kick: Add ¼ tsp of cayenne pepper or a tablespoon of chopped chipotle pepper in adobo sauce to the food processor. It adds a wonderful smoky heat.
- Herbaceous Twist: Blend in a handful of fresh herbs like rosemary, thyme, or sage for a deeply aromatic, savory flavor that screams holiday gathering.
- Sweet & Savory Maple Walnut: Drizzle the finished hummus with a little real maple syrup and sprinkle with crushed, toasted walnuts. Trust me, it works!
- Ultra-Creamy Vegan: For an even richer texture, swap the olive oil for 2-3 tablespoons of creamy, unsweetened coconut milk.
- Butternut Squash Swap: No pumpkin? No problem! Roasted butternut squash purée works beautifully as a 1:1 substitute.
Beau’s Chef Notes & Kitchen Stories
This recipe has been on quite a journey since that first fateful Friendsgiving. I’ve learned that the type of pumpkin matters. While canned is great, finding a sugar pumpkin (the small, sweet ones meant for eating, not carving) will elevate your dip to restaurant-quality status. I also once, in a frantic pre-party rush, accidentally used pumpkin pie spice instead of cinnamon. The result was… interestingly sweet, but my nieces absolutely devoured it! So remember, even a “mistake” can lead to a new favorite. Don’t be afraid to play with your food. That’s where the joy is.
Your Questions, Answered!
Q: My hummus is too thick/grainy. What did I do wrong?
A: Don’t worry, this is the most common hummus hurdle! Graininess usually means it needs more liquid and more blending time. Make sure you’re adding that water, one tbsp at a time, while the processor is running. Let it blend for a solid 3-4 minutes to get it super smooth. And remember, peeling those chickpea skins is the ultimate secret weapon for silkiness.
Q: Can I make this ahead of time?
A: Absolutely! In fact, I recommend it. Making it a day ahead allows the flavors to deepen and marry perfectly. Just store it in an airtight container in the fridge. Give it a good stir and let it sit at room temperature for 15-20 minutes before serving for the best texture and flavor.
Q: How long will pumpkin hummus last in the fridge?
A: It will stay fresh and delicious for up to 5 days. Just keep it covered. You might see a little liquid separate on top—that’s totally normal. Just give it a quick stir and it’s good to go.
Q: Is there a substitute for tahini? I have a sesame allergy.
A> For sure! Sunflower seed butter is your best bet—it has a similar nutty, rich flavor and creamy texture. Just make sure it’s the unsweetened, natural kind.
Pumpkin Hummus
Description
Fall is all about cozy flavors and soul-warming dishes, and this Pumpkin Hummus is the perfect example. Creamy, smooth, and lightly spiced, it’s a fun twist on classic hummus with a subtle sweetness from pumpkin and a touch of warm spices like cumin, cinnamon, and smoked paprika. Perfect as a snack, party dip, or sandwich spread!
Ingredients
-
1 can (15 oz) chickpeas, drained and rinsed
-
1 cup roasted pumpkin or canned pumpkin purée (100% pure)
-
2 tbsp tahini
-
2 tbsp olive oil (plus extra for drizzling)
-
2 tbsp fresh lemon juice
-
1 clove garlic, minced
-
1 tsp ground cumin
-
½ tsp smoked paprika
-
½ tsp cinnamon
-
Salt and black pepper, to taste
-
2–3 tbsp water (to thin, if needed)
-
Optional garnish: toasted pumpkin seeds, extra olive oil, sprinkle of smoked paprika
Instructions
-
Prep Pumpkin (if using fresh):
Preheat oven to 400°F (200°C). Halve a small sugar pumpkin, scoop out seeds, place cut-side down on a parchment-lined baking sheet, and roast 45 minutes or until tender. Scoop 1 cup flesh and cool. -
Combine Ingredients:
In a food processor, add chickpeas, pumpkin, tahini, olive oil, lemon juice, garlic, cumin, smoked paprika, cinnamon, salt, and pepper. -
Blend Until Smooth:
Process for 1–2 minutes, stopping to scrape sides as needed. -
Adjust Consistency:
With the processor running, add water 1 tbsp at a time until creamy and dippable. -
Taste & Adjust:
Add more salt, lemon, or spices to taste. Blend briefly to combine. -
Chill (Optional but Recommended):
Refrigerate for at least 30 minutes for flavors to meld. -
Serve:
Spoon into a bowl, swirl the top with a spoon, drizzle with olive oil, and sprinkle with pumpkin seeds and paprika. Serve with pita chips, fresh veggies, crackers, or apple slices.
Notes
-
Silky Smooth: For ultra-smooth hummus, peel chickpeas before blending.
-
Spicy Kick: Add ¼ tsp cayenne or 1 tbsp chopped chipotle in adobo.
-
Herbaceous Twist: Blend in fresh herbs like rosemary, sage, or thyme.
-
Sweet & Savory: Drizzle with maple syrup and sprinkle toasted walnuts.
-
Substitute: Butternut squash purée works 1:1 if pumpkin isn’t available.
-
Tahini-Free: Use sunflower seed butter if allergic to sesame.
Nutrition
- Calories: 120Cal per ¼ cup serving
- Fat: 6g
- Carbohydrates: 12g
- Fiber: 3g
Nutritional Info (Because We Care!)
While we’re all about flavor first at Feastical, it’s always nice to know you’re eating something that’s good for you, too! This pumpkin hummus is packed with nutrients. Chickpeas are a fantastic source of plant-based protein and fiber, which helps keep you full and satisfied. Pumpkin is loaded with Vitamin A (great for eye health) and antioxidants. The olive oil provides those wonderful heart-healthy fats.
Per serving (approx. ¼ cup):
Calories: ~120 | Fat: 6g | Carbs: 12g | Fiber: 3g | Sugar: 2g | Protein: 4g
Remember, these are estimates and can vary based on your specific ingredients and portions. But overall, it’s a wholesome, nutrient-dense snack you can feel great about enjoying.
Final Thoughts
Well, there you have it, friends—my go-to recipe for the creamiest, most flavorful Pumpkin Hummus that’s sure to become a new fall tradition in your home. It’s more than just a dip; it’s a conversation starter, a crowd-pleaser, and a testament to the fact that the best food often comes from a place of fun and a little bit of fearless experimenting in the kitchen.
I hope you love making it (and eating it!) as much as I do. If you give it a try, be sure to tag me @Feastical on social media—I love seeing your creations! Now, go forth, spread the pumpkin love, and remember: always make time for a good snack.
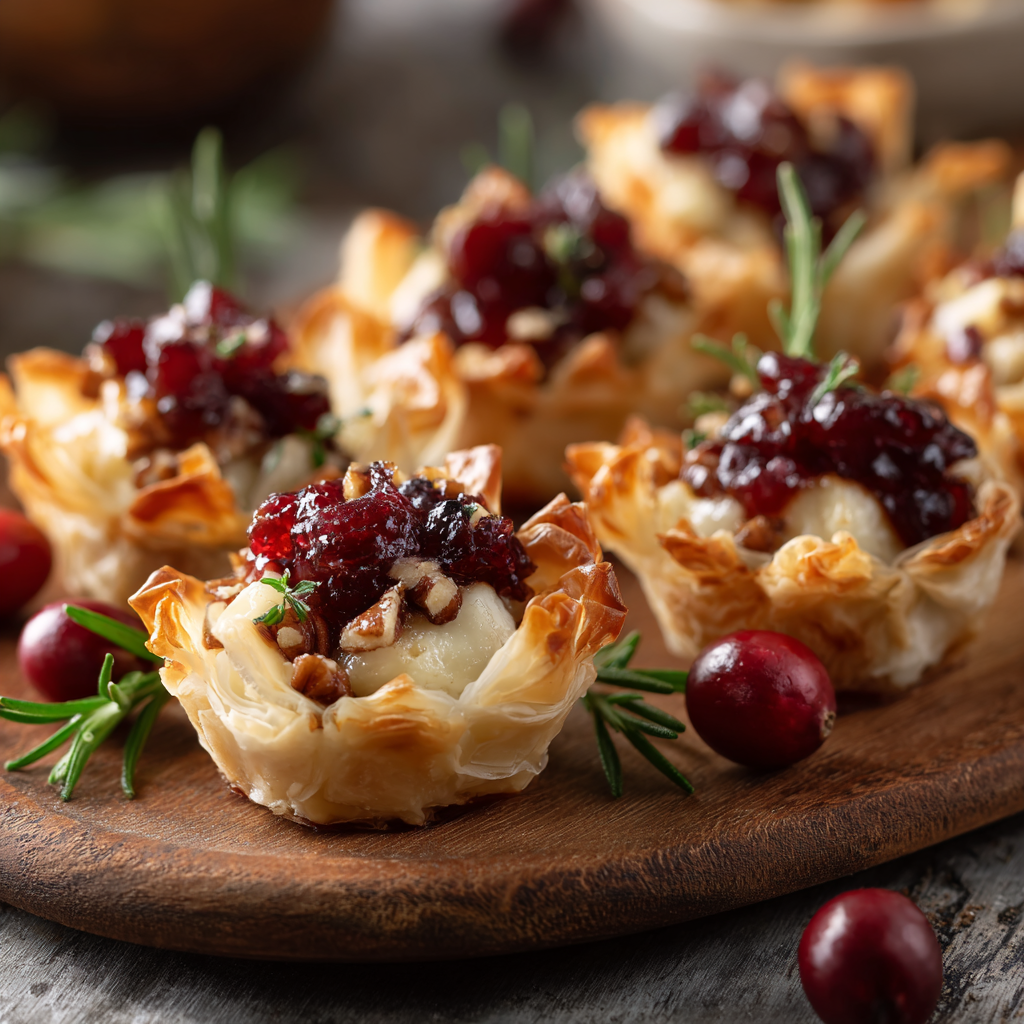
Cranberry & Brie Tartlets
Let’s Make Some Magic: Cranberry & Brie Tartlets
Hey friends, Beau here! Can you smell it? That crisp, festive air is starting to swirl, and you know what that means—it’s officially party season. And whether you’re hosting the big family feast, heading to a friend’s potluck, or just treating yourself to a fancy little snack, every celebration needs a show-stopping appetizer. The kind that makes folks’ eyes light up the second the platter hits the table. The kind that looks like you fussed for hours but secretly comes together in a beautiful, flaky, cheesy flash. That, my friends, is where these Cranberry & Brie Tartlets come in.
Imagine this: a delicate, buttery phyllo cup, cradling a pocket of luxuriously melted, creamy brie. On top, a dollop of sweet-and-tart cranberry sauce that just *pops* with flavor, and maybe a little crunch from some toasted pecans. You pick one up, still warm from the oven, and in one perfect bite, you get that incredible combo of crispy, creamy, sweet, and savory. It’s a flavor and texture party, and everyone’s invited. These little bites are my absolute go-to for the holidays because they are foolproof, endlessly customizable, and disappear from the plate faster than you can say “Happy Holidays!” So, preheat that oven, grab your favorite baking sheet, and let’s create some bite-sized magic together.
A Tartlet Tradition is Born
I’ll never forget the first time I threw these together. It was years ago, right before a last-minute Friendsgiving potluck. You know the drill—you’re scrambling through the pantry, hoping inspiration strikes. I found a lonely box of phyllo cups, a wedge of brie that was begging to be used, and a jar of cranberry sauce left over from a test recipe. In a moment of “what’s the worst that could happen?” genius, I assembled them and popped them in the oven.
The result was nothing short of legendary. They were the first platter to be completely emptied, and I spent the rest of the night giving out the “recipe.” What started as a kitchen Hail Mary has now become a non-negotiable tradition. For me, the smell of these tartlets baking—that warm, cheesy, berry-scented aroma—is the official smell of the holidays. It’s a little reminder that the best creations often come from a place of fun, experimentation, and a desire to bring people together over seriously good food.
Gathering Your Tartlet Toolkit
Here’s the beautiful part: you only need a handful of simple, high-quality ingredients to make these tartlets sing. Let’s break them down.
- 1 package (15-count) phyllo shells: These are the little edible vessels for our delicious cargo! You’ll find them in the freezer section near the desserts. They’re pre-formed and ready to go, which is the ultimate kitchen hack. Chef’s Insight: Keep them frozen until you’re ready to use them to ensure they stay crisp and don’t get soggy.
- 6 oz brie cheese, rind removed, cut into small cubes: The star of the show! Brie melts into this incredible, creamy pool of goodness. Substitution Tip: If you’re not a brie fan, camembert works beautifully. And about the rind—it’s totally edible, but for a smoother melt in these small bites, I prefer to remove it.
- ½ cup cranberry sauce (homemade or store-bought): This is where the tangy magic happens. Chef’s Insight: If using store-bought, I often jazz it up with a squeeze of fresh orange juice or a pinch of orange zest to brighten it up. Whole-berry sauce gives a great texture, but jellied works just fine too!
- 2 tbsp chopped pecans or walnuts (optional): A little sprinkle adds a wonderful toasty, crunchy contrast. Substitution Tip: Not a nut family? Totally fine to leave them out. For a different crunch, try a sprinkle of crispy fried onions or even a few pomegranate arils for a juicy burst.
- Fresh rosemary or thyme sprigs for garnish: Don’t skip this! A tiny herb leaf not only makes them look professionally gorgeous but also adds a whisper of earthy, fresh flavor that cuts through the richness perfectly.
Let’s Build These Bites: A Step-by-Step Guide
Alright, team, let’s get our hands (gently) dirty. This process is so simple it’s almost magical. Here’s exactly how to nail it.
Step 1: Preheat & Prep. First things first, get that oven heating to a cozy 350°F (175°C). This is the perfect temperature to gently melt the brie and warm the phyllo without burning those delicate shells. While it’s warming up, line a baking sheet with your phyllo cups. Give them a little space—they don’t need much, but they appreciate the breathing room. Chef’s Hack: If your shells feel a bit soft straight from the box, you can pop the empty shells in the oven for 2-3 minutes to crisp up before filling. This creates a extra-sturdy barrier against sogginess!
Step 2: The Cheese Please. Take your cubes of rind-free brie and place one neatly inside each phyllo cup. You want a nice, hearty cube that will melt into a generous cheesy pool. Don’t be shy! Chef’s Tip: If the brie is too soft to cube neatly, pop it in the freezer for about 15 minutes. It will firm up beautifully and make slicing a breeze.
Step 3: Crown It With Cranberry. Now, take your cranberry sauce and give it a good stir if it’s separated. Using a small spoon (a ¼ teaspoon measuring spoon is perfect for this!), carefully place a dollop of the saucy goodness right on top of the brie cube. You don’t want to overfill it and risk a sticky, leaky mess in the oven. Just a cute little red hat for your cheese.
Step 4: The Nutty Finale (Optional). If you’re going the nut route, now’s the time! Sprinkle a few pieces of your chopped pecans or walnuts over the cranberry layer. This adds that final textural element and a lovely toasty flavor.
Step 5: Bake to Bubbly Perfection. Slide that baking sheet into your preheated oven and let the magic happen. This should take about 8 to 10 minutes. You’re looking for the cheese to be completely melted and gloriously bubbly, and the edges of the phyllo to turn a beautiful golden brown. Chef’s Hack: Keep a close eye after the 8-minute mark! Ovens can vary, and phyllo goes from perfectly golden to burnt in a flash.
Step 6: Garnish & Serve Immediately. The most important step! As soon as they’re out of the oven, immediately garnish with those tiny fresh herb leaves. The residual heat will release their amazing aroma. Serve these beauties warm. They are best enjoyed fresh from the oven when the cheese is still gooey and the shell is crisp.
How to Serve Your Masterpieces
Presentation is part of the fun! You’ve created these gorgeous, jewel-like appetizers, so let’s show them off. I love to arrange them on a simple white platter or a beautiful piece of slate—something that really lets their red-and-gold colors pop. Place a few extra sprigs of rosemary around the platter for a festive touch.
Because the cheese sets up as they cool, these are truly a “serve immediately” situation. I like to have my guests gathered ’round the kitchen island so I can transfer them straight from the baking sheet to the platter and into their waiting hands. The sound of happy murmurs after that first bite is the best review a chef can get! Pair them with a glass of sparkling prosecco, a crisp white wine, or even a festive cocktail. They’re rich, so a bubbly or acidic drink helps cleanse the palate perfectly.
Get Creative: Tartlet Twist Ideas
The basic formula is a masterpiece, but feel free to play with it! Here are a few of my favorite ways to mix things up.
- Thanksgiving Leftover Style: Chop up a little bit of leftover turkey and add a tiny piece under the brie before baking. Finish with a tiny drizzle of gravy after baking. Seriously!
- Fig & Goat Cheese: Swap the brie for a small piece of creamy goat cheese and replace the cranberry sauce with a spoonful of fig jam. Garnish with a tiny piece of prosciutto for a salty kick.
- Apple Pie Twist: Use a small cube of sharp cheddar cheese and top with a dollop of spiced apple butter or finely diced sautéed apples. A sprinkle of cinnamon on top is divine.
- Savory Herb: Skip the sweet and go savory. Fill with herbed goat cheese and top with a sliver of sun-dried tomato and a fresh basil leaf after baking.
- Spicy Kick: Add a thin slice of jalapeño on top of the brie before the cranberry for a sweet-and-spicy combination that will wake up your taste buds.
From My Kitchen to Yours: Chef’s Notes
Over the years, I’ve made approximately a zillion of these tartlets (slight exaggeration, but you get it). I’ve learned a few things. First, always buy an extra box of phyllo cups. They are notoriously fragile, and you’ll always have a few casualties in the box. Plus, it’s better to have too many than not enough—the filling is easy to scale up! Second, embrace the mess. Sometimes the cheese bubbles over, sometimes the cranberry drips. It’s okay! It just shows they’re made with love (and it all tastes the same). This recipe has evolved from a last-minute fix into a beloved staple, and I hope it becomes one for you, too. The best part is how it gets everyone gathered in the kitchen, waiting for the next batch. That’s the real magic.
Your Questions, Answered!
Q: Can I make these ahead of time?
A: You can *assemble* them ahead of time! Up to a few hours before your party, fill the shells and keep them covered in the fridge. Hold off on baking until your guests arrive. This prevents the phyllo from getting soggy. Do not freeze assembled tartlets.
Q: My phyllo shells got soggy. What happened?
A: Sogginess is usually caused by two things: 1) The filling was too wet, or 2) They weren’t eaten immediately. Using thicker cranberry sauce (not runny) and that pre-baking trick for the empty shells can help create a barrier. But remember, they are best right out of the oven!
Q: Can I use a different cheese?
A: Absolutely! Brie is classic, but other soft, melty cheeses work wonderfully. Camembert is a direct substitute. For a stronger flavor, try a soft goat cheese. For a more stretchy, savory vibe, a small cube of mozzarella could be fun!
Q: How do I keep them warm for a party?
A: Bake them in batches! Since they only take 10 minutes, I’ll often do one tray to put out right away and have a second tray assembled and ready to pop in the oven 15 minutes later. You can also keep them warm on a warming tray or in a low oven (200°F) for a very short period, but they are so quick to bake fresh it’s usually easier to just do multiple rounds.

Cranberry & Brie Tartlets
Description
Crispy, golden phyllo cups filled with creamy brie, topped with tangy cranberry sauce and a sprinkle of toasted pecans—these tartlets are the holiday appetizer everyone will rave about. They’re festive, elegant, and shockingly easy to make in just minutes. Perfect for parties, potlucks, or cozy nights with a glass of bubbly, they’re guaranteed to vanish as soon as they hit the table.
Ingredients
-
1 package (15-count) frozen phyllo shells
-
6 oz brie cheese, rind removed, cut into cubes
-
½ cup cranberry sauce (whole-berry or jellied)
-
2 tbsp chopped pecans or walnuts (optional)
-
Fresh rosemary or thyme leaves, for garnish
Instructions
-
Prep: Preheat oven to 350°F (175°C). Arrange phyllo shells on a baking sheet.
-
Fill: Place a cube of brie in each shell. Top with ½–1 tsp cranberry sauce.
-
Add Crunch: Sprinkle with pecans or walnuts, if using.
-
Bake: 8–10 minutes, until brie is melted and shells are golden.
-
Finish: Garnish with fresh rosemary or thyme. Serve immediately while warm and gooey.
Nutrition
- Calories: 70 Cal per tartlet
- Sugar: 3g
- Fat: 4g
- Carbohydrates: 6g
Nutritional Information (Approximate, Per Tartlet)
Let’s be real—these are a treat, and that’s okay! It’s all about balance. Here’s a rough breakdown of what’s in each delicious bite. Remember, these values can vary based on the specific brands of ingredients you use, especially the cranberry sauce (jellied vs. whole berry, sugar content) and the type of nuts.
- Calories: ~70
- Total Fat: 4g
- Carbohydrates: 6g
- Protein: 2g
- Sugar: 3g
To lighten them up slightly, you could use a light brie cheese (if you can find it) and opt for a reduced-sugar cranberry sauce. The pecans add healthy fats and a bit of protein, but you can omit them to save a few calories. But hey, it’s the holidays. Enjoy a few without guilt!
Final Thoughts
Well, that’s it, folks! Your complete guide to creating the easiest, most impressive appetizer of the season. I hope this recipe brings as much joy to your table as it has to mine. Remember, cooking isn’t about being perfect; it’s about creating moments and memories. These little tartlets are a perfect way to do just that. They’re a conversation starter, a crowd-pleaser, and a testament to the fact that the best food is often the simplest.
So from my kitchen at Feastical to yours, I wish you a season filled with delicious food, great company, and plenty of warm, cheesy, cranberry-filled hugs. Now, go preheat that oven and get your party started! And if you make them, I’d love to see your creations. Tag me @feastical on social media so I can share in the fun. Happy cooking!
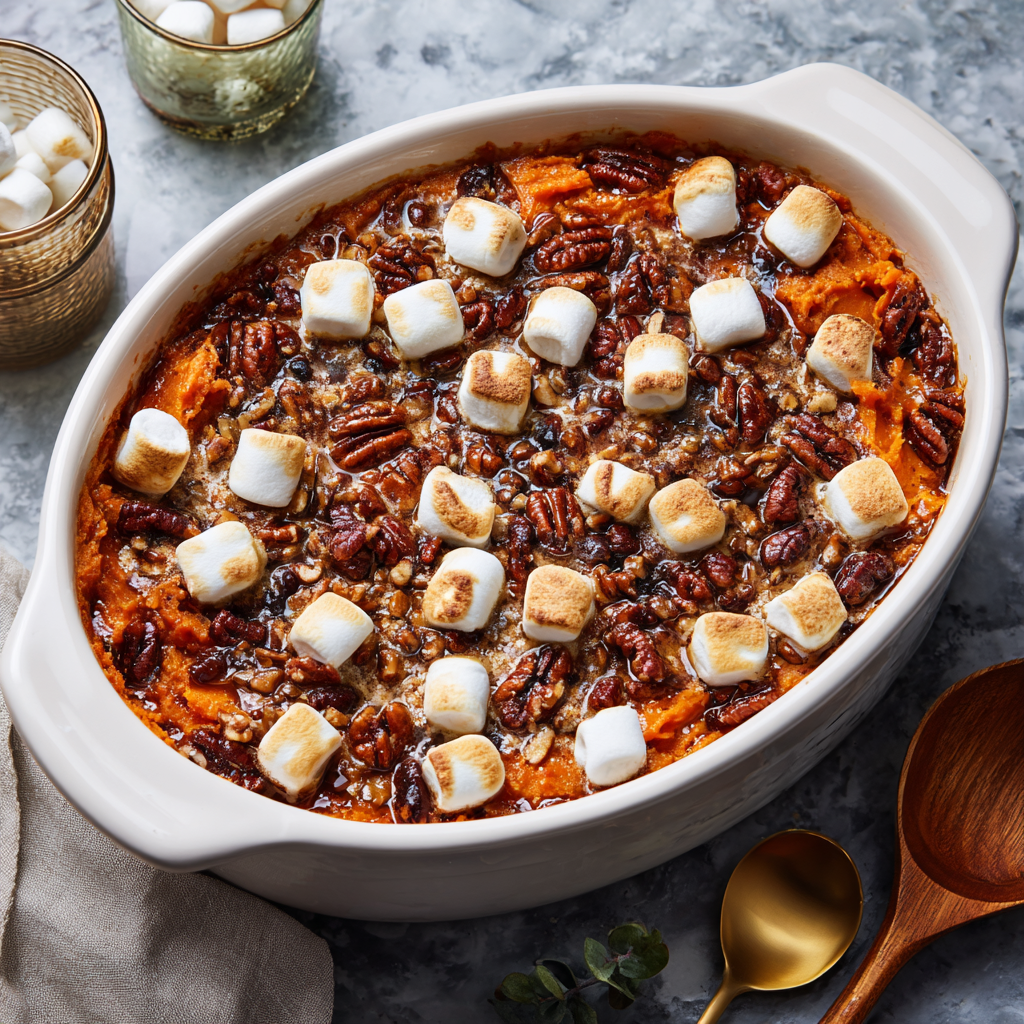
Southern Maple Sweet Potato Casserole (Double Batch + Soulful Twists)
Your New Holiday Showstopper: Southern Maple Sweet Potato Casserole
Hey there, friends! Beau here from Feastical, and let me tell you, I can practically smell the holidays already. It’s that magical time of year where ovens are working overtime, kitchens are filled with laughter (and maybe a little bit of flour dust), and the table is packed with dishes that feel like a warm, edible hug. And right at the center of it all? A dish that’s so much more than a side—it’s a conversation piece, a memory-maker, and quite possibly the first thing to disappear from the buffet line.
I’m talking about my Southern Maple Sweet Potato Casserole. This isn’t your average, run-of-the-mill recipe. We’re taking creamy, dreamy sweet potatoes and giving them a serious upgrade with rich maple syrup, cozy spices, plump raisins, and a crown of toasted marshmallows and crunchy, maple-glazed pecans. It’s a symphony of textures and flavors in every single bite. I’ve crafted this as a double batch because, trust me, you’ll want leftovers. This casserole is the star of the holiday table, the perfect potluck contribution, and honestly, it’s decadent enough to eat as dessert. So, preheat those ovens and grab your favorite mixing bowl—we’re about to create something truly special together.
The Story Behind The Sweetness
This recipe takes me right back to my grandma’s bustling kitchen. Every Thanksgiving, she’d have what seemed like a dozen dishes going at once, but her sweet potato casserole was her pride and joy. She’d let me be her official “taste-tester,” and I’d stand there, spoon in hand, waiting for her to nod approvingly after a final sprinkle of cinnamon. Her version was classic and simple, but it had so much heart. One year, I decided to put my own spin on it. I swapped the canned syrup for the real, pure maple stuff I’d discovered on a trip to Vermont, added a handful of raisins I’d soaked in orange juice for a burst of tangy sweetness, and went a little overboard with the pecans. When I brought it to the table, my grandma took one bite, her eyes lit up, and she said, “Well, Beau, you’ve outdone yourself.” That moment, that approval from the queen of the kitchen herself, is baked right into this recipe. It’s a beautiful blend of tradition and a little bit of my own culinary mischief.
Gathering Your Casserole Crew: The Ingredients
Here’s the dream team that makes this casserole so unforgettable. Don’t be intimidated by the list—it’s mostly pantry staples, and I’ve got plenty of tips and swaps for you!
- 8 large sweet potatoes, peeled and cubed: The star of the show! Look for firm potatoes with smooth skin. Pro Chef Tip: Cubing them before roasting ensures they cook evenly and quickly, giving them a deeper, caramelized flavor compared to boiling.
- 4–5 tbsp extra virgin olive oil: For roasting. It helps the spices stick and creates those delicious, crispy edges.
- 2 tsp ground cinnamon + 1 tsp ground nutmeg (for roasting): We’re building layers of flavor right from the start. Toasting these spices with the potatoes wakes up their essential oils and makes them incredibly fragrant.
- 1 cup almond milk (or dairy of choice): This adds creaminess. I love the slight nutty flavor of almond milk here, but whole milk, oat milk, or even canned coconut milk for a tropical twist work beautifully.
- 4 tsp vanilla extract: A non-negotiable for depth of flavor. Use the real stuff, not imitation!
- 8 tbsp (1 stick) unsalted butter, cubed: For rich, velvety texture and that classic, comforting buttery taste. Salted butter works too; just maybe ease up on any added salt later.
- ⅔ cup organic brown sugar: Adds a deep, molasses-like sweetness that pairs perfectly with maple.
- ½ cup pure maple syrup: The co-star! Please, for the love of all things holy, use real maple syrup. The fake pancake stuff just won’t give you the same complex, autumnal flavor.
- 2 tsp ground cinnamon + ¼ tsp ground nutmeg + Pinch of ground allspice (for filling): The spice brigade, part two! This is where the warm, soulful flavor profile really comes to life.
- 2 cups organic raisins, soaked and drained: I highly recommend soaking them in warm water or orange juice for 10-15 minutes before using. It plumps them up, making them juicy little flavor bombs instead of dry, chewy bits.
- 4 cups mini marshmallows: For that iconic, gooey, toasted topping. They’re fun and nostalgic!
- 3 cups raw pecans: For the crunchy, nutty topping. You can use walnuts if you prefer, but pecans are the classic Southern choice.
- ½ cup pure maple syrup (for topping): To glaze the pecans and make them irresistibly sticky and sweet.
- Optional: ½ tsp flaky sea salt / zest of 1 orange / splash of bourbon: My “pro” twists! The sea salt creates an amazing sweet-salty contrast, the orange zest adds a bright, citrusy note that cuts through the richness, and a splash of good bourbon adds a wonderful, warm depth.
Let’s Get Cooking: Building Your Casserole Masterpiece
Okay, team, let’s do this! Follow these steps, and you’ll have a flawless casserole. I’m walking you through every bit of it.
- Preheat & Prep: Fire up your oven to 400°F (205°C). While it’s heating, peel and cube those sweet potatoes into roughly 1-inch chunks. The more consistent the size, the more evenly they’ll roast. Toss them in a large bowl with the olive oil, cinnamon, and nutmeg. Chef Hack: Lining your baking sheet with parchment paper makes cleanup an absolute breeze.
- Roast to Perfection: Spread the spiced potatoes in a single layer on your prepared baking sheet. Roast for 25-30 minutes, or until they are fork-tender and have some beautiful caramelized spots. Roasting instead of boiling is our secret weapon—it concentrates their natural sweetness!
- Mash and Mix: Reduce your oven temp to 350°F (175°C). Transfer the tender, fragrant sweet potatoes to a very large mixing bowl. Mash them until smooth with a potato masher or a hand mixer. Now, add in the milk, cubed butter, brown sugar, ½ cup maple syrup, the second round of spices, and vanilla. Mix everything until it’s gloriously smooth and well-combined. Fold in those plumped-up, drained raisins. Chef Commentary: Don’t be shy here—mix with love! This is the heart of your casserole.
- Assemble with Flair: Grease a 9×13 inch baking dish (or a larger one if you have it—this is a double batch!). Spread the sweet potato filling evenly into the dish. Now, create a beautiful, even layer of mini marshmallows over the entire surface.
- Create the Topping: In a medium bowl, toss the raw pecans with the remaining ½ cup of maple syrup until they’re all nicely coated. Sprinkle this sticky, nutty goodness all over the marshmallow layer. If you’re using it, now’s the time for a light sprinkle of flaky sea salt over the top.
- The Final Bake: Pop the uncovered dish into your 350°F oven for 25-30 minutes. You’re waiting for a spectacular transformation: the marshmallows should be golden brown and puffy, the pecans should be fragrant and toasted, and the edges should be bubbly. Pro Tip: Keep a close eye on it for the last 10 minutes! Marshmallows can go from perfectly golden to sadly scorched in a flash.
How to Serve This Beauty
Patience is a virtue, but I know it’s hard! Let the casserole rest for about 10 minutes after pulling it from the oven. This allows it to set just enough so you can get a clean scoop. Use a large spoon to serve up generous portions, making sure everyone gets a bit of that gooey marshmallow top, those crunchy pecans, and the creamy filling. This casserole is a powerhouse side dish that pairs perfectly with all your holiday classics: roasted turkey, honey-glazed ham, or even a hearty vegetarian wellington. For a next-level experience, serve it with a dollop of freshly whipped cream or a scoop of vanilla bean ice cream on the side—trust me on this one.
Make It Your Own: Delicious Twists & Swaps
This recipe is incredibly versatile. Feel free to play around and make it suit your taste!
- Bourbon-Spiked: For a grown-up twist, add 2-3 tablespoons of good bourbon to the filling when you mix in the wet ingredients. It adds a wonderful warmth and complexity.
- Tropical Escape: Swap the raisins for dried pineapple or mango chunks. Use coconut milk instead of almond milk and add a handful of toasted coconut flakes to the pecan topping.
- Nut-Free & Still Crunchy: Have an allergy? No problem! Replace the pecans with a crunchy oat streusel topping. Mix 1 cup rolled oats, ½ cup brown sugar, ¼ cup flour, and ½ cup melted butter. Sprinkle it over the marshmallows before baking.
- Less Sweet, More Savory: Cut the brown sugar down to ⅓ cup and omit the marshmallows. Top with the maple pecans for a sophisticated side that’s still full of flavor but less dessert-like.
- Apple Pie Vibe: Fold in a cup of finely diced, peeled apples (like Granny Smith) into the filling for little pockets of tartness and texture.
Beau’s Chef Notes & Kitchen Tales
This recipe has seen a few… experiments over the years. One memorable Thanksgiving, I was chatting away and completely forgot I had the pecans toasting on the stove. Let’s just say I created “Cajun-Style” charcoal pecans and had to frantically send my cousin to the store for more! Another time, I tried to be fancy and make my own marshmallows. They melted into a single, sticky lake on top. Delicious, but not exactly the look I was going for. Stick with the mini ones—they’re foolproof! The beauty of this dish is its forgiving nature. It’s hard to mess up, and even my “mistakes” have usually been happily eaten. It’s evolved from my grandma’s simple version to this loaded, flavor-packed masterpiece, and I hope it becomes a tradition in your home, too.
Your Questions, Answered!
Q: Can I make this casserole ahead of time?
A: Absolutely! You can roast the potatoes and mix the filling (without the marshmallow and pecan topping) up to 2 days in advance. Keep it covered in the fridge. When you’re ready to bake, let it sit at room temp for 30 minutes, add your toppings, and bake. You might need to add 5-10 minutes to the baking time since it’s starting from cold.
Q: My casserole is too watery! What happened?
A: This usually happens if the sweet potatoes are boiled instead of roasted (they absorb water) or if you used a milk alternative that is very thin. The fix? You can mix a tablespoon of cornstarch with a tablespoon of cold milk and stir it into your filling before assembling to help thicken it up.
Q: How do I prevent the marshmallows from burning?
A: The key is positioning your oven rack in the center, not too close to the top heating element. If you see the top browning too quickly, you can loosely tent the dish with aluminum foil for the remainder of the baking time.
Q: Can I freeze leftovers?
A: The texture of the marshmallows and potatoes can change a bit after freezing and thawing, becoming a bit softer. It will still taste great, but for the best experience, I recommend enjoying it fresh!

Southern Maple Sweet Potato Casserole (Double Batch + Soulful Twists)
- Total Time: 55 minutes
Description
Creamy roasted sweet potatoes, kissed with maple syrup and warm spices, topped with gooey marshmallows and maple-glazed pecans—this casserole is a holiday masterpiece. It’s indulgent, nostalgic, and absolutely irresistible. Whether it’s Thanksgiving, Christmas, or a cozy Sunday feast, this dish will steal the show and probably be the first thing gone from the table.
Ingredients
Sweet Potato Filling
-
8 large sweet potatoes, peeled & cubed
-
4–5 tbsp olive oil
-
2 tsp cinnamon + 1 tsp nutmeg (for roasting)
-
1 cup almond milk (or milk of choice)
-
8 tbsp unsalted butter, cubed
-
⅔ cup brown sugar
-
½ cup pure maple syrup
-
2 tsp cinnamon + ¼ tsp nutmeg + pinch allspice
-
4 tsp vanilla extract
-
2 cups raisins, soaked & drained
Topping
-
4 cups mini marshmallows
-
3 cups pecans
-
½ cup pure maple syrup
-
Optional: flaky sea salt, orange zest, or splash of bourbon
Instructions
-
Roast Potatoes: Preheat oven to 400°F. Toss sweet potatoes with oil, cinnamon & nutmeg. Roast 25–30 min until caramelized & tender.
-
Mash & Mix: Reduce oven to 350°F. Mash potatoes until smooth. Mix in milk, butter, brown sugar, maple syrup, spices & vanilla. Fold in raisins.
-
Assemble: Spread filling in a greased 9×13 dish. Top with marshmallows.
-
Pecan Glaze: Toss pecans with ½ cup maple syrup. Sprinkle over marshmallows.
-
Bake: 25–30 min until marshmallows are golden and pecans are toasted. Rest 10 min before serving.
Notes
For a grown-up twist, stir 2 tbsp bourbon into the filling before baking—it adds incredible depth and warmth.
- Prep Time: 25 min
- Cook Time: 30 min
Nutritional Information*
Okay, let’s be real—this is a holiday treat, meant to be savored and enjoyed! But for those who like to know, here’s a rough breakdown per serving (based on 16 servings).
- Calories: ~360 kcal
- Carbohydrates: 45g
- Fat: 18g
- Sugar: 28g
- Fiber: 4g
- Protein: 3g
*This is an estimate generated using a nutrition calculator. Values can vary based on specific ingredients and portion sizes. The raisins and sweet potatoes provide a good dose of fiber and vitamins like Vitamin A, while the pecans add healthy fats.
Final Thoughts from My Kitchen to Yours
Well, friends, there you have it—my heart and soul in a casserole dish. This recipe is more than just a list of ingredients; it’s an invitation to create joy, to gather around the table, and to make delicious memories with the people you love. Don’t stress about making it perfect. Embrace the little messes, laugh if you burn the first batch of pecans (like someone I know…), and most importantly, enjoy the process. Cooking is an act of love, and this casserole is full of it. I’d love to hear how it turns out for you! Tag me @Feastical on social media so I can see your beautiful creations. Now, go forth and bake!
With love and a full belly,
Beau

Pecan Pie Brownies
Pecan Pie Brownies: The Ultimate Dessert Mashup You NEED to Make
Hey friends, Beau here from Feastical! Let’s get real for a second. You’re staring into your pantry, and you’ve got a serious craving. But it’s a complicated one. Part of you is dreaming of that deep, dark, fudgy chew of a perfect brownie. The other part? It’s whispering sweet nothings about the gooey, buttery, nutty goodness of a classic pecan pie. What if I told you that you don’t have to choose? What if the universe, in its infinite dessert wisdom, designed a treat that combines both of these iconic favorites into one mind-blowing, show-stopping bite?
Well, friends, that day is today. These Pecan Pie Brownies are my absolute go-to when I need to bring a dessert that will genuinely make people’s eyes light up. We’re talking a rich, chocolatey brownie base, topped with a luxurious, sweet, and crunchy pecan pie layer. It’s the best of both worlds, and I’ve designed this recipe as a double batch in a big ol’ sheet pan because, trust me, you’re going to want plenty to share (or, you know, not share… I don’t judge). This is feel-good food at its finest—simple to make but sophisticated in flavor. So, grab your favorite mixing bowl, and let’s create some magic together!
The Thanksgiving That Started It All
This recipe holds a special place in my heart, and it all started with a little kitchen panic a few years back. I was hosting my first big Friendsgiving, and I’d promised both a classic pecan pie and a tray of fudge brownies. But as the day went on, oven space became hotter than a contested parking spot on Black Friday. I had the turkey, the casseroles, the rolls—you name it, it needed to bake. I looked at the pie shell and the brownie mix on the counter and had a true “Aha!” moment. What if I just… combined them?
I quickly whipped up the brownie base, par-baked it, and slathered on my grandma’s pecan pie filling. The result? Pure, unadulterated dessert harmony. The brownie provided a sturdy, fudgy foundation that held up to the gooey topping perfectly. It was an instant hit. The tray was demolished before the coffee was even brewed. That day, I learned that the best recipes often come from a little bit of chaos and a whole lot of heart. Now, it’s not a proper gathering at my place without a pan of these bars.
Gathering Your Ingredients (Let’s Talk Shop!)
Here’s everything you’ll need to create this masterpiece. Remember, baking is part science, part art—so I’ve included my best chef insights and swaps to make it your own.
For the Brownie Base:
- 2 boxes brownie mix (the kind that makes a 13×9 pan each) – Insight: I’m a from-scratch guy 90% of the time, but for a double batch this size, a good quality mix is a fantastic timesaver and delivers consistent results. Look for one labeled “fudgy” or “chocolatey.”
- Eggs, Oil, and Water – As directed on both packages. Pro Tip: Use the amount listed for a “fudgy” texture if the box gives you the option!
For the Pecan Pie Topping:
- 2 cups granulated sugar – This sweetens the deal and helps create that classic pecan pie texture.
- 3 cups light corn syrup – This is the key to that signature gooey, glossy filling. For a deeper flavor, you can substitute 1 ½ cups of it with dark corn syrup or even pure maple syrup.
- 8 large eggs – They bind the whole topping together and give it structure. Make sure they’re at room temperature for a smoother blend!
- ½ cup unsalted butter, melted – Unsalted lets you control the salt level. That rich, buttery flavor is non-negotiable for authenticity.
- 1 tbsp vanilla extract – Don’t be shy! This adds a beautiful warmth that complements the nuts and chocolate.
- 4 cups pecans, roughly chopped – I like a mix of chopped and a few whole halves for texture. Toasting them beforehand (350°F for 5-7 minutes) will unlock an incredible, nutty depth of flavor.
Optional Flavor Twists (Get Creative!):
- 1 tbsp bourbon – My personal favorite add-in. It adds a warm, complex note that cuts the sweetness perfectly.
- ½ tsp cinnamon – A cozy, warming spice that makes it taste like the holidays.
- ½ cup mini chocolate chips – Because more chocolate is always a good idea. Stir these into the pecan mixture.
- Flaky sea salt – A sprinkle on top before baking creates an unforgettable sweet-and-salty contrast.
Let’s Bake: Building Your Dessert Masterpiece
Okay, team! Let’s fire up the oven and get to it. Follow these steps, and you’ll be a hero in no time.
- Preheat and Prep: Crank your oven to 350°F (175°C). This is the sweet spot for baking both layers evenly. Now, take your 13×18-inch sheet pan and line it with parchment paper, leaving some overhang on the sides. This is your secret weapon for easy cleanup and even easier removal of the whole slab of brownies later. Give the parchment a very light spritz with cooking spray—just to be safe.
- Whip Up the Brownie Base: In a large bowl, prepare both boxes of brownie mix according to their package directions. Usually, this means whisking together the mix, eggs, oil, and water until just combined. Chef’s Hack: Do not overmix! A few lumps are totally fine. Overmixing = tough brownies, and we want them fudgy and tender. Pour the beautiful, chocolatey batter into your prepared pan and spread it into an even layer.
- First Bake: Pop the pan into your preheated oven and bake for 20-22 minutes. You’re not looking for a fully baked brownie here. It should just be set on top—meaning if you jiggle the pan, it jiggles just a little, but it’s not liquid anymore. This par-baking is crucial! It gives the brownie a head start so it doesn’t turn into a soupy mess when we add the wet pecan topping.
- Create the Gooey Topping: While the brownie is baking, let’s make the magic. In another large bowl, whisk together the sugar, corn syrup, 8 eggs, melted butter, and vanilla. Whisk until it’s smooth and beautifully golden. If you’re using any of the optional twists like bourbon or cinnamon, whisk them in now. Finally, gently fold in the pecans until they’re all gloriously coated.
- The Big Merge: Once the brownie base is out of the oven (it will be hot!), carefully and slowly pour the pecan mixture over it. Use a spatula to spread it into a perfectly even layer, making sure to get into all the corners. If you’re going for the sea salt sprinkle, now’s the time!
- Final Bake to Perfection: Gently return the loaded pan to the oven. Now, bake for another 30-35 minutes. You’ll know it’s done when the top is a rich golden brown and the center is just set. It might still have a very slight jiggle—that’s okay! It will firm up as it cools. If the pecans look like they’re browning too quickly, you can tent the pan loosely with aluminum foil.
- The hardest part: COOL COMPLETELY. I know, the aroma is killing you. But patience is key here. You must let these brownies cool completely in the pan on a wire rack. This allows the pecan pie layer to set up properly. If you cut into them warm, they’ll be delicious but messy. For clean, beautiful bars, let them cool. I sometimes even pop the whole pan in the fridge for an hour to speed things up!
- Slice and Serve: Once completely cool, use the parchment paper overhang to lift the entire block out of the pan. Place it on a cutting board and use a sharp knife to slice it into bars. For super clean cuts, wipe your knife clean between slices.
How to Serve These Show-Stopping Bars
Presentation is part of the fun! You can keep it simple and let the bars speak for themselves, or you can dress them up for a real “wow” factor.
For a homey, comforting vibe, just stack them on a rustic wooden board or a simple plate. They are plenty rich and beautiful on their own. If you’re feeling fancy, plate them individually. Place a bar on a dessert plate, add a dollop of freshly whipped cream or a scoop of high-quality vanilla bean ice cream. The contrast of the cold cream with the rich, room-temperature bar is divine. For a final flourish, drizzle a little caramel sauce or even a chocolate ganache over the top. A few extra pecan halves and a tiny sprinkle of sea salt make it look like it came from a professional bakery. Perfect for your holiday table, a potluck, or just a Tuesday night treat!
Mix It Up! Delicious Variations to Try
The basic recipe is a total winner, but part of the joy of cooking is making it your own. Here are a few of my favorite twists:
- The Salted Caramel Swirl: Before adding the pecan topping, drizzle ½ cup of warm caramel sauce over the par-baked brownie base. Use a knife to swirl it gently into the brownie, then proceed with the recipe. The caramel ribbons take it to another level.
- The Chocolate Lover’s Dream: Stir ½ cup of mini chocolate chips into the pecan pie filling itself. You get little pockets of melted chocolate in every bite. You could also use white chocolate chips for a fun contrast.
- The Bourbon Pecan: This is my personal favorite. Add that tablespoon of good bourbon to the pecan filling. It adds a wonderful depth and warmth that makes the flavor so much more complex.
- The “Healthier” Swap: For a slightly less sweet version, you can replace one cup of the corn syrup with pure maple syrup. The flavor will be deeper and more nuanced.
- The Nut-Free Version: Not a fan of pecans? Swap them out for a different nut! Walnuts are a classic substitute and work beautifully here.
Beau’s Chef Notes & Kitchen Stories
This recipe has evolved so much since that first frantic Friendsgiving. I’ve learned that toasting the pecans is an absolute game-changer—it adds a nuttiness that raw pecans just can’t match. I also started using the parchment paper sling after one… unfortunate… incident where I tried to cut them in the pan and scratched my brand new sheet pan to oblivion. Learn from my mistakes!
The beauty of this dessert is its forgiving nature. Even if your layers mix a little at the edges, it still tastes incredible. It’s a hug in dessert form—a little messy, not always perfect, but always, always filled with love. Don’t stress about making it flawless. Just enjoy the process and the incredible results.
FAQs & Troubleshooting: Your Questions, Answered
Q: My pecan pie layer is super runny even after cooling. What happened?
A: The most common culprit is underbaking. Make sure you bake it until the center is just set with only a slight jiggle. Also, it MUST cool completely to room temperature to set properly. If you’re in a humid environment, chilling them in the fridge will help firm them up beautifully.
Q: Can I make these ahead of time?
A: Absolutely! In fact, I think they taste even better the next day. Once completely cool, store them in an airtight container at room temperature for up to 2 days, or in the fridge for up to 5 days. They also freeze wonderfully for up to 3 months. Just thaw at room temperature.
Q: Can I use a homemade brownie recipe instead of a mix?
A: You sure can! You’ll need a homemade recipe designed for a 13×18-inch half-sheet pan (which is a lot of batter!). Make sure it’s a fudgy, dense brownie recipe, not a cakey one, so it can support the heavy topping.
Q: The top is browning too fast! Help!
A: Ovens can vary. If the pecans are getting too dark before the center is set, simply tent the entire pan loosely with a piece of aluminum foil. This will shield the top and allow the center to continue cooking without burning.
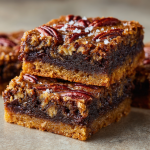
Pecan Pie Brownies
- Total Time: 1 hour 15 minutes
Description
Why choose between gooey pecan pie and fudgy brownies when you can have both? These bars are the perfect marriage of rich chocolate and nutty, buttery caramel goodness. Born out of a Thanksgiving kitchen crunch, this recipe has become a show-stopper at gatherings—easy to make, impossible to resist, and guaranteed to disappear fast.
Ingredients
Brownie Base
-
2 boxes brownie mix (13x9 each, “fudgy” style)
-
Eggs, oil & water (per package directions)
Pecan Pie Topping
-
2 cups granulated sugar
-
3 cups light corn syrup (or swap half with dark corn syrup or maple syrup)
-
8 large eggs, room temperature
-
½ cup unsalted butter, melted
-
1 tbsp vanilla extract
-
4 cups pecans, roughly chopped (toast for deeper flavor)
Optional Twists
-
1 tbsp bourbon
-
½ tsp cinnamon
-
½ cup mini chocolate chips
-
Flaky sea salt for topping
Instructions
-
Prep Pan & Oven: Heat oven to 350°F. Line a 13×18 sheet pan with parchment, leaving overhang. Lightly grease.
-
Mix Brownies: Prepare batter as directed. Spread evenly in pan.
-
Par-Bake: Bake 20–22 min, until just set on top but still soft inside.
-
Make Pecan Mix: Whisk sugar, corn syrup, eggs, butter, and vanilla until smooth. Stir in pecans (plus any optional twists).
-
Layer: Pour pecan mix evenly over hot brownie base.
-
Final Bake: Bake 30–35 min until golden and just set in center. Tent with foil if browning too quickly.
-
Cool Completely: Let set at room temp (or chill) before slicing for clean cuts.
-
Serve: Cut into bars. Top with whipped cream, ice cream, or caramel drizzle if you’re feeling fancy.
Notes
For bakery-style flair, sprinkle flaky sea salt before baking or swirl in caramel for ribbons of extra indulgence.
- Prep Time: 20 min
- Cook Time: 55 min
Nutrition
- Calories: ~380 kcal per bar
- Sugar: 40g
- Fat: 18g
Nutritional Information (Because Knowledge is Power!)
Okay, let’s be real—this is a decadent dessert, meant to be enjoyed as a treat! Here’s a rough breakdown per bar (assuming you get 24 generous bars from the pan). Remember, these are estimates and can vary based on the specific ingredients and brands you use.
- Calories: ~380 kcal
- Carbohydrates: 50g
- Fat: 18g
- Sugar: 40g
- Protein: 4g
To make them a tad lighter, you can use the maple syrup swap mentioned above and reduce the sugar by ¼ cup. But sometimes, you just gotta live a little!
Final Thoughts from My Kitchen to Yours
Well, there you have it, my foodie friends—my all-time favorite dessert mashup that never fails to bring joy. These Pecan Pie Brownies are more than just a recipe; they’re a conversation starter, a memory maker, and the ultimate comfort food. They prove that the best things in life often come from combining simple, beloved flavors into something new and extraordinary.
I hope you’ll give this recipe a try for your next gathering (or, hey, just for yourself!). If you do, I’d love to hear about it. Tag me @Feastical on social media so I can see your beautiful creations. Now, go preheat that oven, and let’s get baking! Until next time, keep your kitchen messy and your heart full.
With love and a full belly,