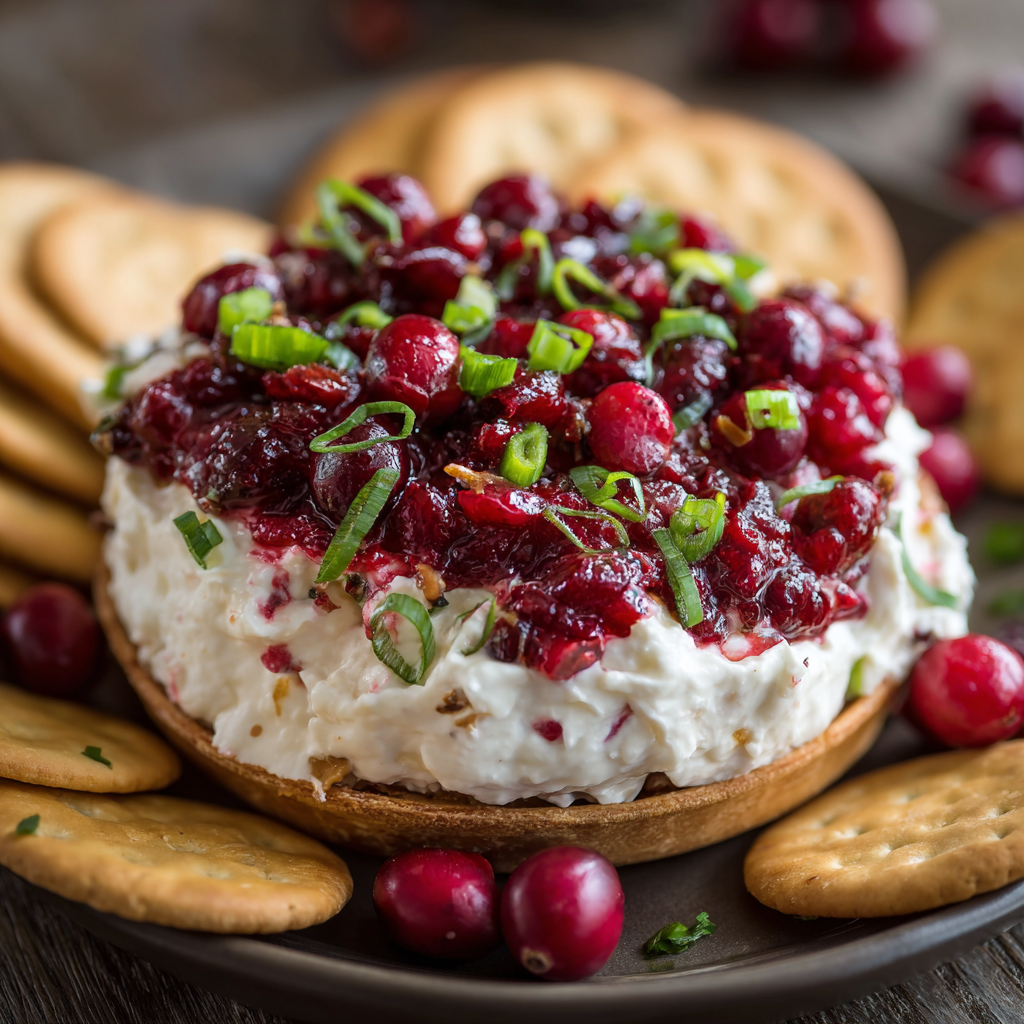
Cranberry Jalapeño Cream Cheese Dip
The Dip That Stole the Show: Cranberry Jalapeño Cream Cheese Dip
Hey friends, Beau here from Feastical! Let’s talk about party food for a second. You know the scene: you walk into a gathering, scan the snack table, and your eyes instantly lock onto the one. That one dish that looks so vibrant, so intriguing, you just have to grab a cracker and dive in. You take a bite, and boom—flavor fireworks. Sweet, spicy, creamy, and tangy all dance on your tongue at once. That, my friends, is the magic of this Cranberry Jalapeño Cream Cheese Dip.
This isn’t just another dip; it’s a conversation starter, a crowd-pleaser, and quite possibly the easiest “wow factor” recipe you’ll ever add to your entertaining arsenal. It’s the perfect blend of festive cheer and a little bit of playful kick, all sitting on a cloud of luxurious cream cheese. Whether you’re gearing up for the holidays, hosting a game-day bash, or just need a spectacular snack for Friday night, this dip has your back. It comes together in about 15 minutes of active work, and I promise you, it’s the dish everyone will be asking you about all night. So, let’s get mixing and create some delicious memories together!
A Happy Accident in a Holiday Kitchen
I have to be totally honest with you—this now-signature recipe started as a complete kitchen experiment gone wonderfully right. A few years back, I was tasked with bringing an appetizer to my friend’s massive, chaotic, and utterly fun holiday potluck. I’d planned to make my usual cranberry sauce, but in the festive frenzy, I grabbed the wrong pepper, adding a spicy jalapeño instead of the mild one I’d intended. Rather than start over, I leaned into it, adding some fresh cilantro and green onion for a fresh kick.
When I arrived, I realized I’d forgotten the crackers. Panic set in! The only thing I had in my cooler was a block of cream cheese I’d meant to use for another recipe. In a moment of pure desperation, I smeared the cream cheese on a plate, dumped my “mistake” cranberry relish on top, and prayed no one would notice. Friends, they noticed—but not in the way I feared. That plate was scraped clean in minutes. People were literally eating it with spoons. They couldn’t get enough of the sweet heat and creamy contrast. That “happy accident” taught me a beautiful lesson: sometimes the best recipes aren’t planned; they’re discovered with a little courage and a lot of flavor.
Gathering Your Flavor All-Stars
The beauty of this dip is in its simplicity and the powerhouse flavors of each ingredient. Here’s what you’ll need to make the magic happen.
- 12 oz Fresh Cranberries: The star of the show! Their bright, tart punch is non-negotiable for that classic flavor. Don’t even think about the canned sauce here—we want that fresh, pop-in-your-mouth tang. Chef’s Insight: Give them a quick rinse and pick through to remove any soft or bruised berries.
- 1–2 Jalapeños, seeded and finely chopped: This is where you control the heat! One pepper gives a gentle warmth, two brings a confident kick. Remember, the seeds and membranes hold most of the heat, so remove them for a milder dip. Substitution Tip: For a smokier flavor, use 1-2 canned chipotles in adobo sauce, minced.
- ¼ cup Chopped Green Onions: They add a mild, oniony crunch and a gorgeous pop of green color. Use both the white and green parts!
- ¼ cup Chopped Fresh Cilantro: Don’t skip this! It brings a crucial fresh, herbaceous note that balances the sweetness and heat. Substitution Tip: If you’re one of those folks who thinks cilantro tastes like soap, fresh parsley or even a little mint works beautifully.
- ½ cup Sugar: This sweetens the intensely tart cranberries. You can adjust this to your taste. Substitution Tip: Honey, maple syrup, or your favorite sugar substitute like monk fruit or erythritol work perfectly for a refined sugar-free version.
- 1 tablespoon Lemon or Lime Juice: A bright hit of citrus acidity that makes all the other flavors sing. I’m a lime guy myself for this recipe—it pairs amazingly with the jalapeño and cilantro.
- ¼ teaspoon Salt: Trust me, this tiny amount is essential. It doesn’t make the dip salty; it enhances every other flavor in the bowl and balances the sweetness.
- 16 oz Cream Cheese, softened: The creamy, cool, luxurious base for our spicy cranberry topping. Let it sit on the counter for a good hour before you start. Substitution Tip: For a lighter version, use Neufchâtel cheese. For a dairy-free option, a high-quality plant-based cream cheese works surprisingly well.
- Optional Garnish: A little extra chopped cilantro or green onion on top makes it look restaurant-quality.
Building Your Masterpiece, Step-by-Step
This process is so simple, it’s almost laughable. But a few pro tips along the way will ensure your dip is absolutely perfect.
Step 1: The Cranberry Chop
Grab your food processor and dump in those beautiful red cranberries. Pulse them 8-10 times until they are finely chopped but not pureed. You want a nice, chunky relish texture. No food processor? No worries! You can finely chop them by hand—it’s a great arm workout and you get more control over the texture. Just be careful, they can roll away!
Step 2: The Flavor Mix
Transfer your chopped cranberries to a medium-sized bowl. Now, add in your finely chopped jalapeño, green onions, cilantro, sugar, citrus juice, and salt. Grab a spatula and mix everything together until it’s beautifully combined. Take a tiny taste (it will be tart and bold!) and adjust if needed—a pinch more sugar? A squeeze more lime? You’re the boss.
Step 3: The Patience Part
This might be the hardest step: cover the bowl with plastic wrap and pop it in the fridge for at least one hour. I know, I know, you want to dig in now. But this waiting time is magical. It allows the sugar to dissolve and mellow the cranberries’ tartness, and it lets all those incredible flavors get to know each other and become best friends. Overnight is even better if you’re planning ahead!
Step 4: The Creamy Canvas
Take your softened cream cheese and spread it evenly onto your serving plate or into a shallow dish. Use the back of a spoon or a small offset spatula to create a smooth, inviting layer. Pro Tip: For a stunning presentation, create slight swirls or ridges on the surface with your spoon—they’ll catch the cranberry topping beautifully.
Step 5: The Grand Finale
Pull your vibrant cranberry mixture from the fridge. Give it a quick stir, then spoon it generously over your waiting cream cheese base. Spread it right to the edges so every cracker gets a bit of everything. Garnish with a sprinkle of fresh cilantro or green onions for that professional finish.
How to Serve This Party Hero
Presentation is part of the fun! I love using a wide, shallow bowl or a colorful plate that shows off the gorgeous red-and-white layers. Now, for the vehicles to get this dip from plate to mouth:
The Classic Crew: Buttery round crackers (like Ritz), sturdy pita chips, or thin, crispy crostini are the undisputed champions here. Their neutral, toasty flavor is the perfect foil for the dip’s boldness.
The Healthy Squad: Don’t overlook fresh, crunchy veggies! Thick slices of English cucumber, endive leaves, bell pepper strips, and sturdy carrot chips are fantastic for scooping and add a refreshing crunch.
The “Other” Ideas: Get creative! This dip is incredible slathered on leftover turkey sandwiches, served alongside roasted pork tenderloin, or even as a topping for baked brie. It’s a multi-talented condiment!
Make It Your Own: Delicious Variations
Once you’ve mastered the base recipe, the world is your oyster! Here are a few of my favorite twists to keep things exciting.
1. The Tropical Twist: Add ¼ cup of well-drained crushed pineapple and 2 tablespoons of toasted shredded coconut to the cranberry mixture. It adds a sweet, tropical vibe that’s irresistible.
2. The Thanksgiving Leftover Dip: Stir ½ cup of finely chopped leftover turkey and ¼ cup of chopped candied pecans into the cranberry mixture before topping the cream cheese. It’s a whole meal on a cracker!
3. The Creamy Dreamy Version: For an ultra-luxurious, spreadable dip, skip the layered presentation and simply fold the chilled cranberry mixture into the softened cream cheese until it’s swirled and marbled. It’s easier for serving a big crowd.
4. The Citrus Swap: Use orange juice and zest instead of lemon/lime for a sweeter, warmer citrus note. A pinch of cinnamon in the cranberry mix makes it extra cozy.
5. The Heat Seeker’s Delight: Leave the seeds in one of the jalapeños, or add a few slices of pickled jalapeño for an extra vinegary kick.
Beau’s Chef Notes & Kitchen Stories
This recipe has evolved in my kitchen over the years. I used to be meticulous about chopping everything the exact same size, but I’ve learned that a little textural variety is part of its charm. I also started adding the tiny pinch of salt after I realized it was the secret weapon that made my guests’ eyes light up—they couldn’t pinpoint why it was so good, but I knew!
One of my favorite kitchen memories involving this dip was when my nephew, a notoriously picky eater, decided he was only going to eat “the red stuff.” He proceeded to eat an entire bowl of just the cranberry relish with a spoon, jalapeños and all, declaring it “spicy fruit.” It just goes to show you, never underestimate the power of a bold flavor—it might just win over the toughest critic.
Your Questions, Answered
Q: Can I make this dip ahead of time?
A: Absolutely! This is a fantastic make-ahead appetizer. Prepare the cranberry mixture and store it in an airtight container in the fridge for up to 3 days. You can also shape the cream cheese block onto the plate, cover it tightly with plastic wrap, and keep it chilled. Assemble everything just before serving for the best texture.
Q: My dip is too tart! How can I fix it?
A: No problem—this is an easy fix. Simply stir in an additional tablespoon or two of sugar or honey into the cranberry mixture. Let it sit for 15 minutes to dissolve, then taste again. The tartness can vary depending on the cranberries.
Q: Why is my cream cheese layer difficult to spread?
A: This almost always means your cream cheese wasn’t soft enough. True softening takes a good 60-90 minutes on the counter. If you’re in a pinch, you can microwave it on a plate for 10-15 seconds, but be careful—you don’t want it melted, just soft.
Q: Is there a way to make this less spicy for kids?
A: Of course! For a totally mild version, you can omit the jalapeño entirely. The dip will still be deliciously sweet and tart. You could also substitute a tiny bit of finely diced red bell pepper for a little color and crunch without any heat.

Cranberry Jalapeño Cream Cheese Dip
Description
Hey friends! Sweet, spicy, creamy, and tangy—that’s what this dip delivers in every bite. Perfect for holidays, game day, or a casual snack, it comes together in about 15 minutes and is guaranteed to be the centerpiece of any table.
Ingredients
-
12 oz fresh cranberries – bright and tart; rinse and pick through for quality
-
1–2 jalapeños, seeded and finely chopped – adjust heat to taste
-
¼ cup chopped green onions – both white and green parts
-
¼ cup chopped fresh cilantro – fresh flavor balance
-
½ cup sugar – adjust for sweetness; honey or maple syrup works too
-
1 tbsp lemon or lime juice – brightens all flavors
-
¼ tsp salt – enhances all other flavors
-
16 oz cream cheese, softened – luxurious, creamy base
Optional garnish: extra cilantro or green onions
Instructions
-
Chop the Cranberries:
Pulse cranberries in a food processor 8–10 times until chunky. Hand-chopping works too. -
Mix the Flavor:
In a bowl, combine cranberries, jalapeño, green onions, cilantro, sugar, citrus juice, and salt. Stir well. Adjust sweetness or acidity to taste. -
Chill:
Cover and refrigerate for at least 1 hour (overnight is even better) to let flavors meld. -
Prepare the Cream Cheese Base:
Spread softened cream cheese on a serving plate or shallow dish. Smooth or create swirls for presentation. -
Top with Cranberry Mixture:
Spoon the chilled cranberry mixture over the cream cheese, spreading to the edges. Garnish with extra cilantro or green onions if desired.
Notes
-
Too tart? Add 1–2 tbsp sugar or honey.
-
Cream cheese hard to spread? Let it sit 60–90 min or microwave 10–15 sec.
-
Kid-friendly? Omit jalapeño or use red bell pepper for color without heat.
-
Make-ahead: Prepare cranberry mixture up to 3 days ahead; assemble just before serving.
Nutrition
- Calories: 160 kcal per serving
- Sugar: 7 g
- Fat: 13 g
- Carbohydrates: 8 g
Nutritional Information*
Okay, let’s be real—this is a party dip, a treat meant for sharing and enjoying. But it’s always good to know what you’re eating! Here’s a rough breakdown per serving (based on 12 servings, without dippers).
Calories: ~160 | Fat: 13g | Saturated Fat: 8g | Protein: 2g | Carbohydrates: 8g | Sugar: 7g | Sodium: 125mg
*Please note: This is an estimate generated using a nutritional calculator and will vary based on the specific brands and ingredients you use. Using a sugar substitute will significantly lower the carbohydrate and sugar count.
Final Thoughts from My Kitchen to Yours
Well, there you have it—my go-to, never-fail, always-impressive party dip. It’s more than just a recipe; it’s a reminder that cooking should be fun, flexible, and full of flavor. It’s about creating something that brings people together and gets them talking.

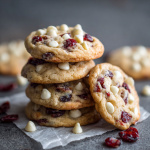
White Chocolate Cranberry Cookies
Your New Favorite Cookie: White Chocolate Cranberry Magic
Hey friends, Beau here from Feastical! Let’s talk about something that makes a kitchen feel like a home: the incredible, soul-warming smell of cookies baking in the oven. Is there anything better? That sweet, buttery aroma just seems to hug everyone in the house, promising something delicious is just minutes away. And if I had to pick one cookie that’s an absolute superstar, a recipe that never fails to bring a smile, it’s got to be these unbelievably soft and chewy White Chocolate Cranberry Cookies.
We’re talking about a cookie that’s a perfect ten. It’s got that classic, buttery sugar cookie base that just melts in your mouth. Then, we load it up with creamy, dreamy white chocolate chips that get all gooey and perfect when they’re warm. And just when you think it can’t get any better, we throw in a handful of chewy, tangy dried cranberries that cut through the sweetness like a little burst of fruity sunshine. It’s the ultimate sweet-and-tart combo, and trust me, you’re going to want to make a double batch because these beauties disappear fast.
Whether you’re gearing up for the holiday hustle, need a standout treat for the school bake sale, or just want to turn a regular Tuesday into something special, this recipe is your new best friend. It’s simple, soulful, and 100% satisfying. So, tie on your favorite apron, preheat that oven, and let’s bake up some serious joy together.
A Cookie That Tastes Like Coming Home
This recipe takes me right back to my first tiny apartment kitchen. It was about the size of a postage stamp, but it was mine, and I loved every inch of it. One particularly dreary November afternoon, my best friend came over feeling a little down. Now, my solution to most of life’s problems—big or small—usually involves butter and sugar. I scanned my pantry and found a half-bag of white chocolate chips and some leftover dried cranberries from a failed attempt at a “healthy” salad.
I decided to wing a cookie recipe, figuring even a baking disaster would be a fun distraction. As we creamed the butter and sugar, the mood already started to lift. We laughed, we gossiped, and we probably ate more raw dough than we should have. When that first tray came out of the oven, the whole place smelled like a warm hug. That first bite—the gooey white chocolate, the tart cranberry, the soft, chewy center—was pure magic. We ended up eating half the batch right there on the kitchen floor. Those cookies didn’t solve everything, but they reminded us of the simple, powerful joy of sharing good food with a good friend. That’s the spirit I bake into every batch even now.
Gathering Your Cookie Crew: The Ingredients
One of the things I love most about this recipe is how approachable it is. You likely have most of this stuff in your kitchen already! Here’s the lineup and a few of my chef-y insights to help you understand the “why” behind the “what.”
- 1 cup (2 sticks) unsalted butter, softened – This is the foundation of our flavor. Unsalted lets us control the salt level perfectly. Pro Tip: “Softened” means your butter should give slightly when you press it but shouldn’t be greasy or melted. If you forget to take it out, you can quickly soften it by cutting it into chunks and letting it sit for 15-20 minutes.
- 1 cup brown sugar, packed – Pack it in there! The molasses in brown sugar is the secret to a chewy, moist cookie and gives it that gorgeous caramel color.
- ½ cup white sugar – The white sugar helps create a slight crispness on the edges while the center stays soft. It’s the perfect partner to the brown sugar.
- 2 large eggs – Always use large eggs for baking consistency. They bind everything together and add richness.
- 2 teaspoons vanilla extract – Don’t skimp! A good quality vanilla adds a deep, warm flavor that makes the cookies taste homemade. If you have vanilla bean paste, a teaspoon of that is heavenly here.
- 2½ cups all-purpose flour – The structure of our cookie. Make sure to fluff your flour with a spoon before scooping it into your measuring cup and leveling it off. This prevents accidentally using too much and ending up with dry cookies!
- 1 teaspoon baking soda – Our leavening agent! This is what gives the cookies their perfect rise and spread.
- ½ teaspoon salt – Crucial for balancing all the sweetness and making the flavors pop. If you only have salted butter, just reduce this to a scant ¼ teaspoon.
- 1½ cups white chocolate chips – I prefer using high-quality baking chips or chunks for the best melt. You can also chop up a bar of good white chocolate for uneven, puddly pockets of goodness.
- 1 cup dried cranberries – Look for “soft” dried cranberries, not the super hard ones. For an extra flavor boost, you can plump them up by soaking them in hot water or even a little orange juice for 10 minutes before draining and adding them to the dough.
- Optional: ½ cup chopped macadamia nuts or pecans – If you’re a nut lover, this add-in is a game-changer. The buttery, rich flavor of macadamias is a classic pairing, but toasted pecans are a fantastic, more affordable alternative.
Let’s Get Baking: The Step-by-Step Guide
Alright, team! Let’s turn these ingredients into cookie magic. Follow these steps, and you’ll be a cookie hero in no time.
Step 1: Preheat and Prep
Preheat your oven to 350°F (175°C). This is non-negotiable for even baking! Line your baking sheets with parchment paper. Not only does this prevent sticking, but it makes cleanup an absolute dream. No parchment? A silicone baking mat works great, too.
Step 2: Creaming is Believing
In a large bowl, beat together the softened butter, packed brown sugar, and white sugar. Now, here’s a chef hack: don’t rush this! Cream them together on medium speed for a good 2-3 minutes until the mixture is light, pale, and fluffy. This step incorporates air into your dough, which is key for that perfect texture. It should look like a smooth, delicious cloud.
Step 3: Egg-cellent Addition
Beat in the eggs one at a time, making sure the first is fully incorporated before adding the second. Then, pour in that glorious vanilla extract. Mix until everything is beautifully combined and smooth. The smell right now is already incredible.
Step 4: The Dry Team
In a separate bowl, whisk together your flour, baking soda, and salt. This ensures the leavening and salt are evenly distributed so every cookie is consistent. Gradually add this dry mixture to your wet ingredients, mixing on low speed just until the flour disappears. Do not overmix! Overworking the dough after adding the flour is the number one cause of tough cookies.
Step 5: The Grand Finale (Mix-Ins!)
Switch to a sturdy spatula or wooden spoon for this part. Gently fold in the white chocolate chips, dried cranberries, and nuts if you’re using them. Make sure they’re evenly distributed throughout the dough.
Step 6: Scoop and Space
Use a cookie scoop or a tablespoon to drop rounded 1.5-tablespoon-sized balls of dough onto your prepared baking sheets. Leave about 2 inches between each one. They need room to spread and become the perfect cookie puddles we’re after. For a super pro move, you can roll the dough balls between your palms to make them perfectly round.
Step 7: Bake to Perfection
Bake for 10-12 minutes. Now, listen up! This is the most important part. The cookies are done when the edges are set and are just starting to turn a light golden brown. The centers will still look soft, puffy, and underbaked. THAT IS WHAT YOU WANT. They will continue to cook on the hot baking sheet as they cool. This is the secret to a soft, chewy center. If you wait for the centers to look done in the oven, you’ll have overbaked, crunchy cookies.
Step 8: The Patient Cool-Down
Let the cookies cool on the hot baking sheet for 5 full minutes. This allows them to set up without becoming rock hard. Then, carefully transfer them to a wire rack to cool completely. Or, you know, grab a glass of milk and enjoy a few while they’re still warm and the chocolate is gloriously melty.
How to Serve These Cookie Superstars
Okay, you’ve baked the perfect batch. Now, how do you make them shine? Presentation is part of the fun!
For a simple, homey feel, just pile them high on a rustic wooden board or in a big, beautiful ceramic bowl. Let people grab them as they please—it’s the ultimate sign of a welcoming home.
If you’re feeling fancy, these cookies are stunning on a dessert platter. Place a few on a nice plate and dust them with a light shower of powdered sugar for a “wintery” effect. Drizzling a little melted white chocolate over the top and adding a few extra dried cranberries makes them look like they came from a professional bakery.
And of course, you can’t go wrong with the classic combo: a still-warm cookie nestled next to a tall, cold glass of milk. For the adults, try pairing one with a cup of hot coffee or a glass of dessert wine like a Moscato d’Asti. The sweetness of the cookie and the slight acidity of the wine are a match made in heaven.
Make It Your Own: Delicious Recipe Twists
One of the best things about a great base recipe is how easily you can adapt it. Here are a few of my favorite ways to mix it up!
- The Orange Zest Zinger: Add the zest of one large orange to the dough when you cream the butter and sugar. The citrus oil brightens up the entire cookie and makes the cranberry flavor sing even louder.
- Nutty Professor: As mentioned, macadamia nuts are classic. But toasted pecans, walnuts, or even almonds would be fantastic. Toasting the nuts first in a dry skillet for a few minutes unlocks their deepest, richest flavor.
- Dark Chocolate Switch-Up: Not a white chocolate fan? (No judgment here!). Swap them out for an equal amount of dark chocolate chips or chunks. The deep, bittersweet chocolate with the tart cranberry is an elite combination.
- Gluten-Free & Awesome: You can easily make these gluten-free! Use a good 1:1 gluten-free all-purpose flour blend (I love Bob’s Red Mill or Cup4Cup). The results are nearly identical—soft, chewy, and delicious.
- Oatmeal Cranberry White Chocolate: For a heartier, chewier cookie, replace ½ cup of the all-purpose flour with ¾ cup of old-fashioned oats. It adds a wonderful texture and makes them feel a little more wholesome.
Beau’s Chef Notes & Kitchen Stories
This recipe has been my go-to for years, and it’s evolved with me. I once, in a frantic pre-holiday baking spree, accidentally used baking POWDER instead of baking SODA. Let me tell you, friends, they came out of the oven looking like little pale, cakey hockey pucks. They tasted fine, but they had zero spread and the texture was all wrong. It was a hilarious (and delicious) lesson in reading labels carefully!
Another trick I’ve learned is that this dough is a fantastic candidate for freezing. If you want to have ready-to-bake cookies on demand, just scoop the dough balls onto a sheet pan and freeze them solid. Then, toss them into a zip-top freezer bag. You can bake them straight from the freezer; just add 1-2 minutes to the baking time. It’s the ultimate hack for fresh cookies anytime a craving strikes.
Your Questions, Answered: FAQs & Troubleshooting
Q: My cookies spread too much and came out flat. What happened?
A: This is usually caused by butter that is too warm or melted. Make sure your butter is just softened, not melted or greasy. Another culprit could be an old or expired baking soda that has lost its potency. Also, ensure your baking sheet is cool before placing the next batch of dough on it; a hot pan will make the cookies start spreading before they even hit the oven.
Q: My cookies are too cakey and puffy. I want them flatter and chewier!
A: This often means there was a bit too much flour. Next time, try fluffing your flour with a spoon, spooning it into the measuring cup, and leveling it off without packing it down. Also, make sure you’re using large eggs, not extra-large or jumbo, as too much liquid can throw off the balance.
Q: Can I use frozen cranberries instead of dried?
A: I wouldn’t recommend it. Frozen cranberries contain a lot of water, which they’ll release into the dough as they bake. This will make your cookies soggy, prevent them from spreading properly, and can cause the cranberries to become bitter. Stick with dried for the best texture and flavor.
Q: How do I store these cookies to keep them soft?
A: The best way to keep cookies soft is to store them in an airtight container at room temperature once they are completely cool. I like to throw a single piece of bread into the container. The cookies will absorb the moisture from the bread and stay soft for days (the bread will get hard, but it’s a sacrifice we’re willing to make!).
White Chocolate Cranberry Cookies
Description
Hey friends! Nothing says “home” like the smell of cookies baking. These White Chocolate Cranberry Cookies are soft, chewy, and melt-in-your-mouth delicious. The buttery base, gooey white chocolate, and tangy cranberries make them a perfect sweet-and-tart treat.
Ingredients
-
1 cup (2 sticks) unsalted butter, softened
-
1 cup packed brown sugar
-
½ cup white sugar
-
2 large eggs
-
2 tsp vanilla extract
-
2½ cups all-purpose flour
-
1 tsp baking soda
-
½ tsp salt
-
1½ cups white chocolate chips
-
1 cup dried cranberries
-
Optional: ½ cup chopped macadamia nuts or pecans
Tips:
-
Soften cranberries by soaking in hot water or orange juice for 10 min for extra chewiness.
-
Toast nuts to enhance flavor.
-
Don’t overmix dough to keep cookies soft.
Instructions
-
Preheat oven to 350°F (175°C). Line baking sheets with parchment paper or a silicone mat.
-
Cream butter and sugars for 2–3 minutes until light and fluffy.
-
Add eggs and vanilla, one egg at a time, mixing until smooth.
-
Mix dry ingredients in a separate bowl: flour, baking soda, and salt. Gradually add to wet ingredients on low speed until just combined.
-
Fold in white chocolate chips, cranberries, and nuts (if using) gently.
-
Scoop dough: Use 1.5-tablespoon-sized balls, spaced 2 inches apart.
-
Bake 10–12 minutes: Edges set, centers soft and puffy.
-
Cool on baking sheet 5 minutes, then transfer to a wire rack.
Notes
-
Too flat? Butter too warm, baking sheet hot, or old baking soda.
-
Too cakey? Slightly too much flour or too-large eggs.
-
Keep cookies soft: store in airtight container with a slice of bread for moisture.
-
Dough can be frozen in scoops; bake straight from freezer (add 1–2 min).
Nutrition
- Calories: 150 kcal Per Cookie
- Sugar: 12 g
- Fat: 8 g
- Fiber: 0.5 g
- Protein: 2 g
Nutritional Information (Because We’re Curious!)
Okay, let’s be real—we’re not eating cookies for their health benefits. We’re eating them for joy! But I know some folks like to keep track, so here’s a general breakdown per cookie (based on a yield of 36 cookies, without optional nuts). Remember, these are estimates and can vary based on specific ingredients and portion sizes.
Calories: ~150 | Fat: 8g | Saturated Fat: 5g | Carbohydrates: 18g | Fiber: 0.5g | Sugar: 12g | Protein: 2g
The main sources of calories are the butter and sugars, which provide the energy and that irresistible flavor and texture. The white chocolate chips add fat and sugar, while the cranberries contribute a small amount of fiber and micronutrients. Enjoy them mindfully as part of a balanced diet—because a life with cookies is a life well-lived!
Final Thoughts from My Kitchen to Yours
Well, there you have it, my friends—my all-time favorite White Chocolate Cranberry Cookie recipe, served up with a side of kitchen stories and a whole lot of heart. This isn’t just a list of ingredients and steps; it’s an invitation to create your own moments of joy. Baking is about so much more than the final product. It’s about the laughter that happens while you’re waiting for the butter to soften, the pride you feel when you pull a perfect golden batch from the oven, and the connections you make when you share what you’ve made with people you love.
I hope this recipe becomes a staple in your home, just like it is in mine. I hope your kitchen fills with that incredible smell and your table is surrounded by happy people.
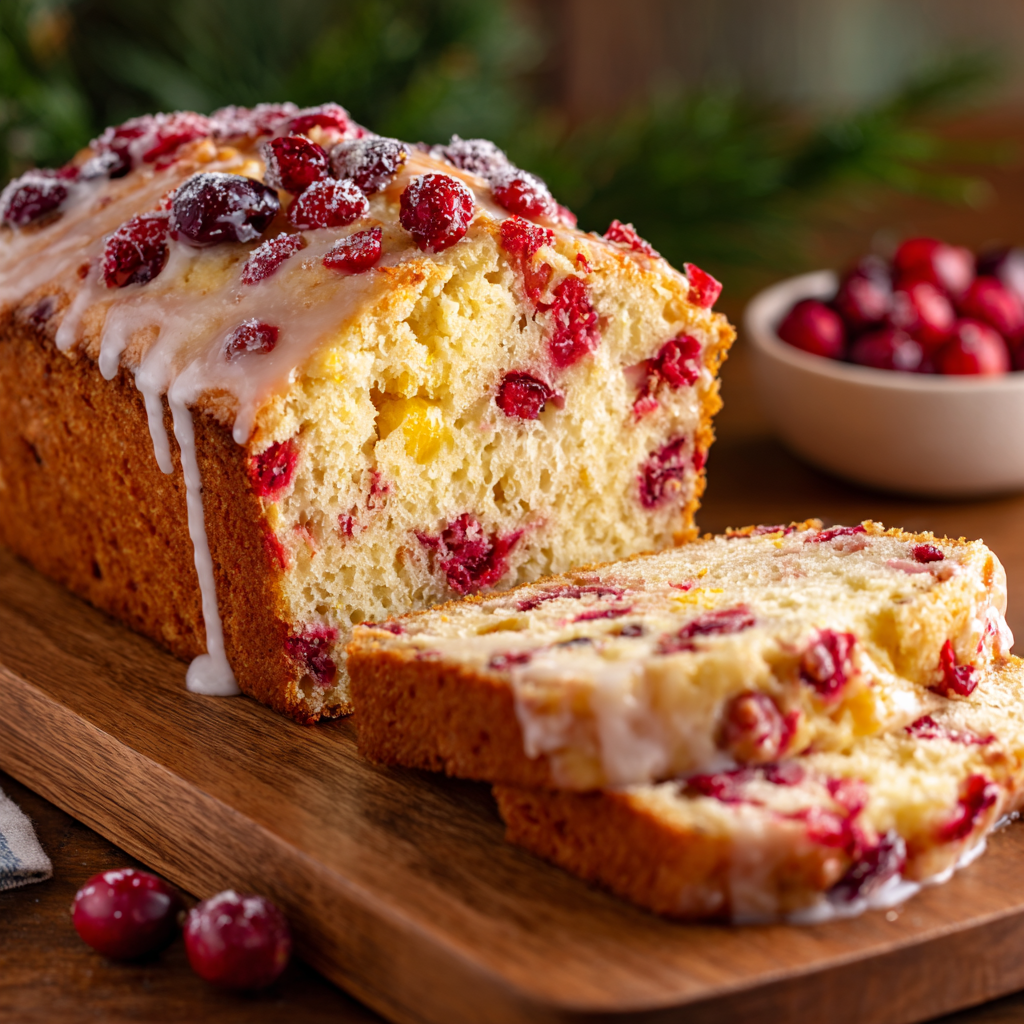
Cranberry Orange Bread
Your New Favorite Loaf: Cranberry Orange Bread That Tastes Like a Sunny Morning
Hey friends, Beau here from Feastical! Is there anything better than the smell of something sweet and citrusy baking in the oven? It’s like a warm, fragrant hug that fills every corner of your kitchen. And if I had to pick one bake that delivers that feeling every single time, it’s this incredibly moist, bursting-with-flavor Cranberry Orange Bread.
We’re not talking about a dry, crumbly loaf that needs a gallon of coffee to wash it down. Oh no. This is the stuff of legends: a tender, buttery-soft crumb (thanks to a clever little trick I’ll share with you), packed with juicy, tart cranberries and infused with the sunny, bright essence of fresh orange in every single bite. It’s the perfect balance of sweet and tangy, cozy and refreshing—a total paradox in the best way possible.
Whether you’re whipping it up for a lazy weekend brunch, packing a slice for a lunchbox surprise, or baking a few loaves to gift to neighbors during the holidays, this recipe is your new go-to. It’s deceptively simple, wildly forgiving, and guaranteed to make you look like a rockstar baker. So, preheat that oven, grab your favorite mixing bowl, and let’s create a little magic together. You’re about to fall in love with baking all over again.
A Slice of Sunshine & My Grandma’s Apron
This recipe always takes me right back to my grandma’s kitchen. She was a wizard with anything involving fruit and flour. Every November, like clockwork, as the first frost hit the windows, she’d pull out her big ceramic bowl and a wooden spoon that had seen more battles than any kitchen utensil should. The star of the show was always the bag of vibrant, crimson cranberries she’d been saving.
I’d sit at the counter, legs swinging, and my job was to zest the oranges. She’d tell me, “Beau, get all the sunny part, but none of the white—that’s the bitter stuff!” I’d watch the tiny citrus oils spray into the air, smelling like pure, unadulterated joy. She’d juice the oranges by hand, and I’d inevitably sneak a sip of the fresh-squeezed nectar. The *pop-pop-pop* of the cranberries as she folded them into the batter was our little symphony.
That bread wasn’t just food; it was an event. It meant family was coming over, stories would be shared, and laughter would echo through the house. It was my first real lesson that the best recipes aren’t just about ingredients—they’re about the memories you bake into them. This is my version of her classic, with a few Feastical twists, and I hope it becomes a part of your story, too.
Gathering Your Sunshine Squad: The Ingredients
Here’s the dream team! The beauty of this list is its simplicity. You probably have most of this in your pantry right now. Using quality ingredients here makes a world of difference, especially with the citrus.
- 2 cups all-purpose flour: The trusty foundation of our loaf. For a slightly lighter crumb, you can swap one cup for pastry flour, but all-purpose works perfectly.
- 1 tablespoon baking powder: This is our primary leavening agent, giving the bread its beautiful rise. Make sure it’s fresh! If it’s been in your cupboard for over a year, it might have lost its power.
- ½ teaspoon salt: Never skip the salt! It’s the flavor enhancer that makes all the sweetness and citrus pop. It balances everything out beautifully.
- 1 cup granulated sugar: The perfect amount of sweetness to counter the tart cranberries. For a deeper flavor, you can use half white and half light brown sugar.
- 2 large eggs: Bring them to room temperature! This is my secret hack for a smoother, more emulsified batter that rises evenly. Cold eggs can make the oil seize up a bit.
- ½ cup vegetable oil: This is the key to that incredibly moist texture that stays for days. A neutral oil like avocado or canola works great. You can use melted butter for a richer flavor, but the crumb will be slightly denser.
- ½ cup fresh orange juice: Please, please use the real deal! The flavor is so much brighter and more vibrant than the bottled stuff. You’ll need about 1-2 large oranges. Juice them yourself—it’s worth it.
- 1 tablespoon orange zest: This is where the magic lives! The zest is packed with fragrant citrus oils. Zest the oranges before you juice them—it’s much easier.
- 1½ cups fresh or frozen cranberries: No need to thaw if using frozen! I prefer the tart punch of whole berries, but you can coarsely chop them if you want a more even distribution. If using fresh, give them a rinse and pat them dry.
- Optional: ½ cup chopped walnuts or pecans: For a little crunch and nutty warmth. Toast them in a dry pan for a few minutes first to really unlock their flavor!
- Optional glaze: ½ cup powdered sugar + 1–2 tsp orange juice: This is the gorgeous, sweet finishing touch that takes it from breakfast bread to dessert-level decadence.
Let’s Get Baking: The Simple Steps to Glory
Ready to make your kitchen smell incredible? Follow these steps, and you’ll have a perfect loaf. Remember, the number one rule in quick bread making: DO NOT OVERMIX. A few lumps in the batter are totally fine and will prevent a tough, chewy bread.
- Preheat and Prep: Fire up your oven to 350°F (175°C). Now, take your 9×5-inch loaf pan and give it a good coating of butter or non-stick spray. Dust it lightly with flour, tapping out the excess. This little ritual ensures your beautiful bread will slide out effortlessly after its bake. Line the bottom with a strip of parchment paper for absolute foolproof removal.
- Combine the Dry Team: In a large bowl, grab your whisk and vigorously whisk together the flour, baking powder, and salt. We’re not just mixing here; we’re aerating the flour and making sure the baking powder is evenly distributed. This is the secret to a uniform rise without any bitter pockets.
- Whisk the Wet Team: In a separate medium bowl, combine the sugar, room temperature eggs, oil, fresh orange juice, and that glorious orange zest. Whisk it until it’s completely smooth and homogenous. You’ll see the sugar begin to dissolve into the liquids. See how the oil and juice are playing nice? That’s why we used room temp eggs!
- The Grand Union: Create a little well in the center of your dry ingredients. Pour the entire contents of the wet bowl into that well. Now, with a spatula or wooden spoon, gently fold the mixture together. Stop as soon as you no longer see streaks of dry flour. I mean it! A few lumps are your friends. Overmixing is the enemy of tenderness.
- Fold in the Goodies: Toss your cranberries (and toasted nuts, if using) with a teaspoon of flour. This light coating helps prevent them from sinking to the bottom of the loaf during baking. Gently fold them into the batter until they’re just evenly distributed.
- Pan and Smooth: Pour the beautiful, speckled batter into your prepared loaf pan. Use your spatula to smooth the top into an even layer. For a professional touch, you can sprinkle a few extra cranberries and a pinch of sugar on top before baking for a gorgeous, rustic look.
- Bake to Golden Perfection: Slide the pan into the center of your preheated oven and let it work its magic for 50-60 minutes. Rotate the pan halfway through for even browning. The bread is done when it’s a deep golden brown on top and a toothpick or cake tester inserted into the very center comes out clean or with a few moist crumbs (but no wet batter).
- The All-Important Cool Down: This is the hardest part—waiting! Let the loaf cool in the pan on a wire rack for at least 15 minutes. This allows it to set and firm up. Then, run a knife around the edges to loosen it, and gently invert it onto the rack to cool completely before slicing. I know it’s tempting, but slicing it warm will make it gummy! If you’re glazing, wait until it’s completely cool.
How to Serve This Slice of Heaven
This bread is a superstar all on its own, but a little flair never hurt anybody! Here’s how I love to serve it up:
The Classic Slice: For breakfast or an afternoon pick-me-up, a thick, unadorned slice alongside a hot cup of coffee or tea is absolute perfection. The simplicity lets the bright orange and tart cranberry flavors truly shine.
Fancy Brunch Style: Want to impress your guests? Lightly toast a slice and slather it with good-quality salted butter or even a creamy mascarpone cheese. The combination of warm, citrusy bread, cool, rich cheese, and a flake of sea salt is next-level delicious.
Dessert Mode: Drizzle that optional orange glaze over the top for a sweet finish. Serve it with a scoop of vanilla bean ice cream or a dollop of freshly whipped cream for a simple yet stunning dessert.
The Ultimate Gift: Let the loaf cool completely, then wrap it tightly in cellophane or a nice tea towel and tie it with a ribbon. It’s a heartfelt, homemade gift that says you care way more than any store-bought item ever could.
Make It Your Own: Delicious Recipe Variations
This recipe is like a blank canvas—feel free to get creative! Here are a few of my favorite twists:
- White Chocolate Craze: Fold in ½ cup of white chocolate chips along with the cranberries. The creamy sweetness of white chocolate is a dream pairing with the tart berries.
- Lemon Twist: Swap the orange juice and zest for lemon! You’ll get a more pronounced tang that is equally fantastic with the cranberries. A lemon glaze would be fabulous here too.
- Spiced & Cozy: Add ½ teaspoon of cinnamon and ¼ teaspoon of nutmeg to the dry ingredients. These warm spices make the bread feel even more festive and cozy, perfect for the holidays.
- Gluten-Free Friendly: Substitute the all-purpose flour with a 1:1 gluten-free baking blend. The result is just as tender and moist!
- Vegan Version: Use a flax egg (1 tbsp ground flaxseed mixed with 3 tbsp water per egg, let sit for 5 mins) and your favorite plant-based milk mixed with a teaspoon of vinegar instead of buttermilk (if using). The oil base makes this conversion super easy.
Beau’s Chef Notes & Kitchen Stories
This recipe has evolved so much since my grandma’s days. Her original version used shortening and no zest—can you imagine?! Over the years, I’ve learned that the zest is non-negotiable for that intense orange flavor. I also switched to oil after a small kitchen disaster involving melted butter that I accidentally browned. The oil version was not only easier but yielded a moister crumb that stayed soft for days, so I never looked back!
One of my favorite kitchen fails was the time I was filming a video for Feastical and, in my excitement, I forgot the baking powder. The resulting loaf was so dense we could have used it as a doorstop. We had a good laugh, ordered pizza, and it became a great reminder to always double-check your ingredients before you start! It happens to the best of us.
Your Questions, Answered!
Q: My bread is browning too quickly on top, but the center is still wet. What do I do?
A: This is common! Loosely tent a piece of aluminum foil over the top of the loaf pan for the remaining baking time. This will shield the top from burning while allowing the center to continue cooking through.
Q: Can I use dried cranberries instead of fresh?
A: You can, but the result will be different. Soak the dried cranberries in hot orange juice for 10-15 minutes first to plump them up. The bread will be sweeter and lack the tart “pop” of fresh berries. I highly recommend fresh or frozen for the best texture and flavor contrast.
Q: Why did my bread sink in the middle?
A: This usually points to two things: either the bread needed a few more minutes to bake in the center, or the leavening agent (baking powder) may be old and lost its potency. Always test with a toothpick and make sure your baking powder is fresh!
Q: How should I store this bread?
A> Once completely cool, store it tightly wrapped in plastic wrap or in an airtight container at room temperature for up to 3 days. For longer storage, it freezes beautifully! Wrap the whole loaf or individual slices tightly in plastic wrap and then foil. Freeze for up to 3 months. Thaw at room temperature.

Cranberry Orange Bread
Description
Hey friends! There’s nothing like the smell of something sweet and citrusy baking in the oven—it’s a warm, fragrant hug. This Cranberry Orange Bread is moist, tender, bursting with juicy cranberries, and infused with fresh orange flavor. Perfect for brunch, gifting, or a cozy breakfast treat, it’s simple, forgiving, and utterly delicious.
Ingredients
-
2 cups all-purpose flour (or 1 cup flour + 1 cup pastry flour for lighter texture)
-
1 tbsp baking powder (fresh!)
-
½ tsp salt
-
1 cup granulated sugar (or half white + half light brown sugar)
-
2 large eggs, room temperature
-
½ cup vegetable oil (neutral oil like canola or avocado; melted butter for richer flavor)
-
½ cup fresh orange juice (about 1–2 oranges)
-
1 tbsp orange zest
-
1½ cups fresh or frozen cranberries (coarsely chopped if desired)
-
Optional: ½ cup toasted walnuts or pecans
-
Optional glaze: ½ cup powdered sugar + 1–2 tsp orange juice
Tips:
-
Coat cranberries and nuts lightly with flour to prevent sinking.
-
Don’t overmix the batter; a few lumps are fine.
-
Toast nuts to enhance flavor.
Instructions
-
Preheat oven to 350°F (175°C). Grease a 9×5-inch loaf pan, dust with flour, and line with parchment paper.
-
Mix dry ingredients: Whisk flour, baking powder, and salt in a large bowl.
-
Mix wet ingredients: Whisk sugar, eggs, oil, orange juice, and zest until smooth.
-
Combine: Pour wet ingredients into dry, folding gently until just combined. Stop when no dry streaks remain.
-
Fold in cranberries and nuts (if using) gently.
-
Bake: Pour batter into pan, smooth the top, and bake 50–60 minutes until golden and a toothpick comes out clean. Rotate pan halfway for even baking.
-
Cool: Let cool in the pan 15 minutes, then remove and cool completely on a wire rack before slicing.
-
Optional glaze: Drizzle over cooled bread for a sweet, citrusy finish.
Notes
-
White Chocolate: Fold in ½ cup white chocolate chips.
-
Lemon Twist: Use lemon juice and zest instead of orange.
-
Spiced: Add ½ tsp cinnamon + ¼ tsp nutmeg.
-
Gluten-Free: Use a 1:1 gluten-free flour blend.
-
Vegan: Replace eggs with flax eggs and use plant-based milk.
Nutrition
- Calories: 220 kcal
- Carbohydrates: 30 g
- Fiber: 1 g
- Protein: 3 g
Nutritional Information (Per Slice, based on 12 slices)
While this is definitely a treat, it’s made with real, simple ingredients. Here’s a rough breakdown:
- Calories: ~220 kcal
- Carbohydrates: 30 g
- Protein: 3 g
- Fat: 9 g
- Saturated Fat: 1 g
- Fiber: 1 g
- Sugar: 18 g
Note: This information is an estimate provided by an online nutrition calculator. Values may vary based on specific ingredients and portion sizes.
Final Thoughts from My Kitchen to Yours
Well, there you have it, my friends—my all-time favorite Cranberry Orange Bread recipe. It’s more than just a list of ingredients and steps; it’s a passport to creating your own warm, delicious memories. I hope this loaf brings as much joy to your home as it has to mine over the years.
Remember, baking is supposed to be fun. Don’t stress over perfection. If a few cranberries sink, who cares? If the top is a little lopsided, it’s just more proof that it was made with love. The most important ingredient is always the joy you stir into the batter.
I’d love to see your creations! If you bake this loaf (and I really hope you do), tag me @Feastical on social media so I can share in your success. Now go forth, bake something beautiful, and as always… dig in!
With love and a full belly,
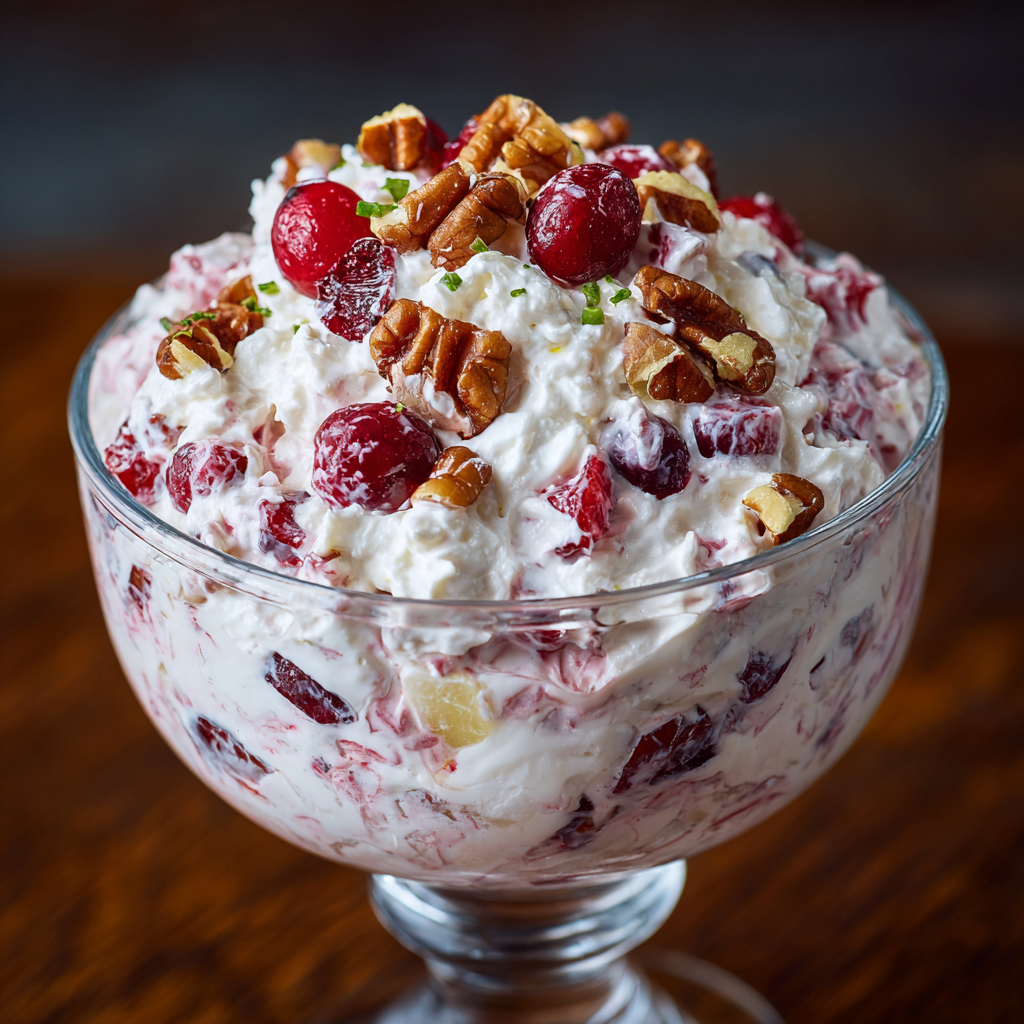
Cranberry Salad
Your New Holiday Favorite: The Creamy Cranberry Salad That Steals the Show
Hey friends, Beau here from Feastical! Can you smell it? That crisp, chilly air is starting to whisper, and you know what that means—holiday season is just around the corner. And for me, the holidays aren’t about the perfectly browned turkey or the towering tier of presents. Nope. It’s all about the sides. The glorious, show-stopping, passed-down-through-generations side dishes that make every plate feel like a celebration.
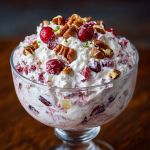
But let’s be real. Sometimes those classic recipes can feel a little… heavy. Between the gravy, the mashed potatoes, and the stuffing, your palate is begging for a break. That’s where my all-time favorite comes in: the Cranberry Salad. Now, don’t let the word “salad” fool you. This isn’t a bowl of leafy greens. This is a brilliant, ruby-red, sweet-tart, creamy-crunchy masterpiece that sits right on the line between a side dish and a dessert. It’s the pop of color and flavor that cuts through the richness of the main feast and leaves everyone feeling refreshed and asking for seconds.
This recipe is a total breeze to whip up, requires zero oven space (a major win on Turkey Day!), and is guaranteed to become a new tradition at your table. It’s the kind of dish that feels fancy but is secretly one of the easiest things you’ll make all season. So, grab your favorite mixing bowl and let’s create some magic together.
The First Bite: A Thanksgiving Memory
I’ll never forget the first time this cranberry salad truly clicked for me. I was about ten years old, buzzing around my grandma’s kitchen like a hyperactive bee, “helping” by mostly sneaking pieces of shredded cheese and raw cookie dough. The air was thick with the scent of roasting turkey and pies. My grandma, a woman who ruled her kitchen with a gentle but firm hand, handed me a bag of these bizarre, hard, sour little red berries.
My job? To pulse them in her ancient, avocado-green food processor. I was dubious. One taste of a raw cranberry and my whole face puckered. But then, she worked her magic. She mixed them with sugar and told me we had to be patient. We let them sit while we worked on other things. When we came back, the berries had transformed. They were still vibrant and tart, but now they were also sweet and juicy. Folding in the fruit, the nuts, and that fluffy whipped topping felt like we were creating edible clouds. That first chilled, creamy-crunchy spoonful on Thanksgiving Day was a revelation. It wasn’t just a dish; it was a moment of pure, joyful balance amidst the feast. It’s that feeling of simple, shared kitchen magic that I hope this recipe brings to your home.
Gathering Your Cranberry Salad Crew
Here’s everything you’ll need to bring this festive wonder to life. The beauty of this recipe is in its flexibility, so I’ve packed in my favorite chef insights and swaps to make it your own!
- 1 (12 oz) bag fresh cranberries: This is the star of the show! Look for bags where the berries are firm, shiny, and deep red. Avoid any that are soft, brown, or shriveled. Chef’s Tip: If you accidentally buy a bag with a few mushy ones, just give them a quick rinse and pick out the bad berries—they’ll sink to the bottom of the water.
- ½ cup granulated sugar: This is our sweetening agent that tames the intense tartness of the cranberries. Substitution Tip: You can easily use a sugar-free substitute like monk fruit sweetener or erythritol in the same amount for a lower-carb version. The maceration step is key for any granulated sweetener to dissolve properly.
- 1 apple, finely chopped: I love using a crisp, sweet apple like Honeycrisp or Fuji for a nice texture contrast. The apple adds a subtle sweetness and a wonderful crunch. Chef’s Insight: No need to peel it! The skin adds a beautiful fleck of color and extra nutrients.
- 1 (8 oz) can crushed pineapple, drained: This little can is a powerhouse of tropical sweetness and moisture. Pro Hack: Make sure you drain it REALLY well. I like to press it in a fine-mesh strainer or even squeeze it in a clean kitchen towel. Extra liquid will make your salad runny.
- ½ cup chopped walnuts or pecans: The nutty, toasty crunch is non-negotiable for me. Walnuts have a slight bitterness that pairs perfectly with the sweet fruit, while pecans bring a richer, buttery flavor. Toast them in a dry pan for a few minutes for a massive flavor upgrade!
- 1 (8 oz) container whipped topping (like Cool Whip), thawed: This gives our salad its iconic light, fluffy, and creamy base. Substitution Tip: For a from-scratch feel, you can use an equal amount of freshly whipped heavy cream sweetened with a tablespoon of powdered sugar. It’s divine!
- Optional: 1 orange, zested and juiced: This is my secret weapon for brightness. The zest adds incredible aromatic citrus oil, and a tablespoon or two of juice enhances the fruity flavors without making it too liquid. Highly recommend!
Let’s Get Mixing: Building Your Masterpiece
Alright, team! Let’s fire up the food processor (or your knife skills) and make some magic. This comes together so quickly, you’ll be amazed.
- Pulse the Berries: Dump your entire bag of fresh, rinsed cranberries into the bowl of a food processor. Pulse them in short, sharp bursts until they are finely chopped. You’re aiming for a rustic, chunky relish texture, not a smooth puree. About 10-12 pulses should do it. No food processor? No sweat! You can chop them by hand—it’s a great arm workout and very therapeutic. Just make sure your knife is sharp.
- The Magic of Maceration: Transfer your beautifully chopped cranberries to a large mixing bowl. Sprinkle the ½ cup of sugar over the top and stir it all together until everything is well combined. Now, here’s the most important step: WALK AWAY. Let this mixture sit on your counter for at least 30 minutes. This resting time, called maceration, allows the sugar to pull out the natural juices from the cranberries, mellowing their intense tartness and creating a lovely, syrupy base. You’ll see the transformation happen!
- Bring in the Brigade: After your 30 minutes are up, give the cranberry-sugar mix a good stir. You’ll see it’s much juicier. Now, add in your finely chopped apple, the very well-drained crushed pineapple, your toasted nuts, and the orange zest/juice if you’re using it. Stir everything together with a sturdy spoon until it’s one happy, fruity family.
- The Fluffy Finale: Now, take your thawed whipped topping (or freshly whipped cream) and plop it right on top of the fruit mixture. Here’s my pro tip for keeping it light: use a spatula and fold the whipped topping into the fruit. Don’t stir aggressively! Gently cut through the center, bring the spatula along the bottom of the bowl, and fold it over the top. Rotate the bowl and repeat until no white streaks remain. This gentle technique keeps the air in the whipped topping, ensuring your salad stays fluffy and light, not dense.
- Chill Out: Cover the bowl with plastic wrap or a lid and pop it into the refrigerator for at least 1 hour, though 2-3 is even better. This chilling time is non-negotiable. It allows all the incredible flavors to get to know each other, meld together, and become something truly greater than the sum of their parts. It also helps the salad set up perfectly.
How to Serve This Stunning Side
When it’s time to serve, you’ve got options! This dish is a stunner no matter how you present it.
For a classic family-style feel, simply bring the whole beautiful bowl to the table and let everyone serve themselves. It adds such a vibrant pop of color to the spread. If you’re feeling a bit fancy, you can serve it in a large, clear glass trifle bowl to show off all those gorgeous layers of red, white, and brown.
For individual portions that feel extra special, use an ice cream scoop to place perfect, quenelle-like dollops into small dessert cups or mason jars. Garnish is key! A little extra sprinkle of chopped nuts on top, a few whole cranberries for a festive touch, or even a tiny fresh mint leaf takes it from “wow” to “WOW!”
And remember, this salad is best served cold, straight from the fridge. It’s the perfect, refreshing counterpoint to all the warm, savory dishes on your holiday plate.
Make It Your Own: Delicious Twists & Tweaks
One of the best things about this recipe is how adaptable it is. Play with it! Here are a few of my favorite variations:
- Dreamy Creamy Citrus: Swap the orange for a lemon! Use the zest of one whole lemon and about a tablespoon of its juice. It creates a brighter, even more tangy flavor profile that is absolutely irresistible.
- Tropical Escape: Add ½ cup of sweetened shredded coconut along with the other fruits. Toasted coconut would be even better for an incredible nutty flavor and extra crunch. You could even substitute macadamia nuts for the walnuts for the ultimate tropical vibe.
- Berry Bliss: Feel free to add up to a half cup of other fresh or frozen (and thawed) berries like raspberries or chopped strawberries. They’ll add another dimension of sweetness and a beautiful color variation.
- Dairy-Free Delight: This is an easy one! Simply use your favorite dairy-free whipped topping (So Delicious CocoWhip is a fantastic option) or make your own by whipping up a can of full-fat coconut milk that has been chilled overnight.
- A Grown-Up Kick: For a sophisticated twist at an adults-only gathering, fold in a tablespoon of orange liqueur like Grand Marnier or Cointreau along with the whipped topping. It adds a wonderful depth of flavor.
Beau’s Kitchen Notes & Stories
Over the years, this recipe has seen it all in my kitchen. I once, in a frantic pre-Thanksgiving hurry, forgot to drain the pineapple. The result was a delicious but… soupy… cranberry salad. We served it with a slotted spoon and laughed it off. Lesson learned! I’ve also learned that toasting the nuts is the single biggest flavor upgrade you can make for the minimal effort it takes.
This recipe has evolved from my grandma’s classic to my own, with the addition of orange zest becoming a permanent fixture. I love that it’s a living recipe—one you can truly make your own. The base is perfect, and the add-ins are your playground. Don’t be afraid to experiment and find your family’s favorite version.
Your Cranberry Salad Questions, Answered!
Q: Can I make this cranberry salad ahead of time?
A: Absolutely! In fact, I highly recommend it. This salad tastes even better the next day after the flavors have had more time to mingle. You can make it up to 24 hours in advance. Just keep it tightly covered in the fridge. If you’re using freshly whipped cream, it might weep a tiny bit, but it will still taste amazing.
Q: My salad is a bit runny. What happened and can I fix it?
A: The most common culprit is not draining the pineapple well enough. Next time, really press down on it in that strainer! If it’s already runny, you can try stirring in a tablespoon of instant vanilla pudding mix—it will help thicken it up without affecting the flavor. Or, just serve it with a slotted spoon. No stress!
Q: Can I use frozen cranberries?
A: You can, but let them thaw completely first, and then drain off any excess liquid before you chop them. Fresh cranberries really are best for texture and consistency here.
Q: I’m not a fan of nuts. Can I leave them out?
A> Of course! The recipe will still be delicious. If you want to replace that crunchy element, you could try adding something like chopped celery for a savory crunch or even some crushed graham crackers or vanilla wafers on top just before serving for a sweet crunch.
Cranberry Salad
Description
Hey friends! The holidays are here, and while the turkey and stuffing are stars of the show, it’s the sides that often steal the spotlight. Enter my all-time favorite: Creamy Cranberry Salad. Tart, sweet, creamy, and crunchy all at once, this salad is the perfect pop of color and flavor to balance your festive feast. Plus, it’s quick, no-bake, and a guaranteed crowd-pleaser.
Ingredients
-
1 (12 oz) bag fresh cranberries – firm, shiny, deep red
-
½ cup granulated sugar – or sugar substitute for a lower-carb version
-
1 apple, finely chopped – Honeycrisp or Fuji for crunch; no need to peel
-
1 (8 oz) can crushed pineapple, drained – press well to avoid runniness
-
½ cup chopped walnuts or pecans, toasted – for a nutty, crunchy boost
-
1 (8 oz) container whipped topping, thawed – or freshly whipped cream
-
Optional: 1 orange, zested and juiced – for extra brightness
Chef Tips:
-
Toast nuts lightly in a dry pan to enhance flavor.
-
Macerate cranberries for 30 minutes to soften tartness and release natural juices.
-
Fold whipped topping gently to keep the salad light and fluffy.
Instructions
-
Pulse the cranberries: Rinse cranberries, then pulse in a food processor until roughly chopped. (Hand-chop if preferred.)
-
Macerate: In a large bowl, mix cranberries with sugar and let sit 30 minutes to draw out juices.
-
Combine fruits & nuts: Stir in chopped apple, drained pineapple, toasted nuts, and optional orange zest/juice.
-
Add the creaminess: Fold in whipped topping gently until evenly mixed.
-
Chill: Cover and refrigerate at least 1 hour (2–3 hours preferred) to allow flavors to meld.
Notes
Can I make it ahead? Yes! Flavors deepen after 24 hours in the fridge.
Too runny? Likely pineapple not drained well; add 1 tbsp instant pudding or serve with a slotted spoon.
Frozen cranberries? Thaw fully and drain before chopping.
No nuts? Substitute celery for crunch or sprinkle crushed graham crackers on top.
Nutritional Information (A Quick Note!)
Hey, we’re all about balance here at Feastical! While this is definitely a treat, it’s also packed with real fruit and nutrients. Here’s a rough breakdown per serving (assuming 10 servings), but remember, this can vary based on your specific ingredients and substitutions.
Approximate Nutrition Per Serving:
Calories: ~180 | Total Fat: 9g | Saturated Fat: 5g | Cholesterol: 0mg | Sodium: 10mg | Total Carbohydrates: 22g | Dietary Fiber: 2g | Total Sugars: 18g | Protein: 1g
Cranberries are a fantastic source of Vitamin C and antioxidants. The apples and pineapple add fiber and vitamins, and the nuts contribute healthy fats and protein. Using a sugar-free substitute and light whipped topping can significantly lower the calorie and sugar count if that’s a priority for you. Enjoy it as part of your festive feast!
Final Thoughts from My Kitchen to Yours
Well, there you have it, my friends. My ultimate, feel-good, crowd-pleasing Cranberry Salad. It’s more than just a recipe; it’s a little bowl of holiday joy, a burst of flavor, and a guaranteed conversation starter at any potluck or dinner table.
I hope this recipe brings as much lightness and happiness to your holiday table as it has to mine over the years. The best part about cooking is sharing it with the people you love. So, whip up this easy dish, take a well-deserved bow, and watch it disappear.
Red Velvet Crinkle Cookies – Festive and Fudgy
Your New Favorite Holiday Cookie Is Here: Red Velvet Crinkle Cookies
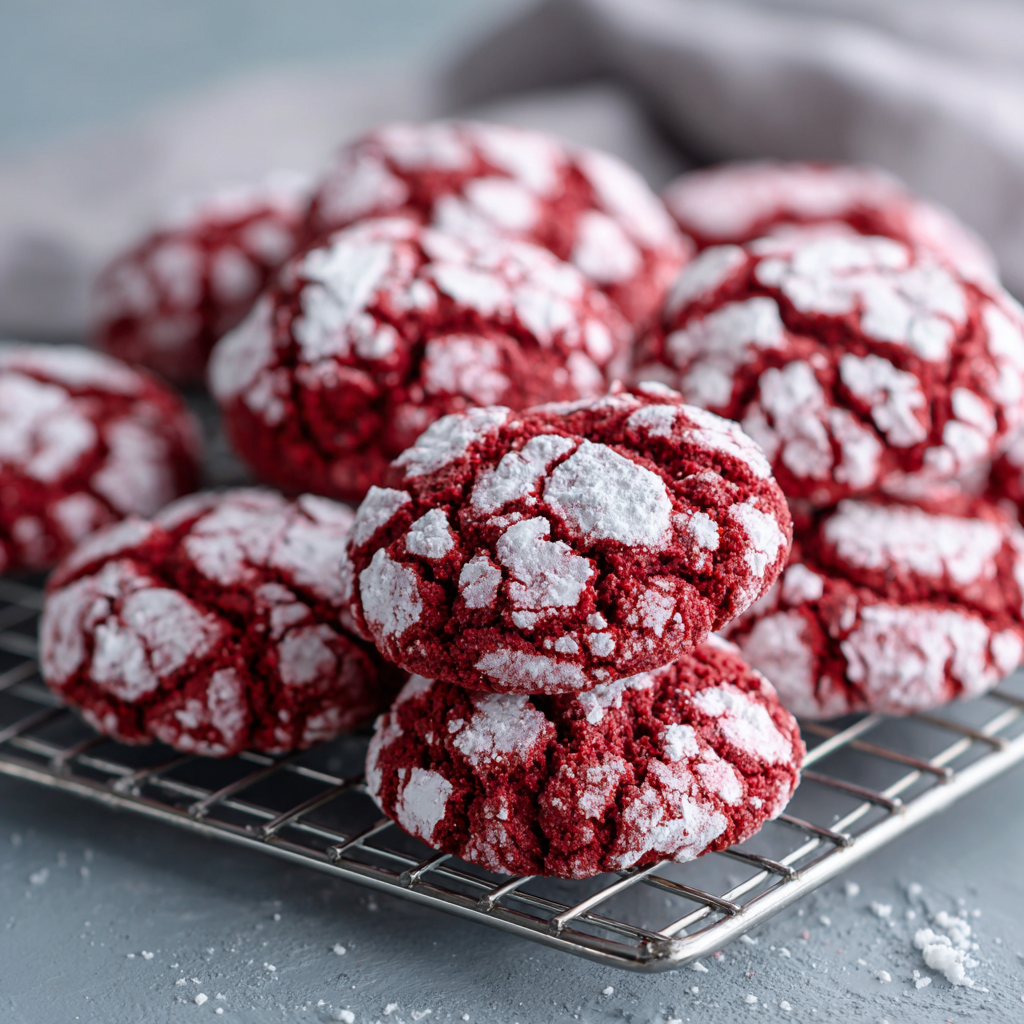
Hey friends, Beau here from Feastical! Is there anything more magical than the moment you pull a tray of cookies from the oven? That warm, sugary scent fills the entire kitchen, and you just know you’re about to create a core memory. Now, imagine that feeling, but amplified by a hundred. Imagine cookies that are not only incredibly delicious but also stunningly beautiful—deep, passionate red with a delicate, snowy white crackle on top. That, my friends, is the pure joy of a perfect Red Velvet Crinkle Cookie.
These aren’t just any cookies; they’re a festive experience. They’re soft, fudgy, and have that subtle cocoa tang that makes red velvet so irresistibly unique. And that iconic crinkled powdered sugar top? It’s like each cookie gets its own little winter sweater. They’re the superstar of any holiday cookie swap, the perfect homemade gift that says “I love you” in sugar and food coloring, and honestly, they’re just a downright fun bake. The best part? We’re starting with a boxed cake mix, which means we’re keeping things simple, approachable, and absolutely foolproof. Whether you’re a baking novice or a seasoned pro, these cookies are your ticket to holiday baking glory. So, preheat that oven, grab your favorite mixing bowl, and let’s make some magic together!
A Cookie That Tastes Like a Christmas Memory
I have to share a quick story about why these cookies hold a special place in my heart. It takes me right back to my first apartment after college. My kitchen was about the size of a postage stamp, and my baking tools consisted of one wonky-handed mixer and a single, warped baking sheet. But I was determined to host a proper holiday party. I wanted to impress my friends with a spread that looked like it came from a magazine, but my budget (and skills) were, let’s say, “humble.”
That’s when I discovered the magic of cake mix cookies. I whipped up a batch of these red velvet crinkles, and I’ll never forget the collective gasp when I brought the tray out. They looked so elegant and professional! My friend Sarah, who always had the most perfect homemade treats, asked, “Beau, did you really make these?” with total awe in her voice. I beamed with pride. That moment taught me a powerful lesson: the most impressive dishes aren’t always the most complicated. It’s about the love you stir in and the joy you share. These cookies have been my not-so-secret weapon for bringing people together ever since.
Gathering Your Cookie Crew: The Ingredients
Part of the beauty of this recipe is its simplicity. You only need a handful of pantry staples to create something truly spectacular. Here’s your shopping list:
- 1 box (15.25 oz) Red Velvet Cake Mix: This is our superstar and secret weapon! It’s perfectly pre-measured with flour, sugar, cocoa, and leavening agents, giving us that signature flavor and rich color without any fuss. Chef’s Insight: I typically grab the Duncan Hines or Betty Crocker varieties; they both have great color and flavor. For a from-scratch feel, you can use my homemade red velvet cake mix recipe!
- 2 large eggs: These are the binders of our cookie universe. They bring the dough together and provide structure, ensuring our cookies are chewy and fudgy instead of cakey. Pro Tip: Make sure your eggs are at room temperature! They incorporate into the thick dough much more easily, giving you a smoother, more uniform batter.
- ⅓ cup vegetable oil: Oil is our key to an ultra-moist and tender cookie. It creates a denser, richer texture than butter would, which is exactly what we’re going for with a fudgy crinkle cookie. Substitution Tip: You can easily swap in canola oil or even melted (and slightly cooled) coconut oil if you prefer.
- 1 tsp vanilla extract: A dash of vanilla is the flavor enhancer. It deepens the chocolate notes and adds a warm, comforting aroma that makes these cookies taste truly homemade. Chef’s Upgrade: For a next-level flavor, try using almond extract instead. It pairs beautifully with the cocoa and creates a more complex taste profile.
- ½ cup powdered sugar (for rolling): This is what creates that beautiful, classic snowy crackle effect. As the cookies bake and expand, the dough bursts through the powdered sugar coating, creating those gorgeous crinkles. Chef’s Hack: For an even more dramatic white finish, roll your dough balls twice! Once before you start shaping all the cookies, and then a quick second roll right before they go in the oven.
Let’s Get Baking: Your Foolproof Steps to Perfect Crinkles
Ready to see some magic happen? Follow these steps, and you’ll have a tray of perfect cookies in no time. I’ve sprinkled in all my best tips to ensure your success!
- Preheat and Prep. Fire up your oven to 350°F (175°C). This is our sweet spot for getting that perfect rise and crackle. Now, line a baking sheet with parchment paper. Trust me on this—it prevents sticking without adding extra grease and makes cleanup an absolute dream. No parchment? A silicone baking mat works wonders, too.
- Mix the Dough. In a large bowl, combine the red velvet cake mix, eggs, vegetable oil, and vanilla extract. I like to use a sturdy spatula or a wooden spoon for this. Your mixer will work, but it’s such a thick dough that a spoon often does the trick without overmixing. Mix until everything is just combined and a thick, slightly sticky dough forms. You’ll know it’s right when there are no dry streaks of cake mix left. Don’t overmix! We want tender cookies, not tough ones.
- Scoop and Roll. Now for the fun, slightly messy part! Pour your powdered sugar into a small, shallow bowl. Use a medium cookie scoop (about 1.5 tablespoons) or a tablespoon to portion out the dough. Roll each portion between your palms to form a smooth, 1-inch ball. Chef’s Hack: If the dough is too sticky to handle, pop it in the fridge for 15-20 minutes. This firms it up perfectly for rolling. Generously roll each ball in the powdered sugar until it’s completely coated. Remember my double-dip tip for an extra-white finish!
- Bake to Perfection. Place your beautiful, sugar-dusted dough balls about 2 inches apart on your prepared baking sheet. They need their space to spread and crinkle properly! Slide the tray into your preheated oven and bake for 10-12 minutes. You’re looking for the tops to have cracked beautifully and the edges to look set. The centers might still look a little soft and underdone—that’s exactly what we want! This is the secret to a fudgy, moist center. Overbaking is the enemy of a soft cookie.
- The All-Important Cool Down. Once out of the oven, let the cookies rest on the hot baking sheet for at least 5 minutes. This allows them to finish setting up without becoming hard. If you try to move them too soon, they might fall apart. After their rest, gently transfer them to a wire rack to cool completely. I know it’s hard, but try to let them cool before you dive in—the flavor and texture are worth the wait!
How to Serve These Show-Stopping Cookies
Presentation is part of the fun with these cookies! Here are a few of my favorite ways to serve them up:
The Classic Cookie Platter: Pile these red and white beauties high on a simple white or rustic wooden platter. They are so visually striking that they need no accompaniment, but they play nicely with other Christmas classics like gingerbread men and snowball cookies.
With a Side of Joy: For the ultimate cozy experience, serve these cookies slightly warm alongside a giant glass of cold milk. The combination of the fudgy, slightly warm cookie and the cold milk is pure bliss. They’re also incredible crumbled over a scoop of vanilla bean ice cream or even as a topping for a holiday milkshake.
Gifting from the Heart: These cookies make phenomenal gifts. Let them cool completely, then stack them in a cellophane bag tied with a pretty ribbon, or arrange them in a festive tin between layers of parchment paper. Add a handwritten tag, and you’ve got a heartfelt, homemade gift that anyone would be thrilled to receive.
Mix It Up! Fun Variations to Try
Once you’ve mastered the classic, the kitchen playground awaits! Here are a few delicious twists to keep things interesting:
- White Chocolate Chip Bliss: Fold ¾ cup of high-quality white chocolate chips into the dough before scooping. The creamy sweetness of the white chocolate is a match made in heaven with the tangy red velvet.
- Peppermint Twist: Add ½ teaspoon of peppermint extract to the dough along with the vanilla. After rolling in powdered sugar, press a crushed candy cane piece onto the top of each dough ball before baking for a festive and refreshing crunch.
- Cream Cheese Pocket: For the ultimate red velvet experience, take a small cube of cold cream cheese (about ¼-inch) and press it into the center of each dough ball, sealing the dough around it completely before rolling in sugar. You’ll get a surprise molten cream cheese center!
- Gluten-Free & Easy: This recipe is naturally adaptable! Simply use your favorite gluten-free red velvet cake mix (I love King Arthur’s mix) and ensure all your other ingredients are certified gluten-free. The method stays exactly the same.
- Orange Zest Zing: Add the zest of one large orange to the dough. The citrus note cuts through the sweetness and adds a bright, sophisticated flavor that will have everyone asking for your secret.
Beau’s Chef Notes & Kitchen Stories
This recipe has evolved in my kitchen over the years. I remember one hilarious holiday season where I ran out of regular vegetable oil and had to use extra-virgin olive oil. Let me tell you, those were… interesting. They had a uniquely herbal note that was not exactly “festive.” We now call them The Italian Christmas Cookies and it’s a family joke. So, learn from my mistake—stick with a neutral oil!
Another tip: if you want a more intense red color, don’t be afraid to add an extra teaspoon of red gel food coloring to the dough. Gel food colorings are more potent than liquid ones and won’t throw off the liquid balance in your dough. These cookies are forgiving and fun, so don’t stress. Embrace the mess, enjoy the process, and remember that even the slightly lopsided ones taste incredible.
Your Questions, Answered!
Q: My cookies didn’t crinkle much. What did I do wrong?
A: The most common culprit is not enough powdered sugar! You need a really thick, generous coating to force that beautiful crack. Also, make sure your oven is fully preheated. Putting dough into a cooler oven can prevent the rapid rise that creates crinkles.
Q: Can I make the dough ahead of time?
A: Absolutely! You can cover the bowl of dough and refrigerate it for up to 2 days. You can also roll the dough balls and keep them in a single layer in an airtight container in the fridge for a day. Roll them in the powdered sugar right before you bake them.
Q: Why are my cookies cakey and puffy instead of fudgy and dense?
A: This usually means the dough was overmixed. Once you add the eggs to the cake mix, you only want to stir until the dry ingredients are *just* incorporated. Overmixing develops the gluten in the flour and leads to a cakier texture.
Q: Can I freeze these cookies?
A> Yes, they freeze beautifully! Once baked and cooled completely, place them in a single layer in a freezer-safe bag or container. They’ll keep for up to 3 months. Thaw at room temperature. You can also freeze the unbaked, sugar-rolled dough balls on a tray before transferring to a bag. Bake straight from frozen, adding a minute or two to the baking time.

Red Velvet Crinkle Cookies – Festive and Fudgy
Description
Bring a little magic to your holiday baking with these Red Velvet Crinkle Cookies! Soft, fudgy, and topped with a snowy powdered sugar crackle, these cookies are easy to make with a boxed cake mix and deliver big flavor with minimal effort. Perfect for cookie swaps, gifts, or just a cozy treat with a glass of milk.
Ingredients
-
1 box (15.25 oz) Red Velvet Cake Mix
-
2 large eggs (room temperature)
-
⅓ cup vegetable oil (or canola/coconut oil)
-
1 tsp vanilla extract (or almond extract for a twist)
-
½ cup powdered sugar (for rolling)
Instructions
1. Preheat & Prep:
-
Preheat oven to 350°F (175°C).
-
Line a baking sheet with parchment paper or a silicone baking mat.
2. Mix the Dough:
-
In a large bowl, combine cake mix, eggs, oil, and vanilla extract.
-
Stir until just combined; the dough should be thick and slightly sticky.
3. Scoop & Roll:
-
Pour powdered sugar into a shallow bowl.
-
Scoop ~1.5 tablespoons of dough and roll into a 1-inch ball.
-
Roll each ball generously in powdered sugar. (Optional: double-roll for extra white crackles.)
-
If dough is too sticky, chill for 15–20 minutes.
4. Bake:
-
Place cookies 2 inches apart on the prepared sheet.
-
Bake for 10–12 minutes until tops crackle and edges are set.
-
Centers may look slightly soft—perfect for a fudgy texture.
5. Cool:
-
Let cookies rest on the baking sheet for 5 minutes, then transfer to a wire rack to cool completely.
Notes
-
White Chocolate: Fold in ¾ cup white chocolate chips before baking.
-
Peppermint: Add ½ tsp peppermint extract; top with crushed candy cane.
-
Cream Cheese Center: Insert a ¼-inch cube of cold cream cheese into each dough ball before rolling.
-
Orange Zest: Add zest of one orange for a bright flavor.
-
Make Ahead: Dough can be refrigerated up to 2 days or frozen for later.
Nutrition
- Calories: 120 kcal per cookie, approx
- Sugar: 11g
- Fat: 5g
- Carbohydrates: 18g
Nutritional Information*
*Please note: This is an estimated nutritional breakdown based on the ingredients used. Your specific values may vary depending on brands and exact portions.
Per Cookie (approx., recipe makes 24 cookies):
- Calories: 120 kcal
- Total Fat: 5g
- Saturated Fat: 1g
- Carbohydrates: 18g
- Fiber: 0g
- Sugar: 11g
- Protein: 1g
These are a treat, through and through! I believe in enjoying indulgent, feel-good food mindfully. Savor one or two of these with your coffee or milk as part of a balanced holiday season.
Final Thoughts from My Kitchen to Yours
Well, there you have it—my everything-I-know guide to the most perfect, fudgy, and festive Red Velvet Crinkle Cookies. This recipe is more than just a list of ingredients; it’s a passport to creating joy, sharing laughter, and making your kitchen the heart of the home this holiday season.
I hope you feel empowered to bake up a batch (or three!) of these stunning cookies. They’re proof that you don’t need to be a professional pastry chef to create something truly spectacular. So put on your favorite holiday playlist, dust everything in powdered sugar with wild abandon, and get ready to make some memories. I can’t wait for you to experience the magic.
If you make them, please share your creations with me! Tag @feastical on Instagram or Facebook so I can see your beautiful bakes. Happy holidays and happy baking, friends!
With love and a full cookie jar,
Cherry Coconut Snowball Cookies
Let’s Bake a Little Bit of Magic: Cherry Coconut Snowball Cookies
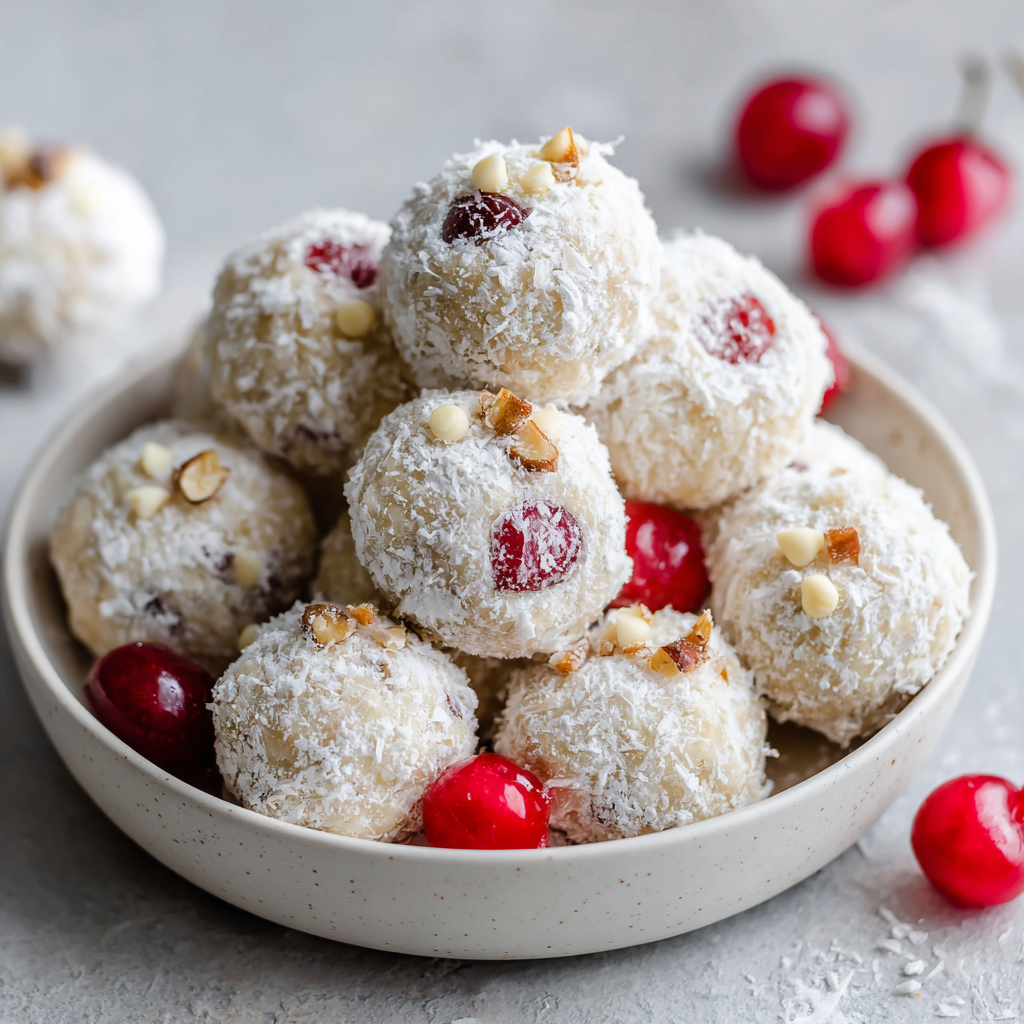
Hey friends, Beau here! Is there anything that screams “holiday cheer” more than a plate of snowball cookies sitting on the counter? You know the ones – those delicate, powdery puffs of buttery goodness that practically melt on your tongue. Well, get ready, because we’re about to take that classic and spin it into something truly spectacular. I’m talking about my Cherry Coconut Snowball Cookies, and trust me, this is a recipe you’ll want to bookmark, pin, and commit to memory.
We’re not just making a simple batch today. Oh no. We’re going big with a double batch because these cookies disappear faster than you can say “Feastical!” We’re weaving in the sweet, nostalgic tang of maraschino cherries, the toasty crunch of walnuts and coconut, and a hidden, creamy surprise of white chocolate chips. It’s a flavor party in your mouth, and everyone’s invited. This recipe is my love letter to holiday baking—simple enough for a beginner but with enough soul to impress your favorite foodie. So, tie on your favorite apron, put on some festive tunes, and let’s create some kitchen magic together. These aren’t just cookies; they’re edible hugs, and I can’t wait for you to try them.
A Snowy Kitchen and a Grandmother’s Secret
This recipe always takes me right back to my grandma’s kitchen. Every December, a big snowstorm would inevitably roll in, and the world would go quiet and white outside her window. Inside, though, her kitchen was a warm, fragrant hub of chaos and love. The radio would be playing carols, and every surface would be dusted with a fine layer of flour, just like the snow outside.
She always made the classic snowballs, but one year, I decided to be her “little helper.” I saw a jar of bright red maraschino cherries and, convinced they would make everything better, I proudly dumped a handful into her mixing bowl. Instead of being upset, she just laughed that big, booming laugh of hers and said, “Well, Beau, let’s see what your invention tastes like!” We folded them in, along with some coconut from a coconut she’d cracked herself that morning. The result was pure magic—a happy accident that became our signature holiday cookie. Now, every time I bake them, I can still hear her laughter and feel that sense of snowy, cozy joy. It’s a memory I bake into every single batch.
Gathering Your Cookie Crew: The Ingredients
Here’s the dream team of ingredients that’s going to make these cookies sing. I’ve included my chef-y insights and easy swaps to make this recipe work for you!
- 2½ cups powdered sugar, divided: This is for both the dough and the iconic snowy coating. The division is key! We use one cup inside for sweetness and save the rest for the final roll. Don’t pack it when measuring—just spoon it lightly into your cup.
- 1 cup (2 sticks) unsalted butter, softened: This is the heart of the cookie, providing that melt-in-your-mouth texture. Chef’s Tip: *Unsalted* lets you control the salt. “Softened” is crucial! It should leave a slight indent when you press it. Too cold, and your cookies will be tough; too melted, and they’ll spread.
- 2 cups all-purpose flour: The main structural ingredient. For a slightly more tender cookie, you can swap in ½ cup of cake flour, but all-purpose works perfectly.
- ½ cup instant oats: This is my sneaky twist! It adds a lovely, soft chew and a hint of wholesome heartiness that balances the sweetness. Quick oats work just fine here too.
- ½ cup sweetened coconut, finely chopped: It adds tropical sweetness and chewy texture. If you only have shredded, give it a few extra chops with your knife. For a less sweet version, use unsweetened coconut.
- ½ cup walnuts, finely chopped: They provide a wonderful toasty crunch. Feel free to substitute with pecans for a richer flavor or omit for a nut-free version.
- 1/8 tsp salt: Don’t skip this! It’s not enough to make things salty; it just makes all the other flavors pop and prevents the cookie from tasting flat.
- 30 maraschino cherries, finely chopped and patted DRY: This is the star! CRUCIAL STEP: You *must* pat them thoroughly dry with paper towels. Any extra liquid will mess with your dough’s consistency. I chop them into small pieces so you get a bit of cherry in every single bite.
- 1 tsp vanilla extract: The supporting actor that adds a layer of warm, rich depth. For a next-level flavor, try using almond extract instead—it pairs beautifully with the cherry!
- ½ cup white chocolate chips (our optional, but highly recommended, twist!): These little pockets of creamy sweetness are the surprise that makes everyone say, “Wow, what’s in these?!” They’re optional, but they take the indulgence to a 10.
Let’s Get Rolling: The Step-by-Step Guide
Alright, team, let’s do this! Follow these steps, and you’ll have perfect cookies every single time. I’ve packed this section with all my best hacks.
Step 1: Preheat and Prep. Fire up that oven to 350°F (175°C). This gives it plenty of time to reach the perfect, steady temperature. Line your baking sheets with parchment paper. This isn’t just for easy cleanup; it prevents the bottoms from over-browning. Chef’s Hack: If you don’t have parchment, you can use a silicone baking mat or even just a bare sheet, but keep a closer eye on them.
Step 2: The Creaming Method. In a large bowl, cream together the softened butter and 1 cup of the powdered sugar. Now, “creaming” isn’t just mixing—it’s about beating air into the butter. Use an electric mixer on medium-high for a good 2-3 minutes until it becomes light, fluffy, and almost white in color. This is the foundation for a tender cookie, so don’t rush it!
Step 3: Vanilla Vibes. Mix in that glorious vanilla extract until it’s fully incorporated. Just a quick beat is all it needs.
Step 4: Whisk the Dry Crew. In a separate bowl, take your flour, instant oats, chopped coconut, chopped walnuts, and salt. Give them a good whisk. This does two things: it combines everything evenly and aerates the flour, making your final dough lighter.
Step 5: Combine with Care. Gradually add the dry ingredients to the wet butter mixture. I usually do it in three additions, mixing on low speed until *just* combined. The second you don’t see any more dry flour, STOP. Overmixing is the enemy of tender cookies—it develops gluten and makes them tough.
Step 6: The Fun Fold-In. Now, gently fold in those beautifully chopped and thoroughly dried cherries and the white chocolate chips (if using) with a spatula. This ensures they’re evenly distributed without overworking the dough.
Step 7: Scoop and Ball. Use a small cookie scoop (about 1 tablespoon size) or your hands to portion the dough. Roll it into smooth, 1-inch balls. Place them about 2 inches apart on your prepared baking sheets. They don’t spread a ton, but they need a little room to breathe.
Step 8: Bake to Perfection. Pop them in the oven for 12-14 minutes. You’re looking for the very edges to just barely start turning a light golden brown. The tops should still look soft and set, not wet. Chef’s Hack: Ovens lie! They have hot spots. Rotate your baking sheet halfway through for even baking.
Step 9: The Double Sugar Shower. This is the most important step! Let the cookies cool on the baking sheet for exactly 5 minutes. They need to be firm enough to handle but still warm. Now, roll each warm cookie in the remaining 1½ cups of powdered sugar. The residual warmth helps the first layer of sugar stick and creates that classic, slightly melted snowy look. Let them cool completely on a wire rack. Once cool, give them a second roll in the sugar for that pristine, winter-wonderland finish.
Sharing the Joy: How to Serve These Snowballs
Presentation is part of the fun! Pile these snowy gems high on a vintage cake stand or a simple rustic wooden board for that perfect homey feel. I love pairing them with a strong cup of coffee—the bitterness is a fantastic contrast to the sweet, buttery cookie. They’re also incredible crumbled over a bowl of vanilla ice cream for an next-level dessert.
These cookies are the ultimate edible gift. Let them cool completely, then package them in a cute cellophane bag tied with a ribbon or stack them in a festive tin. They ship surprisingly well, too, so you can mail a taste of your holiday spirit to loved ones far away. Honestly, a plate of these and a warm smile is one of the best gifts you can give.
Make It Your Own: Delicious Recipe Variations
Once you’ve mastered the base, the world is your oyster! Here are a few of my favorite twists:
- The Almond Joy: Swap the walnuts for almonds (toasted, if you have time!), use almond extract instead of vanilla, and replace the white chocolate chips with dark chocolate chips. You’ve just made a cookie that tastes like the famous candy bar!
- Tropical Escape: Use macadamia nuts instead of walnuts and add a tablespoon of finely chopped dried pineapple along with the cherries. It’s a sunny vacation in every bite.
- Cherry Cordial: For the adults, try adding a teaspoon of cherry liqueur or amaretto to the butter mixture. It deepens the cherry flavor beautifully.
- Gluten-Free Snowball: Simply replace the all-purpose flour with a 1:1 gluten-free baking blend. The oats and coconut already add great texture, so no one will know the difference!
- Classic Purist: Want to go back to basics? Just omit the cherries and white chocolate chips. You’ll have an incredible classic snowball cookie that’s still loaded with coconut, oats, and nuts.
Beau’s Kitchen Confidential: Chef’s Notes
This recipe has evolved so much from that first accidental batch in my grandma’s kitchen. The addition of oats was my mom’s idea to make them a bit heartier, and the white chocolate chips were my own “what if?” moment that stuck. I’ve learned a few things along the way: First, patience with the butter is everything. I once tried to microwave it to soften it and ended up with a puddle. The cookies spread into sad, flat pancakes. Lesson learned! Second, drying those cherries is non-negotiable. I’ve also found that letting the dough chill for 15-20 minutes if your kitchen is really warm makes the balls easier to roll. Most of all, have fun with it! Baking is about the joy of creating, not perfection.
Your Questions, Answered: FAQs & Troubleshooting
Q: My cookies spread too much! What happened?
A: This almost always comes down to butter that was too warm or melted. Your butter should be soft but still cool to the touch. If your kitchen is hot, try popping the shaped dough balls in the fridge for 10 minutes before baking. Also, double-check your flour measurement—scooping directly from the bag can pack in too much, but spooning and leveling is more accurate.
Q: Can I make these cookies ahead of time?
A: Absolutely! They are fantastic make-ahead cookies. You can store the baked and fully cooled cookies in an airtight container at room temperature for up to a week. The flavor actually improves after a day! You can also freeze the unbaked dough balls on a sheet pan, then transfer to a freezer bag. Bake from frozen, adding 1-2 minutes to the bake time.
Q: My powdered sugar coating melted and got gooey. Help!
A: You rolled them while they were too hot! Letting them cool for that exact 5-minute window is the sweet spot. If you roll them too soon, the heat creates a wet paste. If this happens, just let them cool completely and give them a second, heavier dusting. It’ll cover up any mistakes.
Q: Can I use frozen or fresh cherries instead?
A: I don’t recommend it for this specific recipe. Maraschino cherries have a unique sweetness and texture that fresh/frozen cherries don’t. Fresh cherries contain way too much water, which will steam in the oven and make the dough far too wet.
Cherry Coconut Snowball Cookies
Description
Buttery, tender, and rolled in snowy sweetness—these cookies are little bites of holiday joy. With chewy cherries, nutty crunch, tropical coconut, and a surprise hint of white chocolate, they’re more than cookies… they’re edible hugs. Perfect for gifting, sharing, or sneaking with a cup of coffee when no one’s looking. Let’s roll up some holiday magic together!
Ingredients
-
2½ cups powdered sugar, divided
-
1 cup (2 sticks) unsalted butter, softened
-
2 cups all-purpose flour
-
½ cup instant oats
-
½ cup sweetened coconut, finely chopped
-
½ cup walnuts, finely chopped (or pecans)
-
⅛ tsp salt
-
30 maraschino cherries, finely chopped & patted dry
-
1 tsp vanilla extract (or almond extract)
-
½ cup white chocolate chips (optional but dreamy)
Instructions
-
Prep: Heat oven to 350°F (175°C). Line baking sheets with parchment.
-
Cream: Beat butter + 1 cup powdered sugar until fluffy (2–3 min). Add vanilla.
-
Mix Dry: In another bowl, whisk flour, oats, coconut, walnuts, and salt.
-
Combine: Slowly mix dry ingredients into butter mixture until just blended.
-
Fold: Stir in cherries and white chocolate chips.
-
Shape: Roll dough into 1-inch balls. Place 2 inches apart on baking sheets.
-
Bake: 12–14 minutes, until edges are lightly golden.
-
Snowfall Magic: Cool 5 minutes, roll in remaining powdered sugar. Cool fully, then roll again for that snowy finish.
Notes
-
Pat cherries completely dry to avoid soggy dough.
-
Roll cookies warm for the first sugar coat, cool for the second.
-
Chill shaped dough balls 10 min if your kitchen is warm—prevents spreading.
Nutrition
- Calories: 130 Cal
- Fat: 7g
- Carbohydrates: 9g
- Fiber: 1g
- Protein: 1g
Nutritional Information (Approximate, Per Cookie)
Alright, let’s keep it real—these are a treat, and they’re meant to be enjoyed as such! Here’s a rough breakdown of what’s in each delicious cookie. This information is an estimate based on the ingredients used and can vary based on specific brands and portion sizes.
Calories: 130 | Fat: 7g | Saturated Fat: 4g | Carbohydrates: 16g | Fiber: <1g | Sugar: 9g | Protein: 1g
The fats primarily come from the butter, nuts, and coconut, which provide that rich, satisfying mouthfeel. The carbs and sugar come from the flour, powdered sugar, and sweet additions. While they’re not a health food, they are made with real, whole(ish) ingredients and a whole lot of love—which counts for something in my book!
One Last Bite: Final Thoughts
Well, my friends, we’ve done it. We’ve created a cookie that’s not only delicious but also packed with story, soul, and a whole lot of festive spirit. These Cherry Coconut Snowball Cookies are more than just a recipe; they’re a tradition starter. They’re the cookie you’ll be asked to bring to every potluck, the one your kids will remember you making, and the one that makes your kitchen smell like a holiday dream.
I hope you have as much fun baking them as I do. Remember, don’t stress about perfection. If a few break, that’s just the chef’s treat. If they’re not perfectly round, it just means they’re homemade with heart. Thank you for spending this time in the kitchen with me. Now, go enjoy the fruits of your labor with someone you love. Until next time, happy baking!

Best Soft Christmas Cookies
The Ultimate Soft Christmas Cookies: Your New Holiday Tradition
Hey friends, Beau here from Feastical! Is there anything that smells more like the holidays than a fresh batch of sugar cookies cooling on the wire rack? That sweet, buttery aroma just wraps around your home like a cozy, edible blanket. It’s the scent of anticipation, of family arriving, and of pure, unadulterated joy. If your holiday baking list feels a little incomplete without that classic, tender, melt-in-your-mouth cookie, you’ve landed in the right kitchen.
Today, we’re not just making any sugar cookies. We’re crafting the Best Soft Christmas Cookies you’ll ever taste. We’re going big with a double batch because, let’s be real, one batch is never enough. They disappear faster than wrapping paper on Christmas morning! And because I love a little culinary adventure, we’re adding two secret weapons: a kiss of almond extract and a pop of citrus zest. These aren’t just cookies; they’re buttery, soft canvases waiting for your holiday magic. So, tie on your favorite apron, dust off that rolling pin, and let’s create some delicious memories together.
A Cookie Cutter Christmas Memory
My love for these cookies started long before Feastical was even a twinkle in my eye. It began in my grandma’s kitchen, a place that always smelled like cinnamon and unconditional love. Every December, her Formica countertops would disappear under a mountain of flour, and my job was the “official dough taster” and sprinkle distributor.
I remember one year, I was so determined to roll the dough perfectly that I ended up covered in more flour than the cookies. I proudly presented my slightly lopsided, thick-as-a-brick Santa cookie to my grandpa. He took one bite, his eyes crinkled into a smile, and he declared it the best one he’d ever had—”more cookie to love,” he said. That’s the magic of these soft Christmas cookies. They aren’t about perfection. They’re about the laughter, the little flour-handprints on everything, and the love you knead into every single batch. That’s the real recipe, right there.
Gathering Your Cookie Crew (The Ingredients!)
Here’s your shopping list for this double-batch delight. Remember, baking is part science, part soul. Using quality ingredients makes a world of difference in flavor!
- 7½ cups all-purpose flour: The foundation of our cookie. It gives structure. For a slightly lighter cookie, you can swap 2 cups with cake flour, but all-purpose works beautifully.
- 2 tsp baking powder: This is our leavening agent, the little miracle worker that gives these cookies their signature soft, pillowy rise and prevents them from spreading too thin.
- 1 tsp salt: Never skip the salt! It’s the flavor enhancer that makes the sweet notes pop and balances everything out. I use fine sea salt.
- 3 cups white sugar: For sweetness and that classic sugary crunch on the outside. For a deeper flavor, you could use half white, half light brown sugar.
- 2 cups (4 sticks) butter, softened: The heart and soul of the cookie. Use real butter, unsalted and softened to room temperature. This means you can press your finger into it and leave a slight indent. This is non-negotiable for that perfect creamy, fluffy texture when creaming with the sugar.
- 4 large eggs: They bind everything together and add richness. Make sure they’re at room temperature too! It helps everything emulsify smoothly.
- 4 tsp vanilla extract: Pure vanilla extract, please! It adds a warm, comforting depth. This is our first flavor layer.
- 1 tsp almond extract (optional but highly recommended): This is our first “festive twist.” It adds a warm, nutty, almost marzipan-like note that screams holidays. If you have a nut allergy, simply leave it out—the cookies will still be amazing.
- Zest of 1 orange: Our second secret weapon! The bright, citrusy oils in the zest cut through the richness and add a incredible festive freshness. Use a microplane for the finest zest.
- Colored sanding sugar or icing, for decorating: The fun part! Sanding sugar gives a gorgeous sparkle, while icing lets you get truly artistic.
Let’s Bake: The Step-by-Step Magic
Alright, team. Let’s get our hands dusty. Follow these steps, and you’ll be a cookie hero in no time.
- Whisk the Dry Team: In your largest bowl, whisk together the flour, baking powder, and salt. This isn’t just mixing; we’re aerating the flour and ensuring our leavening is evenly distributed. No one wants a bitter bite of baking powder! Set this aside.
- Cream the Butter & Sugar: In another large bowl (or your stand mixer fitted with the paddle attachment), cream together the softened butter and sugar. Now, listen up: don’t rush this step. Beat it on medium-high speed for a good 3-5 minutes until it’s light, pale yellow, and fluffy. This incorporates air, which is key for texture. It should look like delicious, sugary clouds.
- Incorporate the Wet Ingredients: Beat in the eggs, one at a time, making sure each is fully incorporated before adding the next. This prevents the mixture from breaking. Now, pour in the vanilla and almond extracts and add the orange zest. Mix until everything is smooth and wonderfully fragrant.
- Bring It All Together: With your mixer on low speed, gradually add the dry ingredients to the wet. Mix just until the flour disappears. Pro Chef Hack: Overmixing at this stage develops gluten, which can make cookies tough. A few stray flour bits are okay—they’ll get worked in during the next step.
- Chill Out (The Dough, That Is): This is the most important step for perfect, cut-out cookies! Divide the dough into two manageable portions, flatten them into 1-inch thick discs (this helps them chill faster), and wrap them tightly in plastic wrap. Chill for at least 2 hours, or ideally overnight. This solidifies the butter, preventing cookie-spread in the oven, and allows the flavors to meld beautifully.
- Roll & Cut: Preheat your oven to 350°F (175°C). On a lightly floured surface, roll one disc of dough to a ¼-inch thickness. Use your favorite holiday cookie cutters! Dip them in flour between cuts to prevent sticking. If the dough gets too warm and soft, pop it back in the fridge for 15 minutes.
- Bake to Perfection: Place the cut-outs on ungreased or parchment-lined baking sheets. If you’re going the sugar-sprinkle route, do it now before baking. Bake for 10-12 minutes. You want the edges to be just barely starting to turn a light golden brown. The centers should still look soft and set, not wet. They will continue to cook on the hot baking sheet. This is the secret to a soft cookie!
- Cool Down: Let the cookies cool on the baking sheet for 5 minutes before transferring them to a wire rack to cool completely. This is the ultimate test of willpower. Try to resist eating them all straight away!
How to Serve These Holiday Stars
Presentation is part of the fun! For a classic look, arrange a platter with a mix of shapes and decorations. They look stunning stacked high on a vintage cake stand. For a cozy, personal touch, pile a few into a small festive mug and give it as a gift with a hot chocolate packet. These cookies are the perfect partner for a cold glass of milk, a mug of rich hot cocoa, or a warm cup of coffee. They’re also the star of any cookie exchange—just be prepared to hand out this recipe!
Get Creative: Recipe Variations
Feel like mixing it up? Here are a few of my favorite twists on this classic:
- Lemon-Poppy Seed Joy: Swap the orange zest for lemon zest and add 2 tablespoons of poppy seeds to the dry ingredients for a delightful texture and bright, sunny flavor.
- Spiced Chai Twist: Add 2 teaspoons of ground cinnamon, 1 teaspoon of ground ginger, ½ teaspoon of ground cardamom, and ¼ teaspoon of ground cloves to the dry ingredients. It’s like a warm chai latte in cookie form!
- Chocolate Dipped Delight: Melt your favorite semi-sweet or dark chocolate and dip half of each cooled cookie in it. Let them set on parchment paper for an elegant and decadent finish.
- Funfetti Festive: Omit the almond and orange. After mixing, fold in ½ cup of colorful holiday sprinkles or nonpareils right into the dough for a fun, colorful surprise inside and out.
- Gluten-Free & Dairy-Free Friendly: Use a 1:1 gluten-free flour blend and replace the butter with a high-quality plant-based butter stick (not tub style). The texture will be slightly more delicate but still delicious.
Beau’s Chef Notes
This recipe has evolved so much over the years. I started with my grandma’s base, which was fantastic but a bit plain. The almond and orange additions were a happy accident—I was making amaretto sours one night and had the extracts and citrus out. I thought, “Why not?” and it was a game-changer. The dough can also be frozen for up to 3 months! Just double-wrap the discs in plastic and then in foil. Thaw in the fridge overnight before rolling. And a funny story: I once accidentally used salted butter and forgot to adjust the salt. Let’s just say they were… memorable. In a very salty way. We all have kitchen flops, and that’s okay! It’s how we learn.
FAQs & Troubleshooting
Q: My cookies spread too much and lost their shape! What happened?
A: This is almost always due to dough that’s too warm. Ensure your butter was softened, not melted, and that you do not skip the chilling step. Chilling is mandatory for cut-out cookies. Also, make sure your baking powder isn’t expired.
Q: My cookies are tough. How can I make them softer?
A> Tough cookies are usually from overmixing the dough after adding the flour. Mix just until combined! Also, be careful not to over-flour your rolling surface. Roll gently and use just enough flour to prevent sticking.
Q: Can I make the dough ahead of time?
A: Absolutely! The dough discs can be refrigerated for up to 3 days. You can also freeze them for up to 3 months. This makes holiday prep a breeze.
Q: My icing is making the cookies soggy. Help!
A> Always ensure your cookies are completely cool before you ice them. Any residual heat will melt the icing and make it seep into the cookie. For royal icing, a thin “flood” layer should set into a hard shell and not make the cookie soft.
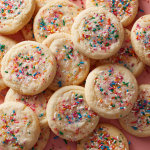
Best Soft Christmas Cookies
Description
These cookies are the heart of holiday baking—soft, buttery, and full of warmth. A touch of almond extract and bright citrus zest makes them unforgettable. Perfect for decorating with kids, gifting to neighbors, or piling high on your festive table. Let these sweet little stars be the tradition that fills your home with joy, laughter, and the irresistible smell of Christmas.
Ingredients
-
7½ cups all-purpose flour
-
2 tsp baking powder
-
1 tsp salt
-
3 cups white sugar
-
2 cups (4 sticks) unsalted butter, softened
-
4 large eggs, room temperature
-
4 tsp vanilla extract
-
1 tsp almond extract (optional)
-
Zest of 1 orange
-
Sanding sugar or icing for decorating
Instructions
-
Mix Dry Ingredients: In a large bowl, whisk flour, baking powder, and salt.
-
Cream Butter & Sugar: Beat butter and sugar until fluffy (3–5 min).
-
Add Wet Ingredients: Mix in eggs one at a time, then vanilla, almond extract, and zest.
-
Combine: Gradually fold in dry mix until just combined. Don’t overmix!
-
Chill Dough: Divide into discs, wrap, and refrigerate at least 2 hours (or overnight).
-
Roll & Cut: Preheat oven to 350°F (175°C). Roll dough to ¼-inch thick, cut into shapes.
-
Bake: Place on lined trays, bake 10–12 min until edges are lightly golden.
-
Cool & Decorate: Rest on tray 5 min, then transfer to wire rack before decorating.
-
Notes
-
Chill the dough—this prevents spreading and keeps shapes sharp.
-
Use real butter for best flavor and texture.
-
Roll dough evenly for cookies that bake consistently.
Nutrition
- Calories: 110 Cal per cookie, approx.
- Fat: 5g
- Carbohydrates: 15g
Nutritional Information (Approximate)
Alright, let’s keep it real—these are a holiday treat! But it’s good to know what you’re enjoying. This info is per cookie (based on a yield of 8 dozen).
- Calories: 110 kcal
- Carbohydrates: 15g
- Protein: 1g
- Fat: 5g
- Saturated Fat: 3g
- Cholesterol: 19mg
- Sodium: 65mg
- Sugar: 7g
Remember, the holidays are about balance and joy. Enjoy a cookie (or three!) guilt-free.
Final Thoughts from My Kitchen to Yours
There you have it, friends—my all-time favorite recipe for Soft Christmas Cookies. This double batch is made for sharing, for gifting, and for leaving out for Santa (with a carrot for Rudolph, of course). But more than the ingredients or the steps, what matters most is the time you spend making them. So put on some holiday music, call your loved ones into the kitchen, and embrace the beautiful, floury mess of it all. These cookies are a labor of love, and I know they’ll become a cherished part of your holiday traditions, just like they are in mine.
From my Feastical family to yours, happy baking and happiest holidays!
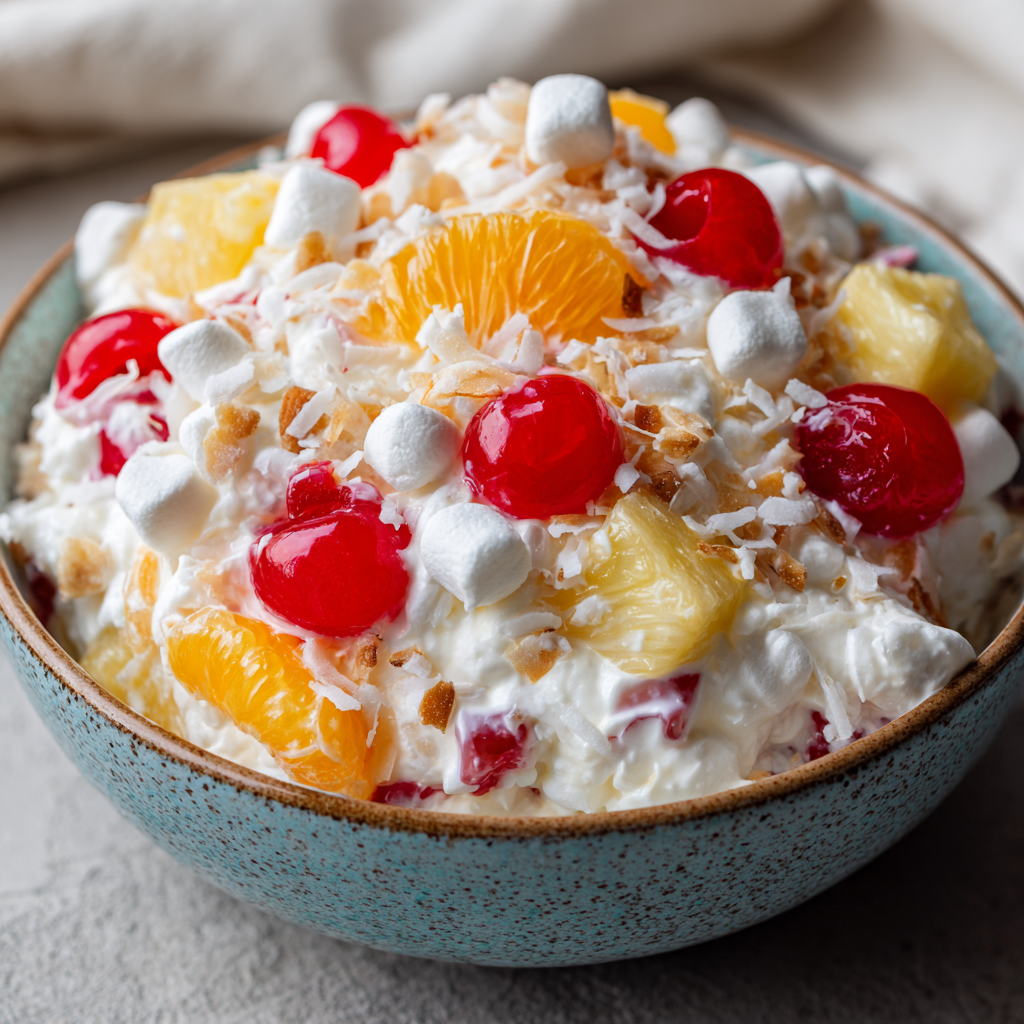
Classic Ambrosia Salad
Sunshine in a Bowl: My Ultimate Classic Ambrosia Salad
Hey friends, Beau here from Feastical! Let’s have a real talk for a second. In a world of avocado toast and artisanal everything, there’s something downright magical about the dishes that have stood the test of time. The ones that show up at every family gathering, year after year, and somehow always manage to make you smile. For me, that dish is Classic Ambrosia Salad. It’s not just a dessert; it’s a feeling. It’s the taste of sunshine on a cloudy day, a sweet, creamy, dreamy bite of pure, unapologetic joy.
If you’ve never had it, you might be wondering, “Beau, what even IS ambrosia salad?” Well, my friend, prepare to have your world rocked. Imagine fluffy clouds of whipped cream, sweet bursts of juicy fruit, chewy little marshmallows, and the subtle, tropical kiss of coconut all hanging out together in one incredible bowl. It’s light, it’s refreshing, and it’s the perfect counterpoint to all those heavy, savory dishes on the table. It’s the life of the potluck party, and today, I’m sharing my absolute favorite version. This isn’t just a recipe; it’s a passport back to your happiest memories. So, let’s put on our favorite apron, crank up some tunes, and create a little bit of edible sunshine together.
The Potluck That Started It All
I’ll never forget the first time ambrosia salad truly captured my heart. I was about ten years old, and we were at a massive, sprawling family reunion at my Great-Aunt Shirley’s house. The tables were groaning under the weight of deviled eggs, fried chicken, and about fifteen different kinds of potato salad. But my eyes were locked on the dessert table, specifically on a magnificent, gleaming glass bowl filled with what looked like pink-tinted clouds studded with jewels.
I grabbed a heaping spoonful, not entirely sure what to expect. One bite and I was a goner. It was cool, creamy, and impossibly fruity. The mini marshmallows were soft and sweet, the cherries were like little flavor explosions, and the coconut added this amazing texture that made every single bite an adventure. I went back for seconds, and then thirds, much to the amusement of Aunt Shirley, who caught me red-handed. She just winked and said, “That’s the magic of ambrosia, kiddo. It’s food for the soul.” She was right. Every time I make it now, I’m instantly transported back to that sunny afternoon, surrounded by laughter and family. It’s more than a recipe; it’s a time machine.
Gathering Your Sunshine: The Ingredients
The beauty of this recipe is in its simplicity. We’re using a few pantry staples to create something truly spectacular. Here’s what you’ll need:
- 1 (11 oz) can mandarin oranges, drained – These little guys are the quintessential ambrosia citrus. They’re sweet, tender, and burst with juice. Chef’s Insight: Be patient and let them drain really well on a paper towel. Any extra liquid will make our creamy base runny.
- 1 (8 oz) can crushed pineapple, drained – This adds a fantastic tropical tang and helps keep the salad moist. Substitution Tip: If you only have pineapple chunks, just give them a rough chop. You can also use fresh pineapple for a brighter, less sweet flavor!
- 1 cup maraschino cherries, halved and drained – They bring that iconic pop of color and a sweet, almond-like flavor. Pro Hack: Pat them dry with a paper towel too, unless you want your entire salad to turn a vibrant pink (which, honestly, can be kinda fun for holidays!).
- 3½ cups frozen whipped topping (like Cool Whip), thawed – This is our creamy, dreamy base. It’s stable, light, and holds up beautifully in the fridge. Substitution Tip: You can absolutely use an equal amount of freshly whipped heavy cream sweetened with a tablespoon of sugar for a richer, from-scratch vibe.
- 2 cups shredded coconut – The soul of ambrosia! It provides that essential tropical flavor and a wonderful chewy texture. Chef’s Insight: I prefer sweetened shredded coconut for that classic taste, but unsweetened works if you want to dial back the sugar a notch.
- 2 cups miniature marshmallows – The fun factor! They get soft and pillowy as the salad chills. Fun Twist: Use pastel-colored marshmallows for an Easter-themed version!
- ½ cup milk – Just a splash to help loosen the mixture and make everything blend together seamlessly. Any kind you have on hand works great.
Creating the Magic: Step-by-Step Instructions
Okay, team! Let’s get mixing. This is the easiest “cooking” you’ll ever do. No oven required!
- The Creamy Base: Grab your largest mixing bowl. We want plenty of room to fold without making a mess. Plop in the thawed whipped topping, pour in the milk, and add all that glorious coconut. Now, here’s the key: fold gently with a large spatula. We’re not beating or stirring aggressively. We want to keep all that airy lightness in the whipped topping. Think of it as gently coaxing the ingredients to become friends.
- Fruit & Fun Incorporation: Now for the colorful part! Add your beautifully drained mandarin oranges, crushed pineapple, halved cherries, and all those mini marshmallows right on top of the creamy base. Seriously, isn’t it pretty already?
- The Gentle Mix: Again, with a gentle hand, fold everything together. Slide your spatula down the side of the bowl, lift the bottom over the top, and turn the bowl. Repeat until you see no more streaks of white. It should be a beautiful, marbled mess of cream and fruit. Chef’s Hack: If you’re worried about breaking up the fruit, you can add the marshmallows first and fold them in, then add the sturdier fruits. The goal is a cohesive mix, not a fruit puree!
- The Patience Game (The Hardest Part!): Cover the bowl tightly with plastic wrap and pop it in the refrigerator. You must let it chill for at least one hour, but honestly, two is even better. This isn’t just about getting it cold. This is where the magic happens. The marshmallows soften, the flavors mingle and get to know each other, and the whole thing transforms from a mixture into a cohesive, incredible salad.
- The Final Touch: When you’re ready to serve, give it one last gentle stir, scoop it into your prettiest serving bowl, and get ready for the compliments to roll in.
How to Serve This Retro Masterpiece
Presentation is part of the fun with a dish this vibrant! I’m a firm believer that food tastes better when it looks good. For a true retro feel, serve your ambrosia salad in a large, clear glass bowl or a vintage-inspired trifle dish. Let those beautiful colors shine through!
This is the ultimate potluck and party dish. It’s a superstar on the holiday table (it’s a non-negotiable at my Thanksgiving), the perfect sweet side at a summer BBQ, or a delightful light dessert after a heavy meal. I love serving it in individual small bowls or pretty mason jars for a portion-controlled treat. Garnish with an extra maraschino cherry on top and a little sprinkle of coconut for that “wow” factor. It pairs beautifully with a cup of coffee or a glass of iced tea. Honestly, it’s so good, I’ve been known to eat it straight from the bowl for breakfast (no judgment here!).
Make It Your Own: Delicious Variations
The best recipes are like a great playlist—you can tweak them to match your mood. Here are a few of my favorite ways to riff on this classic:
- Citrus Splash: Add 1 cup of well-drained segment of grapefruit or orange segments for an extra burst of fresh citrus.
- Berry Bliss: Fold in a cup of fresh blueberries or sliced strawberries right before serving for a gorgeous color and antioxidant boost.
- Nutty Crunch: For some added texture, stir in ½ cup of chopped pecans or walnuts. The toasty flavor is incredible with the sweet fruit.
- Dairy-Free Dream: Easily make this vegan! Use coconut whipped topping or a vegan whipped cream alternative, and ensure your marshmallows are vegan-friendly (most standard minis are not, but brands like Dandies are perfect). Use any plant-based milk you like.
- Greek Yogurt Twist: Want to add a protein punch and a tangy flavor? Swap out half of the whipped topping for an equal amount of plain or vanilla Greek yogurt. It’s delicious and slightly healthier!
Beau’s Chef Notes & Kitchen Stories
This recipe has evolved in my kitchen over the years. My Great-Aunt Shirley’s original version actually used sour cream along with the whipped cream, which gives it a fantastic tang. Feel free to experiment with a 50/50 split if that’s your thing! I’ve also learned the hard way that draining the fruit is the single most important step. One year, I was in a huge rush and just dumped the cans in without draining. I ended up with Ambrosia Soup! It still tasted good, but it wasn’t the thick, creamy delight we all love. Lesson learned. Now I drain everything like my dessert depends on it—because it does.
Your Ambrosia Questions, Answered!
Q: Can I make ambrosia salad ahead of time?
A: Absolutely! In fact, I highly recommend it. Making it a day in advance allows the flavors to meld together perfectly. Just keep it covered tightly in the fridge. It’s best eaten within 2-3 days.
Q: My salad is getting watery. What did I do wrong?
A: This is almost always due to the fruit not being drained thoroughly enough. Canned fruit holds a lot of liquid. Next time, let the fruit sit in a strainer for a few minutes, and then pat it dry with paper towels. It makes all the difference!
Q: Can I use fresh fruit instead of canned?
A: You can, but be cautious. Fresh fruit, especially like oranges or pineapple, will release more liquid as it sits. If using fresh, I’d recommend serving the salad sooner rather than later. For berries, add them right before serving so they don’t bleed color.
Q: Is this really a “salad”?
A: Hey, in the grand tradition of Midwestern and Southern cooking, anything with whipped topping and fruit qualifies as a salad! Don’t overthink it. Just enjoy it.

Classic Ambrosia Salad
Description
This retro dessert salad is light, airy, and bursting with tropical flavor. Perfect for potlucks, holiday tables, or just a sunny treat on a gloomy day.
Ingredients
-
1 (11 oz) can mandarin oranges, drained
-
1 (8 oz) can crushed pineapple, drained
-
1 cup maraschino cherries, halved and drained
-
3½ cups frozen whipped topping (like Cool Whip), thawed
-
2 cups shredded coconut (sweetened or unsweetened)
-
2 cups miniature marshmallows
-
½ cup milk (any kind)
Instructions
-
Prepare the Creamy Base:
In a large mixing bowl, combine the whipped topping, milk, and coconut. Fold gently with a spatula to keep the mixture airy. -
Add Fruit & Marshmallows:
Fold in the mandarin oranges, crushed pineapple, halved cherries, and marshmallows. Use a gentle hand to avoid breaking the fruit. -
Chill:
Cover the bowl tightly with plastic wrap and refrigerate for at least 1 hour (2 hours is ideal). This allows the flavors to meld and the marshmallows to soften. -
Serve:
Give it a gentle stir before serving. Scoop into a clear glass bowl or individual serving cups. Garnish with extra cherries or a sprinkle of coconut for presentation.
Notes
-
Watery Salad: Ensure all fruit is thoroughly drained. Pat dry with paper towels if needed.
-
Make Ahead: Prepare 1 day in advance for flavors to meld. Best eaten within 2–3 days.
-
Fresh Fruit: If using fresh oranges or pineapple, serve sooner to prevent excess liquid.
Nutrition
- Calories: 210
- Sodium: 30mg
- Fat: 9g
- Cholesterol: 0mg
Nutritional Information*
*Please note: This is an estimated nutritional breakdown. It’s a dessert salad, so it’s meant to be enjoyed as a sweet treat!
Per Serving (Approximately ½ cup):
Calories: 210 | Total Fat: 9g | Saturated Fat: 8g | Cholesterol: 0mg | Sodium: 30mg | Total Carbohydrates: 32g | Dietary Fiber: 2g | Total Sugars: 27g | Protein: 1g
While it’s a sweet dish, it does provide a small amount of fiber and vitamin C from the fruit and coconut. To lighten it up, you can use sugar-free canned fruit, light whipped topping, and reduced-fat coconut as mentioned in the variations.
Final Thoughts from My Kitchen to Yours
Well, there you have it, my friends—my not-so-secret recipe for pure, unadulterated happiness in a bowl. This Classic Ambrosia Salad is more than the sum of its parts. It’s a celebration of simplicity, a testament to the power of shared food memories, and proof that some classics never go out of style.
I hope you’ll whip up a batch for your next gathering—or honestly, just for yourself on a Tuesday. You deserve it. If you make it, I’d love to see your creation! Tag me on social @feastical and use the hashtag #feastical so I can share in the joy.
Now, go forth and create something delicious. Until next time, keep your spatula close and your appetite closer!
Beau
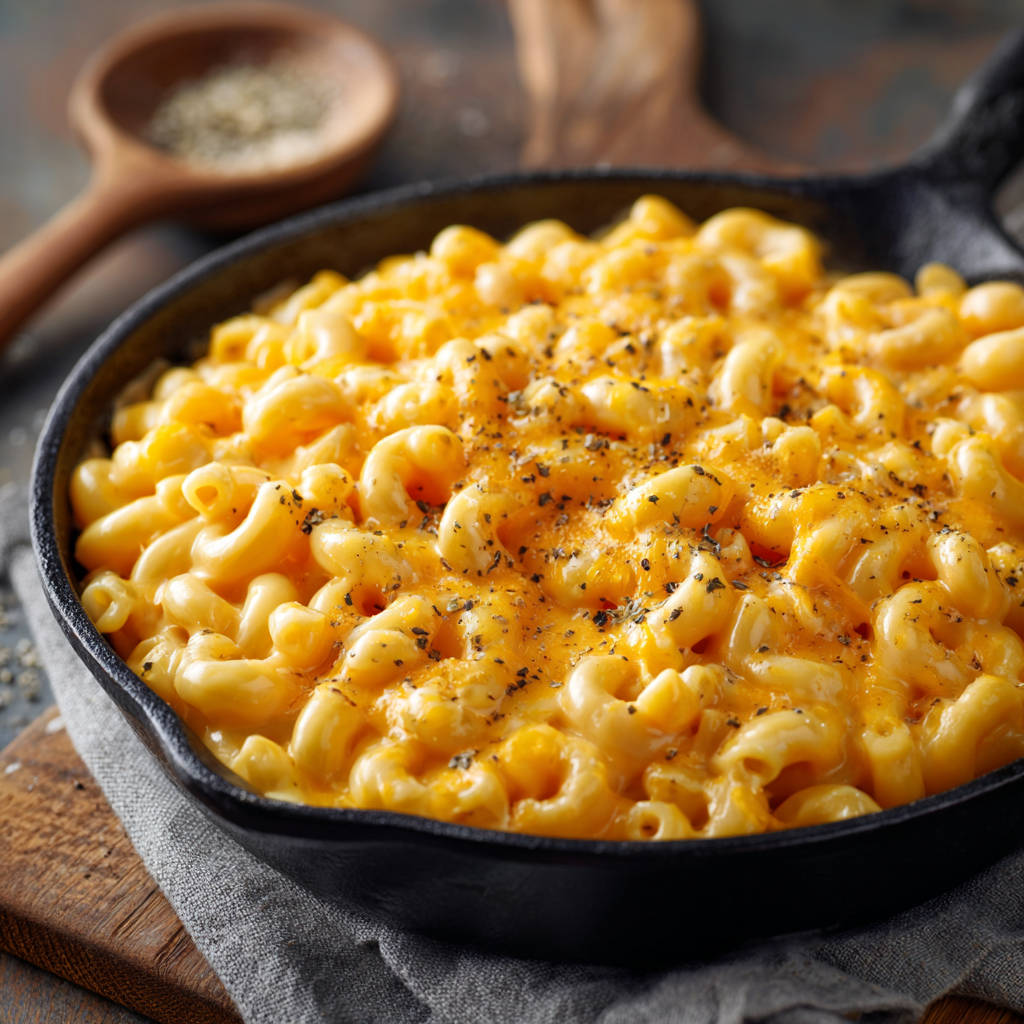
Simple Macaroni and Cheese
Simple Mac and Cheese: Your New Go-To Comfort Food Recipe
Hey friends, Beau here from Feastical! Let’s be real for a second. Some days just call for a big, steaming bowl of pure, unapologetic comfort. You know the ones I’m talking about. The sky is grey, your to-do list is a mile long, and your soul is begging for something warm, cheesy, and wonderfully simple. That’s where this hero of a recipe comes in. Forget the boxed stuff with the mysterious powder packet—we’re making real, from-scratch, creamy, dreamy macaroni and cheese, and I promise it’s easier than finding your missing spatula (we’ve all been there). This isn’t just food; it’s a culinary hug. It’s the dish you whip up on a hectic Wednesday that makes everyone at the table stop, take a breath, and smile. It’s made with pantry staples you probably already have, and it comes together in under 30 minutes. So, tie on your favorite apron, put on some good music, and let’s make a pot of happiness together.
A Pot of Memories: Why This Dish Means So Much
This recipe takes me right back to my grandma’s linoleum-floored kitchen. It wasn’t fancy, but it was the heart of her home. After a long day of playing outside until the streetlights flickered on, I’d walk in and be hit by the most incredible smell: butter, flour toasting, and sharp cheddar melting into a creamy sauce. That was my signal. Dinner was almost ready. I’d slide into my usual chair at the Formica table, and she’d place a bowl in front of me, the cheese still bubbling and the steam fogging up my glasses. It was never just about the mac and cheese, though hers was the gold standard. It was about the way she’d tousle my hair and ask about my day. It was about the simple, powerful act of being nourished, both body and soul. This recipe is my attempt to bottle that feeling—the warmth, the love, the pure joy of a shared meal. I hope it becomes a part of your story, too.
Gather Your Ingredients: The Building Blocks of Cheesy Goodness
Here’s the beautiful part: this magic is made with just a handful of simple ingredients. This is where we build our flavor foundation, so let’s talk about each one!
- 1 (8 oz) box elbow macaroni: The classic vessel for all that cheesy sauce. Its small, curved shape is perfect for trapping goodness in every bite. Chef’s Insight: Don’t overcook it in the first boil! We’re going to let it finish cooking a bit in the sauce, so aim for al dente (a little firm to the bite) according to the package directions.
- ¼ cup butter: This is the rich, flavorful base of our sauce. It adds depth and helps create our roux. Substitution Tip: Unsalted butter is best so you can control the salt level, but salted works in a pinch—just taste before adding the extra salt later.
- ¼ cup all-purpose flour: This teams up with the butter to create the roux, which is the secret thickening agent that gives our sauce its luxurious, creamy body (no runny sauce here!).
- ½ tsp salt & Ground black pepper, to taste: The essential flavor enhancers! Salt makes the cheese flavor pop, and freshly cracked black pepper adds a tiny, welcome kick. Always season in layers!
- 2 cups milk: This transforms our thick roux into a silky béchamel sauce. Whole milk will give you the richest, creamiest result, but 2% works great too. Chef’s Hack: Let your milk sit out for 10-15 minutes to take the chill off. A cold milk added to a hot roux can sometimes make the sauce a bit grainy.
- 2 cups shredded Cheddar cheese: The star of the show! I prefer a sharp or extra-sharp cheddar for a bigger flavor punch. CRUCIAL TIP: For the love of all that is cheesy and good, please shred your own cheese from a block! Pre-shredded bags contain anti-caking agents that can prevent your sauce from melting smoothly, leaving it a little gritty. Trust me, the extra two minutes of shredding is a game-changer.
Let’s Get Cooking: Your Foolproof Guide to Creamy Perfection
Okay, team! Let’s fire up the stove and make some magic. Follow these steps, and you’ll have a perfect pot of mac and cheese in no time.
- Cook the Pasta: Bring a large pot of well-salted water to a rolling boil. Add your elbow macaroni and cook according to the package directions for al dente. Remember, we’re going to cook it a bit more in the sauce, so we don’t want mushy pasta! Once it’s done, drain it in a colander but DO NOT rinse it. That little bit of leftover starch helps the sauce cling to every noodle. Set it aside.
- Create the Roux (The Secret Weapon): In the same pot (fewer dishes to wash—you’re welcome!), melt the butter over medium heat. Once it’s foamy, sprinkle in the flour and immediately start whisking. Keep whisking for a full 1-2 minutes. You’re toasting the flour just enough to cook out its raw taste. It should smell a little nutty and look like a smooth paste. This is your flavor foundation! Season it now with the salt and a good few cranks of black pepper.
- Whisk in the Milk: Now, slowly pour in the milk, just a splash at a time at first, whisking constantly. This initial patience prevents lumpy sauce! Once you’ve incorporated about half the milk, you can pour in the rest. Keep whisking! Bring the mixture to a gentle simmer. You’ll feel the sauce start to thicken beautifully as it heats. Let it bubble gently for 3-5 minutes, whisking often, until it’s smooth and coats the back of a spoon.
- Bring on the Cheese! This is the best part. Turn the heat off completely. Now, gradually add your freshly shredded cheddar cheese, one handful at a time, stirring with a wooden spoon or spatula until it’s fully melted before adding the next handful. Melting the cheese off the heat prevents it from breaking and becoming oily. You’ll end up with a velvety, smooth, incredibly cheesy sauce.
- The Grand Finale: Add your drained, cooked macaroni back into the pot with the glorious cheese sauce. Gently fold everything together until every single noodle is perfectly coated in that creamy, cheesy embrace.
How to Serve It Up: From Simple to Spectacular
You can absolutely grab a spoon and eat this straight from the pot (no judgment here!). But if you want to make it a meal or fancy it up for guests, here are a few of my favorite ways to serve it.
For a classic, cozy feel, simply spoon it into bowls while it’s still piping hot. The steam rising, the cheese stretching… it’s a thing of beauty. If you’re feeling a bit extra, transfer the mac and cheese to an oven-safe baking dish, sprinkle the top with a handful of extra cheese or buttery breadcrumbs (panko works great!), and pop it under the broiler for 2-3 minutes until the top is golden brown and gloriously crispy. That contrast of textures is *chef’s kiss*. This dish is the ultimate sidekick to so many meals. I love it alongside a simple green salad with a tangy vinaigrette to cut through the richness, some roasted broccoli, or classic BBQ favorites like pulled pork or grilled chicken.
Mix It Up! 5 Delicious Twists on Classic Mac & Cheese
The basic recipe is a perfect canvas for your culinary creativity! Here are a few ways to make it your own.
- The Protein Power-Up: Stir in a cup of diced cooked ham, crispy crumbled bacon, shredded rotisserie chicken, or even a can of drained tuna for a hearty, full-meal situation.
- Veggie Delight: Fold in a cup of steamed broccoli florets, sautéed mushrooms, caramelized onions, or thawed frozen peas for a pop of color, flavor, and nutrition.
- Spice It Up: Add a pinch of cayenne pepper, smoked paprika, or a dash of your favorite hot sauce to the cheese sauce for a warm, smoky kick.
- Gourmet Cheese Blend: Swap out half the cheddar for another melting cheese like Gruyère (so nutty and delicious!), Gouda, Monterey Jack, or a little bit of cream cheese for extra tang and creaminess.
- Gluten-Free/Dairy-Free Friendly: Use your favorite gluten-free pasta. For the sauce, use a gluten-free flour blend and your preferred plant-based butter and milk (unsweetened oat or almond milk work well). For the cheese, there are some great melting vegan cheddar shreds on the market now!
Beau’s Chef Notes: A Few Extra Nuggets of Wisdom
This recipe has been my faithful companion for years, and it’s evolved in tiny ways. I used to just dump all the cheese in at once until I learned the hard way about the perils of a broken, greasy sauce. Low and slow is the way to go! Also, the type of cheese really matters. A bland cheese will make a bland sauce. Invest in a good, flavorful block of cheddar—you’ll taste the difference. One time, I was filming a video for the site and was talking to the camera so much I completely forgot to whisk the roux. Let’s just say I had to start over with a very lumpy, unfortunate-looking paste. The lesson? Even us “pros” make mistakes! Cooking is about the journey, not perfection.
Your Mac and Cheese Questions, Answered!
Q: My cheese sauce turned out grainy/oily. What happened?
A: This is usually one of two things. First, the heat was too high when you added the cheese. Always melt cheese off the direct heat. Second, it could be from pre-shredded cheese. Those anti-caking agents are the enemy of a smooth sauce. Shred your own!
Q: Can I make this ahead of time?
A: You can! Assemble the recipe completely, then transfer it to a baking dish. Let it cool, cover, and refrigerate for up to two days. When ready to bake, you may need to add a splash of milk to loosen it up, then bake at 350°F (175°C) for 20-30 minutes, until heated through.
Q: My sauce is too thick. How can I thin it out?
A: No problem! Simply whisk in a little more warm milk, a tablespoon at a time, until it reaches your desired consistency.
Q: My sauce is too thin. How can I thicken it?
A. Let it simmer on the stove for a few more minutes, stirring constantly. You can also make a “slurry” by mixing a tablespoon of flour with two tablespoons of cold milk until smooth, then whisking that into the simmering sauce. Cook for another 2-3 minutes until thickened.

Simple Macaroni and Cheese
Description
Say goodbye to the boxed stuff. This from-scratch macaroni and cheese is velvety, cheesy, and made with pantry staples. Perfect for a cozy weeknight or a crowd-pleasing side.
Ingredients
-
8 oz elbow macaroni (about 2 cups dry)
-
¼ cup butter
-
¼ cup all-purpose flour
-
½ tsp salt
-
Freshly cracked black pepper, to taste
-
2 cups milk (whole milk for richest flavor)
-
2 cups freshly shredded sharp cheddar cheese
Chef’s Tips:
-
Cook pasta al dente; it will finish cooking in the sauce.
-
Let milk sit at room temperature for 10–15 minutes to avoid a grainy sauce.
-
Shred your own cheese from a block for the smoothest melt.
Instructions
-
Cook the Pasta:
Boil macaroni in salted water until al dente. Drain but do not rinse. Set aside. -
Make the Roux:
In the same pot, melt butter over medium heat. Sprinkle in flour and whisk constantly for 1–2 minutes until slightly nutty and smooth. Season with salt and pepper. -
Add Milk:
Slowly whisk in milk, a splash at a time, to prevent lumps. Bring to a gentle simmer, whisking until thickened (3–5 minutes). -
Add Cheese:
Turn off heat. Gradually stir in shredded cheddar, one handful at a time, until fully melted and smooth. -
Combine Pasta and Sauce:
Add drained macaroni to the pot and fold until every noodle is coated in cheesy goodness.
Notes
-
Grainy/Oily Sauce: Cheese added over high heat or pre-shredded cheese may cause this. Melt cheese off the heat.
-
Too Thick: Whisk in warm milk, a tablespoon at a time.
-
Too Thin: Simmer a few more minutes or whisk in a flour-milk slurry (1 tbsp flour + 2 tbsp cold milk).
-
Make-Ahead: Assemble and refrigerate for up to 2 days. Add a splash of milk when reheating in the oven at 350°F (175°C) for 20–30 minutes.
Nutritional Information*
*Please note: This is an estimated nutritional breakdown. Values can vary based on specific ingredients used.
Per serving (approx., recipe serves 4):
Calories: 450 | Protein: 17g | Fat: 22g | Carbohydrates: 45g | Sugar: 5g
This is a hearty, comforting dish. To lighten it up slightly, you can use a lower-fat milk, reduce the butter by a tablespoon, or use a reduced-fat cheese (though the meltability might change). Remember, food is about joy and nourishment, and this dish delivers on both in a big way!
Final Thoughts: Dig In!
And there you have it, friends! Your new favorite, fail-proof, incredibly delicious simple macaroni and cheese recipe. It’s more than just pasta and cheese; it’s a reminder that the simplest things in life are often the best. It’s about the joy of creating something with your own two hands and sharing it with people you love. I hope this recipe finds its way into your regular rotation and becomes a source of comfort and happy memories in your kitchen, just like it has in mine. Now, go forth and get cheesy! And if you make it, I’d love to hear about it. Tag me @Feastical on social media so I can see your beautiful creations. Until next time, happy cooking!
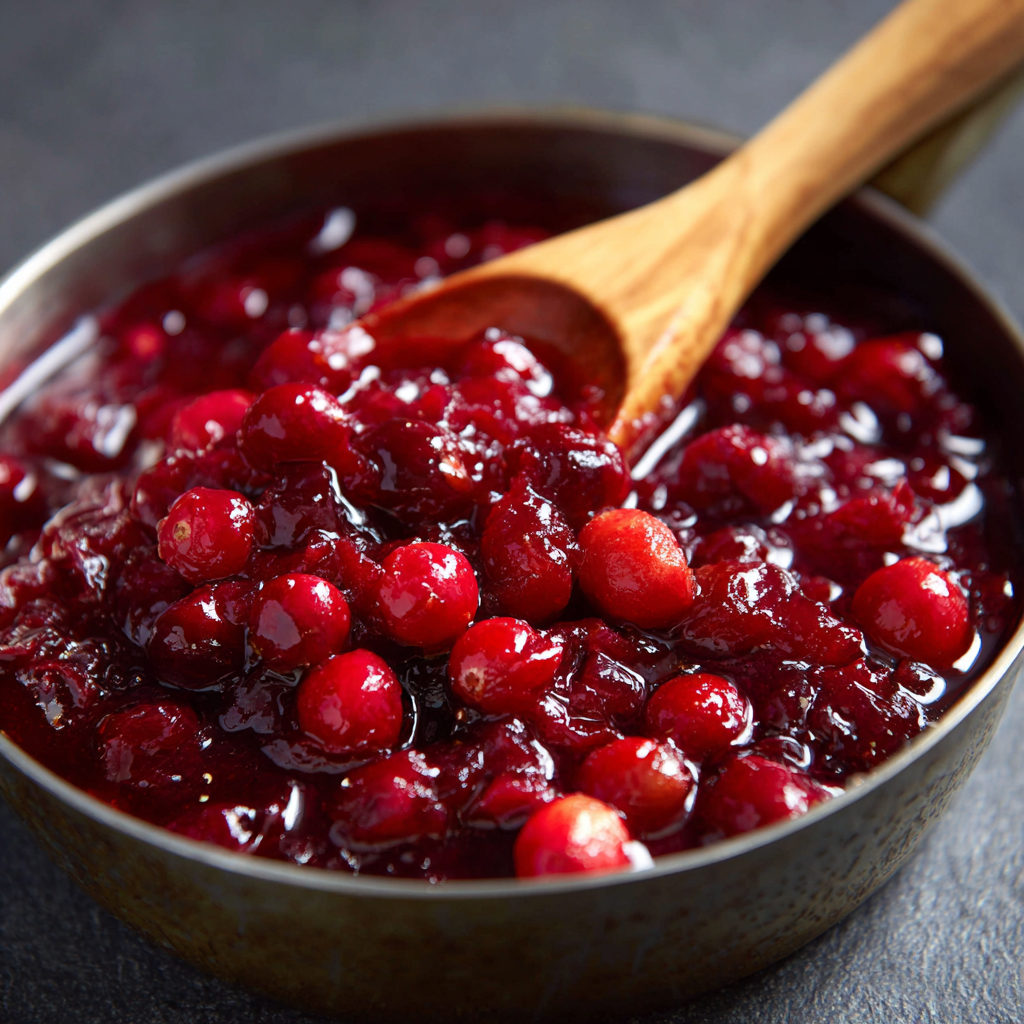
Classic Cranberry Sauce with Orange Juice
Ditch the Can: Your New Favorite Homemade Cranberry Sauce is 20 Minutes Away!
Hey friends, Beau here from Feastical! Let’s have a real talk for a second. Is there anything that signals “the holidays are here!” more than that distinct *thwomp-schlurp* sound of cranberry sauce sliding out of a can, ridges and all? I get it. It’s nostalgic, it’s easy, and it’s… well, it’s jiggly. But what if I told you that in the same amount of time it takes to wrestle that can opener, you could be stirring a pot of something truly magical? Something that will make your guests’ eyes light up and have them asking, “Wait, you MADE this?”
I’m talking about my go-to Classic Cranberry Sauce with a sunny burst of orange juice. This isn’t just a side dish; it’s a vibrant, tangy, sweet-tart revelation that absolutely deserves a spot next to your golden turkey and fluffy mashed potatoes. We’re using just three simple ingredients, one saucepan, and about 20 minutes of your time. The result? A condiment that’s bursting with real fruit flavor, has the most incredible jewel-toned color, and brings a fresh, zesty brightness to cut through all the rich, savory goodness on your plate.
This recipe is a game-changer, whether you’re hosting your first Friendsgiving or you’re a seasoned Thanksgiving pro looking for a little upgrade. It’s forgiving, fun to make, and fills your kitchen with the most incredible festive aroma. So, grab your favorite spoon and let’s turn those beautiful ruby-red berries into the star of your holiday spread. Trust me, once you go homemade, you’ll never go back to the can.
The Thanksgiving That Almost Wasn’t (And The Sauce That Saved It)
I’ll never forget my third year hosting Thanksgiving. I was determined to make it my magnum opus. The turkey was brining, the pies were prepped, and I felt like a culinary superhero. That is, until I opened the fridge on the big day and discovered my beloved, from-scratch, slow-simmered gravy had… well, let’s just say it had met an unfortunate end on the bottom shelf. It was a tragedy of Shakespearean proportions in my kitchen. Panic set in. The gravy was the linchpin of the entire meal!
In my fluster, I reached for the one thing I knew I could count on: a bag of cranberries. As I poured them into a pot with sugar and the juice from the oranges I was segmenting for a salad, something wonderful happened. The frantic energy melted away, replaced by the gentle, rhythmic popping of the berries and the incredible citrusy-sweet scent that filled the air. That simple, no-fail process was a moment of calm in the chaos. When I served that bright, cheerful sauce, everyone raved about it. It was the unexpected hero of the meal, a delicious reminder that sometimes the simplest things, made with a little love (and a dash of desperation), are the most memorable. Now, I make it with a smile, remembering how it saved the day.
Gathering Your Sunshine Squad: The Ingredients
See? I told you it was simple! The beauty of this recipe is in its purity. Just three main players come together to create something far greater than the sum of their parts. Here’s what you’ll need:
- 12 oz Fresh Cranberries: This is your star! Look for bags where the berries are firm, shiny, and a deep ruby red. Give them a quick rinse and pick through them to remove any soft or squishy ones. Chef’s Insight: Don’t use frozen cranberries without thawing them first, as they’ll release a lot more water and throw off the cooking time and consistency.
- 1 Cup White Sugar: This is our sweet balancer to the cranberries’ intense tartness. Granulated white sugar is perfect because it dissolves cleanly and lets the berry and orange flavors shine. Substitution Tip: You can easily swap this for coconut sugar for a deeper, caramel-like flavor, or use a 1:1 ratio of maple syrup (just reduce the orange juice by a couple of tablespoons as syrup is looser).
- 1 Cup Orange Juice (preferably fresh!): This is the secret weapon! While store-bought works in a pinch, squeezing it fresh from 2-3 oranges makes a WORLD of difference. It adds a vibrant, sunny acidity that elevates the sauce from great to “can I eat this with a spoon?” incredible. Chef’s Hack: If you’re juicing oranges, toss in a bit of the zest for an extra punch of citrus oil. You won’t regret it!
Let’s Get Cooking: The Foolproof Method
Ready to create some magic? This is one of the most satisfying cooking processes—it’s quick, colorful, and you get to listen to the cheerful popping symphony of the cranberries. Let’s do this!
- Combine & Conquer: Grab a medium-sized saucepan—nothing too shallow, as the berries can bubble up quite a bit. Dump in your rinsed cranberries, sugar, and orange juice. Give it a good stir to make sure everything is getting acquainted. No need to turn on the heat yet!
- Bring to a Boil: Now, place your pot over medium-high heat. Let the mixture come to a rolling boil. You’ll see the sugar dissolve completely and the berries will start to float and dance. This is where the party starts! Chef’s Tip: Resist the urge to stir constantly at this stage. Let the heat do its work evenly.
- Simmer & Pop: Once you’ve got a good boil going, immediately reduce the heat to a gentle simmer. This is crucial! We don’t want to scorch the sugar. Now, you can stir occasionally. After about 5-7 minutes, you’ll start hearing it: the satisfying *pop* *pop* *pop* as the cranberries burst open. It’s music to a food-lover’s ears! Keep simmering for a total of 12-15 minutes. The sauce will start to thicken and reduce slightly.
- The Consistency Test: How do you know it’s done? The sauce will coat the back of your spoon nicely. If you drag your finger through it, the line should hold its shape. Remember, it will thicken SIGNIFICantly as it cools, so don’t over-reduce it here. We’re going for a loose, saucy consistency in the pot.
- Cool Down: When you’re happy with the thickness, take the pot off the heat. Pour the sauce into a heat-proof bowl or container. Let it cool to room temperature on your counter. This cooling period is when the magic finalizes—the pectin from the berries sets up and gives you that perfect, spreadable consistency.
- Chill Out: Once it’s no longer hot, cover it and pop it in the fridge for at least an hour, but preferably longer. This allows the flavors to meld and marry into one harmonious, delicious condiment.
Plating Up: How to Serve Your Masterpiece
Okay, your sauce is chilled, set, and begging to be eaten. Now what? This isn’t just for turkey! While it’s obviously a classic pairing with roasted poultry, its versatility is its superpower.
For a classic holiday spread, serve it in a beautiful little bowl right on the table so everyone can help themselves. I love using a white ceramic dish to really make that ruby red color pop. But let’s think outside the Thanksgiving box! Swirl it into your morning yogurt or oatmeal for a tangy kick. Dollop it on top of a warm goat cheese log for an incredible and easy appetizer. It’s also a fantastic condiment for leftover turkey sandwiches—spread it on the bread instead of mayo for a flavor explosion. And honestly? A spoonful straight from the jar is a perfectly acceptable snack in my book.
Mix It Up: Delicious Variations to Try
Once you’ve mastered the classic, the world is your cranberry oyster! This recipe is an amazing blank canvas. Here are a few of my favorite ways to play with the flavors:
- Spiced & Nice: Add a cinnamon stick, a few whole cloves, or a star anise pod to the pot while simmering. Just remember to fish them out before cooling! It gives the sauce a wonderfully warm, spiced depth that screams holidays.
- Berry Merry Mix-In: Stir in a half cup of fresh raspberries or blueberries during the last 5 minutes of cooking. They’ll break down and add another layer of complex berry flavor and a slightly different texture.
- Herbaceous Twist: For a surprisingly elegant twist, stir in 1-2 teaspoons of finely chopped fresh rosemary or thyme right after you take the sauce off the heat. The herbal notes pair brilliantly with the citrus and tart berries.
- Boozy & Bold: Replace ¼ cup of the orange juice with a splash of Grand Marnier, Cointreau, or even a nice bourbon. The alcohol will cook off, leaving behind an incredible, rich flavor.
- Lower Sugar Option: You can reduce the sugar to ¾ cup for a tarter sauce that still sets nicely. The orange juice provides a lot of natural sweetness!
Beau’s Kitchen Notes: A Few Parting Thoughts
This recipe has been my trusty sidekick for years, and it’s evolved in tiny ways. I almost always add the zest of one orange now—it just wakes up the whole dish. And don’t be afraid of the seeds in fresh-squeezed juice; I think they add a bit of rustic charm! One year, I got a little overzealous and added a whole minced jalapeño (seeds and all). It was… spicy. Surprisingly good on tacos later that week, but maybe not for Grandma at Thanksgiving. The point is, make it your own! This sauce keeps beautifully in the fridge for up to a week, and it freezes like a dream for months. I often make a double batch in November just to have stashed away for a random burst of holiday flavor in January.
Your Questions, Answered!
Q: My sauce is too thin/runny! What did I do wrong?
A: Don’t panic! First, did you let it cool completely? It thickens a ton as it chills. If it’s still too loose after cooling, you can simmer it for a few more minutes next time or add a pinch of cornstarch slurry (mix 1 tsp cornstarch with 1 tbsp cold water) at the end of cooking and simmer for a minute to thicken it up.
Q: My sauce is too bitter! How can I fix it?
A> Bitterness can come from overcooking the cranberries. It’s a fine line! To balance it out, stir in a tiny pinch of salt (it works wonders) or a tablespoon more of sugar or maple syrup after it has cooled a bit.
Q: Can I make this ahead of time?
A: Absolutely! In fact, I highly recommend it. Making it 1-2 days ahead allows the flavors to develop and meld together perfectly. Just keep it covered in the fridge.
Q: Why is my cranberry sauce so foamy?
A> A little foam on top while cooking is totally normal! It’s just impurities from the fruit and juice. You can skim it off with a spoon if you want a perfectly clear sauce, but I usually just give it a stir and don’t worry about it—it disappears upon cooling.
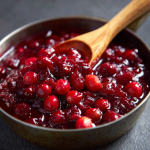
Classic Cranberry Sauce with Orange Juice
Description
Ditch the can! This easy, fresh cranberry sauce elevates any holiday table with its jewel-toned color and zesty brightness. Perfect for Thanksgiving, Christmas, or anytime you want a fresh, tangy-sweet condiment.
Ingredients
-
12 oz fresh cranberries (firm, shiny, ruby red)
-
1 cup granulated sugar (or coconut sugar/maple syrup, see tips)
-
1 cup fresh orange juice (approx. 2–3 oranges)
-
Optional: zest of 1 orange, spices (cinnamon stick, cloves, star anise), or ¼ cup alcohol (Grand Marnier, Cointreau, bourbon)
Instructions
-
Combine Ingredients:
In a medium saucepan, mix cranberries, sugar, and orange juice (plus optional zest/spices). Stir to combine. -
Bring to a Boil:
Place over medium-high heat and bring to a rolling boil. Berries will float and start popping. -
Simmer & Pop:
Reduce heat to a gentle simmer. Stir occasionally. After 5–7 minutes, listen for the pop-pop-pop of bursting berries. Simmer 12–15 minutes total. -
Check Consistency:
Sauce should coat the back of a spoon. Remember, it thickens as it cools. -
Cool & Chill:
Pour into a heat-proof bowl and cool to room temperature. Cover and refrigerate at least 1 hour before serving.
Notes
-
Too Thin/Runny: Cool completely; thickens as it chills. Add a cornstarch slurry (1 tsp cornstarch + 1 tbsp cold water) and simmer 1–2 minutes if needed.
-
Too Bitter: Add a pinch of salt or extra sugar/maple syrup. Avoid overcooking cranberries.
-
Foamy Sauce: Foam is normal and disappears upon cooling. Skim if desired.
-
Make-Ahead: Prepare 1–2 days in advance; flavors meld beautifully.
Nutrition
- Calories: 110 Cal per 2-tablespoon serving
- Carbohydrates: 28g
- Fiber: 2g
Nutritional Information (Because We’re Curious!)
Okay, let’s be real: this is a holiday treat! But it’s also made from whole, real fruit, and that’s something to feel good about. This nutritional info is per serving (about a 2-tablespoon scoop) and is an estimate.
Per Serving (approx.):
Calories: 110
Carbohydrates: 28g
Fiber: 2g (Thanks, cranberries! That’s 8% of your daily value!)
Sugar: 24g (This is primarily natural fruit sugars plus the added sugar for balance)
Fat: 0g
Vitamin C: A fantastic boost from both the cranberries and the fresh orange juice!
So while it’s a sweet condiment, it’s also packing a punch of fiber and antioxidants from those gorgeous cranberries. Enjoy it guilt-free as part of your festive feast!
The Final Scoop
And there you have it, friends! Your journey from can-to-fan is complete. This Classic Cranberry Sauce with Orange Juice is more than a recipe; it’s a invitation to add a little more homemade love to your table. It’s proof that the best dishes are often the simplest ones, made with a few good ingredients and a few minutes of care.
I hope this recipe becomes a new tradition in your home, creating its own funny stories and happy memories. It’s a small act of cooking that delivers a huge payoff in flavor and joy. If you make it (and I really hope you do), tag me @feastical on social media and show me your beautiful creations! I love seeing what you whip up in your kitchens.
Now, go forth and sauce! And from my kitchen to yours, Happy Holidays.
With love and a full spoon,
Beau