Garbage Bread Recipe : The Ultimate Stuffed Pizza Bread Everyone Loves
Garbage Bread Recipe: The Ultimate Stuffed Pizza Bread Everyone Loves
Hey there, friend! Beau here, welcoming you back to my kitchen corner at Feastical. Pull up a stool, grab your favorite apron (the one with the questionable stain that tells a story), and let’s talk about a recipe that’s less of a formal dish and more of a culinary hug. Don’t let the name fool you—Garbage Bread is pure comfort food gold.
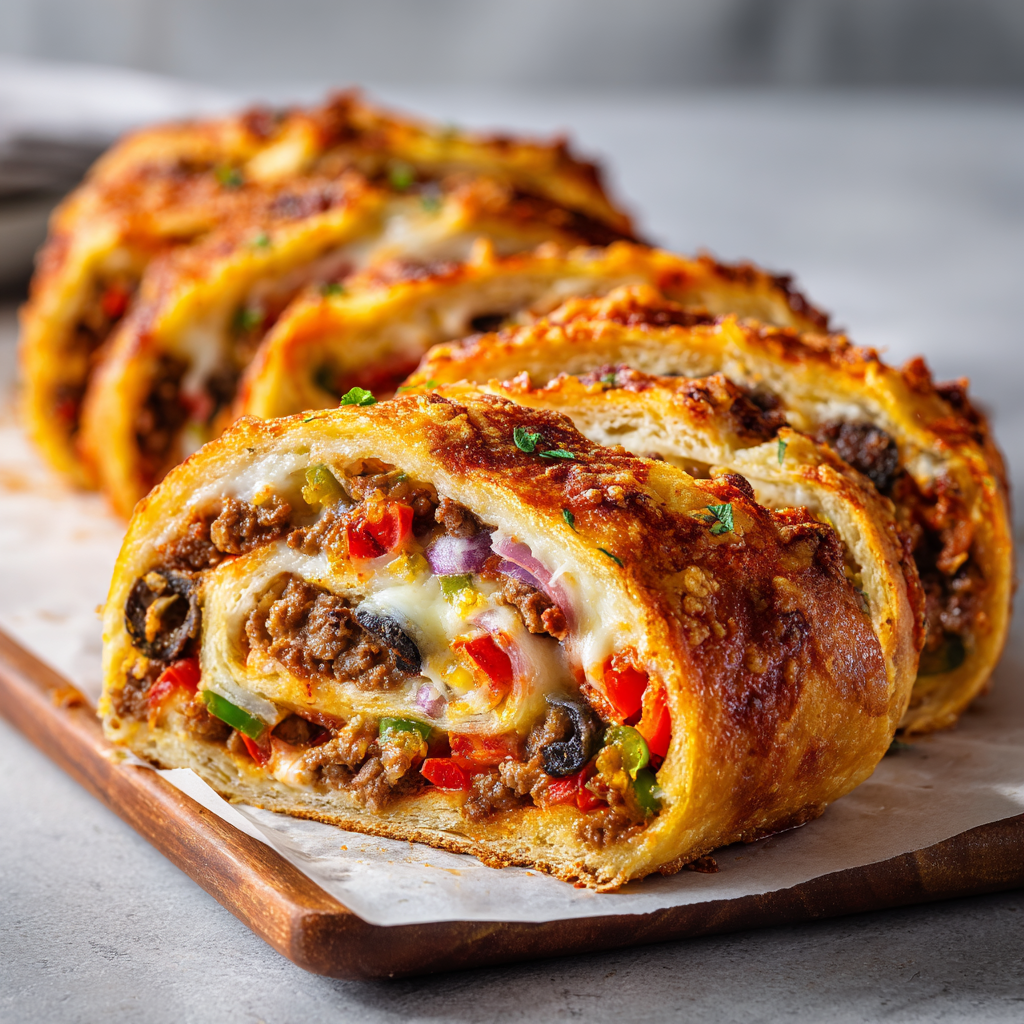
Inspired by the loose, fun spirit of a classic New York–style stromboli, this rolled pizza bread is a glorious, delicious mess. It’s packed with savory beef, rivers of melty cheese, and colorful veggies, all snugly wrapped in a golden, crispy crust that crackles when you slice into it. But here’s my favorite part: this recipe is a celebration of the “clean out the fridge” philosophy. Got a handful of pepperoni, a lonely bell pepper, some mushrooms about to turn? Toss ’em in! This bread is flexible, forgiving, and fiercely delicious.
I’m talking the perfect centerpiece for game night, a family dinner that gets even the pickiest eater excited, or a weekend project that fills your house with the irresistible smell of baking dough and Italian seasoning. It’s the kind of food that brings people together, sparks conversations, and disappears fast. So, are you ready to roll up your sleeves (and some dough) and make some magic? Let’s dig in.
The Night We Named a Legend: My First Garbage Bread
I have to confess, the name “Garbage Bread” wasn’t born in a fancy test kitchen. It was born in a cramped college apartment, circa 2 a.m., surrounded by my best friends after… let’s call it a “robust” night out. We were ravenous, our fridge was a barren landscape of condiments and random leftovers, and our pizza delivery budget was spent for the month.
There was a roll of leftover pizza dough from a failed calzone experiment, half a pound of taco meat from Tuesday, some sad-looking onions, a bag of shredded “Italian blend” cheese that was mostly sawdust, and a jar of olives. In a moment of hungry genius (or desperation), we threw it all together, rolled it up like a sleeping bag, and baked it. When we pulled that golden, bubbling log out of the oven, my buddy Mike said, “Dude, it’s just garbage from the fridge… but it’s *amazing* garbage.” And just like that, a legend was named. It wasn’t pretty, but it was real, satisfying, and made with what we had. That’s the spirit I want to bring to your kitchen today.
Your Garbage Bread Blueprint: Ingredients & Smart Swaps
Here’s your shopping (or fridge-foraging) list. Remember, these are guidelines, not commandments! The beauty is in the customization.
- 1 thin-crust pizza dough (store-bought or homemade): The foundation. Store-bought is a fantastic shortcut—I won’t judge! If you’re feeling ambitious, my easy no-knead dough is a game-changer. Chef’s Insight: Let it sit at room temp for 30 minutes before rolling. A relaxed dough won’t fight you.
- 1 lb ground beef (80/20 blend is perfect): Provides rich, savory flavor. Substitution Tip: Ground Italian sausage, turkey, chicken, or even plant-based crumbles work wonderfully. This is your chance to use up that extra taco meat or meatloaf mix!
- 1 cup shredded mozzarella cheese: For that iconic, stretchy, melty goodness. Chef’s Insight: Always shred your own if you can! Pre-shredded cheese has anti-caking agents that can make melting less smooth.
- ½ cup shredded cheddar cheese: Adds a sharp, tangy punch that cuts through the richness. Substitution Tip: Provolone, Monterey Jack, or a spicy pepper jack would be fabulous here.
- ½ cup diced onion: Sweetness and depth. Yellow or white onion works best. Sautéing them first is non-negotiable—it tames the bite and brings out their natural sugars.
- 2 cloves garlic, minced: Flavor bomb alert! Fresh is best, but ½ tsp garlic powder in a pinch will do.
- ½ cup sliced bell peppers: Color, crunch, and a touch of sweetness. I love using a mix of red and green for visual pop.
- ½ cup sliced black olives (optional): I know they’re divisive, but I love their salty, briny kick. Substitution Tip: Not a fan? Skip ’em! Try pepperoncini, sun-dried tomatoes, or artichoke hearts instead.
- 1 tbsp Italian seasoning: The aromatic soul of the dish. Rub it between your palms before adding to wake up the dried herbs.
- Salt & black pepper, to taste: Season every layer. Taste your filling before it goes on the dough!
- 2 tbsp olive oil: For sautéing. A good glug adds flavor.
- 1 egg (for egg wash): The secret to that professional, glossy, golden-brown crust. Just beat it with a tablespoon of water.
Let’s Build It: Step-by-Step with Chef Beau’s Hacks
Follow these steps, and you’re guaranteed success. I’ve sprinkled in my favorite kitchen hacks to make it even easier.
- Preheat & Prep: Crank your oven to 375°F (190°C) and line a baking sheet with parchment paper. Why parchment? It guarantees no sticking and makes cleanup a dream. No scrubbing pans tonight!
- Sizzle Your Aromatics: Heat the olive oil in a skillet over medium-high. Toss in your diced onions and let them dance until they’re soft and translucent—about 3-4 minutes. Chef’s Hack: Add a tiny pinch of salt here. It helps draw out the moisture and speeds up the cooking.
- Brown the Beef: Add the ground beef, breaking it up with your spoon or spatula as it browns. Get it nice and crumbly. Once no pink remains, add the minced garlic and cook for just 30 seconds until fragrant—burnt garlic is bitter, and we don’t want that!
- Veggie Party: Stir in your bell peppers, olives (if using), Italian seasoning, and a good crack of black pepper. Cook for just 2-3 more minutes. We want the peppers to soften slightly but still have a bit of bite. Critical step: Remove the skillet from the heat and let this mixture cool for 10 minutes. Putting hot filling on dough = a steamy, soggy, difficult-to-roll mess. Patience, grasshopper.
- Roll the Canvas: On a lightly floured surface, roll your dough into a roughly 10×14-inch rectangle. Don’t stress about perfection! If it’s a little lopsided, that’s character. If the dough keeps snapping back, let it rest for 5 more minutes—it’s just being stubborn.
- Assemble the Masterpiece: Spread the cooled filling evenly over the dough, leaving a 1-inch border all around. This border is your glue! Sprinkle both cheeses generously over the meat and veggie layer.
- The Roll-Up: Starting from one of the long sides, tightly roll the dough over the filling, using the border to help tuck it in. Roll it like you’re rolling a yoga mat—firm but gentle. Once rolled, pinch the seam to seal it tightly. Don’t forget to pinch the ends closed too! Place the roll seam-side down on your prepared baking sheet. Pro Tip: A little water on your fingertips can help seal the seam if it’s being difficult.
- Slash & Glaze: Use a sharp paring knife to cut 4-5 small diagonal slits on top of the loaf. This lets steam escape so it doesn’t burst open randomly. Give it a beautiful, all-over brush with your egg wash. This is what gives you that bakery-worthy shine.
- Bake to Golden Perfection: Slide it into your preheated oven and bake for 25-30 minutes. You’re looking for a deep, golden-brown crust that sounds hollow when gently tapped. The cheese inside should be bubbly and glorious.
- The Hardest Part – Rest! I know, I know. It smells incredible. But let it rest for 5-7 minutes on the pan before you slice. This allows the molten cheese to set slightly so your slices hold together beautifully, instead of becoming a delicious but messy lava flow.
How to Serve This Heroic Loaf
Presentation is part of the fun! Place the whole loaf on a big wooden cutting board or a rustic platter. Let people gather ’round. Use a sharp serrated knife to slice it into 1.5-inch thick pieces—you’ll hear that satisfying crust crackle.
This is a stand-alone superstar, but I love serving it with a few “dippers” on the side. A bowl of warm marinara sauce for dipping is classic and essential. For a creamy contrast, a side of garlicky ranch or zesty pesto aioli is amazing. Round out the meal with a simple, crisp green salad tossed in a bright vinaigrette to cut through the richness. It’s the perfect casual feast.
Make It Your Own: 5 Tasty Twists
The “garbage” philosophy means you can riff endlessly. Here are some of my favorite variations:
- The Supreme: Swap beef for Italian sausage. Add sliced pepperoni, diced ham, sautéed mushrooms, and a mix of green and red peppers.
- Buffalo Chicken: Use shredded cooked chicken tossed in buffalo sauce instead of beef. Use a Monterey Jack and blue cheese crumble blend. Serve with ranch for dipping.
- Breakfast Garbage Bread: Scrambled eggs, cooked breakfast sausage, diced potatoes, and cheddar cheese. Perfect for a brunch crowd-pleaser.
- Veggie Lover’s Dream: Skip the meat. Load it up with roasted zucchini, spinach, caramelized onions, mushrooms, and ricotta mixed with the mozzarella.
- Philly Cheesesteak Style: Thinly sliced ribeye steak, sautéed onions and green peppers, and provolone cheese. A masterpiece.
Beau’s Kitchen Notebook
This recipe has evolved from that late-night dorm experiment into my go-to “no-fail fun food.” Over the years, I’ve learned the cooling-the-filling trick the hard way (soggy dough is a sad thing). I’ve also found that letting the baked bread rest is just as important as the baking time itself. One time, in a hurry for a football game, I sliced it immediately and we had to eat it with forks—still delicious, but not the elegant log slices I envisioned! The beauty is in its imperfection. Every time I make it, it’s a little different, based on what’s in season or lurking in the vegetable drawer. That’s the real magic.
Your Questions, Answered!
Q: Can I make this ahead of time?
A: Absolutely! You can assemble the roll (through step 7), wrap it tightly in plastic wrap, and refrigerate for up to 24 hours. When ready, let it sit at room temp for 30 minutes, slash, egg wash, and bake. You may need to add 5-ish minutes to the bake time since it’s starting cold.
Q: My bread split open while baking! What happened?
A> Don’t worry, it’s still edible gold! This usually means 1) the filling was too hot when rolled, creating steam, 2) you overfilled it, or 3) the slits on top weren’t deep enough to vent properly. It’s a cosmetic issue—just call it “rustic.”
Q: Can I freeze Garbage Bread?
A: For sure. Bake it completely, let it cool totally, then wrap the whole loaf or individual slices tightly in foil and freeze for up to 2 months. Reheat in a 350°F oven until warm and crispy again.
Q: Is the dough supposed to be so sticky when I roll it?
A> If it’s sticking to your rolling pin and counter, you need more flour. Don’t be shy! Sprinkle your surface and pin lightly. The dough should be pliable but not stick to everything it touches.

Garbage Bread Recipe : The Ultimate Stuffed Pizza Bread Everyone Loves
Description
If you’ve got some dough, a bit of meat, a handful of cheese, and random fridge extras, you’re already halfway to Garbage Bread. Despite the funny name, this is pure comfort food — a rolled pizza-style bread stuffed with savory fillings and baked until golden and melty. It’s perfect for game nights, family dinners, or using up leftovers in the tastiest way possible.
Ingredients
-
1 lb (450 g) pizza dough (store-bought or homemade)
-
1 lb (450 g) ground beef (or sausage/turkey)
-
1 tbsp olive oil
-
1/2 cup diced onion
-
2 cloves garlic, minced
-
1/2 cup diced bell peppers
-
1/2 cup sliced olives (optional)
-
1 tbsp Italian seasoning
-
Salt and black pepper, to taste
-
1 cup shredded mozzarella cheese
-
1/2 cup shredded cheddar or provolone
-
1 egg + 1 tbsp water (for egg wash)
Optional add-ins: pepperoni, mushrooms, cooked bacon, spinach, leftover taco meat
Instructions
-
Preheat oven to 375°F (190°C). Line a baking sheet with parchment.
-
Cook filling: Heat oil in a skillet. Sauté onion 3–4 minutes. Add beef and cook until browned. Stir in garlic for 30 seconds.
-
Add peppers, olives, Italian seasoning, salt, and pepper. Cook 2–3 minutes more.
Remove from heat and cool 10 minutes. -
Roll dough on a floured surface into a rectangle (about 10×14 inches).
-
Add filling evenly, leaving a 1-inch border. Sprinkle cheeses over top.
-
Roll tightly from the long side into a log. Pinch seam and ends closed.
-
Place seam-side down on the pan. Cut 4–5 small slits on top.
-
Brush with egg wash.
-
Bake 25–30 minutes until deep golden brown.
-
Rest 5–7 minutes, then slice and serve.
Notes
-
Cool the filling first — hot filling makes the dough soggy and hard to roll.
-
Don’t overfill or it may split while baking.
-
Shred your own cheese for better melting.
-
Let dough rest at room temp 20–30 minutes before rolling so it stretches easily.
Nutritional Information (Approximate)
Please note: This is an estimate for 1 of 6 servings, based on the original ingredient list. Values will vary with substitutions.
- Servings: 4-6
- Prep Time: 15 minutes
- Cook Time: 30 minutes
- Calories: ~420 per serving
- Protein: 22g
- Carbohydrates: 32g
- Fat: 24g
This is hearty, satisfying comfort food. Pair it with that big green salad I mentioned to balance the meal perfectly!
Final Slice of Thought
And there you have it, my friend—the glorious, unpretentious, and endlessly adaptable wonder that is Garbage Bread. It’s more than a recipe; it’s an invitation to play in the kitchen, to use what you have, and to create something unabashedly delicious that brings people together. It’s proof that the best meals aren’t always the most complicated ones, but the ones made with a dash of creativity and a whole lot of heart.
I hope you give this a try and make it your own. Tag me @Feastical if you do—I love seeing your kitchen creations! Now, go preheat that oven, raid your fridge, and get ready for the compliments to roll in. Until next time, keep your knives sharp and your kitchen messy.
Happy cooking,
Beau

Ranch Chicken and Potato Bake: One-Dish Wonder for Busy Nights
Ranch Chicken and Potato Bake: Your New Favorite One-Dish Wonder
Hey, foodie friend! Ever have one of those nights where your energy is at zero, your stomach is growling like a bear, and the mere thought of using more than one dish sends shivers down your spine? Yeah, me too. All the time, in fact. That’s exactly why I created this little slice of weeknight heaven: my Ranch Chicken and Potato Bake.
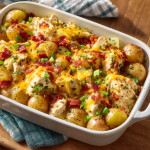
Picture this: juicy chunks of chicken and tender baby potatoes, all tossed in that iconic, herby ranch seasoning and roasted until everything is crispy-edged and golden. Then, just when you think it can’t get better, we blanket the whole thing in a layer of melty cheddar cheese and a sprinkle of crispy bacon. It all happens in one single baking dish, with minimal prep, and maximum “wow, you made this?” factor.
This isn’t just a recipe; it’s a strategy. A strategy for reclaiming your evening, filling your kitchen with incredible smells, and putting a seriously satisfying, feel-good meal on the table that will have everyone asking for seconds. So, tie on your apron (or don’t, I’m not judging), and let’s make dinner the easiest, tastiest part of your day.
The Night This Bake Was Born: A Tale of Chaos & Comfort
This recipe has its roots in what I lovingly call a “fridge forage frenzy.” It was a rainy Tuesday, I’d just gotten back from the market, and my brain was completely fried. I had a pack of chicken, a bag of potatoes, and a deep, primal craving for something cozy and cheesy. I also had a looming deadline, a dog who needed walking, and approximately 45 minutes of patience left in my tank.
Staring into the pantry, my eyes landed on a packet of ranch seasoning. A lightbulb went off. I remembered how my grandma used to shake those same herbs over her famous roast potatoes. In that moment, it all clicked. I chopped, I tossed, I baked, and I crossed my fingers. What came out of the oven was nothing short of magic. The ranch seasoning created this savory, aromatic crust on the chicken and potatoes that was out-of-this-world good. It was the ultimate “more than the sum of its parts” dish. That chaotic Tuesday night experiment is now a requested classic in our home, and I have a feeling it’s about to become one in yours, too.
Gathering Your Flavor Crew: Ingredients & Insights
Here’s everything you’ll need to build this flavor masterpiece. I’ve tossed in some chef-y notes and swaps so you can make it your own!
- 1.5 lbs boneless, skinless chicken breasts or thighs, cut into chunks – Thighs are my go-to for guaranteed juiciness, but breasts work great if you’re watching fat. Just don’t overcook them! Cutting them into even, 1.5-inch chunks ensures everything cooks at the same rate.
- 1.5 lbs baby potatoes, halved or quartered – The smaller you cut them, the crispier they get! I love the buttery texture of Yukon Golds or the colorful pop of tri-colored babies. No need to peel—that skin adds texture and nutrients.
- 2 tbsp olive oil – Our cooking conductor. It helps the seasoning stick and promotes that beautiful golden roast. Avocado oil works too!
- 1 packet (1 oz) ranch seasoning mix – The MVP! This little packet is a powerhouse of dried buttermilk, garlic, onion, dill, and parsley. It’s our shortcut to deep, herby flavor. For a from-scratch version, I have a great blend on the site!
- 1 tsp garlic powder & 1 tsp paprika – We’re amplifying the savory notes and adding a touch of smoky sweetness and color. Smoked paprika is a fantastic upgrade here.
- Salt and pepper, to taste – Always season as you go! The ranch mix has salt, so taste before adding extra.
- 1 cup shredded cheddar cheese – The glorious, melty finish. A sharp cheddar gives the best flavor punch. A Monterey Jack blend would be fabulously gooey, too.
- 4 slices cooked bacon, crumbled (optional but HIGHLY recommended) – Because bacon makes everything better. It adds a salty, crunchy, umami bomb. For a shortcut, use real bacon bits from the store.
- 2 tbsp chopped green onions or fresh parsley (for garnish) – Don’t skip the green! It adds a fresh pop of color and a bright flavor that cuts through the richness perfectly.
Let’s Get Baking: Simple Steps to Deliciousness
Ready? This is where the magic happens, and it’s so straightforward.
- Preheat & Prep: Fire up your oven to 400°F (200°C). Grab your trusty 9×13-inch baking dish and give it a light coating of oil, butter, or a quick spritz of non-stick spray. This is our one-dish wonder stage!
- The Flavor Toss: In a large mixing bowl (bigger than you think you need!), combine your chicken chunks and halved potatoes. Drizzle with the olive oil. Now, sprinkle over the ranch seasoning, garlic powder, paprika, salt, and pepper. Here’s my pro-tip: get your hands in there! Toss and massage everything together for a full minute. You want every nook and cranny coated in that glorious, flavorful oil. Trust me, it makes a difference.
- Stage the Bake: Dump the contents of your bowl into the prepared baking dish and spread everything into a single, even layer. Try not to crowd the pieces too much—we want hot air to circulate for even browning, not steaming.
- Roast to Perfection: Slide that dish into your preheated oven and let it work its magic, uncovered, for 35-40 minutes. Here’s the key hack: around the 20-minute mark, pull the dish out and give everything a good, gentle stir with a spatula. This moves the pieces around so the ones on the edge don’t over-brown and the ones in the center get their turn to crisp up. The bake is done when the chicken is cooked through (no pink inside, 165°F internal temp) and the potatoes are fork-tender.
- The Grand Finale: Now for the fun part! Take the dish out of the oven (carefully, it’s hot!). Immediately sprinkle the shredded cheese and crumbled bacon evenly over the entire surface. Return it to the oven for just 3-5 more minutes. You’re just melting the cheese into a beautiful, bubbly blanket.
- Garnish & Serve: Pull the bake out for the final time. Let it rest for about 3-5 minutes (this helps the juices redistribute in the chicken). Then, scatter the chopped green onions or parsley over the top. This adds that perfect finishing touch of freshness and color. Dig in straight from the dish—I won’t tell!
How to Serve This Hearty Hero
This bake is a hearty meal all on its own, but I love rounding it out with a simple, fresh side to balance the richness. Here are a few of my favorite ways to plate it up:
Family-Style Comfort: Place the entire baking dish right in the center of the table (on a trivet, please!). Let everyone serve themselves. It’s casual, communal, and means fewer dishes for you!
The Perfect Plate: Scoop a generous portion onto a warm plate. The steam rising from the cheesy, ranch-scented chicken and potatoes is part of the experience! I love to add a crisp, green side. A simple wedge salad with a tangy buttermilk dressing (staying on theme!) or a pile of steamed green beans or broccoli with a squeeze of lemon are perfect complements. A slice of crusty bread is also welcome for mopping up any delicious bits left behind.
Make It Your Own: Delicious Twists & Swaps
Got a different protein in the fridge? Cooking for a vegetarian friend? No problem! This recipe is incredibly versatile.
- “Everything But The…” Veggie Load-Up: Toss in a cup of chopped veggies with the potatoes and chicken. Broccoli florets, bell pepper strips, and sliced onions roast beautifully and add color and nutrients.
- Spicy Southwest Kick: Add 1 teaspoon of chili powder and 1/2 teaspoon of cumin to the seasoning mix. Swap the cheddar for pepper jack cheese and garnish with fresh cilantro and a dollop of cool sour cream.
- Creamy Dreamy Version: For an extra-indulgent, saucy bake, pour 1/2 cup of heavy cream or a (10.5 oz) can of cream of chicken soup (undiluted) over the chicken and potatoes before the final cheese sprinkle. It creates a delicious, creamy sauce as it bakes.
- Pork Chop or Sausage Swap: Use 1.5 lbs of boneless pork chops (cut into chunks) or sliced smoked sausage or kielbasa instead of chicken. The cooking time remains largely the same!
- Dairy-Free & Whole30 Friendly: Omit the cheese. Use a compliant ranch seasoning (or make your own without buttermilk powder) and ensure your bacon is sugar-free. The flavors from the herbs and spices are still phenomenal.
Beau’s Kitchen Notebook
Over the years, this bake has seen some fun experiments. One time, I was out of cheddar and used a combo of mozzarella and parmesan—it was a hit! Another time, I added a handful of frozen corn in the last 10 minutes of baking for a sweet, juicy pop. Don’t be afraid to play.
The biggest lesson? That “stir halfway” tip is non-negotiable. I learned the hard way after one side of my potatoes were near-charcoal and the other side was barely tan. A quick stir ensures golden, even perfection on every piece. Also, letting it rest after it comes out of the oven is a game-changer for juicy chicken. Patience, young grasshopper!
Your Questions, Answered
Q: Can I make this ahead of time?
A: Absolutely! You can chop the chicken and potatoes, toss them with the oil and seasonings, and store them covered in the baking dish in the fridge for up to 8 hours. When you’re ready, just pop it in the preheated oven. You may need to add 5-7 extra minutes since it’s starting cold.
Q: My potatoes aren’t getting tender before my chicken is done. Help!
A: This usually means your potato pieces are too big! Aim for 1-inch chunks, max. You can also par-cook them: microwave the halved potatoes for 3-4 minutes before tossing with the chicken and seasoning. This gives them a head start.
Q: Can I use frozen chicken?
A: I don’t recommend it directly. Thawed frozen chicken releases a lot of water, which can steam your ingredients instead of roasting them. For best results, thaw your chicken completely and pat it very dry with paper towels before chopping and seasoning.
Q: How do I store and reheat leftovers?
A: Store cooled leftovers in an airtight container in the fridge for 3-4 days. Reheat in the microwave in 60-second bursts, or better yet, in a 350°F oven for 10-15 minutes until hot. The oven helps keep the potatoes from getting soggy.
Ranch Chicken and Potato Bake: One-Dish Wonder for Busy Nights
Description
Need a dinner that’s filling, flavorful, and doesn’t leave you with a sink full of dishes? This Ranch Chicken and Potato Bake is the answer. Everything roasts together in one pan — juicy chicken, tender potatoes, herby ranch seasoning, melty cheese, and crispy bacon on top. It’s simple enough for busy nights and tasty enough to become a regular favorite.
Ingredients
-
1.5 lb (700 g) boneless skinless chicken breasts or thighs, cut in chunks
-
1.5 lb (700 g) baby potatoes, halved or quartered
-
2 tbsp olive oil
-
1 packet (1 oz) ranch seasoning mix
-
1 tsp garlic powder
-
1 tsp paprika (smoked paprika if you like extra flavor)
-
Salt and black pepper, to taste
-
1 cup shredded cheddar cheese
-
4 slices cooked bacon, crumbled (optional)
-
2 tbsp chopped green onions or parsley (for garnish)
Instructions
-
Preheat oven to 400°F (200°C). Lightly grease a 9×13-inch baking dish.
-
Season everything: In a large bowl, combine chicken and potatoes. Add olive oil, ranch seasoning, garlic powder, paprika, salt, and pepper. Toss well to coat evenly.
-
Spread in dish in a single layer so pieces roast instead of steam.
-
Bake uncovered for 35–40 minutes, stirring once halfway through, until potatoes are fork-tender and chicken is cooked through (165°F / 74°C inside).
-
Add toppings: Sprinkle cheese and bacon over the top.
-
Return to oven for 3–5 minutes until cheese is melted and bubbly.
-
Rest 5 minutes, garnish with green onions or parsley, then serve.
Notes
-
Cut potatoes small (about 1 inch) so they cook at the same speed as the chicken.
-
Stir halfway through baking for even browning.
-
Use chicken thighs if you want extra juicy results.
-
Pat chicken dry first so it roasts instead of steaming.
-
Meal prep friendly: You can season everything and refrigerate up to 8 hours before baking.
-
Extra creamy option: Add 1/2 cup cream or a can of cream of chicken soup before baking.
Nutritional Info (A Rough Guide)
Please note: The following is an approximate estimate per serving (1/4 of the recipe), calculated using chicken breasts and including the optional bacon. Values can vary based on specific ingredients and brands used.
- Calories: ~460
- Protein: 38g (Excellent for keeping you full!)
- Fat: 22g
- Carbohydrates: 28g
- Fiber: 3g
- Sugar: 2g
This dish is a balanced source of lean protein and complex carbs from the potatoes. To lower the fat and calories slightly, use chicken breasts, reduce the cheese to 1/2 cup, and omit the bacon. Remember, food is about nourishment AND joy—this bake delivers on both!
Final Thoughts
And that’s it, my friend! You’re now armed with the recipe for one of the most requested, comforting, and downright easy dinners in my arsenal. This Ranch Chicken and Potato Bake is proof that fantastic flavor doesn’t require fancy techniques or a mountain of dirty pots. It’s about smart, simple cooking that brings people together.
I hope this recipe finds its way into your regular rotation, becoming your own go-to savior on busy nights. Give it a try, make it your own with the variations, and most importantly, enjoy the process and the delicious results. Don’t forget to snap a pic and tag me @Feastical—I love seeing your kitchen creations!
Now, go enjoy that well-earned, delicious dinner. You’ve got this!
With a full belly and a happy heart,
Beau

Meatloaf Muffins: Mini Comfort Food with Big Flavor
Hey, Friend! Let’s Talk About the Coziest Little Upgrade to Dinner
Raise your hand if you’ve ever stood in front of the fridge at 5 PM, stared into the abyss, and thought, “I need something that feels like a hug on a plate, but I do not have the energy for a whole production number.” Yeah, me too. More times than I’d care to admit. That exact feeling is why I became slightly obsessed with reinventing the classics—taking those beloved, soul-warming dishes and giving them a smart, modern twist that fits real, busy life. And today, my friend, we’re tackling the ultimate comfort food icon: meatloaf.
But forget the dense, hefty log that takes over an hour to bake. We’re making Meatloaf Muffins. These adorable, individual portions are the weeknight dinner hero you didn’t know you needed. They bake in under 25 minutes, promise the most irresistible crispy-edged, juicy-centered bite every single time, and are so fun to eat, they’ll make you feel like a kid again (in the best way possible). They’re perfect for meal prep, a hit with picky eaters, and they freeze like a dream. So, tie on your apron, grab your favorite muffin tin, and let’s turn that comforting classic into something fast, fabulous, and packed with big, happy flavor.
The Muffin Tin Epiphany: A Story of Burnt Ends & Big Wins
My love affair with meatloaf muffins started not in some fancy culinary school, but in my first apartment’s kitchen, which was roughly the size of a postage stamp. I was craving my mom’s Sunday meatloaf—that glorious, ketchup-glazed masterpiece—but my patience (and my attention span for a 70-minute bake time) was non-existent. I also had a tragic history of undercooked centers or dried-out edges with the traditional loaf. Disaster seemed imminent.
Then, I glanced at my muffin tin, usually reserved for blueberry bursts. A lightbulb went off. What if…? I portioned my meat mixture into those cups, reasoning that more surface area meant more of those coveted, flavor-packed caramelized edges. Friends, it was a revelation. Twenty minutes later, I pulled out a dozen perfect, personal-sized meatloaves, each one uniformly cooked, gloriously glazed, and begging to be popped right out of the pan. That night, dinner felt like a victory, not a chore. It taught me a lesson I’ve carried ever since: the best kitchen hacks aren’t complicated; they’re just clever, simple pivots that give you your life (and your dinner) back.
Gathering Your Flavor Crew: What Goes In & Why
Every ingredient here has a job, from adding moisture to building that deep, savory base. Here’s your shopping list and my chef-y notes on each player. Don’t stress about being exact—cooking is a feel, not a forensic science.
- 1 lb ground beef (80/20 blend is ideal): The star! The 80/20 blend gives you the perfect balance of lean meat and fat for juicy, flavorful muffins without being greasy. Chef’s Swap: Use half ground beef, half ground pork for incredible richness, or go all turkey/chicken for a leaner option (see variations below!).
- 1/2 cup breadcrumbs (plain): Our binder and texture-builder. They soak up the juices and keep everything tender. Chef’s Hack: No breadcrumbs? Pulse 2 slices of stale bread in a food processor, or use quick oats for a whole-grain twist.
- 1/4 cup milk (any kind): The secret to tenderness! It creates a “panade” with the breadcrumbs, ensuring a soft, not dense, crumb.
- 1 large egg: The glue that holds our little muffin family together. Always crack it into a separate bowl first to avoid shell surprises!
- 1/4 cup finely chopped onion: Sweetness and aroma. Grate it if you’re hiding veggies from kiddos—it virtually disappears.
- 1/4 cup grated carrot (optional but brilliant): My stealth health move. It adds a hint of sweetness, tons of moisture, and a nutrient boost. You won’t taste “carrot,” just amazing juiciness.
- 2 tbsp ketchup (in the mix): Builds a tangy, sweet foundation right into the meat. Trust me.
- 1 tbsp Worcestershire sauce: The umami bomb! It adds a deep, savory, complex flavor that makes the beef sing.
- 1 tsp garlic powder & 1 tsp salt & 1/2 tsp black pepper: The essential flavor trio. Garlic powder distributes more evenly than fresh here. Season confidently!
For That Glorious Glaze:
- 1/4 cup ketchup: The sweet, tangy base of our shiny hat.
- 1 tbsp brown sugar: Caramelizes beautifully for a sticky, finger-licking-good finish.
- 1 tsp Dijon or yellow mustard: Adds a sharp little kick that cuts through the richness. Dijon is my go-to for extra depth.
Let’s Get Building: Your Foolproof, Step-by-Step Guide
This is where the magic happens, and it’s seriously simple. I’ll walk you through each step with my favorite kitchen hacks sprinkled in.
- Preheat & Prep. Fire up your oven to 375°F (190°C). This hot temperature is key for getting those crispy edges. While it heats, grab your standard 12-cup muffin tin and give it a generous coat of non-stick spray or a brush of oil. This is non-negotiable for easy release later!
- The Gentle Mix. In a large bowl, combine all of your meatloaf ingredients: the beef, breadcrumbs, milk, egg, onion, carrot, ketchup, Worcestershire, and seasonings. Now, here’s the most important tip of the day: use your hands. It’s the best tool for the job. Mix gently until everything is just combined. Overmixing is the enemy of tender meatloaf—it makes it tough. Think “uniform,” not “pasty.”
- Portion with Panache. Divide your mixture evenly among the 12 muffin cups. I like to use a large cookie scoop for neatness and speed, but spoons work great too. Gently press the mixture down into each cup to create a flat top—this gives us a perfect canvas for our glaze.
- Whisk & Glaze. In a small bowl, stir together the ketchup, brown sugar, and mustard until smooth. Then, using a spoon, generously top each meatloaf muffin with this glossy goodness. Don’t be shy—this glaze is the flavor crown!
- Bake to Perfection. Slide the tin into your preheated oven and bake for 20-25 minutes. You’re looking for the glaze to be bubbly and set, and the internal temperature to reach 160°F (71°C) on an instant-read thermometer. If you don’t have one, look for the juices to run clear. This quick bake time is the whole point—dinner in a flash!
- The Crucial Rest. Once out of the oven, let the muffins rest in the tin for 5 minutes. This allows the juices to redistribute, so they don’t all run out when you pop them out. Then, run a small knife around the edges and lift them out with a spoon or fork. And boom—dinner is served.
How to Plate Your Mini Masterpieces
These muffins are incredibly versatile servers! For the ultimate comfort food plate, nestle 2-3 muffins next to a mountain of creamy mashed potatoes and a simple side of steamed green beans or roasted broccoli. The mini size makes them perfect for “pick-your-own” dinner nights—set out a muffin tin (cooled, of course!) with different sides in each cup. For a fun lunchbox or picnic treat, let them cool completely and pack them like savory cupcakes. You can even skewer them with a pretzel stick for a party appetizer and dip them in extra ketchup or a creamy horseradish sauce. However you serve them, that first bite of crispy, glazed edge giving way to the tender, savory center is pure, unadulterated joy.
Make It Your Own: 5 Tasty Twists on the Theme
The basic recipe is a flawless canvas. Here’s how to paint your own flavor masterpiece:
- Italian-Style: Swap the Worcestershire for 2 tbsp of grated Parmesan and 1 tsp of Italian seasoning. Use marinara sauce instead of ketchup for the glaze, and top with a little mozzarella in the last 5 minutes of baking.
- BBQ Bacon Cheddar: Mix in 1/2 cup of shredded sharp cheddar and 1/3 cup of cooked, crumbled bacon into the meat. Use your favorite BBQ sauce instead of the ketchup glaze.
- Turkey & Herb: Use ground turkey (93% lean) and add 2 tbsp each of fresh, chopped parsley and chives. The fresh herbs brighten up the leaner meat beautifully.
- Spicy Southwest: Add 1/2 cup of drained black beans (mashed slightly), 1/4 cup of corn, and a diced jalapeño to the mix. Use a smoky chipotle hot sauce in place of the Worcestershire.
- Gluten-Free/Dairy-Free: Super easy! Use gluten-free oats or gluten-free breadcrumbs, and any unsweetened non-dairy milk (almond or oat work great). The recipe works perfectly.
A Few More Nuggets from My Kitchen
Over the years, I’ve made hundreds of these muffins (my freezer is a testament to this fact). A few lessons learned: First, if you’re using a lean meat like turkey, add an extra tablespoon of milk or a splash of olive oil to the mix to guarantee moisture. Second, don’t skip grating the carrot if you have one—it’s my not-so-secret weapon. And finally, this recipe has evolved into my “clean out the fridge” hero. A few leftover roasted mushrooms? Chopped spinach? Bits of bell pepper? Finely chop them and toss them in. The muffin structure is forgiving and friendly. It’s less of a rigid recipe and more of a delicious, portion-controlled concept.
Your Questions, Answered!
Q: Can I make these ahead of time?
A: Absolutely! You can assemble the raw muffins in the tin, cover tightly, and refrigerate for up to 24 hours before baking. Add 1-2 minutes to the bake time since they’ll be going in cold. You can also freeze them unbaked—freeze solid in the tin, then pop out and store in a freezer bag for up to 3 months. Bake from frozen, adding 10-15 minutes.
Q: Why are my muffins swimming in grease?
A: This usually means your ground beef had a higher fat content (like 73/27). No worries! Just use a spoon to carefully drain any excess fat from the muffin cups about halfway through baking, or simply choose a leaner blend next time.
Q: Can I use a different pan?
A: For sure! A standard loaf pan will take 50-60 minutes. For mini loaves, use a mini loaf pan and bake for 30-35 mins. The muffin tin is just the fastest, most portion-friendly option.
Q: How do I store and reheat leftovers?
A: Let them cool, then store in an airtight container in the fridge for 3-4 days. Reheat in the microwave for 60-90 seconds, or back in a 350°F oven for about 10 minutes to re-crisp the edges.

Meatloaf Muffins: Mini Comfort Food with Big Flavor
Description
Some nights you want a dinner that feels warm and comforting — but you don’t want to wait an hour for it to cook. That’s where Meatloaf Muffins come in. They’re everything you love about classic meatloaf, just baked in a muffin tin for quicker cooking, crispier edges, and perfect portions. Great for busy weeknights, meal prep, and picky eaters too.
Ingredients
For the meatloaf:
-
1 lb (450 g) ground beef (80/20 preferred)
-
1/2 cup breadcrumbs (or quick oats)
-
1/4 cup milk
-
1 large egg
-
1/4 cup finely chopped onion
-
1/4 cup grated carrot (optional, for moisture)
-
2 tbsp ketchup
-
1 tbsp Worcestershire sauce
-
1 tsp garlic powder
-
1 tsp salt
-
1/2 tsp black pepper
For the glaze:
-
1/4 cup ketchup
-
1 tbsp brown sugar
-
1 tsp Dijon or yellow mustard
Instructions
-
Preheat oven to 375°F (190°C). Grease a 12-cup muffin tin well.
-
Make the meat mixture: In a large bowl, combine beef, breadcrumbs, milk, egg, onion, carrot, ketchup, Worcestershire sauce, and seasonings.
-
Mix gently with your hands or a fork just until combined. Do not overmix or the muffins will be dense.
-
Fill the muffin tin: Divide mixture evenly into the 12 cups and lightly press the tops flat.
-
Make the glaze: Stir ketchup, brown sugar, and mustard in a small bowl.
-
Top each muffin with a spoonful of glaze.
-
Bake for 20–25 minutes, until cooked through (internal temp 160°F / 71°C).
-
Rest 5 minutes before removing from the pan. Serve warm.
Notes
-
Don’t overmix — this is the #1 secret to tender meatloaf.
-
Use a cookie scoop for even portions.
-
Add moisture for lean meats: If using turkey or chicken, add 1 extra tablespoon milk or a little olive oil.
-
Easy veggie boost: Finely chopped spinach, bell peppers, or mushrooms mix in well.
-
Make ahead: Store unbaked muffins in the fridge up to 24 hours before cooking.
-
Freezer friendly: Freeze cooked muffins up to 3 months.
Nutritional Snapshot (Per Muffin)
Remember, this is an estimate based on the standard recipe with 80/20 beef. Your specific ingredients will cause variations.
- Calories: ~210
- Protein: 15g (Great for staying full!)
- Fat: 12g
- Carbohydrates: 9g
- Fiber: 1g
For a leaner option, using 93% lean ground turkey reduces the fat to about 7g and calories to ~180 per muffin, while keeping the protein high.
Final Thoughts
And there you have it—the humble meatloaf, transformed into a quick, crave-worthy, and downright delightful dinner solution. This recipe is all about removing the stress and maximizing the joy of a home-cooked, comforting meal. It’s proof that you don’t need hours to create something that truly satisfies the soul. I hope these little muffins find a regular spot in your dinner rotation and bring as much happy, hassle-free comfort to your table as they have to mine. Now, go preheat that oven! And when you make them, tag me over on Instagram @feastical—I love seeing your kitchen creations. Happy cooking!
Beau

Egg White Veggie Muffins with Spinach & Feta (Make-Ahead Brunch)
Your Brunch Game Just Got a Major (Delicious) Upgrade
Hey friends, Beau here from Feastical! Let’s talk about a classic kitchen dilemma: you want to serve something impressive, wholesome, and downright tasty for brunch, but you also don’t want to be chained to the stove while your guests are sipping mimosas and having all the fun without you. Sound familiar? I’ve been there more times than I’ve burnt toast (which is saying something).
That’s exactly why I’m utterly devoted to these little kitchen miracles: Egg White Veggie Muffins with Spinach & Feta. Think of them as your culinary best friends—they’re light, fluffy, packed with colorful veggies and tangy cheese, and they bake up all at once while you’re free to… well, be the awesome host you are. They’re the ultimate make-ahead, grab-and-go, please-almost-everyone hero we all need in our recipe arsenal.
Whether you’re feeding a hungry crowd, meal prepping for a busy week, or just craving a hit of protein without the fuss, these muffins deliver. They’re simple without being boring, healthy without tasting like “health food,” and they honestly look so cheerful on a platter. So, preheat that oven, grab your favorite mug of coffee, and let’s make a brunch (or breakfast, or snack) that’s as smart as it is satisfying.
Brunch, Chaos, and a Lesson in Make-Ahead Magic
My love for these muffins was forged in the beautiful chaos of a surprise Sunday gathering. Picture it: my phone blows up at 10 AM. Friends, hearing rumors of a recent farmers’ market haul, are “just popping by.” My fridge is full of gorgeous, fresh produce, but my counter is empty. Cue the internal panic.
I remembered a trick my grandma used for busy holiday mornings—baking eggs in a muffin tin. I grabbed my carton of egg whites, a handful of spinach that was begging to be used, some confetti-like bell peppers, and my forever-crush, a block of feta. In a whirlwind of chopping and whisking, I had two trays in the oven. Twenty minutes later, I was pulling out puffy, golden-topped muffins just as the doorbell rang. The smell was incredible. We piled them on a big board with some fruit and yogurt, and brunch was saved. No stress, no last-minute scrambling at the stove—just good food and better company. That day, these muffins graduated from a handy recipe to a brunch-time legend in my kitchen.
Gathering Your Flavor Squad
Here’s the beautiful part: this recipe is incredibly flexible. This is your base camp—feel free to explore once you’ve tried it! Here’s what you’ll need:
- 1½ cups liquid egg whites – The superstar! I love the convenience of the carton for this. It’s no-fuss and gives a consistently light texture. Chef’s Tip: If you’re using whole eggs, you’ll need about 10 large eggs, separated. Save those gorgeous yolks for a rich hollandaise or custard!
- 1 cup fresh spinach, finely chopped – We’re wilting it down, so it blends right in, giving you that lovely green hue and a mild, earthy flavor. Don’t use frozen here unless you squeeze every last drop of water out—soggy muffins are not the goal.
- ½ cup bell pepper, diced – I use red or orange for a sweet pop of color and flavor. Green works too for a more savory bite. This is your confetti!
- ¼ cup onion, finely diced – Yellow or red onion adds a necessary savory foundation. If raw onion is too strong for you, give it a quick 2-minute sauté in a tiny bit of oil to mellow it out first.
- ⅓ cup crumbled feta cheese – The salty, tangy, creamy element that makes these irresistible. It doesn’t melt away completely, giving you little pockets of briny goodness. Substitution Tip: Goat cheese or dairy-free crumbles work wonderfully here.
- ¼ tsp garlic powder – Trust me on the powder! Fresh garlic can sink and burn. The powder distributes flavor evenly throughout every single bite.
- Salt and black pepper, to taste – Go easy on the salt at first, as the feta is plenty salty. I do about ¼ tsp of kosher salt and a good few cracks of black pepper.
- Cooking spray or olive oil – For greasing the pan. Non-stick spray is your best insurance policy for easy release. Do not skip this step!
Let’s Build Some Muffin Magic: Step-by-Step
Ready? This is where the fun happens. It’s so simple, you might just start dancing in the kitchen. (I fully support this.)
- Preheat & Prep: Fire up your oven to a cozy 350°F (175°C). Now, take your 12-cup muffin tin and give it a really good coat of cooking spray. Get in the corners and up the sides! This little act of kindness will pay you back tenfold when your perfect muffins pop right out. Chef’s Hack: For ultimate non-stick power, you can use silicone muffin liners—no greasing needed, and they pop out like a dream.
- Veggie Distribution Party: This is my favorite part. Evenly divide your finely chopped spinach, bell pepper, onion, and crumbled feta among the 12 muffin cups. I like to do this by eye—a little pinch of this, a little sprinkle of that. It feels rustic and ensures every muffin gets a bit of everything. Pro Tip: Sprinkle the feta last so some of it stays on top for a gorgeous golden-brown finish.
- Whisk the Whites: In a medium bowl or a large liquid measuring cup (which makes pouring easier!), vigorously whisk your liquid egg whites with the garlic powder, salt, and pepper. You’re not looking for stiff peaks, just a bit of frothiness and total incorporation of the seasonings. This aerates them just enough for a lovely, light texture.
- The Pour: Slowly and carefully pour the seasoned egg whites over the veggie-cheese mix in each cup. Aim to fill each one about ¾ of the way full. They puff up a little, but not like a cake, so it’s safe to go nearly to the top if you have extra. Using the measuring cup with a spout gives you so much control and less mess!
- Bake to Perfection: Slide your masterpiece into the preheated oven. Set your timer for 18 minutes and resist the urge to open the door! Peeking lets the heat escape. At 18 minutes, check them. They should be set, with the tops just turning a very light golden, especially around the feta. If they still jiggle, give them another 2-4 minutes. Total bake time is usually 18-22 minutes.
- The Grand Release: Take the tin out and let it cool on a wire rack for a solid 5 minutes. This is crucial! It lets the muffins settle and firm up, making them much easier to remove. Then, run a small offset spatula or a butter knife gently around the edges of each muffin and lift them out. Behold your beautiful, fluffy creations!
How to Serve These Little Beauties
Presentation is part of the joy! For a brunch spread, I love piling them high on a rustic wooden board or a big, colorful platter. Tuck in some fresh herb sprigs (dill or chives are perfect) and maybe some cherry tomatoes or grapes around the edges for a burst of color.
They’re fantastic warm, at room temperature, or even cold straight from the fridge. Offer a couple of dipping sauces on the side—a creamy herbed yogurt sauce (just Greek yogurt, lemon, dill, salt) or a spicy sriracha mayo takes them to a whole new level.
For a complete meal-prep breakfast, let them cool completely, then store 2-3 in a container. Pair them with a handful of baby carrots, a piece of fruit, or a small whole-grain muffin. You’ve got a balanced, delicious breakfast ready in seconds all week long.
Make It Your Own: 5 Flavor Twists to Try
The basic formula is your playground. Once you’ve mastered the classic, try one of these delicious spins:
- The “Everything Bagel”: Swap the feta for a creamy schmear of whipped cream cheese. Before baking, sprinkle the top of each muffin with everything bagel seasoning. Unreal flavor!
- Mediterranean Sunrise: Use sun-dried tomatoes (chopped) and kalamata olives instead of bell pepper. Add a teaspoon of dried oregano to the egg whites. Swap feta for crumbled goat cheese.
- Southwest Fiesta: Add a handful of black beans (rinsed and drained) and some canned green chiles to the veggie mix. Use a pepper jack cheese instead of feta, and add a pinch of cumin to the eggs.
- Lean & Green Machine: Double the spinach and add ½ cup of chopped broccoli florets. A tablespoon of nutritional yeast added to the egg mix gives a great, cheesy flavor boost without the dairy.
- Carnivore’s Delight: For my meat-loving friends, add ½ cup of finely diced, cooked ham, crumbled cooked bacon, or browned breakfast sausage to the veggie mix. The fat and salt from the meat make these incredibly savory.
A Few Extra Nuggets from My Kitchen
Over the years, I’ve learned a thing or two about these reliable muffins. First, they freeze like a dream. Cool them completely, pop them in a single layer on a baking sheet to freeze solid, then transfer to a freezer bag. Reheat in the microwave for 60-90 seconds straight from frozen for a instant breakfast.
Second, my partner likes to call these my “clean-out-the-fridge” special, and they’re not wrong! That last handful of cherry tomatoes? Chop ’em up. A lonely mushroom? Dice it small. A few stalks of asparagus? You get the idea. As long as you keep the total veggie volume roughly the same and chop things finely, you really can’t go wrong. Cooking should be fun, not rigid. Now, go create your own version!
Your Questions, Answered
Q: My muffins stuck to the pan! Help!
A: Ah, the classic pitfall. Grease, grease, grease! Next time, be generous with that cooking spray or use silicone liners. Also, the 5-minute cool-down is non-negotiable—it lets the proteins relax and release. If they still stick, a thin, flexible silicone spatula is your best friend for prying them out gently.
Q: Can I use whole eggs instead of just egg whites?
A: Absolutely! You’ll need about 6-7 large whole eggs, whisked. The texture will be slightly richer and more “eggy” (in a good way), and they’ll be a bit more yellow in color. They’re delicious!
Q: Why are my muffins watery or soggy?
A: Watery veggies are the usual suspect. Always use fresh spinach (not frozen/thawed) and make sure your bell peppers and onions are diced, not puréed. If you’re using a veggie like zucchini, salt it and squeeze out the water first. Also, ensure they are fully cooked—a toothpick inserted should come out clean.
Q: How long do they last in the fridge?
A: Stored in an airtight container, they’re perfect for 3-4 days. They might release a tiny bit of moisture, but just pat them dry with a paper towel before reheating. For longer storage, freeze them for up to 2 months.

Egg White Veggie Muffins with Spinach & Feta (Make-Ahead Brunch)
Description
If you want a brunch dish that looks great, tastes fresh, and doesn’t keep you stuck at the stove, these Egg White Veggie Muffins are a smart go-to. They’re light, fluffy, loaded with colorful vegetables, and boosted with tangy feta. Perfect for brunch spreads, busy weekday breakfasts, or meal prep — and they bake all at once in one pan.
Ingredients
-
1½ cups liquid egg whites
-
1 cup fresh spinach, finely chopped
-
½ cup bell pepper, small dice
-
¼ cup onion, finely diced
-
⅓ cup crumbled feta cheese
-
¼ tsp garlic powder
-
Salt and black pepper, to taste
-
Cooking spray or olive oil for greasing pan
Optional add-ins:
-
Chopped mushrooms
-
Cherry tomatoes (seeded, diced)
-
Fresh herbs (dill, chives, parsley)
Instructions
-
Preheat oven
Heat oven to 350°F (175°C). Generously grease a 12-cup muffin tin or use silicone liners. -
Distribute fillings
Divide spinach, bell pepper, onion, and feta evenly among muffin cups. -
Season egg whites
In a bowl or large measuring cup, whisk egg whites with garlic powder, salt, and pepper until lightly frothy. -
Fill cups
Pour egg whites into each cup until about ¾ full. -
Bake
Bake for 18–22 minutes until set and lightly golden on top. Centers should not jiggle. -
Cool & remove
Rest 5 minutes, then run a knife around edges and lift out.
Notes
-
Grease the pan well — egg whites stick more than whole eggs.
-
Chop veggies small so muffins hold together cleanly.
-
Avoid watery vegetables unless pre-cooked or squeezed dry.
-
Don’t overbake — they can turn rubbery if left too long.
-
Cool before removing for easier release.
A Quick Look at the Good Stuff
While I’m all about flavor first, it feels great to know you’re fueling your body well. These muffins are a fantastic source of high-quality, complete protein from the egg whites, which helps keep you full and satisfied. The veggies add a dose of vitamins (like Vitamin C from the peppers and Vitamin A from the spinach) and a tiny bit of fiber.
Using egg whites keeps the fat and cholesterol lower than a whole-egg version, and the feta provides calcium and a flavorful punch so you don’t need a lot. They’re naturally low-carb and can easily be made dairy-free with a simple cheese swap. Remember, this is an approximate breakdown per muffin (makes 12), based on the exact ingredients listed. Your specific brands and any variations will alter it slightly.
Per Muffin: Calories: 55 | Protein: 7g | Carbohydrates: 2g | Fat: 2g | Fiber: 0.5g
The Last Bite
And there you have it, friends—my not-so-secret weapon for stress-free, crowd-pleasing, feel-good food. These Egg White Veggie Muffins are more than just a recipe; they’re a strategy for enjoying the moment, whether that’s a lazy Sunday with loved ones or a hectic Tuesday morning dash out the door.
I hope you bake up a batch and make them your own. Tag me @Feastical if you do—I love seeing your kitchen creations! Remember, good food doesn’t have to be complicated to be incredible. It just has to be made with a little intention and a lot of heart. Now, go enjoy that brunch (and that mimosa). You’ve earned it.
Until next time, keep it flavorful,
Beau

Easter Rocky Road Cheesecake Bars : No-Bake Chocolate Marshmallow Dessert
Easter Rocky Road Cheesecake Bars – Your New No-Bake Tradition
Hey friends, Beau here from Feastical! Pull up a stool and let’s talk about the best part of any spring gathering: the dessert table. Now, I love a project, but when the sun is shining and you’d rather be hunting for eggs (or hiding from your relatives), the last thing you need is a fussy, oven-bound recipe. That’s where these Easter Rocky Road Cheesecake Bars swoop in to save the day.
Imagine this: a buttery chocolate biscuit base, a cloud of vanilla-specked no-bake cheesecake, and a glorious, chunky rocky road topping dripping with melted chocolate, pastel marshmallows, and crunchy nuts. It’s a texture dreamland—creamy, crunchy, chewy, and chocolatey all in one bite. These bars are the edible equivalent of your favorite cozy sweater: familiar, comforting, and always a good idea. They scream celebration without you having to scream in the kitchen. Whether you’re hosting a big Easter brunch, need a show-stopping contribution, or just want to treat yourself to something special, this no-bake wonder is your ticket to dessert glory. So, let’s ditch the complicated baking and make something magically simple together.
Why This Recipe Feels Like Spring
This recipe takes me right back to my grandma’s linoleum-floored kitchen. Easter was always chaos—cousins everywhere, the smell of ham in the air, and a giant, slightly lopsided bunny cake as the centerpiece. But my favorite memory? The “kiddie table” dessert spread. It was an unspoken rule: the fancier the adult desserts, the more fun ours had to be. Think bowls of chocolate eggs, rainbow sprinkles, and those irresistible pastel marshmallows.
My aunt would always bring her famous rocky road fudge, a concoction so rich and chunky we’d be bouncing off the walls. This cheesecake bar is my grown-up (but not too grown-up) homage to that feeling. It captures that same playful, nostalgic joy but in a sleek, sliceable form. It’s the perfect bridge between the elegance of a cheesecake and the pure, unadulterated fun of a candy-packed treat. Every time I make it, I get a little hit of that childhood excitement. Food memories are the best kind, aren’t they?
Gathering Your Rocky Road Cheesecake Crew
Here’s the beautiful part: no fancy ingredients required. This is all about pantry heroes and a few festive touches. Let’s break it down:
For the Chocolate Biscuit Base:
- 250 g Chocolate Digestive Biscuits: The classic UK choice for a reason—they have a perfect hint of wheaty sweetness that pairs with chocolate like a dream. Chef’s Insight: No digestives? Graham crackers or Oreos (sans filling) work brilliantly. Just crush them until they resemble fine sand.
- 120 g Unsalted Butter, melted: This is the glue. Using unsalted lets you control the salt level. Substitution Tip: For a dairy-free base, coconut oil works in a pinch, though the flavor will be subtly different.
For the Luxurious No-Bake Cheesecake Layer:
- 300 g Full-Fat Cream Cheese, softened: Full-fat is non-negotiable here, friends. It sets firmer and delivers that iconic rich, tangy flavor. Leave it on the counter for a good hour before you start.
- 200 ml Heavy Whipping Cream: This is what gives the layer its light, mousse-like texture. Make sure it’s cold for the best whip.
- 100 g Powdered Sugar: Also called icing sugar. It dissolves instantly, preventing any graininess. Sift it if it’s lumpy!
- 1 tsp Pure Vanilla Extract: The soul of the cheesecake. The real stuff makes a world of difference.
For the Festive Rocky Road Topping:
- 200 g Milk or Dark Chocolate, melted: Your choice! Milk chocolate is sweeter and more kid-friendly, while dark (around 70%) adds a sophisticated depth. Chef’s Hack: Melt it slowly in a bowl over simmering water or in short bursts in the microwave for the smoothest result.
- 150 g Mini Marshmallows: Go for pastel colors to make it Easter-perfect! The mini size distributes the gooeyness perfectly.
- 80 g Chopped Nuts (Almonds or Peanuts): For that essential crunch. Toast them lightly first for an incredible flavor boost.
- 50 g Mini Chocolate Eggs or Candy Pieces: The festive confetti! This is where you can get creative with seasonal sprinkles, chopped-up creme eggs, or even little bunny-shaped chocolates.
Let’s Build Some Dessert Magic: Step-by-Step
Ready? Throw on some tunes, clear some counter space, and let’s get to it. This is the fun part.
- Crush & Conquer the Base: Pop your biscuits into a sturdy zip-top bag. Now, channel any lingering stress and go at them with a rolling pin until you have fine crumbs. No bag? A food processor works in seconds. Pour the crumbs into a bowl, drizzle in the melted butter, and mix until it looks like wet sand. Tip it into your lined 8×8 or 9×9 inch pan and press it down firmly and evenly with the bottom of a glass or a measuring cup. This compact layer is your foundation—make it strong! Slide it into the fridge to set up while you make the filling.
- Whip Up the Cheesecake Cloud: In a large bowl, beat the softened cream cheese with an electric mixer until it’s completely smooth and lump-free. Scrape down the sides! Add the powdered sugar and vanilla and beat again until silky. Now, in a separate, clean bowl, whip the cold heavy cream to soft peaks. Pro-Tip: Don’t overwhip it here; it should be billowy and just hold its shape. Gently fold the whipped cream into the cream cheese mixture using a spatula. Use big, sweeping folds from the bottom up until no white streaks remain. You’ve just created no-bake cheesecake gold.
- Layer & Smooth: Pull your chilled base from the fridge. Dollop the cheesecake mixture on top and spread it out into one gorgeous, even layer. A small offset spatula is your best friend for this, but the back of a spoon works too. Give the pan a gentle tap on the counter to settle everything and remove air bubbles.
- Create the Rocky Road Topper: In a medium bowl, gently mix your melted (but slightly cooled) chocolate with the mini marshmallows, chopped nuts, and most of your chocolate eggs/candy (save a few for garnish!). The goal is to coat everything in a glossy chocolate cloak. Spoon this irresistible mixture over the cheesecake layer and spread it gently. Don’t press down hard—you want a textured, rocky landscape! Scatter the reserved candies on top for a bakery-worthy finish.
- The Patient Chill: This is the hardest part. Cover the pan and refrigerate for at least 4 hours, but ideally overnight. This patience pays off BIG TIME, allowing all the layers to firm up perfectly so you get those clean, beautiful slices.
- Slice & Serve with Style: When it’s set, use the parchment paper to lift the whole slab out of the pan. Warm a sharp knife under hot water, dry it quickly, and slice into bars or squares. Wipe the knife clean and re-warm between cuts for super clean edges. Admire your masterpiece, then dig in!
How to Serve These Show-Stopping Bars
Presentation is part of the fun! Place these bars on a beautiful platter or a cake stand. For an extra touch of spring, scatter a few extra pastel marshmallows or edible flowers around the base. They’re rich, so small squares are perfect. I love serving them with a pot of strong coffee for the adults or a glass of cold milk for the kids. They’re a complete dessert on their own, but if you’re feeling extra, a tiny dollop of whipped cream or a drizzle of salted caramel sauce never hurt anybody. Remember, the vibe is festive, fun, and utterly shareable.
Make It Your Own: Fun Variations to Try
The beauty of this recipe is its adaptability. Here are a few ways to twist it up:
- Salted Caramel Pretzel Twist: Swap the nuts for crushed salted pretzels and drizzle the top with store-bought or homemade salted caramel sauce after slicing. Sweet, salty, crunchy perfection.
- Cookies & Cream Dream: Use Oreos (whole, filling and all) for the base. In the topping, use white chocolate and add in some extra crushed Oreo pieces along with the marshmallows.
- Fruity Spring Flare: Add 50g of dried cranberries or chopped dried apricots to the rocky road topping for a chewy, tangy contrast to all that chocolate.
- Nut-Free & Fabulous: Simply omit the nuts! Replace them with extra mini eggs, or add in some toasted coconut flakes or rice cereal for that essential crunch.
- Decadent Dark Chocolate Orange: Use dark chocolate for the topping and add the zest of one orange to the cheesecake layer. Garnish with candied orange peel for a sophisticated, grown-up flavor.
Beau’s Kitchen Notes & Stories
I’ve made this recipe more times than I can count, and it’s evolved from a messy, thrown-together trifle into these elegant bars. The biggest lesson? Patience is a ingredient. That long chill is not a suggestion—it’s the law for perfect slices. One time, in a hurry for a picnic, I only chilled it for two hours. Let’s just say we ate delicious, spoonable “rocky road cheesecake *puddle*” out of bowls with graham crackers. Still tasty, but not the showpiece I wanted! Now, I always make it the day before. It’s one less thing to worry about, and the flavor actually improves. Also, a warm knife is the secret weapon for pro-level slices. Trust me on this one.
Your Questions, Answered
- Q: Can I freeze these cheesecake bars?
A: Absolutely! Once set, slice them, then place on a tray and flash-freeze for an hour before transferring to a container with parchment between layers. They’ll keep for up to 2 months. Thaw in the fridge overnight. - Q: My cheesecake layer is too soft. What happened?
A: This usually means it didn’t chill long enough, or the cream was under-whipped. Make sure your cream is very cold before whipping, and give it that full 4+ hour chill. The cream cheese must also be full-fat for proper structure. - Q: Can I use a different pan size?
A: Yes, but it will change the bar thickness. A 9×9 pan will give you thinner, more numerous bars (chill time may be less). An 8×8 gives classic, thicker bars. A springform pan works for a circular “cake” style—just be sure to line it. - Q: The chocolate in my topping seized when I mixed it. Help!
A: Ah, the dreaded seize! Make sure your melted chocolate has cooled slightly (it should be warm, not hot) before adding the other ingredients. Also, ensure your marshmallows and nuts are dry (not damp). If it happens, try stirring in a tiny teaspoon of neutral oil (like vegetable) to smooth it back out.

Easter Rocky Road Cheesecake Bars : No-Bake Chocolate Marshmallow Dessert
Description
If you want a festive dessert without turning on the oven, these Easter Rocky Road Cheesecake Bars are the perfect solution. They combine a chocolate cookie base, a creamy no-bake cheesecake layer, and a chunky rocky road topping loaded with chocolate and marshmallows. They’re colorful, fun, and ideal for spring gatherings, potlucks, or holiday dessert tables — with minimal effort and maximum payoff.
Ingredients
Chocolate Base
-
2½ cups (250 g) chocolate biscuits or graham crackers, crushed
-
½ cup (120 g) unsalted butter, melted
No-Bake Cheesecake Layer
-
10 oz (300 g) full-fat cream cheese, softened
-
¾ cup (100 g) powdered sugar
-
1 cup (200 ml) cold heavy whipping cream
-
1 tsp vanilla extract
Rocky Road Topping
-
7 oz (200 g) milk or dark chocolate, melted and slightly cooled
-
1½ cups (150 g) mini marshmallows
-
½ cup (80 g) chopped almonds or peanuts (optional)
-
⅓ cup (50 g) mini chocolate eggs or Easter candy pieces
Instructions
-
Make the base
Mix crushed biscuits with melted butter until combined. Press firmly into a lined 8×8 inch (20×20 cm) pan. Chill 20 minutes. -
Prepare cheesecake layer
Beat cream cheese until smooth. Add powdered sugar and vanilla and mix well. -
Whip cream
In a separate bowl, whip cold cream to soft peaks. Gently fold into the cream cheese mixture until smooth and fluffy. -
Layer
Spread cheesecake mixture evenly over the chilled base. Return to fridge while you prepare the topping. -
Rocky road topping
Stir marshmallows, nuts, and candy into the melted chocolate until coated. Spoon gently over the cheesecake layer and spread lightly. -
Chill
Refrigerate at least 4 hours (overnight is best) until fully set. -
Slice
Lift out using parchment, cut into bars with a warm knife, and serve.
Notes
-
Use full-fat cream cheese for proper setting.
-
Cool the melted chocolate slightly before mixing in marshmallows to prevent melting them.
-
Press the base very firmly so bars hold together when sliced.
-
Warm your knife under hot water and wipe dry between cuts for clean edges.
-
Make one day ahead — flavor and texture improve overnight.
Nutritional Information*
*Please note: This is an approximate estimate generated from the ingredients used. For precise dietary needs, calculate with your specific brands.
Per Serving (1 bar, based on 12 servings): Calories: ~380 kcal | Protein: 6g | Carbohydrates: 34g | Sugars: 25g | Fat: 25g | Saturated Fat: 14g | Fiber: 2g | Sodium: 180mg
This is a celebratory treat, meant to be enjoyed mindfully and shared. The richness means a little goes a long way in satisfaction!
Final Thoughts from My Kitchen to Yours
And there you have it—my ultimate feel-good, no-fuss Easter dessert. These Rocky Road Cheesecake Bars are more than just a recipe; they’re a reminder that the best food brings joy, connects us to memories, and doesn’t have to be complicated to be incredible. I hope this becomes a bright spot in your spring celebrations, a recipe you come back to when you need something guaranteed to make people smile.
If you make them (and I really hope you do!), tag me over on @Feastical or leave a comment on the blog. I love seeing your creations and hearing your kitchen stories. Now, go forth, crush those biscuits, and make something deliciously spectacular. Happy Easter, and happy cooking!
With love and a full spoon,
Beau
Zesty Lemon Chicken Wraps : Bright, Fresh, and Satisfying
Zesty Lemon Chicken Wraps: Your New Go-To for a Bright, Satisfying Bite
Hey friends, Beau here from Feastical! Let’s talk about those days when you want something that tastes incredible but doesn’t require an incredible amount of effort. You know the vibe: you’re buzzing with energy but short on time, craving something fresh that won’t weigh you down, but still packs a serious flavor punch. You stare into the fridge, hoping for inspiration to strike. Well, consider this your sign to grab a lemon and some chicken, because we’re about to make magic happen.
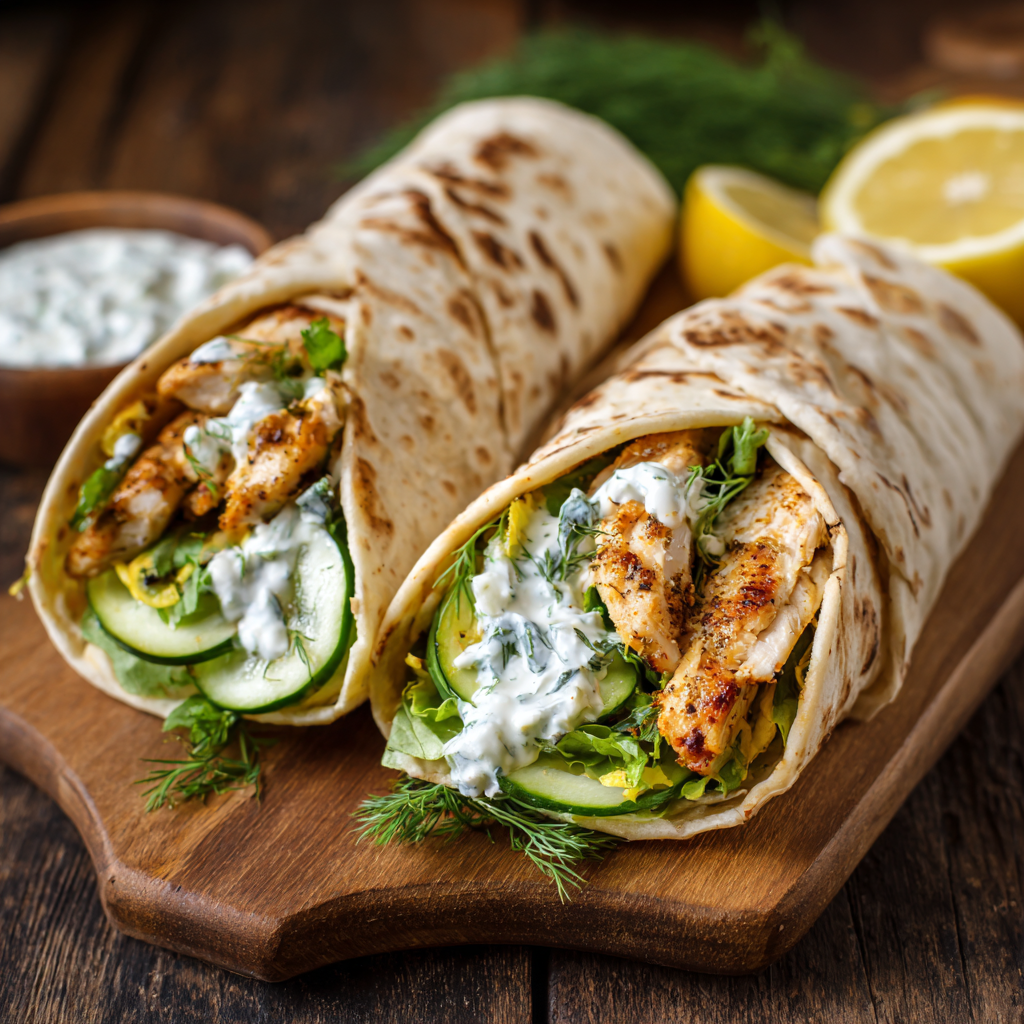
These Zesty Lemon Chicken Wraps are my culinary sunshine on a plate—or, well, in a handheld bundle. They’re the perfect harmony of tangy, savory, creamy, and crunchy. Imagine perfectly seared chicken strips, kissed with lemon and garlic, tucked into a soft wrap with cool, crisp veggies, and all of it brought together with a herby yogurt sauce that’s so good you’ll want to put it on everything. It’s the kind of meal that feels both light and wholly satisfying, a trick I love to pull off in my kitchen.
Whether you’re packing a lunch that’ll make your coworkers jealous, needing a no-fuss dinner after a long day, or putting together a spread for a casual gathering, these wraps are your MVP. They’re forgiving, flexible, and famously delicious. So, tie on your apron (or don’t, I’m not judging), and let’s create something downright delightful together.
The Picnic That Started It All
This recipe always takes me back to a spontaneous beach picnic a few summers ago. A couple of friends texted last minute, the sun was shining, and the only rule was “bring something you can eat with your hands.” I raided my kitchen, throwing together what I had: a lone lemon, some chicken breasts, yogurt, and whatever veggies were hanging out in the crisper. I whipped up a quick marinade, cooked the chicken while I chopped, and bundled everything into tortillas.
We sat on the sand, wrapped in blankets, and unwrapped these bundles of joy. The moment that tangy, herby, fresh bite hit, everyone went quiet—that good, focused “mmm” kind of quiet. One friend, mouth full, declared it the best thing she’d eaten all week. It wasn’t fancy. There were no rare ingredients. It was just simple, honest food made with a dash of “what the heck, let’s try this.” That’s the spirit I try to bring to Feastical every single day. Food doesn’t need to be complicated to be memorable; it just needs to be made with a little love and a lot of flavor.
Gathering Your Flavor All-Stars
Here’s the beautiful part: this recipe is a masterclass in simple ingredients doing extraordinary things. Let’s break it down.
- 2 boneless, skinless chicken breasts: Our protein star. I like to slice them into even strips before marinating—it creates more surface area for that zesty flavor to cling to and cooks in a flash. Chef’s Swap: Chicken thighs work wonderfully for even more juiciness, or use firm tofu or chickpeas for a veggie-powered version.
- Juice and zest of 1 large, bright lemon: This is the “zesty” in our title! The juice tenderizes the chicken and provides that mouthwatering tang, while the zest holds the powerful, fragrant lemon oils. Pro-tip: Always zest your lemon before you juice it. Trying to zest a squishy, juiced lemon half is a comedy act I don’t recommend.
- 1 tablespoon good olive oil: It helps the marinade coat the chicken and prevents sticking in the pan. It also carries flavor like a champ.
- 1 garlic clove, minced: The savory backbone. One clove infuses the chicken with a warm, aromatic punch without overpowering the lemon. Feel free to go for two if you’re a garlic fiend (I often am).
- Salt and freshly cracked black pepper, to taste: The fundamental enhancers. Don’t be shy here—seasoning each layer is our secret weapon.
- 1/2 cup plain Greek yogurt (full-fat for creaminess): The cool, creamy heart of our sauce. Greek yogurt is thick, tangy, and packed with protein. Chef’s Insight: Its thickness means it won’t make your wrap soggy. For a dairy-free option, a thick coconut yogurt can work in a pinch.
- 1 tablespoon chopped fresh dill or mint: The herbal high note! Dill brings a lovely, grassy freshness that pairs perfectly with lemon and cucumber. Mint offers a brighter, more vibrant kick. Use what you love or have on hand—parsley or chives are great too!
- 2 large wraps or flatbreads: The vessel! I love a soft flour tortilla or a lavash bread. Gently warming them is a game-changer for pliability. For a lower-carb option, large lettuce leaves (like butter or romaine) make fantastic, crunchy cups.
- 1/2 cup thinly sliced cucumber: For that essential cool, watery crunch. English/hothouse cucumbers have fewer seeds, but any cucumber works—just slice it thin!
- 1 cup of your favorite mixed greens: Adds volume, color, and nutrients. A spring mix, arugula (for a peppery kick), or simple spinach all bring their own personality.
Let’s Build Some Flavor, Step-by-Step
Ready to cook? I’ll walk you through each step with all my favorite hacks so your wraps turn out perfect every single time.
- Marinate with Purpose: Place your chicken strips in a bowl or zip-top bag. Add the lemon juice, lemon zest, olive oil, minced garlic, a good pinch of salt, and several cracks of black pepper. Get in there with your hands (the best tools in the kitchen!) and massage everything together until every piece is coated. Let it sit for at least 20 minutes at room temperature. Why? This brief marinate allows the acid in the lemon to begin tenderizing the chicken and lets the flavors start to mingle. If you have more time, 2-3 hours in the fridge is even better!
- Cook the Chicken to Juicy Perfection: Heat a skillet or grill pan over medium-high heat. You want it nice and hot so the chicken gets a beautiful sear. Add the chicken strips in a single layer—don’t crowd the pan! Let them cook undisturbed for 3-4 minutes until you see golden-brown edges. Flip and cook for another 3-4 minutes until cooked through and juicy. My #1 Tip: Resist the urge to constantly move them around! Let the pan do its work to create that flavorful crust. Transfer to a plate and let them rest for a minute.
- Whip Up the “Could-Eat-It-With-a-Spoon” Sauce: While the chicken cooks (or rests), make your sauce. In a small bowl, combine the Greek yogurt, chopped herb of choice, a teaspoon of lemon juice, a pinch of salt, and pepper. Stir until smooth and vibrant green flecks are throughout. Taste it! Adjust seasoning. This sauce is a flavor bomb waiting to happen.
- Warm Your Wraps: This is the step everyone skips but makes ALL the difference in a non-ripped, pliable wrap. You have options: 30 seconds in a dry skillet, 15-20 seconds in the microwave (covered with a damp paper towel), or a brief pass over a gas flame. Just until soft and flexible.
- The Grand Assembly: Lay your warmed wrap on a clean surface. Spread a generous layer of the herby yogurt sauce down the center, leaving a 2-inch border at the top and bottom. Pile on a handful of those fresh greens, a line of cucumber slices, and then top with those glorious, warm lemon chicken strips. Drizzle a little extra sauce over the chicken if you’re feeling fancy.
- The Art of the Tight Roll: Fold the sides of the wrap in over the filling. Then, starting from the bottom edge closest to you, roll it up tightly and firmly, tucking the filling in as you go. You want a snug, cylindrical bundle. If you’re packing it to go, wrap it tightly in parchment paper or foil, then slice it in half on a diagonal—it just looks better that way!
How to Serve & Savor
These wraps are fantastic all on their own, but a little flair never hurt! For a quick lunch, I wrap mine in parchment paper and foil—it keeps everything contained and gets even more flavorful as it sits for an hour. For dinner, I love to plate it more intentionally. Slice the wrap in half on a sharp diagonal to show off all those beautiful layers inside. Serve it with a simple side salad dressed with a lemon vinaigrette (use the leftover lemon juice!), or a handful of sweet potato fries for that perfect salty-crunchy contrast.
For a crowd, set up a DIY wrap bar! Put the warm chicken in a bowl, the sauce in another, and all the chopped veggies and greens in separate dishes. Let everyone build their own masterpiece. It’s interactive, fun, and guarantees everyone gets exactly what they want. Pair with a crisp white wine, a citrusy sparkling water, or a classic iced tea.
Make It Your Own: Flavor Twists & Swaps
The true beauty of this recipe is its versatility. Play with it! Here are a few of my favorite riffs:
- Mediterranean Mezze: Add crumbled feta cheese, Kalamata olives, and a sprinkle of dried oregano to the filling.
- Spicy Fiesta: Add a teaspoon of chili powder or smoked paprika to the chicken marinade. Swap the yogurt sauce for a lime crema (Greek yogurt + lime juice + cilantro), and add sliced avocado and pickled red onions.
- Herb Garden Delight: Use a mix of soft herbs in the sauce and filling—think tarragon, basil, and chives alongside the dill. Add very thinly sliced radishes for extra peppery crunch.
- Protein Swap-Out: As mentioned, chickpeas (tossed in the lemon marinade and roasted until crispy) or pan-seared shrimp are phenomenal. For a steakhouse twist, use thinly sliced flank steak.
- Low-Carb/Lettuce Wrap: Ditch the bread entirely! Use large, sturdy butter lettuce or romaine leaves as cups. Load them up with the chicken, sauce, and veggies for a super fresh, crunch-forward meal.
Beau’s Kitchen Notes
This recipe has evolved from that beach-day improvisation into a trusted weeknight friend. I’ve learned a few things along the way. First, the marinating time is flexible but valuable—even 10 minutes makes a difference. Second, if your chicken breasts are very thick, I sometimes give them a gentle pound with a rolling pin or pan to even out the thickness before slicing. It ensures every piece cooks at the same rate. And lastly, don’t stress about the perfect roll! My first few were… leaky. The trick is don’t overstuff, and use that tight tuck-and-roll motion. If it bursts, just laugh, eat the evidence, and call it a deconstructed salad bowl. No harm, no foul, just good food.
Your Questions, Answered
Q: Can I make this ahead of time?
A: Absolutely! You can marinate the chicken overnight for deeper flavor. Cook the chicken and make the sauce up to 3 days ahead. Store separately in the fridge. Assemble the wraps just before eating to keep the wrap from getting soggy.
Q: My wrap is soggy! What happened?
A: The usual culprits are assembling too far in advance or using a sauce that’s too thin/watery. Our thick Greek yogurt sauce helps a lot! Also, make sure your cooked chicken has rested and isn’t piping hot when you assemble, as the steam can soften the wrap. If packing for later, a layer of greens between the sauce and the wrap acts as a helpful barrier.
Q: What’s the best way to reheat the chicken?
A: To keep it juicy, reheat gently. A quick 60-90 seconds in the microwave works, or warm it in a skillet over low heat with a tiny splash of water or broth to create steam. I don’t recommend reheating the fully assembled wrap, as it can get mushy.
Q: Can I use bottled lemon juice?
A: For the marinade in a pinch, yes. But for the sauce and for the zest, fresh lemon is non-negotiable for that bright, vibrant flavor. The bottled stuff just can’t compete on the freshness front.

Zesty Lemon Chicken Wraps : Bright, Fresh, and Satisfying
Description
When you want something quick, flavorful, and satisfying without feeling heavy, these Zesty Lemon Chicken Wraps are a perfect choice. Juicy lemon-garlic chicken, crisp veggies, and a creamy herbed yogurt sauce come together in a soft wrap for a meal that works for lunch, dinner, or meal prep. Simple ingredients, big flavor, zero fuss.
Ingredients
Lemon Chicken
-
2 boneless skinless chicken breasts, sliced into strips
-
Juice and zest of 1 large lemon
-
1 tablespoon olive oil
-
1 garlic clove, minced
-
Salt and black pepper, to taste
Herbed Yogurt Sauce
-
1/2 cup plain Greek yogurt
-
1 tablespoon chopped fresh dill or mint
-
1–2 teaspoons lemon juice
-
Pinch of salt and pepper
Wraps
-
2 large tortillas or flatbreads
-
1 cup mixed greens
-
1/2 cup thinly sliced cucumber
-
Optional: sliced tomatoes, shredded carrots, feta cheese
Instructions
-
Marinate the chicken
In a bowl, mix lemon juice, zest, olive oil, garlic, salt, and pepper. Add chicken and toss well. Let marinate at least 20 minutes (up to 3 hours refrigerated). -
Cook
Heat a skillet over medium-high heat. Cook chicken strips in a single layer for 3–4 minutes per side until golden and cooked through. Rest 2 minutes. -
Make the sauce
Stir yogurt, herbs, lemon juice, salt, and pepper until smooth. Adjust to taste. -
Warm the wraps
Heat briefly in a dry pan or microwave until soft and flexible. -
Assemble
Spread yogurt sauce down the center. Add greens, cucumber, and chicken. Add any extras you like. -
Wrap and serve
Fold sides in, roll tightly, slice in half, and enjoy.
Notes
-
Zest the lemon first, then juice it.
-
Don’t overcrowd the pan — it helps the chicken brown instead of steam.
-
Slice chicken evenly so it cooks at the same speed.
-
Let hot chicken cool slightly before wrapping to prevent soggy bread.
-
Make it meal-prep friendly: store chicken and sauce separately and assemble fresh.
Nutritional Breakdown (Per Serving)
Please note: The following is an estimate for one full wrap, calculated using the base ingredients. Variations will change these values.
- Calories: ~390
- Protein: 30g (Fantastic for keeping you full and satisfied!)
- Carbohydrates: 28g
- Fat: 18g
- Fiber: 3g
This meal is a wonderful balance of lean protein, healthy fats, and complex carbs. The Greek yogurt adds gut-friendly probiotics, and the fresh veggies provide vitamins and hydration. To lower the calories or carbs, simply use a low-carb wrap or lettuce cup, and you’ve got
Final Thoughts
So there you have it—your roadmap to a meal that’s as vibrant and lively as you are. These Zesty Lemon Chicken Wraps aren’t just a recipe; they’re a reminder that the best food often comes from simplicity, a little creativity, and the willingness to embrace those “what the heck, let’s try this” moments in the kitchen.
Whether you’re craving a quick lunch, a stress-free dinner, or a shareable feast, these wraps deliver every time. They’re bright, satisfying, and endlessly adaptable—just like the way we like to live and eat. So go ahead, grab that lemon, fire up the skillet, and treat yourself to a bite that feels like sunshine.
Thanks for cooking with me today. Remember, it’s not about being perfect—it’s about enjoying the process and savoring every flavorful bite. Until next time, keep it fresh, keep it zesty, and keep making every meal a little celebration.
Stay hungry,
Beau
Feastical
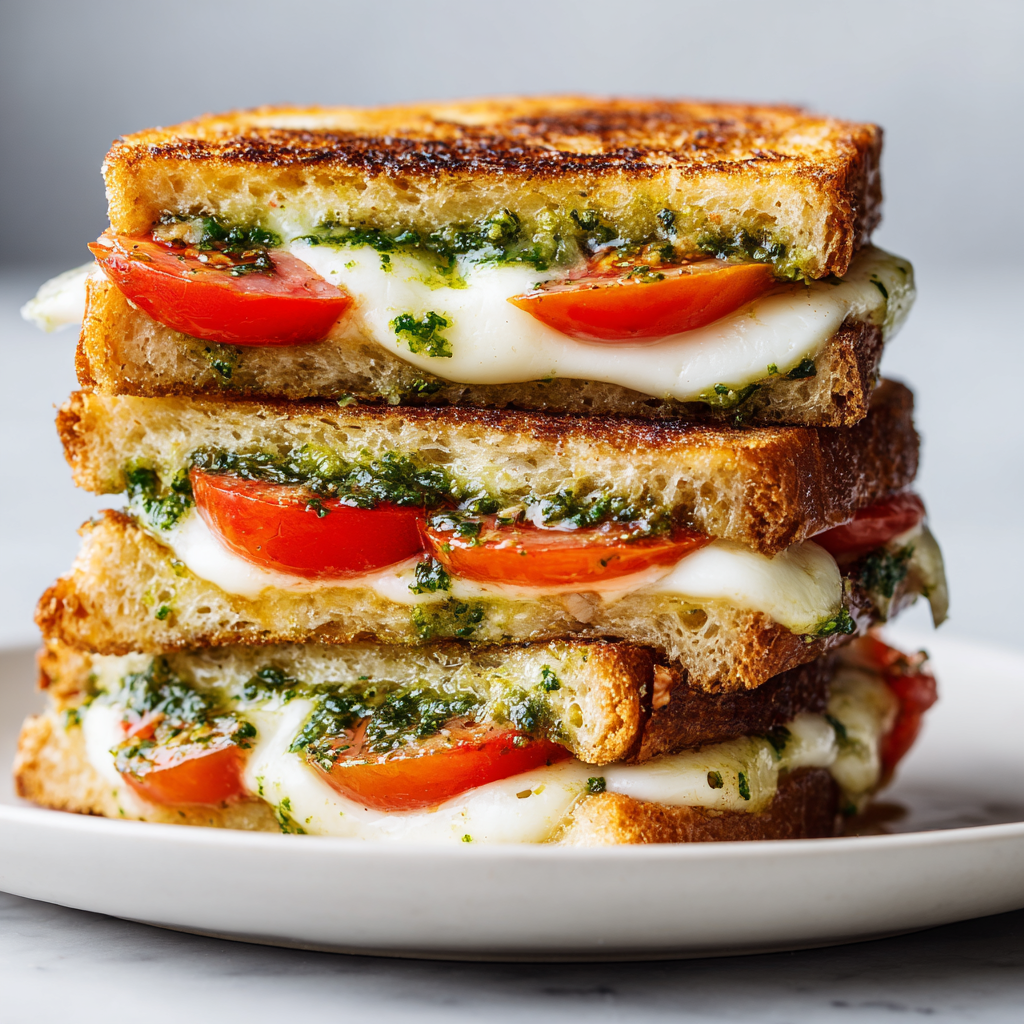
Caprese Grilled Cheese : A Golden, Melty Upgrade
When a Salad and a Grilled Cheese Fall Madly in Love
Hey friends, Beau here! Let’s talk about one of life’s greatest kitchen miracles: the moment two incredible dishes collide to create something even more magical. We’ve all had that classic, sun-ripened Caprese salad—the juicy tomatoes, the creamy mozzarella, the fragrant basil, a drizzle of olive oil. It’s summer on a plate. And then, of course, there’s the humble grilled cheese: a crispy, golden, buttery hug of melted goodness that’s been solving bad days since, well, forever. What if we took the bright, fresh soul of the first and packed it into the warm, comforting embrace of the second? Friends, that is not a ‘what if.’ That is today’s mission.
This Caprese Grilled Cheese is my go-to when I want a meal that feels both indulgent and a little bit virtuous (we’ve got veggies in there!). It’s for those days when you want cooking to be a joy, not a chore. We’re talking about a sandwich that crackles when you bite into it, reveals a river of stretchy, mild mozzarella, and bursts with the vibrant, garden-fresh punch of basil pesto and tomato. It’s fast, it’s foolproof, and it absolutely delivers on the “wow” factor. So, tie on your apron, grab your favorite spatula, and let’s turn simple ingredients into a little bit of golden-brown heaven.
The Summer That Tasted Like Basil and Sunshine
This recipe always takes me back to my grandparents’ backyard garden. My Nonna, she had tomato plants that were practically legendary—heavy, fragrant fruits that warmed in the sun. Right next to them was a sprawling basil plant that smelled like heaven when you brushed past it. One sweltering afternoon, tired of weeding, I dragged myself inside. Nonna, without a word, sliced a tomato, tore some mozzarella, and piled it all on a plate with a few basil leaves. She handed it to me with a chunk of crusty bread. “Eat,” she said. It was so simple, yet it completely reset my whole day.
Years later, stuck in a tiny apartment kitchen during a dreary drizzle, I was craving that taste of summer. A grilled cheese was on the menu, but my heart was in that sun-drenched garden. I looked at the sad tomato and the ball of mozzarella on my counter… and it clicked. What if I could get that Caprese flavor, but in the cozy, warm form I needed right then? I mashed some basil into olive oil, slapped it all between bread, and grilled it. That first bite was a time machine. It wasn’t Nonna’s exact plate, but it captured its spirit perfectly. That’s the beauty of food—it’s a delicious, edible souvenir.
Gathering Your Flavor Dream Team
Here’s what you’ll need to build this masterpiece. Remember, the better your ingredients, the more your sandwich will sing. But I’ve also got swaps for you, because we work with what we’ve got!
- 4 slices sourdough or country bread: This is your foundation. I love the tangy chew of sourdough or the sturdy crumb of a good country loaf. They hold up to the filling and get incredibly crispy. Chef’s Insight: Avoid super-soft sandwich bread—it can get soggy. Day-old bread is actually perfect here!
- 4 oz fresh mozzarella, sliced: We’re using the fresh stuff that comes in water (mozzarella di bufala or fior di latte), not the low-moisture block for pizza. Its creamy, milky melt is unmatched. Sub Tip: In a pinch, a good whole-milk mozzarella ball works. For a sharper twist, try a few thin slices of provolone mixed in.
- 1 medium tomato, sliced: Go for the ripest, reddest tomato you can find! A beefsteak or a juicy vine-ripened tomato is ideal. Chef’s Insight: A light sprinkle of salt on the tomato slices before assembling draws out excess moisture, preventing a soggy sandwich. It’s a game-changer.
- 2 tablespoons basil pesto: This is the flavor bomb. Use a good-quality store-bought pesto for ease, or go all-in with my easy homemade pesto recipe. Sub Tip: No pesto? Thinly slice fresh basil leaves and mix them with a teaspoon of olive oil and a tiny pinch of minced garlic.
- 1 tablespoon butter, softened: Real, salted butter is the key to that iconic golden, crispy crust. Chef’s Insight: Soften it to room temperature so it spreads easily without tearing the bread. For a different flavor, try mayonnaise on the outside—it creates an insane, even crisp!
- Salt and black pepper, to taste: Don’t you dare forget these! They elevate every single layer. Freshly cracked pepper on the tomato is a tiny step with massive impact.
Let’s Build & Sizzle: Your Foolproof Roadmap to Melty Bliss
Okay, team. Let’s get this sandwich from counter to plate in under 15 minutes. I’ll walk you through each step with my favorite little hacks along the way.
- Prep Your Station: Before you touch a single ingredient, get everything out and ready. Slice your tomato and cheese, have your pesto and butter handy, and get your bread lined up. We’re cooking over medium heat, so go ahead and place your skillet or griddle on the stove. A little mise en place (that’s chef talk for “get your stuff together”) makes the process smooth and stress-free.
- Flavor the Bread: Lay out your four bread slices. Using a spoon or a butter knife, spread a generous tablespoon of pesto on one side of each slice. Yes, all four! This ensures every single bite is packed with that herby, garlicky goodness. Cover right to the edges for maximum flavor.
- Layer with Love & Wisdom: On two of the pesto-slathered slices, start your stack. First, lay down the slices of fresh mozzarella. Then, add your tomato slices. Here’s my pro tip: sprinkle a little salt and a good grind of black pepper directly onto the tomato. This simple act seasons the tomato itself and pulls out a bit of water, which means less steam inside your sandwich and a crispier result.
- Sandwich & Butter Up: Place the remaining bread slices on top, pesto-side down, to create two sandwiches. Now, spread the softened butter evenly over the top outer side of each sandwich. Be generous but even—this is what creates that gorgeous, even golden crust.
- Heat, Grill, and Press: Place your skillet or griddle over medium heat. Let it get properly warm (a drop of water should sizzle). Carefully place the sandwiches in the pan, butter-side down. Now, immediately butter the now-top sides of the bread. Cook for 3-4 minutes, until the bottom is a deep, golden brown. Don’t rush by cranking the heat! Medium heat melts the cheese perfectly before the bread burns. Use a spatula to press down gently—this improves contact for even browning.
- The Flip & Final Crisp: Carefully flip the sandwiches with your spatula. They should feel sturdy. Cook for another 3-4 minutes on the second side, again pressing gently, until it’s equally golden and you see cheese starting to ooze out the sides. If you’re unsure about the melt, you can cover the pan for the last minute to trap heat.
- Rest and Devour: Transfer your gorgeous, golden sandwiches to a cutting board. This is crucial: let them rest for 1-2 minutes. This allows the molten cheese to settle slightly, so when you cut in, it doesn’t all gush out immediately. Then, slice diagonally (it just tastes better that way, trust me) and serve immediately!
How to Plate Your Masterpiece
You’ve created a work of art—let’s serve it like one! A grilled cheese deserves a little fanfare. I love serving the halves stacked slightly askew on a simple wooden board or a brightly colored plate, showing off that beautiful cross-section. A little pile of kettle-cooked potato chips or a handful of crisp, cool grapes on the side is my ideal textural contrast. For a real “lunch at the café” feel, a simple green salad with a lemony vinaigrette cuts through the richness perfectly. And if you’re feeling extra? Dunk a corner into a small bowl of warm marinara sauce for a pizza-dip moment. No matter how you do it, serve it hot and with a big smile.
Make It Your Own: Delicious Twists on the Theme
The basic blueprint is perfect, but the kitchen is your playground! Here are a few of my favorite ways to riff on this recipe:
- The “Everything But The Kitchen Sink”: Add a couple of slices of creamy avocado inside, or a few slices of prosciutto or salami for a salty, meaty punch. A thin schmear of fig jam on the bread before the pesto adds a sweet, sophisticated note.
- Pesto Power Swap: Swap the basil pesto for sun-dried tomato pesto for a deeper, tangier flavor, or try a vibrant kale pesto. Even a simple tapenade would be incredible.
- Cheese Please Variations: Mix your cheeses! Try adding a sprinkle of grated Parmesan to the fresh mozzarella for a salty kick, or use burrata instead for an ultra-creamy, decadent center.
- Dietary-Friendly Flips: Gluten-Free? Use your favorite GF bread. Dairy-Free? Vegan mozzarella and butter alternatives work great—just watch the melt time. Low-Carb? Cook it in a panini press between two layers of parchment for a “crustless” version, or use sturdy lettuce leaves as the “bread.”
- Breakfast Caprese: Add a fried egg inside! The runny yolk mixed with the pesto and tomato is a next-level experience.
Beau’s Behind-the-Scenes Notes
This recipe has evolved in my kitchen more times than I can count. The biggest lesson? Patience with the heat. I used to blast it on high, desperate for that crispy bread, only to end up with burnt outsides and cold, unmelted cheese inside. Medium heat is your true friend here—it’s the difference between good and legendary. Also, I once tried using huge, watery heirloom tomato slices without salting them first. The result was a delicious but unfortunately soggy mess. We live and we learn! Now, I see this sandwich as a canvas. Some days I add a balsamic glaze drizzle after it’s cooked. Other days, I mix a little chili flake into the butter. It’s your kitchen, your rules. Make it taste like you.
Your Questions, Answered
Q: My bread is burning before the cheese melts! What am I doing wrong?
A: Your heat is too high, my friend! Dial it back to a true medium. If it’s still happening, try covering the pan with a lid for a minute after flipping to trap steam and heat, which will help melt the cheese faster. Also, make sure your cheese slices aren’t too thick.
Q: Can I make this ahead of time?
A: You can assemble the sandwiches ahead of time (wrap them tightly in plastic wrap) and keep them in the fridge for a few hours before cooking. Don’t butter the outside until you’re ready to grill, though, or the bread will get soggy.
Q: Why is my sandwich soggy in the middle?
A> Two likely culprits: 1) Your tomato was very watery. Always salt your tomato slices and let them sit on a paper towel for a few minutes before assembling. 2) You might be using too much pesto or a very oily one. A thin, even layer is all you need.
Q: What’s the best cheese for maximum stretch?
A: Fresh mozzarella gives a creamy, mild melt. For that iconic “pull,” a combination of fresh mozzarella and a little bit of a drier, low-moisture mozzarella (the pizza kind) or even a young provolone works wonders. The different milk proteins create a fantastic stretch.

Caprese Grilled Cheese : A Golden, Melty Upgrade
Description
Some recipes feel like pure kitchen magic — and this is one of them. Caprese Grilled Cheese brings together the bright, fresh flavors of a classic tomato-mozzarella-basil salad and the crispy, melty comfort of grilled cheese. It’s quick, satisfying, and perfect for lunch or an easy dinner. If you want something cozy but still a little fresh and vibrant, this sandwich delivers every time.
Ingredients
-
4 slices sourdough or country bread
-
4 oz (115 g) fresh mozzarella, sliced
-
1 medium ripe tomato, sliced
-
2 tablespoons basil pesto
-
1 tablespoon butter, softened (or mayonnaise)
-
Salt and black pepper, to taste
Optional extras:
-
Fresh basil leaves
-
Balsamic glaze drizzle
Instructions
-
Prep the tomato
Lay tomato slices on a paper towel and lightly sprinkle with salt. Let sit 5 minutes to remove excess moisture (this helps prevent soggy bread). -
Spread the pesto
Spread pesto on one side of each slice of bread. -
Assemble
On two slices (pesto side up), layer mozzarella and tomato. Add black pepper and extra basil if using. Top with remaining bread slices, pesto side down. -
Butter the outside
Spread butter (or mayo) on the outer sides of each sandwich. -
Cook
Heat a skillet over medium heat. Place sandwiches in the pan and cook 3–4 minutes per side, pressing gently, until bread is golden brown and cheese is melted. -
Rest and serve
Let rest 1–2 minutes, then slice and serve warm.
Nutritional Info (A Quick Breakdown)
Alright, let’s talk numbers for a moment. This info is for one full sandwich (two halves), calculated using standard ingredients. Remember, this is comfort food with fresh ingredients at its heart! Each sandwich provides a good source of protein and calcium from the cheese, and the tomato adds a dose of vitamins C and K. Using whole-grain sourdough can add fiber. As with all good things, it’s part of a balanced plate. The pesto and olive oil (in the pesto and butter) contribute healthy fats. To lighten it up slightly, you can use a light butter spread, go easier on the pesto, or use cooking spray instead of butter for grilling (though you’ll sacrifice some flavor).
Per Serving (1 sandwich): Calories: ~450 | Protein: 16g | Carbohydrates: 34g | Fat: 28g | Saturated Fat: 12g | Cholesterol: 60mg | Sodium: 750mg | Fiber: 2g | Sugar: 4g
Final Thoughts
And there you have it! The Caprese Grilled Cheese: proof that the best recipes often come from marrying two simple, beloved ideas. It’s more than just a sandwich; it’s a quick trip to an Italian summer, a solution for a busy weeknight, and a guaranteed way to make your kitchen smell amazing. I hope this recipe becomes a regular in your rotation, and I can’t wait to hear how you make it your own. Did you add bacon? Try a different pesto? Let me know in the comments below—I read every single one. Now, go forth and grill something magnificent. Until next time, keep it soulful, keep it simple, and always keep it delicious. Talk soon, Beau.

Spring Veggie Lo Mein : Fresh Flavor in Every Bite
Spring Has Sprung in Your Skillet: The Ultimate Veggie Lo Mein
Hey friends, Beau here! Is it just me, or does something magical happen the moment the weather turns? One day you’re craving slow-simmered stews and hearty casseroles, and the next, all you want is something bright, crisp, and bursting with life. Your kitchen mood shifts from cozy hibernation to sunny celebration. That’s exactly where this Spring Veggie Lo Mein comes in. It’s not just a recipe; it’s a 20-minute vacation on a plate.
We’re talking about tender noodles tangled up with a confetti of the season’s best—crunchy cabbage, sweet snap peas, and sunny carrots—all dancing in a light, savory sauce that sings with ginger and garlic. It’s the kind of meal that feels both indulgent and incredibly virtuous. Whether you’re a stir-fry fanatic or a wok-wary newbie, this dish is your ticket to a stress-free, flavor-packed dinner. So, let’s turn up the heat, grab your favorite wooden spoon, and wok this way to a seriously delicious spring meal.
The Stir-Fry Symphony: A Family Tradition
This recipe takes me right back to my mom’s bustling kitchen on busy weeknights. She called stir-fry her “clean-out-the-crisper symphony,” and I was her eager (if slightly messy) conductor-in-training. The sizzle as the hit the hot oil was our opening note. The rhythmic scrape of the spatula against the wok was the percussion. My job was the “mise en place”—arranging all the colorful veggies in little bowls like a painter’s palette before the chaos began.
There was always a race against time, a thrilling culinary sprint where everything had to be just right. “The wok hay—the breath of the wok—is everything, Beau!” she’d say, as I watched, wide-eyed, at the shimmering heat and soaring flames (okay, hers were more impressive than my electric stove’s). That lesson stuck: high heat, quick moves, and fresh ingredients are the holy trinity of a great stir-fry. This Spring Veggie Lo Mein is my homage to those nights—a simpler, veggie-forward version that captures all that joyful energy and puts a fresh, seasonal spin on a beloved classic.
Gathering Your Rainbow: Ingredients & Insights
Here’s your grocery list for freshness! The beauty of this is in its flexibility, so don’t stress if you need to swap something out.
- 8 oz lo mein noodles or spaghetti: The hearty foundation. Lo mein noodles have a perfect chew, but spaghetti is a brilliant pantry stand-in. Chef’s Tip: Look for fresh lo mein noodles in the refrigerated section of your Asian market for next-level texture.
- 1 cup green cabbage, thinly sliced: Adds a fantastic, mild crunch that holds up to cooking. Napa cabbage works beautifully here too for a more tender bite.
- 1 cup carrots, julienned or shredded: A pop of color and natural sweetness. I use a julienne peeler for perfect matchsticks in seconds!
- 1 cup snap peas, trimmed: The essence of spring! That satisfying *snap* is pure joy. No snap peas? Green beans or asparagus cut into pieces are great substitutes.
- 2 tablespoons sesame oil or neutral oil: Sesame oil gives incredible depth of flavor. For high-heat stir-frying, I often use 1 tbsp avocado oil to cook and 1 tbsp toasted sesame oil drizzled in at the end for aroma.
- 2 garlic cloves, minced & 1 tsp fresh ginger, grated: The dynamic duo. Please, for the love of flavor, use fresh! That zing is irreplaceable.
- 3 tablespoons light soy sauce: Our salty, umami base. For a gluten-free version, tamari is a seamless swap. If you only have regular soy sauce, it’s fine—just know it’s saltier.
- 1 tablespoon rice vinegar: The secret brightener that balances the saltiness. A tiny splash of brightness that makes all the difference.
- 1 teaspoon honey or maple syrup (optional): A whisper of sweetness to round out the sauce. I often add it, but it’s totally optional if you prefer a more savory profile.
- Sliced green onions & toasted sesame seeds for garnish: Never skip the garnish! They add fresh aroma, color, and a final layer of texture that elevates the whole dish from “homemade” to “restaurant-worthy.”
Let’s Get Cooking: Your Step-by-Step Guide
Ready? Apron on, music up, and let’s make some magic happen. The key to stir-fry success is having everything prepped and within arm’s reach before you fire up the wok.
Step 1: Noodle Duty. Get a large pot of salted water boiling. Cook your noodles according to the package directions, but aim for al dente—they’ll cook a bit more in the wok later. Once done, drain and give them a quick rinse with cool water to stop the cooking and prevent sticking. Toss with a tiny drizzle of oil if you’re not moving right to the next step.
Step 2: Sauce Symphony. In a small bowl, whisk together your light soy sauce, rice vinegar, grated ginger, and that optional honey. Taste it! Get to know your sauce. This is your flavor bomb, ready to deploy.
Step 3: Wok & Roll. Place your largest skillet or wok over medium-high heat and let it get properly hot. Add your oil and swirl it around. You should see it shimmer. Now, add the minced garlic. We’re not looking for color, just fragrance—sauté for about 30 seconds until it smells incredible. Don’t let it burn!
Step 4: Veggie Party! Time for the main event. Add your sliced cabbage, carrots, and snap peas all at once. There will be a glorious sizzle! Stir-fry for 3-4 minutes. You want the veggies to be crisp-tender—they should still have a vibrant color and a pleasant bite. This is not the time for mushy vegetables!
Step 5: The Grand Toss. Reduce the heat to medium. Add your drained noodles to the wok, then pour that beautiful sauce all over everything. Using tongs or two spatulas, toss, toss, TOSS! Get every noodle and veggie coated in that glossy, flavorful sauce. Let it all cook together for another 1-2 minutes so the noodles drink up the sauce and everything is piping hot.
Step 6: The Final Flourish. Kill the heat. Immediately transfer your gorgeous Spring Veggie Lo Mein to a serving platter or bowls. Generously sprinkle with sliced green onions and a shower of toasted sesame seeds. That contrast of green, white, and the nutty seeds makes it Instagram-ready.
Plating Up: How to Serve Your Masterpiece
This dish is a star all on its own, but a little presentation goes a long way! I love serving it family-style in a big, shallow bowl or on a platter. The vibrant colors just beg to be shown off. For a complete meal, here are my go-to pairings:
Protein Power-Up: Serve alongside or top with some simply prepared protein. Think quick-seared shrimp, shredded rotisserie chicken, sliced teriyaki tofu, or a perfectly fried egg with a runny yolk that acts as extra sauce.
The Crunch Factor: Offer little bowls of extra toppings for folks to customize. Extra sesame seeds, crushed peanuts or cashews, or even those crispy fried onions add amazing texture.
On the Side: A simple cucumber salad tossed with a bit of rice vinegar and salt, or a light miso soup, makes this feel like a full, restaurant-quality feast with almost no extra effort.
Make It Your Own: Delicious Twists & Swaps
The canvas of this recipe is made for your creativity! Here are a few of my favorite ways to riff on it:
- The Protein-Packed: Add 8 oz of thinly sliced chicken breast, flank steak, or extra-firm tofu (pressed and cubed) at the beginning of Step 3. Cook through, then remove from the wok before sautéing the garlic. Add it back in with the noodles.
- Spicy Garlic Kick: Add 1-2 teaspoons of chili-garlic sauce or a big pinch of red pepper flakes to the sauce mixture. Finish with a drizzle of chili oil for serious heat lovers.
- Mushroom Lover’s Dream: Swap the snap peas for a mix of sliced shiitake and cremini mushrooms. Sauté them first until they release their water and get golden—they bring an incredible meaty, umami depth.
- Gluten-Free & Grain-Free: Use 100% buckwheat soba noodles or your favorite rice noodles. Swap the soy sauce for tamari. It’s that easy!
- Peanutty Delight: Whisk 1-2 tablespoons of smooth peanut butter or almond butter into the sauce mixture. Thin it with a splash of warm water if needed. Garnish with chopped peanuts for a satay-inspired lo mein.
Beau’s Kitchen Confidential
This recipe has been a Feastical staple for years, and it’s evolved from a “use whatever’s in the fridge” scramble to this refined (but still easy!) spring version. One hilarious kitchen fail taught me a vital lesson: do not crowd your wok. I once doubled the recipe in my standard skillet, and instead of stir-frying, I was steam-stewing the veggies into a sad, soggy pile. The wok lost its “breath.” Now, if I’m cooking for a crowd, I do two batches back-to-back. Trust me, it’s worth the extra five minutes for that perfect crisp-tender texture. Also, my ginger grater and I have a love-hate relationship—it’s a mess-maker but a flavor-saver. No regrets!
Your Questions, Answered (Before You Even Ask!)
Q: My noodles turned out soggy/mushy. What happened?
A: The most common culprit is overcooking the noodles in the boiling stage. Remember, al dente is your goal! They’ll soften more in the sauce. Also, make sure your wok/pan is hot enough so the sauce coats and clings quickly, rather than simmering and steaming the noodles.
Q: Can I use different vegetables?
A> Absolutely! Bell peppers, broccoli florets, baby corn, water chestnuts—you name it. Just remember to cut them uniformly so they cook evenly. Denser veggies like broccoli may need a quick blanch in the noodle water before stir-frying.
Q: How do I store and reheat leftovers?
A: Store in an airtight container in the fridge for up to 3 days. The best way to reheat is in a skillet over medium heat with a tiny splash of water or broth to loosen things up. The microwave can make the noodles a bit rubbery.
Q: The sauce seems too simple. Can I add more flavor?
A> For sure! A teaspoon of oyster sauce (or vegetarian oyster sauce) adds great depth. A splash of mirin (sweet rice wine) adds complexity. Or, finish with a tiny dot of toasted sesame oil right before serving for an aromatic punch.
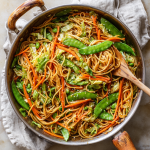
Spring Veggie Lo Mein : Fresh Flavor in Every Bite
Description
When you want something quick but still colorful and satisfying, this Spring Veggie Lo Mein is the perfect go-to. It’s packed with crisp vegetables, tender noodles, and a light savory sauce with garlic and ginger. Everything cooks fast in one pan, making it ideal for busy weeknights or a healthy lunch prep.
Ingredients
-
8 oz (225 g) lo mein noodles or spaghetti
-
1 cup green cabbage, thinly sliced
-
1 cup carrots, julienned or shredded
-
1 cup snap peas, trimmed
-
2 tablespoons oil (neutral oil for cooking; optional toasted sesame oil for flavor)
-
2 garlic cloves, minced
-
1 teaspoon fresh ginger, grated
Sauce
-
3 tablespoons light soy sauce (or tamari)
-
1 tablespoon rice vinegar
-
1 teaspoon honey or maple syrup (optional)
-
1–2 tablespoons water (if needed to loosen)
Garnish (optional)
-
Sliced green onions
-
Toasted sesame seeds
-
Chili flakes
Instructions
-
Cook the noodles
Boil noodles in salted water until al dente. Drain and rinse briefly with cool water to stop cooking. Set aside. -
Mix the sauce
In a small bowl, whisk soy sauce, rice vinegar, honey/maple (if using), and 1 tablespoon water. -
Heat the pan
Place a large skillet or wok over medium-high heat. Add oil. When hot, add garlic and ginger and cook for about 30 seconds until fragrant. -
Stir-fry the vegetables
Add cabbage, carrots, and snap peas. Stir-fry 3–4 minutes until crisp-tender and bright. -
Combine
Add cooked noodles and pour in the sauce. Toss well for 1–2 minutes until everything is coated and heated through. Add a splash of water if the noodles look dry. -
Finish and serve
Remove from heat. Garnish with green onions and sesame seeds if desired.
Notes
-
Prep everything first — stir-fries cook fast, so have veggies and sauce ready before heating the pan.
-
Use high heat for crisp vegetables, not soft or steamed ones.
-
Don’t overcrowd the pan — cook in two batches if doubling.
-
Add protein easily — toss in cooked chicken, shrimp, tofu, or a fried egg.
-
Extra flavor boost — add a few drops of toasted sesame oil at the very end, not during high-heat cooking.
Nourishing & Delicious: A Quick Nutrition Glance
Here’s the scoop on what’s fueling you! This breakdown is an estimate per serving (assuming recipe serves 3) and will vary based on specific ingredients and brands used.
Per Serving (approximate):
Calories: 290 | Protein: 8g | Carbohydrates: 45g | Dietary Fiber: 5g | Total Fat: 9g | Saturated Fat: 1g | Sodium: ~900mg (primarily from soy sauce; use low-sodium to reduce)
This Spring Veggie Lo Mein is a wonderfully balanced meal. The complex carbs from the noodles give you lasting energy, while the colorful mix of vegetables provides a spectrum of vitamins, antioxidants, and that all-important fiber to keep you feeling satisfied. Using a moderate amount of heart-healthy oils like sesame or avocado adds good fats. It’s a meal that truly proves eating well can be the most delicious part of your day.
Final Thoughts
And there you have it, friends—my heartfelt homage to the season, packed into one sizzling skillet. This Spring Veggie Lo Mein is more than a recipe; it’s a reminder to celebrate the simple, fresh flavors right at our fingertips. It’s about the joy of a quick, communal meal that doesn’t sacrifice an ounce of taste or satisfaction.
I hope this dish finds its way into your regular rotation, becoming your own “clean-out-the-crisper symphony.” Give it a try, play with the variations, and make it yours. And when you do, I’d love to hear about it! Tag me over on the ‘gram @feastical or drop a comment on the blog. Now, go forth and wok. Your fork is waiting!
With a full heart and an empty skillet,
Beau
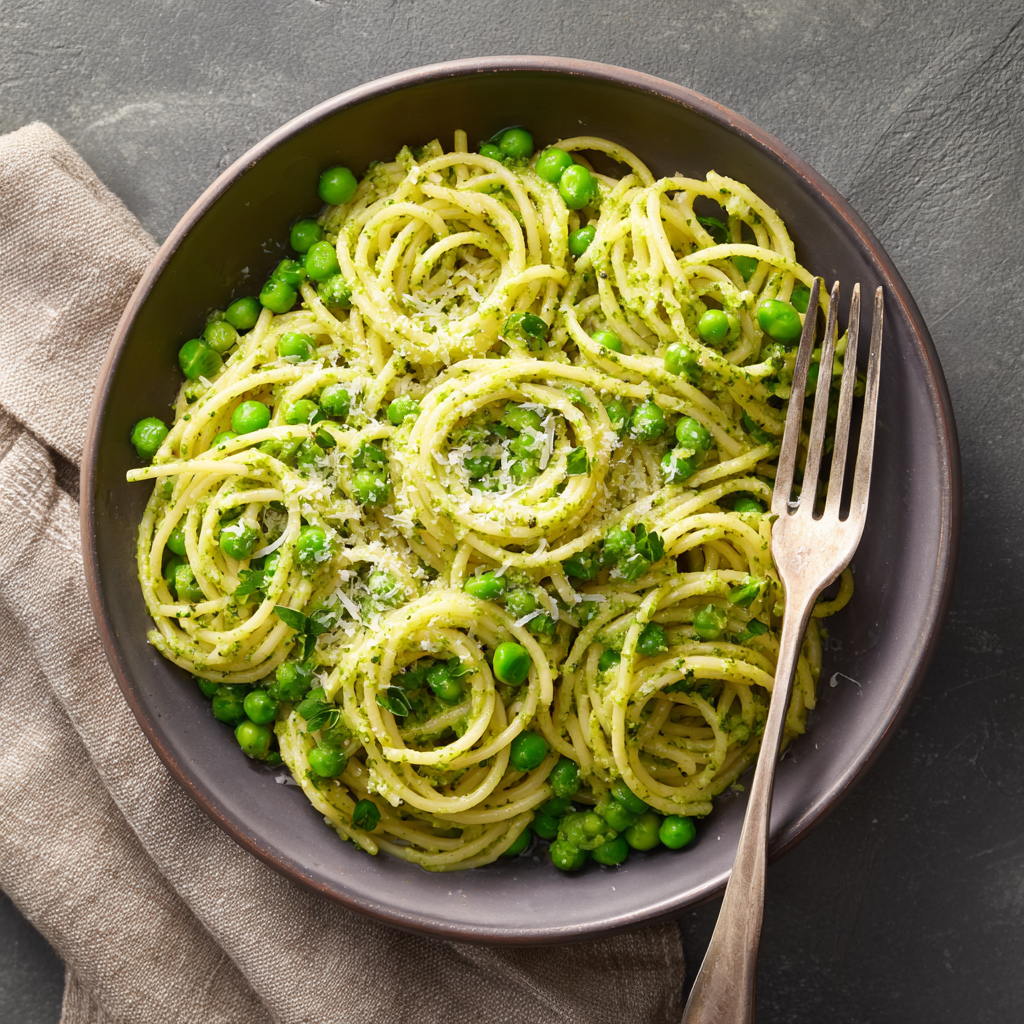
Pesto Pea Spaghetti : A Fresh Twist on a Classic
Pesto Pea Spaghetti: Your New 20-Minute Weeknight Hero
Hey friends, Beau here from Feastical! Let’s have a real talk for a second. We’ve all been there: it’s been a day, your energy is at zero, but your stomach is singing a hunger song that can’t be ignored. The temptation to call for takeout is strong. But what if I told you that in the same amount of time it takes for that delivery driver to get lost in your neighborhood, you could whip up a dinner that’s not just fast, but actually vibrant, satisfying, and feels like a little act of kitchen magic?
Enter my forever-favorite, always-reliable, Pesto Pea Spaghetti. This isn’t just another pasta dish. It’s a brilliant, bright-green hug in a bowl. It’s where the deep, herbaceous joy of pesto meets the gentle, sweet pop of peas, all tangled up in perfect al dente spaghetti. It’s comfort food that doesn’t weigh you down, and fancy-feeling food that demands zero fuss. Whether you’re cooking for one, two, or a whole hungry crew, this recipe is your ticket to a seriously delicious dinner without the drama. So, grab your favorite pot, and let’s turn a regular weeknight into something a little more… Feastical.
The Night That Sparked a Pasta Love Affair
This recipe takes me right back to my first tiny apartment kitchen, which was roughly the size of a postage stamp. I had one pot, one pan, and a budget that made dried pasta and a bag of frozen peas look like gourmet treasures. One particularly bleary Wednesday, after a long shift, I stared into my nearly empty fridge. There was a sad little jar of pesto, that trusty bag of peas, and a nub of Parmesan. Spaghetti was a pantry staple.
In a move born purely from hunger-fueled desperation, I threw them all together. But when I took that first forkful… guys, it was a revelation. The sweetness of the peas cut through the richness of the pesto in the most perfect way. The Parmesan melted into a salty, creamy glue that brought everything together. It was simple, but it was complete. That humble bowl taught me one of my core kitchen philosophies: incredible food isn’t about the number of ingredients; it’s about how a few good ones can play together to create something greater than the sum of their parts. This dish has been in my rotation ever since, a delicious reminder of where I started and why I love cooking.
Gathering Your Flavor Friends
Here’s the beautiful part – the ingredient list is short, sweet, and mighty. Every single one plays a key role. Let’s break it down:
- 12 oz Spaghetti: The classic foundation. I love the way spaghetti’s long strands cradle the sauce. Chef’s Insight: Don’t break the pasta! Let it soften as it slides into the boiling water for perfect, non-sticky strands.
- 1 cup Frozen Peas: Our sweet, green gem. Why frozen? They’re flash-frozen at peak freshness, so they’re often more vibrant and nutritious than “fresh” peas that have traveled for days. Thaw them quickly by running under warm water.
- 1/2 cup Pesto: The flavor powerhouse. A good store-bought pesto works in a pinch (no judgment here!), but if you have 10 extra minutes, homemade pesto will absolutely sing in this dish. Basil is classic, but don’t be afraid to try arugula or spinach pesto!
- 2 tbsp Olive Oil: For silky richness. This helps gently warm the pesto without cooking it harshly, preserving that fresh basil flavor. A good extra-virgin olive oil adds a fruity note.
- 1/4 cup Grated Parmesan Cheese: The salty, umami kick that ties the room together. Freshly grated from a block is infinitely better than the pre-shredded stuff (which has anti-caking agents that can make it clumpy in sauces).
- Salt & Black Pepper: Your essential flavor amplifiers. We salt the pasta water generously (it should taste like the sea!), and a crack of fresh black pepper at the end adds a subtle warmth.
- Optional: Fresh Basil & Lemon Zest: The grand finale. A few torn basil leaves add a gorgeous fragrance, and a sprinkle of lemon zest just before serving is like flipping on a brightness switch—it makes every other flavor pop.
Let’s Get Cooking: Your Foolproof Roadmap
Ready to make magic? Follow these steps, and you’ll have a restaurant-worthy plate in no time. I’m chatting you through every little tip I’ve learned over the years.
- Boil & Salt Like a Pro: Fill your largest pot with water, set it over high heat, and bring it to a rolling boil. Here’s my non-negotiable rule: salt the water aggressively. I’m talking a couple of big tablespoons. This is your one chance to season the pasta from the inside out. Add the spaghetti, give it a gentle stir to prevent sticking, and cook according to package directions for al dente – tender but with a pleasant bite. Before you drain it, scoop out about 1/2 cup of that starchy, salty pasta water. This liquid gold is our secret sauce thickener and helper.
- Unlock the Pea Potential: While the pasta cooks, take your thawed peas and give them a quick mash with a fork or pulse them 2-3 times in a food processor. We’re not making pea puree! We want a rough, chunky mash so some peas burst and thicken the sauce, while others stay whole for those delightful pops of sweetness. This one trick transforms the texture of the whole dish.
- Build the Sauce: Place a large skillet or (use the empty pasta pot for fewer dishes!) over medium heat. Add the olive oil and let it warm for 30 seconds. Add the pesto and your mashed peas. Stir and let them get friendly for just 1-2 minutes until everything is warm and fragrant. You’ll see the colors become even more vibrant.
- The Grand Toss – Where Magic Happens: Add the drained spaghetti directly into the skillet with the pesto-pea mixture. Now, start tossing! Use tongs to lift and coat every strand. The sauce might seem a bit tight at first. This is where you become a pasta boss: start adding that reserved pasta water, a few tablespoons at a time, tossing continuously. Watch as the starch in the water emulsifies with the pesto and oil, creating a creamy, glossy sauce that clings perfectly to the pasta. You may not need all the water—stop when the sauce looks silky and moves easily.
- The Finishing Touches: Take the pan off the heat. Stir in most of your grated Parmesan (saving a little for topping), and a few good cracks of black pepper. Give it one final, confident toss. Taste it! Does it need another pinch of salt? A little more pepper? This is your moment to adjust.
Plating Up with Pizzazz
You’ve done the hard work—now let’s make it pretty! I love serving this family-style in a big, shallow bowl for that rustic, “dig in!” feel. Use your tongs to lift and twirl generous nests of pasta into each individual bowl or plate. Top with the remaining grated Parmesan, a few artfully torn fresh basil leaves, and that all-important sprinkle of lemon zest. The zest isn’t just for looks; the citrus oils will perfume the whole dish as you serve it.
What to serve on the side? Keep it light and fresh. A simple arugula salad with a lemon vinaigrette balances the richness. For some protein, grilled shrimp or a piece of pan-seared lemon chicken breast alongside is absolutely divine. And don’t forget the crusty bread—it’s mandatory for swiping up every last bit of that glorious green sauce from your plate.
Make It Your Own: Delicious Twists & Swaps
The beauty of this recipe is its adaptability. Play with it! Here are some of my favorite riffs:
- Protein Power-Up: Add a can of drained, flaked sustainable tuna or a couple of handfuls of shredded rotisserie chicken when you toss the pasta with the sauce. For a vegetarian protein boost, a can of rinsed white beans or crispy pan-fried chickpeas are fantastic.
- Green Goddess Version: Blitz a handful of fresh spinach or arugula into the pesto (or use it instead of basil) and add a couple of chopped green onions with the peas. It’s a mega-dose of green goodness.
- Creamy Dreamy: Stir in a 1/4 cup of heavy cream, mascarpone, or even full-fat coconut milk (for a dairy-free option) along with the pesto for an ultra-luxurious, velvety sauce.
- Vegan & Dairy-Free: Easy! Use a vegan pesto (often made with nuts and nutritional yeast) and swap the Parmesan for a sprinkle of vegan “parm” or a tablespoon of nutritional yeast for that cheesy, savory flavor.
- Spring Fling: In spring, swap half the peas for fresh, thinly sliced asparagus spears, added to the skillet for the last minute of cooking. Finish with fresh mint instead of basil.
Beau’s Kitchen Notebook
This recipe has been my loyal companion for years, and it’s evolved in fun ways. I once made it for a first date, thinking I was being all impressive and chef-y. I was so busy talking that I accidentally used mint instead of basil in the pesto. Guess what? She loved it, and now “Minty Pea Pasta” is our anniversary dish! The lesson? Don’t fear the happy accident.
Another pro-tip: if you’re making homemade pesto, double the batch. Freeze the extra in an ice cube tray. Then, on any given night, you can pop out a pesto cube, grab some peas and pasta, and be 10 minutes from dinner glory. It’s the ultimate freezer hack for future-you.
Your Questions, Answered
Q: My sauce turned out oily/greasy. What happened?
A: This usually means the pesto got too hot and “broke.” Pesto is best warmed gently, not cooked. Make sure your skillet is only on medium heat, and add the pasta and a splash of that starchy water right away—the emulsification will bring it back together beautifully.
Q: Can I use fresh peas instead of frozen?
A> Absolutely! If you can get your hands on gorgeous, fresh spring peas, blanch them in the boiling pasta water for about 60 seconds before scooping them out, then proceed with the recipe. Their flavor is incredible.
Q: The pasta seems dry after I toss it. Help!
A> No panic! This is why we save the pasta water. Simply add a few more tablespoons of the reserved water and toss vigorously. The starch will loosen the sauce and make it creamy again. You can always add more water, but you can’t take it out, so go slow.
Q: How do I store and reheat leftovers?
A> Store in an airtight container in the fridge for up to 3 days. To reheat, add a splash of water or milk to a skillet over low heat and stir gently until warmed through. The microwave can make it a bit gummy, so the stovetop is best.

Pesto Pea Spaghetti : A Fresh Twist on a Classic
Description
Some nights you want dinner to be fast, comforting, and actually good for you — not just something quick. That’s where Pesto Pea Spaghetti saves the day. It’s bright, herby, slightly sweet from the peas, and wonderfully creamy without needing a heavy sauce. With just a few ingredients and one pot, you can have a vibrant, satisfying meal on the table in about 20 minutes.
Ingredients
-
12 oz (340 g) spaghetti
-
1 cup frozen peas, thawed
-
½ cup pesto (store-bought or homemade)
-
2 tablespoons olive oil
-
¼ cup grated Parmesan cheese
-
Salt and black pepper, to taste
-
Optional: fresh basil leaves, lemon zest, chili flakes
Instructions
-
Cook the pasta
Bring a large pot of salted water to a boil. Cook spaghetti until al dente according to package directions. Reserve ½ cup of pasta water, then drain. -
Mash the peas
Lightly mash the peas with a fork (leave some whole for texture). -
Warm the sauce base
In a large skillet or the empty pasta pot over medium heat, add olive oil, pesto, and mashed peas. Warm gently for 1–2 minutes, stirring. -
Combine
Add the drained spaghetti to the skillet. Toss to coat. Add reserved pasta water a few tablespoons at a time until the sauce becomes glossy and lightly creamy. -
Finish
Remove from heat. Stir in Parmesan and black pepper. Taste and adjust salt if needed. -
Serve
Top with extra Parmesan, basil, lemon zest, or chili flakes if desired.
Notes
-
Salt your pasta water well — it should taste like the sea for best flavor.
-
Don’t overheat pesto — gentle warming keeps the color bright and prevents oil separation.
-
Use pasta water gradually to control sauce texture.
-
Add protein easily — grilled chicken, shrimp, tuna, or white beans mix in well.
-
Make it creamy — stir in 2–3 tablespoons cream or Greek yogurt at the end if you want a richer sauce.
Nutritional Information (Approximate, per serving)
This dish is a wonderfully balanced meal! Here’s a general breakdown for one serving (based on 4 servings total):
Calories: ~420 | Protein: 12g | Carbohydrates: 55g | Fat: 18g | Fiber: 5g
It’s a great source of complex carbs for energy, and the peas pack a surprising amount of plant-based protein and fiber to keep you full. The fats from the olive oil, nuts (in the pesto), and cheese are the satisfying, heart-healthy kind. To lower the carbs, you can easily swap in your favorite legume-based or vegetable noodle. Remember, this info is an estimate – your specific brands and portion sizes will cause variation.
Final Thoughts
And there you have it, my foodie friend – your blueprint to a ridiculously easy, impossibly delicious dinner that’s ready before you can even scroll through delivery app reviews. This Pesto Pea Spaghetti is more than a recipe; it’s a reminder that good food doesn’t have to be complicated. It’s about simple ingredients, a little technique, and the joy of creating something nourishing and delightful with your own two hands.
I hope this dish becomes a trusted friend in your kitchen rotation, just like it is in mine. Give it a try, play with the variations, and make it yours. And when you do, I’d love to hear about it! Tag me @Feastical on socials so I can see your gorgeous creations. Now, go grab that fork and dig into something good. Happy cooking!
– Beau
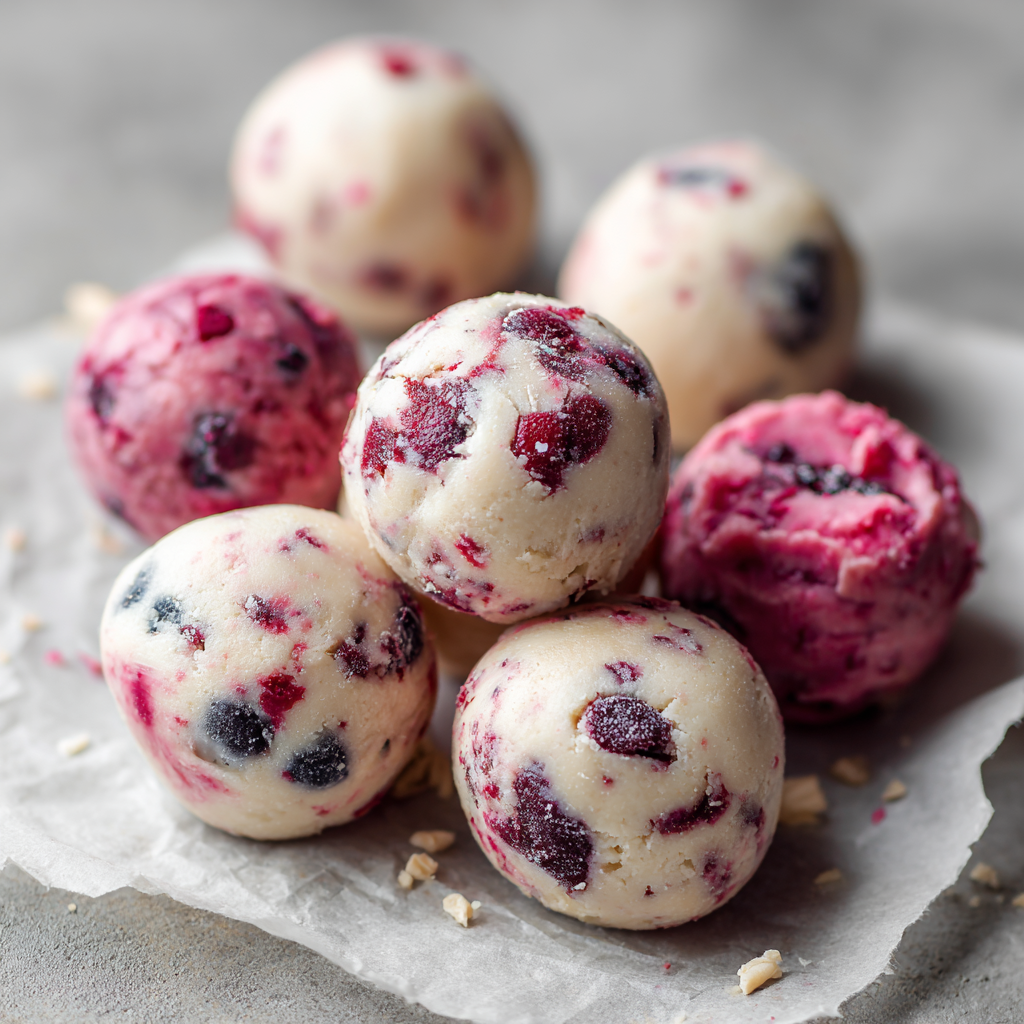
Frozen Berry Protein Bites: Creamy, Cold, and Packed with Protein
Frozen Berry Protein Bites: Your New Secret Weapon for a Sweet, Healthy Treat
Hey friends, Beau here from Feastical! Tell me if this sounds familiar: it’s that mid-afternoon lull, or maybe you’ve just rolled out your yoga mat after a good workout, and a craving hits. Not just any craving—a sweet, creamy, gotta-have-it-now kind of craving. But you’re also trying to be kind to your body, to fuel it with the good stuff. So you’re stuck in that classic standoff between the pint of ice cream calling your name from the freezer and the sensible voice reminding you about protein and nutrition.
Well, my foodie friends, I’m here to call a truce. What if I told you you could have a treat that’s cold, creamy, delightfully sweet, and packed with protein? A snack that feels like a cheat code but is made from just a handful of simple, wholesome ingredients? Enter the hero of our story today: Frozen Berry Protein Bites.
These little frozen gems are the snack I wish I’d invented years ago. They’re the perfect marriage of a thick, frosty bite of frozen yogurt and the satisfying punch of a protein shake, all rolled into one pop-in-your-mouth delight. They’re ridiculously easy to make (we’re talking 5 minutes of active time, scout’s honor), require zero fancy equipment, and are endlessly customizable. Whether you need a post-gym refuel, a poolside cool-down, or just a sweet bite that won’t derail your day, these bites have got your back. So, let’s ditch the dilemma and make a batch together. Your freezer (and your taste buds) are about to become best friends.
The “Aha!” Moment: From Melty Mess to Frozen Perfection
This recipe was born, like so many of my favorites, from a happy little kitchen accident. A few summers back, I was experimenting with a protein-packed smoothie bowl. I’d blended my Greek yogurt, berries, and protein powder into this glorious, thick paste. It was so good, I got a bit… overzealous. I made way more than I could possibly eat.
Not wanting to waste a single spoonful, I did what any sensible person would do: I dolloped the leftover mixture onto a plate, thinking I’d just save it for later. Fast forward two hours of forgetting it on the counter (we’ve all been there). When I finally remembered, it had turned into a sad, slightly separated puddle. In a last-ditch effort to salvage it, I scooped the dollops onto a parchment-lined tray and shoved them into the freezer, fully expecting to toss them the next day.
You can imagine my shock when I taste-tested one of those frozen blobs the following afternoon. That creamy, melt-in-your-mouth texture! The intense, cold berry flavor! It was like a healthy, grown-up version of those frozen yogurt dots I loved as a kid. The “Frozen Berry Protein Bite” was officially born. It was a reminder that sometimes, the best recipes aren’t planned—they’re discovered when you’re just playing around, trying not to waste good food. Now, I make them on purpose, and I’m so excited to share the proper method with you.
Gathering Your Simple, Star-Quality Ingredients
Part of the magic here is the short, sweet ingredient list. Each one plays a crucial role in creating that perfect creamy-yet-firm, sweet-yet-tangy bite. Let’s break it down:
- ½ cup thick Greek yogurt (plain or vanilla): This is our creamy base. I’m talking about the full-fat or 2% kind that’s so thick your spoon stands up in it. That thickness is non-negotiable—it ensures our bites hold their shape and don’t get icy. Chef’s Insight: If you’re dairy-free, a super thick coconut or almond-based yogurt can work, but you may need to add a touch more protein powder to help it set.
- 2 tablespoons mashed berries: The fruity heart of the bite! I love a mix of raspberries and blueberries for a tangy-sweet punch, but frozen strawberries or blackberries are fantastic too. Substitution Tip: No fresh berries? Use frozen! Just thaw and drain them really well to avoid excess liquid. You can even use a tablespoon of all-natural berry jam or preserves in a pinch.
- ½ scoop vanilla protein powder: Our protein powerhouse and natural sweetener. This acts as a binder, soaking up any excess moisture from the yogurt and berries. Chef’s Insight: The type of protein powder matters! For the creamiest texture, I swear by a good-quality casein or a blend. Whey protein isolate can work, but it sometimes sets a bit harder. Vegan pea or brown rice protein powders are great options too—just know the flavor and color will be more pronounced.
See? Just three friends hanging out, ready to make something incredible. Now, let’s get mixing!
Step-by-Step: Let’s Build Some Bites!
This is where the fun really begins. We’re not just making food; we’re creating tiny, edible treasures. Follow these steps, and you’ll be a Frozen Bite pro in no time.
- The Great Mash & Mix: In a small, sturdy bowl, add your berries. Grab a fork and mash them with gusto until you have a chunky, juicy pulp. Now, plop in your glorious, thick Greek yogurt. Sprinkle the protein powder over the top. Here’s my pro tip: Stir the powder into the yogurt just a little bit first before fully integrating it with the berries. This prevents the powder from clumping on contact with berry juice. Then, stir everything together until it’s one beautifully smooth, uniformly pink (or purple!) mixture. No streaks of white yogurt should remain.
- The Dollop Drop: Line a small baking sheet or plate with parchment paper. Using a teaspoon or a small cookie scoop (my secret weapon for uniform bites!), drop small, rounded spoonfuls of the mixture onto the paper. You’re aiming for the size of a large chocolate chip or a little smaller than a ping-pong ball. Don’t stress about perfection—rustic is charming! Chef’s Hack: If you have mini silicone molds (like for candy or mini muffins), use them! They give you perfect little domes and make removal a breeze. Simply spoon the mixture in and give the mold a tap on the counter to settle it.
- The Big Chill: Carefully transfer your tray or molds to the freezer. This is the test of patience! Let them freeze solid, which will take about 1.5 to 2 hours. The 30 minutes in the original concept is the minimum to be firm enough to handle, but for the ideal creamy-but-solid texture, give them a full two hours. I like to make these right after dinner so they’re rock-solid and ready for tomorrow’s snacks.
- Storage & Enjoyment: Once frozen, pop your bites off the parchment paper or out of the molds. Immediately transfer them to a freezer-safe bag or airtight container. This prevents them from picking up any freezer smells and stops them from sticking together into one giant bite-blob. To eat, just grab one (or three!) straight from the freezer. Let it sit on your tongue for a second to take the initial edge off the cold, then enjoy that creamy, berry-licious melt.
How to Serve Your Frozen Masterpieces
The beauty of these bites is that they are a complete, grab-and-go snack all on their own. But if you want to get fancy (or just extra delicious), here are a few of my favorite ways to serve them:
The Classic Pop: Straight from the container to your mouth. Ideal for a quick protein hit while running out the door.
The Power Bowl: Scatter a handful over a bowl of warm oatmeal or chia pudding. The contrast of hot and cold, creamy and creamy-er, is absolute magic.
The Dessert Platter: Want to impress guests? Arrange a few bites on a small plate with some fresh mint leaves, a drizzle of melted dark chocolate, and a few whole berries. It looks gourmet but took you minutes.
The Smoothie Topper: Blend up your favorite smoothie and drop 2-3 frozen bites on top. They act like delicious, melting protein-packed ice cream scoops.
Get Creative: 5 Flavor Twists to Try
Once you master the basic formula, the flavor world is your oyster! Here are some of my favorite riffs on the original:
- Tropical Escape: Swap the mixed berries for mashed ripe mango or pineapple. Use vanilla or unflavored protein powder, and add a tiny pinch of coconut extract. Roll the finished bites in unsweetened shredded coconut before freezing.
- Chocolate Peanut Butter Cup: Use chocolate protein powder. Instead of berries, mix in one tablespoon of natural peanut butter (or powdered peanut butter for less fat). You’ll have a frozen treat that tastes like your favorite candy.
- Lemon Blueberry Bliss: Use mashed blueberries only. Add the zest of one small lemon and a teaspoon of lemon juice to the yogurt mixture. It’s so bright, fresh, and tangy!
- Cookies & Cream: Use vanilla protein powder and plain yogurt. After mixing, gently fold in 1 tablespoon of crushed gluten-free or regular Oreo pieces. A fun, decadent-feeling twist.
- Vegan Berry Bomb: Use a thick, plain, unsweetened coconut yogurt and a vegan vanilla protein powder. Mash in your berries as usual. The coconut adds a lovely subtle flavor that pairs perfectly with the fruit.
Beau’s Kitchen Notes & Stories
Over countless batches, I’ve learned a thing or two. First, these bites have become my not-so-secret weapon for healthy-ish party snacks. I once brought a giant Tupperware of them to a backyard BBQ, and they disappeared faster than the chips! Kids especially go nuts for them, thinking they’re getting a special frozen candy.
Second, the evolution of this recipe has all been about texture. I’ve tried adding honey (made them too soft), chia seeds (fun crunch, but changes the vibe), and even blending everything (too airy). The simple mash-and-stir method truly is the gold standard. It gives you that perfect, dense, creamy bite that slowly melts instead of immediately turning to ice shards in your mouth. Trust the process, and trust your freezer!
FAQs: Your Questions, Answered
Q: My bites are super icy and hard. What went wrong?
A: This usually points to two things: 1) Your yogurt wasn’t thick enough, introducing more water that turns to ice. Next time, strain regular yogurt in a cheesecloth for an hour or seek out the absolute thickest brand. 2) You might have used a straight whey protein isolate. Try a casein blend next time for a creamier freeze.
Q: Can I make these without protein powder?
A: You can, but they won’t set as firmly and will be more like frozen yogurt drops. To help them along, try adding a teaspoon of almond flour or coconut flour to absorb moisture. The flavor and protein boost won’t be the same, but they’ll still be a tasty frozen treat.
Q: How long do they last in the freezer?
A: In an airtight container, they’ll keep beautifully for up to 2 months. After that, they might start to develop a little freezer frost or lose peak flavor.
Q: Can I double or triple the recipe?
A> Please do! This recipe scales up perfectly. It’s a fantastic way to meal-prep a healthy snack for the whole week. Just make sure you have enough parchment-lined space in your freezer for all those tasty bites to freeze flat initially.

Frozen Berry Protein Bites: Creamy, Cold, and Packed with Protein
Description
When a sweet craving hits but you still want something nourishing, these Frozen Berry Protein Bites are the perfect solution. They’re cold, creamy, naturally sweet, and packed with protein. Best of all, they take just minutes to prepare and live happily in your freezer for grab-and-go snacking. Great for post-workout fuel, lunchboxes, or a light dessert.
Ingredients
-
½ cup thick Greek yogurt (plain or vanilla)
-
2 tablespoons mashed berries (strawberries, blueberries, or raspberries)
-
½ scoop vanilla protein powder
-
Optional: 1–2 teaspoons honey or maple syrup (if you like it sweeter)
Instructions
-
Mash the berries in a small bowl with a fork until juicy and mostly smooth.
-
Add yogurt and protein powder to the bowl.
-
Mix well until fully combined and creamy with no dry pockets.
-
Line a small tray or plate with parchment paper.
-
Scoop small spoonfuls of the mixture onto the tray (about 1 teaspoon each).
-
Freeze for 1½–2 hours, or until completely firm.
-
Transfer to an airtight container and keep stored in the freezer.
Enjoy straight from frozen for the best texture.
Notes
-
Use very thick yogurt — Greek or strained yogurt gives the creamiest, least icy texture.
-
Drain thawed frozen berries before mashing to avoid excess water.
-
Taste before freezing and adjust sweetness if needed.
-
Try silicone mini molds instead of spooning for perfect shapes.
-
Flavor swaps: Use chocolate protein powder + peanut butter, or mango + coconut yogurt for a tropical version.
A Quick Look at the Nutrition (Per Bite, Approx.)
Remember, these are estimates and can vary based on your specific brands of yogurt and protein powder. But to give you an idea of the powerhouse you’re eating:
- Calories: ~40-50
- Protein: ~4-5 grams
- Carbohydrates: ~3-4 grams
- Sugar: ~2-3 grams (naturally occurring from yogurt and berries)
- Fat: ~1-2 grams
Compare that to a store-bought protein bar or a scoop of ice cream, and you’ll see why I’m so excited about these. You’re getting a satisfying, portion-controlled sweet treat with a meaningful protein payoff and very little added sugar. It’s a win-win-win.
Final Thoughts
And there you have it, friends—everything you need to know to conquer those sweet cravings with something that truly loves you back. These Frozen Berry Protein Bites are more than just a recipe; they’re a reminder that eating well doesn’t have to be complicated, expensive, or boring. It can be playful, colorful, and deeply satisfying.
I hope this recipe finds its way into your regular rotation, becoming your go-to for busy mornings, post-workout wins, or just because. If you make them, I’d love to hear about it! Tag me over on @Feastical or drop a comment on the blog. Tell me what flavor twist you tried, or share your own happy kitchen accident that turned into a favorite.
Now, go forth and freeze! Your spoon (and your muscles) will thank you.
With love and a full freezer,
Beau