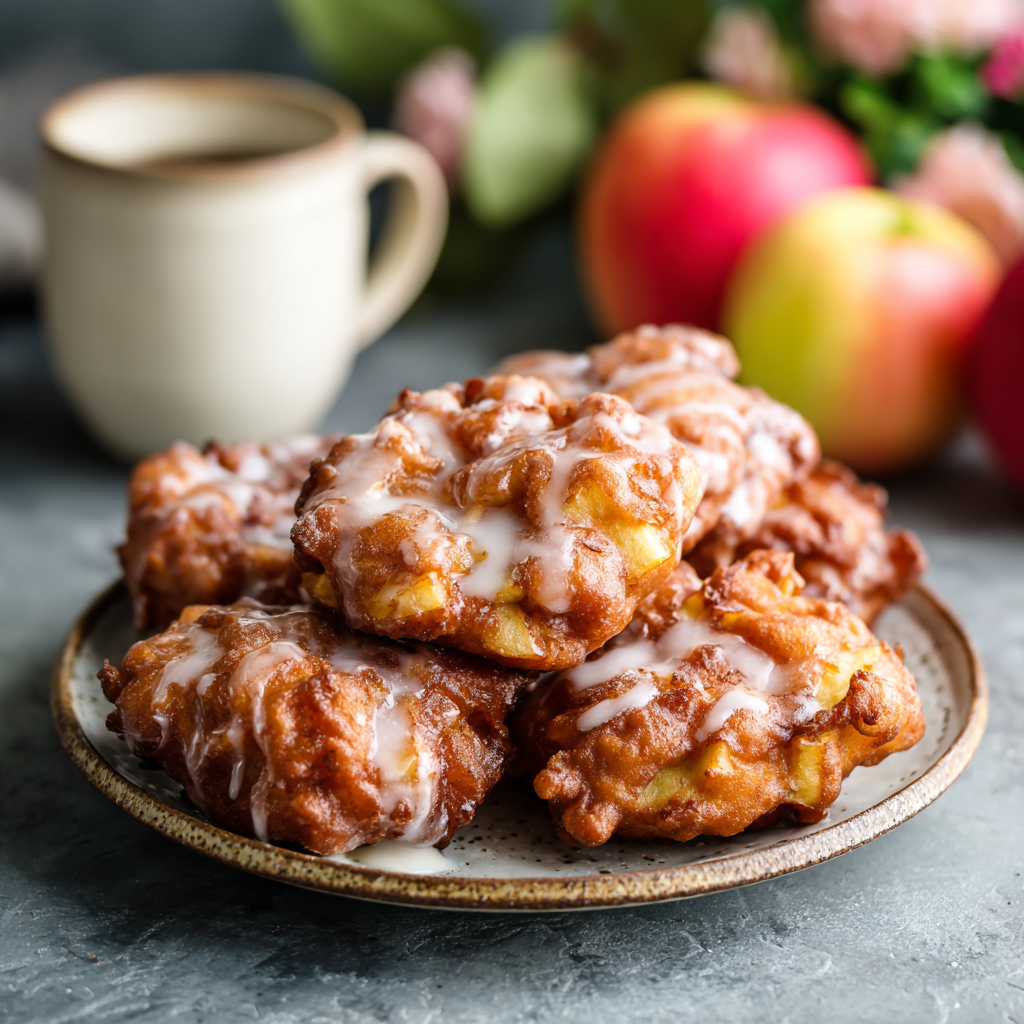
Apple Fritters with Cinnamon Sugar Glaze
Welcome to Apple Fritter Heaven!
Hey there, friends! Beau here, welcoming you back to my kitchen. Is there anything that screams “cozy fall morning” more than the smell of cinnamon and apples sizzling in a pan? I’m talking about that magical, sugary aroma that wafts through the entire house, pulling everyone out of bed and into the kitchen with a happy, curious grin. That’s the power of a truly perfect homemade apple fritter.
Now, I know what you might be thinking: “Beau, frying at home? That sounds a little… intense.” But trust me on this one. We’re keeping it simple, soulful, and seriously satisfying. These aren’t just any apple fritters; they’re little clouds of fried dough packed with juicy, tender apple chunks, spiced with warm cinnamon, and finished with a sweet, drippy glaze that’s basically a hug for your taste buds. They’re crispy on the outside, impossibly soft and fluffy on the inside, and they taste a million times better than anything you can get from a donut shop because you made them with your own two hands. So, tie on your favorite apron, and let’s make some messy, magnificent magic together.
A Sticky-Sweet Memory
This recipe takes me right back to my grandma’s kitchen on a crisp October Saturday. My job, as her official “sous-chef” (a fancy title for a seven-year-old covered in flour), was to peel the apples. I’d make a towering, spiral pile of apple skins while she mixed the batter with these strong, knowing hands that had made this recipe a thousand times. The real magic happened when that first spoonful of batter hit the hot oil. It would hiss and sputter, transforming from a pale, lumpy blob into a gorgeous, golden-brown masterpiece. She’d always let me drizzle the glaze, and I’d always “accidentally” make extra so I could lick the spoon. It wasn’t just about the fritters; it was about the laughter, the stories, and the shared anticipation of that first, heavenly bite. That’s the feeling I want to bring to your kitchen today.
Gathering Your Fritter-Making Gear
Nothing too fancy here, just simple, good-quality ingredients that work together in perfect harmony. Here’s what you’ll need:
For the Apple Fritters:
- 2 cups all-purpose flour: The sturdy foundation of our fritter. It gives them that perfect structure. For a slightly lighter texture, you can swap in 1 cup of cake flour for one cup of all-purpose.
- 1/3 cup granulated sugar: Just the right amount of sweetness to complement the tart apples.
- 2 tsp baking powder: Our rising star! This is what gives the fritters their incredible lift and fluffy interior. Make sure it’s fresh for the best puff.
- 1 tsp cinnamon: The soul of this dish. That warm, familiar spice is non-negotiable for me.
- 1/2 tsp salt: Don’t skip this! Salt is a flavor enhancer and makes all the other ingredients pop.
- 2/3 cup milk: Whole milk is my go-to for richness, but any milk you have on hand will work beautifully.
- 2 large eggs: They bind everything together and add wonderful richness.
- 2 tbsp melted butter: For that undeniable, buttery flavor. Let it cool slightly before adding it to the wet mix so it doesn’t cook the eggs!
- 2 tsp vanilla extract: The secret weapon! A little vanilla adds a beautiful depth of flavor that makes these taste truly bakery-quality.
- 2 medium apples, peeled and diced: I love using a mix of Granny Smith (for tartness) and Honeycrisp or Fuji (for sweetness). About 1 ½ to 2 cups diced.
- Oil, for frying: Use a neutral oil with a high smoke point. Canola, vegetable, or peanut oil are all excellent choices. You’ll need enough for about 2 inches in your pot or skillet.
For the Cinnamon Sugar Glaze:
- 1 1/2 cups powdered sugar: Creates that smooth, dreamy glaze we all love.
- 2–3 tbsp milk: Start with 2 tablespoons and add more as needed to reach your desired drizzling consistency.
- 1/2 tsp cinnamon: Doubling down on the cozy flavor.
- 1/2 tsp vanilla extract: Because why not? A little more vanilla never hurt anybody.
Let’s Get Frying: Your Step-by-Step Guide
Ready to create some magic? Follow these steps and you’ll be a fritter-making pro in no time. I’ve packed this section with all my best chef hacks to ensure your success!
- Combine the Dry Team. In a large bowl, grab your whisk and vigorously whisk together the flour, sugar, baking powder, cinnamon, and salt. This isn’t just about mixing; you’re aerating the flour and making sure the baking powder is evenly distributed, which is key for a uniform rise. No one wants a fritter with a baking powder pocket!
- Unite the Wet Team. In a separate medium bowl, whisk the milk, eggs, slightly cooled melted butter, and vanilla extract until it’s one smooth, happy, yellow mixture. Pro Tip: Crack your eggs into a small bowl first before adding them to the mix. It’s a simple trick that saves you from fishing out bits of eggshell later!
- Make the Batter. Pour your wet ingredients into the dry ingredients. Now, here’s the most important tip: mix until *just* combined. A few lumps are totally fine! Overmixing is the enemy of tender, fluffy fritters—it develops the gluten in the flour and can make them tough. Gently fold in the diced apples until they’re evenly distributed.
- Heat the Oil. Pour your oil into a heavy-bottomed pot, Dutch oven, or deep skillet until it’s about 2 inches deep. Attach your candy/deep-fry thermometer and heat over medium heat until it reaches a steady 350°F (175°C). This temperature is crucial! If the oil is too cool, the fritters will absorb oil and become greasy. If it’s too hot, they’ll brown on the outside before cooking through on the inside. No thermometer? Test with a small bit of batter—it should sizzle actively and turn golden brown in about 60-90 seconds.
- Fry to Golden Perfection. Carefully drop heaping tablespoons of batter into the hot oil. Don’t overcrowd the pan—fry in batches of 3-4 to maintain the oil temperature. They’ll fry for about 2-3 minutes per side. You’ll see them puff up beautifully! Use a slotted spoon or spider strainer to gently flip them. When they’re a deep, golden brown on both sides, remove them and let them drain on a wire rack set over a baking sheet lined with paper towels. The rack keeps them from getting soggy on the bottom—a game-changing hack!
- Whip Up the Glaze. While the fritters are still warm, make the glaze. In a small bowl, whisk the powdered sugar, 2 tablespoons of milk, cinnamon, and vanilla until smooth. If it’s too thick, add the remaining milk, a teaspoon at a time, until it’s a thick but pourable consistency.
- The Grand Finale: Glaze! You can either dip the top of each warm fritter directly into the glaze or use a spoon to drizzle it lavishly over the top. I’m a dipper—I love that full coverage! Let the glaze set for a few minutes. I know it’s hard, but it’s worth the wait.
How to Serve These Golden Gems
Serve these apple fritters warm! Pile them high on a rustic wooden board or a pretty platter for everyone to grab. They are absolute perfection alongside a hot cup of coffee, a cold glass of milk, or a steaming mug of spiced cider. For a next-level brunch spread, serve them with other breakfast favorites like crispy bacon or savory breakfast sausages to balance the sweetness. They’re best enjoyed the day they’re made, ideally within an hour or two of frying, while the exterior is still slightly crisp.
Mix It Up! Creative Fritter Twists
Once you’ve mastered the classic, the world is your apple-filled oyster! Here are a few fun variations:
- Apple Berry Bliss: Fold in 1/2 cup of fresh or frozen cranberries or blueberries along with the apples for a tart, juicy burst.
- Gluten-Free Goodness: Substitute the all-purpose flour with a 1:1 gluten-free baking blend. The texture will be slightly different but still delicious!
- Chunky Monkey: Add 1/2 cup of chopped walnuts or pecans to the batter for a wonderful crunch.
- Caramel Drizzle: Swap the cinnamon glaze for a simple caramel glaze. Whisk 1 cup of powdered sugar with 2-3 tablespoons of store-bought caramel sauce and a splash of milk.
- Baked Option: Want to avoid frying? Scoop the batter onto a parchment-lined baking sheet, gently flatten, and bake at 375°F (190°C) for 15-18 minutes, flipping halfway. They’ll be more like muffin tops, but still yummy!
Beau’s Chef’s Notes
This recipe has been through a lot of iterations in my kitchen. The first time I made them by myself, I was so nervous about the oil temperature that I definitely ended up with a few slightly doughy, slightly greasy frisbees. But hey, that’s how we learn! The wire rack trick was a total revelation I picked up after one too many soggy-bottomed fritters. I also used to be very precise with my apple dicing, but now I embrace a mix of sizes—some bigger chunks give you amazing juicy pockets in every bite. Don’t be afraid of the fry! It’s a simple technique that feels fancy, and the result is so, so worth it. The biggest evolution? I now always make a double batch. They disappear faster than you can say “is there another one?”
Fritter FAQs & Troubleshooting
Q: My fritters are greasy. What happened?
A: The most likely culprit is oil temperature. If the oil isn’t hot enough, the fritters will absorb it instead of immediately searing. Always use a thermometer and let the oil come back up to 350°F between batches. Also, avoid overcrowding the pan, as adding too many fritters at once causes the temperature to plummet.
Q: My glaze is too thin/too thick. How can I fix it?
A: Glazes are super easy to adjust! Too thin? Whisk in more powdered sugar, a tablespoon at a time. Too thick? Add more liquid, but do it one tiny teaspoon at a time. You can use milk, cream, or even a little apple cider for extra flavor.
Q: Can I make the batter ahead of time?
A: I don’t recommend it. The baking powder starts working as soon as it gets wet, so letting the batter sit will result in less fluffy, dense fritters. For the best rise and texture, mix the batter and fry it right away.
Q: What’s the best apple to use?
A: You want an apple that holds its shape when heated and has a balance of sweet and tart flavor. My top picks are Granny Smith, Honeycrisp, Braeburn, or Fuji. Using a mix of varieties gives you a more complex flavor!
Apple Fritters with Cinnamon Sugar Glaze
- Total Time: 25–30 min
Description
Homemade Apple Fritters
Ingredients
Fritters:
-
2 cups all-purpose flour (or 1 cup AP + 1 cup cake flour for lighter texture)
-
1/3 cup granulated sugar
-
2 tsp baking powder
-
1 tsp cinnamon
-
1/2 tsp salt
-
2/3 cup milk (whole milk preferred)
-
2 large eggs
-
2 tbsp melted butter, slightly cooled
-
2 tsp vanilla extract
-
2 medium apples, peeled and diced (mix Granny Smith + Honeycrisp or Fuji)
-
Oil for frying (neutral, high smoke point; ~2 inches deep)
Cinnamon Glaze:
-
1 1/2 cups powdered sugar
-
2–3 tbsp milk
-
1/2 tsp cinnamon
-
1/2 tsp vanilla extracT
Instructions
1. Mix Dry Ingredients:
Whisk together flour, sugar, baking powder, cinnamon, and salt in a large bowl.
2. Mix Wet Ingredients:
In a separate bowl, whisk milk, eggs, melted butter, and vanilla until smooth.
3. Combine & Fold in Apples:
Pour wet ingredients into dry ingredients; stir just until combined (lumps are okay). Fold in diced apples gently.
4. Heat Oil:
Heat oil in a deep skillet, pot, or Dutch oven to 350°F (175°C). Use a thermometer or test with a small bit of batter—it should sizzle and brown in 60–90 sec.
5. Fry Fritters:
Drop heaping tablespoons of batter into oil, 3–4 at a time. Fry 2–3 min per side until golden brown. Use a slotted spoon to flip and remove. Drain on a wire rack over paper towels to prevent sogginess.
6. Make Glaze:
While fritters are warm, whisk powdered sugar, 2 tbsp milk, cinnamon, and vanilla until smooth. Adjust consistency with extra milk if needed.
7. Glaze Fritters:
Dip tops of warm fritters in glaze or drizzle with a spoon. Let set for a few minutes before serving.
Notes
-
Greasy fritters: Oil too cool or overcrowded pan. Maintain 350°F and fry in small batches.
-
Glaze issues: Too thin → add powdered sugar; too thick → add liquid a teaspoon at a time.
-
Batter ahead: Don’t do it—baking powder works immediately, and resting reduces fluffiness.
-
Apple selection: Use firm apples that hold their shape (Granny Smith, Honeycrisp, Fuji). Mixing sweet + tart adds depth.
- Prep Time: 15 min
- Cook Time: 10–15 min per batch
Nutritional Information*
*Please note: This is an estimated nutritional breakdown provided by an online calculator. Values can vary based on specific ingredients used and portion size.
Per fritter (assuming recipe makes 12): Calories: ~250 | Protein: 4g | Carbohydrates: 38g | Fat: 9g | Fiber: 2g

Cajun Jambalaya Pasta
Spice Up Your Dinner Routine with My Cajun Jambalaya Pasta
Hey friends, Beau here from Feastical! Let’s talk about those nights. You know the ones. You’re standing in front of the fridge, door wide open, and you’re hit with that universal craving: you want something cozy, but you also want something with a little fire. You want to feel like you’re wrapped in a blanket, but you also want your taste buds to do a happy dance. Well, pull up a chair, because I’ve got the absolute perfect solution that’s been saving my weeknights and wowing my friends for years: my one-pan wonder, Cajun Jambalaya Pasta.
This dish is the glorious lovechild of a classic Louisiana jambalaya and your favorite creamy pasta. We’re talking tender chicken, plump shrimp, and smoky andouille sausage all hanging out in a skillet with colorful bell peppers and onions. The whole party gets tossed in a creamy, spicy, smoky Cajun sauce that clings to every single noodle. It’s hearty, it’s satisfying, and it’s bursting with more flavor than a Mardi Gras parade. The best part? It comes together faster than you can decide what to stream tonight. So, grab your biggest skillet and your favorite apron—we’re about to make some magic.
The Night This Pasta Saved the Day
This recipe has a special place in my heart because it was born from a beautiful kitchen mishap. Years ago, I was attempting to make a traditional jambalaya for a big group of friends. Long story short, I got a little overzealous with the rice-to-liquid ratio and ended up with something… a bit soupy. Dinner was in 20 minutes, and I was starting to sweat!
I stared into that pot of flavorful, saucy, meaty goodness and had a lightbulb moment. I yelled to my wife, “Quick, boil some pasta! Any pasta!” I drained my almost-jambalaya, reserving that incredible spicy broth, tossed it all with a pound of penne and a splash of cream, and gave it a stir. What emerged from that near-disaster was a standing ovation. My friends devoured it, claiming it was the best thing I’d ever made. They still ask for “that jambalaya pasta thing” every time they come over. It just goes to show that some of the best recipes aren’t planned—they’re discovered in a moment of happy, hungry chaos.
Gathering Your Flavor Dream Team
Here’s everything you’ll need to bring this Cajun masterpiece to life. Don’t stress if you need to make a swap or two—cooking is all about making it your own!
- 12 oz Penne Pasta: I love penne because all those little tubes trap the creamy sauce perfectly. But feel free to use fettuccine, rigatoni, or even bowties!
- 2 tbsp Olive Oil: Our trusty cooking fat for searing all that delicious protein.
- 1 lb Chicken Breast, cut into bite-sized pieces: Boneless, skinless thighs work amazingly here too for even more juicy flavor.
- 8 oz Andouille Sausage, sliced: This is non-negotiable for that authentic, smoky kick! If you can’t find andouille, a good smoked kielbasa will do in a pinch.
- 1/2 lb Shrimp, peeled and deveined: I use large (31/40 count) shrimp. Pro tip: keep them in the fridge until the last second so they stay firm.
- 1 Red & 1 Green Bell Pepper, sliced: For color, sweetness, and a classic “Holy Trinity” base (along with the onion and celery seed in the seasoning).
- 1 Small Onion, sliced: Yellow or white onion adds that essential aromatic sweetness.
- 3 Cloves Garlic, minced: Because what’s a fantastic pasta without garlic? Fresh is best!
- 2 tbsp Cajun Seasoning (divided): The star of the show! Check the salt content—some brands are saltier than others. I like to use a salt-free blend so I can control the seasoning myself.
- 1 cup Chicken Broth: This forms the base of our incredible sauce. Low-sodium is my go-to.
- 1 cup Heavy Cream: For that luxurious, rich, and creamy sauce that makes this dish so indulgent.
- 1 (14 oz) can Diced Tomatoes (optional): I highly recommend this! It adds a touch of acidity and chunkiness that pushes this dish even closer to a true jambalaya.
- 1/2 cup Grated Parmesan Cheese: For salty, umami depth. The real stuff from a wedge is worlds better than the canned powder.
- Salt & Black Pepper, to taste: Season as you go!
- Fresh Parsley, for garnish: A pop of green color and fresh flavor to finish it off.
Let’s Get Cooking: Your Step-by-Step Guide
Alright, team! Fire up the stove and let’s do this. Read through these steps once before you start—it’s a fast-paced recipe, and being prepared is the best chef hack of all.
Step 1: Cook your pasta in a large pot of well-salted water until it’s just al dente (it should still have a slight bite). Remember, it’s going to hang out in the sauce later and cook a little more, so we don’t want mushy pasta! This is crucial: before you drain it, scoop out about 1/2 cup of that starchy, salty pasta water. This liquid gold is our secret weapon for making the sauce silky and perfectly clingy. Drain the pasta and set it aside.
Step 2: In a large, heavy-bottomed skillet or Dutch oven, heat the olive oil over medium-high heat. While that’s heating, toss your chicken and shrimp in a bowl with half of the Cajun seasoning. This gives them a fantastic flavor base right from the start.
Step 3: Time to sear! Add the seasoned chicken to the hot skillet in a single layer. Don’t crowd the pan—if you need to, work in batches. We’re not cooking it all the way through yet; we just want a beautiful brown sear on the outside. This takes about 2-3 minutes per side. Remove the chicken to a clean plate. Next, add the sliced andouille sausage. Let it cook for 2-3 minutes per side until it’s beautifully caramelized and has rendered some of its smoky fat into the pan. Remove the sausage to the same plate as the chicken. Finally, add the shrimp. They cook super fast—just 1-2 minutes per side until they’re pink and opaque. Remove them to the plate. See? We’re building layers of flavor in that same pan!
Step 4: In that same glorious, flavor-packed skillet (don’t you dare clean it!), add the sliced bell peppers and onion. Sauté them for about 5-6 minutes, until they start to soften and get a little char. Add the minced garlic and cook for just 30 more seconds until fragrant—you’ll smell it! Don’t let the garlic burn.
Step 5: Now for the sauce! Pour in the chicken broth to deglaze the pan. Use your spoon to scrape up all those browned, tasty bits stuck to the bottom (that’s called the “fond,” and it’s pure flavor). Add the heavy cream, the remaining Cajun seasoning, the diced tomatoes (if using), and a good pinch of salt and pepper. Let this simmer for about 5 minutes, allowing it to reduce and thicken slightly.
Step 6: Stir in the grated Parmesan cheese until it melts into the sauce, making it even richer. Now, welcome everyone back to the party! Add the cooked chicken, sausage, and shrimp (and any accumulated juices on that plate) back into the skillet. Give it a good stir to coat everything in that creamy Cajun sauce.
Step 7: Add the drained pasta and toss everything together until every noodle is dressed in that gorgeous sauce. If the sauce seems a little too thick, add a splash of that reserved pasta water until it reaches your perfect consistency. The starch in the water will help emulsify everything into a smooth, restaurant-quality sauce.
Step 8: Taste it! This is the most important step. Does it need more salt? A crack of black pepper? Another pinch of Cajun spice? Adjust to your liking. Serve immediately, garnished generously with fresh chopped parsley.
How to Serve It Up in Style
This dish is a complete meal in a bowl, so you don’t need much! I love serving it family-style right in the skillet I cooked it in—it makes for a fun, rustic presentation. Pile it high into big, shallow bowls. A simple side of warm, crusty garlic bread or a light, crisp green salad with a tangy vinaigrette is all you need to cut through the richness. And don’t forget a cold beer, a glass of iced tea, or a crisp white wine like Sauvignon Blanc to wash it all down.
Make It Your Own: Delicious Twists & Swaps
- Seafood Lover’s Delight: Swap the chicken for scallops or a firm white fish like cod, cut into chunks.
- Vegetarian Vibes: Omit the meat and use hearty vegetables like mushrooms, zucchini, and extra bell peppers. Use vegetable broth and add a can of rinsed red kidney beans for protein.
- Spice Level Control: For a milder dish, use a mild smoked sausage and a low-sodium Cajun seasoning. For extra heat, add a pinch of cayenne pepper or a few dashes of your favorite hot sauce with the cream.
- Creole Twist: Add a teaspoon of dried thyme, a teaspoon of dried oregano, and a bay leaf with the broth for a more herbaceous, Creole-inspired flavor.
Beau’s Chef Notes & Kitchen Stories
This recipe has evolved so much since that fateful “oops” night. I’ve learned that the key is building flavor at every single step. Don’t skip searing the proteins separately! It creates a deeper, more complex flavor base. Also, toasting your Cajun seasoning for just 30 seconds in the pan before adding the liquids can really wake up the spices.
One funny story: I once accidentally used a heaping tablespoon of cayenne pepper instead of paprika while making my own Cajun seasoning blend. Let’s just say we needed an entire gallon of milk and a loaf of bread on the table that night. My brother-in-law, who claims he can handle any heat, was sweating through his shirt! So, a word to the wise: always taste your spices as you go. This dish is all about big, bold flavor, but it should still be enjoyable, not painful!
Your Questions, Answered!
Q: My sauce turned out too thin. How can I thicken it?
A: No worries! Let the sauce simmer for a few more minutes uncovered to reduce. If it’s still too thin, make a quick slurry by mixing 1 tablespoon of cornstarch with 2 tablespoons of cold water. Whisk this into the simmering sauce and it should thicken up in a minute or two.
Q: Can I make this ahead of time?
A> You can prep the components ahead (chop veggies, slice sausage, mix seasoning), but I highly recommend serving it fresh. The pasta can continue to absorb the sauce and become soft. If you have leftovers, they will still taste great! Reheat gently in a skillet with a tiny splash of cream or broth to loosen the sauce back up.
Q: My shrimp ended up rubbery. What happened?
A> This almost always means they were overcooked. Shrimp cook in just 2-3 minutes. The key is to sear them quickly, remove them from the pan, and only add them back at the very end just to warm through. They should be opaque and pink, but still curled into a loose “C” shape.
Q: Is there a substitute for heavy cream to make it lighter?
A> Absolutely! For a lighter version, you can use half-and-half. I don’t recommend using milk, as it’s more likely to curdle with the acid from the tomatoes and the heat. You could also use a full-fat canned coconut milk for a dairy-free option with a subtle tropical twist!
Cajun Jambalaya Pasta
- Total Time: 40–45 mins
Description
Cajun Jambalaya Pasta
Ingredients
-
12 oz penne pasta (or fettuccine, rigatoni, bowties)
-
2 tbsp olive oil
-
1 lb chicken breast, cut into bite-sized pieces (or boneless thighs)
-
8 oz andouille sausage, sliced (or smoked kielbasa)
-
½ lb shrimp, peeled and deveined (large, 31/40 count)
-
1 red bell pepper, 1 green bell pepper, sliced
-
1 small onion, sliced
-
3 cloves garlic, minced
-
2 tbsp Cajun seasoning, divided (adjust salt to taste)
-
1 cup chicken broth (low-sodium)
-
1 cup heavy cream (or half-and-half / canned coconut milk for lighter/dairy-free)
-
1 (14 oz) can diced tomatoes, optional
-
½ cup grated Parmesan cheese
-
Salt & black pepper, to taste
-
Fresh parsley, for garnish
Instructions
1. Cook Pasta:
-
Boil pasta in salted water until just al dente.
-
Reserve ½ cup pasta water before draining. Set aside.
2. Prep Proteins:
-
Toss chicken and shrimp with half the Cajun seasoning.
3. Sear Proteins:
-
Heat olive oil in a large skillet over medium-high.
-
Cook chicken 2–3 mins per side until browned. Remove.
-
Cook sausage 2–3 mins per side until caramelized. Remove.
-
Cook shrimp 1–2 mins per side until pink and opaque. Remove.
4. Sauté Vegetables:
-
In the same skillet, sauté bell peppers and onion 5–6 mins until softened.
-
Add garlic for 30 sec until fragrant.
5. Make Sauce:
-
Pour in chicken broth to deglaze pan.
-
Add heavy cream, remaining Cajun seasoning, diced tomatoes (optional), salt, and pepper.
-
Simmer 5 mins until slightly thickened.
6. Finish Dish:
-
Stir in Parmesan until melted.
-
Return chicken, sausage, and shrimp to the skillet.
-
Add cooked pasta and toss to coat.
-
If sauce is too thick, add reserved pasta water to reach desired consistency.
-
Taste and adjust seasoning.
7. Serve:
-
Garnish with fresh parsley.
-
Serve with crusty garlic bread or a crisp green salad.
Notes
-
Seafood Lover: Swap chicken for scallops or firm white fish.
-
Vegetarian: Omit meat; use mushrooms, zucchini, extra bell peppers, and beans.
-
Spice Level: Mild – use mild smoked sausage; Hot – add cayenne or hot sauce.
-
Creole Twist: Add 1 tsp dried thyme, 1 tsp dried oregano, and a bay leaf with broth.
-
Thickening Sauce: Simmer longer or use a cornstarch slurry (1 tbsp cornstarch + 2 tbsp cold water).
-
Avoid Rubber Shrimp: Cook shrimp last, just until pink and opaque.
- Prep Time: 15 mins
- Cook Time: 25–30 mi
Nutrition
- Calories: 590 kcal
- Fat: 24g
- Carbohydrates: 52g
- Fiber: 4g
- Protein: 38g
Nutritional Information*
*This is an estimate per serving, provided for informational purposes only.
Per serving (approx.): Calories: 590 | Protein: 38g | Carbs: 52g | Fat: 24g | Fiber: 4g
Final Thoughts
This Cajun Jambalaya Pasta is more than just a convenient weeknight meal. It’s a story in a skillet—a tale of a happy kitchen accident that became a beloved tradition. It’s a lesson in building flavor with the Holy Trinity, the power of fond, and the magic of starchy pasta water. It’s a delicious homage to the rich, vibrant culinary traditions of Louisiana, blending the hearty, spicy soul of Cajun country with the luxurious, complex flair of Creole city cooking.
Most importantly, it’s a reminder that cooking doesn’t have to be rigid or intimidating. Some of the best dishes are born from improvisation and a willingness to experiment. This recipe is your blueprint, your starting point for creating something truly special that will bring people together around the table. So embrace the chaos, taste as you go, adjust the heat to your liking, and don’t be afraid to make it your own. Now, go grab that big skillet and create some magic—and don’t forget to save your pasta water
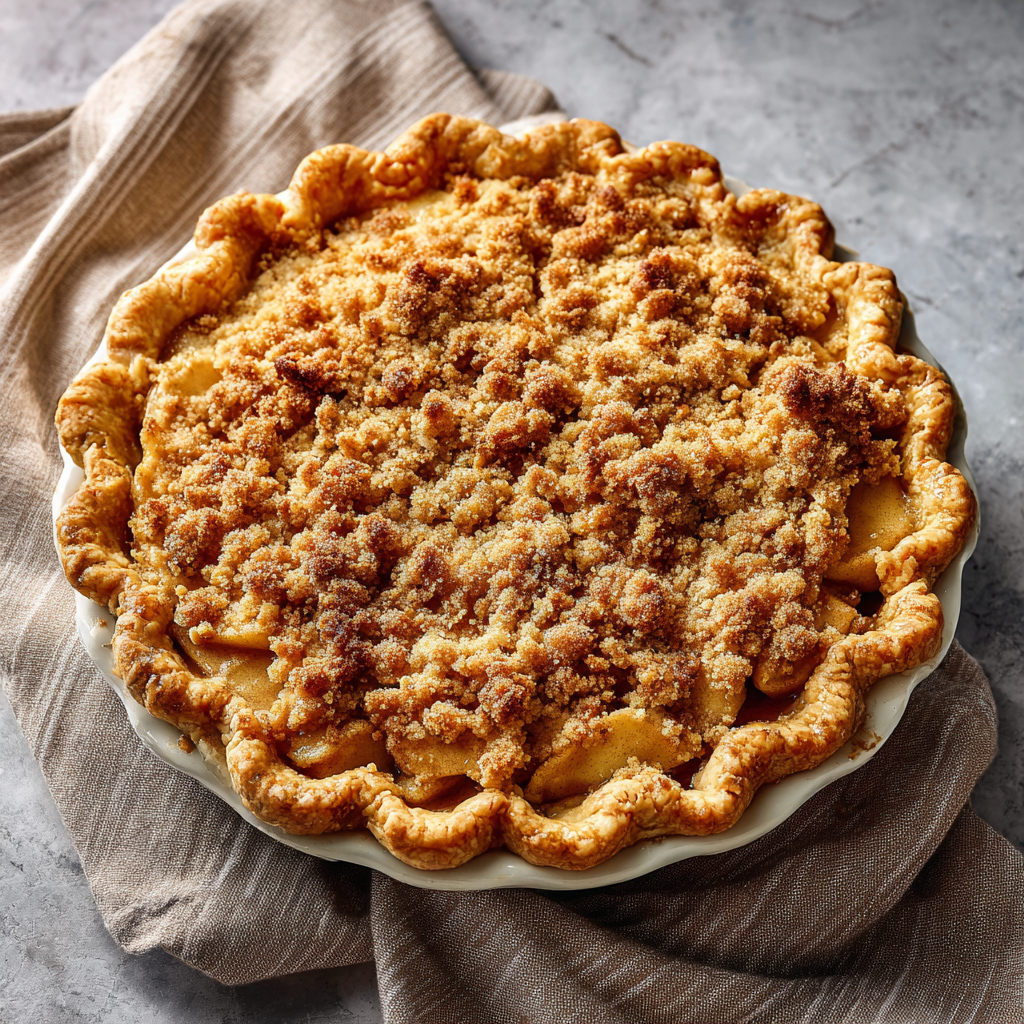
Dutch Apple Pie (with a Buttery Crumb Topping)
The Cozy, Crumbly Magic of Dutch Apple Pie
Hey there, friends! Beau here, welcoming you back to my kitchen at Feastical. Is there anything in the world that smells more like pure, unadulterated joy than an apple pie baking in the oven? That sweet, cinnamon-infused aroma that wafts through the house, wrapping everything in a warm, sugary hug? It’s the scent of weekends at grandma’s, of holiday gatherings, and of simple, soul-satisfying Sundays. Today, we’re ditching the fuss of a lattice top and diving headfirst into the glorious, buttery world of Dutch Apple Pie.
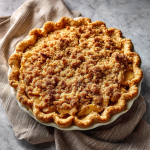
Now, if you’ve ever been intimidated by the idea of weaving a perfect pastry lattice, this recipe is your new best friend. Dutch Apple Pie swaps that intricate top crust for a generous, craggy blanket of buttery crumb topping—a streusel that bakes up into golden, crunchy, sugary perfection. It’s less about precision and more about heart. The contrast is everything: tender, spiced apples bubbling away underneath a crunchy, cookie-like topping that you’ll want to eat by the handful (no judgment here, I’ve done it). This isn’t just a pie; it’s a textural masterpiece that’s easier to make but every bit as impressive and delicious as its traditional cousin. So, preheat those ovens, grab your favorite mixing bowl, and let’s create some magic together.
A Slice of Memory
This recipe takes me right back to my first apartment after college. My kitchen was about the size of a postage stamp, and my tools consisted of one wobbly spatula, a single pot, and a hand-me-down mixing bowl from my mom. I was desperate to host my first Friendsgiving, to prove I could “adult” with the best of them. A traditional pie felt way out of my league, but this Dutch version? It felt approachable. I remember the chaos of peeling apples on my tiny counter, the nervous excitement as I mixed the crumb topping with my fingers, and the absolute triumph when I pulled that bubbling, golden-brown beauty out of my rickety oven.
The pie was far from perfect—the edges were a little dark, and I may have overloaded it with cinnamon—but the reaction from my friends was everything. That crumb topping was the star of the show. We ate it straight from the pan, scooping up warm, juicy apples and crispy crumbs with spoons, and in that messy, laughter-filled moment, I truly understood the power of food to bring people together. It wasn’t about perfection; it was about the love baked right in. That’s the feeling I want you to capture every time you make this.
Gathering Your Cast of Characters
Great food starts with great ingredients. Here’s what you’ll need to build your Dutch Apple Pie masterpiece. Don’t stress about having every single thing—cooking is about creativity, so I’ve included my favorite swaps and chef secrets right alongside.
For the Pie Crust:
- 1 (9-inch) deep-dish pie shell (homemade or store-bought) – Let’s be real, sometimes a store-bought crust is a lifesaver! No shame in that game. If you’re going homemade, my pro tip is to use a mix of butter and shortening for the ultimate flaky, flavorful base.
For the Apple Filling:
- 6–7 medium apples, peeled, cored, and sliced ¼-inch thick – I use a mix of Granny Smith (for their tartness and structure that holds up to baking) and Honeycrisp (for their incredible sweetness and juicy flavor). Other great options: Braeburn, Jonagold, or Pink Lady. Avoid Red Delicious—they turn to mush!
- ¾ cup granulated sugar – This sweetens the deal and helps pull the juices out of the apples to create that amazing syrupy filling.
- ¼ cup packed brown sugar – Adds a deep, molasses-like warmth that pairs perfectly with the cinnamon.
- 2 tablespoons all-purpose flour – This is our thickening agent, crucial for turning all those apple juices into a luscious, not-runny sauce. Cornstarch or tapioca starch work great too for a gluten-free option.
- 1 tablespoon fresh lemon juice – A bright squeeze of acid keeps the apples from browning and balances the sweetness. Bottled works in a pinch, but fresh is best!
- 1½ teaspoons ground cinnamon – The MVP of pie spices. Don’t be shy!
- ¼ teaspoon freshly grated nutmeg – Trust me, grating a whole nutmeg seed makes a world of difference compared to the pre-ground stuff. It’s warmer and more aromatic.
- A generous pinch of salt – This is non-negotiable! Salt makes all the other flavors pop and cuts through the sweetness.
- 1 teaspoon pure vanilla extract – The secret weapon! Adds a beautiful, complex background note that makes people wonder, “What is that amazing flavor?”
For the Crumb Topping:
- 1 cup all-purpose flour
- ½ cup packed brown sugar – For that rich, caramel-y flavor in every crumb.
- ¼ cup granulated sugar
- ½ cup (1 stick) cold unsalted butter, cubed – COLD is the key word here! It ensures your topping stays crumbly and doesn’t turn into a paste. I pop the cubed butter in the freezer for 5 minutes before using.
- ½ teaspoon cinnamon – A little extra spice for the topping itself? Yes, please.
- Pinch of salt
- Optional: ¼ cup chopped pecans or old-fashioned oats – Pecans add a fantastic toasty crunch, and oats give it a homey, crisp-like texture. I highly recommend trying one of these!
Let’s Get Baking: Building Your Pie, Step-by-Step
Ready to make some magic? Follow these steps, and you’ll have a show-stopping dessert that looks like it came from a professional bakery. I’ve sprinkled in all my favorite chef hacks to ensure your success.
Step 1: Preheat and Prep
Preheat your oven to 375°F (190°C). This is crucial for getting that oven spring and a crispy crust right from the start. If you’re using a frozen pie shell, make sure it’s fully thawed. Place it on a baking sheet—this makes it infinitely easier to move in and out of the oven and catches any potential bubble-overs!
Step 2: Create the Filling
In a large bowl, combine your sliced apples, granulated sugar, brown sugar, flour, lemon juice, cinnamon, nutmeg, salt, and vanilla. Now, get your hands in there! Toss everything together until the apples are evenly coated. This isn’t a job for a wimpy spoon; you want to make sure every single apple slice is kissed with flavor. Let this mixture sit for 10-15 minutes. You’ll see a syrupy liquid start to form at the bottom of the bowl—this is exactly what you want! It’s the foundation of your glorious, not-watery filling.
Step 3: Make the Crumb Topping
While the apples are macerating, let’s make the star of the show. In a separate medium bowl, whisk together the flour, brown sugar, granulated sugar, cinnamon, and salt. Add your very cold, cubed butter. Now, using a pastry cutter, two forks, or (my personal favorite method) your clean fingertips, work the butter into the dry ingredients. Pinch and rub the mixture between your fingers until it transforms from a sandy texture into clumpy, pea-sized crumbs. If you’re adding nuts or oats, stir them in now. Pop the whole bowl in the fridge while you finish the filling. Keeping it cold ensures a perfect, crumbly bake.
Step 4: Assemble the Pie
Give your apple filling one more good stir. Now, carefully pour the entire contents of the bowl—apples and all the syrupy liquid—into your pie shell. Spread it out into an even layer. Don’t skimp! Pile those apples high; they will shrink down as they bake. Now, take your chilled crumb topping and sprinkle it evenly over the entire surface of the apples. Don’t press it down! Just let it rest loosely in a beautiful, craggy blanket of goodness.
Step 5: Bake to Perfection
Place your pie (on its baking sheet!) into the preheated oven. Bake for 50 to 60 minutes. You’re looking for a few key signs of doneness: the crumb topping should be a deep, golden brown, the filling should be actively bubbling around the edges (and maybe even through the topping in places!), and the apples should be tender when poked with a knife through one of those bubbles. About halfway through the baking time, check your pie crust edges. If they are browning too quickly, gently tent them with a pie crust shield or some strips of aluminum foil to prevent burning.
Step 6: The Hardest Part: Wait!
I know, I know. The smell is intoxicating, and you want to dive right in. But you must, must, MUST let this pie cool for at least 2-3 hours on a wire rack. This waiting period is non-negotiable. It allows the bubbling filling to set and thicken properly. If you cut into it too early, you’ll have a soupy, runny mess—even if it tastes amazing, it won’t slice neatly. Trust me, it’s worth the wait.
How to Serve This Masterpiece
Once your pie has patiently cooled and set, it’s showtime! Slice it with a sharp knife, wiping the blade clean between cuts for beautiful pieces. The classic pairing is, of course, a giant scoop of vanilla ice cream. The way the cold, creamy ice cream melts into the warm, spiced apples and crunchy topping is a little slice of heaven. For an extra-decadent treat, a drizzle of warm caramel sauce or a dollop of freshly whipped cream takes it over the top. Serve it on your favorite plates and watch the smiles appear.
Make It Your Own: Delicious Variations
The beauty of this recipe is its versatility. Don’t be afraid to play around!
- Pear & Ginger Twist: Swap out half the apples for ripe pears and add 1 tablespoon of finely chopped crystallized ginger to the filling for a warm, spicy kick.
- Berry Apple Bliss: Add a cup of fresh or frozen cranberries to the apple filling for a gorgeous tartness and pop of color.
- Gluten-Free Friendliness: Use a 1:1 gluten-free flour blend for both the filling thickener and the crumb topping. Ensure your pie crust is GF too!
- Oaty Nutty Crunch: Replace half the flour in the topping with old-fashioned oats and add chopped walnuts or pecans for a granola-like texture.
- Boozy Apple: For a sophisticated twist, add two tablespoons of bourbon or calvados to the apple filling mixture.
Beau’s Chef Notes & Kitchen Stories
This recipe has been my go-to for years, and it’s evolved with me. I once, in a frantic pre-holiday rush, accidentally used salted butter and left out the added salt. The result was strangely flat and one-dimensional. I learned my lesson: salt is essential! Another time, I was chatting with a friend and lost track of time, letting the apples macerate for almost an hour. The filling released so much liquid I was worried, but I just added an extra tablespoon of flour, and it turned out perfectly—maybe even better! The moral of the story? Don’t panic. Baking is a living process. This pie is forgiving and full of love. It’s about the joy of creating something with your hands and sharing it with people you care about. The little imperfections are just proof that it was made by a human, not a machine.
Your Questions, Answered
Q: My crumb topping melted into the filling! What happened?
A: Ah, the number one culprit here is butter that was too warm. It’s vital that your butter is very cold when you make the topping. If your kitchen is particularly warm, after making the crumbs, pop the whole bowl in the fridge or even the freezer for 10-15 minutes before sprinkling it on the pie. This ensures those solid butter bits stay intact and create steam as they bake, leading to a flaky, crumbly texture.
Q: Why is my filling so runny?
A: A runny filling usually comes down to two things: 1) Not letting the pie cool completely. This is the most common mistake! The filling continues to thicken as it cools. 2) Not enough thickener. Different apples release different amounts of juice. If you know your apples are super juicy (looking at you, McIntosh!), you can bump the flour in the filling up by an extra half tablespoon. Also, make sure you’re baking the pie until you see those thick, slow bubbles—that’s a sign the thickening agents have been activated.
Q: Can I make this pie ahead of time?
A: Absolutely! This pie is a fantastic make-ahead dessert. You have two great options: 1) Unbaked: Assemble the pie completely, then wrap it tightly in plastic wrap and freeze it for up to 2 months. Bake directly from frozen, adding 20-25 minutes to the baking time. 2) Baked: Bake and cool the pie completely, then wrap it well and store it at room temperature for up to 2 days, or in the fridge for up to 4 days. Re-warm slices in a 300°F oven for 10-15 minutes to bring back that fresh-from-the-oven magic.
Q: The edges of my crust are getting too dark. Help!
A> This is a super common issue. The solution is simple: pie crust shields! You can buy fancy silicone ones, or simply take a long strip of aluminum foil and gently mold it around the crust edge before you start baking. Remove it for the last 15 minutes of baking to allow the bottom crust to fully brown. It’s a little trick that makes a huge difference.
Dutch Apple Pie (with a Buttery Crumb Topping)
- Total Time: 3 hrs 20 mins
Description
Dutch Apple Pie with Buttery Crumb Topping
Ingredients
Pie Crust:
-
1 (9-inch) deep-dish pie shell (homemade or store-bought)
Apple Filling:
-
6–7 medium apples (Granny Smith + Honeycrisp), peeled, cored, sliced ¼-inch
-
¾ cup granulated sugar
-
¼ cup packed brown sugar
-
2 tbsp flour (or cornstarch/tapioca for GF)
-
1 tbsp fresh lemon juice
-
1½ tsp ground cinnamon
-
¼ tsp freshly grated nutmeg
-
Pinch of salt
-
1 tsp vanilla extract
Crumb Topping:
-
1 cup all-purpose flour
-
½ cup packed brown sugar
-
¼ cup granulated sugar
-
½ cup (1 stick) cold unsalted butter, cubed
-
½ tsp cinnamon
-
Pinch of salt
-
Optional: ¼ cup chopped pecans or old-fashioned oats
Instructions
1. Preheat Oven & Prep:
-
Preheat oven to 375°F (190°C).
-
Place pie shell on a baking sheet to catch spills.
2. Make the Filling:
-
Toss apples with sugars, flour, lemon juice, cinnamon, nutmeg, salt, and vanilla.
-
Let sit 10–15 mins until syrup forms.
3. Make the Crumb Topping:
-
In a bowl, combine flour, sugars, cinnamon, and salt.
-
Cut in cold butter until pea-sized crumbs form.
-
Stir in nuts or oats if using. Chill until ready.
4. Assemble the Pie:
-
Pour apple filling into pie shell.
-
Sprinkle crumb topping evenly over apples without pressing.
5. Bake:
-
Bake 50–60 mins until topping is golden brown and filling bubbles.
-
Tent edges with foil if browning too fast.
6. Cool:
-
Let cool 2–3 hrs on a wire rack before slicing to set the filling.
Serving Suggestions:
-
Serve warm with vanilla ice cream, whipped cream, or caramel drizzle
Notes
-
Crumb melted? Butter too warm; keep topping cold.
-
Runny filling? Let pie cool completely; add extra flour if apples are very juicy.
-
Crust edges dark? Use foil or pie shields for protection.
-
Make-ahead: Assemble & freeze unbaked (up to 2 months) or store baked in fridge (4 days).
- Prep Time: 25 mins
- Cook Time: 55–60 mins
Nutrition
- Calories: 410 kca
- Sugar: 36g
- Fat: 18g
- Carbohydrates: 64g
Nutritional Information*
Prep Time: 25 mins | Cook Time: 55 mins | Total Time: 1 hr 20 mins (plus cooling) | Servings: 8
*This is an estimate provided for informational purposes only. I’m a chef, not a nutritionist!
Per Slice (approx.): Calories: ~410 | Carbohydrates: 64g | Protein: 3g | Fat: 18g | Saturated Fat: 8g | Sugar: 36g | Fiber: 4g
Final Thoughts
This Dutch Apple Pie is more than a recipe; it’s a journey through texture, technique, and tradition. It celebrates the humble apple, the power of a simple crumb, and the profound importance of patience. It’s a dessert built for sharing, for sparking joy, and for creating those warm, lingering memories around the table. Whether you stick to the classic script or embark on your own variations, remember that the love and care you pour into it are the truest ingredients of all. Now, go forth, bake with confidence, and get ready to accept your compliments

Cinnamon-Spiced Apple Pie with Buttery Crust
Your New Go-To Apple Pie Recipe That Tastes Like a Hug
Hey friends, Beau here! Is there anything in this world that smells more like pure, unadulterated joy than a cinnamon-spiced apple pie baking in the oven? I’m talking about that magical aroma that starts as a sweet whisper and then slowly, confidently, fills every corner of your home until it’s practically pulling your family into the kitchen by their noses. That’s the power of a truly great pie. It’s not just dessert; it’s a centerpiece, a conversation starter, and a tangible piece of comfort you baked with your own two hands.
Now, I know what some of you might be thinking: “Beau, pie crust is my nemesis.” Or, “I can never get my apple filling just right—it’s always too soupy or too firm.” Trust me, I’ve been there. I’ve had my fair share of pastry disasters that were better suited for a hockey game than a dinner party. But that’s exactly why I’ve poured all my kitchen triumphs and tribulations into perfecting this recipe. This Cinnamon-Spiced Apple Pie with a Buttery Crust is my love letter to classic baking, designed to be foolproof, flavorful, and fantastically flaky. We’re using a double-crust method for two glorious pies because, let’s be real, one is never enough. One for you now, and one to gift to a neighbor (or, you know, to keep in the freezer for a rainy day—no judgment here). So, dust off that rolling pin, preheat your oven, and let’s create some magic together.
The Pie That Started It All
This recipe isn’t just a list of ingredients to me; it’s a living, breathing scrapbook of my childhood. Every autumn, my Grandma Mae would declare it “Apple Pie Season.” This wasn’t a casual suggestion; it was a weekend-long event. We’d pile into the old station wagon and drive out to the orchard, where my brother and I were put to work as “official apple testers.” Our job was to determine the perfect tart-to-sweet ratio, a responsibility we took very seriously (and which inevitably led to a few stomachaches).
Back in her flour-dusted kitchen, Grandma Mae would let me stand on a wobbly wooden stool to help her mix the filling. She never measured the cinnamon—just a generous “glug” from the jar straight into the bowl, sending a cloud of spicy fragrance into the air. Her hands, quick and sure, would weave the most beautiful lattice top I’ve ever seen. To this day, the sound of apples sizzling and bubbling away in a buttery crust takes me right back to that stool, watching her work her magic, teaching me that the secret ingredient in every great dish is always, always the love you stir into it. This pie is my best attempt to capture that feeling in every single slice.
Gathering Your Pie-Making Posse: The Ingredients
Great pies start with great ingredients. Don’t worry, we’re not using anything too crazy here—just simple, quality stuff that makes a world of difference. Here’s your shopping list for two show-stopping pies.
For the Flaky Pie Crust:
- 5 cups all-purpose flour: The foundation of our crust. I like unbleached for its slightly heartier flavor, but any good all-purpose will work beautifully.
- 2 tbsp sugar: A little sweetness to complement the apples and help with browning.
- 2 tsp salt: Crucial. Salt is the flavor enhancer that makes the butter and apples truly sing. Don’t skip it!
- 2 cups cold unsalted butter, cubed: This is the star of the show. I insist on high-quality butter and keeping it ICE COLD is the #1 rule for a flaky, not tough, crust. I pop my cubed butter into the freezer for 10-15 minutes before I start.
- ½–¾ cup ice water: The key word is ice. We add just enough to bring the dough together without warming up the butter.
- 2 tbsp apple cider vinegar: My secret weapon! The acid in the vinegar tenderizes the gluten in the flour, guaranteeing a more tender, workable crust. You won’t taste it, I promise.
For the Apple Filling:
- 12–14 apples (a mix of Granny Smith & Honeycrisp), about 6 lbs: Using two types is our genius hack! The tart Granny Smith holds its shape, while the sweet Honeycrisp breaks down a bit for that classic, gooey pie texture. Peeled and sliced about ¼-inch thick.
- 1½ cups sugar + ½ cup brown sugar: White sugar for pure sweetness, brown sugar for that deep molasses warmth. It’s the ultimate sweet team.
- 6 tbsp flour: Our thickening agent. It soaks up the juices released by the apples as they bake, preventing a sad, soupy bottom.
- 2 tbsp lemon juice + Zest of 1 lemon: The bright acid from the juice keeps the apples from browning and cuts through the sweetness. The zest adds a incredible fragrant punch.
- 3 tsp cinnamon + ½ tsp nutmeg: The dynamic duo of cozy spices. Feel free to add a pinch of cardamom or allspice if you’re feeling adventurous!
- ½ tsp salt: Again, it’s all about balancing and enhancing the flavors.
- 2 tsp vanilla extract: The flavor backbone that makes everything taste more… well, more.
- 3 tbsp maple syrup: A little splash of liquid gold adds a complex, autumnal depth you just can’t get from sugar alone.
- 4 tbsp butter, cut up: Dotting little pats of butter over the filling before adding the top crust is a pro move. It melts into the apples, making them impossibly rich and luxurious.
For Assembly:
- 2 eggs + 2 tbsp water (egg wash): Brushed on the top crust for that picture-perfect, glossy golden-brown finish.
- 2 tbsp coarse sugar (optional but highly recommended): This isn’t just pretty; it adds a delightful crunch with every bite.
Let’s Get Baking: The Step-by-Step Guide
Okay, team. Aprons on! Let’s walk through this together. Read through all the steps once before you begin—it’s like having a roadmap to pie success.
Step 1: The Crust (A Labor of Love)
In a large bowl, whisk together your flour, sugar, and salt. Now, grab your cold, cubed butter and scatter it over the flour. Using a pastry cutter, two forks, or even your fingertips, work quickly to “cut” the butter into the flour. You’re looking for a mix of sizes—some pea-sized pieces, some smaller flakes. This variety is what creates steam pockets during baking, leading to ultimate flakiness. Now, drizzle in the apple cider vinegar and a few tablespoons of the ice water. Use a fork to gently mix. Keep adding water, one tablespoon at a time, just until the dough begins to clump together when you press it. You might not need all the water! Divide the shaggy dough into four equal discs, wrap them tightly in plastic wrap, and chill in the fridge for at least an hour (or up to 2 days). This rest period is non-negotiable—it relaxes the gluten and re-chills the butter.
Step 2: The Filling (Flavor Party)
While the dough chills, let’s make the filling. This is the fun part! In an enormous bowl, toss your sliced apples with the lemon juice and zest. This coats them and prevents browning. In a separate smaller bowl, whisk together the white sugar, brown sugar, flour, cinnamon, nutmeg, and salt. Dump this spicy, sugary mixture over the apples and toss, toss, toss until every single slice is coated. Now, stir in the vanilla and maple syrup. Let this glorious mess sit for 15-20 minutes. You’ll see a syrup start to form at the bottom—this is exactly what we want! That syrupy goodness is our future thickened filling.
Step 3: Roll & Assemble (The Main Event)
Preheat your oven to 400°F (200°C). Lightly flour your surface and grab two of your dough discs. Roll one out into a circle about 12 inches in diameter. Don’t worry about a perfect circle; rustic is charming! Gently lift and place it into a 9-inch pie dish, letting the edges hang over. Repeat for the second pie. Now, give your apple filling one more good toss and divide it evenly between your two pie shells. It will look like a mountain—it will shrink as it bakes! Dot the tops of the filling with the cut-up butter.
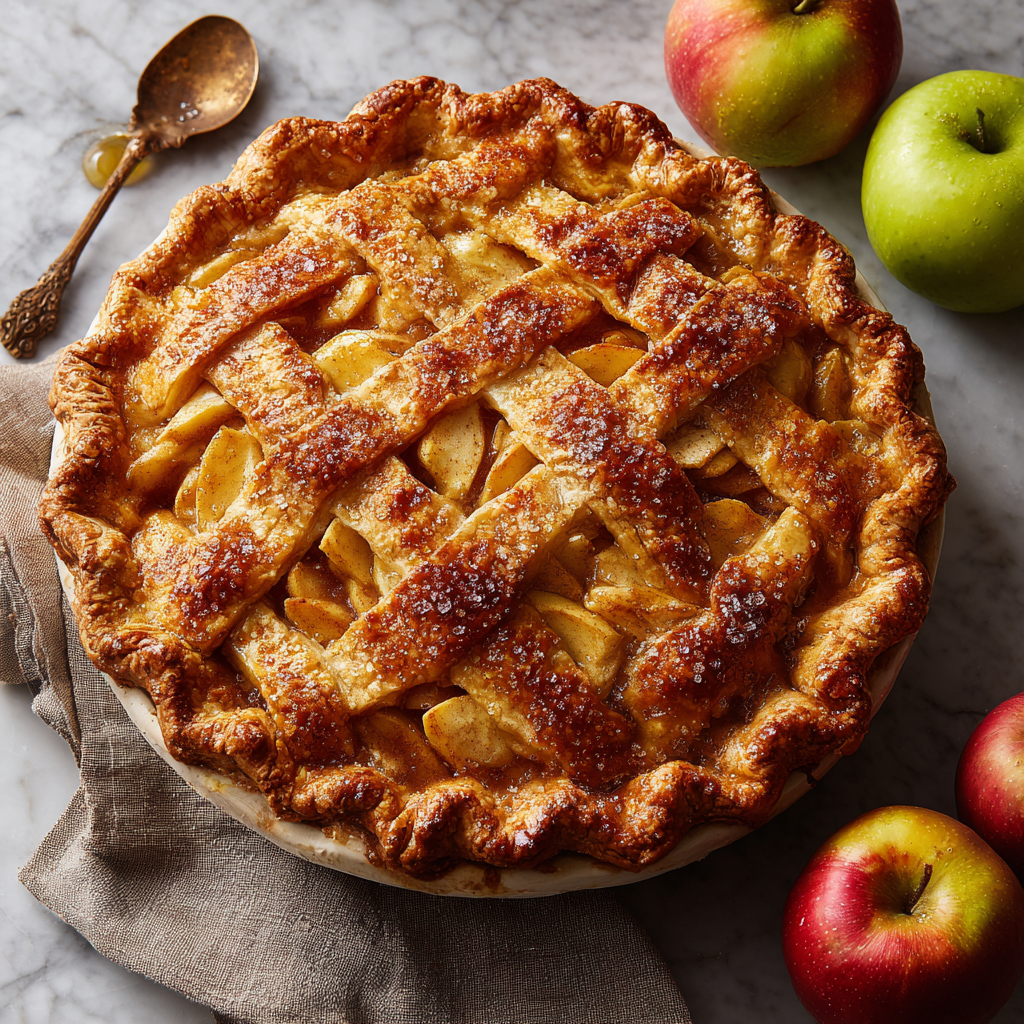
Now, for the tops! Roll out your remaining two discs. You can go classic with a full top (just remember to cut a few slits for steam to escape) or get fancy with a lattice weave. To lattice: cut the rolled dough into long strips, about 1 inch wide. Lay half the strips vertically over the pie, then weave the other half horizontally. Crimp the edges together with the bottom crust. My method: press together with your fingers, then use a fork to make a decorative seal around the rim.
Step 4: Bake to Golden Perfection
Whisk your eggs with 2 tbsp of water to make an egg wash. Gently brush this over the entire top crust of both pies. This is your shine and glue. Sprinkle generously with that coarse sugar. Place the pies on a baking sheet (this is KEY to catch any bubbling-over juices and save your oven from a sticky mess).
Bake at 400°F for 20 minutes. This initial high heat helps set the crust. Then, without opening the oven door, reduce the heat to 375°F (190°C) and bake for another 35-40 minutes. You’re looking for a deep golden-brown crust and thick, bubbly juices peeking through. If the edges are browning too fast, you can tent them with a little strip of foil.
Step 5: The Hardest Part: Wait.
I know, I know. It’s torture. But you MUST let the pies cool on a wire rack for at least 2 hours, preferably 3-4. This waiting period is when the filling sets. If you cut into it too early, it will be a delicious but runny mess. I promise it’s worth the wait!
How to Serve This Masterpiece
Presentation is part of the fun! Slice your perfectly cooled pie with a sharp, thin knife. Wipe it clean between cuts for pristine slices. The classic move is to serve it slightly warm (you can pop a slice in the microwave for 15 seconds) with a giant scoop of vanilla bean ice cream that slowly melts into the spiced apples—a combination known affectionately in my house as “à la mode magic.” For a decadent twist, drizzle a little warm caramel sauce over the top or add a dollop of freshly whipped cream. Serve it on a beautiful plate with a hot cup of coffee or tea, and get ready for the compliments to roll in.
Mix It Up! Recipe Variations
Once you’ve mastered the classic, the pie world is your oyster! Here are a few of my favorite twists:
- Bourbon Caramel Apple Pie: Stir 2-3 tablespoons of good bourbon into the apple filling along with the vanilla for a rich, grown-up flavor.
- Cheddar Crust Apple Pie: A legendary combo! Add 1 cup of finely shredded sharp cheddar cheese to the flour mixture when making your crust.
- Gluten-Free & Vegan: Use a 1:1 gluten-free flour blend for the crust and filling. Swap the butter for very cold vegan butter and use a flax egg (1 tbsp ground flax + 3 tbsp water per egg) for the wash.
- Pear & Ginger Apple Pie: Replace 3-4 of the apples with firm, ripe pears and add 1 tablespoon of freshly grated ginger to the spice mix.
- Dutch Apple Pie: Skip the top crust! Instead, mix 1 cup flour, ½ cup brown sugar, ½ cup cold butter, and ½ cup rolled oats into a crumble. Sprinkle it over the filling and bake.
Beau’s Chef Notes & Kitchen Stories
This recipe has evolved over about a decade of baking. The vinegar in the crust was a game-changer I learned from a pastry chef friend after one too many tough crusts. The maple syrup was a happy accident—I was out of brown sugar once and had to improvise, and the result was so good it became a permanent fixture.
A funny story: I once, in a pre-coffee haze, mistook the salt for sugar and made the most inedibly salty pie crust known to mankind. My dog wouldn’t even eat it. So now, I always, always taste a tiny pinch of my flour mixture before adding the butter. It’s my little ritual to avoid savory dessert disasters! Remember, baking is a science, but it’s also an art. Don’t stress about a messy lattice or a slightly lopsided crust. That’s what gives it character and proves it was made with real hands, right in your kitchen.
Apple Pie FAQs: Your Questions, Answered
Q: My bottom crust is always soggy! How do I prevent that?
A: This is the #1 question! A few tips: 1) Make sure your filling has enough flour to absorb the juices. 2) Let the filled, unbaked pie sit for a few minutes before adding the top—you might see more liquid leach out; just spoon a little of it out. 3) Bake on a preheated baking sheet. The direct heat from the sheet helps cook the bottom crust faster. 4) Glass or ceramic pie plates are better than metal for achieving a crisp bottom.
Q: Can I make this pie ahead of time?
A: Absolutely! You have options. 1) Unbaked: Assemble the pie, wrap it tightly in a few layers of plastic wrap and foil, and freeze for up to 3 months. Bake from frozen, adding about 20 minutes to the baking time. 2) Baked: Bake and cool the pie completely, then wrap and freeze. Thaw overnight in the fridge and warm in a 300°F oven for 20 minutes before serving.
Q: My filling is too runny/too firm. What went wrong?
A: Runny filling is usually due to not enough thickener (flour) or not letting the pie cool completely. Too firm can mean too much flour or using apples that don’t release enough juice. Trust the flour measurement here and, most importantly, the cooling time! The filling thickens significantly as it cools.
Q: Can I use only one type of apple?
A: You can, but the blend is highly recommended for the best texture and flavor balance. If you must use one, go for a firm, all-purpose apple like Braeburn or Jonagold. Using only a soft apple like McIntosh will lead to a mushy filling.
Cinnamon-Spiced Apple Pie with Buttery Crust
- Total Time: 2 hrs 15 mins
Description
Cinnamon-Spiced Apple Pie with Buttery Crust – Double Batch
Ingredients
For the Crust:
-
5 cups all-purpose flour
-
2 tbsp sugar
-
2 tsp salt
-
2 cups cold unsalted butter, cubed
-
½–¾ cup ice water
-
2 tbsp apple cider vinegar
For the Apple Filling:
-
12–14 apples (Granny Smith + Honeycrisp), peeled & sliced ¼-inch thick (~6 lbs)
-
1½ cups sugar
-
½ cup brown sugar
-
6 tbsp flour
-
2 tbsp lemon juice + zest of 1 lemon
-
3 tsp cinnamon
-
½ tsp nutmeg
-
½ tsp salt
-
2 tsp vanilla extract
-
3 tbsp maple syrup
-
4 tbsp butter, cut into small pats
For Assembly & Topping:
-
2 eggs + 2 tbsp water (egg wash)
-
2 tbsp coarse sugar (optional)
Instructions
1. Make the Crust:
-
Whisk flour, sugar, and salt.
-
Cut in cold butter until pea-sized and smaller flakes form.
-
Mix in vinegar and ice water, 1 tbsp at a time, until dough clumps together.
-
Divide into 4 discs, wrap, and chill 1 hr (up to 2 days).
2. Prepare the Filling:
-
Toss apples with lemon juice and zest.
-
In a separate bowl, mix sugars, flour, cinnamon, nutmeg, and salt.
-
Add to apples and toss; stir in vanilla and maple syrup.
-
Let sit 15–20 mins until syrupy.
3. Assemble Pies:
-
Preheat oven to 400°F (200°C).
-
Roll 2 dough discs into 12-inch circles; place in pie dishes.
-
Divide apple filling between pies; dot with butter.
-
Roll remaining 2 discs; place over pies (full or lattice). Crimp edges.
-
Brush tops with egg wash; sprinkle sugar.
4. Bake:
-
Bake at 400°F for 20 mins.
-
Reduce heat to 375°F (190°C) and bake 35–40 mins until golden brown and bubbly.
-
Tent edges with foil if browning too fast.
5. Cool & Serve:
-
Cool on a wire rack 2–4 hrs before slicing.
-
Serve slightly warm with vanilla ice cream, whipped cream, or caramel drizzle.
Notes
-
Soggy bottom? Preheat baking sheet, ensure proper flour in filling, or blind-bake crust.
-
Runny filling? Let pies cool completely; increase thickener if needed.
-
One apple type? Use firm apple (Braeburn or Jonagold) but blend recommended for best texture.
-
Make ahead? Assemble and freeze unbaked up to 3 months; bake from frozen (+20 mins).
- Prep Time: 1 hr 15 mins (includes chilling dough)
- Cook Time: 55–60 mins
Nutrition
- Calories: 420 Cal
- Sugar: 35g
- Fat: 19g
- Carbohydrates: 66g
Nutritional Information*
*Approximate values per slice (based on 16 slices total from 2 pies). Remember, this is a treat meant to be savored and shared!
- Calories: ~420 kcal
- Carbohydrates: 66g
- Fat: 19g
- Sugar: 35g
- Fiber: 4g
- Protein: 4g
Final Thoughts
This Cinnamon-Spiced Apple Pie is so much more than a dessert. It is a project that demands your attention and rewards it with immense satisfaction. It is a science experiment that yields delicious, edible results. It is a history lesson, connecting us to the generations of bakers who came before us, each perfecting their own version of this classic comfort. And most importantly, it is a vehicle for connection—to our past, to our homes, and to each other.
It teaches patience, from the chilling of the dough to the agonizing wait for the baked pie to cool. It teaches mindfulness, requiring you to be present in the process, to feel the dough with your hands, to smell the spices, to see the transformation in the oven. It teaches generosity, as the recipe makes two pies, quietly insisting that you share your hard-won bounty with someone else who needs a taste of homemade comfort.
Cinnamon Apple Pie Recipe
The Ultimate Cinnamon Apple Pie: A Double Dose of Comfort
Hey there, Feastical family! Beau here, coming to you from a kitchen that smells absolutely incredible. If you’ve ever wanted your home to smell like a cozy autumn hug, you’re in the right place. Today, we’re talking about the undisputed champion of comfort desserts: Cinnamon Apple Pie. But not just any pie. We’re going big. This is my legendary double-batch recipe that yields two stunning, golden-brown masterpieces. Why two? Because one is for you to proudly display and devour with your favorite people, and the other is for… well, also for you to devour, or to gift to a neighbor and instantly become the most popular person on your block. This isn’t just a recipe; it’s a feel-good mission. We’re using a symphony of warm spices, a zip of citrus, and the flakiest crust to create something that doesn’t just feed the stomach, but truly feeds the soul. So, tie on your apron, and let’s bake some memories together.
A Slice of Memory: Why This Pie Hits Different
This recipe is baked with a little extra secret ingredient: nostalgia. I can’t smell cinnamon and baking apples without being instantly transported to my grandma’s kitchen. It was a chaotic, flour-dusted haven, and her apple pie was the star of every family gathering. My job, as the eager (and messy) little helper, was to sneak apple slices while she wasn’t looking. She’d always pretend not to notice, but then she’d wink and say, “Beau, a chef’s gotta taste test!” She taught me that the best pies aren’t about perfection; they’re about the love you knead into the crust and the stories you share while waiting for them to bake. That’s the spirit I’ve tried to capture here. This double-crust beauty, with its hint of lemon zest and vanilla, is my homage to her. It’s a recipe built for making your own stories, for filling your home with that same unforgettable, welcoming aroma that says, “You are home, and you are loved.”
Gathering Your Pie-Making Posse: The Ingredients
Here’s the crew we’re working with. Using quality ingredients makes a world of difference, but I’ve also included my best hacks and swaps because I believe in keeping things real and accessible!
For the Pastry Crust:
- 4 (9-inch) pie shells (2 bottoms, 2 tops): Let’s be real, making homemade crust is a beautiful thing, but sometimes life happens. Using a good-quality store-bought crust is my not-so-guilty secret for getting pie on the table with a smile still on my face. If you’re a from-scratch hero, more power to you! Use your favorite butter-based recipe for two double-crust pies.
For the Cinnamon Apple Filling:
- 14 large Granny Smith apples: This might seem like a mountain of apples, but trust me, they cook down. Granny Smiths are my MVP because their tartness and firm structure hold up beautifully against the sugar and heat, preventing a mushy filling. Chef’s Swap: Feel free to mix it up! Try half Granny Smith and half Honeycrisp or Braeburn for a more complex sweetness.
- 1 cup white sugar + 1 cup lightly packed brown sugar: The dynamic duo! White sugar provides clean sweetness, while the brown sugar brings deep molasses notes and that gorgeous, gooey caramel quality to the filling. Light or dark brown sugar works great here.
- 4 tbsp all-purpose flour: This is our thickening agent, crucial for transforming those juicy apple juices into a luscious, sliceable sauce and not a soupy mess.
- 2 tsp ground cinnamon + ¼ tsp ground nutmeg: The heart and soul of the spice profile. Cinnamon is the warm, familiar star, and nutmeg is its best friend, adding a subtle, nutty depth. For next-level flavor, grate your own nutmeg!
- 2 tbsp lemon juice + Zest of 1 lemon: Don’t skip this! The acid in the lemon juice keeps the apples from browning while you prep, and the zest adds a tiny, bright sparkle that cuts through the sweetness and makes all the other flavors pop.
- 1 tsp vanilla extract: The warm, aromatic backbone that ties everything together. Use the real stuff—it matters!
- 2 tbsp cold salted butter, cut into small cubes: Dotting these little cubes over the filling before adding the top crust is a pro move. As it melts, it bastes the apples from within, adding an incredible richness and another layer of flavor.
For Assembly and Topping:
- 2 large eggs, beaten (for egg wash): This is what gives our crust that professional, glossy, deep golden-brown finish. It’s the pie’s equivalent of a perfect highlight!
- 4 tbsp sanding sugar (optional): The finishing touch! This coarse sugar doesn’t melt away completely, giving the top crust an irresistible crunch and a beautiful, sparkling appearance. Regular sugar works in a pinch, but sanding sugar is a game-changer.
Let’s Get Baking: The Step-by-Step Magic
Okay, team! It’s go time. Read through these steps once before you start—it’s like having a friendly chef right there with you, guiding you through every fold and crimp.
- Preheat and Prepare: Crank that oven to 400°F (200°C). Position your racks in the center of the oven to ensure even baking. This initial blast of high heat is crucial for setting the crust and getting that lift we call “oven spring.”
- The Flavor Foundation: In a bowl large enough to host a party for all those apples, toss your sliced apples with the white sugar, brown sugar, flour, cinnamon, nutmeg, lemon juice, lemon zest, and vanilla. Now, here’s the key: let it sit for 10-15 minutes. Don’t just mix and rush! This maceration time allows the sugar to pull juice from the apples, which then dissolves the flour and sugar, creating the base of your filling sauce. You’ll see it get syrupy—that’s exactly what you want!
- Fill ‘Er Up: Divide your amazing, fragrant apple mixture evenly between your two bottom pie crusts. Pile them high—they will shrink down as they bake. Now, take those little cubes of cold butter and dot them evenly over the apples. This is your secret weapon for richness!
- Top It Off: Carefully place your top crusts over the mounds of apples. You can go classic with a full crust (just don’t forget to cut a few decorative slits or a small hole in the center to let steam escape) or get fancy with a lattice weave. Crimp the edges together firmly using your fingers or a fork. A good seal prevents any precious filling from bubbling out during its oven adventure.
- The Glam Squad: Beat those eggs in a small bowl and gently brush a thin, even layer over the entire top crust. This is your adhesive for the next step. Now, generously sprinkle that gorgeous sanding sugar over the egg wash. This isn’t just for looks; it creates a delightful sugary crunch.
- The Bake: Place your pies on a baking sheet (this is a non-negotiable life-saver for catching any bubbling-over juices). Bake at 400°F for 20 minutes. This high heat gets the party started. Then, without opening the door, reduce the heat to 375°F and bake for another 35-40 minutes. The pie is done when the crust is a deep, golden brown and the filling is actively bubbling through the vents or lattice. If the edges of your crust are getting too dark too quickly, tent them loosely with strips of aluminum foil.
- The Ultimate Test of Patience: I know, I know. The smell is intoxicating, and you want to dive in immediately. But you MUST let the pies cool for at least 2 hours, preferably on a wire rack. This isn’t a suggestion—it’s a commandment. This cooling time allows the filling to set properly. If you cut into a hot pie, you’ll have a delicious but soupy mess. Trust me, the wait is absolutely worth it for that perfect, clean slice.
How to Serve Your Masterpiece
Presentation is part of the fun! Let that beautiful, sugar-sparkled crust be the star. Slide your pie onto a beautiful cake stand or a simple wooden board. For serving, use a sharp, thin knife dipped in hot water for the cleanest slices. Now, the age-old question: à la mode or not? For me, it’s always a resounding YES. A generous scoop of high-quality vanilla bean ice cream melting over the warm pie is a match made in heaven. A dollop of freshly whipped cream or even a sharp cheddar cheese slice on the side are also iconic pairings. Serve it with a smile—you’ve earned it!
Make It Your Own: Delicious Twists & Tweaks
Once you’ve mastered the classic, the pie world is your oyster! Here are a few of my favorite ways to play with this recipe:
- Bourbon Caramel Apple Pie: Stir 2-3 tablespoons of good bourbon into the apple filling mixture. Drizzle the bottom of each pie crust with 2 tablespoons of store-bought or homemade caramel sauce before adding the apples.
- Apple Cranberry Pie: Add 1 cup of fresh or frozen cranberries to the apple mixture for a gorgeous, tart burst of flavor and a stunning pop of red color.
- Oatmeal Crumble Top: Skip the top crust! Instead, mix 1 cup rolled oats, 1/2 cup flour, 1/2 cup brown sugar, 1 tsp cinnamon, and 1/2 cup melted butter for a single pie. Crumble this mixture over the filling for a delicious, crunchy alternative.
- Gluten-Free Friendly: Use a 1:1 gluten-free flour blend in place of the all-purpose flour in the filling and, of course, a certified GF pie crust. The result is just as fantastic!
- Spice It Up: Add a pinch of cardamom or a tiny pinch of black pepper to the spice mix for a wonderfully warm and complex undertone.
Beau’s Chef Notes & Kitchen Confessions
This recipe has evolved from many happy (and a few hilarious) kitchen experiments. I once, in a pre-coffee haze, used salt instead of sugar. Let’s just say it was a very… memorable pie. The lemon zest and vanilla are my personal additions to my grandma’s original—they just make the flavors sing a little louder. Don’t stress about a perfectly crimped edge or a magazine-worthy lattice. My best-tasting pies often look the most “rustic” (a fancy word for homemade and full of character). The real goal is the joy of making it and the people you get to share it with. Laugh off the flour on your nose, and remember: even if it’s a little lopsided, it’s made with love, and that’s what makes it perfect.
Your Pie Questions, Answered!
Q: My bottom crust is soggy! What did I do wrong?
A: This is the #1 pie complaint! A few tricks: First, make sure your filling isn’t too wet before it goes in (let it macerate!). Second, you can blind-bake your bottom crust for 10-15 minutes before adding the filling. Just prick it with a fork, line it with parchment paper and pie weights or dried beans, and bake until lightly golden. Third, baking on a preheated baking sheet helps cook the bottom crust faster.
Q: My filling is too runny. How can I thicken it up?
A: This usually means the pie needed more time to cool and set. If it’s still runny after cooling, you might need a bit more thickener next time. Try upping the flour to 5 tbsp for the double batch, or use a tablespoon of cornstarch or tapioca starch in addition to the flour for a super sturdy set.
Q: Can I make this ahead of time?
A: Absolutely! You can assemble the pies completely, then freeze them unbaked for up to 3 months. When you’re ready, bake straight from frozen—just add about 20 extra minutes to the baking time, keeping an eye on the crust. You can also bake them a day ahead; they reheat wonderfully in a 350°F oven for 15-20 minutes.
Q: Why did my filling shrink away from the crust?
A: This is natural! Apples release a lot of moisture and will shrink down as they cook. Piling them high in the crust to begin with accounts for this and helps prevent a giant gap.
Print
Cinnamon Apple Pie Recipe
- Total Time: 1 hr 40–45 mins
Description
Ultimate Cinnamon Apple Pie – Double Batch
Ingredients
For the Crust:
-
4 (9-inch) pie shells (2 bottoms, 2 tops – store-bought or homemade)
For the Cinnamon Apple Filling:
-
14 large Granny Smith apples, peeled, cored, and sliced
-
1 cup white sugar
-
1 cup brown sugar (lightly packed)
-
4 tbsp all-purpose flour (thickener)
-
2 tsp ground cinnamon
-
¼ tsp ground nutmeg
-
2 tbsp lemon juice + zest of 1 lemon
-
1 tsp vanilla extract
-
2 tbsp cold salted butter, cut into small cubes
For Assembly & Topping:
-
2 large eggs, beaten (egg wash)
-
4 tbsp sanding sugar (optional, for sparkle and crunch)
Optional Twists:
-
Bourbon Caramel: 2–3 tbsp bourbon + 2 tbsp caramel under apples
-
Apple Cranberry: Add 1 cup cranberries to filling
-
Oatmeal Crumble Top: Skip top crust; use oat-butter-sugar crumble
-
Gluten-Free: 1:1 GF flour blend in filling + GF pie crust
-
Extra Spice: Pinch of cardamom or black pepper
Instructions
1. Preheat Oven:
-
400°F (200°C), racks in center.
2. Prepare Filling:
-
Toss apple slices with sugars, flour, cinnamon, nutmeg, lemon juice/zest, and vanilla.
-
Let sit 10–15 mins to macerate and draw out juices.
3. Fill Pies:
-
Divide filling between two bottom crusts.
-
Dot with cold butter cubes.
4. Top Crust:
-
Place top crust (full or lattice). Crimp edges firmly.
-
Cut slits for steam escape.
5. Egg Wash & Sugar:
-
Brush tops with beaten egg.
-
Sprinkle sanding sugar generously.
6. Bake:
-
Place pies on a baking sheet.
-
Bake at 400°F for 20 mins.
-
Reduce heat to 375°F, bake 35–40 mins until golden brown and filling bubbles.
-
Tent edges with foil if browning too quickly.
7. Cool:
-
Let pies cool at least 2 hours on wire racks for filling to set.
Notes
-
Soggy bottom crust? Blind-bake or bake on preheated sheet.
-
Runny filling? Ensure proper maceration, cool fully, or add extra flour/cornstarch.
-
Filling shrinkage is normal; pile apples high.
-
Assemble ahead: freeze unbaked for up to 3 months or bake a day before.
- Prep Time: 45 mins
- Cook Time: 55–60 min
Nutrition
- Calories: 390 Calories (approx. per slice)
- Sugar: 36g
- Fat: 16g
- Carbohydrates: 65g
Nutritional Information (Per Slice, 1 of 16 Slices)
Calories: ~390 | Carbohydrates: 65g | Fat: 16g | Sugar: 36g | Fiber: 4g
Please note: This is an estimate based on the ingredients used. Values can vary depending on specific brands and ingredient choices.
Final Thoughts
The Ultimate Cinnamon Apple Pie is so much more than a list of ingredients and a set of instructions. It is a project of love, a lesson in patience, and a gateway to creating lasting memories. It connects us to the past—to grandmas and traditions—while allowing us to put our own spin on a classic, making it uniquely ours. It teaches us the science of pastry and the art of balance, rewarding our effort with a result that is both visually stunning and deeply satisfying to the soul.
Remember that perfection is not the goal. A lopsided crimp, a slightly dark edge, or an apple slice that refused to stay hidden adds character and tells the story of a real person in a real kitchen. Embrace the flour on your nose and the joy of the process. Share it generously, because the true magic of this pie is not just in its consumption, but in its power to connect, comfort, and bring people together. So preheat your oven, gather your apples, and get ready to bake not just a pie, but a whole lot of happiness. Happy baking
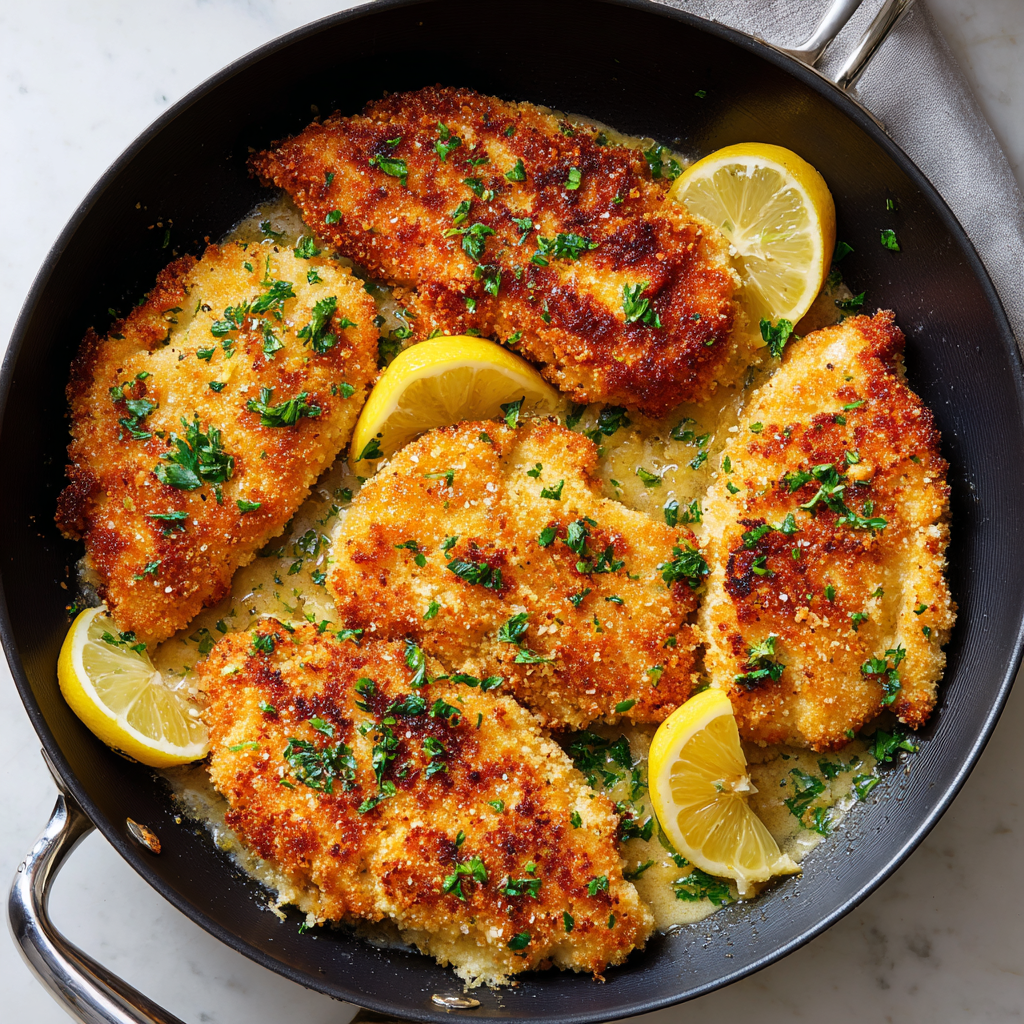
Crispy Lemon Garlic Chicken Cutlets
Golden, Zesty, and Irresistibly Crispy: Your New Favorite Chicken is Here!
Hey friends, Beau from Feastical here! Let’s talk about one of life’s simple, magnificent pleasures: a perfectly cooked chicken cutlet. You know the one. It’s got that shatteringly crisp, golden-brown crust that gives way to the most tender, juicy chicken inside. Now, imagine that beautiful cutlet swimming in a pan sauce so good you’ll want to drink it with a straw—a sauce where rich, melted butter dances with sharp, fragrant garlic and the bright, sunny zing of fresh lemon. That, my friends, is the magic of Crispy Lemon Garlic Chicken Cutlets.
This isn’t just a recipe; it’s your ticket to a 35-minute weeknight victory that feels straight out of a cozy Italian trattoria. It’s the kind of dish that makes everyone at the table stop scrolling on their phones and actually look up to ask, “Wow, what is that smell?” The best part? It’s deceptively simple. We’re not talking fancy techniques or hard-to-find ingredients. This is about mastering a few fundamentals—a proper sear, a balanced sauce, a confident hand with seasoning—to create something truly spectacular.
Whether you’re serving it over a heap of fluffy mashed potatoes, a nest of angel hair pasta ready to soak up that glorious sauce, or a simple arugula salad for a lighter touch, this dish delivers every single time. It’s my go-to for impressing dinner guests, for treating my family on a busy Wednesday, or just for giving myself a pat on the back with a fork. So, tie on your favorite apron, grab your trusty skillet, and let’s turn your kitchen into the best little restaurant in town. Ready to get crispy?
A Little Story Behind the Sizzle
This recipe takes me right back to my first tiny apartment kitchen. It was about the size of a postage stamp, with questionable linoleum and a stove that had exactly one reliable burner. But it was mine. I’d just started getting seriously into cooking, moving beyond boxed mac and cheese and frozen pizzas. I wanted to make something that felt… grown-up. Sophisticated. But I was on a serious budget.
Chicken breasts were on sale, and I had a lemon, a few cloves of garlic, and some butter. I’d seen a chef on TV do something similar and thought, “I can totally fake that.” I pounded those chicken breasts with a can of beans (I didn’t own a meat mallet!), dredged them in some seasoned flour, and created a chaotic but delicious splatter-fest in my tiny skillet. The moment I added the lemon juice to the garlicky butter and it all sizzled and foiled up, filling my entire studio apartment with that incredible aroma, I knew I’d cracked the code. It wasn’t pretty, but man, did it taste like triumph. It was the first meal in that apartment that truly felt like *me*. Every time I make this now, I get a little hit of that proud, hungry, twenty-something energy.
Gathering Your Flavor All-Stars
Simple ingredients, big flavor—that’s the Feastical motto. Here’s what you’ll need to make this lemon garlic chicken masterpiece happen. Don’t just toss them in your cart; read my little chef notes next to each one. They make all the difference!
- 4 boneless, skinless chicken breasts: The main event! Look for breasts that are similar in size so they cook evenly. Pro Tip: If yours are huge, slice them in half horizontally to create two thinner cutlets—it makes pounding much easier and ensures a perfect cook.
- 1 cup all-purpose flour: The first layer of our crispy armor. It helps the egg wash stick, which in turn helps the breadcrumbs stick. It’s the glue of the breading world!
- 1 tsp salt & 1 tsp black pepper: The dynamic duo of seasoning. We’re seasoning every layer, people! Don’t be shy.
- 2 large eggs: Our binding agent. Beaten well, they create a sticky layer that gives the breadcrumbs something to hold onto for dear life.
- 1 cup breadcrumbs: The source of that glorious CRUNCH. I prefer plain Panko breadcrumbs for their incredible light and airy texture, but traditional fine breadcrumbs work great, too. Substitution Tip: For a gluten-free version, use a 1:1 GF flour blend and gluten-free breadcrumbs. It works like a charm!
- 2 tbsp olive oil: We use this for the initial sear. Its higher smoke point is perfect for getting that golden-brown color without burning the butter we’ll add later.
- ½ cup unsalted butter, divided: The heart and soul of our sauce. Using unsalted lets us control the sodium level perfectly. We use half for cooking the chicken and half for the sauce. Chef’s Insight: That little bit of browned milk solids from the first round of butter adds an incredible nutty, rich depth to the final sauce.
- 4 cloves garlic, minced: Fresh is non-negotiable here, friends. The pre-minced stuff in a jar just doesn’t have the same punch. We want that potent, fragrant kick!
- ¼ cup freshly squeezed lemon juice: Please, for the love of all that is good, use real lemons! The flavor is brighter, cleaner, and infinitely better than the bottled stuff. You’ll need about 2 large lemons.
- ¼ cup chicken stock: This loosens up our sauce just enough to make it spoonable and helps meld all the flavors together. White wine is a fantastic substitute here if you have a bottle open!
- 2 tbsp fresh parsley, chopped: This isn’t just a pretty green garnish. Its fresh, slightly peppery flavor cuts through the richness of the butter and adds a beautiful pop of color and freshness right at the end.
Let’s Get Cooking: The Step-by-Step Sizzle
Alright, team! Let’s fire up the stove and transform these simple ingredients into something magical. Follow these steps, and you’ll have a restaurant-quality dish on your table in no time. I’ve packed each step with my best tips and hacks to ensure your success.
- Pound the chicken breasts to an even thickness. This is the single most important step for avoiding dry, overcooked edges and a raw center. Place a chicken breast between two pieces of plastic wrap or inside a large zip-top bag. Using the flat side of a meat mallet, a heavy skillet, or even a rolling pin, gently pound until it’s about ½-inch thick all over. Chef’s Hack: No mess! Pounding inside a bag contains all the splatter.
- Set up your breading station. Get three shallow bowls or plates. In the first, combine the flour, salt, and pepper. In the second, beat the two eggs until no streaks of white remain. In the third, pour out your breadcrumbs. This assembly line setup is a game-changer for efficiency and keeping your hands clean(ish).
- Dredge each chicken breast. Here’s the secret to a perfect, non-soggy crust: use one hand for dry ingredients and one for wet. With your left hand (if you’re right-handed), coat a chicken breast in the flour, shaking off any excess. Then, using your right hand, dip it fully into the egg wash, letting the excess drip off. Finally, place it in the breadcrumbs and use your left hand to press and coat it thoroughly. Place the breaded cutlet on a clean plate or wire rack. Repeat! Pro Tip: Let the breaded cutlets sit for 5-10 minutes before cooking. This helps the coating set and adhere better, so it’s less likely to fall off in the pan.
- Cook the chicken. Heat the olive oil and 2 tablespoons of the butter in a large skillet over medium heat. Once the butter is melted and foaming, carefully add the chicken cutlets (don’t crowd the pan—cook in batches if you need to!). Cook for 4-5 minutes per side, until the crust is a deep golden brown and the internal temperature reaches 165°F. Chef’s Hack: Don’t move them around! Let them develop a beautiful sear before you even think about flipping. Remove the chicken to a clean plate and tent loosely with foil.
- Create the legendary sauce. Reduce the heat to medium-low. Melt the remaining butter in the same skillet. Those little browned bits left from the chicken? That’s liquid gold! Add the minced garlic and sauté for just 60-90 seconds until incredibly fragrant. Don’t let it burn! Pour in the fresh lemon juice and chicken stock. It will bubble and sizzle gloriously—use a wooden spoon to scrape up all those delicious browned bits from the bottom of the pan. Let it simmer for 2-3 minutes until it slightly reduces and thickens.
- Bring it all home. Return the cooked chicken cutlets to the skillet, along with any juices that collected on the plate. Spoon that beautiful lemon garlic butter sauce all over each cutlet, ensuring every nook and cranny gets some love. Let everything heat through for a minute. Sprinkle with the fresh chopped parsley right in the pan.
How to Serve This Sunshine on a Plate
This dish is the ultimate team player, but how you serve it can take it from great to legendary. My absolute favorite way is to serve it over a bed of angel hair pasta or fettuccine. The pasta acts like a delicious sponge, soaking up every last drop of that lemon garlic butter sauce. For a lighter option, it’s incredible on a pile of simple arugula dressed with just a squeeze of lemon—the warm chicken wilts the greens slightly, creating a fantastic warm salad. And you can never, ever go wrong with a side of creamy mashed potatoes or roasted asparagus. No matter how you plate it, make sure you have a piece of crusty bread on hand for mopping up the sauce. Trust me on this.
Mix It Up! Fun Flavor Twists
Once you’ve mastered the classic, the world is your crispy chicken oyster! Here are a few of my favorite ways to play with this recipe:
- Piccata Style: Add 2 tablespoons of briny capers and a handful of fresh parsley to the sauce right at the end. The salty, lemony combo is unreal.
- Creamy Dreamy: Stir in ¼ cup of heavy cream or half-and-half at the very end of making the sauce for a rich, velvety, decadent twist.
- Herb Garden Delight: Add a teaspoon of Italian seasoning or dried oregano to the breadcrumb mixture for an extra layer of herbal flavor.
- Parmesan Crisp: Mix ½ cup of freshly grated Parmesan cheese into the breadcrumbs for a cheesy, umami-packed crust.
- Spicy Kick: Add a pinch of red pepper flakes to the butter when you sauté the garlic for a gentle, warming heat.
Beau’s Chef Notes & Kitchen Confessions
This recipe has been a living, evolving thing in my kitchen for years. I’ve learned a few things the hard way so you don’t have to! First, the “resting the breaded cutlets” tip was a game-changer I learned after a particularly frustrating episode where my beautiful breading ended up stuck to the pan instead of the chicken. Patience, young grasshopper!
I also used to be terrified of pounding chicken. It felt aggressive and I was sure I was going to pulverize it. Then a chef friend told me to think of it as “gentle persuasion,” not “rageful pounding.” It changed my entire perspective. Now I find it weirdly therapeutic. And remember, the sauce is meant to be simple and light. If you want it thicker, you can let it reduce a bit longer, or add a tiny slurry of cornstarch and water. But I love it just as it is—a loose, buttery, lemony delight that ties the whole dish together. This is comfort food that wears a fancy suit. It’s humble enough for a Tuesday and elegant enough for date night. That’s its magic.
Your Questions, Answered!
Q: My breading is falling off! What did I do wrong?
A: The most common culprit is not shaking off the excess flour after the first dredge. That loose flour creates a barrier that prevents the egg from properly adhering to the chicken. Another reason could be moving the chicken too soon in the pan. Make sure your oil/butter is hot enough (a breadcrumb dropped in should sizzle immediately) and let the chicken cook undisturbed for a full 3-4 minutes to form a solid crust before you attempt to flip it.
Q: Can I make this ahead of time?
A: You can bread the chicken cutlets ahead of time! Lay them in a single layer on a baking sheet, cover with plastic wrap, and refrigerate for up to 4 hours before cooking. This can actually help the coating set. I don’t recommend cooking them fully ahead, as the crust will lose its crispness. The sauce is best made fresh and served immediately.
Q: My chicken is cooked through but the breading isn’t golden brown. Help!
A: This usually means your heat was too low. You need a good medium heat to achieve that beautiful golden-brown sear without overcooking the inside. If this happens, you can always finish the chicken under the broiler for a minute or two to crisp up the coating. Just keep a very close eye on it!
Q: Is there a way to make this recipe healthier?
A> Absolutely! For a lighter version, you can skip the breading altogether. Just season the pounded chicken breasts with salt and pepper and sear them in 1 tablespoon of olive oil. Remove them, then make the sauce as directed. You can also reduce the butter by using 2 tablespoons of butter and a tablespoon of olive oil for the sauce instead. It will still be incredibly flavorful!

Crispy Lemon Garlic Chicken Cutlets
- Total Time: 35 minutes
Description
Crispy Lemon Garlic Chicken Cutlets
Ingredients
-
4 boneless, skinless chicken breasts (pounded to ½-inch thickness)
-
1 cup all-purpose flour
-
1 tsp salt
-
1 tsp black pepper
-
2 large eggs, beaten
-
1 cup breadcrumbs (Panko preferred)
-
2 tbsp olive oil
-
½ cup unsalted butter, divided
-
4 cloves garlic, minced
-
¼ cup freshly squeezed lemon juice (~2 lemons)
-
¼ cup chicken stock (or white wine)
-
2 tbsp fresh parsley, chopped
Optional Variations:
-
Piccata Style: Add 2 tbsp capers
-
Creamy Twist: Stir in ¼ cup heavy cream
-
Herb Boost: 1 tsp Italian seasoning in breadcrumbs
-
Parmesan Crunch: ½ cup grated Parmesan in breadcrumbs
-
Spicy Kick: Red pepper flakes in butter when sautéing garlic
Instructions
1. Pound Chicken:
Place chicken between plastic wrap or a zip-top bag and gently pound to ½-inch thickness.
2. Set Up Breading Station:
-
Bowl 1: Flour, salt, pepper
-
Bowl 2: Beaten eggs
-
Bowl 3: Breadcrumbs
3. Dredge Chicken:
-
One hand for dry, one for wet. Coat in flour → egg → breadcrumbs. Press breadcrumbs to adhere. Let sit 5–10 minutes.
4. Cook Chicken:
-
Heat olive oil + 2 tbsp butter in a skillet over medium heat.
-
Cook chicken 4–5 min per side until golden brown and 165°F internal.
-
Remove and tent with foil.
5. Make Sauce:
-
Reduce heat to medium-low. Melt remaining butter.
-
Sauté garlic 60–90 seconds (do not burn).
-
Add lemon juice and chicken stock; scrape browned bits from skillet. Simmer 2–3 minutes until slightly reduced.
6. Finish Dish:
-
Return chicken to skillet and spoon sauce over. Heat through 1 min.
-
Sprinkle with fresh parsley and serve.
Notes
-
Shake off excess flour before egg wash to prevent soggy breading.
-
Let chicken sit in breadcrumbs for better adhesion.
-
Cook at medium heat for golden, crispy crust. Finish under broiler if needed.
-
Breading can be done ahead (up to 4 hours in fridge), but cook fresh for crispiness.
-
Lighter version: skip breadcrumbs and reduce butter; still flavorful.
- Prep Time: 15 minutes
- Cook Time: 20 minutes
Nutrition
- Calories: 460 Cal
- Fat: 23g
- Carbohydrates: 24g
- Protein: 38g
Nutritional Information*
Prep Time: 15 mins | Cook Time: 20 mins | Total Time: 35 mins | Servings: 4
Calories: ~460 | Protein: 38g | Carbs: 24g | Fat: 23g | Fiber: 1g
*Please note: These values are estimates based on the ingredients used and may vary depending on specific brands or substitutions.
Final Thoughts
The true beauty of a recipe like this Crispy Lemon Garlic Chicken Cutlet lies not in its complexity, but in its perfect balance of simplicity and profound satisfaction. It demonstrates that you don’t need a pantry full of esoteric ingredients or professional-grade equipment to create something truly extraordinary. You need technique, a little bit of patience, and high-quality, humble ingredients treated with respect.
This dish is more than the sum of its parts. It’s a lesson in texture—the audibly crisp crust giving way to the tender interior. It’s a masterclass in balancing flavors—the rich, nutty butter harmonizing with the sharp, aromatic garlic and the bright, acidic lemon. It’s a reminder that the most flavorful components often come from the process itself, from the fond created by a proper sear to the pan sauce built from its remnants.
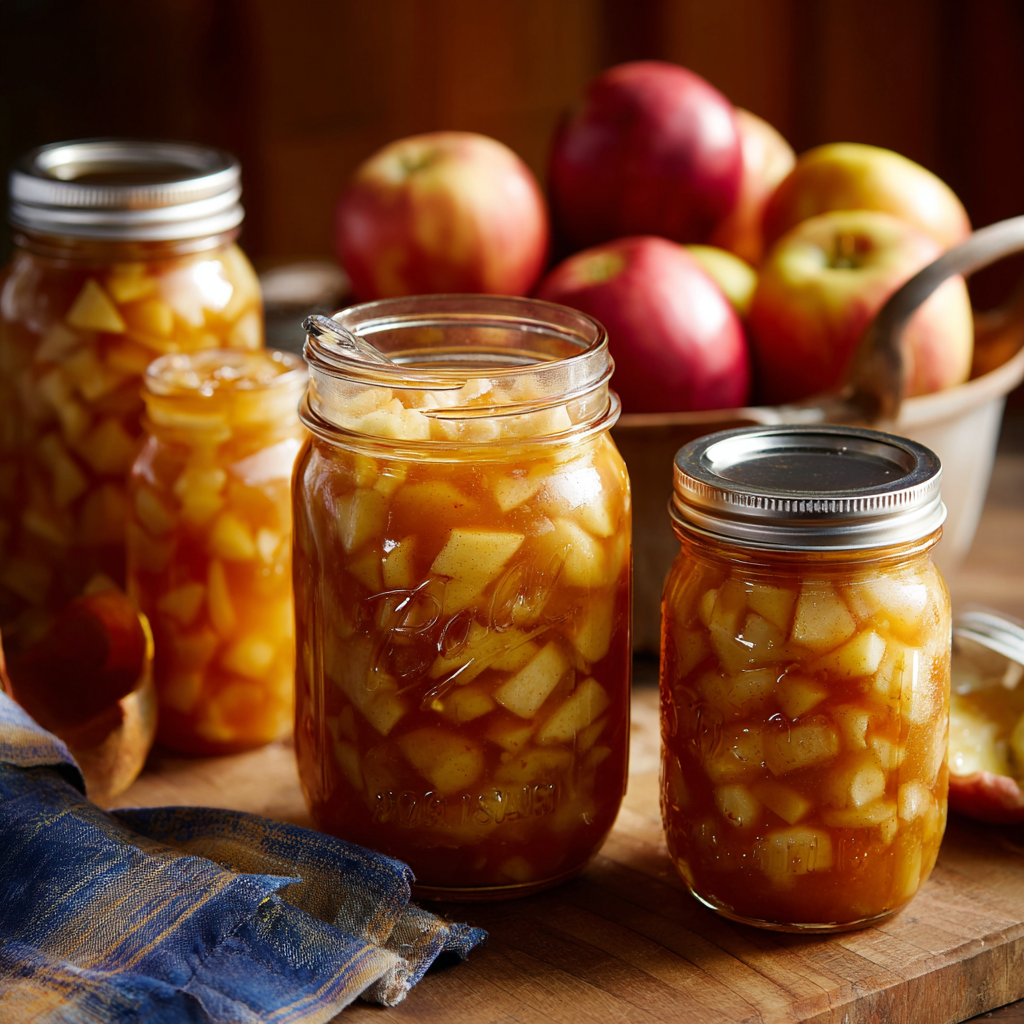
Classic Apple Pie Filling for Canning
Your Pie Season Superpower: Homemade Canned Apple Pie Filling
Hey friends, Beau here from Feastical! Let’s talk about that feeling. You know the one. It’s a crisp Tuesday in February, the sky is that particular shade of endless gray, and out of nowhere, a powerful, undeniable craving hits you: you need a warm, spiced, bubbling-hot homemade apple pie. Right now.
But then reality sets in. Peeling all those apples. Mixing the spices. Simmering the filling. The craving slowly fades, replaced by the sigh of resignation that comes with a project that feels just a little too big for a weeknight. What if I told you there was a way to bottle the very essence of autumn? To have the heart of a perfect apple pie sitting on your pantry shelf, ready to be poured into a crust and baked into golden, flaky perfection at a moment’s notice?
That, my friends, is the magic of canning your own apple pie filling. This isn’t just about preserving fruit; it’s about preserving possibility. It’s about gifting your future self a little jar of “yes, we can have pie tonight.” This double-batch recipe is my go-to for filling the pantry with the coziest of comforts. We’re kicking the flavor up a notch with a splash of vanilla and a hint of pure maple syrup—trust me, it’s the upgrade this classic deserves. So, grab your biggest pot and your favorite apron. We’re about to make pie season absolutely stress-free.
The Scent of Memory: Why This Filling is Special
For me, the smell of apples and cinnamon simmering on the stove is a time machine. It instantly whisks me back to my grandma’s kitchen, a place of wonderful chaos and flour-dusted countertops. Every fall, she’d recruit all the grandkids for what she called “The Great Apple Peeling Marathon.” We’d sit around her old farmhouse table with those crank-operated peelers, creating mountains of spiraled apple skins while she worked her magic at the stove.
One year, I must have been about ten, I was in charge of stirring the giant pot of filling. I got distracted by the dog chasing a squirrel outside the window and let the bottom scorch just a little. I was mortified, sure I’d ruined the entire batch. Grandma just laughed her deep, warm laugh, scooped out the un-scorched part, and said, “Beau, honey, a little caramelization never hurt anybody. It’s just extra flavor!” She was right. That batch had a deeper, almost toffee-like note that was incredible. While I don’t recommend scorching your filling, that day taught me that cooking is an adventure, not a perfection contest. This recipe is that same spirit—forgiving, flavorful, and made to share with the people you love.
Gathering Your Pie-Making Arsenal
Here’s everything you’ll need for this epic double batch. This makes enough to fill 14 pint jars, which is enough for 7 or 8 pies! Talk about a return on investment.
- 24 cups sliced, peeled, cored apples (about 5–6 lbs): This is your star player! I love a mix of firm, tart apples like Granny Smith for structure and sweeter ones like Honeycrisp or Fuji for depth. Chef’s Tip: Soak them in that lemon water as you go to keep them from turning brown and sad.
- 5 ½ cups granulated sugar: It seems like a lot, but remember, this is for many pies! It sweetens and helps preserve the filling.
- 1 ½ cups ClearJel®: This is non-negotiable for safe canning! Don’t use regular cornstarch or flour; they break down and get cloudy in the jar. ClearJel is a modified cornstarch that stays stable. Find it online or in canning supply stores.
- 3 tsp ground cinnamon, 1 tsp ground nutmeg, 1 tsp ground allspice: The holy trinity of pie spice. The allspice is my “twist”—it adds a warm, complex note that makes people ask, “What is *in* this?”
- 5 cups apple juice: Using juice instead of just water gives the syrup an incredible apple-forward intensity. Use a good-quality, unfiltered juice for the best flavor.
- 2 ½ cups cold water: Helps create the liquid base for our syrup.
- 1 cup lemon juice: Crucial for acidity, which is a big part of safe canning. It also brightens all the other flavors and prevents browning.
- 2 tbsp vanilla extract (twist) & 2 tbsp pure maple syrup (twist): Here’s where we make it truly *Feastical*. The vanilla adds a warm, aromatic sweetness, and the maple syrup brings a rich, earthy depth that pairs perfectly with apples. It’s a game-changer!
- 14 Ball® or Kerr® Pint (16 oz) Jars, with new lids and bands: Always use jars designed for canning and never reuse lids—the sealing compound is one-time-use only.
Let’s Get Preserving: Your Step-by-Step Guide
Okay, team! Let’s do this. Read through all the steps first, and remember: organization is your best friend in canning. I like to get all my jars washed and my equipment laid out before I even turn on the stove.
Step 1: The Apple Prep Party
First, get a giant bowl and fill it with water mixed with a good glug of lemon juice (about 1 tbsp per cup of water). As you peel, core, and slice your apples (about 1/2-inch thick slices are perfect), toss them right into the lemon water bath. This keeps them looking fresh and prevents them from oxidizing and turning brown. Once they’re all prepped, drain them well in a colander. You want them ready to go when your syrup is hot!
Step 2: Building the Luxurious Syrup Base
In your largest, heaviest-bottomed pot (I’m talking a massive 10-12 quart capacity), whisk together the granulated sugar, ClearJel®, and all your spices (cinnamon, nutmeg, allspice). Whisking the dry ingredients first prevents the ClearJel from clumping when you add liquid. Now, slowly—and I mean slowly—pour in the apple juice and cold water while whisking constantly. You’re making a smooth slurry.
Step 3: Cook to Thicken
Place the pot over medium-high heat. Bring the mixture to a simmer, stirring constantly with a sturdy wooden spoon or heat-proof spatula. It will start to thicken and will eventually come to a full, rolling boil. Once it’s bubbling thickly, let it cook for one more minute. You’ll know it’s ready when it’s glossy and thick enough to coat the back of your spoon. Remove it from the heat.
Step 4: The Flavor Bomb Finale
Quickly stir in the 1 cup of lemon juice, the 2 tablespoons of vanilla extract, and the 2 tablespoons of maple syrup. It will bubble and sizzle a bit and smell absolutely incredible. This is the best part!
Step 5: Bring in the Apples
Immediately fold all of those drained apple slices into the hot syrup. You need to work relatively quickly here. Return the pot to the heat and cook the apple mixture for exactly 5 minutes, stirring gently but constantly. You’re not trying to cook the apples to mush—just heat them through and get them perfectly coated. The filling will be very thick. Remove from heat.
Step 6: Jar It Up!
While the filling was cooking, your canning pot with its boiling water bath should have been heating up, and your jars should be kept hot (I keep mine in a low oven or in hot water until I need them). Using a ladle and a canning funnel (a lifesaver for keeping jar rims clean!), carefully ladle the hot pie filling into the hot pint jars, leaving a full 1-inch of headspace at the top. Remove any air bubbles by sliding a small non-metallic utensil around the inside of the jar. Wipe the rims impeccably clean with a damp paper towel—this is critical for a good seal!
Step 7: Process for Safety
Place a hot, new lid on each jar and screw on the band until it’s fingertip-tight (snug, but don’t Hercules it). Using your jar lifter, carefully lower the jars into the boiling water bath, ensuring they are covered by at least 1-2 inches of water. Process the pints for 25 minutes (adjusting for altitude if necessary).
Step 8: The Hardest Part: Waiting
After processing, carefully remove the jars and place them on a towel-lined countertop. Listen for the most satisfying sound in the world: the triumphant *pop* *pop* *pop* of the jars sealing as they cool. Let them sit, undisturbed, for 12-24 hours. Then, check that each lid is sealed by pressing on the center—if it doesn’t flex, you’ve succeeded! Label your beautiful jars with the date and store them in a cool, dark place.
How to Use Your Liquid Gold
When that pie craving strikes, it’s showtime! Let your canned filling come to room temperature, or give it a quick warm-up in a saucepan if you’re in a hurry. Pour it into your favorite homemade or store-bought pie crust, add a top crust, crimp the edges, vent the top, and bake at 375°F (190°C) for about 45-55 minutes, or until the crust is golden brown and the filling is bubbly. That’s it! You’ve just made a “from-scratch” pie on a random Wednesday. You’re a legend.
Make It Your Own: Delicious Variations
The beauty of this base recipe is how adaptable it is! Here are a few ways to play with the flavors:
- Bourbon-Spiced: Replace 1/2 cup of the apple juice with 1/2 cup of good bourbon for a rich, grown-up twist.
- Cardamom & Ginger: Swap the nutmeg and allspice for 1 tsp ground cardamom and 1 tbsp of finely grated fresh ginger for a bright, exotic flavor profile.
- Sugar-Free Option: Use a sugar-free apple juice and replace the granulated sugar with a canning-safe sweetener like erythritol, following the manufacturer’s conversion chart.
- Pear-Apple Medley: Replace half of the apples with firm, peeled and sliced pears (like Bosc) for a more complex fruit flavor.
- cranberry-Apple Crush: Stir in 2 cups of fresh or frozen cranberries with the apples for a gorgeous pink hue and a delicious tart kick—perfect for the holidays!
Beau’s Kitchen Confidential
This recipe has evolved in my kitchen over the years. The first time I made it, I was so nervous about food safety that I undercooked the syrup. Let’s just say my first pie was a bit…soupy. Live and learn! The ClearJel step is crucial for that perfect sliceable consistency. I also learned that a podcast or a great playlist is essential for the apple-peeling phase—it turns a chore into a party.
My other big tip? Enlist a friend or your kids! Turn it into a canning party. You handle the hot stuff, and they can be on apple prep or lid-wiping duty. It makes the work fly by and you end up with not just a pantry full of pie, but a heart full of great memories, too. That’s what Feastical is all about.
Your Apple Pie Filling Questions, Answered!
Q: Can I use cornstarch instead of ClearJel?
A: I really, really don’t recommend it for canning. Cornstarch breaks down under high heat and over time, leading to a thin, runny filling in the jar and a cloudy appearance. ClearJel is formulated to stay stable and thick through the canning process and storage. For food safety and quality, it’s worth seeking out.
Q: My filling is super thick right out of the jar, is that normal?
A: Absolutely! It’s supposed to be very thick. This is a concentrated pie filling. As it bakes in the pie, the juices from the apples will release and it will thin out to the perfect pie consistency. If it seems too thick to spread in the crust, just let it sit for 10 minutes after opening the jar—it will loosen up a bit.
Q: Why did my liquid separate in the jar after canning?
A: A little separation is totally normal, especially with fruit. It’s often just natural fruit juice. Simply give the jar a good stir when you open it before adding it to your pie crust. To minimize it, make sure you’re using the correct amount of ClearJel and not overcooking the apples when you add them to the syrup.
Q: How long do processed jars last?
A: For the best quality and flavor, enjoy your canned pie filling within 12-18 months. The acidity and sugar mean it’s safe much longer, but the color and texture are at their peak within the first year. Always store your jars in a cool, dark, dry place.

Classic Apple Pie Filling for Canning
- Total Time: 14–16 hours including cooling
Description
Skip the peeling-and-simmering panic on a weeknight—this homemade apple pie filling lets you bottle the essence of autumn. With tender, spiced apples, a touch of vanilla and maple syrup, and a perfectly thick syrup base, you’ll have ready-to-bake pies at a moment’s notice. This double batch fills 14 pint jars—enough for 7–8 pies!
Ingredients
-
24 cups sliced, peeled, cored apples (~5–6 lbs; mix firm and sweet varieties)
-
5 ½ cups granulated sugar
-
1 ½ cups ClearJel® (not cornstarch)
-
3 tsp ground cinnamon
-
1 tsp ground nutmeg
-
1 tsp ground allspice
-
5 cups apple juice
-
2 ½ cups cold water
-
1 cup lemon juice
-
2 tbsp vanilla extract
-
2 tbsp pure maple syrup
-
14 pint jars with new lids and bands
Instructions
Prep: Wash jars, keep them hot. Preheat water bath to boiling.
-
Apple Prep: Peel, core, and slice apples. Place in lemon water to prevent browning, then drain.
-
Syrup Base: In a large pot, whisk sugar, ClearJel®, cinnamon, nutmeg, and allspice. Slowly whisk in apple juice and water to make a smooth slurry.
-
Cook Syrup: Bring to a simmer over medium-high heat, stirring constantly. Boil 1 minute until thick and glossy. Remove from heat.
-
Flavor Finish: Stir in lemon juice, vanilla, and maple syrup.
-
Add Apples: Fold in drained apple slices, cook 5 minutes gently, just to coat apples without softening too much.
-
Jar Filling: Ladle hot filling into hot jars, leaving 1-inch headspace. Remove air bubbles, wipe rims clean. Seal with lids and bands fingertip-tight.
-
Process: Boiling water bath for 25 minutes (adjust for altitude). Cool 12–24 hours, check seals.
Notes
-
ClearJel® is essential for thick, shelf-stable filling.
-
Do not overcook apples—they should be tender, not mushy.
-
Keep jars hot to prevent breakage.
-
Let jars sit undisturbed during cooling for proper sealing.
- Prep Time: 45–60 min
Nutrition
- Calories: 180 Cal per 1 cup of filling, approximate
- Fat: 0g
- Carbohydrates: 45g
- Protein: 0.5g
Nutritional Information*
*This is an approximate estimate for the entire filling per 1-pint jar, prepared as written. Actual values will vary based on specific ingredients used.
Per 1 Pint Jar (Approx.): Calories: ~320 | Carbohydrates: 83g | Sugars: 62g | Protein: 0.5g | Fat: 0.2g | Fiber: 4g | Sodium: 5mg
Final Thoughts
Embarking on the project of canning your own apple pie filling is about more than just stocking a pantry. It’s an act of foresight, a gesture of kindness to your future self. It’s about reclaiming the ability to create something profoundly comforting and celebratory on your own terms, on your own timeline. The initial investment of time—the peeling, the stirring, the waiting—pays dividends for months to come in the form of effortless desserts, impromptu gatherings, and the deep satisfaction of self-reliance.
This jar represents more than apples and spice. It holds the potential for a weeknight treat that feels like a holiday, a last-minute dessert that wows a crowd, and the unmistakable aroma of warmth and love wafting from your oven on the darkest of days. It’s a taste of autumn, preserved at its peak, ready to bring light to the grayest winter afternoon. So, here’s to less sighing and more pie. Here’s to preserving possibility, one jar at a time. Now, go forth and can

Apple Crumble Pie
Hey, Pie People! Let’s Bake a Memory.
Is there anything in this world that smells more like pure, unadulterated joy than an apple pie baking in the oven? I’m Beau, and if you’re new around here, welcome to my kitchen—a place where we celebrate the magic of feel-good food. That incredible aroma of cinnamon and butter weaving through your house isn’t just a sign of a dessert on its way; it’s a promise of laughter around the table, of plates being passed, and of that first warm, gooey bite that makes everyone at the table go completely silent for a second. That’s the power of a great pie.
But today, we’re not just making any apple pie. We’re taking everything we love about the classic—the sweet-tart filling, the flaky crust—and cranking it up to eleven with a buttery, crunchy, oat-and-almond crumble topping. This isn’t a delicate, fussy dessert. This is a hearty, generous, “go ahead and grab a second slice” kind of pie. And because one pie is simply a tease (and frankly, never enough for my crew), we’re making two. Yes, two! One for now, and one to gift, to freeze for a rainy day, or, let’s be real, to devour tomorrow for breakfast. So, tie on your favorite apron, preheat that oven, and let’s create some kitchen magic together. This Apple Crumble Pie is about to become your new favorite tradition.
The Pie That Started It All
This recipe takes me right back to my grandma’s linoleum-floored kitchen, a place that always smelled like coffee and cloves. I was maybe ten years old, “helping” her make her famous apple pie, which mostly meant I was sneak-eating more apple slices than made it into the bowl. Her recipe was a classic lattice-top, beautiful and precise. But one frantic Thanksgiving, with a house full of cousins and the dog running underfoot, she simply ran out of time to weave that perfect lattice. Without missing a beat, she mixed flour, sugar, and cold butter right in the same apple-dusted bowl, crumbled it over the filling with her hands, and shoved it in the oven.
We all thought it was a disaster. But when she pulled that pie out, golden and rustic, with sugary-buttery peaks everywhere, it was a revelation. It was imperfectly perfect. It was faster, it had this incredible textural contrast, and it tasted even better. That was the day I learned a crucial kitchen lesson: sometimes, the best recipes aren’t born from perfection, but from happy accidents and the simple desire to get something delicious on the table to share with the people you love. This crumble topping is my permanent, delicious tribute to that day.
Gathering Your Pie-Making Posse (The Ingredients)
Great pies start with great ingredients. Here’s everything you’ll need to make two show-stopping desserts. Don’t be intimidated by the list—a lot of this is probably already in your pantry!
For the Filling:
- 2 (9-inch) deep dish pie crusts – I’m a huge fan of a good homemade crust, but hey, life happens! A quality store-bought crust is a fantastic shortcut that saves you time and mess. No judgment here—we’re going to make it incredible with our filling and topping.
- 10 cups apples (about 4½–5 lbs), peeled, cored, and thinly sliced – This is the heart of the pie! I love using a mix of tart and sweet apples for a complex flavor. Granny Smith holds its shape beautifully, and Honeycrisp or Braeburn add amazing sweetness. Using a variety is my #1 chef hack for a next-level filling.
- 1 cup white sugar – This sweetens the deal and helps create that glorious, syrupy juice we all love.
- 1½ tsp ground cinnamon – The quintessential warm spice. It’s the cozy blanket for your apples.
- Juice of ½ lemon – This little twist does two things: it adds a bright zing that cuts through the sweetness, and its acid keeps the apples from turning brown while you prep. It’s a tiny step with a big payoff.
- Optional: 1 tsp vanilla extract – I almost never make a dessert without vanilla. It adds a layer of warmth and depth that makes the whole pie taste richer and more homemade.
For the Crumble Topping:
- ⅔ cup white sugar – For that sweet, crispy, caramelized crunch on top.
- 1½ cups all-purpose flour – The base of our crumble, it gives the topping structure.
- ½ cup rolled oats – My secret weapon! This is the “twist” that takes it from a standard streusel to a hearty, textural crumble. It adds a wonderful chew and makes it feel even more comforting.
- ½ cup chopped almonds or pecans – Optional but highly recommended. The nuts toast up in the oven, adding a fantastic nutty flavor and an extra layer of crunch. If you have a nut allergy, just leave them out—the topping is still amazing.
- 12 tbsp (1½ sticks) cold butter, cut into small pieces – This is non-negotiable. COLD butter is the key to a crumbly, not pasty, topping. We’re going to “cut it in” to create little pea-sized butter pockets that melt in the oven for maximum flakiness.
- Pinch of salt – Balances all the sweetness and makes the flavors pop.
Let’s Get Our Hands Dirty: The Step-by-Step
Ready to build our masterpiece? Follow these steps, and you’ll have two gorgeous pies ready for the oven in no time. I’ve packed this section with all my favorite chef hacks to ensure your success.
- Preheat and Prep. Fire up your oven to 375°F (190°C). This is the perfect temperature to cook the apples through without burning our crumble. Pro Tip: Place a baking sheet on the middle rack while the oven preheats. You’ll place your pies on this hot sheet later, and it will help cook the bottom crust perfectly, preventing a soggy bottom—every pie-maker’s nemesis!
- Create the Apple Magic. In your largest bowl, toss all your thinly sliced apples with the 1 cup of sugar, 1½ tsp cinnamon, lemon juice, and that optional vanilla extract. Get in there with your hands and mix it all up until every single apple slice is glistening and coated. Let it sit for about 10 minutes. You’ll see the sugar pull out some of the apple juices—this is exactly what we want! It’s going to create that saucy filling. Now, divide this glorious mixture evenly between your two pie crusts. Pile it high—it will shrink down as it bakes.
- Build the Crumble. In a separate, medium-sized bowl, whisk together the 1½ cups flour, ⅔ cup sugar, ½ cup rolled oats, your chopped nuts, and that pinch of salt. Now, add your COLD butter pieces. Here’s the fun part: use a pastry cutter, two forks, or—my personal favorite—your clean fingertips to work the butter into the dry ingredients. Pinch and rub the mixture between your fingers until it looks like coarse, sandy crumbs with some larger, pea-sized chunks of butter throughout. Those butter chunks are pure gold—they’ll melt and create pockets of deliciousness. Don’t overwork it! You want it to be clumpy, not a uniform dough.
- Top It Off. Take handfuls of your crumble mixture and sprinkle it evenly over the two apple-filled pies. Don’t press it down! Just let it sit loosely on top, covering the apples completely right to the edge of the crust. This loose layer is what gives you that beautiful, craggy, textured top.
- Bake to Golden Perfection. Carefully place your pies on the preheated baking sheet (this catches any bubbling-over juices and gives that crust a heat boost from below). Bake for 40-50 minutes. You’re looking for a deep golden brown topping and bubbly filling around the edges. About halfway through, take a peek. If the crust edges or topping is browning too quickly, gently tent the pies with aluminum foil. This lets the apples finish cooking without the top getting too dark.
- The Hardest Part: Wait. I know, I know. The smell is intoxicating. But you MUST let the pies cool on a wire rack for at least 1 hour, preferably 2-3. This isn’t just to avoid burning your mouth; it’s crucial for the filling to set. If you cut into it too early, the filling will be soupy and run everywhere. Letting it cool allows the natural pectins in the apples to thicken everything up into sliceable perfection. Trust me, it’s worth the wait.
Serving Up the Goodness
Now for the best part: serving! This pie is a superstar all on its own, but a few accompaniments make it legendary. Slice it warm (not piping hot!) and serve it right on the plate. The classic pairing is, of course, a giant scoop of vanilla ice cream. The contrast of the cold, creamy ice cream melting into the warm, spiced apples is a thing of beauty. For a decadent twist, drizzle a little warm caramel sauce over the top. If you’re a purist, a simple dollop of freshly whipped cream is absolute heaven. No matter how you serve it, make sure you’re surrounded by good company.
Make It Your Own: Recipe Variations
This recipe is a fantastic canvas for your creativity! Here are a few of my favorite twists:
- Spice It Up: Add ¼ tsp of nutmeg or cardamom to the filling along with the cinnamon for a more complex spice profile.
- Berry Apple Fusion: Replace one cup of apples with fresh or frozen cranberries for a gorgeous sweet-tart flavor explosion, perfect for the holidays.
- Gluten-Free Friend: Use a certified GF pie crust and swap the all-purpose flour in the topping for a 1:1 gluten-free baking blend. It works like a charm!
- Maple Brown Sugar: Swap the white sugar in the filling for brown sugar and add a tablespoon of maple syrup for a deeper, almost caramel-like flavor.
- Boozy Apple: For the adults, toss the apples with a tablespoon of bourbon or dark rum along with the lemon juice. It adds a wonderful warmth.
Beau’s Chef Notes & Kitchen Stories
This recipe has evolved so much since my grandma’s frantic kitchen experiment. The addition of oats and nuts was my doing, inspired by the oatmeal cookies I could never get enough of as a kid. I wanted that chewy, hearty texture on top of my pie, and it stuck. Over the years, I’ve learned a few things: a mix of apples is non-negotiable for the best flavor, and cold butter is the undisputed king of crumble topping.
I’ll never forget the first time I made this for a big Feastical potluck. I brought both pies, still slightly warm. I turned my back for one second to grab some plates, and when I turned around, one pie was already half gone, and a friend was just standing there, fork in hand, with a huge, guilty-but-happy smile on her face. She just said, “I couldn’t help myself. It’s too good.” That’s the reaction I’m always hoping for. Food that makes people forget their manners just a little is always the best kind.
Apple Pie FAQs: Your Questions, Answered
Q: My filling is always too runny. How can I fix this?
A: This is the #1 question! First, ensure you’re letting the pie cool COMPLETELY. This is the biggest fix. Secondly, toss your apples with the sugar and spices and let them macerate for 10-15 minutes. Then, before putting them in the crust, drain off about half of the liquid that has accumulated in the bowl. You can also add a tablespoon of cornstarch or tapioca flour to the sugar mixture to help thicken the juices as they bake.
Q: Can I make this ahead of time?
A: Absolutely! You have two great options. 1) Assemble and refrigerate: Prepare the pies completely, cover tightly with plastic wrap, and refrigerate for up to 24 hours before baking. You might need to add 5-10 minutes to the baking time since it’s going in cold. 2) Freeze unbaked: This is my go-to for gifting. Assemble the pies, wrap them tightly in a few layers of plastic wrap and foil, and freeze for up to 3 months. Bake straight from frozen, adding 20-30 minutes to the baking time and covering with foil for the first half to prevent over-browning.
Q: The bottom of my crust is soggy. Help!
A: The preheated baking sheet trick is your best defense! Placing the pie dish on a hot surface immediately starts cooking the bottom crust. Also, make sure your oven is fully preheated. If it’s a chronic issue, you can blind-bake (pre-bake) the crust for about 10 minutes before adding the filling, but I find the hot sheet method works perfectly for this recipe.
Q: What are the best apples to use?
A: You want a mix that holds its shape and offers a balance of sweet and tart. My gold-standard combo is ⅔ firm, tart apples like Granny Smith or Pink Lady, and ⅓ sweeter, softer apples like McIntosh, Braeburn, or Honeycrisp. The Grannies provide structure and tang, while the others break down a bit more and create a saucier filling.
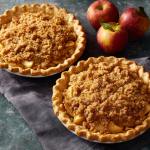
Apple Crumble Pie
- Total Time: 2½–3 hours (mostly waiting!)
Description
Hey, Pie People! Let’s bake a memory. There’s nothing quite like the smell of apple pie in the oven—warm cinnamon, bubbling apples, and that buttery crust. This version keeps all the comfort of a classic pie but ditches the lattice fuss for a golden oat-and-almond crumble topping that’s rustic, crunchy, and irresistibly good. And because one pie is never enough, we’re making two—one for the table, one to share (or keep for “breakfast”).
Ingredients
Pie Base
-
2 (9-inch) deep-dish pie crusts (homemade or quality store-bought)
Apple Filling
-
10 cups apples (about 4½–5 lbs), peeled, cored, thinly sliced
-
1 cup white sugar
-
1½ tsp ground cinnamon
-
Juice of ½ lemon
-
Optional: 1 tsp vanilla extract
Crumble Topping
-
1½ cups all-purpose flour
-
⅔ cup white sugar
-
½ cup rolled oats
-
½ cup chopped almonds or pecans (optional)
-
12 tbsp (1½ sticks) cold butter, cut into small cubes
-
Pinch of salt
Instructions
-
Preheat & Prep
-
Heat oven to 375°F (190°C).
-
Place a baking sheet on the middle rack while preheating (prevents soggy bottoms).
-
-
Make the Filling
-
Toss apple slices with sugar, cinnamon, lemon juice, and vanilla (if using).
-
Let sit 10 minutes until juices form. Divide evenly into the two crusts. Pile high—apples shrink as they bake.
-
-
Mix the Crumble
-
In a bowl, whisk flour, sugar, oats, nuts (if using), and salt.
-
Cut in cold butter using fingers, a pastry cutter, or two forks until mixture is coarse crumbs with pea-sized butter bits.
-
-
Assemble
-
Sprinkle crumble loosely over both pies. Don’t press down—airy crumbles bake best.
-
-
Bake
-
Place pies on hot baking sheet. Bake 40–50 minutes, until topping is golden and filling is bubbling.
-
If browning too quickly, tent loosely with foil halfway through.
-
-
Cool & Serve
-
Cool on wire rack at least 1 hour (2–3 for clean slices).
-
Slice and serve warm with vanilla ice cream, whipped cream, or caramel drizzle.
-
Notes
-
Best apples: Use a mix! Granny Smith or Pink Lady (tart/firm) + Honeycrisp, Braeburn, or McIntosh (sweet/juicy).
-
Prevent soupy pie: Let filling macerate, then drain half the juices before filling crust.
-
Storage: Cool completely. Refrigerate up to 3 days, or freeze unbaked (well-wrapped) for up to 3 months. Bake frozen pies with an extra 20–30 minutes, tenting with foil for the first half.
- Prep Time: 30 minutes
- Cook Time: 40–50 minutes
Nutrition
- Calories: 360 Cal
- Sugar: 30g
- Fat: 16g
- Carbohydrates: 52g
Nutritional Information (Per Slice, 1 of 16)
Calories: ~360 | Carbohydrates: 52g | Fat: 16g | Sugar: 30g | Fiber: 3g
Please note: This is an estimate based on the ingredients used and may vary depending on specific brands and substitutions.
Final Thoughts
From the first whiff of cinnamon and baking apples to the last crumb on the plate, this Apple Crumble Pie is more than a recipe—it’s an experience. It’s a celebration of contrasts: the crisp, nutty topping against the soft, yielding filling; the sweet sugar against the tart apples; the solitary focus of baking against the joyful noise of sharing it. It’s a dessert that respects tradition while embracing a wonderfully imperfect, hands-on approach. It proves that the most cherished recipes are often born not from rigid precision, but from love, a willingness to experiment, and the simple desire to create something that brings people together. So bake it with confidence, share it generously, and savor every bite. You’re not just making a pie; you’re baking a memory, one delicious, crumbly slice at a time.

Spiced Pumpkin Cream Cheese Delight
Spiced Pumpkin Cream Cheese Delight: Your New Fall Flavor Obsession
Hey friends, Beau here! 🍂 Ever have one of those crisp autumn days where you’re craving ALL the cozy vibes – cinnamon-kissed air, fuzzy socks, and a dessert that tastes like a pumpkin-spiced hug? But… maybe without the oven marathon? *raises hand* That’s exactly why I created this Spiced Pumpkin Cream Cheese Delight. Picture this: a gingersnap crust that crunches like fallen leaves, a cloud of vanilla-speckled cream cheese fluff, and a luscious pumpkin pudding layer that’s pure velvet. All chilling peacefully in your fridge while you binge-watch that new baking show. No sweating over a hot stove, no fancy techniques – just pure, spoonable joy that makes everyone at your potluck or Friendsgiving go “DANG, BEAU!” It’s the edible equivalent of your favorite flannel shirt, and trust me, it disappears faster than the last marshmallow in the hot cocoa bag. Let’s make magic happen!
Gingersnaps & Grandma’s Apron: A Flavor Memory
This recipe? It’s got roots. When I was about knee-high to a countertop, my Grandma Collier would let me “help” make her legendary pumpkin pie every Thanksgiving. Translation: I’d sneak gingersnaps from the tin while she rolled crust, getting crumbs absolutely everywhere. She’d pretend not to notice, humming along to old jazz records. One chaotic year, the pie filling overflowed spectacularly (my enthusiastic stirring was to blame). Instead of scolding, she laughed, scooped the spiced pumpkin goo into bowls with crushed cookies, and declared it “Pumpkin Parfait Surprise!” That messy, improvised dessert – creamy, spicy, crunchy – became our secret tradition. This Delight is my grown-up, slightly fancier homage to her. It captures that same magic: the warmth of spice, the comfort of pumpkin, the joy of something shared… minus the oven disaster! Every bite still tastes like her kitchen and that crumb-covered grin of mine.
Gather Your Flavor Arsenal (It’s Easier Than You Think!)
Here’s your grocery list for pure autumn bliss. Don’t sweat substitutions – cooking should be fun, not rigid!
- Crust Crusaders:
- 2 (16 oz) packages gingersnap cookies, finely crushed: The MVP! Their spicy-snap is *chef’s kiss* for fall. Chef Hack: Pulse in a food processor or bash ’em in a zip-top bag with a rolling pin (stress relief included!). Sub: Graham crackers + 1 tsp cinnamon + ½ tsp ginger work in a pinch.
- 12 tbsp (1 ½ sticks) unsalted butter, melted: The glue! Unsalted lets you control the salt. Make sure it’s fully liquid and slightly cooled.
- Optional: ½ cup finely chopped toasted pecans or walnuts: Adds nutty depth & crunch. Toast them in a dry pan for 3-4 mins until fragrant – game changer!
- Cream Cheese Cloud Layer:
- 32 oz (4 blocks) cream cheese, ROOM TEMP: Non-negotiable! Cold cream cheese = lumpy sadness. Leave it out for 2+ hours. Sub: Full-fat for richness, light works but texture is slightly less lush.
- 3 ½ cups powdered sugar: Sweetens smoothly. Sift it if it’s clumpy!
- 2 tsp pure vanilla extract: Flavor booster. Pure > imitation, always.
- 3 cups whipped topping (like Cool Whip), thawed: Creates that dreamy fluff. Sub: Homemade whipped cream (whip 3 cups heavy cream + ¼ cup powdered sugar to stiff peaks).
- Optional: 1 tsp orange zest or ½ tsp cinnamon: Zest adds bright pop, cinnamon deepens warmth. Try both!
- Velvety Pumpkin Dream Layer:
- 4 (3.4 oz) packages pumpkin spice instant pudding mix: The flavor shortcut hero! Ensure it’s *pumpkin spice* flavored. Sub: Vanilla instant pudding + 2 tbsp pumpkin pie spice blend.
- 4 cups whole milk: Full fat = best set & creaminess. Sub: 2% works, avoid skim (too thin).
- Optional: 1 tsp maple extract or bourbon vanilla: Maple = autumn vibes, bourbon vanilla = sophisticated warmth. A tiny splash makes a big impact!
- Fluffy Finishing Touch:
- 2 cups whipped topping (thawed): The snowy crown!
- Optional garnish: Crushed gingersnaps, chopped candied pecans, cinnamon/pumpkin spice sprinkle, caramel drizzle. Go wild – texture & pretty factor!
Let’s Build Some Delight! (Step-by-Step with Beau’s Hacks)
Grab your 9×13 pan and let’s get layering! This is foolproof, promise.
- The Foundation: Crunch Time! In a big bowl, mix the finely crushed gingersnaps and melted butter until it looks like wet sand. Stir in toasted nuts if using. Dump it into your pan. Beau’s Pro Move: Use the bottom of a measuring cup or glass to press it FIRMLY and evenly. Get those edges tight! Pop it in the fridge for 15 mins while you prep the next layer. This chills the butter, setting the crust so it doesn’t crumble later.
- Cream Cheese Cloud Construction: In a large bowl, beat the ROOM TEMP cream cheese with an electric mixer on medium until it’s completely smooth and lump-free (1-2 mins). Scrape the bowl! Gradually add the powdered sugar and vanilla. Beat on medium-low until combined, then crank it up to medium-high for 1-2 mins until fluffy. Beau’s Hack: Fold in the whipped topping (and zest/cinnamon if using) with a rubber spatula using gentle, sweeping motions. Over-mixing deflates the fluff! Spread this cloud carefully over your chilled crust. Smooth the top. Rinse your spatula – sticky cream cheese is no joke!
- Pumpkin Velvet Magic: In another large bowl, whisk the pumpkin spice pudding mixes and milk together vigorously for a full 2 minutes. Not 1:45! Set a timer. It’ll look thin but TRUST. Let it sit untouched for 5 minutes. It will thicken dramatically. Whisk in maple/bourbon vanilla extract now if using. Pour/spread this gorgeous pumpkin velvet gently over the cream cheese layer. Tilt the pan slightly for even coverage.
- The Grand Finale (aka The Fluff Top): Gently spread the remaining 2 cups of whipped topping over the pumpkin layer. Be a zen master – slow and steady prevents mixing the layers. Sprinkle or drizzle your chosen garnish artfully. Beau’s Tip: Crushed gingersnaps add great texture contrast!
- The Waiting Game (The Hardest Part!): Cover loosely with plastic wrap (don’t let it touch the topping). Refrigerate for AT LEAST 4 hours, but overnight is GOLD. This sets the pudding fully and lets the flavors meld into pure harmony. Make-Ahead Win: Perfect up to 2 days ahead! Uncover after the first hour to prevent condensation.
Serving Up the Cozy
Time for the grand reveal! Run a thin knife around the pan’s edge. For picture-perfect squares, dip a sharp knife in hot water and wipe it clean between each cut. Serve chilled straight from the fridge on dessert plates. Pair it with a hot mug of spiced apple cider or a drizzle of extra caramel for the “wow” factor. It’s rich, so small squares go a long way (though seconds are mandatory!).
Mix It Up! Your Delight, Your Rules
This recipe is your flavor playground! Try these twists:
- Chocolate Swirl Dream: Melt ½ cup chocolate chips with 1 tsp coconut oil. Drizzle over the pumpkin layer before adding the final whipped topping, then swirl gently with a knife.
- Maple Pecan Bliss: Use maple extract in the pumpkin layer AND garnish with extra toasted pecans and a generous maple syrup drizzle.
- Ginger Lover’s Kick: Add 1-2 tbsp finely minced crystallized ginger to the crust mixture or sprinkle on top.
- Lighter Lift: Use light cream cheese, sugar-free pudding mix, and light whipped topping. It’s still delicious!
- Individual Jars: Layer the components in mason jars for adorable portable treats!
Beau’s Behind-the-Scenes Scoop
Okay, confession time: The first time I tested this, I got impatient (shocker!) and didn’t chill the crust before adding the cream cheese. Let’s just say… it was more of a “Pumpkin Cream Cheese Landslide” than a “Delight.” Lesson learned: Patience = perfect layers! Over the years, I’ve tweaked it – adding the nuts for crunch, playing with extracts, realizing bourbon vanilla is a GENIUS move. It’s become my most-requested fall recipe, and I love how adaptable it is. One friend even swapped in gluten-free gingersnaps and said it was epic! The best part? Seeing people’s faces light up with that first bite. It’s pure, uncomplicated joy – just like Grandma’s kitchen. Pro Tip: If you have leftovers (rare!), they taste even better on day two. The spices really sing!
Your Questions, Answered (Let’s Avoid Kitchen Oopsies!)
Q: My pudding layer seems runny! Did I mess up?
A: Don’t panic! Two likely culprits: 1) Did you whisk the pudding mix and milk for a full 2 minutes? That activation time is crucial. 2) Did you let it sit for 5 minutes to thicken BEFORE spreading? If you spread it too soon, it might weep. If it’s still too thin after chilling overnight, next time try using only 3 ¾ cups milk for a firmer set.
Q: Why is my cream cheese layer lumpy?
A: This is almost always a temperature issue! Cream cheese MUST be truly room temperature. Take it out of the fridge 2-3 hours ahead. Cold cream cheese won’t blend smoothly no matter how long you beat it. If you have small lumps, try beating it alone first for longer, or press the mixture through a fine-mesh sieve (a pain, but effective!).
Q: Can I use real pumpkin puree instead of pudding mix?
A: The pudding mix is key for structure and stability in this no-bake format. Adding pumpkin puree to the cream cheese layer would make it too soft. If you want real pumpkin flavor, try adding 1-2 tbsp of puree to the *pumpkin pudding layer* along with the milk, but know it might soften the final texture slightly.
Q: How long will this keep in the fridge?
A: Covered tightly, it stays delicious for 3-4 days! The crust might soften slightly after day 2, but the flavor is still amazing. It does not freeze well – the layers separate and get icy.
Spiced Pumpkin Cream Cheese Delight
- Total Time: 4 hours 30 minutes
Description
Hey friends, Beau here! Ever crave dessert that feels like slipping into your favorite flannel—warm, cozy, and ridiculously comforting—but without turning the oven on? This Spiced Pumpkin Cream Cheese Delight is it. With a crunchy gingersnap crust, a cloud of vanilla cream cheese fluff, and a silky pumpkin pudding layer, this no-bake beauty tastes like pumpkin pie’s fun, low-maintenance cousin. Perfect for potlucks, Friendsgiving, or late-night fridge raids.
Ingredients
Crust Layer
-
2 (16 oz) packages gingersnap cookies, finely crushed
-
12 tbsp (1 ½ sticks) unsalted butter, melted
-
½ cup chopped toasted pecans or walnuts (optional)
Cream Cheese Cloud Layer
-
32 oz (4 blocks) cream cheese, room temperature
-
3 ½ cups powdered sugar, sifted if clumpy
-
2 tsp pure vanilla extract
-
3 cups whipped topping (Cool Whip or homemade whipped cream)
-
Optional: 1 tsp orange zest or ½ tsp cinnamon
Pumpkin Velvet Layer
-
4 (3.4 oz) packages pumpkin spice instant pudding mix
-
4 cups whole milk (2% works, avoid skim)
-
Optional: 1 tsp maple extract or bourbon vanilla
Finishing Touch
-
2 cups whipped topping, thawed
-
Garnishes: crushed gingersnaps, candied pecans, cinnamon, caramel drizzle
Instructions
-
Make the Crust
-
Mix crushed gingersnaps + melted butter (and nuts if using).
-
Press firmly into a 9×13 pan using the bottom of a glass.
-
Chill in fridge for 15 minutes.
-
-
Cream Cheese Cloud
-
Beat room-temp cream cheese until smooth (1–2 min).
-
Add powdered sugar + vanilla, beat until fluffy.
-
Fold in whipped topping + zest/cinnamon gently.
-
Spread evenly over chilled crust.
-
-
Pumpkin Velvet Layer
-
Whisk pudding mix + milk for full 2 minutes. Let sit 5 minutes to thicken.
-
Stir in maple extract or bourbon vanilla if using.
-
Spread gently over cream cheese layer.
-
-
Finishing Touch
-
Spread remaining whipped topping evenly.
-
Garnish with crushed cookies, nuts, or drizzle.
-
-
Chill & Serve
-
Cover loosely with plastic wrap.
-
Refrigerate at least 4 hours (overnight = best texture).
-
Slice with a hot knife for clean edges.
-
Notes
-
Smooth cream cheese = room temp (take it out 2–3 hours ahead).
-
Crust success = chill it before layering.
-
Presentation hack: Dip knife in hot water and wipe between cuts.
-
Make-ahead: Stays fresh 3–4 days in fridge. Best eaten by day 2 for crisp crust.
- Prep Time: 30 minutes
Nutrition
- Calories: 380 kcal per serving, 1 of 20
- Sugar: 25g
- Fat: 26g
- Carbohydrates: 35g
- Protein: 5g
Nutritional Info (Approximate per Serving)
Based on 20 servings, using whole milk, full-fat cream cheese, and whipped topping, including optional ½ cup pecans in crust:
Calories: ~380 kcal | Fat: ~26g | Saturated Fat: ~14g | Carbohydrates: ~35g | Sugar: ~25g | Protein: ~5g | Sodium: ~280mg
Note: This is an estimate. Values change significantly with substitutions (light ingredients, omitting nuts, etc.).
Final Thoughts
The Spiced Pumpkin Cream Cheese Delight is more than just a recipe; it’s an experience. It’s a testament to the fact that the most beloved dishes often stem from happy accidents and cherished memories, like the one in Grandma Collier’s kitchen. It proves that creating something show-stopping doesn’t require advanced techniques or sweating over a hot oven—it requires an understanding of simple ingredients and a little patience for the magic of chilling to happen.
This dessert is a love letter to autumn itself. It captures the season’s essence in every layer: the crunchy decay of fallen leaves in the crust, the soft, comforting embrace of a cozy sweater in the cream cheese cloud, and the warm, spiced heart of a harvest festival in the pumpkin velvet. It’s adaptable to any occasion, from a grand holiday feast to a quiet weeknight treat, and it invites you to play, experiment, and make it your own.
So, as the air turns crisp and the leaves begin to blaze, I encourage you to clear a space on your countertop, gather your ingredients, and create this little piece of magic. Share it with friends, savor it alone, and maybe even start a new tradition of your own. Because the true delight, in the end, isn’t just in the eating—it’s in the making, the sharing, and the memory-making that happens along the way. Now, go make some magic
Scrambled Veggie Bowl
Wake Up to Sunshine in a Bowl: Your New Favorite Veggie-Packed Breakfast
Hey friends, Beau here from Feastical! Pull up a stool and let’s chat about mornings. You know those days when you stumble into the kitchen half-awake, craving something hearty but actually good for you? Yeah, me too – which is exactly why I created this Scrambled Veggie Bowl. Imagine this: crispy golden hashbrowns snuggled next to fluffy, cheesy eggs bursting with fresh spinach and juicy tomatoes, all crowned with creamy avocado confetti. It’s like your favorite breakfast diner decided to take a vitamin-packed vacation! What makes this bowl magic? It’s lightning-fast (15 minutes tops!), endlessly customizable, and packed with 25g of protein to fuel your adventures. Whether you’re meal-prepping for busy weeks or treating yourself to a lazy Sunday brunch, this recipe’s your kitchen BFF. No fancy skills required – just real food, real flavor, and zero fuss. Ready to make mornings delicious? Let’s grab our spatulas and get cracking!
The Little Bowl That Could: My Backpacking Breakfast Epiphany
Picture this: Me, shivering in a misty Colorado campground at 6 AM, rummaging through a half-frozen cooler. I was six days into a backpacking trip with buddies, and we were down to our last eggs and one sad-looking avocado. Desperate for warmth, I threw everything into my trusty skillet – frozen hashbrowns included. As that cheesy, veggie-loaded scramble bubbled away over the campfire, something hilarious happened. Three groggy hikers emerged from tents like bears to honey, plates in hand. My buddy Carlos mumbled through a mouthful, “Dude, this tastes like a hug from your grandma… if your grandma wore hiking boots.” We called it “Mountain Mercy Bowl” that day, but the real miracle? Discovering that epic meals happen when you stop overthinking and let simple ingredients shine. Now, whenever I make this at home, I still smell pine trees and hear crackling flames. Food memories? They’re the best souvenirs.
Your Veggie Bowl Toolkit: Ingredients & Why They Rock
- 2 eggs – Your protein powerhouse! Cage-free or pasture-raised make the yolks sunshine-yellow. Vegan? Swap in tofu scramble (see variations).
- 1 cup fresh spinach – It wilts down to nothing, sneaking in iron. Kale works too, but chop it finely!
- ½ cup cherry tomatoes, halved – Bursting with umami when sautéed. Use diced bell peppers off-season.
- 2 tbsp shredded cheddar – Melts into gooey pockets. Pro tip: Freeze cheese for 10 minutes before grating – no clumps!
- ¼ avocado, mashed – Nature’s butter! Add lemon juice to keep it green. Hate avocado? Try garlic-herb hummus.
- 2 frozen hashbrown patties – The crispy foundation. No air fryer? Bake at 425°F for 15 mins. Tater tots are fun too!
- Salt & pepper – Season eggs generously. I use flaky sea salt for finishing.
- Optional: dried herbs/chili flakes – My fave? Smoked paprika on avocado. Feels fancy, takes 2 seconds.
Chef’s Grocery Hack: Grab pre-washed spinach and frozen hashbrowns – we’re optimizing for cozy, not complicated!
Let’s Build Your Breakfast Masterpiece: Step-by-Step
1. Air-Fry the Hashbrowns: Crank that air fryer to 400°F (200°C). Toss in hashbrowns – no oil needed! Cook 10-12 minutes, flipping halfway. Why flip? It’s the secret for maximum crunch on both sides. They’re done when golden like autumn leaves. Chef’s Hack: Throw them in cold – no preheating means crispier edges!
2. Scramble Like a Pro: While hashbrowns dance, heat a nonstick skillet over medium. Add a quick spray of oil or butter. Toss in spinach and tomatoes. Sizzle 1-2 minutes until spinach wilts and tomatoes blister – those little char spots = FLAVOR TOWN! Whisk eggs with salt and pepper in a cup (add a splash of milk for fluffiness). Pour over veggies. Let them set slightly before gently pushing with a spatula. Biggest Mistake? Over-stirring! Fold occasionally for soft curds. When eggs are 90% done, sprinkle cheese. Residual heat will melt it into oozy perfection.
3. Assemble With Joy: Spoon eggs into your favorite bowl. Place hashbrowns alongside – I break mine into chunks for easy dipping. Dollop mashed avocado on top like green clouds. Sprinkle herbs or chili flakes. Presentation Tip: Use colorful bowls! Food tastes better when it looks happy.
Making It Instagram-Worthy (Because We Eat With Our Eyes First!)
Grab a wide, shallow bowl – everything needs room to shine! Layer hashbrowns first for a crispy “raft,” then pile eggs slightly off-center. Place avocado in a bright swoosh across the top. Finish with microgreens or extra cheese snow. Serve IMMEDIATELY with hot sauce on the side (I’m addicted to chipotle mayo). Pair with a giant mug of cold brew or fresh OJ. For weekend vibes? Add a mini fruit salad on the rim. Remember: Bowls are edible art – play with textures and colors!
Mix It Up! 5 Delicious Twists
1. Mediterranean Fling: Swap cheddar for feta, add kalamata olives & cucumber ribbons.
2. Southwestern Kick: Black beans + corn in eggs, top with salsa & lime-spiked avocado.
3. Vegan Powerhouse: Tofu scramble (with turmeric & nutritional yeast) + sweet potato tots.
4. Low-Carb Love: Replace hashbrowns with crispy roasted cauliflower.
5. Breakfast-for-Dinner: Add sautéed mushrooms & onions, top with a fried egg!
Beau’s Backstage Kitchen Confessions
This bowl’s been through more makeovers than my college band! Originally, I used tater tots (still delicious) until my air fryer fell in love with hashbrown patties. Pro tip: Mash avocado RIGHT before serving – nobody likes brown sludge! One Tuesday, I accidentally used cinnamon instead of chili flakes (don’t ask). Verdict? Weirdly not terrible. My kid now calls it “Dessert Bowl” and requests it. Lesson? Cooking should be playful. This recipe’s my kitchen sink – toss in leftover roasted veggies, that lonely sausage link, or wilting herbs. It always forgives you. Oh, and if you’re ever in a REAL hurry? Microwave sweet potato and smash it into the bowl. Your secret’s safe with me.
Your Questions, My Answers!
Q: My eggs turned rubbery! What went wrong?
A> Too high heat is the usual suspect! Medium heat + pulling them off just BEFORE they look done = silky eggs. They keep cooking in the bowl!
Q: Can I meal-prep this?
A> Absolutely! Cook components separately. Store eggs/veggies, hashbrowns, and avocado (with lemon juice) in airtight containers. Reheat hashbrowns in air fryer 3 mins, eggs in microwave 30 secs. Assemble fresh!
Q: No air fryer? Help!
A> No sweat! Bake hashbrowns at 425°F for 15-20 mins on a wire rack (crispy bottoms!) or pan-fry in 1 tbsp oil until golden.
Q: Avocado hates me. Other toppings?
A> Try Greek yogurt with herbs, smashed white beans with garlic, or even guacamole! Creaminess is key.

Scrambled Veggie Bowl
- Total Time: 15 minutes
Description
Hey friends, Beau here from Feastical! Ever wander into the kitchen half-awake, craving something hearty but healthy? This Scrambled Veggie Bowl is your new go-to. Think crispy hashbrowns, cheesy fluffy eggs, fresh spinach and tomatoes, and creamy avocado on top. It’s done in just 15 minutes, endlessly customizable, and delivers a solid 25g protein boost to power your day.
Ingredients
-
2 eggs – whisked with a pinch of salt & pepper
-
1 cup fresh spinach (or finely chopped kale)
-
½ cup cherry tomatoes, halved
-
2 tbsp shredded cheddar cheese (or your favorite melty cheese)
-
¼ avocado, mashed with a squeeze of lemon
-
2 frozen hashbrown patties (air-fried or baked)
-
Optional toppings: dried herbs, chili flakes, microgreens
Instructions
-
Crisp the Hashbrowns
-
Air fryer: 400°F (200°C), 10–12 min, flip halfway.
-
Oven: 425°F (220°C), 15–20 min on wire rack.
-
Pan-fry: 1 tbsp oil, 3–4 min per side until golden.
-
-
Cook the Veggie Scramble
-
Heat skillet (medium). Add spinach + tomatoes, sauté 1–2 min until wilted/blistered.
-
Pour in whisked eggs. Gently fold (don’t over-stir!) until softly set.
-
Sprinkle cheese in while eggs are still slightly wet; let residual heat melt it.
-
-
Assemble Your Bowl
-
Place hashbrowns in a wide bowl.
-
Spoon cheesy veggie scramble on top.
-
Dollop avocado mash, sprinkle chili flakes/herbs.
-
Optional: drizzle hot sauce or chipotle mayo for extra kick!
-
Notes
-
Fluffier eggs: Add 1 tbsp milk or cream to your whisked eggs.
-
Avocado saver: Mix with lemon juice to prevent browning.
-
Meal prep: Store eggs & hashbrowns separately; reheat before serving.
-
Vegan swap: Use tofu scramble + sweet potato tots.
- Prep Time: 3 minutes
- Cook Time: 12 minutes
Nutrition
- Calories: 410 Cal
- Fat: 18g
- Carbohydrates: 20g
- Protein: 25g
Fuel Facts (Per Serving)
Calories: 410 | Protein: 25g | Fat: 18g | Carbs: 20g | Fiber: 7g
Note: Stats vary with swaps. Add hot sauce for metabolism boost!
Final Thoughts
At its heart, this Scrambled Veggie Bowl is so much more than the sum of its parts. It’s a testament to the idea that eating well doesn’t have to be complicated, expensive, or time-consuming. It’s a reminder that the most satisfying meals often come from a place of simplicity and intuition, not rigid recipes. Whether it becomes your weekly meal-prep hero, your lazy Sunday centerpiece, or the inspiration for your own culinary creations, I hope it brings a little sunshine and a lot of flavor to your mornings. Remember, the best kitchen tool you have is your own creativity. Don’t be afraid to play, to swap, to experiment, and to make it truly yours. Here’s to many more delicious mornings ahead. Now, go forth and conquer your day