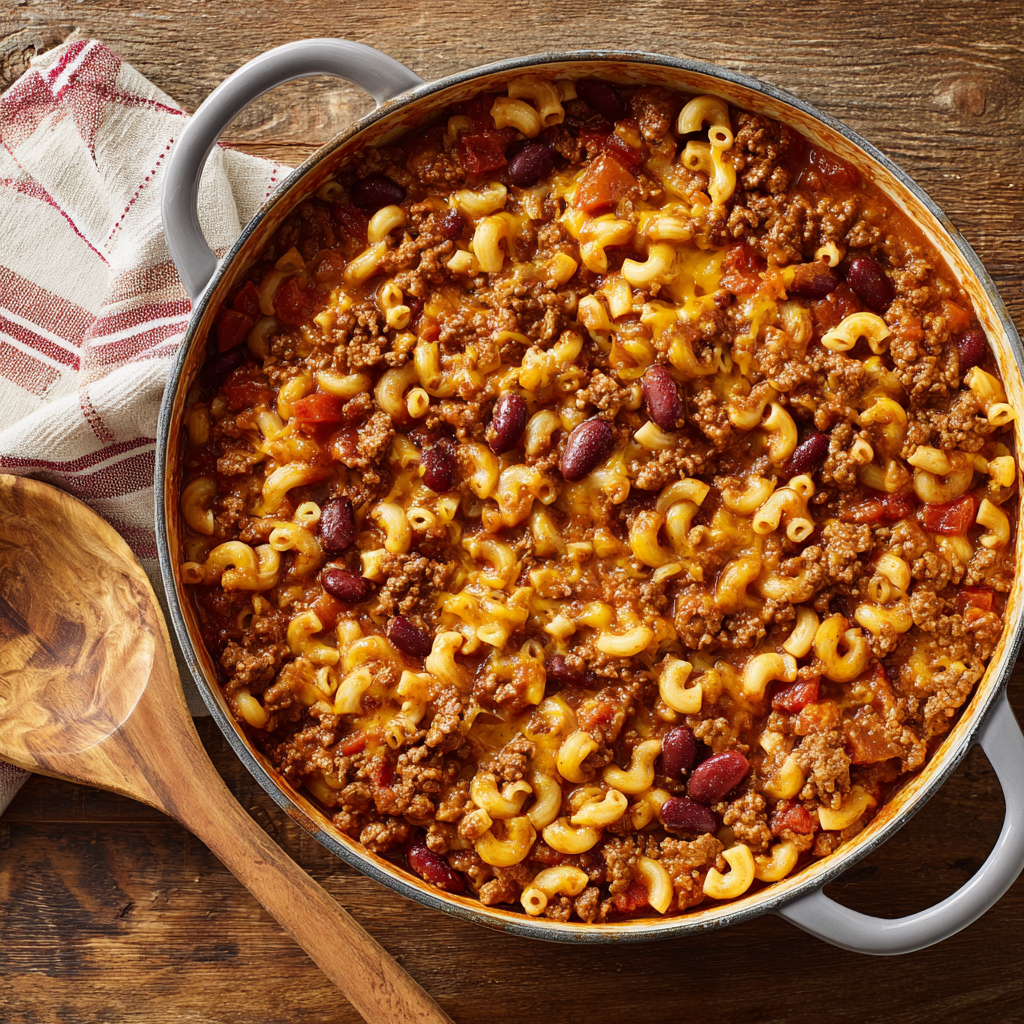
Cheesy Chili Mac
Your New Favorite One-Pot Wonder: Cheesy Chili Mac
Hey friends, Beau here from Feastical! Let’s talk about that magical moment when you stare into your pantry, your stomach is rumbling, and you need something good. Not just “open-a-can” good, but a soul-warming, crowd-pleasing, “wow-did-you-really-make-this?” kind of good. You want comfort, but you also want flavor that packs a punch. You crave something hearty, but you absolutely do not crave a mountain of dirty dishes afterward.
Sound familiar? I’ve been there more times than I can count. That’s why I’m so ridiculously excited to share this recipe with you today. We’re taking two of the greatest comfort foods of all time—creamy, dreamy mac and cheese and robust, spicy chili—and smashing them together into one glorious, life-changing pot. This isn’t just any chili mac; this is my ultimate, Cheesy Chili Mac, designed to be heartier, cheesier, and more flavorful than any version you’ve tried before. We’re talking tender pasta and savory beef swimming in a rich, tomato-y chili sauce, all hugged by a ridiculous amount of melted Monterey Jack and cheddar cheese. It’s the culinary equivalent of your favorite cozy sweater, and I promise, it’s about to become your new weeknight hero.
The Night That Called for Chili Mac
This recipe has a special place in my heart because it was born from a classic “Collier Family Chaos” evening. Picture it: a rainy Tuesday, my nephew’s entire soccer team unexpectedly landed at our house after practice, and my sister called with a “help, I need to feed an army in 30 minutes” plea. The cupboards were… interesting. We had ground beef, some pasta, a few cans of beans and tomatoes, and a whole lot of cheese. In a moment of pure, hungry inspiration, I decided to throw caution (and every ingredient) to the wind and just make one giant pot of everything.
The smell alone brought everyone into the kitchen. That sizzle of beef and onions meeting chili powder and cumin is basically a dinner bell. When I lifted the lid after the pasta had cooked, the sight of that bubbling, cheesy, incredible-smelling concoction was met with a chorus of “Whoa!” We served it up with some crusty bread, and the sound that followed was the best sound a home cook can hear: complete and total silence, broken only by the happy scraping of forks against bowls. It was a hit. It was a triumph. And it immediately earned a permanent spot in our family recipe rotation.
Gathering Your Flavor Arsenal
Here’s everything you’ll need to create this masterpiece. I’ve included some of my favorite chef-y insights and swaps to make this recipe truly your own.
- 2 lbs Lean Ground Beef: I like an 85/15 blend for great flavor without too much excess grease. For a twist, try ground turkey or a plant-based ground “meat”!
- 2 Medium Onions, diced: The sweet, savory base of our dish. No onions? A tablespoon of onion powder can work in a pinch.
- 3 tbsp Chili Powder: This is our flavor backbone! Adjust up or down based on your heat tolerance.
- 1 tbsp Cumin: That warm, earthy, unmistakable chili flavor. Don’t skip it!
- 1 tsp Salt: Essential for making all the other flavors pop.
- 2 tbsp Granulated Garlic: Quick, easy, and delivers consistent garlicky goodness. Fresh minced garlic works beautifully too—use about 6 cloves.
- 2 tbsp Brown Sugar: Our secret weapon! It doesn’t make it sweet, just perfectly balances the acidity of the tomatoes.
- 1 tsp Smoked Paprika (the Feastical twist!): This is my “pro move” ingredient. It adds a subtle, smoky depth that makes people go, “What is that amazing flavor?”
- 30 oz Tomato Sauce & 28 oz Diced Tomatoes: This combo gives us a perfect saucy base with little bursts of tomato texture. Fire-roasted diced tomatoes are a fantastic upgrade here.
- 4 cups Beef Broth: This is our cooking liquid for the pasta, infusing it with beefy flavor. Low-sodium is best so you can control the salt.
- 16 oz Elbow Macaroni: The classic choice! Its little tubes are perfect for trapping all that cheesy, meaty goodness.
- 2 cups Frozen Corn: Adds a pop of sweetness and color. No need to thaw!
- 8 oz Diced Green Chilies: These are mild and add a fantastic tangy flavor, not heat. They’re a game-changer.
- 1 (15 oz) can Black Beans, drained: For extra fiber, protein, and heartiness. Kidney or pinto beans are great substitutes.
- 3 cups Monterey Jack Cheese & 3 cups Cheddar Cheese, shredded: The star of the show! I always shred my own—it melts so much creamier than the pre-shredded stuff, which has anti-caking agents. A sharp cheddar gives the best flavor punch.
Let’s Get Cooking: Your One-Pot Journey to Glory
Grab your biggest, heaviest-bottomed pot or Dutch oven. This is our one-pot wonder vehicle, and we’re about to take it for a ride. Follow these steps, and you really can’t go wrong.
- Brown the Beef & Onions: Crank your heat to medium and add the ground beef and diced onions to the pot. Use your spoon or a spatula to break up the meat as it cooks. We’re looking for a nice, even brown here, no pink left! Once it’s done, carefully drain off any excess fat. Chef’s Hack: Draining the fat is key for a sauce that’s not greasy. I like to tilt the pot and use a spoon to scoop it out, or you can carefully pour it into an old can.
- Bloom the Spices: This is the most important step for a rich, deep flavor! Add the chili powder, cumin, salt, granulated garlic, brown sugar, and that magical smoked paprika right into the hot beef and onions. Stir it constantly for about 60 seconds. You’ll smell the spices becoming incredibly fragrant—this is called “blooming,” and it wakes up their essential oils, making your entire dish taste a million times better.
- Create the Saucy Base: Now, pour in the tomato sauce, diced tomatoes (with their juices!), beef broth, frozen corn, diced green chilies, and drained black beans. Give it all one big, enthusiastic stir. Bring this glorious mixture to a rolling boil. You’ll know it’s ready when big bubbles are breaking the surface.
- Cook the Pasta: Stir in the entire box of elbow macaroni. Make sure every piece gets submerged in that lovely liquid. Now, reduce the heat to a gentle simmer (that’s a light bubbling), pop the lid on, and let it work its magic for 12-15 minutes. Stir it once or twice halfway through to prevent any sticking. The pasta should be perfectly al dente—tender but with a little bite. Chef’s Hack: Don’t peek too often! Keeping the lid on traps the steam and heat, which is what cooks the pasta perfectly.
- The Big Cheese Melt: Turn off the heat! This is crucial. Removing the pot from the heat before adding the cheese prevents it from getting greasy or seizing up. Now, sprinkle in all that beautiful shredded Monterey Jack and cheddar cheese. Stir slowly and watch as it melts into the most incredible, creamy, cheesy sauce that coats every single bite.
- The Final Rest: I know it’s tempting to dive right in, but patience, young grasshopper! Let the chili mac rest, with the lid on, for about 5 minutes off the heat. This allows the sauce to thicken up perfectly and the flavors to fully mingle and get to know each other.
How to Serve It Up Feastical-Style
Okay, the moment of truth! Ladle that steaming, cheesy goodness into big, comfortable bowls. This dish is a complete meal in a bowl, but I love to dress it up with a few fun toppings to make it extra special. Set up a little “toppings bar” and let everyone customize their own bowl!
- A dollop of cool sour cream or Greek yogurt to cut through the richness.
- A sprinkle of fresh, chopped cilantro or green onions for a bright, fresh finish.
- Some sliced jalapeños for my heat-seeking friends.
- A handful of tortilla chips for that perfect satisfying crunch.
- A squeeze of fresh lime juice to make all the flavors sing.
And on the side? A simple green salad or some warm, buttery cornbread is absolutely perfection. It’s the ultimate comfort food feast.
Make It Your Own: Delicious Twists & Swaps
One of the best things about this recipe is its flexibility. Play with it! Here are a few of my favorite variations:
- Spicy Fiesta: Kick up the heat by using Pepper Jack cheese instead of Monterey Jack and adding a teaspoon of chipotle powder with the other spices.
- BBQ Lover’s Dream: Swap the chili powder for your favorite BBQ seasoning blend and use a smoky BBQ sauce in place of half the tomato sauce. Stir in some cooked, shredded chicken instead of beef for a whole new vibe.
- Tex-Mex Taco Mac: Use a packet of taco seasoning instead of the individual spices, and swap the black beans for a can of rinsed kidney beans. Top with crushed tortilla chips and a drizzle of ranch!
- Vegetarian Delight: Easy! Simply omit the ground beef and use an extra can of black beans or pinto beans. Use vegetable broth instead of beef broth. You’ll still get a super satisfying and hearty meal.
- Gluten-Free Goodness: This recipe adapts beautifully. Just use your favorite gluten-free elbow pasta (like those made from brown rice or quinoa) and ensure your beef broth is certified gluten-free.
A Few More Thoughts from My Kitchen
This recipe has evolved so much since that first chaotic Tuesday night. I started adding the smoked paprika after a happy accident when I grabbed the wrong jar, and it was the best mistake I ever made. The brown sugar was my grandma’s old trick for her famous chili, and it works like a charm here, too.
One funny story: I once accidentally used a whole can of chipotle peppers in adobo instead of the mild green chilies. Let’s just say we needed a fire hose and about a gallon of milk on standby. We still ate it, but we were sweating! So, learn from my mistakes and double-check your cans. The beauty of cooking is that even the “oops” moments can lead to something delicious (or at least, a really good story).
Your Questions, Answered!
Q: My sauce seems a bit thin. How can I thicken it up?
A: No worries! The easiest fix is to let it rest for a few more minutes with the lid off—the pasta will continue to absorb the liquid. If it’s still too thin, mix a tablespoon of cornstarch with two tablespoons of cold water to make a slurry, stir it in, and let it simmer for a minute or two. It will thicken right up!
Q: Can I make this in a slow cooker?
A: Absolutely! Brown the beef and onions with the spices on the stove first (this step is important for flavor!). Then, transfer everything except the pasta and cheese to your slow cooker. Cook on LOW for 6-7 hours or HIGH for 3-4. About 20 minutes before serving, stir in the dry macaroni and cook on HIGH until tender. Then, turn off the heat and stir in the cheese.
Q: How do the leftovers hold up?
A: They’re fantastic! Store them in an airtight container in the fridge for up to 4 days. The pasta will absorb more liquid, so when you reheat it, add a splash of beef broth or water to loosen it up again. It reheats beautifully on the stove or in the microwave.
Q: My cheese got a little stringy and clumpy. What happened?
A: This usually happens if the heat is too high when you add the cheese. Always remember to remove the pot from the heat completely before stirring in your shredded cheese. Also, grating your own cheese from a block (instead of using pre-shredded) makes a world of difference in achieving a smooth, creamy melt.
Let’s Talk Nourishment
While this Cheesy Chili Mac is the epitome of comfort food, it’s also packed with real, wholesome ingredients that actually fuel your body. The lean ground beef provides a powerful punch of protein and iron, essential for keeping you full and energized. The black beans and tomatoes are fantastic sources of fiber and vitamins, and using a whole-grain pasta can bump up the fiber content even more. The cheese, besides being utterly delicious, adds calcium and more protein. It’s a balanced, hearty meal that proves comfort food can be both soul-satisfying and nourishing. Remember, it’s all about balance and enjoying the food that makes you feel good, inside and out!
Print
Cheesy Chili Mac
Description
Hey friends! Let’s talk comfort food magic. This Cheesy Chili Mac combines creamy, dreamy mac and cheese with hearty, flavorful chili—all in one pot. It’s quick, easy, and ridiculously delicious, making it the perfect weeknight dinner for busy nights or hungry crowds.
Ingredients
-
2 lbs lean ground beef (85/15 blend, or swap for turkey/plant-based)
-
2 medium onions, diced
-
3 tbsp chili powder
-
1 tbsp cumin
-
1 tsp salt
-
2 tbsp granulated garlic (or 6 cloves fresh, minced)
-
2 tbsp brown sugar
-
1 tsp smoked paprika (optional but amazing)
-
30 oz tomato sauce
-
28 oz diced tomatoes (fire-roasted optional)
-
4 cups beef broth (low-sodium preferred)
-
16 oz elbow macaroni
-
2 cups frozen corn
-
8 oz diced green chilies (mild)
-
1 (15 oz) can black beans, drained
-
3 cups Monterey Jack cheese, shredded
-
3 cups cheddar cheese, shredded
Instructions
-
Brown the beef & onions: Cook over medium heat until beef is browned. Drain excess fat.
-
Bloom the spices: Stir in chili powder, cumin, salt, granulated garlic, brown sugar, and smoked paprika for 1 minute until fragrant.
-
Add liquids & veggies: Pour in tomato sauce, diced tomatoes, beef broth, corn, green chilies, and black beans. Stir and bring to a rolling boil.
-
Cook the pasta: Add macaroni, reduce to a gentle simmer, cover, and cook 12–15 minutes, stirring occasionally, until pasta is al dente.
-
Add the cheese: Remove from heat and stir in Monterey Jack and cheddar until smooth and creamy.
-
Let it rest: Cover and let stand for 5 minutes to thicken the sauce.
Notes
-
Toppings bar: Sour cream, cilantro, green onions, jalapeños, tortilla chips, or lime juice.
-
Spicy twist: Use Pepper Jack and add chipotle powder.
-
BBQ flavor: Replace chili powder with BBQ seasoning and add BBQ sauce. Swap beef for shredded chicken.
-
Vegetarian option: Skip beef, add extra beans, and use vegetable broth.
-
Gluten-free: Use gluten-free pasta and broth.
Nutrition
- Calories: 540Cal Per Serving
- Carbohydrates: 48 g
- Protein: 32 g
Dig In & Enjoy!
And there you have it, friends! My ultimate, no-fuss, one-pot Cheesy Chili Mac. It’s the recipe I turn to when I need to feed a crowd, when I’m craving something deeply comforting, or when I just want to make an ordinary Tuesday feel a little more special.
I hope this recipe finds its way into your kitchen and becomes a trusted friend, just like it is in mine. Cooking should be fun, approachable, and always end with a happy, full belly. So, give it a try, make it your own, and be sure to tag me @Feastical or use the hashtag #FeasticalFeast so I can see your beautiful creations! Now, go forth and create something delicious.
Final Thoughts: Your New Go-To Recipe is Served
Well, friends, we’ve reached the end of our one-pot journey, and I am so genuinely thrilled for you to try this. This Cheesy Chili Mac is more than just a recipe to me; it’s a reminder that the best meals aren’t always the most complicated ones. They’re the ones that bring people together, that turn a chaotic evening into a cherished memory, and that leave you feeling satisfied and happy, not stressed about a messy kitchen.
It’s a recipe built for real life—for busy weeknights, for feeding hungry crowds, and for those nights when you just need a big, warm, cheesy hug in a bowl. It’s forgiving, flexible, and downright delicious.
I hope this recipe becomes a canvas for your own culinary adventures. Tweak the spices, try a new cheese, load it up with your favorite toppings—make it yours. Most of all, I hope it brings as much joy and comfort to your table as it has to mine.
Prep Time: 10 mins | Cook Time: 25 mins | Total Time: 35 mins
Course: Main Course | Cuisine: American | Keyword: cheesy chili mac, one pot meal, comfort food, easy dinner, family meal, beef and pasta
Servings: 8 | Calories per serving (approx.): 480 | Protein: 30g | Carbs: 38g | Fat: 24g

Creamy Sausage Pasta
Your New Weeknight Hero: Creamy Sausage Pasta
Hey friends, Beau here! Let’s be real for a second. Some nights, you just need a dinner that feels like a warm, hearty hug from the inside out. You know the ones I’m talking about. The clock is ticking, stomachs are rumbling, and the thought of a complicated recipe with a mountain of dishes makes you want to just order a pizza.
Well, I’m about to become your new best friend. This Creamy Sausage Pasta is my absolute go-to for those exact moments. It’s the culinary equivalent of pulling on your favorite worn-in hoodie. It’s savory, it’s creamy, it’s packed with flavor, and the best part? It’s ready in under 30 minutes. I’m not talking about one of those “30 minutes if you have three hands and a food processor” recipes. This is honest-to-goodness, weeknight-easy magic.
We’re talking juicy Italian sausage, sweet and tangy sun-dried tomatoes, and fresh spinach all tangled up in a velvety, Parmesan-laced cream sauce that clings to every nook and cranny of your favorite pasta. It’s a one-pan wonder (plus the pot for the pasta, but we can forgive that) that delivers maximum comfort with minimal fuss. So, grab your favorite skillet and let’s create some kitchen magic that will have everyone asking for seconds.
The Story Behind the Supper
This recipe wasn’t born in a fancy test kitchen; it was born out of a desperate need for comfort on a rainy Tuesday. I’d just moved into my first real apartment, and my best friend, Leo, came over to help me build a bookshelf. Three hours and one lopsided shelf later, we were soaked from a sudden downpour, covered in sawdust, and absolutely starving. My pantry was a sad collection of college-era staples, but I had some pasta, a lonely tube of sausage, and the last dregs of a jar of sun-dried tomatoes.
I threw it all together in a pan, crossing my fingers. The moment that cream hit the hot sausage and melted into the Parmesan, the whole tiny kitchen smelled like an Italian grandmother’s dream. Leo and I devoured it straight from the skillet, and that lopsided bookshelf didn’t seem so bad anymore. This dish became our victory meal. It’s a reminder that the best food isn’t always the most complicated—it’s the meal that brings people together and turns a rough day into a great memory.
Gathering Your Flavor Dream Team
Here’s everything you’ll need to whip up this cozy masterpiece. Don’t stress if you’re missing an item or two—I’ve included my favorite chef hacks and substitutions to make this recipe work for you!
- 300g Pasta (Penne or Fusilli): These short, sturdy shapes are perfect for catching all that creamy sauce in their tubes and twists. Chef’s Insight: I’m a penne guy, but rigatoni or farfalle (bow-ties) work beautifully too!
- 300g Italian Sausage, casings removed: This is the flavor foundation. I use mild Italian sausage, but if you like a kick, hot Italian sausage is fantastic. Substitution Tip: No sausage? Ground turkey or chicken seasoned with a teaspoon of fennel seeds, dried oregano, and a pinch of red pepper flakes will get you close.
- 1 tbsp Olive Oil: Just a splash to get things sizzling.
- 3 Cloves Garlic, minced: Because what’s a feel-good pasta without garlic? Fresh is best here for that bright, aromatic punch.
- ½ tsp Chili Flakes (optional): My not-so-secret weapon. Even if you’re sensitive to spice, a pinch adds a subtle warmth in the background that really makes the other flavors pop.
- ½ cup Sun-Dried Tomatoes, chopped: These little gems pack a powerful sweet-tangy punch that cuts through the richness of the sauce. Chef’s Insight: If you’re using the kind packed in oil, they add even more flavor! Just give them a rough chop.
- 2 cups Fresh Spinach: It wilts down to almost nothing and adds a lovely pop of color and a hint of earthiness. Don’t be intimidated by the volume—it shrinks dramatically!
- 1 cup Heavy Cream: This is what creates that luxurious, velvety sauce. Substitution Tip: For a lighter version, half-and-half will work, but the sauce will be a bit thinner. You can let it simmer a minute or two longer to thicken.
- ½ cup Grated Parmesan: Use the real stuff, freshly grated if you can! The pre-shredded kind often has anti-caking agents that can make your sauce a little grainy.
- Salt & Pepper to taste: Your trusty sidekicks. Remember, the sausage and Parmesan are already salty, so taste before you add more salt at the end!
Let’s Get Cooking: Your Step-by-Step Guide
Ready to make some magic? Follow these steps, and you’ll have a restaurant-worthy dish on the table in no time. I’ve sprinkled in my favorite tips to ensure your pasta is perfect.
- Cook the Pasta: Bring a large pot of well-salted water to a rolling boil. Add your pasta and cook it according to the package directions until it’s al dente—that means it still has a slight bite to it. This is crucial! We’re going to finish cooking the pasta in the sauce, and mushy pasta is a sad pasta. Before you drain it, reserve about ½ cup of that starchy pasta water. This liquid gold is our secret weapon for making the sauce silky and perfectly clingy. Drain the pasta and set it aside.
- Brown the Sausage: While the pasta is working, heat the olive oil in a large skillet or Dutch oven over medium-high heat. Add the sausage (casings removed!) and cook it, breaking it up with a wooden spoon, until it’s beautifully browned and cooked through. This should take about 5-7 minutes. Chef’s Hack: Don’t stir it constantly! Let it get a good sear on one side before breaking it up—that browned crust equals big flavor.
- Build the Aromatics: Push the sausage to one side of the skillet. In the cleared space, add the minced garlic and chili flakes (if using). Let them sizzle for just 30-60 seconds until incredibly fragrant. You’ll know it’s ready when you get that amazing garlicky aroma. Stir it into the sausage. Chef’s Tip: Adding the garlic directly to the hot spot prevents it from burning and becoming bitter.
- Welcome the Tomatoes & Cream: Now, stir in the chopped sun-dried tomatoes and let them mingle with the sausage for a minute. This wakes up their flavor. Pour in the heavy cream, bring everything to a gentle simmer, and let it bubble for 2-3 minutes. You’ll see the cream start to thicken slightly and take on a lovely pale orange hue from the tomatoes and sausage.
- Wilt the Spinach & Create the Sauce: Turn off the heat. This is important—we don’t want to overcook the cream. Add the fresh spinach in handfuls, stirring constantly. It will wilt almost instantly from the residual heat. Now, stir in the grated Parmesan until it melts into the cream, creating a smooth, velvety sauce.
- The Grand Finale: Combine & Toss: Add the drained, cooked pasta directly into the skillet with your glorious sauce. Using tongs, toss everything together until every single piece of pasta is coated in that creamy, dreamy sauce. If the sauce seems a little too thick, this is where you use that reserved pasta water! Add a tablespoon or two at a time, tossing continuously, until the sauce reaches your desired consistency. Give it a taste and season with salt and pepper as needed.
How to Serve It Up in Style
This dish is a star all on its own, but a little presentation goes a long way! I love serving this family-style, right in the skillet I cooked it in—it’s rustic, beautiful, and means one less dish to wash. Use tongs to twirl a generous portion into warm, shallow bowls.
To take it over the top, finish it with a final flourish. A light shower of extra Parmesan cheese is a must. A few fresh basil leaves torn over the top add a wonderful freshness and a pop of green. For a bit of zing and color, a little sprinkle of lemon zest is absolutely divine. And don’t forget a thick, crusty slice of garlic bread on the side for mopping up every last drop of that incredible sauce. You’ll thank me later.
Make It Your Own: Delicious Twists & Swaps
One of the best things about this recipe is how adaptable it is. Feel like switching it up? Here are some of my favorite variations:
- The Mushroom Lover’s Dream: Add 8 oz of sliced cremini mushrooms when you’re browning the sausage. They’ll release their water and develop a deep, savory umami flavor that pairs perfectly with the sausage.
- Green Power-Up: Swap the spinach for an equal amount of chopped kale or Swiss chard. Just add it a minute earlier to allow a little more time to wilt.
- Chicken & Bacon Twist: Not a sausage fan? Use 300g of diced chicken breast or thighs. For extra smokiness, cook 4-5 slices of chopped bacon in the skillet first, then use the bacon fat to cook the chicken.
- Sun-Dried Tomato & Pesto Swirl: For an extra herby kick, stir in a couple of tablespoons of basil pesto along with the cream. It’s a flavor explosion!
- Lighter Version: Use half-and-half or whole milk instead of heavy cream, and swap the sausage for lean ground turkey. The sauce will be a bit lighter, but still utterly delicious.
Beau’s Kitchen Notes
This recipe has been with me for years, and it’s evolved in the best way. I used to be so nervous about the sauce breaking that I’d add the cheese off the heat, which is a great habit! But I’ve learned that the real key to a non-grainy sauce is using freshly grated Parmesan. Trust me on this one—it makes a world of difference. This dish is also a fantastic “clean out the fridge” recipe. Got a lone zucchini? Dice it up and sauté it with the sausage. A handful of cherry tomatoes? Toss ’em in! Cooking should be fun, not rigid. So play, experiment, and make it yours.
Your Questions, Answered!
Q: My sauce seems a little thin/watery. How can I thicken it up?
A: No worries! First, let it simmer for another minute or two off the heat—it will often continue to thicken as it sits. If it’s still too thin, you can create a quick slurry by mixing a teaspoon of cornstarch with a tablespoon of cold water. Stir this into the sauce and let it simmer for a minute until thickened.
Q: Can I make this creamy sausage pasta ahead of time?
A: You can absolutely prep the components! Cook the sausage and make the sauce (hold the Parmesan until the end). Store it separately from the cooked pasta in the fridge for up to 2 days. When ready to serve, gently reheat the sauce, stir in the Parmesan, and toss with the pasta, adding a splash of water or cream to loosen it up.
Q: My sauce broke and looks greasy/oily. What happened?
A: This usually happens if the heat was too high when you added the cream or cheese, causing the fat to separate. To fix it, remove the pan from the heat and vigorously whisk in a tablespoon of cold water or cream. This can often bring it back together. To prevent it, always simmer the cream gently and add the cheese off the direct heat.
Q: Can I freeze leftovers?
A> I’ll be honest, cream-based sauces don’t always freeze and reheat the best—they can become grainy or separate. This dish is truly best enjoyed fresh. If you must, freeze it in an airtight container for up to a month. Thaw in the fridge overnight and reheat gently on the stovetop with a splash of milk or cream to help re-emulsify the sauce.

Creamy Sausage Pasta
Description
Hey friends, Beau here! This creamy sausage pasta is the ultimate weeknight hug on a plate. Juicy Italian sausage, sweet sun-dried tomatoes, fresh spinach, and a velvety Parmesan cream sauce make this a one-pan wonder (plus the pasta pot). Ready in under 30 minutes, it’s hearty, satisfying, and simple.
Ingredients
Pasta & Protein
-
300 g pasta (penne or fusilli; rigatoni or farfalle also work)
-
300 g Italian sausage, casings removed (mild or hot)
-
1 tbsp olive oil
-
Salt & pepper, to taste
Flavor Boosters
-
3 cloves garlic, minced
-
½ tsp chili flakes (optional)
-
½ cup sun-dried tomatoes, chopped
-
2 cups fresh spinach
Creamy Sauce
-
1 cup heavy cream (or half-and-half for lighter version)
-
½ cup grated Parmesan cheese, freshly grated if possible
Optional Garnish & Sides
-
Extra Parmesan cheese
-
Fresh basil leaves
-
Lemon zest
-
Garlic bread for serving
Instructions
Bring a large pot of salted water to a boil. Cook pasta until al dente. Reserve ½ cup pasta water, then drain.
Heat olive oil in a large skillet over medium-high heat. Add sausage and cook 5–7 minutes, breaking it up, until browned.
Push sausage to the side. Add garlic and chili flakes (if using) to the cleared space and cook 30–60 seconds until fragrant. Stir into sausage.
Stir in sun-dried tomatoes, then pour in cream. Simmer 2–3 minutes until slightly thickened.
Turn off heat. Stir in fresh spinach until wilted. Add Parmesan, stirring until smooth and velvety.
Add cooked pasta to the skillet. Toss to coat evenly. If sauce is too thick, add reserved pasta water a tablespoon at a time. Taste and season with salt and pepper.
Notes
-
Mushroom Lover: Add 8 oz sliced mushrooms with the sausage.
-
Greens Swap: Replace spinach with kale or Swiss chard.
-
Chicken & Bacon Twist: Swap sausage for diced chicken and add cooked bacon for smokiness.
-
Pesto Kick: Stir 2 tbsp basil pesto into the sauce for herby flavor.
-
Lighter Version: Use half-and-half or whole milk and lean ground turkey.
Nutrition
- Calories: 620 Cal Per Serving
- Sugar: 4 g
- Fat: 38 g
- Saturated Fat: 18 g
- Carbohydrates: 45 g
- Protein: 25 g
Nutritional Information (Approximate)
Okay, let’s talk nutrition, friends! This is a hearty, comforting dish, and it’s meant to be satisfying. The information below is a rough estimate per serving (assuming the recipe serves 4) and can vary based on the specific ingredients you use, like the fat content of your sausage and cream.
Per Serving (approx.):
Calories: ~620 kcal | Protein: ~25 g | Carbohydrates: ~45 g | Fat: ~38 g | Saturated Fat: ~18 g | Sugar: ~4 g | Sodium: ~800 mg
Remember, balance is key! Pairing a rich dish like this with a light, crisp side salad the next day is one of my favorite ways to enjoy all foods without guilt. Food is fuel, but it’s also joy, community, and comfort—and this dish delivers on all fronts.
Final Thoughts from My Kitchen to Yours
And there you have it! My beloved Creamy Sausage Pasta in all its glory. It’s more than just a recipe to me; it’s a reminder of laughter with friends, the joy of a simple, satisfying meal, and the fact that you don’t need fancy techniques to create something truly special.
I hope this recipe finds its way into your regular rotation and becomes a source of comfort and joy in your home. Give it a try, and don’t forget to tag me @FeasticalBeau or use the hashtag #FeasticalFeast so I can see your beautiful creations! Now, go forth and cook with confidence. You’ve got this.
With a full heart and an even fuller plate,
Beau

Tori Chili (Sweet & Spicy Chicken)
Your New Weeknight Hero: Tori Chili is Here to Save Dinner
Hey friends, Beau here from Feastical! Let me paint you a picture. It’s been one of those days. You’re tired, maybe a little hangry, and the siren song of the takeout menu is getting louder by the minute. But your wallet (and maybe your well-being) is gently whispering, “Hey, remember that we like to cook?” I get it. I’ve been there more times than I can count.
That exact feeling is precisely why I’m so excited to share one of my all-time favorite, no-fuss, flavor-packed recipes with you today: Tori Chili. Now, don’t let the name fool you—this isn’t a heavy, slow-simmered pot of beans. “Tori” means chicken in Japanese, and this dish is a beautiful fusion of Chinese-Japanese flavors that comes together in a flash. We’re talking tender, juicy pieces of chicken, wok-tossed in a glossy, clingy sauce that’s the perfect dance partner of sweet, tangy, and spicy.
It’s the kind of meal that feels like a treat but is deceptively simple to whip up. In about 20 minutes, you can transform a few humble ingredients into a dinner that will have everyone at the table asking for seconds. And the best part? We love to serve it over a fluffy mountain of steamed rice with soft, creamy scrambled eggs. It’s a complete, comforting, and utterly craveable bowl of goodness. So, let’s ditch the takeout temptation and create some real-deal kitchen magic together. Your fork is waiting!
The Night I Discovered My Go-To Comfort Food
I’ll never forget the first time I truly *met* Tori Chili. It wasn’t in a fancy restaurant or from a family recipe passed down through generations. Nope. It was in a tiny, hole-in-the-wall izakaya (a Japanese pub) in a random back alley, after a long, rainy day of traveling. My friend and I were soaked, exhausted, and desperately pointing at pictures on a menu we could barely read.
The dish that arrived was unassuming—a simple bowl of rice topped with this glistening, dark-orange chicken and a soft pile of scrambled eggs. One bite, and I was a changed man. The warmth of the ginger, the kick of the chili, the sweet tang of the sauce… it was like a warm hug for my soul. It was the ultimate “feel-good” food. I must have asked the waiter three times what it was called, scribbling “Tori Chili” on a napkin like it was culinary treasure. I went home obsessed, and after countless attempts (and a few delicious failures), I finally nailed down my own version. It’s a recipe that always brings me back to that cozy, happy place, and now, I’m so thrilled to share that feeling with you.
Gathering Your Flavor All-Stars
One of the best things about this Tori Chili is the ingredient list. You probably have most of this in your pantry right now! Here’s everything you’ll need to serve four hungry people (or two very hungry people with fantastic leftovers).
- 500g (about 1 lb) Chicken Breast, cut into bite-sized pieces: I like breast for its lean, quick-cooking nature, but chicken thighs are an amazing swap for even more juiciness and flavor. Don’t be shy with the knife here—keeping the pieces uniform ensures they all cook at the same time.
- Salt & Pepper to taste: The fundamentals! We’re seasoning the chicken directly to build layers of flavor from the inside out.
- 3 tbsp Cornstarch: This is our secret weapon for that incredibly crispy, golden exterior on the chicken. It creates a delicate crust that the glorious sauce will cling to later. Potato starch works beautifully here too if that’s what you have on hand.
- 1 tbsp Neutral Oil: Think vegetable, canola, or avocado oil. We need something with a high smoke point to get a good sear without any off-flavors.
For the Magical Sweet & Spicy Sauce:
- 4 tbsp Ketchup: Before you raise an eyebrow, trust me! This isn’t just for burgers. It gives the sauce a tangy-sweet tomato base and that signature glossy look. For a more refined touch, you can use tomato paste thinned with a bit of water and a pinch of sugar.
- 2 tbsp Soy Sauce: The salty, umami backbone of our sauce. Use tamari or coconut aminos for a gluten-free version.
- 1 tbsp Rice Vinegar: This adds a bright, clean acidity that cuts through the richness. A splash of apple cider vinegar can step in if needed.
- 2 tbsp Sugar: Balances the heat and acidity. Brown sugar, honey, or maple syrup would all add their own delicious nuance.
- 2 tsp Chili Garlic Sauce (adjust to heat level): This is where the “chili” comes in! Start with 2 tsp for a medium kick, and add more if you’re feeling brave. Sriracha works in a pinch, but chili garlic sauce has a better texture and garlicky punch.
- 1 tbsp Water: Just a splash to loosen everything up and help the sauce meld together.
- 1 tsp Grated Ginger & 1 clove Garlic, minced: The aromatic heart and soul of the dish. Fresh is absolutely best here—it makes all the difference!
Let’s Get Cooking: Your Step-by-Step Guide to Glory
Ready to see some magic happen? This whole process is faster than waiting for a pizza delivery. Let’s do this!
- The Prep is Key. First things first, let’s get our chicken ready. Pat those bite-sized pieces dry with a paper towel—this is a chef’s hack for a crispier crust. Toss them in a bowl with a good pinch of salt and pepper, then sprinkle over the cornstarch. Get your hands in there and toss until every single piece is lightly and evenly coated. It should look like a light, dusty snow has fallen on your chicken. Set this aside while you whisk together the sauce.
- Whisk Up the Liquid Gold. In a separate medium bowl, combine all of your sauce ingredients: the ketchup, soy sauce, rice vinegar, sugar, chili garlic sauce, water, ginger, and garlic. Whisk it until the sugar has dissolved and the sauce is smooth and homogenous. Giving it a taste now is a great idea—you can adjust the spice or sweetness to your liking. Set this flavor bomb within arm’s reach of the stove.
- Golden Brown and Delicious. Place a large skillet or wok over medium-high heat and add your oil. You’ll know it’s ready when the oil shimmers. Carefully add your coated chicken in a single layer, giving each piece a little room to breathe. Don’t crowd the pan! If you need to, cook in two batches. We’re looking for a beautiful golden-brown sear on all sides, which should take about 5-7 minutes total. The cornstarch coating will create a fantastic, slightly crispy exterior while keeping the inside tender.
- The Grand Sauce Finale. Once the chicken is cooked through, it’s showtime! Reduce the heat to medium-low. Pour your pre-mixed sauce right into the pan. It will sizzle and bubble gloriously. Stir constantly, letting the sauce heat up, thicken, and turn wonderfully glossy as it coats every nook and cranny of the chicken. This should only take 2-3 minutes. You’ll see it transform before your eyes—when the sauce clings to the chicken without pooling at the bottom of the pan, you’re done!
Plating Up Your Masterpiece
Now for the really fun part—building your bowl! This is where Tori Chili truly becomes a meal. My absolute favorite way to serve it is the classic, comforting way.
Start with a generous bed of fluffy steamed white rice (or brown rice for a nuttier flavor). While your chicken was cooking, I hope you had a small pan going to whip up some soft, creamy scrambled eggs. Just whisk a couple of eggs with a splash of milk or water, cook them low and slow, and you’ve got the perfect pillow for your chicken. Pile the eggs right on top of the rice.
Now, lovingly spoon that glistening Tori Chili over the eggs and rice. The final touches? A sprinkle of thinly sliced green onions for a fresh bite and a dash of toasted sesame seeds for a little nutty crunch. The contrast of textures and temperatures—the hot, saucy chicken, the soft, mild eggs, and the warm rice—is nothing short of perfection. Dig in immediately and prepare for the compliments to roll in!
Make It Your Own: Delicious Twists on Tori Chili
The beauty of this recipe is its flexibility. Once you’ve mastered the basic formula, feel free to get creative! Here are a few of my favorite ways to mix it up:
- The Veggie-Packed Power Bowl: Add a whole onion (sliced) and a colorful bell pepper (cut into strips) to the pan right after the chicken is cooked. Sauté for 2-3 minutes until they just start to soften, then proceed with the sauce. A handful of frozen edamame tossed in at the end is also a fantastic addition!
- Sweet & Sour Swap: For a fruitier, tangier vibe, replace the ketchup with an equal amount of pineapple juice and add a tablespoon of apple cider vinegar. Toss in some fresh pineapple chunks with the sauce for a tropical twist.
- Go Gluten-Free & Low-Carb: It’s easy! Use tamari instead of soy sauce and serve your Tori Chili over cauliflower rice. It’s just as satisfying and a great lighter option.
- Extra Umami Kick: Stir a teaspoon of miso paste into the sauce mixture for an incredible depth of savory flavor. It’s a total game-changer.
- The “Clean Out the Fridge” Version: Got some broccoli florets, carrots, or mushrooms? Chop ’em up and toss them in! This recipe is wonderfully forgiving and a great way to use up lingering veggies.
Beau’s Kitchen Confidential
This recipe has evolved so much since that first napkin-scribble version. I used to be afraid of the cornstarch, thinking it would make the chicken gummy, but it’s the very thing that makes it so good! My biggest “Aha!” moment was realizing that pre-mixing the sauce is non-negotiable. Trying to add the ingredients separately to the pan always led to a rushed, unevenly flavored mess. Now, the whisk-and-pour method is my religion.
A funny story: I once, in a sleepy morning daze, accidentally used cinnamon instead of pepper when coating the chicken. Let me tell you, it was… an interesting flavor profile. Not my finest hour, but it taught me to always double-check my spice jars! Stick with pepper, folks.
Your Tori Chili Questions, Answered!
I’ve made this recipe a hundred times, and I’ve heard all your brilliant questions. Here are the ones that pop up most often.
Q: My sauce didn’t get thick and glossy. What happened?
A: No worries! This usually means the heat was too low when you added the sauce, or you didn’t let it bubble and reduce for long enough. The cornstarch from the chicken needs that good heat to activate and thicken the sauce. If it’s still too thin after 3-4 minutes, you can make a “slurry” by mixing 1 tsp of cornstarch with 1 tbsp of cold water and stirring it in. It should thicken up in under a minute.
Q: Can I make this ahead of time?
A: You can! The sauce can be mixed and stored in the fridge for up to 3 days. The chicken is best cooked fresh, but you can prep and coat it in cornstarch a few hours ahead. Keep it in the fridge on a plate until you’re ready to cook. The final dish reheats well, but the crispy coating on the chicken will soften.
Q: Is there a way to make it less spicy for my kids?
A: Absolutely. Family-friendly cooking is my jam. Simply reduce the chili garlic sauce to 1/2 a teaspoon, or leave it out entirely. You can always serve extra chili sauce on the side for the heat-lovers at the table to add to their own plates.
Q: My chicken stuck to the pan! Help!
A> This is a common one. First, make sure your pan and oil are properly hot before adding the chicken. A good test is flicking a tiny bit of water into the oil—if it sizzles, you’re good to go. Also, resist the urge to move the chicken around right away. Let it sear for a minute or two on the first side to form a crust, and it will release from the pan much more easily.

Tori Chili (Sweet & Spicy Chicken)
Description
Hey friends, Beau here! This Tori Chili is a fast, flavor-packed weeknight hero. Tender chicken, a glossy sweet-and-spicy sauce, and optional soft scrambled eggs make it a complete, crave-worthy meal. Ready in about 20 minutes, it’s the perfect antidote to takeout cravings.
Ingredients
Chicken
-
500 g (1 lb) chicken breast, cut into bite-sized pieces (thighs also work)
-
Salt & pepper, to taste
-
3 tbsp cornstarch (or potato starch)
-
1 tbsp neutral oil (vegetable, canola, avocado)
Sweet & Spicy Sauce
-
4 tbsp ketchup
-
2 tbsp soy sauce (or tamari for gluten-free)
-
1 tbsp rice vinegar
-
2 tbsp sugar (or honey/maple syrup)
-
2 tsp chili garlic sauce (adjust for heat)
-
1 tbsp water
-
1 tsp grated ginger
-
1 clove garlic, minced
Optional Garnish & Sides
-
Steamed rice (white, brown, or cauliflower rice)
-
Soft scrambled eggs
-
Sliced green onions
-
Toasted sesame seeds
Instructions
1. Prep the Chicken
Pat chicken pieces dry. Season with salt and pepper, then toss in cornstarch until evenly coated. Set aside.
2. Make the Sauce
In a bowl, whisk together ketchup, soy sauce, rice vinegar, sugar, chili garlic sauce, water, ginger, and garlic. Adjust sweetness or spice to taste.
3. Cook the Chicken
Heat oil in a skillet or wok over medium-high heat. Add chicken in a single layer (cook in batches if needed). Sear 5–7 minutes until golden brown and cooked through.
4. Finish with Sauce
Reduce heat to medium-low. Pour sauce over the chicken and stir constantly for 2–3 minutes until thickened and glossy.
5. Plate & Serve
-
Serve over a bed of rice.
-
Top with soft scrambled eggs if desired.
-
Garnish with green onions and sesame seeds.
Notes
-
Veggie Boost: Add bell peppers, onions, broccoli, or edamame after cooking chicken.
-
Sweet & Sour Twist: Substitute ketchup with pineapple juice and a splash of vinegar; add pineapple chunks.
-
Low-Carb Option: Serve over cauliflower rice.
-
Extra Umami: Stir 1 tsp miso paste into the sauce.
-
Kid-Friendly: Reduce chili garlic sauce to ½ tsp or omit.
Nourishing Your Body & Soul
While I’m all about flavor first, I also believe in knowing what’s going into our bodies. This Tori Chili is a pretty well-balanced meal, especially when served with rice and eggs! Here’s a rough breakdown per serving (including the chicken and sauce, but not including rice or eggs, as those can vary so much).
Per Serving (approx.):
Calories: ~390 kcal
Protein: ~30 g
Carbohydrates: ~20 g
Fat: ~18 g
Sugar: ~10 g
Sodium: ~700 mg
Remember, this is comfort food that’s packed with lean protein to keep you full and satisfied. The sauce does contain sugar and sodium, but by making it at home, you’re in complete control—you can adjust the sugar and use low-sodium soy sauce if you prefer. It’s all about finding the balance that makes you feel good!
One Last Bite of Wisdom
And there you have it, friends! My go-to recipe for when life gets busy, but my cravings get specific. This Tori Chili is more than just a recipe; it’s a 20-minute passport to a seriously satisfying dinner that never fails to hit the spot. It’s proof that you don’t need a ton of time or fancy ingredients to put something truly delicious and memorable on the table.
I hope this recipe finds its way into your regular rotation and becomes a trusted friend in your kitchen, just like it is in mine. If you make it (and I really hope you do!), tag me on social with #Feastical so I can see your beautiful creations. Now, go forth and cook something Feastical!
With a full heart and an even fuller plate,
Beau
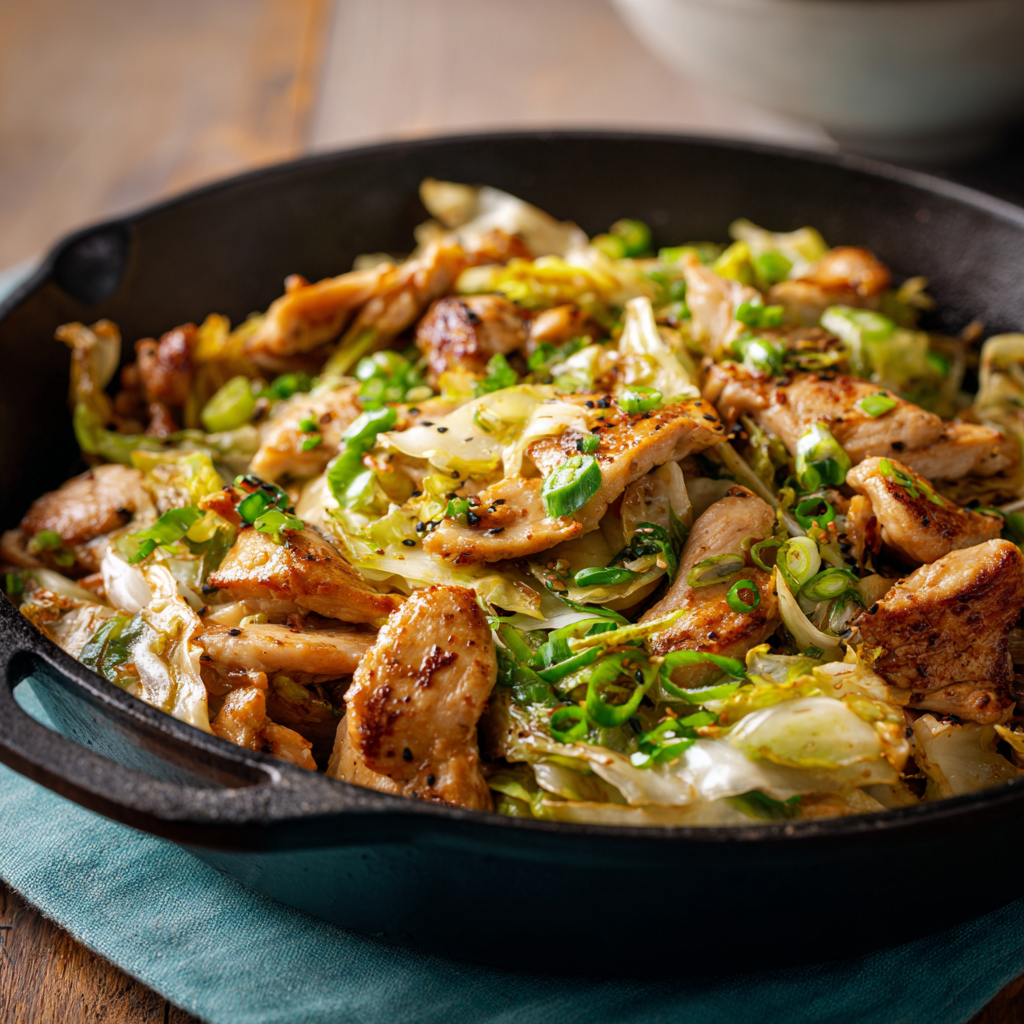
Miso Marinated Chicken Stir-Fry (Keichan Yaki)
Miso Magic: Your New Favorite Chicken Stir-Fry is Here!
Hey friends, Beau here! Let’s talk about one of life’s greatest simple pleasures: that incredible sizzle when something truly delicious hits a hot pan. It’s the sound of a fast, flavorful meal coming together, and it’s a sound I think we could all use a little more of in our lives. If your weeknight dinner routine needs a jolt of joyful energy, you are in for a treat. Today, we’re diving fork-first into one of my all-time favorite quick fixes: Miso Marinated Chicken Stir-Fry.
Now, I know what you might be thinking. “Beau, another stir-fry?” But trust me, this isn’t just any stir-fry. This is a taste of a specific Japanese regional gem called Keichan Yaki, straight from the heart of Gifu Prefecture. It’s bold, it’s savory, and it’s packed with that deep, soul-satisfying flavor known as umami. The star of the show? A simple, magical marinade built on miso paste that transforms humble chicken and cabbage into something absolutely extraordinary. It’s the kind of dish that feels like a warm hug but comes together in less time than it takes to watch your favorite sitcom. So, grab your favorite well-seasoned wok or trusty skillet, and let’s make some kitchen magic happen together!
The Train Ride That Changed My Dinner Game
I’ll never forget the first time I tasted Keichan Yaki. I was traveling through Japan, crammed into a tiny, incredibly loud izakaya (that’s a Japanese pub) tucked away near a train station. The place was buzzing with energy—friends laughing, salarymen unwinding after a long day, and the most incredible aromas wafting from the open kitchen. I pointed to something on a neighboring table that looked and smelled unbelievable: a heaping plate of sizzling chicken and cabbage with a gorgeous, caramelized glaze.
One bite and I was a goner. It was salty, slightly sweet, deeply savory, and had this incredible charred-edge quality from the hot pan. It was comfort food, but with a sophistication that blew my mind. I asked the chef about it, and he proudly called it “Keichan,” a local specialty. That dish, enjoyed in a cloud of steam and laughter, embodied everything I love about food: its power to connect, to comfort, and to create a lasting memory. I’ve been recreating that feeling in my own kitchen ever since, and now, I’m so excited to share it with you.
Gathering Your Flavor Powerhouses
This recipe is a beautiful example of how a few simple, high-quality ingredients can create a symphony of flavor. Here’s your shopping list for this umami party!
For the Magical Miso Marinade:
- 500g Boneless, Skinless Chicken Thighs: I highly recommend thighs for this! They stay incredibly juicy and tender during high-heat stir-frying, unlike breasts which can dry out. If you must use breast, slice it thinly and reduce the cooking time.
- 3 Tbsp Miso Paste: This is the heart and soul of the dish! Use white (shiro) miso for a milder, slightly sweeter flavor, or red (aka) miso for a deeper, saltier punch. Don’t have miso? In a real pinch, you could use a tablespoon of soy sauce and a tablespoon of tahini, but the flavor profile will be different.
- 2 Tbsp Soy Sauce: Our salty backbone. Use tamari for a gluten-free version—it works perfectly!
- 1 Tbsp Sake: This Japanese rice wine adds a subtle sweetness and complexity. No sake? A dry sherry or even a splash of white wine will do the trick.
- 1 Tbsp Mirin: The sweet balance to our salty miso and soy. If you don’t have mirin, a half-tablespoon of sugar or honey dissolved in a tablespoon of water is a great stand-in.
- 1 Tbsp Grated Ginger: For that warm, zesty kick. Fresh is best here! The little microplane grater is your best friend.
- 1 Clove Garlic, Minced: Because what’s a stir-fry without garlic? Enough said.
- 1 Tsp Sesame Oil: Our flavor “twist” at the end. It’s not for cooking, but for finishing, and it adds that iconic, nutty aroma.
- ½ Tsp Chili Flakes (Optional): For my friends who like a little heat! Feel free to add a sprinkle or leave it out entirely.
For the Stir-Fry Itself:
- 1 Tbsp Neutral Oil: Avocado, grapeseed, or canola oil are perfect. They have a high smoke point, which is essential for getting a good sear.
- 2 Cups Chopped Cabbage: The classic veggie for Keichan! It softens beautifully and soaks up all the delicious sauce. Green cabbage is traditional, but savoy cabbage adds a nice textural flair.
- 1 Onion, Sliced: I like a yellow onion for its balance of sweetness and pungency. It caramelizes wonderfully in the pan.
- Sliced Green Onions for Garnish (Optional): A pop of fresh color and a mild, oniony crunch to finish the dish. Highly recommended!
Let’s Get Sizzling: Your Step-by-Step Guide
Ready to cook? This comes together so fast, so I recommend having all your ingredients prepped and within arm’s reach. We call this mise en place in the chef world, and it’s the secret to a stress-free stir-fry!
- Create the Flavor Base: In a medium-sized bowl, combine the miso paste, soy sauce, sake, mirin, grated ginger, minced garlic, sesame oil, and chili flakes (if using). Whisk it all together until it’s a smooth, luscious sauce. Chef’s Hack: If your miso is a bit lumpy, just add a tiny splash of warm water to help it dissolve into the other liquids more easily.
- Marinate the Chicken: Slice your chicken thighs into bite-sized pieces, about 1-inch chunks. Add them to the bowl with the marinade and toss until every piece is lovingly coated. Now, for the hardest part of this recipe: patience. Let it marinate for at least 30 minutes at room temperature. If you have more time, pop it in the fridge for up to 4 hours (or even overnight!). The longer it marinates, the deeper and more incredible the flavor will be.
- Heat it Up: Place your largest skillet or wok over medium-high heat and let it get properly hot. Add your tablespoon of neutral oil and swirl it around to coat the surface. You’ll know it’s ready when the oil shimmers. Chef’s Tip: A hot pan is non-negotiable! It’s what gives us that beautiful caramelization instead of steaming the chicken.
- Cook the Chicken (In Batches!): Using tongs or a slotted spoon, remove the chicken from the marinade, letting any excess drip off. Reserve that leftover marinade—don’t you dare throw it away! Add the chicken pieces to the hot pan in a single layer. You might need to do this in two batches to avoid overcrowding. Cook for 2-3 minutes per side, until you get a gorgeous, browned, slightly crispy exterior.
- Bring in the Veggies: Once the chicken is cooked through, add all of it back to the pan. Now, toss in your sliced onions and chopped cabbage. The pan might seem full, but don’t worry—the cabbage will wilt down significantly.
- The Grand Finale: Here’s where the magic happens. Pour in the reserved marinade. It’s going to hit the hot pan and sizzle and bubble, creating an instant, glossy sauce that coats everything. Stir-fry for another 3-4 minutes, tossing constantly, until the vegetables have softened but still have a bit of crunch, and the edges of the cabbage and onion have picked up some charred spots.
- Taste and Serve! Give it a quick taste. It should be perfectly savory, but if you feel it needs a tiny bit more salt, a dash of extra soy sauce will do the trick. You’re done!
Plating Up Your Masterpiece
This dish is a rustic beauty, so you don’t need to get too fancy. I love serving this family-style, right in the middle of the table, and letting everyone dig in. The best companion for this savory stir-fry is a big, fluffy cloud of steamed white rice. The plain rice is the perfect canvas for that incredible miso sauce. For a low-carb option, cauliflower rice works wonderfully too!
To make it look extra pretty, transfer your stir-fry to a large, shallow bowl or platter. Give it a final, generous sprinkle of those vibrant green onion slices. For an extra touch, a tiny drizzle of toasted sesame oil or a sprinkle of white and black sesame seeds right at the end adds a beautiful finish and a nutty aroma. It’s a complete, balanced, and utterly satisfying meal in a bowl.
Make It Your Own: Fun Flavor Twists!
One of the best things about a recipe like this is its flexibility. Feel free to play around and make it suit your mood or what’s in your fridge!
- Pork Lover’s Delight: Thinly sliced pork belly or pork shoulder is a traditional and delicious alternative to chicken. It becomes incredibly tender and rich.
- Veggie-Packed Power Bowl: Want to go meat-free? Use thick slices of king oyster mushrooms or pressed, extra-firm tofu. Marinate them just like the chicken for maximum flavor.
- Spice It Up: Add a tablespoon of gochujang (Korean chili paste) to the marinade for a sweet, spicy, and fermented kick. It’s a game-changer!
- More Veg, More Fun: Feel free to add a handful of shredded carrots for color and sweetness, or some sliced bell peppers for a fresh crunch. Just add them with the cabbage and onion.
- Noodle It Up: Turn this into a full-on noodle stir-fry! Cook up some yakisoba or udon noodles according to package directions, then toss them right into the pan during the last minute of cooking to coat them in the sauce.
Beau’s Kitchen Confidential
This recipe has been a staple in my kitchen for years, and it’s evolved in fun ways. I once accidentally used dark soy sauce instead of the regular kind, and it turned the whole dish a deep, mahogany brown—it looked a little wild, but it tasted amazing! My biggest lesson learned? Don’t skip the marinating time. I’ve been impatient before and cooked it after just 10 minutes, and while it was still good, it wasn’t the transcendent experience it is after a proper 30-minute soak. The flavors truly need that time to meld and penetrate the chicken. It’s a simple step that pays massive dividends in flavor.
Your Questions, Answered!
Q: Can I make this ahead of time?
A: Absolutely! You can marinate the chicken for up to 24 hours in the fridge, which actually makes it a fantastic meal-prep option. The cooked stir-fry will keep in an airtight container in the fridge for 3-4 days and reheats beautifully in a microwave or skillet.
Q: My sauce burned in the pan! What happened?
A> This usually happens if the heat is too high. The sugar in the mirin and miso can caramelize quickly and then burn. If you notice it starting to stick and blacken, just lower the heat a touch and add a tablespoon or two of water or chicken broth to the pan to deglaze it and loosen the sauce.
Q: Is it safe to cook with the marinade that had raw chicken in it?
A> This is a great food safety question! The key is that we are bringing the reserved marinade to a full, rolling boil in the hot pan with the cooked chicken and veggies. This boiling process will kill any potential bacteria, making it perfectly safe and incredibly flavorful.
Q: My cabbage got really soggy. How can I avoid that?
A> The trick is high heat and a short cooking time. Make sure your pan is screaming hot before you add the veggies, and only cook them until they are just wilted and tender-crisp, about 3-4 minutes. Don’t walk away—keep them moving in the pan!

Miso Marinated Chicken Stir-Fry (Keichan Yaki)
Description
Hey friends, Beau here! This stir-fry is savory, slightly sweet, and bursting with umami. Juicy chicken thighs, tender cabbage, caramelized onions, and a glossy miso marinade make it a fast, flavorful weeknight winner. Serve over rice, noodles, or cauliflower rice for a complete meal.
Ingredients
Marinade
-
500 g boneless, skinless chicken thighs, cut into 1-inch pieces
-
3 tbsp miso paste (white or red)
-
2 tbsp soy sauce (or tamari for gluten-free)
-
1 tbsp sake (or dry sherry/white wine)
-
1 tbsp mirin (or ½ tbsp honey/sugar in 1 tbsp water)
-
1 tbsp grated fresh ginger
-
1 clove garlic, minced
-
1 tsp sesame oil
-
½ tsp chili flakes (optional)
Stir-Fry
-
1 tbsp neutral oil (avocado, grapeseed, canola)
-
2 cups chopped cabbage
-
1 medium onion, sliced
-
Sliced green onions, for garnish (optional)
Instructions
In a medium bowl, whisk together miso paste, soy sauce, sake, mirin, ginger, garlic, sesame oil, and chili flakes.
Add chicken pieces to the marinade and toss to coat. Let sit at room temperature for at least 30 minutes (up to 4 hours in the fridge for deeper flavor).
Place a wok or large skillet over medium-high heat until hot. Add 1 tbsp oil and swirl to coat.
Cook chicken in a single layer (in batches if necessary) for 2–3 minutes per side until golden brown and slightly crispy. Remove and set aside.
Return chicken to the pan. Add onions and cabbage. Stir-fry 3–4 minutes until vegetables are wilted but still crisp.
Pour in the reserved marinade. Stir-fry for another 3–4 minutes until sauce thickens slightly and coats chicken and vegetables.
Plate immediately over steamed rice, noodles, or cauliflower rice. Garnish with green onions and a drizzle of sesame oil if desired.
Notes
-
Pork Option: Swap chicken for thinly sliced pork belly or shoulder.
-
Vegetarian: Use firm tofu or thick king oyster mushrooms instead of meat.
-
Spicy: Add 1 tbsp gochujang to the marinade.
-
Extra Veggies: Toss in shredded carrots or bell peppers with the cabbage.
-
Noodle Stir-Fry: Add cooked udon or yakisoba noodles at the end for a heartier dish.
Nutrition
- Calories: 320 Cal Per Serving
- Fat: 12 g
- Carbohydrates: 18 g
- Protein: 22 g
Nourishing Your Body & Soul
While I’m all about flavor first, it’s always nice to know what’s fueling your body! This dish is a wonderfully balanced meal. The chicken thighs provide a great source of high-quality protein to keep you feeling full and satisfied, while the cabbage and onion deliver fiber, vitamins C and K, and antioxidants. Using miso and soy sauce does mean this dish is higher in sodium, so if you’re watching your salt intake, you can use a low-sodium soy sauce. The fats are primarily from the chicken and oil, contributing to that feeling of satisfaction. Remember, these are estimates and can vary based on your specific ingredients and portion sizes.
Per Serving (Approximate): 320 calories, 22g protein, 12g fat, 18g carbohydrates, 3g fiber.
One More Thing Before You Dig In…
And there you have it, my friends! A taste of a Japanese pub, right in your own kitchen. This Miso Marinated Chicken Stir-Fry is more than just a recipe; it’s a reminder that the most memorable meals are often the simplest ones, made with love and a few powerhouse ingredients. It’s proof that you don’t need a long list of complicated steps to create something truly special for yourself or your family.
I hope this recipe brings as much joy and flavor to your table as it has to mine. If you make it (and you totally should!), I’d love to see your creation. Tag me on social @Feastical or @BeauCollier with #FeasticalEats so I can cheer you on! Now, go forth, get that pan sizzling, and enjoy every last bite. You’ve earned it.
With a full heart and an even fuller plate,
Final Thoughts: More Than a Meal, a Memory on a Plate
So there you have it—a dish that’s as much about the story as it is about the flavor. This Miso Marinated Chicken Stir-Fry is your ticket out of a dinner rut and into a world of deep, savory comfort. It’s a reminder that the most joyful cooking isn’t about perfection; it’s about the sizzle, the aroma, and the simple pleasure of creating something delicious with your own hands.
I hope this recipe becomes a new, reliable favorite in your rotation—a dish that feels both exciting and familiar, a meal that gathers people around the table. Now, go make some kitchen magic and, more importantly, make some memories. Happy cooking!

Italian Popovers
Italian Popovers: Your New Secret Weapon for Wow-Worthy Meals
Hey friends, Beau here! Let’s talk about one of life’s simple, magical pleasures: pulling a tray of golden, puffy, impossibly airy popovers out of the oven. That moment when you peer through the glass and see those glorious, irregular domes rising high above the pan? It’s pure kitchen sorcery, and I’m here to tell you a little secret—it’s the easiest kind of magic to master.
Today, we’re taking that classic, buttery popover and giving it a serious Italian vacation. We’re packing them with salty, savory prosciutto, melty, nutty Fontina cheese, and a pop of fresh green onion. The result? An Italian Popover that’s part Yorkshire pudding, part savory muffin, and 100% irresistible. They’re crisp and shatter-y on the outside, tender and almost custardy on the inside, with little pockets of cheesy, meaty goodness in every single bite.
The best part? You don’t need any fancy equipment. No special popover pan required—just your trusty muffin tin and a handful of simple ingredients you probably already have hanging out in your fridge and pantry. Whether you’re serving them alongside a cozy bowl of Tuscan Tortellini Soup, as the star of your weekend brunch spread, or just grabbing one as a dangerously delicious snack, these little guys are about to become your new go-to. So, preheat that oven and let’s make some kitchen magic together!
The Popover That Stole My Heart (and Almost My Apron)
I’ll never forget the first time I truly fell for a popover. It wasn’t in a fancy restaurant or a culinary school demo. It was in my Nonna’s kitchen, a place that always smelled like simmering tomatoes and fresh basil. She was a wizard with pasta, but one rainy Sunday, she decided to experiment. She whisked together a simple batter, but instead of keeping it plain, she folded in some leftover diced pancetta and a handful of sharp provolone she had grated for our lunch.
She poured the batter into a rusty old muffin tin, slid it into the oven, and told me, “Now, Beau, don’t you dare open that door. You’ll let the magic out.” I pressed my nose against the oven window, watching in awe as these humble little cups of batter began to climb. They puffed up like chef’s hats, turning a deep, golden brown. When she finally pulled them out, they looked like edible clouds. I bit into one, burning the roof of my mouth (as is tradition), and was instantly hooked. That was the moment I learned that the simplest recipes, with a little personal twist, can create the most memorable food. These Italian Popovers are my homage to her spontaneous, joyful spirit in the kitchen.
Gathering Your Italian Popover Dream Team
Here’s everything you’ll need to create these savory wonders. Remember, the quality of your ingredients really shines here, so use the best you can get your hands on!
- 4 large eggs: These are the backbone of our popover, providing structure and that incredible puff. Make sure they’re at room temperature for maximum volume! If you forgot to take them out, just place them in a bowl of warm water for 5-10 minutes.
- 2 cups all-purpose flour: The foundation of our batter. I don’t recommend swapping for whole wheat here, as it can make the popovers a bit dense. We want that airy lift!
- 2 cups whole milk: The fat content in whole milk gives us a richer flavor and a more tender crumb. For a truly decadent popover, you could even use half-and-half, but whole milk is the sweet spot.
- ½ tsp salt: Essential for balancing all the flavors. Don’t skip it!
- 4 oz prosciutto, chopped: This adds a wonderful salty, savory depth. It gets a little crispy around the edges as it bakes. Chef’s Tip: Give it a quick pan-fry for 2-3 minutes to render some fat and crisp it up before adding it to the batter—it’s a game-changer!
- 1 cup (4 oz) shredded Fontina cheese: I love Fontina for its excellent melting quality and mild, nutty flavor. If you can’t find it, a good Gruyère or even a low-moisture Mozzarella will work beautifully.
- 4 tbsp green onions, chopped: These provide a fresh, mild oniony bite that cuts through the richness of the cheese and prosciutto. The green parts add a lovely pop of color, too!
Let’s Build Some Sky-High Popovers: A Step-by-Step Guide
Ready to see some oven magic? Follow these steps, and you’ll be a popover pro in no time. I’m sharing all my little hacks along the way to ensure your success.
- Preheat and Prep: Crank your oven to 425°F (220°C). This initial blast of high heat is crucial for creating that signature steam that makes the popovers rise. While it’s heating, generously grease your muffin tin with butter, oil, or non-stick spray. I’m a butter guy—it adds fantastic flavor and helps with browning. Get every nook and cranny! Chef’s Hack: If you have time, pop the greased muffin tin into the heating oven for 5-10 minutes. A hot pan gives the batter an instant kick-start for an even better rise.
- Whisk the Wet Team: In a large bowl, grab your whisk and vigorously whisk together the room-temperature eggs, whole milk, and salt until the mixture is smooth, pale, and slightly frothy. This incorporates air, which is our friend! You’re building the foundation for a light and airy texture right here.
- Incorporate the Flour: Now, slowly add the all-purpose flour to the wet ingredients, whisking constantly. We want a smooth, lump-free batter with the consistency of heavy cream. A few small lumps are okay—don’t overmix! Overworking the flour can develop gluten and make the popovers tough instead of tender. Chef’s Insight: Some recipes let the batter rest for 30 minutes, which can help, but honestly? With these loaded popovers, I go straight in, and they turn out perfectly every time.
- Fold in the Goodies: Using a spatula, gently fold in the shredded Fontina, chopped prosciutto, and green onions. The key word is fold. We don’t want to deflate all the air we just whisked in. Just mix until everything is evenly distributed.
- Fill the Pan: Carefully pull the hot muffin tin out of the oven (remember that oven mitt!). Using a ladle or a measuring cup, fill each muffin cup about ¾ of the way full. This gives the batter plenty of room to climb the walls and create that iconic “popover” shape.
- Bake with Confidence: Immediately place the tin in the hot oven and set your timer for 20-25 minutes. This is the hardest part: DO NOT OPEN THE OVEN DOOR for at least the first 20 minutes. The rush of cold air will cause the popovers to collapse. Trust the process! You’ll know they’re done when they are magnificently puffed, deep golden brown, and firm to the touch.
- Serve Immediately: As soon as they come out of the oven, use a butter knife to gently loosen them from the pan. Transfer them to a wire rack or a bread basket. Popovers are at their absolute peak within the first 10 minutes of leaving the oven—that’s when the contrast between the crispy shell and the soft, steamy interior is pure perfection.
How to Serve Your Italian Masterpieces
Okay, you’ve got a batch of gorgeous, golden popovers. Now what? The possibilities are endless, but here are a few of my favorite ways to enjoy them.
For a cozy dinner, these are the ultimate sidekick to any soup or stew. Imagine dipping one of these cheesy, airy puffs into a big bowl of creamy tomato basil soup or a rich, hearty beef stew. They’re also fantastic alongside a simple weeknight pasta or a fresh, vibrant salad.
For brunch, you’ve just found your new MVP. Serve them with a platter of scrambled eggs, fresh fruit, and crispy bacon. They effortlessly elevate any brunch spread from simple to spectacular. And let’s be real, grabbing one with your coffee as you run out the door is a pretty stellar way to start the day.
For entertaining, place a basket of these warm popovers in the middle of the table and watch them disappear. They’re a guaranteed conversation starter and make everyone feel like you’ve been slaving away for hours, when we both know it took you just 10 minutes of active prep time. You’re welcome.
Mix It Up! Your Popover, Your Rules
The basic recipe is a dream, but don’t be afraid to get creative and make it your own! Here are a few delicious twists to try:
- The Herbalist: Add 1 teaspoon of your favorite dried Italian herbs (oregano, basil, thyme) directly into the batter. For a fresh finish, stir in a tablespoon of chopped fresh rosemary or basil.
- Vegetarian Delight: Simply swap the prosciutto for ½ cup of chopped, oil-packed sun-dried tomatoes (pat them dry first) and a handful of chopped, pitted kalamata olives. So much flavor!
- Spicy ‘Nduja Kick: Love a little heat? Fold in a tablespoon or two of soft ‘nduja sausage or ½ teaspoon of red chili flakes for a popover with a spicy, savory punch.
- Parmesan Crisp Top: Right before baking, sprinkle the top of each filled muffin cup with a little extra grated Parmesan cheese. It creates an incredibly flavorful, crispy cheesy crust on top.
- Breakfast Swap: Turn these into a full breakfast by using cooked, crumbled Italian sausage and sharp cheddar cheese instead of the prosciutto and Fontina.
A Few Chef’s Secrets & Stories
Over the years, I’ve made these popovers more times than I can count, and they’ve never failed me. The recipe has evolved from my Nonna’s simple “use what you have” method to this more refined version, but the spirit remains the same. I once made a batch for a big family potluck and accidentally used salted butter to grease the pan and forgot I’d already added the salt to the batter. Let’s just say they were… intensely seasoned. We still ate them, but it was a good lesson in tasting as you go (even with batters)!
The other thing I’ve learned is to embrace the “ugly.” Not every popover will be a perfect, symmetrical dome. Some will lean, some will have wild, craggy tops, and some might even fuse with their neighbor. That’s part of their charm! It means they’re homemade, full of character, and packed with love.
Popover Perfection: Your Questions, Answered
Q: My popovers didn’t puff up! What went wrong?
A: The most common culprits are opening the oven door too early (letting the steam escape) or under-mixing the batter. Make sure your oven is fully preheated and you whisk the initial batter until it’s smooth and frothy. Also, check your baking powder isn’t expired if you added any (though this recipe doesn’t rely on it).
Q: Can I make the batter ahead of time?
A: You can whisk it together up to an hour ahead and keep it in the fridge, but I find the best rise comes from using the batter immediately. If you do refrigerate it, let it come back to room temperature for 20-30 minutes and give it a gentle stir before baking.
Q: My popovers are sticking to the pan. How can I prevent this?
A> Grease, grease, grease! Be incredibly generous with your butter, oil, or non-stick spray. Getting the pan nice and hot before adding the batter also helps create a non-stick barrier. Running a thin knife around the edges right when they come out of the oven is key.
Q: Can I freeze these?
A> Absolutely! Let them cool completely, then store them in a freezer-safe bag for up to 2 months. To reheat, pop them directly from the freezer into a 350°F (175°C) oven for 8-10 minutes, or until warm and crisp.

Italian Popovers
Description
Hey friends, Beau here! These Italian Popovers are airy, golden, and filled with melty Fontina cheese, salty prosciutto, and fresh green onions. Perfect for brunch, dinner sides, or snacks, they’re light, crisp on the outside, tender inside, and surprisingly easy to make—even in a regular muffin tin.
Ingredients
-
4 large eggs, room temperature
-
2 cups all-purpose flour
-
2 cups whole milk
-
½ tsp salt
-
4 oz prosciutto, chopped (optional: pan-fry 2–3 min for extra crisp)
-
1 cup (4 oz) shredded Fontina cheese (sub: Gruyère or low-moisture Mozzarella)
-
4 tbsp green onions, chopped
Instructions
1. Preheat & Prep
-
Preheat oven to 425°F (220°C).
-
Generously grease a 12- or 16-cup muffin tin with butter or oil.
-
Optional: Place the greased tin in the hot oven for 5–10 min for an even better rise.
2. Make Batter
-
In a large bowl, whisk eggs, milk, and salt until smooth and slightly frothy.
-
Gradually whisk in flour until a smooth, thick, lump-free batter forms.
-
Gently fold in prosciutto, cheese, and green onions.
3. Fill & Bake
-
Fill each muffin cup about ¾ full.
-
Bake 20–25 min without opening the oven door.
-
Popovers are done when puffed, golden brown, and firm to the touch.
4. Serve Immediately
-
Loosen with a butter knife and transfer to a wire rack.
-
Best enjoyed within 10–15 min for maximum crispness.
Serving Suggestions
-
Side for soups or stews (tomato basil, minestrone, or creamy pasta soups).
-
Brunch with scrambled eggs, fresh fruit, or bacon.
-
Party appetizer—serve warm in a basket, fresh out of the oven.
Notes
-
Don’t open the oven early—steam is what makes popovers rise.
-
Use room-temperature eggs for maximum puff.
-
Grease the tin generously; run a knife around edges after baking to prevent sticking.
-
Popovers can be frozen after cooling; reheat 8–10 min at 350°F (175°C).
Nutritional Information (Because We’re Curious!)
Okay, let’s talk numbers. Remember, these are estimates and can vary based on the specific brands of ingredients you use. This info is for one popover from a batch of 16.
- Calories: ~150 kcal
- Protein: 7 g
- Carbohydrates: 13 g
- Fat: 8 g
- Saturated Fat: 4 g
- Sugar: 1 g
- Fiber: 0.5 g
- Sodium: 280 mg
While these aren’t a “health food,” they are a wonderfully satisfying and portion-controlled treat. The protein from the eggs and prosciutto helps keep you full, and they’re a far more interesting and homemade option than a store-bought roll or muffin. It’s all about balance, friends!
Your New Go-To Recipe Awaits
And there you have it! Everything you need to know to whip up a batch of these unbelievably delicious Italian Popovers. They’re light, they’re crisp, they’re cheesy, and they are utterly satisfying in a way that only homemade bread can be.
I hope this recipe brings as much joy and comfort to your kitchen as it has to mine. It’s a reminder that the most impressive dishes are often the simplest ones, made with a little confidence and a lot of heart. So, don’t be intimidated. You’ve got this.
Now, I’d love to hear from you! Did you try the spicy ‘nduja twist? Did your kids go crazy for them? Snap a picture of your popover masterpiece and share it with me over on Instagram @feastical. Happy baking!
With a full heart and an even fuller plate,
Final Thoughts: Your Secret Weapon is Ready.
Forget complicated recipes and hours of prep. These Italian Popovers are your ticket to effortless, show-stopping meals. They’re the golden, cheesy, impossibly airy proof that the simplest ingredients can create pure magic. So, preheat that oven, trust the process, and get ready to earn some serious kitchen accolades. You’ve got this.
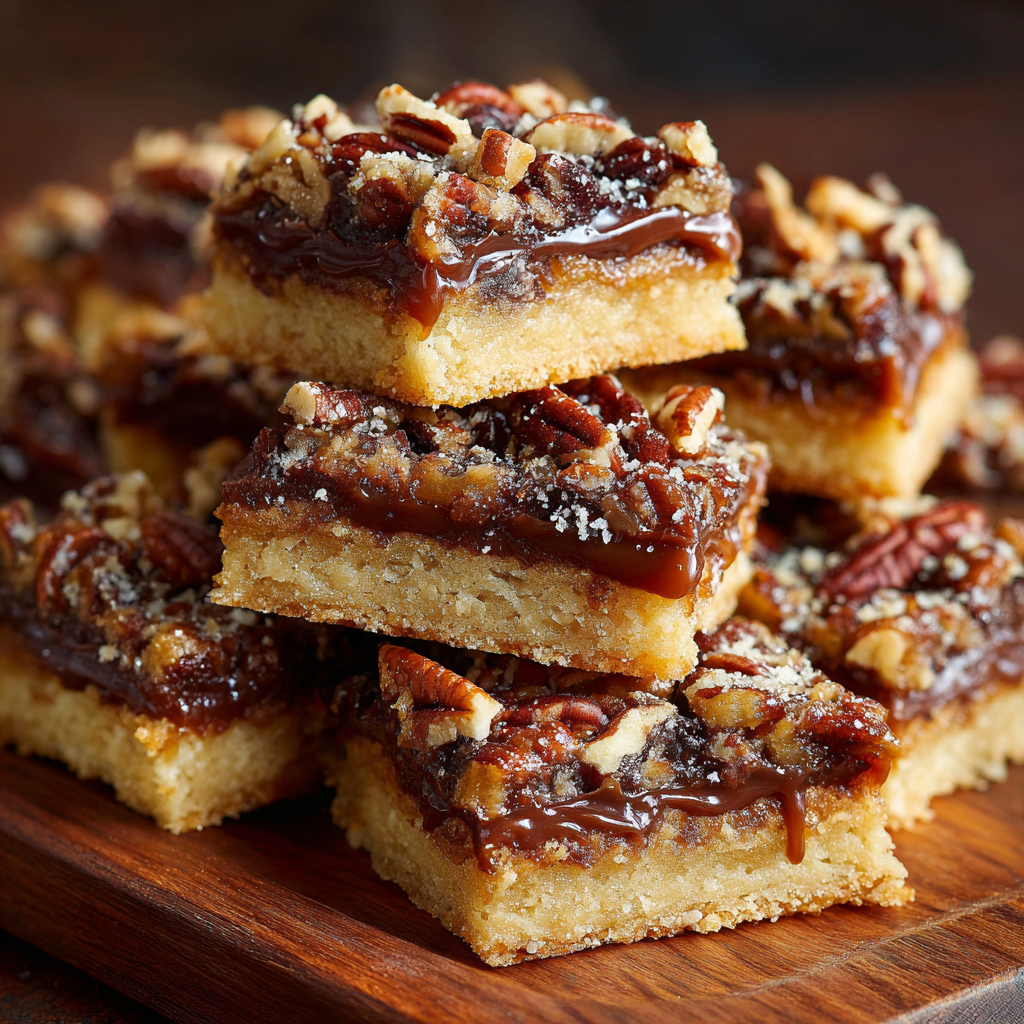
Pecan Chocolate Toffee Bars
The Only Pecan Chocolate Toffee Bars Recipe You’ll Ever Need
Hey friends, Beau here! Let’s get one thing straight right out of the gate: life is just too short for boring desserts. You deserve a treat that makes you close your eyes and hum with happiness after the very first bite. You know the kind I’m talking about. The ones that are impossible to eat just one of, the ones that disappear from the platter in minutes at a potluck, and the ones that friends and family will absolutely beg you to make again.
Well, my Pecan Chocolate Toffee Bars are that dessert. Imagine this: a foundation of melt-in-your-mouth shortbread that’s so buttery it practically crumbles at a touch. On top of that, we pour a layer of bubbling, golden homemade toffee that’s both crisp and deeply caramelized. Then, because we believe in living our best lives, we blanket the whole thing in a wave of melted semi-sweet chocolate and finish it with a confetti of toasted, nutty pecans.
The magic of this recipe? It’s a one-pan wonder. No fussy layers, no complicated techniques. It’s the kind of baking project that feels incredibly impressive but is secretly so simple. Whether you’re a baking newbie looking for a guaranteed win or a seasoned pro wanting a new go-to, these bars are your answer. So, tie on your favorite apron, preheat that oven, and let’s create some pure, unadulterated kitchen magic together.
A Batch of Bars and a Flood of Memories
This recipe always takes me right back to my grandma’s kitchen. She wasn’t a fancy chef, but she was a wizard with a bag of chocolate chips and a stick of butter. I remember one particularly chaotic Christmas Eve. The turkey was taking forever, the relatives were getting louder, and us kids were buzzing with a potent mix of excitement and sugar.
Grandma, in her infinite wisdom, quietly pulled out a bowl and started creaming butter and sugar. She saw me watching and waved me over. “Beau,” she said, “sometimes the best way to calm a storm is to give it something sweet to focus on.” She let me press the shortbread dough into the pan and, most importantly, gave me the coveted job of sprinkling the chocolate chips. The smell of that toffee bubbling away is forever linked in my mind with the feeling of anticipation and love. That pan of bars didn’t just feed us; it centered us. It’s that spirit of simple, soulful, and deeply satisfying food that I try to bring to every recipe I create for you here at Feastical.
Gathering Your Delicious Arsenal
One of the things I love most about this recipe is the simplicity of the ingredients. You probably have most of these in your pantry right now! Here’s the lowdown on everything you’ll need and why it matters.
For the Shortbread Base:
- 1 cup (2 sticks) unsalted butter, softened: This is the heart and soul of our base. Using unsalted lets you control the salt level. Chef’s Insight: “Softened” means your finger leaves a gentle indent when you press it. Don’t melt it! We want to cream it for a light, crumbly texture.
- ½ cup brown sugar: Brown sugar brings a lovely, subtle molasses flavor and a hint of moisture that white sugar doesn’t, giving our base a slight chew.
- 2 cups all-purpose flour: The workhorse of the base. It provides the structure. For a slightly nuttier flavor, you could swap in ½ cup of whole wheat flour, but all-purpose is perfect here.
- ¼ tsp salt: Trust me on this. Salt is the secret weapon that makes all the sweet, buttery flavors pop. It balances everything out beautifully.
For the Golden Toffee Layer:
- 1 cup (2 sticks) unsalted butter: Yes, more butter. This is a dessert, not a salad! It’s essential for creating that rich, classic toffee flavor and texture.
- 1 cup brown sugar: Packed tight! This is the primary sweetener for our toffee and, when heated with the butter, creates that incredible caramelization.
- 2 tbsp light corn syrup (or golden syrup): Don’t be scared of this ingredient! It’s not here for sweetness; it’s a magical stabilizer that prevents the sugar from crystallizing, giving you a smooth, glassy toffee instead of a grainy one. Substitution Tip: If you don’t have it, honey can work in a pinch, but it will add its own distinct flavor.
- 1 tsp vanilla extract: The finishing touch for the toffee. Use the real stuff if you can! It adds a warm, aromatic depth that takes the whole layer to the next level.
For the Toppings (The Grand Finale!):
- 1 ½ cups semi-sweet chocolate chips: I love the balance of semi-sweet against the sweet toffee, but feel free to use milk chocolate if that’s your jam. Chef’s Hack: The residual heat from the hot toffee layer is enough to melt the chips perfectly, so no need to melt them separately!
- 1 cup chopped pecans, toasted: Toasting the pecans is a non-negotiable step for me. It unlocks their oils and gives them a deep, nutty, incredible flavor that raw nuts just can’t compete with.
Let’s Build Some Magic: The Step-by-Step Guide
Alright, team! Let’s get our hands dirty (figuratively, of course—we’re using a mixer!). Follow these steps, and you’ll be a toffee bar hero in no time.
- Preheat and Prep: Fire up your oven to 350°F (175°C). Now, grab a 9×13-inch baking pan. This is my #1 pro-tip: line it with parchment paper, leaving some overhang on the two long sides. Why? This creates a “sling” that will let you lift the entire slab of bars out of the pan later for pristine, crumb-free cutting. It’s a total game-changer!
- Create the Buttery Base: In a medium bowl, combine your softened butter and that ½ cup of brown sugar. Use an electric mixer (or some serious elbow grease with a wooden spoon) to cream them together until the mixture is light, pale, and fluffy. This should take about 2-3 minutes. Now, add your flour and salt. Mix on low speed just until the dough comes together and no dry streaks of flour remain. It will be crumbly, but it should hold together when you press it. Dump this mixture into your prepared pan and use your fingers or the flat bottom of a measuring cup to press it into a firm, even layer. Get it nice and compact—this is the foundation for our masterpiece!
- First Bake: Pop that pan into your preheated oven and bake for 15-18 minutes. You’re looking for a beautiful light golden brown color around the edges and the top will look dry and set. This par-bakes the crust so it can stand up to the wet toffee layer.
- The Toffee Transformation: While the crust is baking, let’s make the toffee. In a medium, heavy-bottomed saucepan, combine the 1 cup of butter and 1 cup of brown sugar. Cook this over medium heat, stirring constantly with a wooden spoon or heatproof spatula, until the butter melts and the mixture comes to a boil. Once it’s boiling, let it bubble away for a full 3-4 minutes, still stirring non-stop. Chef’s Warning: This stuff is HOT and can burn quickly, so don’t walk away! You’ll see it thicken slightly and become a gorgeous, deep caramel color. Remove it from the heat and immediately stir in that teaspoon of vanilla. It will bubble up excitedly—that’s a good sign!
- Marry the Layers: As soon as your shortbread base comes out of the oven, carefully and slowly pour the hot toffee mixture over the top. Tilt the pan gently to help it spread into an even layer. Then, slide the whole pan back into the oven for another 10 minutes. This second bake sets the toffee and fuses it to the crust.
- The Chocolate Blanket: Pull the pan from the oven—it will be a vision of bubbling, golden perfection. Immediately sprinkle the entire surface with your chocolate chips. Now, walk away. I’m serious! Let it sit for 2-3 minutes. The residual heat will gently melt the chips. After they’ve had a chance to soften, use an offset spatula or the back of a spoon to spread the chocolate into a smooth, luscious layer.
- The Nutty Finale: While the chocolate is still warm and gooey, generously sprinkle your toasted, chopped pecans all over the top. Gently press them down just a bit so they adhere.
- The Hardest Part: The Wait: I know, I know. The smell is intoxicating, and you want to dive in. But you must let these bars cool completely at room temperature. For the cleanest cuts, I highly recommend then transferring the pan to the refrigerator for at least an hour to fully set the chocolate and toffee. Use the parchment paper sling to lift the whole slab onto a cutting board before slicing.
How to Serve These Show-Stopping Bars
Presentation is part of the fun! Once your giant slab of toffee bar goodness is fully set and firm, use a large, sharp knife to cut it into bars or squares. For super clean cuts, wipe the knife blade clean with a warm, damp cloth between each slice.
I love serving these bars piled high on a rustic wooden board or a pretty ceramic platter. They are the ultimate potluck, picnic, or bake sale star. A little dusting of flaky sea salt right before serving takes them to a whole new level of sweet-and-salty bliss. For a truly decadent experience, serve them slightly warmed with a scoop of high-quality vanilla bean ice cream. You’ll be a legend, I promise.
Make It Your Own: Delicious Recipe Twists
One of the best things about a great base recipe is how easily you can customize it. Feel free to get creative and play with these ideas!
- The Salted Dark Chocolate Lover: Swap the semi-sweet chips for dark chocolate chunks and finish the bars with a generous sprinkle of flaky sea salt along with the pecans.
- The Nut-Free Zone: No pecans? No problem! Swap them out for toasted pumpkin seeds (pepitas) for a great crunch, or just leave the nuts off entirely for a pure chocolate-toffee experience.
- The Tropical Twist: Replace the pecans with a mix of toasted coconut flakes and chopped macadamia nuts. It’s like a candy bar vacation in every bite.
- The “Everything but the Kitchen Sink” Bar: Feel like going wild? After sprinkling the chocolate, add a handful of pretzel pieces, a drizzle of caramel sauce, and a sprinkle of toffee bits along with the pecans.
- Espresso Infusion: For a coffee kick, add 1-2 teaspoons of instant espresso powder to the flour when you’re making the shortbread base. It adds a wonderful depth that complements the chocolate perfectly.
Beau’s Kitchen Chronicles
This recipe has been with me for years, and it’s evolved in tiny ways. I used to be terrified of making toffee, convinced I’d end up with a scorched, sticky mess. The key, I learned through a few (okay, several) failed batches, is the constant stirring and a reliable heavy-bottomed pot. Don’t try to rush it by cranking up the heat! The corn syrup was my grandma’s secret, and I’ve stuck with it ever since. The funniest kitchen fail? I once forgot the parchment paper. Let’s just say we had to eat that batch directly out of the pan with spoons—which, honestly, wasn’t the worst punishment in the world.
Your Toffee Bar Questions, Answered!
Over the years, I’ve gotten a lot of questions about this recipe. Here are the most common ones to help you bake with confidence.
- Q: My toffee layer seems to have split or looks greasy. What happened?
A: This usually means the toffee was heated a bit too aggressively. The fat can separate from the sugar. Don’t worry, it will still taste delicious! Next time, make sure you’re using a medium heat and stirring constantly to encourage emulsification. - Q: Can I use a different type of nut?
A: Absolutely! Toasted walnuts or almonds would be fantastic substitutes. Just make sure you toast them first to maximize their flavor. - Q: Why do my bars fall apart when I cut them?
A: This almost always comes down to not letting them cool completely. The chocolate and toffee need time to firm up. Patience is a virtue, especially in baking! Chilling them in the fridge is the ultimate cheat code for perfect slices. - Q: How should I store these, and how long do they last?
A: Store them in an airtight container at room temperature for up to 4 days, or in the fridge for up to a week. They also freeze beautifully for up to 3 months! Just layer them between sheets of parchment paper in a freezer-safe container.

Pecan Chocolate Toffee Bars
Description
Hey friends, Beau here! These bars are the ultimate treat: buttery shortbread, golden homemade toffee, melted chocolate, and toasted pecans. They’re simple to make, impressive to serve, and impossible to eat just one of. Perfect for holidays, potlucks, or anytime you want to feel like a baking hero.
Ingredients
Shortbread Base:
-
1 cup (2 sticks) unsalted butter, softened
-
½ cup brown sugar
-
2 cups all-purpose flour
-
¼ tsp salt
Golden Toffee Layer:
-
1 cup (2 sticks) unsalted butter
-
1 cup brown sugar, packed
-
2 tbsp light corn syrup (or golden syrup)
-
1 tsp vanilla extract
Toppings:
-
1½ cups semi-sweet chocolate chips
-
1 cup toasted chopped pecans
Instructions
1. Prep
-
Preheat oven to 350°F (175°C).
-
Line a 9×13-inch baking pan with parchment paper, leaving overhang for easy lifting.
2. Make Shortbread Base
-
Cream softened butter and brown sugar until light and fluffy (2–3 minutes).
-
Add flour and salt; mix until just combined.
-
Press firmly and evenly into prepared pan.
-
Bake 15–18 minutes until lightly golden; set aside.
3. Make Toffee
-
In a medium saucepan, melt 1 cup butter with 1 cup brown sugar and corn syrup over medium heat, stirring constantly.
-
Bring to a boil and cook 3–4 minutes until caramelized.
-
Remove from heat and stir in vanilla.
4. Combine Layers
-
Pour hot toffee over baked shortbread base; tilt to spread evenly.
-
Return pan to oven for 10 minutes to set the toffee.
5. Add Chocolate & Pecans
-
Remove from oven; immediately sprinkle chocolate chips on top. Let melt 2–3 minutes, then spread smooth.
-
Sprinkle toasted pecans over the chocolate, gently pressing to adhere.
6. Cool & Slice
-
Let bars cool completely at room temperature, then refrigerate at least 1 hour for clean cuts.
-
Lift from pan using parchment sling; slice into squares or bars with a sharp knife, wiping clean between cuts.
Notes
-
Salted Dark Chocolate: Use dark chocolate and sprinkle flaky sea salt over pecans.
-
Nut-Free: Replace pecans with toasted pumpkin seeds or omit entirely.
-
Tropical Twist: Use toasted coconut flakes and macadamia nuts instead of pecans.
-
Coffee Kick: Add 1–2 tsp instant espresso powder to the shortbread flour for depth.
Nutrition
- Calories: 280 Cal Per Serving
- Fat: 19g
- Carbohydrates: 25g
- Protein: 2g
A Quick Bite on Nutrition
Let’s be real, we’re not eating these for our health—we’re eating them for pure, unadulterated joy! That said, it’s always good to be informed. These bars are a rich, indulgent treat. The estimated nutritional info per bar (if you cut the pan into 16 bars) is approximately: 280 calories, 19g fat, 25g carbs, and 2g protein. They’re definitely a “sometimes food,” but oh, what a wonderful sometimes it is! The pecans do bring healthy fats and a bit of protein to the party, and using dark chocolate can offer some antioxidants. My philosophy? Enjoy every single bite mindfully and without guilt.
Your New Go-To Dessert Awaits
And there you have it, my friends! My all-time favorite, crowd-pleasing, soul-satisfying Pecan Chocolate Toffee Bars. This recipe is a testament to the fact that the best food doesn’t have to be complicated. It’s about great ingredients, a few simple techniques, and a whole lot of love baked right in.
I can’t wait for you to experience the magic in your own kitchen. The sound of that shortbread base crunching, the rich chocolate melting on your tongue, the salty-sweet-toasty-nutty flavor explosion… it’s a feeling I want to share with everyone. So, bake a batch, share them with someone you love (or don’t, I won’t judge!), and create your own delicious memories.
Final Thoughts: Your New Legacy Dessert
So, there you have it. What began as a simple list of ingredients has transformed—through a little heat and a lot of heart—into a pan of pure, unadulterated joy. These Pecan Chocolate Toffee Bars are more than just a dessert; they’re an experience. They’re the recipe you’ll pull out when you need a guaranteed win, the one you’ll be asked to bring to every gathering, and the one you might just secretly make for yourself on a Tuesday because you deserve it.
This recipe is a beautiful paradox: it feels impressively gourmet but is built on beautifully simple foundations. It’s a reminder that the most cherished recipes aren’t about perfection, but about the connection and happiness they create. The memory of your grandmother’s kitchen, the calm in a holiday storm, the hum of contentment after the first bite—that’s the real magic we’re baking.
You now have everything you need—the tips, the tricks, the heartfelt story, and the permission to make it your own. This isn’t just another recipe to try; it’s the one—the only pecan chocolate toffee bar recipe you’ll ever need.
Now, go preheat that oven and create your own kitchen magic. I have a feeling your friends and family are about to have a new favorite.

White Chocolate Raspberry Cheesecake
Your New Favorite Dessert is Here: White Chocolate Raspberry Cheesecake
Hey friends, Beau from Feastical here! Let’s talk about a dessert that feels like a celebration in every single bite. We’re diving fork-first into the world of my legendary White Chocolate Raspberry Cheesecake. Now, I know what you might be thinking: “Beau, cheesecake can be intimidating!” But trust me, we’re going to walk through this together, step-by-step, and I promise you’ll end up with a show-stopping masterpiece that’s as fun to make as it is to devour.
This isn’t just any cheesecake. This is a symphony of textures and flavors. Imagine a buttery, crumbly crust that gives way to an impossibly silky, rich filling infused with sweet, creamy white chocolate. Woven through it all are vibrant, tangy ribbons of raspberry swirl that cut through the richness perfectly. It’s elegant enough for a holiday table, special enough for a birthday, and honestly, just perfect for a Tuesday when you need a little extra joy.
So, tie on your favorite apron, clear some counter space, and let’s create some magic. This recipe is my love letter to desserts that look fancy but are built on simple, feel-good techniques. Get ready to fall in love with baking all over again!
The Cheesecake That Started It All
This recipe takes me right back to my grandma’s kitchen, a place that always smelled like sugar and sunshine. She was the queen of “a little of this, a little of that” cooking, but her cheesecake was a sacred, written-in-pen recipe. One summer, I was determined to learn it. I was about fourteen, feeling mighty confident with a whisk, and I decided to “improve” her classic New York-style by adding the white chocolate and raspberry she loved in her thumbprint cookies.
The first attempt was… a learning experience. Let’s just say I learned the hard way that “softened” cream cheese doesn’t mean “melted in the microwave.” We ended up with a lumpy, grainy filling that made us both laugh until we cried. But Grandma, in her infinite wisdom, just patted my shoulder and said, “Beau, the best recipes are born from happy mistakes. Let’s try again, together.” That second try, watching the beautiful pink swirls marble into the creamy white batter, was pure magic. It’s that spirit of joy, experimentation, and togetherness that I’ve baked into this very recipe for you.
Gathering Your Cheesecake Dream Team
Here’s everything you’ll need to create this masterpiece. I’ve included some of my favorite chef insights and substitution tips to make this recipe your own. Remember, quality ingredients make a happy cheesecake!
For the Buttery Crust:
- 1½ cups graham cracker or vanilla wafer crumbs: Graham crackers give you that classic, slightly honeyed flavor, while vanilla wafers create a sweeter, more cookie-like base. You can’t go wrong! I often use a food processor to crush them, but a zip-top bag and a rolling pin work great for a little stress relief.
- ¼ cup granulated sugar: This sweetens the crust and helps it crisp up beautifully.
- 6 tbsp melted butter: The glue that holds our crust together! Use unsalted butter so you control the salt level. For a deeper flavor, try browning the butter first—it adds a incredible nutty note.
For the Silky White Chocolate Filling:
- 3 (8 oz) blocks full-fat cream cheese, softened: This is non-negotiable, friends. Full-fat gives you that luxuriously creamy texture. And softened is the secret word! Leave it on the counter for a few hours until it’s room temperature and pliable. This prevents a lumpy batter.
- ¾ cup granulated sugar: The perfect amount to sweeten without overpowering the white chocolate.
- 3 large eggs, at room temperature: Room temp eggs incorporate more smoothly, giving you a seamless, velvety filling. Add them one at a time, just like we’ll talk about in the steps.
- 8 oz quality white chocolate, melted and slightly cooled: Don’t use white chocolate chips here—they often contain stabilizers that don’t melt as smoothly. Look for a baking bar. We’ll melt it gently to avoid seizing.
- ½ cup full-fat sour cream: This is my secret weapon! It adds a subtle tang and incredible moisture, making the cheesecake even creamier.
- 1 tsp pure vanilla extract: The flavor backbone. It enhances both the chocolate and the berry notes beautifully.
For the Vibrant Raspberry Swirl:
- ½ cup raspberry preserves or seedless raspberry sauce: Using seedless preserves gives you a super smooth, beautiful swirl. If you love the texture of seeds, go for it! You can also blend fresh raspberries with a little sugar and strain them for a from-scratch sauce.
Let’s Build This Beautiful Beast: Step-by-Step
Okay, team. This is where the fun begins. Read through all the steps once before you start, and remember: patience is your best friend in the cheesecake game. We’re not rushing; we’re creating.
- Preheat and Prep: Fire up your oven to 325°F (165°C). Grab your trusty 9-inch springform pan. Pro Chef Hack: For extra insurance against sticking, take a small piece of butter and lightly grease the bottom and sides of the pan before you add the crust. It’s a little trick that makes release day a breeze.
- Create the Crust: In a medium bowl, stir together your graham cracker crumbs and sugar. Pour in the melted butter and mix until the mixture resembles wet sand and holds together when you pinch it. Dump it into your prepared pan and press it firmly and evenly into the bottom and about halfway up the sides. I like to use the bottom of a measuring cup to really tamp it down flat. Bake this for 10 minutes, then let it cool on a rack while you make the filling. This quick pre-bake sets the crust and prevents sogginess!
- Conquer the Filling: In the bowl of a stand mixer fitted with the paddle attachment (or a large bowl with a hand mixer), beat the softened cream cheese and sugar on medium-low speed until it is completely smooth, creamy, and free of lumps. This is crucial: Scrape down the bowl and beater several times to ensure no hidden lumps are lurking. Now, with the mixer on low, add the eggs one at a time, mixing until just incorporated after each addition. Overmixing at this stage incorporates too much air and can cause cracking! Finally, mix in the slightly cooled melted white chocolate, followed by the sour cream and vanilla extract. Mix until the batter is a beautiful, uniform, creamy dream. Remember, low and slow wins the race.
- The Grand Swirl: Pour your gorgeous filling into the cooled crust and smooth the top with a spatula. Now, for the art project! Drop small spoonfuls of the raspberry preserves randomly over the top of the filling. Take a thin knife or a wooden skewer and gently drag it through the raspberry dollops and the cheesecake batter beneath, creating beautiful marbled patterns. Don’t over-swirl, or the colors will muddle! A few elegant passes are all you need.
- The Perfect Bake: Place the cheesecake in the preheated oven and bake for 55-65 minutes. You’re looking for the edges to be puffed and set, while the center—about a 3-inch circle—still has a distinct jiggle when you gently shake the pan. It will look underdone, but I promise, it’s perfect. This residual heat will continue to cook the center as it cools. Another Pro Hack: For the ultimate creamy texture and to prevent cracks, place a pan of hot water on the rack below the cheesecake. The steam creates a gentle, even heat.
- The All-Important Cool Down: Once baked, turn off the oven, crack the door open slightly, and let the cheesecake cool inside for about an hour. This gradual temperature change is the #1 defense against the dreaded cheesecake crack! After that, transfer it to a wire rack to cool completely to room temperature. Then, and only then, cover it and move it to the refrigerator to chill for at least 4 hours, but preferably overnight. This patience-testing step is what gives you that perfect, sliceable, firm-yet-creamy texture.
How to Serve This Stunning Dessert
The moment of truth! When you’re ready to serve, run a thin, sharp knife under hot water, wipe it dry, and gently slide it around the edge of the springform pan before releasing the clamp. This ensures a clean, beautiful release.
For the final flourish, I love to top the whole cheesecake with a pile of fresh, vibrant raspberries right in the center. You can also dust the edges with a little powdered sugar for a snowy effect or drizzle with a bit of extra melted white chocolate.
When slicing, remember the hot knife trick! Dip your sharp knife in hot water and wipe it clean between each cut. This gives you those pristine, restaurant-quality slices that show off your beautiful swirls. Serve it on its own for pure decadence, or with a little dollop of freshly whipped cream on the side. It’s a showstopper no matter what!
Make It Your Own: Delicious Twists & Swaps
One of the best things about this recipe is its versatility. Feel like playing? Here are some of my favorite ways to mix it up:
- Chocolate Lover’s Dream: Swap the graham cracker crust for a chocolate wafer crust. You can even fold in a handful of mini dark chocolate chips into the batter for a double-chocolate experience.
- Triple Berry Blast: Use a mix of raspberry, blackberry, and strawberry preserves for your swirl. The mix of berry flavors is absolutely incredible.
- Lemon Raspberry Brightness: Add the zest of one lemon to the cheesecake filling. The bright, citrusy notes make the raspberry and white chocolate absolutely sing.
- Boozy & Bold: For a grown-up version, stir one tablespoon of Chambord (raspberry liqueur) or a good quality vanilla vodka into the raspberry preserves before swirling.
- Gluten-Free Friendly: Use certified gluten-free graham crackers for the crust, and you’re all set! The filling is naturally gluten-free.
Beau’s Chef’s Notes & Kitchen Confessions
This recipe has been my go-to for years, and it’s evolved with every bake. I used to be so terrified of cracks that I’d barely breathe near the oven! But I’ve learned that even if a small crack appears (and they sometimes do!), it’s nothing a pile of fresh berries or a whipped cream topping can’t hide. The flavor is always 100% phenomenal.
My biggest lesson? The overnight chill is not a suggestion—it’s a commandment. The flavors meld and deepen, and the texture becomes absolute perfection. It’s a dessert that rewards planning. And hey, if you’re like me and sometimes forget to soften the cream cheese, you can *gently* warm it in the microwave in 15-second bursts on low power. Just watch it like a hawk!
Your Cheesecake Questions, Answered!
Over the years, I’ve gotten a lot of questions about this recipe. Here are the ones I see most often!
Q: My cheesecake cracked! What did I do wrong?
A: First, don’t panic! It still tastes amazing. Cracks usually happen from a sudden temperature change or overbaking. Next time, make sure you’re using the water bath method (even just a pan of water on a lower rack helps) and that you’re cooling it gradually in the turned-off oven with the door cracked. Remember, the center should still be jiggly!
Q: Can I use frozen raspberries instead of preserves?
A: You can! Thaw about 1 cup of frozen raspberries, then blend and strain them to remove the seeds. Simmer the puree in a small saucepan with a tablespoon of sugar until it thickens slightly (like a thin sauce). Let it cool completely before using it for the swirl.
Q: Why is my filling lumpy?
A: This almost always traces back to the cream cheese not being soft enough. Room temperature is key! Also, make sure you’re beating the cream cheese and sugar until it’s perfectly smooth before adding the other ingredients.
Q: How long will this keep in the fridge?
A: Tightly covered, this cheesecake is happy in the fridge for up to 5 days. It also freezes beautifully for up to 3 months. Thaw it overnight in the refrigerator before serving.

White Chocolate Raspberry Cheesecake
Description
Hey friends, Beau from Feastical here! This cheesecake is a showstopper: buttery crust, silky white chocolate filling, and vibrant raspberry swirls that cut through the richness perfectly. Elegant enough for holidays, birthdays, or just a Tuesday treat, it’s built on simple, feel-good techniques that anyone can master.
Ingredients
For the Crust:
-
1½ cups graham cracker or vanilla wafer crumbs
-
¼ cup granulated sugar
-
6 tbsp unsalted butter, melted
For the White Chocolate Filling:
-
3 (8 oz) blocks full-fat cream cheese, softened
-
¾ cup granulated sugar
-
3 large eggs, room temperature
-
8 oz white chocolate, melted and slightly cooled
-
½ cup full-fat sour cream
-
1 tsp vanilla extract
For the Raspberry Swirl:
-
½ cup raspberry preserves or seedless raspberry sauce
Optional Garnish:
-
Fresh raspberries
-
Powdered sugar
-
Drizzle of melted white chocolate
Instructions
1. Prep & Crust
-
Preheat oven to 325°F (165°C).
-
Grease a 9-inch springform pan lightly with butter.
-
Mix crumbs and sugar; stir in melted butter until wet sand-like. Press into the bottom and halfway up the sides.
-
Bake 10 minutes; let cool while preparing filling.
2. Make Filling
-
Beat cream cheese and sugar until smooth.
-
Add eggs one at a time, mixing slowly.
-
Mix in melted white chocolate, sour cream, and vanilla until smooth.
3. Add Raspberry Swirl
-
Pour filling over cooled crust.
-
Drop spoonfuls of raspberry preserves on top and gently swirl with a knife or skewer.
4. Bake Cheesecake
-
Bake 55–65 minutes: edges set, center slightly jiggly.
-
Optional: place a pan of hot water on a lower rack for gentle baking.
5. Cool & Chill
-
Let cool in oven with door cracked for 1 hour.
-
Transfer to wire rack to reach room temperature.
-
Refrigerate at least 4 hours or overnight.
6. Serve
-
Run a hot, clean knife around the edges before removing the springform.
-
Garnish with fresh raspberries, powdered sugar, or extra melted white chocolate.
-
Slice with a hot knife for perfect, clean pieces.
Notes
-
Chocolate Lovers: Use chocolate wafer crust or fold in mini dark chocolate chips.
-
Triple Berry: Swap or mix preserves: raspberry, strawberry, and blackberry.
-
Lemon Twist: Add zest of 1 lemon to filling for bright citrus notes.
-
Boozy: Stir 1 tbsp Chambord or vanilla vodka into raspberry preserves.
-
Gluten-Free: Use certified gluten-free graham crackers.
-
Prevent Cracks: Use a water bath and allow gradual cooling.
Nutrition
- Calories: 420Cal Per slice
- Fat: 28g
- Carbohydrates: 35g
- Protein: 6g
Nutritional Info (Because Balance is Key!)
Now, let’s be real—this is a decadent, special-occasion dessert. But I believe in knowing what you’re eating, so you can enjoy every single bite mindfully. The following is an estimate per slice (based on 12 servings):
- Calories: ~420
- Fat: 28g
- Protein: 6g
- Carbohydrates: 35g
This cheesecake is rich in calcium from the dairy and provides a good amount of energy, making it a truly satisfying treat. It’s all about savoring a slice, not devouring the whole thing (as tempting as that may be!). Pair it with a cup of black coffee or a glass of cold milk for the ultimate experience.
Final Thoughts from My Kitchen to Yours
Well, there you have it, my friends—my heart and soul in cheesecake form. This White Chocolate Raspberry Cheesecake is more than just a recipe; it’s a project filled with love, a little bit of science, and a whole lot of delicious reward. It’s the dessert you make when you want to say “I love you,” “Congratulations,” or simply “You are worth the effort.”
I hope you feel inspired, empowered, and excited to give it a try. Remember, cooking is an adventure, and the kitchen is your playground. If you make it, I’d be absolutely thrilled to see your creation! Tag me @Feastical on social media so I can cheer you on.
Until next time, keep your kitchen messy and your heart full.
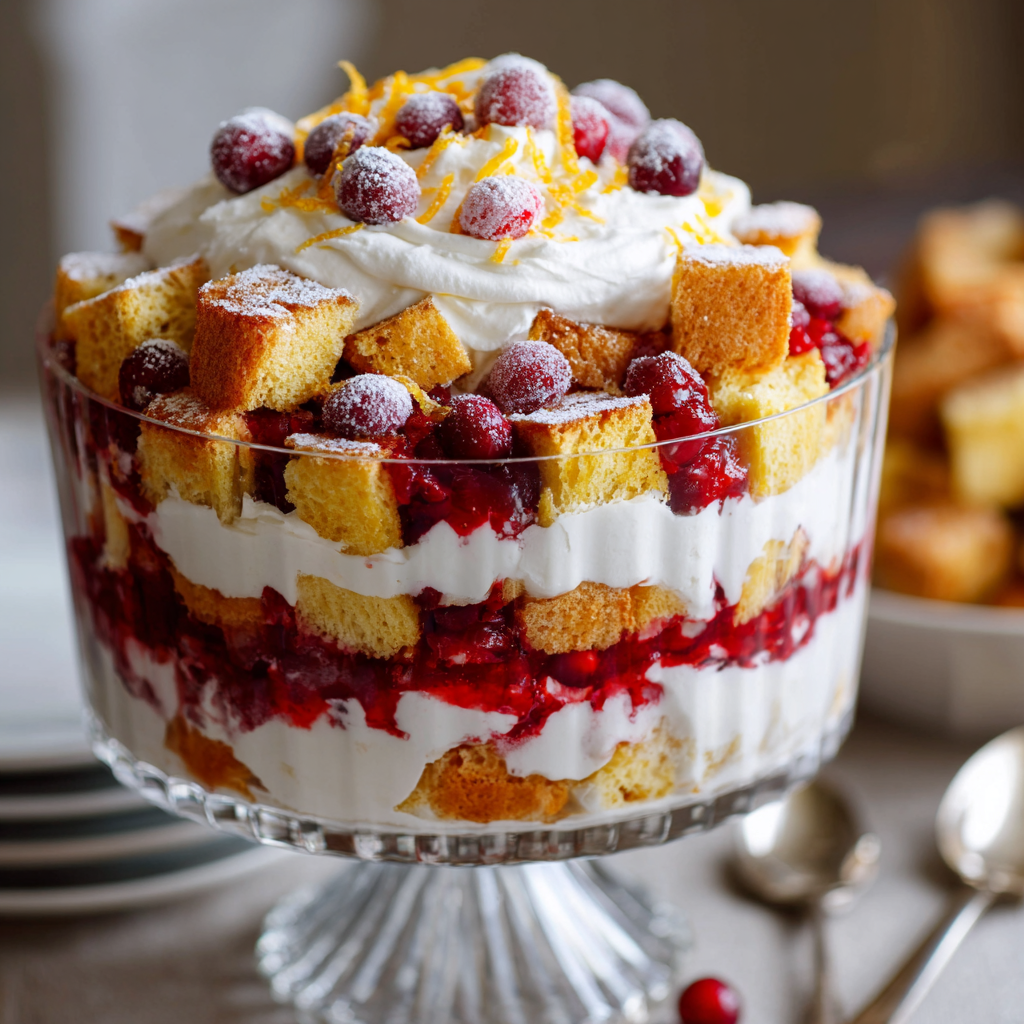
Cranberry Orange Trifle
Cranberry Orange Trifle: The No-Fuss Dessert That Steals the Holiday Show
Hey friends, Beau here from Feastical! Can you smell it? That’s the smell of the holidays rolling in—pine needles, cinnamon sticks, and the sweet, sweet promise of dessert. And let’s be real, the dessert table is the main event, isn’t it? You want something that looks like a million bucks but doesn’t require a culinary degree and a week of your life to make. You want a dessert that makes people’s eyes light up when you carry it to the table.
Well, my foodie friend, I’ve got your secret weapon right here: the Cranberry Orange Trifle. This beauty is a symphony of flavors and textures. We’re talking tender, zesty orange cake, a tart and vibrant cranberry sauce, and clouds of the fluffiest, slightly sweetened whipped cream. Each spoonful is a perfect bite—a little sweet, a little tangy, and 100% comforting.
The best part? It’s literally layers of simple components stacked together in a gorgeous dish. No fancy pastry skills required. If you can whip cream and spread layers, you are a trifle-making superstar. So, let’s ditch the stress and create a dessert that’s not just a treat for the taste buds, but a total showstopper for the eyes, too. Grab your favorite trifle bowl (or a big glass one—we’re not picky!), and let’s get layering!
The Trifle That Started It All
This recipe takes me right back to my Nana’s kitchen, a place that always smelled of citrus and nutmeg. One particularly chaotic Christmas Eve, she was so busy with the main feast she completely forgot about dessert. Panic set in for a hot minute until she looked at the leftover orange loaf cake from breakfast and a jar of cranberry sauce in the pantry. With a wink, she said, “Watch this, Beau.”
She cubed that cake, whipped some cream, and started layering everything in her big, clouded glass bowl. In less than 15 minutes, she created what looked like the most elegant, intentional dessert I’d ever seen. When she served it, my aunts and uncles raved, convinced she’d slaved over it for hours. She just smiled, and I learned a powerful lesson that day: the best recipes often come from a little bit of love and a whole lot of smart, simple thinking. This trifle is my homage to her—a little bit of magic made from simple, beautiful things.
Gathering Your Trifle Trio
This recipe is all about the harmony of three main components. Don’t be intimidated by the list; most of it is probably already in your kitchen! Here’s what you’ll need and my little chef insights for each.
- 1 Orange Pound Cake or Loaf Cake (cubed): You can absolutely use a high-quality store-bought cake here—no judgment! It’s a huge time-saver. If you’re feeling ambitious, my homemade orange pound cake adds an extra-special touch. The key is a cake that’s sturdy enough to hold up to the juicy layers without turning to mush.
- 2 cups Cranberry Sauce (whole berry works best): The tart superstar! I love using a whole-berry sauce for those little bursts of flavor. Homemade is fantastic, but a good-quality jarred sauce works beautifully in a pinch. The tanginess is crucial for cutting through the richness of the cream.
- 2 cups Heavy Whipping Cream: Make sure it’s heavy whipping cream and it’s very cold. This is non-negotiable for getting those perfect, fluffy peaks. I sometimes pop my bowl and beaters in the freezer for 10 minutes before I start.
- ¼ cup Powdered Sugar: We’re using powdered instead of granulated sugar because it dissolves instantly, giving us a silky-smooth whipped cream without any graininess.
- 1 tsp Vanilla Extract: A splash of pure vanilla adds a warm, cozy depth to the cream. It’s the secret handshake that makes it taste truly homemade.
- Optional Garnishes: Orange Zest & Sugared Cranberries: These are your “wow” factors. A little bright orange zest on top adds a pop of color and fragrance, and sugared cranberries look like edible jewels. They’re easier to make than they look, I promise!
Let’s Build Some Delicious Layers!
Okay, the fun part! We’re going to build this masterpiece step-by-step. Put on some holiday tunes, and let’s get to it.
Step 1: The Cake Prep
First, take your orange cake and cut it into roughly 1-inch cubes. Don’t worry about them being perfect—rustic is charming! Chef’s Hack: If you have a little extra time, spread the cubes on a baking sheet and toast them in a 350°F (175°C) oven for 5-7 minutes. This gives them a slightly crisp exterior that holds up even better against the moist layers, adding a wonderful textural contrast.
Step 2: Whip It Good!
In a large, chilled bowl, pour in your cold heavy whipping cream. Using a hand mixer or a stand mixer with the whisk attachment, start whipping on medium-high speed. Once it starts to thicken slightly (after about a minute), add in the powdered sugar and vanilla extract. Pro Tip: Start slow when you add the sugar or you’ll have a sweet, powdery cloud in your face! Continue whipping until soft peaks form. What’s a soft peak? When you lift the beaters, the cream should form a peak that gently curls over at the top. Be careful not to over-whip, or you’ll start making butter! (Though if you do, just call it a science experiment and start over with new cream.)
Step 3: The Grand Layering Ceremony
Now, grab your trifle dish or individual glass cups. We’re creating layers of joy. Start with a solid base of cake cubes, using about a third of them. Gently press them down just a bit. Next, spoon a third of your cranberry sauce over the cake. Use the back of the spoon to spread it into an even layer, making sure to get some of those beautiful berries right up against the glass for a stunning visual. Now, dollop a third of your whipped cream over the cranberry layer and spread it gently. And that’s your first layer! Repeat the process—cake, cranberry, cream—two more times.
Step 4: The Finishing Flourish
For the top layer, I like to make it all about the cream. Give it a final, beautiful swoop with your spatula. Now, sprinkle that vibrant orange zest over the top and artfully arrange a few sugared cranberries. It instantly looks like it came from a professional bakery.
Step 5: The Patience Game
This might be the hardest step: cover the trifle with plastic wrap and pop it in the fridge for at least one hour, but ideally 2-4. I know, the wait is torture! But this chill time is magical. It allows the cake to soak up all the lovely juices from the cranberry sauce, the flavors to mingle and get to know each other, and the whole structure to set up perfectly for slicing.
How to Serve Your Masterpiece
When it’s finally time to serve, use a large, deep spoon to dig all the way down to the bottom, ensuring you get every single glorious layer in one scoop. I love serving this right from the trifle dish placed in the center of the table—it’s a real conversation starter!
For an extra festive touch, pair each serving with a cup of strong coffee, a hot chocolate with a cinnamon stick, or even a glass of dessert wine like a Moscato d’Asti. The bubbles and lightness are a fantastic contrast to the creamy, rich trifle. If you’re doing individual cups, you can let your guests grab their own, which is perfect for a casual holiday party.
Make It Your Own: Creative Twists
The beauty of a trifle is its versatility. Feel free to play around and make it suit your taste or dietary needs!
- Lemon Blueberry Bliss: Swap the orange cake for lemon pound cake and the cranberry sauce for a thick blueberry compote. It’s like summer in a bowl, even in the dead of winter.
- Chocolate Cherry Cheer: Use chocolate cake cubes and a layer of cherry pie filling. Top with chocolate shavings for an incredibly decadent twist.
- Boozy & Bold: For the adults, you can brush the cake cubes with a little Grand Marnier, Cointreau, or even a sweet sherry before layering. It adds a wonderful warm depth.
- Dairy-Free Dream: Easily make this dairy-free by using chilled coconut cream (the solid part from a can of full-fat coconut milk) whipped with powdered sugar. It’s just as luscious!
- Nutty Crunch: Add a textural surprise by sprinkling a layer of toasted, chopped pecans or walnuts between the cranberry and cream layers.
Beau’s Kitchen Confidential
Over the years, this trifle has been my trusty plus-one to more potlucks than I can count. One time, I was rushing out the door and forgot to add the sugar to the whipped cream. I realized it at the party and, in a moment of panic, I gently folded in a jar of lemon curd I found in the host’s fridge. Guess what? It was a happy accident everyone demanded the recipe for! So don’t be afraid to improvise. The recipe you see here is the classic, but your kitchen, your rules. The trifle is a forgiving friend, not a fussy critic.
Your Trifle Questions, Answered!
Can I make this trifle ahead of time?
Absolutely! In fact, I highly recommend it. You can assemble the entire trifle, cover it tightly, and let it hang out in the fridge for up to 24 hours before serving. The flavors will be even more amazing. Just add any fresh garnishes like orange zest right before you serve.
My whipped cream is runny! What happened?
This usually means one of two things: your cream wasn’t cold enough, or your bowl/beaters were warm. Always start with everything chilled. If it’s a lost cause, you can stabilize it next time by adding a tablespoon of cornstarch or instant pudding mix to the cream while whipping.
What can I use if I don’t have a trifle dish?
No problem! A large glass salad bowl, a pretty soup tureen, or even a clear 9×13 baking dish will work perfectly. For a party, individual parfait glasses or even sturdy mason jars are adorable and portion-controlled.
The bottom layer seems dry. How can I prevent this?
This is a common trifle quirk. To ensure every bite is moist, you can very lightly sprinkle the first layer of cake cubes with a little orange juice or simple syrup before adding the cranberry sauce. It’s a little extra step that guarantees perfection.

Cranberry Orange Trifle
Description
Hey friends, Beau here! The holidays are all about cozy flavors, bright colors, and desserts that wow without the stress. Enter the Cranberry Orange Trifle—layers of tender orange cake, tart cranberry sauce, and fluffy whipped cream that make every bite a holiday hug. It’s easy to assemble, beautiful to serve, and absolutely delicious. Let’s make some magic!
Ingredients
For the Trifle:
-
1 Orange Pound Cake or Loaf Cake, cubed (store-bought works!)
-
2 cups Cranberry Sauce (whole berry recommended)
-
2 cups Heavy Whipping Cream, very cold
-
¼ cup Powdered Sugar
-
1 tsp Vanilla Extract
Optional Garnishes:
-
Orange zest
-
Sugared cranberries
Instructions
1. Prepare the Cake
-
Cube your orange cake into 1-inch pieces. Rustic is perfect!
-
Tip: Toast the cubes at 350°F (175°C) for 5-7 minutes for a slight crisp that holds up against the juicy layers.
2. Whip the Cream
-
In a chilled bowl, whip the cold heavy cream.
-
When slightly thickened, add powdered sugar and vanilla extract.
-
Continue until soft peaks form (gently curling over).
-
Tip: Don’t over-whip, or it’ll turn to butter.
3. Layer the Trifle
-
In a trifle dish or glass cups, start with 1/3 of the cake cubes. Press gently.
-
Add 1/3 of cranberry sauce, spreading evenly.
-
Top with 1/3 of whipped cream.
-
Repeat two more times until all layers are used.
4. Garnish & Chill
-
Finish with a smooth layer of whipped cream.
-
Sprinkle orange zest and arrange sugared cranberries on top.
-
Cover and refrigerate 1–4 hours for flavors to meld.
5. Serve
-
Use a deep spoon to scoop all layers.
-
Pair with coffee, hot chocolate, or dessert wine for a festive touch.
Notes
-
Make ahead: Assemble up to 24 hours in advance. Add fresh garnish just before serving.
-
Keep cream stable: Ensure cream and tools are very cold; add cornstarch or instant pudding if needed.
-
No trifle dish? Large glass bowl, clear 9×13 dish, or individual mason jars work.
-
Extra moist layers: Lightly drizzle cake with orange juice or simple syrup before layering.
-
Flavor twists: Lemon cake & blueberry sauce, chocolate cake & cherry filling, or boozy versions with Grand Marnier.
Nutrition
- Calories: 280 Cal Per Serving
- Fat: 15g
- Saturated Fat: 9g
- Carbohydrates: 32g
- Fiber: 1g
Nutritional Info (Because We’re All Friends Here)
Let’s keep it real—this is a celebratory dessert, and it’s meant to be enjoyed! But I know many of you like to plan, so here’s a general breakdown per serving (assuming 8 servings). Remember, these are estimates and can vary based on your specific ingredients.
Per Serving: Approximately 280 calories, 15g fat (9g saturated), 32g carbohydrates, 1g fiber, 22g sugar, 3g protein.
To lighten it up a bit, you can use a reduced-fat pound cake and swap the heavy cream for a lighter whipping cream (just check that it has enough fat to whip properly). You can also reduce the powdered sugar in the whipped cream by a tablespoon or two. But my philosophy? Enjoy the real deal during the holidays, savor every bite, and get back to your routine tomorrow.
Your New Holiday Tradition
And there you have it! The Cranberry Orange Trifle in all its layered glory. This recipe is more than just a dessert; it’s a reminder that the best holiday memories are often made from simple, joyful moments in the kitchen. It’s about creating something beautiful and delicious that brings everyone together around the table.
I hope this recipe becomes a star on your holiday table and a tradition in your home, just like it is in mine. If you make it (and I really hope you do!), tag me on social @feastical with #FeasticalHolidays so I can see your beautiful creations! Now, go forth and trifle. You’ve got this.
Final Thoughts: You’ve Got This!
So there you have it, my friend—the not-so-secret secret to a stress-free, showstopping holiday dessert. This Cranberry Orange Trifle is more than just a recipe; it’s a reminder that the most memorable moments often come from simplicity, a little bit of love, and a willingness to embrace a happy accident or two.
You don’t need to be a pastry chef to create something truly beautiful and delicious. All you need is a few simple components, a gorgeous bowl, and the confidence to stack them high. This trifle is your canvas. It’s forgiving, flexible, and guaranteed to bring a little bit of “wow” to your table.
So, as the holiday chaos swirls around you, let this be your moment of calm, creative joy. Channel your inner Nana, put on those holiday tunes, and build something delicious. I have no doubt it will be the star of the show.
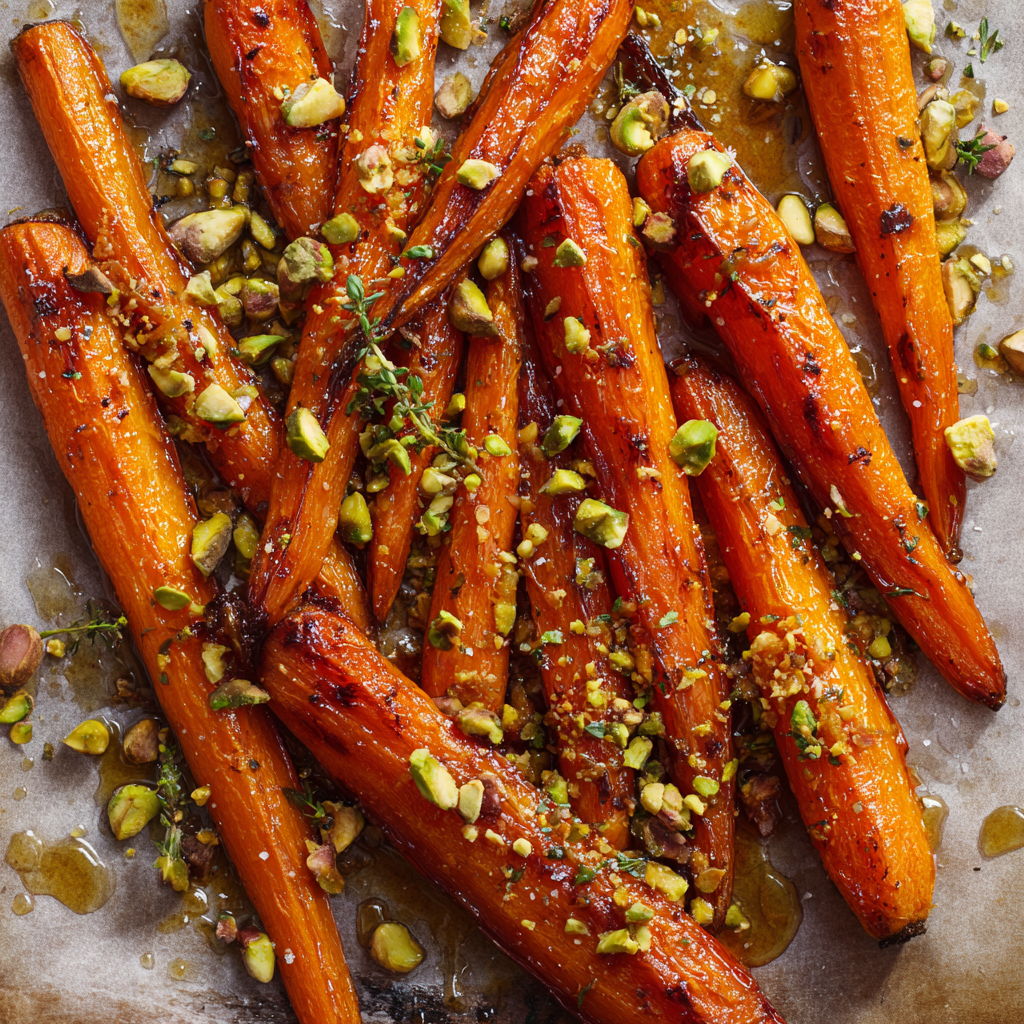
Roasted Carrots with Honey & Pistachios
Your New Go-To Side Dish is Sweet, Savory, and Seriously Simple
Hey friends, Beau here! Welcome back to the Feastical kitchen. You know that feeling when you need a side dish that’s going to do a little more than just sit there on the plate? Something that’s going to turn heads, start conversations, and maybe even steal a little thunder from the main course? I’m talking about a sidekick with star power.
Well, pull up a chair, because I’m about to let you in on one of my all-time favorite secrets: Roasted Carrots with Honey & Pistachios. This isn’t just a recipe; it’s a total game-changer for weeknight dinners and holiday feasts alike. We’re taking the humble carrot, a true kitchen workhorse, and elevating it into something truly spectacular. Imagine this: carrots, roasted until they’re tender and caramelized at the edges, then draped in a warm, golden honey glaze and finished with a confetti of salty, crunchy pistachios.
It’s a symphony of textures and flavors—sweet, savory, earthy, and nutty all at once. And the best part? It’s deceptively easy. This dish is proof that you don’t need a culinary degree or a pantry full of obscure ingredients to create something memorable. You just need a little know-how, a hot oven, and about 40 minutes. So, let’s get these carrots roasting and fill your kitchen with the kind of aroma that makes everyone ask, “What’s cooking? It smells amazing in here!”
A Carrot Epiphany at a Farmhouse Table
I’ll never forget the first time I truly got the carrot. It wasn’t in a fancy restaurant or from a complicated cookbook. It was at a friend’s rustic farmhouse dinner years ago. The table was crammed with people, laughter echoed off the walls, and in the middle of it all was a platter of these gorgeous, glistening roasted carrots. They weren’t just an afterthought; they were the centerpiece of the veggie spread.
I took one bite, and it was a revelation. The carrot was sweet, almost like candy, but with a deep, savory, roasted flavor that was utterly irresistible. They were finished with a drizzle of wild honey from the host’s own hives and a sprinkle of nuts from a jar in the pantry. It was simple, honest food, but it was made with such intention. That dish taught me a powerful lesson: cooking isn’t about showing off. It’s about taking beautiful, simple ingredients and treating them with respect to create something that makes people feel good. It’s about connection. Every time I make this recipe, I’m transported back to that warm, noisy farmhouse kitchen, and I hope it brings a little of that same joy to your table.
Gathering Your A-Team: Simple Ingredients, Big Flavor
One of the things I love most about this recipe is the short, sweet ingredient list. Each component plays a specific role in building that incredible final flavor. Here’s what you’ll need and why it matters.
- 2 lbs Carrots, peeled and cut on the bias: This is our star! I recommend using whole carrots, not baby carrots, for the best texture and sweetness. Cutting them on the bias (aka diagonally) isn’t just for looks—it creates more surface area, which means more delicious, caramelized edges. Chef’s insight: Try to pick carrots that are roughly the same thickness so they cook evenly.
- 2 tbsp Olive Oil: Our trusty workhorse. A good, extra-virgin olive oil helps the carrots roast up beautifully and adds a subtle fruity note. Substitution tip: Avocado oil is a fantastic high-heat alternative if that’s what you have on hand.
- Salt & Pepper, to taste: Don’t be shy here! Salt is essential for pulling out the natural sweetness of the carrots and balancing the honey. Freshly cracked black pepper adds a gentle warmth that ties everything together.
- 2 tbsp Honey: This is our magic glaze. When warmed, it becomes a beautiful, drizzle-able liquid gold that clings to every nook and cranny of the carrots. Substitution tip: For a vegan version, pure maple syrup works wonderfully and gives a slightly deeper, caramel-like flavor.
- ⅓ cup Chopped Pistachios: Our flavor and texture finisher! The pistachios bring a lovely, buttery crunch and a subtle saltiness that cuts through the sweetness perfectly. Chef’s insight: Give them a quick toast in a dry pan for a minute or two before chopping to really wake up their nutty aroma.
- Optional: Fresh Thyme or Parsley for garnish: A final flourish! A sprinkle of fresh, green herbs not only makes the dish look restaurant-worthy but adds a pop of fresh, aromatic flavor. Thyme has an earthy affinity with roasted veggies, while parsley gives a bright, clean finish.
Let’s Get Roasting: Your Foolproof Guide to Carrot Perfection
Alright, team, it’s go-time. This is where the magic happens. Follow these steps, and you’ll have a tray of golden, glorious carrots in no time. I’ve packed this section with my favorite chef hacks to make sure you get perfect results every single time.
- Preheat and Prep: First things first, get that oven screaming hot. Crank it to 400°F (200°C). While it’s heating up, line a large baking sheet with parchment paper. This isn’t just for easy cleanup (though that’s a huge bonus!); it also prevents the honey from sticking and burning onto the pan at the end. Little Chef Hack: Give your carrots a good wash and peel. When cutting them on the bias, aim for pieces about ½-inch thick. This ensures they’ll be tender in the center and caramelized on the outside without burning.
- The Perfect Toss: Pile your beautiful orange spears onto the prepared baking sheet. Drizzle them with the olive oil, then season generously with salt and pepper. Now, get your hands in there! Use your hands to toss everything together, making sure every single piece of carrot is lovingly coated in that oil and seasoning. Trust me, hands are the best tools in the kitchen for this—you’ll get a much more even coat than with a spoon. Once they’re slick and shiny, spread them out in a single, uncrowded layer. This is crucial for proper roasting, not steaming!
- Roast to Caramelized Glory: Slide that tray into your preheated oven and let the heat work its magic. We’re going to roast them for 25-30 minutes. About halfway through, at the 15-minute mark, I want you to open the oven and give them a good flip. You’ll already start to see some beautiful browning on the bottoms. This flip ensures they get evenly caramelized and gorgeous on all sides. They’re done when you can easily pierce them with a fork and the edges are kissed with dark, crispy bits.
- The Grand Finale (Drizzle & Sprinkle): As soon as you pull the carrots out of the oven, it’s time for the grand finale! They need to be warm for this next step. Take your honey and warm it for about 10 seconds in the microwave—this makes it super runny and easy to drizzle. Drizzle that liquid gold all over the hot carrots. Immediately follow up with a generous sprinkle of your chopped pistachios. The residual heat will help the honey cling and slightly toast the nuts. If you’re using fresh herbs, now’s the time to scatter them over the top for that fresh, colorful finish.
Plating Up: How to Make Your Carrots Shine
You’ve done the hard work, now let’s make these beauties look as good as they taste. Presentation is part of the fun! I like to transfer the carrots to a warm serving platter—a long, rectangular one works great for showing off their shape. Pour any of the delicious honey and oil goodness left on the baking sheet right over the top; that’s pure flavor!
So, what do you serve these with? Honestly, they’re incredibly versatile. They are a dream alongside a simple roasted chicken or a juicy pork loin. For a vegetarian feast, they pair beautifully with a creamy lentil salad or a big portion of creamy polenta. During the holidays, they are the perfect vibrant, sweet counterpoint to a savory holiday turkey or a rich beef roast. They’re also fantastic at room temperature, making them a brilliant make-ahead option for potlucks and picnics.
Make It Your Own: Delicious Twists on a Classic
Once you’ve mastered the base recipe, the world is your oyster! (Or, well, your carrot). Don’t be afraid to play around and adapt this to your taste or what you have in the fridge. Here are a few of my favorite riffs:
- Spicy & Smoky: Add ½ teaspoon of smoked paprika and a pinch of cayenne pepper to the olive oil before tossing with the carrots. The smoky heat with the sweet honey is a match made in heaven.
- Maple-Glazed with Pecans: Swap the honey for pure maple syrup and the pistachios for toasted pecans. This gives a wonderfully autumnal, deep caramel flavor that just screams comfort food.
- Herbaceous & Cheesy: After drizzling with honey, finish the carrots with a shower of freshly crumbled goat cheese or feta and a big handful of fresh chopped dill. The tangy cheese and bright dill are an incredible combination.
- Moroccan-Inspired: Toss the carrots with a spice blend of ¼ teaspoon each of cumin, coriander, and cinnamon along with the oil. Use chopped toasted almonds instead of pistachios and finish with a sprinkle of fresh mint.
- Vegan Powerhouse: As mentioned, use maple syrup instead of honey. For a extra protein boost, after roasting, toss the carrots with a can of drained and rinsed chickpeas that you’ve roasted alongside them for the last 15 minutes.
Beau’s Kitchen Confidential
This recipe has been a staple in my kitchen for years, and it’s evolved in the best way. I used to be so precise with my cuts, but I’ve learned that a little rustic irregularity is a good thing—it gives you a variety of textures in one bite! One time, I was filming a video for the site and I got so caught up in chatting that I completely forgot to flip the carrots. You know what? They were still delicious, just a bit more caramelized on one side. It was a great reminder that cooking is forgiving, and the goal is flavor, not perfection. Don’t stress, just enjoy the process. The smell of carrots roasting with a little black pepper is one of my favorite kitchen smells—it just feels like home.
Your Questions, Answered!
I’ve gotten a lot of questions about this recipe over the years, so I’ve gathered the most common ones here to help you out.
Q: Can I use baby carrots instead of whole carrots?
A: You can, but I find whole carrots have a superior flavor and texture. If you use baby carrots, just be aware they often contain more water, so they might steam rather than roast and won’t caramelize as well. If it’s all you have, pat them very dry before tossing with oil and maybe add a few extra minutes to the roasting time.
Q: My carrots are burning before they get tender! What did I do wrong?
A> This usually means your oven is too hot, or your carrot pieces are too small. Oven temperatures can vary, so an inexpensive oven thermometer is a great investment. If you see them browning too quickly, simply lower the temperature to 375°F and let them cook a bit longer. Also, make sure you’re cutting them into substantial pieces, no smaller than ½-inch thick.
Q: Can I make these ahead of time?
A> Absolutely! You can peel and cut the carrots a day in advance; just keep them submerged in water in the fridge so they don’t dry out. You can also roast the carrots completely, let them cool, and store them in the fridge. To serve, warm them gently in a 350°F oven for about 10 minutes before adding the honey and pistachios so they get glossy again.
Q: What other nuts can I use?
A> Pistachios are my favorite, but this is a very flexible recipe! Toasted almonds, walnuts, pecans, or even pumpkin seeds (pepitas) would be delicious. Just make sure whatever nut or seed you use is toasted for maximum crunch and flavor.

Roasted Carrots with Honey & Pistachios
Description
Hey friends, Beau here! Carrots don’t have to be boring. In this recipe, they’re tender, caramelized, and finished with a honey glaze and crunchy pistachios. Perfect for weeknights, holidays, or potlucks—it’s a side dish that steals the spotlight.
Ingredients
-
2 lbs carrots, peeled and cut on the bias (~½-inch thick)
-
2 tbsp olive oil (or avocado oil)
-
Salt & freshly cracked black pepper, to taste
-
2 tbsp honey (or maple syrup for vegan version)
-
⅓ cup chopped pistachios (toasted for extra aroma)
-
Optional garnish: fresh thyme or parsley
Instructions
1. Preheat & Prep
-
Preheat oven to 400°F (200°C).
-
Line a baking sheet with parchment paper for easy cleanup and to prevent sticking.
2. Prep the Carrots
-
Wash, peel, and cut carrots diagonally into ½-inch thick pieces.
-
Toss carrots with olive oil, salt, and pepper until evenly coated. Spread in a single layer.
Tip: Uniform size ensures even roasting and caramelization.
3. Roast the Carrots
-
Roast for 25–30 minutes, flipping halfway through at 15 minutes.
-
Carrots are done when tender and slightly caramelized at the edges.
Chef Hack: Avoid overcrowding the pan—otherwise, the carrots steam instead of roast.
4. Finish with Honey & Pistachios
-
Warm honey for 10 seconds in the microwave to make it drizzle-ready.
-
Drizzle honey over the hot carrots and sprinkle with toasted pistachios.
-
Optional: Add fresh herbs for a bright, aromatic finish.
5. Serve & Enjoy
-
Transfer carrots to a warm serving platter, drizzle with any pan juices, and serve immediately.
-
Perfect alongside roasted meats, vegetarian mains, or at potlucks.
Notes
-
Baby carrots vs whole carrots? Whole carrots roast better and have superior texture.
-
Carrots burning before tender? Oven too hot or pieces too small; lower to 375°F and cook longer.
-
Make ahead? Peel and cut in advance (store in water) or roast, cool, and reheat gently.
-
Other nuts? Almonds, walnuts, pecans, or pumpkin seeds all work—toast for max flavor.
Nutrition
- Calories: 160 Cal Per Serving
- Fat: 8g
- Saturated Fat: 1g
- Carbohydrates: 19g
- Fiber: 4g
- Protein: 3g
A Nourishing Bite
While we’re all about the flavor here at Feastical, it’s always nice to know that what you’re eating is also doing your body good. And this dish is a total powerhouse! Carrots are famously packed with beta-carotene, which your body converts to Vitamin A—essential for healthy vision, skin, and immunity. They’re also a great source of fiber.
We’re using healthy fats from the olive oil and pistachios, which help your body absorb all those fat-soluble vitamins from the carrots. The honey adds natural sweetness, and the pistachios bring a little plant-based protein to the party. So, you can feel fantastic about serving this side dish—it’s as nourishing as it is delicious.
Approximate Nutritional Info per Serving (Serves 6):
Calories: ~160 | Fat: 8g | Saturated Fat: 1g | Carbohydrates: 19g | Fiber: 4g | Sugar: 12g | Protein: 3g
Wrapping It All Up
Well, there you have it, my friends—my not-so-secret weapon for a side dish that never fails to impress. It’s proof that a little bit of technique and a few quality ingredients can transform the ordinary into the extraordinary. I hope this recipe finds its way into your regular rotation and becomes a beloved favorite in your home, just like it is in mine.
Final Thoughts: Your New Go-To Side is Served
So there you have it—the simple, stunning side dish that’s ready to steal the show. It’s more than just a recipe; it’s a reminder that the most memorable meals often come from the humblest ingredients, treated with a little care and creativity. With its perfect balance of sweet, savory, and crunchy, this dish is guaranteed to become a star on your table, from a quiet Tuesday night to a bustling holiday feast.
I hope these honey-glazed carrots bring as much warmth, connection, and downright deliciousness to your kitchen as they have to mine. Now, I’d love to hear from you! Did you make them? What twist did you try? Share your creations with me @Feastical. Happy cooking!

Creamy Parmesan Broccoli Bake
Your New Favorite Side Dish is Here to Steal the Show
Hey friends, Beau here! Let’s be real for a second. We all have that one dish. The one that shows up at the family potluck, sits there quietly next to the glazed ham or the golden turkey, and then—BAM—it’s gone before you can even blink. The dish that makes your aunt ask for the recipe and your veggie-skeptical nephew sneak a second helping. That, my friends, is the magic of a truly epic casserole.
And today, we’re making one for the ages. We’re talking about my Creamy Parmesan Broccoli Bake. Now, I know what you might be thinking: “Beau, it’s just broccoli.” But oh, it is so much more than that. This is broccoli living its absolute best life, swimming in a velvety, garlicky Parmesan sauce, and baked under a perfectly golden, bubbly top. It’s the culinary equivalent of your favorite cozy sweater. It’s veggies, but we’re making them cozy, comforting, and downright irresistible.
This recipe is the hero we need for busy weeknights, holiday feasts, or anytime you need a guaranteed win on the dinner table. It’s simple, soulful, and so satisfying. So, preheat that oven, grab your favorite baking dish, and let’s transform that humble head of broccoli into a side dish that’s fully prepared to steal the spotlight.
The Broccoli That Won Over a Skeptic
This recipe has a special place in my heart because it’s the dish that officially made me a broccoli believer. Growing up, my experience with broccoli was, well, tragic. It was usually relegated to the “eat-it-because-it’s-good-for-you” corner of my plate—a sad, steamed, and often soggy affair. I’d hide it under my mashed potatoes or, on particularly brave days, feed it to the dog under the table (sorry, Mom!).
That all changed one Thanksgiving at my Grandma Lorraine’s house. She was a wizard with cream, cheese, and a well-seasoned casserole dish. She brought a bubbling, golden-topped dish to the table that smelled like heaven. I took one skeptical bite and my world turned upside down. The broccoli was tender but still had a bite, and it was enveloped in this rich, cheesy, garlicky sauce that made my eyes go wide. I asked for seconds before I’d even finished my first helping. Grandma just winked and said, “See, Beau? Everything’s better with a little sauce and a lot of love.” She was right. This bake is my homage to her—a recipe that turns skeptics into superfans, one cheesy bite at a time.
Gathering Your Cast of Characters
One of the best things about this recipe is its beautiful simplicity. You likely have most of these ingredients hanging out in your fridge and pantry right now. Here’s everything you’ll need to create this masterpiece.
- 5 cups fresh broccoli florets: Look for bright green, firm heads of broccoli. The florets are our stars here—they hold the sauce perfectly. Chef’s Insight: No fresh broccoli? A 16-ounce bag of frozen florets, thawed and patted dry, works in a pinch! Just be sure to squeeze out any excess water so your bake doesn’t get soupy.
- 2 tbsp butter: This is the rich, flavorful base for our roux. Unsalted is best so we can control the salt level, but salted works too—just adjust your added salt later.
- 2 tbsp all-purpose flour: Our trusty thickening agent. It teams up with the butter to create the roux that gives our sauce its luxurious body.
- 1 ½ cups milk: Whole milk will give you the creamiest, richest sauce, but 2% works wonderfully too. I don’t recommend skim, as the sauce can end up a bit thin.
- ½ cup sour cream: This is my secret weapon! It adds a wonderful tang and incredible creaminess that takes the sauce to a whole new level. Substitution Tip: Plain, full-fat Greek yogurt is a fantastic swap if that’s what you have on hand.
- ¾ cup grated Parmesan cheese: Please, for the love of all that is cheesy and good, grate it yourself if you can! The pre-grated stuff in a tub often has anti-caking agents that can make your sauce a little grainy. Freshly grated Parmesan melts like a dream and has a much more robust flavor.
- ½ cup shredded mozzarella cheese: This is our stretchy, gooey dream machine. It adds that classic, pull-apart cheese quality we all love.
- ½ tsp garlic powder: I know, I know—fresh garlic is king. But in this creamy sauce, garlic powder distributes its flavor evenly without the risk of burning, giving you that consistent, cozy garlic note in every bite.
- Salt & freshly cracked black pepper, to taste: Don’t be shy! Season in layers. Taste your sauce before you add the broccoli and adjust accordingly.
- Optional: ½ cup crushed crackers or breadcrumbs for topping: For that irresistible golden, crunchy top! Buttery Ritz crackers are my personal favorite, but panko breadcrumbs toasted with a little butter also work beautifully.
Let’s Get Cooking: Building Your Broccoli Masterpiece
Okay, team! Aprons on? Let’s do this. I’ll walk you through each step, sharing all my little kitchen hacks to ensure your bake is absolutely perfect.
- Preheat and Prep: First things first, get that oven preheating to 375°F (190°C). This is the perfect temperature for getting a bubbly, golden bake without burning the top. While it’s warming up, lightly grease your 9×9-inch baking dish (or a similar-sized casserole dish) with a little butter or non-stick spray. Chef’s Hack: A well-preheated oven is key for even cooking. Don’t put your casserole in a cold oven!
- Wake Up the Broccoli: We’re not cooking the broccoli all the way through just yet. We’re just giving it a quick head start. Steam or blanch your broccoli florets for about 2-3 minutes, until they turn a vibrant, brilliant green and are just tender-crisp. Why do this? This step locks in that beautiful color and ensures our broccoli bakes up perfectly tender, not raw and crunchy. Immediately drain it well and maybe even give it a gentle pat with a paper towel. A dry broccoli is a happy broccoli when it comes to avoiding a watery sauce!
- Craft the Velvety Sauce (This is the Fun Part!): In a medium saucepan over medium heat, melt your 2 tablespoons of butter. Once it’s foaming, add the 2 tablespoons of flour and immediately start whisking. Cook this roux for about a full minute. You’ll smell a lovely, nutty aroma—that’s how you know it’s ready! Now, slowly—and I mean slowly—pour in the milk while whisking constantly. Pro Tip: Adding the milk gradually while whisking is the secret to a lump-free sauce. Don’t rush it! You’re creating a beautiful, smooth base. Keep whisking until the sauce thickens enough to coat the back of a spoon, about 3-5 minutes.
- Cheese, Please!: Take the saucepan off the heat. Now, stir in your sour cream, garlic powder, the glorious ¾ cup of grated Parmesan, and the ½ cup of mozzarella. The residual heat will melt the cheese beautifully. Give it a good stir until everything is smooth, creamy, and united in cheesy harmony. Now, taste it! This is your moment. Season with salt and a good crack of black pepper until it sings.
- The Grand Union: In a large mixing bowl, gently toss your pre-cooked broccoli florets with the magnificent cheese sauce you just created. Make sure every single floret gets a cozy, cheesy blanket. Then, pour the whole mixture into your prepared baking dish and spread it into an even layer.
- The Golden Crown: If you’re using the optional topping, now’s the time! Sprinkle your crushed crackers or breadcrumbs evenly over the top. This adds a wonderful textural contrast to the creamy interior.
- Bake to Perfection: Pop that dish into your preheated oven and bake for 20-25 minutes. You’re looking for the sauce to be bubbly around the edges and the top to be a beautiful, inviting golden brown. If you used a topping, it should be perfectly crisp.
- The Hardest Step of All: Let it Rest! I know, the aroma is intoxicating and you want to dive right in. But trust me on this—let it sit for about 5-10 minutes after pulling it out of the oven. This allows the sauce to set just a little, making it easier to serve beautiful, clean scoops instead of a cheesy lava flow. It’s worth the wait, I promise!
How to Serve This Cozy Masterpiece
This Creamy Parmesan Broccoli Bake is the ultimate team player. It’s incredibly versatile and makes everything it touches feel like a special occasion.
For a classic family dinner, I love serving it right out of the baking dish in the middle of the table, family-style. It’s the perfect sidekick to a simple roasted chicken, some pan-seared pork chops, or a juicy pot roast. The creamy, cheesy flavors complement savory meats perfectly.
Heading to a potluck or holiday gathering? This is your golden ticket. It travels like a dream and always earns rave reviews. Pair it with other comfort food classics like garlic mashed potatoes and herb stuffing for the ultimate feast.
And for my vegetarian friends? This bake is a star all on its own! Serve a bigger portion alongside a hearty quinoa salad or a lentil soup for a completely satisfying and comforting meal. No matter how you plate it, get ready for the compliments to roll in!
Make It Your Own: Delicious Twists & Swaps
One of my favorite things about cooking is making a recipe your own. This broccoli bake is a fantastic canvas for your creativity! Here are a few of my favorite ways to mix it up.
- The “Everything but the Kitchen Sink” Version: Add a cup of cooked, diced chicken, ham, or even leftover holiday turkey to the mix before baking for a full, one-dish meal. A half-cup of cooked, crumbled bacon is also a game-changer!
- Cauli-Power Blend: Not a broccoli-only household? Use half broccoli and half cauliflower florets. The flavors work in perfect harmony, and it’s a great way to get more veggies in.
- Spice It Up: Add a little kick with a pinch of cayenne pepper or a few shakes of your favorite hot sauce into the cheese sauce. A tablespoon of diced jalapeños would also be fantastic for a spicy twist.
- Gluten-Free & Lighter Options: To make this gluten-free, simply swap the all-purpose flour for a 1:1 gluten-free flour blend and use gluten-free crackers for the topping. For a lighter version, you can use low-fat milk and reduced-fat cheeses, though the sauce will be slightly less rich.
- Italian-Inspired Twist: Swap the mozzarella for Italian blend cheese and stir in a teaspoon of Italian seasoning into the sauce. Top with a mix of breadcrumbs and a little extra Parmesan for a real “fancy pasta night” vibe.
Beau’s Kitchen Notes & Stories
This recipe has been a living, evolving thing in my kitchen for years. The sour cream was a happy accident one day when I was out of heavy cream, and it turned out to be the best “mistake” I ever made! It’s become the non-negotiable secret to the sauce’s tangy creaminess.
I’ve also learned that this dish is a fantastic “clean out the fridge” hero. That little nub of cheddar? Grate it in. A handful of Gruyère left over from another recipe? Yes, please! A bit of fontina? Divine. Don’t be afraid to play with your cheese blends. Cooking should be fun, not stressful. The most important ingredient is always the joy you stir into it.
Your Questions, Answered!
Over the years, I’ve gotten a few repeat questions about this bake. Here are the answers to help you nail it every single time.
Q: My casserole turned out a bit watery. What happened?
A: The most common culprit is excess water on the broccoli. If you’re using frozen, make sure it’s fully thawed and you’ve squeezed it in a clean kitchen towel. For fresh, pat it dry after blanching. Also, be sure your sauce has thickened nicely on the stovetop before you combine everything.
Q: Can I make this ahead of time?
A: Absolutely! You can assemble the entire casserole (without baking) up to a day in advance. Cover it tightly and store it in the fridge. When you’re ready, you may need to add a few extra minutes to the baking time since it will be going in cold.
Q: What’s the best substitute for sour cream?
A: As mentioned, full-fat plain Greek yogurt is my go-to. You could also use an equal amount of heavy cream or crème fraîche for a similar rich and tangy effect.
Q: Can I freeze the leftovers?
A: You can, but with a caveat. Cream-based sauces can sometimes separate or become a bit grainy upon thawing. It will still taste good, but the texture might not be as perfect. If you do freeze it, thaw it overnight in the fridge and reheat it gently in the oven.

Creamy Parmesan Broccoli Bake
Description
Hey friends, Beau here! Broccoli doesn’t have to be boring. In this dish, it’s tender, cheesy, and baked under a golden, bubbly topping that will have everyone asking for seconds. Perfect for weeknights, holidays, or potlucks—it’s cozy, comforting, and utterly irresistible.
Ingredients
-
5 cups fresh broccoli florets (or 16 oz frozen, thawed & patted dry)
-
2 tbsp butter
-
2 tbsp all-purpose flour
-
1½ cups milk (whole milk recommended)
-
½ cup sour cream (or plain Greek yogurt)
-
¾ cup freshly grated Parmesan cheese
-
½ cup shredded mozzarella cheese
-
½ tsp garlic powder
-
Salt & freshly cracked black pepper, to taste
-
Optional topping: ½ cup crushed crackers or breadcrumbs
Instructions
1. Preheat & Prep
-
Preheat oven to 375°F (190°C).
-
Grease a 9×9-inch baking dish with butter or non-stick spray.
2. Blanch the Broccoli
-
Steam or blanch broccoli for 2–3 minutes until vibrant green and slightly tender.
-
Drain thoroughly and pat dry.
Tip: Dry broccoli prevents a watery bake.
3. Make the Velvety Sauce
-
Melt butter in a medium saucepan over medium heat.
-
Add flour, whisking constantly for 1 minute to make a roux.
-
Slowly pour in milk, whisking continuously to avoid lumps. Cook 3–5 minutes until thickened.
-
Remove from heat; stir in sour cream, garlic powder, Parmesan, and mozzarella. Season with salt and pepper to taste.
4. Combine & Assemble
-
Gently toss broccoli with cheese sauce in a large bowl.
-
Pour mixture into prepared baking dish and spread evenly.
-
Optional: Sprinkle crushed crackers or breadcrumbs on top.
5. Bake to Perfection
-
Bake for 20–25 minutes until bubbly and the top is golden brown.
-
Let rest 5–10 minutes before serving to set the sauce.
Serving Suggestions
-
Serve family-style alongside roasted meats or as a vegetarian main with grains or soup.
-
Perfect for potlucks—travels well and is always a hit.
Notes
-
Watery casserole? Pat broccoli dry and ensure sauce is thick before combining.
-
Make ahead? Assemble up to 1 day in advance; add a few extra minutes to bake.
-
Sour cream substitute? Greek yogurt, heavy cream, or crème fraîche.
-
Freezing? Can freeze, but sauce texture may change; thaw overnight and reheat gently.
A Note on Nutrition
I’m all about balance. While this is definitely a comfort food dish, it’s packed with good-for-you broccoli, which is a fantastic source of Vitamins C and K, fiber, and powerful antioxidants. The cheese and milk provide a good dose of protein and calcium.
This is a rough estimate per serving (assuming 6 servings and without the optional topping): approximately 210 calories, 13g fat, 8g protein, and 14g carbs. Remember, these are estimates and can vary based on the specific brands and ingredients you use. My philosophy? Enjoy your food, savor the comfort, and know that feeding your soul is just as important as feeding your body. This dish does both beautifully.
Final Thoughts from My Kitchen to Yours
Well, there you have it! My go-to recipe for a side dish that never, ever fails. This Creamy Parmesan Broccoli Bake is more than just a recipe; it’s a reminder that with a little love and a lot of cheese, we can make even the simplest ingredients feel like a celebration.
I hope this dish finds its way to your table and becomes a part of your own family’s story. It’s a testament to the fact that food doesn’t have to be complicated to be incredible. It just has to be