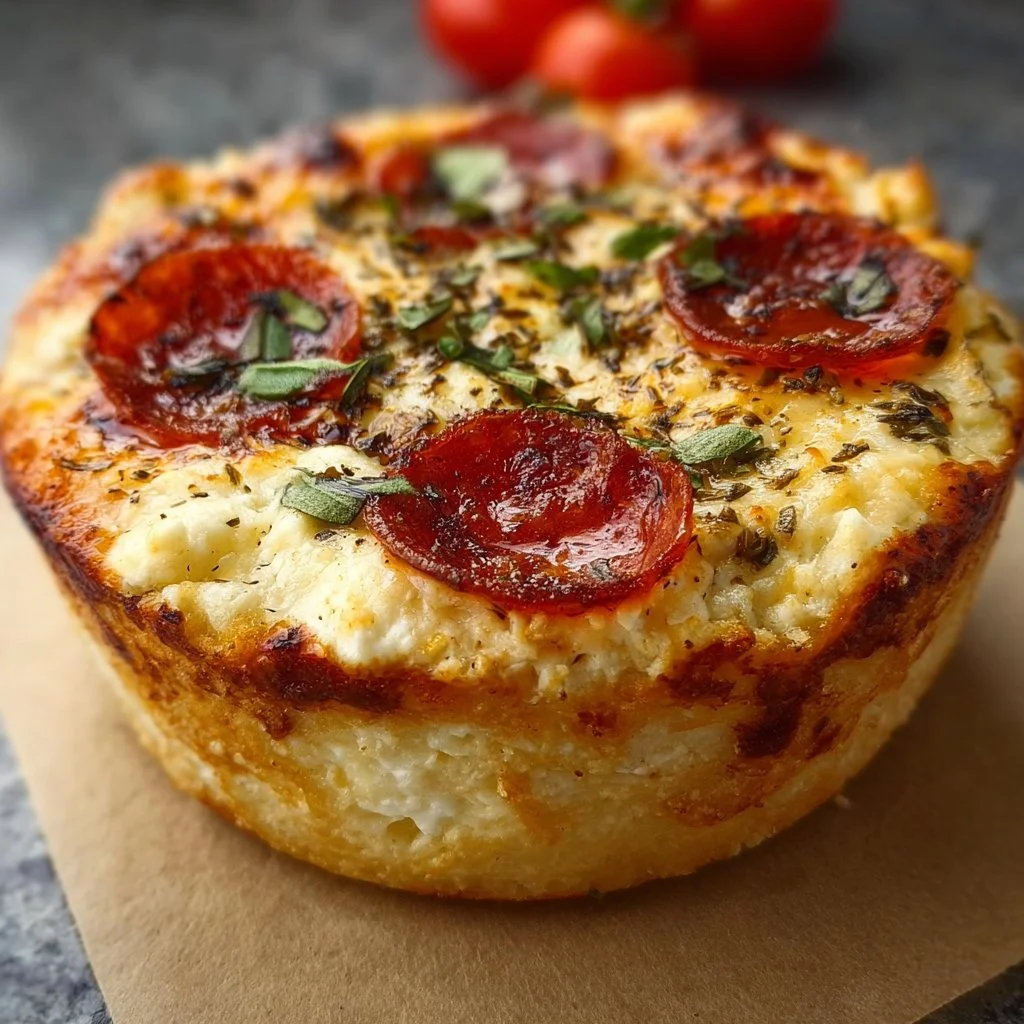
Cottage Cheese Pizza Bowl
# Delightful Cottage Cheese Pizza Bowl: A Healthy Twist on Comfort Food

## Introduction

Hey there, food lovers! Welcome back to Feastical! Today, we’re diving deep into a dish that merges the soul-soothing essence of pizza with a nutritious twist: the Cottage Cheese Pizza Bowl. Now, I know what you might be thinking—cottage cheese? Pizza? Together? But trust me, this creamy, protein-packed bowl is about to become your new obsession!

Imagine the classic pizza flavors you adore but in a lighter, more wholesome form. You’ve got your favorite toppings, a splash of comforting Italian herbs, and that creamy goodness of cottage cheese—all wrapped up in one delicious bowl. Plus, it’s super easy to whip up! This dish takes the guilt out of indulgent pizzas while adding a healthy zing that will have you feeling great after you eat!

This recipe is perfect for those hectic weeknights when you crave the comfort of pizza but don’t want to roll out dough (who has time for that?). Or, if you’re simply looking to sneak more nutrition into your meals without sacrificing flavor, you've hit the jackpot right here! So, grab your apron, pull on those funky socks, and let’s get cooking together! I promise, this dish will not only satisfy your pizza cravings but also become a staple in your kitchen repertoire.

## Personal Story

Every time I make this Cottage Cheese Pizza Bowl, I’m transported back to my childhood kitchen, where the rich aroma of homemade pizza filled the air. My mom was the queen of comfort food, and pizza night was a sacred ritual in our house. She always had a trusty bowl of cottage cheese in the fridge—my dad swore by its health benefits. I remember sneaking spoonfuls when no one was looking, just to enjoy that creamy texture.

One day, as we assembled our pizzas, I had a bright idea to mix in some cottage cheese with the traditional toppings. My mom raised an eyebrow, but once she tasted my creation, she was sold! The dish became a beloved part of our pizza nights, allowing us to load up on flavors without feeling sluggish afterward. Years later, I still make it often, especially when I need that nostalgic warm hug from my childhood. It’s a beautiful reminder of how simple ingredients can bring joy, creativity, and memories to our dining tables.

## Ingredients

Here’s what you’ll need for your Cottage Cheese Pizza Bowl:

- **1 cup cottage cheese**
  This creamy base is packed with protein and healthy fats. If you're not a fan of cottage cheese, Greek yogurt is a great substitute—the tanginess complements the toppings well.

- **1/2 cup cherry tomatoes, halved**
  These little gems burst with sweetness and are full of antioxidants. You can swap them for sun-dried tomatoes or diced regular tomatoes if cherry tomatoes aren't available.

- **1/4 cup bell peppers, diced**
  These colorful veggies add crunch and nutrients. Feel free to use any color you love—red, yellow, or green!

- **1/4 cup olives, sliced**
  Olives add a briny, salty flavor that elevates the dish. Kalamata olives are my go-to, but any variety will work just as well.

- **1/4 cup mozzarella cheese, shredded**
  Ah, the classic! Fresh or pre-shredded mozzarella gives that gooey goodness we all crave. You can substitute with a dairy-free cheese for a non-dairy option.

- **1/4 teaspoon Italian seasoning**
  A magical blend of herbs that transports you straight to Italy! You can easily use oregano or basil if you don't have Italian seasoning on hand.

- **Salt and pepper to taste**
  Essential flavor enhancers! Adjust according to your taste preference.

- **Fresh basil leaves for garnish**
  This aromatic herb adds a beautiful touch. If basil isn’t around, you can use parsley or arugula for a different twist.

## Step-by-Step Instructions

Now that we have our ingredients lined up, let’s get cooking! Here’s how to create this delightful dish:

### Step 1: Preheat Your Oven
Preheat your oven to 375°F (190°C). This simply ensures that your pizza bowl gets deliciously warm when we bake it in the next steps.

### Step 2: Mix the Base
In a medium mixing bowl, add 1 cup of cottage cheese. Season it with a pinch of salt and pepper, and stir well until creamy. This is where the magic starts! If you want your base to be a bit more flavorful, here’s a little chef tip: adding a dash of garlic powder or red pepper flakes can really kick it up a notch.

### Step 3: Layer Your Toppings
Now, time to layer! Start with the cottage cheese mixture at the bottom of a baking dish (I usually use a modest-sized ramekin for individual servings). Next, heap on those halved cherry tomatoes, followed by the diced bell peppers. Feel free to add your olives—these little guys are the flavor bombs of this dish. Top it off with mozzarella and sprinkle the Italian seasoning evenly over everything.

### Step 4: Bake It Up
Place your filled dish in the preheated oven, and let it bake for about 20-25 minutes or until the cheese is bubbly and slightly browned. Pro tip: for an extra crunchy top, you can broil it for the last 2-3 minutes but keep a close eye—it goes from perfect to charred in a flash!

### Step 5: Plate It Up
Once it's out of the oven, let it sit for a couple of minutes to avoid burning your taste buds! I like to garnish with fresh basil leaves. This adds a lovely color and aroma!

That’s it! You now have a delicious Cottage Cheese Pizza Bowl that’s ready to be devoured.

## Serving Suggestions

Presentation is key, my friends! Here are a few fun serving ideas:

- **Party Style**: Serve directly in individual ramekins for a cozy get-together. Everyone gets their little bowl of joy, and it encourages sharing!

- **Side Salad**: Pair your pizza bowl with a vibrant green salad. A light vinaigrette will balance the richness of the cheese beautifully.

- **Crusty Bread**: You can add a side of crusty garlic bread for those who want to scoop up every last bit.

- **Garnish Galore**: Try adding a drizzle of balsamic glaze for a sweet and tangy touch right before serving.

## Recipe Variations

When it comes to recipes, creativity knows no bounds! Here are some fun twists you can try on this dish:

1. **Spicy Kick**: Add sliced jalapeños or sprinkle some red pepper flakes on top before baking for a zesty touch that’ll make your taste buds dance!

2. **Mediterranean Style**: Swap out the olives for artichoke hearts and use feta cheese instead of mozzarella. The flavors will take you straight to a seaside café.

3. **Vegetarian Delight**: Top with a mix of roasted veggies like zucchini and mushrooms for an extra nutrient boost.

4. **Protein Boost**: Mix in some cooked ground turkey or chicken to give this bowl a hefty protein punch.

5. **Zucchini Noodle Base**: For a low-carb option, layer zucchini noodles at the bottom instead of cottage cheese or blend the two for added texture!

## Chef’s Notes

What I love most about this Cottage Cheese Pizza Bowl is how versatile it is! It started as a simple dish in my childhood kitchen and evolved into a canvas for culinary creativity. On days when nothing seems to go right, whipping up this bowl of goodness always brings me back to my humble roots.

One time, I experimented endearingly with leftover veggie scraps, and it turned out fantastic! The best advice I can offer is to make this dish your own. Don’t be afraid to improvise or make it a family affair—cooking together always adds that special ingredient of love!

## FAQs and Troubleshooting

**Q1: My cottage cheese is too lumpy. How can I avoid this?**
A1: Using a blender or food processor to smooth it out can help; blend it until creamy before mixing in the toppings.

**Q2: Can I prepare this in advance?**
A2: Absolutely! You can prep all the ingredients and mix them ahead of time, then simply bake when you're ready to eat.

**Q3: What if I don’t like olives?**
A3: No problem! You can leave them out altogether or replace them with pickled red onions for a tangy crunch.

**Q4: How do I keep it warm if I’m serving guests?**
A4: Place it in a warm oven (around 200°F) while you prepare other dishes to keep the heat in.

## Nutritional Info

This Cottage Cheese Pizza Bowl not only satisfies your cravings but also delivers a solid punch of nutrition. Here’s a rough breakdown per serving:

- **Calories**: Approximately 300-350 calories (without added proteins)
- **Protein**: About 25 grams, thanks to the cottage cheese
- **Fat**: Roughly 15 grams, with healthy fats from cheese and olives
- **Carbs**: Approximately 25 grams, making it a good meal option
- **Fiber**: Around 5 grams, thanks to the veggies

Not only is this dish a delicious option for various diets, but it’s also a fantastic way to add some wholesome food to your routine without sacrificing taste.

## Final Thoughts

There you have it, lovely foodies! Your go-to guide to making a delightful Cottage Cheese Pizza Bowl that’s simple, healthy, and downright delicious. Remember, cooking is all about finding joy in the process and sharing it with others. So invite friends or family over, and let each of them personalize their bowl.

Whether you keep it classic or get creative with toppings, I hope every bite brings you that warm, nostalgic feeling like a cozy hug. Enjoy making this dish as much as I enjoyed sharing it with you, and until next time, keep it flavorful and fun in the kitchen! Happy cooking from your friend, Beau!

Delightful Cottage Cheese Pizza Bowl
- Total Time: 35 minutes
- Yield: 2 servings 1x
- Diet: Vegetarian
Description
A creamy, protein-packed twist on pizza, combining cottage cheese with favorite toppings for a wholesome meal.
Ingredients
- 1 cup cottage cheese
- 1/2 cup cherry tomatoes, halved
- 1/4 cup bell peppers, diced
- 1/4 cup olives, sliced
- 1/4 cup mozzarella cheese, shredded
- 1/4 teaspoon Italian seasoning
- Salt and pepper to taste
- Fresh basil leaves for garnish
Instructions
- Preheat your oven to 375°F (190°C).
- Mix the cottage cheese with salt and pepper in a bowl until creamy.
- Layer the cottage cheese mixture in a baking dish, followed by cherry tomatoes, bell peppers, olives, and mozzarella. Sprinkle Italian seasoning on top.
- Bake for 20-25 minutes until cheese is bubbly and slightly browned.
- Plate it up and garnish with fresh basil.
Notes
Feel free to substitute toppings based on your taste or dietary preferences.
- Prep Time: 10 minutes
- Cook Time: 25 minutes
- Category: Main Course
- Method: Baking
- Cuisine: Italian
Nutrition
- Serving Size: 1 serving
- Calories: 350
- Sugar: 5g
- Sodium: 400mg
- Fat: 15g
- Saturated Fat: 5g
- Unsaturated Fat: 8g
- Trans Fat: 0g
- Carbohydrates: 25g
- Fiber: 5g
- Protein: 25g
- Cholesterol: 30mg
Keywords: Cottage Cheese, Pizza Bowl, Healthy Dinner, Italian Cuisine, Comfort Food

Cottage Cheese Chips – The Ultimate High-Protein Snack
Cottage Cheese Chips – The Ultimate High-Protein Snack
Hey there, fellow food lovers! If you’re on a quest for a high-protein snack that’s as crispy as it is delicious, you’ve just landed in the right spot. Today, we’re diving into the world of Cottage Cheese Chips – a marvelously crunchy snack that packs a nutritional punch without compromising on taste. Whether you’re looking for a guilt-free munch during movie night or a nutritious boost pre- or post-workout, these chips are your new best friend.
Growing up, I always had a love affair with snacks. After school, I’d rummage through the pantry, seeking those satisfying crunches that could only come from chips. But I wanted something that didn’t make me feel guilty afterward. Fast forward to today, and I’ve transformed my nostalgic cravings into something wholesome and equally indulgent—a snack that combines the heartiness of cottage cheese with irresistible crispiness. So grab your apron and let’s make some Cottage Cheese Chips together!
These delightful little bites are unbelievably easy to whip up and adaptable to suit your taste buds. With just a few kitchen staples, your air fryer or oven, and a sprinkle of creativity, you’ll be on your way to a new snack sensation. Not only are they packed with protein, but they’re also gluten-free, and you can customize them to your heart’s content. Let’s get our snack game strong and dig into the world of Cottage Cheese Chips!
Personal Story
The first time I stumbled upon the idea of making chips from cottage cheese was during a late-night cooking session in my tiny apartment kitchen. I was watching one of those cooking shows where the chef takes something ordinary and turns it into something magical. As I snacked on some overly processed chips, feeling a hint of remorse, an idea struck me. Why not try making something just as crunchy but far more nutritious?
With my trusty tub of cottage cheese and an array of seasonings, I started experimenting. The sound of the oven timer buzzing was the moment of truth. As I pulled out the tray, the enticing aroma filled my kitchen, transporting me back to my childhood days filled with laughter and family gatherings. Taking that first bite was transformative—I felt as if I had unlocked a treasure buried within the pantry. The crunch along with the creamy cheese flavor was everything I didn’t know I needed. The best part? I could indulge guilt-free! And that’s how my love affair with Cottage Cheese Chips blossomed, turning late-night cravings into healthy delights.
Ingredients
Here’s what you’ll need to whip up your Cottage Cheese Chips. Trust me—these ingredients are simple, and you probably have most of them in your kitchen already!
-
1 cup (256g) whole milk small curd cottage cheese (4% milkfat, high protein)
This is the star of the show! Whole milk cottage cheese is creamy, rich, and packed with protein—perfect for creating a satisfying snack. If you’re going for a lower-calorie version, you can use low-fat cottage cheese, but keep in mind that the texture might be slightly less creamy. -
Seasonings of your choice (optional)
This is where you can get creative! Whether you crave savory or spicy, the choice is yours. Some favorites include garlic powder, onion powder, smoked paprika, or Italian herb blend. For a spicy kick, add a pinch of cayenne or chili powder. Don’t be afraid to experiment! -
Parmesan cheese (optional)
This adds an extra layer of flavor. Parmesan lends a nice umami character and can enhance that cheesy goodness. If you’re looking for dairy-free options, nutritional yeast can provide a similar cheesy flavor without any dairy.
Step-by-Step Instructions
Ready to get cooking? Let’s turn that cottage cheese into crispy bites of heaven!
-
Preheat Your Oven or Air Fryer
If you’re using the oven, preheat it to 400°F (200°C). If you have an air fryer, set it to 350°F (175°C). Preheating is crucial for achieving that perfect crispiness, so don’t skip this step! -
Prepare the Cottage Cheese
In a bowl, add 1 cup of cottage cheese. If you prefer a smoother texture, you can blend it briefly in a food processor until it reaches your desired consistency. For chunky chips, you can go for the traditional texture. -
Add Seasonings
This is the fun part! Sprinkle your chosen seasonings over the cottage cheese. If you want to add Parmesan, mix it in now. I typically recommend 1 tablespoon of Parmesan for a nice kick! Stir everything well to ensure even flavor distribution. -
Scoop and Shape
Using a spoon or a small ice cream scoop, drop spoonfuls of the mixture onto a lined baking sheet (if using the oven) or the air fryer basket. Aim for small rounds—consider 2-3 inches in diameter. Leave enough space between the chips so they can crisp up nicely. -
Bake or Air Fry
- Oven: Bake for about 15-20 minutes. Keep an eye on them; you want them golden brown and crispy. You may need to flip them halfway through for even cooking.
- Air Fryer: Crisp them up for about 10-12 minutes, checking halfway through to ensure they don’t burn.
-
Cool and Enjoy
Once they’re out of the oven or air fryer, let those little beauties cool for a few minutes. They’ll continue crisping up as they cool. Serve them warm or store them in an airtight container for snacking later.
Serving Suggestions
Now that you have a batch of crispy Cottage Cheese Chips ready to go, here are some fun ways to serve them up:
-
Dip ‘n’ Munch: Pair your chips with some homemade guacamole, salsa, or a zesty Greek yogurt dip. The contrasting flavors and textures will elevate your snacking experience.
-
Party Platter Wow: For gatherings, create a beautiful platter featuring your Cottage Cheese Chips alongside sliced veggies, olives, and a selection of your favorite dips. Friends will be impressed by your culinary creation.
-
Crunchy Salad Toppers: Crumble the chips over a fresh salad for an added crunch factor. They’ll provide that protein boost while making your salad feel like a filling meal.
Recipe Variations
Feeling adventurous? Here are some creative twists to make your Cottage Cheese Chips even more exciting:
-
Cheesy Ranch Flavor: Mix in ranch seasoning and extra cheddar cheese for a zesty ranch chip that’s perfect for parties!
-
Sweet Cinnamon Delight: Add a sprinkle of cinnamon and a few drops of vanilla extract for a sweet version of Cottage Cheese Chips. Perfect for dessert!
-
Spicy Sriracha Twist: Mix in Sriracha or your favorite hot sauce for a fiery kick. These chips pair fabulously with a cooling dip.
-
Italian Herb Infusion: Sprinkle Italian herbs like oregano, basil, and thyme into the cottage cheese for a Mediterranean flair. Served alongside bruschetta, they make a fantastic appetizer.
-
Sweet Potato Spice: If you want to incorporate some veggies, mix mashed, roasted sweet potato into the cottage cheese before dolloping them onto the baking sheet for a sweeter, nutrient-dense chip.
Chef’s Notes
I’ve been experimenting with these Cottage Cheese Chips for quite some time now, and they never cease to amaze me. One day, while hosting a movie night, I decided to try a version with a sprinkle of taco seasoning. They disappeared faster than popcorn! Ever since, I’ve had friends and family clamoring for their “cottage chip fix.”
Another funny kitchen story came from a mishap involving too much garlic powder. Picture this: my friend bit into a chip only to have her eyes widen with delight (or perhaps horror). Let’s just say we all enjoyed the extra kick that night, even if we all had to keep mints handy!
FAQs and Troubleshooting
-
Why aren’t my chips crisping up?
The key here is moisture; if you’re using cottage cheese that’s too watery, they may not crisp. Ensure you’re using a thick variety and consider draining excess liquid before mixing in your spices. -
Can I make these ahead of time?
Absolutely! Just store them in an airtight container, and they’ll stay crunchy for a few days. You can even re-crisp them in the air fryer for a few minutes if needed. -
What can I pair with my cottage chips?
The world is your oyster! Dips like hummus, tzatziki, or even guacamole work beautifully. You can also enjoy them with some fresh veggies for a wholesome platter. -
Can I freeze the cottage cheese chips?
I recommend enjoying them fresh for the best texture; however, you can freeze the uncooked dollops of mixture on a baking sheet, then transfer them to a bag once frozen. Bake straight from the freezer, just add extra time to cook.
Nutritional Info
Cottage Cheese Chips are not only delicious but also packed with nutrition! Here’s a rough breakdown of the nutritional benefits per serving (if following the basic recipe without additional toppings):
- Calories: Approximately 150
- Protein: Around 15g
- Carbohydrates: 5g
- Fat: 6g (depending on the fat percentage of cottage cheese)
- Fiber: Negligible
Keep in mind that adding seasonings, cheese, or dips can alter these values slightly, but the protein punch will still be a fantastic addition to your snack list!
Final Thoughts
So, there you have it—a high-protein, addictive snack that’s incredibly easy to make and super forgiving for those kitchen novices among us. With Cottage Cheese Chips, you get to blend quality ingredients, creativity, and, most importantly, a ton of fun!
So whether you’re plopping down for a binge session on your favorite show or hosting a lively get-together, these chips will shine as the perfect companion. Remember, cooking should never feel like a chore; it’s an adventure waiting to unfold. As you personalize your chips with flavors and seasonings, you’ll discover your own signature twist!
I hope you enjoy making and munching on these Cottage Cheese Chips as much as I do. Let’s embrace the joy of snacking together, one crisp bite at a time! Happy snacking!
Print
Cottage Cheese Chips
- Total Time: 25 minutes
- Yield: 4 servings 1x
- Diet: Gluten-Free
Description
A high-protein, crispy snack made from cottage cheese, perfect for guilt-free munching.
Ingredients
- 1 cup (256g) whole milk small curd cottage cheese (4% milkfat, high protein)
- Seasonings of your choice (optional)
- 1 tablespoon Parmesan cheese (optional)
Instructions
- Preheat your oven or air fryer to 400°F (200°C) or 350°F (175°C) respectively.
- Prepare the cottage cheese in a bowl. Blend for a smoother texture if desired.
- Add the chosen seasonings and Parmesan, mixing well for even flavor distribution.
- Scoop spoonfuls onto a lined baking sheet or air fryer basket, shaping into small rounds.
- Bake for 15-20 minutes in the oven or 10-12 minutes in the air fryer until golden brown.
- Cool for a few minutes before serving or storing in an airtight container.
Notes
Use thick cottage cheese for best results. Experiment with different seasonings for variety.
- Prep Time: 10 minutes
- Cook Time: 15 minutes
- Category: Snack
- Method: Baking
- Cuisine: American
Nutrition
- Serving Size: 1 serving
- Calories: 150
- Sugar: 2g
- Sodium: 200mg
- Fat: 6g
- Saturated Fat: 2g
- Unsaturated Fat: 3g
- Trans Fat: 0g
- Carbohydrates: 5g
- Fiber: 0g
- Protein: 15g
- Cholesterol: 30mg
Keywords: cottage cheese chips, high-protein snack, healthy snacks, gluten-free chips, easy recipes

Soft Cottage Cheese Oatmeal Cookies Pack 4g Protein Each
Soft Cottage Cheese Oatmeal Cookies: A Protein-Packed Delight
Hey there, fellow food lovers! It’s Beau Collier here, and today we’re whipping up something special that’s as scrumptious as it is nutritious—Soft Cottage Cheese Oatmeal Cookies. If you’re like me, you’re always on the lookout for tasty snacks that don’t just hit the sweet spot but pack a punch in the protein department too. That’s right; each cookie has 4 grams of protein, making these little delights a guilt-free treat that’ll keep you powered up, whether you’re tackling errands, gym sessions, or those Netflix marathons.
These cookies are perfect for any moment of the day, from breakfast on the go to a post-workout snack, or even a sweet addition to your afternoon tea. Plus, they come together in a flash, allowing you to spend less time in the kitchen and more time enjoying the things you love. With cozy ingredients like oats and almond flour, and the creamy goodness of cottage cheese, you’ll see how this recipe emerged from the melting pot of my culinary journey.
So, gather your ingredients, put on your favorite apron (or maybe grab that mismatched t-shirt you love but your friends keep teasing you about), and let’s dive into these delightful cookies that weave health and happiness into every bite!
Personal Story
You know, every recipe I share comes with a little piece of my story, and this one is no exception. Back when I was in college, I was on a quest for something healthy yet yummy—something to satisfy the sweet tooth without derailing my goals of eating better. I stumbled upon the idea of baking with cottage cheese while flipping through a magazine during a late-night study session.
At first, it sounded a little odd: cookies made with cheese? But curiosity got the best of me. I gathered my friends one evening, and we had the ultimate kitchen experiment. The laughter, the shared excitement, and the sweet aroma wafting through the air made it one of those perfect nights that stick with you. When we finally took our first bite, it was pure bliss! We couldn’t believe how soft and chewy they were, and they didn’t taste remotely like cheese! Ever since that night, these cookies have been a staple in my kitchen, reminding me of how food can bring people together.
Ingredients
Here’s what you’ll need for these Soft Cottage Cheese Oatmeal Cookies:
-
1 cup cottage cheese
A fantastic source of protein, cottage cheese will give your cookies their tenderness and a dreamy, soft texture. If you’re lactose-sensitive, you can try silken tofu as a swap—just make sure to blend it until smooth! -
1 cup rolled oats
Go for old-fashioned oats for that hearty, chewy texture. If you’re gluten-free, look for certified gluten-free oats, which are hearty and equally delicious! -
1/2 cup honey
Honey adds natural sweetness and moisture. Agave syrup or maple syrup can serve as great substitutes if you prefer vegan options! -
1/2 cup almond flour
This flour keeps the cookies light and nutty. If you don’t have almond flour, finely ground oats or whole wheat flour can also work well, though they’ll slightly change the flavor. -
1 teaspoon vanilla extract
A splash of vanilla elevates the flavor, making the cookies aroma irresistible! Feel free to experiment with almond or hazelnut extracts for a unique twist. -
1/2 teaspoon baking powder
This helps the cookies rise—giving them that tender chewiness we crave. Ensure your baking powder is fresh for the best results! -
1/2 teaspoon cinnamon
Cinnamon warms up the flavor profile and pairs beautifully with the oats. You can swap this for nutmeg or pumpkin spice during fall for a cozy twist! -
1/4 cup chocolate chips
Chocolate chips are the icing on the cake (or in this case, the cookie)! Use dark chocolate chips for a richer flavor or toss in dried fruit like cranberries for a chewy touch. -
1/4 cup chopped nuts
Whether you go for walnuts, pecans, or almonds, nuts add that fabulous crunch. You can leave them out for a nut-free version or swap them with seeds for added texture!
Step-by-Step Instructions
Now, let’s get down to the fun part—baking these delightful cookies! Here’s how to do it:
-
Preheat the Oven (350°F/175°C)
It’s essential to preheat your oven so the cookies bake evenly. Nothing worse than waiting around for oven temperature—just set it and forget it while you prep! -
Combine the Wet Ingredients
In a large mixing bowl, whisk together the cottage cheese, honey, and vanilla extract until smooth and creamy. If you’ve got a mixer, feel free to use it for an ultra-smooth mixture (like whipped cream!). Chef tip: If you’re battling with the cottage cheese being chunky, give it a quick blend in a food processor before adding the other liquids. -
Mix in the Dry Ingredients
In another bowl, mix the rolled oats, almond flour, baking powder, and cinnamon together. Gradually add this dry mixture to the wet ingredients, stirring gently until combined. This is a good time to taste and see if you want to add more cinnamon or perhaps a pinch of salt! -
Fold in the Goodies
Gently fold in the chocolate chips and nuts. This step is all about keeping the dough fluffy! Chef hack: Reserve a few chocolate chips to sprinkle on top before baking—we eat with our eyes first! -
Scoop the Dough Onto a Baking Sheet
Line a baking sheet with parchment paper, and using a cookie scoop or tablespoon, drop spoonfuls of dough onto the sheet about 2 inches apart. Pro tip: Wet your hands slightly if the dough is sticky to help shape it into perfect rounds! -
Bake Those Cookies!
Slide the cookie sheet into your preheated oven and bake for about 12-15 minutes or until the edges are golden brown and the centers are set. The cookies will continue to firm up as they cool, so don’t overbake! -
Cool and Enjoy
Once they’re out of the oven, let them cool on the baking sheet for 5 minutes before transferring them to a wire rack to cool completely. If you can resist, let them rest a little longer so the flavors can meld together beautifully!
Serving Suggestions
These Soft Cottage Cheese Oatmeal Cookies are so versatile! You can serve them warm with a glass of cold milk, or if you fancy something a little more indulgent, sandwich a scoop of ice cream between two cookies for a delicious twist on a classic dessert!
For breakfast, a couple of cookies alongside fresh fruit or Greek yogurt make for a power-packed start to your day. You can even crumble them over oatmeal or a smoothie bowl for added texture and sweetness.
Presentation matters too! Stack them in a mason jar for a cute kitchen display, or wrap them individually in parchment paper and tie them with twine for a lovely homemade gift!
Recipe Variations
Got a playful spirit? Here are some fun variations to consider:
-
Nut-Free Option: Use sunflower seed butter instead of nuts for added creaminess and a nut-free treat.
-
Add Some Zing: Incorporate a tablespoon of lemon or orange zest for a fruity twist that brightens the flavor.
-
Use Different Flour: Swap the almond flour with coconut flour for a tropical vibe! Just remember to adjust the liquid slightly as coconut flour absorbs more moisture.
-
Dried Fruit Delight: Add in a 1/4 cup of raisins or chopped dried apricots for chewy bursts of sweetness.
-
Spicy Kick: Introduce a pinch of cayenne pepper or ginger for a spicy cookie that surprises the palate. Trust me; you’ll be amazed!
Chef’s Notes
Let’s take a minute to talk about how this recipe has evolved over time. When I first made these cookies in college, I had no idea how divine cottage cheese could be in baking! It was more of a whim than anything. Through experimentation, I played with flavors and textures, leading me to wild variations like adding peanut butter and changing up the sweeteners.
I’ve even made them breakfast-style, throwing in some mashed bananas and swapping honey for maple syrup. They were a hit with my friends, and I will never forget the laughter and joy that filled my small kitchen.
Nothing brings people together quite like good food—and these cookies are a testament to that!
FAQs and Troubleshooting
-
Q: Why are my cookies too hard?
- A: Make sure not to overbake them! Every oven is different, so keep an eye on those edges—golden means they’re done but still soft in the center.
-
Q: Can I freeze these cookies?
- A: Absolutely! These cookies freeze beautifully. Just let them cool completely, then place them in an airtight container or freezer bag. They’ll keep for up to three months!
-
Q: What if my dough is too wet?
- A: If the dough feels too sticky, add a little more rolled oats or almond flour until you get the right consistency. Remember, you want it to be scoopable!
-
Q: Can I use Greek yogurt instead of cottage cheese?
- A: Sure thing! Greek yogurt gives a similar texture and will still provide the protein kick you’re looking for!
Nutritional Info
Each Soft Cottage Cheese Oatmeal Cookie packs a punch with 4 grams of protein! Here’s a rough breakdown of other nutritional stats (based on the recipe possible yields):
- Calories: Approximately 120 per cookie
- Carbohydrates: 15g
- Fat: 4g
- Protein: 4g
- Fiber: 2g
These cookies are not only a great post-workout fuel but can also serve as a healthier option for dessert after dinner!
Final Thoughts
Baking these Soft Cottage Cheese Oatmeal Cookies brings back so many fond memories of laughter, love, and the warmth of a bustling kitchen filled with friends. They remind me just how powerful food can be in connecting us and forming lasting bonds. As you whip up a batch, I hope they evoke that same sense of joy and nostalgia for you.
So, grab your ingredients, put on your cooking playlist, and let the fun begin! If you do give these cookies a try, I’d love to hear about it! Share your experiences, twist on flavors, or even the kitchen mishaps along the way. Remember, cooking is as much about the journey as it is about the end result—so let’s keep it flavorful and fun at Feastical!
Happy baking, friends! 🍪✨
Print
Soft Cottage Cheese Oatmeal Cookies
- Total Time: 25 minutes
- Yield: 12 cookies 1x
- Diet: Vegetarian
Description
Delicious and nutritious Soft Cottage Cheese Oatmeal Cookies that are perfect for any time of the day, packed with protein and flavor.
Ingredients
- 1 cup cottage cheese
- 1 cup rolled oats
- 1/2 cup honey
- 1/2 cup almond flour
- 1 teaspoon vanilla extract
- 1/2 teaspoon baking powder
- 1/2 teaspoon cinnamon
- 1/4 cup chocolate chips
- 1/4 cup chopped nuts
Instructions
- Preheat the oven to 350°F (175°C).
- Combine the cottage cheese, honey, and vanilla extract in a large mixing bowl.
- Mix the rolled oats, almond flour, baking powder, and cinnamon in another bowl.
- Add the dry mixture to the wet ingredients and stir gently until combined.
- Fold in the chocolate chips and nuts.
- Scoop the dough onto a baking sheet lined with parchment paper.
- Bake for 12-15 minutes or until the edges are golden brown.
- Cool on the baking sheet for 5 minutes before transferring to a wire rack.
Notes
These cookies freeze beautifully and can be served warm with milk or crumbled over yogurt for breakfast.
- Prep Time: 10 minutes
- Cook Time: 15 minutes
- Category: Dessert
- Method: Baking
- Cuisine: American
Nutrition
- Serving Size: 1 cookie
- Calories: 120
- Sugar: 10g
- Sodium: 50mg
- Fat: 4g
- Saturated Fat: 1g
- Unsaturated Fat: 3g
- Trans Fat: 0g
- Carbohydrates: 15g
- Fiber: 2g
- Protein: 4g
- Cholesterol: 10mg
Keywords: cookies, healthy snacks, protein cookies

Baked Blueberry Cottage Cheese Bowls
Baked Blueberry Cottage Cheese Bowls: A Comfort Food You Never Knew You Needed
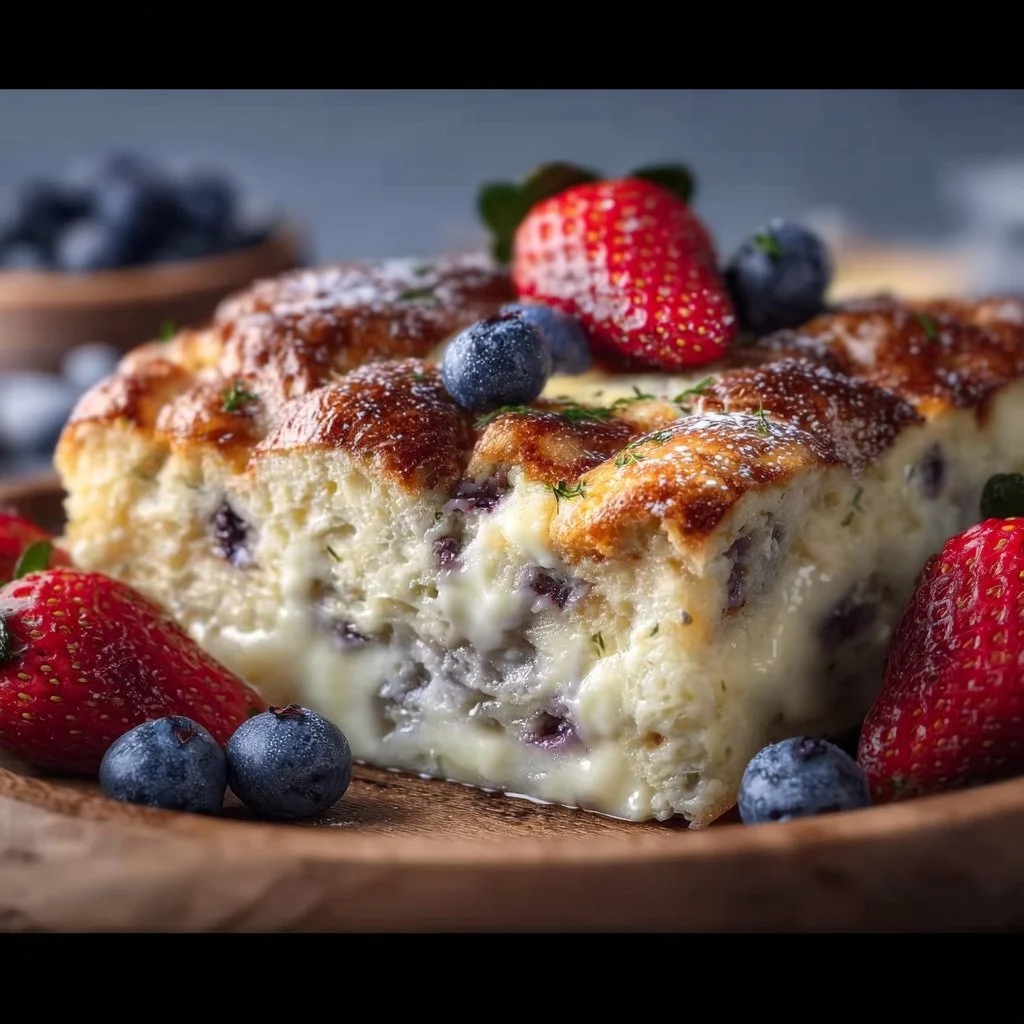
Hello, fellow food lovers! I’m Beau Collier, and I’m so thrilled you’re here at Feastical. Today, we’re diving into a dish that’s as wholesome and delicious as a hug from Grandma: Baked Blueberry Cottage Cheese Bowls. If you thought cottage cheese was just for diet enthusiasts and gym-goers, think again! This delightful dish bursts with flavor, is ridiculously easy to make, and is packed with nutrients. So, whether you’re breakfasting solo or hosting brunch for friends, get ready to impress and indulge. Let’s get started!
A Nostalgic Bite of Brunch Bliss
Growing up, my weekends were filled with breakfast feasts. My family had a favorite little café down the street that served the fluffiest pancakes, crispy bacon, and an unforgettable blueberry bake. I remember sitting in a sun-drenched booth—fork in one hand, steaming cup of coffee in the other—engulfed in the sweet and tangy aroma wafting from the kitchen. Those moments were pure magic, the smells and flavors mingling together to create a sense of home.
Fast forward to today, I decided to recreate the essence of that blueberry bake, but with a twist: cottage cheese! This ingredient not only adds a protein boost but also creates a creamy texture that is simply divine. Baked Blueberry Cottage Cheese Bowls are a nostalgic nod to my childhood, while also providing a nourishing meal that fuels your day. Let’s roll up our sleeves and get cooking!
Ingredients
Here’s what you will need to whip up these scrumptious bowls:
-
1 cup cottage cheese
- The star of the show! Rich in protein and calcium, cottage cheese gives the dish a creamy texture. If you prefer, try ricotta or Greek yogurt for a different vibe.
-
2 cups blueberries (fresh or frozen)
- Sweet, juicy, and bursting with antioxidants! Frozen blueberries work perfectly if you’re in a pinch. Just remember, they may release more juice, leading to a slightly different texture.
-
1/2 cup oats
- Oats add a wonderful heartiness to the dish. For a gluten-free option, use certified gluten-free oats, or swap for almond flour if you’re feeling wild.
-
2 eggs
- These are our binding agents. They add fluffiness and structure. If you’re vegan or egg-free, try flax eggs (1 tablespoon of ground flax mixed with 2.5 tablespoons of water equals one egg).
-
1/4 cup honey or maple syrup
- A touch of natural sweetness! You can adjust this to your liking. If you prefer low-sugar options, mashed bananas or a dash of stevia works too.
-
1 teaspoon vanilla extract
- Adds depth and enhances the blueberry flavor. Always opt for pure vanilla extract over artificial for a richer taste.
-
1/2 teaspoon baking powder
- This magical powder helps the bowls rise and become fluffy. Make sure it’s fresh for best results!
-
Pinch of salt
- Enhances all the flavors. Don’t skip this step!
-
Toppings (e.g., nuts, seeds, or additional berries)
- Get creative! Chopped nuts, granola, or a sprinkle of cinnamon can take your bowl to the next level.
Step-by-Step Instructions
Alright, chef friends, let’s get cooking! Here’s how to elevate your kitchen to a blueberry paradise in just a few simple steps:
-
Preheat Your Oven:
- Set your oven to 350°F (175°C). Let it warm up while you gather your ingredients. An appropriately heated oven ensures even baking, giving your bowls the perfect texture!
-
Mix the Base:
- In a large mixing bowl, combine the cottage cheese, oats, and eggs. Use a fork or whisk to blend these ingredients until smooth and creamy. If you love texture, feel free to keep some cottage cheese lumps—that way, you’ll get a delightful combination of creaminess and oat chew in every bite.
-
Add the Sweetness:
- Pour in the honey or maple syrup and vanilla extract. Mix well. The sweet aroma will already start filling your kitchen, and trust me, it’s just the beginning! At this stage, taste the batter! Adjust the sweetness if you’d like a little more pizzazz.
-
Incorporate Blueberries:
- Gently fold in the blueberries. If using frozen, be careful not to overmix, as they can break apart and turn your batter blue (unless you’re into that!). Embrace the colors of fresh blueberries.
-
Add Dry Ingredients:
- Sprinkle in the baking powder and a pinch of salt. Fold until just combined. Elevate your mixing game by folding rather than stirring—this keeps everything light and airy!
-
Prep Your Baking Dish:
- Lightly grease a baking dish or individual ramekins with non-stick spray or a drizzle of olive oil. You want these bowls to come out with ease—your hard work deserves it!
-
Pour and Bake:
- Pour your mixture into the greased dish. Spread evenly and pop it into the preheated oven. Bake for 25–30 minutes, or until the top is golden brown and a toothpick inserted comes out clean. You’ll want to make sure the center is firm—no one likes gooey leftovers!
-
Let It Cool:
- Once baked, let your bowls cool for a few minutes before serving. I know it’s hard to resist, but letting them cool slightly helps solidify the structure.
-
Top It Off:
- Serve warm topped with additional blueberries, nuts, or a drizzle of honey. Garnish with a sprig of mint if you want to impress your guests! Presentation matters, after all.
Serving Suggestions
When it comes to serving, I like to channel my inner diner vibe. Think cozy and inviting! Here are a few ideas to consider:
-
Individual Bowls: If you baked in ramekins, serve each bowl with a sprinkle of fresh blueberries and a dollop of yogurt on top.
-
Large Dish Platter: For a family-style serving, bake in a larger dish and cut into squares. Serve it straight from the oven on a colorful plate, accompanied by a variety of toppings in small bowls.
-
Breakfast Bar: Create a breakfast bar with your baked bowls being the star! Add toppings like chopped nuts, coconut flakes, or personalized sweeteners to let guests customize their creations.
Whatever route you choose, don’t forget to share your creations with friends and loved ones. Nothing feels better than a shared meal—go ahead and make someone’s day!
Recipe Variations
Let’s be real; cooking is all about creativity! Here are some fun twists on the original recipe:
-
Berry Medley: Swap blueberries for a mix of raspberries, strawberries, and blackberries for a vibrant medley of flavors.
-
Nutty Delight: Stir in some chopped nuts into the batter, like walnuts or pecans, for an added crunch.
-
Chocolate Love: Add a handful of dark or white chocolate chips for a dessert-like twist. Dessert for breakfast? Yes, please!
-
Cocoa Bliss: Incorporate 1-2 tablespoons of cocoa powder into the batter for a chocolatey version—adjust the sweetener accordingly.
-
Spiced Up: Add a dash of cinnamon or a pinch of nutmeg for a warm, spiced flavor that’s perfect for chilly mornings.
Chef’s Notes
Over the years, I’ve modified this recipe time and again. The great thing about cooking is that it’s not just about following rules; it’s about expressing yourself! I’ve even gone through phases where I’ve made this bake with different cheeses—ricotta or even a vegan cream cheese spread. And let me tell you, experimenting in the kitchen can lead to unexpected delicious surprises! Don’t be afraid to switch things up based on what you have on hand or what you’re craving.
One time, I forgot to add sweetener and didn’t realize until the first bite—oh boy, was that an adventure! I turned it into a savory option and topped it with a sprinkle of cheese and herbs. Cooking is about learning, laughing, and of course… eating!
FAQs and Troubleshooting
-
Can I use a different fruit?
- Absolutely! Feel free to experiment with any berries or even try apples with a sprinkle of cinnamon.
-
Why is my dish soggy?
- This could be from using too many frozen fruits. If using frozen blueberries, make sure to drain excess moisture before adding them to the mix.
-
How do I store leftovers?
- Store any leftovers in an airtight container in the fridge for up to 3-4 days. You can reheat them in the microwave or enjoy them cold!
-
Can I make this ahead of time?
- Definitely! You can prepare the mixture the night before, store it in the fridge, and bake it fresh in the morning.
Nutritional Info
This Baked Blueberry Cottage Cheese Bowl isn’t just delicious—it’s also a powerhouse of nutrients! Each serving provides:
- Calories: Approximately 200-250, depending on the sweetener used and any toppings.
- Protein: About 15-20g, thanks to the cottage cheese and eggs.
- Healthy Fats: If you add nuts, you’re looking at healthy fats that keep you satisfied.
- Fiber: The oats and berries provide essential fiber, making this bowl a balanced meal that keeps you feeling full for longer.
With a vibrant mix of protein, fiber, and antioxidants, this dish fuels your day with goodness!
Final Thoughts
There you have it—a delicious recipe for Baked Blueberry Cottage Cheese Bowls that are simple, satisfying, and full of nostalgia! This dish not only honors those fond breakfast memories from my childhood but also adapts to the modern-day need for healthy, easy meals.
I hope you get as much joy from making and eating this dish as I do. Dig into a bowl or two, share them with friends and family, and watch everyone come together over a meal that feels like home. Thanks for joining me in the kitchen today, and remember, food is about love and community. Until next time, keep cooking, keep smiling, and most importantly—keep enjoying every bite! Happy dining!
Print
Baked Blueberry Cottage Cheese Bowls
- Total Time: 45 minutes
- Yield: 4 servings 1x
- Diet: Vegetarian
Description
A wholesome and delicious dish bursting with flavor, perfect for breakfast or brunch.
Ingredients
- 1 cup cottage cheese
- 2 cups blueberries (fresh or frozen)
- 1/2 cup oats
- 2 eggs
- 1/4 cup honey or maple syrup
- 1 teaspoon vanilla extract
- 1/2 teaspoon baking powder
- Pinch of salt
- Toppings (e.g., nuts, seeds, or additional berries)
Instructions
- Preheat your oven to 350°F (175°C).
- Mix the cottage cheese, oats, and eggs in a bowl until smooth.
- Add the honey or maple syrup and vanilla extract; mix well.
- Incorporate the blueberries gently.
- Add the baking powder and salt; fold until just combined.
- Prep a baking dish or ramekins with non-stick spray.
- Pour the mixture into the prepared dish and spread evenly.
- Bake for 25–30 minutes or until golden brown.
- Let cool for a few minutes before serving.
- Top with additional blueberries, nuts, or honey before serving.
Notes
Feel free to get creative with toppings and mix-ins like nuts or spices to suit your preference.
- Prep Time: 15 minutes
- Cook Time: 30 minutes
- Category: Breakfast
- Method: Baking
- Cuisine: American
Nutrition
- Serving Size: 1 serving
- Calories: 225
- Sugar: 10g
- Sodium: 150mg
- Fat: 5g
- Saturated Fat: 1.5g
- Unsaturated Fat: 3g
- Trans Fat: 0g
- Carbohydrates: 36g
- Fiber: 4g
- Protein: 15g
- Cholesterol: 70mg
Keywords: Baked Blueberry, Cottage Cheese, Healthy Breakfast, Brunch Recipe

Creative Ways To Eat Cottage Cheese
Creative Ways to Eat Cottage Cheese
Hey there, fellow food lovers! I’m Beau Collier, and today we’re diving into the wonderful world of cottage cheese—yes, that often-overlooked dairy delight! Once relegated to the shadows of salads and the depths of a lonely fridge, cottage cheese is bursting with potential and versatility. This creamy, protein-packed powerhouse is not just for dieters or athletes; it’s time to bring it into the spotlight with some delightful and creative ways to enjoy every spoonful.
Growing up, I remember my grandmother making this magical "cottage cheese salad." She would whip it up on a hot summer day, combining her favorite fruits, nuts, and a drizzle of honey. It was a fixture at every family gathering, and it felt like a celebration on a plate. But cottage cheese isn’t limited to just sweet indulgences; it’s a canvas inviting savory toppings and pairings that will surprise and delight your palate.
In this guide, we’ll explore everything from classic sweet combos to hearty savory dishes. We’ll walk through the different ingredients, cooking tips, and presentation ideas that will make your cottage cheese experience unforgettable. Whether you want a quick breakfast, a nutrient-rich lunch, or a snack that doesn’t skimp on flavor, I’ve got you covered!
So, grab your spoon and let’s liven up that tub of cottage cheese! Trust me; it’s about to become your new kitchen superstar.
Personal Story
I still vividly recall those sunlit afternoons in my grandmother’s garden, where strawberries and peaches thrived in vibrant abundance. With a joyful squeal, I would gather the ripest fruits, my fingers sticky with juice, and rush back into the kitchen. That’s where Grandma would stand by the counter, a bowl of creamy cottage cheese waiting impatiently beside her.
“Time to create our masterpiece!” she’d exclaim, her eyes dancing with delight. She’d hand me a spoon and let me go wild—tossing the fruits on top, drizzling honey like icing on a cake, and adding a sprinkle of cinnamon for good measure. Each bite was pure bliss, a creamy concoction of sweetness and nostalgia.
To this day, whenever I dig into a bowl of cottage cheese topped with fresh fruits, I’m taken back to those sun-drenched afternoons. It’s a tasty reminder of family, love, and the joy of cooking together.
Ingredients
Let’s gather the delightful ingredients that will transform your cottage cheese into a bowl of pure joy! Here’s what you’ll need:
-
Cottage Cheese:
- The star of the show! Choose full-fat for rich creaminess, low-fat for a lighter option, or non-fat if you’re watching calories. Cottage cheese is high in protein and calcium, making it a fantastic addition to your diet!
-
Fruits (e.g., berries, pineapple, peaches):
- Fresh or frozen fruits are perfect for adding sweetness and texture. You can substitute fresh fruits with dried options like raisins or date paste if you’re looking for a different kick!
-
Nuts (e.g., almonds, walnuts):
- Nuts add a satisfying crunch and healthy fats to your dish. Use mixed nuts or seeds for variety; sunflower seeds or pumpkin seeds work wonders too.
-
Honey or Maple Syrup:
- Sweeteners enhance the flavor profile. While honey is great for a floral sweetness, maple syrup adds a rich, earthy note. Try using agave nectar or stevia for sugar-free alternatives!
-
Cinnamon:
- A sprinkle of this aromatic spice will elevate any sweet dish. Don’t like cinnamon? Vanilla extract does the job too!
-
Granola:
- This adds an extra crunch and can be customized with your favorite flavors. Look for nut-free or gluten-free options if dietary restrictions are in play.
-
Vegetables (e.g., cucumber, tomatoes, bell peppers):
- For savory bites, add fresh veggies for flavor and crunch. You can swap them out for roasted veggies or even pickled versions depending on your mood.
-
Herbs (e.g., chives, parsley):
- Fresh herbs bring a burst of brightness to your savory mix. Basil or cilantro can create a refreshing twist!
-
Avocado:
- Creamy, nutritious, and oh-so-delicious, avocado works beautifully with cottage cheese. If you don’t have avocado, try using a dollop of guacamole instead!
-
Olive Oil:
- A drizzle of high-quality olive oil can enhance flavors and add richness. Flavored oils can add an exciting kick too; think chili-infused!
-
Crackers or Toast:
- Perfect for serving cottage cheese as a snack—crackers offer crunch, while toast delivers that warm, comforting base. Try whole grain or gluten-free crackers for added flavor and texture.
Ultimately, the beauty of cottage cheese lies in its versatility. Each ingredient adds its unique flair, creating an exquisite tapestry of taste!
Step-by-Step Instructions
Alright, let’s dive into creating your cottage cheese masterpiece! Here are your step-by-step instructions, complete with chef tips to ensure you nail this dish!
Sweet Cottage Cheese Bowl
-
Prepare your base:
- Start with 1 cup of cottage cheese in a bowl. You can use either regular or low-fat, depending on your preference. Chef tip: If you prefer a creamier texture, give it a quick mix with a spoon to fluff it up!
-
Add your fruits:
- Chop up your favorite fruits. I’m partial to a fruit medley of strawberries, blueberries, and ripe peaches! Add about ½ cup of fruit on top of the cottage cheese. Chef insight: Mix and match seasonal fruits for a refreshing twist!
-
Drizzle with sweetness:
- Next, add a tablespoon of honey or maple syrup over the top. Feel free to adjust this to your level of sweetness! Tip: Warm the honey slightly to make it easier to drizzle.
-
Sprinkle some spice:
- A dusting of cinnamon or a dash of vanilla extract will elevate your dish to gourmet status. Just a pinch will do! Chef hack: Use a shaker to evenly distribute your cinnamon.
-
Add the crunch:
- Toss in a handful of granola and a tablespoon of nuts. This is where you can really get creative! Tip: Toast the nuts for an extra crunchy experience!
-
Mix and enjoy:
- Dive in with your spoon, mixing everything together for that perfect harmony of flavor and texture.
Savory Cottage Cheese Bowl
-
Get your cottage cheese base ready:
- Just like with the sweet bowl, start with 1 cup of cottage cheese. Pro tip: A sprinkle of salt elevates the flavor immediately!
-
Chop up your veggies:
- Dice cucumbers, tomatoes, and bell peppers. Use about ½ to 1 cup in total based on your preference. Chef hint: Peppers add a nice crunch; consider roasting them for added depth!
-
Herb it up:
- Finely chop some fresh herbs—chives or parsley work wonders—and sprinkle them on top. Tip: If you can get your hands on some dill, that truly takes it to the next level!
-
Add your creaminess:
- Slice up half an avocado and place it on top. Insider tip: You can store leftover avocado with lemon juice to keep it from browning!
-
Drizzle with olive oil:
- A subtle drizzle of olive oil will enhance the flavors beautifully; about 1-2 teaspoons should do the trick. Chef hack: Infused oils can take this to new heights—try garlic or herb-infused!
-
Serve with crackers or toast:
- Pair your beautiful dish with whole-grain crackers or crusty toast for that satisfying crunch!
Mixing flavors is half the fun! Enjoy dining on your savory creation.
Serving Suggestions
Plating and presenting your cottage cheese doesn’t need to be complicated. For a sweet bowl, consider using a clear glass bowl to showcase those colorful fruit layers; perhaps garnish with a mint leaf or a sprinkle of powdered sugar for an eye-catching touch.
For your savory selection, serve it on a rustic wooden board with a basket of colorful crackers or sliced toasted baguette. This not only invites your guests in but allows them to build their own bites.
Don’t forget to take a moment to snap a picture—your creations deserve to shine on social media!
Recipe Variations
Here are a few creative twists to invigorate your cottage cheese adventures:
-
Tropical Paradise Delight:
- Swap in tropical fruits—try mangoes, bananas, and coconut flakes. A drizzle of coconut cream can turn your bowl into a mini-vacation!
-
Spicy Mexican-Inspired Bowl:
- Mix cottage cheese with diced jalapeños, cilantro, and a splash of lime. Serve it with tortilla chips for crunch!
-
Italian Twist:
- Add diced sun-dried tomatoes, basil, and a swirl of balsamic glaze for an Italian-inspired treat.
-
Breakfast Parfait:
- Layer cottage cheese with layers of oats, nuts, and fruit for a breakfast that’s both nutritious and visually appealing.
-
Protein-Packed Smoothie:
- Blend cottage cheese with your favorite fruits, greens, and a splash of milk for a creamy smoothie that fuels your metabolism!
Explore, experiment, and let your taste buds do the talking!
Chef’s Notes
Cottage cheese is an ingredient that’s near and dear to my heart. I’ve watched it evolve over the years—from that unassuming tub in the fridge to becoming a versatile star in every type of cuisine. Here’s a fun story: I once turned a cottage cheese bowl into a friendly competition with friends—who can create the most unique topping? The results were outstanding and some combinations left us laughing at just how delicious odd pairings can be!
Remember, this journey of food is all about creativity—there’s no right or wrong way to enjoy cottage cheese. Your palate is the ultimate guide!
FAQs and Troubleshooting
Q: Can I use flavored cottage cheese?
Absolutely! Flavored varieties can add an exciting twist. Just be mindful of the flavor combinations you choose!
Q: What if my cottage cheese is too thick?
If it’s too thick for your liking, simply mix in a splash of milk or yogurt to reach your desired consistency.
Q: How long does cottage cheese last in the fridge?
Generally, it’s best consumed within a week after opening. Always check the expiration date and trust your senses—if it smells off, toss it!
Q: Can cottage cheese be frozen?
You can freeze cottage cheese, but the texture may change after thawing. It’s best used in recipes like smoothies or baked dishes post-thawing.
Nutritional Info
Cottage cheese stands out as a nutritional powerhouse. A one-cup serving of low-fat cottage cheese typically packs about:
- Protein: 27 grams
- Calories: 206 calories
- Fat: 10 grams (full-fat varies)
- Carbohydrates: 6 grams
- Calcium: 14% of your daily value
Combine it with fruits or veggies, and you’ll compound those nutrients, creating a snack or meal that will fuel your day, whether at breakfast, lunch, or an afternoon pick-me-up!
Final Thoughts
So there you have it: creative ways to enjoy cottage cheese that will brighten your meals. It’s quick, nutritious, and endlessly adaptable—whether you’re in the mood for a sweet treat or a savory delight, this humble dairy ingredient has got your back.
So, channel that inner kitchen magician, get inspired, and dive into the wonderful world of cottage cheese. And as you create your culinary masterpieces, don’t forget to share the joy (and your plates!) with friends and family. Food is meant to be shared, and every bite tells a story. Happy cooking, my foodie friends; you’ve got this!
Let’s continue celebrating the joy of cooking and the beauty of delicious food together at Feastical. Now, it’s time to dig in!
Print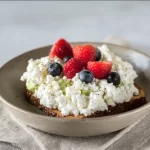
Creative Ways to Eat Cottage Cheese
- Total Time: 10 minutes
- Yield: 2 servings
- Diet: Vegetarian
Description
Discover delightful ways to enjoy cottage cheese, from sweet bowls loaded with fruits to savory dishes packed with veggies.
Ingredients
- Cottage Cheese
- Fruits (e.g., berries, pineapple, peaches)
- Nuts (e.g., almonds, walnuts)
- Honey or Maple Syrup
- Cinnamon
- Granola
- Vegetables (e.g., cucumber, tomatoes, bell peppers)
- Herbs (e.g., chives, parsley)
- Avocado
- Olive Oil
- Crackers or Toast
Instructions
- Prepare your base: Start with 1 cup of cottage cheese in a bowl.
- Add your fruits: Chop and add about ½ cup of seasonal fruits on top.
- Drizzle with sweetness: Add a tablespoon of honey or maple syrup over the top.
- Sprinkle some spice: Dust with cinnamon or a dash of vanilla extract.
- Add the crunch: Toss in granola and nuts.
- Mix and enjoy: Stir everything together for the perfect blend of flavors.
Notes
Cottage cheese can be enjoyed sweet or savory—experiment with different toppings to find your favorite combo!
- Prep Time: 10 minutes
- Cook Time: 0 minutes
- Category: Snack
- Method: No Cooking
- Cuisine: American
Nutrition
- Serving Size: 1 bowl
- Calories: 350
- Sugar: 15g
- Sodium: 300mg
- Fat: 10g
- Saturated Fat: 3g
- Unsaturated Fat: 5g
- Trans Fat: 0g
- Carbohydrates: 42g
- Fiber: 4g
- Protein: 20g
- Cholesterol: 15mg
Keywords: cottage cheese, healthy snacks, easy recipes
2-Ingredient Cottage Cheese Bread
The Bliss of 2-Ingredient Cottage Cheese Bread: A No-Fuss Culinary Delight
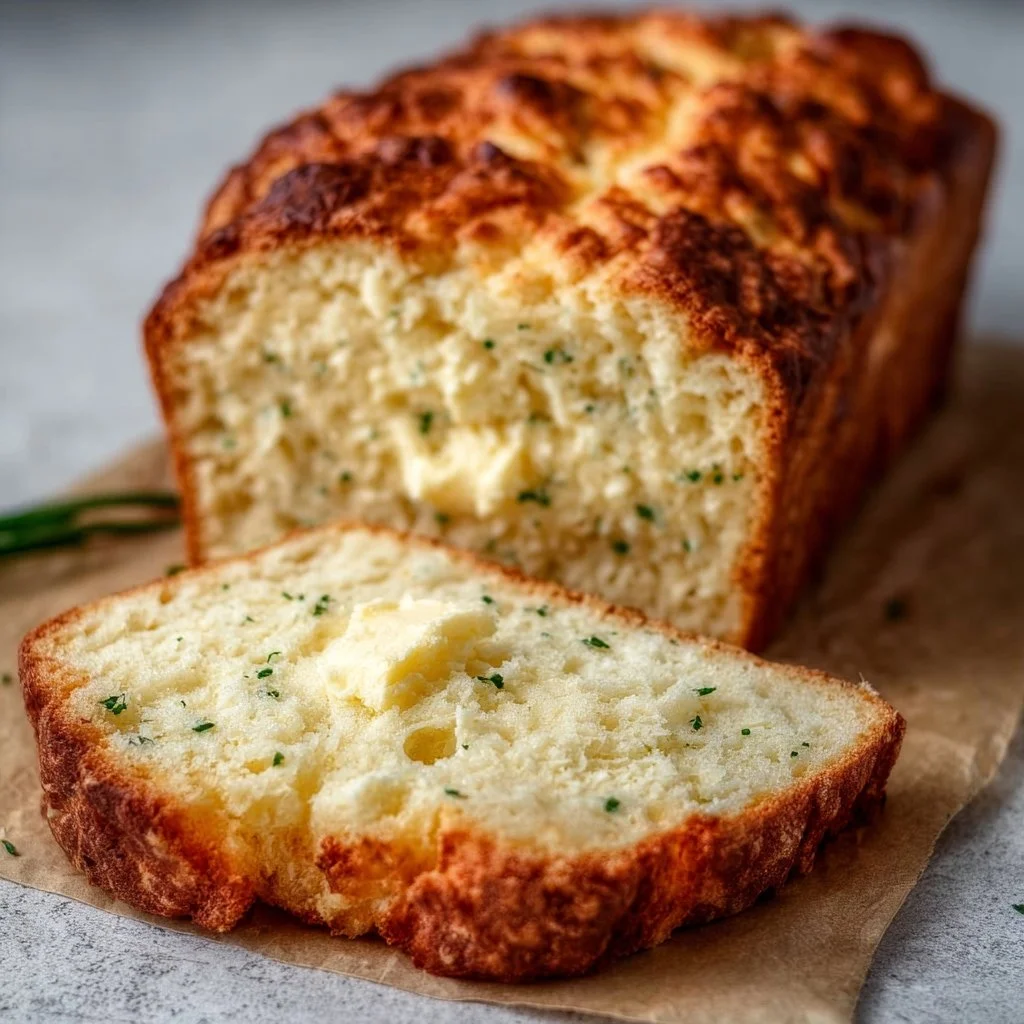
Hey there, fellow food lover! Today we’re diving into the light and fluffy world of 2-Ingredient Cottage Cheese Bread. If you’ve ever found yourself staring at a half-open jar of cottage cheese wondering what the scoop is (pun totally intended) on what to do with it, you’re in the right place! This recipe is not just easy; it’s a love letter to delicious simplicity. You see, sometimes the best things come in small packages, and this delightful bread is no exception.
Picture this: it’s a chilly Sunday morning, and the house is filled with the aroma of freshly baked bread. There’s nothing quite like sinking your teeth into a warm slice of that soft goodness, lightly toasted, topped with your favorite spread, and just the thought of it brings a smile. This cottage cheese bread isn’t just comfort food; it embodies all the warm hugs and joy that come from good cooking. Plus, it’s low-carb, gluten-free, and packed with protein—what’s not to love?
When I first stumbled upon this recipe, I was looking for a solution to use up an unusually large tub of cottage cheese (a little too much for my mac and cheese adventures!). As I often do, I wandered into the kitchen as if it were a kind of zen garden, trusting my instincts more than an elaborate method. Just mixing, baking, and a bit of tasting along the way—I came out with a creation that changed my breakfast routine forever. Not only is this bread incredibly versatile, but it also has that ‘whoa, did you actually make this?’ factor, making it perfect for impressing guests or enjoying all alone. So grab your apron; let’s get this baking party started!
Personal Story
Let me take you back to my childhood, where Sunday mornings meant family breakfasts that felt like a big affair. My mom, who was the queen of the kitchen, had a knack for turning the simplest ingredients into magical dishes. One of my favorites was her delightful, fluffy pancakes that were heavenly and never quite turned out the same twice—definitely a case of "every pancake tells a story"!
One morning, however, she had a little too much cottage cheese leftover from a lasagna she had whipped up earlier in the week. An inspired moment struck as she casually mixed it with flour and eggs, and just like that, cottage cheese pancakes were born. Talk about a game-changer; they were light, airy, and utterly delicious!
Fast forward to today, and that memory still warms my heart. I wanted to recreate that magic without needing a long list of groceries—or hours of prep time. It’s all about finding joy in the unexpected, right? That’s how I landed on this simple 2-Ingredient Cottage Cheese Bread recipe—an homage to those carefree mornings filled with laughs and love. Just like my mom’s cooking, it’s about letting goodness arise from simplicity, and trust me—you’ll want to share this recipe with everyone you know!
Ingredients
Before we roll up our sleeves and get baking, let me give you the lowdown on the star players in our 2-Ingredient Cottage Cheese Bread!
-
1 cup cottage cheese
The star ingredient! Packed with protein, creamy cottage cheese gives this bread a moist texture and lovely flavor. Did you know you can substitute it with Greek yogurt or ricotta if you’re looking for a variation? -
1 cup almond flour
Gluten-free and rich in healthy fats, almond flour is a fantastic option that adds a slight nuttiness to the bread. If you don’t have it, you could use regular flour or oat flour, but keep in mind it may change the texture a bit. -
2 eggs
These little beauties are essential for binding the ingredients together and creating the fluffy height we strive for in our bread. If you need a vegan substitute, flaxseed meal mixed with water works when you let it sit for a bit (1 tablespoon flaxseed meal + 3 tablespoons water = 1 egg). -
1 tsp baking powder
This is what gives our bread that delightful lift! Baking powder is a leavening agent that works wonders when it comes to lightening up baked goods. Make sure it’s fresh for the best results! -
Salt to taste
Don’t forget this happy little seasoning to bring all the flavors together. A pinch enhances the sweetness and balances the overall taste!
Step-by-Step Instructions
Okay, time to shine in the kitchen! Follow these simple steps, and you’ll have a delightful loaf of cottage cheese bread ready in no time. Let’s go!
Step 1: Preheat Your Oven
First things first: preheat your oven to 350°F (175°C). This allows your oven to be perfectly heated when you’re ready to pop in your bread, ensuring it bakes evenly and gets that lovely golden crust. While it heats up, take a moment to gather your ingredients and utensils.
Step 2: Combine the Cottage Cheese and Eggs
In a mixing bowl, toss in 1 cup of cottage cheese and 2 eggs. Use a fork or a whisk to mix them together until they’re thoroughly combined. Tip: If you want a completely smooth texture, you can blend the cottage cheese in a blender for a second before mixing it with the eggs!
Step 3: Add the Almond Flour and Baking Powder
Once your cottage cheese and eggs are mixed well, it’s time to add in 1 cup of almond flour and 1 tsp of baking powder. Mix it all together until you have a batter-like consistency. Little chef hack: A spatula works wonders here for folding and mixing without overdoing it.
Step 4: Season with Salt
This is the moment to sprinkle in a little salt! Taste the batter to see if you want a pinch more. Tip: Remember, salt enhances flavors—less is sometimes more!
Step 5: Grease the Loaf Pan
Grab a standard-sized loaf pan (about 9×5 inches) and lightly grease it with a splash of olive oil, butter, or coconut oil. This helps the bread slide out effortlessly once it’s baked. Chef’s Insight: Lining the pan with parchment paper can also make your life a whole lot easier during the extraction phase!
Step 6: Pour and Bake
Pour the mixture into the greased loaf pan, and smooth it out with your spatula. Pop it in the preheated oven and set your timer for 30-35 minutes. Chef tip: You’ll know it’s ready when the top is golden and springy to the touch!
Step 7: Cool and Enjoy
Once it’s done, take the bread out of the oven and let it cool in the pan for about 10 minutes. Then gently turn it out onto a wire rack to cool completely. Slice and serve it warm or let it sit for a bit to make lovely toast. Your kitchen will be filled with all the cozy vibes at this point!
Serving Suggestions
Here’s where you can get your creative juices flowing! This cottage cheese bread is wonderfully versatile and can be enjoyed in various ways.
-
Toast it Up: Slice a piece, toast it to crispy perfection, and spread a layer of creamy avocado or almond butter on top. You can even sprinkle some chili flakes for a tiny kick!
-
Make Sandwiches: Use this bread as a sturdy base for sandwiches. Add turkey, fresh veggies, and a smear of pesto for a delicious lunch option that packs a nutritional punch!
-
Breakfast Delight: Serve it with a drizzle of honey and fresh berries for a wholesome breakfast. It’s like a brunch dream!
-
Soup Companion: Pair it with a hearty bowl of soup for a comforting dinner. This bread makes a lovely sidekick to anything from tomato bisque to a chunky vegetable chowder!
Recipe Variations
You know I love to mix things up! Here are a few creative twists you can try with your 2-Ingredient Cottage Cheese Bread:
-
Herbed Variation: Add fresh herbs like chopped rosemary or basil right into the batter for a savory twist that will tantalize your taste buds.
-
Cheesy Goodness: Fold in ½ cup of shredded cheese—cheddar, mozzarella, or even feta can add an incredible depth of flavor to your bread!
-
Sweeten the Deal: When you’re in the mood for something sweeter, stir in a tablespoon of honey or agave syrup. You can even throw in some cinnamon for that comforting aroma!
-
Nutty Crunch: Add a handful of walnuts or pecans to the batter for delightful texture and flavor. It also amps up the healthy fat content!
-
Veggie Boost: Grate in some zucchini or carrot to sneak in extra veggies. This also adds moisture and nutrition!
Chef’s Notes
Ah, the journey to discover the perfect bread! This recipe has evolved beautifully over the years. When I first tried it, I thought, "Will this even work?"—and oh, what a pleasant surprise it was! As I played with ingredients and tweaks, I found that keeping it simple is truly the key to success.
Speaking of kitchen anecdotes, I once mistakenly knocked over an entire container of almond flour while filming a quick tutorial. Let’s just say my kitchen turned into a "snowy" scene! Amidst all the giggles and clean-up, it felt like the universe was reminding me that food is all about joy and laughter—never a chore.
Just like any recipe with a simple foundation, this bread is open to evolution. How you enjoy it is limited only by your imagination!
FAQs and Troubleshooting
1. My bread turned out dense. What went wrong?
A common culprit for dense bread is overmixing! Be sure to mix just until combined, and check that your baking powder is fresh for maximum lift.
2. Can I freeze this bread?
Absolutely! Once completely cooled, slice the bread, wrap it tightly, and store it in the freezer. It’ll last for about a month. Just pop it in the toaster straight from the freezer when you’re ready!
3. Can I use regular flour instead of almond flour?
Yes, but keep in mind that using regular flour will no longer make this bread gluten-free. Adjust the liquid slightly as all-purpose flour absorbs more moisture than almond flour.
4. What can I use if I don’t have cottage cheese?
Consider Greek yogurt or ricotta as good substitutes, but note that the flavor and texture will vary slightly.
Nutritional Info
Let’s talk nutrition! This simple cottage cheese bread is not just a treat; it’s loaded with goodness. Each slice (based on 8 slices per loaf) typically contains:
- Calories: Approximately 100 calories
- Protein: 6g
- Carbohydrates: 4g
- Fat: 6g
- Fiber: 1g
This bread is fantastic for anyone looking for a low-carb option that doesn’t skimp on flavor. Plus, it’s gluten-free, making it suitable for those with specific dietary needs. You can also tweak the recipe by swapping ingredients to align with your health goals while still enjoying a delicious homemade loaf.
Final Thoughts
There you have it, my friends! The delightful journey of crafting 2-Ingredient Cottage Cheese Bread is filled with nostalgia, creativity, and most importantly—a simple way to add some warmth to your kitchen. The best part? You don’t need to be a culinary genius to whip this up. Just a little love and a willingness to experiment, and you’re on your way to gorgeous, fluffy bread that’s sure to impress.
So next time you find yourself with some cottage cheese that needs a home, or if you’re in the mood to create something special yet simple, remember this recipe! Cooking is an adventure, and it’s all about finding joy in every bite. Can’t wait for you to try it and make your kitchen smell heavenly! Now, go on and bake up some memories!
Happy cooking! 🥖❤️
Print
2-Ingredient Cottage Cheese Bread
- Total Time: 45 minutes
- Yield: 8 slices 1x
- Diet: Gluten-Free
Description
A light and fluffy cottage cheese bread that is gluten-free, low-carb, and packed with protein. Perfect for toasting or making sandwiches!
Ingredients
- 1 cup cottage cheese
- 1 cup almond flour
- 2 eggs
- 1 tsp baking powder
- Salt to taste
Instructions
- Preheat your oven to 350°F (175°C).
- Combine 1 cup of cottage cheese and 2 eggs in a mixing bowl, mixing until thoroughly combined.
- Add 1 cup of almond flour and 1 tsp of baking powder, mixing until batter-like consistency is achieved.
- Season with salt to taste.
- Grease a standard-sized loaf pan with olive oil, butter, or coconut oil.
- Pour the mixture into the greased loaf pan and smooth it out.
- Bake in the preheated oven for 30-35 minutes until the top is golden and springy to the touch.
- Cool the bread in the pan for about 10 minutes, then turn out onto a wire rack to cool completely.
Notes
This bread is versatile and can be topped with various spreads or used in sandwiches.
- Prep Time: 10 minutes
- Cook Time: 35 minutes
- Category: Bread
- Method: Baking
- Cuisine: American
Nutrition
- Serving Size: 1 slice
- Calories: 100
- Sugar: 2g
- Sodium: 200mg
- Fat: 6g
- Saturated Fat: 1g
- Unsaturated Fat: 5g
- Trans Fat: 0g
- Carbohydrates: 4g
- Fiber: 1g
- Protein: 6g
- Cholesterol: 90mg
Keywords: cottage cheese bread, gluten-free bread, low-carb recipe, easy baking, healthy snacks
High-Protein Breakfast Bake
The Ultimate High-Protein Breakfast Bake: Fuel Your Day the Delicious Way!
Hey there, food lovers! I’m Beau Collier, and if you’re anything like me, breakfast is not just the first meal of the day; it’s a ritual that sets the tone for everything that follows. Today, we’re diving into a vibrant and nourishing dish that packs a punch of protein to fuel your morning: the High-Protein Breakfast Bake!
Imagine waking up to the enticing aroma of something warm and comforting lingering in your kitchen. The kind of breakfast that feels like a big hug but is also loaded with nutrients to kickstart your day. Trust me, whether you’re rushing to work, curling up with your favorite book, or lounging around on a lazy weekend, this Breakfast Bake is your answer to wholesome and delicious.
This bake is not just easy-peasy but super customizable—perfect for all my fellow foodies out there who love to play around in the kitchen. From toddlers to grandparents, everyone at the table will be reaching for seconds (or thirds!). Plus, you can prep it the night before for an extra smooth morning—bless those weekday hustle vibes!
So grab your apron, put on your favorite playlist, and let’s create something delightful you can be proud of. Get ready to whip up this High-Protein Breakfast Bake that’s ready to impress your taste buds and feed your soul!
Personal Story
As I reminisced about my childhood mornings, I’m taken back to my mom bustling around the kitchen, apron tied and a smile painted across her face. Those were the days when pancakes flipped with ease, and the air was thick with the scent of maple syrup and vanilla syrup wafting from the stove. While pancakes are delightful, I always imagined how fantastic a breakfast sweet that was packed with nutritional prowess could be.
One Sunday morning, my mom surprised us with a baked oatmeal dish filled with seasonal fruits and nuts. It was more than just breakfast; it was an experience—a warm family gathering around the table, laughter and stories mixing with the aroma of baked goodness. Ever since that day, I believed that breakfast should be more than a meal; it should be a celebration.
That was the inspiration behind my High-Protein Breakfast Bake. Bit by bit, I developed this recipe to combine the nostalgic warmth of those cozy breakfasts with health-giving ingredients that help us wake up with a spring in our step. And just like my mom made many versions of that baked dish, I encourage you to play with this recipe and make it your own!
Ingredients
Let’s get down to what you’ll need to whip up this delicious dish! Here’s your ingredient lineup:
-
1 cup cottage cheese
Creamy and rich in protein, cottage cheese is the star of the show here! If you’re not a fan or looking for a vegan alternative, try silken tofu for a similar texture. -
1 cup blueberries
Fresh or frozen, these bite-sized bursts of sweetness are packed with antioxidants. Not into blueberries? Try strawberries, raspberries, or even dried fruits like cranberries. -
1 cup oats
These whole grains are fiber-rich and keep you feeling full. For a gluten-free option, use certified gluten-free oats or swap for quinoa flakes if you’re feeling adventurous! -
3 large eggs
They add structure and protein to the bake. If you’re egg-free, try flax eggs (1 tablespoon ground flaxseed mixed with 2.5 tablespoons of water) for a vegan swap. -
1/4 cup honey or maple syrup
This natural sweetener adds flavor and moisture. Keep it gluten-free with pure maple syrup, or use agave nectar for a different flavor profile. -
1 teaspoon vanilla extract
This adds a warm, comforting flavor. Use pure vanilla extract for the best taste; imitation vanilla will work in a pinch but won’t be quite as good. -
1 teaspoon baking powder
This helps the batter rise, giving it a light, fluffy texture. A pinch of baking soda can be used too, but make sure you balance it with something acidic like a splash of lemon juice. -
Pinch of salt
A tiny bit of salt enhances all the flavors. It’s easy to overlook, but don’t skip it—it makes a difference!
Step-by-Step Instructions
Okay, it’s time to get our hands dirty in the kitchen and create some magic! Here’s how to bring this High-Protein Breakfast Bake to life:
-
Preheat and Prepare
First things first, let’s preheat that oven to 350°F (175°C). While it’s heating up, grab an 8×8-inch baking dish (or any suitable oven-safe dish you’ve got) and grease it lightly with cooking spray or a dab of butter. -
Mix It Up
In a large mixing bowl, combine the cottage cheese, eggs, honey or maple syrup, and vanilla extract. Use a whisk to combine everything until it’s nice and smooth. You want the cottage cheese to blend in well but don’t stress if there are a few small curds left here and there; they’ll add great texture! -
Fold in Dry Ingredients
Next, sprinkle the oats, baking powder, and salt into the wet mixture. Gently fold everything together until well incorporated. You want to avoid overmixing; just combine until you can’t see any dry oats peeking through. -
Add in the Blueberries
Fold in the blueberries with care. You don’t want them to completely burst; we’re aiming for juicy pockets of flavor throughout our bake! -
Spread and Smooth
Pour the mixture into your prepared baking dish and spread it out evenly. Give it a quick gentle shake to help the batter settle into all the corners. -
Pop It in the Oven
Time to bake! Slide that beauty into the oven and let it bake for around 30-35 minutes. The top should turn a golden brown, and a toothpick inserted into the center should come out clean. Don’t be tempted to open the oven door too soon! Let it bake steadily without interruption. -
Cool and Serve
Once it’s done, remove it from the oven and allow it to cool for about 10 minutes. This makes slicing easier! You can serve it warm or at room temperature. Cut into squares, and get ready to enjoy!
Serving Suggestions
Serving this High-Protein Breakfast Bake is as delightful as the bake itself! Here are a few tasty ideas:
- Fresh Fruit Topping: Serve slices with a dollop of Greek yogurt and a handful of fresh berries for a pop of freshness and tang.
- Nut Butter Drizzle: Drizzle with almond or peanut butter for a nutty flavor boost that complements the sweetness of the bake perfectly.
- Maple Glaze: A light drizzle of warm maple syrup across the top adds an indulgent touch.
- Coconut Flakes: For a tropical twist, sprinkle some toasted coconut flakes on top just before serving!
Recipe Variations
Let’s get creative! Here are some fun twists on our delicious breakfast bake:
- Savory Spin: Omit the sweet ingredients entirely and add chopped spinach, diced tomatoes, and crumbled feta cheese for a savory Italian-inspired breakfast bake.
- Nutty Delight: Fold in a handful of your favorite nuts—walnuts, pecans, or even sunflower seeds—for added crunch and nutrition.
- Banana Bliss: Replace the blueberries with diced bananas for a delightful twist. Drizzle with a bit of extra honey to bring out that sweet flavor.
- Spiced Up: Add a teaspoon of cinnamon or pumpkin pie spice to bring a warm fall flavor to your dish. It’s especially cozy during chilly mornings!
- Choco-Fruit: Mix in dark chocolate chips along with the blueberries for a decadent treat that feels like dessert.
Chef’s Notes
As a chef who’s been in the kitchen for quite some time, I find that recipes evolve as we do! This High-Protein Breakfast Bake began as a basic oatmeal bake but grew into something much heartier and versatile. Over time, I’ve added a few twists here and there—try adding vanilla protein powder for an extra protein kick. Who says you can’t indulge while keeping it healthy?
And remember, don’t hesitate to experiment. The kitchen is a creative playground, and you’re the artist!
FAQs and Troubleshooting
Here are a few common questions that come up when making this breakfast bake:
1. Can I make this ahead of time?
Absolutely! You can prepare the mixture the night before and store it in the fridge. Just pop it in the oven in the morning, and you’re good to go!
2. How do I store leftovers?
Store leftover bake slices in an airtight container in the fridge for up to five days. You can reheat them in the microwave for a quick, convenient breakfast.
3. My bake is too dry! What happened?
If your bake turns out a bit dry, it could be due to overbaking. Keep an eye on it in the oven, and do your toothpick test!
4. Can I freeze it?
Yes! Slice the bake into portions and freeze them in an airtight container. Just thaw and reheat when you’re ready to eat!
Nutritional Info
This High-Protein Breakfast Bake doesn’t just taste delicious; it’s a nutritional powerhouse that’ll fuel your morning! Here’s a breakdown of what you get per serving (based on generous 8 servings):
- Calories: ~190-220
- Protein: ~12-15g
- Carbohydrates: ~25-30g
- Fat: ~4-5g
- Fiber: ~3-4g
- Sugar: ~5-7g (depending on the sweetener used)
This dish is packed with protein from the cottage cheese and eggs while providing hearty oats for energy and fiber! It’s the ultimate well-rounded breakfast to kick off your day right.
Final Thoughts
There you have it—the ultimate High-Protein Breakfast Bake, a celebratory dish you’ll love to make and share! Whether you’re treating yourself to a comforting breakfast or serving it to family and friends, this recipe is sure to bring joy to your mornings.
Remember, cooking should be a joyful and creative experience. This breakfast bake recipe is just a jumping-off point, inviting you to make it your own and express your culinary creativity. So, grab your favorite ingredients, throw on a big smile, and let’s get cooking!
Happy baking, and until next time, keep your spatula at the ready and your heart full of flavor!
Print
High-Protein Breakfast Bake
- Total Time: 40 minutes
- Yield: 8 servings 1x
- Diet: Vegetarian
Description
A delightful and nourishing breakfast bake packed with protein, perfect for fueling your mornings and customizable for every taste.
Ingredients
- 1 cup cottage cheese
- 1 cup blueberries
- 1 cup oats
- 3 large eggs
- 1/4 cup honey or maple syrup
- 1 teaspoon vanilla extract
- 1 teaspoon baking powder
- Pinch of salt
Instructions
- Preheat the oven to 350°F (175°C) and grease an 8×8-inch baking dish.
- Mix the cottage cheese, eggs, honey or maple syrup, and vanilla extract until smooth.
- Fold in oats, baking powder, and salt until just combined.
- Carefully fold in the blueberries.
- Pour the mixture into the prepared baking dish and spread evenly.
- Bake for 30-35 minutes until golden brown and a toothpick inserted comes out clean.
- Cool for 10 minutes before slicing and serving.
Notes
Feel free to customize the recipe with different fruits, nuts, or flavors to suit your taste preferences.
- Prep Time: 10 minutes
- Cook Time: 30 minutes
- Category: Breakfast
- Method: Baking
- Cuisine: American
Nutrition
- Serving Size: 1 slice
- Calories: 200
- Sugar: 6g
- Sodium: 250mg
- Fat: 5g
- Saturated Fat: 2g
- Unsaturated Fat: 3g
- Trans Fat: 0g
- Carbohydrates: 30g
- Fiber: 4g
- Protein: 15g
- Cholesterol: 70mg
Keywords: healthy breakfast, high-protein, breakfast bake, easy breakfast, nutritious meal

3-Ingredient Blueberry Breakfast Cookies : Quick, Healthy & Delicious
3-Ingredient Blueberry Breakfast Cookies – Your New Morning BFF
Hey friends, Beau here from Feastical! Let’s be real for a second. How many mornings have you spent staring into the fridge, half-awake, wondering how toast suddenly feels like a complicated life choice? Or scrambling to find a breakfast that doesn’t leave you crashing by 10 AM? I’ve been there more times than I’d like to admit, usually while trying to locate my coffee mug that’s somehow always in the last place I look (which is, inevitably, the dishwasher).
That’s exactly why I’m so crazy about this recipe. We’re throwing the classic breakfast rulebook out the window and making something that feels like a treat but fuels your body like a champion. Introducing my 3-Ingredient Blueberry Breakfast Cookies. Yes, you read that right. Three core ingredients stand between you and a warm, soft, fruity cookie that’s perfect for breakfast. No flour, no refined sugar, no fancy equipment—just simple, feel-good food that comes together faster than you can brew your first cup of coffee.
Think of these as the love child of a muffin-top and an oatmeal bowl, all dressed up in a portable, hand-held package. They’re naturally sweet, packed with fiber, and bursting with juicy blueberries. Whether you’re running out the door, need a lunchbox star, or just want a cozy snack with your afternoon tea, these cookies have got your back. So, let’s ditch the morning stress and make something deliciously simple together.
A Little Sunshine in a Cookie: Why This Recipe Sticks
This recipe always takes me back to my grandma’s sun-drenched kitchen. She wasn’t a “fancy” cook, but she was a wizard with simplicity. Her biggest kitchen hack? Never let a ripe banana go to waste. “Beau,” she’d say, pointing a flour-dusted finger my way, “a spotted banana isn’t past its prime—it’s just telling you it’s ready for something better.”
She’d mash those bananas into pancakes, swirl them into batter, and yes, mix them into her “kitchen sink” oatmeal cookies. I remember one sleepy summer morning, I was disappointed we were out of chocolate chips. With a wink, she pulled a container of wild blueberries from the fridge, fresh from the farmer’s market. “Try these instead, sunshine.” The resulting cookies were a revelation—tart, sweet, and so moist. They didn’t need anything else. That lesson in adaptable, joyful cooking stuck with me. This recipe is my tribute to that: a little bit of nostalgia, a whole lot of practicality, and the promise that the best foods are often the simplest ones we make with love (and ripe bananas).
Gathering Your Simple, Mighty Trio (Plus Friends)
Here’s the beautiful part. You probably have these ingredients sitting in your kitchen right now, just waiting for their moment of glory. Let’s break them down.
- 1 large ripe banana – This is our superstar, our natural sweetener, and our binder all in one. The riper (read: spottier and softer) the banana, the sweeter and more fragrant your cookies will be. Chef’s Insight: No ripe bananas? Bake a yellow banana at 300°F for 15-20 minutes until the skin blackens. It works like a charm!
- 1 cup rolled oats (old-fashioned) – These give our cookies heart, texture, and staying power. Rolled oats are perfect because they hold their shape just enough. Substitution Tip: Need to be gluten-free? Just ensure your oats are certified GF. In a pinch, quick oats work, but the texture will be a bit more uniform and less chewy.
- ⅓ cup fresh or frozen blueberries – Little bursts of joy and antioxidants! I love frozen wild blueberries because they distribute beautifully and rarely bleed as much. Pro Hack: If using frozen, do NOT thaw them. Toss them in straight from the freezer to prevent a purple swamp.
- ½ tsp lemon zest (The Secret Sparkle) – Okay, I know this makes it four things, but trust me, it’s a game-changer. This tiny addition brightens up all the flavors and makes the blueberry taste even more… blueberry-y. It’s non-negotiable in my book!
- A pinch of cinnamon or vanilla extract (Optional, but Highly Recommended) – A dash of cinnamon adds cozy warmth, while a few drops of vanilla rounds out the sweetness. Think of these as your flavor boosters.
Let’s Make Some Magic: Step-by-Step
Preheat your oven to 350°F (175°C). Line a baking sheet with parchment paper. (This is the easiest cleanup you’ll ever have. No sticking, I promise!).
Step 1: The Banana Mash
Peel that ripe banana and plop it into a medium mixing bowl. Now, get mashing! A fork works perfectly here. You want it mostly smooth, but a few tiny lumps are A-OK—they’ll create lovely little pockets of intense banana flavor. Chef’s Chatter: This is a fantastic job for a kitchen helper, big or small. There’s something deeply satisfying about turning a banana into mush.
Step 2: The Oaty Embrace
Pour your cup of rolled oats right into the banana mush. Also, add your lemon zest and that optional pinch of cinnamon or vanilla now. Stir everything together with a sturdy spoon or spatula. You’ll have a thick, sticky, and frankly, somewhat dubious-looking mixture. This is normal! You’re on the right track. Let it sit for 2-3 minutes. This allows the oats to soak up the banana moisture and become perfectly tender.
Step 3: The Berry Fold
Time for the blueberries! Gently fold them in until they’re just distributed. Be gentle here—we want to avoid crushing them into the batter and turning everything gray-blue. If you’re using frozen berries, work quickly. Pro Tip: A folding motion with your spatula, turning the batter over from the bottom, is the best technique.
Step 4: Shape & Bake
Using a spoon or a cookie scoop, drop mounds of the dough onto your prepared baking sheet. You should get about 6-8 cookies. Now, use the back of a spoon or your fingers (a little water on them prevents sticking) to gently press and flatten each mound into a cookie shape. They won’t spread much, so shape them how you want them to look finished.
Slide the tray into your preheated oven and bake for 12-15 minutes. You’re looking for the edges to be set and lightly golden. The tops will still look a bit soft—that’s perfect! They firm up as they cool.
Step 5: The (Brief) Patience Part
Let the cookies cool on the baking sheet for at least 5-10 minutes. This is crucial—they need this time to set up and become cookie-like. If you try to move them too soon, they’ll think they’re still batter. After that, transfer them to a wire rack or directly to your plate!
How to Serve These Sunny Little Disks of Joy
Warm from the oven, these cookies are basically a hug for your taste buds. But the fun doesn’t stop there! Here are my favorite ways to serve them up:
- The Classic Combo: Pair two cookies with a dollop of Greek yogurt and an extra handful of fresh berries. It’s a balanced, protein-packed breakfast plate.
- On-The-Go Power-Up: Let them cool completely, then wrap them individually in parchment paper. Grab one as you head out the door with a travel mug of coffee for the ultimate busy-morning duo.
- Dessert Remix: Crumble a slightly warmed cookie over a bowl of vanilla ice cream or coconut whipped cream. Drizzle with a touch of honey. You’re welcome.
- Afternoon Recharge: They’re the ideal companion to a cup of tea or a glass of cold milk for that 3 PM slump. It’s a healthy choice that feels decidedly indulgent.
Make It Your Own: Fun Twists & Swaps
The base recipe is your canvas. Get creative! Here are a few of my favorite riffs:
- Tropical Vibes: Swap the blueberries for ¼ cup of chopped dried mango and 2 tablespoons of shredded coconut. Hello, vacation in a cookie!
- Apple Cinnamon Delight: Replace the blueberries with ¼ cup of finely chopped apple (no need to peel) and add an extra ½ teaspoon of cinnamon. Cozy autumn flavors, anytime.
- Chocolate Chip Happy Place: Because sometimes you just need chocolate for breakfast. Use 2-3 tablespoons of dark chocolate chips instead of blueberries. (We won’t tell!).
- Nutty Crunch: Fold in 2 tablespoons of chopped walnuts, pecans, or almonds along with the blueberries for added crunch and healthy fats.
- Peanut Butter Lover’s: Add a heaping tablespoon of natural peanut butter (or any nut/seed butter) to the mashed banana. It adds protein and a delicious richness.
Beau’s Kitchen Notes & Stories
This recipe has been my kitchen sidekick for years, and it’s evolved in the funniest ways. I once accidentally used steel-cut oats (don’t ask how I confused the bags). The result was… crunchy. Very, very crunchy. We dubbed them “breakfast biscotti.” So, learn from my mistake: rolled oats are your friend!
I’ve also learned that these cookies are the ultimate peacekeepers. Kids love them because they’re cookies. Parents love them because they’re secretly wholesome. It’s a win-win. I always double the batch and keep some in the freezer. A 30-second zap in the microwave brings them right back to life, as if by magic. They’ve saved me from more than one “hangry” moment, and I’m sure they’ll do the same for you.
Your Questions, Answered!
Q: My cookies turned out soggy/mushy in the middle. What happened?
A: This usually means they needed more bake time or more cooling time. Ovens vary, so if yours runs cool, add 2-3 minutes. Also, make sure you’re letting them cool fully on the baking sheet—this is when they finish setting up! Using a very, very ripe (almost liquid) banana can also contribute, so try one that’s spotty but still holds some shape when peeled.
Q: Can I make these vegan or add protein?
A: They’re naturally vegan as written! For a protein boost, stir 1-2 tablespoons of your favorite vanilla or unflavored protein powder into the oats before adding them. You may need a tiny splash of plant-based milk if the dough gets too thick.
Q: How do I store them, and how long do they last?
A: They keep best in an airtight container at room temp for 2 days. For longer storage, I highly recommend the freezer! Lay them flat on a tray to freeze solid, then transfer to a bag. They’ll keep for up to 2 months. Thaw at room temp or microwave for 20-30 seconds.
Q: Can I use something other than banana?
A: The banana is key as the binder and sweetener. For a banana-free version, you’d need a major recipe overhaul (like using applesauce and an egg, which changes everything). This recipe is proudly and unapologetically banana-based!

3-Ingredient Blueberry Breakfast Cookies : Quick, Healthy & Delicious
Description
Say goodbye to rushed mornings and uninspiring toast! These 3-ingredient blueberry breakfast cookies are soft, naturally sweet, and packed with fiber and antioxidants. They’re easy, portable, and delicious—a cozy muffin-top and oatmeal bowl rolled into one cookie. Perfect for breakfast, lunchboxes, or a guilt-free snack.
Ingredients
-
1 large ripe banana
-
1 cup rolled oats (old-fashioned)
-
⅓ cup fresh or frozen blueberries
-
Optional: ½ tsp lemon zest (brightens flavors)
-
Optional: pinch of cinnamon or 1 tsp vanilla extract (adds warmth and depth)
Instructions
-
Preheat & Prep: Preheat oven to 350°F (175°C) and line a baking sheet with parchment paper.
-
Mash the Banana: Peel and mash the banana in a medium bowl with a fork until mostly smooth. A few small lumps are fine—they add flavor pockets.
-
Add the Oats & Flavorings: Stir in the oats, lemon zest, and optional cinnamon or vanilla. Let the mixture sit 2–3 minutes for the oats to absorb moisture.
-
Fold in Blueberries: Gently fold in blueberries without crushing. If using frozen, fold straight from the freezer to prevent color bleed.
-
Shape the Cookies: Drop spoonfuls of batter onto the prepared sheet. Flatten slightly with the back of a spoon or your fingers (wetting your fingers prevents sticking).
-
Bake: Bake 12–15 minutes, until edges are set and lightly golden. The tops may look soft—that’s perfect.
-
Cool: Let cookies cool 5–10 minutes on the sheet, then transfer to a wire rack or plate. They’ll firm up as they cool.
Notes
-
Avoid soggy cookies: Make sure to let them cool fully before moving.
-
Extra protein: Stir 1–2 tbsp of protein powder into the oats before adding bananas. Add a splash of plant milk if needed.
-
Storage: Store in an airtight container at room temp for 2 days. Freeze for up to 2 months. Reheat in the microwave 20–30 seconds.
-
Banana hack: If no ripe bananas, bake a yellow banana at 300°F (150°C) for 15–20 min until blackened and soft.
Nutritional Nibbles (Because We’re Curious!)
Okay, let’s talk facts, but let’s keep it simple and real. These aren’t meant to be a low-calorie diet food; they’re meant to be a nourishing, real-food start to your day. Per cookie (assuming the recipe makes 7):
- Calories: ~90
- Key Features: They provide a nice dose of dietary fiber from the oats and banana to keep you full, natural sugars for energy, and antioxidants from those beautiful blueberries.
- They are naturally gluten-free (with GF oats), dairy-free, egg-free, and contain no added sugar or oil. They’re a whole-grain, fruit-filled option that beats a sugary cereal bar any day of the week. Think of them as fuel, not just food.
Final Crumbs of Wisdom
And there you have it, friends—the simplest, most forgiving recipe in my arsenal. These 3-Ingredient Blueberry Breakfast Cookies are proof that you don’t need a pantry full of exotic items or hours of free time to make something truly wonderful to eat. They’re about embracing imperfection (lumpy banana mash is beautiful!), celebrating simple ingredients, and giving yourself a break in the morning.
I hope this recipe finds its way into your regular rotation and becomes a little beacon of simplicity on your craziest days. Make them, share them, and tag me @feastical so I can see your beautiful creations! Now, go grab that spotted banana and make your kitchen smell amazing. Happy baking!
With a full heart and a full plate,
Beau
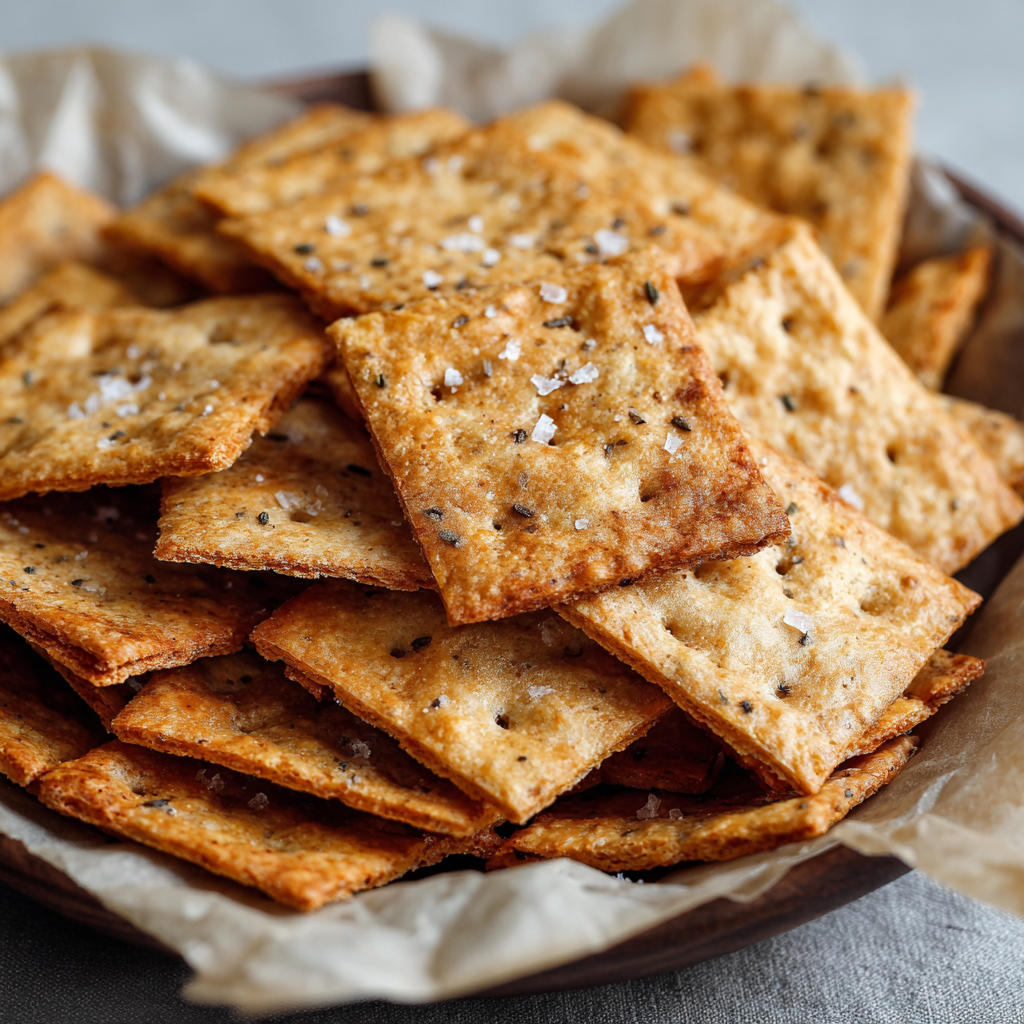
3-Ingredient Sourdough Crackers : Easy, Crispy & Perfect for Snacking
The Magical, Crispy Cure for Your Sourdough Discard Blues
Hey friend, Beau here. Can we have a quick, totally judgment-free heart-to-heart about that jar lurking in the back of your fridge? You know the one. It’s got that familiar, tangy scent, and it’s filled with the sourdough starter discard you just couldn’t bear to toss. You promised yourself you’d make pancakes or a coffee cake, but here we are. Again. I feel you. We’ve all been there, staring at the discard, feeling a twinge of guilt mixed with culinary indecision.
But what if I told you that in about five minutes of active effort, you could transform that humble discard into the most addictive, satisfying, and seriously impressive homemade crackers you’ve ever tasted? Crackers so crisp they sing when you break them, with a rich, buttery flavor and that subtle tang that makes sourdough so irresistible. And the best part? We’re talking three ingredients. That’s it. No kneading, no fancy rolling pins, no chilling for hours. This is the ultimate low-effort, high-reward kitchen magic, and I’m so excited to guide you through it.
At Feastical, I live for recipes that feel like a warm hug but don’t turn your kitchen into a war zone. These sourdough discard crackers are exactly that. They’re the perfect vehicle for your favorite cheese, a swoop of creamy hummus, or even just enjoyed solo as you walk past the cookie jar (we don’t judge here). They’re a fantastic way to reduce food waste, impress your friends, and finally feel like a sourdough wizard. So, let’s grab that jar, preheat the oven, and turn what felt like a chore into your new favorite snack. Trust me, once you make these, you’ll start hoarding your discard on purpose!
More Than a Snack: A Taste of Grandma’s Kitchen
This recipe always takes me back to my Grandma Lou’s kitchen. She wasn’t a fancy “sourdough baker,” but she was a queen of “waste not, want not.” Her counter was a perpetual buffet of simple, incredible food made from bits and bobs. I remember one summer afternoon, she saw me about to scrape the last of some old, thin pancake batter down the sink. “Hold on there, Beau,” she said, her eyes twinkling. She poured it onto a hot, greased sheet pan, slid it in the oven, and twenty minutes later, we were breaking apart the most delicious, crispy, savory “chip” I’d ever had. It was a revelation!
Making these sourdough crackers feels like that same magic. It’s taking something seemingly past its prime and, with a little heat and love, creating pure gold. Whenever my kitchen fills with the toasty, buttery aroma of these crackers baking, I’m eight years old again in Grandma Lou’s kitchen, learning that the best food often comes from the simplest, most resourceful ideas. It’s a tradition of flavor and frugality I’m so happy to carry on and share with you.
Your Tiny, Mighty Ingredient List
See? I told you it was simple. The beauty here is in the quality and your little tweaks. Let’s break down this powerhouse trio.
- 1 Cup Sourdough Discard (Unfed): This is your star player! The hydration of your starter (how thick or thin it is) can vary. Don’t sweat it. A thicker discard will make a slightly sturdier cracker, a thinner one will spread more easily and be extra crisp. Chef’s Insight: This is the perfect use for discard that’s been in the fridge for a few days, developing even more complex, tangy flavor. No starter? A mix of 1/2 cup flour + 1/2 cup water with a big splash of plain yogurt or vinegar can mimic the tang in a pinch, but the real sourdough flavor is irreplaceable.
- 2 Tablespoons Melted Butter (or Olive Oil): Butter gives an incomparable rich, savory flavor and helps the crackers achieve that perfect golden hue and snap. Substitution Tip: For a dairy-free version, extra-virgin olive oil is fantastic, lending a fruity, rustic note. Avocado oil or melted coconut oil (refined for neutral taste) work great too. This is your chance to play with flavor!
- 1/2 Teaspoon Fine Sea Salt (Plus Extra for Topping): Salt is the conductor of this flavor orchestra. It enhances the tang of the sourdough and the richness of the fat. I prefer fine sea salt in the batter for even distribution. Chef’s Insight: The sprinkle of salt on top before baking isn’t just for taste—it creates those delightful salty crystals that make each bite pop. Try using flaky sea salt like Maldon for the topping for an extra special texture and burst of flavor.
Let’s Make Some Noise: The Step-by-Step Crack
Ready? This is where the fun begins. Preheat your oven to a cozy 325°F (160°C). This lower temperature is key—it dries the crackers out slowly for maximum crispiness without burning. Line a standard half-sheet baking pan (about 18″x13″) with parchment paper. No parchment? A silicone baking mat is your best friend here.
- The Simple Stir: In a medium bowl, combine your sourdough discard, melted butter (or oil), and the 1/2 teaspoon of salt. Grab a whisk or a fork and give it a good, vigorous stir for about 30 seconds. You want it completely smooth, with no streaks of fat or dry pockets. It will be a loose, pourable batter. That’s perfect! Chef Hack: If your discard is super thick, you can add a teaspoon of water to help it loosen up and incorporate with the butter smoothly.
- The Art of the Spread: Pour your batter directly onto the center of your prepared parchment paper. Now, take an offset spatula or the back of a large spoon. Your mission is to spread the batter as thinly and evenly as humanly possible. We’re talking nearly translucent in spots. This is the most important step for getting crackers, not a flatbread. Work from the center out, using gentle, sweeping motions. Don’t worry about covering the entire pan; focus on a thin, even layer. Chef Hack: Tilt and gently shake the pan to help the batter flow into a thin sheet.
- The Salty Finish: Once you’re happy with your spread, give the top a light, even sprinkle of your chosen salt (flaky is amazing here!). You can also add cracked black pepper, everything bagel seasoning, or dried herbs at this stage. Press them in gently with your palm.
- The First Bake: Slide the pan into your preheated oven. Set a timer for 10 minutes. This initial bake sets the structure.
- The Score & Return: After 10 minutes, the batter will be set and may just be starting to pull away from the edges. Carefully pull it out. Now, take a pizza cutter, sharp knife, or even a bench scraper and score the entire sheet into your desired cracker size. I like 1-inch squares, but rectangles or diamonds are fun too! Don’t skip this step. Scoring now makes breaking them apart later a clean, satisfying snap instead of a messy shatter.
- The Crispening: Return the pan to the oven. Now, we play the waiting game. Bake for another 30 to 40 minutes. Start checking at 30 minutes. You’re looking for a deep, golden brown color across the entire sheet, especially in the center. The edges will be darker—that’s good! They should feel completely dry and firm to the touch.
- The Cool Down: This is the final test of your patience! Remove the pan and let the giant cracker sheet cool completely on the pan. I mean it. As it cools, it continues to crisp up. Trying to break them warm leads to bending, not snapping.
- The Grand Finale: Once totally cool, use your hands to break the sheet apart along the scored lines. Listen to that beautiful crackle! That’s the sound of success.
How to Serve Your Homemade Masterpiece
Congratulations, you’ve just made legit artisan crackers! Now, let’s do them justice. For the ultimate cheese board, pair these tangy crackers with a creamy, mild brie or goat cheese to complement the sourdough flavor, or a sharp aged cheddar for a powerful contrast. A dollop of fig jam on top? Divine.
For a quick snack, a bowl of these next to a container of hummus, olive tapenade, or a simple white bean dip will disappear frighteningly fast. Crumble them over a creamy soup instead of croutons for an incredible texture contrast. Or, my personal favorite: pack a handful in a small zip-top bag for an afternoon pick-me-up that’s miles better than anything from a vending machine. They’re sturdy, so they travel well!
Make It Your Own: 5 Flavor Twists to Try
The basic recipe is a perfect canvas. Once you’ve mastered it, let your creativity run wild with these easy variations:
- Everything Bagel Magic: After spreading the batter, sprinkle generously with everything bagel seasoning. The garlic, onion, sesame, and poppy seeds toast beautifully and create an instant favorite.
- Herb & Garlic Delight: Whisk 1 teaspoon of dried rosemary (crushed), 1/2 teaspoon of garlic powder, and 1/4 teaspoon of onion powder right into the batter. Finish with a sprinkle of flaky salt.
- Cheesy Parmesan Crisps: Fold 1/4 cup of finely grated Parmesan or Pecorino Romano cheese into the batter. The cheese adds a salty, umami punch and helps create an even crispier texture.
- Seeded & Wholesome: Add 2 tablespoons of mixed seeds (sesame, flax, sunflower, pumpkin) to the batter for extra crunch, fiber, and a lovely speckled look.
- Spicy Sriracha Kick: Replace 1 tablespoon of the melted butter with 1 tablespoon of Sriracha or your favorite hot sauce. You’ll get a gorgeous rosy color and a slow, building heat that’s seriously addictive.
A Few Notes from My Kitchen to Yours
I’ve made these crackers more times than I can count, and they’ve become a Feastical staple. The recipe has evolved from a “let’s try this” experiment to a non-negotiable weekly bake. One funny fail early on? I got impatient and broke them while still warm. Let’s just say I ended up with a bowl of “cracker bites” and “cracker dust”—still tasty, but not the elegant snap I was after. Patience is truly a virtue here!
Also, don’t be afraid if your batter looks too thin in the pan. It’s supposed to! A thicker layer just means a chewier, more flatbread-like result, which is also delicious in its own right. But for that classic cracker crisp, thin is in. Finally, these keep surprisingly well. If they last more than two days (a big if), store them in an airtight container at room temperature. If they lose a little snap, a quick 5-minute warm-up in a 300°F oven will revive them perfectly.
Your Questions, Answered
Q: My crackers are chewy, not crispy. What happened?
A: The most common culprit is under-baking or spreading the batter too thick. Next time, spread it even thinner and bake until the *entire* sheet, especially the center, is a uniform golden brown. They should feel completely dry. Also, ensure they cool completely on the pan.
Q: Can I use active, bubbly starter instead of discard?
A: Absolutely! The result will be slightly less tangy and may have a tiny bit more “lift,” but it works perfectly fine. The recipe is wonderfully forgiving.
Q: How long do they stay fresh, and how should I store them?
A: In an airtight container at room temperature, they stay perfectly crisp for up to a week. You can also freeze the cooled crackers in a freezer bag for up to 2 months. They thaw almost instantly.
Q: My crackers burnt on the edges but are soft in the middle.
A: This usually means your oven runs hot or has hotspots. Try reducing the temperature to 300°F next time and rotating the pan halfway through the second bake. Using a light-colored aluminum pan instead of a dark sheet can also help prevent over-browning.

3-Ingredient Sourdough Crackers : Easy, Crispy & Perfect for Snacking
Description
These sourdough discard crackers are the fastest, crunchiest way to use up leftover starter—no kneading, no rolling, no stress. With just three ingredients and a low, slow bake, you’ll get deeply golden, snappy crackers with that irresistible sourdough tang. Perfect for cheese boards, dips, or straight-from-the-jar snacking.
Ingredients
-
1 cup sourdough discard (unfed)
-
2 tablespoons melted butter or olive oil
-
½ teaspoon fine sea salt (plus extra for topping)
Instructions
-
Preheat & Prep:
Heat oven to 325°F (160°C). Line a baking sheet with parchment paper or a silicone mat. -
Mix:
In a bowl, whisk together the discard, melted butter (or oil), and salt until smooth and pourable. -
Spread Thin:
Pour onto the prepared pan and spread as thinly and evenly as possible with a spatula. Thin = crispy. -
Season:
Sprinkle lightly with extra salt (optional add-ins below). -
Bake & Score:
Bake for 10 minutes, remove, then score into cracker-sized pieces with a knife or pizza cutter. -
Crisp:
Return to the oven and bake 30–40 minutes, until uniformly golden and dry (edges will be darker). -
Cool Completely:
Let cool on the pan; crackers crisp as they cool. Break along score lines.
Notes
-
Go thinner than you think: Thick batter = chewy. Ultra-thin = crackly crisp.
-
Rotate if needed: If edges brown too fast, rotate the pan halfway through.
-
Revive snap: If they soften, warm at 300°F for 5 minutes.
-
Storage: Airtight container at room temp for up to 1 week; freeze up to 2 months.
Nutritional Snapshot
Let’s be real—we’re eating crackers for joy and crunch, not as a diet food! But it’s good to know what’s in your snack. This nutritional info is an estimate for approximately 8 small crackers (about a 1-ounce serving), based on using butter. Remember, ingredients and serving sizes can vary.
Per Serving: Calories: ~120 | Total Fat: 7g | Saturated Fat: 4g (with butter) | Carbohydrates: 12g | Dietary Fiber: <1g | Sugars: 0g | Protein: 2g | Sodium: 200mg
These crackers are a source of energy from carbohydrates and fats. Using olive oil increases heart-healthy monounsaturated fats. The sourdough fermentation process may help pre-digest some of the grains, making them potentially easier on the stomach for some people, though the discard in this recipe hasn’t undergone a long ferment. Most importantly, they’re a homemade, whole-ingredient alternative to store-bought crackers, which often contain added preservatives and oils.
The Final, Delicious Thought
And there you have it! What started as a jar of forgotten sourdough discard is now a beautiful batch of homemade, deeply satisfying crackers. This recipe embodies everything I love about cooking: simplicity, resourcefulness, and the pure joy of creating something delicious from scratch. It’s a little kitchen win that feels huge.
I hope these crackers become a regular in your home, a secret weapon for your cheese boards, and a source of pride when you casually say, “Oh these? I just whipped them up from my sourdough discard.” Remember, the best meals and snacks are the ones shared. So make a double batch, pack some for a friend, and spread the crispy, tangy love.
Happy baking, and as always, thanks for hanging out in my kitchen!
– Beau

50-Year-Old Lunchroom Ladies Brownies : Soft, Fudgy, and Frosted to Perfection
Remember the Best Part of School? It Was These Brownies.
Hey friends, Beau here! Let’s get real for a second. When you think back to your school days, what sticks with you? For me, beyond the history tests and playground games, it’s the food. Specifically, the legendary, almost mythical desserts that appeared on the lunch tray. And the undisputed champion of the cafeteria? The thick, fudgy, perfectly frosted Lunch Lady Brownie.
You know the one I’m talking about. It wasn’t some delicate, artisanal pastry. No, this was a substantial brownie. A square of pure, unadulterated joy that was soft, chewy, and slathered with a creamy chocolate frosting that seemed to melt into the warm surface beneath. It was the treat that could turn a rough day around, the one you’d trade your fruit cup for in a heartbeat.
Well, my fellow food-lovers, I’ve got fantastic news. That iconic recipe isn’t lost to time. After chatting with a lovely retired lunchroom lady named Carol at a church potluck (the best place to find culinary treasure!), I’m thrilled to share this piece of edible nostalgia with you. This is the 50-Year-Old Lunchroom Ladies Brownie recipe, passed down through generations, and it’s every bit as soft, fudgy, and frosted to perfection as you remember. So, preheat your ovens and grab your favorite mixing bowl—we’re about to take a delicious trip down memory lane.
A Slice of Sweet Nostalgia
This recipe takes me right back to the crisp autumn of fourth grade. Picture it: I’d just aced a spelling test I’d been sweating over for weeks. As a reward to myself, I used my coveted lunch money to buy the “hot lunch” instead of my usual brown-bag sandwich. The main course is a blur, but I can still vividly remember the moment I saw that brownie sitting on the edge of my orange plastic tray. It was glorious. Thick, almost cake-like, with a crackly surface and that unmistakable sheen of chocolate frosting.
I took my first bite right there in the noisy cafeteria, and it was pure magic. It tasted like victory, like comfort, like a warm hug from someone who just wanted you to be happy. That single brownie became my personal benchmark for all brownies to come. For years, I chased that specific texture and flavor, and finding this recipe felt like unearthing a priceless artifact. It’s more than a dessert; it’s a time machine to a simpler, sweeter moment.
Gathering Your Simple, Soulful Ingredients
The beauty of this recipe is its beautiful simplicity. No fancy chocolate to chop, no complicated techniques. Just honest, pantry-staple ingredients coming together to create something extraordinary. Here’s what you’ll need:
For the Brownies:
- 1 cup butter, melted – This is the secret to that dense, moist crumb. Using oil can work, but butter gives it that rich, classic homemade flavor we’re after. Chef’s Insight: I like to melt it until it’s just liquid and slightly golden, which adds a tiny nutty note.
- 1/2 cup cocoa powder – We’re using standard, unsweetened cocoa powder here, not Dutch-process. This is what gives it that classic, “lunchroom” chocolate flavor. It’s nostalgic and perfect.
- 2 cups all-purpose flour – The structure-builder. Don’t over-measure! Spoon it into your measuring cup and level it off for the perfect texture.
- 2 cups granulated sugar – This is what creates that beautifully crisp, paper-thin crust on top as the brownies bake. It’s a signature trait of this style of brownie.
- 4 large eggs – They bind everything together and contribute to the rich, tender structure. Make sure they’re at room temperature for a smoother batter.
- 4 teaspoons vanilla extract – Yes, four whole teaspoons! This might seem like a lot, but it’s essential for balancing the sweetness and adding a beautiful aroma. Substitution Tip: If you have it, vanilla bean paste would be incredible here!
- 1 cup chopped nuts (optional) – Walnuts or pecans are the traditional choice. They add a wonderful crunch and contrast to the soft, fudgy brownie. But if you’re a purest, feel free to leave them out!
For That Legendary Frosting:
- 1/4 cup softened butter – Not melted! Softened to room temperature so it whips up light and fluffy with the sugar.
- 1/4 cup milk – Whole milk or evaporated milk both work beautifully. Evaporated milk makes it extra creamy and rich.
- 1/4 cup cocoa powder – The same unsweetened cocoa we used in the brownies for consistent flavor.
- 3 cups powdered sugar – This gives the frosting its smooth, spreadable consistency and sweet finish.
- Dash of salt – Never, ever skip the salt in a sweet frosting! It cuts the sweetness and makes the chocolate flavor pop.
Let’s Bake Some Magic: Your Step-by-Step Guide
Ready to create some kitchen magic? Follow these steps, and you’ll be a lunchroom legend in no time. I’ve sprinkled in my favorite chef hacks to ensure your success.
- Preheat and Prep. Fire up your oven to 350°F (175°C). Grab your trusty 9×13-inch baking pan and give it a good greasing with butter or a non-stick spray. Chef’s Hack: For super easy removal, line the pan with parchment paper after greasing, leaving a little overhang on the sides. You’ll thank me later!
- Create the Chocolate Base. In a large mixing bowl, combine the melted butter and 1/2 cup of cocoa powder. Whisk it together until it forms a smooth, dark paste. This step, called “blooming” the cocoa in the fat, intensifies the chocolate flavor right from the start.
- Sweeten the Deal. Add the 2 cups of granulated sugar to the chocolate-butter mixture and stir it in. You’ll notice the texture change and become grainy—that’s perfectly normal!
- Incorporate the Eggs. Crack in your four eggs, one at a time, mixing well after each addition. This helps build the structure and ensures a smooth, emulsified batter. Now, pour in those glorious 4 teaspoons of vanilla and give it one more good stir.
- Bring It All Together. It’s flour time! Add the 2 cups of all-purpose flour to the bowl. Now, here’s the key: mix just until the flour disappears and the batter is smooth. Do NOT overmix! Overmixing develops gluten and can make your brownies tough instead of tender. Chef’s Tip: I like to switch to a spatula for this step to avoid over-beating.
- Fold in the Fun. If you’re using nuts, now’s the time. Gently fold them into the batter until they’re evenly distributed.
- Bake to Perfection. Pour the thick, luscious batter into your prepared pan and spread it into an even layer. Pop it into the preheated oven and set your timer for 20 minutes. The magic number for these is usually 20-25 minutes. You’re looking for the edges to be set and pulling slightly away from the pan, while the center still looks a little soft. A toothpick inserted near the edge should come out with a few moist crumbs, not wet batter. Remember, slightly underbaked is better than overbaked for a fudgy texture!
While the Brownies Bake, Make the Frosting!
- In a medium bowl, beat the softened 1/4 cup butter with 1/4 cup cocoa powder and a dash of salt until it’s combined. It will be thick.
- Alternately add the milk and the powdered sugar, about a cup at a time, beating on medium speed until the frosting is smooth, creamy, and spreadable. If it seems too thick, add a teaspoon of milk. Too thin? A little more powdered sugar. You’ve got this!
The Final, Crucial Step: As soon as the brownies come out of the oven, spread that beautiful frosting right over the top while they’re still warm. This is the lunchroom secret! The residual heat will help the frosting melt slightly, creating that seamless, glossy layer that sinks into every nook and cranny. Let the frosted brownies cool completely in the pan on a wire rack before you even think about cutting them. I know, the wait is torture, but it’s essential for clean squares!
How to Serve Up a Slice of Happiness
Presentation is part of the fun! For the ultimate nostalgic experience, serve these brownies just as they are, cut into generous squares right from the pan. A simple glass of ice-cold milk is their lifelong companion.
Want to dress them up for a potluck or party? Here are a few ideas:
- Top a warm brownie square with a scoop of high-quality vanilla bean ice cream for the ultimate Brownie Sundae.
- Add a drizzle of caramel or raspberry sauce for a beautiful and delicious twist.
- For a festive touch, sprinkle a few colorful sprinkles or some flaky sea salt on top of the frosting before it sets.
No matter how you serve them, the reaction will be the same: pure, unbridled joy and a chorus of “Oh my gosh, these taste just like I remember!”
Make It Your Own: Delicious Recipe Variations
While the classic version is perfection, every great recipe has room for a little personal flair. Here are a few of my favorite twists:
- Mint Chocolate Chip: Add 1/2 teaspoon of peppermint extract to the frosting and fold 3/4 cup of mini chocolate chips into the brownie batter instead of nuts.
- Rocky Road: After frosting the warm brownies, immediately sprinkle with mini marshmallows, chopped walnuts, and a handful of chocolate chips.
- Peanut Butter Swirl: Drop 1/2 cup of warmed, smooth peanut butter by spoonfuls onto the brownie batter before baking. Use a knife to swirl it gently through the batter for a marbled effect.
- Gluten-Free Swap: You can easily substitute the all-purpose flour with your favorite 1:1 gluten-free flour blend. I’ve had great success with this!
- Double Chocolate Chaos: Fold in 1 cup of semi-sweet or milk chocolate chips along with the nuts (or instead of them) for an extra hit of melty chocolate in every bite.
Beau’s Chef’s Notes & Kitchen Confessions
Over the years, this recipe has become a staple in my own kitchen, and it’s evolved in little ways. I once, in a moment of sheer distraction, accidentally used a whole cup of cocoa powder in the brownie batter instead of a half. The result? The most intensely dark, almost black, and fudgy brownie you can imagine. It was a happy accident we now call “Midnight Brownies”!
The other thing I’ve learned is that this recipe is incredibly forgiving. It doesn’t demand precision. It invites you to relax, have fun, and trust the process. That’s the real magic of these old-fashioned recipes—they were made to be shared and loved, not stressed over.
Your Brownie Questions, Answered!
Let’s tackle a few common questions to make sure your brownie-baking is foolproof.
Q: My brownies are cakey, not fudgy. What happened?
A: The most common culprit is overbaking. Remember, take them out when the center is still slightly soft! Also, check your flour measurement—if you packed too much flour in, it will lead to a drier, cakier texture.
Q: Can I make these brownies ahead of time?
A: Absolutely! In fact, I think they taste even better the next day. The flavors have more time to meld, and the texture becomes even more soft and cohesive. Just store them covered at room temperature.
Q: My frosting is too runny/thick. How can I fix it?
A> No worries! Frosting is all about balance. If it’s too runny, beat in a little more powdered sugar, a quarter cup at a time. If it’s too thick to spread, add a teaspoon of milk until it reaches your desired consistency.
Q: Why frost them while they’re warm?
A> This is the signature move! Spreading the frosting on the warm brownies creates a thin, glossy layer that partially melts and bonds with the brownie itself. It creates a unique texture you can’t get by frosting them cold.
Let’s Talk Nutrition (The Realistic, Foodie Way)
Friends, we’re here for a good time, not a long time—and that includes enjoying decadent desserts without guilt! These brownies are a treat, through and through. They’re made with real ingredients like butter, eggs, and sugar, and they’re meant to be savored and shared.
Approximately, one brownie (based on 24 servings) contains around 290 calories, 14g of fat, and 28g of sugar. My philosophy at Feastical has always been about balance. Enjoy one (or two!) of these incredible brownies with your afternoon coffee, pack them in a lunchbox for a special surprise, or share them with neighbors. Food is love, and these brownies are packed with it. So, enjoy every single bite mindfully and joyfully. Life’s too short for mediocre desserts!
Print
50-Year-Old Lunchroom Ladies Brownies : Soft, Fudgy, and Frosted to Perfection
- Total Time: 35 mins
Description
Thick, fudgy, and topped with that melt-into-the-warm-brownie frosting—this is the Lunch Lady Brownie you grew up loving. It’s rich, nostalgic, and dangerously easy to make. Straight from a 50-year-old cafeteria recipe passed down through generations, this brownie delivers pure chocolate comfort in every bite. Whether you’re baking for a potluck, a craving, or just a trip down memory lane, these will transport you right back to the lunchroom—minus the hairnets!
Ingredients
For the Brownies
-
1 cup butter, melted
-
½ cup unsweetened cocoa powder
-
2 cups granulated sugar
-
4 large eggs, room temp
-
4 tsp vanilla extract
-
2 cups all-purpose flour
-
1 cup chopped nuts (optional)
-
Pinch of salt
For the Frosting
-
¼ cup softened butter
-
¼ cup milk (whole or evaporated)
-
¼ cup unsweetened cocoa powder
-
3 cups powdered sugar
-
Dash of salt
Instructions
-
Preheat & Prep
Heat oven to 350°F (175°C). Grease a 9×13-inch pan or line with parchment for easy lifting. -
Mix the Batter
In a large bowl, whisk melted butter and cocoa until smooth. Add sugar, mix well, then beat in eggs one at a time. Stir in vanilla, then gently fold in flour (and nuts if using) until just combined. -
Bake
Spread batter evenly into the pan. Bake 20–25 minutes—edges should pull slightly from the pan while the center stays soft. -
Make the Frosting
Beat butter, cocoa, and salt together. Gradually add powdered sugar, alternating with milk, until smooth and spreadable. -
Frost While Warm
Spread frosting over hot brownies so it melts slightly into the surface. Cool completely before cutting into squares.
Notes
-
Slightly underbake for fudgy texture.
-
Use evaporated milk for ultra-creamy frosting.
-
Add a sprinkle of flaky salt for a gourmet touch.
- Prep Time: 10 mins
- Cook Time: 25 mins
Nutrition
- Calories: 290 Cal Per Serving
The Last, Delicious Bite
And there you have it! The legendary 50-Year-Old Lunchroom Ladies Brownie, ready to bring a wave of sweet nostalgia and chocolatey comfort into your kitchen. This recipe is a testament to the fact that the best foods aren’t always the most complicated. They’re the ones made with simple ingredients, a little bit of love, and a whole lot of history.
I hope you’ll bake a batch, fill your home with that incredible chocolate-vanilla aroma, and create some new happy memories around this old-school classic. Don’t forget to tag me @Feastical on social media when you make them—I love seeing your culinary creations!
Until next time, keep your whisks busy and your hearts full.
Final Thoughts:
So, there you have it—the secret to recapturing one of childhood’s simplest joys. This isn’t just a brownie recipe; it’s a time machine disguised as dessert. It’s a reminder that the best memories are often sweet, a little messy, and shared with others. Now, go preheat that oven and make some new memories. Happy baking!