Low-Point Chicken Nachos (Only 3 WW Points)
Low-Point Chicken Nachos That Actually Taste Like a Party (Only 3 WW Points!)
Hey friends, Beau here from Feastical! Let’s talk about one of life’s great dilemmas: the intense, soul-deep craving for a loaded plate of nachos versus the desire to feel good about what you’re eating. For the longest time, I felt like I had to choose between the two. I’d stare longingly at those melty, crunchy, gloriously topped chips, then sigh and reach for a rice cake. Not exactly the same vibe, right?
Well, I’m here to tell you that the era of sad, FOMO-induced snacks is over. Today, we’re making magic. We’re crafting a plate of Chicken Nachos so ridiculously flavorful, so texturally perfect, and so utterly satisfying that you’ll do a double-take when I remind you the whole glorious plate is just 3 PersonalPoints on Weight Watchers. Yes, you read that right. Three.
This isn’t about deprivation; it’s about clever, feel-good creation. We’re using a few brilliant ingredient swaps and some classic kitchen love to build a snack (or heck, a full dinner—no judgment here) that tastes like a warm hug from your favorite taqueria. So, grab your favorite apron and let’s turn that craving into a celebration. Your spatula and your taste buds are about to become best friends.
The Nacho Negotiation: A Kitchen Confession
This recipe was born from a very specific, very relatable moment. Picture it: A big game Sunday a few years back. Friends were over, and the spread was legendary—except for me. I was deep in my wellness journey, watching a mountainous platter of fully-loaded nachos make its way around the room like a delicious, cheesy comet. Each pass was a tiny torture.
I finally cracked. I retreated to the kitchen, determined to make something I could enjoy. I rummaged through the fridge: leftover salsa chicken, those high-fiber tortillas I’d been experimenting with, a little tub of light queso. In a flash of “what’s the worst that could happen?” energy, I baked the tortillas into chips, piled everything on, and gave it a zap. The first bite was a revelation. It was crispy, savory, creamy, and spicy—everything I was craving! I brought my little personal plate back to the couch, and I kid you not, three people asked if they could try a bite. My “diet” food got devoured. That’s the moment I knew: feeling good about your food should never mean missing out on the fun. This recipe is that delicious pact with myself, and now, I’m so excited to share it with you.
Your Nacho Blueprint: Simple Ingredients, Big Flavor
Here’s the beautiful part: this recipe is all about smart staples. No weird, hard-to-find items. Just a few key players that do the heavy lifting on flavor while keeping things light. Let’s break it down:
- 2 Xtreme Wellness High Fiber Tortillas (1 WW point each): This is our game-changing base. These tortillas are soft and pliable, but when baked, they transform into crispy, sturdy chips that can hold all our toppings without getting soggy. The fiber content is a hero, keeping you full and happy. Chef’s Insight: Don’t have this brand? Any high-fiber, low-point tortilla or flatbread will work. The mission is maximum crunch for minimum points.
- Cooking Spray (like PAM) & Salt: Our dynamic duo for perfect chips. A light mist of spray helps the salt adhere and promotes even, golden baking. Substitution Tip: If you have an oil mister with your favorite avocado or olive oil, that works great too—just be mindful of a light coating.
- 1 Cup Shredded Salsa Chicken (0 WW points): The hearty, flavorful star. I make a big batch of this in my slow cooker weekly—it’s the ultimate healthy meal prep. How-to: Just toss 1-2 boneless, skinless chicken breasts into your slow cooker and cover with 1 cup of your favorite salsa (I like a verde salsa for a brighter flavor!). Cook on low for 6-8 hours or high for 3-4, then shred with two forks. It’s juicy, tender, and packed with flavor.
- 5 Tbsp Trader Joe’s Queso (1 WW point for the whole amount!): Our melty, creamy glue. TJ’s Queso is a legend for a reason—it’s deliciously cheesy and surprisingly low in points. Chef’s Insight: If you don’t have a Trader Joe’s nearby, look for any light or “skim milk” queso dip at your grocery store. Always check the label for the best points value.
- 3 Tbsp Trader Joe’s Fat-Free Sour Cream (0 WW points): The cool, tangy finish. This adds that essential creamy element that balances the spice. Substitution Tip: Plain, non-fat Greek yogurt is a fantastic, protein-packed alternative with the same tangy kick.
Optional Flair: Want to add a zero-point flavor bomb? Dice up some fresh tomatoes, onions, jalapeños, or cilantro for a bright, fresh topping. A squeeze of lime juice over the whole plate is also a game-changer.
Building Your Masterpiece: Step-by-Step
Alright, team. Let’s get building. This process is fast, fun, and fills your kitchen with the best smells. Follow these steps, and you’ll have a perfect plate in about 20 minutes flat.
- Preheat & Prep: Fire up your oven to 350°F (175°C). This is our tool for transformation. While it heats, grab your tortillas. Using a sharp knife or a pizza cutter, slice each tortilla into 8 triangles—just like you’re cutting a pizza. This creates the perfect chip size.
- Make Your Chips: Lay the tortilla triangles in a single layer on a baking sheet. Give them a very light mist with your cooking spray—we’re talking a quick pass, not a drenching. Then, sprinkle a pinch of salt over them. This little step makes all the difference, seasoning the base layer of our dish. Pop the sheet into the preheated oven and bake for 12-15 minutes. You’re looking for golden edges and a crisp texture. Chef’s Hack: For extra-even cooking, give the sheet a quick rotate halfway through. And don’t crowd the pan! If needed, use two sheets.
- Warm Your Toppings: While your homemade chips are getting crispy, warm up your salsa chicken and queso. I usually just microwave the chicken for 60 seconds and the queso for 30 seconds. You want everything warm and ready for assembly. Hot toppings + hot chips = no sad, cold nachos.
- The Grand Assembly: Take your beautiful, golden chips out of the oven. Leave the oven on! Immediately, spread the warm shredded chicken evenly over the chips. Then, dollop and drizzle that warm queso all over the top. Don’t be shy! The goal is cheesy coverage.
- The Final Melt: Here’s the pro move. Slide the entire loaded sheet back into the oven for just 2-3 minutes. This melts the queso perfectly into the chicken and chips, bonding everything together in glorious harmony. If you’re in a rush, a 60-second blast in the microwave works too, but the oven gives a slightly better texture.
- Finish & Serve: Carefully remove your nacho creation from the oven. Immediately, add your cool, creamy dollops of fat-free sour cream. This contrast of temperatures and textures is key. Add any fresh toppings you like (hello, jalapeño slices!), and serve right away. Nachos wait for no one!
How to Serve & Savor
This recipe makes one incredibly generous personal plate—the kind you can curl up on the couch with. But let’s talk presentation and pairing, because we eat with our eyes first!
Plating: I love serving these right on the baking sheet lined with parchment paper for that rustic, “dig in” feel. For a prettier presentation, use a wide, shallow bowl or a small platter. The key is to avoid piling them too high, which can lead to uneven topping distribution. We want every chip to have its moment in the spotlight.
The Perfect Pairings: While these nachos are a complete meal on their own, they play well with others! For a true feast, pair them with a big, crisp side salad with a zesty lime vinaigrette (zero-point dressing, of course). If you’re serving a crowd, multiply the recipe and let everyone build their own mini sheet-pan nachos. Drink pairing? A sparkling water with lots of lime, an icy light beer, or a refreshing unsweetened iced tea are all fantastic companions.
Make It Your Own: Delicious Variations
The beauty of this framework is its flexibility. Once you’ve mastered the base, the nacho world is your oyster! Here are a few of my favorite twists:
- Buffalo Chicken Nachos: Swap the salsa chicken for shredded chicken tossed in 2-3 tbsp of your favorite zero-point Buffalo hot sauce. Use a light blue cheese dressing (thin it with a little buttermilk or yogurt) instead of sour cream. Spicy, tangy, and incredible.
- BBQ “Pizza” Nachos: Use shredded chicken tossed in 2 tbsp of sugar-free BBQ sauce. Top with diced red onion, a sprinkle of smoked paprika, and fresh cilantro. The queso still works, or try a light sprinkle of part-skim mozzarella (just track it!).
- Fully Loaded Veggie Nachos: Keep it zero-point on the toppings! Skip the chicken and load up with black beans (rinsed and drained), roasted corn, diced bell peppers, onions, and jalapeños. Add extra salsa and maybe a sprinkle of nutritional yeast for a cheesy flavor.
- Breakfast Nachos: Who says nachos are just for dinner? Use the baked chips as a base. Top with scrambled egg whites, a crumbled turkey sausage patty, and a drizzle of the queso. Top with pico de gallo. Game-changing brunch.
- Shrimp & Avocado Nachos: For a pescatarian twist, replace the chicken with cooked, chopped shrimp seasoned with chili powder and lime. Add a few thin slices of avocado (track the healthy fat points) for creamy richness.
Beau’s Kitchen Notes
This recipe has become a weekly staple in my house, and it’s evolved in fun ways. I started making the chips in my air fryer for an even quicker crunch (380°F for 5-6 minutes, shaking once). Sometimes, I’ll double or triple the chicken and chip base and build a huge platter for movie night with my partner—we just track our portions. It feels so normal and festive.
A funny lesson learned: I once got overzealous with the cooking spray on the chips. I mean, I *soaked* them, thinking “more crispiness!” Wrong. They came out oddly tough and fried in spots. A light, even mist is truly the secret. It’s a lesson in restraint that makes the end result even better. Food metaphors, am I right?
Your Nacho Questions, Answered
- Q: My tortilla chips are chewy, not crispy. What happened?
A: This usually means they were either under-baked or crowded on the pan. Ensure they’re in a single layer with a little space between them, and bake until the edges are distinctly golden brown. Ovens vary, so yours might need an extra minute or two. - Q: Can I make these ahead of time?
A: Nachos are best enjoyed immediately. However, you can prep all the components ahead! Bake the chips and store them in an airtight container at room temp. Keep your chicken and queso separate in the fridge. When ready, warm the toppings, spread everything on the chips, and do the final melt. It’s a 5-minute assembly. - Q: I can’t find Xtreme Wellness or Trader Joe’s products. Help!
A> No problem! The formula is simple: Low-point tortilla + low-point cheese sauce + lean protein. Look for any high-fiber, low-carb tortilla (like Ole Xtreme Wellness or Mission’s Carb Balance). For queso, scout your grocery dairy/dip aisle for a “light” version. Compare labels to find the lowest points option. The community in WW apps is great for finding specific brand recommendations in your area. - Q: How do I accurately track this?
A> I track it as: 1 serving of the specific tortillas (2), 1 serving of the specific queso (1), and 0 for the chicken, salsa, cooking spray, and fat-free sour cream. Always double-check the barcodes in your app for the most accurate points, as formulas can change.

Low-Point Chicken Nachos (Only 3 WW Points)
Description
Low-Point Chicken Nachos (Only 3 WW Points!)
Crispy, cheesy, flavorful nachos that actually feel indulgent—but are just 3 PersonalPoints. Perfect for a snack, game day, or even a full meal.
Ingredients
-
2 high-fiber, low-point tortillas (1 WW point each) – e.g., Xtreme Wellness or similar
-
Cooking spray & pinch of salt
-
1 cup shredded salsa chicken (0 WW points) – leftover or prepped in slow cooker
-
5 tbsp light queso (1 WW point total) – Trader Joe’s or any low-fat/light cheese dip
-
3 tbsp fat-free sour cream (0 WW points) – or plain non-fat Greek yogurt
-
Optional toppings: diced tomatoes, onions, jalapeños, cilantro, squeeze of lime
Instructions
1. Preheat & Prep
-
Preheat oven to 350°F (175°C).
-
Slice each tortilla into 8 triangles (like pizza slices).
2. Make Crispy Chips
-
Lay tortilla triangles in a single layer on a baking sheet.
-
Lightly mist with cooking spray and sprinkle with salt.
-
Bake 12–15 minutes, turning halfway if needed, until golden and crispy.
3. Warm Toppings
-
While chips bake, warm your salsa chicken (60 sec in microwave) and queso (30 sec in microwave).
4. Assemble Nachos
-
Spread the warm chicken evenly over chips.
-
Drizzle/dollop the queso over the chicken and chips.
5. Melt & Finish
-
Return the loaded nachos to the oven for 2–3 minutes to meld the cheese and chicken.
-
Remove and add sour cream and optional fresh toppings (jalapeños, tomatoes, lime juice, cilantro).
Serving Suggestions
-
Serve on the baking sheet for a casual, “dig-in” feel or a small platter for a prettier presentation.
-
Pair with a zesty salad or sparkling water, light beer, or unsweetened iced tea.
Notes
-
Air fryer option: 380°F for 5–6 minutes, shaking halfway for extra crunch.
-
Don’t over-spray the chips—light mist only.
-
Prep components ahead: chips at room temp, chicken/queso in fridge; assemble and melt when ready.
Nutritional Information*
Here’s a breakdown for the entire recipe as written (one generous serving):
- Calories: ~290
- Protein: 27g (This high protein count is a huge win for staying full!)
- Carbohydrates: 25g
- Dietary Fiber: 12g (Nearly half the carbs are fiber—that’s the magic of those tortillas.)
- Fat: 9g
- WW PersonalPoints: 3
*This is an approximation based on the specific brands listed. Always calculate using your own tracker with the exact products you use for the most accurate points count.
Prep Details: Prep Time: 5 minutes | Cook Time: 15 minutes | Total Time: 20 minutes | Servings: 1
Final Thoughts from My Kitchen to Yours
Friends, this recipe is more than just a list of ingredients and steps. It’s a reminder that taking care of yourself can and should be delicious. It’s proof that with a little creativity, you don’t have to give up the foods that feel like celebration.
These Low-Point Chicken Nachos are my go-to for busy weeknights, solo movie dates, and anytime I need a guaranteed smile from my plate. They’re simple, they’re fast, and they absolutely deliver on the comfort food promise. I hope this recipe finds its way into your regular rotation and brings you as much joy as it has brought me.
Sausage Flatbread Pizza : Creamy, Sweet & Spicy in Every Bite
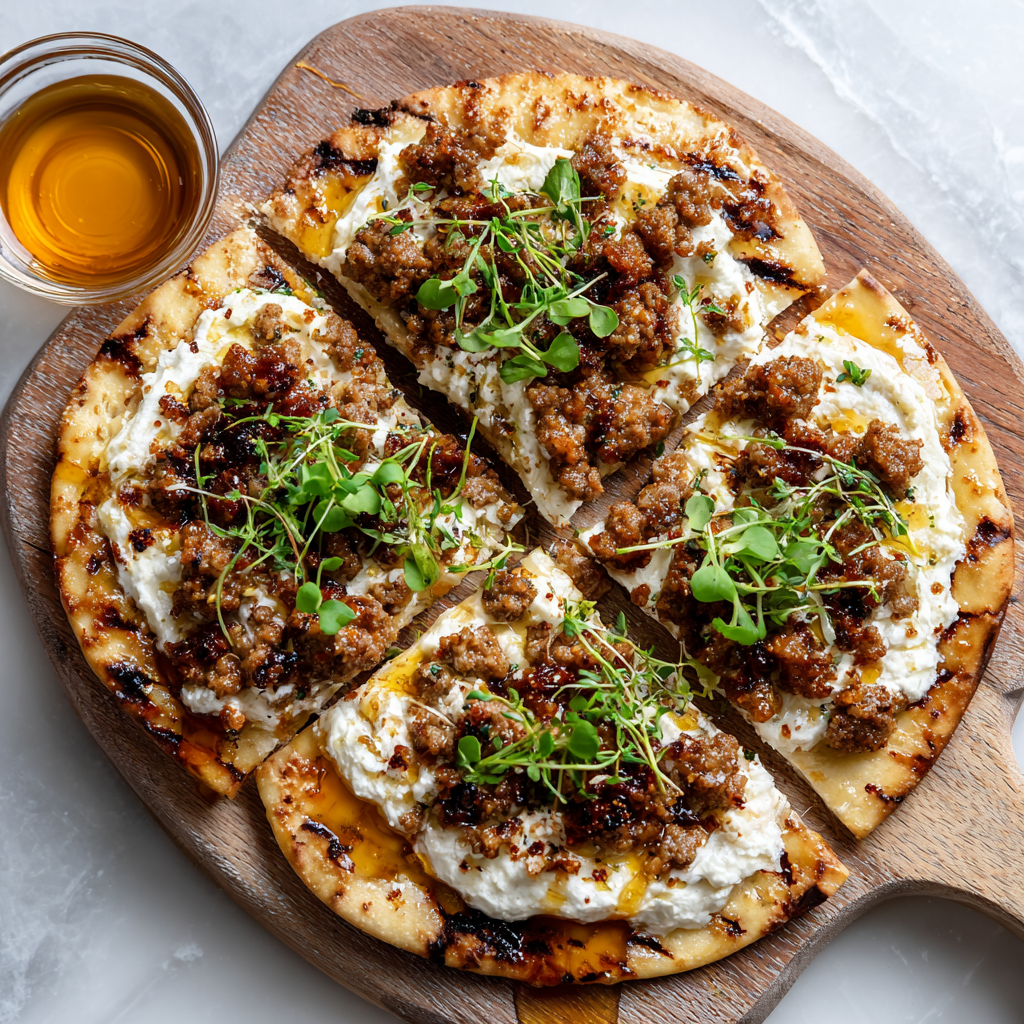
Sausage Flatbread Pizza – Creamy, Sweet & Spicy in Every Bite
Hey friends, Beau here from Feastical! Let’s talk about the beautiful chaos of a weeknight. You know the scene: stomachs are rumbling, time is ticking, and the siren call of takeout menus is getting louder. But what if I told you that in less time than it takes for delivery to arrive, you could be pulling a golden, bubbling, flavor-packed masterpiece out of your own oven?
That’s the magic of this Sausage Flatbread Pizza. It’s my go-to hero when I want something that feels gourmet, tastes incredibly complex, but asks for practically zero effort. We’re talking about a crispy flatbread canvas slathered with luscious, cool ricotta, piled high with savory crumbled sausage and deeply sweet caramelized onions, then finished with a drizzle of spicy-sweet hot honey that makes your taste buds sit up and applaud.
This isn’t just a recipe; it’s a strategy. A strategy for winning the weeknight, for impressing your friends without breaking a sweat, and for creating that warm, satisfied feeling that only a truly great meal can bring. So, grab your favorite baking sheet and let’s turn your kitchen into the best pizzeria in town—no dough-tossing skills required.
The Night We Fell for Flatbread Pizza
I have to confess, my love affair with flatbread pizza started in a moment of sheer desperation. It was a rainy Tuesday, my fridge was sending out mixed signals (half an onion, some ricotta from a pasta project, and a lonely tube of sausage), and my better half was giving me that classic “I’m-hungry-but-don’t-want-to-be-a-bother” look. The classic pizza delivery felt too predictable.
On a whim, I spotted a package of naan bread in the freezer—leftover from a long-forgotten curry night. Lightbulb moment. I toasted it up, smeared on that ricotta, and used up every bit of those fridge stragglers. When I pulled it out of the oven and drizzled it with the spicy honey I keep for my fried chicken, the kitchen went silent. Then came the sound: that perfect crunch followed by a happy sigh. It was a 30-minute miracle that felt like a cozy Friday night. That’s the beauty of cooking; sometimes the best recipes aren’t planned, they’re rescued from the depths of the fridge and become lifelong favorites.
Your Flavor Toolkit: What You’ll Need
Here’s the beautiful part: this recipe is more of a blueprint than a rigid rulebook. The ingredients are simple, and I’ve got swaps for days. This is what you’ll need to gather:
- 2 Flatbreads or Naan: This is our foundation. I love the chewy-yet-crispy texture of naan, but any store-bought flatbread or even a pre-baked pizza crust works. Chef’s Insight: If you have pita bread, use it! Just watch the baking time as it can crisp up faster.
- ½ cup Ricotta Cheese: Our creamy, dreamy base. It’s milder than tomato sauce and creates the perfect backdrop for the other flavors. Substitution Tip: No ricotta? Whole-milk cottage cheese blended until smooth, or even a soft goat cheese, would be fantastic.
- 1 tsp Olive Oil: A little drizzle adds richness and helps the flatbread get gorgeously golden.
- ½ lb Italian Sausage: The flavor anchor. I use spicy Italian sausage for that kick, but sweet/mild works too. Chef’s Insight: For a lighter option, remove the sausage from its casing and crumble it as it cooks for perfect, bite-sized pieces.
- 1 Small Onion, thinly sliced: This is non-negotiable for that sweet, umami depth. Yellow or white onions are perfect here.
- 1 tsp Butter: The secret weapon for caramelizing. Butter brings out the onion’s natural sugars like nothing else.
- Salt & Pepper, to taste: Season at every stage – it builds layers of flavor.
- 2 tbsp Hot Honey: The superstar finish! It’s the magical balance of sweet and heat. DIY Hack: No store-bought? Gently warm 2 tbsp of honey with ¼ tsp of red pepper flakes (or a pinch of cayenne) for 30 seconds. Let it cool slightly. Instant magic.
- Optional: Fresh Thyme or Arugula: A sprinkle of thyme before baking adds an herby perfume. A handful of peppery arugula tossed on top after baking adds a fresh, green crunch that cuts through the richness beautifully.
Let’s Build Some Magic: Step-by-Step
Ready? Apron on, oven preheating, let’s do this. We’ll tackle this in three easy acts: the onions, the assembly, and the grand finale.
- Caramelize Those Onions (The Patient Part): In a skillet, melt your butter over medium-low heat. Add your thinly sliced onions and a pinch of salt. The salt helps draw out the moisture. Now, here’s the chef hack: be patient. Don’t crank the heat! Let them cook slowly, stirring maybe every 5 minutes, for 10-15 minutes. You’re waiting for them to turn a soft, golden brown and smell incredibly sweet. This step is what gives the pizza its sophisticated flavor base. While they’re working their magic, you can cook your sausage.
- Prep & Preheat: Crank your oven to 400°F (200°C). This hot oven will give us a crisp crust without drying out the toppings. Place your flatbreads on a baking sheet – no need for parchment, but a light spritz of oil on the sheet never hurts.
- The Creamy Base: Spoon that ricotta onto the flatbreads and spread it evenly, leaving just a tiny border for the “crust.” Drizzle lightly with the olive oil and season with a crack of black pepper and a tiny pinch of salt (remember, the sausage and onions are seasoned too).
- Top It Up: Now for the fun part! Scatter the cooked, crumbled sausage evenly over the ricotta. Follow it with those glorious, golden caramelized onions. The beauty is in the rustic distribution – no need to be perfect.
- Bake to Perfection: Slide the baking sheet into your hot oven. Bake for 10-12 minutes. You’re looking for the edges of the flatbread to be deeply golden and crisp, and the toppings to be heated through and bubbling in spots. If you love extra crispness, a minute under the broiler at the end will do the trick (watch it like a hawk!).
- The Grand Finale: The second it comes out of the oven, that’s when the magic happens. Drizzle the hot honey generously all over the top. If you’re using arugula or fresh herbs, toss them on now. The residual heat will slightly wilt the greens, which is exactly what you want. Slice it up and serve immediately – this is peak eating experience!
How to Serve This Showstopper
Presentation is part of the joy! I like to place the whole baked flatbreads right on a big wooden cutting board in the center of the table. It feels communal and inviting. Slice them into rustic wedges or rectangles with a pizza cutter or sharp knife.
This pizza is a complete meal in itself, but if you’re feeding a crowd or want to round things out, keep it simple. A bright, lemony arugula salad with a sharp vinaigrette is the perfect foil to the rich, creamy pizza. For a cozy night in, a bowl of roasted tomato soup for dipping would be absolutely divine. And let’s not forget the drinks: a crisp lager, a glass of chilled Pinot Noir, or even a sparkling lemonade all make fantastic companions.
Make It Your Own: Delicious Twists
The fun doesn’t stop here. This recipe is a perfect playground for creativity. Here are a few of my favorite spins:
- The “Everything But The Kitchen Sink” Veggie: Swap the sausage for a mix of roasted veggies! Try thin slices of bell pepper, zucchini, and mushrooms tossed in olive oil and roasted at 400°F for 15 minutes before adding them to the pizza.
- Fig & Prosciutto Elegance: For a fancier appetizer version, use the ricotta base, top with a few thin slices of prosciutto and fresh, sliced figs (or a dollop of fig jam). Bake as directed and finish with the hot honey and a sprinkle of chopped rosemary.
- Break-for-Brunch Pizza: Before baking, use the back of a spoon to create small wells in the ricotta. Crack an egg into each well. Bake until the egg whites are set but the yolks are still runny. Finish with hot honey and chopped chives. Mind-blowing brunch material.
- White Chicken & Spinach: Use shredded rotisserie chicken and a handful of fresh baby spinach (it wilts perfectly in the oven) instead of sausage. A little sprinkle of garlic powder in the ricotta takes it up a notch.
- Dairy-Free Delight: Use a creamy, plain plant-based yogurt or spreadable cashew cheese instead of ricotta. Opt for a plant-based sausage crumble or use those roasted veggies from variation #1.
A Few Notes From My Kitchen to Yours
This recipe has become such a staple in my home that it’s evolved in little ways. I almost always double the caramelized onions and keep the extra in the fridge—they’re amazing on burgers, in omelets, or just on a cracker with cheese. Also, I’ve learned that letting the ricotta come to room temperature for 10 minutes before spreading makes it infinitely easier to work with.
The biggest lesson? Don’t skip the hot honey. I mean it! That sweet-heat finish is what transforms this from a simple sausage pizza to a “wow, what is that flavor?!” experience. It’s the culinary equivalent of a perfect high-five at the end of a meal.
Your Questions, Answered
Q: My flatbread got soggy in the middle. What happened?
A: This usually means either the ricotta was spread too thickly, or the toppings were too wet. Make sure your cooked sausage is drained of excess grease and your onions are properly caramelized (not steaming in their own liquid). Also, ensure your oven is fully preheated for that instant crisp.
Q: Can I make these ahead of time?
A: You can absolutely prep the components! Caramelize the onions and cook the sausage up to 3 days ahead. Store them separately in the fridge. Assemble and bake when you’re ready for the freshest, crispiest result.
Q: What’s the best way to reheat leftovers?
A: To revive the crunch, skip the microwave. Reheat slices in a toaster oven or regular oven at 375°F for 5-7 minutes, or in a dry skillet over medium heat until the bottom re-crisps.
Q: I don’t have a skillet for the onions. Can I bake them?
A: Yes! Toss sliced onions with the butter (melted), a little oil, salt, and pepper on a parchment-lined sheet. Roast at 400°F for 20-25 minutes, stirring once, until golden. It’s a hands-off caramelization method I love.

Sausage Flatbread Pizza : Creamy, Sweet & Spicy in Every Bite
Description
Sausage Flatbread Pizza – Creamy, Sweet & Spicy
A weeknight hero: crispy flatbread, creamy ricotta, savory crumbled sausage, sweet caramelized onions, and a finishing drizzle of spicy-sweet hot honey. Ready in about 30 minutes.
Ingredients
-
2 flatbreads or naan (store-bought, pre-baked works too)
-
½ cup ricotta cheese
-
1 tsp olive oil
-
½ lb Italian sausage (sweet, mild, or spicy)
-
1 small onion, thinly sliced
-
1 tsp butter
-
Salt & pepper, to taste
-
2 tbsp hot honey (or honey + ¼ tsp red pepper flakes)
-
Optional: Fresh thyme or arugula
Chef Notes & Substitutions:
-
Use pita bread or pre-baked pizza crust if you prefer.
-
Substitute ricotta with smooth cottage cheese or soft goat cheese.
-
Turkey sausage works for a lighter version.
-
Hot honey can be DIY: warm honey + red pepper flakes.
Instructions
1. Caramelize the Onions
-
Melt butter in a skillet over medium-low heat.
-
Add onions and a pinch of salt. Cook slowly, stirring every 5 minutes, for 10–15 minutes until soft, golden, and sweet.
2. Cook the Sausage
-
Remove sausage from casing, crumble into a skillet, and cook over medium heat until browned and fully cooked. Drain excess grease.
3. Prep the Flatbread
-
Preheat oven to 400°F (200°C).
-
Place flatbreads on a baking sheet. Lightly drizzle with olive oil.
4. Add the Ricotta Base
-
Spread ricotta evenly over flatbreads, leaving a small border.
-
Season lightly with salt and pepper.
5. Layer Toppings
-
Scatter cooked sausage evenly over the ricotta.
-
Top with caramelized onions. Optional: sprinkle fresh thyme.
6. Bake
-
Bake in preheated oven 10–12 minutes until flatbread edges are golden and crisp.
-
Optional: 1 minute under the broiler for extra crispness.
7. Finish & Serve
-
Drizzle hot honey over the pizza immediately.
-
Optional: top with arugula or fresh herbs.
-
Slice into wedges or rectangles and serve hot.
Notes
-
Caramelized onions can be doubled and stored for other meals.
-
Let ricotta sit at room temperature 10 minutes before spreading for easier handling.
-
Don’t skip the hot honey – it transforms the flavor from “good” to “wow.”
Nutritional Information (Per Serving)
Estimated for 1 of 4 servings (¼ of the total recipe). Please note: This is an estimate and can vary based on specific ingredients used and portion sizes.
- Calories: ~460
- Protein: 21g
- Carbohydrates: 32g
- Fat: 28g
- Sugar: 8g
This pizza is a satisfying balance of protein, carbs, and fats. Using leaner turkey sausage or increasing the veggie-to-sausage ratio can lower the fat content, while whole-grain flatbread can add fiber. Remember, it’s all about balance and enjoyment!
Final Slice of Thought
So there you have it, friends—my not-so-secret weapon for turning an ordinary evening into a little feast. This Sausage Flatbread Pizza proves that incredible flavor doesn’t need to be complicated. It’s about smart shortcuts (thank you, store-bought flatbread!), layering a few powerhouse ingredients, and finishing with a flourish that makes everyone smile.
I hope this recipe finds its way into your regular rotation and becomes your own Tuesday night hero. Give it a try, play with the variations, and most importantly, have fun with it. That’s what Feastical is all about. Now, go forth and bake something awesome! And when you do, tag me or drop a comment—I’d love to see your delicious creations.
Until next time, keep it flavorful!
– Beau

Sausage Sliders : Cheesy, Buttery, and Totally Irresistible
Sausage Sliders: Your New Secret Weapon for Cheesy, Buttery Bliss
Why These Sliders Will Steal the Show at Your Next Gathering
Hey friends, Beau here from Feastical! Let’s talk about a universal truth: nobody, and I mean nobody, can resist a warm, cheesy, buttery slider. It’s the food equivalent of a high-five. And today, I’m handing you the blueprint for the ultimate crowd-conquering, flavor-bombing, conversation-stopping Sausage Slider. Imagine this: juicy, savory Italian sausage, a blanket of oozy provolone cheese, all hugged by the impossible sweetness of a Hawaiian roll, and then the whole situation gets a golden shower of garlic-infused butter. Are you swooning yet? You should be.
These aren’t just sandwiches; they’re a culinary event. They’re what you make when you want to be the hero of game day, the star of the potluck, or the genius behind a ridiculously easy and satisfying weeknight dinner that makes everyone think you slaved for hours. The best part? They come together in about 25 minutes with minimal fuss. We’re keeping it simple, soulful, and deeply satisfying—just like we like it around here. So, preheat that oven, and let’s make some magic happen together.
The Tailgate That Started It All
I have to take you back to a chilly autumn Saturday a few years ago. My buddy Dave was hosting a huge tailgate, and my job was “bring something hearty that can feed a small army.” I wanted something more exciting than plain burgers, easier than individual sliders, and more fun than a casserole. I started playing around in the kitchen, and the idea for these baked sliders was born. I brought a giant pan, still wrapped in foil and smelling like heaven, straight to the parking lot.
Friends, they were gone in under six minutes. I’m not exaggerating. People were coming back for thirds, asking for the recipe, and one guy (hi, Mark!) literally hugged the empty pan. That’s when I knew this recipe was special. It’s more than food; it’s a catalyst for laughter, high-fives, and shared joy. Every time I make them now, I think of that tailgate—the crisp air, the team spirit, and the simple, delicious thing that brought us all together for a perfect moment.
Gathering Your Flavor Crew
Here’s the beautiful cast of characters you’ll need. Each one plays a crucial role in creating that perfect bite. Don’t worry, I’ve got notes and swaps for you!
- 1 lb Italian Sausage: This is your flavor foundation. I love the fennel and herb kick in sweet or mild Italian sausage. Chef’s Insight: For a lighter version, use turkey or chicken Italian sausage. For spice lovers, hot Italian sausage is a glorious choice. Just squeeze it right out of the casings into your pan.
- 1 pack (12-count) Hawaiian Rolls: The secret weapon! Their soft, sweet, pillowy texture is the perfect contrast to the savory sausage. Sub Tip: Can’t find Hawaiian rolls? Brioche rolls or even soft potato rolls will work in a pinch.
- 6 slices Provolone Cheese: Provolone melts like a dream and has a mild, slightly smoky flavor that doesn’t overpower. Chef’s Insight: Feel free to mix it up! Sharp cheddar, mozzarella, or even pepper jack for a kick are all fantastic teammates.
- 2 tablespoons Butter, melted: This is what creates that irresistible, glossy, golden-brown top. Salted or unsalted works fine here.
- 1 clove Garlic, minced: Fresh is best! It infuses the butter with aromatic goodness. Quick Hack: In a serious pinch, 1/4 teaspoon of garlic powder stirred into the melted butter will do.
- 1/2 teaspoon Italian Seasoning: A little herbaceous lift. This simple blend of dried oregano, basil, thyme, and rosemary ties everything together.
- Optional for serving: Marinara Sauce or Banana Peppers: The supporting actors! A little cup of warm marinara for dipping is classic, while tangy banana peppers add a brilliant vinegary crunch.
Let’s Build Some Deliciousness: Step-by-Step
Follow these steps, and you really can’t go wrong. I’m walking you through each one with all my favorite kitchen hacks!
- Preheat & Prep: Fire up your oven to 350°F (175°C). Grab a 9×13-inch baking dish and give it a quick mist of cooking spray or a rub of butter. This prevents any sneaky sticking.
- Brown That Sausage: Heat a skillet over medium heat. Add your sausage (casings removed) and break it up with a wooden spoon or spatula. Cook until it’s beautifully browned and no pink remains, about 8-10 minutes. Pro Tip: Don’t just drain the grease—transfer the cooked sausage to a plate lined with a paper towel. This soaks up excess fat and keeps your sliders from getting greasy.
- Slice the Rolls: Here’s a game-changer: keep the Hawaiian rolls connected! Using a long, sharp serrated knife, slice the entire sheet of rolls in half horizontally, so you have one giant top “lid” and one giant bottom “base.” Place the bottom half snugly into your prepared baking dish.
- Layer the Goodness: Spread the drained, cooked sausage evenly over the bottom rolls. Press it down gently so it adheres. Now, drape your slices of provolone cheese over the sausage layer. You might need to tear a slice or two to get full coverage—embrace the rustic look! Gently place the top half of the rolls back on, like putting the lid on the coziest sandwich house.
- Create the Garlic Butter Glaze: In a small bowl, combine the melted butter, minced garlic, and Italian seasoning. Give it a good whisk. Chef’s Hack: Brush this heavenly mixture generously over the tops of the rolls. Get into every nook and cranny! This butter is what gives them that gorgeous color and incredible flavor.
- Bake to Perfection: Tightly cover the whole baking dish with aluminum foil. This traps steam and melts the cheese perfectly without over-browning the tops. Bake covered for 10 minutes. Then, remove the foil and bake for another 5-7 minutes, until the tops are a perfect golden brown and you can hear the cheese sizzling inside.
- The Final Touch: Pull the pan out of the oven and let it rest for just 2-3 minutes. This makes them easier to slice. Then, use a sharp knife to slice along the roll seams, creating 12 individual sliders. Watch that cheese pull—it’s the best part!
Serving Your Masterpiece
Presentation is part of the fun! You can serve these right from the baking dish for a casual, family-style vibe. For a party, transfer them to a platter and garnish with a little sprinkle of fresh chopped parsley or a few extra banana peppers on the side. I always put out a bowl of warm marinara sauce for dipping—it takes them to a whole new level of cozy.
What to serve alongside? Keep it simple. A big, crisp green salad with a tangy vinaigrette cuts through the richness perfectly. For the ultimate game day spread, pair them with some crispy potato wedges, crunchy veggie sticks, or a bowl of chili. And don’t forget the napkins—these are gloriously messy in the best possible way.
Make It Your Own: Delicious Twists & Swaps
The basic recipe is a home run, but feel free to get creative! Here are a few of my favorite ways to mix it up:
- Pepperoni Pizza Style: After adding the sausage, scatter a handful of mini pepperoni over the top. Swap the provolone for mozzarella and add a tablespoon of grated Parmesan to the garlic butter. Serve with extra marinara.
- Breakfast Sliders: Use cooked breakfast sausage patties or crumbles. Layer with scrambled eggs and slices of cheddar cheese. A dash of maple syrup in the garlic butter is a revelation!
- Spicy Southwestern: Use chorizo or spicy Italian sausage. Add a layer of thinly sliced jalapeños or a sprinkle of chili powder with the sausage. Pepper Jack cheese is a must here.
- Veggie-Packed: Sauté a finely diced bell pepper and onion with the sausage for added flavor and texture. You can even swap half the sausage for these veggies to lighten it up.
- Gluten-Free/Dairy-Free: Use your favorite gluten-free slider buns (toast them slightly first so they don’t get soggy). For dairy-free, use vegan cheese slices and plant-based butter.
Beau’s Kitchen Notes
This recipe has evolved from that first tailgate batch. I used to make individual sliders, which was a fussy nightmare. Baking them as one whole sheet? Life-changing hack. I also learned the hard way that draining the sausage on paper towels is non-negotiable unless you want a pool of grease in your pan (lesson learned at a very messy family reunion).
My favorite part is the flexibility. I’ve made these for a fancy-ish brunch, a kids’ sleepover, and everything in between. They never fail. The biggest compliment I get is when someone takes a bite, closes their eyes, and says, “Oh, wow.” That’s what cooking is all about for me.
Your Questions, Answered
Q: Can I make these ahead of time?
A: Absolutely! You can assemble the entire pan (up to the point of brushing with butter), cover tightly with plastic wrap and then foil, and refrigerate for up to 24 hours. When ready to bake, let the dish sit at room temp for 20-30 minutes, brush with the butter, and bake as directed, adding maybe 3-5 extra minutes since it’s starting cold.
Q: My sliders got a bit soggy on the bottom. What happened?
A: This usually means there was a little too much grease in the sausage. Be diligent about draining it on paper towels! Also, using a slightly thicker, sturdy roll helps. If you’re worried, you can even toast the bottom halves of the rolls for 5 minutes in the oven before assembling.
Q: Can I freeze them?
A: For best results, I recommend freezing them after baking and cooling. Wrap individual sliders or the whole pan (sliced) tightly in foil and then plastic freezer bags. Reheat in a 300°F oven, covered, until warmed through. The texture of the rolls will be a bit softer, but the flavor will still be great.
Q: I don’t have Italian seasoning. What can I use?
A: No problem! Use 1/4 teaspoon dried oregano and 1/4 teaspoon dried basil. Or, get creative with a pinch of everything bagel seasoning or even just some garlic and onion powder in the butter.

Sausage Sliders : Cheesy, Buttery, and Totally Irresistible
Description
Warm, cheesy, buttery sliders that disappear faster than you can say “game day snack.” Juicy Italian sausage, provolone cheese, sweet Hawaiian rolls, and a garlic butter glaze make these sliders the ultimate party or weeknight hit.
Ingredients
-
1 lb Italian sausage (sweet, mild, or hot)
-
1 pack (12-count) Hawaiian rolls
-
6 slices provolone cheese
-
2 tbsp butter, melted
-
1 clove garlic, minced
-
½ tsp Italian seasoning
-
Optional for serving: Marinara sauce, banana peppers
Chef Notes & Substitutions:
-
Turkey or chicken sausage works for a lighter version.
-
Brioche or soft potato rolls can substitute Hawaiian rolls.
-
Swap cheese types: cheddar, mozzarella, or pepper jack.
-
Garlic powder can replace fresh garlic in a pinch.
Instructions
1. Preheat & Prep
-
Preheat oven to 350°F (175°C).
-
Lightly grease a 9×13-inch baking dish with cooking spray or butter.
2. Brown the Sausage
-
Heat a skillet over medium heat. Add sausage (casings removed) and break it up.
-
Cook 8–10 minutes until browned and no pink remains.
-
Drain excess grease on paper towels.
3. Slice the Rolls
-
Keep rolls connected. Slice horizontally into a top and bottom half.
-
Place the bottom half in the prepared dish.
4. Layer the Sliders
-
Spread cooked sausage evenly over the bottom rolls.
-
Lay provolone slices on top, tearing to cover fully.
-
Place the top half of the rolls back on.
5. Garlic Butter Glaze
-
Mix melted butter, garlic, and Italian seasoning.
-
Brush generously over the top rolls.
6. Bake
-
Cover tightly with foil. Bake 10 minutes to melt the cheese.
-
Remove foil, bake 5–7 more minutes until tops are golden brown.
7. Slice & Serve
-
Let rest 2–3 minutes.
-
Slice along roll seams to create 12 sliders.
-
Serve warm with optional marinara or banana peppers.
Notes
-
Pepperoni Pizza Style: Add mini pepperoni, swap provolone for mozzarella, sprinkle Parmesan.
-
Breakfast Sliders: Use breakfast sausage, scrambled eggs, cheddar, and a touch of maple syrup in the butter.
-
Spicy Southwestern: Use chorizo or hot sausage, add jalapeños, and pepper jack cheese.
-
Veggie-Packed: Sauté bell peppers and onions with sausage.
-
Gluten-Free/Dairy-Free: Use GF rolls, vegan cheese, and plant-based butter.
Nutritional Information (Approximate)
Here’s a general breakdown per serving (2 sliders). Remember, this is an estimate and can vary based on the specific brands of sausage, cheese, and rolls you use.
- Calories: 380
- Protein: 16g
- Carbohydrates: 22g
- Fat: 24g
- Fiber: 1g
While these are definitely a treat, you can lighten them up by using lean turkey sausage, reduced-fat cheese, and brushing with a lighter hand on the butter. Balance is key—enjoy them with a big salad and savor every delicious bite!
Go Forth and Slider!
And there you have it, friends—my not-so-secret, always-impressive, wildly delicious Sausage Slider recipe. This is the kind of food that creates moments: the happy silence of people eating, the satisfied smiles, the requests for “just one more.” It’s simple, joyful cooking at its best.
I hope you make these for your people soon. I hope they disappear from the pan at record speed. And most of all, I hope you have as much fun making them as I do. Don’t forget to tag @Feastical if you share a photo—I love seeing your kitchen creations!
Now, go preheat that oven. Your new favorite snack is waiting. Happy cooking!
– Beau
French Toast Cupcakes : Maple-Cinnamon Flavor in Every Bite
French Toast Cupcakes: Your New Favorite Brunch & Dessert Mashup
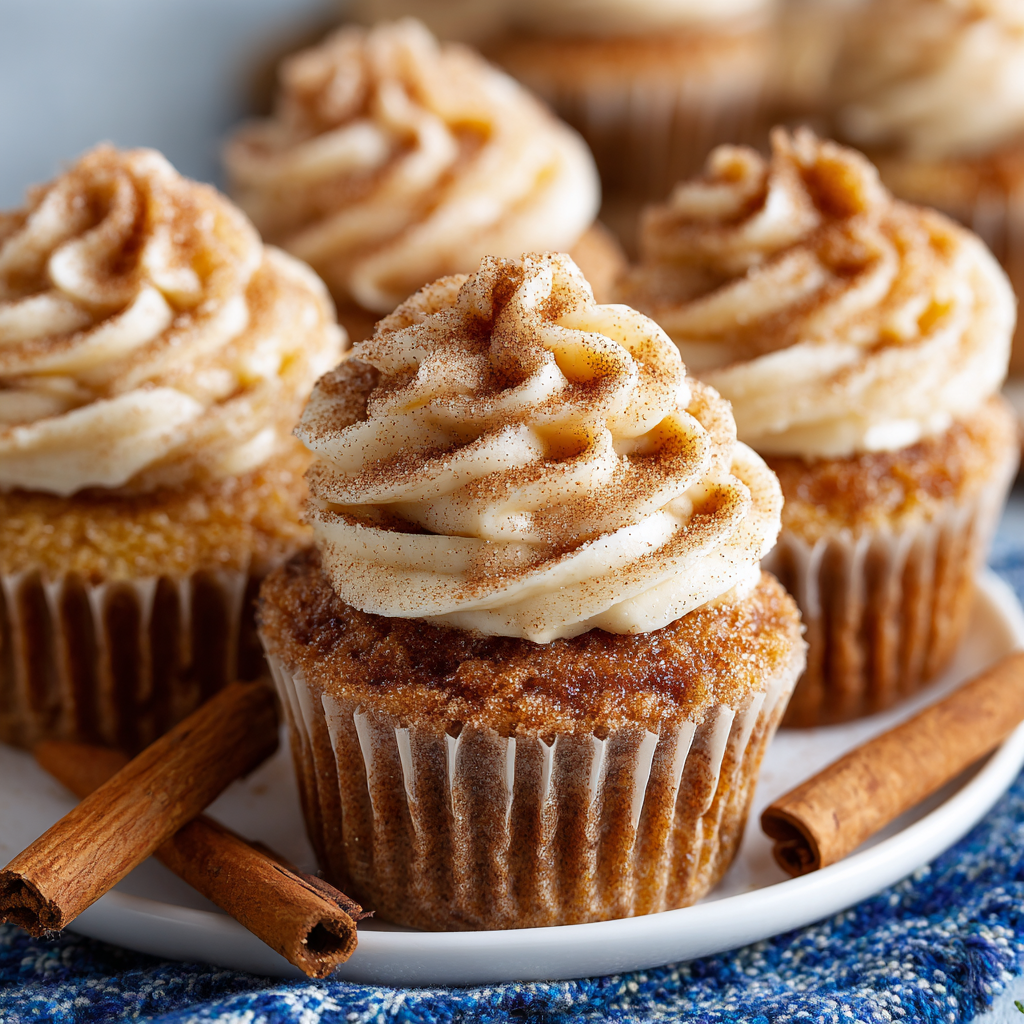
Hey friends, Beau here from Feastical! Grab your favorite mug of coffee and pull up a chair. Today, we’re doing something magical. We’re taking everything we love about a lazy Sunday morning—the aroma of cinnamon and vanilla wafting from the kitchen, the golden-brown slices of French toast soaked in maple syrup, that feeling of pure, uncomplicated comfort—and we’re transforming it into the most delightful handheld treat you’ve ever tasted. I’m talking about French Toast Cupcakes.
Imagine this: a supremely moist, soft cupcake that tastes exactly like the center of the most perfect piece of cinnamon-kissed French toast. Now, top that with a cloud of maple buttercream frosting so good you might just want to eat it with a spoon (no judgment here). Finish it with a playful dusting of cinnamon sugar, and you’ve got a masterpiece. It’s breakfast, dessert, and a hug, all in one perfect, portable package.
Whether you’re hosting a brunch party that’ll have everyone talking, looking for a show-stopping bake sale contribution, or simply treating yourself after a long week, these cupcakes are your answer. They’re approachable, fun, and packed with that soul-satisfying flavor we all crave. So, tie on your apron—let’s make some magic together.
The Sunday Morning Symphony That Inspired a Cupcake
This recipe didn’t just pop into my head from nowhere. It was born from a lifetime of noisy, love-filled Sunday mornings. Growing up, my dad was the undisputed King of French Toast. Every weekend, without fail, you’d hear the clatter of the bowl, the sizzle of butter in the pan, and the sound of Van Morrison or Aretha Franklin spinning on the record player. It was our family’s weekly ritual.
My job was “Cinnamon Sugar Commissioner.” I’d stand there, shaker in hand, ready to dust each warm slice the second it left the griddle. The trick, my dad taught me, was to do it while the toast was still glistening with butter, so the sugar would stick and create this tiny, sweet-crisp crust. That memory—the smell, the sound, the taste—is baked right into the soul of this cupcake. The cake itself captures that soft, eggy interior, and that final dusting of cinnamon sugar on top of the frosting? That’s my official, grown-up nod to my old role. It’s a little bite of my childhood, and I’m so excited to share that feeling with you.
Gathering Your Flavor Crew: Ingredients & Insights
Here’s where the party starts! This list is simple, but every ingredient plays a key role in building that authentic French toast flavor. Let’s break it down.
For the Cupcakes:
- 1 ½ cups all-purpose flour: Our reliable foundation. For a slightly more tender crumb, you can swap in ½ cup of cake flour for ½ cup of the all-purpose.
- 1 ½ teaspoons baking powder: This is our lift! It gives the cupcakes their perfect, airy dome. Make sure yours is fresh for the best rise.
- 1 teaspoon cinnamon: The heart of the flavor. Don’t be shy—this is what screams “French toast!”
- ¼ teaspoon nutmeg: Cinnamon’s best friend. This tiny amount adds a warm, cozy depth that makes the flavor profile really sing.
- ¼ teaspoon salt: The ultimate flavor enhancer. It balances the sweetness and makes all the other ingredients taste more like themselves.
- ½ cup (1 stick) unsalted butter, softened: Hello, richness and moisture! “Softened” means it should leave a slight indentation when you press it. Pro tip: if you forget to take it out, cut it into chunks and let it sit for 15-20 minutes.
- ¾ cup brown sugar: We’re using brown sugar instead of white for its gorgeous molasses notes. It gives the cake a deeper, almost caramel-like warmth that’s essential.
- 2 large eggs: They bind the batter and contribute to that classic French toast “eggy” texture. Bring them to room temperature for a smoother, fluffier batter.
- 1 teaspoon vanilla extract: Pure vanilla is always my go-to. It’s the aromatic backbone of so many cozy bakes.
- ½ cup milk: Whole milk is ideal here for richness, but any milk you have will work.
- 2 tablespoons pure maple syrup: This is our secret weapon! Adding it to the batter gives an unmistakable maple undernote that permeates every single bite.
For the Maple Buttercream Frosting:
- ½ cup (1 stick) unsalted butter, softened: Same deal here—properly softened butter is non-negotiable for a silky, pipeable frosting.
- 2 cups powdered sugar: Sift it! I know it’s an extra step, but it prevents lumps and gives you the smoothest frosting imaginable.
- 2 tablespoons pure maple syrup: Not just for pancakes, friends. This is where the maple flavor really shines. The darker the grade, the more robust the flavor.
- 1 teaspoon vanilla extract: Balances the maple beautifully.
- 1–2 tablespoons milk or heavy cream: This is your control knob for consistency. Start with one, and add the second only if you need to thin it for perfect piping.
Let’s Bake: Step-by-Step with Chef Beau’s Hacks
Ready? Let’s turn these amazing ingredients into something unforgettable. Follow these steps, and you’ll be a French Toast Cupcake hero in no time.
- Preheat & Prep. Fire up your oven to 350°F (175°C). Line a standard 12-cup muffin tin with your favorite cupcake liners. I’m partial to parchment or gold foil liners—they peel away beautifully. Chef’s Tip: Give your tin a very light spritz of non-stick spray over the liners. This guarantees a perfectly round cupcake top with no sticking.
- Mix the Dry Team. In a medium bowl, whisk together the flour, baking powder, cinnamon, nutmeg, and salt. I use a fork or a small whisk to do this—it’s faster than sifting and does a great job of aerating and combining. Set this flavor-packed bowl aside.
- Cream the Butter & Sugar. In a large mixing bowl, beat the softened butter and brown sugar together on medium-high speed for a good 2-3 minutes. We’re not just mixing; we’re “creaming.” This incorporates air, which is crucial for a light texture. You’ll know it’s ready when the mixture turns pale and looks fluffy.
- Add the Wet Players. With the mixer on medium, add the eggs one at a time, letting each fully incorporate before adding the next. Scrape down the bowl. Then, mix in the vanilla and the 2 tablespoons of maple syrup. Your kitchen should already smell incredible.
- Combine with Care. Here’s the key to a tender cupcake: don’t overmix! With the mixer on low, add about one-third of the dry ingredients. Mix until just combined. Then, add half of the milk. Repeat: another third of dry, the rest of the milk, then the final third of dry. Mix until you no longer see streaks of flour. A few small lumps are totally fine—they’re better than a tough cake from overmixing!
- Bake to Golden Perfection. Using a cookie scoop or a spoon, divide the batter evenly among the 12 liners, filling each about ¾ full. This is the sweet spot for the perfect dome. Slide the tin into the center of your preheated oven and bake for 18-22 minutes. Chef’s Hack: Rotate the pan halfway through for even baking. They’re done when the tops spring back lightly to the touch and a toothpick inserted into the center comes out clean or with just a couple of moist crumbs.
- The Crucial Cool-Down. Let the cupcakes cool in the pan for 5 minutes, then transfer them to a wire rack to cool completely. I can’t stress this enough: frosting a warm cupcake is a recipe for a melty, sad puddle. Patience is your friend here.
- Whip Up the Maple Dream Frosting. While the cupcakes cool, make your frosting. Beat the softened butter in a clean bowl for a minute until it’s super creamy. Gradually add the sifted powdered sugar on low speed (to avoid a sugar cloud!), then the maple syrup and vanilla. Once combined, beat on medium-high for 2-3 minutes until light and fluffy. If it’s too thick, add milk, one teaspoon at a time, until it’s pipeable.
- Decorate & Devour! Fit a piping bag with your favorite tip (I love a large open star or round tip for these) and fill it with frosting. Pipe a generous swirl onto each cooled cupcake. The final, essential step: dust the tops with a little cinnamon sugar. It’s the signature finish that ties the whole “French toast” experience together.
Serving These Sunny-Side-Up Sweets
Presentation is part of the fun! These cupcakes are stars on their own, but a little extra flair never hurts. For a brunch spread, pile them high on a rustic cake stand or a wooden board. Tuck in a few sprigs of fresh thyme or rosemary for a pretty, fragrant touch.
Want to go all-in on the theme? Drizzle a little extra maple syrup over the top right before serving for a decadent, glossy finish. Or, crumble a piece of cooked bacon on top for the ultimate sweet-salty brunch bite. Serve them with strong coffee, cold milk, or even a mimosa for the full celebratory effect. They’re conversation starters, I promise!
Mix It Up! Delicious Twists on the Classic
One of the best things about this recipe is how adaptable it is. Feel like playing? Try one of these fun variations:
- Stuffed French Toast Cupcakes: Before baking, place a small cube of cream cheese or a spoonful of apple pie filling in the center of each cupcake batter portion. The cake will bake around it for a delicious surprise inside.
- Brown Butter Bliss: Take the flavor up a notch by browning the butter for both the cake and the frosting. It adds a deep, nutty complexity that’s absolutely divine.
- Bacon Maple Crunch: Fold ½ cup of finely chopped, cooked bacon into the cupcake batter. Top the frosted cupcakes with a small piece of candied bacon. Trust me on this one.
- Gluten-Free Friendly: Swap the all-purpose flour for a 1:1 gluten-free baking blend. The recipe works like a charm!
- Dairy-Free Delight: Use plant-based butter and your favorite non-dairy milk (oat or almond work great) in both the cake and frosting.
Chef Beau’s Notebook
This recipe has evolved in my kitchen over many batches. The biggest “aha!” moment was adding the maple syrup directly to the batter. At first, I just relied on the frosting, but I wanted that flavor woven through every single layer. The two tablespoons made all the difference.
A funny kitchen story? The first time I tested these, I got so excited about the aroma that I pulled them out of the oven early. I frosted them immediately (big mistake), and my beautiful maple buttercream turned into a river flowing right off the cupcakes and onto the counter. It was a sweet, sticky lesson in patience that my dog thoroughly enjoyed cleaning up. Learn from my eagerness—let them cool!
FAQs & Cupcake Rescue Tips
Q: My cupcakes sunk in the middle! What happened?
A: This usually means they needed just another minute or two in the oven, or there was a bit too much leavening. Make sure your baking powder is fresh and not expired. Also, avoid opening the oven door frequently during the first 15 minutes of baking.
Q: Can I make these ahead of time?
A: Absolutely! The unfrosted cupcakes can be baked, cooled, and stored in an airtight container at room temperature for one day, or frozen for up to a month. Frost them the day you plan to serve for the best texture.
Q: My frosting is too runny/too thick. Help!
A> Frosting is a feel thing! Too runny? Beat in more sifted powdered sugar, a quarter cup at a time. Too thick? Add liquid (milk, cream, or even a touch more maple syrup) one teaspoon at a time until it’s perfect.
Q: Is pure maple syrup really necessary?
A> For the best, most authentic flavor, I highly recommend it. The imitation syrups have a different, often artificial taste that won’t give you the same cozy, deep maple vibe. It’s worth the splurge for this recipe!

French Toast Cupcakes : Maple-Cinnamon Flavor in Every Bite
Description
Imagine everything you love about French toast—cinnamon, vanilla, soft, eggy sweetness—compressed into a moist, portable cupcake and topped with a cloud of maple buttercream frosting. These French Toast Cupcakes are perfect for brunch, dessert, or any time you need a sweet, comforting treat.
Ingredients
Cupcakes
-
1½ cups all-purpose flour (or swap ½ cup for cake flour for a more tender crumb)
-
1½ tsp baking powder
-
1 tsp cinnamon
-
¼ tsp nutmeg
-
¼ tsp salt
-
½ cup (1 stick) unsalted butter, softened
-
¾ cup brown sugar
-
2 large eggs, room temperature
-
1 tsp vanilla extract
-
½ cup milk (whole milk preferred)
-
2 tbsp pure maple syrup
Maple Buttercream Frosting
-
½ cup (1 stick) unsalted butter, softened
-
2 cups powdered sugar, sifted
-
2 tbsp pure maple syrup
-
1 tsp vanilla extract
-
1–2 tbsp milk or heavy cream (for consistency)
Topping
-
Cinnamon sugar for dusting
Instructions
1. Prep Oven & Tin
-
Preheat oven to 350°F (175°C).
-
Line a 12-cup muffin tin with cupcake liners. Lightly spray the liners to prevent sticking.
2. Mix Dry Ingredients
-
In a medium bowl, whisk together flour, baking powder, cinnamon, nutmeg, and salt. Set aside.
3. Cream Butter & Sugar
-
In a large bowl, beat softened butter and brown sugar on medium-high for 2–3 minutes until pale and fluffy.
4. Add Wet Ingredients
-
Mix in eggs one at a time, then add vanilla extract and maple syrup. Scrape down the sides.
5. Combine Wet & Dry
-
On low speed, add one-third of the dry ingredients, then half the milk. Repeat: dry, milk, dry. Mix until just combined. Small lumps are okay.
6. Bake
-
Divide batter evenly into liners (¾ full). Bake 18–22 minutes, rotating halfway, until tops spring back and a toothpick comes out clean.
-
Cool 5 minutes in the pan, then transfer to a wire rack to cool completely.
7. Make Maple Buttercream
-
Beat softened butter until creamy. Gradually add powdered sugar, maple syrup, and vanilla. Beat 2–3 minutes until fluffy.
-
Adjust consistency with milk or cream as needed for piping.
8. Frost & Finish
-
Pipe frosting onto cooled cupcakes. Dust with cinnamon sugar. Optional: drizzle extra maple syrup or add a piece of candied bacon for fun.
Notes
-
Stuffed Cupcakes: Add cream cheese or apple pie filling in the center before baking.
-
Brown Butter Flavor: Brown the butter for a nutty depth in both cupcake and frosting.
-
Bacon Maple Crunch: Fold ½ cup cooked, chopped bacon into batter; top frosted cupcakes with candied bacon.
-
Gluten-Free: Swap flour for a 1:1 gluten-free blend.
-
Dairy-Free: Use plant-based butter and milk.
Nutritional Information (Per Cupcake)
While we’re all about indulgence here at Feastical, I believe in mindful enjoyment. This estimated nutritional breakdown is for one frosted cupcake, based on a yield of 12. Remember, treats like these are about nourishing the soul, too!
- Calories: ~320
- Total Fat: 16g
- Saturated Fat: 10g
- Carbohydrates: 40g
- Fiber: 0.5g
- Sugars: 28g (includes the maple syrup and brown sugar)
- Protein: 3g
Final Thoughts from My Kitchen to Yours
And there you have it, friends—the full story of our French Toast Cupcakes. This recipe is more than just a list of ingredients and steps; it’s an invitation to create your own delicious memories. It’s about taking a familiar, beloved flavor and seeing it in a brand new, joyful way.
I hope you bake these for someone you love, or better yet, get someone to join you in the kitchen. Let them be the “Cinnamon Sugar Commissioner.” Share the story, share the sweetness. That’s what Feastical is all about.
If you make them (and I really hope you do!), tag me @feastical on social media so I can see your beautiful creations. Now, go preheat that oven and get baking. Your kitchen is about to smell like a warm, happy Sunday morning.
With a full heart and an empty mixing bowl,
Beau
Homemade Brown Gravy : Rich, Savory, and Ready in 10 Minutes
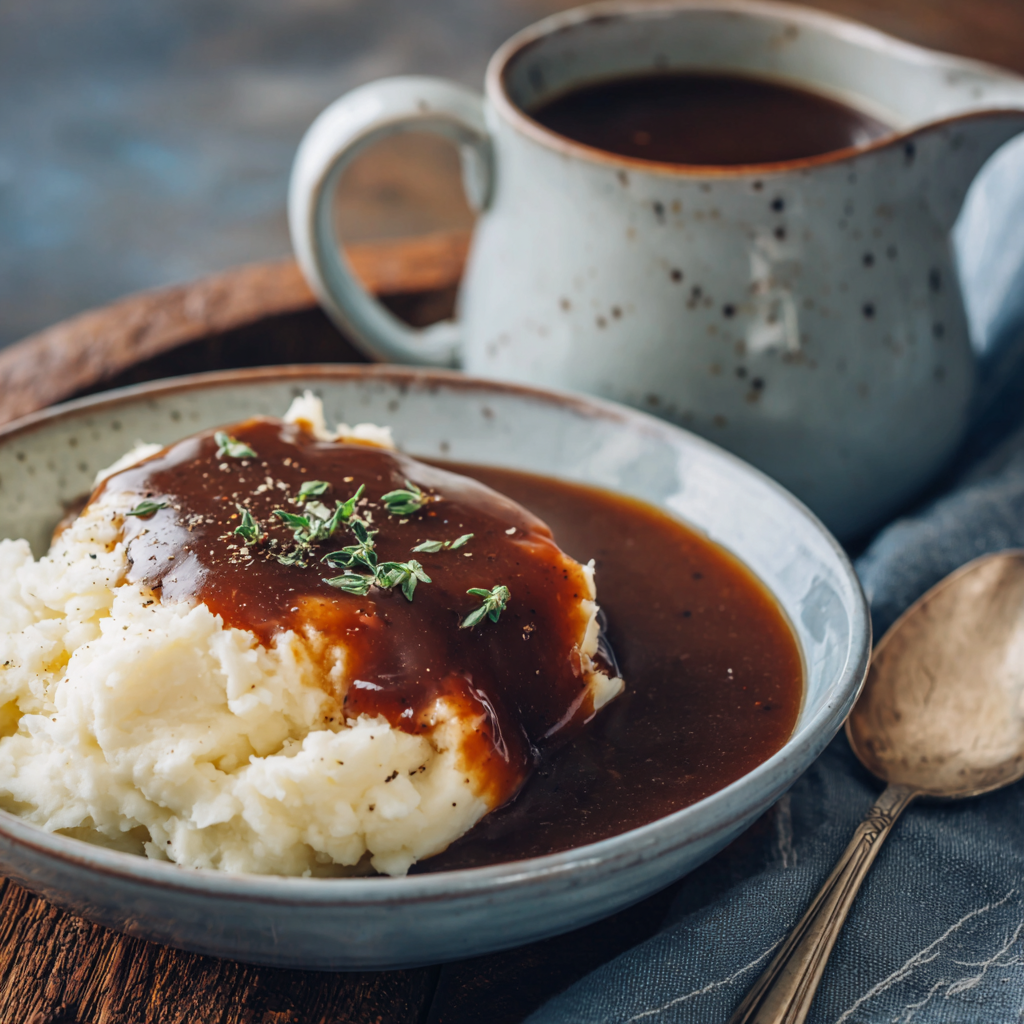
Homemade Brown Gravy – Your Secret Weapon for Instant Comfort
Hey friends, Beau here! Let’s talk about something magical. That glossy, savory, soul-warming river of deliciousness that turns a simple Tuesday dinner into a feast. I’m talking about homemade brown gravy. Now, I see you eyeing those dusty packets in the back of your pantry. We’ve all been there. But today? Today, we’re setting them free (or, you know, recycling them) and making something real.
This isn’t a fussy, all-day sauce. This is my 10-minute miracle gravy. It’s for when the mashed potatoes are piled high, the meatloaf is singing, and you realize the one thing missing is that luscious, rich pour. It’s for when you need a hug in a gravy boat. The best part? No roast drippings required. Just a few pantry basics, a saucepan, and a little bit of whisking love. We’re building deep, complex flavor from the ground up, and I promise, once you taste the difference, there’s no going back. So grab your favorite whisk—let’s make your plate legendary.
The Gravy Boat That Sailed a Thousand Meals
My love for gravy started not on a plate, but in a cabinet. My Grandma Collier had this ancient, off-white ceramic gravy boat. It was chipped on the spout and had a faint, forever stain no scrubber could defeat. To me, it was a treasure chest. The moment she’d pull it down for Sunday supper, the whole mood in the kitchen shifted. It was the signal that something special was happening.
I’d stand on a stool, watching her whisk, the air thick with the smell of roasting chicken and promise. She’d never measure—just a “glug” of this, a “pinch” of that. When she finally poured that smooth, brown silk from that old boat, it was like she was anointing the entire meal. The potatoes, the stuffing, the slices of meat—it all came together under that savory waterfall. This recipe is my ode to that feeling. It’s my attempt to bottle that simple, generous magic, no fancy tools or years of practice needed. Just you, a saucepan, and the power to make dinner feel like a celebration.
Your Gravy Dream Team: Simple Ingredients, Big Flavor
Here’s the beautiful part: everything you need is probably already in your kitchen. This is pantry alchemy at its finest.
- 4 tbsp Unsalted Butter: Our flavor foundation and fat for the roux. Chef’s Insight: Unsalted lets you control the salt level perfectly. In a pinch, salted butter works—just taste before adding extra salt later.
- 4 tbsp All-Purpose Flour: Our thickening agent. It teams up with the butter to create the roux, which gives the gravy its body. Sub Tip: For a gluten-free version, a 1:1 gluten-free flour blend works wonderfully.
- 2 cups Beef Broth: The soul of the gravy! Chef’s Plea: I highly recommend low-sodium. It gives you the power to build and adjust the seasoning yourself. A good-quality broth makes all the difference.
- 1 tsp Worcestershire Sauce: The secret umami weapon. It adds a complex, savory depth that makes people say, “What IS that amazing flavor?” It’s our not-so-secret sauce.
- ½ tsp Garlic Powder & ½ tsp Onion Powder: These dried heroes deliver consistent, mellow allium flavor without the chopping or risk of burning. They dissolve right in for even seasoning throughout.
- Salt & Black Pepper to taste: The dynamic duo of finishing. We’ll add a pinch early, but the final adjustment at the end is where your personal taste shines.
Let’s Make Magic: The 10-Minute Gravy Method
Ready? This is where the fun happens. Put on some tunes, and let’s get whisking.
- Make the Roux (The Flavor Foundation): In a medium saucepan, melt your butter over medium heat. Once it’s foamy, sprinkle in all the flour. Now, grab your whisk and get to work! Whisk constantly for 1-2 minutes. You’re looking for it to become bubbly and take on a lovely pale golden color—like the color of a perfectly toasted marshmallow. Chef’s Hack: This step cooks out the raw flour taste and toasts the starch, which is what gives your gravy that incredible, nutty, rich base flavor. Don’t rush it or walk away!
- Add the Broth (The “No-Lump” Dance): Here’s the only critical moment. Take your beef broth and slowly, and I mean slowly, pour it in while whisking like your gravy depends on it (because it does!). Start with just a few tablespoons and whisk until completely smooth, then add a little more. Once you’ve incorporated about half, you can pour in the rest more steadily. Chef’s Secret: Using cold or room-temp broth helps prevent lumps better than hot broth. Trust me on this.
- Season & Simmer (The Flavor Build): Whisk in the Worcestershire sauce, garlic powder, onion powder, a good pinch of salt, and a few cracks of black pepper. Crank the heat up to medium-high and bring it to a gentle boil. Once you see those bubbles, immediately reduce the heat to low to maintain a simmer.
- Thicken & Taste (The Finish Line): Let it simmer gently for 3-5 minutes, whisking occasionally. You’ll feel it thicken beautifully on your whisk. Pro Tip: Gravy continues to thicken slightly as it cools. If it gets too thick, just whisk in a splash of extra broth or even hot water. Now, the most important step: TASTE. Dip a spoon, let it cool for a second, and try it. Does it need more pepper? A pinch more salt? This is your moment to make it perfect for you.
Pour It On: How to Serve Your Homemade Masterpiece
This is the reward! Get that gravy hot and ready to anoint your creations.
For the classic Family-Style Feast, transfer your gravy to a warm gravy boat or a small pitcher. Let everyone pour their own river of joy right at the table—it’s interactive and fun!
For Everyday Plating, I’m a fan of the “moat” or the “blanket.” For mashed potatoes, make a well in the center and fill it to the brim. For meatloaf or roast beef, drape it generously over the top, letting some cascade down the sides onto the plate. Don’t forget the sides! A little over roasted carrots or green beans is a game-changer.
And hey, if you have leftovers (a rare occurrence in my house), let it cool and store it in a jar in the fridge for up to 4 days. Reheat it gently in a saucepan with a tiny splash of broth or water to loosen it up.
Mix It Up: Your Gravy, Your Rules
Once you’ve mastered the base, the world is your gravy boat. Here are a few of my favorite twists:
- The “Mushroom Magic” Gravy: Sauté ½ cup finely chopped mushrooms in the butter before adding the flour. Use half beef, half mushroom broth for an earthy, umami explosion. Perfect for vegetarians (use all mushroom broth and vegan Worcestershire).
- “Herb-Infused” Gravy: Add ½ teaspoon of dried thyme or rosemary (crushed between your fingers) when you add the other powders. For fresh herbs, stir in a tablespoon of finely chopped thyme or sage at the very end.
- “Creamy Onion” Gravy: Cook down ½ a thinly sliced onion in the butter until soft and caramelized, then proceed with the flour. This adds a wonderful sweetness and texture.
- “Spicy Kick” Gravy: Add a few dashes of your favorite hot sauce along with the Worcestershire, or a pinch of cayenne pepper. Amazing on turkey burgers or fries.
- Vegan/Pantry Swap: Use vegan butter or olive oil, and swap the beef broth for a robust vegetable broth. Use a vegan Worcestershire or a splash of soy sauce for that umami punch.
Beau’s Kitchen Notes & Stories
This recipe has been my reliable dinner-saver more times than I can count. I’ve made it in a rental cabin with a wobbly stove, and I’ve even whipped up a double batch at a friend’s potluck when they “forgot” the gravy (we became heroes that night).
It’s evolved from my grandma’s “a little of this” method into these precise, fail-proof steps, but the spirit is exactly the same. The biggest lesson? Don’t fear the roux. So many folks get nervous, but just keep whisking and trust your nose. When it smells toasty and nutty, you’re golden—literally. And always, always taste at the end. Your palate is the best tool in your kitchen.
Gravy 911: Your Questions, Answered
- Help! My gravy is lumpy. Can I save it? Absolutely! First, stop whisking and grab your blender or an immersion blender. Blend it until smooth. If you don’t have one, you can force it through a fine-mesh sieve with a spatula. To prevent it next time, just remember: slow broth + constant whisking = smooth gravy.
- My gravy tastes bland. What happened? No worries! This is an easy fix. Bland gravy usually needs salt. Add a pinch at a time, stirring and tasting. If it’s still missing something, a dash more Worcestershire sauce or a tiny splash of soy sauce can add that savory depth. Remember, low-sodium broth needs your help to shine!
- Can I make this ahead of time? You bet. Let it cool, store it in an airtight container in the fridge for 3-4 days. Reheat on the stove over low heat, adding a splash of liquid (broth, water, or even milk) to bring it back to the perfect pouring consistency.
- What if I have actual meat drippings? Lucky you! That’s flavor gold. Replace the 4 tbsp of butter with an equal amount of fat from your roasting pan (skimmed of excess liquid). The method stays exactly the same, but your gravy will have that specific, glorious roast flavor.

Homemade Brown Gravy : Rich, Savory, and Ready in 10 Minutes
Description
Nothing transforms a meal like a rich, silky brown gravy. This easy, no-drippings-needed recipe is perfect for mashed potatoes, meatloaf, roast beef, or even vegetables. It’s ready in just 10 minutes, uses pantry staples, and delivers deep, savory flavor that store-bought packets can’t touch.
Ingredients
-
4 tbsp unsalted butter
-
4 tbsp all-purpose flour (or gluten-free flour blend)
-
2 cups beef broth (low-sodium recommended)
-
1 tsp Worcestershire sauce
-
½ tsp garlic powder
-
½ tsp onion powder
-
Salt & black pepper, to taste
Instructions
-
Make the Roux:
-
Melt butter in a medium saucepan over medium heat.
-
Sprinkle in flour and whisk constantly for 1–2 minutes until bubbly and lightly golden.
-
-
Add the Broth:
-
Slowly pour in beef broth while whisking constantly to avoid lumps. Start with a few tablespoons, whisk until smooth, then add the rest gradually.
-
-
Season & Simmer:
-
Whisk in Worcestershire sauce, garlic powder, onion powder, salt, and pepper.
-
Bring to a gentle boil, then reduce heat to low and simmer for 3–5 minutes, whisking occasionally, until thickened.
-
-
Finish & Adjust:
-
Taste and adjust salt and pepper as needed.
-
If too thick, whisk in a splash of broth or water.
-
Notes
-
Mushroom Gravy: Sauté ½ cup chopped mushrooms in butter before adding flour. Use half beef, half mushroom broth.
-
Herb-Infused: Add ½ tsp dried thyme or rosemary while seasoning. Fresh herbs can be stirred in at the end.
-
Creamy Onion: Cook ½ a thinly sliced onion in butter until caramelized before flour.
-
Spicy Kick: Add cayenne pepper or hot sauce for heat.
-
Vegan: Use vegan butter or olive oil and vegetable broth with vegan Worcestershire or soy sauce.
Serving Suggestion: Pour hot over mashed potatoes, meatloaf, roasted vegetables, or any dish that could use a savory hug.
Nutritional Info (Because We’re Curious!)
Please note: This is an estimate for informational purposes, based on the specific brands and ingredients I used. Your results may vary.
Per ¼ Cup Serving: Calories: ~90 | Total Fat: 6g | Saturated Fat: 3.5g | Carbohydrates: 6g | Protein: 1g | Sodium: ~180mg (will vary based on broth and seasoning).
At the end of the day, this homemade gravy is about real ingredients and ditching the additives. You control the salt, the fat, and the flavor. It’s a wholesome, delicious way to elevate your meal from good to “can I have the recipe?”
The Last Delicious Drizzle
And there you have it, friends—the simple secret to a gravy that doesn’t come from a packet. It’s more than just a sauce; it’s a gesture. It’s the ladle of love that turns weeknight chicken into a comfort food classic and Sunday supper into a memory.
I hope this recipe finds its way into your regular rotation and becomes your own dinner-table magic trick. Remember, the best kitchens are filled with laughter, a few spills, and the incredible aroma of something good happening on the stove. Now go forth, whisk confidently, and pour generously. Your plate is waiting.
Loved this recipe? Share your gravy triumphs with me over on Feastical or tag me on social! I love seeing your creations.
With a full gravy boat and a happy heart,
Beau
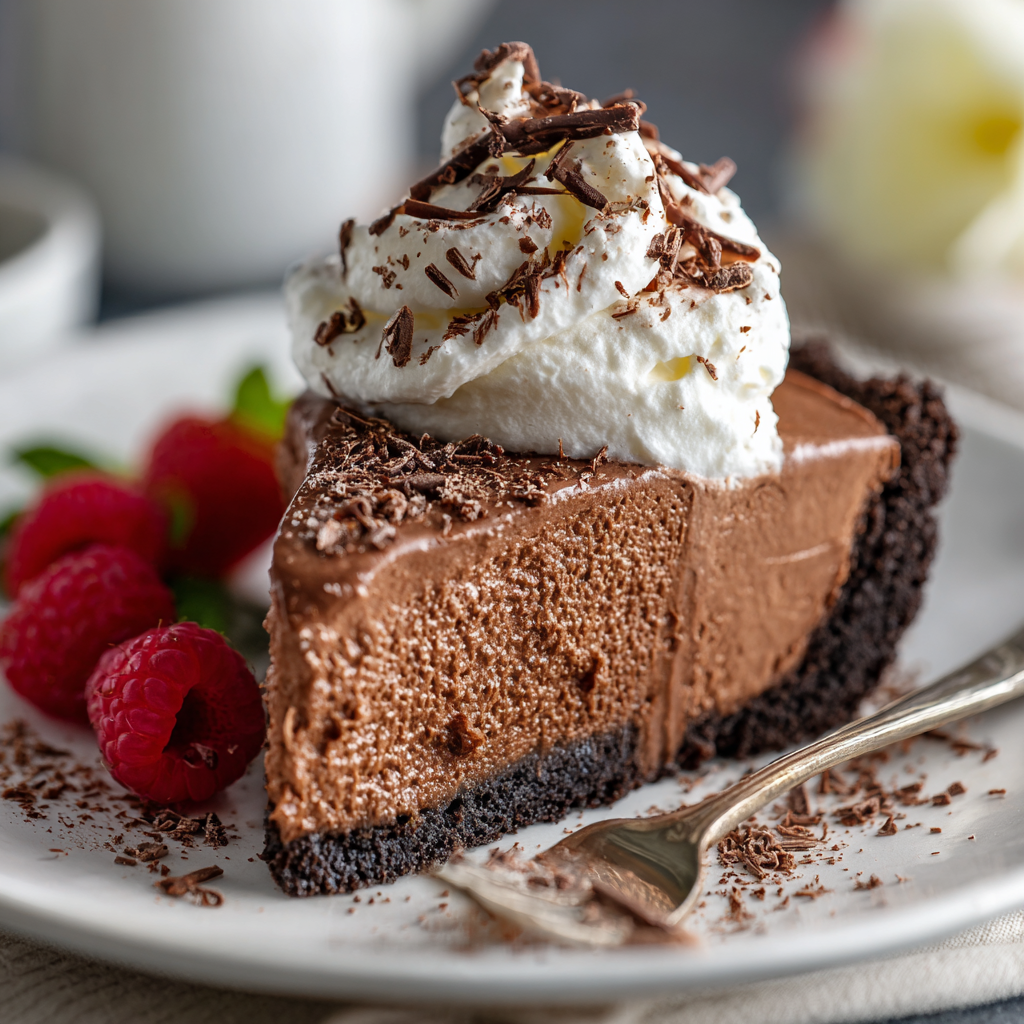
Chocolate Mousse Pie : Silky, Rich & No-Bake
Chocolate Mousse Pie – Silky, Rich & No-Bake: Your New Secret Weapon
Hey friend, Beau here from Feastical. Pull up a chair and let’s talk about one of life’s greatest, simplest pleasures: a perfect slice of chocolate pie. You know the kind. The one that looks like it belongs in a fancy bakery case but secretly comes together in your kitchen without breaking a sweat. The kind where the first bite makes everyone at the table go completely, blissfully silent. That’s exactly what we’re making today.
This isn’t just any dessert. This is my go-to, no-bake chocolate mousse pie, and it’s about to become yours, too. We’re talking about a crisp, buttery chocolate cookie crust cradling a cloud of the silkiest, richest, most ethereal chocolate mousse you’ve ever tasted. It’s decadent without being heavy, elegant without being fussy, and it requires exactly zero oven time. Seriously. If you can melt chocolate and whip cream, you are already a champion in the making.
Whether you’re gearing up for a holiday feast, hosting a last-minute dinner party, or just decided that Tuesday night deserves a standing ovation, this pie is your answer. It’s the dessert that says “I’m an incredible cook” while you’re quietly laughing inside because you know how easy it was. So, let’s ditch the complicated recipes and the stress. Grab your favorite mixing bowl, and let’s make a little magic—the kind that tastes like pure chocolate bliss.
A Pie That Tastes Like a Memory
This recipe always takes me back to my grandma’s linoleum-floored kitchen. She was a wizard with three ingredients and a whole lot of love. Her version of “fancy” was a Jell-O pudding pie, but to my eight-year-old self, it was the height of sophistication. I’d sit at that Formica table, swinging my legs, watching her whisk with a calm focus I now recognize as culinary love.
One summer, I decided to “help” by adding an entire, unmeasured handful of chocolate chips to her filling. Instead of a scolding, she just laughed that wonderful, crinkly-eyed laugh of hers and said, “Well, Beau, let’s see how our experiment turns out.” What emerged from the fridge hours later was a firmer, profoundly chocolatey masterpiece. It was a mess, frankly, with chocolate smudges everywhere, but it was our mess. That was the day I learned that the best recipes aren’t about perfection—they’re about joy, a dash of bravery, and sharing the delicious results. This pie is my grown-up, slightly more refined homage to that lesson. It’s for creating your own sweet, delicious memories, one perfectly imperfect slice at a time.
Gathering Your Chocolate Treasure
Here’s the beautiful part: the ingredient list is short and sweet. Quality is our secret weapon here, especially with the chocolate. Let’s break it down.
For the Crust:
- 1 ½ cups chocolate cookie crumbs (about 20 Oreo cookies, filling scraped out) – The foundation! I use classic Oreos for that deep chocolate flavor. The little bit of filling left behind after scraping just adds to the richness. Chef’s Insight: You can also use chocolate graham crackers or even generic chocolate sandwich cookies. For a gluten-free crust, gluten-free chocolate cookies work perfectly.
- 5 tablespoons unsalted butter, melted – This is the glue that holds our crunchy dream together. Using unsalted butter lets us control the salt level. Substitution Tip: If you only have salted butter, just omit the pinch of salt later in the filling. Vegan butter works great for a dairy-free crust!
For the Luscious Filling:
- 1 ½ cups heavy cream or heavy whipping cream, divided – This is our two-in-one wonder. We’ll use half to melt the chocolate into a ganache and whip the other half into fluffy peaks. Chef’s Insight: Make sure your cream is cold, straight from the fridge, for the whipping part. Chilling your bowl and beaters helps it whip up faster and higher.
- 1 ½ cups semi-sweet or dark chocolate chips – The star of the show! I prefer a good-quality semi-sweet chip (around 55-60% cacao) for a balanced, not-too-bitter flavor. Pro Move: For an ultra-silky texture, chop up a high-quality baking chocolate bar instead of using chips. It melts more evenly.
- 1 teaspoon pure vanilla extract – The flavor enhancer. It rounds out the chocolate and adds a warm, comforting depth. Don’t skip it!
- A generous pinch of fine sea salt – This is NOT optional! Salt makes chocolate taste more chocolatey. It cuts the sweetness and brings all the flavors into sharp, delicious focus.
For the Grand Finale (Optional but Encouraged):
- Extra whipped cream for piping – Because more cream is always a good idea.
- Chocolate shavings or curls – Use a vegetable peeler on a chocolate bar for instant elegance.
- A sprinkle of flaky sea salt – Trust me on this. A few crystals on each slice is a game-changer.
Let’s Build Our Masterpiece: Step-by-Step
Ready? Tie on an apron (or don’t—live dangerously), and let’s get to the fun part. Read through all the steps once before you start. You’ve got this!
Step 1: Crafting the No-Bake Crust
First, grab your trusty 9-inch pie dish. Place your cookies (filling scraped out) in a zip-top bag and crush them with a rolling pin until you have fine, even crumbs. No big chunks! Pour the crumbs into a bowl and drizzle the melted butter over them. Use a fork to mix until every single crumb looks like dark, damp sand. It should hold together when you pinch it. Dump this glorious mixture into your pie dish and press it firmly and evenly across the bottom and up the sides. I like to use the bottom of a flat measuring cup to really pack it in. Pop the crust in the fridge to set up while you make the filling. This 15-minute chill gives us a solid base.
Chef’s Hack: Rinse your hands with cold water before pressing the crust to prevent the buttery crumbs from sticking to your fingers!
Step 2: Creating the Chocolate Heart (The Ganache)
Now, for the magic. Pour your chocolate chips into a medium, heat-proof bowl. In a small saucepan, heat ¾ cup of the heavy cream over medium heat. We don’t need a rolling boil—just bring it to a gentle simmer where you see small bubbles forming around the edges. Immediately pour the hot cream over the chocolate chips. Walk away. Let it sit, untouched, for a full 3 minutes. This patience allows the heat to gently melt the chocolate from within.
After 3 minutes, take a whisk or a spatula and start stirring from the center outwards. You’ll see it transform into a smooth, glossy, heavenly substance called ganache. Once it’s silky, whisk in the vanilla and that all-important pinch of salt. Now, this next part is crucial: let this ganache cool down to room temperature. If it’s too warm when we add the whipped cream, it’ll melt it and we’ll lose our airy mousse texture. You can speed this up by placing the bowl in the fridge, but stir it every 5 minutes so it cools evenly.
Step 3: Whipping & Folding – The Art of Air
While the chocolate cools, grab that other ¾ cup of cold heavy cream. Using a stand mixer, hand mixer, or a whole lot of elbow grease and a whisk, whip the cream until you get stiff peaks. This means when you lift the beaters, the cream stands straight up in a peak that doesn’t flop over. Don’t go past this to butter territory!
Now, check your chocolate. It should be cool to the touch, about the consistency of thick pudding. Add about one-third of the whipped cream to the chocolate bowl. Use your spatula to fold it in. This isn’t stirring! You’re gently cutting through the center, scooping from the bottom, and turning the mixture over itself. This lightens the dense chocolate. Once incorporated, add the remaining whipped cream and continue to fold gently but confidently until no white streaks remain. Be patient—you want to keep all that lovely air you whipped in.
Step 4: The Big Chill
Pull your chilled crust from the fridge. Spoon your fluffy, dreamy chocolate mousse filling into the crust. Smooth the top with your spatula, or make pretty swirls. For the ultimate set and flavor meld, this pie needs to chill in the refrigerator for at least 4 hours, but overnight is even better. I always cover it loosely with plastic wrap so it doesn’t absorb any fridge smells. This wait is the hardest part, but it’s what gives us that perfect, sliceable texture.
Presenting Your Chocolate Masterpiece
The moment of truth! Serving this pie is half the fun. For clean slices, dip a sharp, thin-bladed knife in hot water and wipe it dry between each cut. It will glide right through the creamy filling.
I like to keep it simple: a dollop of freshly whipped cream on each slice, a few delicate chocolate shavings, and that final, artisanal touch—a tiny sprinkle of flaky sea salt. Serve it on plates you love. This pie pairs beautifully with a cup of strong black coffee, a glass of red wine like a Cabernet Sauvignon, or simply the happy silence of your dining table. It’s rich, so small slices are perfectly satisfying (though seconds are always allowed at my table).
Make It Your Own: Delicious Twists & Swaps
This recipe is a fantastic canvas. Here are a few ways to play with the flavors:
- The Mint Chocolate Chip: Add ½ teaspoon of peppermint extract (not mint extract!) to the filling along with the vanilla. Fold in ½ cup of mini chocolate chips at the very end for texture.
- The Salty Bourbon Pecan: Stir 2 teaspoons of good bourbon into the cooled ganache. Before adding the filling, sprinkle the bottom of the crust with ½ cup of chopped, toasted pecans. Top finished slices with a candied pecan.
- The Orange Dream: Add the zest of one large orange to the cream as you heat it for the ganache. Let it infuse as it simmers, then strain it out before pouring over the chocolate. A touch of orange liqueur (like Grand Marnier) in the filling is divine.
- Vegan & Dairy-Free Delight: Use vegan chocolate chips. For the crust, use vegan butter and gluten-free cookies if needed. For the filling, replace the heavy cream with two cans of full-fat coconut milk that have been chilled overnight—scoop out the solid coconut cream to use as your whipping/ganache base. It’s incredibly rich and works like a charm!
- Mocha Madness: Dissolve 1 tablespoon of instant espresso powder into the hot cream before pouring it over the chocolate. It won’t taste like coffee, just like a deeper, more amazing chocolate.
Beau’s Kitchen Notes & Stories
This recipe has been my faithful companion for years, evolving from a more complicated, egg-based mousse into this simple, foolproof version. The first time I served it at a big family potluck, my uncle—a man of few words—ate two slices, looked at me, and simply said, “You can bring this every time.” That’s the highest praise I know.
One hilarious kitchen fail: I once got overzealous with the salt and used a coarse grind instead of fine sea salt. The filling had little crunchy salt bursts. My friends declared it “artisanal” and “intentionally textured,” but I knew the truth! Learn from my mistake: a fine, dissolving salt is key for the filling, save the big flakes for garnish.
Your Questions, Answered
Q: My filling seems a bit grainy, not silky. What happened?
A: This usually means the chocolate got too hot or was stirred too vigorously while melting, causing it to “seize” slightly. Next time, ensure your cream is just simmering, not boiling, and let it sit on the chips undisturbed. If it happens, you can sometimes save it by whisking in a tablespoon of warm cream until smooth.
Q: Can I make this pie ahead of time?
A: Absolutely! That’s one of its best features. Make it up to 2 days in advance. Keep it covered in the fridge. Add whipped cream and toppings just before serving for the freshest look.
Q: My crust is soggy. How do I prevent that?
A: A soggy bottom is often from not packing the crust firmly enough or not chilling it before adding the filling. Really press it in! Also, ensure your filling is completely cooled to room temp before adding it to the chilled crust.
Q: Can I use milk chocolate instead?
A> You can, but the filling will be much sweeter and softer. I’d recommend using only 1 cup of milk chocolate chips and adding an extra ¼ cup of semi-sweet to balance it. And maybe reduce the whipping cream in the mousse by 2 tablespoons for a firmer set.

Chocolate Mousse Pie : Silky, Rich & No-Bake
Description
Sometimes you just need a dessert that feels like a hug—and this no-bake chocolate mousse pie is exactly that. A crisp, buttery chocolate cookie crust cradles a fluffy, creamy chocolate mousse that’s rich without being heavy. Elegant enough for company but simple enough for a weeknight treat, this pie comes together with just a few ingredients and no oven time.
Ingredients
For the Crust:
-
1 ½ cups chocolate cookie crumbs (about 20 Oreo cookies, filling removed)
-
5 tbsp unsalted butter, melted
For the Chocolate Mousse Filling:
-
1 ½ cups heavy cream, divided
-
1 ½ cups semi-sweet or dark chocolate chips
-
1 tsp pure vanilla extract
-
Pinch of fine sea salt
Optional Toppings:
-
Extra whipped cream
-
Chocolate shavings or curls
-
Flaky sea salt
Instructions
-
Make the Crust:
-
Crush cookies into fine crumbs and mix with melted butter.
-
Press mixture firmly into the bottom and up the sides of a 9-inch pie dish.
-
Chill in the fridge for 15 minutes.
-
-
Prepare the Ganache:
-
Heat ¾ cup of cream over medium heat until it just starts to simmer.
-
Pour over chocolate chips and let sit 3 minutes.
-
Stir until smooth, then mix in vanilla and pinch of salt. Cool to room temperature.
-
-
Whip the Cream:
-
Whip the remaining ¾ cup of cold cream to stiff peaks.
-
-
Fold Together:
-
Gently fold one-third of the whipped cream into the cooled ganache to lighten it.
-
Fold in the remaining whipped cream until fully combined.
-
-
Assemble the Pie:
-
Spoon the mousse into the chilled crust. Smooth the top.
-
Refrigerate for at least 4 hours, preferably overnight.
-
-
Serve:
-
Top with whipped cream, chocolate shavings, and a sprinkle of flaky salt if desired.
-
Slice with a sharp knife dipped in hot water for clean cuts.
-
Notes
-
Mint Chocolate: Add ½ tsp peppermint extract and fold in mini chocolate chips.
-
Bourbon Pecan: Stir 2 tsp bourbon into ganache; add toasted pecans to crust or top.
-
Orange Chocolate: Infuse cream with orange zest; optional orange liqueur.
-
Vegan/Dairy-Free: Use coconut cream and vegan chocolate chips; vegan butter for crust.
-
Mocha Twist: Add 1 tbsp instant espresso powder to hot cream before pouring over chocolate.
Serving Suggestions: Pairs beautifully with black coffee, red wine, or a simple glass of milk.
Nutritional Information (For Your Curiosity)
Okay, let’s be real: this is a celebration dessert. It’s rich, decadent, and meant to be savored. Here’s a rough breakdown per slice (based on 8 servings), but remember, these are estimates. Your specific ingredients will cause variations. This pie is a treat for the soul, so enjoy it mindfully and joyfully!
- Calories: ~410
- Total Fat: 30g
- Saturated Fat: 18g
Final Thoughts: A Slice of Simple Magic
And there you have it—the blueprint for a dessert that feels like a decadent secret, but is really just a celebration of simplicity and good ingredients. This no-bake chocolate mousse pie isn’t just a recipe; it’s an invitation. An invitation to slow down, to create something beautiful with your own hands, and to share a moment of pure, chocolatey joy with the people you love.
Remember, the true magic of this pie lies not in perfection, but in the process. In the sound of cookies being crushed, the smell of chocolate melting, and the quiet pride of pulling something this stunning from your own refrigerator. It’s the dessert that turns a regular Tuesday into an occasion and makes a dinner party feel legendary.
So, whether you stick to the classic version or embark on a flavor twist of your own, you’re not just making a pie. You’re weaving a little bit of that Feastical spirit—generous, joyful, and unabashedly delicious—into your kitchen. You’re creating the kind of treat that people remember. The slice they’ll ask you to bring, time and time again.
Now, go forth, whip that cream, fold that mousse, and get ready for the best kind of silence there is: the one that falls over a table when everyone takes their first bite.
With a full heart and an empty mixing bowl,
Beau
From my kitchen to yours.

Ritz Cracker Chicken Casserole : Creamy, Crunchy & Family-Approved
The Recipe That Feels Like a Warm Hug: Ritz Cracker Chicken Casserole
Hey friends, Beau here from Feastical! Let’s talk about that magical moment when you need a dinner that’s guaranteed to make everyone at the table smile. You know the feeling: it’s been a long day, the couch is calling, but your stomach (and probably a few hungry family members) are demanding something delicious and deeply satisfying. You don’t want to fuss with a million steps, but you also refuse to sacrifice flavor. Sound familiar? That, my friends, is the exact moment you need a hero casserole.
Today, I’m pulling back the curtain on one of my all-time, no-fail, crowd-pleasing classics: Ritz Cracker Chicken Casserole. This dish is the edible equivalent of your favorite cozy sweater. It’s creamy, it’s cheesy, it’s got that irresistible buttery-crunchy topping that crackles with every forkful, and it wraps cooked chicken in the most comforting embrace. It’s the dinner that asks for so little—just about 10 minutes of hands-on prep—and gives back so, so much. Whether you’re feeding a family of picky eaters, prepping for a potluck where you want to be the undisputed champion, or just treating yourself to a cozy night in, this recipe is your secret weapon. So, preheat that oven, grab your favorite baking dish, and let’s make a memory that tastes absolutely incredible.
More Than Just a Casserole: A Crunchy, Buttery Memory
This recipe always takes me straight back to my grandma’s linoleum-floored kitchen. It wasn’t fancy, but it was the heart of her home, always warm and smelling of something good. She called this her “Sunday Night Special,” the meal she could whip up after church with whatever she had on hand. For her, that often meant leftover roasted chicken from Friday’s dinner and the ever-present box of Ritz crackers in the pantry.
My job, as the eager (and perpetually snacky) grandkid, was to crush the crackers. She’d hand me the sleeve and a rolling pin, and I’d go to town on a piece of wax paper, creating a pile of golden crumbs while she mixed the creamy filling. The best part was “quality control”—sneaking a pinch of buttery crumbs before they went on the casserole. She’d always pretend not to see, with a little wink. When that casserole came out of the oven, bubbling and golden, it wasn’t just dinner. It was the sound of laughter around the table, the feeling of being cared for, and the simple, powerful magic of buttery crackers on top of something creamy. That’s the spirit I want to bring to your kitchen today.
Your Blueprint for Deliciousness: The Ingredients
Here’s the beautiful part: this recipe is built on simple, humble ingredients that work together to create something greater than the sum of its parts. Let’s break them down.
- 3 cups cooked chicken, shredded or chopped: The star! Use leftover rotisserie chicken for ultimate ease and flavor. Leftover roasted or grilled chicken works great, or you can quickly poach two large breasts. Chef’s Tip: For more depth, use a mix of white and dark meat.
- 1 can (10.5 oz) cream of chicken soup: The creamy glue. It creates that luxurious, cohesive sauce. Substitution Insight: Cream of mushroom or celery soup are fantastic swaps. For a from-scratch version, mix 1 cup of a thick bechamel sauce with a teaspoon of chicken bouillon paste.
- ½ cup sour cream: The tangy secret weapon! It cuts through the richness and adds a wonderful creaminess. Allergy/Dietary Swap: Plain, full-fat Greek yogurt is a perfect 1:1 substitute.
- 1 cup shredded cheddar cheese: The melty, savory goodness. I prefer sharp cheddar for a flavor punch, but mild cheddar, Colby Jack, or a Mexican blend are all winners. Chef’s Insight: Always shred your own cheese if you can! Pre-shredded bags contain anti-caking agents that can make the sauce a bit grainy.
- 1 sleeve Ritz crackers, crushed (about 35-40 crackers): The iconic crown. They bring that signature, lightly salty, buttery crunch. Substitution Tip: For a different twist, try buttery round crackers like Club, or for a gluten-free version, use gluten-free butter crackers.
- 4 tbsp butter, melted: This transforms the cracker crumbs into a golden, cohesive, flavor-packed topping. Don’t skip it!
- ½ tsp garlic powder (optional): My little flavor boost. It adds a subtle, savory background note. Feel free to omit or swap with onion powder, smoked paprika, or dried herbs like thyme.
- Salt & pepper to taste: The essential seasoners. Remember, the soup and crackers have salt, so taste your filling before adding more!
- Optional: chopped fresh parsley or chives for garnish: A pop of color and fresh flavor that makes the dish look restaurant-worthy.
Let’s Build It: Step-by-Step with Beau’s Best Hacks
Ready to create some magic? Follow these simple steps, and I’ll whisper my favorite kitchen hacks along the way.
- Preheat & Prep: Fire up your oven to 350°F (175°C). Take a 9×13-inch baking dish and give it a light coating of butter, cooking spray, or a quick wipe of oil. This ensures easy serving and cleanup later—no one wants to scrub baked-on cheese!
- Create the Dreamy Filling: In a large mixing bowl, combine your cooked chicken, cream of chicken soup, sour cream, shredded cheddar, garlic powder (if using), and a few cranks of black pepper. Chef’s Hack: Mix this with a sturdy silicone spatula or your (clean!) hands. You want everything evenly coated, but don’t over-mix into a paste. It should be chunky and inviting. Give it a taste here—this is your moment to adjust seasoning. Need a little more pepper? Add it now!
- Spread the Love: Dump that gorgeous, creamy chicken mixture into your prepared dish. Use your spatula to spread it into a smooth, even layer, getting it into all the corners. A level surface means your topping will bake evenly.
- Build the Iconic Crust: Now for the fun part! Place your Ritz crackers in a zip-top bag (my go-to for less mess) or between two sheets of parchment paper. Grab your rolling pin and crush them! You’re aiming for a mix of fine crumbs and some small pea-sized pieces for great texture. Pour the crumbs into a bowl and drizzle the melted butter over them. Toss with a fork until every crumb is shimmering and moistened. Pro Tip: Don’t wash that butter-melting bowl yet! A little residual butter helps the crackers toast to perfection.
- Top & Bake: Sprinkle the buttery crumbs evenly over the entire surface of the casserole. Pat them down gently—just a light press—so they adhere. Slide the dish into the middle of your preheated oven and bake for 25-30 minutes. You’re waiting for the magic signs: the filling should be bubbling vigorously around the edges, and that cracker topping should be a deep, golden brown.
- The Final Touch: Carefully remove your masterpiece from the oven (those bubbles are hot!). Let it sit for about 5 minutes. This allows the filling to set slightly so you get clean slices. Then, sprinkle with that optional fresh parsley or chives for a gorgeous finish.
How to Serve This Show-Stopper
Presentation is part of the fun! I like to cut this casserole into generous squares and lift them out with a flat spatula, making sure to get plenty of that crackly crust on top. For a family-style vibe, just place the whole baking dish right on the table with a big serving spoon and let everyone dig in—it’s comforting and communal.
This casserole is a complete meal superstar, but it loves good company on the plate. My absolute favorite pairing is a simple, bright green salad with a tangy vinaigrette to balance the richness. Steamed green beans, roasted broccoli, or garlicky sautéed spinach are also perfect veggie sides. For the ultimate comfort carb duo, you can’t go wrong with a side of fluffy mashed potatoes or buttery egg noodles. And don’t forget a cold, crisp beverage—a glass of iced tea, a dry cider, or a light lager are all fantastic choices.
Make It Your Own: Creative Twists & Swaps
The beauty of this blueprint is its flexibility. Once you’ve mastered the classic, play with it! Here are a few of my favorite riffs:
- The “Everything But The Kitchen Sink” Version: Stir in 1 cup of frozen mixed vegetables (peas, carrots, corn) or chopped steamed broccoli florets into the filling for a veggie-packed one-dish meal.
- Buffalo Chicken Twist: For a spicy kick, mix ¼ cup of buffalo sauce into the filling. Use a blue cheese or Monterey Jack cheese blend, and garnish with crumbled blue cheese and sliced green onions.
- Herb & Lemon Brightener: Add the zest of one lemon and 2 tablespoons of chopped fresh dill or parsley to the filling. It lightens the whole dish and adds a gorgeous fresh flavor.
- Gluten-Free & Lower-Carb Friendly: Use a certified gluten-free cream soup and gluten-free crackers. For a lower-carb option, swap the Ritz topping for a mix of crushed pork rinds and grated Parmesan cheese tossed with melted butter.
- Italian-Inspired: Use cream of mushroom soup, swap the cheddar for mozzarella and Parmesan, and add 1 teaspoon of Italian seasoning to the filling. Top with buttery crushed cheese-flavored crackers.
Beau’s Kitchen Notes & Stories
Over the years, this recipe has seen many iterations in my kitchen. I’ve made it for grieving friends, new neighbors, and countless “I don’t know what to cook” Tuesday nights. It never fails. One time, I was filming a video for the site and realized I was out of Ritz crackers mid-recipe. Panic? Nah. I used a bag of frozen tater tots I had in the freezer, slightly thawed and crushed. The “Tater Tot Chicken Casserole” was born, and it was a hilarious, delicious happy accident! The moral? Don’t be afraid to improvise. Cooking is about feeding people and making memories, not perfection. This casserole is forgiving—it wants to work for you.
Your Questions, Answered!
Q: Can I make this casserole ahead of time?
A: Absolutely! Assemble the casserole completely (through adding the topping), cover tightly with plastic wrap or foil, and refrigerate for up to 24 hours. When ready to bake, remove it from the fridge while the oven preheats (about 20 minutes), then bake as directed. You may need to add 5-10 minutes to the baking time since it’s starting cold.
Q: My cracker topping got soggy/burnt. What happened?
A: Sogginess usually means the casserole was covered while baking, or the filling was very wet. Ensure you’re using the correct soup amount and bake uncovered. Burning means the topping is too close to the oven’s top heating element. Try baking on a middle or lower-middle rack. If it’s browning too fast, you can loosely tent it with foil for the last 10 minutes.
Q: Can I use uncooked chicken?
A: I don’t recommend it. The baking time isn’t long enough to safely and thoroughly cook raw chicken from scratch. Using pre-cooked chicken ensures perfect food safety and texture.
Q: How do I store and reheat leftovers?
A: Store cooled leftovers in an airtight container in the fridge for up to 3 days. Reheat individual portions in the microwave until hot. To recrisp the topping, reheat servings in a toaster oven or regular oven at 350°F until warmed through.

Ritz Cracker Chicken Casserole : Creamy, Crunchy & Family-Approved
Description
Sometimes you just need a dinner that feels like a warm hug—and this Ritz Cracker Chicken Casserole is exactly that. Creamy, cheesy, with a buttery, crunchy topping, it’s simple to make, crowd-pleasing, and perfect for weeknight dinners, potlucks, or any cozy night in. With just 10 minutes of prep, you’ll have a comforting, hearty meal ready to bake.
Ingredients
-
3 cups cooked chicken, shredded or chopped (rotisserie works great!)
-
1 can (10.5 oz) cream of chicken soup (or mushroom/celery)
-
½ cup sour cream (or Greek yogurt)
-
1 cup shredded cheddar cheese (sharp or mild)
-
1 sleeve Ritz crackers (about 35–40), crushed
-
4 tbsp butter, melted
-
½ tsp garlic powder (optional)
-
Salt & pepper, to taste
-
Optional: chopped parsley or chives for garnish
Instructions
-
Preheat & Prep: Preheat oven to 350°F (175°C). Lightly butter or spray a 9×13-inch baking dish.
-
Make the Filling: In a large bowl, mix chicken, soup, sour cream, cheese, garlic powder, and pepper. Taste and adjust seasoning.
-
Assemble: Spread the filling evenly in the prepared baking dish.
-
Prepare the Topping: Crush Ritz crackers into a mix of fine crumbs and small pieces. Toss with melted butter until coated.
-
Top & Bake: Sprinkle cracker mixture evenly over the casserole. Bake uncovered for 25–30 minutes until bubbly and golden brown.
-
Finish: Let stand 5 minutes, then garnish with parsley or chives if desired. Serve warm.
Notes
-
Vegetable boost: Add 1 cup of frozen peas, carrots, or steamed broccoli for a one-dish meal.
-
Spicy twist: Stir in ¼ cup buffalo sauce and use Monterey Jack or blue cheese.
-
Gluten-free: Use gluten-free cream soup and crackers.
-
Italian style: Swap cheddar for mozzarella & Parmesan, add 1 tsp Italian seasoning.
Nutritional Information*
*Please note: Nutritional info is an estimate based on the specific ingredients listed and standard database calculations. Values can vary based on product brands and specific substitutions used.
Per Serving (Serves 6):
Calories: 420 | Total Fat: 26g | Saturated Fat: 13g | Cholesterol: 115mg | Sodium: 720mg | Total Carbohydrates: 20g | Dietary Fiber: 1g | Sugars: 3g | Protein: 24g
This dish is a good source of protein from the chicken and cheese. To adjust the nutrition profile, you can use low-sodium soup, reduced-fat sour cream and cheese, and increase the veggie content as suggested in the variations.
Final Thoughts from My Kitchen to Yours
At the end of the day, recipes like this Ritz Cracker Chicken Casserole are the bedrock of Feastical. It’s not about being fancy; it’s about being fantastically satisfying. It’s about creating a meal that gathers people, that fills your kitchen with a smell that promises comfort, and that leaves you with a happy, full belly and a clean plate. I hope this recipe becomes a trusted friend in your recipe rotation, just like it is in mine.
Now, I’d love to hear from you! Did you add your own twist? Did the kids go back for seconds? Snap a pic of your creation and tag me @Feastical—nothing makes me happier than seeing your kitchen wins. Until next time, keep your whisks ready and your ovens warm. Happy cooking, friends!
— Beau
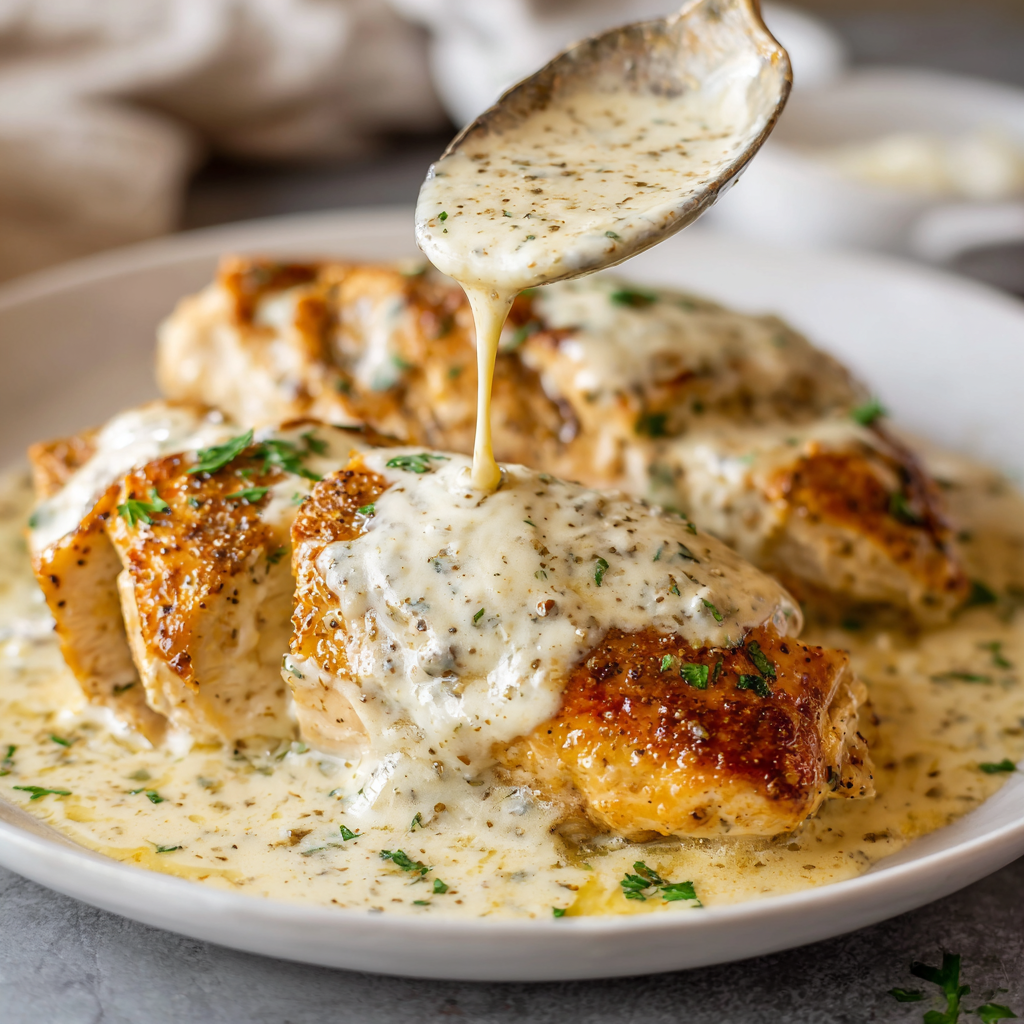
Olive Garden Chicken : Creamy, Savory & Made at Home
Hey There, Hungry Friend! Let’s Bring That Olive Garden Magic Home
Ever have one of those days where a specific craving hits you like a ton of warm, garlicky breadsticks? You know the one. It’s not just any meal—it’s that creamy, dreamy, Italian-style chicken dish from Olive Garden. The one that feels like a savory hug. But between busy schedules and the hassle of going out, sometimes a restaurant trip just isn’t in the cards.
Well, what if I told you that magic isn’t locked inside those cozy, endless-salad-bowl walls? What if you could create that same soul-satisfying, “just-one-more-bite” comfort right in your own kitchen, with ingredients you probably already have? Friends, that’s exactly what we’re doing today. We’re taking back our comfort food destiny!
This isn’t just another copycat recipe. This is my homemade homage to that beloved creamy Italian chicken—a dish so simple it feels like a cheat code, yet so delicious it’ll have your family asking if you’ve secretly hired a personal chef. We’re talking tender, juicy chicken bathing in a luxuriously creamy, parmesan-kissed sauce, all infused with the zesty, herby punch of Italian dressing. It’s the ultimate weeknight win that tastes like you fussed all day. So tie on your favorite apron (or don’t, I’m not the boss of you), and let’s make some mealtime magic together.
The Table Where It All Began: A Nostalgic Nudge
This recipe takes me straight back to a red vinyl booth in the late 90s. It was a “big deal” family dinner after my little sister’s choir concert. I was a teenager, more interested in my walkman than wine, but even I couldn’t ignore the spectacle of food arriving at our table. When that plate of creamy chicken arrived for my dad, the aroma alone was a showstopper—garlic, herbs, and rich cream. He offered me a bite, and my world of frozen pizzas and boxed mac & cheese instantly expanded.
It wasn’t just the flavor; it was the feeling. It was celebratory, shared, and deeply comforting. Years later, as I started finding my own feet in the kitchen, that memory became a mission. I wanted to capture that feeling for a regular Tuesday. After many (delicious) experiments, this version was born. It’s become my go-to for “I need a win” dinners, potlucks where I want to be the hero, and quiet nights where the best comfort is the kind you make yourself. Every time I make it, I’m back in that booth for a second, reminded that the best recipes are the ones that come with a side of memory.
Gathering Your Flavor Allies: The Dream Team
Here’s the beautiful part: this dish is built on simple, powerful ingredients. Each one plays a key role, and knowing *why* helps you become the master of your own kitchen. Let’s break it down.
- 2–3 Boneless, Skinless Chicken Breasts: Our protein star! They’re like blank canvases ready to soak up all the sauce’s goodness. Chef’s Insight: For even more tender chicken, try using thighs! They’re harder to overcook and bring a richer flavor.
- 1 cup Creamy Italian Dressing: This is the secret flavor rocket fuel. It’s a marinade, sauce base, and seasoning packet all in one. Substitution Tip: Any brand of creamy Italian works, but if you only have regular Italian vinaigrette, mix in 2 tablespoons of mayonnaise to add that creamy body.
- ½ cup Grated Parmesan Cheese: The salty, nutty backbone of our sauce. Chef’s Plea: Please, for the love of all that is cheesy and good, use real grated Parm from the refrigerated section, not the shelf-stable canister. The flavor difference is night and day.
- ¼ cup Cream Cheese, softened: Our stealthy sauce thickener and silky-smooth operator. Pro Hack: Leave it on the counter for 30 minutes before you start. A softened block blends into the sauce seamlessly, no lumps allowed!
- ½ cup Heavy Cream or Whole Milk: This creates the luxurious, velvety texture. Substitution Tip: Heavy cream gives the richest result, but whole milk works in a pinch. For a lighter twist, half-and-half is a perfect middle ground.
- 1 teaspoon Garlic Powder & ½ teaspoon Black Pepper: The dynamic duo for depth. The powder distributes garlic flavor evenly, and fresh pepper adds a gentle heat. Chef’s Insight: Feel free to add a pinch of red pepper flakes here if you like a subtle kick!
- Optional: Chopped Fresh Parsley for Garnish: This isn’t just decoration, folks! That little pop of green adds a fresh, clean note that brightens the entire rich dish.
Let’s Get Cooking: Your Foolproof Roadmap to Delicious
Ready? This process is so easy, you’ll be grinning the whole time. We’re using a slow cooker for that “set it and forget it” magic, but I’ll give you a stovetop speed-run option too.
- Prep Your Chicken: Give your chicken breasts a quick pat dry with a paper towel. This helps the sauce stick better. No need to season them—trust me, the dressing and sauce have it covered. Place them in the bottom of your slow cooker. They can be snug, but not stacked like pancakes.
- Create the Sauce: In a medium bowl, combine the Italian dressing, grated Parmesan, softened cream cheese, heavy cream, garlic powder, and black pepper. Now, grab your whisk and go to town! Whisk it until it’s as smooth as you can get it. A few tiny cream cheese specks are okay—they’ll melt into bliss. Chef’s Hack: If your cream cheese is still a bit cold, pop the bowl in the microwave for 15-second bursts, whisking in between, to help it loosen up.
- The Big Pour: Slowly and lovingly pour that glorious, creamy sauce all over the waiting chicken. Use a spoon or spatula to nudge it around, making sure each breast gets a good saucy blanket.
- The Waiting Game (The Best Part): Pop the lid on your slow cooker. For tender, shreddable chicken, cook on LOW for 4-5 hours. If you’re in a hurry, HIGH for 2-3 hours will work. You’ll know it’s done when the chicken is cooked through (165°F internal temp) and tender enough to shred easily with a fork.
- Finish & Serve: Carefully remove the chicken to a cutting board. Give the sauce in the pot a really good stir—this is where it all comes together into a cohesive, creamy dream. You can slice the chicken, or my personal favorite, use two forks to shred it into bite-sized pieces. Return all that juicy chicken back to the sauce and stir to coat. Let it hang out for 5-10 minutes on the “Warm” setting to let the flavors marry. Important Tip: If your sauce seems a bit thin, mix 1 tablespoon of cornstarch with 2 tablespoons of cold water and stir it into the hot sauce. Let it cook for another 10-15 minutes on HIGH to thicken up beautifully.
Plating Up the Perfect Bite: How to Serve This Star
This is where your inner artist gets to play! This creamy chicken is the ultimate team player and loves to be served over a base that can catch all that amazing sauce.
The Classic Move: A big bed of hot, cooked fettuccine or penne pasta is the traditional (and absolutely perfect) route. Toss the pasta with a little of the sauce first, then pile the chicken on top. Garnish with extra Parmesan and that chopped parsley.
The Cozy Comfort Switch-Up: Forget the pasta! Serve this over a cloud of creamy mashed potatoes, buttery rice, or even soft polenta. It’s a game-changer.
Keep It Light(ish): For a lower-carb option, spoon it over roasted zucchini noodles, steamed broccoli, or a simple arugula salad for a warm chicken salad situation. Don’t forget a piece of warm, crusty bread on the side for dipping—that sauce is liquid gold!
Make It Your Own: Delicious Twists & Swaps
Got dietary needs or just feeling creative? This recipe is a fantastic foundation. Here are some of my favorite ways to mix it up:
- The “Lighter” Lift: Use fat-free cream cheese, swap the heavy cream for 2% milk, and use a light Italian dressing. The flavor profile stays fantastic, just a bit lighter on the calories.
- Sun-Dried Tomato & Spinach Fancy-Pants Version: In the last 30 minutes of cooking, stir in ½ cup of chopped sun-dried tomatoes (oil-packed and drained) and two big handfuls of fresh baby spinach. The colors and flavors are incredible.
- Mushroom Lover’s Dream: Sauté 8 oz of sliced cremini mushrooms in a pan until golden. Add them to the slow cooker with the chicken at the beginning for an earthy, umami-packed twist.
- Different Protein, No Problem: Chicken thighs are foolproof here. For a pork twist, use a 2-pound pork tenderloin. Cooking time remains the same—just cook until the pork reaches 145°F.
- Instant Pot Express: Use the “Sauté” function to sear the chicken quickly on both sides. Add the sauce ingredients, seal the lid, and cook on HIGH pressure for 10 minutes, with a 10-minute natural release. Quick, easy, and just as tasty.
Beau’s Kitchen Confidential: A Few Extra Thoughts
This recipe has been a workhorse in my kitchen for years, and it’s evolved from a strict copycat to my own “house version.” The biggest lesson? Don’t stress about precision. Once, I only had ⅓ of a cup of cream cheese left and subbed the rest with plain Greek yogurt. Guess what? It was tangy and fantastic! Another time, I forgot to soften the cream cheese and just plopped it in. The sauce was slightly lumpy, but after an extra vigorous whisk at the end, it was still a crowd-pleaser.
The beauty of these “dump-and-go” recipes is their resilience. They’re about feeding people and creating joy, not perfection. So, if your sauce is a little thicker or thinner than the picture, if you use a different cheese, or if you accidentally cook it on high for 4 hours (been there!), it’s going to be okay. In fact, it’s going to be delicious. That’s the Feastical promise.
Your Questions, Answered: Let’s Troubleshoot Together
Q: My sauce turned out a bit thin. How can I fix it?
A: No worries! This is common, especially with slower cooker models that retain a lot of moisture. My go-to fix is a cornstarch slurry. Mix 1 tablespoon of cornstarch with 2 tablespoons of COLD water until smooth. Stir this into the hot sauce in the slow cooker, set it to HIGH, and let it bubble for 10-15 minutes until thickened. You can also remove the chicken, pour the sauce into a saucepan, and simmer it on the stovetop to reduce and thicken.
Q: Can I make this on the stovetop instead?
A: Absolutely! It’s faster, too. Cut your chicken into 1-inch cubes. In a large skillet over medium-high heat, cook the chicken until browned on the outside. Reduce heat to low, pour in your sauce mixture, and simmer for 15-20 minutes, stirring occasionally, until the chicken is cooked through and the sauce has thickened to your liking.
Q: Is it possible to make this ahead of time?
A: 100%. You can assemble the raw chicken and sauce in the slow cooker insert, cover it tightly, and refrigerate it overnight. In the morning, just place the cold insert into the base and start cooking. You may need to add 30-60 minutes to the cook time since you’re starting from cold.
Q: My sauce seems a little too salty. What happened?
A: The dressing and Parmesan both bring salt. Next time, look for a lower-sodium Italian dressing and reduce the Parmesan slightly. To fix it now, try stirring in a splash of plain cream or milk and a small squeeze of lemon juice to balance it. Serving it over a plain base like unsalted pasta or potatoes will also help.

Olive Garden Chicken : Creamy, Savory & Made at Home
Description
Creamy Italian Chicken (Olive Garden–Style)
Prep Time
10 minutes
Cook Time
4–5 hours (LOW) or 2–3 hours (HIGH)
Ingredients
-
2–3 boneless, skinless chicken breasts
-
1 cup creamy Italian dressing
-
½ cup freshly grated Parmesan cheese
-
¼ cup cream cheese, softened
-
½ cup heavy cream (or whole milk)
-
1 tsp garlic powder
-
½ tsp black pepper
-
Optional garnish: chopped fresh parsley
Instructions
-
Add chicken
Place chicken breasts in the bottom of the slow cooker. -
Make sauce
In a bowl, whisk together Italian dressing, Parmesan, cream cheese, heavy cream, garlic powder, and black pepper until mostly smooth. -
Pour & cook
Pour sauce over chicken. Cover and cook:-
LOW: 4–5 hours
-
HIGH: 2–3 hours
Chicken should be tender and fully cooked (165°F / 74°C).
-
-
Finish
Remove chicken, slice or shred, then return to the sauce. Stir well and let sit on WARM for 5–10 minutes. -
Serve
Garnish with parsley if desired.
Notes
-
Chicken thighs work great and stay extra juicy
-
Sauce too thin? Add slurry:
-
1 tbsp cornstarch + 2 tbsp cold water
-
Stir in and cook on HIGH 10–15 minutes
-
-
Use freshly grated Parmesan for best texture
Nutritional Information (A Quick Reference)
While we’re all about feel-good food, I know some folks like to keep track. Here’s a general breakdown for one serving (about ¼ of the recipe, served without pasta or other sides), based on using heavy cream and full-fat ingredients. Remember, your specific brand choices will cause variations.
- Calories: ~390
- Protein: 32g (Great for keeping you full!)
- Total Fat: 24g
- Saturated Fat: 10g
- Carbohydrates: 7g
- Sugar: 3g
- Sodium: ~780mg
Note: To lower the sodium, use a low-sodium dressing and reduce the Parmesan slightly. For lower fat/calories, refer to the “Lighter Lift” variation above.
Your Homemade Comfort Awaits
And there you have it, friend! The secret to that iconic, creamy Italian chicken comfort is officially yours. No reservation required. What I love most about this recipe isn’t just its deliciousness, but its incredible ability to bring people together over something simple, satisfying, and made with your own two hands.
I hope this recipe becomes a reliable, joy-sparking staple in your kitchen like it is in mine. When you make it, I’d love to hear about it! Tag me on social @Feastical or leave a comment on the blog. Did you add spinach? Try it with pork? Let me know your twists!
Now, go forth and cook with confidence. Your table is waiting for its new favorite meal.
With a full heart and a happy stomach,
Beau
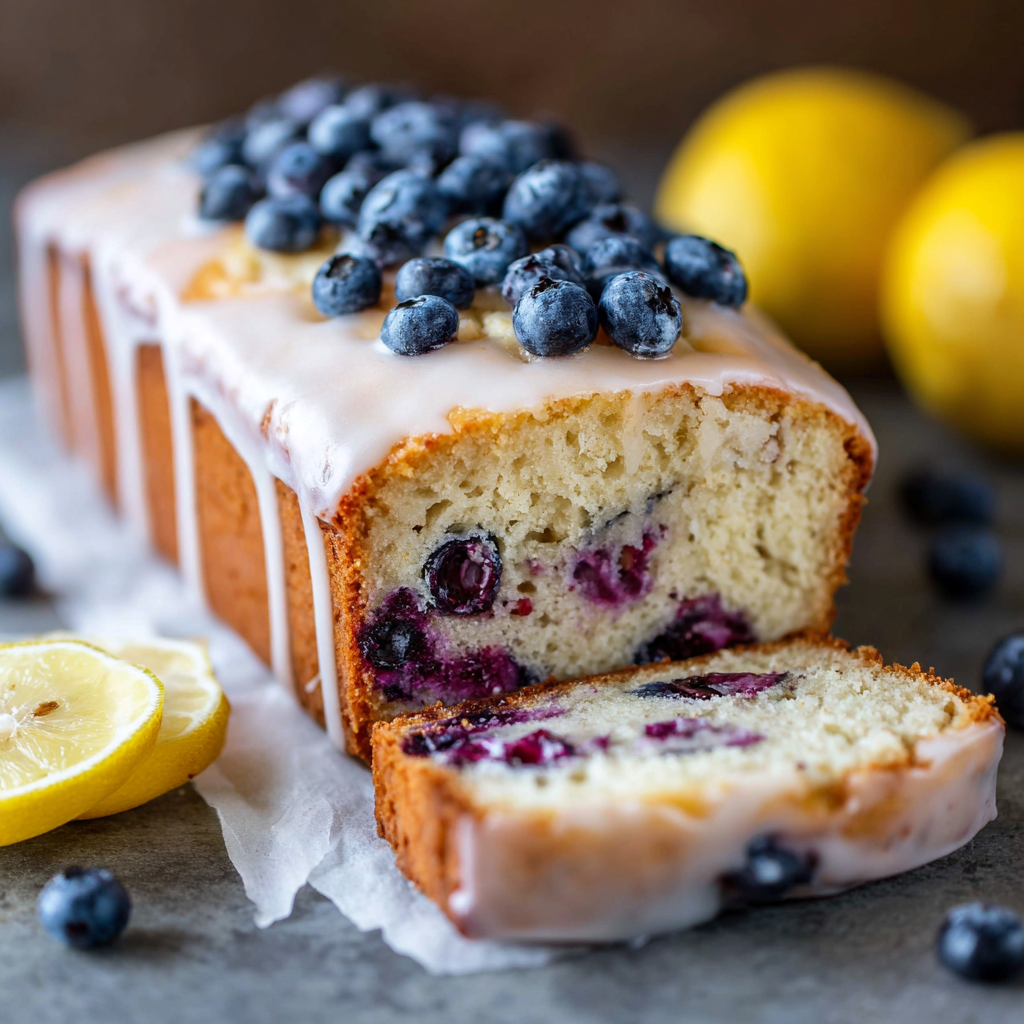
Lemon Blueberry Loaf Cake : Bright, Moist & Bursting with Berries
Lemon Blueberry Loaf Cake: Your Slice of Sunshine
Hey there, friend! Beau here, welcoming you back to my kitchen at Feastical. You know that feeling when you need a little burst of joy? Maybe the sky is a stubborn shade of gray, or the week just feels… longer than usual. That’s exactly when I head to my countertop, pull out my favorite mixing bowl, and reach for a bright yellow lemon. Because happiness, I’ve found, often starts with a little zest.
Today, I’m beyond excited to share with you my absolute go-to for baking bliss: this Lemon Blueberry Loaf Cake. This isn’t just a cake; it’s a mood-lifter, a brunch superstar, and a “wow, you made that?!” showstopper all wrapped up in one beautifully simple loaf. Imagine the softest, most tender crumb, perfumed with real lemon and studded with pockets of juicy, jammy blueberries. Then, we crown it with a whisper-thin, zesty lemon glaze that seeps into every nook and cranny. It’s sunshine in cake form, I tell you.
Whether you’re a seasoned baker or someone who’s still on first-name terms with that mysterious spatula in the back of the drawer, this recipe is for you. We’re keeping it simple, soulful, and seriously satisfying. So, tie on your apron, preheat that oven, and let’s bake something that tastes like a warm, sweet hug.
Why This Cake? A Little Kitchen Memory
This recipe takes me right back to my grandma’s linoleum-floored kitchen. She wasn’t a fancy baker, but she was a practical one. One rainy summer afternoon, with a pint of blueberries threatening to go soft and a lemon rolling around the fruit bowl, she decided to “whip something up.”
I was her official taste-tester (a prestigious title for a seven-year-old). I remember watching her rub the lemon zest into the sugar with her fingers, the citrus oil scent exploding into the air. “That’s where the real flavor lives, Beau,” she’d say. When she folded in those blueberries, they looked like little violet marbles in the pale yellow batter. The wait for it to bake felt endless, but the moment that warm, lemony steam hit my face when she turned the loaf out… magic. It was humble, it was imperfectly gorgeous, and it was made with what we had. That’s the spirit I bring to every recipe here at Feastical—and it’s the heart of this beautiful loaf.
Gathering Your Sunshine: Ingredients & Insights
Here’s what you’ll need to create this masterpiece. I’ve added my little chef notes next to each one—because knowing the “why” makes you a more confident cook!
- 1½ cups all-purpose flour: The trusty backbone of our loaf. It gives structure without being tough. For a slightly lighter crumb, you can swap in ½ cup cake flour, but all-purpose works perfectly.
- 1 teaspoon baking powder: Our leavening agent! This is what gives the cake its gentle rise and soft texture. Make sure yours is fresh (it should fizz vigorously if you sprinkle a bit in hot water).
- ½ teaspoon salt: Never skip this! Salt is the flavor enhancer that makes the lemon sing and balances the sweetness. It’s the secret handshake of good baking.
- ½ cup (1 stick) unsalted butter, softened: Hello, richness and moisture! Using unsalted lets you control the salt level. “Softened” means it should give easily to a gentle press but not be oily or melted. Pro tip: if you forgot to take it out, cube it and let it sit for 15-20 minutes.
- ¾ cup granulated sugar: Sweetness and tenderness. We’re not making an overly sweet dessert here—this amount lets the fruit shine.
- 2 large eggs, at room temperature: They bind the batter and add moisture. Room temp eggs blend much more smoothly into the creamed butter and sugar, giving you a better texture.
- 1 tablespoon lemon zest: This is the GOLD. The zest holds the potent, fragrant lemon oils. Use a fine grater or microplane and only get the bright yellow skin, not the bitter white pith underneath.
- 2 tablespoons fresh lemon juice: The tart, punchy counterpart to the sweet zest. Always, always use fresh juice. The bottled stuff just can’t compare in flavor.
- ½ cup milk (any kind), at room temperature: Moisture and tenderness again. Whole milk is luxurious, but 2%, almond, or oat milk work great too.
- 1 cup fresh or frozen blueberries: The jewel of the loaf! If using frozen, do not thaw—they’ll bleed less. The key move: toss them in 1 teaspoon of the measured flour before folding in. This little hack helps suspend them in the batter so they don’t all sink to the bottom.
For the Glaze (Optional, but Highly Recommended):
- ½ cup powdered sugar: Sift it if it’s lumpy for a super-smooth glaze.
- 1–2 tablespoons fresh lemon juice: Start with one, then add the second by teaspoons until you get a thick but pourable consistency.
Let’s Get Baking: Step-by-Step Sunshine
Ready to make some magic? Follow these steps, and read my little commentary along the way—it’s like I’m right there with you, handing you the whisk!
- Prep & Preheat: Start by preheating your oven to 350°F (175°C). This is the sweet spot for even baking. Grease a standard 9×5 inch loaf pan thoroughly with butter or non-stick spray, then line it with a strip of parchment paper that overhangs the long sides. This “sling” will be your best friend when it’s time to lift the beautiful, fragile loaf out. No more flipping and hoping!
- The Dry Team: In a medium bowl, whisk together your flour, baking powder, and salt. Give it a good 30-second whisk. This isn’t just mixing; it’s aerating the flour and ensuring the baking powder is evenly distributed for a uniform rise. Set this bowl aside—the dry team is ready.
- Creaming is Key: In a large mixing bowl, beat the softened butter and granulated sugar together on medium-high speed for a full 2-3 minutes. We’re not just combining them; we’re “creaming.” This process traps tiny air bubbles in the butter, which expand in the oven and give us that lovely, light crumb. It should turn pale, fluffy, and almost look like a soft, yellow cloud.
- Egg-cellent Addition: With the mixer on medium, add the eggs one at a time, beating well after each addition. Let the first egg fully disappear into the butter-sugar mix before adding the second. This prevents the batter from curdling or splitting. Now, beat in the lemon zest and fresh lemon juice. The smell right now is your first reward.
- The Gentle Merge: Here’s where we switch to a gentle hand. With the mixer on low, add about one-third of the dry ingredients and mix until just combined. Then pour in half of the milk and mix. Repeat with another third of the dry, the rest of the milk, and finish with the last of the dry ingredients. Mix until you no longer see streaks of flour, but stop immediately after. Overmixing at this stage develops gluten and leads to a tough, dense loaf. A few tiny lumps are perfectly fine!
- Berry Ballet: Take that cup of blueberries you’ve tossed in a teaspoon of flour. Using a flexible spatula, gently fold them into the batter. Use a broad, sweeping motion from the bottom of the bowl up and over. We want to distribute them without crushing them or overworking the batter.
- Into the Oven: Scrape the beautiful, speckled batter into your prepared loaf pan. Smooth the top gently. Give the pan a light tap on the counter to settle any big air pockets. Slide it onto the middle rack of your preheated oven.
- The Bake & The Test: Bake for 50-60 minutes. Start checking at 50 minutes. The true test? Insert a toothpick or a thin skewer into the very center of the loaf. It should come out with a few moist crumbs clinging to it, but not wet batter. If it’s clean, it’s done! The top will be a gorgeous golden brown, and the cake will have pulled away slightly from the sides of the pan.
- The Crucial Cool: Let the loaf cool in the pan on a wire rack for at least 30 minutes. I know it’s hard to wait! But this allows the structure to set. Then, use those parchment paper slings to carefully lift it out onto the rack to cool completely before glazing. A warm cake will drink up the glaze too quickly and make a mess.
- The Glorious Glaze: Whisk your powdered sugar and lemon juice together in a small bowl. Start with 1 tablespoon of juice and add more by the teaspoon until it’s thick but pourable—like a slow-moving lava. Drizzle it artistically (or enthusiastically!) over the completely cooled loaf. Let it set for 10-15 minutes before slicing.
Serving Your Slice of Sunshine
Now for the best part! This loaf is incredibly versatile.
For the ultimate afternoon treat, slice a thick piece, pour yourself a cup of Earl Grey tea or a strong coffee, and just savor. The contrast of the tart-sweet cake with a bitter beverage is *chef’s kiss*.
At brunch, it’s a superstar. Serve it alongside a frittata and some crispy bacon. It feels fancy without any fuss.
Want to dress it up for dessert? Warm a slice slightly and add a dollop of softly whipped cream or a scoop of vanilla bean ice cream. The warmth will make the blueberries extra jammy and the cold cream is pure heaven.
And honestly? It’s pretty darn perfect all on its own, eaten straight from your hand as you stand by the kitchen counter. No judgment here.
Make It Your Own: Fun Flavor Twists
Once you’ve mastered the classic, play around! Here are a few of my favorite spins:
- Lemon Blueberry Poppy Seed: Add 2 tablespoons of poppy seeds to the dry ingredients. They add a wonderful, subtle crunch and a beautiful visual speckle.
- Gluten-Free Sunshine: Swap the all-purpose flour for a 1:1 gluten-free baking blend (I like the ones with xanthan gum already included). The result is just as tender and delicious.
- Mixed Berry Bonanza: Use a mix of blueberries, raspberries, and blackberries for a more complex berry flavor. If using raspberries, be extra gentle when folding—they’re delicate!
- Cream Cheese Swirl: Before baking, drop small spoonfuls of a mixture of 4 oz softened cream cheese, ¼ cup sugar, and 1 egg yolk over the batter. Use a knife to swirl it gently for a gorgeous marbled effect and a tangy surprise.
- Lavender Infused: Add 1 teaspoon of culinary-grade dried lavender buds to the sugar before creaming it with the butter. Rub them together with your fingers to release the oils. It adds a stunning, floral note that pairs beautifully with lemon.
Beau’s Kitchen Notes & Stories
This recipe has been my reliable friend for years, and it’s evolved in my kitchen. I once, in a distracted moment, accidentally used a whole cup of lemon juice instead of two tablespoons. The result was… alarmingly tart, but weirdly refreshing! We dubbed it the “Pucker-Up Loaf” and ate it anyway. Lesson learned: measure your liquids.
The biggest game-changer for me was the flour-toss trick with the berries. I used to have a persistent “blueberry sinkhole” at the bottom of my loaves. A very wise baker friend shared that tip, and it fixed everything. It’s the little things!
This cake also freezes beautifully. Wrap the cooled, unglazed loaf tightly in plastic wrap and then foil. It’ll keep for up to 3 months. Thaw overnight on the counter, then glaze and serve. Perfect for having a slice of sunshine ready whenever you need it.
Your Questions, Answered
Q: My blueberries all sank to the bottom! What happened?
A: The most common culprit is not tossing them in that teaspoon of flour, or using berries that are too wet/thawed. The flour coating gives them a bit of “grip” in the batter. Also, make sure your batter isn’t too thin—if it seems runny, you might have under-measured the flour.
Q: Can I use frozen blueberries without thawing?
A: Absolutely, and it’s often better! Do not thaw them. Toss them straight from the freezer in the flour. This helps prevent them from bleeding too much color into the batter and turning the whole loaf purple.
Q: The top of my loaf is browning too fast, but the center isn’t done.
A: This happens! Tent a loose piece of aluminum foil over the top of the loaf pan for the last 15-20 minutes of baking. This will shield it from direct heat and allow the center to cook through without the top burning.
Q: My glaze is too runny/thick. How do I fix it?
A> Too runny? Whisk in more sifted powdered sugar, a tablespoon at a time. Too thick? Add more lemon juice just a few drops at a time until it loosens up. You’re aiming for a consistency that slowly ribbons off the whisk.

Lemon Blueberry Loaf Cake : Bright, Moist & Bursting with Berries
Description
Lemon Blueberry Loaf Cake
Moist, tender, bright, and bursting with blueberries
Ingredients
Loaf Cake
-
1½ cups all-purpose flour
-
1 tsp baking powder
-
½ tsp salt
-
½ cup unsalted butter, softened
-
¾ cup granulated sugar
-
2 large eggs, room temperature
-
1 tbsp lemon zest
-
2 tbsp fresh lemon juice
-
½ cup milk (any kind), room temperature
-
1 cup blueberries (fresh or frozen, do not thaw)
-
1 tsp flour (for tossing blueberries)
Lemon Glaze (Optional)
-
½ cup powdered sugar
-
1–2 tbsp fresh lemon juice
Instructions
-
Preheat oven to 350°F (175°C). Grease a 9×5-inch loaf pan and line with parchment paper.
-
Mix dry ingredients
In a bowl, whisk together flour, baking powder, and salt. Set aside. -
Cream butter & sugar
In a large bowl, beat butter and sugar until light and fluffy, about 2–3 minutes. -
Add eggs & lemon
Beat in eggs one at a time. Mix in lemon zest and lemon juice. -
Combine batter
Add dry ingredients in three additions, alternating with milk, mixing just until combined. Do not overmix. -
Add blueberries
Toss blueberries with 1 tsp flour, then gently fold into the batter. -
Bake
Pour batter into prepared pan. Bake for 50–60 minutes, until a toothpick inserted in the center comes out with a few moist crumbs. -
Cool
Let cool in pan for 30 minutes, then lift out and cool completely on a wire rack. -
Glaze (optional)
Whisk powdered sugar with lemon juice until thick but pourable. Drizzle over cooled loaf.
Notes
-
Tossing blueberries in flour helps prevent sinking
-
Tent loosely with foil if the top browns too fast
-
Do not overmix for a tender crumb
-
Frozen blueberries work best straight from the freezer
Nutritional Info (A Quick Note!)
Hey, we’re all about feel-good food here, and that includes feeling good about what we eat. This info is an estimate per slice (based on 10 slices) to help you make informed choices. Remember, baking at home means
Final Thoughts: Your Slice of Sunshine Awaits
And there you have it—the simple, joyful magic of a Lemon Blueberry Loaf Cake. It’s more than just a recipe; it’s a reminder that some of life’s brightest moments are stirred, baked, and shared with love right in our own kitchens.
Whether you bake this loaf to brighten a cloudy day, to share with someone special, or simply to fill your home with the irresistible scent of lemon and blueberries, remember this: you’re not just baking a cake—you’re creating a memory. Each slice holds the warmth of hands that made it, the care you poured in, and the simple, beautiful truth that good things often come from humble ingredients and a willing heart.
So go ahead, slice into that golden loaf. Let the glaze crackle, the berries burst, and the tender crumb melt on your tongue. You’ve made sunshine. And you deserve every single bite.
Thank you for baking with me today. Until next time, keep your oven warm and your heart even warmer.
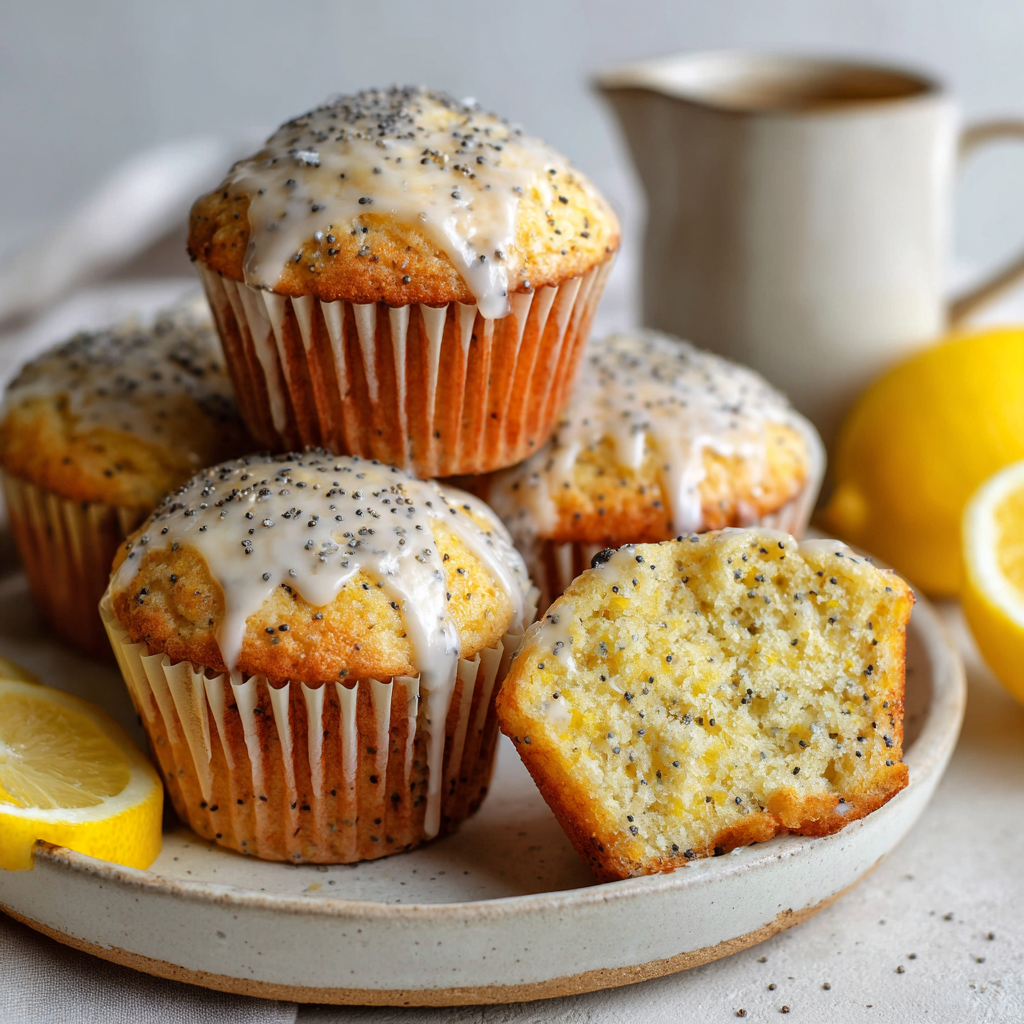
Bakery-Style Lemon Poppy Seed Muffins : Bright, Fluffy & Irresistible
Sunshine in a Muffin Tin: Your New Morning Best Friend
Hey there, friend! Beau here, welcoming you back to my kitchen. Is it just me, or does the world sometimes need a little extra sparkle? A bit of brightness to cut through the gray? That’s exactly the magic I find in a perfect Lemon Poppy Seed Muffin. We’re not talking about the dry, sad cousins you sometimes find languishing on a coffee shop counter. Oh no. We’re crafting Bakery-Style Lemon Poppy Seed Muffins – the kind with a domed, golden top, a tender, cloud-like crumb that’s bursting with sunny citrus flavor, and that delightful little *pop* of texture from the poppy seeds.
This recipe is my go-to for turning a regular Tuesday into something special. It’s the edible equivalent of throwing open the curtains on a spring morning. They’re incredibly simple to make, but with a few of my favorite chef-approved hacks, they look and taste like they came from the finest bakery case. Whether you’re whipping them up for a weekend brunch crowd, packing them in lunchboxes as a sweet surprise, or simply treating yourself with a warm muffin and a cup of coffee, this recipe is about to become a staple. So, grab your favorite mixing bowl and let’s bake some happiness together!
More Than a Muffin: A Zest-Filled Memory
This recipe always takes me back to my grandma’s sun-drenched kitchen. She wasn’t a fancy baker, but she had a way of making the simplest things feel like an event. One particularly grumpy, drizzly Saturday when I was about ten, I trailed in after little league, feeling sorry for myself after a strikeout. Without a word, she handed me a lemon and a old, bright yellow zester. “Make yourself useful,” she said with a wink. “We’re making sunshine.”
As I grated, filling the air with that incredible, eye-wateringly bright aroma, my mood started to lift. She taught me how to juice the lemon without getting seeds in the bowl, and let me stir the poppy seeds into the batter, calling them “little flavor specks.” The wait while they baked was agony, but the reward… that first warm, sticky bite of a muffin fresh from the oven, with its sweet-tart glaze? It was a hug in food form. It taught me that cooking isn’t just about feeding people; it’s about changing the weather in a room. That’s the spirit I want to bring to your kitchen today.
Gathering Your Sunshine Squad: Ingredients & Insights
Great baking starts with great ingredients, and understanding why we use them is half the fun. Here’s your lineup, with my personal notes to guide you.
- 2 cups all-purpose flour: The trusty foundation. For a slightly lighter crumb, you can swap one cup for cake flour.
- 1 tbsp poppy seeds: These aren’t just for looks! They add a wonderful, subtle nutty crunch. Pro-tip: give them a quick toast in a dry pan for 60 seconds to really wake up their flavor.
- 1 tbsp baking powder + 1/2 tsp baking soda: Our dynamic leavening duo! The powder gives the initial lift for that beautiful dome, and the soda reacts with the yogurt/lemon juice for a tender texture.
- 1/2 tsp salt: The flavor enhancer. Never skip it! It makes the lemon and sweetness truly sing.
- 1/2 cup unsalted butter, melted: Richness and moisture. Using unsalted lets you control the salt level. Let it cool slightly before adding so it doesn’t cook the eggs!
- 2/3 cup granulated sugar: The perfect amount of sweetness to balance the tart lemon. It also helps create a lovely golden crust.
- 2 large eggs: Room temperature is best! They incorporate more easily, leading to a smoother, more uniform batter.
- 1/2 cup Greek yogurt or sour cream: The secret weapon for supremely moist muffins! The tang also complements the lemon perfectly. I prefer full-fat for the best texture, but low-fat works in a pinch.
- 1/2 cup milk: Whole milk adds richness, but any milk you have will do. Even a plant-based alternative like almond or oat milk works beautifully.
- 2 tbsp lemon zest (about 2 lemons): This is where the big, bright lemon flavor lives! Use a microplane if you have one—it gets the zest fine without the bitter white pith.
- 3 tbsp fresh lemon juice: Please, for the love of all things good, use fresh lemons! The bottled stuff just doesn’t compare. Roll your lemons on the counter firmly before cutting to get more juice.
- 1 tsp vanilla extract: The background singer that makes the lead vocalist (lemon) sound even better. It adds a layer of warm, comforting flavor.
For the Optional (but highly recommended) Lemon Glaze:
- 1/2 cup powdered sugar: Sift it if it’s lumpy for the silkiest glaze.
- 1–2 tbsp fresh lemon juice: Start with one tablespoon and add the second slowly until you reach a thick but drizzle-able consistency.
Let’s Get Baking: Step-by-Step to Muffin Heaven
Ready to see the magic happen? Follow these steps, and you’ll be a muffin maestro in no time. I’ve packed each one with my favorite kitchen hacks.
Step 1: Preheat & Prep. Crank that oven to 375°F (190°C). This slightly higher heat is our first trick to getting that gorgeous, sky-high muffin top. Line a 12-cup muffin tin with paper liners or grease it generously. I’m a liner guy – less mess, easy cleanup, and they look cute!
Step 2: The Dry Team. In a large bowl, grab your whisk and thoroughly combine the flour, poppy seeds, baking powder, baking soda, and salt. Whisking here does two things: it mixes everything evenly, and it aerates the flour a bit, contributing to a lighter muffin. See? We’re building texture already.
Step 3: The Wet Dream Team. In a medium bowl, combine the slightly cooled melted butter and sugar. Whisk it for a good 30 seconds – you’re not just mixing, you’re helping the sugar start to dissolve. Add the eggs one at a time, whisking well after each. Now, stir in the Greek yogurt, milk, that glorious lemon zest, fresh lemon juice, and vanilla. It might look a little curdled at this point—that’s totally okay! The acid from the yogurt and lemon is just saying hello to the other ingredients.
Step 4: The Grand Union (The Most Important Step!). Pour the wet ingredients into the dry. Now, put down that electric mixer. Pick up a sturdy spatula or a wooden spoon. Gently fold the batter together. Your mission is to just combine them—no dry streaks of flour should remain, but a few lumps are perfectly fine, even welcome! Overmixing is the #1 enemy of tender muffins. It develops the gluten in the flour and leads to a tough, tunneled texture. We want gentle, fluffy clouds, not bread!
Step 5: Portion with Love. Divide the batter evenly among the 12 muffin cups. I like to use a large cookie scoop or an ice cream scoop for less mess and even portions. For that true bakery-style dome, fill the cups all the way to the top. Don’t be shy!
Step 6: Bake to Golden Perfection. Slide the tin into your preheated oven. Bake for 18-22 minutes. Start checking at 18 minutes—they’re done when the tops are springy to the touch and a toothpick inserted into the center of a muffin comes out clean or with just a few moist crumbs. That hot oven will give you a beautiful, cracked, golden top.
Step 7: Cool & Drizzle. Let the muffins cool in the pan for 5 minutes, then transfer them to a wire rack. This stops the cooking and prevents soggy bottoms. While they’re still a bit warm, whisk together your powdered sugar and lemon juice for the glaze and drizzle it artfully over the tops. The warm muffins will soak in just a little, creating an amazing flavor layer.
How to Serve These Citrus Gems
Presentation is part of the joy! Let these muffins cool until just warm or reach room temperature before glazing for cleaner lines (though I love a messy, drippy glaze, too!). Pile them high on a rustic wooden board or a vintage cake stand for serious brunch appeal. Of course, they’re equally perfect nestled in a napkin, enjoyed straight from your hand.
The ultimate pairing? A strong cup of black coffee or a pot of Earl Grey tea. The bitterness plays off the sweet-tart muffin brilliantly. For a real treat, serve a warm muffin with a dollop of lightly sweetened whipped cream or a side of fresh berries. They’re fantastic for breakfast, a mid-afternoon pick-me-up, or as a light dessert. Honestly, I’ve been known to enjoy one for all three in the same day… no judgment here!
Make It Your Own: Delicious Twists & Swaps
Once you’ve mastered the classic, have fun playing with it! Here are a few of my favorite riffs:
- Blueberry Lemon Poppy Seed: Gently fold 1 cup of fresh or frozen blueberries (don’t thaw) into the batter at the very end. A classic combo that never fails.
- Lavender Infused: Add 1 teaspoon of culinary dried lavender to the dry ingredients. It adds a beautiful, floral note that’s incredibly elegant.
- Gluten-Free & Dairy-Free Friendly: Use a 1:1 gluten-free flour blend. Swap the butter for melted coconut oil, use dairy-free yogurt, and your favorite non-dairy milk. It works like a charm!
- Cream Cheese Swirl: Before baking, drop small spoonfuls of sweetened cream cheese (mix 4 oz cream cheese with 2 tbsp sugar) onto the batter in each cup and use a toothpick to swirl it in gently.
- Orange Poppy Seed: Swap the lemon zest and juice for orange! Use the juice of one orange (about 1/4 cup) and reduce the milk by a tablespoon or two to compensate for the extra liquid.
Beau’s Kitchen Notes & Stories
This recipe has been my little laboratory project for years. The biggest game-changer was switching from all baking powder to the combination of powder and soda with an acidic ingredient (yogurt/lemon). It was like someone turned on the light—the texture went from good to “OH WOW.”
A funny fail I had early on? I once, in a pre-coffee haze, used sesame seeds instead of poppy seeds. Let me tell you, “Lemon Sesame Muffins” are… not recommended. The look on my friend’s face when he bit into one was priceless. Now I keep my jars very clearly labeled! The moral: even mistakes make for good stories and great learning. Don’t be afraid to experiment (with the right ingredients!).
Your Questions, Answered!
Q: My muffins didn’t dome! They’re flat. What happened?
A: The usual suspects: old baking powder/soda (check expiration dates!), under-filling the cups (be bold, fill to the top!), or an oven that wasn’t hot enough. That initial blast of high heat is crucial for the rise.
Q: Why is my batter so thick/lumpy?
A>Don’t worry! This is a thick batter by design—that’s what helps support the dome and poppy seeds. The lumps will mostly bake out. Just ensure there are no dry flour patches, and you’re golden.
Q: Can I make these ahead of time?
A>Absolutely! Bake them, let them cool completely, and store in an airtight container at room temp for 2 days, or freeze for up to 3 months. I often freeze them unglazed, then add the glaze after thawing.
Q: My muffins are dry. How can I prevent that?
A>The key is not overbaking. Check early! Also, make sure you’re measuring your flour correctly (spoon it into the cup and level it off, don’t scoop). And don’t skip the yogurt/sour cream—it’s our moisture guardian.

Bakery-Style Lemon Poppy Seed Muffins : Bright, Fluffy & Irresistible
Description
Bakery-Style Lemon Poppy Seed Muffins
Soft, fluffy, bright, and bursting with citrus flavor
Ingredients
Muffins
-
2 cups all-purpose flour
-
1 tbsp poppy seeds
-
1 tbsp baking powder
-
½ tsp baking soda
-
½ tsp salt
-
½ cup unsalted butter, melted and slightly cooled
-
⅔ cup granulated sugar
-
2 large eggs, room temperature
-
½ cup Greek yogurt or sour cream
-
½ cup milk
-
2 tbsp lemon zest (about 2 lemons)
-
3 tbsp fresh lemon juice
-
1 tsp vanilla extract
Optional Lemon Glaze
-
½ cup powdered sugar
-
1–2 tbsp fresh lemon juice
Instructions
-
Preheat oven to 375°F (190°C). Line a 12-cup muffin tin with liners or grease well.
-
Mix dry ingredients
In a large bowl, whisk together flour, poppy seeds, baking powder, baking soda, and salt. -
Mix wet ingredients
In a separate bowl, whisk melted butter and sugar until combined. Add eggs one at a time. Stir in yogurt, milk, lemon zest, lemon juice, and vanilla. -
Combine
Pour wet ingredients into dry ingredients. Gently fold just until combined. Do not overmix—small lumps are okay. -
Fill muffin cups
Divide batter evenly, filling each cup nearly to the top for bakery-style domes. -
Bake
Bake for 18–22 minutes, or until tops are lightly golden and a toothpick inserted comes out clean. -
Cool & glaze (optional)
Cool muffins for 5 minutes in the pan, then transfer to a wire rack. Mix glaze ingredients and drizzle over slightly warm muffins.
Notes
-
High heat = tall tops: Baking at 375°F helps create domed muffins
-
Don’t overmix: Overworking the batter leads to dense muffins
-
Use fresh lemons: Zest provides the strongest lemon flavor
-
Thick batter is normal: This helps support the poppy seeds and rise
Nutritional Information (Per Muffin, without glaze)
While we bake for joy and flavor, it’s always good to know what’s in our food. Here’s the breakdown for one delicious muffin (based on standard ingredients, calculated with Greek yogurt):
- Calories: ~210
- Protein: 4g
- Carbohydrates: 26g
- Fat: 10g (Saturated Fat: 6g)
- Fiber: 1g
- Sugars: 12g
Remember, these are approximate. Using different brands or substitutions will alter the values. The glaze adds about 25-30 calories and 7g of sugar per muffin. Enjoy as part of a balanced day!
Final Thoughts: Share the Sunshine!
And there you have it, friends—my heart and soul in muffin form. This recipe is more than just a list of steps; it’s an invitation to slow down, to enjoy the simple process of creating something beautiful and delicious with your own hands. The scent of lemon zest and baking muffins has the power to turn any kitchen into the happiest place in the house.
I truly hope you love making (and devouring!) these Bakery-Style Lemon Poppy Seed Muffins as much as I do. When you make them, I’d be over the moon if you tagged @Feastical on social media so I can see your beautiful creations. Now, go preheat that oven and make some sunshine. Happy baking!
With love and a spatula,
Beau