
Pumpkin Spice Latte Muffins
Your Favorite Fall Drink, Now in Muffin Form!
Hey friends, Beau here! Is there anything that signals the cozy arrival of fall more than that first, magical sip of a Pumpkin Spice Latte? That warm hug of pumpkin, the gentle kick of espresso, and those iconic spices that just smell like happiness… it’s a whole vibe. But what if I told you you could have all that incredible flavor, not in a cup, but in a soft, tender, melt-in-your-mouth muffin? Welcome to my kitchen, where we’re baking up a batch of my famous Pumpkin Spice Latte Muffins!
These aren’t just any muffins. They’re the literal embodiment of your favorite coffee shop order, baked into a portable, snackable, utterly irresistible treat. We’re talking a super moist pumpkin muffin base, packed with warm spices and a hint of real coffee depth, all topped off with a sweet, drippy coffee glaze that ties it all together. The best part? Your entire house will smell like a fall-scented candle, but way, way better because you get to eat the results. So, preheat that oven, grab your favorite mug of something warm, and let’s turn that PSL obsession into something you can eat with your hands. Trust me, you’re gonna want to make a double batch.
The Day I Spilled My PSL… And Created Something Better
This recipe has a fun little origin story, as the best recipes often do. A few years back, I was in a classic autumn rush—trying to juggle a warm PSL, my keys, and a grocery bag full of pumpkin puree. You can probably guess what happened next. Yep. A tragic latte spill all over my kitchen counter (and my new shoes!).
As I was frantically cleaning up the sweet, spicy mess, I had a lightbulb moment. The flavors soaking into the paper towels were incredible—the coffee, the pumpkin, the spice. Instead of mourning my lost drink, I thought, “Why not bake these flavors together?” I immediately got to work, adding a scoop of espresso powder to my go-to pumpkin muffin batter and whipping up a simple coffee glaze. The result was nothing short of magic. It was the PSL, reincarnated as the most perfect muffin. Now, I almost thank my past clumsy self for that happy little accident. It gave us this recipe!
Gathering Your PSL Muffin Squad
Here’s the dream team of ingredients that makes these muffins sing. Don’t worry, I’ve got notes and swaps for you because I know we don’t all have the same stuff in our pantries!
For the Muffins:
- 1 3/4 cups (218g) all-purpose flour: The trusty foundation of our muffin. For a slightly denser, heartier muffin, you can swap half for whole wheat pastry flour. It adds a lovely nutty tone.
- 1 tsp baking soda: Our leavening agent! This is what gives the muffins their beautiful rise and soft, airy texture. Make sure it’s fresh for the best lift.
- 1/2 tsp salt: Crucial! Salt is the flavor enhancer here. It makes the sweet taste sweeter and the spices pop. Never skip it.
- 2 tsp pumpkin pie spice: The heart and soul of the spice blend! No pumpkin pie spice? No problem. Make your own with 1 tsp cinnamon, 1/2 tsp ginger, 1/4 tsp nutmeg, and 1/4 tsp allspice or cloves.
- 1 tbsp instant espresso powder: This is our secret weapon for that deep, robust coffee flavor without adding extra liquid. Chef’s Insight: If you only have regular instant coffee, you can use it, but the coffee flavor will be milder. For a serious coffee punch, use a finely ground espresso brew powder.
- 1 cup (244g) pumpkin puree: The star of the show! Please make sure you’re using 100% pure pumpkin puree, not pumpkin pie filling, which has added sugar and spices. It also keeps these muffins incredibly moist.
- 2/3 cup (133g) brown sugar: I prefer brown sugar here for its deep molasses flavor—it pairs perfectly with pumpkin and spice. Light or dark brown works great!
- 2 large eggs: They bind everything together and add richness. For a vegan swap, I’ve had great success with flax eggs (1 tbsp ground flaxseed mixed with 3 tbsp water per egg).
- 1/3 cup (79ml) vegetable oil: Oil keeps these muffins moist and tender for days, much more so than butter. I use a neutral oil like avocado or canola. Melted coconut oil also works if you like a subtle coconut note.
- 1 tsp vanilla extract: The flavor bridge that ties all the warm notes together.
- 1/4 cup (60ml) milk: Any kind you have! Dairy, almond, oat—it all works beautifully. It just loosens the batter to the perfect consistency.
For the Coffee Glaze:
- 1/2 cup (57g) powdered sugar: Creates a smooth, sweet, drizzle-able glaze. Sift it if it’s lumpy!
- 1–2 tsp brewed espresso or strong coffee: Using liquid coffee instead of milk or water is the key to making this glaze taste like a true latte. Add slowly until you get your perfect drizzling consistency.
- Optional: pinch of cinnamon: A little extra spice never hurt anybody! It adds a pretty speckled look and a flavor boost.
Let’s Get Baking: The Step-by-Step Lowdown
Alright, team! Muffins are one of the easiest, most satisfying things to bake. Follow these steps, and you’ll be a PSL muffin pro in no time.
Step 1: Fire up your oven to 350°F (175°C). This is the perfect muffin temperature—hot enough to get a nice rise but gentle enough to cook through without burning. While it’s heating, line a 12-cup muffin pan with paper liners or give it a really good grease with non-stick spray. This prevents any tragic sticking incidents!
Step 2: In a large bowl, grab your whisk and combine the all-purpose flour, baking soda, salt, pumpkin pie spice, and that all-important instant espresso powder. Whisk it really well! We want those dry ingredients and that espresso powder completely evenly distributed. No one wants a bite with a pocket of baking soda. Chef’s Hack: Whisking the espresso powder with the dry ingredients ensures the coffee flavor is throughout the entire muffin, not just in one spot.
Step 3: In a separate medium bowl, it’s time for the wet team. Combine the pumpkin puree, brown sugar, eggs, vegetable oil, vanilla extract, and milk. Whisk it until it’s completely smooth and homogenous. You’ll have a gorgeous, thick, orange-brown batter that already smells amazing.
Step 4: Here’s the most important step: DO NOT OVERMIX! Pour the wet ingredients into the dry ingredients. Use a spatula and gently fold them together until the flour is just absorbed. It’s okay if there are a few streaks of flour left; it’s better than overmixing! Overmixing develops gluten and leads to tough, dense muffins. We want tender, cloud-like crumbs.
Step 5: Divide that beautiful batter evenly among your 12 prepared muffin cups. I like to use a cookie scoop for less mess and even distribution. They should be about 2/3 to 3/4 of the way full. This is the perfect amount for a great, domed muffin top.
Step 6: Pop the pan into your preheated oven and bake for 18 to 22 minutes. Ovens can be sneaky, so start checking at 18 minutes. They’re done when the tops are springy to the touch and a toothpick inserted into the center of a muffin comes out clean or with just a few moist crumbs. No wet batter!
Step 7: Let the muffins cool in the pan for about 5 minutes. This allows them to set up so they don’t fall apart when you take them out. Then, transfer them to a wire rack to cool completely before glazing. I know, the wait is torture, but if you glaze them while they’re hot, the glaze will just melt and slide right off!
Step 8: While they’re cooling, make your super simple coffee glaze. In a small bowl, whisk the powdered sugar with 1 teaspoon of your brewed espresso or strong coffee. Keep adding coffee, just a few drops at a time, until it reaches a thick but drizzle-able consistency. Too runy? Add a bit more powdered sugar. Too thick? A tiny bit more coffee.
Step 9: The best part! Once the muffins are completely cool, drizzle that glorious coffee glaze over the tops. Use a spoon or put the glaze in a small zip-top bag, snip off the corner, and pipe it on for a more professional look.
How to Serve These Beauties
Okay, you’ve baked the perfect muffins. How do you make them an experience? It’s all in the serving!
Obviously, the number one pairing is a hot beverage. Enjoy one with a fresh-brewed coffee, a steaming latte (a PSL, of course!), or a hot chai tea. The combination is pure autumn bliss.
For plating, these muffins are gorgeous on a simple wooden cutting board or a vintage cake stand. Dust them with a little extra cinnamon or pumpkin pie spice right over the glaze for a pretty finish. They’re the ultimate breakfast treat, the perfect afternoon pick-me-up with your book, or a show-stopping dessert at a fall dinner party. Serve them at your next gathering and just wait for the compliments to roll in.
Mix It Up! Fun PSL Muffin Twists
Once you’ve mastered the classic, get creative! Here are a few of my favorite ways to switch things up:
- The “Coffee Cake” Crunch: Before baking, make a quick streusel topping! Mix 1/4 cup flour, 1/4 cup brown sugar, 2 tbsp cold cubed butter, and 1/2 tsp cinnamon with a fork until crumbly. Sprinkle generously over the batter before baking for an incredible crunchy texture.
- Chocolate Chip Delight: Because chocolate and coffee are a match made in heaven. Fold 3/4 cup of semi-sweet or dark chocolate chips into the batter right before dividing it into the pan.
- Gluten-Free & Vegan Friendly: Easy! Use a 1:1 gluten-free baking flour blend. For the eggs, use flax eggs, and make sure your sugar is certified vegan. Use a plant-based milk and you’re good to go!
- Cream Cheese Swirl: Thin 4 oz of softened cream cheese with a tablespoon of sugar and a splash of vanilla. Drop spoonfuls onto the batter in the pan and use a toothpick to swirl it in for a marbled, tangy surprise.
- Maple Kissed: Replace the brown sugar in the muffin batter with pure maple syrup. Reduce the milk to 2 tbsp to account for the extra liquid. The maple flavor is a natural best friend for pumpkin.
Beau’s Kitchen Notes
This recipe has evolved so much since that first spilled-latte experiment! I initially tried using fresh brewed coffee in the batter, but it made the muffins too wet and diluted the flavor. The instant espresso powder was the game-changer—it delivers a pure, potent coffee punch.
A funny story: I once accidentally used baking powder instead of baking soda. Let’s just say the muffins tasted… metallic and weird, and they rose into weird pointy tops. Always double-check your containers! Now, I keep my baking soda in a clearly labeled jar to avoid any more kitchen mishaps. The journey to a great recipe is full of little lessons!
Your Questions, Answered!
Q: My muffins didn’t dome. They’re flat! What happened?
A: The usual culprit is old or expired baking soda. It loses its potency over time and won’t give your muffins the lift they need. Also, make sure your oven is fully preheated before the pan goes in!
Q: Can I make these without espresso powder?
A> You can, but you’ll lose a lot of the “latte” flavor. In a pinch, you can dissolve 1 tablespoon of instant coffee granules in the 1/4 cup of milk called for in the recipe before adding it to the wet ingredients. The flavor will be milder, though.
Q: How should I store these muffins, and do they freeze well?
A> Because they’re so moist, store them in an airtight container at room temperature for 2-3 days. They freeze beautifully! Freeze the unglazed muffins on a baking sheet, then transfer to a freezer bag for up to 3 months. Thaw at room temperature and glaze right before serving.
Q: My glaze is too runny/thick. How can I fix it?
Print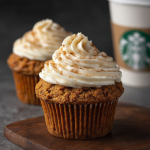
Pumpkin Spice Latte Muffins
Description
Pumpkin Spice Latte Muffins
Cozy, tender pumpkin muffins infused with coffee flavor, warm fall spices, and topped with a sweet coffee glaze—your favorite fall drink, now in muffin form!
Ingredients
For the Muffins
-
1 3/4 cups (218g) all-purpose flour (or swap 1/2 cup for whole wheat pastry flour)
-
1 tsp baking soda
-
1/2 tsp salt
-
2 tsp pumpkin pie spice (or 1 tsp cinnamon + 1/2 tsp ginger + 1/4 tsp nutmeg + 1/4 tsp cloves/allspice)
-
1 tbsp instant espresso powder (or 1 tbsp instant coffee granules dissolved in milk)
-
1 cup (244g) pumpkin puree (not pumpkin pie filling)
-
2/3 cup (133g) brown sugar
-
2 large eggs (or 2 flax eggs for vegan)
-
1/3 cup (79ml) vegetable oil (neutral oil like canola or avocado)
-
1 tsp vanilla extract
-
1/4 cup (60ml) milk (any kind)
For the Coffee Glaze
-
1/2 cup (57g) powdered sugar, sifted
-
1–2 tsp brewed espresso or strong coffee
-
Optional: pinch of cinnamon for garnish
Instructions
1. Prep
-
Preheat oven to 350°F (175°C).
-
Line a 12-cup muffin pan with paper liners or grease well.
2. Mix Dry Ingredients
-
In a large bowl, whisk flour, baking soda, salt, pumpkin pie spice, and instant espresso powder until well combined.
3. Mix Wet Ingredients
-
In a medium bowl, whisk pumpkin puree, brown sugar, eggs, oil, vanilla, and milk until smooth.
4. Combine
-
Pour wet ingredients into dry. Gently fold with a spatula until just combined; a few streaks of flour are okay.
5. Portion
-
Divide batter evenly among muffin cups (about 2/3–3/4 full).
6. Bake
-
Bake 18–22 minutes until tops spring back and a toothpick comes out clean or with a few moist crumbs.
7. Cool
-
Cool in pan 5 minutes, then transfer to a wire rack to cool completely before glazing.
8. Glaze
-
Whisk powdered sugar with 1 tsp brewed espresso. Adjust consistency with additional coffee or powdered sugar as needed. Drizzle over cooled muffins and optionally sprinkle with cinnamon.
Notes
-
Avoid overmixing: gently fold until just combined.
-
Use fresh baking soda for proper rise.
-
Cool muffins before glazing to prevent melting glaze.
-
Freeze unglazed muffins on a sheet, then transfer to freezer bags for up to 3 months. Glaze after thawing.
Nutrition
- Calories: 240 kcal
- Fat: 10g
- Carbohydrates: 33g
- Protein: 3g
A> Glazes are easy to adjust. Too runny? Whisk in more powdered sugar, a tablespoon at a time. Too thick? Add liquid (more coffee or a tiny splash of milk) literally drop by drop until it reaches your desired consistency.
Quick Nutrition Breakdown
Hey, I’m all about balance! Enjoy your treats mindfully. Here’s a general nutritional estimate per muffin (including glaze), but remember, it can vary based on specific ingredients and brands used.
Per Muffin: Approximately 240 calories | 10g fat | 33g carbohydrates | 3g protein
These muffins get their moisture from pumpkin and oil, and the pumpkin puree is a great source of Vitamin A and fiber. While they are a sweet treat, they’re made with real ingredients and no crazy additives. Enjoy them as part of a balanced diet!
Final Thoughts from My Kitchen to Yours
Well, there you have it, friends! My ultimate, feel-good, taste-like-fall Pumpkin Spice Latte Muffins. This recipe is so close to my heart because it came from a simple, messy moment that turned into something truly delicious. That’s what cooking is all about—creativity, experimentation, and a little bit of happy chaos.

Savory Pumpkin Cheddar Muffins
Your New Favorite Fall Side Dish is a Muffin (And It’s Not Sweet!)
Hey friends, Beau here from Feastical! Let’s talk about pumpkin. I love it, you love it, but let’s be real—by the time November rolls around, sometimes you need a break from the sugar rush. Between the lattes, the pies, and the cookies, our taste buds are begging for something different. Something… savory.
What if I told you we could take all that cozy, comforting pumpkin goodness and give it a seriously delicious, cheesy, savory makeover? Enter the star of today’s show: my Savory Pumpkin Cheddar Muffins. These little guys are a game-changer. They’re moist, tender, and packed with sharp cheddar, fresh chives, and a hint of garlic. They’re the unexpected hero waiting to be dunked into your next bowl of chili, served alongside a hearty stew, or starring on your weekend brunch table.
This isn’t just another muffin recipe. It’s a flavor experience. It’s proof that pumpkin is one of the most versatile ingredients in your pantry, ready to play for either team—sweet or savory. So, if you’re ready to fall in love with pumpkin all over again, preheat that oven and grab your favorite mixing bowl. We’re about to create some magic.
The “Aha!” Moment: How These Muffins Came to Be
This recipe was born from a happy little kitchen accident, as the best ones often are. A few autumns ago, I was prepping for a big Friendsgiving potluck. My mission was to make my famous from-scratch pumpkin pie. I got a little overzealous with the can opener and ended up with a whole extra cup of pumpkin puree just sitting there on the counter, staring at me.
I couldn’t let it go to waste. My mind started racing. I had a block of extra-sharp cheddar in the fridge, some chives growing in a pot on the windowsill, and a serious craving for something warm and bready. I thought, “What if I made muffins… but skipped the sugar?” I started throwing things into a bowl with the wild, creative confidence of someone who hasn’t yet realized they might be creating a complete disaster.
Twenty minutes later, the kitchen smelled insane—like a cheesy, herby, pumpkin-y dream. I pulled them out, let one cool for exactly 37 seconds (patience is not my virtue), and took a bite. You guys. It was a revelation. They were perfect. They were the hit of the potluck, and I’ve been tweaking and perfecting the recipe ever since. It just goes to show that some of the best culinary adventures start with a simple “What if?”
Gathering Your Savory Pumpkin Dream Team
Here’s everything you’ll need to make a dozen of these glorious muffins. The beauty of this recipe is its simplicity. Let’s break it down, ingredient by ingredient.
- 2 cups (248g) all-purpose flour: The trusty foundation of our muffin. It gives us that perfect, tender crumb. For a whole-wheat version, you can swap in half whole wheat pastry flour, but know it’ll make the muffin a bit denser (in a hearty, delicious way!).
- 2 tsp baking powder & 1/2 tsp baking soda: Our dynamic leavening duo. They work together to give these muffins their perfect rise and light texture. Make sure they’re fresh! If your baking powder is older than a season of The Great British Bake Off, it’s time for a new can.
- 1/2 tsp salt & 1/4 tsp black pepper: Crucial for enhancing all the other flavors. Don’t be shy with them! The pepper adds a little warm kick that plays so nicely with the cheddar.
- 1 tsp garlic powder: This is our secret weapon. It distributes garlic flavor evenly throughout the batter without the risk of biting into a raw, pungent piece of fresh garlic. Trust me on this one.
- 1 cup (244g) pumpkin puree: The star! Not pumpkin pie filling—make sure you grab the plain, pure pumpkin puree. It adds incredible moisture and a subtle, earthy sweetness that balances the cheese.
- 2 large eggs: They bind everything together and add richness. For an egg-free version, a couple of flax eggs (2 tbsp ground flaxseed + 5 tbsp water, left to sit for 5 mins) work great.
- 1/2 cup (120ml) milk: Any kind you have on hand works—whole, 2%, even unsweetened almond or oat milk. It thins the batter to the perfect consistency.
- 1/4 cup (60ml) olive oil or melted butter: Olive oil keeps things moist and lends a fruity note, while melted butter gives that classic, rich, buttery flavor. You can’t go wrong with either.
- 1 cup (115g) shredded sharp cheddar cheese: The bolder the cheddar, the better the muffin. I always shred my own from a block—it melts and incorporates much better than the pre-shredded stuff, which is coated in anti-caking agents.
- 2 tbsp chopped fresh chives: They provide a mild, fresh onion flavor that brightens up the whole muffin. In a pinch, you could use the green parts of scallions or even a teaspoon of dried chives.
Let’s Get Baking: Your Foolproof Guide to Muffin Success
Ready to make some magic? Follow these steps, and you’ll be a savory muffin master in no time. I’ve packed this section with all my favorite chef hacks to ensure your muffins are perfect.
Step 1: Preheat and Prep. Fire up your oven to 375°F (190°C). This is the ideal temperature for getting a nice golden top and a perfectly cooked interior. Now, grab your standard 12-cup muffin tin. Grease it really well with butter or non-stick spray, or line it with parchment paper liners. I’m a fan of the non-stick spray method for maximum golden-brown edges.
Step 2: Whisk the Dry Team. In a large bowl, grab your whisk and combine the flour, baking powder, baking soda, salt, black pepper, and that all-important garlic powder. Whisk it all together until it’s one uniform mixture. This isn’t just about combining; it’s about aerating the flour a little, which leads to a lighter muffin. Chef’s hack: if you’re adding any dry spices like smoked paprika or cayenne, add them now!
Step 3: Unite the Wet Team. In a medium bowl, combine the pumpkin puree, eggs, milk, and your fat of choice (oil or melted butter). Whisk this until it’s completely smooth and there are no streaks of egg white or pumpkin left. You want a gloriously orange, smooth, and slightly thick liquid.
Step 4: The Big Merge. Here’s the key to tender muffins: DO NOT OVERMIX. Pour the wet ingredients into the dry ingredients. Using a spatula, gently fold them together. Stop when you just barely see the last traces of flour disappear. A few lumps are absolutely fine—I promise! Overmixing is the #1 cause of tough, dense muffins.
Step 5: The Flavor Fold-In. Now, gently fold in the shredded cheddar cheese and chopped chives until they’re just evenly distributed. Try to work quickly so you don’t overwork the batter.
Step 6: Portion and Top. Divide the batter evenly among the 12 muffin cups. I like to use a large cookie scoop for less mess and even portions. They should be about ¾ full. For an extra cheesy, gorgeous top, sprinkle a little extra cheese on each one before they go in the oven.
Step 7: Bake to Golden Perfection. Pop the tin into your preheated oven and bake for 18-22 minutes. You’re looking for golden brown edges and a top that springs back lightly when touched. The ultimate test? A toothpick inserted into the center of a muffin should come out clean, maybe with a few moist crumbs, but no wet batter.
Step 8: The Cool Down. Let the muffins cool in the pan for about 5 minutes. This allows them to set up so they don’t fall apart when you take them out. Then, transfer them to a wire rack. I know it’s hard, but try to let them cool for at least 10-15 minutes before diving in—this allows the flavors to really settle and develop.
How to Serve These Savory Beauties
Okay, they’re out of the oven and your kitchen smells like a fall wonderland. Now what? These muffins are the ultimate supporting actor—they make everything else on the plate shine.
The Cozy Bowl Companion: This is their starring role. Crumble one right into a big, steaming bowl of chili, beef stew, or potato soup. The muffin soaks up the broth and adds a incredible texture and flavor. It’s a game-changer.
The Brunch All-Star: Move over, boring biscuits! Serve these warm muffins alongside your weekend eggs, bacon, and a fresh salad. They’re a fantastic, unexpected addition to any brunch spread.
The On-The-Go Snack: Grab one on your way out the door. They’re satisfying, packed with flavor, and are a much more interesting alternative to a granola bar. Perfect for a packed lunch, too!
The Appetizer Hero: Slice them in half, toast them lightly, and schmear them with a creamy herbed goat cheese or a soft garlic and herb butter. Instant, impressive party appetizer!
Mix It Up! Creative Twists on the Classic
Once you’ve mastered the base recipe, the world is your savory muffin oyster! Here are a few of my favorite ways to switch things up.
- Jalapeño Popper: Add 1-2 tablespoons of finely diced fresh jalapeño (seeds removed for less heat, kept for more!) and swap out half of the cheddar for cream cheese. Just chop the cream cheese into small cubes and fold it in—you’ll get amazing creamy pockets.
- Everything Bagel: Swap the chives for everything bagel seasoning! Fold 2 tablespoons into the batter, and then sprinkle another tablespoon on top with the extra cheese before baking.
- Bacon & Scallion: Because bacon makes everything better. Fold in ½ cup of cooked, crumbled bacon and replace the chives with the green parts of 3-4 chopped scallions.
- Gluten-Free & Dairy-Free: Use a 1:1 gluten-free all-purpose flour blend. For dairy-free, use your favorite plant-based milk, olive oil, and a good vegan cheddar cheese that melts well.
- Herb Garden: Feel free to play with other soft herbs! Fresh thyme, rosemary, or sage would all be fantastic additions. Just keep the total quantity to about 2 tablespoons of finely chopped herbs.
Beau’s Kitchen Notes
This recipe has evolved so much since that first happy accident. I’ve learned that a dash of smoked paprika (about ¼ tsp) adds a wonderful smoky depth that plays incredibly well with the pumpkin and cheese. I also highly recommend letting the batter sit for 5 minutes after you’ve portioned it into the tin before putting it in the oven. This little rest allows the leavening agents to start working and gives you a slightly better rise.
One time, I was filming a video of me making these and I was talking to the camera, gesturing wildly with my spatula, and I completely forgot to add the oil. I didn’t realize it until I was cleaning up and saw the full measuring cup still on the counter. The result? Let’s just say they were… hockey pucks. So learn from my airheaded mistake—double-check your wet ingredients!
Your Questions, Answered
Q: Can I make these muffins ahead of time?
A: Absolutely! They keep wonderfully. Once completely cool, store them in an airtight container at room temperature for 2 days, or in the fridge for up to 5 days. They also freeze beautifully for up to 3 months. Just thaw at room temperature or warm them up in a 350°F oven for 10 minutes.
Q: My muffins turned out dense. What happened?
A: The most likely culprit is overmixing the batter. Remember, fold gently until the flour *just* disappears. The other common cause is old or expired baking powder or soda, which loses its lifting power over time.
Q: Can I use fresh pumpkin instead of canned?
A: You sure can! Just make sure you’re using pure, cooked, and pureed pumpkin (or even roasted butternut squash). The key is to make sure it’s not too watery. If your fresh puree seems wet, strain it in a fine-mesh sieve for a bit to remove excess moisture.
Q: My cheese sunk to the bottom. How do I prevent that?
A: This is a common issue. Tossing your shredded cheese in a tablespoon of the dry flour mixture before folding it into the batter helps coat it and prevents it from sinking during baking.

Savory Pumpkin Cheddar Muffins
Description
Savory Pumpkin Cheddar Muffins
These muffins are tender, cheesy, and full of fall flavor without any added sugar. Perfect as a side for soups, stews, chili, or brunch.
Ingredients
Dry Ingredients
-
2 cups (248g) all-purpose flour (or swap 1 cup for whole wheat pastry flour)
-
2 tsp baking powder
-
1/2 tsp baking soda
-
1/2 tsp salt
-
1/4 tsp black pepper
-
1 tsp garlic powder
Wet Ingredients
-
1 cup (244g) pumpkin puree (not pie filling)
-
2 large eggs
-
1/2 cup (120ml) milk (any kind)
-
1/4 cup (60ml) olive oil or melted butter
Add-Ins
-
1 cup (115g) shredded sharp cheddar cheese
-
2 tbsp chopped fresh chives (or scallion greens)
Instructions
1. Prep
-
Preheat oven to 375°F (190°C).
-
Grease a 12-cup muffin tin or line with parchment liners.
2. Mix Dry Ingredients
-
In a large bowl, whisk flour, baking powder, baking soda, salt, black pepper, and garlic powder.
3. Mix Wet Ingredients
-
In a medium bowl, whisk together pumpkin puree, eggs, milk, and olive oil/butter until smooth.
4. Combine
-
Pour wet ingredients into dry and gently fold with a spatula until just combined. Stop when flour disappears; a few lumps are fine.
5. Fold in Cheese & Chives
-
Gently fold shredded cheddar and chives into the batter.
6. Portion & Bake
-
Divide batter evenly among muffin cups (about ¾ full). Optionally, sprinkle extra cheese on top.
-
Bake 18-22 minutes, until golden and a toothpick inserted comes out clean or with a few moist crumbs.
7. Cool
-
Cool in pan 5 minutes, then transfer to a wire rack for 10-15 minutes before serving.
Notes
-
Prevent sinking cheese: Toss shredded cheese in 1 tbsp flour before folding in.
-
Dense muffins: Avoid overmixing and use fresh baking powder/soda.
-
Fresh pumpkin: Use cooked, pureed pumpkin or butternut squash; strain if watery.
Nutrition
- Calories: 220 kcal per muffin
- Fat: 11g
- Carbohydrates: 20g
Nutritional Information*
Alright, let’s talk numbers. It’s always good to know what’s going into your body! Here’s a general breakdown per muffin (based on the recipe as written, using 2% milk and olive oil).
Per Muffin: ~220 calories | 11g fat | 20g carbs | 6g protein
These muffins are a satisfying snack or side. They provide a decent amount of protein and healthy fats from the eggs, oil, and cheese to help keep you full. The pumpkin puree is a great source of Vitamin A and fiber. Remember, this is just an estimate—your exact numbers will vary slightly based on the specific brands of ingredients you use and any substitutions you make.
*This information is provided as a courtesy and is an estimate only. For precise nutritional information, we recommend using a calculator with your exact ingredients.
Final Thoughts from My Kitchen to Yours
Well, there you have it, friends—my complete love letter to the savory side of pumpkin. These muffins are more than just a recipe; they’re a reminder to play with your food, to experiment, and to not be afraid of a little happy accident in the kitchen.
They’re humble, comforting, and utterly delicious. I hope this recipe finds its way into your regular fall rotation and becomes a new tradition, just like it has in my home. Nothing makes me happier than thinking of you all in your kitchens, whipping up a batch of these, and sharing them with the people you love.

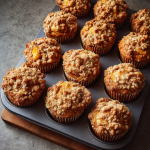
Pumpkin Apple Crumble Muffins
Your New Favorite Fall Morning (Or Anytime) Treat Is Here!
Hey friends, Beau here! Is there anything better than that first crisp morning of fall? You know the one I’m talking about. The air gets that little bite to it, the leaves start to put on their fiery show, and all you can think about is wrapping your hands around a warm mug and something delicious baking in the oven. That feeling—that cozy, joyful, everything-is-right-in-the-world feeling—is exactly what I wanted to capture in a recipe. And let me tell you, these Pumpkin Apple Crumble Muffins are it.
We’re talking about the most tender, spiced pumpkin muffin you can imagine, packed with little pockets of soft, sweet-tart apple, and let’s be real—the star of the show—a buttery, crunchy, cinnamon-oat crumble that sits on top like a delicious crown. As these guys bake, your kitchen will smell like a cross between a pumpkin pie, an apple orchard, and pure happiness. It’s the kind of aroma that brings everyone wandering into the kitchen, asking with hopeful eyes, “Is it ready yet?” Whether you’re fueling up for a busy day, hosting a brunch, or just need a 3 PM pick-me-up that feels like a warm hug, these muffins are your answer. So, tie on your favorite apron, and let’s make some magic together!
A Recipe Born from a Happy Kitchen Accident
This recipe has a fun little origin story, as the best ones often do. A few autumns ago, I was in a serious baking mood. I had a can of pumpkin puree begging to be used and a bowl of gorgeous Honeycrisp apples on the counter. The plan was simple: make a pumpkin loaf. But then I saw the remains of a streusel topping I’d made for a coffee cake the day before, sitting in a bowl in the fridge. You know me, I hate wasting anything!
In a moment of pure “what if?” energy, I decided to scrap the loaf idea, grab my muffin tin, and just go for it. I folded the apples right into the pumpkin batter, crumbled that leftover streusel over the top, and crossed my fingers. What came out of the oven was nothing short of legendary. The muffins were perfectly moist from the pumpkin, the apples added this amazing texture and freshness that cut through the spice, and that topping… oh, that topping! It added a crunch and a sweetness that took them from a simple muffin to a full-on dessert-for-breakfast experience. It was a happy accident that instantly became a permanent part of my fall baking rotation, and I am so thrilled to finally be sharing it with you.
Gathering Your Fall Flavor All-Stars
Here’s everything you’ll need to make a dozen of these glorious muffins. The beauty of this recipe is in its simplicity—no fancy equipment or obscure ingredients required!
For the Pumpkin Apple Muffins:
- 1 3/4 cups (218g) all-purpose flour: The trusty foundation of our muffin. For a lighter texture, you can swap in white whole wheat flour for half of this.
- 1 tsp baking soda: Our leavening agent! This is what gives the muffins their beautiful rise and airy crumb. Make sure it’s not expired for maximum puff power.
- 1/2 tsp salt: Crucial for balancing all the sweet flavors and making the spices pop. Don’t skip it!
- 2 tsp pumpkin pie spice: The heart and soul of the flavor! If you’re out, make your own by mixing 1 tsp cinnamon, 1/2 tsp ginger, 1/4 tsp nutmeg, and 1/4 tsp allspice or cloves.
- 1 cup (244g) pumpkin puree: Not pumpkin pie filling! We want pure, unsweetened pumpkin puree. It adds incredible moisture and that iconic flavor.
- 2/3 cup (133g) brown sugar: I prefer brown sugar here for its deep, molasses-like flavor that pairs perfectly with pumpkin and apple. It also keeps the muffins extra moist.
- 2 large eggs: They bind everything together and add structure. Bring them to room temperature for a smoother batter that rises evenly.
- 1/3 cup (79ml) vegetable oil: Oil keeps these muffins supremely tender and moist long after they’ve cooled. Melted coconut oil or even a light olive oil works great too.
- 1 tsp vanilla extract: The flavor enhancer! A splash of vanilla makes all the other ingredients sing in harmony.
- 1 cup peeled and diced apples: I love the sweet crunch of Honeycrisp or the firm, tart bite of Granny Smith. The contrast is amazing! No need to be precise with the dicing—chunks are good!
For the Oat Crumble Topping:
- 1/3 cup (42g) all-purpose flour: The base of our crumble, helping to create those delightful clumps.
- 1/3 cup (30g) rolled oats: Old-fashioned oats give the best texture and chew. Quick oats will work in a pinch but will be less defined.
- 1/3 cup (67g) brown sugar: Sweetens and helps caramelize the topping for that perfect crunch.
- 1 tsp cinnamon: Because you can never have too much cinnamon in the fall!
- 4 tbsp (57g) unsalted butter, cold and cubed: This is the most important part! Cold butter is the secret to a crunchy, crumbly topping, not a melted, sandy one. Don’t let it warm up!
Let’s Get Baking: Building Your Muffin Masterpieces
Ready to create some kitchen magic? Follow these steps and you’ll be a muffin hero in no time. Remember, baking is about joy, not stress—so have fun with it!
- Preheat and Prep: Fire up your oven to 350°F (175°C). This gives it plenty of time to reach the perfect, even temperature. Line a 12-cup muffin pan with paper liners or give each cup a generous spritz of non-stick spray. I’m a liner guy—less cleanup!
- Combine the Dry Goods: In a medium-sized bowl, grab your whisk and combine the flour, baking soda, salt, and pumpkin pie spice. Give it a good whisk for about 30 seconds. This isn’t just mixing; you’re aerating the flour and making sure the leavening is evenly distributed, which means a better rise for every single muffin.
- Whisk the Wet Wonders: In a larger bowl, whisk together the pumpkin puree, brown sugar, eggs, vegetable oil, and vanilla extract. Whisk it until it’s completely smooth and one gorgeous, unified shade of orange. You shouldn’t see any streaks of egg yolk.
- The Big Merge: Here’s my #1 chef hack for perfect muffins: do not overmix! Pour the dry ingredients into the wet ingredients. Use a spatula and gently fold them together. Stop when you just barely see the last bit of flour disappear. A few lumps are totally fine—I promise! Overmixing is the fast track to tough, dense muffins.
- Fold in the Fun: Now, gently fold in those beautiful diced apples until they’re evenly distributed throughout the batter.
- Make the Magic Crumble: In a small bowl, combine the flour, oats, brown sugar, and cinnamon for the topping. Add your cold, cubed butter. Now, get your hands in there (my favorite part!) or use a pastry cutter to work the butter into the dry ingredients. Pinch and rub everything together until you have a mixture that resembles coarse, crumbly sand with some larger pebble-sized bits. Those bigger bits will bake into glorious crunchy clusters.
- Fill and Top: Divide the batter evenly among the 12 muffin cups. They should be about 3/4 of the way full. Now, be generous! Take handfuls of your crumble topping and pile it high on each muffin cup. Press it down gently so it adheres to the batter.
- Bake to Perfection: Slide the pan into your preheated oven and bake for 20-24 minutes. Rotate the pan halfway through for even browning. They’re done when the tops are springy to the touch and a toothpick inserted into the center of a muffin (avoid a big apple chunk) comes out clean or with a few moist crumbs.
- The Hardest Part: Wait! Let the muffins cool in the pan for about 5 minutes. This allows them to set up so they don’t fall apart when you take them out. Then, transfer them to a wire rack to cool completely. I know it’s tempting, but try to let them cool for at least 15 minutes—that crumble topping is molten lava fresh out of the oven!
How to Serve Up These Autumn Delights
Okay, they’re out of the oven and your house smells incredible. Now what? These muffins are incredibly versatile.
For the ultimate breakfast or brunch spread, serve them warm alongside a hot cup of coffee or a frothy chai latte. The way the steam from your drink mingles with the warm spices of the muffin is a fall morning ritual I live for.
They also make a fantastic dessert! Warm one up for about 10 seconds in the microwave and serve it à la mode with a scoop of vanilla bean ice cream. The contrast of the warm muffin, cool ice cream, and crunchy topping is a game-changer.
Pack them in lunchboxes, take them on a hike, or enjoy one as your afternoon snack with a cup of tea. They’re a crowd-pleaser anywhere, anytime.
Make It Your Own: Delicious Twists & Swaps
Love the recipe but want to switch it up? Go for it! Baking is all about creativity.
- Gluten-Free Friendly: Swap the all-purpose flour for a 1:1 gluten-free baking blend. Use certified GF oats in the topping. The texture might be slightly more delicate, but just as delicious!
- Dairy-Free Delight: The muffin base is already dairy-free! For the crumble, simply replace the cold butter with an equal amount of cold, solid coconut oil or a plant-based butter stick.
- Nutty Crunch: Add 1/2 cup of chopped pecans or walnuts to the crumble topping for an extra layer of flavor and crunch.
- Ginger Zing: Love ginger? Add 1/2 teaspoon of ground ginger to the dry ingredients and/or 2 tablespoons of finely chopped crystallized ginger to the batter with the apples.
- Whole Wheat Boost: Substitute half of the all-purpose flour (about 7/8 cup) with whole wheat pastry flour for a heartier, fiber-rich muffin with a still-tender texture.
Beau’s Kitchen Notes & Stories
Over the years, I’ve made these muffins more times than I can count, and they’ve never let me down. One time, my nephew was “helping” me and, in his excitement, dumped the entire container of cinnamon into the batter. We soldiered on, and you know what? They were some of the spiciest, most intense muffins ever, but we still ate every last one! The lesson? Don’t be afraid to experiment.
I’ve also learned that the crumble topping is a sacred thing in my house. If I don’t vigilantly guard the cooled muffins, the topping mysteriously disappears from all of them, leaving a trail of crumbs leading to my partner. So consider this your warning—hide one for yourself if you want the full experience!
Your Questions, Answered!
Q: My apples all sunk to the bottom! How do I prevent that?
A: This is a common muffin mystery! Tossing your diced apples in a tiny spoonful of the measured flour (from your dry ingredients) before folding them in helps coat them and provides a bit of grip, preventing them from sinking during baking.
Q: Why were my muffins dry?
A: The most likely culprit is overbaking. Ovens can vary, so start checking at the 18-minute mark. Another reason could be overmixing the batter, which develops too much gluten. Remember, fold gently until just combined!
Q: Can I make these into a loaf instead?
A: Absolutely! Grease a 9×5 loaf pan, pour in the batter, top with crumble, and bake at 350°F (175°C) for 55-65 minutes, or until a toothpick inserted in the center comes out clean. The baking time will be much longer.
Q: Can I freeze these muffins?
A> Yes, they freeze beautifully! Let them cool completely, then store them in a single layer in a freezer-safe bag or container for up to 3 months. Thaw at room temperature or warm them up straight from the freezer in the microwave or oven.
Pumpkin Apple Crumble Muffins
Description
Hey friends! These muffins capture the essence of fall: tender, spiced pumpkin muffins filled with sweet-tart apples and topped with a buttery, crunchy cinnamon-oat crumble. Perfect for breakfast, brunch, or a cozy snack any time of day.
Ingredients
Muffins
-
1 3/4 cups (218g) all-purpose flour
-
1 tsp baking soda
-
1/2 tsp salt
-
2 tsp pumpkin pie spice (or 1 tsp cinnamon + 1/2 tsp ginger + 1/4 tsp nutmeg + 1/4 tsp allspice)
-
1 cup (244g) pumpkin puree (100% pure, not pie filling)
-
2/3 cup (133g) brown sugar
-
2 large eggs, room temperature
-
1/3 cup (79ml) vegetable oil (or melted coconut/light olive oil)
-
1 tsp vanilla extract
-
1 cup peeled and diced apples (Honeycrisp or Granny Smith)
Crumble Topping
-
1/3 cup (42g) all-purpose flour
-
1/3 cup (30g) rolled oats
-
1/3 cup (67g) brown sugar
-
1 tsp cinnamon
-
4 tbsp (57g) unsalted butter, cold and cubed
Instructions
1. Prep
-
Preheat oven to 350°F (175°C).
-
Line a 12-cup muffin pan with paper liners or grease generously.
2. Dry Ingredients
-
In a medium bowl, whisk together flour, baking soda, salt, and pumpkin pie spice.
3. Wet Ingredients
-
In a large bowl, whisk pumpkin puree, brown sugar, eggs, vegetable oil, and vanilla until smooth.
4. Combine
-
Gently fold dry ingredients into wet until just combined. A few lumps are fine.
-
Fold in diced apples.
5. Crumble Topping
-
In a small bowl, combine flour, oats, brown sugar, and cinnamon.
-
Cut in cold butter using a pastry cutter or your fingers until mixture forms coarse crumbs with some larger clusters.
6. Assemble
-
Divide batter evenly into muffin cups (¾ full).
-
Generously sprinkle crumble on top, pressing gently.
7. Bake
-
Bake 20-24 minutes, rotating halfway, until tops are springy and a toothpick inserted near the center comes out clean (avoid large apple chunks).
-
Cool 5 minutes in pan, then transfer to a wire rack for at least 15 minutes before serving.
Notes
-
Apples sinking? Toss diced apples in a tablespoon of flour before folding in.
-
Dry muffins? Avoid overmixing and overbaking. Check at 18 minutes.
-
Loaf option: Bake in a 9×5-inch loaf pan 55-65 minutes at 350°F (175°C).
-
Freezing: Cool completely, then freeze in a single layer for up to 3 months. Thaw at room temperature or warm before serving.
Nutrition
- Calories: 250 kcal per muffin,
- Fat: 11g
- Carbohydrates: 35g
Nutritional Information*
Alright, let’s talk fuel! While these are definitely a treat, it’s good to know what you’re enjoying. Here’s the approximate breakdown per muffin:
- Calories: ~250 kcal
- Fat: 11g
- Carbohydrates: 35g
- Protein: 3g
*Please note: This is an estimate generated using a nutritional calculator and will vary based on specific ingredients and brands used, as well as portion sizes. For precise dietary needs, it’s always best to calculate using your exact products.
Final Thoughts from My Kitchen to Yours
Well, there you have it, my friends—my all-time favorite Pumpkin Apple Crumble Muffins. This recipe is more than just a list of ingredients; it’s a invitation to create, to share, and to fill your home with the incredible smells and tastes of the season. It’s a reminder that the best moments often happen in the kitchen, often by happy accident.
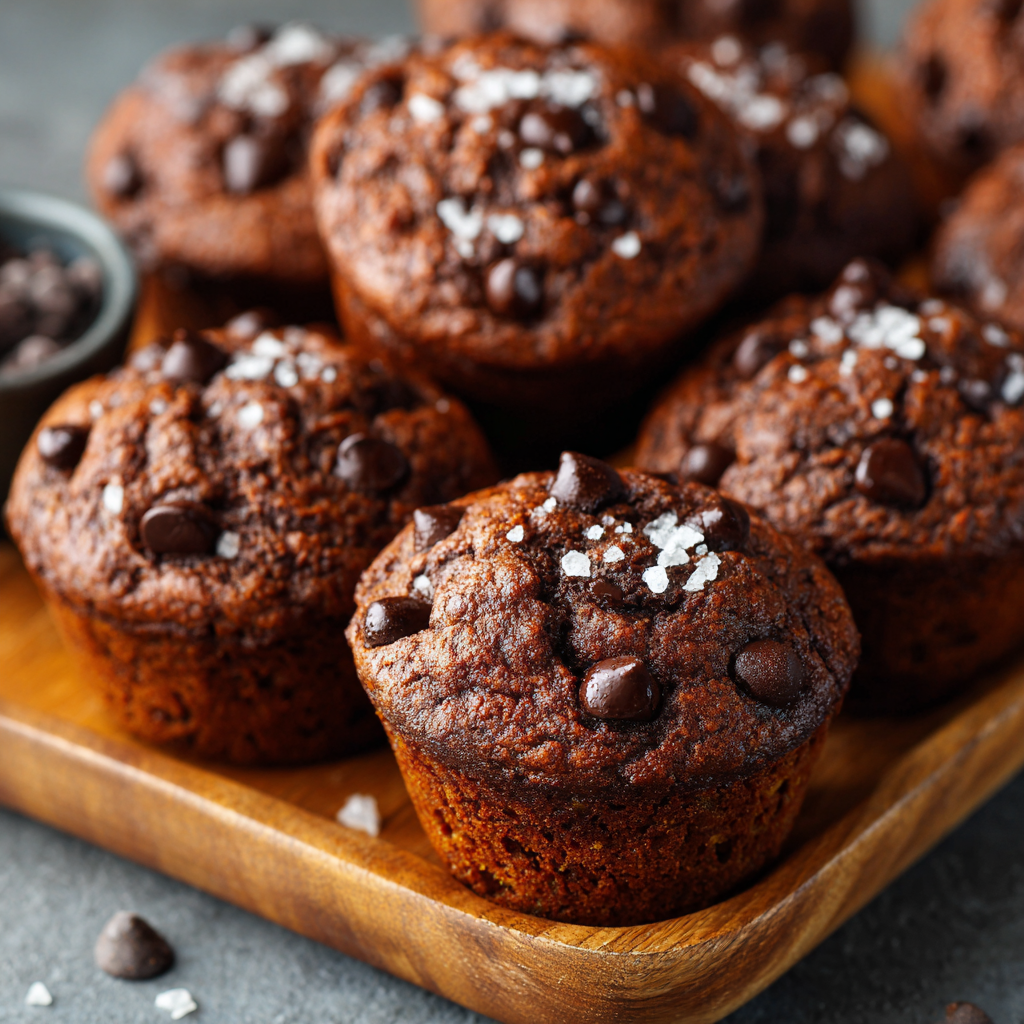
Chocolate Pumpkin Muffins
Your New Favorite Muffin is Waiting: Chocolate Pumpkin Muffins
Hey friends, Beau here from Feastical! Let’s talk about that magical moment when two incredible flavors decide to throw a party in your mouth. You know the one. It’s when sweet meets savory, when cozy meets decadent, and when you take a bite of something so good you just have to close your eyes for a second. That, my friends, is the exact experience I’m bringing you today with these unbelievably delicious Chocolate Pumpkin Muffins.
Now, I know what some of you might be thinking. Pumpkin? And chocolate? Together? Trust me on this one. This isn’t some weird, healthy-tasting compromise. This is a rich, deeply moist, and intensely chocolatey muffin that just so happens to get its superpowers from a can of pumpkin. The pumpkin doesn’t scream “PIE!”—instead, it whispers “hello, gorgeous moisture” and “hey, want a muffin that stays soft for days?” It melds with the cocoa powder to create a flavor that’s earthy, warm, and deeply satisfying. We’re finishing them off with a shower of melty chocolate chips and a cheeky pinch of flaky sea salt that cuts through the sweetness perfectly. Think of it as a brownie that decided to get a little more sophisticated and put on a muffin top. And who can blame it?
So, whether you’re looking for the ultimate fall breakfast, a lunchbox superstar, or just a 3 PM pick-me-up that feels like a warm hug, you’ve come to the right place. Grab your favorite mixing bowl, and let’s make your kitchen smell absolutely incredible.
The Accidental Masterpiece: A Kitchen Happy Accident
I have to confess, this recipe was born from a beautiful kitchen mishap. It was a crisp October morning a few years back, and I was in full-on pumpkin mode. My mission: a double batch of my classic spiced pumpkin muffins. I had my podcast on, I was dancing around the kitchen (a common occurrence), and I was merrily scooping flour and spices. In my rhythmic fervor, I grabbed a canister and dumped a generous amount into the wet ingredients before I realized my mistake. Instead of more flour, I had just added a whole cup of my high-quality dark cocoa powder.
My heart sank for a second. There went my beautiful, orange-hued pumpkin muffins! But a chef never wastes good ingredients. I decided to roll with it, adding a bit more liquid to balance out the cocoa’s thirst and crossing my fingers. What emerged from the oven 20 minutes later was nothing short of magic. The kitchen smelled like a chocolatier’s dream, and the muffins were the darkest, most fudgy-looking things I’d ever seen. That first warm bite was a revelation. The pumpkin made the crumb impossibly tender, and the chocolate flavor was deep and complex, not just sweet. It was a happy accident that instantly became a permanent part of my recipe box, and I’ve been refining it for you all ever since.
Gathering Your Muffin-Making Magic
Here’s everything you’ll need to make a dozen of these decadent treats. Remember, baking is a science, but it’s also about feel! I’ve included my chef-y notes to help you understand the “why” behind each ingredient.
- 1 cup (244g) pumpkin puree – Not pumpkin pie filling! Look for 100% pure pumpkin in a can. This is our moisture MVP and the secret to that incredibly tender crumb. Chef’s Insight: If you have leftover canned pumpkin, freeze it in tablespoon portions on a baking sheet, then pop them in a bag for future smoothies or single-serving muffins!
- 2/3 cup (133g) brown sugar – I prefer brown sugar here for its deep molasses flavor and the extra moisture it brings to the party. It complements the pumpkin and chocolate beautifully.
- 1/3 cup (79ml) vegetable oil – Oil keeps these muffins moist far longer than butter would. A neutral oil like vegetable, canola, or even melted coconut oil works perfectly.
- 2 large eggs – Our trusty binders, bringing the whole team together. Make sure they’re at room temperature to create a smoother, more emulsified batter.
- 1 tsp vanilla extract – The flavor booster. It enhances both the chocolate and the warm spices. Use the real stuff if you’ve got it!
- 1 cup (125g) all-purpose flour – The foundation of our muffin structure. For a lighter texture, fluff your flour with a spoon before scooping into the measuring cup, then level it off.
- 1/2 cup (42g) unsweetened cocoa powder – This is where the deep chocolate flavor comes from! Use a good-quality natural cocoa powder for the best taste. Chef’s Tip: Sifting this is non-negotiable to avoid lumpy batter!
- 1 tsp baking soda – Our leavening agent that gives the muffins their perfect rise and tender dome.
- 1/2 tsp salt – Crucial for balancing all the sweetness and making the chocolate flavor pop. Don’t skip it!
- 2 tsp pumpkin pie spice – The warm, cozy essence of fall. If you don’t have any pre-mixed, you can make your own with cinnamon, ginger, nutmeg, and allspice.
- 1/2 cup (120ml) buttermilk or milk – Buttermilk adds a lovely, subtle tang that tenderizes the gluten even further. Substitution Tip: No buttermilk? No problem! Stir 1 ½ tsp of lemon juice or white vinegar into your ½ cup of milk and let it sit for 5 minutes to curdle. Good to go!
- 3/4 cup (130g) chocolate chips – Because more chocolate is always the answer. I use semi-sweet, but dark or milk chocolate would also be fantastic.
- Flaky sea salt for topping – The pro move. A tiny sprinkle on top before baking creates an incredible sweet-and-salty contrast that will have everyone asking for your secret.
Let’s Get Baking: The Step-by-Step Lowdown
Follow these steps, and you’re guaranteed muffin success. I’ve packed this section with all my favorite kitchen hacks to make you feel like a pro.
Step 1: Preheat your oven to 350°F (175°C). This is the golden rule of baking—a properly preheated oven is key for that perfect rise. While it’s heating up, line a 12-cup muffin tin with paper liners or give each cup a generous spray with non-stick cooking spray. Chef’s Hack: For easy cleanup and ultra-release, I like to give the top of the pan a quick spray too, just in case those muffins decide to peak over the edge!
Step 2: In a large bowl, let’s combine our wet ingredients. Grab your whisk and vigorously whisk together the pumpkin puree, brown sugar, and vegetable oil until they’re completely smooth and well-combined. No streaks of oil! Then, whisk in the eggs, one at a time, followed by the vanilla extract. You want this mixture to be gloriously smooth and emulsified. Chef’s Commentary: This is your arm workout for the day. Getting this mixture smooth now means no over-mixing later, which is the key to a tender, not tough, muffin.
Step 3: In a separate, medium-sized bowl, it’s time for the dry team. Here’s a non-negotiable tip: sift your flour, cocoa powder, baking soda, salt, and pumpkin pie spice together. I know, I know, it feels like an extra dish. But sifting not only removes any lumps from the cocoa and flour, it also aerates the mixture, making your muffins lighter and ensuring the leavening is evenly distributed. Trust me, it makes a difference you can taste.
Step 4: Pour the sifted dry ingredients into the wet ingredients. Grab a spatula (not the whisk!) and gently fold them together. Stop when you still see a few dry streaks of flour. It might look a bit thick and shaggy—that’s okay! Now, pour in the buttermilk and continue to fold gently. The batter will loosen up beautifully. Remember, the goal is to mix until just combined. Over-mixing is the enemy of fluffy muffins!
Step 5: Time for the chocolate chips! Reserve a small handful for topping if you’re feeling fancy, then fold the rest into the batter until they’re evenly distributed.
Step 6: Using a cookie scoop or two spoons, divide the batter evenly among the 12 prepared muffin cups. They should be about ¾ of the way full. This is the perfect amount for a beautiful, domed top. Now, sprinkle the tops with those reserved chocolate chips and, most importantly, that flaky sea salt. Just a tiny pinch on each one!
Step 7: Slide the pan into the middle of your preheated oven and bake for 18-22 minutes. The magic test? A toothpick inserted into the center of a muffin should come out with a few moist crumbs clinging to it, but not wet batter. If it comes out completely clean, they might be a tad overdone. Chef’s Hack: Set your timer for 18 minutes and check. Ovens vary, so yours might need the full 22.
Step 8: Let the muffins cool in the pan for about 5 minutes. This allows them to set up so they don’t fall apart when you take them out. Then, transfer them to a wire rack to cool completely. I know it’s hard, but try to let them cool for at least 15 minutes before diving in—the chocolate chips are like molten lava!
How to Serve These Beauties
Honestly, one of these muffins, still slightly warm from the oven and clutched in your hand with a hot cup of coffee is a perfect moment. But let’s get creative!
For a breakfast that feels like a celebration, split one open, slather it with a little salted butter or cream cheese, and watch it melt into all the nooks and crannies. If you’re hosting a brunch, these are an absolute star on the table. Place them on a rustic wooden board or a cute cake stand. For the ultimate dessert experience, warm a muffin for 15 seconds in the microwave and serve it à la mode with a big scoop of vanilla bean ice cream. The contrast of warm muffin and cold ice cream is next-level goodness. They also pack beautifully for picnics, hikes, or as a sweet surprise in a lunchbox.
Make It Your Own: Delicious Twists & Swaps
The beauty of this recipe is its flexibility. Here are a few ways to mix it up:
- Gluten-Free Goodness: Swap the all-purpose flour for a 1:1 gluten-free baking blend. I’ve had great success with brands like Bob’s Red Mill or King Arthur.
- Dairy-Free Delight: Use your favorite plant-based milk (oat milk is fantastic here) with the lemon juice trick for “buttermilk,” and ensure your chocolate chips are dairy-free.
- Spice It Up: Add a kick of heat by folding in ¼ teaspoon of cayenne pepper with the dry ingredients. Chocolate and chili are a match made in heaven.
- Nutty Professor: Fold in ½ cup of chopped walnuts or pecans along with the chocolate chips for a wonderful crunch.
- Orange Zest Zing: The zest of one orange added to the wet ingredients adds a bright, citrusy note that cuts through the richness beautifully.
Beau’s Kitchen Notes
Over the years, this recipe has seen a few evolutions. I started with all-purpose flour, tried a version with half whole wheat (it works, but it’s denser!), and once, in a moment of madness, I added a swirl of peanut butter. That was a glorious, messy success. The biggest lesson I’ve learned is to embrace the sifting. I used to be a “just whisk it in the bowl” guy, but taking the extra minute to sift the cocoa and flour truly creates a superior, bakery-style texture. Also, the flaky salt topping was a suggestion from my niece, and it was a total game-changer. Never underestimate the wisdom of a nine-year-old with a sweet tooth!
Your Questions, Answered
Q: Can I make these as mini muffins or a loaf?
A: Absolutely! For mini muffins, reduce the baking time to 10-14 minutes. For a loaf, grease a 9×5 inch pan and bake for 55-65 minutes, tenting with foil halfway through to prevent the top from over-browning.
Q: My muffins turned out dense. What happened?
A: The most common culprit is over-mixing the batter. Once you add the flour, mix until *just* combined. Also, make sure your baking soda is fresh and not expired!
Q: Can I freeze these muffins?
A: You bet! These muffins freeze like a dream. Let them cool completely, then store them in a freezer-safe bag or container for up to 3 months. Thaw at room temperature or warm them up in the microwave for 30 seconds.
Q: My toothpick came out clean but the centers seem underdone. Why?
A: Ah, the sneaky chocolate chip! If you hit a chocolate chip with your toothpick, it will come out wet and muddy. Try testing in a few spots to avoid the chips and get a true read on the cake part.

Chocolate Pumpkin Muffins
Description
Hey friends! If you love chocolate and pumpkin, these muffins are about to become your new obsession. They’re rich, moist, and perfectly chocolatey, with the pumpkin adding a tender crumb that stays soft for days. Sprinkle with chocolate chips and a pinch of flaky sea salt for a cozy, decadent treat—perfect for breakfast, lunchboxes, or an afternoon pick-me-up.
Ingredients
-
1 cup (244g) pumpkin puree – 100% pure pumpkin, not pie filling
-
2/3 cup (133g) brown sugar
-
1/3 cup (79ml) vegetable oil
-
2 large eggs, room temperature
-
1 tsp vanilla extract
-
1 cup (125g) all-purpose flour
-
1/2 cup (42g) unsweetened cocoa powder
-
1 tsp baking soda
-
1/2 tsp salt
-
2 tsp pumpkin pie spice (or homemade mix of cinnamon, ginger, nutmeg, allspice)
-
1/2 cup (120ml) buttermilk or milk (see tip below)
-
3/4 cup (130g) chocolate chips, divided
-
Flaky sea salt for topping
Tip: For homemade buttermilk, stir 1 ½ tsp lemon juice or white vinegar into ½ cup milk and let sit for 5 minutes.
Instructions
1. Prep
-
Preheat oven to 350°F (175°C).
-
Line a 12-cup muffin tin with paper liners or lightly grease.
2. Mix Wet Ingredients
-
In a large bowl, whisk together pumpkin puree, brown sugar, and vegetable oil until smooth.
-
Add eggs one at a time, then whisk in vanilla extract.
3. Mix Dry Ingredients
-
Sift together flour, cocoa powder, baking soda, salt, and pumpkin pie spice in a medium bowl.
4. Combine
-
Gently fold dry ingredients into wet ingredients until just combined.
-
Fold in buttermilk until batter loosens slightly.
5. Add Chocolate Chips
-
Fold in most of the chocolate chips, reserving a few for topping.
6. Fill Muffin Cups
-
Divide batter evenly among the 12 cups, filling about ¾ full.
-
Top with reserved chocolate chips and a pinch of flaky sea salt.
7. Bake
-
Bake 18-22 minutes, or until a toothpick inserted in the center comes out with a few moist crumbs.
-
Cool 5 minutes in the pan, then transfer to a wire rack.
Notes
-
Don’t over-mix—stir until just combined to keep muffins tender.
-
Sifting cocoa and flour gives a lighter, bakery-style texture.
-
Flaky sea salt on top enhances flavor and balances sweetness.
-
Test muffins in a few spots to avoid hitting chocolate chips with a toothpick.
Nutritional Information (Per Muffin)
Okay, let’s be real: these are a treat, and they’re meant to be enjoyed as such! But here’s a general breakdown of what’s in each delicious muffin. This is an estimate and can vary based on specific ingredients and brands used.
Calories: ~260 | Fat: 12g | Saturated Fat: 3.5g | Carbohydrates: 34g | Fiber: 2g | Sugar: 22g | Protein: 4g
The pumpkin adds a dose of Vitamin A, and using cocoa powder means you’re getting some flavonoids (hello, antioxidants!). To lighten them up a bit, you could reduce the chocolate chips to ½ a cup and use a sugar substitute designed for baking, though I haven’t tested this myself.
Final Thoughts from My Kitchen to Yours
Well, there you have it. My beloved, accidentally-perfected Chocolate Pumpkin Muffins. This recipe is more than just a list of ingredients; it’s a reminder that some of the best things in life come from happy little mistakes and the courage to just go with it. I hope these muffins become a staple in your home, filling your kitchen with the incredible aroma of chocolate and warm spices and filling your people with joy.
I’d love to hear how your baking adventure goes! Did you add nuts? Try the orange zest? Tag me on social @feastical with your creations. Nothing makes me happier than seeing you all in your kitchens, creating and sharing feel-good food.
Happy baking, friends!
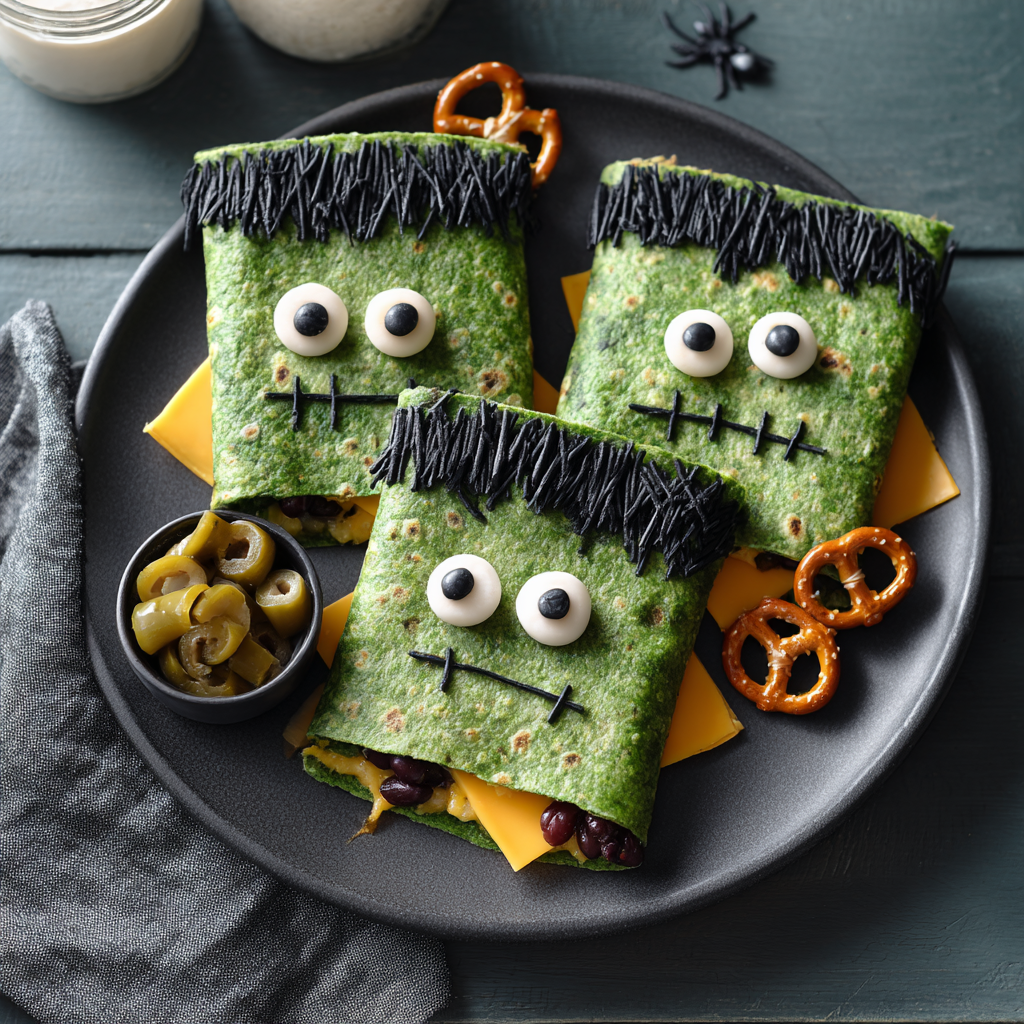
Frankenstein Quesadillas
It’s Alive! Introducing the Frankenstein Quesadilla
Hey there, Feastical family! Beau here, coming at you from a kitchen that’s seen more than its fair share of… well, experiments. Some glorious, some not-so-much (we don’t talk about The Great Cupcake Flood of ‘18). But today, we’re whipping up something that’s an absolute monster hit – and I mean that in the best way possible. We’re making Frankenstein Quesadillas!
Now, I know what you might be thinking. “Beau, quesadillas are for Tuesday nights, not for Halloween.” And to that I say, why can’t Tuesday night be Halloween? Life’s too short for boring food, especially when you have little monsters of your own running around the house, begging for something fun to eat. This recipe is the perfect solution. It’s a quick, easy, and downright hilarious way to turn a simple lunch or snack into a spooky celebration. They’re packed with gooey cheese and protein-rich beans, so they’re secretly wholesome, but the green tortillas and silly olive faces make them an instant kid-magnet. The best part? You don’t need a culinary degree or a lab full of mysterious equipment. Just a skillet, a few simple ingredients, and a willingness to play with your food. So, grab your favorite spatula (let’s hope you can find it!) and let’s create a meal that’s so fun, it’s scary. Well, almost.
The Monster Mash in My Kitchen
This recipe always takes me back to my nephew Leo’s first “real” Halloween. He was about four, and he was absolutely obsessed with monsters—but only the friendly, funny-looking ones. His favorite was, you guessed it, Frankenstein’s monster. That year, I offered to handle lunch for my sister and her little crew of pint-sized ghosts and goblins. I wanted to make something that would make them giggle, something that felt like part of the party. I stared into the fridge, saw tortillas, cheese, and a bag of spinach, and a mad scientist idea was born. I blitzed that spinach into a puree, slathered it on a tortilla to make it green, and threw together a quesadilla. A few olive slices and a dollop of sour cream later, and a monster stared back at me from the plate. When Leo saw it, his eyes got huge. He pointed a tiny, chocolate-stained finger and yelled, “FRANKEN-YINE!” before devouring the entire thing. The sound of those kids laughing and chomping down on their “monster heads” was better than any treat. It was a reminder that the best meals aren’t always the fanciest; they’re the ones made with a pinch of creativity and a whole lot of love.
Gathering Your Monster-Making Supplies
The beauty of this recipe is its simplicity. You probably have most of this hanging out in your fridge and pantry right now! Here’s what you’ll need to bring your culinary creature to life.
- 4 Spinach Tortillas: These are the foundation of our monster’s iconic green complexion. No spinach tortillas? No problem! You can easily make your own by blending a handful of fresh spinach with a teaspoon of water and brushing it onto regular tortillas. Whole wheat or gluten-free tortillas work great here too.
- 1 Cup Shredded Cheddar or Mexican Blend Cheese: The “glue” that holds our monster together and gives us that epic, gooey cheese pull. I’m a fan of a good Mexican blend for a little extra flavor kick, but sharp cheddar is a classic for a reason. For a healthier twist, low-fat cheese works perfectly.
- 1/2 Cup Black Beans (or Refried Beans): This is our secret weapon for adding protein and making these quesadillas actually filling. I like using whole black beans for a bit of texture, but smooth, creamy refried beans are an awesome alternative, especially for younger kids. Pinto beans work too!
- 1/4 Cup Sliced Black Olives: These aren’t just a garnish; they’re the star of the show! We use them for the spiky hair and the eyes. Their salty, briny flavor is the perfect contrast to the rich cheese and beans.
- 1/4 Cup Sour Cream: The perfect canvas for our monster’s scars and stitches. If you’re not a sour cream fan, Greek yogurt is a fantastic, protein-packed substitute. For a dairy-free version, a thinned-out guacamole or vegan sour cream will do the trick.
- 4-6 Pretzel Sticks: The all-important “neck bolts.” This is optional, but it’s the detail that really sells the Frankenstein vibe. If you don’t have pretzel sticks, you can use broken pieces of spaghetti or even slim breadsticks.
Building Your Edible Monster: A Step-by-Step Guide
Alright, team! Let’s fire up the skillet and get creating. This process is half cooking, half arts and crafts, and I’m here for it.
Step 1: The Assembly Line
Lay two of your green spinach tortillas flat on your cutting board. This is your monster’s foundation. Sprinkle a layer of cheese on each one, but leave about a half-inch border around the edge. This prevents the cheesy lava from erupting out the sides when it melts. Next, spoon your beans evenly over the cheese. If you’re using whole black beans, I like to give them a gentle mash with a fork first—it helps everything stick together. Now, top each with another spinach tortilla, pressing down gently to create your quesadilla “sandwiches.”
Step 2: The Transformation (Aka Cooking!)
Heat a large, non-stick skillet or griddle over medium heat. No need for oil or butter if your skillet is non-stick; the natural fats in the cheese will do the work for you. Carefully place one quesadilla in the pan. Now, the chef’s key to a perfectly crispy, non-soggy quesadilla? DON’T PEEK for a full 2-3 minutes. Let that heat work its magic. You’ll know it’s ready to flip when the bottom is golden brown with a few darker spots and the cheese on the bottom layer is visibly melted. Use a large spatula to confidently flip it over. It’s a bit of a wrist action, but you’ve got this! Cook for another 2-3 minutes on the second side until equally golden and delightfully crispy. Repeat with the second quesadilla.
Step 3: The Signature Shape
Move your cooked quesadillas back to the cutting board and let them cool for just a minute. This is crucial—if you cut into them while they’re nuclear hot, all the filling will ooze out. Using a sharp knife or a pizza cutter, slice each quesadilla into a rectangle shape. I usually just trim off the rounded edges to create a classic, boxy Frankenstein head. (P.S. Don’t you dare throw those trimmings away! That’s the cook’s treat. Dip them in the leftover sour cream.)
Step 4: Bring Him to Life! (The Decorating Stage)
This is where the fun really begins. Let the kids take the lead here!
- Hair: Press sliced black olives along the top edge to create his iconic spiky, crazy hair.
- Eyes: Use two olive slices or whole black beans for the eyes.
- Scars & Stitches: Spoon your sour cream into a small plastic baggie, snip a tiny corner off, and pipe it on to create scars, a mouth, and those iconic forehead stitches. If you have a piping tip, even better!
- Neck Bolts: Gently press two pretzel sticks into the sides of the rectangle for the final, electrifying touch.
And just like that… IT’S ALIVE!
How to Serve Your Masterpiece
Presentation is everything with a dish this fun! Serve your Frankenstein Quesadillas right on the cutting board for a rustic, family-style feel, or plate them individually. I love putting each one on a dark-colored plate—it makes the green tortilla and white sour cream really pop. A little bowl of salsa for “blood” dip or a side of guacamole “monster snot” (kids love gross names!) on the side makes for a complete and hilarious meal. Pair it with a simple side of “witch’s finger” carrot sticks or apple slices for a balanced spooky spread.
Monster Mash-Ups: Creative Twists
Feel like experimenting? Here are a few ways to customize your monster:
- The Mummy: Use strips of tortilla to wrap a hot dog or a cheese stick, bake until crispy, and add edible eyes for a classic mummy dog!
- Vampire Bat: Use whole wheat tortillas. Cut into bat wing shapes with cookie cutters, fill with cheese and black bean spread, and use two small red pepper pieces for the eyes.
- Spicy Monster: Add a kick by mixing some diced green chiles or a sprinkle of chili powder into the cheese filling. Perfect for grown-ups!
- Pizza Monster: Swap the beans for a layer of pepperoni and use marinara sauce for the scars instead of sour cream.
- Breakfast Monster: Use scrambled eggs and breakfast sausage as the filling for a spooky and satisfying morning meal.
Beau’s Chef Notes
This recipe has evolved so much since that first Halloween. I’ve learned a thing or two, like the importance of letting the quesadilla cool for a minute before cutting—a lesson learned after a string of cheese-related burns. One of my favorite kitchen fails was the year I tried to use blue corn tortillas to make a “Blue Frankenstein.” It looked less like a classic monster and more like a sad, bruised swamp creature. We ate it anyway, of course. The real magic of this dish is that it doesn’t have to be perfect. Crooked stitches, wobbly eyes, and a missing bolt just give your monster more personality! The goal is to have fun, laugh, and create something together. That’s what Feastical is all about.
Frankenstein Quesadilla FAQs
Q: My quesadilla is oozing cheese everywhere in the pan! What did I do wrong?
A: Ah, the classic cheese volcano! This usually means you’ve overfilled it or your heat was too high. Next time, make sure to leave a clear border around the edge of the tortilla when you add your filling, and keep that heat at a steady medium. A well-sealed edge is your best friend.
Q: Can I make these ahead of time for a party?
A: You absolutely can! Cook and cut the quesadillas into rectangles ahead of time and keep them warm in a 200°F oven on a baking sheet. I’d hold off on the decorations until just before serving, though, so the sour cream doesn’t get runny and the pretzel bolts stay crunchy.
Q: My tortillas are burning before the cheese melts! Help!
A> This is a sign your heat is too high. Dial it back to medium-low and be patient. Cooking low and slow is the key to a perfectly melted interior and a crispy, but not burnt, exterior. You can also cover the skillet with a lid for a minute to help trap heat and melt the cheese faster.
Q: Any tips for getting the perfect rectangle shape?
A> A large, sharp chef’s knife or a pizza wheel is your best tool. Press down firmly and use a gentle sawing motion. Trimming the curved edges off is the easiest way to get that classic square-headed look. Remember, it doesn’t have to be geometrically perfect—Frankenstein’s monster was stitched together, after all!

Frankenstein Quesadillas
Description
Hey there! Today we’re bringing a little Halloween fun to the table with Frankenstein Quesadillas. These are not just your regular quesadillas—they’re packed with gooey cheese, protein-rich beans, and decorated to look like everyone’s favorite friendly monster. Perfect for a quick lunch, snack, or party treat, they’re easy to make, fun to assemble, and guaranteed to make kids (and adults!) giggle.
Ingredients
-
4 Spinach Tortillas (or brush regular tortillas with spinach puree)
-
1 cup shredded cheddar or Mexican blend cheese
-
½ cup black beans (whole or refried)
-
¼ cup sliced black olives
-
¼ cup sour cream (or Greek yogurt)
-
4–6 pretzel sticks (optional, for “neck bolts”)
Instructions
1. Assemble the Monster
-
Lay two tortillas flat.
-
Sprinkle cheese over each, leaving a ½-inch border.
-
Spread beans evenly on top; mash whole beans slightly.
-
Top with the remaining tortillas and gently press down.
2. Cook the Quesadilla
-
Heat a non-stick skillet over medium heat.
-
Place a quesadilla in the pan and cook 2–3 minutes without peeking.
-
Flip carefully and cook another 2–3 minutes until golden and crispy.
3. Shape the Monster
-
Let the quesadilla cool for 1 minute.
-
Trim rounded edges with a sharp knife or pizza cutter to form a rectangle.
4. Decorate
-
Hair: Line sliced olives along the top.
-
Eyes: Use two olive slices or whole beans.
-
Scars & Stitches: Pipe sour cream in small lines.
-
Neck bolts: Gently press in pretzel sticks.
Notes
-
-
Leave a border around the tortilla to prevent cheese overflow.
-
Cook on medium heat; too high will burn the tortilla.
-
Let the quesadilla cool slightly before cutting to avoid filling spills.
-
Decorations can be added by kids for a fun interactive activity.
-
Nutrition
- Calories: 300 Cal Per Serving
- Fat: 16g
- Carbohydrates: 28g
- Protein: 12g
Nutritional Information (Per Serving)
Calories: ~300 | Protein: 12g | Carbohydrates: 28g | Fat: 16g
*Note: This is an estimate and can vary based on specific ingredients and portion sizes. Using low-fat cheese and beans can lower the calorie and fat content.
Final Thoughts from Beau’s Kitchen
And there you have it! You’ve just successfully brought a delicious, gooey, and slightly silly monster to life right on your stovetop. This Frankenstein Quesadilla is proof that you don’t need a complicated recipe or a full day in the kitchen to create a moment of pure, spooky joy.
The real magic of this dish isn’t just in the melty cheese or the crispy tortilla—it’s in the giggles it inspires. It’s in the proud look on your kid’s face when they take a bite out of their own creation. It’s about turning an ordinary Tuesday into a mini Halloween celebration and finding the fun in the everyday.
So, embrace the messy stitches and the lopsided smiles. Celebrate the cheese that oozes out the sides (that’s just your monster’s personality showing through!). This recipe is a launchpad for your own creativity, so make it your own.

Halloween Pizza Night
Turn Your Kitchen into a Spooky Pizza Parlor This Halloween!
Hey there, Feastical family! Beau here. Is there anything better than the smell of pizza wafting through the house? It’s pure, unadulterated joy. Now, imagine mixing that incredible smell with the infectious, giddy energy of Halloween. That’s the magic we’re cooking up today. Forget the store-bought, sugar-loaded treats for a second—let’s create something that’s not only a total blast to make but is also a real, honest-to-goodness meal that your kids (and let’s be real, you) will actually be excited to eat.
I’m talking about a Halloween Pizza Night that’s so fun, it’ll become a new family tradition. We’re crafting mini masterpieces: creepy crawly olive spiders, grinning jack-o’-lantern faces, and adorable string cheese mummies, all on a canvas of golden, crispy crust. This isn’t about being a perfect pastry chef; it’s about grabbing your favorite little helpers, rolling up your sleeves, and making a wonderful, delicious mess together. The best memories are often made covered in a little bit of flour and a whole lot of laughter. So, preheat those ovens, put on a spooky playlist, and let’s turn pizza night into the main event of your fright night festivities. This is hands-on, feel-good food at its most festive!
The Spooky Tradition That Stuck
This whole Halloween pizza night thing started years ago, totally by accident. My nephew, Leo, was about five and was already a pint-sized pizza critic. One rainy October afternoon, we were tasked with making lunch, and the only things in the fridge were pizza dough, cheese, and a rogue jar of olives. As I was slicing the olives for a topping, Leo pointed at one and declared, “That looks like a bug!” A lightbulb went off. We started arranging them with little olive-legs, and before we knew it, we had a whole colony of “spider” pizzas. We used pepperoni to make silly faces and he giggled the entire time. His absolute delight was more satisfying than the pizza itself (and that’s saying something!). That simple, unplanned kitchen moment sparked a yearly ritual. Now, every October, Leo demands our “spooky pizza party,” and it’s my favorite kitchen date of the year. It proves that the recipes you remember aren’t just about taste—they’re about the story you cook up along the way.
Gathering Your Spooky Supplies
Here’s your shopping list for frightfully good fun! The beauty of this is its flexibility—use what you love and have on hand.
- 4–6 mini pizza crusts (or English muffins/pita rounds): This is your blank canvas! I love using pre-made mini naan or flatbreads for a super easy start. English muffins give a fantastic nook-and-cranny texture that holds toppings perfectly, and pita rounds get wonderfully crispy. Chef’s Insight: For a from-scratch option, my simple no-knead pizza dough is foolproof and fun for kids to punch down!
- 1 cup pizza sauce: Use your favorite jarred brand to save time, or simmer a can of crushed tomatoes with a pinch of salt, dried oregano, and a garlic clove for 10 minutes for a quick fresh version.
- 1 1/2 cups shredded mozzarella cheese: The glue that holds our monster creations together! I highly about shredding your own from a block—it melts so much creamier and doesn’t have the anti-caking additives that pre-shredded bags do.
- Sliced black olives (for spiders): These are the star of the show for our eight-legged friends. The slices are perfect for the body and the legs. Don’t like olives? Thin slices of mushroom or even little strips of ham can work for a different kind of critter.
- Pepperoni slices: Essential for the jack-o’-lantern faces! Their round shape and red-orange color are just right. For a healthier twist, try thin slices of summer sausage or even use roasted red pepper strips to form the face.
- Orange bell peppers, cut into thin strips: These are perfect for creating the classic pumpkin face features—triangles for eyes and a jagged mouth. Their sweet, crunchy flavor is a great contrast to the savory cheese and pepperoni.
- String cheese (for mummy wraps): This is the ultimate hack for mummy pizzas! Simply peel the string cheese into thin, perfect “bandage” strips. So easy and effective.
- Optional toppings: mushrooms, onions, basil, or any favorites: This is where you get creative! Add some “eyeballs” with half a mushroom (pupil made from an olive bit). Green onion scraps can be witch’s hair. Let your imagination run wild!
Let’s Build Some Monster Pizzas!
Step 1: Preheat and Prep
Fire up your oven to 400°F (200°C). This is the perfect temperature for getting a crispy crust and beautifully melted, bubbly cheese without burning our delicate toppings. While it’s heating, line a baking sheet with parchment paper. Chef’s Hack: Parchment paper is a lifesaver for easy cleanup—because we’re about to make a fun mess!
Step 2: Sauce Your Canvas
Lay out your chosen crusts on the prepared baking sheet. Using a spoon, spread a thin, even layer of pizza sauce on each one, leaving a small border around the edge for the crust. Pro Tip: Don’t over-sauce! A thick layer will make the crust soggy. We’re going for a base coat, not a swimming pool.
Step 3: The Main Event—Decorating!
This is where the party starts! Assign each crust a monster personality or let the artists go wild.
- For Spider Pizzas: Place one olive slice in the center for the body. Then, take four more olive slices and carefully tear or cut each one in half. Arrange eight of these half-moon pieces around the body to create the spider’s legs. They don’t have to be perfect—wonky legs are extra spooky!
- For Jack-o’-Lantern Pizzas: Create a circle of pepperoni slices to form the pumpkin shape. Then, use your thin strips of orange bell pepper to create a classic (or silly!) jack-o’-lantern face inside the pepperoni circle. Triangles for eyes and a jagged smile are classic, but let the kids design their own.
- For Mummy Pizzas: Sprinkle a light layer of shredded mozzarella first (this acts as the glue). Then, take your string cheese “bandages” and lay them across the pizza in a haphazard criss-cross pattern, like a wrapped mummy. Leave a small gap near the top for the eyes! After baking, you’ll add the olive eyes.
Step 4: Bake to Perfection
Carefully slide your spooky creations into the hot oven. Bake for 8-10 minutes, but start watching at the 8-minute mark. You’re looking for the cheese to be fully melted and bubbly and the edges of the crust to turn a beautiful golden brown. Ovens vary, so keep an eye on them! The mummy pizzas might need a minute less since the string cheese strips are delicate.
Step 5: The Final Touch (Mummy Eyes!)
As soon as the mummy pizzas come out of the oven, press two small olive pieces or slices into the gap you left to create the eyes. The residual heat will warm them up and make them stick perfectly.
How to Serve Up the Spookiness
Presentation is part of the fun! Don’t just slide these onto plates. Arrange them on a large, dark wooden cutting board or a slate platter to make the colors pop. Scatter a few extra olive “spiders” and pepperoni “pumpkins” around the board for effect. Label them with little placards: “Arachnid Alley,” “Pumpkin Patch,” and “Mummy’s Tomb.” Serve with a side of extra warm pizza sauce for dipping, and watch them disappear faster than a ghost in the night!
Spooky Swaps & Creative Twists
This recipe is a fantastic template for all sorts of dietary needs and wild ideas!
- Gluten-Free Ghouls: Use your favorite gluten-free pizza crust, English muffin, or even portobello mushroom caps as the base!
- Dairy-Free Dread: Excellent vegan mozzarella shreds and string cheese alternatives are available now. For the mummy, you could even use very thin strips of vegan white cheese or tofu.
- Meat-Lover’s Monstrosity: Use crumbled cooked sausage as “dirt,” with olive spiders crawling through it. Pepperoni bats? Yes, please!
- Green Goblin Pizzas: Use pesto instead of tomato sauce for a green base. Create a monster face with broccoli florets for hair, olive eyes, and a red pepper mouth.
- Break-of-Dawn Zombies: Make breakfast pizzas! Use a gravy or cheese sauce base, scrambled egg “brains,” and bacon bit “worms.”
Beau’s Kitchen Confidential
This recipe has evolved so much since that first day with Leo. We’ve had pizzas with so many toppings they looked like abstract art, and we’ve had a few that were a little *too* well-done (I call them “zombified”). The key is to lean into the imperfection. The pizzas with one lopsided eye are always the ones that make us laugh the hardest. One year, we tried making a spider with waaaay too many legs—it was less a spider and more a terrifying eldritch horror. We still ate it, and it was delicious. The goal isn’t a Pinterest-perfect pizza (though if you make one, tag me!); it’s about the experience. Put on some Halloween tunes, let the kids assign everyone a “monster chef” name, and enjoy the process. The mess is just proof of a great time.
Your Spooky Pizza Questions, Answered!
Q: My crust got soggy. What happened?
A: The most common culprit is too much sauce! Remember, we’re just painting a thin layer. Also, make sure your oven is fully preheated. A hot oven will crisp the bottom quickly, preventing sogginess. If you’re using a particularly moist ingredient like fresh mushrooms, you can sauté them briefly first to release their water.
Q: Can I make these ahead of time for a party?
A: You can definitely do some prep ahead! You can pre-slice all your toppings and store them in separate containers in the fridge. You can even sauce the crusts and keep them on the sheet pan. But I’d highly recommend assembling and baking right before serving. They are best fresh out of the oven when the cheese is gloriously gooey.
Q: The string cheese on my mummy pizza burned a little. How can I prevent that?
A: Great catch! String cheese can be a bit more delicate. You have two options: 1) Bake the mummy pizzas for a minute or two less than the others, or 2) Add the string cheese “bandages” halfway through the baking process. Bake the sauced crust with the base layer of shredded cheese for about 5 minutes, then take it out, add the string cheese strips, and pop it back in for the remaining 3-4 minutes.
Q: My spider legs keep falling off! Help!
A: No worries! This is a common kitchen conundrum. Try pressing them lightly into the sauce so it acts like glue. You can also place a tiny dot of sauce on the back of each olive leg to help it adhere. If all else fails, a light sprinkle of cheese over the very ends of the legs can help anchor them down.

Halloween Pizza Night
Description
Spooky Halloween Mini Pizzas
Transform your kitchen into a festive pizza parlor with creepy, fun, and delicious mini pizzas! Perfect for kids, family nights, or Halloween parties.
Ingredients
Ingredients (4–6 mini pizzas)
-
Mini pizza bases: 4–6 mini pizza crusts, English muffins, pita rounds, or mini naan
-
Sauce: 1 cup pizza sauce (jarred or quick homemade)
-
Cheese: 1 1/2 cups shredded mozzarella cheese
-
Toppings for creativity:
-
Sliced black olives (spiders)
-
Pepperoni slices (jack-o’-lanterns)
-
Orange bell pepper strips (jack-o’-lantern features)
-
String cheese, peeled into strips (mummies)
-
Optional extras: mushrooms, onions, basil, green onions, roasted red pepper, cooked sausage
-
Instructions
1. Prep
-
Preheat oven to 400°F (200°C).
-
Line a baking sheet with parchment paper.
2. Sauce the crust
-
Spread a thin, even layer of pizza sauce on each crust, leaving a small border.
3. Decorate your pizzas
Spider Pizza
-
Place one olive slice in the center for the body.
-
Cut four more olives in half and arrange eight half-slices around the body as legs.
Jack-o’-Lantern Pizza
-
Arrange pepperoni slices to form a pumpkin shape.
-
Use thin orange bell pepper strips to create triangle eyes and jagged mouth.
Mummy Pizza
-
Sprinkle a light layer of shredded mozzarella as glue.
-
Lay string cheese strips haphazardly across the pizza for “bandages,” leaving a small gap at the top for eyes.
-
Add small olive slices to the gap after baking.
4. Bake
-
Bake for 8–10 minutes until cheese is melted, bubbly, and edges are golden.
-
Mummy pizzas may need 1–2 minutes less to avoid burning string cheese.
5. Serve
-
Arrange on a platter or cutting board for presentation.
-
Add extra olive spiders or pepperoni pumpkins for fun!
-
Serve with extra warm pizza sauce for dipping.
Notes
-
Prevent soggy crust: Use a thin layer of sauce; preheat oven fully.
-
Mummy string cheese: Bake for a shorter time or add halfway through baking.
-
Spider legs: Press lightly into sauce or secure with a tiny dot of cheese.
-
Prep ahead: Slice toppings and sauce crusts in advance, but bake fresh.
Nutrition
- Calories: 280Cal
- Fat: 12g
- Carbohydrates: 28g
- Protein: 14g
Nutritional Information (Approximate, per mini pizza)
Calories: 280 | Protein: 14g | Carbohydrates: 28g | Fat: 12g
Note: This is a rough estimate and can vary greatly based on the specific crust and toppings you use. The real value is in the fun and togetherness!
Final Thoughts from Beau
And there you have it—your ticket to the most memorable Halloween dinner on the block. This isn’t just about feeding hungry goblins and ghosts; it’s about creating those loud, messy, and absolutely priceless moments of togetherness. The best part? There are no rules. If your spider has ten legs or your mummy’s bandages are a little too neat, it doesn’t matter. What matters is the laughter and the pride on your little chef’s face when they pull their creation out of the oven.
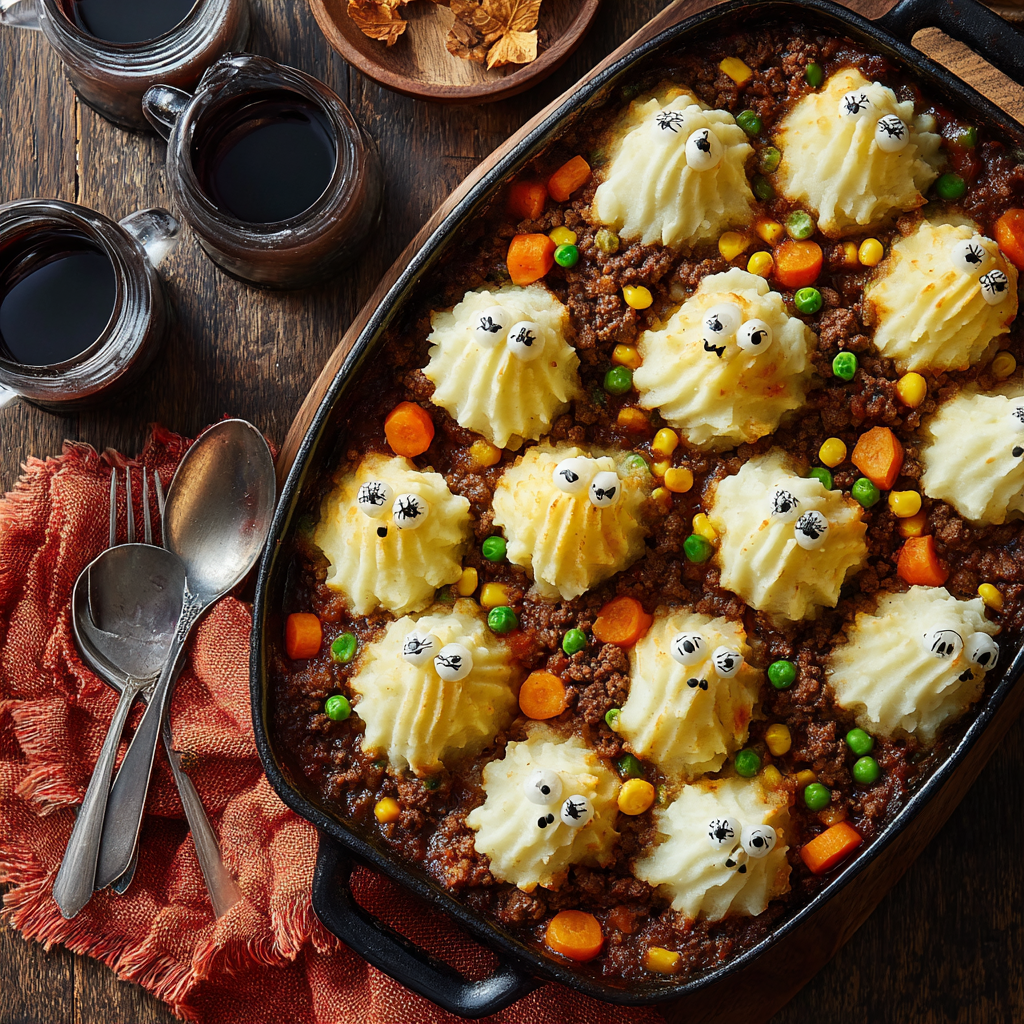
Ghoulish Shepherd’s Pie
Your New Spooky Season Star: Ghoulish Shepherd’s Pie!
Hey there, friends! Beau here from Feastical, and can we just take a moment to appreciate the absolute magic of October? The crisp air, the colorful leaves, and that infectious, spooky-fun energy that seems to buzz everywhere you go. It’s my favorite time to get creative in the kitchen, and let’s be real—nothing brings people together like a seriously fun, seriously delicious meal.
If you’ve been searching for that perfect Halloween dinner—the one that’s more “wow!” than “boo!”—your quest ends right here. Forget the complicated, stress-inducing recipes that have you running around like a headless chicken. We’re all about maximum flavor and maximum fun with minimal fuss. Today, we’re taking a beloved, hug-in-a-bowl classic—Shepherd’s Pie—and giving it a playful, ghostly makeover that will have the whole family (yes, even the picky ones) grinning from ear to ear.
Imagine this: a rich, savory, and deeply comforting filling of meat and veggies, simmered to perfection. Now, picture it topped not with just any mashed potatoes, but with a whole squad of adorable, piped potato ghosts, each one peeking out with little peppercorn eyes. It’s a centerpiece dish that’s as delightful to look at as it is to devour. It’s cozy comfort food dressed up for the holiday, and I promise you, it’s going to become a new Halloween tradition. So, preheat those ovens, grab your favorite piping bag (or a trusty zip-top bag!), and let’s make some dinnertime magic together.
A Spooky Supper & A Happy Memory
This recipe always takes me right back to one of my first Halloweens in my own apartment. I was dead-set on hosting a “spooky supper” for my friends, but my chef skills were, let’s say… still under construction. I wanted something impressive but utterly foolproof. I stared into my fridge, saw the usual suspects—ground beef, an onion, some carrots, and a giant bag of potatoes—and had a lightbulb moment. Shepherd’s Pie! But how to make it Halloween?
I remember scooping the mashed potatoes on top, trying to sculpt a ghost face with a spoon. It looked… less like a friendly spirit and more like a potato blob that had seen things. We’re talking abstract art, at best. We laughed so hard, but you know what? It tasted incredible. That messy, lopsided ghost pie was the hit of the night. It taught me a huge lesson: food doesn’t have to be perfect to be perfect. It just has to be made with a little love and a lot of fun. This version is my redemption—a way to get those cute ghosts right, so you can have the wow factor AND the deliciousness, all without the abstract-artist struggle.
Gathering Your Ghoulish Crew: The Ingredients
This is where the magic starts! The beauty of this dish is that it uses simple, wholesome ingredients that you probably already have on hand. Here’s your shopping list for the most spooktacular Shepherd’s Pie ever.
- 1 lb ground beef or lamb: The hearty base of our filling. I often use an 85/15 blend for a great balance of flavor without being too greasy. For a traditional twist, use ground lamb. Feeling a bit adventurous? Ground turkey or a plant-based ground meat alternative work beautifully for a lighter or vegetarian version!
- 1 onion, chopped: The aromatic foundation. Yellow or white onions are perfect here, bringing a subtle sweetness once they’re cooked down.
- 2 garlic cloves, minced: Because is it even a savory dish without garlic? Fresh is always best, but in a pinch, ½ tsp of garlic powder will do the trick.
- 1 cup frozen peas and carrots: My little kitchen hack for color, sweetness, and nutrients without all the chopping. No need to thaw—they’ll cook perfectly in the sauce. If you have fresh, by all means, chop ’em up!
- 2 tbsp tomato paste: This is our secret weapon for deep, rich flavor and that gorgeous color. Pro tip: fry it in the pan with the onions and meat for a minute before adding liquids—it unlocks a whole new level of flavor!
- 1 tbsp Worcestershire sauce: The ultimate flavor booster. It adds a complex, savory, slightly tangy umami punch. For a gluten-free option, just check the label, as some brands contain wheat.
- 1/2 cup beef broth: This creates our simple, delicious sauce. Low-sodium is my go-to so I can control the salt level myself. Vegetable broth works great if you’re going the turkey or plant-based route.
- Salt and pepper to taste: Season as you go! Taste your filling before it goes into the dish and adjust. Remember, the potatoes will be seasoned too.
- 4 cups mashed potatoes: The star of our spooky show! You can use your favorite homemade recipe (I love adding a bit of cream cheese for extra stability and flavor) or even sturdy store-bought ones. The key is they need to be thick and pipeable, not loose and runny.
- Whole peppercorns or black sesame seeds: The adorable finishing touch for the ghost eyes. Peppercorns are classic, but sesame seeds are easier for little ones to eat and are a fun nod to tiny poppy seeds.
Conjuring Your Creepy-Cute Masterpiece: Step-by-Step
Alright, team! Let’s fire up the stove and get this party started. Follow these steps, and you’ll have a hauntingly good dinner on the table in no time.
Step 1: Preheat & Prep
First things first, get that oven preheated to 375°F (190°C). This ensures it’s perfectly hot and ready to go when our pie is assembled. While it’s heating, chop your onion and mince your garlic. Having your “mise en place” (everything in its place) makes the cooking process so smooth and enjoyable.
Step 2: Brown the Meat
Grab a large skillet and place it over medium-high heat. Add your ground meat and cook it, breaking it up with your spoon or spatula, until it’s nicely browned and no longer pink. This is where we build our base flavor, so don’t rush it! Once browned, carefully drain off any excess grease.
Step 3: Sauté the Aromatics
Add your chopped onion and minced garlic right into the skillet with the meat. Cook them together for about 4-5 minutes, until the onion becomes soft and translucent. You’ll smell that incredible fragrance—that’s the sound of success, my friends!
Step 4: Build the Flavor
Now, push the meat and onions to the side and plop your tomato paste right onto the hot surface of the skillet. Let it cook for about 30 seconds—this little trick, called “toasting,” gets rid of any tinny taste and makes it taste richer and sweeter. Then, stir it all together. Pour in the Worcestershire sauce and beef broth, and add your frozen peas and carrots. Give it a good stir, bring it to a simmer, and let it cook for about 5-7 minutes, until the liquid has reduced and thickened into a glorious sauce. Season generously with salt and pepper. Give it a taste—this is your moment to be the chef! Adjust if needed.
Step 5: Assemble the Base
Transfer your savory, delicious filling into a baking dish. An 8×8 or 9×9 square dish or a similar-sized oval baker works perfectly. Spread it out into an even layer. Go ahead, sneak another taste. I won’t tell.
Step 6: Create the Ghosts!
This is the fun part! If your mashed potatoes are cold, give them a quick zap in the microwave to make them just warm enough to pipe easily. Spoon them into a piping bag fitted with a large round tip (a ½ or ¾ inch opening is perfect). No piping bag? No problem! A large zip-top bag with one corner snipped off works just as well. Now, pipe your ghosts: start with a wider base and pull up to create a tall, wispy peak. Don’t overthink it! Imperfect ghosts have more character. Leave a little space between them so they can get slightly crispy in the oven.
Step 7: Give Them Eyes
Take your whole peppercorns or black sesame seeds and gently press two into each potato ghost to create eyes. They instantly come to life!
Step 8: Bake to Golden Perfection
Carefully place your assembled masterpiece into the preheated oven. Bake for 20-25 minutes, or until the filling is bubbling around the edges and those adorable potato ghosts have developed a few light, golden-brown spots. Your kitchen is going to smell absolutely incredible.
Serving Your Spooky Supper
Pull that gorgeous pie out of the oven and let it rest for about 5 minutes—this helps the filling set so you get a perfect scoop. Serve it up right from the dish at the table for a real “wow” moment. I love placing a big portion on a plate, making sure every serving gets at least one friendly ghost. It pairs wonderfully with a simple green salad with a bright vinaigrette to cut through the richness, or just some crusty bread for mopping up every last bit of that savory filling. Dim the lights, light some candles, and watch everyone’s faces light up with delight!
Mix It Up! Ghoulish Recipe Variations
This recipe is a fantastic canvas for your own creativity! Here are a few of my favorite twists:
- Jack-O’-Lantern Pie: Use sweet potato mash instead of regular potatoes for a orange-top version. Pipe on spooky faces with sour cream or black olive tapenade!
- Boo-tarian Option: Swap the ground meat for 2 cups of cooked brown lentils or a plant-based ground “meat.” Use vegetable broth for a completely vegetarian and equally delicious pie.
- Spicy Phantom: Add a kick by stirring in a teaspoon of smoked paprika or a few dashes of hot sauce into the meat filling.
- Cheesy Ghosts: Stir a half cup of shredded sharp cheddar or parmesan cheese into your mashed potatoes before piping for an extra decadent, flavorful topping.
Beau’s Chef’s Notes & Kitchen Stories
This recipe has come a long way from my lopsided blob ghost days! Over the years, I’ve learned that the key to the best ghosts is the potato texture. You want them firm enough to hold their shape. If your potatoes are too loose or wet, try adding a tablespoon of cornstarch or parmesan cheese to the mash to help stiffen them up. Another fun tip: if you’re making this for a party, you can assemble the whole thing a few hours ahead, keep it in the fridge, and then just pop it in the oven when your guests arrive. The ghosts might bake up a little smoother, but they’ll be just as tasty.
I’ll never forget the year I tried to get *too* fancy and piped intricate ghost arms. They all melted into the filling in the oven, leaving my ghosts looking like they had… unfortunate accidents. We now call that the “Year of the Amputee Ghosts.” Keep it simple, friends! A simple peak is spooky, cute, and totally fail-proof.
FAQs & Troubleshooting Your Ghoulish Pie
Q: My mashed potatoes are too runny to pipe. What can I do?
A: This is the most common hiccup! Don’t worry. First, ensure your potatoes are well-drained after boiling. You can stir them over low heat for a minute to evaporate extra moisture. To rescue them now, try adding a thickener like a tablespoon of cornstarch, instant potato flakes, or grated parmesan cheese until the consistency is firmer. If all else fails, you can simply spread the potatoes over the top and use a fork to create spooky swirls and peaks—it’ll still taste amazing!
Q: Can I make this dish ahead of time?
A: Absolutely! You can prepare the meat filling and the mashed potatoes up to two days in advance. Store them separately in airtight containers in the fridge. When you’re ready, let the potatoes come to room temperature (or warm them slightly) to make piping easier, assemble the pie, and bake as directed. You might need to add 5-10 minutes to the baking time since it’s starting from cold.
Q: My filling is too watery. How can I fix it?
A: A soupy filling usually means the liquid didn’t reduce enough. You can simmer the filling for a few more minutes uncovered to thicken it up before transferring it to the baking dish. A teaspoon of cornstarch mixed with a tablespoon of cold water and stirred into the simmering filling will also thicken it up quickly.
Q: What’s the best way to reheat leftovers?
A: The oven is your best friend here! Reheat at 350°F (175°C) in an oven-safe dish, covered with foil, for about 15-20 minutes, or until heated through. The microwave will work in a pinch, but it can make the potato ghosts a little soft.
Ghoulish Shepherd’s Pie
- Total Time: 45 min
Description
This isn’t just any Shepherd’s Pie—it’s a spooktacular feast topped with mashed potato ghosts that stare back at you with peppercorn eyes. Cozy, hearty, and hauntingly cute, it’s the perfect Halloween dinner centerpiece. One bite and it just might become your new October tradition.
Ingredients
-
1 lb ground beef or lamb (swap turkey or plant-based if preferred)
-
1 onion, chopped
-
2 garlic cloves, minced
-
1 cup frozen peas & carrots
-
2 tbsp tomato paste
-
1 tbsp Worcestershire sauce
-
½ cup beef broth (or veggie broth)
-
Salt & pepper, to taste
-
4 cups mashed potatoes (thick, pipeable)
-
Whole peppercorns or black sesame seeds (for eyes)
Instructions
-
Preheat oven to 375°F (190°C).
-
Cook meat: In a skillet, brown ground meat. Drain excess fat.
-
Add aromatics: Stir in onion & garlic, cook until softened.
-
Build sauce: Toast tomato paste 30 sec, stir in Worcestershire, broth, peas & carrots. Simmer 5–7 min until thickened. Season to taste.
-
Assemble: Spread filling in baking dish (8×8 works).
-
Make ghosts: Pipe mashed potatoes into little ghost mounds. Add peppercorn or sesame seed “eyes.”
-
Bake: 20–25 min, until filling bubbles & ghosts are lightly golden.
-
Serve: Rest 5 min, then scoop & enjoy—make sure each plate gets a ghost!
- Prep Time: 20 min
- Cook Time: 25 min
Nutritional Information (Approximate, per serving)
Calories: 410 | Protein: 26g | Carbohydrates: 28g | Fat: 22g
Please note: This is an estimate based on the ingredients listed. Values can vary significantly based on the specific brands and ingredients you use.
Final Thoughts: A New Halloween Tradition is Served
And just like that, you’ve done it! You’ve conjured up a dinner that’s equal parts playful, delicious, and downright memorable. This Ghoulish Shepherd’s Pie is more than just a meal; it’s an experience. It’s the laughter that erupts when you bring it to the table. It’s the joy of seeing those little peppercorn eyes staring back at you. It’s the warm, comforting feeling of sharing something made with love (and just the right amount of spooky fun).
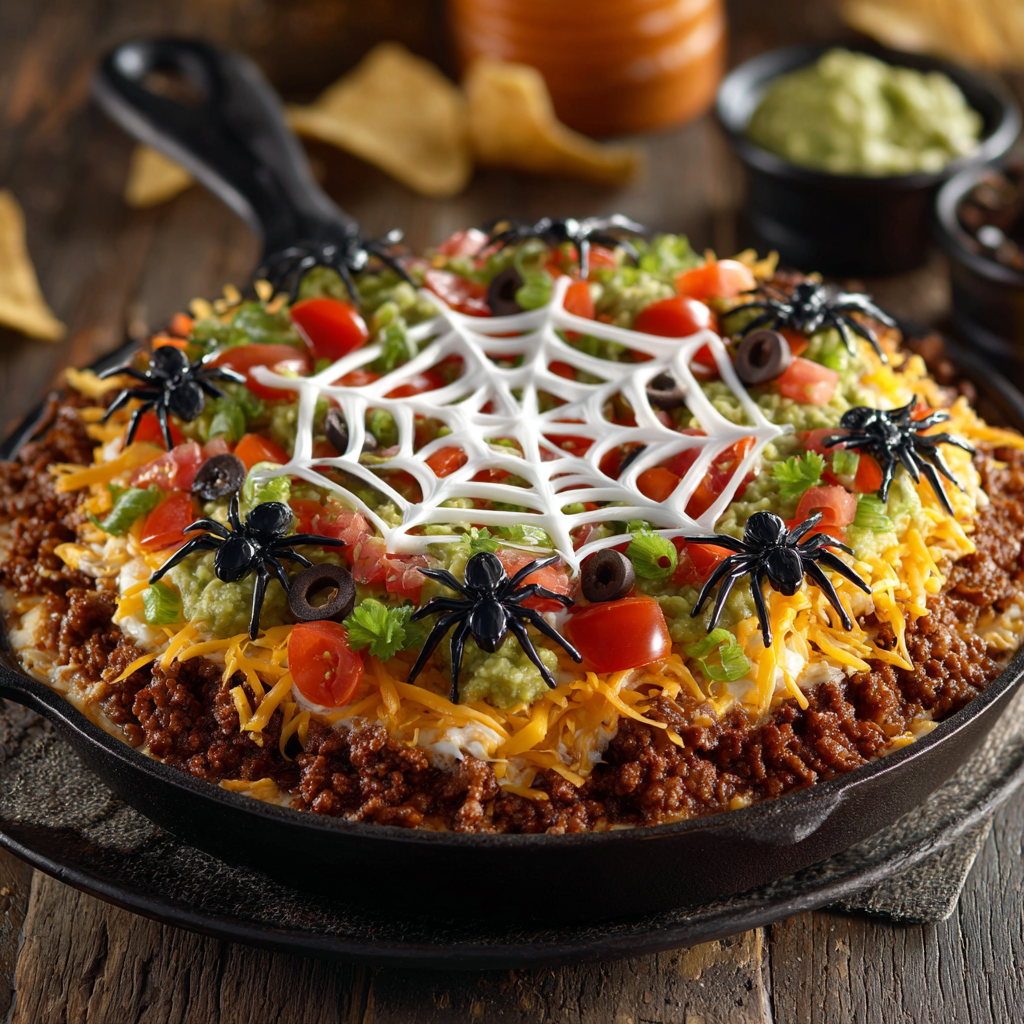
Spider Web Taco Dip Dinner
Spooktacular Snacking: Your New Halloween Party Star is Here!
Hey friends, Beau from Feastical here! Can you feel it? That crisp, autumn air is finally rolling in, and you know what that means—it’s time to start planning the ultimate Halloween bash. And let’s be real, the true star of any great party isn’t the spookiest costume or the coolest decorations (though those are a close second!). It’s the food. That one show-stopping, conversation-starting, can’t-stop-eating-it dish that has everyone gathered around the table, laughing, dipping, and making a gloriously delicious mess.
Well, my foodie friends, I’ve got just the thing to absolutely win Halloween this year. I’m talking about my legendary Spider Web Taco Dip Dinner. This isn’t just any layered dip; it’s a deep, flavor-packed fiesta in a dish that’s as fun to make as it is to devour. Imagine: creamy refried beans, perfectly seasoned meat, cool guacamole, zesty salsa, and a blanket of melted cheese, all coming together in perfect harmony. And the pièce de résistance? A creepy, cool sour cream spider web draped over the top, complete with little olive spiders crawling across it.
This recipe is my go-to for a reason. It’s incredibly easy to throw together, even if you’re also trying to wrestle a tiny ghost or dinosaur into their costume. It’s a total crowd-pleaser for both kids and adults. And most importantly, it tastes absolutely incredible. So, grab your favorite skillet and a big platter—we’re about to create a Halloween memory that’s seriously delicious.
A Dip That’s Woven Into My Halloween Memories
This recipe takes me right back to my first Halloween in my first real apartment. My buddies and I decided to throw a last-minute party. The budget was tight—like, “decorations are literally just orange and black construction paper” tight. I was determined to make the food memorable, so I raided my pantry and fridge. I had ground beef, a can of refried beans, some sour cream, and the usual taco fixings. The layered dip was born out of necessity!
But it needed a Halloween twist. My then-roommate, Dave, who was an art student, looked at the sour cream and said, “Dude, we can totally draw on that.” With a steady hand (and maybe a little pre-party courage), he piped a perfect spider web across the top. We used olives for spiders, and just like that, our party had its main event. The dip was gone in about ten minutes flat, and people are still asking me to make “that spider dip” every single year. It’s a reminder that the best recipes aren’t about fancy ingredients; they’re about creativity, fun, and sharing something awesome with the people you love.
Gathering Your Web-Weaving Ingredients
Here’s everything you’ll need to build this epic edible centerpiece. Don’t stress about being exact—this is a very forgiving recipe, and I’ve included my favorite chef-y swaps and insights for each ingredient.
- 1 lb ground beef or turkey: I usually go for an 80/20 beef for the best flavor, but lean turkey is a fantastic, lighter option. For a vegetarian twist, a plant-based ground crumble works wonders!
- 1 packet taco seasoning: The ultimate shortcut for big flavor. I like the low-sodium versions so I can control the salt level. Feel free to use 2-3 tablespoons of your own homemade blend if you have one!
- 1 can (16 oz) refried beans: This is the sturdy base of our dip. The traditional kind gives that authentic flavor, but black refried beans are a delicious and visually cool alternative.
- 1 cup sour cream (plus extra for piping): This adds a crucial creamy, tangy layer. Chef’s Hack: For a protein boost, you can easily swap in plain Greek yogurt. It has the same tang and thickness!
- 1 cup guacamole: Use your favorite store-bought brand to save time, or mash up 2 ripe avocados with a squeeze of lime and a pinch of salt. Pro tip: spreading the guacamole directly onto the meat layer helps create a barrier that keeps the beans from bleeding into the sour cream.
- 1 1/2 cups salsa: This is where you can control the heat! I prefer a mild or medium chunky salsa so you get nice little bits of tomato and pepper. If you’re feeling brave, go for a hot habanero salsa!
- 1 cup shredded cheddar cheese: The melty, cheesy goodness on top. A pre-shredded Mexican blend saves time, but shredding your own cheese from a block will give you a smoother melt (no anti-caking agents).
- 1/2 cup chopped tomatoes: For a fresh, juicy pop of flavor. Roma tomatoes are less watery, which is perfect here.
- 1/4 cup sliced black olives: These are for garnish and, of course, for crafting our creepy crawlers.
- 1/4 cup chopped green onions: A little bit of sharp, fresh onion flavor to finish it off.
- Tortilla chips for serving: The vehicle for all this goodness! Get a sturdy, restaurant-style chip that can scoop up all the layers without breaking.
Weaving Your Delicious Web: A Step-by-Step Guide
Alright, let’s get building! This process is super simple and honestly, kind of therapeutic. Put on some fun Halloween tunes and let’s get into it.
Step 1: The Hearty Base
Grab a large skillet and heat it over medium-high heat. Crumble in your ground beef or turkey and cook it until it’s nicely browned and no pink remains. This usually takes about 7-8 minutes. Once it’s cooked, carefully drain off the excess fat. Now, sprinkle that packet of taco seasoning over the meat and add a splash of water (about ¼ cup). Give it all a good stir, reduce the heat, and let it simmer for 2-3 minutes until the sauce thickens up and coats every little crumble. This step is key for locking in that bold, savory flavor into every bite.
Step 2: The Art of Layering
Now, take your serving dish—a 9×13 inch baking dish or a deep, round platter works perfectly. We’re going to build our dip like we’re building a flavorful skyscraper. Here’s the order:
- Layer 1: Refried Beans. Spread them evenly across the bottom. Pro tip: If you microwave the beans for 30 seconds first, they’ll spread much more easily!
- Layer 2: Seasoned Meat. Spoon the meat mixture over the beans and press it down gently into an even layer.
- Layer 3: Guacamole. Carefully spread your guacamole over the meat. This creates a fantastic flavor barrier.
- Layer 4: Sour Cream. Dollop the cup of sour cream across the guacamole and then spread it gently to cover. Try to be smooth here—it makes the web look cooler later!
- Layer 5: Salsa. Spoon the salsa over the sour cream and spread it out. Don’t worry about being perfect!
- Layer 6: Cheese. Sprinkle that beautiful shredded cheddar over the salsa like a warm, cheesy blanket.
- Layer 7: The Garnish Brigade. Now, scatter the chopped tomatoes, most of the olives (save a few for spiders!), and the green onions over the top.
Step 3: Creating the Masterpiece (The Web!)
This is the fun part! Take your extra sour cream and scoop it into a small plastic baggie (a Ziploc sandwich bag is perfect). Seal the bag and then snip a TINY corner off one end. You’ve just made a makeshift piping bag! Now, starting from the center of the dip, pipe a continuous spiral outward, like a coiled snake. Then, take a knife or a toothpick and gently drag it from the center of the spiral out to the edge. Do this in 6-8 places around the dish, and like magic, a spider web will appear!
Step 4: The Eight-Legged Friends
Take your reserved black olives. For each spider, use one whole olive half for the body. Take another olive half and slice it into super thin strips—these will be the legs. Arrange eight little legs coming out from under the body and place your spider on the web! So cute and creepy.
Step 5: The Chill
I know, I know, you want to dig in immediately. But trust me on this: cover the dip with plastic wrap and let it chill in the fridge for at least 30 minutes. This crucial step lets the flavors get to know each other and marry beautifully, and it firms up the layers so every chip scoop is perfect.
How to Serve This Spooky Spectacle
Presentation is everything! Place the whole dish right in the center of your table so everyone can admire your web-weaving skills. Surround it with a huge bowl of sturdy tortilla chips for dipping. I like to add some thematic flair by serving the chips in a clean, plastic cauldron. For a full fiesta spread, you could also put out small bowls of extra toppings like jalapeños, cilantro, or a different salsa. Don’t forget the napkins—this is a gloriously messy eat!
Mix It Up! Creative Twists on the Classic
The beauty of this dip is its versatility. Here are a few ways to make it your own:
- Seven-Layer Swap: Add a layer of shredded iceberg lettuce right under the cheese for that classic seven-layer dip crunch.
- Buffalo Chicken Style: Use shredded rotisserie chicken tossed in buffalo sauce instead of the taco meat, and use a blue cheese or ranch dressing instead of sour cream for the web.
- Fully Loaded Nacho Version: After assembling, pop the whole dish (without the web and spiders) into a 350°F oven for 10-15 minutes until the cheese is bubbly. Let it cool slightly before adding the cold sour cream web.
- Bean-Free Zone: Not a bean fan? Simply replace the refried bean layer with an extra layer of well-seasoned meat or even a thin spread of cream cheese.
- Ghostly White Web: For a different look, use a cilantro-lime crema (blend sour cream with lime juice and cilantro) for your web against the darker layers.
Beau’s Chef Notes & Kitchen Stories
This recipe has evolved so much since that first Halloween party. One year, I was in a huge rush and tried to pipe the web with a bottle of squeeze mayo I had in the fridge… let’s just say a mayo web, while structurally sound, is not a flavor win. Stick with sour cream!
Another time, my niece was helping me make the spiders and we decided to use small pepperoni slices for “blood-red” spiders. They were terrifyingly effective! The point is, don’t be afraid to play around and have fun with it. This dish is meant to be a conversation starter. The recipe below is your blueprint, but your creativity is the secret ingredient. Over the years, I’ve learned that the chill time is non-negotiable. It truly makes all the difference in the world, giving the dip time to set up so you get a perfect scoop with every single chip.
Your Spider Web Dip Questions, Answered!
Q: My dip turned out a bit watery. What happened?
A: The most common culprit is salsa! Salsas can vary widely in liquid content. To avoid a soupy dip, try draining your salsa in a fine-mesh strainer for a few minutes before adding it. Also, using less watery veggies like Roma tomatoes helps.
Q: Can I make this spider web taco dip ahead of time?
A: Absolutely! You can assemble the entire dip (minus the sour cream web and olive spiders) up to a day in advance. Keep it covered tightly in the fridge. About an hour before serving, add your web, spiders, and final garnishes, then let it chill for that final 30 minutes to set the web.
Q: How do I keep the guacamole from turning brown?
A: The magic of this layered dip is that the guacamole is completely sealed between the meat and the sour cream, which protects it from air (the thing that causes browning). If you’re making it ahead, just ensure you spread the sour cream layer completely to the edges to seal it in.
Q: My web broke when I was piping it! Help!
A: No worries! This is edible art, not brain surgery. If your spiral breaks, just gently reconnect it with your toothpick. If the sour cream is too thick to pipe smoothly, you can stir in a tiny teaspoon of milk or lime juice to loosen it up.

Spider Web Taco Dip Dinner
Description
Oh Beau, this Spider Web Taco Dip Dinner is pure Halloween showstopper energy! You’ve nailed the balance between cozy comfort food and creepy-cute party vibes. It’s hearty enough to be a main, fun enough to be the centerpiece, and nostalgic in the best way.
Ingredients
Ingredients
-
1 lb ground beef or turkey (or plant-based crumble)
-
1 packet taco seasoning (or 2–3 tbsp homemade blend)
-
1 can (16 oz) refried beans (pinto or black)
-
1 cup sour cream (+ extra for piping web, or use Greek yogurt)
-
1 cup guacamole (store-bought or 2 ripe avocados + lime + salt)
-
1 ½ cups salsa (chunky, drained if watery)
-
1 cup shredded cheddar cheese (or Mexican blend)
-
½ cup chopped tomatoes (Roma recommended)
-
¼ cup sliced black olives (for garnish + spiders)
-
¼ cup chopped green onions
-
Tortilla chips (sturdy, restaurant-style for dipping)
Instructions
-
Cook the Meat:
-
In a skillet over medium-high heat, brown the ground beef/turkey (7–8 min).
-
Drain excess fat. Stir in taco seasoning + ¼ cup water. Simmer 2–3 min until thickened.
-
-
Layer the Dip (in a 9×13 dish or deep platter):
-
Layer 1: Refried beans (warm slightly for easier spreading).
-
Layer 2: Seasoned meat.
-
Layer 3: Guacamole (creates a barrier).
-
Layer 4: Sour cream (smooth it for web effect).
-
Layer 5: Salsa.
-
Layer 6: Cheese.
-
Layer 7: Garnish with chopped tomatoes, olives, green onions.
-
-
Make the Web:
-
Fill a zip-top bag with extra sour cream, snip a tiny corner.
-
Pipe a spiral from center outward.
-
Drag a toothpick from center to edge in 6–8 spots to create web effect.
-
-
Add the Spiders:
-
Use olive halves for bodies.
-
Slice thin strips for legs. Arrange on web.
-
-
Chill (30 min):
-
Cover and refrigerate so layers set and flavors meld.
-
-
Serve:
-
Place in the center of your table, surrounded by tortilla chips.
-
Optional: serve chips in a Halloween cauldron for extra flair.
-
Nutrition
- Calories: 340 Cal per serving
- Carbohydrates: 20g
Nutritional Information*
*This is an estimate per serving (based on 8 servings), using 90/10 lean ground beef and standard ingredients. Values can vary based on your specific brands and substitutions.
- Calories: 340
- Protein: 18g
- Carbohydrates: 20g
- Fat: 22g
Prep Time: 20 minutes | Chill Time: 30 minutes | Serves: 6-8
Final Thoughts: A New Halloween Tradition is Served
And just like that, you’ve done it! You’ve conjured up a dinner that’s equal parts playful, delicious, and downright memorable. This Ghoulish Shepherd’s Pie is more than just a meal; it’s an experience. It’s the laughter that erupts when you bring it to the table. It’s the joy of seeing those little peppercorn eyes staring back at you. It’s the warm, comforting feeling of sharing something made with love (and just the right amount of spooky fun).
This recipe is proof that you don’t need a witch’s cauldron or a pantry full of obscure ingredients to create Halloween magic. All you need is a little creativity, a few kitchen staples, and the willingness to play with your food. Whether this becomes your new Halloween Eve tradition or just a wonderfully weird Wednesday night dinner, it’s a reminder that the best moments are often the ones we create around the table.

Ghostly Chicken Pot Pie
Spooky Season Just Got Cozier: Welcome to Ghostly Chicken Pot Pie!
Hey friends, Beau here from Feastical! Is there anything better than that moment you pull a golden, bubbling chicken pot pie out of the oven? The smell of buttery pastry and savory herbs fills the whole house, promising a hug in every single bite. It’s the ultimate comfort food, the culinary equivalent of your favorite cozy sweater. But what if we took that beloved classic and gave it a little Halloween makeover? Enter the star of tonight’s dinner table: the Ghostly Chicken Pot Pie.
This isn’t just dinner; it’s an experience. We’re taking that same soul-soothing, creamy filling loaded with tender chicken and sweet vegetables and tucking it all under a blanket of adorable, flaky ghost-shaped pastry. It’s festive without being fussy, cute without compromising on that deep, satisfying flavor we all crave. Whether you’re hosting a Halloween party, looking for a fun way to get the kids excited about dinner, or just want to treat yourself to something special, this recipe is your new go-to. So, tie on your favorite apron, put on a spooky playlist, and let’s turn a cozy classic into a hauntingly delicious masterpiece. No tricks here, folks—just the treat of a perfect meal.
A Pie for the Storybooks: My First Haunted Kitchen
This recipe always takes me back to my first Halloween in my own place. I wanted to host a dinner party that was more “charming spooky” than “jump-scare terrifying.” I’d mastered my grandma’s classic pot pie recipe—it was my security blanket dish, the one I could make with my eyes closed. But I wanted to add a dash of personality, a wink of fun. As I was rolling out the puff pastry, I absentmindedly cut a little crescent shape from the corner. It looked… like a little ghost boo-ing! A lightbulb went off.
I spent the next hour with a paring knife and a steady hand, crafting a fleet of wobbly, imperfect pastry ghosts. They weren’t pretty, but they were full of heart. When I pulled that pie out of the oven and my friends saw the golden, slightly lopsided specters floating on a sea of creamy filling, the room erupted in laughter and genuine delight. That’s the magic of food, isn’t it? It’s not just about feeding people; it’s about creating a moment, a memory. That silly, heartfelt pie became an instant tradition, and now, I’m so excited to share that moment with you.
Gathering Your Ghoulish Crew: The Ingredients
Here’s everything you’ll need to conjure up this spirit-filled supper. Don’t stress about being exact—cooking is about feeling, so use this as your roadmap and make it your own!
- 2 cups cooked, shredded chicken: This is your pie’s superstar! I love using the meat from a rotisserie chicken for maximum flavor and ease, but leftover roasted chicken or even gently poached and shredded breast meat works beautifully.
- 1 cup frozen peas and carrots: The classic duo! Using frozen is my go-to chef hack—they’re picked at peak freshness and pre-chopped, saving you so much time. No need to thaw!
- 1/2 cup corn (optional): I’m a big fan of adding corn for a little pop of sweetness and color. Feel free to skip it or swap in another veggie like green beans or diced celery.
- 1/3 cup butter: This is the base of our luxurious sauce. Unsalted is best so we can control the seasoning ourselves.
- 1/3 cup all-purpose flour: Our thickening agent! It teams up with the butter to make a roux, which gives the filling its perfect, gravy-like body.
- 1 3/4 cups chicken broth: Use a good-quality broth for the best flavor. This forms the liquid base of our sauce.
- 2/3 cup milk: Whole milk will give you the creamiest, richest result, but 2% works just fine too. This adds a touch of creaminess to balance the broth.
- Salt and pepper to taste: Season as you go! Taste your filling before it goes into the dish and adjust accordingly.
- 1 tsp garlic powder & 1 tsp onion powder: These pantry powerhouses add a deep, savory backbone to the filling. They distribute flavor more evenly than fresh in this application, but a finely minced garlic clove sautéed with the butter is also divine.
- 1 sheet puff pastry or 1 can biscuit dough: The ghost maker! Puff pastry bakes up incredibly flaky and impressive, while biscuit dough yields a softer, more dumpling-like top. Both are fantastic—it just depends on your texture preference. Thaw puff pastry according to package directions.
- 1 egg (for egg wash, optional): This is the secret to a gorgeous, golden-brown, shiny finish on your pastry ghosts. A quick brush is totally worth it!
Conjuring the Casserole: Let’s Make Some Magic!
Alright, team! Let’s fire up the oven and get cooking. Follow these steps, and you’ll have a spellbinding pot pie in no time.
- Preheat and Prepare: Crank your oven to 400°F (200°C). This high heat is key to getting that pastry puffed and golden. While it’s heating, grab a 9-inch pie dish or an 8×8 baking dish—no need to grease it. This is also the perfect time to roll out your puff pastry if you’re using it.
- Create the Roux (Don’t Panic!): In a medium saucepan, melt the 1/3 cup of butter over medium heat. Once it’s foaming, sprinkle in the 1/3 cup of flour. Now, whisk constantly for a full minute. You’re toasting the flour and cooking out that raw taste, which is what will give your sauce a beautiful nutty flavor and perfect thickness. This mixture is called a roux, and it’s your sauce’s best friend.
- Whisk in the Liquids: Here’s the only tricky part: slowly stream in the chicken broth and milk while whisking like your pie depends on it (it does!). Whisking continuously prevents lumps from forming. Keep cooking and whisking for 3-5 minutes until the sauce thickens beautifully. It should coat the back of a spoon. You’ve just made a gorgeous velouté sauce! Chef high-five.
- Bring in the Band: Turn the heat down to low. Stir in the shredded chicken, frozen peas and carrots, corn, garlic powder, onion powder, salt, and pepper. Mix everything until it’s one happy, creamy family. Give it a taste—does it need more pepper? A pinch more salt? Adjust it now. Pour this glorious filling into your waiting baking dish.
- Summon the Spirits: On a lightly floured surface, roll out your pastry or biscuit dough slightly. Using a knife or a ghost-shaped cookie cutter, cut out your spooky shapes. Get creative! You can make big ghosts, little ghosts, even a few “boo!” shapes. Don’t worry about perfection—wobbly ghosts have more character! Arrange them on top of the filling. They can overlap a little; it adds to the haunted effect.
- The Golden Touch (Egg Wash): If you’re using it, beat your egg with a tablespoon of water. Gently brush this over your pastry ghosts. This is what will make them bake up shiny and picture-perfect.
- Bake to Perfection: Slide your masterpiece into the preheated oven and bake for 20-25 minutes. You’re waiting for two things: the pastry to be puffed and a deep golden brown, and the filling to be bubbly around the edges. Your kitchen will smell absolutely incredible.
- Rest is Best: I know it’s hard, but let the pie sit for 5-10 minutes after pulling it out of the oven. This allows the filling to set slightly, so it doesn’t run everywhere when you scoop out your first serving. It’s worth the wait, I promise!
Setting the Haunted Table: How to Serve
Presentation is part of the fun! Place the baking dish right in the center of the table and let everyone admire your handywork. Use a large spoon to scoop out servings, making sure each person gets at least one full ghost on their portion. This pie is a complete meal all on its own, but for a true feast, I love serving it with a simple arugula salad with a bright lemon vinaigrette to cut through the richness. And of course, a big glass of cold apple cider or a pumpkin ale for the adults completes the autumnal vibe perfectly.
Boo-tiful Twists: Recipe Variations
Feel like switching it up? This recipe is a fantastic canvas for your creativity!
- Turkey Twist: Use leftover Thanksgiving turkey instead of chicken for a brilliant post-holiday meal.
- Vegetarian Phantom: Skip the chicken and use a hearty mix of mushrooms, leeks, and potatoes for a deeply savory vegetarian version. Use vegetable broth instead of chicken.
- Biscuit Boos: If you used puff pastry, try it with flaky biscuit dough next time (or vice-versa)! The texture is completely different and so delicious.
- Spicy Specter: Add a pinch of cayenne pepper to the filling or a dash of hot sauce to give your pie a little warm, spicy kick.
- Potato Topping: Not a pastry person? Swap the ghosts for a layer of mashed potatoes, pipe them into spooky shapes, and bake until golden for a Shepherd’s Pie hybrid!
Beau’s Kitchen Chronicles: Chef’s Notes
This recipe has evolved so much since that first wobbly-ghost year. I’ve learned that the best tool for cutting the ghosts is actually a small paring knife—it gives you way more control than a big cookie cutter. I also used to precook my vegetables, but I discovered that the frozen ones cook perfectly in the sauce during baking, which saves a step! My favorite kitchen fail was the time I got overzealous with the pepper and created a “Spicy Ghost” that made us all cough. We still laughed through the tears. The moral of the story? Taste as you go, and remember that even the “mistakes” usually taste pretty darn good. Food is love, remember? Even if it’s a little haunted.
Ghostly Guidance: FAQs & Troubleshooting
Q: My sauce is too thin! How can I thicken it up?
A: Don’t worry, this happens to the best of us. If your filling is too runny after mixing, let it simmer on the stove for a few more minutes before transferring it to the baking dish. It should thicken as it cooks. If it’s already in the dish, you can mix a tablespoon of cornstarch with two tablespoons of cold water into a slurry and stir it into the warm filling before adding the pastry top. Return it to the stove to heat until thickened, then proceed.
Q: Can I make this ahead of time?
A: Absolutely! You can prepare the filling completely, let it cool, and store it in the fridge for up to two days. When you’re ready to bake, let the filling come to room temperature for a bit (or warm it slightly on the stove), top with your pastry ghosts, and bake. You may need to add a few extra minutes to the baking time since it’s starting cold.
Q: My pastry ghosts sunk into the filling! What did I do wrong?
A> This usually means the filling was too hot when you placed the pastry on top, or the pastry was too thin. Make sure your filling has cooled slightly (it doesn’t have to be cold, just not bubbling hot) before adding the topping. Also, ensure your pastry isn’t rolled paper-thin; a little thickness helps it float.
Q: Can I freeze the assembled pot pie?
A> I don’t recommend freezing it with the puff pastry topping already on, as it can get soggy. Instead, freeze the filling alone in an airtight container for up to 3 months. Thaw in the fridge overnight, then top with fresh pastry and bake as directed.

Ghostly Chicken Pot Pie
- Total Time: 45 minutes
Description
A cozy classic just got a Halloween glow-up! Imagine tender chicken, creamy veggies, and a buttery sauce tucked under golden, ghost-shaped pastry. It’s comforting, festive, and fun—perfect for a spooky dinner party or a cozy night in. Get ready for a pie that’s as cute as it is delicious.
Ingredients
-
2 cups cooked shredded chicken (rotisserie works great)
-
1 cup frozen peas & carrots
-
1/2 cup corn (optional)
-
1/3 cup butter
-
1/3 cup all-purpose flour
-
1 3/4 cups chicken broth
-
2/3 cup milk (whole preferred)
-
1 tsp garlic powder
-
1 tsp onion powder
-
Salt & pepper to taste
-
1 sheet puff pastry (or 1 can biscuit dough)
-
1 egg (for egg wash, optional)
Instructions
-
Preheat oven to 400°F (200°C).
-
Make the sauce: Melt butter in a saucepan. Whisk in flour, cook 1 min. Slowly whisk in broth + milk until thickened (3–5 min).
-
Fill it up: Stir in chicken, peas, carrots, corn, garlic & onion powder, salt & pepper. Pour into a pie dish.
-
Ghostly topping: Roll out pastry. Cut ghost shapes with a knife or cookie cutter. Arrange on filling. Brush with egg wash if using.
-
Bake: 20–25 min, until pastry is golden and filling is bubbling.
-
Cool slightly before serving so the filling sets.
- Prep Time: 20 min
- Cook Time: 25 min
Nutrition
- Calories: 390 Cal
- Carbohydrates: 26g
- Protein: 28g
Nutritional Info (Approximate, per serving)
Calories: 390 | Protein: 28g | Carbohydrates: 26g | Fat: 20g
Please note: This is an estimate and can vary significantly based on specific ingredients used (e.g., type of milk, specific brand of pastry, exact cuts of chicken).
Final Thoughts from Beau
So there you have it, friends—your guide to turning a simple supper into a spooky, spectacular event. This Ghostly Chicken Pot Pie is more than just a recipe; it’s an invitation to play with your food, to create a moment of pure, unadulterated joy around the dinner table.
Remember, it doesn’t have to be perfect. In fact, the wobbly, lopsided ghosts are often the ones with the most character. The real magic isn’t in a flawless pastry cutout, but in the laughter that fills your kitchen, the delicious smell that welcomes everyone home, and the shared experience of a meal made with a little bit of love and a whole lot of fun.

Creepy Cabbage Rolls
Spooky, Savory, and Seriously Good: Meet Your New Halloween Favorite
Hey there, friends! Beau here, welcoming you back to my kitchen at Feastical. You know me—I’m all about those recipes that feel like a warm hug, the kind of food that gathers everyone around the table laughing and sharing stories. But sometimes, a little playful mischief is in order, especially when there’s a full moon on the horizon and the air gets that crisp, spooky-ooky feel. That’s exactly why I’m so dang excited to share these Creepy Cabbage Rolls with you today.
Now, don’t let the name fool you. There’s nothing truly frightening about these guys, except for how quickly they’ll disappear from your plate! We’re taking a beloved classic—the humble, hearty, deeply comforting cabbage roll—and giving it a fun Halloween makeover that’s perfect for a festive dinner. Imagine: tender cabbage leaves, soft from a quick boil, wrapped around a savory, well-seasoned filling of meat and rice. They’re nestled in a baking dish, smothered in a rich, tangy tomato sauce, and then… the pièce de résistance… they get a set of eerie, edible “eyeballs” made from simple black olive slices that stare right back at you from the depths of the oven.
It’s a dish that’s equal parts delicious and delightfully creepy, guaranteed to be the talk of your Halloween party. It’s not just about the ‘wow’ factor, though. This is real food, my kind of food. It’s satisfying, relatively simple to make, and fills your home with the most incredible aroma. So, whether you’re a seasoned pro who knows your way around a head of cabbage or a kitchen newbie ready to tackle your first food-based craft project, I’ve got your back. Grab your favorite apron, and let’s turn up the Halloween spirit and create something magically delicious together.
A Rolled-Up Memory: Why This Dish Haunts Me (In the Best Way)
This recipe takes me right back to my grandma’s kitchen, though she’d probably get a kick out of our spooky twist. Her version was strictly a Sunday supper affair—serious, savory, and simmered for hours. But my cousin Leo and I, we were a couple of little monsters. One particularly blustery October afternoon, we were “helping” her in the kitchen (which mostly involved stealing bits of raw ground beef when she wasn’t looking). We were also deep into planning our Halloween costumes, arguing over who was scarier, a vampire or a mummy.
As Grandma laid out the blanched cabbage leaves, they reminded Leo of old mummy wrappings. Before we knew it, we were sneakily placing a single black olive in the center of one roll before she folded it up, giggling like mad scientists. When it came out of the oven, we served it to our unsuspecting dad. His face when he cut into his dinner and found a single, solitary “eye” staring up at him was absolutely priceless. He burst out laughing, and from that year on, our traditional Halloween dinner was born. It’s a silly, sweet memory that I’ve baked right into this recipe, and I hope it helps you create some of your own.
Gathering Your Potion Ingredients
Here’s everything you’ll need to conjure up these deliciously creepy creations. Don’t stress about having the exact thing—cooking is about creativity, so I’ve included my favorite swaps and chef secrets right here.
- 1 large head green cabbage: This is our vessel, our edible wrapper. You want one that feels heavy for its size with crisp, vibrant outer leaves. Chef’s Tip: No cabbage? Large, sturdy Swiss chard or collard green leaves make a fantastic (and equally delicious) stand-in.
- 1 lb ground beef or turkey: The heart of our filling. I use 85/15 beef for great flavor without being too greasy, but lean turkey is a fabulous lighter option.
- 1/2 cup cooked rice: This helps stretch the meat and gives the filling a wonderful texture. Use white, brown, or even cauliflower rice for a low-carb version. Chef’s Insight: Day-old, slightly dry rice works best as it absorbs the meat juices without making the filling mushy.
- 1 small onion, finely chopped: The aromatic base that builds so much flavor. Yellow or white onion works perfectly here.
- 2 garlic cloves, minced: Because is it even dinner without garlic? Not in my kitchen!
- 1 large egg: Our binding agent. It holds the meat and rice together so your rolls don’t fall apart during their baking spell.
- 2 cups tomato sauce: The cozy, red blanket we tuck our rolls into. Use your favorite jarred marinara for ease, or a simple pureed canned tomato sauce.
- 1 tsp paprika: Sweet or smoked paprika adds a lovely depth and a hint of color. Smoked paprika will give it a subtly spooky, smoky note.
- Salt and pepper to taste: The essential seasonings. Taste your raw filling mix (a little won’t hurt!) and adjust until it sings.
- 10–12 black olive slices: The star of the show! These are our creepy eyeballs. Get the pre-sliced kind for ultimate ease.
Weaving Your Kitchen Magic: A Step-by-Step Spell
Follow these steps, and you’ll have a dish that’s both spellbinding and scrumptious. Read through once before you start—it’s my number one hack for a smooth cooking experience!
Step 1: Prepare the Cabbage Leaves. Bring a large pot of salted water to a rolling boil. Carefully lower the whole head of cabbage into the water. Let it boil for about 8-10 minutes. You’ll see the outer leaves start to become soft and pliable. Using tongs, carefully peel off about 10-12 of the large outer leaves. If the inner leaves are still too firm, pop the head back in the water for another few minutes and repeat. Chef’s Hack: Use a knife to make a small, shallow cut around the core at the bottom first—this often helps the leaves release more easily! Lay the leaves flat on a kitchen towel to drain and cool. Once they’re cool enough to handle, use a paring knife to shave down the thick, tough part of the center stem on each leaf. This makes rolling a total breeze.
Step 2: Concoct the Filling. In a large mixing bowl, combine the ground meat, cooked rice, chopped onion, minced garlic, egg, paprika, and a generous pinch of salt and pepper. Now, get your hands in there! Mix everything together until it’s just combined. Chef’s Commentary: Over-mixing can make the meat mixture tough, so mix with a light hand until you don’t see streaks of egg anymore.
Step 3: Roll ‘Em Up! Grab a prepared cabbage leaf and place it on a clean surface with the stem end facing you. Spoon about 2-3 tablespoons of the meat mixture onto the bottom third of the leaf. Shape it into a little log. Fold the bottom of the leaf up and over the filling, then fold in the sides (like you’re folding a burrito!), and roll it up tightly away from you to encase the filling completely. The leaf should stick to itself. Place the roll seam-side down in a 9×13 inch baking dish. Repeat the process until all your filling is gone!
Step 4: Sauce and Bake. Once all your little mummy bundles are snug in the dish, pour the tomato sauce evenly over the top. You can sneak a little water (about 1/4 cup) into the empty sauce jar, swirl it around, and pour that in too—gets every last bit of sauce and adds just enough liquid to keep everything moist. Cover the dish tightly with aluminum foil. This is crucial! It traps the steam and gently cooks the rolls, making the cabbage incredibly tender. Bake in a preheated 375°F (190°C) oven for 45 minutes.
Step 5: Add the EYES! This is the fun part. After 45 minutes, carefully remove the foil (mind the hot steam!). The rolls should be cooked through and smelling amazing. Now, press two black olive slices onto the top of each roll to create the creepy eyeball effect. Pop the dish back in the oven, uncovered, for a final 10 minutes to let everything set and the “eyes” warm through.
Plating Your Masterpiece
Presentation is part of the fun! Use a large spoon to lift out each creepy cabbage roll and place it on a plate. Be sure to spoon plenty of that delicious tomato sauce from the pan over the top. The “eyeballs” should be staring proudly up at your guests. For a full Halloween feast, serve them alongside some “witch’s finger” breadsticks or on a bed of “monster mash” (creamy garlic mashed potatoes). Don’t forget the dramatic dim lighting and a few plastic spiders for full effect!
Brew Up Your Own Variation
The beauty of this recipe is its flexibility. Don’t be afraid to put your own spin on it!
- Meatless Monster: Swap the ground meat for a mixture of cooked lentils and finely chopped mushrooms for a hearty vegetarian version.
- Fiery Phantom: Add some heat! Mix 1/2 teaspoon of crushed red pepper flakes or a finely chopped jalapeño into the filling.
- Spooky Spanish Twist: Use ground chorizo instead of beef and add a pinch of saffron to the rice for a deeply flavorful, reddish-orange filling.
- Cheesy Ghoul: Who doesn’t love cheese? Place a small cube of mozzarella or a sprinkle of feta in the center of the meat filling before you roll it up for a delicious, melty surprise.
Beau’s Kitchen Notes
This recipe has evolved so much from that first sneaky olive my cousin and I hid. I’ve made it probably a hundred times since, for everything from kids’ Halloween parties to cozy adult dinners. The biggest lesson? Don’t panic if your first few rolls tear a little. Cabbage leaves can be forgiving, and you can always use a second, smaller leaf to patch it up—think of it as adding extra bandages to your mummy! I also love making a double batch and freezing half before baking. They make the best “I don’t feel like cooking” night dinner—just thaw, sauce, and bake. It’s a dish that’s meant to be fun, so put on some spooky tunes, don’t take it too seriously, and enjoy the process.
Your Questions, Answered
Q: My cabbage leaves keep tearing when I try to peel them. Help!
A: This is the most common hurdle! First, ensure you’re boiling the cabbage long enough. The outer leaves should peel off very easily. If they’re resisting, let the head boil for another 2-3 minutes. Also, using that knife to cut around the core base is a game-changer. And remember, a small tear isn’t the end of the world—the rolls will still taste amazing.
Q: Can I make these ahead of time?
A: Absolutely! You can assemble the rolls completely (without baking) up to a day in advance. Keep them covered tightly in the baking dish in the fridge. You might need to add a few extra minutes to the baking time since you’re starting from cold. They also freeze beautifully for up to 3 months.
Q: How do I know when the rolls are done cooking?
A: The internal temperature of the meat filling should reach 160°F (71°C) if using beef or 165°F (74°C) if using turkey or poultry. If you don’t have a thermometer, the cabbage will be very tender and the sauce will be bubbling actively around the edges.
Q: My filling is a bit bland. What can I do?
A: Seasoning is key! Don’t be shy with the salt and pepper in the filling mix. Next time, try adding other herbs like dried oregano or thyme, or a splash of Worcestershire sauce for a big umami boost.
Creepy Cabbage Rolls
- Total Time: 1 hr 20 minutes
Description
Classic cabbage rolls get a Halloween twist! Tender leaves wrap around a savory meat-and-rice filling, simmered in rich tomato sauce, then topped with eerie black olive “eyeballs.” Equal parts cozy and creepy, this dish is guaranteed to steal the spotlight at your Halloween dinner.
Ingredients
For the Rolls
-
1 large head green cabbage (or Swiss chard/collards)
-
1 lb ground beef or turkey
-
½ cup cooked rice (white, brown, or cauliflower rice)
-
1 small onion, finely chopped
-
2 garlic cloves, minced
-
1 large egg
-
1 tsp paprika (sweet or smoked)
-
Salt & pepper to taste
For the Sauce
-
2 cups tomato sauce (or favorite marinara)
-
¼ cup water
For the Spooky Touch
-
10–12 black olive slices (the “eyeballs”)
Instructions
-
Prep Cabbage: Boil whole cabbage in salted water 8–10 min. Peel off 10–12 softened leaves. Trim thick stem ribs.
-
Mix Filling: Combine ground meat, rice, onion, garlic, egg, paprika, salt & pepper. Mix gently until combined.
-
Roll ‘Em Up: Place 2–3 tbsp filling on bottom of each leaf. Fold sides in, roll tightly like a burrito. Place seam-side down in baking dish.
-
Sauce It: Pour tomato sauce + water evenly over rolls. Cover dish with foil.
-
Bake: Cook at 375°F (190°C) for 45 min.
-
Add Eyes: Remove foil, press 2 olive slices on top of each roll. Return to oven uncovered for 10 more minutes.
-
Serve: Spoon extra sauce over rolls, let the “eyeballs” stare back at your guests, and enjoy!
Notes
-
Meatless Monster: Swap meat for lentils + mushrooms.
-
Fiery Phantom: Add jalapeño or red pepper flakes to filling.
-
Spanish Twist: Use chorizo + saffron rice.
-
Cheesy Ghoul: Hide a cube of mozzarella in the center of the filling.
- Prep Time: 25 minutes
- Cook Time: 55 minutes
Nutrition
- Calories: 320Cal per serving
- Carbohydrates: 18g
- Protein: 24g
Nutritional Information (Per Serving, Approximate)
Servings: 5 | Calories: 320 | Protein: 24g | Carbohydrates: 18g | Fat: 16g
Final Thoughts from Beau’s Kitchen
Well, friends, there you have it—your ticket to a Halloween dinner that’s equal parts playful and profoundly satisfying. These Creepy Cabbage Rolls are so much more than just a meal; they’re an experience. They’re a chance to gather your own little coven of friends or family, roll up your sleeves, and create something that’s guaranteed to spark laughter, stories, and maybe even a playful shriek or two.
Remember, the real magic isn’t just in the black olive eyeballs or the spooky presentation—it’s in the act of creating together. It’s in the warmth of the oven on a chilly autumn night and the incredible aroma that fills your kitchen. It’s in the silly traditions we start and the memories we make, just like the one I still cherish with my cousin Leo and my grandma.