Your New Secret Weapon: High-Protein Teriyaki Chicken Fried Rice
Hey there, friend! Beau here, from Feastical. Let’s talk about that universal, mid-week dilemma: you’re staring into the fridge, tired, maybe a little hangry, and the siren song of the takeout app is getting louder by the second. We’ve all been there. The promise of something savory, saucy, and satisfying is just a few taps away… but so is the regret of a meal that leaves you feeling sluggish and blows your wellness goals out of the water.
What if I told you there’s a third option? One that gives you all the glossy, umami-packed joy of takeout teriyaki chicken, but packs a powerful protein punch, keeps your energy steady, and sets you up for a winning week? Enter my High-Protein Teriyaki Chicken Fried Rice Meal Prep. This isn’t just a recipe; it’s your ticket to reclaiming your lunch break and fueling your days with something you’ll genuinely look forward to.
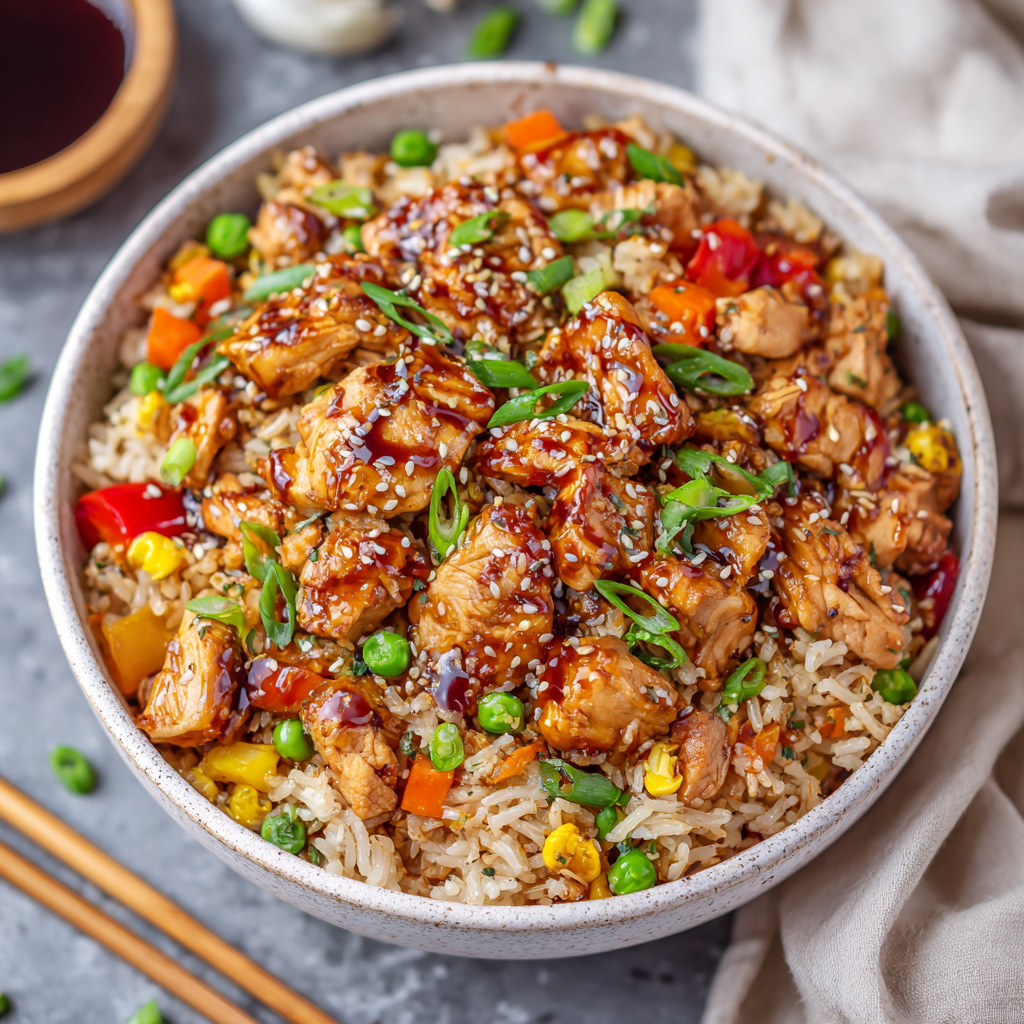
We’re talking tender, air-fried chicken draped in a sticky-sweet homemade teriyaki glaze that’s better than anything from a packet. It sits atop a mountain of savory fried rice, flecked with scrambled egg and crisp-tender veggies. Each container is a perfectly balanced 550-calorie powerhouse with a whopping 50 grams of protein. It’s designed for the busy bee, the gym-goer, the parent on-the-go, or anyone who believes healthy eating should never mean sacrificing flavor. So, tie on your apron (or don’t, I’m not the boss of you), and let’s build a meal prep hero that’s about to become a weekly staple.
The Takeout Pivot That Started It All
This recipe was born out of pure necessity (and a slight obsession). A few years back, I was deep in a project, working crazy hours, and my meal prep had… well, let’s just say it had seen better days. I was surviving on sad salads and bland grilled chicken. One particularly grueling Wednesday, I caved and ordered teriyaki chicken and fried rice. That first bite was a revelation—a warm, salty-sweet hug that instantly lifted my spirits.
But after, I felt that all-too-familiar food coma setting in. I looked at the nutrition info (yikes) and realized I’d consumed enough sodium for a small army and very little of the protein I needed to keep my energy up. A lightbulb went off. “Why can’t I have that incredible flavor in a version that makes me feel awesome?” I hit the kitchen with a mission: recreate that takeout magic, but better. After a weekend of tinkering—adjusting sauce ratios, testing cooking methods for the chicken, perfecting the rice texture—this glorious hybrid was born. It became my secret weapon, the meal I’d pack with pride, knowing I had a delicious victory waiting for me at lunchtime. It’s the happy compromise your taste buds and your goals have been waiting for.
Gathering Your Flavor Arsenal
Here’s everything you’ll need to build this better-than-takeout masterpiece. I’ve added my chef-y notes and swaps to make this recipe work for your kitchen.
- 700g (about 1.5 lbs) Chicken Breast, diced: Our lean protein superstar. Dicing it ensures quick, even cooking and perfect bite-sized pieces. Chef’s Tip: For even more tender chicken, brine it for 20 minutes in 2 cups of water + 1 tbsp salt before dicing and proceeding.
- Garlic Salt, to taste: An easy flavor booster for the chicken. If you don’t have it, use regular salt and a pinch of garlic powder.
- 2 tablespoons Cornstarch: The magic dust! This is our key to getting that crispy, golden exterior on the air-fried chicken without deep-frying. It also helps thicken our sauce beautifully.
- 100g Frozen Mixed Vegetables (peas, carrots, corn): The ultimate convenience hack. They’re pre-chopped, nutritious, and add color and sweetness. No need to thaw!
- 3 Eggs: For richness, extra protein, and that classic fried rice texture. They’re our “mix-in” that makes the rice feel special.
- 600g Cooked Rice (cold, day-old is BEST): This is non-negotiable for perfect fried rice! Freshly cooked rice is too moist and steamy, leading to a mushy mess. Cold, day-old rice has dried out a bit, giving you separate, perfectly fryable grains. Brown rice or cauliflower rice work great here too (see variations!).
- 2 tablespoons Soy Sauce (for the rice): Our primary source of savory, umami depth. Use low-sodium if you’re watching salt intake.
- 1 tablespoon Sesame Oil: The fragrant finish. That nutty aroma is the signature scent of great fried rice. Don’t sub this with another oil—it’s essential!
- Sesame Seeds (optional): For a pretty finish and a little extra crunch. A sprinkle makes it look legit.
For the Homemade Teriyaki Sauce:
- 4–5 tablespoons Soy Sauce: The salty backbone. Start with 4, you can always add more.
- 1/2 tablespoon Rice Vinegar: The subtle tang that balances the sweetness. White wine vinegar or a squeeze of lime juice works in a pinch.
- 1 tablespoon Ginger Paste & 1 tablespoon Garlic Paste: My favorite time-savers! They provide intense, instant flavor without any chopping. Freshly grated ginger and minced garlic are fabulous if you have the time.
- 3 tablespoons Honey: For that glossy, natural sweetness. Maple syrup or agave are perfect vegan swaps.
- 1 teaspoon Cornstarch: Our slurry to thicken the sauce into a gorgeous, clingy glaze.
Let’s Build Your Meal Prep Masterpiece: Step-by-Step
Ready to cook? Follow these steps and my embedded hacks for flawless results every single time.
Step 1: Cook the Chicken (The Crispy Base)
Season your diced chicken generously with garlic salt. Now, toss it in a bowl with the 2 tablespoons of cornstarch until every piece has a light, even coating. This is the secret to getting that crave-able crunch in the air fryer! Arrange the coated chicken in your air fryer basket in a single layer—don’t crowd them. Air fry at 200°C (400°F) for 12-15 minutes, shaking the basket halfway through, until golden brown and cooked through. Chef’s Hack: No air fryer? No sweat! You can achieve similar results by baking the cornstarch-coated chicken on a parchment-lined sheet pan at 425°F for 15-18 minutes.
Step 2: Prepare the Fried Rice (The Fluffy Foundation)
While the chicken cooks, heat a large non-stick skillet, wok, or pan over medium-high heat. Add your frozen veggies straight from the bag—no oil needed yet. Let them sizzle and cook for 2-3 minutes until they’re heated through and any ice crystals have evaporated. Push the veggies to one side of the pan. Add a tiny drizzle of oil to the empty space and crack in your 3 eggs. Let them set for a moment, then scramble them right there in the pan until they’re just cooked through. Now, mix the scrambled eggs in with the veggies!
Step 3: Add the Rice & Season
Crumble your cold, day-old rice into the pan, breaking up any large clumps with your fingers or a spatula. The cold rice will sizzle—that’s the sound of success! Drizzle the 2 tablespoons of soy sauce and 1 tablespoon of sesame oil over everything. Now, toss, toss, toss! Use a flipping motion to combine everything evenly and heat the rice through. This should take about 3-4 minutes. You’ll see the rice grains becoming separate and perfectly coated. Divide this glorious fried rice evenly between your 4 meal prep containers.
Step 4: Whip Up the Magic Teriyaki Sauce
In a small saucepan, combine all your teriyaki sauce ingredients: soy sauce, rice vinegar, ginger paste, garlic paste, honey, and that 1 teaspoon of cornstarch. Whisk it together well before you turn on the heat—this prevents the cornstarch from clumping. Now, place it over medium heat and bring to a simmer, whisking constantly. In just 2-3 minutes, you’ll watch it transform from a thin liquid to a beautifully glossy, slightly thickened sauce. Remove it from the heat.
Step 5: The Glorious Glaze & Assembly
By now, your chicken should be done and beautifully crispy. Add the hot chicken directly into the pan with the teriyaki sauce. Gently toss and fold until every single piece is luxuriously coated in that sticky, shiny glaze. Spoon the glazed teriyaki chicken over the bed of fried rice in each container. Finish with a sprinkle of sesame seeds for that pro touch. And there you have it—four containers of pure, protein-packed joy, ready to rock your week.
How to Serve & Savor
This meal prep is designed for grab-and-go convenience, but that doesn’t mean we can’t plate it with a little flair! When you’re ready to eat, simply reheat it in the microwave for 1.5-2 minutes, until piping hot. For a next-level lunch break, consider these fun adds:
Fresh Toppings: Keep a small container of thinly sliced green onions or chopped cilantro in the fridge. A fresh sprinkle right before eating adds a vibrant pop of color and flavor that makes it feel brand new.
The Crunch Factor: A small handful of extra sesame seeds or even some chopped, roasted peanuts or cashews tucked on the side adds an incredible contrasting texture when you’re ready to eat.
The Veggie Boost: Feel like you need some green? Serve your reheated container alongside a simple side salad of shredded cabbage or cucumber ribbons dressed with a little more rice vinegar and sesame oil. It’s the perfect crisp, cool contrast to the warm, savory rice.
The Restaurant Vibe: At home, I love to flip my container onto a real plate. Sometimes, I’ll even add a few extra steamed broccoli florets on the side. It feels like a proper, satisfying meal, not just “meal prep.”
Mix It Up! Creative Twists & Swaps
Once you’ve mastered the base recipe, the world is your teriyaki oyster! Here are some of my favorite ways to riff on this classic.
1. Protein Swap-Out: Not a chicken fan? This recipe is incredibly flexible. Try it with diced extra-firm tofu (press it well and coat in cornstarch), shrimp, lean ground turkey, or even thinly sliced sirloin steak. Adjust the cooking time accordingly.
2. Rice & Grain Alternatives:
- Cauliflower Rice: For a low-carb version, swap the white rice for 600g of riced cauliflower. Sauté it from frozen until tender and dry before adding your soy sauce and sesame oil.
- Brown Rice/Quinoa: For extra fiber and nutrients, use cold, cooked brown rice, quinoa, or a grain blend. The heartier texture is fantastic!
3. Sauce Variations:
- Spicy Teriyaki: Add 1-2 teaspoons of sriracha or a spoonful of gochujang to the sauce mixture.
- Pineapple Teriyaki: Add ¼ cup of crushed pineapple (juice included) to the sauce as it simmers. It adds a fantastic sweet-tart flavor.
- Ginger-Forward: Love ginger? Double the ginger paste in the sauce for a real zing.
4. Vegetable Deluxe: Elevate your veggie game by using a stir-fry blend with broccoli, snap peas, and water chestnuts, or add diced bell peppers and onions with the frozen mix.
Beau’s Kitchen Confidential Notes
This recipe has truly evolved in my kitchen. The first batch? Let’s just say the sauce was a salty, thin soup and the chicken was dry. The biggest game-changer was using cornstarch on the chicken before air frying. It creates a protective, crispy layer that seals in the juices—a trick I learned from my favorite Chinese cooking methods. Another “aha” moment was embracing the frozen veggie mix. As a chef, I used to turn my nose up at them, but for meal prep? They are a total genius move, locking in nutrition and saving you a ton of chopping time on a busy Sunday. This dish is a reminder that the best home cooking isn’t about being fancy; it’s about being smart, flavorful, and kind to your future self.
FAQs & Your Questions, Answered
Q: My fried rice turned out mushy! What did I do wrong?
A: This almost always comes down to the rice. You MUST use cold, day-old rice that has had time to dry out in the fridge. Freshly cooked, warm rice has too much moisture, which steams in the pan and creates a gummy texture. Plan ahead—cook your rice the night before!
Q: Can I freeze these meal prep containers?
A: You can, but with a caveat. The texture of the rice and veggies can become a bit soft and watery upon thawing and reheating. For best results, I recommend refrigerating and consuming within 4 days. If you must freeze, freeze the chicken/rice separately if possible, and reheat from frozen, adding a splash of water to help steam it back to life.
Q: Is there a substitute for the honey to make this recipe lower in sugar?
A: Absolutely! You can use a sugar-free maple syrup, or my personal favorite for a deeper flavor: a tablespoon or two of pureed dates or a splash of pineapple juice. The sauce will be less glossy but just as tasty.
Q: My sauce didn’t thicken. How can I fix it?
A: No worries! This usually means the cornstarch wasn’t fully activated. Simply mix another ½ teaspoon of cornstarch with 1 tablespoon of cold water to create a smooth slurry. Whisk this into the simmering sauce and cook for another minute. It should thicken right up.

High-Protein Teriyaki Chicken Fried Rice Meal Prep (550 Calories, 50g Protein)
Description
Your New Secret Weapon: High-Protein Teriyaki Chicken Fried Rice
Hey there, friend. Beau here from Feastical.
Let’s talk about that mid-week moment: you’re tired, you’re hungry, and the takeout app is calling your name. You want something saucy, savory, deeply satisfying… but you also don’t want the food coma, the sodium overload, or the “why did I do that?” regret.
So here’s your third option.
All the glossy, sticky-sweet goodness of teriyaki chicken.
All the comfort of fried rice.
But packed with protein, balanced macros, and meal-prep power.
This High-Protein Teriyaki Chicken Fried Rice delivers ~550 calories and 50g of protein per serving — and it actually tastes like something you’d crave.
Let’s build it.
Ingredients
For the Chicken
-
700g (1.5 lbs) chicken breast, diced
-
Garlic salt, to taste
-
2 tablespoons cornstarch
For the Fried Rice
-
600g cooked rice (cold, day-old preferred)
-
100g frozen mixed vegetables (peas, carrots, corn)
-
3 eggs
-
2 tablespoons soy sauce
-
1 tablespoon sesame oil
-
Sesame seeds (optional)
For the Homemade Teriyaki Sauce
-
4–5 tablespoons soy sauce
-
½ tablespoon rice vinegar
-
1 tablespoon ginger paste
-
1 tablespoon garlic paste
-
3 tablespoons honey
-
1 teaspoon cornstarch
Instructions
Step 1: Crispy Protein Base
-
Season diced chicken with garlic salt.
-
Toss with cornstarch until lightly coated.
-
Air fry at 200°C / 400°F for 12–15 minutes, shaking halfway through.
No air fryer? Bake at 425°F for 15–18 minutes on a lined sheet pan.
The cornstarch is key — it creates that lightly crisp exterior without deep frying.
Step 2: Build the Fried Rice
-
Heat a large skillet or wok over medium-high heat.
-
Add frozen vegetables (no oil needed yet). Cook 2–3 minutes until heated through.
-
Push veggies to one side.
-
Add a small drizzle of oil and scramble the eggs in the open space.
-
Mix eggs with veggies.
Now add your cold rice.
Break up clumps and toss thoroughly.
Drizzle:
-
Soy sauce
-
Sesame oil
Cook 3–4 minutes until heated through and grains are separate.
Divide evenly into 4 meal prep containers.
Step 3: Make the Teriyaki Sauce
In a small saucepan, whisk together:
-
Soy sauce
-
Rice vinegar
-
Ginger paste
-
Garlic paste
-
Honey
-
Cornstarch
Heat over medium, whisking constantly.
Simmer 2–3 minutes until thick and glossy.
Step 4: Glaze the Chicken
Add hot cooked chicken directly into the sauce.
Toss until evenly coated in that sticky glaze.
Spoon over fried rice.
Finish with sesame seeds.
Meal prep = complete.
Notes
Protein Swaps
-
Extra-firm tofu (press well, coat in cornstarch)
-
Shrimp
-
Lean ground turkey
-
Thin-sliced steak
Rice Alternatives
-
Brown rice
-
Quinoa
-
Cauliflower rice (cook thoroughly to remove excess moisture)
Sauce Variations
-
Add sriracha for spice
-
Add crushed pineapple for sweet-tart flavor
-
Double the ginger for extra zing
Nutritional Info (Per Serving)
Here’s a breakdown of what’s fueling your body in each delicious container. Remember, these are estimates and can vary slightly based on your specific ingredients (like the exact brand of soy sauce or honey).
- Calories: 550 kcal
- Protein: 50g (That’s a muscle-repairing, hunger-crushing powerhouse!)
- Carbohydrates: 69g (Primarily from the rice and veggies, providing lasting energy.)
- Fat: 11g (Mostly healthy, unsaturated fats from the sesame oil and eggs.)
This macro profile makes it an excellent post-workout meal, a satisfying lunch to power through an afternoon, or a balanced dinner.
Final Thoughts: Your New Secret Weapon
And there you have it, friend—your new secret weapon against boring lunches and the takeout temptation. This High-Protein Teriyaki Chicken Fried Rice is more than just a meal prep recipe; it’s a declaration that you don’t have to compromise. You can have the sticky, sweet, savory flavors you crave while still giving your body the fuel it needs to crush the rest of your week.
Imagine opening your fridge tomorrow (and the next day, and the next) to find a container of this glossy, gorgeous goodness waiting for you. No decisions, no delivery fees, no food coma—just a perfectly balanced, 50-gram-protein powerhouse that tastes as good as it makes you feel. That, my friends, is the kind of self-care that pays dividends.
So, go ahead and make a mess in your kitchen. Embrace the sizzle of cold rice hitting a hot pan. Whip up that shimmering teriyaki glaze and watch it transform simple chicken into something truly special. Pack those containers with pride, knowing you’ve just outsmarted your busiest days.
Now I want to hear from you! When you make this recipe, tag me over on [Your Social Media Handle]—I absolutely love seeing your creations. And if you put your own spin on it (maybe with that Pineapple Teriyaki twist?), drop a comment below and let the whole Feastical community know how it turned out.