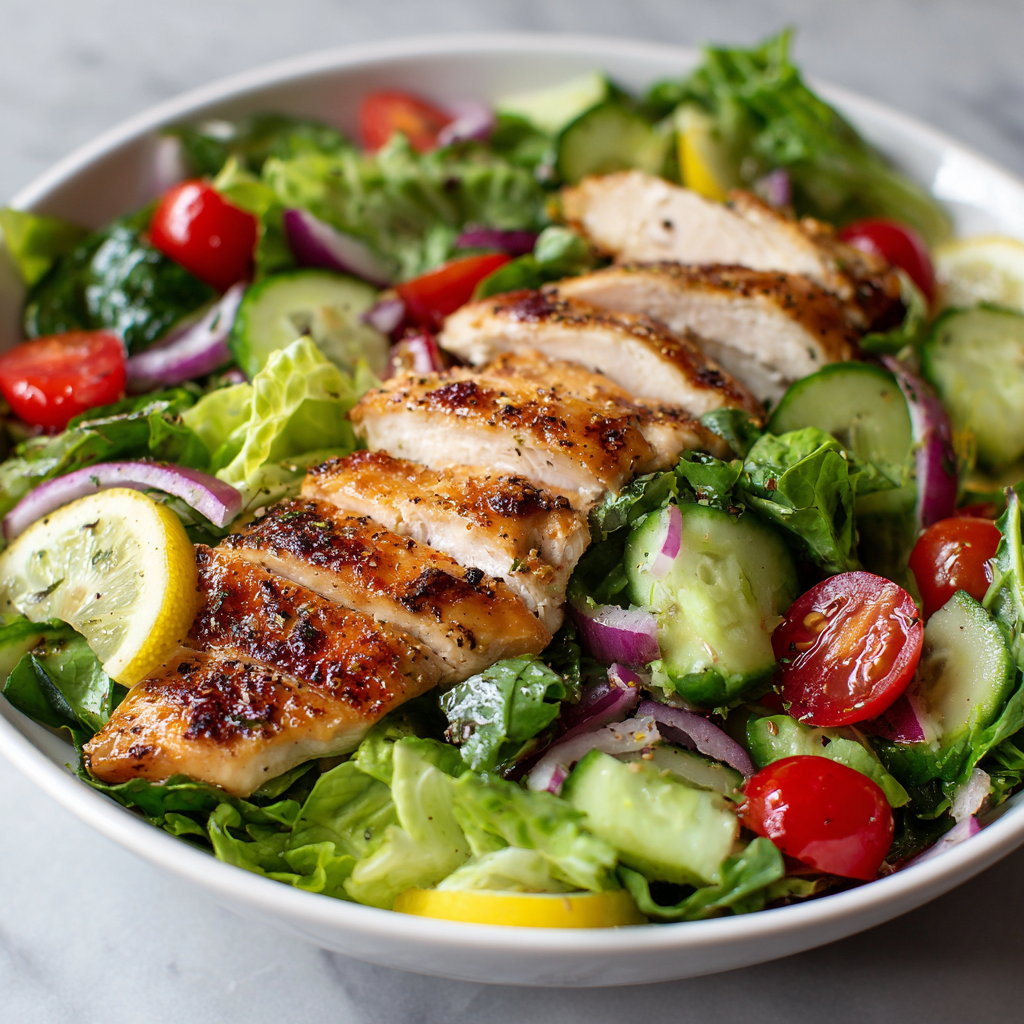
Grilled Chicken Salad with Mixed Greens : Light, Fresh & Protein-Packed
Your New Go-To Salad That’s Anything But Boring
Hey friends, Beau here! Let’s talk about the unsung hero of the kitchen: the humble salad. Now, I know what you might be thinking—”Beau, you’re the comfort food guy. Since when do you get jazzed about a pile of leaves?” Well, hear me out. A truly great salad isn’t a side thought or a punishment; it’s a vibrant, crunchy, soul-satisfying meal that makes you feel fantastic. And that’s exactly what we’re building today.
This Grilled Chicken Salad with Mixed Greens is my lunchtime MVP and my favorite easy-breezy dinner. It’s the glorious intersection of “I want something delicious” and “I want to feel amazing after eating it.” We’re talking juicy, herb-kissed grilled chicken resting on a mountain of crisp, colorful greens, all brought together with a bright, zippy lemon dressing that you’ll want to put on everything. It’s protein-packed, loaded with fresh flavor, and comes together faster than you can decide what to stream tonight. This isn’t just a salad; it’s a main event that proves healthy eating can be the most delicious part of your day. So, grab your favorite big bowl and let’s make something wonderfully fresh together.
Why This Salad? A Little Backyard Memory
This recipe takes me straight back to my grandma’s porch on a warm summer evening. She wasn’t a fancy cook, but she was a brilliant one. After my grandpa would finish grilling chicken for the family, she’d always snag an extra breast before it hit the dinner table. With a wink, she’d hustle me into the kitchen, pull out a giant wooden bowl, and we’d tear up whatever lettuces were thriving in her garden—butter lettuce, peppery arugula, whatever we had.
She’d slice that still-warm chicken, throw it on top, and make a dressing right in the salad bowl with lemon juice, oil, salt, and a suspicious amount of black pepper. We’d eat it standing at the counter, the smoky scent of the grill still in the air, arguing about baseball. It was never written down. It was just… food. Real, simple, and connected to a moment. That’s the spirit I want to bring you with this recipe. It’s more than ingredients; it’s a feeling of ease, freshness, and gathering—even if you’re just gathering with yourself for a quick, terrific meal.
Gathering Your Flavor Arsenal
Here’s everything you’ll need to build this masterpiece. Remember, great salads start with great components, so let’s chat about each one!
- 1 large boneless, skinless chicken breast (about 6-8 oz): Our protein star. Chef’s Insight: I like to “butterfly” it (slice it horizontally almost all the way through and open it like a book) for faster, more even cooking. No more dry ends and a raw middle!
- 3 cups mixed greens: The foundation! I love a blend of baby spinach (for sweetness), arugula (for a peppery kick), and romaine (for that perfect crunch). Substitution Tip: Use any hearty greens you love—kale (massage it first with a bit of dressing!), chopped Brussels sprouts, or even shaved cabbage for a slaw-style twist.
- 1/2 cup cherry tomatoes, halved: Little bursts of juicy sweetness. Pro Tip: If your tomatoes are looking a bit sad, toss the halves with a pinch of salt and let them sit for 5 minutes. It intensifies their flavor like magic.
- 1/4 cucumber, sliced: For a refreshing, hydrating crunch. I prefer English or Persian cucumbers for their thin skins and fewer seeds.
- 1/4 red onion, thinly sliced: A necessary bite of sharpness. Take the Edge Off: Soak the slices in ice water for 10 minutes. It keeps the flavor but mellows the intense sharpness beautifully.
- 1 tablespoon extra virgin olive oil (plus more for chicken): The heart of our dressing. Use the good stuff here—it makes a difference!
- Juice of 1/2 a fresh lemon: Our zesty wake-up call. Please, please use fresh lemon juice. The bottled stuff just can’t compete in a simple dressing like this.
- Salt and freshly ground black pepper: Seasoning superheroes. Don’t be shy with the pepper!
- Optional toppings (Go wild!): Avocado slices (for creamy richness), crumbled feta or goat cheese (tangy!), toasted sunflower seeds or sliced almonds (crunchy fat), or a handful of fresh herbs like dill or basil.
Let’s Build It, Step-by-Step
Ready to get cooking? Follow these steps and I’ll throw in my favorite kitchen hacks along the way.
- Prep & Season the Chicken: Pat your chicken breast completely dry with paper towels. This is the #1 secret to getting a gorgeous sear! Drizzle it lightly with olive oil, then season generously on both sides with salt and pepper. For extra flavor, feel free to add a sprinkle of garlic powder, paprika, or dried Italian herbs. Let it sit while you prep your veggies—letting it come to room temperature helps it cook evenly.
- Grill or Pan-Cook to Perfection: Heat a grill pan, outdoor grill, or regular skillet over medium-high heat. Add a tiny drizzle of oil. Once hot, add the chicken. Cook for 5-7 minutes per side, depending on thickness, until the internal temperature reaches 165°F. Chef’s Hack: Avoid moving it around! Let it get a good sear before you flip. Once done, transfer it to a cutting board and LET IT REST for at least 5 minutes. This is non-negotiable! It lets the juices redistribute so every slice is succulent.
- Chop & Assemble the Greens: While the chicken rests, add your mixed greens to a large, wide salad bowl. Scatter the halved tomatoes, sliced cucumber, and (drained) red onions over the top. Pro Tip: Use a bowl bigger than you think you need. You want room to toss everything without launching veggies across the kitchen!
- Whisk Up That Zippy Dressing: In a small bowl or jar, combine the 1 tablespoon of olive oil, the juice from half a lemon, a big pinch of salt, and several cranks of fresh black pepper. Whisk or shake until it emulsifies slightly. Taste it! Your tongue is the best tool. Need more zip? Add lemon. Too sharp? A bit more oil. Make it yours.
- Slice & Toss with Love: After its rest, slice your chicken against the grain into thin, beautiful strips. Drizzle about half the dressing over the salad greens and veggies and give it a gentle but thorough toss with your hands or salad tongs. This ensures every nook and cranny gets a kiss of flavor.
- The Grand Finale: Pile the dressed greens onto your plate or bowl. Artfully arrange the sliced grilled chicken on top. Drizzle the remaining dressing over the chicken. Now, add your optional toppings—a fan of avocado, a sprinkle of cheese, a shower of seeds. You’ve just created restaurant-quality at home.
How to Serve It Up in Style
Presentation is part of the joy! I love serving this salad in a wide, shallow bowl—it lets all the beautiful colors shine. For a true “chef at home” touch, place a handful of greens on the plate first, then use your hands to loosely pile the rest in the center, creating height. Lay the chicken slices slightly overlapping on one side. Scatter your toppings so you get a bit of everything in each forkful.
This salad is a complete meal on its own, but if you’re serving a crowd or want something extra, it pairs wonderfully with a crusty baguette to sop up any leftover dressing, a cup of creamy tomato soup, or even some crispy roasted sweet potato wedges on the side. For drinks, I’m a fan of sparkling water with extra lemon, a crisp white wine, or a lightly hopped pale ale.
Make It Your Own: 5 Flavor Twists
This recipe is your playground. Here are some of my favorite ways to remix it:
- Mediterranean Fiesta: Swap the lemon dressing for a garlicky Greek yogurt tzatziki sauce. Add kalamata olives, diced bell pepper, and extra feta. Cucumber moves from garnish to co-star!
- BBQ Ranch Swing: Brush the chicken with your favorite BBQ sauce in the last minute of grilling. Use a creamy buttermilk ranch dressing and add roasted corn, black beans, and crispy tortilla strips on top.
- Asian-Inspired Zing: Marinate the chicken in soy sauce, ginger, and a touch of honey. For the dressing, whisk together sesame oil, rice vinegar, lime juice, and a dab of miso. Top with mandarin orange segments, chopped peanuts, and cilantro.
- Go Vegetarian: Replace the chicken with a can of rinsed chickpeas, patted dry and roasted in the oven with olive oil and smoked paprika until crispy. Or, use marinated and grilled portobello mushroom caps.
- Bold & Berry: Perfect for summer. Use a balsamic vinaigrette, add fresh strawberries or blueberries, candied pecans, and swap the feta for creamy goat cheese.
A Few More Thoughts From My Kitchen
This recipe has been a constant in my rotation for years, and it’s evolved in the silliest ways. I once, in a frantic lunch rush, used pre-seasoned fajita chicken strips from the grocery store. Was it gourmet? Nope. Was it still a delicious, healthy-ish meal in 5 minutes? Absolutely. The point is to feed yourself well, not to be perfect.
I also highly recommend making an extra chicken breast or two when you fire up the grill. Having that ready-to-go protein in the fridge is a game-changer for quick salads, wraps, or grain bowls throughout the week. And that dressing? Double or triple it. Keep it in a jar. Your future self will thank you when you can instantly upgrade any meal with a quick shake and pour.
Your Questions, Answered
Q: My chicken always turns out dry. What am I doing wrong?
A: The twin culprits are usually overcooking and not resting. Invest in a cheap digital meat thermometer—pull the chicken at 165°F. And that resting period is crucial! Also, try brining it for 30 minutes in saltwater before cooking for incredibly juicy results.
Q: Can I make this salad ahead of time?
A> For sure, but keep components separate. Grill the chicken and chop the veggies, but store the dressing in a separate container and the greens in a bag with a dry paper towel. Assemble right before eating to keep everything crisp.
Q: My salad gets soggy so fast after I add dressing. Help!
A> You might be overdressing! Start with less than you think—you can always add more. Also, ensure your greens are bone dry after washing (a salad spinner is a lifesaver). Water from wet greens dilutes the dressing and causes wilting.
Q: I don’t have a grill or grill pan. What’s the next best method?
A> A regular skillet works great! Get it nice and hot for a good sear. You can also bake the chicken at 400°F for 18-22 minutes, or even use an air fryer for a super-quick, crispy exterior.

Grilled Chicken Salad with Mixed Greens : Light, Fresh & Protein-Packed
Description
Grilled Chicken Salad with Mixed Greens – Fresh, Fast & Flavorful
A protein-packed, vibrant salad with juicy grilled chicken, crisp greens, fresh veggies, and a zesty lemon dressing. Perfect for lunch, dinner, or anytime you want a meal that feels both light and satisfying.
Ingredients
-
Salad:
-
1 large boneless, skinless chicken breast (6–8 oz)
-
3 cups mixed greens (spinach, arugula, romaine)
-
½ cup cherry tomatoes, halved
-
¼ cucumber, sliced
-
¼ red onion, thinly sliced
Dressing:
-
1 tbsp extra virgin olive oil
-
Juice of ½ a fresh lemon
-
Salt and freshly ground black pepper
Optional Toppings:
-
Avocado slices
-
Crumbled feta or goat cheese
-
Toasted sunflower seeds or sliced almonds
-
Fresh herbs like dill or basil
-
Instructions
-
Prep & Season Chicken:
-
Pat chicken dry, drizzle with olive oil, and season generously with salt, pepper, and optional spices (garlic powder, paprika, Italian herbs). Let sit while prepping veggies.
-
-
Cook Chicken:
-
Grill, pan-sear, or bake at 400°F for 18–22 min until internal temp reaches 165°F. Rest 5 min before slicing.
-
-
Assemble Salad:
-
In a large bowl, add mixed greens, cherry tomatoes, cucumber, and drained red onion.
-
-
Make Dressing:
-
Whisk olive oil, lemon juice, salt, and pepper until slightly emulsified.
-
-
Slice & Toss:
-
Slice chicken against the grain. Toss half the dressing with the salad, pile greens on a plate, arrange chicken on top, drizzle remaining dressing, and add optional toppings.
-
Notes
-
Juicy Chicken: Use a meat thermometer, pull at 165°F, and let it rest. Brine for extra moistness.
-
Make Ahead: Keep components separate—greens dry, veggies chopped, dressing in a jar. Assemble just before eating.
-
Avoid Soggy Salad: Start with dry greens and add dressing gradually.
-
No Grill? Use a hot skillet, bake at 400°F, or air-fry for crispy edges.
The Nourishing Details
Let’s talk about what’s fueling you! This nutritional breakdown is for the core recipe (chicken, greens, veggies, basic dressing) without optional toppings. Remember, these are estimates, as exact values depend on the specific ingredients and portions you use.
Per Serving (Serves 1):
Calories: ~300-350 | Protein: ~30g | Fat: ~18g (mostly heart-healthy monounsaturated from the olive oil) | Carbohydrates: ~8g | Fiber: ~2g
This salad is a fantastic balance of lean protein for muscle repair and satiety, healthy fats for nutrient absorption and energy, and low-glycemic carbs from the vegetables. It’s a meal that provides steady energy without the post-lunch slump. Adding avocado or nuts increases the healthy fats, while a sprinkle of cheese adds calcium and more protein.
Final Thoughts
And there you have it, friends—my not-so-secret formula for a grilled chicken salad that you’ll actually crave. It’s proof that with a few good ingredients and a little know-how, you can turn the everyday into the exceptional. Food doesn’t have to be complicated to be deeply satisfying and good for you.
I hope this recipe becomes a trusted friend in your kitchen, just like it is in mine. It’s flexible, forgiving, and always delivers. Give one of the fun variations a try next time, or stick to the classic. Most importantly, have fun with it! Cooking should be a joy, not a chore. Now, if you’ll excuse me, I think it’s time for my lunch… and I know exactly what I’m making.
Got your own twist? I’d love to hear it! Tag me on social @feastical or drop a comment over on the blog. Until next time, keep your spatula handy and your bowl ready!
Cheers,
Beau

Cheesy Baked Pizza Dip Recipe : The Ultimate Party Appetizer
The Dip That Stole the Party: Your New Go-To Appetizer is Here!
Hey there, friend! Beau here, welcoming you back to my kitchen at Feastical. You know that magical moment at a gathering when everyone’s eyes widen, conversations pause, and a collective “Ooooh” ripples through the room? That, my friends, is the power of a truly epic appetizer hitting the table. And today, we’re crafting the undisputed champion of that moment: my legendary Cheesy Baked Pizza Dip.
Imagine everything you adore about a loaded, cheesy, pepperoni-topped pizza—the tangy sauce, the gooey mozzarella stretch, the savory bite of pepperoni—but transformed into a warm, scoopable, dippable masterpiece. This isn’t just a dip; it’s a conversation piece, a memory maker, and the quickest route to becoming the MVP of any potluck, game day spread, or casual Friday night in. The best part? It comes together in about 10 minutes of hands-on work. We’re talking minimal fuss for maximum flavor impact. So, preheat that oven, grab your favorite baking dish, and let’s create the appetizer that promises to be the first empty dish on the table. Trust me, this recipe is about to become your delicious secret weapon.
More Than a Dip: A Family Tradition in a Dish
This recipe has roots, and like all the best comfort foods, they’re tangled up in memory. My family has always been fiercely competitive about our weekly game nights. Think Monopoly deals getting heated, Scrabble words being challenged (often by me, I’ll admit), and the constant, friendly trash talk. Years ago, during a particularly intense round of Trivial Pursuit, I needed a snack that was hearty enough to be a meal for us grazers but required zero utensils or attention. I rummaged through the fridge—cream cheese, leftover pizza sauce, a sad-looking bell pepper, and a treasure trove of cheese. I layered it all into a pie dish, crossed my fingers, and threw it in the oven.
The dip was an instant legend. The game was momentarily forgotten as we all dove in with crusty bread, the cheesy pull stretching comically between the dish and our plates. Now, it’s a non-negotiable part of our game night lineup. It’s the taste of laughter, friendly rivalry, and the simple joy of sharing a seriously good bite with the people you love. When I make it now, I can almost hear the dice rolling and my sister arguing about a trivia answer. That’s the magic of food—it’s a flavor, a feeling, and a memory, all baked into one bubbly, glorious dish.
Gathering Your Flavor All-Stars
Simple ingredients, incredible results. That’s the Feastical motto. Here’s what you’ll need to build your dip masterpiece. I’ve added my little chef-y insights and swaps so you can make it your own.
- Cream Cheese (8 oz, softened): This is our rich, creamy foundation. Pro-Tip: Full-fat cream cheese is non-negotiable for the best texture and flavor. For a lighter twist, Neufchâtel works, but the dip will be slightly less luscious. Remember, softened means it should give easily when pressed—this prevents a lumpy base layer!
- Italian Seasoning (1/2 tsp): Our flavor booster! This little jar of dried herbs (usually oregano, basil, thyme, rosemary) instantly gives that “pizza parlor” aroma. No Italian seasoning? A pinch each of dried oregano and basil will do the trick beautifully.
- Pizza Sauce (1/2 cup): The zesty heart of the dip. Use your favorite jarred brand for ease, or if you’re feeling fancy, a half-cup of homemade marinara. I avoid super chunky sauces here for a smoother layer.
- Shredded Mozzarella Cheese (1 cup): The king of the cheese pull! Pre-shredded is convenient, but if you have a few extra minutes, shredding a block of low-moisture mozzarella yourself melts creamier and avoids the anti-caking agents found in pre-shredded bags.
- Shredded Parmesan Cheese (1/2 cup): The salty, nutty flavor powerhouse. Freshly grated Parmigiano-Reggiano is a game-changer, but the stuff in the green canister works in a pinch. For a different twist, try Asiago.
- Mini Pepperoni (1/4 cup): The classic pizza bite! Minis are perfect because they distribute evenly in every scoop. If you only have regular slices, just give them a rough chop. Feeling adventurous? Crumbled cooked Italian sausage or diced ham are fantastic substitutes.
- Optional Toppings: This is your playground! I love sliced black olives for a briny note, diced bell peppers or onions for crunch, and sautéed mushrooms for an earthy depth. Drain any canned veggies well!
- Your Favorite Dippers: The vehicle for deliciousness! Toasted baguette slices, sturdy tortilla chips, warm breadsticks, or even crisp bell pepper strips for a low-carb option.
Let’s Build Some Deliciousness: Your Step-by-Step Guide
Okay, team! Let’s fire up the oven and get layering. Follow these steps, and you’ll have a perfect, bubbly dip in no time. I’m chatting you through each one with my favorite hacks.
- Preheat and Prep (375°F/190°C): First things first—get that oven warming up to a nice, even 375°F (190°C). This is the sweet spot for melting everything together without burning the top too quickly. While it heats, grab a small baking dish—an 8-inch pie plate, a 1-quart oval baker, or a small cast-iron skillet works wonders. No need to grease it; the cream cheese handles that.
- The Creamy Foundation: In a medium bowl, plop in your softened cream cheese and sprinkle the Italian seasoning over it. Now, get in there with a fork or a sturdy spatula and mash and mix until it’s completely smooth and the herbs are evenly distributed. This step is crucial! Lumps of cold cream cheese are the enemy of a silky dip layer. Chef’s Hack: If you forgot to soften the cream cheese, pop the sealed block into a bowl of warm (not hot) water for 10 minutes. It’ll save the day!
- Layer One: Spread the Love: Scoop your seasoned cream cheese mixture into your baking dish. Use the back of a spoon or a small offset spatula to spread it into a smooth, even layer that completely covers the bottom. Think of this as the delicious “crust” of our dip-pizza.
- Layer Two: The Saucy Heart: Here comes the color and tang! Spoon your pizza sauce over the cream cheese layer. Gently spread it out, leaving a tiny border if you can. We want distinct layers for that beautiful “cut-into-it” reveal.
- Layer Three: The Cheese Blanket: Time for the good stuff! Evenly sprinkle the shredded mozzarella over the sauce, followed by the parmesan. Don’t skimp—this cheesy blanket is what bakes into that gorgeous, golden, bubbly top we’re all dreaming of.
- Layer Four: Topping Time! This is where you customize. Scatter your mini pepperoni (or other meat) and any optional veggies you’re using over the cheese. Try to distribute them evenly so every dip gets a bit of everything.
- Bake to Bubbly Perfection: Carefully place your assembled masterpiece into the preheated oven. Bake for about 20 minutes. You’re looking for the cheese to be fully melted, the edges to be bubbling enthusiastically, and the top to look gloriously set.
- The Optional Golden Finish (Broil): For that extra pizzeria-style finish, switch your oven to BROIL for the last 2-3 minutes. WATCH IT LIKE A HAWK! This will give the pepperoni crispy edges and the cheese a beautiful, spotted golden-brown top. It’s a game-changer, but it goes from perfect to charred in seconds.
- The Grand Finale: Serve Immediately! As soon as it comes out of the oven (careful, the dish is hot!), place it on a trivet or heat-safe surface. This dip is meant to be enjoyed piping hot, when the cheese is at its maximum stretchiness. Gather your dippers and dive in!
How to Serve This Cheesy Masterpiece
Presentation is part of the fun! I love serving this dip right in the baking dish I cooked it in—it’s rustic and inviting. Place it in the center of a large board or platter and surround it with an array of dippers. Think about color and texture: the golden brown of toasted baguette slices, the yellow of robust tortilla chips, the pale white of warm, soft breadsticks, and the bright green of fresh endive leaves or sliced bell peppers for a fresh contrast. Tuck a few extra pepperoni slices and herb sprigs around the board for garnish. Pro-Serving Tip: Have a small spoon or spreader nearby for guests who prefer to load their dipper. And a little bowl for discarded olive pits if you used them! The goal is to make it easy, communal, and irresistibly inviting.
Make It Your Own: Delicious Twists & Swaps
Once you’ve mastered the classic, the world is your cheesy oyster! Here are a few of my favorite ways to riff on this recipe:
- The “Supreme” Experience: Go all out! After the sauce layer, scatter a mixture of cooked Italian sausage crumbles, diced green bell pepper, sliced red onion, and black olives before adding the cheese. It’s a whole pizza in dip form.
- Spinach & Artichoke Pizza Dip: A hybrid favorite! Mix a 10-oz package of thawed and squeezed-dry frozen spinach and 1/2 cup of chopped artichoke hearts into the seasoned cream cheese base. Proceed with the recipe as written. It’s creamy, tangy, and veggie-packed.
- White “Pizza” Dip: Skip the red sauce! Instead, mix 1/2 cup of ricotta cheese and a minced garlic clove into the cream cheese base. Layer that, then top with mozzarella, parmesan, and toppings like cooked crumbled bacon and chopped broccoli florets.
- Spicy ‘Nduja Kick: For the heat seekers, dollop a few teaspoons of spicy ‘nduja sausage or sprinkle crushed red pepper flakes over the sauce layer before adding cheese. The heat infuses the whole dip beautifully.
- Lightened-Up Version: Use Neufchâtel cheese, part-skim mozzarella, and load up on veggie toppings like mushrooms, onions, and peppers. Serve with cucumber rounds and carrot sticks for dipping. It’s still indulgent but a tad lighter.
Beau’s Kitchen Confidential
This recipe has evolved from that first desperate fridge forage into a true Feastical staple. One time, in a pre-party panic, I accidentally used a block of whipped cream cheese. The result? A slightly airier, fluffier base that was actually fantastic! It just goes to show that cooking is an adventure. Another tip: if I’m making this for a bigger crowd, I double the recipe and use a 9×13 dish. Just add 5-10 minutes to the bake time. And let’s talk about the cheese spillover—it’s a badge of honor. I always place my baking dish on a small sheet pan just in case of bubbly overflow. It saves on cleanup and lets you focus on the important thing: hearing those “oh my gosh, this is amazing” compliments roll in.
Your Questions, Answered!
Q: Can I make this dip ahead of time?
A: Absolutely! Assemble the dip completely in the baking dish, cover tightly with plastic wrap, and refrigerate for up to 24 hours. When you’re ready, bake it straight from the fridge, adding 5-10 minutes to the baking time since it will be cold.
Q: My dip seems a little watery/oily after baking. What happened?
A: This usually comes from the pizza sauce or toppings. Make sure your sauce isn’t overly watery, and always drain canned veggies (olives, mushrooms) incredibly well. For pepperoni, the mini ones tend to release less oil than chopped large slices. A quick blot with a paper towel after baking can also help.
Q: What’s the best way to reheat leftovers?
A: While best fresh, leftovers can be revived! Reheat individual portions in the microwave in 30-second bursts until warm. For a larger amount, cover the dish with foil and reheat in a 350°F oven for 10-15 minutes. The cheese won’t have the same epic stretch, but the flavor will still be there.
Q: I don’t have a small baking dish. What can I use?
A: No problem! A standard muffin tin works great for individual dip cups (bake for 12-15 mins). A small cast-iron skillet is perfect and looks gorgeous on the table. Even a deeper glass pie plate will do the job beautifully.

Cheesy Baked Pizza Dip Recipe : The Ultimate Party Appetizer
Description
Cheesy Baked Pizza Dip – The Party-Stopping Appetizer
A warm, gooey, pizza-inspired dip loaded with mozzarella, parmesan, mini pepperoni, and a tangy sauce—perfect for game nights, potlucks, or casual Friday gatherings. Ready in ~30 minutes (10 minutes prep, 20 minutes bake).
Ingredients
Dip Base:
-
8 oz cream cheese, softened
-
½ tsp Italian seasoning
Sauce & Cheese:
-
½ cup pizza sauce (smooth, not chunky)
-
1 cup shredded mozzarella
-
½ cup shredded Parmesan
Toppings:
-
¼ cup mini pepperoni
-
Optional: diced bell peppers, onions, mushrooms, black olives
Dippers:
-
Toasted baguette slices, breadsticks, tortilla chips, or fresh veggie sticks
Instructions
-
Preheat & Prep:
-
Oven to 375°F (190°C).
-
Choose an 8-inch pie plate, small cast-iron skillet, or 1-quart baking dish. No need to grease.
-
-
Cream Cheese Layer:
-
Mix softened cream cheese with Italian seasoning until smooth.
-
Spread evenly in the bottom of your baking dish.
-
-
Add Sauce & Cheese:
-
Spoon pizza sauce over the cream cheese layer.
-
Sprinkle mozzarella and Parmesan evenly over the top.
-
-
Top It Off:
-
Scatter mini pepperoni and any optional veggies evenly.
-
-
Bake:
-
Bake for ~20 minutes until cheese is melted and bubbly.
-
Optional: Broil 2-3 minutes for a golden, crispy top—watch closely!
-
-
Serve:
-
Serve hot with your choice of dippers. Ideal when cheese is stretchy and gooey.
-
Notes
-
Make Ahead: Assemble and refrigerate up to 24 hours; add 5–10 minutes to bake time from cold.
-
Prevent Oiliness: Drain veggies and use mini pepperoni to reduce excess grease. Blot if needed.
-
Reheat: Microwave individual portions or reheat covered in oven at 350°F for 10–15 min.
Nutritional Information*
*Please note: This is an estimated breakdown for informational purposes, based on the core recipe with full-fat ingredients and pepperoni, and does not include dippers. Values can vary based on specific brands and ingredient choices.
Per Serving (1/6th of the dip):
Calories: ~240 | Total Fat: 19g | Saturated Fat: 10g | Cholesterol: 55mg | Sodium: 480mg | Total Carbohydrates: 4g | Dietary Fiber: 0g | Sugars: 2g | Protein: 10g
Remember, this is a hearty, shareable appetizer meant to be enjoyed as part of a spread. Pairing it with veggie dippers can add fiber and nutrients. For dietary adjustments, please refer to the variations and substitution tips within the ingredient list!
The Last Bite (Until You Make It Again!)
And there you have it! My ultimate, foolproof, crowd-pleasing Cheesy Baked Pizza Dip. It’s more than just a recipe; it’s a ticket to being the most popular person at the party (in the best possible way). It’s the dish that sparks “how did you make this?!” conversations and has people sneaking back for just one more scoop. I hope it brings as much joy to your table as it has to mine over the years.
So tell me, friend—which variation are you going to try first? Are you a classic pepperoni purist or a loaded supreme adventurer? Tag me @Feastical when you

Thai Basil Chicken : Meal Prep Friendly, Lean, and Loaded with Flavor
Thai Basil Chicken: Your New Favorite 25-Minute Flavor Bomb
Hey friends, Beau here from Feastical! Let’s talk about that magical moment when a dish is so explosively good, so perfectly balanced between spicy, savory, and sweet, that you just have to pause, look at your fork, and whisper, “Wow.” That’s exactly what we’re cooking up today. We’re diving headfirst into the world of Thai Basil Chicken, or as it’s famously known in Thailand, Pad Krapow Gai.
This isn’t just another stir-fry. This is a vibrant, aromatic, feel-it-in-your-soul kind of meal that comes together faster than you can decide what to stream tonight. Imagine lean ground chicken sizzling with a punch of garlic and chili, then getting coated in a glossy, umami-rich sauce, and finally, being tossed with a whole heap of fresh, licorice-scented basil. It’s a symphony in a skillet.
And the best part? It’s a meal-prep superhero. It reheats like a dream, tastes arguably better the next day, and packs a serious protein punch to keep you fueled. Whether you’re a weeknight warrior tired of bland chicken breasts or a meal-prepper looking for a flavor escape, this recipe is your ticket. So, grab your favorite wok or skillet, and let’s turn your kitchen into a street food stall in Bangkok. I promise, it’s easier than you think and more rewarding than you can imagine!
The Bangkok Street Food Memory That Started It All
I’ll never forget my first real taste of Pad Krapow. I was wandering through a bustling Bangkok night market, completely overwhelmed (in the best way) by the symphony of sizzling woks, shouting vendors, and incredible smells. The heat was a living thing, and my stomach was doing the talking.
I pointed at a busy stall where a cook was furiously tossing something in a giant, flaming wok. Minutes later, I was handed a steaming plate of rice crowned with this dark, fragrant, basil-speckled chicken and a perfectly runny fried egg on top. I took that first bite standing at a tiny plastic table, traffic whizzing by, and… time stopped. The heat from the chilies, the saltiness from the sauces, the aromatic basil, and that rich egg yolk all mixed together created a flavor so bold and comforting it felt like a revelation.
That dish taught me that the most memorable food isn’t about fancy techniques or expensive ingredients. It’s about bold flavors, cooked with confidence, and served with heart. I’ve been chasing that taste ever since, and this recipe is my faithful, weeknight-friendly homage to that magical Bangkok moment. Let’s bring that street food energy right into your kitchen.
Gathering Your Flavor Arsenal: Ingredients & Insights
Here’s everything you’ll need. Think of this as building layers of flavor—each ingredient plays a crucial role. Don’t stress if you’re missing something; I’ve got swaps for you!
- 1 lb lean ground chicken: The lean protein star. Its mild flavor is the perfect canvas. Chef’s Insight: Ground turkey or pork work great too! For a vegetarian twist, crumbled super-firm tofu or a plant-based ground “meat” are fantastic.
- 1 tbsp avocado or sesame oil: Our high-heat cooking fat. Avocado oil has a neutral taste and high smoke point. Sesame oil adds a subtle nutty aroma. Sub Tip: Any neutral oil like canola or vegetable works.
- 4 cloves garlic, minced: Non-negotiable for that foundational aroma. Please, use fresh! The pre-minced stuff just won’t give you the same fragrant punch.
- 1–2 Thai chilies (or red chili flakes): The fire-starters! Thai chilies (bird’s eye) bring authentic, bright heat. Chef’s Hack: For less heat, remove the seeds. For no heat, just omit—the dish will still be deliciously savory.
- 2 tbsp low-sodium soy sauce: Salty, umami depth. Using low-sodium lets us control the salt level, especially since we’re adding other savory sauces.
- 1 tbsp oyster sauce: The secret to that rich, glossy, restaurant-style sauce! It’s sweet, salty, and deeply savory. Sub Tip: For a vegetarian version, use mushroom stir-fry sauce.
- 1 tsp fish sauce: Don’t be scared! It smells strong in the bottle but melts into the dish, adding an irreplaceable savory, complex saltiness. It’s the soul of Southeast Asian cooking.
- 1 tsp honey or coconut sugar (optional): A tiny touch to balance the salt and heat. I often skip it, but it’s great if you like a subtle rounded sweetness.
- 1 cup fresh Thai basil: THE signature flavor. Thai basil has purple stems, pointy leaves, and a distinct anise/licorice flavor. Sub Tip: If you can’t find it, regular Italian basil will work in a pinch—the dish will be different but still tasty.
- For Serving: Jasmine rice, cauliflower rice, a fried egg (highly recommended!), sliced cucumber, lime wedges.
Let’s Get Cooking: Your Step-by-Step Roadmap to Deliciousness
This moves fast, so have all your ingredients chopped, measured, and within arm’s reach (this is called mise en place, and it makes you feel like a pro).
- Prep & Pretend You’re a Street Food Vendor: Get your rice cooking first. Mince your garlic and chilies. Mix your sauces (soy, oyster, fish) in a small bowl. This is your flavor bomb, ready to deploy. Wash and dry your basil.
- Sauté the Aromatics – Wake Up the Flavors! Heat your oil in a large skillet or wok over medium heat. Add the garlic (and fresh chilies if using). Here’s my hack: use a cold pan. Add the oil and aromatics before turning on the heat. This prevents the garlic from burning instantly and allows its flavor to infuse the oil gently. Sauté for just 30-60 seconds until fragrant—you’ll smell it! Don’t let it brown.
- Brown the Chicken – Build That Foundation: Crank the heat up to medium-high. Add the ground chicken. Use your spatula to break it up into small crumbles. Let it sit for a minute to get a little color, then keep stirring and breaking it up. Cook for 5-7 minutes until it’s no longer pink and has some browned bits. Those browned bits = flavor!
- Create the Magic Sauce – The Glaze of Glory: Push the chicken to one side of the pan. Pour your pre-mixed sauce into the empty space. Let it bubble and sizzle for about 15 seconds—this caramelizes the sauces slightly. Then, stir everything together until the chicken is beautifully coated in that dark, glossy sauce. Let it simmer together for 1-2 minutes. Taste it! Adjust with a pinch of chili flake for heat or a tiny drizzle of honey if you want more balance.
- The Grand Finale: The Basil! Turn off the heat. Immediately add all of that fresh Thai basil. The residual heat will wilt the leaves perfectly, releasing their incredible perfume without turning them black. Stir until just wilted and marvel at the aroma. You’ve just made restaurant-quality Pad Krapow.
- Serve or Store for Future-You: Spoon it over fluffy jasmine rice or cauliflower rice. Top with a crispy-edged fried egg (the runny yolk is part of the sauce!). For meal prep, divide rice and chicken evenly into containers. Add quick-pickled cucumbers or a lime wedge on the side. The egg is best fried fresh when you reheat.
How to Serve It Up: Building the Perfect Bowl
Presentation is part of the fun! Here’s how to make your Thai Basil Chicken look and taste like it came from a pro.
The Classic Street Food Plate: Pack a bowl with warm jasmine rice. Mound the chicken right on top. Crown it with a fried egg, sunny-side up, so the yolk acts as a rich, extra sauce. On the side, add a few slices of cool, crisp cucumber and a fat wedge of lime for squeezing. The contrast of hot/spicy and cool/crisp is everything.
For Meal Prep Champions: In each of your containers, layer ¾ cup of rice, then a portion of the chicken. Keep a small separate corner for cucumber slices or blanched broccoli. When ready to eat, reheat the chicken and rice (about 1.5-2 minutes in the microwave), then fry a fresh egg while it’s heating. Slide the hot egg on top—it makes all the difference!
Low-Carb/Veggie-Loaded Bowl: Swap the rice for a big bed of cauliflower rice, or even zucchini noodles (“zoodles”). The flavorful chicken and sauce will make you not miss the grains at all.
Make It Your Own: 5 Flavorful Twists
Once you’ve mastered the classic, the wok is your playground! Try these easy variations.
- Spicy Basil Shrimp: Swap ground chicken for peeled, deveined shrimp. Add them in the last 2-3 minutes of cooking so they stay juicy and don’t overcook.
- Vegetarian “Pork” & Tofu: Use a plant-based ground “pork” or crumble half a block of extra-firm, pressed tofu. Sauté until browned. The sauce clings to it beautifully.
- Extra Veggie Power: Add 1 cup of finely chopped green beans, bell peppers, or broccoli florets when you sauté the garlic. Give them a 2-minute head start before adding the protein.
- Holy Basil Heat Bomb: If you can find it, use Holy Basil (Krapow). It’s spicier and more peppery, and it’s the authentic herb used in Thailand. It’s a game-changer.
- Sweet & Tangy Pineapple Basil: Add ½ cup of small pineapple chunks when you add the sauce. The caramelized sweetness with the spicy savory sauce is incredible.
Beau’s Kitchen Notes & Stories
This recipe has evolved in my kitchen more times than I can count. My first attempt? I used dried basil (a crime, I know) and regular soy sauce by the glug. It was… salty brown chicken. Not great. The lesson? Fresh herbs are non-negotiable, and balance is key.
Over time, I learned the beauty of the “sauce sizzle”—pouring it into the hot pan to caramelize before stirring. I also learned that my friends have wildly different heat tolerances, so I now serve chili flakes on the side. The biggest win was realizing this dish freezes amazingly. I now double the batch and stash portions for those “I need something GREAT, and I need it NOW” nights. It’s my edible emergency fund.
Your Questions, Answered: FAQs & Troubleshooting
Q: My dish turned out too salty. What happened?
A: This usually means your soy or oyster sauce was the regular (not low-sodium) variety. Next time, use low-sodium soy and taste before adding any extra salt. You can also balance a salty batch by adding a squeeze of lime juice or serving it with extra plain rice.
Q: Can I make this ahead of time?
A: Absolutely! It’s a meal-prep dream. Cook it fully, let it cool, and store it in an airtight container for up to 4 days. The basil will darken but the flavor will still be wonderful. Reheat gently in a skillet or microwave.
Q: My basil turned black and mushy. Help!
A> You added it while the heat was still too high! The key is to turn the heat OFF, then stir in the basil. The residual heat is plenty to wilt it perfectly while keeping its bright green color and fresh flavor.
Q: Is fish sauce really necessary?
A> For authentic flavor, yes. It adds a deep, savory undertone that soy sauce alone can’t achieve. If you’re allergic or strictly vegetarian, you can substitute with a teaspoon of vegan Worcestershire sauce or simply omit it, but you’ll miss that complex depth.

Thai Basil Chicken : Meal Prep Friendly, Lean, and Loaded with Flavor
Description
A vibrant, aromatic, and fast stir-fry that’s spicy, savory, and slightly sweet. Lean ground chicken (or turkey/pork) cooks in a garlicky, umami-rich sauce, then is tossed with fresh Thai basil for an irresistible street-food flavor. Perfect for weeknight dinners or meal prep.
Ingredients
Chicken Stir-Fry:
-
1 lb lean ground chicken
-
1 tbsp avocado or sesame oil
-
4 cloves garlic, minced
-
1–2 Thai chilies, finely chopped (or red chili flakes)
-
1 cup fresh Thai basil leaves
Sauce:
-
2 tbsp low-sodium soy sauce
-
1 tbsp oyster sauce (or mushroom stir-fry sauce for vegetarian)
-
1 tsp fish sauce (or vegan Worcestershire for substitute)
-
1 tsp honey or coconut sugar (optional)
To Serve:
-
Jasmine rice, cauliflower rice, or zucchini noodles
-
Fried egg (optional but recommended)
-
Sliced cucumber and lime wedges
Instructions
-
Prep Everything: Cook rice first. Mince garlic and chilies. Mix soy, oyster, fish sauce, and honey in a small bowl. Wash basil.
-
Sauté Aromatics: Heat oil in a large skillet or wok over medium heat. Add garlic and chilies. Sauté 30–60 seconds until fragrant, but do not brown.
-
Cook Chicken: Increase heat to medium-high. Add ground chicken, breaking it into small pieces. Let sit briefly to brown, then stir. Cook 5–7 minutes until no longer pink with some golden bits.
-
Add Sauce: Push chicken aside, pour sauce into empty pan space. Let bubble 15 seconds to caramelize slightly, then mix with chicken. Simmer 1–2 minutes and taste—adjust with extra chili or honey if needed.
-
Fold in Basil: Turn off heat. Add Thai basil and stir just until wilted. The residual heat releases aroma without blackening leaves.
-
Serve: Spoon chicken over rice or cauliflower rice. Top with a fried egg and serve with cucumber slices and lime wedges.
Notes
-
Spicy Basil Shrimp: Swap chicken for shrimp; cook 2–3 minutes at the end.
-
Vegetarian: Use plant-based ground “pork” or crumbled extra-firm tofu.
-
Extra Veggies: Add bell peppers, green beans, or broccoli. Sauté 2 minutes before protein.
-
Holy Basil: Authentic Krapow for more peppery, aromatic flavor.
-
Sweet & Tangy: Add ½ cup pineapple chunks with the sauce for caramelized sweetness.
Nutritional Information (A Rough Guide)
Disclaimer: I’m a chef, not a dietitian! These are estimates based on common ingredients and serving sizes (recipe divided into 4 servings with ½ cup cooked jasmine rice).
- Calories: ~450
- Protein: 38g (A powerhouse for muscle repair and keeping you full!)
- Carbohydrates: 30g (Primarily from the rice. Swap for cauliflower rice to significantly lower this.)
- Fat: 22g (Mostly from the ground chicken and oil—healthy, satisfying fats.)
- Fiber: 2g (Boost this by serving with a side of steamed veggies or edamame!)
This dish is a fantastic macro-balanced meal, especially when you add that extra veggie side. It’s high in protein, provides good energy from carbs, and uses lean meat to keep saturated fat in check.
Final Thoughts: Your Kitchen, Your Adventure
And there you have it, friends—your passport to an incredibly flavorful, shockingly easy weeknight dinner. Thai Basil Chicken proves that you don’t need a lot of time or exotic ingredients to eat spectacularly well. It’s about bold flavors, a hot pan, and the courage to try something new.
I hope this recipe becomes a trusted friend in your kitchen rotation, just like it is in mine. It’s saved me from countless boring dinners and has brought friends around my table asking for seconds (and the recipe). So give it a go, play with the heat level, add your favorite veggies, and make it yours.
If you make it, I’d love to see your creation! Tag me @Feastical or shoot me a message. Now, go forth, heat up that wok, and dig into a bowl of pure, unadulterated joy. Happy cooking!
– Beau

Flavorful Mediterranean Orzo Pasta Salad: Fresh, Zesty, and Ready to Impress
Sunshine in a Bowl: Your New Favorite Mediterranean Orzo Pasta Salad
Hey friends, Beau here! Pull up a chair, grab your favorite wooden spoon, and let me tell you about a recipe that’s basically a vacation for your taste buds. We’re talking about my Flavorful Mediterranean Orzo Pasta Salad—a dish so bright, fresh, and downright joyful that it has a permanent spot in my summer rotation (and let’s be real, my winter craving list too).
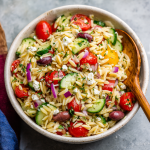
If you’re tired of the same old pasta salads that feel heavy and sad, this one is your game-changer. Imagine: tender little orzo pillows, juicy bursts of tomato, crunchy cucumber, salty pops of Kalamata olive, and that creamy, tangy feta, all dancing together in a zesty lemon-garlic vinaigrette. It’s not just a side dish; it’s a conversation starter, a potluck hero, and the most satisfying light lunch you can whip up in under 30 minutes.
I created this recipe for those days when you want food that feels good, in every sense of the word. It’s nourishing, it’s vibrant, and it brings people together around the table. No fancy techniques required, just good ingredients and a big bowl for tossing. Whether you’re feeding a crowd at a backyard BBQ or just meal-prepping for a busy week, this orzo salad delivers. So, let’s ditch the complicated and embrace the deliciously simple. Your fork is waiting!
The Picnic That Started It All
This recipe has a little bit of my heart baked into it (figuratively, of course—it’s a no-bake situation!). It all started a few summers ago on a spur-of-the-moment picnic with some friends. We were headed to an outdoor concert, and I volunteered to bring “a side.” Problem was, my fridge looked… minimalist. I had some orzo from a risotto attempt, a pint of cherry tomatoes about to turn, a lonely cucumber, and the eternal block of feta.
Throwing caution to the wind, I cooked the orzo, chopped everything in sight, and whisked together a dressing with what I had. I tossed it all in my biggest mixing bowl, crossed my fingers, and ran out the door. You guys, it was the star of the picnic blanket! Between guitar riffs, people kept asking for the recipe. There was something magical about that combination—fresh, easy, and packed with flavor. It was a reminder that the best food often isn’t planned; it’s created with what you have and shared with who you love. That’s the spirit I want to bring to your kitchen today.
Gathering Your Flavor All-Stars
Here’s where the magic begins. The beauty of this salad is in its simple, high-quality components. Let’s break them down:
- 1 cup uncooked orzo pasta: Orzo is like rice’s fun, pasta cousin. It’s the perfect tiny shape for holding onto dressing and veggies. Chef’s Tip: Don’t overcook it! Aim for al dente so it stays nice and textured in the salad.
- 1 cup cherry tomatoes, halved: Little bursts of sweetness and acidity. I like using a mix of colors if I can find them. Substitution: Diced regular tomatoes work in a pinch, but cherry or grape tomatoes hold their shape and juice better.
- 1 cucumber, diced: For that essential, refreshing crunch. I prefer English cucumbers for their thinner skin and fewer seeds. Insight: If using a regular cucumber, you can peel it and scoop out the seedy middle.
- ½ cup Kalamata olives, sliced: These bring a deep, briny, almost wine-like flavor that’s so Mediterranean. Substitution: Not a fan of Kalamatas? Try green Castelvetrano olives for a buttery, milder taste.
- ¼ cup red onion, finely chopped: A little bit goes a long way for sharpness and color. Chef’s Hack: Soak the chopped onion in ice water for 10 minutes before adding. It tames the harsh bite beautifully.
- ½ cup crumbled feta cheese: The salty, creamy superstar. Buy a block and crumble it yourself—it’s infinitely better than the pre-crumbled stuff in texture and flavor.
- 2 tbsp fresh parsley or dill, chopped: The green confetti! Parsley is classic and bright, but dill takes it in a wonderfully aromatic direction. Use what you love.
For the Dressing (The Flavor Conductor):
- 3 tbsp good olive oil: Use the best extra-virgin olive oil you have for this. It’s the base of the dressing, so its flavor really shines through.
- 1 tbsp fresh lemon juice: Non-negotiable! Freshly squeezed, please. It’s the zesty wake-up call for the whole salad.
- 1 tsp red wine vinegar: Adds another layer of tangy complexity. Substitution: White wine vinegar or even a tiny bit of balsamic can work.
- 1 garlic clove, minced: For that unmistakable savory backbone. Pro Tip: Use a microplane to grate it into a paste—it distributes more evenly.
- ½ tsp dried oregano: Rub it between your palms as you add it to wake up the oils. It smells like a Greek island.
- Salt & pepper, to taste: Season confidently! Start with ¼ tsp salt and a few cracks of pepper, then adjust after tossing.
Let’s Build Some Deliciousness: Step-by-Step
Ready to cook? This is the fun part. I’ll walk you through each step with my favorite little hacks to guarantee success.
Step 1: Cook the Orzo. Bring a pot of well-salted water to a boil (it should taste like the sea!). Add the orzo and cook according to package directions, usually about 8-10 minutes. You want it tender but with a slight bite (al dente). Once it’s done, drain it in a colander. Here’s a critical Beau hack: rinse it briefly under cold water. This stops the cooking instantly, cools it down so it doesn’t wilt your fresh veggies, and washes away excess starch so the salad isn’t gummy.
Step 2: Chop & Prep the Veggies. While the orzo cooks, get chopping. Halve those tomatoes, dice the cucumber, slice the olives, and finely chop the red onion (remember that ice water bath trick if you’re sensitive to the bite!). Crumble your feta and chop your herbs. Doing this now is called “mise en place” (everything in its place), and it makes the assembly a breezy, joyful process instead of a frantic one.
Step 3: Whisk the Magic Dressing. In a small bowl or even a mason jar, combine the olive oil, fresh lemon juice, red wine vinegar, minced garlic, dried oregano, salt, and pepper. Whisk it vigorously or shake the jar until it’s beautifully emulsified—you’ll see it turn from separate to slightly creamy. Taste it! Dip a piece of orzo or cucumber in and adjust. Need more zing? Add lemon. More depth? A pinch more salt. You’re the boss.
Step 4: The Grand Toss! In a large, spacious bowl (I’m talking bigger than you think you need), combine the cooled, rinsed orzo, all your prepped veggies, the feta, and most of the herbs. Now, pour that vibrant dressing over the top. Using a large spoon and fork (my preferred tossing tools), gently but thoroughly fold everything together. You want every single piece to get a glossy, flavorful coat.
Step 5: The Rest (Or Not!). You can absolutely serve this immediately—it’s fantastic fresh and at room temperature. But if you have 30 minutes, cover it and pop it in the fridge. This “marry time” allows the flavors to get to know each other and deepen beautifully. Just give it one more gentle stir before serving.
How to Serve & Shine
Presentation is part of the fun! Here’s how to make this salad look as incredible as it tastes:
Transfer your tossed salad to a wide, shallow serving platter or a beautiful, colorful bowl. Sprinkle the reserved fresh herbs over the top for a final pop of green. For a little extra wow factor, add a few whole Kalamata olives and a lemon wedge or two on the side. A final, light drizzle of your best olive oil over the top just before serving adds a gorgeous sheen.
What to serve it with? It’s incredibly versatile!
- The Ultimate Sidekick: It’s a match made in heaven with anything off the grill—lemony chicken skewers, juicy burgers, garlicky shrimp, or simple grilled fish.
- Lunchtime Hero: Pack it in a container with a lid for a fantastic, make-ahead lunch. I’ll even add a can of chickpeas or some leftover grilled chicken right into my portion for extra protein.
- Potluck Power Move: Double or triple the recipe! It feeds a crowd easily and travels like a dream.
- Vegetarian Main: Add a can of drained and rinsed chickpeas or white beans to make it a hearty, standalone meal.
Make It Your Own: 5 Flavorful Twists
This recipe is a fantastic canvas. Play with it! Here are some of my favorite riffs:
- “Greek Island” Style: Add ¼ cup of chopped pepperoncini for a gentle heat, swap in dill for the parsley, and include ½ cup of chopped marinated artichoke hearts.
- Protein-Packed Power Bowl: Fold in 1-2 cups of shredded rotisserie chicken, a can of tuna, or 1 cup of cooked lentils to transform it into a complete, satisfying meal.
- Herb Garden Explosion: Go heavy on the soft herbs! Add 2 tbsp each of chopped fresh mint, basil, and chives along with the parsley. It’s unbelievably fresh.
- Roasted Veggie Delight: Toss 1 cup of chopped bell peppers and red onion in olive oil, roast at 400°F until charred, and let them cool before adding. It adds a smoky sweetness.
- Creamy Dreamy Version: For a richer dressing, whisk 2 tablespoons of plain Greek yogurt or mayonnaise into the original dressing ingredients. It becomes luxuriously creamy.
Beau’s Kitchen Notebook
This salad has evolved with me. I used to be terrified of adding red onion, and now I can’t imagine it without that sharp little kick. I’ve learned that the type of feta matters—a good, creamy, sheep’s milk feta is a revelation. And I’ve made this in every season; in the winter, I’ll use sun-dried tomatoes instead of fresh for a more intense pop. The funniest thing? I once accidentally used vanilla Greek yogurt in the “creamy” variation (don’t ask, it was a late night). It was… an experience. A sweet, savory, confusing experience. We ordered pizza. The moral: label your containers, folks! But seriously, this recipe is forgiving. Taste as you go, trust your instincts, and make it your own.
Your Questions, Answered
Q: Can I make this ahead of time?
A: Absolutely! It’s actually better after chilling for a few hours. Make it up to a day in advance. If making far ahead, hold back on adding the fresh herbs until just before serving so they stay bright and perky.
Q: My salad seems dry the next day. What happened?
A: Pasta and veggies absorb the dressing over time. No worries! Just give it a fresh squeeze of lemon juice and a small drizzle of olive oil, then stir. It’ll come right back to life.
Q: Is there a gluten-free alternative to orzo?
A: Yes! Look for gluten-free orzo, which is often made from rice or corn flour. You can also use cooked quinoa, small rice pearls (like in risotto), or even small gluten-free pasta shells.
Q: Can I use a different cheese?
A: Of course. While feta is classic, try crumbled goat cheese for tang, ricotta salata for a firmer, saltier bite, or even fresh mozzarella pearls for a milder, creamier touch.
Flavorful Mediterranean Orzo Pasta Salad: Fresh, Zesty, and Ready to Impress
Description
Bright, fresh, and full of flavor—this Mediterranean Orzo Pasta Salad is the ultimate crowd-pleaser. Tender orzo, juicy tomatoes, crunchy cucumber, briny olives, and creamy feta come together in a zesty lemon-garlic dressing. Perfect for summer gatherings, make-ahead lunches, or any time you want a light, satisfying meal.
Ingredients
Salad:
-
1 cup uncooked orzo pasta
-
1 cup cherry tomatoes, halved
-
1 cucumber, diced
-
½ cup Kalamata olives, sliced
-
¼ cup red onion, finely chopped
-
½ cup crumbled feta cheese
-
2 tbsp fresh parsley or dill, chopped
Dressing:
-
3 tbsp extra-virgin olive oil
-
1 tbsp fresh lemon juice
-
1 tsp red wine vinegar
-
1 garlic clove, minced
-
½ tsp dried oregano
-
Salt & pepper, to taste
Instructions
-
Cook the orzo: Bring a large pot of salted water to a boil. Add orzo and cook 8–10 minutes until al dente. Drain and rinse under cold water to stop cooking and remove excess starch.
-
Prep the veggies: Halve tomatoes, dice cucumber, slice olives, finely chop red onion, crumble feta, and chop herbs.
-
Make the dressing: Whisk together olive oil, lemon juice, red wine vinegar, garlic, oregano, salt, and pepper until emulsified. Taste and adjust seasoning.
-
Combine: In a large bowl, mix orzo, veggies, feta, and most of the herbs. Pour dressing over and gently toss to coat evenly.
-
Marinate (optional): Serve immediately or chill for 30 minutes to let flavors meld. Garnish with remaining herbs, whole olives, and a drizzle of olive oil before serving.
Notes
-
Greek Island Style: Add ¼ cup chopped pepperoncini, ½ cup marinated artichokes, and swap dill for parsley.
-
Protein Boost: Stir in cooked chicken, tuna, chickpeas, or lentils for a full meal.
-
Herb Explosion: Use fresh mint, basil, or chives along with parsley for extra brightness.
-
Roasted Veggies: Roast bell peppers and red onion at 400°F until lightly charred, then add to salad.
-
Creamy Version: Add 2 tbsp Greek yogurt or mayonnaise to the dressing for richness.
-
Gluten-Free: Use gluten-free orzo, small pasta shells, or cooked quinoa.
-
Cheese Swap: Try goat cheese, ricotta salata, or mozzarella pearls instead of feta.
Nourishment by the Bowlful
Let’s talk about what’s fueling that deliciousness! This salad isn’t just tasty; it’s packed with good-for-you ingredients. The olive oil provides heart-healthy monounsaturated fats, while the fresh veggies deliver vitamins, antioxidants, and fiber. The feta offers a dose of calcium and protein. Remember, nutritional info is an estimate and can vary based on specific brands and portion sizes. Per serving (assuming 6 servings), you’re looking at roughly:
Calories: ~280 | Protein: 8g | Fat: 14g | Carbohydrates: 28g | Fiber: 2g | Sugar: 3g
It’s a balanced, satisfying choice that gives you energy and makes your taste buds incredibly happy.
Final Thoughts
And there you have it, friends—my go-to, never-fail, always-impressive Mediterranean Orzo Pasta Salad. It’s more than just a recipe; it’s an invitation to slow down, chop some fresh ingredients, and create something that sparks joy. I hope this becomes a staple in your home, the dish you’re known for bringing, and the easy answer to “what’s for lunch?”
Remember, cooking is about connection. Share this salad with someone you love. Adapt it with what’s in your fridge. Most importantly, have fun with it! If you make it, I’d be over the moon if you tagged @Feastical on socials so I can see your beautiful creations. Now, go forth and toss! Until next time, keep your kitchen messy and your heart full.
Philly Cheesesteak Tortellini Pasta : Creamy, Cheesy, and Loaded with Flavor
Philly Cheesesteak Tortellini Pasta – Creamy, Cheesy, and Loaded with Flavor
Hey friends, Beau here! Let’s talk about that magical moment when two iconic comfort foods collide and create something even greater than the sum of their delicious parts. You know I live for those “why didn’t I think of that?!” kitchen creations, and let me tell you, this Philly Cheesesteak Tortellini Pasta is exactly that kind of glorious mash-up.
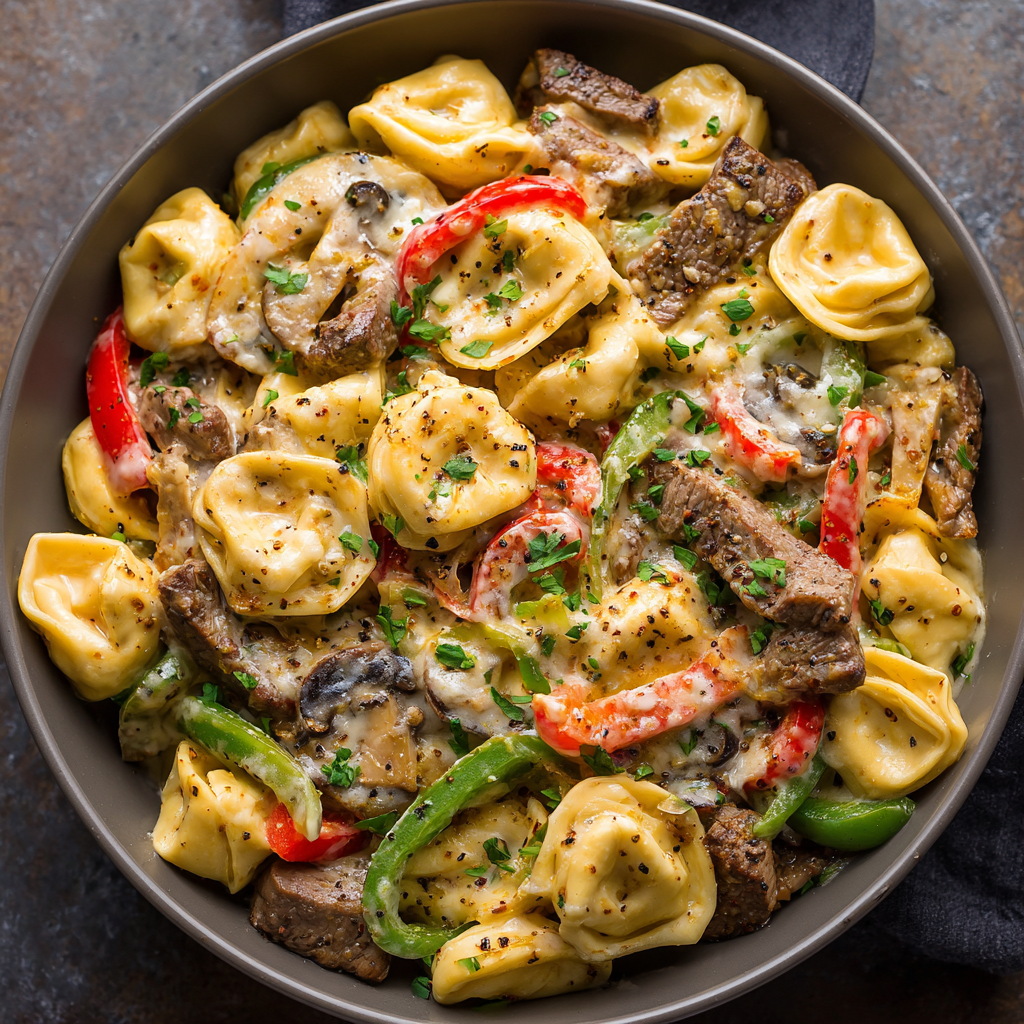
Imagine this: plump, cheesy tortellini, those little pasta pillows of joy, swimming in a creamy, velvety sauce that’s absolutely loaded with all the classic Philly cheesesteak goodness. We’re talking tender, savory strips of steak, sweet caramelized onions, and colorful, crisp-tender bell peppers, all wrapped up in a blanket of melty provolone. It’s the soul-satisfying essence of a cheesy steak sandwich, but in a bowl you can eat with a fork (no drippy juices down your arm!).
This isn’t just a meal; it’s a weeknight dinner hero, a crowd-pleasing potluck star, and the answer to your deepest comfort food cravings. It comes together in about 30 minutes, uses mostly one pan (hello, easy cleanup!), and fills your kitchen with an aroma that will have everyone asking, “Is it ready yet?” So, tie on your apron, crank up some tunes, and let’s turn simple ingredients into a legendary dinner. Trust me, this recipe is about to become a regular in your rotation.
The Food Truck & The “What If?” Moment
This recipe was born from a serious craving and a dash of culinary curiosity. A few years back, I was wandering through a street food festival, utterly hypnotized by the line snaking from this legendary Philly cheesesteak truck. The scent of grilling onions and searing beef was pure magic. But as much as I wanted that sandwich, I’d just spent the day testing pasta recipes and had tortellini on the brain.
Standing there, it hit me: What if you could get that same mouthwatering flavor in every bite of pasta? What if the cheese wasn’t just a slice on top, but a creamy, cohesive sauce clinging to every nook and cranny? I rushed home, bypassed the hoagie rolls, and went straight for the skillet and a package of cheese tortellini. That first experimental batch—a little messy, incredibly cheesy, and absolutely perfect—was a revelation. It captured the hearty, satisfying spirit of Philly but in a fun, shareable, fork-twirlable form. It’s proof that the best recipes often start with a simple, hungry “what if?”
Gathering Your Flavor All-Stars
Here’s everything you’ll need to bring this pasta dream to life. Don’t stress about perfection—cooking is about flavor, not fuss!
- 1 lb cheese tortellini (fresh or frozen): The hearty base. Fresh tortellini cooks faster and has a wonderfully delicate texture, but frozen is a fantastic, always-available backup. The pre-filled cheese inside is a bonus pocket of joy!
- 1 tbsp olive oil: Our cooking workhorse. It adds a subtle fruitiness and prevents everything from sticking to the pan.
- 1/2 lb thinly sliced steak (ribeye or sirloin): The star! Look for “shaved steak” or “cheesesteak meat” at the store, or pop a slightly frozen sirloin or ribeye in the freezer for 30 minutes so you can slice it paper-thin. This ensures quick, even cooking.
- 1 small onion, sliced: Sweetness and depth. I like yellow onions for their balance, but a sweet Vidalia works beautifully too.
- 1 green bell pepper, sliced: Classic Philly crunch and a mild, fresh flavor.
- 1/2 red bell pepper, sliced: For color and a touch more sweetness. Using both peppers makes the dish as vibrant as it is tasty.
- 2 cloves garlic, minced: The flavor booster. It gets sautéed just until fragrant, adding a crucial layer of savory goodness.
- 1/2 cup heavy cream: The foundation of our luscious sauce. It creates a rich, silky base that the cheese will melt into perfectly.
- 1/2 cup beef broth: This is the secret weapon! It adds a deep, meaty umami flavor to the sauce and thins the cream just enough to coat everything beautifully.
- 1 cup shredded provolone or mozzarella cheese: The glue! Provolone is the authentic Philly choice with a sharper, tangier note, while mozzarella is a meltier, milder option. A blend is also incredible.
- Salt & pepper to taste: Your essential seasonings. Always taste before serving!
- Optional: parsley or hot sauce for garnish: A sprinkle of fresh parsley adds a pop of color and freshness, while a dash of hot sauce can cut through the richness for those who like a kick.
Let’s Get Cooking: Your Foolproof Guide
Ready to create some magic? Follow these steps, and you’ll have a restaurant-worthy dish on the table in no time. I’ve packed each step with my favorite chef hacks to ensure your success.
Step 1: Cook the Tortellini. Bring a large pot of well-salted water to a rolling boil. Cook your tortellini according to the package directions, but aim for al dente—it will continue to cook a bit in the sauce later. Once done, drain it and give it a light drizzle of olive oil to prevent sticking. Chef’s Hack: Reserve about 1/4 cup of the starchy pasta water before draining. It’s liquid gold for adjusting sauce consistency at the end!
Step 2: Sear the Steak. While the pasta cooks, heat the olive oil in a large skillet or Dutch oven over medium-high heat. Pat your steak strips dry with a paper towel (this is key for a good sear!). Add them to the hot pan in a single layer, season with salt and pepper, and let them cook undisturbed for 1-2 minutes to get some nice color. Stir just until no longer pink, then immediately remove them to a plate. They’ll finish cooking later, so we’re avoiding tough, overcooked beef!
Step 3: Sauté the Veggies. In that same glorious, beefy-flavored pan (don’t you dare wash it!), add the sliced onions and peppers. Cook them over medium heat for 5-7 minutes, stirring occasionally, until they’ve softened and gained some beautiful caramelized edges. Add the minced garlic and cook for just one more minute until fragrant—you’ll smell it! Burnt garlic is bitter, so keep it moving.
Step 4: Create the Creamy Cheese Sauce. This is where the magic happens! Pour in the beef broth and heavy cream. Let the mixture simmer gently for 3-4 minutes, allowing it to reduce slightly and thicken. Now, reduce the heat to low. Gradually sprinkle in your shredded cheese, stirring constantly until it’s completely melted and the sauce is smooth and cohesive. Chef’s Hack: Adding cheese off the heat or over too high heat can cause it to seize up and get grainy. Low and slow is the way to go for a velvety sauce.
Step 5: The Grand Combine. Add the cooked, drained tortellini and the reserved steak strips (and any juices from the plate!) back into the skillet with the sauce and veggies. Gently toss everything together until every piece of pasta and every strip of steak is coated in that creamy, cheesy embrace. If the sauce seems too thick, splash in a little of that reserved pasta water until it’s just right. Taste and adjust seasoning with more salt and pepper if needed.
Plating Up for Maximum Enjoyment
This dish is a star no matter how you serve it, but a few little touches can make it feel extra special.
Scoop generous portions into wide, shallow bowls—you want room to twirl that pasta! The final flourish is everything. A bright sprinkle of chopped fresh parsley not only looks gorgeous but adds a whisper of freshness. For my spice-loving friends, a few dashes of hot sauce or a pinch of red pepper flakes on the table is a must. If you’re feeling indulgent, an extra little mound of shredded cheese on top never hurt anybody.
What to serve with it? A simple, crisp green salad with a sharp vinaigrette is the perfect counterpoint to the rich, creamy pasta. For a true comfort food feast, a side of warm, buttery garlic bread is absolutely non-negotiable for mopping up every last drop of that incredible sauce.
Make It Your Own: Delicious Twists & Swaps
One of my favorite things about this recipe is its flexibility. Play with it and make it suit your taste!
- The Chicken Cheesesteak: Swap the steak for thin slices of chicken breast or thigh. Sauté until cooked through, then follow the recipe as written. It’s a lighter but equally delicious take.
- The “Mushroom Philly” (Vegetarian): Omit the steak and beef broth. Use vegetable broth instead. Sauté a generous 2 cups of sliced cremini or portobello mushrooms with the peppers and onions until they’re deeply browned and tender. They bring an amazing meaty texture and umami flavor.
- Spicy Kick: Add a diced jalapeño or serrano pepper to the veggie mix. Finish the dish with a swirl of sriracha or chipotle hot sauce for a smoky heat.
- Cheese Blend Bliss: Experiment with your cheese! Try a mix of provolone, mozzarella, and a tablespoon of cream cheese for extra tang and creaminess. A sharp white cheddar also works wonderfully.
- Shortcut Version: In a serious time crunch? Use a high-quality frozen pepper and onion stir-fry mix and pre-cooked grilled steak strips from the deli section. You’ll have dinner on the table in 15 minutes flat.
Beau’s Kitchen Notes
This recipe has seen many iterations in my kitchen! The first time I made it, I may have been a little over-enthusiastic with the cheese (is that possible?) and created a sauce so thick you could stand a fork in it. Delicious, but a lesson learned—the beef broth is the balancing act that makes it saucy, not gloppy.
I’ve also learned this is a fantastic “clean out the fridge” recipe. A lone zucchini? Dice it and toss it in with the peppers. Some leftover roast beef? Chop it up and use it instead of steak. The formula is forgiving. The goal is simple: create something deeply satisfying that makes you and the people you feed happy. That’s what Feastical is all about.
Your Questions, Answered
Q: My cheese sauce turned out grainy/lumpy. What happened?
A: This usually means the heat was too high when you added the cheese. Cheese melts best over low, gentle heat. If it happens, don’t panic! Remove the pan from the heat and vigorously whisk in a splash of extra cream or warm broth. It should smooth right out.
Q: Can I make this ahead of time?
A: You can prep the components! Cook the tortellini, sear the steak, and chop the veggies ahead of time. Store them separately in the fridge. When ready to eat, sauté the veggies, make the sauce, and combine everything. The pasta will heat through perfectly. Note that the sauce will thicken as it sits, so have that pasta water or a bit of extra broth on hand to loosen it up.
Q: What’s the best cut of beef to use if I can’t find shaved steak?
A: Ribeye or top sirloin are your best bets for flavor and tenderness. Partially freeze the steak for 30-45 minutes—this firms it up and makes slicing it super thin a breeze with a sharp knife.
Q: Can I use a different pasta?
A: Absolutely! Cheese ravioli is a direct swap. For a more traditional pasta, try rigatoni, penne, or fettuccine. Just cook your chosen pasta to al dente and proceed with the recipe.

Philly Cheesesteak Tortellini Pasta : Creamy, Cheesy, and Loaded with Flavor
Description
Two comfort food classics collide in this dreamy pasta dish! Tender steak, caramelized onions, and crisp bell peppers meet cheesy tortellini in a rich, creamy sauce that tastes just like a Philly cheesesteak—only fork-friendly. Perfect for weeknight dinners, potlucks, or any time you need a serious comfort-food fix.
Ingredients
-
1 lb cheese tortellini (fresh or frozen)
-
1 tbsp olive oil
-
½ lb thinly sliced steak (ribeye or sirloin)
-
1 small onion, sliced
-
1 green bell pepper, sliced
-
½ red bell pepper, sliced
-
2 cloves garlic, minced
-
½ cup heavy cream
-
½ cup beef broth
-
1 cup shredded provolone or mozzarella cheese
-
Salt & pepper, to taste
-
Optional: chopped parsley or hot sauce for garnish
Instructions
-
Cook the tortellini: Bring a large pot of salted water to a boil. Cook tortellini according to package directions until al dente. Drain, drizzle lightly with olive oil, and reserve ¼ cup pasta water for later.
-
Sear the steak: Heat olive oil in a large skillet over medium-high heat. Pat steak dry and season with salt and pepper. Sear for 1–2 minutes until lightly browned, then remove from pan.
-
Sauté the veggies: In the same skillet, cook onions and peppers for 5–7 minutes until softened and slightly caramelized. Add garlic for the last minute, stirring until fragrant.
-
Make the creamy sauce: Pour in beef broth and heavy cream. Simmer 3–4 minutes. Reduce heat to low and gradually add cheese, stirring until smooth.
-
Combine: Return steak and tortellini to the pan. Toss gently to coat everything in the sauce. Adjust consistency with reserved pasta water if needed. Taste and season with salt and pepper.
-
Serve: Scoop into bowls, garnish with parsley or hot sauce, and enjoy immediately. Pair with garlic bread or a crisp green salad.
Notes
-
Avoid grainy sauce: Add cheese over low heat to prevent it from seizing.
-
Make ahead: Cook pasta, steak, and veggies separately; combine with sauce when ready.
-
Cheese variations: Mix provolone with mozzarella or cream cheese for extra creaminess.
-
Pasta swap: Cheese ravioli, rigatoni, penne, or fettuccine work perfectly.
-
Vegetarian option: Replace steak and beef broth with mushrooms and vegetable broth.
Nutritional Info (A General Guide)
Please note: The following is an approximate estimate per serving (based on 4 servings) generated from the listed ingredients. For precise dietary needs, consult a nutrition calculator with your specific brands and measurements.
- Calories: ~580
- Protein: 34g
- Carbohydrates: 42g
- Fat: 30g
- Prep Time: 10 mins
- Cook Time: 20 mins
- Total Time: 30 mins
- Servings: 4
This dish is a balanced meal in a bowl, providing a good source of protein from the steak and cheese, energy from the pasta, and vitamins from the colorful peppers. To lighten it up slightly, you can use half-and-half instead of heavy cream and opt for a lower-fat cheese blend.
Final Thoughts from My Kitchen to Yours
And there you have it, friends—my take on the ultimate comfort food mashup. This Philly Cheesesteak Tortellini Pasta is more than just a recipe; it’s an invitation to play, to experiment, and to gather around the table for a meal that’s guaranteed to spark joy.
I hope this recipe finds its way into your kitchen and becomes one of those reliable, beloved dishes you turn to again and again. When you make it, I’d love to hear how it turns out! Tag me @feastical on social media so I can see your beautiful creations. Remember, the best ingredient you can add to any dish is a dash of fun and a whole lot of love. Now, go forth and cook something Feastical!
Until next time, keep your spoons sizzling and your hearts full,
Beau

Authentic Greek Chicken Souvlaki: Juicy, Zesty, and Easy to Grill
Let’s Bring the Taverna to Your Backyard: The Magic of Homemade Chicken Souvlaki
Hey friends, Beau here! Let me paint you a picture: It’s a warm summer evening. The air is filled with the hypnotic scent of charcoal, lemon, and garlic. In the distance, you hear the happy chatter of friends and family, the clinking of glasses, and the satisfying sizzle of something incredible hitting a hot grill. That, my friends, is the soul-stirring soundtrack of Greek chicken souvlaki. And guess what? You don’t need a plane ticket to Santorini to experience it. Your own backyard (or even your trusty grill pan) is about to become your favorite Mediterranean taverna.
Today, we’re diving headfirst into my absolute go-to recipe for Authentic Greek Chicken Souvlaki. This isn’t just another grilled chicken recipe. This is a passport to flavor town. We’re talking about tender, juicy cubes of chicken, marinated in a zesty, herbaceous bath until they’re practically begging for the fire, then charred to perfection. Served with warm, pillowy pita, cool, crunchy veggies, and a generous dollop of creamy, garlicky tzatziki… it’s a symphony in every bite. The best part? It’s deceptively simple. This is feel-good, bring-people-together food at its finest, and I can’t wait to walk you through every delicious step.
So, grab your skewers and your appetite. We’re about to make some magic happen.
My First Bite: A Memory That Stuck (Like Good Tzatziki)
My love affair with souvlaki didn’t start in a fancy restaurant; it started at a wobbly plastic table on a bustling side street in Athens. I was 22, backpacking and hungry, completely overwhelmed by the choices. A kind shop owner, seeing my confusion, pointed to a simple grill where skewers were turning over glowing coals. “Souvlaki,” he said with a smile. “You try.”
What arrived was unassuming: a few pieces of grilled chicken on a skewer, nestled in a piece of parchment paper with a slice of lemon and a piece of bread. No plate, no fuss. I took a bite, and my world tilted. The chicken was impossibly juicy, with a crisp, charred edge that gave way to the bright, sunny burst of lemon and the earthy whisper of oregano. It was pure, unadulterated flavor. It was food with a purpose: to nourish and delight, simply and perfectly. That moment taught me more about cooking than any cookbook ever could—that the best dishes often speak in whispers, not shouts, and that true flavor needs no elaborate disguise. Every time I make this recipe, I’m chasing that first, perfect bite. And now, I get to share that chase with you.
Gathering Your Sunshine: The Souvlaki Lineup
Here’s the beautiful part: the ingredient list is short and sweet. This is about quality, not quantity. Let’s break it down.
- 1½ lbs boneless, skinless chicken breast or thighs: This is your star! Thighs are my personal favorite for souvlaki—they have more fat, which means they stay incredibly juicy and forgiving on the grill. Breast works beautifully too; just watch it a minute closer. Cut into sturdy 1-inch cubes.
- 3 tbsp good olive oil: The base of our marinade. It carries the flavors and helps the chicken crisp up. Use the best extra-virgin olive oil you have for dressing; a regular olive oil works great for marinading and grilling.
- Juice of 1 large lemon: Non-negotiable for that authentic zing! Freshly squeezed is key—bottled juice just doesn’t have the same bright, vibrant personality. If you’re in a pinch, a good quality bottled *fresh* lemon juice can work, but really, grab a real lemon.
- 3 garlic cloves, minced: The aromatic soul. Don’t be shy here. I press mine for a more pervasive flavor, but a fine mince works perfectly.
- 1½ tsp dried oregano: Specifically, Greek oregano if you can find it. It’s earthier and more potent than the standard Italian variety. This tiny herb is the signature scent of Greek grilling. If you only have fresh, use 1 tablespoon, chopped.
- 1 tsp kosher salt: Seasoning is crucial. I prefer kosher salt for its clean taste. If using fine table salt, start with ¾ tsp.
- ½ tsp black pepper: Freshly cracked adds a lovely warmth.
- Wooden or metal skewers: If using wooden skewers, soak them in water for at least 30 minutes before grilling to prevent them from becoming matchsticks on your grill! Metal skewers are a fantastic reusable option—they get hot and help cook the chicken from the inside.
For the Full Taverna Experience (Serving Suggestions): Warm pita bread, homemade or store-bought tzatziki, chopped tomato, cucumber, red onion, fresh parsley, and maybe even a sprinkle of crumbled feta. A side of lemon wedges for an extra squeeze is a must!
Let’s Get Grilling: Your Step-by-Step Roadmap to Souvlaki Bliss
Okay, team. Let’s fire it up. This process is simple, but a few chef tricks will take your results from “good” to “can-I-have-your-recipe?” legendary.
- The Flavor Foundation (Make the Marinade): In a medium bowl, whisk together your olive oil, fresh lemon juice, minced garlic, dried oregano, salt, and pepper. Give it a good whisk until it looks slightly emulsified and smells like heaven. Chef’s Hack: Want an even more tender result? Add a tablespoon of plain Greek yogurt to the marinade. The enzymes work wonders!
- The Bath (Marinate the Chicken): Pat your chicken cubes dry with a paper towel. This helps the marinade stick! Add the chicken to the bowl and toss, toss, toss until every single piece is lovingly coated. Cover the bowl (or transfer to a large zip-top bag) and let it marinate in the fridge. Here’s the deal: At least 1 hour is good. But 3-4 hours is the sweet spot. Overnight? Even better! The lemon juice will start to “cook” the exterior a bit, giving you that perfect texture. Just don’t go over 24 hours, or the texture can get a bit mealy.
- Skewer School (Threading the Chicken): When you’re ready to cook, take the chicken out of the fridge about 20 minutes before grilling. Letting it come closer to room temperature ensures even cooking. Now, thread the chicken onto your soaked wooden or metal skewers. Don’t pack the pieces too tightly; leave a tiny bit of space between them so the heat can circulate and give you those beautiful, all-over char marks.
- Fire & Flip (Grilling to Perfection): Preheat your grill to medium-high heat (about 400-450°F). Make sure those grates are clean and lightly oiled! Place your skewers on the grill. Now, here’s the secret: let them be! Don’t move them for a good 4-5 minutes. You want a proper sear. Then, give them a quarter turn to get cross-hatch marks, cook for another 2-3 minutes, then flip and repeat. Total cook time is usually 10-12 minutes. The chicken is done when it’s firm to the touch and registers 165°F internally. A little char is your friend!
- The Grand Finale (Resting): This might be the most important step. Transfer the skewers to a clean plate or cutting board and let them rest for 5 minutes. This allows the juices, which have rushed to the surface during grilling, to redistribute back throughout the meat. If you skip this, those precious juices will end up on the plate, not in your mouth.
Setting the Scene: How to Serve Your Souvlaki Masterpiece
Presentation is part of the fun! You can serve souvlaki two classic ways: As a platter or as a wrap.
For a stunning, shareable platter, lay out a few warm pitas on a large board or plate. Slide the chicken off the skewers (or leave them on for a dramatic effect!) and pile it high. Scatter bowls of creamy tzatziki, chopped tomatoes, cucumbers, and red onions. Add a big handful of fresh parsley or oregano leaves and some lemon wedges. Let everyone build their own perfect bite. It’s interactive, colorful, and downright festive.
For the classic street-food wrap, take a warm pita and slather it with tzatziki. Add a skewer’s worth of chicken, some tomatoes, onions, and a few fries if you’re feeling authentic (yes, fries in the wrap—trust the process!). Roll it up tightly in parchment paper or foil, and you’ve got a handheld taste of Athens. Don’t forget the napkins—this is gloriously messy eating!
Make It Your Own: Delicious Souvlaki Twists
Once you’ve mastered the classic, the world is your grilled oyster! Here are a few of my favorite spins:
- The Spicy Kick: Add 1 teaspoon of smoked paprika and a big pinch of crushed red pepper flakes to the marinade. It adds a warm, smoky depth that’s absolutely addictive.
- The Herb Garden: Swap the dried oregano for 2 tablespoons of chopped fresh herbs. A mix of oregano, thyme, and a little rosemary is divine.
- Pork or Lamb Souvlaki: The marinade works wonders on other proteins! Use cubed pork tenderloin or leg of lamb. Adjust grilling times slightly based on the cut.
- Vegetarian Power: Got veggie friends? Marinade large chunks of halloumi cheese, portobello mushrooms, or extra-firm tofu using the same method. Grill until beautifully marked. So good!
- Citrus Swap: Try using the juice of an orange or a meyer lemon for a sweeter, slightly different citrus profile. Just keep some fresh lemon for serving.
Beau’s Bench Notes: The Inside Scoop
This recipe has been my summer staple for years, and it’s evolved in my kitchen. I used to be strictly a breast man, until one slightly overcooked batch led me to the juicier promised land of thighs. Now I’m a thigh evangelist! A funny story: I once was so eager to grill I forgot to soak my wooden skewers. Let’s just say we had “deconstructed flambéed souvlaki” that night. Lesson learned the smoky way!
My biggest tip? Double the marinade recipe. Use half for the chicken, and reserve the other half (before adding the chicken!) to use as a finishing sauce. Just simmer it in a pan for a few minutes to cook off the raw garlic, then drizzle it over the grilled skewers. Flavor explosion!
Your Souvlaki Questions, Answered!
Q: My chicken always turns out dry. What am I doing wrong?
A: Two likely culprits! First, you might be overcooking it. Use a thermometer—165°F is your target. Second, you’re probably not letting it rest. That 5-minute rest is NOT optional for juicy meat. Also, try thighs—they’re much more forgiving.
Q: Can I cook this indoors?
A: Absolutely! A grill pan over medium-high heat works brilliantly. You can also broil them in the oven on a baking sheet lined with a rack. Place the skewers about 4-6 inches from the broiler element and turn halfway through, cooking for roughly the same time.
Q: How long can I marinate the chicken?
A: The sweet spot is 3-4 hours, up to overnight. Because of the acidic lemon juice, marinating for more than 24 hours can start to break down the proteins too much, giving the chicken a slightly mushy texture.
Q: Can I use the leftover marinade as a sauce?
A> Do not use the marinade that raw chicken has been sitting in as a sauce without cooking it first. If you want to use it, boil it vigorously in a saucepan for at least 3-5 minutes to kill any bacteria. Better yet, make a little extra marinade (without chicken) to use as a finisher!

Authentic Greek Chicken Souvlaki: Juicy, Zesty, and Easy to Grill
Description
Bring the flavors of a Greek taverna straight to your backyard! Tender chicken cubes are marinated in lemon, garlic, and oregano, then grilled to perfection. Served with warm pita, crisp veggies, and creamy tzatziki, this dish is perfect for summer gatherings or a weeknight feast.
Ingredients
-
1½ lbs boneless, skinless chicken thighs or breasts, cut into 1-inch cubes
-
3 tbsp olive oil
-
Juice of 1 large lemon
-
3 garlic cloves, minced
-
1½ tsp dried oregano (Greek oregano if possible)
-
1 tsp kosher salt
-
½ tsp freshly cracked black pepper
-
Wooden skewers (soaked 30 min) or metal skewers
Optional for serving: Warm pita bread, tzatziki, chopped tomato, cucumber, red onion, fresh parsley, lemon wedges, crumbled feta
Instructions
-
Make the marinade: Whisk together olive oil, lemon juice, garlic, oregano, salt, and pepper. For extra tenderness, add 1 tbsp plain Greek yogurt.
-
Marinate the chicken: Pat chicken dry, add to marinade, and toss to coat. Cover and refrigerate for 1–4 hours (overnight for best flavor).
-
Skewer the chicken: Remove chicken from fridge 20 min before grilling. Thread cubes onto skewers, leaving small gaps between pieces.
-
Grill: Preheat grill to medium-high (400–450°F). Oil the grates lightly. Grill 4–5 min per side, rotating for cross-hatch marks, until internal temp reaches 165°F.
-
Rest: Let skewers rest 5 min before serving to keep the chicken juicy.
-
Serve: Offer as a platter with pita, tzatziki, veggies, and lemon wedges, or wrap in pita for a handheld version.
Notes
-
Juicier chicken: Use thighs—they handle grilling better than breasts.
-
Indoor option: Grill pan or oven broiler works perfectly.
-
Extra flavor: Double the marinade, save half, simmer, and drizzle over cooked chicken.
-
Vegetarian twist: Marinate halloumi, portobello, or tofu cubes the same way.
Nutritional Information (A Quick Note!)
Here’s a basic breakdown for the chicken souvlaki only (one serving is roughly ¼ of the recipe, about 6 oz of chicken). Remember, toppings and pita will change this!
Calories: ~250 | Protein: 27g | Fat: 14g | Carbohydrates: 2g | Sodium: ~650mg
This is a high-protein, low-carb option that’s packed with flavor. Using olive oil provides healthy monounsaturated fats. To lighten it up, serve over a big Greek salad instead of with pita, or use Greek yogurt-based tzatziki. As always, these are estimates based on specific ingredients; your brands may vary slightly.
The Last Bite (Until You Make It Again!)
And there you have it, friends—my heart (and stomach’s) recipe for perfect Greek Chicken Souvlaki. This dish is more than just dinner; it’s an experience. It’s about firing up the grill, gathering your people, and sharing something made with simple, honest ingredients and a whole lot of love.
I hope this recipe becomes a regular in your rotation, just like it is in mine. Don’t be afraid to play with it, make it your own, and most importantly, have fun with it. Cooking should be a joy, not a chore. Now, go forth and grill! And when you do, I’d love to hear about it. Tag me over on the blog or socials with your creations.
Until next time, keep your spatula close and your appetite closer. Happy cooking!
Beau

Vietnamese Summer Rolls with Chicken (Fresh & Healthy Rice Paper Rolls)
Meet Your New Favorite Summer Obsession
Hey friends, Beau here! Let’s talk about a meal that feels like sunshine on a plate. You know those days when you crave something utterly delicious but also want to feel light, energized, and maybe even a little virtuous? I’ve got you. Today, we’re diving fork-first into the world of Vietnamese Summer Rolls with Chicken. Forget heavy sauces and long oven times; this is all about fresh, vibrant ingredients coming together in a fun, hands-on way.
These translucent rice paper parcels are little bundles of joy—crisp veggies, tender chicken, soft noodles, and a riot of fragrant herbs, all wrapped up and ready for a dunk in the most addictive peanut sauce you’ll ever make. They’re not just a recipe; they’re an experience. Perfect for a lazy weekend lunch, a stunning appetizer that’ll wow your friends, or a make-ahead healthy dinner that actually excites you. The best part? No cooking heat required (well, barely any), making them the ultimate warm-weather kitchen win. So, clear some counter space, grab your favorite people, and let’s roll!
How a Street Food Stall Stole My Heart
I’ll never forget the first time I truly *got* a summer roll. It wasn’t in a fancy restaurant; it was on a sweltering afternoon in Hoi An, Vietnam, years ago. I was wandering through a bustling market, completely overwhelmed (in the best way) by the sights and smells, when a woman at a tiny stall smiled and gestured for me to sit. With lightning speed, she dipped a brittle sheet of rice paper into a bowl of water, laid it flat, and with a magician’s grace, assembled a perfect roll right before my eyes. She handed it to me with a small dish of sauce.
That first bite was a revelation. The cool, soft wrapper gave way to an incredible CRUNCH, followed by the savory chicken, the freshness of herbs I couldn’t even name yet, and then that sweet, salty, nutty sauce tying it all together. It was interactive, personal, and packed with more flavor and texture than I thought possible. It was food that made you smile. That’s the spirit I want to bring to your kitchen today—that sense of discovery, fun, and pure, unadulterated freshness. Let’s recreate that magic, right at home.
Gathering Your Fresh Crew: Ingredients & Why They Matter
Here’s the beautiful part: the ingredient list is a choose-your-own-adventure of freshness. This is your foundation, but feel free to make it yours!
- 8 Rice Paper Wrappers (Banh Trang): These are the edible glue of the operation! Find them in the Asian aisle. They start hard and brittle but transform into a soft, pliable sheet. Chef’s Tip: Don’t buy the “spring roll” wrappers meant for frying—those are different!
- 2 Cups Cooked Chicken Breast, Thinly Sliced: Leftover rotisserie chicken is your BEST friend here for ease. Poach or bake your own if you prefer. For maximum flavor, toss the cooked, sliced chicken with a tiny splash of soy sauce or fish sauce.
- 1 Cup Rice Vermicelli Noodles, Cooked & Cooled: Also called “bun” or rice sticks. They cook in just 3-5 minutes! Rinse them under cold water after cooking to stop the process and prevent stickiness.
- The Crunch Brigade:
- 1 Cup Shredded Lettuce: Butter or romaine adds great texture. It’s the hydrating base layer.
- 1 Cup Julienned Carrots: Sweet, colorful, and packed with beta-carotene. A julienne peeler makes this task a 30-second dream.
- 1 Cup Julienned Cucumber: Adds a fantastic, refreshing watery crunch. I like to seed them first for less moisture inside the roll.
- ½ Red Bell Pepper, Thinly Sliced: A pop of color and a mild, sweet flavor. Yellow or orange work beautifully too!
- The Herb Heroes:
- ¼ Cup Fresh Mint Leaves: Non-negotiable for that iconic, bright flavor. It’s the soul of the roll!
- ¼ Cup Fresh Cilantro Leaves: Love it or… well, if you’re in the “it tastes like soap” camp, just leave it out or use Thai basil instead.
For The “I Could Drink This” Peanut Dipping Sauce:
- ¼ Cup Creamy Peanut Butter: The rich, nutty backbone. Natural or regular both work—just stir well if using natural.
- 1 Tablespoon Hoisin Sauce: Adds depth, sweetness, and a touch of umami. This is the secret flavor booster!
- 1 Teaspoon Soy Sauce: For saltiness. Use tamari for a gluten-free version.
- 1 Teaspoon Lime Juice: The essential bright note to cut through the richness. Fresh is best!
- 1-2 Tablespoons Warm Water: Your sauce thickness regulator. Start with one and add until it’s a perfect dunkable consistency.
Let’s Get Rolling: Your Step-by-Step Roadmap to Success
Ready to play? Think of this as a fun kitchen assembly line. I recommend setting up a “rolling station” with all your fillings in little bowls. It makes the process smooth and almost meditative.
- Prep Your Fillings: This is the key to easy rolling. Cook your noodles according to package directions (usually a quick boil), drain, and rinse with cold water. Shred your chicken, julienne all your veggies, and wash your herbs. Having everything prepped, cooled, and within arm’s reach is 90% of the battle won. Chef’s Hack: Pat your veggies and herbs dry with a paper towel. Extra moisture can make the rice paper soggy and harder to handle.
- Soften the Rice Paper: Fill a large, shallow skillet or pie dish with warm (not hot) water. Take one rice paper wrapper and submerge it for about 10-15 seconds. You’ll feel it soften. The trick? It should still feel slightly firm when you pull it out—it continues to soften on your work surface. If it’s already floppy in the water, it’s gone too far and might tear. Do one wrapper at a time.
- Lay the Foundation: Gently lay the softened wrapper on a clean cutting board or plate. It will be sticky—that’s good! Now, imagine a horizontal line across the bottom third of the circle. This is where your filling goes. Start with a small bed of lettuce. This creates a protective layer between the sharper veggies and the delicate wrapper.
- Pile on the Goodness: On top of the lettuce, add a small clump of noodles, a few slices of chicken, and then a pinch each of carrots, cucumber, and bell pepper. Finish with 2-3 mint leaves and a few cilantro sprigs. Less is more! Overstuffing is the most common rookie mistake. You want enough to be satisfying, but not so much that you can’t seal the roll.
- The Roll Technique: Here’s the satisfying part. Fold the left and right sides of the wrapper inward over the ends of the filling. Then, lift the bottom flap (the part closest to you) up and over the filling, tucking it in tightly. Now, using both hands, roll the bundle forward firmly but gently until it’s completely sealed. It should feel snug, like a little edible burrito. Place it seam-side down on a serving plate. Pro Tip: If you rip one? No stress! Just double-wrap it with another softened rice paper. It’ll taste the same, I promise!
- Repeat & Sauce It Up: Continue with the remaining wrappers and filling, keeping the finished rolls from touching so they don’t stick. For the sauce, simply whisk the peanut butter, hoisin, soy sauce, and lime juice in a bowl. Add warm water a tablespoon at a time until it’s a silky, dippable consistency. Taste and adjust—want more tang? Add lime. More salt? A dash more soy.
Plating Up the Freshness
Presentation is half the fun with these! Don’t just pile them on a plate. Create a show-stopping platter. Arrange the rolls on a large plate or wooden board, maybe on a bed of extra lettuce leaves or herb sprigs. Slice one or two in half diagonally to show off the beautiful, colorful interior—it’s instant food blogger vibes! Place the bowl of that gorgeous peanut sauce right in the center for dipping.
For a full meal experience, I love serving these with a simple side like a mango and avocado salad or a light, brothy soup. They’re also fantastic as part of a larger “make-your-own-roll” spread. Just put all the components in separate bowls and let everyone dive in and create their own masterpieces. It’s interactive, delicious, and the cleanup is a breeze!
Make It Your Own: Delicious Twists & Swaps
The template is here, but the canvas is yours. Here are a few of my favorite ways to mix it up:
- Shrimp & Mango: Swap the chicken for cooked, peeled shrimp and add thin slices of ripe mango. The sweet mango with the herbs and peanut sauce is a game-changer.
- Totally Vegetarian: Ditch the chicken and add baked tofu (marinated in a little soy sauce), avocado slices for creaminess, and maybe some quick-pickled daikon radish for extra punch.
- Thai-Inspired: Use cooked, ground chicken or pork seasoned with a bit of lemongrass and fish sauce. Add thin rice noodles and lots of Thai basil instead of cilantro.
- “Cheater’s” Dipping Sauce: Short on time? Mix hoisin sauce with a sprinkle of crushed peanuts and a tiny splash of water to loosen. Simple and delicious!
- Low-Carb / Keto-Friendly: Skip the rice noodles entirely and double up on the crunchy veggies and herbs. The rolls will be just as flavorful and refreshing.
Beau’s Kitchen Confidential
Over the years, I’ve made approximately a zillion of these rolls. The first batch was… questionable. My rice paper was either a soggy mess or cracked like a desert floor. I overfilled them so much they looked like bursting sausages. But that’s the joy of cooking! You learn by doing. My biggest “aha” moment was realizing the fillings should be at room temperature or cool, not warm. Warm fillings steam the wrapper from the inside and turn it gummy.
Also, these are best eaten the day they’re made, but if you need to prep ahead, store them individually wrapped in damp paper towels and placed in a single layer in an airtight container in the fridge. They might lose a little texture, but the flavor will still be there. Mostly, just have fun with it. Put on some music, pour yourself a cool drink, and enjoy the process. That’s what Feastical is all about.
Your Summer Roll Questions, Answered
Q: My rice paper keeps tearing! What am I doing wrong?
A: Two likely culprits: 1) You’re oversoftening it. It should still have a hint of stiffness when you take it out of the water. 2) You’re using a rough surface. Make sure your board or plate is smooth. A ceramic plate or a clean, damp kitchen towel on the counter works wonders.
Q: Can I make these ahead of time for a party?
A: You can prep all the components hours ahead and store them separately. I’d recommend rolling them no more than 2-3 hours before serving. Keep them covered with a damp paper towel and then plastic wrap to prevent them from drying out.
Q: My peanut sauce is too thick / too thin. Help!
A> Too thick? Add warm water, just a teaspoon at a time, whisking until perfect. Too thin? Whisk in a bit more peanut butter or a tiny dash of hoisin to thicken it back up. It’s very forgiving!
Q: Are these gluten-free?
A: They can be! Rice paper and rice noodles are naturally gluten-free. Just ensure your soy sauce is tamari, and check that your hoisin sauce is a gluten-free brand (or substitute with a mix of tamari and a pinch of sugar).

Vietnamese Summer Rolls with Chicken (Fresh & Healthy Rice Paper Rolls)
Description
Vietnamese Chicken Summer Rolls – Fresh, Fun & 25-Minute Ready
Hey friends, Beau here! These summer rolls are crunchy, fresh, and bursting with herbs, chicken, and noodles—perfect for a light lunch, appetizer, or interactive dinner. Pair them with a silky peanut dipping sauce and you’ve got a meal that’s as fun to eat as it is delicious.
Ingredients
The Rolls:
-
8 rice paper wrappers (banh trang)
-
2 cups cooked chicken breast, thinly sliced (rotisserie works!)
-
1 cup rice vermicelli noodles, cooked & cooled
-
1 cup shredded lettuce (butter or romaine)
-
1 cup julienned carrots
-
1 cup julienned cucumber (seeded)
-
½ red bell pepper, thinly sliced
-
¼ cup fresh mint leaves
-
¼ cup fresh cilantro leaves (or Thai basil)
Peanut Dipping Sauce:
-
¼ cup creamy peanut butter
-
1 Tbsp hoisin sauce
-
1 tsp soy sauce (or tamari for gluten-free)
-
1 tsp lime juice
-
1–2 Tbsp warm water, to thin
Instructions
1. Prep Fillings
-
Cook noodles according to package instructions; rinse under cold water.
-
Shred chicken, julienne veggies, and wash herbs. Pat dry to avoid soggy wrappers.
2. Soften Rice Paper
-
Fill a shallow dish with warm water.
-
Submerge one wrapper 10–15 seconds until pliable but still slightly firm.
3. Assemble the Rolls
-
Lay wrapper on a smooth surface.
-
Place a small layer of lettuce near the bottom third.
-
Add a small clump of noodles, a few chicken slices, carrots, cucumber, bell pepper, and herbs.
-
Fold left and right sides over the filling.
-
Roll bottom flap over filling, then roll tightly to seal. Place seam-side down.
4. Make Peanut Sauce
-
Whisk peanut butter, hoisin, soy sauce, lime juice, and warm water until smooth. Adjust consistency.
5. Serve
-
Arrange rolls on a platter. Slice diagonally to show vibrant interiors. Serve with peanut sauce in the center.
Notes
-
Tearing rice paper? Don’t oversoften; use a smooth surface.
-
Make ahead? Prep ingredients separately; roll 2–3 hours before serving.
-
Peanut sauce too thick/thin? Adjust with warm water or extra peanut butter/hoisin.
-
Gluten-free? Use tamari and check hoisin sauce label.
Nourishment That Tastes This Good? Yes, Please.
Let’s talk about what you’re putting in your body—because it’s all fantastic stuff! These rolls are a beautifully balanced package. The lean chicken and peanut sauce provide satiating protein. The rice noodles offer quick energy from carbohydrates, while all those gorgeous vegetables deliver essential vitamins, minerals, and fiber to keep your digestion happy. The fats from the peanut sauce are the good, healthy kind. It’s a meal that fuels you without weighing you down. Remember, nutritional values are estimates and can vary based on specific ingredients and portion sizes, but you can feel great about enjoying every fresh, crunchy bite.
Approximate Per Roll (with sauce): Calories: 220 | Protein: 16g | Carbohydrates: 22g | Fat: 8g
The Last Bite
And there you have it, friends—your passport to a fresher, brighter way of eating. These Vietnamese Summer Rolls with Chicken are more than just a recipe; they’re a reminder that healthy food can be bursting with flavor, fun to make, and an absolute delight to share. Don’t be intimidated by the rice paper. Embrace the learning curve, laugh if one turns out a little wonky (the tastiest ones often are), and savor that moment when you dip your first homemade roll into that creamy peanut sauce.
I hope this recipe brings a little bit of that Hoi An market magic to your kitchen table. Give it a try, tag me over on @Feastical with your creations, and let me know how it goes! Until next time, keep your kitchen messy and your heart full. Happy rolling!
– Beau
Pin Title: Fresh Vietnamese Chicken Summer Rolls with Peanut Sauce | Easy & Healthy Recipe
Pin Description: Learn how to make vibrant & healthy Vietnamese Summer Rolls with Chicken! This easy, step-by-step recipe from Feastical features tender chicken, crisp veggies, fresh herbs, and

Apple Crescent Rollups (Easy Cinnamon Sugar Dessert)
Apple Crescent Rollups: Your New Favorite 35-Minute Dessert
Hey friends, Beau here from Feastical! Let me ask you a question that’s probably crossed your mind at least once this week: “How can I make something incredibly delicious, impressively cozy, and have it ready before my latest binge-watch session even hits the climax?” If you’re nodding, I’ve got your answer, and it involves zero fancy equipment and about 10 minutes of hands-on time.
I’m talking about Apple Crescent Rollups. Imagine this: sweet, tender slices of apple tossed in cozy cinnamon sugar, all snuggled up in a warm, flaky, buttery crescent roll blanket. They bake up golden and bubbly, filling your kitchen with a scent that smells like autumn happiness and pure comfort. This isn’t just a dessert; it’s a kitchen hug. It’s the treat you whip up when friends pop over unexpectedly, when the kids declare they need something sweet now, or when you, wonderful human, deserve a warm, gooey bite of simple joy after a long day.
We’re keeping it soulfully simple today. No pastry skills required. No chilling dough for hours. Just straightforward, feel-good food that brings everyone to the table with a smile. So, grab that can of dough hiding in the fridge, and let’s turn simple ingredients into pure magic.
The Story Behind the Rollup: Grandma Ellie’s “Quick-Fix” Philosophy
This recipe always takes me back to my Grandma Ellie’s kitchen. She was the queen of what she called “quick-fix wonders.” She believed with her whole heart that creating joy in the kitchen didn’t have to be complicated. One rainy afternoon, when my cousin and I were buzzing with boredom, she didn’t reach for a complex cookbook. She pulled out a can of biscuits (the ancestor of our crescent dough!), a couple of apples from her backyard tree, and a shaker of cinnamon sugar.
With a wink, she said, “Watch this, boys. We’re making pocket-sized apple pies in 20 minutes.” What emerged from her oven were these rustic, jammy, sugar-dusted parcels. They were imperfect, a little messy, and absolutely perfect. We ate them straight from the pan, burning our tongues because we couldn’t wait. That day, she taught me that the best recipes aren’t about perfection; they’re about the feeling you create. These Apple Crescent Rollups are my homage to her “quick-fix” philosophy—maximum joy, minimum fuss.
What You’ll Need: Simple Ingredients, Big Flavor
Here’s your short and sweet shopping list. I’ve added my chef-y notes and swap-outs so you can make this your own with what you’ve got.
- 1 (8 oz) can refrigerated crescent roll dough: The hero of our quick dessert! That magical, flaky, buttery canvas. Chef’s Tip: Keep it cold until the very second you’re ready to unroll. Warm dough is sticky and tricky.
- 1 large apple (Granny Smith or Honeycrisp recommended): Granny Smith gives us a lovely tartness that balances the sweet, while Honeycrisp is sweet and holds its shape beautifully. Substitution: Use what you love! Fuji, Braeburn, or Pink Lady all work great.
- 1/4 cup granulated sugar: This coats our apples and creates that delicious syrupy juice. Chef’s Insight: This isn’t just for sweetness; it draws moisture out of the apples to create the sauce inside the rollup.
- 1 tsp ground cinnamon: The soul of cozy flavor. Don’t be shy with it! Fun Twist: Add a tiny pinch of nutmeg or cardamom for a more complex spice profile.
- 2 Tbsp unsalted butter, melted: For that golden, crisp, and rich finish. Substitution: Salted butter works just fine; you can then omit any extra salt.
- 1/2 tsp vanilla extract: Our secret flavor booster! Stirred into the butter, it adds a beautiful, warm aroma. Pro Move: Use real vanilla bean paste if you have it for those gorgeous little specks.
- Optional: 1–2 Tbsp brown sugar for topping: Sprinkled on before baking, it creates a delightful, caramelized crunch. Highly recommended!
- Optional glaze: 1/2 cup powdered sugar + 1–2 Tbsp milk: The pretty (and tasty) finishing touch. Chef’s Hack: A drizzle of salted caramel sauce is an incredible alternative here.
Let’s Make Magic: Step-by-Step Instructions
Ready? Let’s roll (pun absolutely intended). Follow these steps, and you’ll be a rollup pro in no time.
- Prep Your Stage: Preheat your oven to 350°F (175°C). Lightly grease a small baking dish (an 8×8” or similar works perfectly). This isn’t just to prevent sticking; a snug dish helps the rollups bake evenly and steams them just a touch for tender apples. My Tip: While the oven heats, get everything else ready. We move fast once that dough is out!
- Create the Filling: Peel your apple, then slice it into thin, bite-sized pieces. I like slices about 1/4-inch thick. Toss them in a bowl with the granulated sugar and cinnamon until every piece is thoroughly coated. You’ll see the sugar start to look a little wet almost immediately—that’s the magic starting! Chef’s Hack: No peeler? That’s fine! Just give the apples a good scrub. The peel adds fiber and texture.
- The Grand Unroll & Assemble: Open the crescent roll can (that *pop* is so satisfying). Unroll the dough on a clean surface and gently separate it into the pre-cut triangles. Place a small pile of your cinnamon apples along the wide end of each triangle. Don’t overfill! About 4-5 slices is perfect. Now, start rolling from the wide end down to the point, gently tucking in the sides as you go to keep the filling secure. It should look like a little stuffed croissant. Pro Move: If the dough tears a little, don’t panic! Just pinch it back together. It’s all going to bake up beautifully.
- Flavor & Shine: Place each little rollup seam-side down in your prepared baking dish. They can be cozy and touching—it’s fine! Now, stir that 1/2 teaspoon of vanilla into your melted butter. Using a pastry brush (or the back of a spoon), generously brush this vanilla butter all over the tops of each rollup. This is KEY for flavor and that gorgeous golden color. For the final touch, sprinkle that optional brown sugar over the top. Trust me on this.
- Bake to Golden Perfection: Slide the dish into your preheated oven. Bake for 20-25 minutes. You’re looking for the tops to be a deep, golden brown and you should see some bubbly, caramel-colored juice peeking out from the seams. Your kitchen will smell unreal.
- The Finishing Touch: Let the rollups cool in the pan for about 5 minutes. They’re molten lava inside right out of the oven! If you’re using the glaze, whisk the powdered sugar and milk together until smooth, then drizzle it artfully (or enthusiastically!) over the warm rollups. The warmth will make the glaze melt into every nook.
How to Serve These Warm Hugs
Presentation is part of the fun! Here’s how I love to serve these up for maximum “wow” factor.
First, I always serve them warm. That’s non-negotiable for the best experience. Use a spatula to gently lift them onto a plate. For a solo treat, place one or two on a small plate with a big scoop of vanilla ice cream melting right over the top. The hot-and-cold combo is legendary.
For a family-style dessert, I keep them right in the baking dish, place it on a trivet in the middle of the table, and let everyone dig in. It’s cozy and communal. A side of whipped cream or a dollop of salted caramel sauce takes it to the next level. And don’t forget the coffee or a cold glass of milk—the perfect partners for this sweet, cinnamony delight.
Make It Your Own: Delicious Variations
Once you’ve mastered the classic, the world is your cinnamon-spiced oyster! Try one of these fun twists.
- Apple Berry Bliss: Add a handful of fresh raspberries or blueberries to the apple filling. The berries burst and create a gorgeous, jammy purple-pink sauce.
- Nutty Caramel Crunch: Sprinkle a few chopped pecans or walnuts into the filling. After glazing, top with an extra sprinkle of nuts for crunch.
- “Apple Pie” Upgrade: Add a tiny pinch of nutmeg and allspice to the cinnamon sugar. After brushing with butter, sprinkle with coarse sugar for a sparkling, crunchy top.
- Dairy-Free & Vegan: Use plant-based crescent roll dough (check labels!), swap butter for melted coconut oil or vegan butter, and use a simple powdered sugar + plant-milk glaze.
- Savory-Sweet Twist: Add a very light sprinkle of flaky sea salt over the glaze. It heightens all the flavors in the most incredible way.
Beau’s Chef Notes & Kitchen Confessions
This recipe is a living, breathing thing in my kitchen. I’ve made it probably a hundred times, and it’s evolved. Sometimes I get fancy with the apple cuts; sometimes I’m in a hurry and they’re more “rustic” (read: chunky). Both are delicious.
One time, I was filming a video for the site and was so busy chatting to the camera that I completely forgot to add the sugar to the apples. I realized it after they were rolled up! Kitchen disaster? Nope. I just sprinkled the sugar-cinnamon mix over the top before the butter. They baked up with a delightful sugary crust. It just goes to show—cooking is resilient. Don’t stress the small stuff. The goal is a delicious, happy kitchen, not a perfect one.
Your Questions, Answered (FAQs & Troubleshooting)
Q: My bottoms got a bit soggy. What happened?
A: This usually means the baking dish was a bit too crowded or the apples released a ton of juice. No worries—they still taste amazing! Next time, try a slightly larger dish so the rollups aren’t touching as much, and make sure your apple slices are thin, not thick chunks.
Q: Can I make these ahead of time?
A: You can assemble them up to a few hours ahead, cover tightly, and keep them in the fridge. Brush with butter and bake straight from the fridge, adding maybe 2-3 extra minutes to the bake time. For best results, I love baking them fresh.
Q: My crescent dough keeps splitting when I unroll it. Help!
A That darn perforated dough! If it’s tearing, it might be too warm. Pop the whole roll (in the tube) in the fridge for 10 more minutes. When unrolling, do it slowly and gently. If it still splits, just press it back together—it’s very forgiving.
Q: Can I use puff pastry instead?
A: Absolutely! Thaw a sheet of puff pastry, cut it into squares or rectangles, add filling, and fold/seal. Bake at 400°F until puffed and golden. It’s a flakier, more voluminous version—equally delicious!

Apple Crescent Rollups (Easy Cinnamon Sugar Dessert)
Description
Apple Crescent Rollups – Your 35-Minute Cozy Dessert
Hey friends, Beau here from Feastical!
Sweet, tender apple slices tossed in cinnamon sugar, all wrapped in buttery, flaky crescent rolls—this is comfort food at its simplest, fastest, and most heartwarming. Perfect for solo indulgence, family dessert, or impromptu guests.
Ingredients
-
1 (8 oz) can refrigerated crescent roll dough
-
1 large apple (Granny Smith or Honeycrisp recommended)
-
¼ cup granulated sugar
-
1 tsp ground cinnamon
-
2 Tbsp unsalted butter, melted
-
½ tsp vanilla extract
-
Optional: 1–2 Tbsp brown sugar for topping
-
Optional glaze: ½ cup powdered sugar + 1–2 Tbsp milk
-
Optional garnish: chopped nuts, coarse sugar, or sea salt
Instructions
1. Prep Your Oven & Dish
-
Preheat oven to 350°F (175°C).
-
Lightly grease an 8×8” baking dish.
2. Make the Apple Filling
-
Peel, core, and thinly slice your apple (~¼-inch thick).
-
Toss slices with granulated sugar and cinnamon until evenly coated.
3. Assemble the Rollups
-
Unroll crescent dough and separate into triangles.
-
Place 4–5 apple slices on the wide end of each triangle.
-
Roll from wide end to tip, tucking sides in. Place seam-side down in the baking dish.
4. Brush & Top
-
Stir vanilla into melted butter. Brush generously over rollups.
-
Sprinkle optional brown sugar over the tops for caramelized crunch.
5. Bake
-
Bake 20–25 minutes until golden brown and bubbly.
-
Let cool 5 minutes before serving.
6. Optional Glaze
-
Whisk powdered sugar with milk; drizzle over warm rollups.
Notes
-
Apple Berry: Add raspberries or blueberries to filling.
-
Nutty Crunch: Fold in chopped pecans or walnuts.
-
Apple Pie Upgrade: Add nutmeg/allspice; sprinkle coarse sugar on top.
-
Vegan: Use plant-based crescent dough, coconut oil or vegan butter, plant milk glaze.
-
Savory-Sweet: Light sprinkle of flaky sea salt over glaze.
Nutritional Information (Estimates)
Because knowledge is power, even with dessert! Here’s a rough estimate per rollup (without optional glaze or brown sugar topping). Remember, these are approximations and will vary based on specific ingredients used.
- Calories: ~180-200 kcal
- Carbohydrates: 25-28g
- Fat: 8-9g
- Protein: 2-3g
- Sugar: 12-14g
This treat is a wonderful source of joy and a little indulgence. Enjoy it mindfully as part of a balanced lifestyle. The apples provide fiber and vitamin C, and let’s be real—the happiness factor is off the charts, which is its own kind of nourishment.
Final Thoughts from My Kitchen to Yours
And there you have it, friends—the wonderfully simple, endlessly comforting Apple Crescent Rollup. This recipe is more than just a dessert; it’s a reminder that creating something special doesn’t require a culinary degree or all day. It requires a few good ingredients, a warm oven, and the intention to make a moment a little sweeter.
I hope this recipe finds its way into your regular rotation, becoming your own “quick-fix wonder” for years to come. When you make it, tag me @feastical or use #feastical so I can see your beautiful creations! Now, go preheat that oven. Your warm, cinnamony hug is waiting.
With a full heart and a happy plate,
Beau
Pin Title: Easy Apple Crescent Rollups | 35-Minute Cinnamon Sugar Dessert
Pin Description: The EASIEST apple dessert! These Apple Crescent Rollups are your secret weapon for a fast, feel-good treat. Tender cinnamon apples wrapped in flaky, buttery crescent dough, baked until golden and bubbly. Ready in just 35 minutes with minimal ingredients, this recipe is perfect for busy weeknights, last-minute guests, or a cozy family dessert. Includes step-by-step photos, chef tips for the perfect rollup, gluten-free and vegan variations, and delicious serving ideas with ice cream or caramel sauce. A simple, kid-friendly baking project that yields impressive results. Save this pin for your next dessert emergency! #easydessert #applerecipe #crescentrolls #quickdessert #

Tuscan White Beans on Toast (Creamy Garlic-Rosemary Beans)
Tuscan White Beans on Toast: Your New Favorite 20-Minute Comfort Food
Hey there, friend! Beau here from Feastical. Let’s talk about one of life’s simple, profound pleasures: something hot, savory, and deeply satisfying that you can whip up faster than you can decide what to stream tonight. We’re not just making beans on toast. Oh no. We’re embarking on a mini-vacation to a sun-drenched Tuscan kitchen, where simplicity is the ultimate sophistication and flavor is king.
This dish, my Creamy Garlic-Rosemary Tuscan White Beans on Toast, is my weeknight superhero. It’s the recipe I make when the cupboards seem bare, when I’m craving something that feels both rustic and elegant, or when I just want to treat myself to a warm, savory hug on a plate. It’s humble ingredients transformed into something magical. We’re talking creamy, dreamy white beans infused with fragrant garlic and earthy rosemary, all piled high on a slab of craggy, toasted bread that’s just begging to soak up every last drop of herby, lemony goodness.
Whether you’re cooking for one on a quiet evening or need a stunning, effortless appetizer for friends, this is your ticket. It’s vegetarian-friendly, endlessly adaptable, and proof that the most memorable meals don’t need a fancy pedigree or a laundry list of steps. They just need a little heart and a few fantastic flavors dancing together. So, grab your favorite skillet and let’s turn simple into spectacular.
The Little Flat in Florence: Where This Love Affair Began
This recipe always takes me back to a tiny, third-floor apartment in Florence, with shutters that creaked and a view of terracotta rooftops. I was there years ago, trying to live on a shoestring but eat like a prince. I’d wander the Mercato Centrale, dazzled by the produce, and always come back with a crusty loaf, a can of fagioli (beans), garlic, and a sprig of rosemary pinched from a public garden (shh… don’t tell the nonni!).
One rainy afternoon, too lazy to brave the streets for lunch, I threw those humble ingredients into a pan. I let the garlic sizzle, crushed some of the beans to create a creamy sauce, and slathered it all on toast. As I ate it, standing at the counter watching the rain roll off the rooftops, I had one of those perfect, quiet food moments. It wasn’t fancy. It wasn’t complicated. But it was everything. It was nourishment and joy and simplicity, all on one plate. That’s the spirit I want to bring to your kitchen today.
Gathering Your Tuscan Toolkit: Ingredients & Insights
Here’s the beautiful part: the ingredient list is short and sweet. This is where quality truly shines. Let’s break it down:
- 2 Tbsp Olive Oil: Use the good stuff here for finishing, but a decent extra-virgin for cooking. It’s the backbone of flavor. Chef’s Insight: That final drizzle at the end? Non-negotiable. It adds a fresh, fruity pop.
- 3 Garlic Cloves, Minced: Fresh is best! Minced fine so it melts into the oil without burning. Sub Tip: In a true pinch, ¾ tsp of good garlic powder works, but add it with the beans.
- 1 Small Shallot or ½ Onion, Finely Chopped (Optional): This adds a sweet, aromatic base. I love shallots for their mildness. Chef’s Hack: No shallot? A few thin slices of leek or a spoonful of onion jam are fabulous twists.
- 1 tsp Fresh Rosemary, Chopped: The soul of the dish! Fresh rosemary is piney and powerful. Sub Tip: If you only have dried, use ½ tsp and rub it between your fingers to wake it up before adding.
- Pinch Chili Flakes (Optional): Just a whisper for a hidden layer of warmth, not heat. Chef’s Insight: This is my secret for adding depth. It’s amazing what a pinch can do.
- 2 Cans (15 oz) White Beans, Drained & Rinsed: Cannellini or Great Northern are perfect—creamy and mild. Pro Tip: Rinsing removes the starchy canning liquid and lets our flavors shine.
- ½ Cup Vegetable or Chicken Broth (or Water): This creates our light sauce. Broth adds more flavor; water keeps it pure. Chef’s Hack: The bean liquid (aquafaba) can be used too, but it will make the final dish thicker.
- 1–2 tsp Lemon Juice + Zest (Optional but Amazing): The bright finish! Acid is the magic wand that lifts and balances the rich beans. Chef’s Insight: Add zest and juice at the very end to preserve their zing.
- Salt & Black Pepper: Season in layers. Taste after simmering!
- 4 Slices Crusty Bread, Toasted: The foundation. Sourdough, ciabatta, a rustic boule—something with heft and chew. Pro Tip: Toast it well! It needs to stand up to the saucy beans without getting soggy.
- Parmesan Shavings + Chopped Parsley (Optional): The flourish. Parmesan adds salty umami, parsley a fresh, green note. Sub Tip: Nutritional yeast for a vegan cheesy vibe, or try chopped mint for a different herb kick.
Let’s Get Cooking: Building Flavor, Step by Step
Ready? This is where the magic happens, and it’s so easy. Put on some music, pour yourself a little something, and let’s cook.
- Sauté the Aromatics – Build Your Flavor Base: Warm the olive oil in a medium skillet over medium heat. Add the chopped shallot or onion (if using) and cook for 2-3 minutes, until it’s softened and translucent. You’re not looking for color, just sweetness. Now, add the minced garlic, rosemary, and that sneaky pinch of chili flakes. Stir constantly for just 30 seconds—until incredibly fragrant. Watch it like a hawk! Burnt garlic is bitter, and we want it golden and happy.
- Simmer the Beans – Let Them Get Cozy: Add the drained and rinsed white beans to the skillet. Pour in the broth or water, and season generously with salt and black pepper. Give everything a gentle stir to combine. Let this simmer for 5-8 minutes. You’ll see the liquid reduce slightly and the beans become infused with all that garlic-rosemary goodness. Chef’s Hack: Use the back of your spoon to lightly mash a few beans against the side of the pan right in this step. It starts thickening the sauce early!
- Create the Creamy Sauce – The Magic Touch: Here’s the key to that rustic, creamy texture without any cream. Take your spoon or a potato masher and gently mash about one-third of the beans right in the pan. Leave the rest whole for texture. The mashed beans will thicken the liquid into a luscious, creamy sauce that clings to the whole beans. Stir in the lemon juice and zest now, if using. Taste! This is your moment. Adjust salt, pepper, or lemon until it sings.
- Toast & Build – The Grand Finale: While the beans simmer, toast your bread until it’s golden and crisp. Drizzle or brush the toast with a tiny bit of olive oil if you’re feeling fancy. Pile the warm, creamy beans high onto each slice. Finish with a final drizzle of your best olive oil, a few shavings of Parmesan, a sprinkle of chopped parsley, and another crack of black pepper. Pro Tip: For maximum enjoyment, serve immediately so the toast retains its crunch against the warm beans.
How to Serve It: From Simple to Sublime
This toast is a complete meal in itself, but oh, the ways you can dress it up! Here’s how I love to serve it:
For a hearty vegetarian lunch, just as it is, with a simple arugula salad dressed with lemon and olive oil on the side. The peppery greens are a perfect contrast.
Want to make it a more substantial dinner? Top each toast with a softly fried or poached egg. The runny yolk mixing with the beans is a little slice of heaven. Or, add a few slices of ripe heirloom tomatoes or a spoonful of slow-roasted cherry tomatoes under the bean pile.
For a stunning appetizer or party snack, slice a baguette into thinner rounds, toast them up, and spoon a smaller amount of beans on each for perfect bite-sized crostini. They disappear in a flash!
No matter how you serve it, the rule is simple: get it to the table fast, with big flavors and an even bigger smile.
Make It Your Own: 5 Flavorful Twists
This recipe is a beautiful canvas. Once you’ve mastered the basic melody, play with these riffs:
- The “Everything But The Kitchen Sink” Veggie Boost: Sauté a handful of chopped kale, spinach, or Swiss chard with the shallots. Or, stir in a quarter cup of sun-dried tomatoes (oil-packed, chopped) with the beans.
- Mediterranean Sunshine: Swap rosemary for 1 tbsp of chopped fresh oregano or thyme. Finish with crumbled feta cheese and a sprinkle of chopped Kalamata olives instead of Parmesan.
- Creamy Vegan Dream: It’s almost there! Just use water or veg broth. For extra richness, stir in a tablespoon of nutritional yeast or a splash of unsweetened plant-based cream at the end.
- Tuscan Soup Transformation: Double the broth (to 1.5-2 cups), don’t mash the beans as much, and you’ve got a fantastic rustic soup! Serve with the toast on the side for dipping.
- Spicy ‘Nduja Kick: For meat lovers, add a teaspoon of spicy ‘nduja or chorizo paste to the oil with the garlic. It will melt and create a deeply flavorful, spicy oil base.
Beau’s Kitchen Notes & Stories
This recipe has been my faithful friend for years, and it’s evolved in fun ways. I once made it on a camping trip using a can of beans, a packet of garlic powder, and a dried rosemary sprig from a tea bag—warmed over a campfire and scooped up with pita bread. It was still incredible. That’s the sign of a great formula!
The biggest lesson I’ve learned? Don’t skip the mashing step. For years I just simmered them whole, and it was good. But that one move of mashing a portion transforms it from “beans on toast” to “creamy Tuscan bean *ragout* on toast.” It’s a game-changer. Also, my husband now calls this my “band-aid” recipe because I make it whenever one of us needs a little culinary comfort. It never fails.
Your Questions, Answered: FAQs & Troubleshooting
Q: Can I use dried beans instead of canned?
A: Absolutely! You’ll need about 1 cup of dried cannellini beans. Soak them overnight, then simmer until tender (1-2 hours). Reserve about ½ cup of the starchy cooking liquid to use instead of broth for an ultra-creamy, flavorful sauce.
Q: My sauce is too thin/too thick. Help!
A: Too thin? Let it simmer uncovered for a few more minutes to reduce. You can also mash a few more beans. Too thick? Simply stir in a splash more broth, water, or even a bit of olive oil to loosen it up to your liking.
Q: How do I store and reheat leftovers?
A: Store the bean mixture separately from the toast in airtight containers in the fridge for up to 3 days. Reheat beans gently in a pan with a tiny splash of water to loosen. Make fresh toast for serving—re-toasted bread is essential for the right texture.
Q: What’s the best bread to use?
A: Any rustic, crusty bread with a firm crumb. Sourdough is my #1 for its tangy contrast. A hearty whole-grain, ciabatta, or a country boule all work beautifully. Avoid soft sandwich bread—it will get soggy immediately.
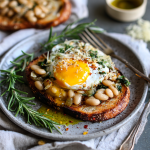
Tuscan White Beans on Toast (Creamy Garlic-Rosemary Beans)
Description
This isn’t just beans on toast—it’s a mini-vacation to a Tuscan kitchen, right in your own kitchen. Creamy white beans infused with garlic and rosemary, piled onto rustic toasted bread, with a drizzle of olive oil and a touch of lemon. Simple, quick, and absolutely comforting.
Ingredients
-
2 Tbsp olive oil (plus extra for finishing)
-
3 garlic cloves, minced
-
1 small shallot or ½ onion, finely chopped (optional)
-
1 tsp fresh rosemary, chopped (or ½ tsp dried)
-
Pinch of chili flakes (optional)
-
2 cans (15 oz each) white beans, drained & rinsed (cannellini or Great Northern)
-
½ cup vegetable or chicken broth (or water)
-
1–2 tsp lemon juice + zest (optional, for brightness)
-
Salt & black pepper, to taste
-
4 slices crusty bread, toasted (sourdough, ciabatta, or rustic boule)
-
Parmesan shavings + chopped parsley (optional, for garnish)
Instructions
1. Sauté the Aromatics
-
Heat olive oil in a skillet over medium heat.
-
Add shallot or onion, cook 2–3 minutes until soft.
-
Stir in garlic, rosemary, and chili flakes for 30 seconds until fragrant.
Watch carefully—burnt garlic is bitter!
2. Simmer the Beans
-
Add drained white beans and broth.
-
Season generously with salt and black pepper.
-
Simmer 5–8 minutes, letting flavors meld.
-
Optional: Mash about ⅓ of the beans for a creamy sauce that clings to the rest.
3. Toast & Assemble
-
Toast bread slices until golden and crisp.
-
Spoon warm, creamy beans on top.
-
Finish with a drizzle of olive oil, Parmesan, parsley, and extra black pepper.
-
Serve immediately to keep toast crunchy.
Notes
-
Mediterranean Style: Swap rosemary for oregano or thyme, finish with feta and Kalamata olives.
-
Vegan Creaminess: Use plant-based broth and stir in nutritional yeast or unsweetened plant cream.
-
Rustic Soup: Double broth, lightly mash beans, serve as soup with toast on the side.
-
Spicy Kick: Add 1 tsp spicy ‘nduja or chorizo paste to the oil with garlic.
Nutritional Information (A Rough Guide)
Please note: The following is an estimate for one serving (¼ of the total recipe, including beans and one slice of bread), calculated using online tools. Values can vary based on specific ingredients and brands used.
- Calories: ~300-420 kcal
- Protein: 12-18g (Beans are a fantastic plant-based protein source!)
- Carbohydrates: 40-55g (Mostly complex carbs from the beans and whole-grain bread, providing steady energy.)
- Fat: 8-14g (Primarily heart-healthy monounsaturated fats from olive oil.)
- Fiber: 8-12g (Thanks to the beans and whole grains, this dish is wonderfully filling and great for digestion.)
This dish is naturally vegetarian, packed with fiber and protein, and can easily be made vegan. It’s a balanced, satisfying meal that fuels you without weighing you down.
Final Thoughts: Your New Kitchen Staple Awaits
And there you have it, friend—my passport to Tuscany, my ultimate comfort food hack, and one of the recipes I’m most proud to share. It proves that you don’t need a lot of time, money, or ingredients to eat incredibly well. You just need to know how to treat those ingredients with a little love and respect.
I hope this recipe finds its way into your regular rotation, becoming your own quick fix for a rough day, your impressive last-minute lunch for a friend, or just a Tuesday night treat that feels special. That’s what Feastical is all about: food that feels good, tastes amazing, and brings us together, one simple, delicious bite at a time.
If you make it (and I really hope you do!), tag me @feastical or drop a comment on the blog. I love seeing your kitchen creations. Now, go forth, grab that crusty loaf, and make something beautiful.
With a full belly and a happy heart,
Beau
Pin Title: Creamy Tuscan White Beans on Toast | 20-Minute
Tasty Cucumber Ranch Crack Salad : Creamy, Crunchy & Irresistible Side Dish
Why This Salad is Called “Crack Salad” (And How to Make Your Own Batch!)
Hey friends, Beau here from Feastical! Tell me if this sounds familiar: you’re at a summer potluck, scanning the table of beautiful dishes, when your eyes lock onto a humble-looking bowl filled with something cool, creamy, and speckled with bacon and cheese. You take a polite spoonful onto your plate, just to be courteous. One bite later, you’re elbowing your way back to the table for a heaping second serving before it’s all gone. That, my friends, is the magic of Cucumber Ranch Crack Salad.
It’s not a fancy name, but it’s an honest one. Once you start, you just can’t stop. This salad is the glorious meeting point of the cool, crisp crunch of fresh cucumbers and the rich, savory, tangy embrace of a creamy ranch and bacon dressing. It’s a textural dream and a flavor bomb all in one refreshing bowl. It’s the side dish that often upstages the main, the recipe that gets whispered about and requested endlessly. And the best part? It comes together in about 10 minutes of active time. No fancy skills required, just a love for good, feel-good food that brings people together. So, grab your favorite mixing bowl and let’s create some kitchen magic that’s guaranteed to disappear faster than you can say “seconds, please!”
The Picnic That Started It All
This recipe takes me straight back to a lazy, sun-drenched Sunday at the lake with my family. My Aunt Margie, who believed no gathering was complete without at least seven side dishes, brought this unassuming cucumber salad. I, a then-teenage “food expert” who thought only complicated food was good food, almost passed it by. She practically shoved a forkful into my hand with a wink. The first bite was a revelation. The cool cucumber was a shock against the smoky, salty bacon and the sharp cheddar. The creamy dressing tied it all together in a way that was both light and indulgent. We all hovered around that bowl, forks clinking, laughing, and fighting for the last bits. It was more than a salad; it was the centerpiece of a perfect afternoon. I begged Aunt Margie for the recipe right there on the spot, and it’s been a cornerstone of my own hosting playbook ever since. It’s a reminder that the most memorable dishes are often the simplest ones, made and shared with love.
Gathering Your Cast of Characters
Here’s everything you need to build this legendary salad. I’ve added a few chef’s notes and swaps because I want this to work in *your* kitchen, with what *you* have on hand.
- 4 cups fresh cucumbers, sliced (about 3–4 medium cucumbers): This is our star! I prefer English or Persian cucumbers for their thin skins, minimal seeds, and extra crunch. No need to peel them unless you want to. If using standard garden cucumbers, you might scoop out the watery seed core with a spoon after slicing.
- ½ cup sour cream & ½ cup ranch dressing: The dynamic duo of creaminess. The sour cream adds a lovely tang and body, while the ranch brings that herby, garlicky flavor we all adore. Chef’s Insight: Use a good-quality bottled ranch you love, or for a next-level touch, try my 5-minute homemade ranch. For a lighter version, swap sour cream for plain Greek yogurt.
- 1 cup shredded cheddar cheese: Sharp cheddar is my go-to for a flavor punch that cuts through the cream. Pre-shredded bags are convenient, but shredding a block yourself melts better and avoids anti-caking additives. Feel free to use Colby Jack, pepper jack for a kick, or even gouda!
- ½ cup cooked bacon, crumbled: The salty, smoky MVP. Baking thick-cut bacon on a sheet pan at 400°F until crispy is my foolproof method. For serious time-saving, real bacon bits from the store work in a pinch, but the flavor of freshly cooked is unmatched.
- 1 tablespoon fresh dill, chopped (optional but highly recommended): This little green gem adds a pop of fresh, herbal brightness that lifts the whole dish. If you only have dried dill, use 1 teaspoon.
- Salt and black pepper, to taste: We season every layer! Always taste at the end. The bacon and cheese are salty, so you may not need much extra salt.
Let’s Build the Magic: Step-by-Step
This process is less about strict technique and more about joyful assembly. Follow these steps for the perfect texture and flavor every time.
- Prep Your Cucumbers Like a Pro: Wash and slice your cucumbers into thin, even rounds, about ¼-inch thick. Now, here’s the #1 CRUCIAL TIP for a non-watery salad: pat those cucumber slices absolutely dry with a clean kitchen towel or paper towels. This removes excess surface moisture so your creamy dressing stays gloriously thick and clings to every slice instead of getting diluted. Place the dried slices in your large serving bowl.
- Create the Creamy Dream Dressing: In a separate medium bowl, combine the sour cream and ranch dressing. Whisk them together until you have a smooth, homogenous, and luscious sauce. This is your blank canvas. Give it a taste—this is where you might add a crack of black pepper.
- Fold in the Flavor Bombs: To your creamy base, add the shredded cheddar, most of the crumbled bacon (save a little for garnish!), and the fresh dill. Stir it all together. You’ll get this thick, chunky, irresistible paste. The cheese and bacon will start to get cozy with the dressing right away.
- The Grand Union: Pour this cheesy, bacony, creamy mixture over your waiting bowl of dried cucumbers. Now, with a large spatula or spoon, gently fold everything together. I say “fold” because you want to coat every cucumber slice without mashing them into mush. Be gentle but thorough.
- The Patience-Pays-Off Step: Cover the bowl and pop it in the fridge for at least 30 minutes. I know, waiting is hard! But this chill time is non-negotiable. It allows the flavors to marry and mingle, the cucumbers to get slightly tender and infused with ranch flavor, and the whole thing to get perfectly cold and refreshing.
- Serve & Swoon: Right before serving, give it one more gentle stir. Transfer to a nice bowl, sprinkle the reserved bacon and maybe an extra pinch of dill on top for a pretty finish, and watch it vanish.
How to Serve This Superstar Salad
This salad is the ultimate team player. Here’s how to let it shine:
The Classic: It’s the undisputed champion of the picnic, BBQ, and potluck table. Serve it alongside grilled chicken, burgers, hot dogs, or pulled pork. Its cool creaminess is the perfect counterpoint to smoky, charred meats.
Weeknight Hero: Turn it into a light main course! Serve a generous scoop over a bed of crisp lettuce, add some grilled shrimp or shredded rotisserie chicken on top, and you’ve got a satisfying dinner in minutes.
Pretty Presentation: For a fancier look, serve it in individual little cups or glasses. Garnish with that extra bacon, a tiny sprig of dill, and a light dusting of cracked black pepper. It instantly elevates the whole experience!
Make It Your Own: Delicious Twists & Swaps
The basic blueprint is perfection, but your kitchen is your playground! Here are some fun ways to riff on it:
- Garden Veggie Load-Up: Add ½ cup of halved cherry tomatoes, ¼ cup of thinly sliced red onion (soak in cold water for 10 minutes to mellow the bite), or some finely chopped bell pepper for extra color and crunch.
- “Everything Bagel” Style: Swap the dill for everything bagel seasoning! Fold a tablespoon into the dressing and sprinkle another on top just before serving. The garlic, onion, and sesame seeds are incredible here.
- Light & Bright Version: Swap the sour cream for full-fat plain Greek yogurt. It adds a protein boost and fantastic tang. You can also use a light ranch dressing.
- Bacon Alternatives: Not a bacon person? Try swapping it for ½ cup of finely chopped ham, crispy pancetta, or even sun-dried tomatoes for a vegetarian smoky-sweet note.
- Herb Garden Delight: Mix in other soft herbs like fresh chives, parsley, or a little bit of tarragon for a more complex herbal profile.
Beau’s Kitchen Notes & Stories
This recipe has lived in my back pocket for years, and it’s evolved in tiny ways. I used to stir everything together in one bowl, but I found that mixing the dressing separately first creates a more uniform coat. I also learned the hard way about drying cucumbers—one soggy, weepy salad was all it took to make that lesson stick! Now, I treat my cucumbers like little jewels that need polishing before they get dressed.
The funniest thing? I’ve had more debates about the name “Crack Salad” than any other recipe. Some folks chuckle, some raise an eyebrow, but everyone, and I mean *everyone*, agrees on the addictive quality. At a neighborhood block party last summer, my friend’s kid called it “The Green Stuff with Bacon” and just stood by the bowl with a spoon. I consider that the highest compliment.
Your Questions, Answered!
Q: My salad got watery after a few hours. What happened?
A: This is almost always due to not drying the cucumbers enough! Cucumbers are over 95% water. The thorough pat-dry step is your best defense. Also, salting cucumbers and letting them drain in a colander for 20 minutes before rinsing and drying is a pro move for make-ahead versions.
Q: Can I make this ahead of time?
A: Absolutely, but with strategy. You can prep the dressing (steps 2 & 3) and slice/dry the cucumbers separately the day before. Store them in separate containers in the fridge. Combine them no more than 1-2 hours before serving for the best texture.
Q: What’s the best ranch to use?
A: Use your favorite bottled brand! A buttermilk ranch is classic. For a thicker, herb-forward dressing, look for a “restaurant style” or “zesty” ranch. Homemade is always a fantastic option if you have the time.
Q: Is there a vegan version?
A> Yes! Use a vegan ranch dressing and sour cream (brands like Kite Hill or Follow Your Heart work well). Skip the bacon or use a smoky coconut bacon or tempeh bacon. Use a vegan cheddar shred, or skip the cheese and add a handful of toasted sunflower seeds for crunch.

Tasty Cucumber Ranch Crack Salad : Creamy, Crunchy & Irresistible Side Dish
Description
Cucumber Ranch “Crack” Salad
Why It’s So Addictive (And How to Make It Perfect Every Time)
Hey friends, Beau here from Feastical!
You know that dish at a potluck that looks simple… almost too simple… and then suddenly it’s gone before the burgers even hit the grill?
That’s this salad.
Ingredients
-
4 cups fresh cucumbers, sliced (about 3–4 medium)
-
½ cup sour cream
-
½ cup ranch dressing
-
1 cup shredded sharp cheddar cheese
-
½ cup cooked bacon, crumbled
-
1 tablespoon fresh dill, chopped (optional but recommended)
-
Salt & black pepper, to taste
Notes
-
Best within 24 hours
-
Stir before serving
-
If watery, drain excess liquid and refresh with a spoonful of sour cream
Nutritional Breakdown (A Chef’s Perspective)
While I’m all about the joy of eating first, I know many of you like to have the facts. Here’s a general look per serving (based on 6 servings). Remember, these are estimates and can vary based on your specific ingredient brands and quantities.
- Calories: ~210
- Protein: 6g (Thanks, cheese and bacon!)
- Carbohydrates: 5g (Mostly from the cucumbers and a bit from the dressing)
- Fat: 18g (The source of all that creamy, satisfying flavor)
This salad is a fantastic lower-carb side dish option. To lighten it up, refer to the variations above, like using Greek yogurt and a light ranch. Food is about nourishment and pleasure, and this salad delivers on both!
Final Thoughts
And there you have it, friends—the full story behind the legendary Cucumber Ranch Crack Salad. It’s more than just a recipe; it’s a guaranteed happiness-bringer, a conversation starter, and the simplest way I know to make a meal feel special. It proves that with a few quality ingredients and a couple of smart tricks (dry those cukes!), you can create something truly unforgettable.
I hope you’ll whip up a batch soon. When you do, I’d love to hear about it! Tag me on social @feastical or leave a comment on the blog. Tell me about your twist, who you shared it with, or if you managed to snag the last bite. Now, go forth, create, and enjoy every delicious moment. Until next time, keep your spatula close and your appetite closer!
Pin Title: Cucumber Ranch Crack Salad | The Creamy, Crunchy Side Dish Everyone Loves!
Pin Description (400+ chars): Discover the ultimate potluck winner: Cucumber Ranch Crack Salad! This easy, no-cook recipe combines crisp cucumbers, smoky bacon, sharp cheddar, and creamy ranch dressing for an addictive side dish that’s always the first to disappear. Perfect for BBQs, summer picnics, or a quick weeknight side. Learn the secret to preventing a watery salad and get delicious recipe variations including a lighter version and vegan swaps. This crowd-pleasing salad comes together in just 10 minutes of prep! #cucumbersalad #ranchsalad #cracksalad #easysidedish #potluckrecipes #summersalad #bbqside #creamySalad #feastical
SEO Meta Description: Make the viral Cucumber Ranch Crack Salad! Creamy, crunchy, addictive side dish with bacon & cheddar. Ready in 40 mins. Perfect for BBQs & potlucks.