No-Bake Oreo Cheesecake: Your New Secret Weapon for Dessert Bliss
Hey friends, Beau here from Feastical! Let me paint you a picture: It’s the peak of summer, your kitchen feels like a sauna, and a crowd is gathering in your backyard. Someone (probably me) volunteered to bring “something sweet,” and now the pressure is on. Turning on the oven feels like a crime against humanity. Sound familiar? That’s exactly the moment this magical, magnificent, mind-blowingly easy No-Bake Oreo Cheesecake was born to save the day.
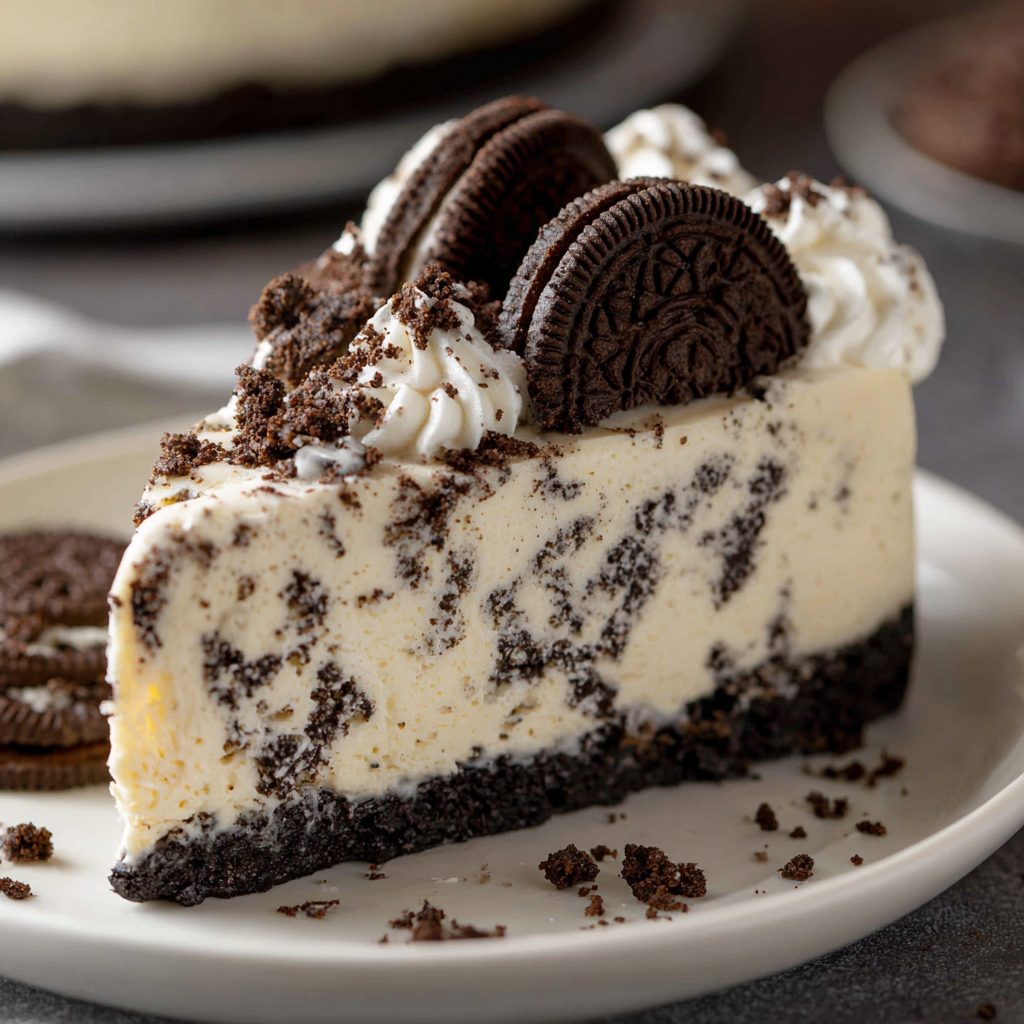
This isn’t just a dessert; it’s a declaration of freedom. Freedom from finicky water baths, from checking for that elusive “just-set” jiggle, and from the heartbreak of cracks. What you get is pure, unadulterated joy in a springform pan: a thick, buttery crust made entirely of Oreos, topped with a cloud of creamy, velvety cheesecake filling that’s speckled with even more chocolate cookie chunks. It’s rich, it’s refreshing, and it requires exactly zero heat. It’s the dessert that lets you look like a rockstar while secretly knowing it’s one of the easiest things you’ve ever made. So, grab your mixing bowls and let’s make some magic that’s cool in every sense of the word.
The Birthday Cake That Almost Wasn’t
This recipe holds a special place in my heart because it once saved my reputation as the “fun uncle.” My niece’s 10th birthday party was in full swing, and her elaborately decorated layer cake… well, let’s just say it met an untimely demise with the kitchen floor. Panic set in. Tears were imminent. Then, I remembered the ingredients for this no-bake wonder chilling in my fridge, intended for a later date.
In a whirlwind 20 minutes, we crushed, mixed, and folded. The kids even helped sprinkle the extra Oreo crumbs on top. We popped it in the freezer for a quick chill (a chef’s hack I’ll share later!), and by the time we sang “Happy Birthday,” we had a stunning, towering cheesecake that got more “oohs” and “ahhs” than the original cake ever would have. It was a chaotic, cookie-filled triumph. Now, it’s not just a dessert in our family; it’s a legend. And it can be one in your home, too.
Gathering Your Cookie Crew: Ingredients & Insights
Simple ingredients, superstar results. Here’s everything you need, plus my little chef-y notes to set you up for success.
For the Oreo Crust:
- 24 Oreo cookies – That’s about one standard package. We’re using the whole cookie—cream filling and all! It adds sweetness and helps bind the crust. No need to scrape.
- 1/4 cup (4 tbsp) unsalted butter, melted – Chef’s Insight: I use unsalted to control the salt level. For a vegan twist, a good plant-based butter works beautifully. This is the glue for our crunchy foundation.
For the Dreamy Filling:
- 16 oz (450g) full-fat cream cheese, softened – Non-negotiable tip: FULL FAT. It sets better and gives that luxurious mouthfeel. Let it sit on the counter for a good 1-2 hours. Vegan cream cheese? Absolutely! Just ensure it’s a block style, not tub-style for spreads.
- 1 cup powdered sugar – Also called icing sugar. It dissolves instantly, unlike granulated sugar, so your filling is silky smooth, not gritty.
- 1 tsp pure vanilla extract – The flavor booster. It rounds out all the sweet, creamy notes.
- 1 1/4 cups heavy whipping cream (or heavy cream) – This is our magic wand that creates the light, mousse-like texture. For dairy-free, a canned coconut cream (chilled overnight) or plant-based heavy cream alternative whips up great.
- 10 Oreo cookies, coarsely crushed – We want chunks here! It gives you delightful little pockets of chocolate crunch in every bite.
For the Grand Finale (Toppings):
- Extra whipped cream – Piped or dolloped. Go for the drama!
- Extra Oreo crumbs or halved cookies – This isn’t just decoration; it’s a promise of what’s inside.
Let’s Build This Beauty: Step-by-Step
Follow these steps, and you’re golden. I’m chatting right alongside you with all my best hacks.
- Conquer the Crust: Toss your 24 Oreos into a food processor and pulse until you have fine, even crumbs. No processor? No sweat! Place them in a sturdy zip-top bag and go to town with a rolling pin—it’s a fantastic stress reliever. Pour the crumbs into a bowl, drizzle in the melted butter, and mix until it looks like dark, wet sand. Chef’s Hack: Press this mixture firmly and evenly into the bottom of a 9-inch springform pan. Use the bottom of a measuring cup to really compact it—this prevents a crumbly, falling-apart crust later. Pop it in the fridge to set while you make the filling.
- Master the Filling Base: In a large bowl, beat your softened cream cheese with a hand mixer or stand mixer until it’s completely smooth and lump-free. This is crucial! Scrape down the sides of the bowl. Add the powdered sugar and vanilla, and beat again until everything is fully incorporated and creamy.
- Whip It Good: In a separate, clean, cold bowl, pour in your heavy cream. Whip it on medium-high speed until stiff peaks form. You’ll know they’re stiff when you lift the beaters and the peak stands straight up without flopping over. Pro-Tip: Chill your bowl and beaters in the freezer for 10 minutes beforehand for faster, higher-volume whipping.
- The Gentle Fold: This is where we keep the fluff alive. Add about one-third of your whipped cream to the cream cheese mixture. Use a rubber spatula and fold gently—cut down through the middle, scoop along the bottom, and turn over. Repeat until mostly combined. Now, add the remaining whipped cream and all of your coarsely crushed Oreos. Fold gently just until no big white streaks remain. A few tiny streaks are fine; overmixing will deflate your gorgeous fluff.
- Assemble and Dream: Pull your crust from the fridge. Pour the glorious filling over the top. Smooth it out with your spatula. For a fancy touch, run a small offset spatula or knife in a swirl pattern on the surface. It’ll catch the toppings beautifully later.
- The Patience Game (The Hardest Part!): Cover the pan with plastic wrap or foil. Please, for the love of all that is creamy, let it chill in the refrigerator for at least 6 hours. Overnight is a true game-changer—it firms up perfectly and the flavors marry into something spectacular. Emergency Speed-Chill Hack: In a pinch (like my birthday story!), you can pop it in the freezer for 2-3 hours. Let it sit at room temp for 15-20 minutes before slicing.
Plating Your Masterpiece
Presentation is the final, fun flourish! Run a thin knife under hot water, dry it, and carefully slide it around the inside edge of the springform pan to release. Unlatch the ring and lift it off.
I love adding fresh swirls of whipped cream around the edge or in the center. Sprinkle a generous handful of fine Oreo crumbs over the top, and strategically place a few cookie halves for height. When slicing, use that hot-knife trick again for beautifully clean cuts. Serve it on simple plates—let that dramatic, black-and-white beauty shine!
Make It Your Own: Delicious Twists
The beauty of this recipe is its versatility. Once you master the base, the world is your cookie jar!
- Mint Chocolate Cool Down: Use Mint Oreos for both the crust and the mix-ins. Add 1/4 tsp of peppermint extract to the filling for an extra-refreshing kick. Perfect for the holidays!
- Cookies & Cream Dream: Fold in 1/2 cup of mini chocolate chips along with the crushed Oreos. It’s a double chocolate delight.
- Peanut Butter Paradise: Swirl 1/3 cup of warm, smooth peanut butter into the filled pan before chilling. Or, use Peanut Butter Oreos if you can find them!
- Fruity Fusion: Top the chilled cheesecake with a simple layer of sweetened sliced strawberries or a raspberry sauce drizzle just before serving for a tart contrast.
- Dietary Swaps: As noted, use gluten-free chocolate sandwich cookies, vegan butter, vegan cream cheese, and coconut cream to make this entirely gluten-free and vegan. It works like a dream.
Beau’s Kitchen Notes
This recipe has evolved from a “quick fix” to my most-requested dessert. I’ve learned a few things: First, the quality of your cream cheese matters. A good brand makes a smoother filling. Second, I once accidentally used salted butter for the crust, and you know what? It was delicious—a little salty-sweet action! So don’t panic over small mistakes.
The real evolution has been in the toppings. I’ve done everything from a dark chocolate ganache drip to a mountain of fresh berries. But honestly, I keep coming back to the classic: more Oreos. It’s simple, nostalgic, and always gets the biggest smile.
Your Questions, Answered
- Q: My filling is too runny! What happened?
A: This usually means either the cream cheese wasn’t soft enough to blend smoothly, the heavy cream wasn’t whipped to stiff peaks, or it simply needs more chilling time. Patience is key—give it the full 6+ hours in the fridge. - Q: Can I make this ahead of time?
A: Absolutely! It’s a meal-prep hero. Make it up to 2 days in advance. Keep it covered in the fridge until you’re ready to serve. Add toppings just before serving for the best texture. - Q: Why is my crust falling apart when I slice?
A: You likely needed to press it more firmly into the pan. Next time, really use some muscle with the bottom of that cup. Also, ensure you’re using a sharp, hot knife to slice cleanly through it. - Q: Is it freezer-friendly?
A> Yes! Wrap the whole cheesecake or individual slices tightly in plastic wrap and foil. Freeze for up to 2 months. Thaw overnight in the refrigerator before enjoying.

No-Bake Oreo Cheesecake : Creamy, Dreamy & Easy Dessert
Description
Rich, velvety, and studded with crunchy Oreos, this cheesecake requires zero baking. Perfect for summer, parties, or any time you want a show-stopping dessert with minimal effort!
Ingredients
For the Crust:
-
24 Oreo cookies (regular or gluten-free)
-
¼ cup (4 tbsp) unsalted butter, melted (or vegan butter for a plant-based version)
For the Cheesecake Filling:
-
16 oz (450g) full-fat cream cheese, softened (or vegan block cream cheese)
-
1 cup powdered sugar
-
1 tsp vanilla extract
-
1 ¼ cups heavy whipping cream (or chilled canned coconut cream for vegan)
-
10 Oreo cookies, coarsely crushed
For the Topping:
-
Extra whipped cream
-
Extra Oreo crumbs or halved cookies
Instructions
1. Make the Crust
-
Crush 24 Oreos into fine crumbs (food processor or zip-top bag + rolling pin).
-
Mix crumbs with melted butter until it resembles wet sand.
-
Press firmly into the bottom of a 9-inch springform pan. Chill in the fridge while making the filling.
2. Prepare the Filling
-
Beat softened cream cheese until smooth.
-
Add powdered sugar and vanilla, mixing until creamy.
-
In a separate chilled bowl, whip heavy cream to stiff peaks.
3. Fold & Mix
-
Gently fold ⅓ of whipped cream into cream cheese mixture, then fold in remaining cream with crushed Oreos. Fold until mostly combined; a few streaks are okay.
4. Assemble & Chill
-
Pour filling over chilled crust and smooth top.
-
Cover and chill at least 6 hours, preferably overnight. For a quick fix, freeze 2–3 hours and let sit 15–20 minutes before slicing.
5. Decorate & Serve
-
Add swirls of whipped cream and sprinkle Oreo crumbs or halved cookies.
-
Slice with a hot knife for clean edges.
Fun Variations
-
Mint Chocolate: Use Mint Oreos and ¼ tsp peppermint extract in filling.
-
Cookies & Cream Double: Fold in ½ cup mini chocolate chips.
-
Peanut Butter Swirl: Add ⅓ cup smooth peanut butter to filling.
-
Fruity Twist: Top with fresh strawberries or raspberry sauce.
-
Vegan/Gluten-Free: Use vegan cream cheese, plant-based butter, coconut cream, and gluten-free Oreos.
Notes
-
Stiff Peaks: Chill your bowl and beaters for fluffier whipped cream.
-
Crust Issues: Press firmly to prevent crumble.
-
Slicing: Hot knife trick = perfect slices.
-
Make Ahead: Up to 2 days in advance, add toppings before serving.
-
Freezer-Friendly: Wrap tightly; freeze up to 2 months. Thaw overnight in fridge.
Nutritional Info (A Chef’s Honest Take)
Let’s keep it real: this is a celebratory, indulgent dessert. A slice is rich, satisfying, and packed with the joy of cookies and cream. It’s not a “health food,” and that’s perfectly okay—it’s a treat!
Based on a 12-slice yield, each serving contains approximately 400-450 calories. It’s worth noting that this dessert is naturally egg-free and, with the simple swaps mentioned, can easily be made gluten-free and vegan to accommodate various dietary needs. The key, as with all good things, is to savor it mindfully and share it with people you love. That’s what Feastical is all about.
Final Crumbs of Wisdom
And there you have it, friends—the full story of my beloved No-Bake Oreo Cheesecake. It’s more than a recipe; it’s a reliable friend for potlucks, a savior for busy days, and a guaranteed smile-maker. It proves that the most impressive desserts don’t have to be complicated.
I hope you whip this up, make some messy, joyful memories in your kitchen, and share it with your favorite people. When you do, tag me over at @feastical—I love seeing your creations! Now, go claim your title as the no-bake dessert champion. You’ve totally got this.
With a full heart and an empty mixing bowl,
Beau