Hey, Friend! Let’s Talk About the Ultimate Crowd-Pleaser
Picture this: It’s Friday night. The game is on, friends are gathered, and the only thing missing is a plate of something utterly irresistible, crispy, and meant for sharing. Or maybe it’s just a Tuesday, and you deserve a dinner that feels like a celebration but cooks up in a flash. Enter my hero: the humble, yet heroic, Dipping Chicken Breast Strip.
This isn’t just another chicken tender recipe. This is your blank canvas for flavor, your ticket to crispy, juicy nirvana, and the reason your favorite dipping sauce exists. We’re taking simple chicken breast and transforming it into golden strips of joy that are lightly crisp on the outside, impossibly tender on the inside, and begging to be dragged through something bold and delicious.
Whether you pan-fry them for that classic, irresistible crunch or bake them for a lighter, just-as-satisfying bite, these strips are my go-to for bringing people together. They’re forgiving for new cooks, fun for experts to play with, and guaranteed to disappear faster than you can say “pass the sauce.” So, tie on your apron, grab your favorite spatula, and let’s make some magic happen. Food this good should always feel like a party, and you’re the host.
The Night That Cemented My Love for a Good Chicken Strip
My love affair with these strips started in a cramped college apartment, not a professional kitchen. My roommate, Dave, and I were broke, it was snowing outside, and our plans for a big night out had fizzled. The mission: feed four hungry friends with one package of chicken breasts and whatever we could scrounge from the pantry.
We sliced the chicken, dredged it in flour, egg, and some suspiciously stale breadcrumbs we crushed by hand. We fried them in a sketchy, warped pan and served them with a wild array of condiments—everything from ketchup and mustard mixed together to the last of a jar of salsa. It was chaos. But you know what? That platter of crispy, golden strips was the star of the night. We laughed, we dunked, we argued over the best sauce combo, and for a few hours, that tiny kitchen was the warmest, happiest place to be.
That’s the spirit I want to bring you today. It’s not about perfection; it’s about the joy of creating something simple and spectacular that gets everyone talking, laughing, and reaching for more. Every time I make these now, I think of that snowy night and smile. Food memories are the best kind.
Gathering Your Flavor Arsenal
Here’s everything you’ll need to build your masterpiece. Don’t stress about exact brands—this is about what you have and love!
- 2 boneless, skinless chicken breasts: The main event! Look for evenly sized breasts so your strips cook at the same rate. Chef’s Insight: If they’re very thick, you can gently pound them to an even ½-inch thickness before slicing for supremely tender results.
- ½ cup all-purpose flour: Our base coat. This initial layer helps the egg wash stick, creating the crucial foundation for our crispy shell. Substitution Tip: For a gluten-free version, swap with your favorite 1:1 GF flour or even fine cornmeal for a hint of sweetness and crunch.
- 2 eggs, beaten: The “glue” that holds our breading on. A good, thorough whisk is key here. Chef’s Hack: Add a tablespoon of milk or hot sauce to your eggs for extra flavor and a slightly lighter texture.
- 1 cup breadcrumbs: The crunch factor. I highly recommend panko for its legendary, airy, shatteringly crisp texture. Substitution Tip: Regular breadcrumbs work great too! For a deeper flavor, try crushing your own crackers, cornflakes, or even pretzels.
- ½ teaspoon garlic powder & ½ teaspoon paprika: Our simple seasoning squad. Garlic powder adds savory depth, while paprika gives a subtle sweetness and gorgeous color. Flavor Boost: Feel free to add onion powder, a pinch of cayenne for heat, or dried herbs like oregano.
- Salt and pepper to taste: The non-negotiable fundamentals. Season every layer—the chicken itself, the flour, maybe even the breadcrumbs. Taste as you go!
- Cooking oil for frying or baking: For frying, use a high-heat oil like avocado, canola, or vegetable oil. For baking, a light coating of olive oil or avocado oil spray will help them crisp up beautifully.
Let’s Get Cooking: Your Path to Crispy Perfection
Follow these steps, and you’ll be a breading pro in no time. I’ve packed each one with my favorite kitchen hacks to ensure success.
- Prep Your Chicken: Pat those chicken breasts completely dry with paper towels. This is the #1 secret for crispy breading—moisture is the enemy of crunch! Slice them into even strips, about 1-inch wide. Think “fat finger” size. Season them generously on all sides with salt, pepper, and a pinch of your garlic powder and paprika. Let them sit for 5 minutes to absorb the flavor.
- Create Your Breading Station: Set up three shallow bowls or plates in an assembly line. Bowl 1: Flour (season it with a little salt and pepper too!). Bowl 2: Beaten eggs. Bowl 3: Breadcrumbs mixed with the remaining garlic powder and paprika. Pro-Tip: Use one hand for dry ingredients (flour and breadcrumbs) and one hand for wet (egg). This keeps you from getting “clubhand,” a dreaded condition where your fingers become a breaded mess!
- The Sacred Breading Ritual: Take a chicken strip and dredge it in the flour, shaking off any excess. This gives the egg something to grip. Next, dunk it fully into the egg wash, letting the excess drip off. Finally, press it firmly into the breadcrumb mixture, coating it evenly and pressing the crumbs to adhere. Place the breaded strip on a clean plate or wire rack. Repeat! Chef’s Hack: For an extra-thick, crunchy coating, double-dip! After the first breadcrumb coat, give it a quick second dip in the egg and another press into the crumbs.
- Cooking – Choose Your Adventure!
- For Pan-Frying (The Classic Crisp): Heat about ¼ inch of oil in a large skillet over medium-high heat. To test if it’s ready, flick a tiny breadcrumb in—it should sizzle immediately. Carefully add strips in a single layer, not crowding the pan. Cook for 3-4 minutes per side until deeply golden brown and cooked through. Transfer to a wire rack set over a baking sheet (this keeps them crispy!).
- For Baking (The Lighter Love): Preheat your oven to 400°F (200°C). Place a wire rack on a baking sheet and spray it lightly with oil. Arrange breaded strips on the rack, giving them space. Lightly spray the tops of the strips with oil. Bake for 18-20 minutes, flipping halfway, until golden and the internal temperature hits 165°F.
- The Final, Crucial Step: Let them rest for a couple of minutes after cooking. This allows the juices to redistribute, ensuring every bite is juicy, not dry.
Plating Up the Fun
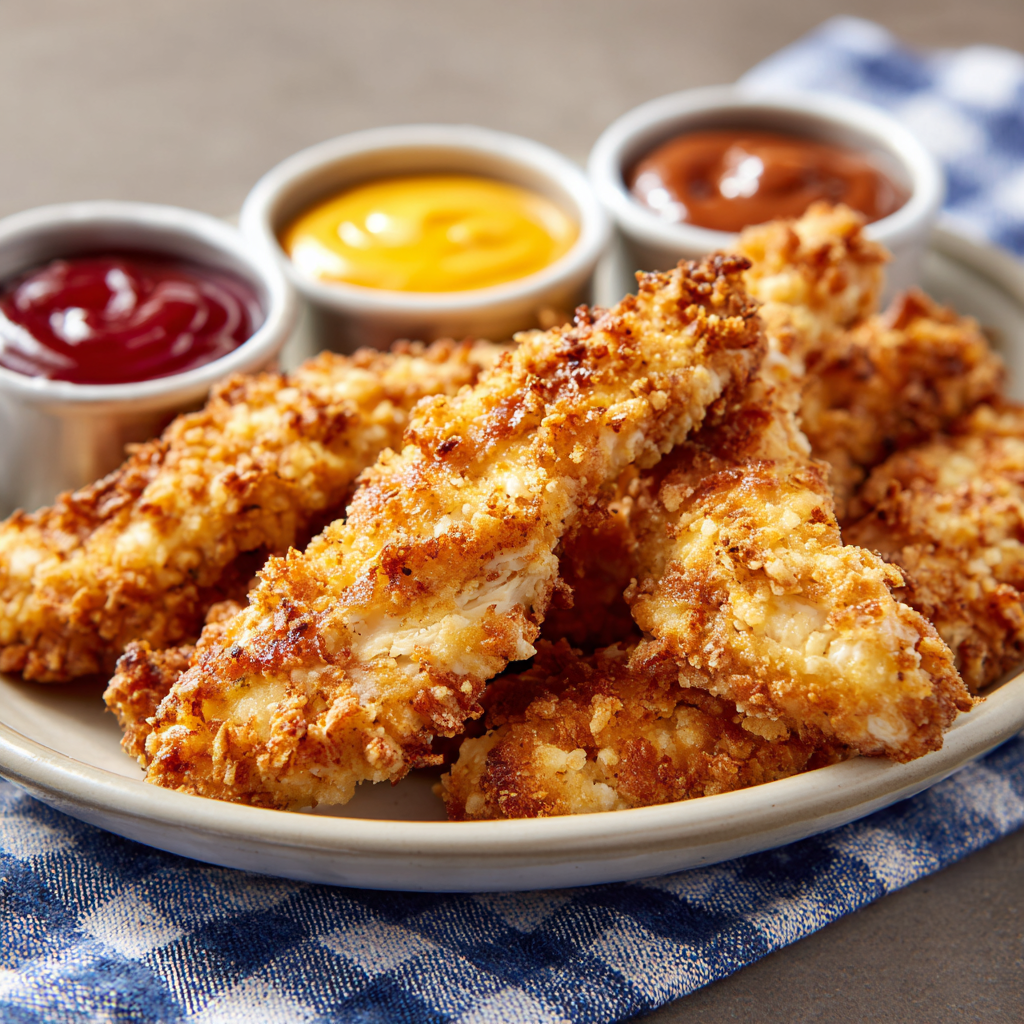
Presentation is part of the experience! Dump these beauties straight from the pan onto a big, rustic platter or a wooden board. Scatter them generously so everyone can grab one easily. Now, the sauce bar: don’t just dollop—serve your sauces in small bowls or ramekins right alongside. I love adding little garnishes for color: a handful of fresh chopped parsley or chives over the strips, or some carrot sticks and celery for a classic crunch.
This is finger food at its finest, so skip the fancy cutlery. Provide plenty of napkins, maybe some lemon wedges for a bright squeeze, and let everyone dig in family-style. It’s interactive, messy, and absolutely perfect.
Make It Your Own: 5 Flavorful Twists
Once you’ve mastered the basic blueprint, the world is your chicken strip. Here are some of my favorite riffs:
- “Everything Bagel” Crunch: Mix your breadcrumbs with 2 tablespoons of everything bagel seasoning. Serve with a quick dill and Greek yogurt sauce.
- Zesty Parmesan Herb: Add ½ cup of finely grated Parmesan and 1 teaspoon of Italian seasoning to the breadcrumbs. Bake until golden and serve with a warm marinara for dipping.
- Sweet & Spicy Glazed: Prepare the strips as baked. In the last 5 minutes of cooking, brush with a mix of honey and sriracha, then return to oven to caramelize slightly.
- Gluten-Free & Air Fryer Magic: Use gluten-free panko and flour. For the ultimate crisp with less oil, cook in an air fryer at 400°F for 10-12 minutes, shaking halfway.
- Kid-Friendly “Dino-Nugget” Style: Use cookie cutters on the chicken before breading to make fun shapes. It’s a guaranteed win.
From My Kitchen to Yours
This recipe has lived more lives than I can count. I’ve made it for toddlers, for fancy parties (served with champagne!), and everything in between. The biggest lesson? Don’t fear the breading process. Embrace the mess—it means you’re doing it right. I once accidentally used powdered sugar instead of flour in a late-night cooking frenzy (don’t ask). The resulting “dessert chicken” was… an experience. Learn from my mistakes: label your containers!
Over time, I’ve learned that the quality of your chicken and taking the time to pat it dry make more difference than any fancy ingredient. This recipe is a friend, not a finicky boss. It wants you to succeed and have a great time doing it.
Your Questions, Answered
Q: My breading is falling off! What did I do wrong?
A: The most common culprits are not patting the chicken dry (moisture breaks the seal), not shaking off excess flour, or crowding the pan during cooking. Also, make sure your oil is hot enough before adding the chicken—a gentle sizzle is key for the breading to set instantly.
Q: Can I make these ahead of time?
A> You can bread the strips and keep them covered on a parchment-lined tray in the fridge for up to 4 hours before cooking. For best results, cook just before serving. You can also freeze uncooked, breaded strips on a sheet pan, then transfer to a freezer bag. Cook from frozen, adding a few extra minutes to the cooking time.
Q: How do I keep them crispy if I’m serving a crowd?
A> The wire rack trick is essential! Never stack hot strips on a plate—they’ll steam and get soggy. If you need to keep them warm, place the wire rack with cooked strips in a 250°F oven until ready to serve.
Q: Is baking really as good as frying?
A> It’s different, but absolutely delicious. Baking gives a slightly lighter, still-crispy coating, while frying delivers that classic, rich crunch. Both are winners. For the *best* baked texture, that light spray of oil on the breading is non-negotiable.

Dipping Chicken Breast Strips : Crispy, Juicy Strips with Bold Sauces
Description
Crispy Dipping Chicken Breast Strips – The Ultimate Crowd-Pleaser
Golden, crispy outside. Juicy, tender inside. Perfect for dipping, sharing, and making any night feel like a celebration.
Ingredients
Chicken Strips:
-
2 boneless, skinless chicken breasts (even thickness, about ½-inch after pounding)
-
Salt & freshly ground black pepper
-
½ tsp garlic powder
-
½ tsp paprika
-
½ cup all-purpose flour (or gluten-free flour/cornmeal)
-
2 large eggs, beaten (optional: 1 tbsp milk or hot sauce)
-
1 cup breadcrumbs (panko preferred for extra crunch)
-
Cooking oil (for frying: avocado/canola/vegetable; for baking: olive or avocado oil spray)
Optional Garnishes & Dips:
-
Fresh parsley or chives
-
Lemon wedges
-
Your favorite dipping sauces (ranch, honey mustard, BBQ, ketchup, sriracha mayo…)
Instructions
1. Prep the Chicken
-
Pat chicken breasts dry. Slice into 1-inch “fat finger” strips.
-
Season generously with salt, pepper, garlic powder, and paprika. Let rest 5 minutes.
2. Set Up Breading Station
-
Bowl 1: Flour (season with a little salt & pepper)
-
Bowl 2: Beaten eggs
-
Bowl 3: Breadcrumbs + remaining garlic powder & paprika
Pro Tip: Use one hand for dry ingredients, one hand for wet to avoid “clubhand.”
3. Bread the Strips
-
Dredge each strip in flour, shake off excess.
-
Dip in egg, letting excess drip.
-
Press into breadcrumbs until evenly coated. Place on a plate or wire rack.
-
Optional: Double-dip for extra crunch (egg → breadcrumbs → egg → breadcrumbs).
4. Cook to Perfection
Pan-Frying (Classic Crunch):
-
Heat ¼ inch of oil over medium-high heat. Test with a breadcrumb—it should sizzle.
-
Fry strips 3–4 minutes per side until golden and cooked through. Drain on a wire rack over a baking sheet.
Baking (Lighter Option):
-
Preheat oven to 400°F (200°C).
-
Place strips on an oiled wire rack over a baking sheet. Lightly spray tops with oil.
-
Bake 18–20 min, flipping halfway, until golden and 165°F internal temp.
Chef’s Hack: Rest cooked strips 2–3 min before serving for juicy perfection.
5. Serve & Enjoy
-
Arrange on a platter or board with dipping sauces in small bowls.
-
Garnish with parsley/chives or lemon wedges.
-
Encourage hands-on dipping fun—messy, interactive, and delicious.
Notes
-
Breading falls off? Chicken too wet, excess flour not shaken off, pan crowded, or oil too cool.
-
Make ahead? Bread in advance (up to 4 hrs) or freeze uncooked strips. Cook from frozen, adding a few minutes.
-
Keep crispy for a crowd? Use a wire rack; hold in 250°F oven until serving.
-
Baking vs frying? Baking gives slightly lighter crunch; frying delivers rich, classic crisp. Both are delicious.
Feeding Your Body & Soul
While I’m all about the joy of food first, I know many of you like to have the facts! Here’s a general breakdown per serving (based on baking, serving 4):
- Calories: ~320
- Protein: 30g (Chicken is a fantastic lean protein source!)
- Carbohydrates: 25g
- Fat: 10g
Remember, these are estimates and can vary based on the exact size of your chicken, breadcrumbs used, and cooking method. The beauty of cooking at home is you control the ingredients—baking reduces fat, using whole-wheat panko adds fiber, and the sauces on the side let you manage added sugars and calories. It’s a balanced, satisfying meal that truly feeds the soul.
The Final Slice
And there you have it—your new secret weapon for deliciousness. These Dipping Chicken Breast Strips are more than just a recipe; they’re an invitation to slow down, get your hands a little messy, and share something wonderful. Whether it’s a quiet dinner for one (leftovers are amazing in salads!) or the centerpiece of a gathering, I hope this dish brings as much laughter and satisfaction to your table as it has to mine.
Don’t forget to tag @Feastical if you share your creations online—I love seeing your kitchen triumphs. Now, go forth, dunk boldly, and remember: the best meals are the ones shared with joy. Until next time, keep your spatula close and your appetite closer!
Cheers,
Beau