Your New Favorite Comfort Food: Cheesy Stuffed Bell Peppers
Hey there, friend! Beau from Feastical here, and I’ve gotta tell you—I think I’ve found one of the most satisfying, hug-in-a-bowl meals to ever come out of a home oven. We’re talking about Cheesy Stuffed Bell Peppers. You know the ones. They look like they belong in a cozy restaurant window, all colorful and bubbling with golden cheese, but the secret is they’re ridiculously simple to make. They’re the culinary equivalent of your favorite cozy sweater.
This isn’t just a recipe; it’s a weeknight dinner hero, a meal-prep champion, and a crowd-pleasing side dish all rolled into one vibrant, edible bowl. Whether you’re feeding a hungry family, impressing a date, or just treating yourself to a delicious solo dinner, these peppers have got your back. They’re forgiving, endlessly customizable, and they make your kitchen smell like a home chef’s dream. So, tie on your apron, grab your favorite baking sheet, and let’s turn some simple ingredients into a symphony of comfort.
The Secret’s in the Stuffed Pepper (And My Grandma’s Kitchen)
My love for stuffed peppers goes way back. I can still picture my grandma’s kitchen on a crisp Sunday afternoon. There’d always be a Pyrex dish in the center of the table, steaming with green bell peppers she’d grown herself, stuffed to the brim with a savory, tomato-y filling. To me, it felt like magic—how a humble vegetable could become a vessel for so much flavor and heart.
She’d call it “clean out the fridge” night, but it was so much more. A little leftover rice from last night’s takeout, the last bit of ground beef, that half-jar of pasta sauce—it all found a new purpose. She taught me that great cooking isn’t about fancy techniques; it’s about creativity, resourcefulness, and sharing. This recipe is my love letter to that lesson. It’s a blueprint, a foundation you can build on with whatever you have on hand. Every time I pull a tray of these from the oven, that cheesy, savory aroma takes me right back to her table. Let’s make some new memories, shall we?
Gathering Your Flavor Crew: The Ingredients
Here’s what you’ll need to gather. Think of this list as your friendly guide—I’ve added some notes and swaps so you can rock this recipe no matter what’s in your pantry!
- 4 large bell peppers (any color!) – The edible bowls! Red and yellow are sweeter, green have a classic, slightly bitter bite. Pick the ones that look the plumpest and shiniest for the best structure.
- 1 lb ground meat – I typically use 85/15 ground beef for flavor, but ground turkey, chicken, or even a plant-based crumble work perfectly. This is your protein powerhouse.
- 1 cup cooked rice or quinoa – Day-old rice is perfect here—it soaks up the flavors without getting mushy. Quinoa is a fantastic gluten-free, protein-packed alternative.
- 1/2 onion, diced – Yellow or white onion adds a sweet, savory base. No onion? A tablespoon of onion powder in a pinch will do.
- 1 cup shredded cheese – I’m a cheddar-for-sharpness, mozzarella-for-gooey-stretch kinda guy. A Mexican blend or pepper jack would also be incredible. Buy a block and shred it yourself for the best melt!
- 1/2 cup tomato sauce or salsa – This is our flavor binder and moisture magic. Plain tomato sauce, marinara, or even a chunky salsa (for a kick!) all work. Chef’s Insight: Salsa adds instant seasoning.
- 2 cloves garlic, minced – Non-negotiable flavor booster. If you’re out, 1/2 tsp of garlic powder can sub in.
- Salt, black pepper, and 1 tsp Italian seasoning – The seasoning dream team. Feel free to use oregano, thyme, or a sprinkle of paprika instead.
- A drizzle of olive oil – For sautéing and giving those pepper tops a lovely sheen.
Let’s Get Building: Step-by-Step Magic
Ready to assemble your edible masterpieces? Follow these steps, and I’ll walk you through every little chef hack I know.
Step 1: Prep Your Oven & Peppers. First, preheat that oven to 375°F (190°C). This is our sweet spot for cooking the peppers through without burning the cheese. Now, take your bell peppers. Slice them in half from top to bottom (through the stem) and carefully cut out the seeds and white ribs. Pro Tip: Leave the stems on—they give the peppers a fun, rustic look and a little handle for eating! If your peppers wobble on the baking sheet, shave a tiny sliver off the bottom to create a flat base.
Step 2: Build the Flavor Base. Heat a large skillet over medium heat with a glug of olive oil. Add your diced onion and cook for 4-5 minutes until soft and translucent. Now, add the minced garlic and stir for just 30 seconds until fragrant—don’t let it burn! Add your ground meat, breaking it up with a wooden spoon. Cook until no pink remains. This is where you season well with salt, pepper, and that Italian seasoning.
Step 3: Create the Filling. Turn the heat down to low. To your beautiful, browned meat mixture, stir in the cooked rice and your tomato sauce or salsa. Let it all get friendly for about 2 minutes, stirring until everything is perfectly combined and heated through. Give it a taste! This is your last chance to adjust the seasoning. Need more salt? A pinch more herbs? Now’s the time.
Step 4: Stuff ‘Em & Top ‘Em. Grab your pepper halves and arrange them on a baking sheet (I line mine with foil or parchment for super easy cleanup). Generously spoon the filling into each pepper cavity, pressing down lightly and mounding it up. Don’t be shy! Then, crown each one with a glorious heap of shredded cheese. A final tiny drizzle of olive oil over the peppers themselves helps them roast beautifully.
Step 5: Bake to Golden Perfection. Slide that tray into your preheated oven. Bake for 25-30 minutes. You’re looking for the peppers to be tender enough to easily pierce with a fork (but not collapsing) and the cheese to be gloriously melted, bubbly, and with maybe a few golden-brown spots. Chef’s Hack: For extra tender peppers, you can par-boil the hollowed-out halves for 5 minutes before stuffing, but I love the slight bite they keep when baked raw.
How to Serve These Beauties
Presentation is part of the fun! I like to serve these straight from the baking sheet, family-style. The vibrant colors are a feast for the eyes. Slide a spatula under each pepper half and place it on a plate. The cheese will be lava-hot and delightfully stretchy—a mandatory photo op!
These peppers are a complete meal on their own, but if you want to round things out, here are my favorite pairings: a simple crisp green salad with a tangy vinaigrette to cut the richness, a slice of crusty garlic bread for mopping up any delicious drippings, or a cool dollop of sour cream or Greek yogurt on the side. For a fresh twist, a sprinkle of chopped cilantro or parsley right before serving adds a wonderful pop of color and flavor.
Make It Your Own: Delicious Twists & Swaps
The true beauty of this recipe is its flexibility. Here are a few of my favorite ways to mix it up:
- The Tex-Mex Fiesta: Use ground chorizo or seasoned ground beef, black beans instead of half the rice, corn kernels, and top with pepper jack cheese. Serve with avocado and lime wedges!
- The Italian Night Special: Use Italian sausage (casings removed), mix in a tablespoon of tomato paste with the sauce, and stir in a handful of fresh chopped spinach. Top with a mix of mozzarella and grated Parmesan.
- The Vegetarian Delight: Skip the meat! Use a full can of rinsed black beans or lentils, and add 1 cup of finely chopped mushrooms (cooked with the onions) for a “meaty” texture. You might need an extra 1/4 cup of tomato sauce for moisture.
- The “Clean Out the Fridge”: Got leftover taco meat? Cooked quinoa? A bit of corn and some diced zucchini? Chop it all up, mix it with a binding agent like sauce or a beaten egg, and stuff away! This is my grandma’s spirit recipe.
- The Low-Carb Version: Replace the rice with 2 cups of finely chopped cauliflower rice (sauté it with the onions to soften). You’ll get all the volume and texture with fewer carbs.
Beau’s Chef Notes & Kitchen Confessions
This recipe has been my trusty sidekick for years, and it’s evolved more than my music taste. I’ve learned that the best stuffed pepper is the one you want to eat. Don’t stress over perfection. Once, I forgot to cook the rice ahead of time and used instant rice straight into the skillet with an extra splash of broth—it worked in a pinch! Another time, I only had two peppers, so I stuffed the extra filling into hollowed-out zucchini boats. Delicious chaos.
My biggest tip? Let them rest for 5 minutes after baking. I know it’s tempting to dive right in, but this allows the filling to set just a bit, making them easier to serve and even more flavorful. Trust me on this one. Also, any leftover filling is amazing in a wrap for lunch the next day.
Your Questions, Answered (Before You Even Ask!)
Q: My peppers are still a bit firm after 30 minutes. What gives?
A: No worries! Ovens and pepper sizes vary. Simply cover the tray loosely with foil (to prevent the cheese from over-browning) and bake for another 5-10 minutes. The par-boiling trick mentioned in the steps is a great safeguard if you always like them super soft.
Q: Can I make these ahead of time?
A: Absolutely! This is a fantastic make-ahead meal. Assemble the stuffed peppers completely, cover tightly, and refrigerate for up to 24 hours. When ready, bake straight from the fridge, adding maybe 5-10 extra minutes to the cook time.
Q: Why is my filling dry?
A: This usually means the meat was very lean or the rice soaked up all the moisture. Next time, try using a higher-fat meat (85/15 beef), or add an extra 1/4 cup of tomato sauce or a splash of beef broth to the filling mix. A beaten egg can also help bind and add moisture.
Q: Can I freeze stuffed peppers?
A> You bet. Assemble them (unbaked), wrap each individually in plastic wrap, and place in a freezer bag. They’ll keep for 2-3 months. Thaw in the fridge overnight before baking as directed. The peppers will be softer after freezing, but still delicious!

Cheesy Stuffed Bell Peppers : Oven-Baked Comfort Food
Description
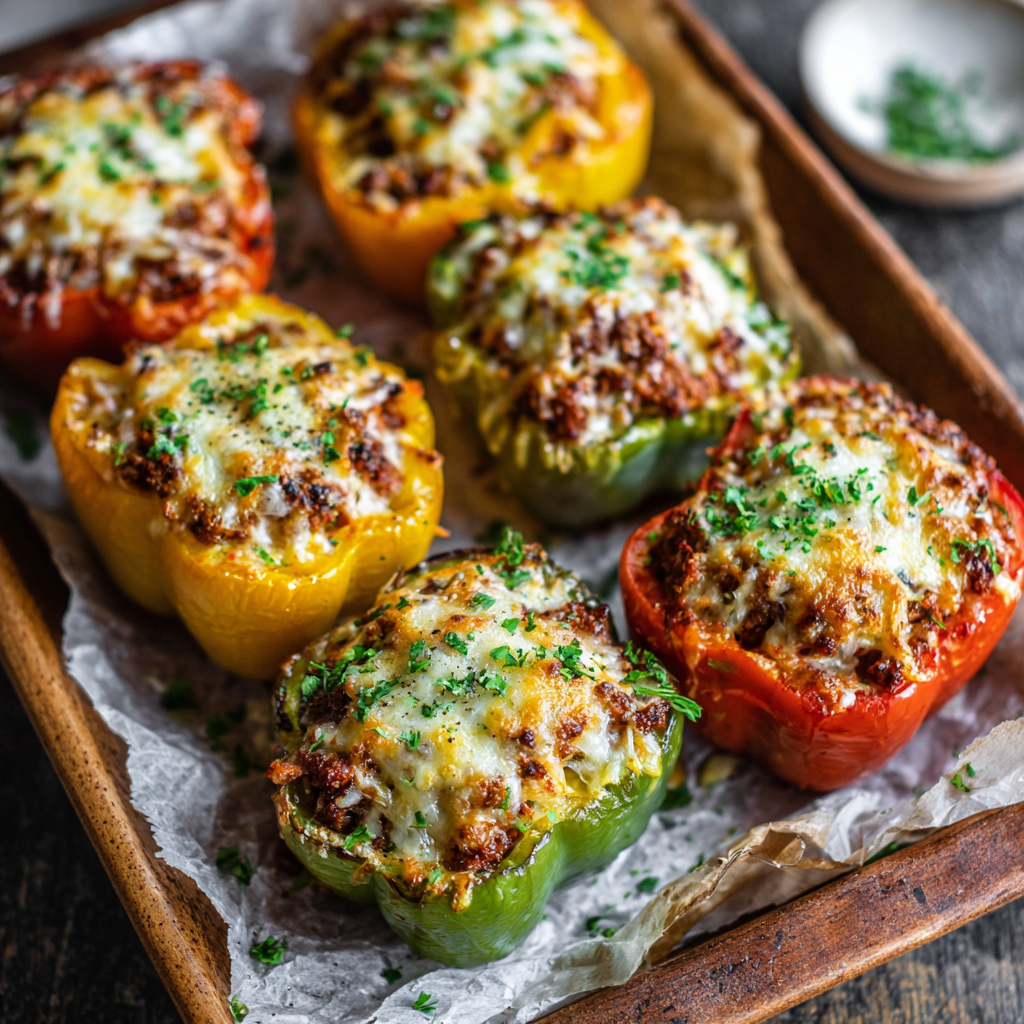
Colorful, cheesy, and ridiculously satisfying—these stuffed bell peppers are a weeknight hero, meal-prep champion, and crowd-pleaser all in one. Packed with protein, veggies, and a gooey cheesy top, they’re comfort food that smells as good as it tastes.
Ingredients
Peppers & Filling:
-
4 large bell peppers (any color)
-
1 lb ground meat (beef, turkey, chicken, or plant-based crumble)
-
1 cup cooked rice or quinoa (day-old rice works best)
-
½ onion, diced
-
2 cloves garlic, minced
-
½ cup tomato sauce or salsa
-
1 cup shredded cheese (cheddar, mozzarella, Mexican blend, or pepper jack)
-
1 tsp Italian seasoning
-
Salt & black pepper to taste
-
Drizzle of olive oil
Optional Twists:
-
Tex-Mex: chorizo, black beans, corn, pepper jack, avocado
-
Italian: Italian sausage, spinach, mozzarella + Parmesan
-
Vegetarian: black beans + mushrooms, extra tomato sauce
-
Low-carb: replace rice with sautéed cauliflower rice
Instructions
1. Prep Peppers
-
Preheat oven to 375°F (190°C).
-
Slice peppers in half lengthwise, remove seeds and ribs. Leave stems on for a rustic look.
-
If peppers wobble, shave a small sliver from the bottom for stability.
2. Cook Filling
-
Heat olive oil in a skillet over medium heat.
-
Sauté onion for 4–5 min until translucent. Add garlic and cook 30 sec.
-
Add ground meat, breaking it up, and cook until no pink remains. Season with salt, pepper, and Italian seasoning.
-
Stir in cooked rice/quinoa and tomato sauce. Heat 2 min. Taste and adjust seasoning.
3. Stuff & Top Peppers
-
Arrange pepper halves on a lined baking sheet.
-
Spoon filling into each pepper, mounding slightly.
-
Top with shredded cheese and a drizzle of olive oil.
4. Bake
-
Bake 25–30 min until peppers are tender and cheese is bubbly and golden.
-
Optional: cover with foil for extra-soft peppers or par-boil peppers 5 min before stuffing for tenderness.
5. Serve
-
Serve straight from the baking sheet or plate individually.
-
Optional: garnish with parsley/cilantro, serve with a salad, crusty bread, or a dollop of Greek yogurt.
Notes
-
Assemble ahead: refrigerate for up to 24 hours, then bake with an extra 5–10 min.
-
Freeze unbaked: wrap individually, freeze 2–3 months, thaw overnight in fridge before baking.
Nutritional Info (For Your Peace of Mind)
Please note: The following is an approximate estimate for one pepper half (using 85/15 ground beef, white rice, and cheddar cheese) and will vary based on your specific ingredients and swaps.
- Calories: ~380
- Protein: 25g
- Carbohydrates: 25g
- Fat: 20g
- Fiber: 3g
This dish is naturally gluten-free (just check your seasoning blends and sauces) and packed with protein and vitamin C from the peppers. Using lean ground turkey, quinoa, and low-fat cheese can easily adjust the numbers to fit your dietary goals. Remember, cooking at home lets you control exactly what goes into your food!
Final Thoughts: Dig In!
And there you have it, friend—my ultimate guide to Cheesy Stuffed Bell Peppers. This recipe is more than just a list of instructions; it’s an invitation to get creative, to use what you have, and to create something truly satisfying with your own two hands.
I hope these colorful, cheesy bundles of joy bring as much comfort and delight to your table as they have to mine. Remember, the best kitchen is a happy, slightly messy one where good food and good times are shared. Now, go preheat that oven! I can’t wait for you to take that first bite of golden, bubbly cheese and savory filling. Don’t forget to tag @feastical if you share a photo—I love seeing your creations!
Until next time, keep it simple, soulful, and always delicious.
– Beau