Ditch the Dishes, Keep the Flavor: Your New Favorite Chicken Parm
Hey friends, Beau here from Feastical. Let’s be real for a second. Who among us hasn’t craved the glorious, cheesy, soul-soothing goodness of Chicken Parmesan… only to remember the whole production? The dredging station that takes over your counter, the splatter of frying oil, the mountain of dishes that appears afterward. Suddenly, that craving feels less like a joy and more like a kitchen conquest you’re just not up for on a Tuesday night. Sound familiar?
Well, my fellow food lovers, I’ve got fantastic news. We can have our Parm and eat it too, without the culinary circus. This isn’t about cutting corners on flavor—it’s about being brilliantly efficient with our time and our dish soap. Enter the hero of your weeknight dinner lineup: the One-Pan Chicken Parmesan Skillet.
This recipe delivers every single thing we adore about the classic: juicy, tender chicken, tangy, herb-kissed marinara, a blanket of oozy, stretchy mozzarella, and that essential, satisfying crunch. But we’re trading the breading and deep-frying for a quick sear and a clever, crispy topping. All the magic happens in one single, trusty skillet, moving from stovetop to oven to table. In about 30 minutes, you’ll have a meal that looks and tastes like you fussed for hours. It’s the kind of recipe that makes you feel like a genius, leaving you more time to actually enjoy the meal with your people. So, grab your favorite skillet, and let’s make a mess-free masterpiece together!
My Kitchen Disaster That Sparked a Better Idea
This recipe was born, like many of my best ones, from a bit of a happy accident. Picture this: It’s years ago, and I’m determined to impress a date with my “signature” Chicken Parmesan. I’ve got three shallow bowls lined up for the breading, a pot of oil heating, and the confidence of a cooking show host. Fast forward twenty minutes: there’s a fine dusting of flour on every surface, a speckle of oil on my shirt, and my kitchen smells like a deep-fryer. I’m orchestrating the chicken fry, the pasta boil, and the sauce simmer like a frantic conductor. The chicken turned out great, but the process? Exhausting.
Afterward, washing what felt like every dish I owned, I had a lightbulb moment. The best part of Chicken Parm isn’t the laborious breading—it’s the perfect bite of tender chicken, savory sauce, melted cheese, and crunch. What if I could shortcut the messy part and double down on the good stuff? What if the “breading” was just a heavenly, garlicky, toasted sprinkle on top? The next time a craving hit, I grabbed my skillet and experimented. The result was faster, easier, and honestly, just as delicious. Sometimes, the best recipes come from simplifying, not complicating. This skillet Parm is my delicious proof.
Gathering Your Flavor Toolkit
Here’s everything you’ll need to build this flavor masterpiece. The beauty is in the simplicity!
- 4 boneless, skinless chicken breasts: The star of our show! Look for ones that are roughly the same thickness so they cook evenly. A quick tip? Place them between two pieces of plastic wrap and gently pound the thicker ends with a rolling pin or pan to even them out. Substitution: Chicken thighs work beautifully here too for even more juicy, forgiving meat.
- Salt and pepper, to taste: The foundational seasonings. Don’t be shy here—seasoning the chicken directly is your first and most important layer of flavor.
- 2 tablespoons olive oil: For searing. It adds a nice flavor and helps create those tasty golden bits in the pan. Chef’s Insight: A good, hot pan with oil is the secret to a perfect sear without sticking.
- 2 cups marinara sauce: Your favorite jarred sauce is 100% your friend here. Choose one you love to eat on its own! Substitution: Got 20 extra minutes? Sauté a little garlic and onion, then simmer a can of crushed tomatoes with basil for a quick homemade version.
- 1 1/2 cups shredded mozzarella cheese: The melty, stretchy glue that holds our dream together. I prefer to shred a block of low-moisture mozzarella—it melts better than pre-shredded (which has anti-caking agents).
- 1/4 cup grated Parmesan cheese: Our flavor booster. The salty, nutty punch of real Parmigiano-Reggiano or Grana Padano is irreplaceable.
For the “Magic” Breadcrumb Topping:
- 3/4 cup panko breadcrumbs: The key to our easy crunch! Panko is lighter and airier than regular breadcrumbs, giving you a spectacular golden, crispy topping. Substitution: Gluten-free panko works perfectly for a GF version.
- 1 tablespoon olive oil: This helps the panko toast up beautifully under the broiler.
- 1/2 teaspoon Italian seasoning: A little dried herb blend for that classic Parm aroma. No blend? Use a pinch each of dried oregano, basil, and thyme.
- Pinch of salt: Balances the topping and makes it tasty enough to eat on its own (which you might be tempted to do!).
Let’s Build It, Step-by-Step
Ready? Put on some tunes, and let’s cook. This is where the fun happens.
- Prep & Season: Pat your chicken breasts completely dry with paper towels. This is non-negotiable for a good sear! Generously season both sides with salt and pepper. While you’re at it, preheat your oven’s broiler on high and make sure one oven rack is positioned about 6-8 inches from the heat source.
- Sear to Perfection: Heat the 2 tablespoons of olive oil in a large, oven-safe skillet (cast iron or stainless steel are perfect) over medium-high heat. Once the oil is shimmering, carefully add the chicken. You should hear a nice sizzle. Let them cook, undisturbed, for 4-5 minutes, until you get a gorgeous golden-brown crust. Flip and sear the other side for another 4-5 minutes. The chicken won’t be cooked through yet—that’s perfect! We’re just building flavor and color here. Chef Hack: Don’t crowd the pan! If your skillet is smaller, sear in two batches. Crowded chicken steams instead of sears.
- Sauce Simmer: Reduce the heat to low. Pour the marinara sauce all around the chicken, spooning a little bit over the top of each piece. Let it gently simmer for about 5 minutes. This allows the chicken to finish cooking through in the sauce, keeping it incredibly juicy and letting the flavors marry.
- Create the Crispy Topping: While the chicken simmers, mix your panko breadcrumbs, 1 tablespoon of olive oil, Italian seasoning, and a pinch of salt in a small bowl. Stir until the panko is evenly coated with the oil. This is your “no-fuss breading.”
- The Cheesy Blanket: Sprinkle the shredded mozzarella and grated Parmesan evenly over each chicken breast, making sure to cover most of the surface. Then, evenly distribute the seasoned panko mixture over the cheese layer.
- Broil to Bubbly Glory: Carefully transfer the entire skillet to the oven under the broiler. WATCH IT CLOSELY! This only takes 2-3 minutes. You’re looking for the cheese to be completely melted and bubbly and the panko to transform into a deep, golden-brown crunch. Important Safety Tip: Remember that skillet handle is HOT! Always use a dry oven mitt.
- Serve & Swoon: Remove the skillet (again, with that mitt!) and let it rest for just a minute. Serve hot, spooning that delicious extra sauce from the pan right over each piece.
How to Plate Your Parm Perfection
Presentation is part of the fun, even on a busy night! I love placing a chicken breast right in the center of a shallow bowl. Spoon some of that glorious sauce from the skillet around it, not just on top. The contrast of the crispy topping against the saucy base is mouthwatering.
This dish begs for simple, complementary sides. A nest of cooked spaghetti or fettuccine tucked underneath is the classic move—the pasta soaks up the extra sauce beautifully. For a lighter option, a big, bright arugula salad with a lemon vinaigrette cut right through the richness. And let’s be honest, a slice of warm, garlicky bread or a soft breadstick on the side is never a wrong choice for sauce-dipping duties. Keep it simple and let the star of the show shine!
Make It Your Own: Fun Twists & Swaps
The beauty of this recipe is its adaptability. Here are a few ways to play with it:
- “Everything Bagel” Chicken Parm: Swap the Italian seasoning in the panko for 2 teaspoons of everything bagel seasoning. The garlic, onion, and sesame seed flavor is insane.
- Spicy Arrabbiata Twist: Use a spicy arrabbiata sauce instead of classic marinara. Add a pinch of red pepper flakes to the panko topping for an extra kick.
- Pesto-Parm Hybrid: After searing, spread a thin layer of basil pesto over each chicken breast before adding the marinara sauce. It adds a gorgeous herby depth.
- Veggie-Packed Version: After searing the chicken, sauté a handful of fresh spinach or sliced mushrooms in the pan for a minute before adding the sauce. An easy way to sneak in more greens!
- Dairy-Free Delight: Use your favorite vegan mozzarella shreds and a dairy-free Parmesan alternative. The method and the crunch remain perfect.
A Few Extra Thoughts From My Kitchen
Over the years, this recipe has become my ultimate “I need something impressive but have zero energy” dinner. I’ve made it for quiet nights alone, last-minute dinner parties, and everything in between. It never fails. One funny note: I’ve learned the hard way to always use a dry oven mitt for that skillet handle. A damp towel? It conducts heat. Ask me how I know! The recipe has evolved to include the panko-oil mix—it started as just dry breadcrumbs sprinkled on, but toasting them in oil first (even in a separate pan) took the crunch to a whole new level. This is your recipe now, so make it your own!
Your Questions, Answered
Q: My chicken breasts are huge and thick. Will they cook through?
A: Absolutely! The key is the simmer-in-sauce step. If they’re very thick (over 1.5 inches), you can add 2-3 more minutes to the simmering time before adding cheese. You can also use a meat thermometer; you’re aiming for 165°F at the thickest part.
Q: Can I make this ahead of time?
A: You can do some prep! Season and sear the chicken, then let the dish cool completely after adding the sauce (but before the cheese and topping). Cover and refrigerate for up to a day. When ready, add the cheese and panko, then broil, adding a couple extra minutes since you’re starting from cold.
Q: My panko topping is burning before my cheese melts!
A> This usually means your broiler is too intense or the rack is too close. Next time, position the rack a bit lower. You can also broil for a minute, then turn off the broiler and let the residual oven heat melt the cheese if the panko is browning too fast.
Q: What if I don’t have an oven-safe skillet?
A> No problem! Simply sear and simmer the chicken in any large skillet. Then, transfer the chicken and sauce to a baking dish before adding the cheese and breadcrumbs. Broil as directed.

One-Pan Chicken Parmesan Skillet : Easy, Crispy, and Mess-Free
Description
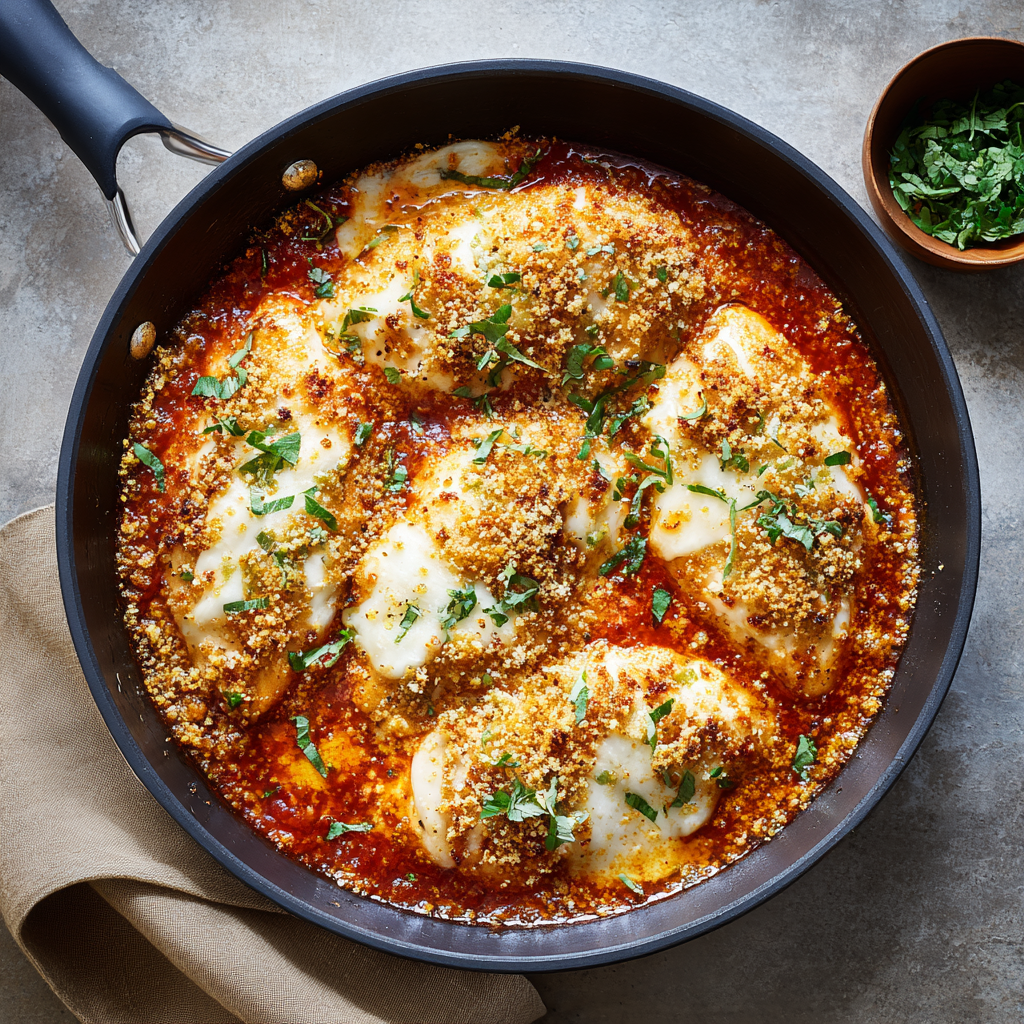
All the cheesy, tangy, crispy goodness of classic Chicken Parmesan—without the dredging, frying, and mountain of dishes. This one-pan version delivers juicy chicken, herby marinara, melted mozzarella, and a golden, crunchy panko topping in about 30 minutes. Perfect for weeknights or last-minute dinner parties.
Ingredients
Chicken & Sauce:
-
4 boneless, skinless chicken breasts
-
Salt & freshly cracked black pepper, to taste
-
2 tbsp olive oil
-
2 cups marinara sauce (jarred or homemade)
-
1 ½ cups shredded mozzarella cheese
-
¼ cup grated Parmesan cheese
Magic Panko Topping:
-
¾ cup panko breadcrumbs
-
1 tbsp olive oil
-
½ tsp Italian seasoning (or mix of oregano, basil, thyme)
-
Pinch of salt
Instructions
-
Prep Chicken & Oven:
Pat chicken dry and season generously with salt and pepper. Preheat your broiler and position a rack 6–8 inches from the heat source. -
Sear Chicken:
Heat 2 tbsp olive oil in a large, oven-safe skillet over medium-high heat. Sear chicken 4–5 minutes per side until golden brown. Chicken won’t be fully cooked yet—this step builds flavor. -
Simmer in Sauce:
Reduce heat to low and pour marinara sauce around the chicken, spooning some on top. Simmer 5 minutes until chicken finishes cooking and flavors marry. -
Prepare Topping:
In a small bowl, mix panko breadcrumbs, 1 tbsp olive oil, Italian seasoning, and a pinch of salt. -
Add Cheese & Crunch:
Sprinkle mozzarella and Parmesan over chicken, then evenly top with the panko mixture. -
Broil:
Place skillet under broiler 2–3 minutes, watching closely. Cheese should be bubbly and panko golden-brown. -
Serve:
Let rest 1 minute. Serve chicken hot with sauce from the skillet. Great over pasta, with salad, or alongside garlic bread.
Notes
-
Thicker Chicken: Simmer slightly longer or use a meat thermometer (165°F internal temp).
-
Make Ahead: Sear and simmer chicken, cool, and refrigerate up to 1 day. Add cheese/panko and broil when ready.
-
Panko Burns: Move rack lower or broil in shorter bursts to prevent burning.
-
No Oven-Safe Skillet: Use any skillet for searing/simmering, then transfer to a baking dish for broiling.
-
Twists:
-
Everything Bagel Topping: swap Italian seasoning for everything bagel seasoning.
-
Spicy: use arrabbiata sauce + red pepper flakes.
-
Pesto: spread a thin layer of pesto under the sauce.
-
Veggies: add spinach or mushrooms before sauce.
-
Dairy-Free: use vegan mozzarella & Parmesan alternative.
-
Nutritional Information (Per Serving, Approximate)
This information is an estimate provided for informational purposes. Actual values can vary based on specific ingredients used (e.g., brand of sauce, exact cheese amounts).
- Calories: 450
- Protein: 40g (Excellent source for muscle repair and keeping you full!)
- Fat: 23g
- Carbohydrates: 20g
- Fiber: 2g
- Sugar: 6g (Primarily from the tomatoes in the
Final Thoughts
So there you have it—the Chicken Parmesan that saves your craving without drowning you in dishes. It’s proof that a truly great meal doesn’t have to be a project. It’s about smart shortcuts that protect the soul of the dish: the juicy chicken, the tangy sauce, the irresistible cheese pull, and that essential crunch.
This skillet method has become more than just a recipe in my kitchen; it’s a reliable friend for busy nights. It’s the dinner that gives you a hug and tells you to go relax. I hope it earns a spot in your regular rotation, giving you back your time and your clean counters. Now, go make it, enjoy it, and remember: the best kind of cooking is the kind that leaves you happy, not hectic.
Let me know how it goes in the comments below—I’d love to hear what twists you try or who you wow with it!